
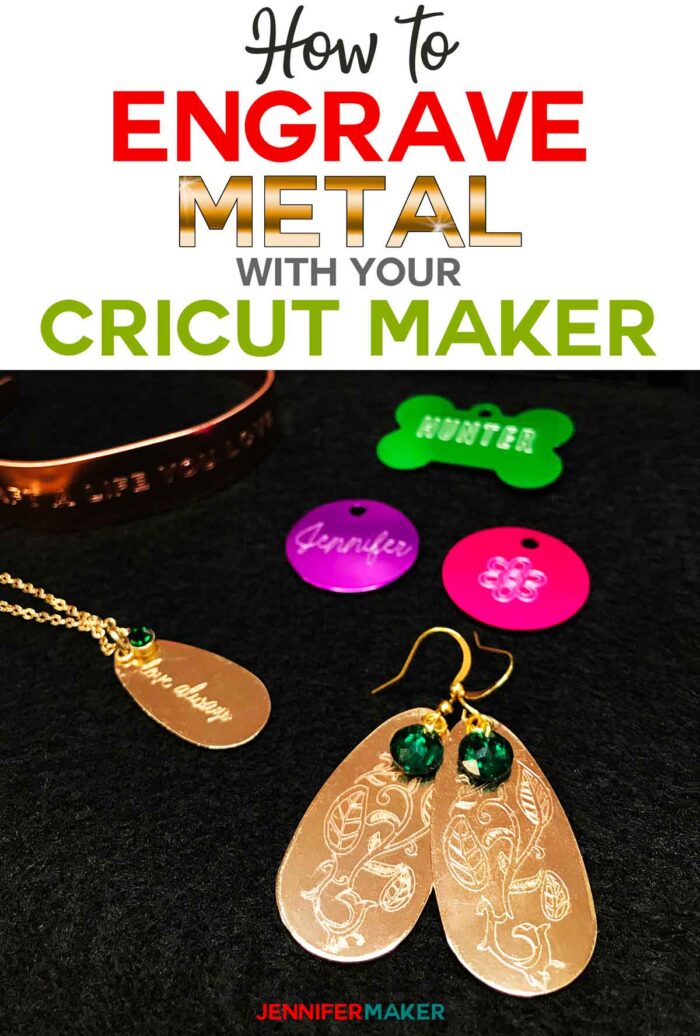
Learn how to use the Cricut Maker engraving tool on metal to personalize anodized aluminum dog tags and charms, copper and aluminum bracelets, and brass earrings and pendants! Plus, I share my tip on how to line up your design on your metal surface every time!
The new Cricut Maker tools include an engraving tool that I am SO excited about! And when I asked all of you what projects you most wanted to engrave, you told me dog tags, bracelets, and earrings! And that is exactly what my first projects with the Cricut Maker engraving tool have been — bright and colorful anodized aluminum dog tags and charms, pretty copper bracelets, and a lovely brass drop earrings and necklaces. And the best part was how EASY it was to use the Cricut Maker Engraving Tool on metal! I literally opened up the package, put the tool in my Maker, loaded up a mat with a blank, and engraved it! I now want to engrave all the things!
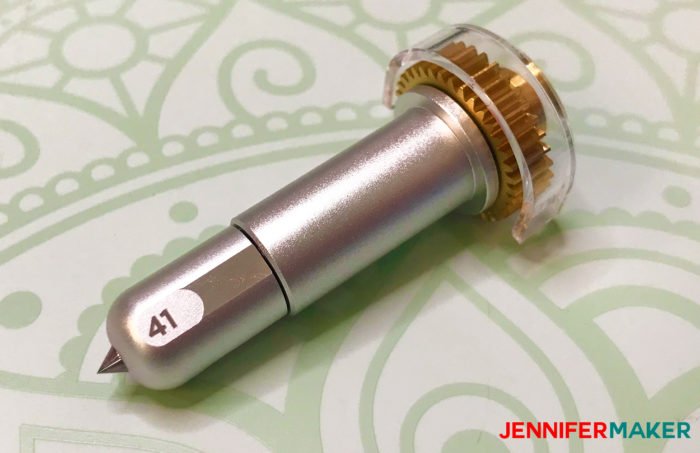

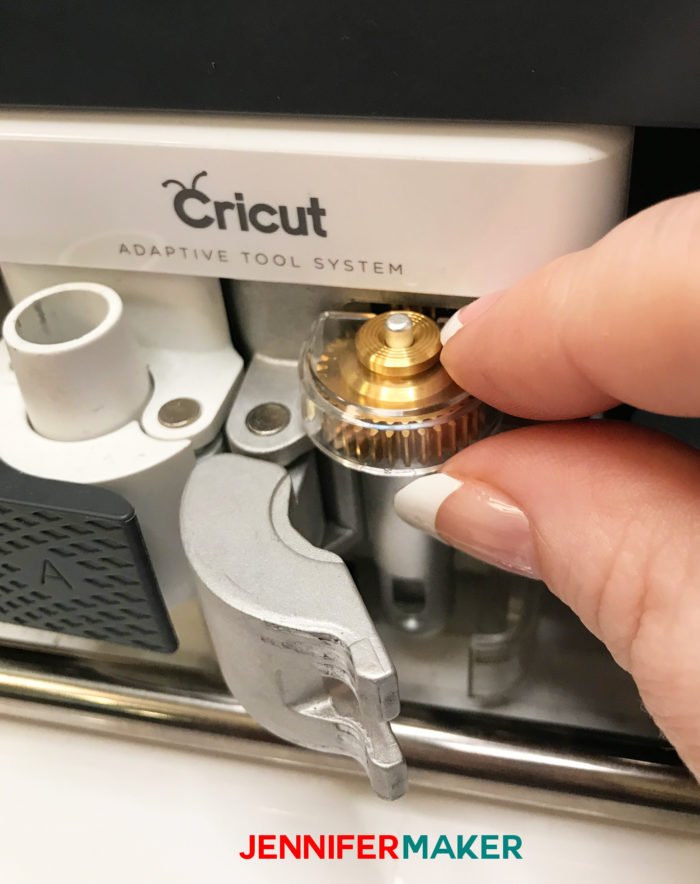
Tip: If you have several of the Cricut Maker tips and aren’t sure which is which, look for the one with “41” on it — this is the engraving tip!
It’s important to note that your metal needs to fit in your Maker, and that means it cannot be very thick, as it needs to fit on a mat and under the engraving tool. My research shows that the thickest metal you can reliably engrave on is 14 gauge, which is 5/64th or .078 of an inch. That’s LESS than 1/8th of an inch. If you aim for something between 1/16th and 1/8th of an inch, you should be right on target. Of course, that means no corrugated metals or metals with other indents or reliefs. In this tutorial, I am engraving on 16 gauge bracelets and 19 gauge charms. You could go also do a higher gauge, just keep in mind that as you go up in gauge, the thinner you get and you need to be careful not to get metal that will crumple or crease with use.
Watch the full step-by-step video showing the Cricut Engraving Tool on a variety of metal projects from start to finish.
This post contains some affiliate links for your convenience (which means if you make a purchase after clicking a link I will earn a small commission but it won’t cost you a penny more)! Read my full disclosure policy.
Materials Needed to Use the Cricut Maker Engraving Tool on Metal
- Cricut Maker
- Cricut Engraving Tip and Cricut QuickSwap Housing (you already have this if you have the Scoring Tool)
- Purple StrongGrip Mat
- Painter’s Tape or Masking Tape
- For Dog Tags: Anodized Aluminum Bone Shape Double-Sided Tags (14 gauge or higher)
- For Charms: Anodized Aluminum Discs (14 gauge or higher)
- For Bracelets: Bracelet Blanks (Tapered) or Copper Bracelet Blanks (Thin) or Anodized Aluminum Bracelets (Thin) (14 gauge or higher)
- For Bracelets: Bracelet Bending Bar
- For Earrings and Necklaces: Brass Drops or Brass Pendants (14 gauge or higher)
- (Optional): Jewelry Kit by Swarovski Crystals (to decorate the earrings and necklace)
- (Optional): Enamel Marker (to make the engraving darker)
- My free engraving templates Design #155 (available in my free resource library—get the password at the bottom of this post)

How to Engrave Metal with the Cricut Maker Engraving Tool
Step 1: Get my Engraving Templates
This step is optional, but it’s really helpful to have a template of what you’re engraving so you can properly size it. I’ve made an engraving template of the projects I engraved in this tutorial, but you can also just use the Shape tool in Cricut to make circles, ovals, squares, and rectangles in the shape of your engraving blank.
If you want to use the free engraving template I used in this tutorial, you can download it from my free resource library. It is available as an SVG for your Cricut, as well as a PDF, PNG, and DXF. Just go to the library, search for Design #155 and upload the file to your design software. If you’re not sure how to upload an SVG cut file to Cricut Design Space, watch this helpful video training series I made.
IMPORTANT NOTE: If you’re not sure how to upload an SVG file to Cricut Design Space, or you’re having issues (such as getting a message that says “unsupported file”), please watch my free training series, SVGs Made Simple. It will help you SO much!
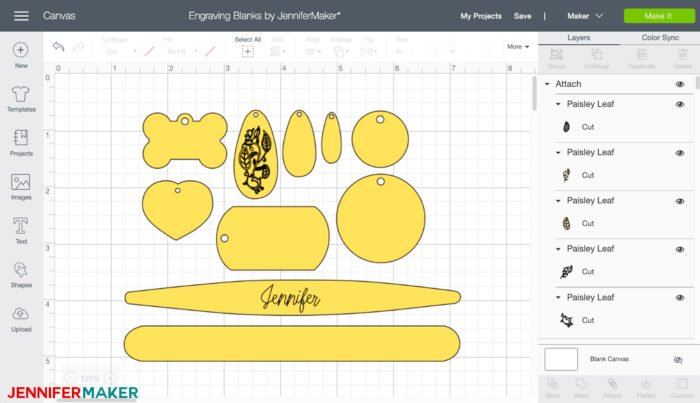
Here’s what my engraving template file looks like uploaded to Cricut Design Space:
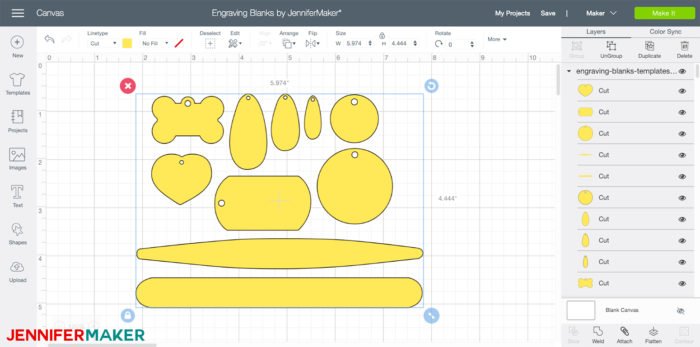
Tip: My template doesn’t include all possible engraving blanks, of course, but I tried to include as many popular shapes as I could think of. If you engraving blank is a similar shape but a different size, first Ungroup the template with the Ungroup button. Then select the one that is similar and change the W and H at the top of the screen to match the size of your blank! Now you have a template for YOUR blank.
Step 2: Create or Find a Design For Your Engraving Blank
If you’d like to just put text on your metal dog tag, charm, or bracelet, it’s simple! Click the Text tool, type the text you want to appear, and pick a font.
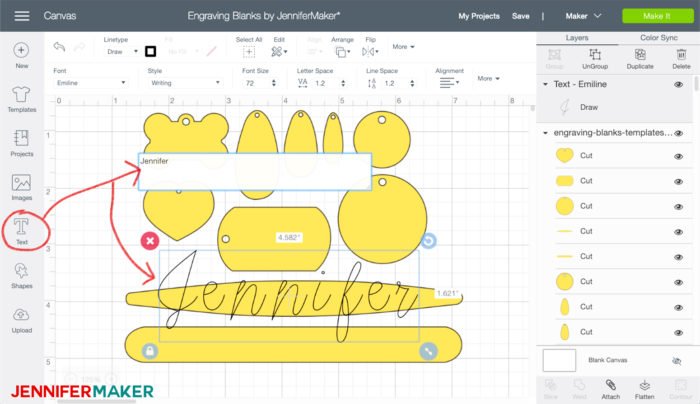
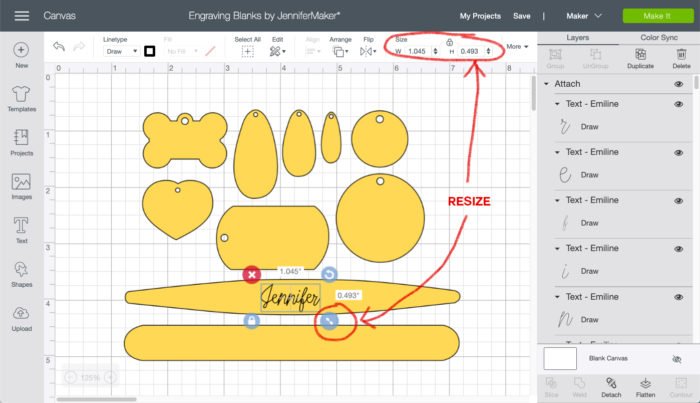
Now resize the text to fit the engraving blank you intend to use. Note that you may want to change the letter spacing so the letters are closer together, especially if you choose a cursive font as I did. If you need finder control over your text, select it, click on More > Advanced > Ungroup to Letters, and then you can manually move each letter into place until you are happy (when you’re done, be sure to select all of those letters and click Attach).
Tip: The Emeline writing font (included in Cricut Access) makes a lovely single-line cursive engraving font, too!
If you’d prefer to engrave a design or image, find one in Cricut Access or upload an SVG of your choice. Resize it to fit inside your engraving blank, being sure to leave more than a 1/16″ margin between the design and the edge of the blank—do not try to go edge to edge.
Step 3: Change Your Design Linetype to Engrave (and HIDE your Templates)
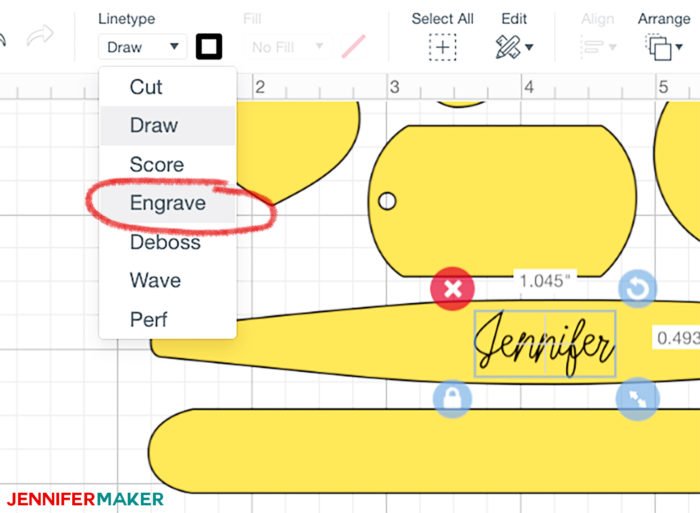
Once you have a design made, make sure it is all attached with itself and then go to the Linetype menu and change it to “Engrave.”
You also need to HIDE the template so that the ONLY thing you see is the design you want to put on your engraving blank. To hide a layer, select it and click the Eye icon next to its name in the layer panel on the left.

Note: It’s very important that you HIDE everything except your design. If you do not, you will be unable to select the appropriate material (such as Anodized Aluminum or Brass) when you go to engrave this project. So you want only the engraving design visible when you click the Make It button.
Step 4: Center Your Design On Your Mat Preview
Once your design is ready, click the green Make It button in the upper right. The next screen is the Mat Preview screen, and this is very important to our technique. Make sure you click, hold, and drag your design to the exact center of the mat preview. You can find the exact center of the mat preview where the 6″ x 6″ lines meet in the middle.
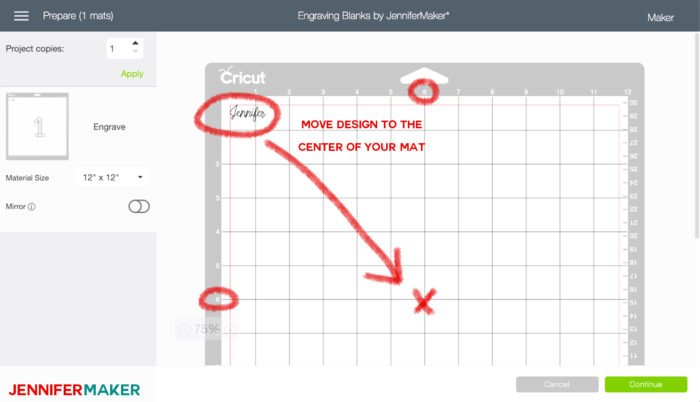
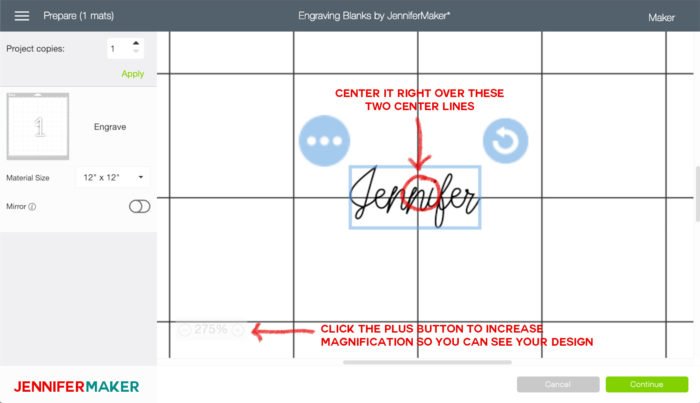
I like to move my engraving design to the center point, then zoom in so I can see it better and make sure it is centered right on those two lines!
When you feel like you have it centered, click the green Continue button. Then click the Browse All Materials link and choose the appropriate metal.
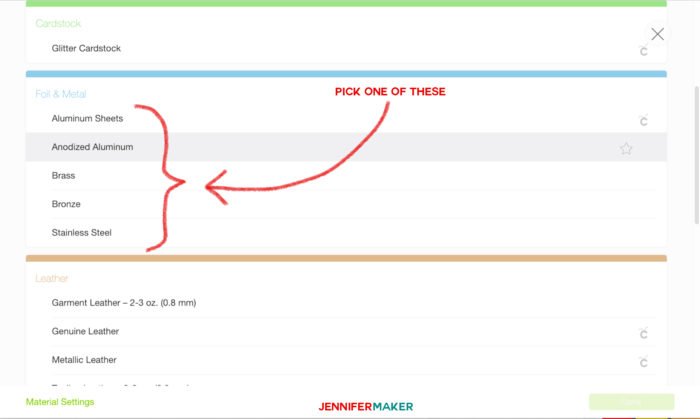
Tip: If you’re using copper, just pick “Brass” instead.
Note: If you cannot select these metals, it means you forgot to hide your template OR you forgot to change your design’s linetype to Engrave. Go back and fix that before continuing.
This is a good time to put your engraving tip in your Maker, too!
Step 5: Center Your Engraving Blank On Your Cutting Mat and Tape it Down
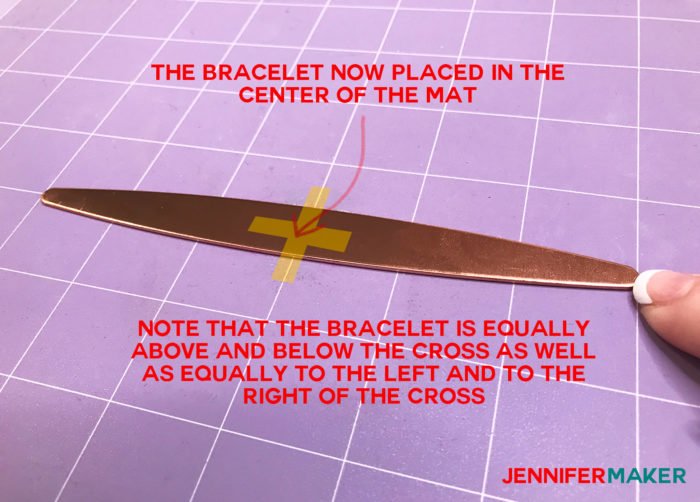
Just as it is important to center your design in your mat preview, it is equally important to center your design on your mat. Thankfully, the Cricut mats already have their centers marked with a white cross, as shown in the photo below.
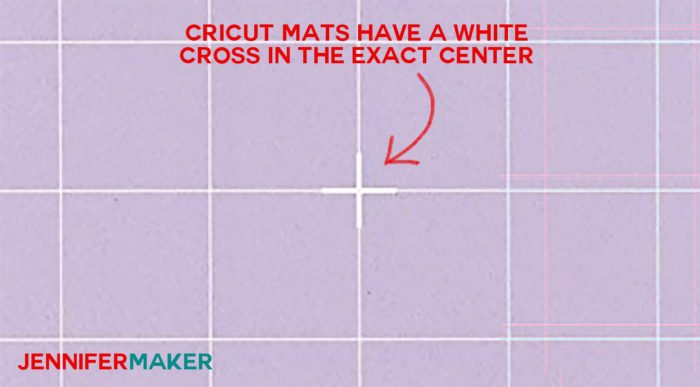
Note: If you’re using an older StrongGrip mat (printed with flowers) or a non-Cricut mat, you may not see the white cross — instead, find the 6″ line at the top and side and follow them to the centerpoint where they meet.
Once you have identified the center of your mat, center your blank on that point. Make sure there is an equal amount of the blank above and below the cross as there is to the left and right of the cross.
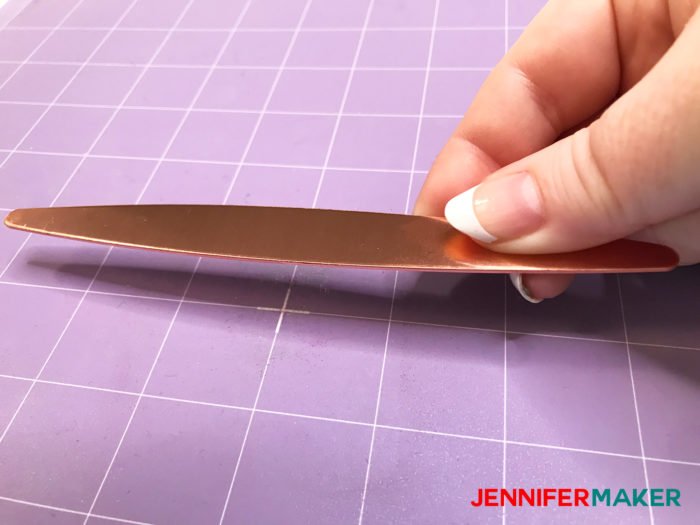
Note: The bracelets and some other blanks will come with a plastic film on them to protect them from scratches. Be sure to remove this film BEFORE you engrave upon it.
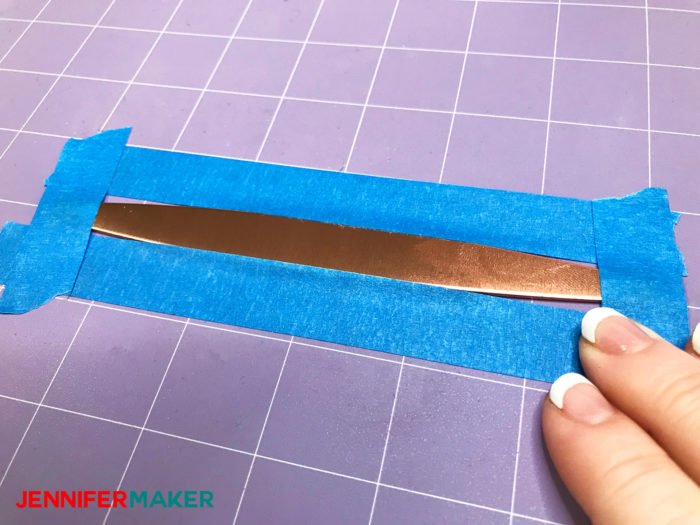
Once the engraving blank is center, tape it down with painter’s tape or masking tape. You only need to barely tape the edges to hold it in place usually, unless your mat is particularly used and unsticky. A stickier mat is best to avoid slippage.
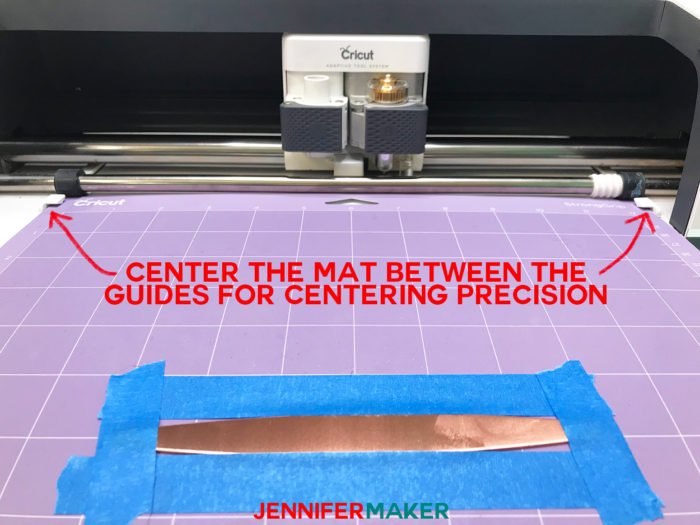
Now you can load your mat into your Cricut. It’s important to point out that there will be about 1/8″ variance in where your design engraves on your mat if you aren’t super careful about how you load your mat. When you put your mat in under the guides, you’ll notice there is a little wiggle room. Get into the habit now of always centering the mat between those guides when you push it in, or you’ll always be a little off. If you find it hard to get it right in the center, pick a side and be consistent and tape your blank a bit off-center to the opposite side to account for it (just a tiny bit, like 1/16″ or less). This is how you can get it perfectly centered every time (well, let’s say nearly every time — we’re human, after all, and we make mistakes!)
Once your mat is in, press the flashing Cricut button to begin engraving. Don’t be alarmed if your tool lifts up and spins every once in a while as it engraves — it does this to remove debris and make sure it’s cleanly engraving your blank! The good news is that it really doesn’t take long to do.
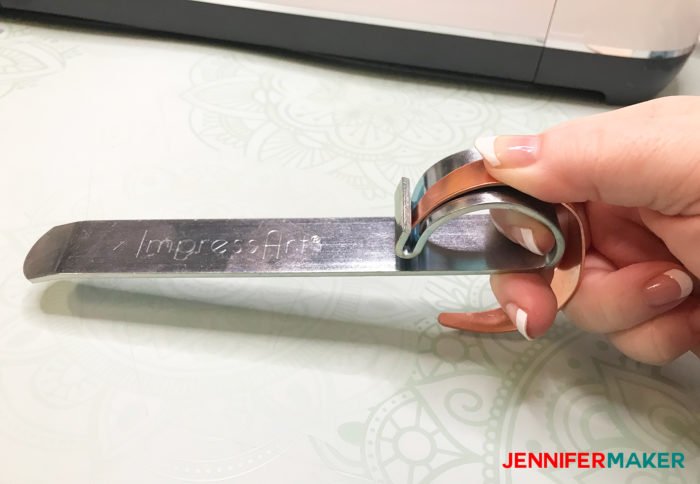
When done, remove it carefully from the mat (bend the mat away from the metal) and brush away any little bits. If you have a bracelet blank, you can use a bracelet bending bar to bend it into shape and size for you!
Once you’ve mastered metals, try engraving other materials with the Cricut Maker Engraving Tool, such as acrylic, leather, and plastic!
Get my free engraving template for your Cricut Maker Engraving Tool
If you use the Cricut Maker Engraving Tool on metal, please share a photo in my helpful Cricut Facebook group or tag me on social media with #jennifermaker.
Love,

Want to remember this? Save the Cricut Maker Engraving Tool on Metal Tutorial to your favorite Pinterest board!


Can I engrave two lines on a dog tag? I managed to type two lines, but want to be sure I do everything right to engrave two lines.
Hi Virginia! I don’t see why not as long as you have the room on your tag.
Can the engraver tool be used with the Explore 2
Hi Jacqueline. No, the engraving tool is just for the Maker. As of right now, there is not an engraving tool compatible from Cricut for the Explore Air 2.
Hi Jennifer,
Thank you for the tutorial, it was very helpful! Does the engraving tool wear out after a while and need to be repalced?
Thank!
Probably so, Terra, but those of us on the team have used our engraving tips probably more than most people and none of us have had to replace one yet! 🙂