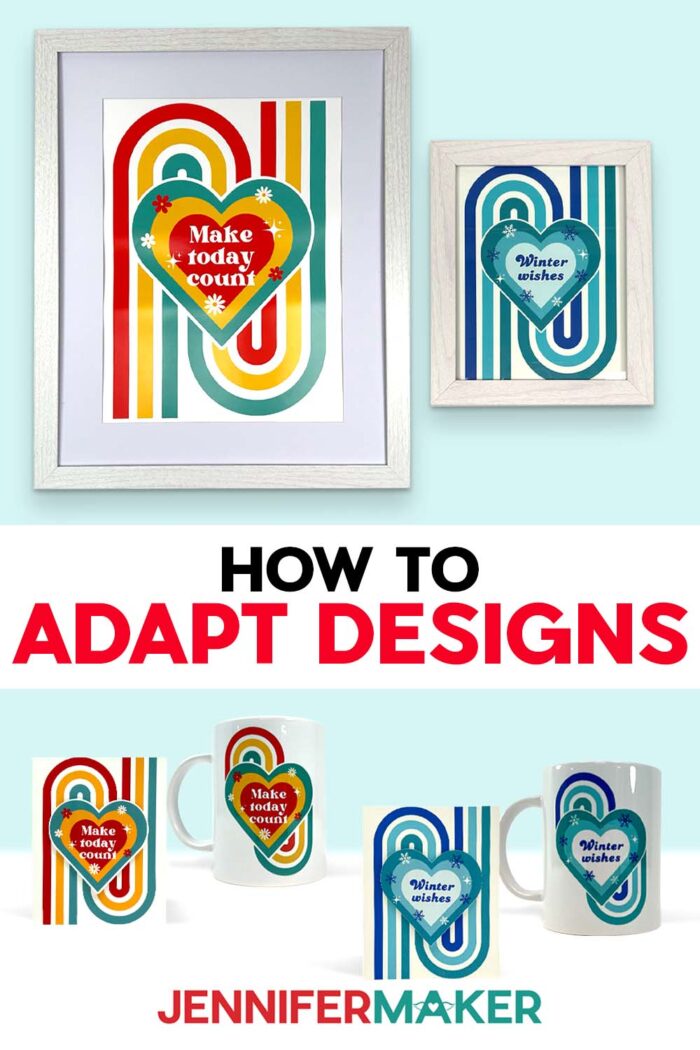
Learn how to adapt designs across different craft blanks for easy designing… without starting from scratch!
Last time I made a cute Canva design, I loved it so much I wanted it on everything. A poster, a card, even a mug… I wanted them all! So I rebuilt the whole thing three separate times, which cut into my crafting time! That’s when I realized learning how to adapt designs instead of starting over was the best way to level up my entire design process. It’s so exciting to see one master design turn into multiple finished pieces!
See the full step-by-step video tutorial on how to adapt designs in Canva:

Ever felt boxed in by a design’s layout? Or frustrated trying to adjust colors after the fact? You’re not alone. But with some early planning, your next design can be more flexible and adaptable, leaving you more time to get creative!
Before you even start, grab my free design elements from my library so you can customize your master design right away, and keep the FAQ responses below handy for quick fixes as you go. In the video tutorial above, I’ll show you how to adapt one master Canva layout so it can flex into different styles to put on real objects without losing its original magic.
This kind of approach is what graphic designers and web designers mean when they say “work smarter,” and it’s a game-changer for crafters, too.

One of my favorite techniques from this project is starting large. Designing at your biggest intended size protects image quality and keeps your text layer crisp. Scaling up later can make images blurry and hard to read. When you begin big, you preserve flexibility for posters, cards, mugs, and even digital platforms like social media graphics or website design elements. It’s one of those basic steps that saves you frustration in the long term.
Another powerful technique is designing in layers. Separating key design elements allows you to create dimension and experiment with different design styles without changing the whole composition. Thinking in layers opens the door to new design techniques and new ideas. Instead of flattening everything into one static file, it helps you build with intention. That shift alone can transform the type of designer you become, especially if this is your first time creating projects with adaptive design possibilities in mind.
And those are just two strategies. My tutorial video walks through many more smart adjustments, including how to account for curved surfaces on a mug, how to extend backgrounds for bleed, and how to refine layouts so they suit different items. With an open mind and a willingness to explore new tools, you’ll start seeing design ideas everywhere! Each project becomes a chance to practice new skills and refine your visual language.
If you’re ready to explore this take on adaptive design in a practical, hands-on way, your next step is to watch my full tutorial and follow along!

And if you’d like to take this learning opportunity even further, my ADVANCE program is the place for you. Inside, we take the same master design concept and explore even more ways to customize it — swapping elements, refining your color palette, and adjusting layouts for different styles, so you can turn one idea into a whole collection of polished projects. It’s perfect if you want guided practice, fresh design ideas, and the confidence to create projects that look intentional and professional every time. Learn more about ADVANCE with JenniferMaker here!
So, want to learn how to adapt designs in Canva? Let me show you how fun and easy it is! This post contains some affiliate links for your convenience (which means if you make a purchase after clicking a link I will earn a small commission but it won’t cost you a penny more)! Read my full disclosure policy.
Materials to Make Projects with Designs Created or Adapted in Canva
View my Amazon shopping list for the exact items I used!
- Free Canva Account (for all projects)
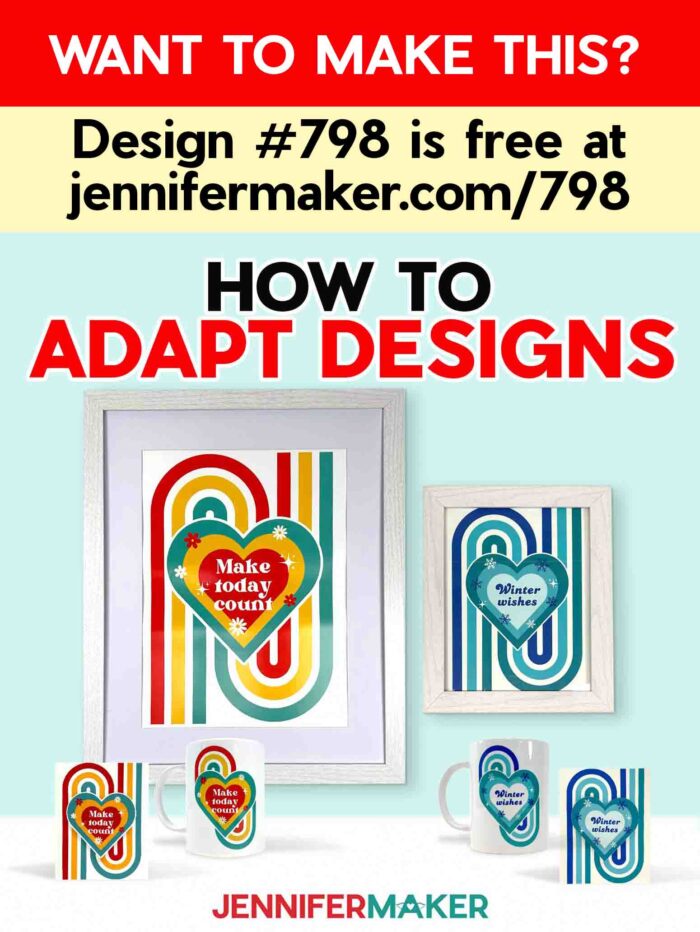
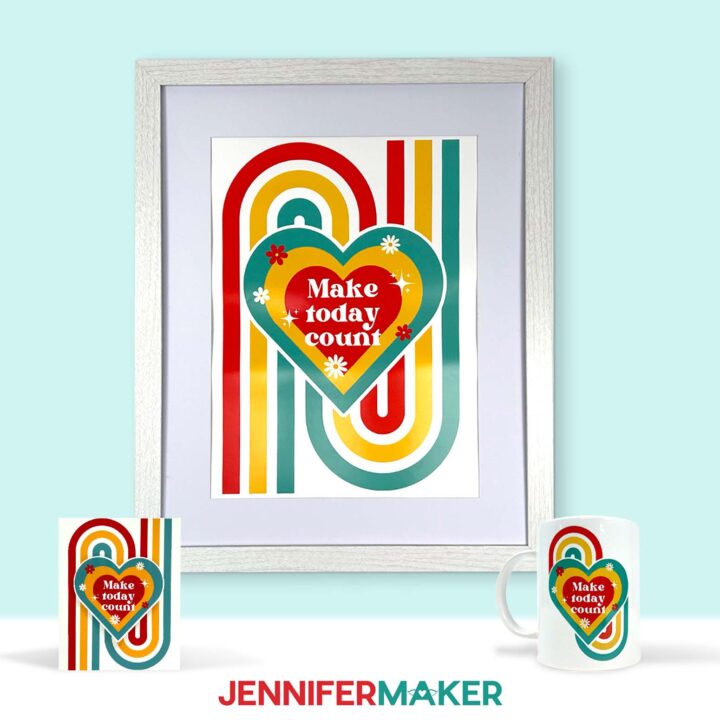
- Design #798 (My colorful heart PNGs and PDF with links to the project templates are available in my free library – get the password by filling out the form at the bottom of this page)
For poster:
- Free Google Account for Google Docs
- One (1) Sheet of Epson Matte Presentation Paper
- Inkjet Printer
- 16″ x 12″ Frame (optional) -OR-
- 8″ x 10″ Frame (optional)
For card:
- Free Google Account for Google Docs
- One (1) Sheet of Epson Matte Presentation Paper
- A way to cut your materials – I’m using the Cricut Maker 4 but you can also use a Maker series machine, an Explore series machine, the Venture or Joy Xtra
- Cricut Green StandardGrip Machine Mat 12″ x 12″
- Scoring Stylus -OR-
- Cricut Scoring Tip and Housing
- Brayer
- Scraper
- Inkjet Printer
- Adhesive Foam Tape
- Several Sheets of Copy Paper (optional for calibrating Print Then Cut and protecting the presentation paper when using the Brayer)
For mug:
How to Adapt Designs Using Canva
How To Adapt Designs
Learn how to adapt designs with Canva elements for mugs, posters, and cards!
Materials
- One (1) Sheet of 8.5" x 11" Epson Matte Presentation Paper (for poster and card)
- 16” x 20” Frame (optional for poster) -OR-
- 16” x 20” Frame (optional for poster) -OR-
- 8” x 10” Frame (optional for poster) -OR-
- 8” x 10” Frame (optional for poster)
- Adhesive Foam Tape (for card)
- One (1) 15 oz Cricut Mug (for mug)
- One (1) Sheet of 8.5" x 11" A-SUB 125g Sublimation Paper (for mug)
- Uncoated White Butcher Paper (for mug)
- 8.5" x 11" Copy Paper (optional for card - calibrating Print Then Cut and protecting the presentation paper while using the brayer)
- Design #798 (My free PDF and PNG files are available in my free resource library - get the password by filling out the form at the bottom of this page)
Tools
- A Free Canva account (for all projects)
- A Free Google account for Google Docs (for poster and mug)
- A way to cut your materials - I’m using the Cricut Maker 4, but you can also use any Maker series machine, an Explore series machine, the Venture, or the Joy Xtra (for card)
- Cricut Green StandardGrip Machine Mat 12" x 12” (for card)
- Scoring Stylus (for card) -OR-
- Cricut Scoring Tip and Housing (for card)
- Brayer (for card)
- Scraper (for card)
- Inkjet Printer (for poster and card)
- Sublimation Printer - I used a converted Epson EcoTank ET-2800 Inkjet Printer (for mug) -AND-
- Sublimation Ink (for mug)
- Cricut Mug Press (for mug)
- Heat-Resistant Tape (for mug)
- Heat-Resistant Gloves (for mug)
- Heat-Resistant Mat (for mug)
- Measuring Tape
- Fan (for ventilation when sublimating)
Instructions
STEP 1: GET MY FREE ADAPTABLE DESIGNS
In this tutorial, I’ll show you how to create my adaptable “Colorful Hearts” master design from scratch. You can learn the steps and thought process with me, then apply them to your own design ideas.
If you want to skip designing and go straight to making projects with designs already adapted for posters, cards, and mugs, download my free files from my free library – look for Design #798. Alternatively, you can use the Save This Project form near the top of this post and the design link will be emailed to you.
TIP: If you’re not sure how to unzip the download file, go to jennifermaker.com/svgs to learn how. The process is similar for PDF and PNG files.
In the PDF folder, you’ll find a file with links to my ready-made “Colorful Hearts” poster, card, and mug designs that will open in Canva. If you want to use one of the ready-made designs, click the link of the design you want to make, and it will open in a new tab in Canva. Click “Share,” then “Download.” Make sure “PNG” is selected, then click “Download” to save the design to your computer. Then follow the steps to print the design for your blank.
In the PNG folder, you’ll find four additional rainbow elements you can use in your design: a flower, a heart, a full rainbow, and a line rainbow.
STEP 2: CREATE A MASTER ADAPTABLE DESIGN
- To get started, open your computer’s browser and go to jennifermaker.com/canva.
NOTE: If you’re new to Canva, check out my Canva for Beginners tutorial. - Either sign in to your account or follow the prompts on the screen to sign up for a free account.
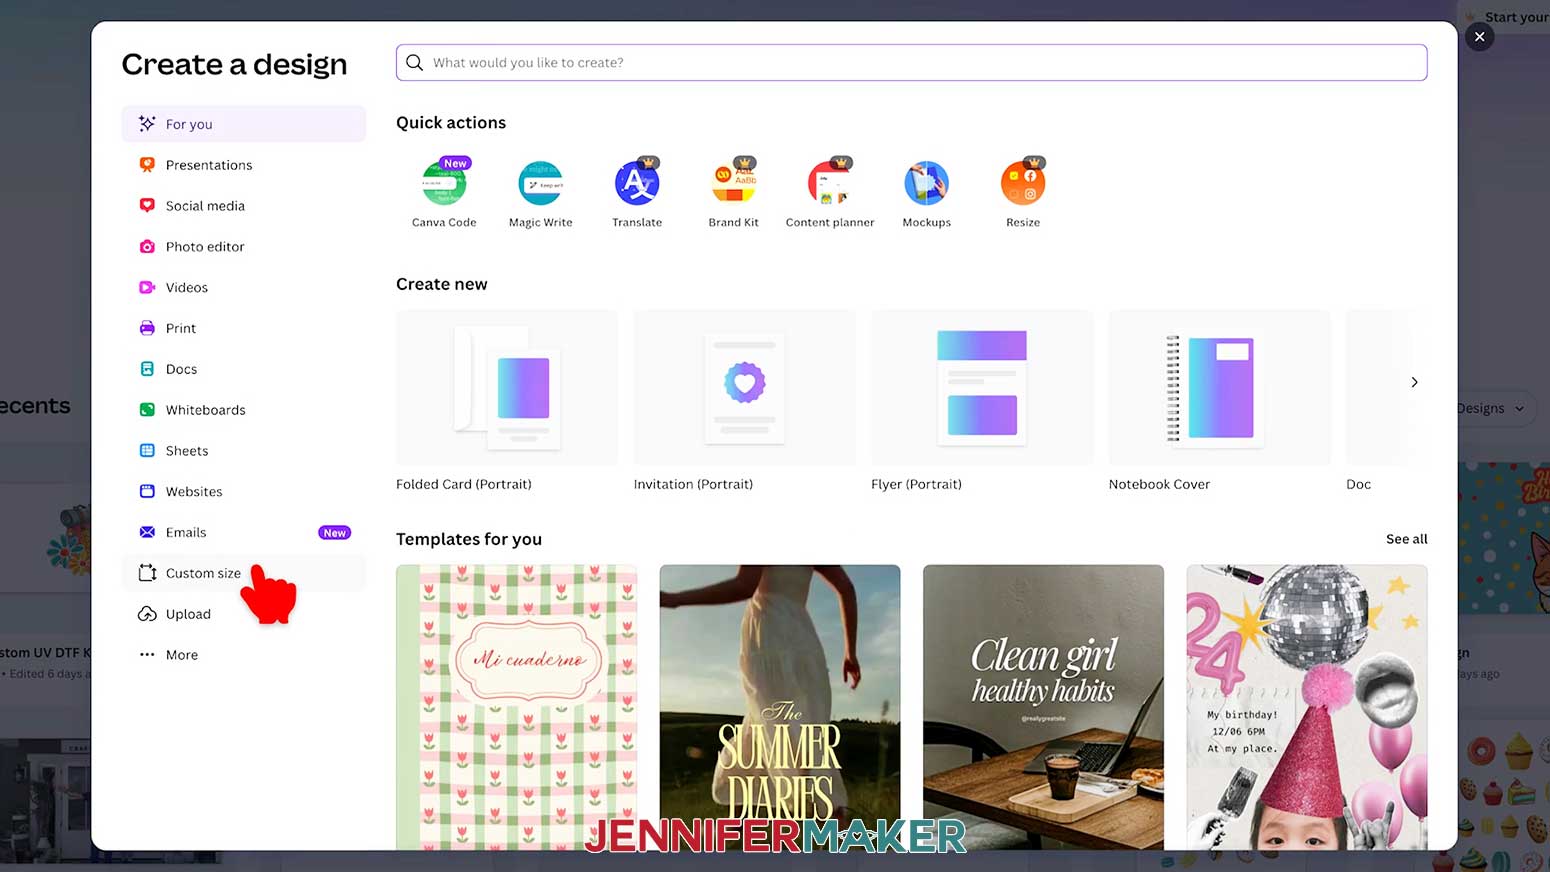
NOTE: Canva does offer paid subscriptions with more tools and elements, but I’ll show you how to do everything with the free account. - On the Canva Home screen, click “Create.”
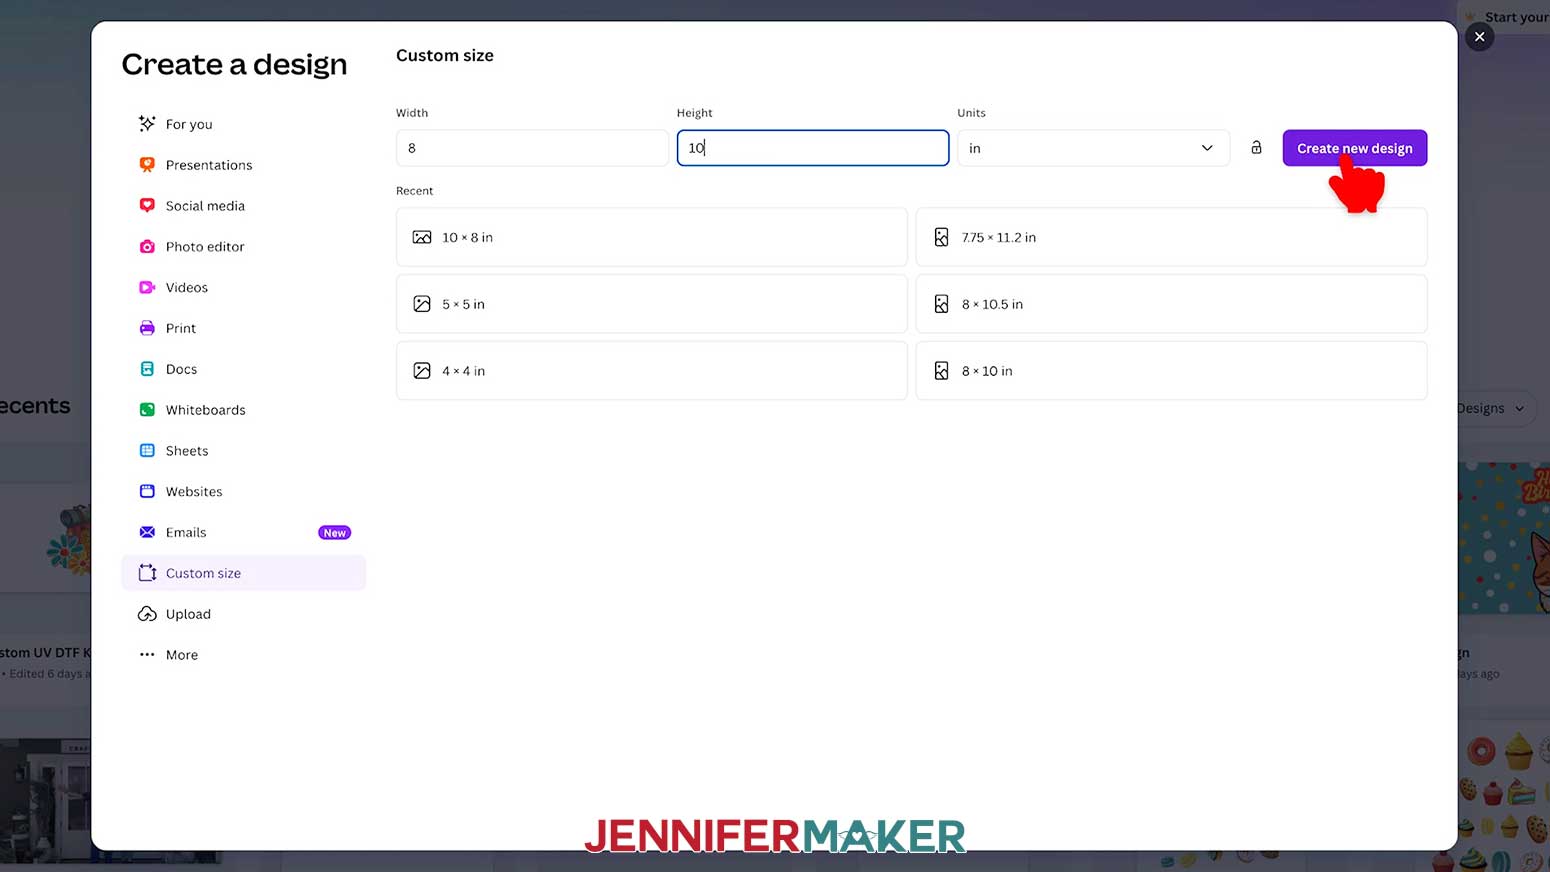
- Click “Custom size.”
NOTE: It’s best to use a large canvas size when making your initial design for more flexibility.
- Change the “Units” to “Inches” and enter “8” in the Width field and “10” in the Height field.
NOTE: You cannot change your canvas size or aspect ratio after creating it, so be sure you pick the right size and aspect ratio for your design idea. - Click “Create new design” to open a blank canvas of this size in a new tab.
- To keep track of the main design, click the name area and type in a title you’ll remember.
NOTE: I’ll call mine “Master Design by JenniferMaker.” - Click “File,” then “Settings,” and make sure there is a checkmark next to “Show rulers and guides.”
- To search for an image in Canva, click “Elements” in the side panel.
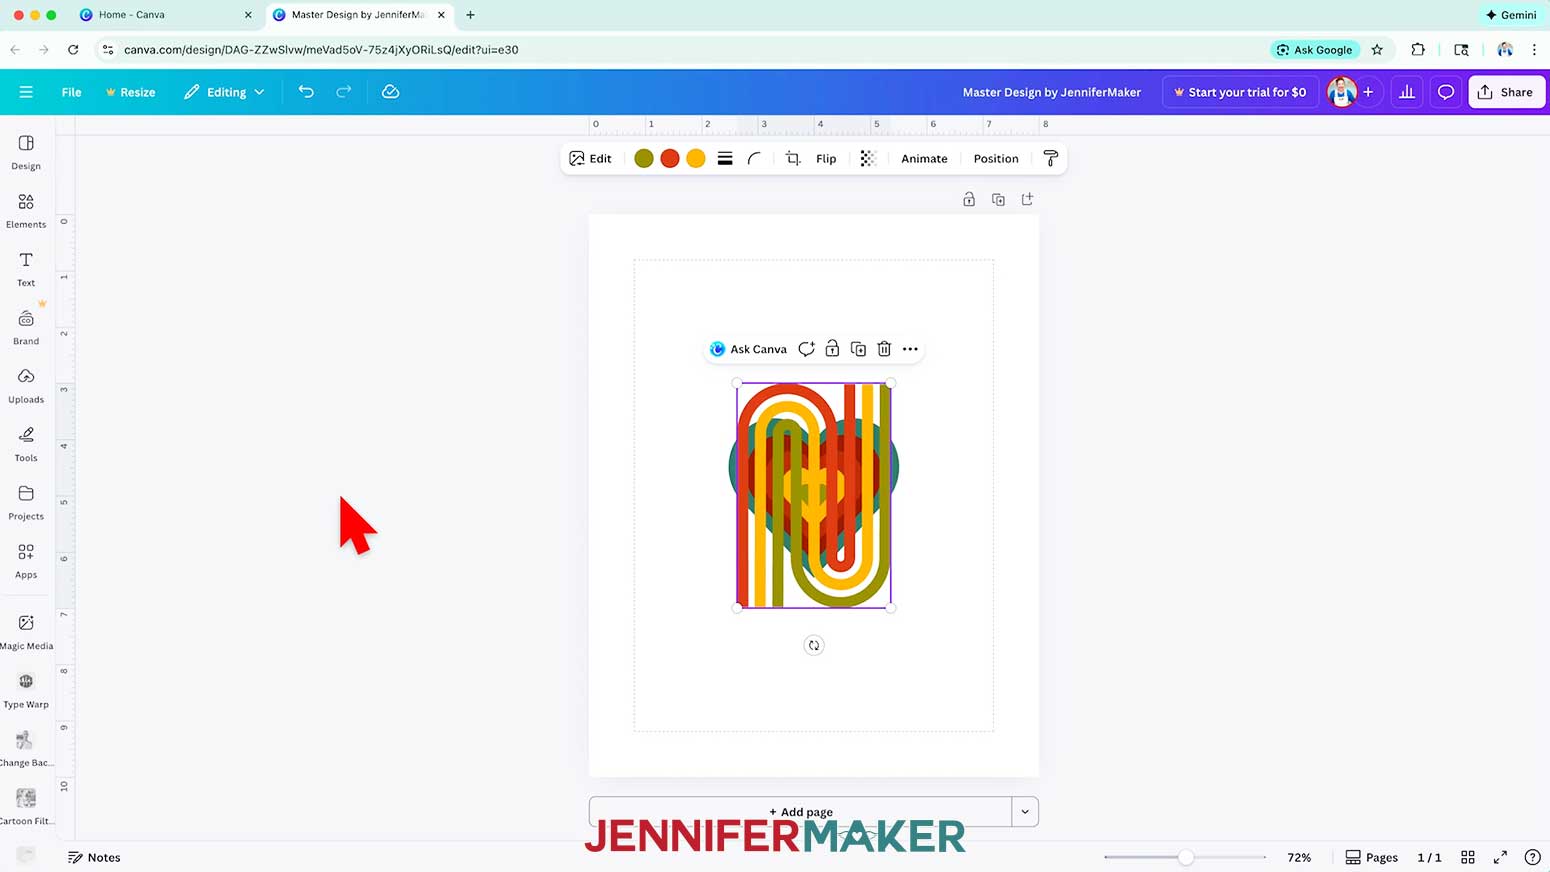
NOTE: You can use just free options by avoiding elements with a crown icon. - “Graphics” elements are more likely to be adjustable, so click “Graphics,” then type a descriptive word or phrase in the “Search elements” box and click the purple arrow.
NOTE: I’ll look for some 1970's-style elements by searching for “groovy.” - Click elements to add them to your canvas.
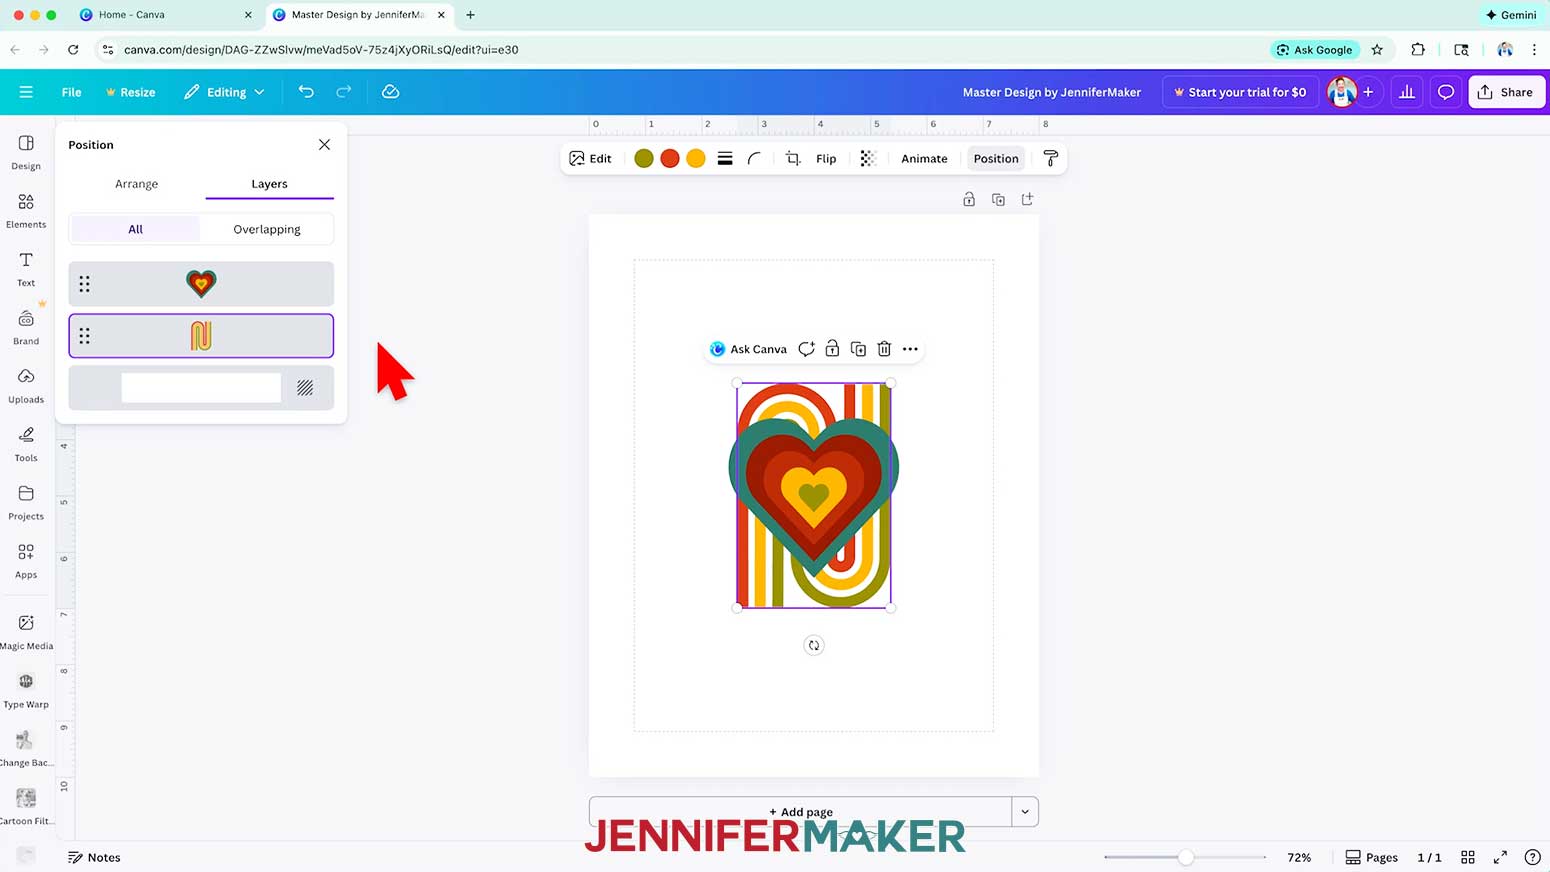
NOTE: I added “70’s Groovy Element Lined” and “70’s Groovy Heart Layer” elements. When I wrote this tutorial, these files were in Canva’s free library. - To see the layer order of your elements, select one element, click “Position” at the top, then click the “Layers” tab.
- You can click and drag the layers into your desired order.
NOTE: I positioned my elements so the rainbow stripe is in the back, and the heart is layered on top. - Click the “X” to exit the menu.
- Use the corner handles to resize your elements as desired.
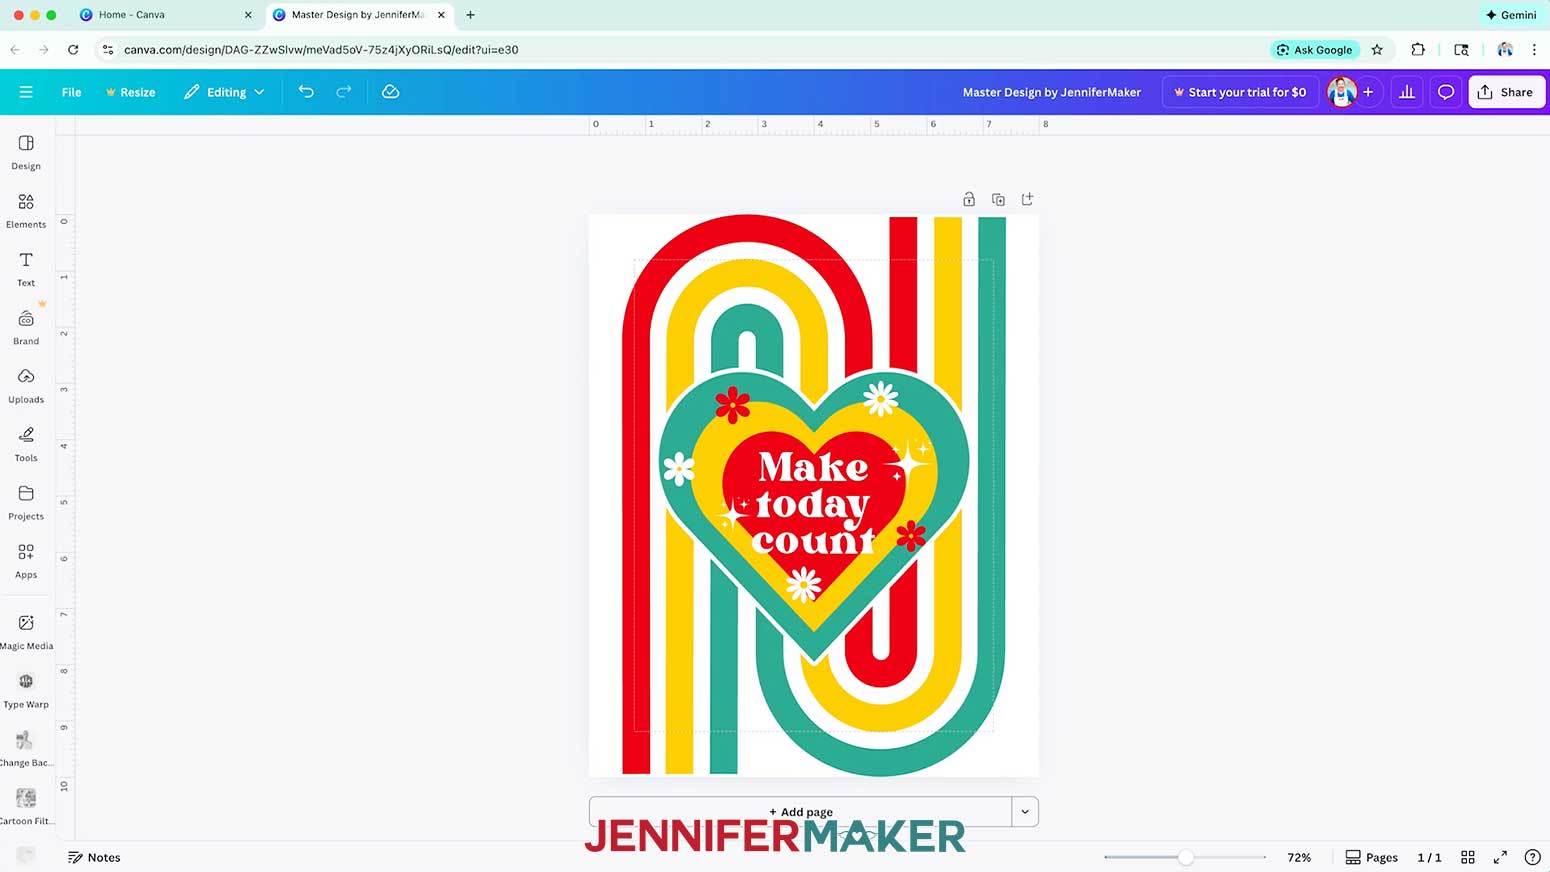
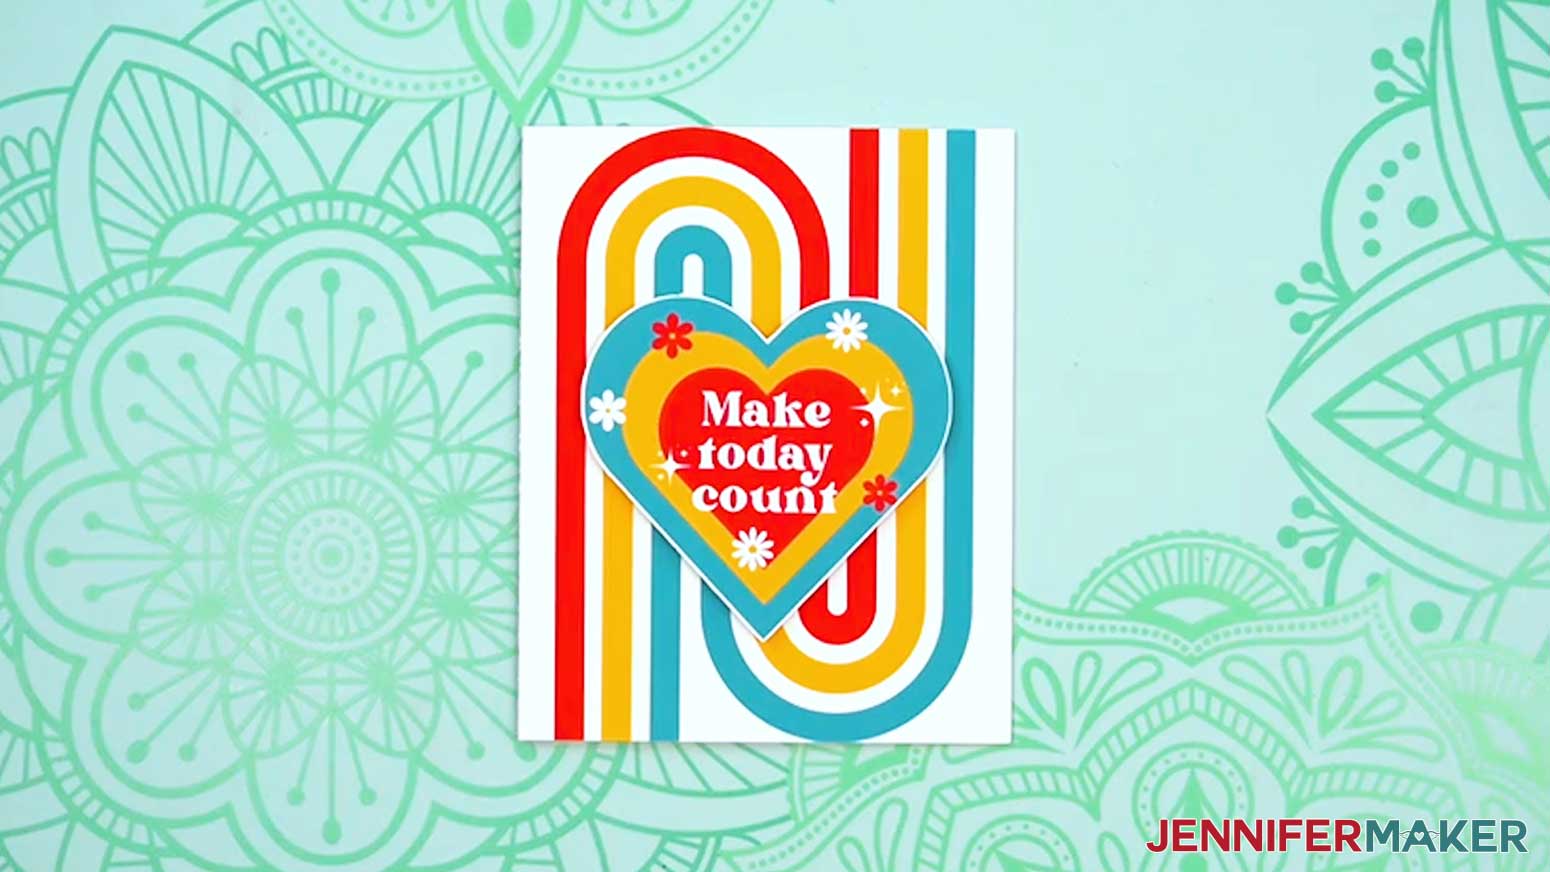
NOTE: I resized the rainbow stripe so each curve touches the top and bottom edges of the canvas (6.8” wide by 10” high), and I resized the heart to 6” wide by 5.5” high.
TIP: Filling the canvas with an element or background image edge-to-edge looks especially nice on posters and cards. - Click and drag your elements to create your design, using the guidelines to help center and align them.
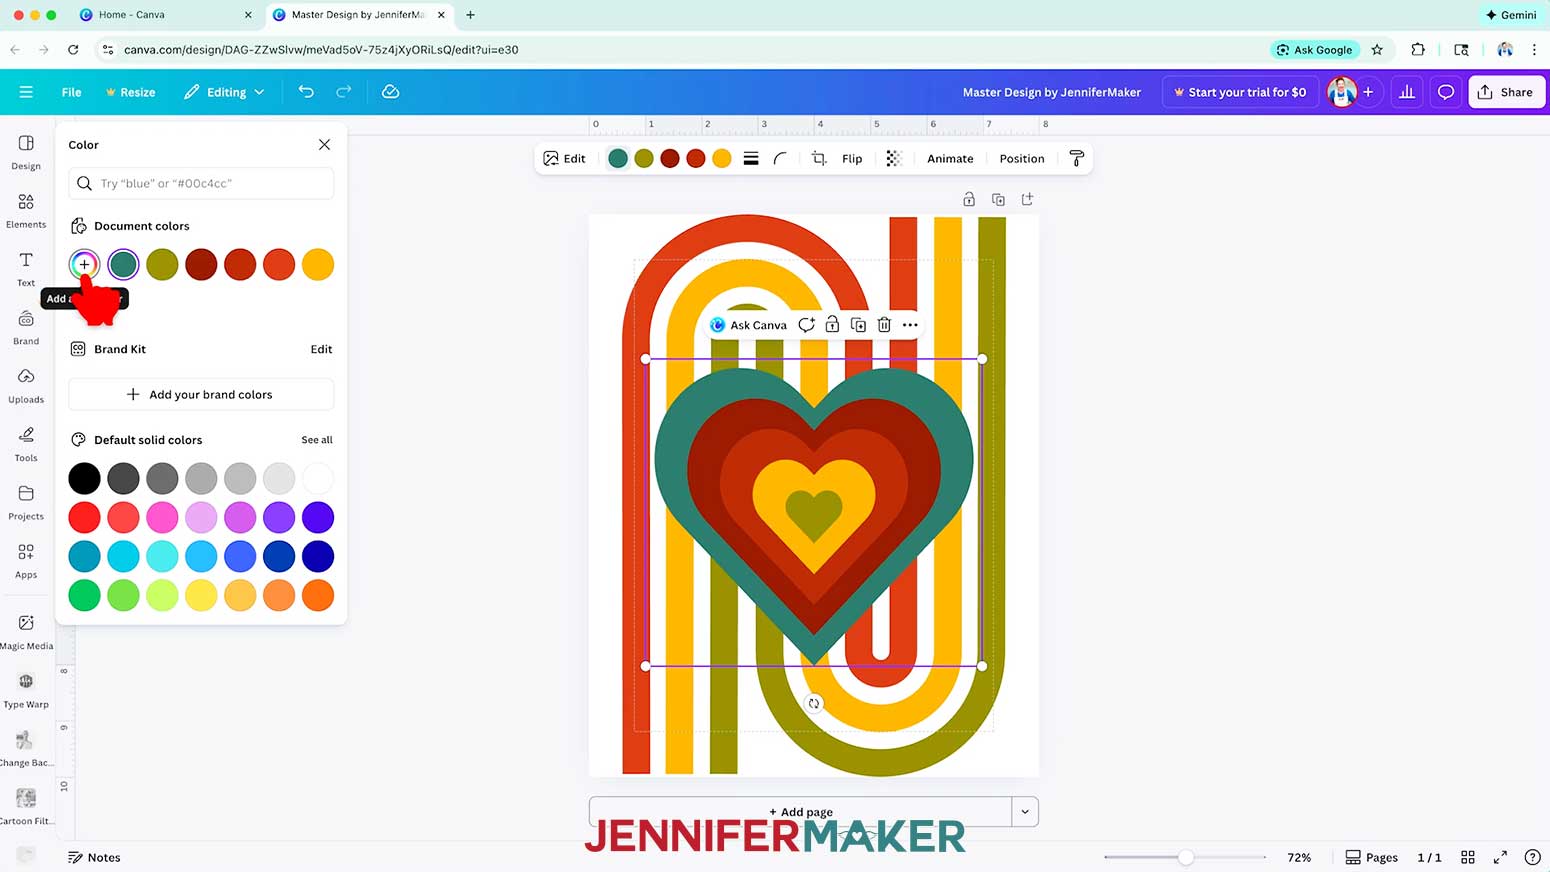
- If you have an element selected and see color swatches in the top menu, you can change some or all of the colors it contains by clicking the swatch and picking a new one. Later, you can adjust the colors for your other design ideas.
TIP: By “Default solid colors,” click “See all” to select even more options, or click the plus sign (+) to “Add a new color.”
NOTE: On the heart, I changed the dark teal to medium teal (#40a592), the dark red to golden yellow (#fcc20e), and the light red, yellow, and green to ruby red (#e40020). On the rainbow background, I changed the dull red to ruby red (#e40020), the yellow to golden yellow (#fcc20e), and the green to medium teal (#40a592).
NOTE: Some images or graphics in Canva cannot be directly color edited. This means that if you change the color, the result does not match the color you selected. As a workaround, select the element you want to recolor, click “Edit” and “Adjust,” then adjust the sliders until the color looks closer to what you want.
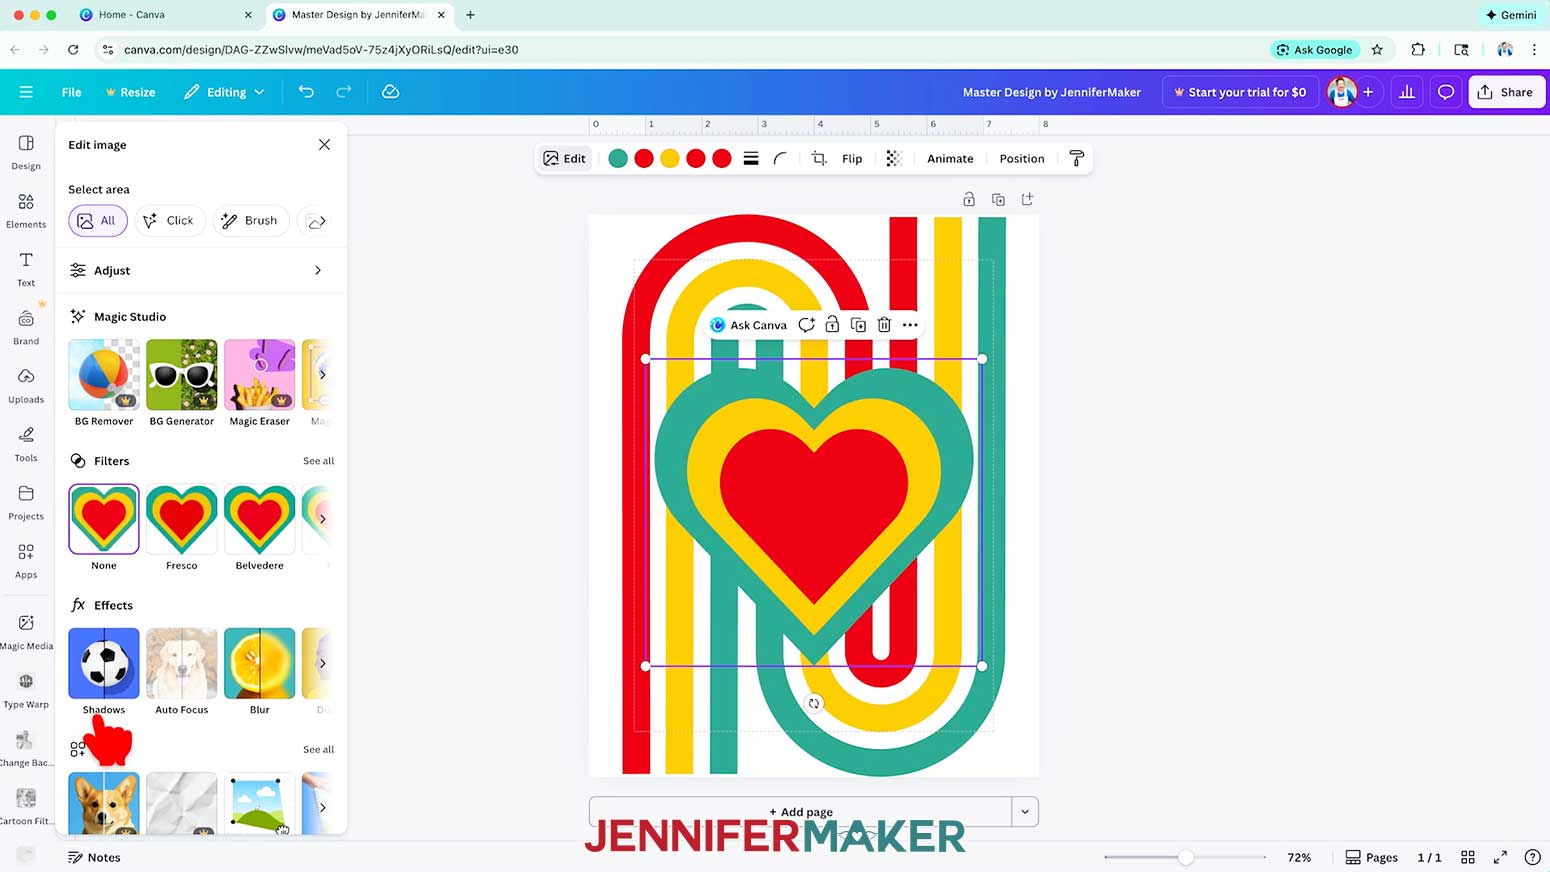
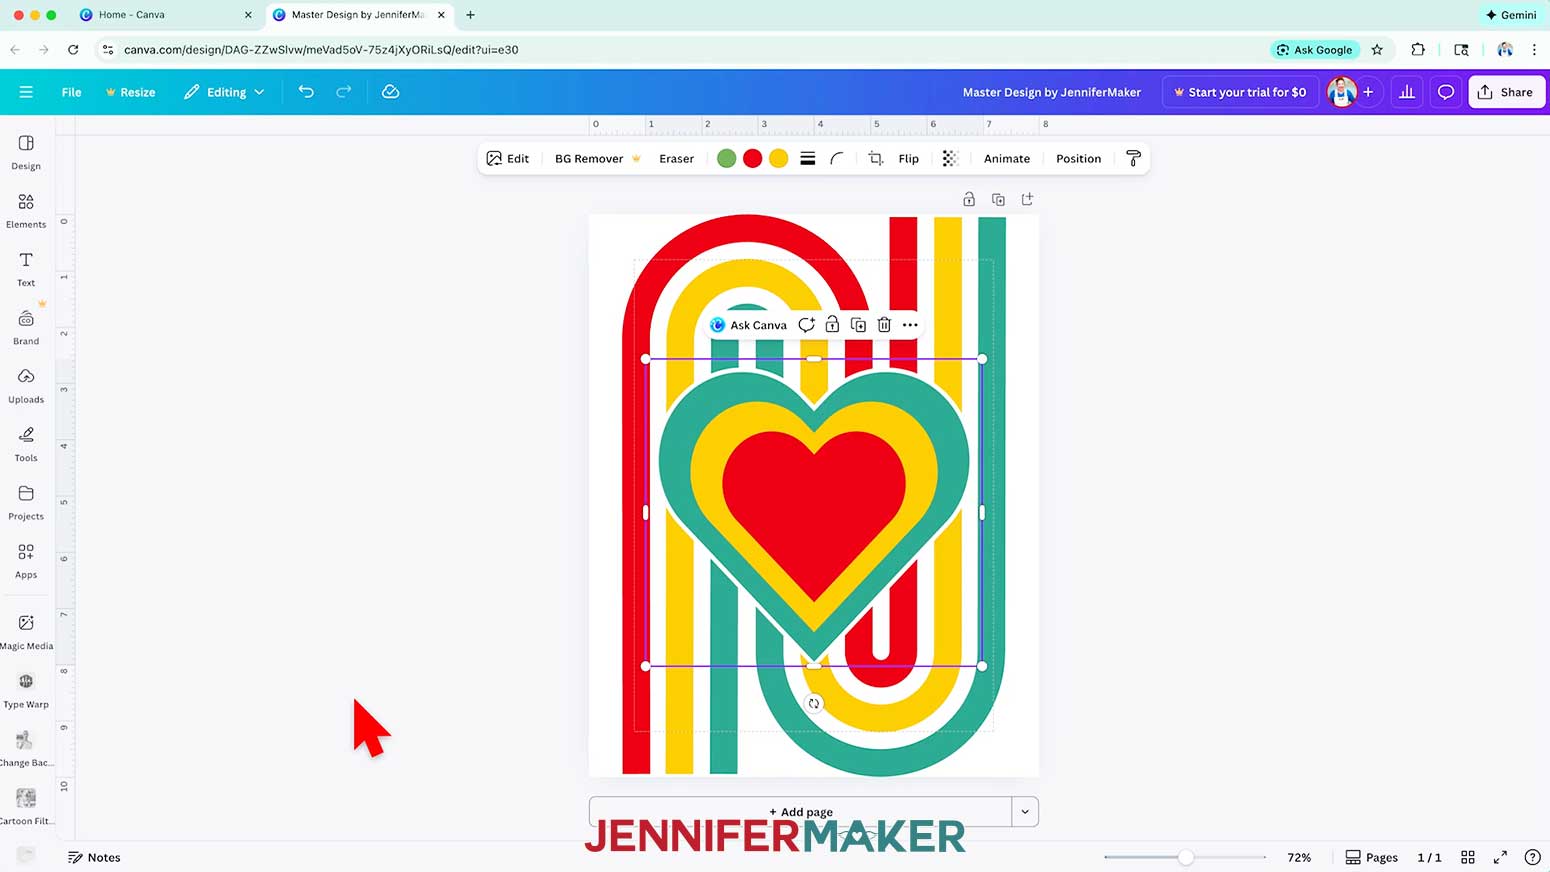
TIP: Some edits can make an element difficult to customize later, so you can “Duplicate” them to keep a simple version. With the copy selected, click “Position” and “Send backward” to hide it behind the original for future use. I did this with my heart element. - To add more adjustable details, select an element and click the “Edit” tool to open a menu with options, such as "Effects."
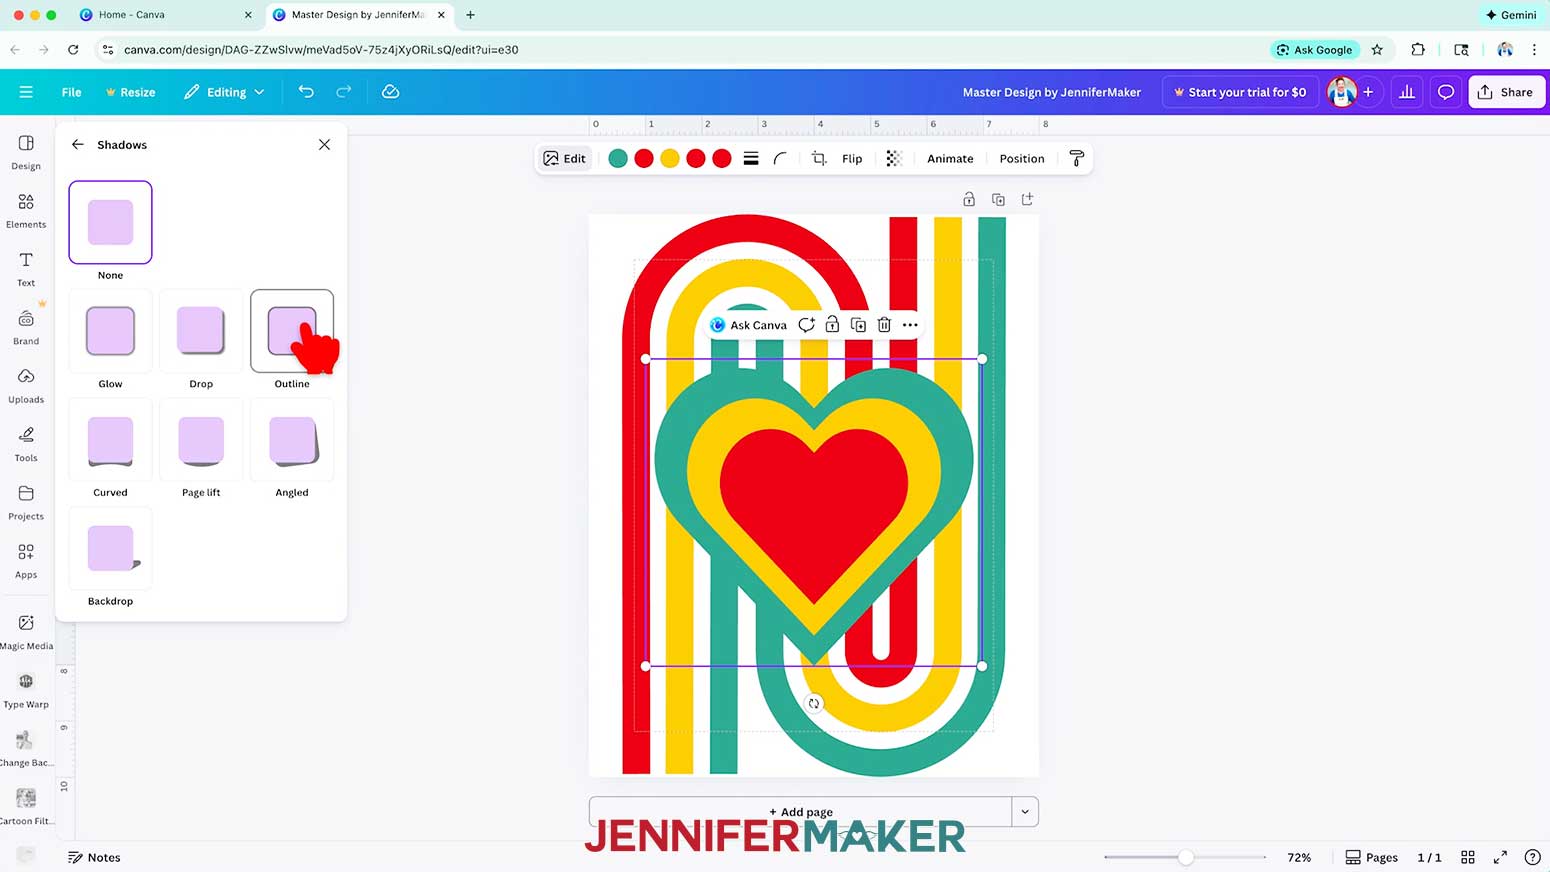
NOTE: I want to add an outline to the heart to make it stand out. - Under “Effects,” click “Shadows.”
- In the “Shadows” menu, select “Outline.”
- Click and drag the “Size” slider to change the thickness of the outline.
NOTE: I set the heart’s outline’s thickness to “26.” - Click the Color swatch to change the color of the outline.
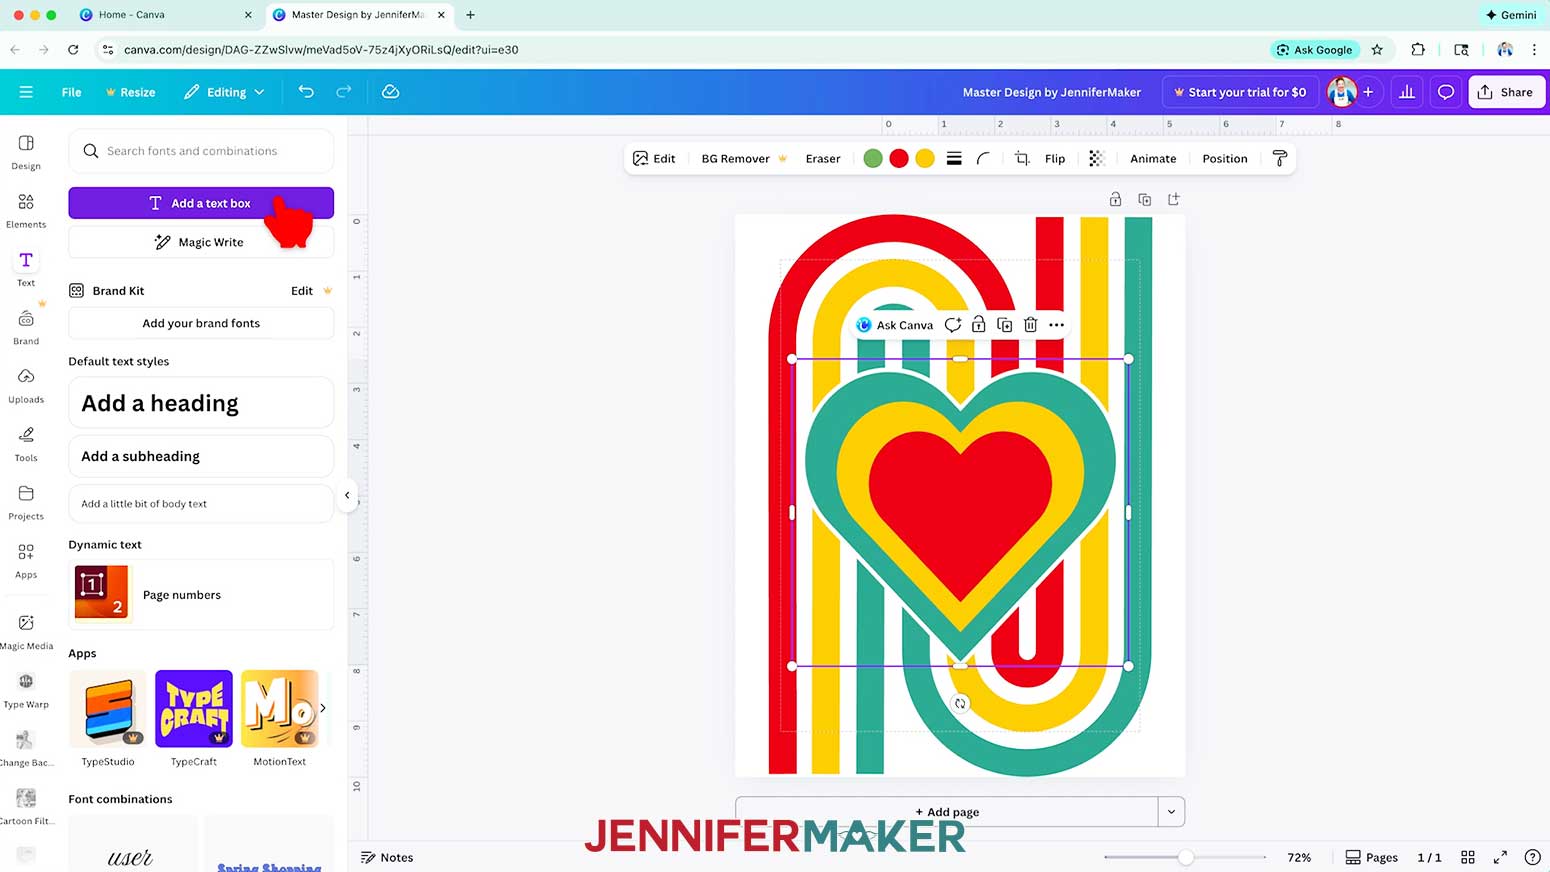
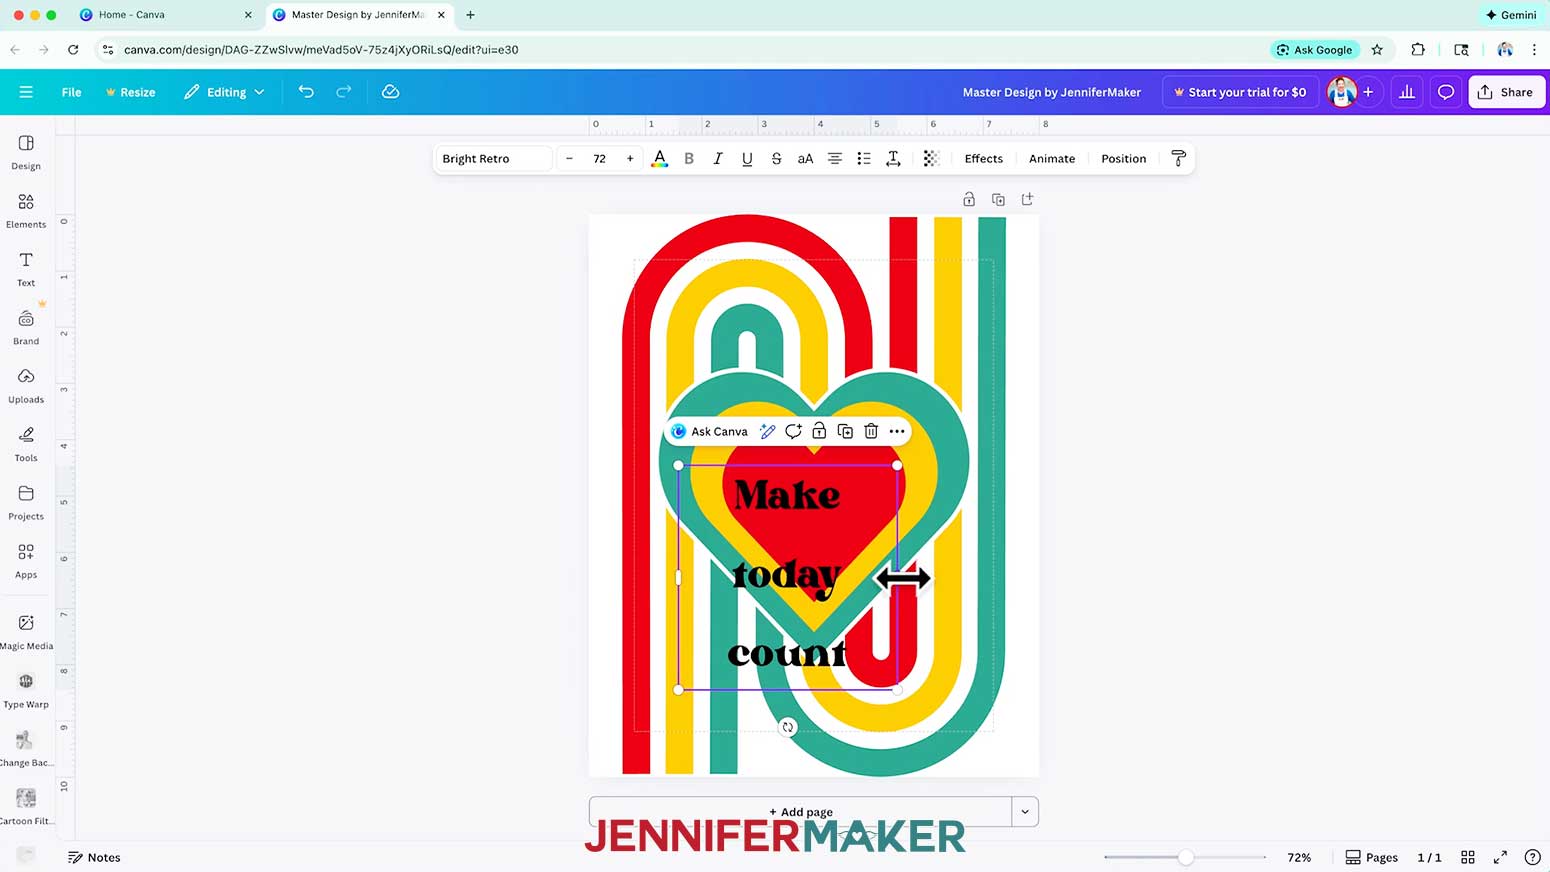
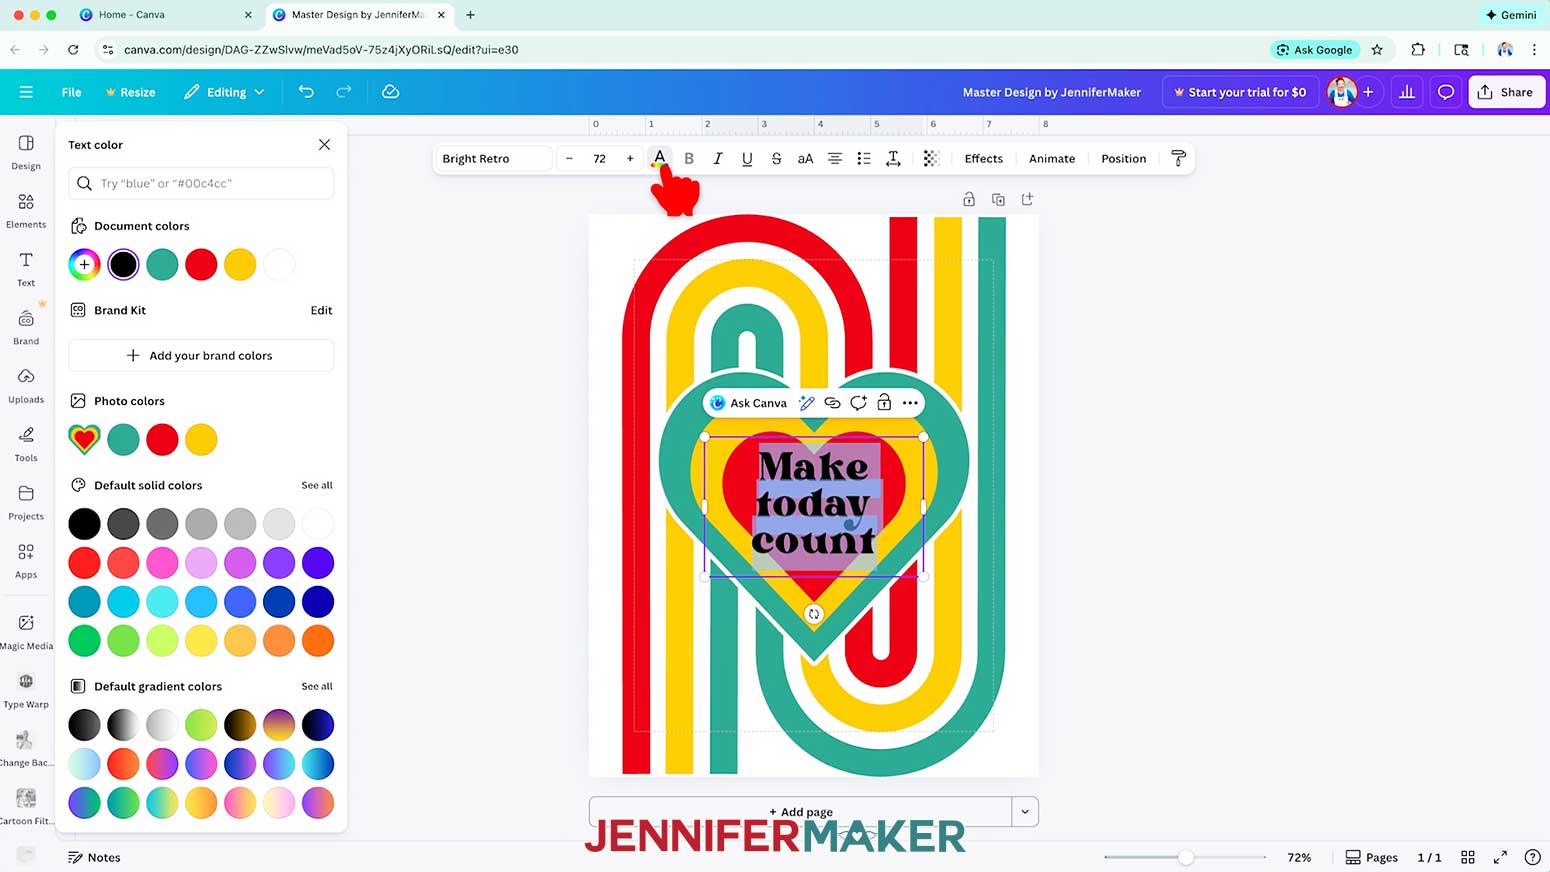
NOTE: I changed the heart’s outline to white. - To add editable text, click the “Text” icon in the side panel, then click “Add a text box.”
- Type your desired text in the box.
NOTE: I’ll type “Make today count,” which can be adjusted for other design ideas. - To change your text’s typeface, select your text and click the font drop-down menu.
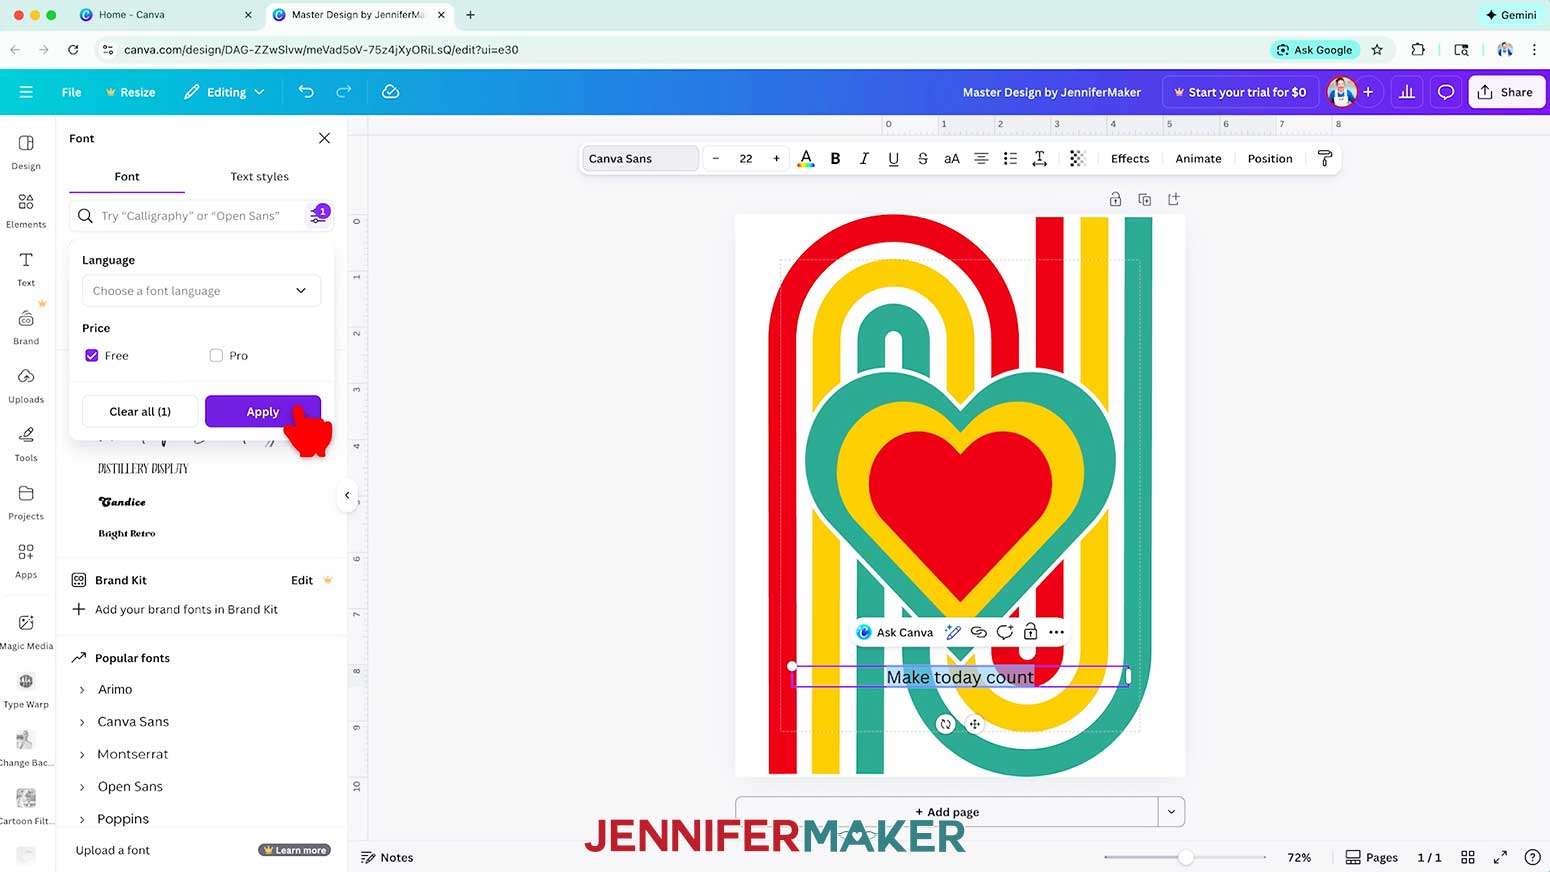
- To see just free options, click on the icon with three horizontal lines and small circles to open the “Filter” menu, then check the box next to “Free,” and click “Apply.”
- Click a typeface you like from the list to apply it to your text.
NOTE: I used a typeface called “Bright Retro.” - To resize your text, use the corner Resize handles to make your text larger or smaller.
NOTE: I resized my text to “72.” - You can use the side handles to change the text’s position inside the box or create multiple lines.
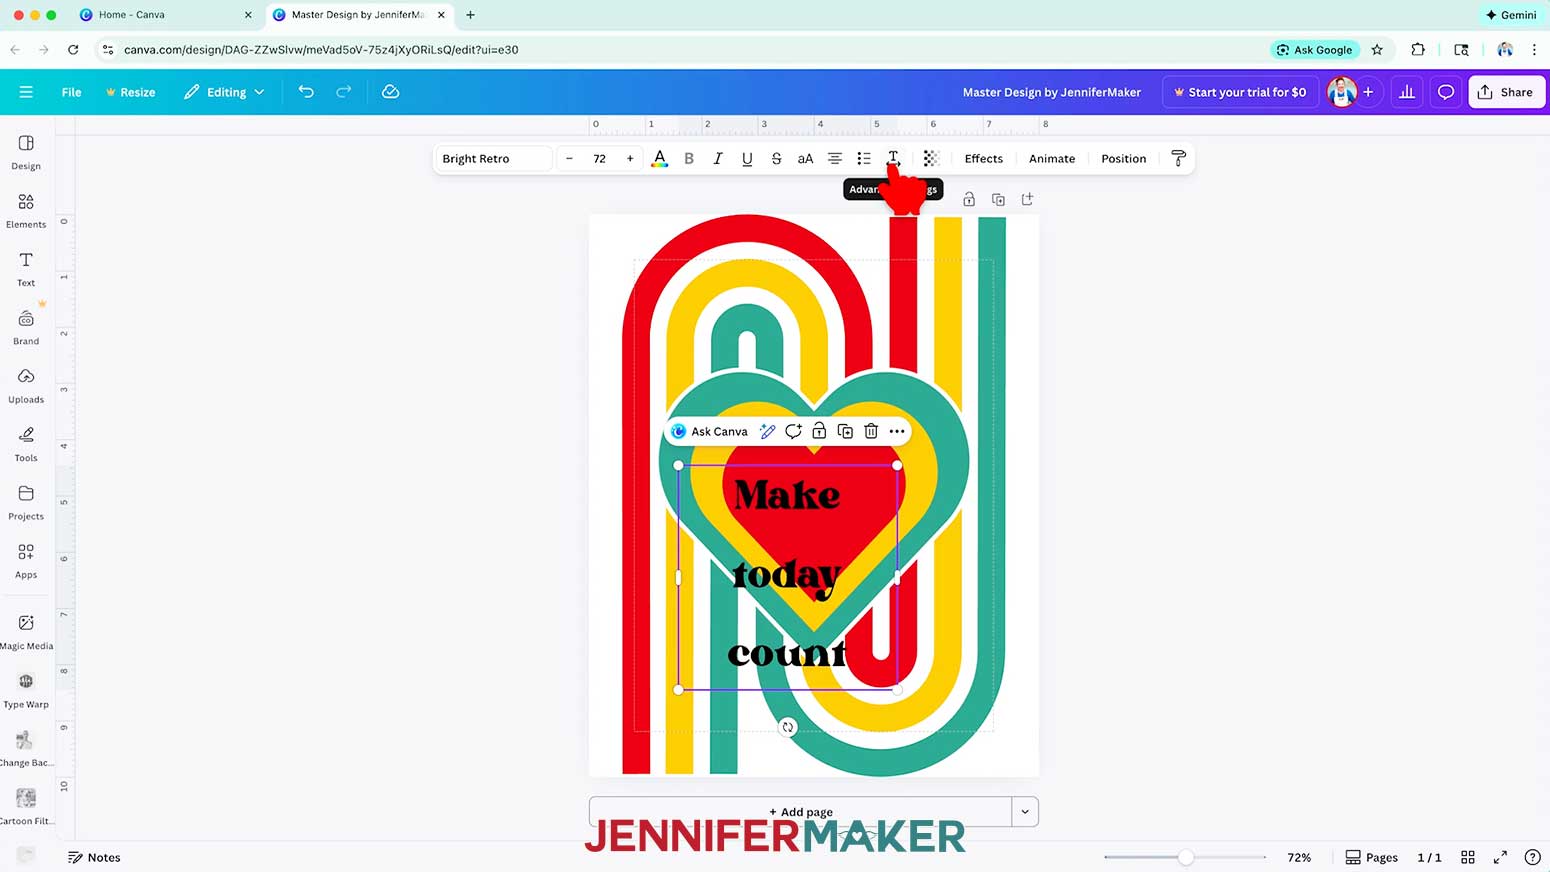
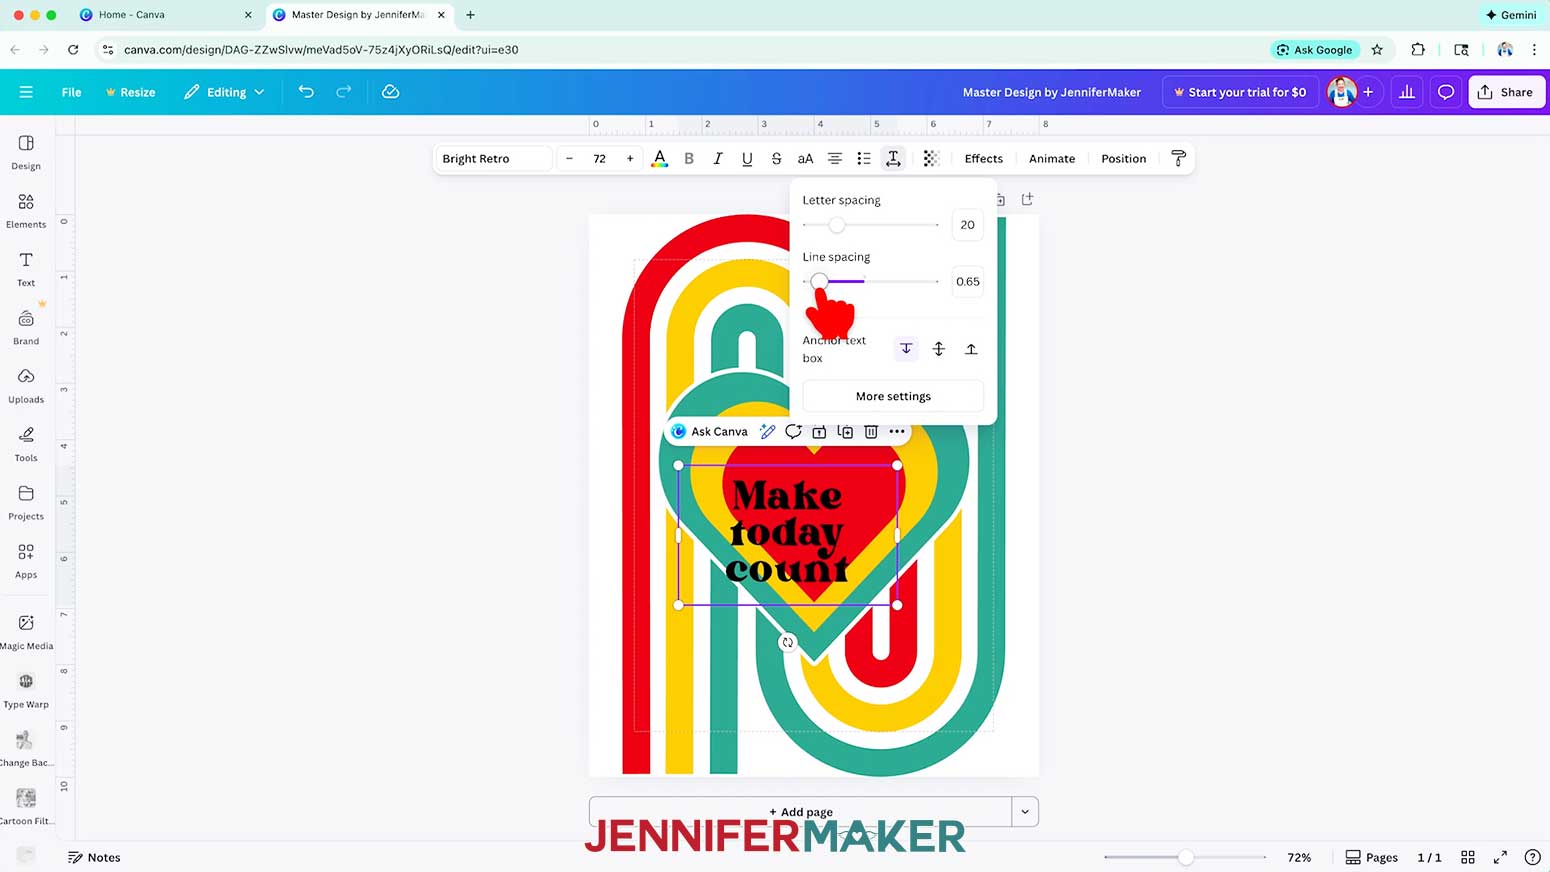
NOTE: I adjusted the side handles so the text is on three separate lines. - To adjust the spacing between your letters or lines of text, click the T and horizontal arrows icon at the top.
- Drag the sliders to adjust the spacing between the letters or lines.
NOTE: I adjusted my “Letter spacing” to 20 and my “Line spacing” to 0.65. - Click and drag the text to move it into your desired position on the Canvas.
NOTE: I’ll place it inside the smallest heart section. - To change the color of your text, click the toolbar button with the letter “A” above a color box and choose a new color.
NOTE: I changed the text to white to stand out and complement my design. - Repeat steps 9-17 to add and adjust additional elements to complement your design.
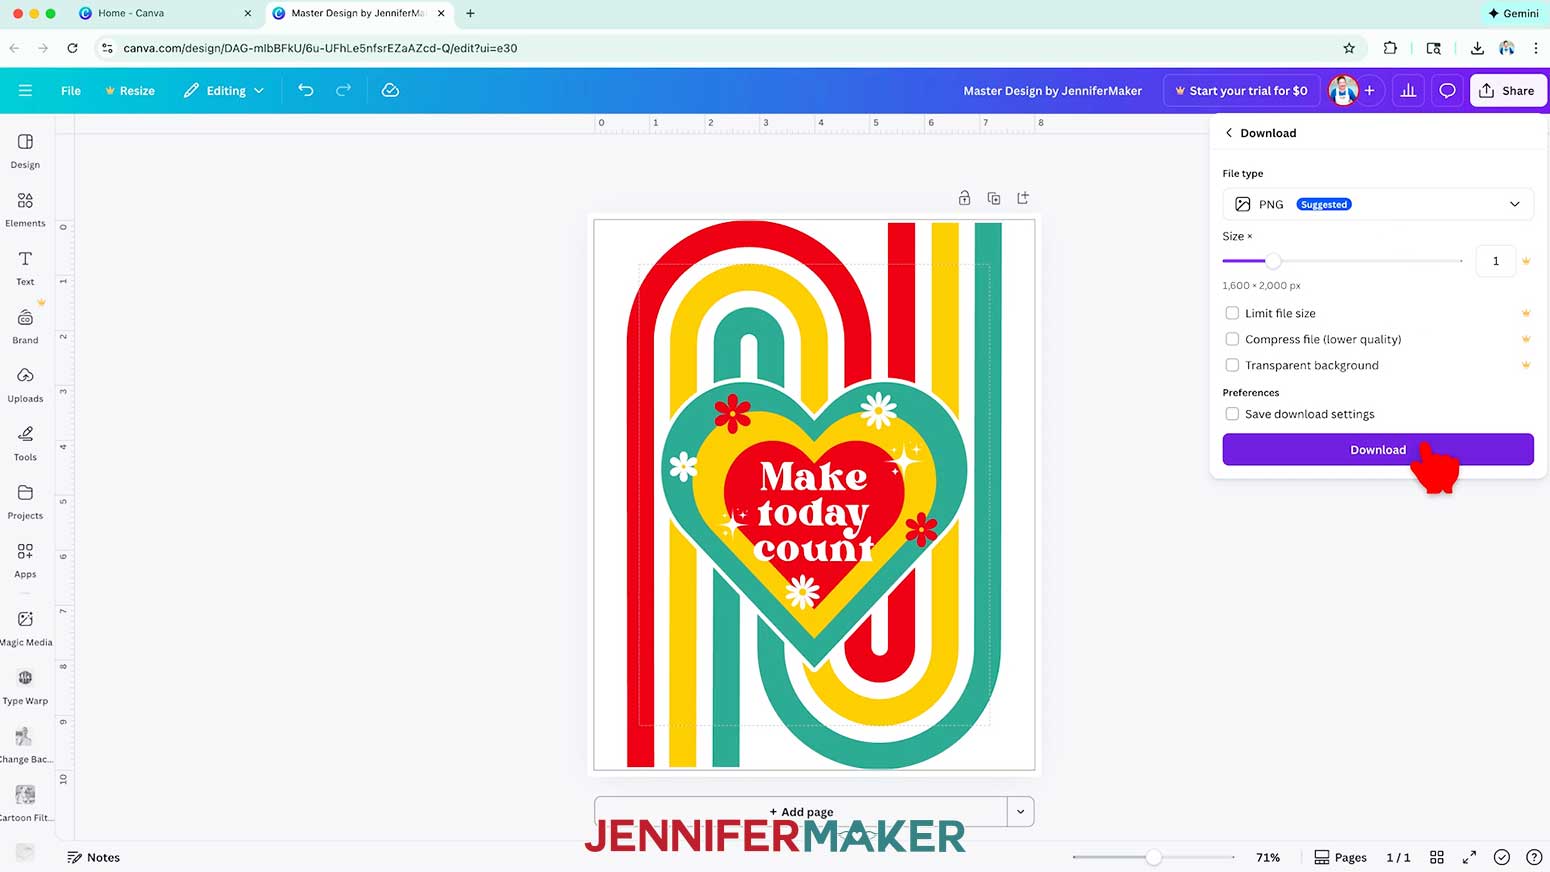
NOTE: I added a “Christmas star,” a red “70’s Groovy Flower,” and a teal “70’s Groovy Flower,” duplicated them each two to three times, then resized and rotated them. To complement my design’s colors, I changed the “Christmas star” to white. I changed the red flower’s petals to ruby red (#e40020) and its center to golden yellow (#fbc20e). On two of the teal flowers, I changed the petals to ruby red (#e40020), and on one of the teal flowers, I changed the petals to white. I changed the centers of all of the flowers to golden yellow (#fbc20e). - When you’re happy with how your master design looks, click “Share,” then “Download.”
- Choose a file type and click “Download” to download a copy of the master design to your computer.
NOTE: I’ll pick a “PNG” as it’s the most adaptable of the free options.
STEP 3: ADAPT YOUR MASTER DESIGN FOR DIFFERENT PROJECTS
BEFORE YOU START: These options show how to adapt the same master design for a poster, card, and mug. In the video, I explain why these changes matter. Here, I will show you step by step how to make it work.
OPTION 1: ADAPT A DESIGN FOR A POSTER
- Open your master design in Canva.
- Click “File.”
- Click “Make a copy,” and a copy of the design will open in a new tab in Canva.
NOTE: Now can edit a copy of the design without changing the original master design. - Click where it says “Copy of” and then your master design’s name, and give the design a new name.
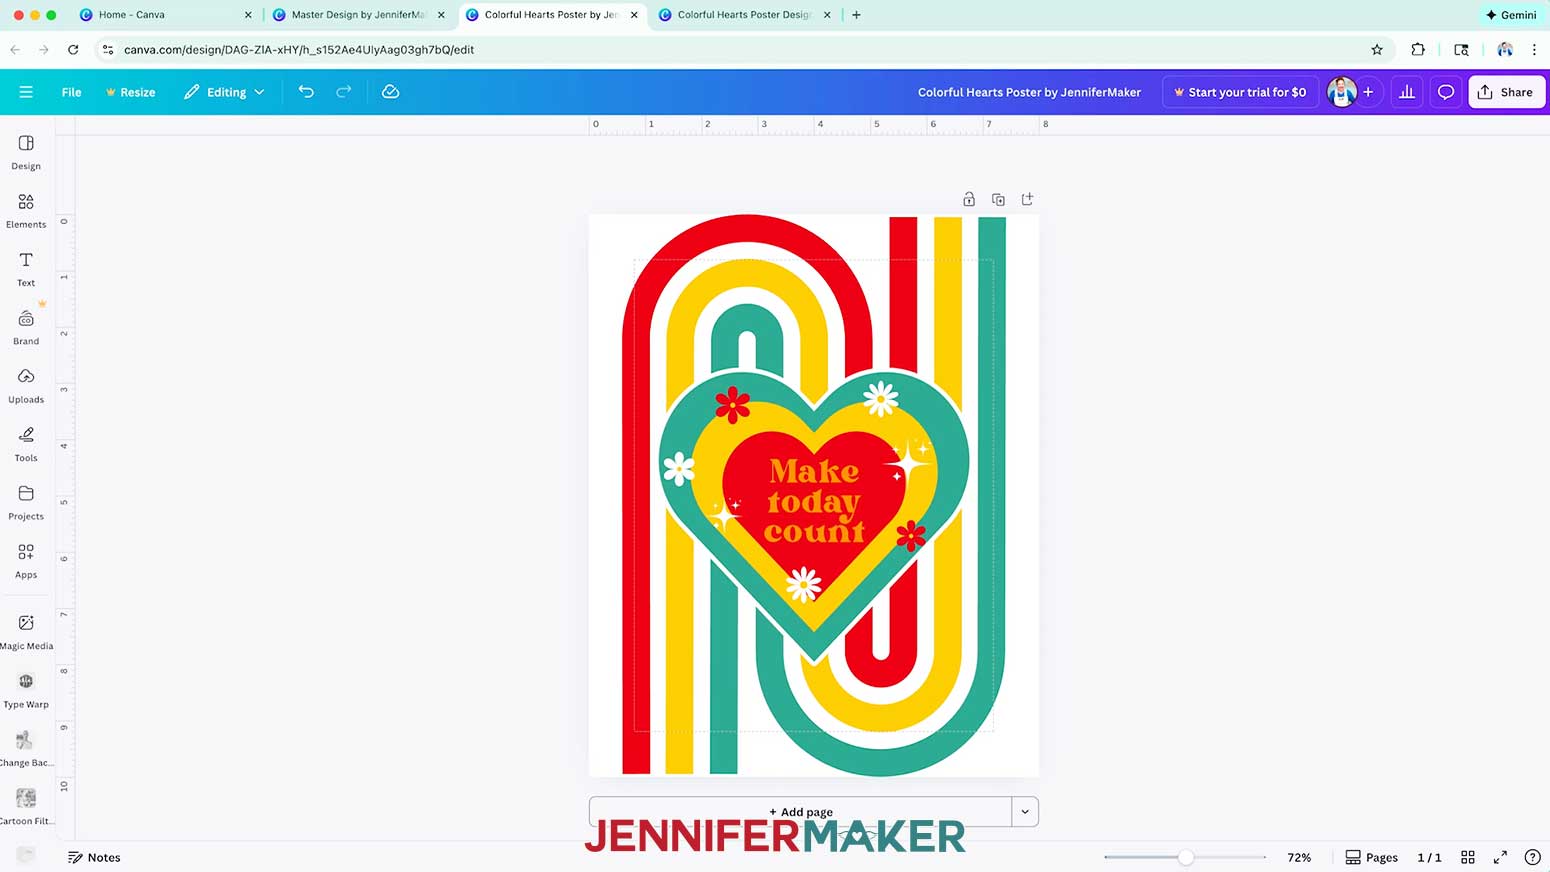
NOTE: I renamed mine “Colorful Hearts Poster by JenniferMaker.” - Because this is a copy of the master design, you can make changes to it without affecting your original. Follow steps 9-34 in “STEP 2: CREATE A MASTER ADAPTABLE DESIGN” to adjust the colors, text, or elements in your design, if desired.
- To create a Print With Canva poster, proceed to “VARIATION 1: PRINT WITH CANVA” below. To print your own poster at home, proceed to “VARIATION 2: PRINT FROM GOOGLE DOCS” below.
VARIATION 1: PRINT WITH CANVA
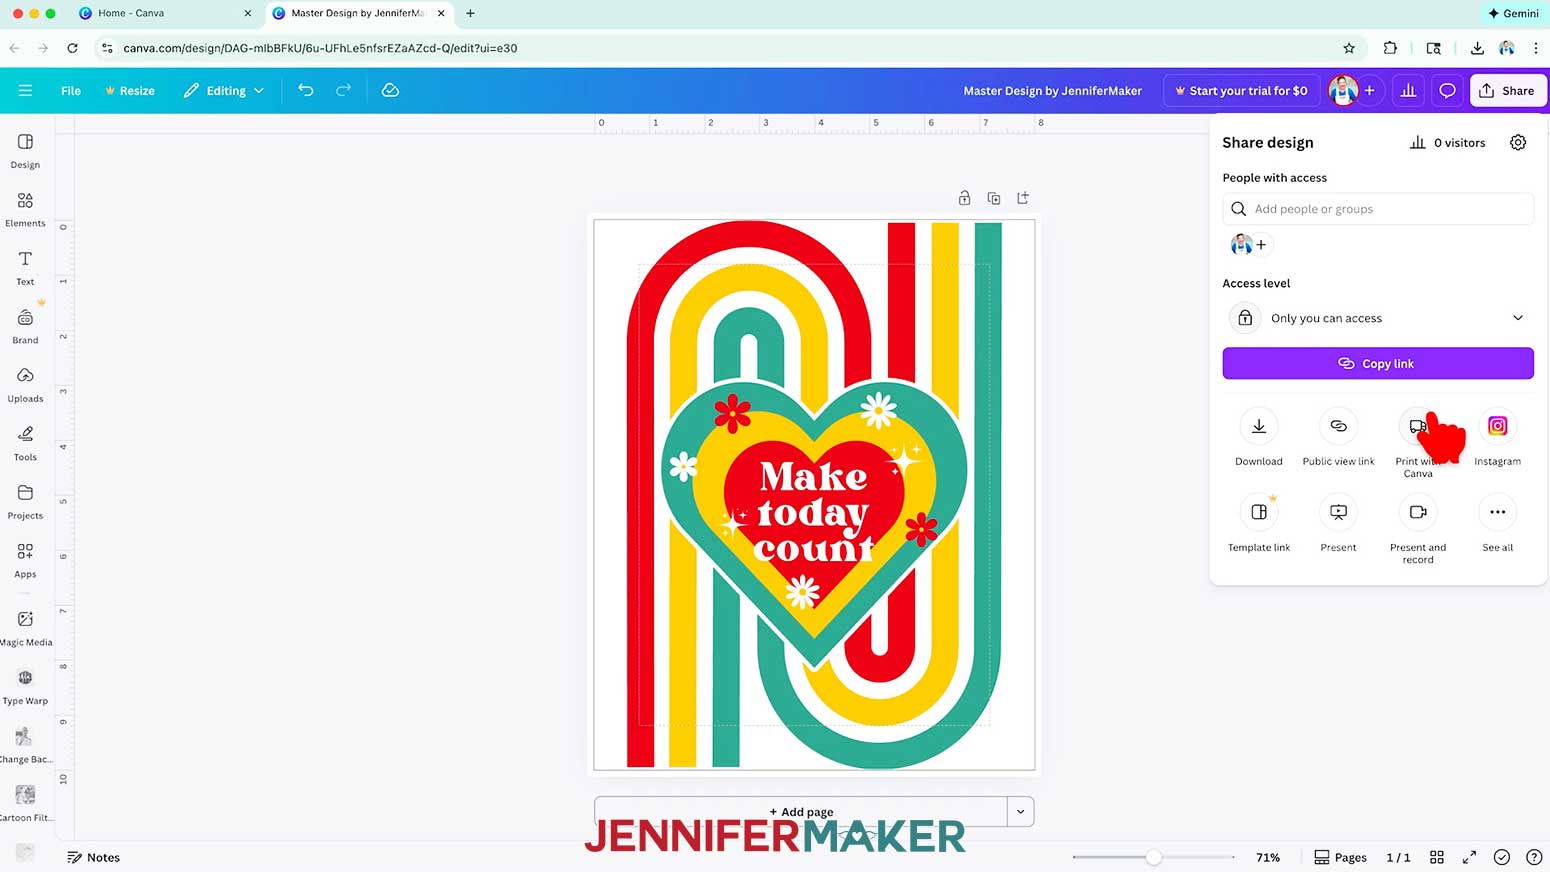
- Click “Share.”
- Click “Print with Canva.”
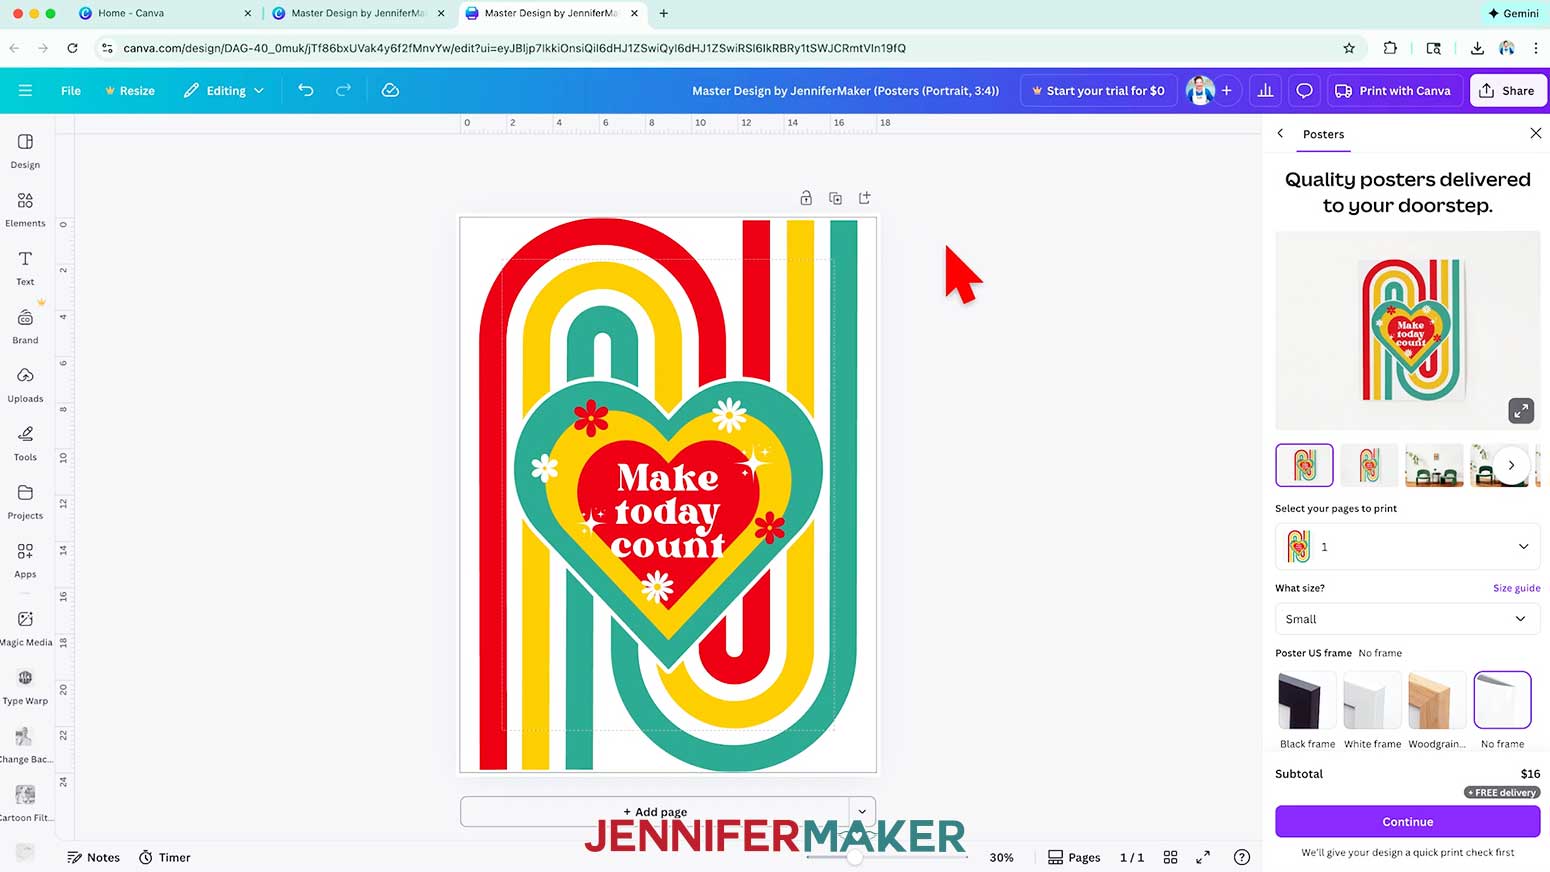
- In the search bar, type “poster.”
- Select a poster option.
NOTE: I selected “Posters (Portrait, 3:4).” - Your design will open in another new tab, on a poster-sized canvas.
NOTE: If the tab doesn’t open up, make sure you have your browser’s pop-up blockers turned OFF. - Drag a selection box around the entire design, then use the corner handles to resize the design so the top and bottom of the rainbow background extend to the edges of the poster canvas.
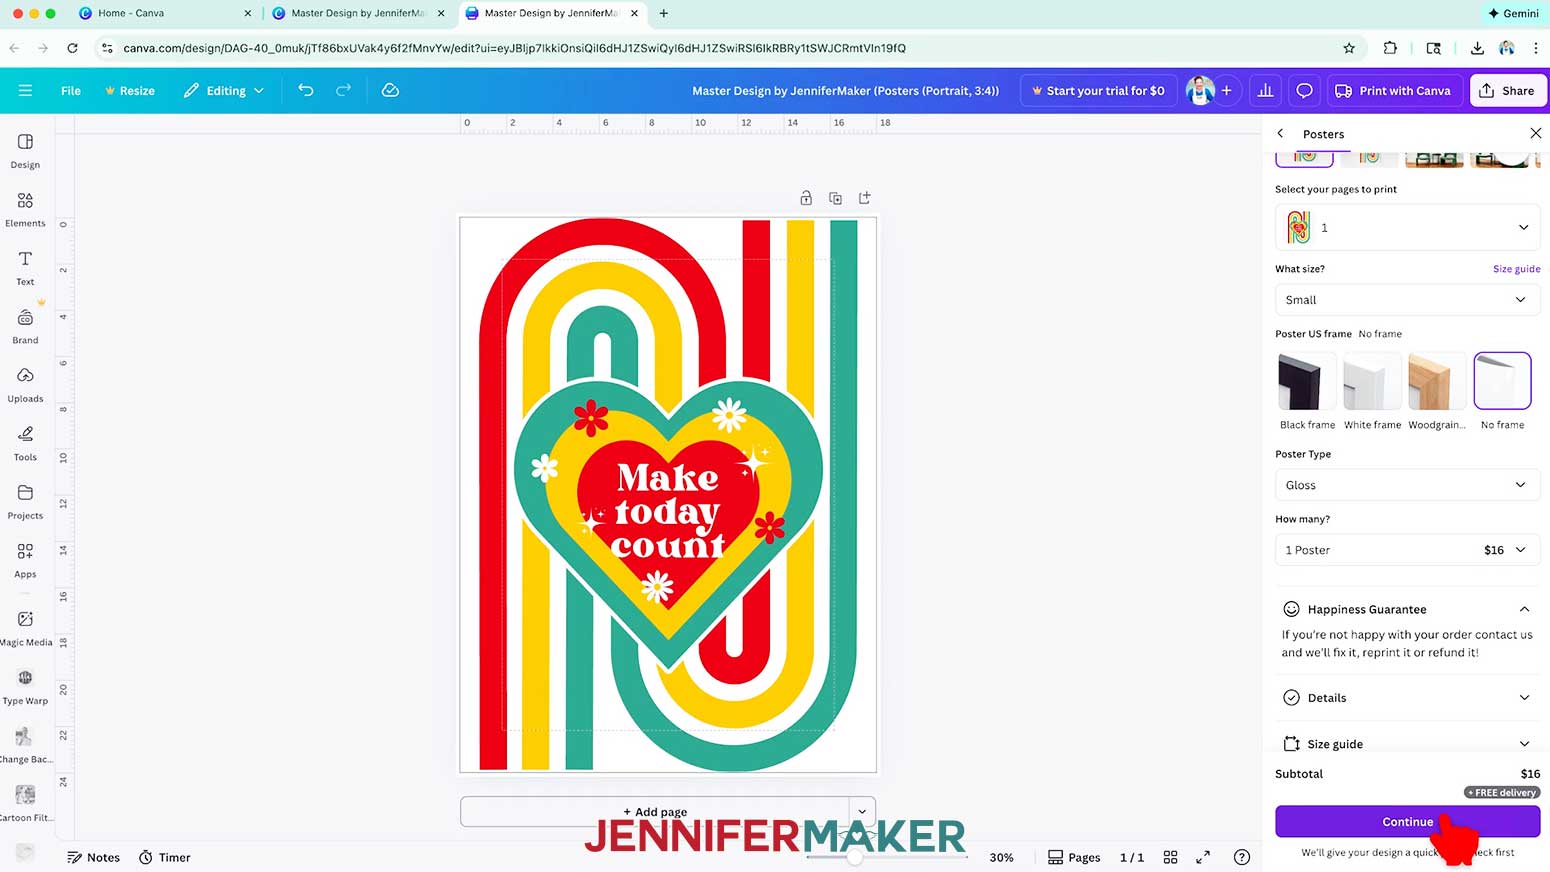
- In the Print With Canva menu under “What size?,” select a size from the drop-down menu.
NOTE: I’ll pick “Small.” - Under “Poster US frame,” select a frame if desired.
NOTE: I’ll pick without a frame. - Under “Poster Type,” select the type of poster you want to order.
NOTE: I ordered a “Gloss” poster for a shinier finish. - Under “How many?,” select the number of posters you want to order.
- Click “Continue.”
- You might see a note to “Automagically” fix any issues with your canvas before ordering your poster. Click the toggle “ON” to apply these fixes.
NOTE: You can also download a free PDF to do a final check of your poster before placing your order. - Either click “Add to cart” and continue working in Canva, or click “Checkout” to purchase your poster.

VARIATION 2: PRINT FROM GOOGLE DOCS
- With your design ready on the Canvas, click “Share” and “Download.”
- Make sure “PNG” is selected for the file type, then click “Download.”
- Follow “STEP 5: PRINT A SEAMLESS PATTERN ONTO PAPER” in my How to Create a Seamless Pattern in Canva tutorial to print your poster from Google Docs.
NOTE: You will need a free Google account to use the free Google Docs software. - Trim off the extra edges with a paper trimmer or scissors. If your poster has a white background like mine, use a ruler to measure your trim lines first, lightly mark them in pencil, and then use a paper trimmer or scissors to cut them.
- Your poster is ready to frame or display!
OPTION 2: ADAPT A DESIGN FOR A GREETING CARD
- Open your master design in Canva.
- Click “File.”
- Click “Make a copy,” and a copy of the design will open in a new tab in Canva.
NOTE: You can edit the copy without changing the original master design. - Click where it says “Copy of” and then your master design’s name, and give the design a new name.
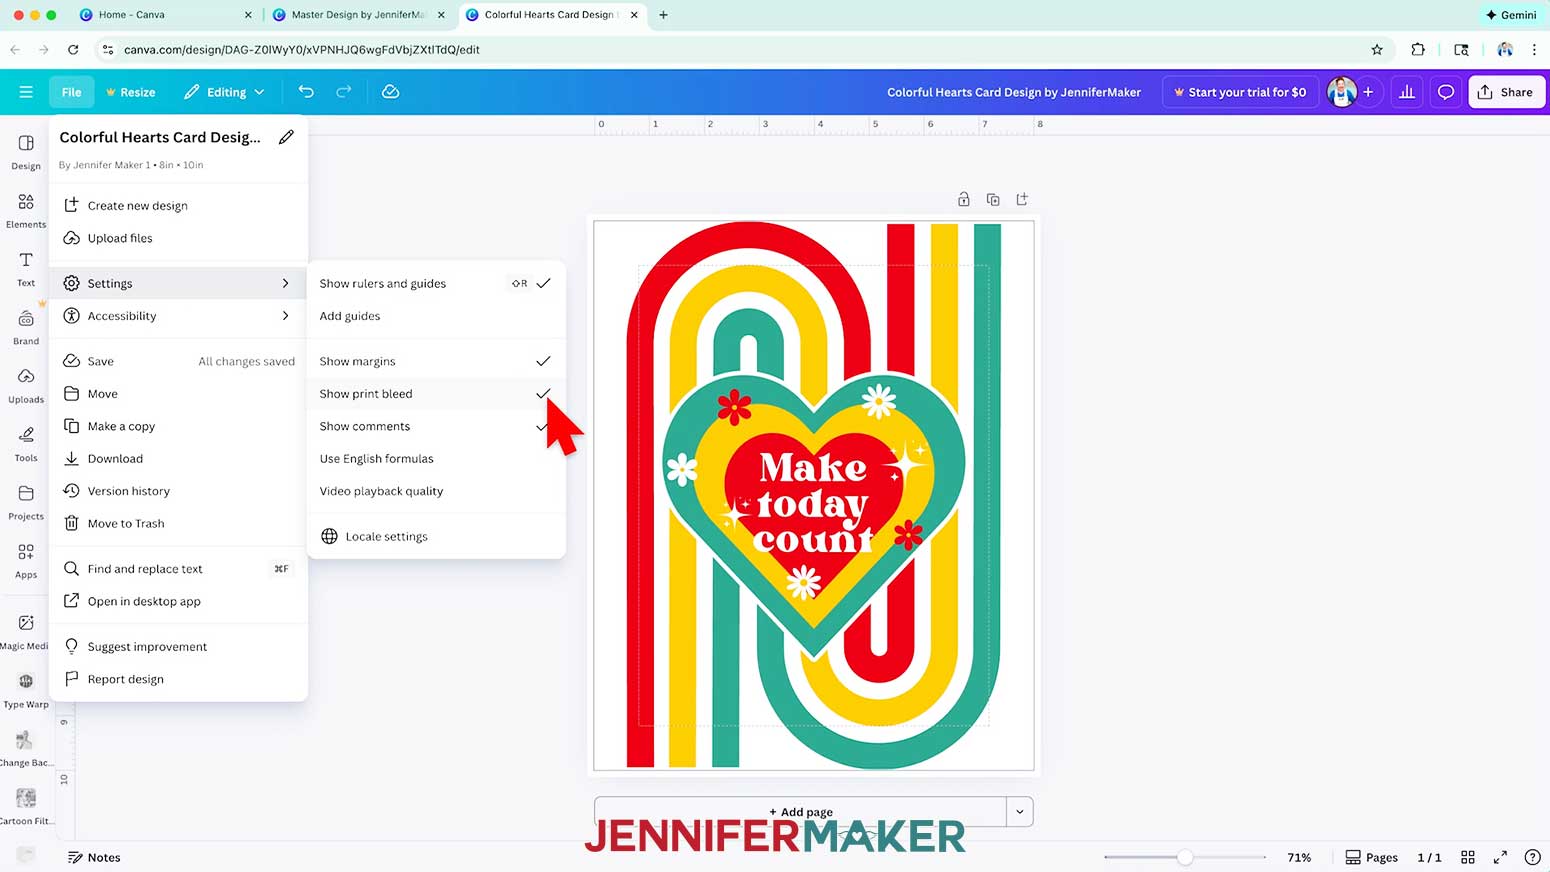
NOTE: I renamed mine “Colorful Hearts Card Design by JenniferMaker.” - To start making the rainbow’s ends go to the very top and bottom edges of the card, click “File,” then “Settings,” and make sure there’s a checkmark next to “Show print bleed.”
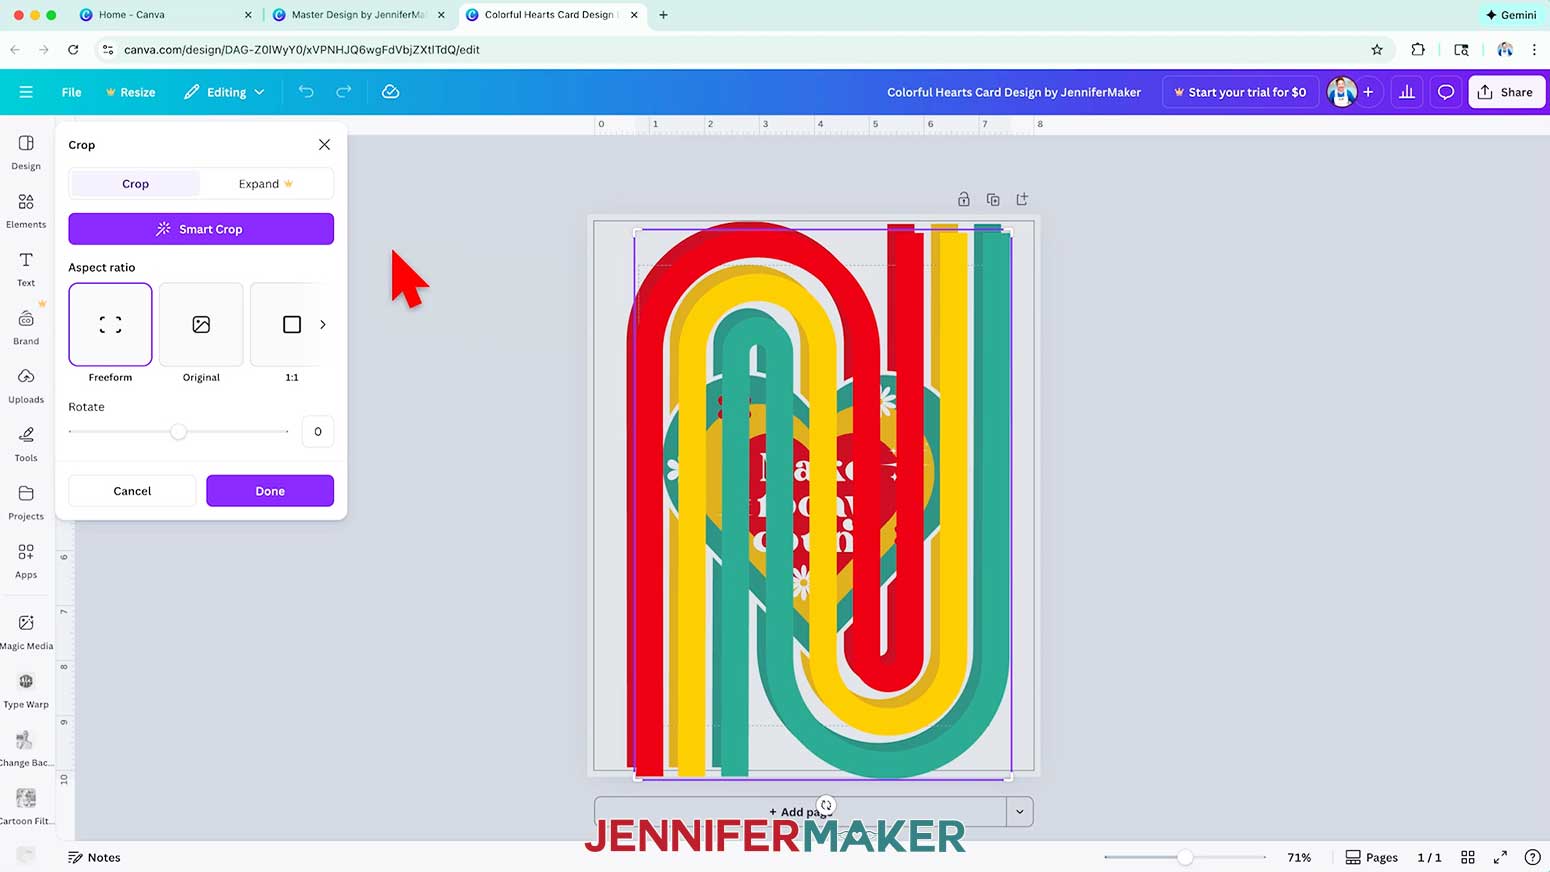
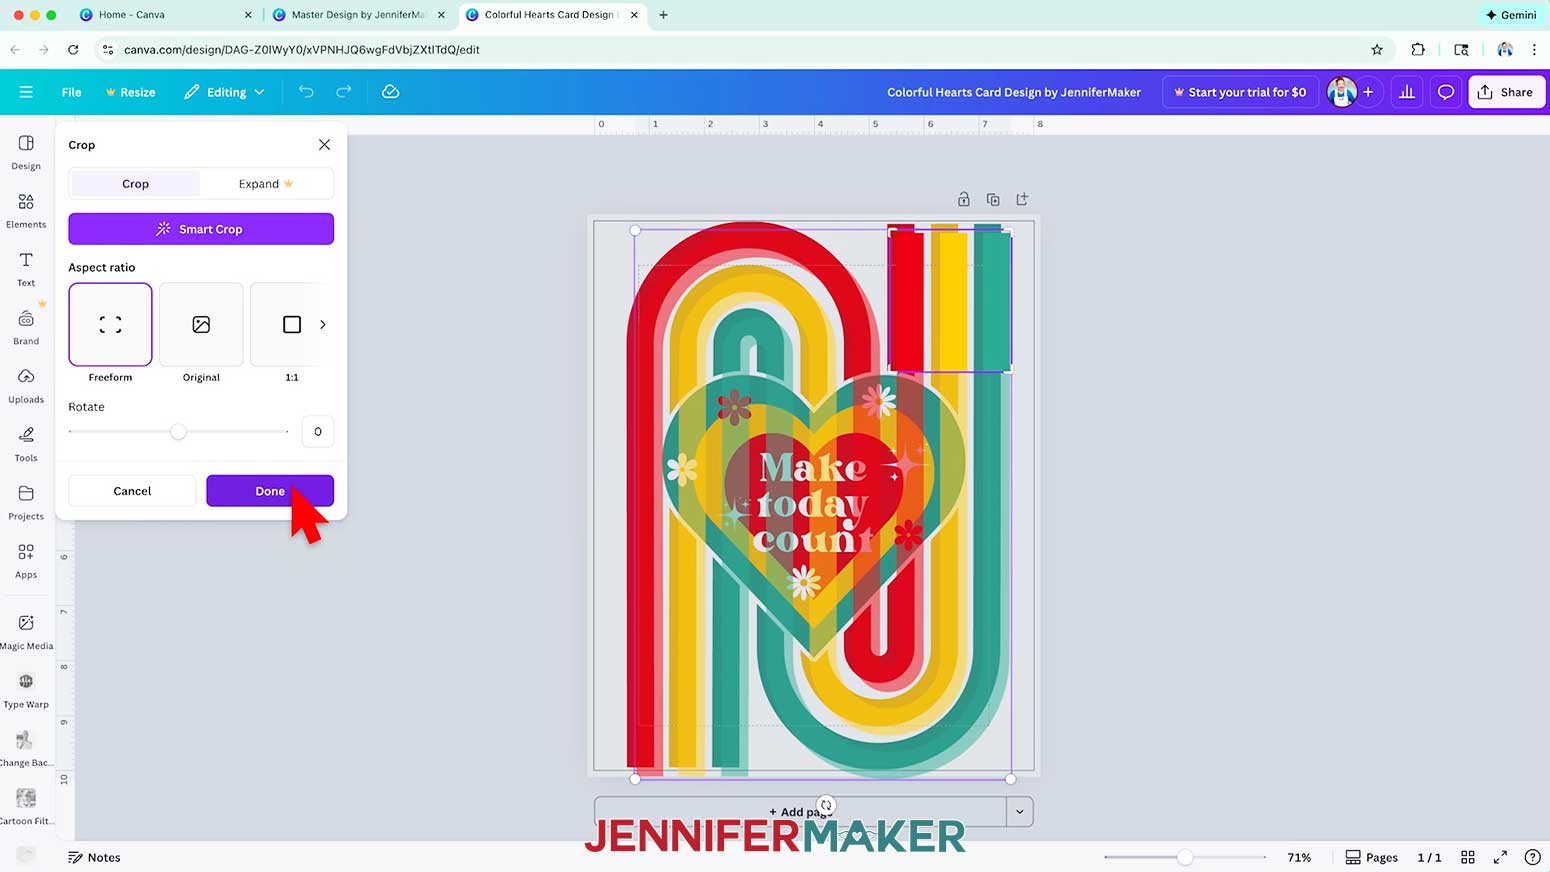
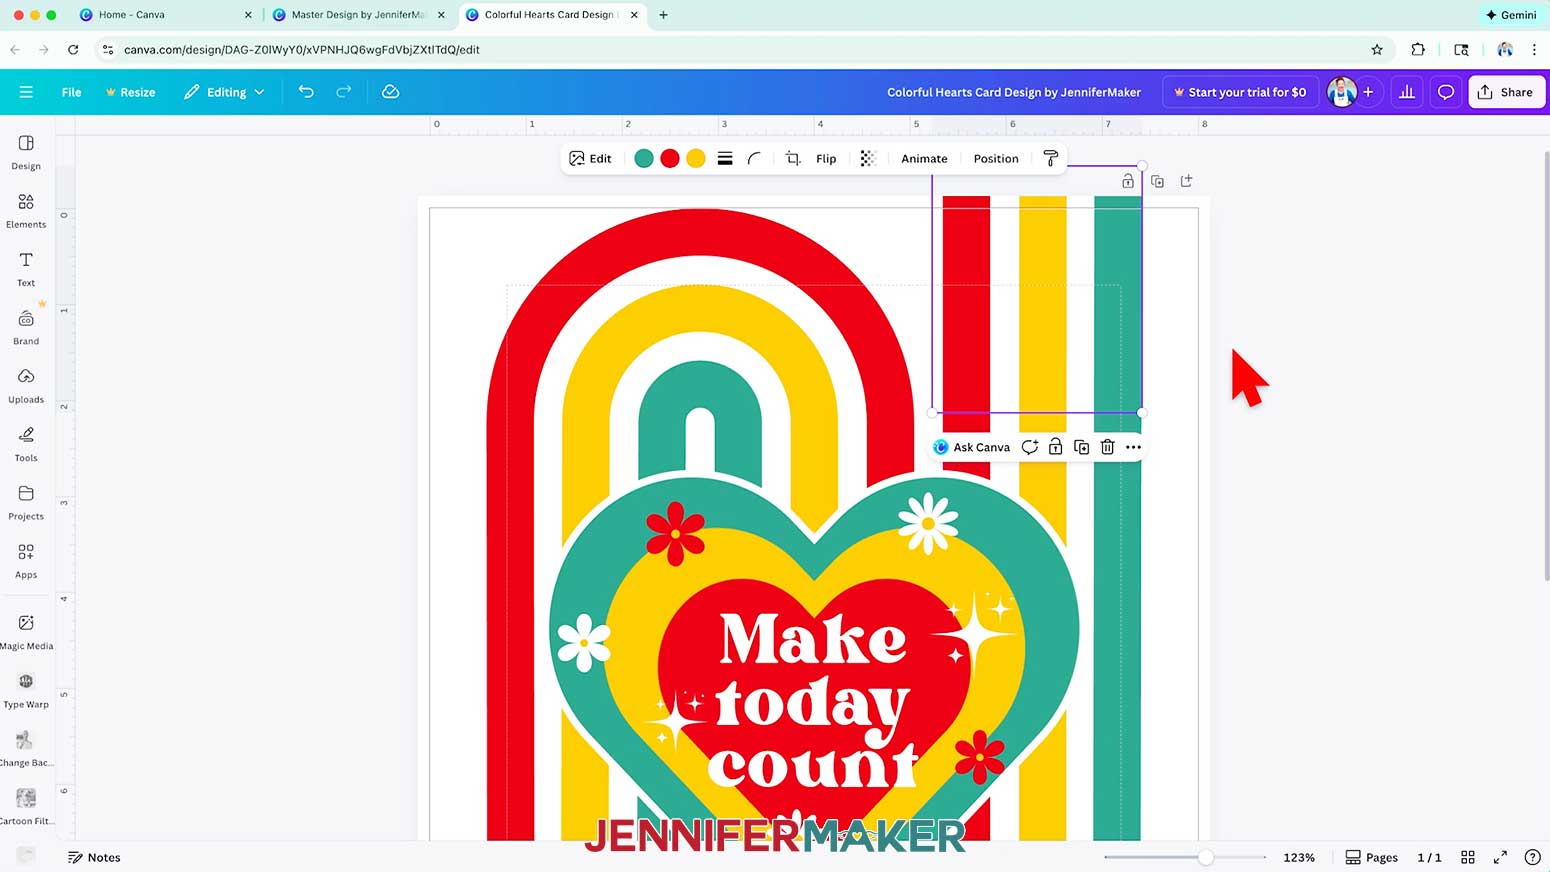
NOTE: Making your project’s elements go past the print bleed line ensures that designs with colors or images running to the edge have no unwanted white gaps after cutting with your Cricut. - Select only the rainbow background, then click the “Duplicate” icon.
- Double-click the duplicated rainbow background to open the “Crop” menu.
- Keep the “Aspect ratio” on “Freeform” so you aren’t constrained to the element’s original proportions, then use the corner handles to crop the rainbow to only a square-shaped striped piece of the top right rainbow end.
- Click “Done.”
- Drag the striped square over the top right end of the original rainbow, aligning the colors, so the stripes go off the canvas.
TIP: Use the slider at the bottom to zoom in if needed. - Repeat steps 6-10 with the bottom left rainbow end.
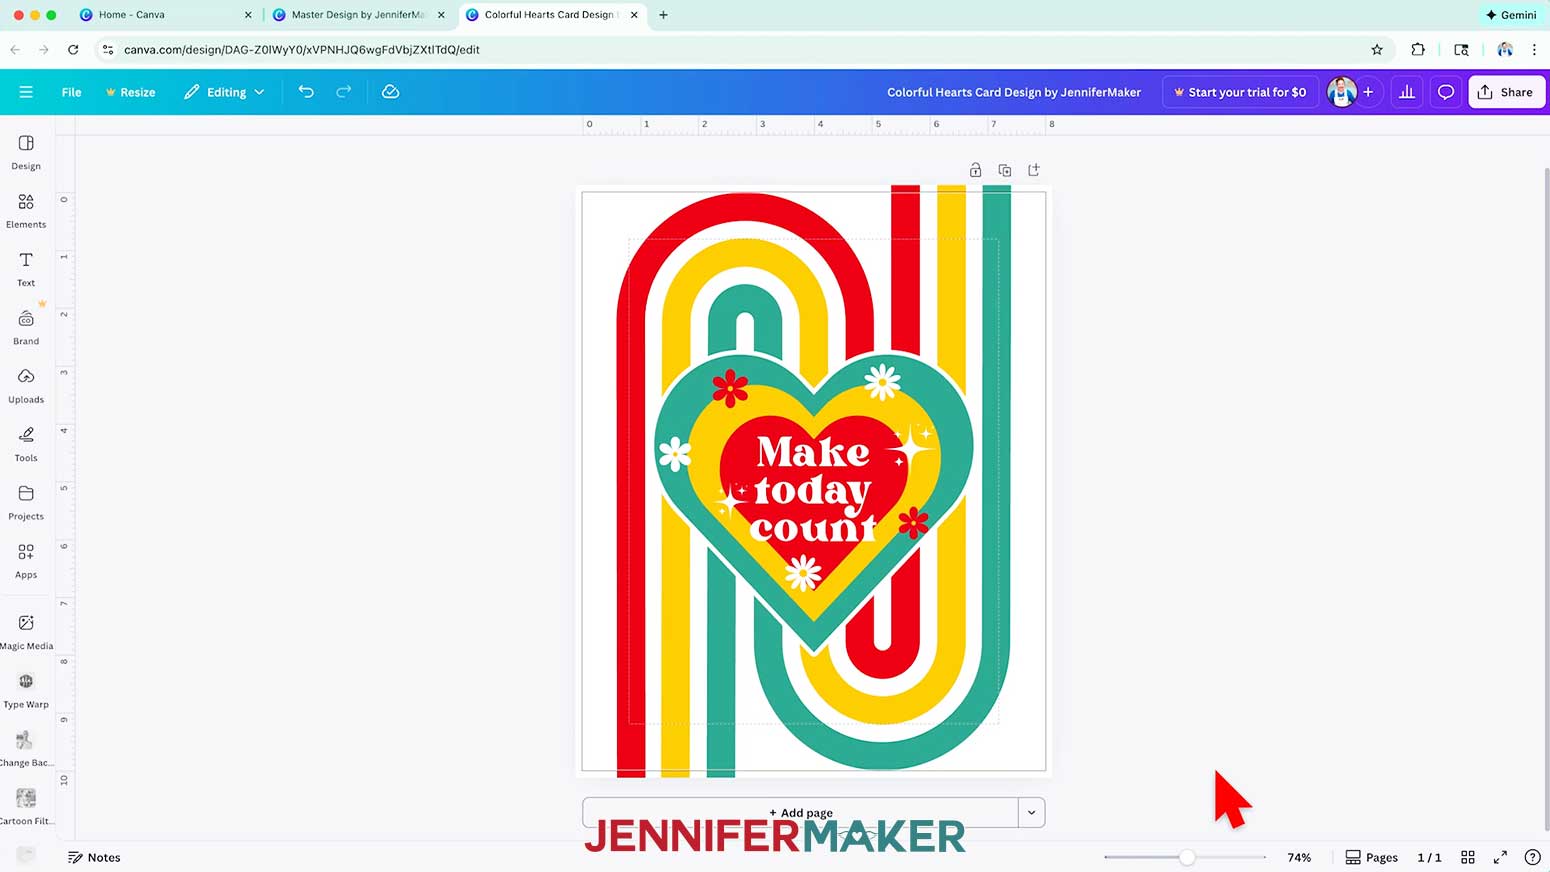
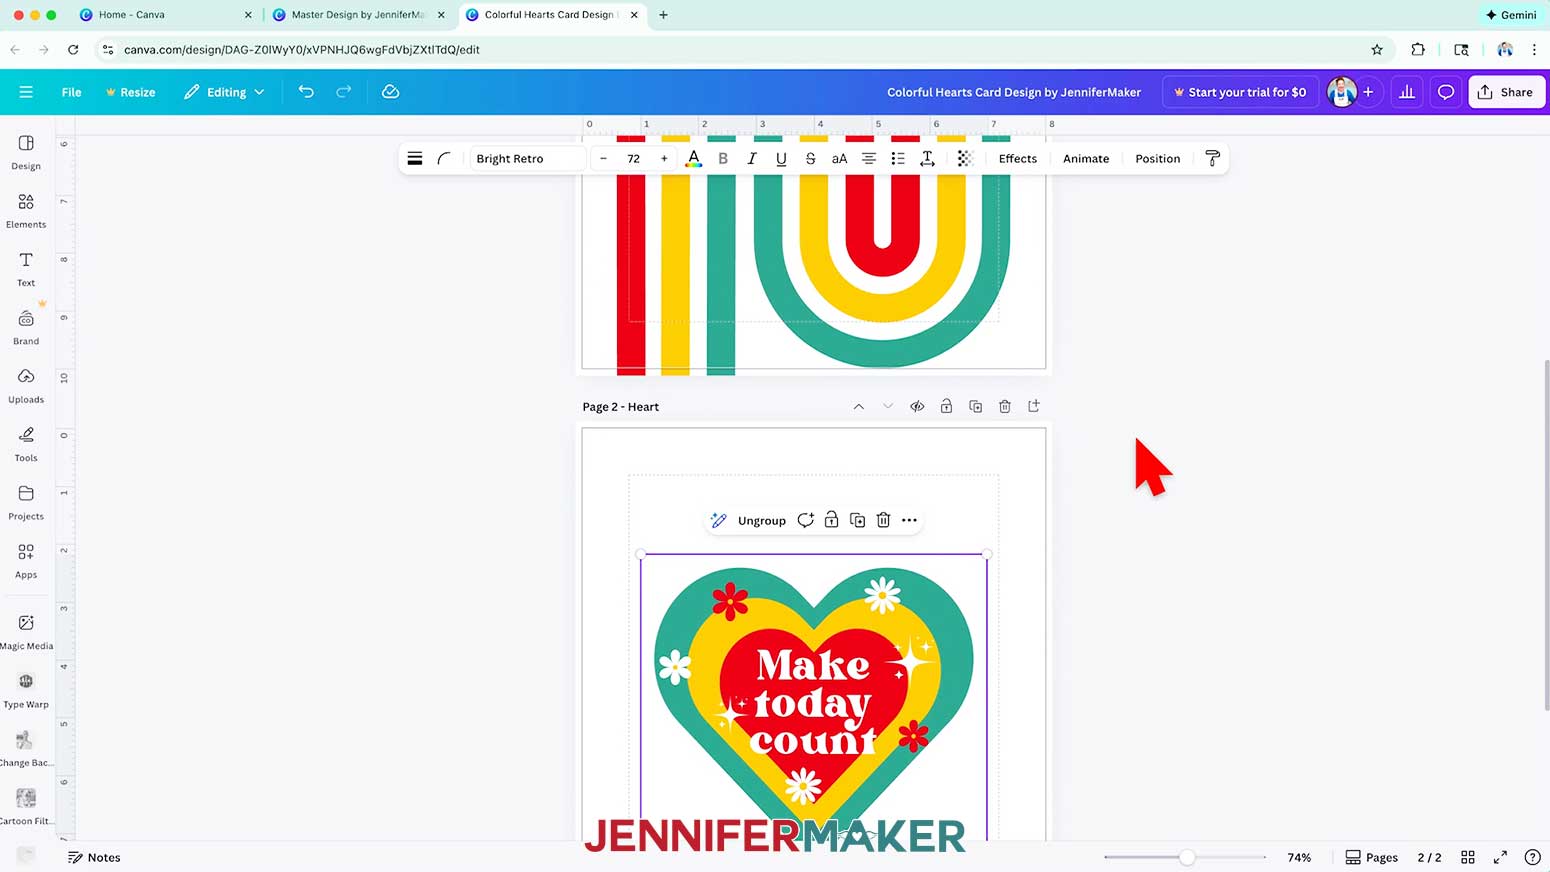
- To make the heart cut as a separate piece that can be attached to the front of the card with adhesive foam tape, first click the “Add page” icon.
- On the new blank page, click the area that says “Add page title” and type “Heart.”
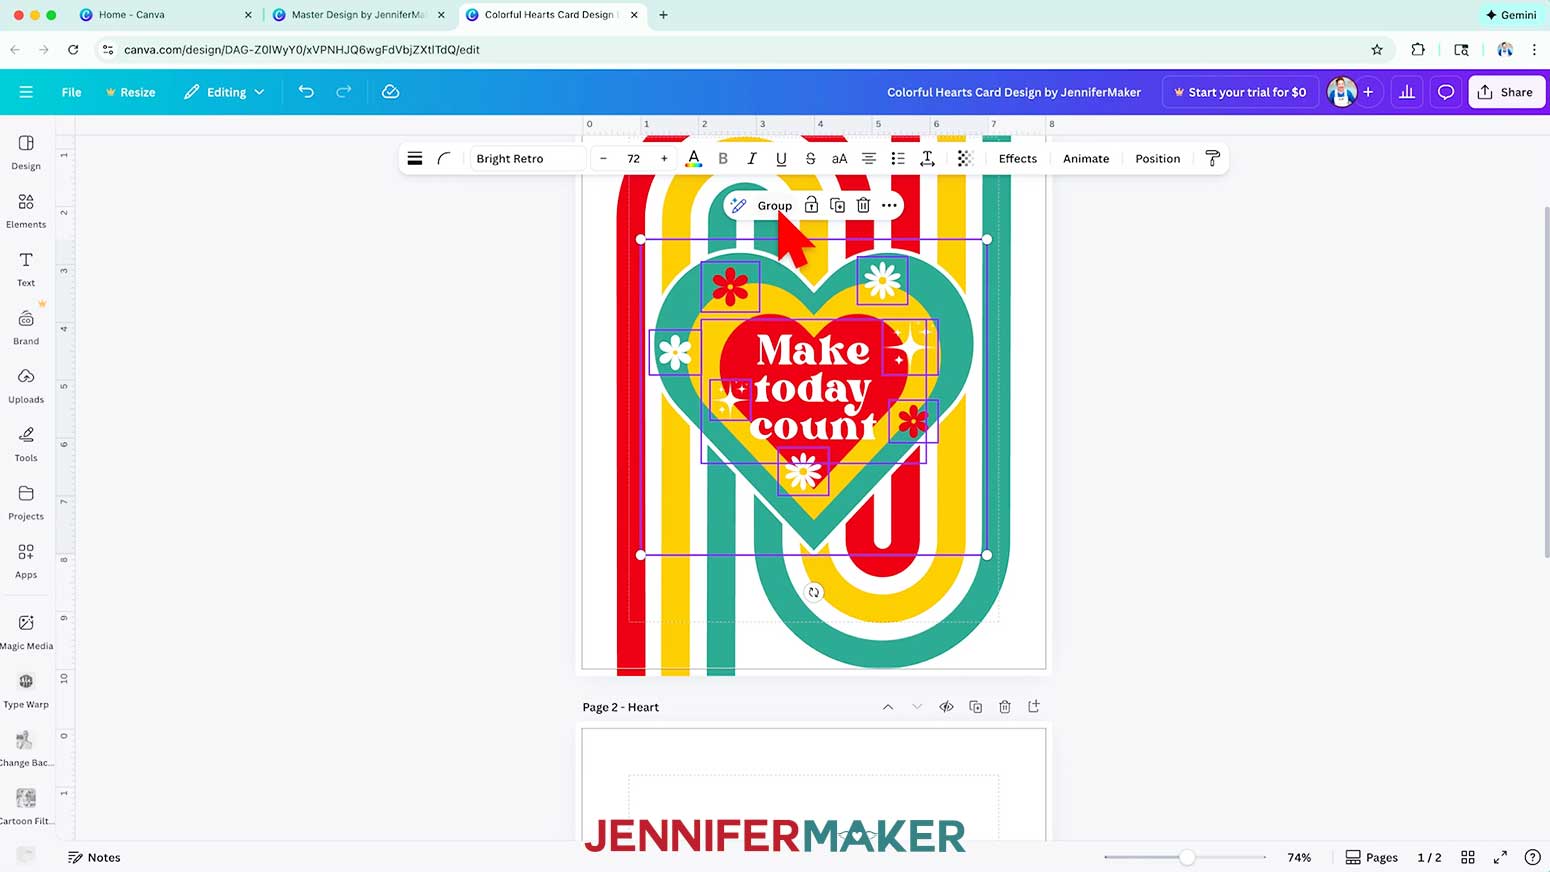
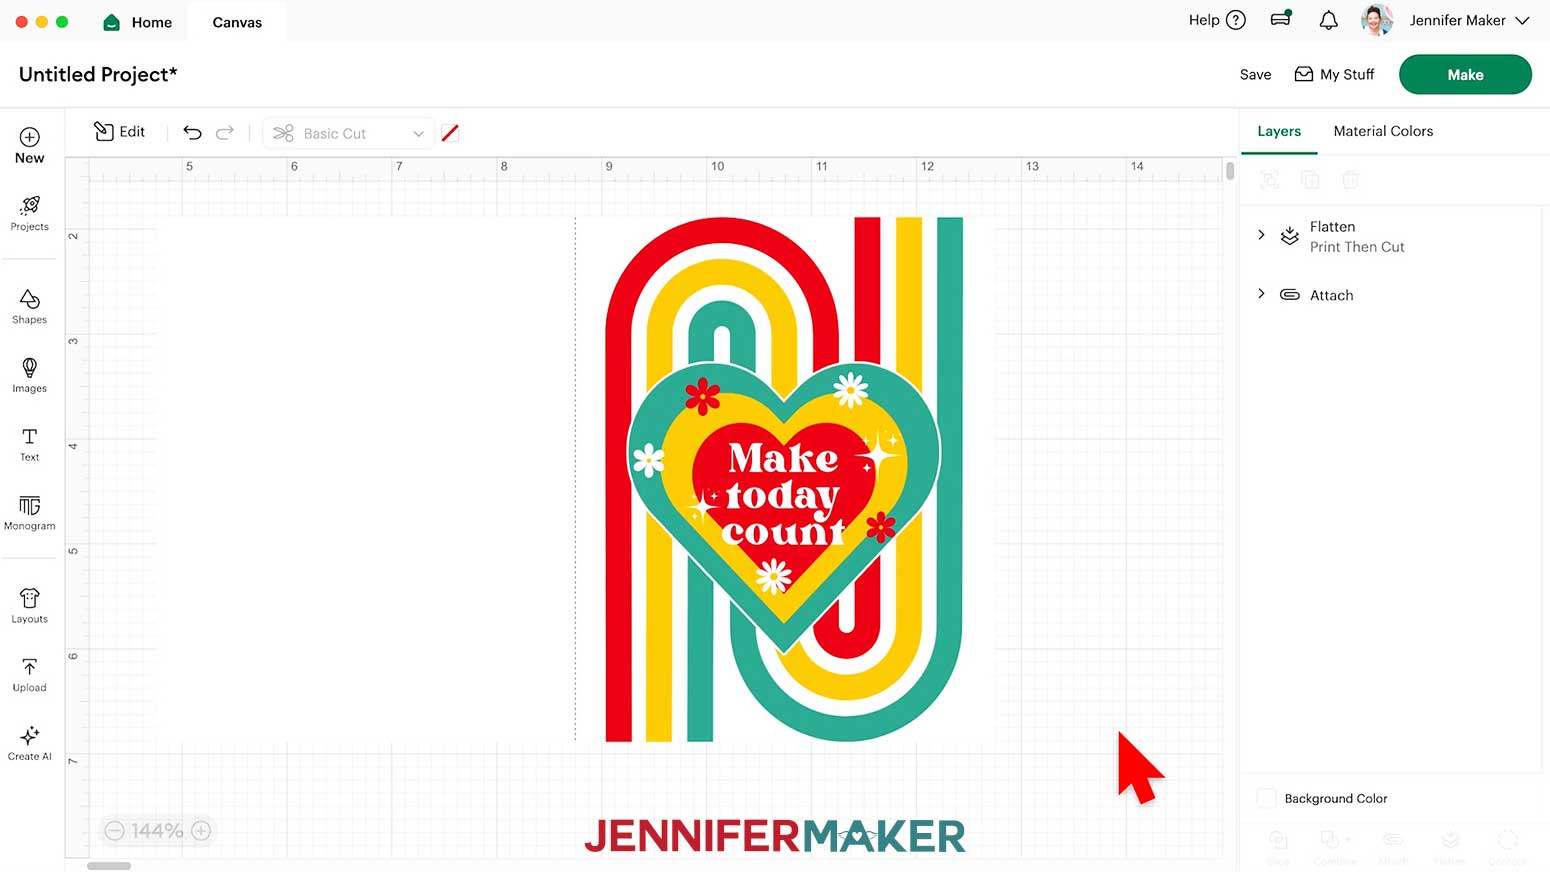
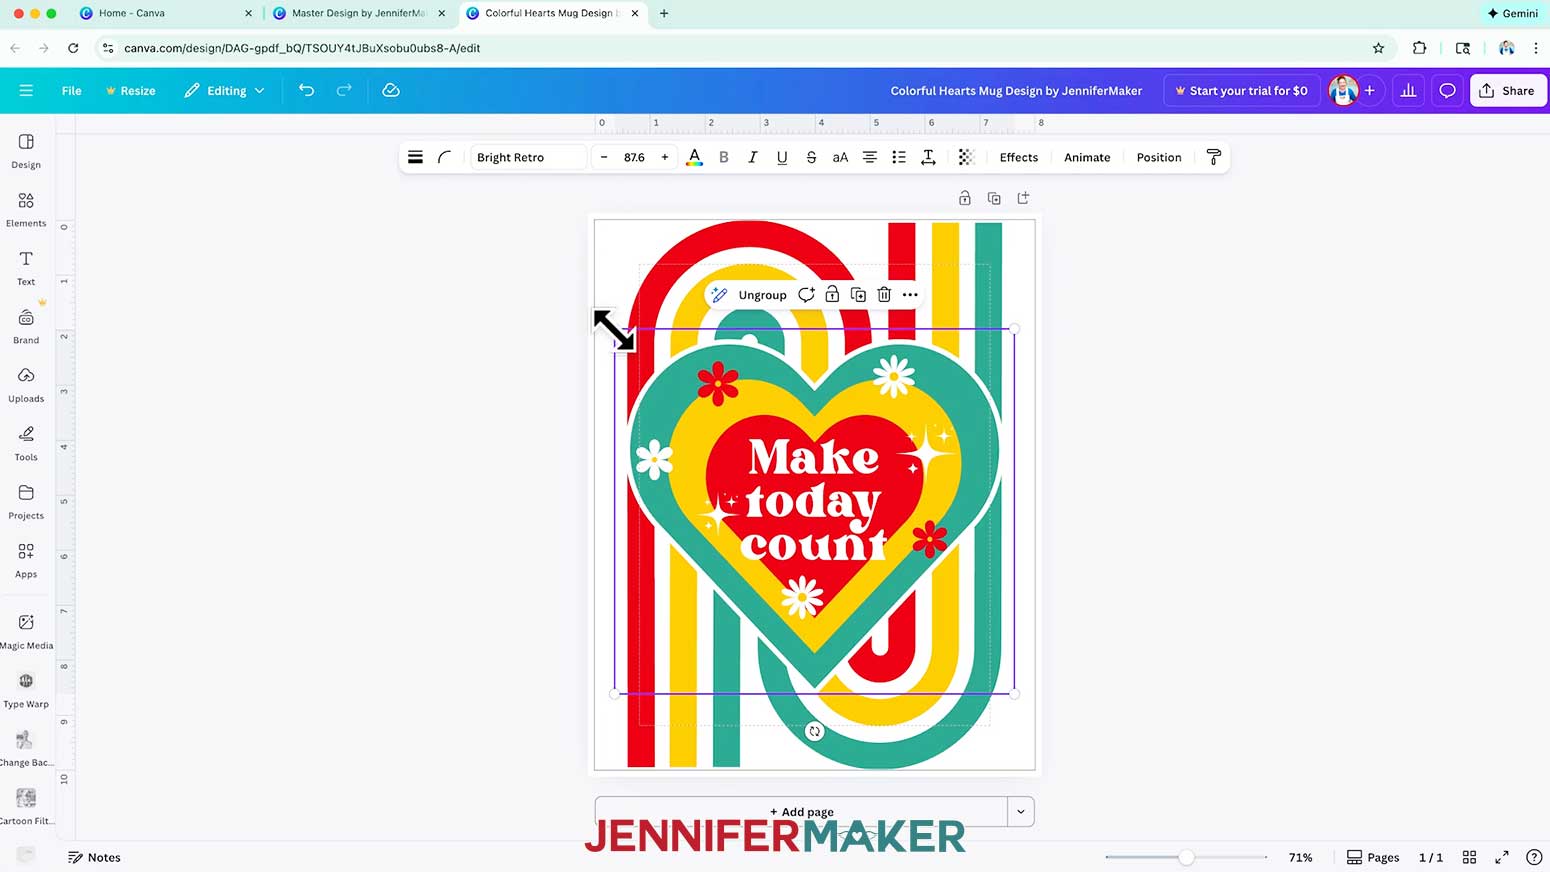
- On the first page with your design, hold the “Shift” key on your keyboard and select the heart, the text, and the small elements, then click the “Group” icon to keep them together.
- Click and drag the grouped heart to the “Heart” page.
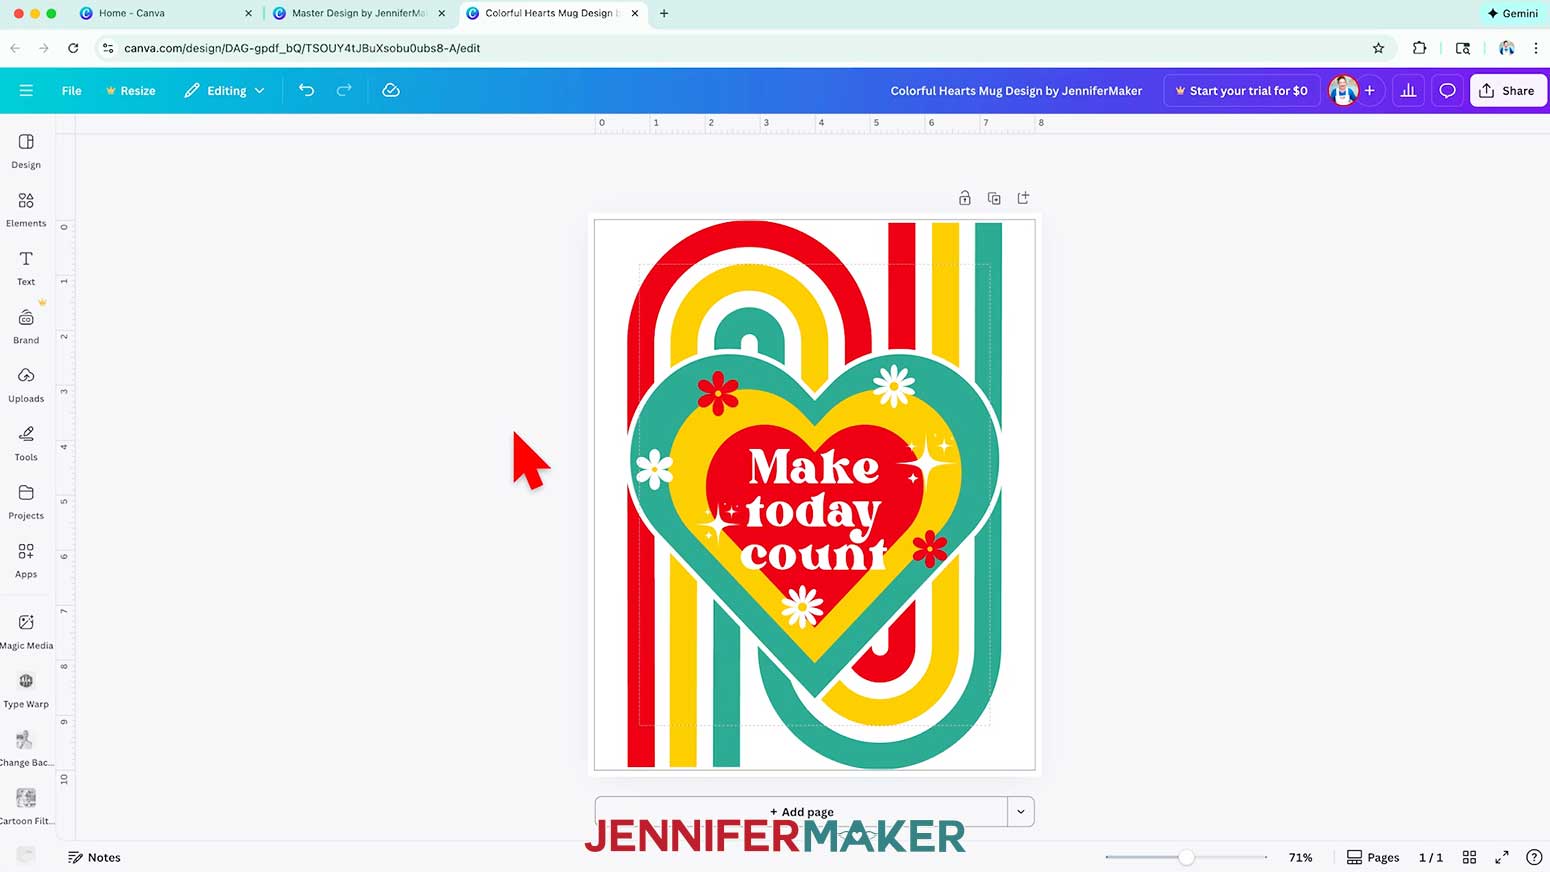
- Click back on the first page with the rainbow background.
- Click the area that says “Add page title” and type “Rainbow Background.”
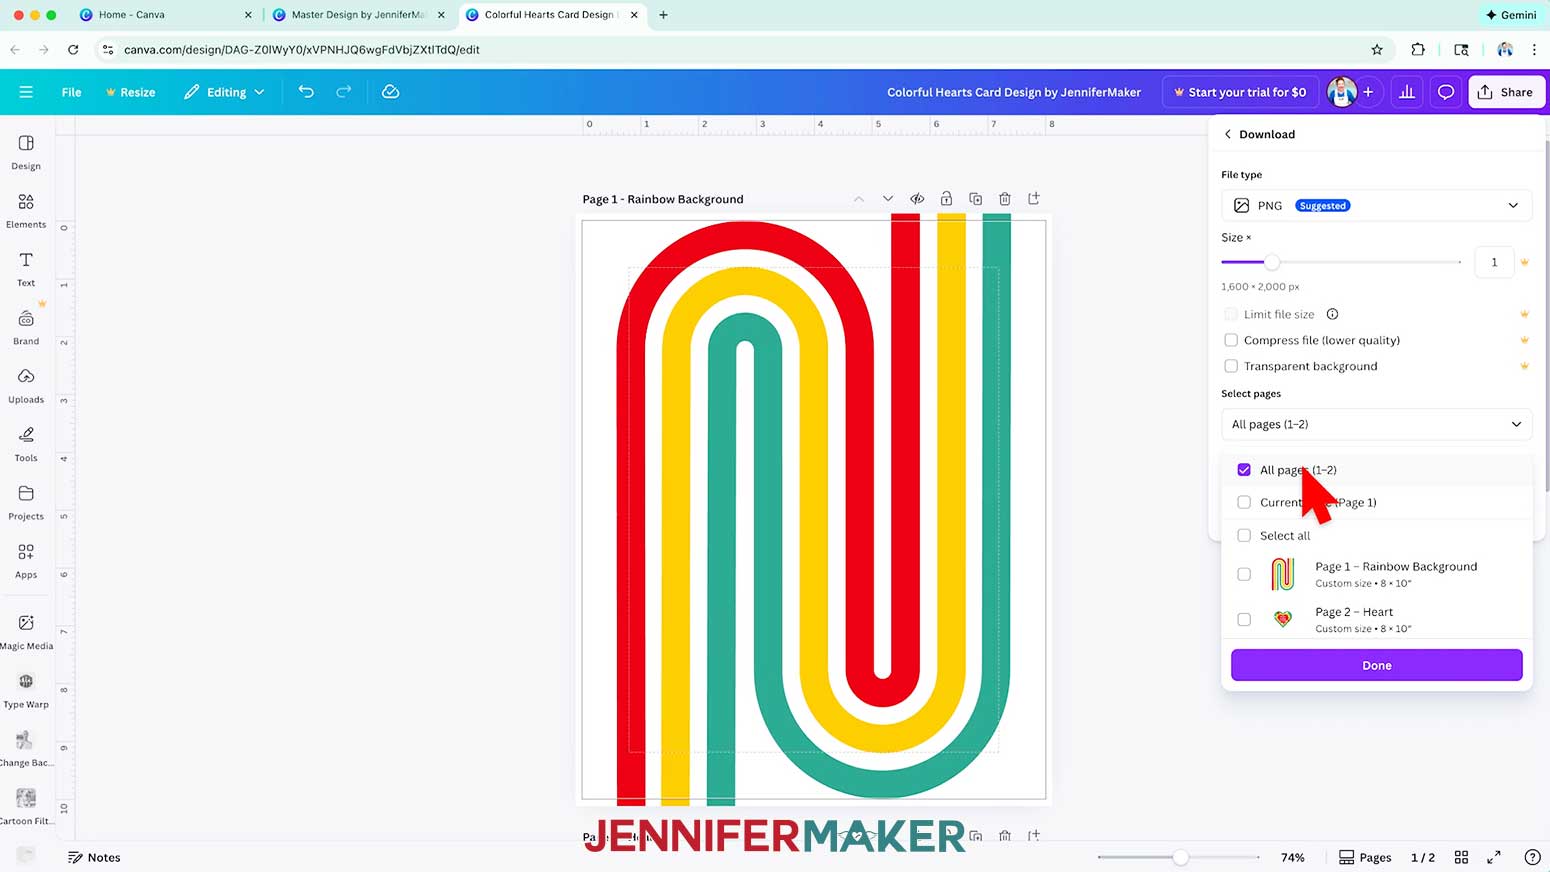
- Click “Share,” then “Download.”
- Make sure “PNG” is selected for the File Type.
- Under “Select pages,” make sure “All pages” is selected so you will download both the rainbow design and the heart.
- Click “Download” to download a ZIP file of your heart and rainbow designs.
- Unzip the ZIP file and extract its contents into a folder.
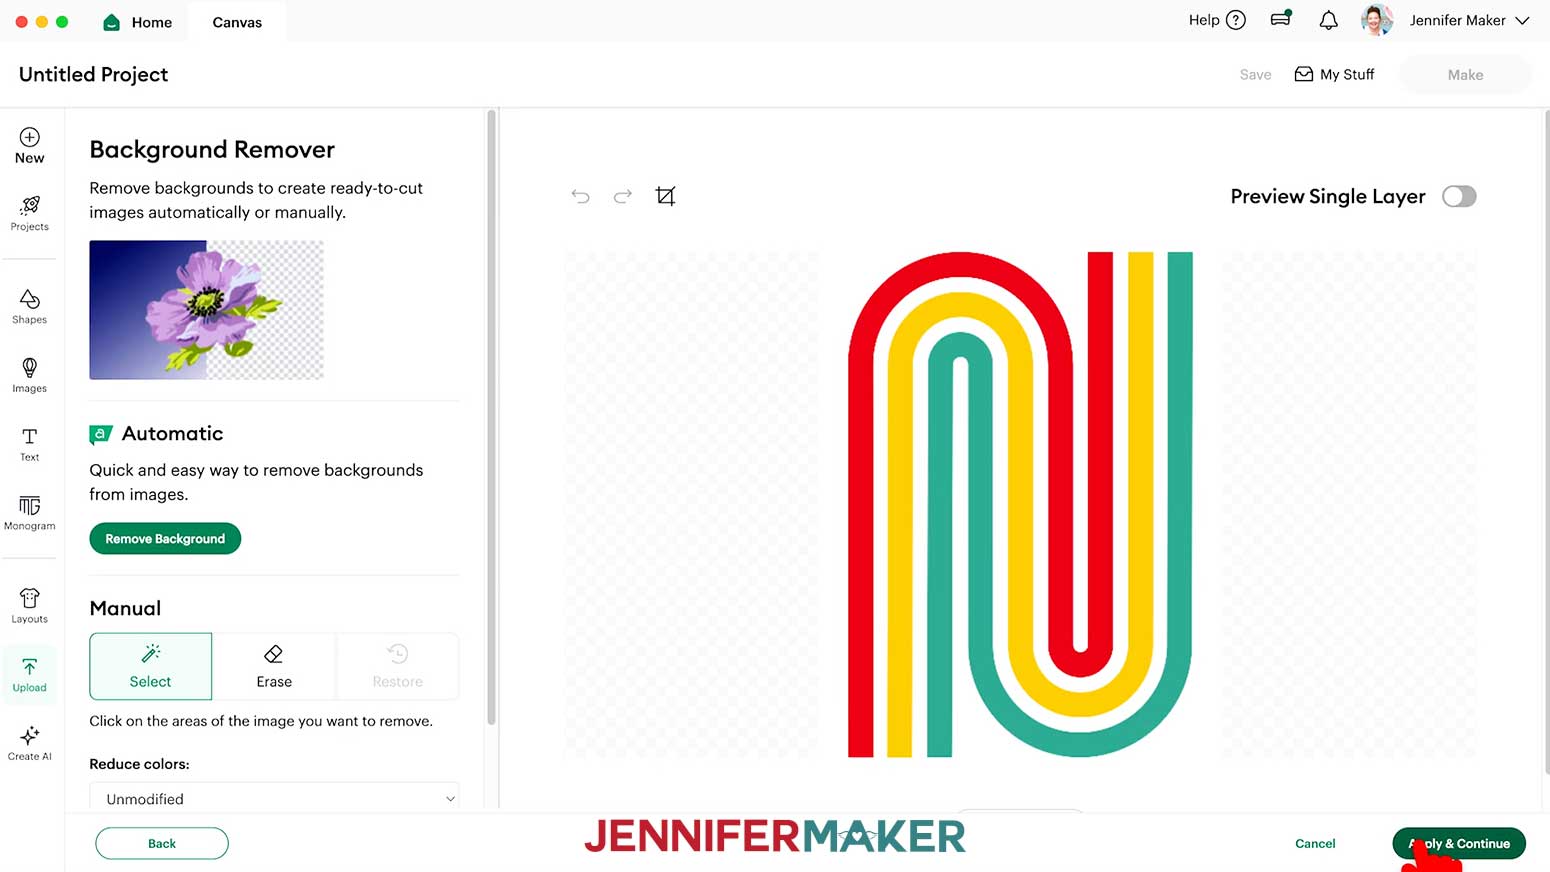
- Open Cricut Design Space with a blank Canvas, then click “Upload.”
- Click “Upload Image,” then “Browse,” and select the rainbow background PNG from the unzipped folder.
TIP: It’s probably in your “Downloads” folder. - Click “Open.”
- Click “Continue.”
- Do NOT remove the background, but click “Apply & Continue.”
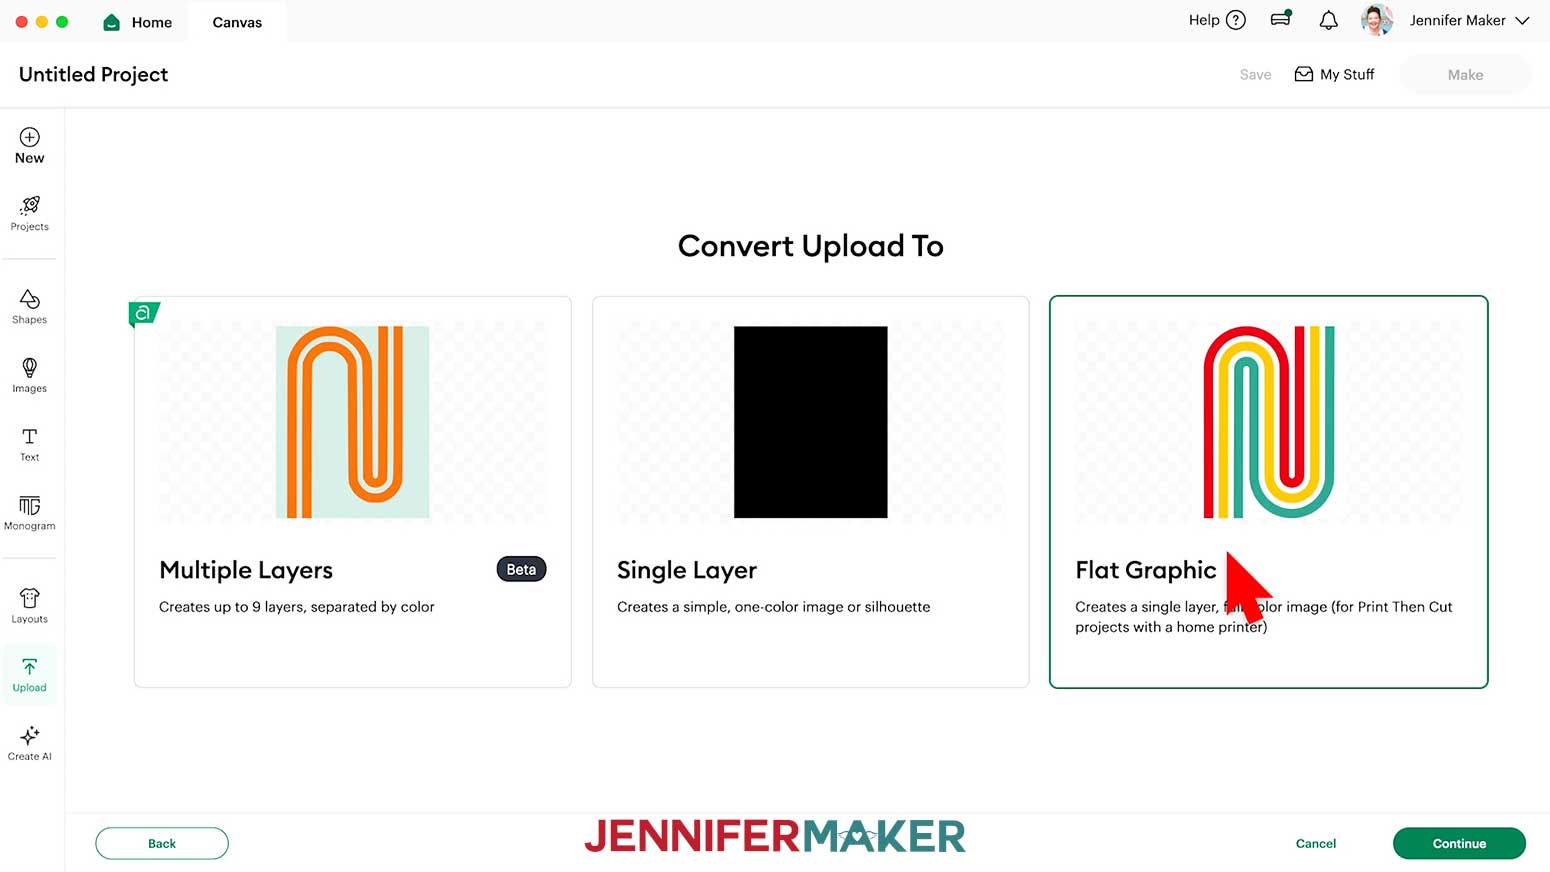
- Select “Flat Graphic” to tell your Cricut that it’s a Print Then Cut design.
- Click “Continue.”
- Click “Upload” to add the design to your Canvas.
- Click “Upload,” “Upload Image,” then “Browse,” and select the heart PNG from the unzipped folder.
- Click “Open.”
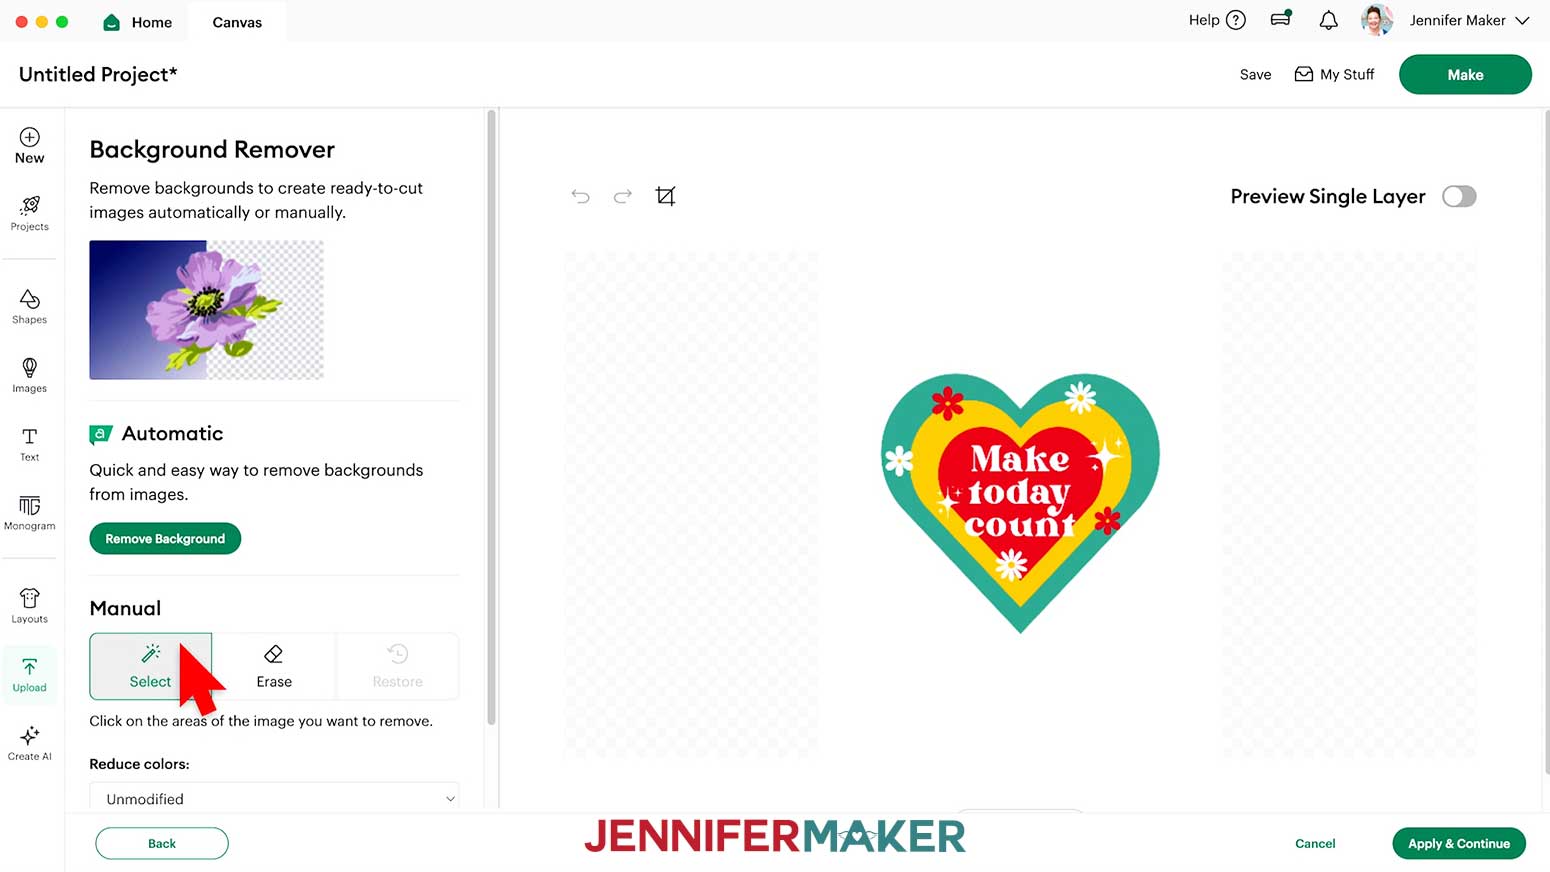
- Click “Continue.”
- On the Background Remover page under “Manual,” click the “Select” option.
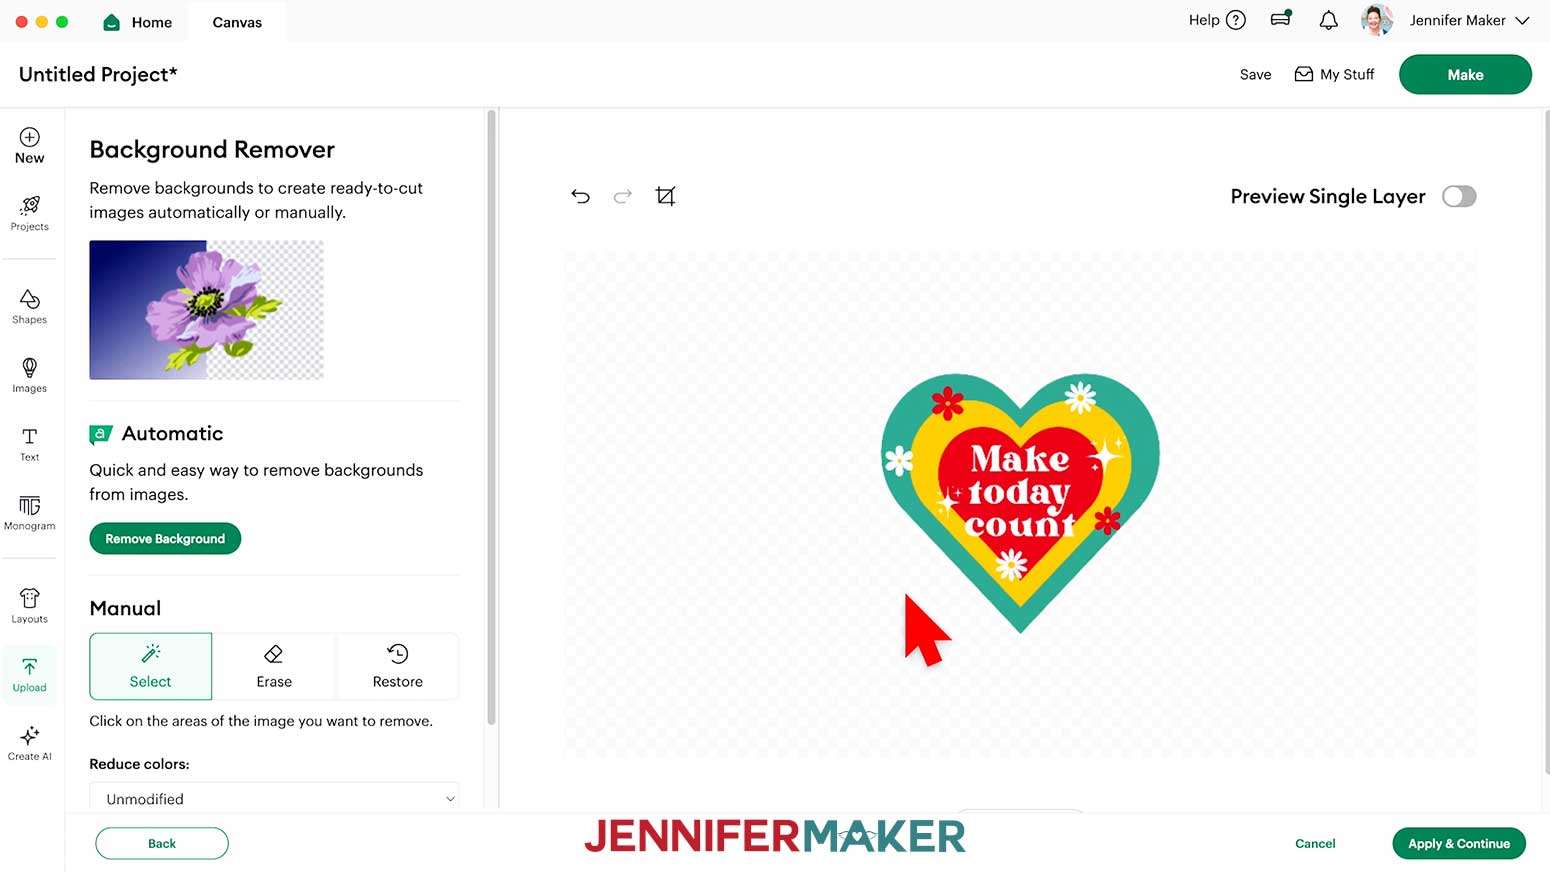
- Click on the white section around the heart to remove the background.
NOTE: You’ll only need to click the background area once to remove the entire background from the heart. - Click “Apply & Continue.”
- Select “Flat Graphic” to tell your Cricut that it’s a Print Then Cut design.
- Click “Continue.”
- Click “Upload” to add the design to your Canvas.
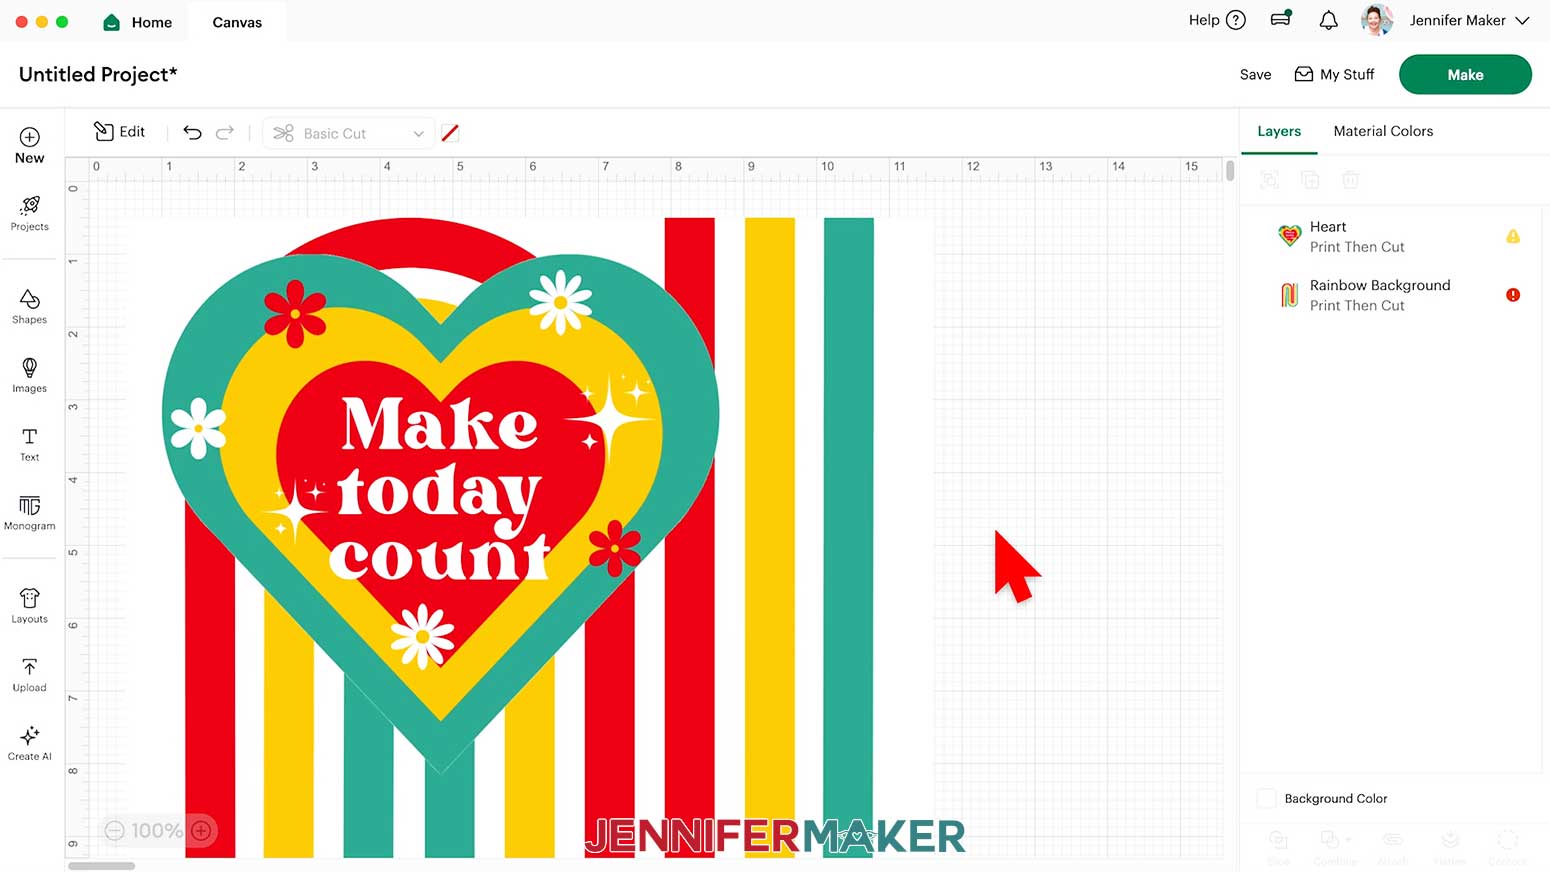
- Here’s how the card design PNG files look on my Canvas in Cricut Design Space.
- If your heart had a white outline, it was probably removed when you removed the heart’s white background during uploading. If you want to add it back, select the heart and click “Edit.”
- Click “Offset.”
- Use the slider to select the “Distance” of your “Offset.”
NOTE: I adjusted the “Distance” of my “Offset” to 0.05 inches. - Click “Apply.”
- Select the new offset layer, which will be dark gray. Use the color box to change its color to white.
- Select the heart and the white offset layer, then click “Flatten.”
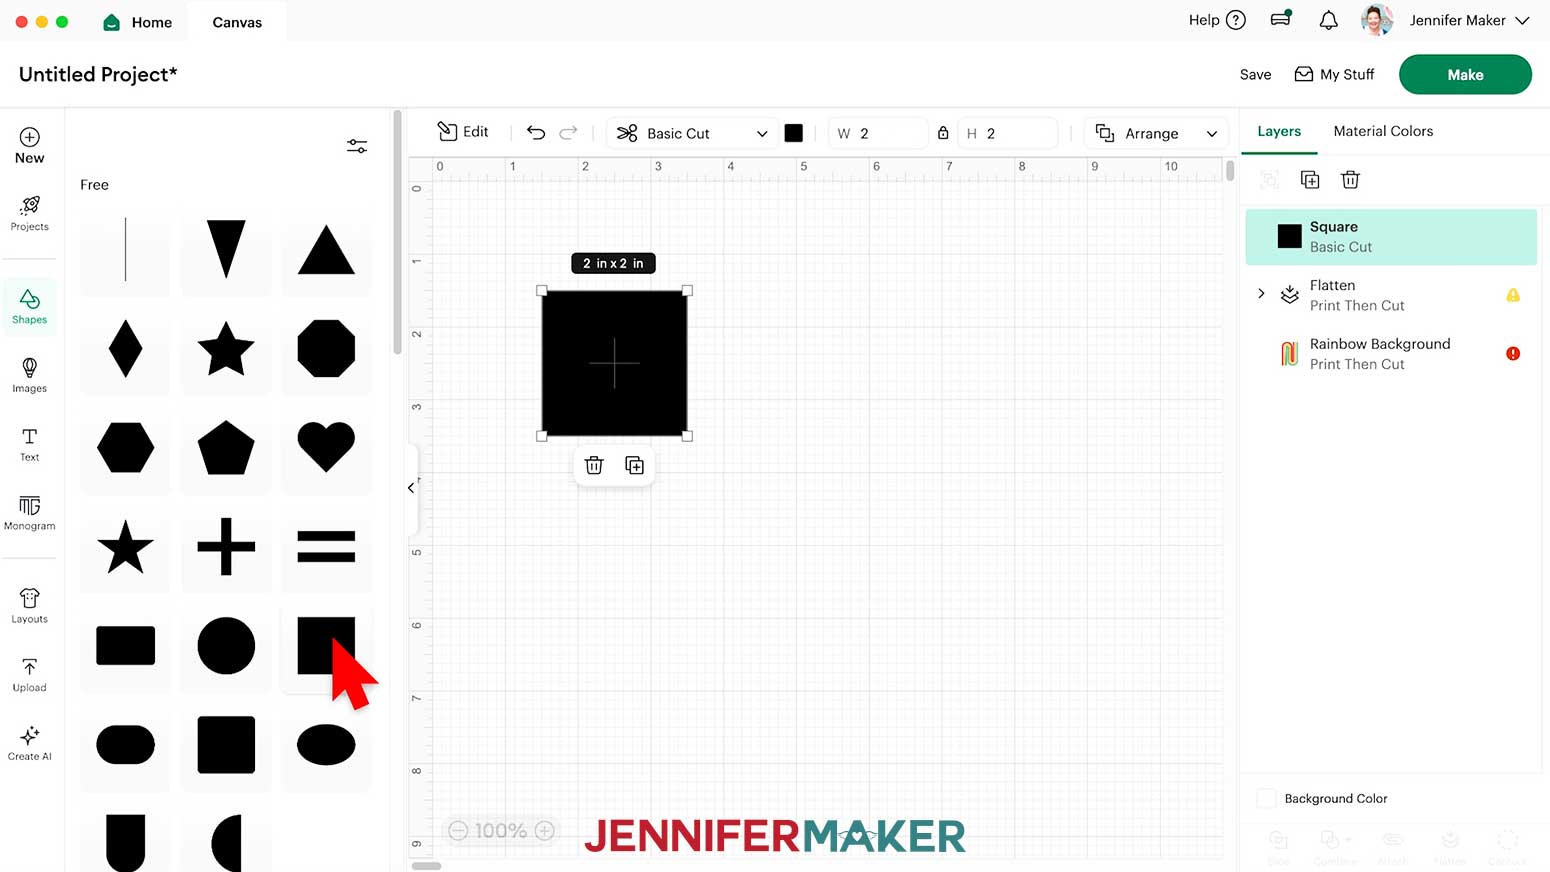
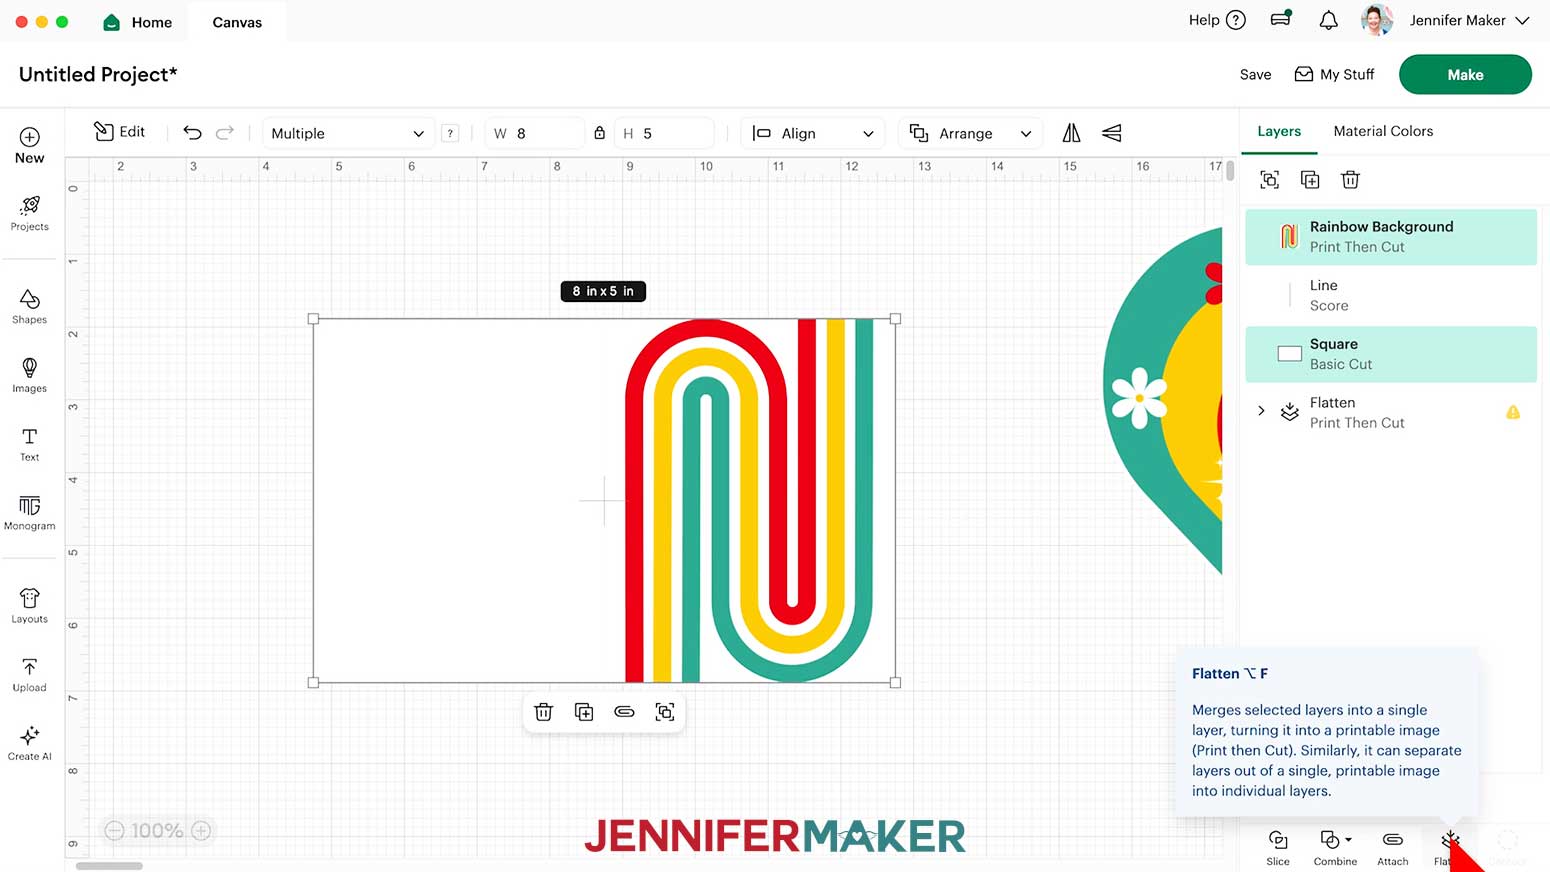
- Click the “Shapes” menu and select the free square to add it to your Canvas to start making the card base.
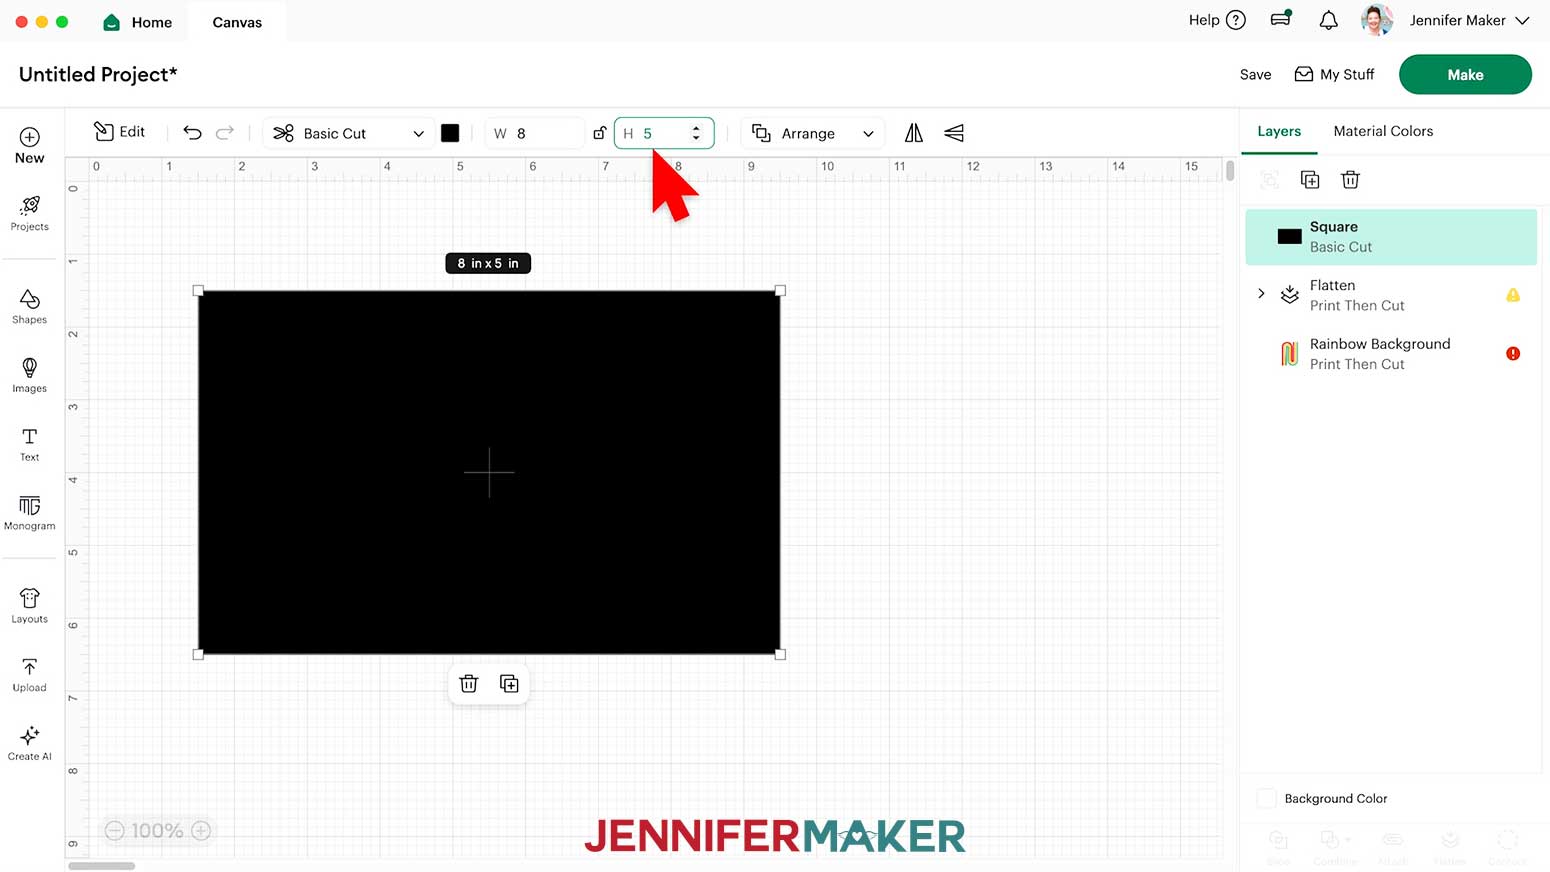
- Click the “Lock” icon to unlock proportions, then resize the square to 8" wide and 5" high.
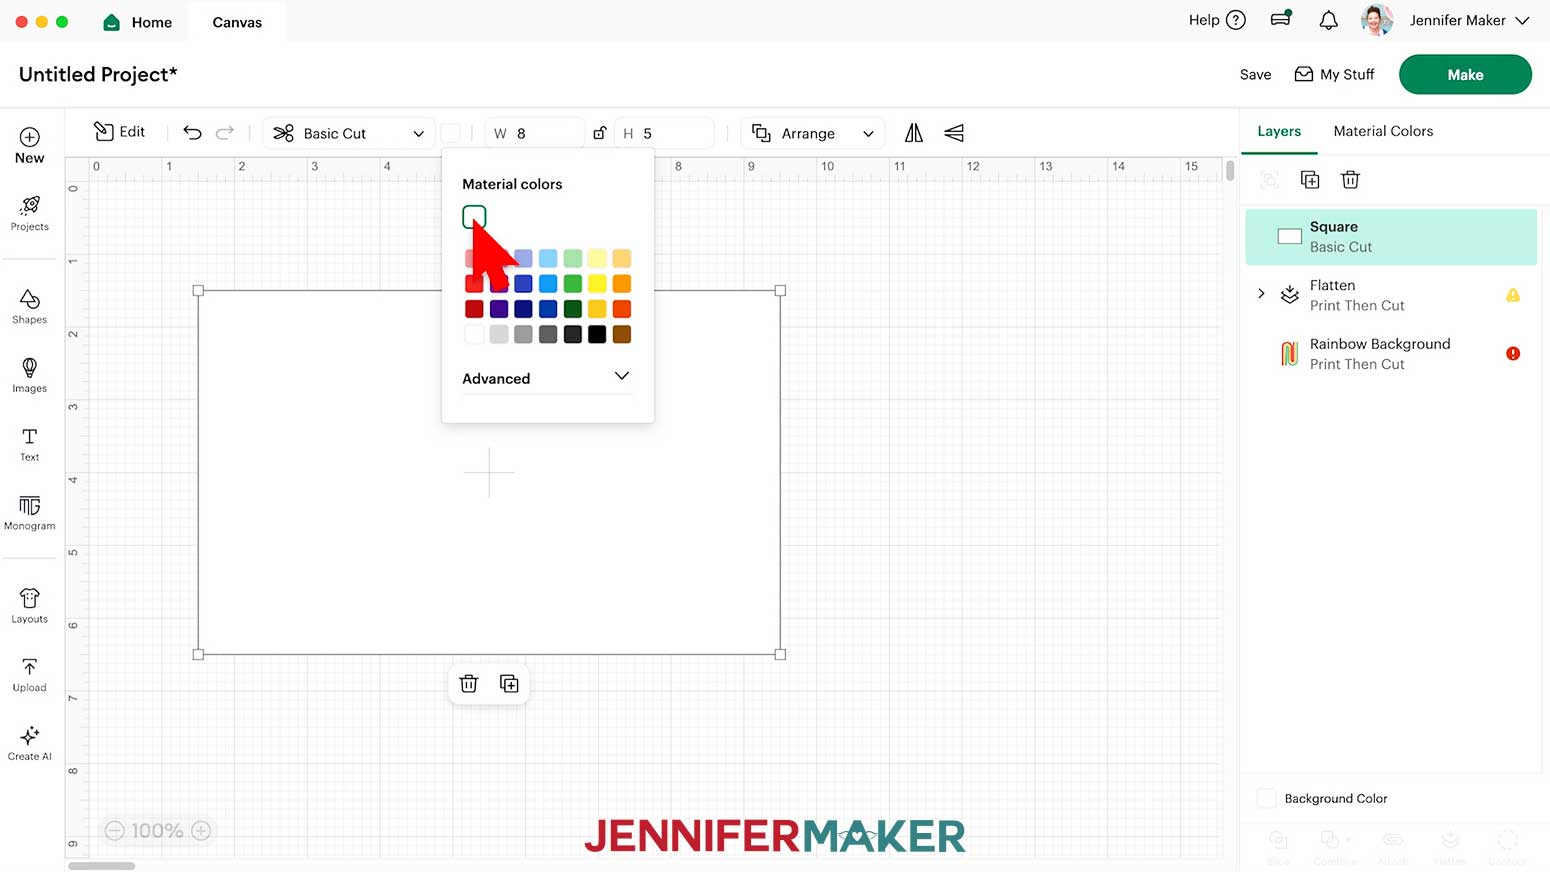
NOTE: This is to make a 4" x 5" foldover card. If you want a different size, resize your square to the height you want your card to be, and twice as long as you want the width to be to account for the fold. - With the rectangle still selected, click the Color Box and change it to white.
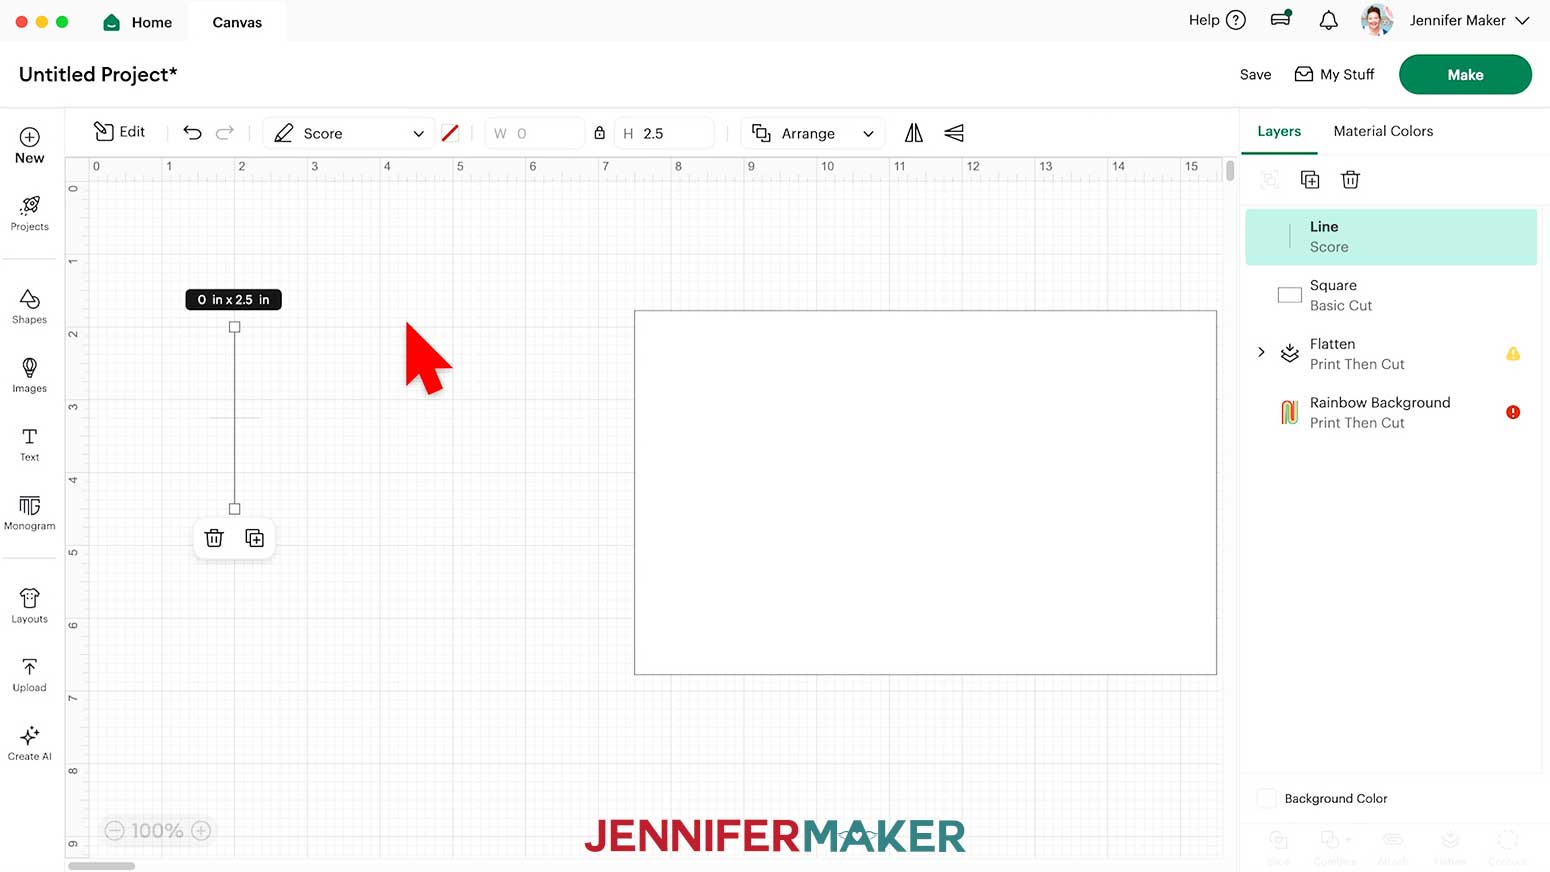
- If you do not have a score tool, skip to step 53. In the “Shapes” menu, select the free line to add it to the Canvas.
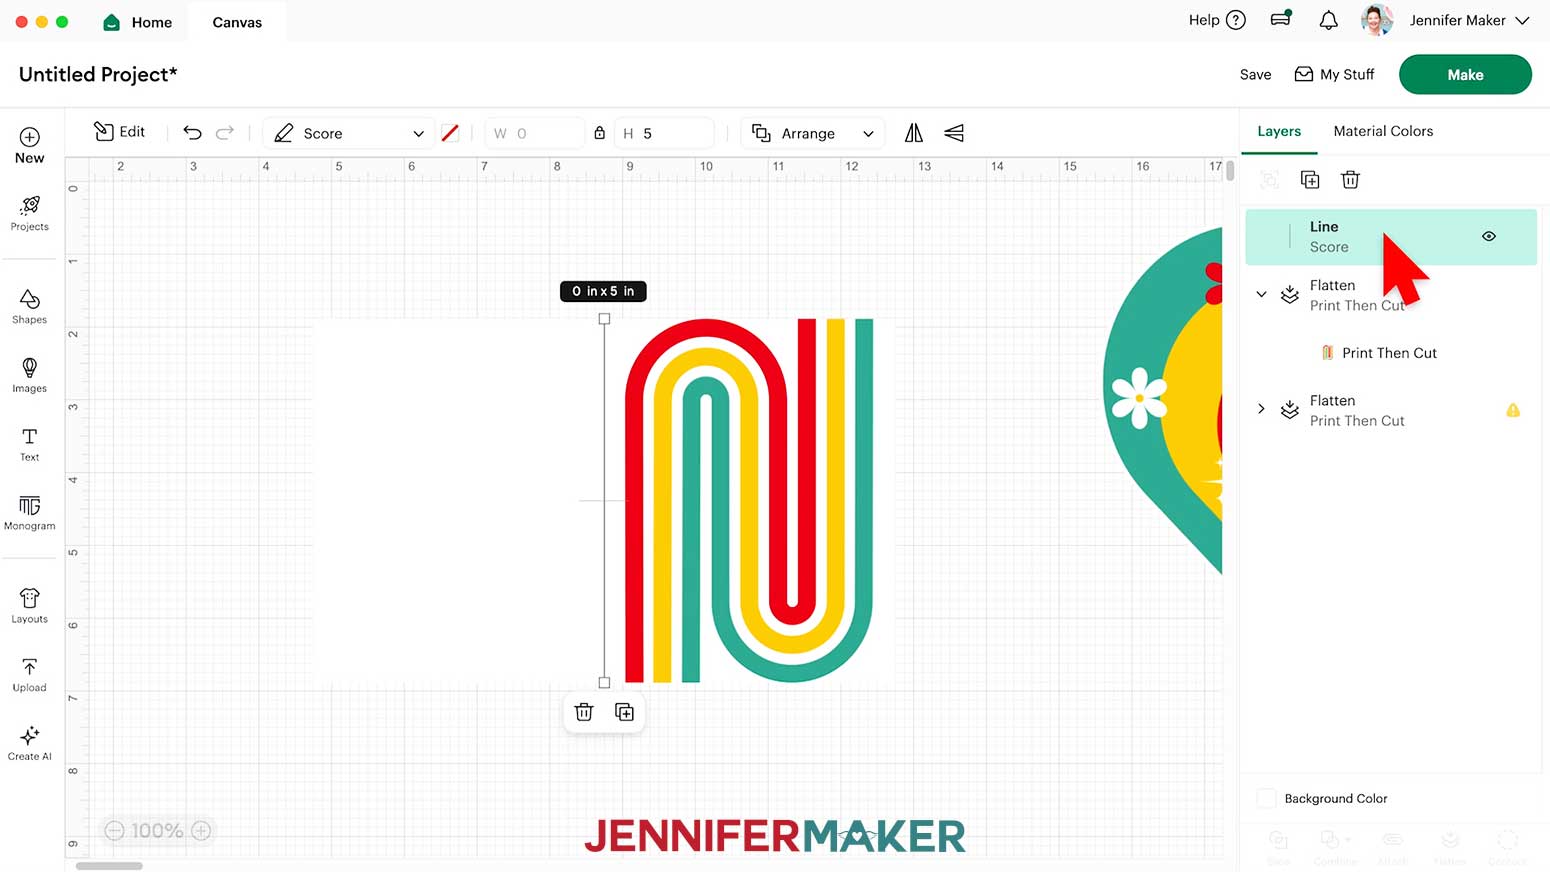
NOTE: The line’s Operation is already set to “Score.” - Use the Height field to resize the line to 5” high so it spans from the top of the white rectangle to the bottom.
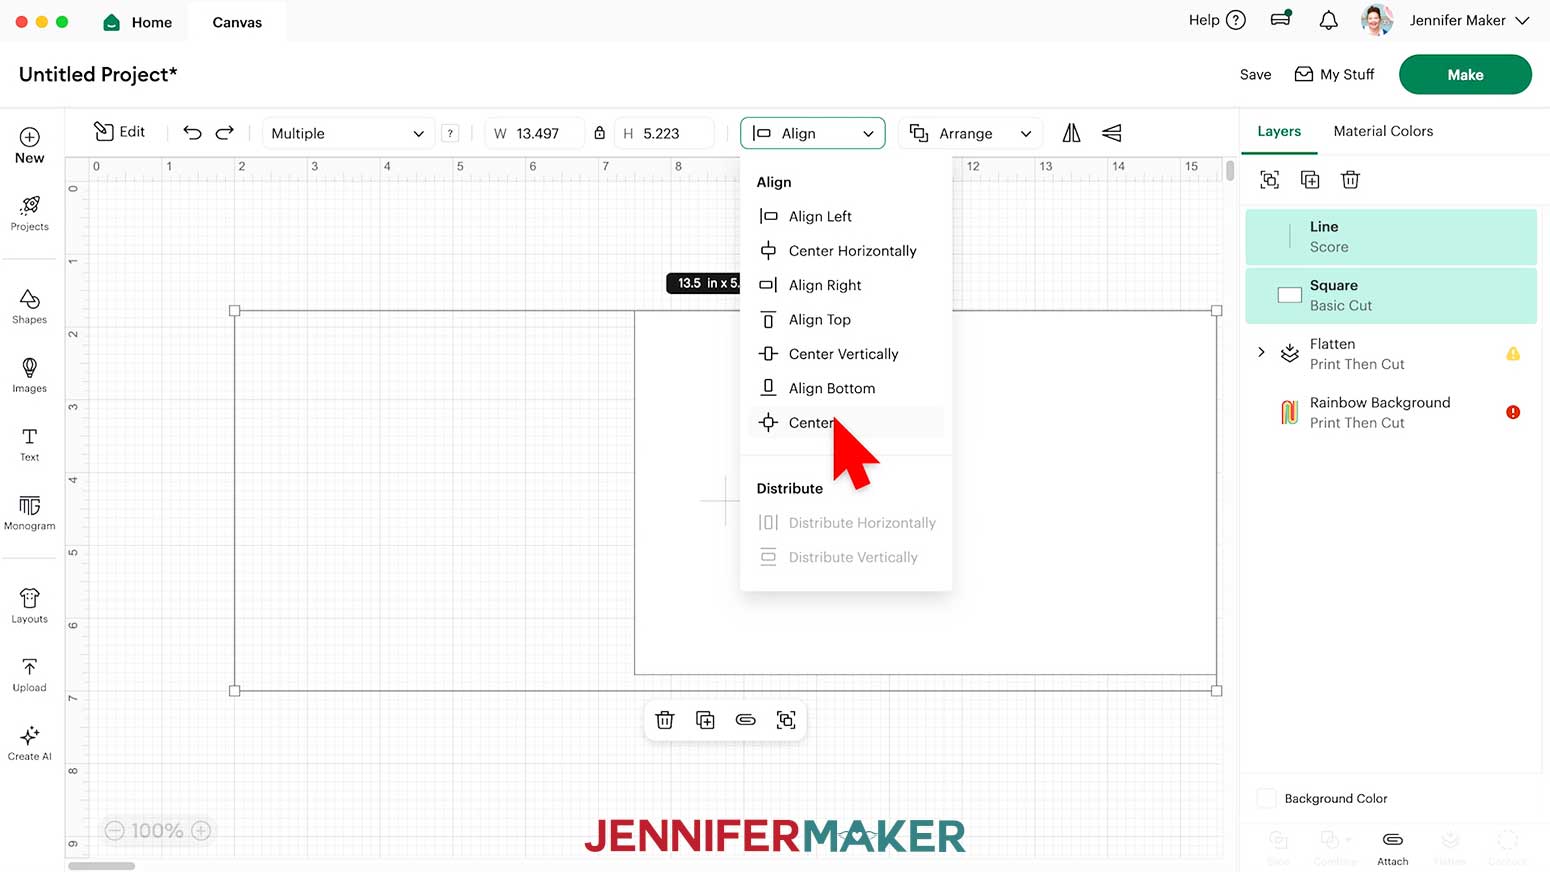
- Select the white rectangle and the line, then click “Align” and “Center” to center the fold line on the card.
NOTE: The “Align” tool may be under the “Edit” menu. - Resize the rainbow background image to 5” high so it will reach from the card’s top to bottom edges.
- In the Layers Panel, click and drag the rainbow background to the top so it’s over the rectangle.
- On the Canvas, drag the rainbow background inside the right side of the rectangle (the front of the card), centered between the score line and the rectangle’s right edge.
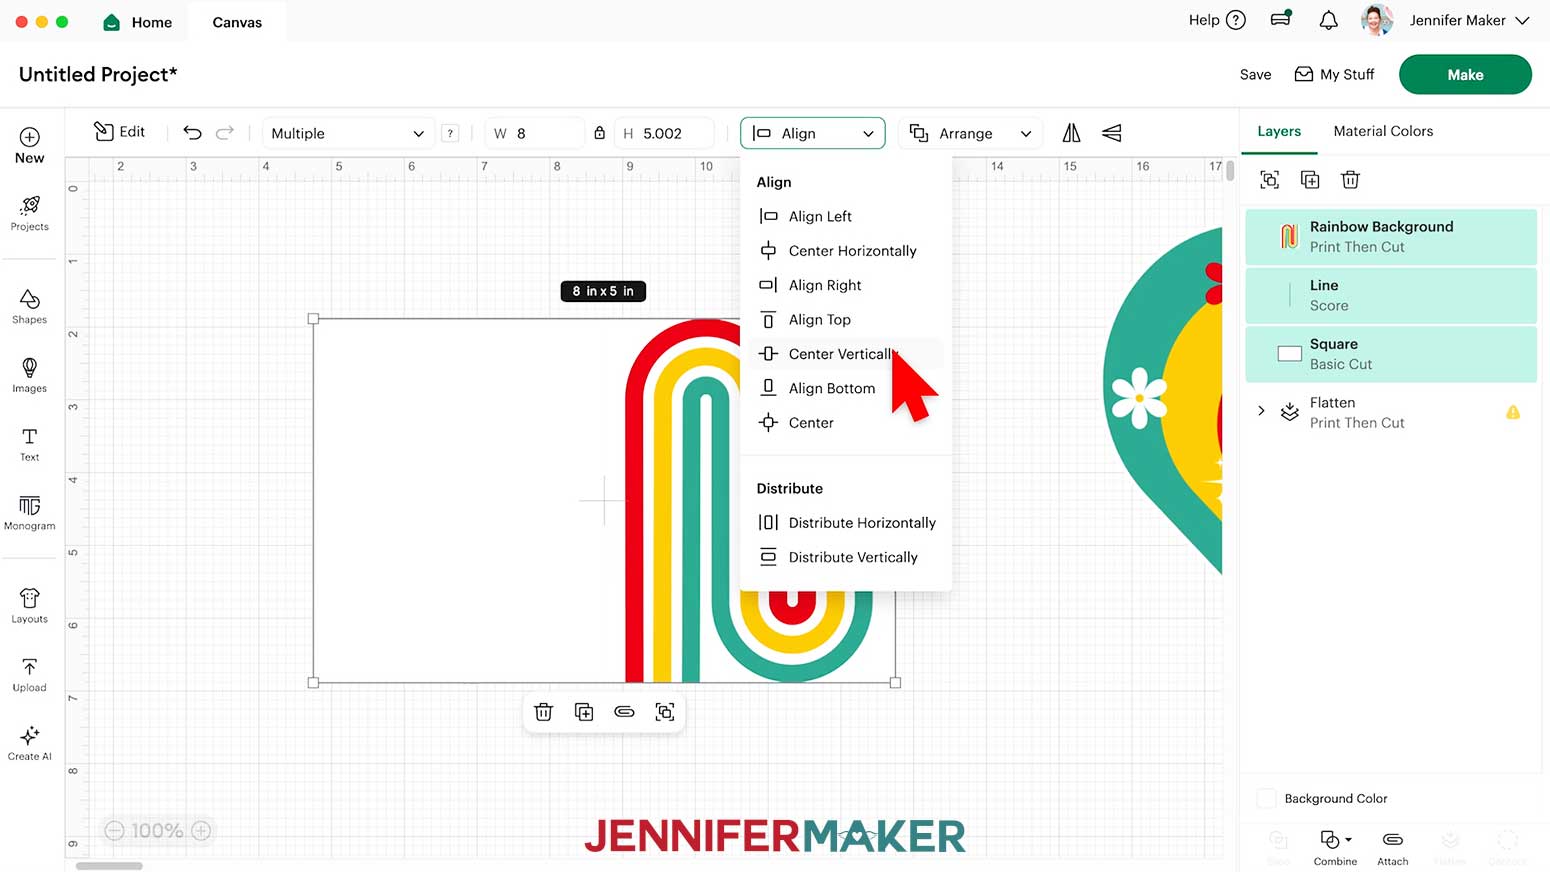
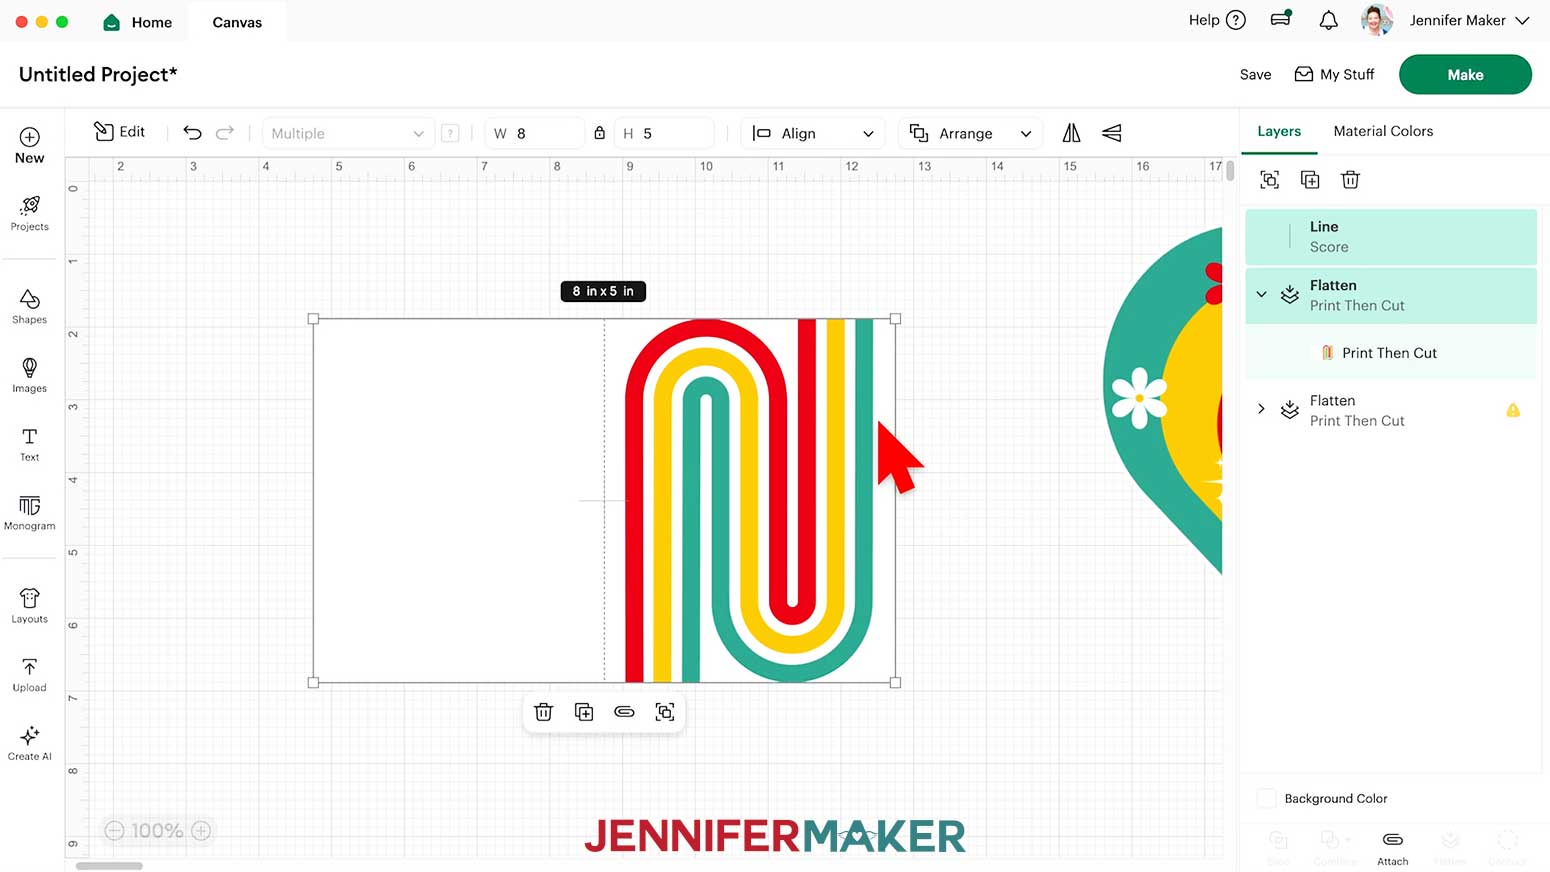
NOTE: The “Align” tool won’t work here because Cricut Design Space doesn’t recognize the score line as an edge. - Select the rectangle, the line, and the rainbow background, then click “Align” and “Center Vertically” to make sure the design touches the very top and bottom edges of the card, and the line stays put.
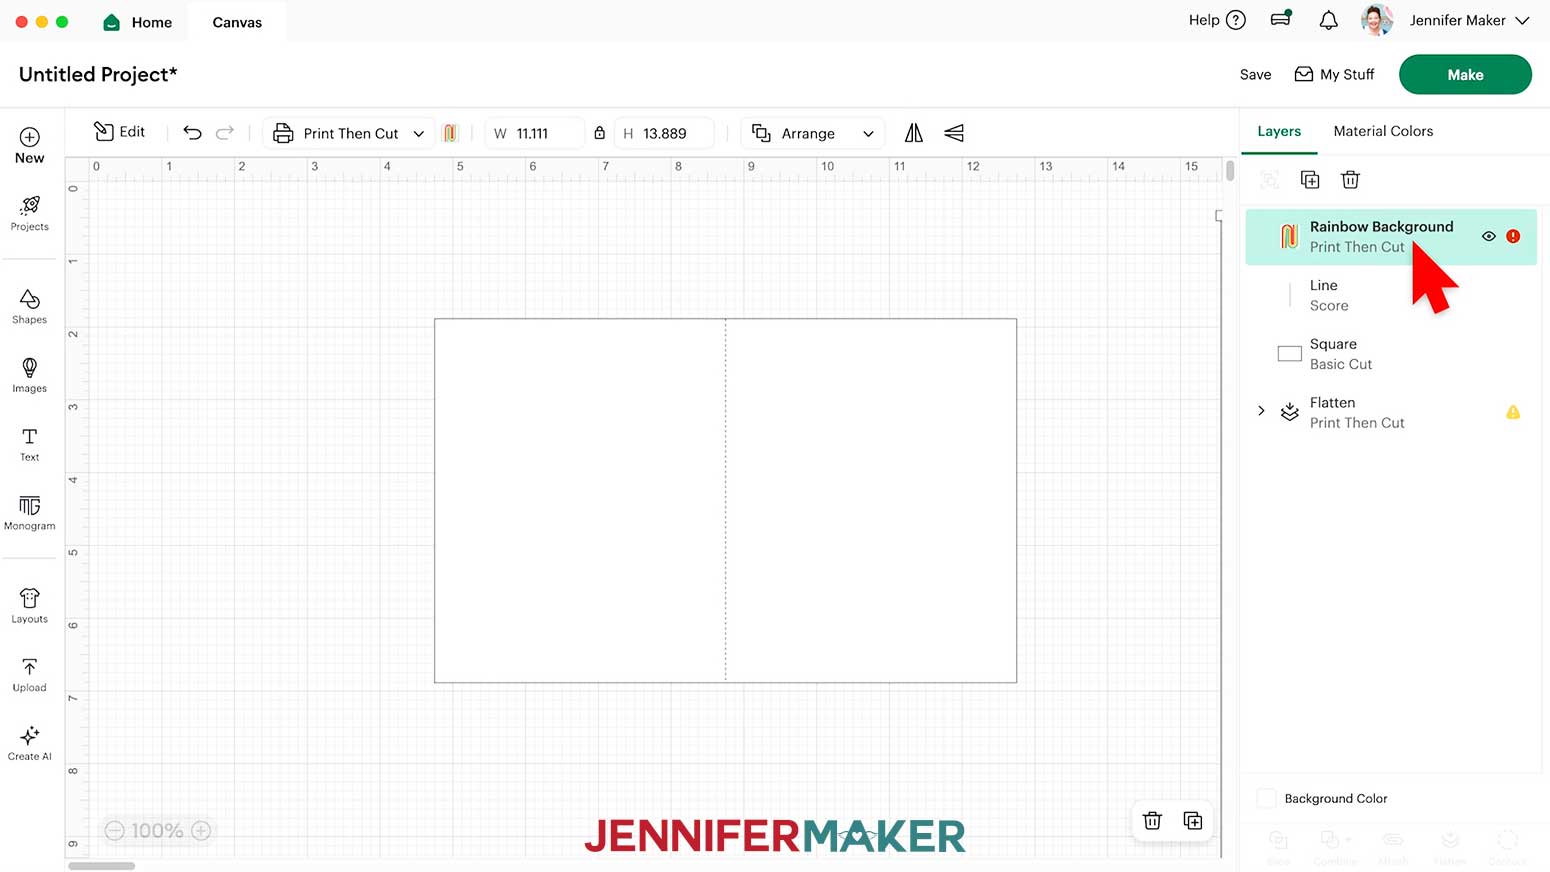
- Select the rainbow background and the rectangle, then click “Flatten” so your Cricut knows to print the background on the card shape.
- In the Layers Panel, make sure the score line is at the top.
- Select the flattened card and the score line, then click “Align” and “Center.”
- Keep the flattened card and the score line selected, then click “Attach” to create your card with a foldable score line.
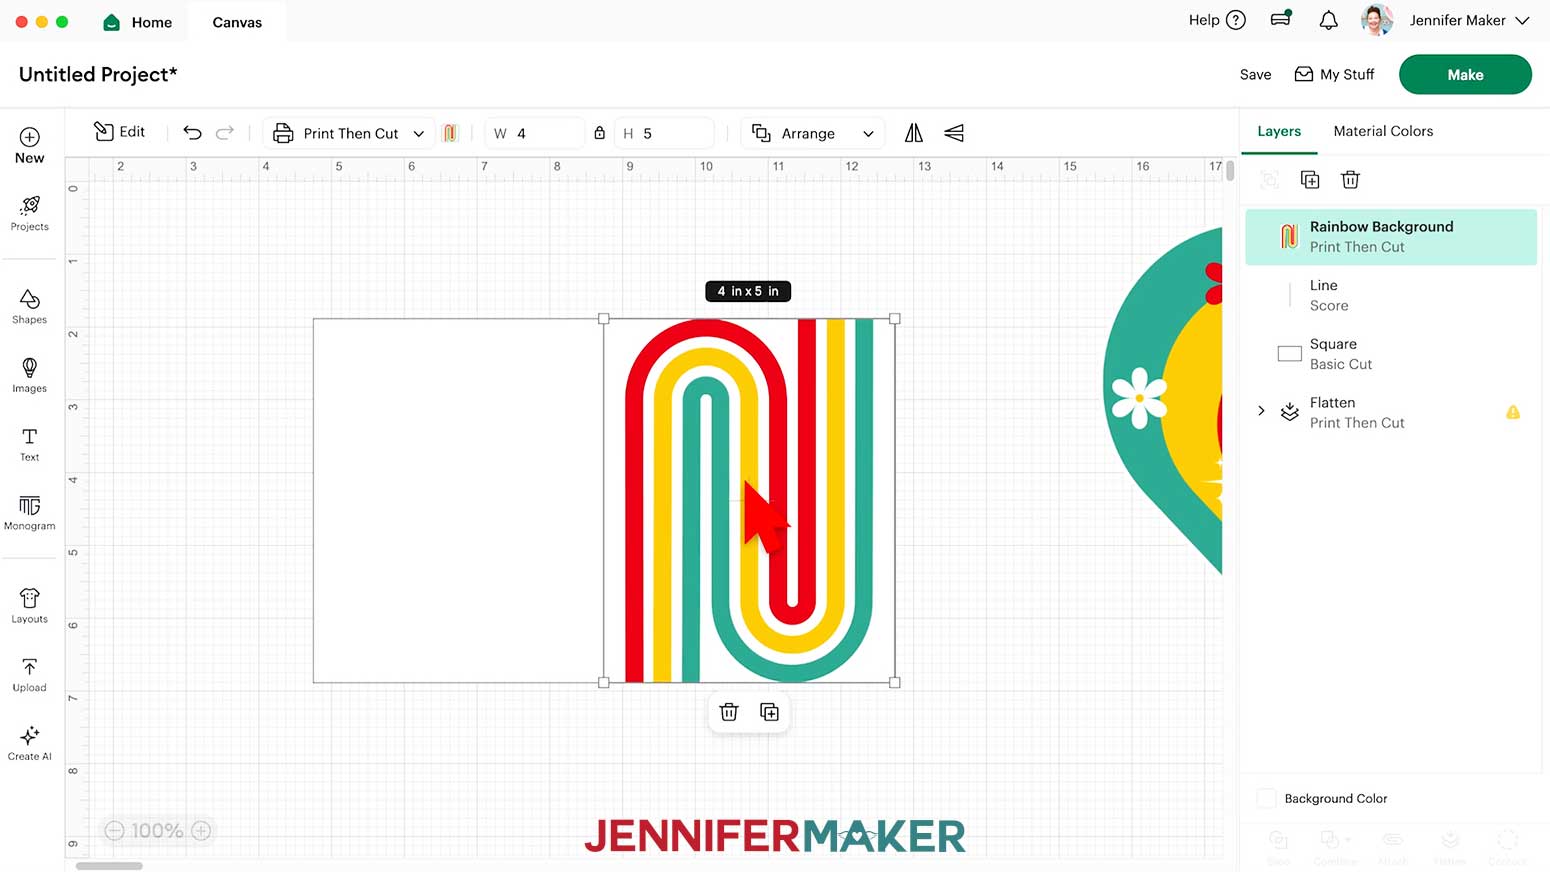
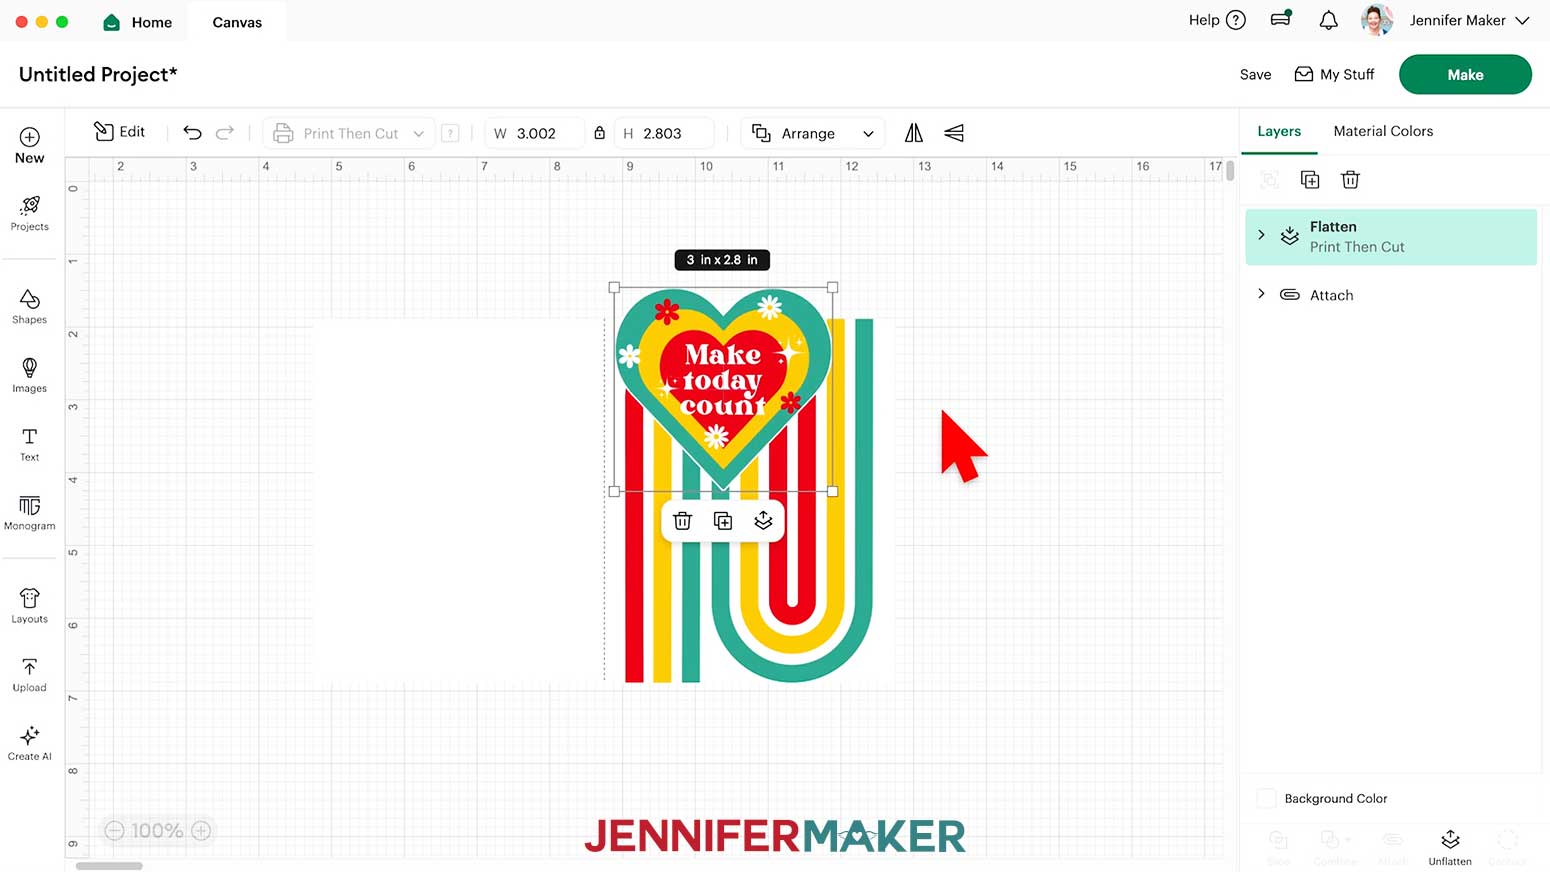
- Drag the heart to the top of the Layers Panel.
- Use the corner handles to resize the heart to your desired size.
NOTE: I resized my heart to 3” wide. - On the Canvas, drag the heart over the rainbow background on the right side of the card to see what it will look like when attached to the card once cut.
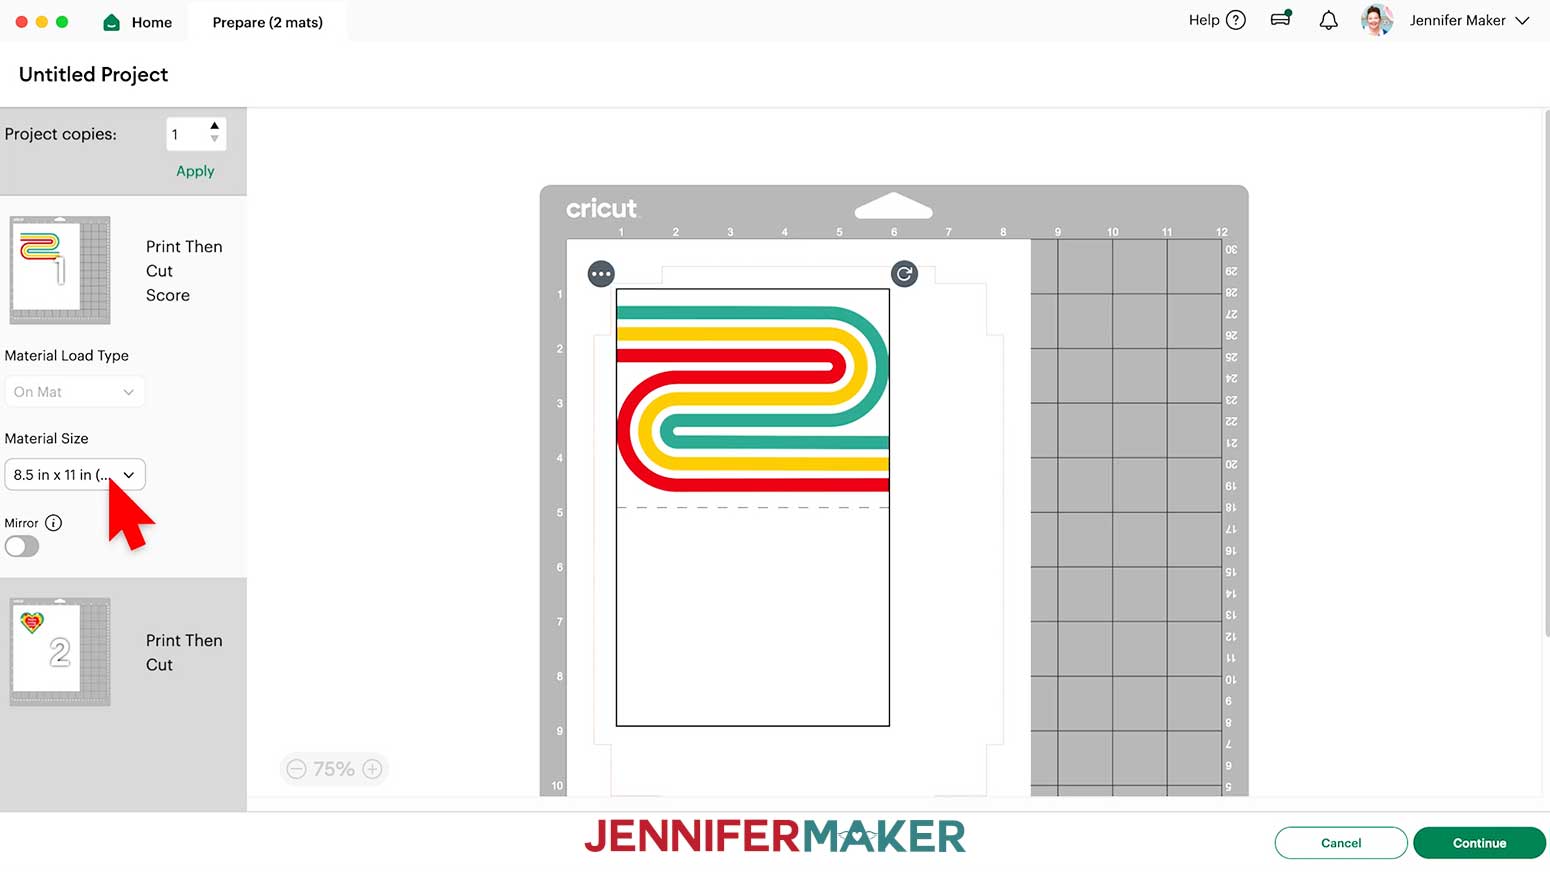
- Make sure your machine is selected, then click “Make.”
- On the “Prepare” screen, change the “Material Size” to match your paper if needed.
NOTE: My paper is 8.5” by 11” so I kept my “Material Size” at "8.5 in x 11 in.” - Click “Continue.”
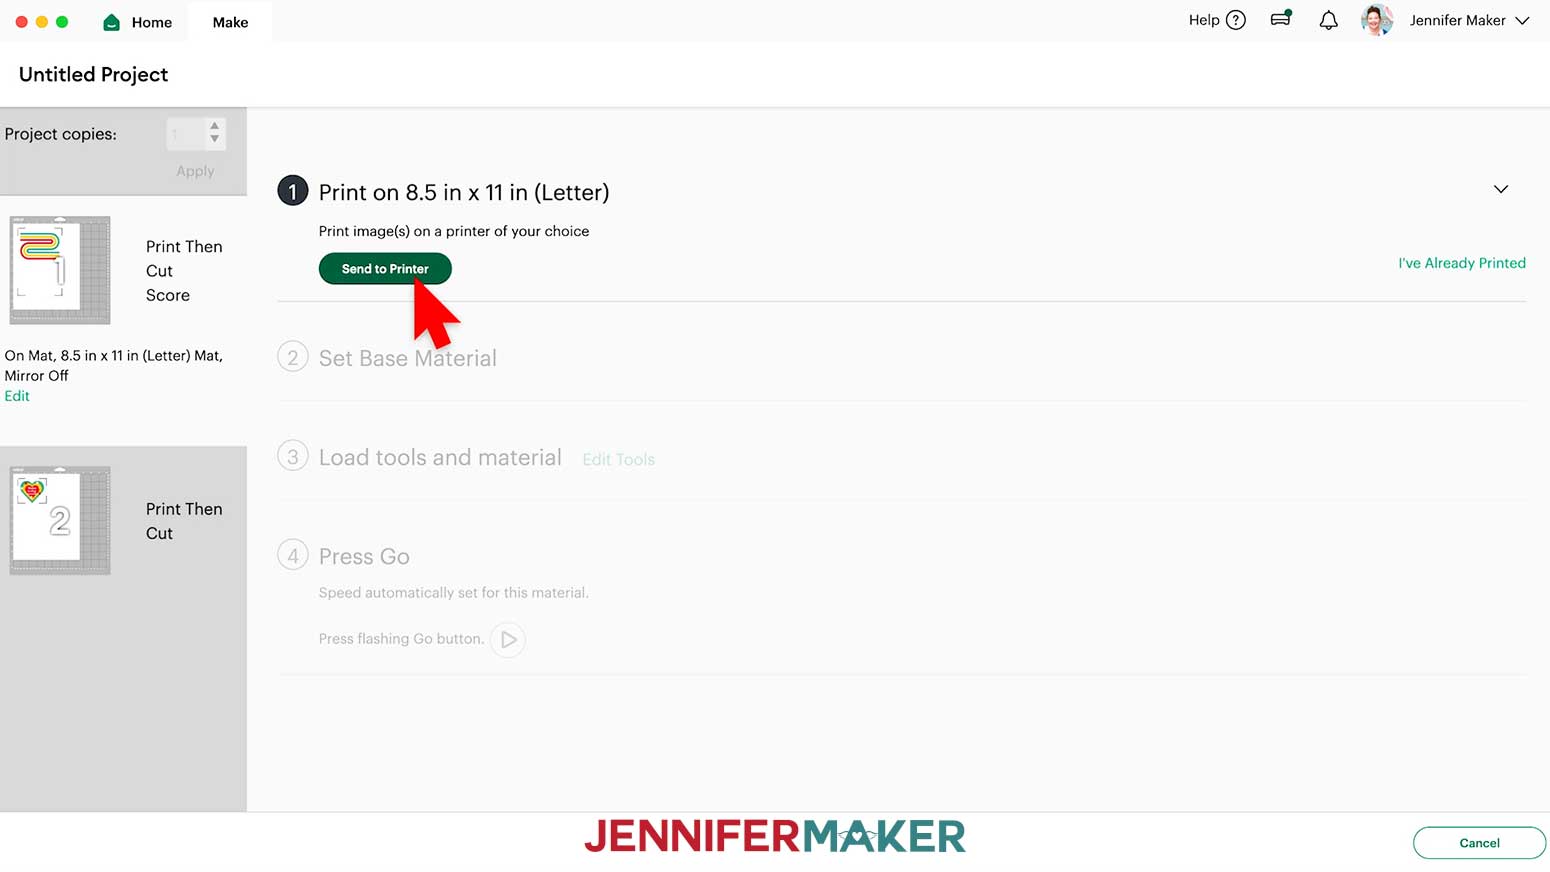
- On the “Make” screen, click “Send to Printer.”
- A window may pop up letting you know that sensor marks (registration marks) will be added to your printed page. Click “Next.”
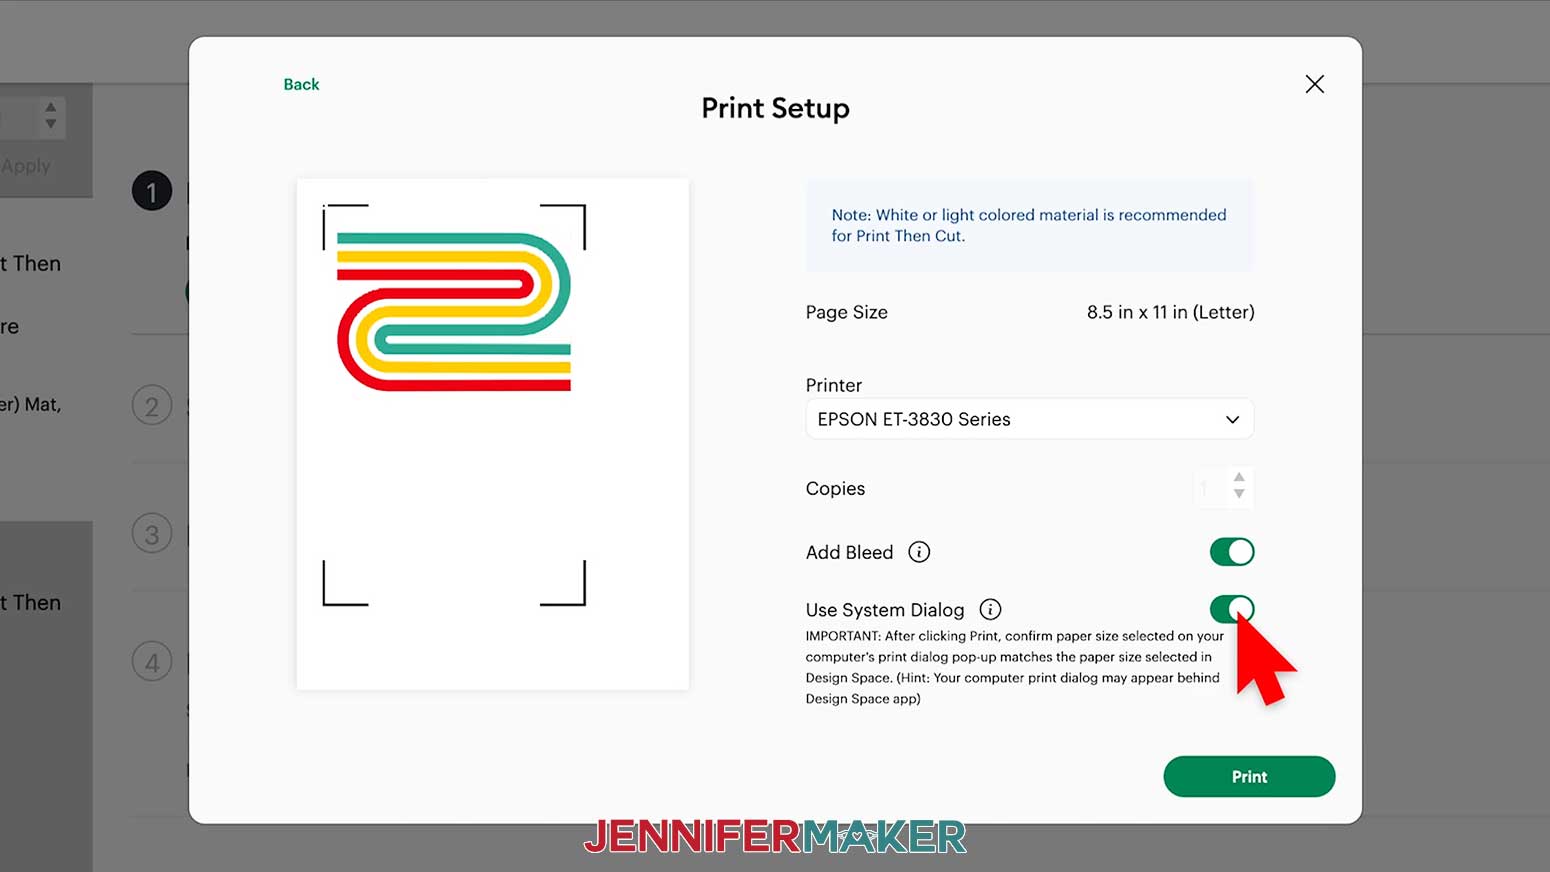
- In the “Print Setup” window, make sure the correct printer is selected.
- Turn the “Use System Dialog” toggle ON for more control.
- Click “Print.”
TIP: The Print Dialog box may be behind your Cricut Design Space window, so minimize it.
NOTE: Your Print Dialog box may look different than mine, and that’s okay. Follow the instructions as closely as you can. - In the Print Dialog Box, change the paper size to match your material, if needed.
- Under “Printer Options, click “Print Settings.”
- Under “Media Type,” select “Presentation.”
- Under “Print Quality,” select “Best Quality.”
- Click “OK.”
- Insert a sheet of presentation paper correctly into your inkjet printer.
- Click “Print.”
- Once your card has printed, carefully remove the sheet from the printer by its edges and leave it to dry face up for a few minutes to avoid ink smearing.
- On the “Make” screen, click “Browse All Materials.”
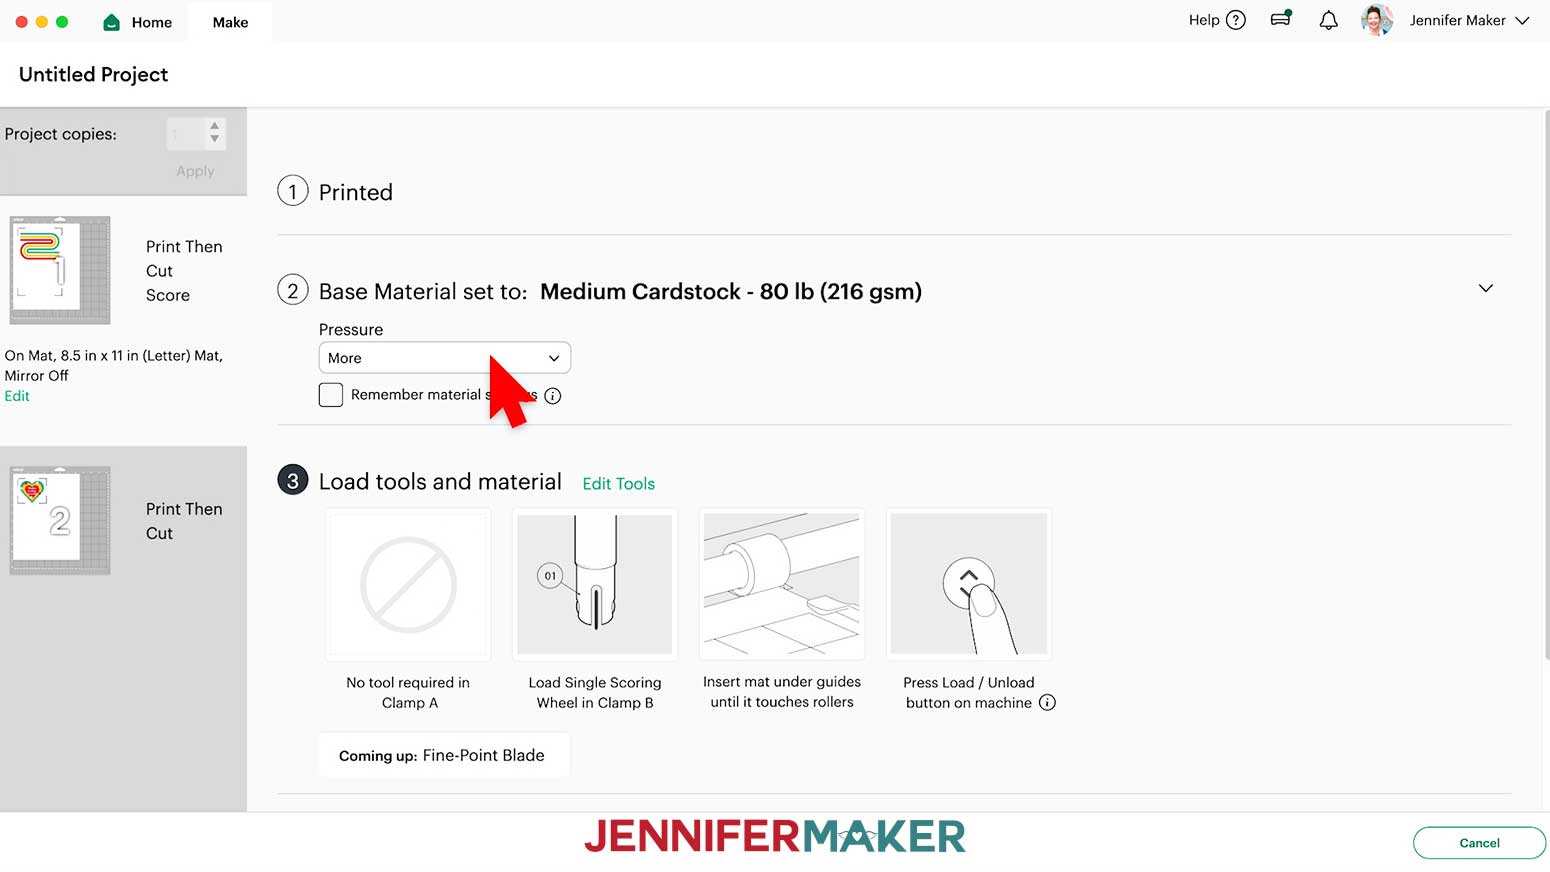
- Cricut Design Space doesn’t have a setting for presentation paper, but I found that the “Medium Cardstock - 80 lb (216 gsm)” setting with “More” Pressure cut the material well.
- If you’re using a scoring tool, it will automatically be set to the Single Scoring Wheel. If you’re using a Scoring Stylus instead, click “Edit Tools” and select it. Then click “Apply.”
- Check that your tools are clean and in the correct clamps.
- Place your presentation paper design-side up on a green StandardGrip machine mat so it matches the orientation on the screen.
- Place a clean piece of copy paper over the card paper, then use a brayer to make sure the card is fully adhered to the mat.
- Remove the copy paper.
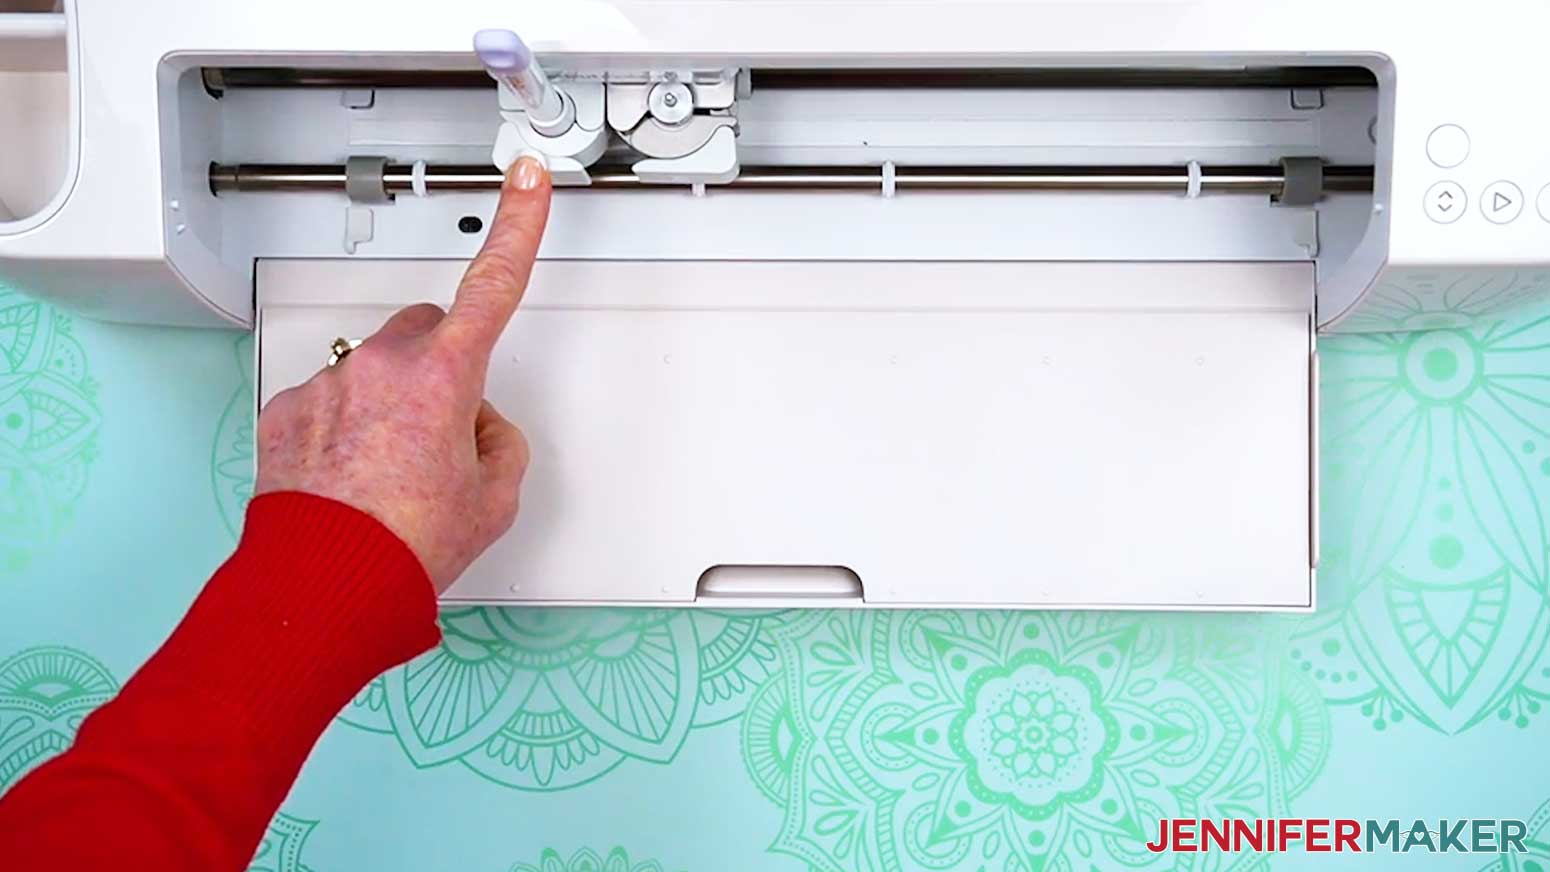
- Press the flashing load/unload button to load the prepared mat into your Cricut so it matches the screen preview.
- Press the flashing middle button to begin scoring and cutting.
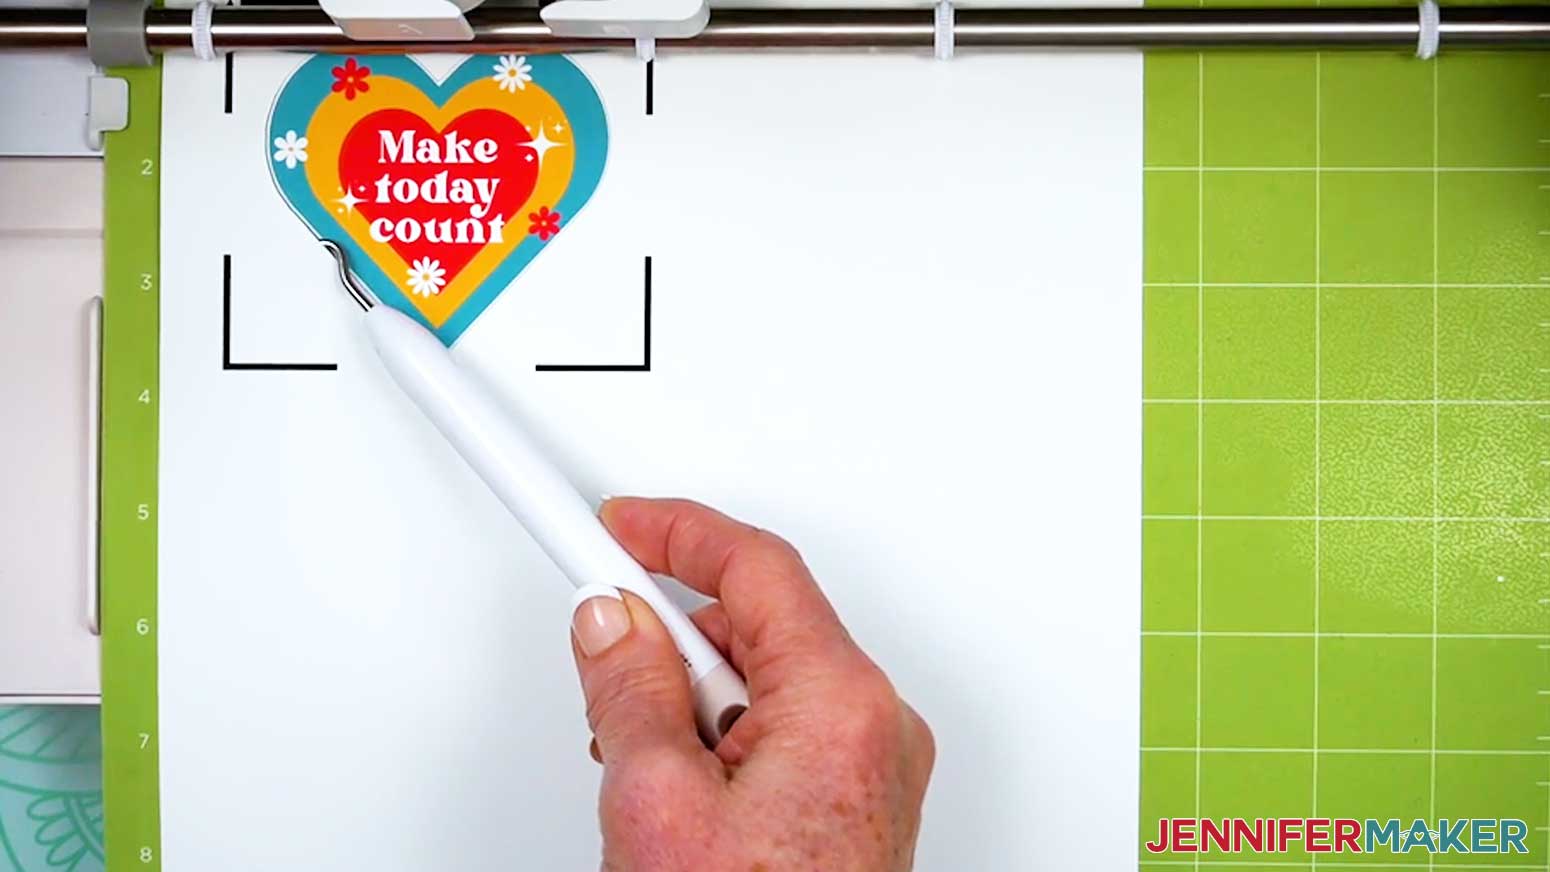
- Before unloading the mat, use a weeding tool to gently lift part of the material outside of the card where it’s cut to see if the cut went all the way through the paper. If not, press the middle button to cut the design in the same spot again.
- When it has finished cutting, unload the mat, flip it over onto your work surface, and roll it back to release the paper.
NOTE: If you have any issues with your cuts, check out my Tips & Tricks for Cleaner Cuts tutorial.


ASSEMBLE THE CARD
- Place the printed card printed-side down, and fold upward along the card’s center score line.
NOTE: If you don’t have a score line, just fold the card in half by matching up the outer edges, and then press down along the middle to create a crease.
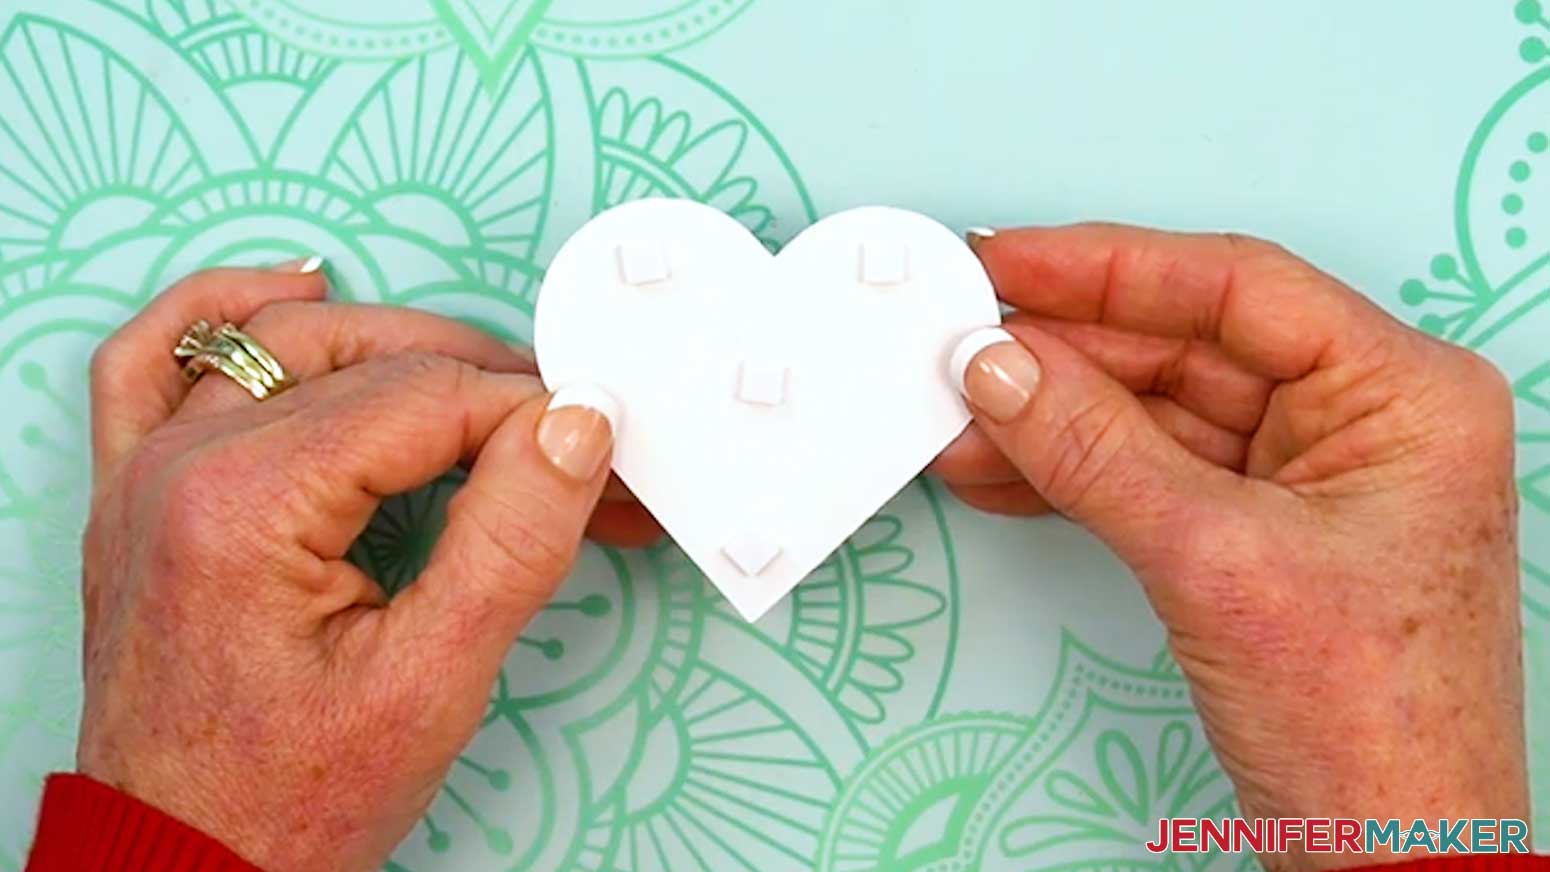
TIP: Use your scraper tool to sharpen the fold for a cleaner look. - Adhere four adhesive foam squares to the back of the heart – two on the curves, one near the point, and one in the center.
- Peel the remaining backings off of the adhesive foam squares.
- Adhere the heart to the center of the card. Use your Canvas in Cricut Design Space as reference if needed.
- Your card is finished!

OPTION 3: ADAPT A DESIGN FOR A MUG
NOTE: Before you begin, measure the area you want to decorate on your sublimation mug blank. Write the dimensions down so you can size your design correctly later.
- Open your master design in Canva.
- Click “File.”
- Click “Make a copy.”
- A copy of the design will open in a new tab in Canva.
NOTE: You can edit the copy without changing the original master design. - Click where it says “Copy of” and then your master design’s name, and give the design a new name.
NOTE: I renamed mine “Colorful Hearts Mug Design by JenniferMaker.” - Hold the “Shift” key on your keyboard and select the heart, the text, and the small elements.
- Click “Group” to keep them together so they all resize proportionately.
- Use the corner handles to resize and reposition the heart so its left and right edges align with the left and right edges of the rainbow background when centered.
NOTE: This way, it will be easier to see the design on one side of the mug without rotating it. - Click and drag the heart down so the top and bottom loops on the rainbow background both show about equally.
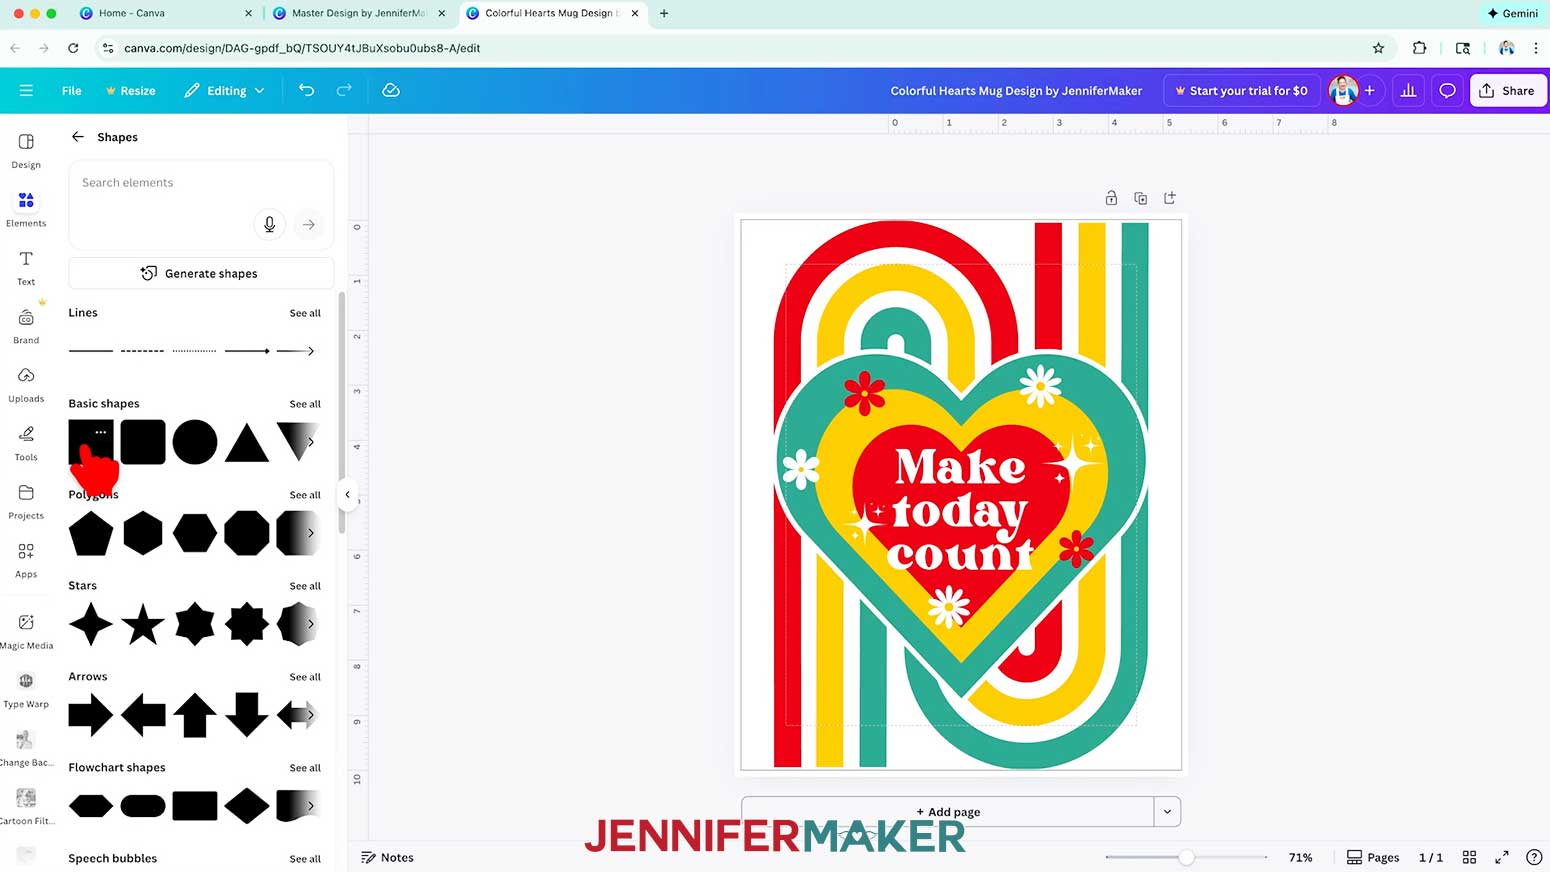
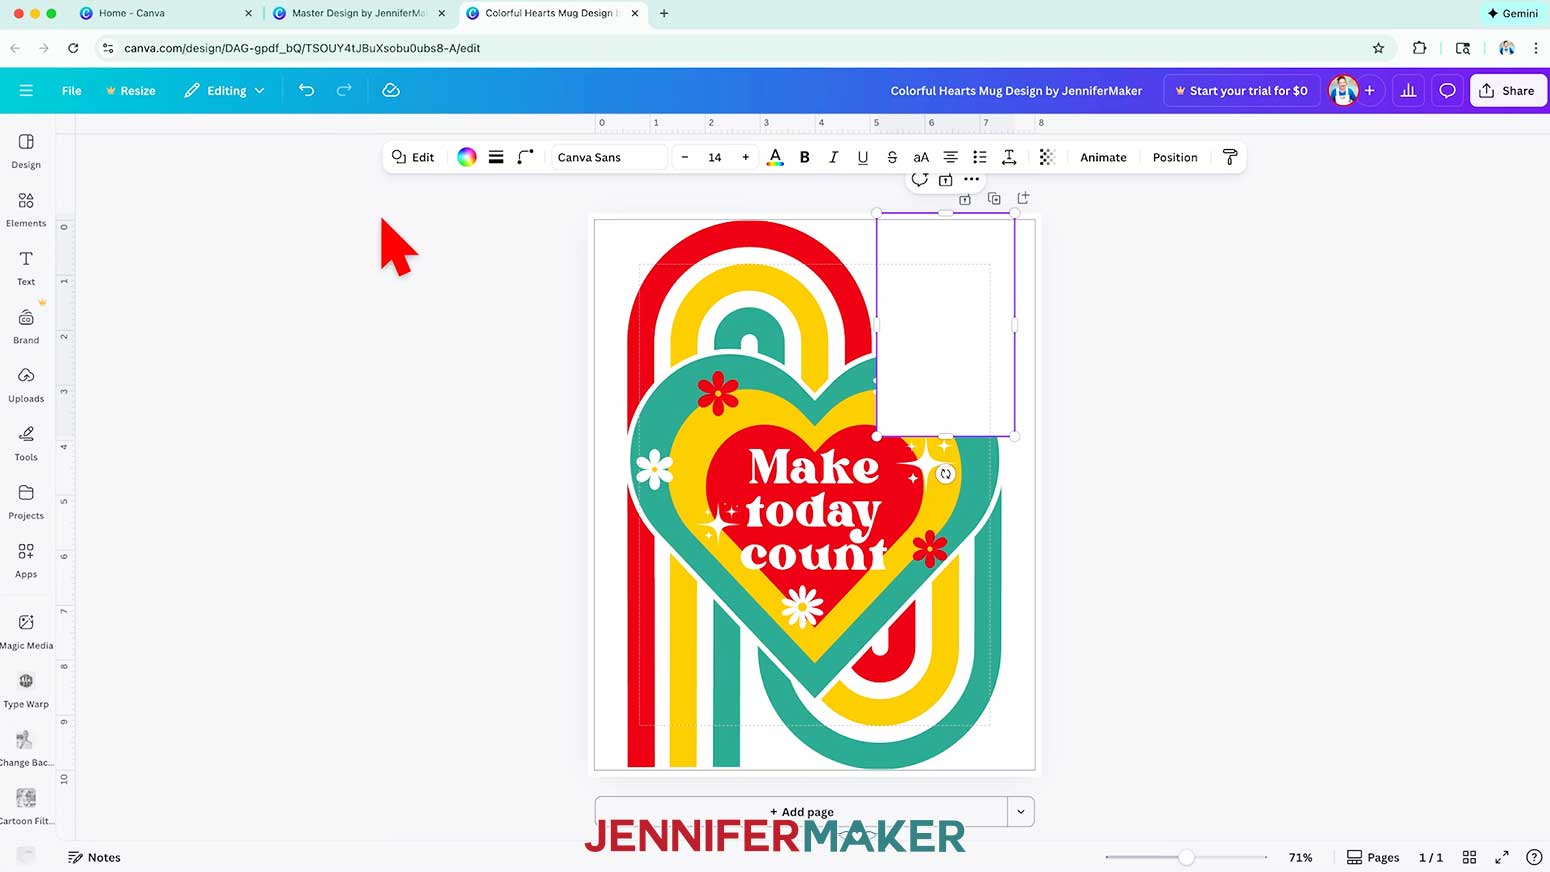
- To begin removing the background rainbow's tails, click “Elements.”
- Click “Shapes.”
- Select the square to add it to the canvas.
- Change the square’s color to white using the color swatch icon.
- Resize and reposition the white square so it fully covers the top right straight part of the rainbow background extending from the heart to the edge of the canvas.
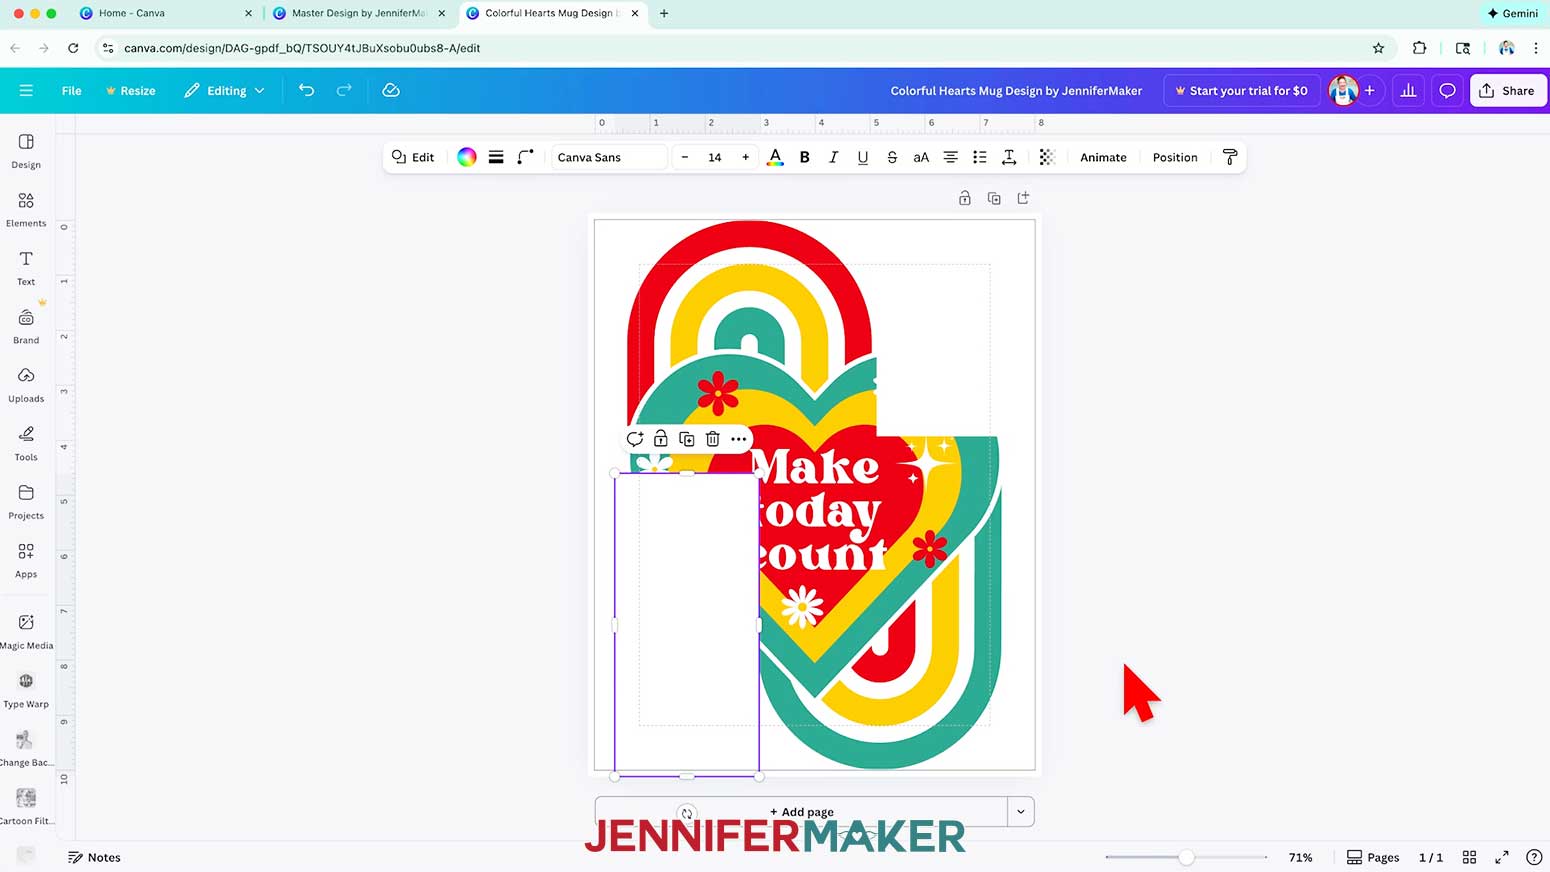
NOTE: Part of the heart will be covered – we will fix that in a moment. - Duplicate the white rectangle.
- Repeat step 14 so the duplicated white rectangle covers the bottom left straight part of the rainbow background that extends from the heart to the edge of the canvas.
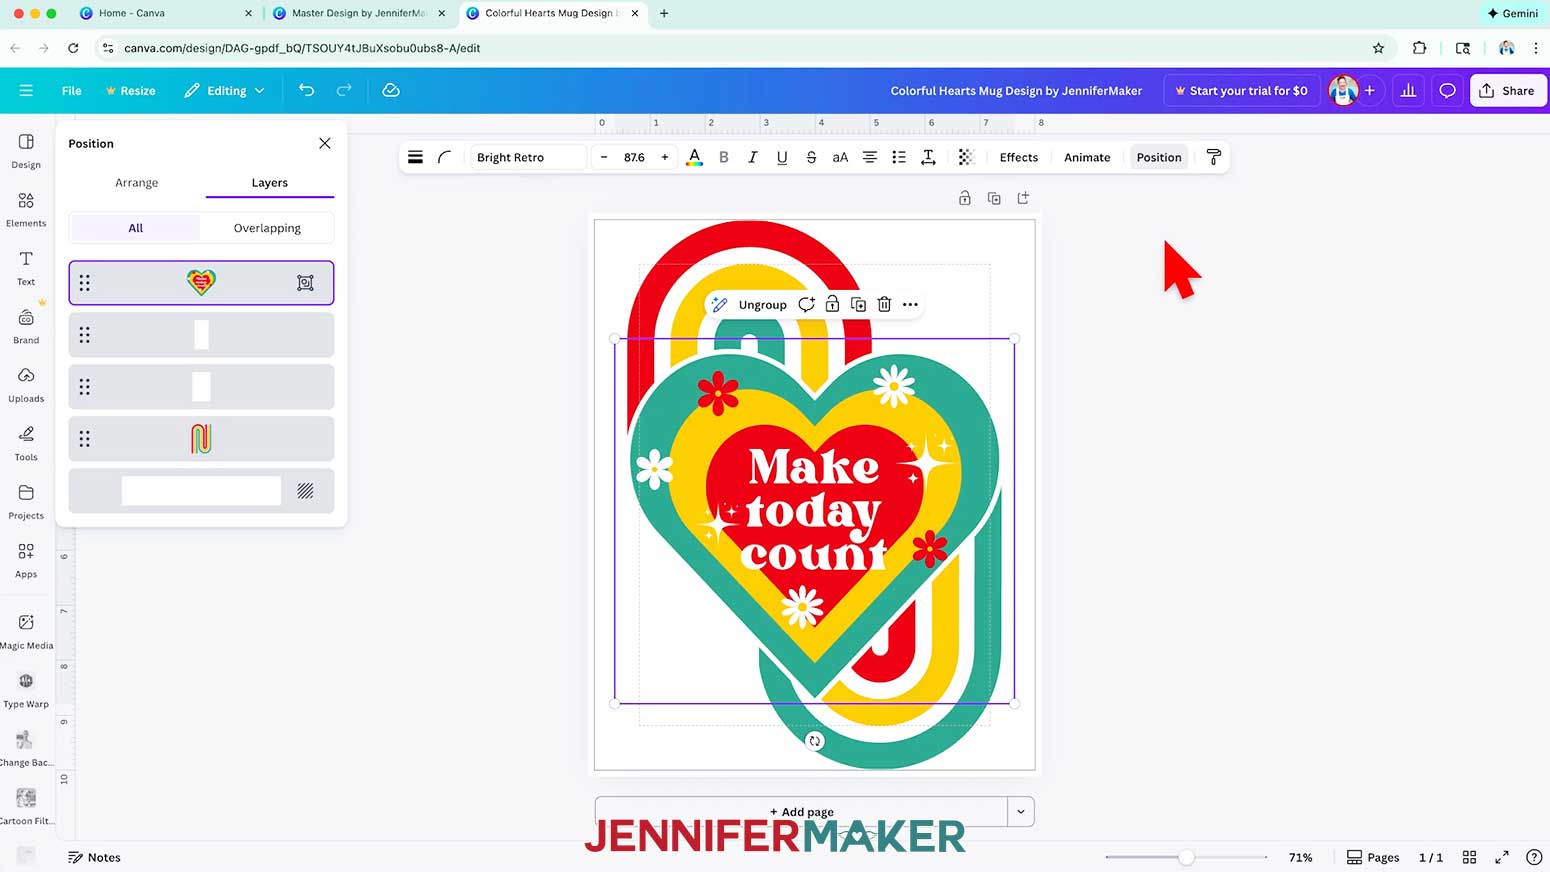
- Click “Position,” then “Layers.”
- Click and drag the layers so the white rectangles are below the heart and the small elements, but on top of the rainbow background.
- Double-check that the rainbow's tails are hidden by the white rectangles. Now the design will fit nicely on a mug!
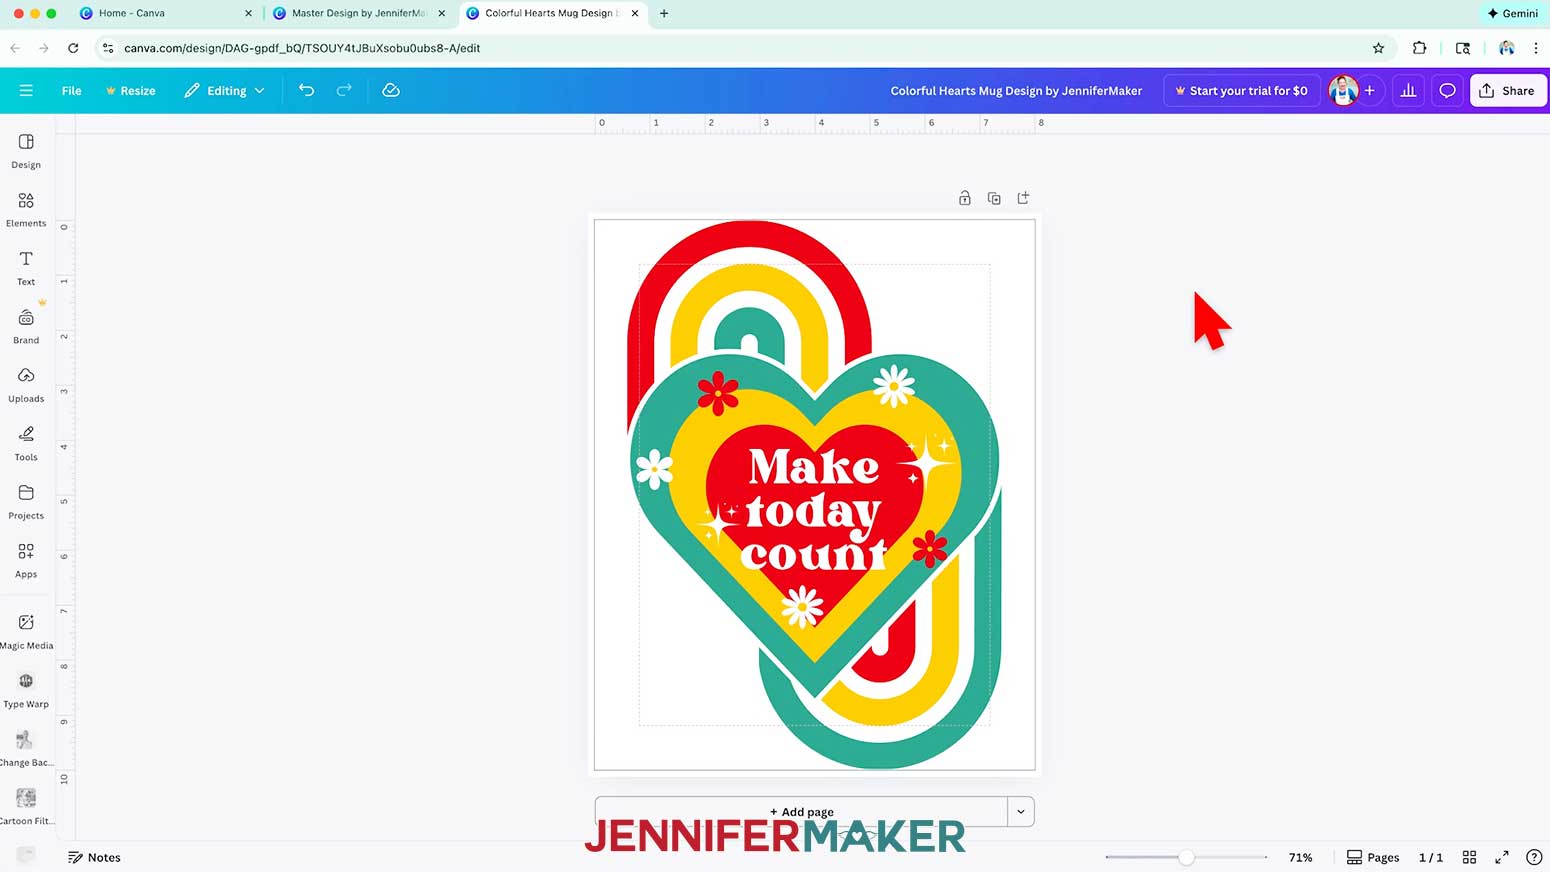
- When your design is ready, click “Share,” then “Download” the PNG design from Canva.
- Follow the steps in my How To Sublimate Mugs tutorial to sublimate your adapted PNG design onto a mug.
STEP 4: SHOW IT OFF
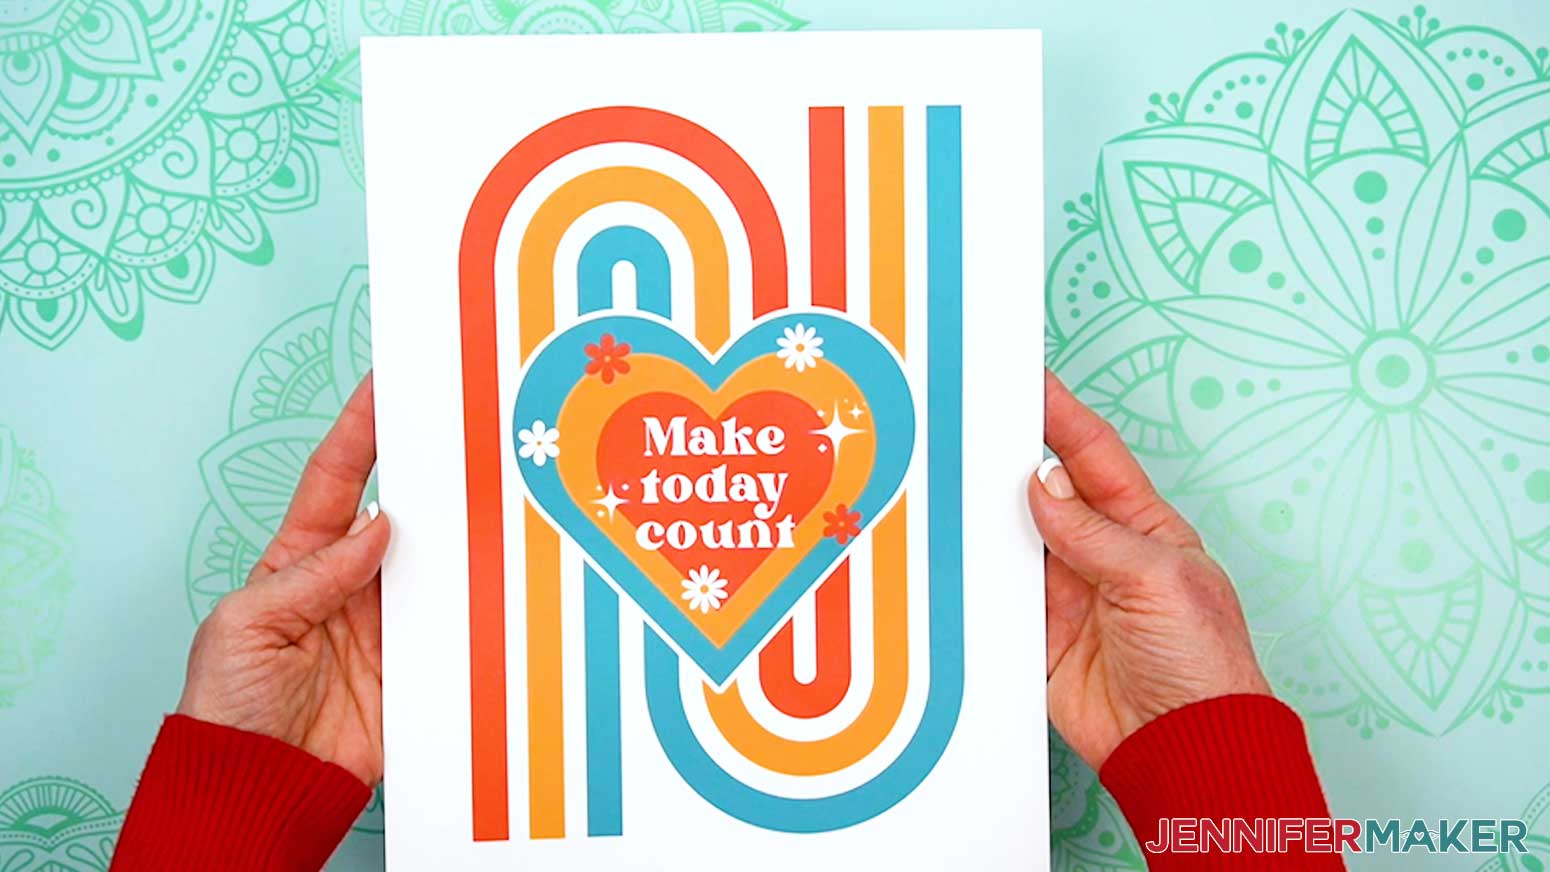
Here’s how my projects using my adapted design turned out!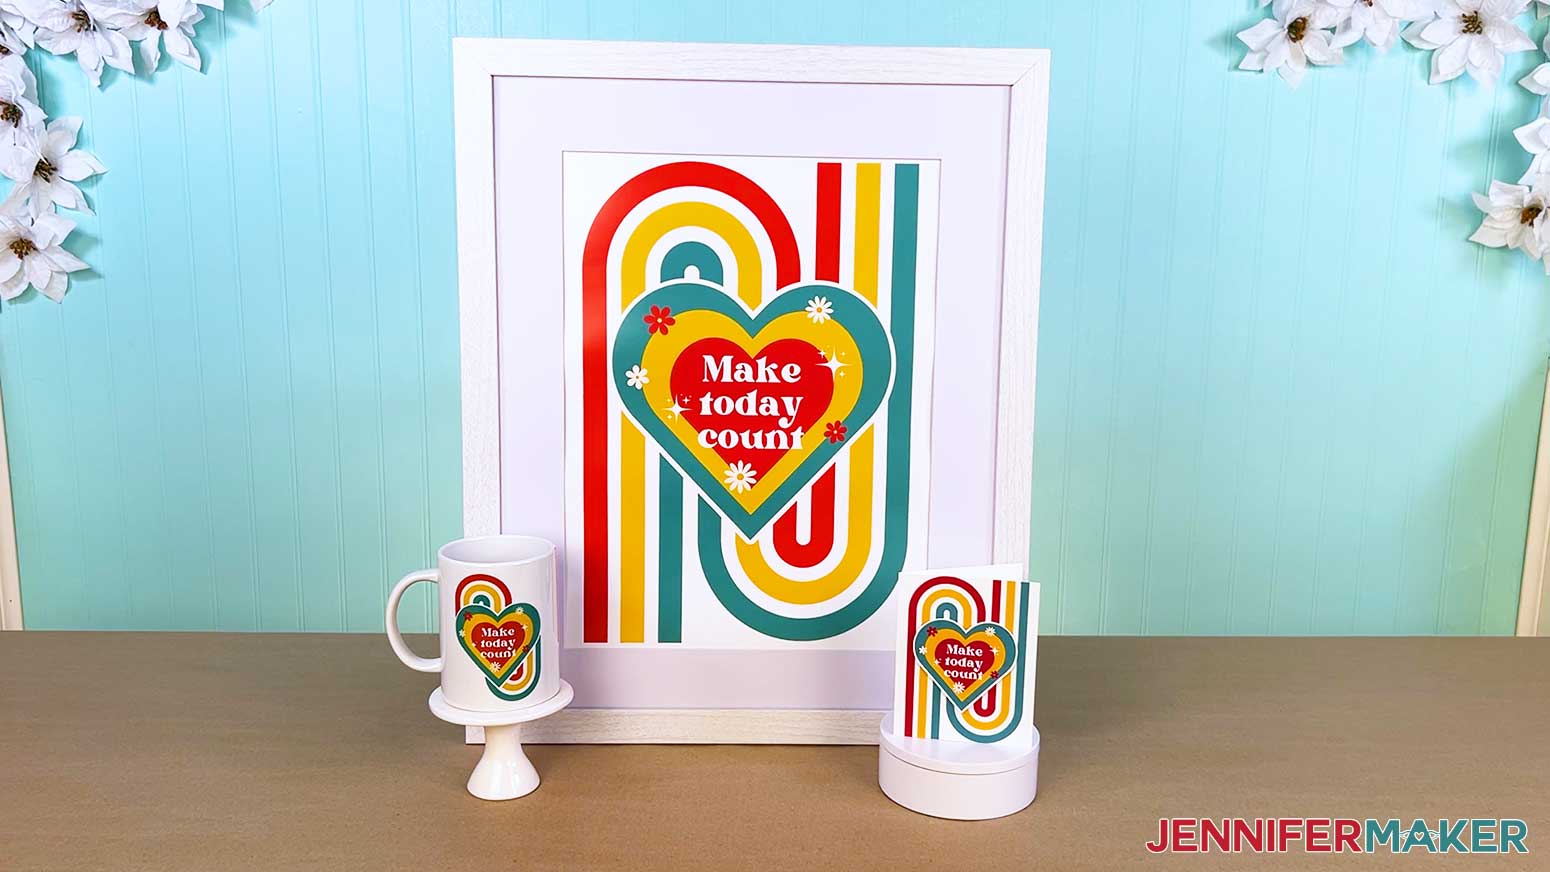
Notes
Canva Typeface Used: Bright Retro
Finished Sizes:
Poster: Print with Canva 12" x 16" and Print from Home 8" x 10"
Card: 4" x 5" when folded
Mug: 15 oz mug with 2.5" x 3.25" design
Answers to Your Questions About How to Adapt Designs in Canva
Q: Can you show me more ways to adapt designs in Canva?
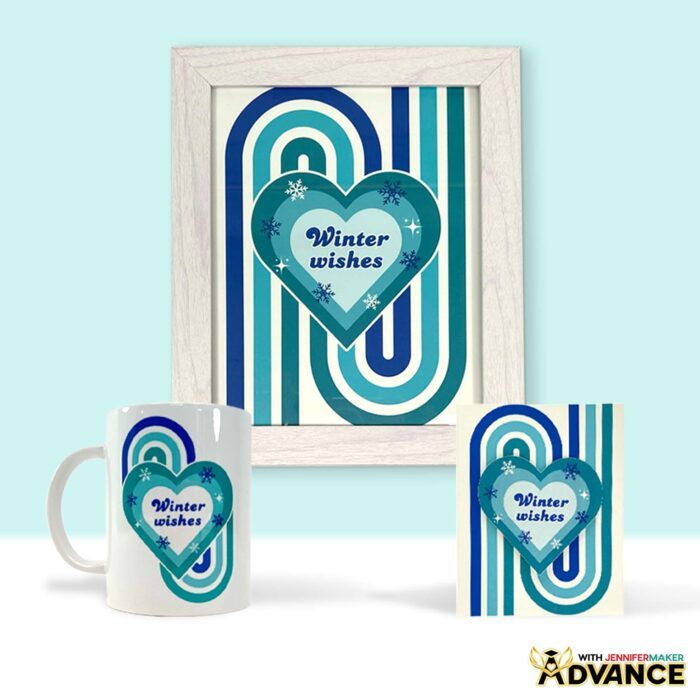
A: You can learn how to customize adapted designs for the seasons in Canva, in my ADVANCE program. Learn more about ADVANCE here!
Q: What does it mean to design once and craft three ways?
A: It means creating one master Canva design and intentionally adapting it for multiple formats (like a poster, greeting card, and mug) without rebuilding it from scratch. That way, when there are new trends, or you want to change the design for a new season or occasion, you can adjust some parts and keep the rest the same, saving time.
Q: What is adaptive design in crafting?
A: While “adaptive design” has a specific meaning in web development, I think it describes this plan-ahead craft process very well, too. Taking one design and trying to make it work for different blanks like a card and a mug will probably leave you frustrated, and one (or more) of your finished projects looking kind of “off.” You know that saying about trying to fit square pegs into round holes? That applies to design, too! You don’t have to be in the design industry to use adaptive design. It’s simply about building a flexible layout that can be resized, rearranged, and customized for different blanks while keeping a consistent visual language.
Q: Can I use a free Canva account for this project?
A: Yes. The design techniques I teach in this tutorial can all be done with a free Canva account.
Q: Where can I find the free design elements mentioned?
A: The free design elements are available in my free resource library for you to customize and use in your own projects.
Q: Is this suitable for beginners?
A: Absolutely! The tutorial walks through the basic steps clearly, making it approachable even if it’s your first time in Canva or adapting one design for multiple projects.
Q: What file type should I download for printing or sublimation?
A: In Canva, download your project as a PNG for high-quality printing and sublimation projects. For multi-page designs, be sure to select “All Pages” to download them together.
Q: Why should I start my design at a larger size?
A: Designing at your largest intended size protects image quality, prevents pixelation, and keeps your text layer crisp. Scaling up later can make images blurry and hard to read.
Q: What size did you use for the master design?
A: I used an 8″ x 10″ canvas to design my poster, which is easy to scale down for smaller projects.
Q: Why are rulers and guides important?
A: Rulers and guides help with alignment, spacing, and overall composition so your design elements feel balanced and intentional.
Q: How do I make sure my poster is readable?
A: When designing a print poster in Canva, focus on bold text, strong contrast between the text and background elements, and a final size that can be read from across the room.
Q: What is print bleed and why does it matter for cards?
A: Print bleed extends your design slightly past the cut line so you don’t end up with unwanted white borders after trimming or cutting with a Cricut.
Q: How do I create a layered, 3D card effect?
A: While designing in Canva, separate key design elements (like a heart) onto their own page so they Print Then Cut separately when you bring them into Cricut Design Space. During assembly, attach them to the card with adhesive foam tape for dimension.
Q: Why should I design in layers?
A: Working in layers allows you to rearrange, resize, and adapt parts of your design independently, making customization much easier.
Q: How do I prepare a design for a mug?
A: Measure the visible height and width of your mug first. Then, center and scale your focal design in Canva so it looks balanced and readable on a curved surface.
Q: Why not extend the full design around a mug?
A: Full edge-to-edge designs can distort on curves. A contained, centered design usually looks cleaner and more professional.
Q: How do I group elements in Canva?
A: Hold the Shift key on your keyboard, select multiple elements, and click “Group” so they resize and move together.
Q: Can I make and sell photo projects I made in Canva?
A: If you want to use my designs and projects for commercial use, please familiarize yourself with my important licensing information as well as important licensing information from Canva before selling your projects.
Q: Can adapting designs in Canva help me in my small business?
A: It sure can! Adapting designs in Canva helps keep your brand identity consistent, strengthens your visual communication, and keeps you aligned with current trends and emerging design trends… without forcing you to redesign everything from scratch every time.
Get my free elements and template links to use in your own adapted designs!
(If you do not see the signup form above, click here.)
I love seeing your Canva projects, and how you use the skills I share with you! Once you’ve learned how to adapt designs in Canva, inspire others and share a photo of your design projects in our Canva Creators Facebook group or tag me on social media with #jennifermaker.
Love,

Want to remember this? Save this How to Adapt Designs in Canva Tutorial to your favorite Pinterest Board!