Learn how to order and apply full-color permanent decals to a variety of surfaces with UV DTF printing!
UV DTF (that stands for UltraViolet, Direct-To-Film) printing is my new favorite way to add permanent, full-color designs to solid items! It has a few challenges (I’ll share my placement tip, because you only get one try!), but If you’ve ever asked, “What is UV DTF printing?” or wondered how to align glossy, full-color stickers on mugs, tumblers, and keychains with perfect precision, you’re in the right place. Good news: you don’t need a UV DTF printer. I’ll show you how to order the decals from a printing service and apply them perfectly the first time. Order extras, because once you try one, you’ll want more, and shipping takes longer than cutting vinyl at home.
Watch the full step-by-step tutorial on how to use UV DTF decals:

What Is UV DTF Printing?
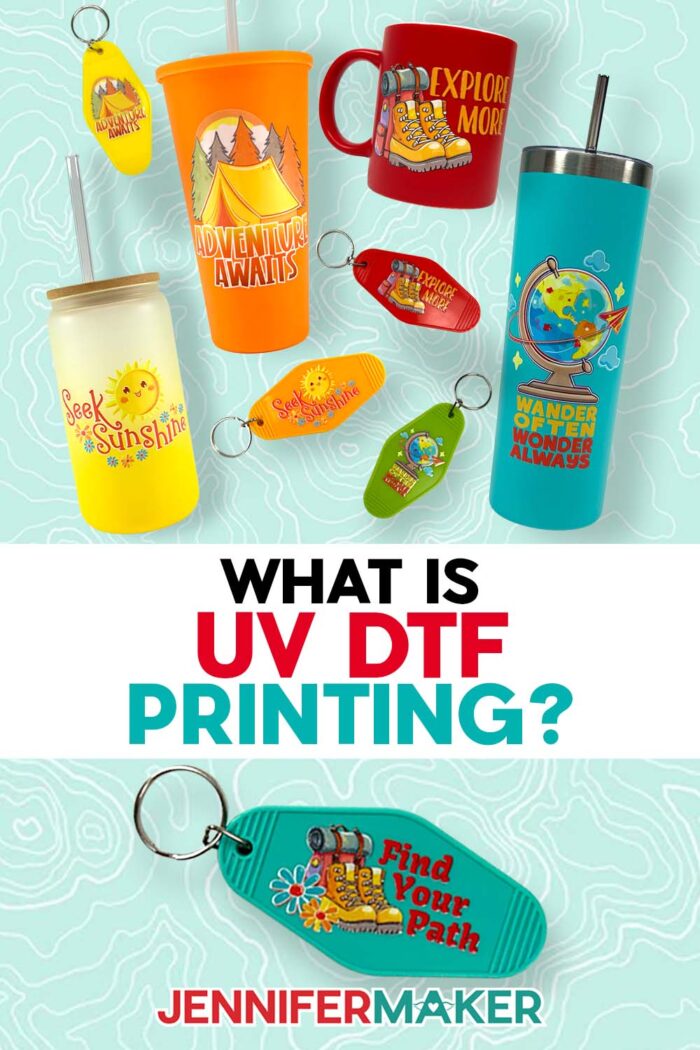
UV DTF printing is a method of creating full-color, permanent decals for hard surfaces. Designs are printed onto a special film using UV-curable inks, then transferred to items like mugs, tumblers, acrylics, and plastics without heat, cutting, or layering required. UV DTF decals work on any surface color, even white details on a dark or black background.
Why You’ll Love UV DTF Printing
✔️ No cutting or weeding
✔️ No heat press or curing
✔️ Works on dark or light surfaces
✔️ Professional, raised finish
✔️ Permanent when applied correctly
Is DTF Or UV DTF Better?
You may have heard of DTF printing already (I’ve used DTF transfers for T-shirts), but UV DTF printing is a separate method, so don’t confuse the two. Although the printing processes do have similarities, their final transfer decals serve different purposes. DTF transfers are excellent for almost any fabric, but they require adhesive powder and heat to bond the design. On the other hand, UV DTF printing works by printing a design onto a special film using UV-cured inks that instantly harden with ultraviolet light right in the printer. That curing process is what gives the finished durable prints their slightly raised, glossy look. There’s no heat press involved, no waiting period, and no sealing step after application.
What makes the UV DTF method especially appealing is how it handles detail. The process supports high-resolution images, so fine lines and layered artwork don’t get muddy. The colors stay rich and opaque, even on darker blanks, which is something sublimation printing can’t do. That alone opens the door to tons more creative options, so you can decorate almost any smooth surface you can find.
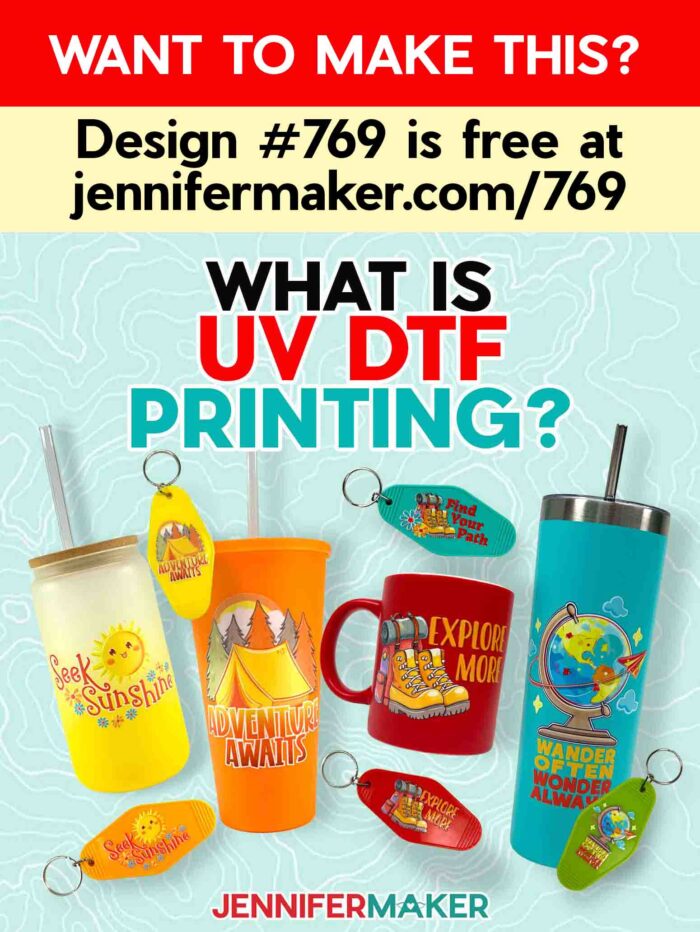
How Do I Get The Adventure-themed Designs?
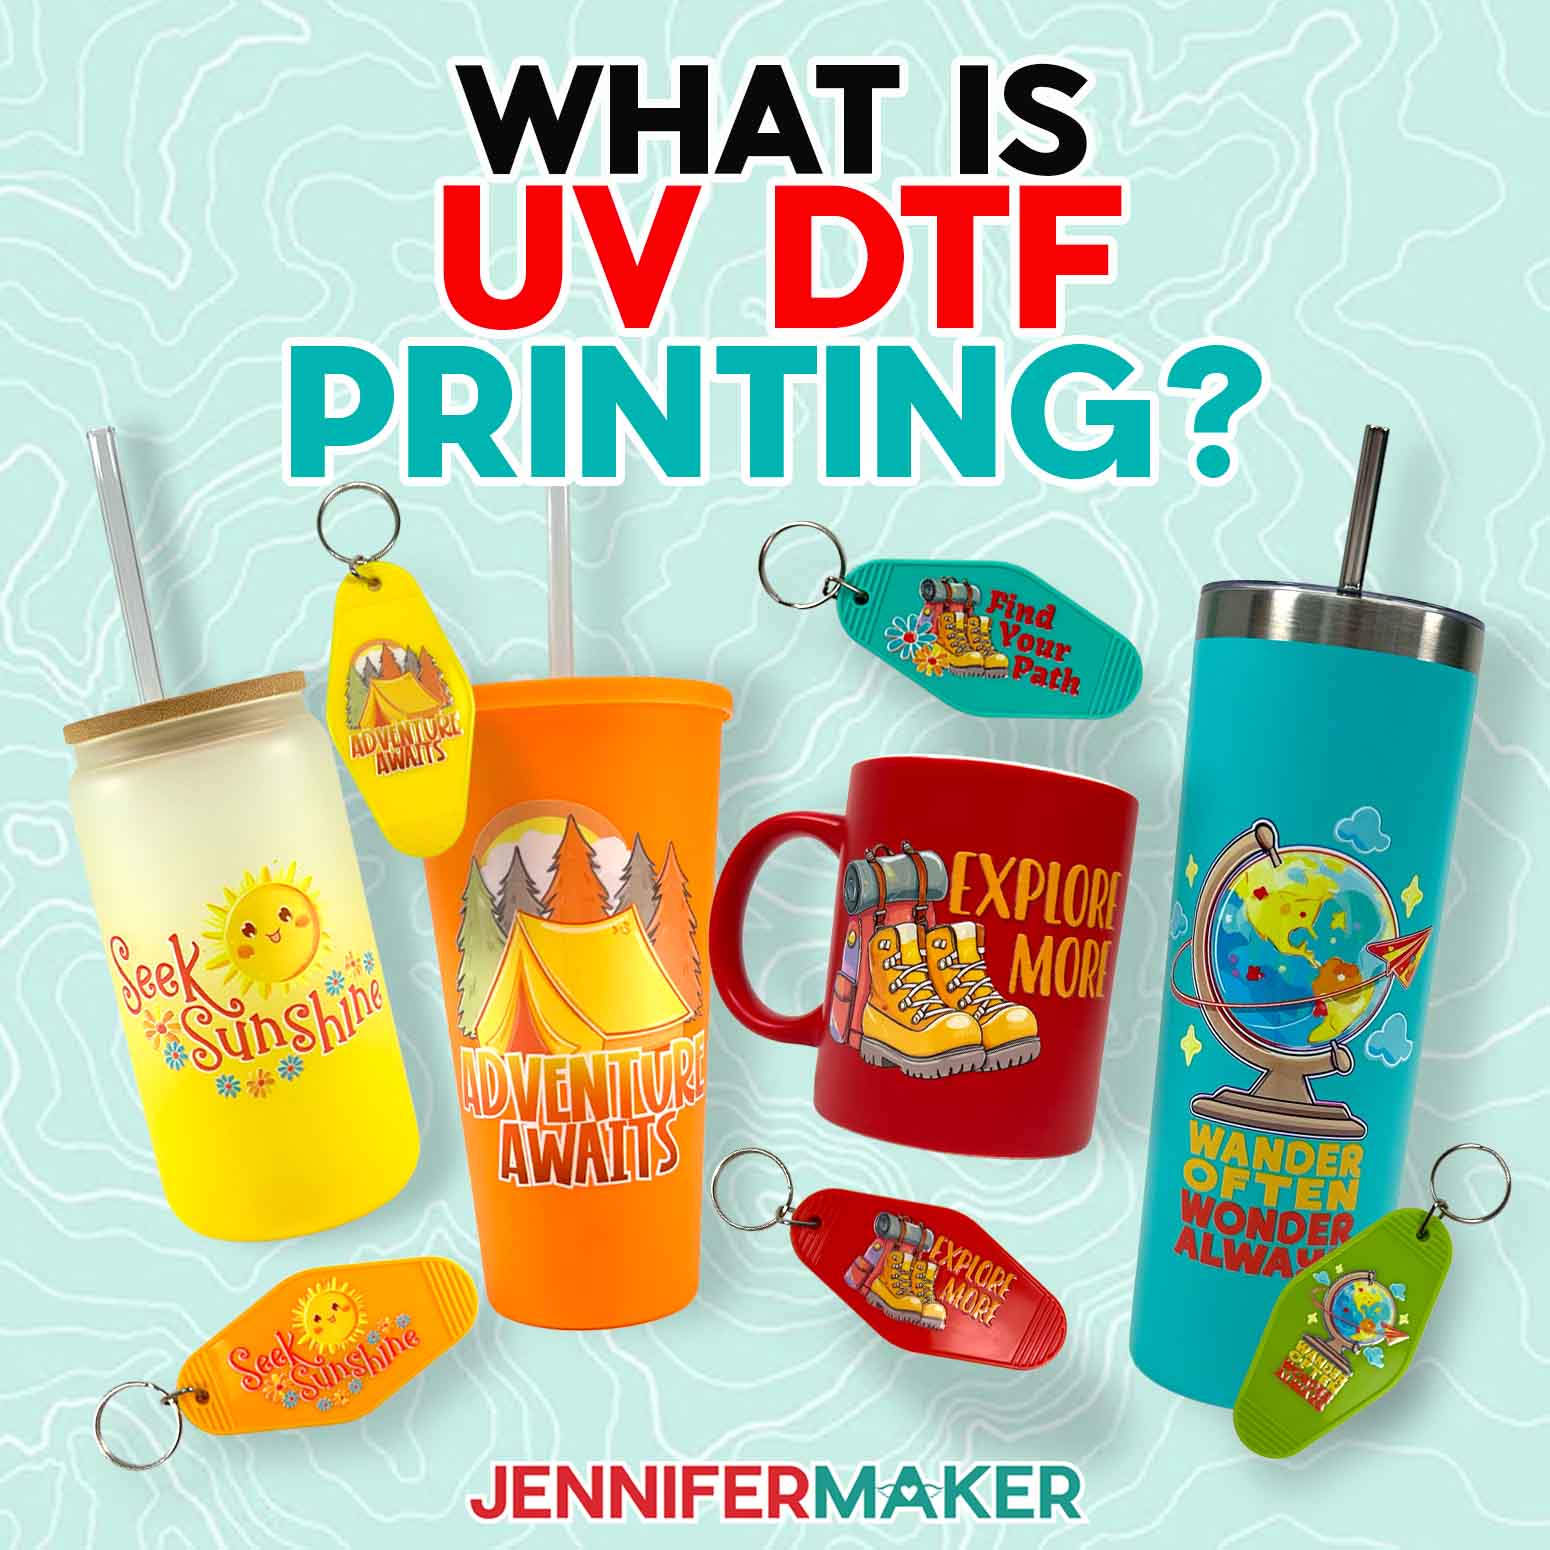
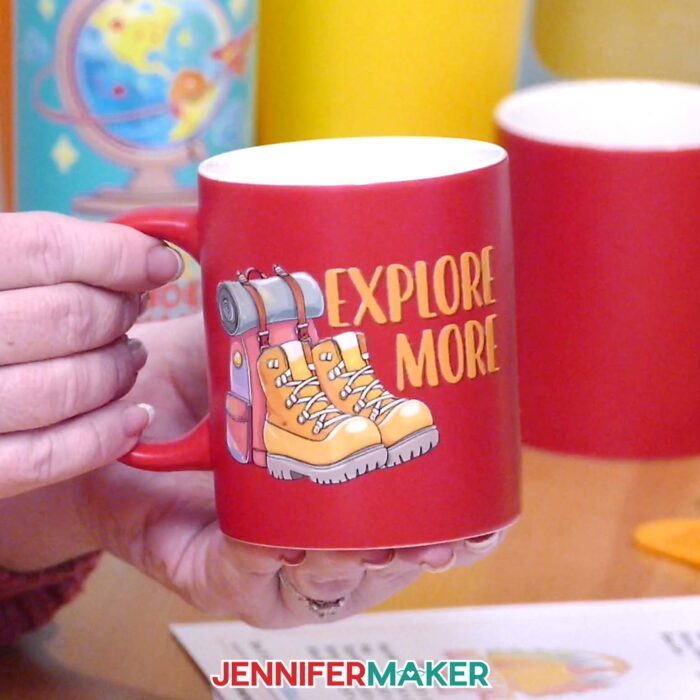
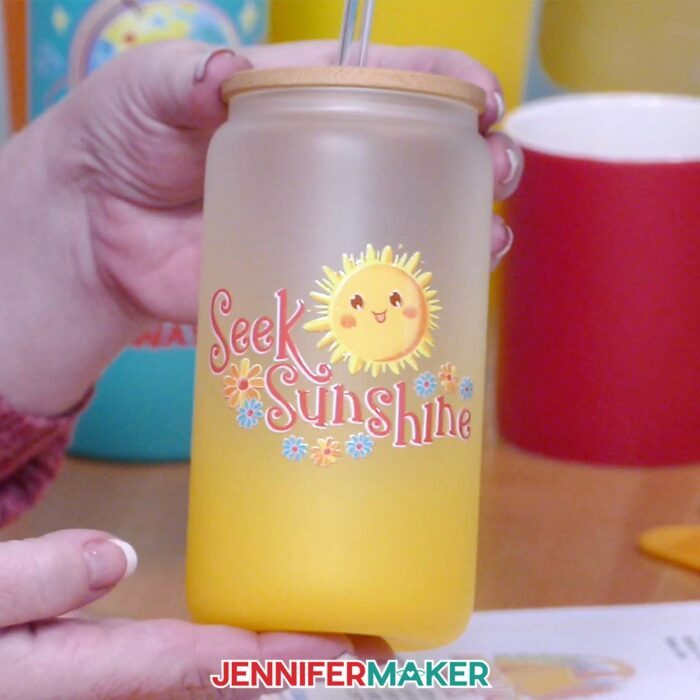
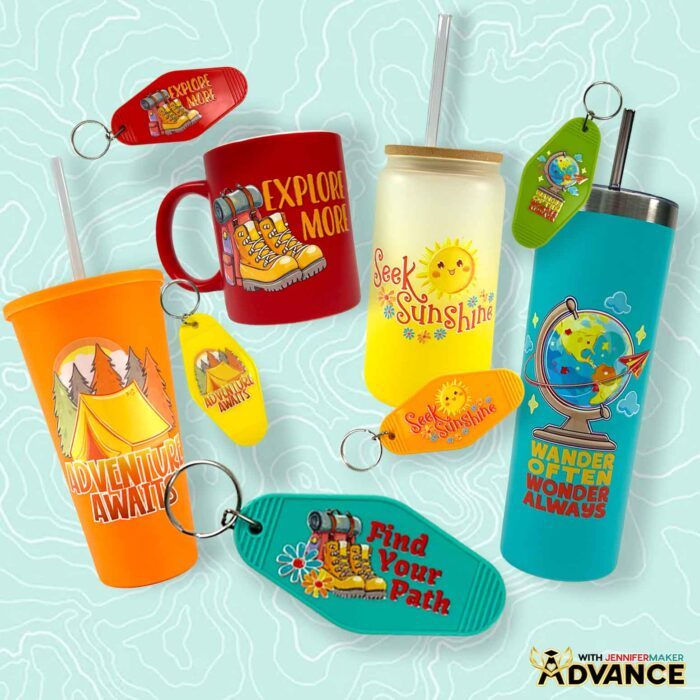
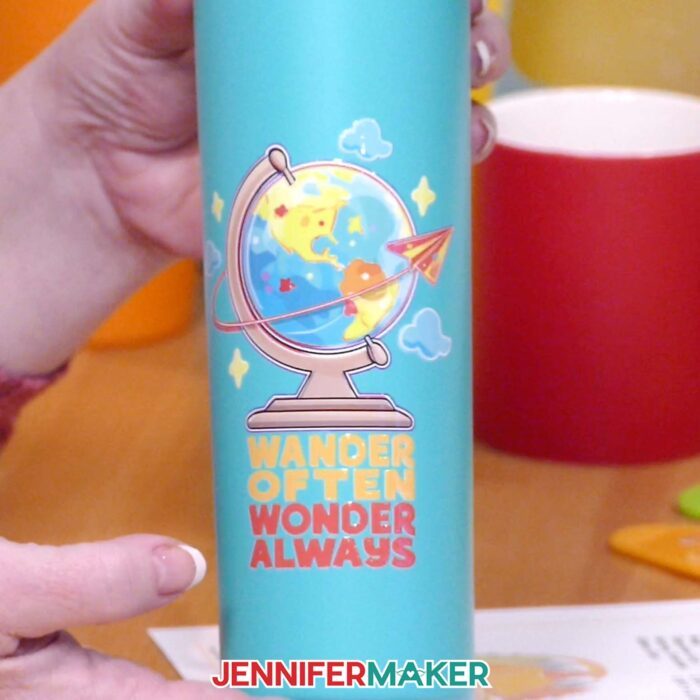
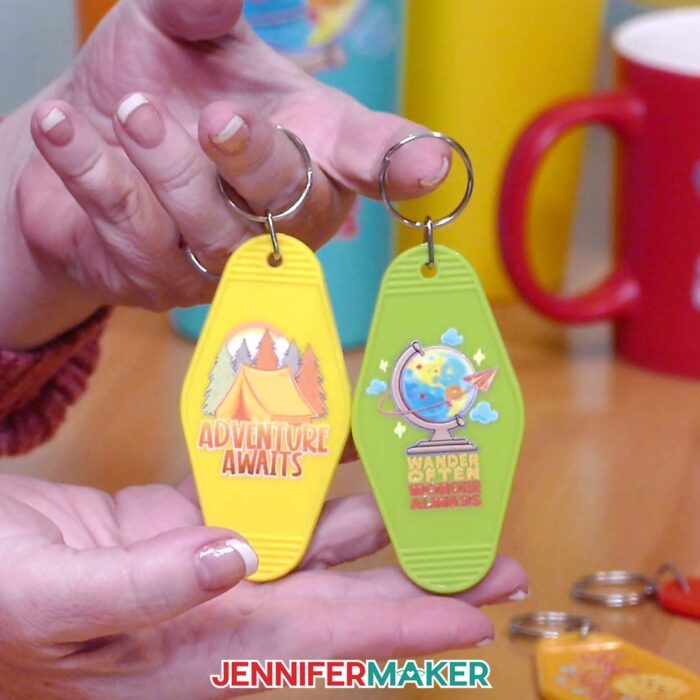
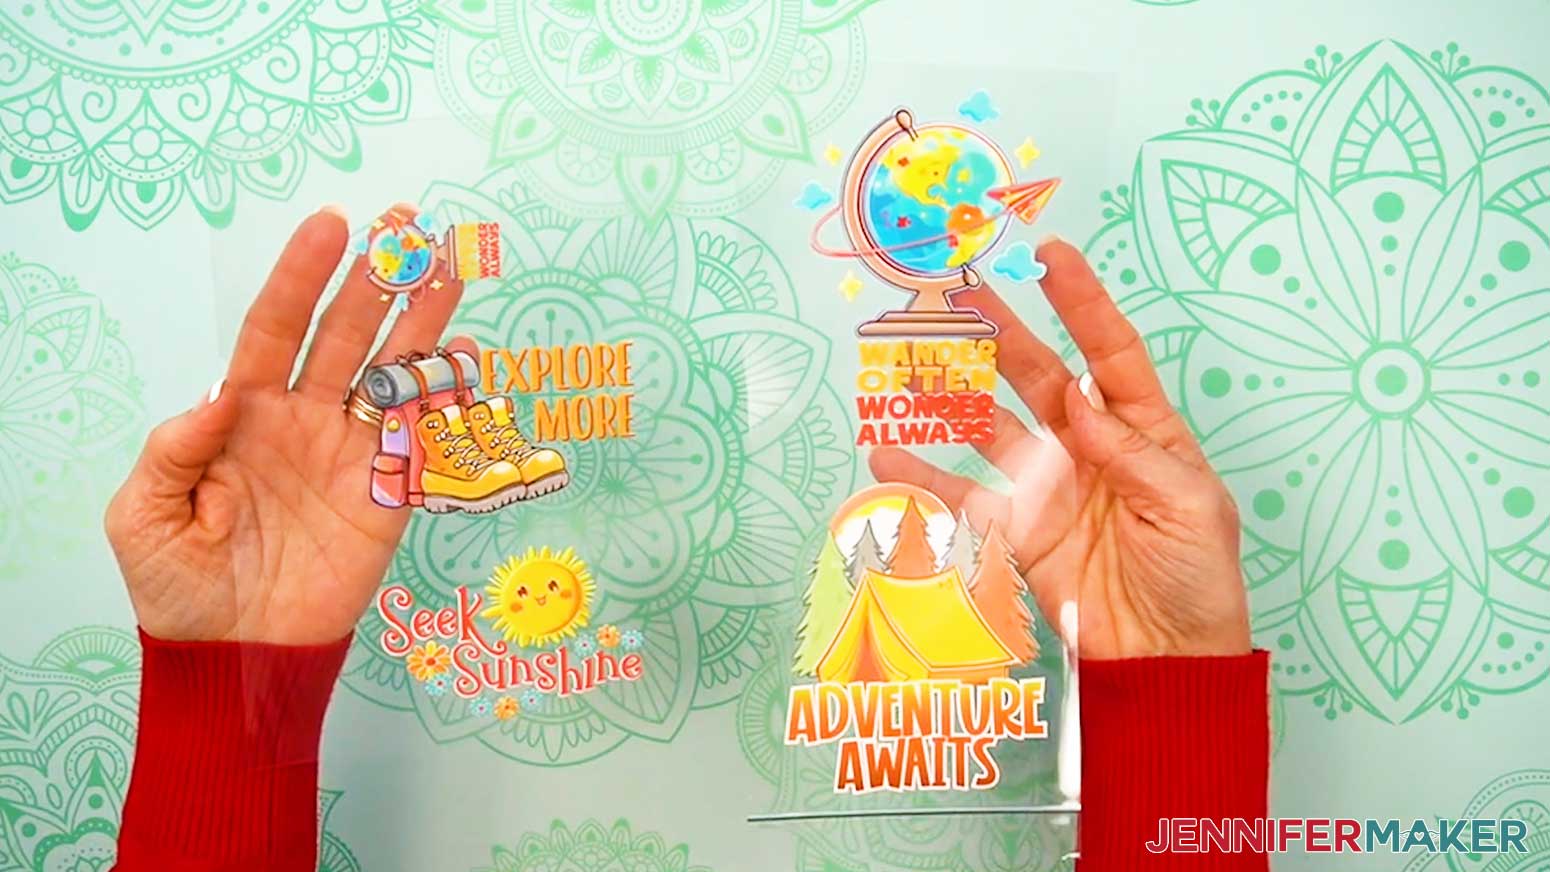
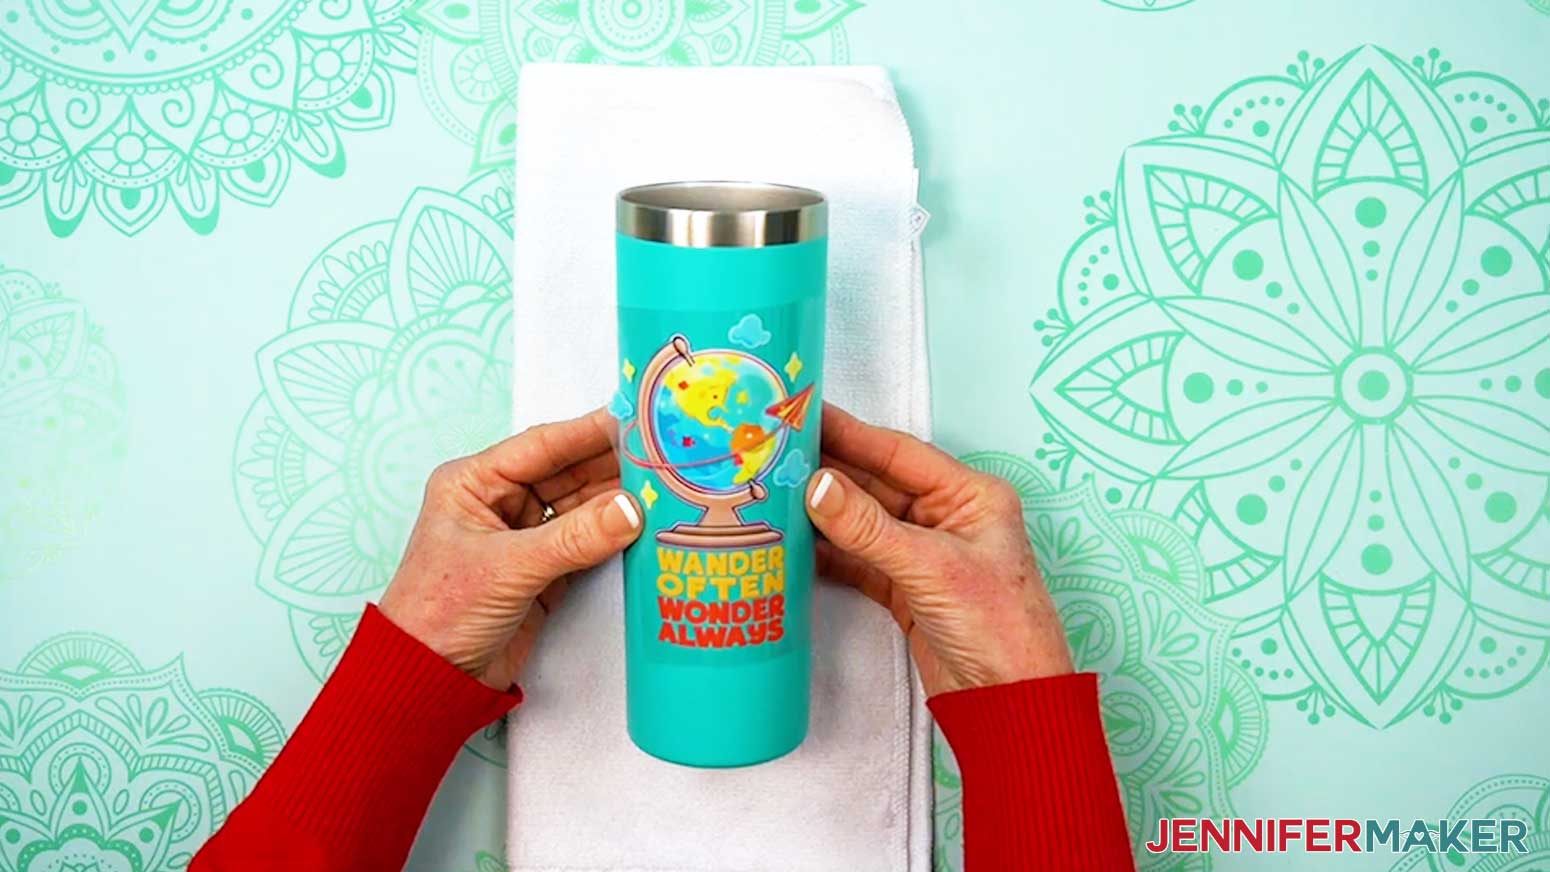
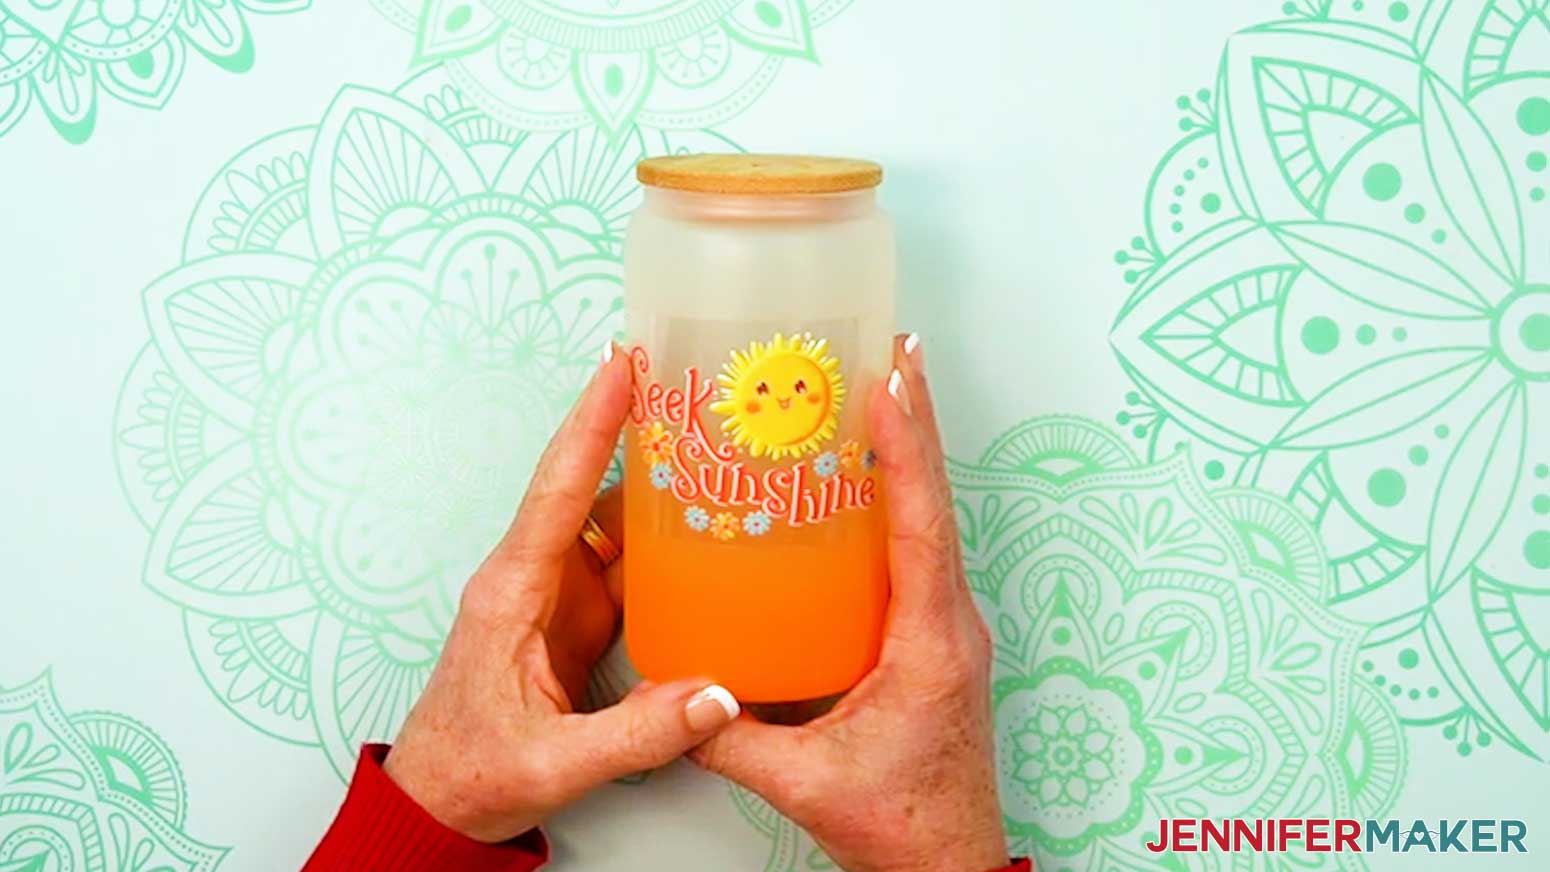
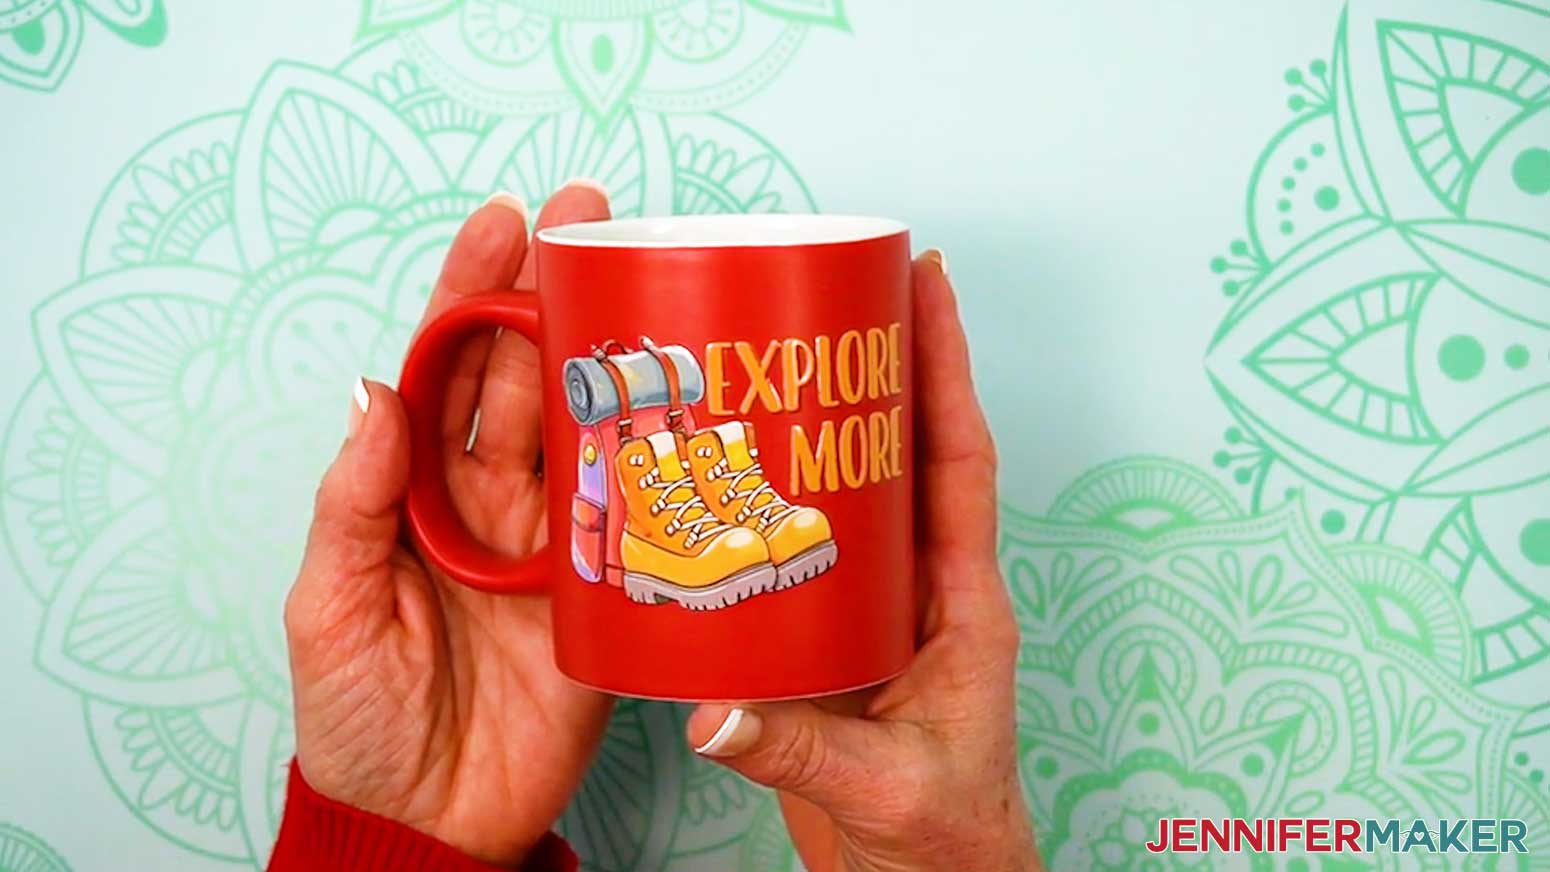
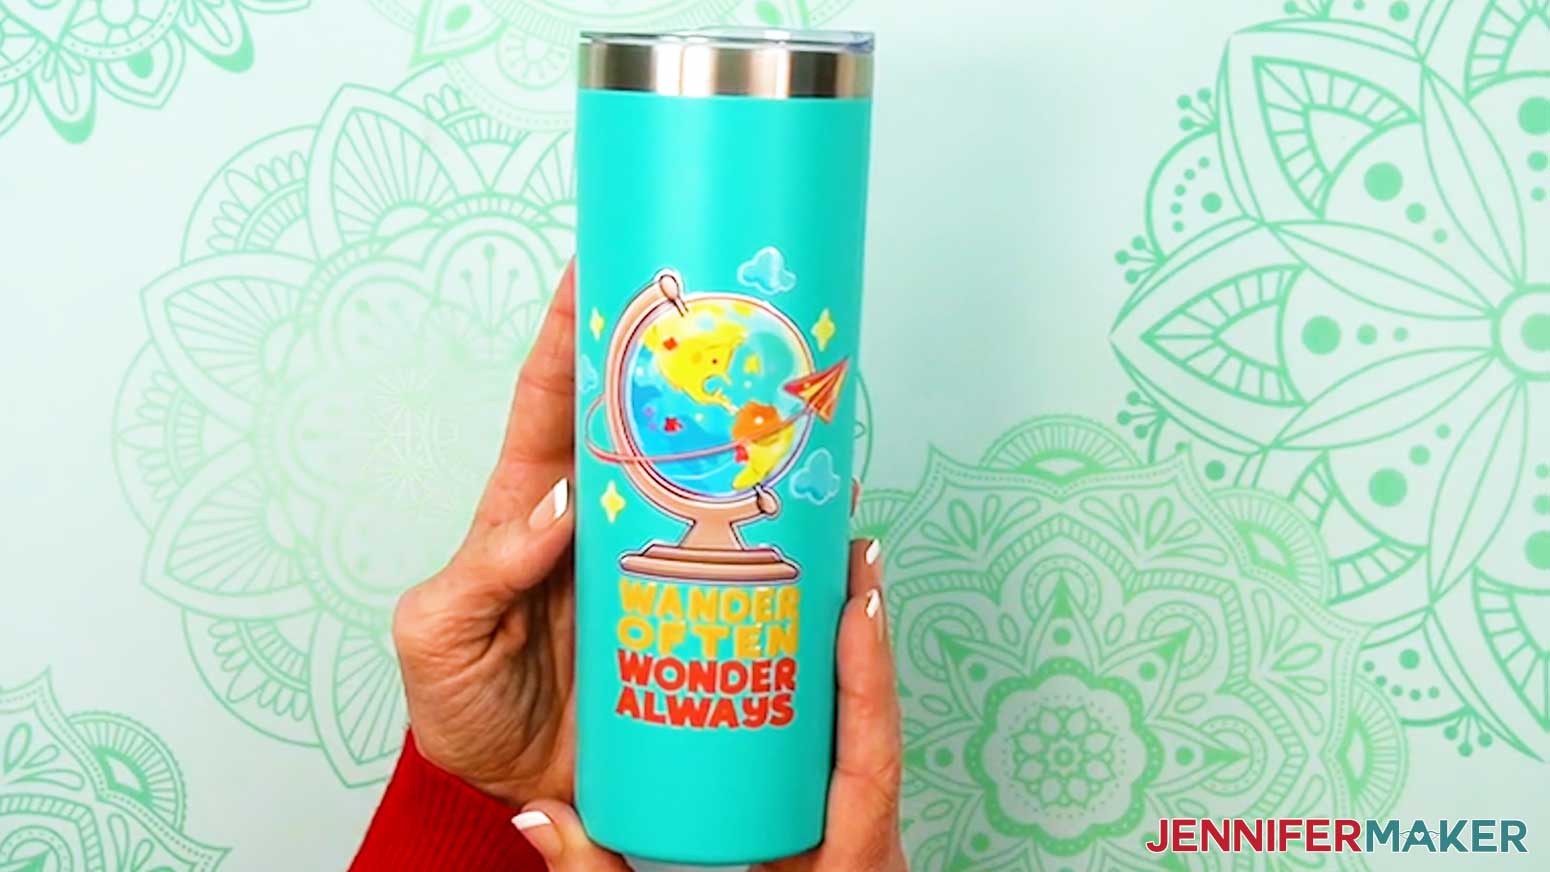
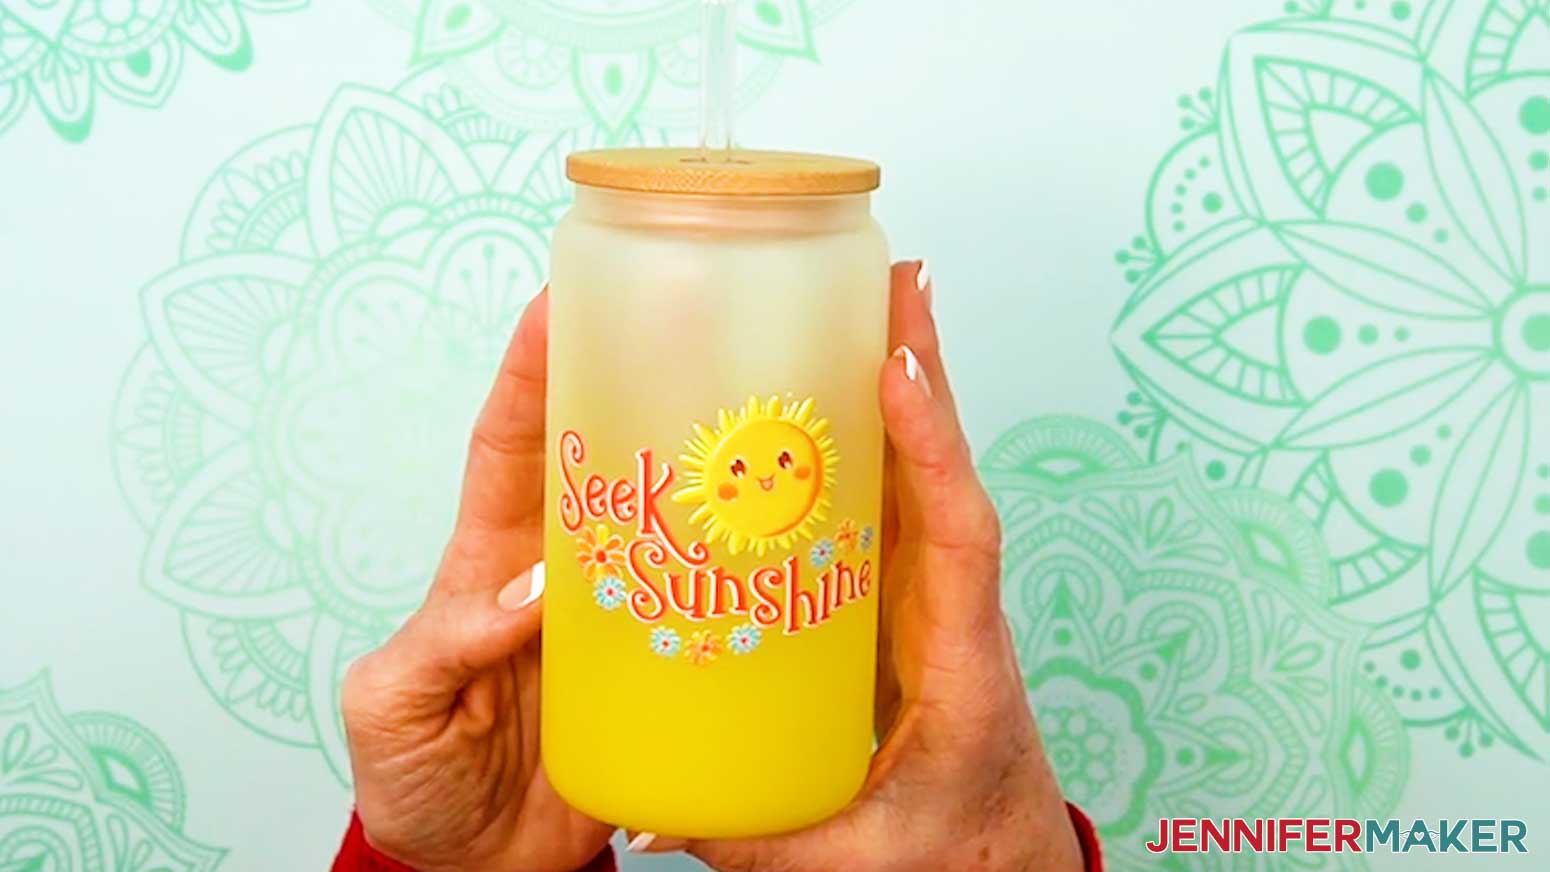
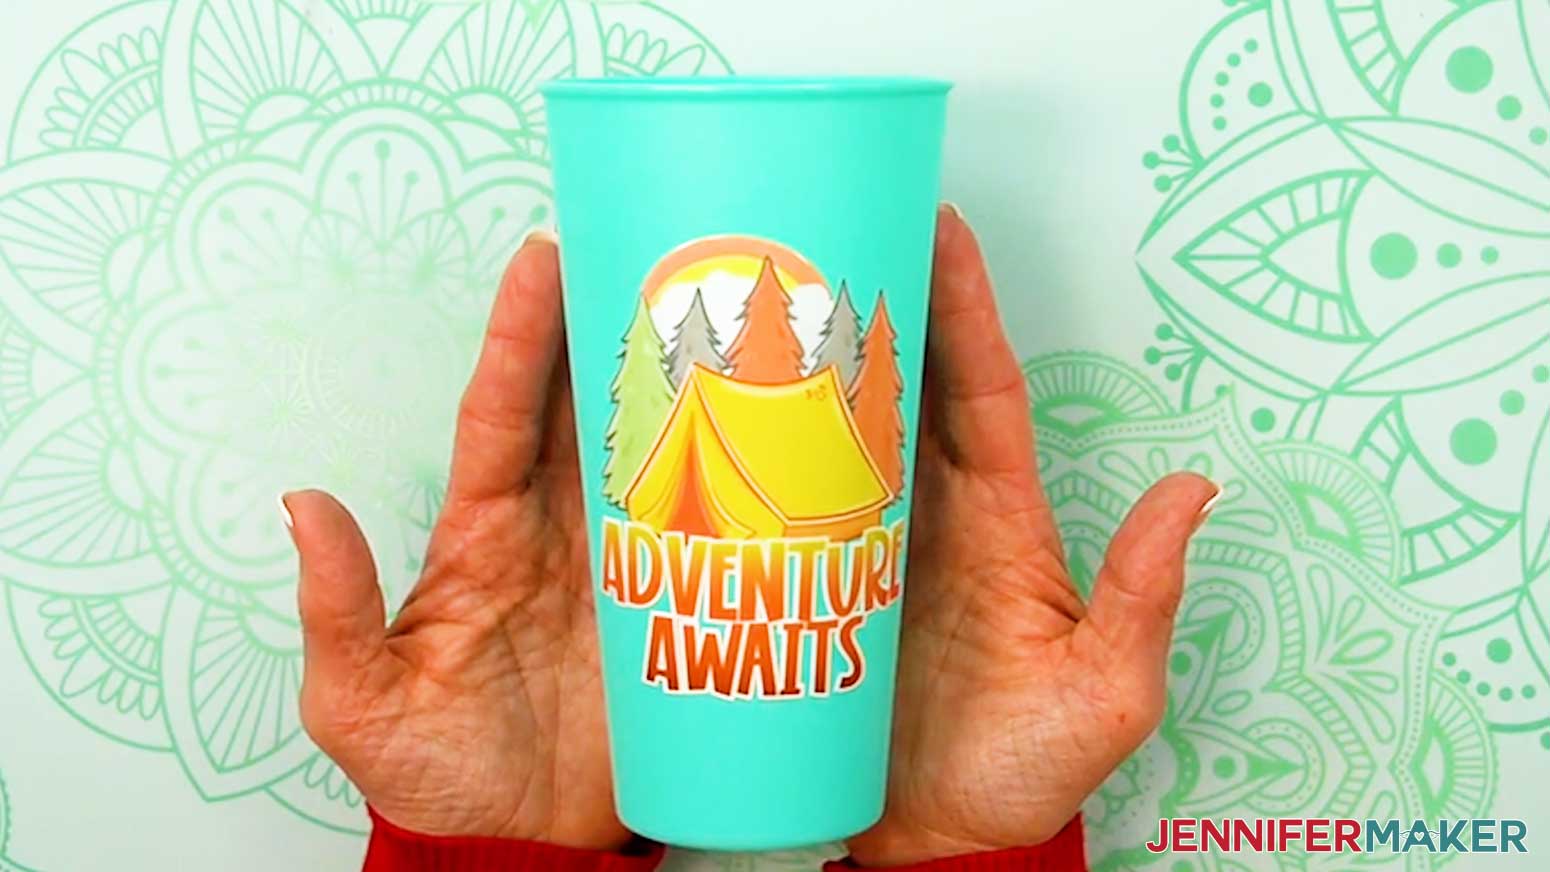
The four designs I created for this project each showcase how beautifully UV DTF printing works. “Adventure Awaits” is bold and energetic, and its horizontal design makes it ideal for tall drinkware where the design can stand alone. “Explore More” has a balanced layout that feels right at home on an everyday mug. “Seek Sunshine” is light and cheerful, and it really shines on frosted glass where the design almost floats. “Wander Often, Wonder Always” leans into fine detail, and that’s where UV DTF printing really flexes its muscles. Don’t forget: the free files are Design #769 in my resource library. Grab them now so you can follow along step by step.
Download includes:
✔️ 4 PNG decal designs (Design #769)
✔️ Measuring & sizing cheat sheet
✔️ Size guide for ordering designs to fit common blanks
Best Surfaces for UV DTF Decals
✔️ ceramic mugs
✔️ stainless tumblers
✔️ acrylic keychains
✔️ plastics
✔️ glass (note: curved surfaces require more care)
For this project, I wanted to show how well UV DTF decals perform on various surfaces, and I thought drinkware would be a perfect way to show off the designs! I tested the stickers on straight-sided ceramic mugs, stainless steel skinny tumblers, tapered plastic cups, frosted glass cans, and acrylic keychains. The results were consistent across the board. They adhered cleanly, followed curves beautifully, and felt smooth, but slightly raised, once finished. Having a wide range of surfaces to stick to is one of the unique benefits that makes UV DTF stickers so appealing.
In my video tutorial, I walk through uploading and ordering your UV DTF stickers using Ninja Transfers, and then teach you the proper application step by step once your stickers arrive. I also teach you how to trim your decal for easy handling, clean the application surface, and use tools to smooth down the design and avoid bubbles. And I show you my handy alignment trick using painters tape to make sure you get the positioning right the first time, every time. Once applied, the decal forms a strong bond with the surface, and the ink sits right on top. This creates durable designs that don’t require additional sealing. The ink is cured during printing, so there’s no post-application curing step — but hand washing is still best for long-lasting results.
Once you’re comfortable applying these designs, ADVANCE members can learn how to create their own custom UV DTF artwork from scratch Learn more about ADVANCE with JenniferMaker here!
Compared to a traditional print method, using UV DTF printing to create high-quality designs feels almost effortless. You’re not adjusting pressure, temperature, or layers. You’re focusing on placement and design, which is where creativity should live. If you’re curious but hesitant, I strongly recommend watching the video tutorial before trying it yourself. Seeing the process in action makes everything click. One successful application is usually all it takes before you start looking around your craft room and thinking, “What can I decorate next?”
UV DTF Troubleshooting (Quick Fixes)
- Decal won’t release from carrier → re-squeegee firmly, try peeling from a different angle
- Bubbles → squeegee from center outward
- Small pieces lift → lay carrier back down and press again
- Crooked placement → prevention only (use painter’s tape hinge method)
Do you want to learn how to prepare, order, and apply UV DTF printed stickers? Let me show you how fun and easy it is! This post contains some affiliate links for your convenience (which means if you make a purchase after clicking a link I will earn a small commission but it won’t cost you a penny more)! Read my full disclosure policy.
Materials to Make Drinkware and Keychains with UV DTF Printed Stickers
View my Amazon shopping list with the exact items I used.
- One (1) UV DTF Decal (I ordered mine from Ninja Transfers)
- One (1) 24 oz Plastic Cup -OR-
- One (1) 20 oz Stainless Steel Skinny Tumbler -OR-
- One (1) 16 oz Glass Can -OR-
- One (1) 12 oz Ceramic Mug -OR-
- One (1) 3.5” x 1.8” Acrylic Keychain
- Scissors
- Squeegee
- Isopropyl Alcohol
- Lint-Free Cloth
- Painter’s Tape
- Ruler or Measuring Tape
- Optional: Tumbler Cradle
- Optional: Weeding Tool
- Optional: Cricut Self-Healing Cutting Mat -OR-
- Optional: Scrap Cardboard (for keychain applications)
- Design #769 (My free PNG/PDF design files are available in my free library – get the password by filling out the form at the bottom of this page)
How to Make Drinkware and Keychains With UV DTF Stickers

What Is UV DTF Printing?
What is UV DTF Printing? Learn how to purchase and apply these permanent decals to a variety of materials!
Materials
- One (1) UV DTF Decal (I ordered mine from Ninja Transfers)
- One (1) 24 oz Plastic Cup -OR-
- One (1) 20 oz Stainless Steel Skinny Tumbler -OR-
- One (1) 16 oz Glass Can -OR-
- One (1) 12 oz Ceramic Mug -OR-
- One (1) 3.5” x 1.8” Acrylic Keychain
- Design #769 (My free PNG design files are available in my free resource library - get the password by filling out the form at the bottom of this page)
Tools
- Scissors
- Squeegee
- Isopropyl Alcohol
- Lint-Free Cloth
- Painter’s Tape
- Ruler or Measuring Tape
- Optional: Tumbler Cradle
- Optional: Weeding Tool
- Optional: Cricut Self-Healing Cutting Mat -OR-
- Optional: Scrap Cardboard (for keychain applications)
Instructions
STEP 1: GET MY FREE UV DTF DESIGNS
First, download my UV DTF Printing files from my free library – look for Design #769. Alternatively, you can use the Save This Project form near the top of this post and the design link will be emailed to you.
In the PNG folder, you’ll find my “adventure,” “explore,” “sunshine,” and “wander” designs. All four designs are high-quality PNGs with the background removed, perfect for use with UV DTF printing. I made these designs with the help of AI art generation and adjusted them with image editing software.
There is also a PDF folder containing my “How to Measure & Size Designs” and “UV DTF Order Sizes” cheat sheets.
TIP: If you’re not sure how to unzip, go to jennifermaker.com/svgs to learn how to unzip files.
STEP 2: ORDER A UV DTF PRINT
NOTE: Unlike regular DTF printing, which requires adhesive transfer powder that can be harmful if inhaled, UV DTF printing uses special inks that are cured instantly when exposed to ultraviolet light. This makes them relatively safer to create at home. However, it can still be costly to set up UV DTF printing at home, so I recommend ordering your UV DTF decal from a third party print service. There are several options available, but I’ll show you how to order through the Ninja Transfers website, which I have used and trust.
- Measure your blank’s design area.
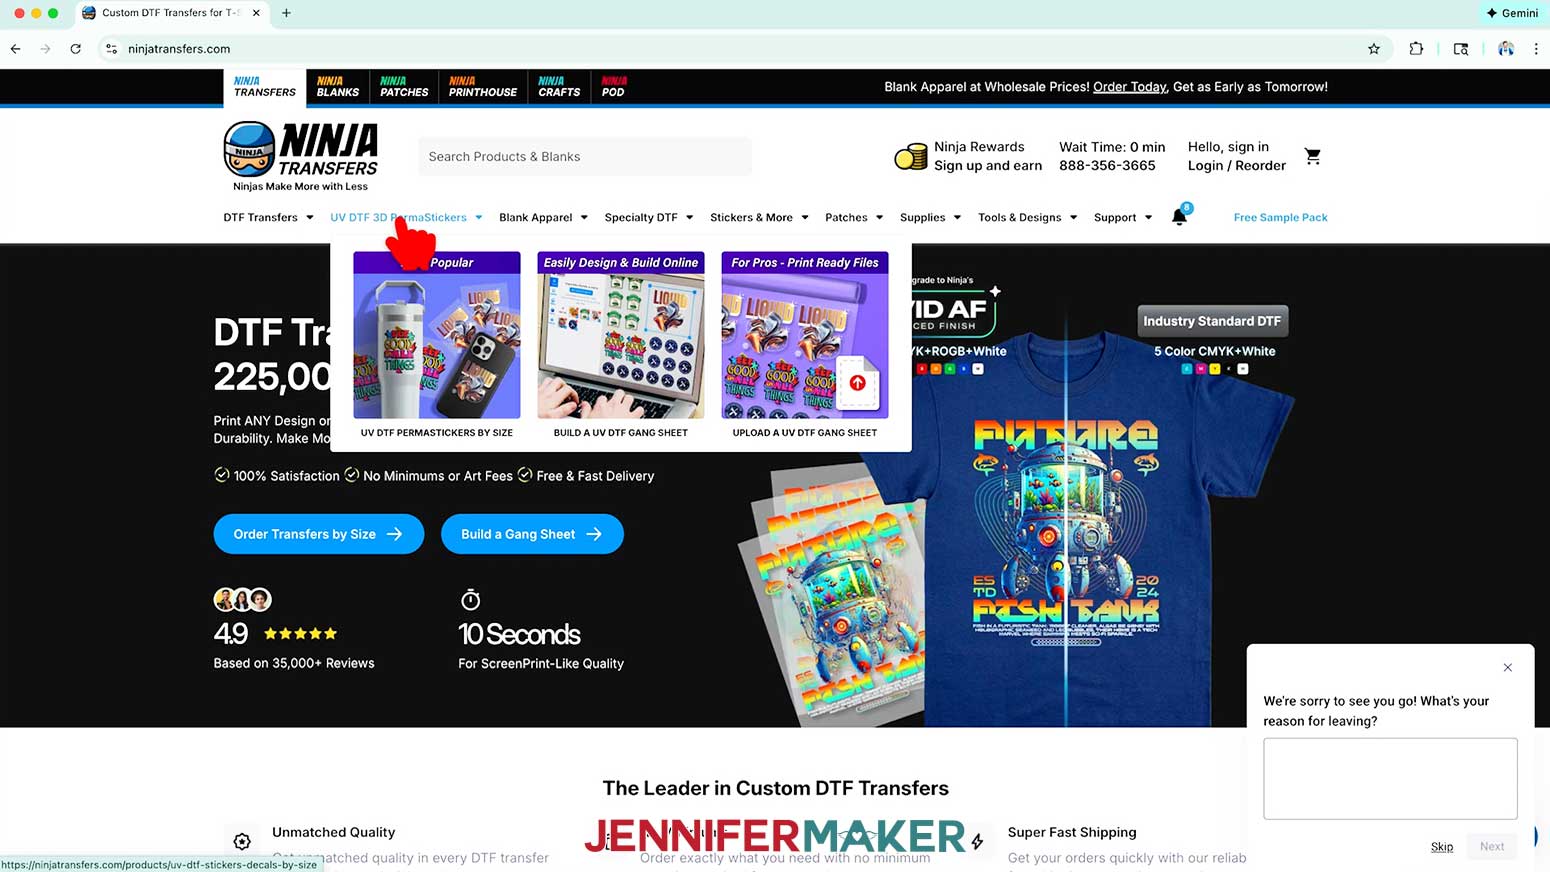
NOTE: For details on measuring different blanks, see the “How to Measure & Size Designs” cheat sheet in the PDF folder. - Open the Ninja Transfers website in your computer’s web browser.
- Click “UV DTF 3D PermaStickers” to create a UV DTF decal.
NOTE: Make sure to click the option with “UV” in the title. Regular DTF is a completely different printing and application process. You can learn more about DTF printing in my How to Make DTF Shirts tutorial.
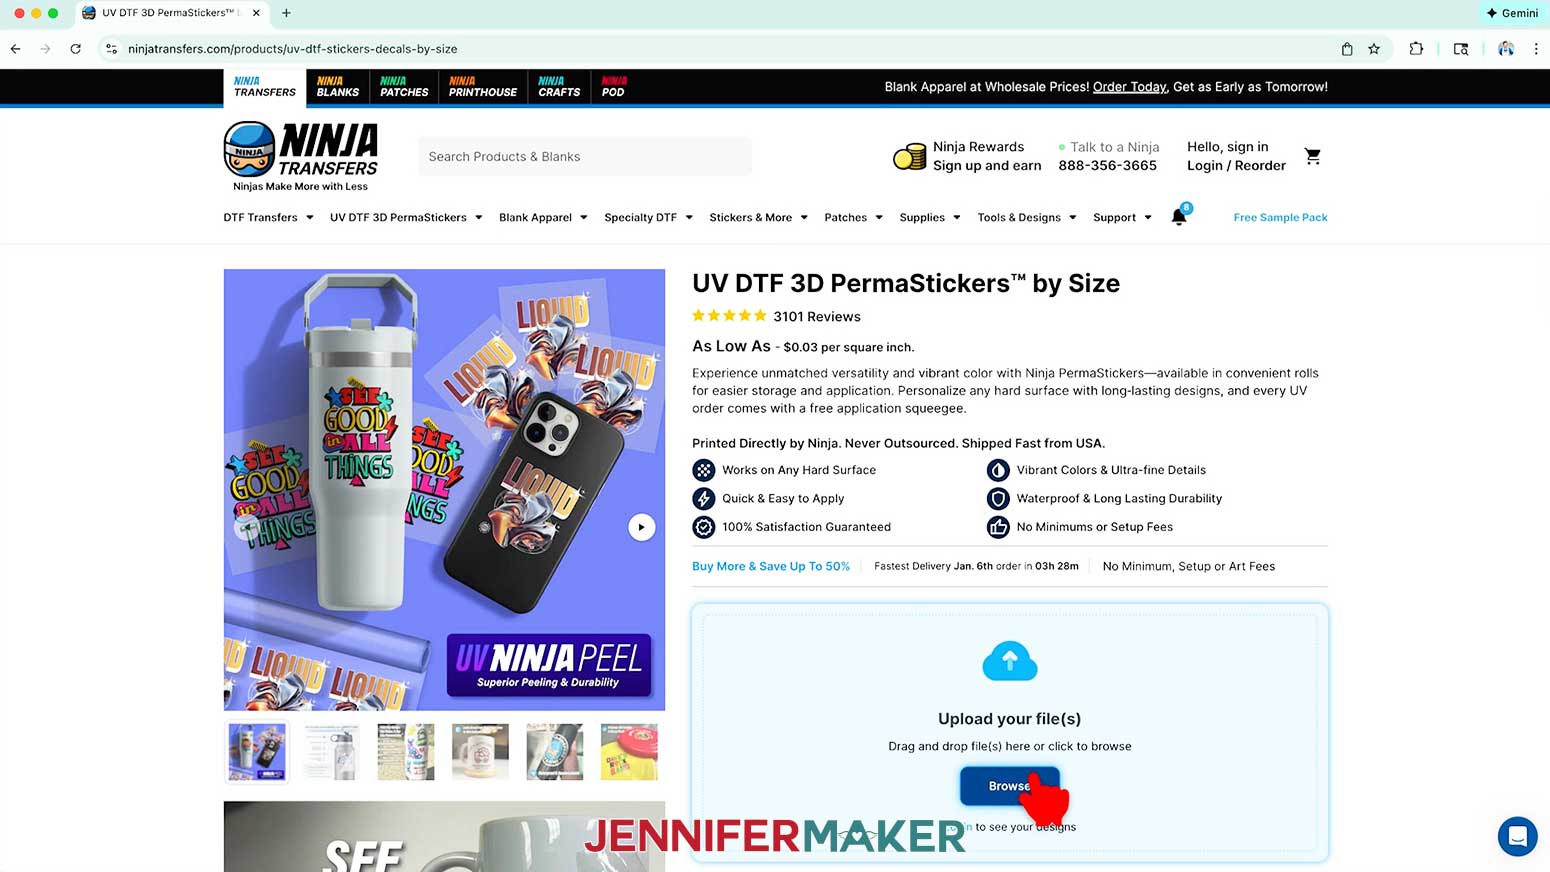
- In the “Upload your file(s)” section, click “Browse.”
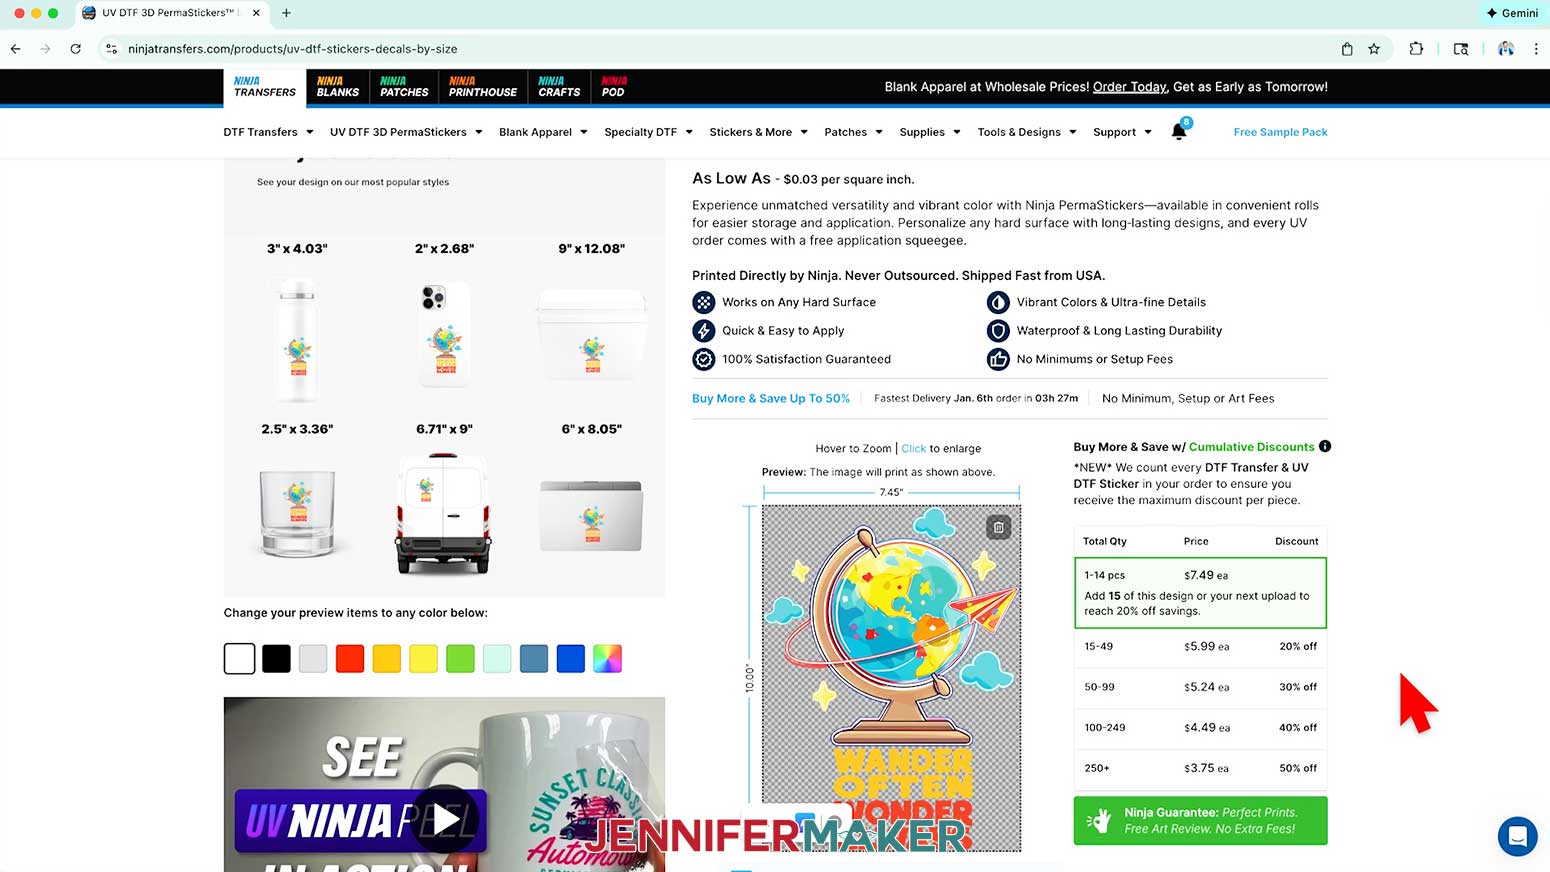
- Select the PNG image file of your choice. I recommend using a high-quality PNG with a transparent background like the ones in my design folder for the best results, but you can also use PDF, JPG, and SVG files with at least 300 DPI image quality.
NOTE: I’ll pick the “wander” PNG, but you can use these steps for any of my designs or similar files.
NOTE: If you use a JPG or an image with a background, Ninja Transfers may try to remove the background automatically. That’s expected behavior, but for this project, starting with a transparent PNG will give you the cleanest and fastest results. - Click “Open” to upload the design. Once it’s finished loading, it will appear in the print preview window on your screen at the maximum recommended size.
- Open my “UV DTF Order Sizes” PDF to see my recommended dimensions for each design based on the blanks in my supplies list.
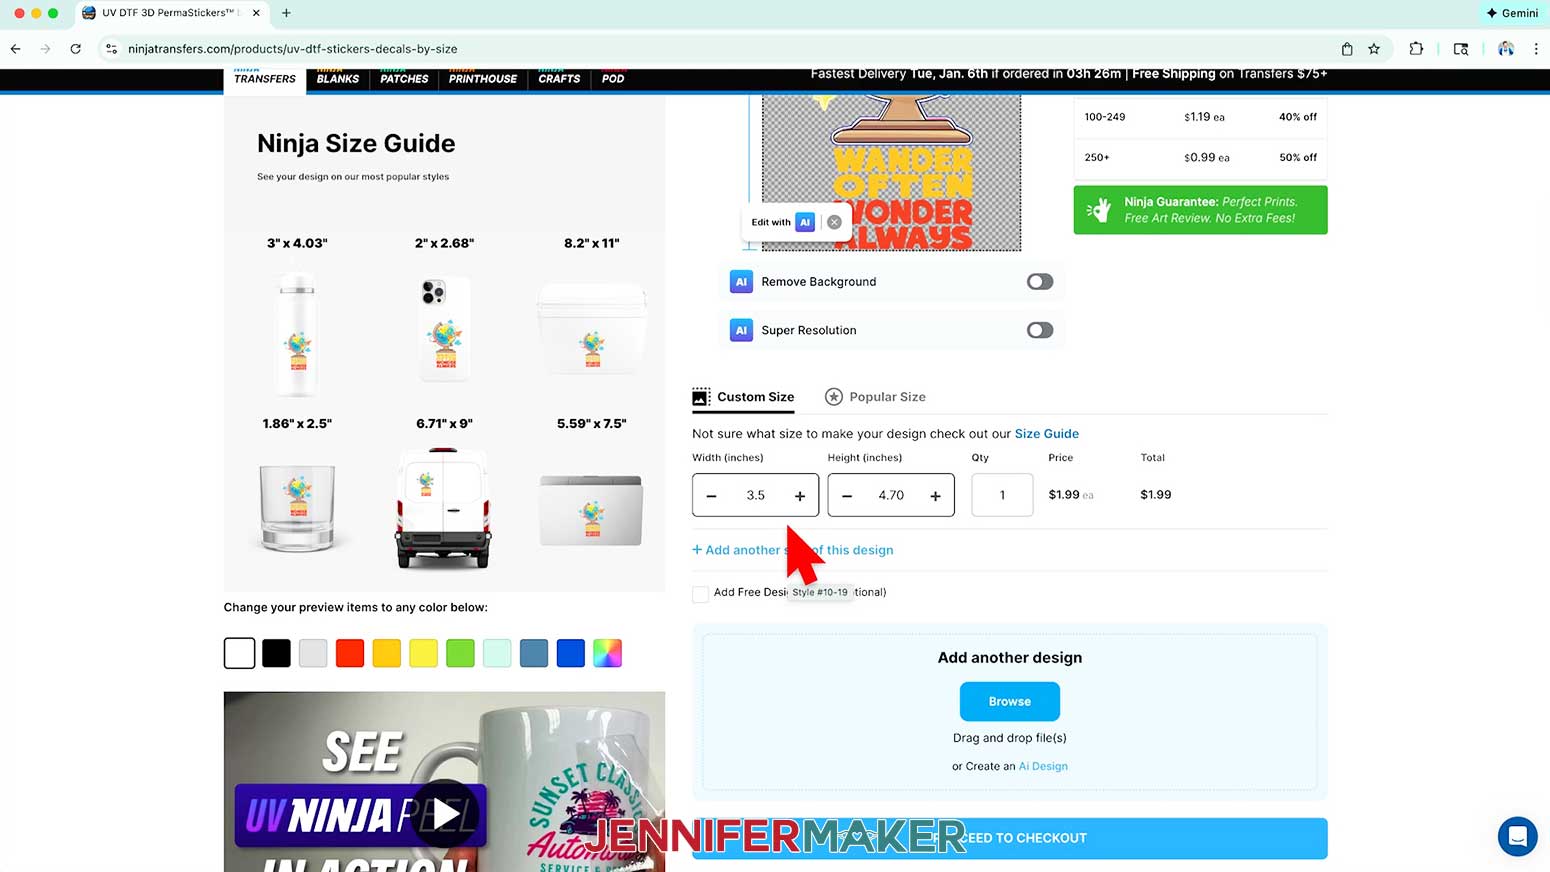
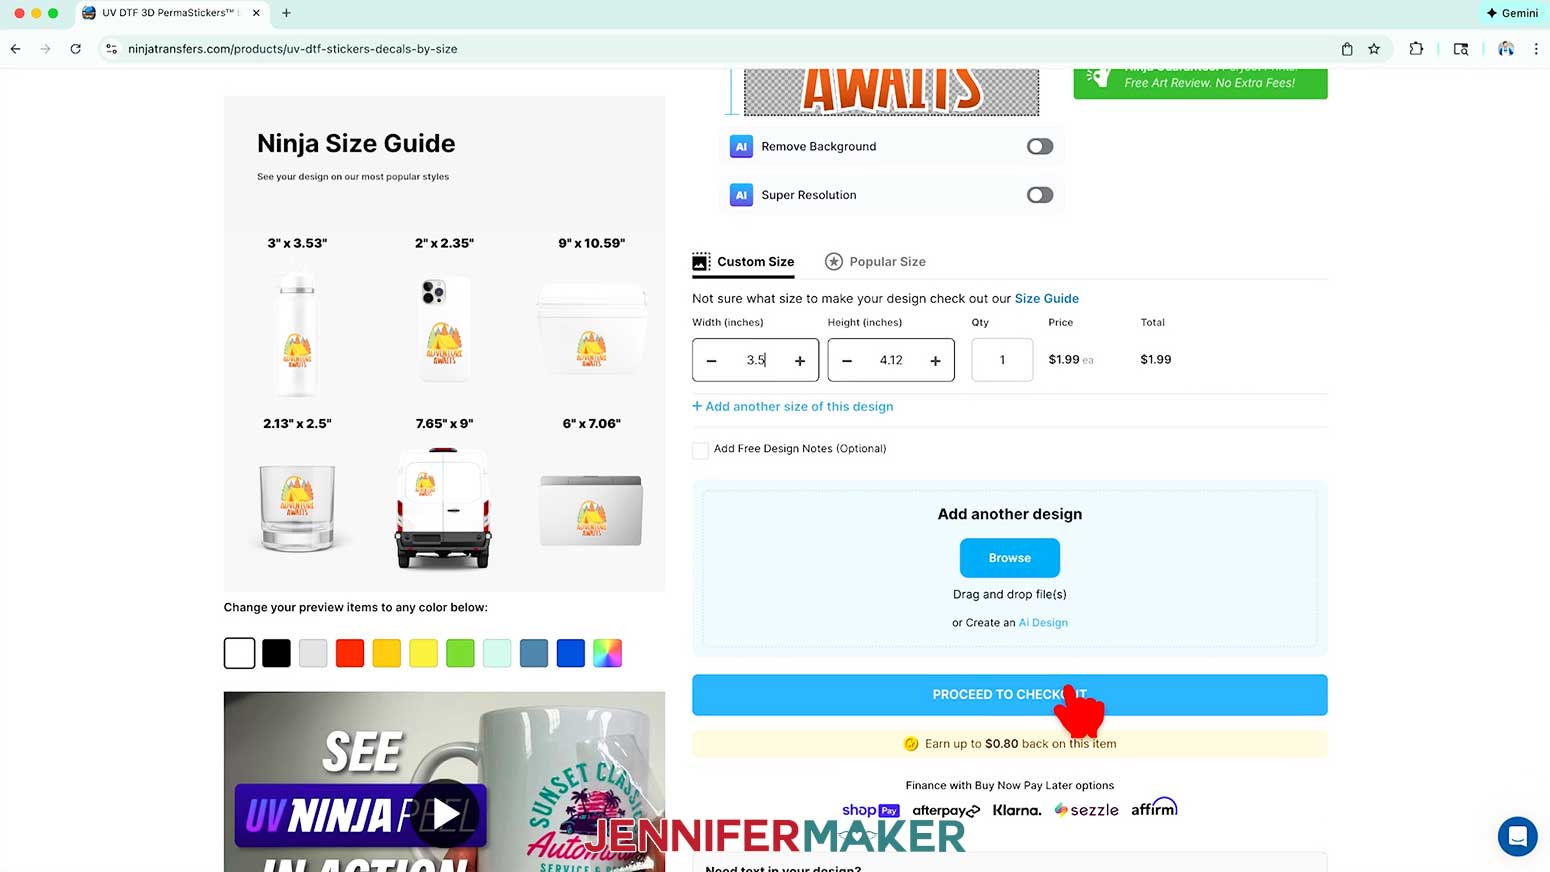
- Under “Custom Size,” change the value in the “Width (inches)” field to match the width of the decal you want to create for the design you’ve chosen. The “Height (inches)” field will automatically adjust proportionally.
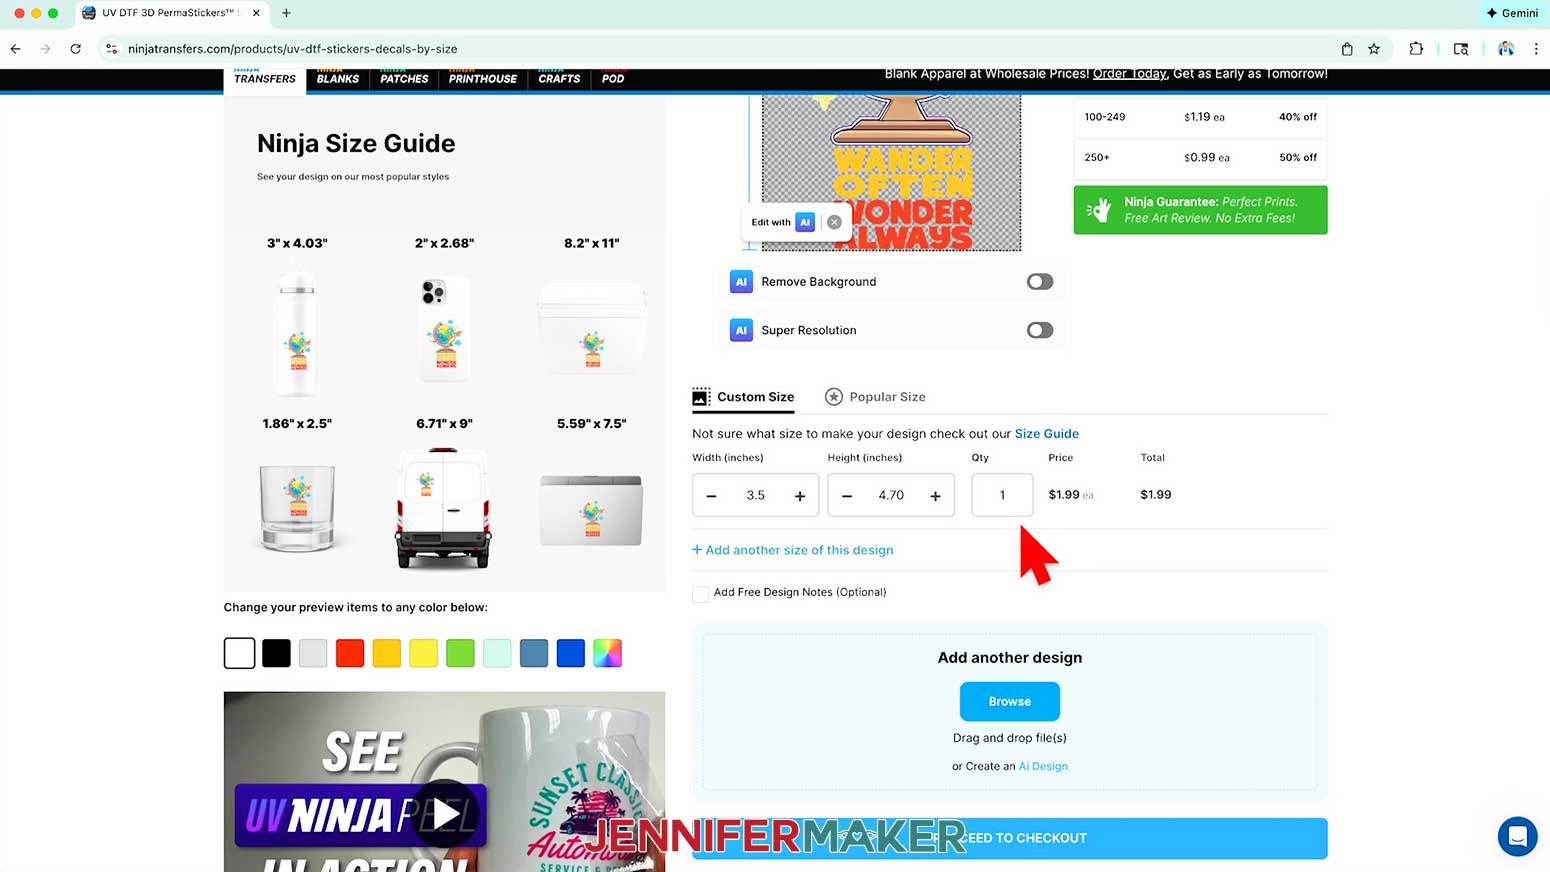
NOTE: I’ll enter “3.5” in the “Width (inches)” field to print a “wander” decal for a skinny tumbler. - Enter the number of decals you’d like to order in the “Qty” (quantity) field. Ninja Transfers automatically updates the cost to order the set number of decals and adds the decals to your cart.
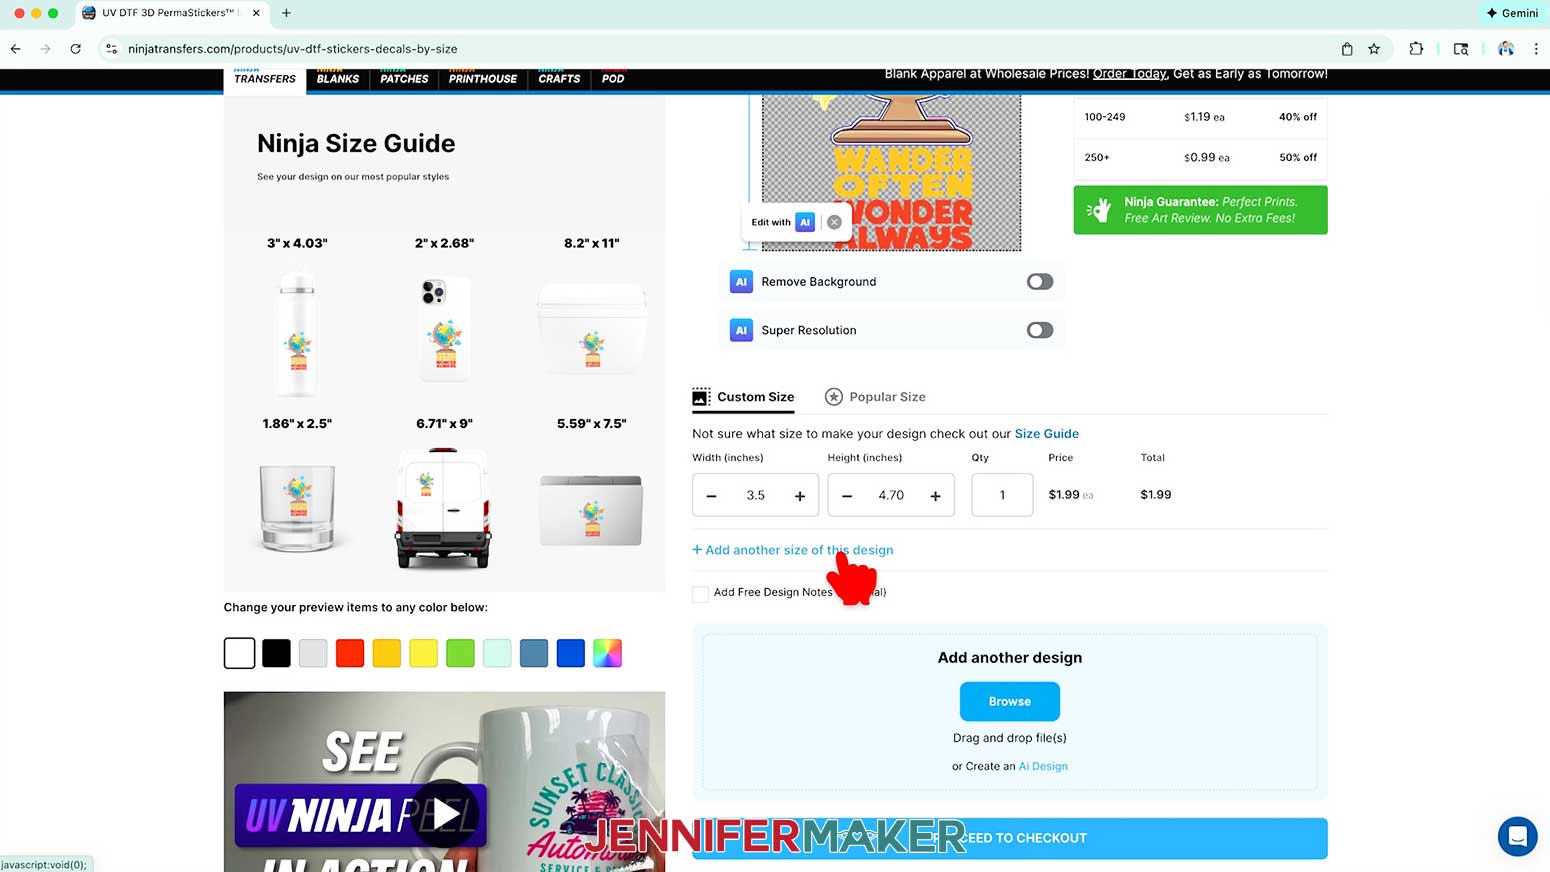
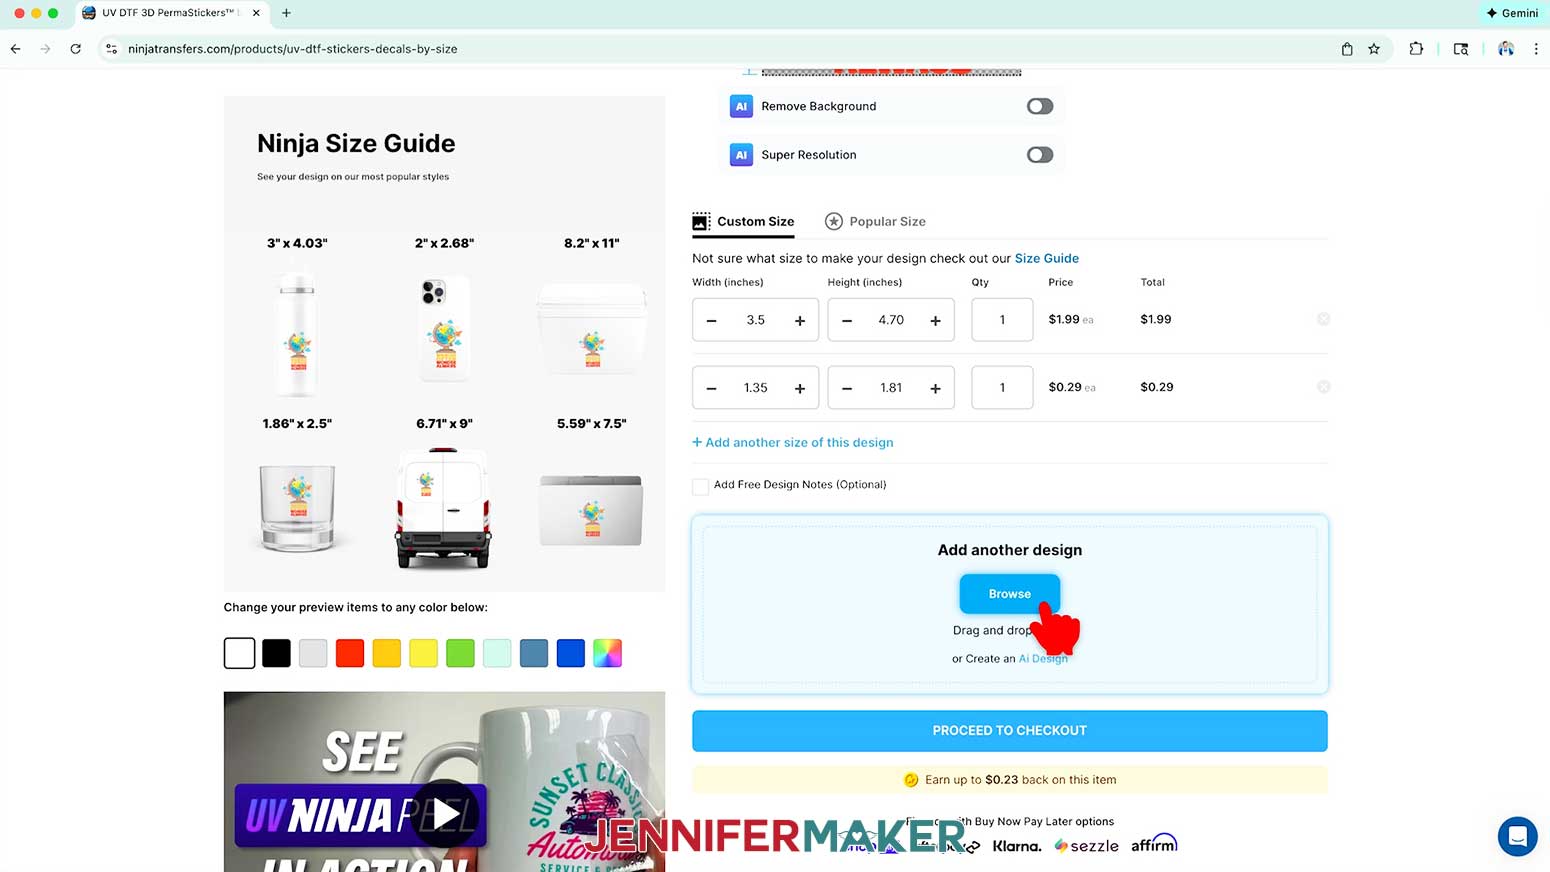
NOTE: I’ll set mine to “1.” - If you’d like to use the same design to create a decal of a different size, click “Add another size of this design.”
- Repeat Steps 7-9 to set the size and quantity of decals you want to add.
NOTE: I’ll set my “Width (inches)” field to “1.35” to print a “wander” decal for a keychain, and set the “Qty” to “1.” - If you’d like to use a different design to create a decal, click “Browse” under “Add another design.”
- Repeat Steps 5-9 to choose a design and set the size and quantity options for the decal.
NOTE: I’ll choose the “explore,” design, set the “Width” to “3.5” to print a decal for a ceramic mug, and set the “Qty” to “1.” - When you’re finished adding your decals, click “Proceed to Checkout.”
- Check that your designs, sizes, and quantities are correct and make any adjustments if needed.
- Click “Checkout.”
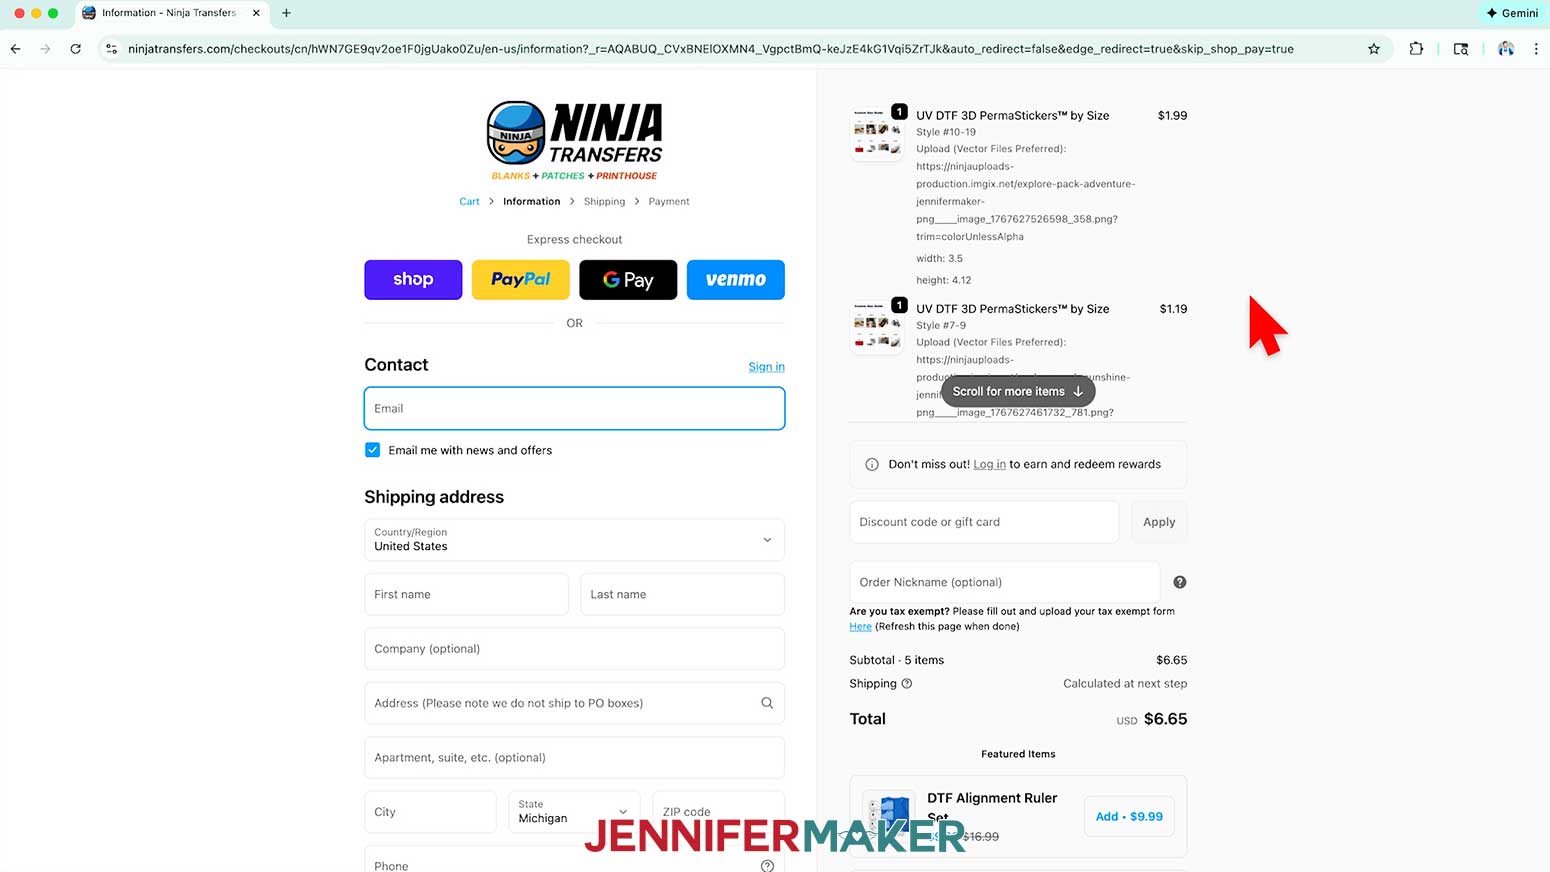
- Fill in your contact details and address on the “Information” page, then click “Continue to shipping.”
- Choose your shipping options on the “Shipping” page, then click “Continue to payment.”
- Fill in your payment details on the “Payment” page.
- Click “Place Your Order.”
NOTE: A confirmation window will pop up to let you know your order has been placed successfully. - When your package arrives, open it up and pull out the materials with your decals to see how they turned out, but don’t separate any layers!
NOTE: Your decals come sandwiched between two sheets of plastic, called a “gang sheet.” The sheet covering your decal’s pretty side is the adhesive carrier sheet, while the other is a non-adhesive backing sheet. Be careful not to pull the sheets apart until you’re ready to apply the decal.
STEP 3: APPLY YOUR UV DTF DECAL TO A BLANK
PREPARE YOUR UV DTF DECAL AND BLANK
NOTE: UV DTF transfers are permanent. Unlike vinyl, you can’t lift up and readjust them once they touch a blank’s surface. To help minimize the risk of a failed decal transfer, I’ll show you my best practices for positioning the decals on each of the blanks in my supplies list.
- Find your UV DTF decal on the gang sheet and trim it into a rectangle, leaving approximately ½” of both gang sheet layers around the design.
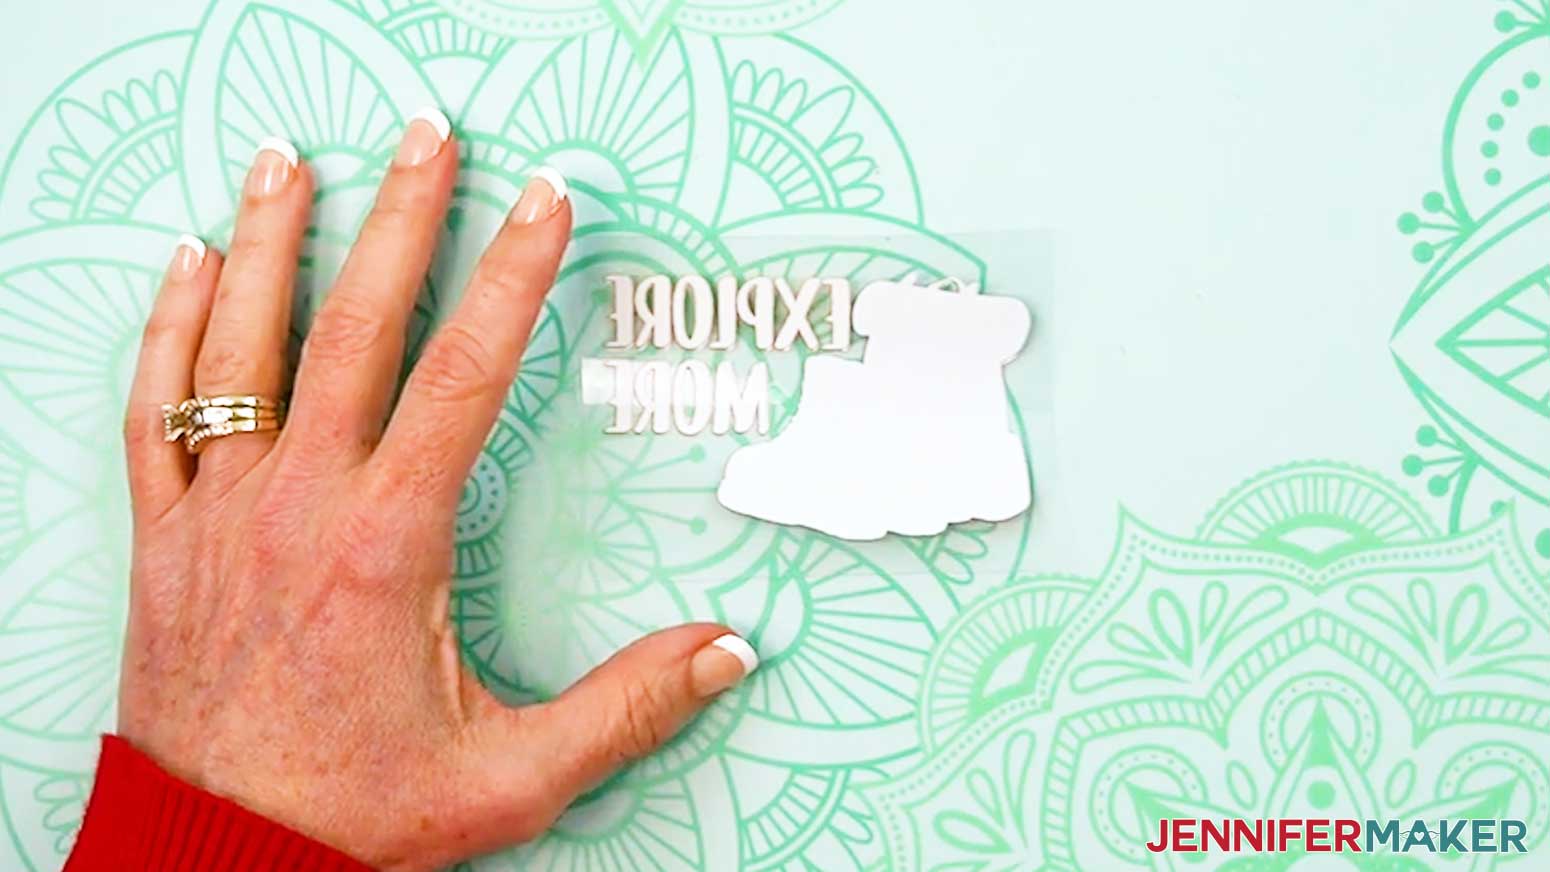
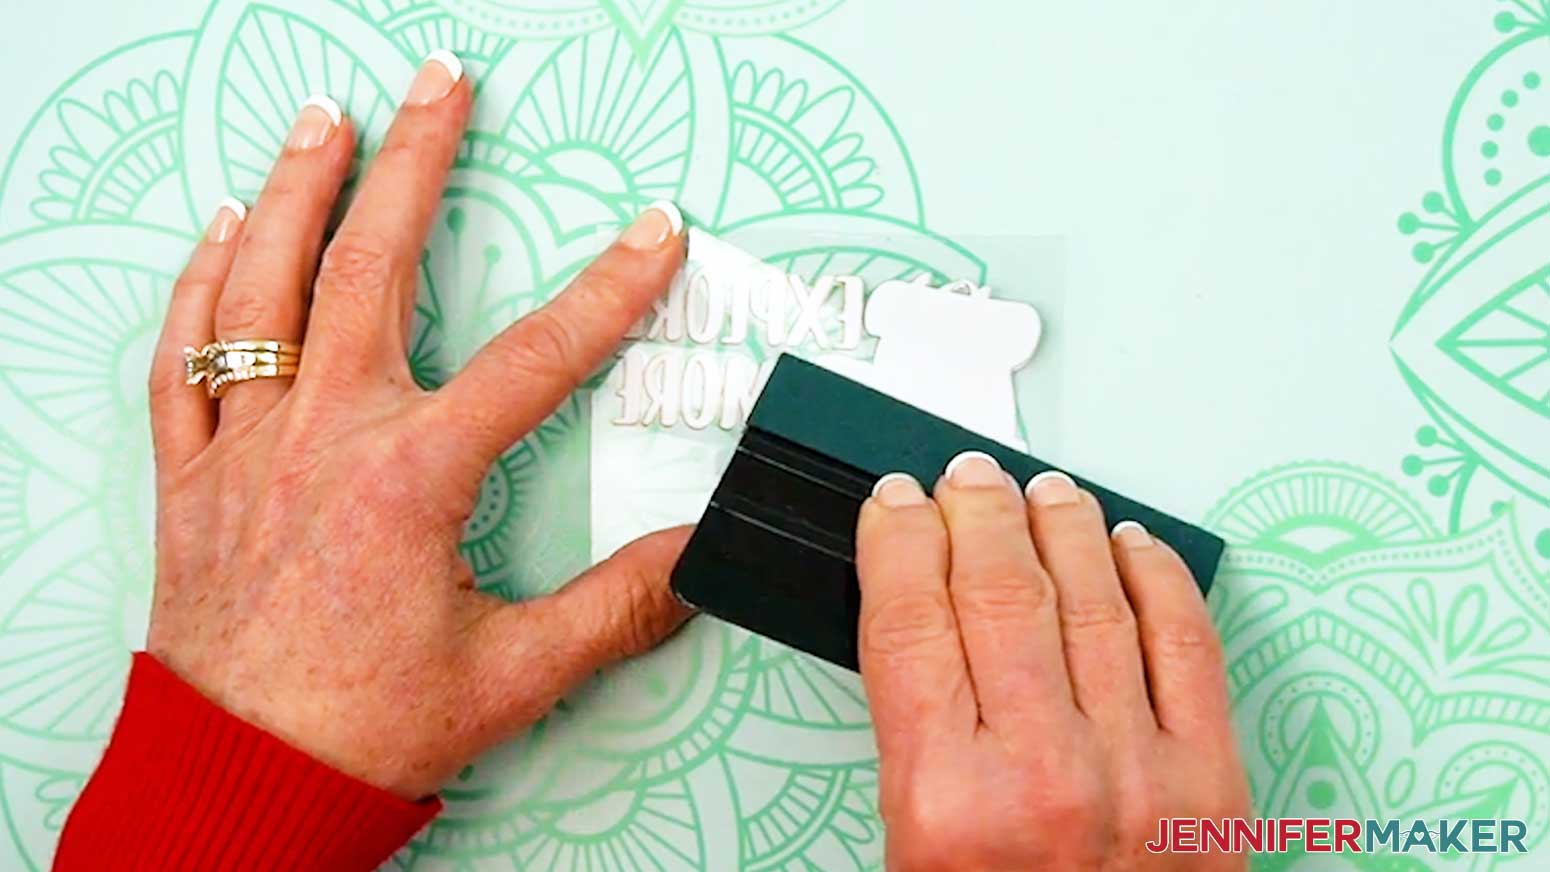
- Place the decal face down on your work surface.
- Use the felt edge of the squeegee to press the decal onto the carrier sheet.
- Use isopropyl alcohol and a lint-free cloth to clean your blank’s surface.
NOTE: Ninja Transfers recommends cleaning your blanks with rubbing alcohol diluted with water, but I found that 91% isopropyl alcohol works well for my blanks.
CERAMIC MUG, STEEL SKINNY TUMBLER, & GLASS CAN
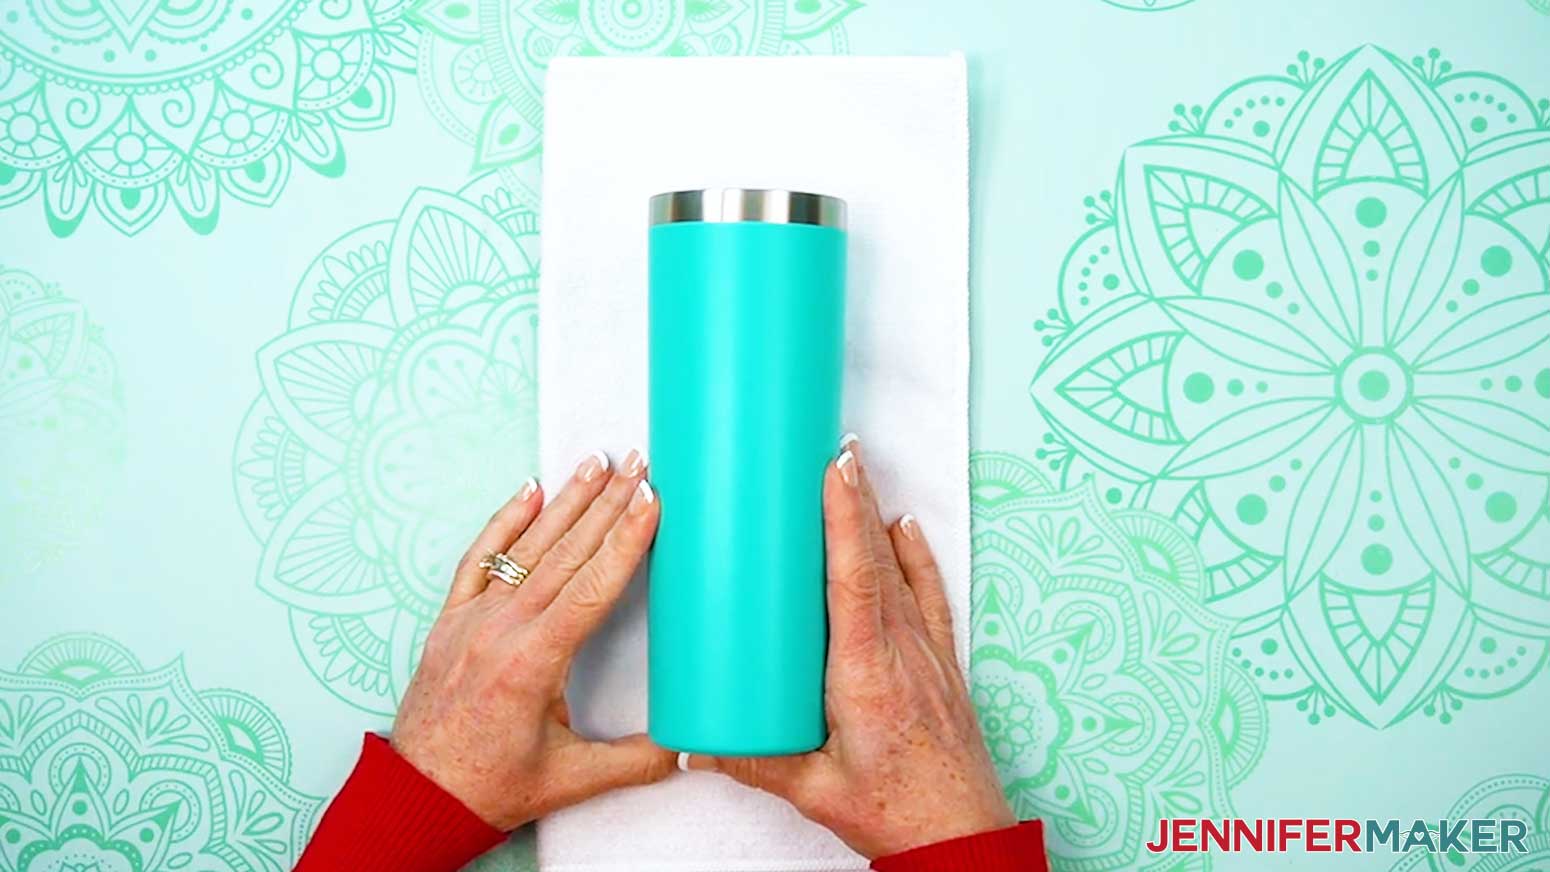
- Lay the blank on a towel or a tumbler cradle to keep it from moving around while applying your decal.
- Lay the decal face up on the blank’s surface where you want to apply it. Remember, the sticky area is still protected by the backing sheet!
TIP: Keep the decal away from the cup’s top edge so your lips don’t touch it while drinking.
NOTE: For the mug, I’ll center the decal on the side facing away from me when holding the handle in my right hand.
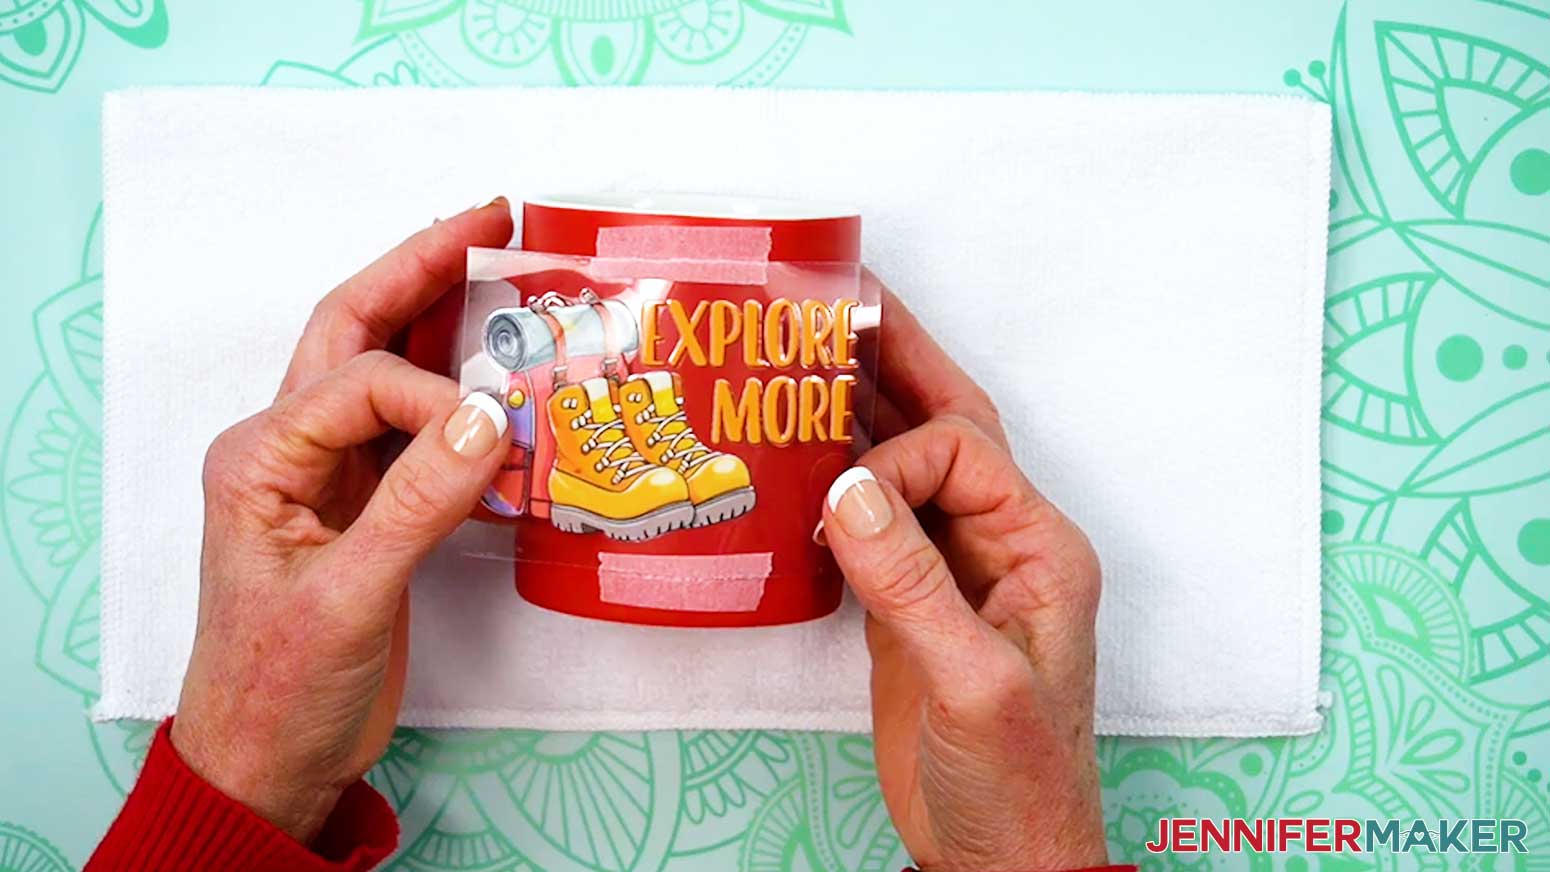
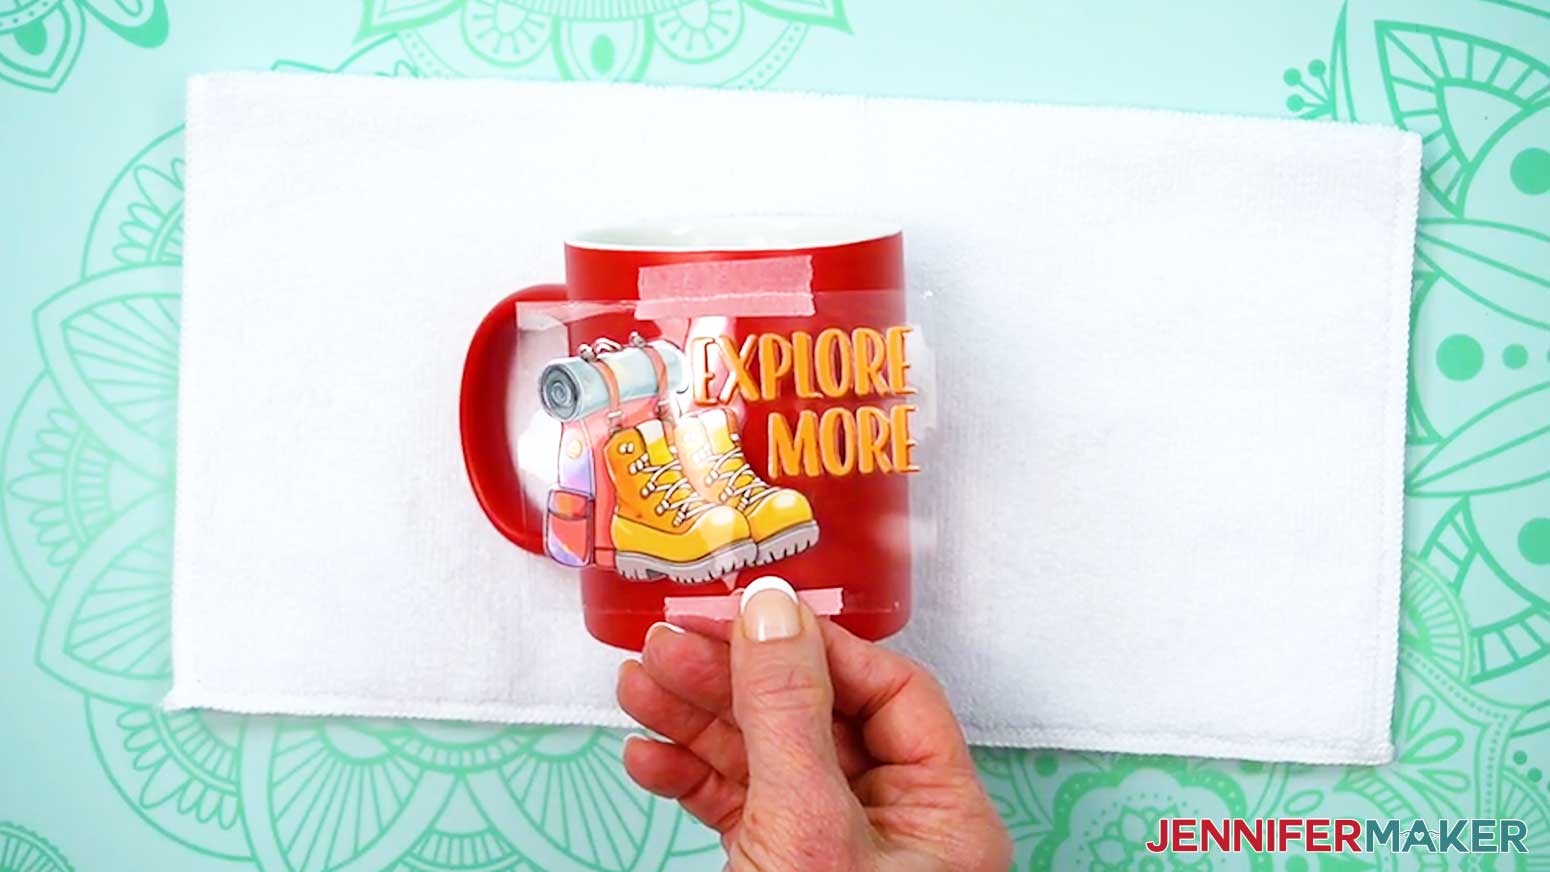
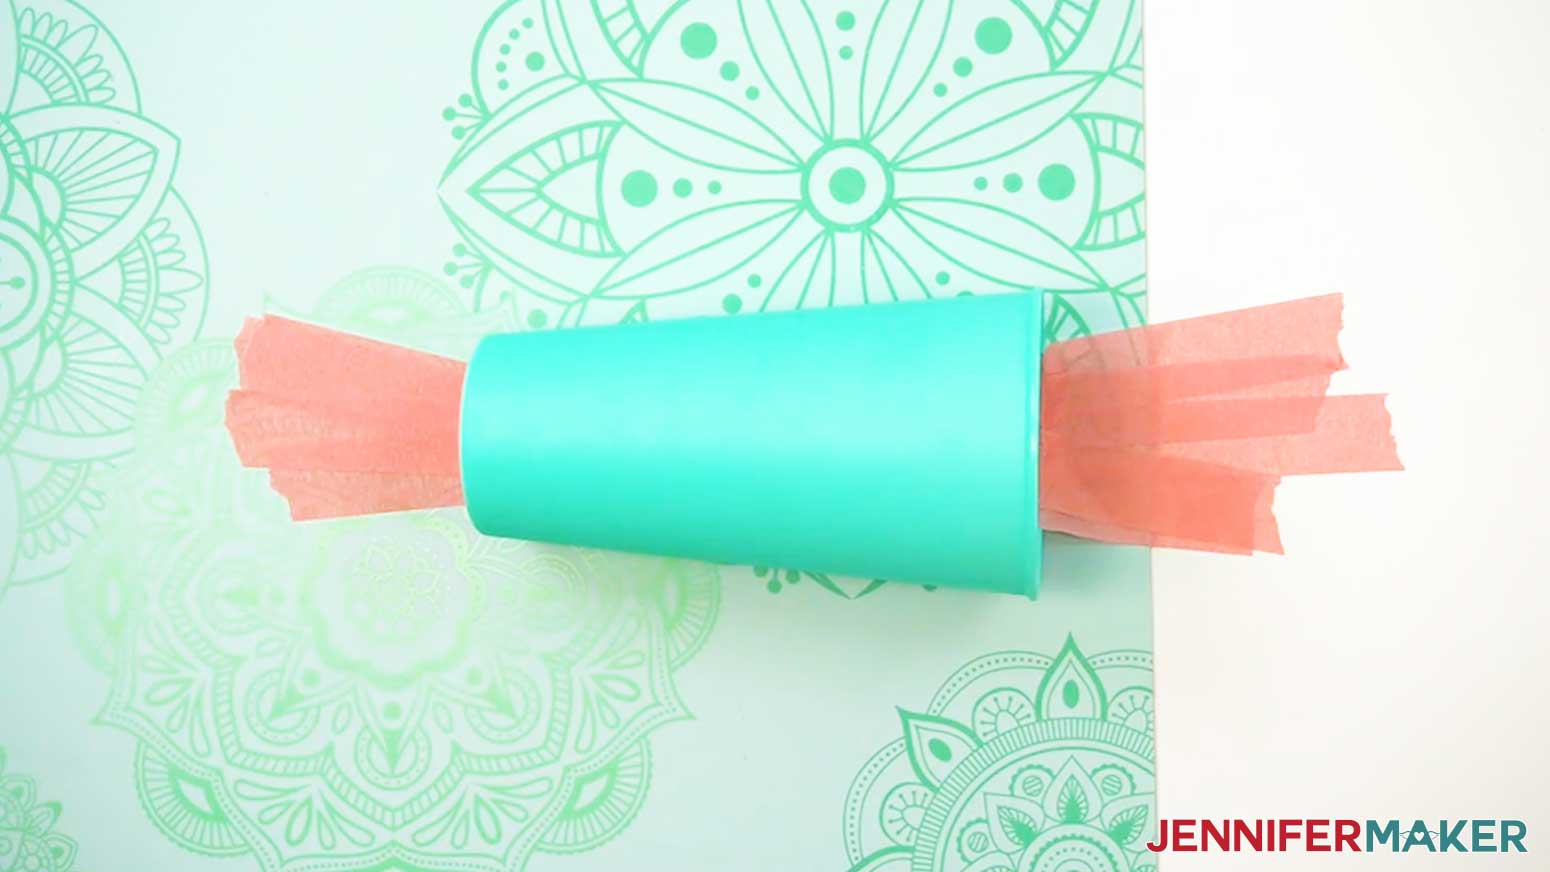
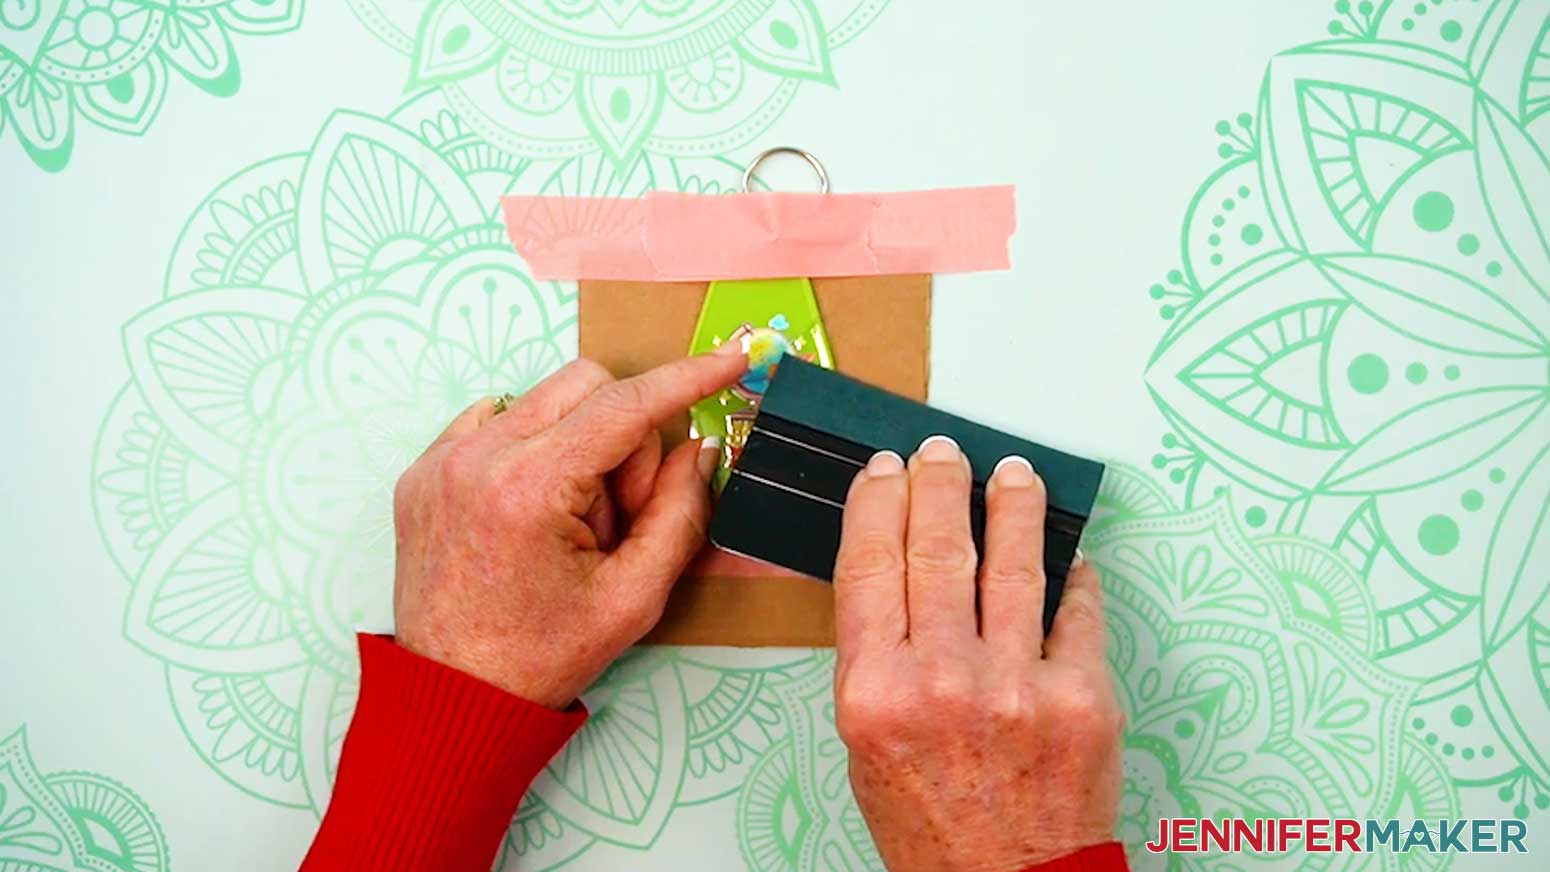
NOTE: For the tumbler and glass can, I’ll center the decal between the top and bottom of the blank. - While holding the decal in place on the blank, place a short piece of painter’s tape along the top edge of the decal’s carrier sheet without touching the decal area so it doesn’t interfere with the transfer.
- Then, place a short piece of painter’s tape along the bottom edge the same way.
NOTE: We’ll use the painter’s tape to help align our decal on the blank once we remove the backing sheet. - We need part of the tape to remain on the blank to help with alignment, so carefully rip the tape along the decal's edge on both sides. Matching pieces of tape should be on the cup and on the carrier sheet's edges. Don't move these alignment marks.
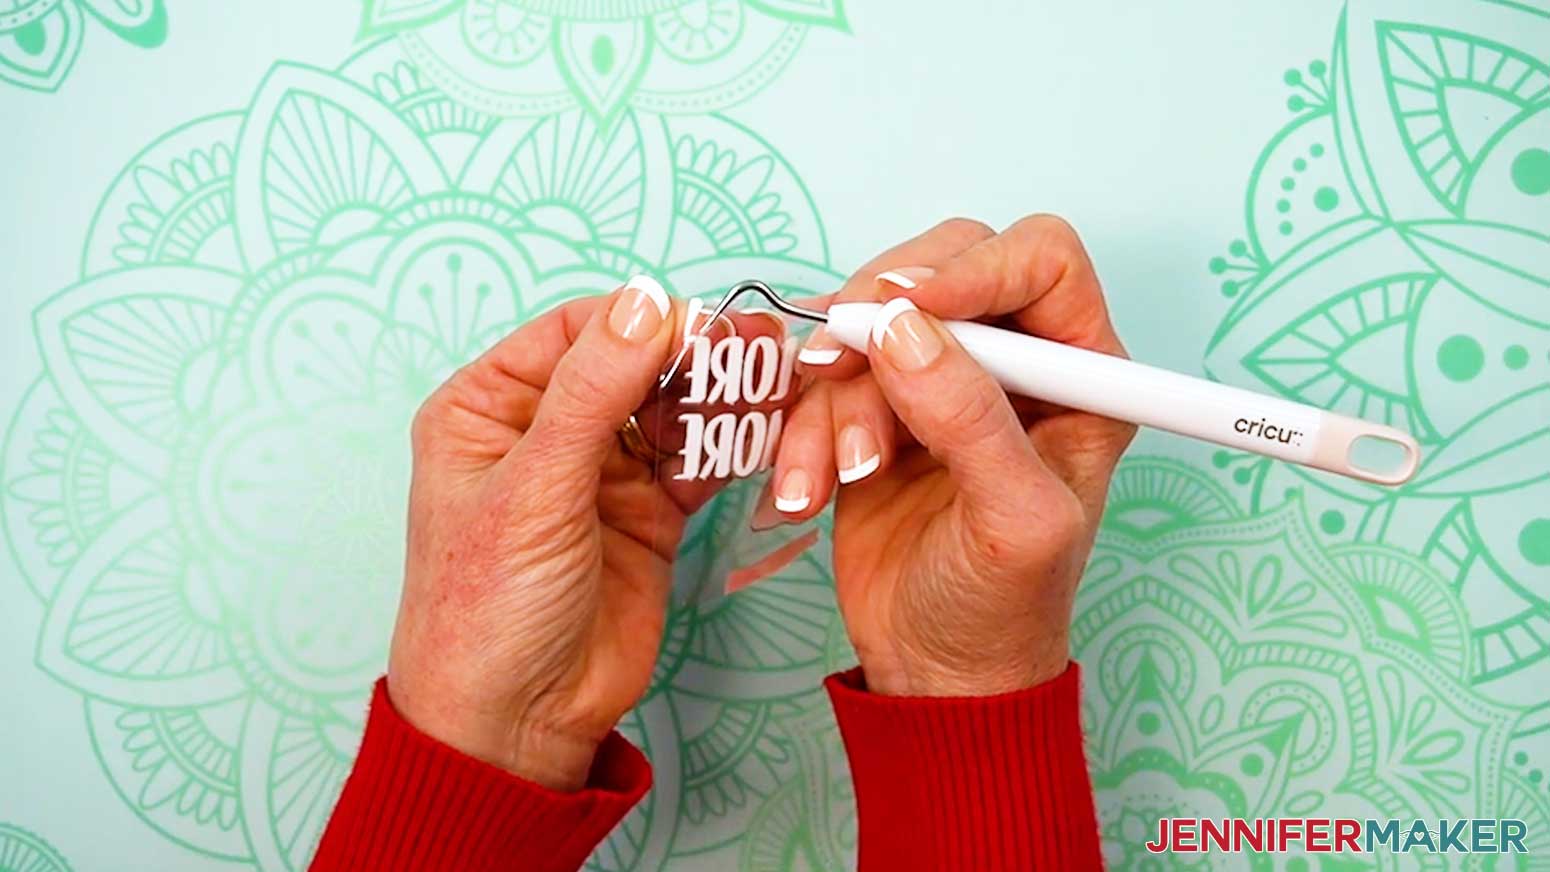
- Carefully peel the non-adhesive backing from the adhesive carrier sheet and decal. Avoid touching the decal.
TIP: Use a weeding tool to separate the two layers of plastic if needed.
NOTE: Make sure the decal remains on the adhesive carrier sheet and all pieces of the design are in place. - Use both hands to hold the top and bottom of the carrier sheet steady to prevent the decal from sticking to the surface too early.
- Place the decal onto the blank so the carrier sheet’s top piece of tape aligns with its partner on the blank.
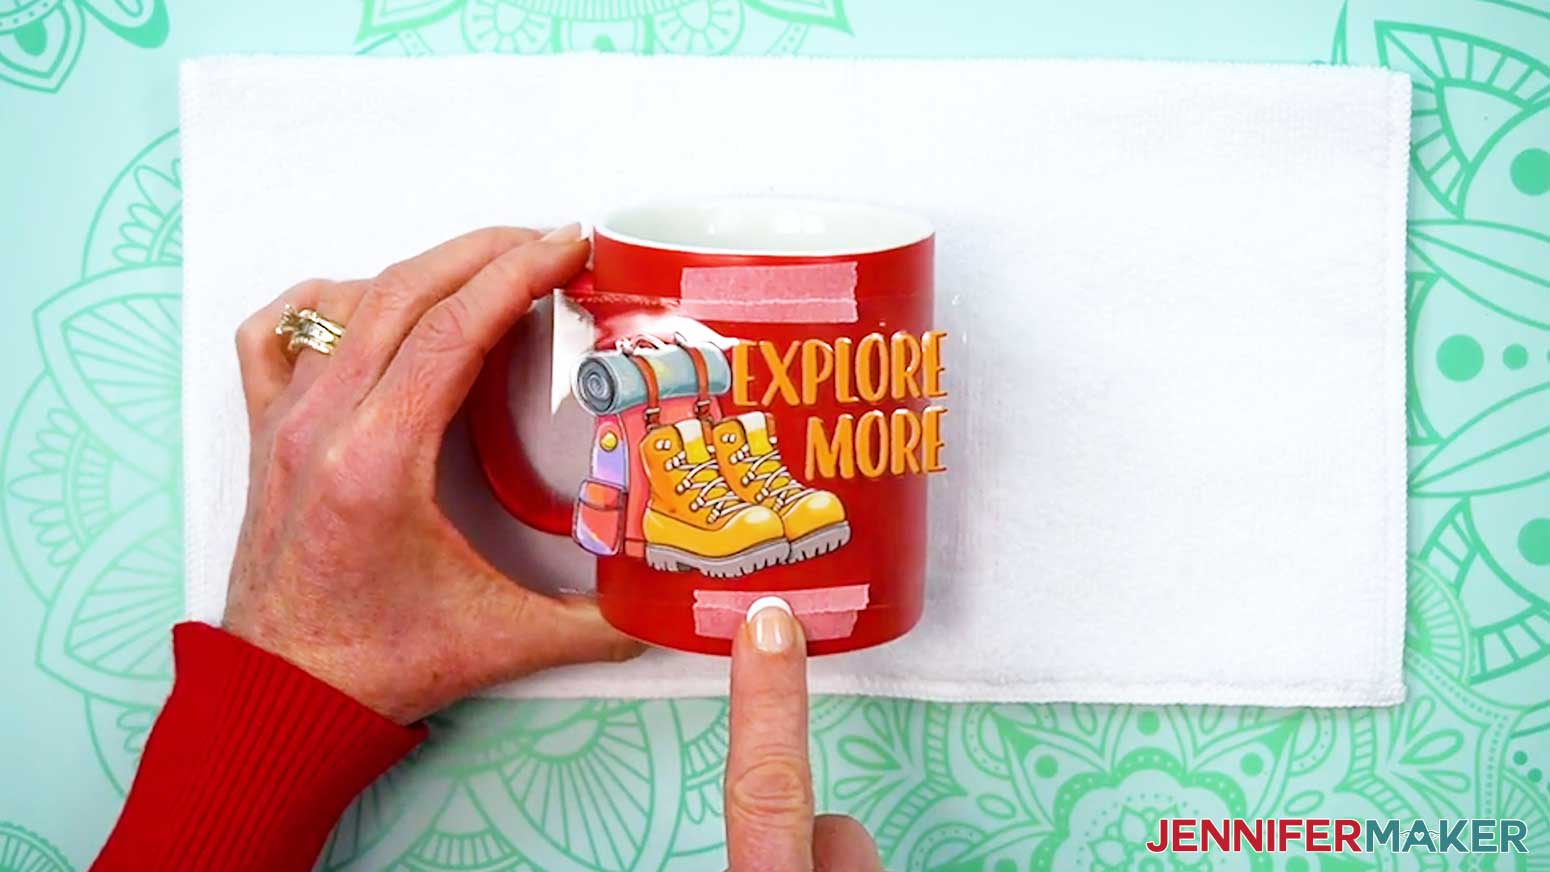
- Press down on the carrier sheet where the top pieces of painter’s tape meet and align to adhere it to the blank.
- Use your finger to press along the decal’s center line from top to bottom, aligning the bottom pieces of painter’s tape where they meet and pressing the carrier sheet into place.
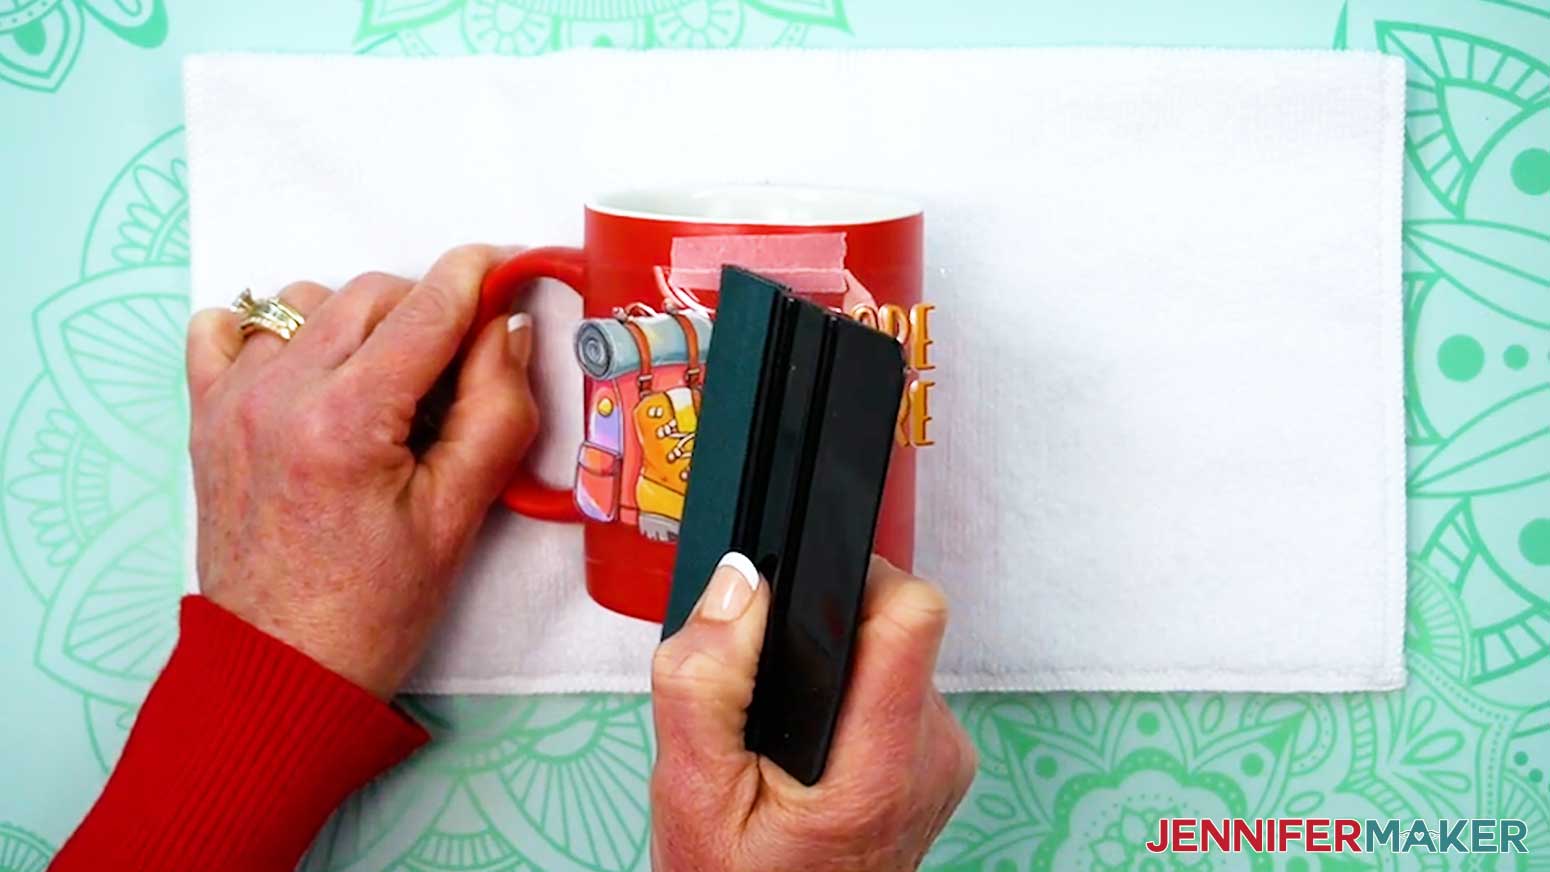
- Use the squeegee’s felt edge to press one side of the decal onto the blank from the center out to avoid bubbles or wrinkles, then the other side from the center out.
- Then use the squeegee’s felt edge to smooth the entire surface of the decal.
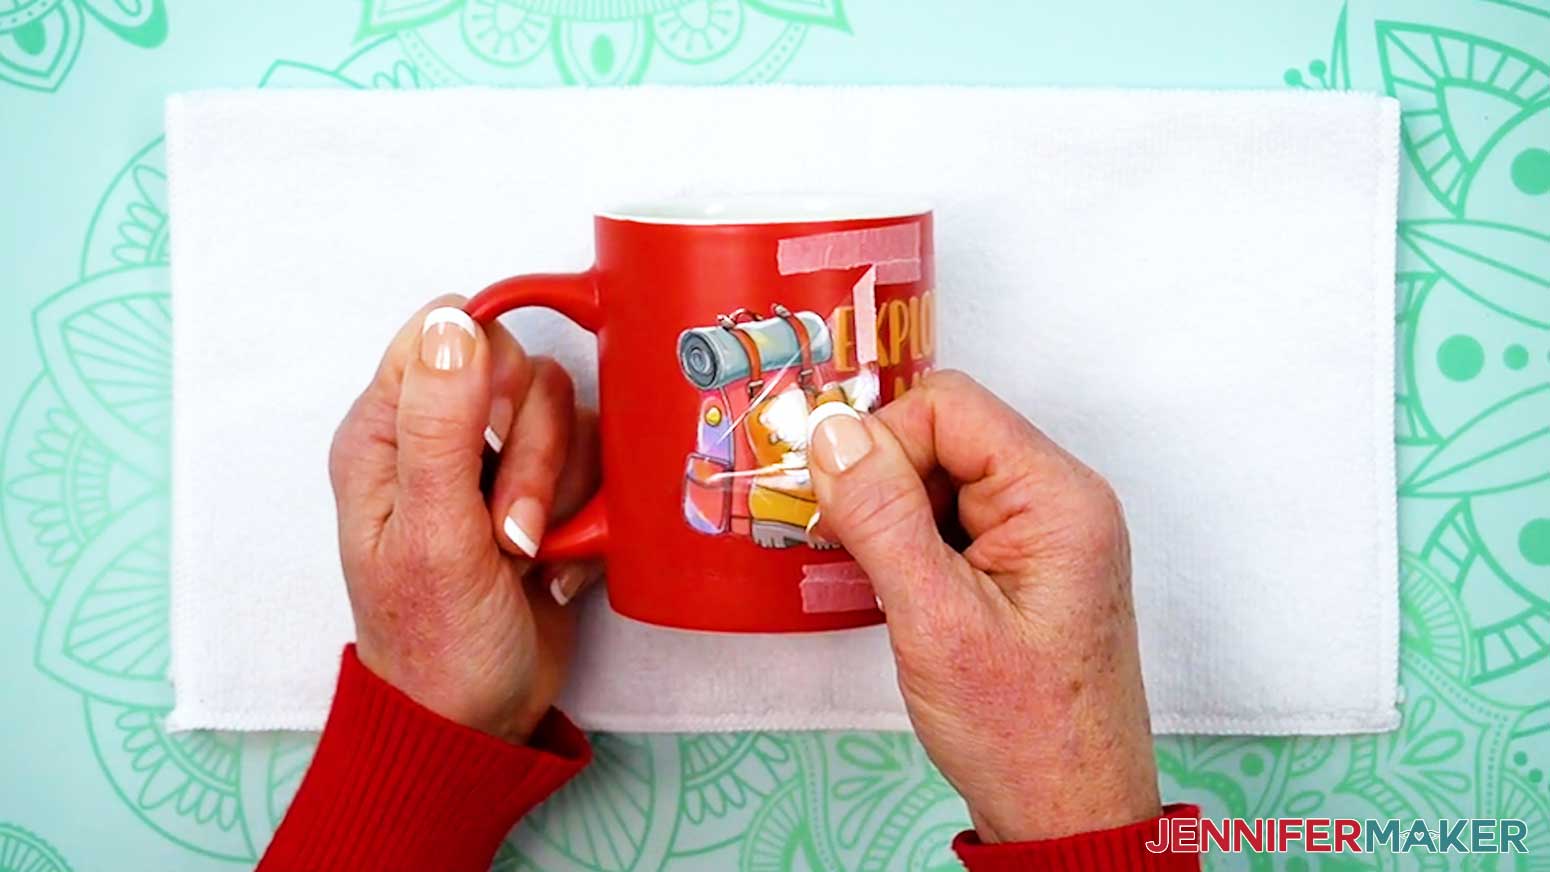
- Carefully peel the carrier sheet away from the blank and decal.
TIP: If any areas of the decal aren’t fully adhered, replace the carrier sheet and use the squeegee to press those sections again. Or, pull the carrier sheet from a different direction to try to encourage the decal to stick to the blank and release from the carrier sheet. - Remove the excess pieces of painter’s tape from the top and bottom of the blank.
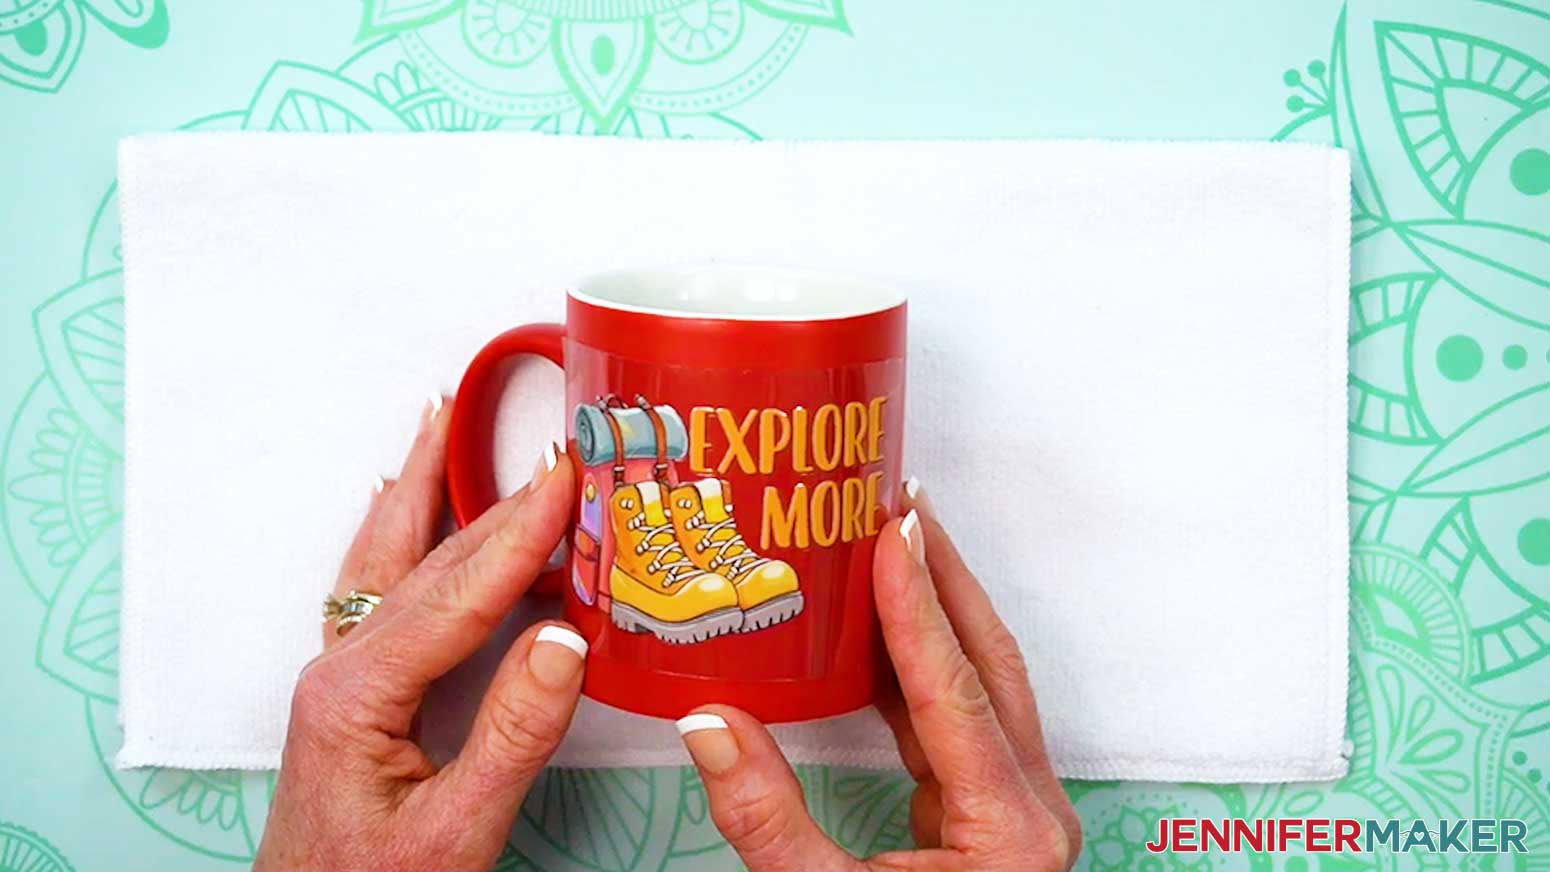
- Your ceramic mug, steel tumbler, or glass can is ready!

PLASTIC TAPERED CUP
- Secure the top and bottom of your tapered cup to your self-healing cutting mat surface with painter’s tape to stabilize it.
NOTE: The plastic cups in my supplies list are very light. I found that taping them down prevents them from slipping around. - Position the decal face up on the cup so you can see the entire design, keeping its bottom edge parallel with the cup’s bottom edge.
TIP: Wider stickers look better placed closer to the top of a tapered cup. - Follow Steps 3-14 of the “CERAMIC MUG, STEEL SKINNY TUMBLER, & GLASS CAN” section above to apply your decal.
- Your plastic tapered cup is ready!

ACRYLIC KEYCHAIN
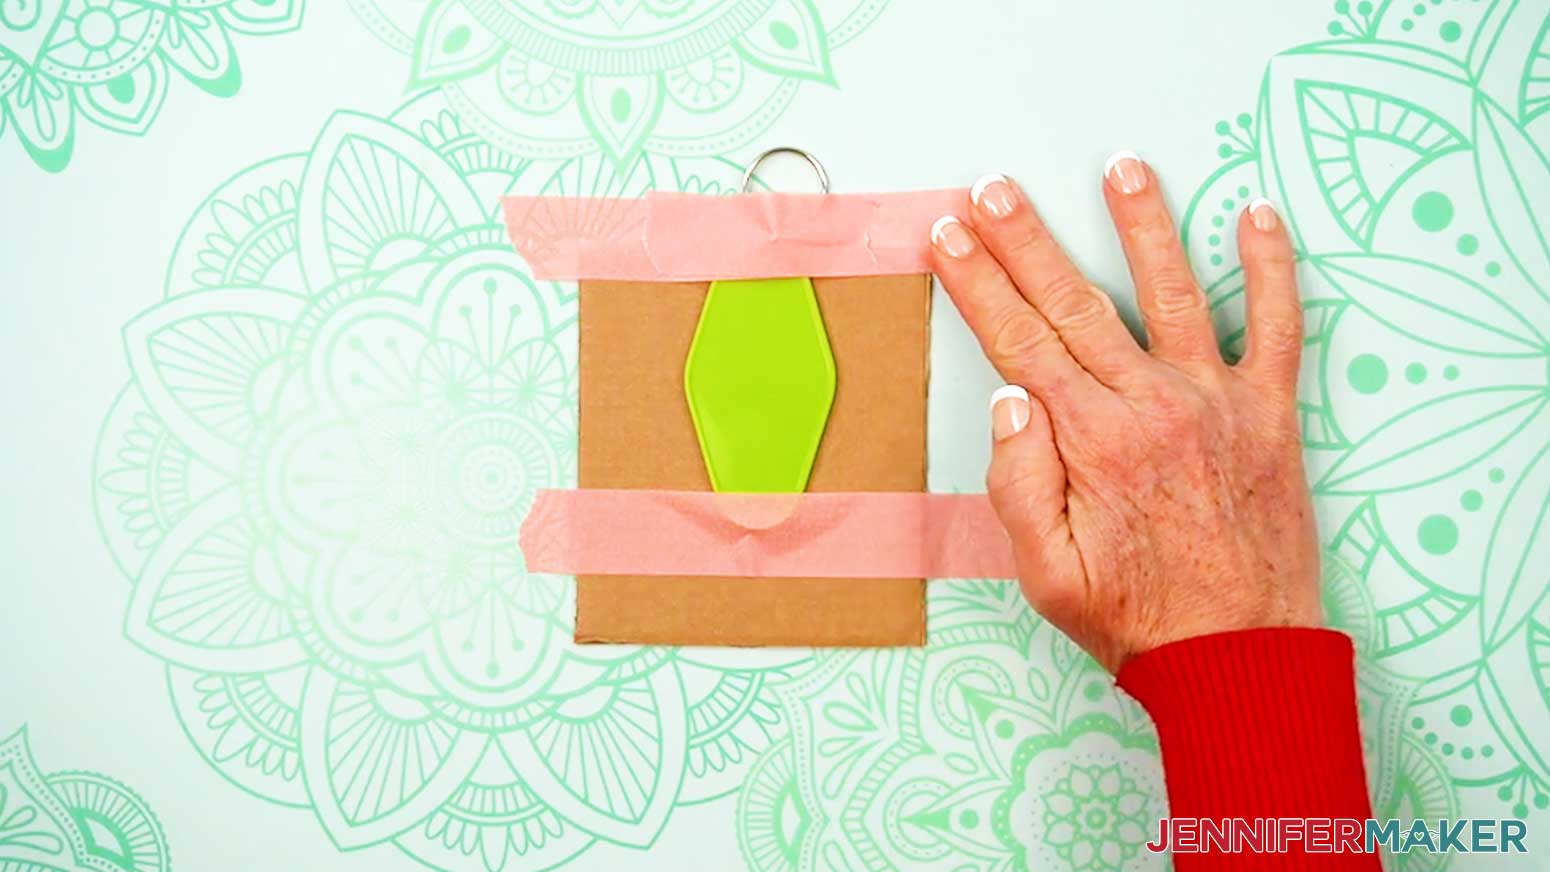
- Place your keychain face up on a flat, solid object thick enough to raise it slightly above your work surface, like your self-healing cutting mat or a piece of cardboard.
TIP: Hang the keyring off the edge to keep the keychain flat.
NOTE: I’ll demonstrate with a vertical design. - Use painter’s tape to secure the tapered ends of your acrylic keychain to your raised surface.
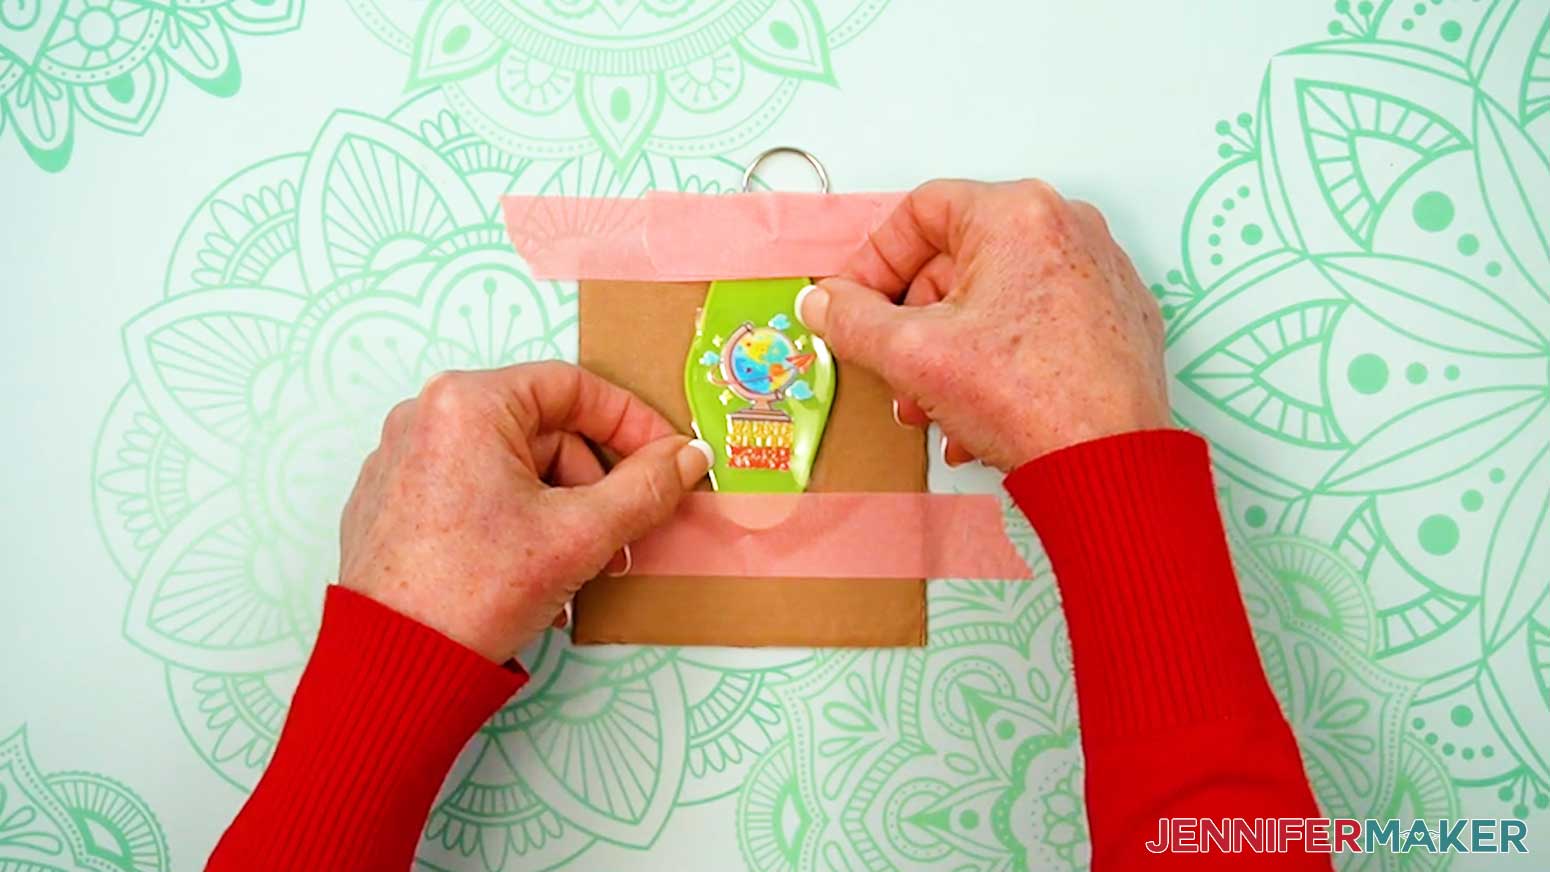
- Peel the non-adhesive backing from the adhesive carrier sheet and decal.
TIP: Use a weeding tool to separate the two layers of plastic if needed. - Use both hands to hold the decal at the top and bottom of the carrier sheet without touching the design.
NOTE: Make sure the decal remains adhered to the adhesive carrier sheet. - Hover the design face up over the blank until it’s in the exact spot you want it, with the top of the design on the same end as the keyring.
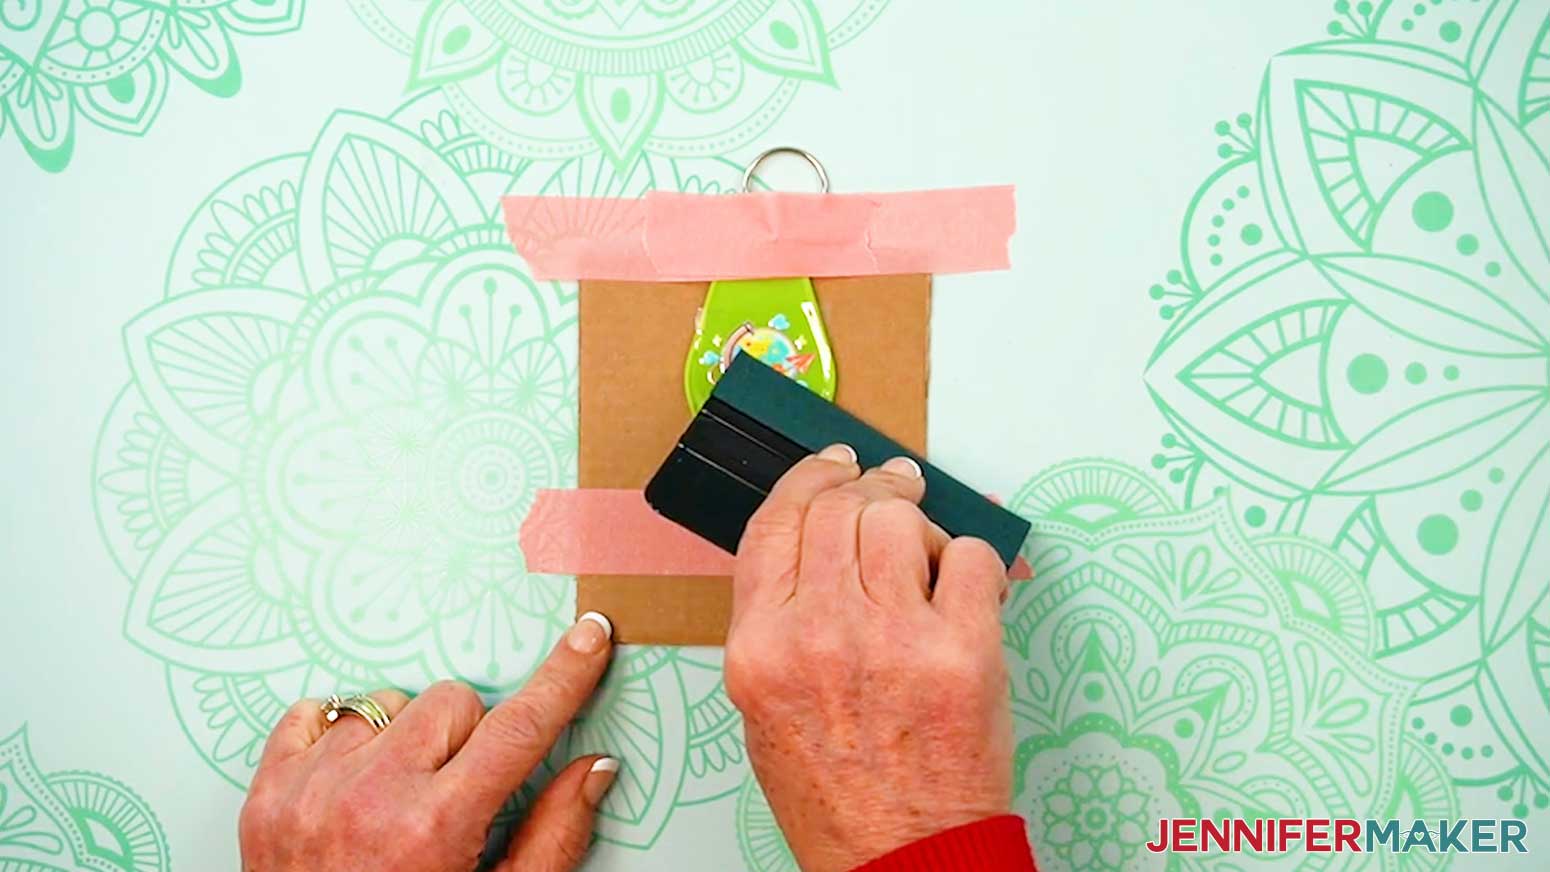
NOTE: Don’t let the decal touch the surface yet -- it’s very sticky and difficult to lift once it’s applied! - Press the carrier sheet and decal straight down onto the blank.
- Use the squeegee’s felt edge to smooth down the decal from one side to the other to avoid bubbles or wrinkles.
- Carefully peel the carrier sheet away from the blank and decal.
TIP: If any areas of the decal aren’t fully adhered, replace the carrier sheet and use the squeegee to press those areas again, or pull the carrier sheet from a different direction to try to encourage the decal to stick to the blank and release from the carrier sheet. - Peel away the masking tape to release your keychain.
- Your acrylic keychain is ready!

STEP 4: SHOW IT OFF
You now have a beautiful UV DTF print applied to a mug, tumbler, glass can, cup, or keychain!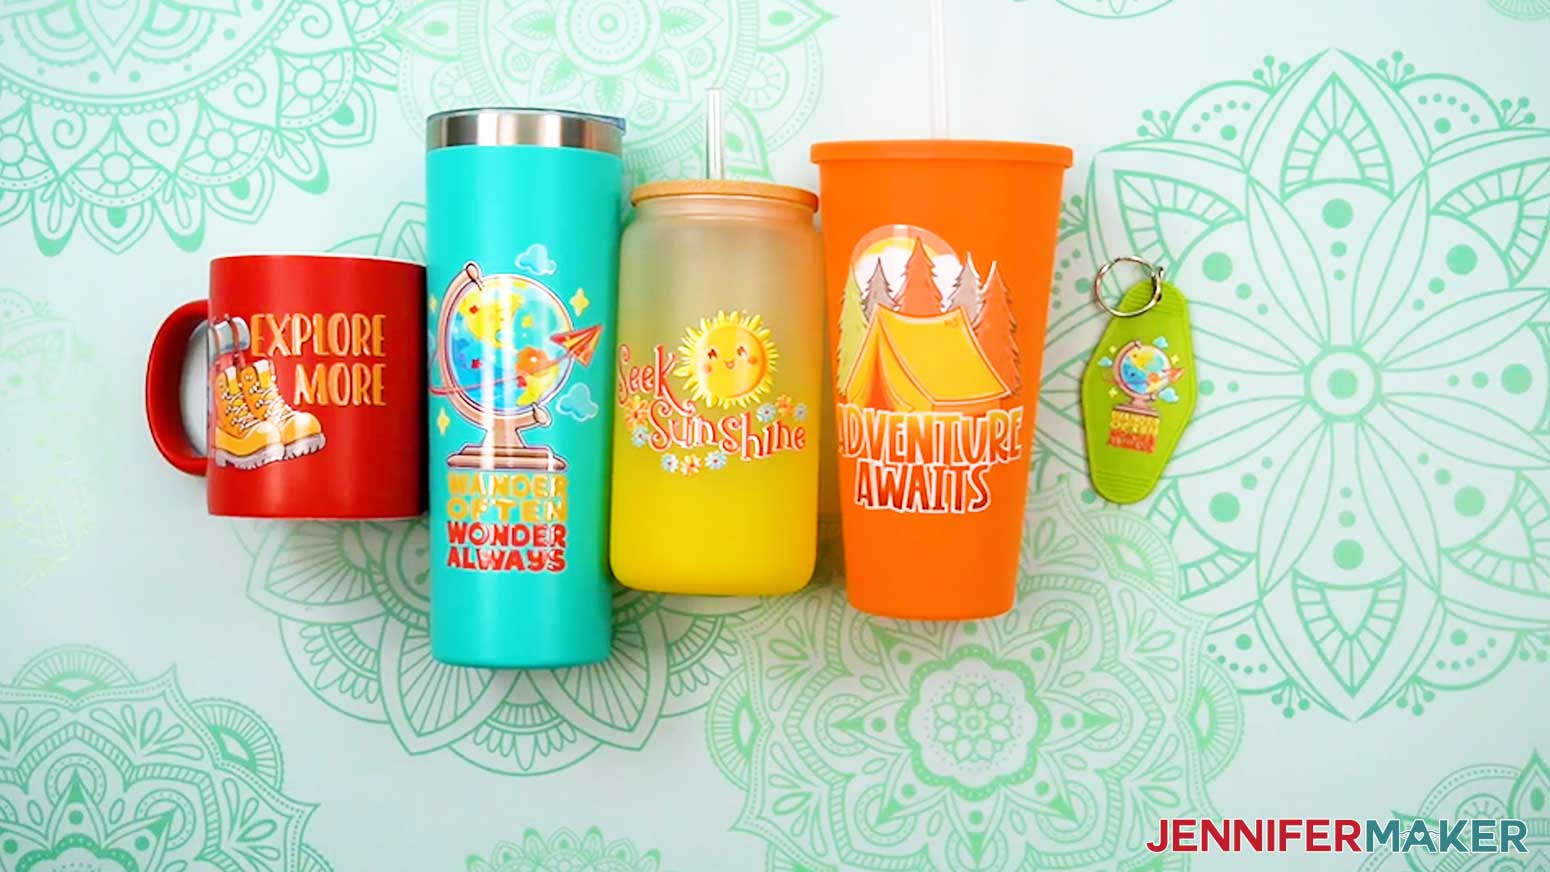
Notes
Finished Decal Sizes (decals are sized to fit the items in my supply list):
Explore More:
Keychain: 1.82” x 1.17”
Mug: 3.5” x 2.26”
Tapered Cup: 3.5” x 2.26”
Skinny Tumbler: 3.5” x 2.26”
Glass Can: 3.5” x 2.26”
Seek Sunshine:
Keychain: 2” x 1.35”
Mug: 3.5” x 2.36”
Tapered Cup: 3.5” x 2.36”
Skinny Tumbler: 3.5” x 2.36”
Glass Can: 3.5” x 2.36”
Adventure Awaits:
Keychain: 1.35” x 1.59”
Mug: 2.34” x 2.75”
Tapered Cup: 3.5” x 4.12”
Skinny Tumbler: 3.5” x 4.12”
Glass Can: 2.97” x 3.5”
Wander Often:
Keychain: 1.35” x 1.81”
Mug: 2.05” x 2.75”
Tapered Cup: 3.5” x 4.7”
Skinny Tumbler: 3.5” x 4.7”
Glass Can: 2.61” x 3.5”
Care Instructions:
For all blanks, hand washing is recommended for maximum decal longevity. Allow to air dry.
Typefaces Used:
Ballyhoo Regular / Free Alternative: Sunday Best
ZP Gingerbread Cake / Free Alternative: Chickens Lovers
ROCKEY Regular / Free Alternative: Hamberger
Wonderful Display Font Regular / Free Alternative: Bestoom
Answers to Your Questions About UV DTF Printing
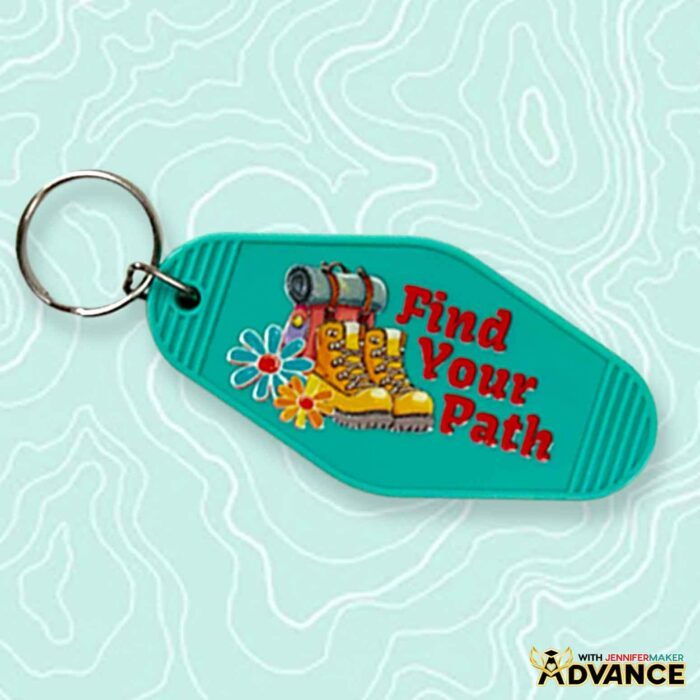
Q: How can I create a custom UV DTF sticker?
A: You can learn how to create your own custom UV DTF stickers just like below in my ADVANCE program. Learn more about ADVANCE here!
Q: What exactly are UV DTF decals?
A: UV DTF decals (also called stickers or prints) are designs printed onto UV DTF film using special inks that cure instantly under UV light. I had mine made by a professional and delivered as ready-to-apply decals so I didn’t need to get the special equipment and supplies.
Q: What surfaces work best for the decals?
A: UV DTF decals work best on hard surfaces like stainless steel, acrylic, ceramic, and coated plastics. Smooth, clean surfaces give the best results.
Q: How do I pick between UV DTF and DTF?
A: If you’re deciding between DTF vs. UV DTF, the biggest factor is what you’re decorating. If you’re working with fabric (like T-shirts, tote bags, or sweatshirts), DTF is a great choice because it bonds to fibers with heat and works well even on dark fabrics. If you’re working with hard goods (like ceramic mugs, acrylic keychains, metal, or many plastics), UV DTF is the better option because it creates a full-color, permanent decal that transfers to smooth surfaces without heat. In short: DTF is for fabric, UV DTF is for hard surfaces.
Q: How is this different from regular DTF printing?
A: Regular DTF printing uses adhesive powder and heat to bond designs to fabric. UV DTF is designed for rigid blanks and doesn’t require heat.
Q: Do I need special equipment?
A: Unless you want to specialize in UV DTF crafting, no, it’s not necessary to invest in special equipment. I recommend ordering the special stickers through a third-party service like Ninja Transfers instead. The decals arrive ready to use on a transfer sheet.
Q: Are these considered high-quality prints?
A: Yes. The UV DTF process supports high-resolution images, clean edges, and opaque color, which results in high-quality prints with professional detail.
Q: Is UV DTF dishwasher safe?
A: When applied correctly, UV DTF stickers bond permanently to an object’s surface and hold up to regular handling. If you apply the decals to mugs or tumblers, avoid soaking and harsh scrubbing for the best longevity.
Q: Can they handle complex artwork?
A: Absolutely. The UV DTF printing technique supports a wide range of designs, including intricate details and full-color prints without needing layering. I recommend using a high-quality PNG with a transparent background like the ones in my download folder for the best results. If you upload to Ninja Transfers, you can also use PDF, JPG, and SVG files with at least 300 DPI image quality.
Q: How does UV DTF printing compare to using vinyl or sublimation?
A: I’ve decorated hard surfaces like mugs and tumblers using adhesive vinyl and sublimation prints for years. Vinyl works great for projects with a handful of colors, but the more layers you add, the bulkier it gets. Sublimation gives gorgeous results, but only on white or light-colored blanks unless you’re willing to take extra steps and bust out a few special materials. UV DTF printing feels like the missing link between the two.
Q: Why order UV DTF decals from a service instead of printing them at home?
A: Setting up your craft room to support UV DTF printing at home can be costly and time-consuming. In addition to the UV printer, you’ll need the right UV ink and supplies to create your transfer sheets, and you’ll want to have additional space to store all of it. Instead, ordering from a print service lets you skip all that and spend more time crafting. But if you really love working with UV DTF and have the space and budget for it, go ahead and treat yourself!
Q: How will my UV DTF decals arrive from the printer?
A: The decals I ordered from Ninja Transfers arrived protected between layers of plastic, and that packaging plays a big role. One side holds the adhesive and the printed image, while another protective backing layer keeps everything clean during shipping. When you’re ready to apply, you peel away the backing, position the design, press it down, and then remove the adhesive carrier sheet. Once the top layer releases, the design stays put. Other companies may use slightly different packaging and preparation methods.
Q: Can UV DTF decals be removed?
A: UV DTF decals can’t be removed cleanly because they’re meant to be permanent. To avoid issues, use my placement method.
Q: How long do UV DTF decals last?
A: It depends on use, but UV DTF decals can last years with proper care. They hold up well to handling, but I recommend hand washing, hand drying, and avoid soaking or using abrasives.
Q: What makes UV DTF printing appealing to crafters?
A: UV DTF prints are easy to apply, look amazing, last a long time, and can be used to decorate items with full color designs that other methods might not support. The process doesn’t require intricate cutting, layering, or heat pressing, so it’s great for crafters without a lot of spare time.
Q: Where can I buy the supplies and tools to make drinkware with UV DTF stickers?
A: I have a list above with links to all of the materials and blanks I used to make it super easy for you to find what you need. I love shopping for craft supplies and deals on Amazon with my Prime membership for fast, free shipping!
Q: Can I make and sell drinkware or keychains using your UV DTF designs?
A: If you want to use my UV DTF designs and project materials for commercial use, please familiarize yourself with my important licensing information before selling your crafts.
Q: Where can I get help if I get stuck?
A: If you want quick troubleshooting or you want to show off your finished projects afterward, my Cricut Facebook group can be a helpful place to compare notes and see what others are doing.
Get my free PNG/PDF files to make your own stickers for UV DTF printing!
(If you do not see the signup form above, click here.)
I absolutely love seeing your handmade crafts! Once you’ve learned how to make UV DTF stickers and apply them to smooth surfaces, inspire others and share photos of your project in our Facebook group or tag me on social media with #jennifermaker.
Love,

Want to remember this? Save this UV DTF Printing Tutorial to your favorite Pinterest Board!