
Learn all about the absolute BEST Cricut vinyl for coffee mugs!
A mug full of hot coffee is one of those simple joys in life. My morning brew is one of my favorite things about my day, and I know I’m not alone there! Mugs with cute coffee-related sayings can make that cup of sunshine even sweeter. We all know that I love to sublimate mugs in my mug press, or use infusible ink to create my own custom art on coffee cups. These can be a bit more intensive projects for some, but making a mug doesn’t have to be that complicated. In fact, these vinyl-decorated mugs are a great way to put together an awesome last-minute gift in a flash. I’ll show you the best Cricut vinyl for coffee mugs, plus some other brands I’ve grown to love! So… which vinyl do you use? This is a Cricut Mystery Box project — it uses all the same black permanent vinyl that you could have gotten in the “Outer Space” mystery box that came out in May 2023. While this mystery box is no longer available for sale, you can still purchase the individual vinyls, which are all links below in my material list. Learn more about Cricut Mystery Boxes and their contents in my Cricut Mystery Box Guide.
Perhaps I would have been a scientist in another life, because I love to run tests and do experiments. With so many options available, I wanted to make sure I was using the best of the best materials when it came to applying vinyl to ceramic mugs. Despite being a relatively simple kind of project, there are definitely things that can go wrong when making coffee mugs with vinyl decals! Which vinyl would be easiest to weed and apply? Which would hold up to being washed in the dishwasher?
This is a Cricut Mystery Box project — it uses all the same black permanent vinyl that you could have gotten in the “Outer Space” mystery box that came out in May 2023. While this mystery box is no longer available for sale, you can still purchase the individual vinyls, which are all links below in my material list. Learn more about Cricut Mystery Boxes and their contents in my Cricut Mystery Box Guide.
Perhaps I would have been a scientist in another life, because I love to run tests and do experiments. With so many options available, I wanted to make sure I was using the best of the best materials when it came to applying vinyl to ceramic mugs. Despite being a relatively simple kind of project, there are definitely things that can go wrong when making coffee mugs with vinyl decals! Which vinyl would be easiest to weed and apply? Which would hold up to being washed in the dishwasher?
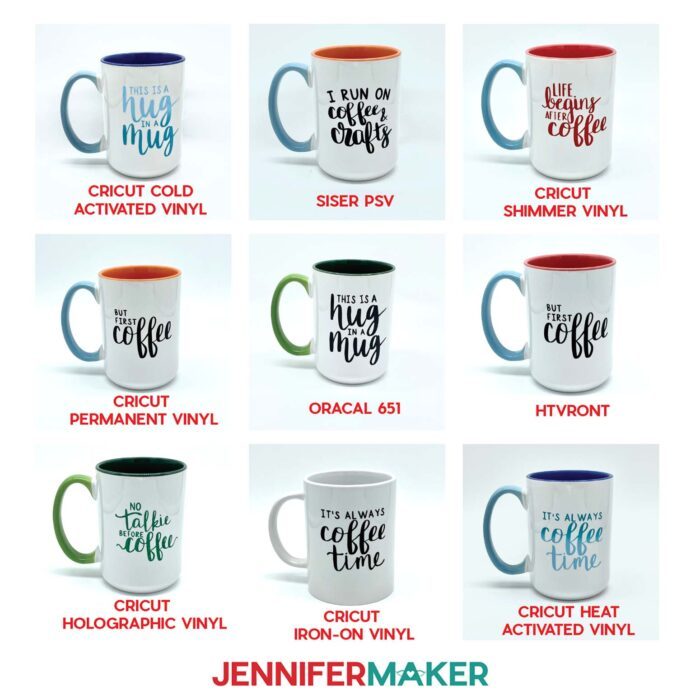
 I ended up testing nine different brands and types of adhesive vinyl (and one heat-transfer vinyl) to get the answers. I’ll show you how to cut, weed, and apply three of them.
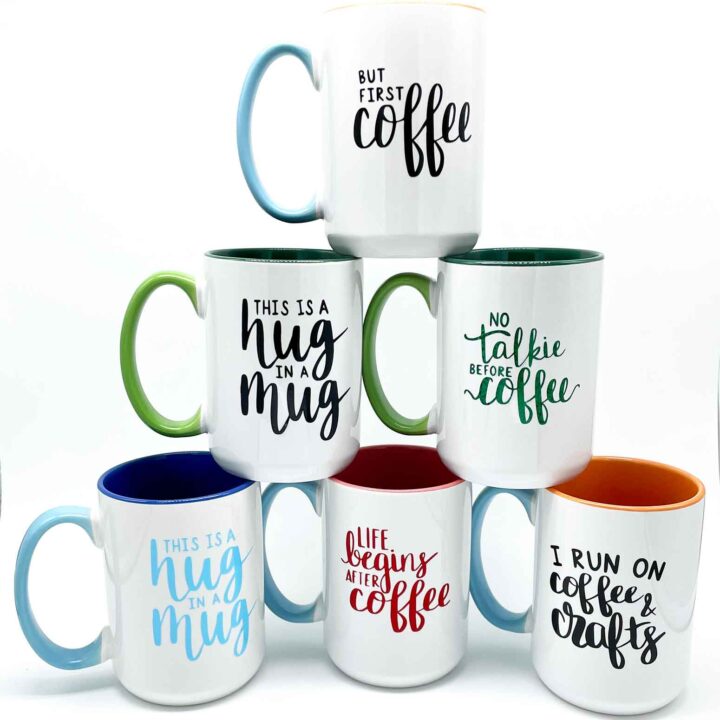
You can use your own designs, or one of the super cute hand lettered designs. These make such great gifts, or you can build a coffee bar full of adorable mugs to hold your own cups of joy.
I ended up testing nine different brands and types of adhesive vinyl (and one heat-transfer vinyl) to get the answers. I’ll show you how to cut, weed, and apply three of them.
You can use your own designs, or one of the super cute hand lettered designs. These make such great gifts, or you can build a coffee bar full of adorable mugs to hold your own cups of joy.
 Speaking of joy, I’m going to show you how to cut a vinyl mug design on the Cricut Joy! This tiny-but-mighty little machine doesn’t get enough credit for all the cool things it can do, so I wanted to use this tutorial to shine the spotlight on how fun and easy it is to make coffee mugs with vinyl decals! You can of course use any other cutting machine to create your custom mug — your Cricut Explore Air, Cricut Maker, and Maker 3 are all great for this project too.
 Cricut Permanent Vinyl (I used Black)
I used the “Premium Vinyl” cut setting with “More” Pressure, and the vinyl weeded easily and the design stayed in place on the carrier sheet. I used StandardGrip transfer tape, and the scraper and weeding tool were very helpful in transferring the vinyl to the tape. Some parts of the backing came up a little with the vinyl, but easily separated with the help of the weeding tool. The vinyl adhered really well to the mug, and the decal was unaffected after a normal cycle on the top rack of my dishwasher.
Cricut Permanent Shimmer Vinyl (I used Red)
I used the “Smart Vinyl – Shimmer” cut setting with “More” Pressure. The Joy does not have a regular Shimmer setting. The “Smart Vinyl – Shimmer” cut non-Smart vinyl just fine! The vinyl weeded easily and the design stayed in place on the carrier sheet. I used StrongGrip transfer tape, and vinyl adhered well to the transfer tape and easily removed from the vinyl backing. The decal was unaffected after a normal cycle on the top rack of my dishwasher.
Cricut Permanent Holographic Sparkle Vinyl (I used Green)
I used the “Holographic Sparkle Vinyl” cut setting with “More” Pressure. The vinyl weeded easily and the design stayed in place on the carrier sheet. I used StandardGrip transfer tape, and vinyl adhered well to the transfer tape and easily removed from the vinyl backing. The vinyl easily adhered to the mug when transfer tape was removed, and the decal was unaffected after a normal cycle on the top rack of my dishwasher.
Oracal 651 (I used Black Gloss)
I used the “Premium Vinyl” cut setting with “More” Pressure. The vinyl weeded easily and the design stayed in place on the carrier sheet. I used StandardGrip transfer tape, and vinyl adhered well to the transfer tape and easily removed from the vinyl backing. The vinyl easily adhered to the mug when transfer tape was removed, and the decal was unaffected after a normal cycle on the top rack of my dishwasher.
Siser Easy PSV (I used Black Gloss)
I used the “Premium Vinyl” cut setting with “More” Pressure. The vinyl weeded easily but the small letters in the design tended to slide around a bit. The vinyl backing was slick. I used StandardGrip transfer tape, and vinyl adhered well to the transfer tape and easily removed from the vinyl backing. The vinyl easily adhered to the mug when transfer tape was removed, and the decal was unaffected after a normal cycle on the top rack of my dishwasher.
HTVRONT Permanent Vinyl (I used Black Gloss)
I used the “Premium Vinyl” cut setting with “More” Pressure. The vinyl weeded easily and the design stayed in place on the carrier sheet. I used StandardGrip transfer tape, and vinyl adhered well to the transfer tape and easily removed from the vinyl backing. The vinyl easily adhered to the mug when transfer tape was removed, and the decal was unaffected after a normal cycle on the top rack of my dishwasher.
Cricut Cold-Activated Color-Changing Vinyl (I used Light Blue to Turquoise)
I used the “Heat/Cold Activated Color-Changing Vinyl” cut setting with “More” Pressure. The vinyl weeded easily and the design stayed in place on the carrier sheet. I used StandardGrip transfer tape, and vinyl adhered well to the transfer tape and easily removed from the vinyl backing. The vinyl easily adhered to the mug when transfer tape was removed, and the decal was unaffected after a normal cycle on the top rack of my dishwasher.
Cricut Heat-Activated Color-Changing Vinyl (I used Turquoise to Light Blue)
I used the “Heat/Cold Activated Color-Changing Vinyl” cut setting with “More” Pressure. The vinyl weeded easily and the design stayed in place on the carrier sheet. I used StandardGrip transfer tape, and vinyl adhered well to the transfer tape and easily removed from the vinyl backing. The vinyl easily adhered to the mug when transfer tape was removed, and the decal was unaffected after a normal cycle on the top rack of my dishwasher.
Cricut Everyday Iron-On (I used Black)
I used the “Everyday Iron-On” cut setting with “More” Pressure. The heat transfer vinyl weeded easily and the design stayed in place on the backer. The application was more challenging because of needing to use the Cricut EasyPress Mini, and baking the mug in the oven helped seal the vinyl to the mug. The decal was unaffected after a normal cycle on the top rack of my dishwasher.
Won’t making coffee mugs with vinyl decals will be so much less stressful now that you know which materials perform the best? This is why I absolutely love testing! Crafting with quality materials where I know what to expect when I use it makes crafting so much less uncertain, and way more fun!
Ready to make your own coffee mugs with vinyl decals? This post contains some affiliate links for your convenience (which means if you make a purchase after clicking a link I will earn a small commission but it won’t cost you a penny more)! Read my full disclosure policy.
Cricut Permanent Vinyl (I used Black)
I used the “Premium Vinyl” cut setting with “More” Pressure, and the vinyl weeded easily and the design stayed in place on the carrier sheet. I used StandardGrip transfer tape, and the scraper and weeding tool were very helpful in transferring the vinyl to the tape. Some parts of the backing came up a little with the vinyl, but easily separated with the help of the weeding tool. The vinyl adhered really well to the mug, and the decal was unaffected after a normal cycle on the top rack of my dishwasher.
Cricut Permanent Shimmer Vinyl (I used Red)
I used the “Smart Vinyl – Shimmer” cut setting with “More” Pressure. The Joy does not have a regular Shimmer setting. The “Smart Vinyl – Shimmer” cut non-Smart vinyl just fine! The vinyl weeded easily and the design stayed in place on the carrier sheet. I used StrongGrip transfer tape, and vinyl adhered well to the transfer tape and easily removed from the vinyl backing. The decal was unaffected after a normal cycle on the top rack of my dishwasher.
Cricut Permanent Holographic Sparkle Vinyl (I used Green)
I used the “Holographic Sparkle Vinyl” cut setting with “More” Pressure. The vinyl weeded easily and the design stayed in place on the carrier sheet. I used StandardGrip transfer tape, and vinyl adhered well to the transfer tape and easily removed from the vinyl backing. The vinyl easily adhered to the mug when transfer tape was removed, and the decal was unaffected after a normal cycle on the top rack of my dishwasher.
Oracal 651 (I used Black Gloss)
I used the “Premium Vinyl” cut setting with “More” Pressure. The vinyl weeded easily and the design stayed in place on the carrier sheet. I used StandardGrip transfer tape, and vinyl adhered well to the transfer tape and easily removed from the vinyl backing. The vinyl easily adhered to the mug when transfer tape was removed, and the decal was unaffected after a normal cycle on the top rack of my dishwasher.
Siser Easy PSV (I used Black Gloss)
I used the “Premium Vinyl” cut setting with “More” Pressure. The vinyl weeded easily but the small letters in the design tended to slide around a bit. The vinyl backing was slick. I used StandardGrip transfer tape, and vinyl adhered well to the transfer tape and easily removed from the vinyl backing. The vinyl easily adhered to the mug when transfer tape was removed, and the decal was unaffected after a normal cycle on the top rack of my dishwasher.
HTVRONT Permanent Vinyl (I used Black Gloss)
I used the “Premium Vinyl” cut setting with “More” Pressure. The vinyl weeded easily and the design stayed in place on the carrier sheet. I used StandardGrip transfer tape, and vinyl adhered well to the transfer tape and easily removed from the vinyl backing. The vinyl easily adhered to the mug when transfer tape was removed, and the decal was unaffected after a normal cycle on the top rack of my dishwasher.
Cricut Cold-Activated Color-Changing Vinyl (I used Light Blue to Turquoise)
I used the “Heat/Cold Activated Color-Changing Vinyl” cut setting with “More” Pressure. The vinyl weeded easily and the design stayed in place on the carrier sheet. I used StandardGrip transfer tape, and vinyl adhered well to the transfer tape and easily removed from the vinyl backing. The vinyl easily adhered to the mug when transfer tape was removed, and the decal was unaffected after a normal cycle on the top rack of my dishwasher.
Cricut Heat-Activated Color-Changing Vinyl (I used Turquoise to Light Blue)
I used the “Heat/Cold Activated Color-Changing Vinyl” cut setting with “More” Pressure. The vinyl weeded easily and the design stayed in place on the carrier sheet. I used StandardGrip transfer tape, and vinyl adhered well to the transfer tape and easily removed from the vinyl backing. The vinyl easily adhered to the mug when transfer tape was removed, and the decal was unaffected after a normal cycle on the top rack of my dishwasher.
Cricut Everyday Iron-On (I used Black)
I used the “Everyday Iron-On” cut setting with “More” Pressure. The heat transfer vinyl weeded easily and the design stayed in place on the backer. The application was more challenging because of needing to use the Cricut EasyPress Mini, and baking the mug in the oven helped seal the vinyl to the mug. The decal was unaffected after a normal cycle on the top rack of my dishwasher.
Won’t making coffee mugs with vinyl decals will be so much less stressful now that you know which materials perform the best? This is why I absolutely love testing! Crafting with quality materials where I know what to expect when I use it makes crafting so much less uncertain, and way more fun!
Ready to make your own coffee mugs with vinyl decals? This post contains some affiliate links for your convenience (which means if you make a purchase after clicking a link I will earn a small commission but it won’t cost you a penny more)! Read my full disclosure policy.
Materials & Tools to Make Coffee Mugs with Vinyl Decals
- Ceramic Mug(s)
- Cricut Permanent Vinyl – I used Black
- Cricut Permanent Shimmer Vinyl – I used Red
- Cricut Permanent Holographic Vinyl – I used Holographic Green
- Oracal 651 Black Gloss
- Siser EasyPSV Black Gloss
- HTVRONT Permanent Vinyl Black Gloss
- Cricut Cold-Activated Color-Changing Vinyl – I used Permanent Light Blue – Turquoise
- Cricut Heat-Activated Color-Changing Vinyl – I used Permanent Turquoise – Light Blue
- StandardGrip Transfer Tape – for Gloss, Holographic, and Temperature-Activated Vinyls
- StrongGrip Transfer Tape – for Shimmer/Glitter Vinyl
- A method to cut your vinyl – I used the amazing Cricut Joy but you can also use the Cricut Maker 3, Cricut Maker, Cricut Explore 3, or the Cricut Explore
- Green StandardGrip 4.5″ x 6.5″ Machine Mat if using the Cricut Joy -OR-
- Green StandardGrip 12″ x 12″ Machine Mat if using another Cricut cutting machine
- Weeding Tool
- Small Scraper
- Scissors
- Isopropyl Alcohol and Lint-Free Cloth or Coffee Filter to clean your mug
- Design #498 – My free designs (available in my free resource library — get the password at the bottom of this post)
- Cricut Everyday Iron-On Vinyl – I used Black
- Cricut EasyPress Mini
- Standard Household Oven
- Baking Sheet
- Heat Resistant Tape
- Oven Mitt

How to Find the Best Cricut Vinyl for Coffee Mugs
Best Cricut Vinyl for Coffee Mugs
Add a fun decal using the best Cricut vinyl for coffee mugs!
Materials
- Ceramic Mug(s)
- Cricut Permanent Vinyl - Black
- Cricut Permanent Vinyl Shimmer Red
- Cricut Permanent Vinyl Holographic Green
- Oracal 651 Black Gloss
- Siser EasyPSV Black Gloss
- HTVRONT Permanent Vinyl Black Gloss
- Cricut Cold-Activated Color-Changing Vinyl – Permanent Light Blue - Turquoise
- Cricut Heat-Activated Color-Changing Vinyl – Permanent Turquoise - Light Blue
- Cricut Everyday Iron-On Black
- StandardGrip Transfer Tape (for Gloss, Holographic, and Temperature-Activated Vinyls)
- StrongGrip Transfer Tape (for Shimmer/Glitter Vinyl)
- Design #498 – My free designs (available in my free resource library—get the password at the bottom of this post)
Tools
- A method to cut your vinyl, I used the amazing Cricut Joy but you can also use the Cricut Maker 3, Cricut Maker, Cricut Explore 3, or the Cricut Explore.
- Cricut Joy StandardGrip 4.5" x 6.5" Machine Mat
- Weeding Tool
- Small Scraper
- Scissors
- Brayer
- Isopropyl Alcohol
- Lint-Free Cloth or Coffee Filter
- Cricut EasyPress Mini (Optional for Iron-On Vinyl)
- Oven (Optional for Baking Mug with Iron-On Vinyl)
- Baking Sheet (Optional to Hold Mug for Baking)
- Heat Resistant Tape (Optional to Hold Iron-On Decal on Mug)
- Oven Mitt (If Using Oven)
Instructions
STEP 1: GET MY FREE BEST CRICUT VINYL FOR COFFEE MUGS DESIGN FILES
First, download my Coffee Mug Decals SVG/DXF/PDF files from my free resource library. It's Design #498. I’ve included six hand-lettered decals for you to choose from!
Upload your SVG file to Cricut Design Space.
TIP: If you're not sure how to upload an SVG cut file to Cricut Design Space, watch this helpful video training series I made. If you're on an iPhone or iPad, here's how to download and upload SVG files to the Cricut Design Space app.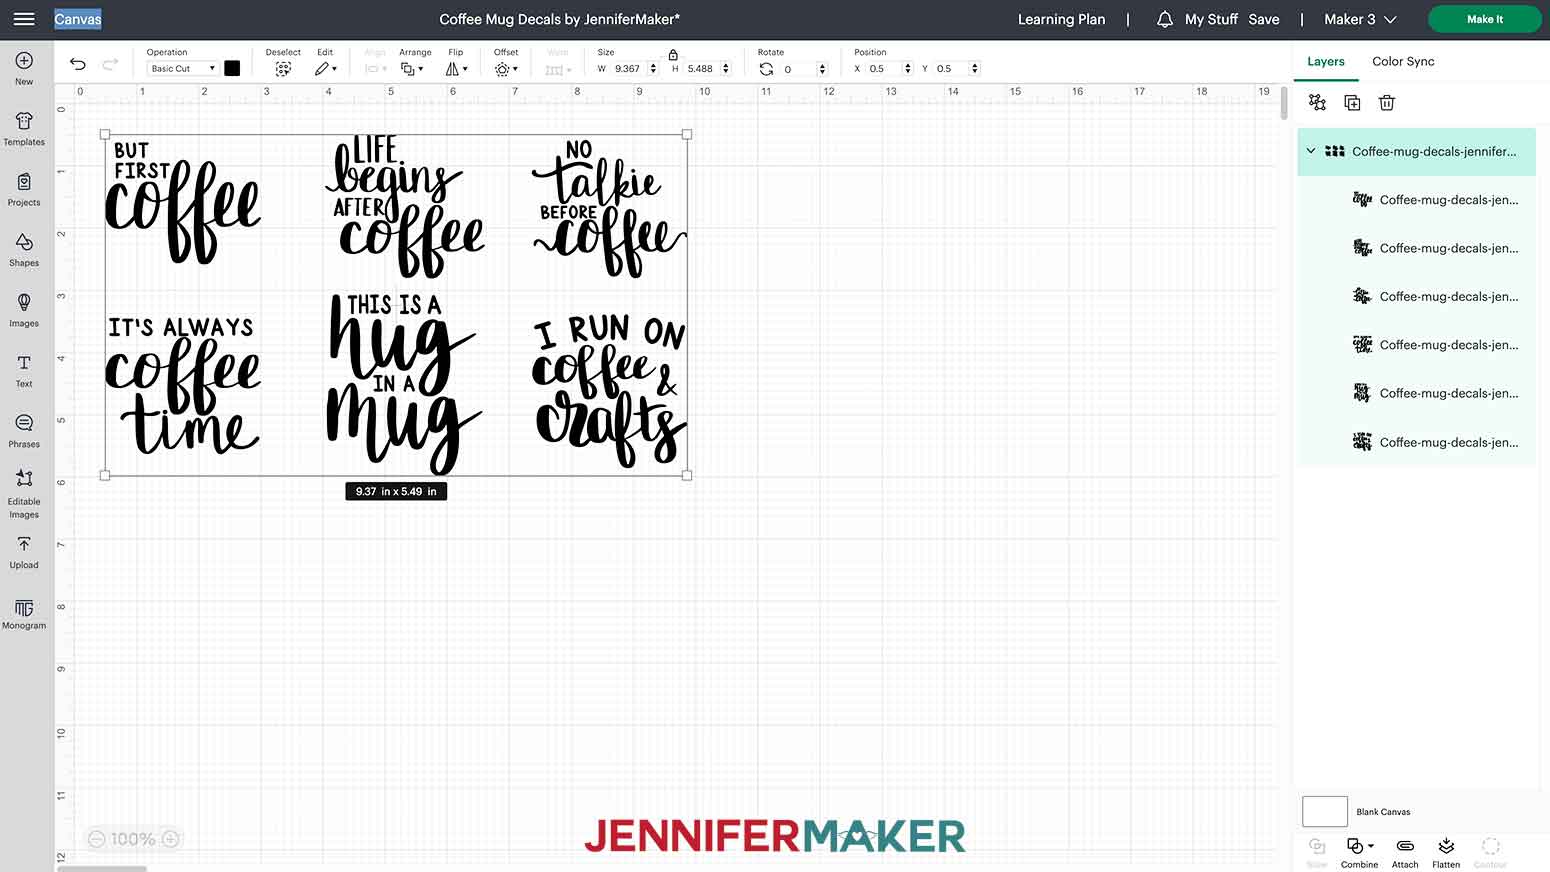
STEP 2: COMPARE VINYL FOR COFFEE MUGS
We are testing and comparing NINE different types of vinyl for ceramic coffee mugs.
1. Cricut Permanent Vinyl - Black
Cut Setting: Premium Vinyl
Pressure: More
Weeding: Weeded easily and design stayed in place.
Type of Transfer Tape: StandardGrip
Ease of use with Transfer Tape: The scraper and weeding tool were very helpful in transferring the vinyl to the transfer tape. Some parts of the backing came up a little with the vinyl but easily separated with help of the weeding tool.
Application to Mug: The vinyl easily adhered to the mug when transfer tape was removed.
Wash Test Results: After a normal dishwasher cycle on the top rack, the vinyl was unaffected.
2. Cricut Permanent Shimmer Vinyl - Red
Cut Setting: Smart Vinyl - Shimmer (The Joy does not have a regular Shimmer setting. The “Smart Vinyl - Shimmer” cut non-Smart vinyl just fine!)
Pressure: More
Weeding: Weeded easily and design stayed in place.
Type of Transfer Tape: StrongGrip Transfer Tape
Ease of use with Transfer Tape: The vinyl adhered well to the transfer tape and easily removed from the vinyl backing.
Application to Mug: The vinyl easily adhered to the mug when transfer tape was removed.
Wash Test Results: After a normal dishwasher cycle on the top rack, the vinyl was unaffected.
3. Cricut Permanent Holographic Sparkle Vinyl - Green
Cut Setting: Holographic Sparkle Vinyl
Pressure: More
Weeding: Weeded easily and design stayed in place.
Type of Transfer Tape: StandardGrip Transfer Tape
Ease of use with Transfer Tape: The vinyl adhered well to the transfer tape and easily removed from the vinyl backing.
Application to Mug: The vinyl easily adhered to the mug when transfer tape was removed.
Wash Test Results: After a normal dishwasher cycle on the top rack, the vinyl was unaffected.
4. Oracal 651 - Black Gloss
Cut Setting: Premium Vinyl
Pressure: More
Weeding: Weeded easily and design stayed in place.
Type of Transfer Tape: StandardGrip Transfer Tape
Ease of use with Transfer Tape: The vinyl adhered well to the transfer tape and easily removed from the vinyl backing.
Application to Mug: The vinyl easily adhered to the mug when transfer tape was removed.
Wash Test Results: After a normal dishwasher cycle on the top rack, the vinyl was unaffected.
5. Siser Easy PSV - Black Gloss
Cut Setting: Premium Vinyl
Pressure: More
Weeding: Weeded easily but the small letters in the design tended to slide around a bit. The vinyl backing was slick.
Type of Transfer Tape: StandardGrip Transfer Tape
Ease of use with Transfer Tape: The vinyl adhered well to the transfer tape and easily removed from the vinyl backing.
Application to Mug: The vinyl easily adhered to the mug when transfer tape was removed.
Wash Test Results: After a normal dishwasher cycle on the top rack, the vinyl was unaffected.
6. HTVRONT Permanent Vinyl - Black Gloss
Cut Setting: Premium Vinyl
Pressure: More
Weeding: Weeded easily and design stayed in place.
Type of Transfer Tape: StandardGrip Transfer Tape
Ease of use with Transfer Tape: The vinyl adhered well to the transfer tape and easily removed from the vinyl backing.
Application to Mug: The vinyl easily adhered to the mug when transfer tape was removed.
Wash Test Results: After a normal dishwasher cycle on the top rack, the vinyl was unaffected.
7. Cricut Cold-Activated Color-Changing Vinyl - Light Blue to Turquoise
Cut Setting: Heat/Cold Activated Color-Changing Vinyl
Pressure: More
Weeding: Weeded easily and design stayed in place.
Type of Transfer Tape: StandardGrip Transfer Tape
Ease of use with Transfer Tape: The vinyl adhered well to the transfer tape and easily removed from the vinyl backing.
Application to Mug: The vinyl easily adhered to the mug when transfer tape was removed.
Wash Test Results: After a normal dishwasher cycle on the top rack, the vinyl was unaffected.
8. Cricut Heat-Activated Color-Changing Vinyl - Turquoise to Light Blue
Cut Setting: Heat/Cold Activated Color-Changing Vinyl
Pressure: More
Weeding: Weeded easily and design stayed in place.
Type of Transfer Tape: StandardGrip Transfer Tape
Ease of use with Transfer Tape: The vinyl adhered well to the transfer tape and easily removed from the vinyl backing.
Application to Mug: The vinyl easily adhered to the mug when transfer tape was removed.
Wash Test Results: After a normal dishwasher cycle on the top rack, the vinyl was unaffected.
9. Cricut Everyday Iron-On - Black
Cut Setting: Everyday Iron-On
Pressure: More
Weeding: Weeded easily and design stayed in place.
Type of Transfer Tape: None with iron-on/HTV (heat transfer vinyl)
Ease of use with Transfer Tape: The design stayed in place on the vinyl backing.
Application to Mug: More challenging with a mini-heat press needed to transfer the vinyl to the mug. Optional step (detailed below): baking mug to seal the iron-vinyl.
Wash Test Results: After a normal dishwasher cycle on the top rack, the vinyl was unaffected.
CONCLUSION
Overall, for permanent vinyl, the Oracal 651 and HTVRONT were the best all-around. They cut and weeded well, and were easily applied to the mug. All of the mugs held up well in the wash test.
The Everyday Iron-On is a more challenging technique but the results, especially with the added bake time, produced a solid result.
Decide on what type of vinyl you’d like to use for your mugs and continue below for instructions on cut and apply your decal on a ceramic mug.
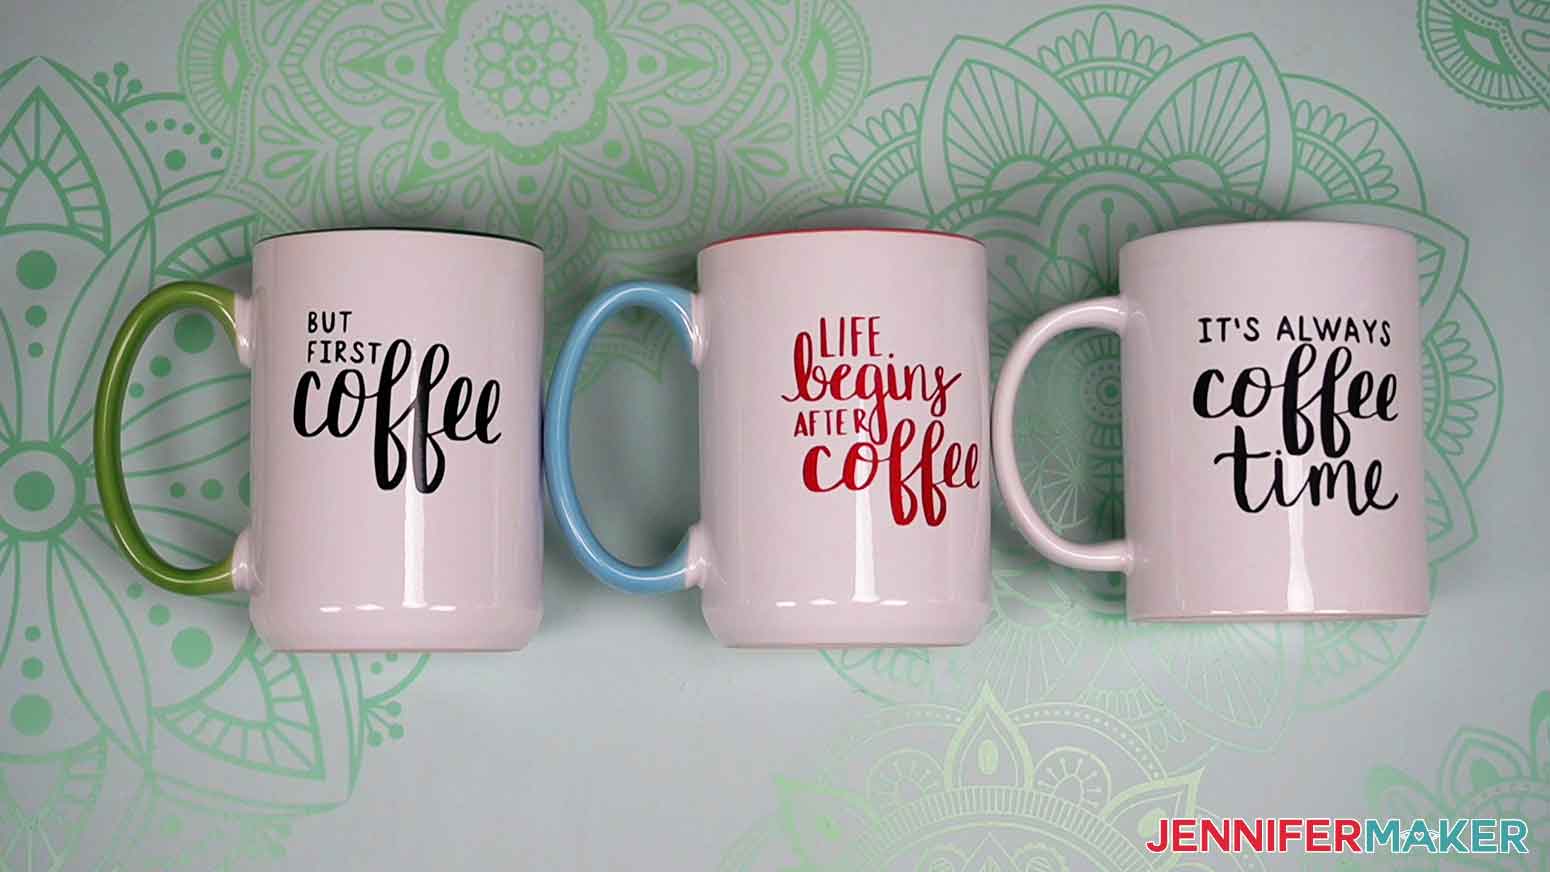
I’m going to show you how to make a mug with HTVRONT permanent black vinyl, Cricut shimmer red vinyl, and the Cricut iron-on black vinyl.
STEP 3: PREPARE AND CUT YOUR COFFEE MUG DECALS
I’m going to make three mug designs today so I’ll delete the rest from my canvas.
Click the “Ungroup” icon above the layers panel to separate the coffee mug decal designs.
You can choose to hide or delete the designs you aren’t going to make. I will leave “But First Coffee,” “Life Begins After Coffee,” and “It’s Always Coffee Time” and delete the rest. 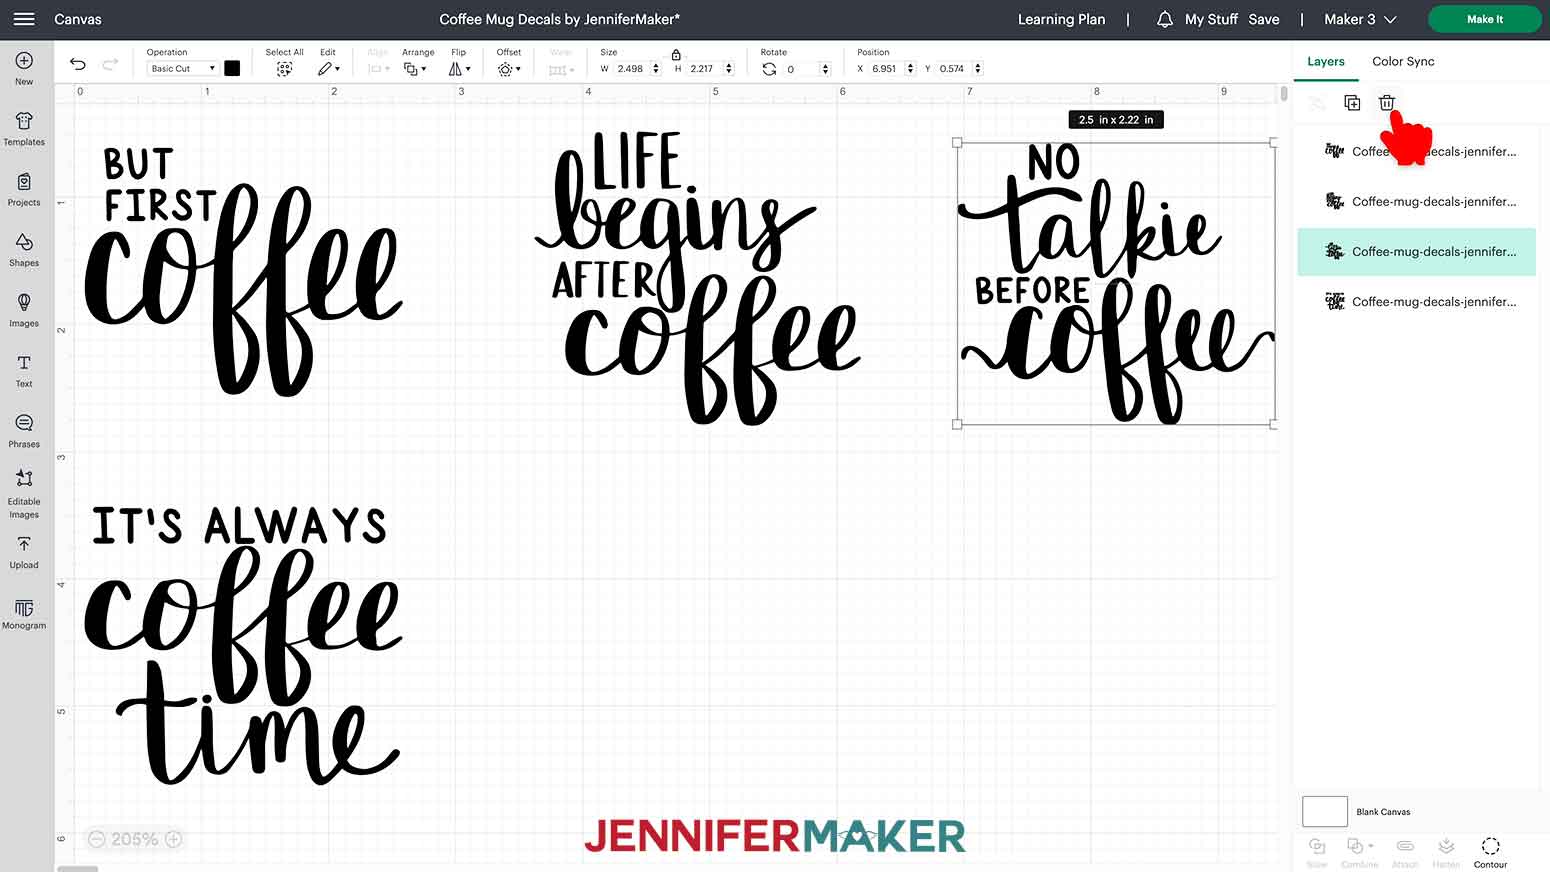
These decals are ready to go for a standard 12oz or 15oz mug. If you are using a different style of mug, you’ll want to measure the visible area of your mug and resize your decal(s) accordingly.
Now let’s change the color of the decals. I’ll leave “But First Coffee” as black. Click on “Life Begins After Coffee” to select it. Click on the color menu and select red.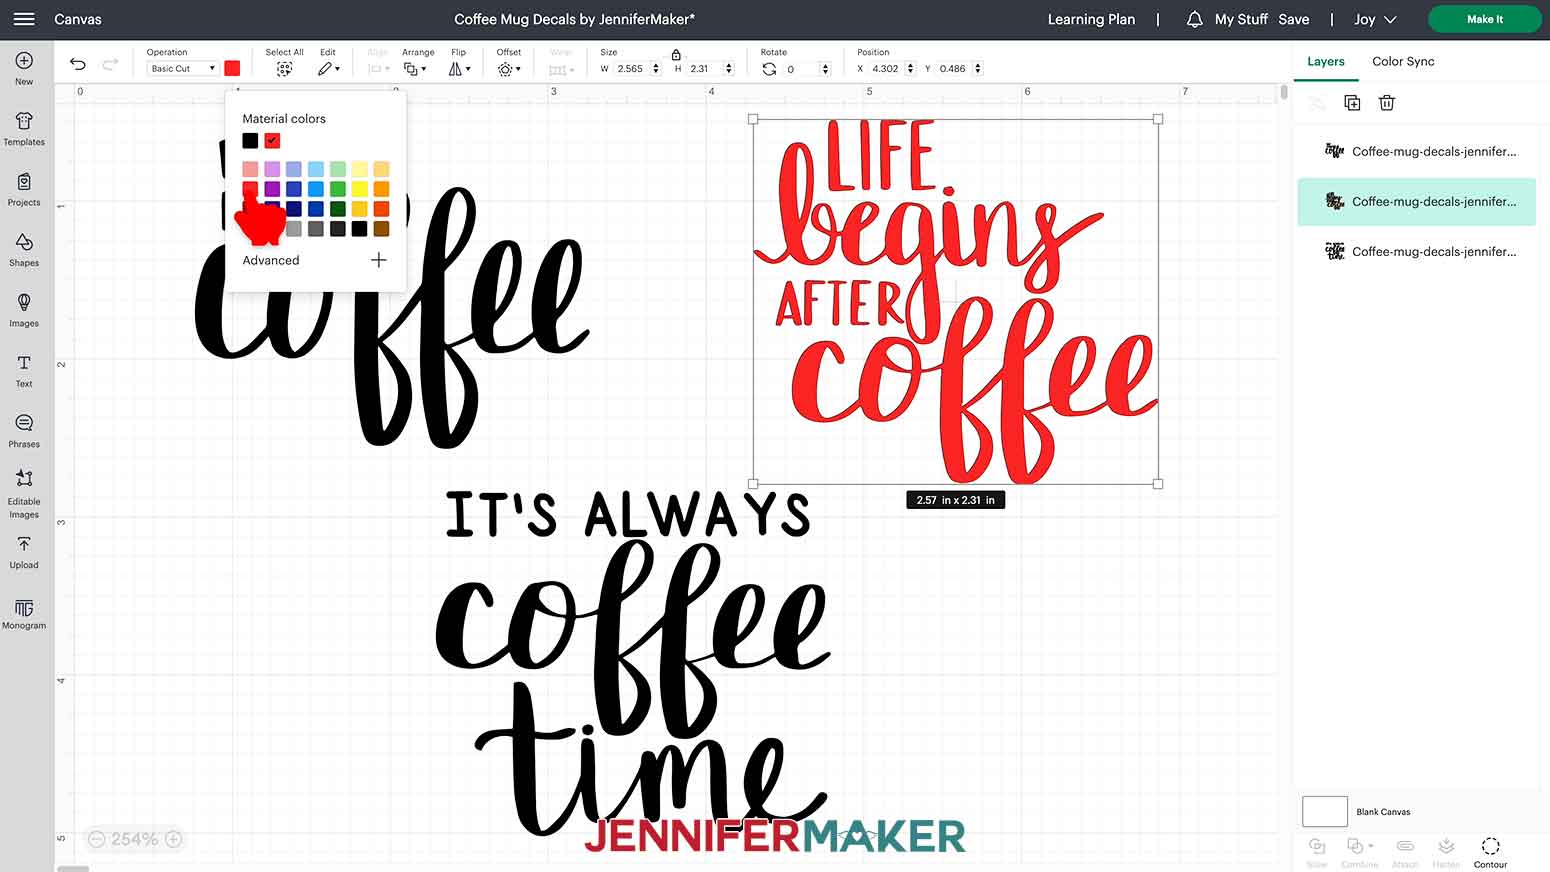
The third design, “It’s Always Coffee Time,” will also be black but if we leave it black, our Cricut will cut it on the same mat at the first decal. We don’t want that since we’re using two different vinyls. Select the design and I’m going to use dark grey so that my Cricut places it on its own mat. 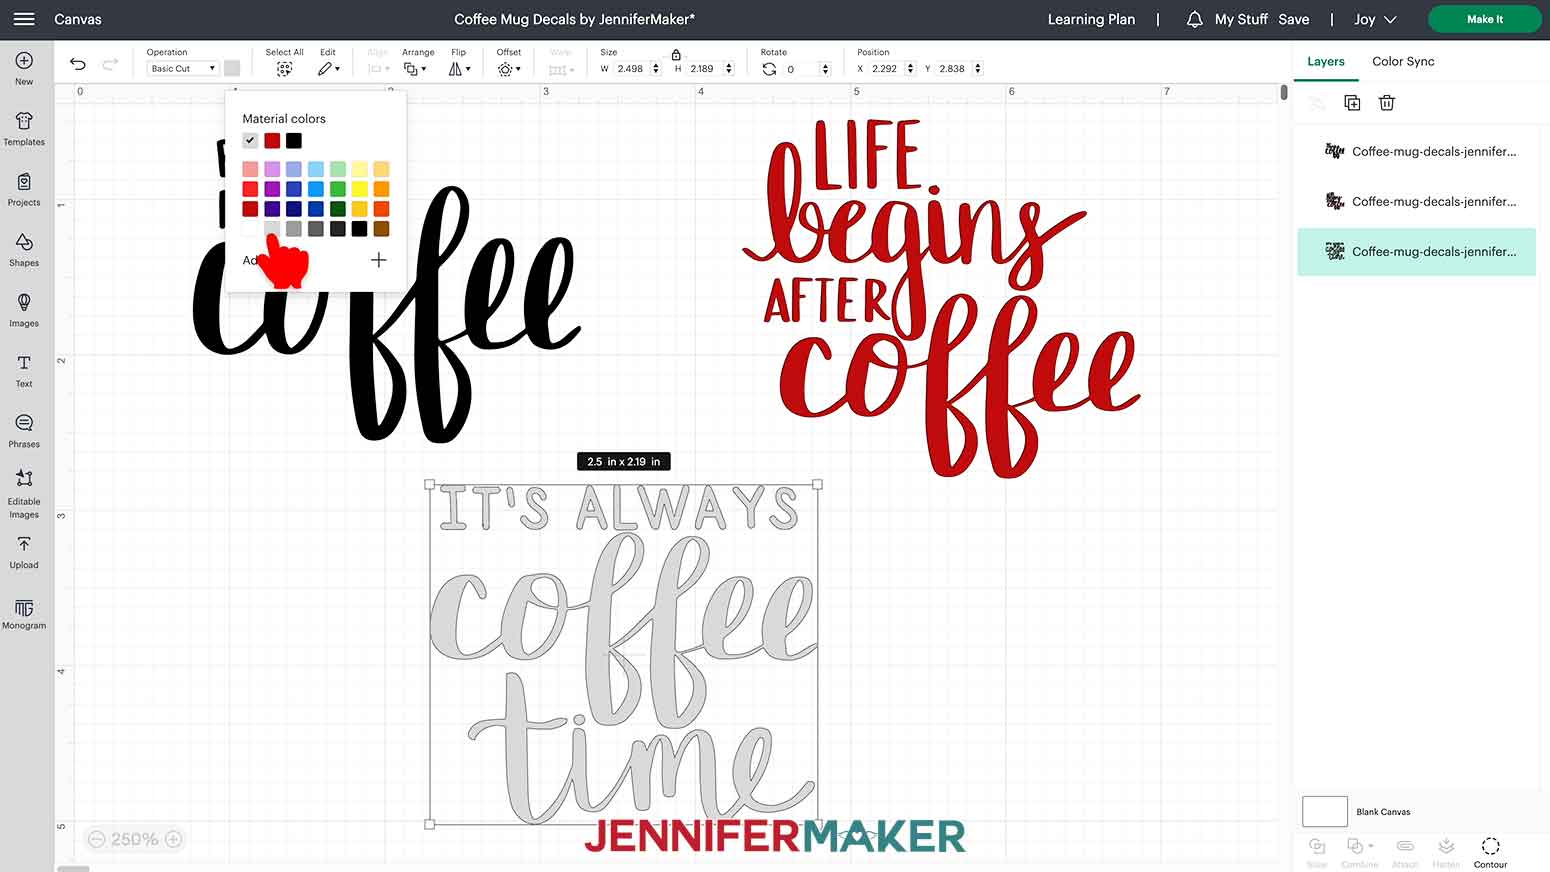
Make sure the correct machine machine is selected and click “Make It” in the upper right corner.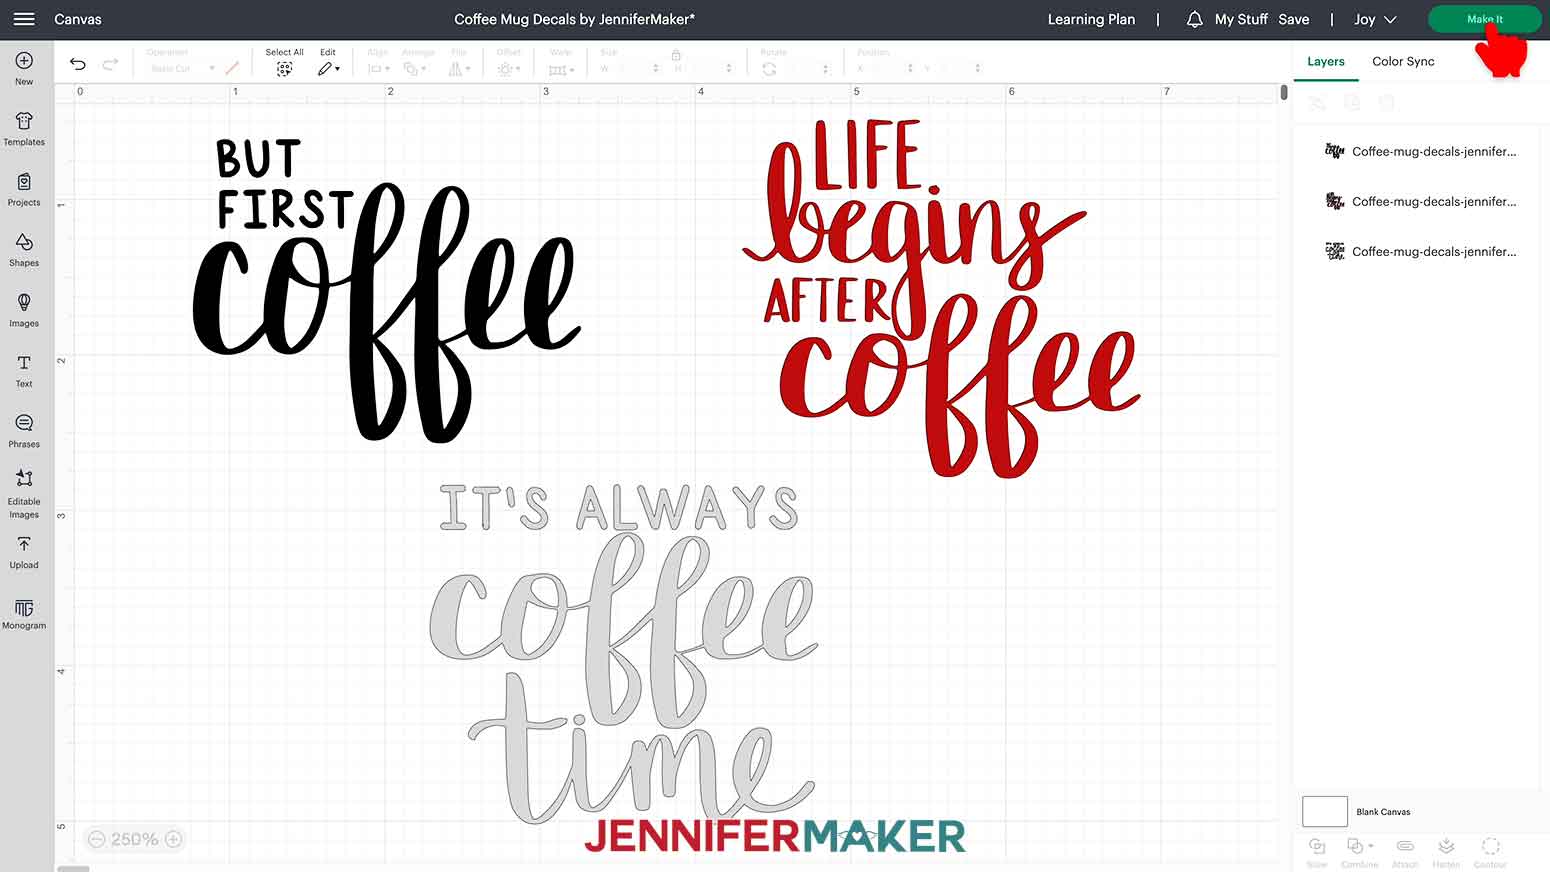
If you are prompted to select how you will load your materials, select “On Mat” and for the Joy “4.5 in x 6.5 in” mat size and click “Confirm.”
The first mat is the grey mat. This is going to be the iron-on black vinyl. Since it is iron-on, we need to toggle “Mirror” to the on position. 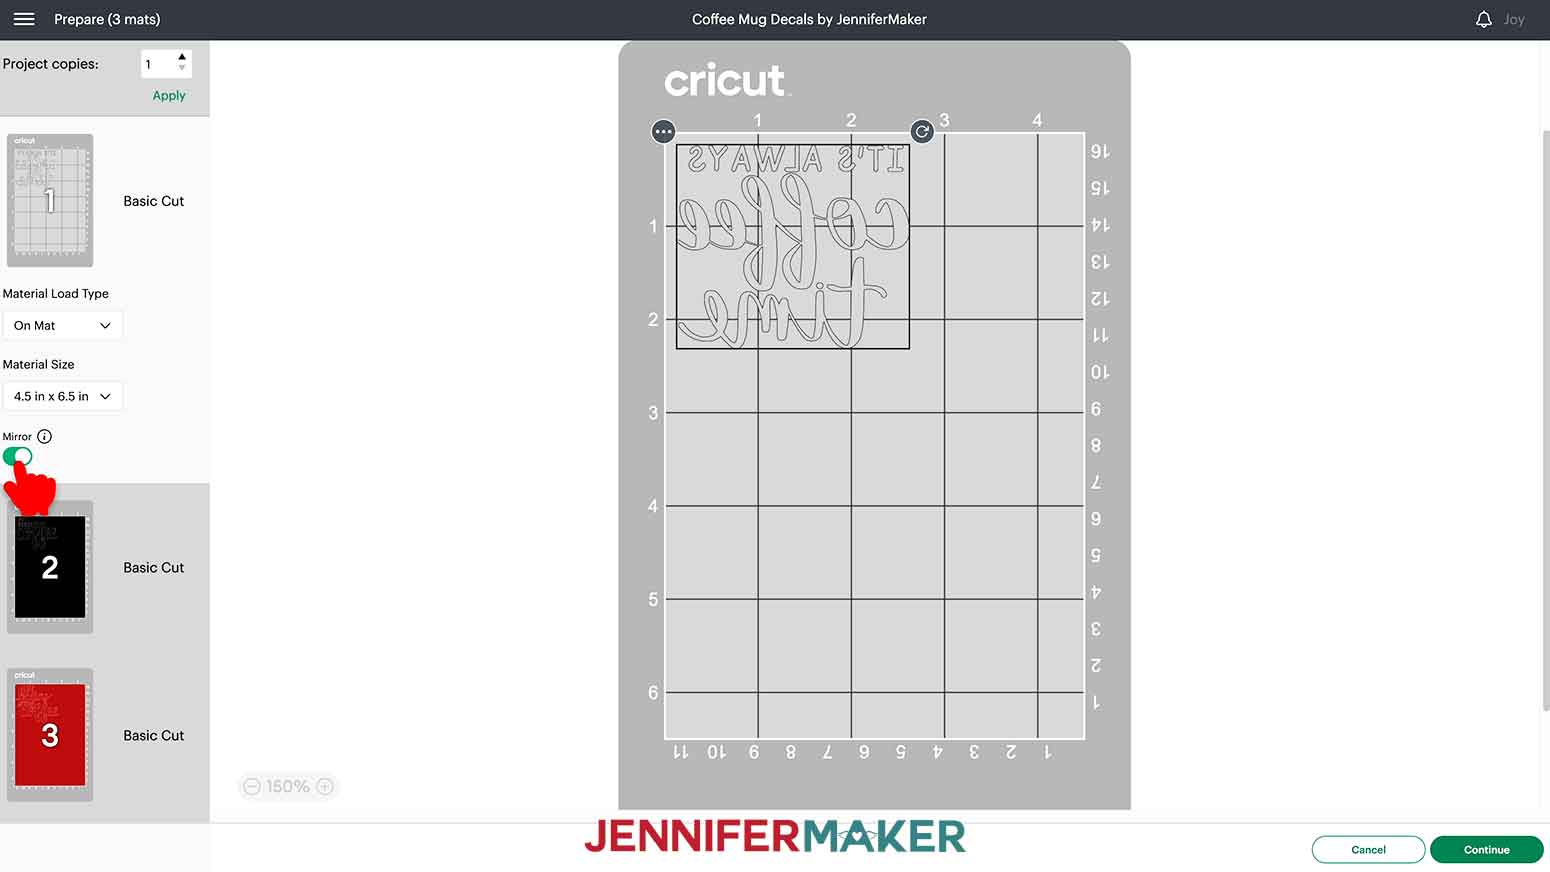
The black and red mat will stay as they are. Click “Continue” in the lower right corner.
The material type will be different for each mat. If you don’t see the correct material on your screen, click “Browse All Materials” and search for the material you are using. 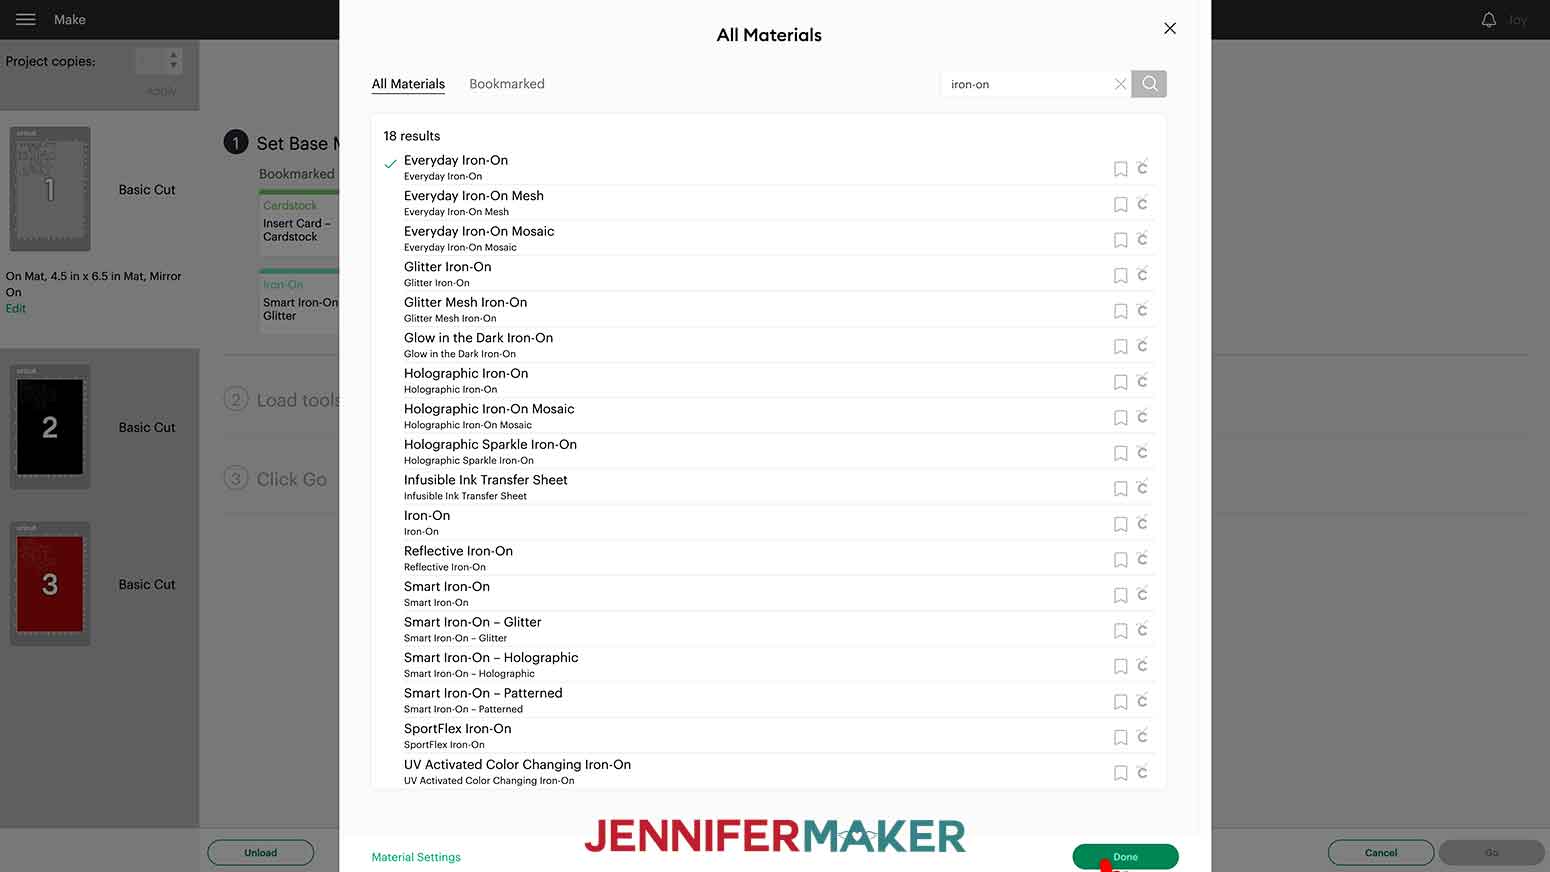
For the iron-on design, I will select “Everyday Iron-On” and for the pressure, select “More.” 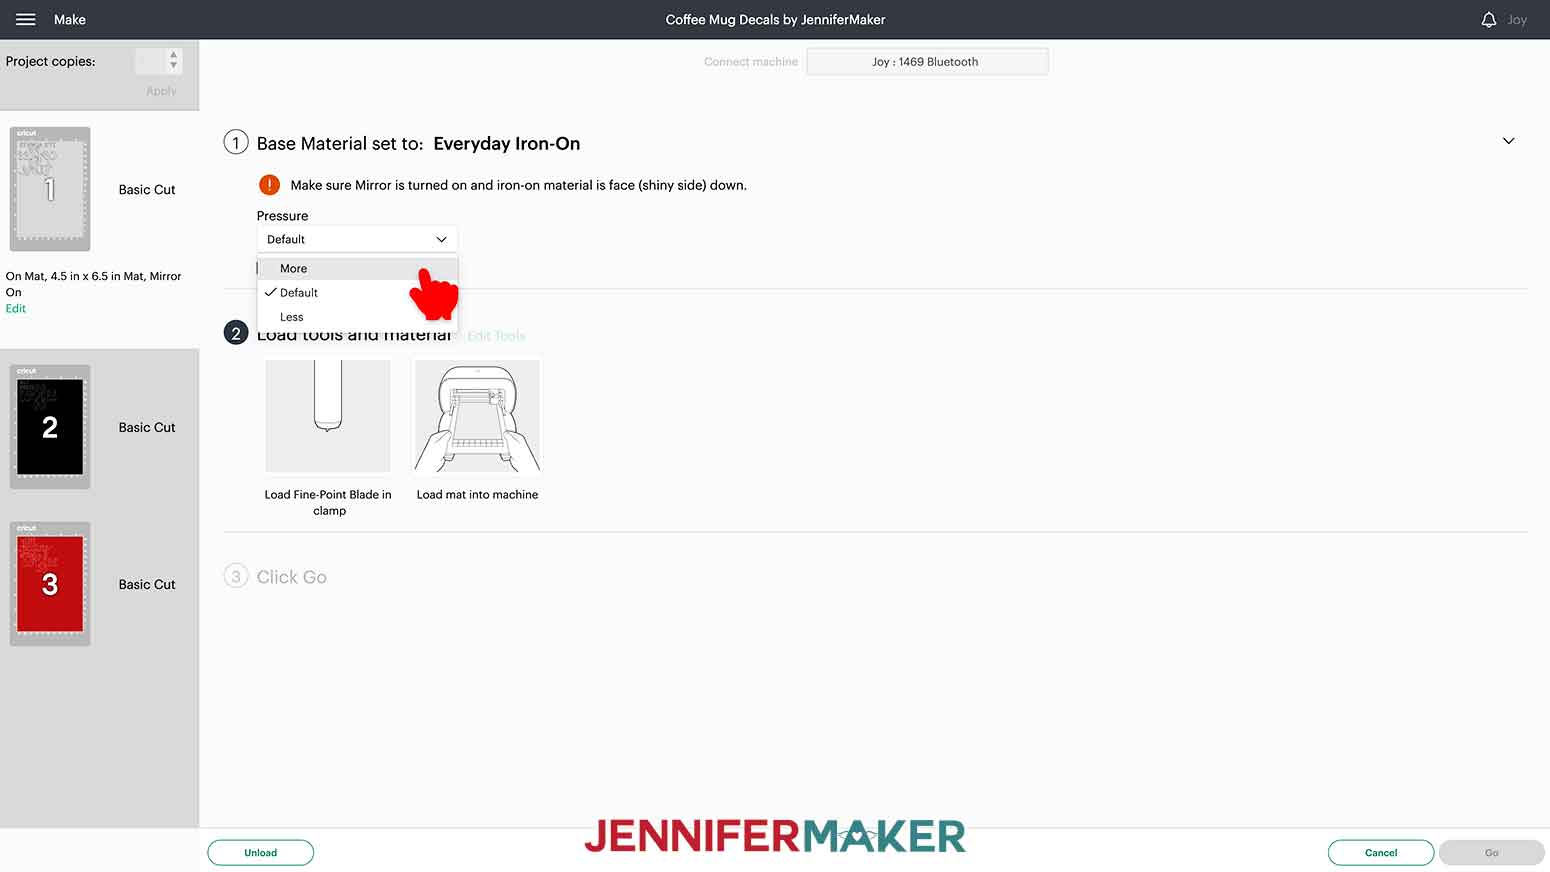
Place your iron-on vinyl with the shiny side down on a green StandardGrip machine mat. Use a brayer to help adhere the vinyl to the machine mat.
Insert the mat into your Joy and allow a moment for it to measure the mat. When it is done, click the green “Go” in the bottom right of the screen. 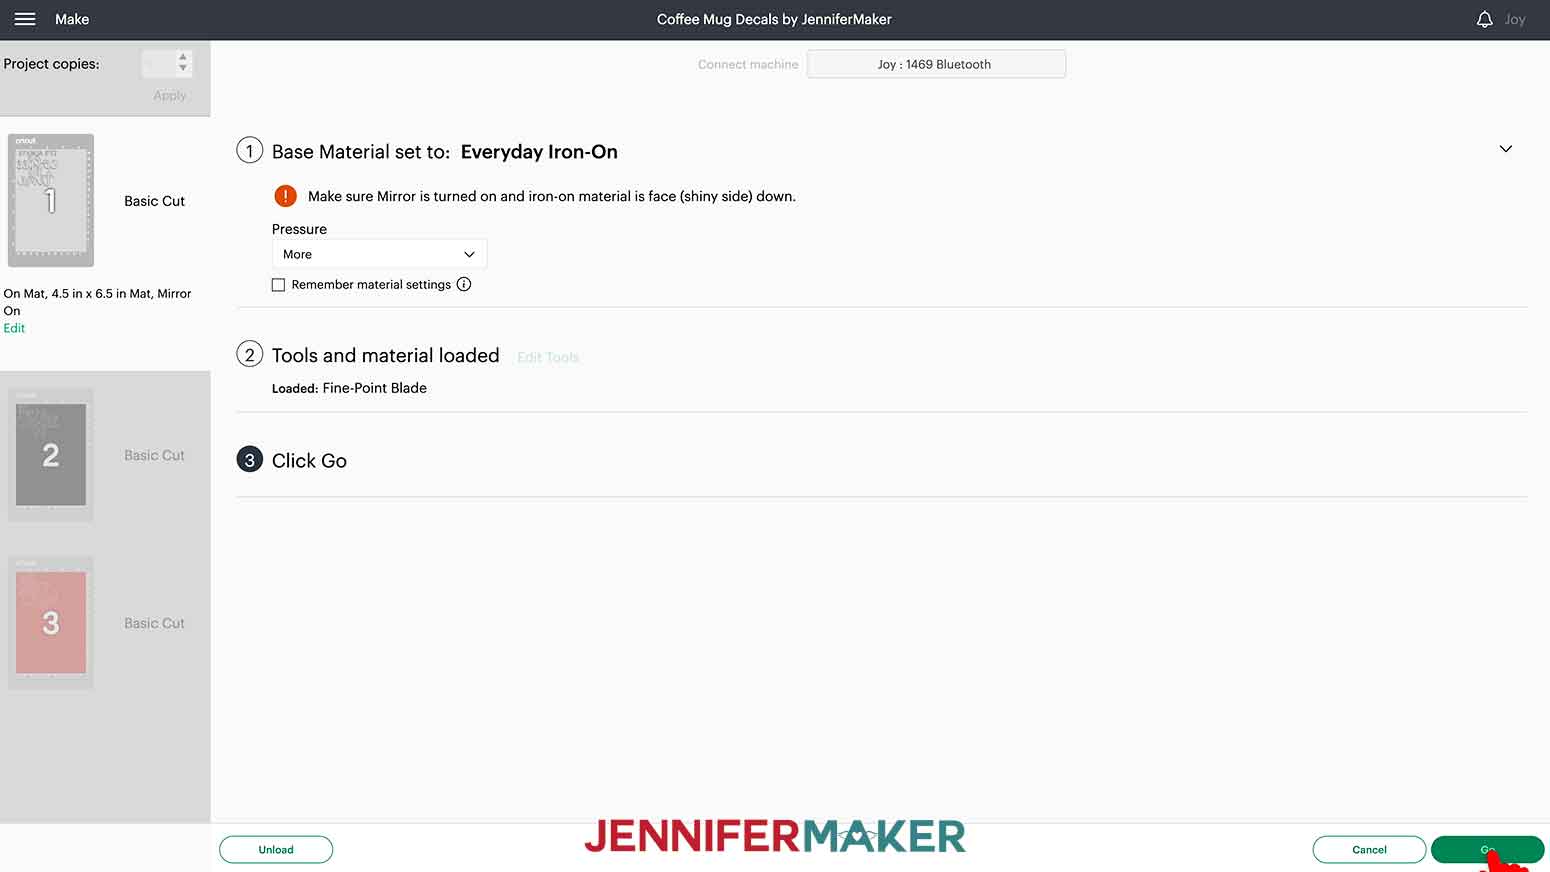
When the cut is done, click “Unload” on your device.
Flip the mat and gently peel the mat away from the vinyl. 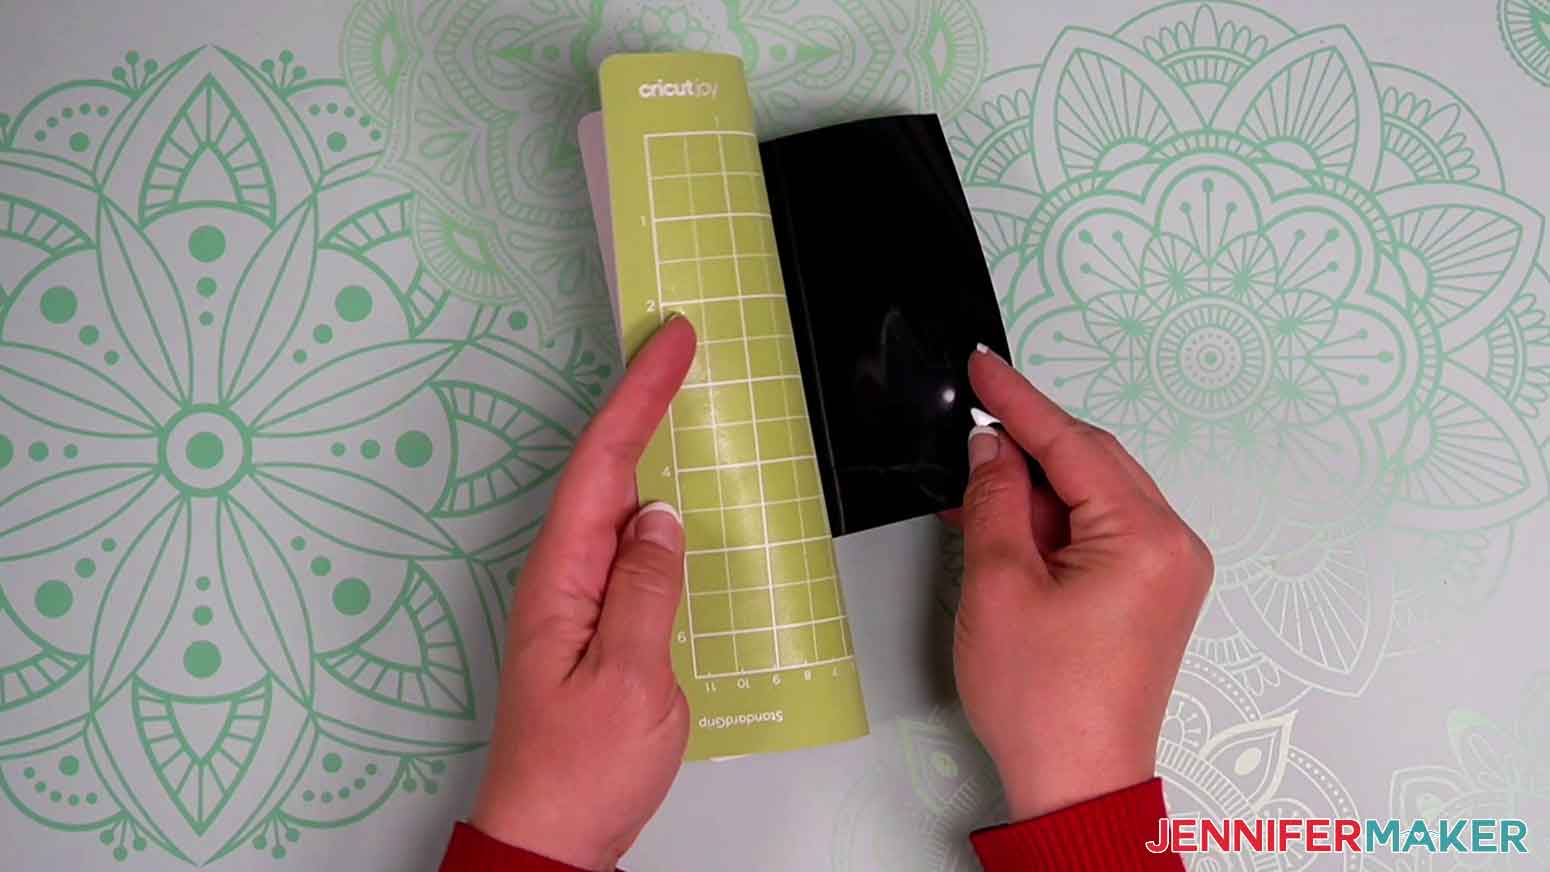
Set the vinyl aside and place the next piece of vinyl on the mat. Next up is the permanent black vinyl. Place the vinyl on the mat with the liner against the mat and the black facing up. 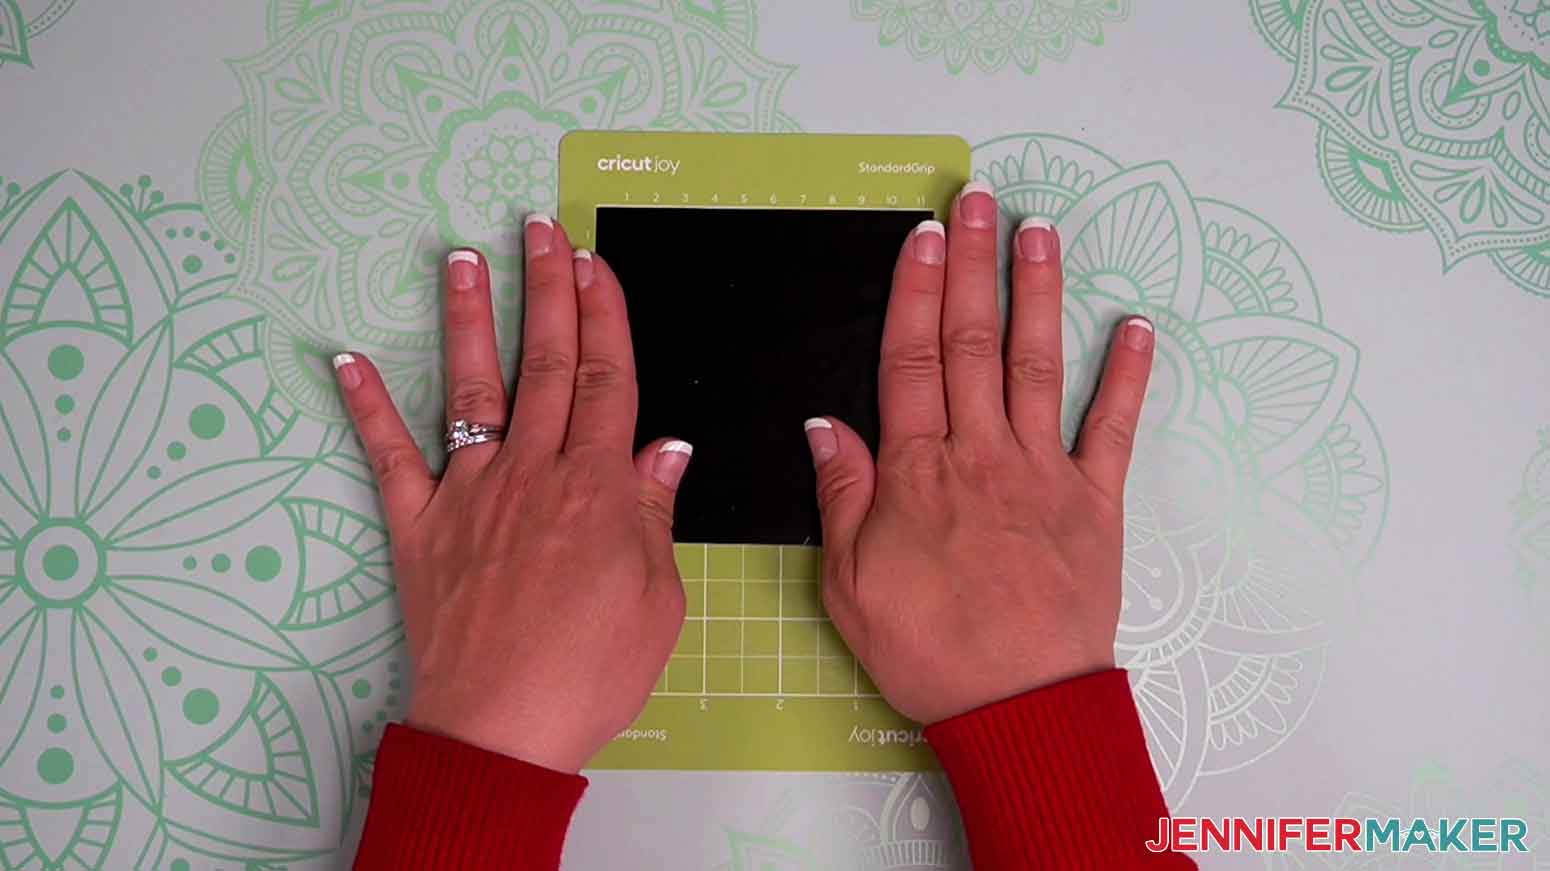
For this vinyl, I will use the “Premium Vinyl” material setting. If you don’t see it displayed, click on “Browse All Materials” to search for it. Again, I will set the Pressure to “More.” 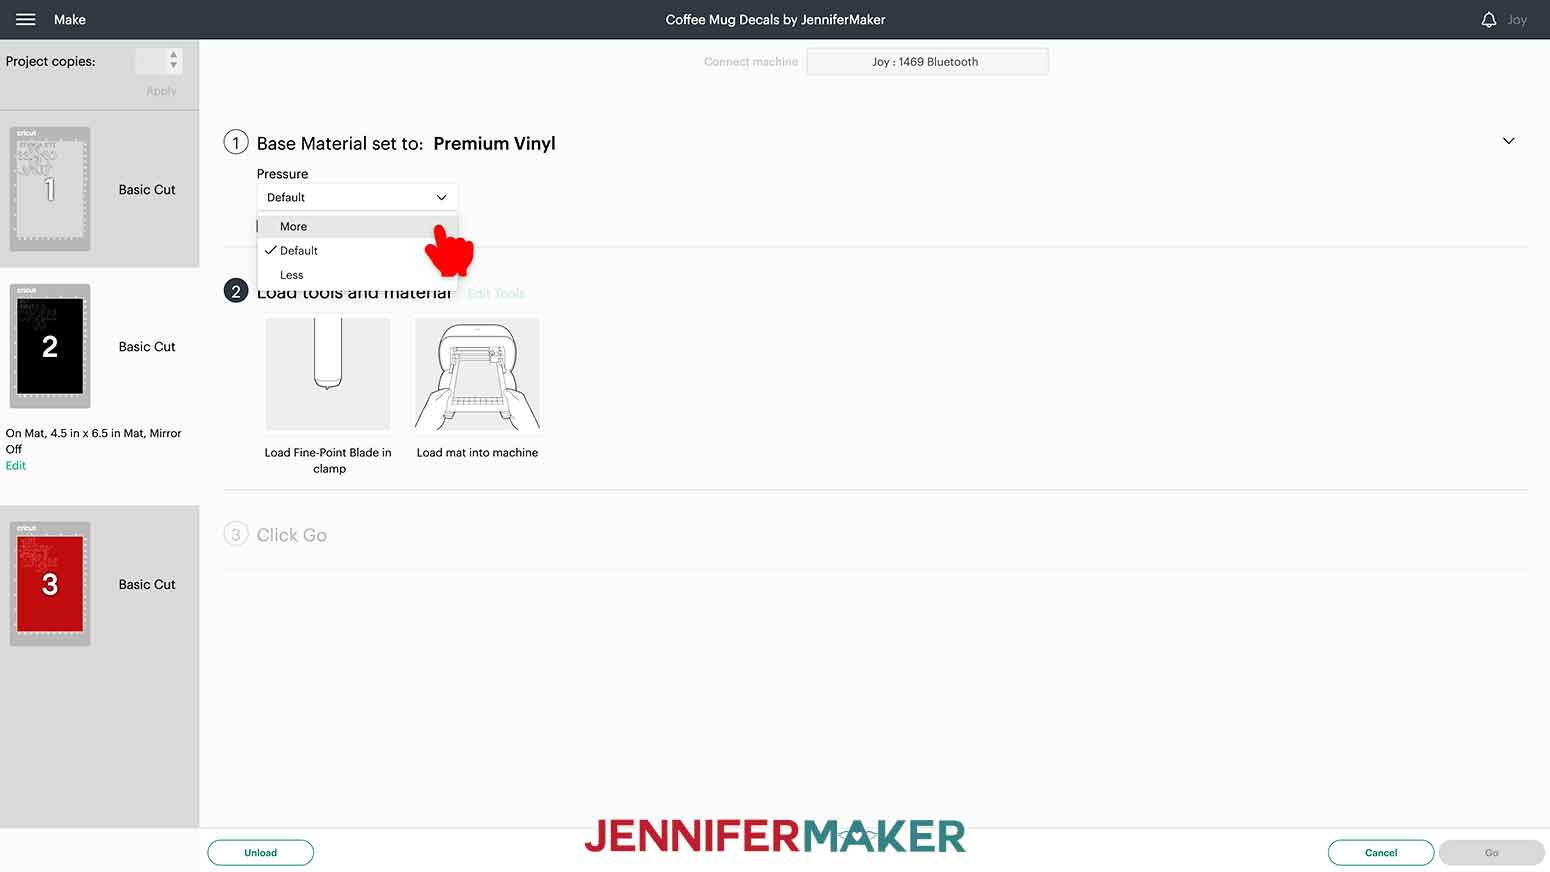
Insert the mat into your Joy and allow a moment for it to measure the mat. When it is done, click the green “Go” in the bottom right of the screen.
When the cut is done, click “Unload” on your device.

Flip the mat and gently peel the mat away from the vinyl.
Set the vinyl aside and place the next piece of vinyl on the mat. Next up is the shimmer red vinyl. Place the vinyl on the mat with the liner against the mat and the red facing up. 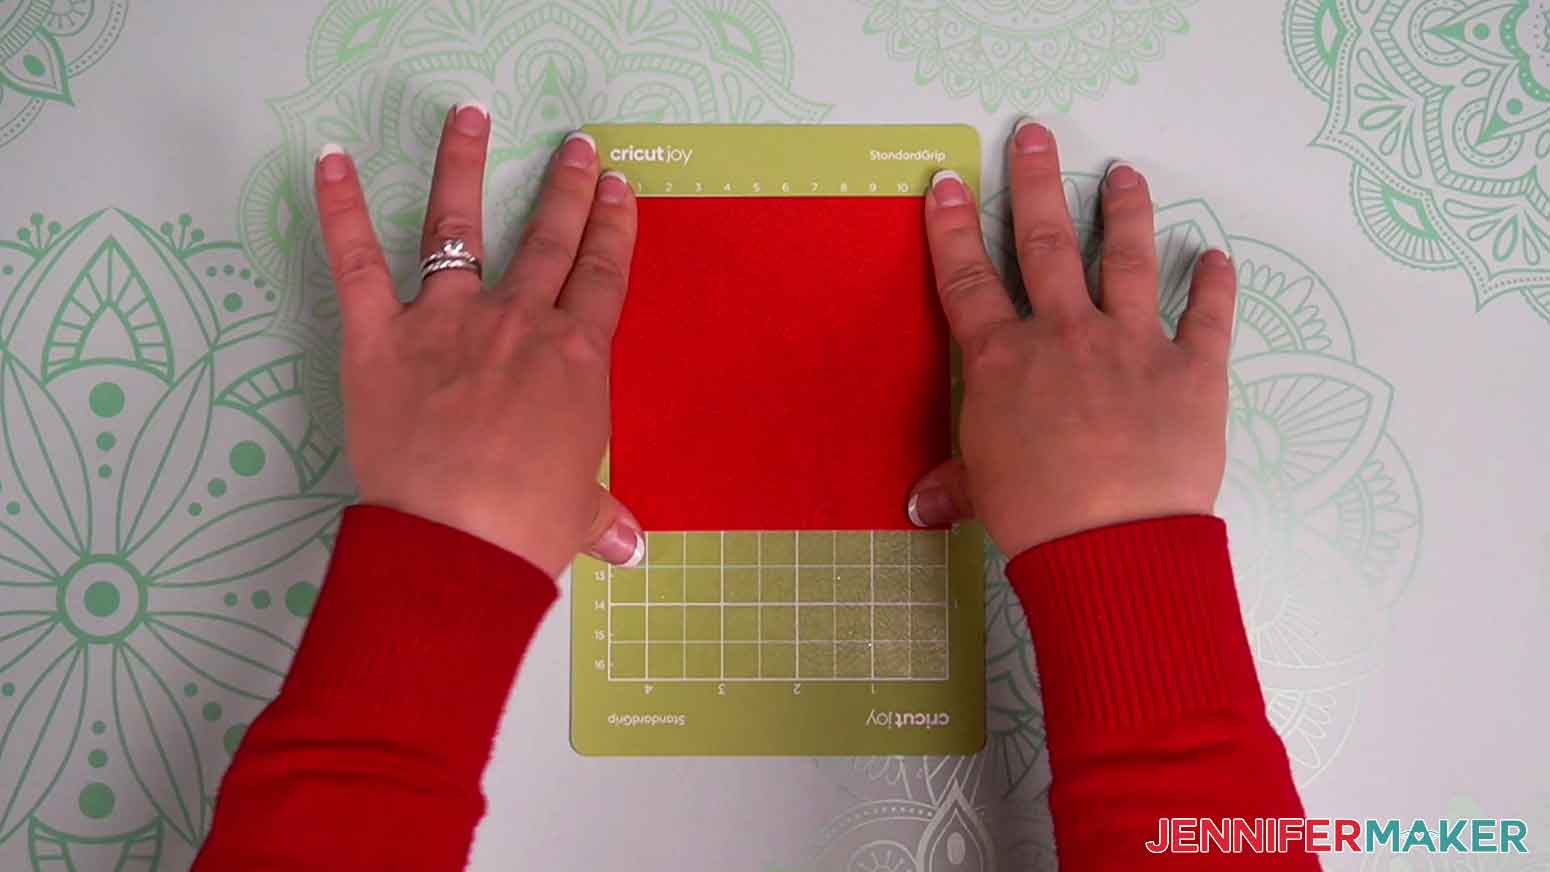
For this vinyl, I will use the “Smart Vinyl-Shimmer” material setting. If you don’t see it displayed, click on “Browse All Materials” to search for it. It is okay to use this setting even if you are not using Smart vinyl. Again, I will set the Pressure to “More.” 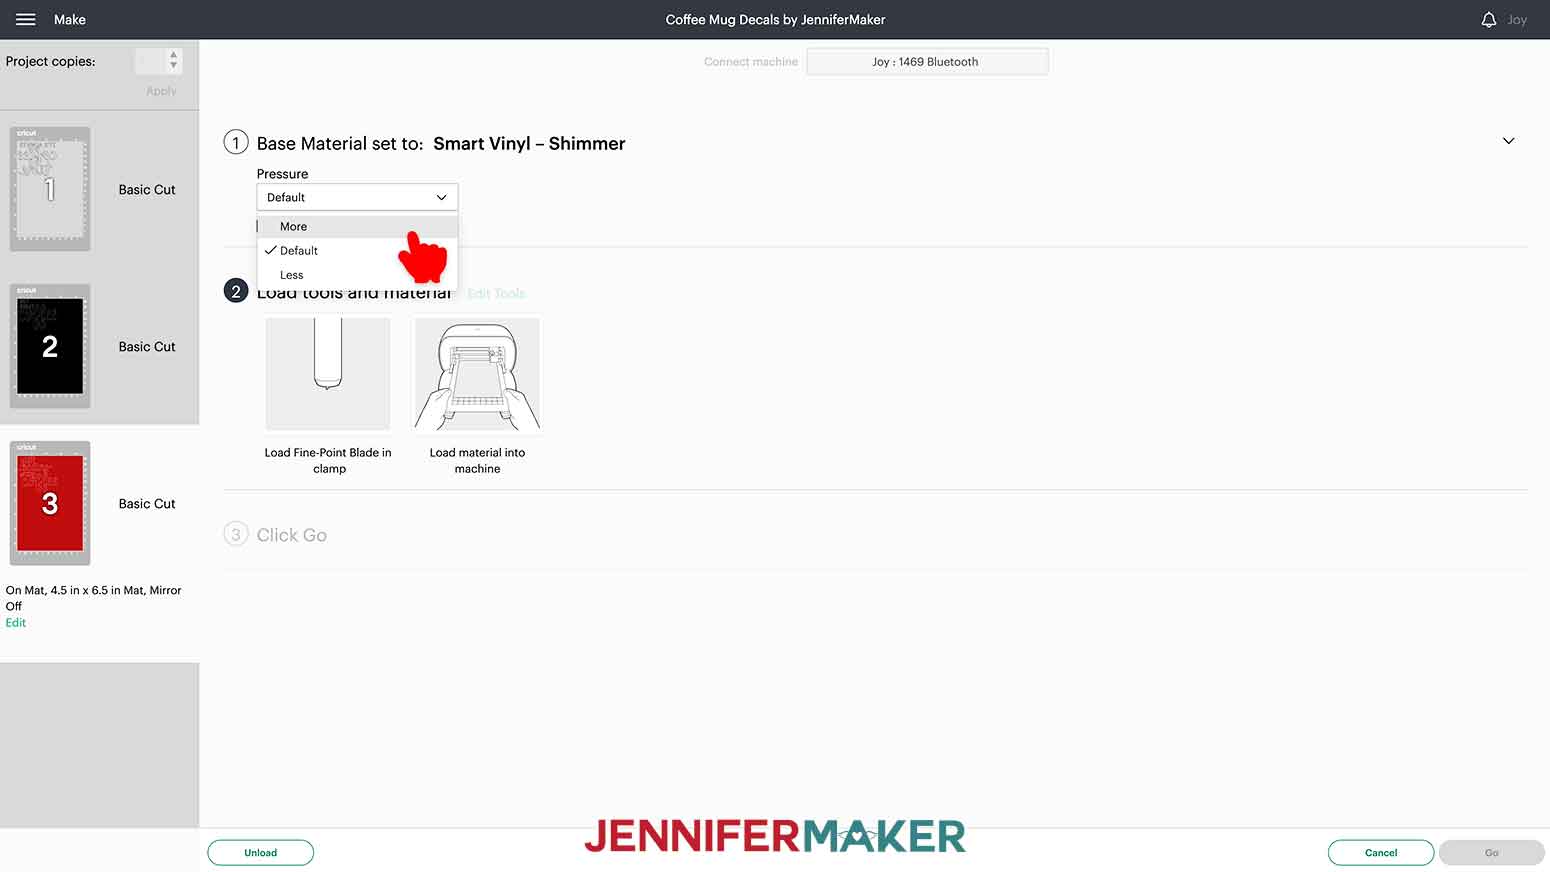
Insert the mat into your Joy and allow a moment for it to measure the mat. When it is done, click the green “Go” in the bottom right of the screen.
When the cut is done, click “Unload” on your device.
Flip the mat and gently peel the mat away from the vinyl.
STEP 4: WEED YOUR DESIGNS AND APPLY TO CERAMIC MUGS
Use a weeding tool to gently remove all of the excess vinyl from your mug decal designs. Remember all of the little bits inside the letters and be careful not to remove any dots if you have an “i” in your design.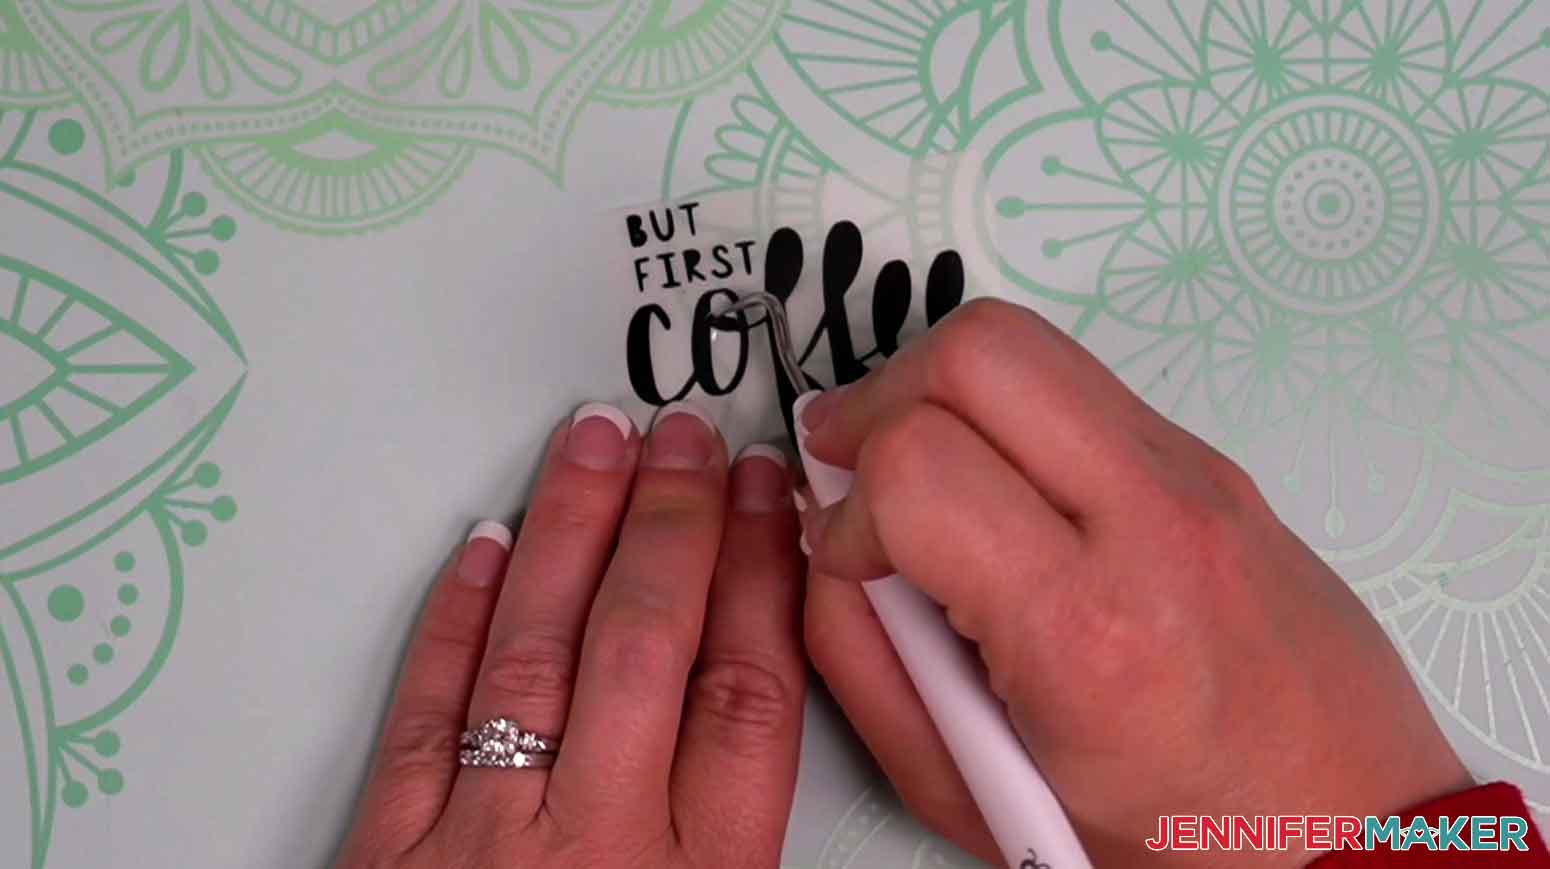
Before applying any designs, we need to clean the surface of the mugs. Use isopropyl alcohol and a lint-free cloth to remove any oil, dust, or debris from the mug surface.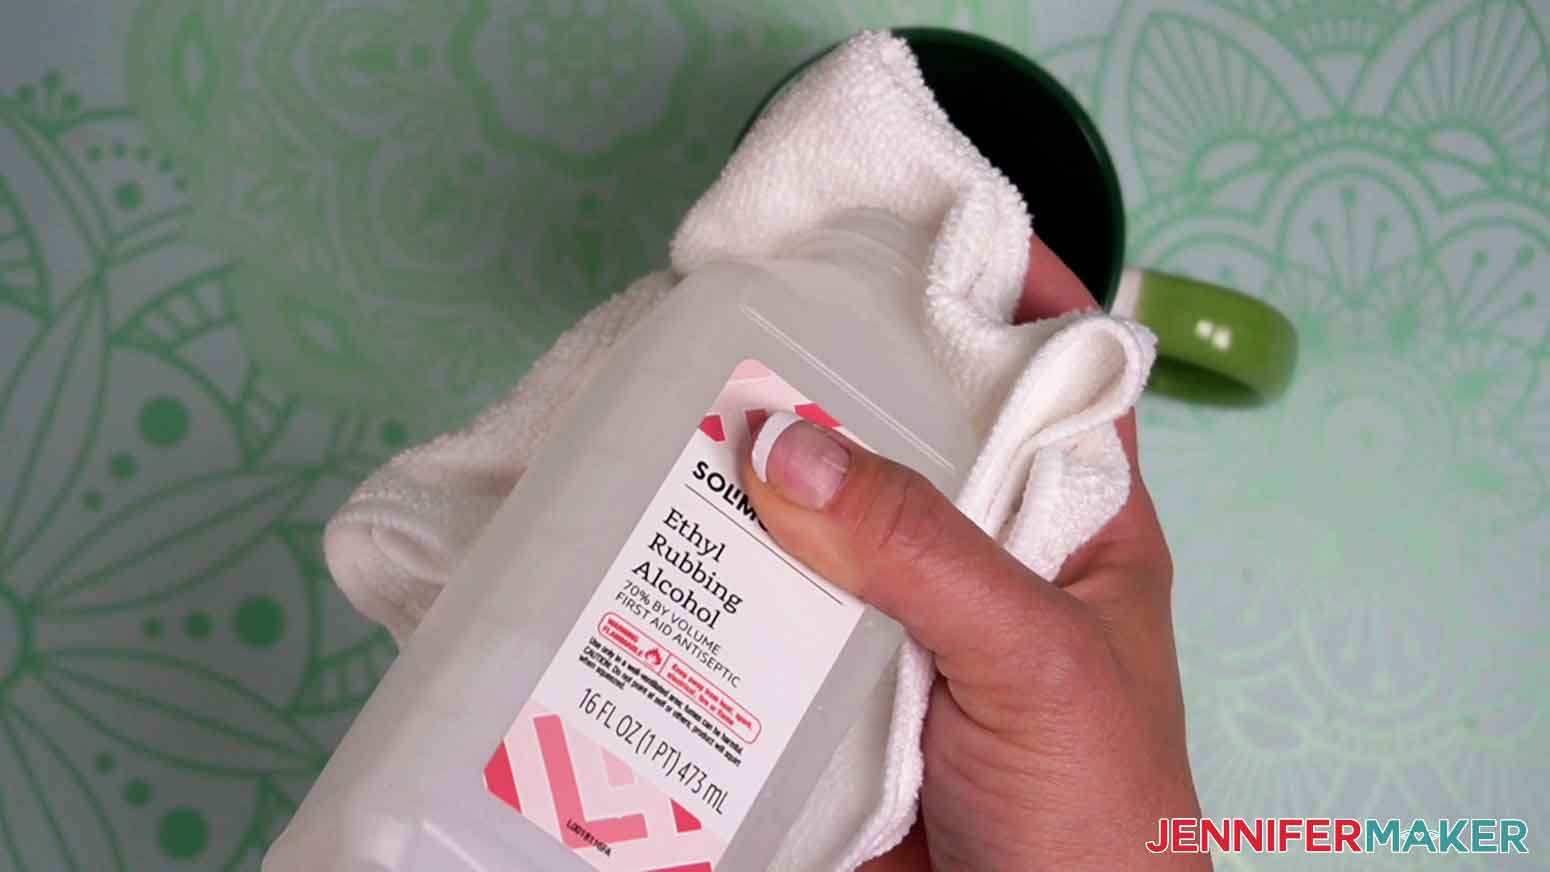
PERMANENT BLACK VINYL
First, we’ll apply the “But First Coffee” black vinyl design to a green accent mug. Cut a piece of StandardGrip transfer tape slightly larger than the design. Place the transfer tape over the permanent vinyl and use a small scraper to adhere the transfer tape to the vinyl.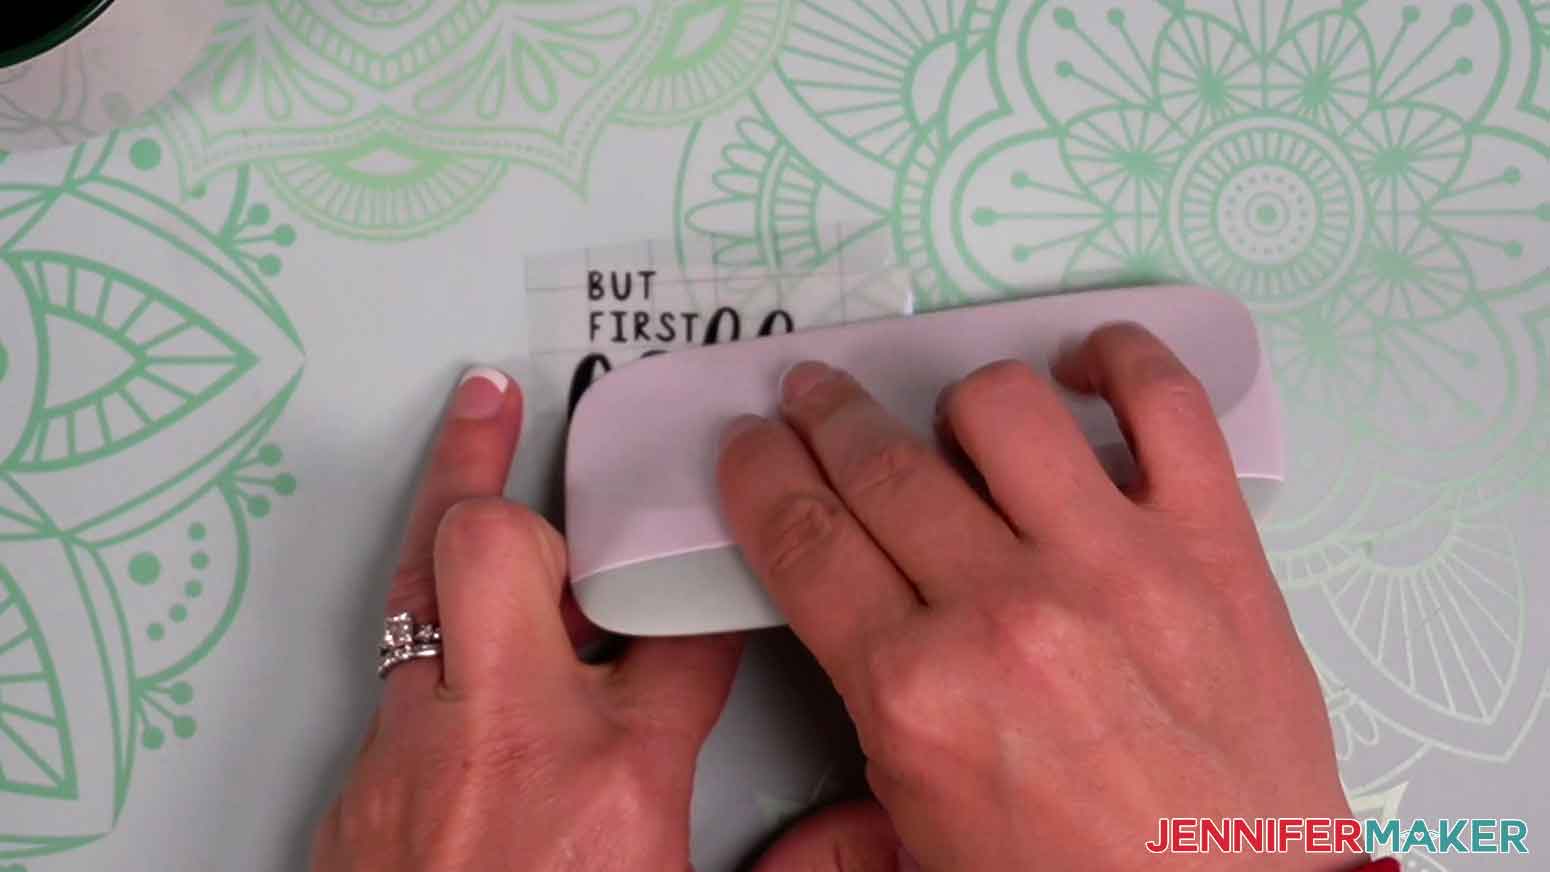
Gently remove the vinyl backing from the vinyl and transfer tape. If any areas stick to the backing, use a weeding tool or scraper to help the vinyl.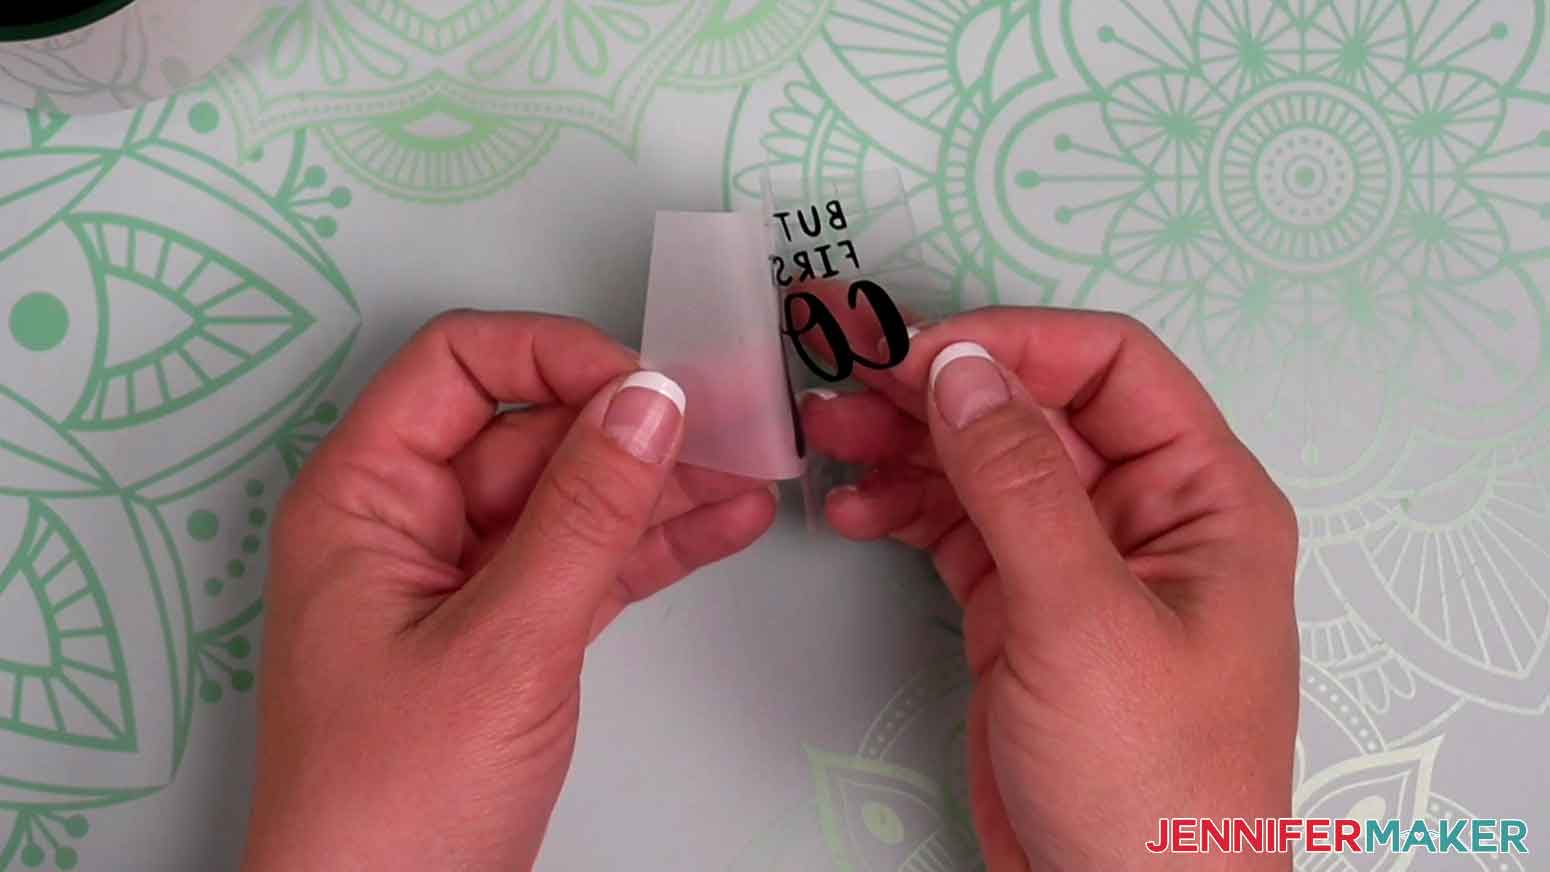
To stabilize my mug, I laid it on a thin roll of painter’s tape. 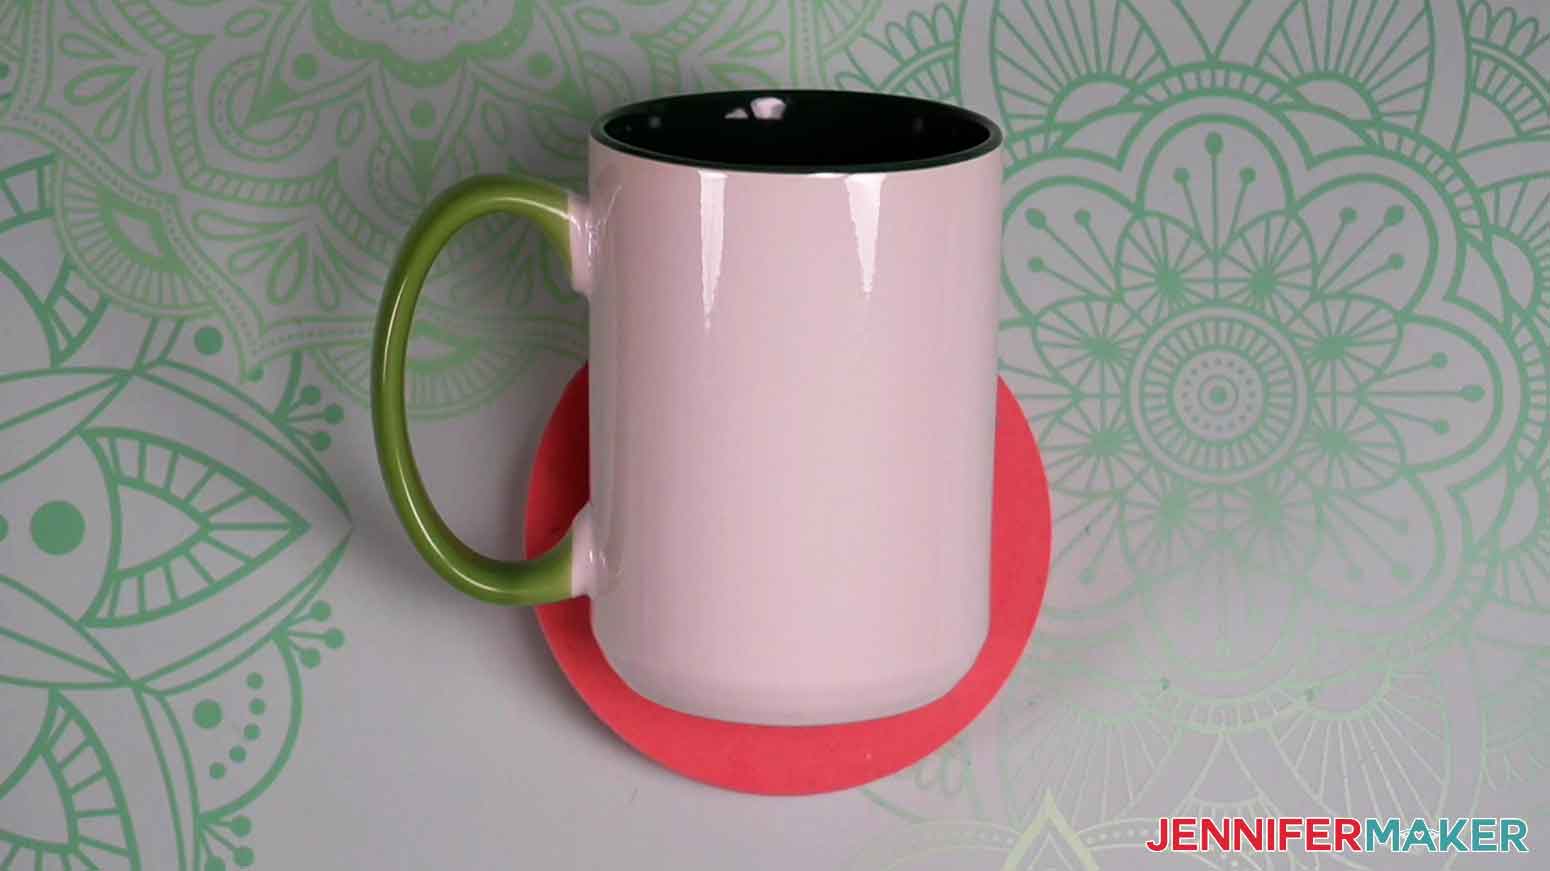
Align the top of the decal with the edge of the mug and and lower it to the center of the blank area. Gently fold up the edges to make a “taco” shape and press the bottom to the mug. 
Press down the side of the design and use a small scraper over the whole design to help maximize the adhesion to the mug. 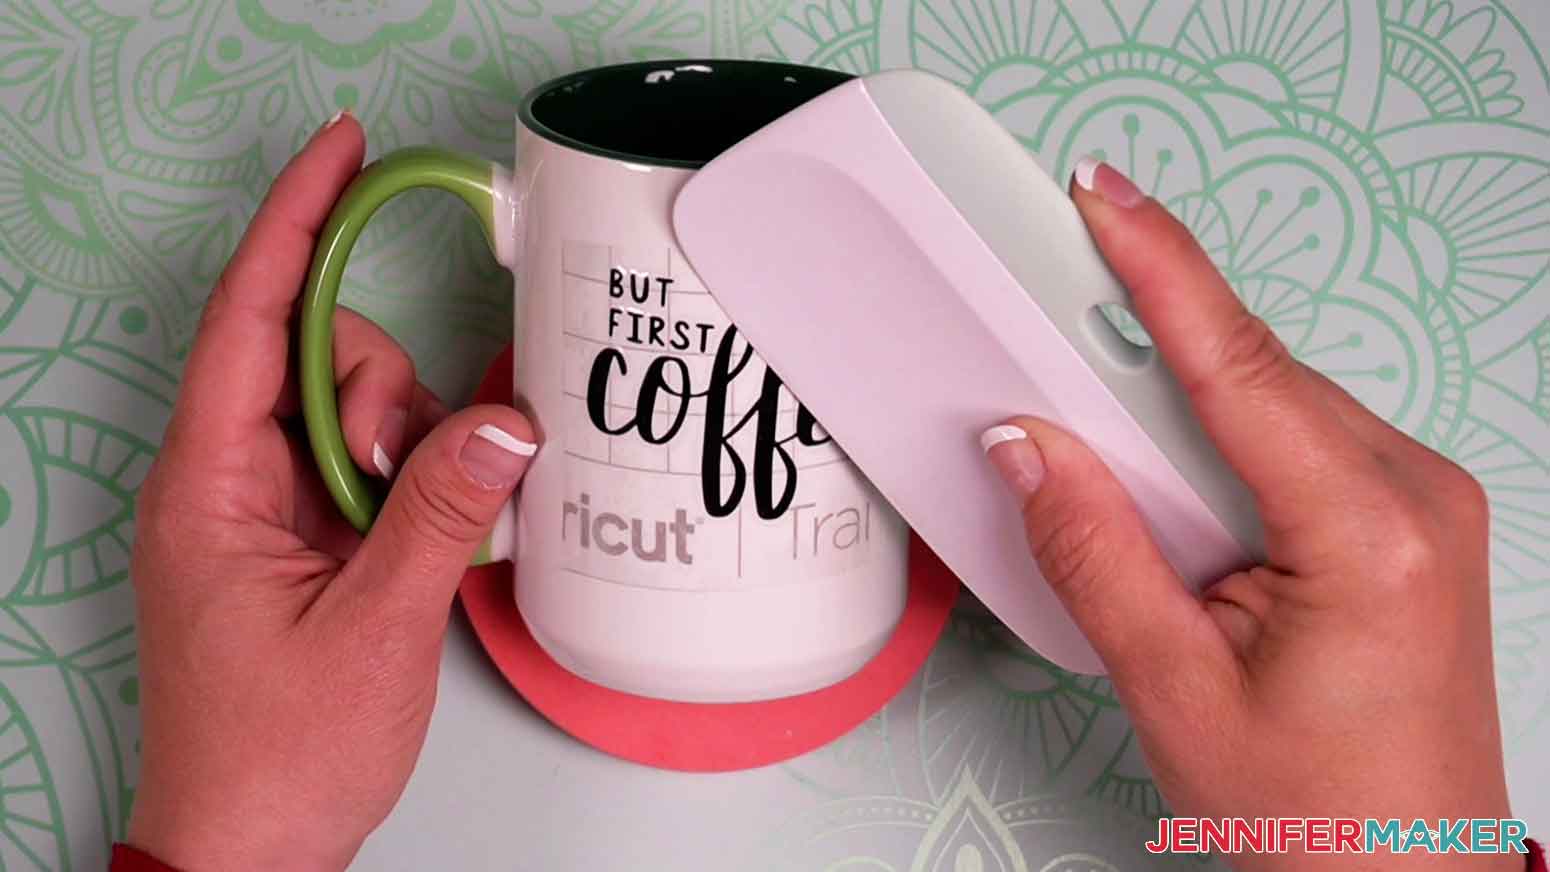
Slowly peel the transfer tape away from the mug. If any areas lift, use the scraper over the area.
The first mug is complete! 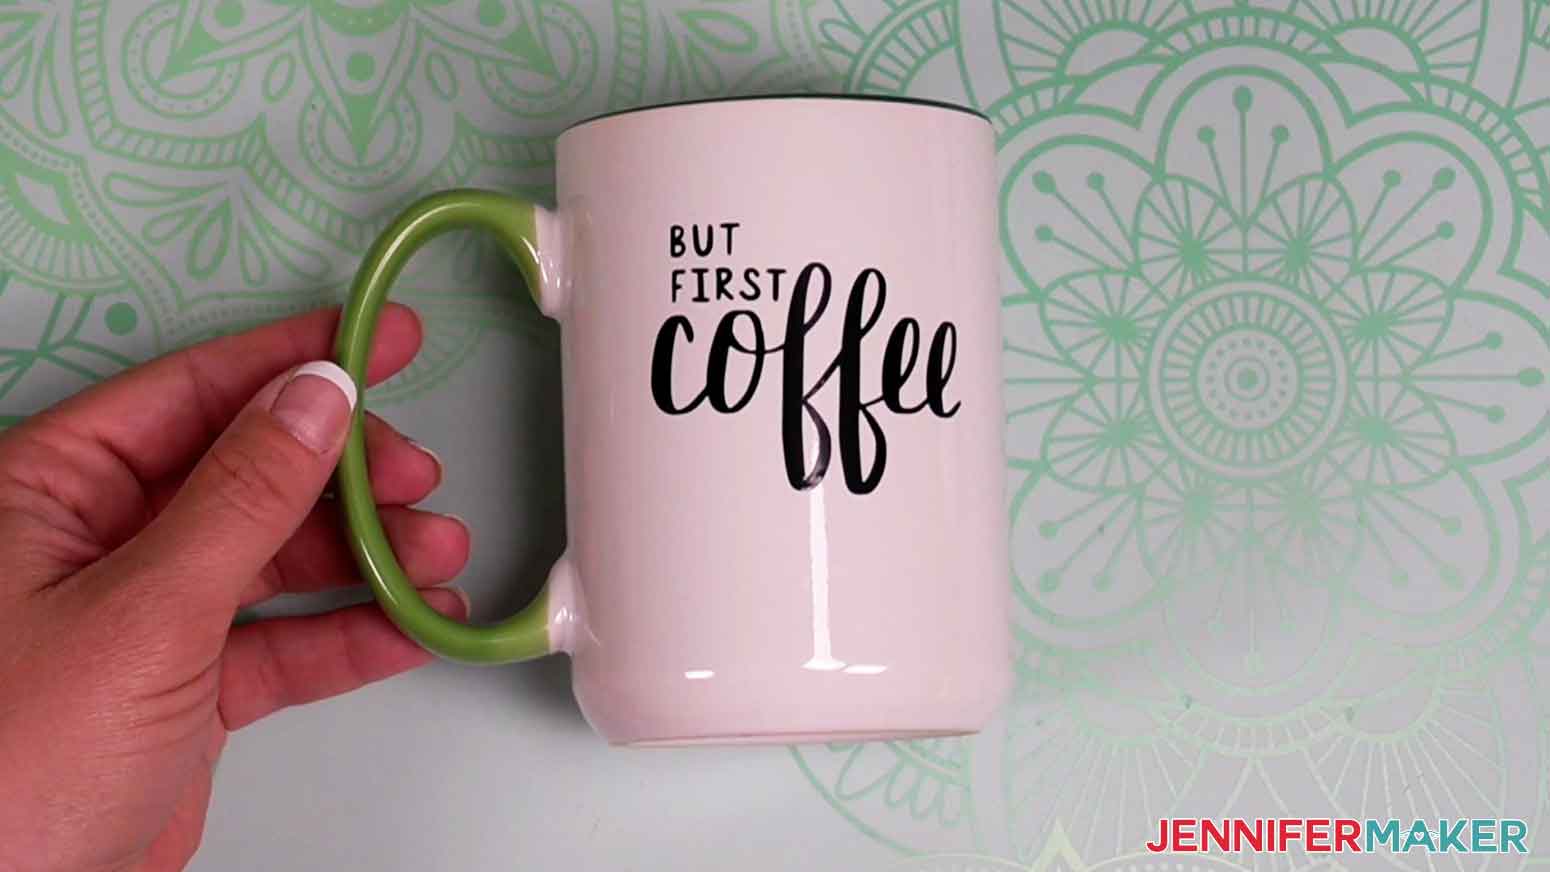
SHIMMER PERMANENT VINYL
Second, we’ll apply the “Life Begins After Coffee” red shimmer vinyl design to a “reef” colored Cricut mug. Cut a piece of StrongGrip transfer tape slightly larger than the design. Place the transfer tape over the shimmer vinyl and use a small scraper to adhere the transfer tape to the vinyl.
Gently remove the vinyl backing from the vinyl and transfer tape. If any areas stick to the backing, use a weeding tool or scraper to help the vinyl.
Stabilize the mug and align the top of the decal with the edge of the mug and and lower it to the center of the blank area. Gently fold up the edges to make a “taco” shape and press the bottom to the mug. 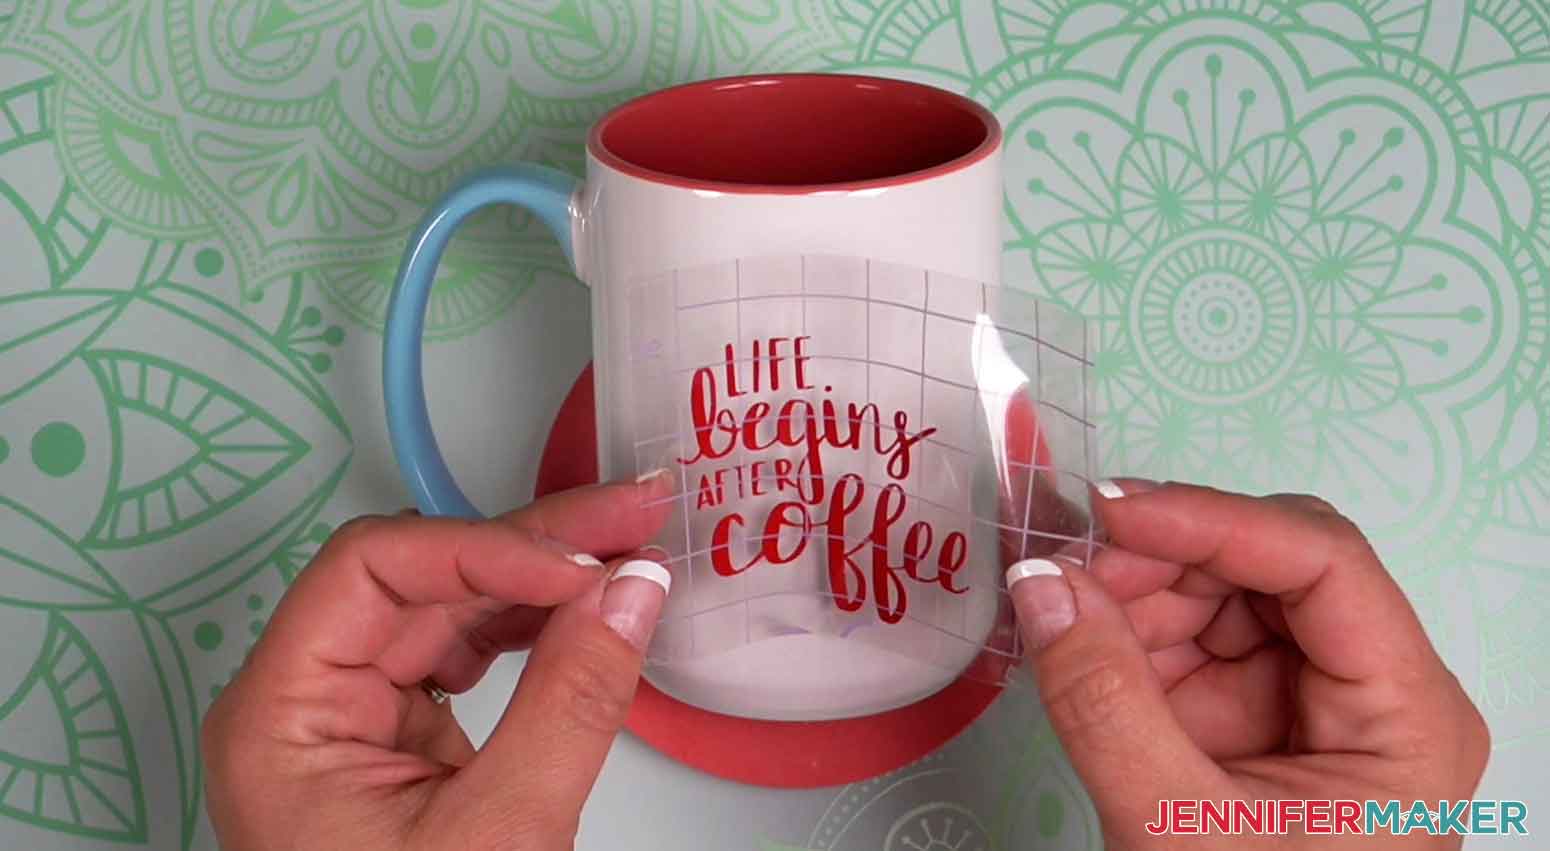
Press down the side of the design and use a small scraper over the whole design to help maximize the adhesion to the mug.
Slowly peel the transfer tape away from the mug. If any areas lift, use the scraper over the area.
The second mug is complete! 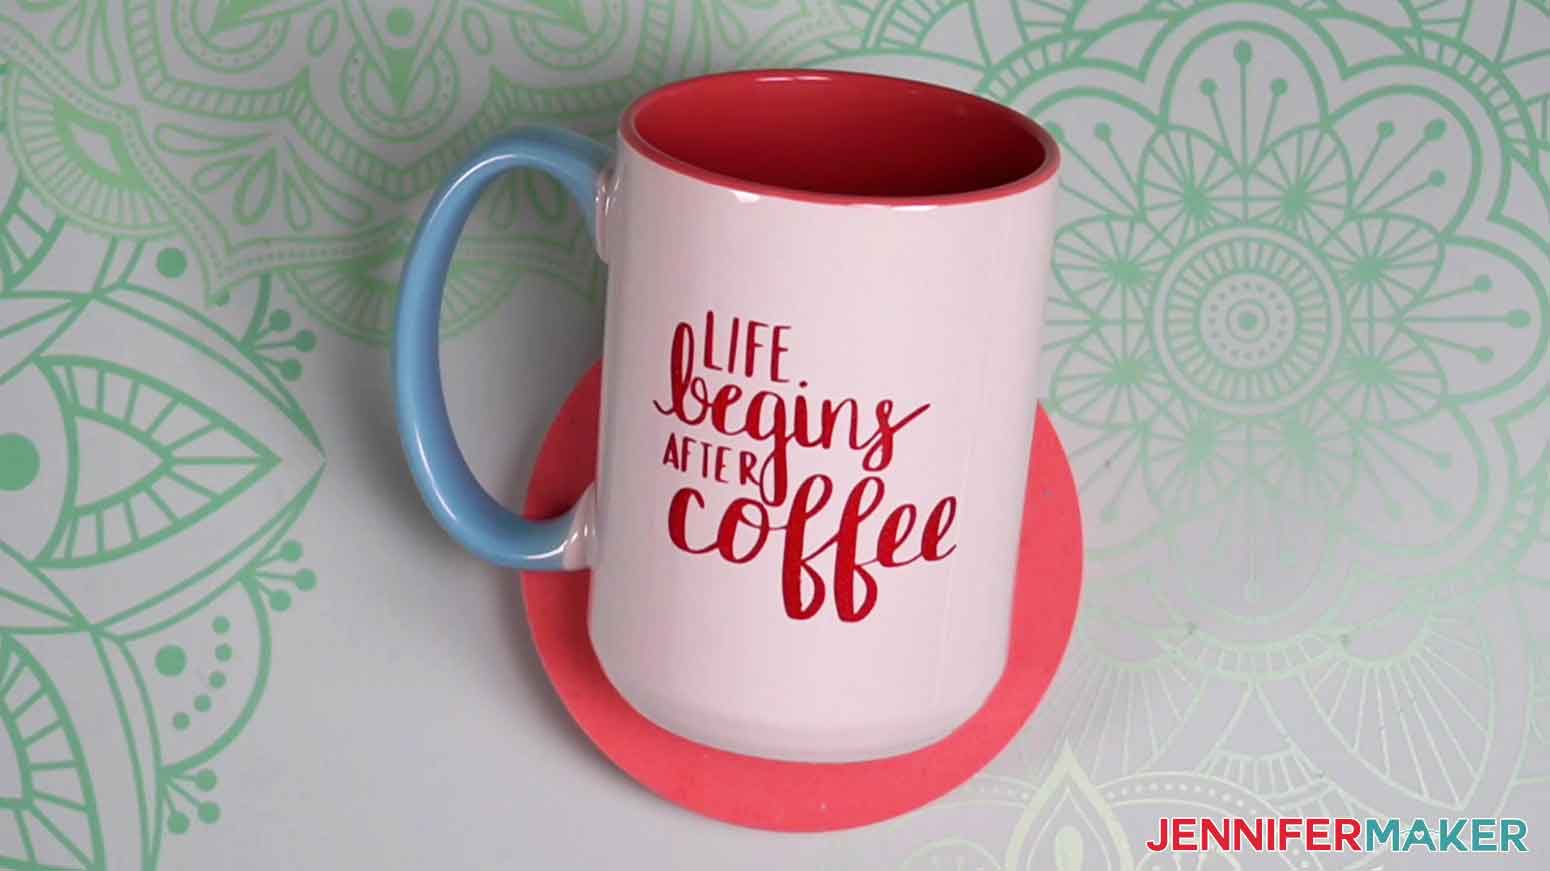
EVERYDAY IRON-ON
Lastly, we’ll apply the “It’s Always Coffee” design with Everyday Iron-On vinyl on a plain white mug. Align the vinyl on the mug surface. I found that the stickiness of the backing was enough to keep the decal against the mug. Optionally, you can use heat-resistant tape around the edges of the design to hold it against the mug. 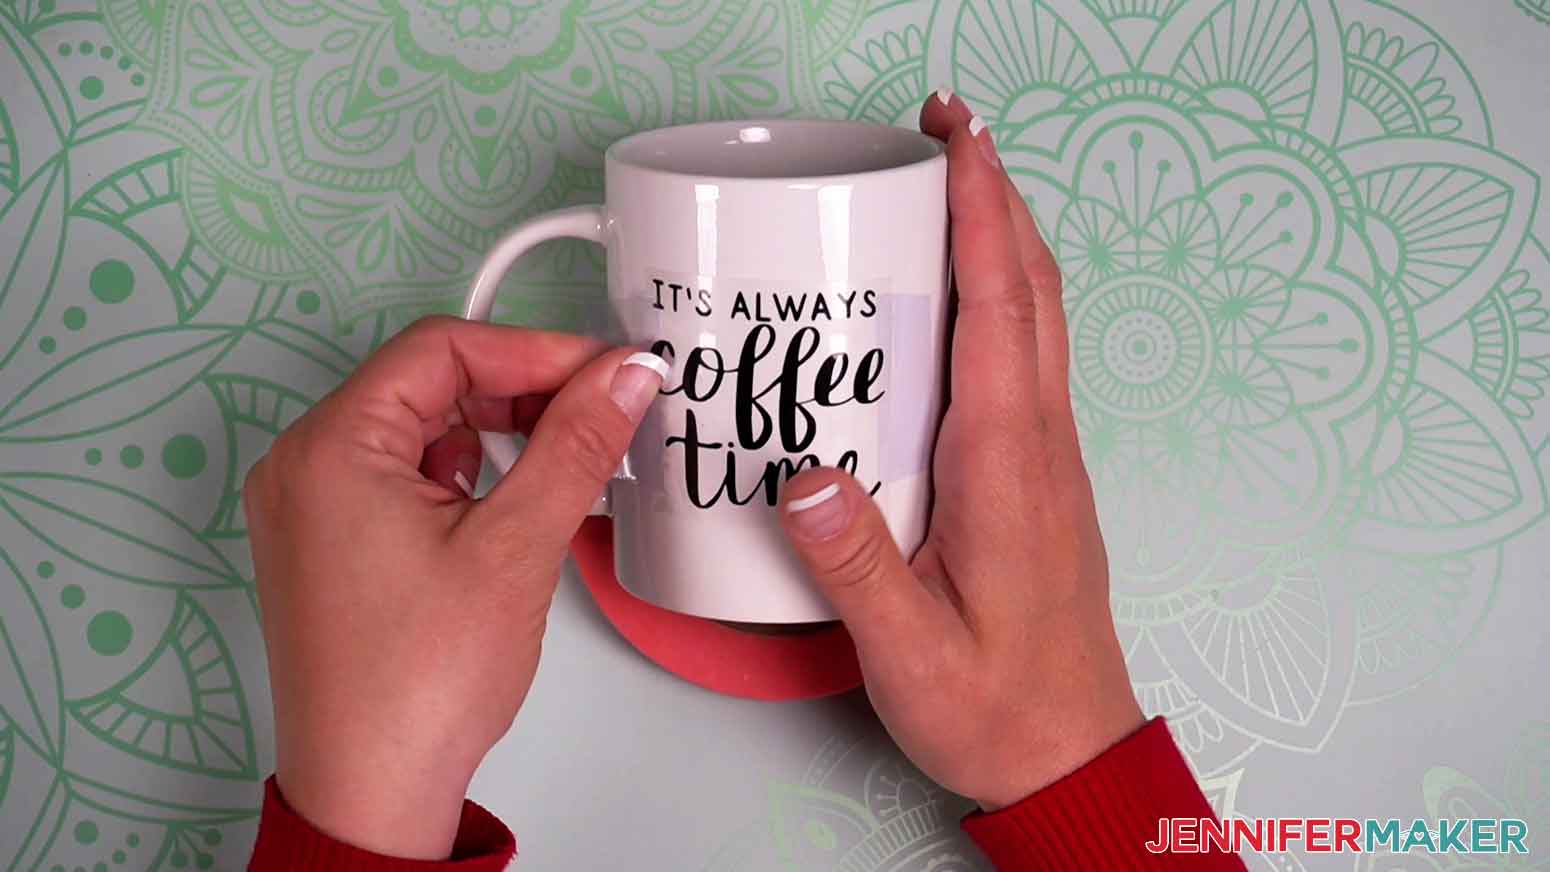
Preheat your EasyPress Mini to the hottest setting. Three squiggly lights will be illuminated.
When the EasyPress Mini beeps that it is ready, press it against the vinyl on the mug. I am going to hold it for about 30 seconds over each section of the design.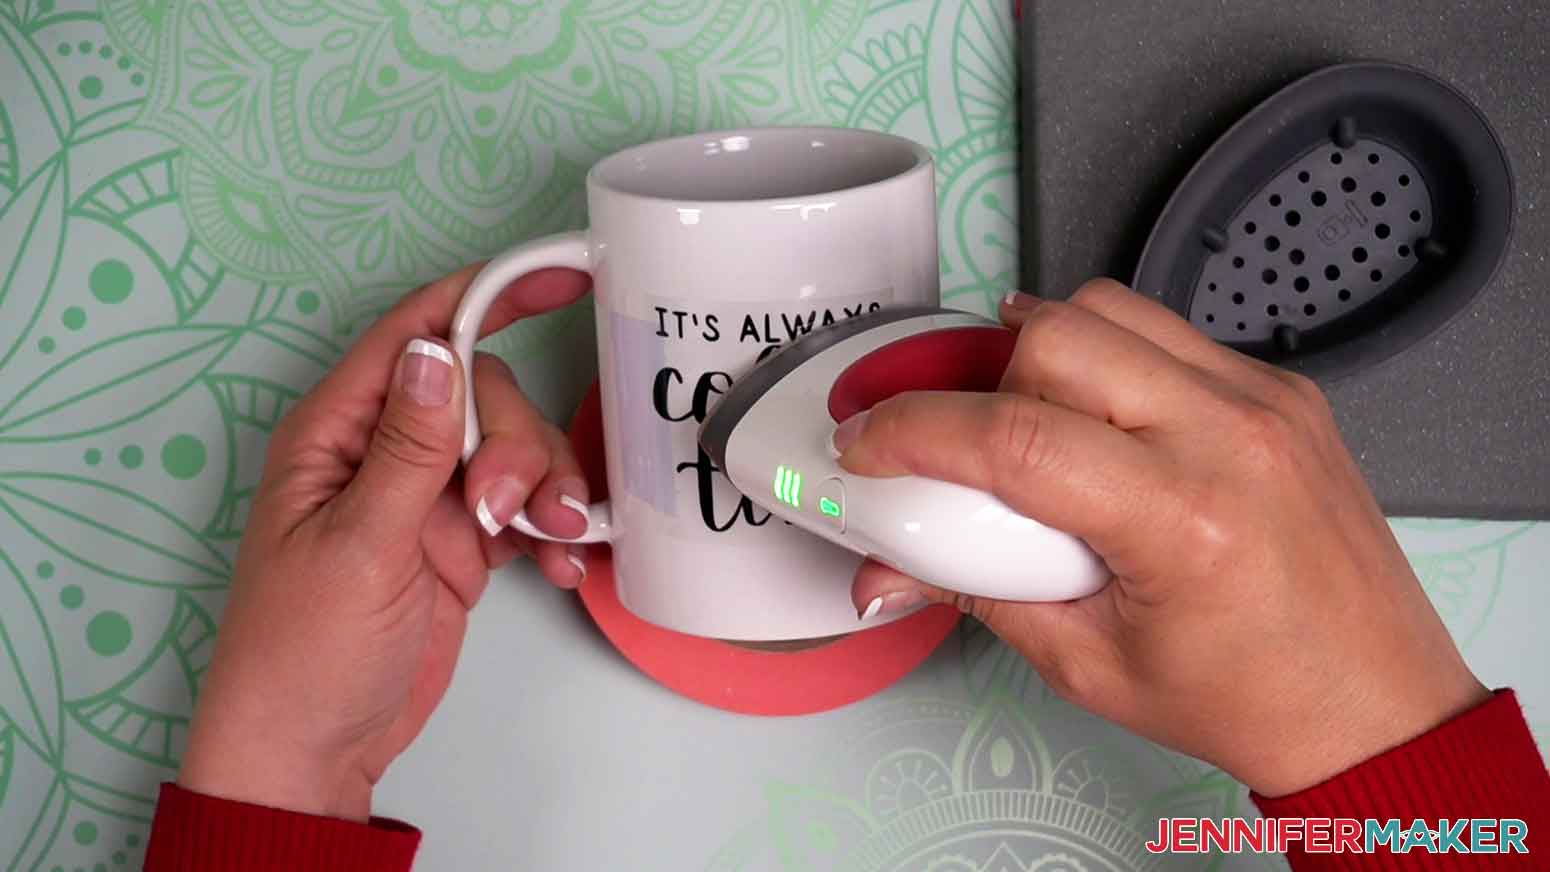
Once the whole design has been pressed, use the top point of the EasyPress Mini to apply pressure into the vinyl. I started at the top left and worked my way across the words to press each letter with some extra pressure.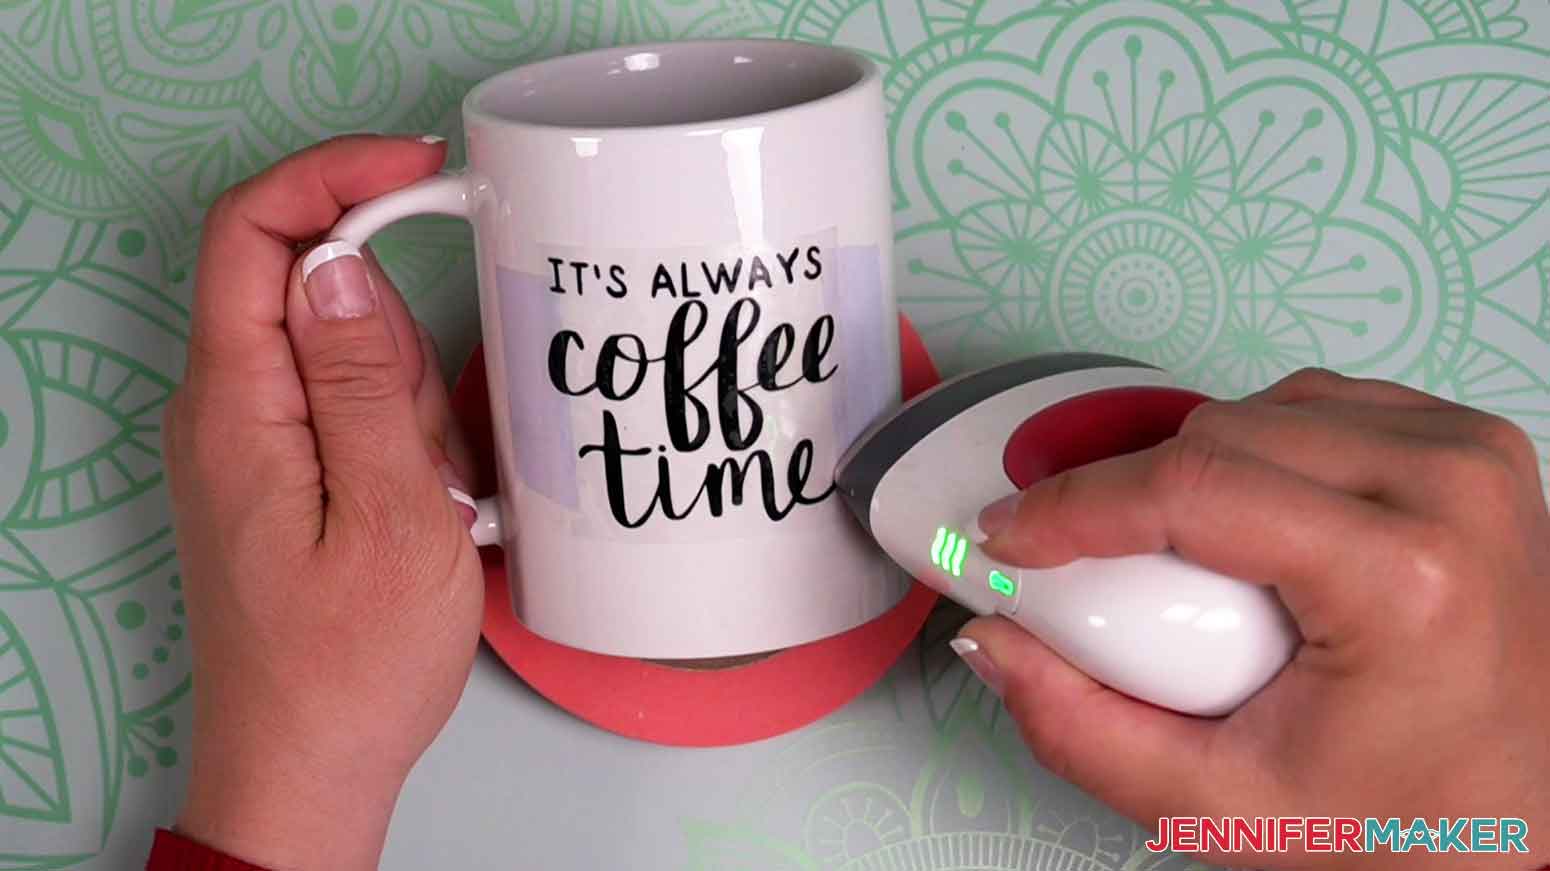
When the clear vinyl backing is cool to touch, gently begin peeling it away from the mug. 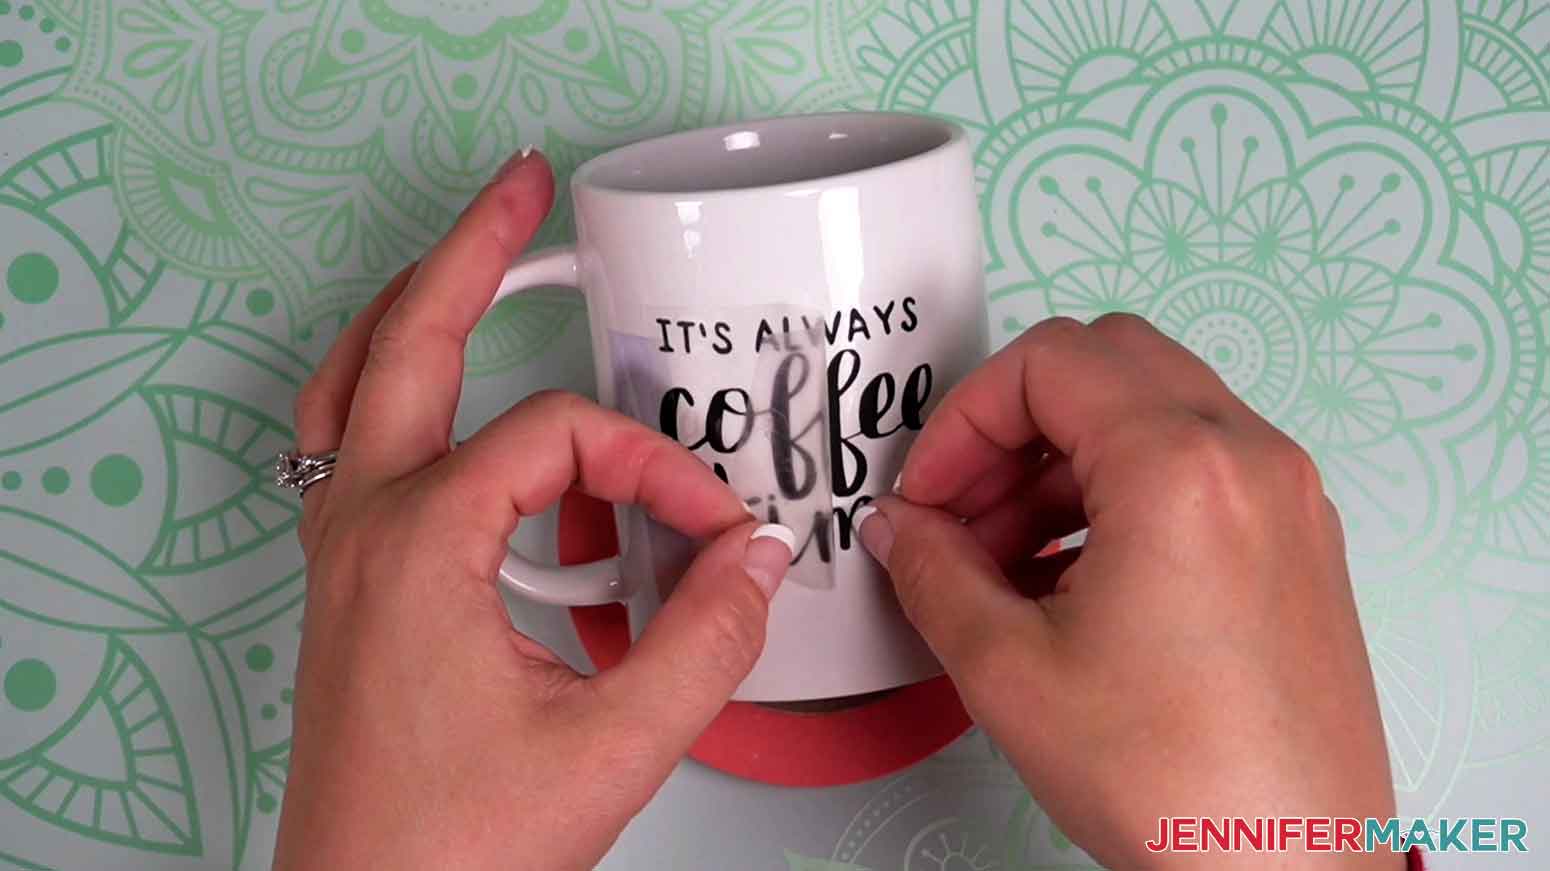
If any areas of vinyl lift from the mug, replace the clear carrier sheet and apply pressure and heat with the EasyPress Mini for a few seconds.
OPTIONAL: I took my mug with iron-on vinyl one step further and baked it in the oven at 300 degrees F (149 degrees C) for 15 minutes. I allowed it to fully cool and noticed the iron-on vinyl looked and felt very adhered to the mug.
The third mug is complete! 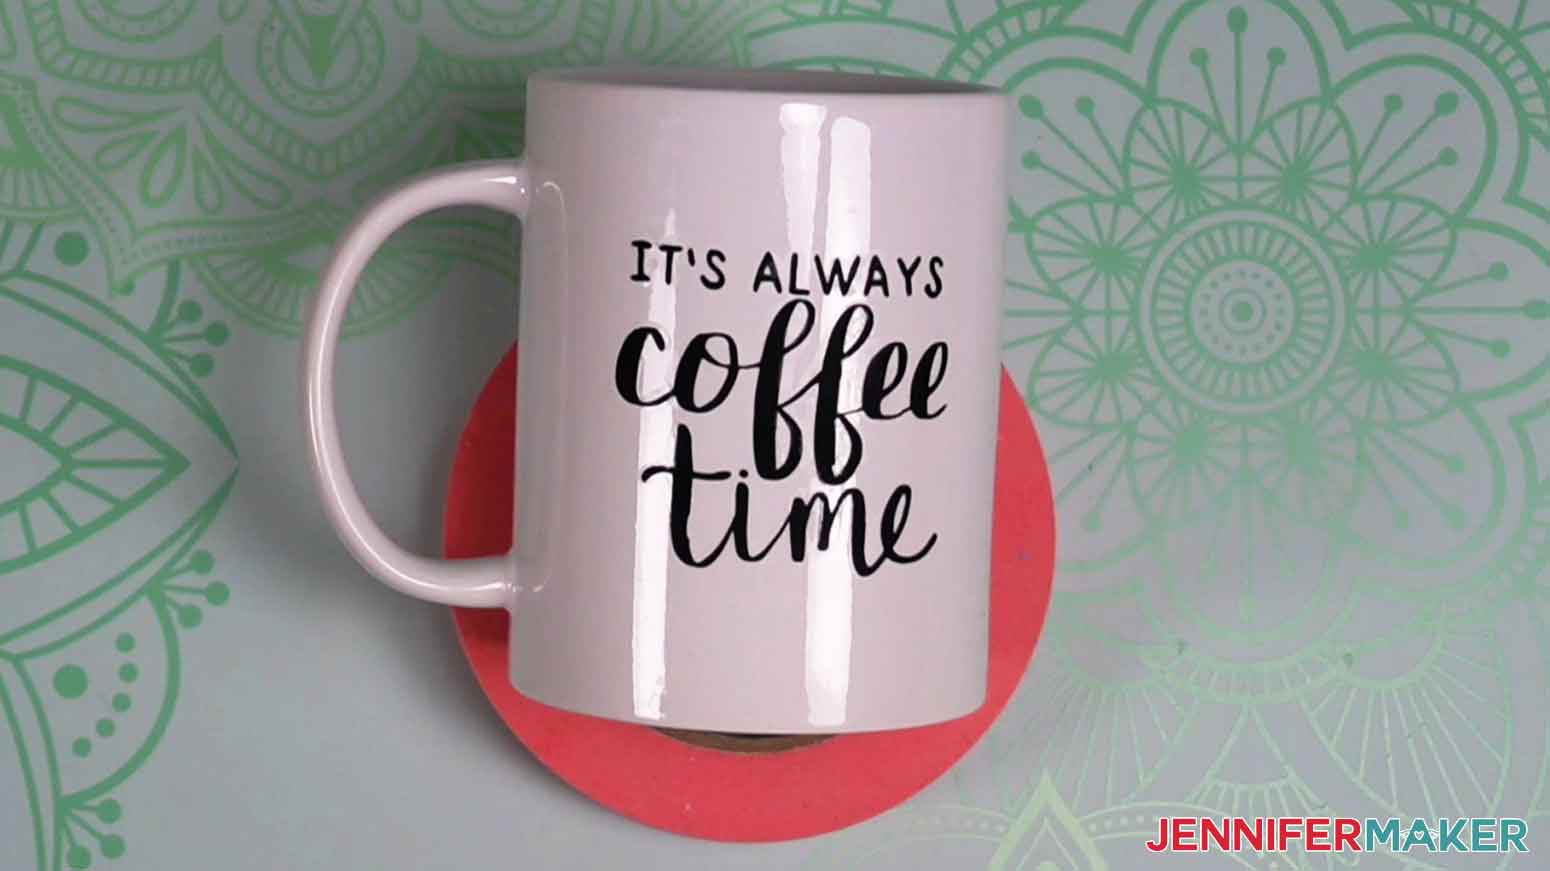
STEP 5: SHOW IT OFF
Here are all of my finished designs! I can’t wait to see what you create!
Notes
CARE INSTRUCTIONS
While all the mugs held up in the top rack of the dishwasher, hand washing is recommended for the longest lasting result.
Do not microwave mugs with vinyl designs.
Answers to Your Questions About Making Coffee Mugs with Vinyl Decals
Q: Can I microwave a Cricut mug? A: I do NOT recommended you put a vinyl mug in a microwave as vinyl creates fumes when heated. If you need to microwave your custom mug, use the Cricut Mug Press to transfer Infusible Ink or print sublimation instead. Q: How do you put vinyl decals on a coffee mug? A: Transfer tape! It’s a must for transferring delicate adhesive vinyl decals with intricate designs to surfaces like coffee mugs and more. When making coffee mugs with vinyl decals, be sure to use the right adhesive strength with your transfer tape (StandardGrip versus StrongGrip) for great results with your type of vinyl! Q: Does Cricut vinyl stay on mugs? A: When I tested Cricut’s permanent adhesive vinyl in black, shimmer, and holographic, as well as Cricut’s heat and cold-activated adhesive vinyl, I had no problem getting the vinyl to adhere and stay on my mugs. Cleaning the cup before applying the vinyl is key to a long-lasting mug decal. Not cleaning thoroughly beforehand will give your mug a higher chance of peeling prematurely. Q: How do I get my Cricut vinyl to stay on a mug? A: To get the best application of vinyl onto your mug, it’s important to first clean your mug. When making coffee mugs with vinyl decals, use some isopropyl alcohol and a microfiber cloth to remove any lint, oils, or smudges from your mug that might interfere with the adhesive on your vinyl. After you clean your mug and apply your vinyl, let the vinyl “cure” on the mug for 2-3 days before washing it. Q: Why is my vinyl peeling off my cup? A: If your vinyl isn’t staying on your mug well, there could be a few reasons why. The first reason is that your mug may not have been properly cleaned before applying the vinyl. If any oils, smudges, lint, or other debris are left on the mug before applying the vinyl, it can have an effect on the adhesive, rendering it less sticky. Another reason for your vinyl peeling off your mug is that you washed it too soon, used the cup in the microwave, or aren’t using a vinyl that’s ideal for this project. You can find out which brands and types of vinyl I recommend for coffee mugs in this tutorial. Q: Do you seal vinyl on coffee mugs? A: When using quality vinyl and getting your technique down, sealing your vinyl decorated mug isn’t really necessary. However if you’d feel better putting a sealant on your coffee mugs with vinyl decals just in case, follow my tutorial on how to seal vinyl-decorated mugs with Mod Podge! Q: What kind of vinyl is dishwasher safe? A: I wanted to find out which vinyls were dishwasher safe, so I did a bunch of tests so you don’t have to! All of the vinyls I tested in this tutorial made it through one normal cycle in the dishwasher. Your experience with other brands and types may vary. Run your own tests if you’re working with a material or brand that is new to you! Long term, your decal will probably last a bit longer if you hand wash it. Q: What is the best vinyl for making mugs? A: Among the brands ant types of vinyl I tested, my favorites were the HTVRONT permanent and Oracal 651 black gloss adhesive vinyls. I feel they had the best results because they were the smoothest to cut and weed, and they both applied easily to the mugs. They both passed the dishwasher test, too! Q: What are other ways to decorate mugs? A: In addition to coffee mugs with vinyl decals, there are so many options for creating different types and styles of cute coffee cups. You can use special sublimation mugs and Cricut infusible ink for both freehand art and designs drawn by your Cricut machine. You can also use a sublimation printer to print designs on sublimation paper or use Infusible Ink transfer sheets for use in mug presses or other sublimation tools. You can even make Sharpie-decorated mugs, and cups with waterslide decals, too. The sky’s the limit!Get my free SVG/PDF/DXF files to make coffee mugs with vinyl decals!
I’d love to see the coffee mugs YOU make with this tutorial! Please share a photo in our Facebook group or tag me on social media with #jennifermaker. Love,
Want to remember this? Save this tutorial on the Best Cricut Vinyl for Coffee Mugs to your favorite Pinterest Board!