Learn how to cut, layer, and assemble different kinds of paper!
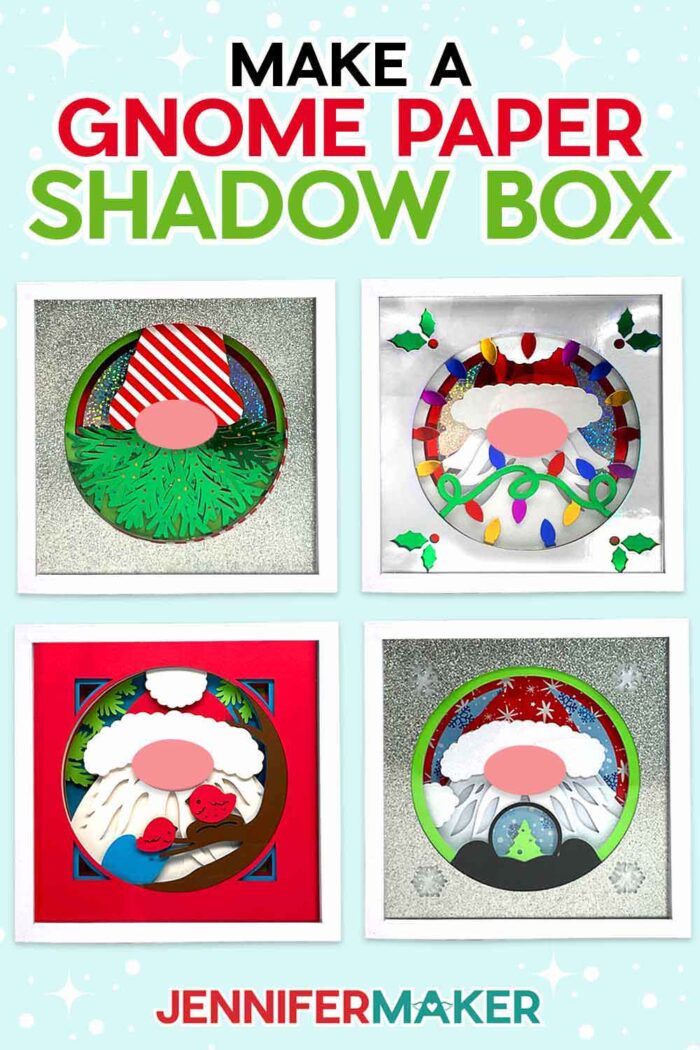
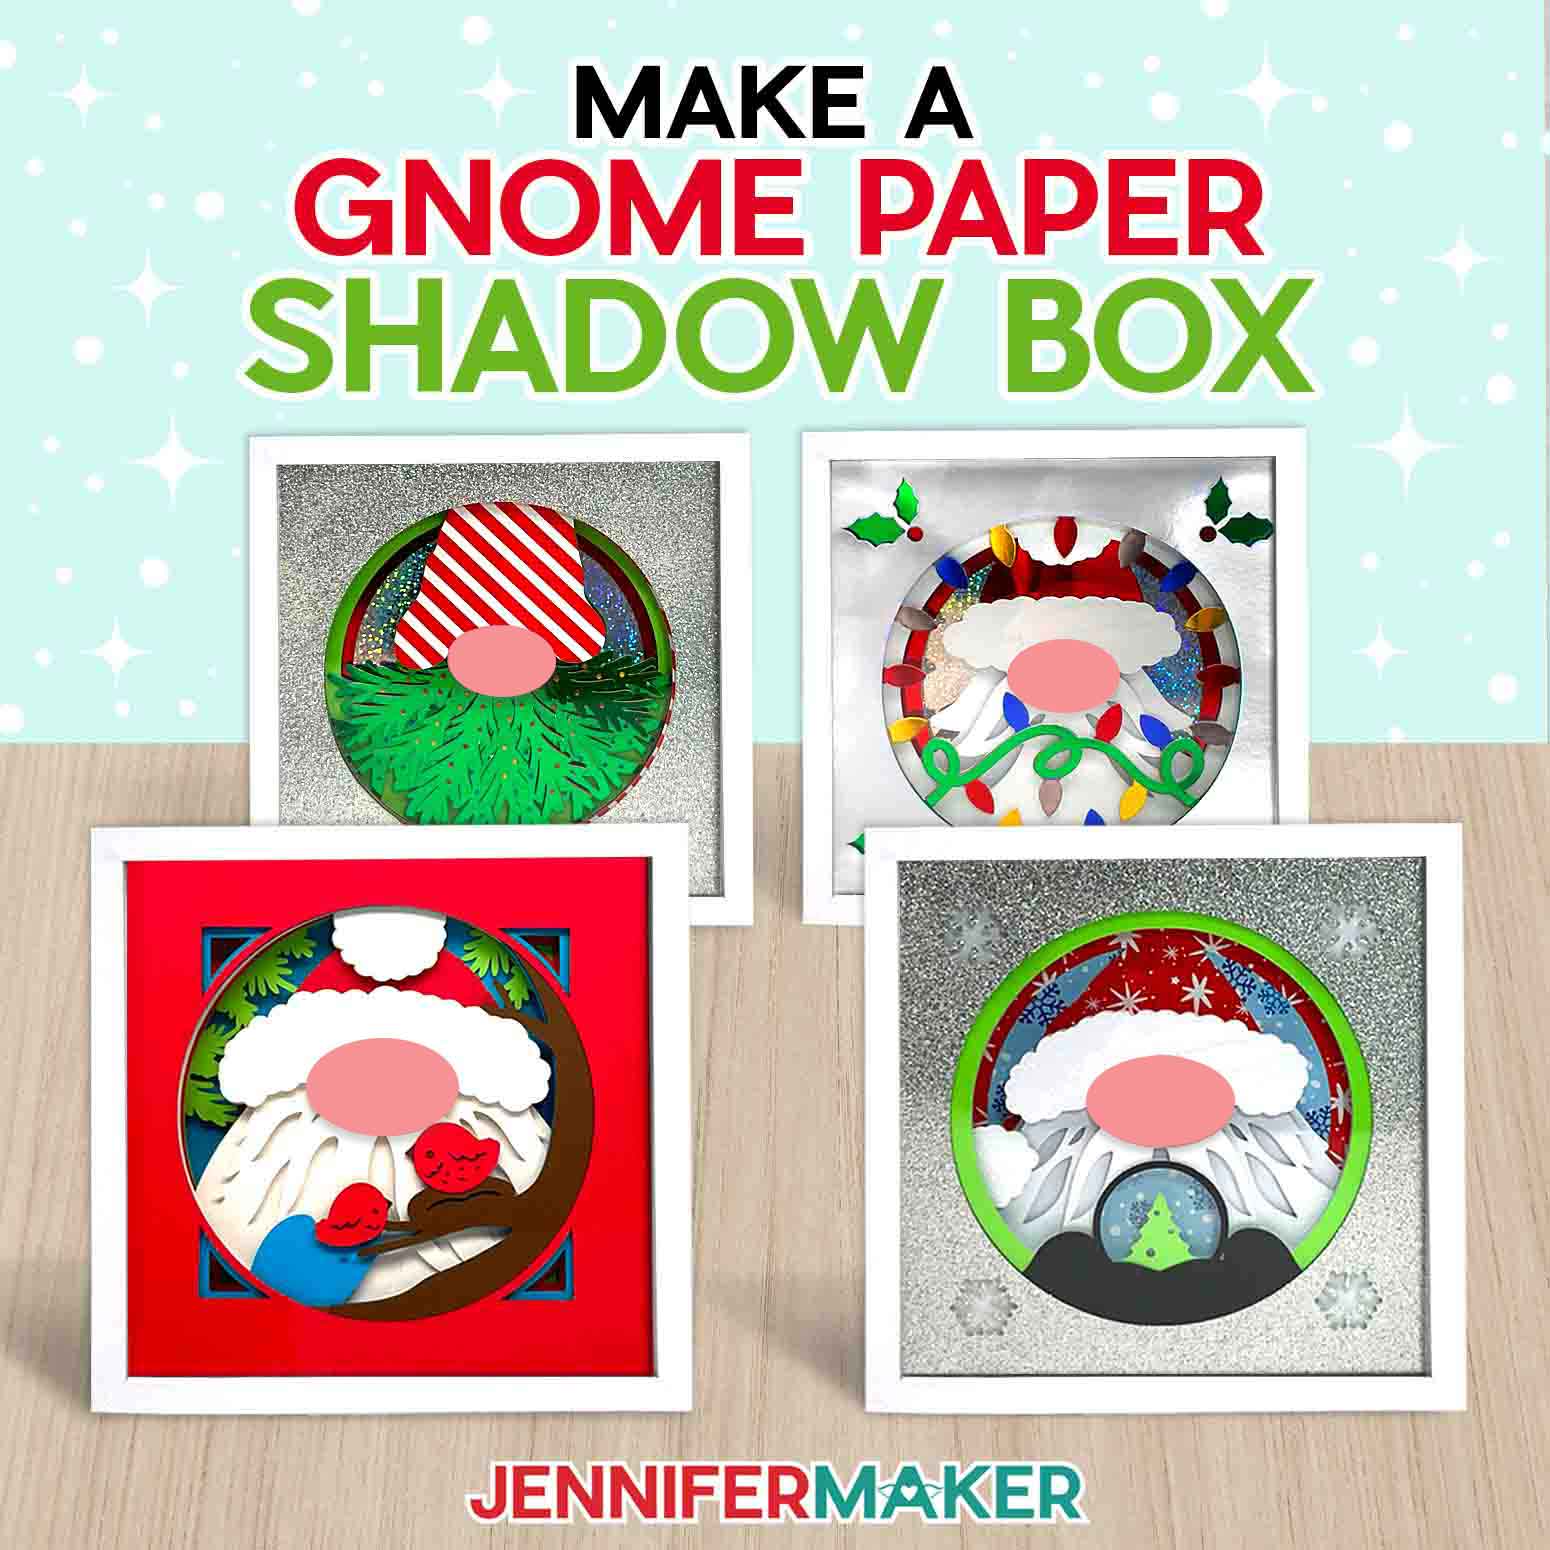
Some of my favorite papercraft projects are layered shadow boxes! And I know many of you love gnomes, so I’ve designed some layered gnome shadow box designs for you! They’re cute, but they’re also a great way to learn how to cut and adhere different kinds of paper.
Watch the full step-by-step layered gnome shadow box tutorial:

Shadow boxes are so much fun to make, and a Cricut makes them super easy! With some paper, a frame, and glue, you can make decor better than what’s available in department stores.
I made these layered gnome shadow box designs with different themes, but you can mix and match your paper choices to make them your own! You can make all the Christmas gnomes you want!
In the paper art tutorial, we’ll start simple and add more detail as we go. Pay attention to the gnome beards for extra fun!
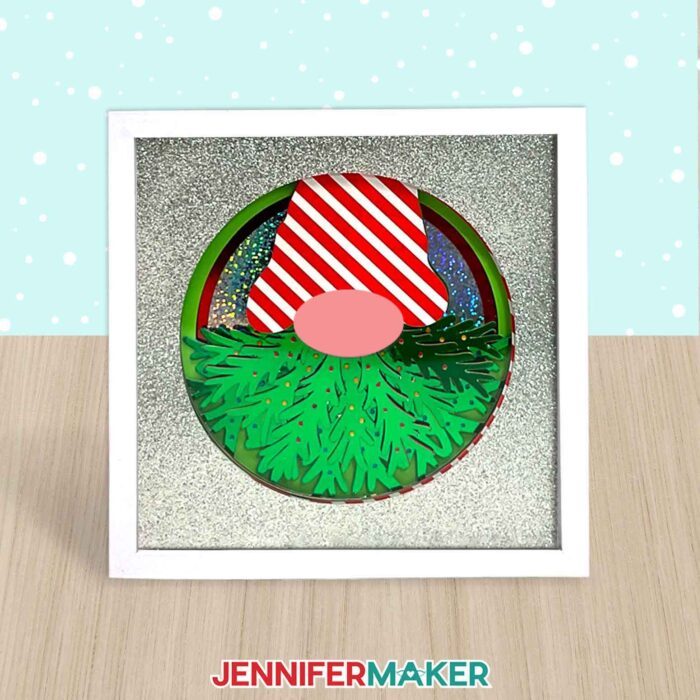
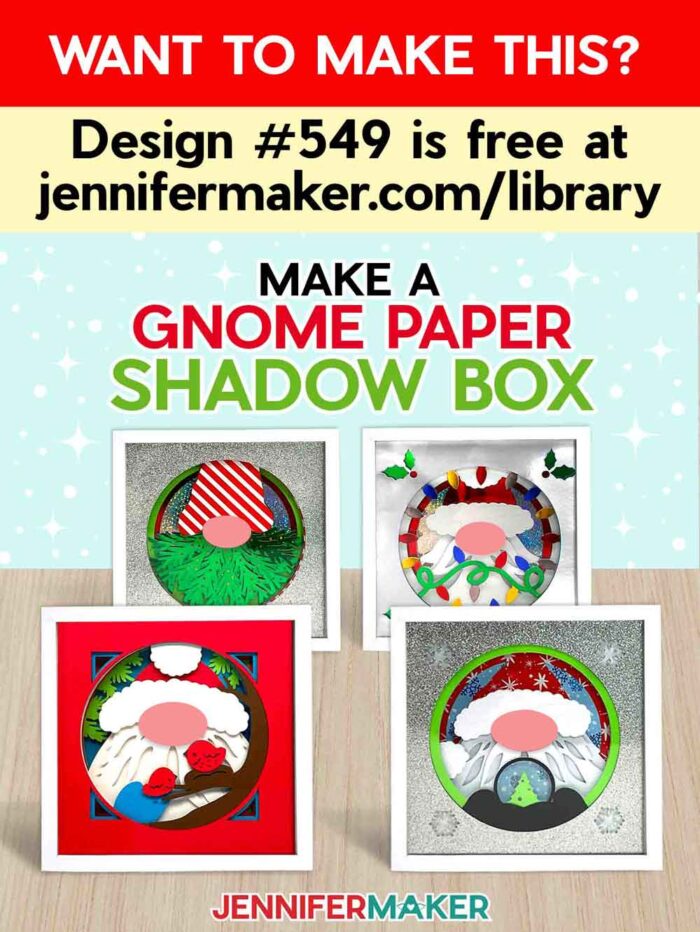
First, a simple gnome with a bird friend, made with just plain cardstock.

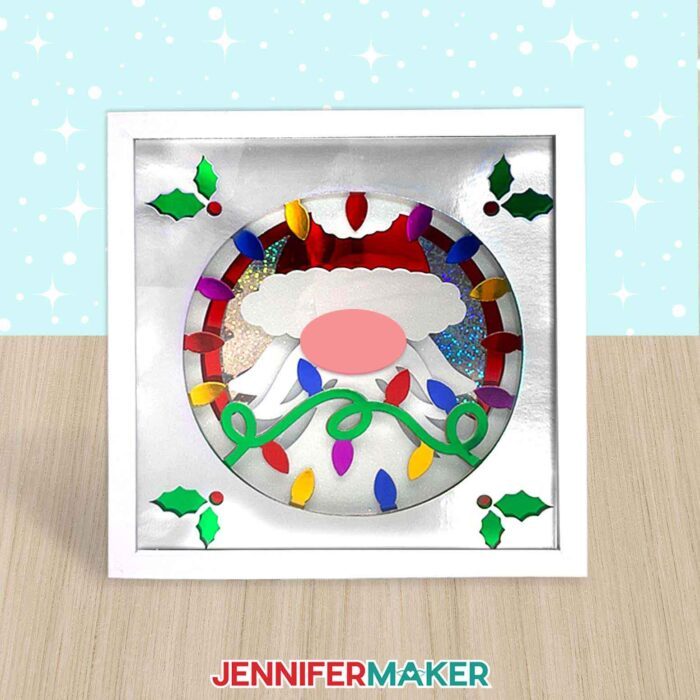
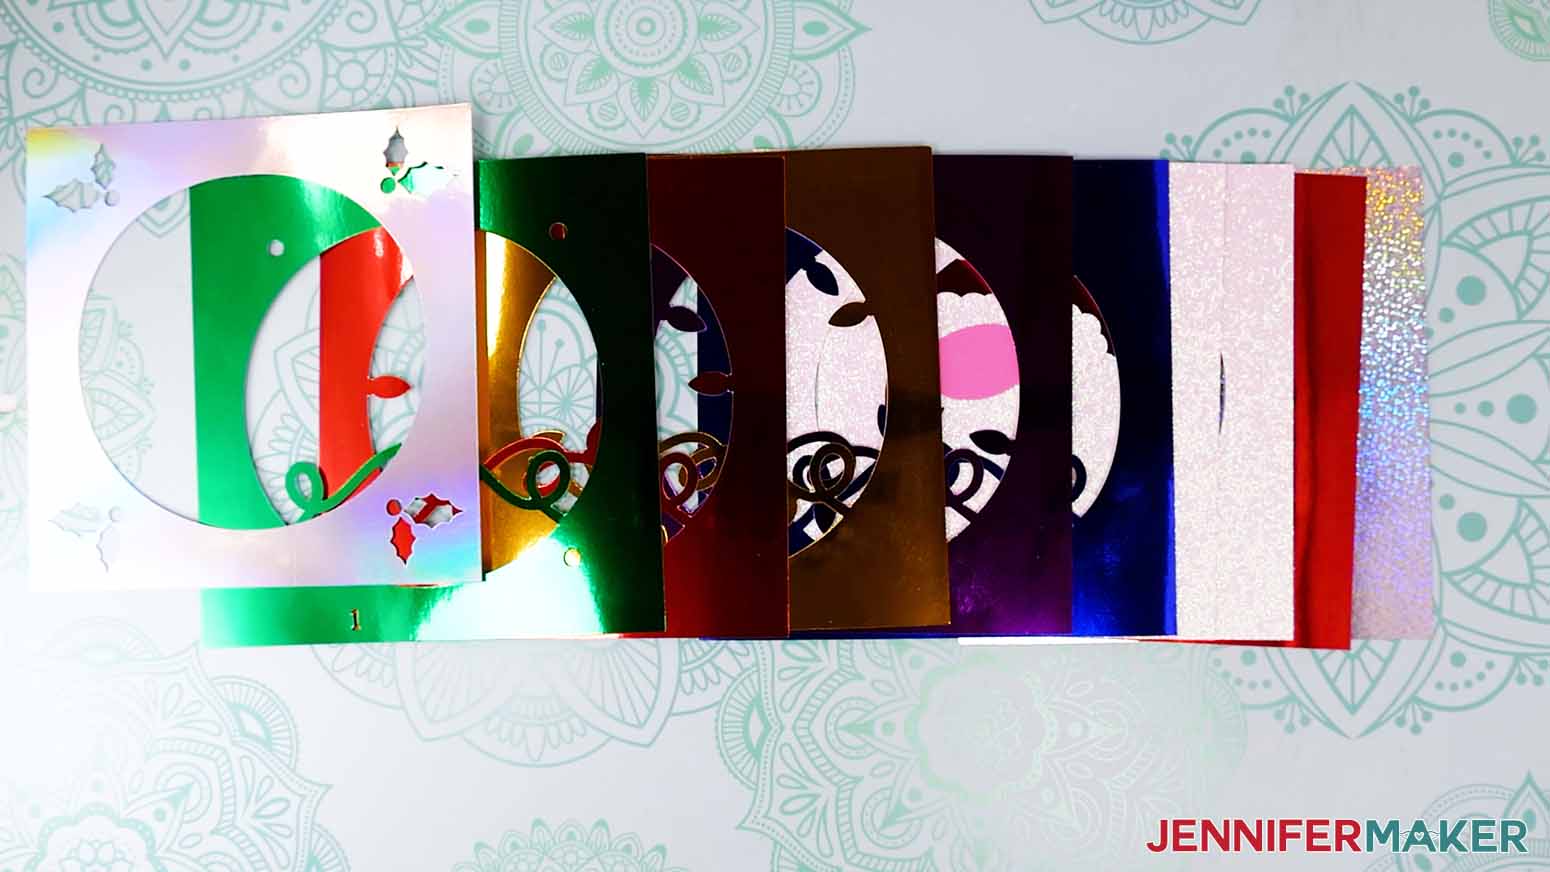
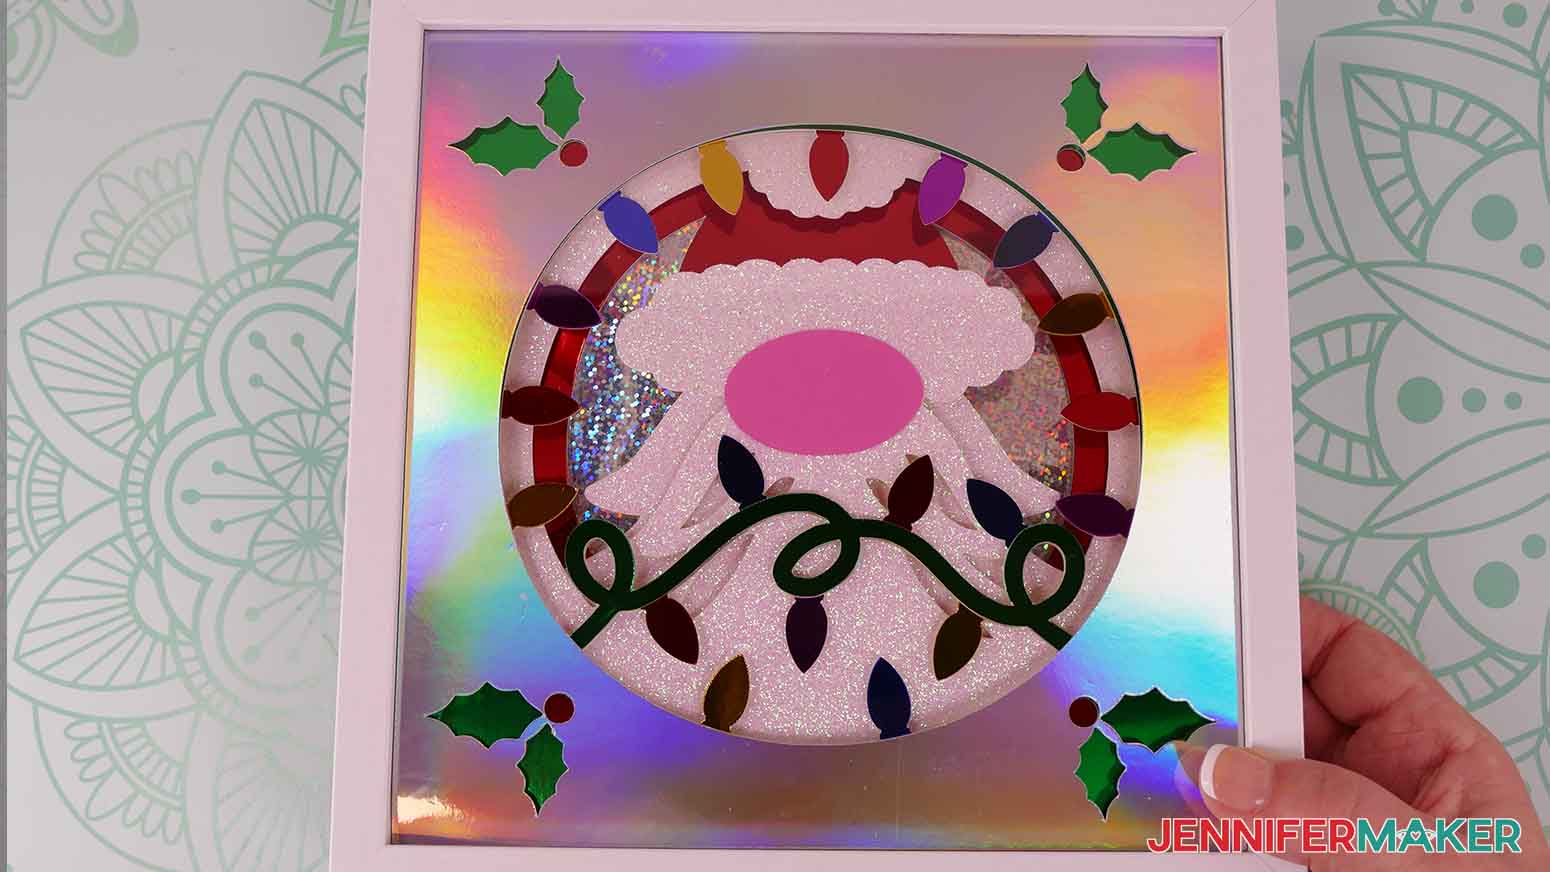
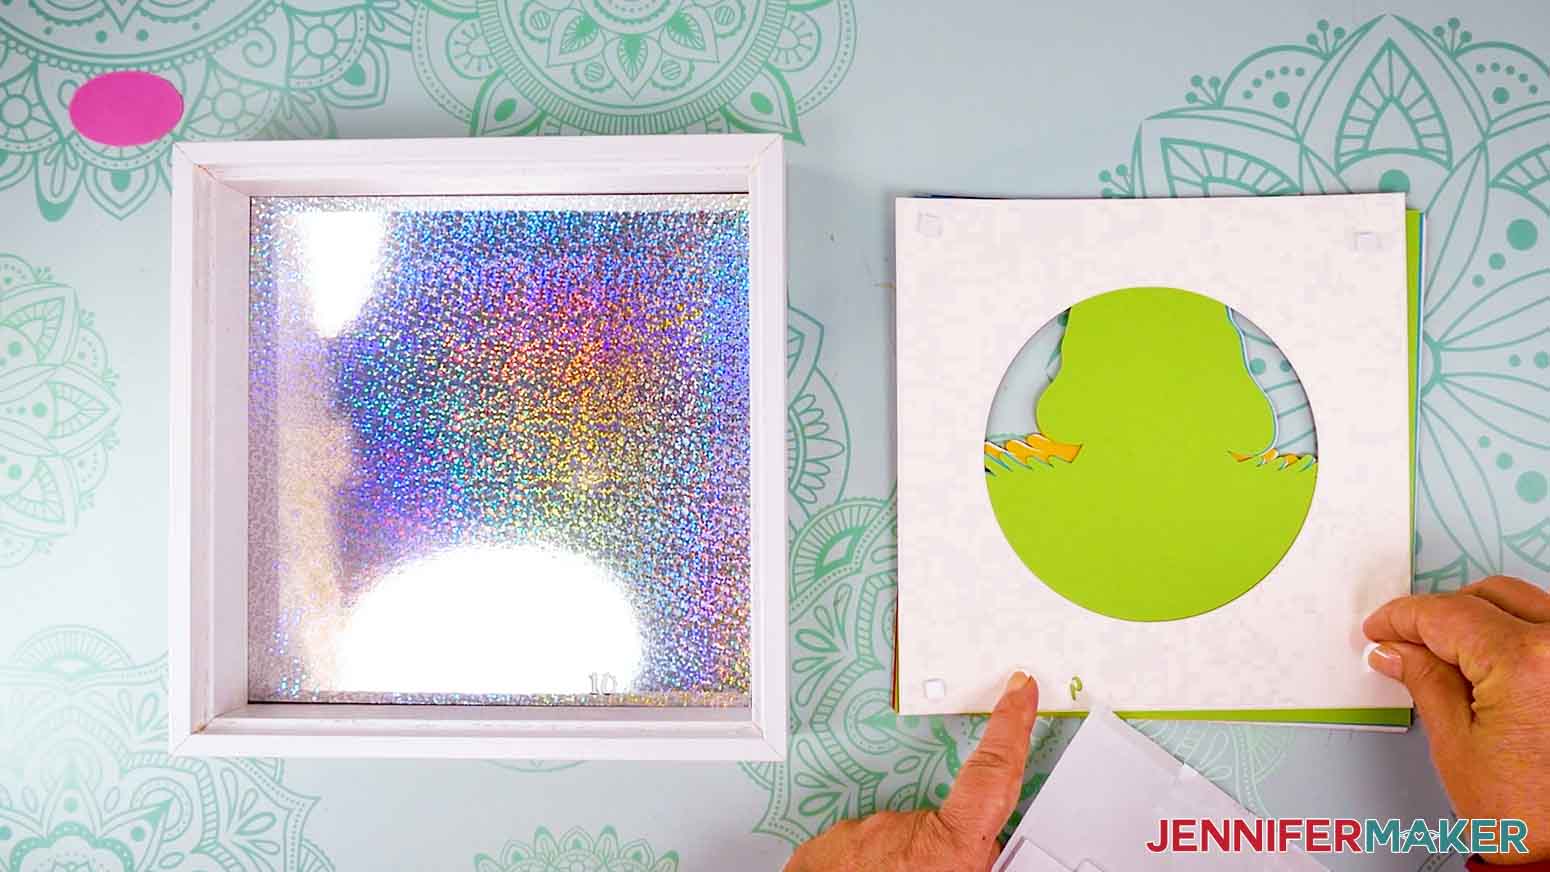
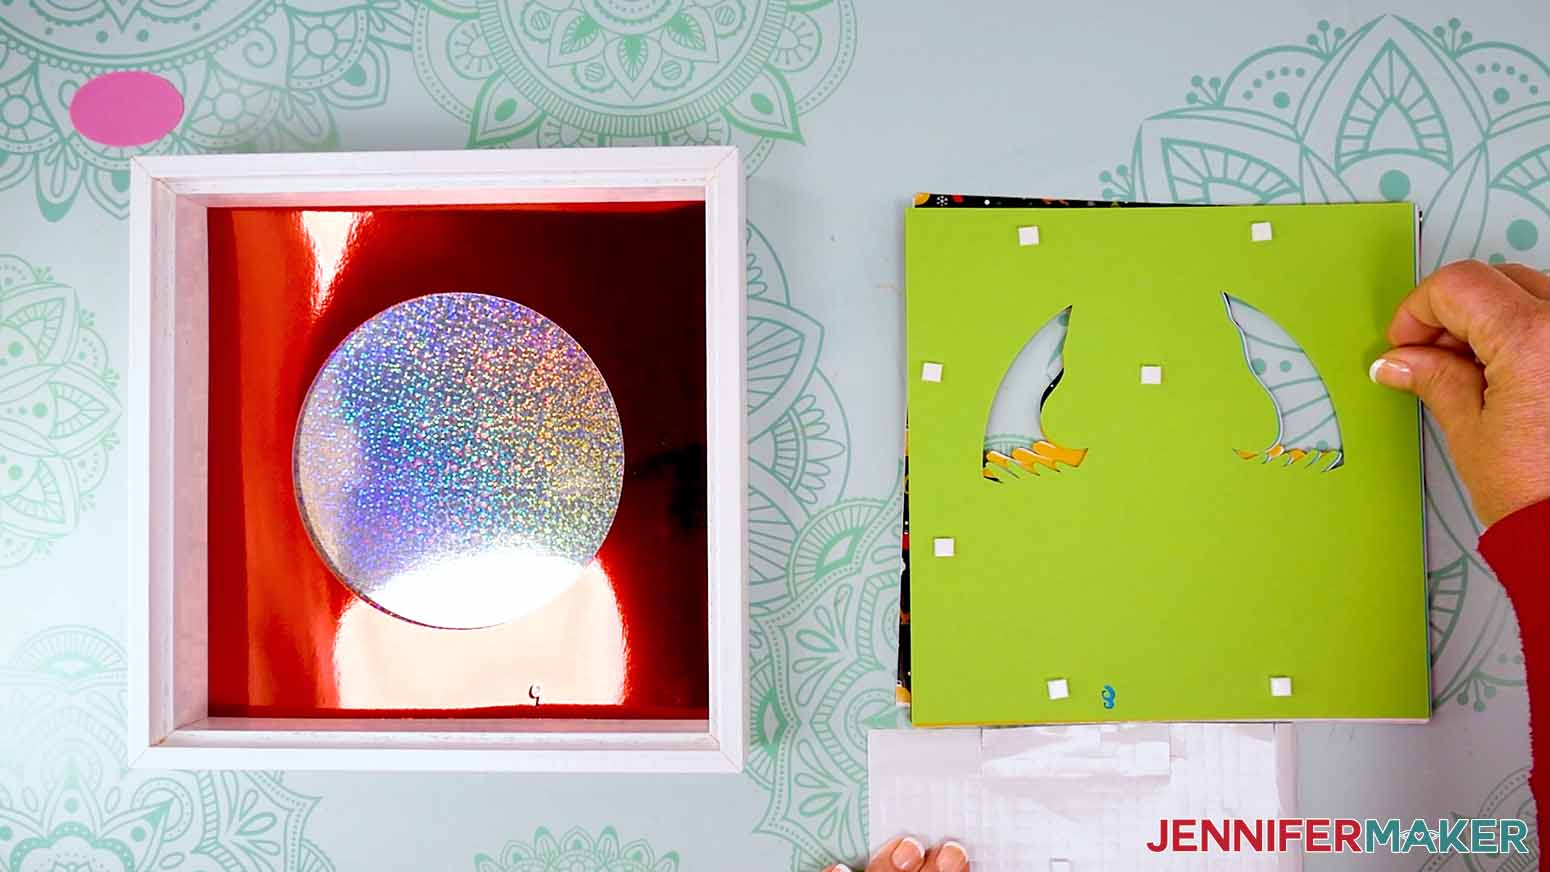
Then, a gnome getting festive with lights and foil and holographic cardstock.
Next up, is a gnome with a glitter cardstock Christmas tree beard and a hat made of light weight paper that takes some extra care!
And finally, a gnome who has put all the paper types together, and even added acetate to make a snowglobe!

I prepared my files in Cricut Design Space and cut the pieces with a Cricut Maker 3 to cut all my materials, but you could use an original Cricut Maker, a machine from the Cricut Explore series, a Cricut Venture, or a Joy Xtra. A green StandardGrip machine mat works well for all the different types of materials. Our usual papercrafting tools will help, too! Then I’ll show you how to put them together using the best adhesive choices for each paper combination. Plus, a few tips on working with the shadow box frame!
Let me show you how easy it is to make a gnome layered shadow box! This post contains some affiliate links for your convenience (which means if you make a purchase after clicking a link I will earn a small commission but it won’t cost you a penny more, there is no additional cost)! Read my full disclosure policy.
Materials to Make A Gnome Layered Shadow Box
View my Amazon shopping list with the exact items we used to make this project
I used many different kinds of paper, and you can mix and match your favorites like:
- Plain Solid Core Cardstock 8.5″ x 11″
- Silver Glitter Cardstock 12″ x 12″
- Iridescent Cardstock Mirror Paper Sheets 8.5″ x 11″
- Color Foil Mirror CardStock 8.5″ x 11″
- White Glitter Cardstock 8.5″ x 11″
- Cricut 12″ x 12″ acetate sheets – optional
- Christmas Patterned Paper 8.5″ x 11″
And some materials and tools to bring the gnomes to life:
- 8″ x 8″ Shadow Box White Frame
- Adhesive Foam Dots Squares
- Craft Glue
- A way to cut your materials – I’m using the Cricut Maker 3 but you can also use the original Maker, an Explore series machine, the Venture or Joy Xtra.
- Cricut Green StandardGrip Machine Mat 12″ x 12″ (remember to put paper with a fancy side right side up!)
- Scraper Tool – to remove small pieces stuck to the mat
- Spatula
- Cricut Blue LightGrip Mat 12 x 12″
- Measuring Tape
- Isopropyl Alcohol
- Lint Free Cloth
- Weeding Tool – optional
- Pair of Scissors
- Design #549 (My free SVG/DXF/PDF design files are available in my free resource library – get the password by filling out the form at the bottom of this page
How to Make Your Own Layered Gnome Beard Shadow Box

Layered Paper Gnome
Learn how to make a layered paper gnome using various types of paper and materials!
Materials
- Recollections Solid Core Cardstock 8.5" x 11"
- Silver Glitter Cardstock 12" x 12"
- Iridescent Cardstock Mirror Paper Sheets 8.5" x 11"
- Color Foil Mirror CardStock 8.5" x 11"
- White Glitter Cardstock 8.5" x 11"
- Cricut 12" x 12" acetate sheets - optional
- Patterned Paper 8.5" x 11"
- 8" x 8" Shadow Box White Frame
- Adhesive Foam Dots Squares
- Craft Glue
- Design #549 (My free SVG/DXF/PDF design files are available in my free resource library – get the password by filling out the form at the bottom of this page)
Tools
- A way to cut your printed design and cardstock - I’m using the Cricut Maker 3 but you can also use the original Maker, an Explore series machine, the Venture or Joy Xtra.
- Cricut Green StandardGrip Machine Mat 12" x 12"
- Scraper Tool
- Spatula
- Cricut Blue LightGrip Mat 12 x 12"
- Measuring Tape
- Isopropyl Alcohol
- Lint Free Cloth
- Weeding Tool - optional
- Scissors
Instructions
STEP 1: GET MY FREE GNOME SHADOW BOX DESIGNS
First, download my Layered Gnome designs from my free library – look for Design #549. Alternatively, you can use the Save This Project form near the top of this post and the design link will be emailed to you.
There are four designs — a gnome with birds, a gnome with lights, a gnome with a Christmas tree, and a gnome with a snowglobe!
NOTE: I’ll show you the basic steps to make the bird design using plain cardstock. If you want to use different materials for the layers or assemble the other designs, there is more detail in the Variations sections below!
TIP: If you’re not sure how to upload, go to jennifermaker.com/svgs to learn how to unzip and upload SVG files.
STEP 2: PREPARE YOUR GNOME SHADOW BOX DESIGN
Bird Design with Plain Cardstock
I used plain cardstock in these colors:
Layer 8 (background) - Blue Cardstock
Layer 7 (branches) - Green Cardstock
Layer 6 (hat) - Red Cardstock
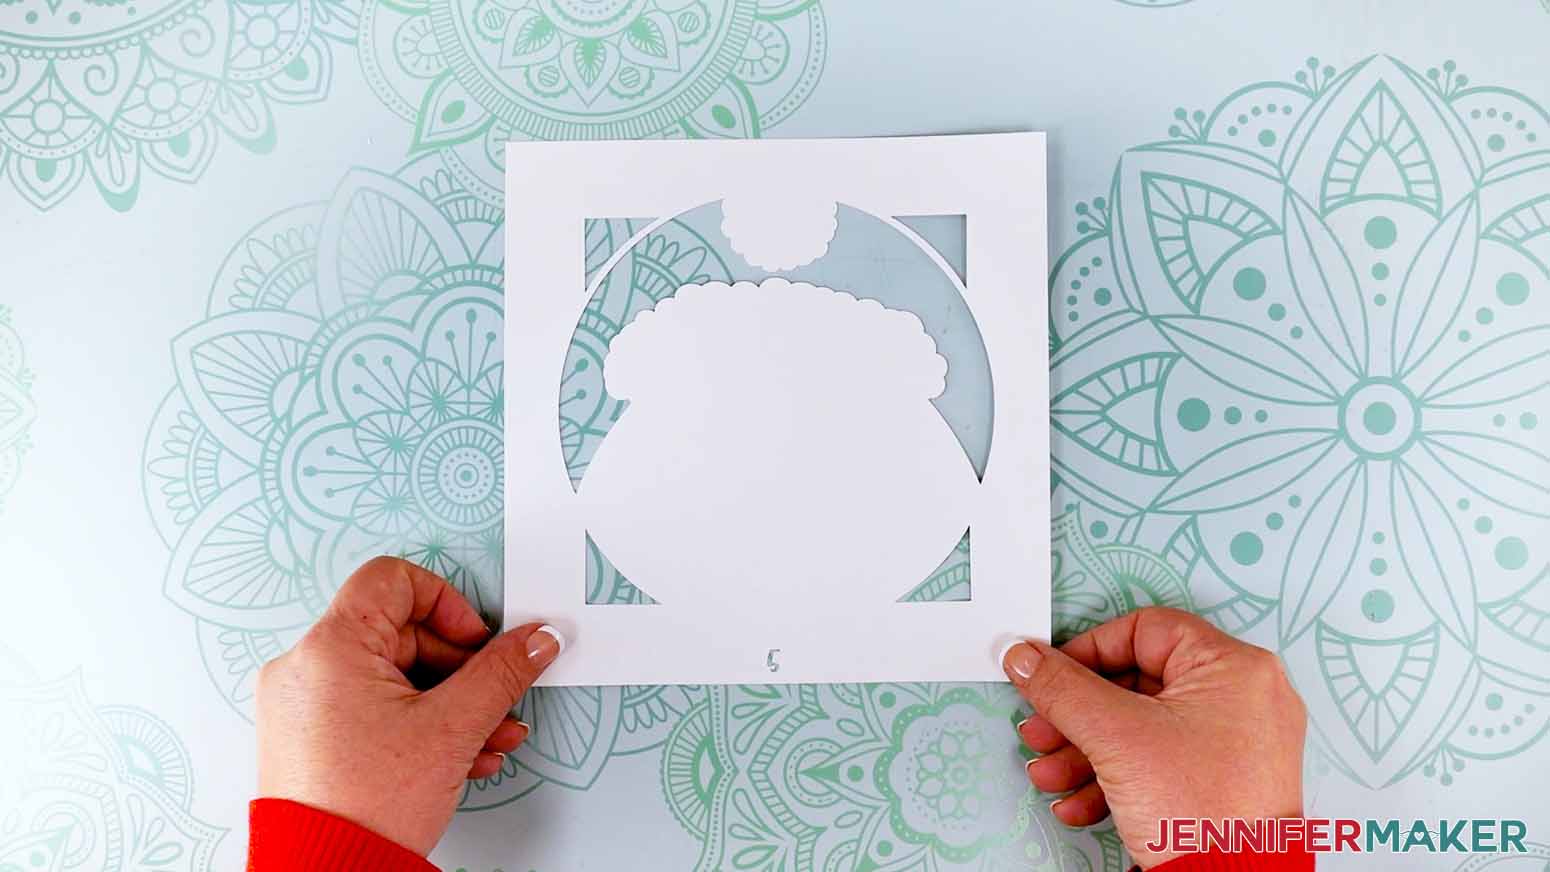
Layer 5 (beard base, pompom) - White Cardstock
Layer 4 (beard middle) - White Cardstock
Layer 3 (beard top, hat brim) - White Cardstock
Layer 2 (mitten) - Blue Cardstock
Layer 1 (tree) - Brown Cardstock
Layer 0 (frame) - White Cardstock
Nose and Birds - Plain Cardstock in pink and red
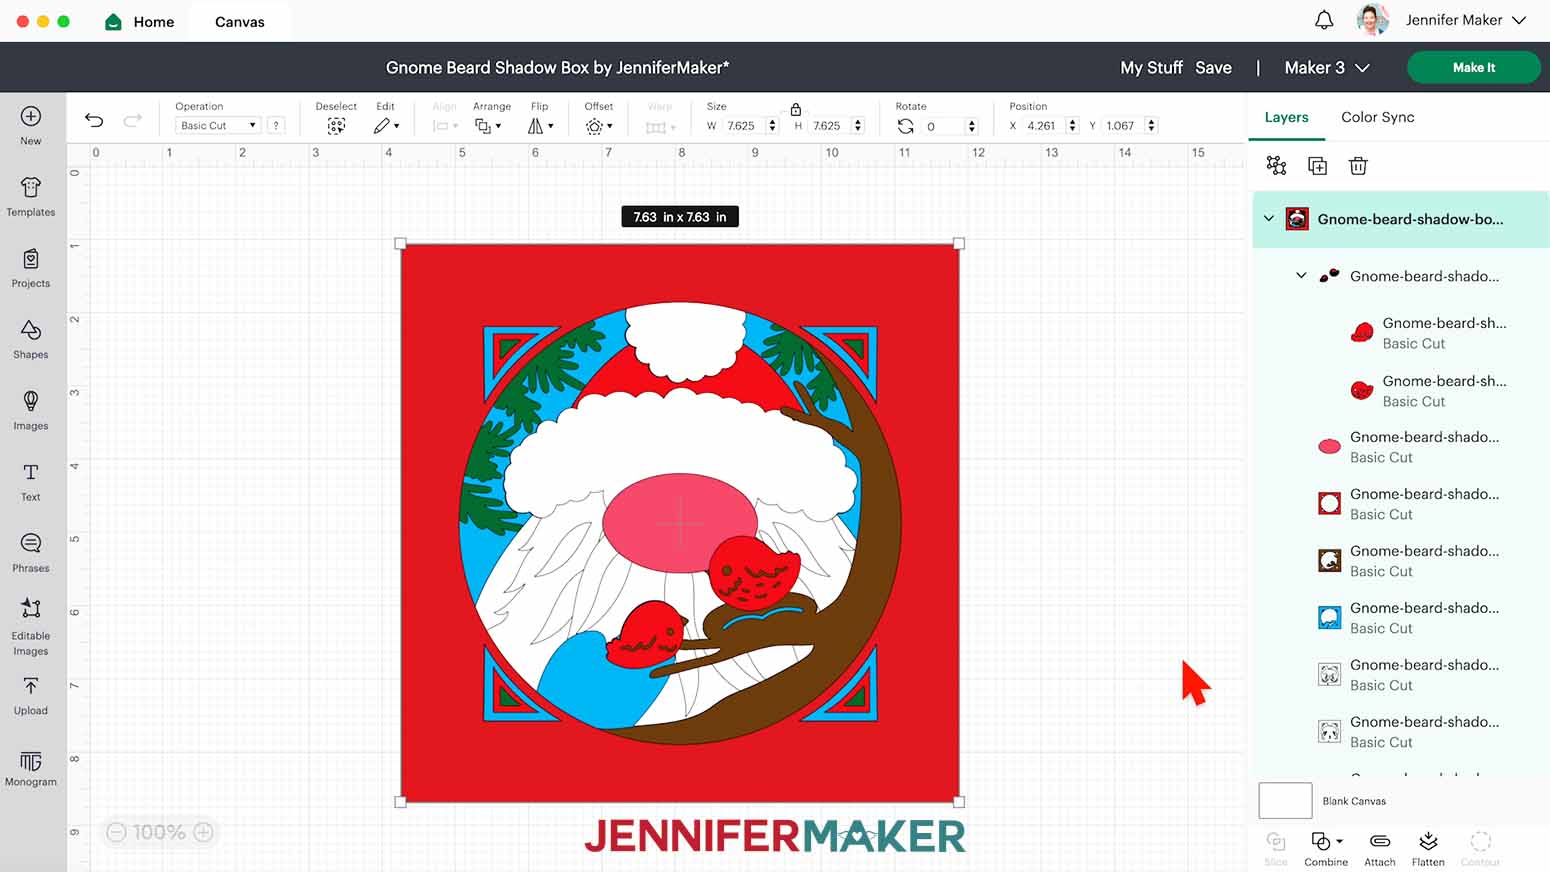
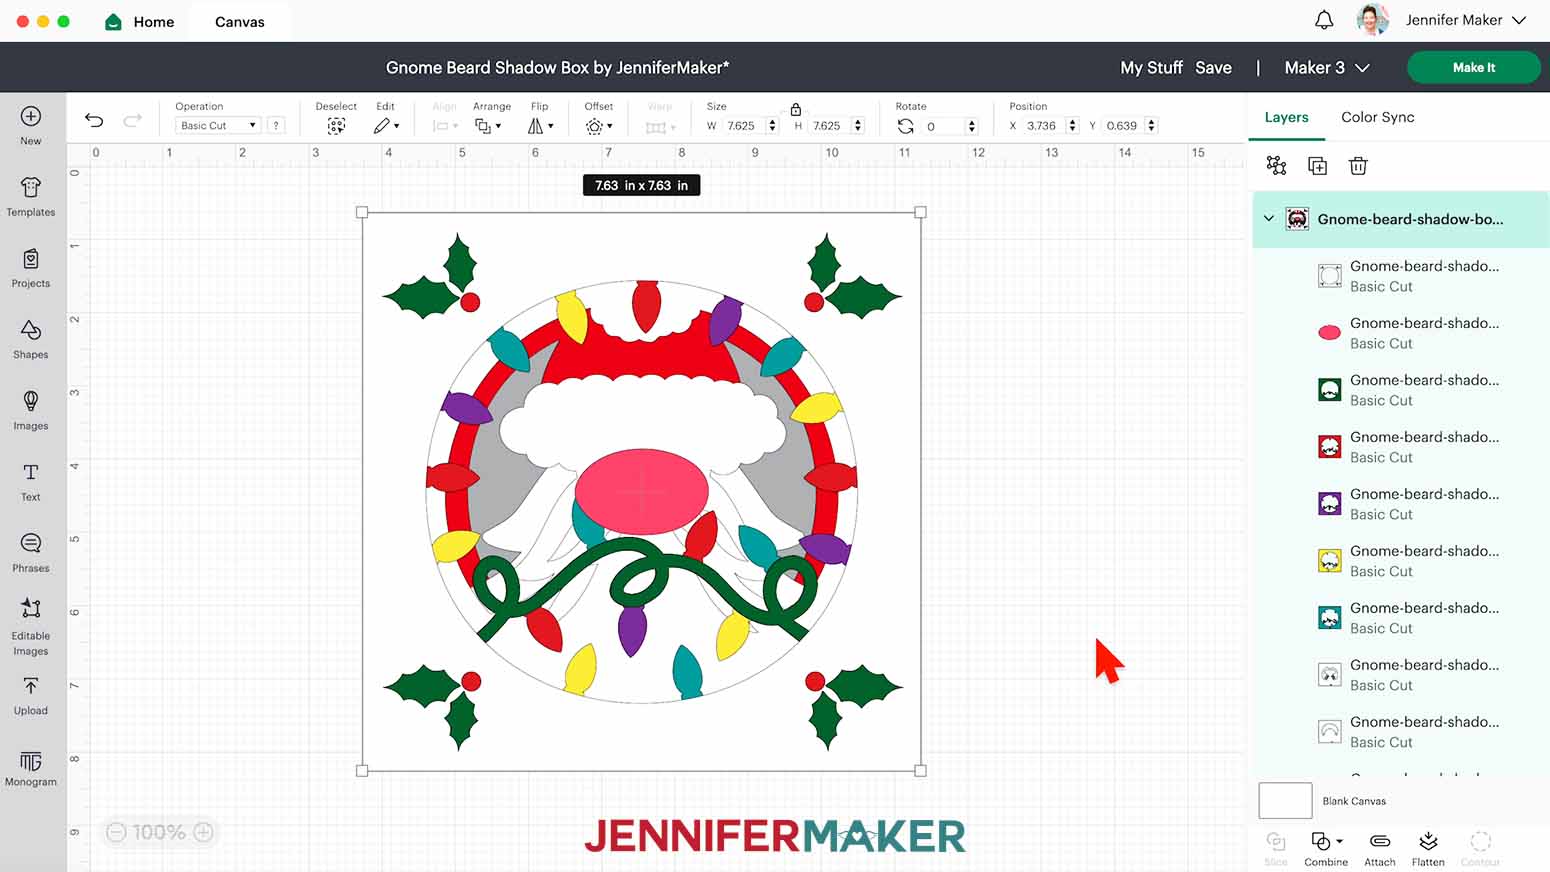
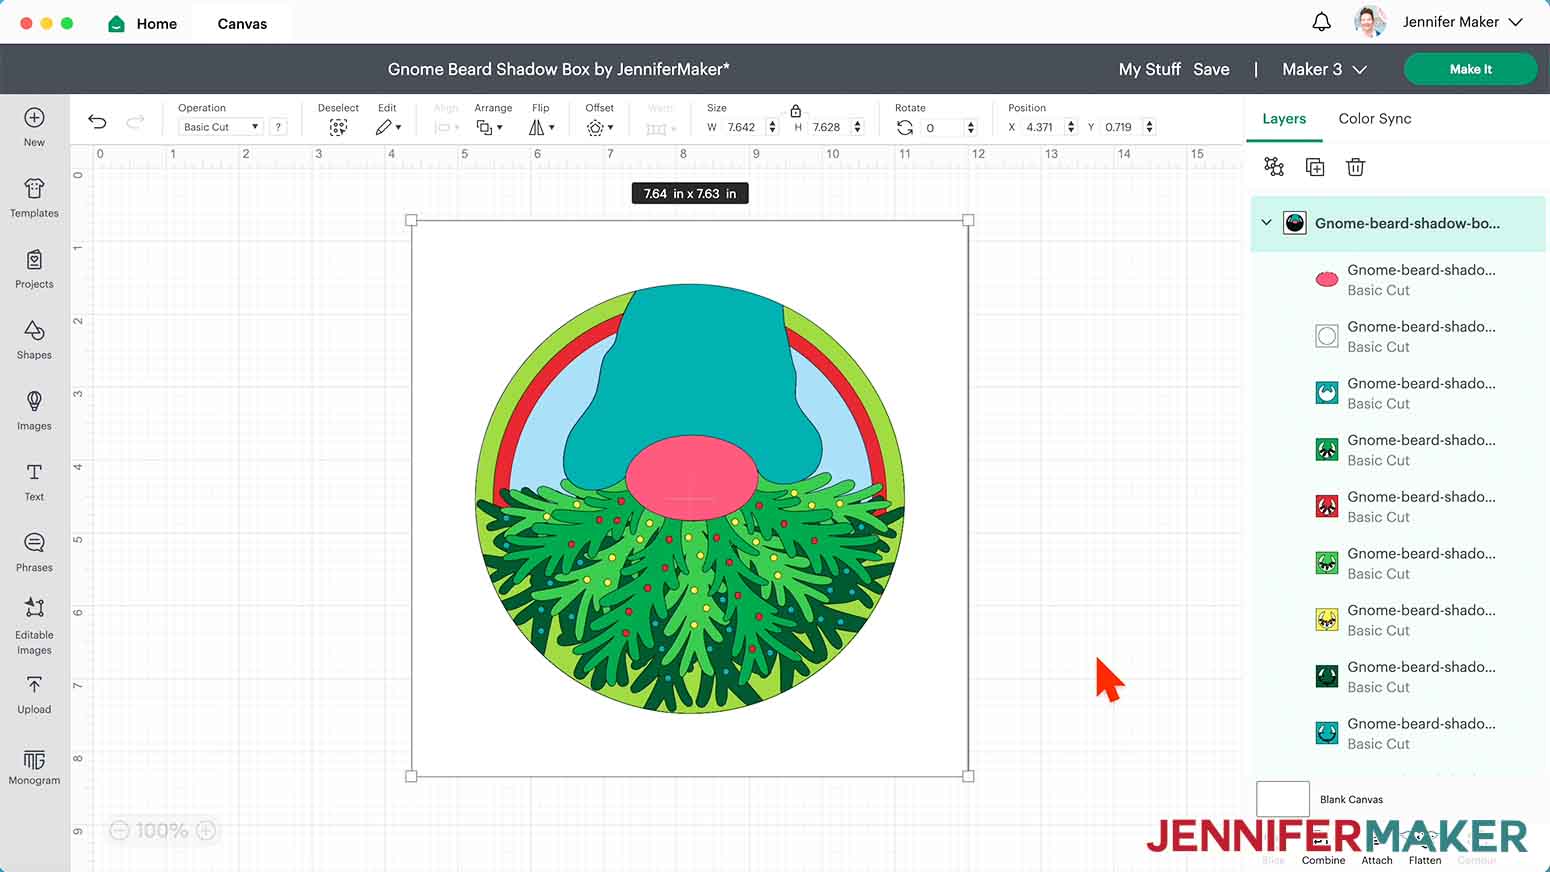
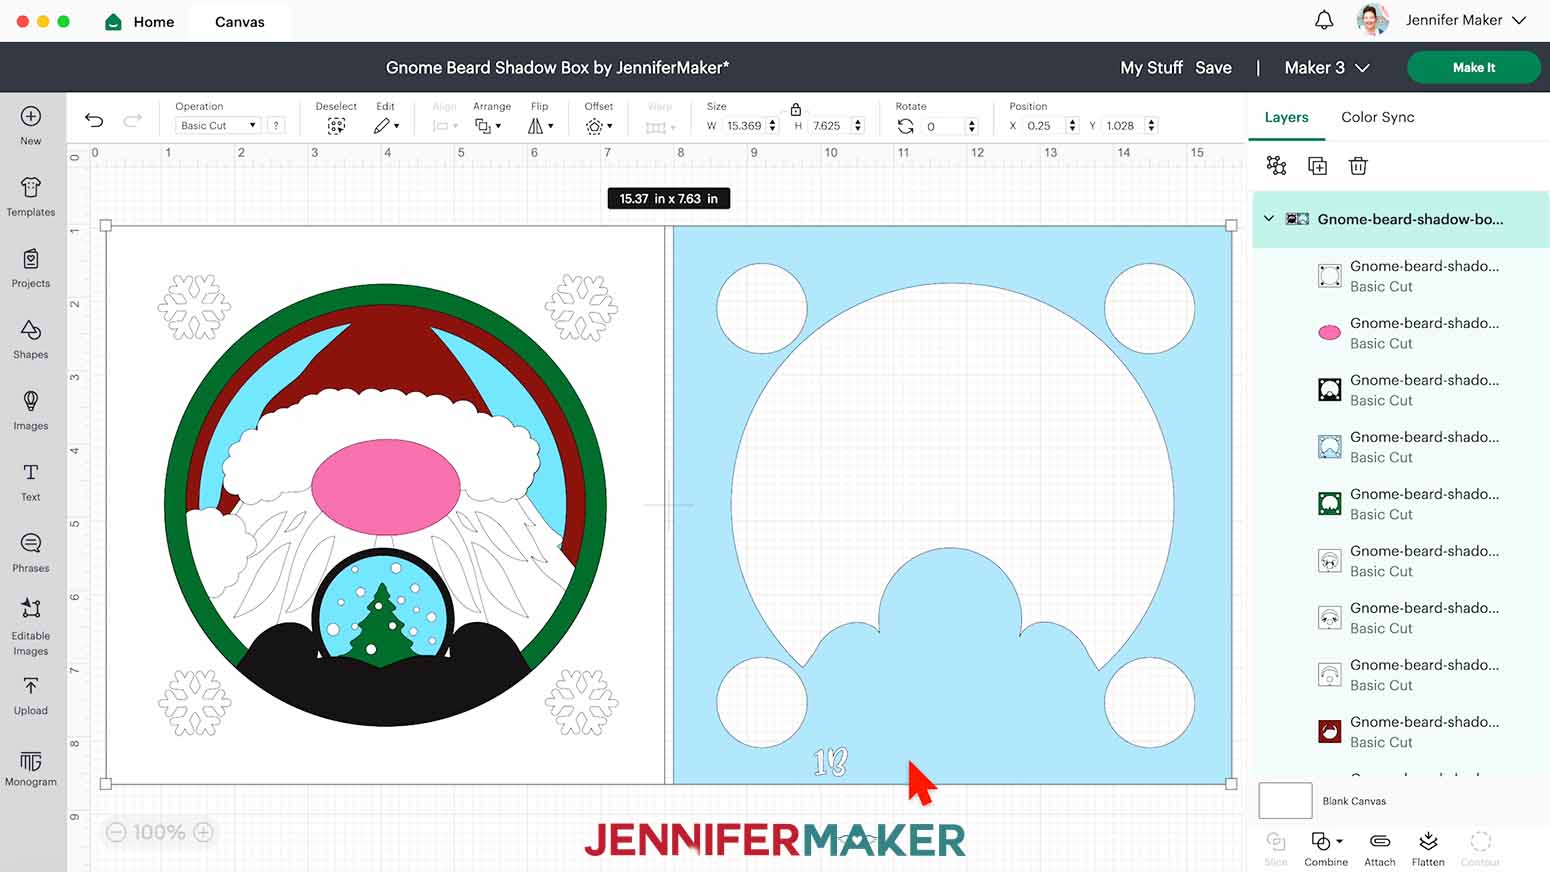
CRICUT DESIGN SPACE
1. Open Cricut Design Space and click “New Project.”
2. Click “Upload” and then “Upload Image.”
3. Click “Browse.”
4. Select the SVG file you want to use.
5. On the Prepare to Upload screen, it will say “Cut image” with the design preview.
6. Click “Upload.”
7. Find your design in Recent Uploads and add it to the Canvas.
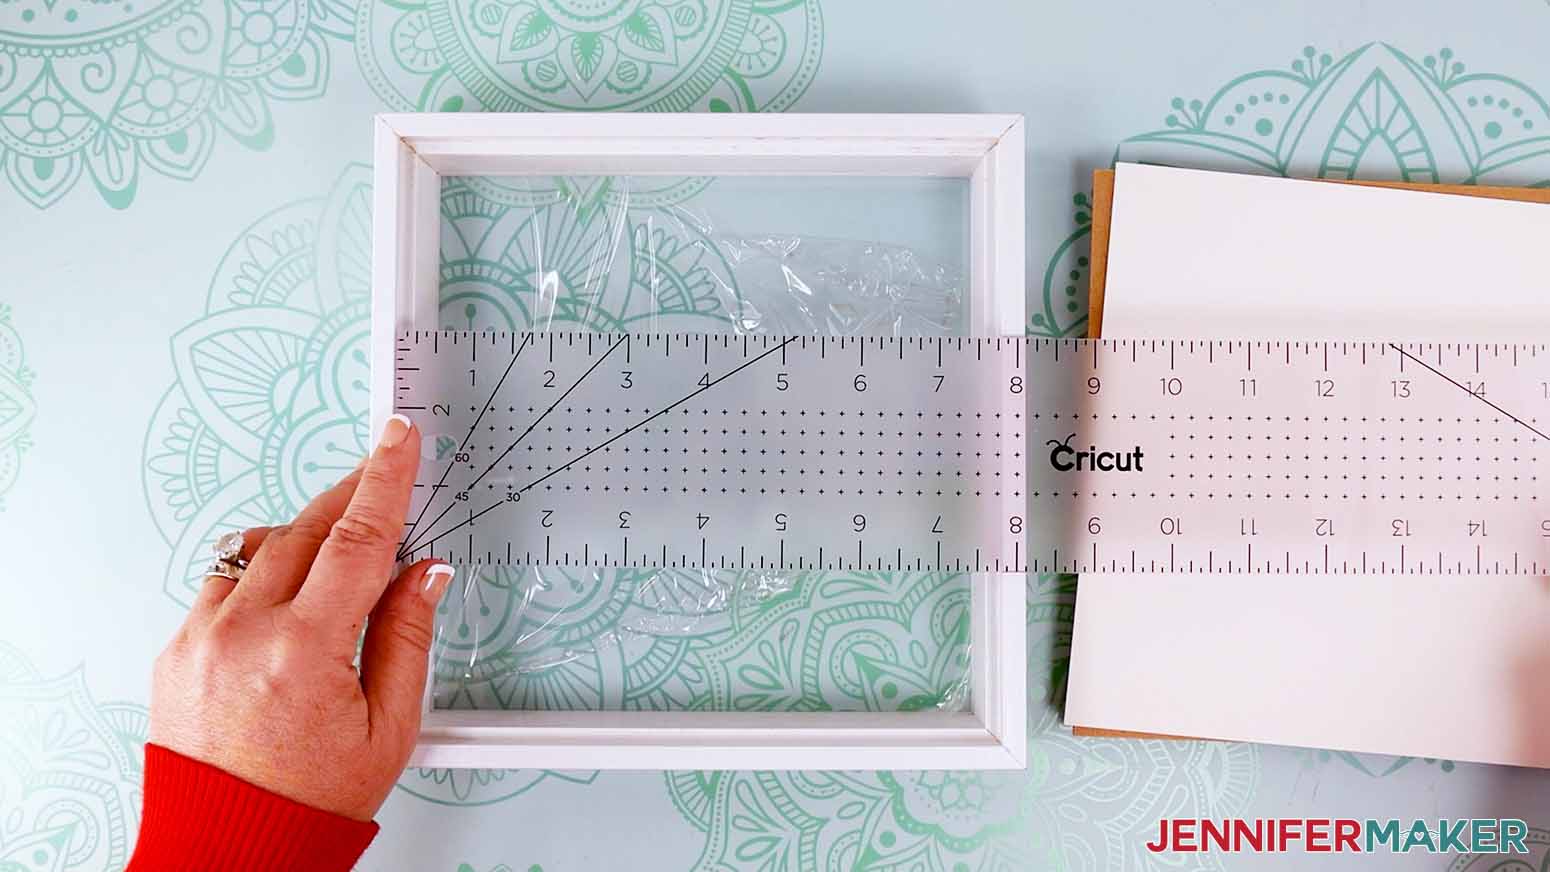
NOTE: The design is set up to fit the 8” x 8” shadow box in my materials list. I don’t recommend reducing the size of the file, as some of the pieces are very intricate and won’t cut well at a smaller size.
You can, however, enlarge your design to fit in a larger square shadow box if you’d like. Open the back of your shadow box and use a tape measure or ruler to measure the opening for your design. Keep the lock icon closed and adjust the Width.
TIP: The numbers at the bottom of most layers help with the layering but will be hidden
8. Make sure the correct machine is selected in the top right.
9. Click “Make It.”
10. If prompted, click "On Mat," choose your mat size, and click “Confirm.”
11. On the Prepare Screen, set the Material Size to match each paper you’re using.
12. Select the first mat again and click “Continue.”
CUTTING
1. On the Make Screen, set the first mat to match your material. Not all machines cut the exact same way, but I got the best results with the settings listed for each material. For plain 65 lb cardstock: “Light Cardstock - 60 lb” with “Default” pressure on a green StandardGrip Mat

2. Place your first mat’s material face up on a green StandardGrip machine mat.
3. Use a brayer to adhere it well.
4. Check that your Fine-Point Blade is clean and in the clamp.
5. Press the flashing “Load/Unload” button to load the prepared mat into your Cricut.
6. Press the flashing “Go” button to begin cutting.
7. When it has finished cutting, check that the cut is complete. If not, press the “Go” button again to make another cut in the same design.
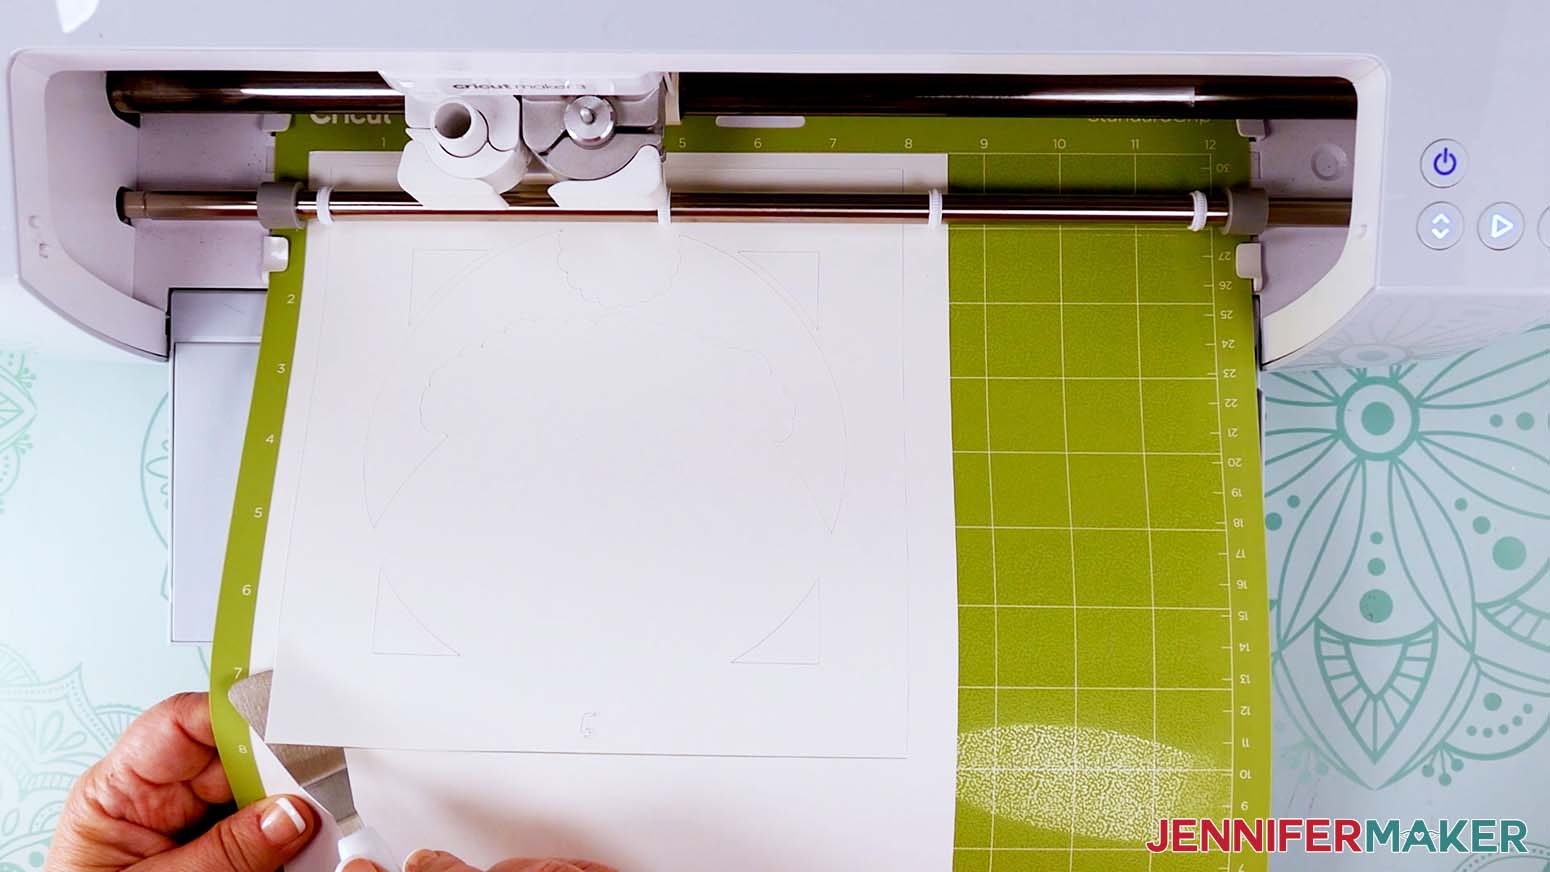
8. When the cut is complete, unload the mat, flip it over onto your work surface, and roll it back to release the paper.A spatula helps lift delicate areas
9. Place the pieces face up in the correct orientation so they’re easier to assemble.
10. Use a scraper to remove cutouts left on the mat.
11. Follow the steps above to cut the other layers.
STEP 3: ASSEMBLE YOUR LAYERED GNOME
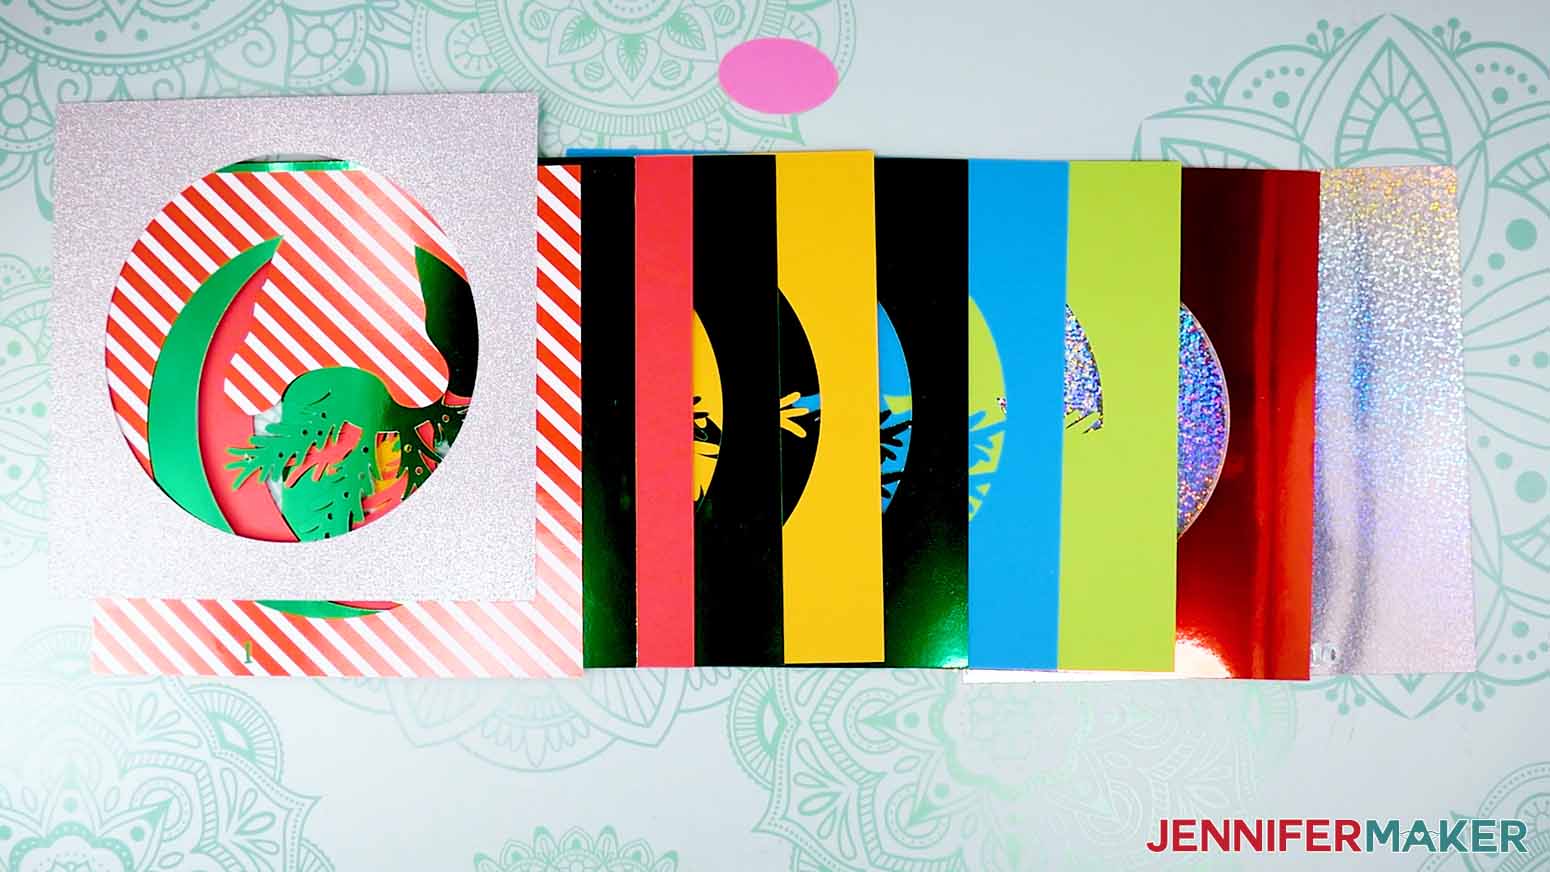
1. Arrange the layers face up in the correct order, the numbers help.
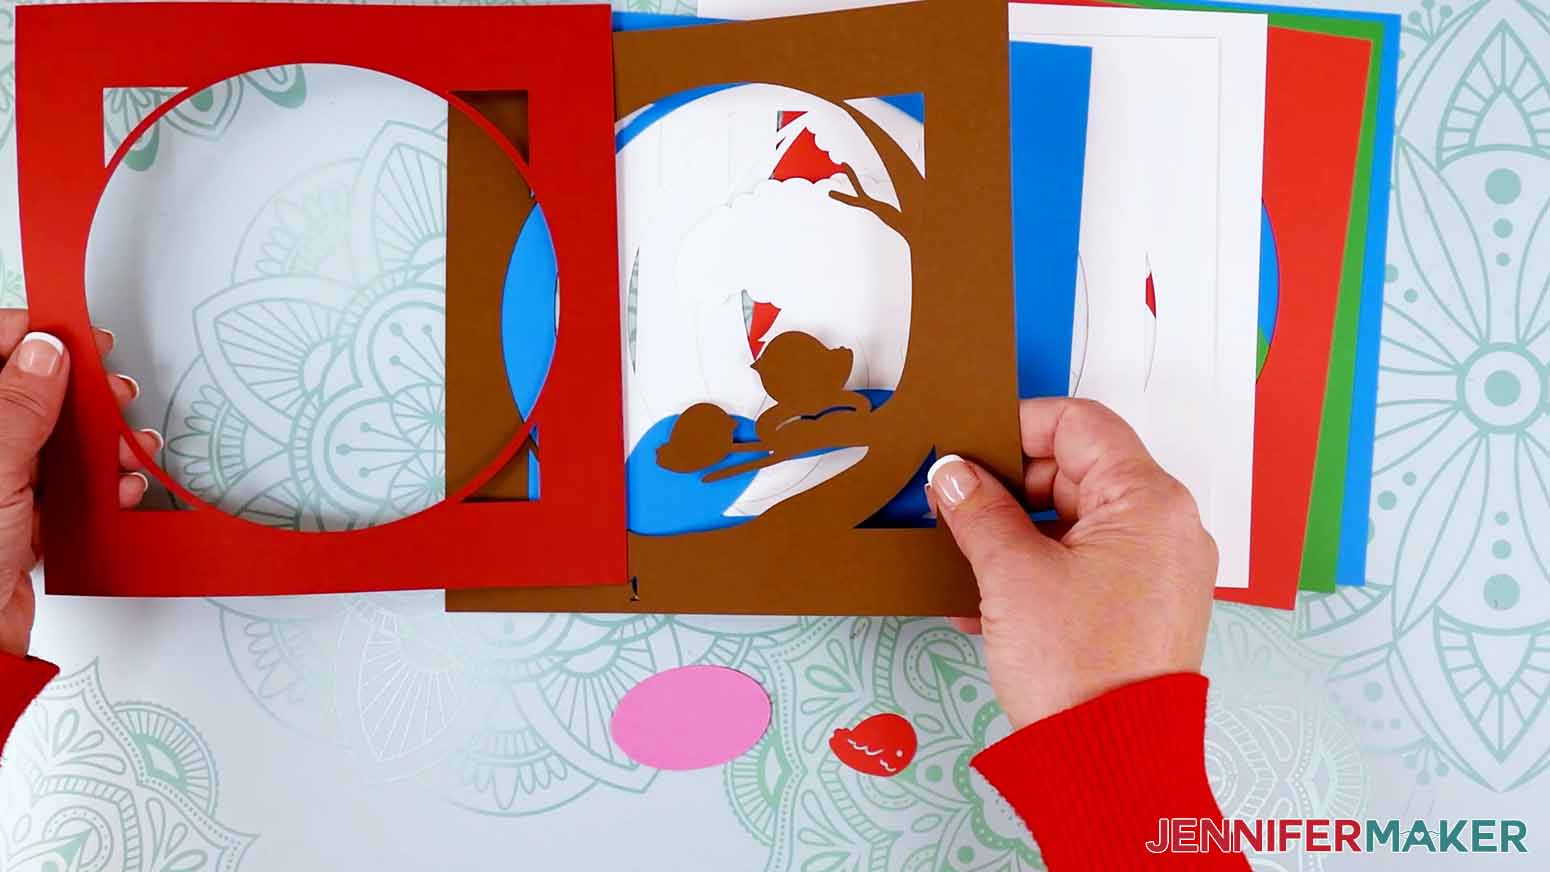
2. Place the stack face down.
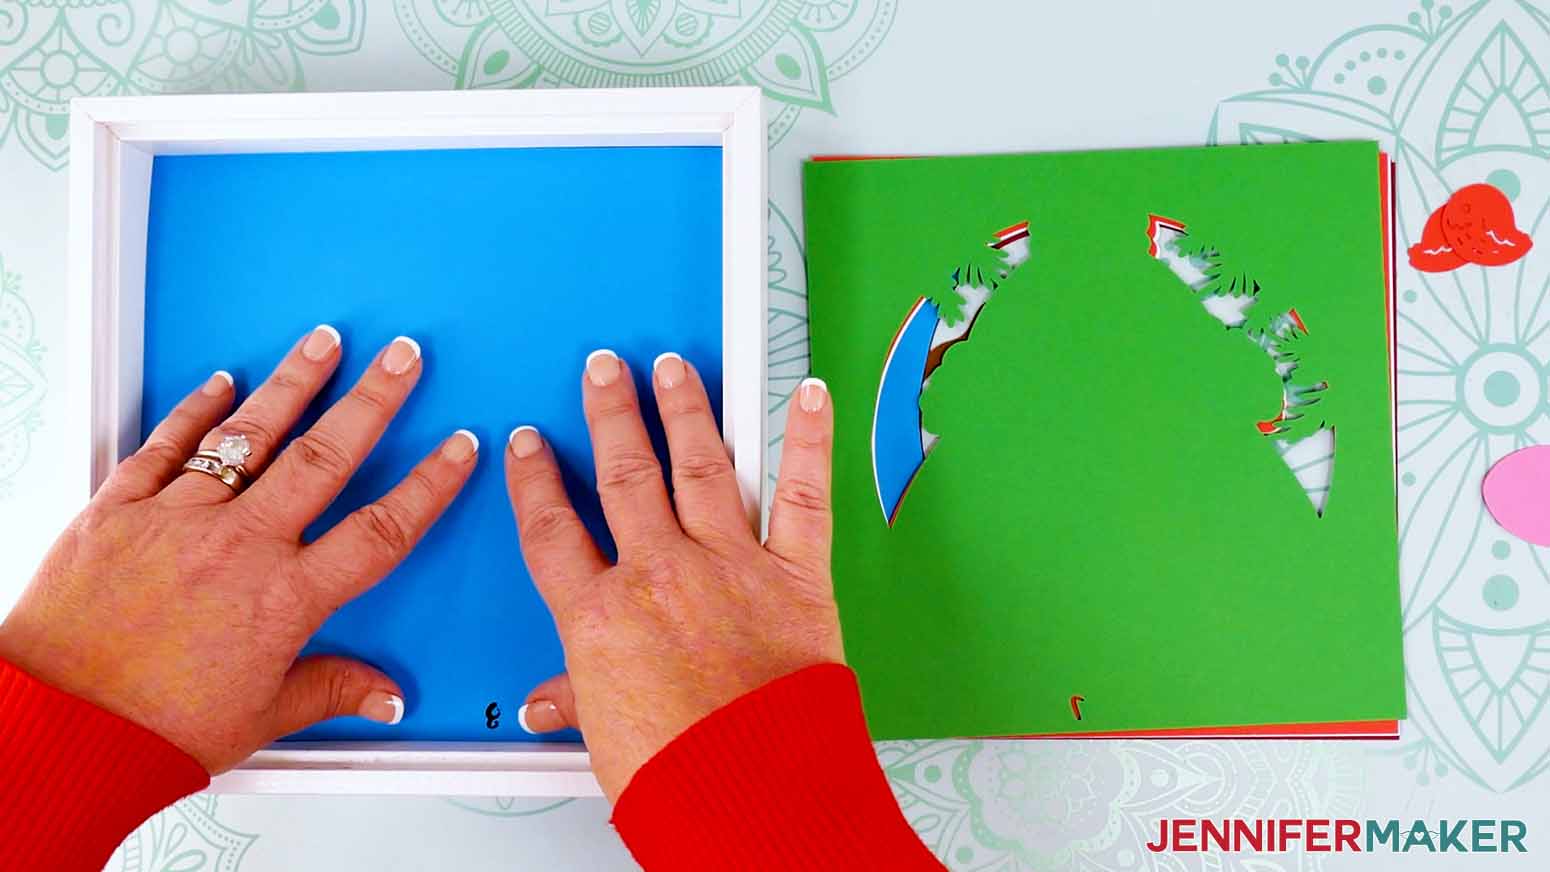
3. The shadow box frame helps with alignment, so have that open and face down, too.
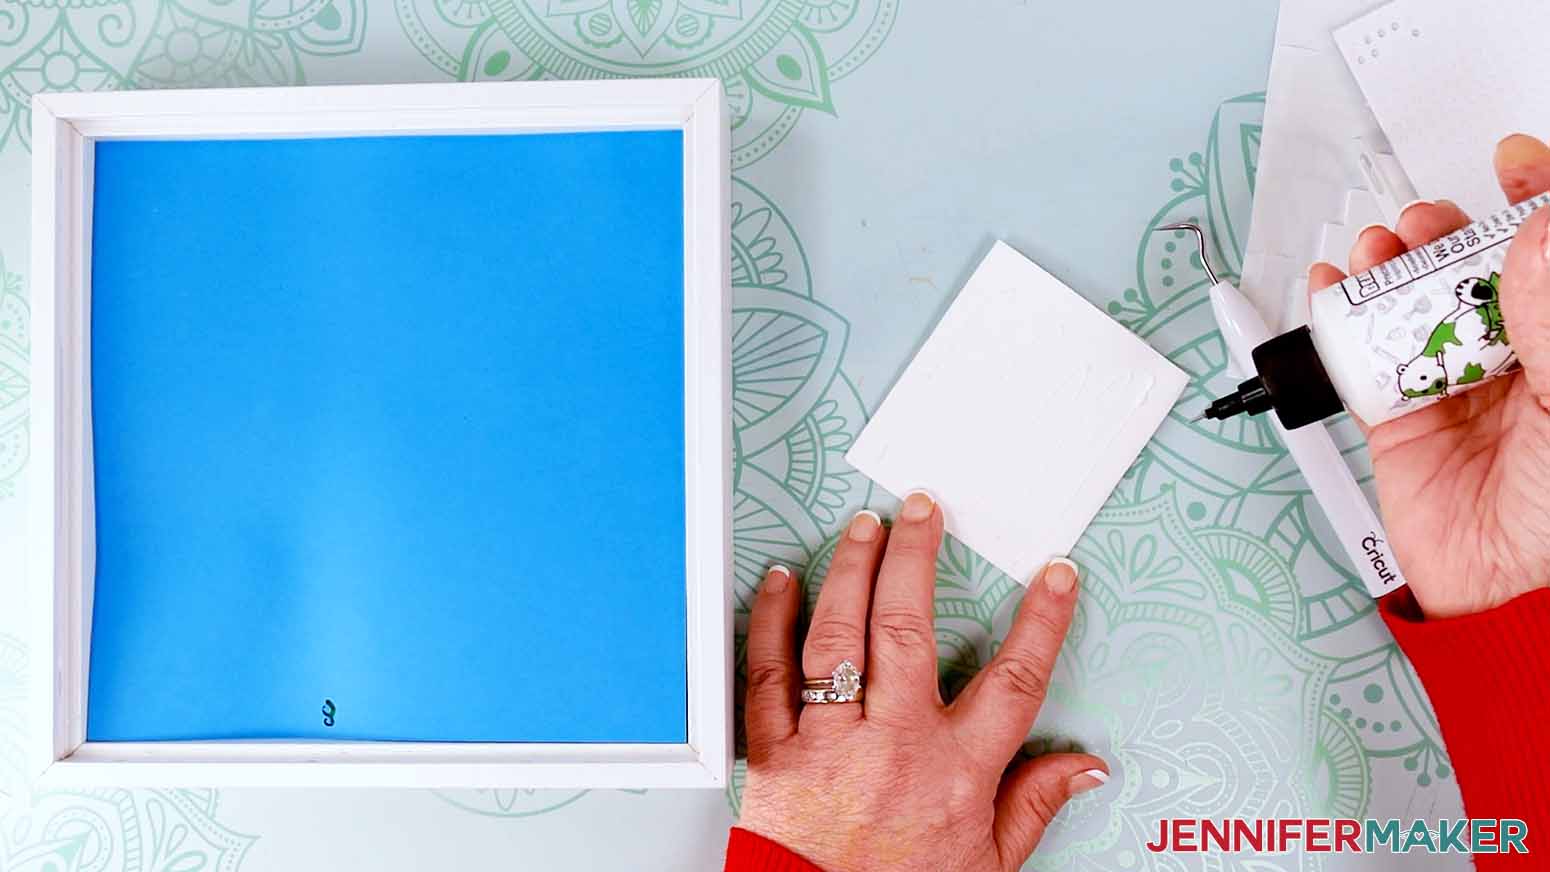
4. Flip the Layer 8, the background, over so it’s face up and put it in the frame.
5. Add adhesive foam squares to the back of the next layer, 7.

6. Use a weeding tool or tweezers to remove the protective papers.
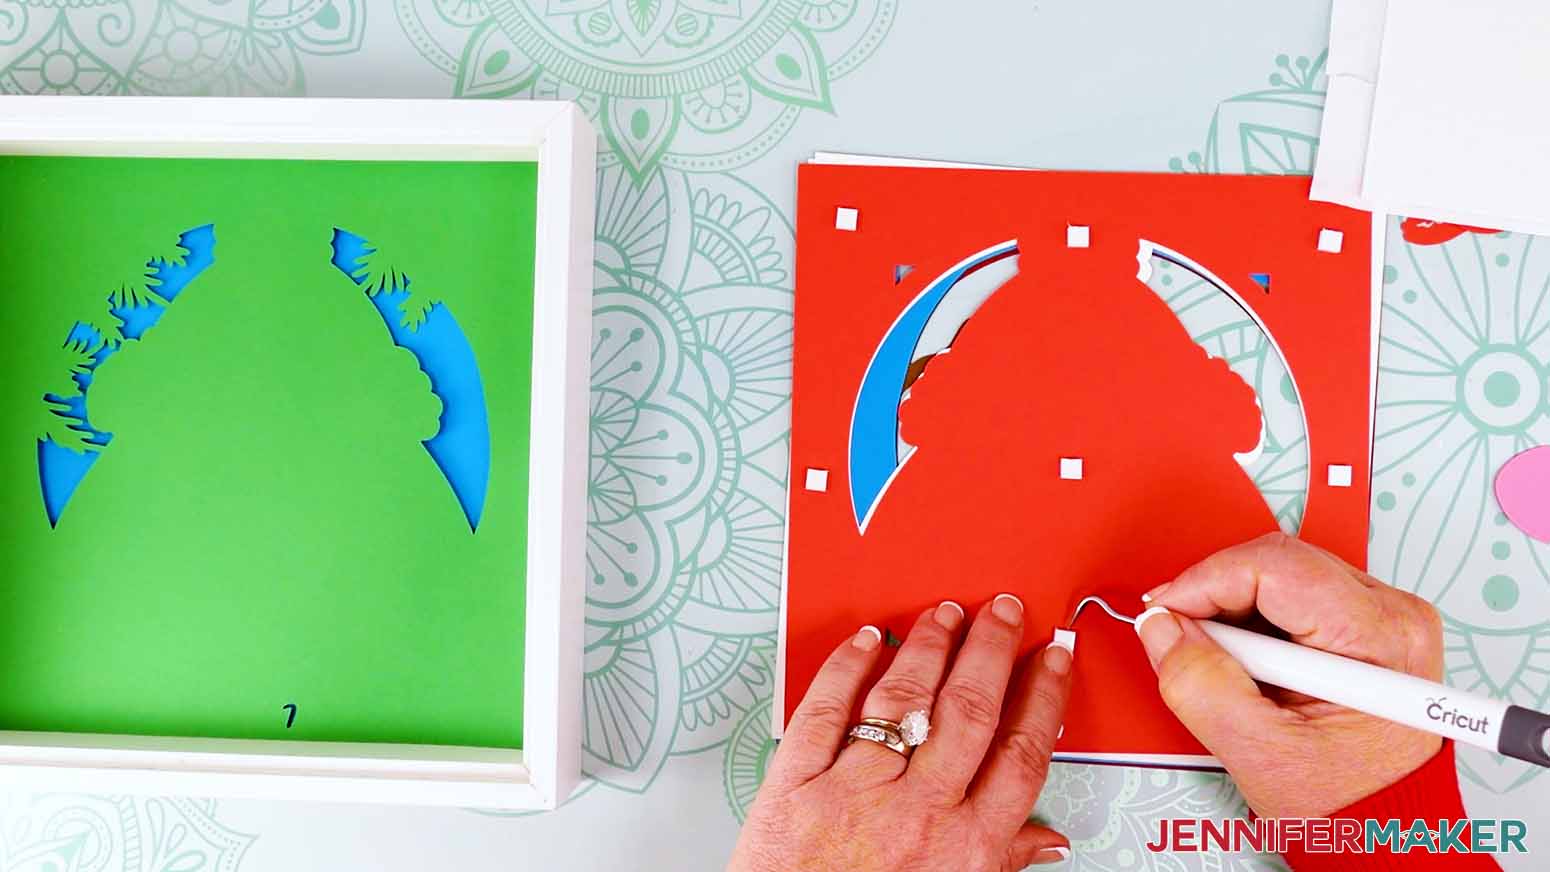
7. Flip Layer 7 over, line it up on Layer 8 and press it in place, using the frame’s edges for alignment help.
NOTE: Layers 6, 5, and 4 all get attached the same way. Place adhesive foam around the sides and on large middle pieces. Stagger them to make the result even. Use the frame’s edges to keep everything lined up.
8. Add Layer 6 on top of Layer 7.
9. Add Layer 5 on top of Layer 6.
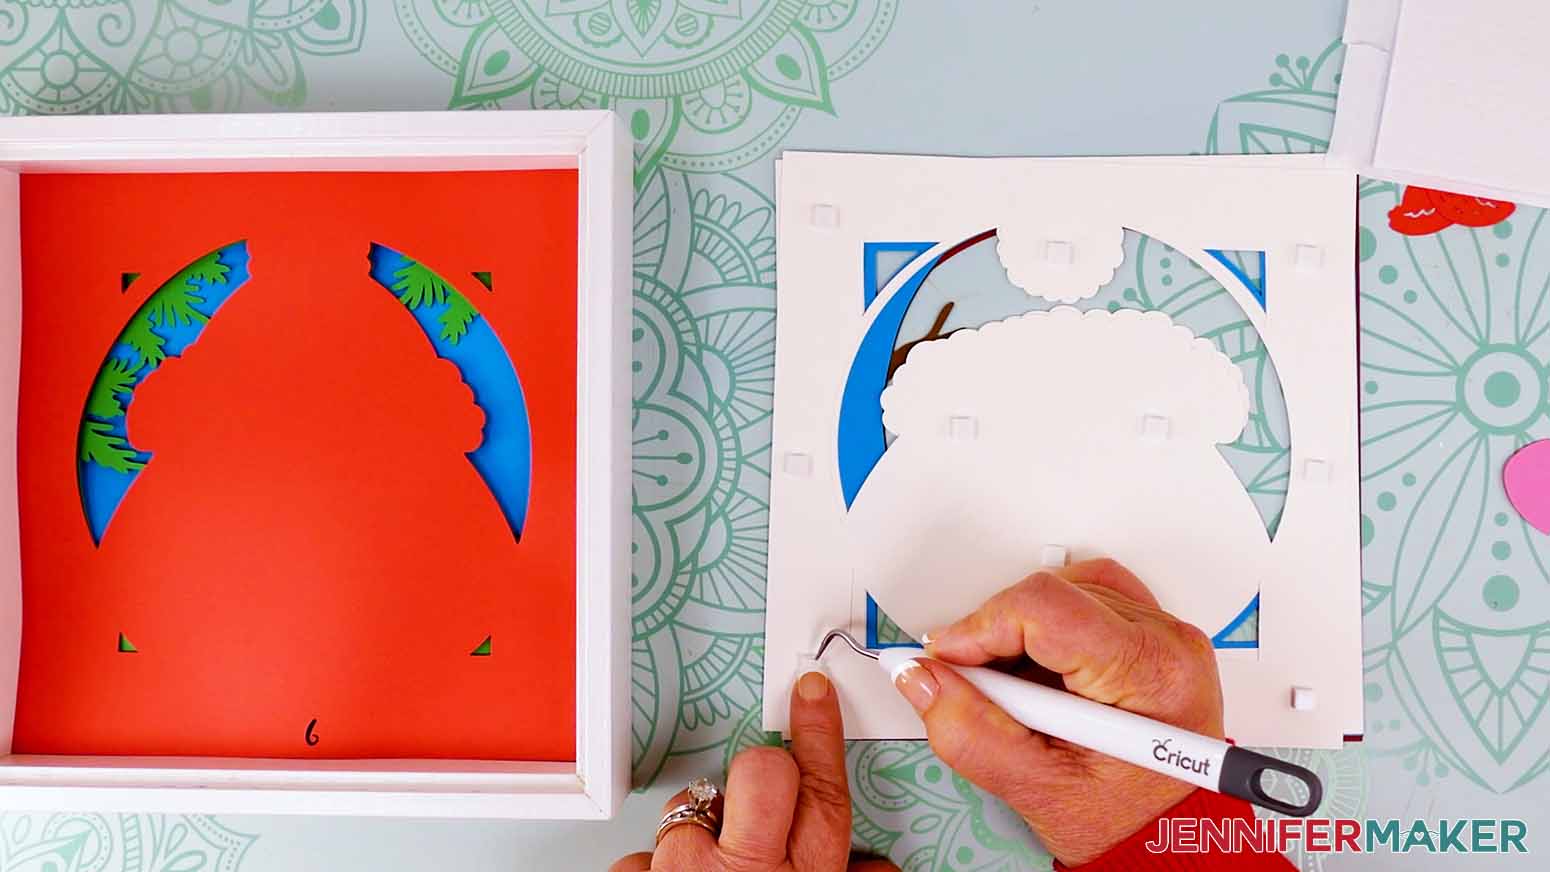
10. Add Layer 4 on top of Layer 5.
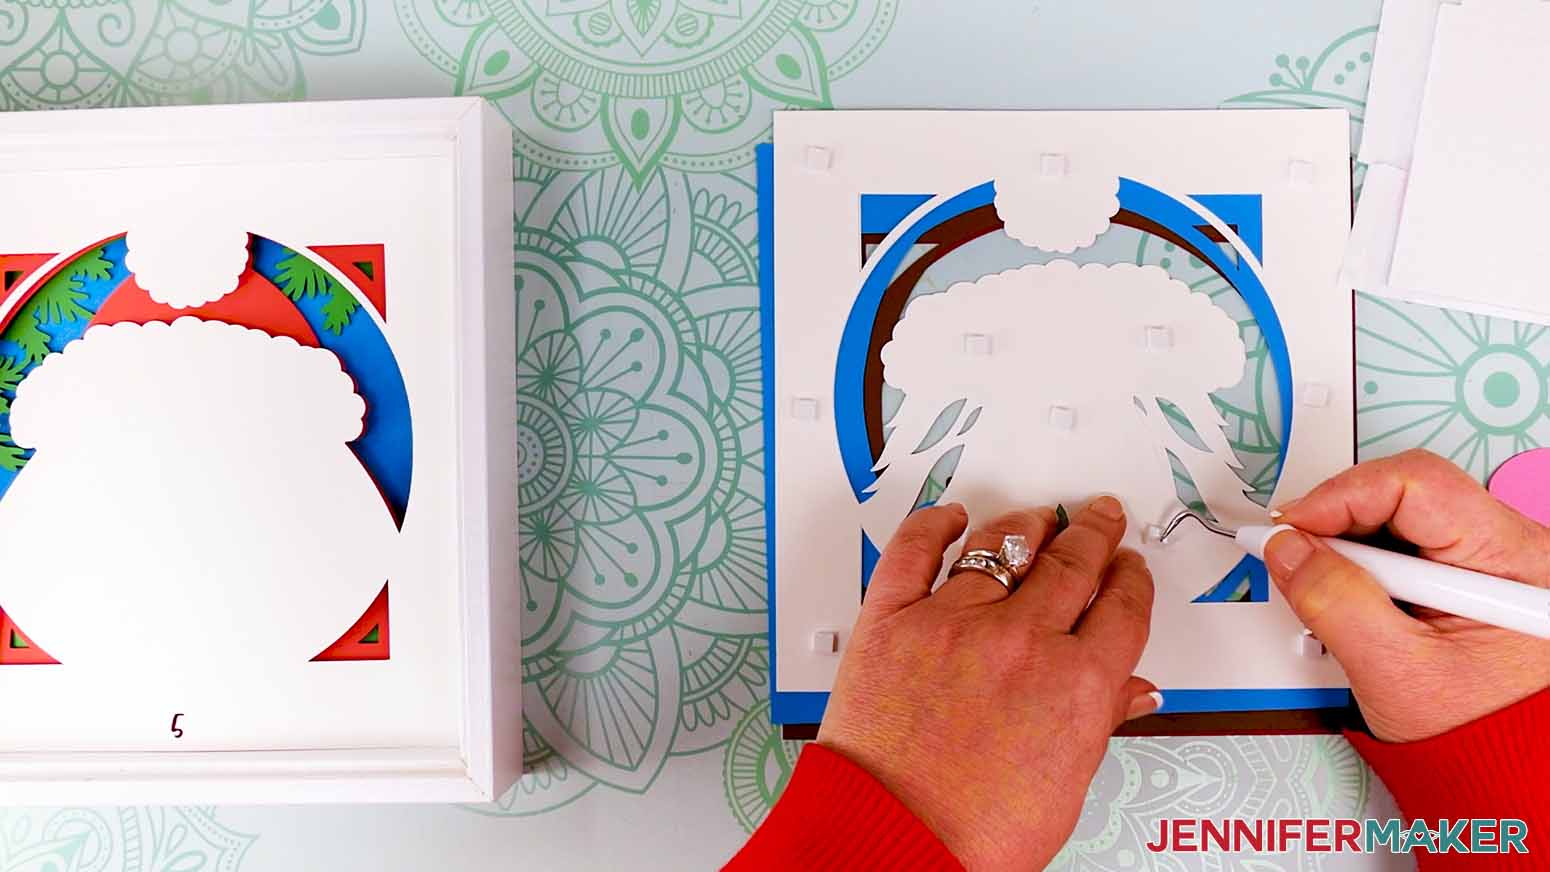
11. When you get to layers with delicate elements, like number 3, use smaller adhesive foam pieces so they’re easier to hide.
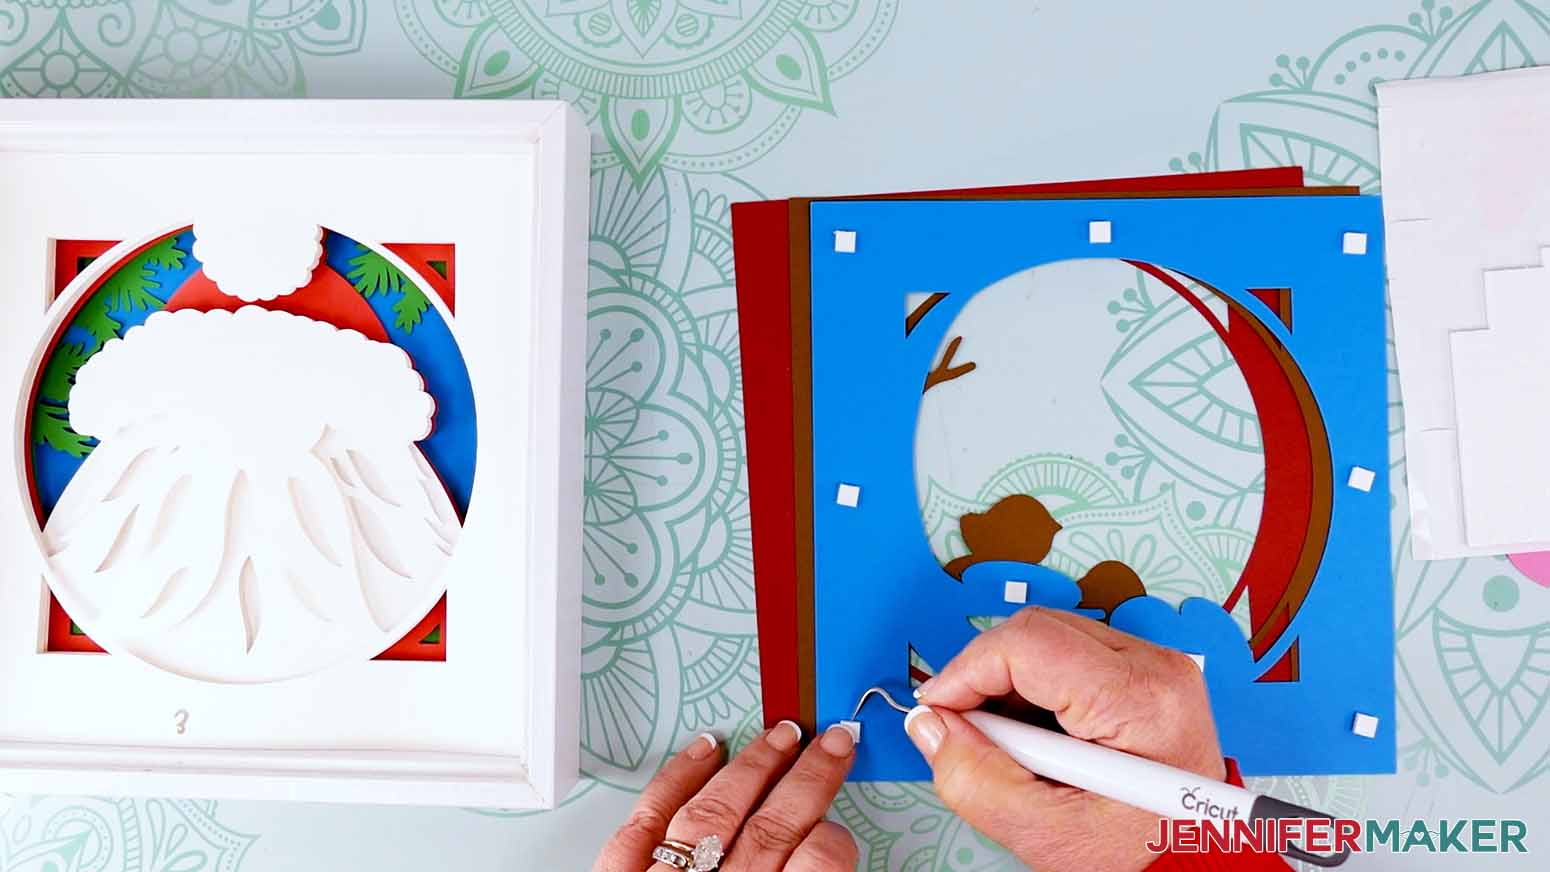
12. Attach the top unnumbered layer on top of Layer 1 with foam. Align the edges before pressing it in place.
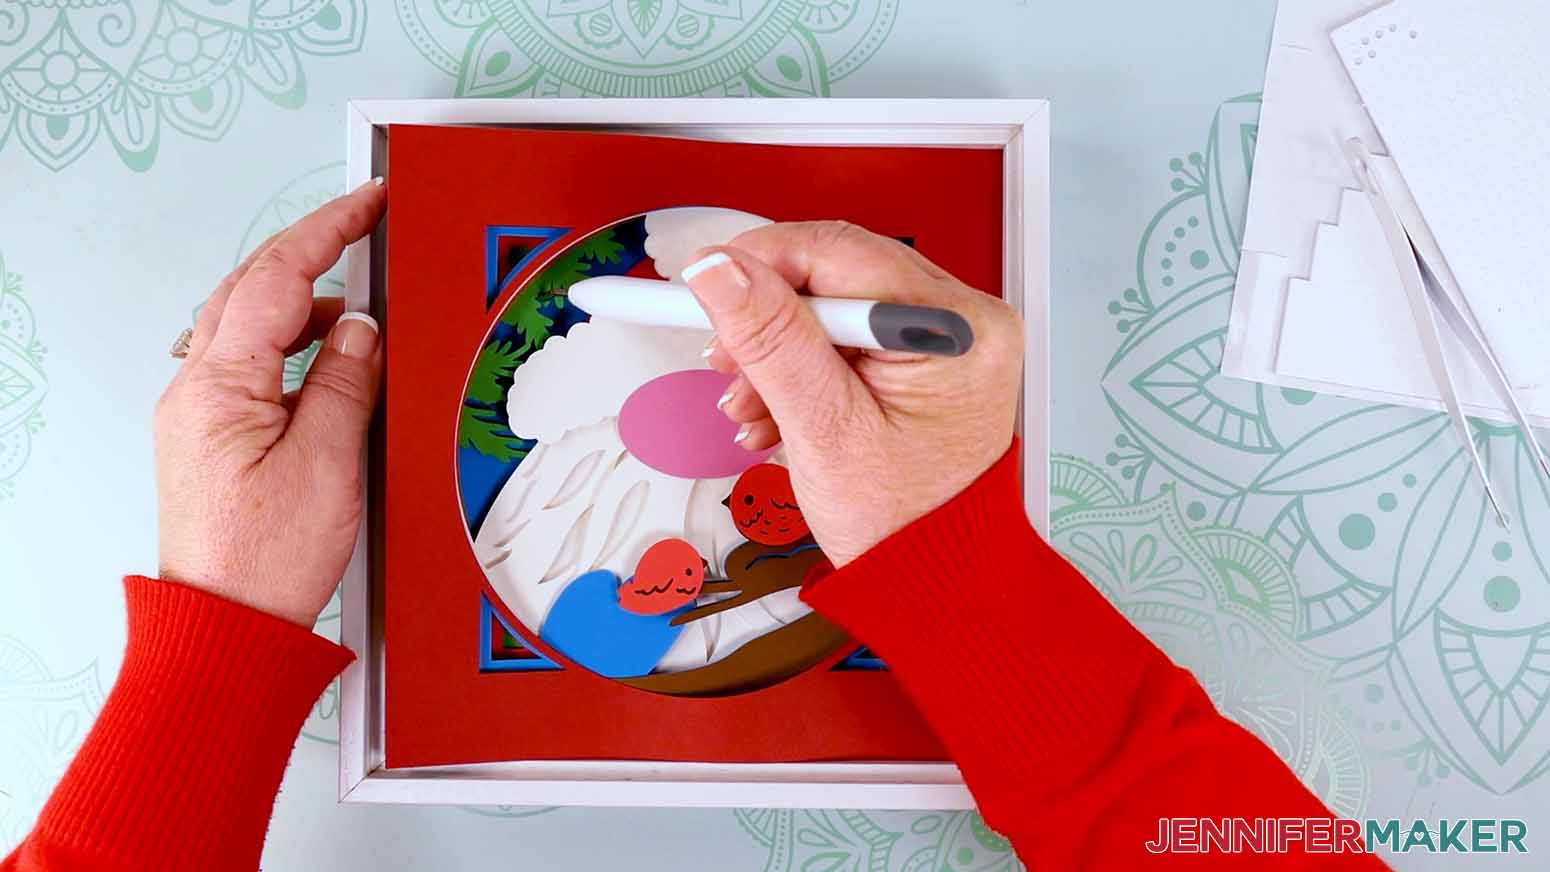
13. Add small foam pieces to the birds’ backs and press them in place.
14. Use good-quality paper glue to add the nose.
15. Let it dry.
16. Flip assembled layers over and lower into the shadow box.
Note: Use a weeding tool to gently lift the layers out of the shadow box.
17. If there’s a gap between the cardstock and where the frame’s backer will sit, the layers could move around during hanging.

18. Fold a rectangular scrap in thirds to make a rounded triangle.
![]()
19. Add some glue to the middle section.
20. Press it onto the back layer.
21. Let it dry, then add the backer with any hanging hardware oriented correctly.
VARIATION 1: LIGHTS GNOME WITH SPECIAL CARDSTOCK
Papers Used:
Layer 9 (background) - Holographic Cardstock
Layer 8 (hat) - Red Foil Cardstock
Layer 7 (beard back) - White Glitter Cardstock
Layer 6 (beard top) - White Glitter Cardstock
Layer 5 (teal lights, wire) - teal Foil Cardstock
Layer 4 (yellow lights) - yellow Foil Cardstock
Layer 3 (purple lights) - Purple Foil Cardstock
Layer 2 (frame berries, red lights) - Red Foil Cardstock
Layer 1 (frame leaves) - Foil Cardstock
Layer 0 (frame) - Silver Foil Cardstock
Nose - Plain Cardstock
1. Follow the Design Space Steps 1 - 12 in the Main Tutorial to prepare your SVG.
2. Set the Material Setting for your first mat to match your material. Not all machines cut the exact same way, but I got the best results with the settings listed for each material.
- For plain 65 lb cardstock: “Light Cardstock - 60 lb” with “Default” pressure on a green StandardGrip Mat
- For glitter cardstock: “Glitter Cardstock” with “Default” pressure on a green StandardGrip Mat
- For foil cardstock - “Foil Kraft Board” with “More” pressure on a green StandardGrip Mat
- For holographic cardstock: “Foil Kraft Board” with “More” pressure on a green StandardGrip Mat
3. Prepare, cut, and remove the pieces from all your mats using the same steps.
4. Arrange the layers face up in the correct order, the numbers help.
5. Place the stack face down.
6. The shadow box frame helps with alignment, so have that open and face down, too.
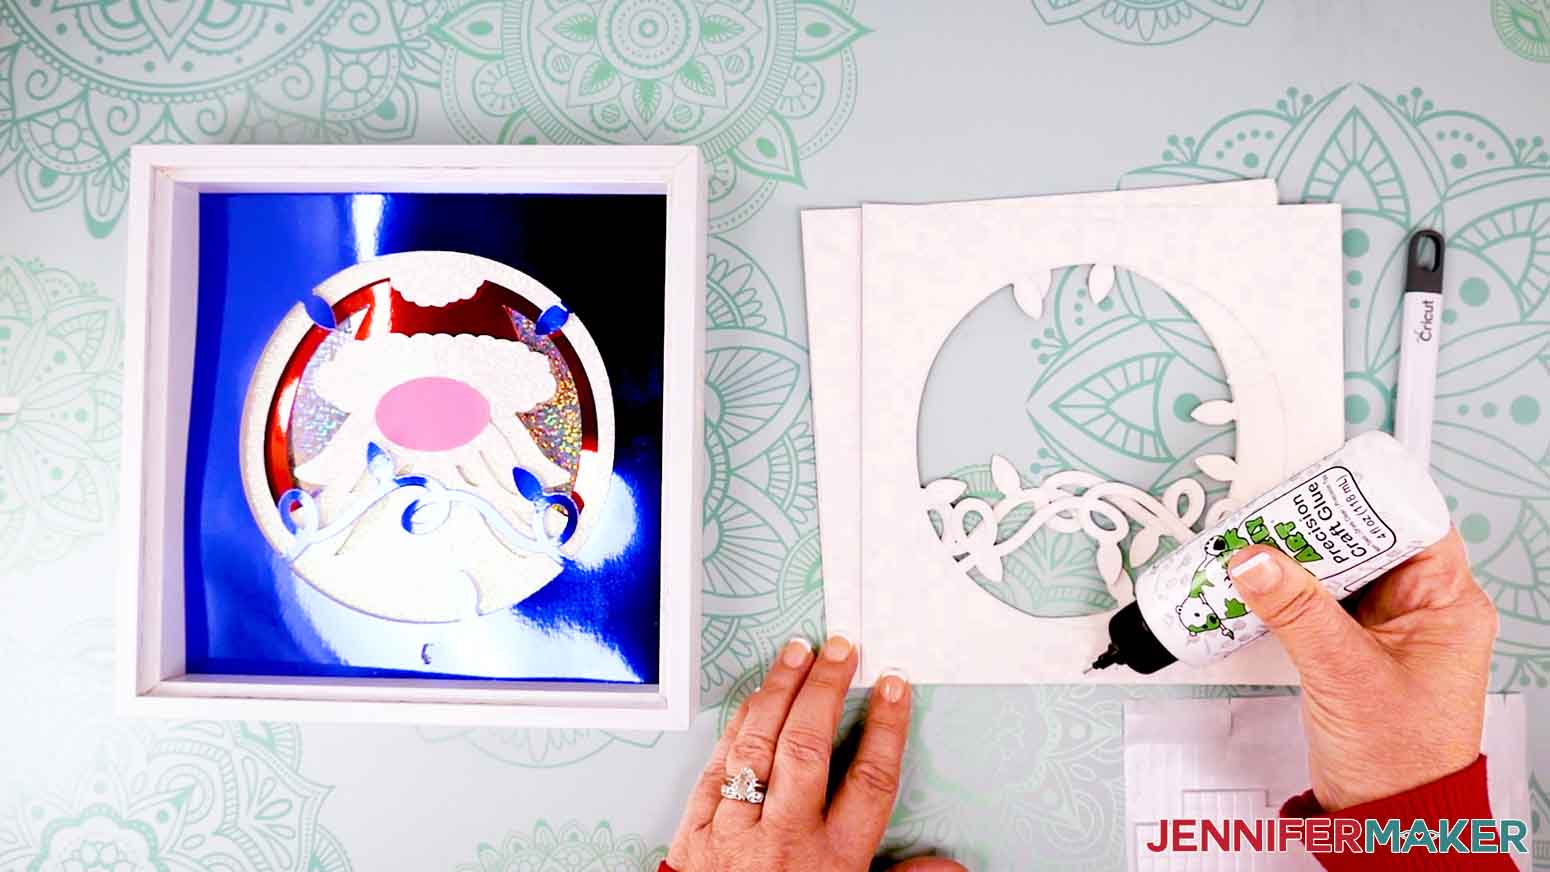
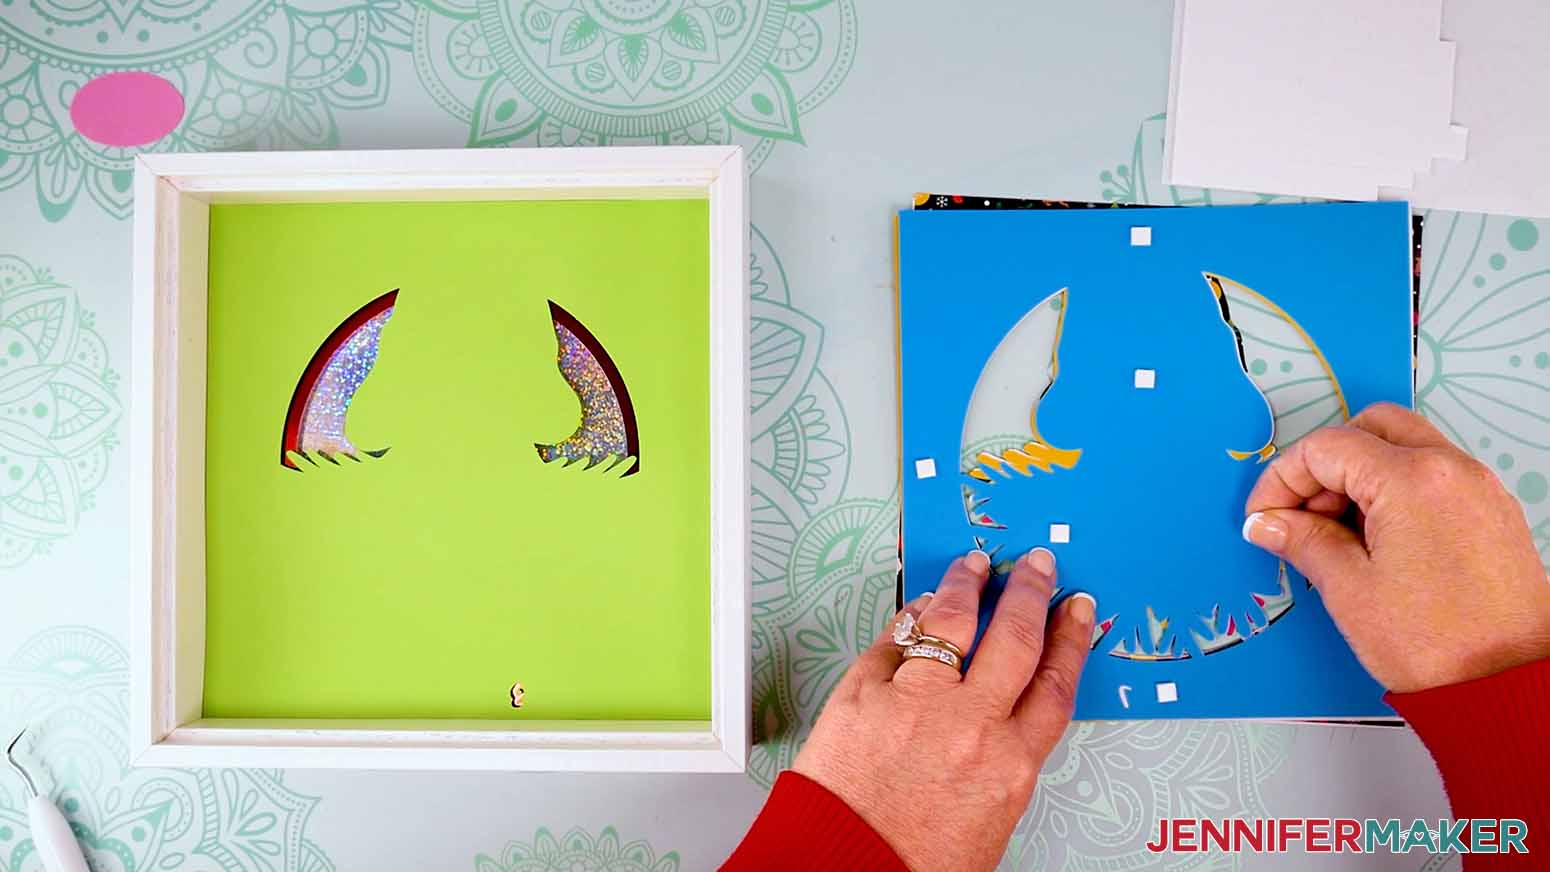
7. Flip Layer 9, the background, over so it’s face up and put it in the frame.
8. Add adhesive foam squares to the back of the next layer, 8.

9. Use a weeding tool or tweezers to remove the protective papers.
10. Flip Layer 8 over, line it up on Layer 9 and press it in place, using the frame’s edges for alignment help.
NOTE: Layers 7, 6, and 5 get attached the same way. Place adhesive foam around the sides and on large middle pieces. Stagger them to make the result even. Use the frame’s edges to keep everything lined up.
11. Add Layer 7 on top of Layer 8.
12. Add Layer 6 on top of Layer 7.

13. Add Layer 5 on top of Layer 6.
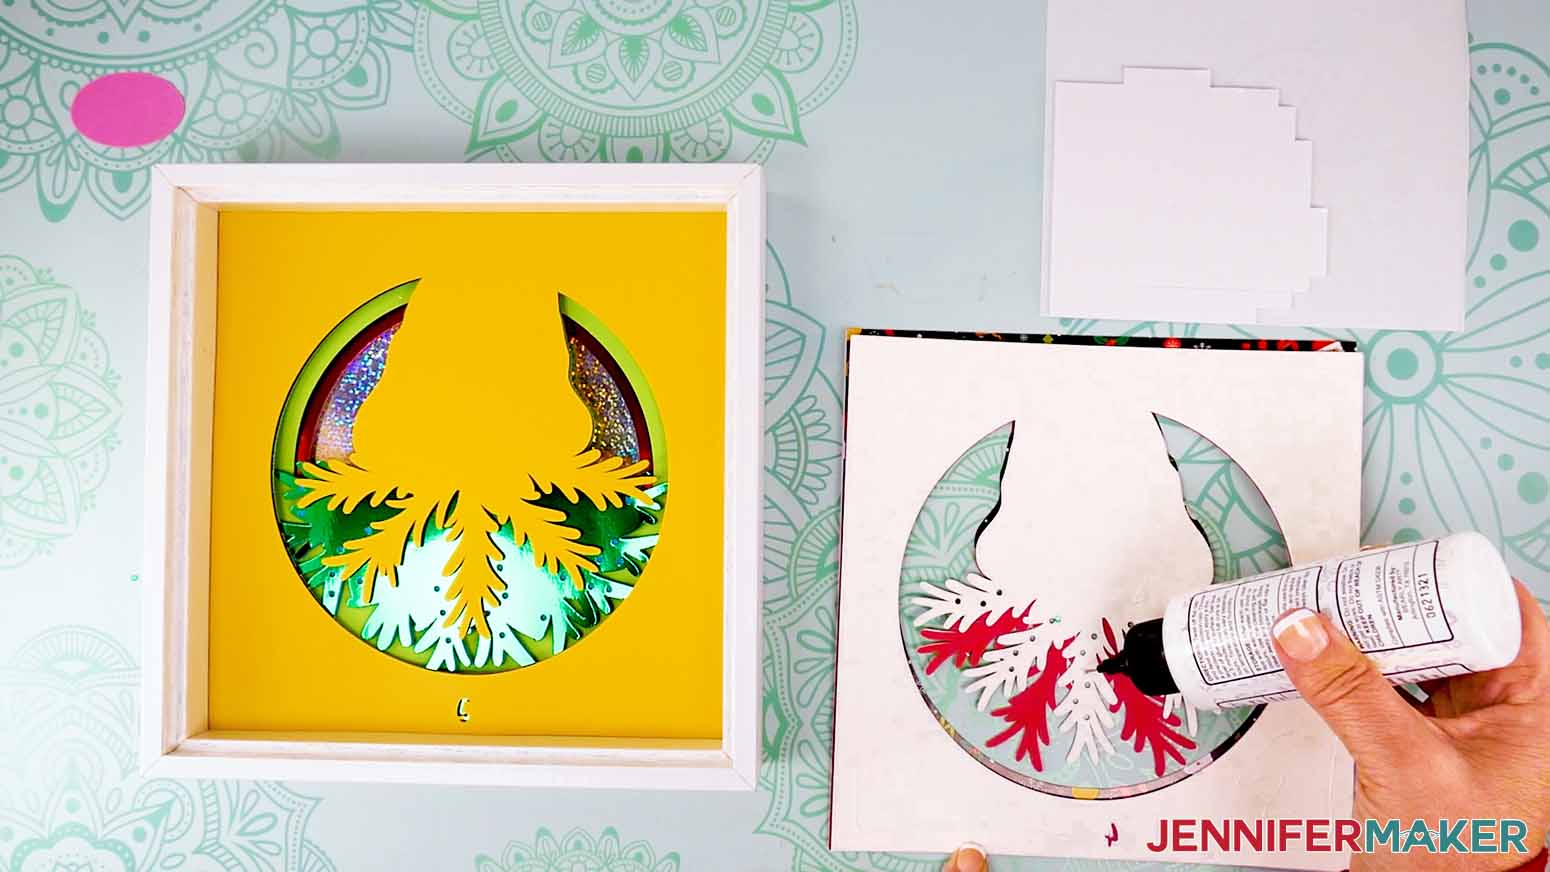
14. Use the lights in Layer 5 to help you glue the nose in the correct spot.
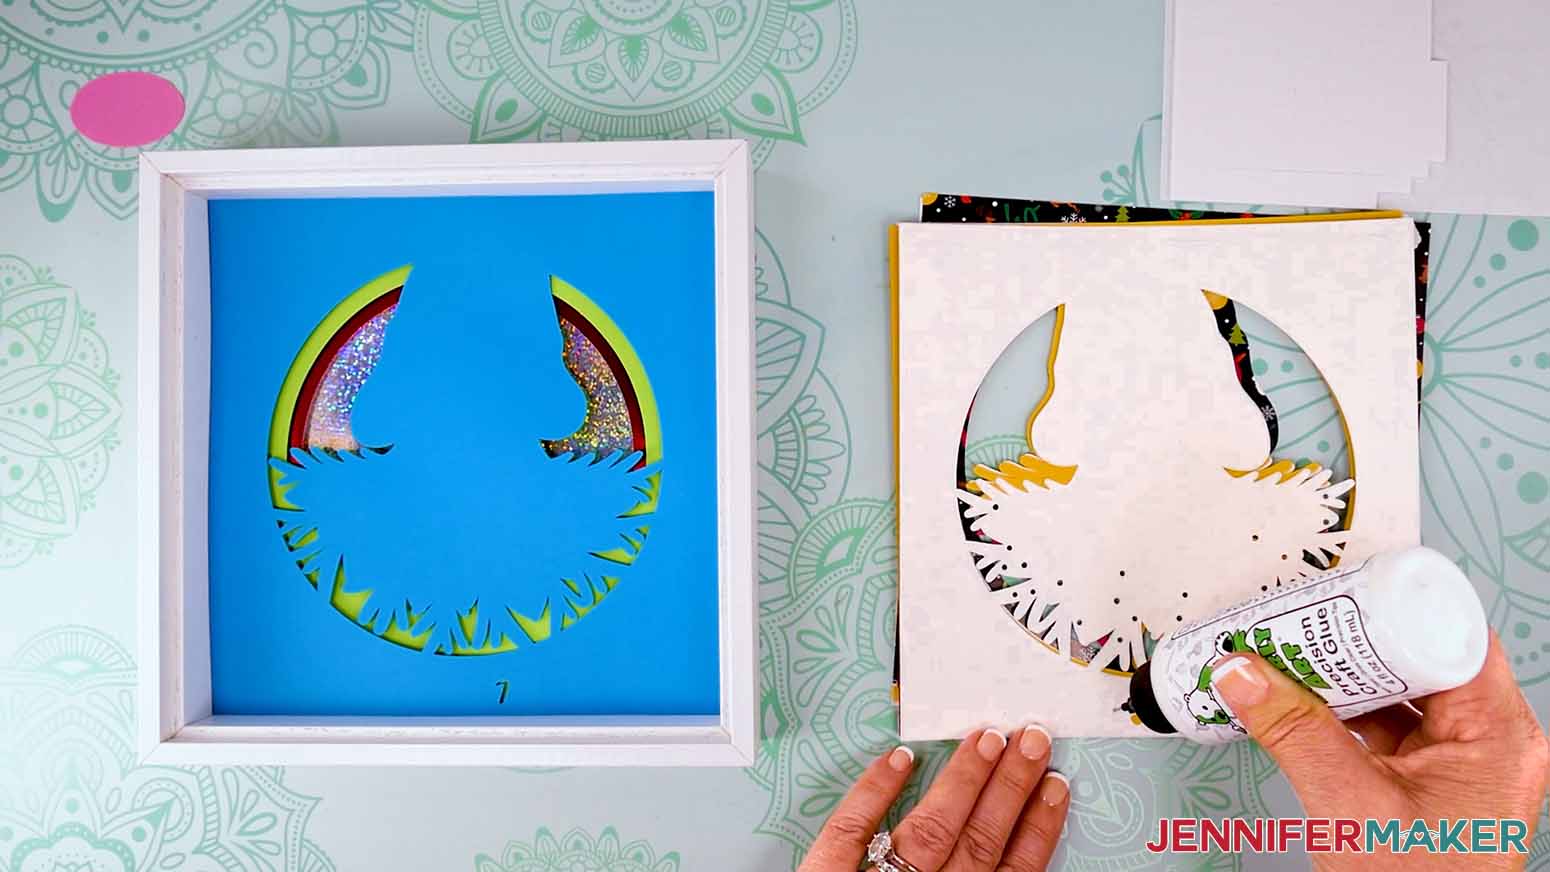
15. Add thin lines of craft glue around the edges of Layer 4 and along the wire. Using glue instead of foam makes the string of lights look like a single object.
16. Flip Layer 4 over, line it up on Layer 5 and press it in place.
17. Add Layers 3, 2 and 1 with glue.

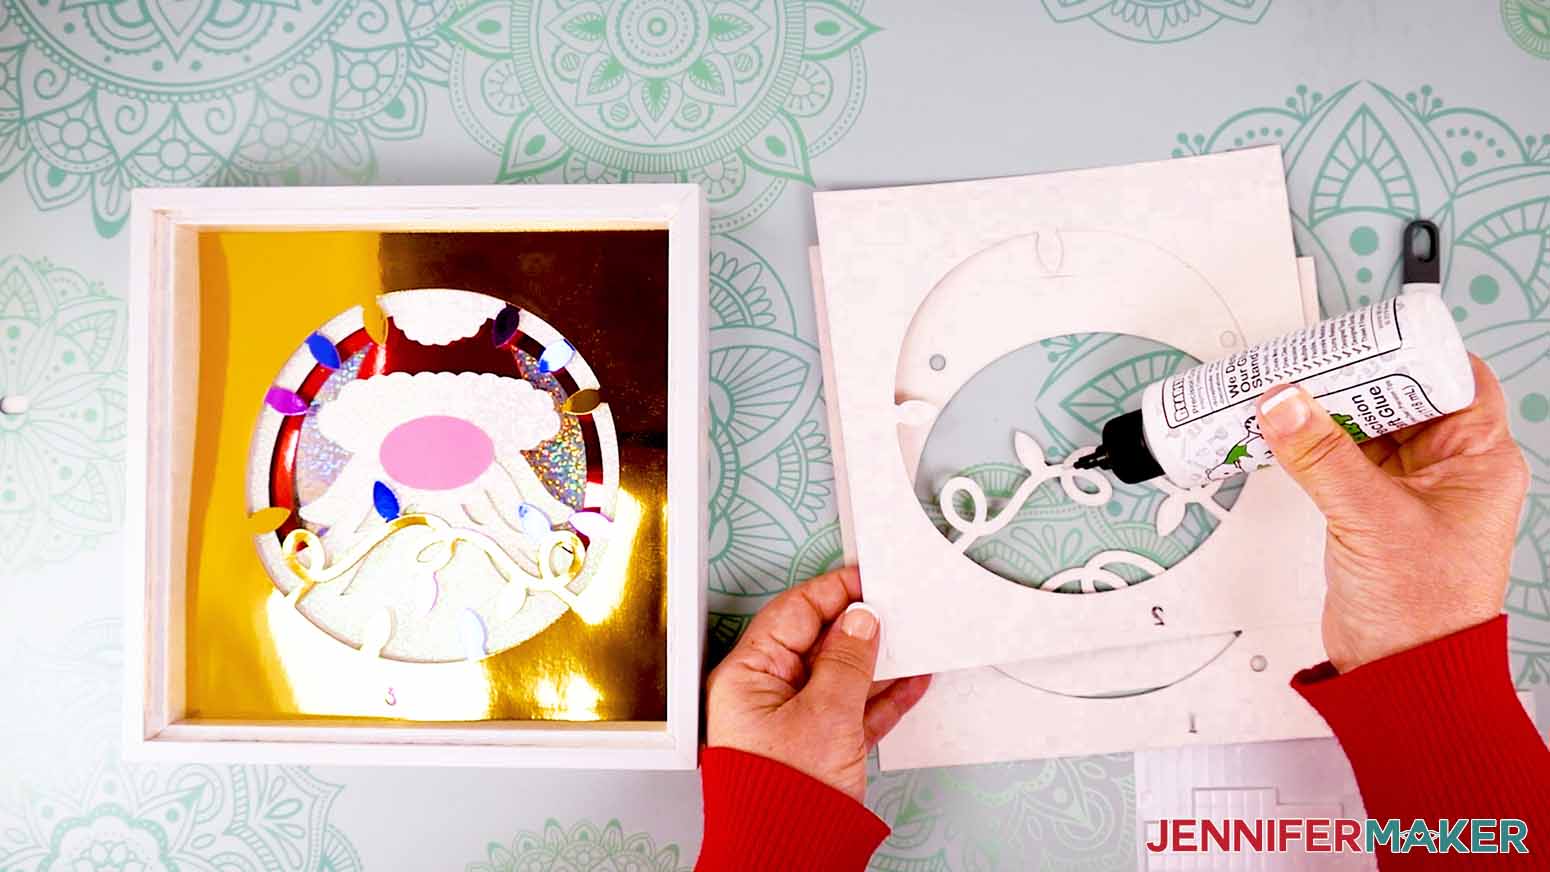
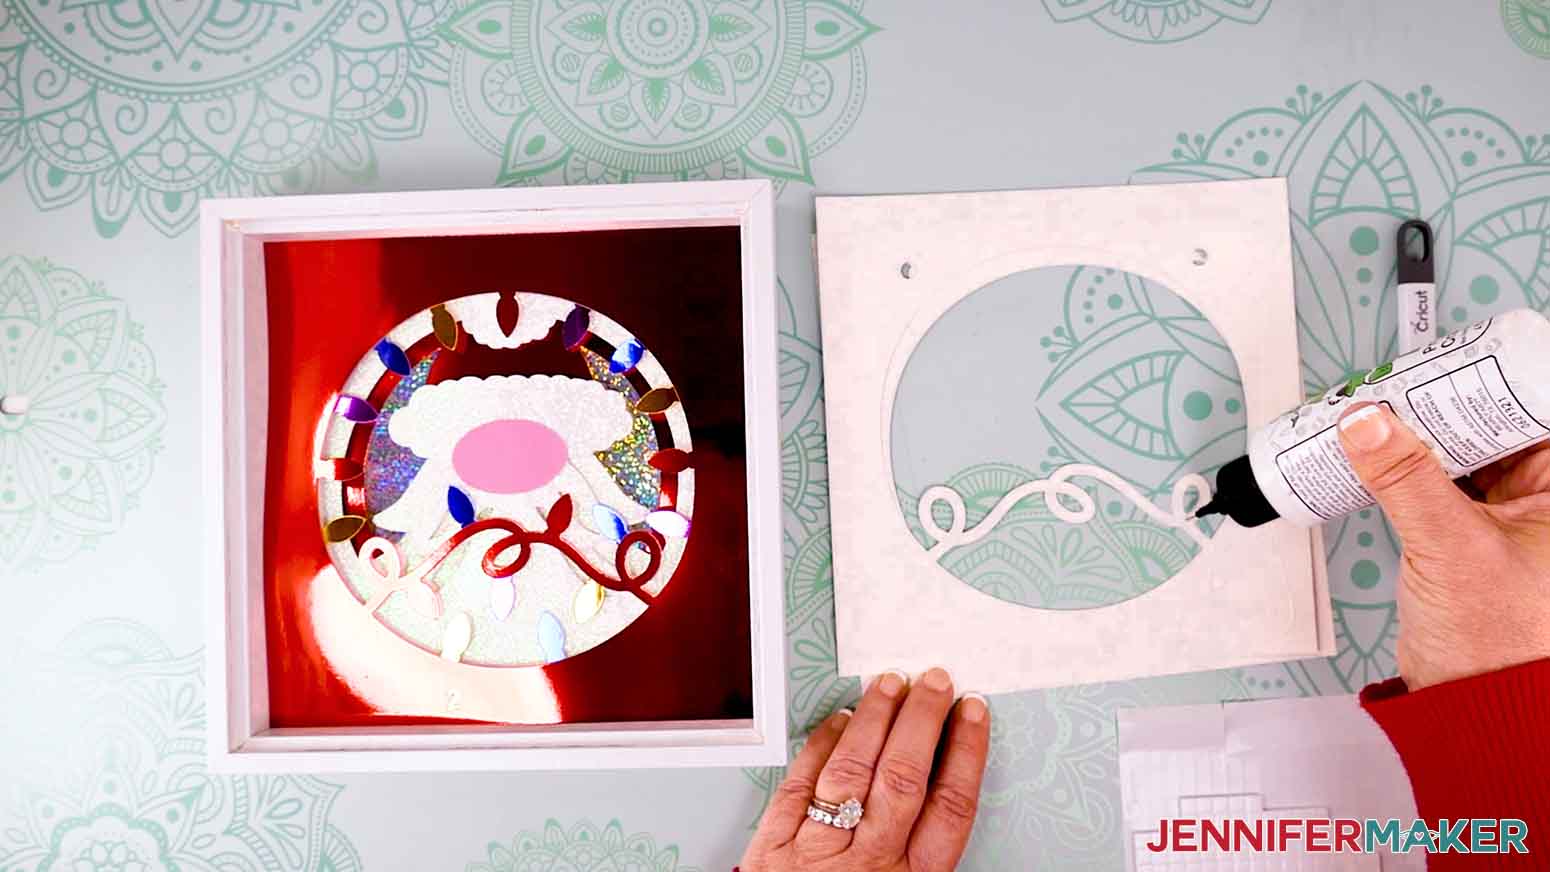
18. Use adhesive foam squares to attach the top unnumbered layer on top of Layer 1. Make sure the berry shapes align before pressing it in place.

19. Follow the shadow box finishing steps above to complete your layered gnome with lights.
VARIATION: TREE GNOME WITH MIXED PAPER THICKNESSES
Papers used:
Layer 10 (background) - Holographic Cardstock
Layer 9 (accent ring)
Layer 8 (beard base) - Foil Cardstock
Layer 7 (blue lights) -
Layer 6 (beard back) - Foil Cardstock
Layer 5 (yellow lights) -
Layer 4 (beard middle) - Foil Cardstock
Layer 3 (red lights) -
Layer 2 (beard top) - Foil Cardstock
Layer 1 (hat) - Patterned Paper - only use for simple layers and between sturdy, smooth layers like foil or holographic cardstock
Layer 0 (frame) - Glitter Cardstock
Nose - Plain Cardstock
1. Follow the Design Space Steps 1 - 12 in the Main Tutorial to prepare your SVG.
NOTE: You can adjust colors using the Color Box, but keep Layers 2, 4, and 6 the greens to create the tree beard.
2. Set the Material Setting for your first mat to match your material. Not all machines cut the exact same way, but I got the best results with the settings listed for each material.
- For plain 65 lb cardstock: “Light Cardstock - 60 lb” with “Default” pressure on a green StandardGrip Mat
- For glitter cardstock: “Glitter Cardstock” with “Default” pressure on a green StandardGrip Mat
- For foil cardstock - “Foil Kraft Board” with “More” pressure on a green StandardGrip Mat
- For holographic cardstock: “Foil Kraft Board” with “More” pressure on a green StandardGrip Mat
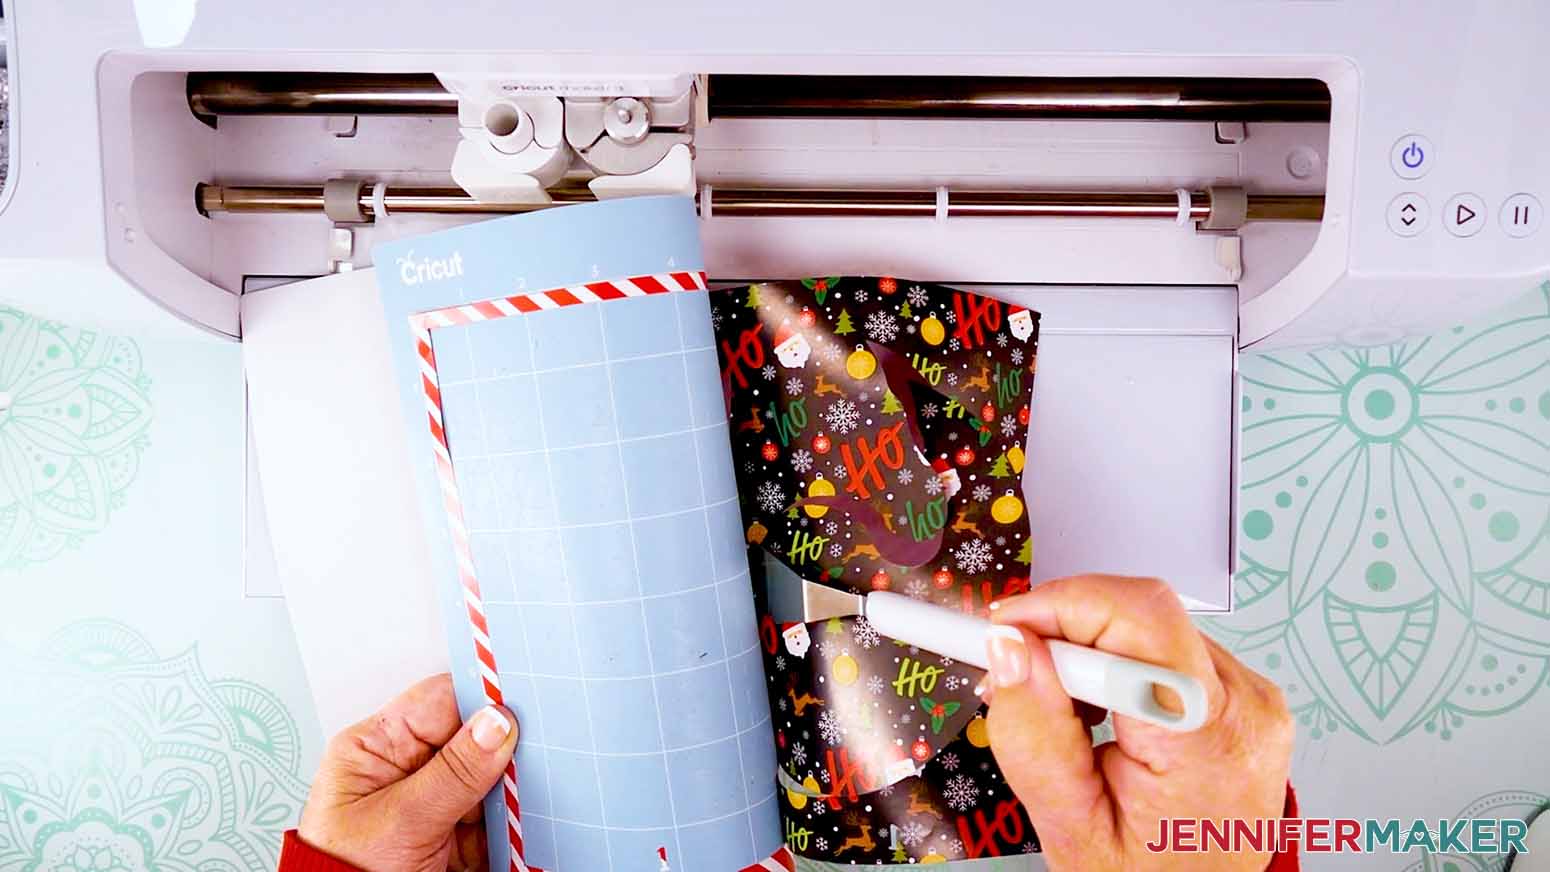
- For patterned paper: “Gift Wrap” with “Default” Pressure on a blue LightGrip Mat
3. Prepare, cut, and remove the pieces from all your mats using the same steps.
NOTE: A weeding tool can poke the little circles out of the beard layers. The patterned paper is delicate. Be very careful removing it from the mat to avoid curling or ripping. Using a spatula can help lift the edges.
4. Arrange the layers face up in the correct order, the numbers help.
5. Place the stack face down.
6. The shadow box frame helps with alignment, so have that open and face down, too.
7. Flip Layer 10, the background, over so it’s face up and put it in the frame.
8. Add adhesive foam squares to the back of the next layer, 9.
9. Use a weeding tool or tweezers to remove the protective papers.
10. Flip Layer 9 over, line it up on Layer 10 and press it in place, using the frame’s edges for alignment help.
11. Add layer 8 on top of layer 9.
12. Add Layer 8 on top of Layer 7.
13. Use glue to add Layer 6 on top of Layer 7, keeping it away from the holes.
14. Add Layer 5 on top of Layer 6 with foam.

15. Glue Layer 4 on top of Layer 5.
16. Add Layer 3 on top of Layer 4 with foam, use smaller pieces on the beard.

17. Glue Layer 2 on top of Layer 3.
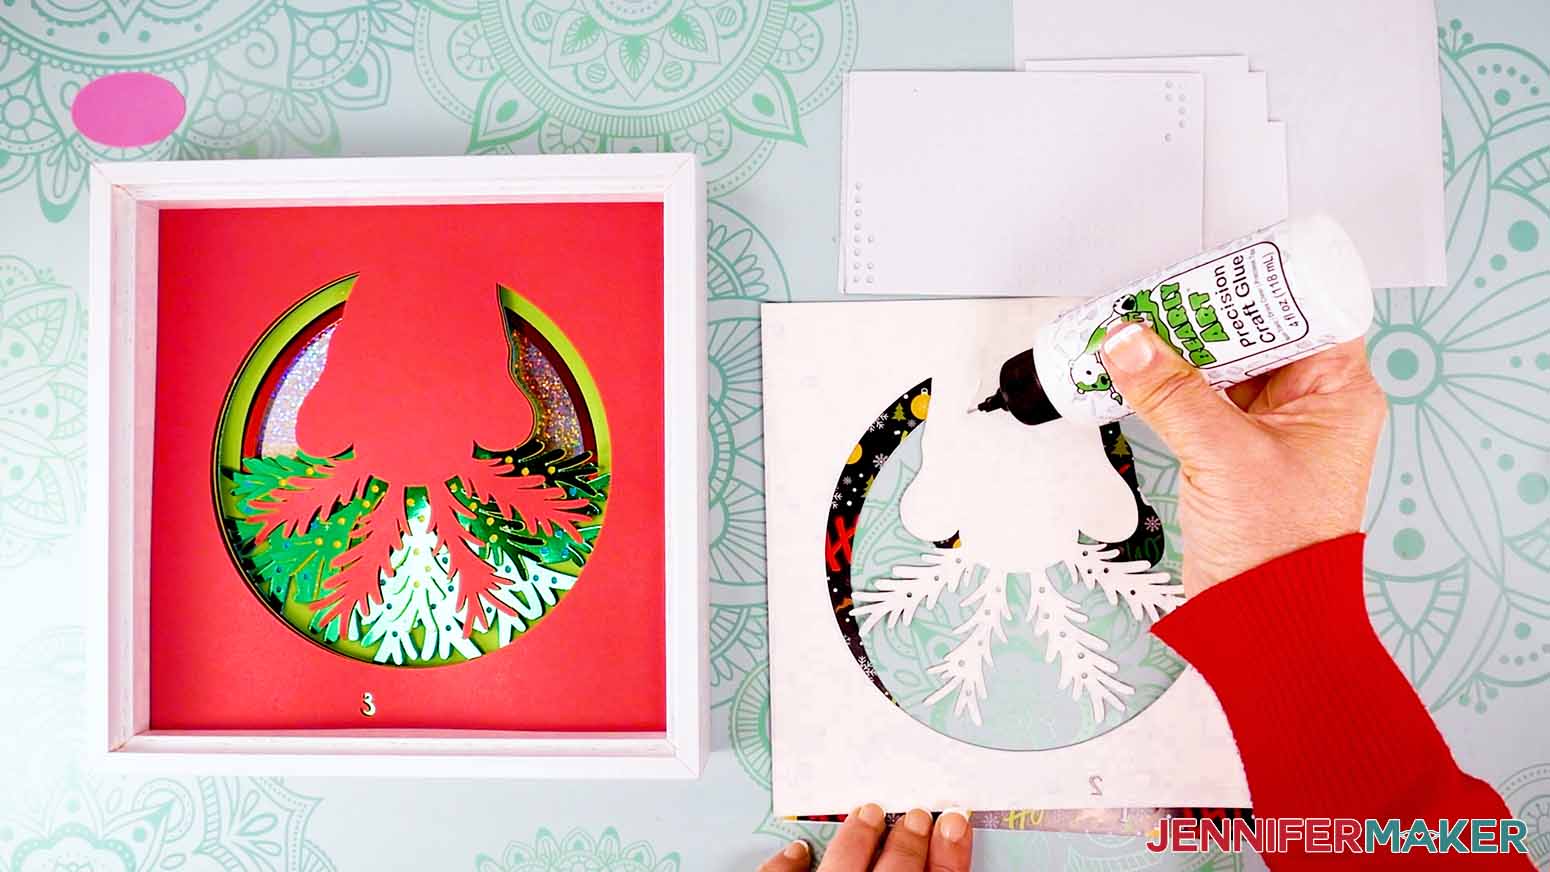
18. Add thin lines of craft glue on the back of Layer 1, the delicate patterned paper.
19. Flip Layer 1 over, line it up on Layer 2 and press it in place. Smooth it out as much as you can and wipe away any extra glue.
20. Add the top player with foam.
21. Glue the nose in place.
22. Follow the shadow box finishing steps above to complete your layered gnome with a tree beard.

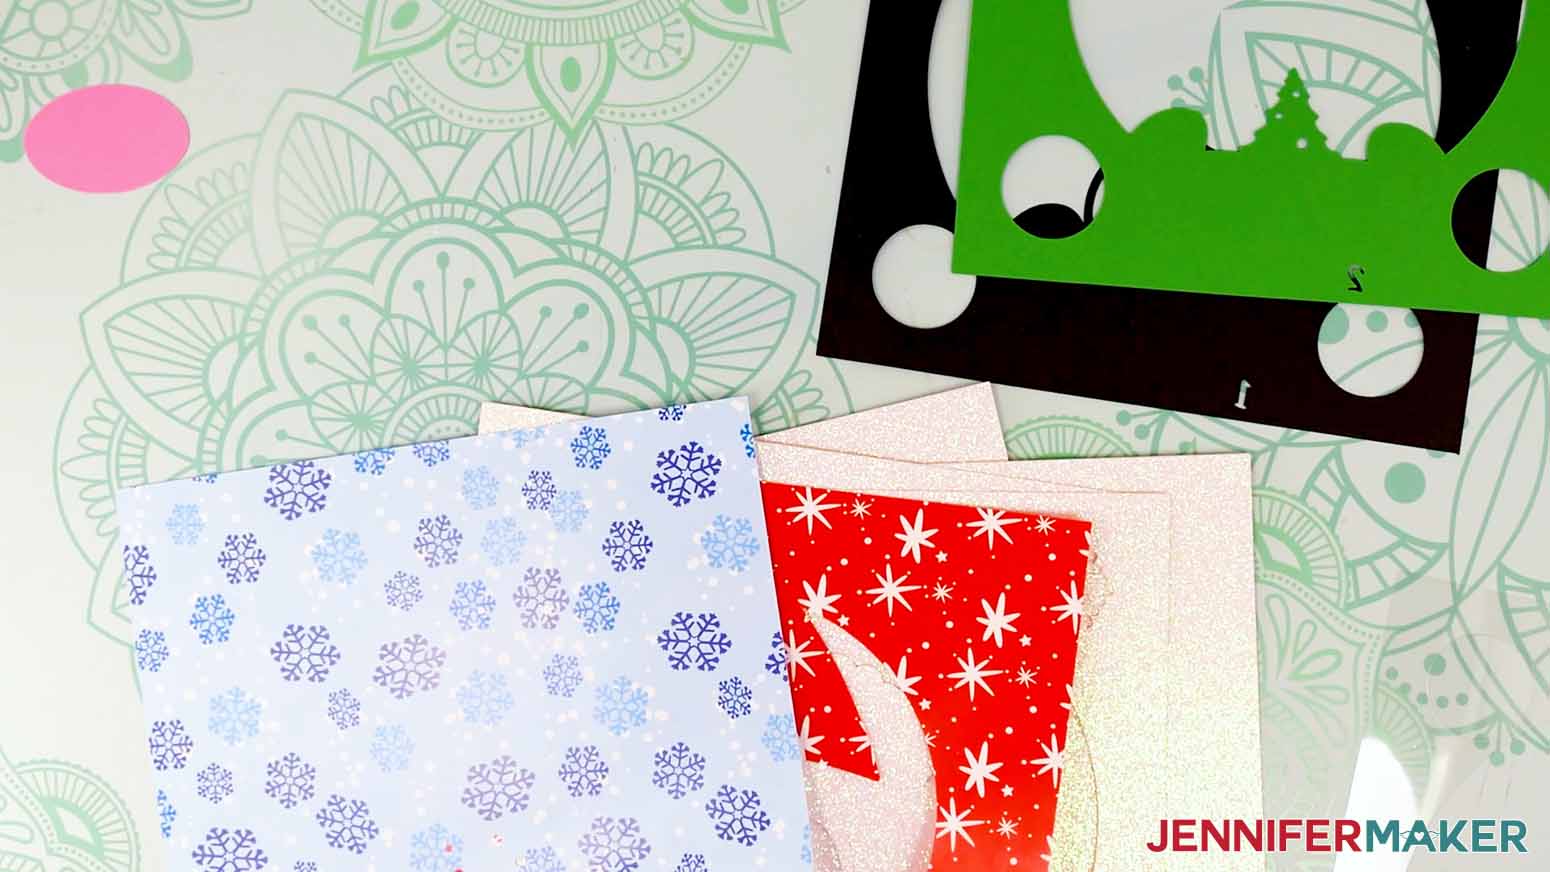
VARIATION: SNOWGLOBE GNOME WITH ACETATE
Papers used
Layer 8 (background) - white Glitter Cardstock
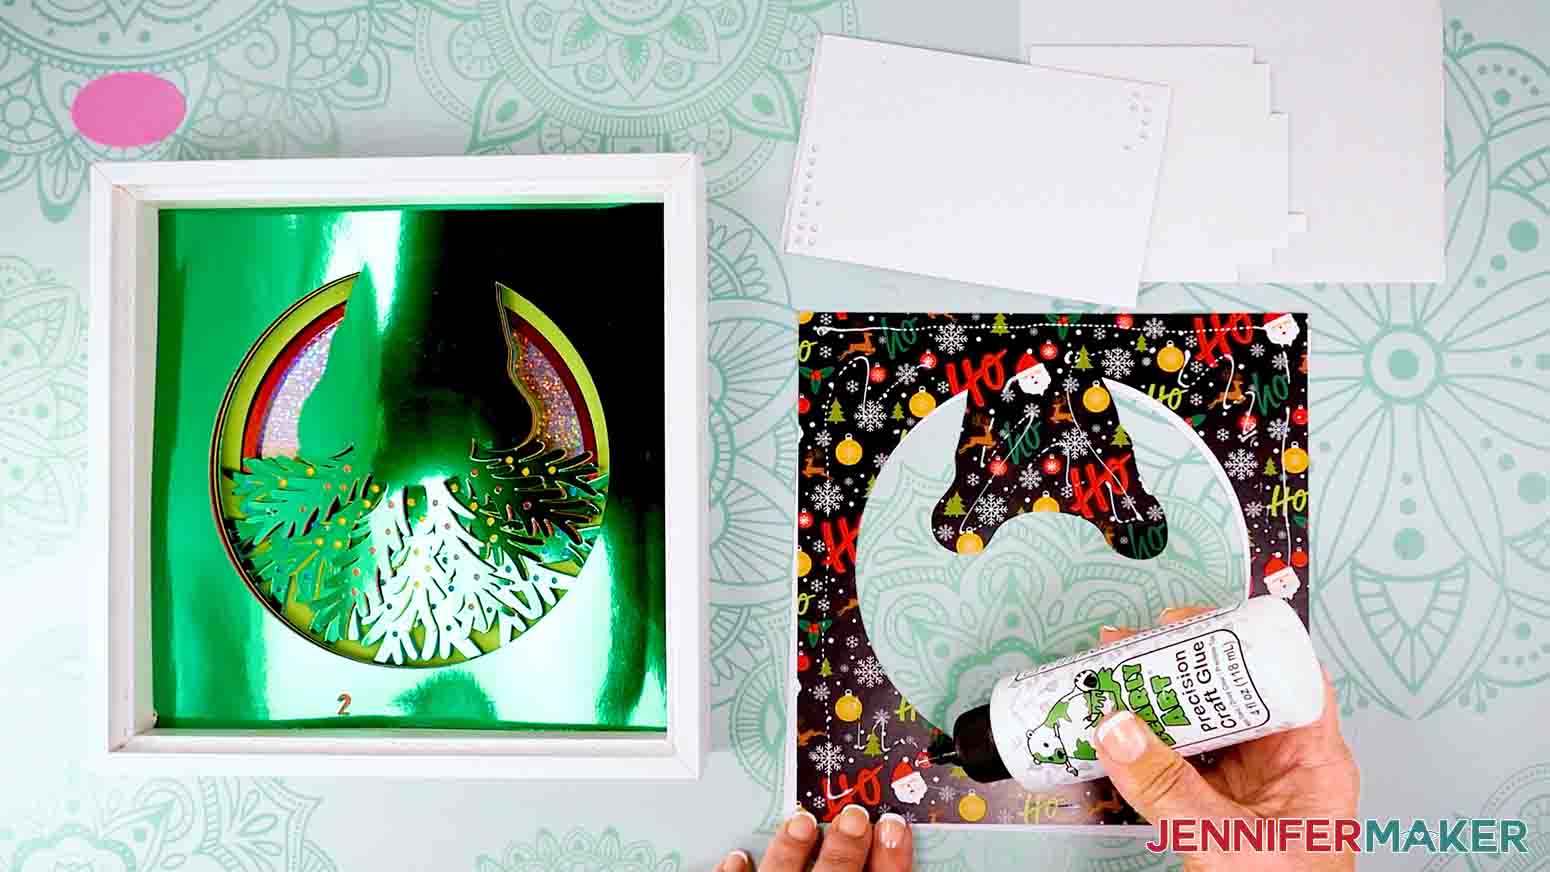
Layer 7 (sky) - Patterned paper
Layer 6 (hat) - Patterned paper
Layer 5 (beard back) - white Glitter Cardstock
Layer 4 (beard middle) - white Glitter Cardstock
Layer 3 (beard top) - white Glitter Cardstock
Layer 2 (tree) - green cardstock
Layer 1B (snowglobe) - Acetate
Layer 1 (snowglobe outline) - Black Cardstock
Layer 0 (frame) - Glitter Cardstock
Nose - Plain Cardstock
1. Follow the Design Space Steps 1 - 12 in the Main Tutorial to prepare your SVG.
NOTE: Layer 1B is the optional acetate layer, so hide it if you don’t want to use the material.
2. Set the Material Setting for your first mat to match your material. Not all machines cut the exact same way, but I got the best results with the settings listed for each material.
- For plain 65 lb cardstock: “Light Cardstock - 60 lb” with “Default” pressure on a green StandardGrip Mat
- For glitter cardstock: “Glitter Cardstock” with “Default” pressure on a green StandardGrip Mat
- For foil cardstock - “Foil Kraft Board” with “More” pressure on a green StandardGrip Mat
- For holographic cardstock: “Foil Kraft Board” with “More” pressure on a green StandardGrip Mat
- For patterned paper: “Gift Wrap” with “Default” Pressure on a blue LightGrip Mat
- For acetate: “Acetate” with “Default” pressure on a green StandardGrip Mat
3. Prepare, cut, and remove the pieces from all your mats using the same steps.
NOTE: The patterned paper is delicate. Be very careful removing it from the mat to avoid curling or ripping. Using a spatula can help lift the edges.
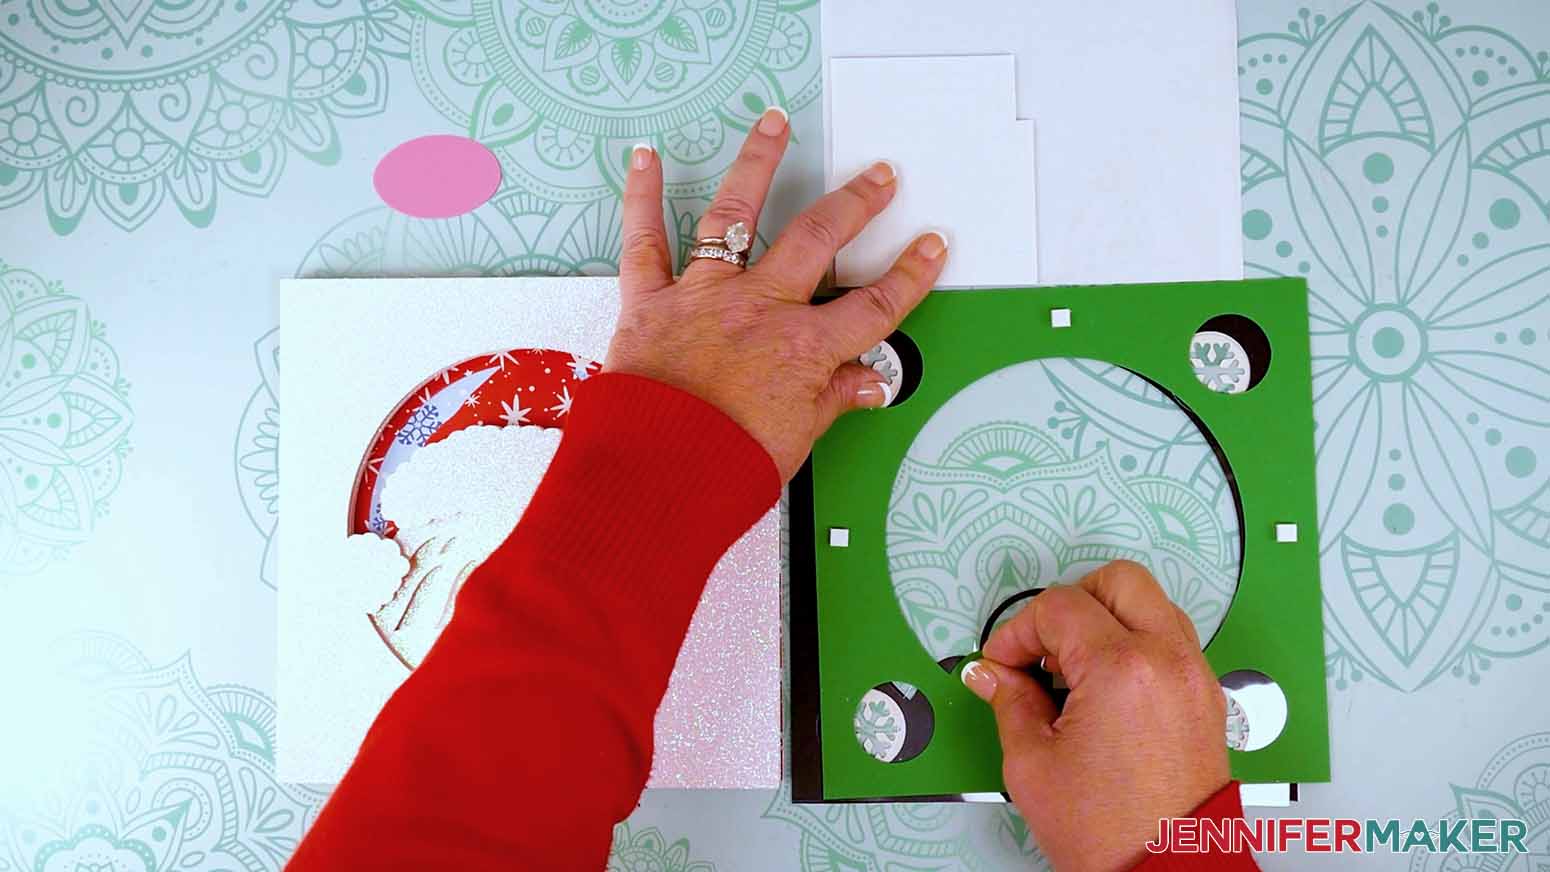
4. Arrange the layers face up in the correct order, the numbers help.
5. Place the stack face down.
6. The shadow box frame helps with alignment, so have that open and face down, too.
7. Flip Layer 8, the background, over so it’s face up and put it in the frame.
8. Add thin lines of glue to the back of the next layer, 7, avoiding the little holes at the bottom.
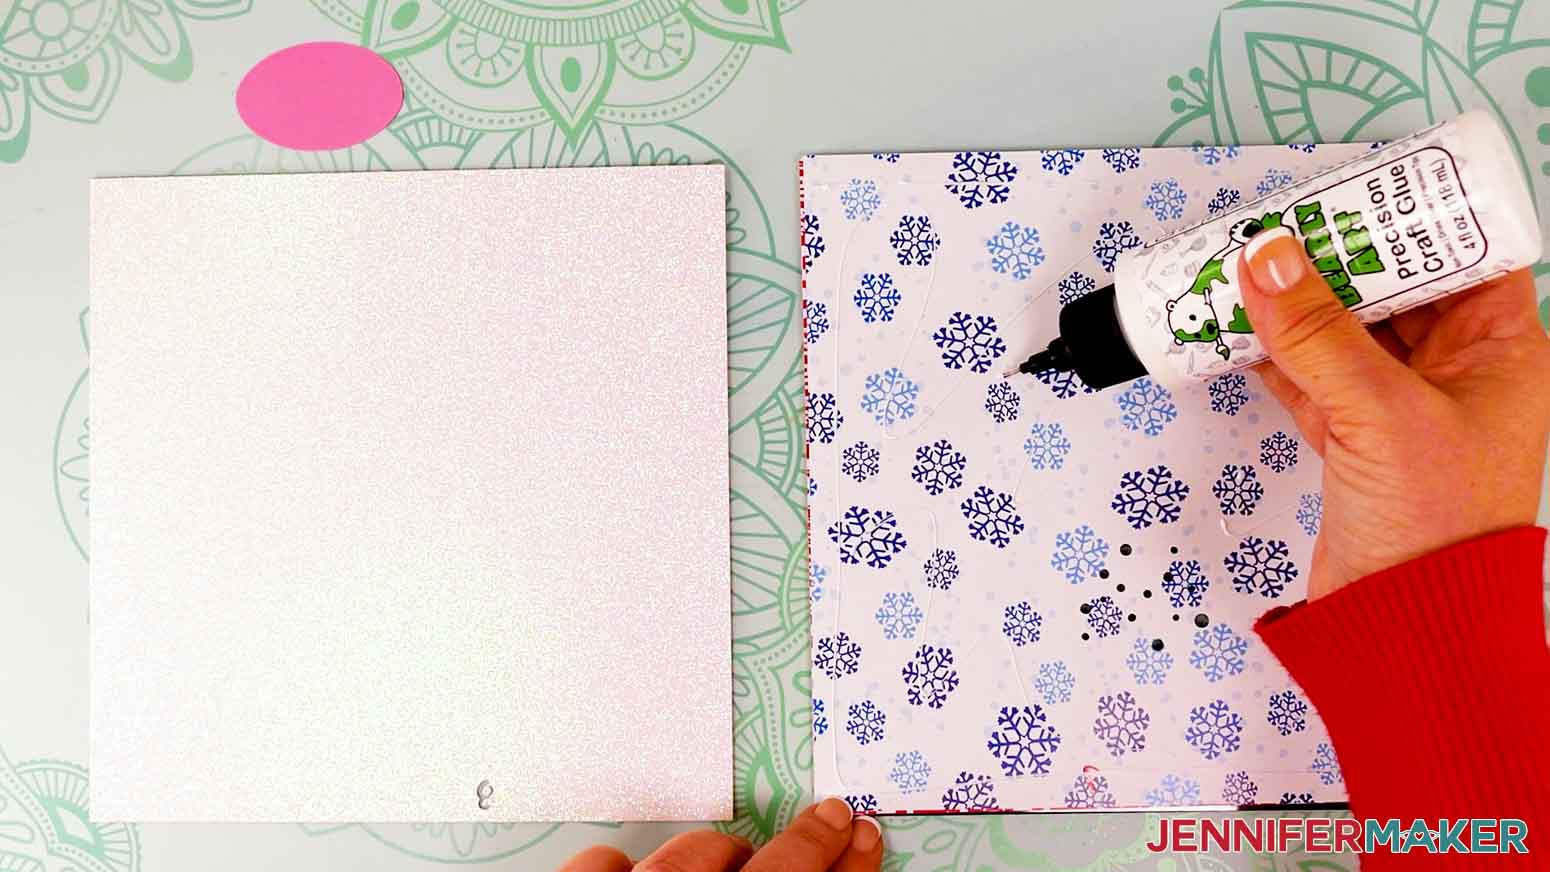
10. Flip Layer 7 over, line it up on Layer 8 and press it in place, using the frame’s edges for alignment help. Smooth it out as best you can.
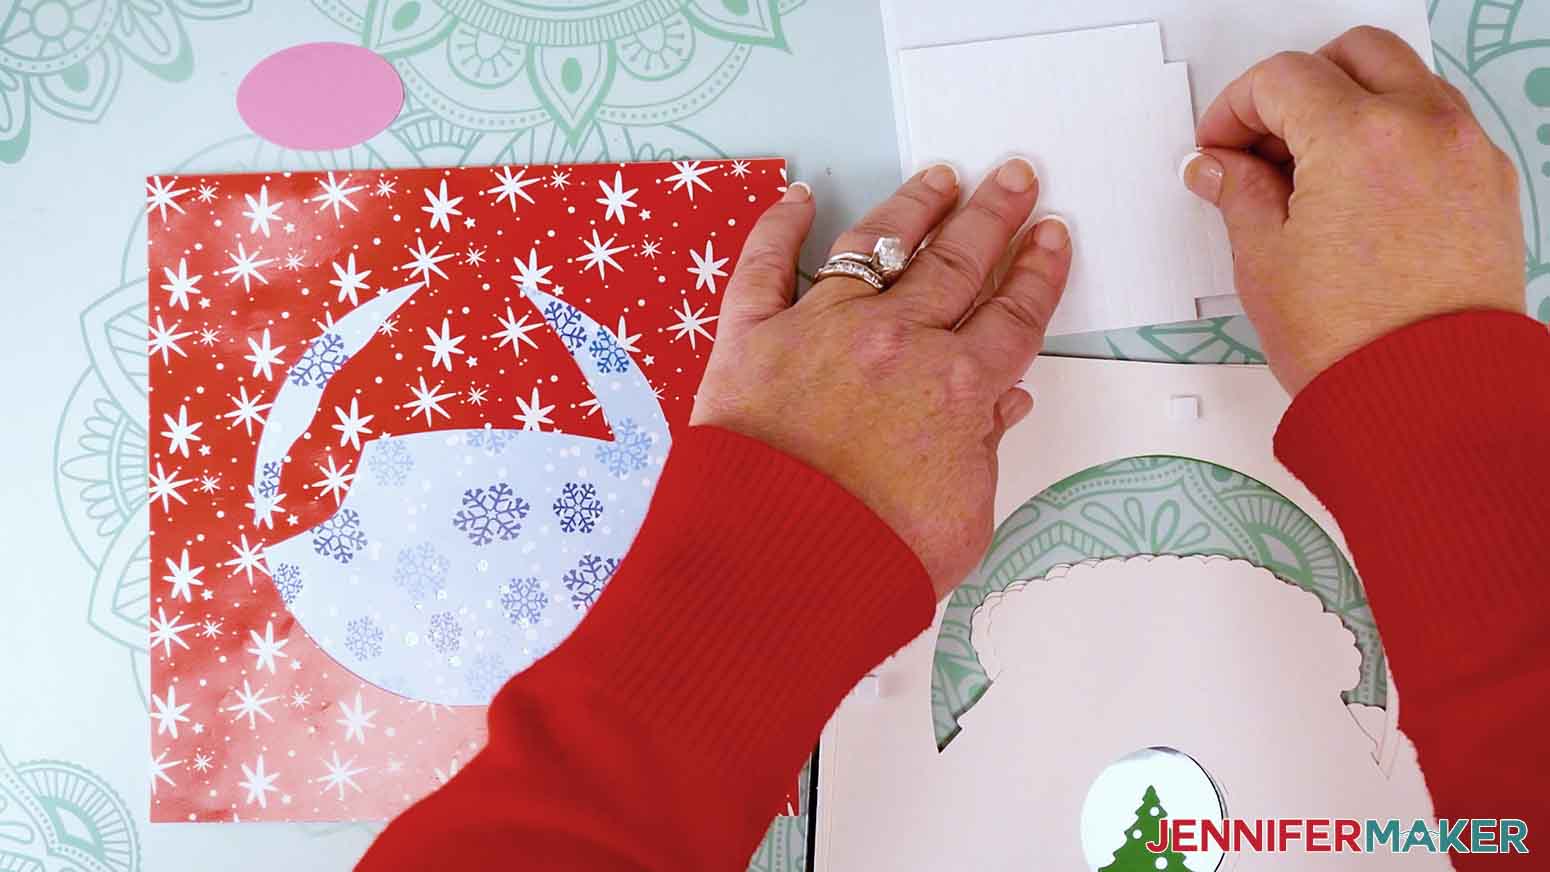
11. Add layers 6 with glue.

12. Add Layers 5, 4, 3, and 2 with foam.
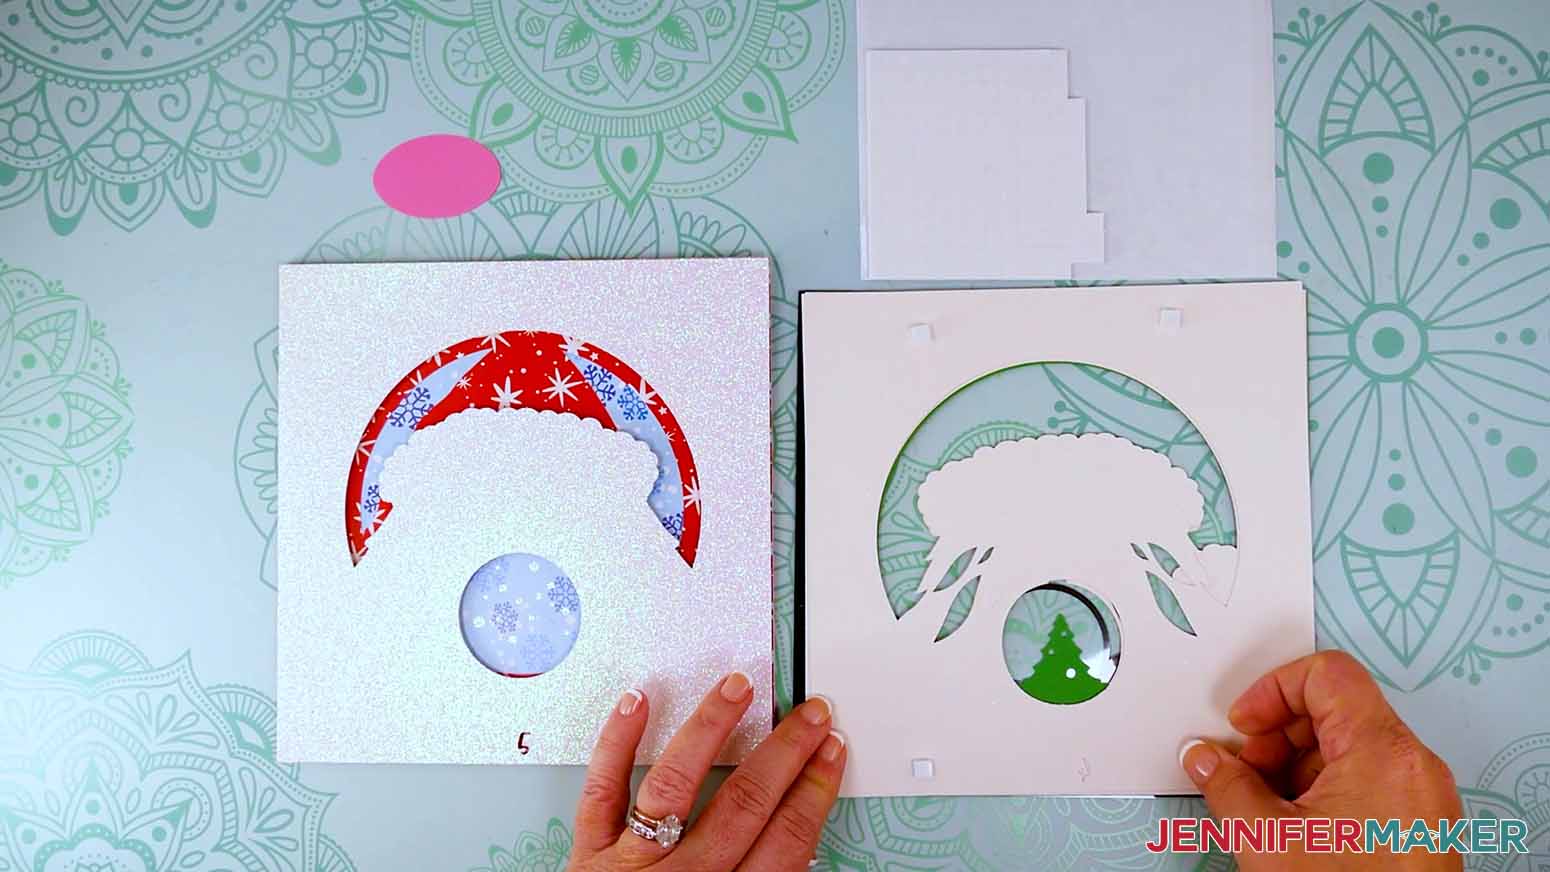

13. Add Layer 1B, the acetate, with glue. Don’t let it spread into the snowglobe area because it will be visible.
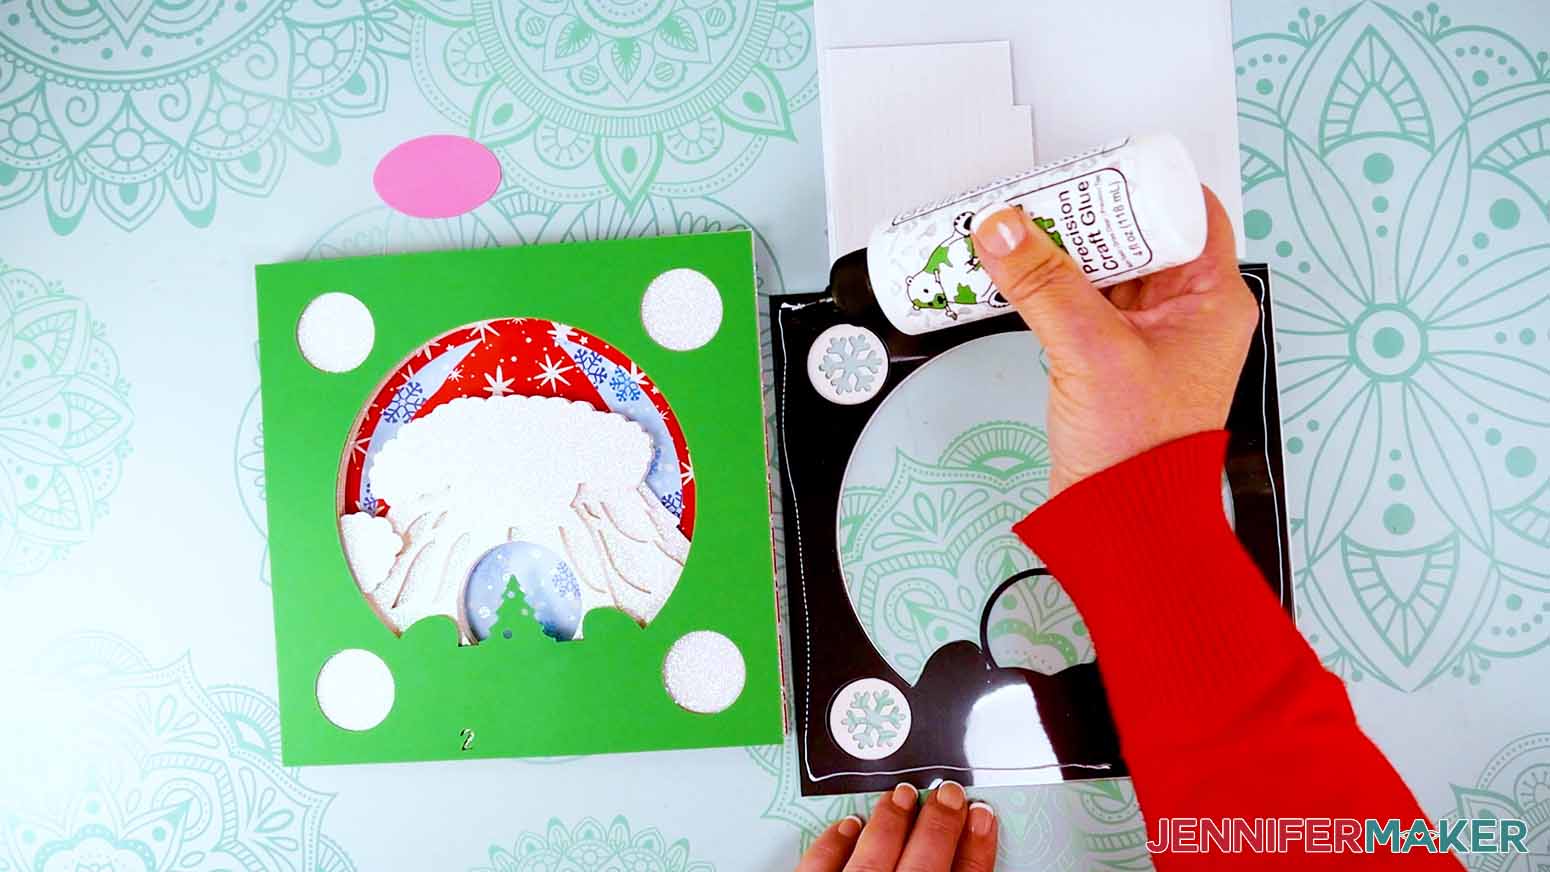
14. Add Layer 1, with glue. Don’t let it spread into the snowglobe area because it will be visible.

15. Add the top Layer with foam.
16. Glue the nose in place.
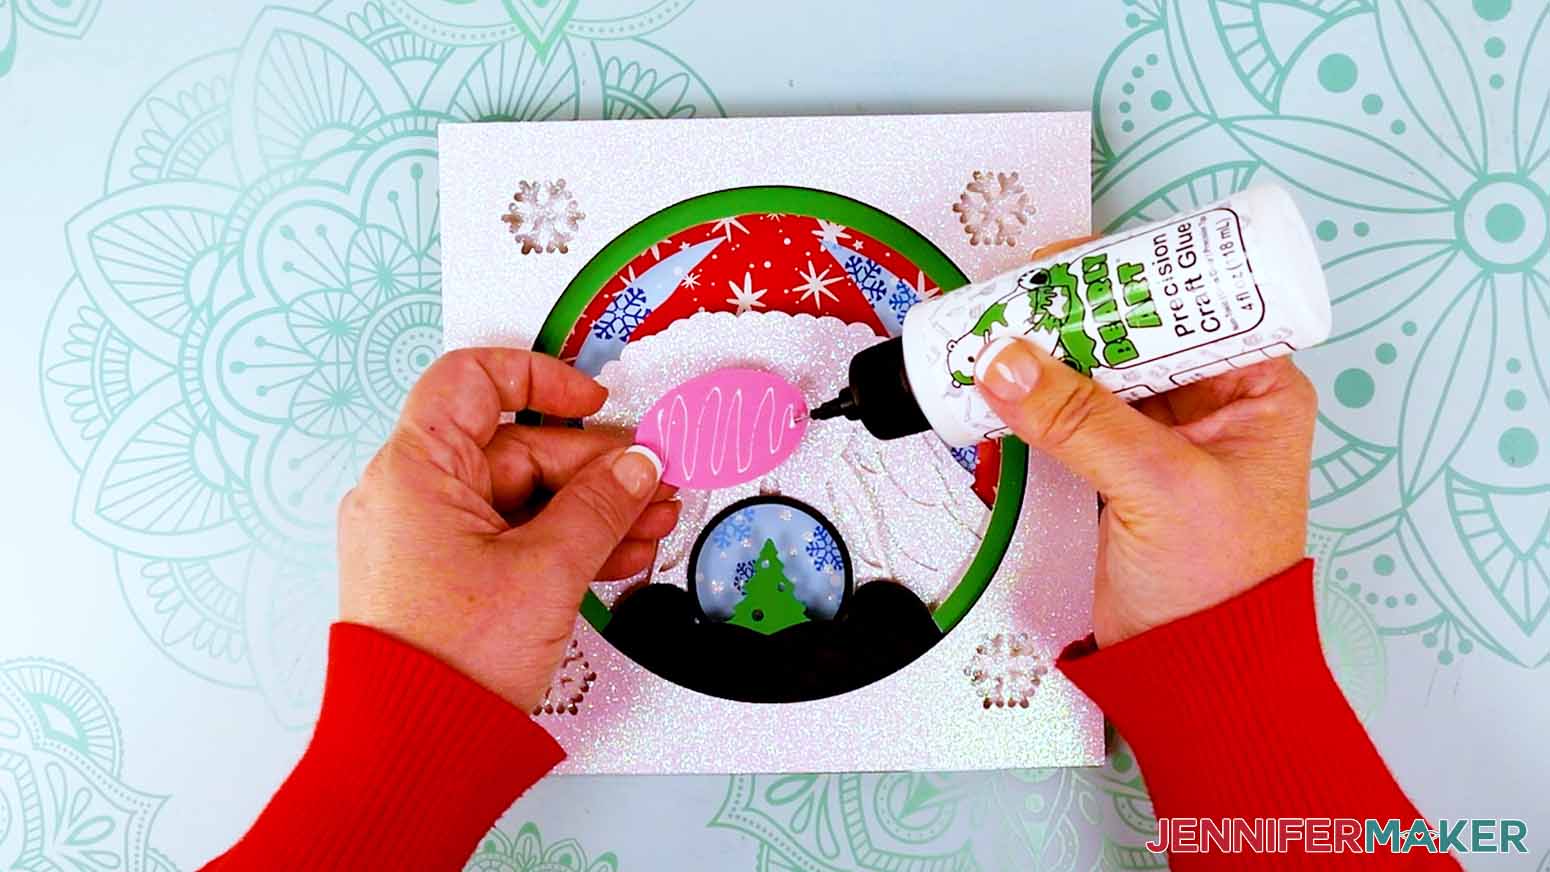
17. Follow the shadow box steps above to finish your gnome with an acetate snowglobe.
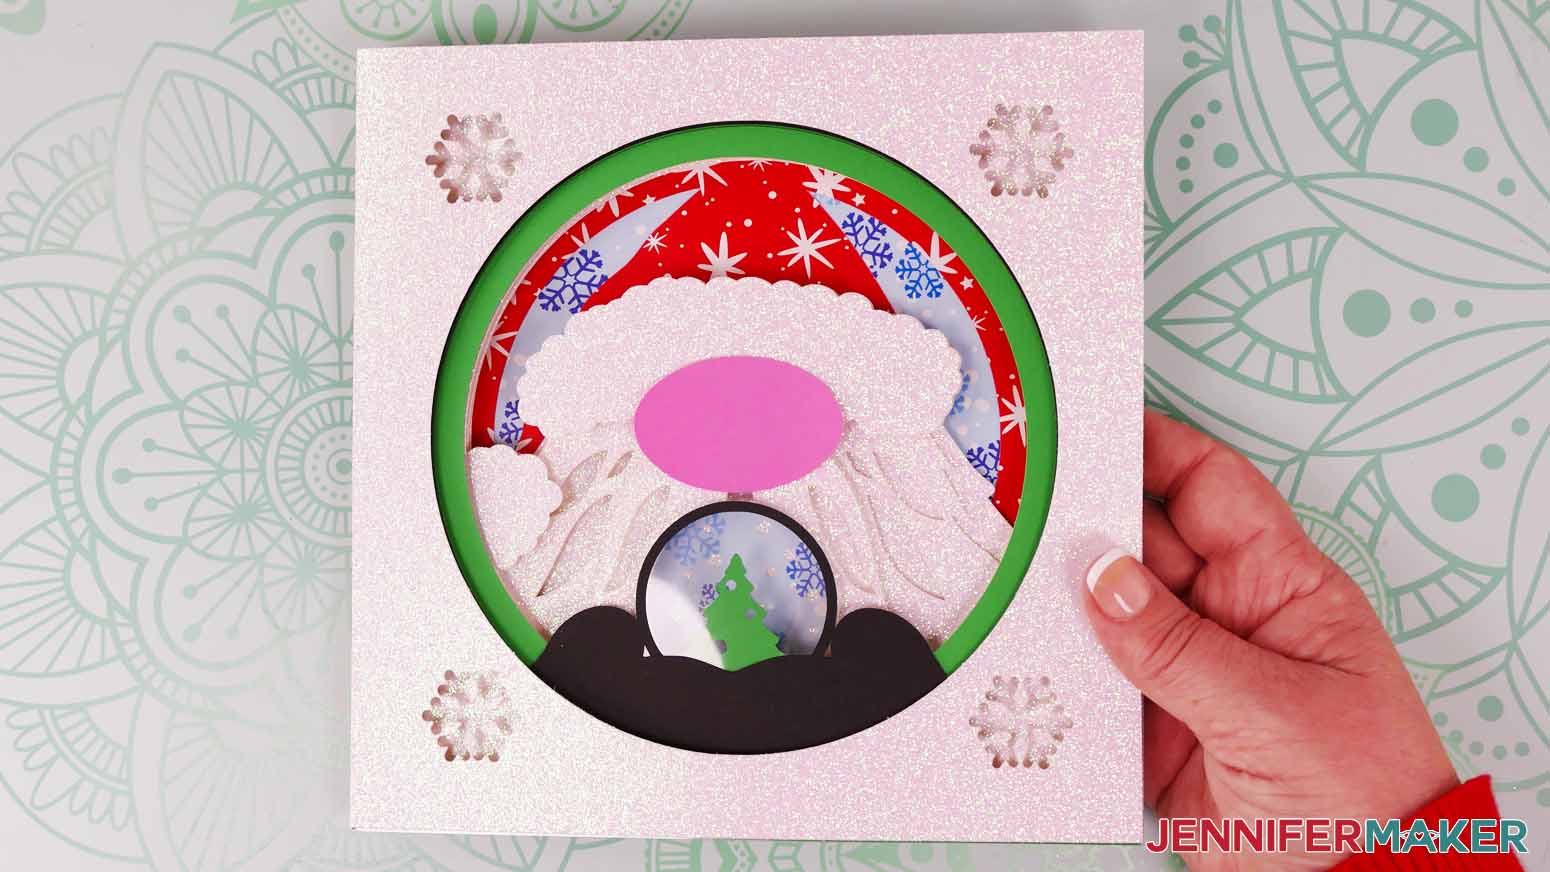
STEP 4: SHOW IT OFF!
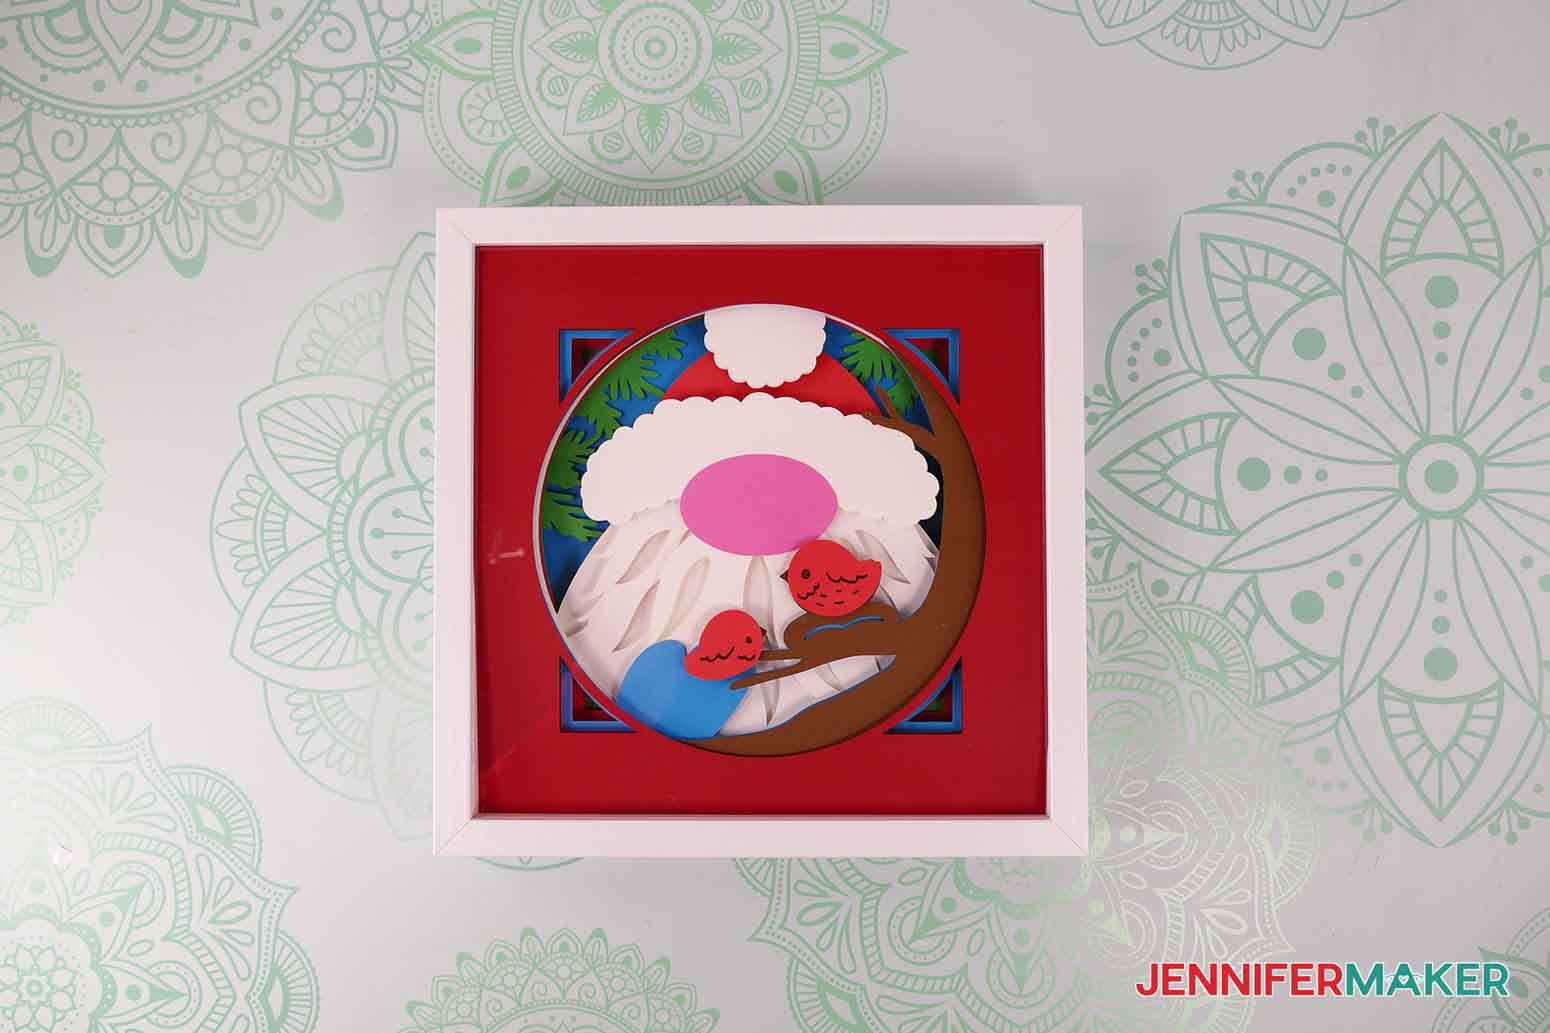
Here is what my layered bearded gnome looks like all ready for winter!!

Answers to Your Questions About Making a Layered Gnome Shadow Box
Q: How many layers should a shadow box have?
A: You can use just a few or many layered paper pieces, depending on the design and depth of the shadow box display case.
Q: Can I cut this project on a Cricut Joy?
A: This design is pretty big for a Joy, but the Joy Xtra can cut these SVG shadow box designs!
Q: What kind of paper do I use for the SVG cut files?
A: You can really use any 65 lb or higher cardstock to make a layered gnome beard shadow box — it’s your choice which different colors and textures you want to use. If you want to use the exact same materials I used, check the list above.
Q: What if my shadow box frame is dirty?
A: First, try cleaning the glass with rubbing alcohol and a lint-free cloth. If it doesn’t come off, you may have received a defective product. Contact the seller’s customer service team or returns department within the period of time available for returns.
Q: How do I keep my layers stuck together?
A: I used a combination of craft glue and double-sided foam in different areas of my gnome layered shadow box designs.
Q: My cardstock keeps ripping on the intricate cuts. What can I do?
A: Be sure you’re using a clean and sticky machine mat, good-quality cardstock, and a clean blade. See my Cricut Cutting Problems post for all the tips I use to get clean cuts every time.
Q. Do I have to use a Cricut?
A: No! My capable design staff and I always include several versions of each digital item. If you have a Silhouette Cameo, which uses Silhouette Studio, you can use the DXF cut files in Silhouette Basic Edition. If you have upgraded to Silhouette Designer Edition, Designer Edition Plus, or Business, you can use the SVG files. If you don’t have a cutting machine, you can print and then cut out my digital download PDF files, too and then use scissors or a craft knife to cut out your pieces. The ZIP file in my resource library includes these file types and more!
Q. Are your free SVGs just for personal use or also commercial use?
A: Yes, you can sell completed projects using these designs, we only ask that you give credit to JenniferMaker.com and do not sell the digital files. If you use them, please share photos with us! We love supporting small businesses!
Q: Where can I buy a shadow box frame?
A: Frames are available at many craft stores and online. I have a link in my list above!
Get my free SVG file collection to create a layered gnome beard shadow box!
I love seeing what you make with my designs and how you use them! Please share a photo of your layered gnome beard shadow box in our Facebook group or tag me on social media with #jennifermaker.
Love,

Want to remember this? Save this Gnome Beard Layered Shadow Box Tutorial to your favorite Pinterest Board!