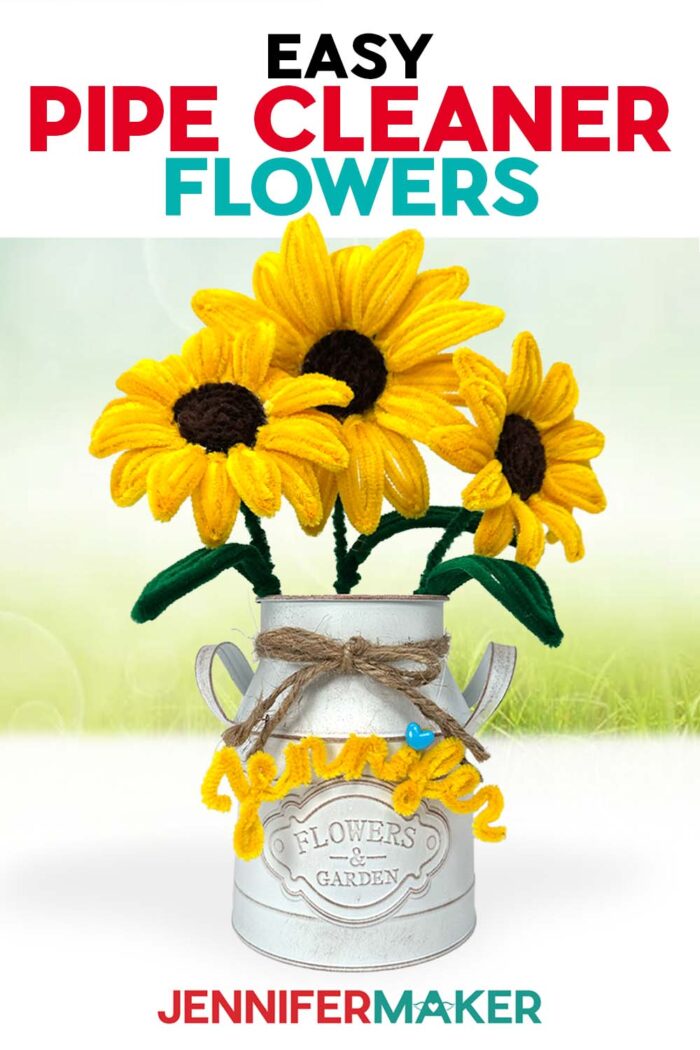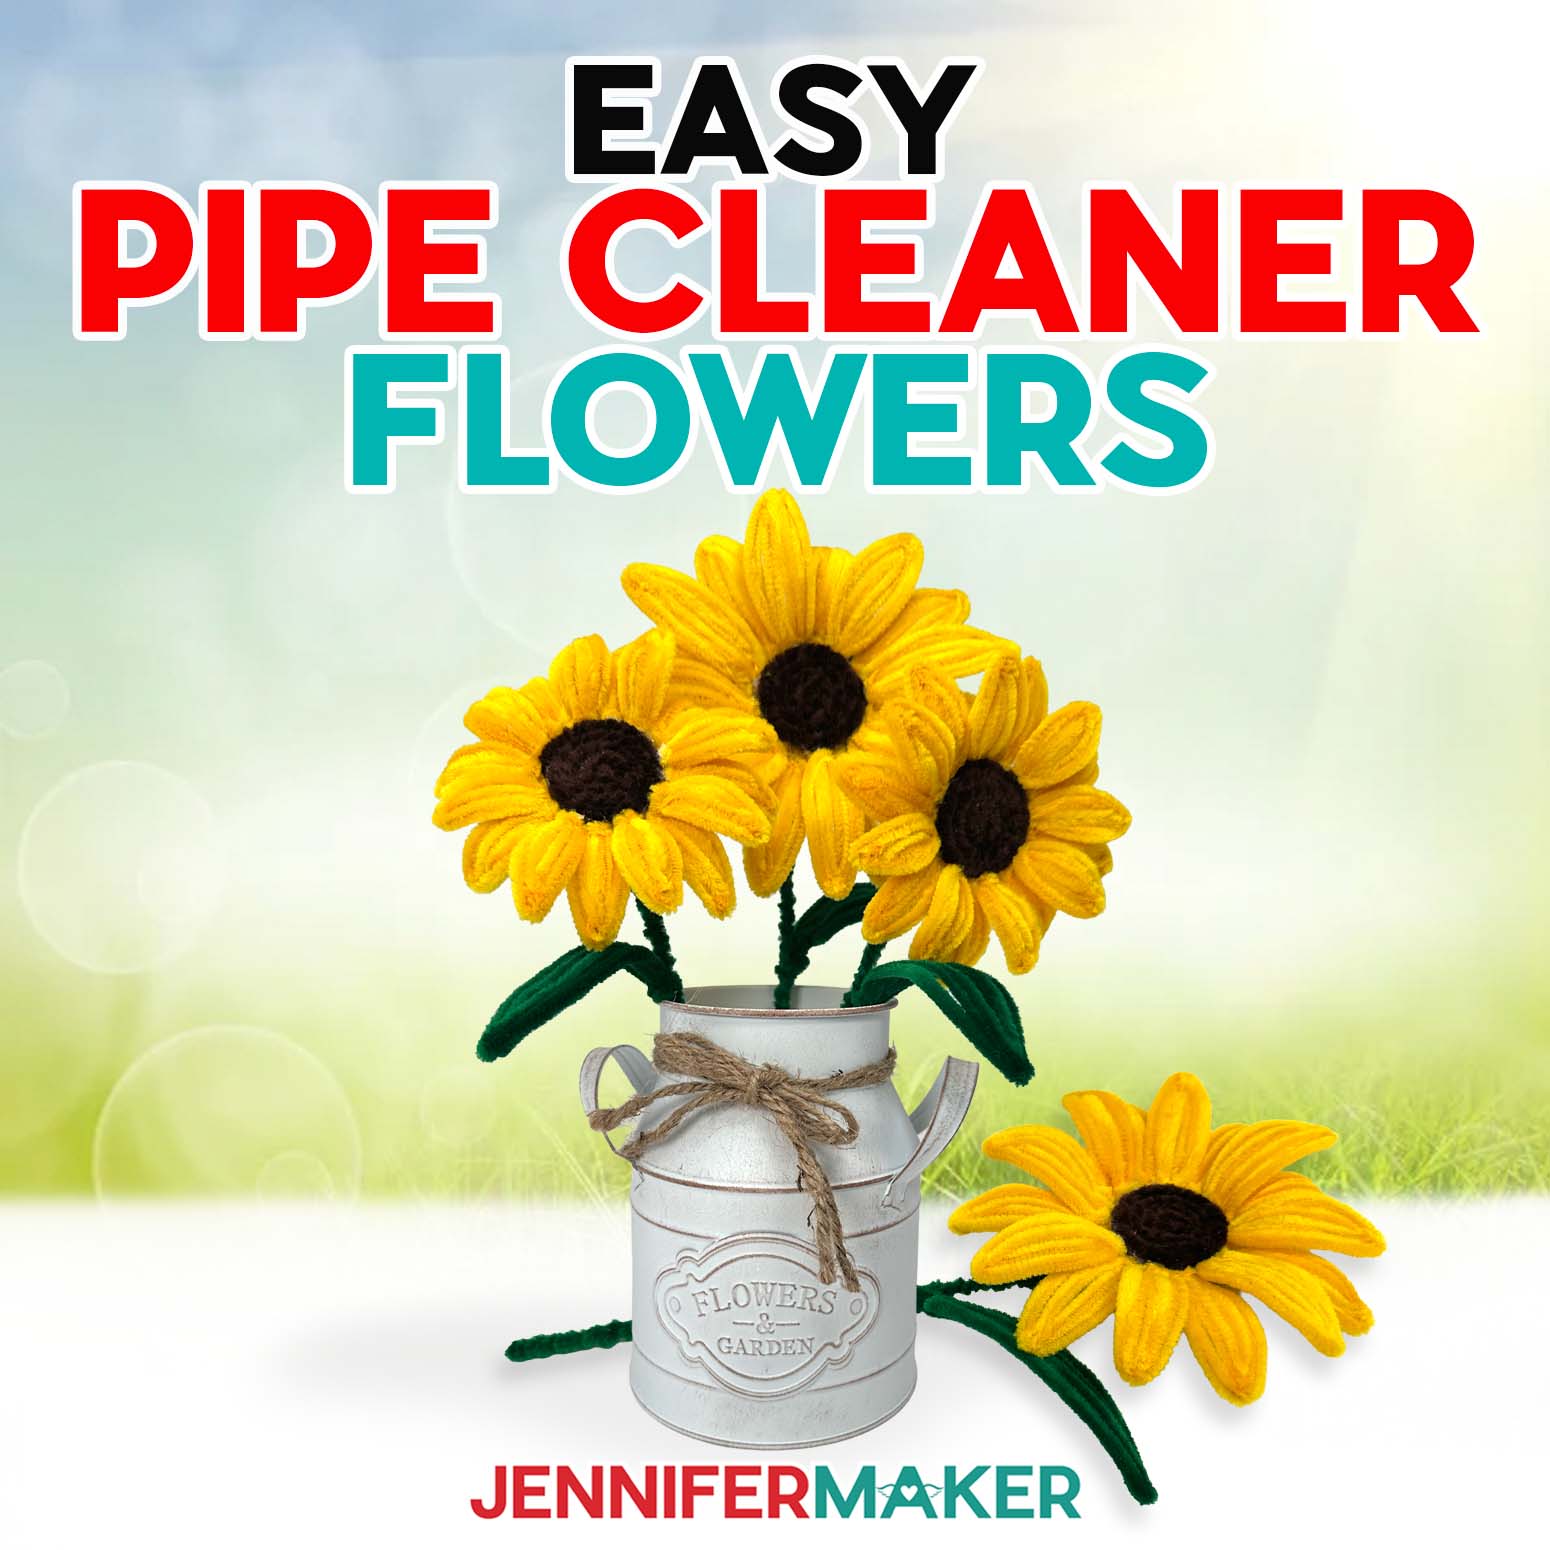
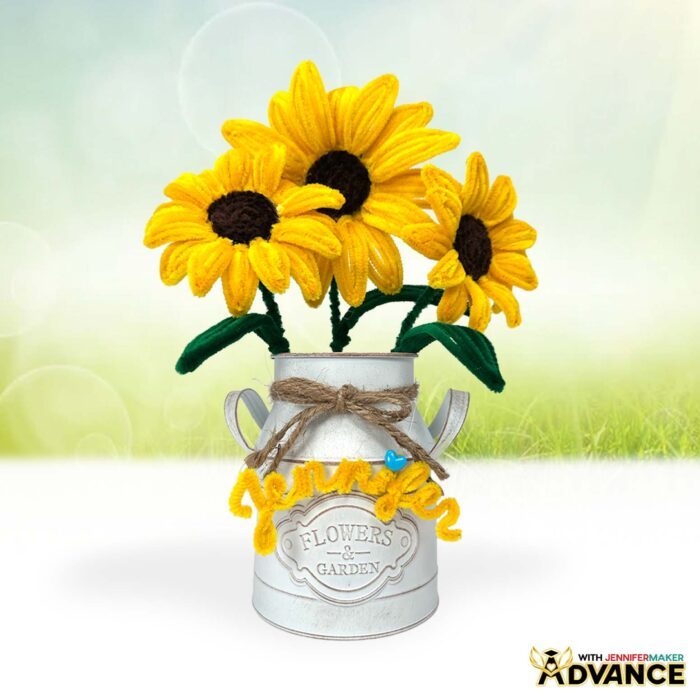
Learn how to make easy pipe cleaner flowers for realistic floral arrangements!
Do you remember making pipe cleaner animals and flowers as a kid? These easy pipe cleaner flowers have that nostalgic feel, but the end result looks shockingly grown-up. Pipe cleaners are inexpensive, forgiving, and easy to manipulate, which makes them perfect for crafts… but they’re also surprisingly capable of looking polished when you use them with intention, like for these sunflowers. And I can teach you how to make them!
Watch the full step-by-step tutorial on how to make easy pipe cleaner flowers:

Pipe cleaner crafts are usually cute and quick, but my free sunflower design leans into symmetry and dimension in a way that feels downright sculptural. We’ll craft yellow pipe cleaners into petals, brown ones into the center, and twist each green pipe cleaner into stems and leaves. When you’re done, you’ll have a bloom that genuinely reads as a sunflower from across the room.
To make this project even easier, I created a free printable PDF Pipe Cleaner Flowers Reference Guide you can use as you craft. It’s essentially your bend-and-twist roadmap, so you’re never guessing where to fold, link, or shape. By checking your pieces against the guide as you work, your flowers come out balanced, symmetrical, and beautifully realistic… even though they’re made from simple pipe cleaner supplies.
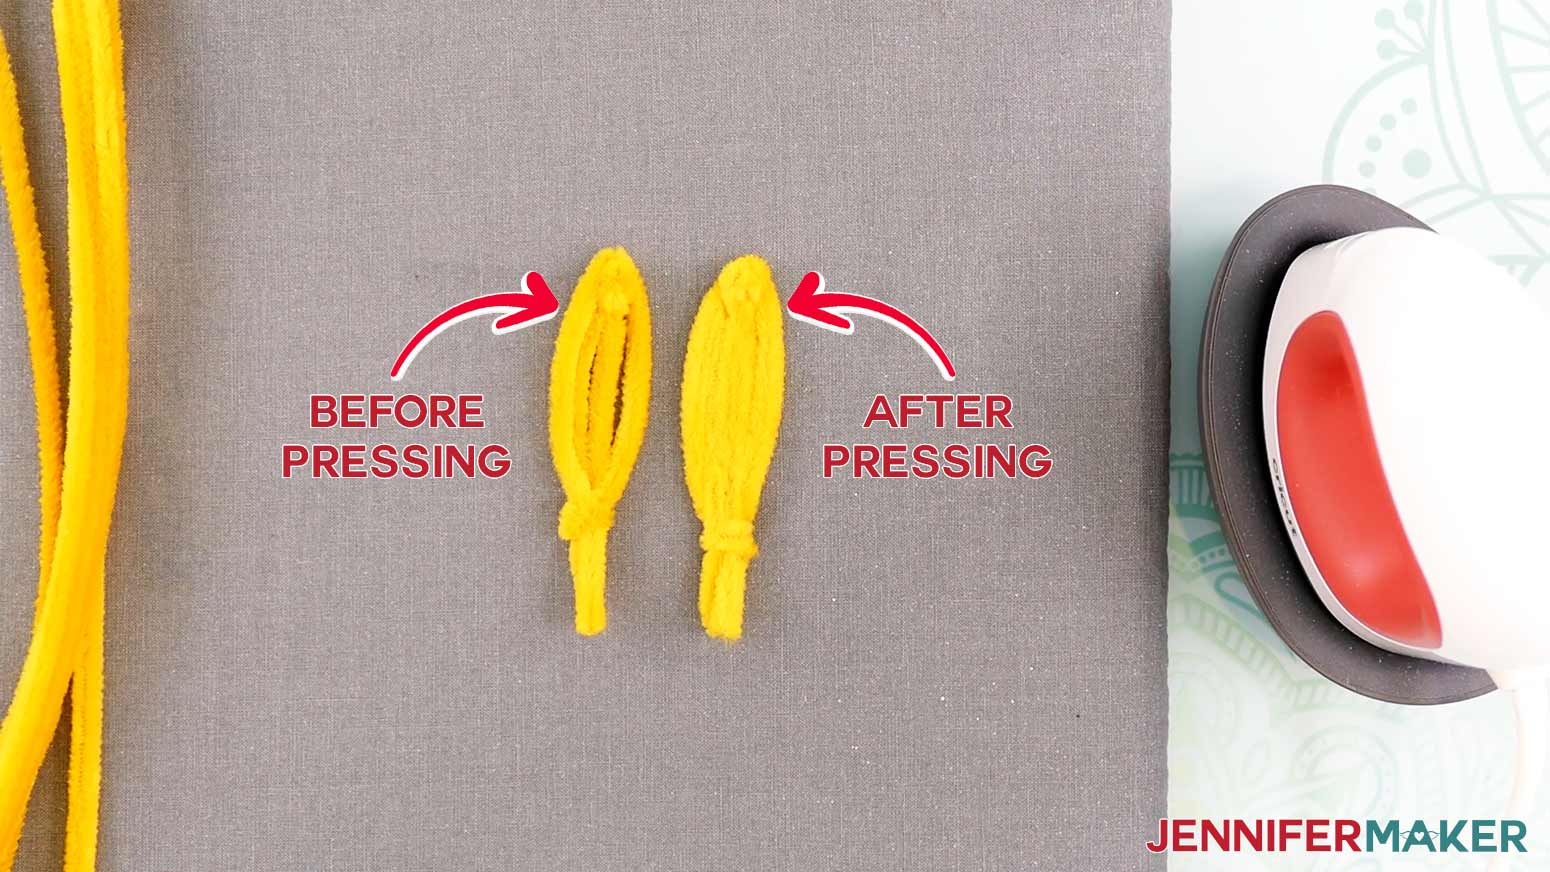
And here’s a secret: the heat-press step is where the magic happens. It fluffs the fibers, softens gaps, and gives your sunflower petals that fuller, more natural look.
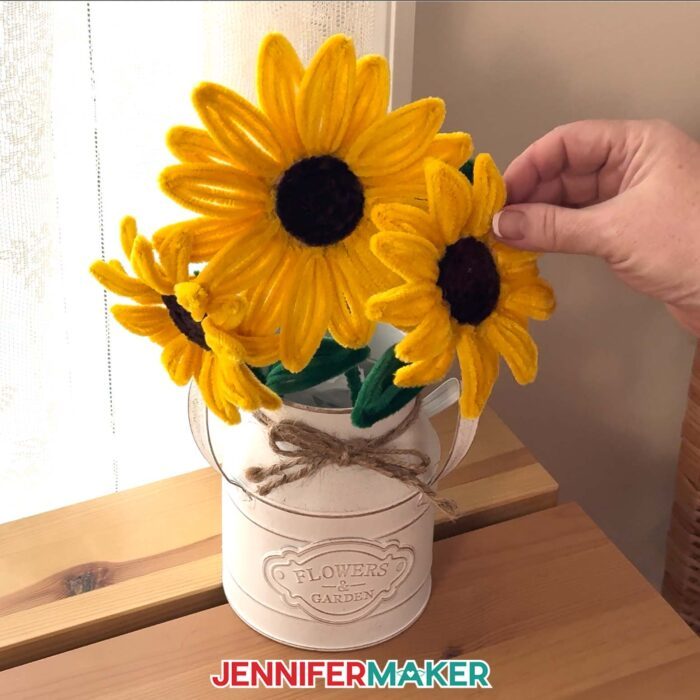
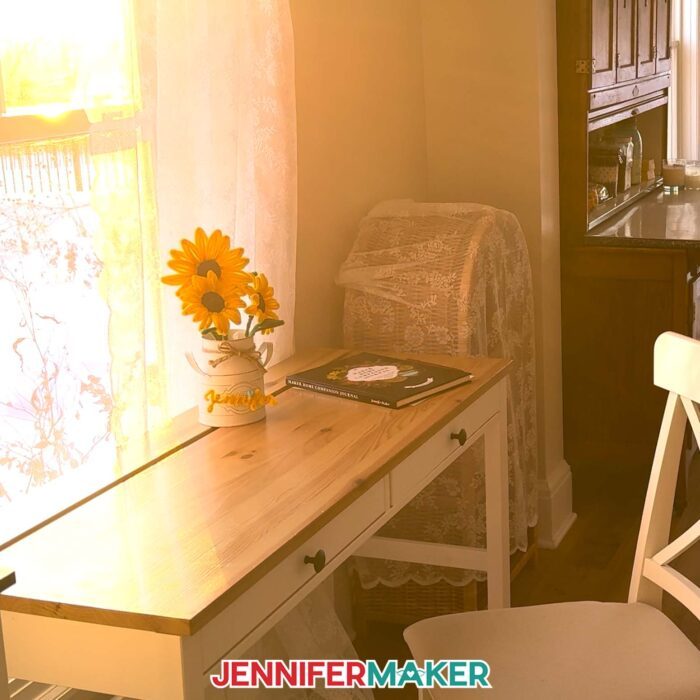
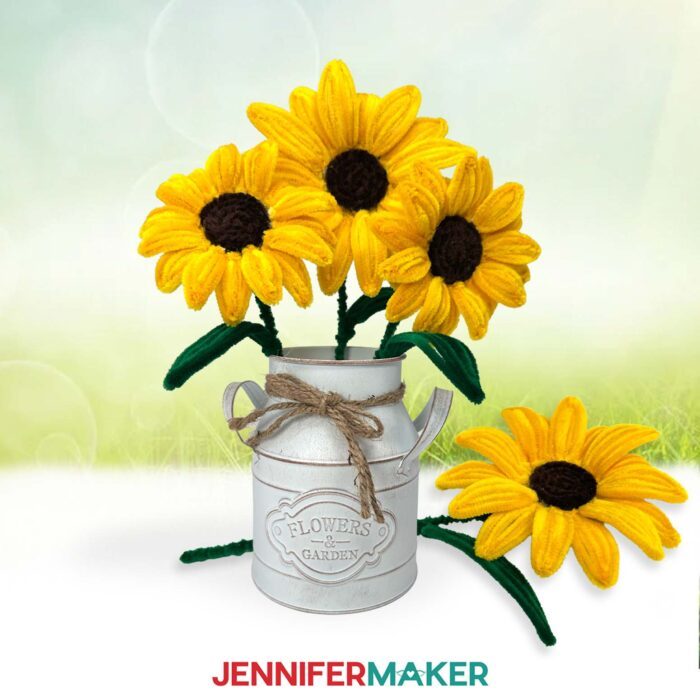
Make one bloom for a cheerful pop of color, or build a whole bouquet of flowers for a centerpiece that never droops or wilts.
If you want to add variety to your arrangement, making smaller flowers is easy with a quick print adjustment. Just print the PDF reference guide at 75%, and follow the scaled diagrams as you bend and shape your pipe cleaners. The shorter petal and stem measurements keep everything perfectly proportioned, so your smaller blooms look just as realistic as the larger ones… only cuter and great for filling out a bouquet.

You can even play with different colors and pipe cleaner craft ideas to match your decor. Start with shades of yellow for spring and summer, then add some orange for a fall harvest look. Or use blue or purple pipe cleaners for a colorful “twist!”
If you’re ready to take pipe cleaners in an even more customizable direction, I also teach a pipe cleaner name project inside my ADVANCE with JenniferMaker program. It’s a fun way to build on these techniques and turn simple materials into bold, personalized pieces you can gift or decorate with! Click here to learn more about the Advance program!
Because the shapes and proportions matter for these flowers, I highly recommend watching the video tutorial and following along with my free PDF reference guide. Seeing the steps in motion — especially for building the center, placing petals evenly, and attaching the stem — makes it so much easier to get that realistic, symmetrical finish without frustration.
If you’re wondering about resizing, shaping, or troubleshooting, there’s a questions and answers section below where I cover the most common things crafters ask about my easy pipe cleaner flowers.

And once you’ve made one, it’s hard not to start imagining more unique fuzzy pipe cleaner art ideas. Different flower types, different sizes… suddenly those simple craft supplies feel like they have endless potential! My easy pipe cleaner flowers are one of those simple crafts that makes folks do a double take, and I can’t wait to see yours bloom!
Do you want to learn how to make easy pipe cleaner flowers? Let me show you how fun and easy it is with my pipe cleaner flowers tutorial and designs! This post contains some affiliate links for your convenience (which means if you make a purchase after clicking a link I will earn a small commission but it won’t cost you a penny more)! Read my full disclosure policy.
Materials to Make Easy Pipe Cleaner Flowers
View my Amazon shopping list with the exact items I used.
- Sixteen (16) Yellow 12″ Pipe Cleaners
- Two (2) Brown 12″ Pipe Cleaners
- Seven (7) Green 12″ Pipe Cleaners
- One (1) 18 Gauge 14″ Floral Wire Stem
- Inkjet Printer (to print your guide sheet)
- Hot Glue Gun & Glue Sticks -AND-
- Hot Glue Finger Protectors
- Scissors
- Wire Cutters
- Measuring Tape
- Heat Press (I used the Cricut EasyPress Mini) (optional for “fluffing” the petals and leaves) -AND-
- Pressing Mat -AND-
- Parchment Paper
- Vase (optional to hold finished flowers)
- Design #799 (My free PDF reference guide is available in my free library – get the password by filling out the form at the bottom of this page)

How to Make Easy Pipe Cleaner Flowers

Easy Pipe Cleaner Flowers
Learn how to make a sunflower out of pipe cleaners with my Easy Pipe Cleaner Flowers tutorial!
Materials
- Sixteen (16) Yellow 12" Pipe Cleaners
- Two (2) Brown 12" Pipe Cleaners
- Seven (7) Green 12" Pipe Cleaners
- One (1) 18 Gauge 14" Floral Wire Stem
- Vase to hold your finished flowers (optional)
- Design #799 (My free PDF pipe cleaner sunflower reference guide is available in my free resource library - get the password by filling out the form at the bottom of this page)
Tools
- Inkjet Printer (to print your guide sheet)
- Hot Glue Gun & Glue Sticks
- Silicone Finger Protectors
- Scissors (to cut pipe cleaners, NOT stem wire)
- Wire Cutters
- Measuring Tape
- Heat Press - I used the Cricut EasyPress Mini (optional for "fluffing” the petals and leaves) -AND-
- Pressing Mat (optional for "fluffing” the petals and leaves) -AND-
- Parchment Paper (optional for "fluffing” the petals and leaves)
Instructions
STEP 1: GET MY FREE PIPE CLEANER FLOWERS REFERENCE GUIDE
First, download my Pipe Cleaner Flowers files from my free library – look for Design #799. Alternatively, you can use the Save This Project form near the top of this post and the design link will be emailed to you.
In the folder, you’ll find a PDF reference guide with the steps to make my pipe cleaner sunflower. At its original size (100%), the printed guide will make an approximately 7"W x 13"H x 6"D sunflower. You can also print the guide at 75% to make a smaller version approximately 5.5"W x 11"H x 5"D.
TIP: If you’re not sure how to unzip files, go to jennifermaker.com/svgs to learn how.
STEP 2: PREPARE YOUR GUIDE AND SUPPLIES
- Download and open the free version of Adobe Acrobat Reader from jennifermaker.com/acrobat.
- In the top menu, click “File” and “Open.”
- Find the “guide” PDF and open it.
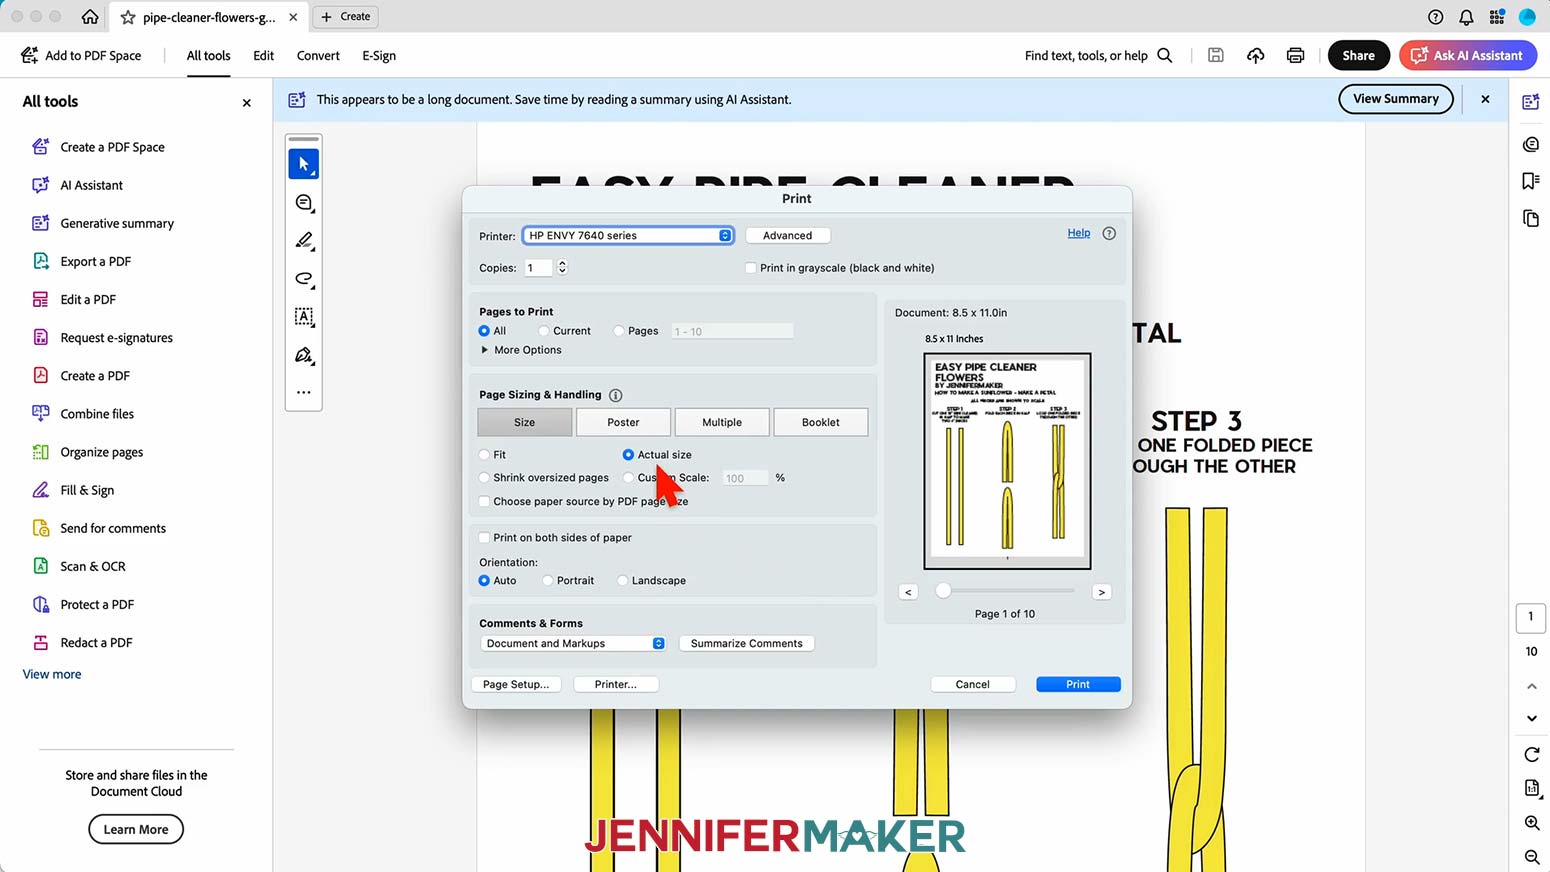
- Click “File” and select “Print.”
- Your screen might look different, but select your printer in the drop-down menu.
- Select color or black and white printing depending on your preference.
- Under “Size,” select “Actual Size” to print the guide for a large flower.

NOTE: If you want to make a smaller flower, you can select “Custom Scale” and set a percentage. I used “75%” to make a smaller flower. - Load 8.5” x 11” paper in your printer.
- Click “Print.”
- Place the printed guide on your work surface.
NOTE: I’ll shape some of the pipe cleaners on the reference guide to make sure the bends are in the right spots. - Gather your supplies and make sure you have enough pipe cleaners for the flower or flowers you plan to make.
NOTE: To make one flower, you will need 12" pipe cleaners in these colors and quantities:
- 16 yellow for the petals (1 for each petal)
- 2 brown for the center
- 7 green for the stem and leaf (2 for the leafy parts under the petals, 3 for a single leaf, and 2 for the stem)
- 1 thick floral wire stem to wrap 2 green pipe cleaners around

STEP 3: MAKE YOUR FLOWER PIECES
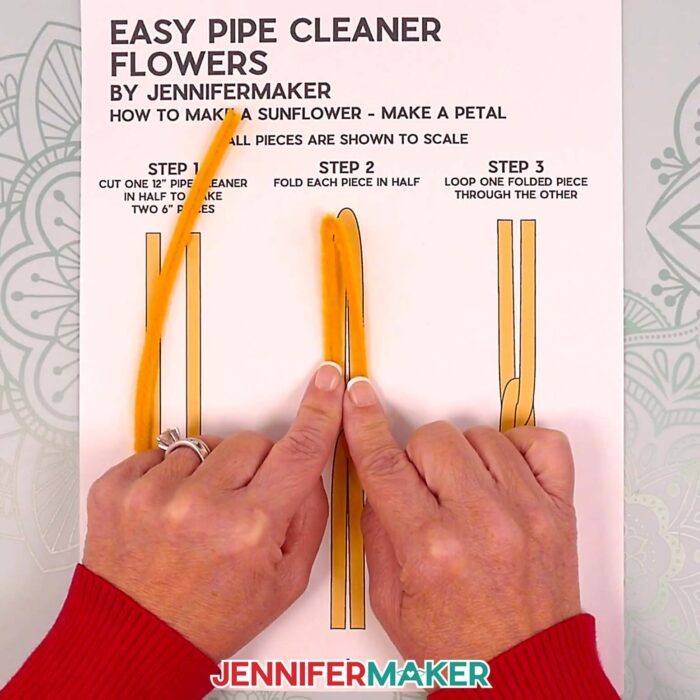
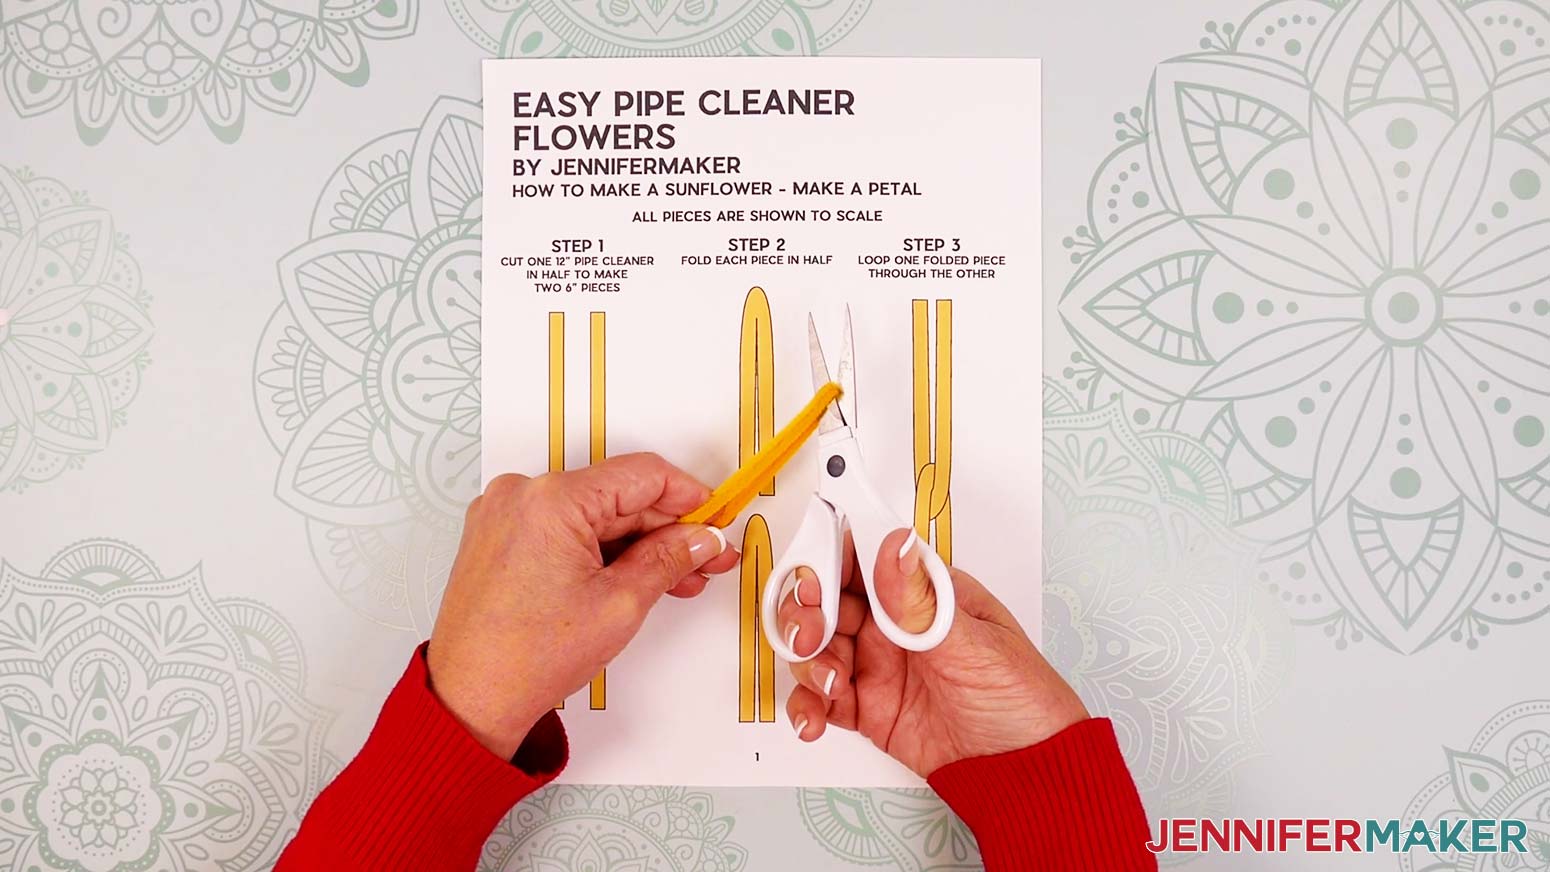
LARGE SUNFLOWER PETALS
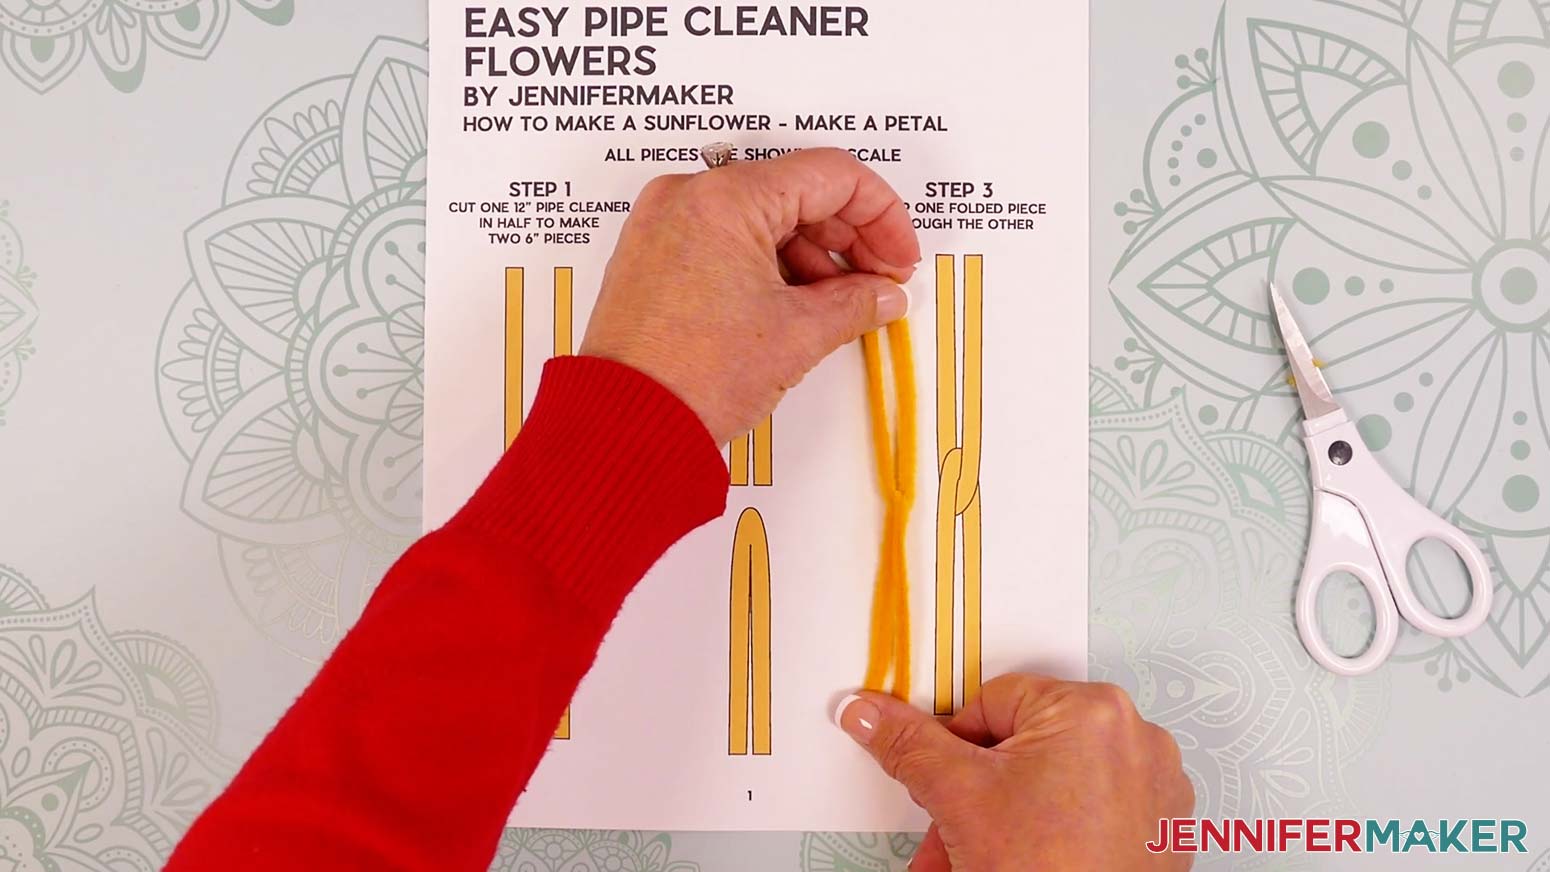
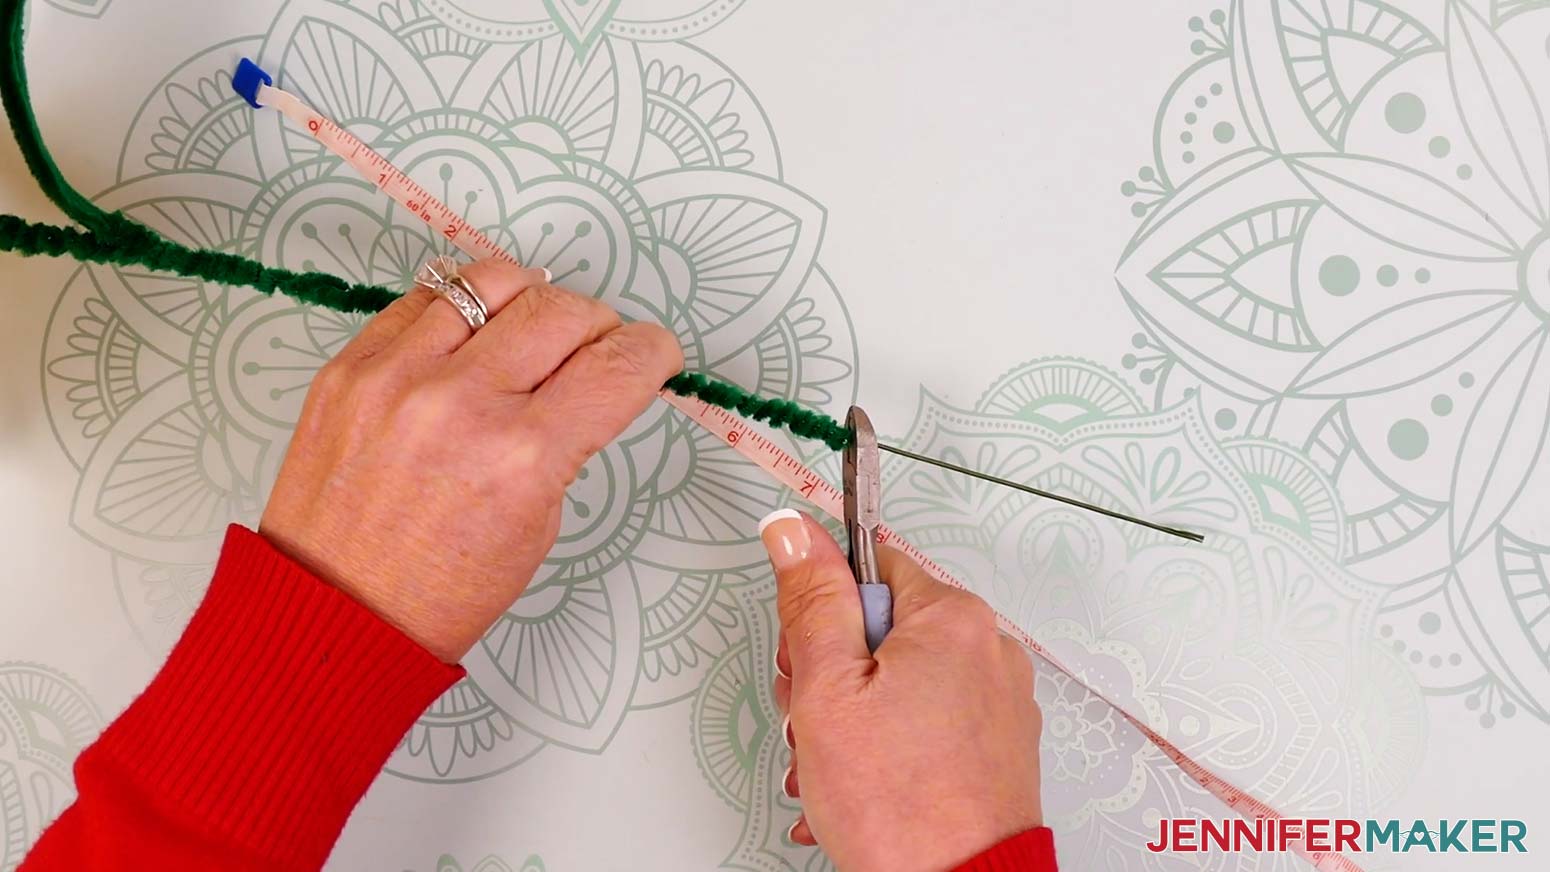
- Match the ends of a 12” yellow pipe cleaner to fold it in half and find the center.
- Use your scissors to cut the pipe cleaner at the center, creating two 6” pieces.
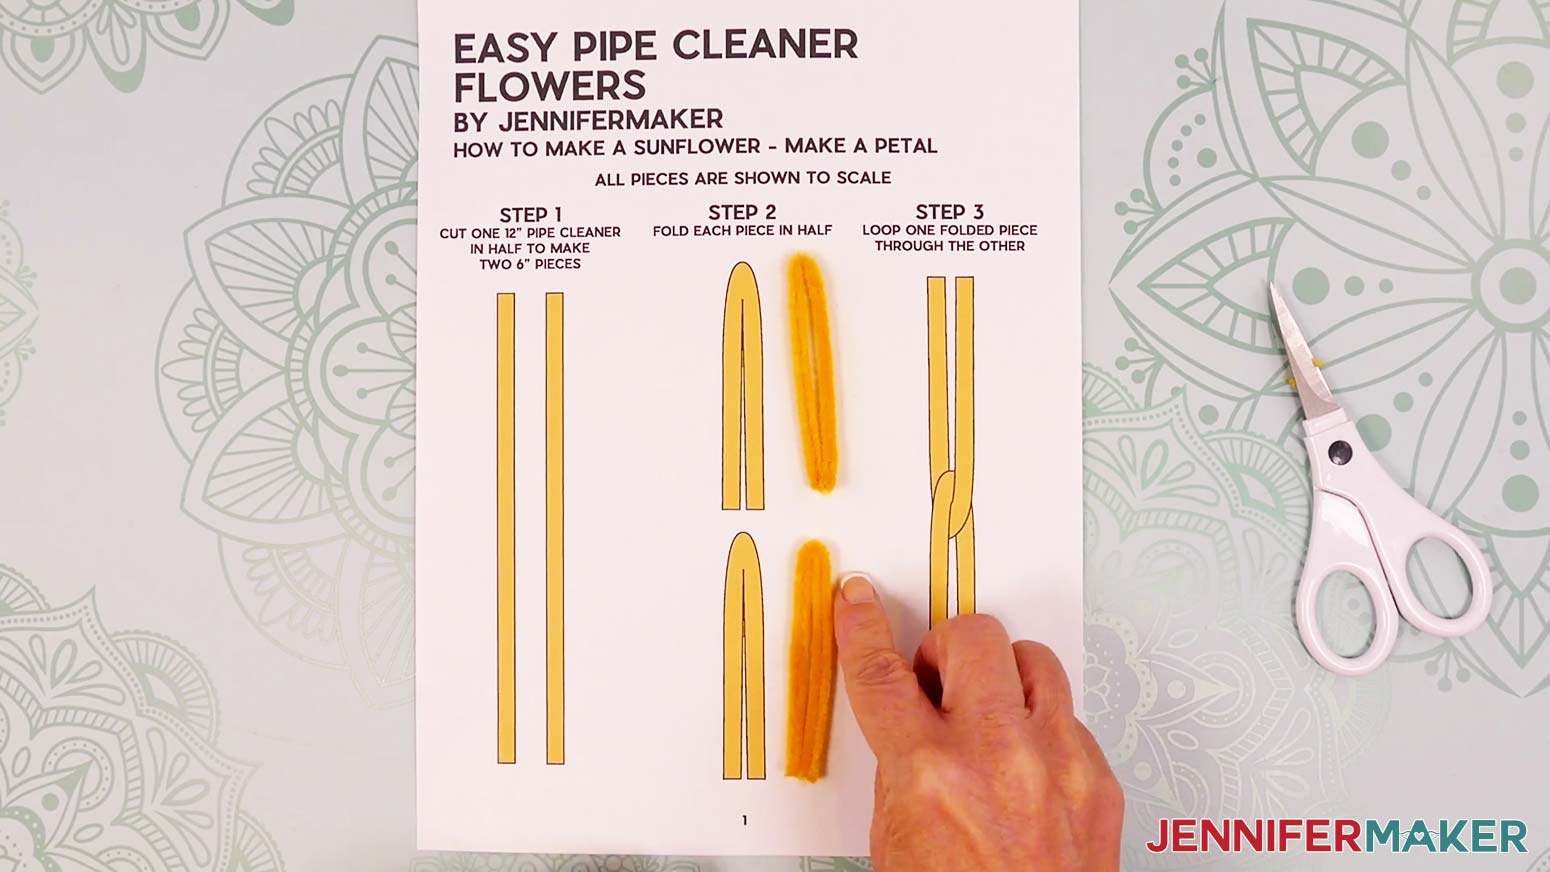
NOTE: If you’re making a smaller sunflower using the reference guide printed at 75% size, cut a single pipe cleaner into two pieces that match the lengths shown on your reference guide. - Match each 6” piece’s ends to fold them in half, so both have a bend and two legs.
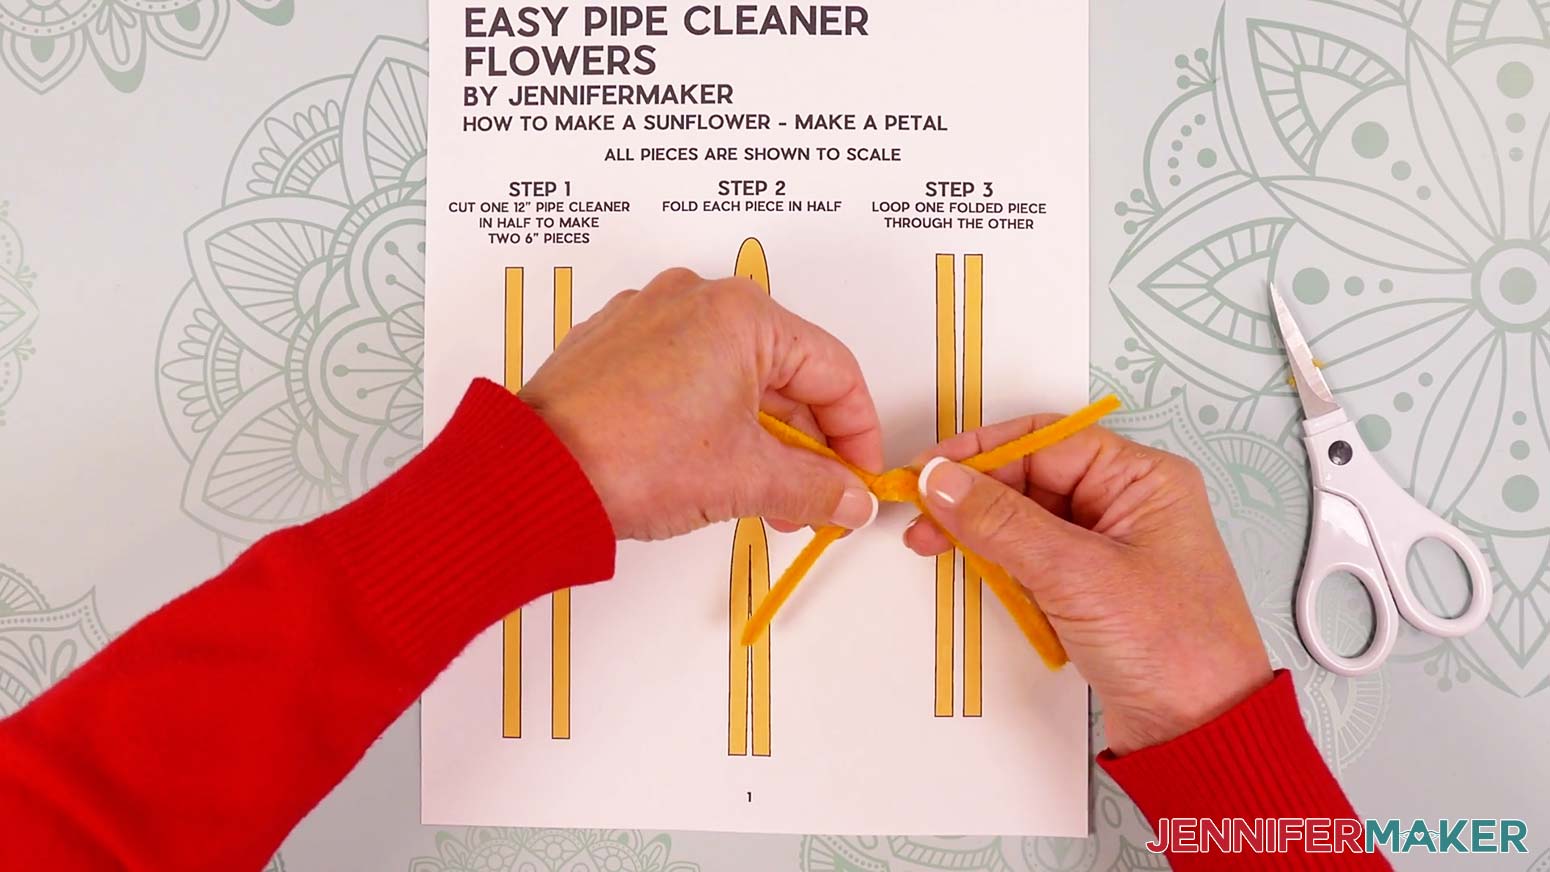
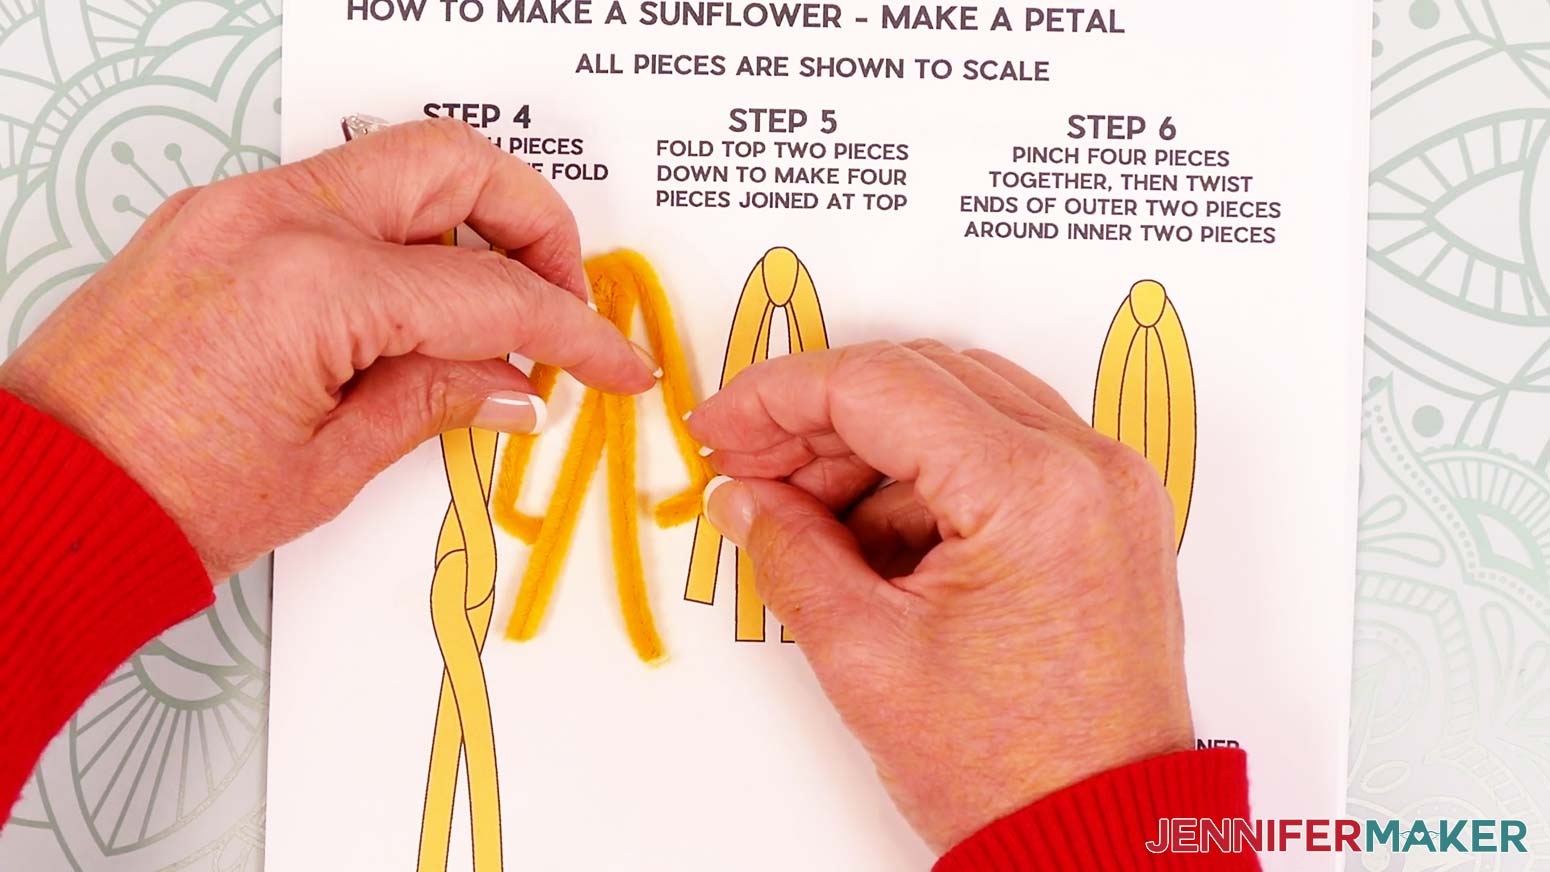
- Insert the leg of one piece into the bend of the other so they are linked.
- Close to the joint, twist the legs of both sides in opposite directions once to secure them together.
- Hold the legs of one end and compare your pieces to the reference guide, making sure the shape looks like a skinny “X.”
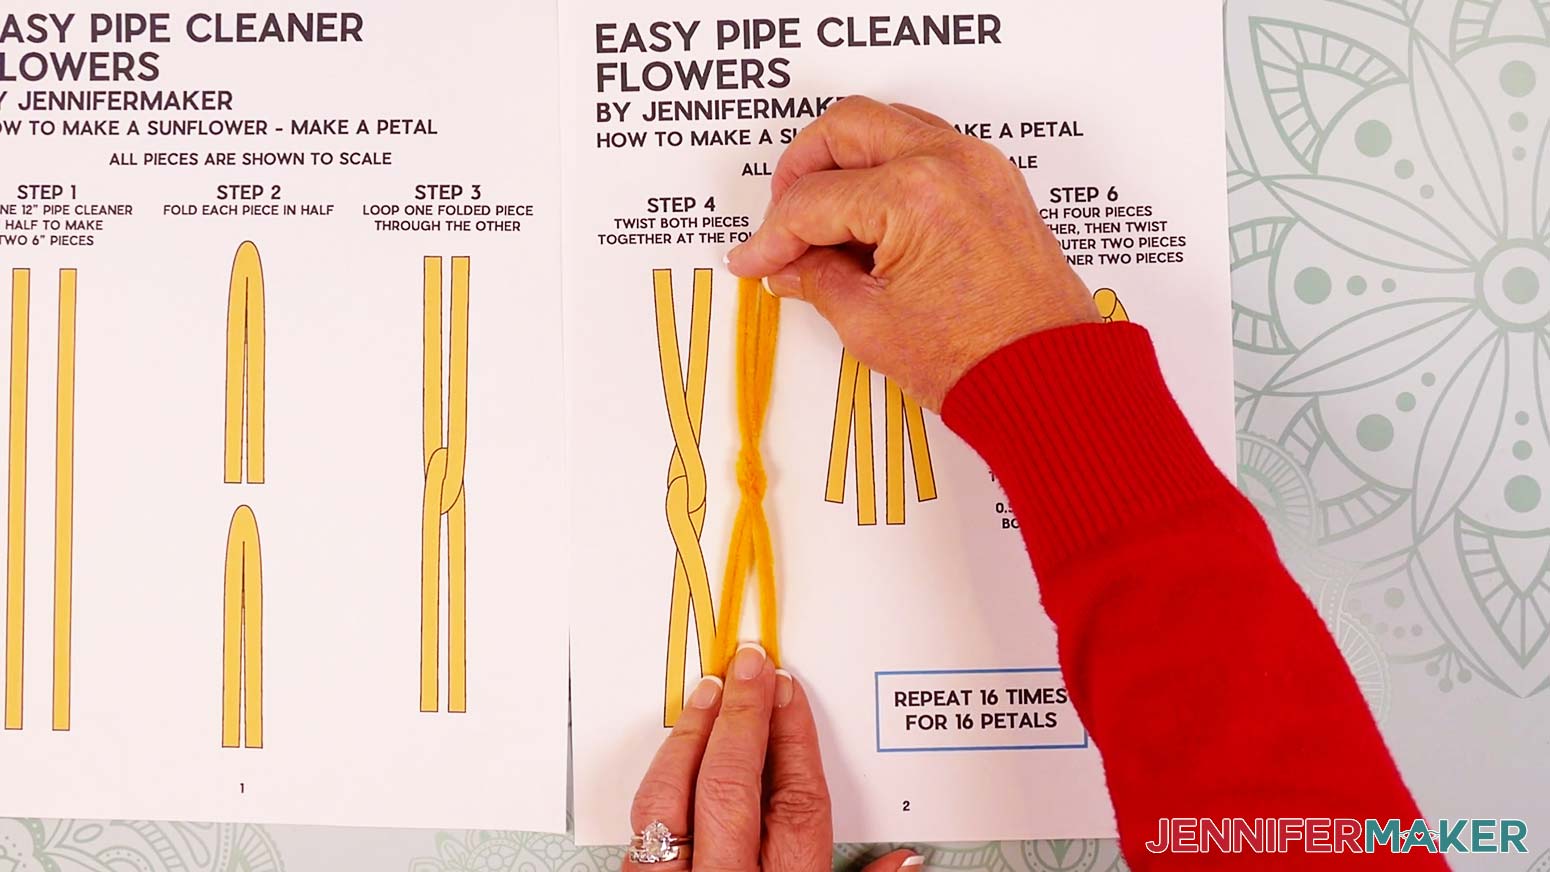
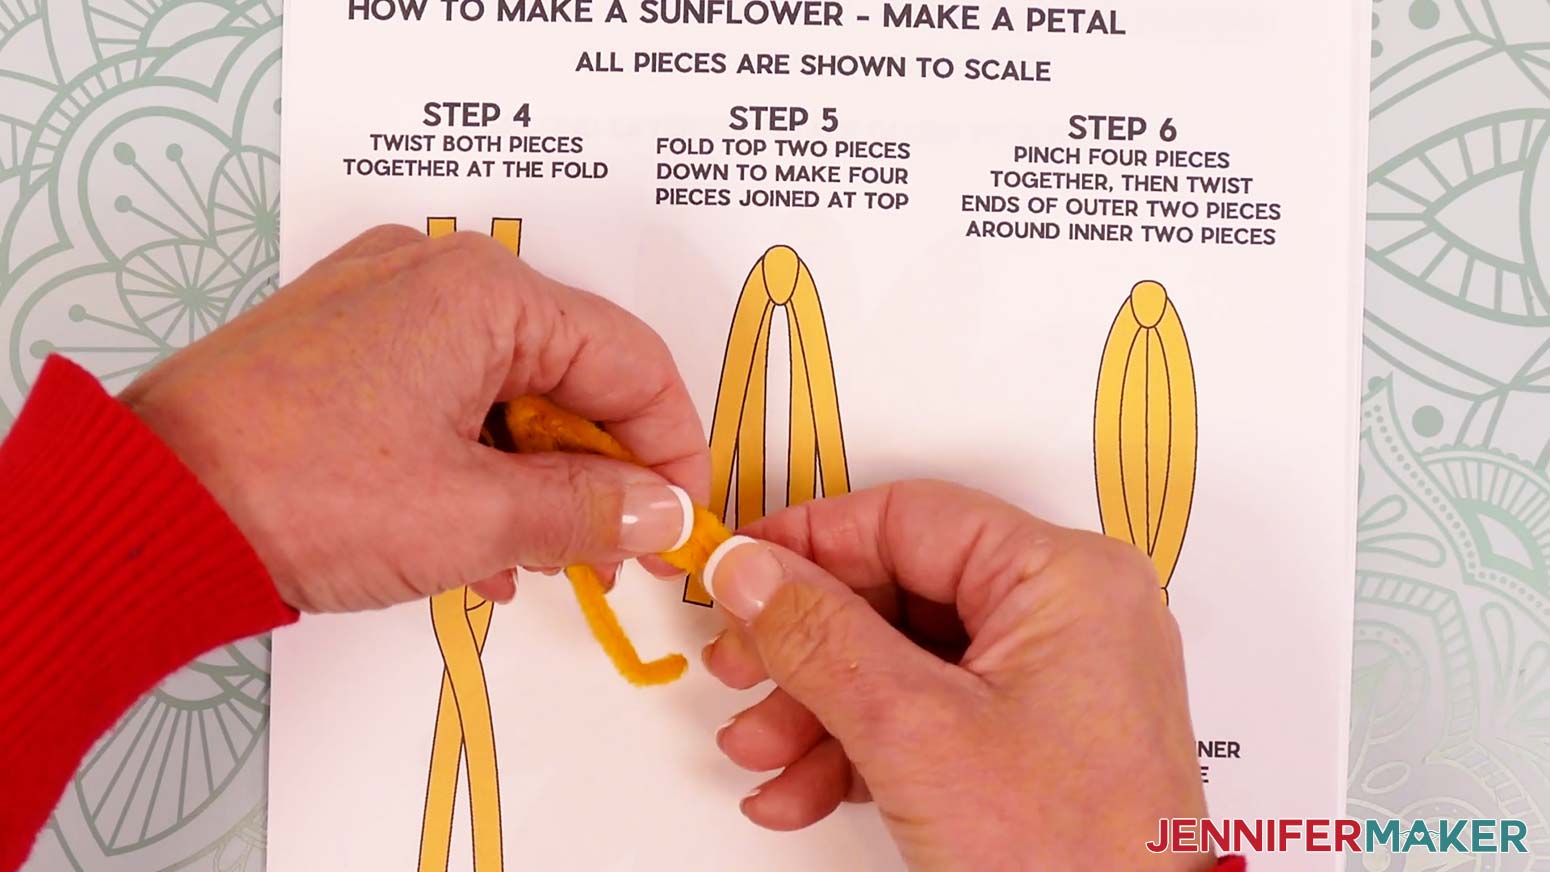
- Keep the lower legs you’re holding still, and fold the upper legs down to either side.
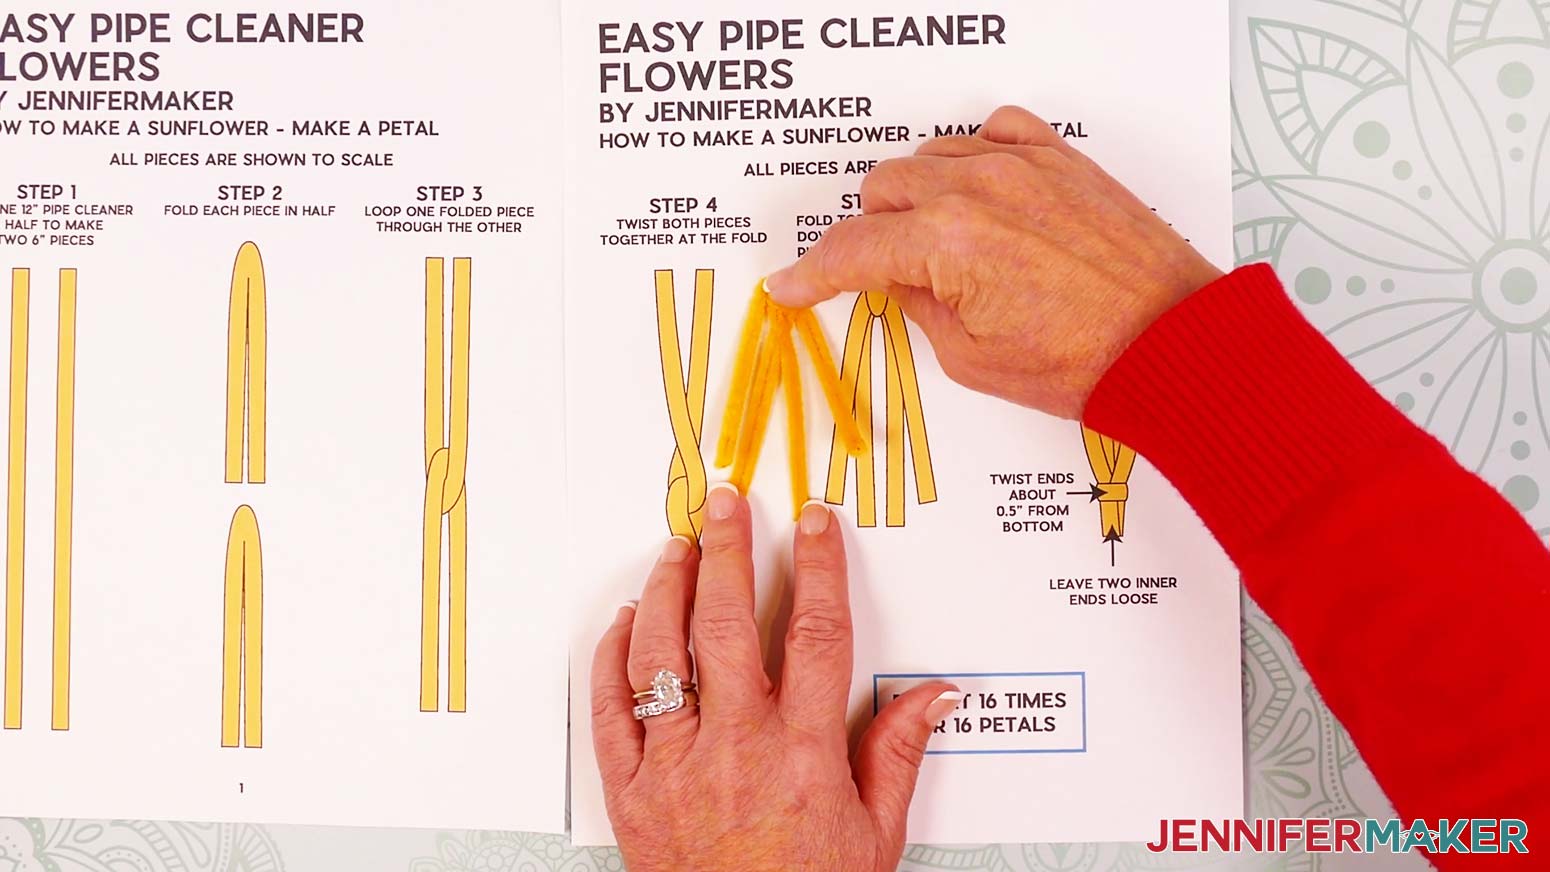
NOTE: The outer legs should be slightly shorter than the inner ones, and the pieces should be flat with the bend at the top. - Keep the four legs flat while smoothing them straight down so they stay aligned in four straight columns.
- Fold the outer legs at 90° angles so they cross the middle legs about 0.5” from their ends.
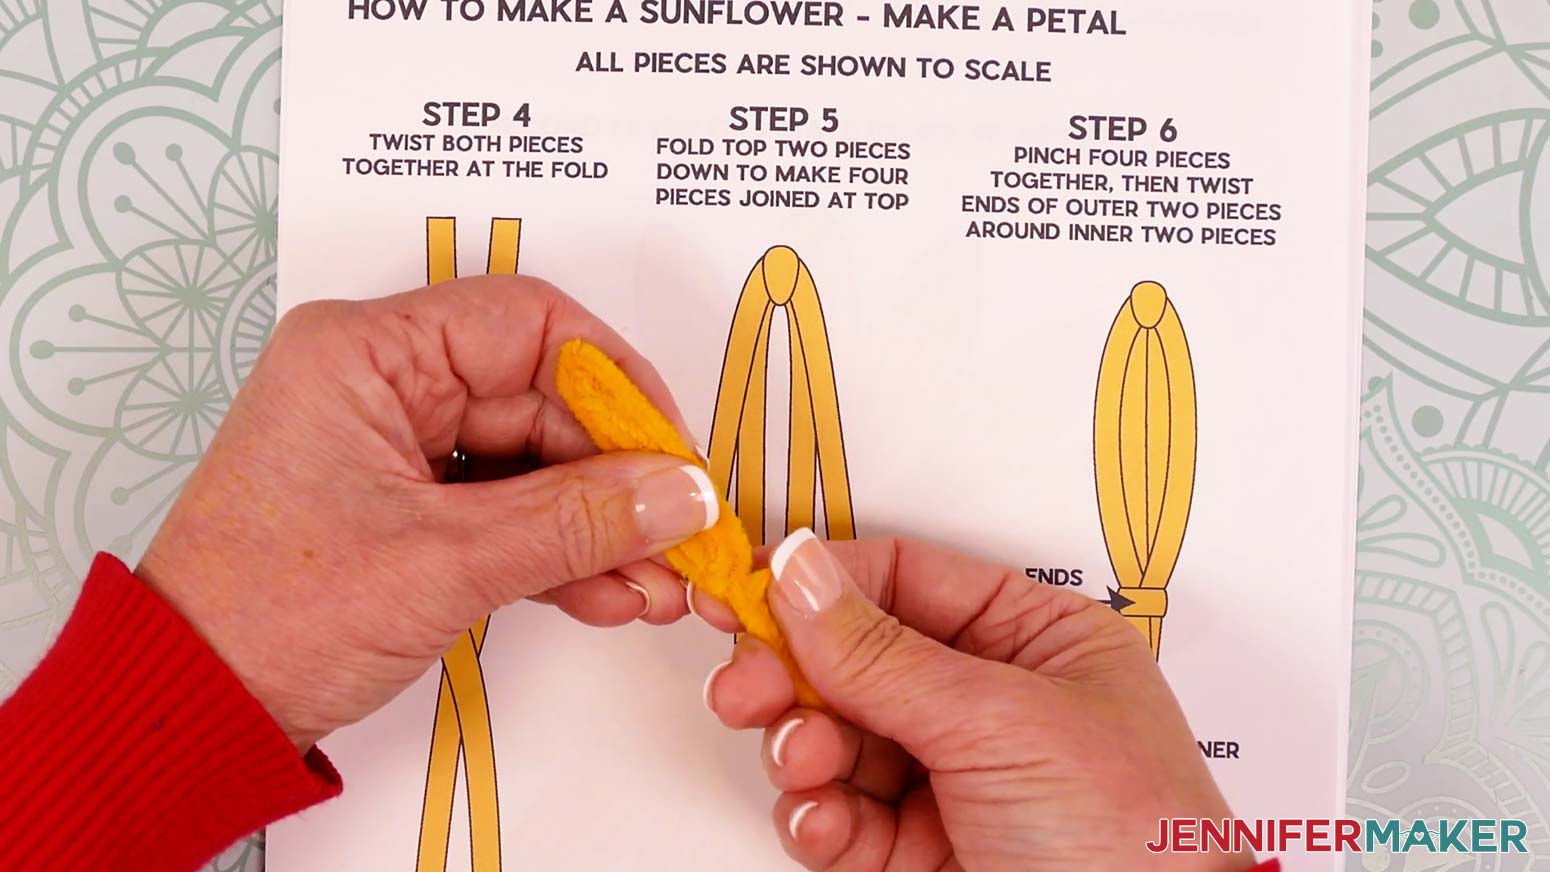
NOTE: It’s OK if they don’t cross right at 0.5” -- that measurement is more of a guide. - Use the shorter folded section to wrap just around the two middle legs from the front to the back.
NOTE: If both sections are the same length, you can wrap either one first. - Use the remaining folded section to wrap around the two middle legs at the same spot from the back to the front.
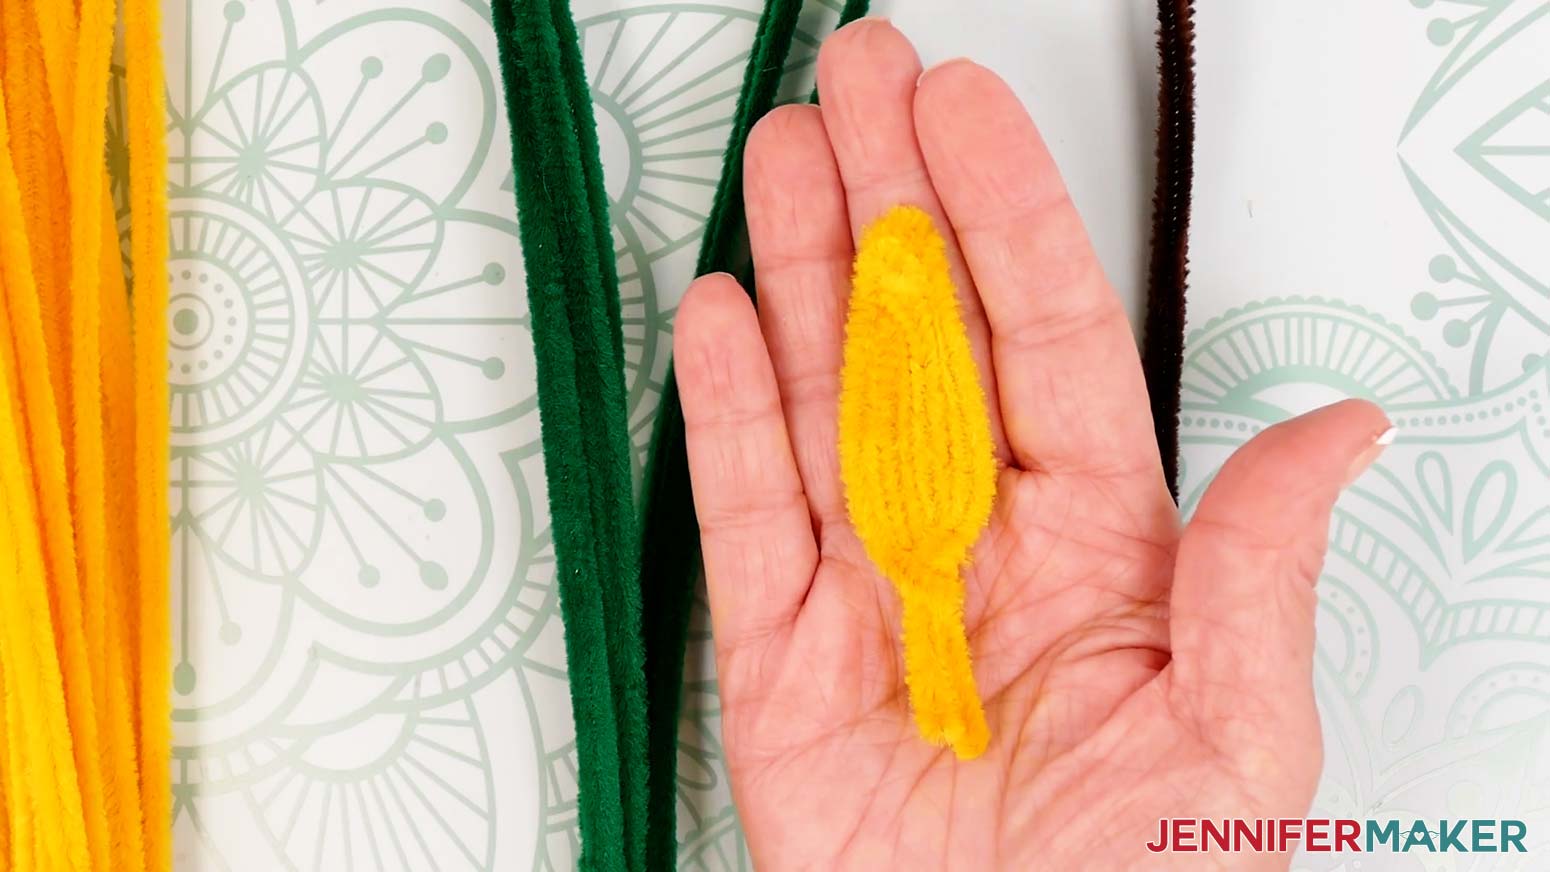
- Repeat Steps 1-11 15 times to create 16 matching petals.
TIP: Real petals are never identical, so don’t worry if they’re not all perfect! - Optionally, you can shape the petals by gently pulling the outer edges out and pinching the ends to make sure the fibers still touch.
- If you notice gaps between the fibers and want to fluff them up a bit, gently heat press each petal on a heat-safe pressing pad.
NOTE: On a Cricut EasyPress, set the temperature to 300°F (149°C) and press each petal for 30 seconds with medium pressure.
NOTE: With a home iron, set it to “Polyester” or "Medium Heat" and press for 30 seconds with medium pressure.
LARGE SUNFLOWER CENTER
- Turn on your hot glue gun and put on your silicone finger protectors.
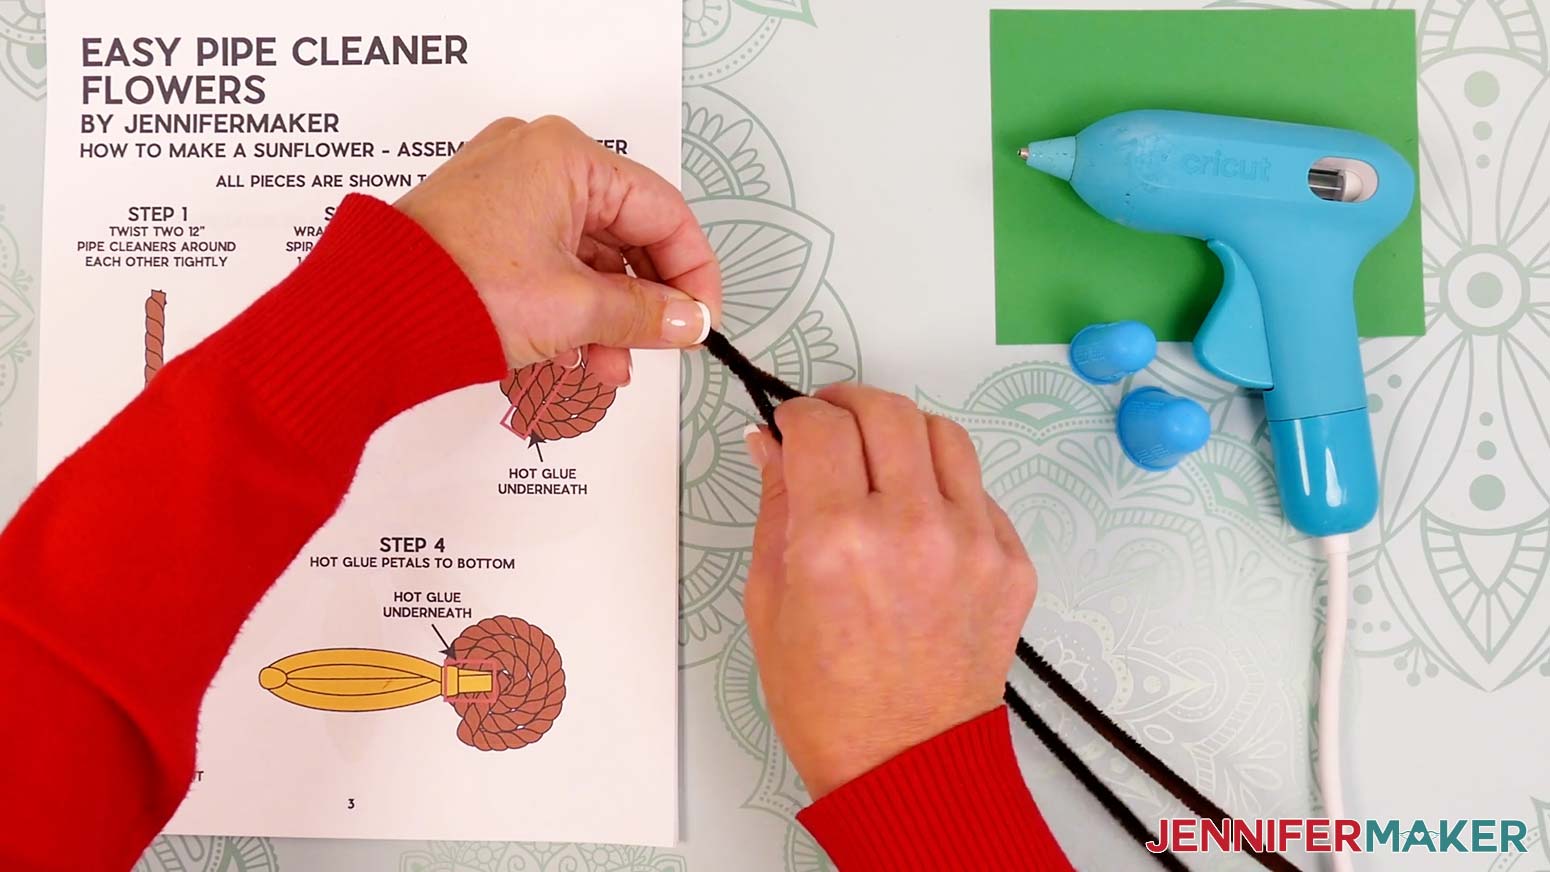
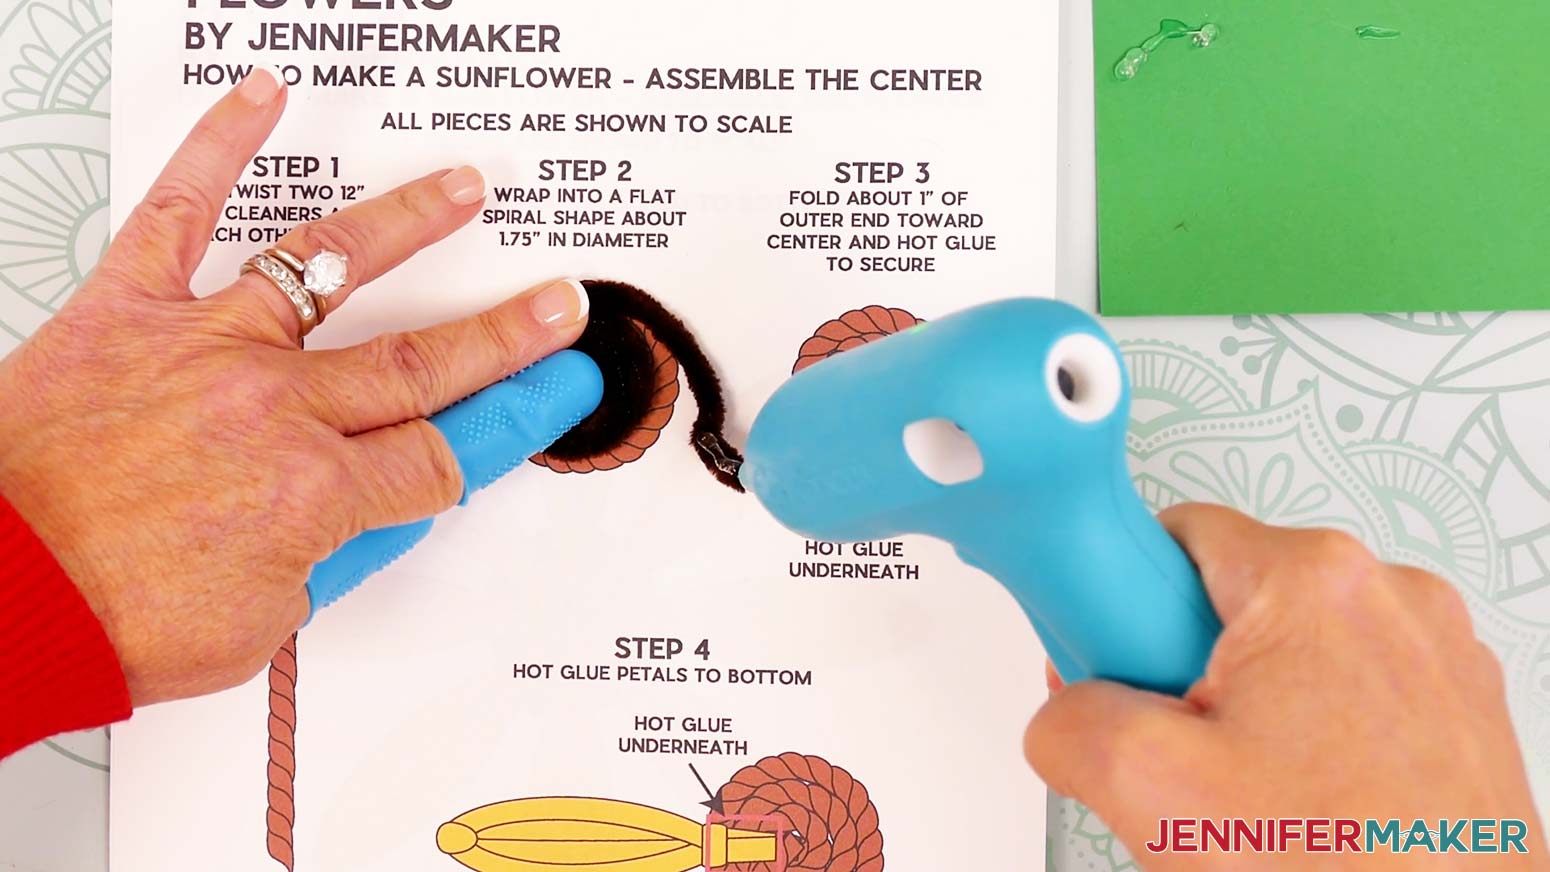
- Match the ends of two 12” brown pipe cleaners, then twist them together tightly along their full lengths.
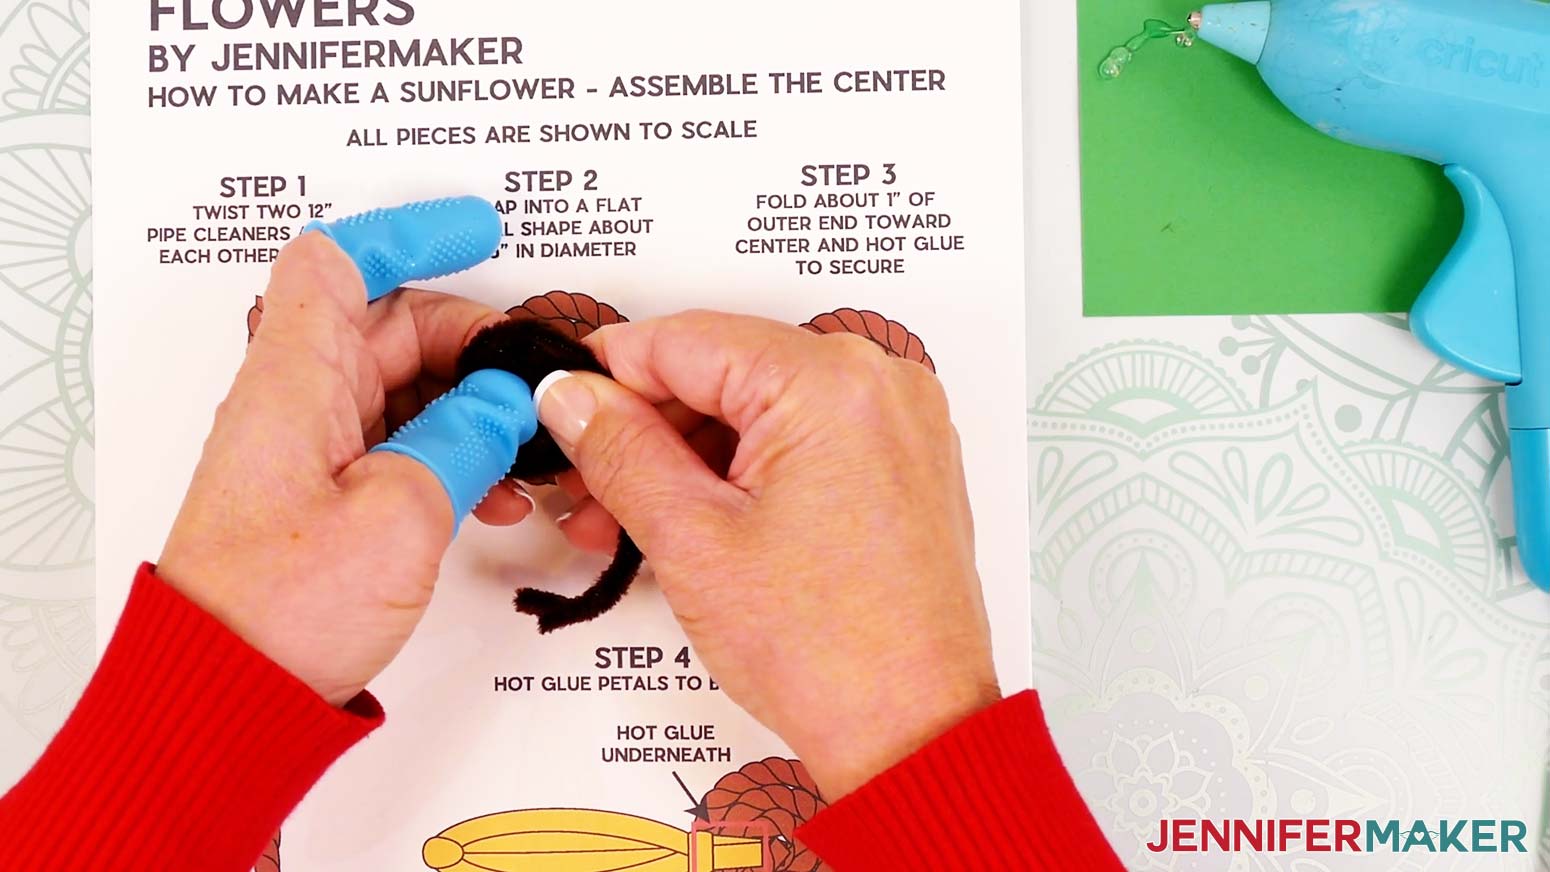
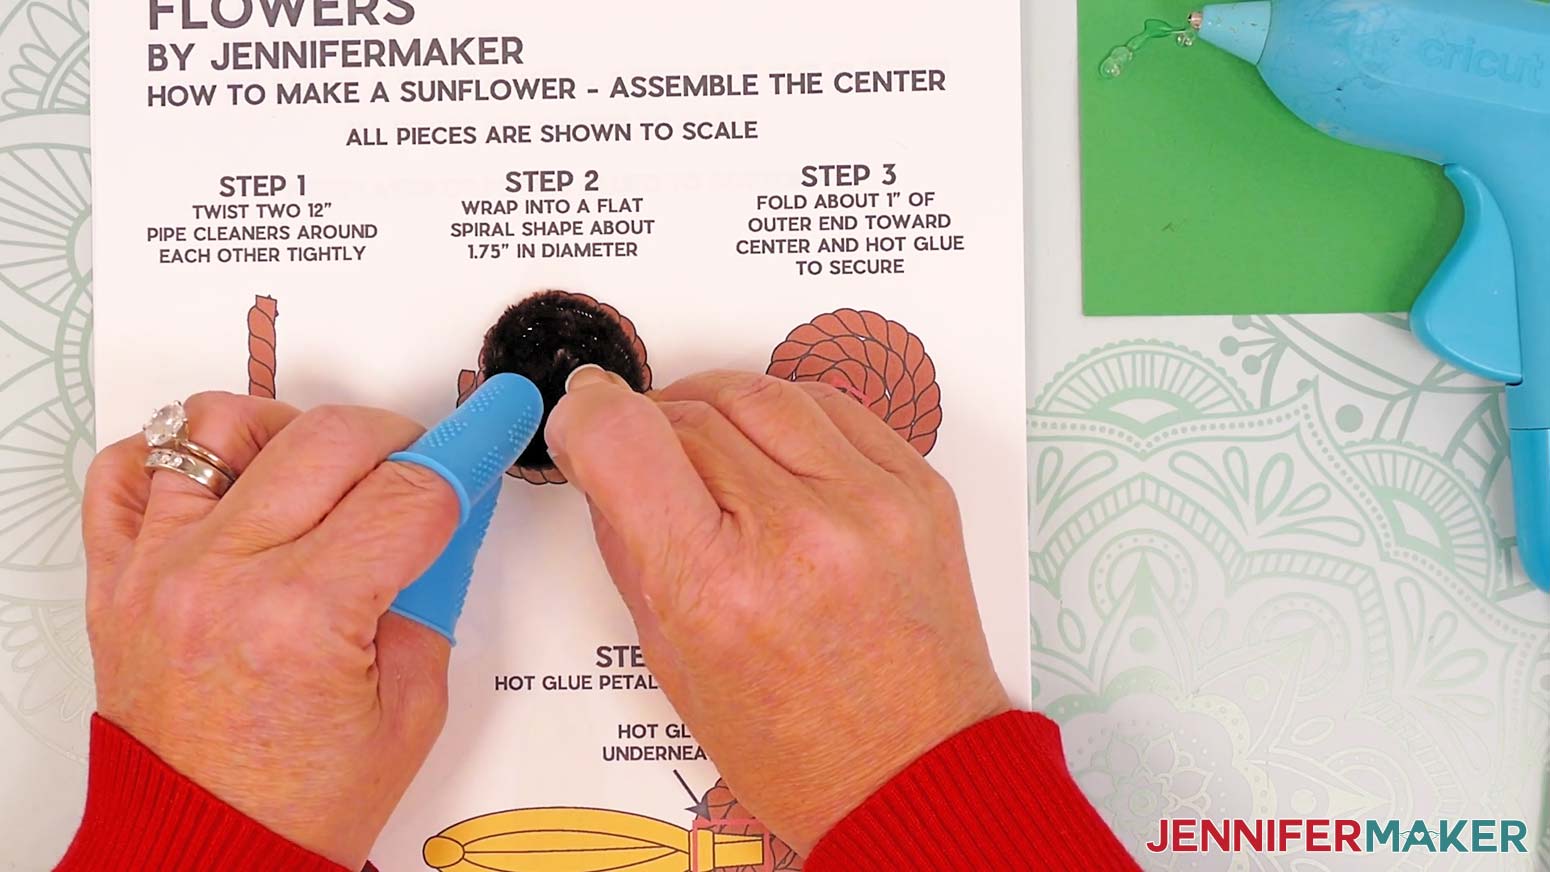
- Starting at one end of the twisted pipe cleaners, coil them into a flat spiral.
TIP: Avoid gaps in the center by holding the spiral’s rings together while you coil the pipe cleaners. - Keeping the spiral secure, fold the outer pipe cleaner’s end in toward the middle so it will touch each ring.
- Lift the folded section up and add hot glue to its underside.
- Use your protected fingers to press the folded twist in toward the middle and hold it in place until the glue completely dries.
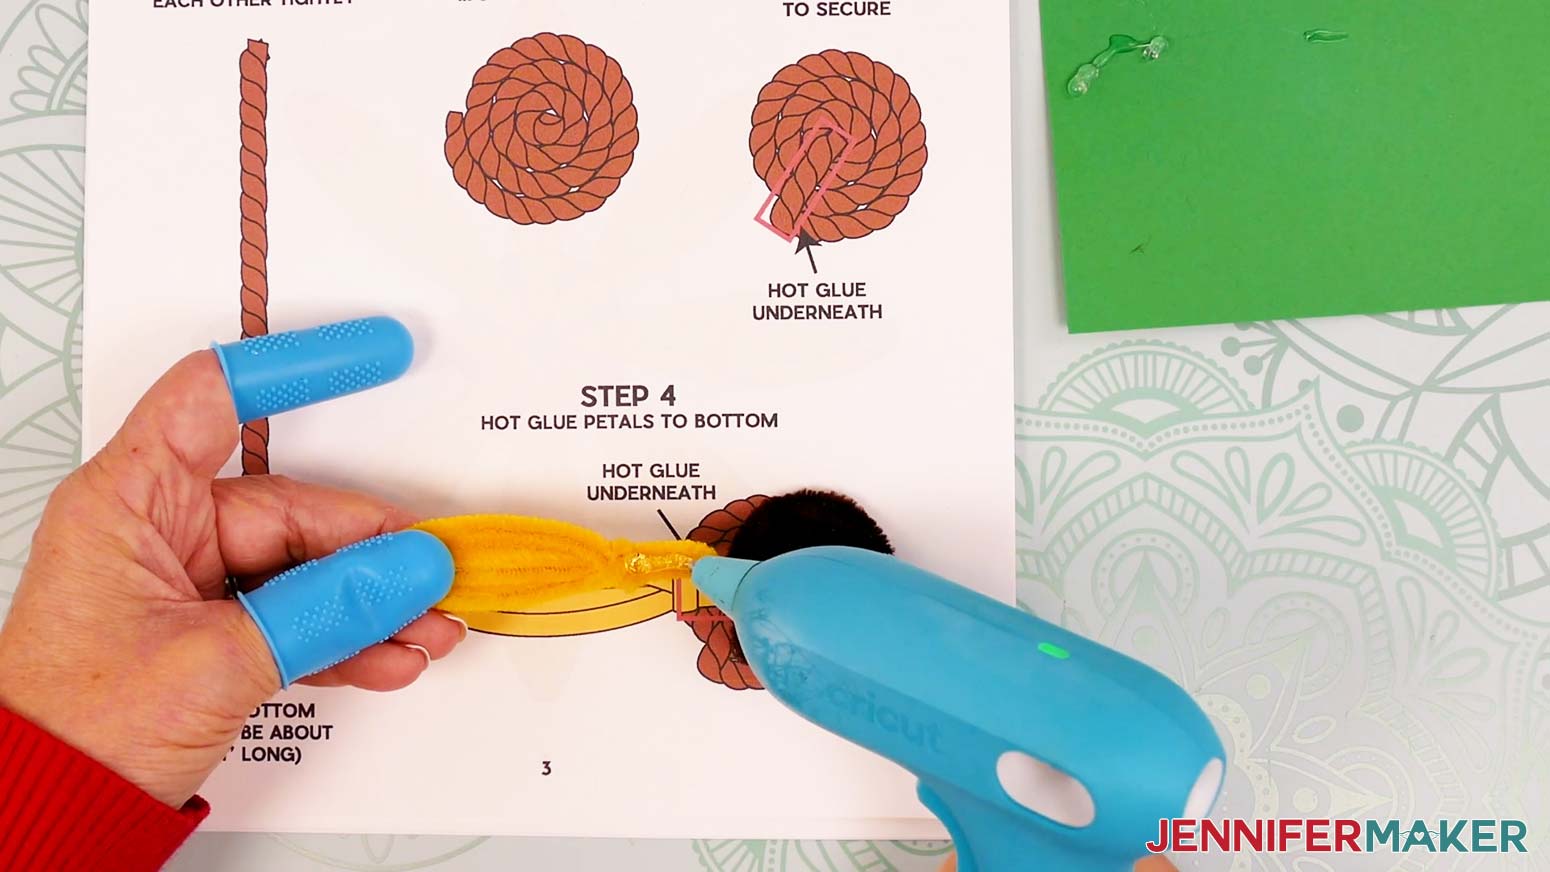
- Place the flower’s center face down so the glue is on top.
NOTE: You can place the center on the reference sheet to help protect your work surface from hot glue, but some of the paper might stick to the flower. - Grab a finished petal and pick the prettier side to be the front.
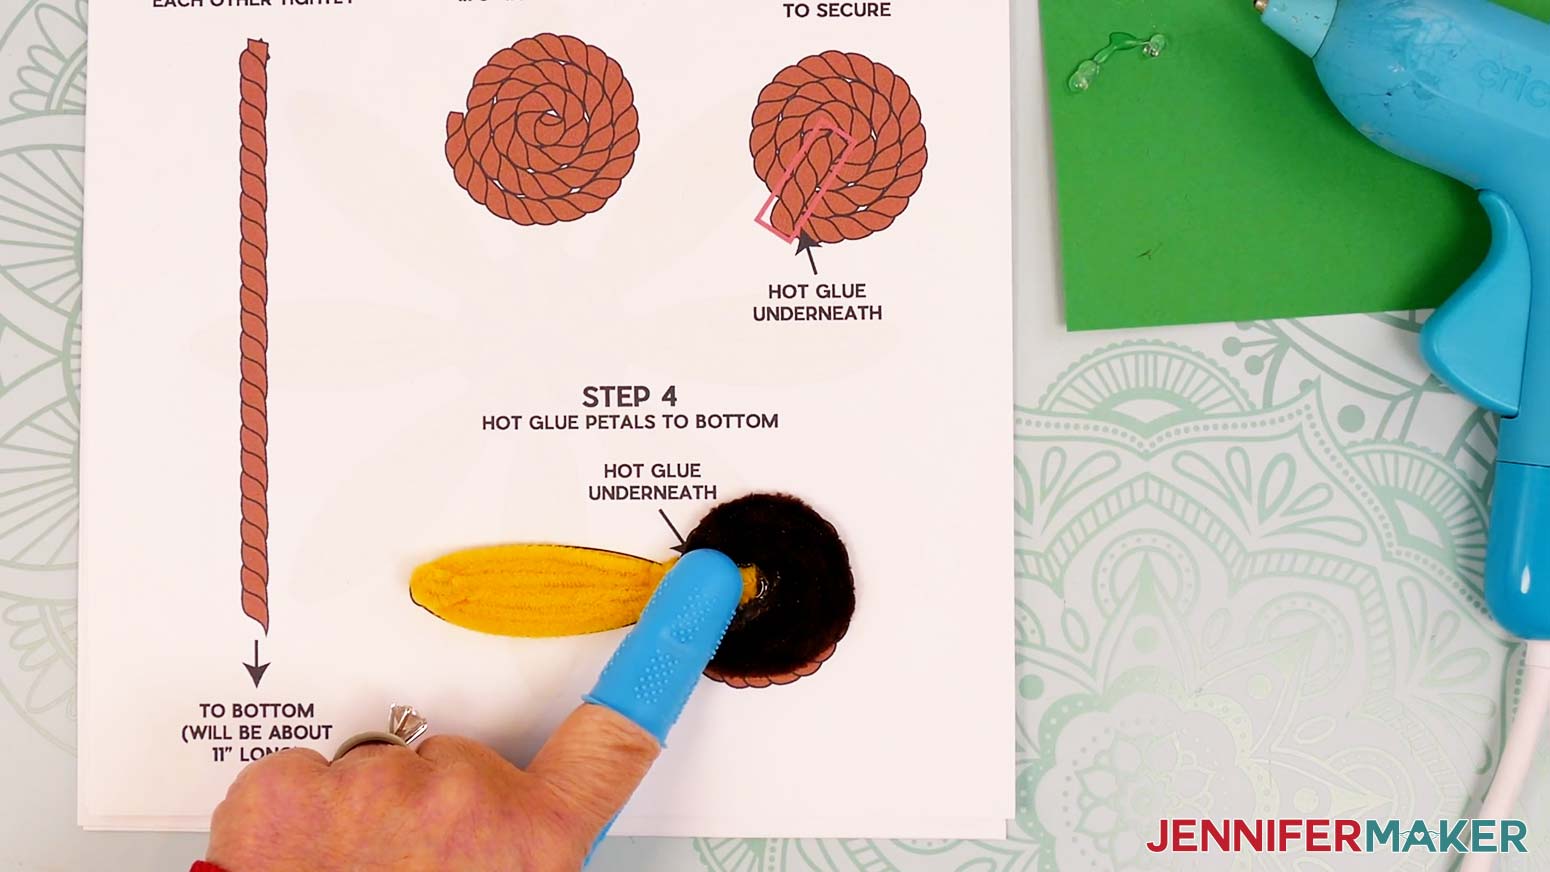
TIP: For example, some of my petals were bumpy or had wire ends showing on one side, so I made those the backs. - Add hot glue to the petal’s front from the wrapped section to the ends of the legs.
- Place the glued section onto the back of the flower center so the shaped petal sticks out.
TIP: Use your protected fingers to hold the petal in place until the glue completely dries. - To make the flower symmetrical, add the next petal opposite the first using Steps 8-10.
NOTE: The petals’ legs may or may not touch each other, depending on their shape, size, and the center’s size.
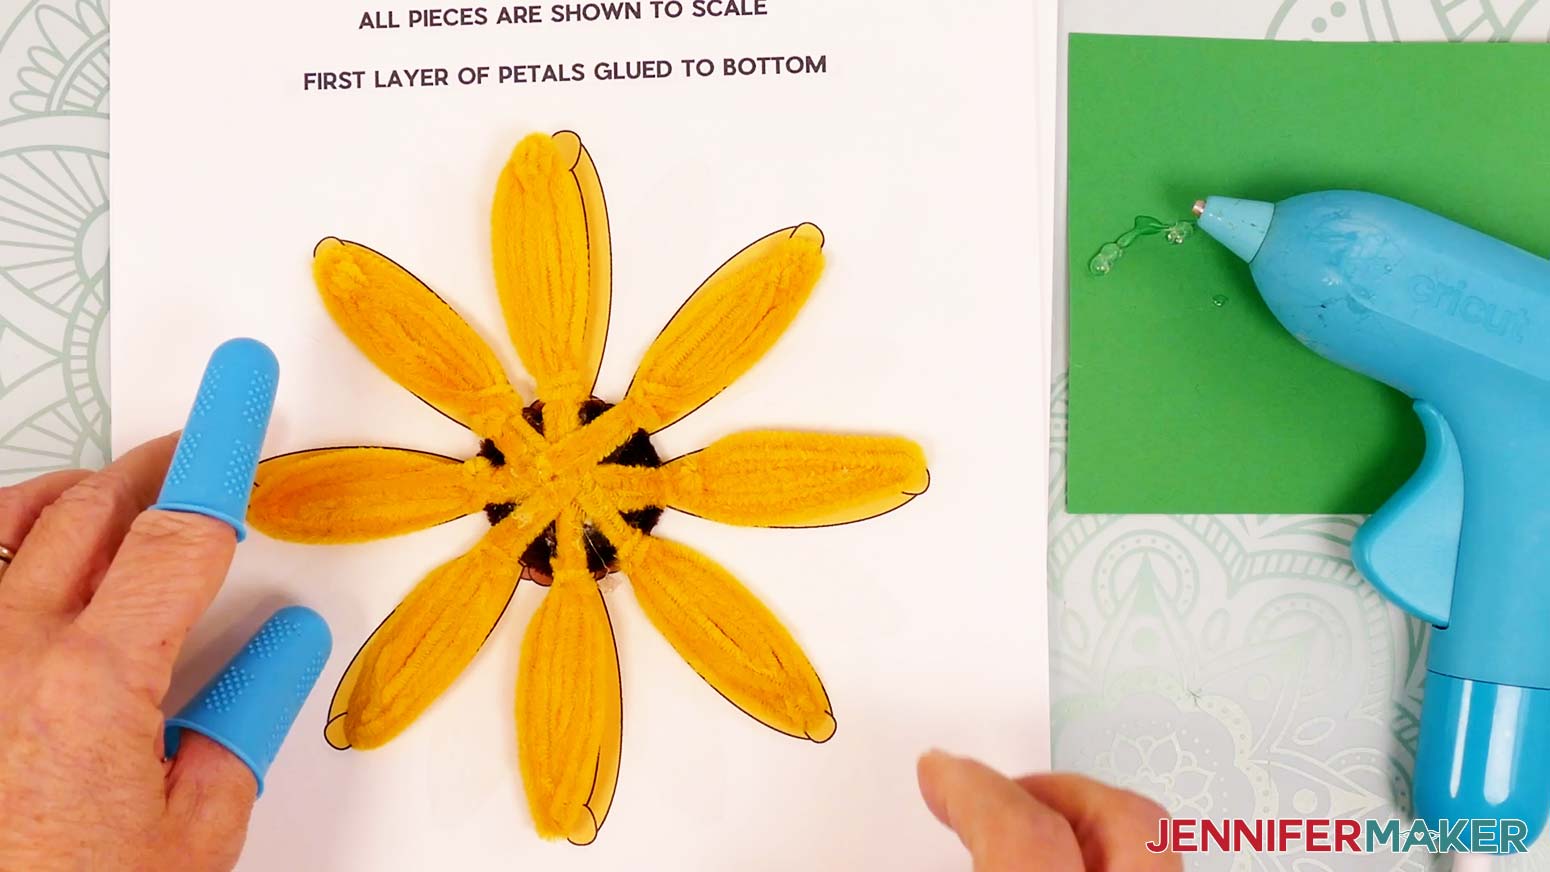
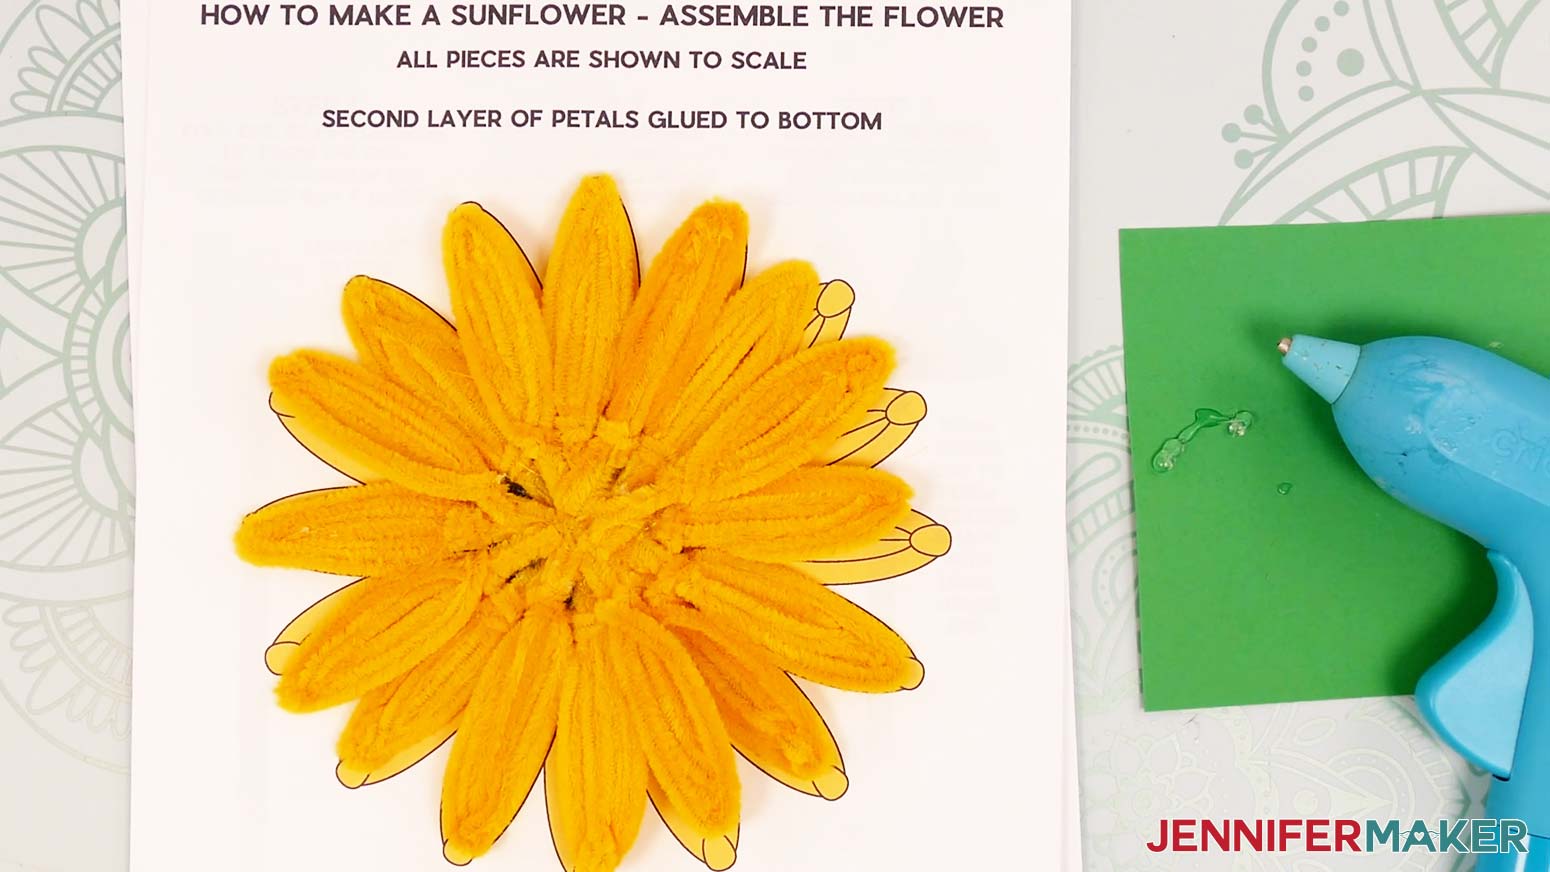
TIP: You can use your reference guide to help symmetrically place the first eight petals as the first layer. If you think of the reference image as a compass, add petals at the four cardinal directions and then the four intermediate directions. - Continue adding the first eight petals the same way for the first layer.
- Fill in the open sections with the remaining eight petals, which will slightly overlap with the first set of petals at their edges.
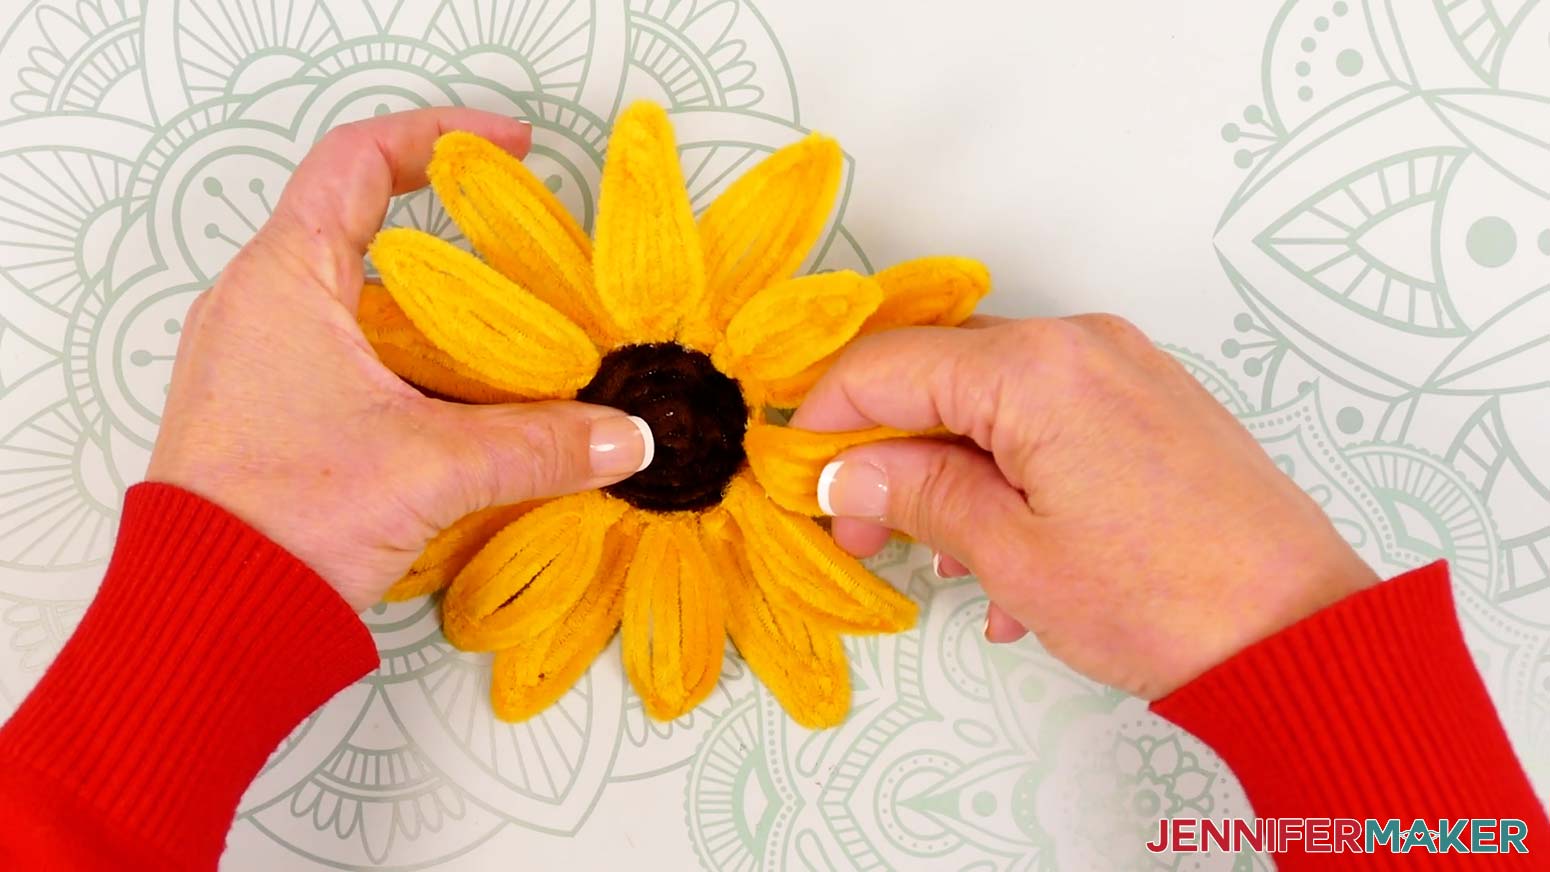
- To shape the flower, hold it face up and gently lift the first eight petals you glued, which will be slightly above the others.
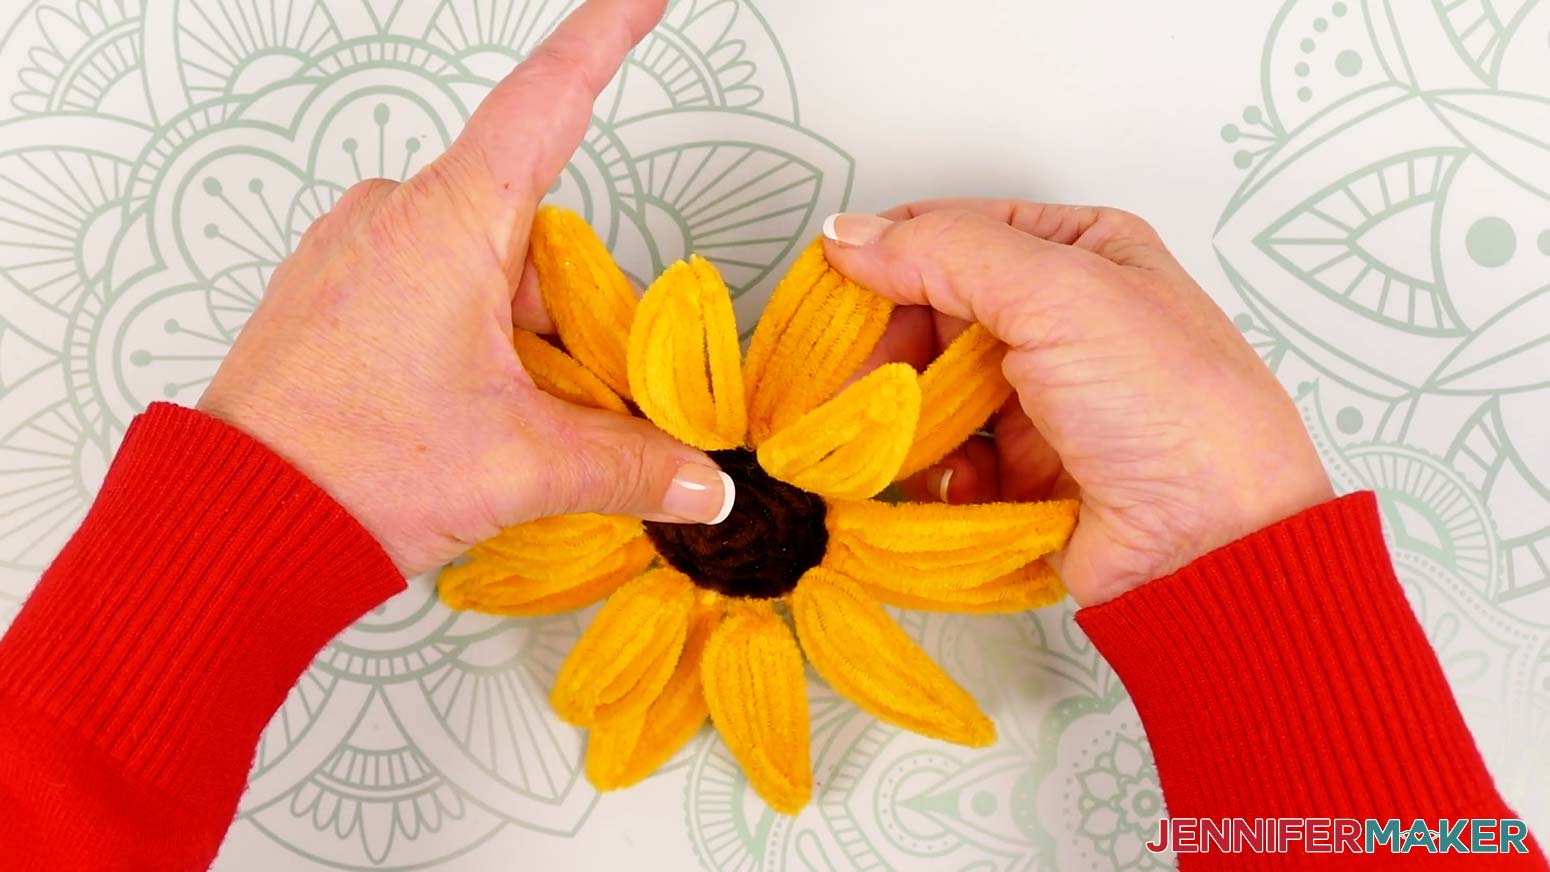
NOTE: You can fine-tune the shaping once everything is complete -- I just found that making the basic petal adjustments is easier before the stem is attached to the flower. - One at a time, gently curve the petals around your fingers so they arch up from the center and down at the tips.
- Once the top layer of petals is shaped, curve the lower layer of petals the same way but with a less dramatic arch so the flower looks even from the top and sides.

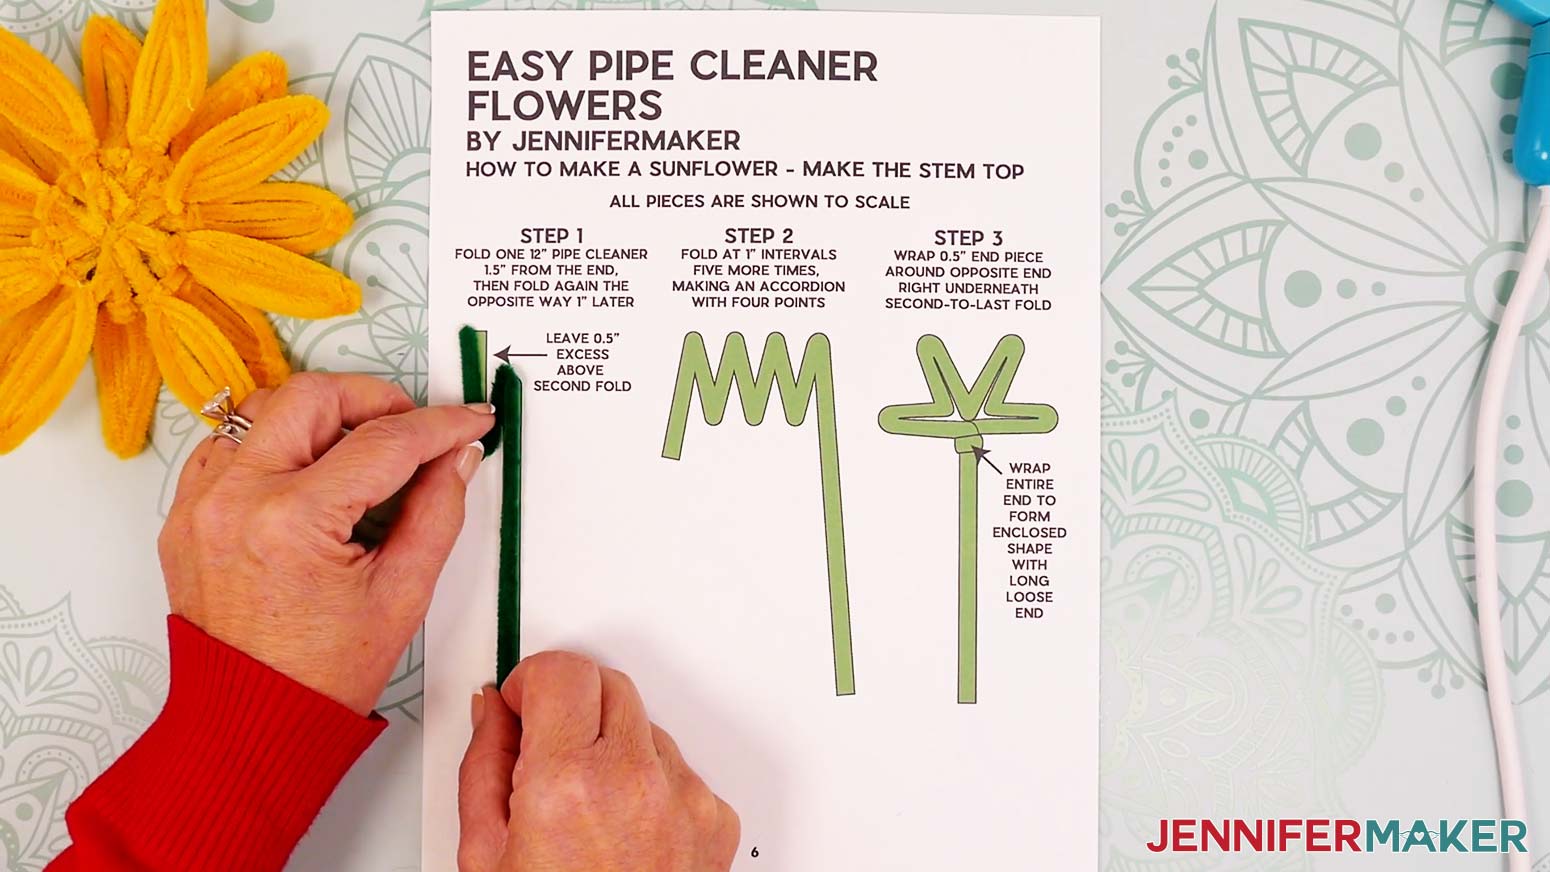
LARGE SUNFLOWER STEM
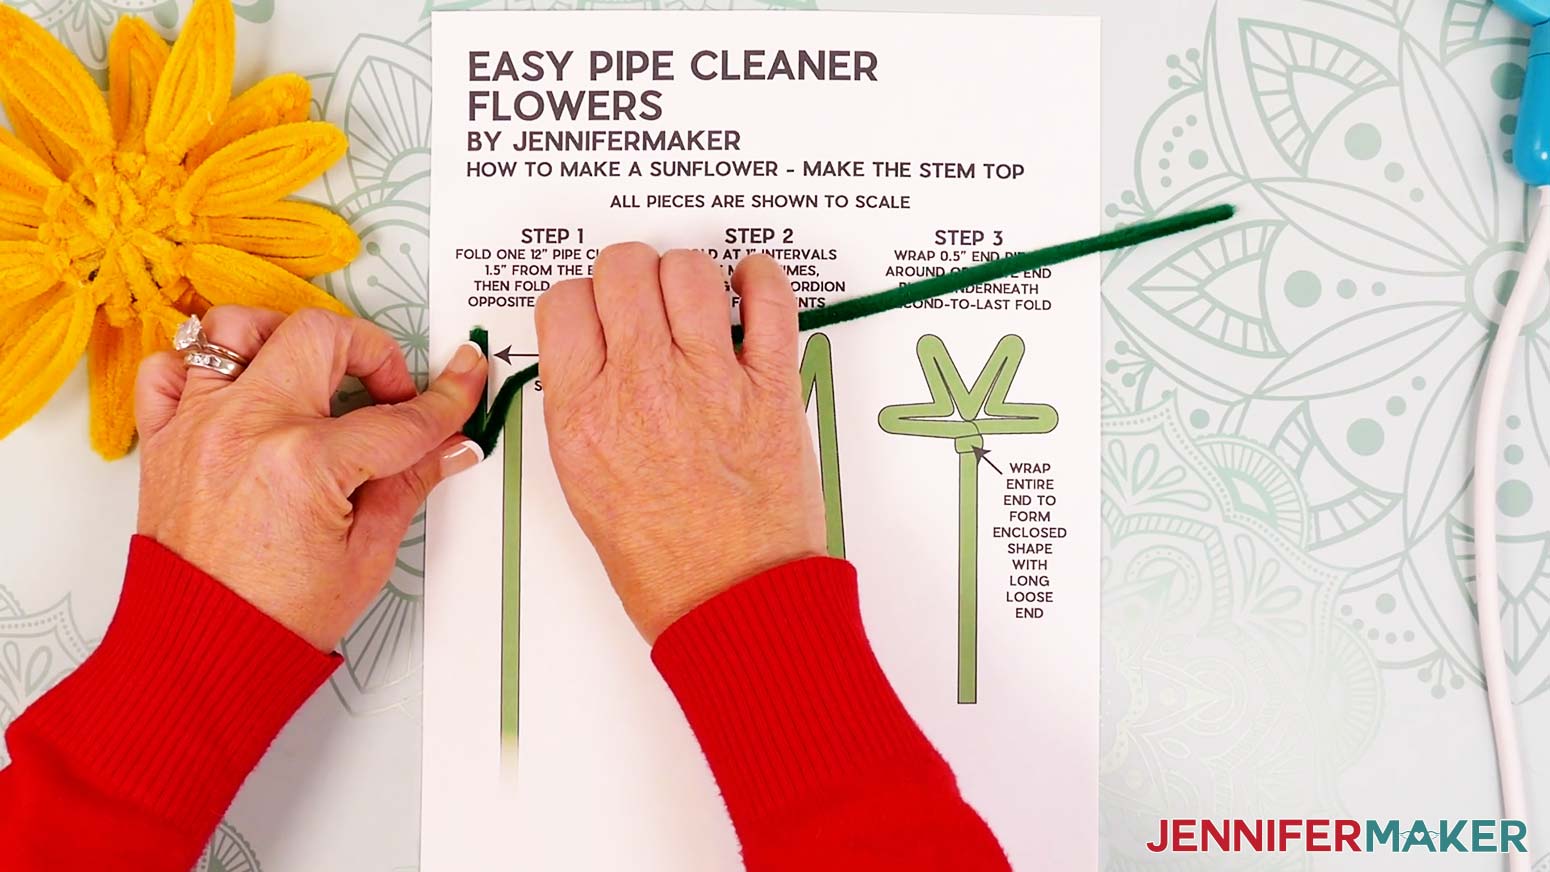
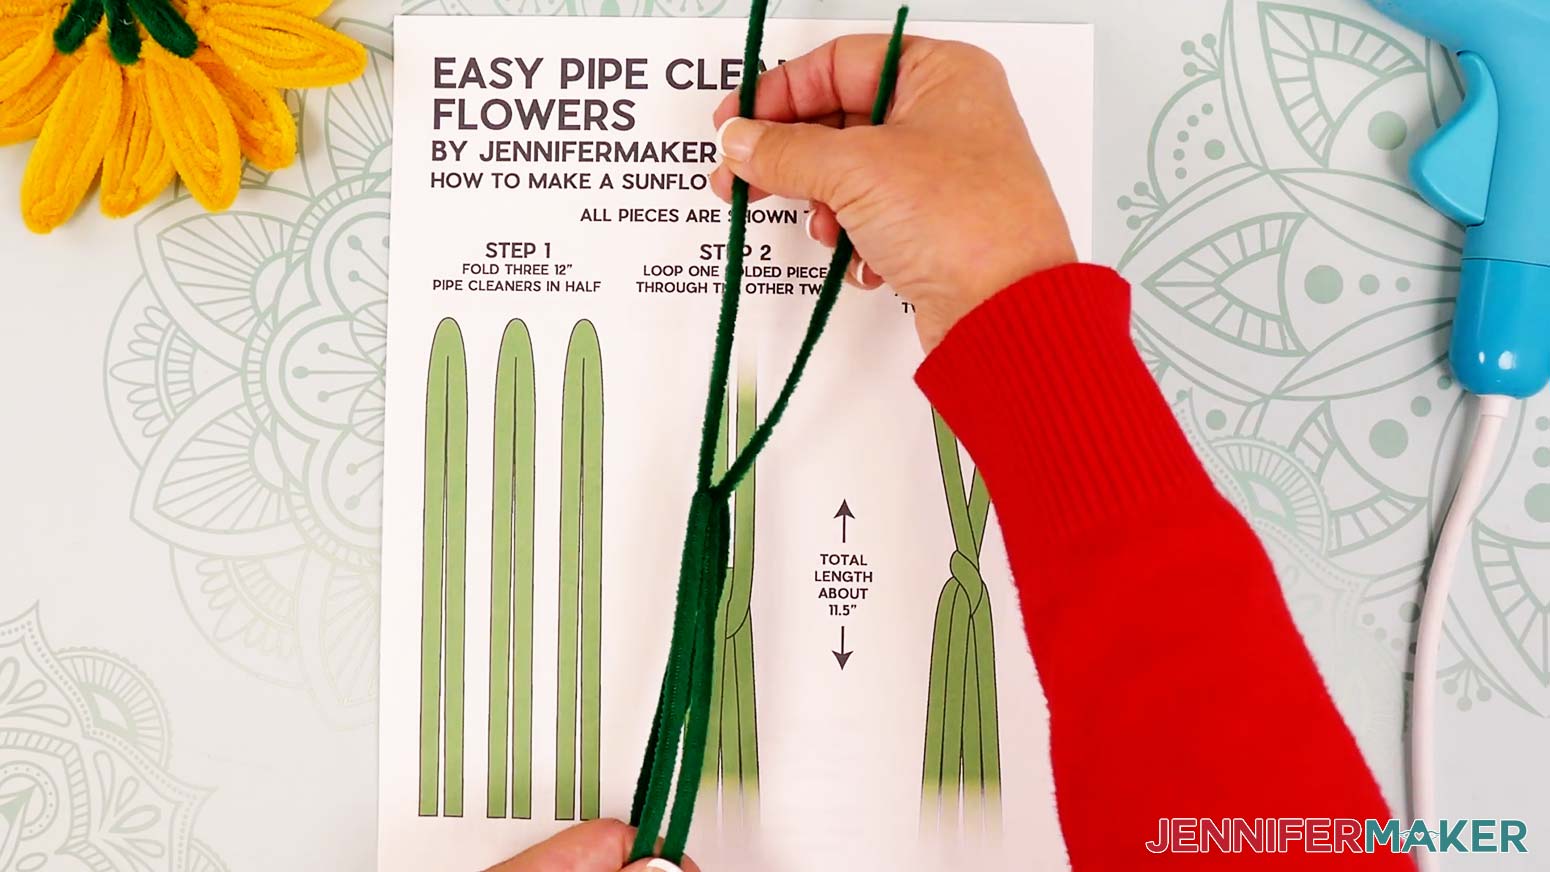
- Fold a 12” green pipe cleaner about 1.5” down from one end.
NOTE: If you’re making a smaller sunflower using the reference guide printed at 75% size, you will fold the pipe cleaner where noted on the printed diagram (it will be less than 1.5”). - Leave about 1” of straight length from the first fold, then fold the pipe cleaner back on itself in the opposite direction to make an accordion shape.
NOTE: Use the reference guide for the correct place to fold if making a smaller sunflower. - Holding the short folded end pointing down, continue the 1” accordion folds until you have four "leaves" with their points going up.
NOTE: The beginning of the accordion should be a bit longer than the rest of it.
TIP: If your shape doesn’t match the one on the reference guide, try flipping it to see a different orientation. - Gently pinch the points at the tops and bottoms to make them sharper if needed.
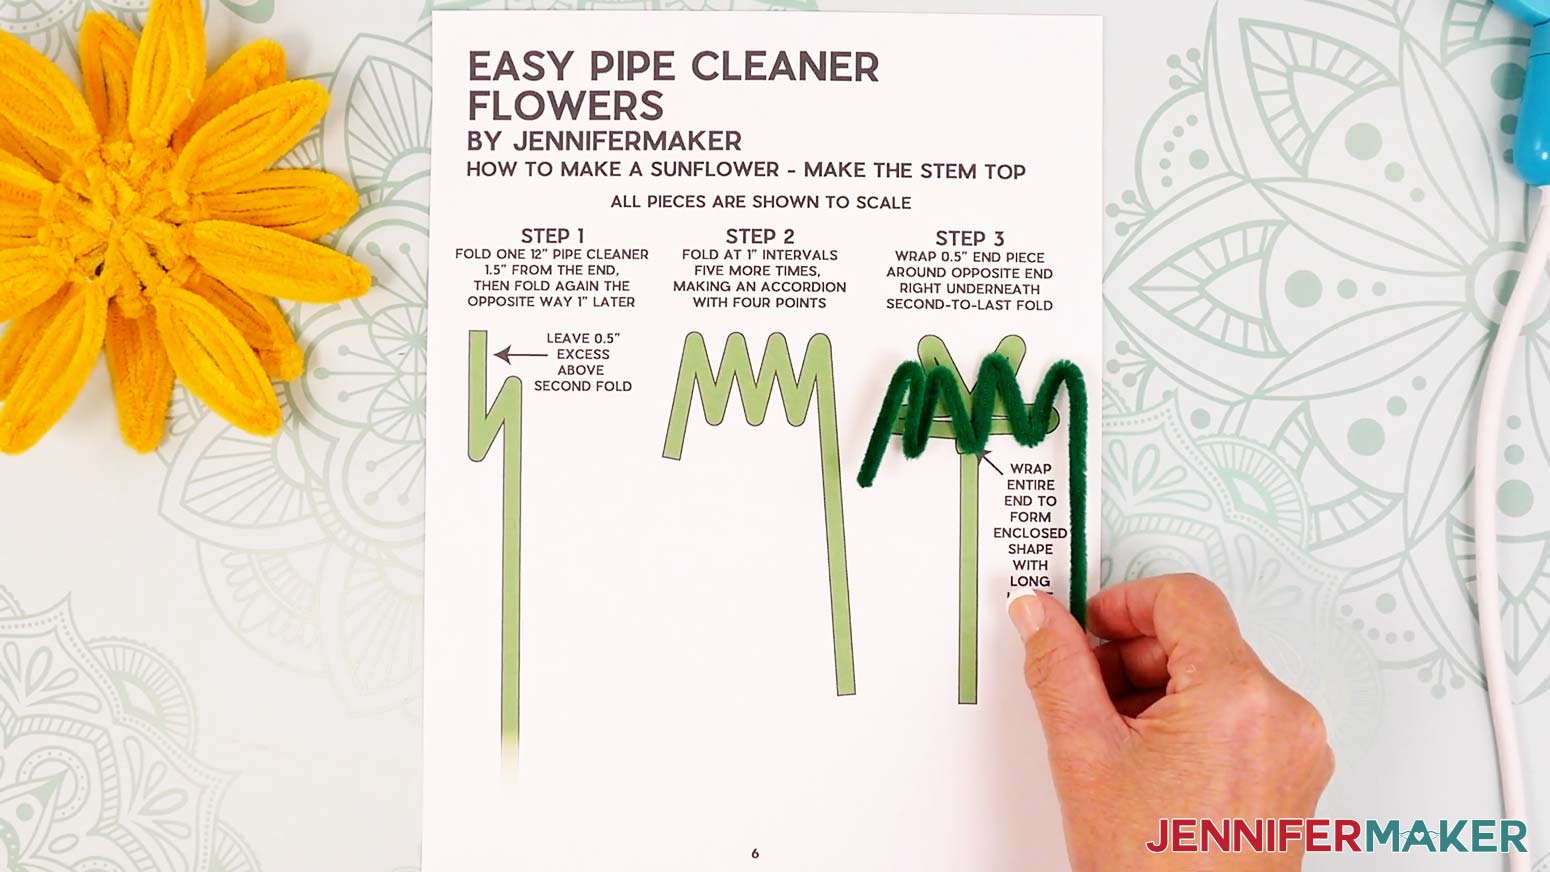
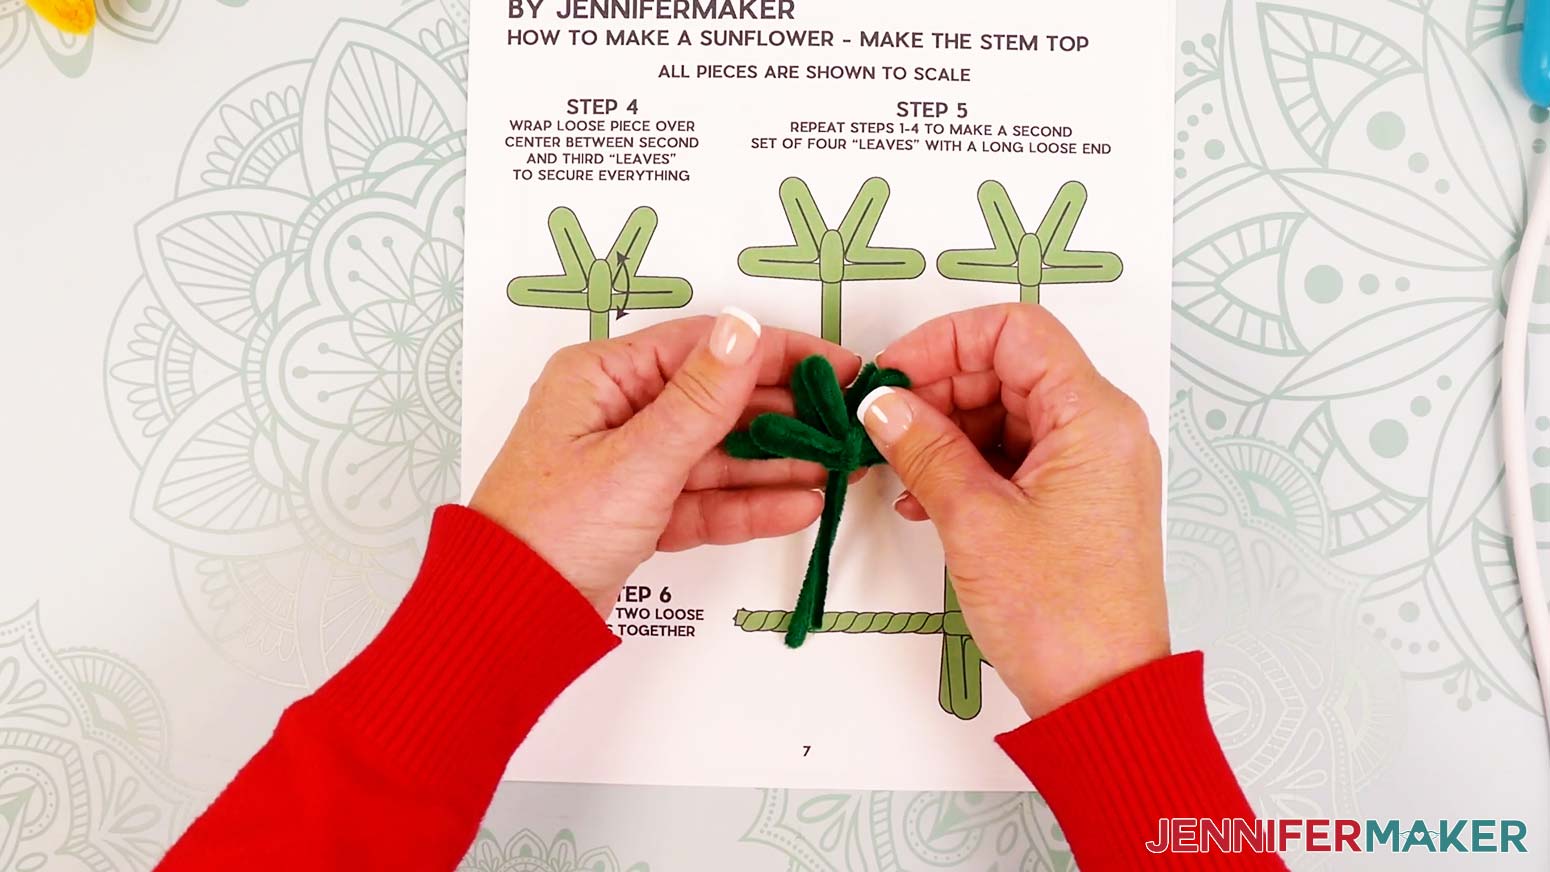
- Bring the short end perpendicular across the long pipe cleaner length, to create an enclosed shape with four pointed leaves that are all the same length.
- Without mishaping any of the points, wrap the short end around the long section to secure the stem’s top into an enclosed loop.
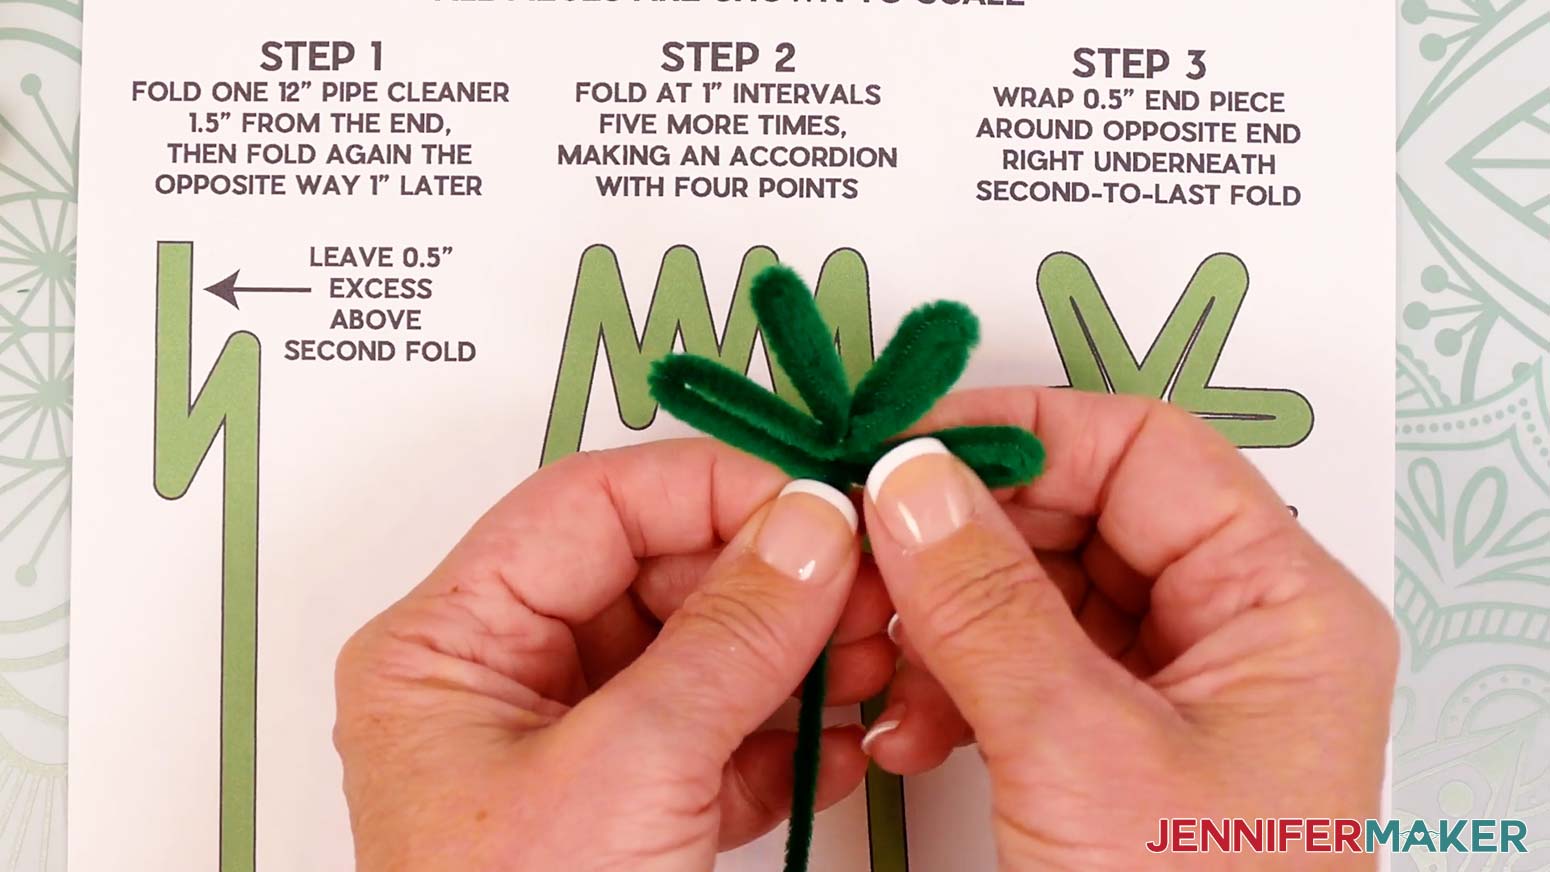
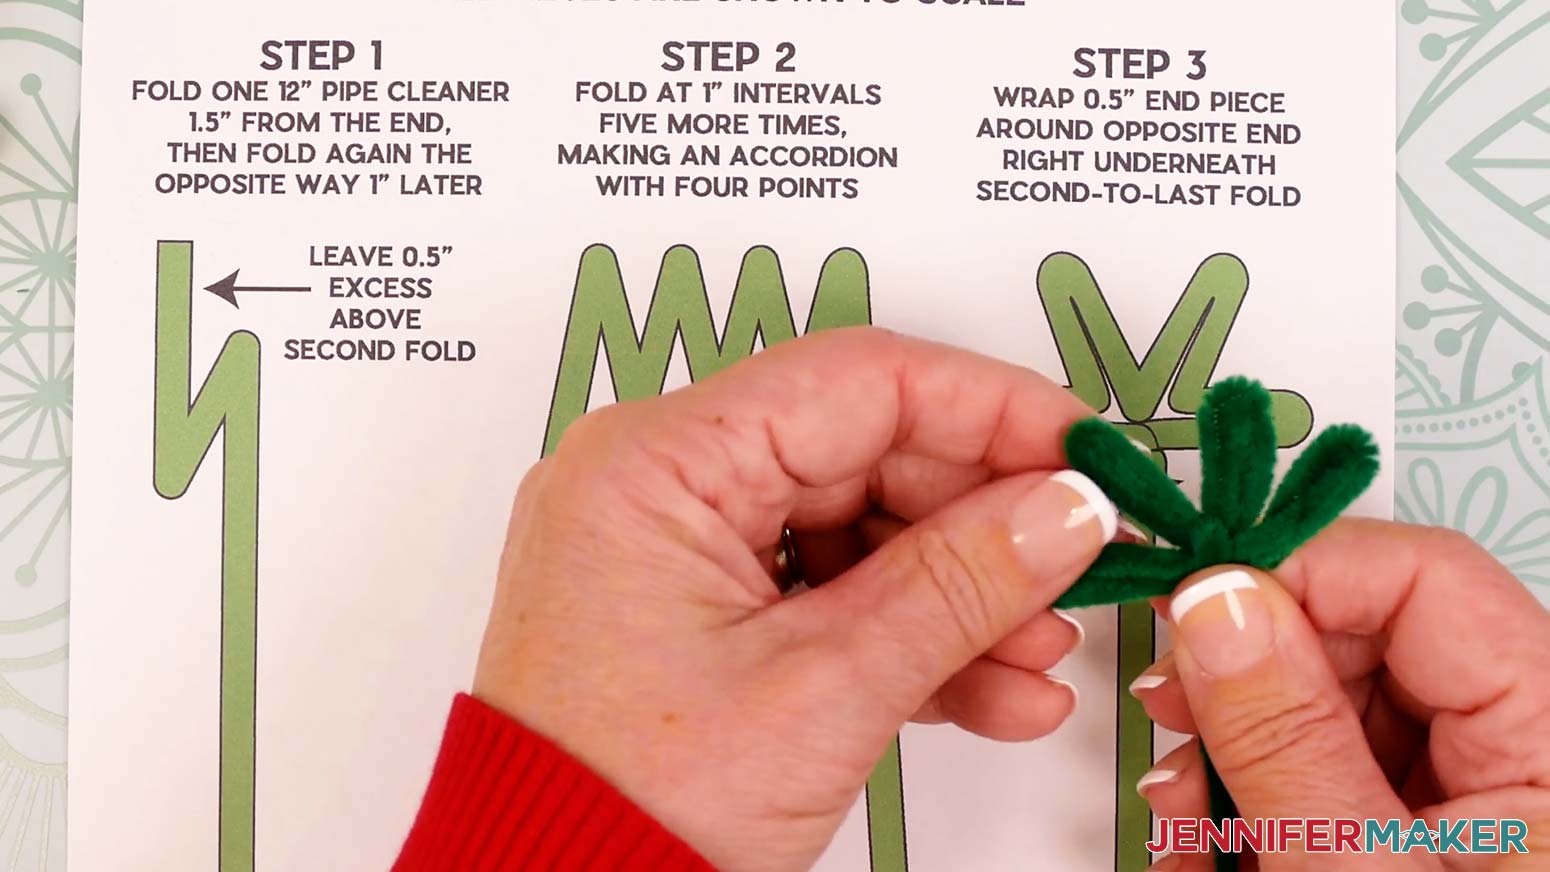
- Gently fan out the four short leaves evenly, so they look like the reference image on your printed guide.
- To secure the leaves, bring the pipe cleaner’s long end up and between the middle leaves, then make a tight fold to bring it straight back down.
- Gently shape the leaves to look more like leaves by slightly pulling apart their edges near the joints.
NOTE: If you’re making a smaller sunflower, trim off the excess length at the bottom of the stem so it matches your printed guide. - Repeat Steps 1-9 to make an identical second stem section.
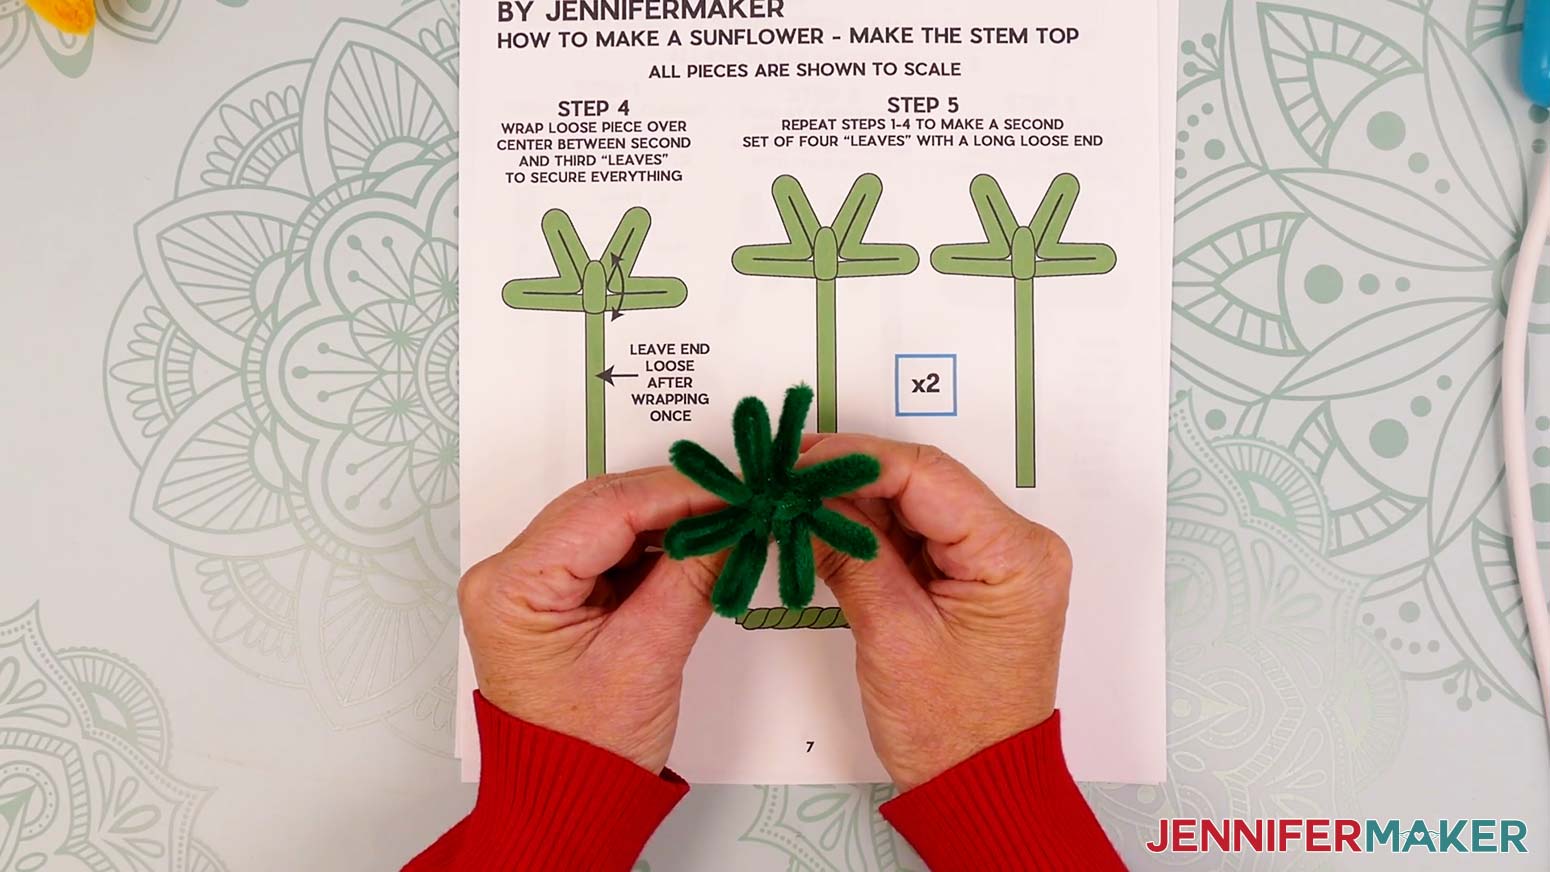
- Stack the stem sections one on top of the other so their joints are at the same spot.
- Hold the sections at the joint and tightly twist the loose stems together along their full lengths.
- Fold the two halves of the stem top down to make an even, mostly flat surface with eight leaves.
- Place your assembled sunflower center and petals face down and check how the stem will sit on its center. You can make adjustments to the shaping as needed.
- Make sure your hot glue gun is on and put your finger protectors back on.
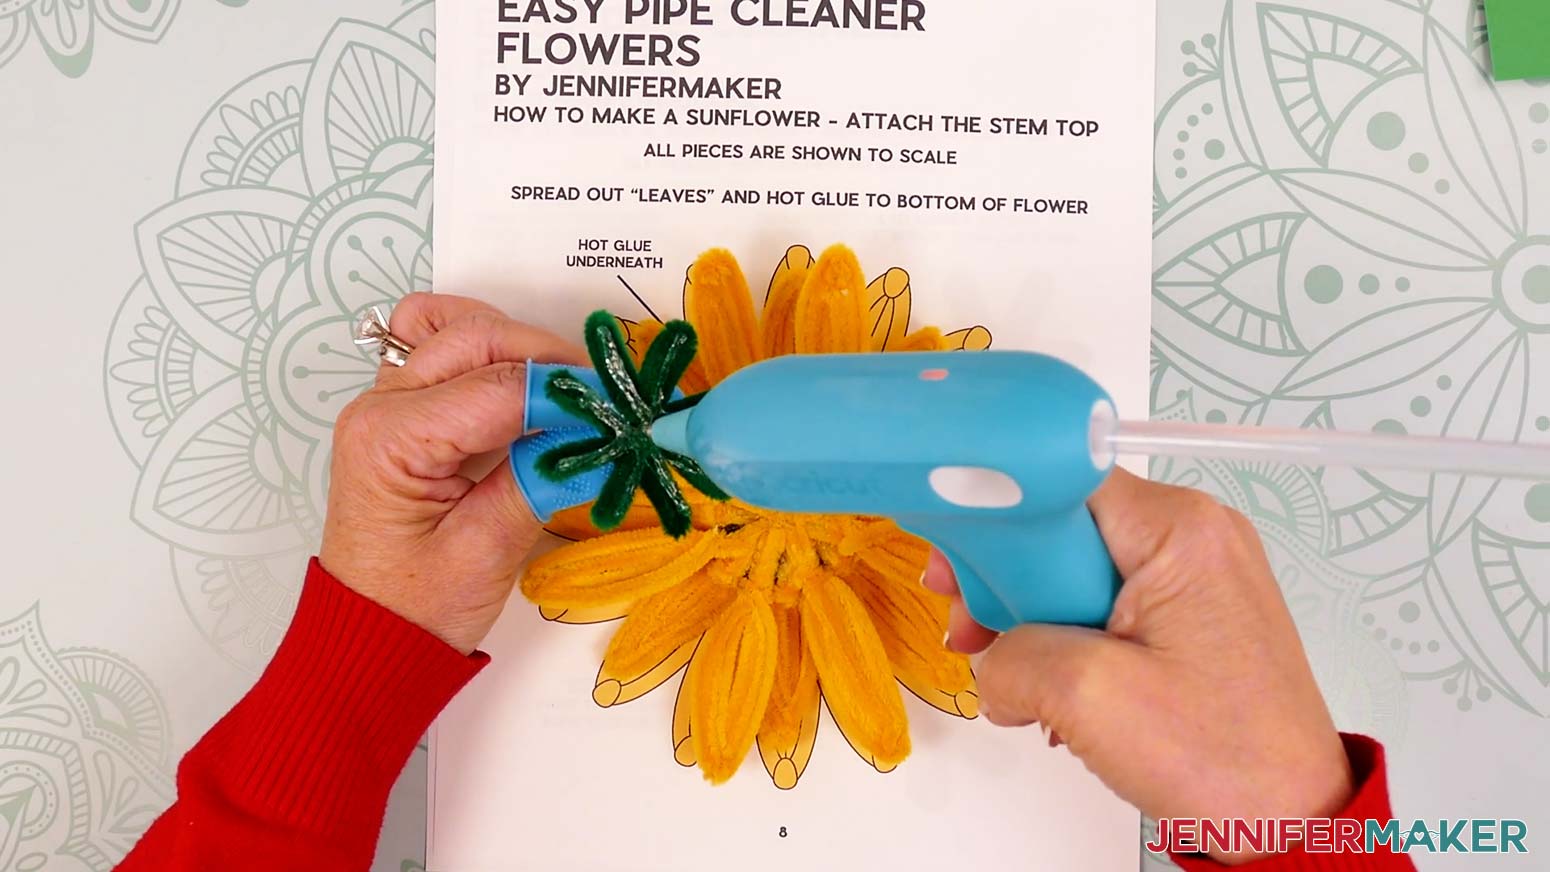
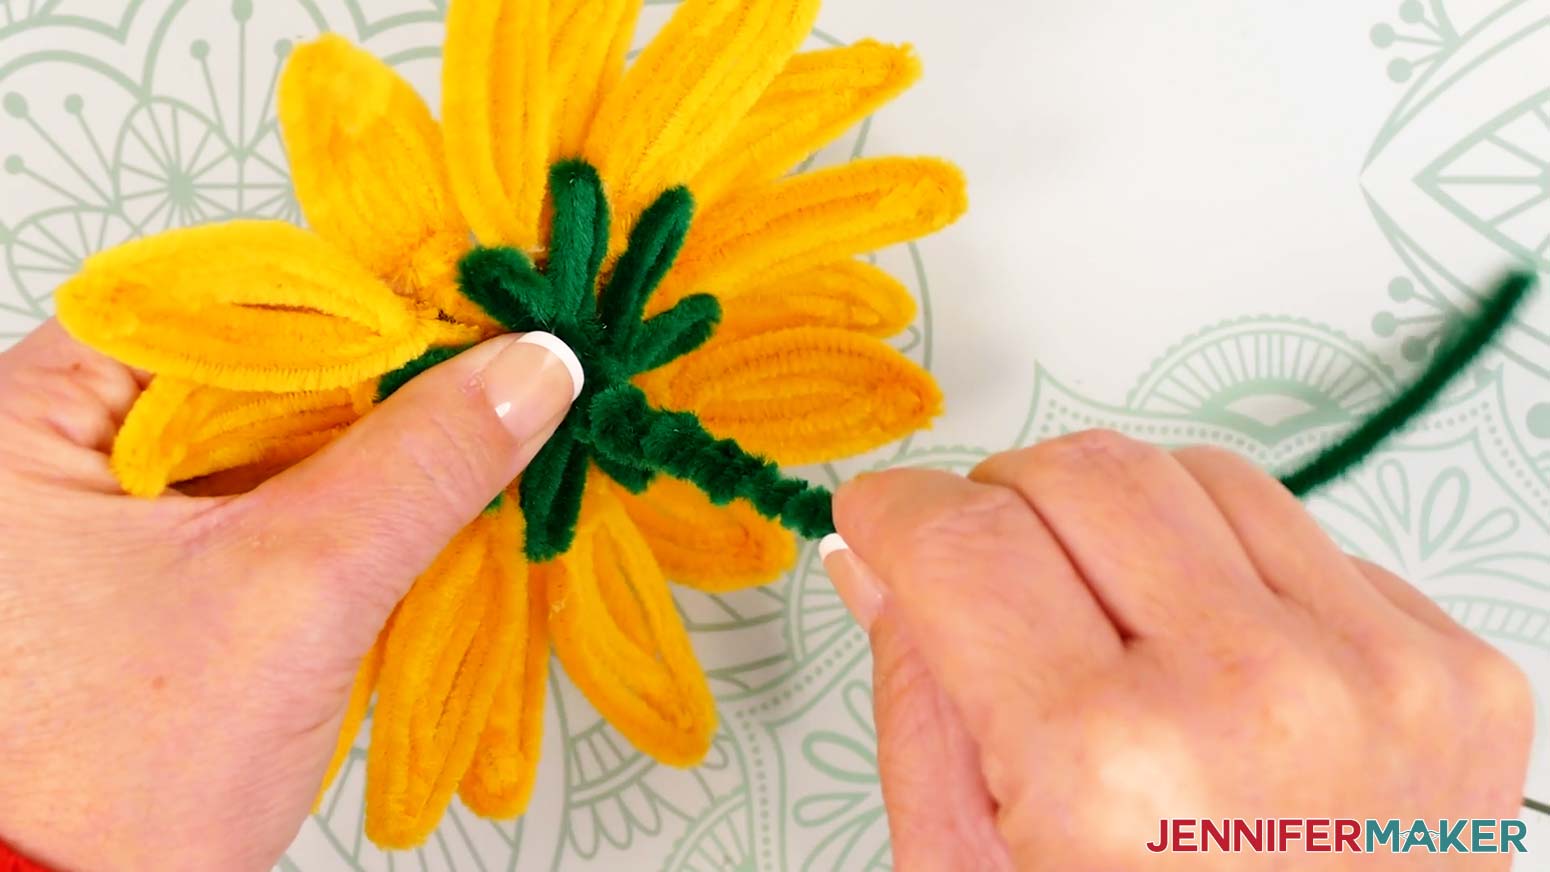
- Hold the stem face up by the twisted end and add hot glue to the tops of the leaves and the joint in the center.
- Flip the stem over and center it on the sunflower’s back.
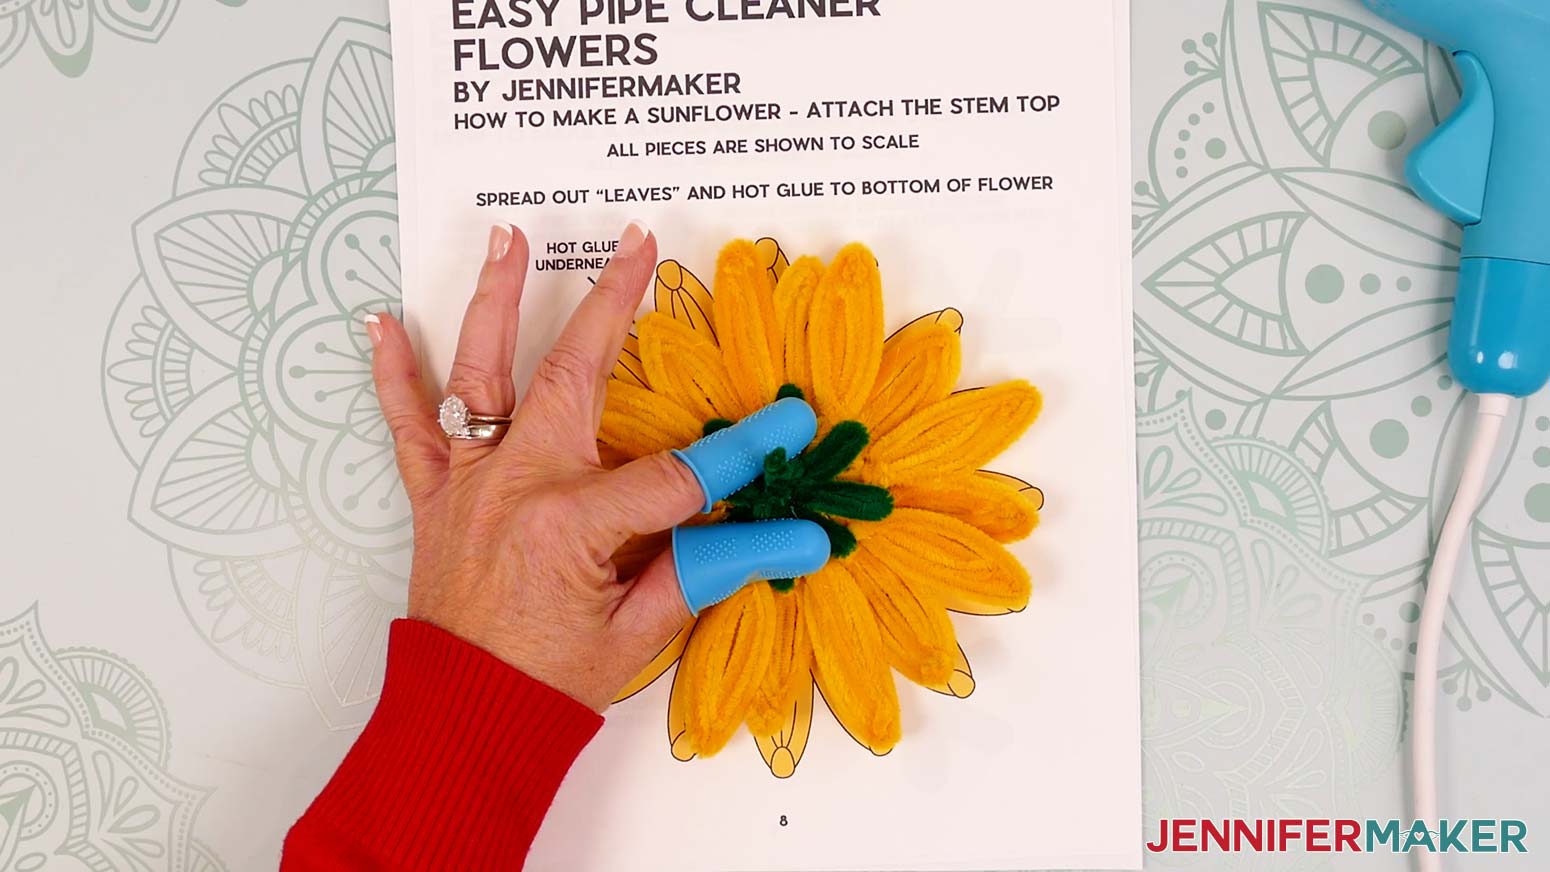
- Press the glued leaves in place and hold them down until the glue dries completely.
NOTE: Pressing on the sunflower may squish the petals, but we can fluff them up once we’re done.


LARGE SUNFLOWER LEAF
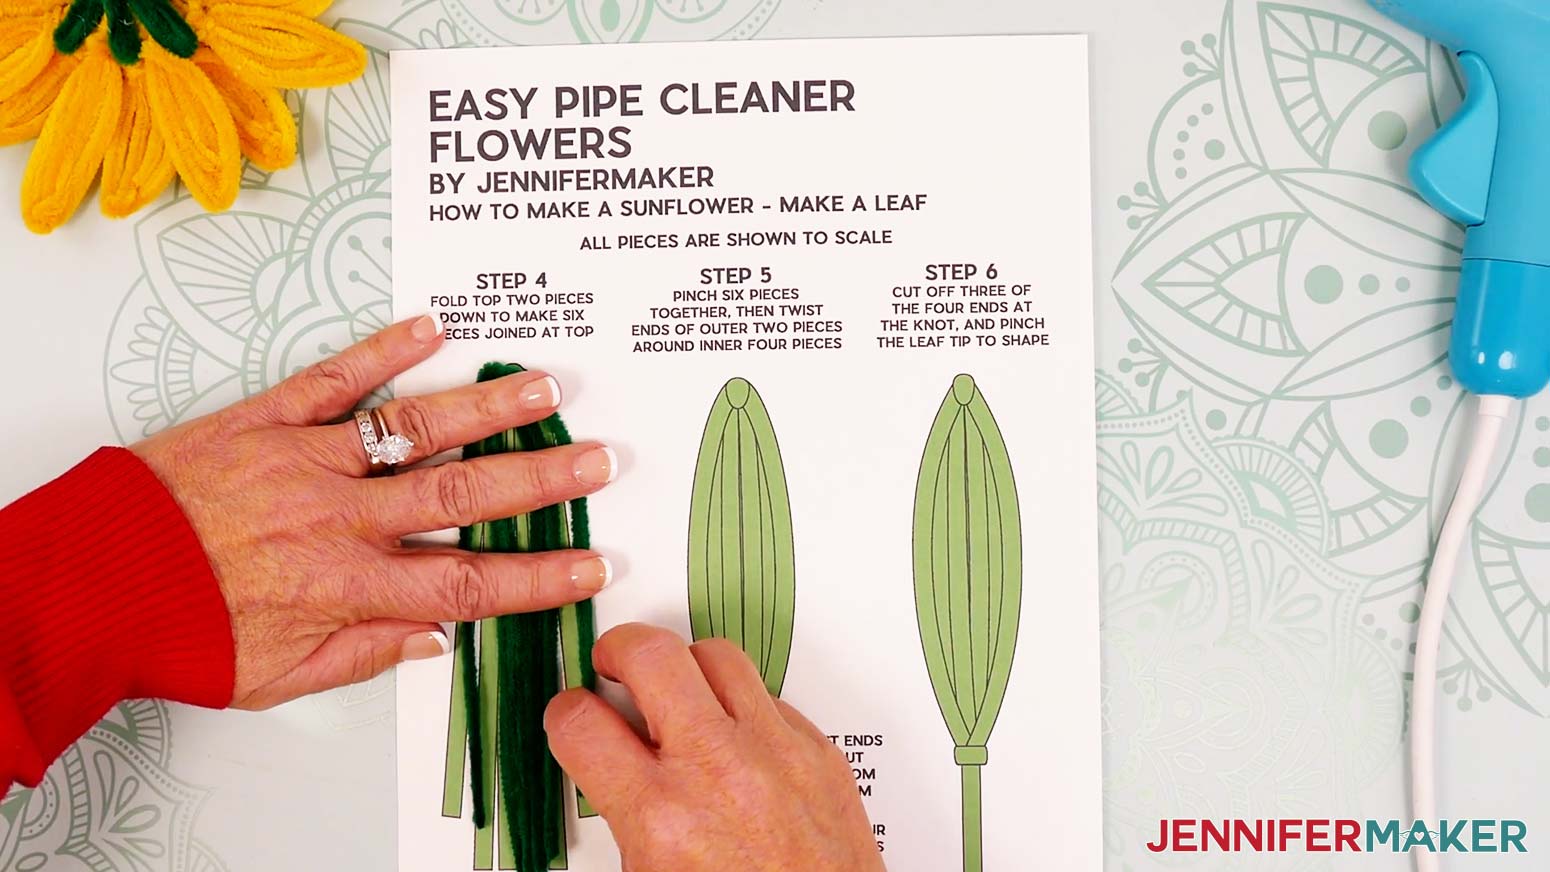
- Match the ends on a 12” green pipe cleaner to find the middle and fold it in half.
NOTE: If you’re making a smaller sunflower using the reference guide printed at 75% size, fold a single pipe cleaner so its legs match the lengths shown on your reference guide, then cut off any excess. - Repeat to fold two more green pipe cleaners in half so they each have a bend and two legs.
- Insert the leg of one piece into the bend of the other two so they are linked.
NOTE: Hold the pieces with the single section as the top of the “X” as shown in the reference guide. - Close to the joint, twist the top section once to secure the pieces together.
- Hold the bottom double sections still, then fold the upper legs down to either side of them.
NOTE: The outer legs should be slightly shorter than the inner ones, and the pieces should be flat with the bend at the top. - Keep the legs flat while smoothing them straight down so they stay aligned in six straight columns.
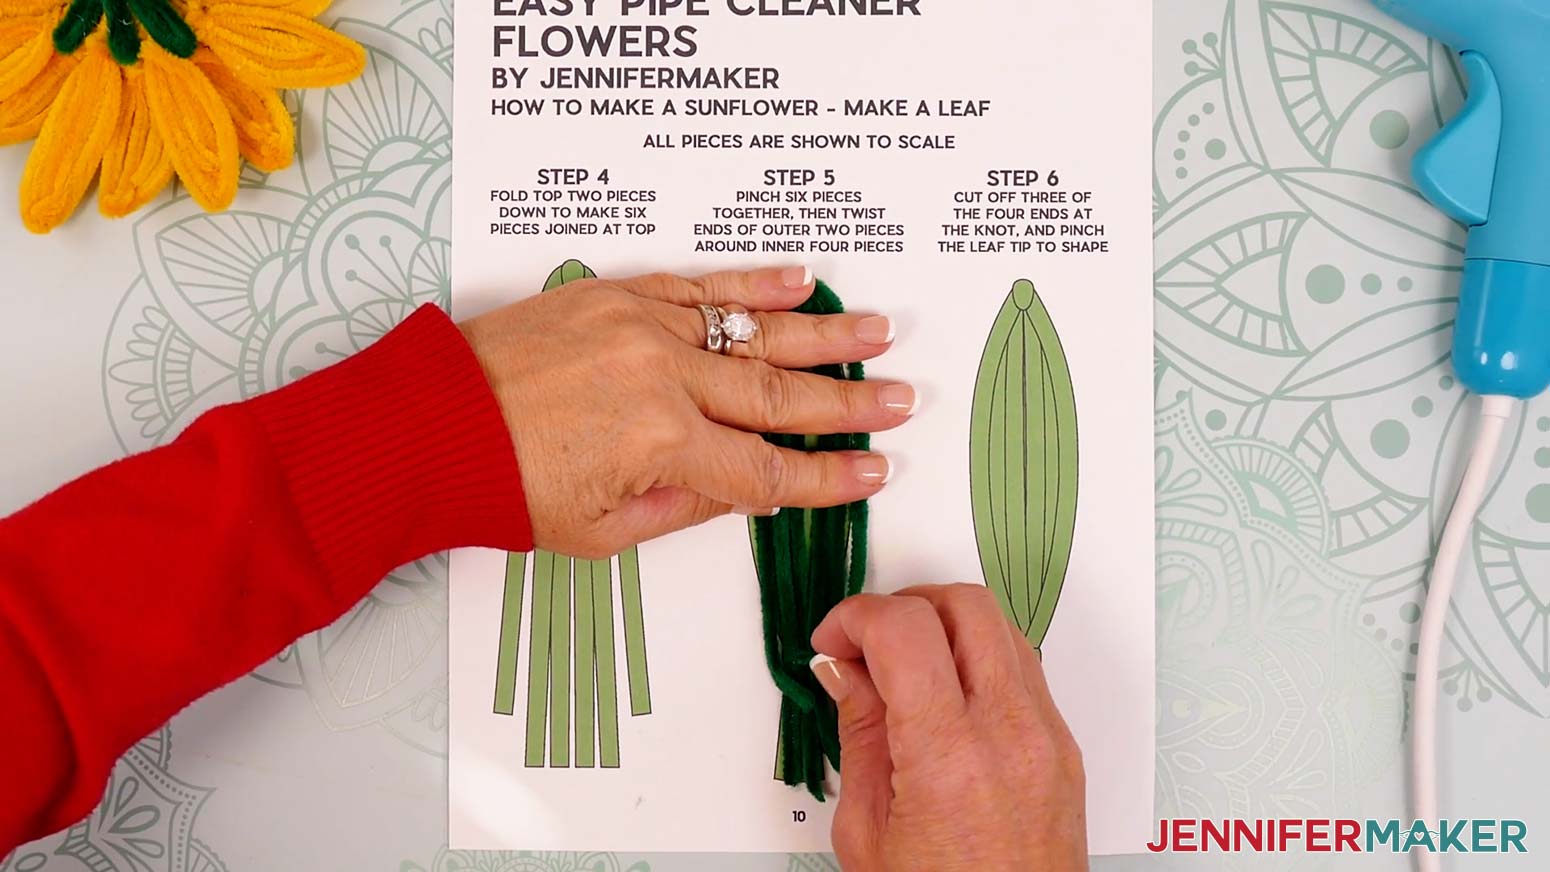
- Fold the outer legs at 90° angles so they cross the middle legs about 1.5” from their ends.
NOTE: If you’re making a smaller sunflower, fold the legs at the area shown on your printed reference guide. - Use the shorter folded section to wrap just around the middle legs from the front to the back.
NOTE: If both sections are the same length, you can wrap either one first. - Use the remaining folded section to wrap around the middle legs at the same spot from the back to the front.
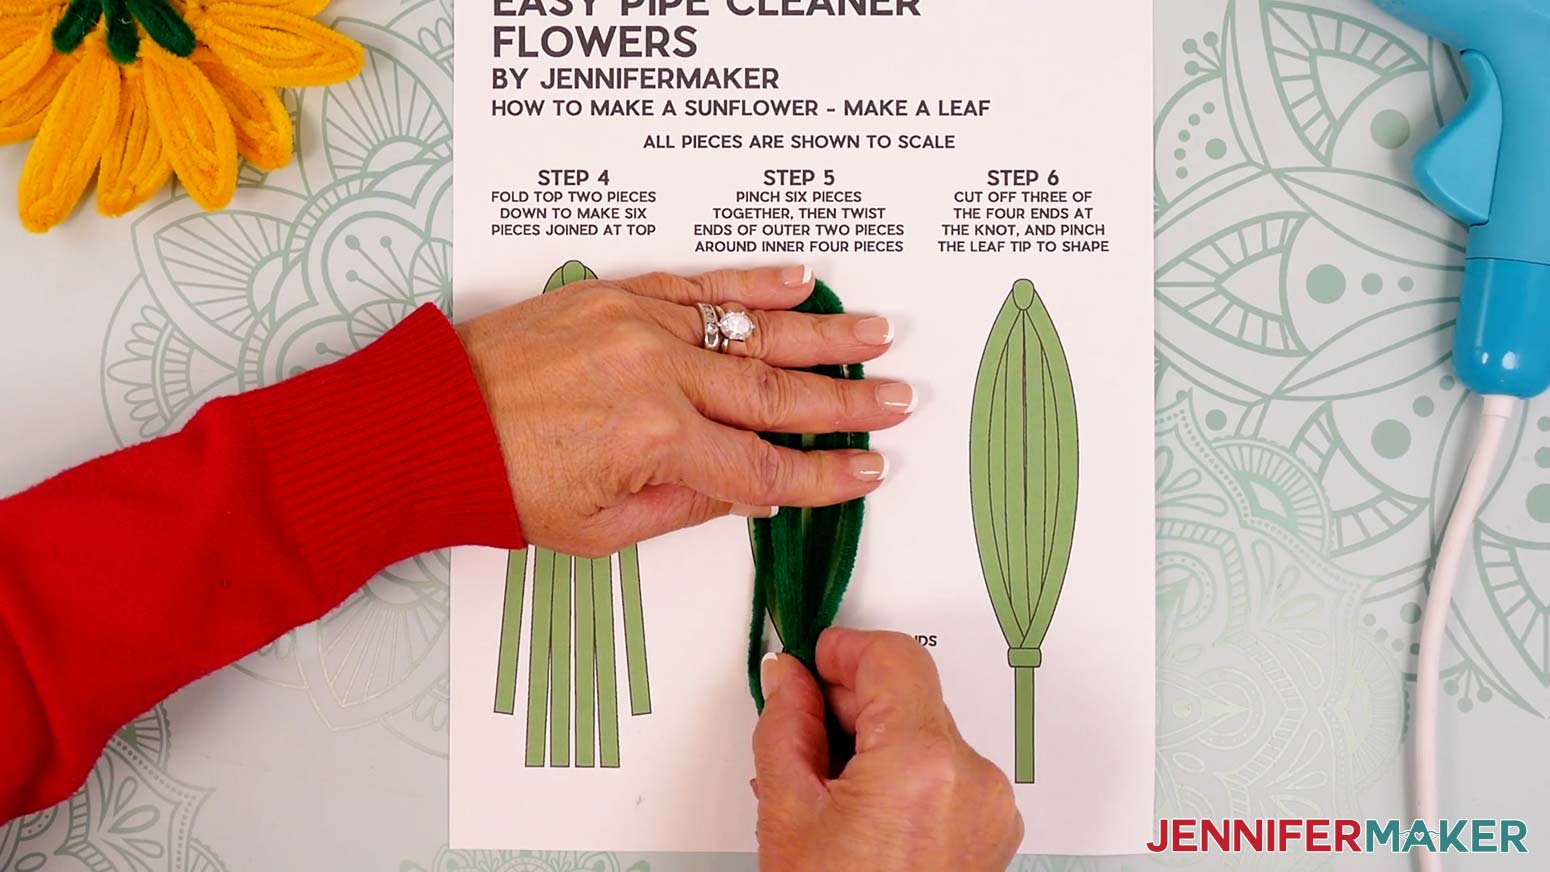
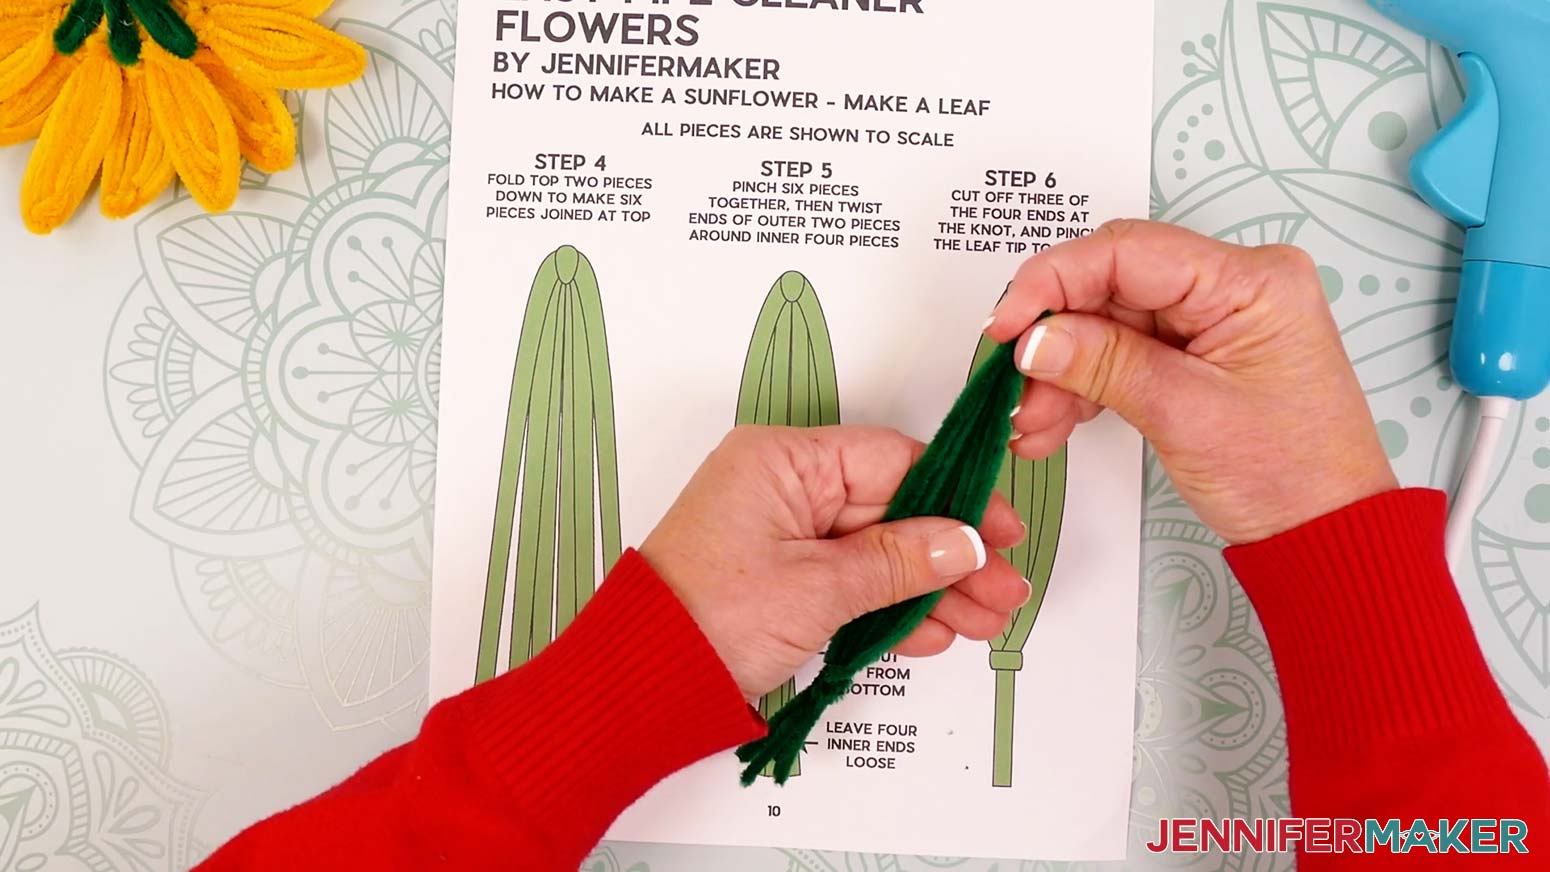
- Shape the leaf by pinching the top joint and gently pulling the outer edges apart. Fluff the fibers so you can’t see through the leaf.
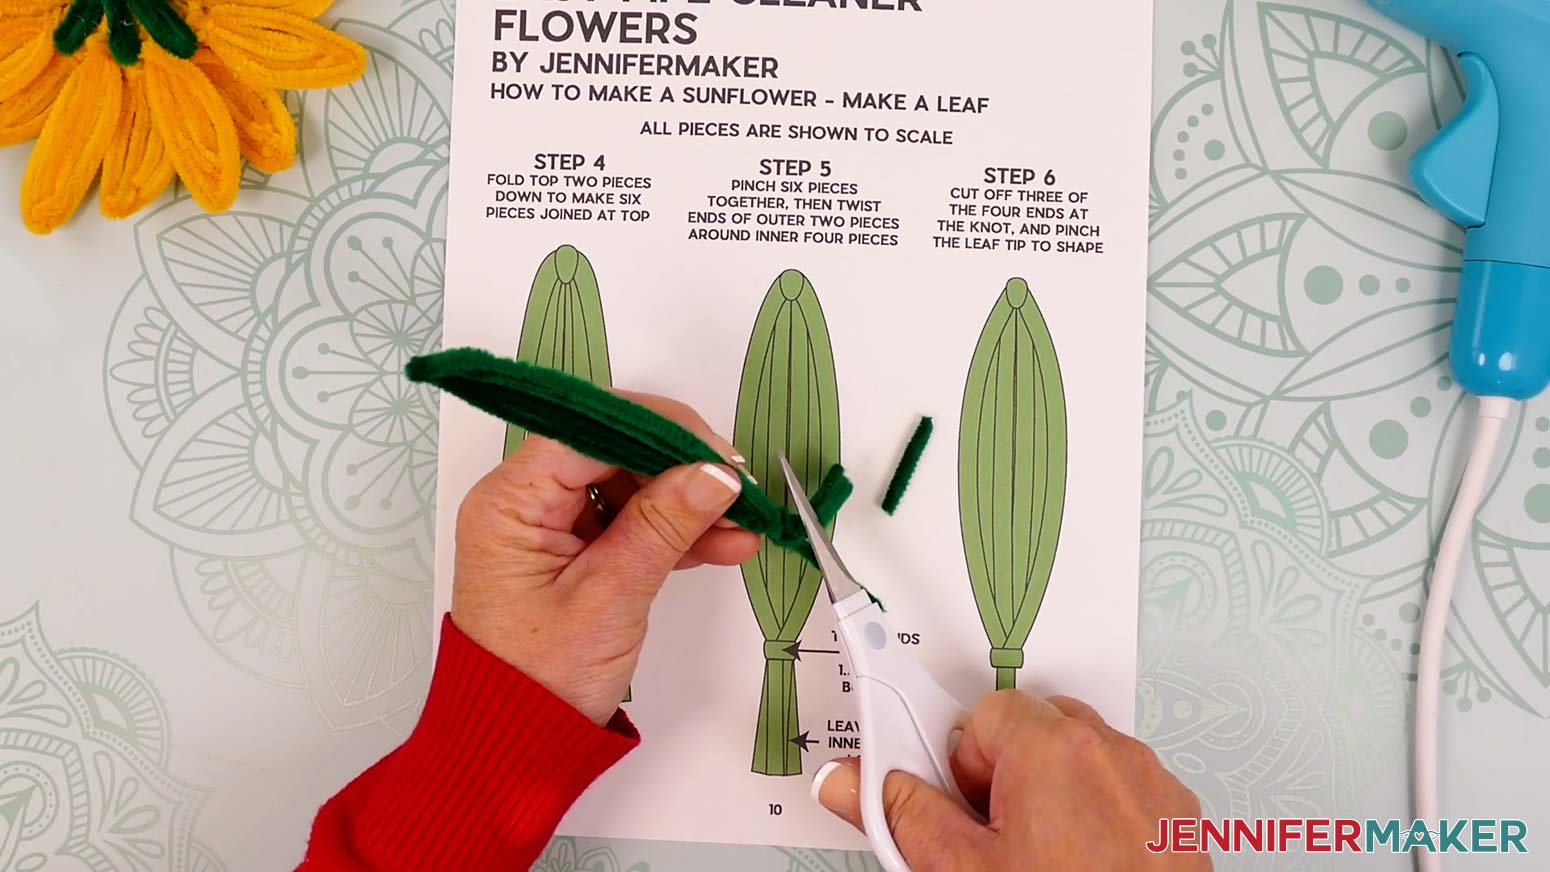
- Find the longest of the four central lengths at the bottom of the leaf and trim the other three right below the wraps.
- If you notice gaps between the fibers and want to fluff them up a bit, gently heat press each leaf on a heat-safe pressing pad.
NOTE: On a Cricut EasyPress, set the temperature to 300°F (149°C) and press for 30 seconds with medium pressure.
NOTE: With a home iron, set it to “Polyester” or "Medium Heat" and press for 30 seconds with medium pressure.

STEP 4: ASSEMBLE THE FLOWER
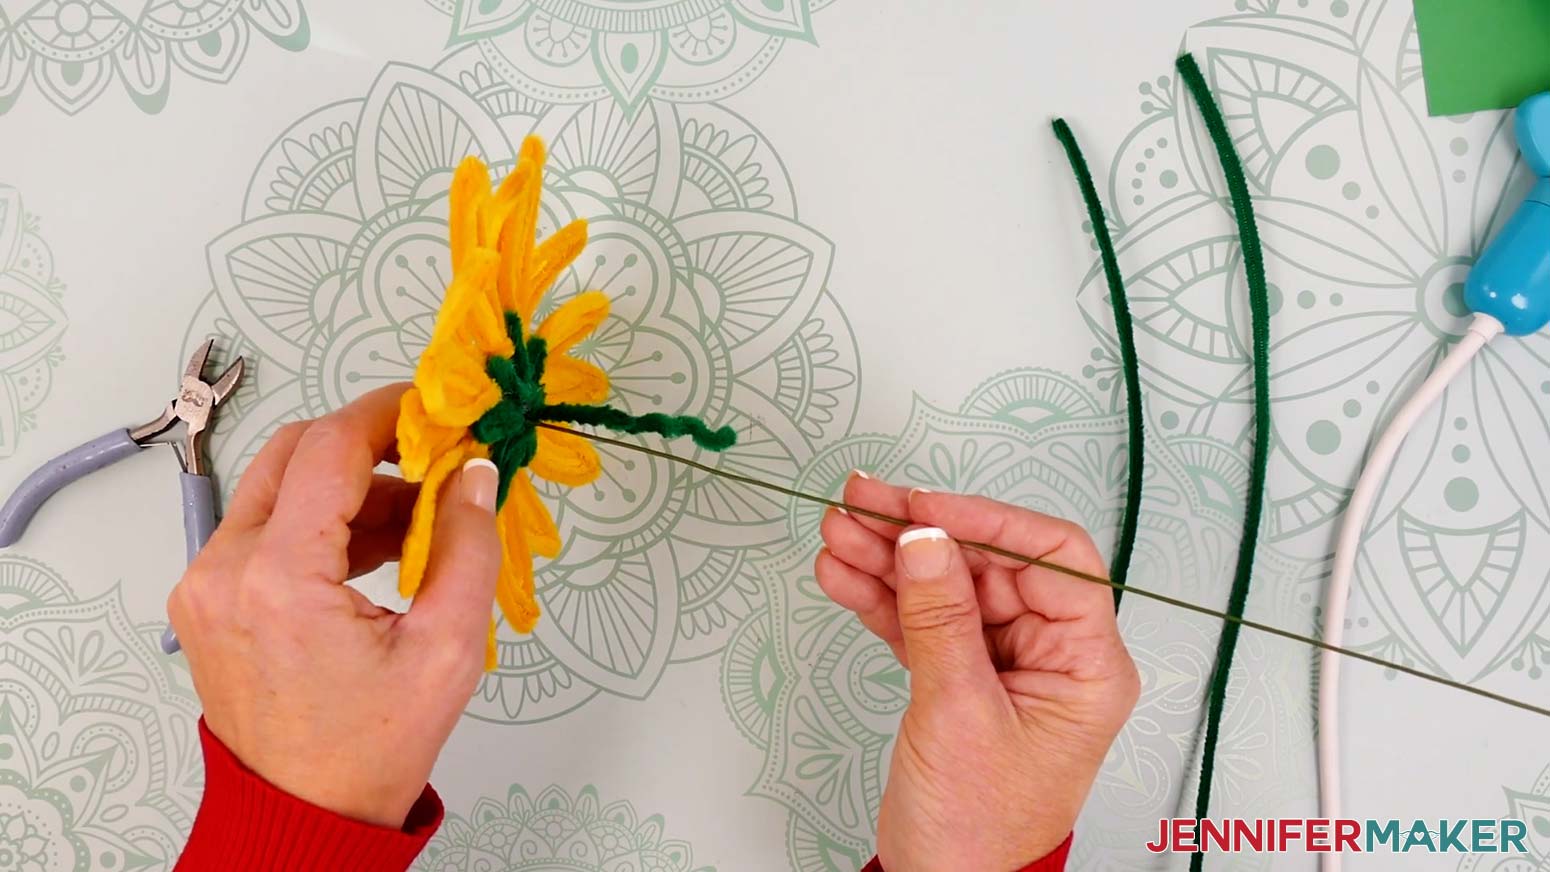
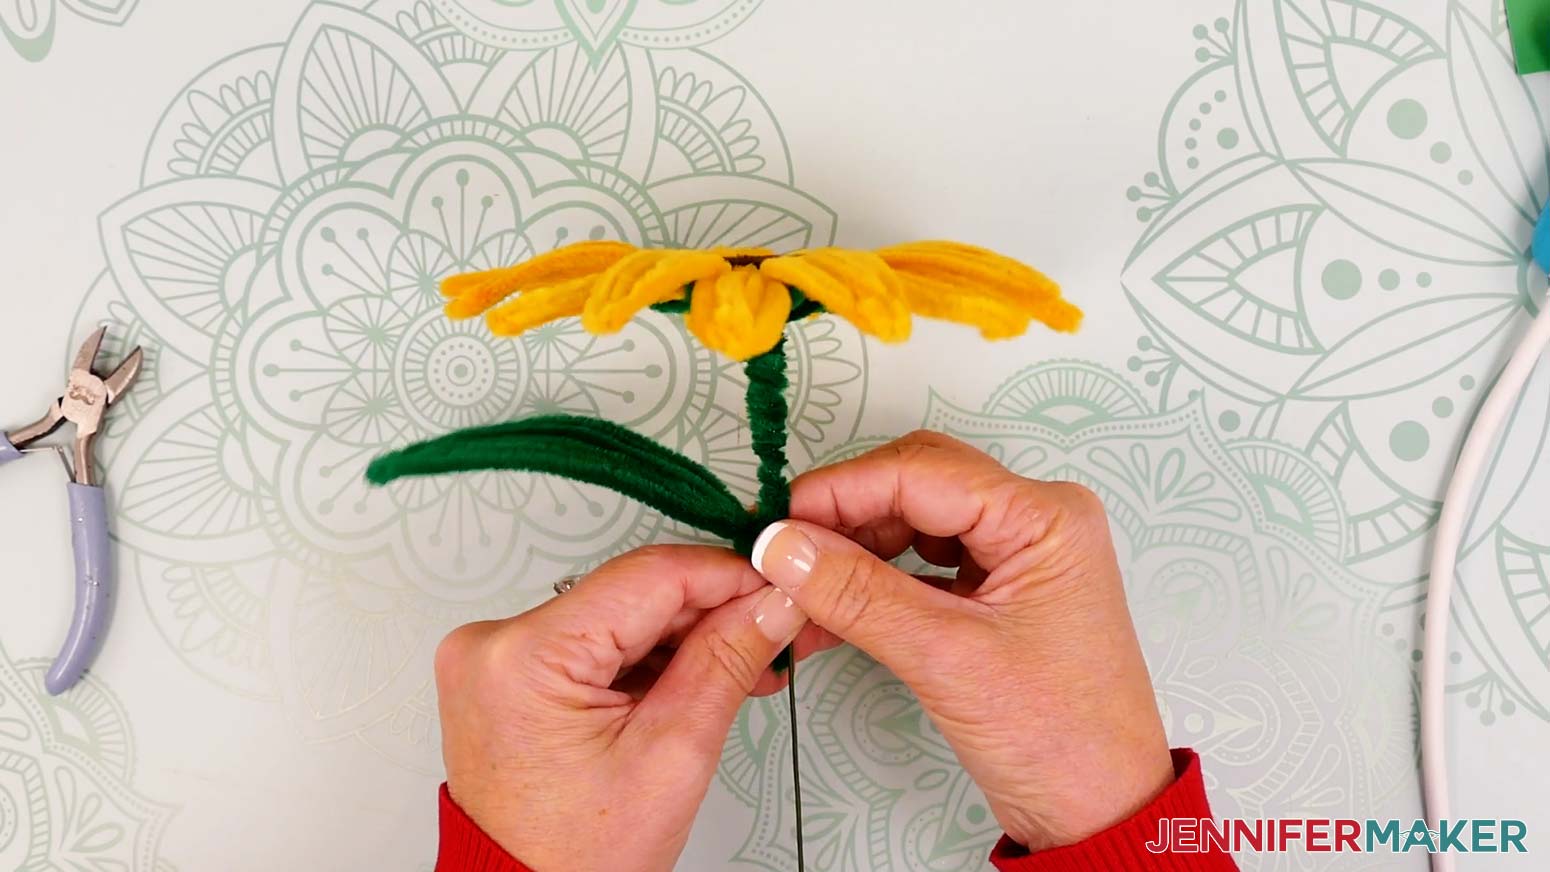
- Press one end of the floral wire into the bottom of the flower right next to the twisted pipe cleaners.
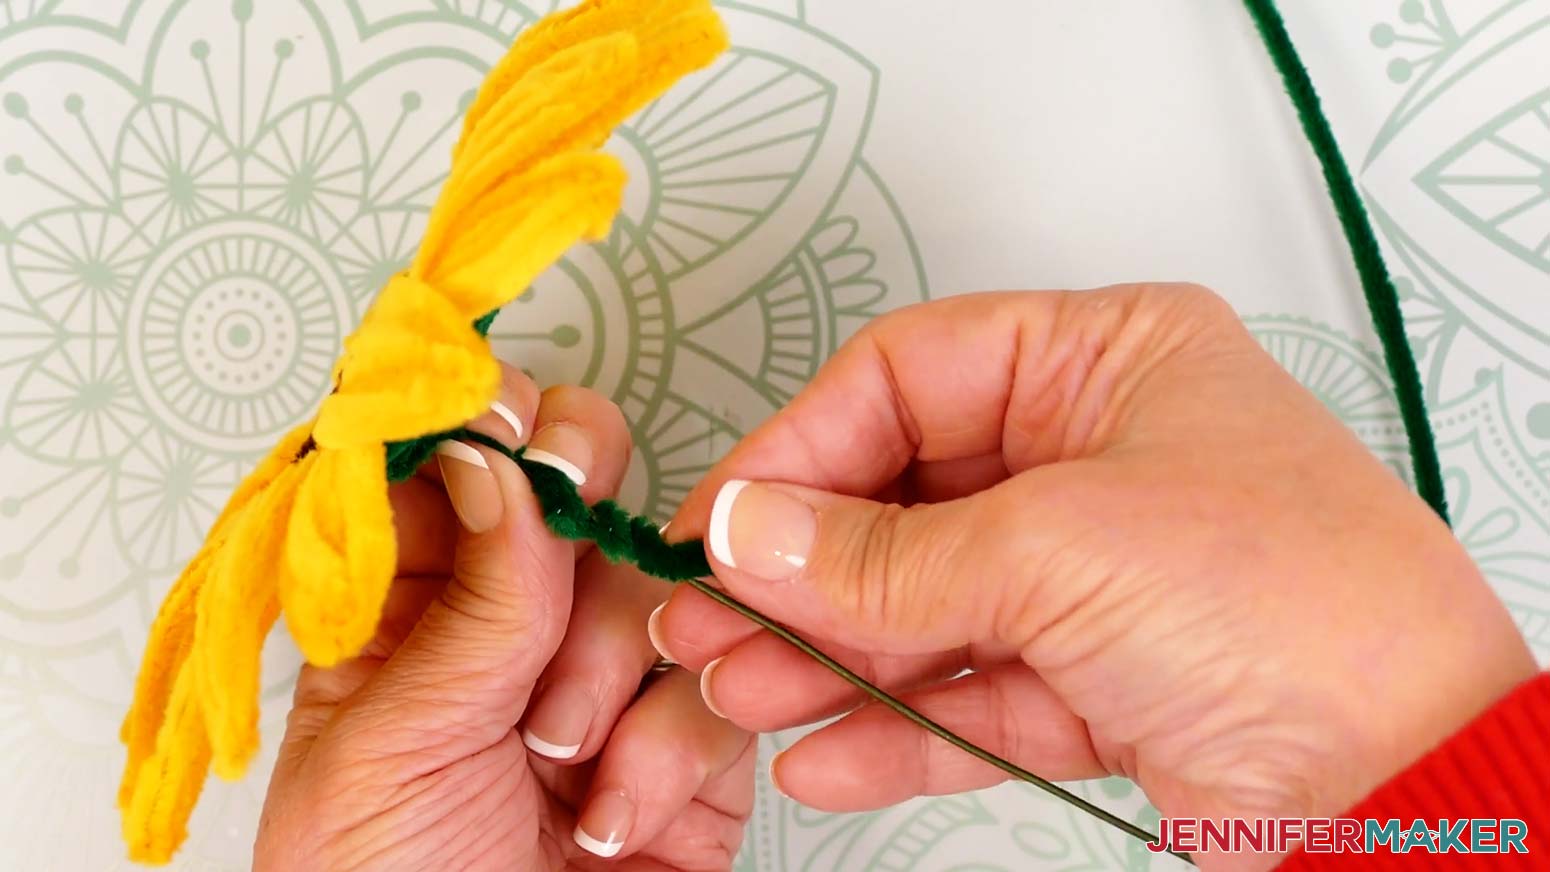
NOTE: You should feel the wire hit the flower center, but don’t push it all the way through, or it could be visible on the top of your flower. - Hold the wire in place and wrap the twisted stem pipe cleaners around it.
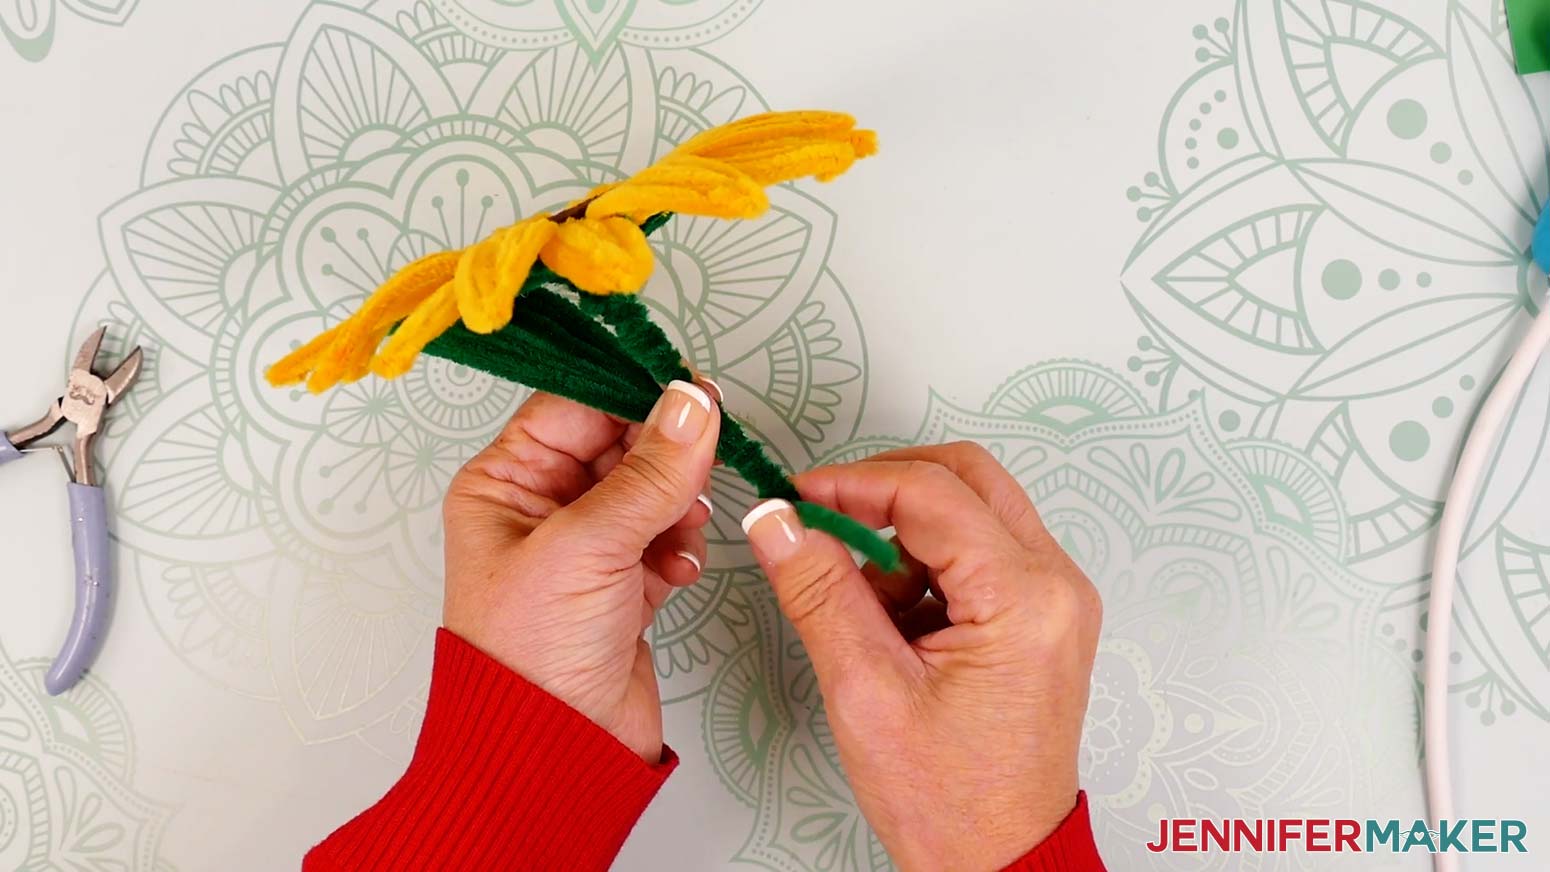
NOTE: The wrap should be tight, but you can have small spaces between the twists for now. - Wrap a full-length green pipe cleaner around the stem so it starts where the floral wire is visible and continues down the existing twisted section to completely cover the wire.
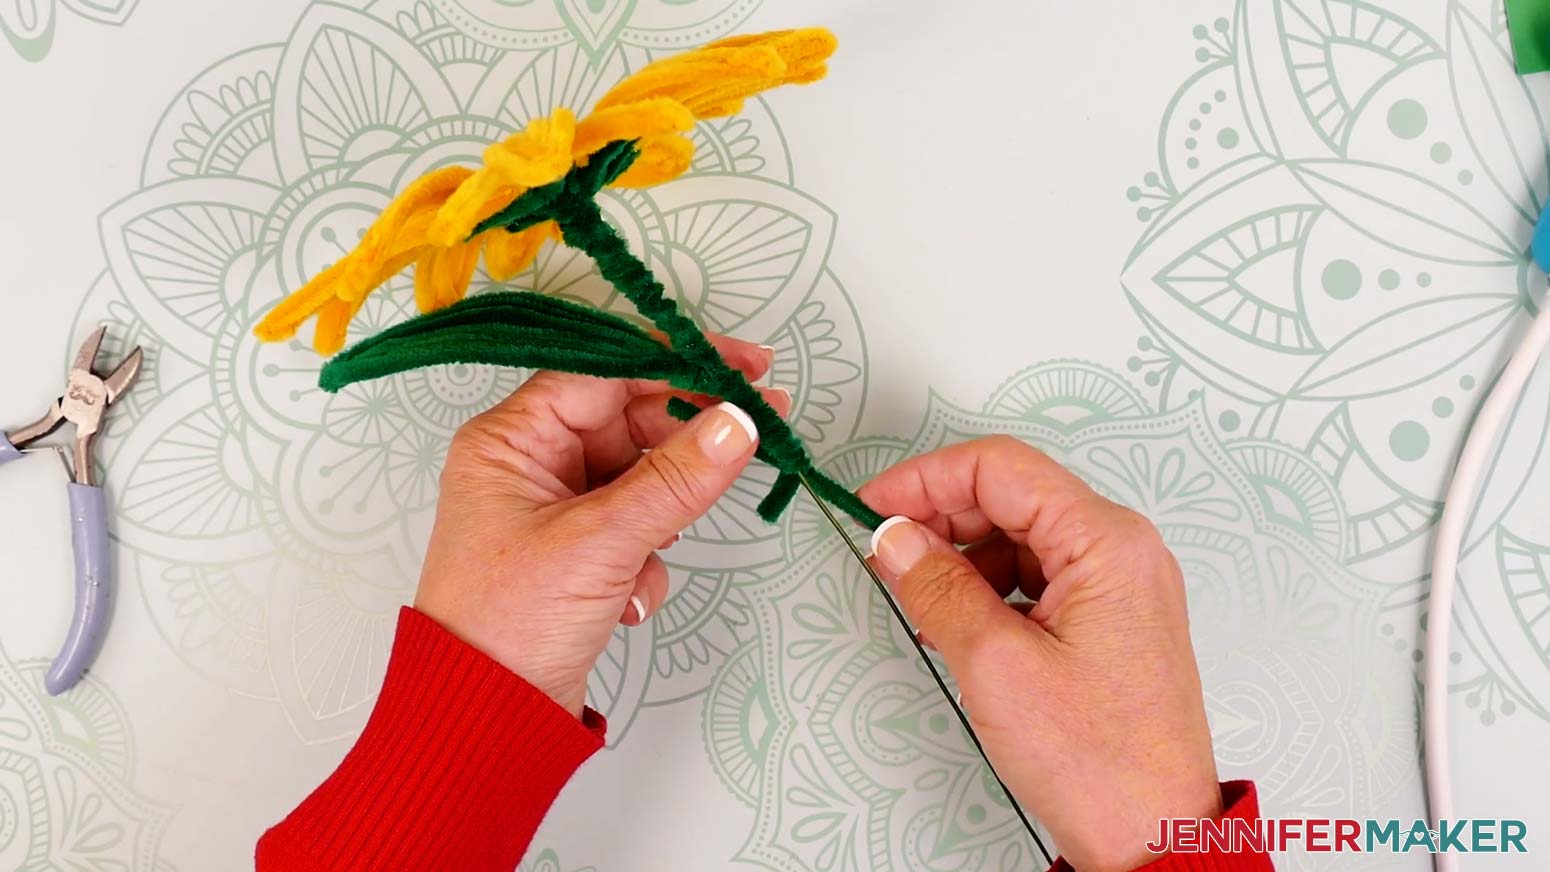
TIP: If you have trouble getting your wraps close together, gently push the coil up along the stem to compress it. - Continue wrapping the stem until you reach the spot where you want to add a leaf.
NOTE: I wrapped about 4” before adding a leaf to the large sunflower. For the smaller sunflower, I added the leaf at about 3”. - With the leaf’s prettier side facing up, align its joint with the lowest covered stem section so the leaf’s short, loose length is along the bare wire.
- Holding the leaf in place, continue wrapping the long pipe cleaner around the leaf’s short section and the wire stem until you get close to the end of the pipe cleaner.
- When you have a few inches of the wrapping pipe cleaner left, you can add a new one by overlapping their ends by about 0.5” to make an “X.” Then wrap the short crossed pieces around the long ones in opposite directions.
- Continue wrapping the stem until you either want to add another leaf (follow Steps 4-6) or the stem is the length you want.
NOTE: I made my stem 10” long for the large flower and 8” long for the small flower. - When the stem is the right length, trim the excess pipe cleaner with your scissors.
- Hold the stem and excess wire in your non-dominant hand, then use wire cutters to trim off the excess wire.
TIP: Holding both pieces will keep the excess wire from flying away when it’s cut.
NOTE: The thick wire can damage scissors, so be sure to use the wire cutters.
STEP 5: SHOW IT OFF
You now have a beautiful pipe cleaner sunflower ready for display in a vase or other container!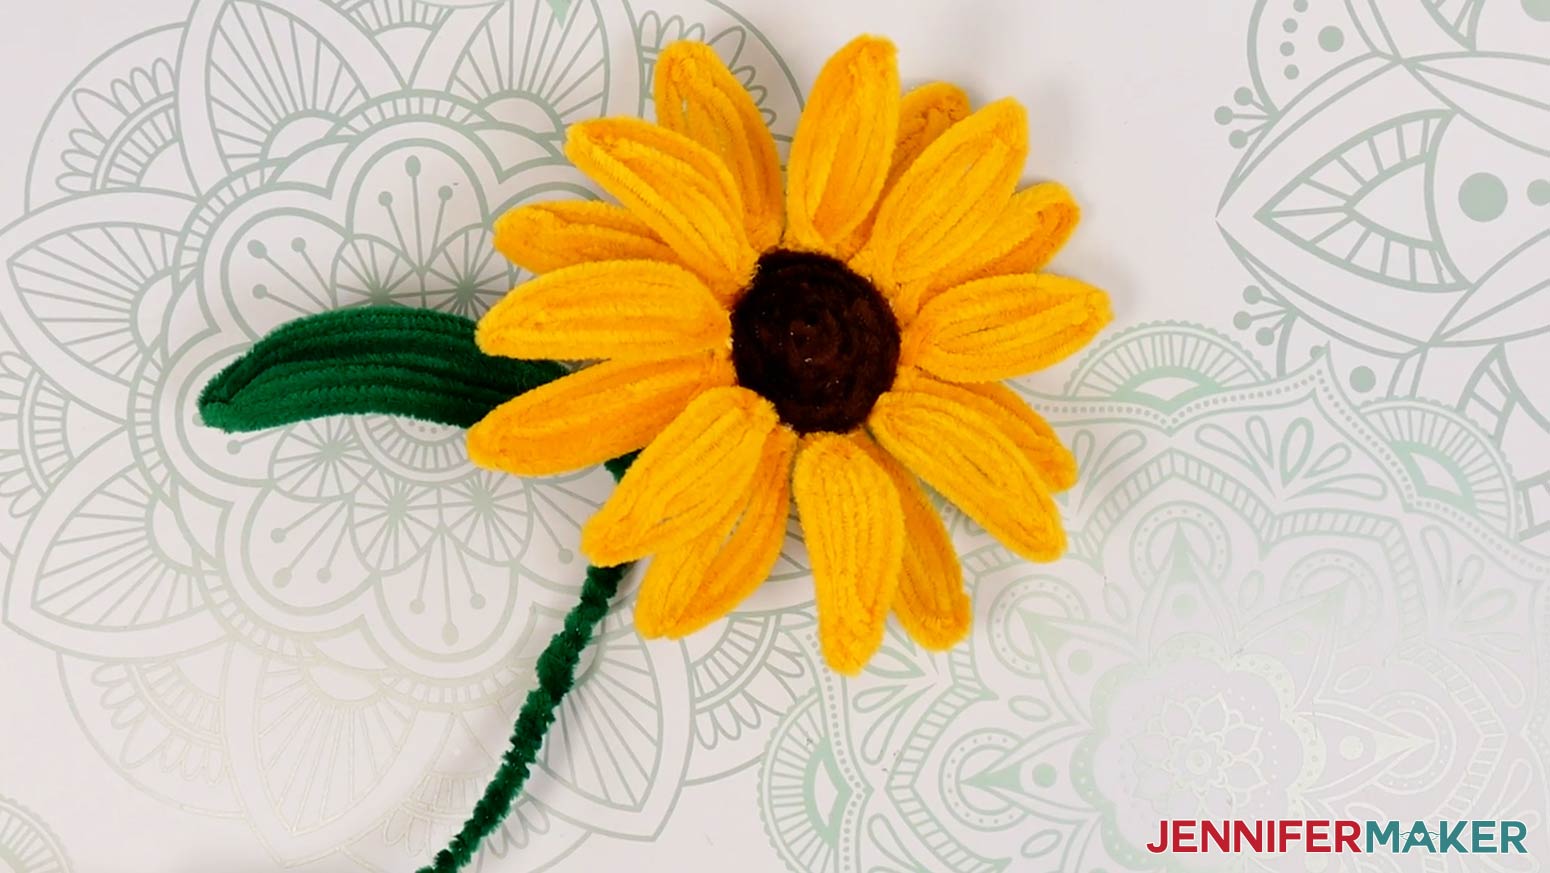
Notes
Finished Sizes:
Large Sunflower: Approximately 7"W x 13"H x 6"D
Small Sunflower: Approximately 5.5"W x 11"H x 5"D
Answers to Your Questions About Making Easy Pipe Cleaner Flowers
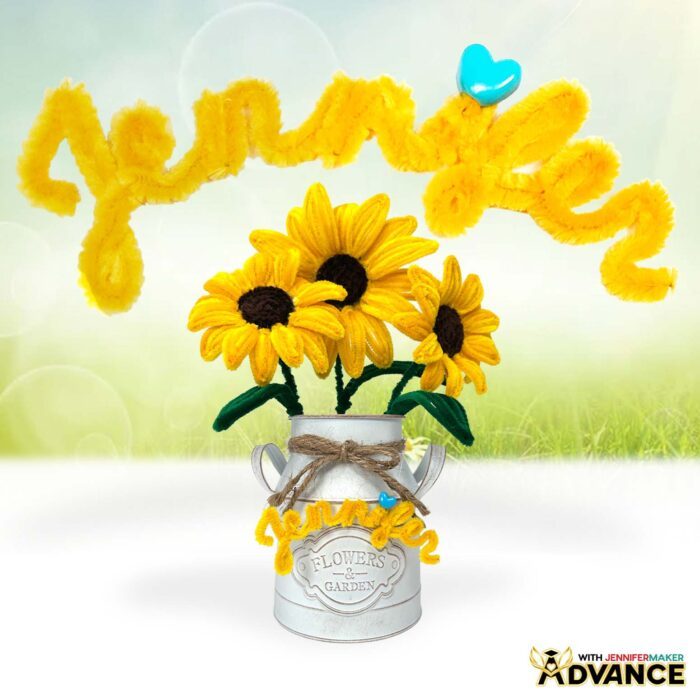
Q: How do I create a custom pipe cleaner name or word?
A: You can learn how to create your own custom pipe cleaner name or word like the design below in my ADVANCE program. Learn more about ADVANCE here!
Q: Can I make and sell pipe cleaner flowers using your design?
A: If you want to use my pipe cleaner sunflowers for commercial use, please familiarize yourself with my important licensing information before selling your crafts.
Q: What supplies do I need for easy pipe cleaner flowers?
A: I mostly used pipe cleaners, floral stems, wire cutters, and hot glue to make my pipe cleaner flowers. Scroll up in this blog post to see a list of all the supplies I used, with links where to find them.
Q: What are the easiest pipe cleaner flowers to make?
A: The easiest ones are simple pipe cleaner flowers with single-layer petals and a small center. These pipe cleaner sunflowers are beginner-friendly crafts because they’re built from repeatable petals and a coiled center. My free PDF reference guide will help you keep the shaping consistent.
Q: Are these pipe cleaner flowers really “easy” for beginners?
A: Yes! If you follow the steps in order and use my free PDF guide and video, you’ll be able to make easy pipe cleaner flowers. They don’t use any unique materials, just simple pipe cleaners and wire. And if you make a mistake, pipe cleaners are forgiving, so you can unwrap and redo parts.
Q: What wire do I need for pipe cleaner flowers?
A: To make my sunflower design, you’ll need some 18-gauge floral stem wire to reinforce the stem and keep the flower upright.
Q: Do I have to use floral wire, or can I skip it?
A: You can skip it for short stems or lightweight blooms, but the flower will be floppier. The floral wire is what makes the stem strong enough for arranging in a vase.
Q: What tools do I actually need?
A: I used scissors for cutting pipe cleaners, wire cutters for trimming floral wire (don’t use scissors on the heavier gauge stem wire or they might get damaged), and hot glue for securing the center and stem base. I like to use a heat press or iron to fluff and smooth the petals and leaves.
Q: Why does the tutorial use hot glue? Can I use something else?
A: Hot glue grabs fast and holds the coiled pipe cleaners and petals firmly. Other glues tend to be too slow to dry or not strong enough on fuzzy fibers, so use a glue that bonds quickly and holds wire well. Plus, hot glue dries clear, so it won’t stand out on your finished flowers.
Q: How do I keep the petals symmetrical and not lopsided?
A: Use my printable PDF reference guide to shape your petals, then add petals in opposite pairs on the center to keep it even. Build the first layer, then fill gaps with the second layer so everything stays balanced.
Q: How many pipe cleaners do I need for one sunflower?
A: For one flower with a leaf, plan on 16 12″ yellow pipe cleaners, 2 brown, and 7 green (plus a wire stem and floral wire).
Q: How many pipe cleaners do you need to make a bouquet of flowers?
A: To make a bouquet of three full-sized sunflowers with 12″ pipe cleaners, you’ll need 48 yellow, 6 brown, and 21 green pieces. To make a bouquet of five full-sized sunflowers, you’ll need 80 yellow, 10 brown, and 35 green. If you mix in smaller flowers, you’ll use fewer per bloom.
Q: How do I make smaller pipe cleaner flowers?
A: Simply print the reference guide at 75% and follow the scaled diagrams to make smaller flowers. The petal shapes and stem-top folds get shorter, and you trim pieces to match the smaller template so the finished flower stays proportioned.
Q: My petals look thin or “gappy.” What should I do?
A: Fluff the pipe cleaners first if they’re skinny, and after shaping, heat-press each petal (covered in parchment on a heat-safe pad) to close gaps and make them look fuller and more realistic.
Q: What heat settings should I use to fluff the petals?
A: In the tutorial, a Cricut MiniPress on Medium (around 300°F / 149°C) for about 30 seconds with medium pressure works well. A home iron on medium heat with no steam is a good substitute.
Q: How do I stop the brown center from getting gaps when I coil it?
A: To make a strong flower center, coil tightly and pinch as you go to keep the rounds aligned. If you see a gap forming, back up and re-coil tighter before gluing. The guide helps you match the center size and shape so you know how tightly to coil the twisted pipe cleaners.
Q: How do I attach the stem so it doesn’t wobble?
A: In the video, I’ll show you how to build the leafy base and beginning of the stem first, then hot glue it to the underside of the flower’s center to make a stable bloom base. Then, we’ll press the floral wire into the underside near the stem and wrap the green stem pipe cleaner tightly down the wire to attach them securely to the flower’s base.
Q: Can I make easy pipe cleaner flowers in different colors?
A: Absolutely. Sunflowers look great in classic yellow, but you can swap in different colors for the seasons, or make fantasy blooms with blended shades for ombré effects!
Q: What if my flower doesn’t look exactly like yours?
A: That’s great! It means you made it your own. Real flowers aren’t identical, and handmade ones won’t be either. My PDF guide keeps the structure consistent, but you can always fine-tune petal curves and spacing at the end if you want.
Q: Are pipe cleaner flowers safe for kids to make?
A: Kids can help with shaping and assembling petals, but adults should handle the hot glue and wire cutters. Use silicone finger protectors, keep wire ends pointed away from hands, and supervise closely to make sure everyone crafts safely.
Q: How do I keep the stem wrap neat when I run out of pipe cleaner?
A: Overlap the old and new pipe cleaner ends by about 1/2 inch in an “X,” then wrap the crossed pieces around in opposite directions to lock them before continuing down the stem.
Q: How long should I make the stem?
A: It’s totally up to your personal preference. I made my largest stem about 10″, but you can make longer ones for tall vases or shorter stems for a fuller, compact arrangement.
Q: What can I do with the extra pipe cleaners from this project?
A: Save them for mini blooms, extra leaves, or mix-and-match accent flowers for your bouquet. Leftovers are perfect for experimenting with new pipe cleaner craft ideas without starting from scratch.
Q: Where can I get help if I get stuck?
A: If you want quick troubleshooting or you want to show off your finished pipe cleaner flowers, my Cricut Facebook group is a helpful place to compare notes and see what others are doing.
Get my free PDF diagram file to make your own easy pipe cleaner flowers!
(If you do not see the signup form above, click here.)
I absolutely love seeing your beautiful craft projects! Once you’ve learned how to make easy pipe cleaner flowers, inspire others and share photos of your project in our Facebook group or tag me on social media with #jennifermaker.
Love,

Want to remember this? Save this tutorial on How To Make Easy Pipe Cleaner Flowers to your favorite Pinterest Board!