
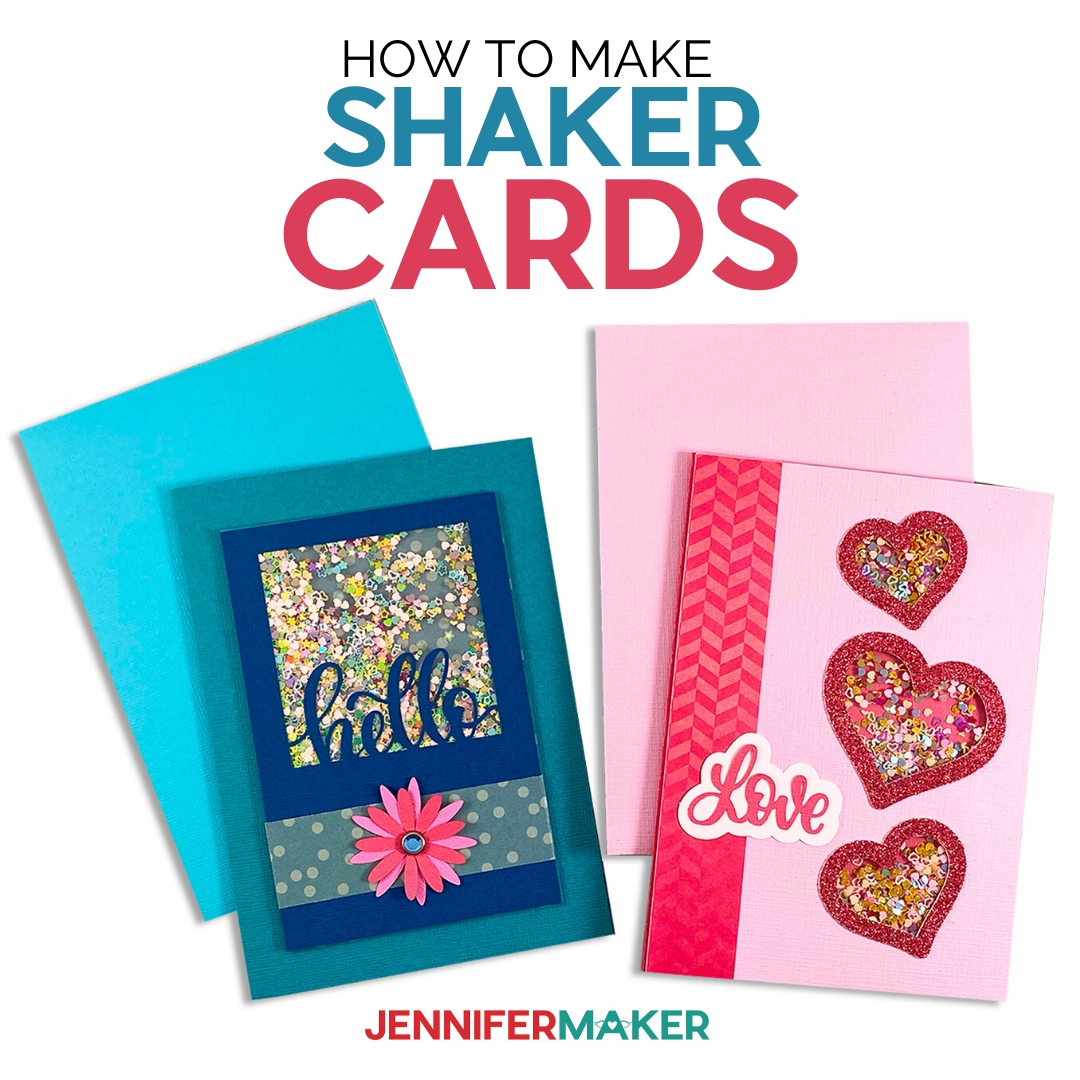
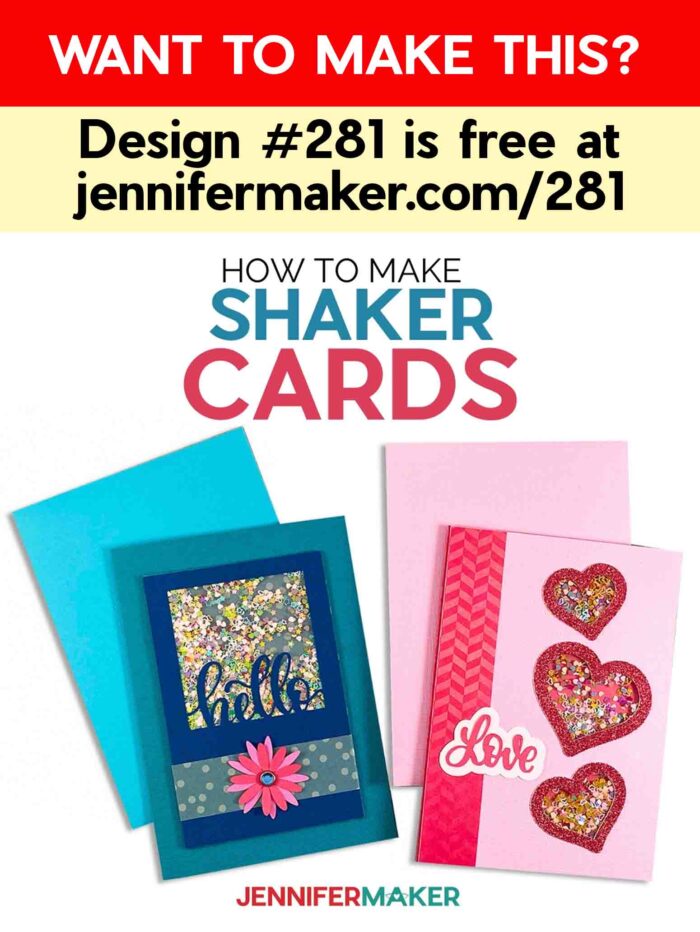
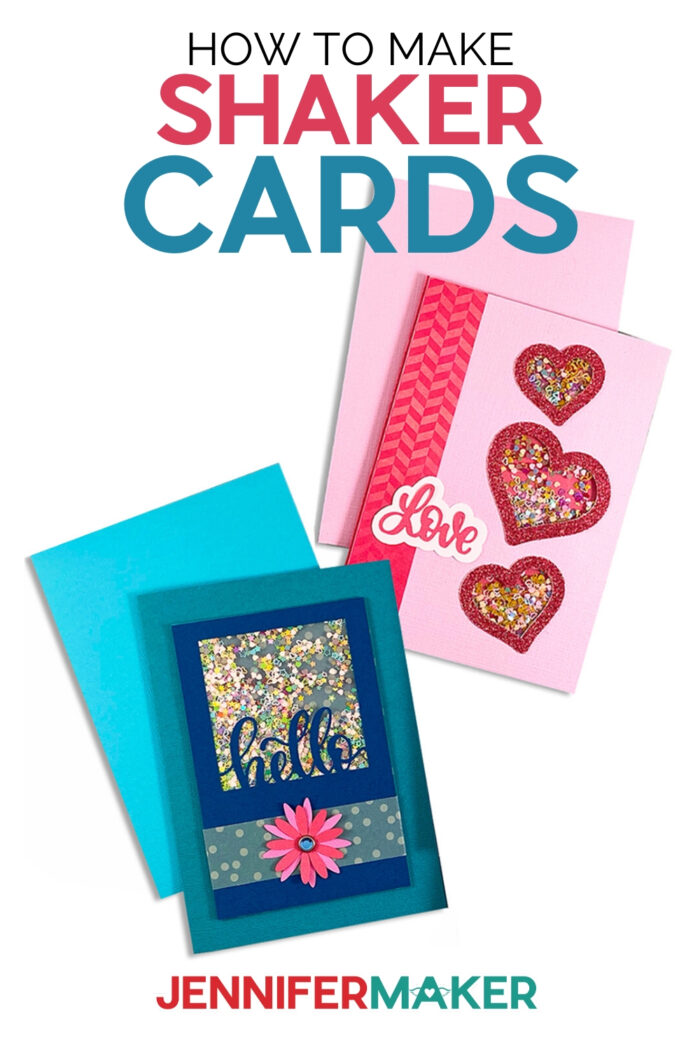
Learn how to Make a Shaker Card to say hello and send love! These shaker cards are so cute and easy to make with my easy template and tutorial!
It is always nice to send and receive a handwritten note or card. I love designing fun pop-up cards and unique cards like my Impossible Card. One card I haven’t yet shown you is the SHAKER CARD! What is a shaker card, you ask? A Shaker Card is a card with a clear window filled with items — usually little sparkly things — that move about when you shake the card… and that’s why we call it a shaker card! So I’m going to teach you how to make a shaker card the easy way with my step-by-step tutorial and design! I’ve even included the envelopes for these cards!
See the full step-by-step process for making these easy Shaker Cards in my video tutorial:
Please note: Cricut Design Space has changed since this video was made, and you’ll now need to set and attach (or remove) your score lines before you make it. See the step-by-step tutorial below for more details.

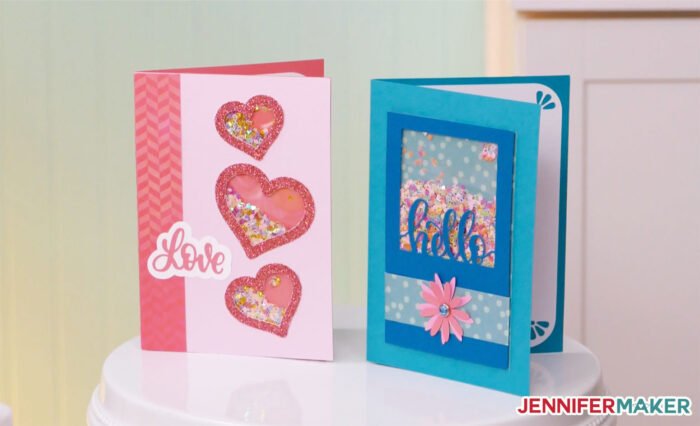
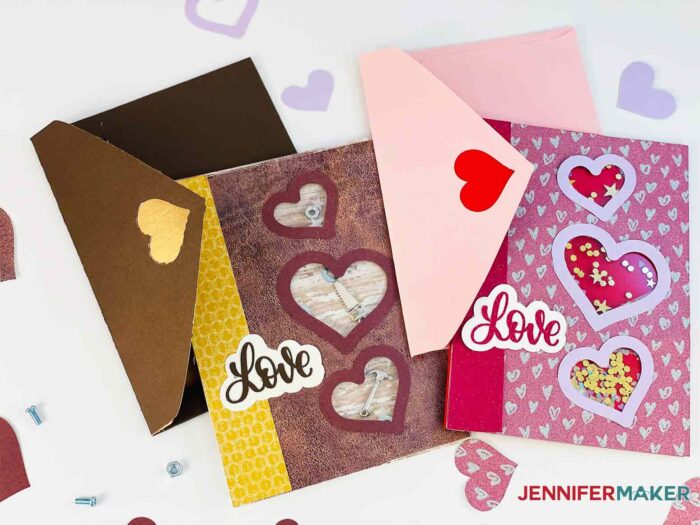
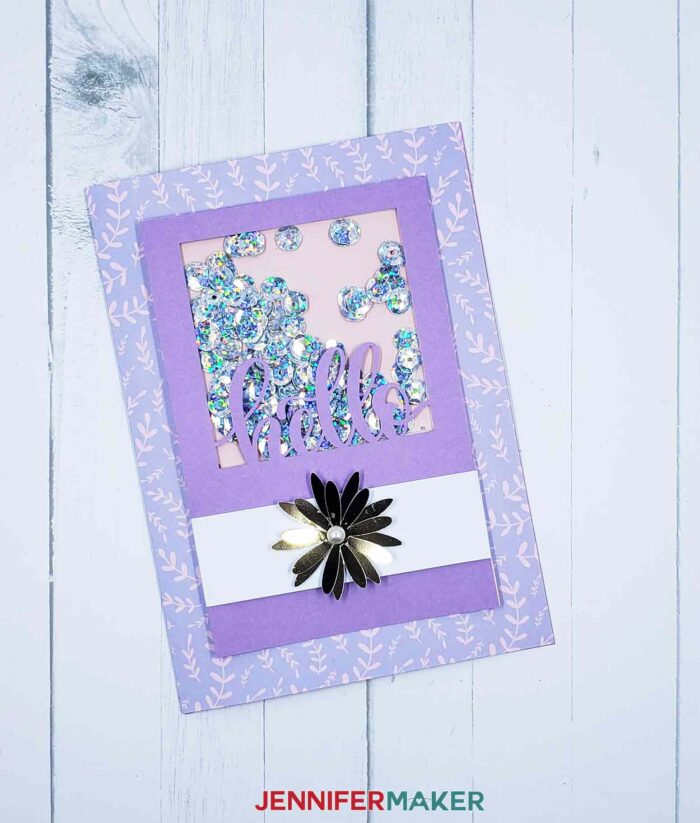
Aren’t these cards so fun? These are a perfect sweet gesture to give any time of year! You can give these shaker cards for any reason – as a thank you card, congratulations or just as a simple thinking of you card. And changing the paper and shaker contents can give you a whole new look! You can see what I mean by the cards in the photo below — a wood-grained cardstock and tool-themed charms give this card an entirely different feel!
To make these shaker cards, you need cardstock in 65 lb. to 80 lb. weight. I used regular cardstock, but feel free to get fancy with special cardstock, like holographic foil Kraft board.
Adhesives are important for this project. Foam mounting tape is essential for creating the window with space for your shaker card contents. I also used double sided adhesive and tacky glue to attach other parts of the card. It is important to know that if you use a cardstock with a texture, like glitter, you may need to experiment with glues or even double-sided tape to find the best adhesive for your paper.
For the shaker card window itself, I used embossable window plastic for my card, but if you don’t have any on hand, you can cut down a sheet of acetate or transparency film to work as well. In a pinch, you can use an old cutting mat cover!
Glitter confetti is really fun to use in these cards, but any kind of confetti will work in these cards. You can also use chunk glitter, rhinestones, small pieces of party foil — really anything super small and shakeable will work! Here are some of things we tried:

Need shaker card filler ideas?
Here are some other things you can put inside your shaker card:
- rhinestones
- pearls
- cake sprinkles
- Tic Tacs
- tiny buttons
- little pompoms
- charms
- pebbles
- mica flakes
- microbeads
- googly eyes
- little polymer clay shapes
- custom confetti made from party foil
Let me show you how easy it is to make a shaker card! This post contains some affiliate links for your convenience (which means if you make a purchase after clicking a link I will earn a small commission but it won’t cost you a penny more)! Read my full disclosure policy.
Materials & Tools to Make a Shaker Card
View my Amazon shopping list with the exact items we used to make this project!
- Five sheets of 65.-80 lb. 8.5″ x 11″ or 12″ x 12″ cardstock per card — I used the American Crafts Variety Pack Jewel Cardstock
- 1 sheet of acetate or 2 sheets of small Embossable Window Plastic, cut to size as needed, per card
- Glitter Confetti or anything small to put in the window of your shaker card
- Rhinestone Brads (for the “hello” card)
- Foam Mounting Tape
- Double-Sided Adhesive Tape
- Tacky Glue
- Cricut Glitter Gel Pens or Cricut Pens & Markers
- Cricut Blue LightGrip Machine Mats (12×12 size and 12×24 size for larger envelope)
- Scoring Stylus (for Cricut Explore or Cricut Maker) or Scoring Wheel (for Cricut Maker)
- Cricut Basic Tool Set (Scraper, Spatula and Scissors needed)
- A way to cut your cardstock (I used the Cricut Maker cutting machine but they can also be cut on a Cricut Explore or Cricut Joy)
- A pair of scissors (for cutting tape and your shaker window)
- Design #281 – My two free Shaker Card SVG files are available in my free resource library — get the password by filling out the form at the bottom of this page)
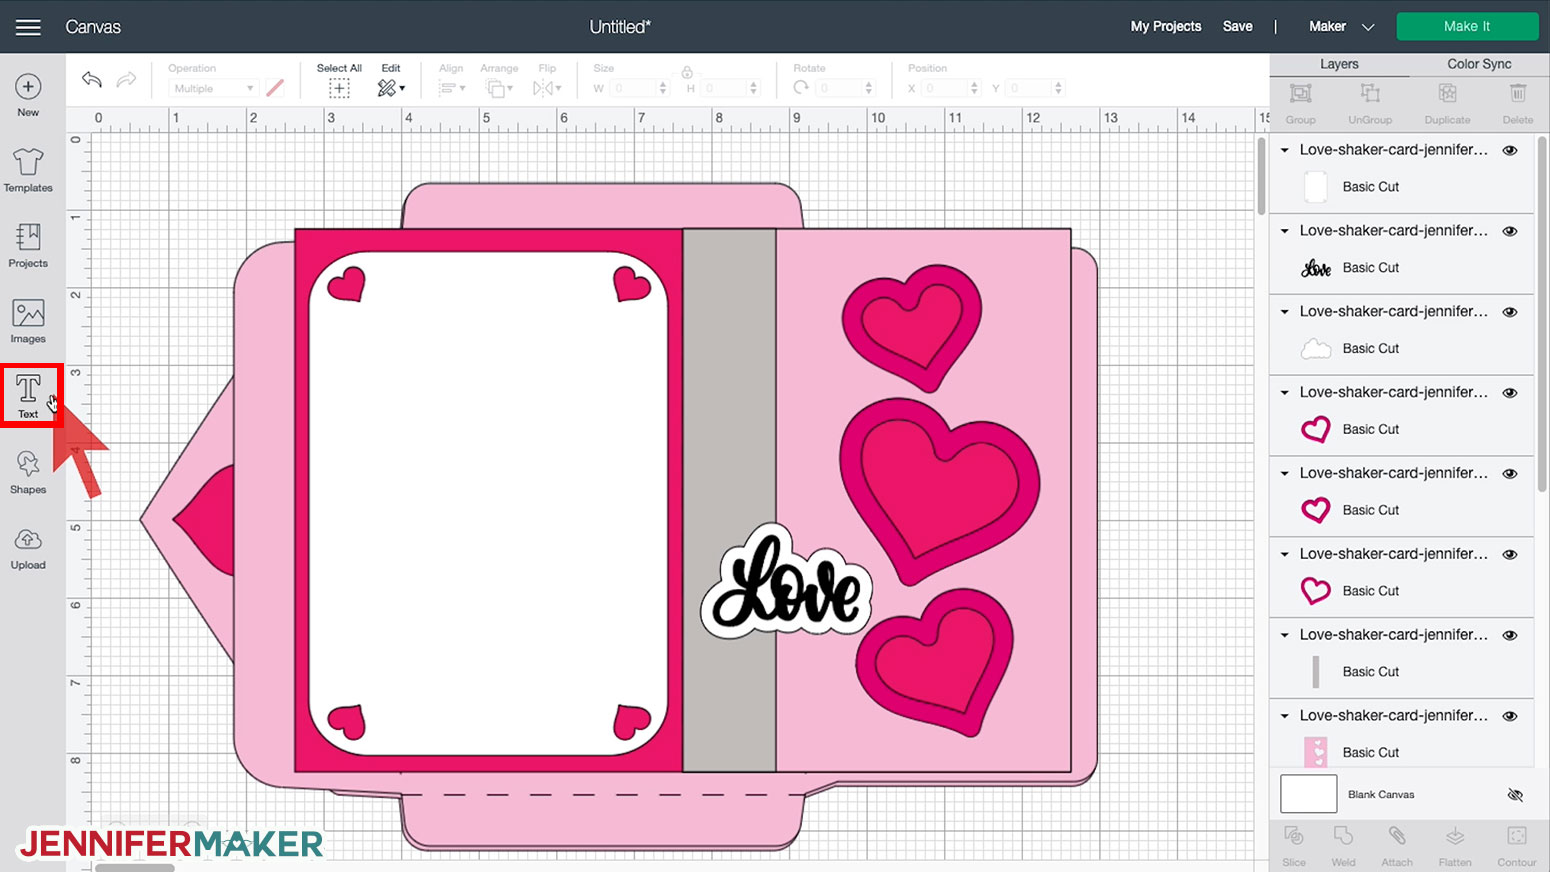
How to Make a Shaker Card
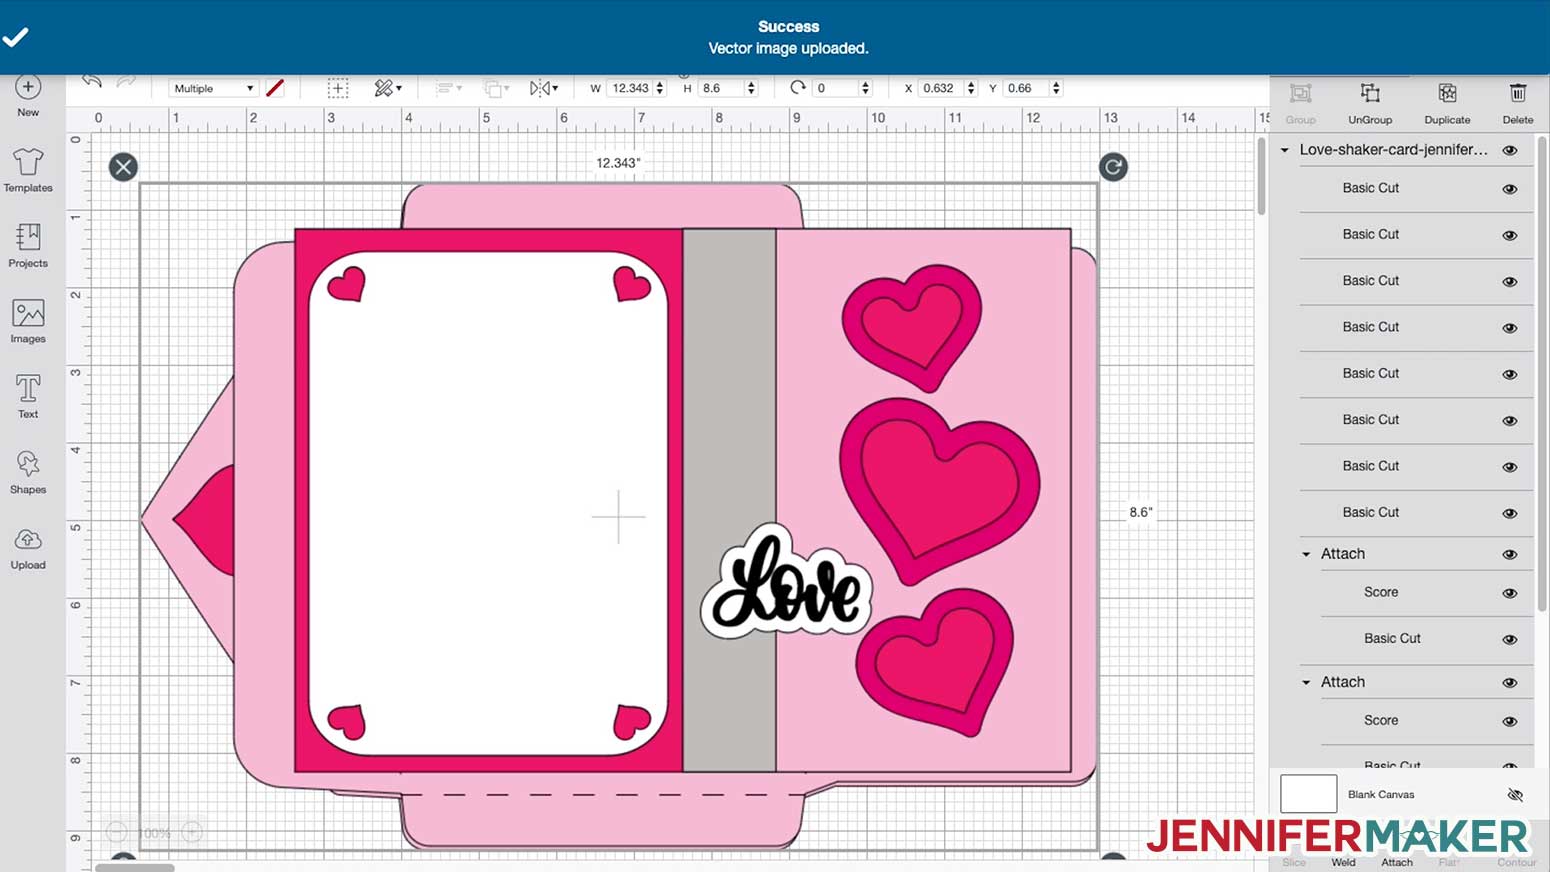
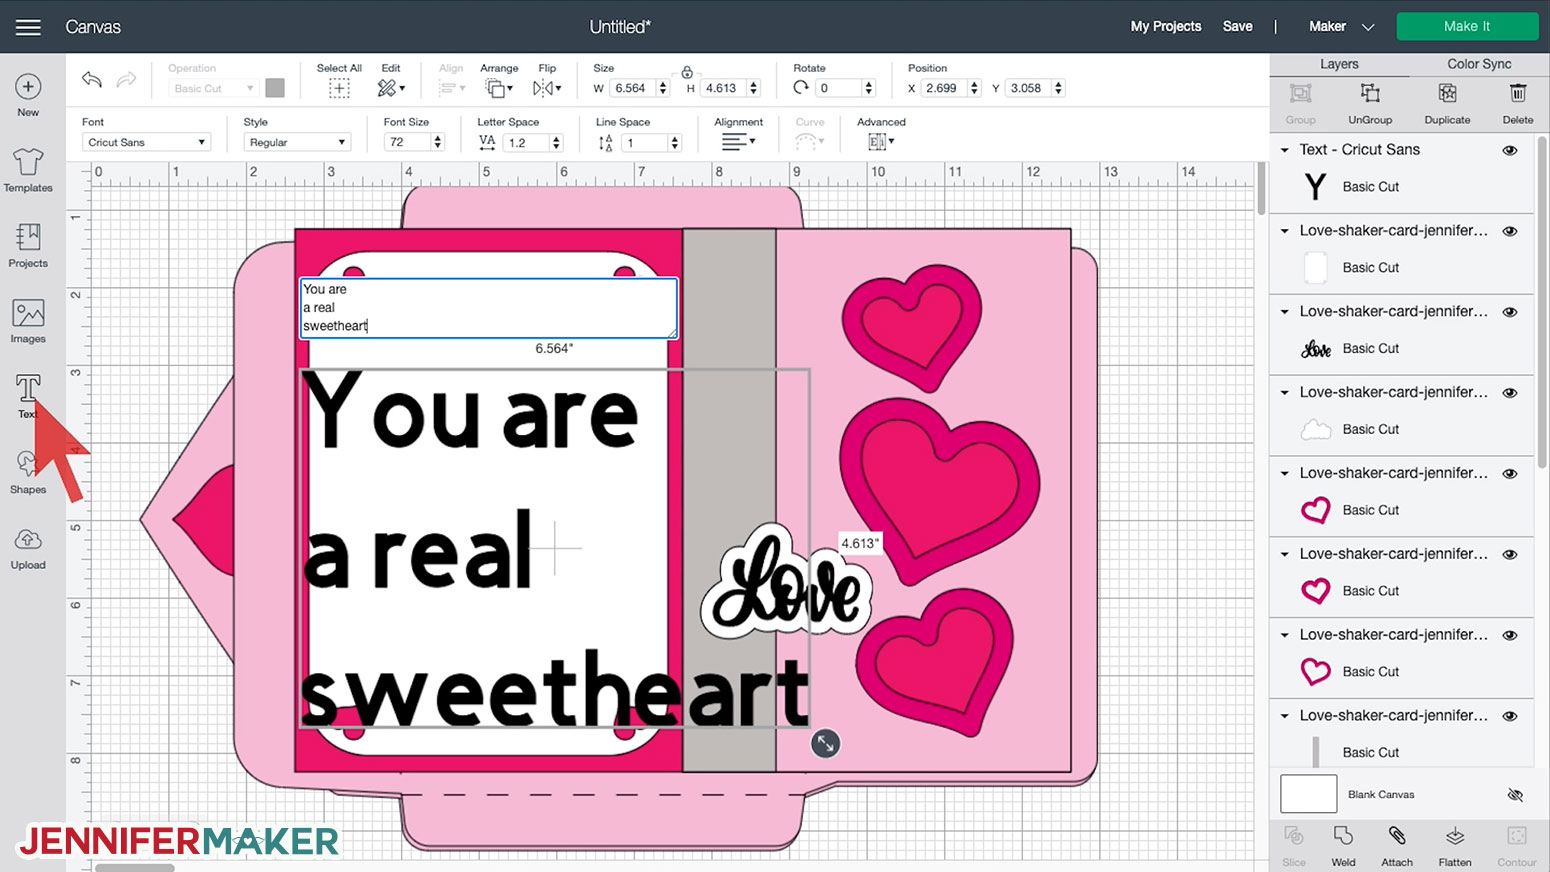
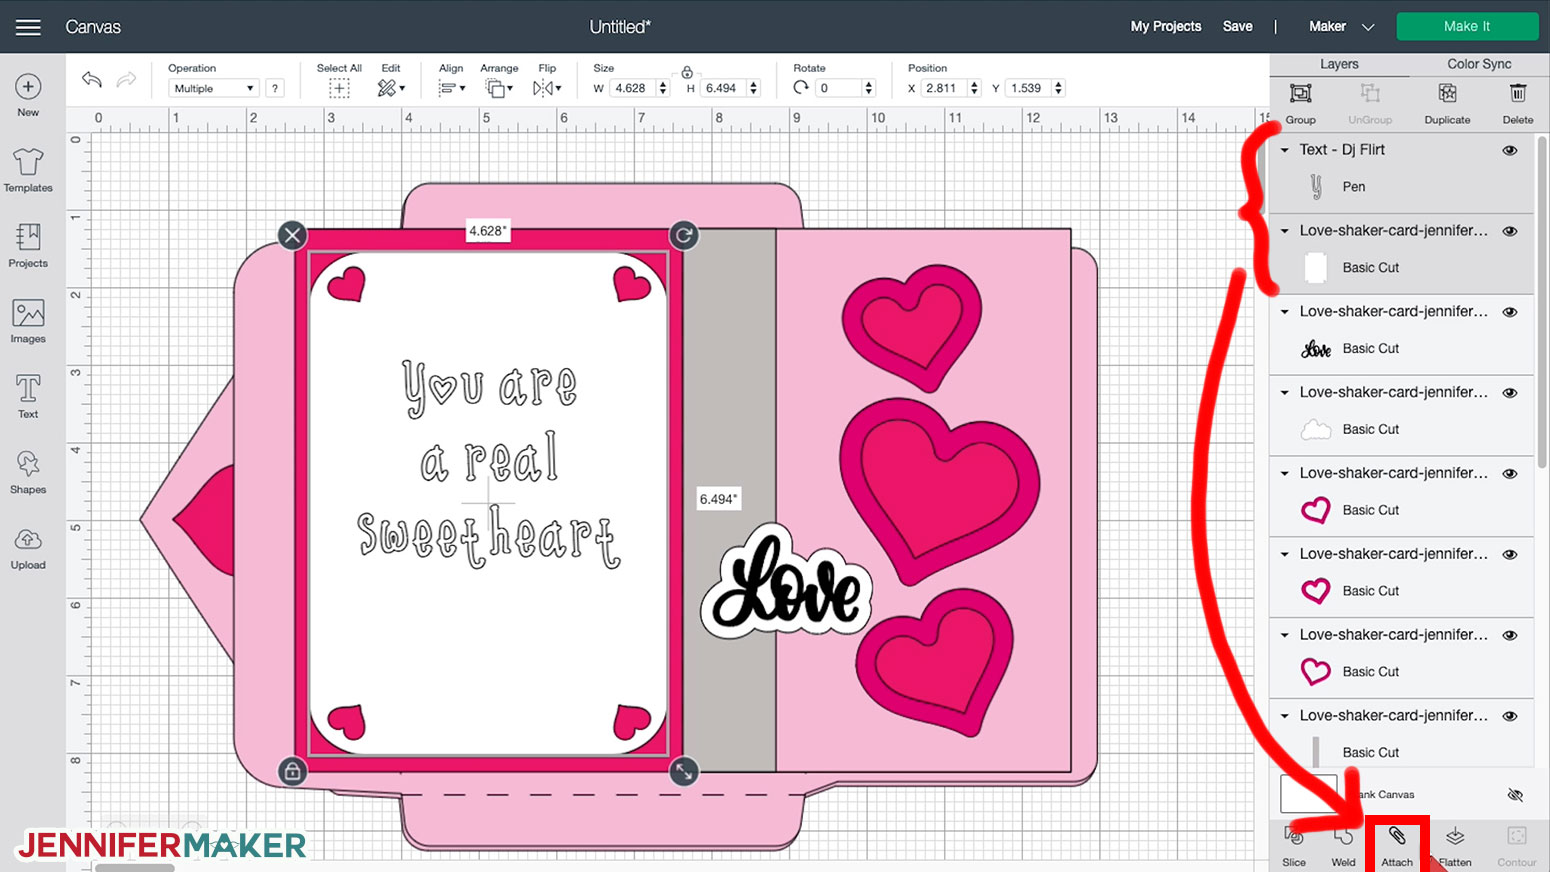
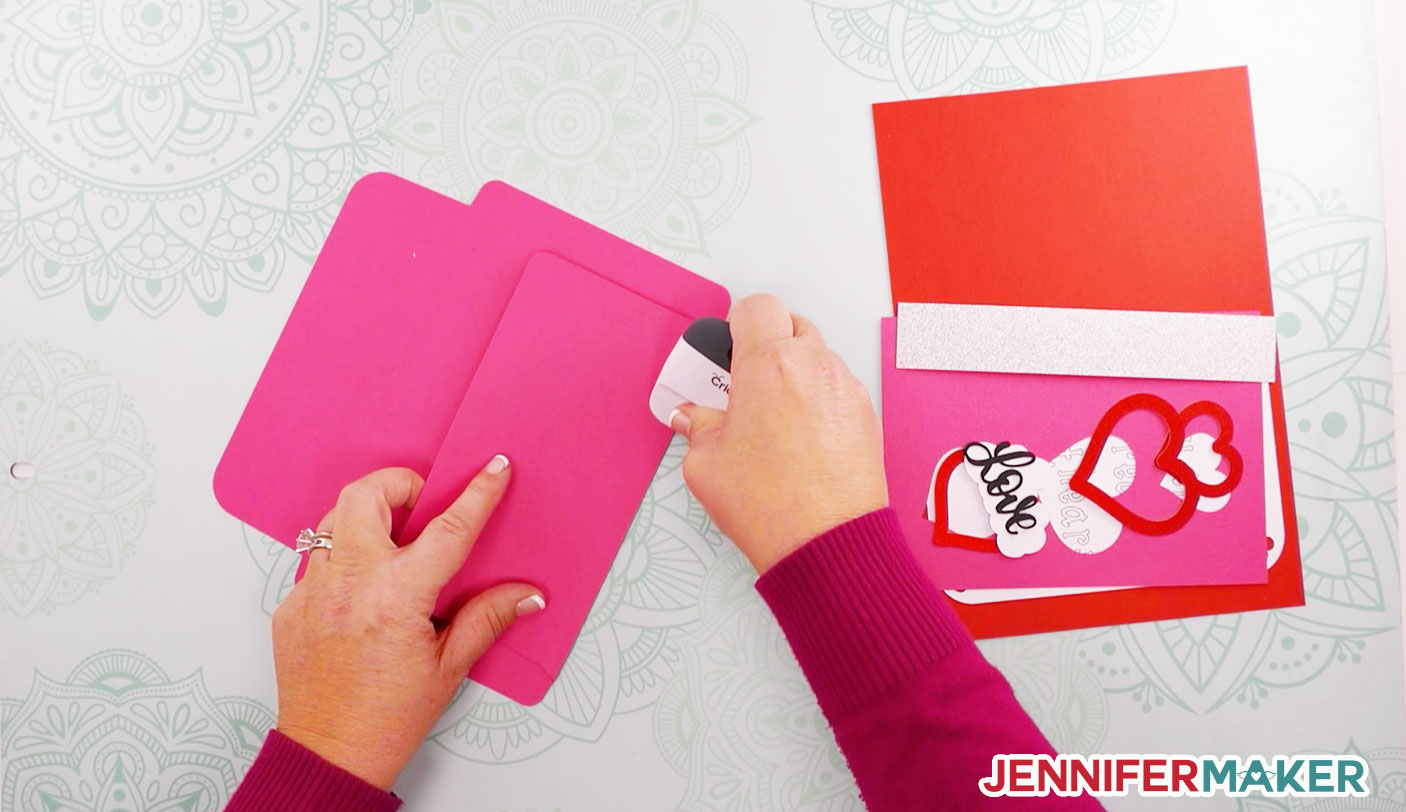
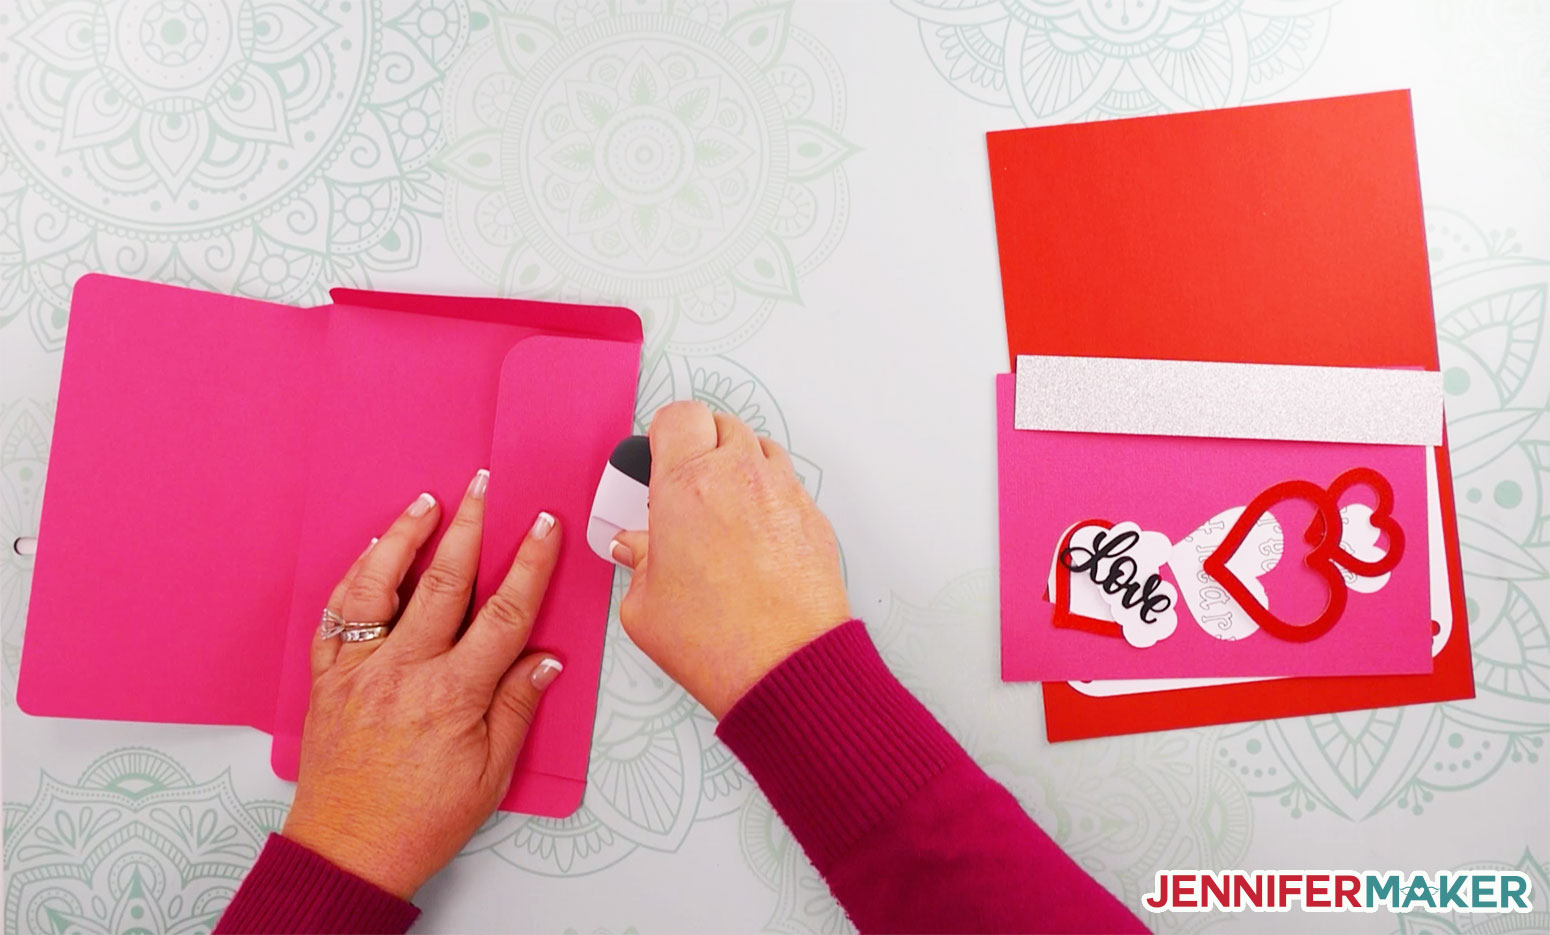
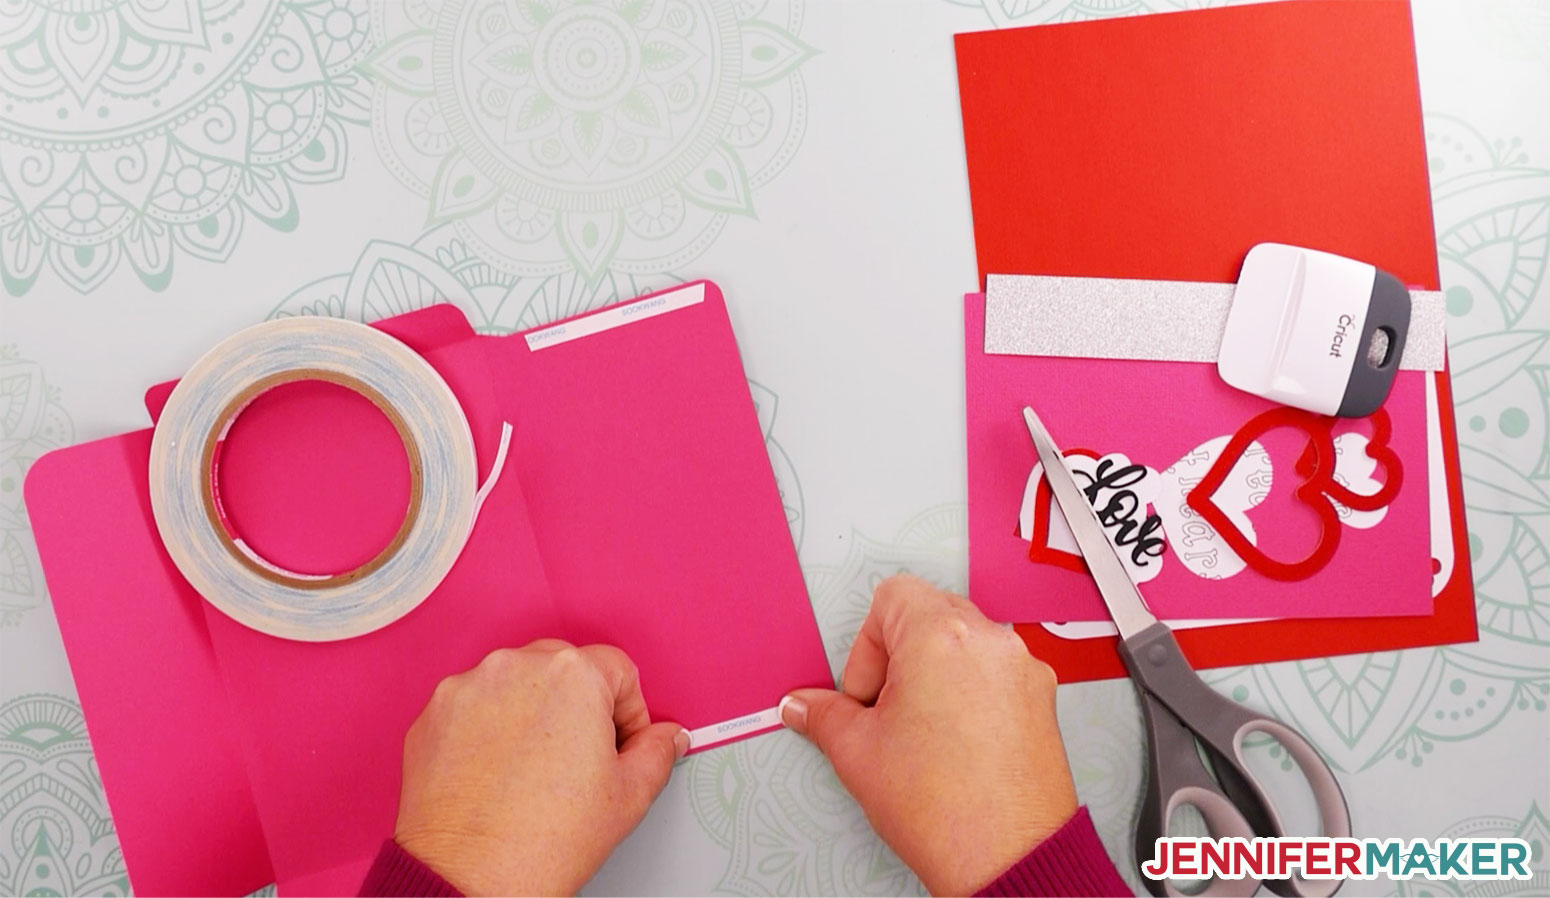
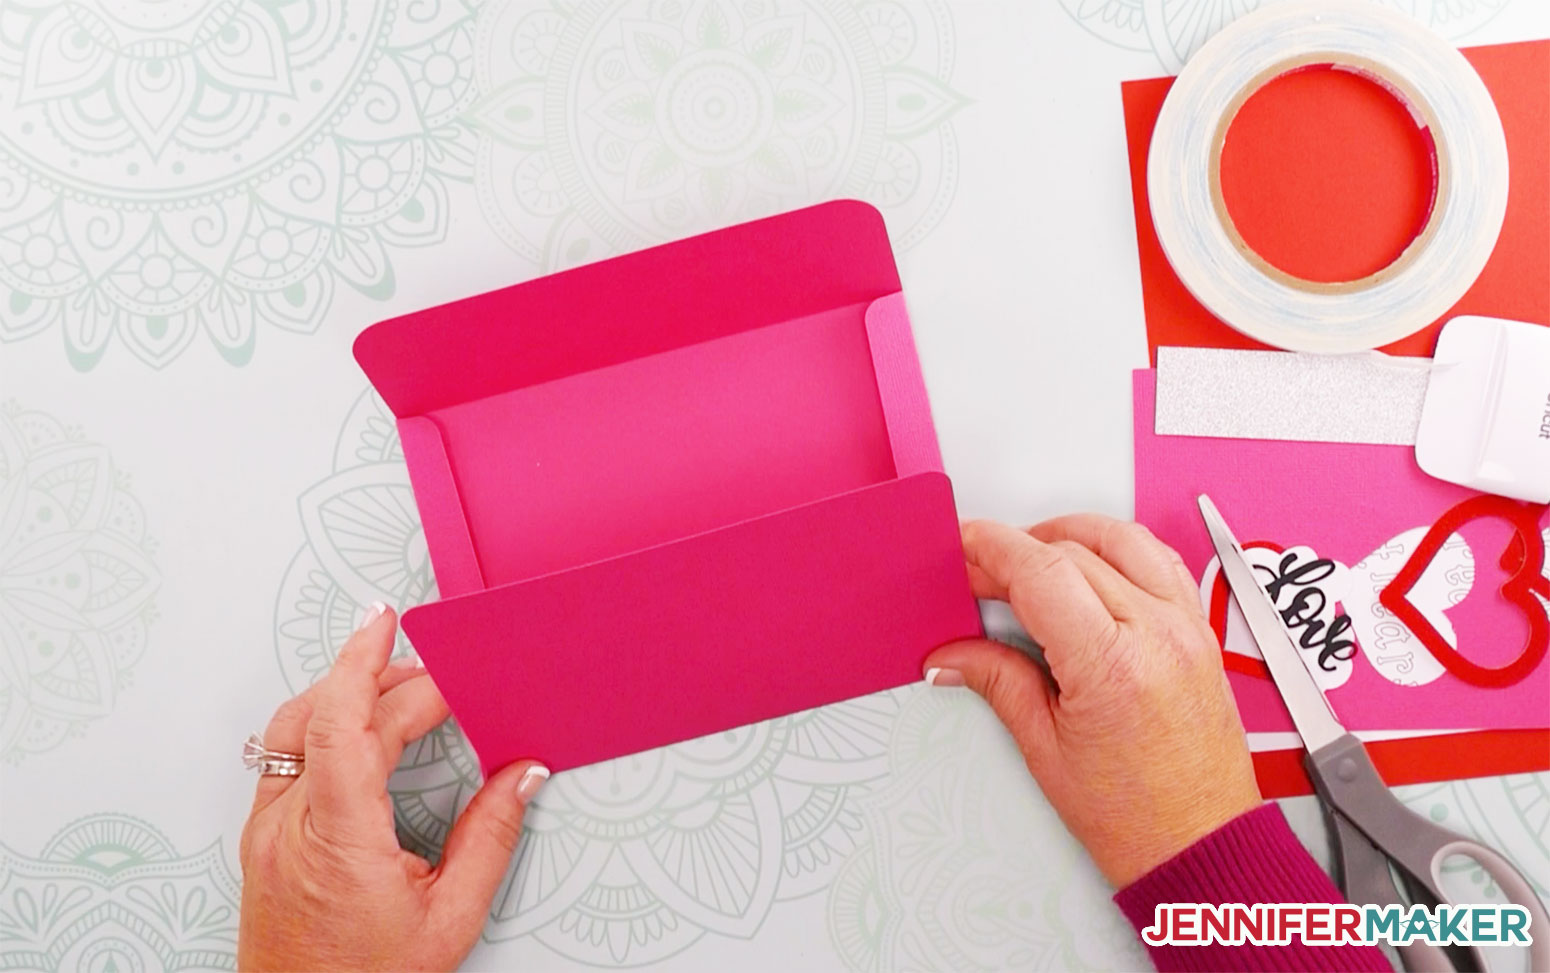
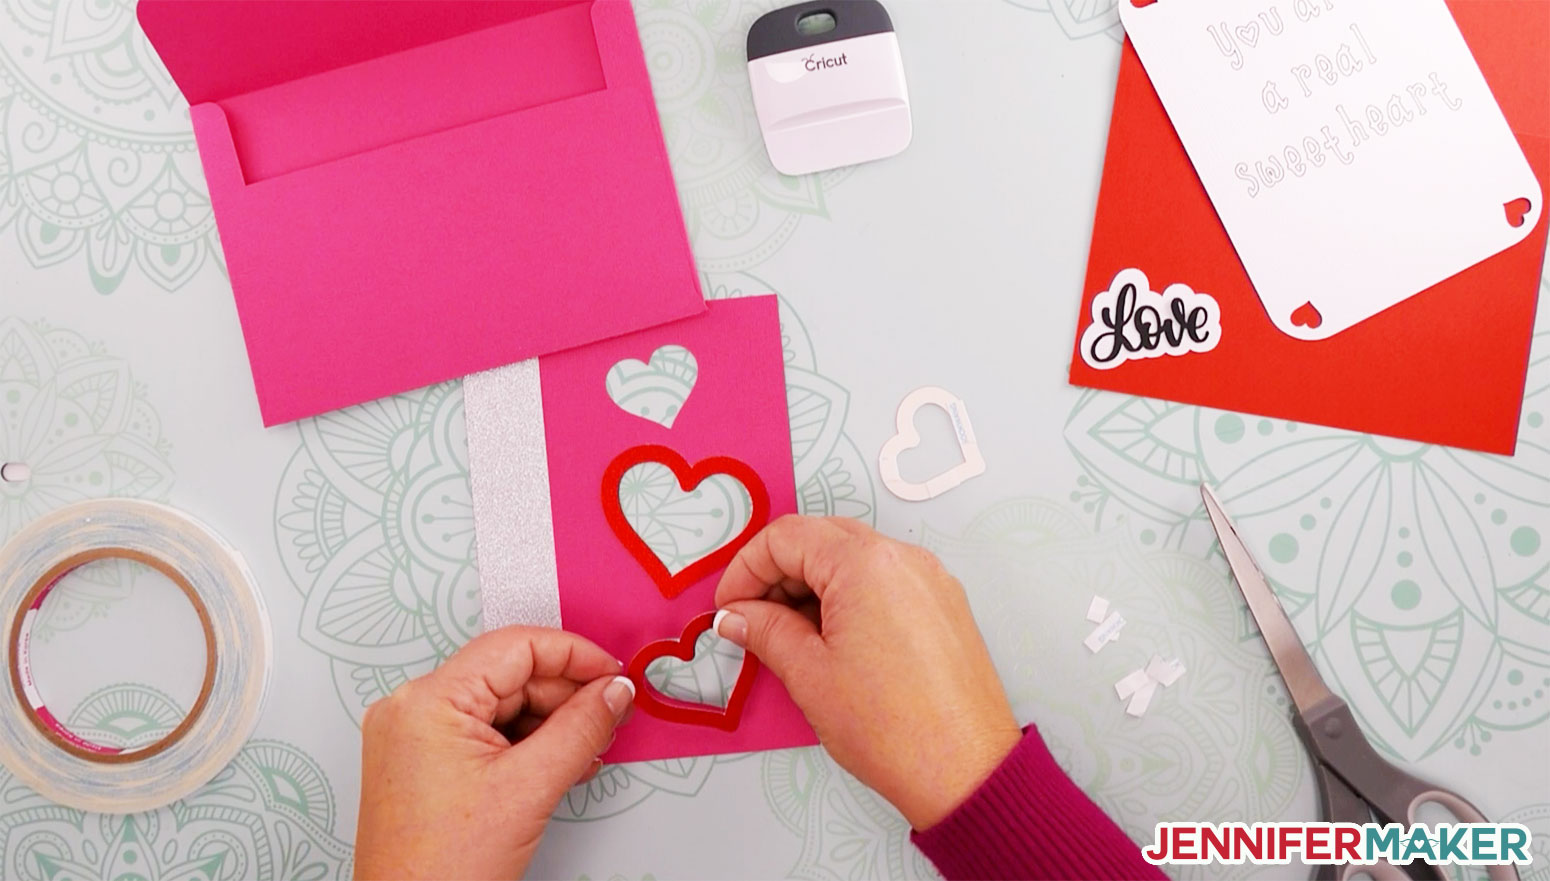
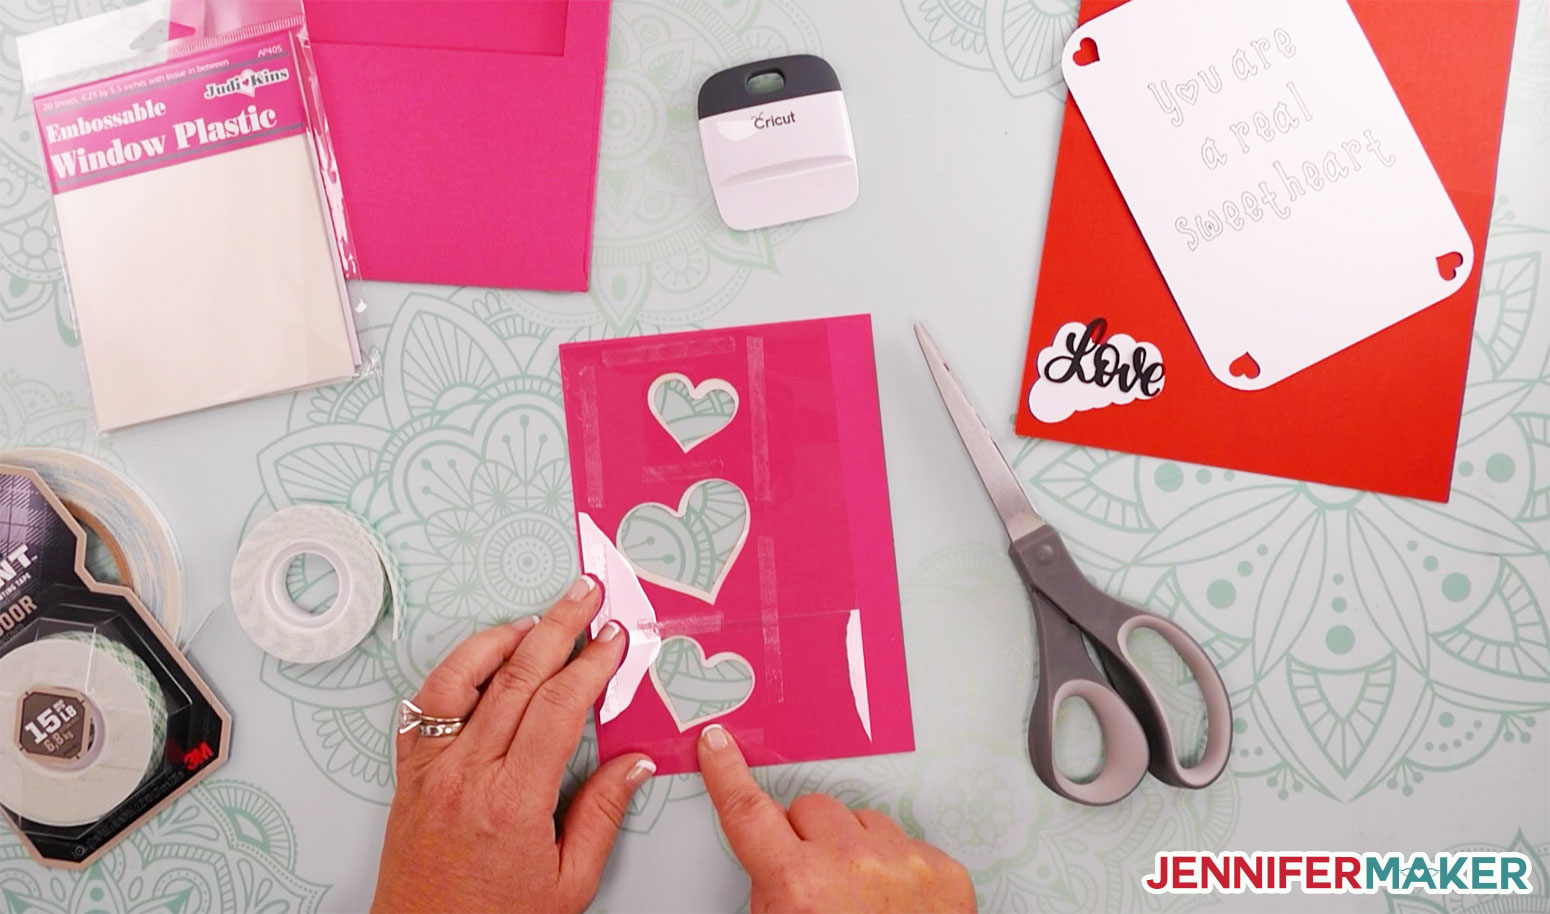
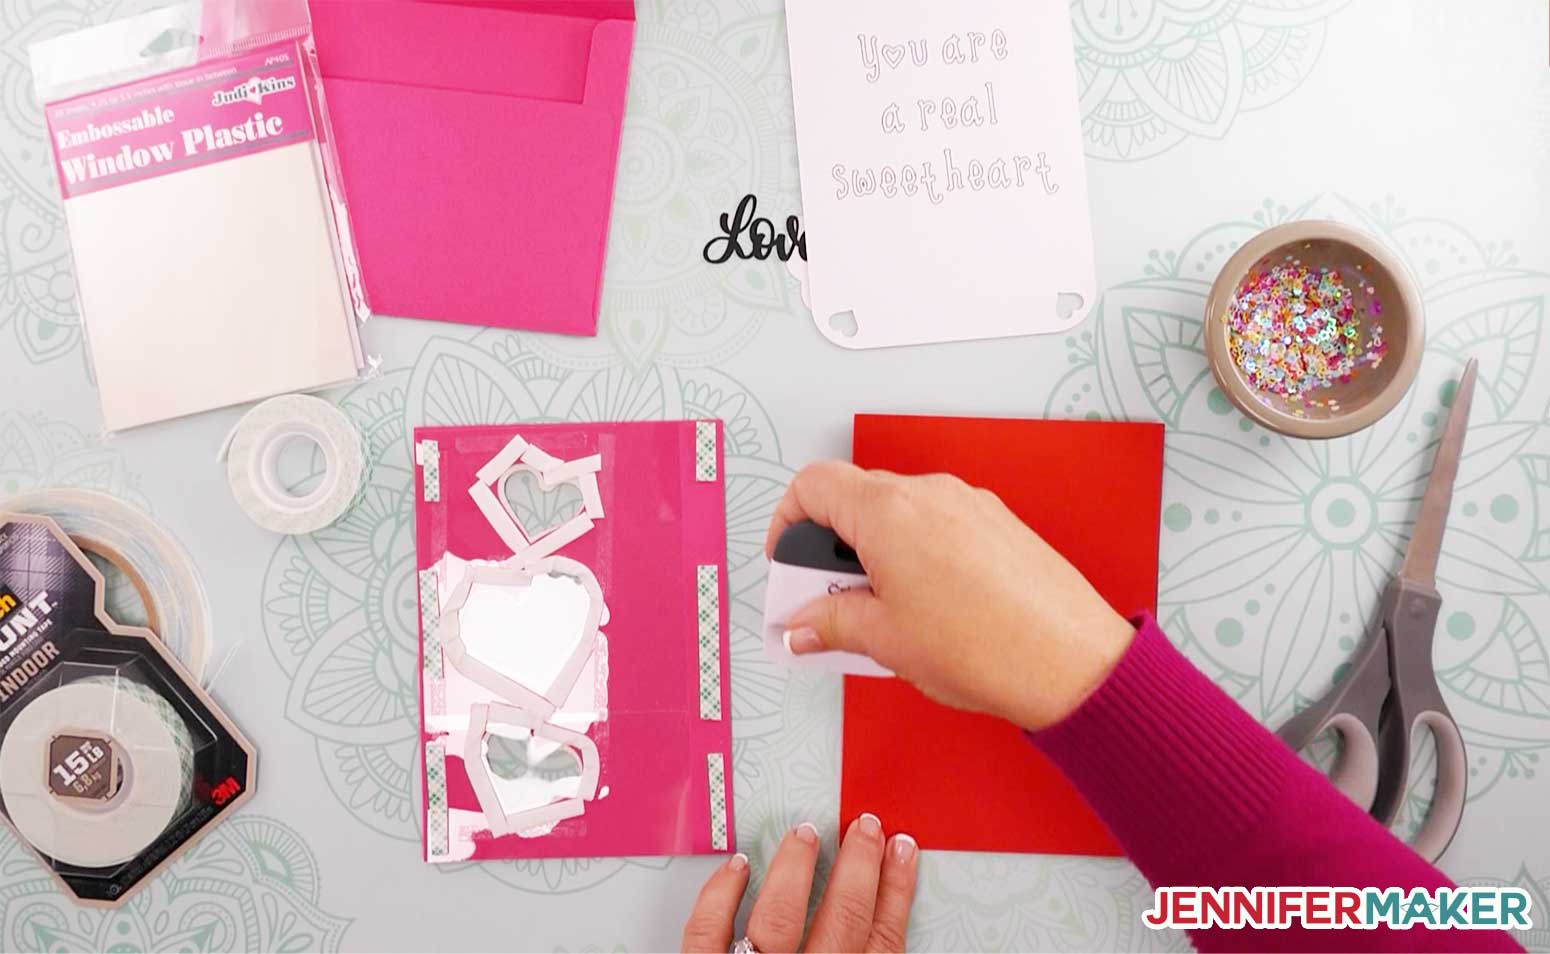
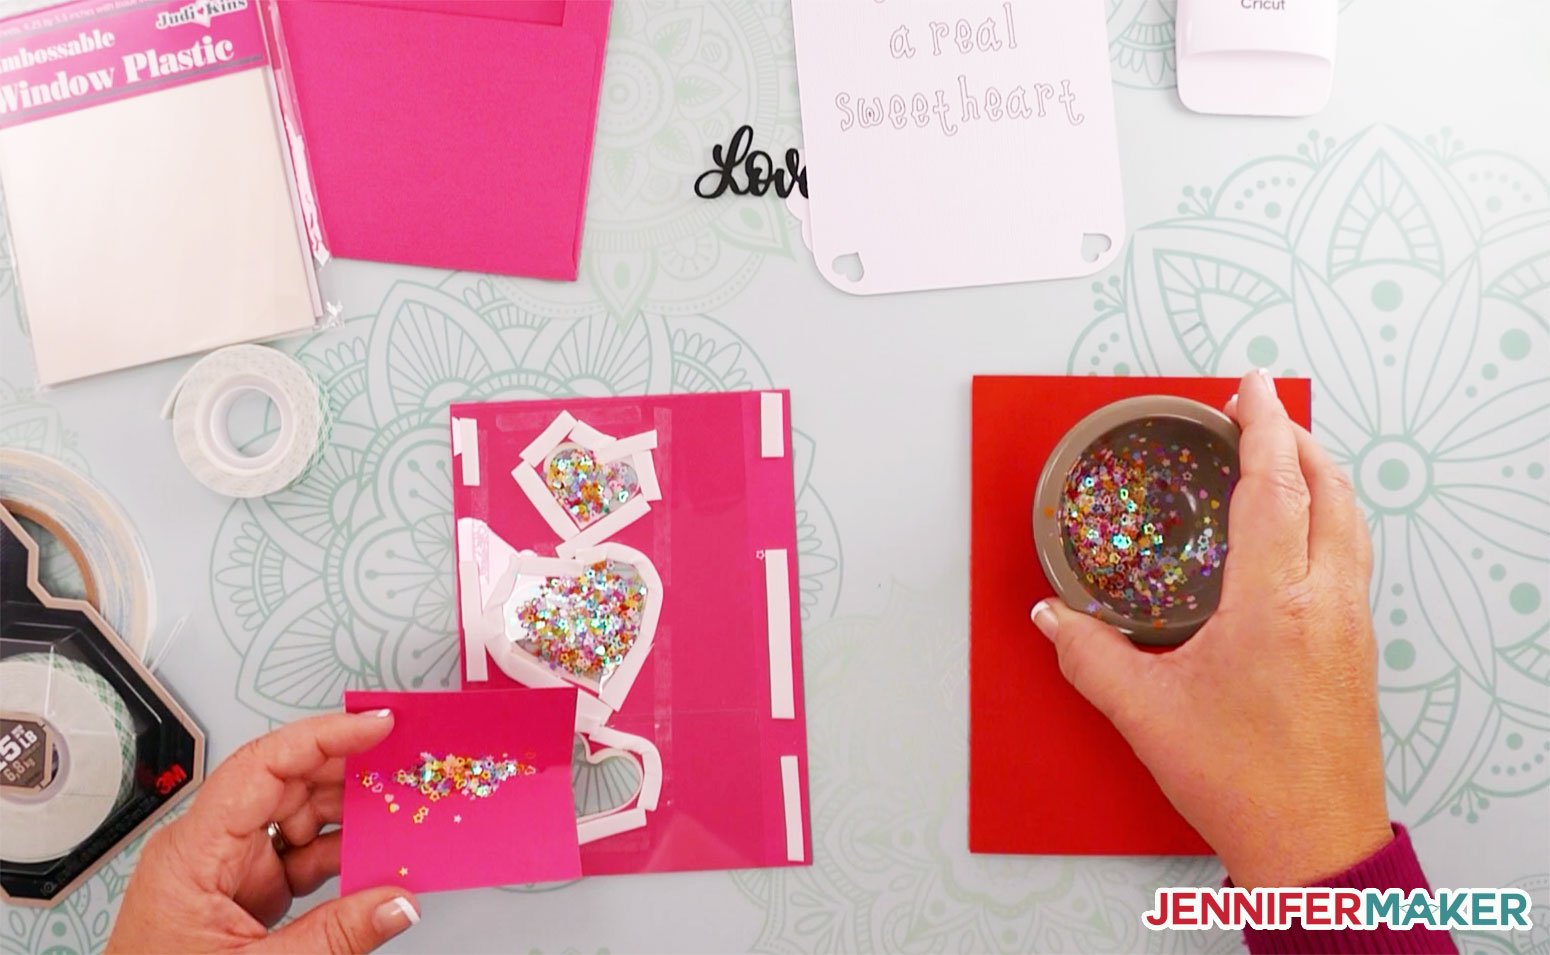
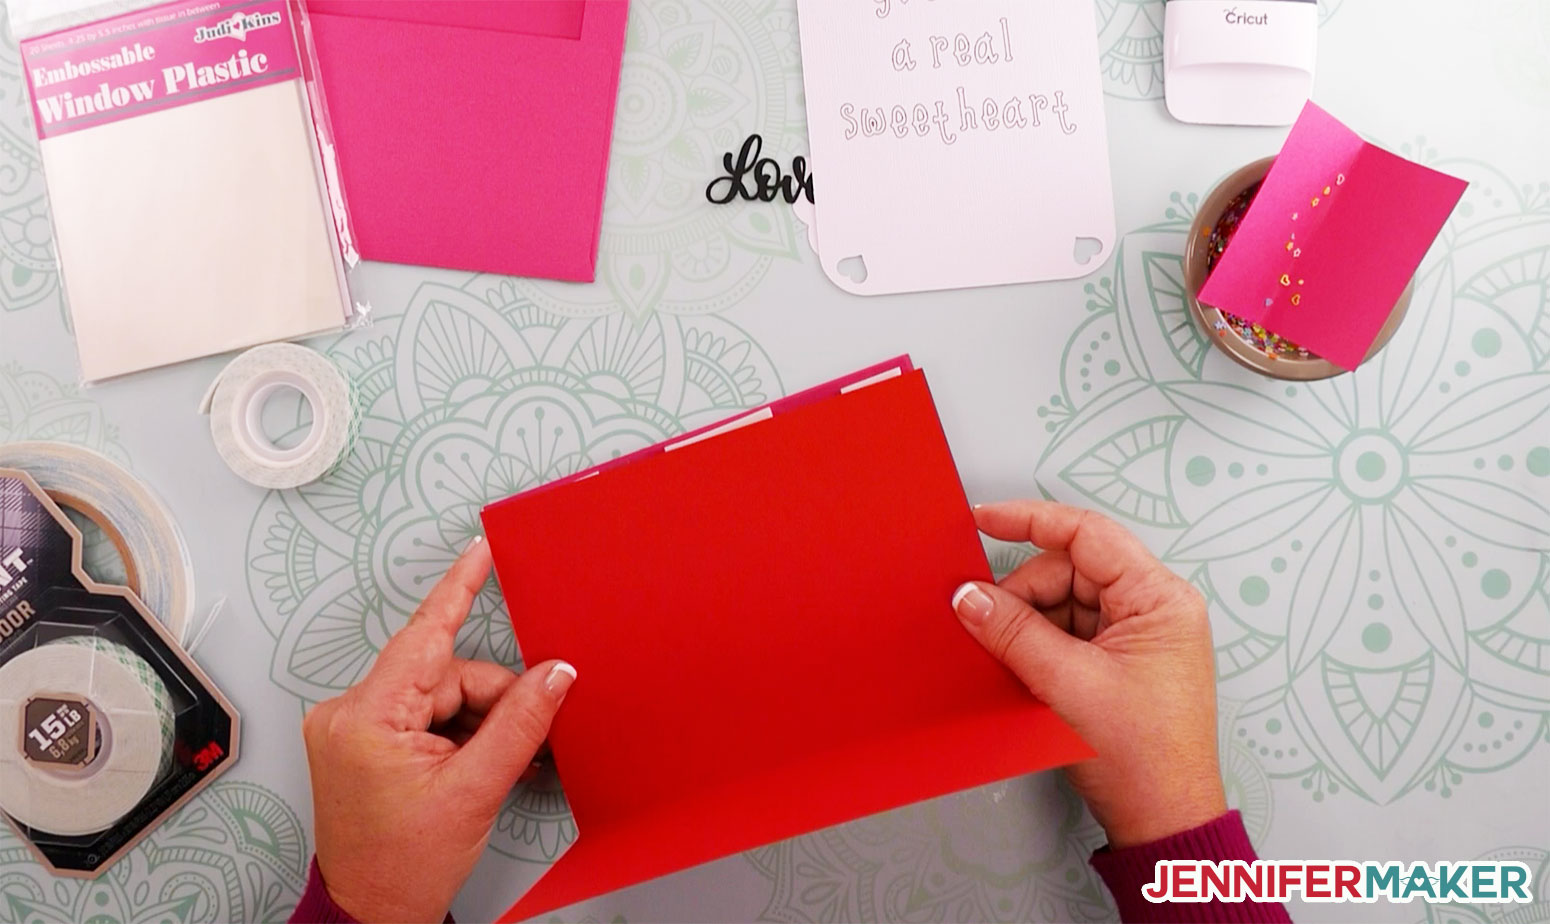
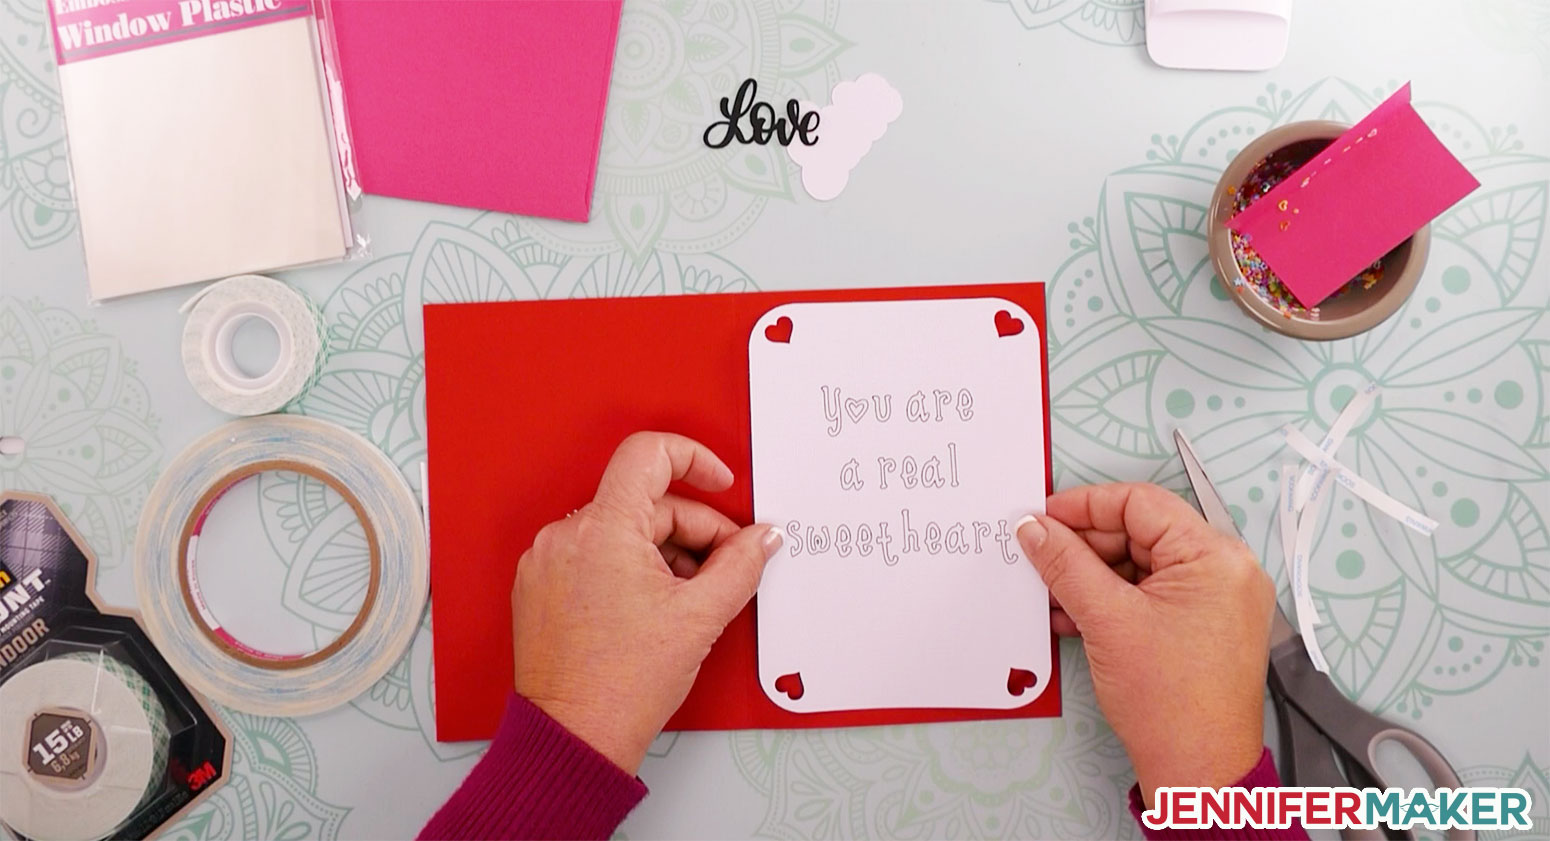
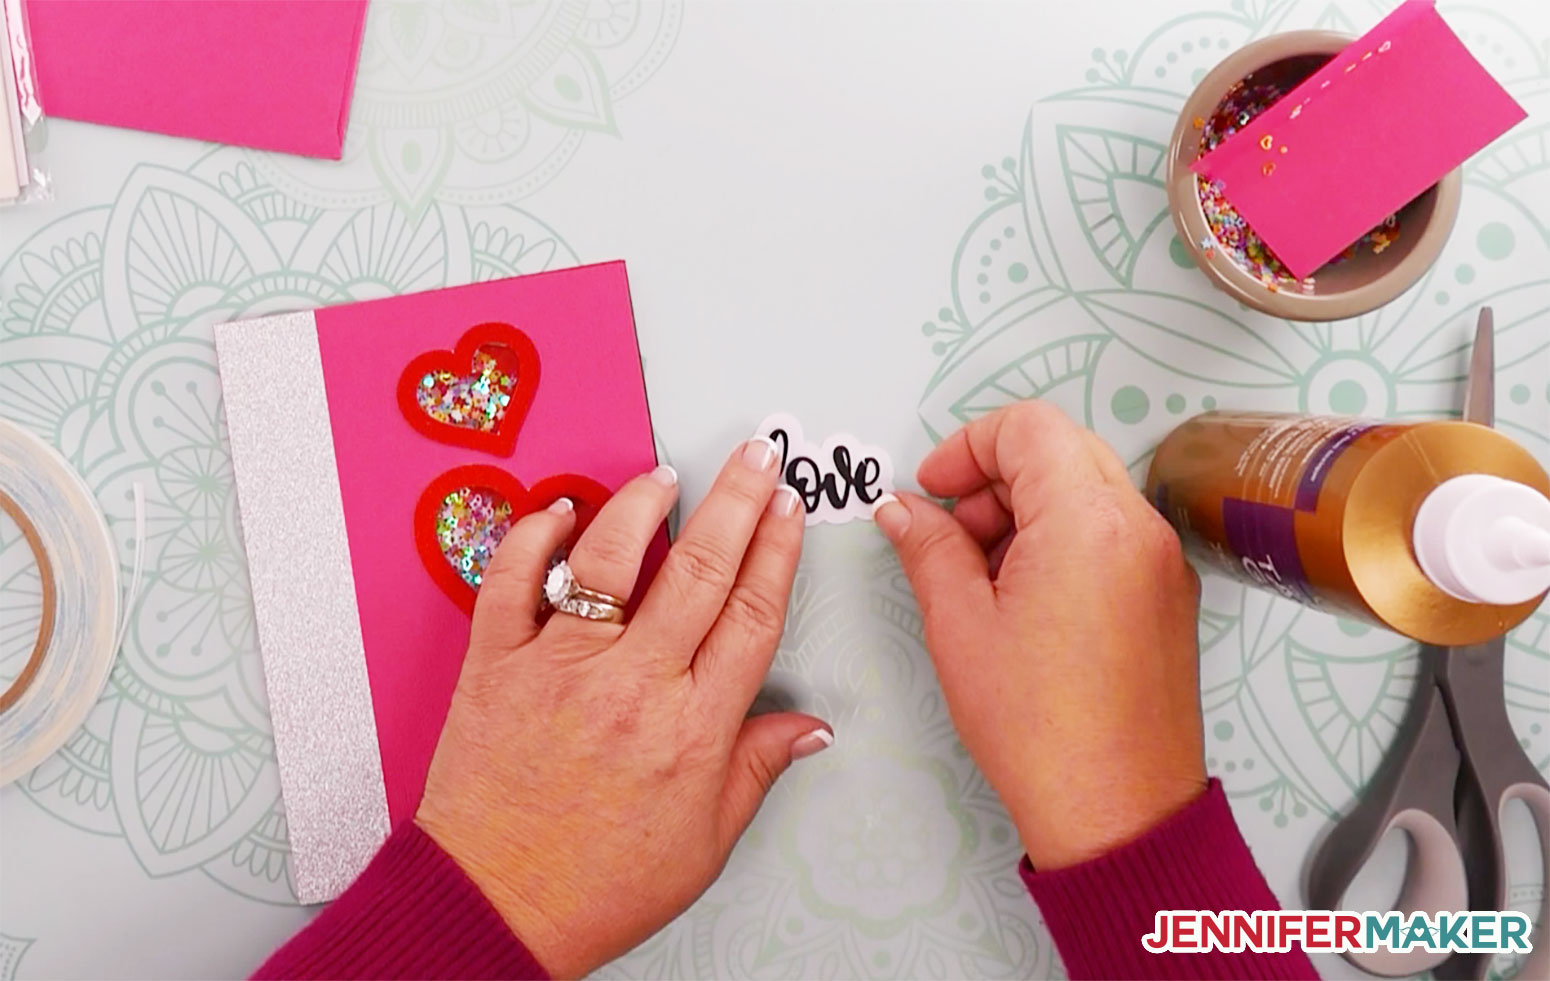
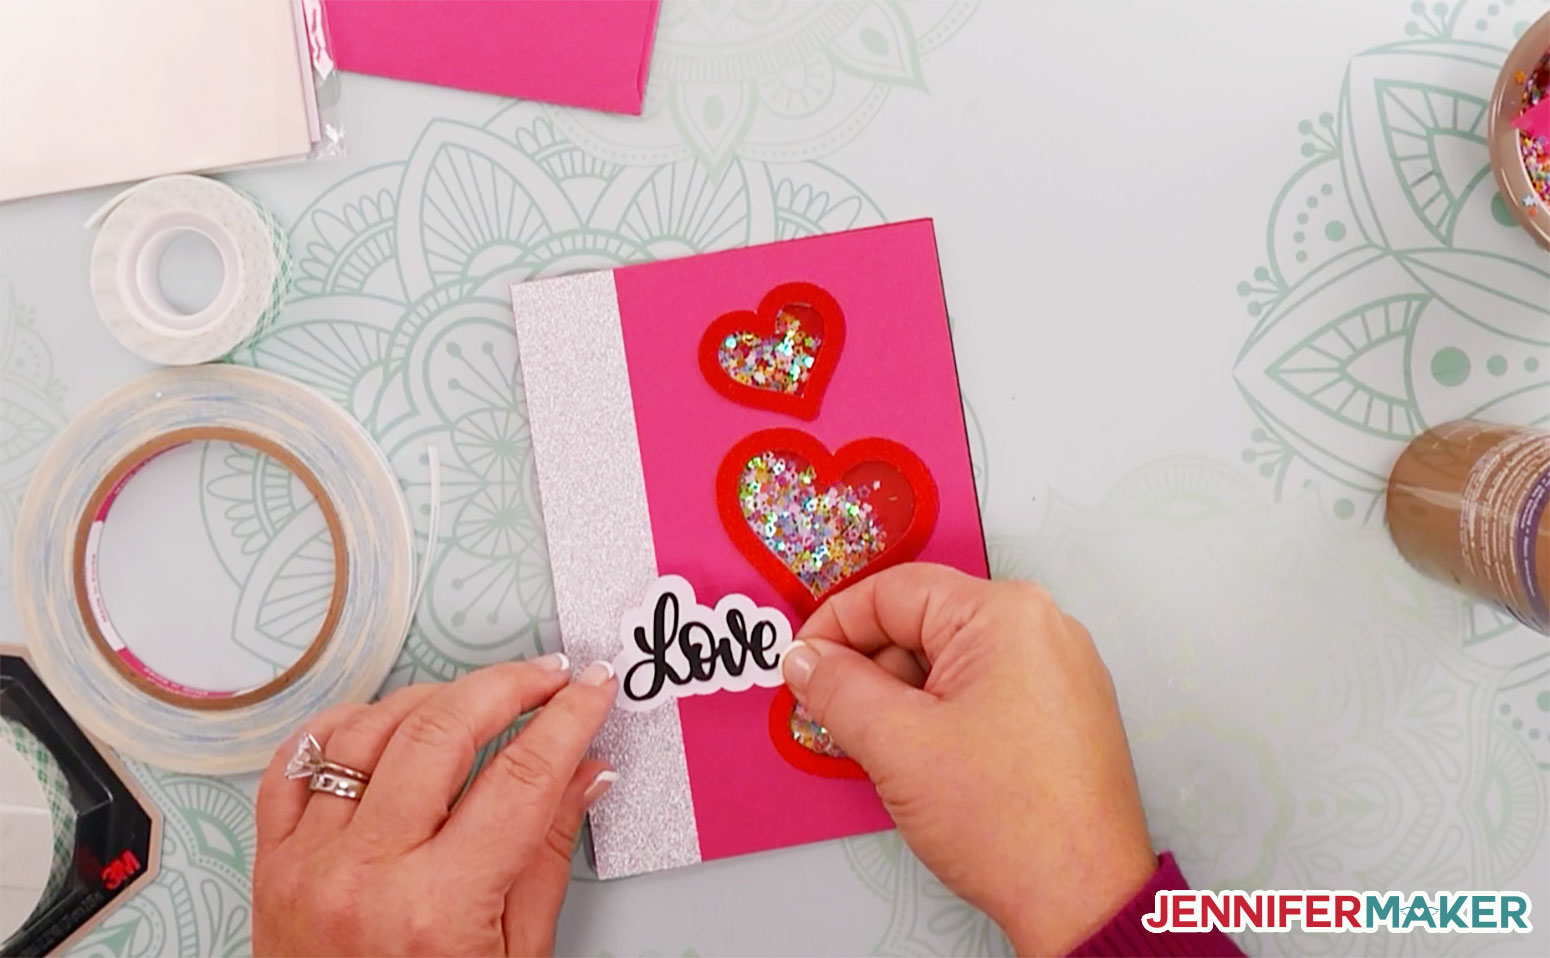
This project shows you how to make fun "love" shaker card. Download my free shaker card templates from my resource library -- just go to the red bar at the top and look for Libraries, then either click Get a Password (if you don't yet have one) or click Enter the Library. You can find the pattern by searching the page for design 281 and then click it to download an SVG cut file for cutting with a Cricut or another cutting machine, or to download a printable PDF. Let me show you how to cut the cardstock for this project on a Cricut cutting machine. First, upload the SVG cut file you downloaded in step 1 to Cricut Design Space. Tip: If you're not sure how to upload an SVG cut file to Cricut Design Space, watch this helpful video training series I made. If you're on an iPhone or iPad, here's how to download and upload SVG files to the Cricut Design Space app. There are two different designs -- the hello card and the love card -- and I'll show you how to put the "love" card together in this tutorial! First thing you want to do is zoom out so you can see the whole design and hide or delete the black layer with the directions. You can do this by selecting the black layer in the Layers panel on the right and clicking the Eye icon or the Delete icon. Now you need to set and attach your score lines. To set and attach score lines in this project, select the design on the Canvas and click Ungroup. Now begin checking the Layers panel for layers that look like nothing more than empty, uncolored lines -- those are the score lines. Another way you can identify the score lines in this project is to look for two layers that are in a small group with themselves -- in these small groupings, the top in the score line and the bottom is the base layer. So once you've found a Score line, select it in the Layers panel, then go to the Operation menu, and choose Score. You should see that layer change from Basic Cut to Score in the Layers panel. Now hold down the Shift key and select the layer below that, then click Attach. Your Score line is now set and attached to its base layer. It's very important you tell Cricut Design Space which layer you want scores by attaching it, or you'll just have scoring happening on empty mats. Continue going down the Layers panel until all layers that just seem like empty lines are set to Score, and make sure you Attach them to the layer immediately below it each time. When you feel you've got them all, click Make It and carefully check each mat. If you see any mats that appear to just be odd black lines, that means you forgot to attach some score lines to their base layers. Go back and find them, and then select the score line and the layer immediately below that, and click Attach. This is how your project should look when all score lines are set and attached: Now you could just go ahead and click the Make It button now but there are some things you can do to customize this design first! The white rectangle with decorative corners is intended for you to add a handwritten or machine-written message. So if you want to use your Cricut machine to write a message, here's how you set that up! I've included two different envelopes for you to use. One can be cut using a 12x12 mat, while the other requires a 12x24 mat. Hide or delete the envelope layer you don't want to use. You are now ready to cut your card. Click the "Make It" button in the upper right, click Continue, then select Medium Cardstock for the material. I changed the cutting pressure from default to more to be sure it cut all the way through. After you finish cutting your white layer, you'll want to replace the pen with the scoring stylus so it scores the other layers as necessary. Now that you have your card and envelope pieces cut, let’s assemble them. Find the large envelope piece and fold the cardstock on the score lines. I use the scraper tool to get a nice crisp fold. Next, add double-sided adhesive to each side of the longest flap. Fold the large envelope flap up. Tip: You can add a strip of double-sided adhesive to the top of the envelope and then add a piece of parchment paper over the adhesive. That way it is ready to seal when you want to use the card or it's ready for someone else to seal if you give the card away. If you cut the larger mat envelope, make sure to glue your accent paper to the inside of the envelope. Glue the contrasting strip of cardstock to the left edge of the card's front. Take the three hearts cut in glitter cardstock, add adhesive to the back of each, then place on top the matching heart cut out on the shaker card. Flip your cardstock over and place clear acetate or window plastic over the hearts using double-sided adhesive tape -- do not use the mounting tape, as you want the acetate to be flat against the card here. Next, cut strips of the foam mounting tape in half and place around each of the three hearts. You want to make sure that the tape ends all touch one another, forming a wall around the hearts, as this is where you will put the confetti/glitter and you don’t want any to come out. Add a few pieces of foam tape to the right side of the card front as well. Fold the larger rectangle piece in half. This piece is the body of your card. Now it's time to grab your glitter! I found it easiest to put the glitter into a small piece of folded cardstock and pour it into the heart sections on your shaker card. You could also use a small dish or spoon. Place your folded card on top of the pink cardstock you just filled with confetti. Make sure the leading edge of the folded card is placed on the edge with the glitter confetti-filled hearts. Open your shaker card and attach your personalized message insert to the inside with double-sided tape. Glue the word "Love" on top of the white cloud-shaped piece. Attach the white cloud-shaped piece of cardstock to the front of the shaker card. Your shaker card and envelope are all done! Give it a shake to see how it works! Finished shaker card is 5" x 7" (if you make the Joy version, it is 4.5" x 6" when finished) Special thanks to the JenniferMaker Design Fairy team, specifically design fairy Caitlin, for helping me design and assemble this awesome love shaker card. As an Amazon Associate and member of other affiliate programs, I earn from qualifying purchases.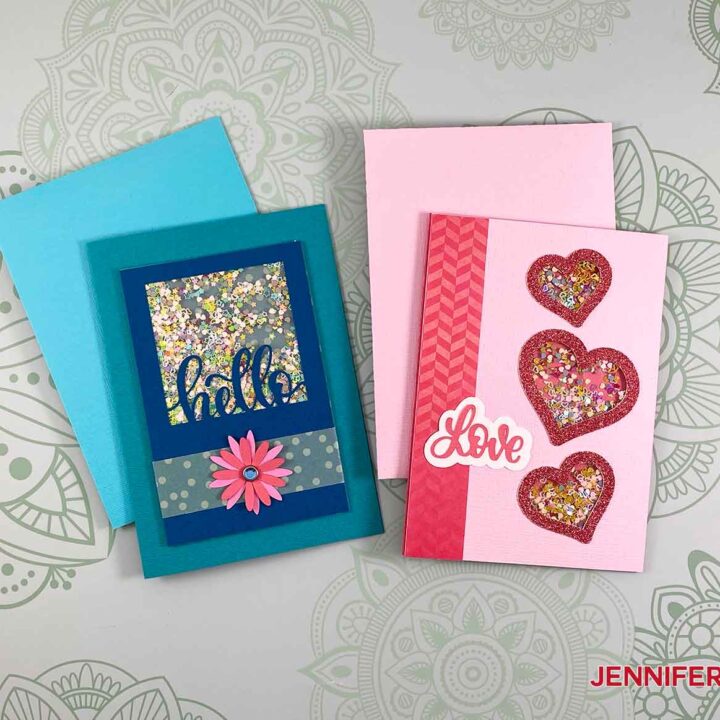
Love Shaker Card
Materials
Tools
Instructions
STEP 1: GET MY FREE SHAKER CARD DESIGN
STEP 2: PREPARE AND CUT THE FILE
After you've placed the design on your canvas in Design Space, click Ungroup in the upper right so you can work with your layers easier.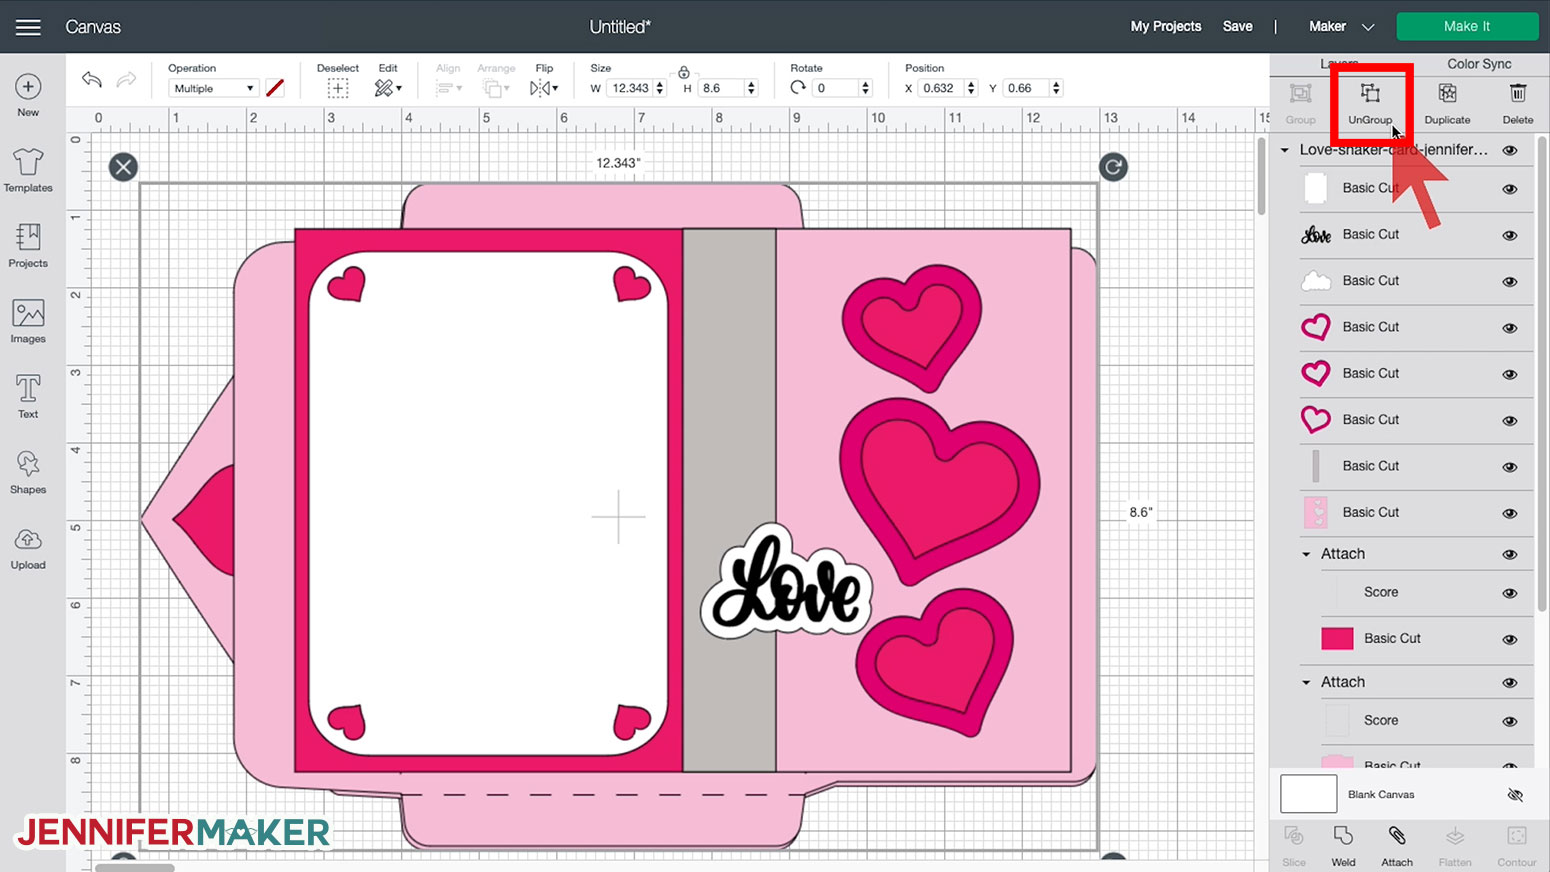
This project requires folding. There are score line layers, and those require a scoring tool, such as the Scoring Stylus or Scoring Wheel. To use one of those two tools, you must set and attach the score lines in this tutorial. This is different than is shown in the video, as Cricut Design Space has changed since the video was made. If you don't set and attach your score lines, your score lines will cut rather than score.HOW TO SET & ATTACH SCORE LINES
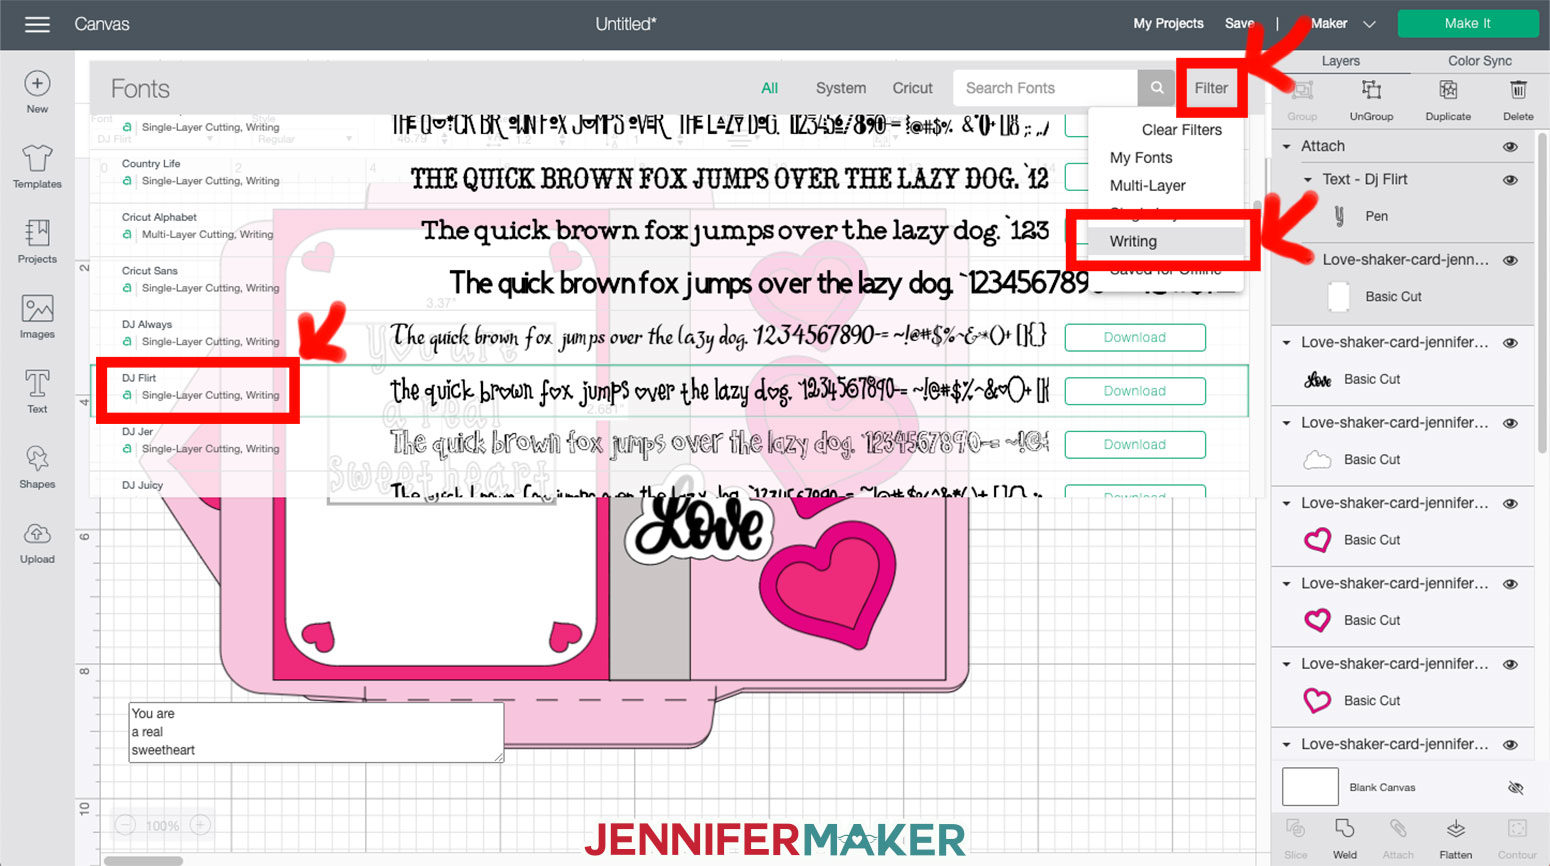 I’ve chosen DJ Flirt for this card, which comes in a Regular style and a Writing style — you can switch between these two with the Style dropdown menu.
 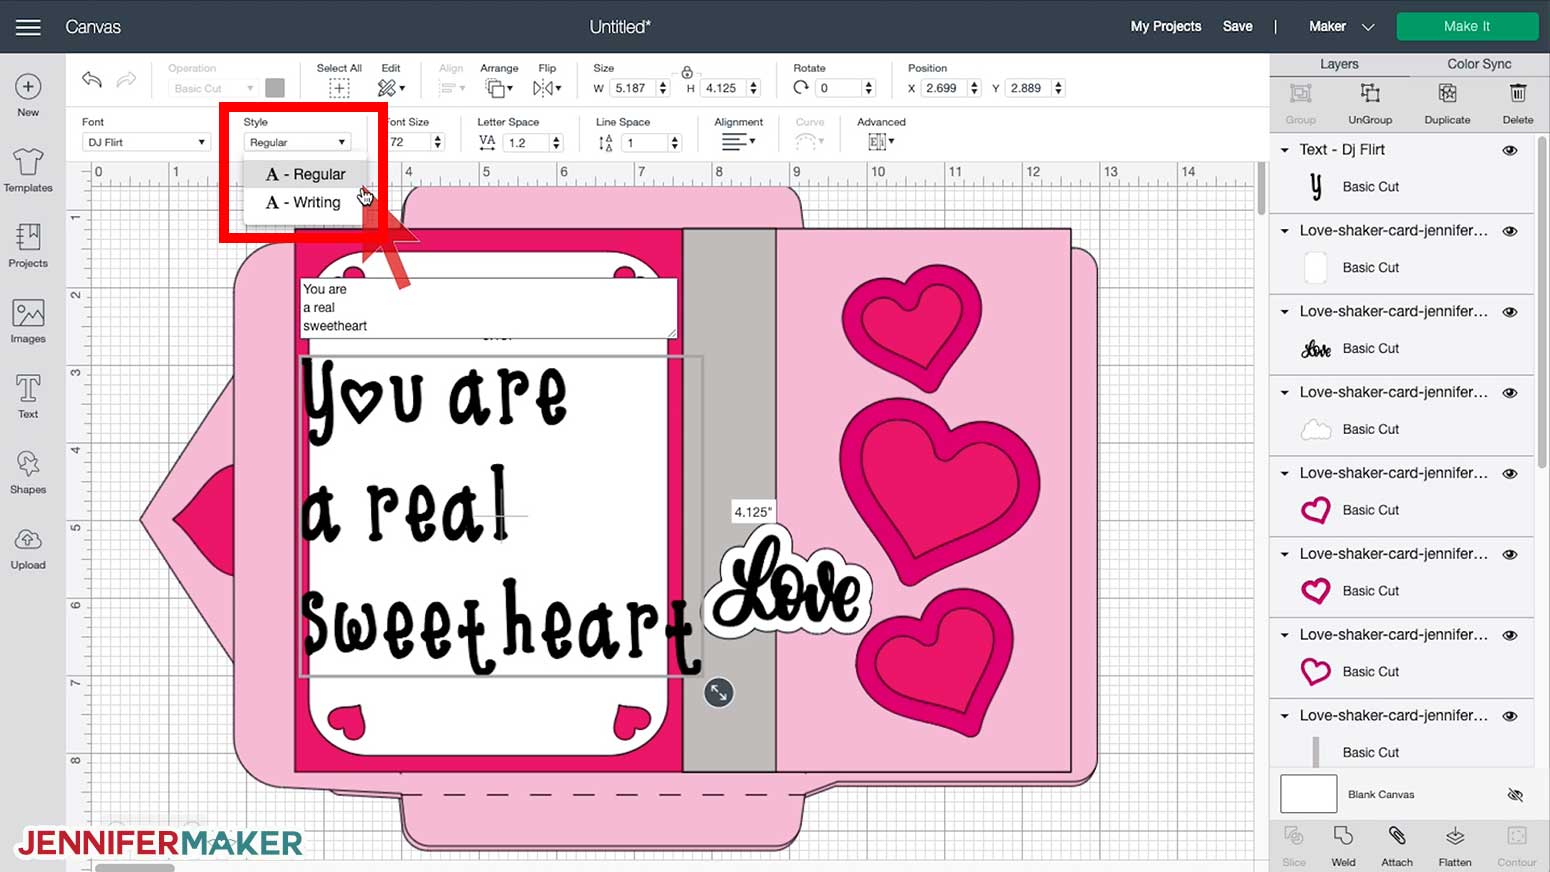 If you choose a writing style, Design Space will automatically switch its type to Draw for you. If you chose a regular style as I have here (because I think the bubble letters look cute on this card), you’ll need to manually change it’s type from Cut to Draw in the Operations menu yourself.
 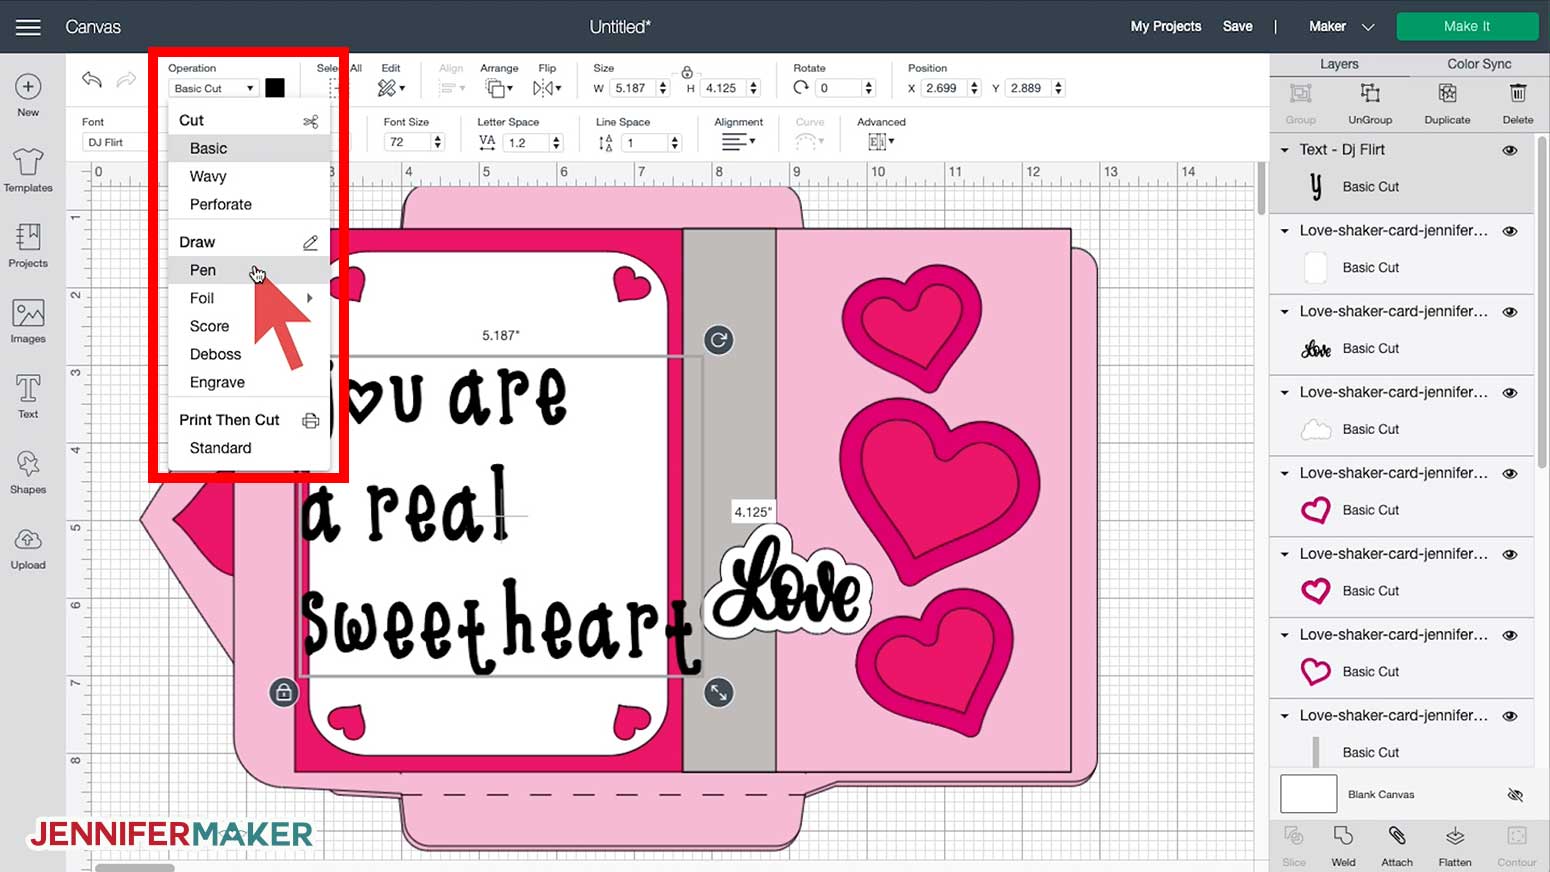 Also note that not all fonts are free and if there is a price, it will be displayed below the font name, but if you're a Cricut Access member, most of these fonts are included — learn about Cricut Access.
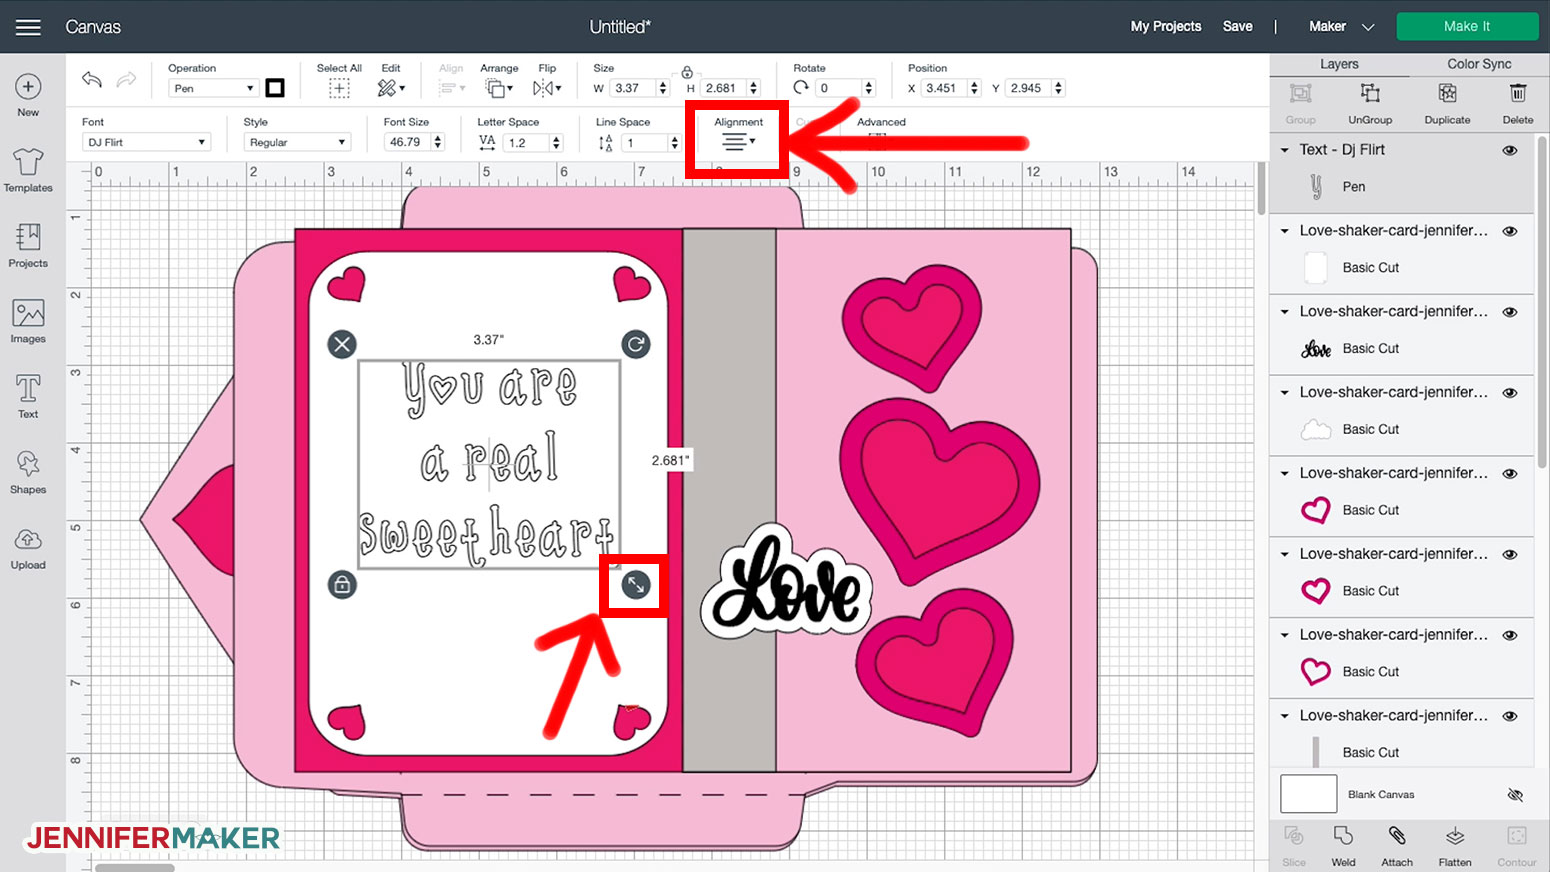
Place your cardstock on your mat, place your pen in clamp A, load it into your machine, and press the flashing button to begin!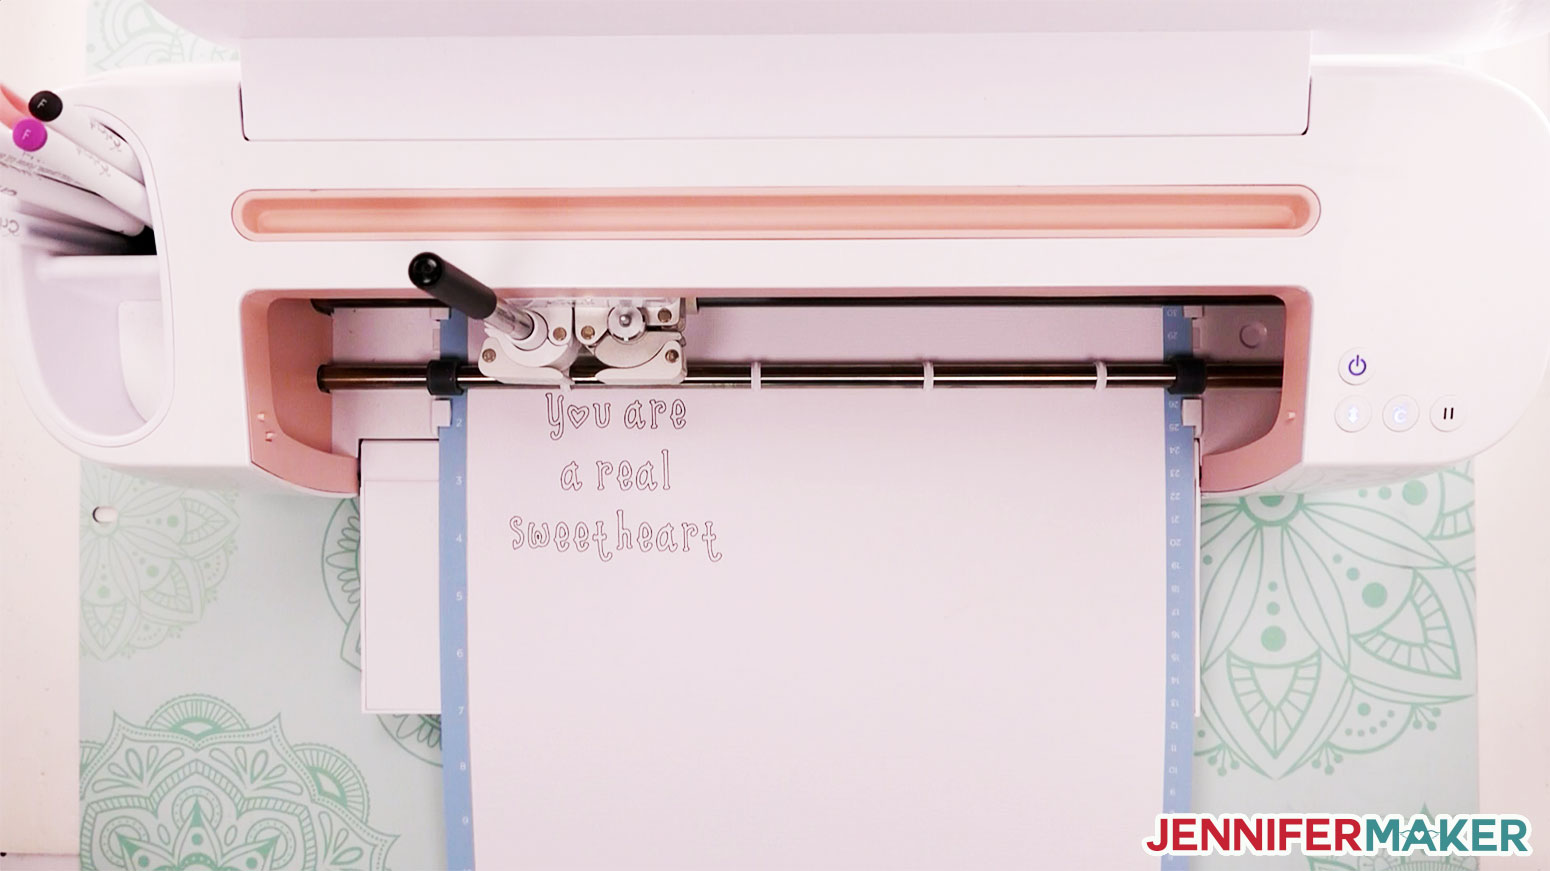
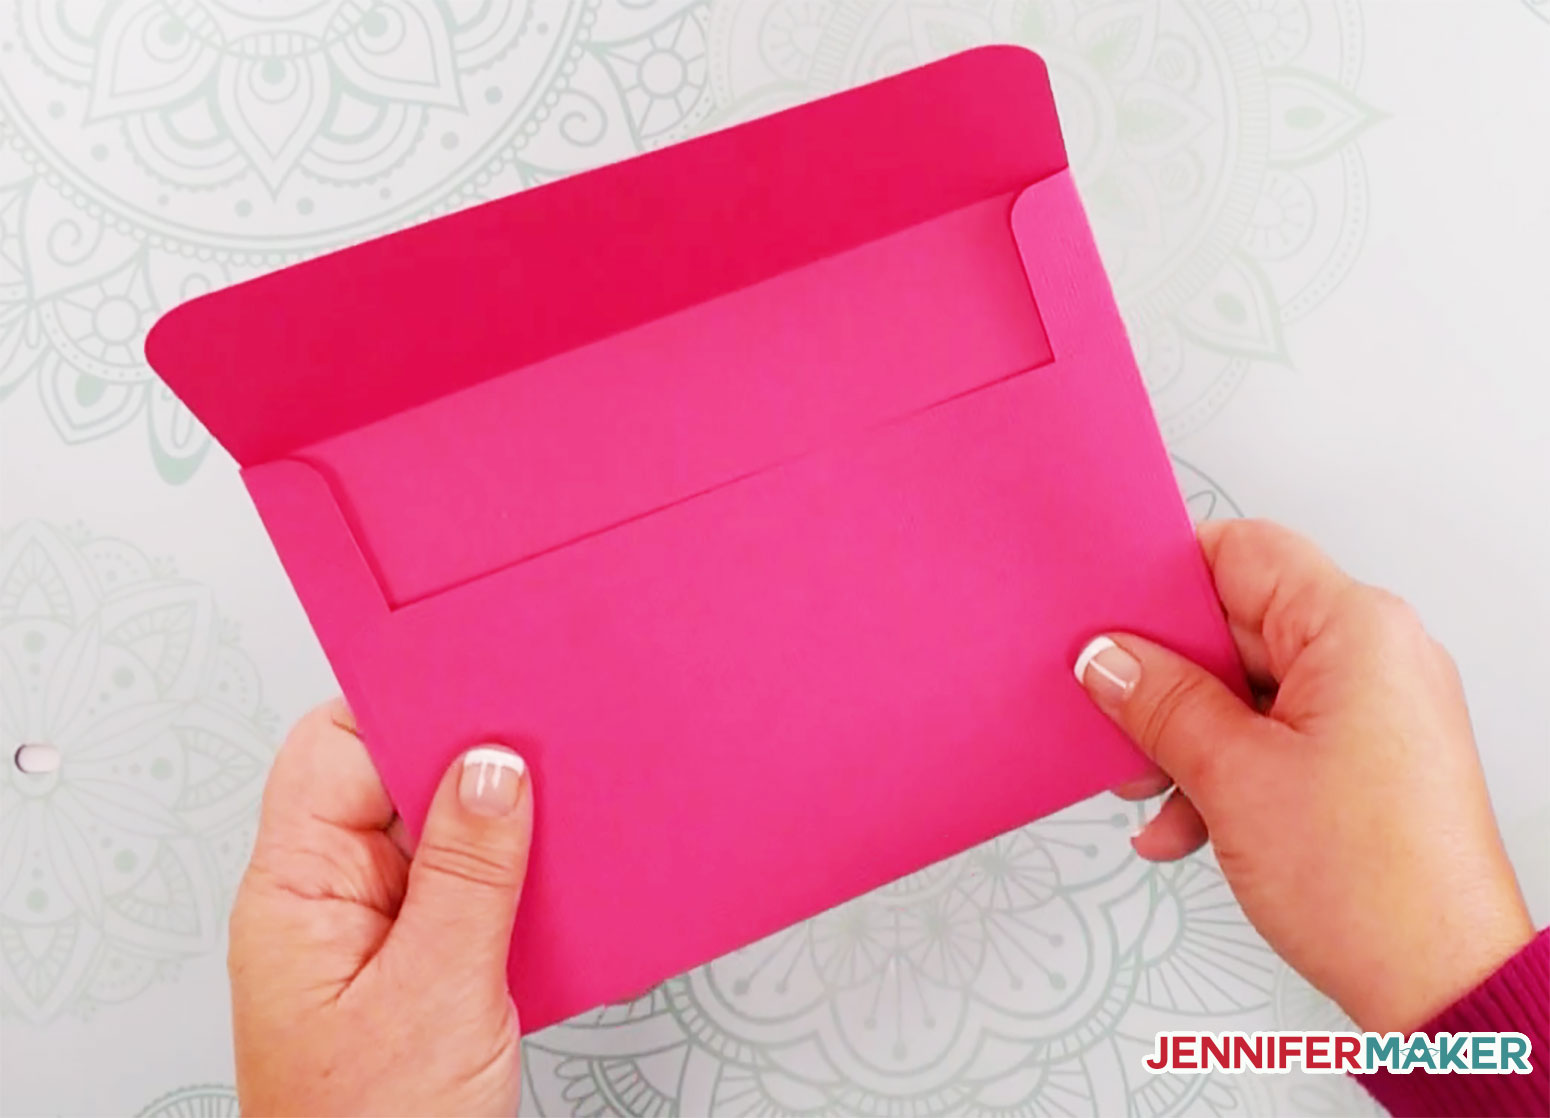
STEP 3: ASSEMBLE THE ENVELOPE
STEP 4: ASSEMBLE THE SHAKER CARD


 ]
]
Notes
Recommended Products

Answers to Your Questions About How to Make a Shaker Card
Q: What can I use instead of acetate or window plastic?
Any clear plastic that is thick yet flexible enough to cut and be taped down works great. If you don’t have acetate, check your stash for clear plastic covers on materials and re-use that instead!
Q: Can I use the Cricut Joy?
Yes, you can, but I do not recommend you simply resize the card as it would only be 3″ x 4.5″ when you’re done. Instead, upload the files in the “SVGs for Cricut Joy” folder to Design Space as those will all fit. Note that you’ll need to glue the two halves of the card together and there is NO envelope for this size (but you can buy or make a 5″ x 7″ envelope for it).
Q: Can I use regular glitter in the shaker card?
You can definitely use regular glitter but it might not shake as well and could get stuck all over the entire sheet of plastic. The bigger and chunkier the glitter, the better.
Q: I don’t have a tape gun, what can I use instead?
You can use any double sided adhesive tape you have on hand! It does need to be flat, however — you cannot use the foam tape for everything in this project.
Q: Will this shaker card cost more postage to mail?
Yes, it will. I recommend using two stamps if you plan to mail the shaker card.
Q: My design came in without score lines set. What do I do?
Check out this tutorial to see how to set and attach your lines!
Get my free SVG files to make a Shaker Card
I’d love to see YOUR shaker card and all the colors and things you choose to put inside it! You can also personalize it by cutting your own confetti pieces using Cricut Party Foil. If you make a Shaker Card, please share a photo in our Facebook group or tag me on social media with #jennifermaker.
Love,

Want to remember this? Save this tutorial on How to Make a Shaker Card to your favorite Pinterest Board!


Love your videos. Another must make one. Finished your new free class Cricut for beginners and purchased your play book. Now to play play play!
Awesome, Marjorie! So glad you love the videos and thank you for your purchase!
Now you can!
I have a quick question. I use Silhouette Studio, and the envelope cones over as bigger than 12″ – is that correct? If not, what size should I make it? thanks
We have two envelopes in this pattern, Mel! One of them is 11.132″ wide x 8.542″ high, and the other (with the lacy cutout) is 12.317″ wide x 8.543″ high!