Learn how to get & apply colorful designs to ANY color or material with DTF transfers!
Let’s talk about something game-changing: DTF Transfers! These vibrant, detailed design transfers are taking the DIY world by storm, and for good reason. Imagine stunning, full-color designs that pop on dark colors … and ALL fabrics? With DTF, you can finally bring your wildest, most colorful ideas to life on any shirt!
Watch the full step-by-step video tutorial on getting & applying DTF transfers:

There’s something magical about creating custom T-shirts that feel uniquely yours. Whether it’s a shirt for a special event, a floral design in colors you love, or something eye-catching and inspiring, T-shirt crafting has a way of sparking joy.
DTF stands for direct-to-film, and involves printing a design onto a special film transfer, which can then be pressed onto fabric. Unlike sublimation which is infused into the fibers, the result is a bold, beautiful design that sits on top of the material. While methods like sublimation can be limiting (like being stuck with white polyester fabrics), DTF lets your imagination run wild, allowing you to apply colorful, detailed designs to cotton, poly blend, or synthetic materials of any color!

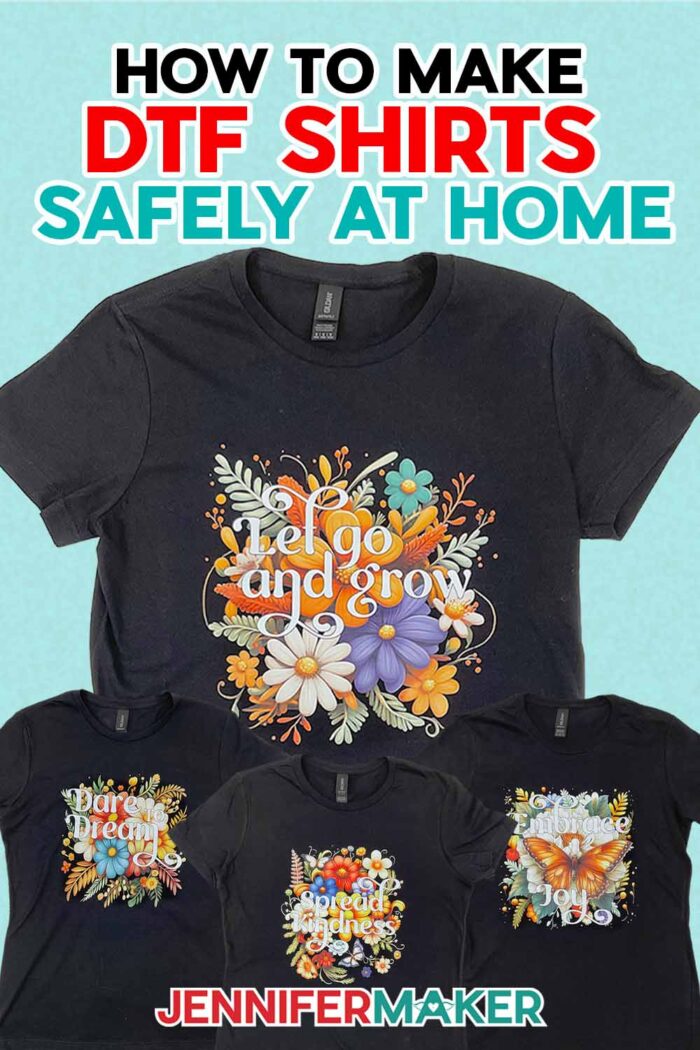
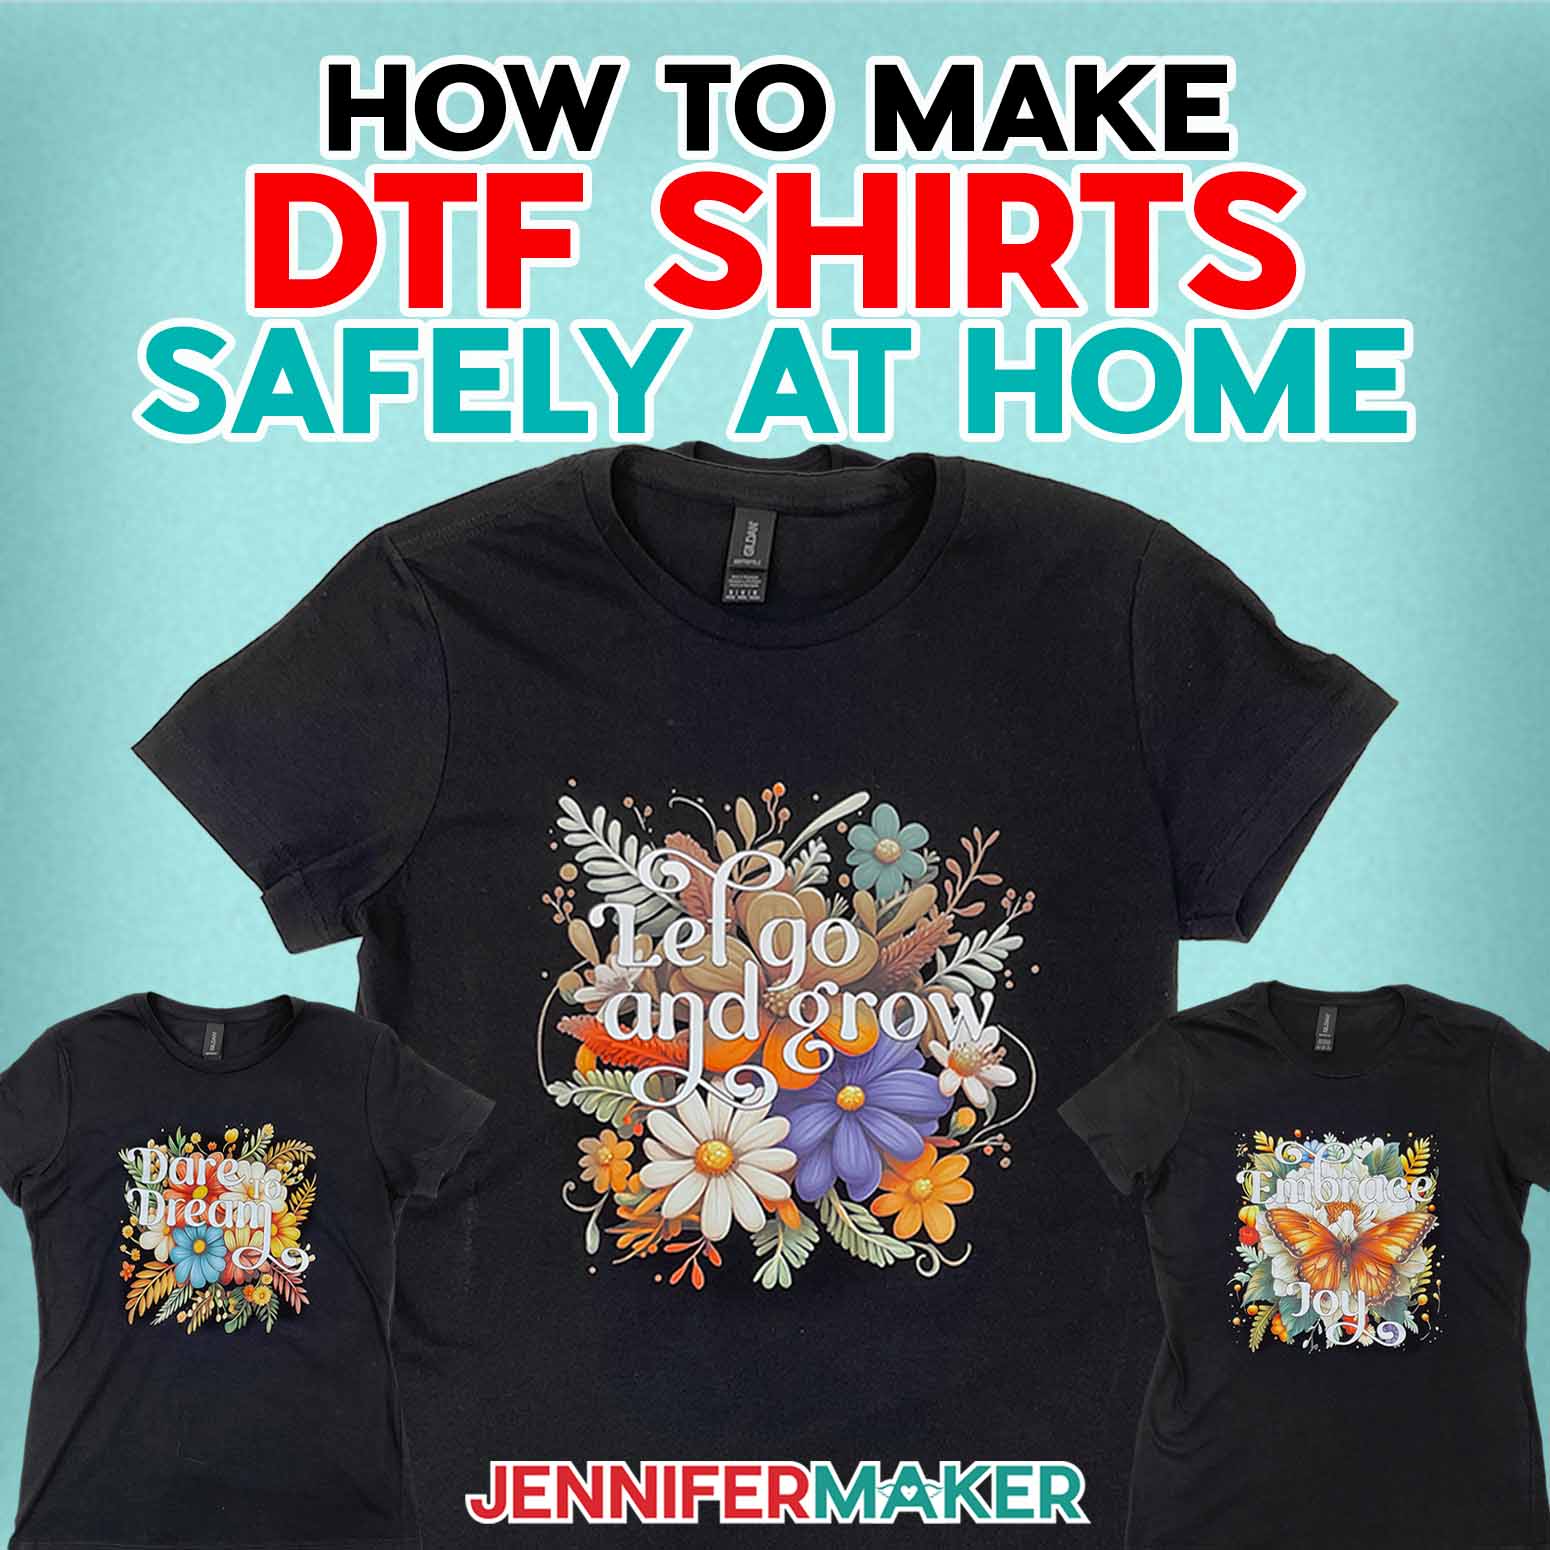
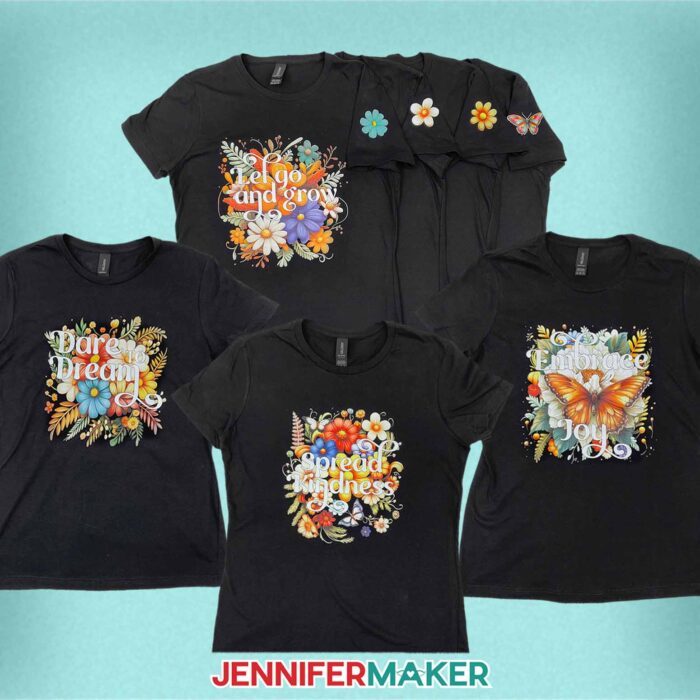
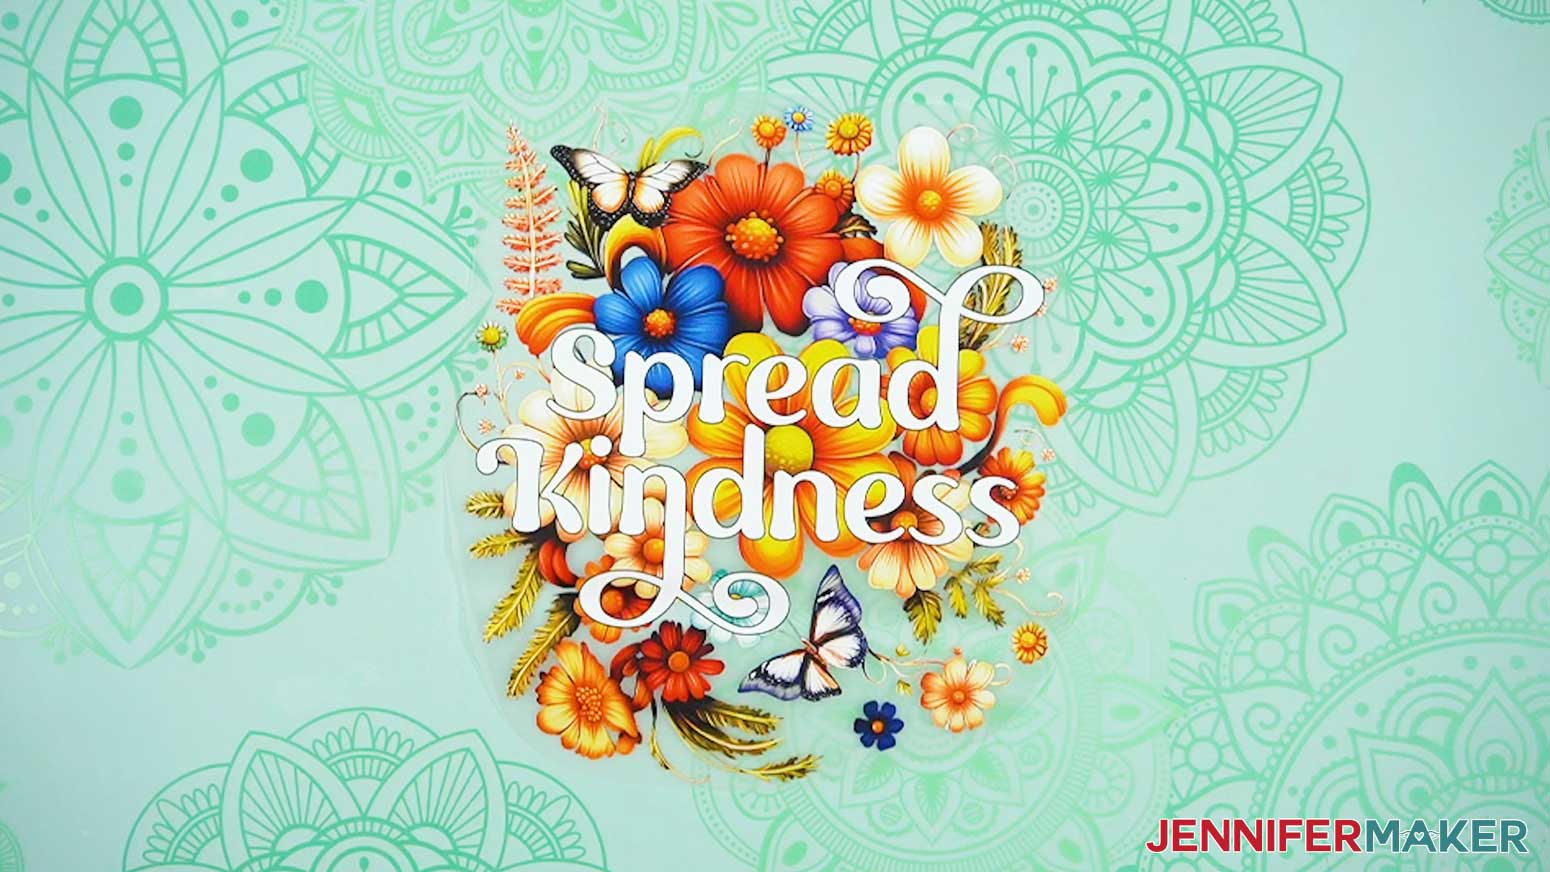
While we’re on the topic of designs, I’ve created four floral PNGs that are perfect for DTF! They’re bright, colorful, and come with inspiring messages like “Dare to Dream” and “Spread Kindness.” I generated these designs using AI art software and the right prompts, then carefully edited them in Photoshop to add the words and clean up the edges so they transfer flawlessly. In the video tutorial, I’ll help you determine what makes a good DTF transfer and what doesn’t, so you’re sure to get the beautiful results you expect.
Want to learn how to create your own AI-generated designs for more projects? My AI Art Playbook has tons of information to get you started!
I tried the at-home DTF printing method a few years ago, and while the results were pretty, the process wasn’t exactly stress-free – or safe. Because of the health risk of inhaling those fine particles, it’s not just messy – it’s potentially hazardous. Not to mention, the adhesives can make their way into your Cricut, printer, and other crafting tools. Handling hazardous powders and worrying about my equipment’s safety? Not my idea of fun.
That’s why I’m so excited to share a much safer way to get those gorgeous custom DTF transfers. Spoiler alert: you can leave the tricky stuff to the pros and simply enjoy the fun part – pressing your beautiful DTF design!
Here’s how it works: You upload your high-resolution design files (think PNGs or JPGs with crisp edges for the best results) to a service that creates DTF prints. They handle the printing, and in just a couple of business days, you’ll have a ready-to-use, full color transfer delivered to your doorstep. It’s that simple. No risky chemicals, no mess, no stress.
I found a great DTF transfer printing service that I really like, and I can’t wait to share them with you in my video!
When your DTF transfer arrives, you’re just a few minutes away from having a custom T-shirt you’ll love. All you need is a heat press (I used a Cricut EasyPress), a pressing mat, and a few other basic supplies you’ll find in my materials list below.
If you’re a sublimation crafter, you might be thinking – hey, this sounds familiar! That’s because a lot of the tools and materials are the same. However, unlike sublimation, you won’t need cardstock – and instead of butcher paper, you’ll need parchment paper. Why not butcher paper? Butcher paper is uncoated, and thicker than parchment paper. In order to ensure a good press of your DTF transfer, high, even heat must be applied to the design. Butcher paper is not technically designed to conduct heat, so it does so unevenly. Parchment, however, lets more heat through and does it more evenly – making it perfect for transferring DTF prints.
In my video and written tutorials, I walk you through all the steps for sourcing your print, preparing your shirt, and pressing your DTF design, so you’re left with a piece of clothing that looks like it was made by a pro!
If you’d like make your T-shirt even more unique, I can teach you how to add a coordinating design to your sleeve — and how to save money when purchasing multiple small DTF transfers at the same time! My workshop and toolkit for this project are part of my ADVANCE with JenniferMaker program, which gives you access to a library full of helpful resources and much more! To find out more about how you can customize your project and level up your crafting skills, check out the Advance program here!
Ready to learn how to source and apply DTF heat transfers? Follow along with me, then make your own awesome T-shirt crafting ideas come to life!
Let me show you how to get and use DTF transfers! This post contains some affiliate links for your convenience (which means if you make a purchase after clicking a link I will earn a small commission but it won’t cost you a penny more, there is no additional cost)! Read my full disclosure policy.
Materials to Make T-Shirts with DTF Transfers
View my Amazon shopping list for the exact items I used!
- One (1) T-Shirt (any style, but I used a black cotton shirt)
- DTF Transfer (I purchased mine from Jiffy)
- Parchment Paper
- Heat Press – I used the 12” x 10” Cricut EasyPress 2
- Cricut EasyPress Mat
- Ruler or Measuring Tape
- Scissors
- Lint Roller
How to Make T-Shirts with DTF Transfers!

DTF Transfers
Learn how to purchase and apply DTF transfers to a T-shirt!
Materials
- One (1) T-Shirt (any style, but I used cotton)
- DTF Transfer (I purchased mine from Jiffy)
- Parchment Paper
- Design #712 (My free PNG design files are available in my free resource library - get the password by filling out the form at the bottom of this page)
Tools
- Heat Press - I used the 12” x 10” Cricut EasyPress 2
- Cricut EasyPress Mat
- Ruler or Measuring Tape
- Scissors
- Lint Roller
Instructions
STEP 1: GET MY FREE DESIGNS FOR CUSTOM DTF TRANSFERS
First, download my DTF Transfer designs from my free library – look for Design #712.
Alternatively, you can use the Save This Project form near the top of this post and the design link will be emailed to you.
The PNG folder contains four motivational floral designs. I made these designs with the help of AI art generation and adjusted them with image editing software.
TIP: If you’re not sure how to download zip files and upload designs, go to jennifermaker.com/svgs.
STEP 2: GET A DTF PRINT
CAUTION: I strongly recommend against trying the “at-home” DTF methods. While the methods in this tutorial are safe, the “at-home” methods of DTF printing involve adhesive transfer powder. Breathing in adhesive transfer powder is hazardous, and requires a respirator, goggles, and other PPE to reduce (not eliminate) risk. Adhesive transfer powder is not safe to use with pets or other people in the home. Using adhesive transfer powder also requires you to cover electronics and other surfaces with drop cloths to protect them from airborne powder. If the powder gets into the machine, it can severely damage it.
ORDER A DTF PRINT FROM JIFFY
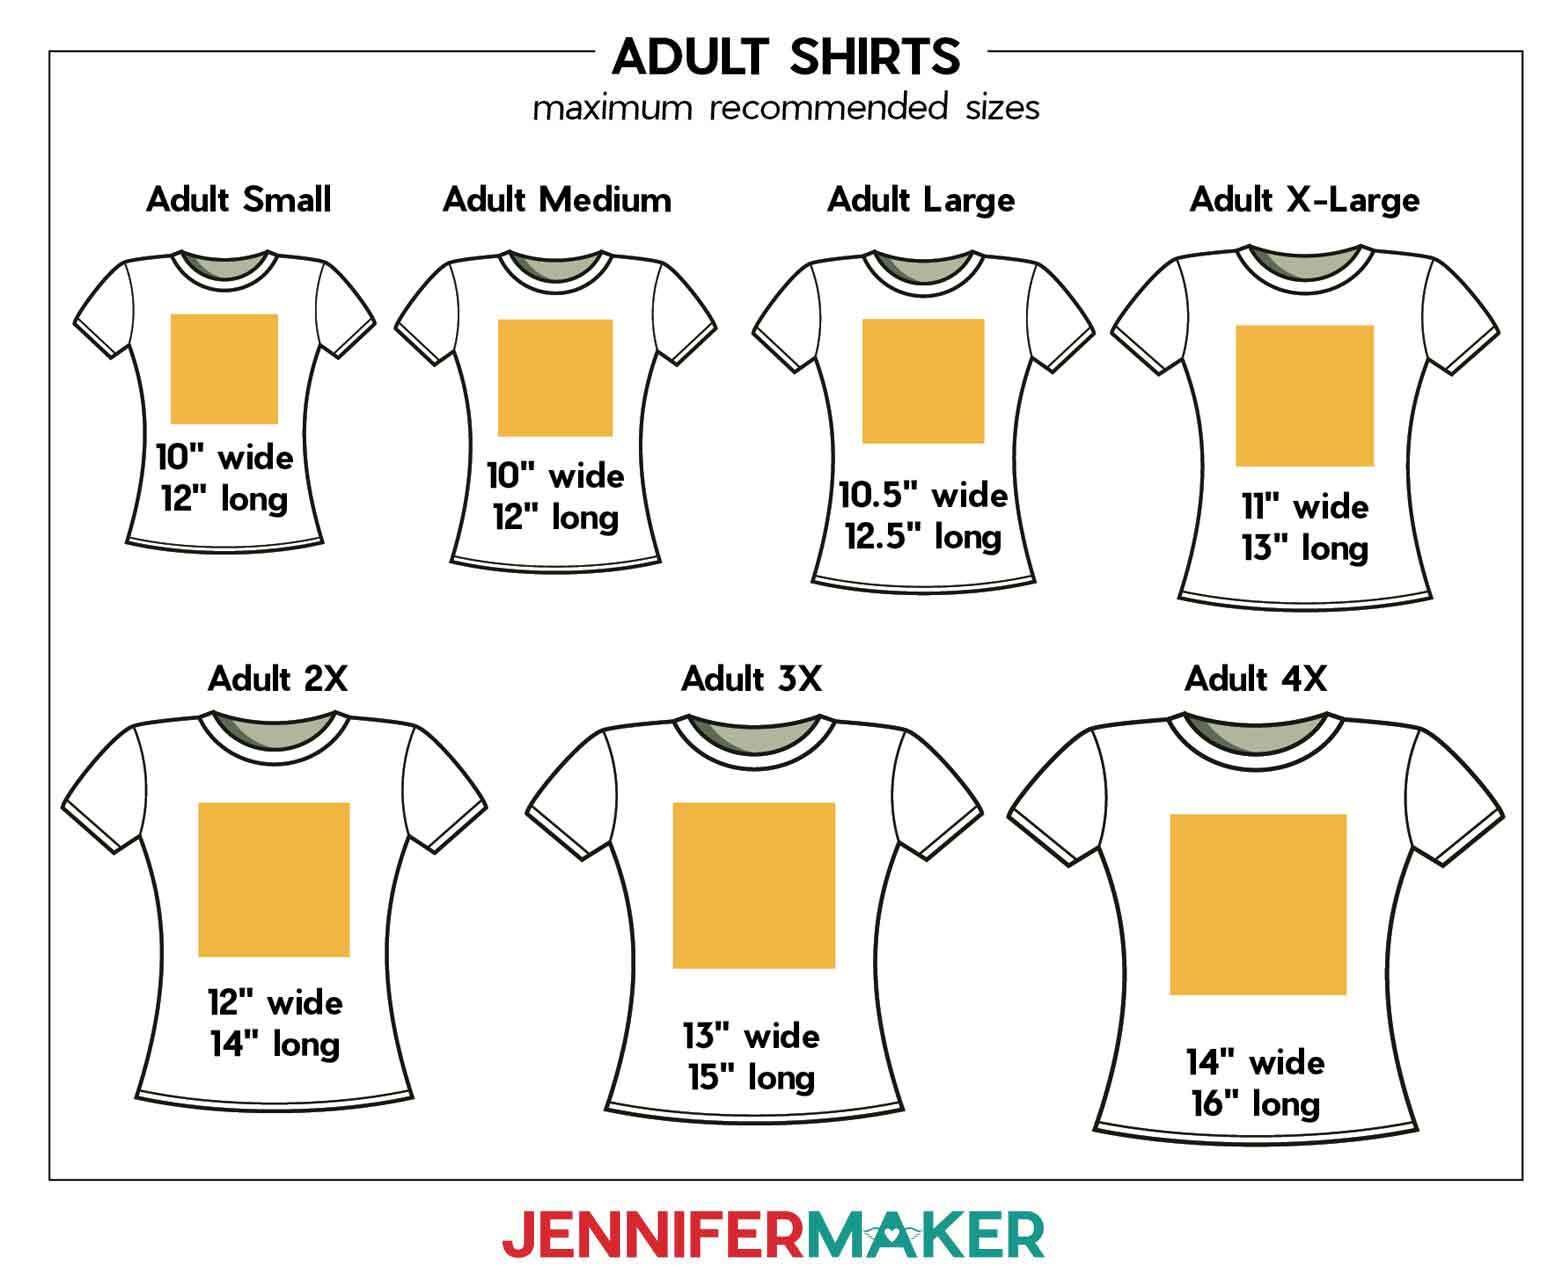
- Determine the size transfer you need by measuring the area on the front of your shirt. My shirt is an Adult Medium, so my transfer will look best around 10” wide and/or 12” long.

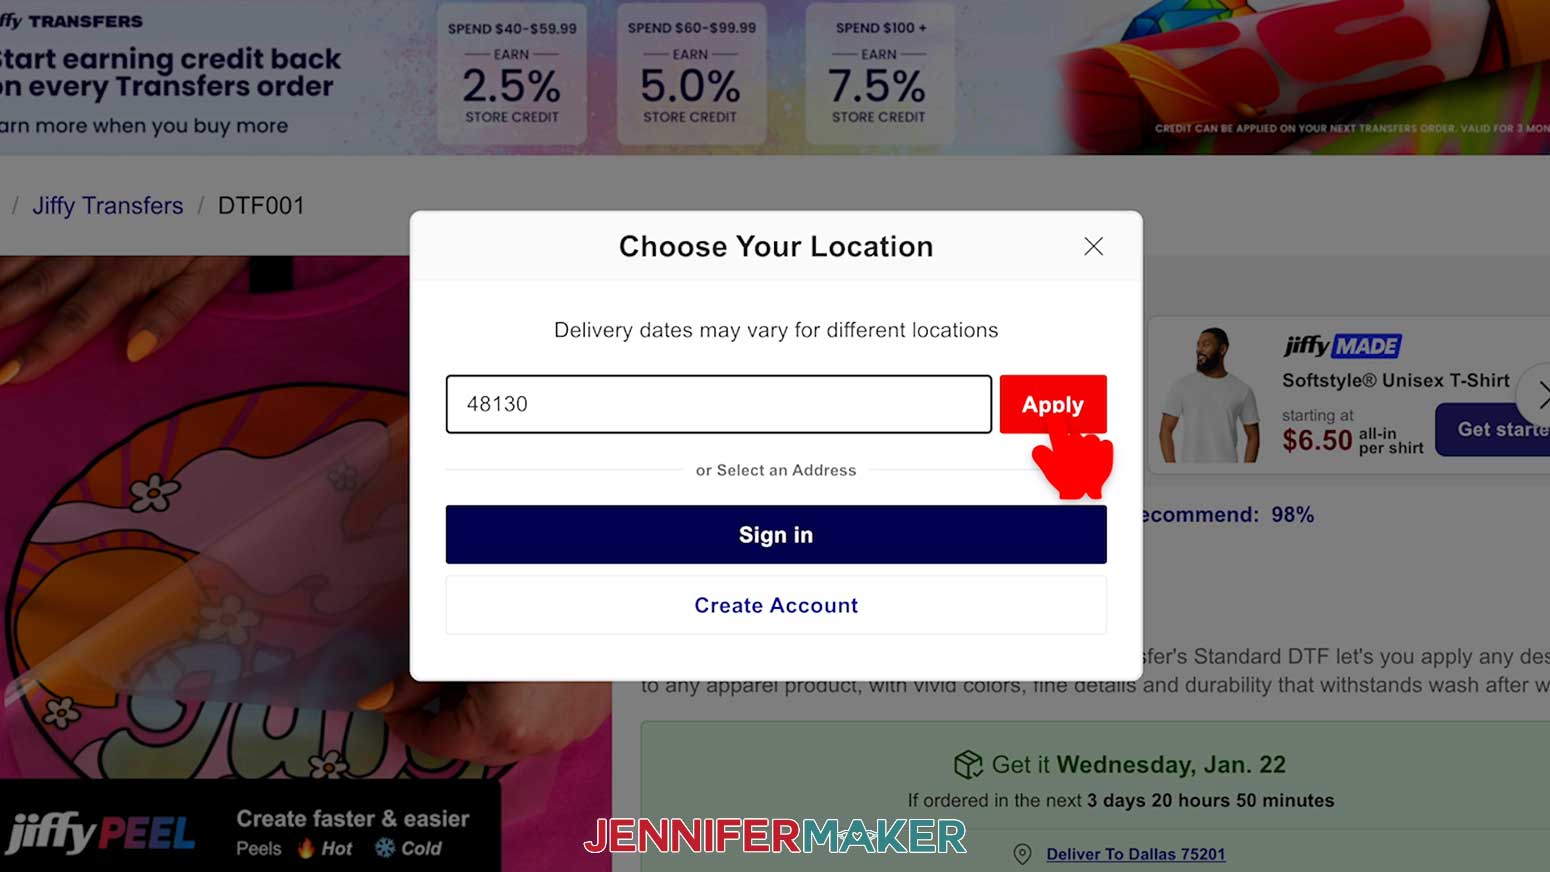
- Go to my Jiffy affiliate link at jennifermaker.com/jiffy-dtf. If you order through this link, I’ll make a small commission but it won’t cost you any more than normal!
TIP: Change your location by entering your ZIP code to generate an estimated earliest delivery date.
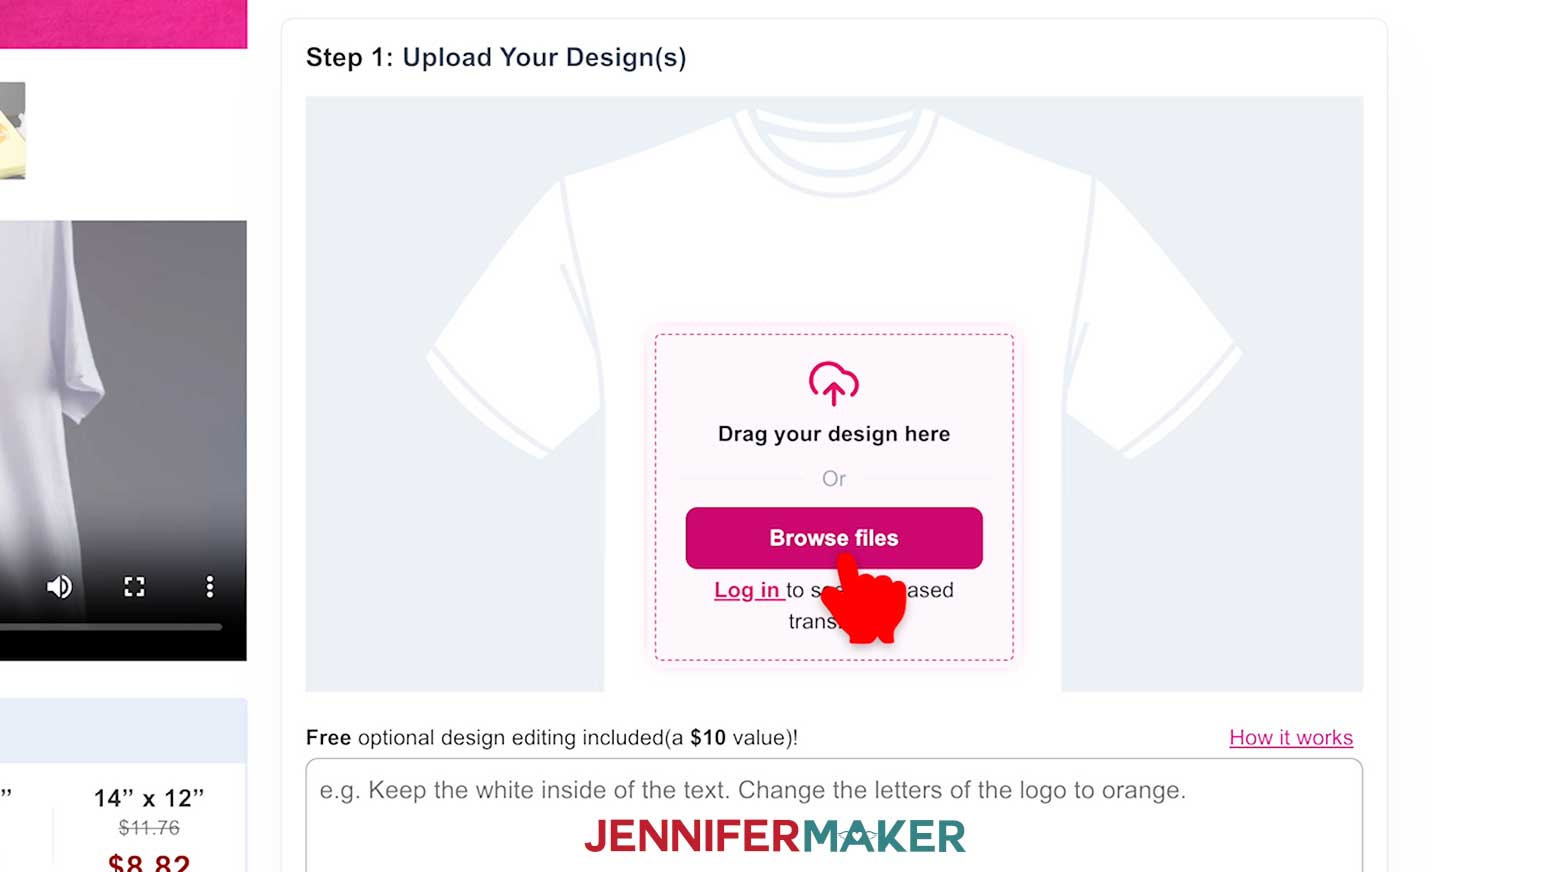
- Scroll down to Step 1: Upload Your Design(s).
- Click “Browse Files” and select the PNG you’d like to use.
- Click “Open” to upload the PNG of your choice.
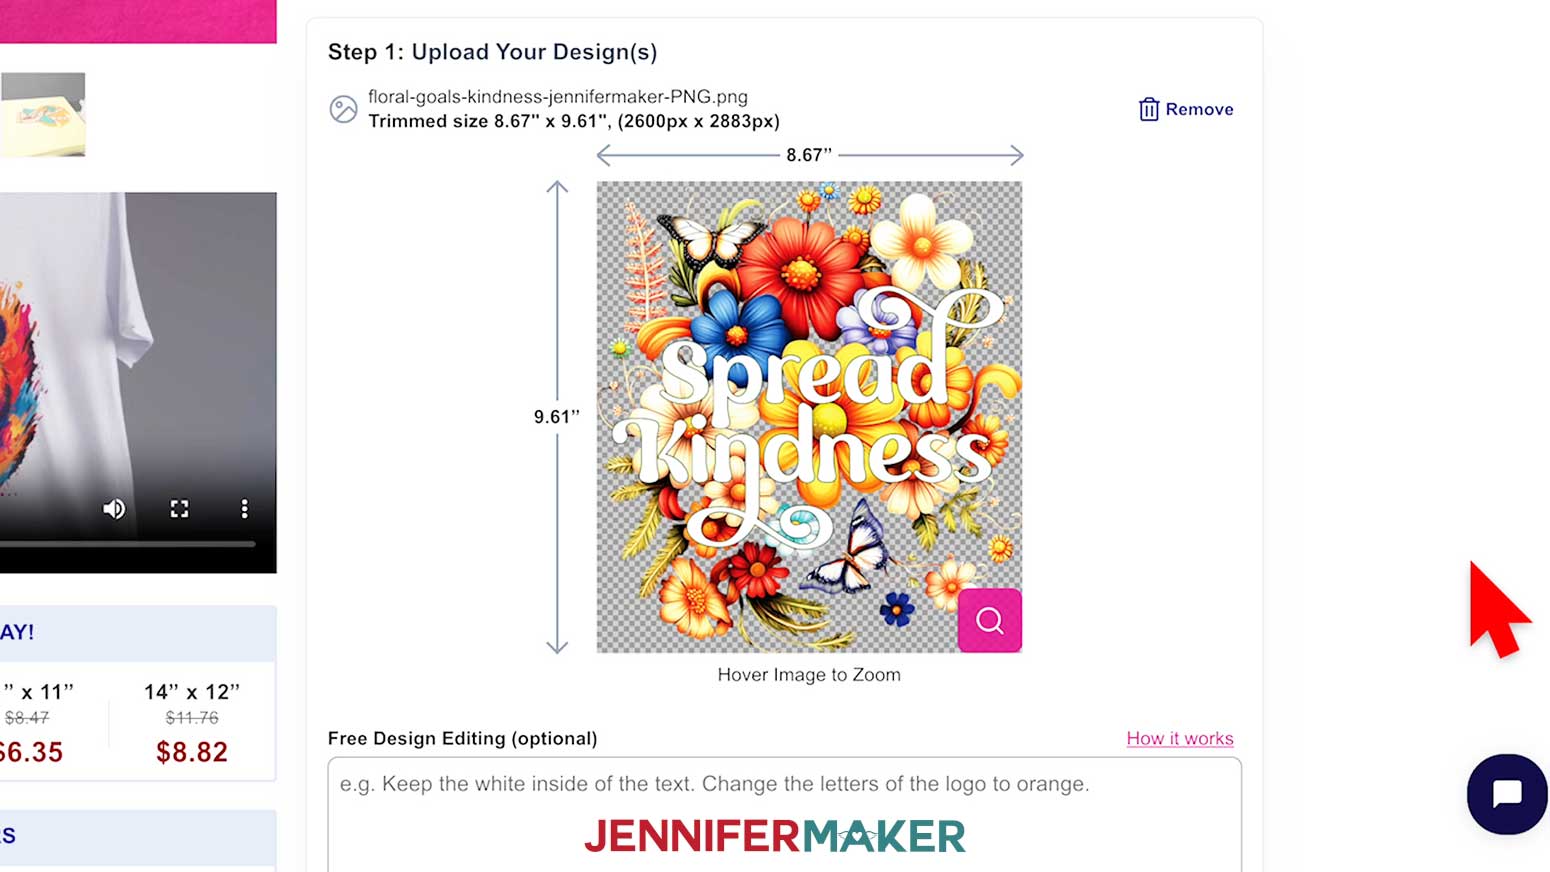
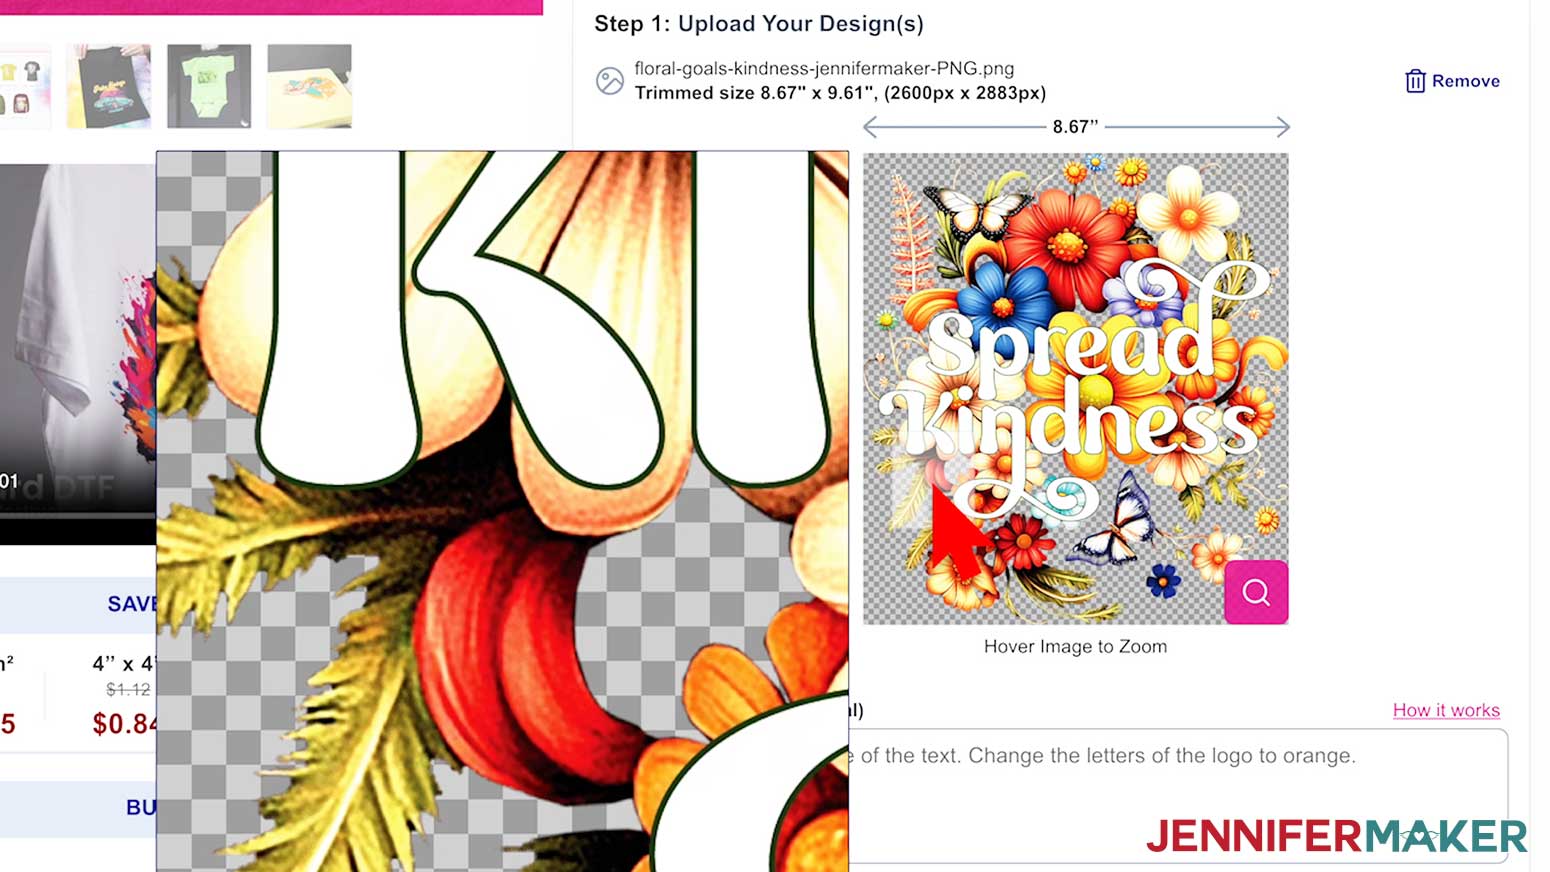
NOTE: Jiffy accepts PNG, SVG, or JPG format image files. - Once the image loads, you can hover your cursor over the image to zoom in and check that everything looks good.
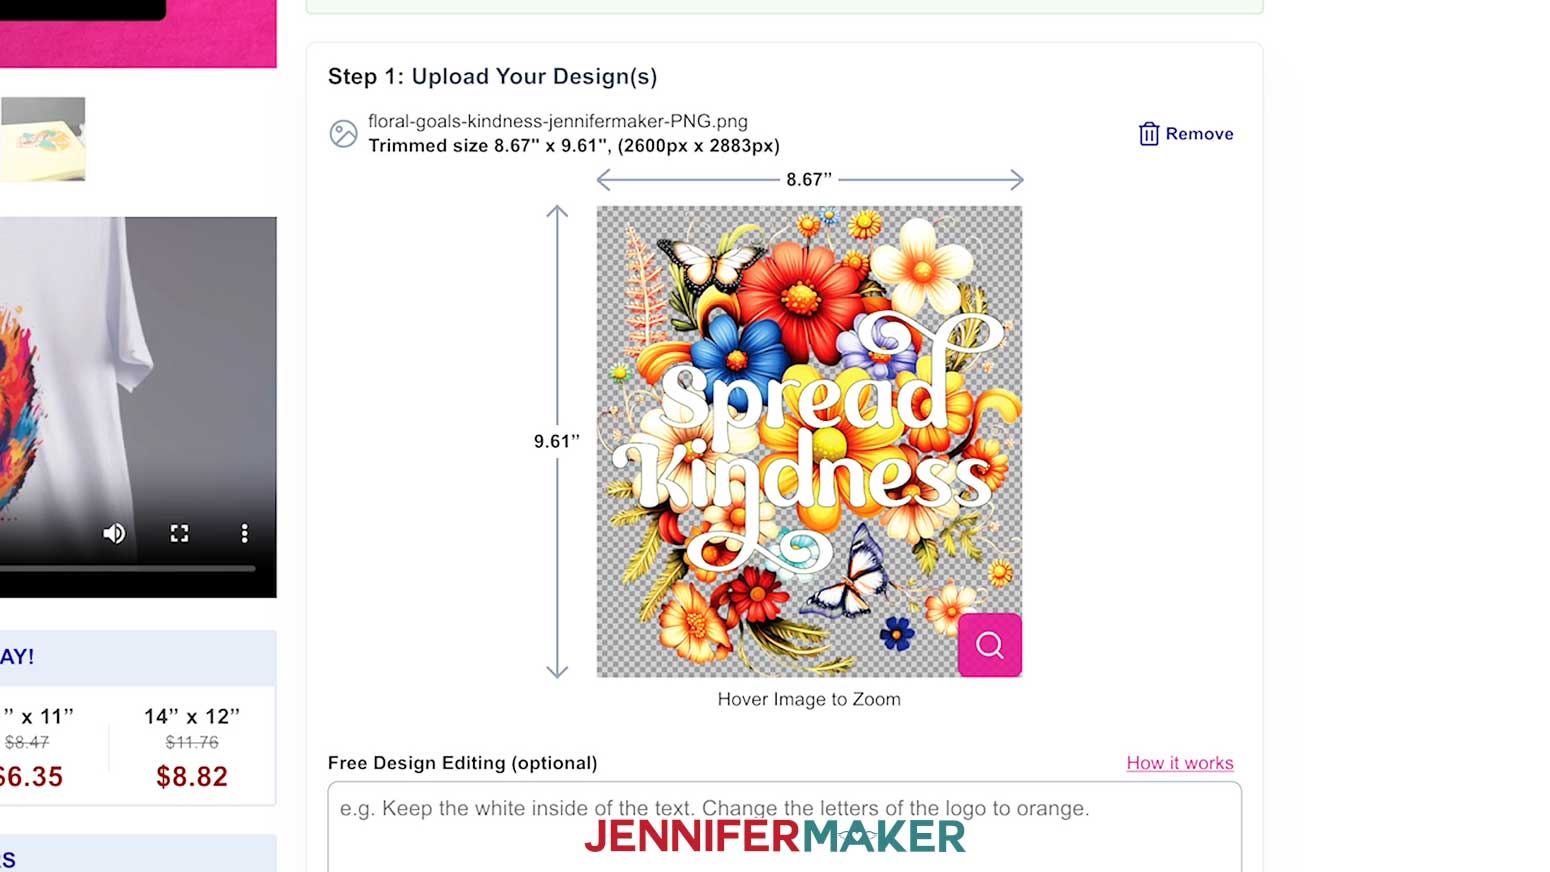
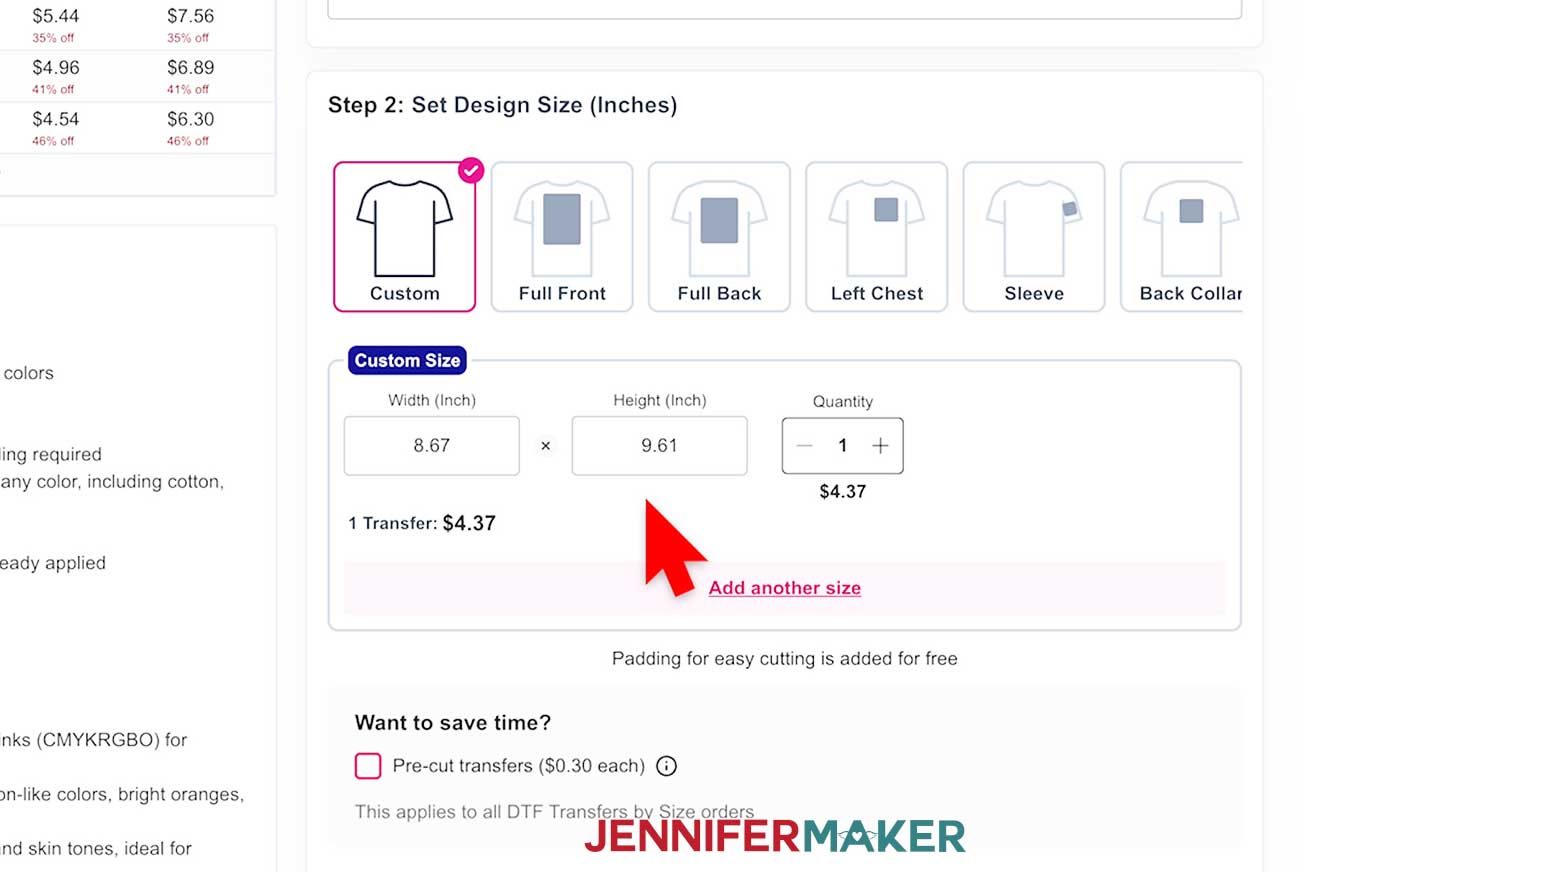
- The dimensions of your image will be shown. The PNG designs in my free download are sized perfectly to fit a women’s size Medium T-shirt.
- Scroll down to Step 2 on the screen to verify that the size of the transfer will work for your blank, and make adjustments if needed. Be sure to keep the “Custom” option selected.
NOTE: Be sure the sizes you choose are correct for your project.
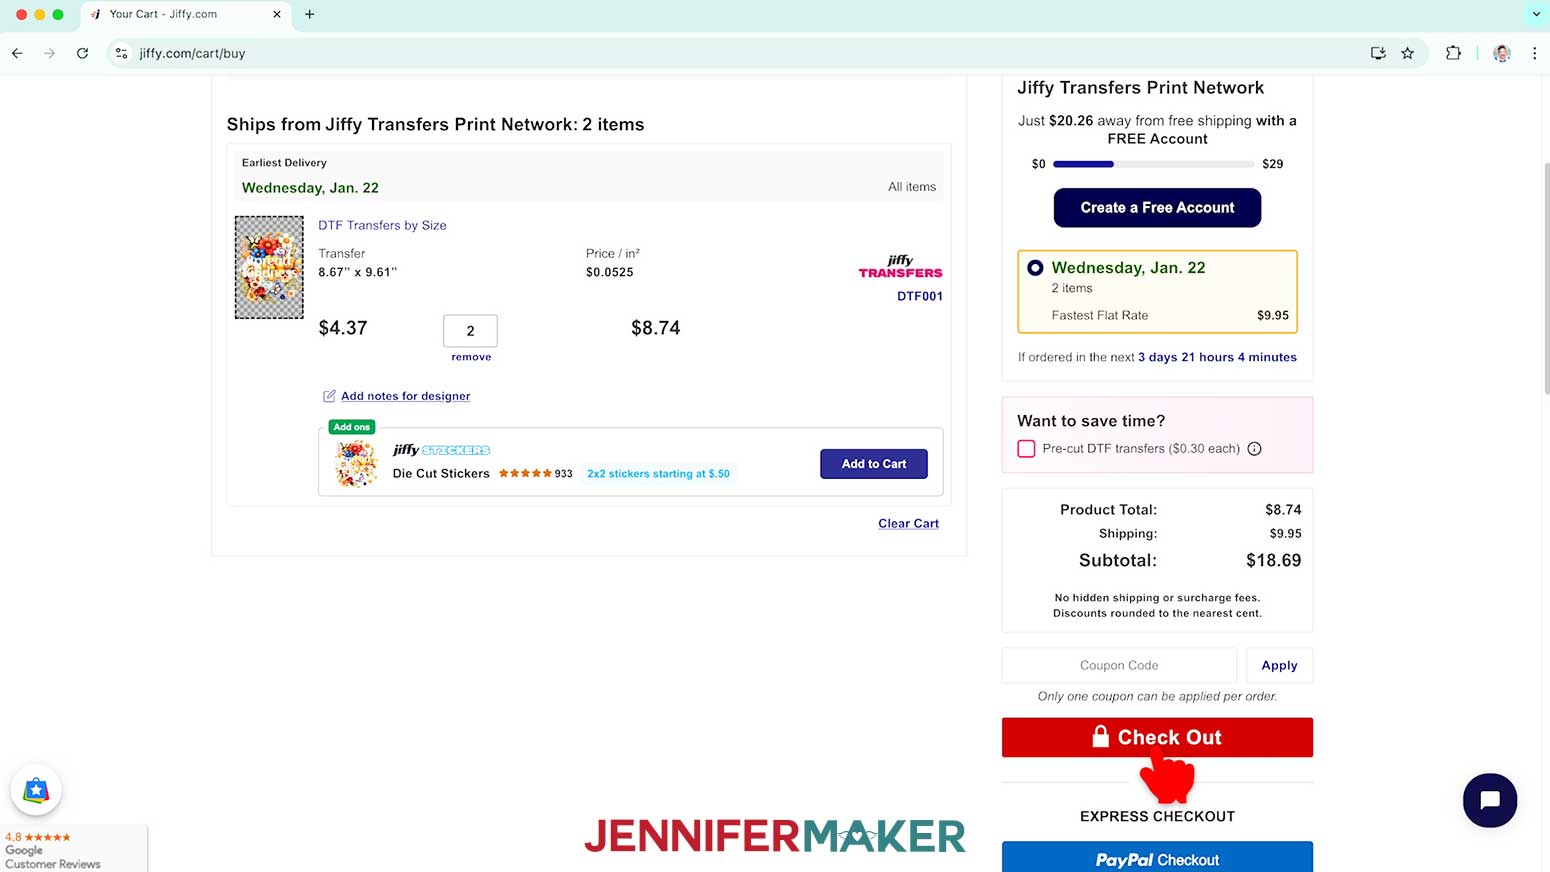
TIP: Check the box next to “Pre-cut transfers” to save time trimming your designs apart, or leave it unchecked to trim them yourself if they print more than one to a sheet. - Once you have all of your designs in your cart and the sizing is correct, click “Add to Cart” under Step 3 and then Check Out.
TIP: Take advantage of sales and free shipping offers to save money on your DTF project!
STEP 3: PRESS YOUR DTF TRANSFER
- If you didn’t order your prints trimmed, trim the carrier sheet around the design. Leave about ¼” of carrier sheet between the design and the edge.
- Determine the center line of your DTF print by carefully folding the sides together and pinching the top and bottom edges of the carrier sheet without creasing the image itself.
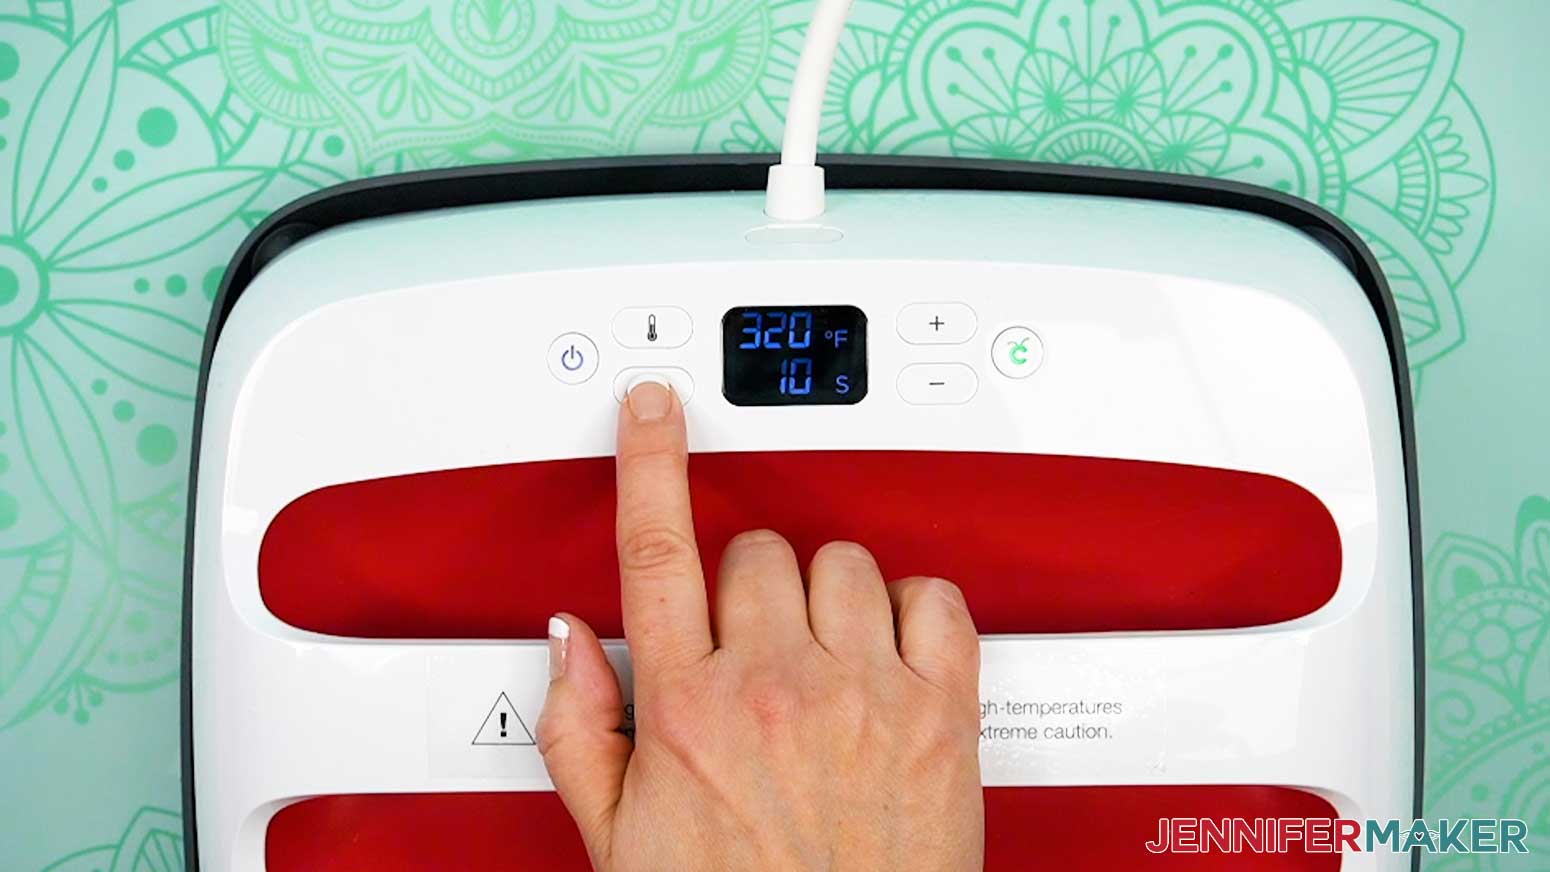
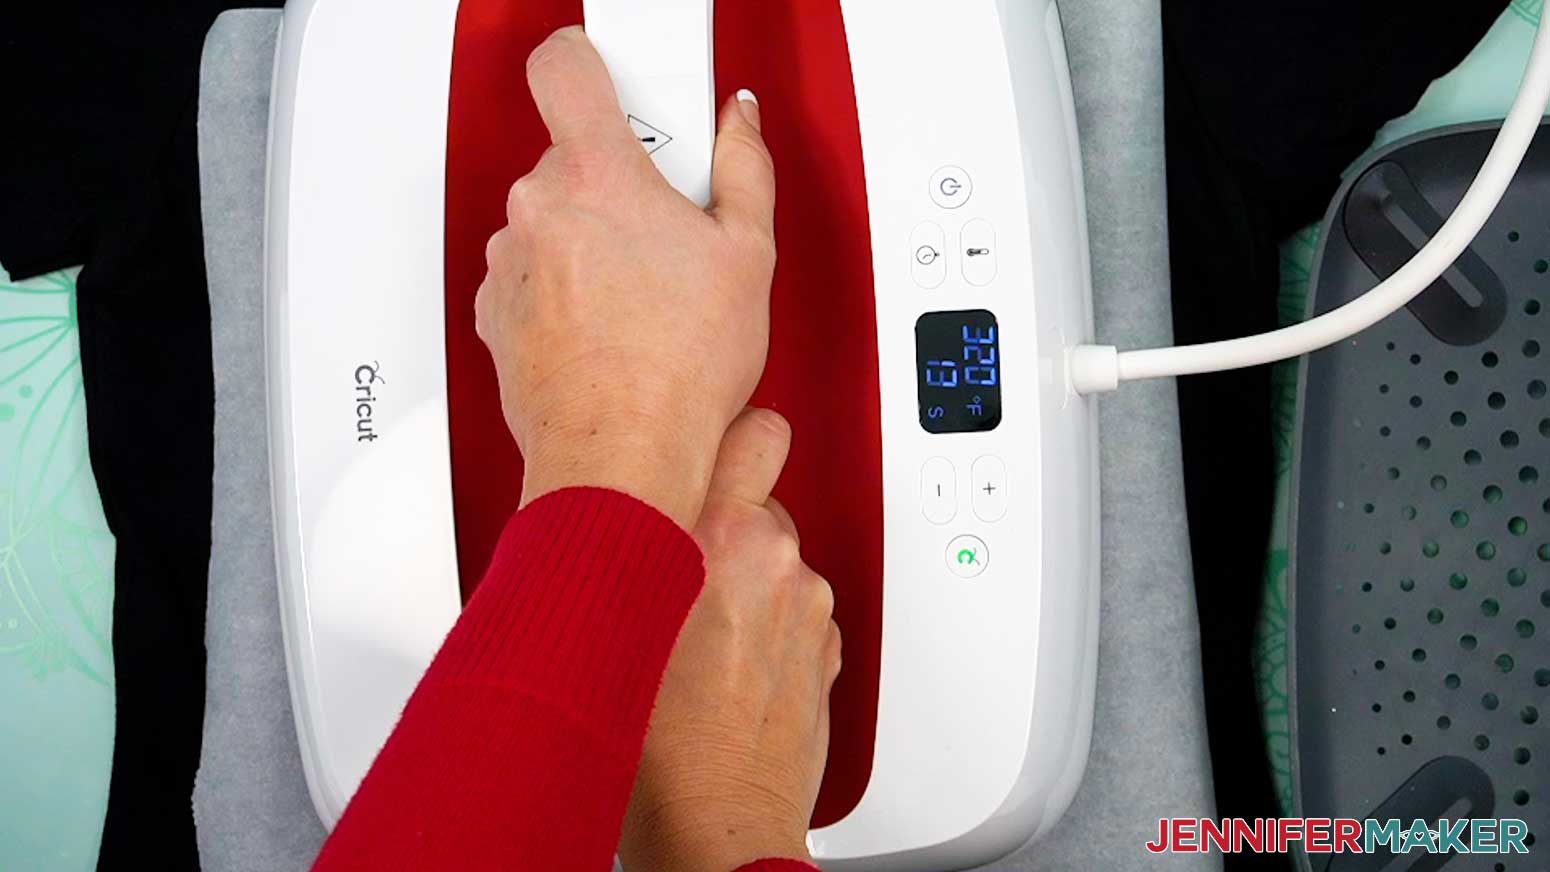
- Follow Jiffy’s Standard DTF pressing temperature recommendations from their Standard DTF page on their website, and set your heat press to 320° F (160° C) for a cotton shirt or 290° F (143° C) for a polyester shirt.
- If you’re using a Cricut EasyPress, place your pressing pad on your work surface.
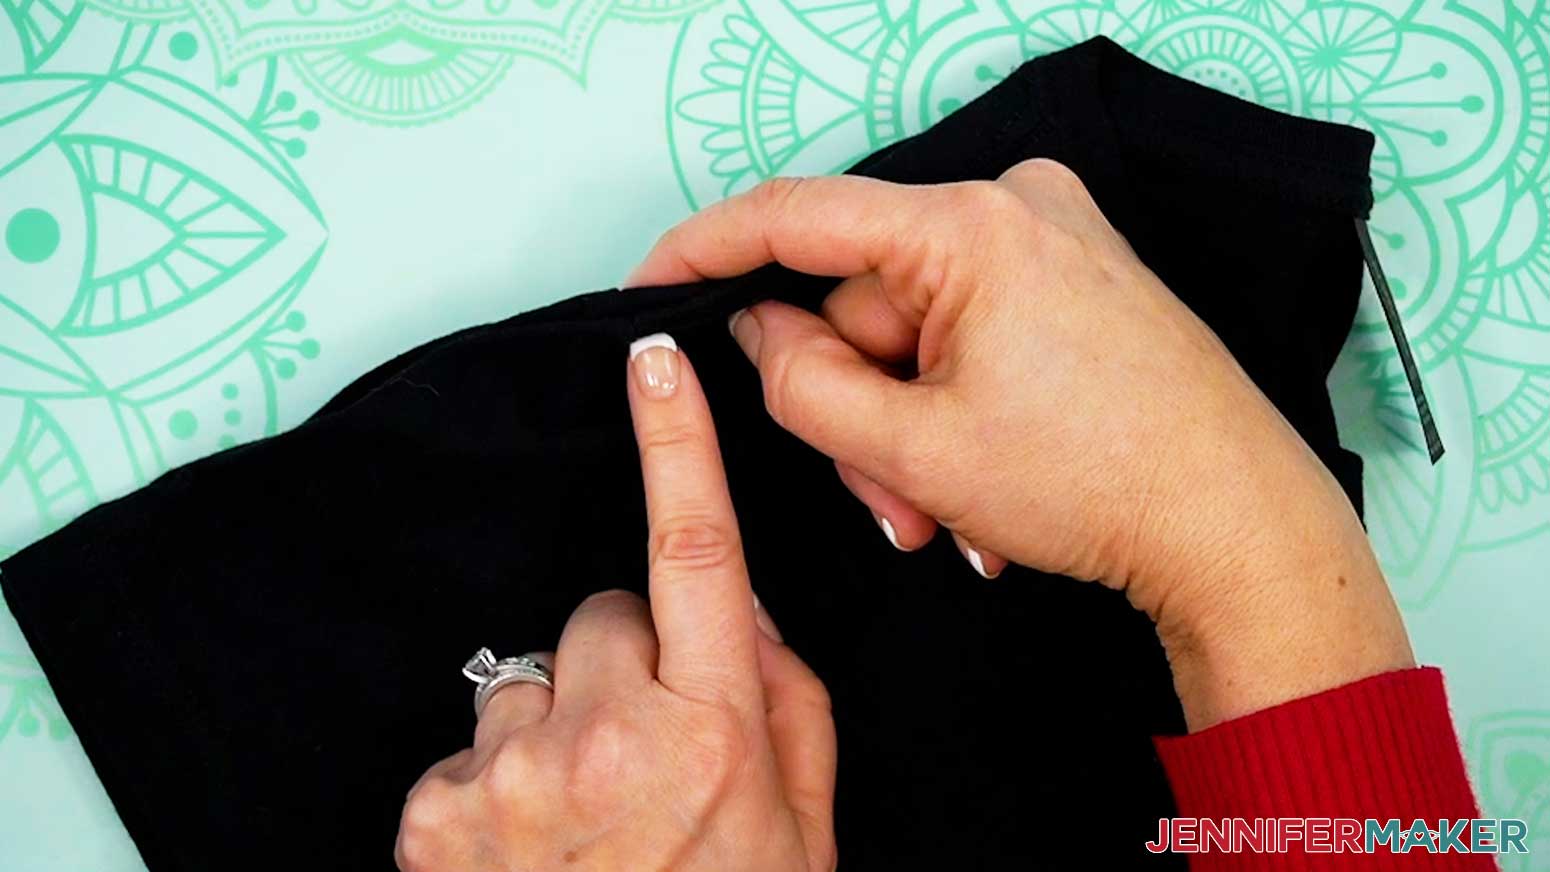
NOTE: If your shirt has unwieldy side seams, you can press them for 10 seconds at 320° F (160° C) for a cotton shirt or 290° F (143° C) for a polyester shirt to help keep them straight for easier pressing. - Find the center of the T-shirt by folding the shirt in half vertically, matching up shoulder seams to make sure the sides are even.
- Lightly press the folded shirt for 10 seconds at 320° F (160° C) for a cotton shirt or 290° F (143° C) for a polyester shirt to help set the center line, remove excess moisture from the material, and smooth out any wrinkles.
- Lint roll the shirt to remove lint or debris that can interfere with the transfer.
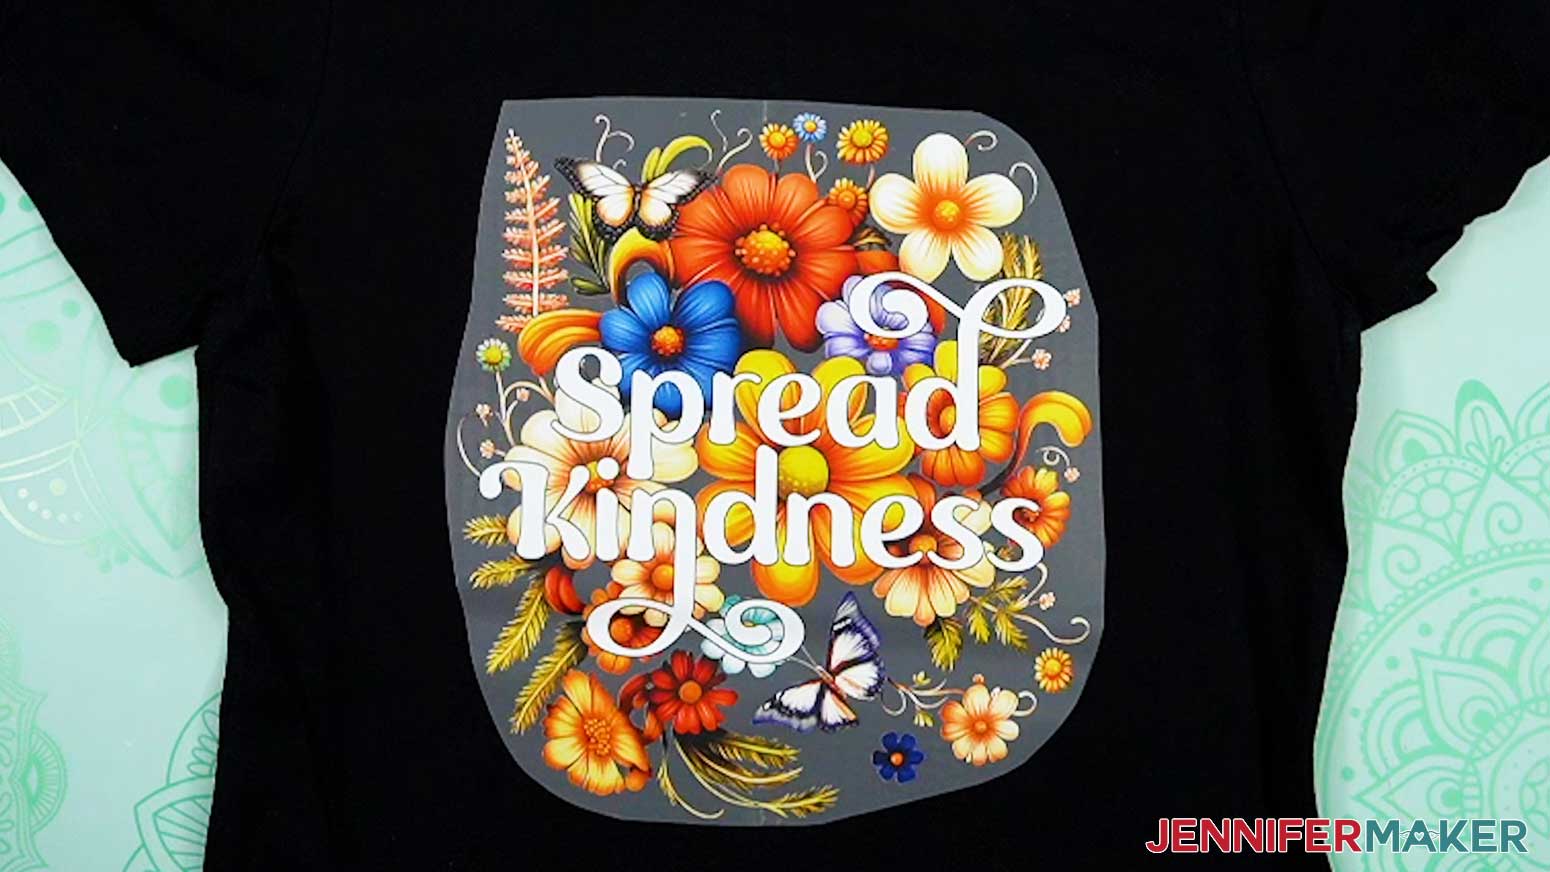
- With the design facing up, center the design on the T-shirt by lining up the creases on the film with the pressed line on the shirt about 2.5” below the neckline for a size Medium women’s shirt.
TIP: Use my T-Shirt Ruler Guide tutorial to create a T-shirt ruler guide to help with the perfect placement of your DTF transfer.
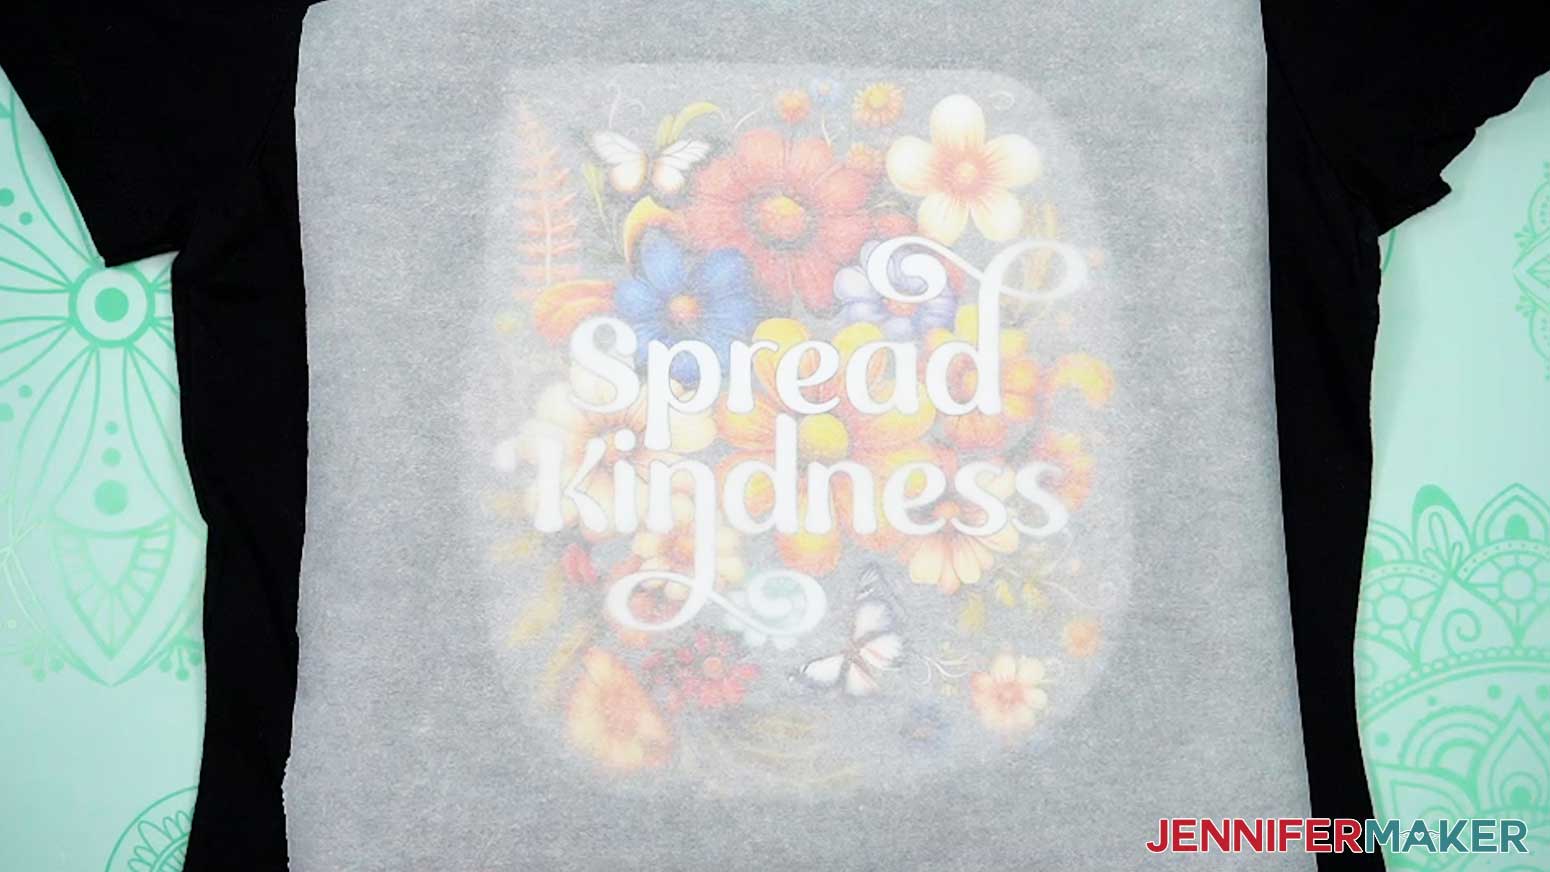
NOTE: You do not need to use heat-resistant tape because the transfer is grippy enough to not shift on the shirt. - Place a piece of parchment paper on top of the shirt and design.
NOTE: Unlike typical sublimation projects, which use butcher paper, DTF requires parchment paper or Teflon, which is thinner and lets more heat through to transfer the image. - Press the shirt with medium to high pressure for 15 seconds for a cotton shirt at 320° F (160° C), or 12 seconds for a polyester shirt at 290° F (143° C).
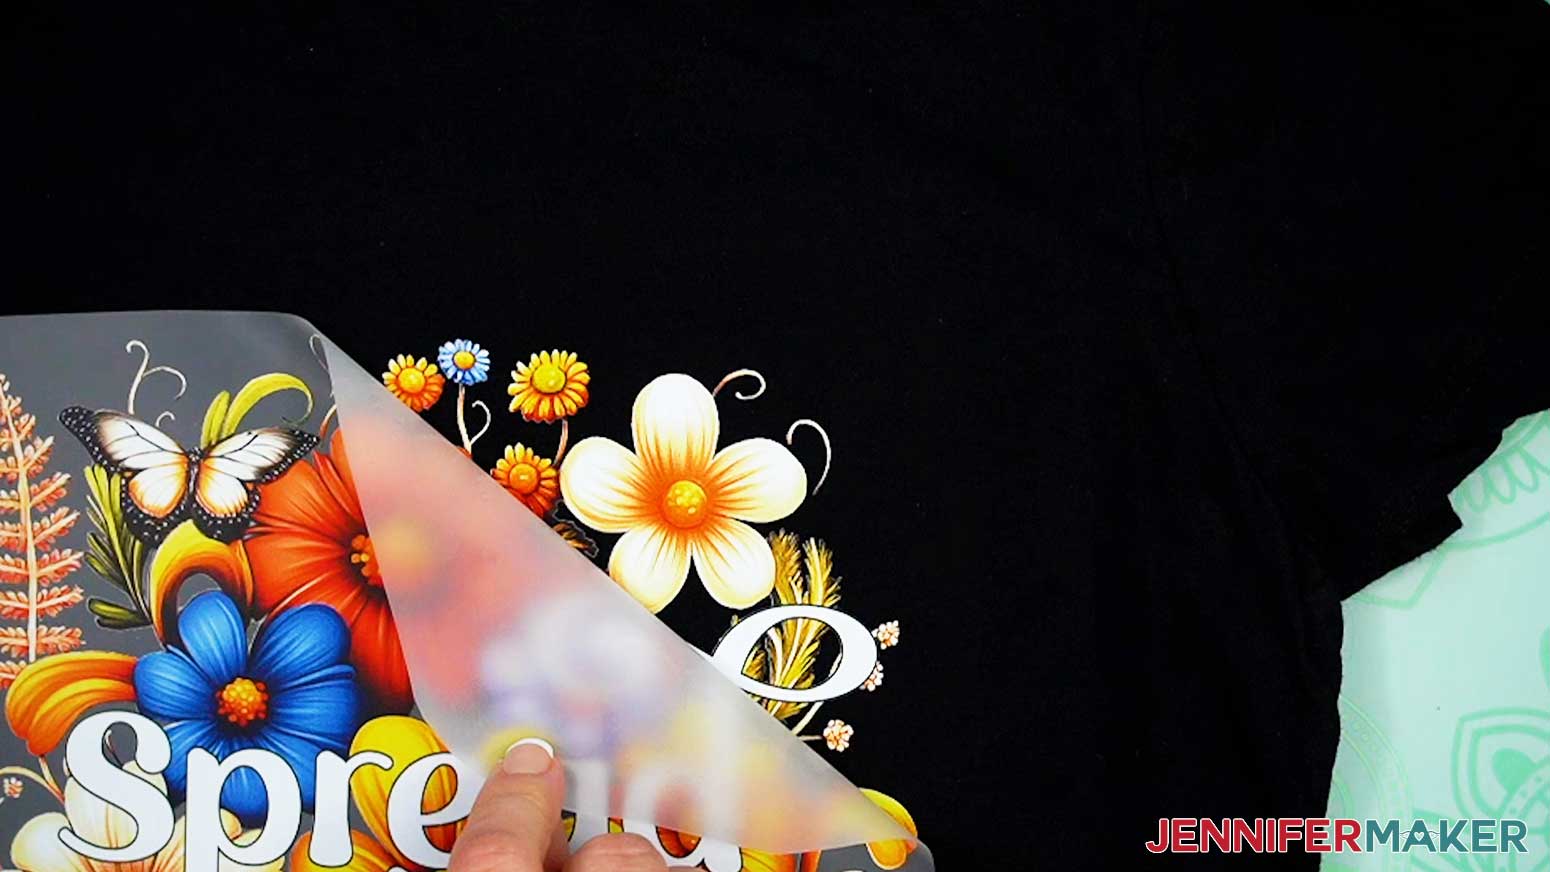
NOTE: If your design is larger than your heat press, press the design in sections, slightly overlapping where your pressing areas meet so each section is adequately heated. - After pressing, allow the design to cool completely.
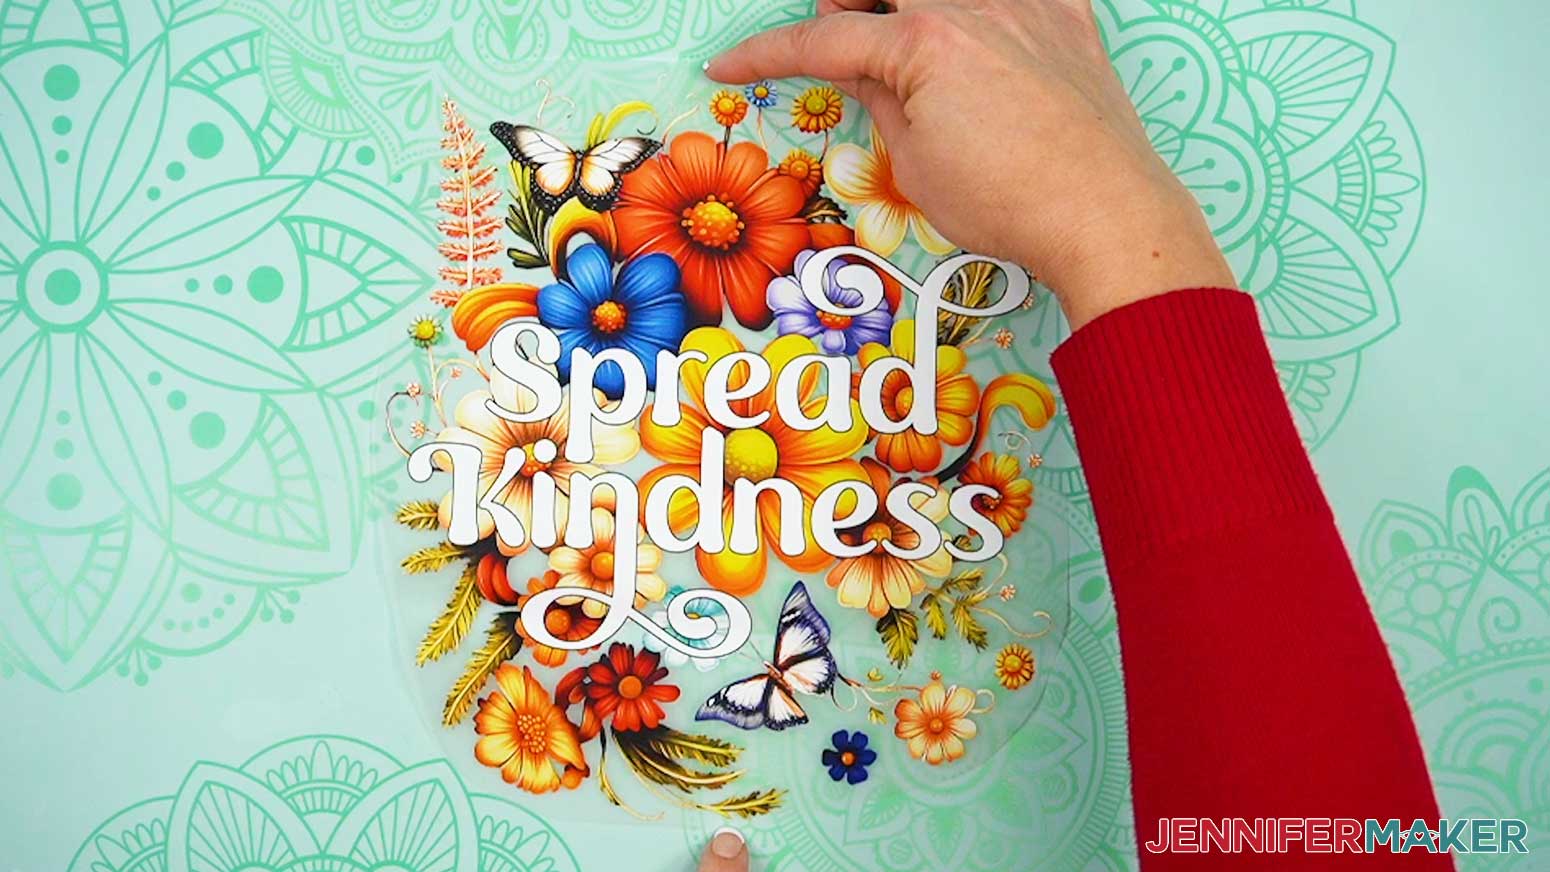
- Slowly peel the carrier sheet from the DTF design. It may feel like the carrier sheet is still attached to the design, so go slowly to avoid damaging the transfer.
TIP: If it’s very hard to peel, try peeling from a different starting point. - Place the parchment paper back down over the design.
- To embed the DTF transfer fully into the fabric and help it “cure” for a longer lasting result, a second press is required. Press the shirt with medium to high pressure for 10 seconds at 320° F (160° C) for a cotton shirt or 290° F (143° C) for a polyester shirt. If your design is larger than the heat press, remember to press in sections, slightly overlapping where the pressing areas meet so each section is adequately heated.
TIP: Using parchment paper for the second press will yield a matte finish to your DTF design. For a shinier finish, try using Teflon for your second press. - Remove the parchment paper and let the shirt cool.
- Your DTF transfer is complete!

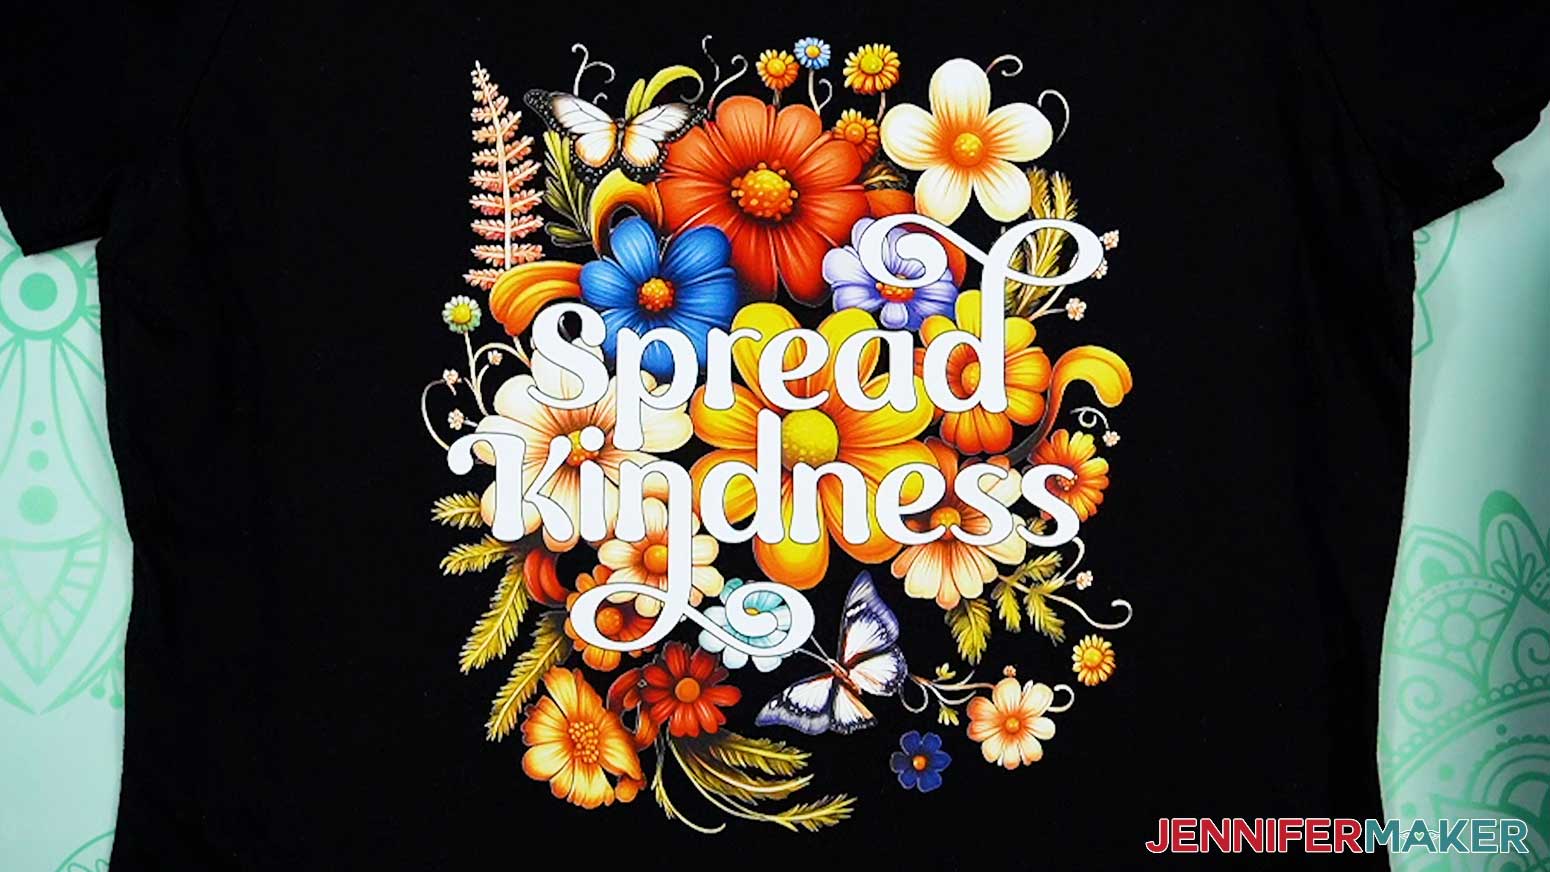
STEP 4: SHOW IT OFF!
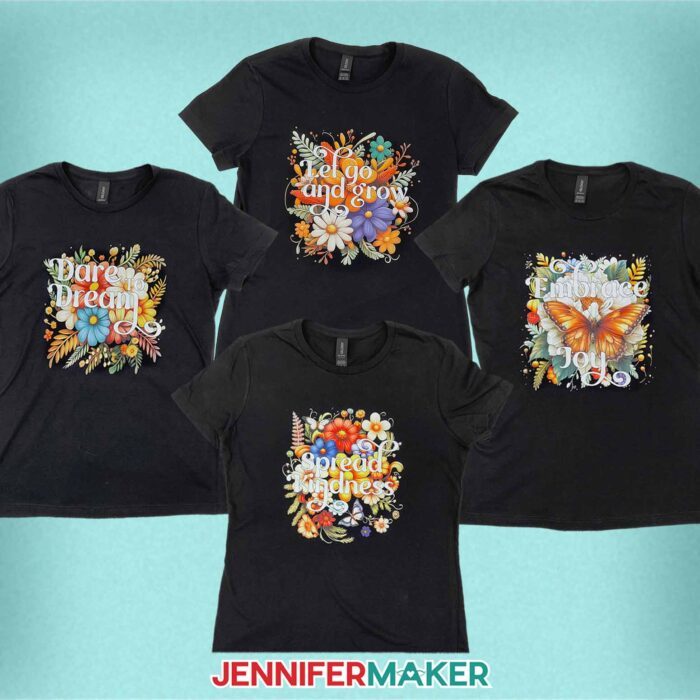
Here are my finished DTF sublimation T-shirts!
Notes
Font Used: Foghe (free alternative: Londona)
Jiffy DTF Transfer Sizes:
Let Go And Grow: 9.71" x 9.8"
Dare To Dream: 9.17" x 9.53"
Spread Kindness: 8.67" x 9.61"
Embrace Joy: 9.67" x 9.87"
Care: Turn the shirt inside out, then machine wash on delicate setting with cold water and a mild detergent. Air dry or tumble dry low heat.
Answers to Your Questions About Ordering & Applying DTF Transfers
Q: I want to add something to my T-shirt. How do I order multiple small DTF transfers and apply them to T-shirt sleeves?
A: You can learn how to order multiple small DTF designs with my design toolkit and in my ADVANCE program. Learn more about ADVANCE here!
Q: What is a DTF transfer?
A: DTF (Direct-to-Film) is a super neat way to add vibrant, full color transfers to all kinds of fabrics — including dark colors! With DTF, a design is printed on a special film with adhesive, then heat-pressed onto fabric for a durable, detailed result.
Q: Can you do DTF on dark shirts?
A: Yes you can! Since DTF transfers are applied on top of fabric, rather than sublimation which becomes infused into the fabric, they can be applied to any color shirt.
Q: Which is better, DTF or sublimation?
A: The choice to sublimate versus use a DTF transfer depends on the design and the surface you want to apply it to! Sublimation is full color and the design cannot crack or peel off, but the shirt must be at least 60% polyester and either white or very light colored for the design to show up and stay after washing. DTF shirts are less durable than sublimation, but they can be done on almost any fabric and on any color shirt.
Q: How long do DTF prints last?
A: With proper care, DTF transfers can last around 50 washes. Turn the shirt inside out, then machine wash on delicate setting with cold water and a mild detergent. Air dry or tumble dry with low heat.
Q: Why is my DTF peeling on my shirt?
A: Peeling can be a result of not using enough heat to apply the design, or using too much heat once it’s applied. Drying your DTF T-shirt in a clothes dryer, especially on higher heat, can degrade your transfer over time, causing it to crack and peel. Instead, wash your DTF decorated shirt inside out on a delicate setting with cold water and a mild detergent. I highly recommend air drying the shirt, but you can tumble dry low if necessary.
Q: Can a Cricut do DTF transfers?
A: A Cricut cutting machine cannot print or apply DTF transfers for you, but a Cricut brand heat press (or any other brand heat press) is a necessary tool to press the transfer onto your T-shirt.
Q: Can I make and sell T-shirts made with these DTF transfer designs?
A: I love supporting creative entrepreneurs! If you want to use my designs and projects for commercial use, please familiarize yourself with my important licensing information before selling your crafts.
I do not permit sale of my digital items, but you can sell the creative goods you make with them — as long as you follow my licensing requirements. That means you cannot sell the flower goals PNG files, but you can sell physical items that you made with the files within the guidelines linked above.
Q: Do you have other crafts like this one I can make?
A: Want to try DTF alternatives? Use different techniques to get full-color results on dark shirts with these projects:
- Printable Vinyl T-Shirts
- Sublimate Glitter & Holographic HTV or EasySubli HTV T-Shirts
- Sublimate Clear HTV
- Print Then Cut Iron-On Transfers
Get my free PNG files to make T-shirts with DTF transfers!
(If you do not see the signup form above, click here.)
I love seeing what you make with my designs and how you use them! Please share a photo of your DTF T-shirts in our Facebook group or tag me on social media with #jennifermaker.
Love,

Want to remember this? Save this DTF T-Shirt tutorial to your favorite Pinterest Board!