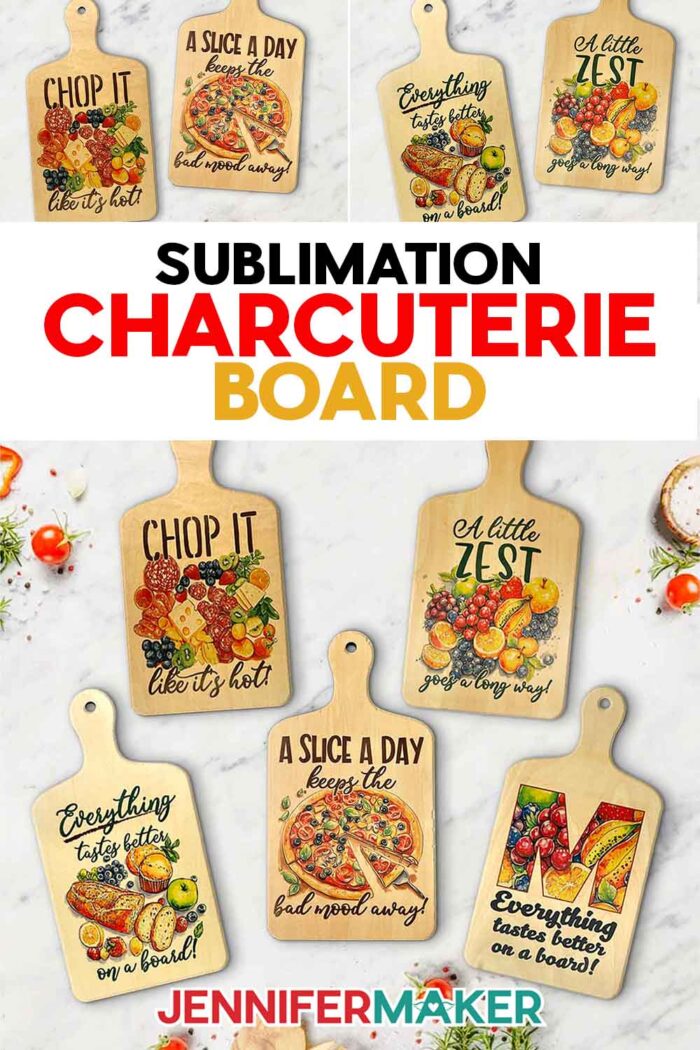
Learn how to make a beautiful charcuterie board with sublimation techniques!
The first time I saw a sublimated wooden board, it wasn’t in a fancy boutique or a curated gift shop. It was in a crafting group, shared by a fellow maker who had transformed a plain piece of wood into something bold, colorful, and completely custom. It wasn’t just decorative, it was personal … and useful! That project stuck with me because I’ve always been drawn to crafts that blend creativity with everyday function, especially kitchen accessories! I started digging deeper and discovered that there’s a sublimation blank for nearly everything. Yes, even wooden cutting boards! I knew I had to try making my own sublimation charcuterie board, and once I did, I was hooked.
Watch the full step-by-step tutorial on how to make a sublimation charcuterie board:

Creating a custom cheese board might sound intimidating, especially if you’ve never tried sublimation before, but this project is incredibly beginner-friendly. You don’t need any expensive design software or advanced tools to make something that looks stunning. All you need is a sublimation printer, a heat press like the Cricut EasyPress, and a coated wood board that’s ready to accept sublimation ink. The board I used is already pre-treated with a sublimation polymer coating, so you can skip the messy sprays or prep and jump right into the fun part: creating. The blanks I used are linked below in my materials list, so you can be sure to get the right kind. This project is so easy, majorly impressive, and a perfect way to bring a pop of personality into your kitchen or gift it to someone special.

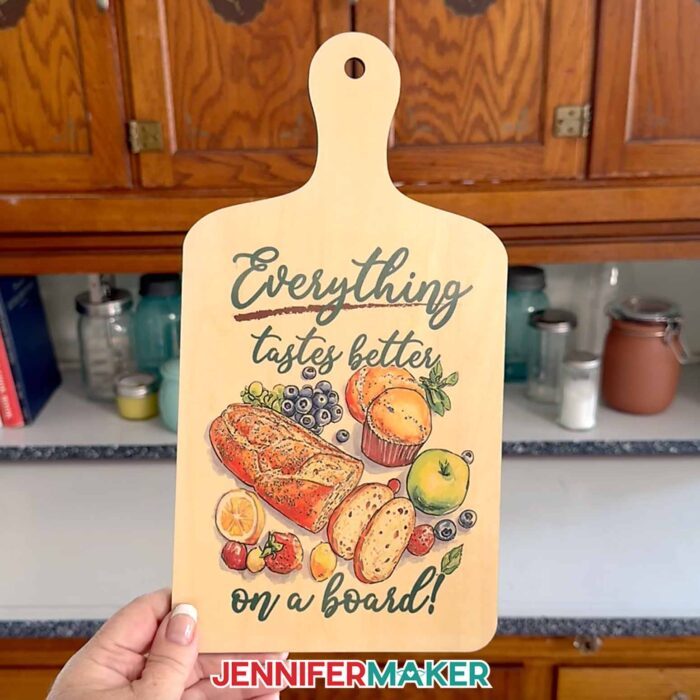
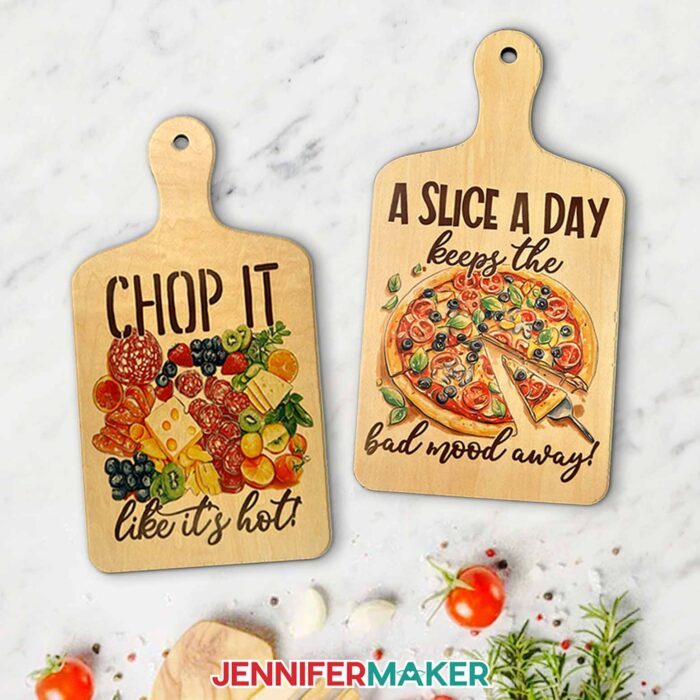
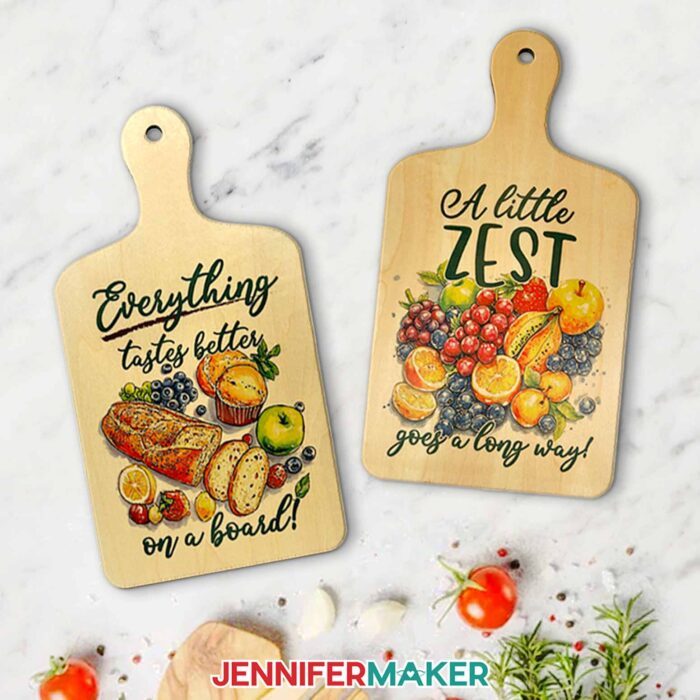
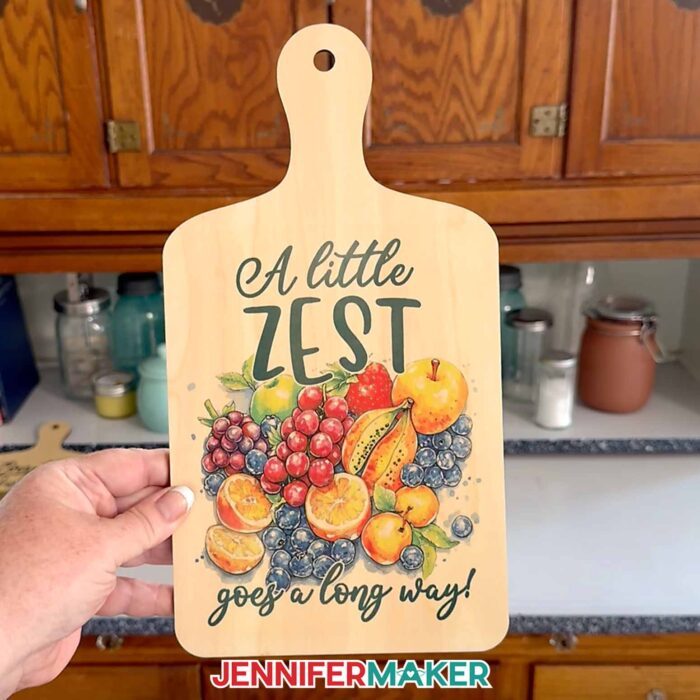
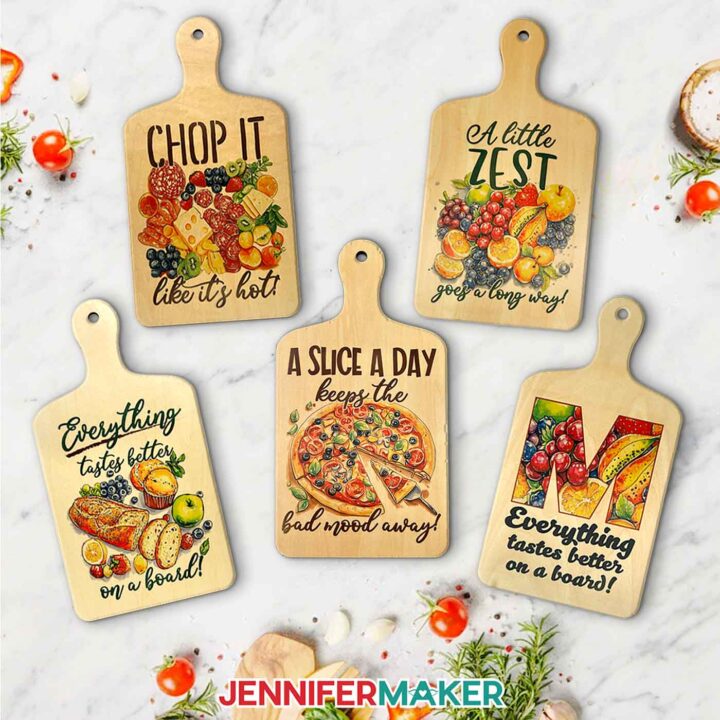
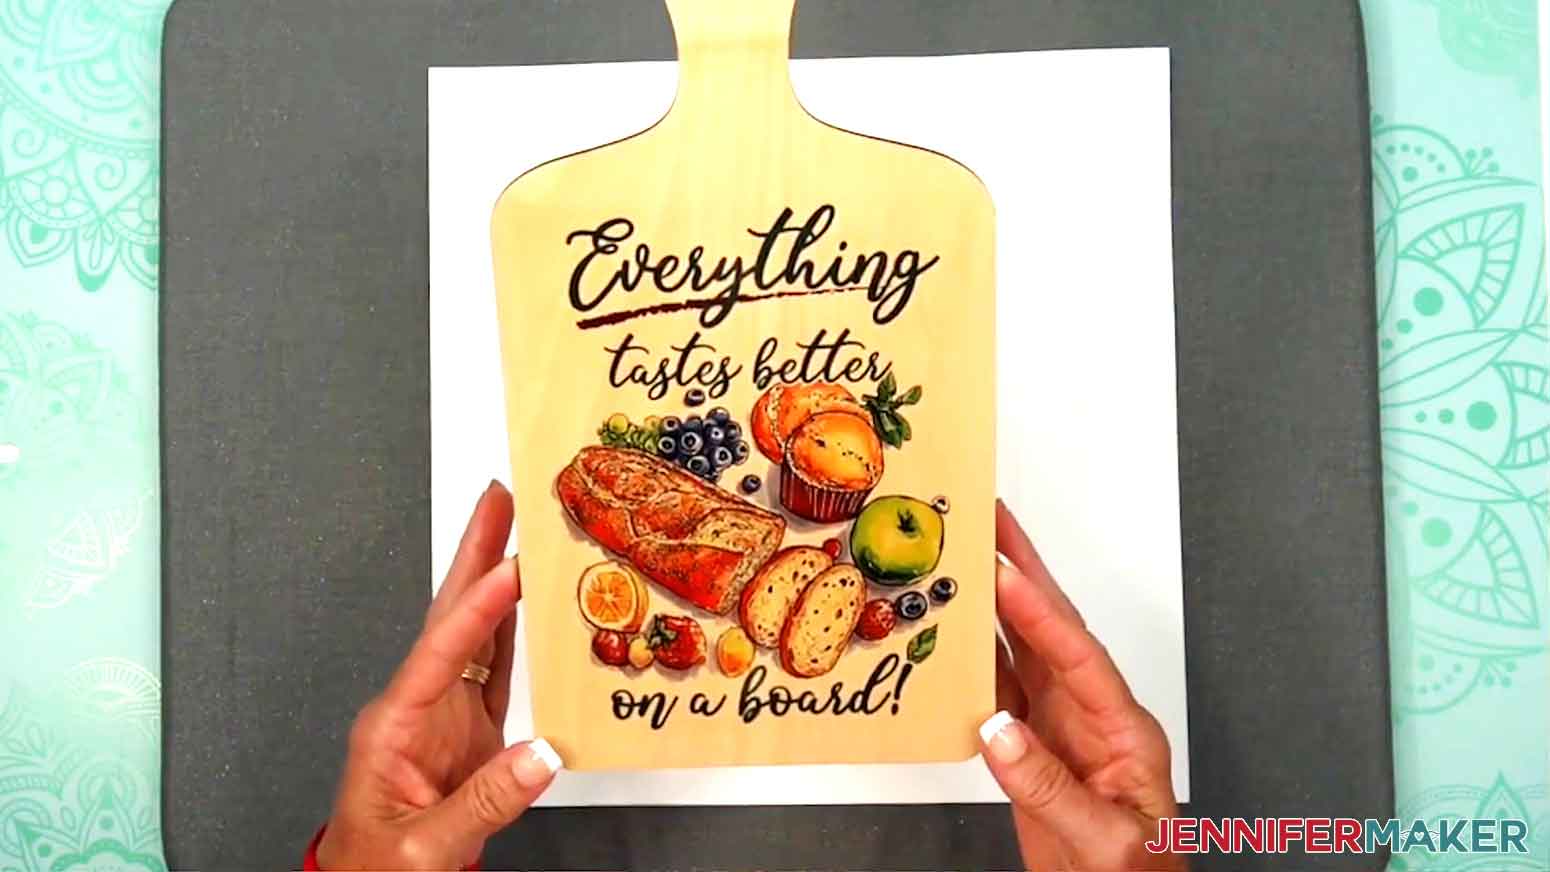
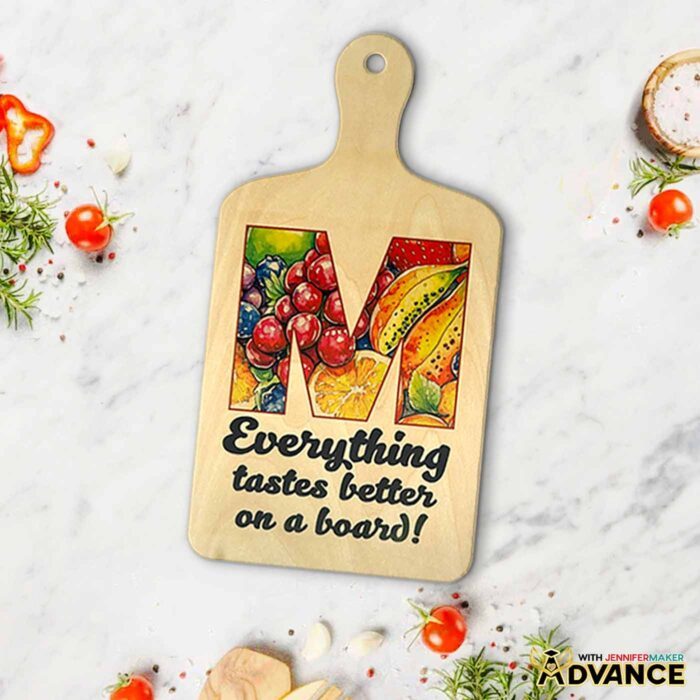
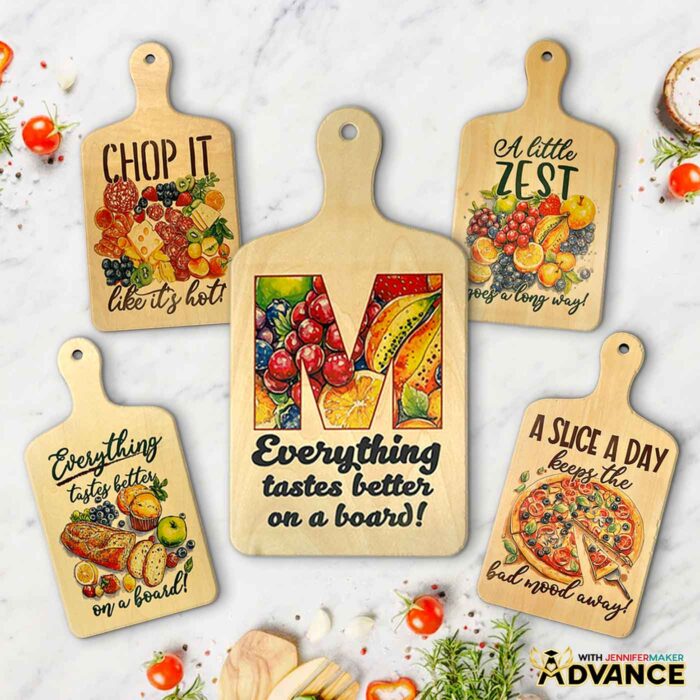
I designed four colorful sublimation files with fun food-themed phrases like “Chop It Like It’s Hot” and “A Little Zest Goes a Long Way” using an AI generator, then fine-tuned each one with image editing software so the colors would transfer beautifully onto my sublimation charcuterie board blanks. Instead of covering the whole thing edge to edge or wrapping around the handle, the design sits centered at the base, creating a gorgeous focal point.
The best part? You don’t need a fancy program to print the designs. I show you exactly how to prep and print them using Google Docs, which is free and super easy to use. In my video tutorial, I walk through the whole process, from sizing your image to fit your board without cutting off important design elements, to mirroring it for sublimation. I even show you how to align the design using the center of the document page, which makes placement on the board much easier than guessing.
Once you have your printed design, I’ll show you how to prep your board by preheating it. This step is key because trapped moisture in wood can lead to blurry or faded transfers. I learned this the hard way, so I always include a preheating step in my process now. Use white butcher paper and white cardstock to keep your press clean.
Securing the design in place with heat-resistant tape helps prevent any shifting during the press, which can lead to ghosting or double images. I share my recommended pressing temperature and time in the tutorial, so be sure to watch before starting your project.
After that comes the best part: peeling away the tape and paper to reveal your vibrant, pressed design underneath. It still feels like magic, every single time!
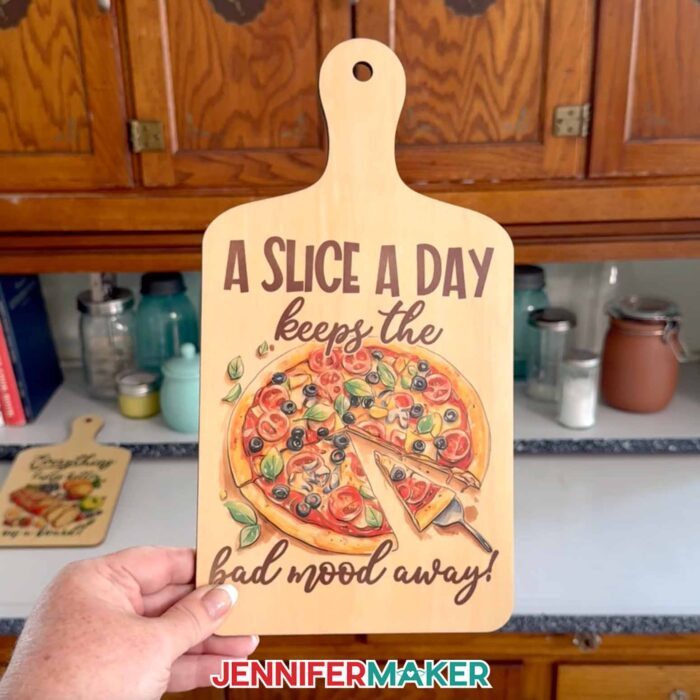
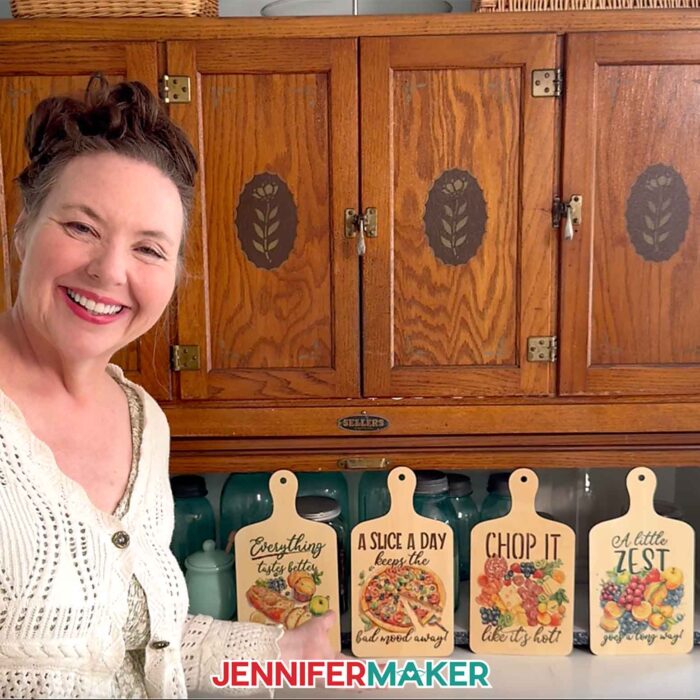
The final result is a sublimation charcuterie board that’s full of personality and perfect for display or gifting. While I don’t recommend putting food directly on the sublimated surface, it’s easy to layer parchment paper over the top or use it as a serving tray for wrapped items.
You could also lean your cheese board against your backsplash as a colorful kitchen accent or give one as a custom housewarming or holiday gift.
If you want to take it even further, I have a special workshop inside my Advance with JenniferMaker membership program that teaches you how to design your own monogrammed board using Canva! It’s perfect for wedding gifts, housewarming or hostess presents, or letting everyone in your kitchen know who the chef is. Learn more in my ADVANCE with JenniferMaker program!
I hope this tutorial inspires you to create your own sublimation charcuterie board masterpiece. It’s colorful, satisfying, and surprisingly easy with the right steps and tools. Be sure to check out the full video tutorial to see how everything comes together. Whether this is your first sublimation project or your five-hundredth, there’s always something new to learn!

Want to learn how to make a sublimation charcuterie board? Let me show you how easy it is! This post contains some affiliate links for your convenience (which means if you make a purchase after clicking a link I will earn a small commission but it won’t cost you a penny more)! Read my full disclosure policy.
Materials to Sublimate a Charcuterie Board
View my Amazon shopping list with the exact items I used.
- One (1) Plywood Sublimation Cutting Board 11.8″ x 6.3″
- One (1) Sheet of 8.5” x 11” A-Sub Sublimation Paper 125g
- White Uncoated Butcher Paper
- 12″ x 12″ White Cardstock
- Sublimation Printer – I used a converted Epson EcoTank ET-2800 Printer
- Sublimation Ink
- Heat Press – I used the 12” x 10” Cricut EasyPress 2
- Cricut EasyPress Mat
- Fan (for ventilation)
- Heat-Resistant Gloves
- Heat-Resistant Tape
- Measuring Tape
- Lint Roller
- Scissors or Paper Trimmer
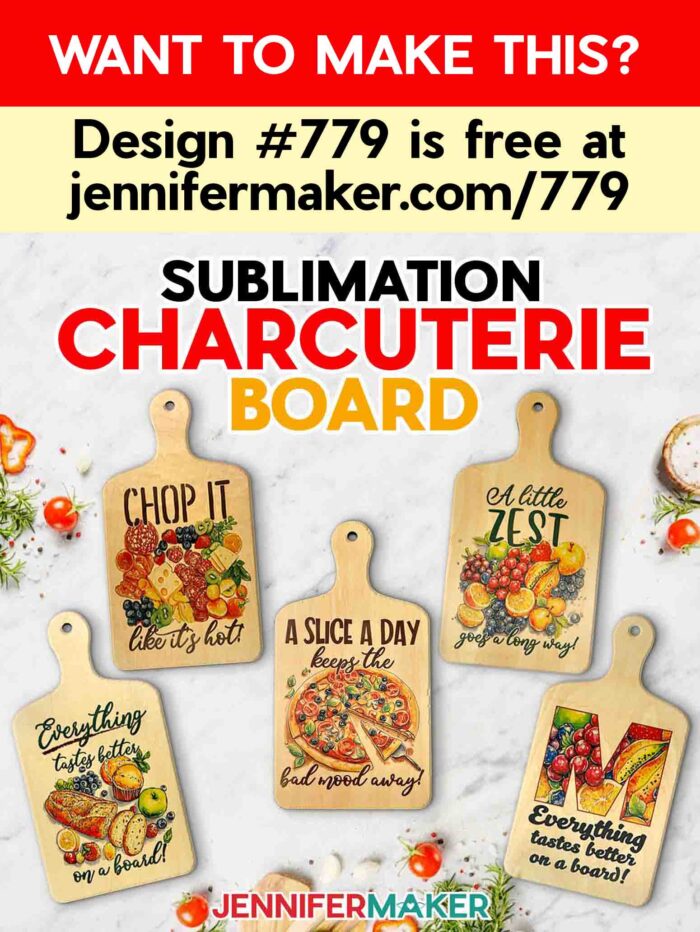
- Design #779 (My free PNG design files are available in my free library – get the password by filling out the form at the bottom of this page)
How to Make a Sublimated Charcuterie Board
Sublimation Charcuterie Board
Learn how to make a sublimation charcuterie board!
Materials
- One (1) Plywood Sublimation Cutting Board 11.8" x 6.3" -OR-
- One (1) Plywood Sublimation Cutting Board 9" x 5.5"
- One (1) Sheet of 8.5” x 11” A-Sub Sublimation Paper 125g
- White Uncoated Butcher Paper
- 12" x 12" White Cardstock
- Design #779 (My free PNG design files are available in my free resource library - get the password by filling out the form at the bottom of this page)
Tools
- Sublimation Printer - I used a converted Epson EcoTank ET-2800 Printer
- Sublimation Ink
- Heat Press - I used the 12” x 10” Cricut EasyPress 3
- Cricut EasyPress Mat
- Fan (for ventilation)
- Heat-Resistant Gloves
- Heat-Resistant Tape
- Measuring Tape
- Lint Roller
- Scissors or Paper Trimmer
Instructions
STEP 1: GET MY FREE CHARCUTERIE BOARD DESIGNS
First, download my Sublimation Charcuterie Board designs from my free library – look for Design #779. Alternatively, you can use the Save This Project form near the top of this post and the design link will be emailed to you.
In the PNG folder, you’ll find four done-for-you charcuterie board designs with fun phrases. I made the background designs with the help of AI art generation and adjusted them with image editing software.
TIP: If you’re not sure how to download zip files and upload designs, go to jennifermaker.com/svgs. The steps are similar for PNGs and Google Docs.
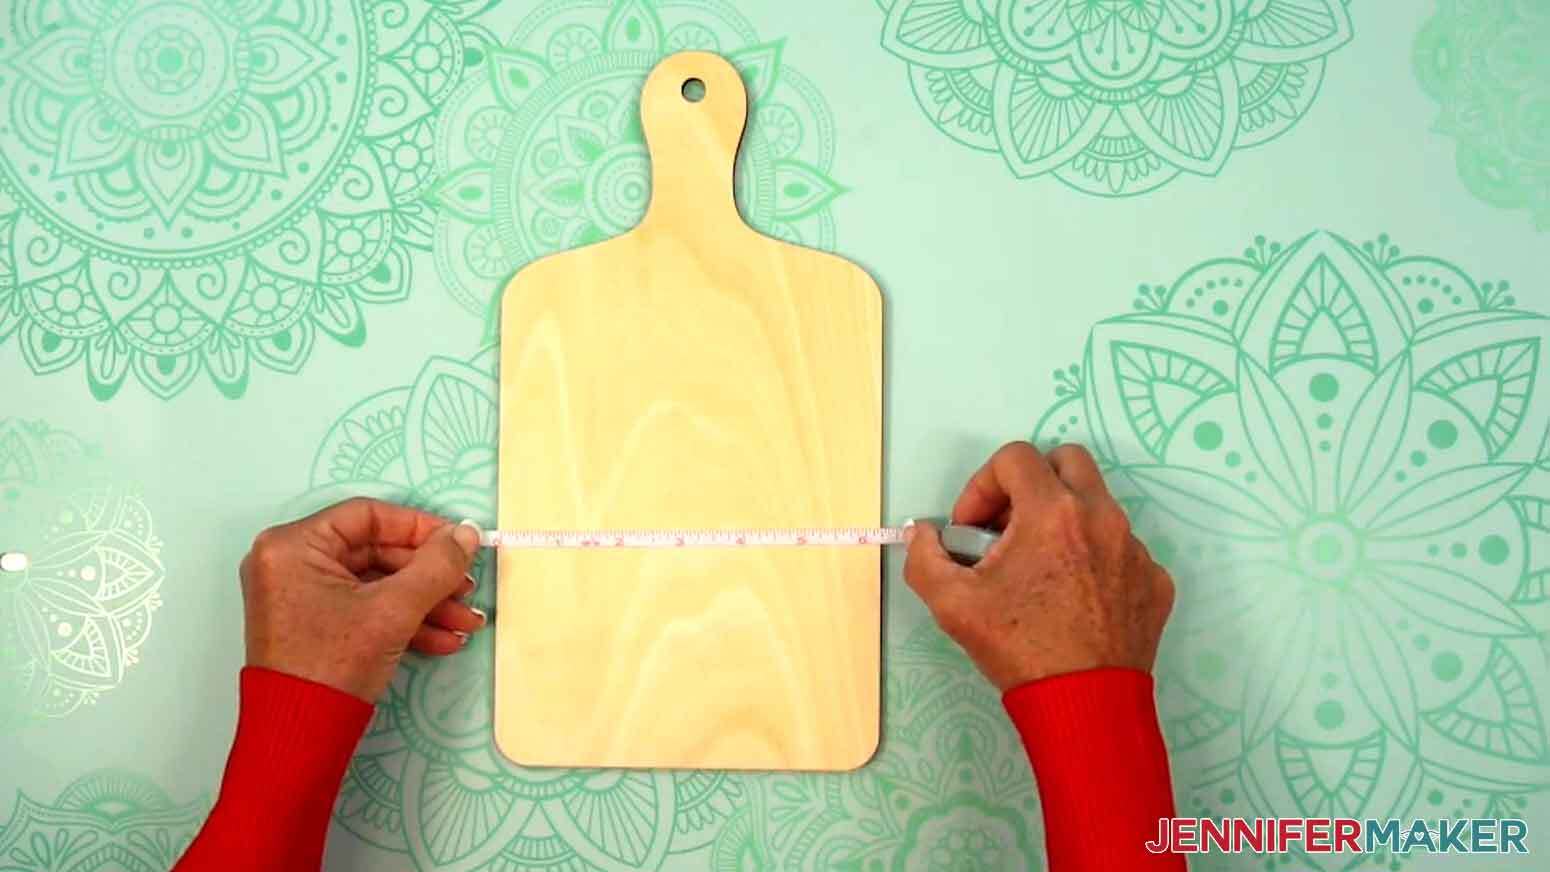
STEP 2: MEASURE YOUR CHARCUTERIE BOARD
- Lay your charcuterie board flat on your work surface with the handle end pointing away from you.
- With a ruler or measuring tape, measure the width of the board at the widest part and record your measurement.

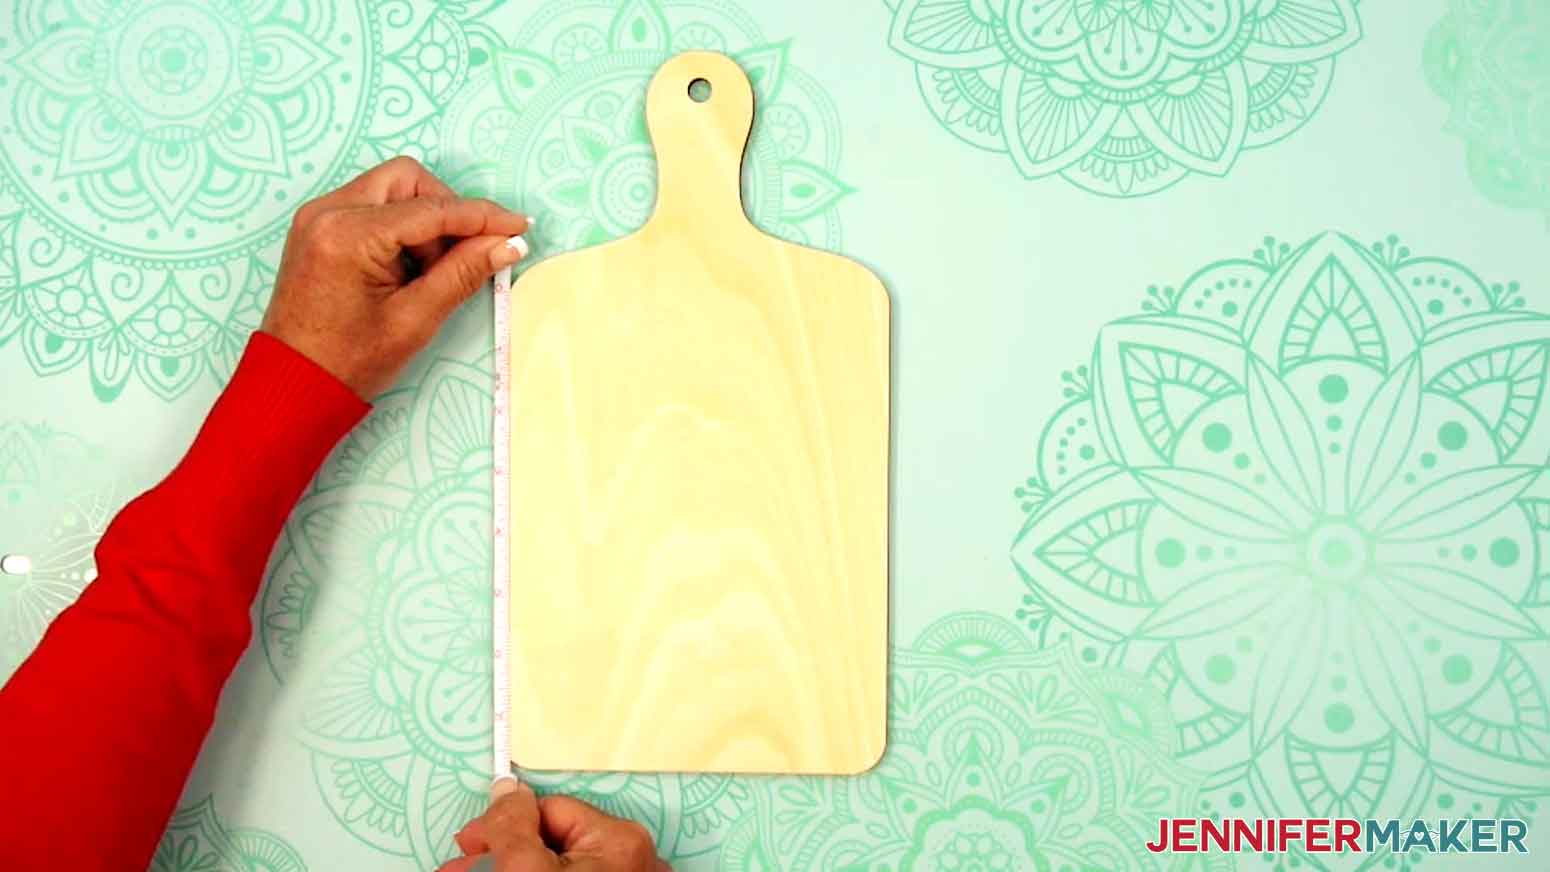
- Then measure the height from the board’s bottom edge to where the side starts to curve near the top and record your measurement.
NOTE: The base of my charcuterie board measures 6.25” at the widest part and 7.75” high. Your sizing might be different even if you use the blank I recommend, so always be sure to measure.
TIP: Sublimation designs can completely cover the blank, but my designs are made to be centered on the base of the board.
 NOTE: The base of my charcuterie board measures 6.25” at the widest part and 7.75” high. Your sizing might be different even if you use the blank I recommend, so always be sure to measure.
TIP: Sublimation designs can completely cover the blank, but my designs are made to be centered on the base of the board.
NOTE: The base of my charcuterie board measures 6.25” at the widest part and 7.75” high. Your sizing might be different even if you use the blank I recommend, so always be sure to measure.
TIP: Sublimation designs can completely cover the blank, but my designs are made to be centered on the base of the board.STEP 3: PRINT YOUR SUBLIMATION DESIGN IN GOOGLE DOCS
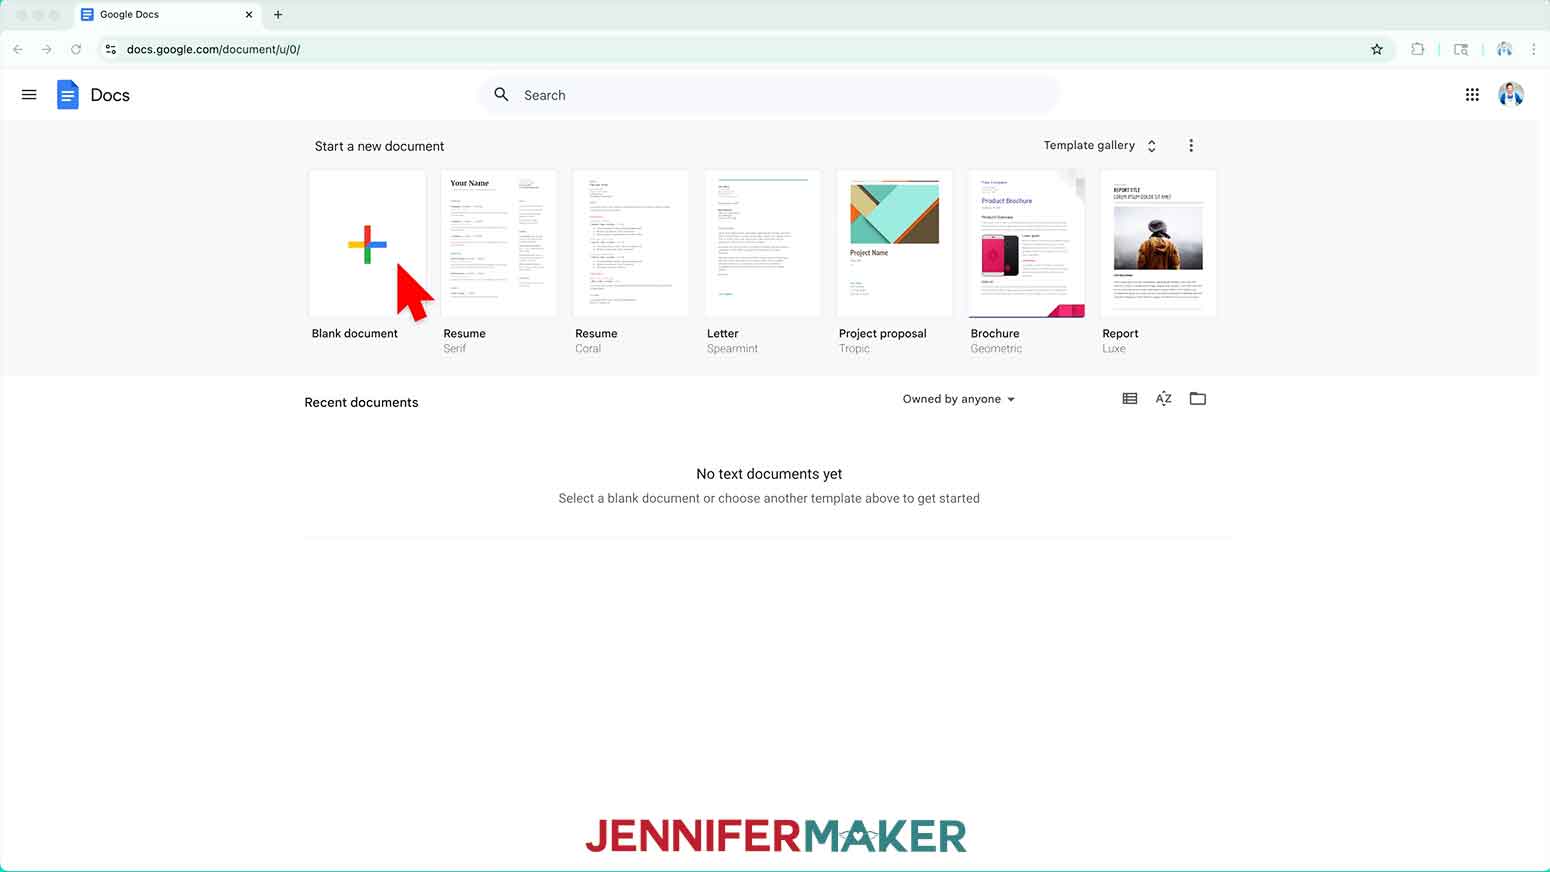
- Open Google Docs in the Google Chrome web browser on your computer. NOTE: You will need a free Google account to use the free Google Docs software. TIP: You can also download and open the Google Docs app, but you’ll have limited access to features, so I do not recommend it on a mobile device.
- Click “Blank document” at the top left to open a new document.
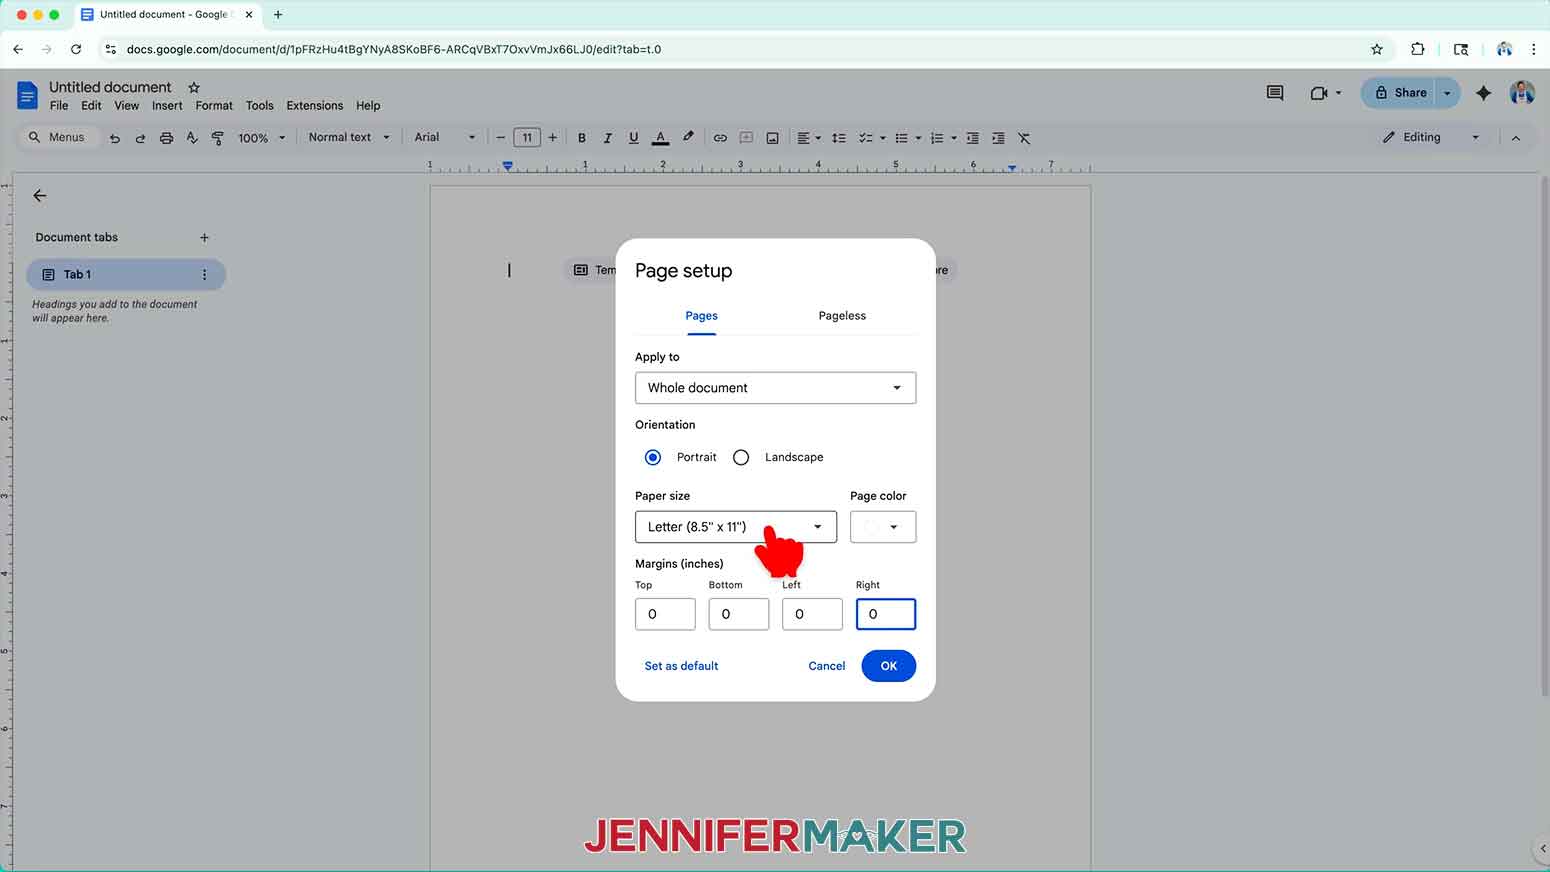
- Go to the File menu and select “Page setup.”
- Make sure the box next to “Portrait” is checked.
- Change your margins to “0” to use more of the page.
- Make sure your Paper Size matches your sublimation paper.
NOTE: I’ll set mine to 8.5” x 11” or letter-size.
- Click “OK” to apply the settings.
- Click the area that says “Untitled document” at the top and type a name for the file.
- Go to the Insert menu, select “Image,” and select “Upload from Computer.”
- Select the PNG file with the image you’d like to use.
NOTE: I’ll choose the “board” file, but you can use these instructions for any of the designs.
TIP: You’ll most likely find it in your Downloads folder.
- Click “Open” to add the image to your document.
- Click “Image Options” at the top of the canvas.
NOTE: You can also open the menu by going to “Format,” “Image,” and “Image Options.”
- Select “Size & Rotation” in the right-hand menu.
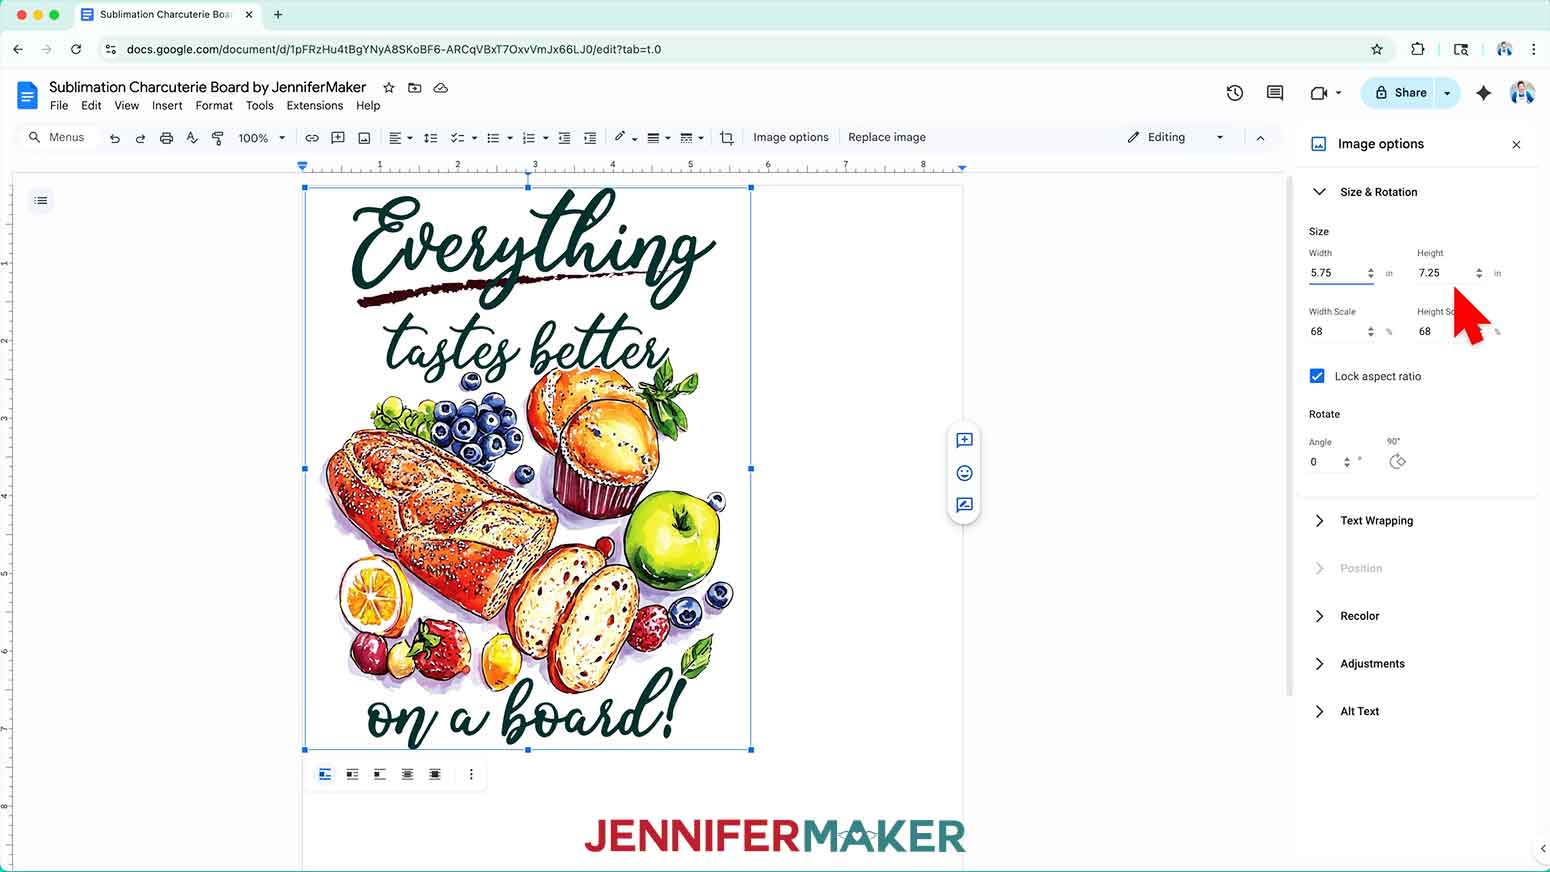
- Keep the “Lock aspect ratio” box checked to maintain the design’s proportions.
- Change the “Width” field so it’s about half an inch smaller than the base width measurement you recorded to ensure your design will fit on the blank.
NOTE: I’ll set mine to 5.75” wide, which will leave a quarter inch margin on the left and right sides of the design when pressed.
- The “Height” field will automatically adjust proportionately.
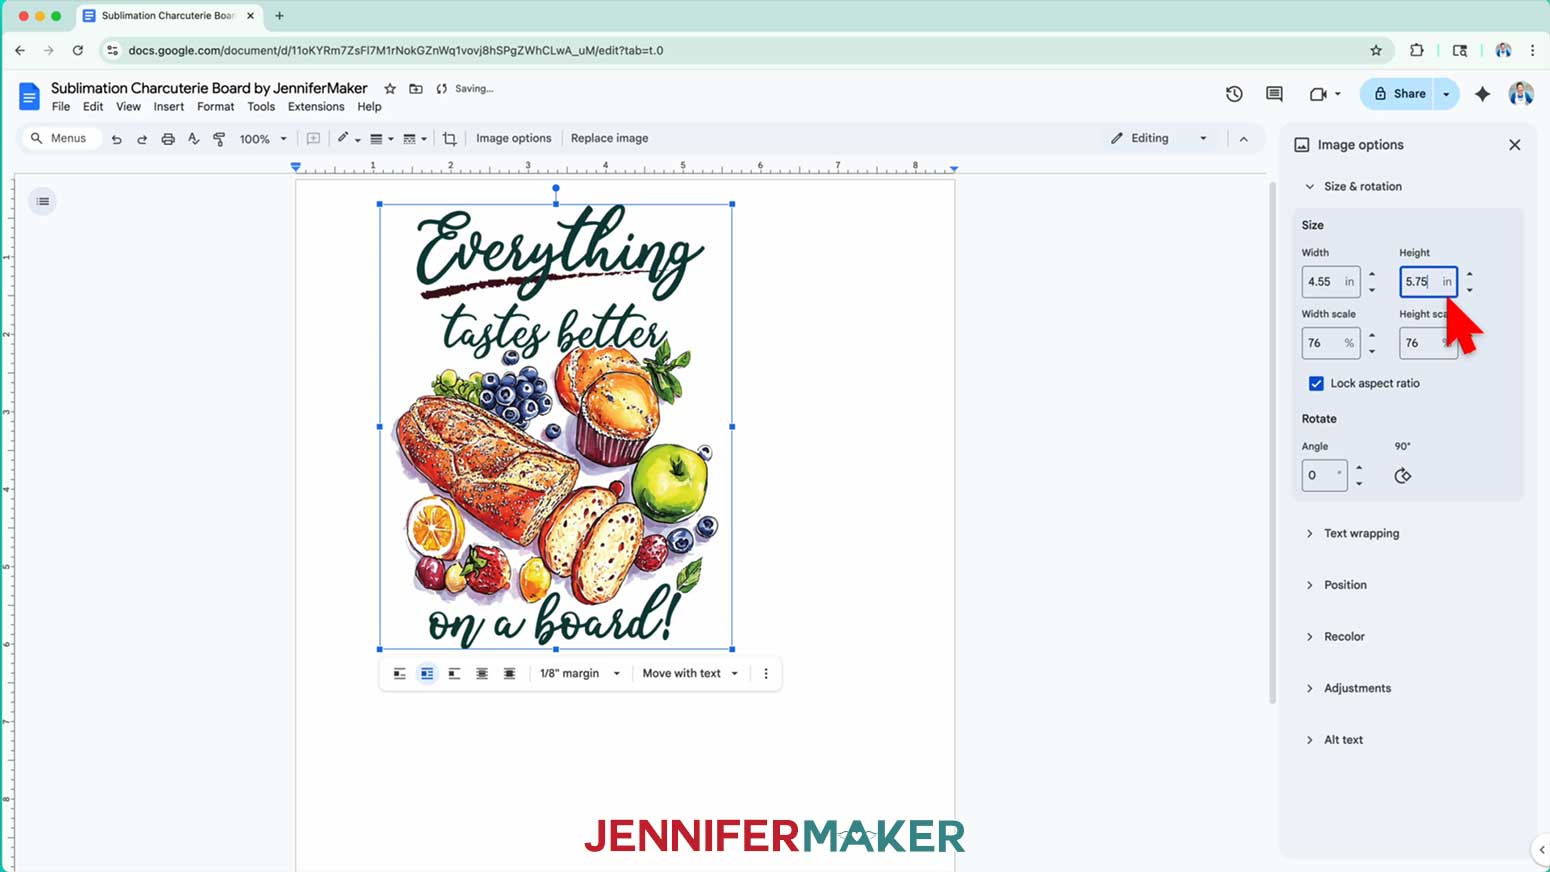
- If you use a board with a different shape, subtract half an inch from the board’s longer dimension to get the maximum size for your design. NOTE: I have a smaller charcuterie board measuring 5.5” x 6.25”, so I’ll subtract half an inch from the height, for a measurement of 5.75”.
- Enter that size in the matching field in the “Size & Rotation” panel. NOTE: I’ll enter 5.75” in the “Height” field.
- The other dimension will auto-adjust, but check both dimensions to make sure they’re smaller than your blank’s measurements. If not, reduce the size further to make sure both dimensions fit.
NOTE: The “Width” field automatically adjusted, and both dimensions are smaller than the blank, so this size will work for my smaller board.
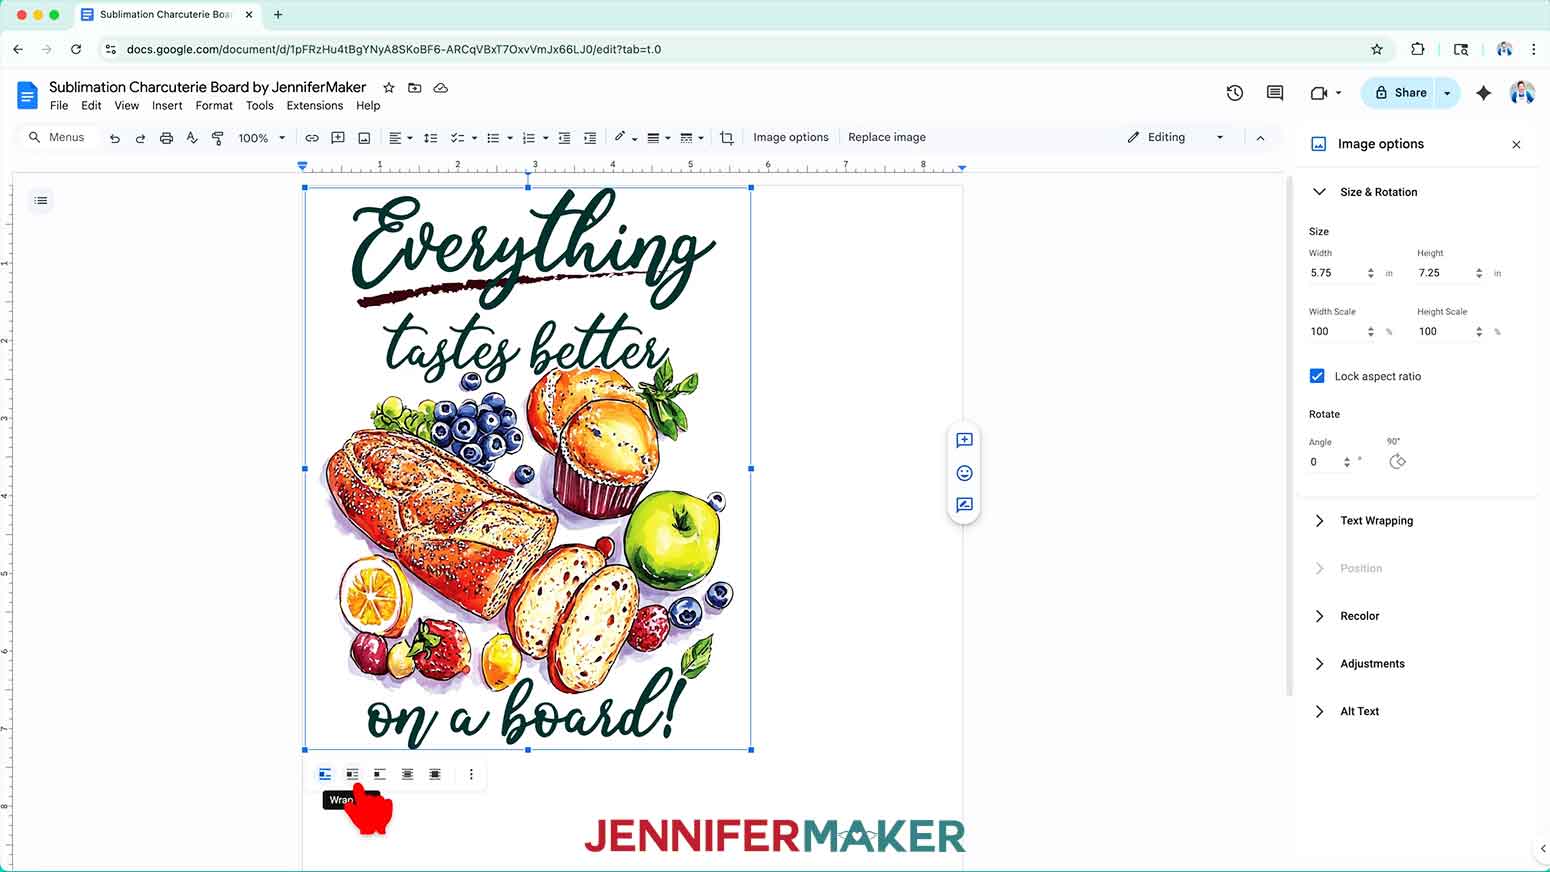
- Click the image and select the “Wrap text” icon from the menu that appears below it.
NOTE: This setting lets you move the design anywhere on the page.
- Click and drag the image to the center of the page to ensure it won’t get cut off at the edges.
- Go to the File menu and choose “Print.”
- Select your sublimation printer under “Destination.”
- Click the arrow beside “More Settings” to select “Print Using System Dialog.”
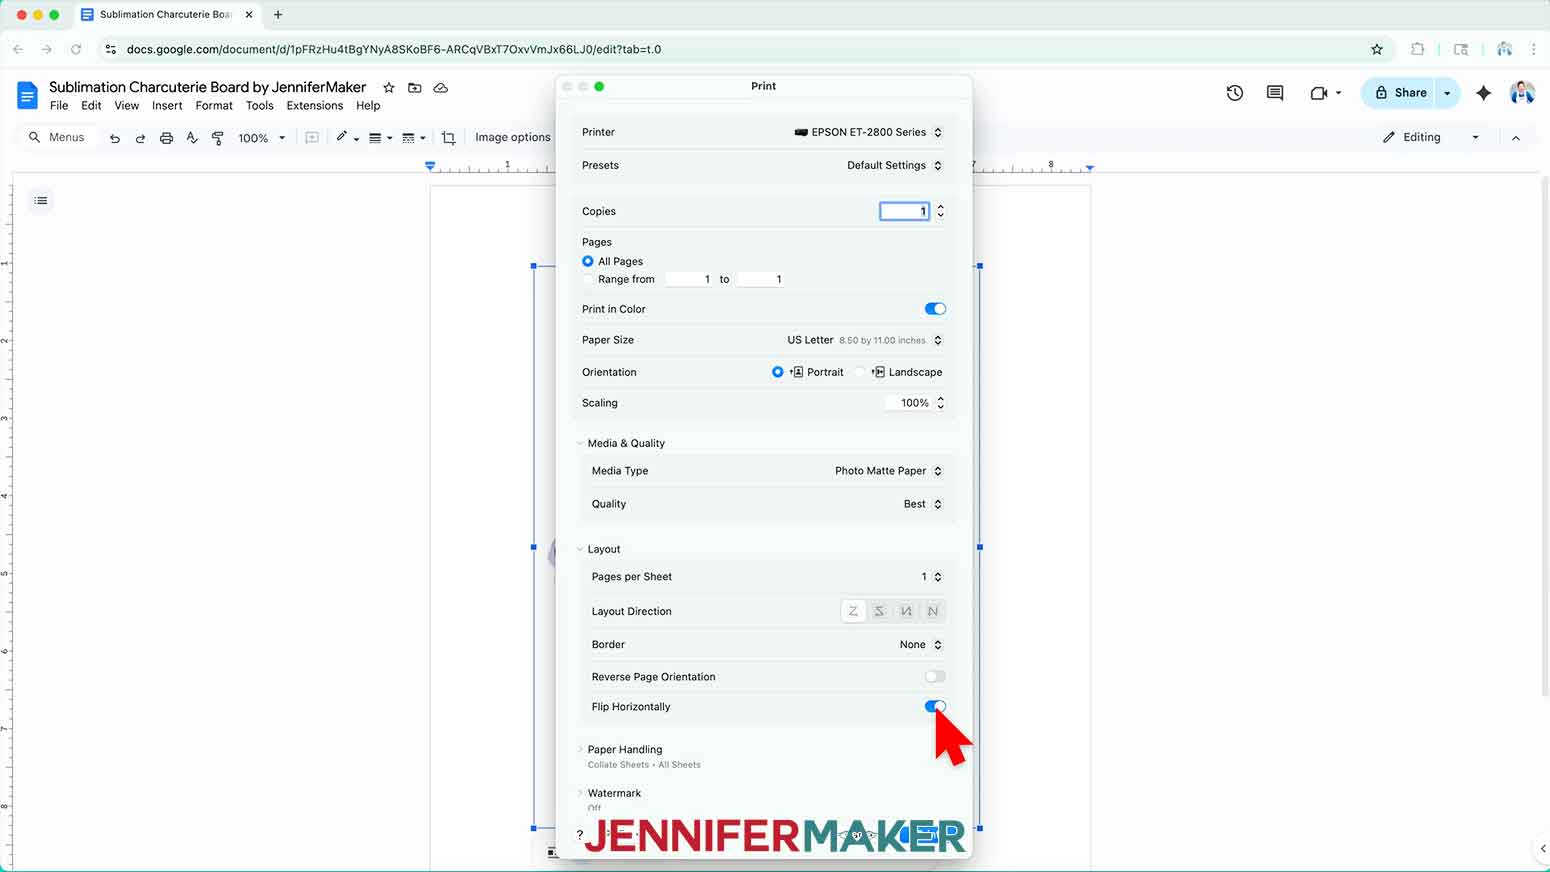
- Your print menu may look different from mine -- just make sure that you “flip horizontally” to mirror the image and select the highest print quality and the best matte photo paper setting. Double-check the sublimation printer and paper size settings to make sure they’re still correct.
- Load a sheet of sublimation paper correctly into your sublimation printer. NOTE: Check the packaging for information on how to load the paper.
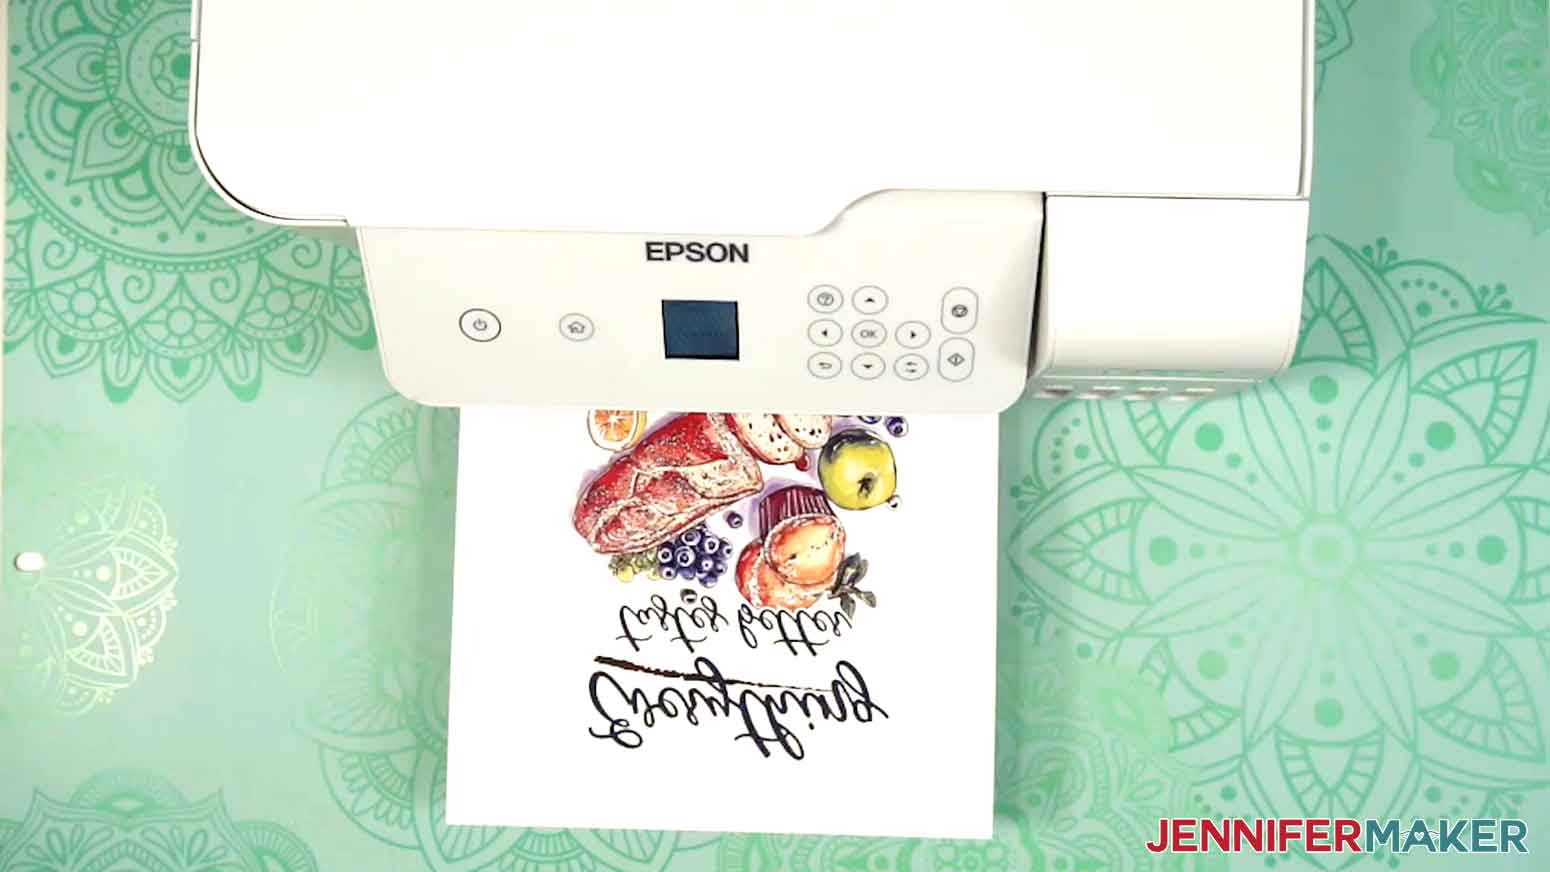
- Click “Print.”
- Allow the print to dry before handling it, as the ink can smear.
NOTE: The printed design will appear lighter before pressing.
- Your image is ready to press!
 TIP: You’ll most likely find it in your Downloads folder.
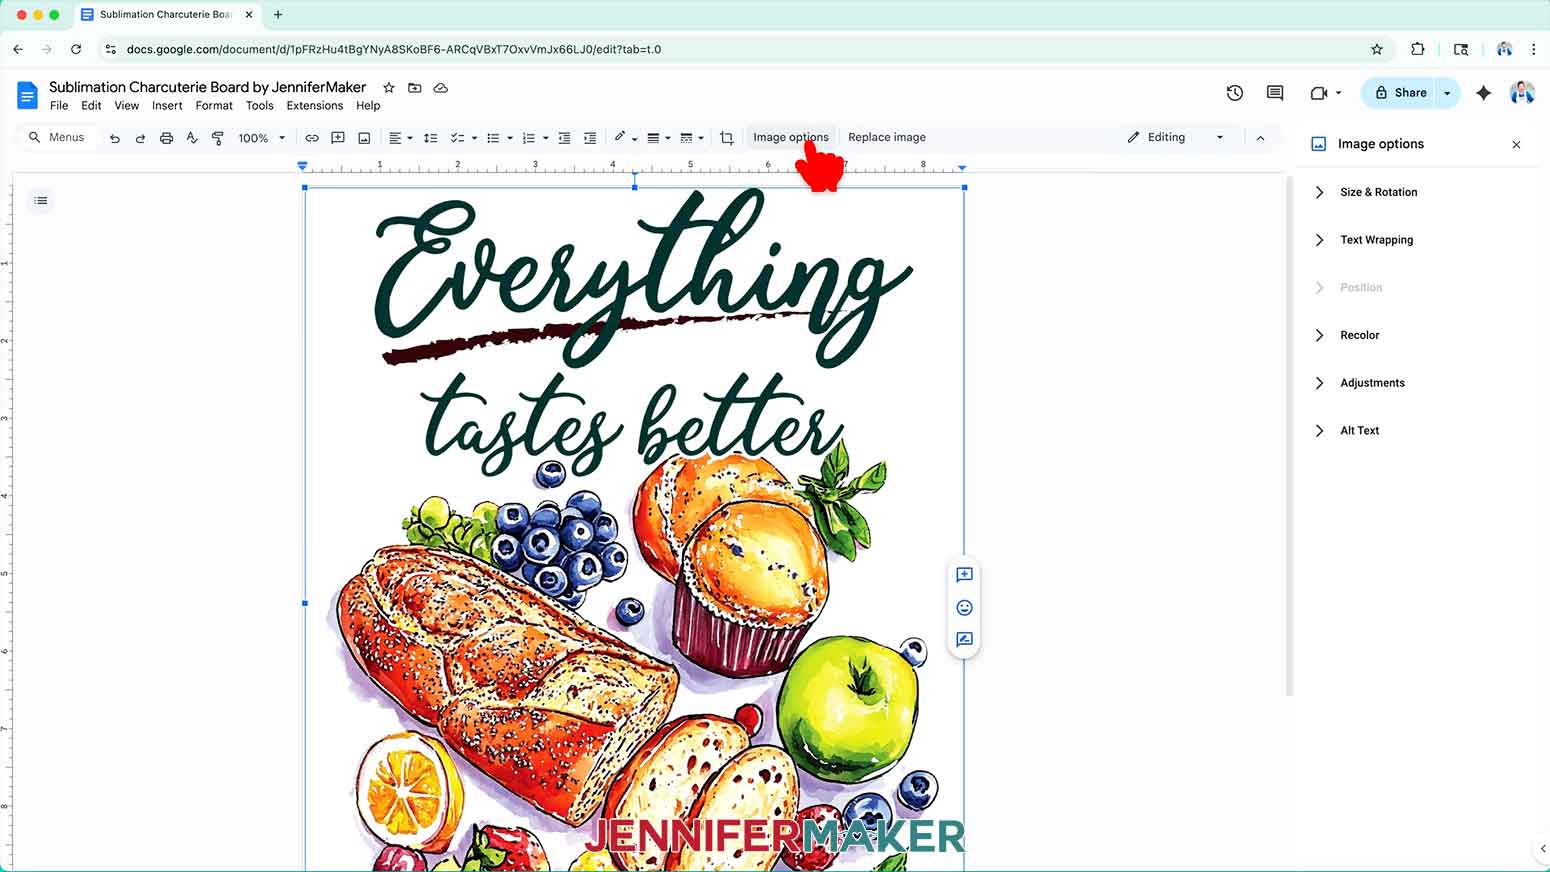
 NOTE: This setting lets you move the design anywhere on the page.
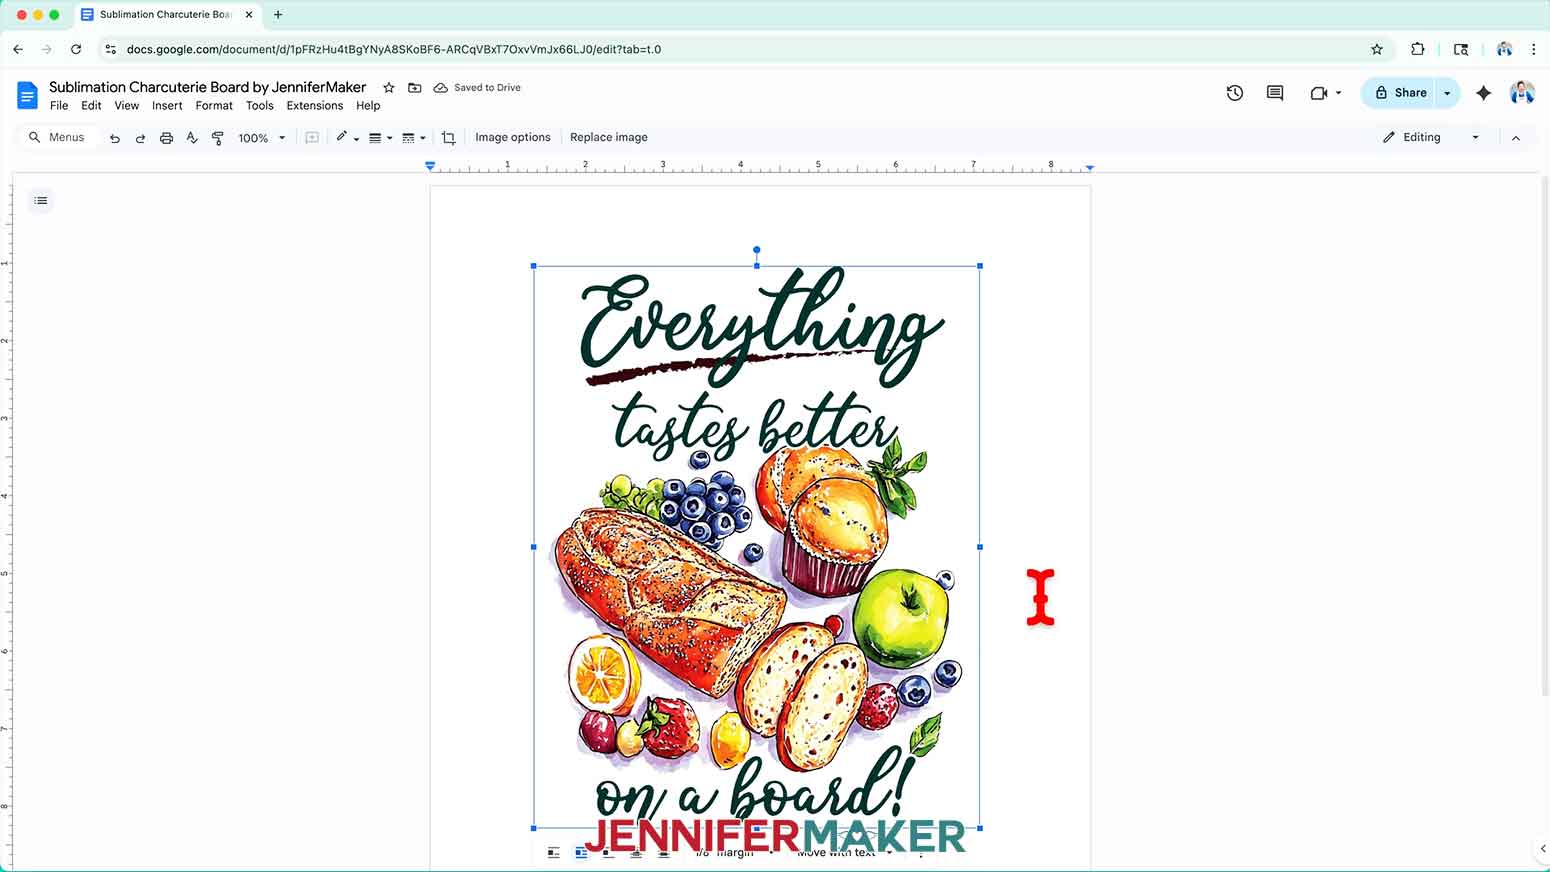

 NOTE: The printed design will appear lighter before pressing.
STEP 4: SUBLIMATE YOUR CHARCUTERIE BOARD
IMPORTANT: As with all sublimation projects, open a window and turn on a fan to improve your ventilation before beginning.
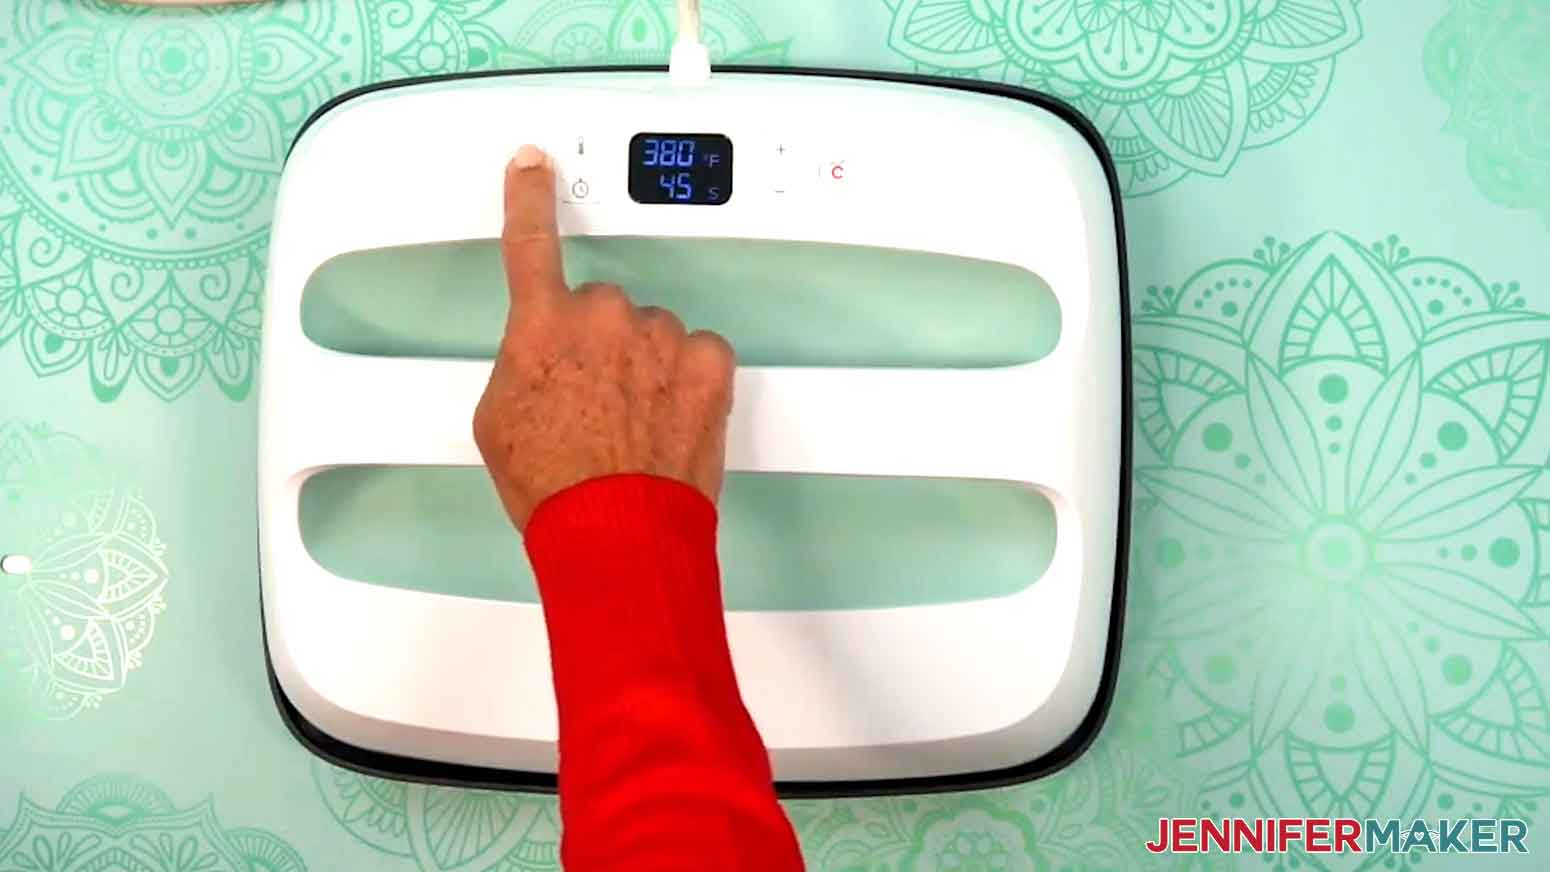
- Set the temperature of your EasyPress to 380℉ (194℃), and set the timer for 45 seconds.
TIP: I followed the time and temperature settings for wood garden stakes in my Sublimation Cookbook. Inside, you can find the settings for tons of other sublimation projects, too!
- Place your pressing mat on your work surface with a piece of white cardstock on top to protect it from any ink that may escape during the sublimation process. TIP: Your cardstock should be clean and free of any ink or other marks that could transfer to your blank during sublimation.
- Use a lint roller to clean any debris from the blank.
TIP: If your charcuterie board came with a protective film, be sure to remove it before cleaning. You can use tweezers or a weeding tool to carefully lift the film if it’s really stuck.
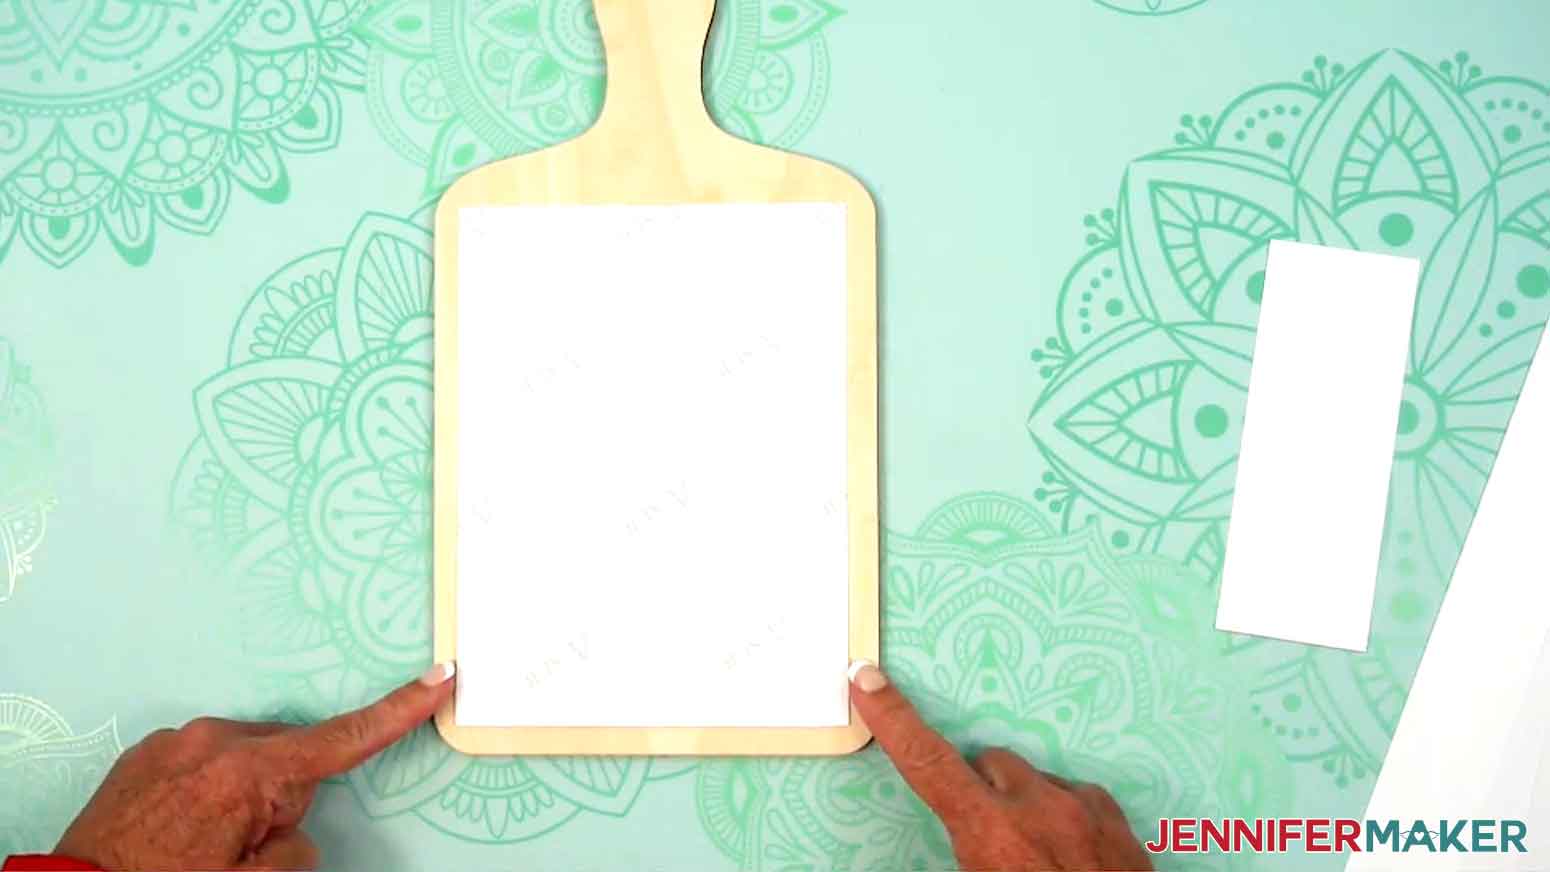
- Place the charcuterie board with the side you want to press face up on your pressing mat, then cover it with a clean sheet of white, uncoated butcher paper. NOTE: The charcuterie boards in my supplies list can be sublimated on both sides, but the wood patterns and coloring on each side may vary. If you’re only sublimating on one side, press your design on the side with the fewest irregularities for best results.
- Cover the entire area of your charcuterie board with the EasyPress and preheat the blank with medium pressure for 45 seconds to remove moisture.
- Lift the EasyPress and place it back on the base.
- Wearing heat-resistant gloves, carefully lift away the butcher paper and set aside the preheated blank to cool completely. TIP: Moisture from the charcuterie blank may have soaked into your blowout paper during pre-heating. If so, use fresh cardstock and butcher paper when pressing the design.
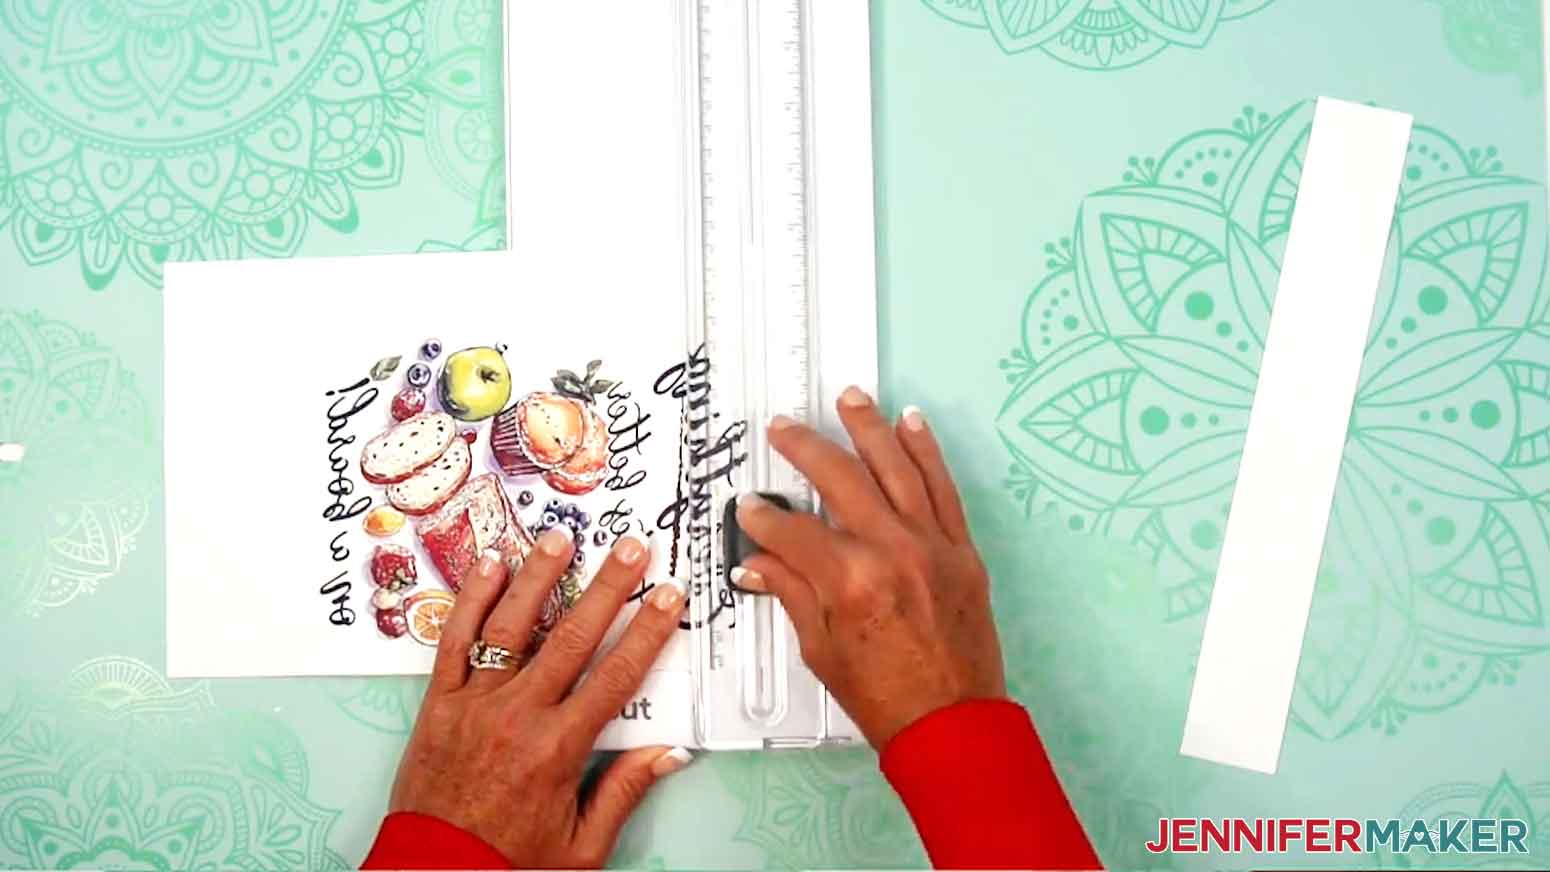
- Use scissors or a paper trimmer to cut your printed design down to a smaller rectangle. Make sure there is at least ⅛” of white around the ink’s edges.
- Place the charcuterie board with the side you want to press face up on your work surface.
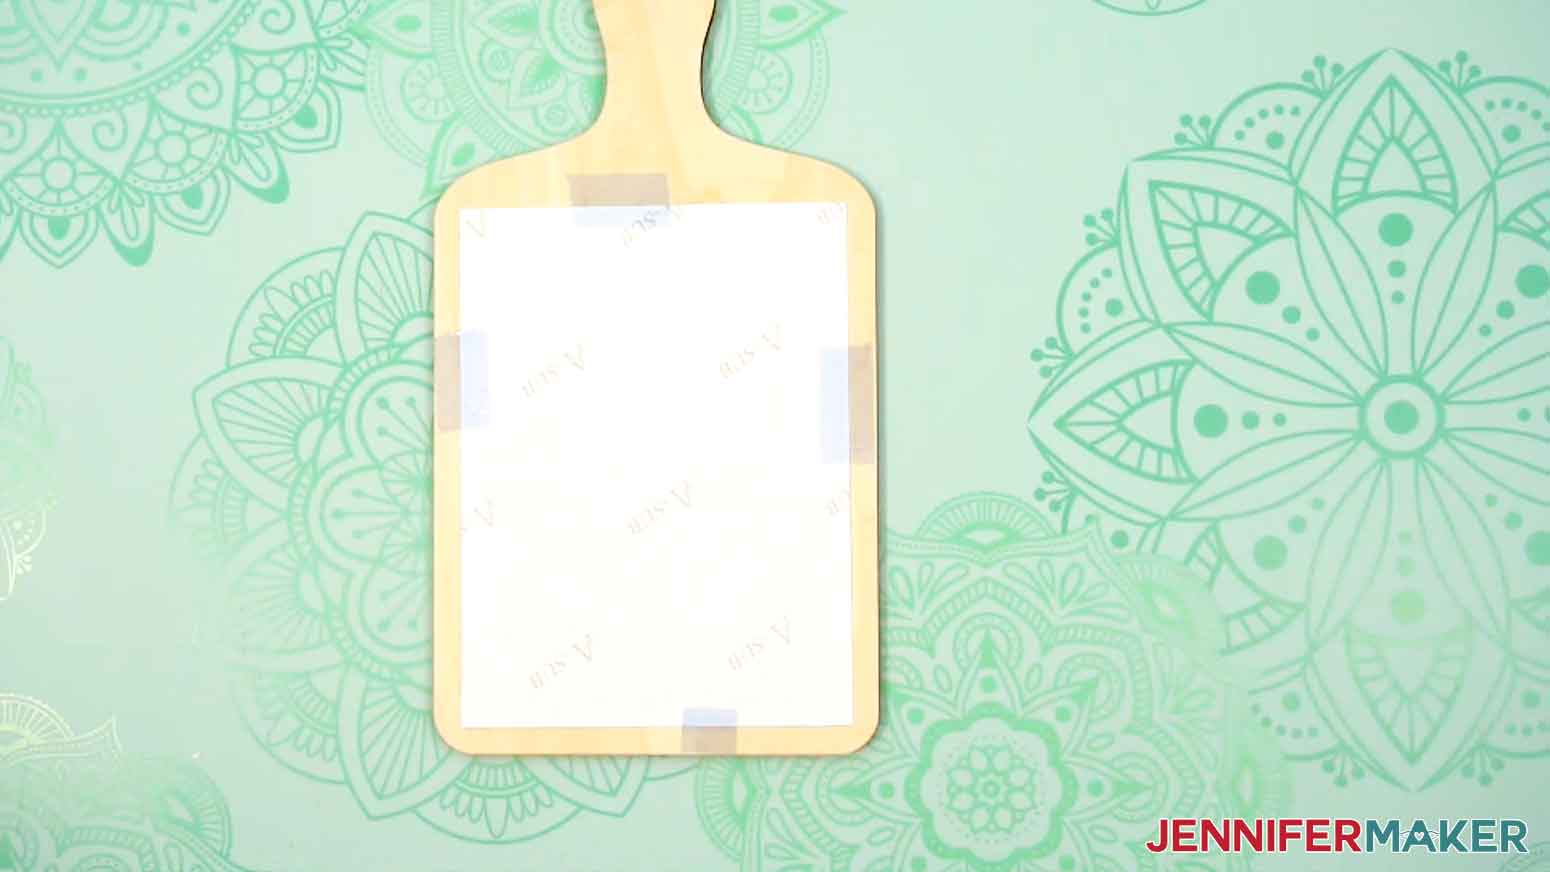
- Center the printed design face-down on the base of the charcuterie board so an even amount of wood shows around the paper.
- Use heat-resistant tape to secure the print to the charcuterie blank on all four sides of the print. Make sure the tape doesn’t touch the ink, and that the print is tight against the sublimation surface.
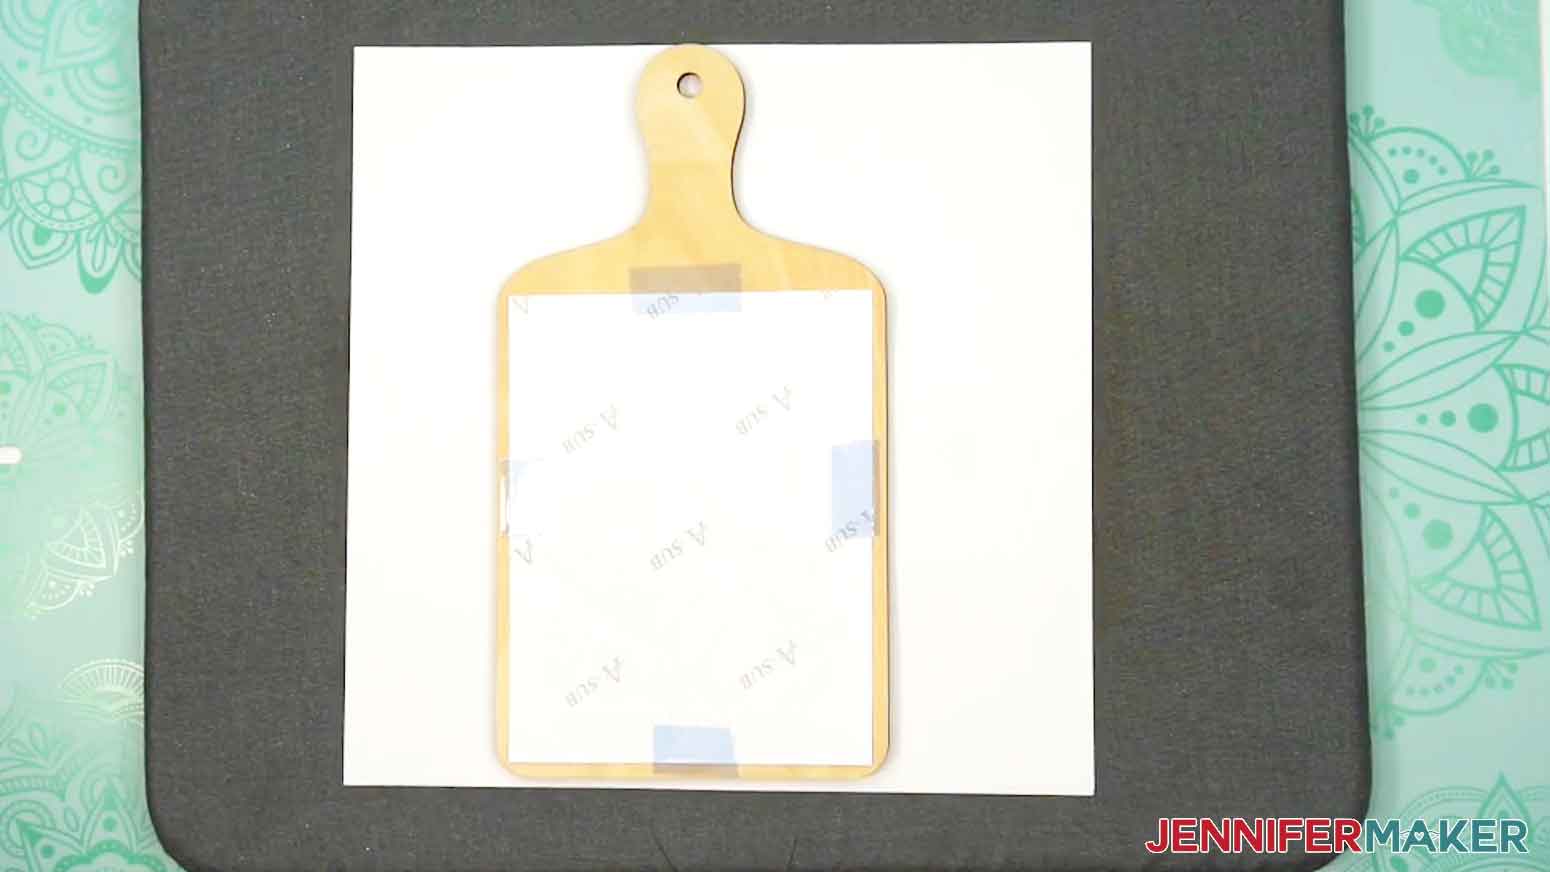
- Place the secured blank onto the cardstock so the charcuterie board is sublimation-side up and the print is face down.
- Place a fresh piece of white uncoated butcher paper on your project to completely cover it.
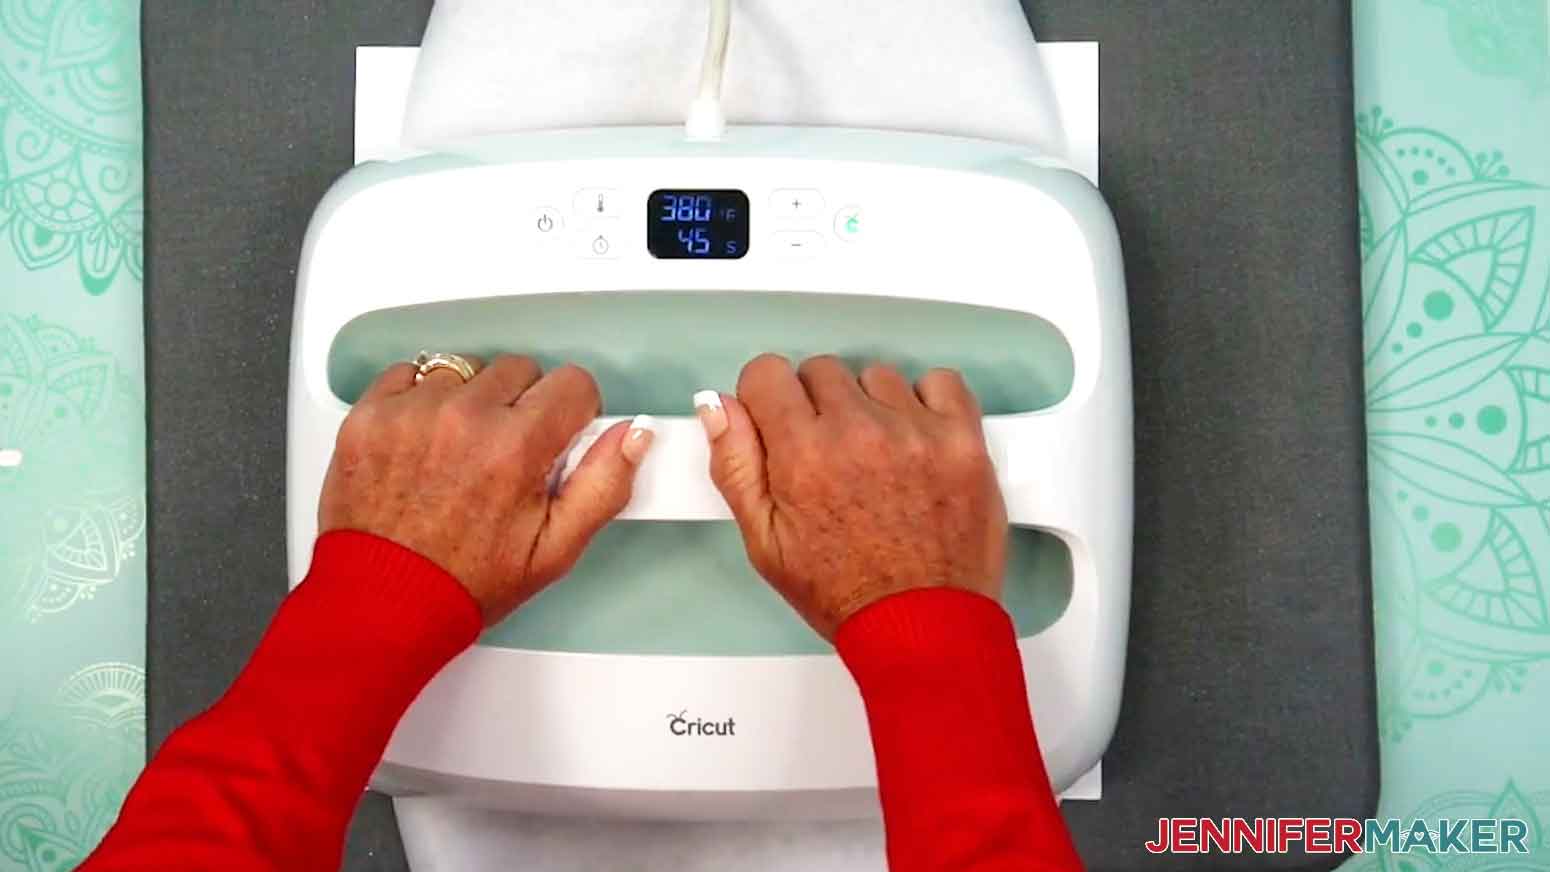
- Make sure the temperature of your EasyPress is at 380℉ (194℃), and the timer is set for 45 seconds.
- Cover the entire area of your charcuterie board with the EasyPress and hold it in place with heavy pressure for 45 seconds.
TIP: Keep pressure even on both sides of the press for best results.
- When the time is up, lift the EasyPress straight up to avoid ghosting. NOTE: Always remember to place your press back on the base after using.
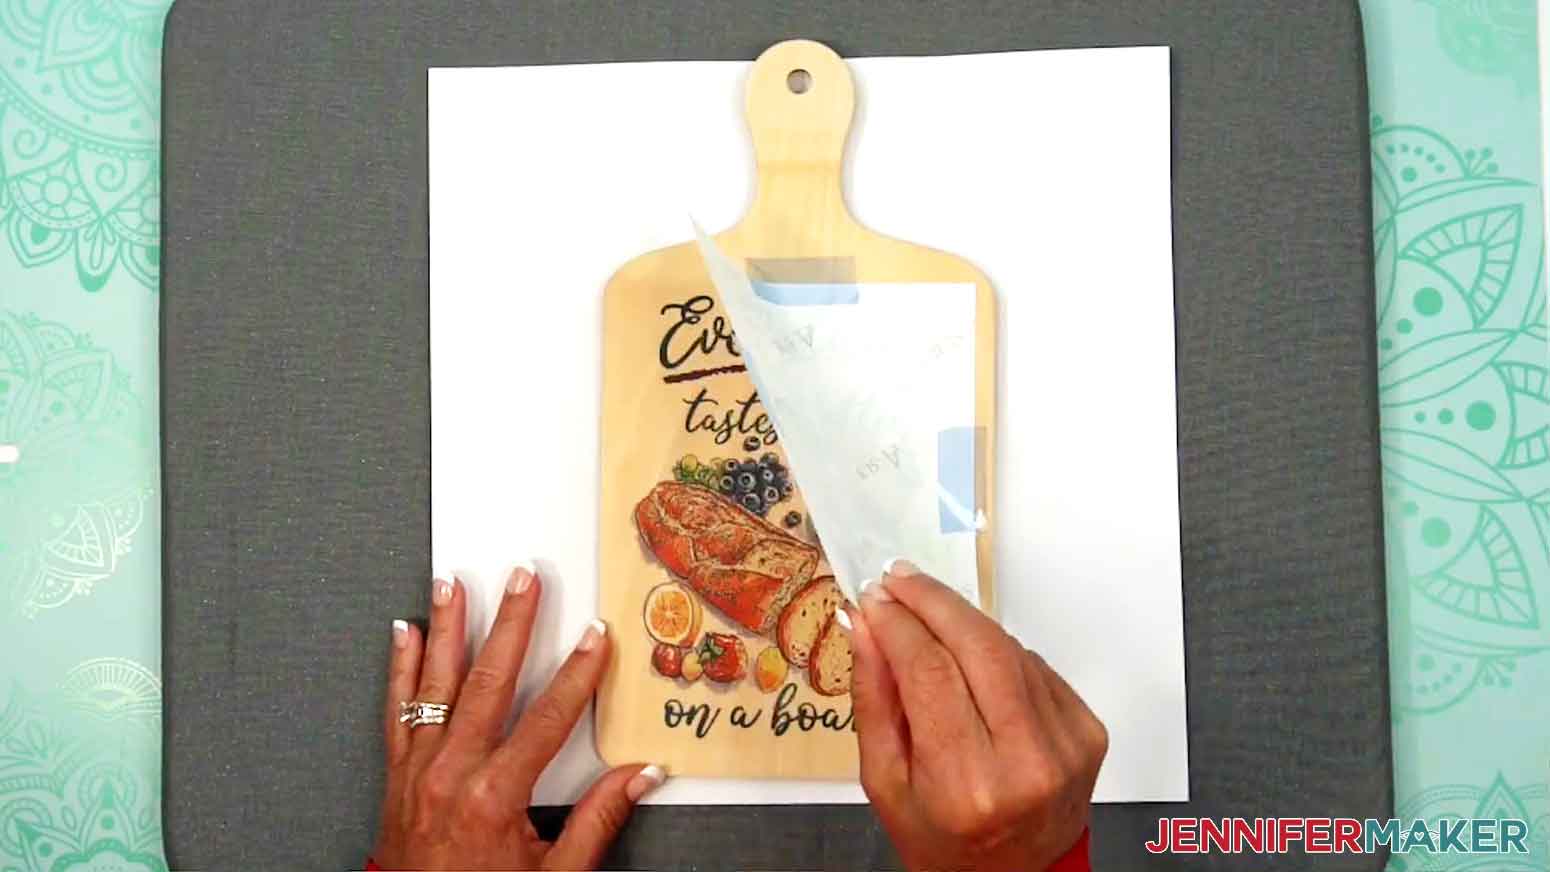
- Let the project cool completely, then remove the butcher paper, the tape, and the design.
- Your sublimated charcuterie board is ready!
 TIP: I followed the time and temperature settings for wood garden stakes in my
 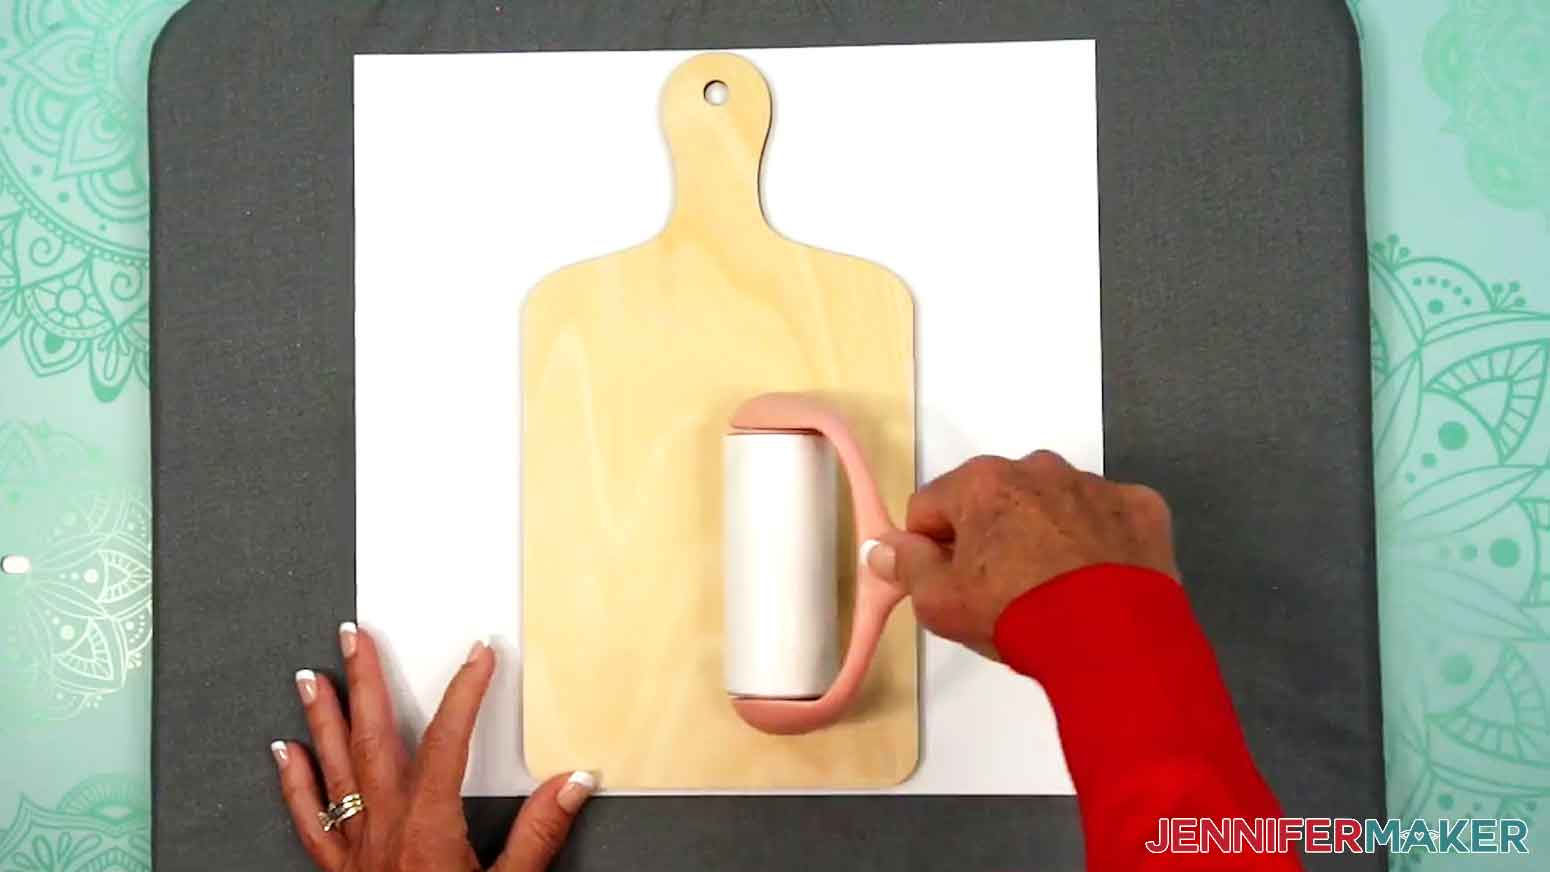 TIP: If your charcuterie board came with a protective film, be sure to remove it before cleaning. You can use tweezers or a weeding tool to carefully lift the film if it’s really stuck.
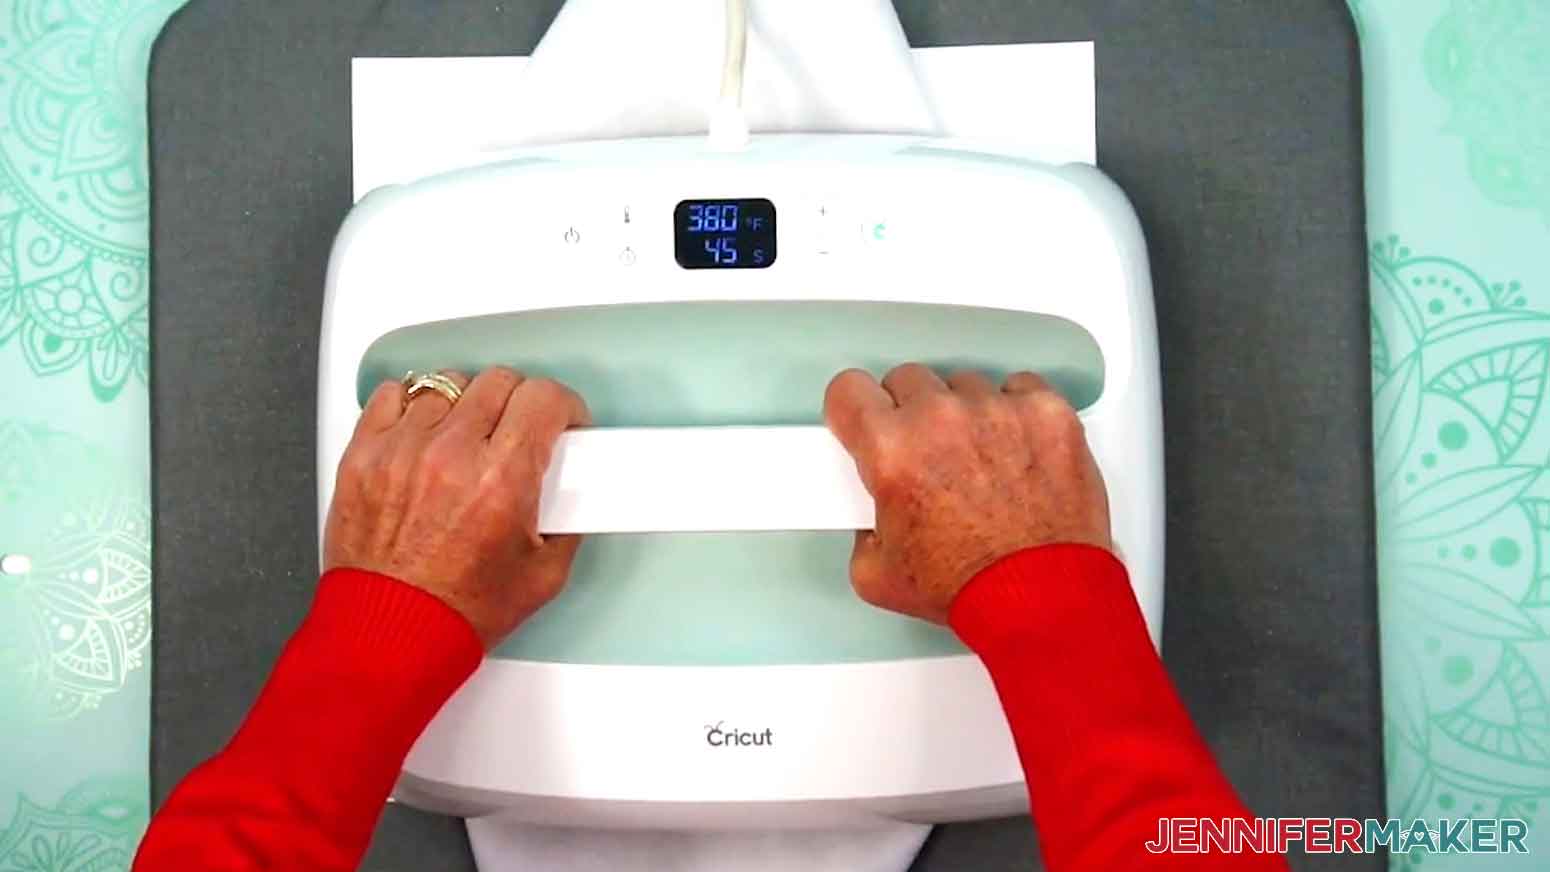
STEP 5: SHOW IT OFF
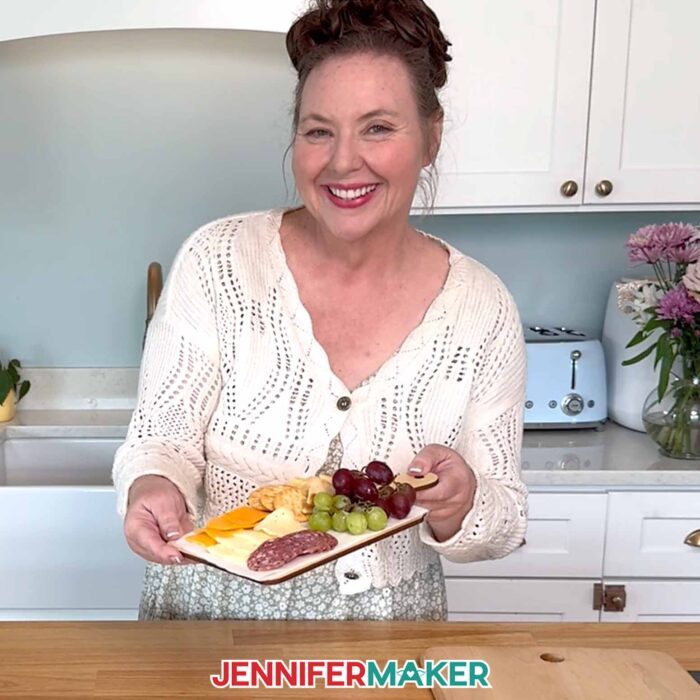
You now have a decorated charcuterie board you can use to display in your kitchen or dining room!
I don’t recommend placing food directly on the surface, but if you’d like to use the board for serving, you can cover the surface with a layer of parchment paper first!
Notes
Print Sizes: Done-For-You Designs: 5.75” W x 7.25” H Blank Sizes: 6.3" x 11.8": Sublimation Area Without Handle: 6.25” W x 7.75” H Full Size With Handle: 6.25” W x 11.875” H
5.5" x 9": Sublimation Area Without Handle: 5.5” W x 6.25” H Full Size With Handle: 5.5” W x 9” H Fonts Used:
Biosha Script Free Alternative: Bonspire Script
Wonderful Display Font Free Alternative: Bestoom
Pantry - Farmhouse Stencil Free Alternative: Solid Stencil 2023
Care: To wash, use warm water, mild soap, and a soft cloth. Allow to air dry.
Answers to Common Questions About Sublimation Charcuterie Boards
Q: I want to design my own custom sublimated charcuterie board. How do I do that?
A: You can learn how to design your own custom monogrammed sublimation charcuterie designs with Canva in my ADVANCE program. Learn more about ADVANCE here!
Q: What do I need to begin sublimation?
A: To get started with sublimation, you need some basics like a printer with sublimation ink, sublimation transfer paper, a heat press, polyester fabric blanks like T-shirts or polymer-based blanks like these boards, special mugs, or garden stakes made for sublimation, and a few other tools and materials you can find in my list above. If you’re not sure where to begin, this beginner-friendly sublimation tutorial walks you through everything step-by-step!
Q: Do I need to add a special coating to my charcuterie board before sublimating?
A: Raw wood typically lacks the special polymer coating needed to absorb sublimation ink during heat pressing, but the charcuterie boards in my materials list already come coated! So if you use the same ones I did, you can skip that step entirely. If you want to sublimate on a different board, check the manufacturer’s information to see if it has the necessary coating.
Q: Help! Why is my ink bleeding all over my board when I press it?!
A: If your sublimation ink runs all over your board, a likely culprit is that your board has too much moisture. When trapped moisture inside the wood meets with heat, it turns into steam, which can cause the ink to bleed and result in a blurry or blotchy image. Make sure to do a thorough pre-press with protective butcher paper and cardstock before sublimating your design onto the board, and replace damp or wrinkled paper with fresh, dry paper before your final press.
Q: Are sublimated charcuterie boards food safe?
A: Professionally sublimated charcuterie boards are often food safe because the manufacturer adds a food-grade finish after pressing the design. These hand-crafted boards won’t have that special finish, so I don’t recommend placing food directly onto them, even if you haven’t sublimated the surface. However, if you do want to use your board when hosting your next wine and cheese night, you can place a layer of parchment paper down first, and then load on your goodies!
Q: How do I make my sublimation brighter?
A: Bright sublimation results come from using the right materials and settings — like using sublimation transfer paper, high quality ink, and a compatible blank pressed at the proper time and temperature. My tutorial includes examples and tips to help your colors really pop.
Q: Is it cheaper to do vinyl or sublimation?
A: There are so many factors involved, but overall I would say that vinyl is a little cheaper, though the results aren’t as long-lasting since sublimation dyes the surface instead of sitting on top of it. You don’t need a Cricut or cutting machine with sublimation, but you do need a sublimation printer with sublimation ink to print your own designs (unless you have them printed by a service like Jiffy). Sublimation blanks can be a little expensive, and mistakes are more difficult to fix than those made with vinyl. However, by knowing how to prevent common sublimation issues like those I cover in the tutorial, you won’t let your money go to waste!
Q: Can you use Canva for sublimation?
A: You can, and I actually used Canva to design many sublimation projects! Canva is one of my favorite tools to design PNG images for use in sublimation crafts! Check out my Canva Coach Playbook to learn all about how to use Canva to create designs, edit photos, and more. And if you want to know exactly how to use Canva to design your own projects, check out my ADVANCE with JenniferMaker program!
Q: Can you sublimate over sublimation mistakes?
A: Sometimes you can rescue a sublimation mistake by using a heat gun to lighten the image or pressing over it with a darker design or pattern, though results may vary depending on the blank and colors. I show what works and what to avoid when sublimating over sublimation mistakes in my How To Remove Sublimation Ink from a Tumbler: Two Ways tutorial.
Q: What is the best print setting for sublimation?
A: The ideal sublimation print setting is usually high-quality or photo mode with mirroring turned on. For detailed guidance, including how to adjust print settings for common printers, check out the walkthrough in the tutorial.
Q: What is the best sublimation ink?
A: I recommend using trusted sublimation ink brands that are compatible with your printer. I use Hiipoo sublimation ink, which works great in my converted Epson EcoTank. In the conversion tutorial, I share the exact ink I use, how to fill the printer correctly, and show how it performs on real projects.
Q: What is the best image type for sublimation printing?
A: High-resolution PNGs with transparent backgrounds or flattened JPEGs tend to work best for sublimation. If you’re not sure how to prep your image, I show how to size and format it perfectly using free tools in the tutorial.
Q: Can you do sublimation with Cricut?
A: While a Cricut cutting machine can be useful in some sublimation projects, it does not sublimate or print sublimation ink. However, you can use a Cricut and Infusible Ink pens to draw designs onto paper which can be sublimated, or use a Cricut machine and Cricut Design Space to cut SVG designs out of Infusible Ink transfer sheets.
Q: What is the best sublimation printer for beginners?
A: Learn all about the top sublimation printers on the market with my post: Choosing the Best Sublimation Printer in 2025.
Q: Can I make and sell my sublimated charcuterie boards?
A: If you want to use my designs and projects for commercial use, please familiarize yourself with my important licensing information before selling your crafts.
Get the free PNG images to sublimate your own charcuterie board!
(If you do not see the signup form above, click here.)
I love seeing your sublimated projects, and how you use them! Once you’ve made your own sublimated charcuterie board, inspire others and share some photos of your creations in our Facebook group or tag me on social media with #jennifermaker.
Love,

Want to remember this? Save this Sublimation Charcuterie Board Tutorial to your favorite Pinterest Board!