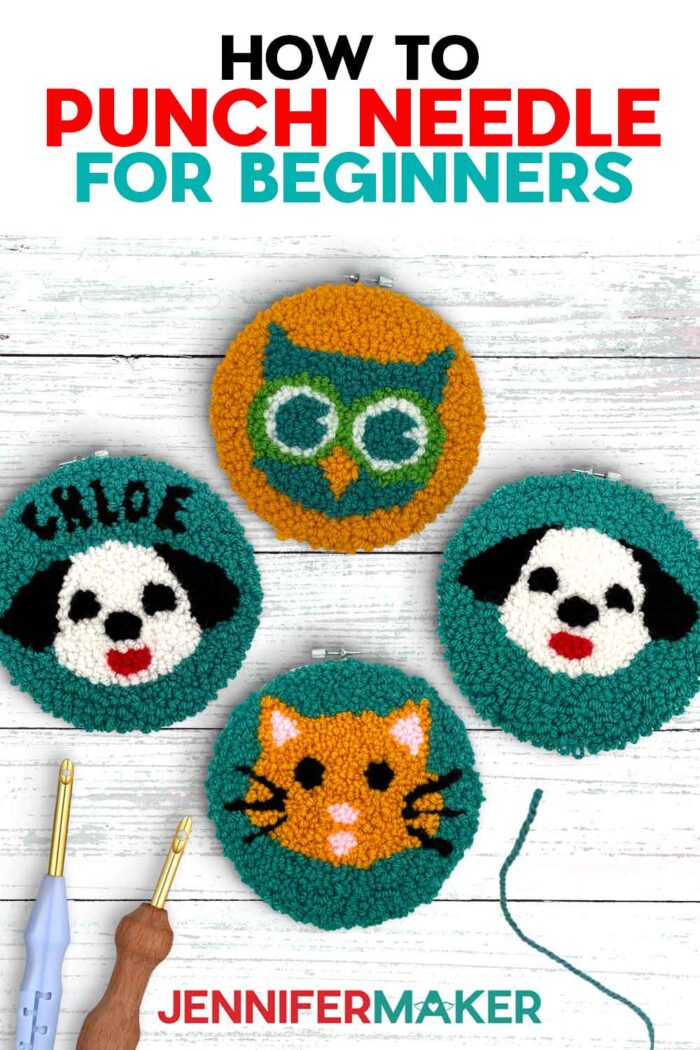
Learn how to punch needle for beginners with this cute craft!
There’s just something calming about embroidery. I love how the simple act of pulling thread through fabric can turn a plain surface into something truly special. When I embroidered those pretty paper embroidery cards, I remember how peaceful it felt to watch the design slowly come to life. And my napkin embroidery project? That one reminded me how a handmade touch can make even an ordinary meal feel like a celebration. So when I saw that punch needle embroidery was getting popular, with its fluffy, textured stitches, I knew I had to see if the Cricut could help make it even easier!
See the full step-by-step video tutorial on how to punch needle for beginners:

Punch needle embroidery can look like one of those “mystical” crafts. You know, the kind that looks beautiful and effortless, but surely involves some secret wizardry to actually pull off. When I first stumbled across punch needle art online, I was fascinated, but totally confused. How does the yarn even stay in the fabric? I had so many questions, and it felt like a mystery I’d never crack. That is, until I tried it for myself and discovered just how fun, forgiving, and beginner-friendly it really is. That’s what inspired me to create this tutorial on how to punch needle for beginners! Because once you know the basic technique, punch needling becomes a great way to relax and make something totally adorable.
In this project, I’ll show you exactly how to create your very first punch needle project from start to finish, including how to draw a design with your Cricut, how to maneuver the tip of the needle for smooth, even loops, and how to finish your piece into a ready-to-hang work of art. This is a perfect way to start exploring the world of punch needle work — especially if you’re like me, and love animals and cute home decor.
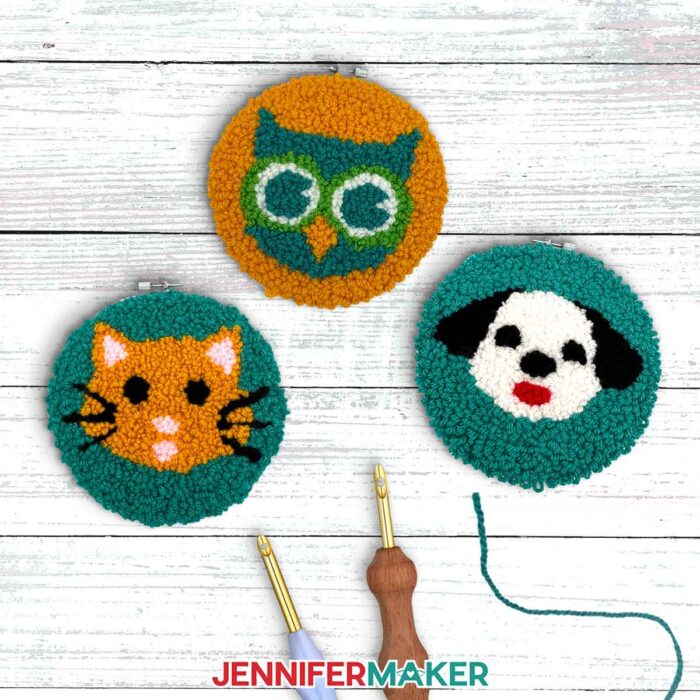
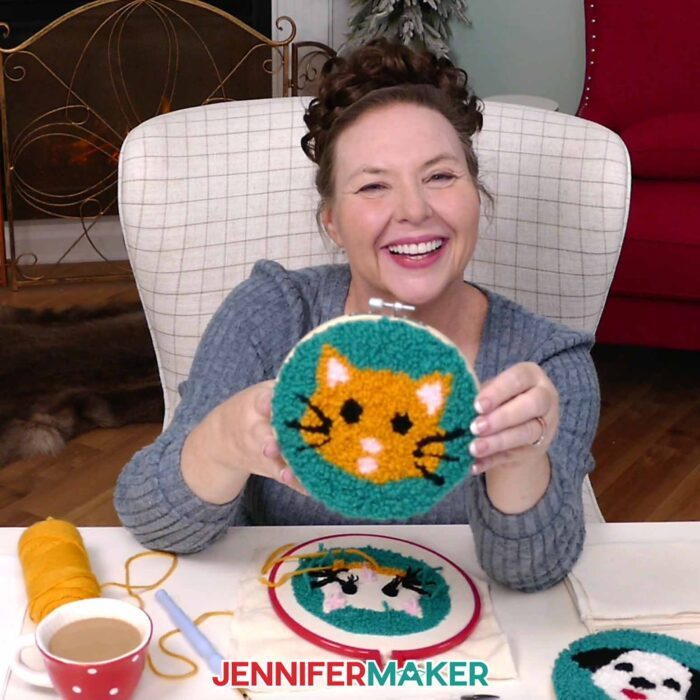
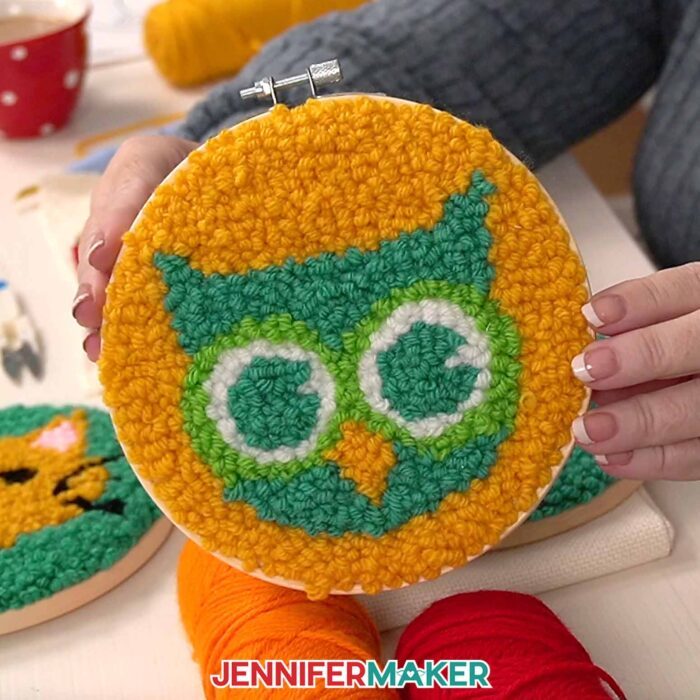
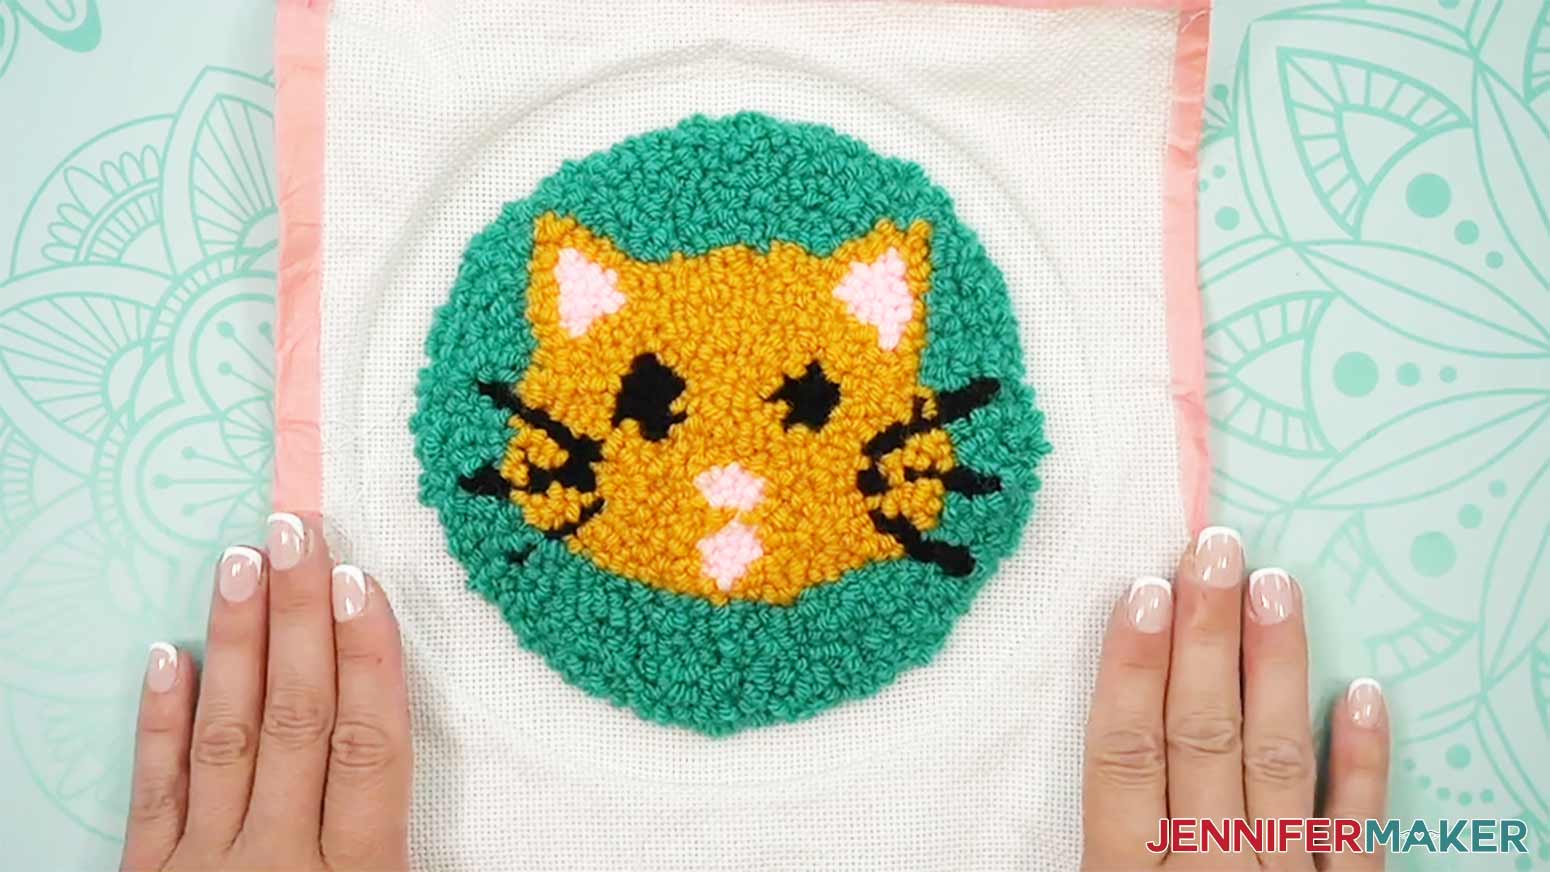
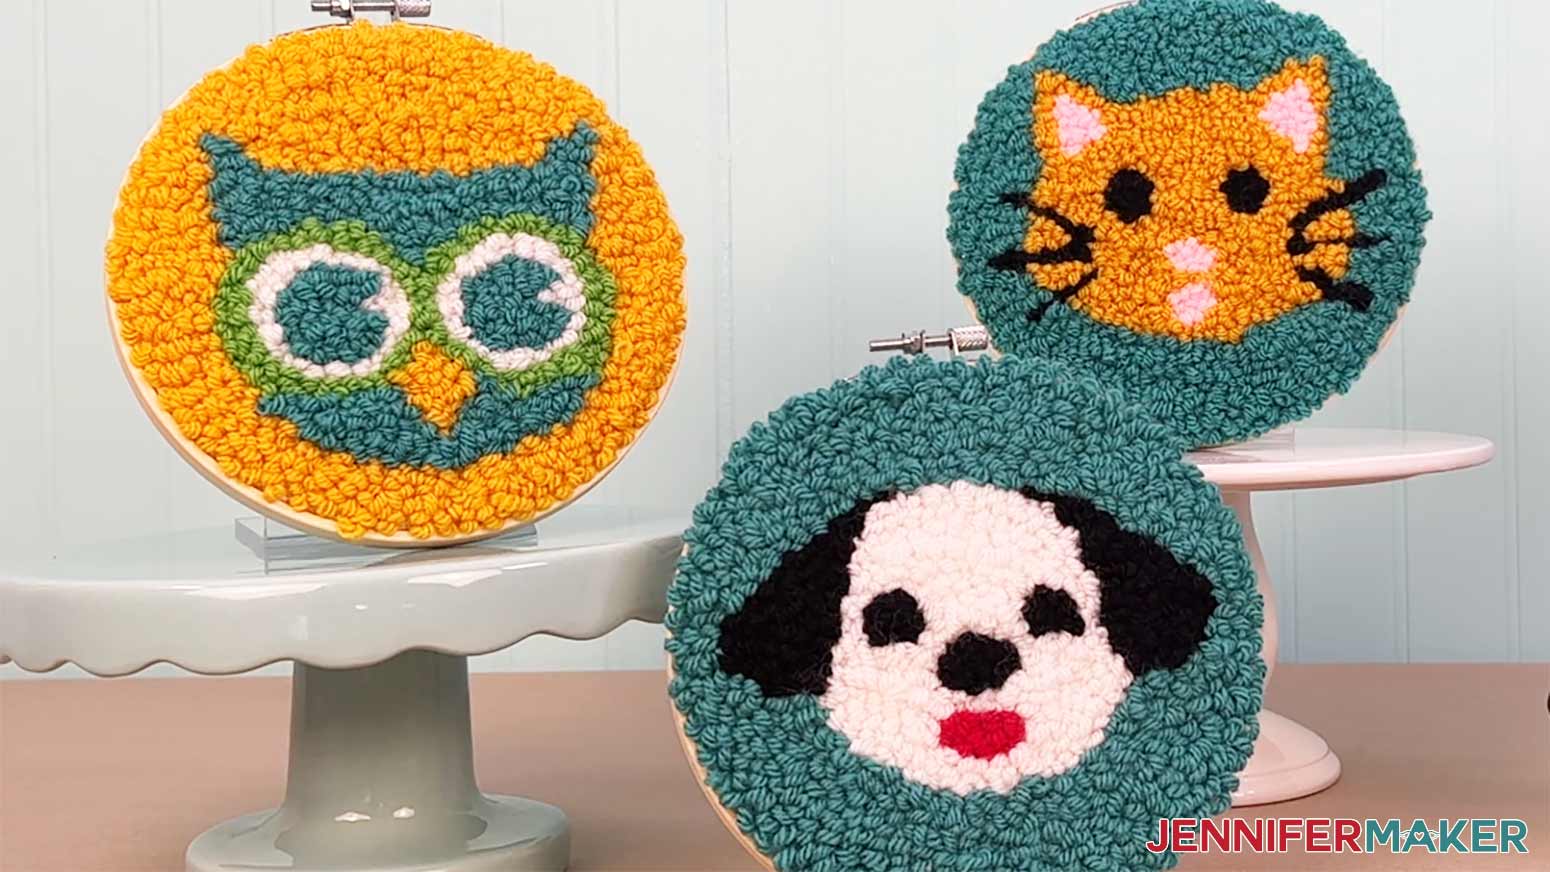
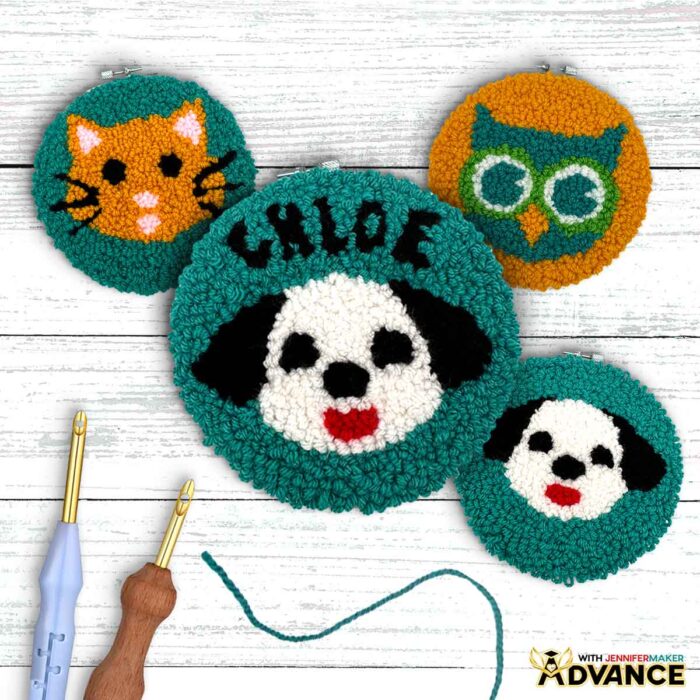
I designed three adorable punch needle patterns for this project: a cat, a dog, and an owl. They’re all drawn in a bold, rounded style that’s perfect for punch needle art. And it’s versatile, too, because you can display either side. The front side is flatter, and the back looped side shows the loops of yarn and gives that signature tufted look. For this tutorial, we’re showing off the back side because the texture is just so fun!
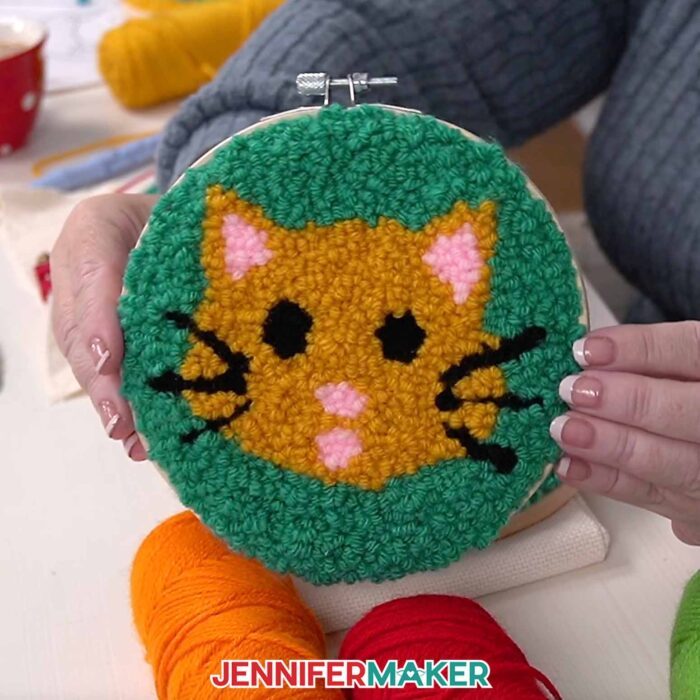
You don’t need a fancy setup to get started, but having the right tools makes a big difference. I used monk’s cloth for my woven fabric, which is soft and the weave of the fabric is just right to hold yarn in place. While you can try different types of punch needles, I used an adjustable punch needle set to the shortest setting, which gives you smaller, tighter loops. Using thicker yarns or adjusting the size punch needle gives different effects, which is fun to experiment with as you move beyond your first punch needle project.
Instead of tracing your punch needle design by hand, we let the Cricut do the work. With a 1mm washable fabric marker, I had my Cricut draw the mirrored animal design onto a 10″ x 10″ square of monk’s cloth. With punch needle embroidery, the back of your work can become the display side, so mirror the design if you want to display it that way. I share this whole process in my video tutorial, so be sure to follow along for the full walkthrough.
Once the design is drawn onto the surface of the fabric, it’s time to hoop it up. I recommend a sturdy plastic punch needle hoop for the punching process, since it holds the cloth extra tight. This is essential for getting those stitches to hold! You’ll tighten the screw and pull the cloth taut until it’s tight as a drum. Loose fabric? That’s one of the most common issues new crafters face, and it’s the main reason loops fall out! In the video tutorial, I share my best tips to get a tight hold from your first stitch to your last.
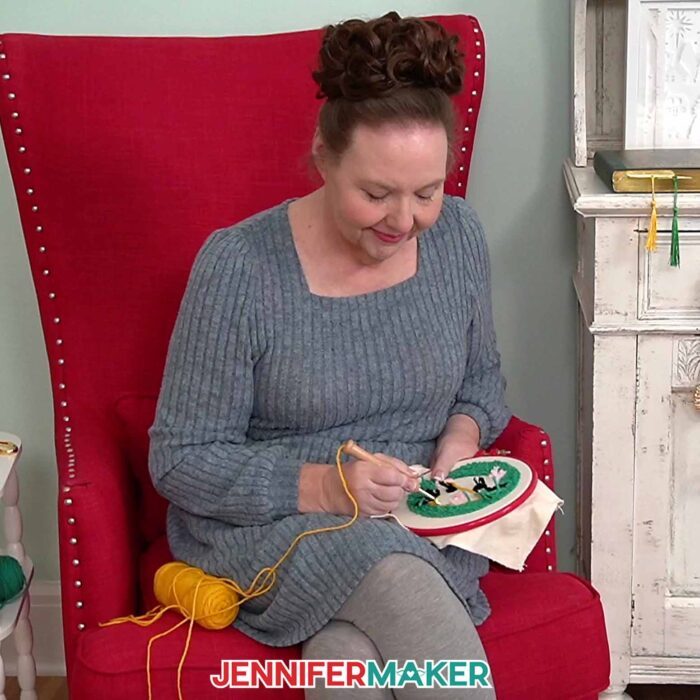
There are different ways to approach your design: you can punch all of one color at once, or work shape by shape. I used worsted weight yarn and switched colors as I moved through the details, background, and animal features, pulling from the skein, which gives the best tension and allows the yarn to feed smoothly. You’ll quickly discover what gives you your desired results. If you mess up, don’t worry! Just pull the yarn out gently and try again. This form of needlework is incredibly forgiving. . . not to mention, so rhythmic and soothing!
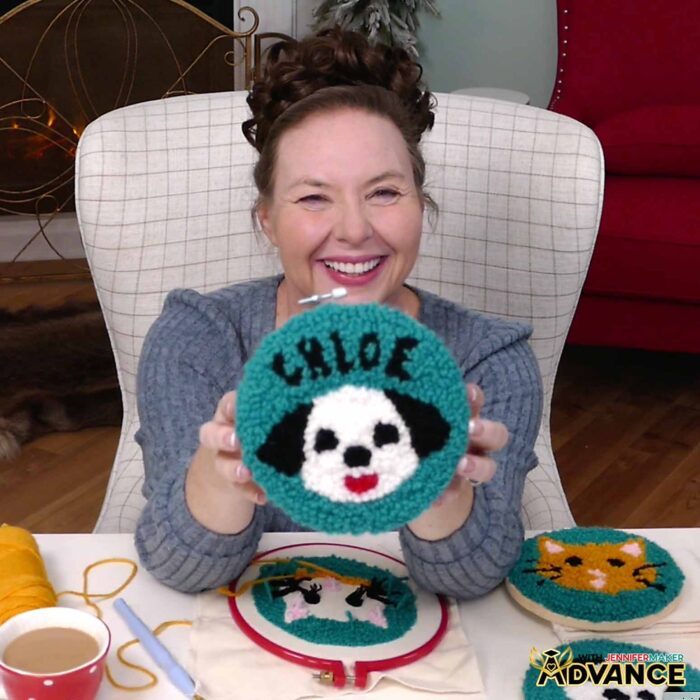
And if you want to personalize your project, I’ve got something extra special for you! In my Advance with JenniferMaker workshop, I teach you how to customize your punch needle design by adding a name or meaningful word right by the image. This is such a sweet touch for baby gifts or family portraits, and I’ll show you exactly how to do it in Cricut Design Space and how to punch the text using the same basic technique. Learn more about ADVANCE with JenniferMaker here!
Once your design is fully punched, you’ll remove it from the working hoop and place it in a pretty bamboo hoop for display. I love turning these into wall hangings, but there are all sorts of projects you can make with this technique, like pillows or even a punch needle rug if you’re feeling bold! Just make sure to check your loops for any strays or tangles, and give the back of the hoop a clean finish by stitching a gathered edge with extra yarn. It hides raw edges and keeps your cloth taut for years to come.
My tutorial on how to punch needle for beginners is hands-down one of the best ways to get started with needle punching. You don’t need a full punch needle kit to try it, just a few key supplies from my materials list below, your Cricut, and the guidance in my video tutorial, which walks you through every step.
Whether you’re totally new to this craft or you’ve tried a few punch needle projects before, I hope my tutorial gives you the confidence and inspiration to make something totally unique. Try out designs in different sizes, test a new type of yarn, and explore the many ways to make your own punch needle magic!
Let me show you how to punch needle for beginners! This post contains some affiliate links for your convenience (which means if you make a purchase after clicking a link I will earn a small commission but it won’t cost you a penny more, there is no additional cost)! Read my full disclosure policy.
Materials for Your Punch Needle Project
View my Amazon shopping list with the exact items I used.
- One (1) 5.0mm Adjustable Length Punch Needle
- One (1) Extra Long Punch Needle Threader
- One (1) 7.5″ Plastic Hoop (for punching)
- 10″ x 10″ Monk’s Cloth (Natural, Unlined)
- Yarn Variety Pack – Medium Weight #4 Worsted
- OPTIONAL: Gold Yarn – Medium Weight #4 Worsted
- OPTIONAL: Pink Yarn – Medium Weight #4 Worsted
- One (1) 6″ Round Hoop (for display)
- A way to draw your design on your fabric – I’m using the Cricut Maker 4, but you can use any Maker series machine, a Cricut Explore Series machine, or the Cricut Venture
- 12” x 12” Cricut Pink FabricGrip Machine Mat
- Washable Fabric Pen -OR-
- 1.0 Cricut Medium Point Marker
- Painter’s Tape
- Ruler -OR-
- Tape Measure
- Scissors
- Yarn Needle (For finishing the back and cleaning up stitches on the front)
- OPTIONAL: Weeding Tool (For cleaning up stitches on the front)

How to Punch Needle for Beginners!

How to Punch Needle for Beginners
Learn how to punch needle for beginners with this cute craft featuring adorable animals!
Materials
- One (1) 5.0mm Adjustable Length Punch Needle
- One (1) Extra Long Punch Needle Threader
- One (1) 7.5" Plastic Hoop (for punching)
- One (1) 6" Round Hoop (for display)
- 10" x 10" Monk's Cloth (Natural, Unlined)
- Yarn Variety Pack - Medium Weight #4 Worsted
- OPTIONAL: Gold Yarn - Medium Weight #4 Worsted
- OPTIONAL: Pink Yarn - Medium Weight #4 Worsted
- Design #780 (My free SVG/PDF/DXF design files are available in my free resource library - get the password by filling out the form at the bottom of this page)
Tools
- A way to draw your design on your fabric - I’m using the Cricut Maker 4, but you can use any Cricut Maker Series machine, a Cricut Explore Series machine, or the Cricut Venture
- 12” x 12” Cricut Pink FabricGrip Machine Mat
- 1.0 Cricut Medium Point Marker
- Painter’s Tape
- Ruler or Tape Measure
- Scissors
- Yarn Needle (for finishing the back and cleaning up stitches on the front)
- OPTIONAL: Weeding Tool (for cleaning up stitches on the front)
Instructions
STEP 1: GET MY FREE ANIMAL PUNCH NEEDLE DESIGNS
First, download my Animal Punch Needle files from my free library – look for Design #780. Alternatively, you can use the Save This Project form near the top of this post and the design link will be emailed to you.
In the SVG folder, you’ll find three variations of my punch needle design to draw using a Cricut machine: a dog, a cat, and an owl.
There is also a DXF folder with versions you can use with other machines, and a PDF folder with versions you can print and trace by hand with the help of a Cricut BrightPad or other backlighting.
TIP: If you’re not sure how to upload, go to jennifermaker.com/svgs to learn how to unzip and upload SVG files.
STEP 2: PREPARE AND DRAW YOUR PUNCH NEEDLE DESIGN
Punch needle projects can be displayed from either side, depending on your preference for flat stitches (the front side) or loop stitches (the back side). This tutorial teaches you how to use the loop side for display.
CRICUT DESIGN SPACE
- In Cricut Design Space, open a blank Canvas.NOTE: If you’re new to using Cricut Design Space, go to cricutkickoff.com for my introductory tutorial on Design Space basics.
- Click “Upload” and then “Upload Image.”
- Click “Browse.”
- Select the SVG file of your choice. NOTE: I’ll pick the “cat” version, but you can use the same steps for all three designs.
- Click “Open,” and then “Continue.”
- Click “Upload” to add the design to your Canvas.

- Click “Save” and give your project a name.
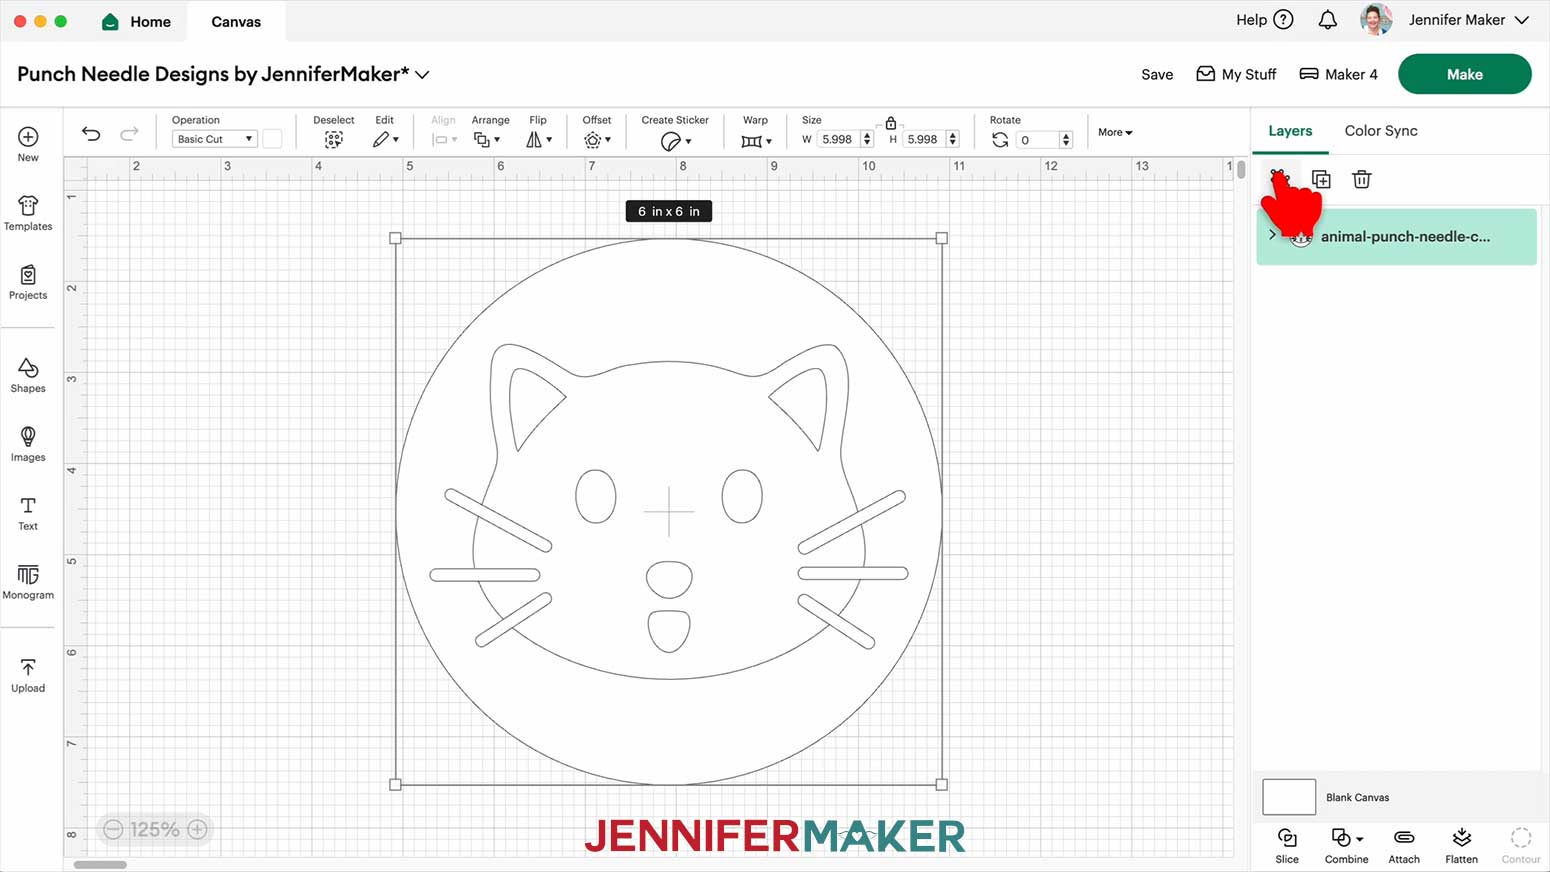
- Ungroup the design. NOTE: There are two layers on your screen: the animal and the background circle.
- Drag a bounding box around both the design and the circle.
- Click the “Operation” dropdown, then select the “Pen” option so the machine knows you want to draw this design.
- Click the Color Box next to “Operation,” then click the dropdown menu and select your pen and color.NOTE: I’ll select “M - Marker (1mm)” and pick “Blue (washable fabric)” for the color.TIP: You can use any color for this project, just make sure you use a 1mm marker so it will show up on the monk's cloth.
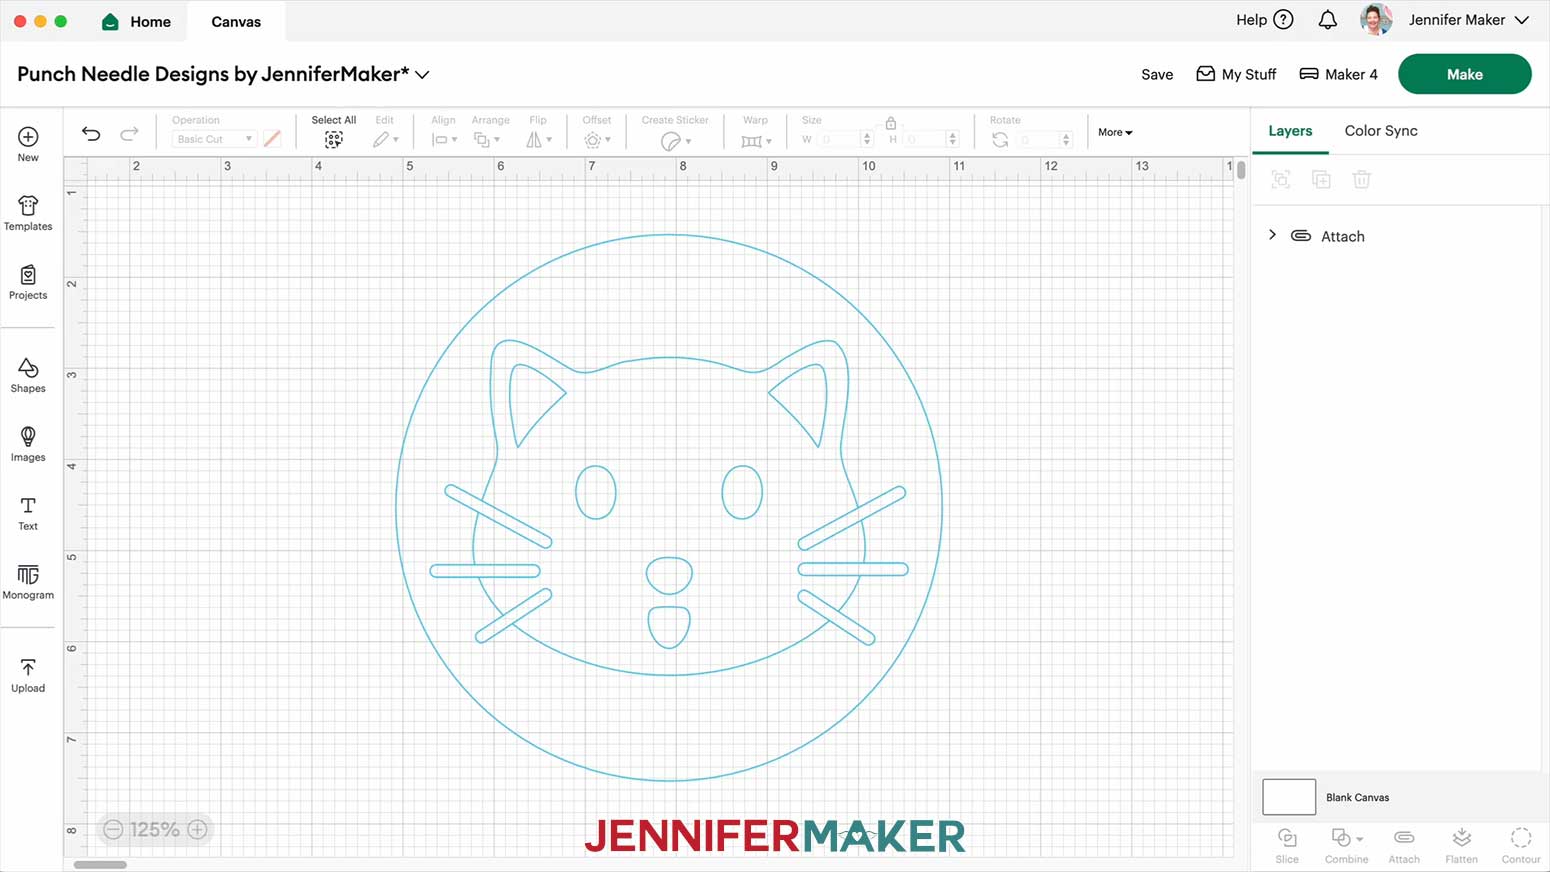
- With both layers still selected, click the “Attach” icon so your machine will draw the designs together on your fabric.
- Your project is ready to draw!
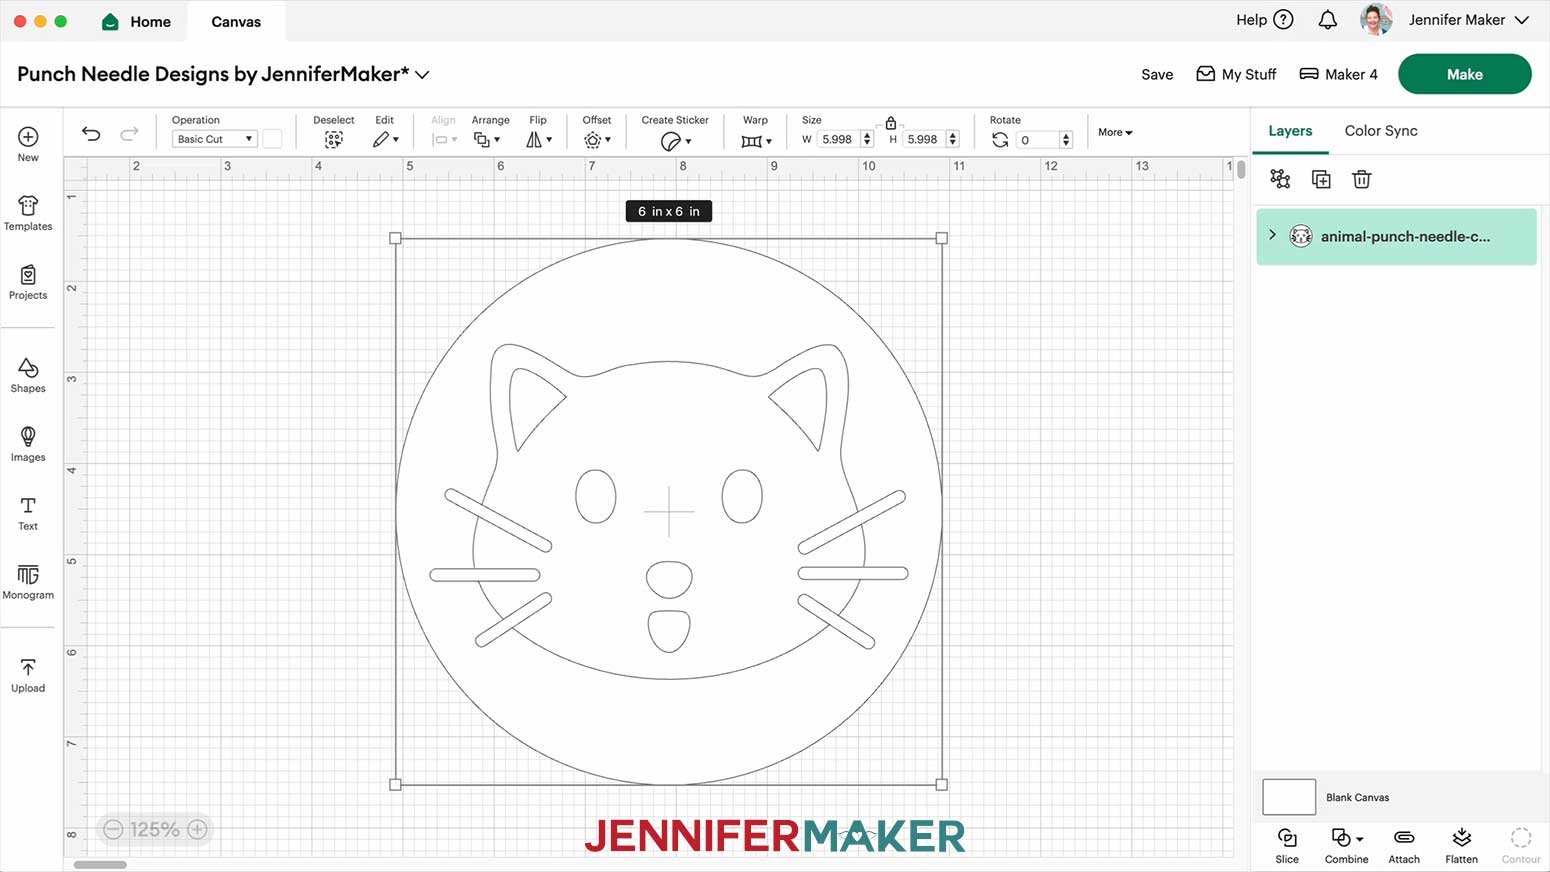
 NOTE: There are two layers on your screen: the animal and the background circle.
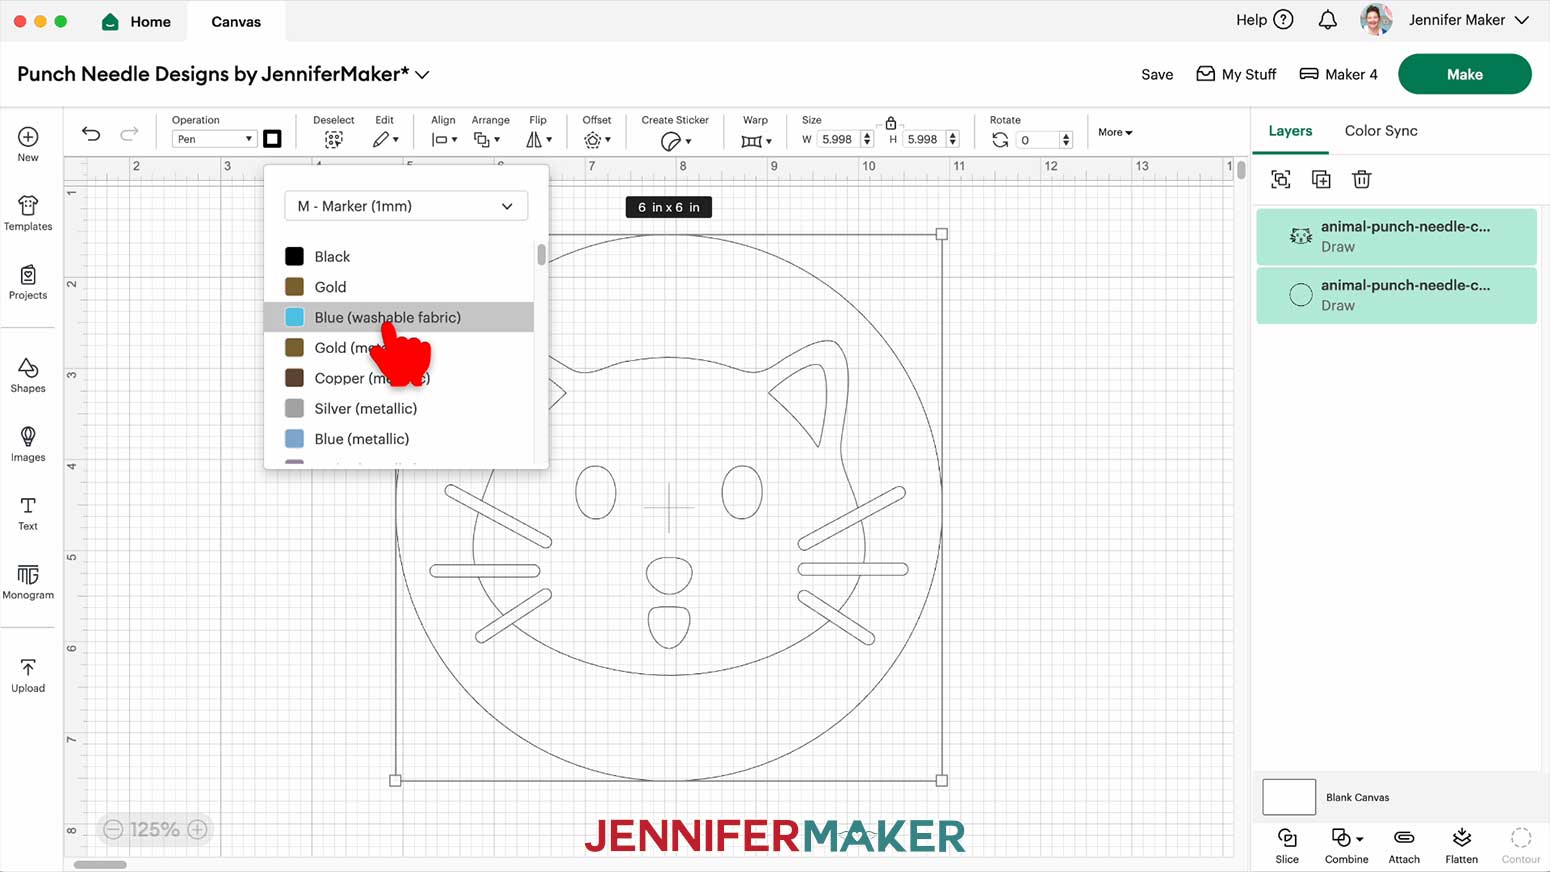 NOTE: I’ll select “M - Marker (1mm)” and pick “Blue (washable fabric)” for the color.TIP: You can use any color for this project, just make sure you use a 1mm marker so it will show up on the monk's cloth.
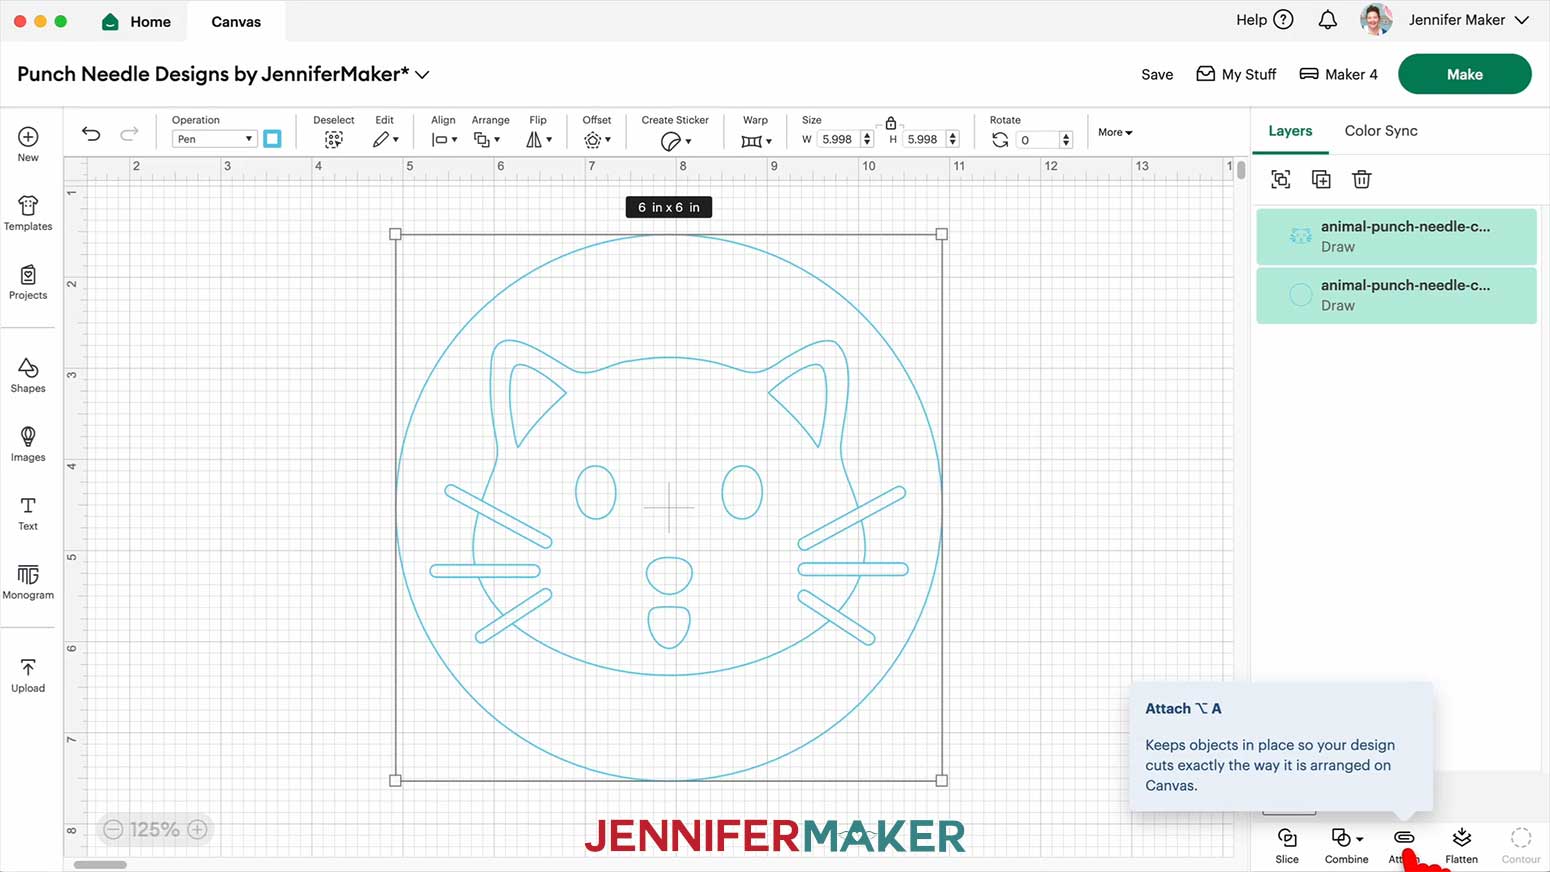
DRAWING
- Make sure the correct machine is selected in the top right.
- Click “Make.”
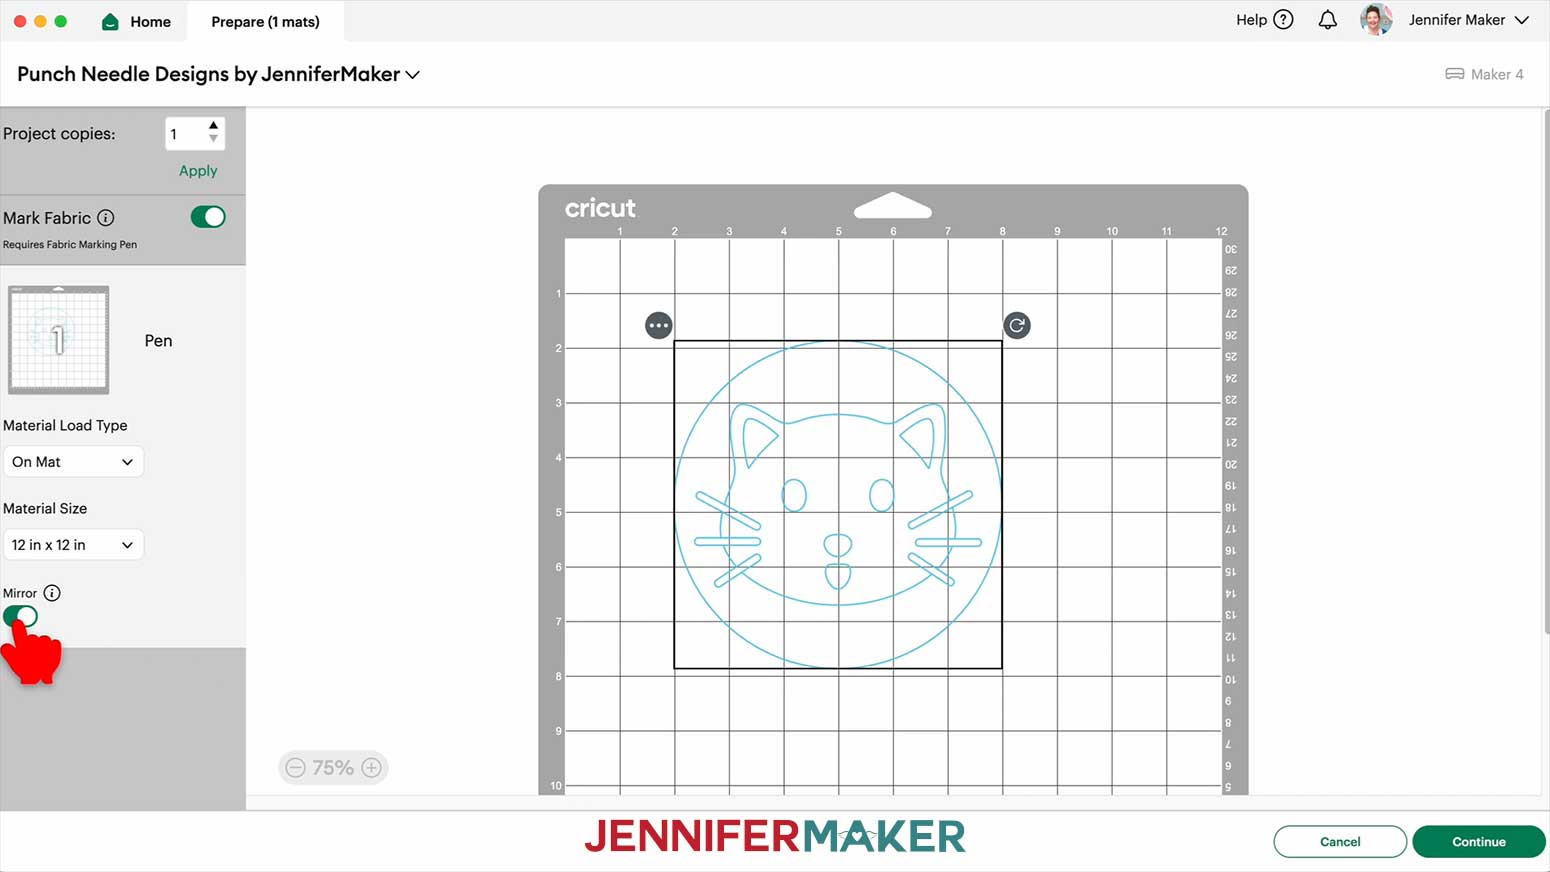
- On the Prepare screen, make sure the correct Material Size is selected for your materials. I’ll use 12” x 12” for mine, and trim my fabric down to 10” x 10” size.
- Drag your design so its top left corner touches the intersection where 2 across and 2 down meet.NOTE: This will center your design on a 10” x 10” piece of fabric.
- To use the loop side of your project as the display side, you’ll need to mirror the project, so make sure the “Mirror” slider is toggled on and shows green.
- Once you are satisfied with your mat layout, click “Continue.”
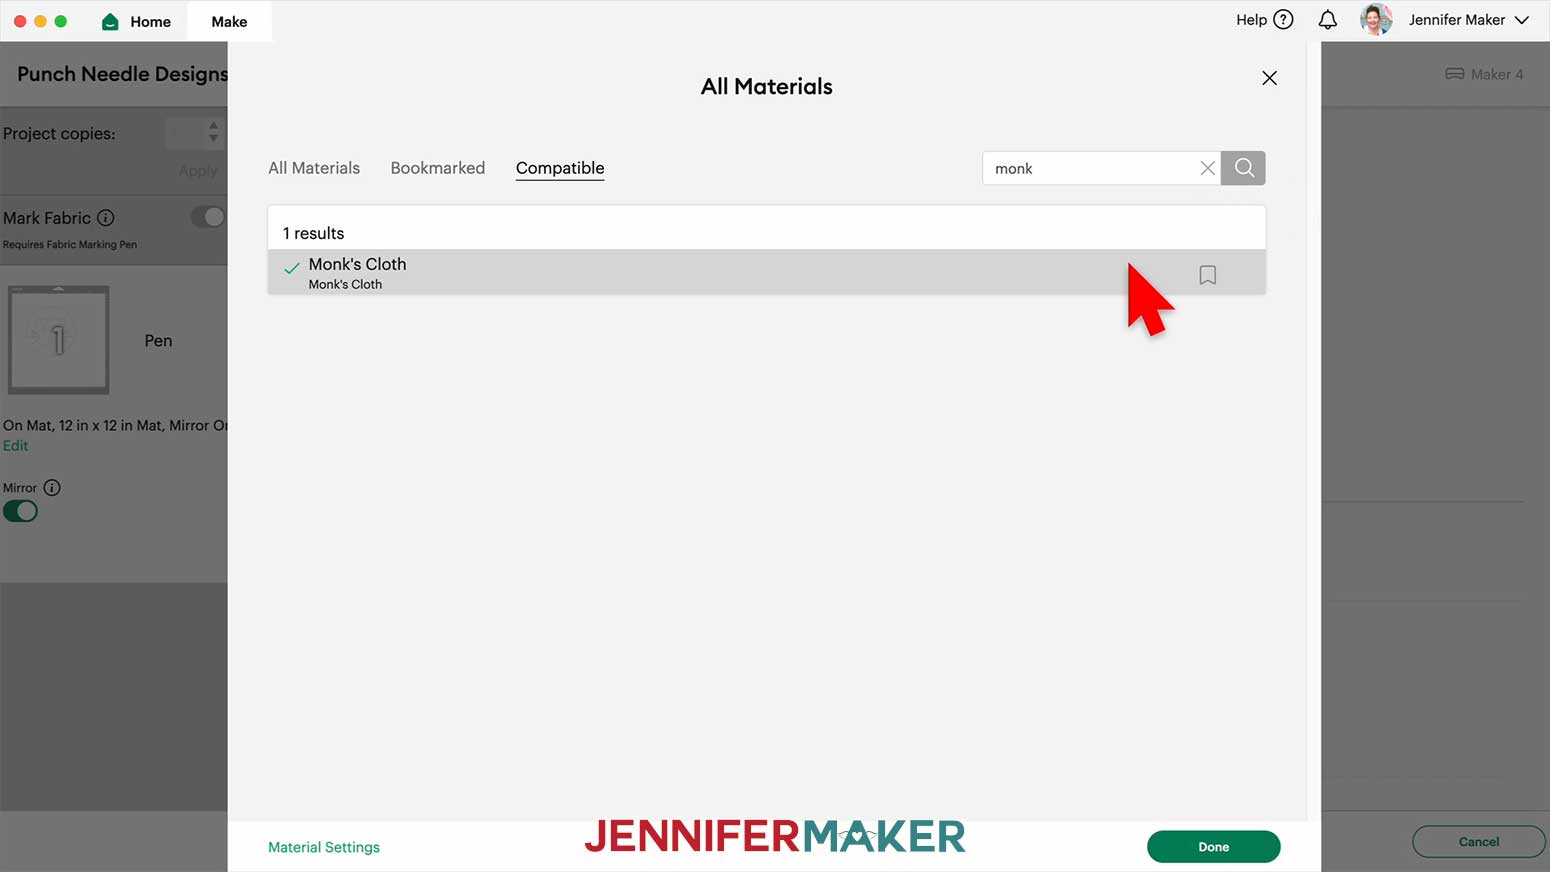
- On the Make screen, set the Base Material for your mat. I used the “Monk’s Cloth” material setting.
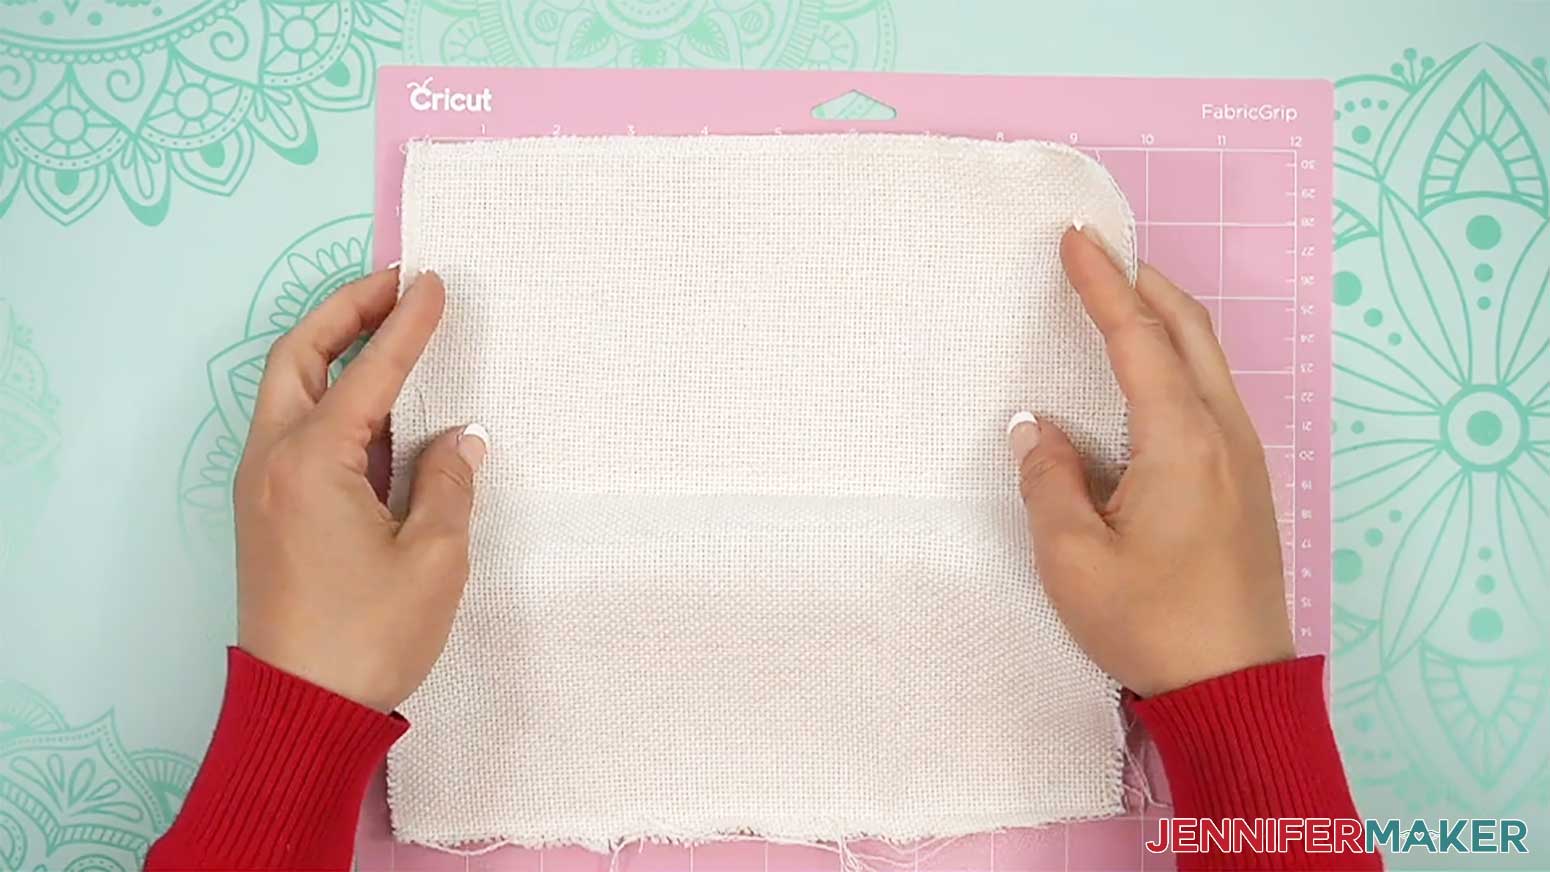
- Use a tape measure and scissors to measure and cut your monk’s cloth into a 10” x 10” square.
- Place your cut fabric face up on a pink FabricGrip machine mat so it covers the design area on your screen plus 2” around each edge.
- Use a brayer to make sure it’s fully adhered and doesn’t have wrinkles.
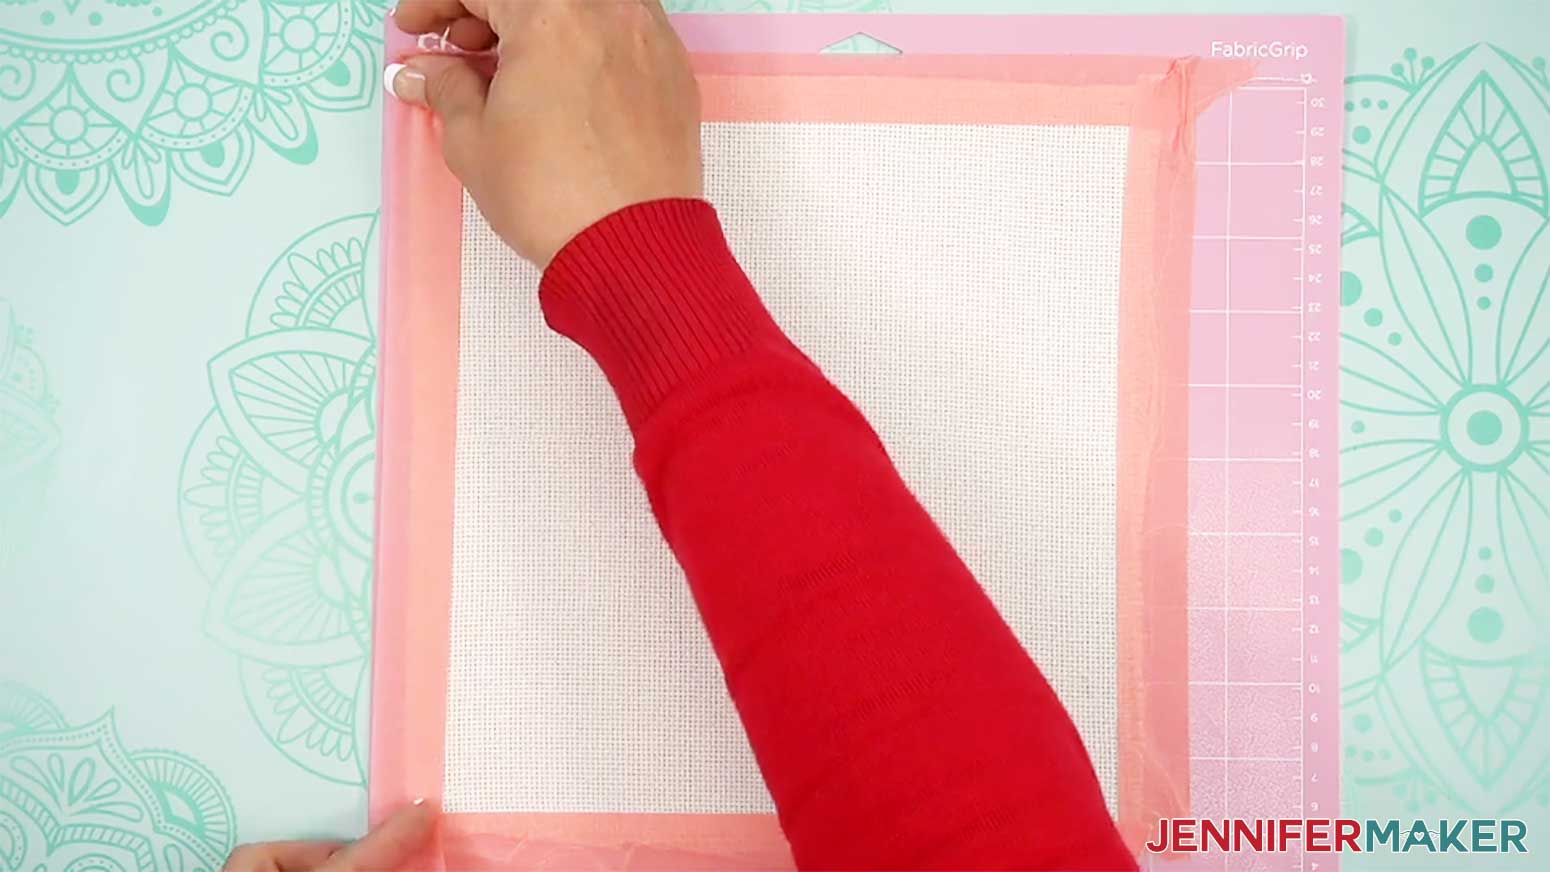
- Use long strips of painter’s tape to secure the edges of your monk’s cloth to the machine mat to keep loose threads from unraveling and getting caught in your machine.
- Follow the screen prompts to prepare your machine and tools.
- Check that your 1mm Marker is in the clamp.TIP: Remove the marker’s cap (put it on the back so you don’t lose it) and test it on scrap material to make sure it flows well first.
- Press the flashing “Load/Unload” button to load the prepared mat into your Cricut.
- Press the flashing middle button to begin drawing.
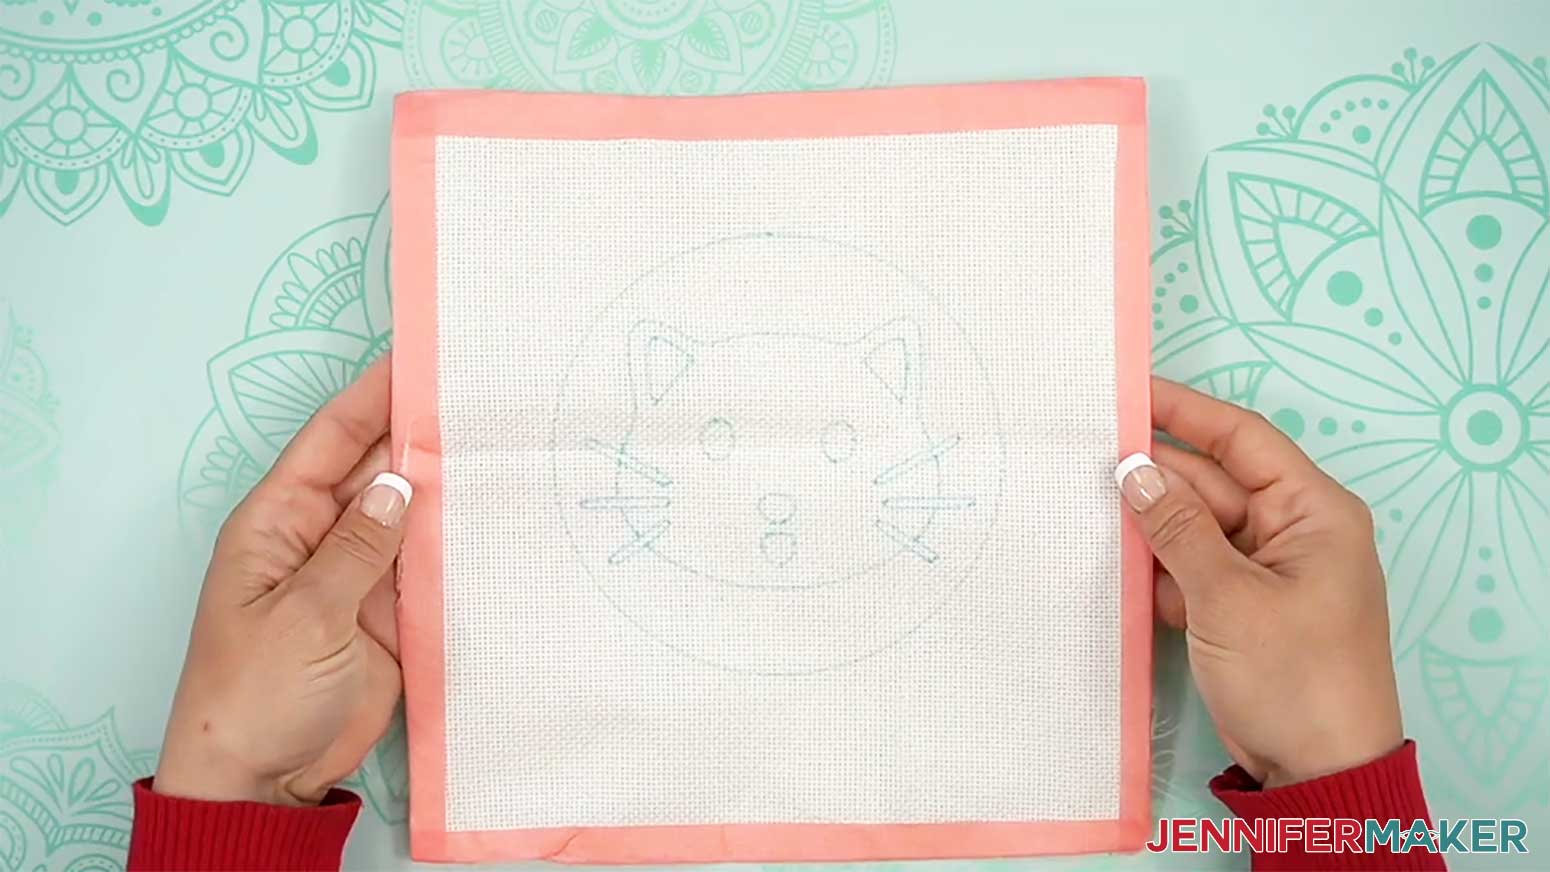
- When it has finished drawing, unload the mat, flip it over onto your work surface, and roll it back to release the fabric.
- Fold the painter’s tape over the edges of the monk’s cloth to keep threads from unraveling while punching your project.
- Lay your project drawing-side up.
STEP 3: PUNCH YOUR DESIGN INTO YOUR MONK’S CLOTH
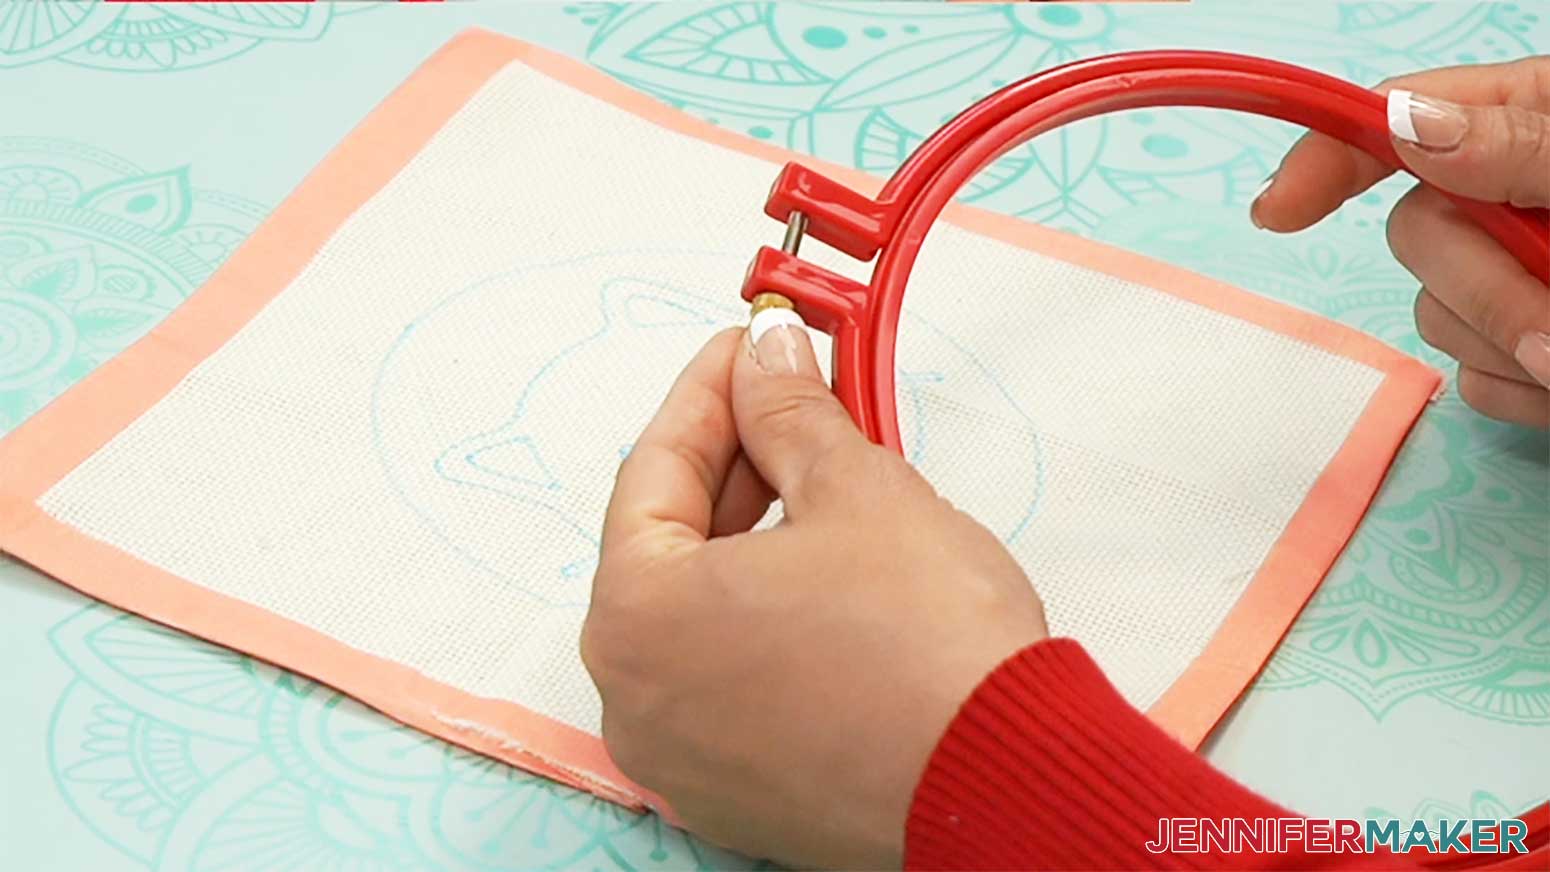
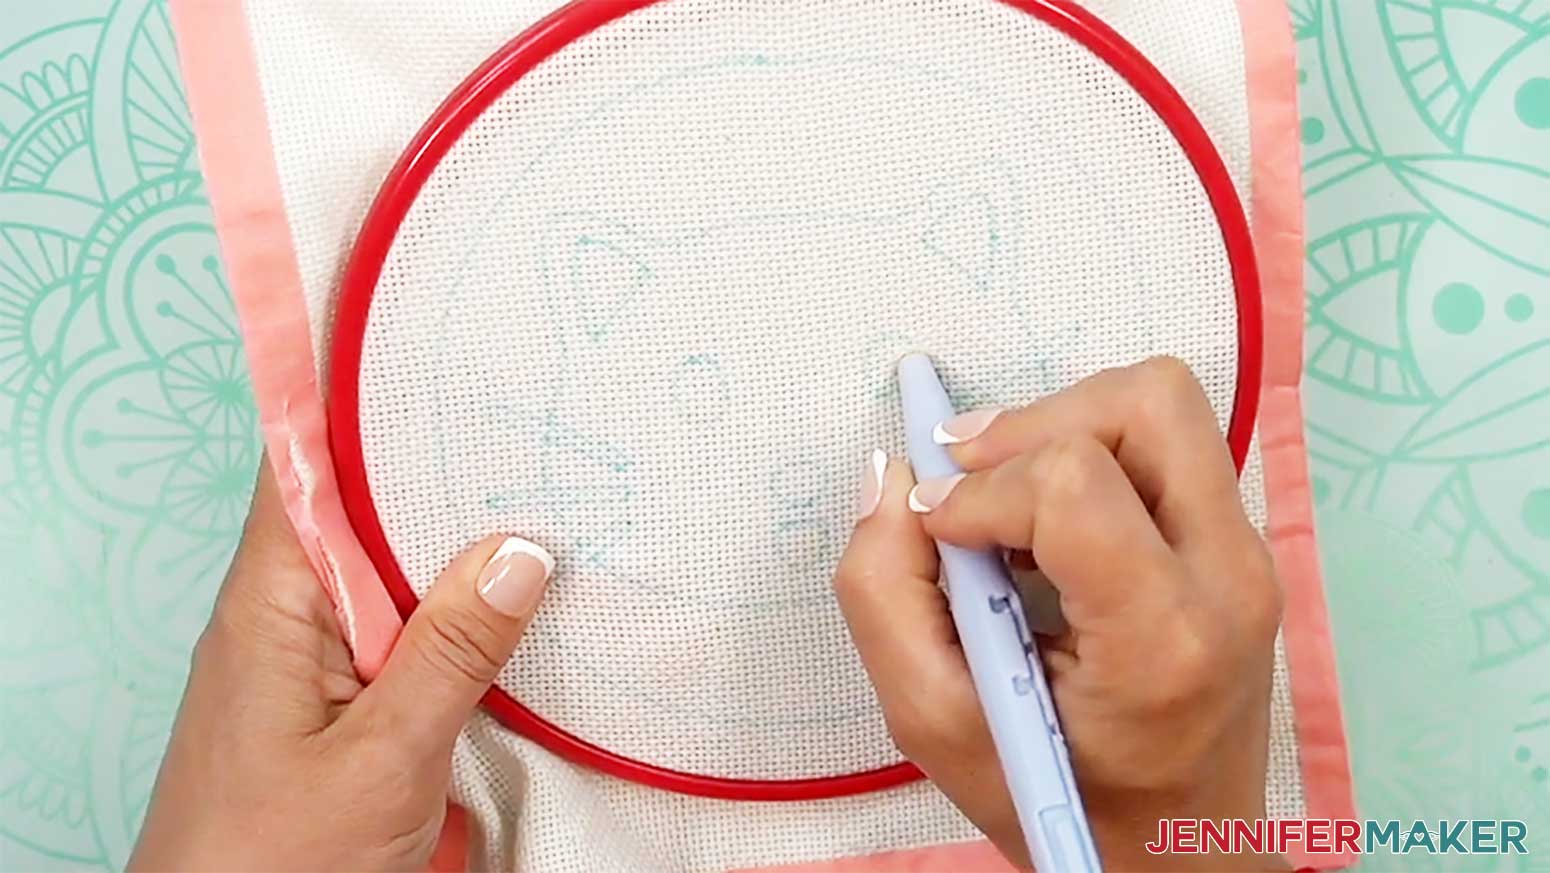
- Loosen the bolt at the top of your plastic punching hoop and remove the inner hoop from the outer one.
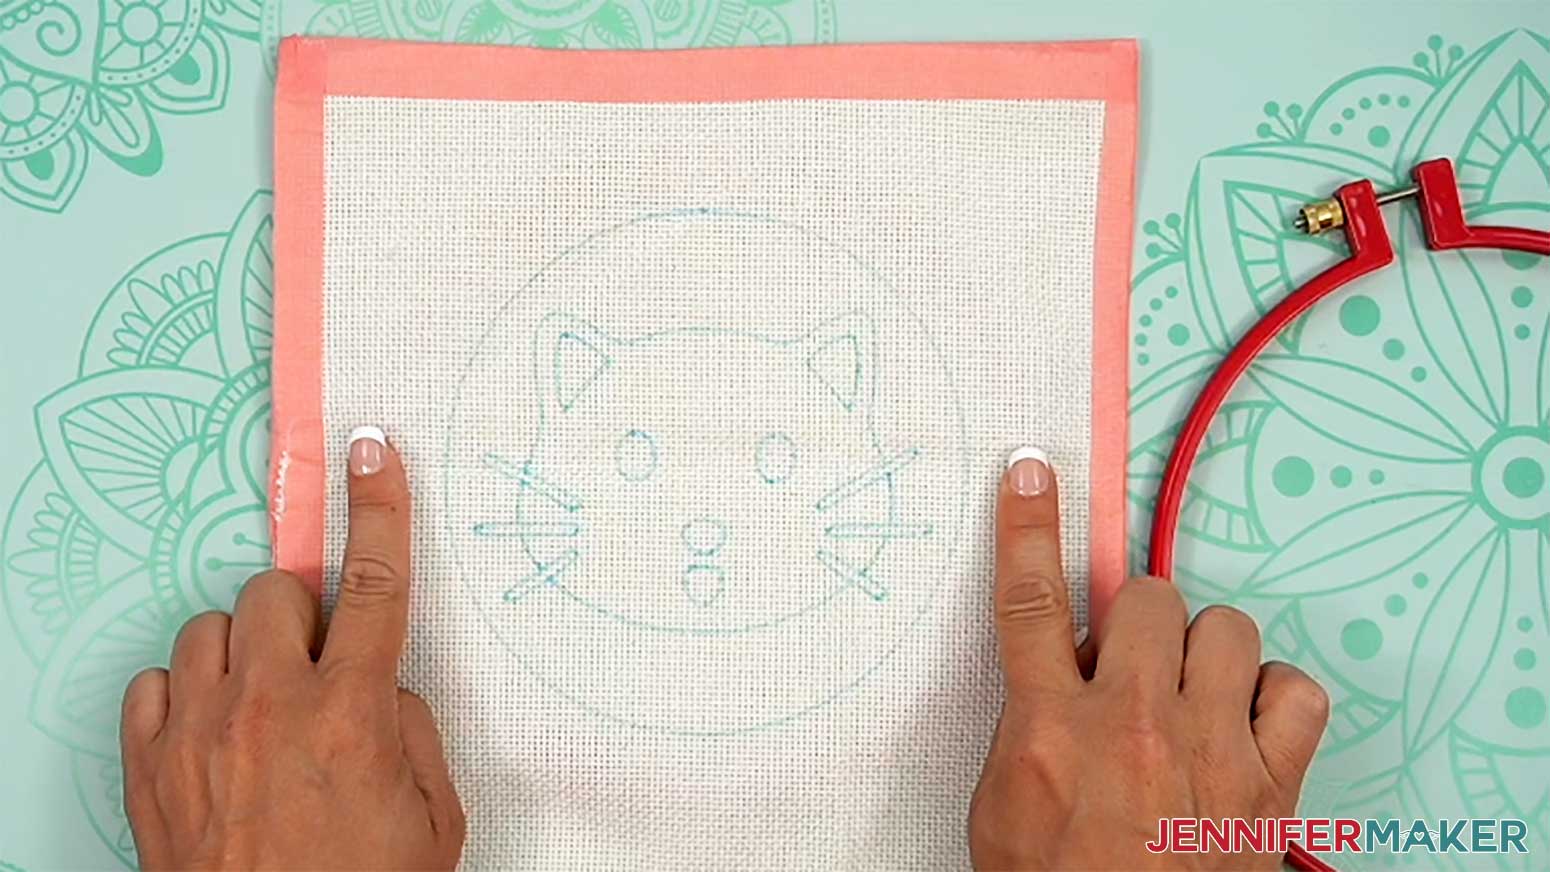
- Slide the inner hoop under the monk's cloth so your design is in the center.
- With the top of your outer hoop (where the bolt is) aligned with the top of your design area, carefully slide the outer hoop down onto the inner hoop, trapping the material in between them.

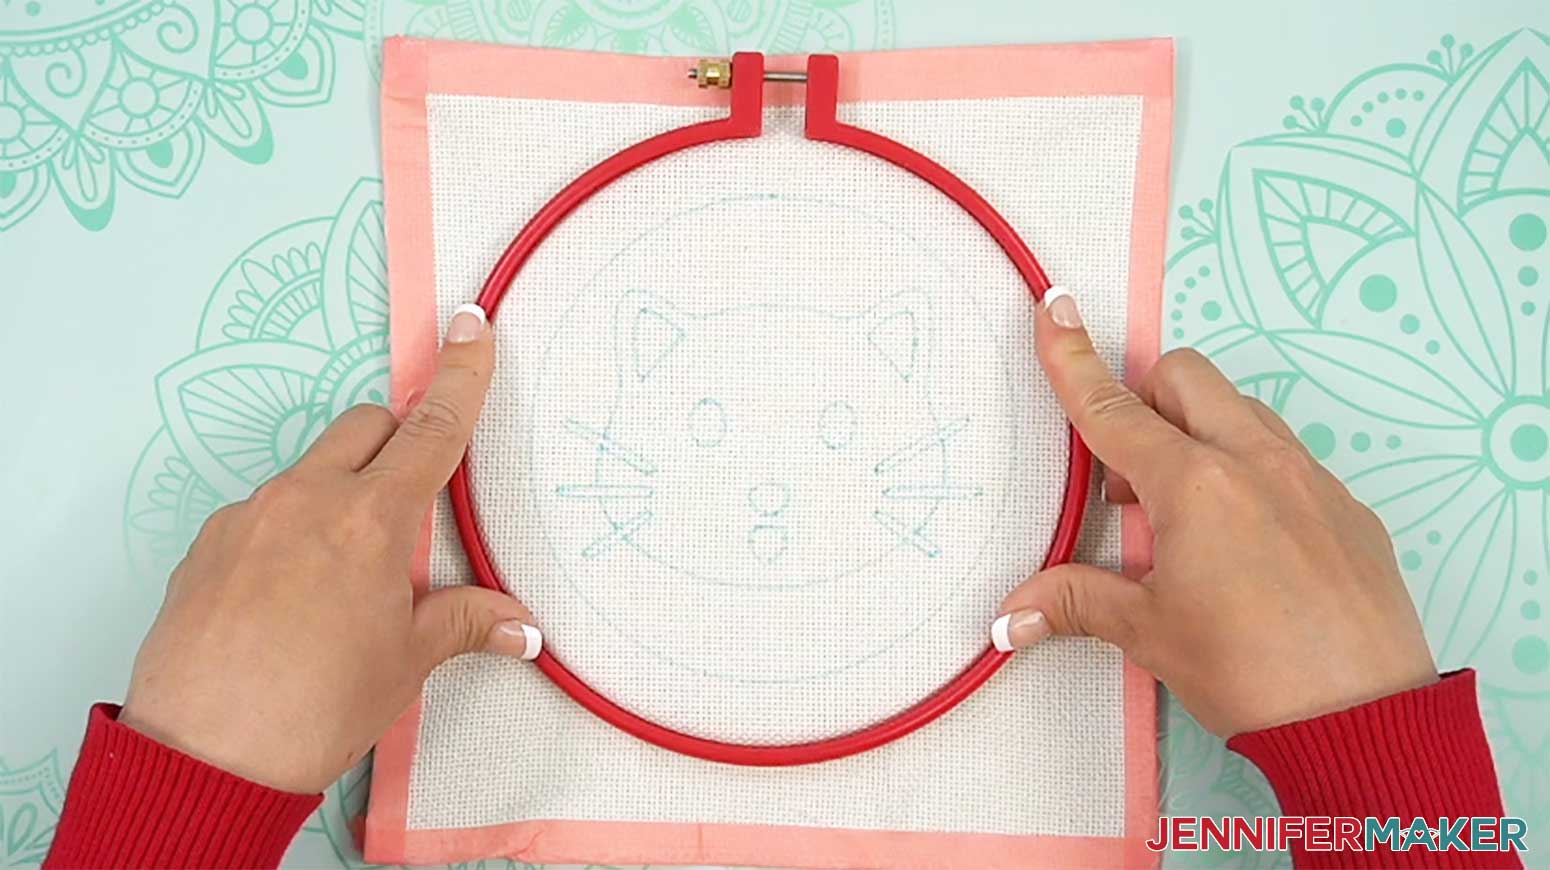
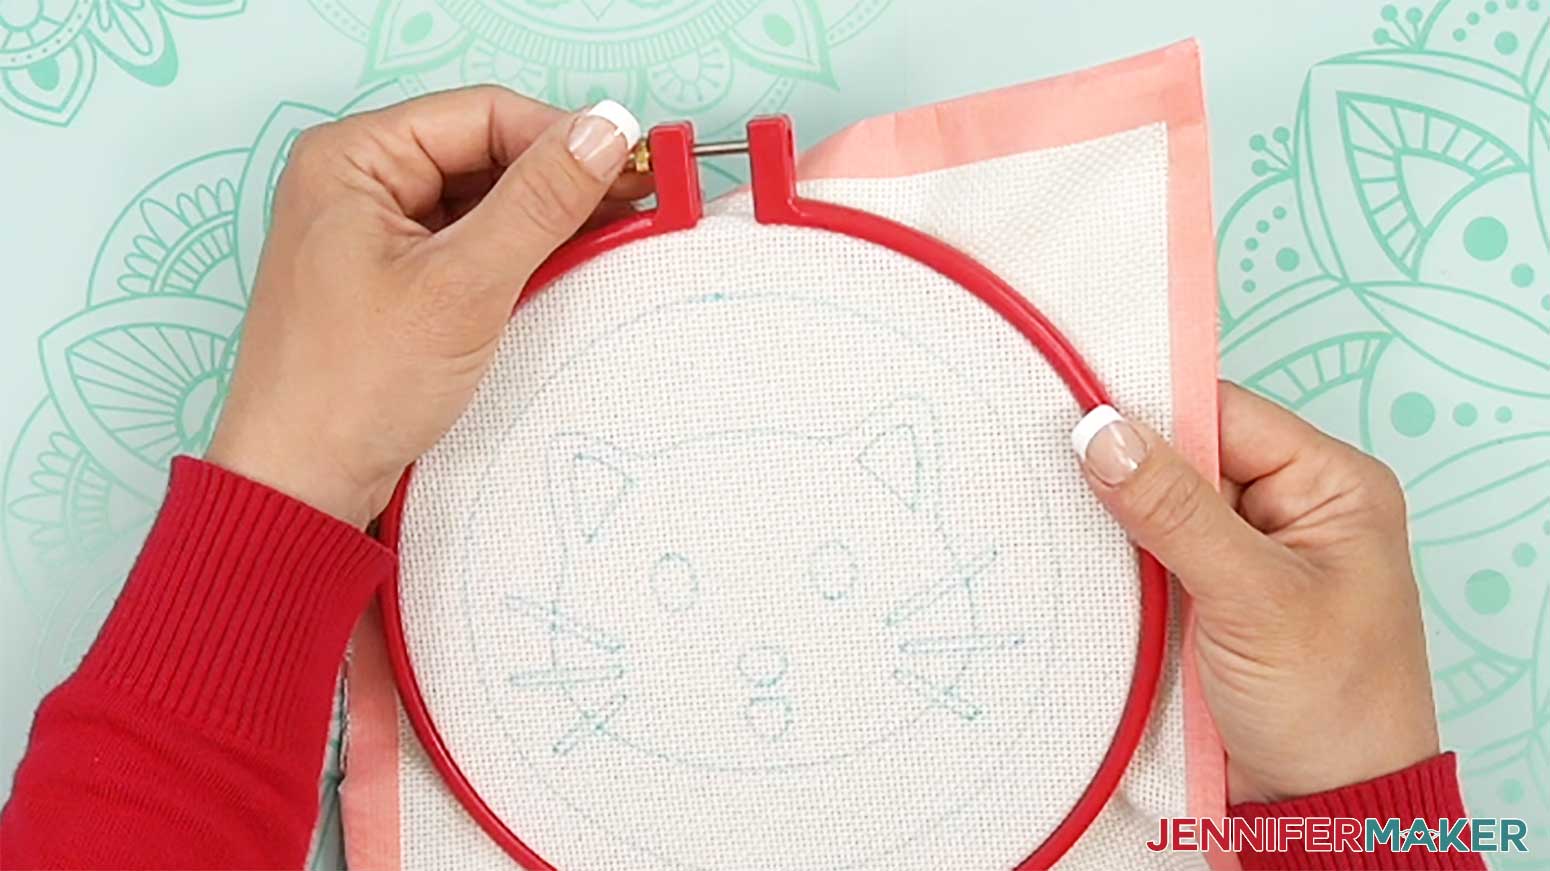
- Carefully hold the fabric taut while tightening the bolt at the top to clamp the hoop closed.

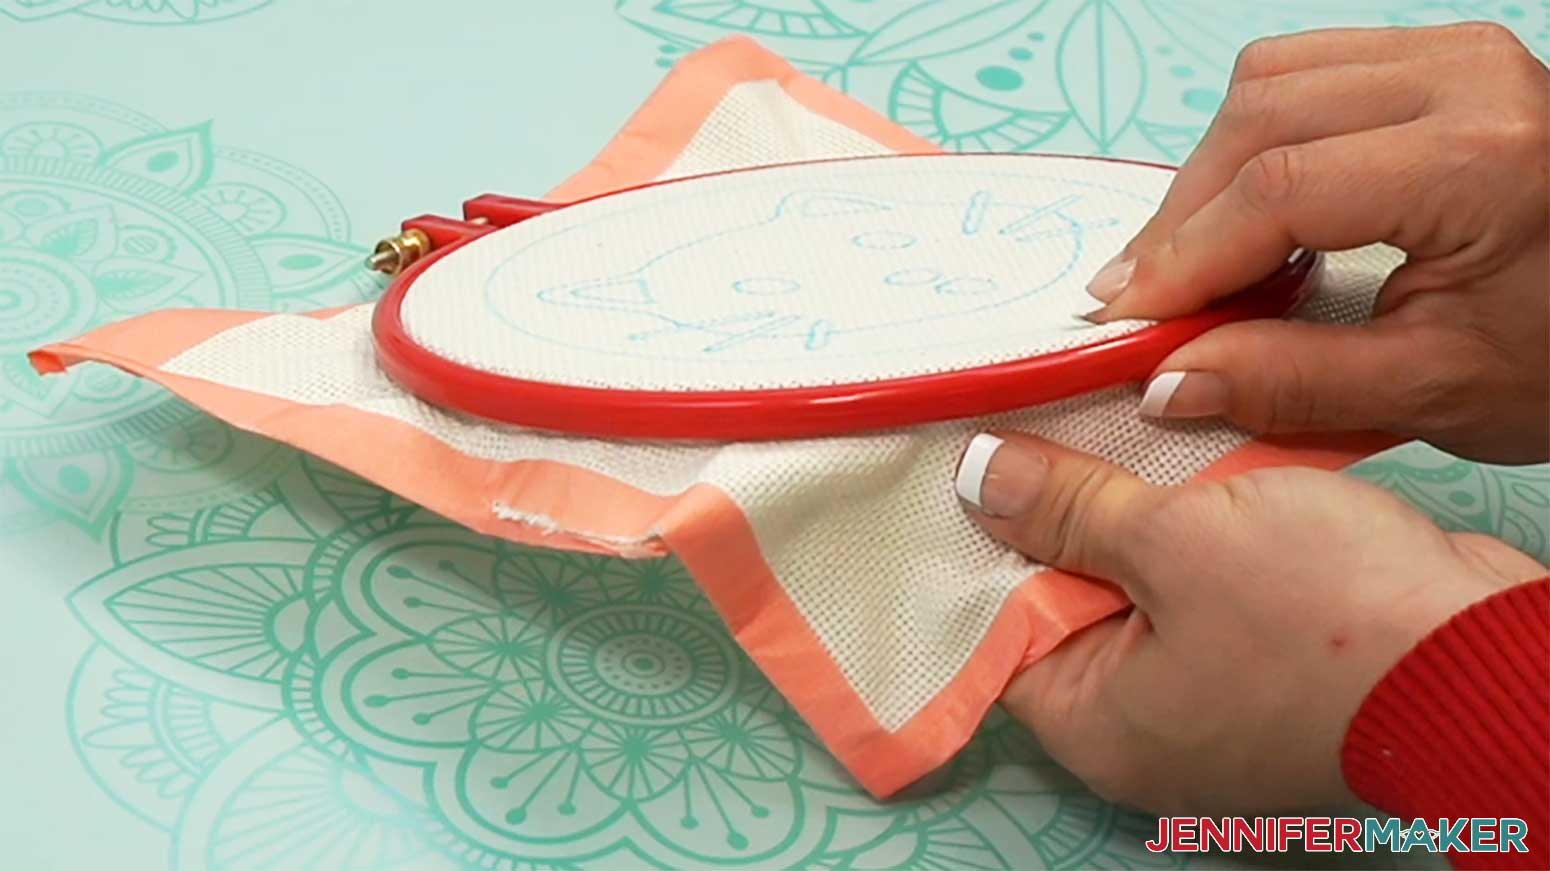
- Working your way around the hoop, pull the fabric as taut and flat as you can. TIP: Try to keep your design in the center.
- Then tighten the bolt as much as you can to hold the fabric in place.
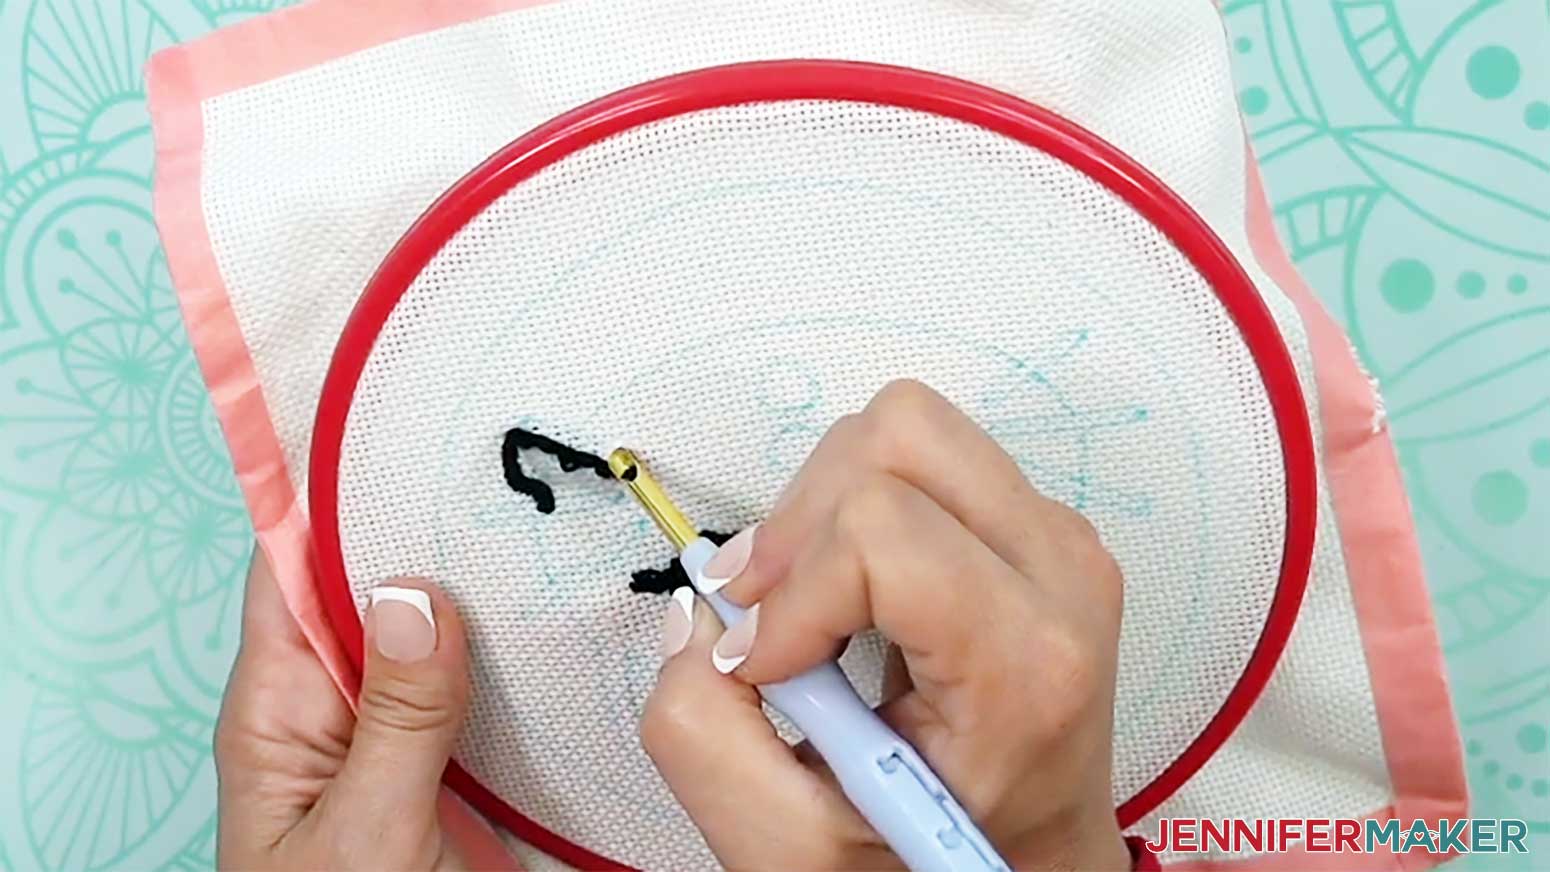
- Decide which shape you want to punch first and pull the yarn end from the skein for that shape’s color. I recommend starting with small inner details first, then working on the larger shapes.NOTE: I’ll start with the cat’s whiskers and face details, then stitch the background to keep the design circular, and finish with the cat’s face.
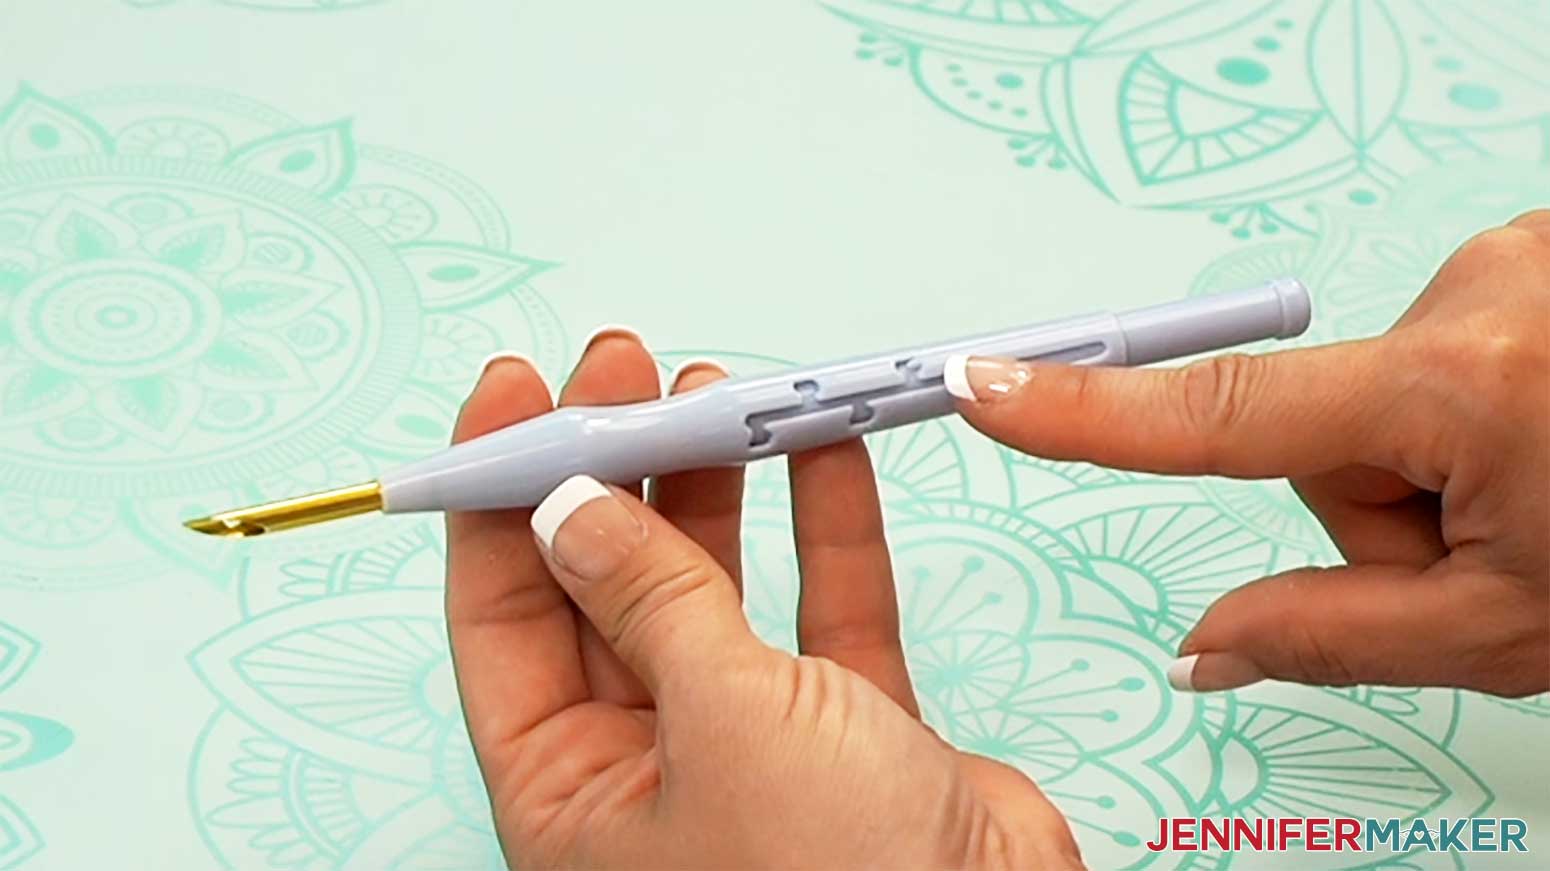
- To thread your adjustable needle, rotate the setting selector so the needle is on the shortest setting.
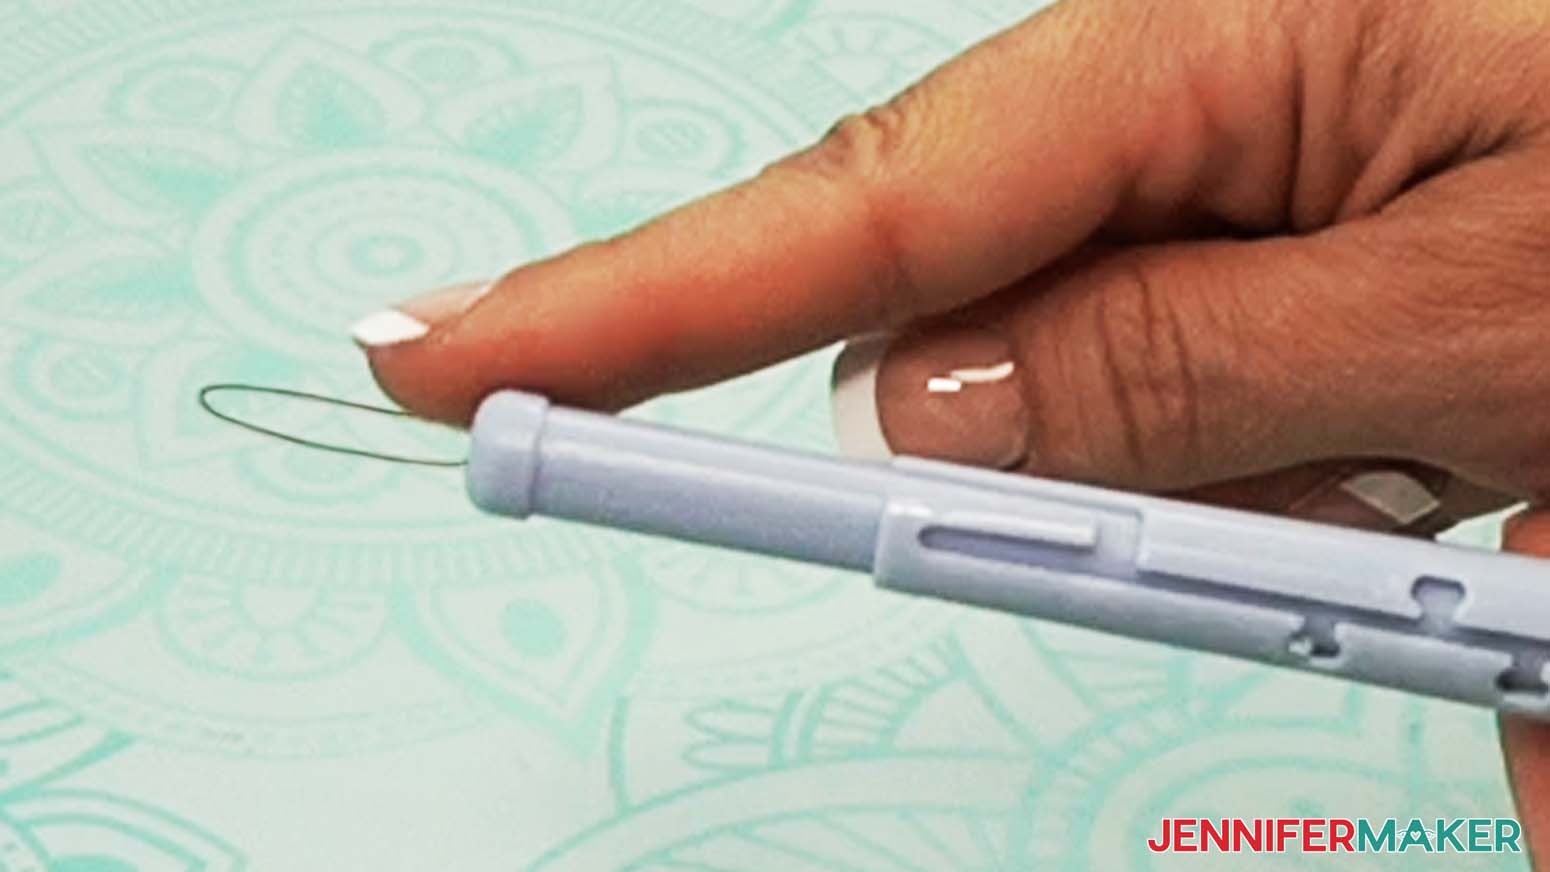
- With the adjustable needle’s tip facing you, slide the loop end of the needle threader up through the tip of the needle until it comes out the top of the handle.
- Insert your yarn’s end through the needle threader’s loop.
- Pull the threader down through the tip of the needle, carrying the yarn with it.TIP: You can pull yarn directly from the skein when punching -- just make sure to give yourself plenty of slack and keep your yarn knot-free!
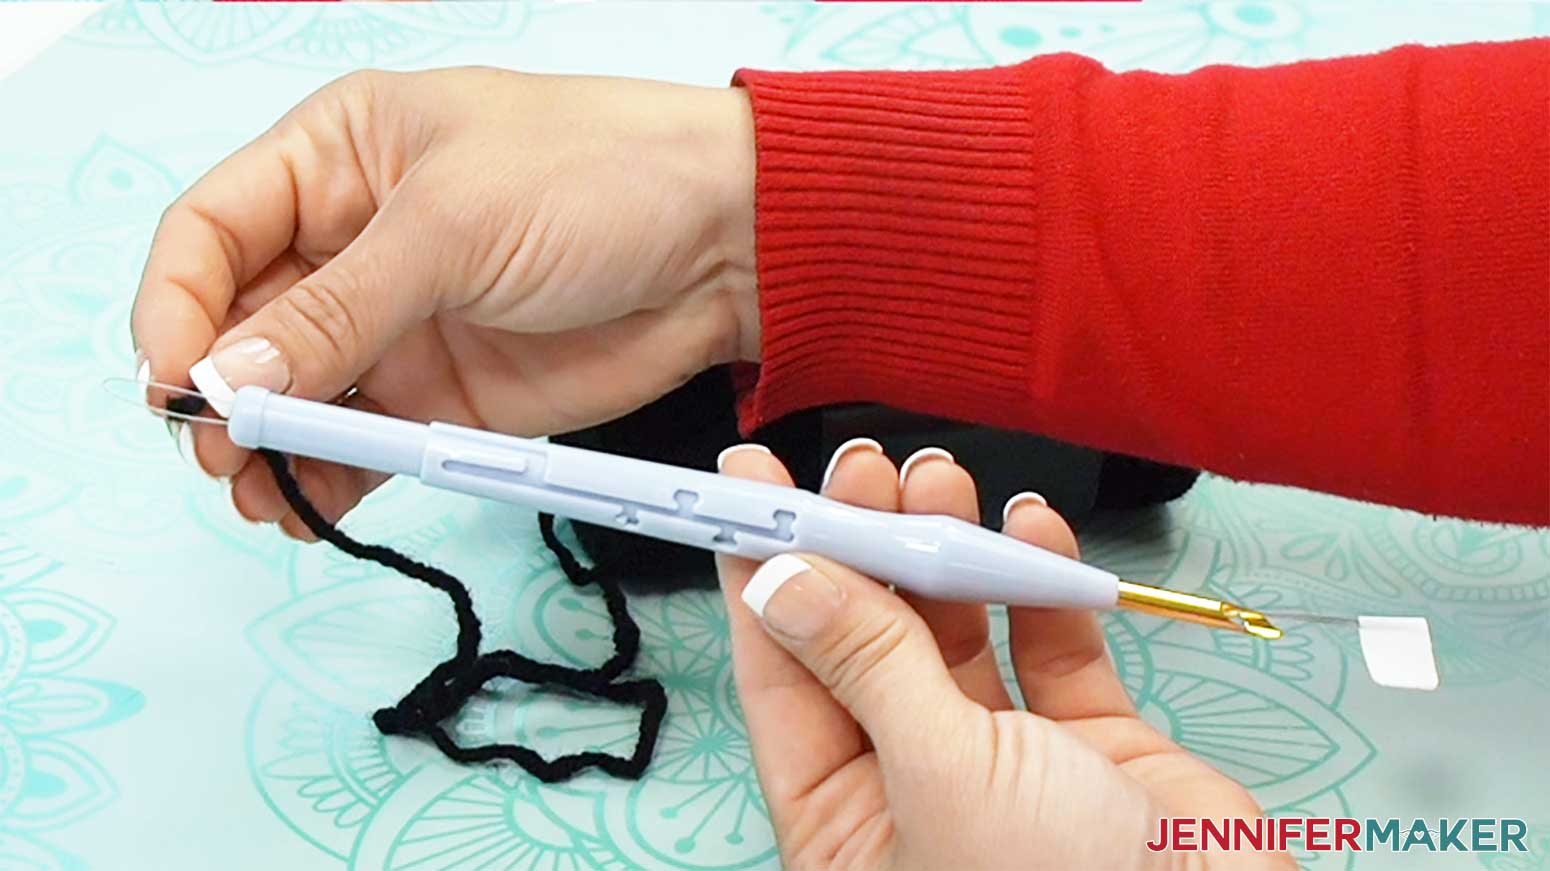
- Then insert the threader through the hole in the tip of the needle from the back (the longer side) to the front (the open side).

- Insert your yarn’s tail through the threader, then pull the threader back through the tip so the tail exits the back of the needle.
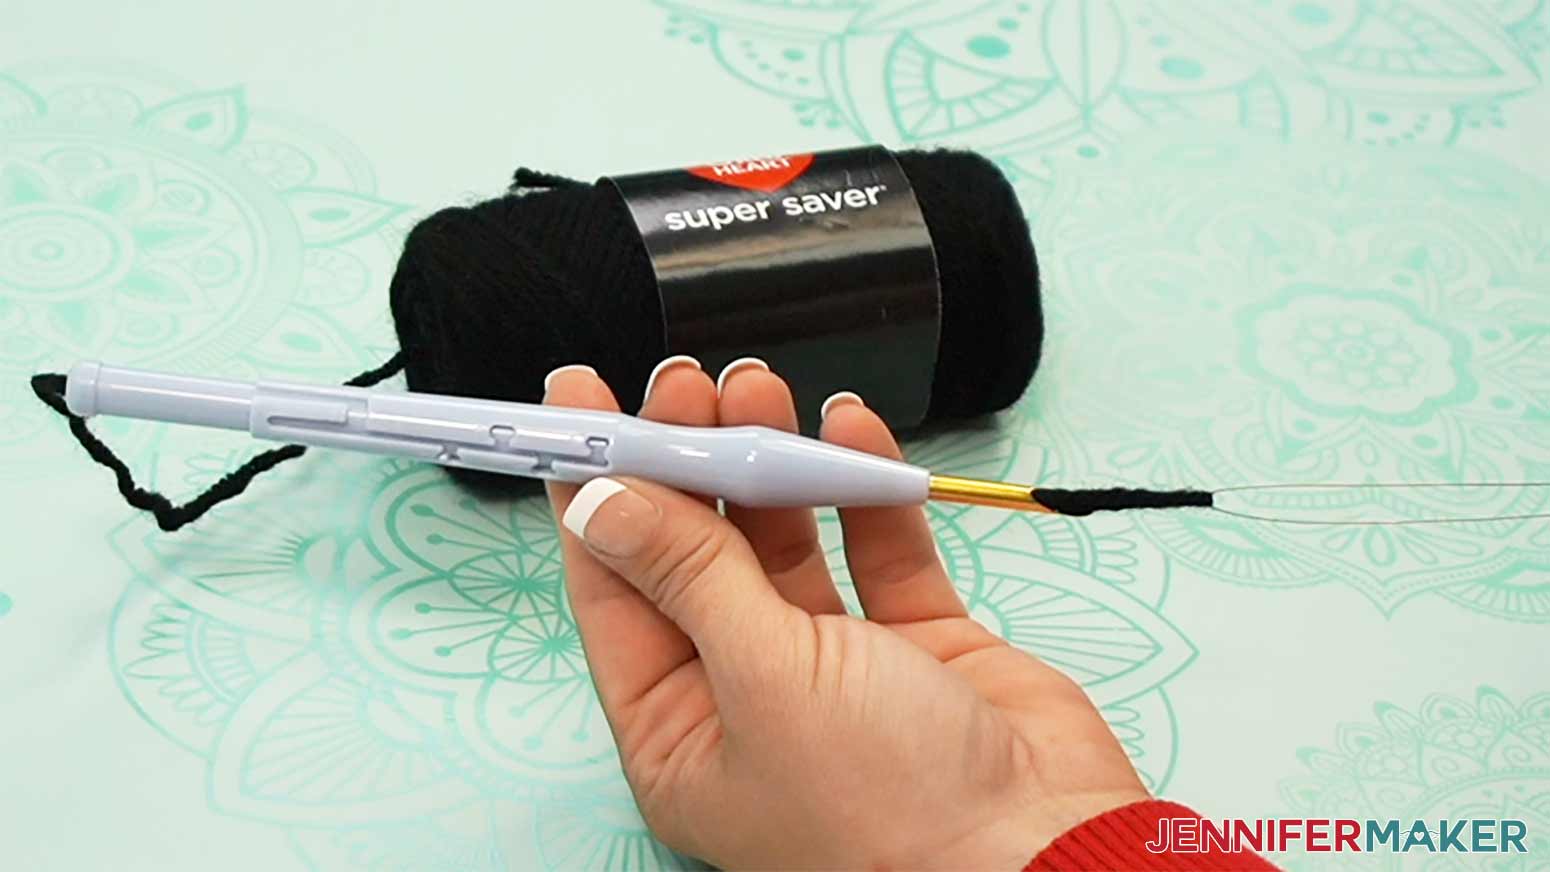
- Pull the yarn from the top of the handle to remove excess tail length, leaving about an inch or two of yarn hanging from the tip.
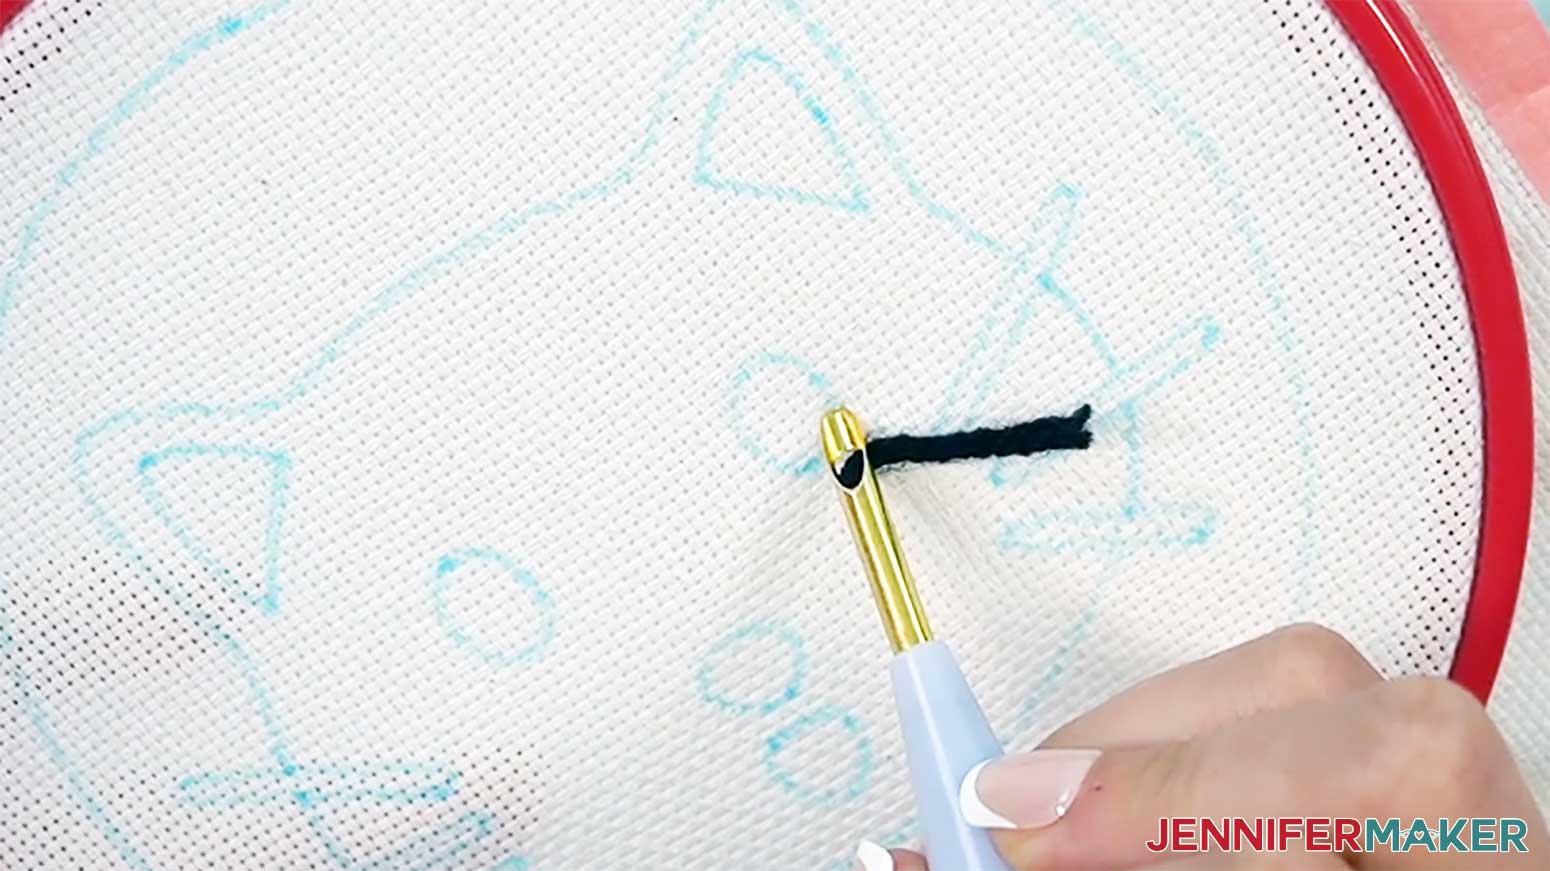
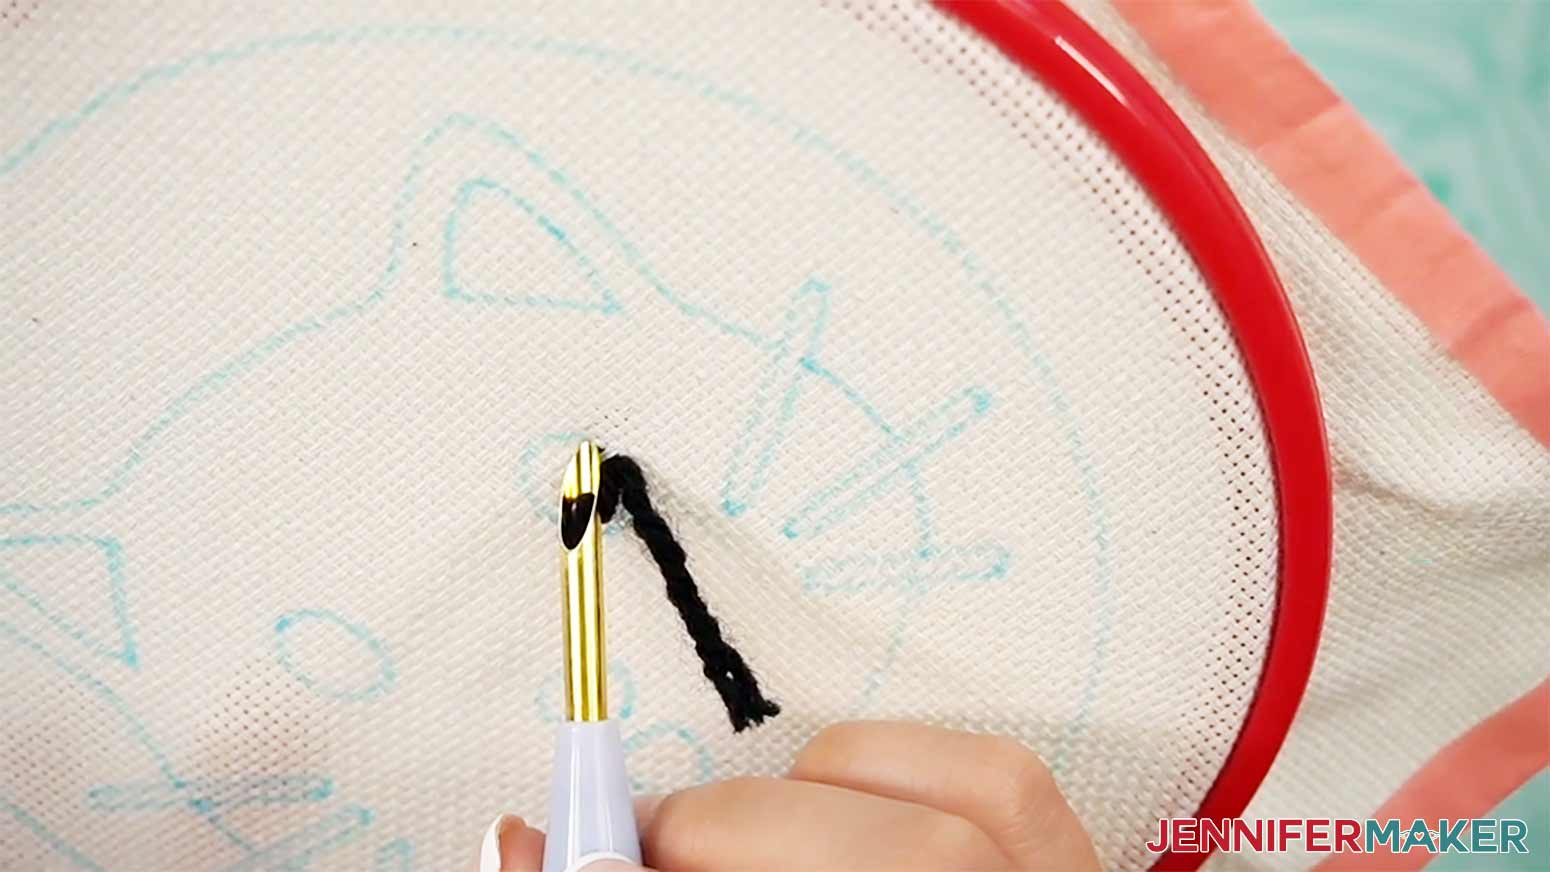
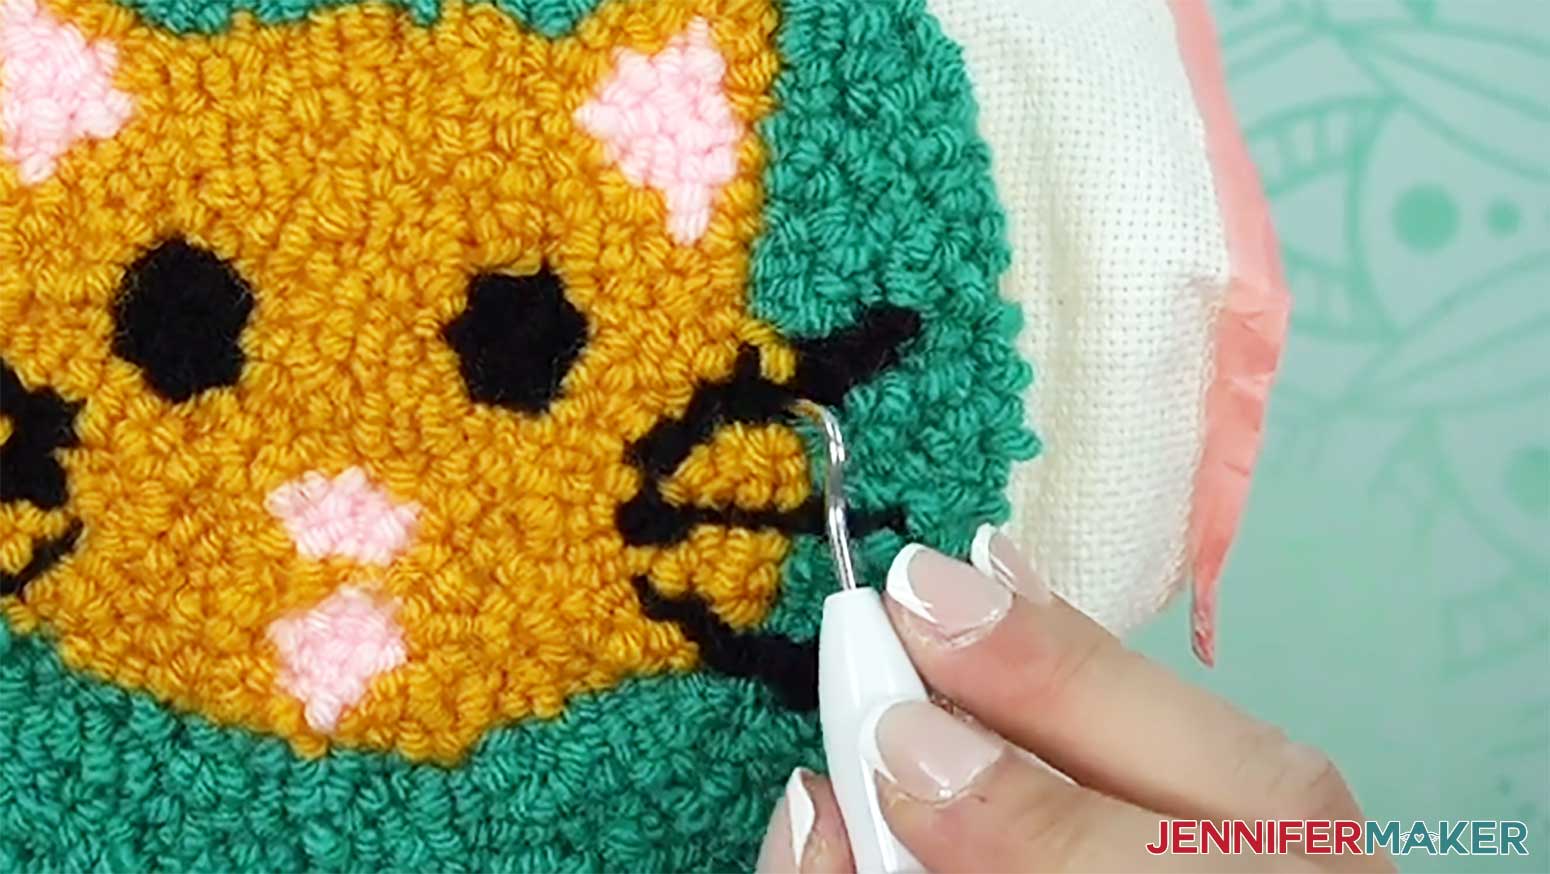
- On the drawn surface, place your needle on the shape’s outline where you want to start stitching, keeping the needle’s front side facing the direction you want your next stitch to go.TIP: Remember, we mirrored the design, so we’re actually punching from the back of the project to the front. We’ll leave loops on the front to create the finished design.
- Keeping your fingers out of the way, push the needle all the way through until the handle touches the fabric.
- Then pull the needle straight back out, keeping the tip close to the fabric. And that’s your first loop stitch!
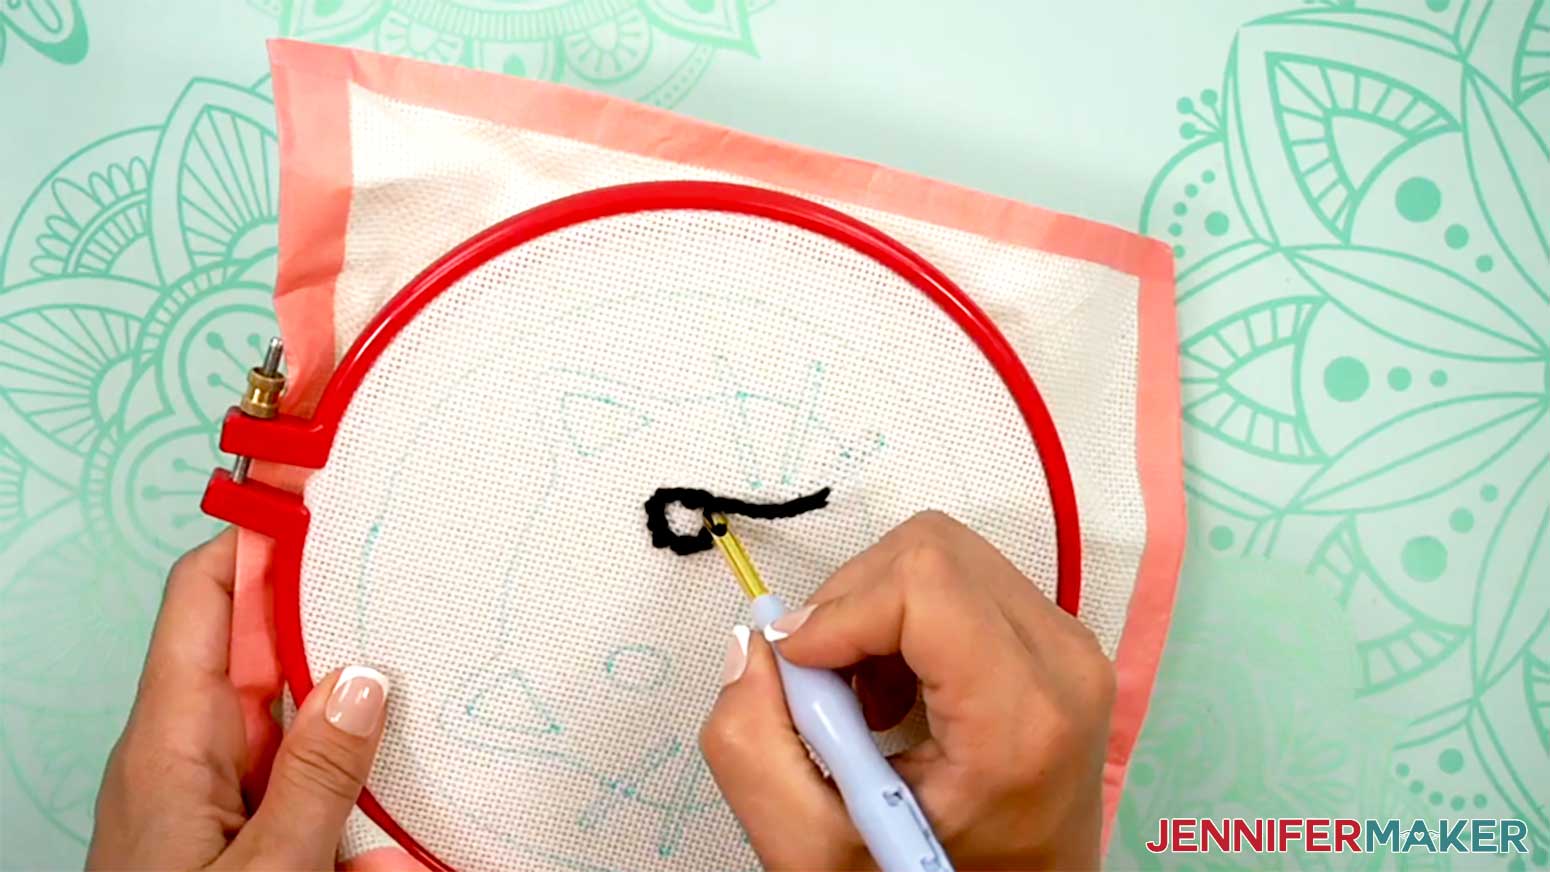
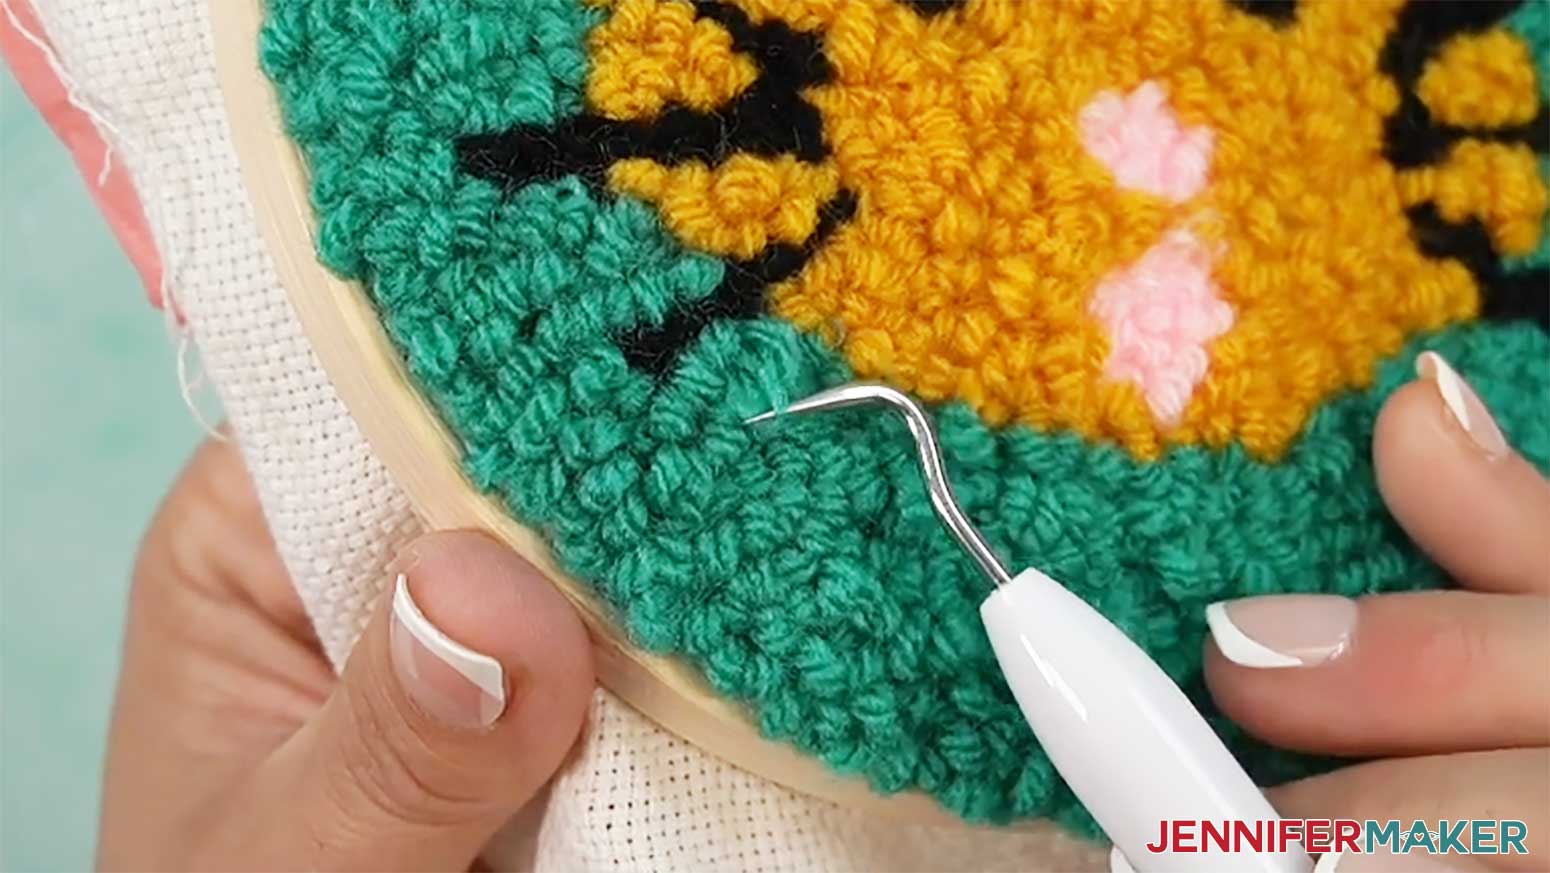
- Keeping the open side of the needle facing the direction you want to stitch, move your needle about ⅛” along the outline, then punch your next stitch through the fabric and back up.
- Continue stitching evenly along the shape’s outline, remembering to rotate as needed to keep the open side of the needle facing the direction you want to move.TIP: To keep your stitches even, keep the tip of your needle close to the fabric and drag it forward. Occasionally, flip the hoop over to check that your stitches are going through properly.
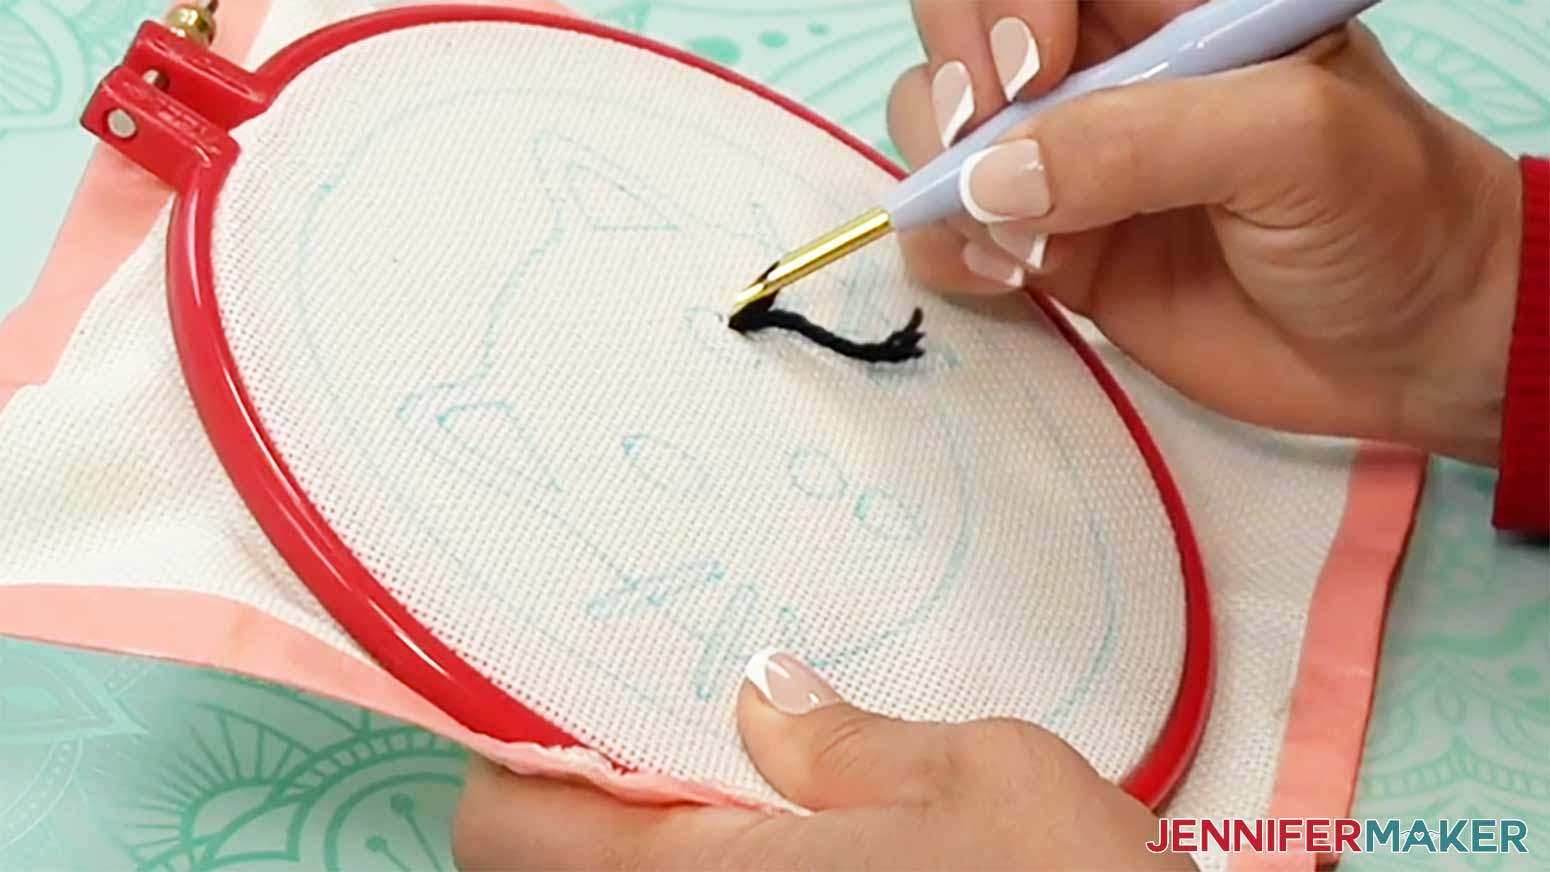
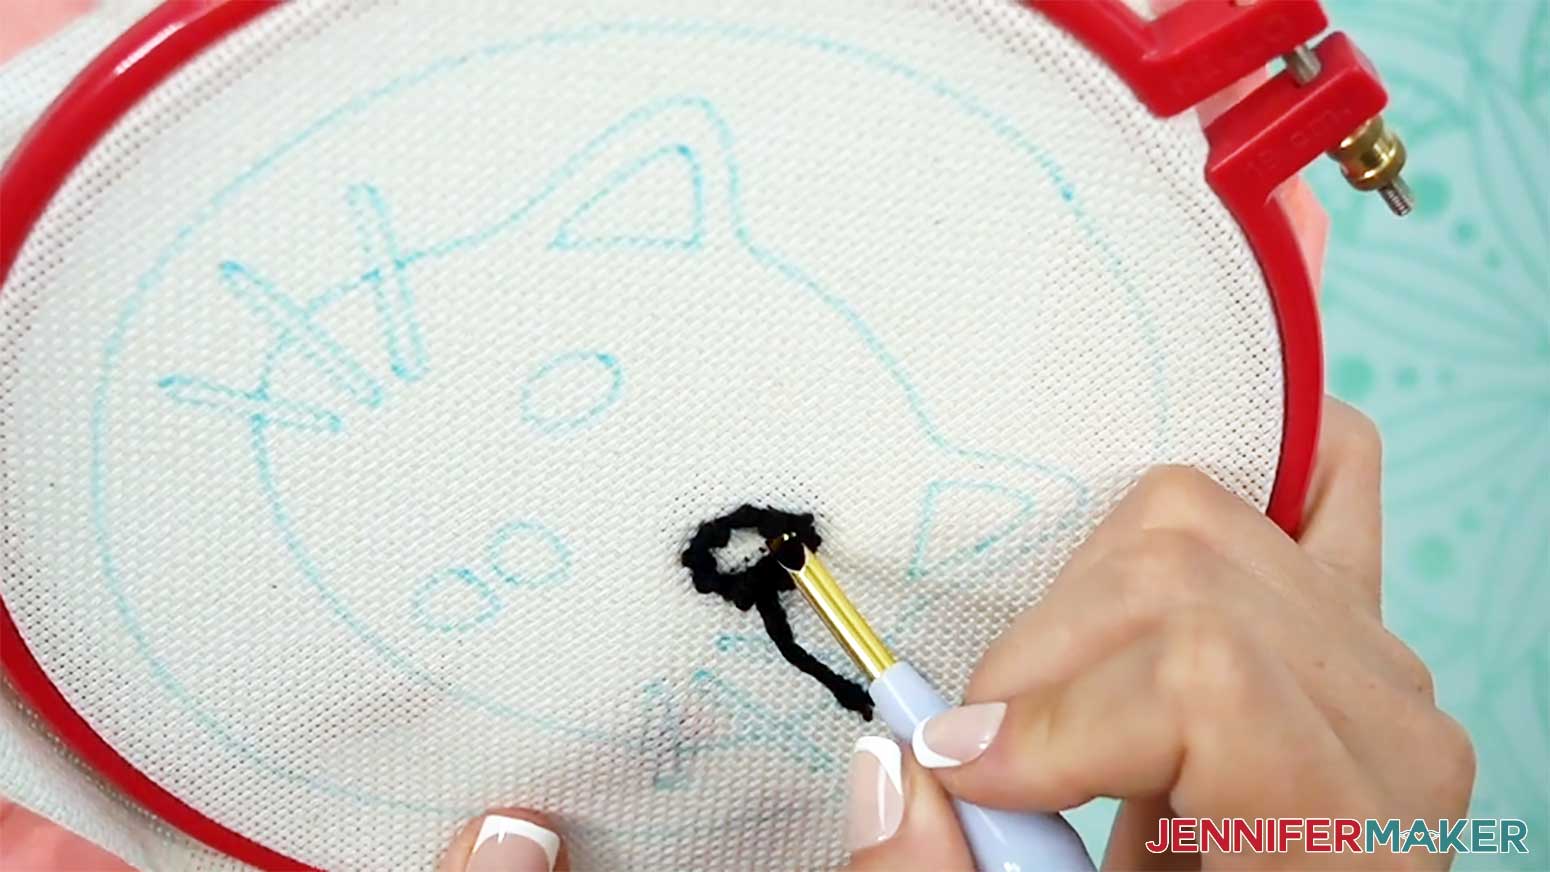
- When you reach your starting point on the outline, place your next stitch just inside the shape’s outline, keeping it close to the yarn you’ve already punched to prevent gaps.TIP: Avoid stitching in holes you’ve already punched, as this can pull out your yarn.
- Follow the first outline to add your next row of stitches.
- Continue following the outline and work your way inward until your shape is entirely filled.
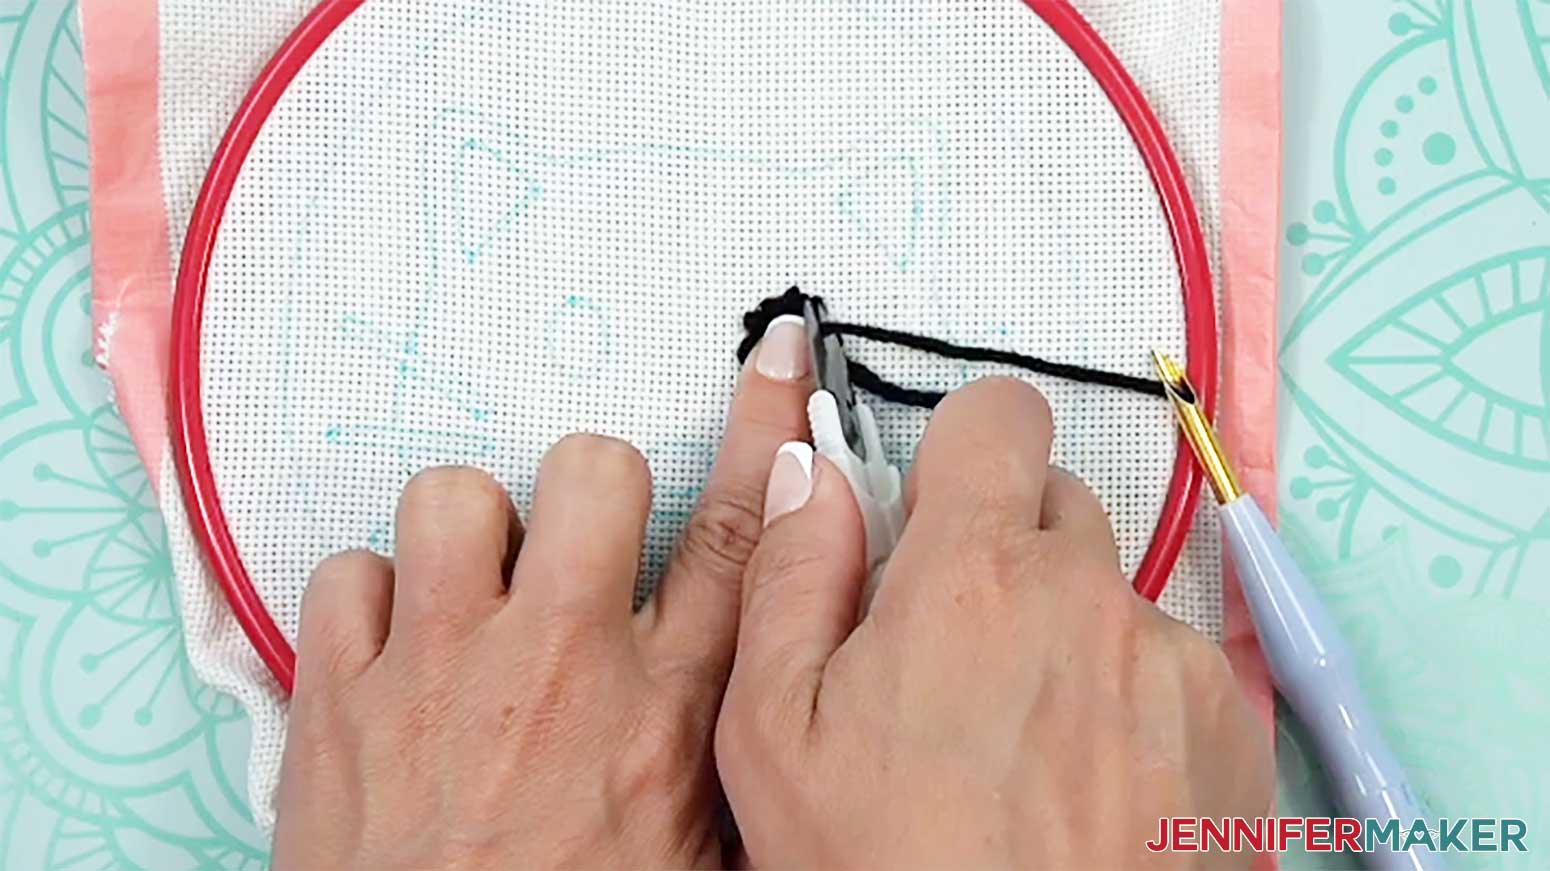
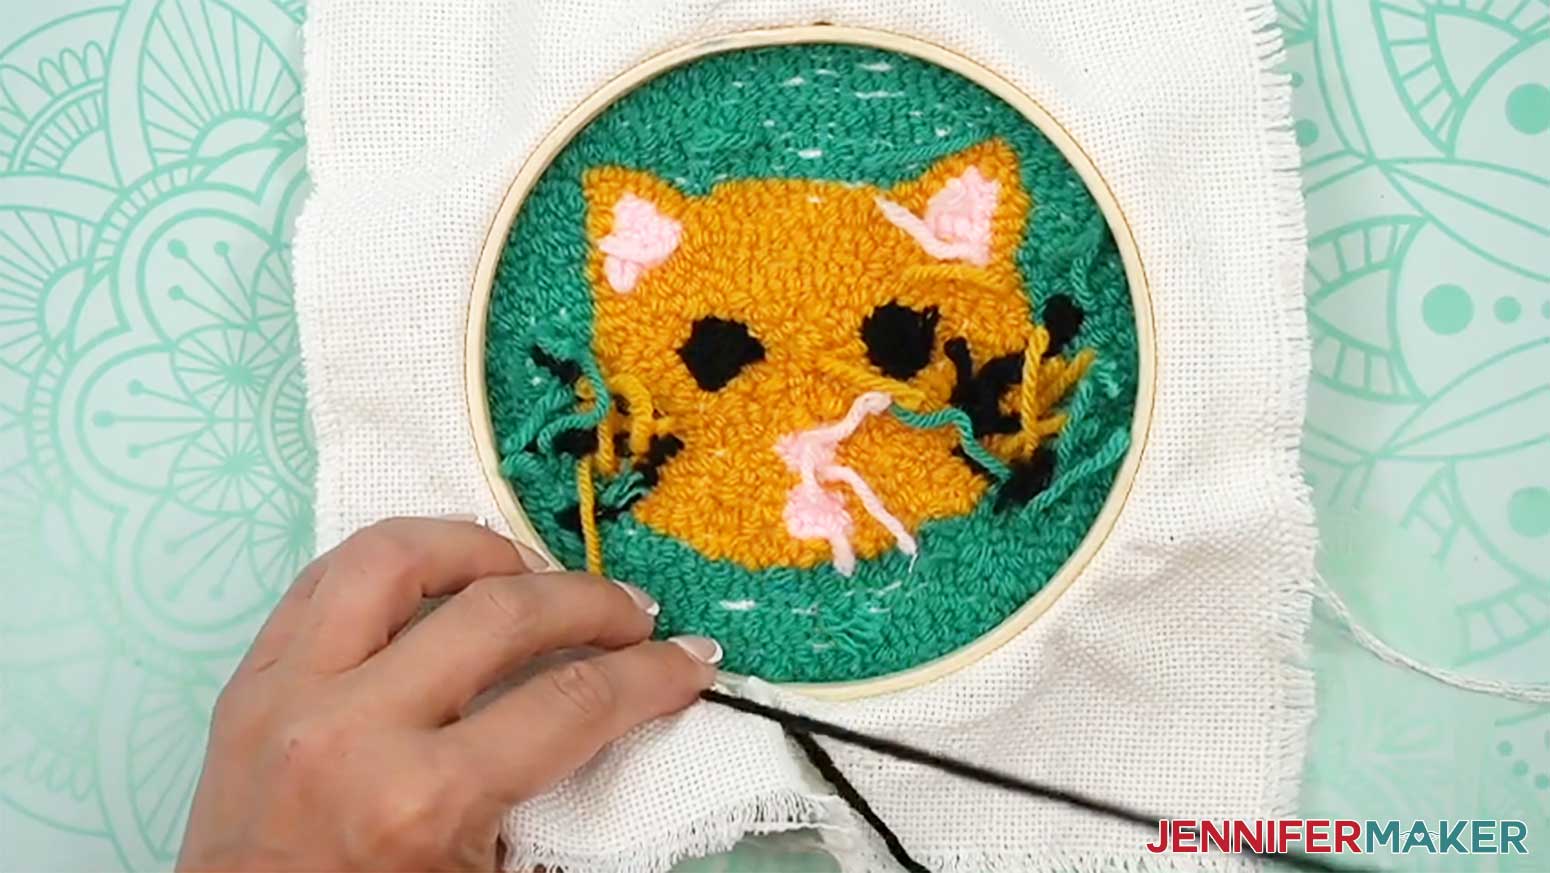
- Once you place your last stitch, pull the needle away from the punching side of the hoop.
- Use your finger to keep the last stitch in place, then use scissors to trim the yarn close to the stitches.
- Repeat Steps 7-24 to stitch the remaining sections of your design.NOTE: Some details may not need to be filled in, like the thin whiskers. So just stitch along the outline and don’t try to add more yarn in the middle.TIP: Be sure to watch the video to see how I filled in the sections of my project, and how to solve common issues when punching!
- Loosen the bolt on top of your punching hoop and remove your project.
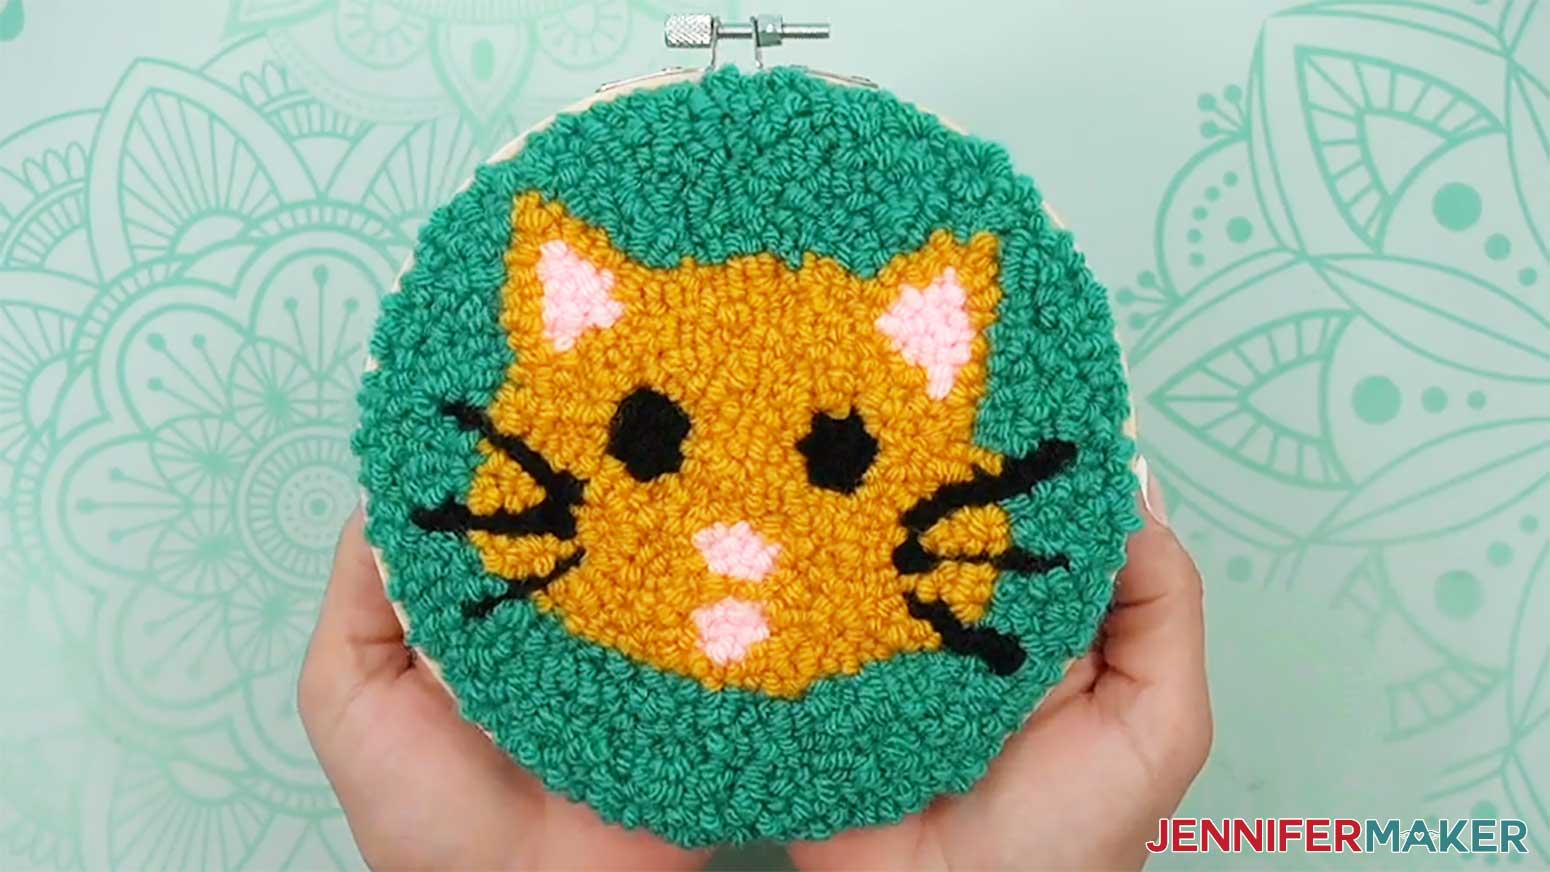
- Lay your project with the display side face up.NOTE: I’ll display the loop side, which is the back of the fabric.
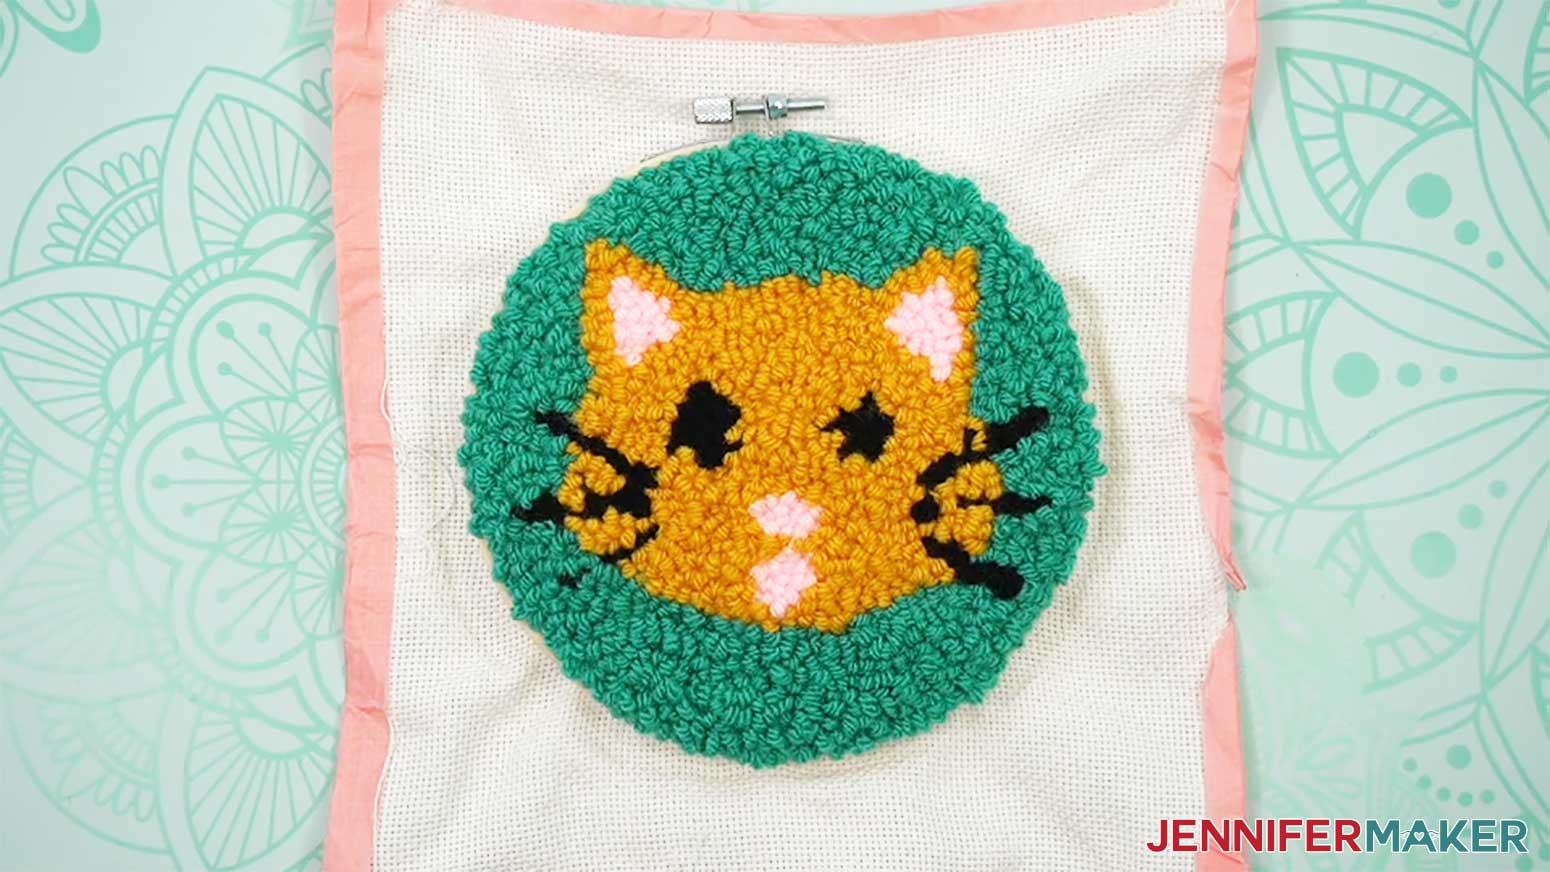
- Repeat Steps 1-6 to place your project into its bamboo display hoop, pulling the fabric tight until the yarn loops rest against the hoop’s edges.TIP: Use the included screwdriver to tighten the top bolt once your project is in place.
- Lay your project face up on your work surface.
- Use a weeding tool or yarn needle to clean up your design by pushing the stitches to shape the sections.
- If you find two different colored yarns looped inside each other, (like a white loop in a black section), use the weeding tool or yarn needle to pull the loops apart so the yarns are in the right sections.

- If there are any extra long loops, use the tip of your weeding tool or yarn needle to push the yarn back into the fabric and even out the loop length.
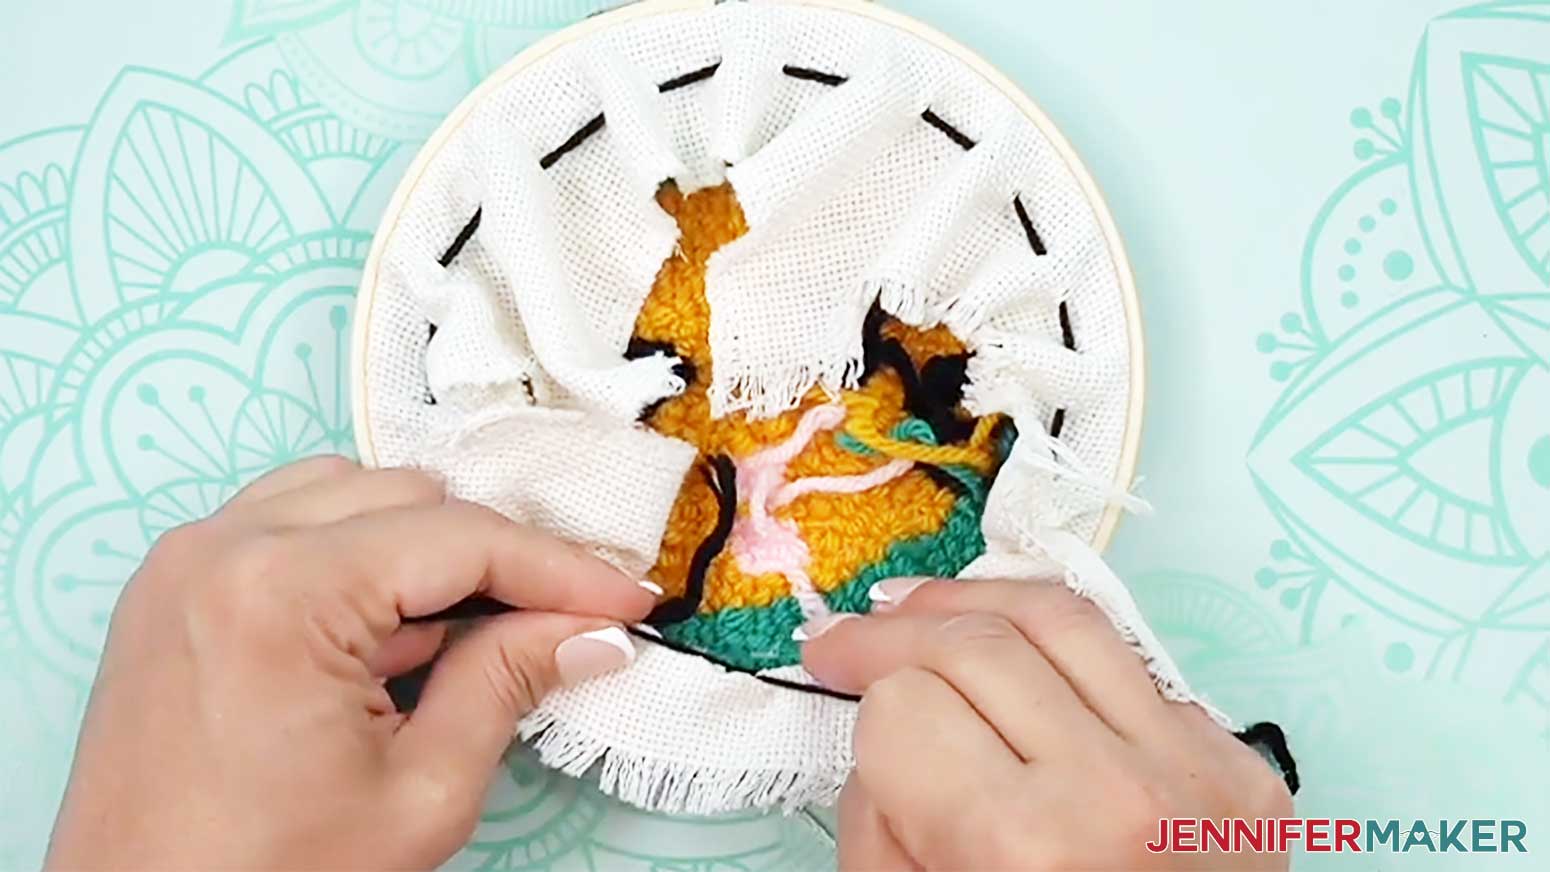
- To finish your project’s back, remove the tape from the fabric’s edges.
- Lay your project face down on your work surface.
- Thread a yarn needle with yarn in the color of your choice.NOTE: This won’t be visible from the front.
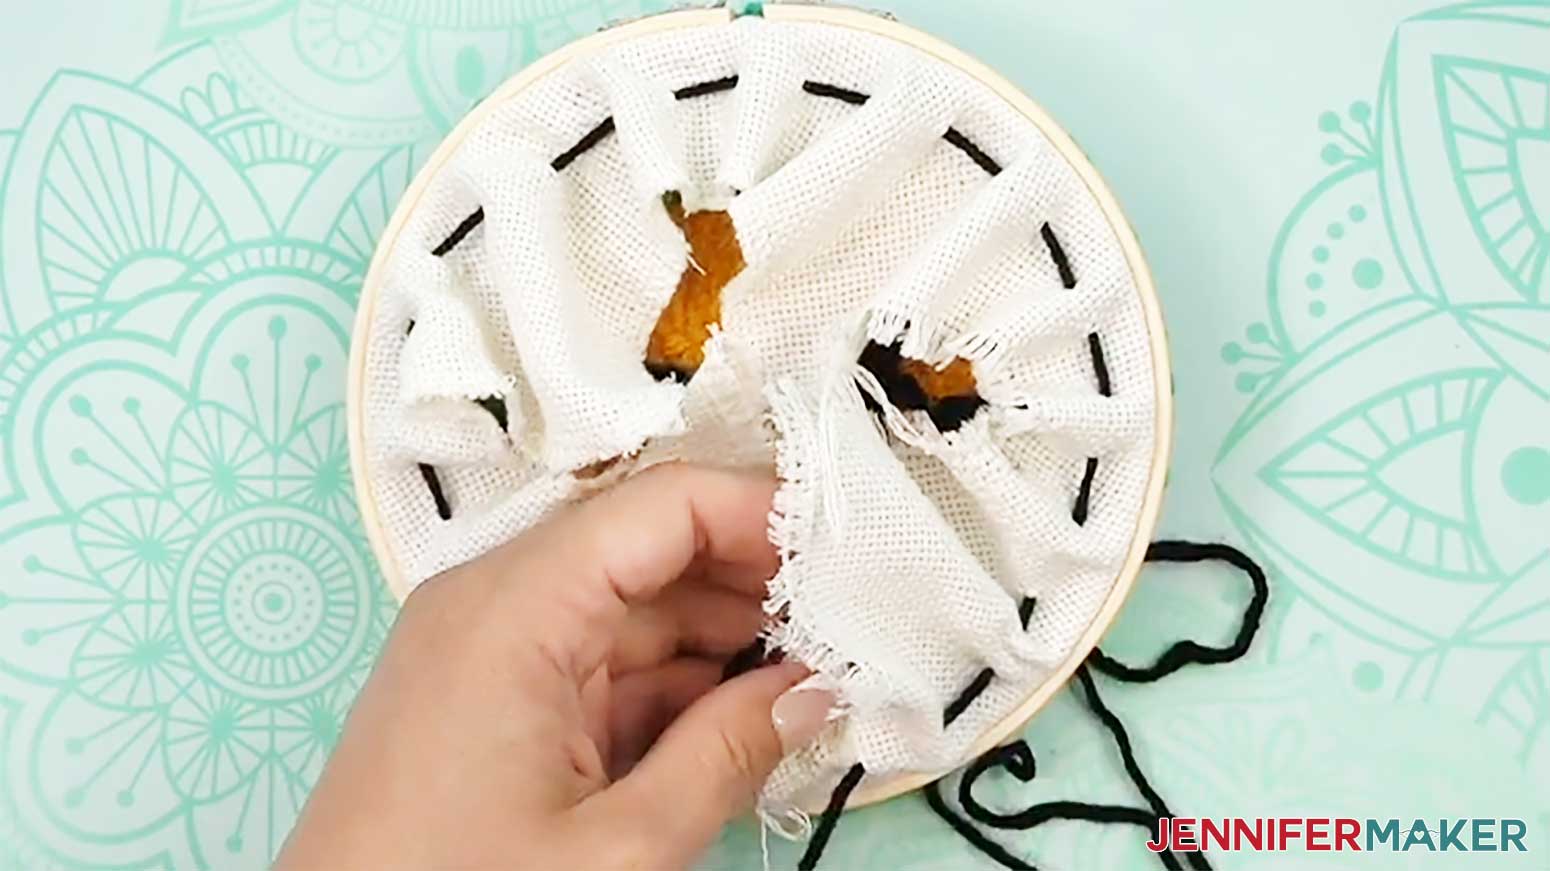
- Bring the needle up through the fabric on the outside of the hoop.
- Then push the needle down through the fabric about ½” to the left of where you brought it up.
- Following around the outside of the hoop, continue weaving the needle up and down through the fabric until you reach your starting stitch.
- Cut the yarn from the skein and remove the needle.
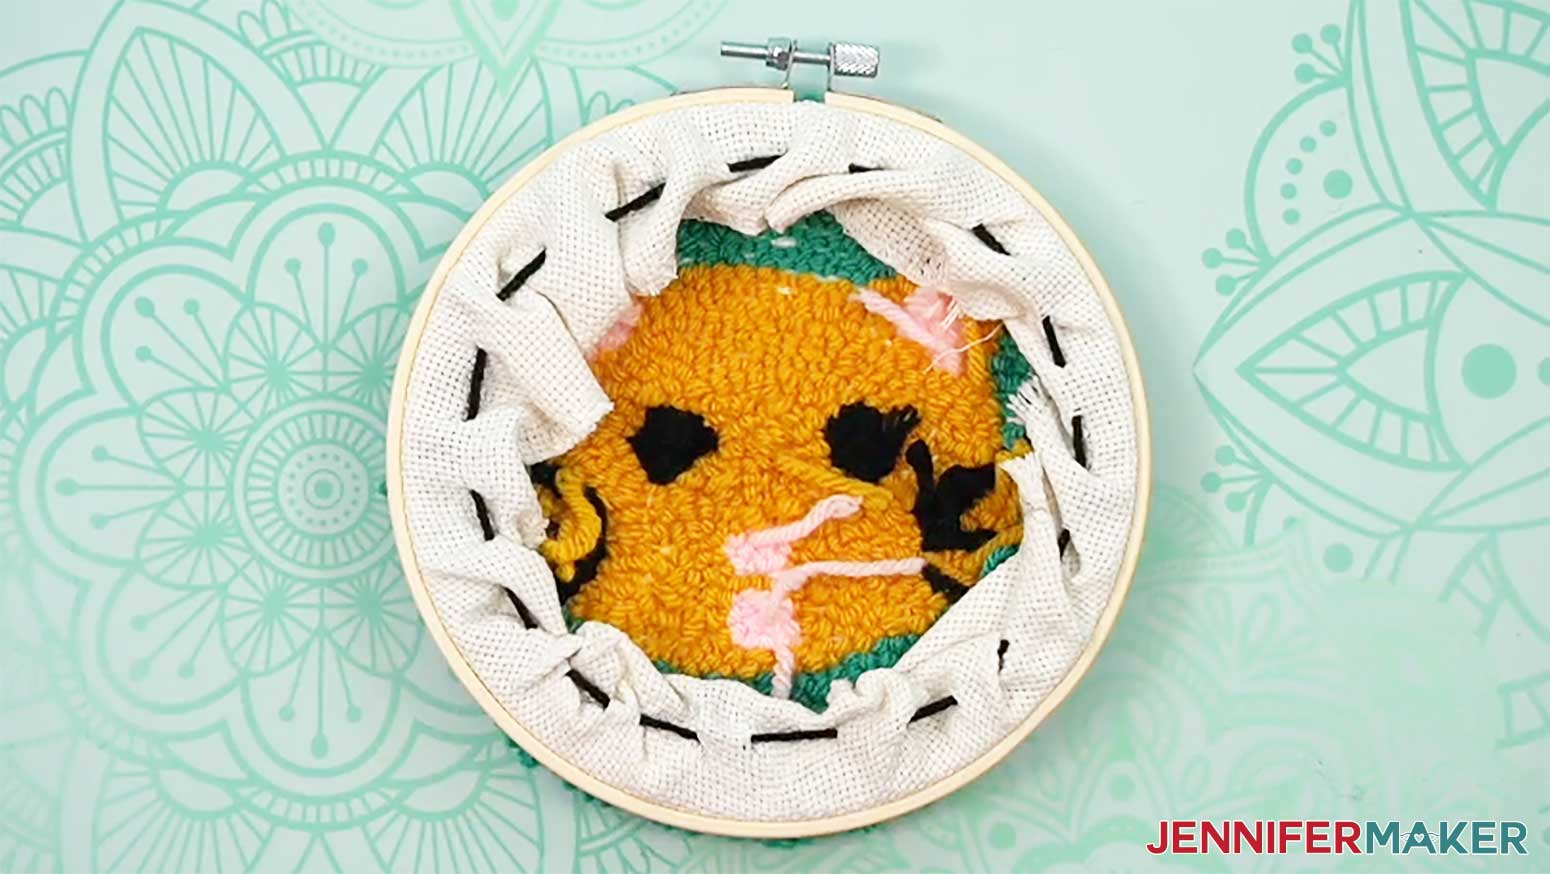
- Pull the yarn ends tightly to bunch the fabric together on the back of your project.
- Tie the yarn ends together to hold the fabric in place.
- Tuck the excess fabric under, and trim off the excess thread.
- Your project is ready for display!
 TIP: You can pull yarn directly from the skein when punching -- just make sure to give yourself plenty of slack and keep your yarn knot-free!
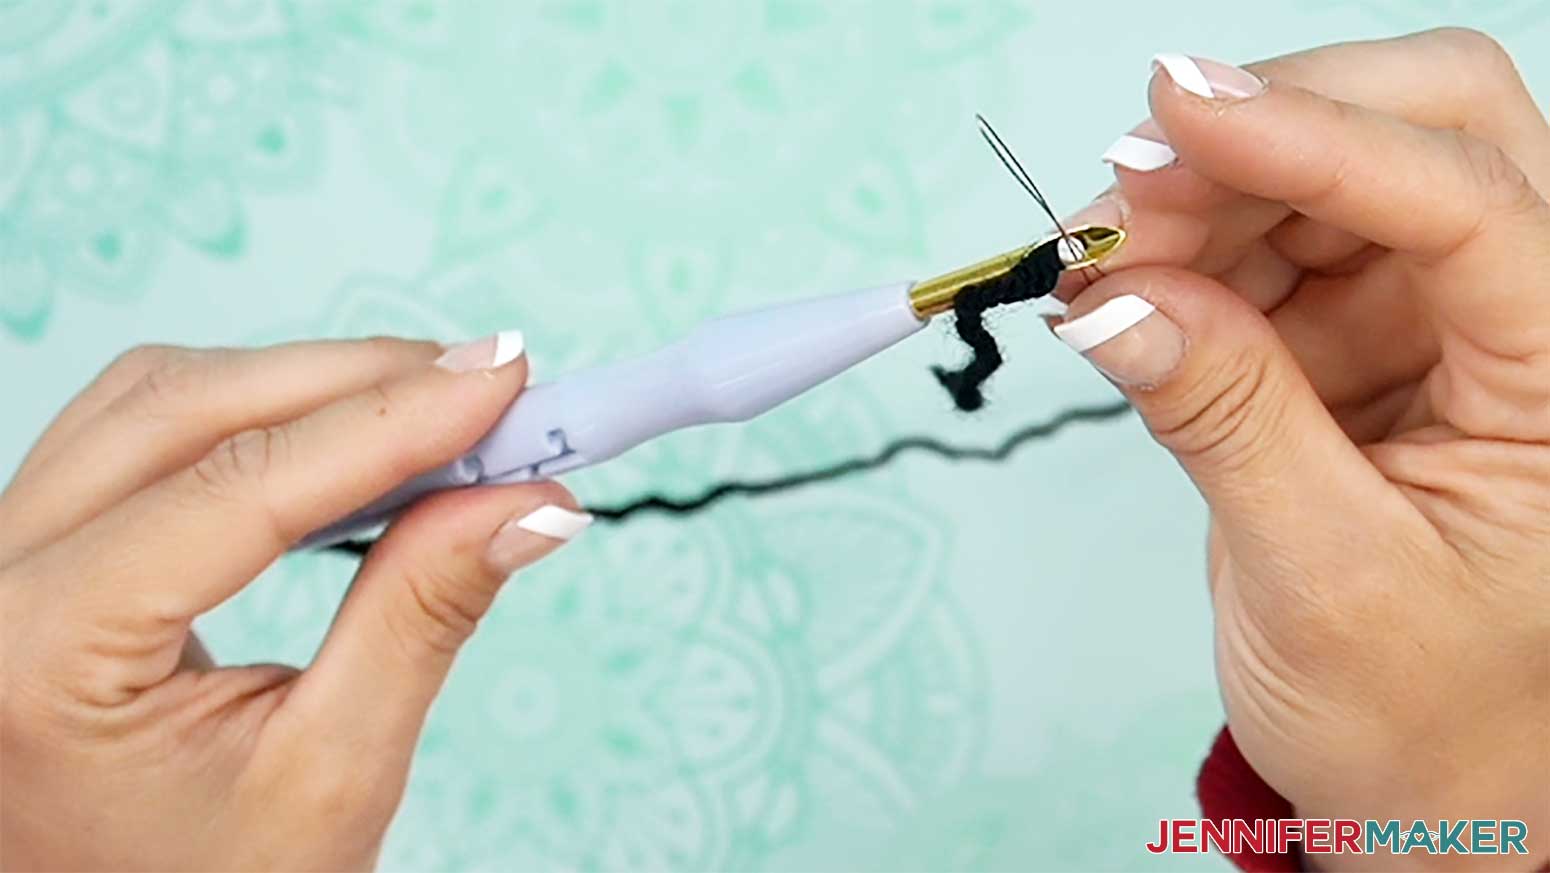


 TIP: Use the included screwdriver to tighten the top bolt once your project is in place.
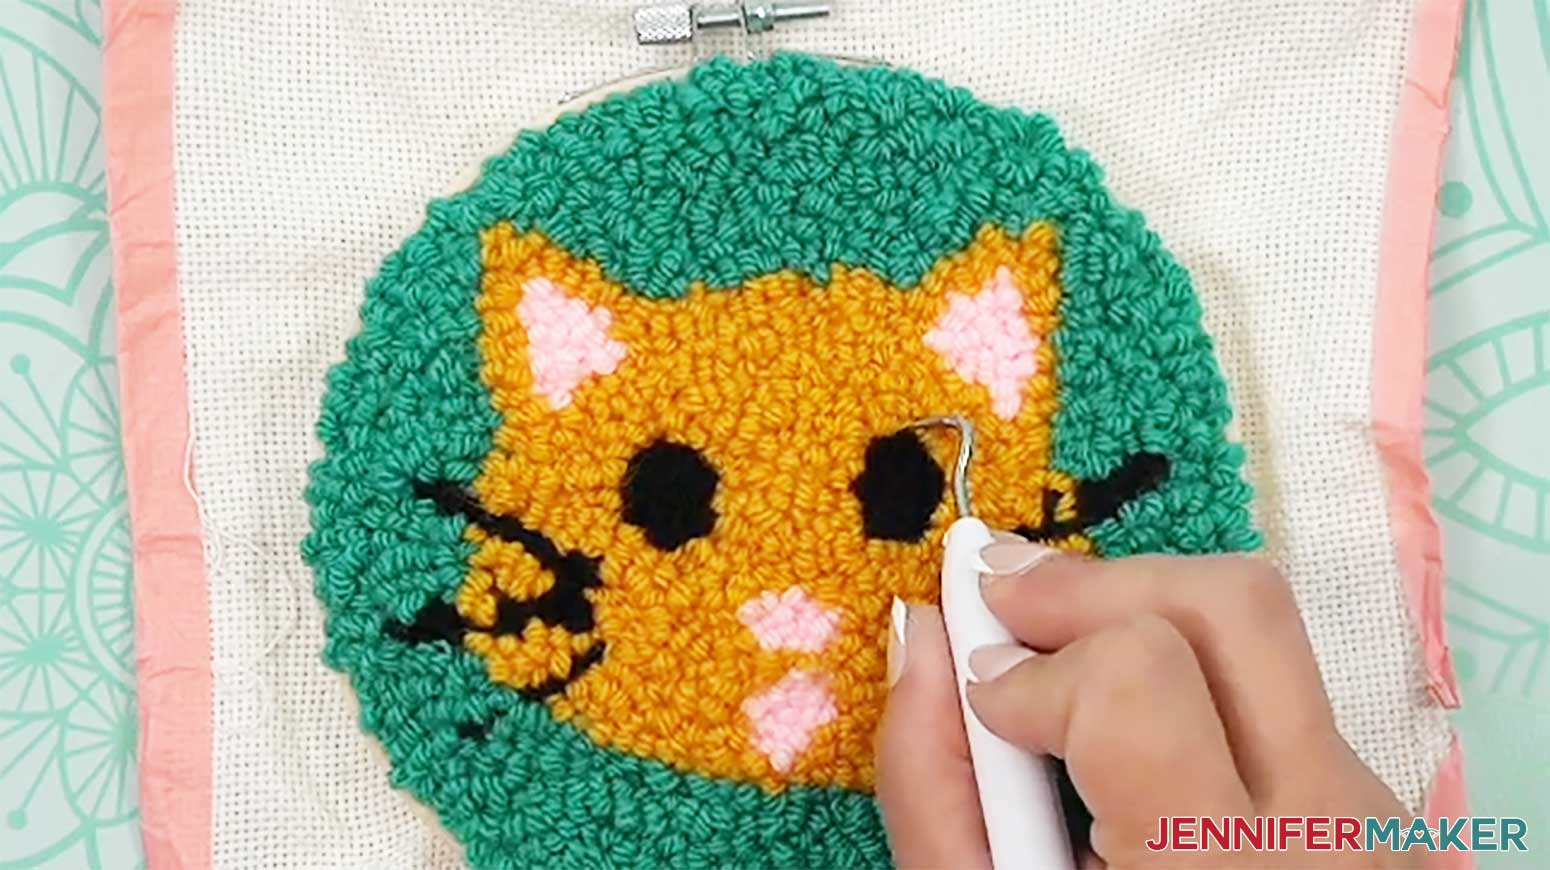
STEP 4: SHOW IT OFF
You now have an impressive animal punch needle project!
Notes
Design Size: 6" x 6" Finished Size: Displayed in a 6" Embroidery Hoop Care: Light dusting while on display. If needed, punched fabric can be carefully washed by hand in lukewarm water and laid flat to dry. Approximate Amount of Yarn Used Per Project: OWL - 43 yards Golden Yellow - 22 yards Teal- 14 yards Green - 3 yards White - 4 yards CAT - 42 yards Teal- 22 yards Red- 1 yard Black - 5 yards Pink- 2 yards Orange - 12 yards DOG - 44 yards White - 11 yards Black - 8 yards Red- 1 yard Teal- 24 yards
Answers to Your Questions About Needle Punching
Q: I want to personalize my punch needle project with a name. How do I do that?
A: You can learn how to personalize your punch needle project in my ADVANCE program. Learn more about ADVANCE here!
Q: What is punch needle?
A: Punch needle is a type of needlecraft that uses a hollow needle to push loops of yarn through fabric to create a pattern or picture. It’s super fun and easy to jump into, even if you’ve never done it before! I show you everything you need to get started in my beginners tutorial above.
Q: How does the yarn stay in the material after punching?
A: Punch needle looks like magic, but there is actually a simple explanation for how the yarn stays in place: tension! The material you use for punch needle is tightly woven, so it holds the yarn in place as you push and pull the needle. Plus, as more and more stitches are added, everything becomes more densely packed, helping to secure the yarn and leaving loops on one side of the fabric.
Q: What kind of needle do I need for needle punching? Which one is best for beginners?
A: Needle punching has its own special type of tool with a hollow needle that carries the yarn inside it as you work. The needles have a sharp point for pushing their way through the fabric, and most come with their own threaders, too! If you’re a beginner, I recommend using the adjustable punch needle in my supplies list. The needle size determines the length of the loops, and an adjustable needle lets you easily explore which lengths and textures you like the most for your projects!
Q: What kind of fabric do I need to make a punch needle project?
A: For the best punch needle experience, you need to use a fabric with enough tension to hold your yarn without being too tight for your needle to punch through. I recommend monk’s cloth if you’re just starting out. It’s durable enough to withstand some punching pressure, but also forgiving in case you make mistakes–just use your finger to push the fabric around and smooth away any holes left behind by misplaced stitches!
Q: Help! Why is my punch needle just making holes?
A: There are several different things that can cause your punch needle to leave behind holes in your fabric instead of beautiful yarn loops, such as using the wrong fabric or not having your needle properly threaded. Make sure you’re using something like monk’s cloth with a slightly open weave and enough tension to hug your yarn as it passes through. For tips on threading your needle and keeping your yarn moving, be sure to watch the video tutorial!
Q: What are common punch needle mistakes?
A: Like any craft, punch needle requires certain skills and techniques to successfully create your project, and it’s okay to make mistakes–especially while you’re still learning! In my tutorial, I cover all the common mistakes you might make when just starting out, and teach you how to fix them! I’ve also included my best tips and tricks to help your punch needle project turn out beautifully, even if it’s your very first try!
Q: Can I use my Cricut to draw my punch needle design onto my fabric?
A: Yes, you absolutely can! My tutorial shows you exactly how to use your Cricut to draw your pattern right onto your fabric using the free punch needle files in my design folder. It’s so simple, and will save you so much time and effort!
Get my free Punch Needle Designs in SVG, DXF, or PDF format!
(If you do not see the signup form above, click here.)
I love seeing what you make with my tutorials and how you customize them! Please share a photo of your custom punch needle project in our Facebook group or tag me on social media with #jennifermaker.
Love,

Want to remember this? Save this How to Punch Needle for Beginners tutorial to your favorite Pinterest Board!