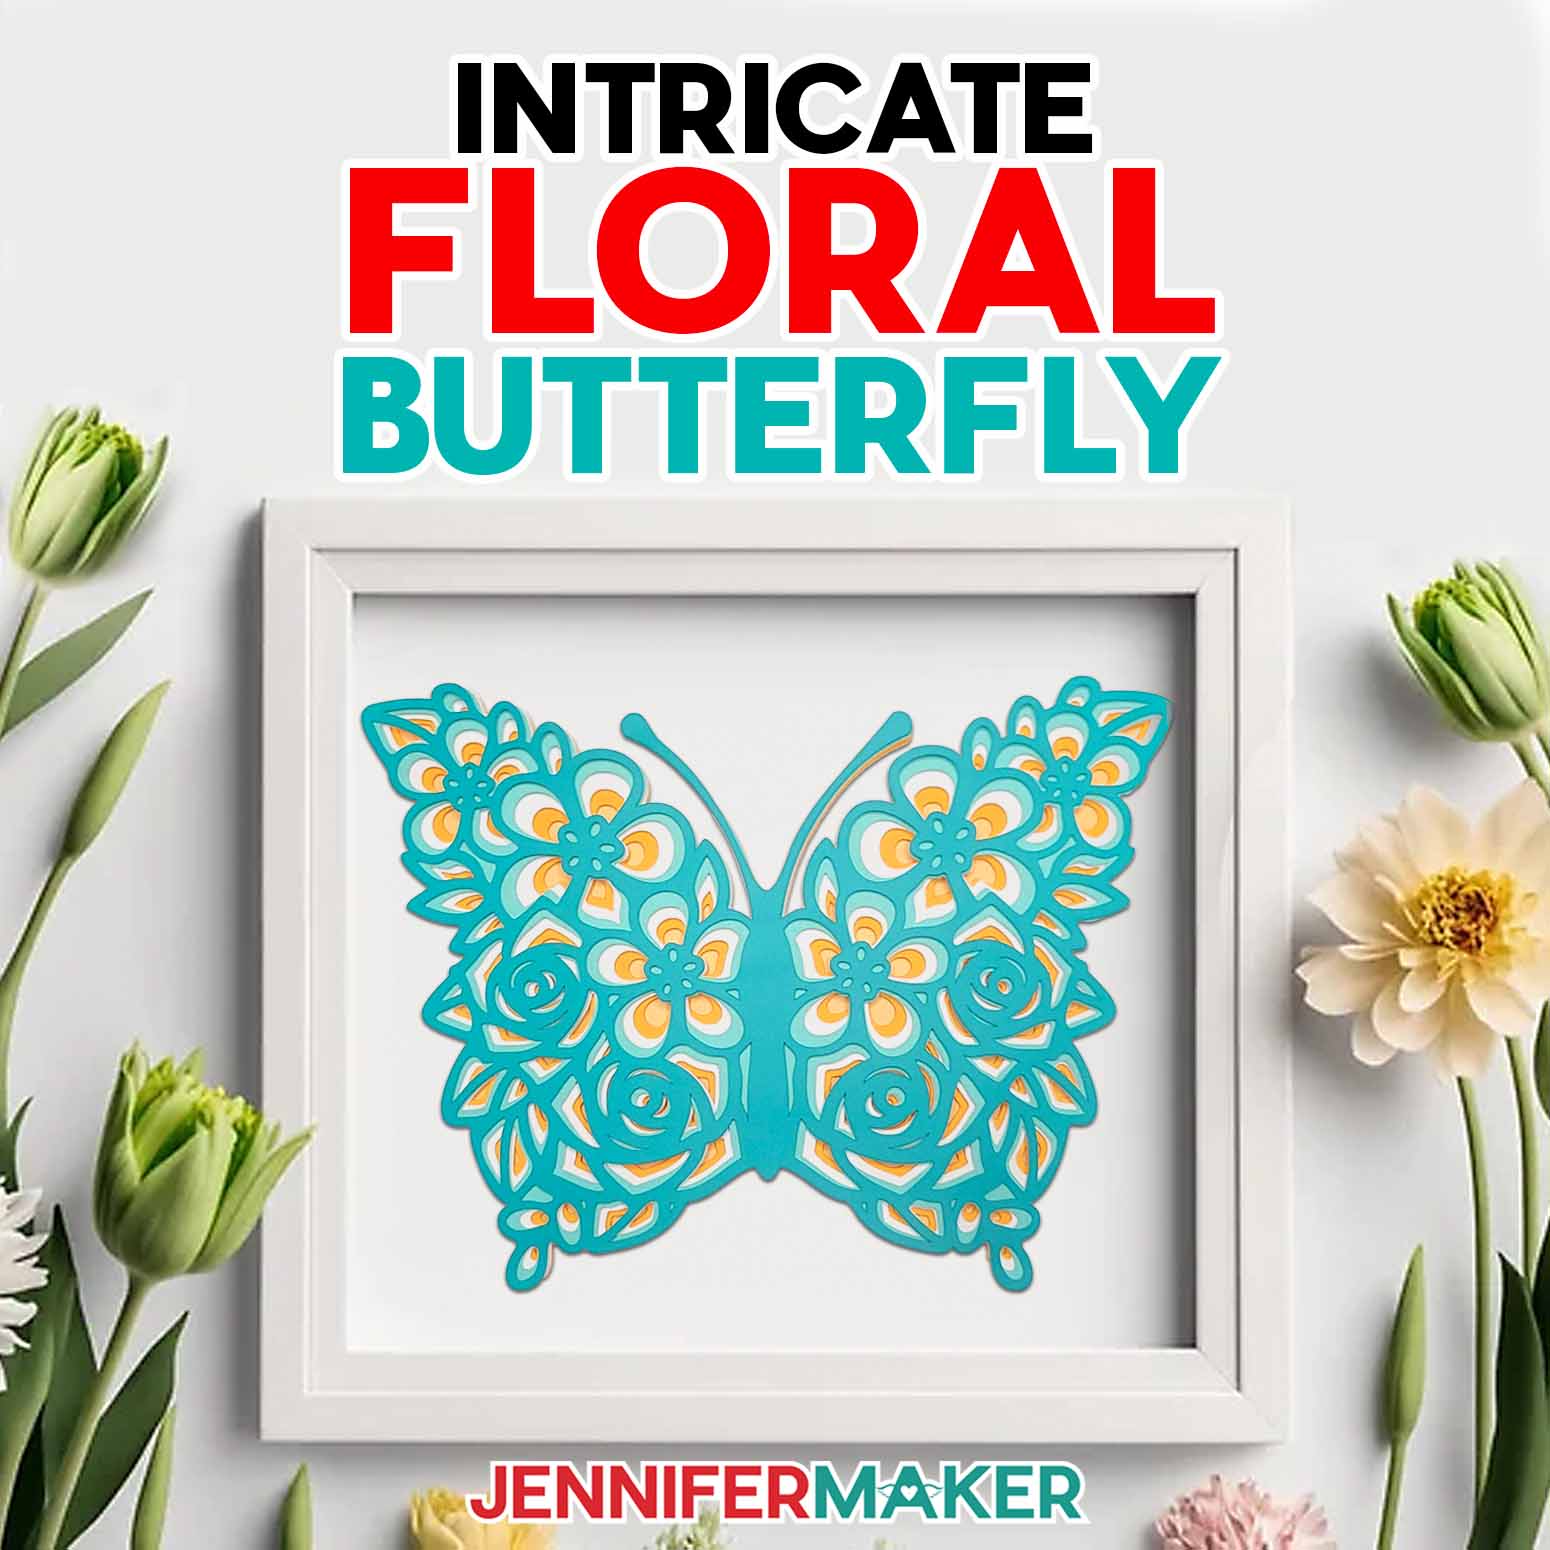
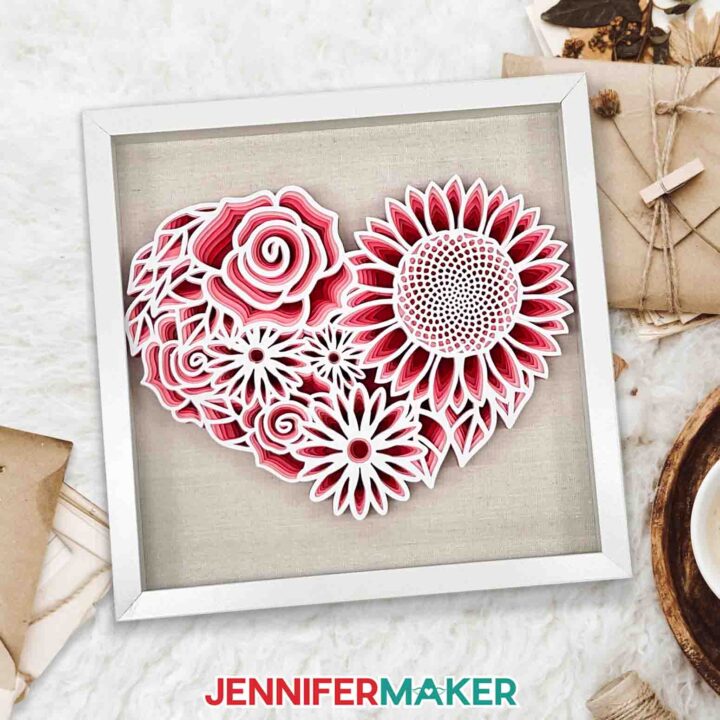
Create an intricate layered floral butterfly from cardstock for beautiful wall art!
No matter how many cardstock projects I create, I’m always amazed at how quickly a Cricut cutting machine delivers perfect, precise cuts with ease, even with the most intricately detailed layers! My peacock side edge card design and my layered 3D mandalas would take hours to cut by hand, but with my Cricut, they take only minutes! So I think you’re going to love how fast and easy this layered floral butterfly comes together, too!

Before I started crafting with a Cricut cutting machine, cutting intricate designs was a daunting task! Small areas were hard to reach with scissors, and craft knives required extra care to make precise cuts in just the right spots. Time investment was another challenge I often faced. But when I switched to machine cutting, those problems disappeared! I can happily say my Cricut has leveled up my crafting exponentially. Now I spend more time creating new designs, like this layered floral butterfly, which is a beautiful spin on the original heart design!
In my tutorials, I always share the best settings for the materials I use, but even machines of the same model sometimes have slight variations between them. So if your first cut doesn’t turn out quite right, you might just need to make a few small adjustments. Then your cuts will turn out perfectly!
First, make sure you’re using the right blade for your machine and material. I’ve found that Cricut’s Premium Fine-Point Blade works the best for cutting most kinds of craft paper on the Maker machines. And the Deep-Point Blade can be a life-saver when cutting thick or textured cardstock (see the cutting video above). Make sure your blade is clean, too. Little bits of stuck-on glitter or adhesive can negatively impact your cuts. You want nice, clean cuts to show off all of your butterfly’s vibrant colors!
Your mat is an important part of the equation as well. A new Cricut StandardGrip Machine Mat has the right amount of tack for the cardstock I used to make my butterfly. But you can still use an older mat as long as it’s sticky enough! Also, make sure to clean up any leftover bits of paper or glitter from other projects. Even small areas of debris can prevent your cardstock from remaining in place when cutting. Movement on the mat can lead to errors in cutting and wasted material.

The kind of paper you use often determines your cutting success. For this layered floral butterfly, use high-quality cardstock to achieve the best results. It really does make a difference! There’s a surprising amount of science involved in paper making, but it mostly boils down to one factor. Poorly made materials lack the fiber structure needed for your machine’s blade to make a clean slice. That’s why some papers rip, snag, and even stick to the mat more easily than others. So buying the good stuff is a worthwhile investment.
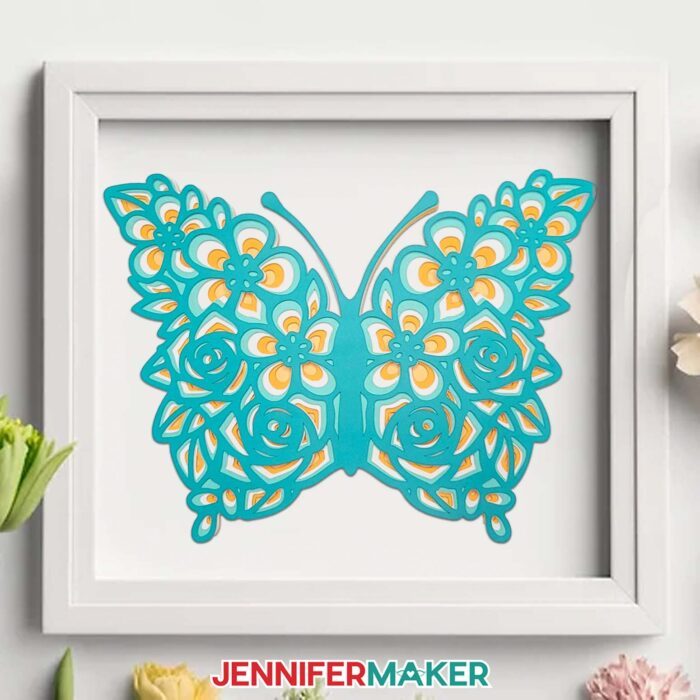
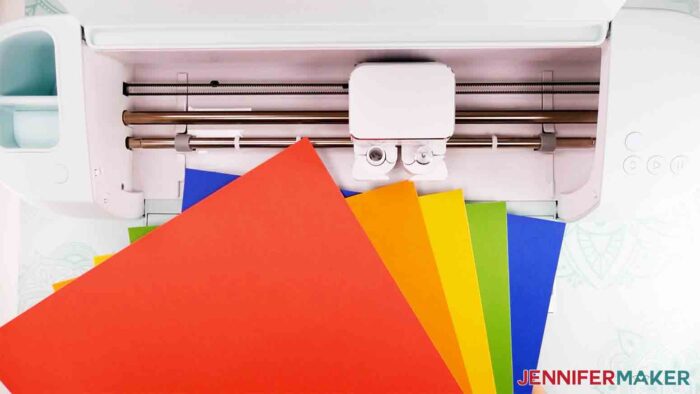
And while we’re on the subject of cardstock, the easiest way to make your project uniquely yours is to use a variety of vibrant colors! I used blues and yellows to create a nice contrast for mine, but you can mix and match your favorite colors to create a whole rainbow of butterflies! And since this design is less complex than some of my other layered floral designs, you can even reduce the size to cut this on a Joy and create miniature butterflies without sacrificing cut quality!
No matter what size or color you choose, your layered floral butterfly is going to look amazing on display! Plus, the foam squares between the layers will create additional depth inside the shadow box. You can find the link to the shadow box I used in my shopping list below, along with everything else I used to bring my layered floral butterfly to life.
When you’re ready to get started, make sure to click on the download link below to access the zip folder with all my free files. Or enter your email address in the form above to have this project sent to your inbox for later!
Let me show you how to make an impressive layered butterfly with floral patterns! This post contains some affiliate links for your convenience (which means if you make a purchase after clicking a link I will earn a small commission but it won’t cost you a penny more, there is no additional cost)! Read my full disclosure policy.
Materials to Make a Layered Floral Butterfly
View my Amazon shopping list for the exact items I used!
- 65-80 lb, 12″ x 12″ cardstock – I used teal, yellow, gold, and white
- 12″ x 12″ Shadow Box Frame (alternative)
- A method to cut your cardstock: I used the amazing Cricut Maker 3, but you can also use a Cricut Maker series, Cricut Explore series, or the Cricut Venture
- Fine-Point Blade
- Deep-Point Blade – optional, but useful if the Fine Point Blade is tearing textured or thick cardstock
- Green StandardGrip Mat (12″ x 12″)
- Brayer Tool
- Spatula
- Weeding Tool
- Scraper
- Scissors -OR- Cricut TrueControl Knife -AND- Self Healing Cutting Mat
- Craft Glue and/or Adhesive Foam Squares
- Ruler
- Design #734 (My free SVG/DXF/PDF design files are available in my free resource library – get the password by filling out the form at the bottom of this page
How to Make a Layered Floral Butterfly!
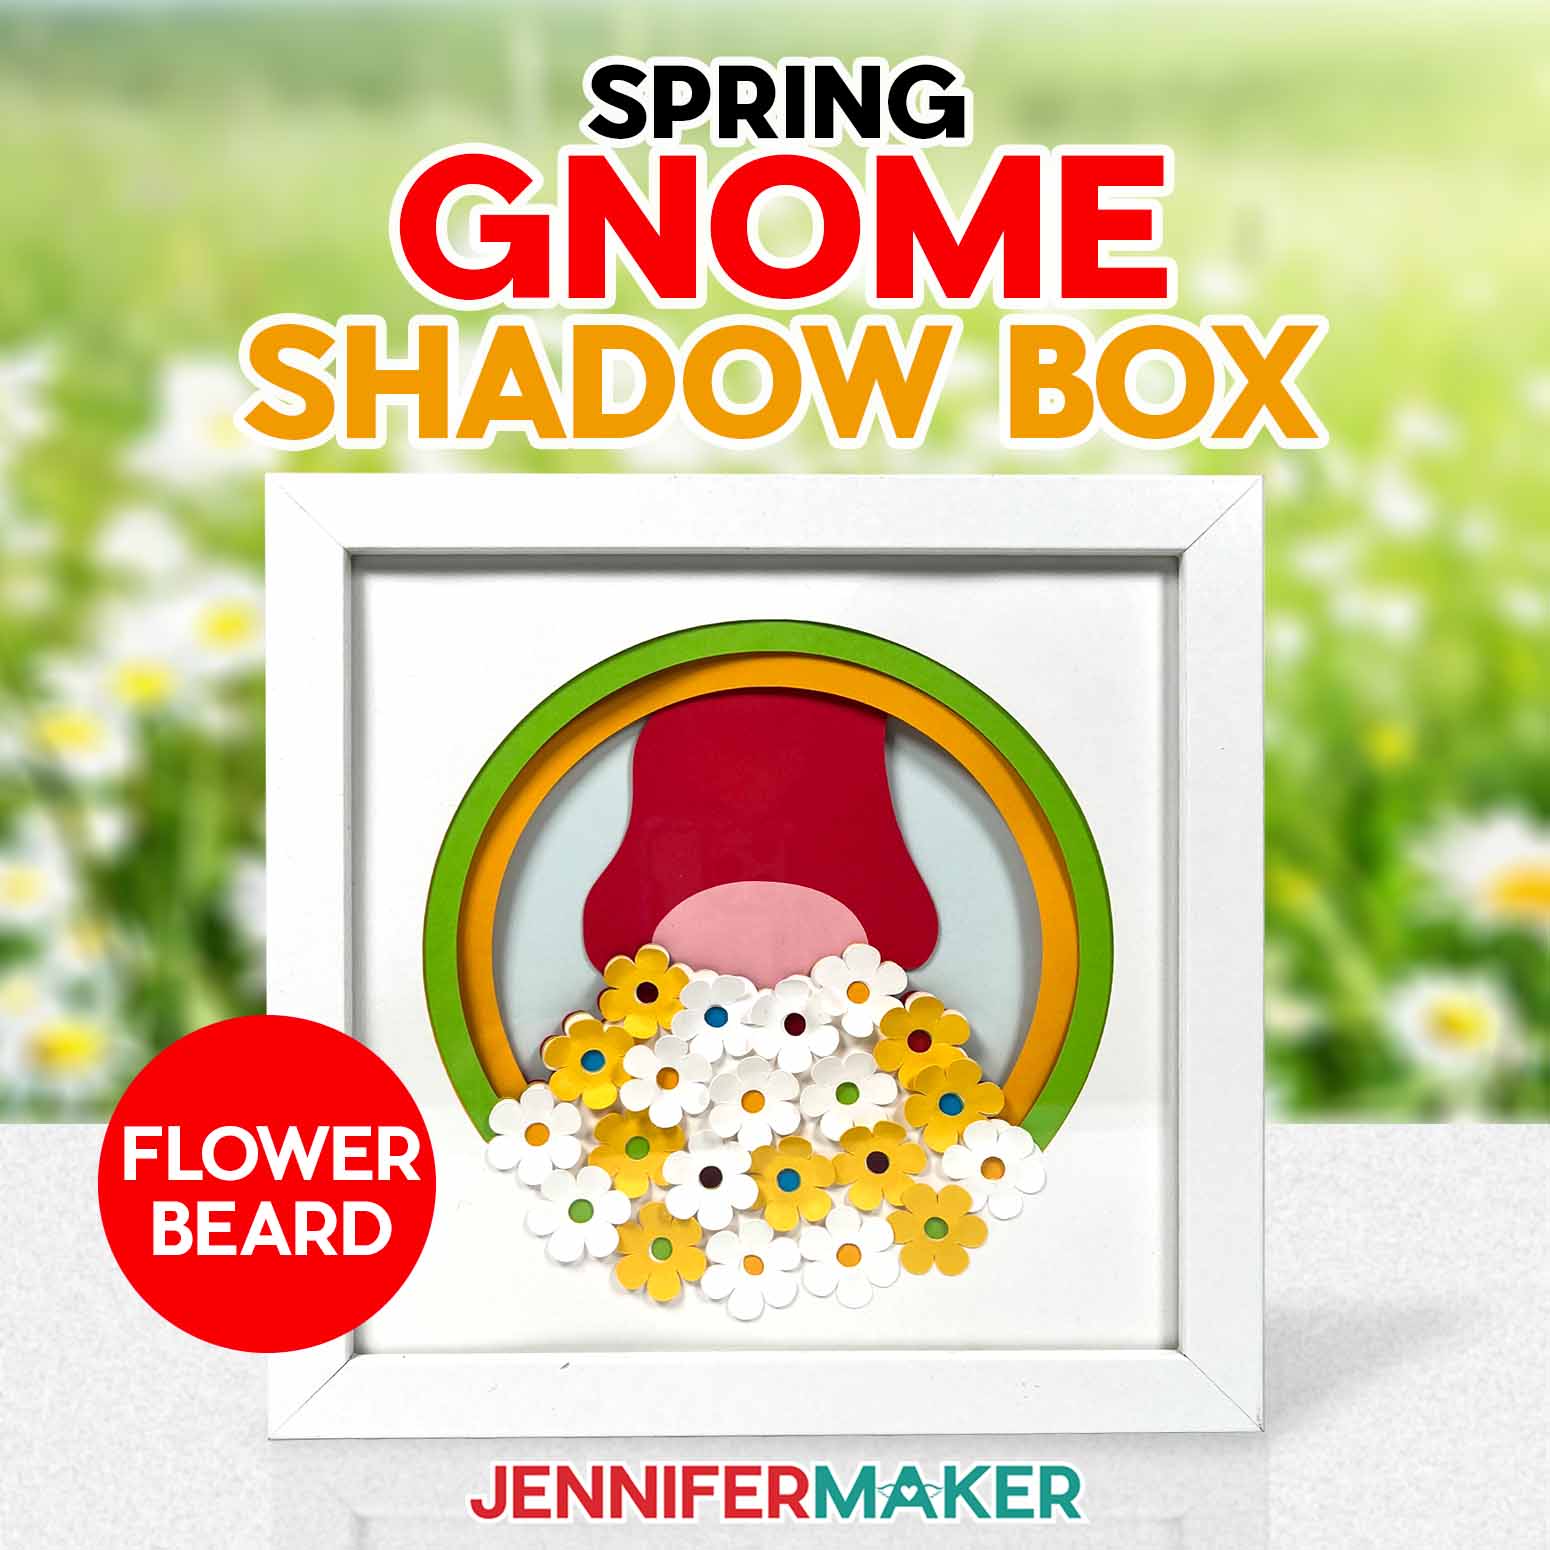
Floral Heart SVG
Create a beautiful offset-layered Floral Heart that is perfect for display or gift giving.
Materials
- 6 Sheets of 65-80 lb. cardstock -- I used Cricut Cardstock Sampler 80 lb, Red Tones - 12" x 12" pack (one of each color)
- 1 Sheet 12" x 12" 80 lb White Cardstock
- 1 Each 12" x 12" Shadow Box Frame
- Design #470 (My free SVG/PDF/DXF design files available in my free resource library - get the password by filling out the form at the bottom of this page)
Tools
- A method to cut your cardstock: I used the amazing Cricut Maker 3, but you can also use the Cricut Maker, or Cricut Explore Series
- Fine-Point Blade
- Deep-Point Blade - useful if the Fine Point Blade is tearing textured or thick cardstock
- Cricut Green StandardGrip Mat (12″ x 12″)
- Brayer Tool
- Spatula
- Weeding Tool
- Scraper
- Scissors -OR-
- Cricut TrueControl Knife -AND-
- Cricut Self Healing Cutting Mat
- Bearly Art Foam Squares -OR-
- Bearly Art Glue
- Ruler
Instructions
STEP 1: GET MY FREE FLORAL HEART FILE
First, download my Floral Heart SVG/PDF/DXF files from my free resource library. It's Design #470.
Each file includes all seven pieces that make this beautiful, layered design.
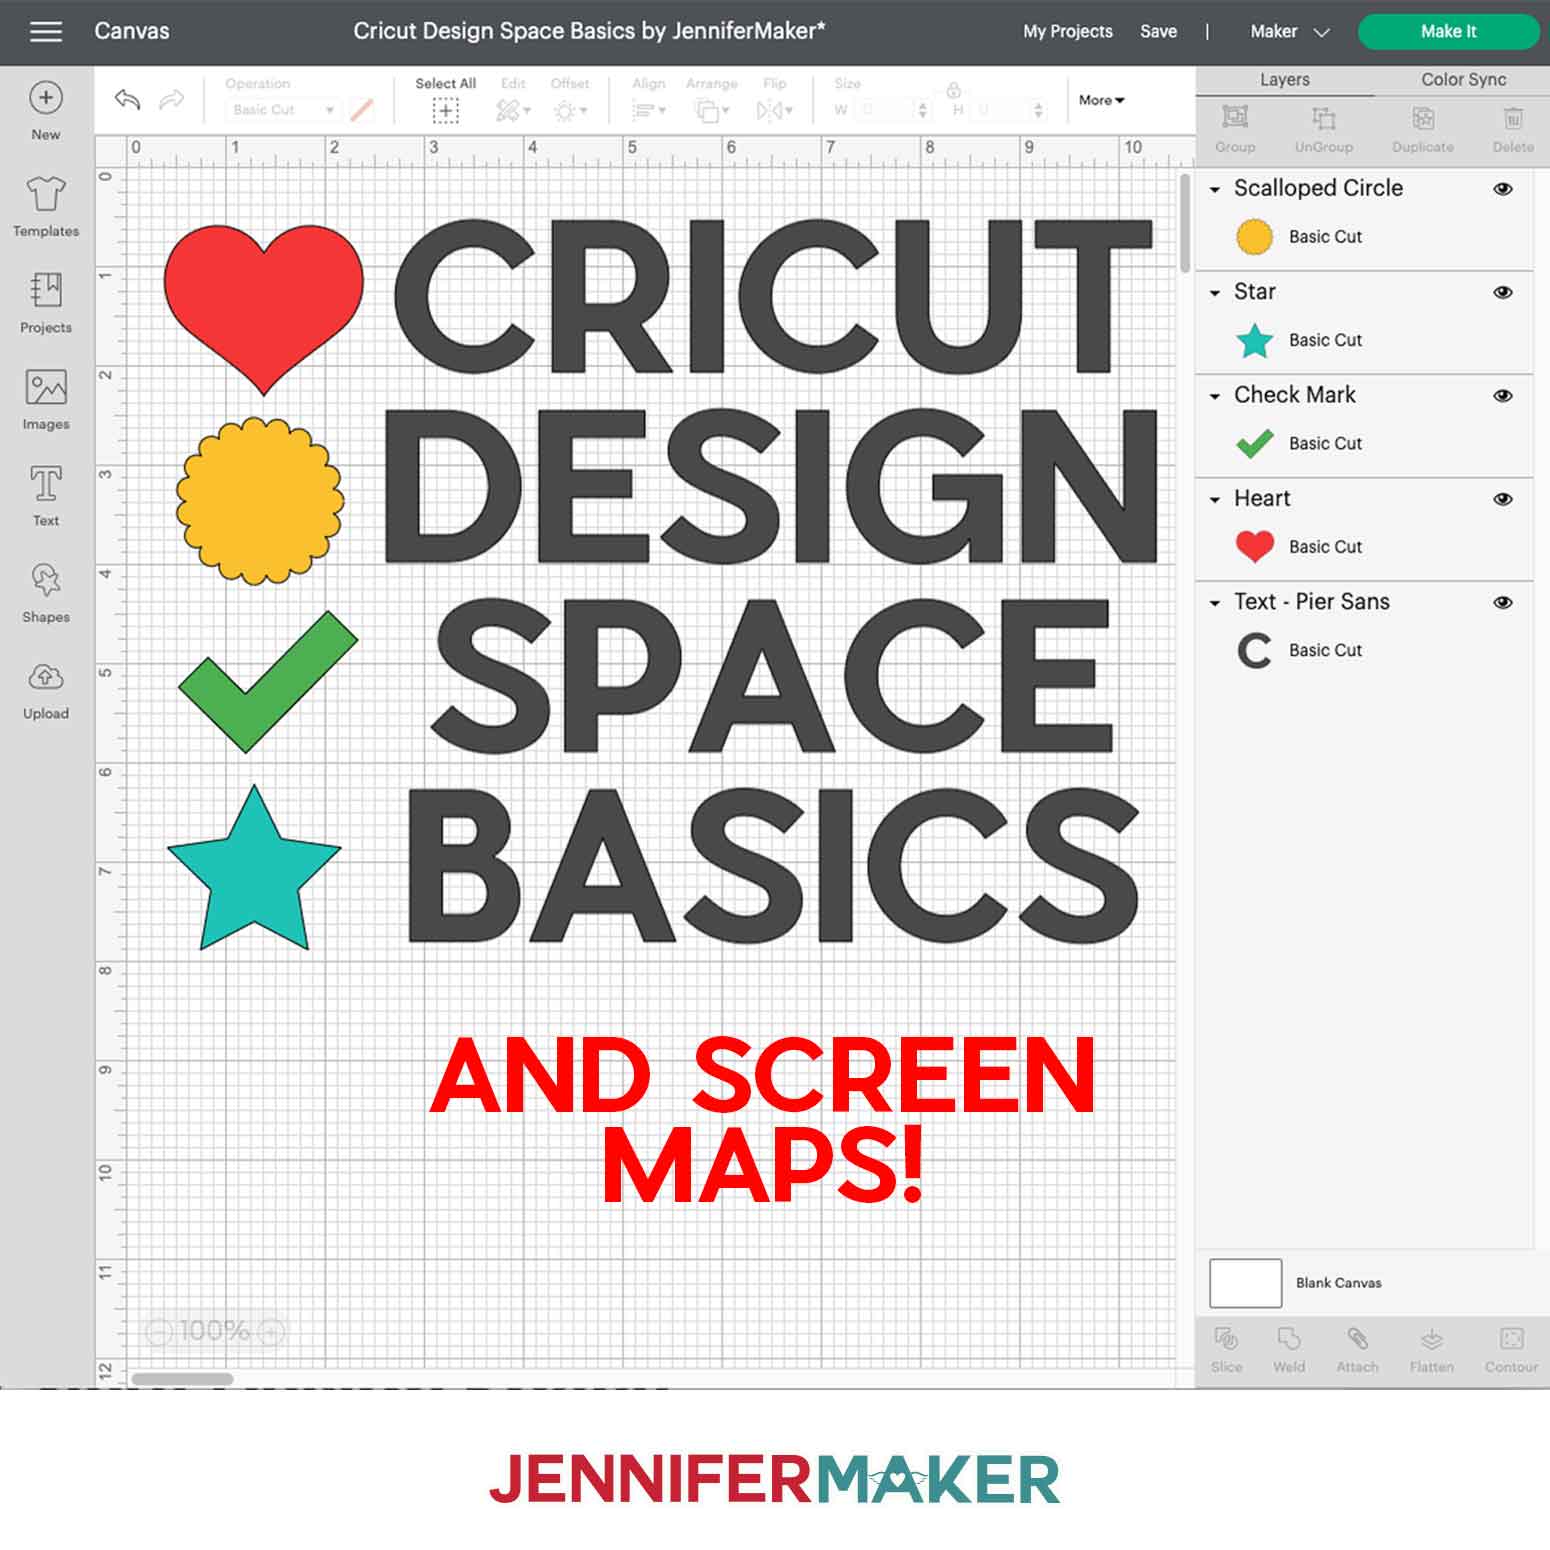
Upload the SVG to Design Space. To do so, click “Upload” on the bottom left of the menu next to your Canvas, then click “Upload Image.”
Tip: If you're not sure how to upload an SVG cut file to Cricut Design Space, watch this helpful video training series I made. If you're on an iPhone or iPad, here's how to download and upload SVG files to the Cricut Design Space app.
To add the Floral Heart to your Canvas, select the image in the preview area, then select "Add to Canvas."
You can zoom out to see the design by clicking on the minus (-) sign on the lower left.
STEP 2: PREPARE YOUR DESIGN FILES
This is what my Floral Heart SVG file looks like when uploaded to Cricut Design Space.
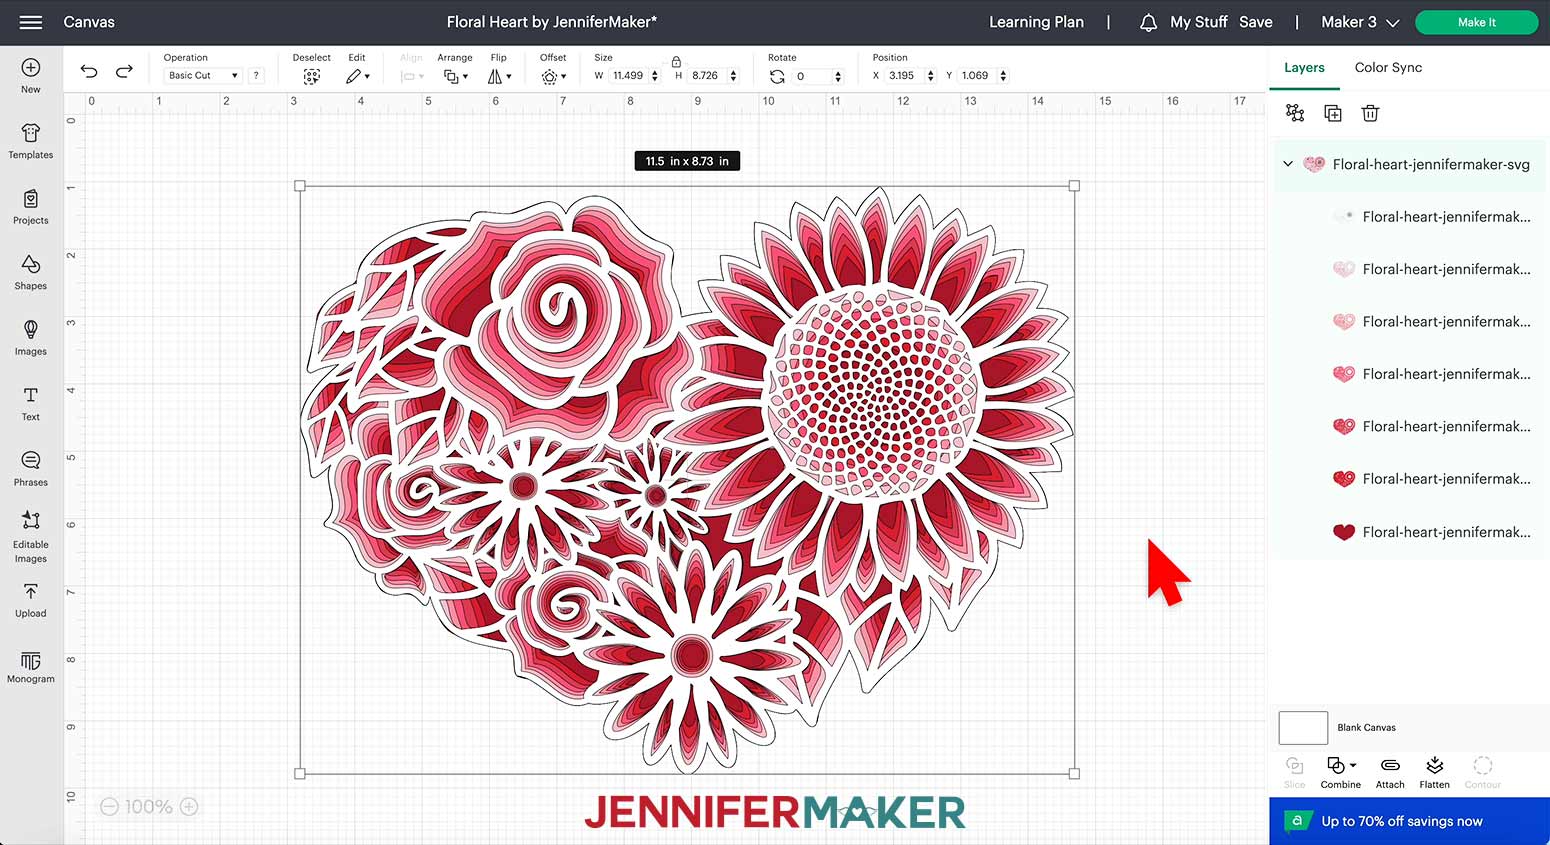
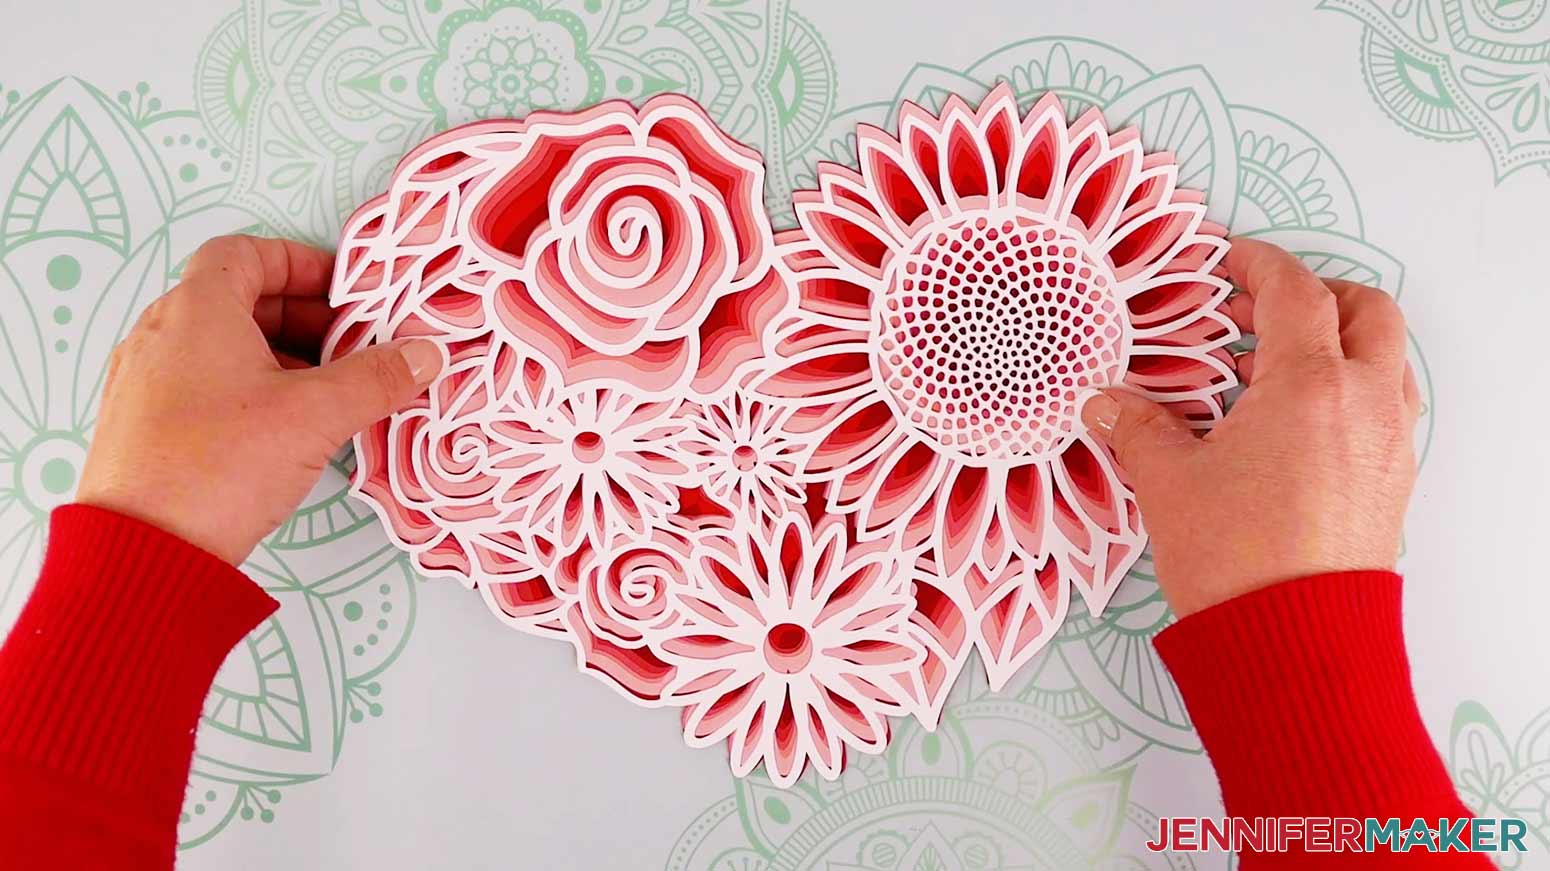
The design is set up to make one Floral Heart approximately 11.5” wide by 8.73” tall.
Before clicking “Make It,” be sure this size will fit inside your frame or in the space where you intend to display your finished Floral Heart.
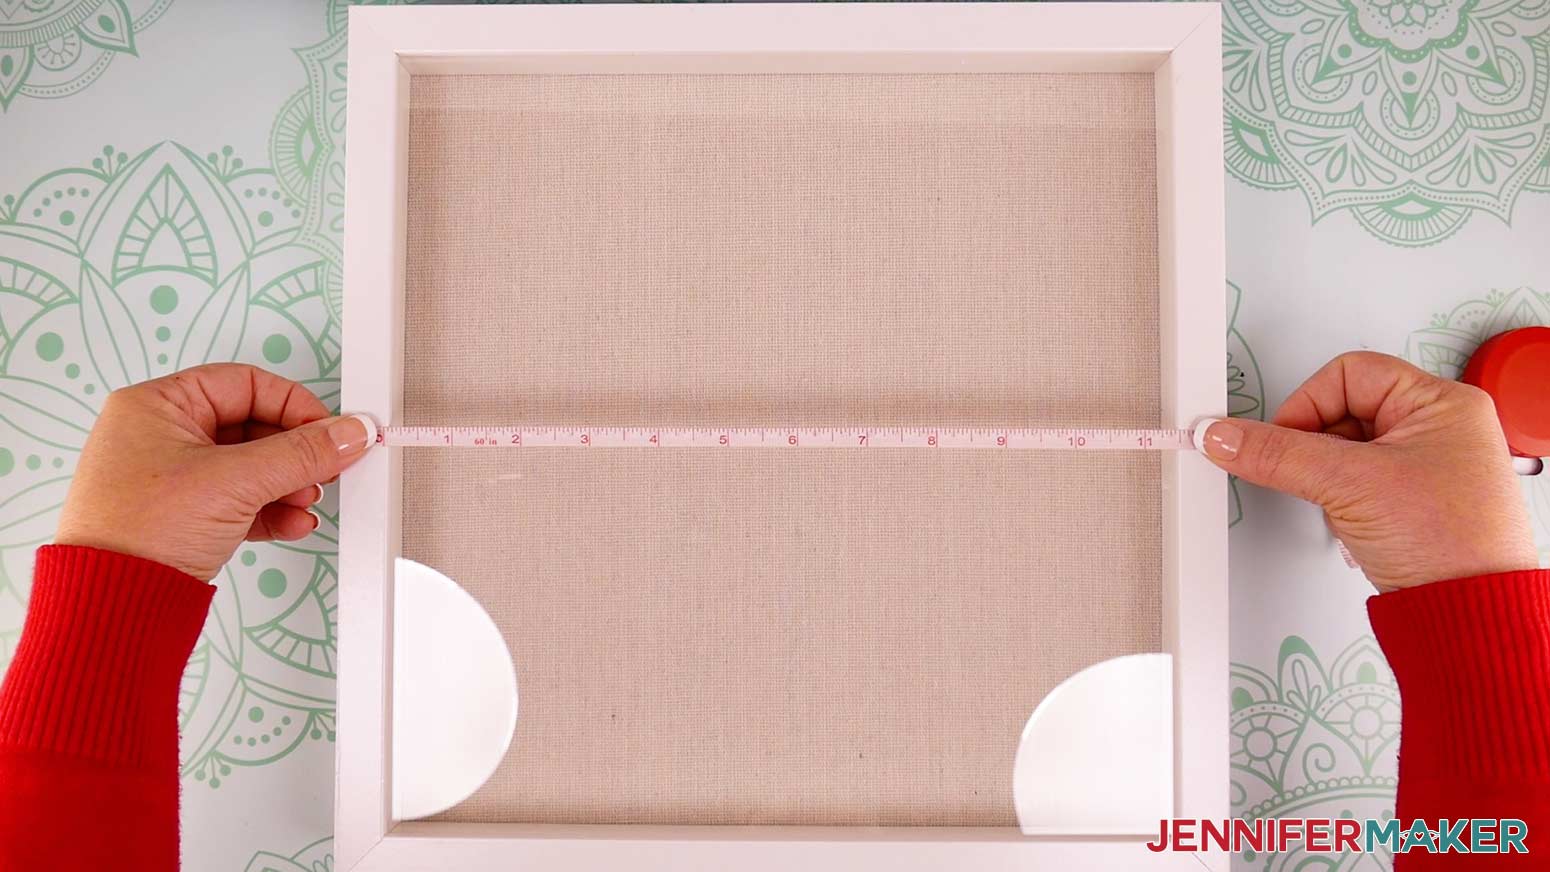
Since I'm using a shadow box frame, I need to measure the space inside the frame to see how much room my Floral Heart will have.
Use a ruler or measuring tape to measure from inside one edge of the frame to inside the other edge.
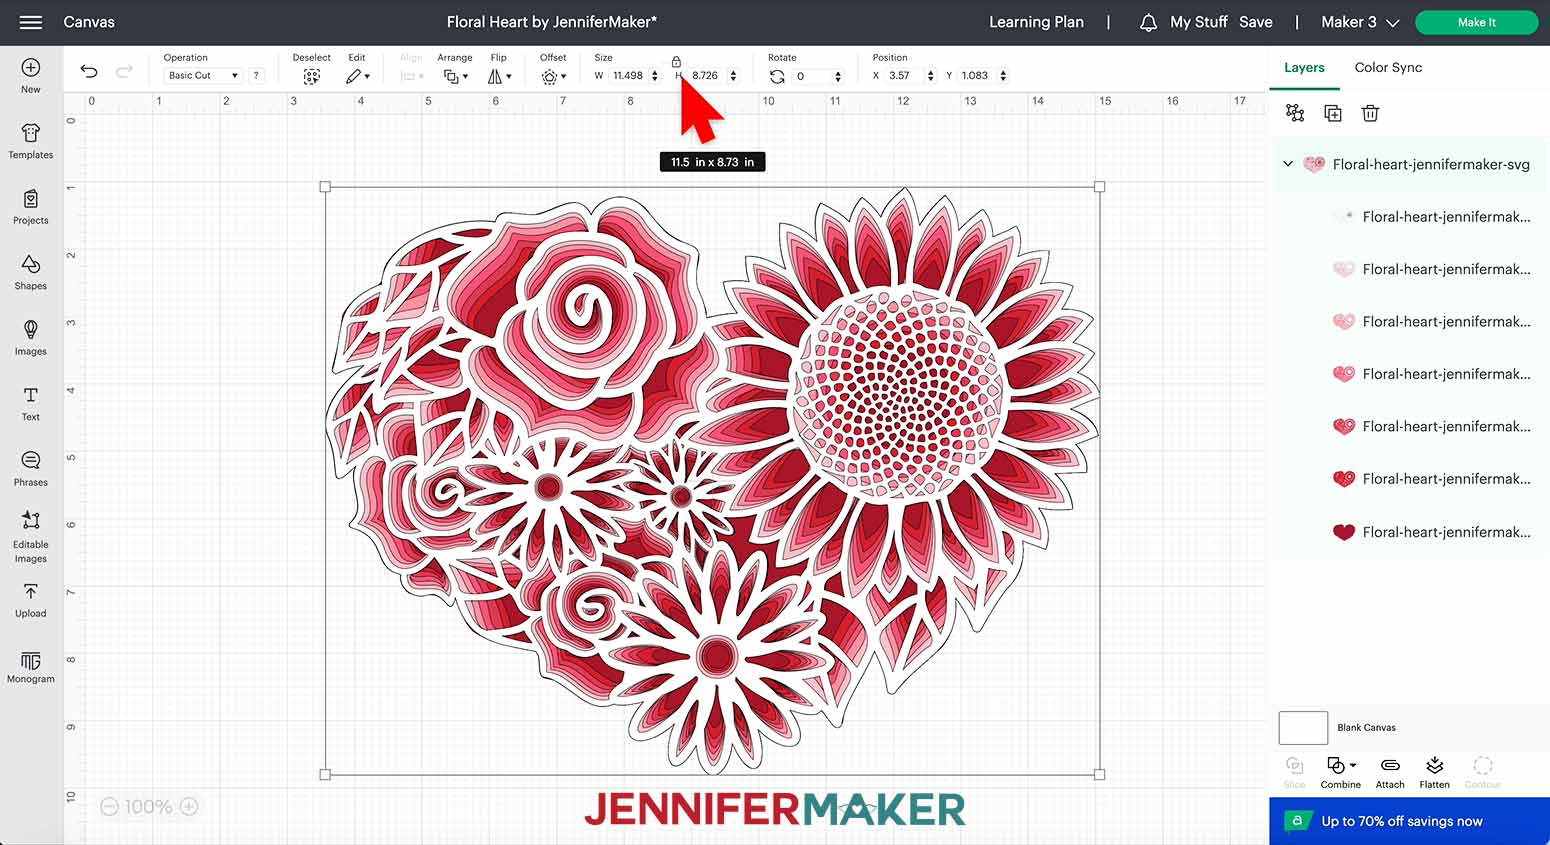
I do not recommend adjusting this design to a smaller size due to the intricate cuts required to produce the offset appearance inside the layers. If the design is too big for your chosen frame or display area, I recommend selecting a different frame or a different piece of art for your project.
If you decide to change the size, be sure to select all the layers and type in the new measurement for the width in the size box at the top of the Canvas while making sure the lock icon is closed.
Once the Floral Heart is the right size, it is ready to cut!
STEP 3: CUT THE HEART LAYERS
Check that the right machine is listed in the top corner, then click "Make It!"
If you are prompted about how you will load your materials, select "On Mat" and 12" x 12". Then click the green Confirm button.
Your design will appear on seven different mats that are marked with the color of each layer.
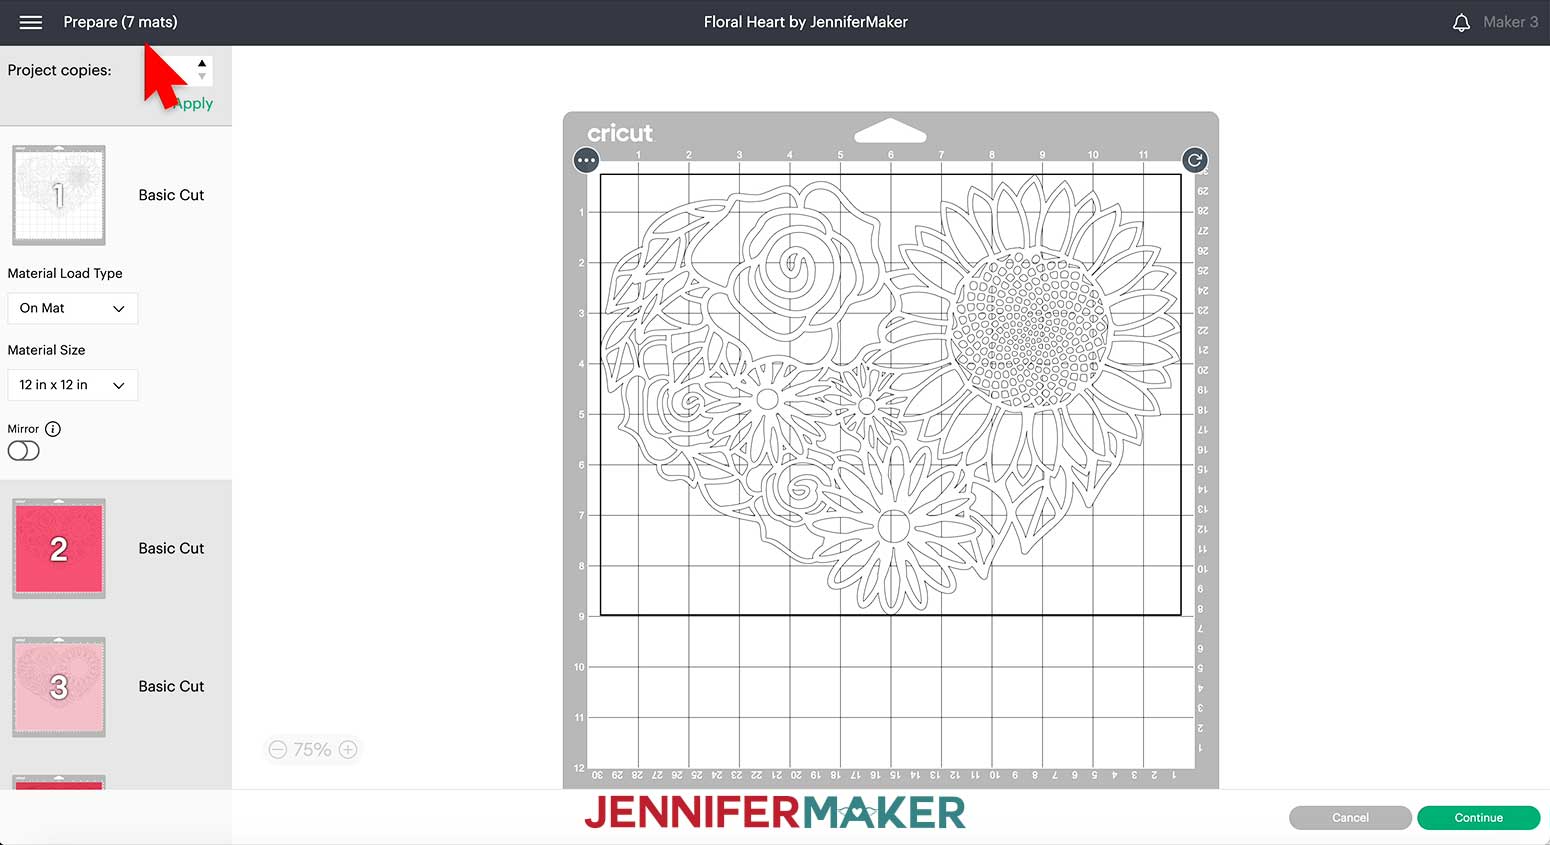
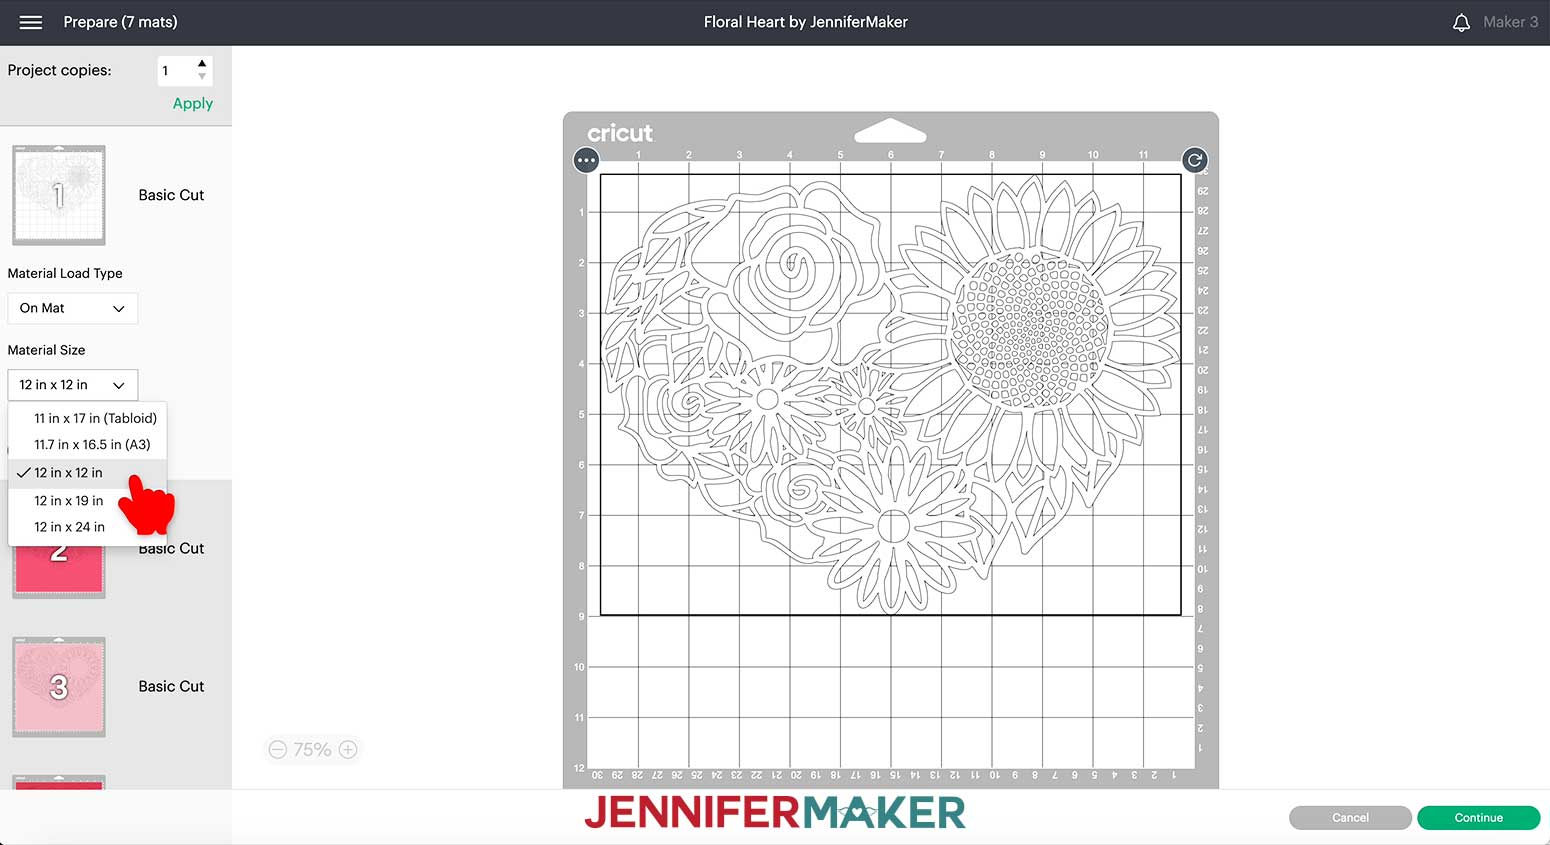
Make sure the correct Material Size is selected for each mat. This design is large so it needs 12” x 12” cardstock.
Leave “Mirror” turned off and click “Continue”
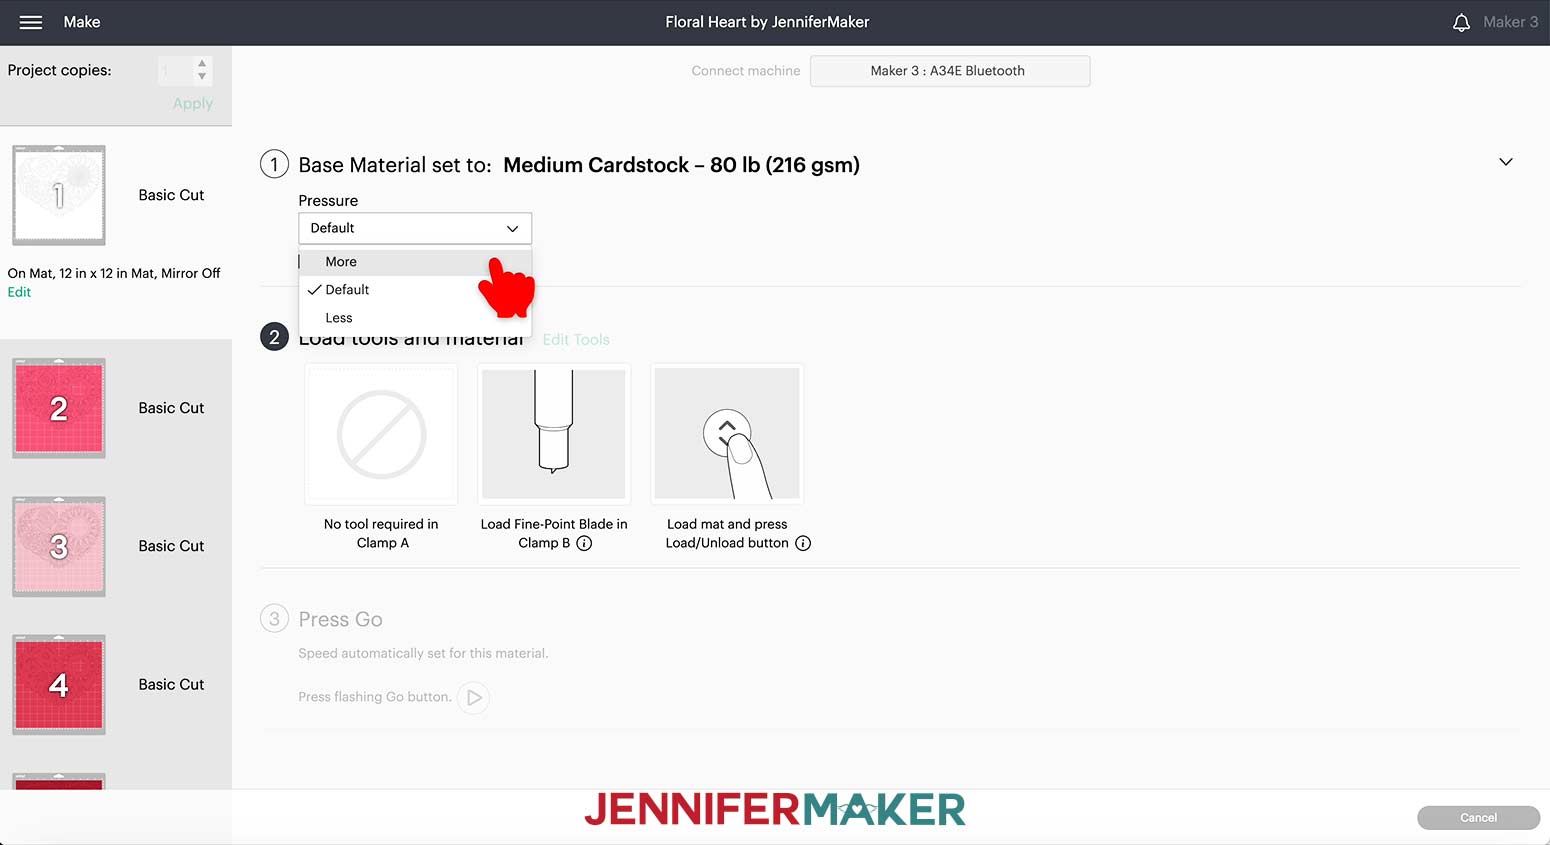
On the “Make” screen, select the cutting settings for each mat. Sometimes, papers of the same weight have different textures and need slightly different settings or tools. I used 80 lb cardstock to make my Floral Heart to give it more structure, but the white and colored, textured papers cut differently.
For the smooth white layer, I used “Medium Cardstock – 80 lb.” with “More Pressure" and a Fine-Point Blade.
I did notice with the slightly textured cardstock that I used for the colored layers, the Fine-Point Blade tended to tear the material, rather than cut it.
The Deep-Point Blade cuts at a different angle than the Fine-Point Blade. This can make a difference when trying to cut thick or textured cardstock because of how the angle of the blade interacts with the fibers of the paper.
So, for the textured paper, I did not change the tool settings that are preselected with "Medium Cardstock - 80 lb" but I did switch the blade in the housing from the Fine-Point Blade to the Deep-Point Blade.
I also changed the pressure to “Less Pressure” to accommodate the slightly different cutting angle.
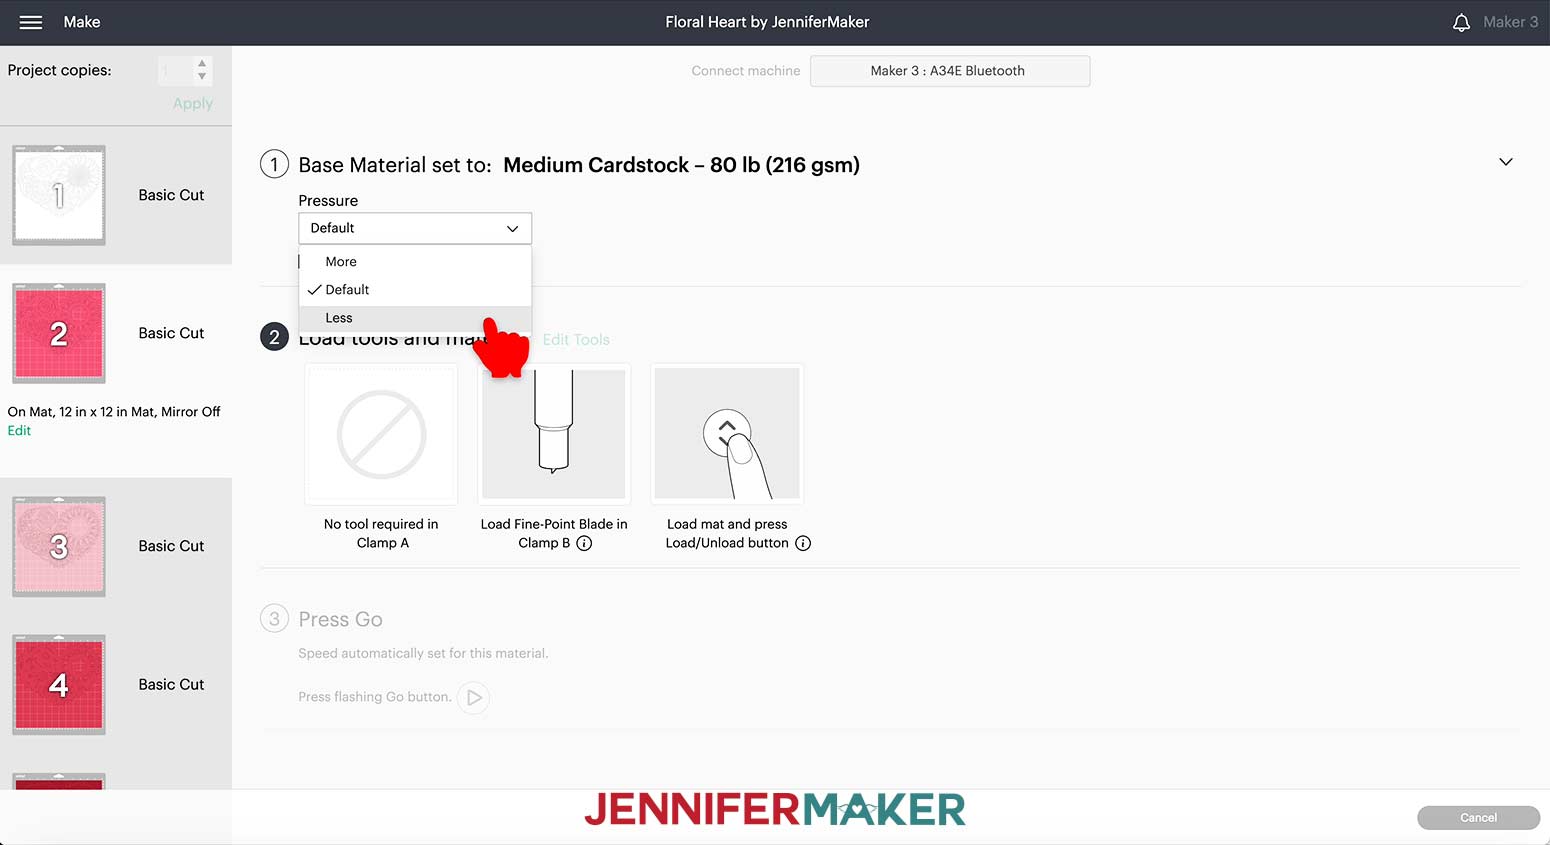
This combination of blade and settings provided a much smoother cut.
Every machine is different, so you may need to test settings before finding one that works correctly for you.
TIP: If you run into any issues cutting your materials, check out my Cricut Tips & Tricks for Cleaner Cuts.
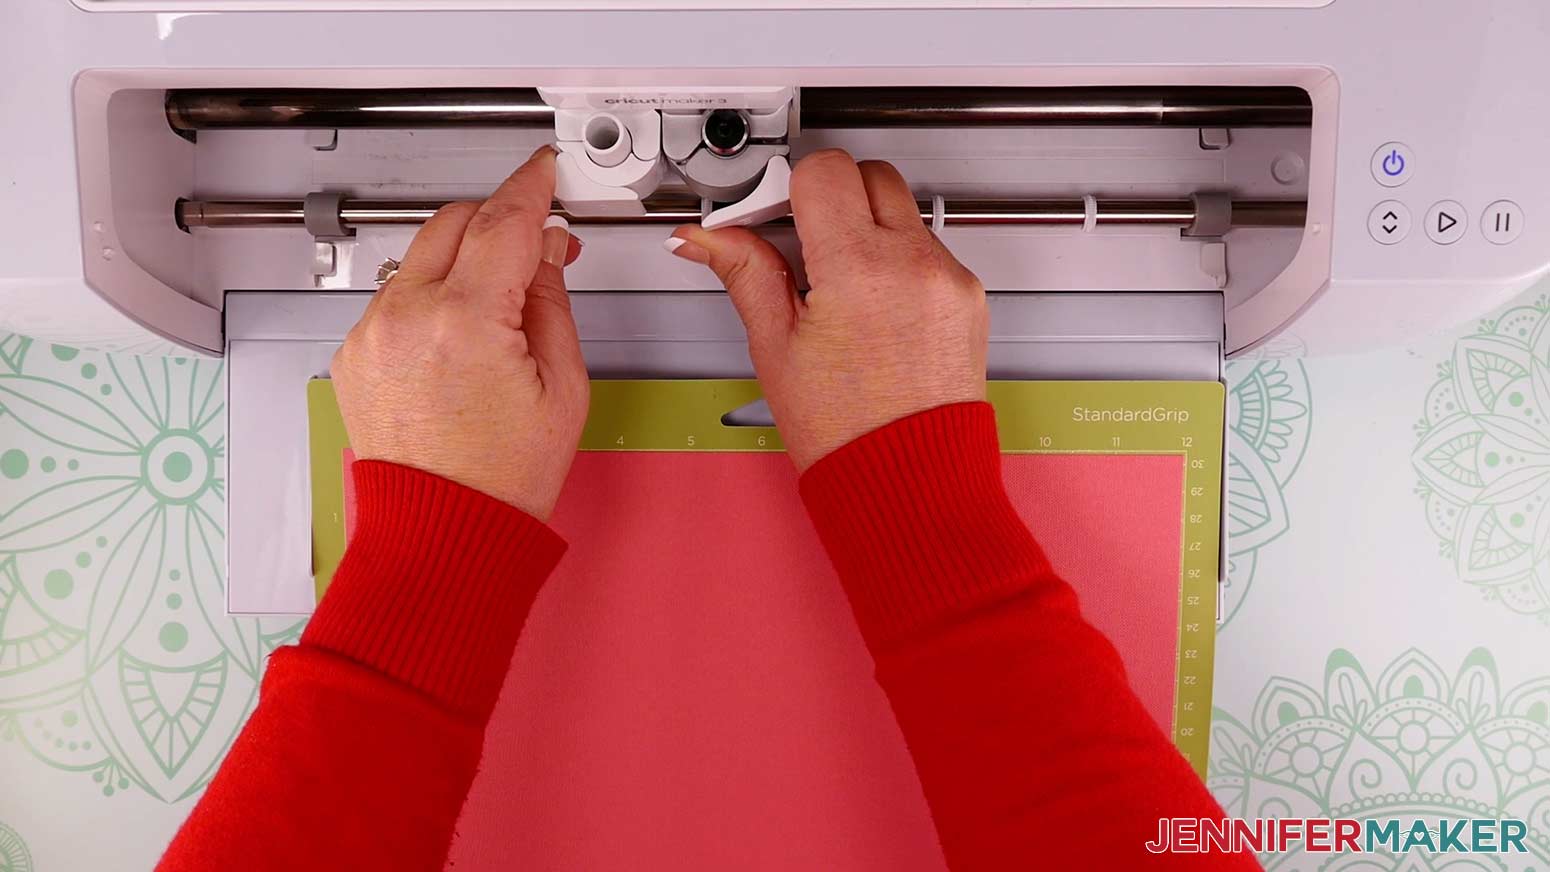
Place the cardstock on your green StandardGrip mat and make sure it has adhered well by pressing it with your brayer.

The mats will cut in layer order from light to dark as long as colors in the file have not been changed.
TIP: If you want more information on how Design Space orders cutting mats, read my article Cricut Mat Order: How Do I cut My Cricut In Order.
Load the mat into your Cricut and press the flashing button to begin.
Once the cutting is complete, and before unloading your mat, check to see if the cut went all the way through. If not, press Start for another pass.
Remove the cut pieces from the mat by turning the mat over and rolling it away from the cardstock. Move slowly and use a spatula to carefully remove the intricate cuts from the mat.
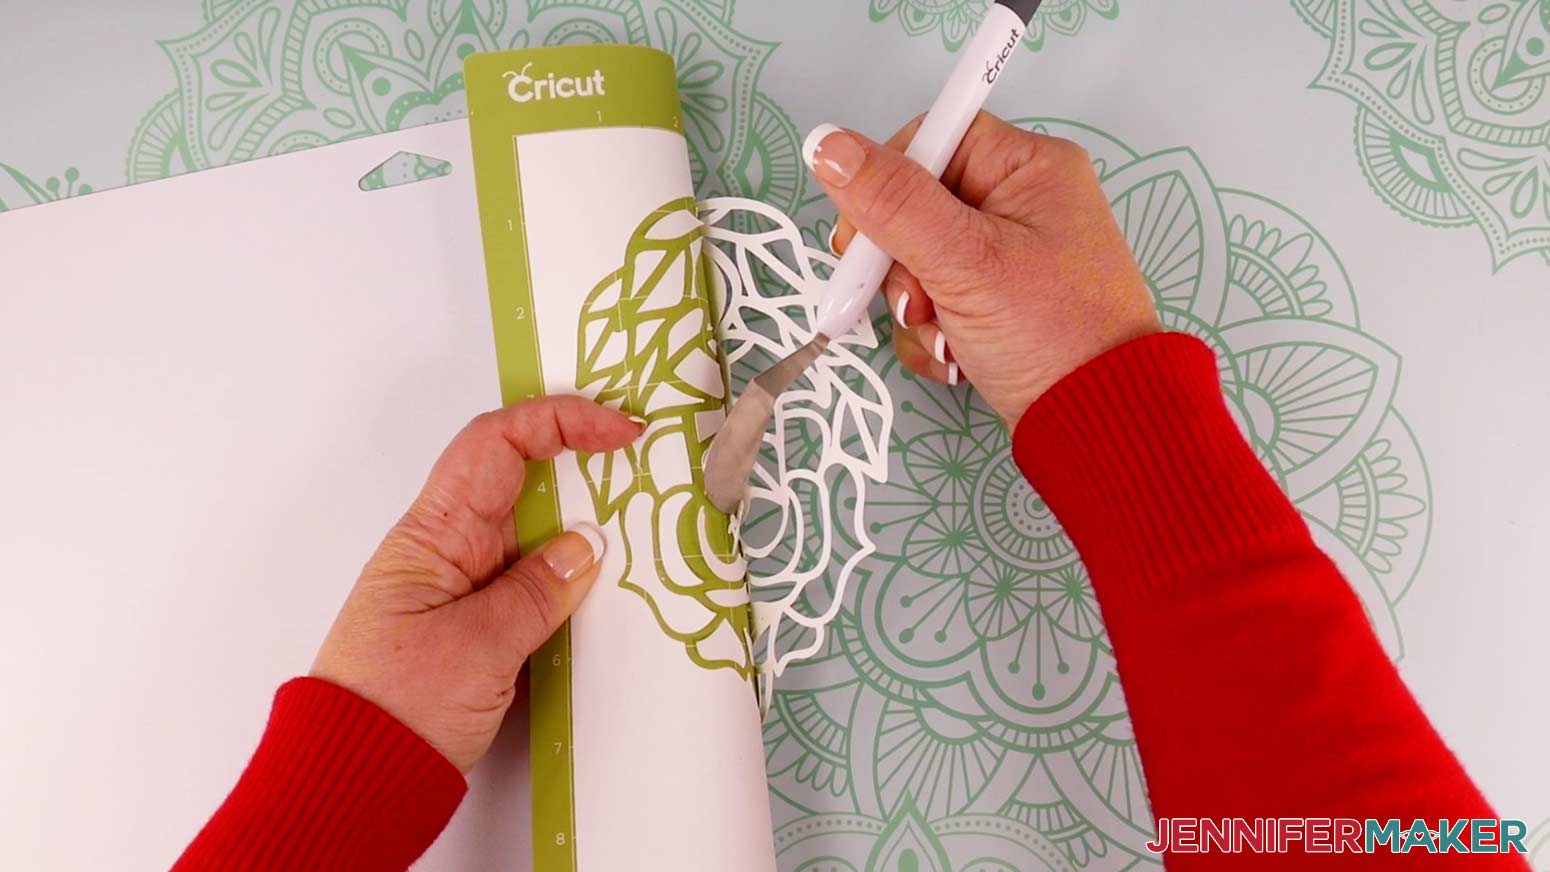
A weeding tool may be useful to poke out little pieces of cardstock that do not remain behind on the mat after the cut piece is removed.
Continue to print, load, cut, and remove mats until all the pieces are cut.
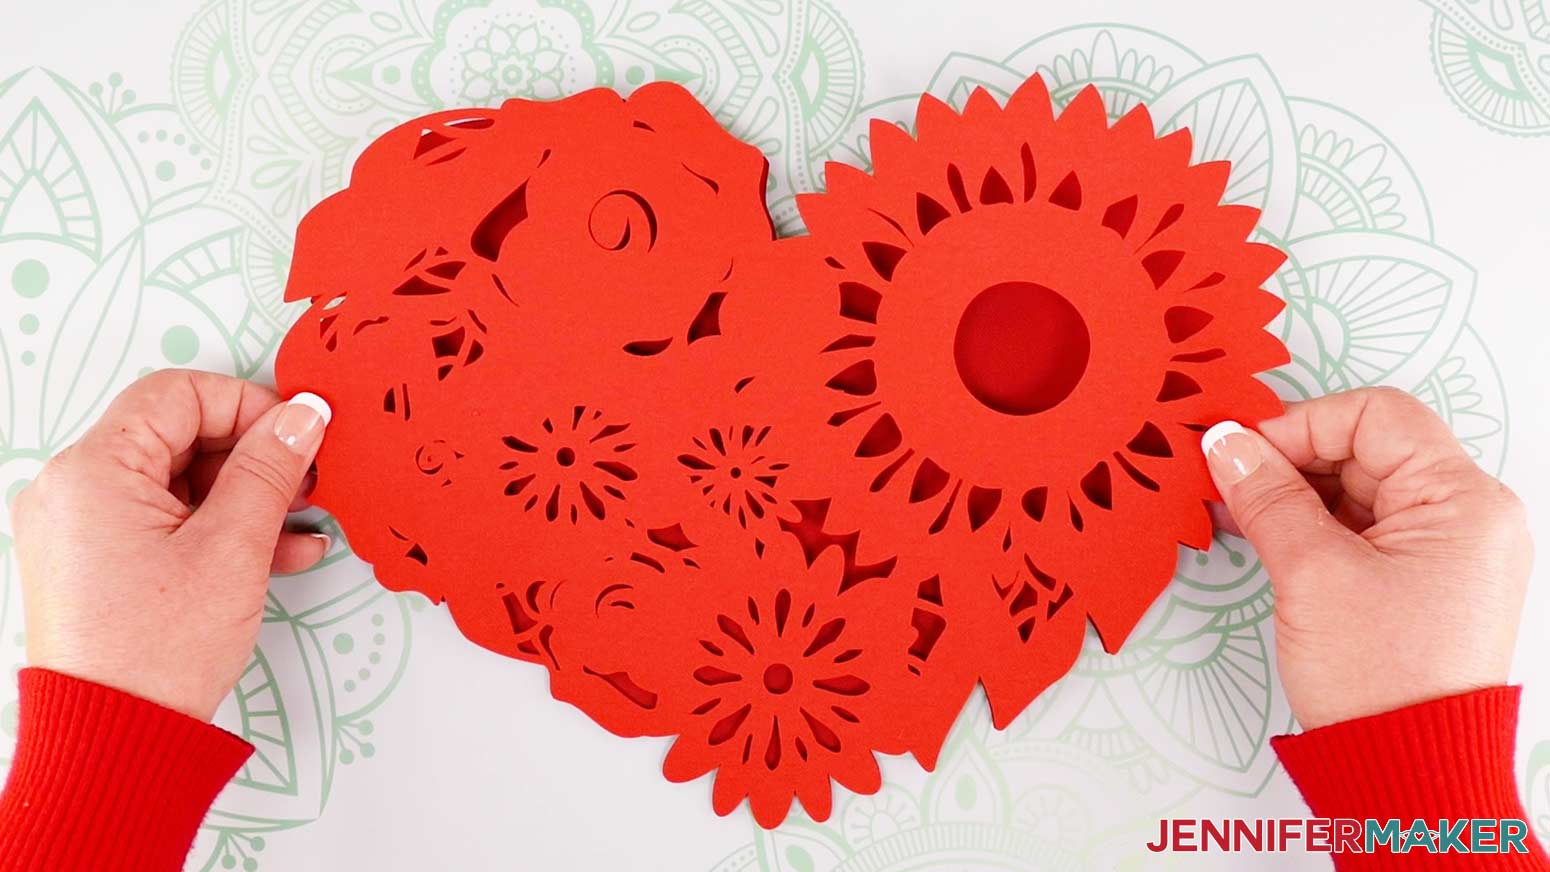
STEP 4: ASSEMBLE THE HEART MANDALA
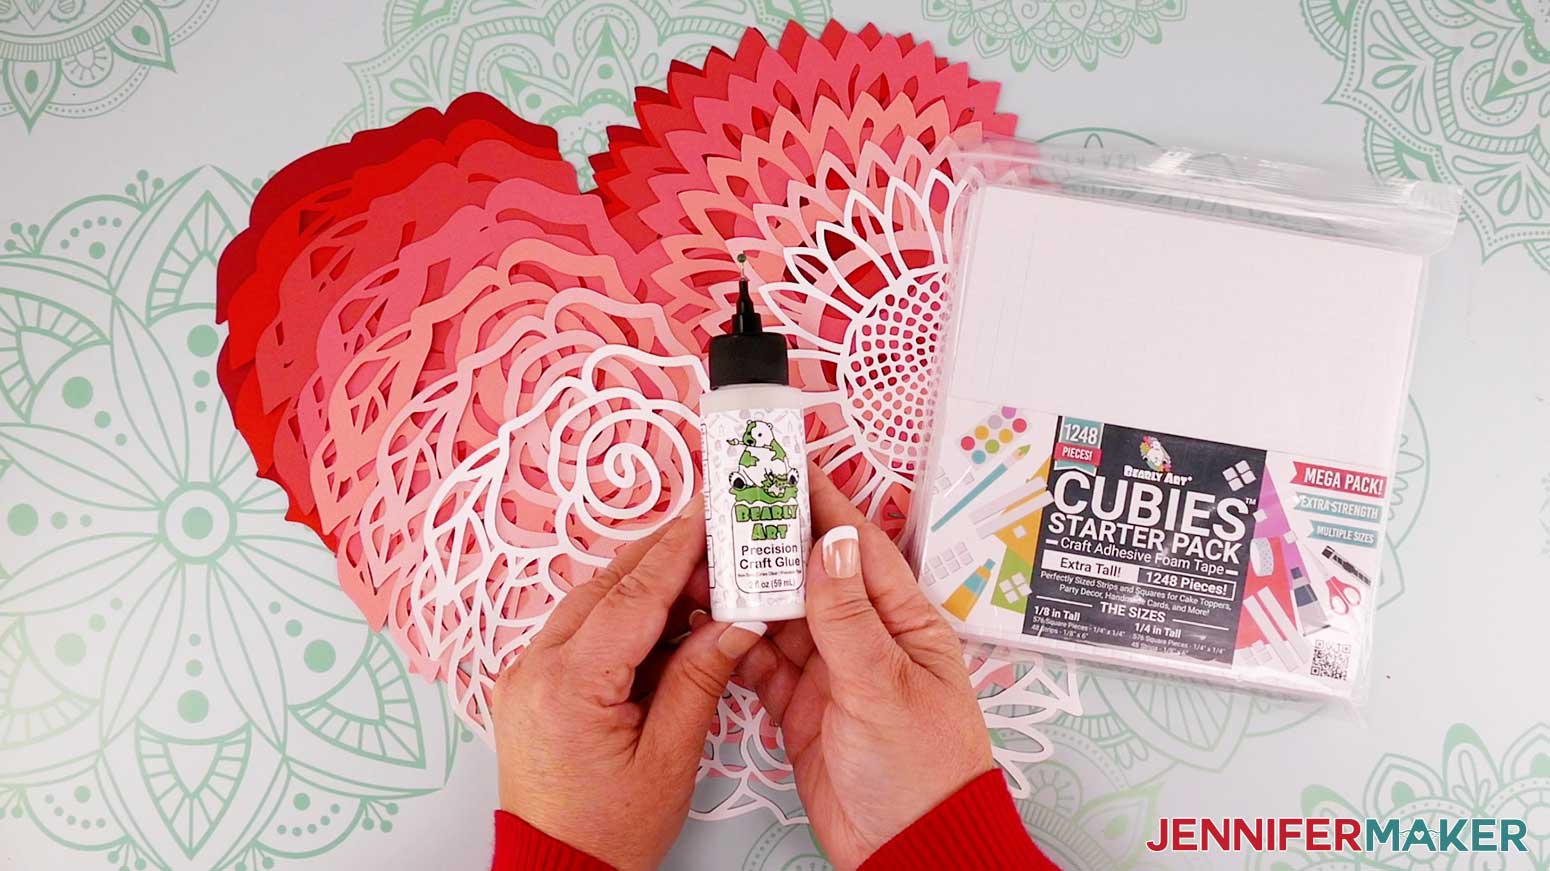
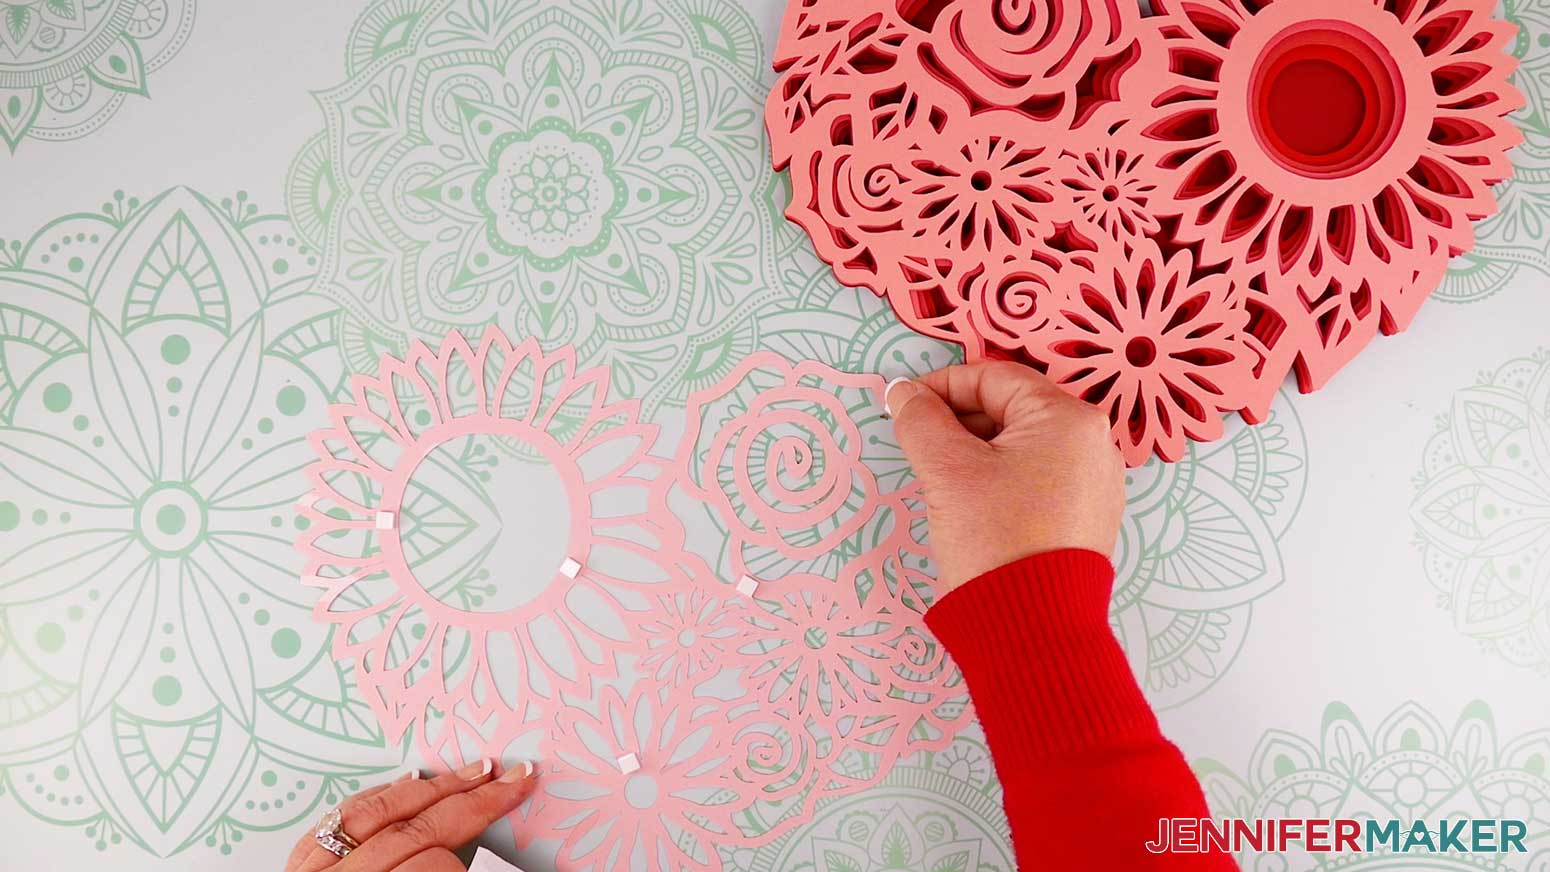
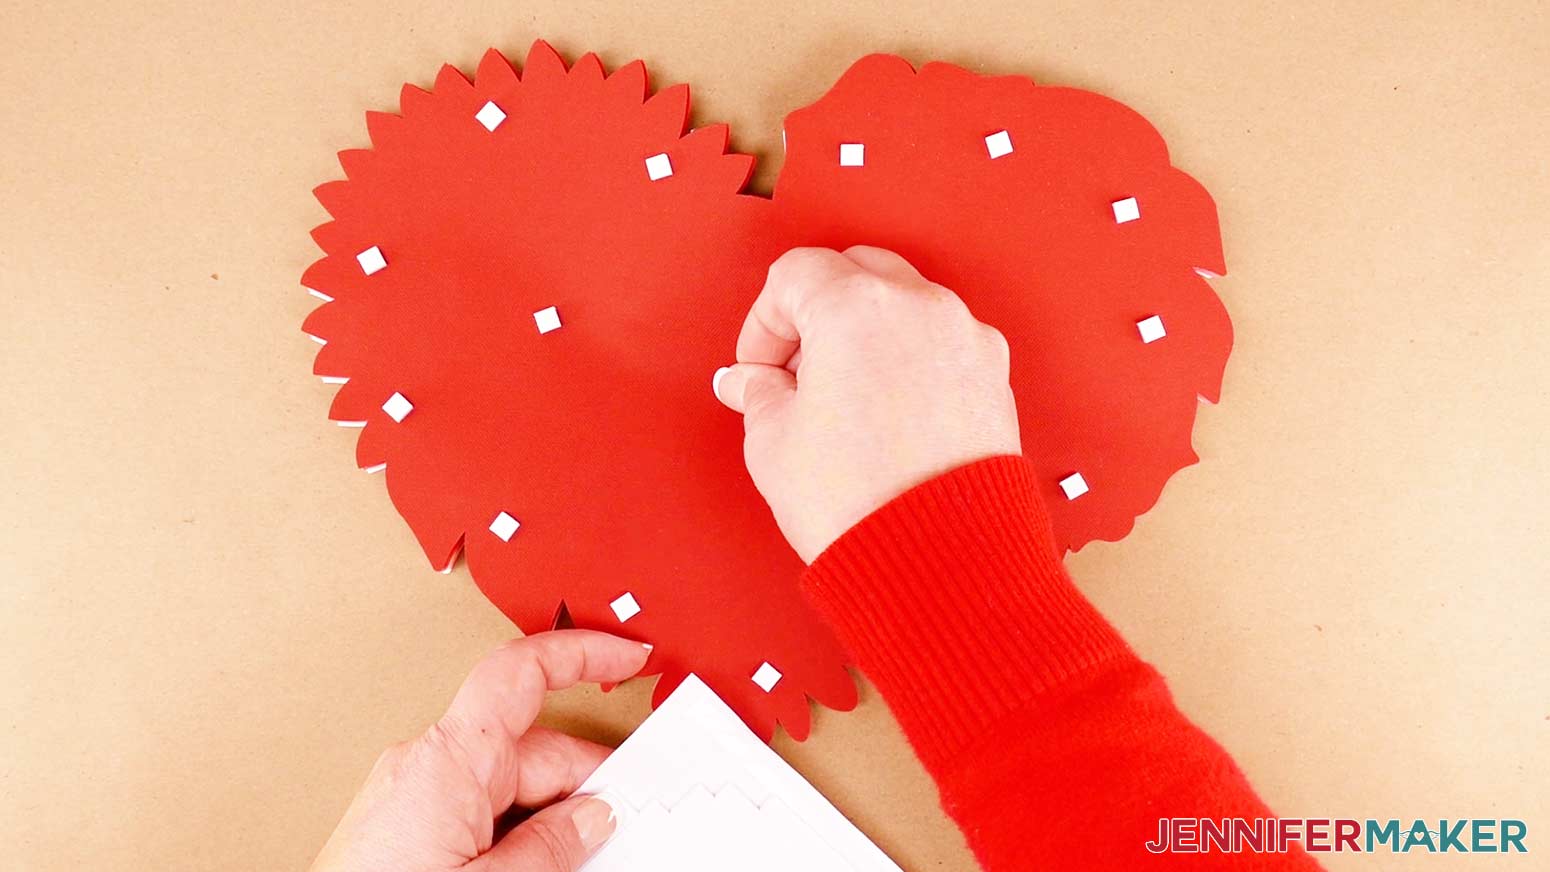
The Floral Heart design consists of seven layers. Gather your cut pieces and foam adhesive. (Alternatively, you can use craft glue if you wish your complete Floral Heart to be less dimensional, but the steps will be the same - just substitute glue where I say foam adhesive!)
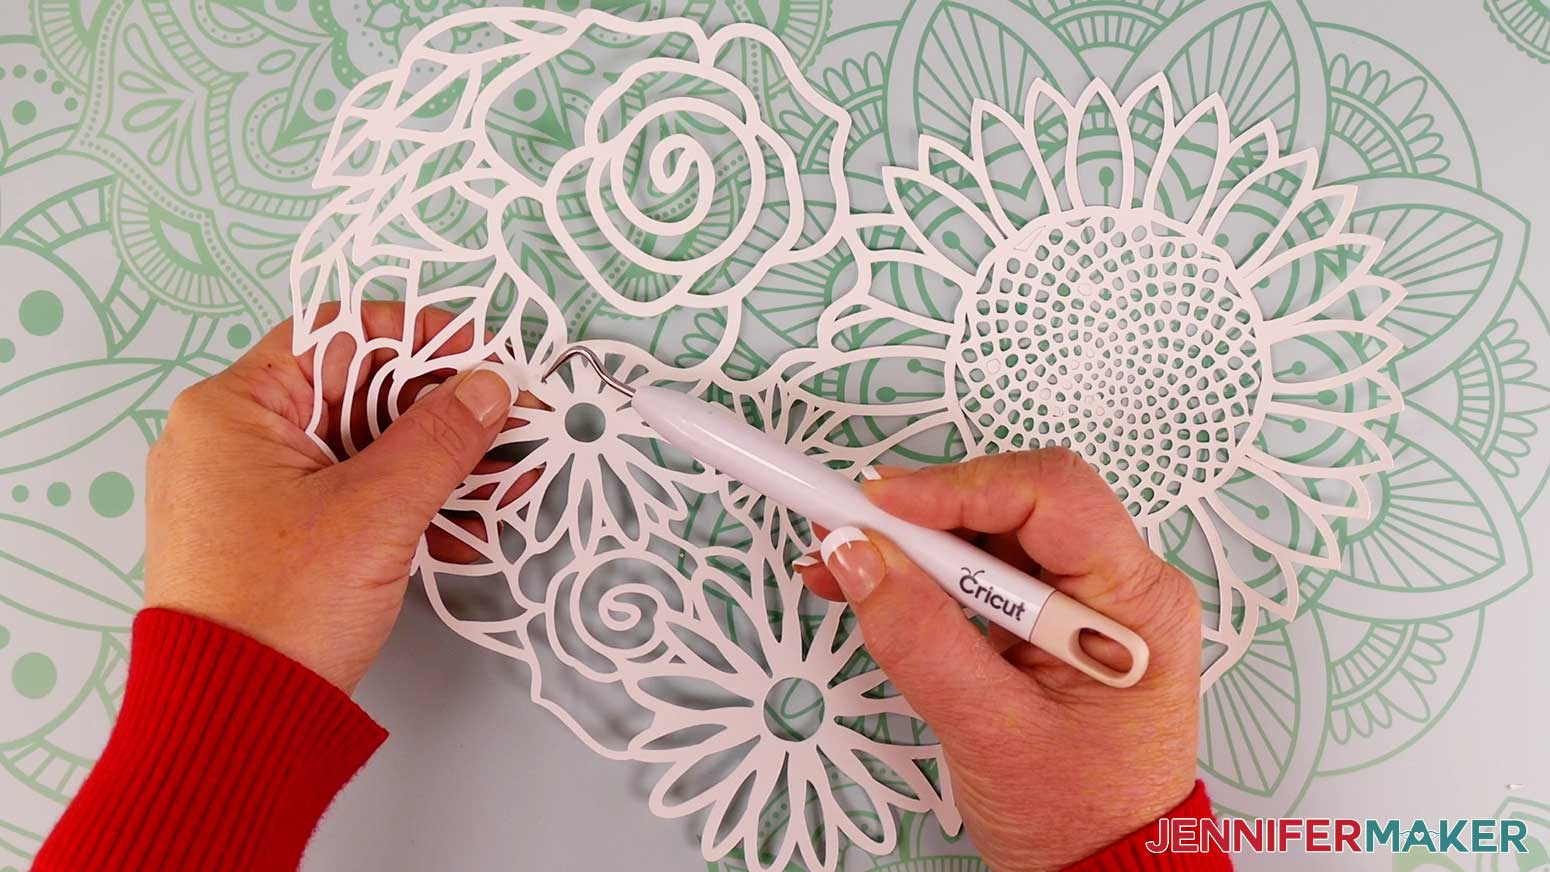
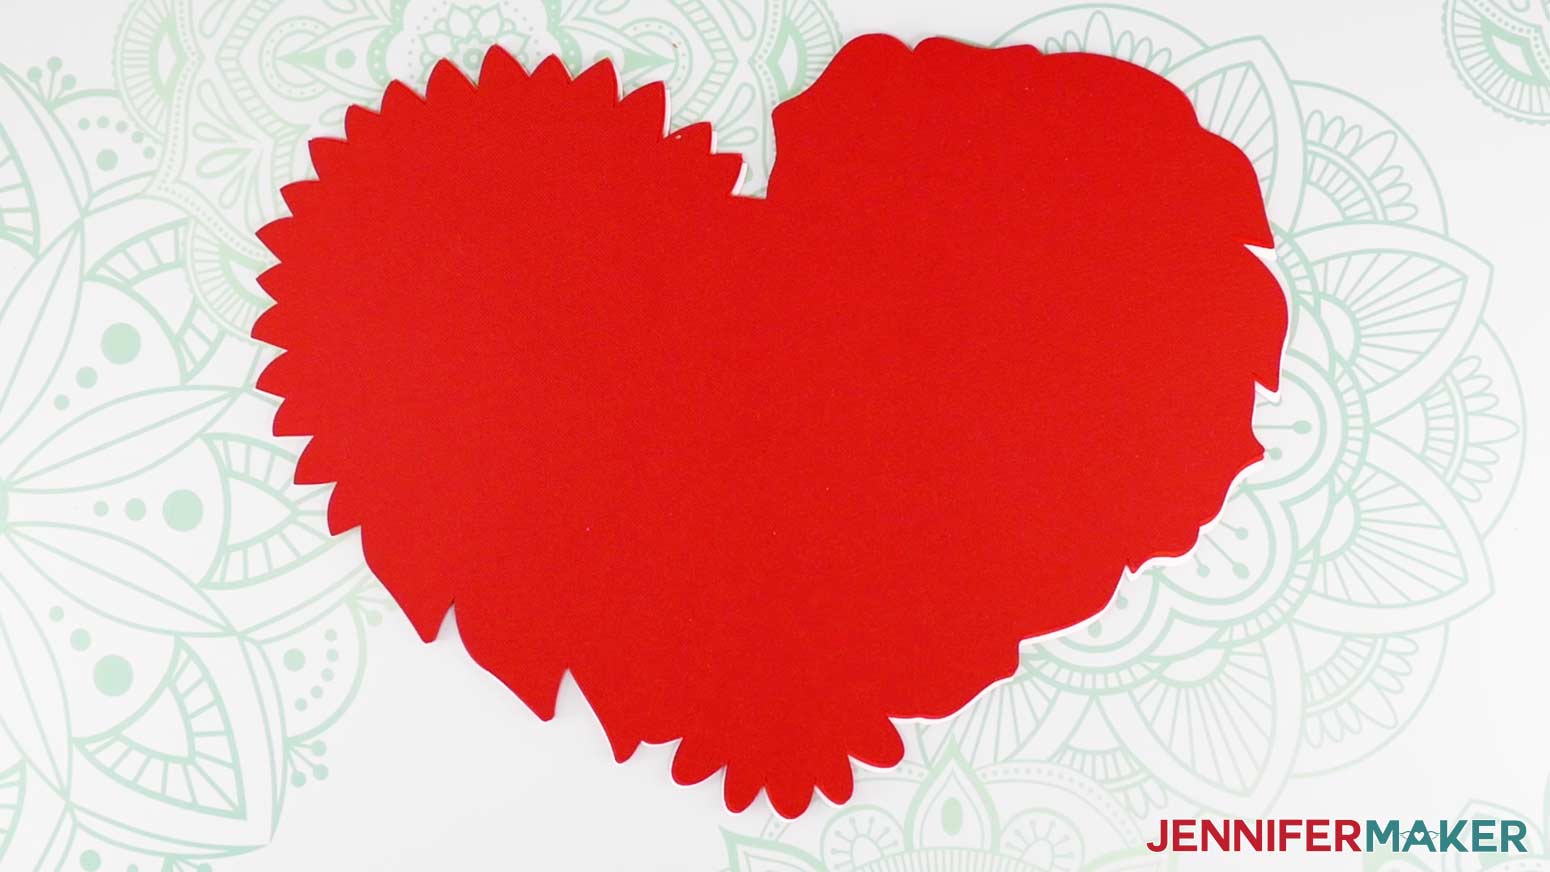
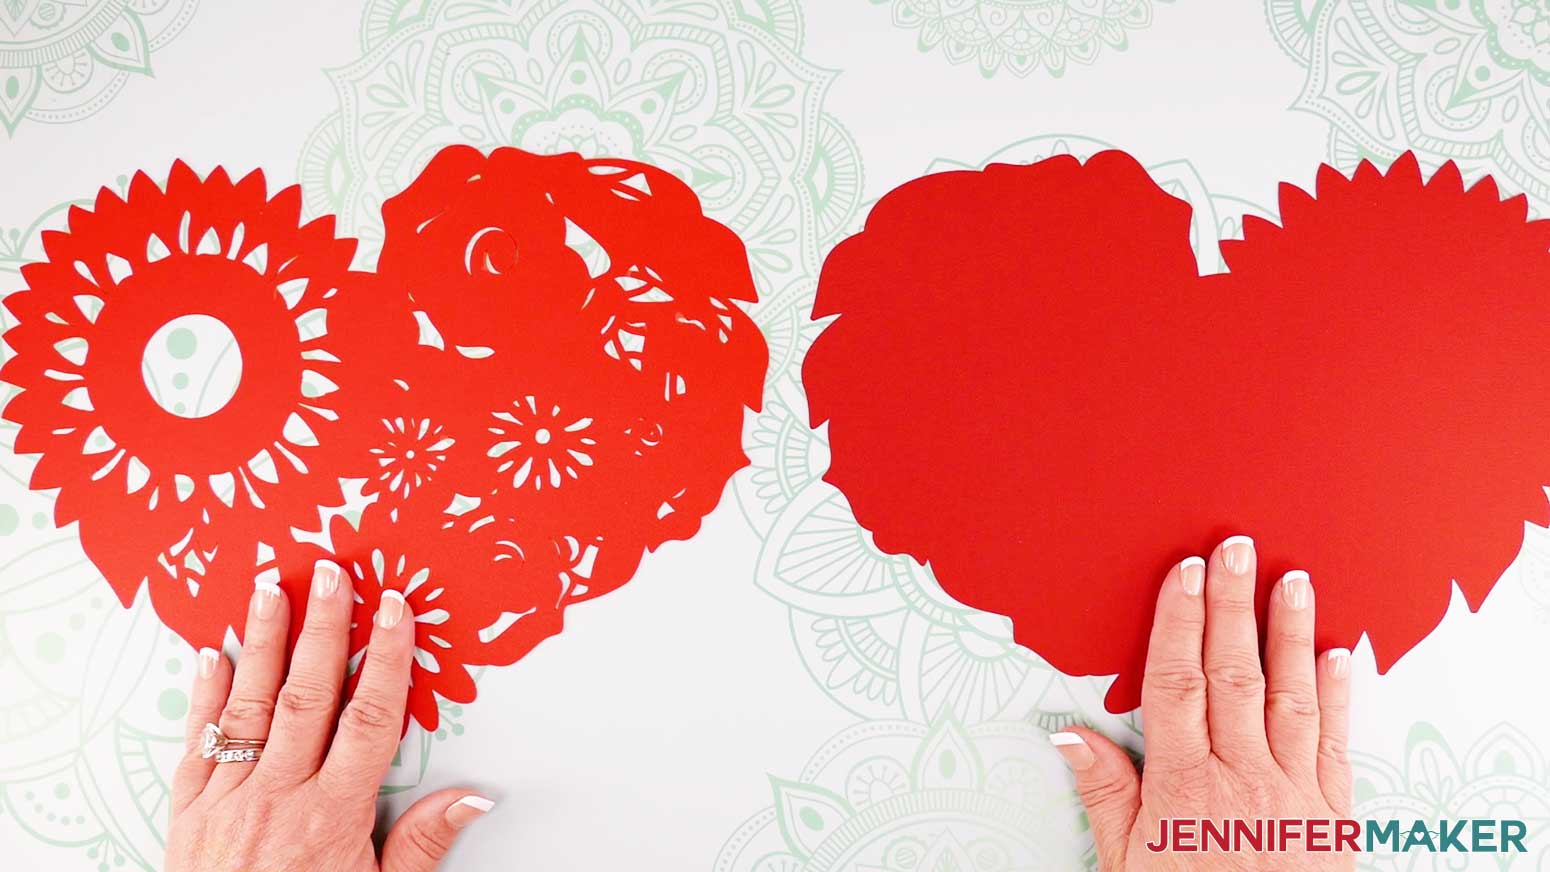
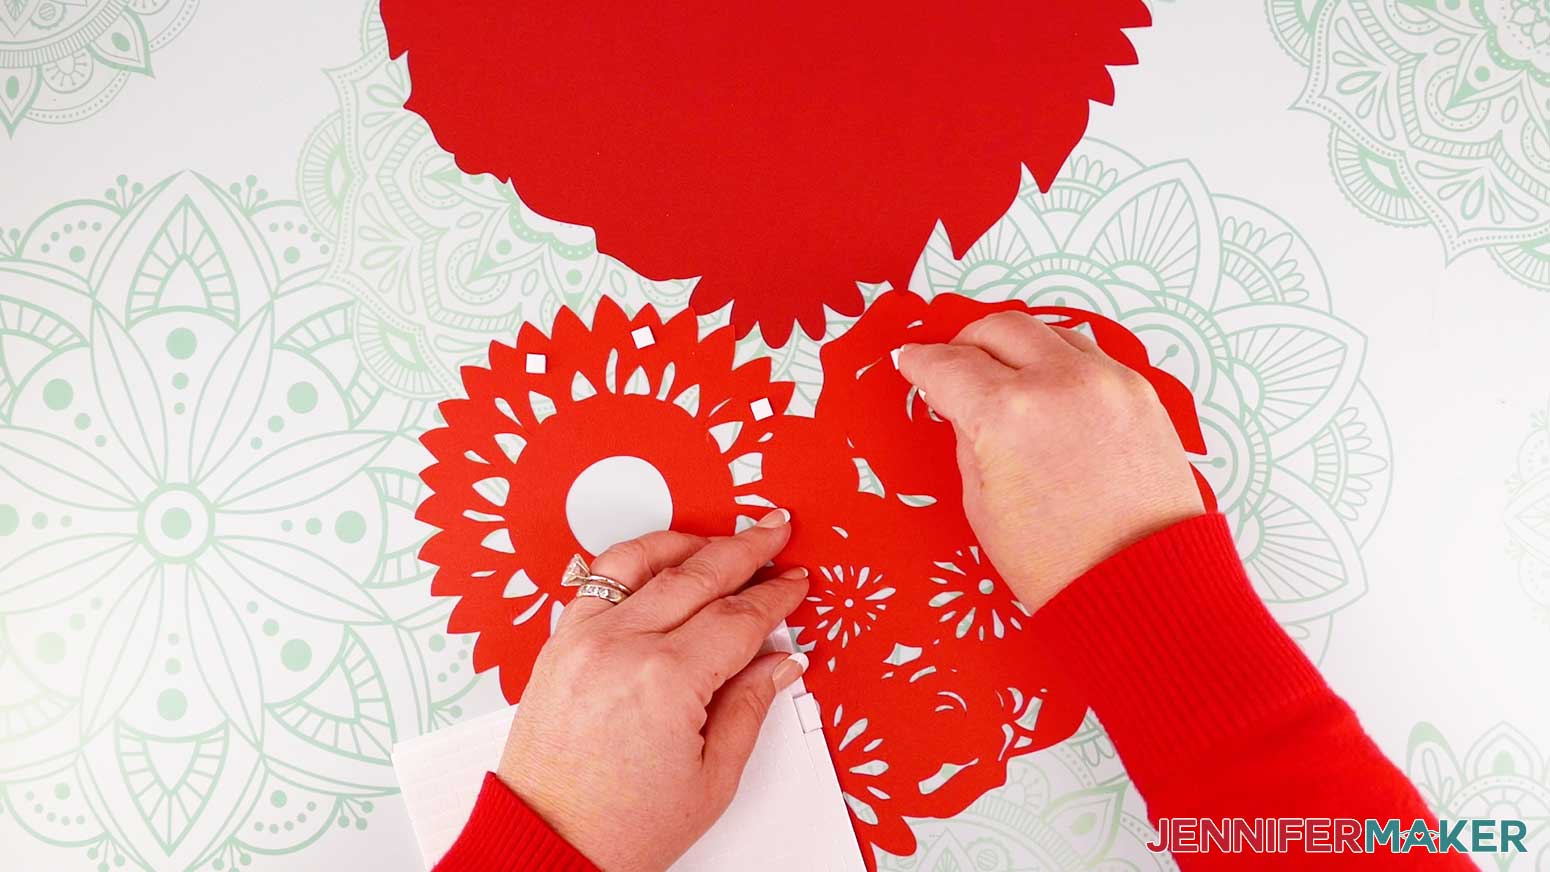
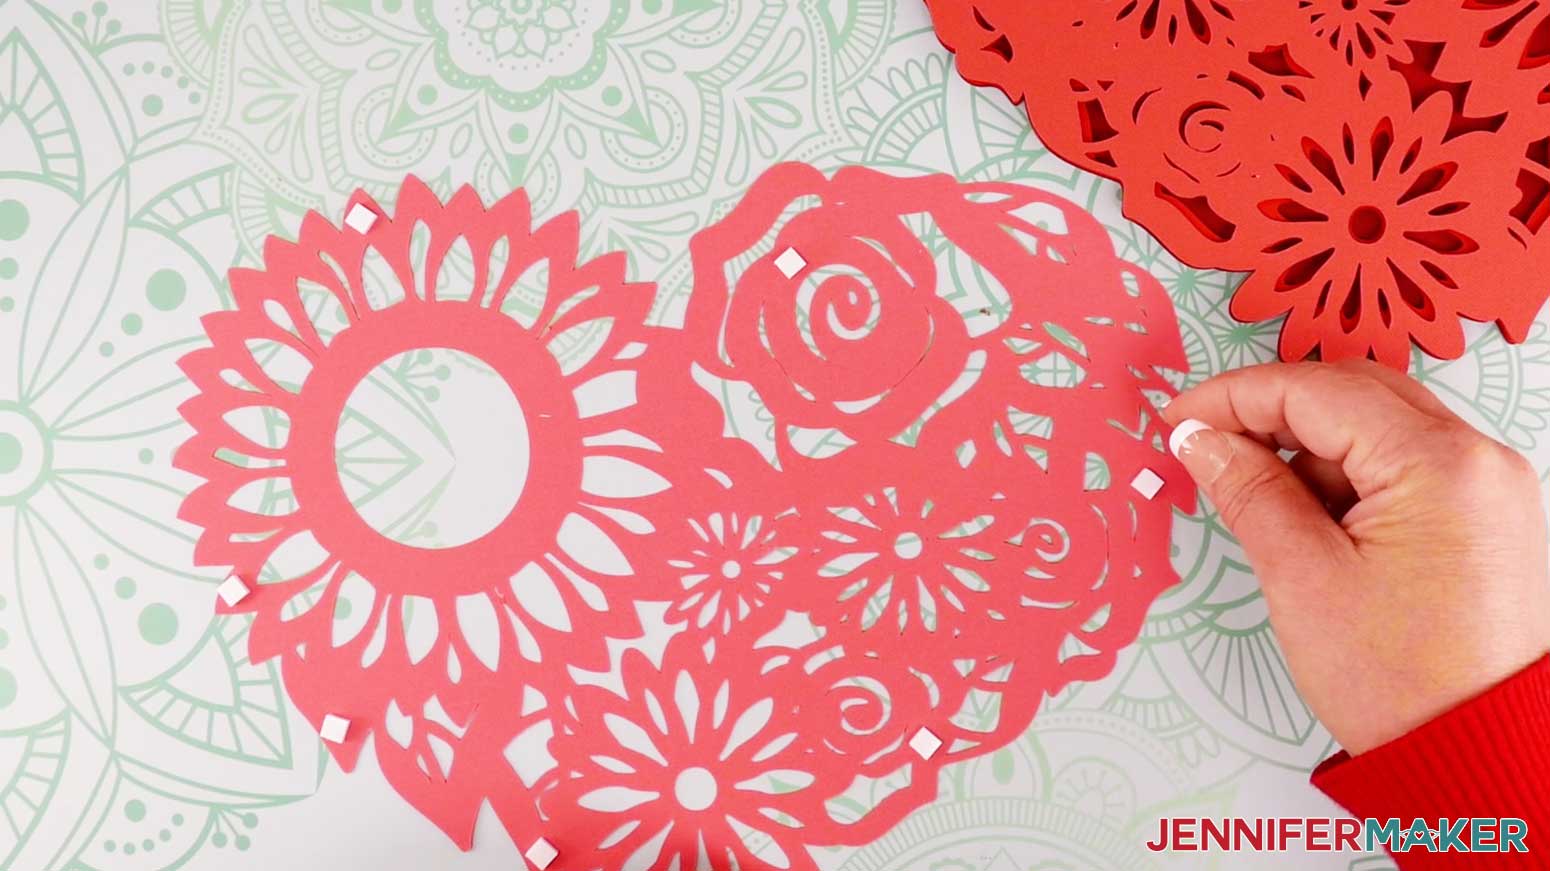
Stack the layers in the correct order from bottom up. The solid piece will be the bottom and each layer up will have more cuts. The top layer will be the most intricately cut piece.
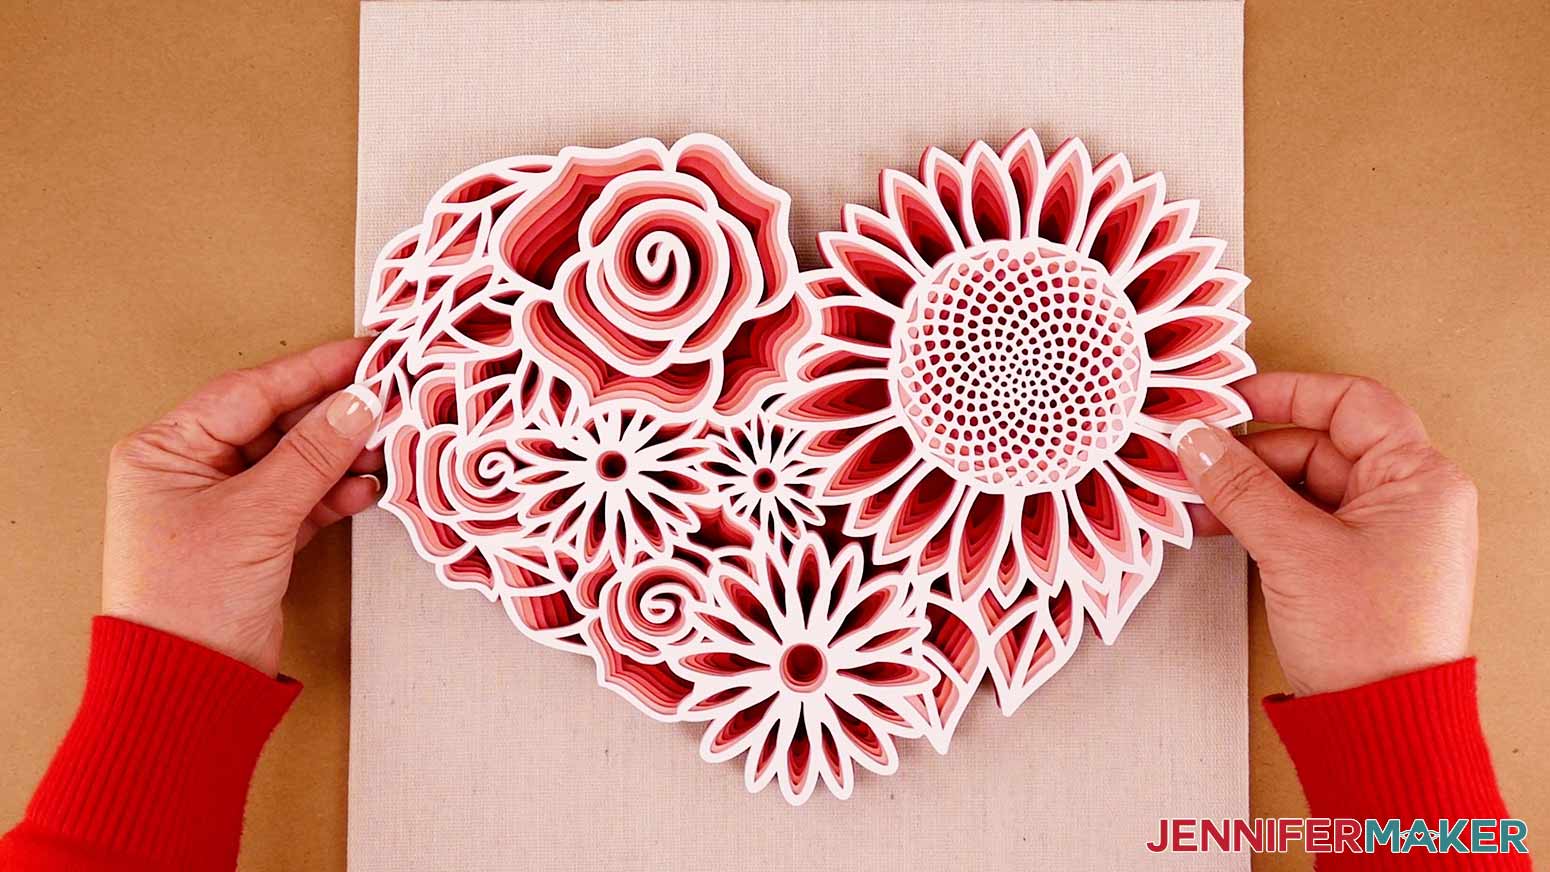
To make sure the layers are ordered correctly, remove the top layer and look inside the center of the sunflower. You will be able to see six layers all moving in to the center.
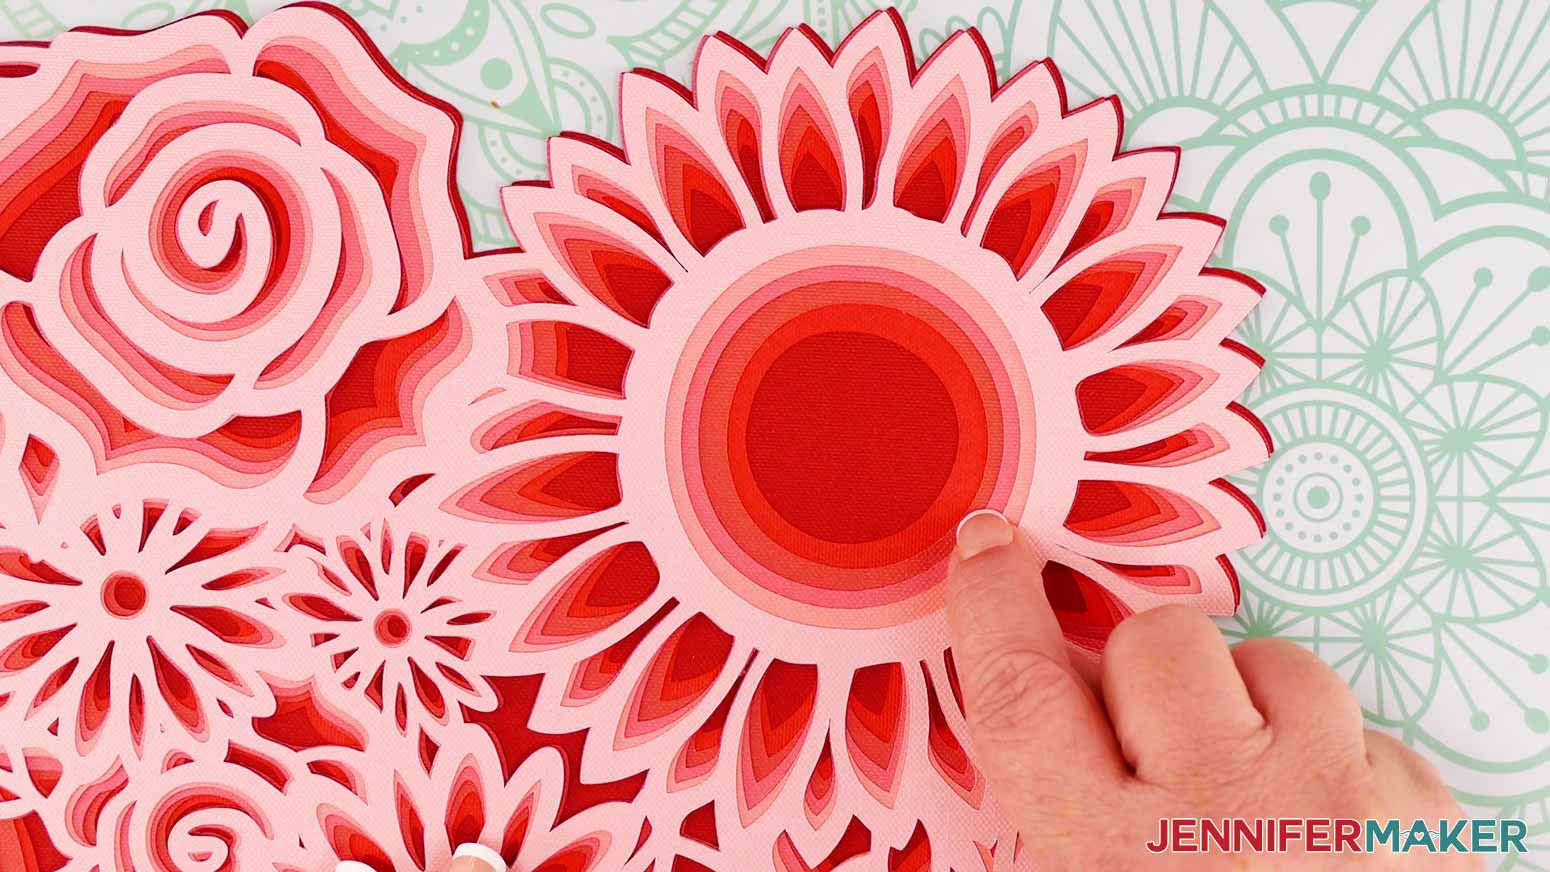
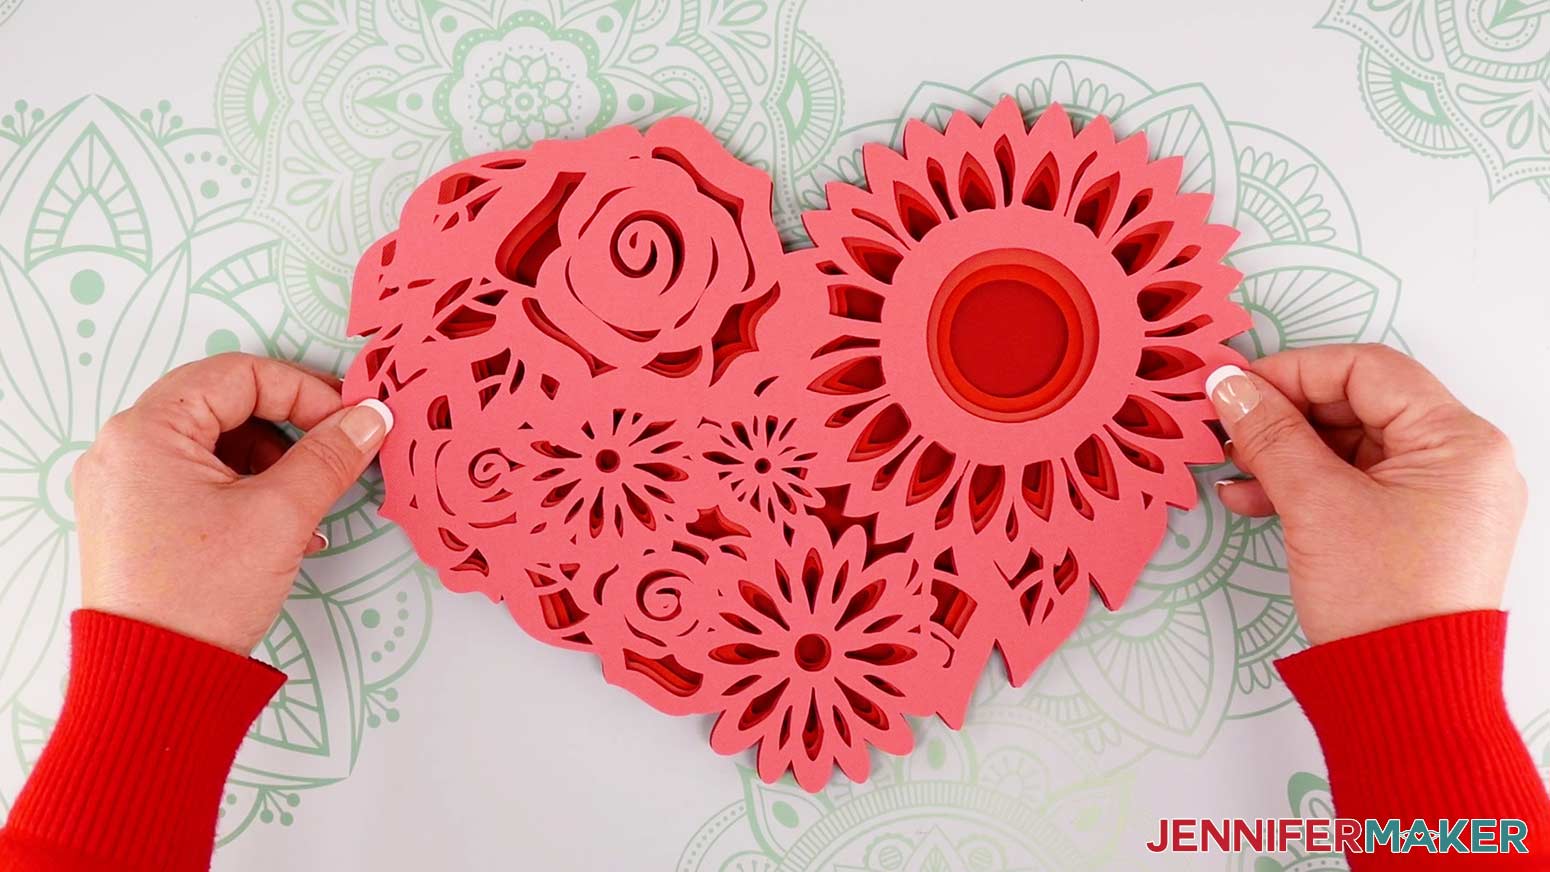
Replace the top layer. Now you have seven layers all stacked and ready to adhere to each other.
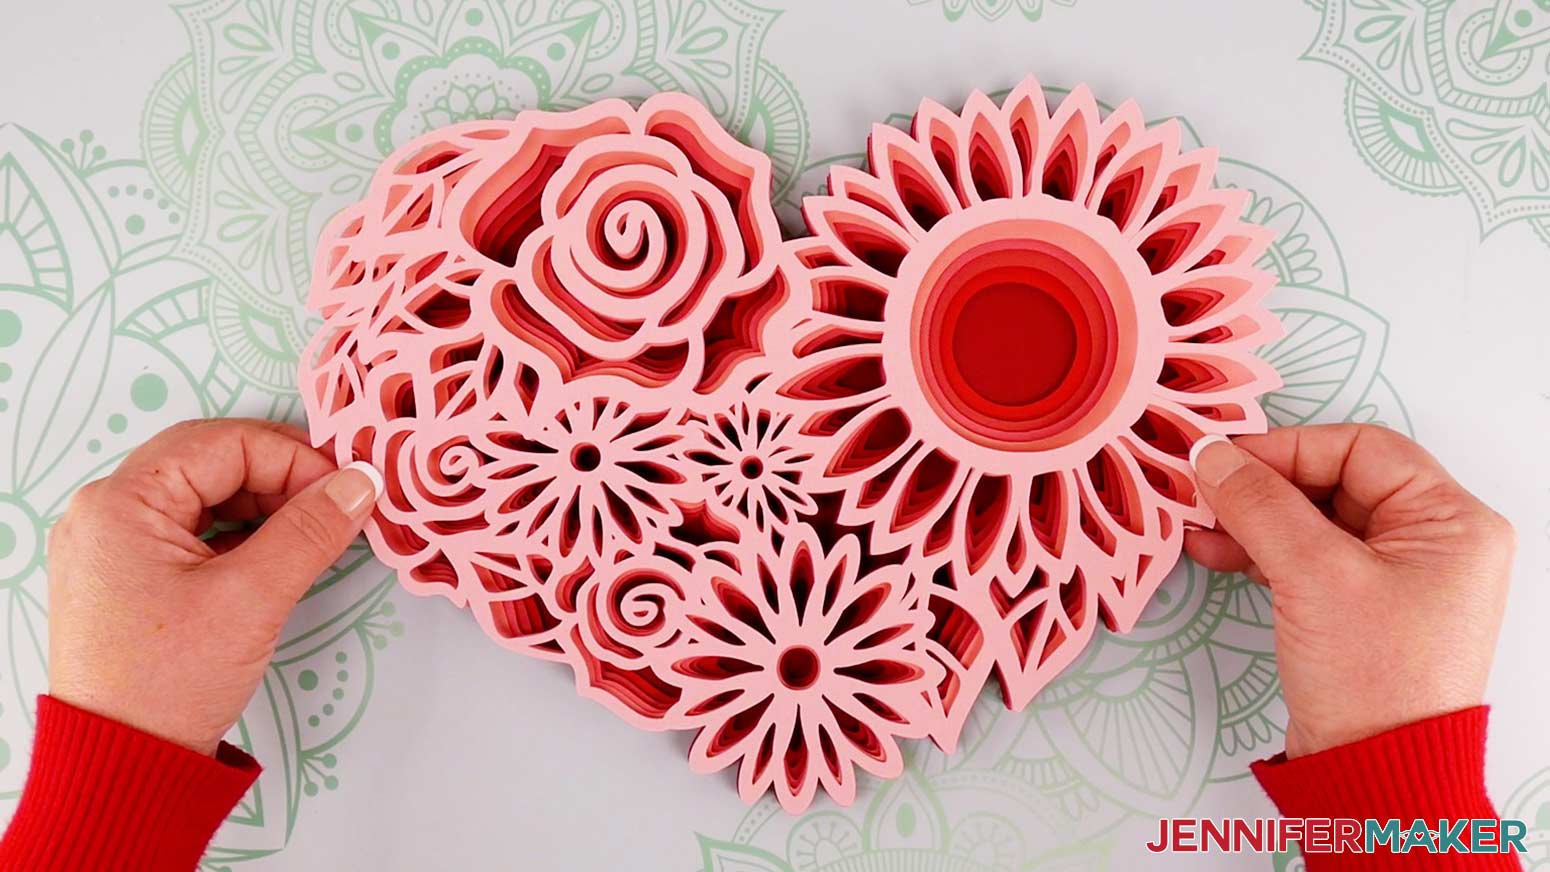
Flip the stack over so you can see the solid back.
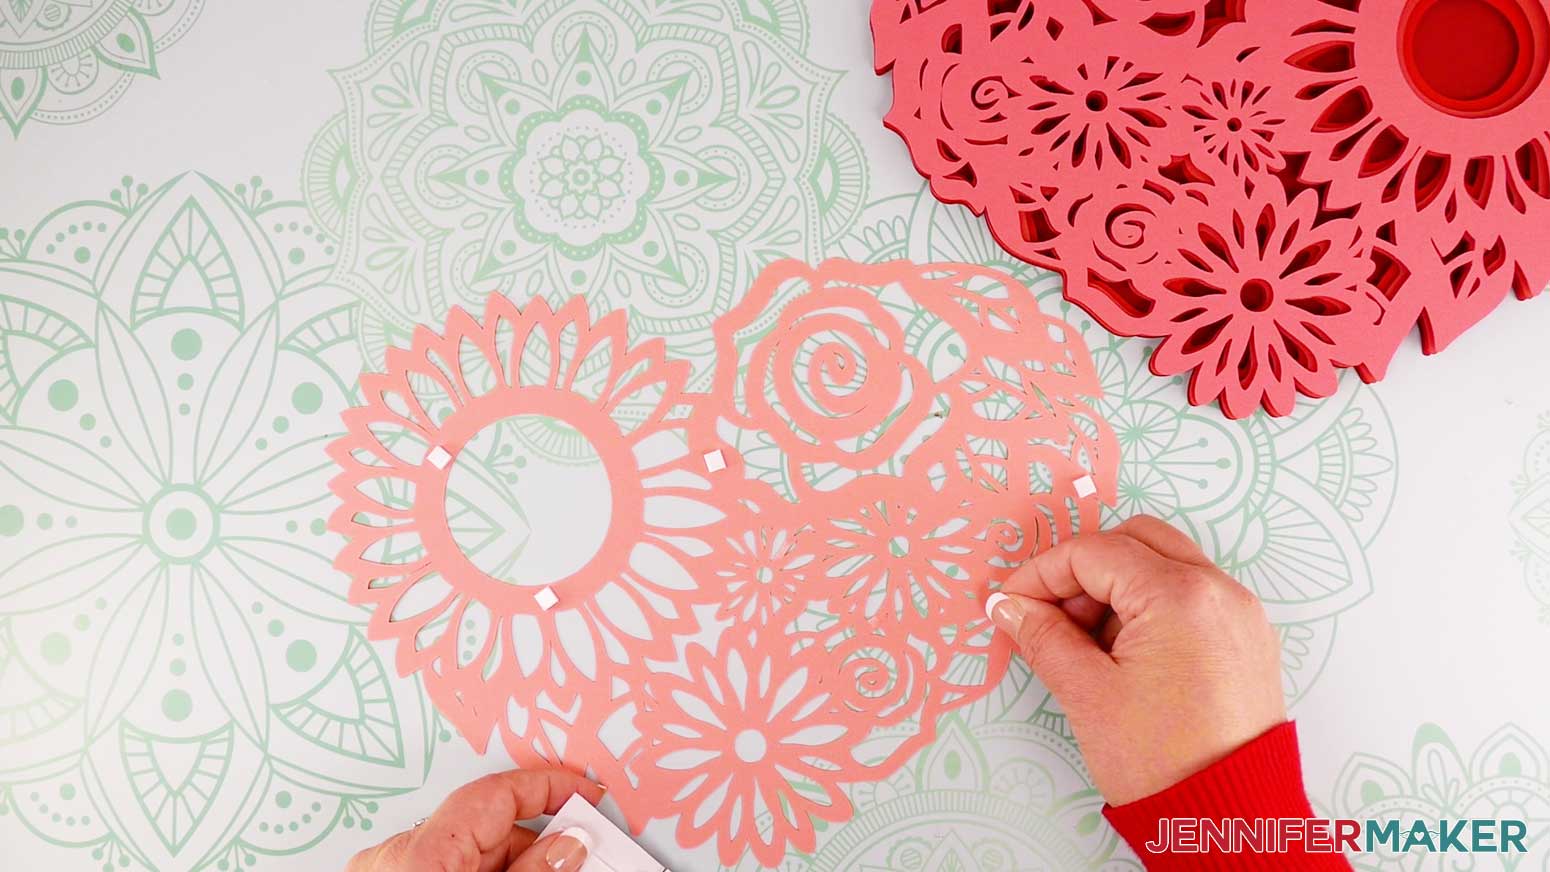
To adhere the layers to each other, we'll flip one layer back over at time.
Start by placing the solid back layer directly on the table and right side up.
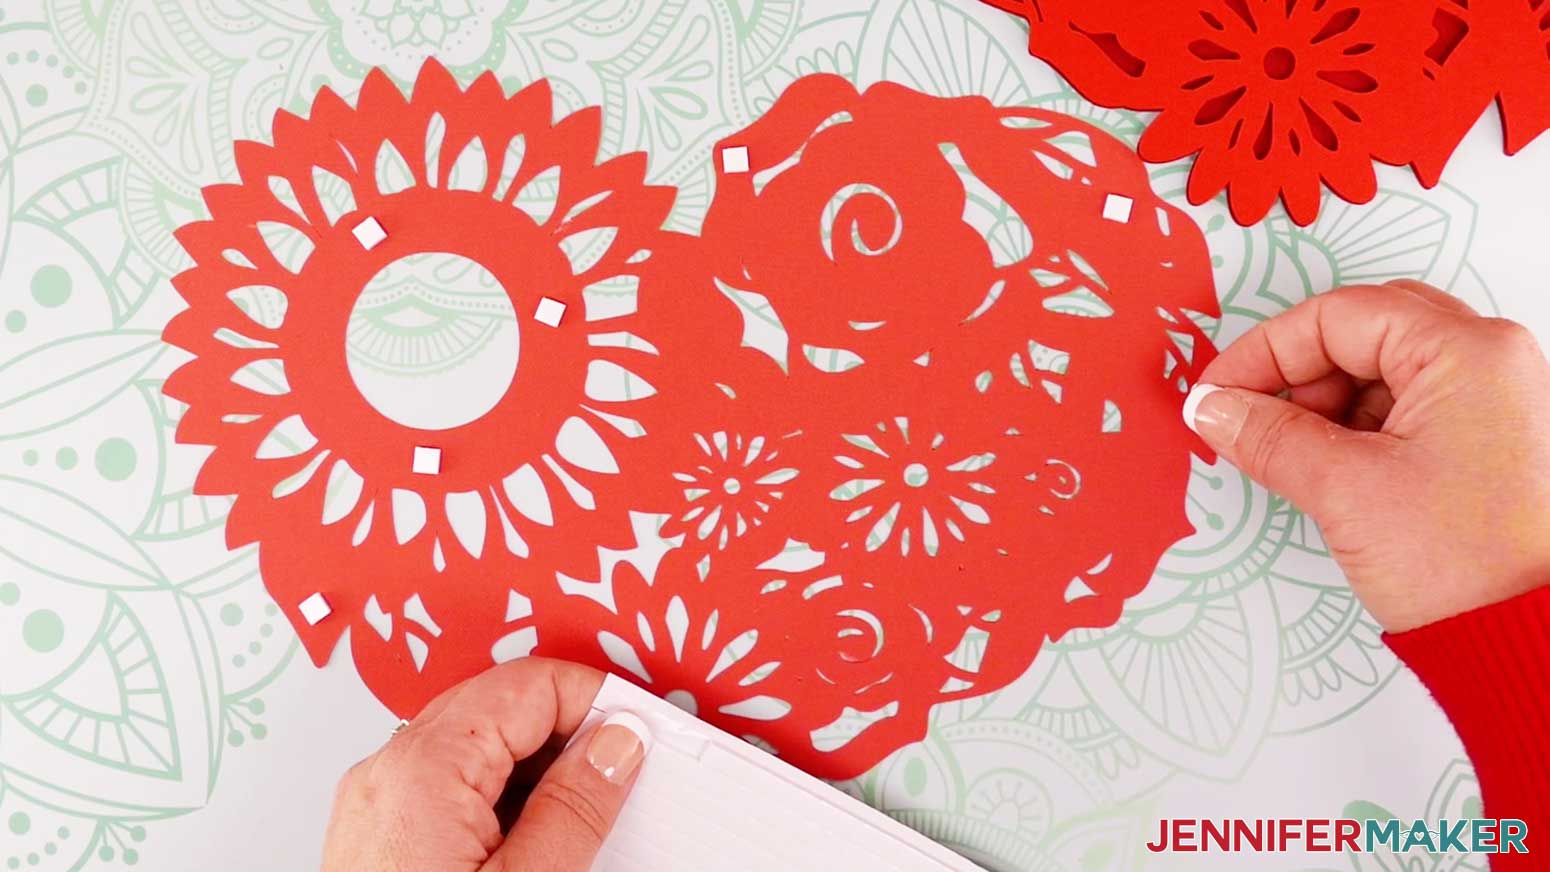
Place the foam adhesive squares on the back of the sixth layer.
Flip layer six right side up and press on to the top of layer seven. Look straight down onto the stack to align the edges of the layers. If you look at it from an angle, it is much more difficult to line them up correctly.
Continue with each layer in the same manner, always adding the adhesive to the back of the next layer up.
Add adhesive to the back of layer five.
Flip and place layer five on top of layer six.
Add adhesive to the back of layer four.
Flip and place layer four on top of layer five.
Add adhesive to the back of layer three.
Flip and place layer three on top of layer four.
Add adhesive to layer two.
Flip and place layer two on top of layer three.
For layer one, you will find it necessary to cut the adhesive foam squares using a craft knife and cutting mat or craft scissors to make very thin strips so the foam adhesive does not show.
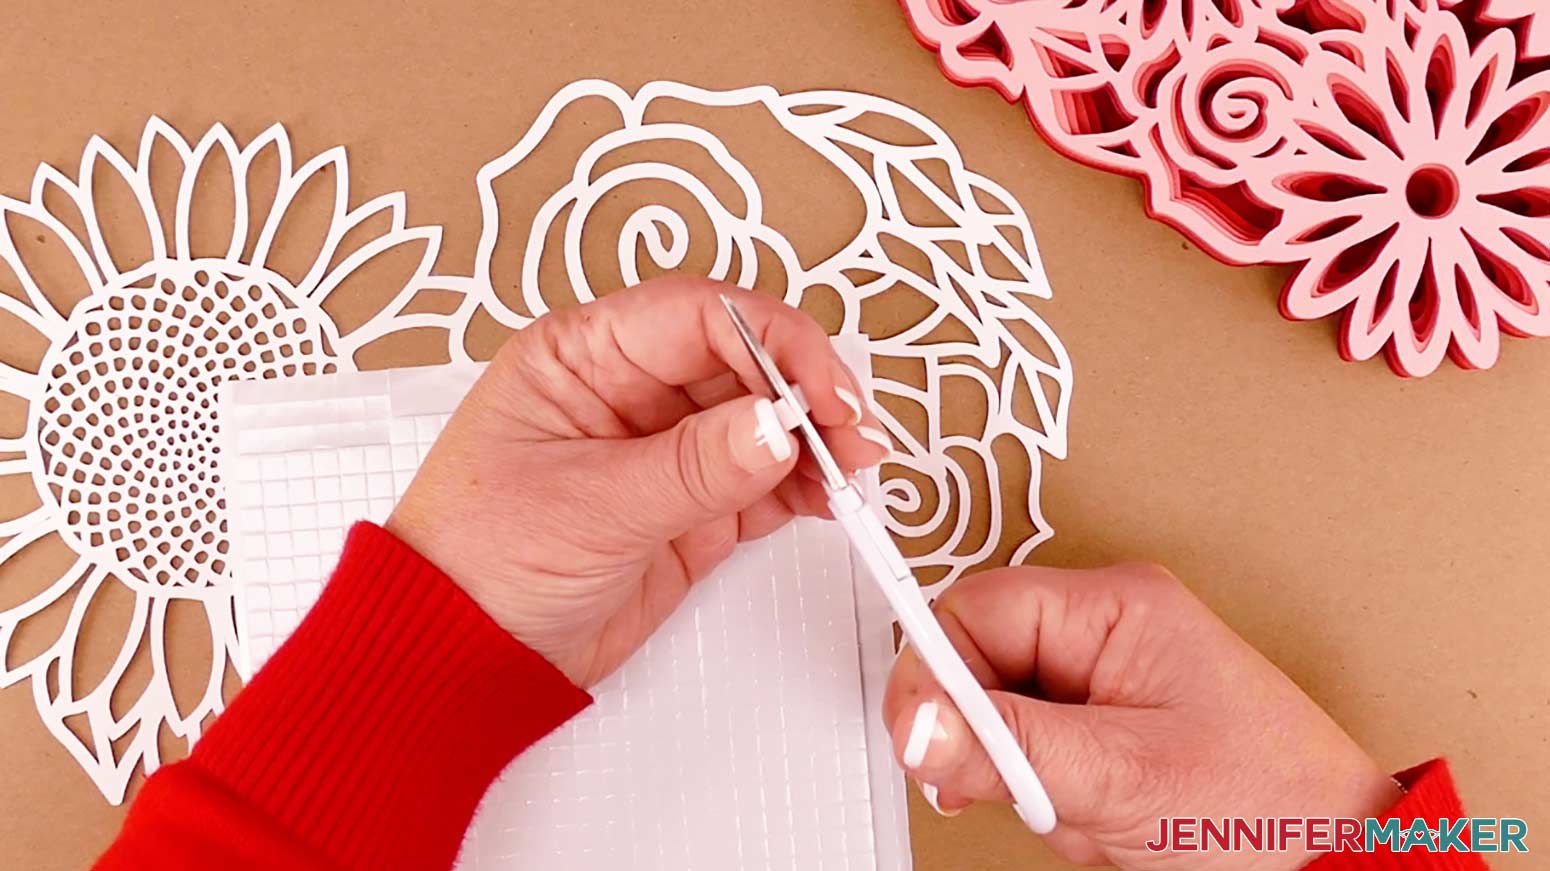
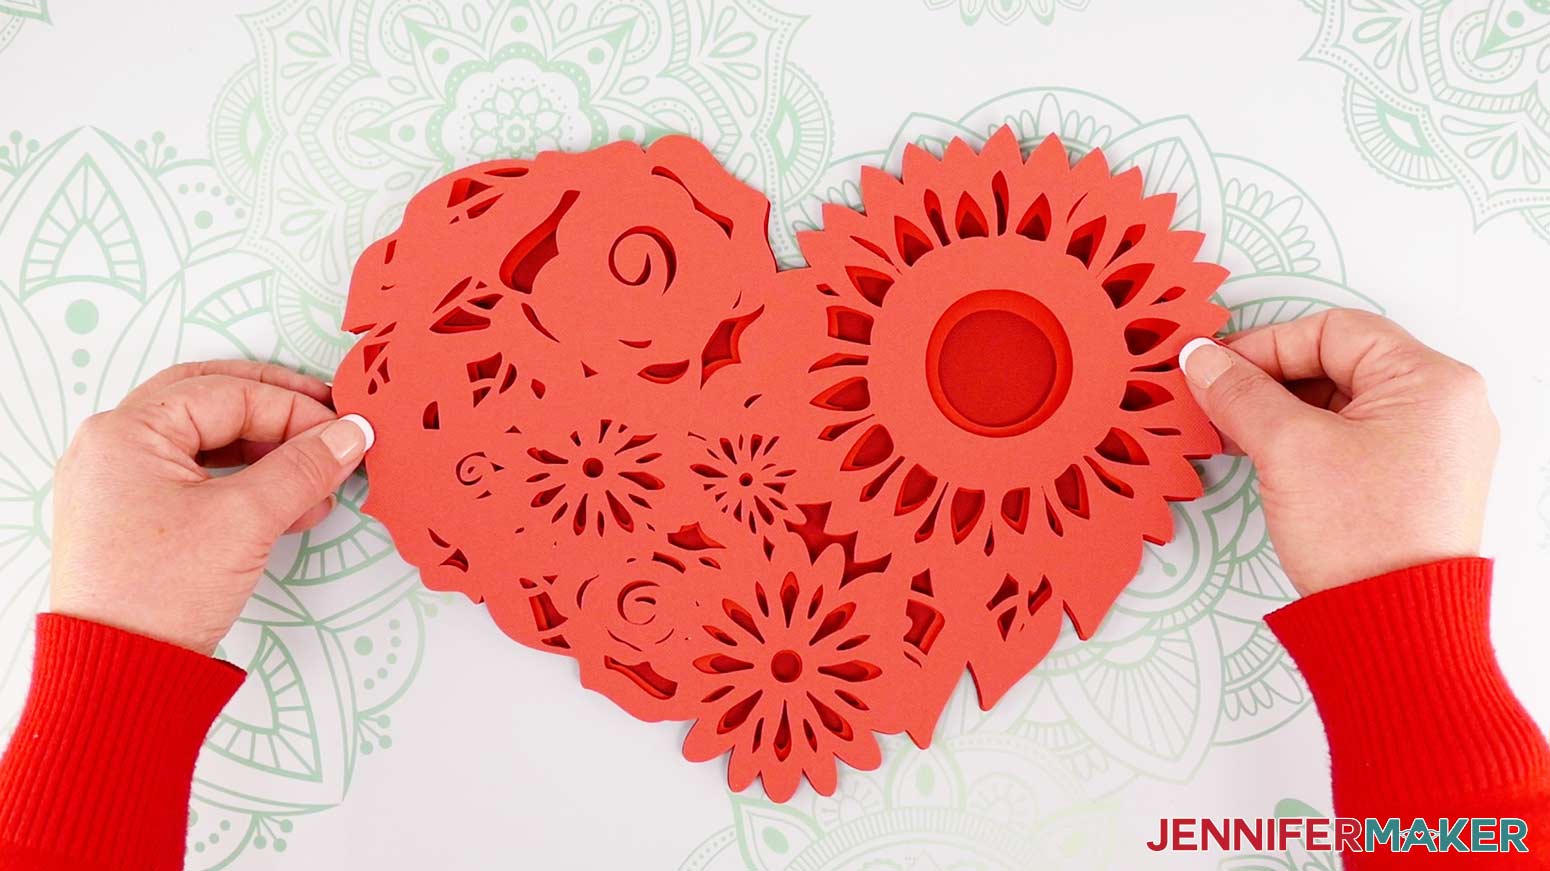
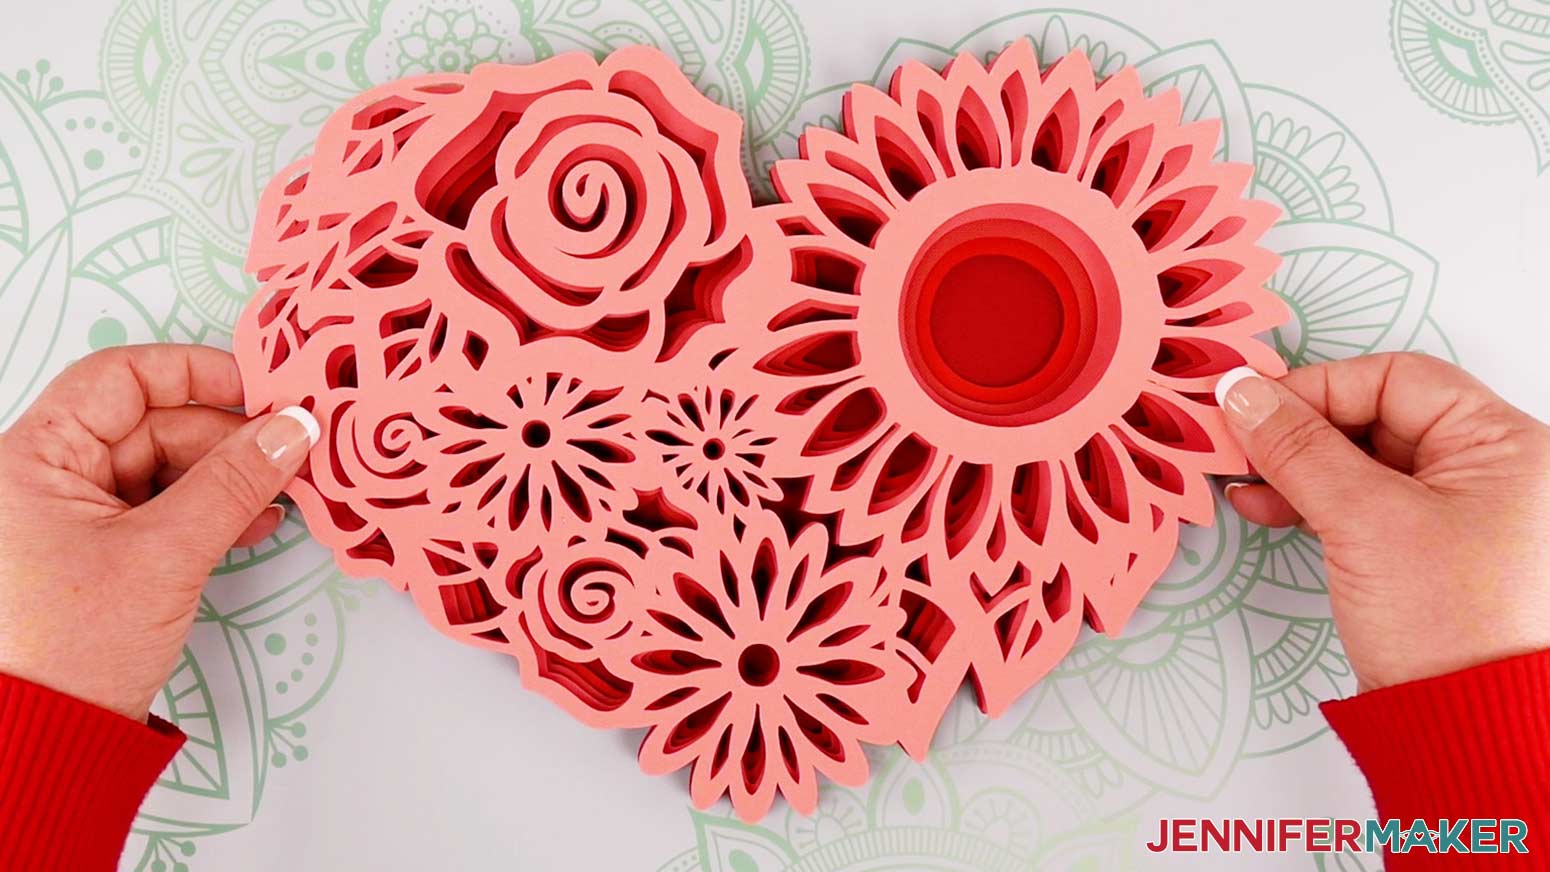
Flip, align and place layer one on top of layer two.
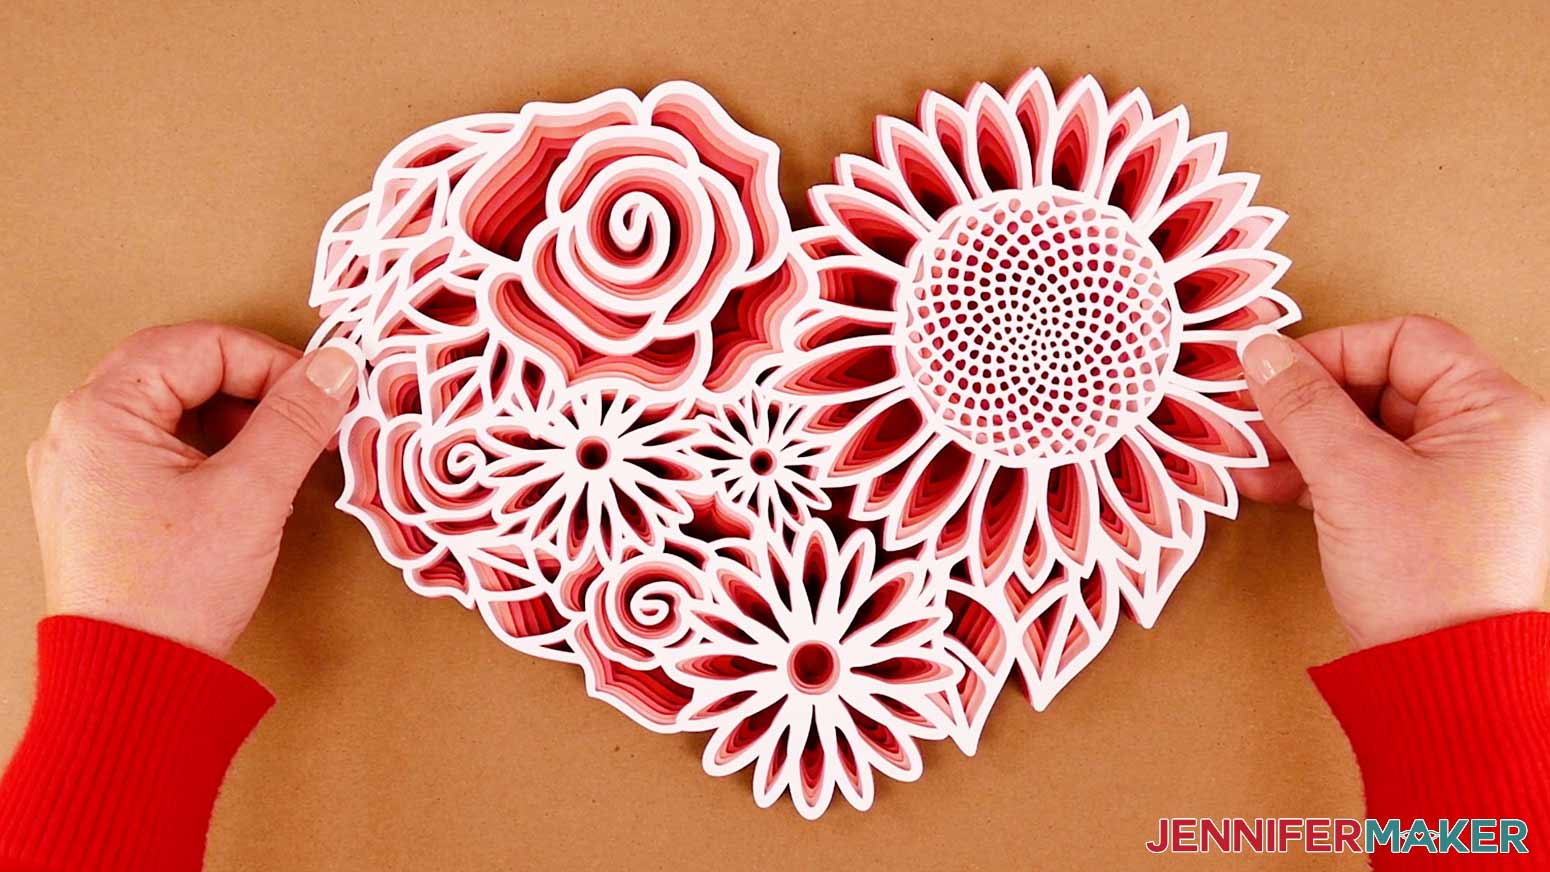
The Floral Heart is now complete and ready to add to your frame or display. I placed my Floral Heart inside a shadow box, so I used the same adhesive foam squares and added them to the back of the heart.
Note: Be really generous with the adhesive to make sure the heart doesn’t slide around inside the frame after it hangs for a while!
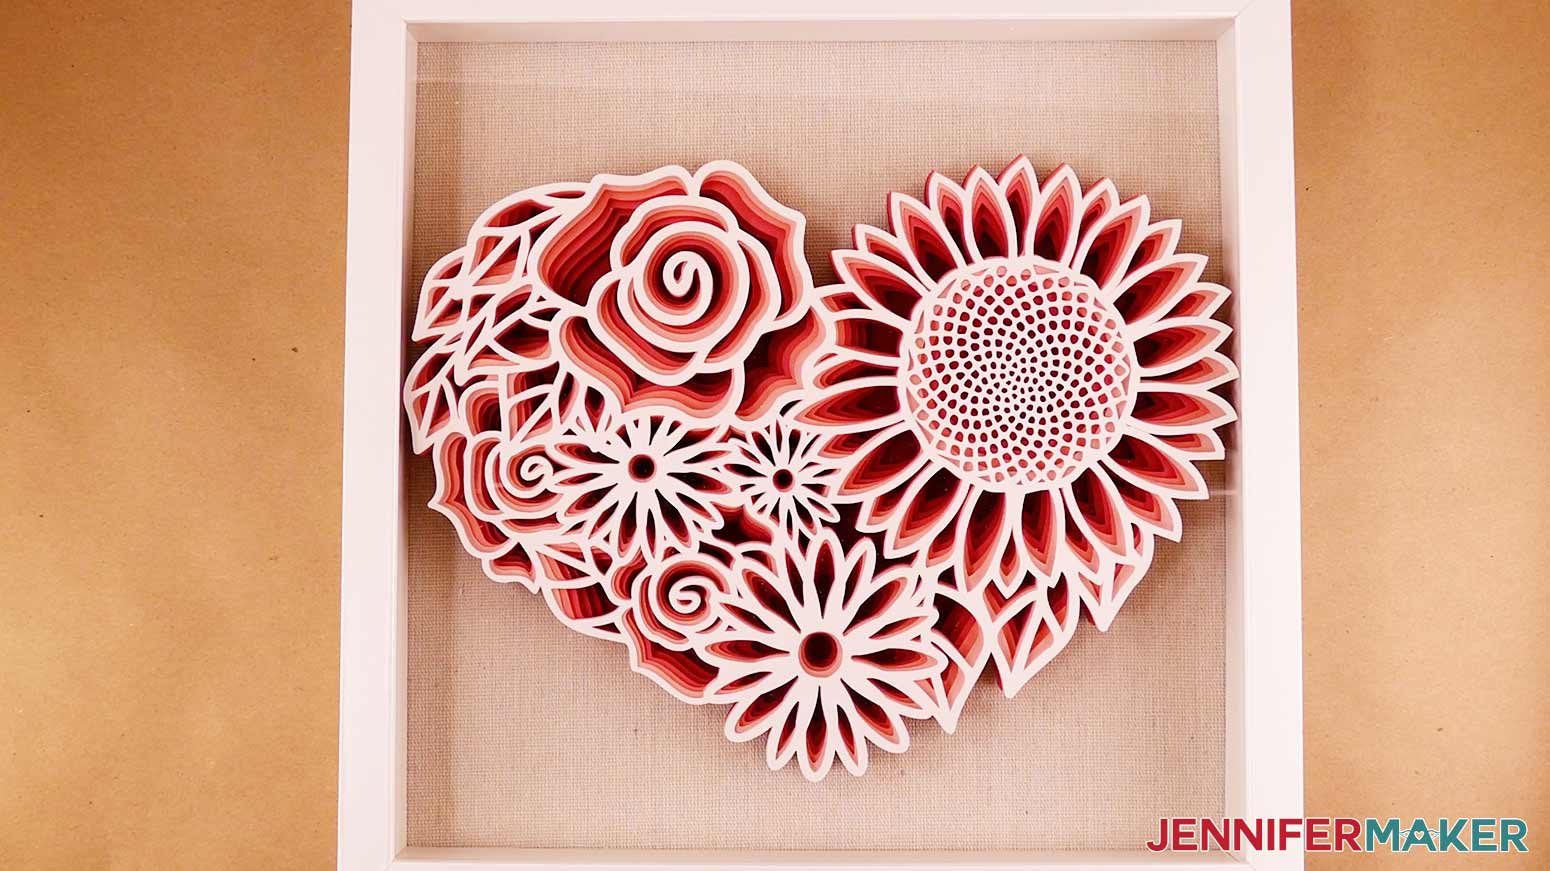
Adhere the Floral Heart to the frame backer and place it inside the frame.
And this is what my finished Floral Heart looks like framed.
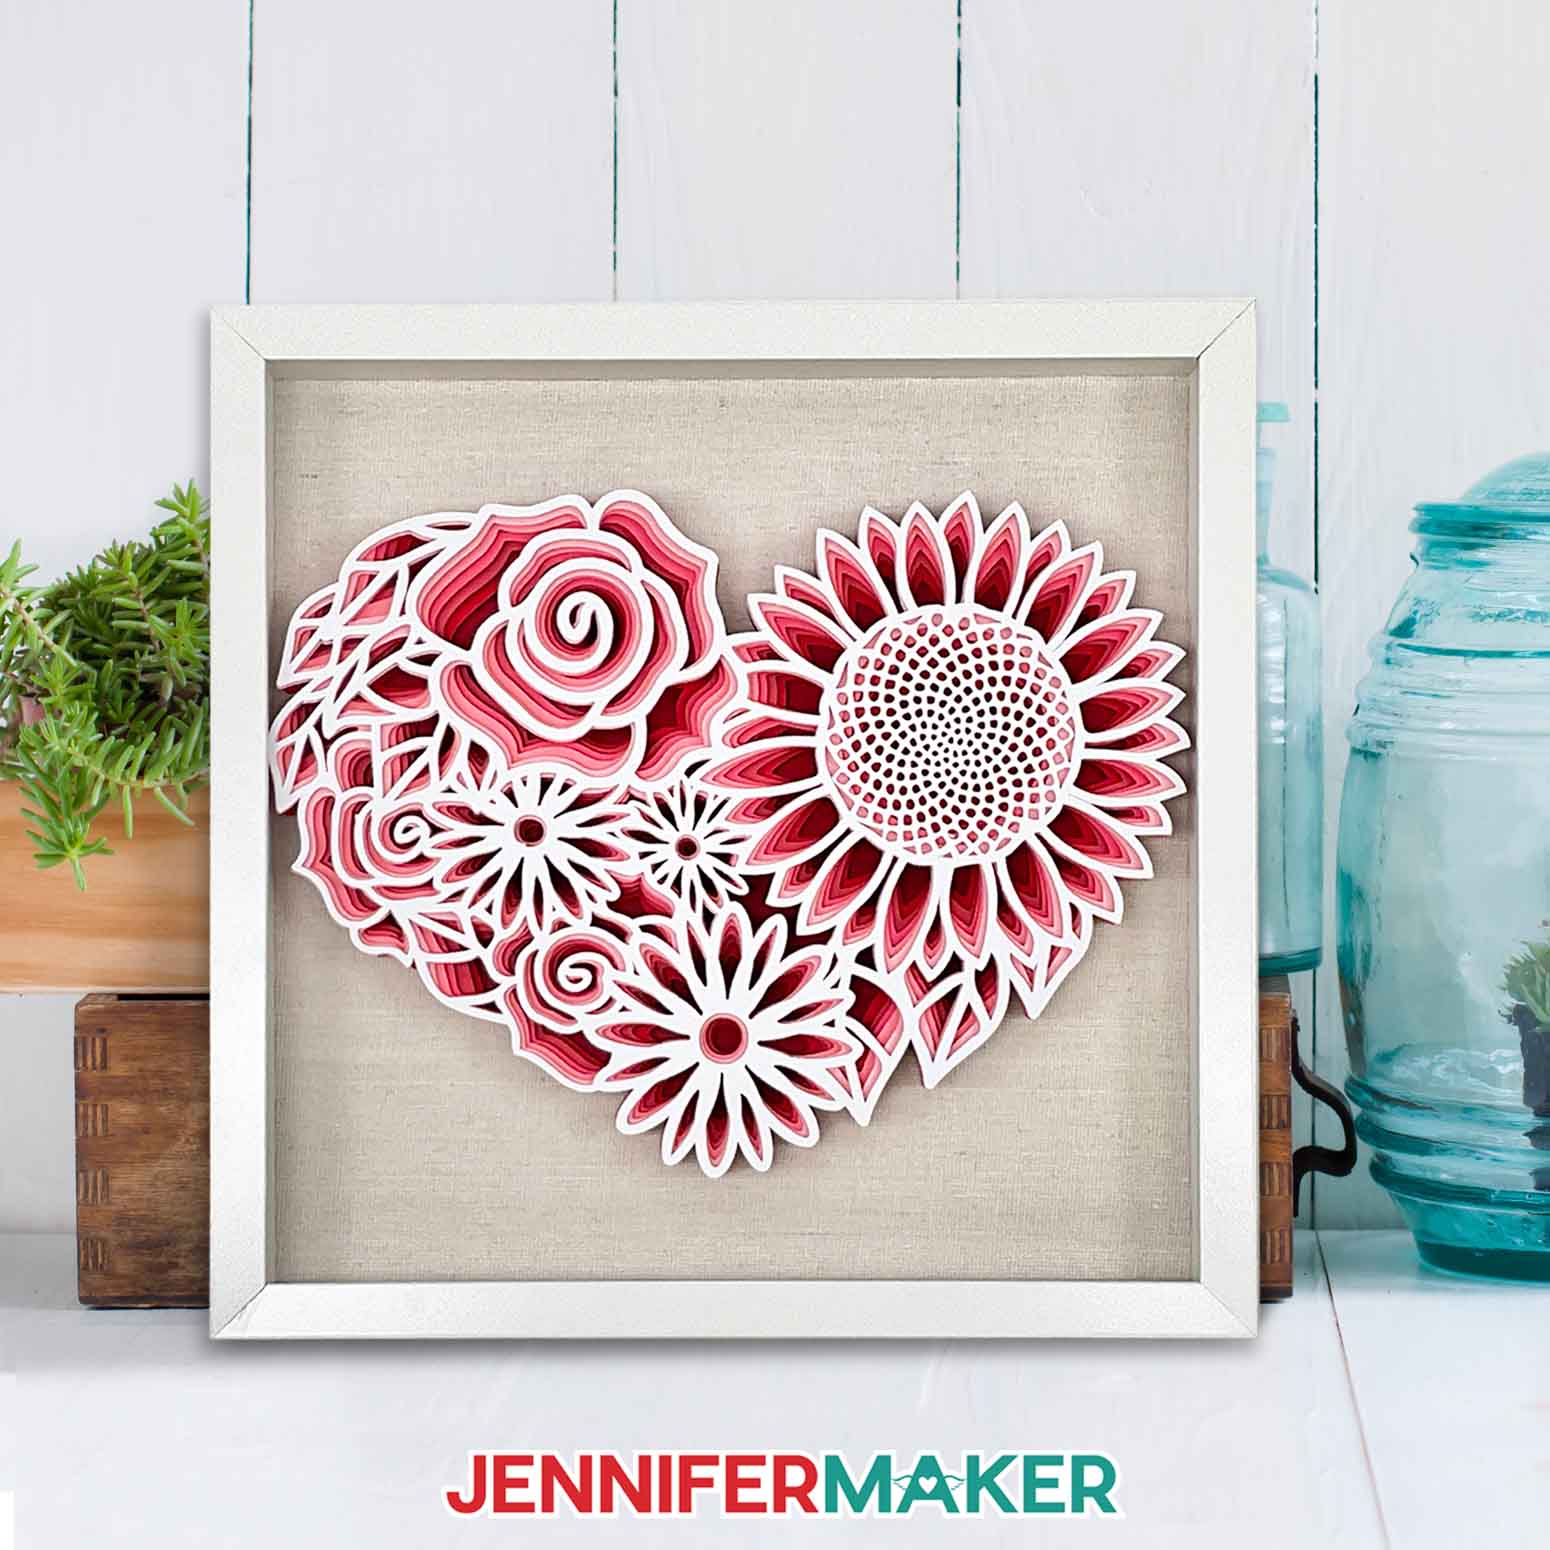
STEP 5: Show it Off
The Floral Heart is great for displaying and can make a wonderful gift. You can even add vinyl text to the glass to personalize it! (Check out this Paper Flower Shadow Box tutorial to see how.)
Notes
Finished Size without Frame: 11.5" x 8.73"
Frame Size: 12" x 12"
Answers to Your Questions About Making Intricate Layered Projects
Q: What is layered paper?
A: Layered paper DIY projects can describe many different techniques. But for most of my designs, it refers to cutting design layers from cardstock with a cutting machine, then using adhesives to put them together in order to create a decoration.
Q: How do you make layered papercut art?
A: To make the most of my layered paper designs, you’ll use Cricut Design Space to prepare the SVG. Then you’ll cut the layers from card stock using a Cricut. Finally, you’ll attach the layers and mount them in a display.
Q: What is paper cutting art?
A: Paper cutting usually refers to intricate designs cut into different colors of paper to create decorative projects. Depending on the desired look, techniques, and materials, some artists cut the designs by hand and others use cutting machines.
Q: How do I keep my layers stuck together?
A: I used a combination of craft glue, and double-sided foam adhesive squares in different areas of my physical product. For the really delicate top layer, glue will probably be easiest.
Q: My cardstock keeps ripping on the intricate cuts. What can I do?
A: Be sure you’re using a clean and sticky machine mat, good-quality cardstock, and a clean blade. See my Cricut Cutting Problems post for all the tips I use to get clean cuts every time.
Q: Do I have to use a Cricut machine?
A: No! We always include several versions of each digital item in the ZIP file for use with machines and software that run on similar technologies. For example, if you have a Silhouette Cameo, which uses Silhouette Studio, you can use the DXF file in Silhouette Basic Edition. Or, if you have upgraded to Silhouette Designer Edition, Designer Edition Plus, or Business, you can use the SVG format with your Silhouette machine. And if you don’t have a cutting machine, you can print and then cut out my digital download PDF files, too! The ZIP archive in my resource library includes these file types and more!
Q: Is your layered floral butterfly SVG a free item just for personal use or do you offer a commercial license?
A: I love supporting creative entrepreneurs! If you want to use my designs and projects for commercial use, please familiarize yourself with my important licensing information before selling your crafts.
I do not permit sale of my digital files like my SVG cut files, but you can sell the physical items you make with them — as long as you follow my licensing requirements. That means you cannot sell the layered floral butterfly SVG, PDF, or DXF files or ZIP folder, but you can sell shadow boxes that you made with the digital products within the guidelines linked above.
Q: Where can I find the supplies and tools to make a layered floral butterfly?
A: My floral SVG files can be made with simple supplies you may already have in your crafting stash. For an easy online experience, I like to shop on Amazon for their free shipping and quick delivery time with my Amazon Prime membership. Just make sure to look for sellers with 5-star reviews, carefully review product information, and check out the product ratings. You can also find most, if not all of the supplies and tools at your local craft store — sometimes even at a cheaper regular price or sale price. So be sure to check for current sales as you continue shopping for supplies. Some sellers send coupons to their newsletter if you share an email address!
Get my free SVG/DXF/PDF files to make a layered floral butterfly!
(If you do not see the signup form above, click here.)
I love seeing what you make with my designs and how you use them! Please share a photo of your Layered Floral Butterfly in our Facebook group or tag me on social media with #jennifermaker.
Love,

Want to remember this? Save this Layered Floral Butterfly tutorial to your favorite Pinterest Board!