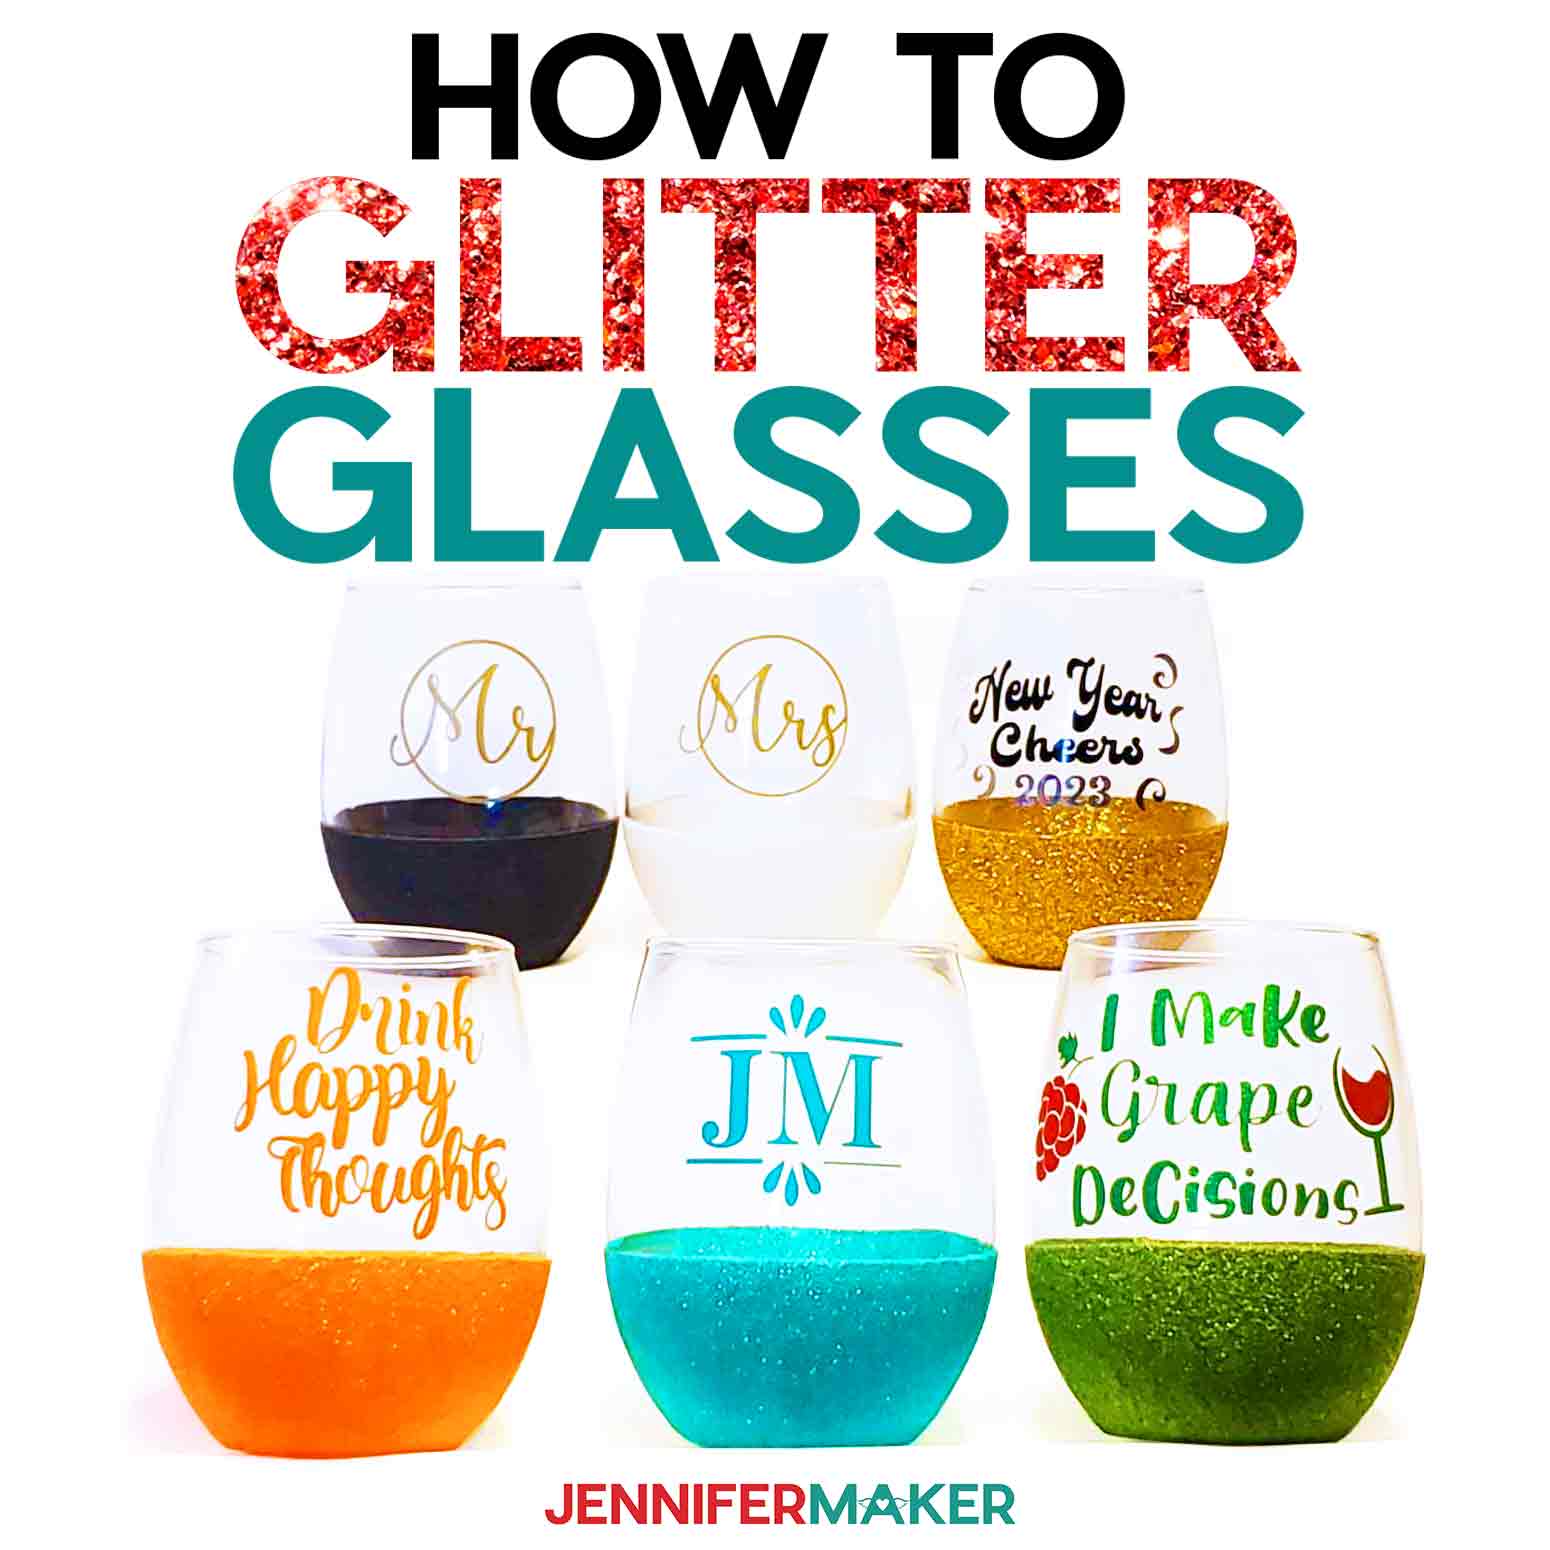
Learn how to glitter wine glasses easily without glittering your whole room!
Wine glasses make great gifts, and they’re so easy to personalize! Vinyl-decorated glasses are popular, but glitter wine glasses have been popping up everywhere, and I can totally see why. They look so chic, especially when you add a matching vinyl decal or monogram for a gift set! But as with any glittery project – I was nervous about how much glitter would get on the glasses compared to my workspace. I came up with some great techniques to keep the glitter contained!
Watch the full step-by-step glitter wine glasses tutorial :

 What is the Merry Maker Mingle? This is an annual tradition here at JenniferMaker! Every day for the first 25 days of December, we gift you with a brand new project, design, tutorial, and video for something YOU asked us to make. On top of that, we host a giveaway with 25 days of prizes. Some of the amazing prizes are Cricut cutting machines, sewing machines, gift cards, and beautiful print editions of our popular Cricut Coach Playbook. You can even earn bonus entries for sharing photos of the daily projects! Click here to learn more about the Merry Maker Mingle!
This is a Cricut Mystery Box project — it uses the silver adhesive foil and tropical sampler adhesive vinyls that you can get in the “Thanksgiving” mystery box (affiliate link) that came out November 9, 2022. Even if the mystery box is not available when you check, you can still purchase the individual vinyls, which are all linked below in my material list. Learn more about Cricut Mystery Boxes and their contents in my Cricut Mystery Box Guide.

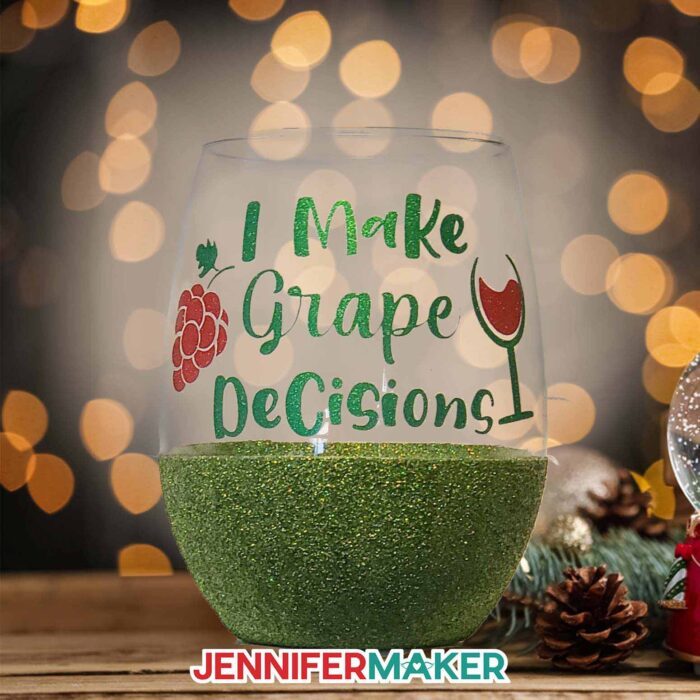
These glitter wine glasses are fun, easy, and a great way to make items for your next party! I’ve included some free SVGs for you to use and I’ll show you how to make a custom design in Cricut Design Space.
Instead of trying to glitter the entire glass, I brushed on Mod Podge to the lower section and bottom. That leaves the top open for adhesive vinyl designs and ensures the glitter won’t irritate your mouth. I have a great tip for making an even edge using a ruler, dry erase marker, and painter’s tape!
I was surprised that the type of glitter was pretty important! Chunky glitter left too much space between the pieces to create a solid surface.
Extra fine glitters almost turned into a paste with added to the adhesive.
But fine and medium glitter worked very well! And with all the options on the market, you can find any color of glitter to match or complement the design you add.
Stemless glasses are easier to manage so you don’t have to decorate a wine glass stem. Getting glitter evenly around the entire stem is very difficult. You can find the smaller glasses at many places, including the dollar store.
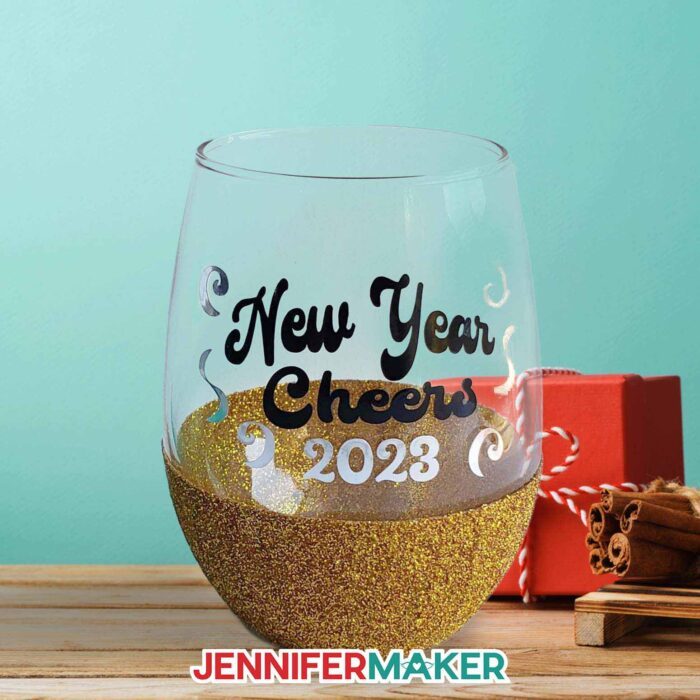
I used both permanent and removable adhesive vinyl for my glitter wine glasses. The removable decorations won’t hold up to as much use, but they’re a perfect way to make drinkware to match a party theme or celebrate a holiday like at a New Year party! Whichever combination you pick, I suggest handwashing the finished glasses just to be on the safe side.
I cut everything on my Cricut Maker 3, but you can use any Cricut machine since the designs are small. You’ll need a green StandardGrip machine mat, scissors, a weeding tool, transfer tape, and our usual Cricut crafting supplies below. We’ll use a coffee filter and rubbing alcohol to clean the glasses, but keep a few filters handy for when we get out the glitter!
Let me show you how easy it is to make DIY glitter wine glasses! This post contains some affiliate links for your convenience (which means if you make a purchase after clicking a link I will earn a small commission but it won’t cost you a penny more)! Read my full disclosure policy.
Materials to Make Glitter Wine Glasses
View my Amazon shopping list with the exact items we used to make this project
- 1 Each 15 oz Stemless Wine Glass
- 1 Roll Cricut Silver Adhesive Foil -OR-
- 1 Pack Cricut Adhesive Vinyl Brights Sampler -OR-
- 1 Pack Cricut Adhesive Vinyl Tropical Sampler -OR-
- 1 Roll Cricut Green Shimmer Adhesive Vinyl -OR-
- 1 Roll Cricut Red Shimmer Adhesive Vinyl -OR-
- 1 Roll Cricut Glossy Black Permanent Adhesive Vinyl -OR-
- 1 Roll Cricut Gold Permanent Adhesive Vinyl
- 1 Container The Glitter Guy Glitter – I used Midas Touch, Under The Sea, Gritty, You’re A Mean One, and Ice – use code JENNIFERMAKER for a discount at check out!
- 1 Container Black Glitter
- A method to cut your vinyl: I used the amazing Cricut Maker 3, but you can also use the Cricut Maker, Cricut Explore Series, or Cricut Joy
- Cricut Green StandardGrip Mat (12″ x 12″)
- Brayer Tool
- Weeding Tool
- Scraper Tool
- Scissors
- Cricut StandardGrip Transfer Tape
- Cricut StrongGrip Transfer Tape – if you use shimmer vinyl on glitter glasses
- Isopropyl Alcohol
- Coffee Filters
- Dry Erase Marker
- Ruler
- Painter’s Tape
- Paintbrush – A flat wide paintbrush worked best for me. Not a foam brush.
- Nitrile Gloves
- Plastic Cups
- Dishwasher safe Mod Podge
- Plastic Tote -OR- Cardboard Box – large and deep enough to help contain the excess glitter
- Design #447 (My free SVG/PDF/DXF design files available in my free resource library – get the password by filling out the form at the bottom of this page)
How to Make Your Own Glitter Wine Glasses
How To Glitter Wine Glasses
Learn the easiest, least messy way to add glitter to the bottom of stemless wine glasses and vinyl decals to the top to create fun custom designs.
Materials
- 1 Each 15 oz Stemless Wine Glass
- 1 Roll Cricut Silver Adhesive Foil -OR-
- 1 Pack Cricut Adhesive Vinyl Brights Sampler -OR-
- 1 Pack Cricut Adhesive Vinyl Tropical Sampler -OR-
- 1 Roll Cricut Green Shimmer Adhesive Vinyl -OR-
- 1 Roll Cricut Red Shimmer Adhesive Vinyl -OR-
- 1 Roll Cricut Glossy Black Permanent Adhesive Vinyl -OR-
- 1 Roll Cricut Gold Permanent Adhesive Vinyl
- 1 Container The Glitter Guy Glitter: Midas Touch - use code JENNIFERMAKER for a discount at check out!
- 1 Container The Glitter Guy Glitter: Under The Sea - use code JENNIFERMAKER for a discount at check out!
- 1 Container The Glitter Guy Glitter: Gritty - use code JENNIFERMAKER for a discount at check out!
- 1 Container The Glitter Guy Glitter: You're A Mean One - use code JENNIFERMAKER for a discount at check out!
- 1 Container Black Glitter
- 1 Container The Glitter Guy Glitter: Ice - use code JENNIFERMAKER for a discount at check out!
- Design #447 (My free SVG/PDF/DXF design files available in my free resource library - get the password by filling out the form at the bottom of this page)
Tools
- A method to cut your vinyl: I used the amazing Cricut Maker 3, but you can also use the Cricut Maker, Cricut Explore Series, or Cricut Joy
- Cricut Green StandardGrip Mat (12″ x 12″)
- Brayer Tool
- Weeding Tool
- Scraper Tool
- Scissors
- Cricut StandardGrip Transfer Tape
- Cricut StrongGrip Transfer Tape
- Isopropyl Alcohol
- Coffee Filters
- Dry Erase Marker
- Ruler
- Painter's Tape
- Paintbrush - A flat wide paintbrush worked best for me.
- Nitrile Gloves
- Plastic Cups
- Mod Podge - Dishwasher Safe
- Plastic Tote -OR- Cardboard Box - large and deep enough to help contain the glitter
Instructions
Adding glitter and vinyl to your wine glasses can make them stand out at your next party. They also make wonderful gifts! There are so many types of glitter available that it can be a bit overwhelming when choosing just one. Glitter also has a reputation for spreading itself around in places you don’t want it, so I have tested multiple types of glitter and ways to contain it to give you an easy way to make your own glitter wine glasses!
STEP 1: PREPARE AND GLITTER THE GLASSES
Before cutting the vinyl to add to the glasses, we need to add the glitter!
First, choose your glitter.
I tested several different types and sizes of glitter. Glitter is available in several sizes including super fine cut, fine cut, medium cut, and chunky glitter. The size descriptions refer to the size of the little bits that make up the glitter.
The super fine cut was more like a powder that turned into a gummy paste when it came into contact with the Mod Podge.

The chunky glitter had a range of very large to very small bits mixed together so it was more difficult to fill in all the spots. It also felt a little odd to the touch after adding it to the glass because the larger bits did not lay down flat on the glass and gave a much more uneven finish.
While you can use any size of glitter that you like, I preferred the fine to medium-cut sizes to get a nice even coating of glitter without too much fuss.
The glitter material is also important. The options include iridescent, holographic, metallic, matte, color shifting, and many more. Each of these has a slightly different amount of sparkle to it, and colors with the same description types can even look different when ordered from different suppliers.
After testing several types, I used a variety of iridescent, holographic, and metallic types in fine to medium sizes to make all my glasses. They all give a good amount of sparkle and vibrancy to the final look.
Once you have selected your glitter, you are ready to prep the glasses.
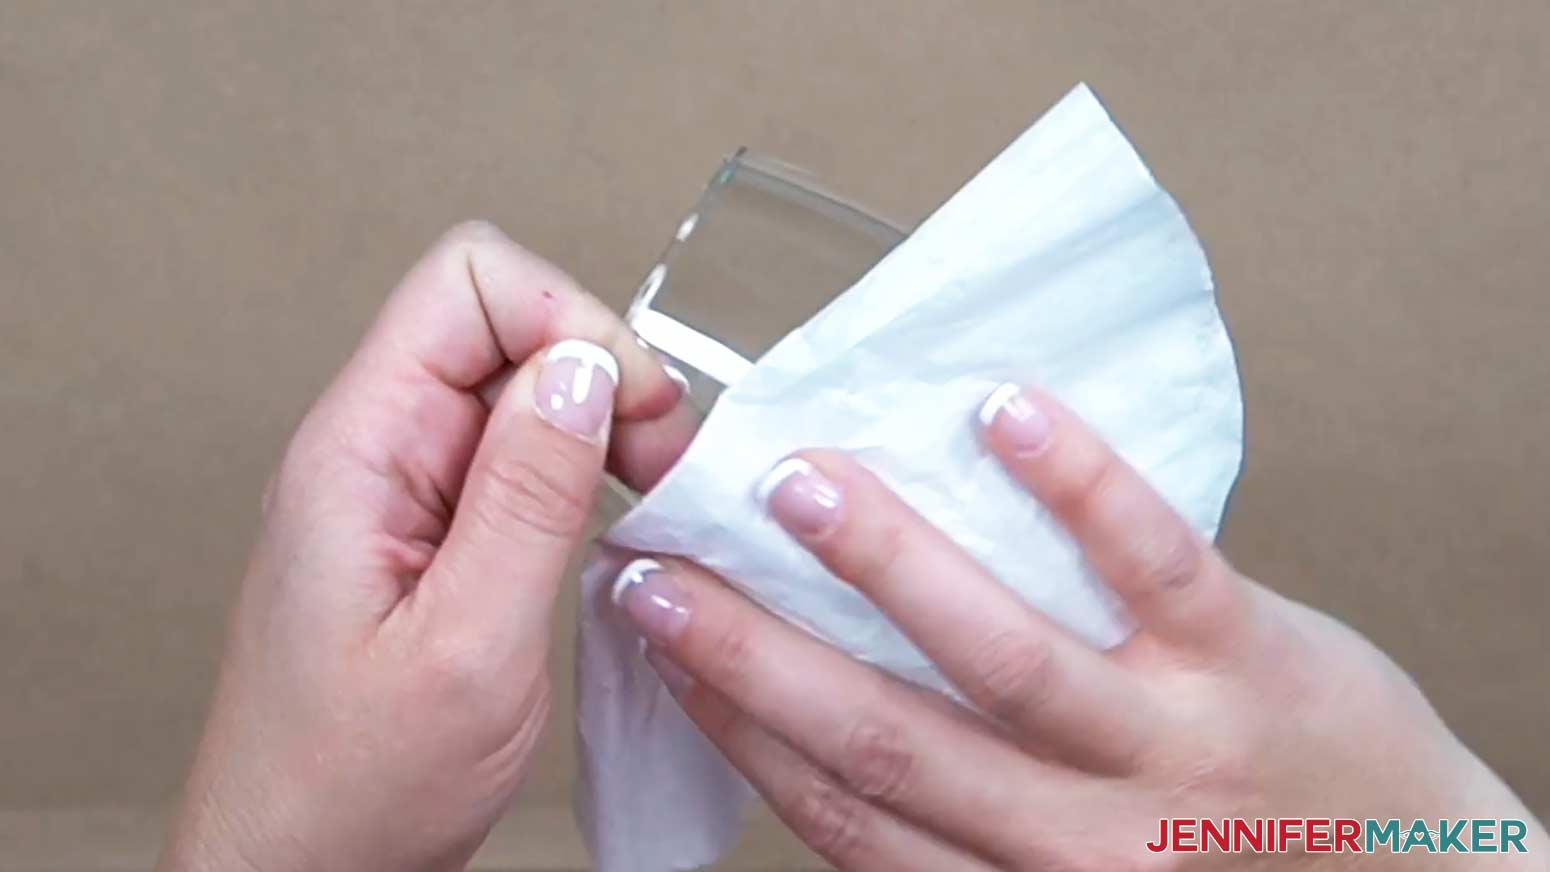
Using the alcohol and coffee filters, clean each of the glasses you plan to glitter. Coffee filters are lint-free and, combined with the alcohol, work to make a nice clean finish for the adhesive.
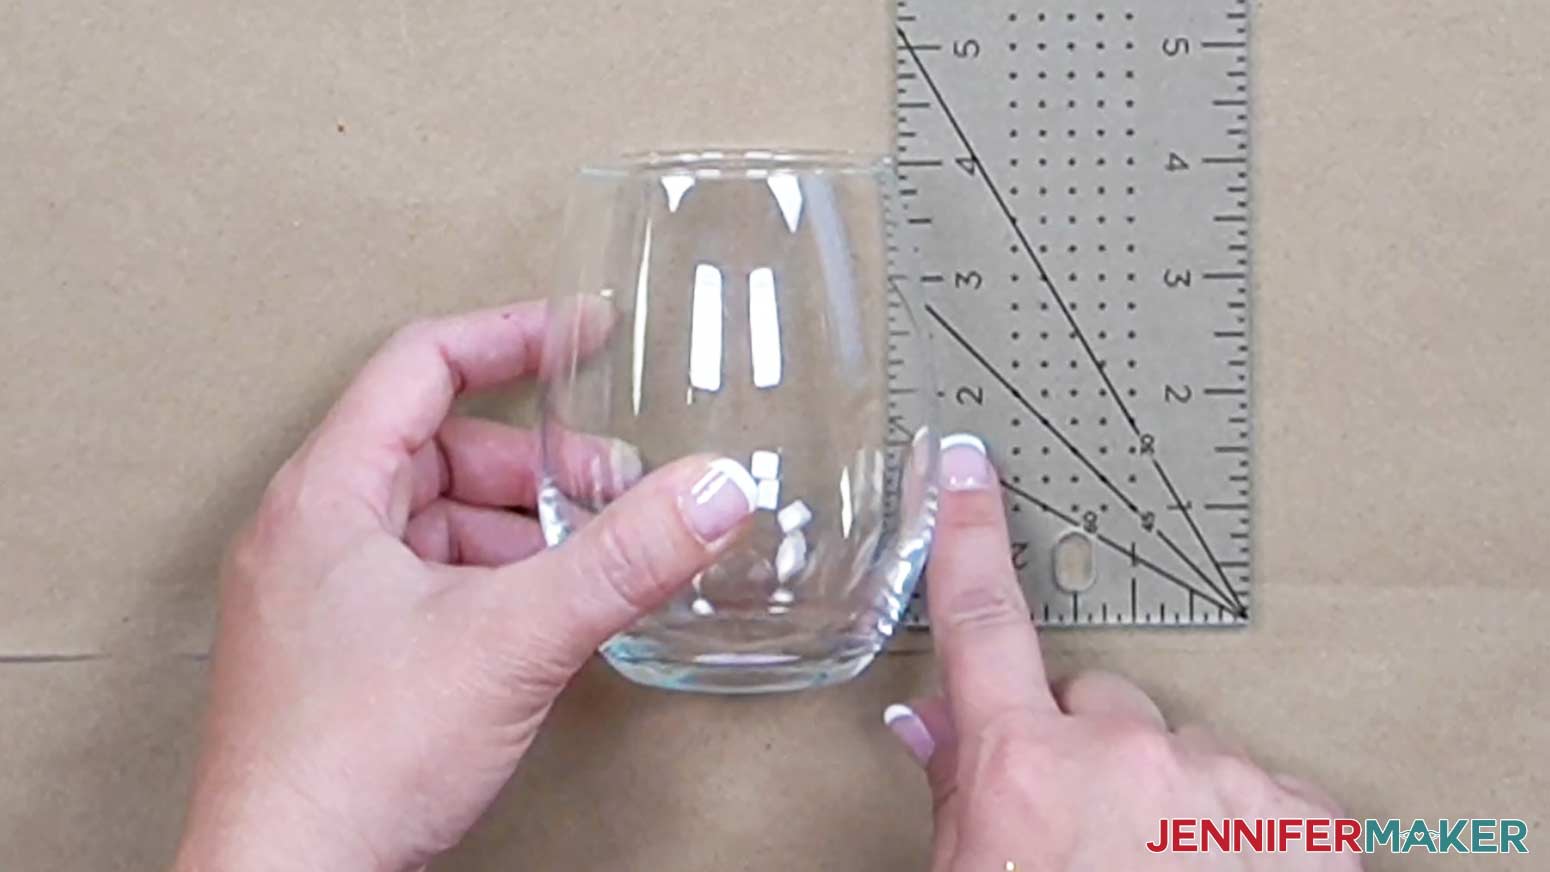
Next, use your ruler to measure from the bottom how high up on the glass you want your glitter to go. Stand the ruler up on the end next to the glass to get a more accurate measurement. I stopped between 1.5” and 1.75” up from the bottom because I wanted to have more room at the top for my decals than glitter on the glass, but if you decide to cover more of the glass in glitter, remember to resize your vinyl decals before cutting them.
Now that you have a measurement, you need to make a guideline all the way around the glass at that spot. There is an easy way to do this!
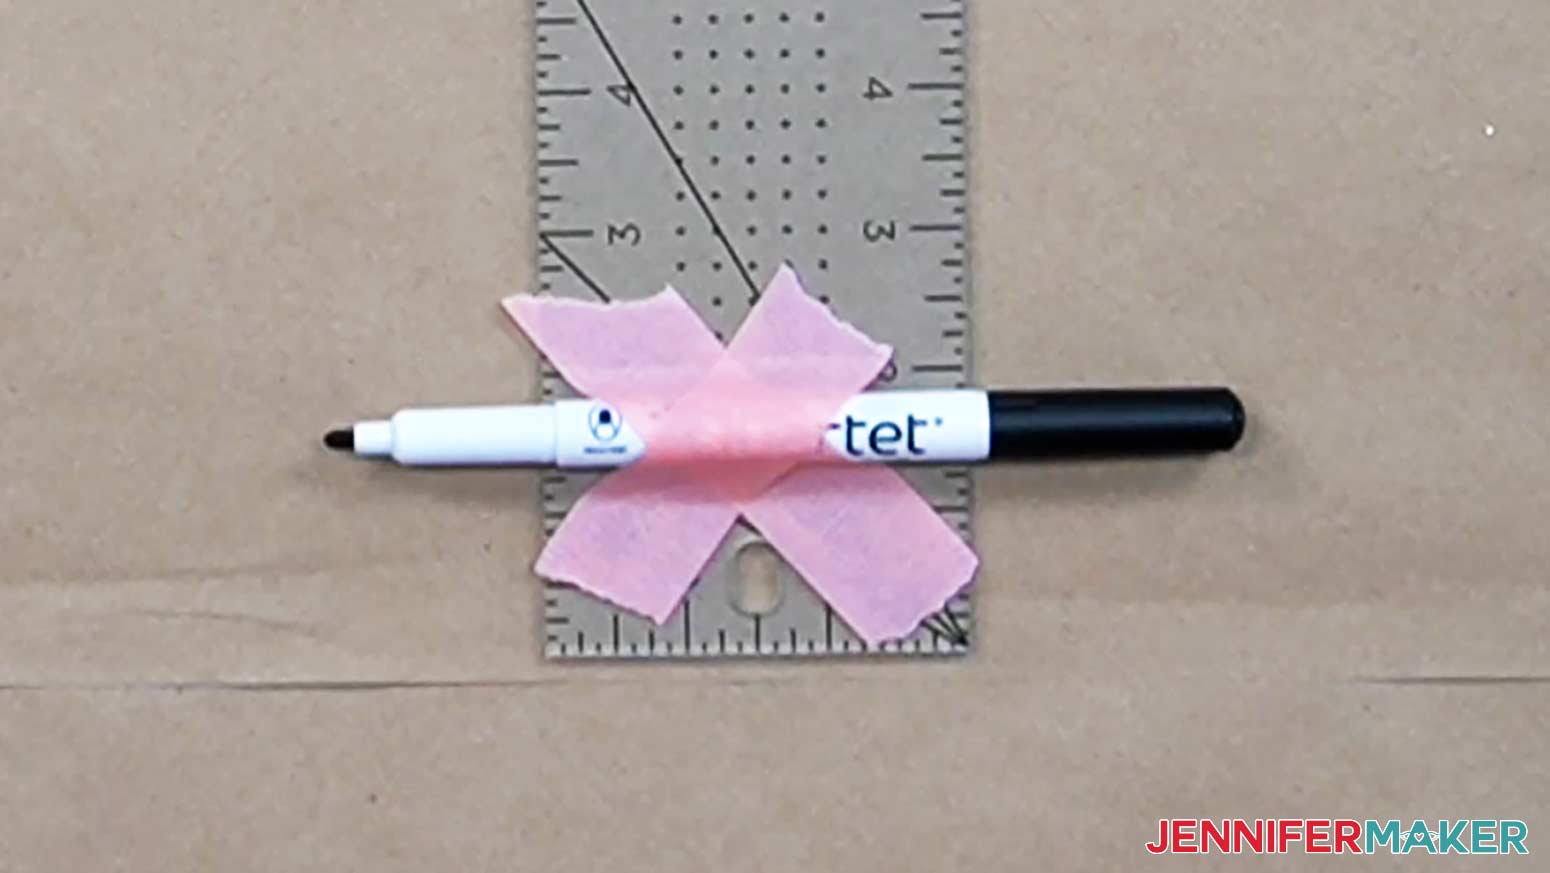
Lay your ruler flat, uncap your dry-erase marker and place it on the ruler so the tip sticks out just past the correct measurement on the ruler. Securely tape the dry-erase marker in place so it will not move.
Stand the ruler back up on the end and place it next to your glass so the marker touches it.
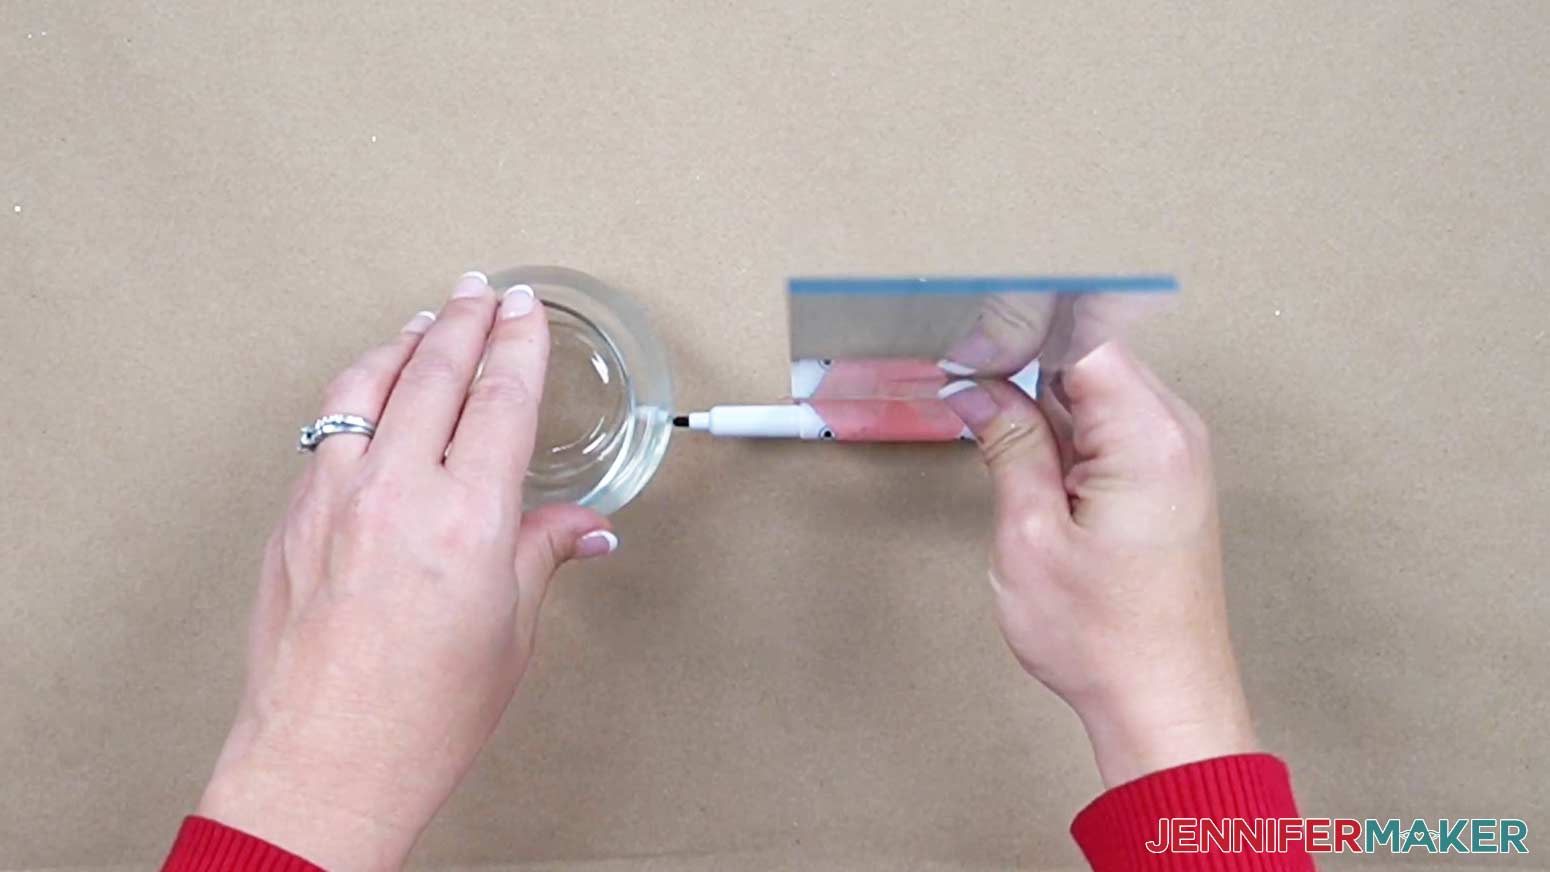
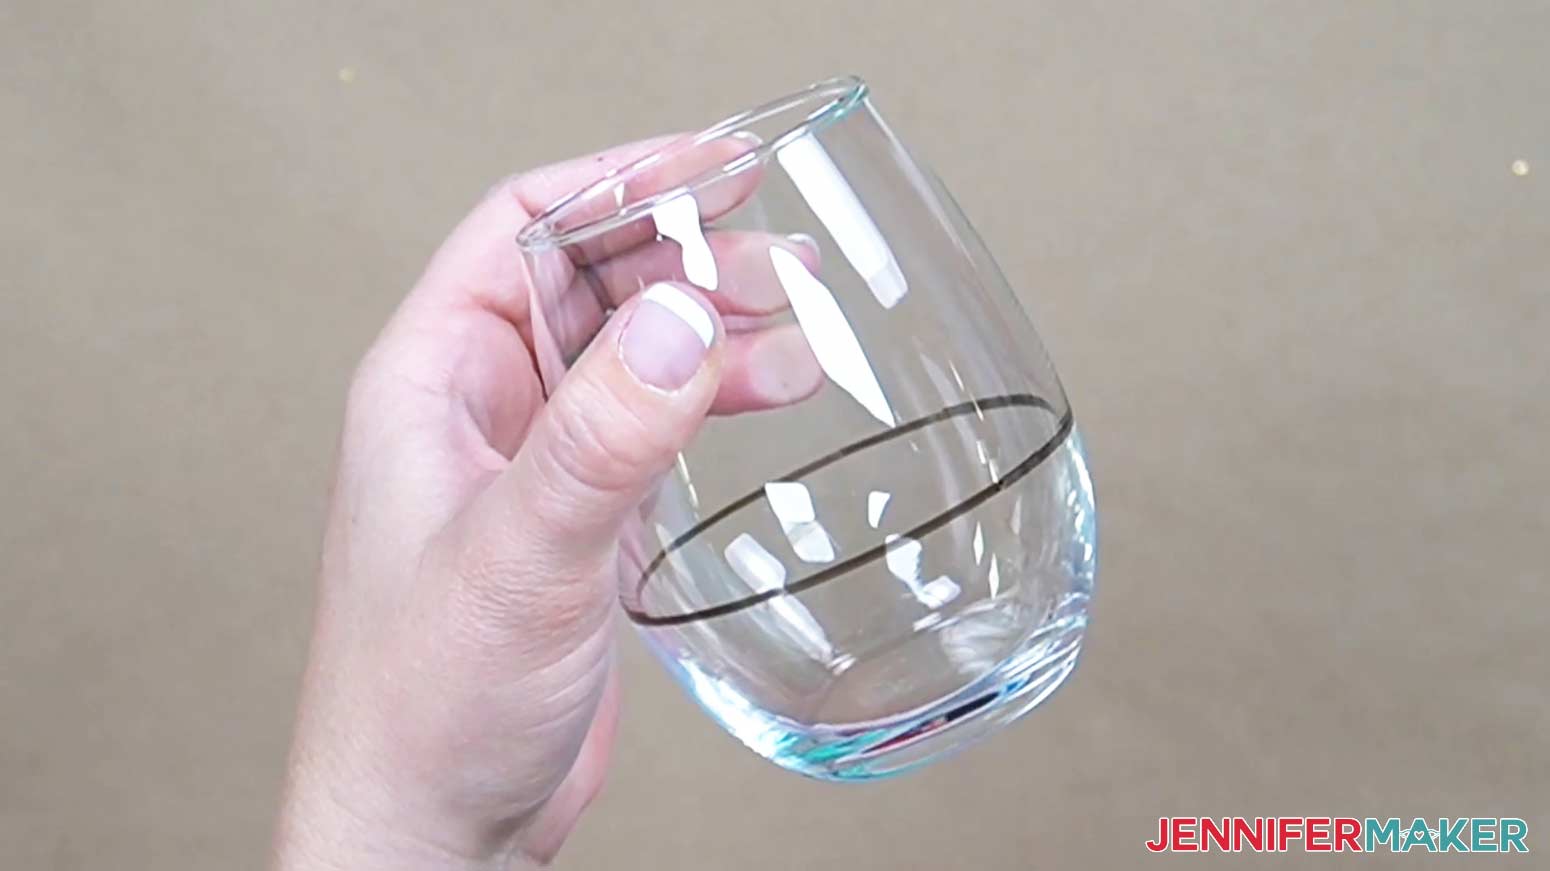
While holding the ruler in place with one hand, rotate the glass with the other. You will end up with a nice, removable guideline all the way around the glass! Make sure that all the glasses you want to make as a set are marked at the same time, so they all have guidelines at the same height.
After adding the guideline, you want to leave the bottom of the glass below the guideline exposed while protecting the rest of the glass from the glue. To do this, turn the glass upside down and apply the painter’s tape in a strip all the way around the glass just below the edge of the guideline.
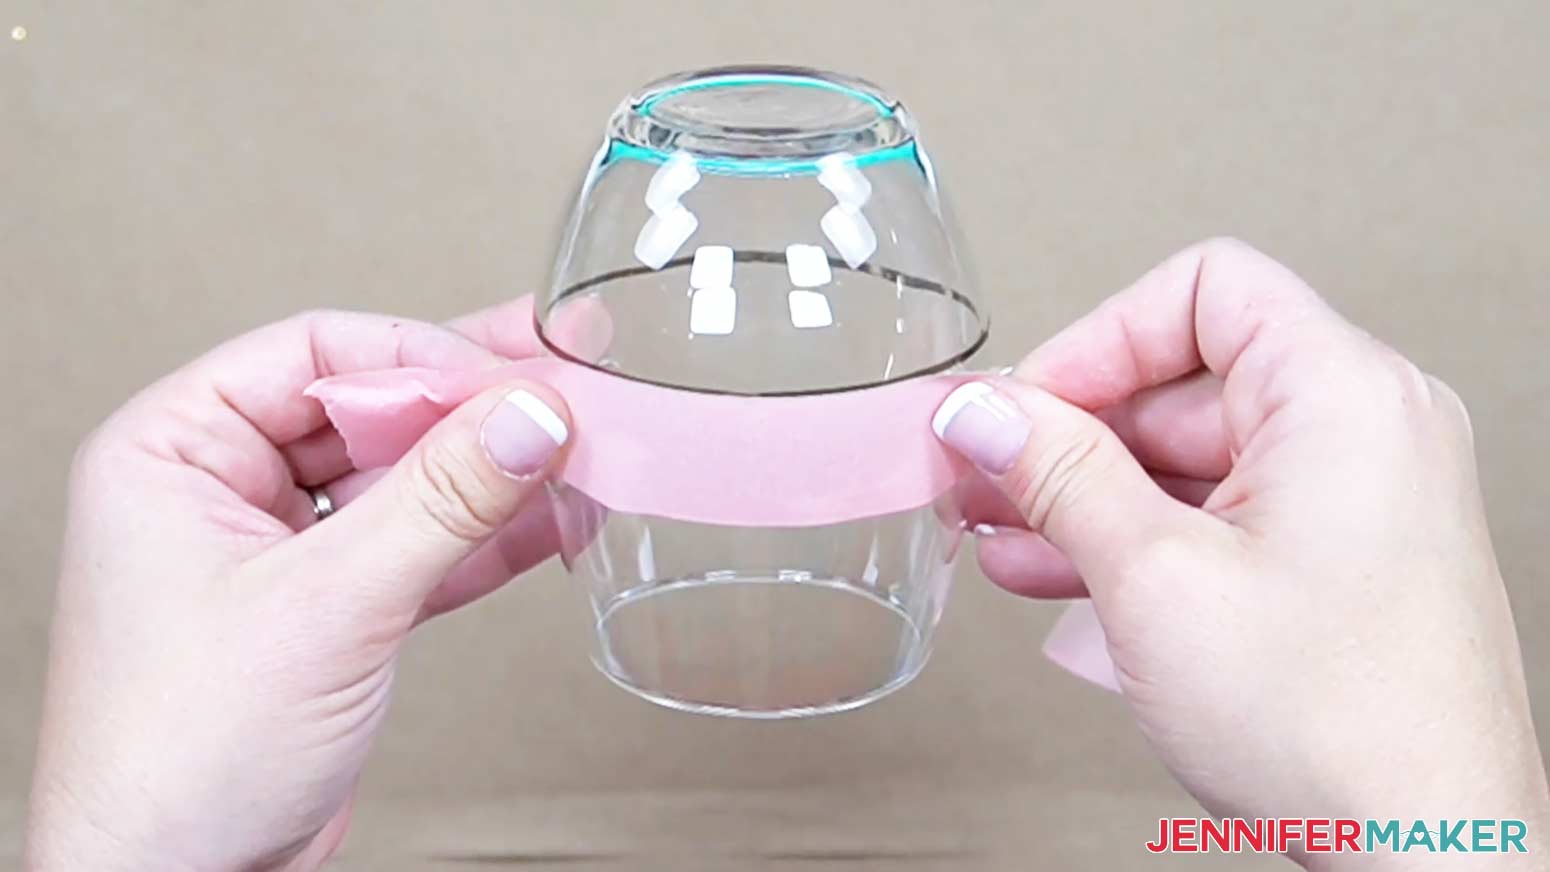
The easiest way to make a nice tight seal is to pull the tape snugly while laying it across the glass. Press the edge at the guideline down first and then smooth the rest of the tape down. Bubbles and creases on most of the tape won’t matter, but glue could seep under any bubble left on the edge next to the guideline.
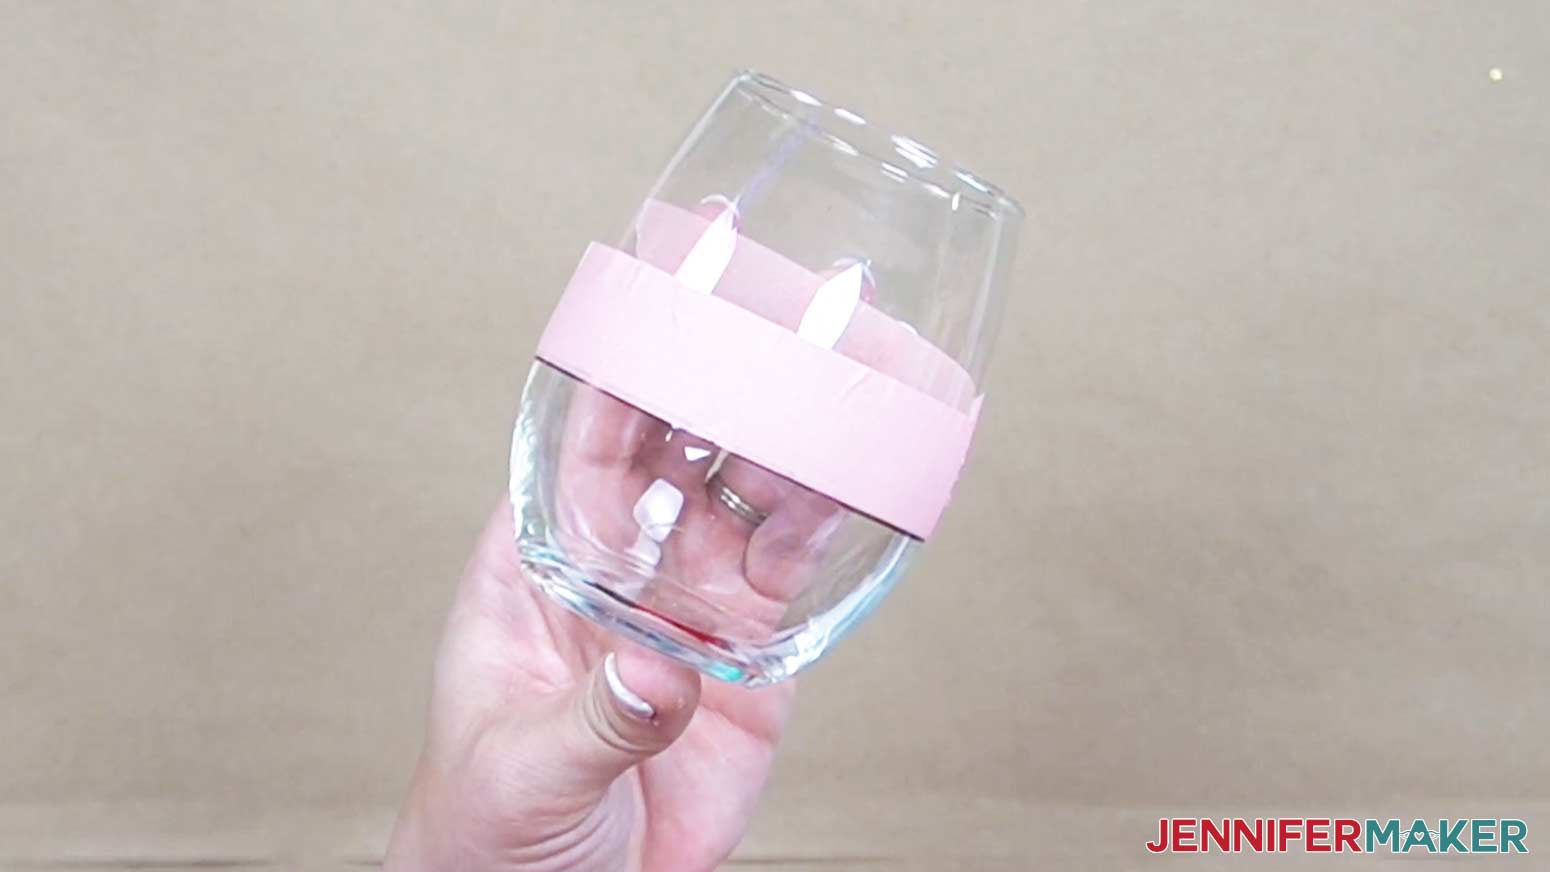
The dry erase marker will leave a fine powder residue that should wipe off easily, so once the tape is in place, wipe the marker guideline and any accidental fingerprints away with your coffee filter and alcohol. It's ok if your tape edge picks up a little of the residue from the marker. It won't have an effect on the finished layers of glitter.
Your glass is now ready for the glitter!
Put a pair of gloves on to protect your hands from the glue and glitter.
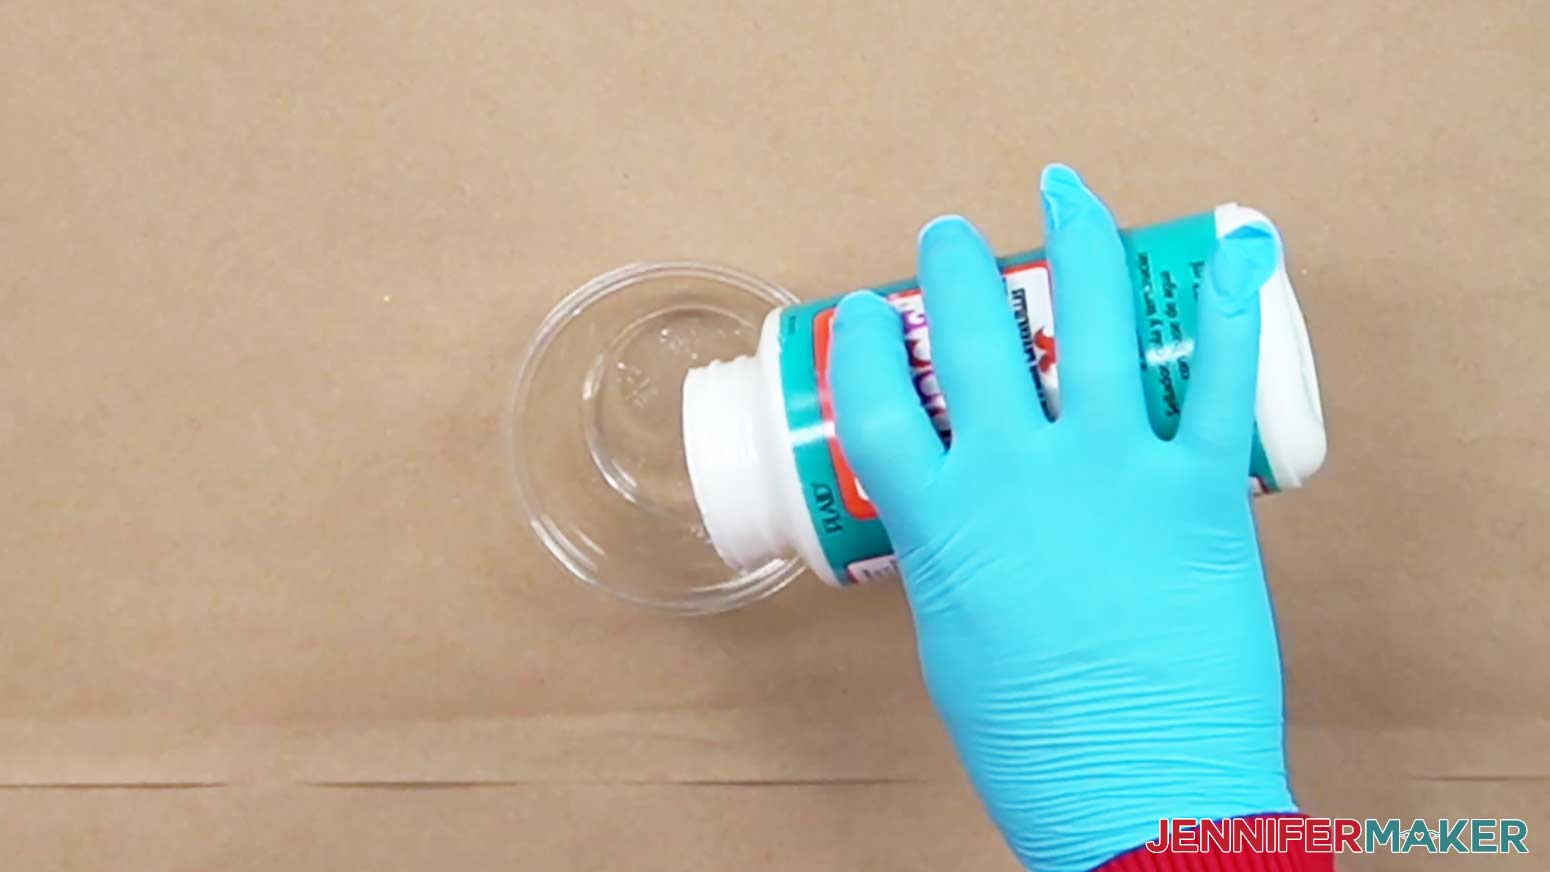
Mix up the Mod Podge in the container by rolling it back and forth on its side a few times. Pour a small amount of Mod Podge into a cup. A little can go a long way! (Be sure the Mod Podge is Dishwasher Safe so that you can safely wash your finished glass.)
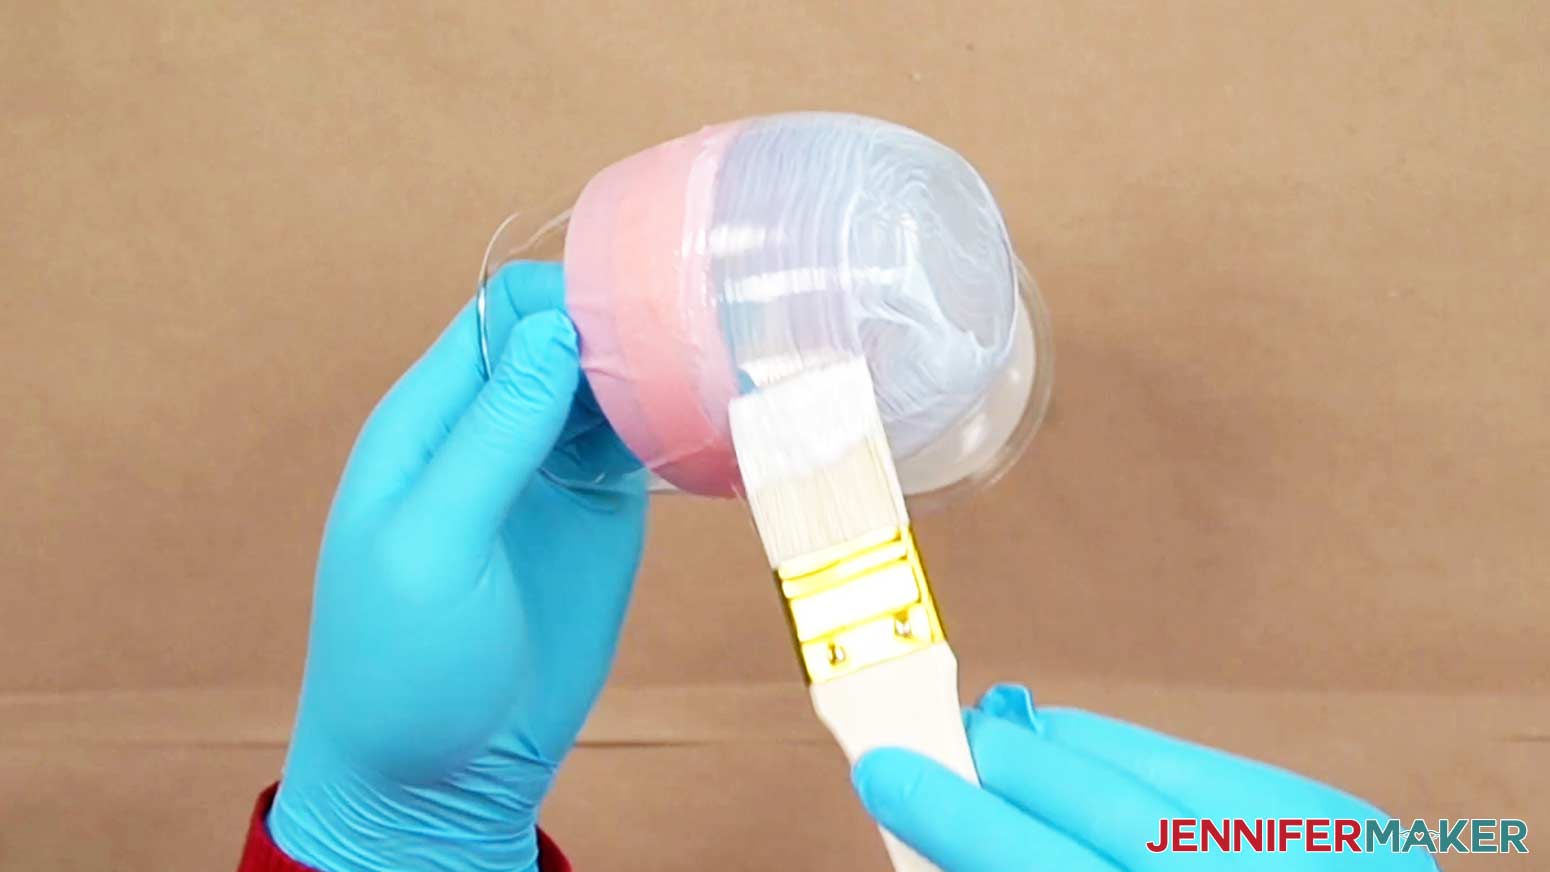
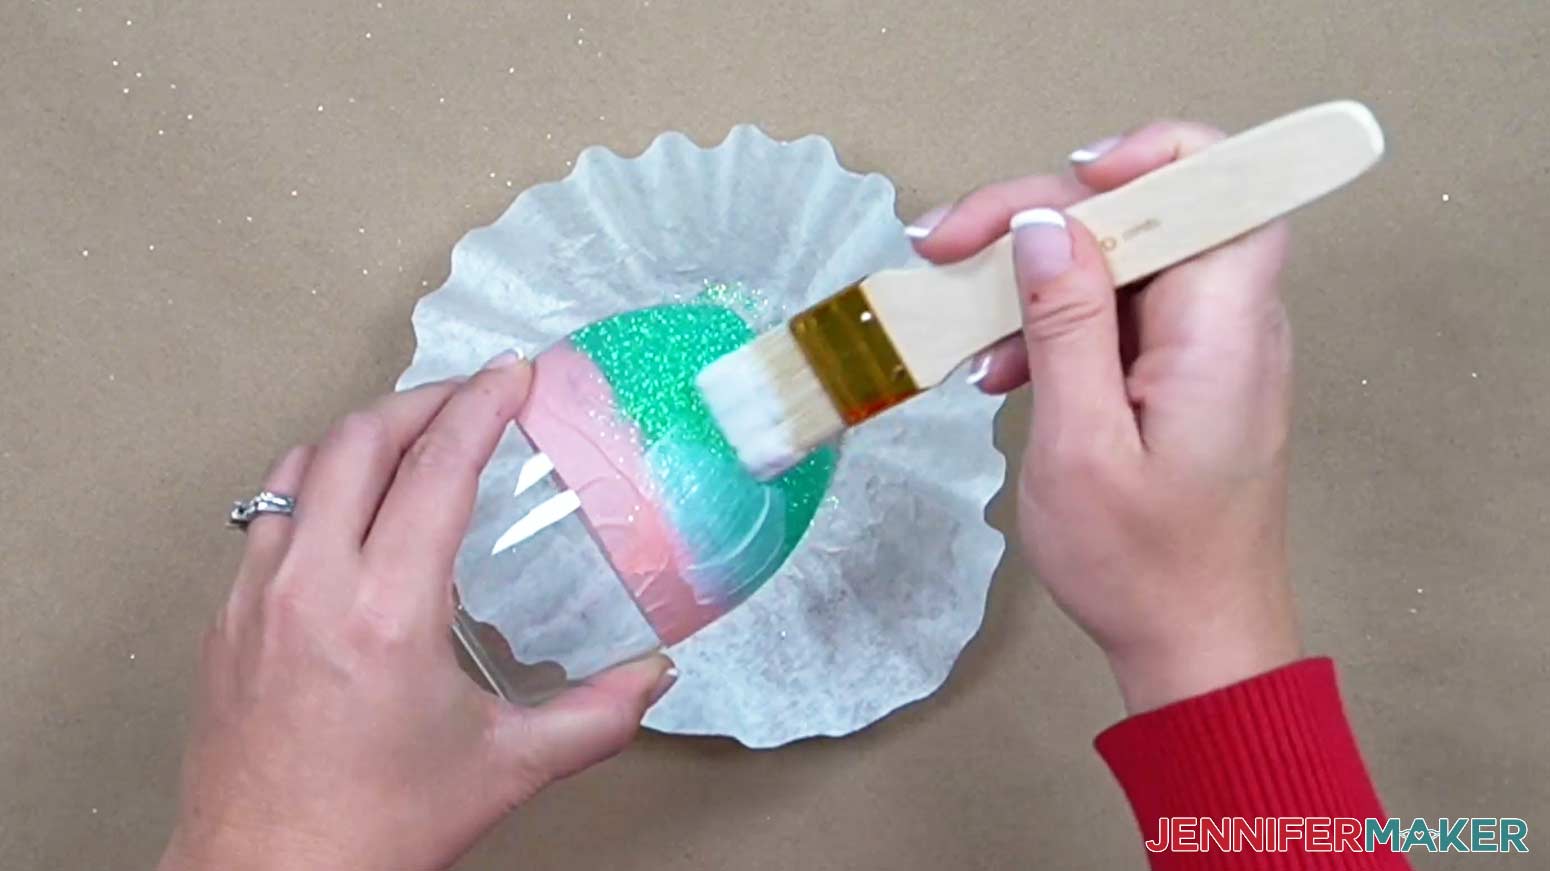
Use a paintbrush to brush the Mod Podge onto the glass above the tape. (You can either leave the glass on the table and rotate it as you paint, or pick it up in one hand and hold it to paint - whichever works best for you!)
Mod Podge will be white when it is applied but will be clear when dry. Try to minimize the number of streaks and globs in your glue on the glass, but don’t worry about having it completely smooth. You can brush right over the edge of the tape guideline, but make sure to not get the glue on the upper part of the glass.
After covering the whole bottom of the glass with Mod Podge (including the actual bottom!), it’s time to add the first layer of glitter. You can leave your glass sitting upside down on the table while you get the glitter ready.
Some glitter containers are easier to pour from than others. If your container does not have a pour-friendly lid, grab another plastic cup and pour quite a bit of glitter into it.
Flatten a coffee filter and place it inside a tote or box. This is going to be the catch basket for extra glitter and will help keep the stray glitter in your workspace to a minimum.
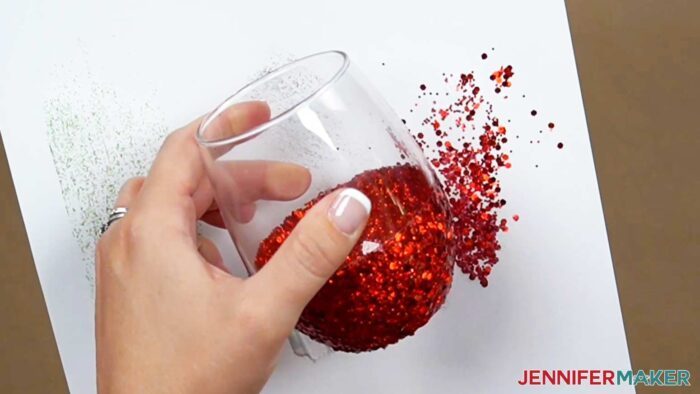
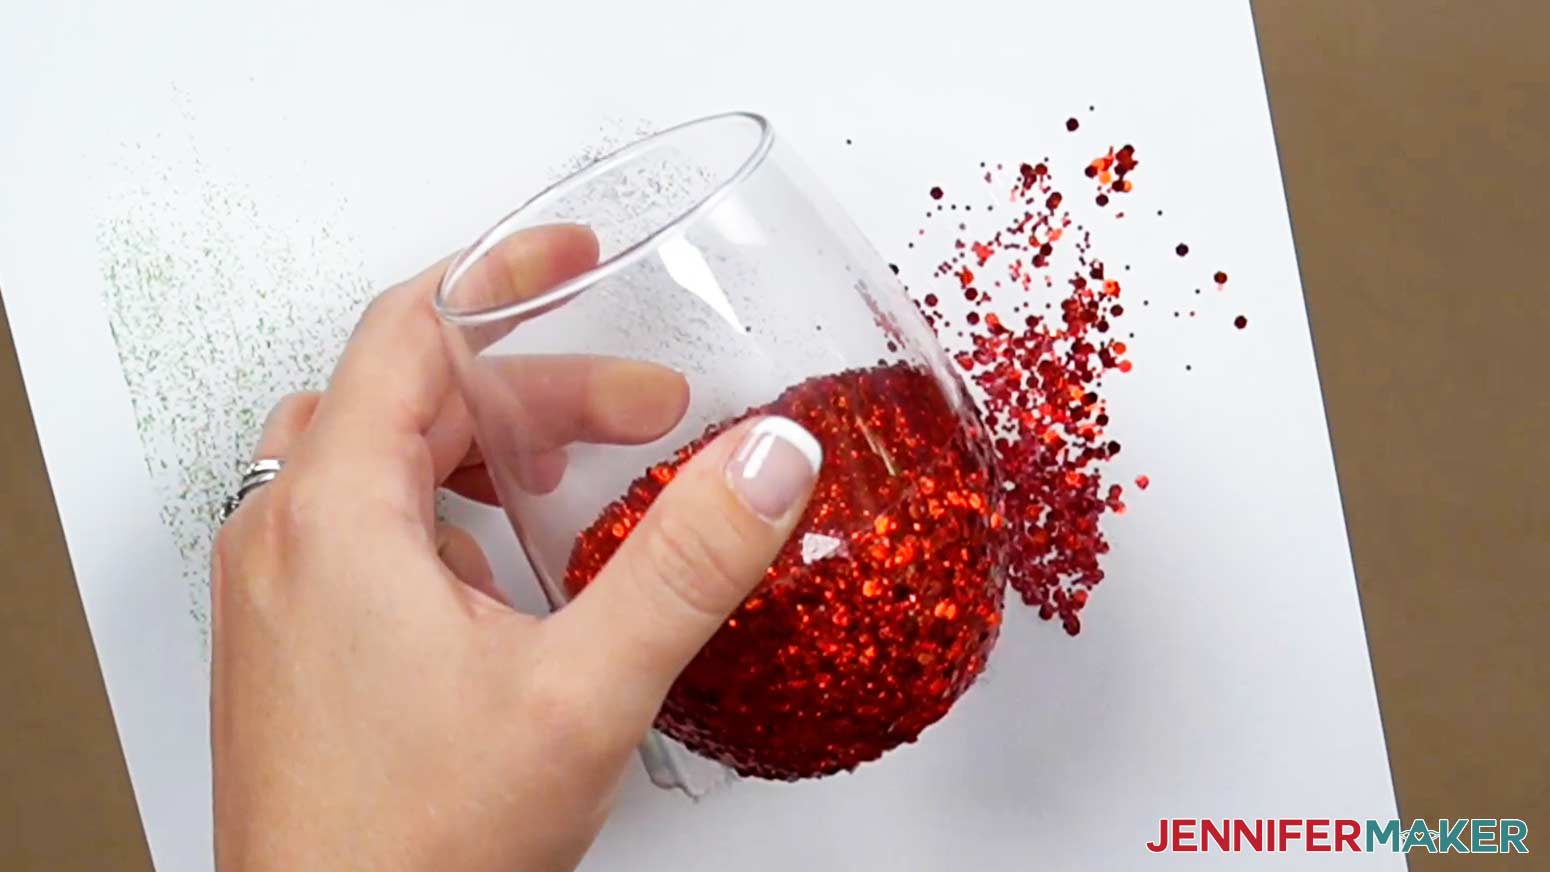
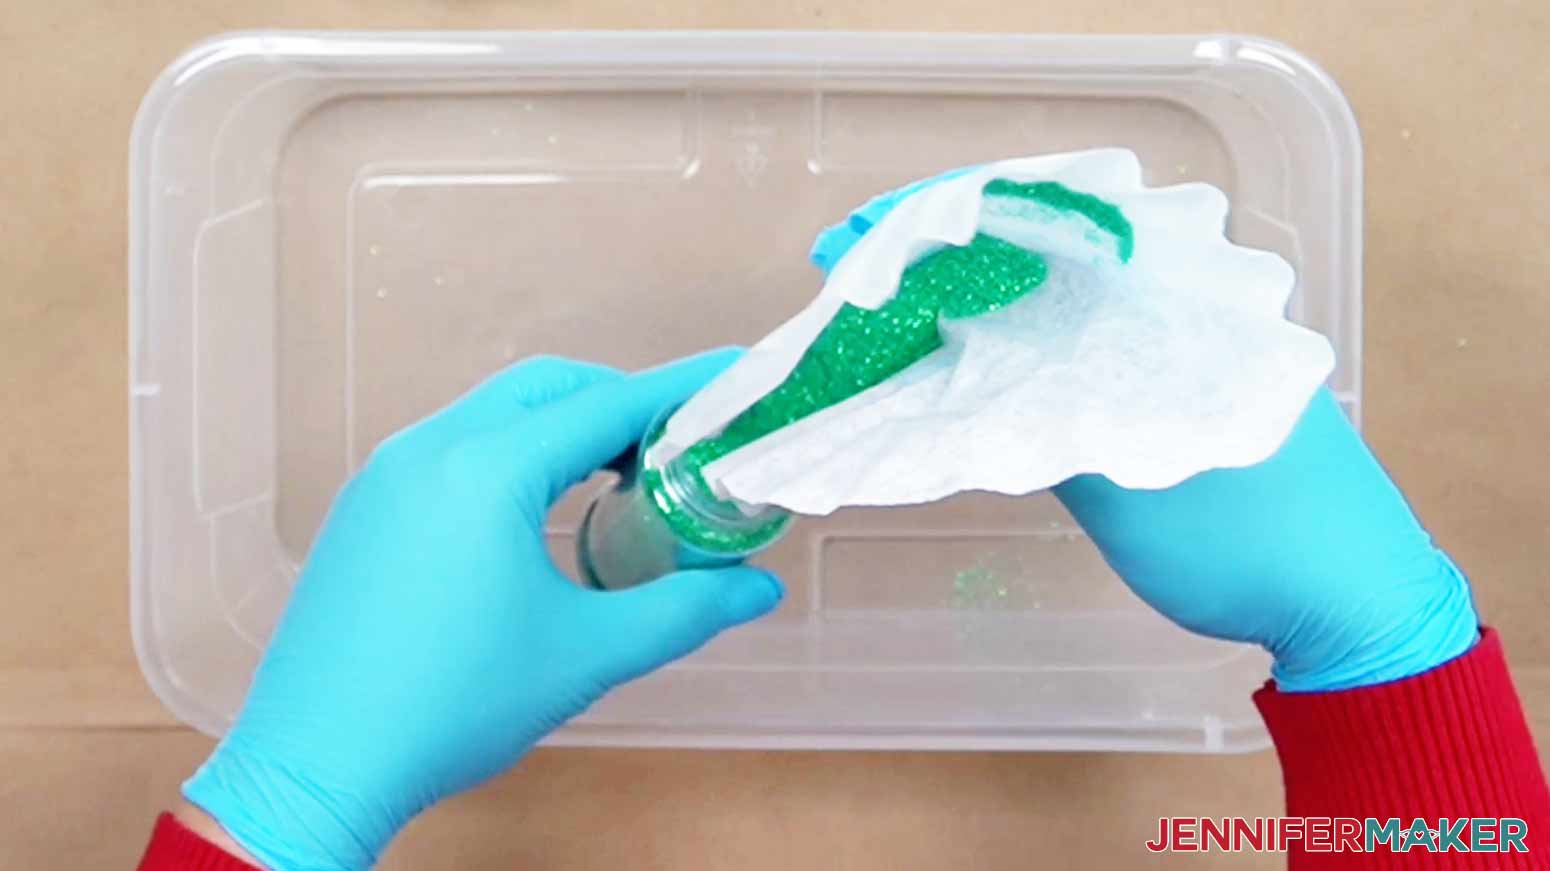
Now hold your glass horizontally over the filter inside the tote. I found the glass was small enough, I could easily hold it by the edge, but if you feel more secure with your hand placed inside the opening of the glass, please feel free to do that instead.
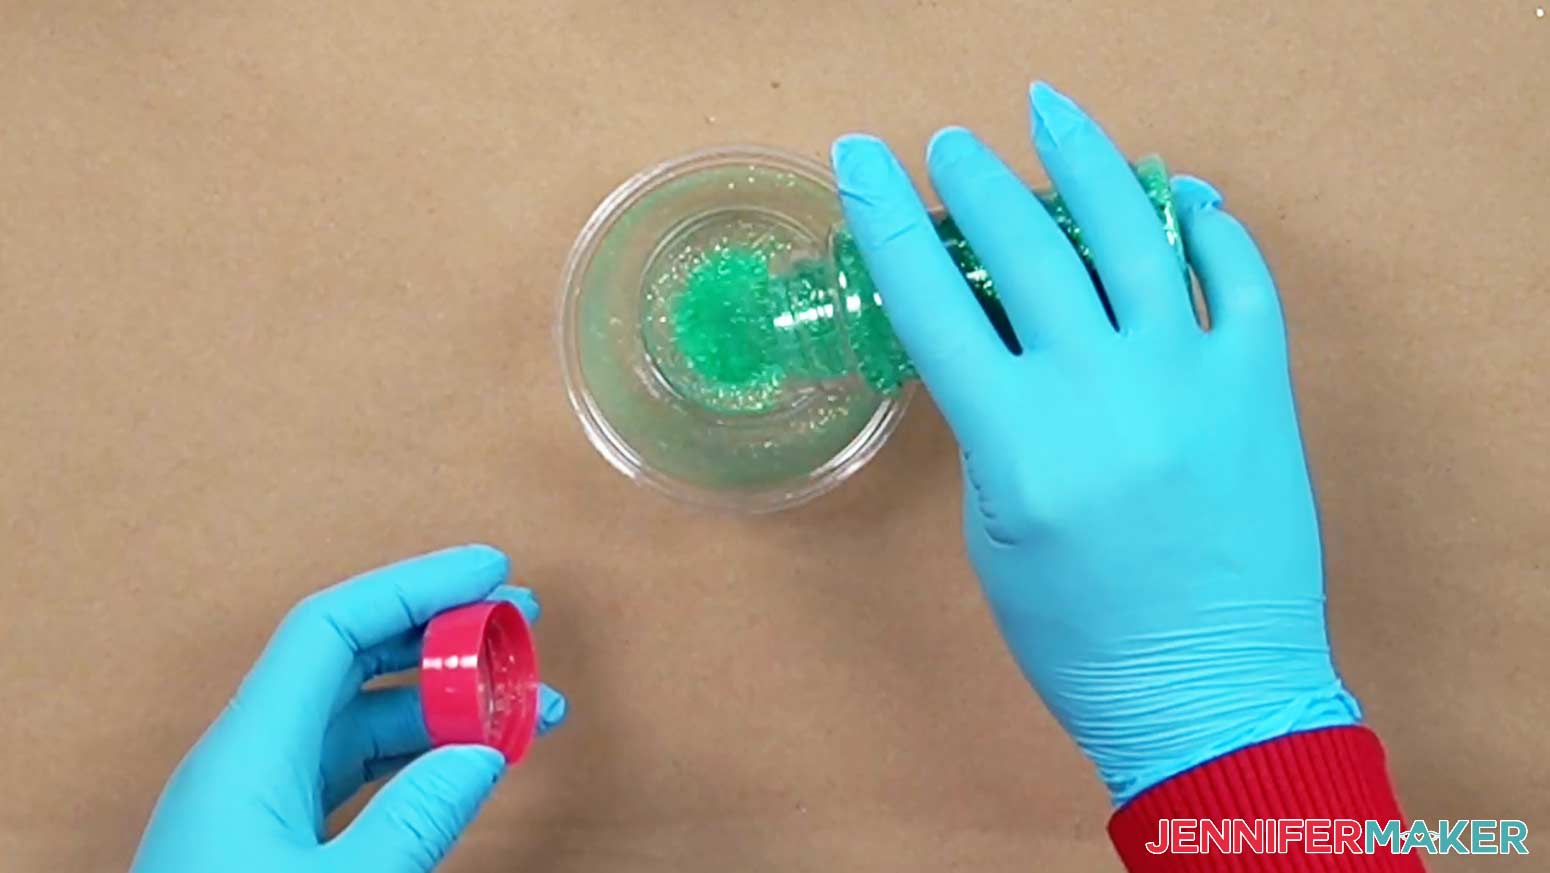
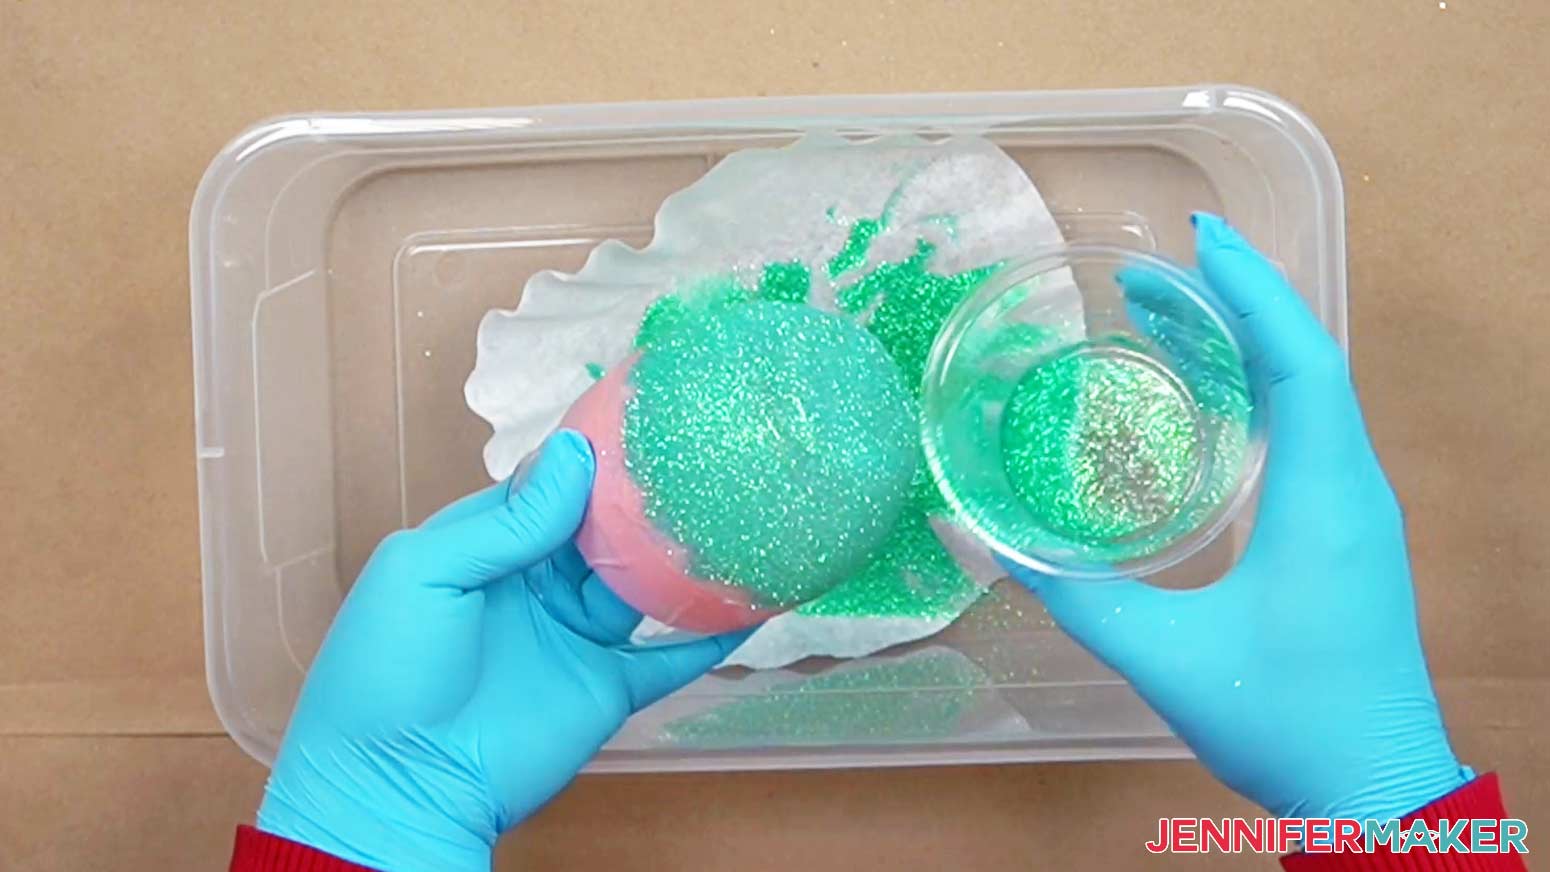
Begin pouring glitter over the bottom part of the glass where the Mod Podge was applied. Rotate the glass as you pour. Excess glitter will fall off and drop onto the coffee filter.
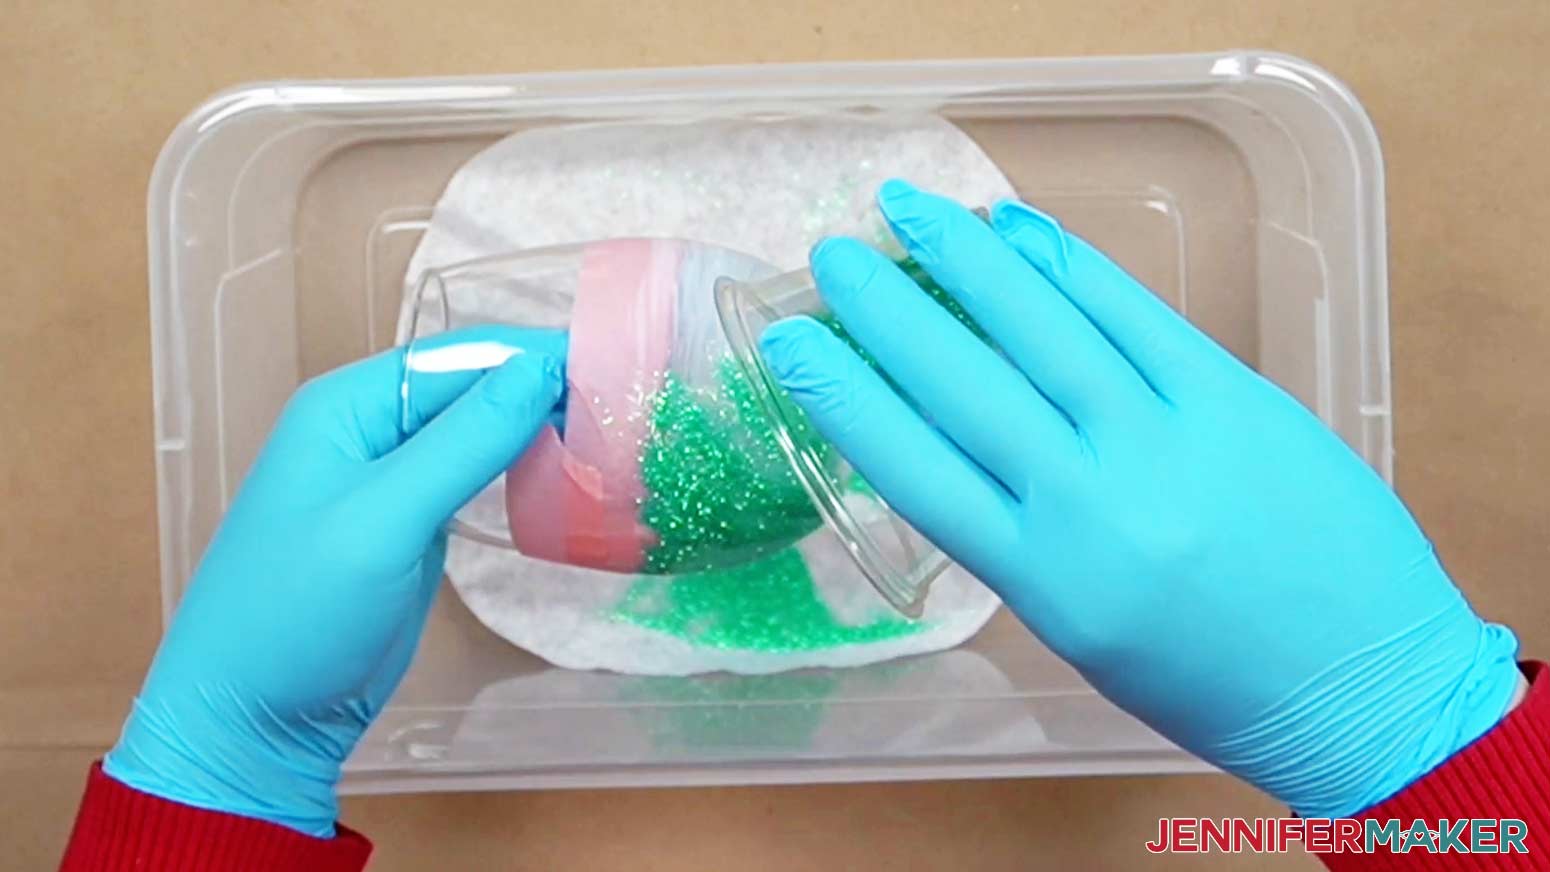
Once you’ve added glitter all the way around the glass, tilt the glass slightly with the bottom up and pour glitter directly onto the edges and bottom, rotating the glass again as you go.
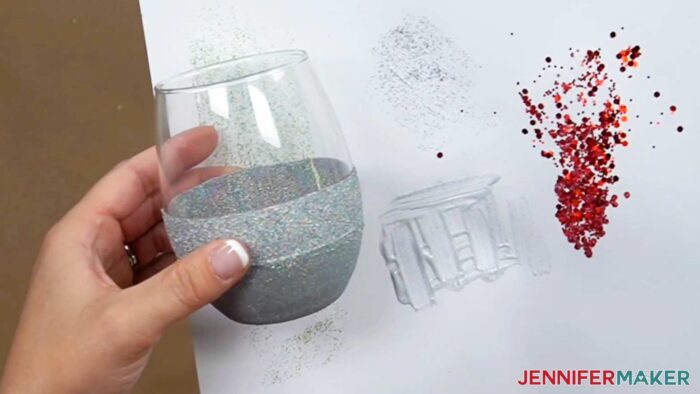
This first layer will probably not coat the entire glass very evenly, but don’t worry because there are more layers to go!
When you have glitter covering the entire area that you painted with Mod Podge, tilt the glass upright and give a small shake to knock off any glitter that didn’t adhere to the Mod Podge.
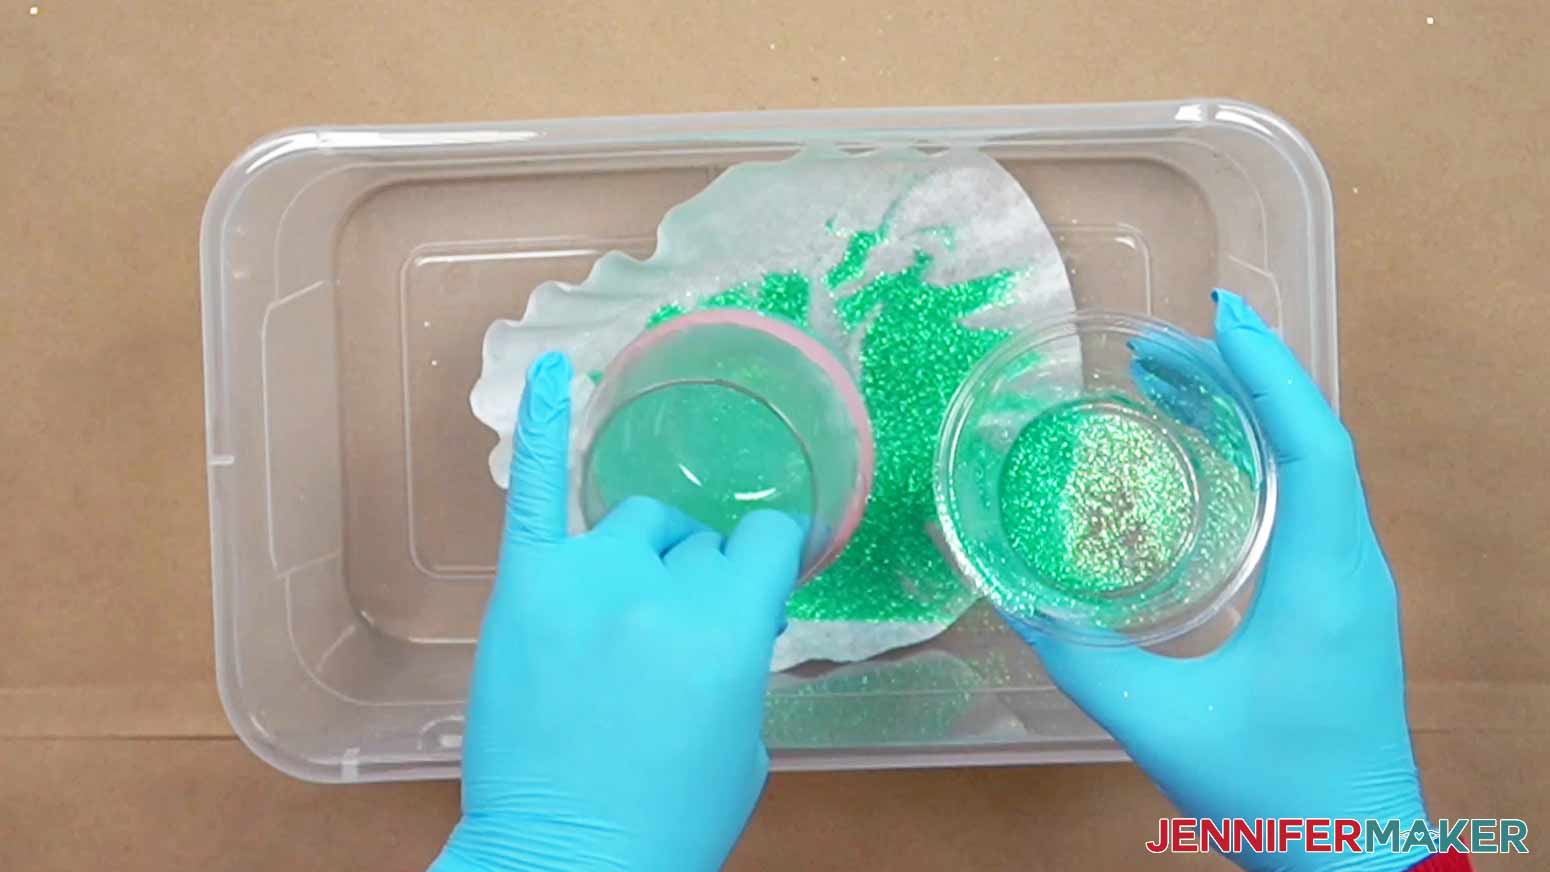
The glass is now ready to set aside to dry. Flatten another coffee filter and set the glass upside down on it to dry for one to two hours. The coffee filter will catch any stray glitter that falls from the glass while it dries.
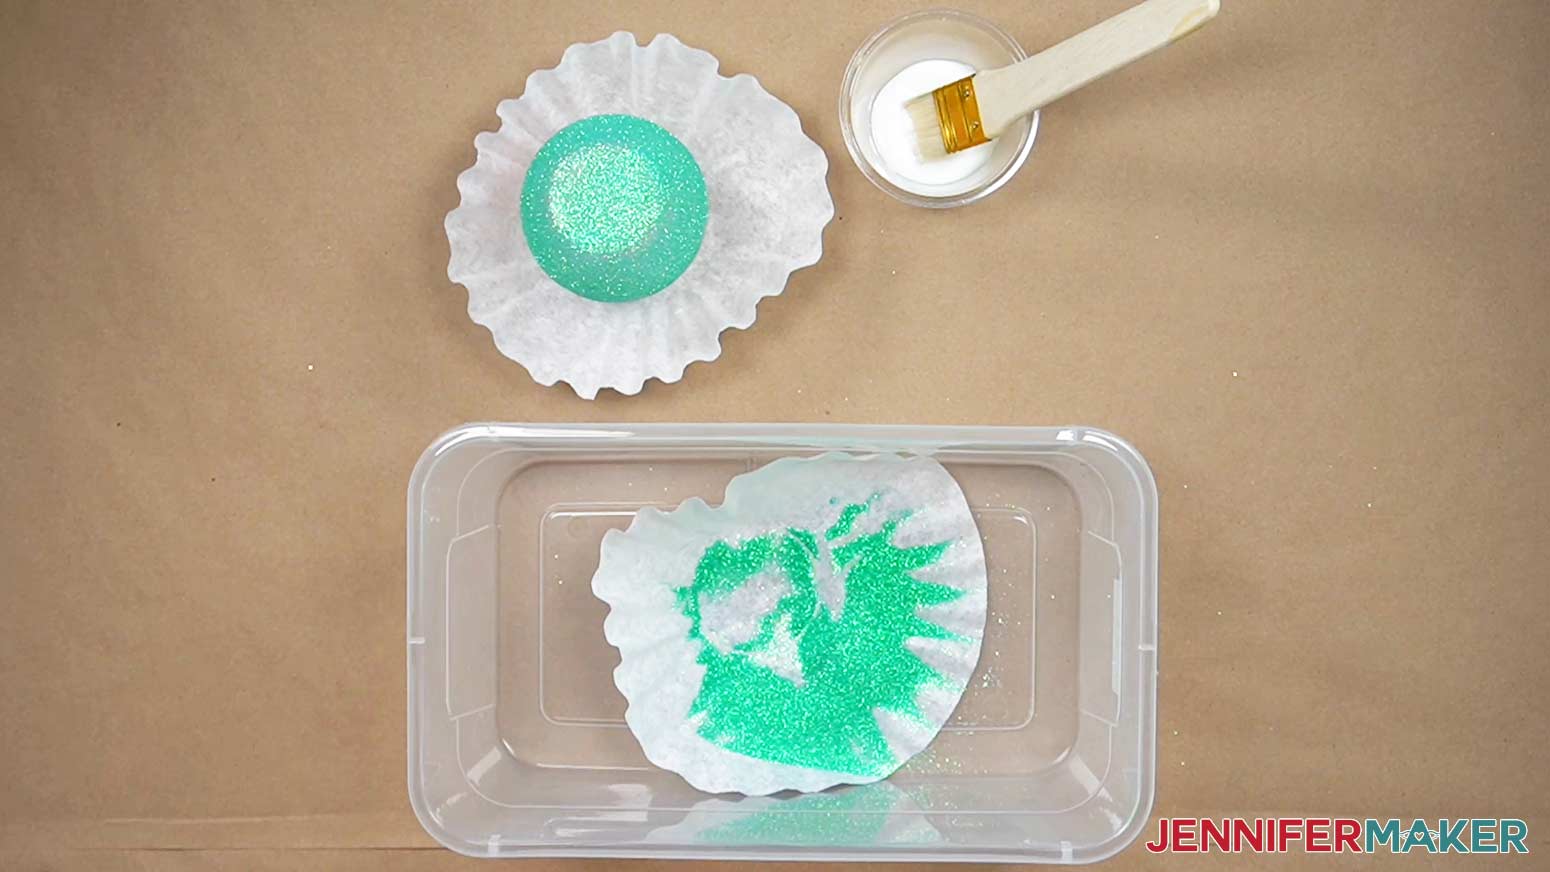
While the glass dries, wash your paintbrush with warm water and clean up the glitter from the first layer so you can reuse it. To easily clean the glitter, gather up the coffee filter at the edges and form a pour spout on one end to pour the excess glitter back into the cup or glitter bottle.
If excess glitter fell into the tote or box, simply shake it to one corner and pour it onto the coffee filter for transferring back into the smaller containers.
After one to two hours, the glass will be ready for the second coat of glitter. If you can see any “wet” looking areas or can see areas of Mod Podge that are still white in color, allow the glass to dry a little longer.
Follow the steps above to apply the Mod Podge and glitter again. Don’t be surprised if some excess glitter comes off the glass and sticks to your paintbrush while applying the next layer of Mod Podge. That's normal as the glitter hasn't been sealed yet.
If you are working on multiple glasses at the same time and using different colors of glitter for each, make sure to have a cup of Mod Podge for each color. The excess glitter will transfer from your paint brush to your Mod Podge cup. You’ll also want to either have multiple paintbrushes or wash your paintbrush with warm water between each color.
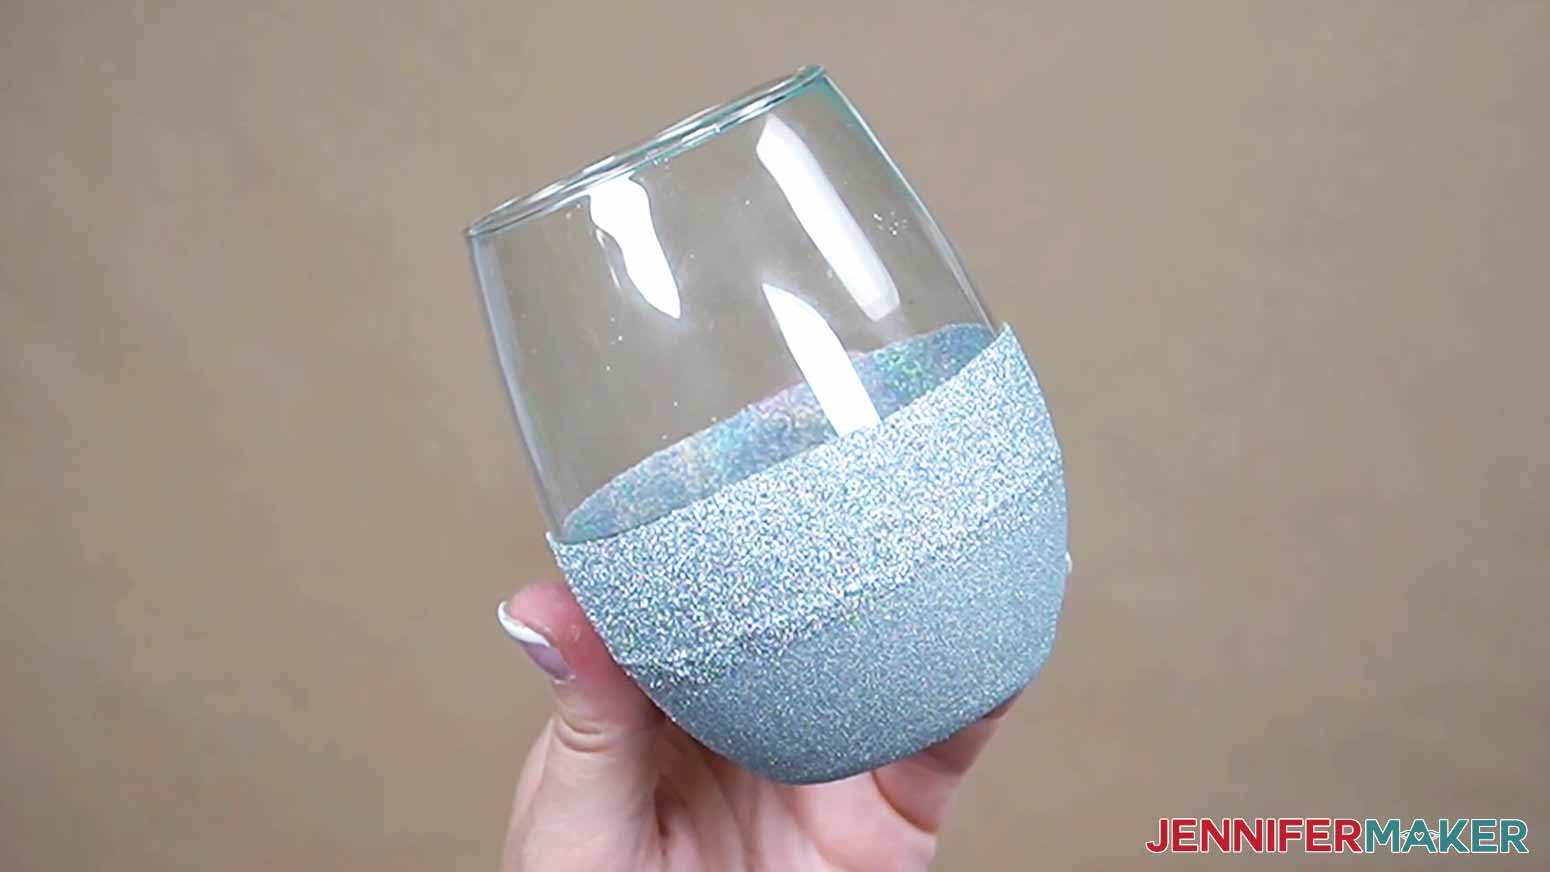
After allowing the second coat to dry, hold the glass up to a light and look through the inside to see if there are areas that allow light in and still need to be coated with more glitter.
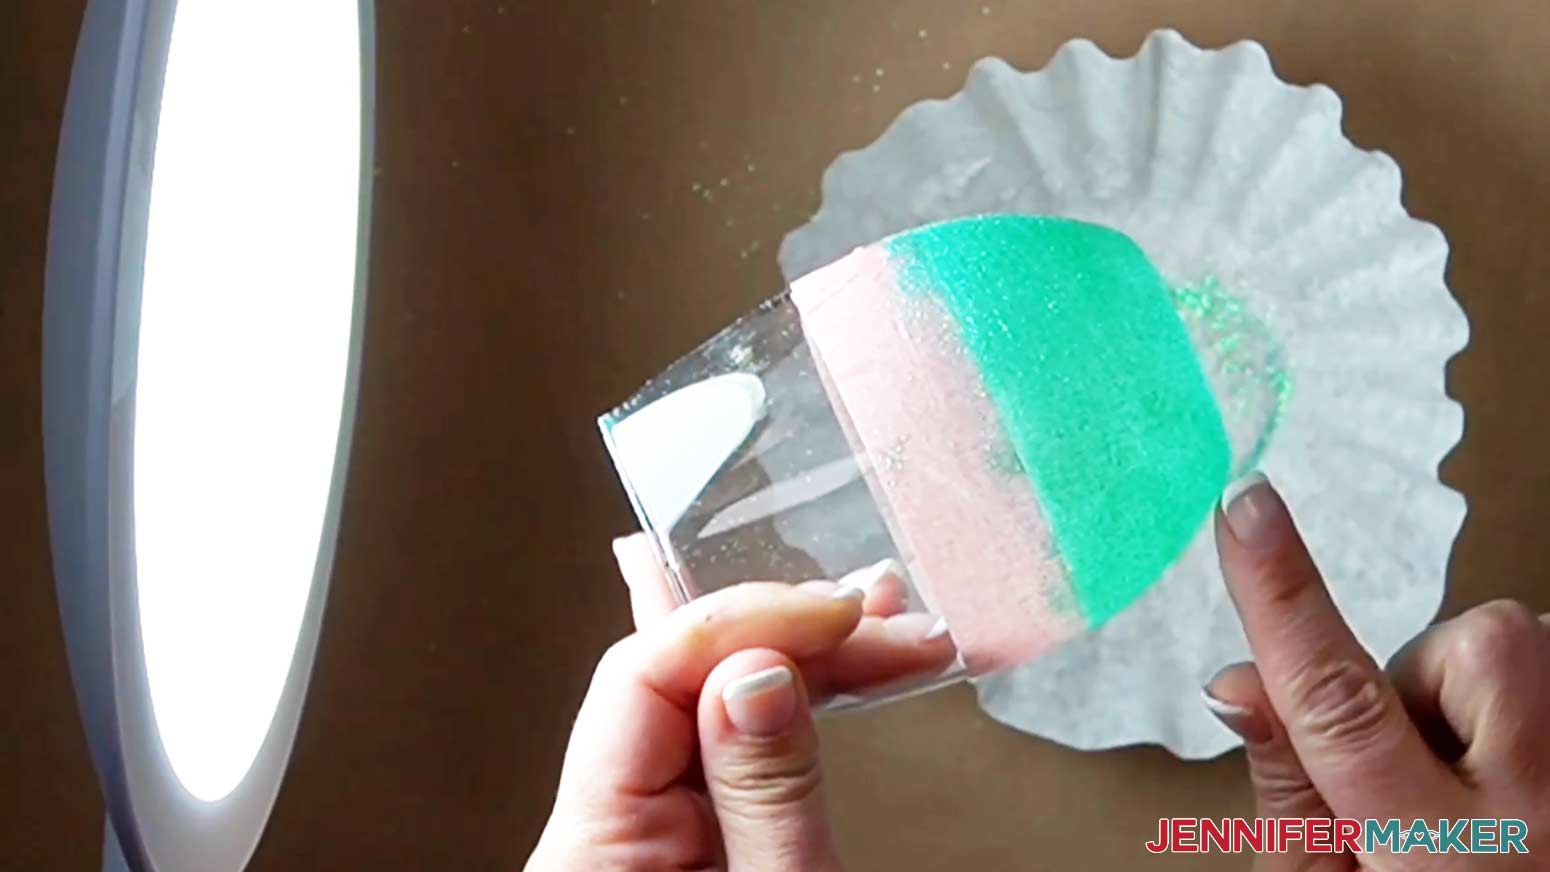
Some colors I used seemed to do fine with two layers of glitter, while others needed a third. If your glass needs one more layer, let it dry and then apply a third coat.
Once your glass has all the glitter layers it needs, apply one more layer of Mod Podge to form the seal over the glitter. This last sealing coat will allow you to handle and wash your glass without the glitter coming off. Make sure to thoroughly paint the entire glittered area. Change directions with your brush occasionally to make sure the glue is getting into all the tiny crevasses between the bits of glitter.
Set the glass down to dry one more time. Wait for at least two hours before touching the glued area.
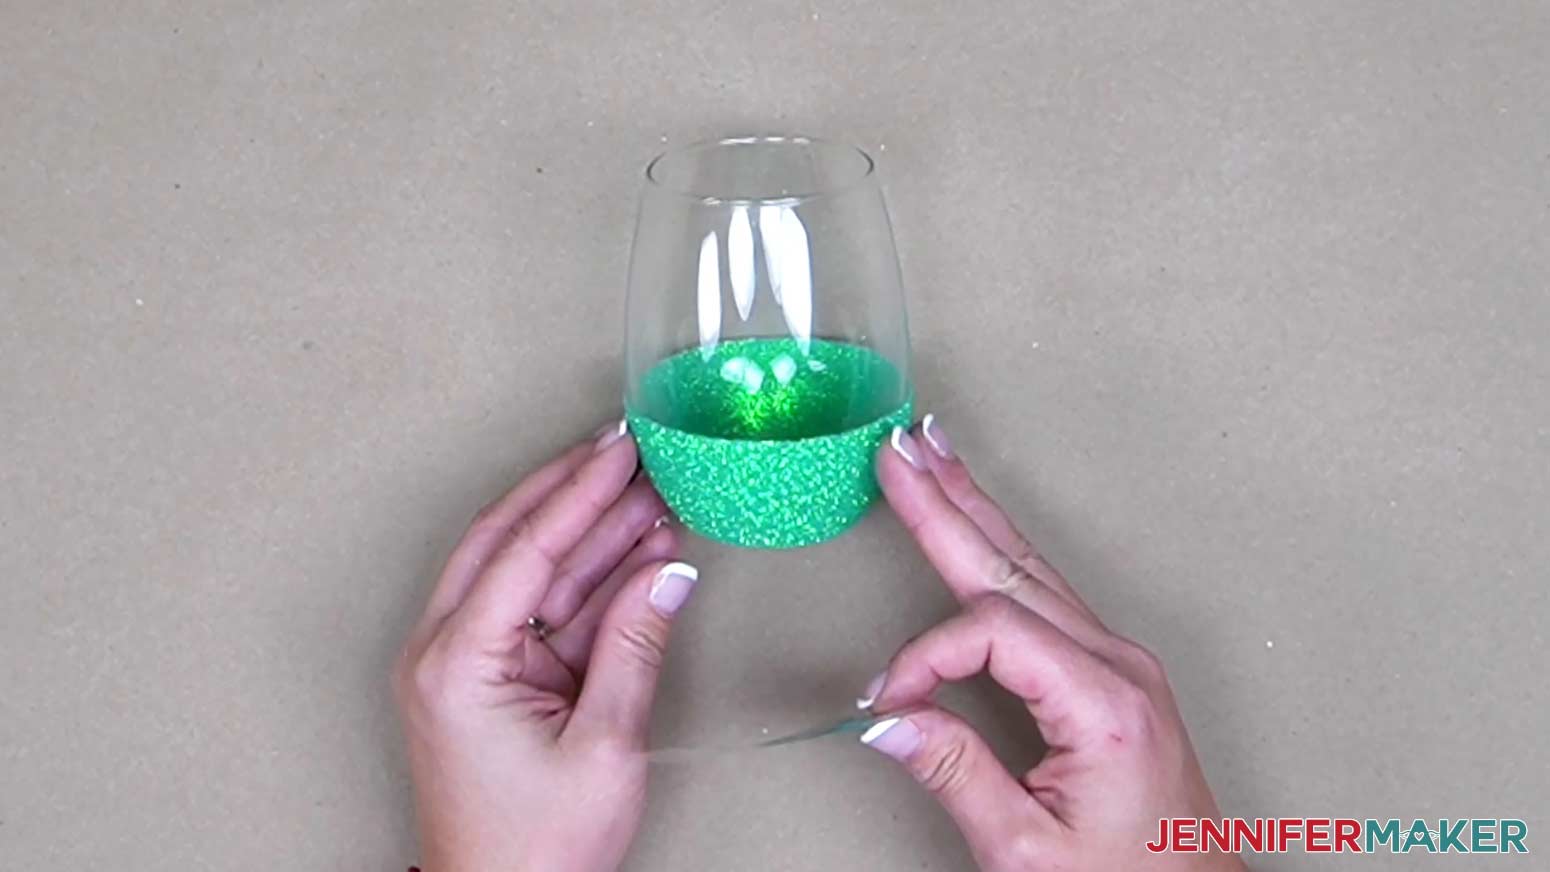
Once the sealing coat has dried, it’s time to remove the tape guideline! Find the edge of the tape and very carefully begin rolling it off the glass as flat as possible back along itself. This technique will help keep the edge of the glitter as nice as possible.

If some of the glitter that should stay on the glass comes up slightly when pulling the tape, you can push the edge of the glitter piece back down and carefully apply some more Mod Podge on top to reseal it. The Mod Podge does make the glass have a little bit of a milky color when it dries, so try to make sure to keep the glue to the glitter and off the glass. (If you accidentally get Mod Podge on the glass where you don't want it, you can wipe it off while it is still wet and clean the area with a little bit of alcohol.)
Allow a minimum of 24 hours for the glass to thoroughly dry before washing it. Though the Mod Podge is labeled as Dishwasher Safe, I recommend only hand washing the glasses once vinyl decals are added.
The glass is now ready for vinyl!
STEP 2: GET MY FREE WINE GLASS DESIGN FILES
Download my Wine Glass Decals SVG/DXF/PDF files from my free resource library. It's Design #447.
You can cut the printable PDF by hand, but I'll show you how to cut SVGs in the collection with a Cricut.
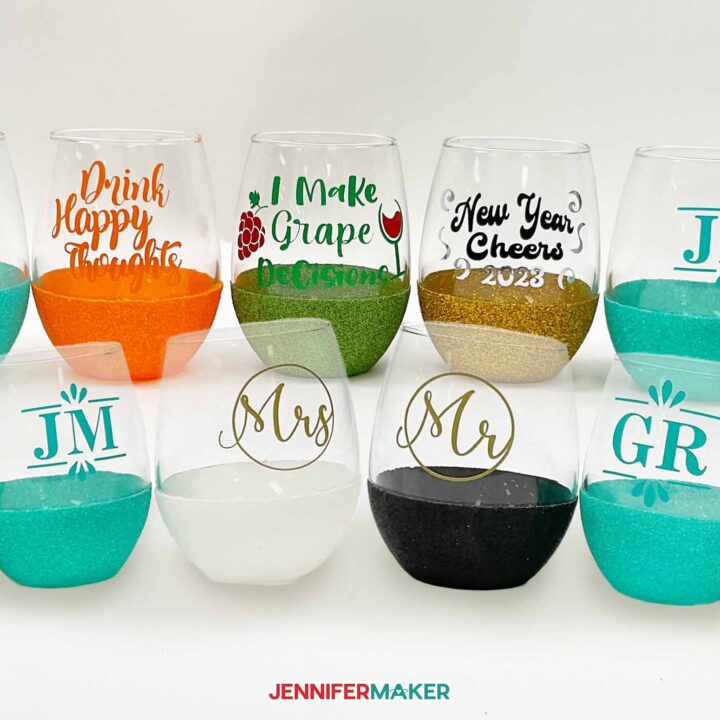
The file includes five different designs you can place on your glasses:
- A New Year’s theme,
- a MR and MRS theme,
- and two different fun phrases that can be used year-round.
I'll also show you how to create a monogram using the “Monogram” function in Design Space.
Upload the SVG and add it to your Canvas.
If you are not sure how to upload an SVG cut file to Cricut Design Space, watch this helpful video training series I made.
If you are on an iPad or iPhone, here is how to download and upload SVG files to the Cricut Design Space app.
STEP 3: PREPARE THE DESIGNS
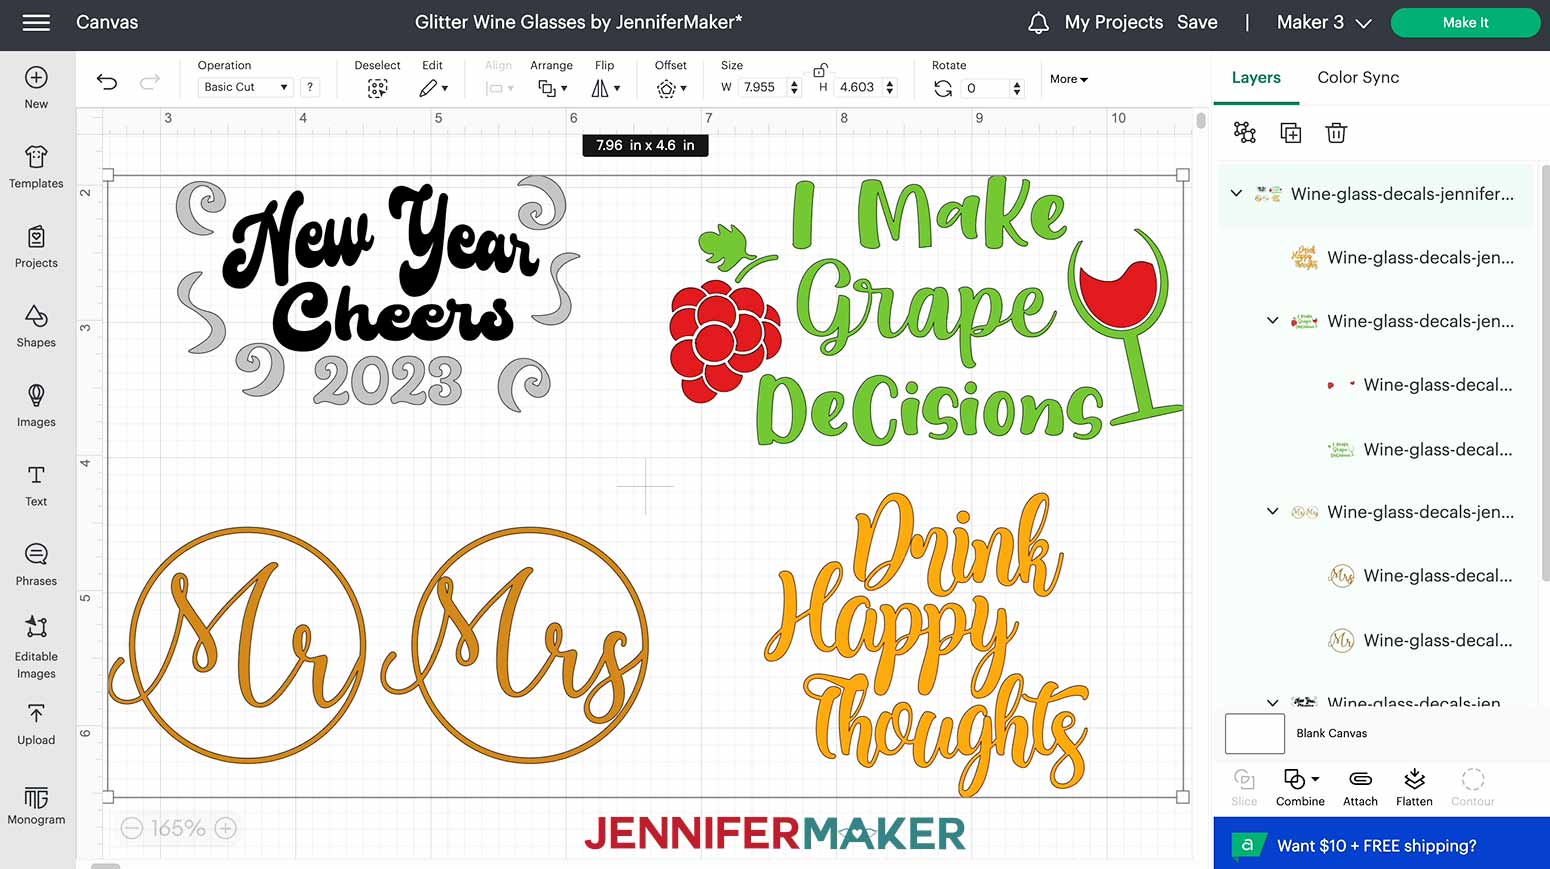
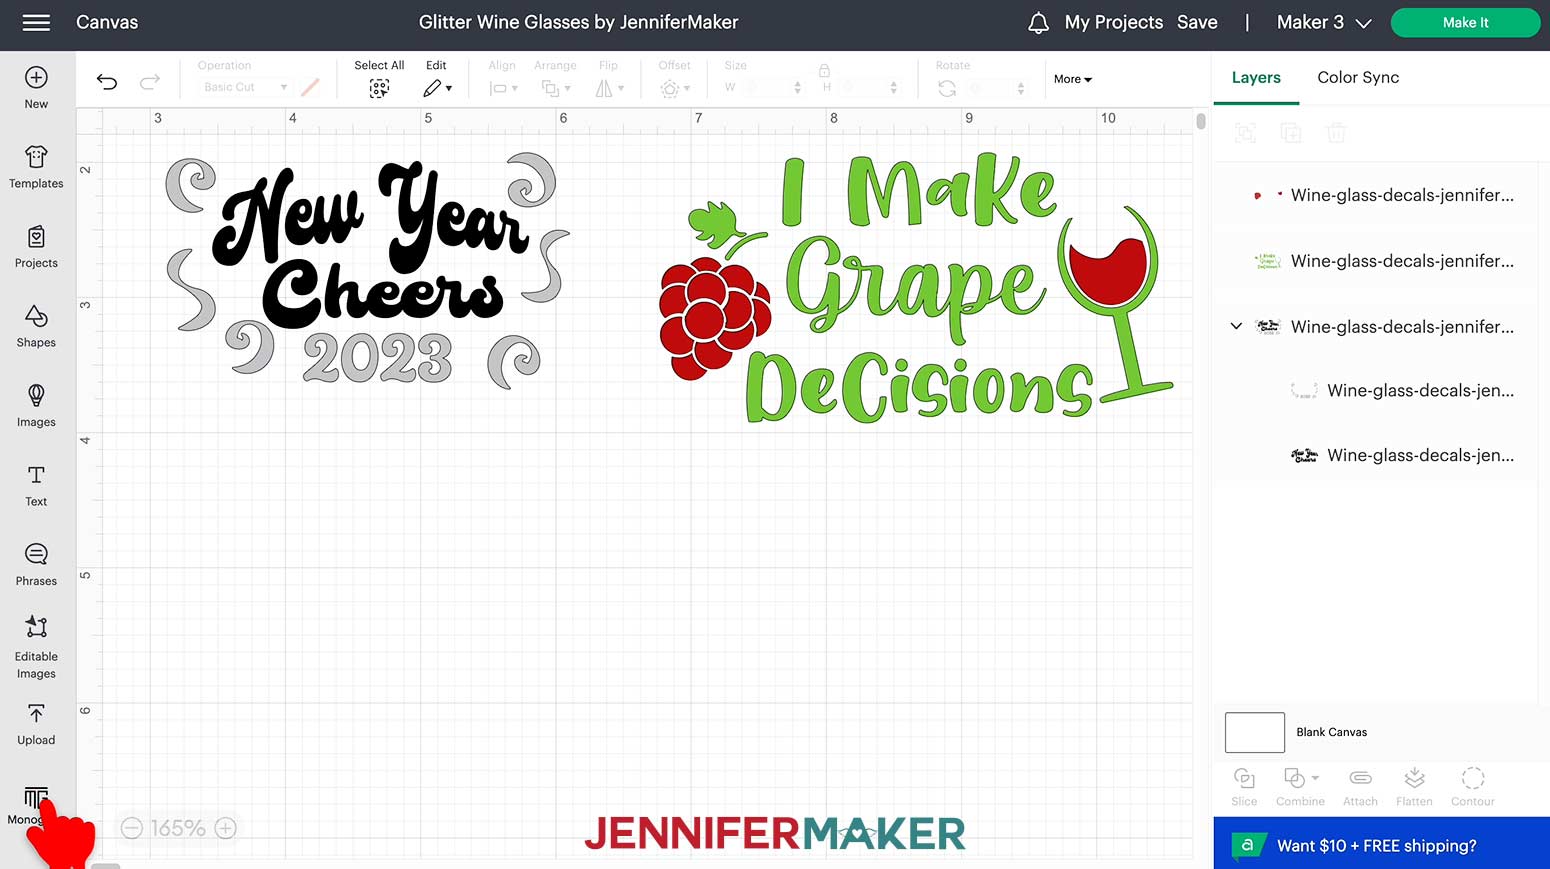
The file includes all the designs in one set. Here is how the collection looks on my Canvas.
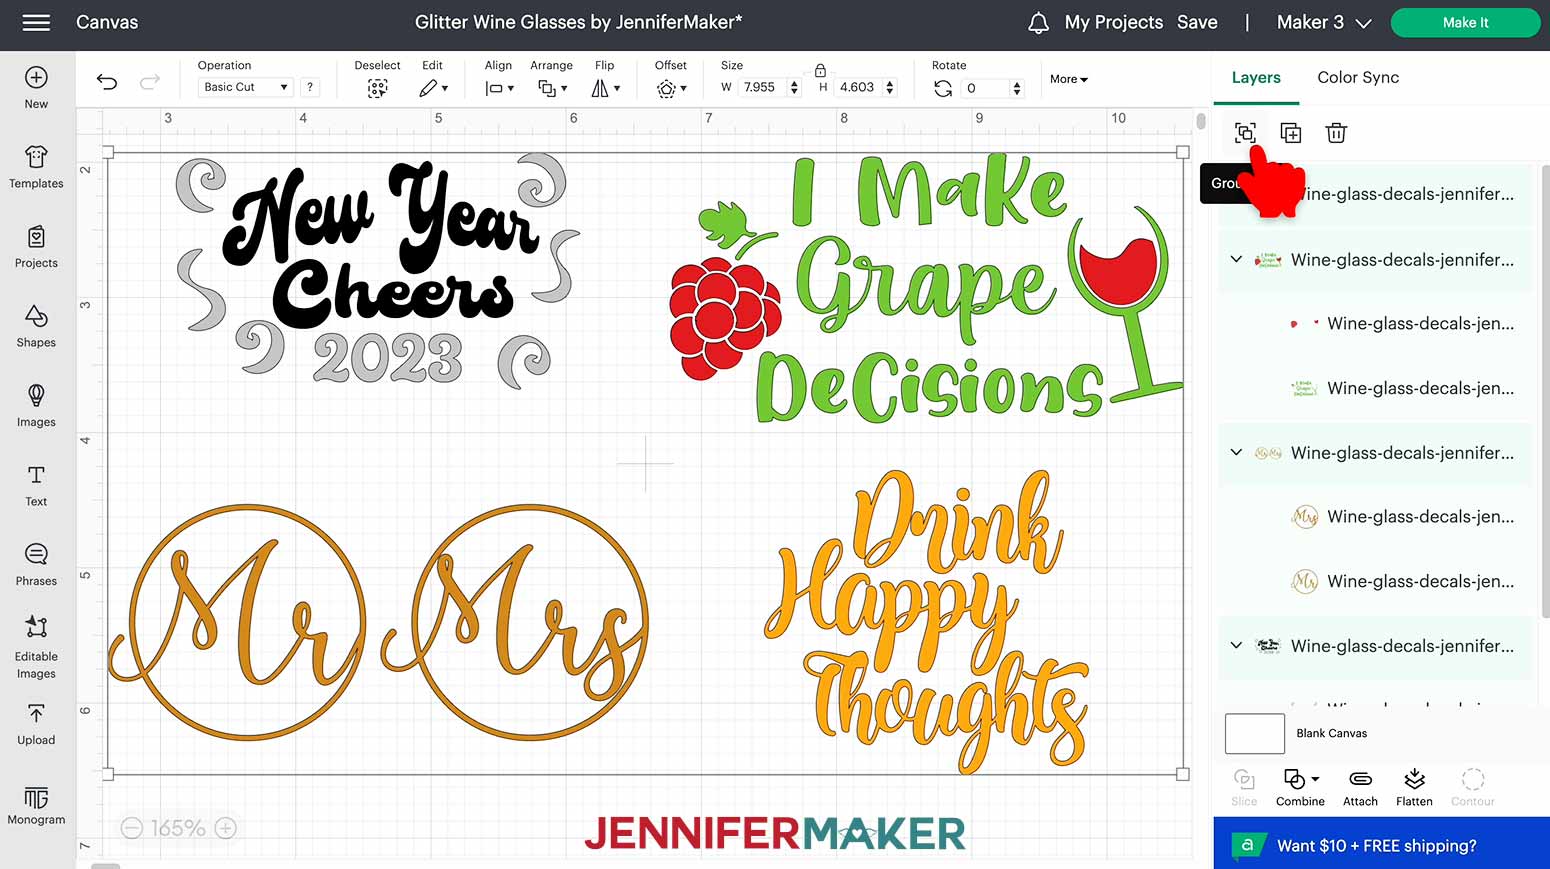
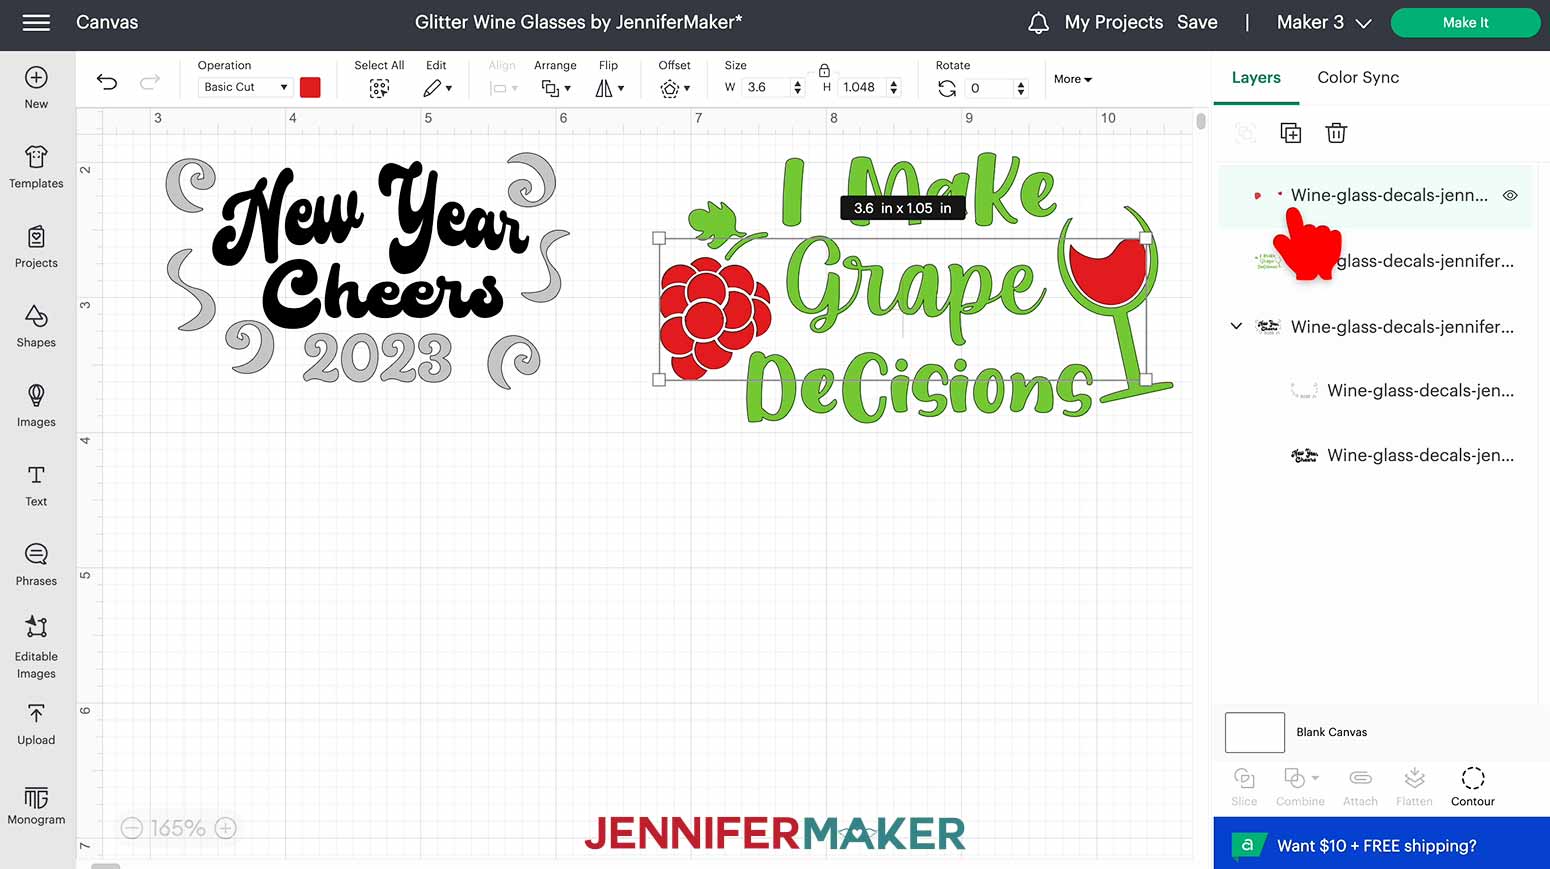
To use only the designs you need, select the set and click “Ungroup” above the Layers Panel.
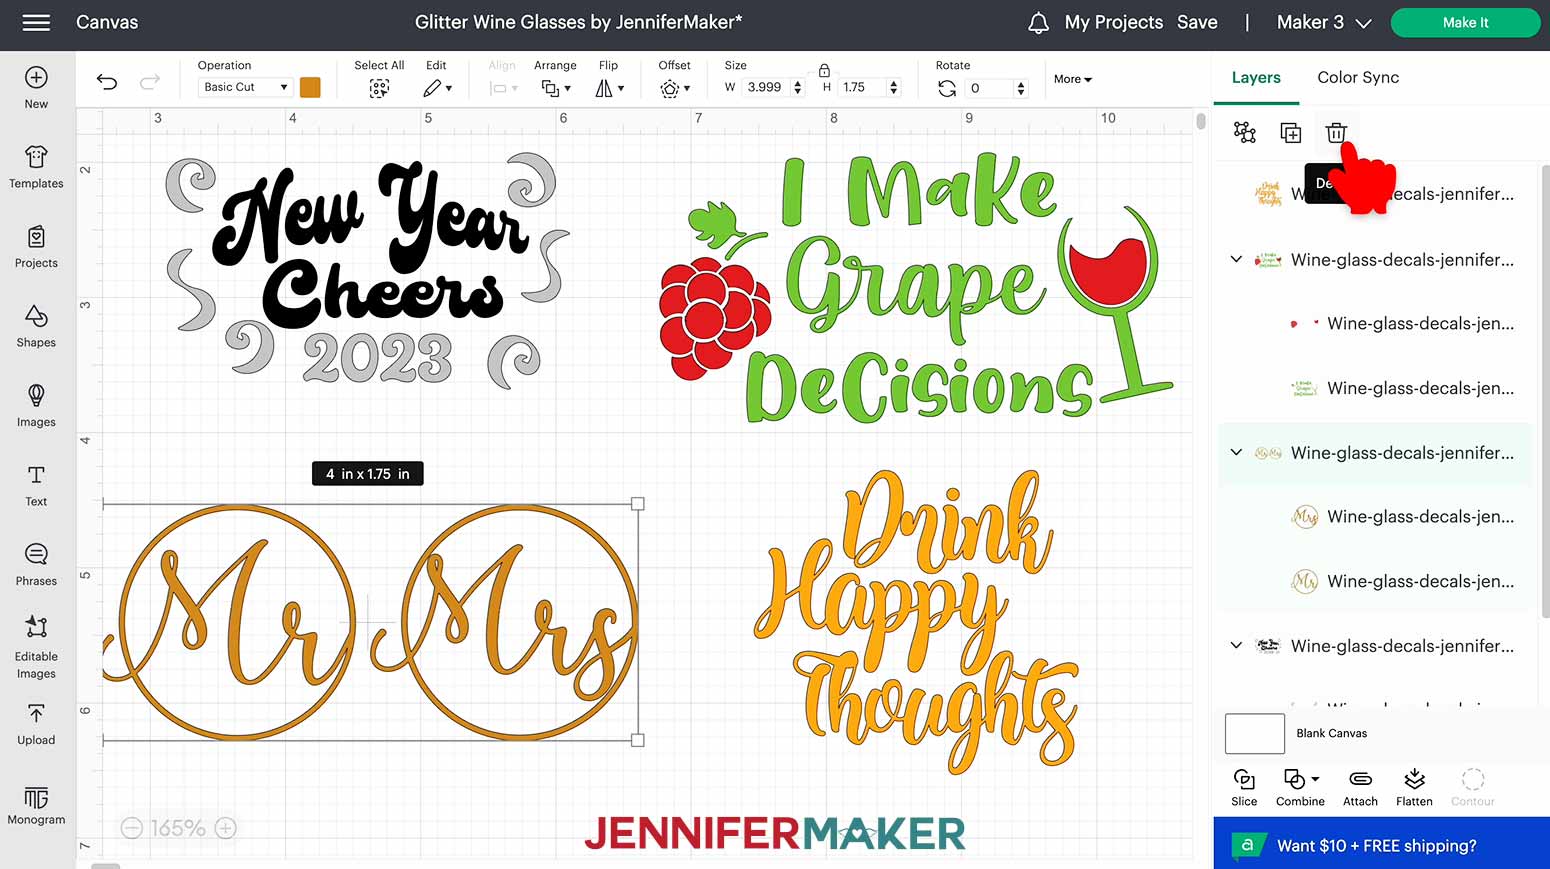
Now each decal is separated from the others. You can delete the unwanted decals by selecting each one and clicking the “Trash Can” at the upper right of the screen.
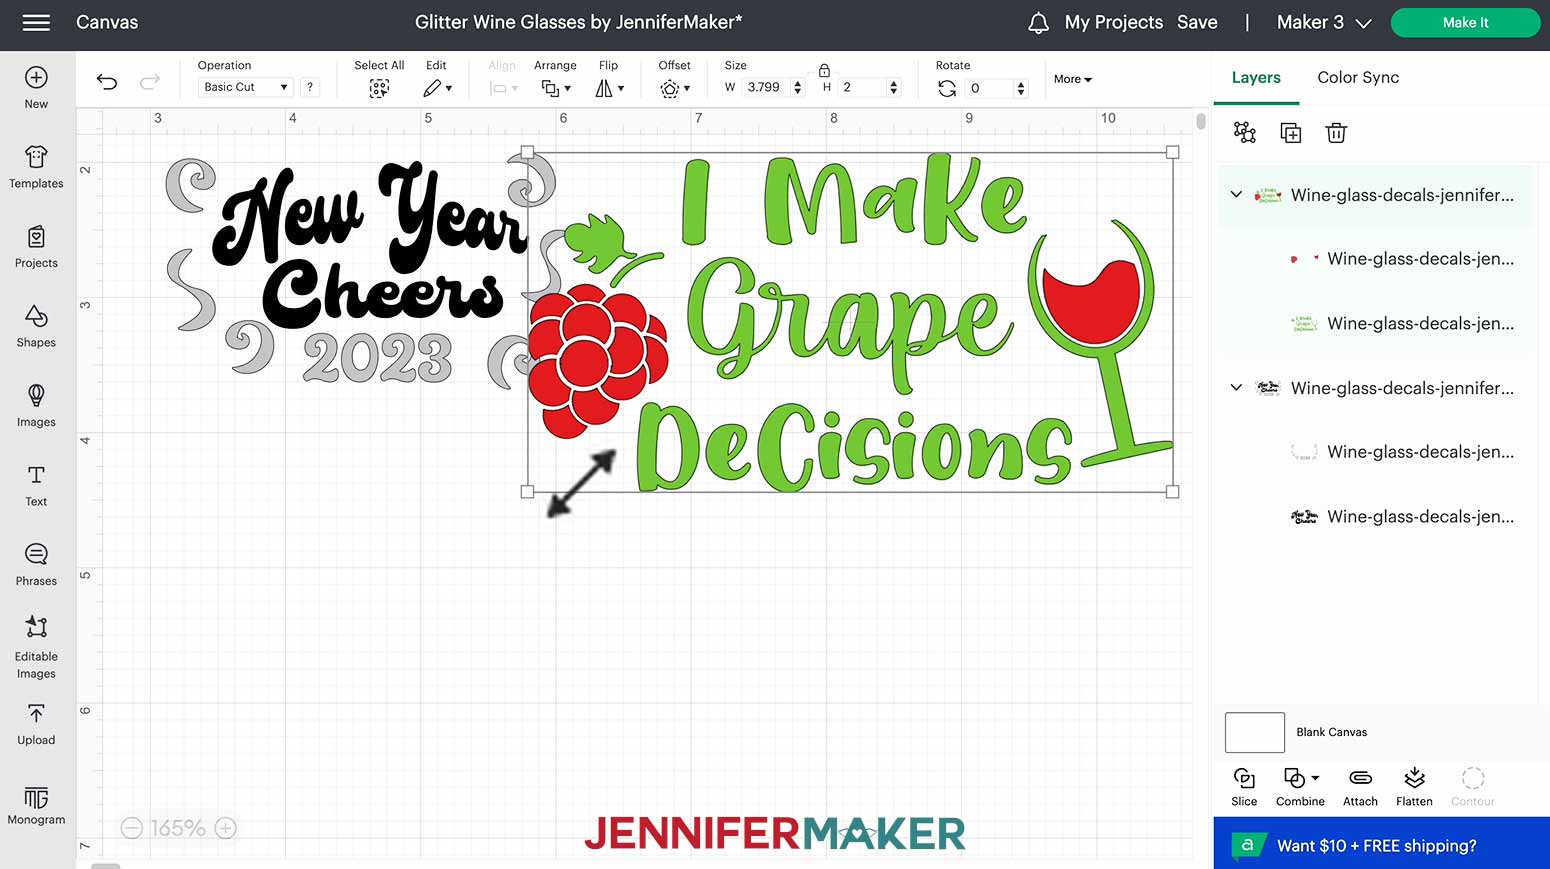
The decals are already sized for the exact glasses and amount of glitter I use in this tutorial, but if you have different-sized glasses, or use different amounts of glitter coverage, you can change the size of the decals.
First, measure the height of the space in which your decal will need to fit. Choose a height for the decal that is at least ½” smaller than the measured height. This allows for a glass border all around the decal.
Select the decal you want to re-size, then, after making sure the lock icon is in the locked position, type the correct size into the Width box. The decal is now shown at your adjusted size.
You can also change the colors of the decals, by selecting the decal and then selecting the Material Colors box next to the Operation drop-down menu in the upper part of the screen.
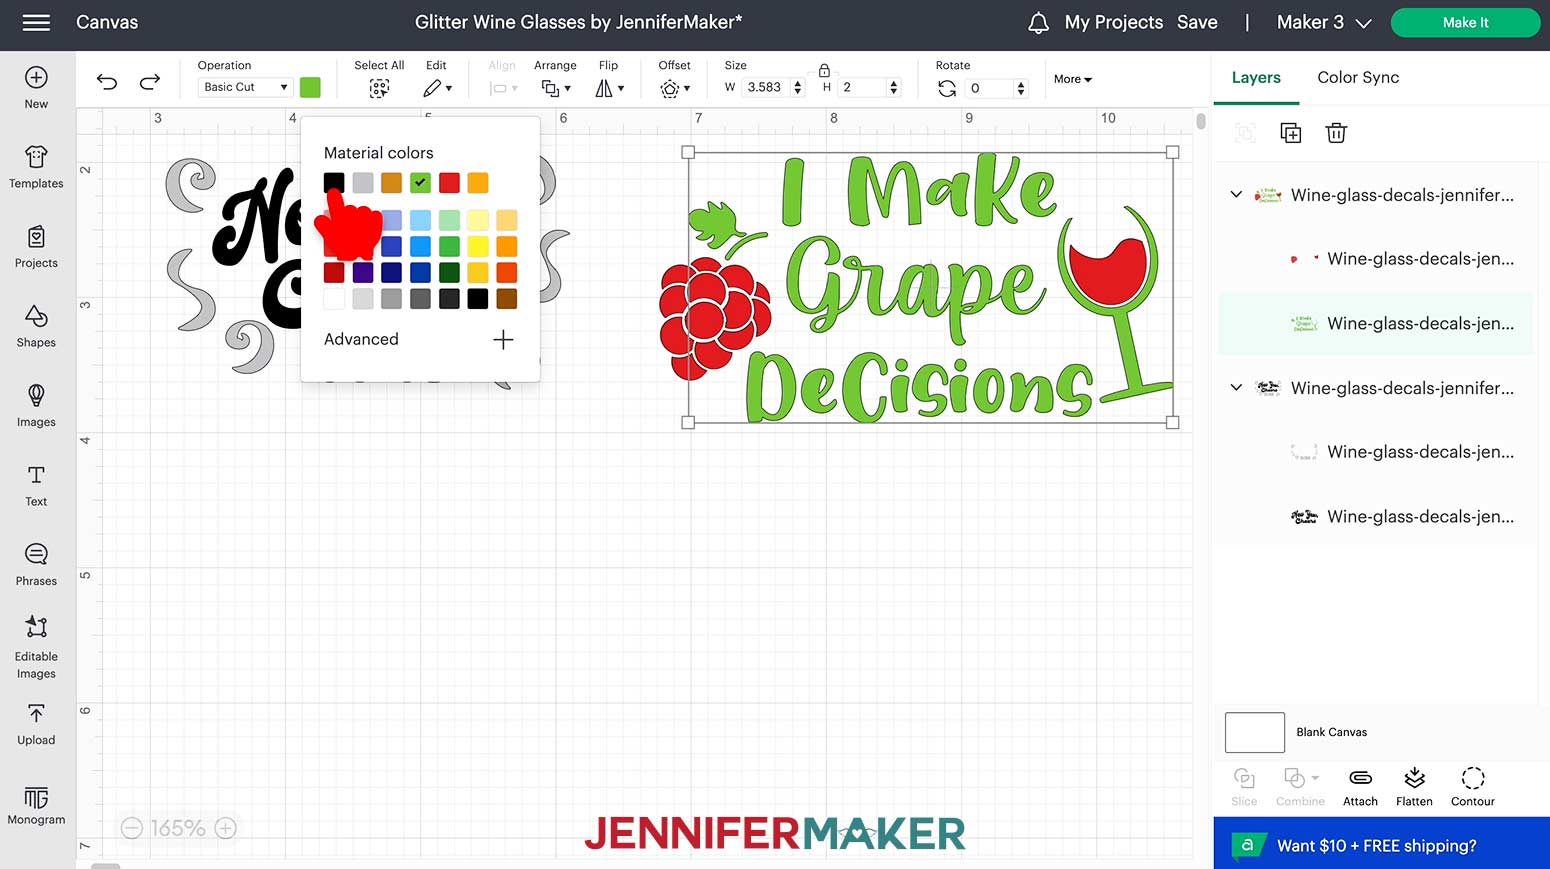
To change individual colors in the multi-color decals, select the decal and use “Ungroup” to separate the different color pieces. Then select only the color you want to change and use the Material Colors box again.
Do this for each color you wish to change.
You are now ready to cut the design file decals!
Make a Custom Monogram
You can use the "Monogram" function to make many different types and styles of monograms. Currently, any Design Space user can create a monogram using the monogram function, however only Cricut Access members are able to cut them. You can use the designs as inspiration to create a similar version using the many free fonts and decorative elements!
To make the Monogram decal, click the “Monogram” icon on the lower left of Design Space.
Type the initials you want included in your monogram into the boxes at the top left. For my design, I am using "JM"
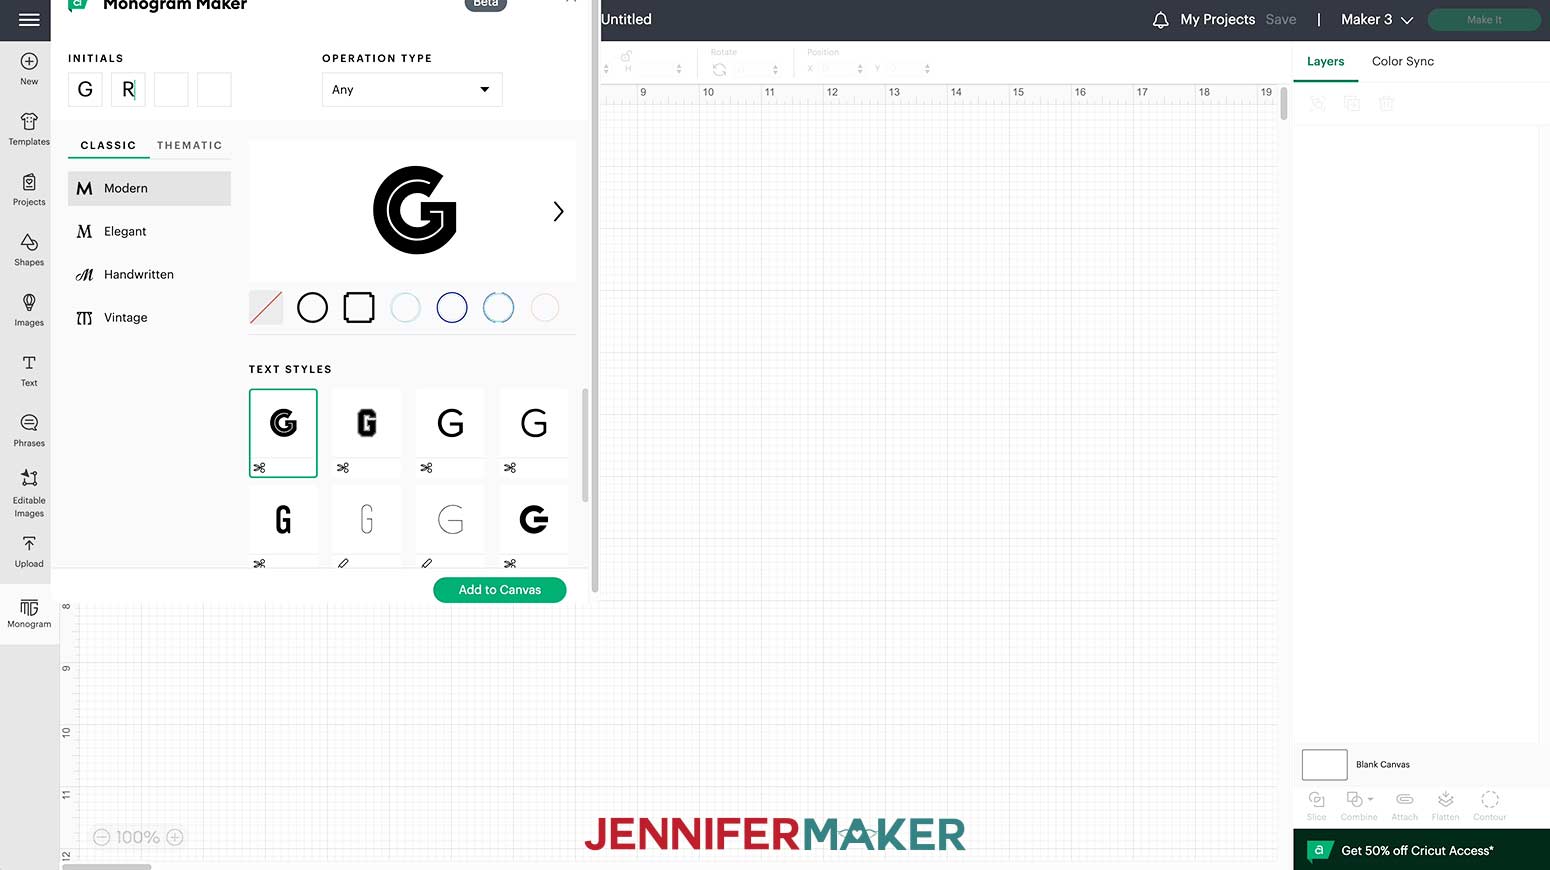
Change the “Operation” drop-down menu to “Cut” so the options shown are only for designs that can be cut.
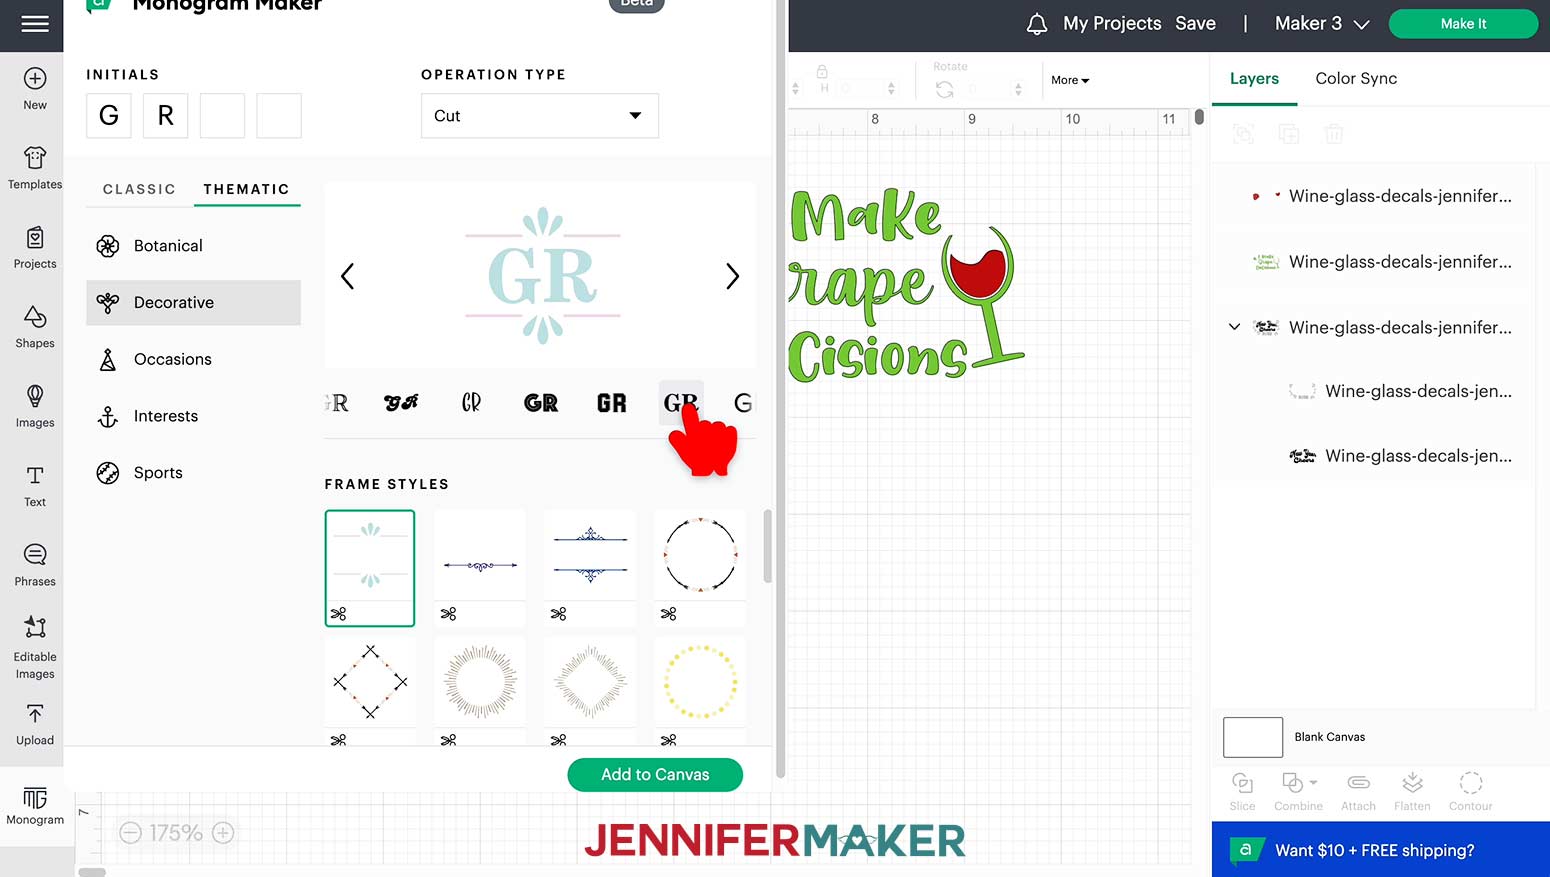
Now choose your style for the monogram. There are multiple options in each category. In the “Classic” menu, you choose a text style first and then a surrounding design. In the “Thematic” menu, it’s the opposite. The text choices will show your chosen initials so you can see exactly how your monogram will look with a particular option.
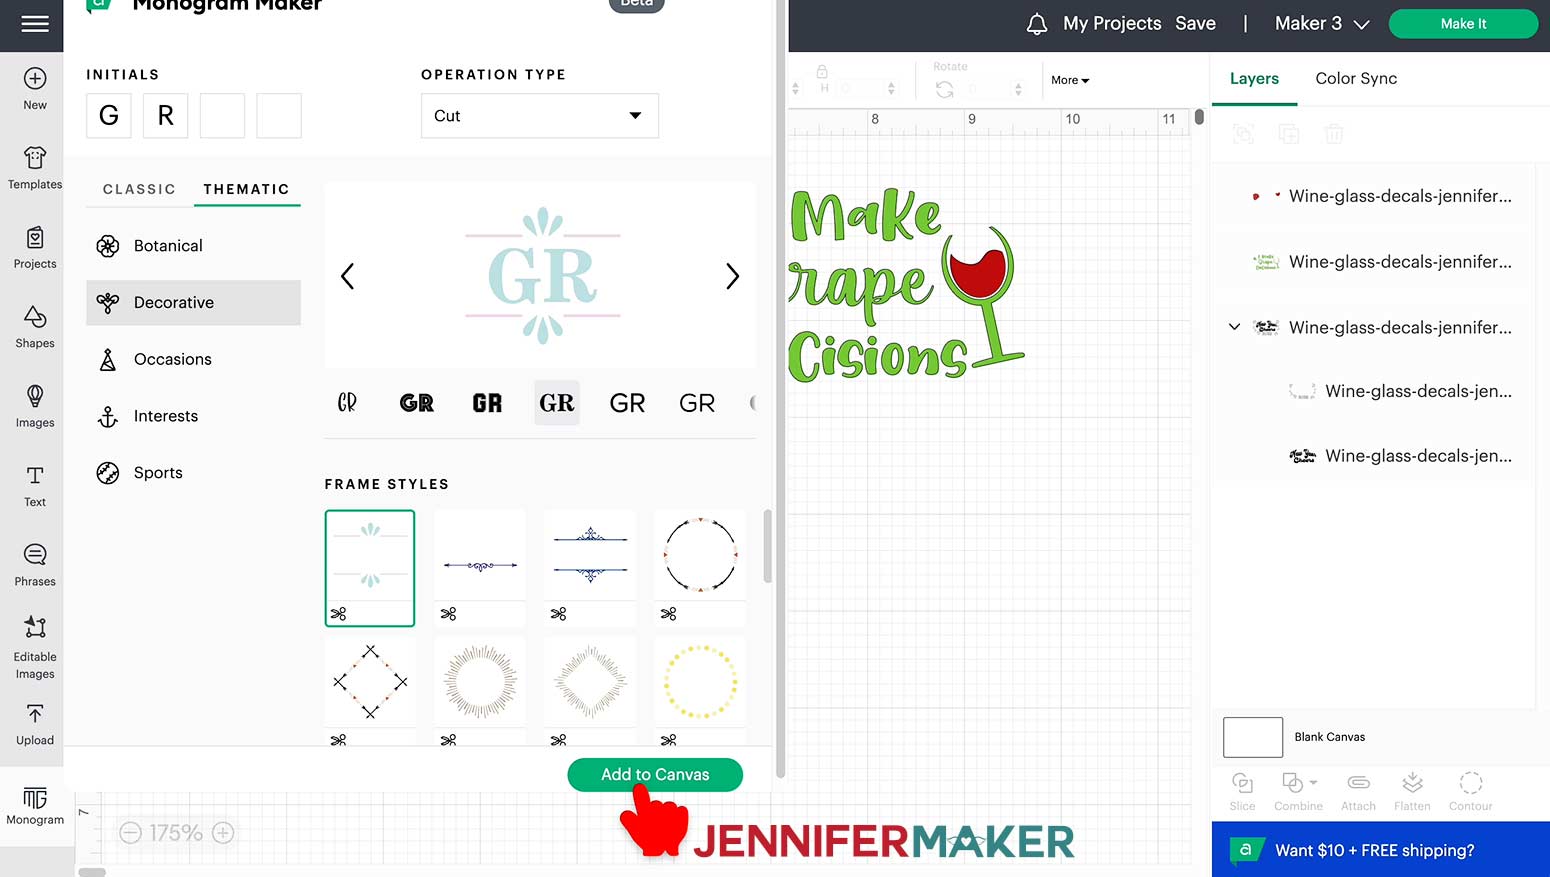
For my monogram, I'll pick the "Thematic-Decorative" menu and select the first frame option with straight lines and a decorative petal shape on top and bottom. I think it is simple yet elegant. I'll also select the font style I feel goes best with the design. In this instance it's a simple serif font that happens to be sixth from the left.
Once you have made your choices, click “Add To Canvas”.
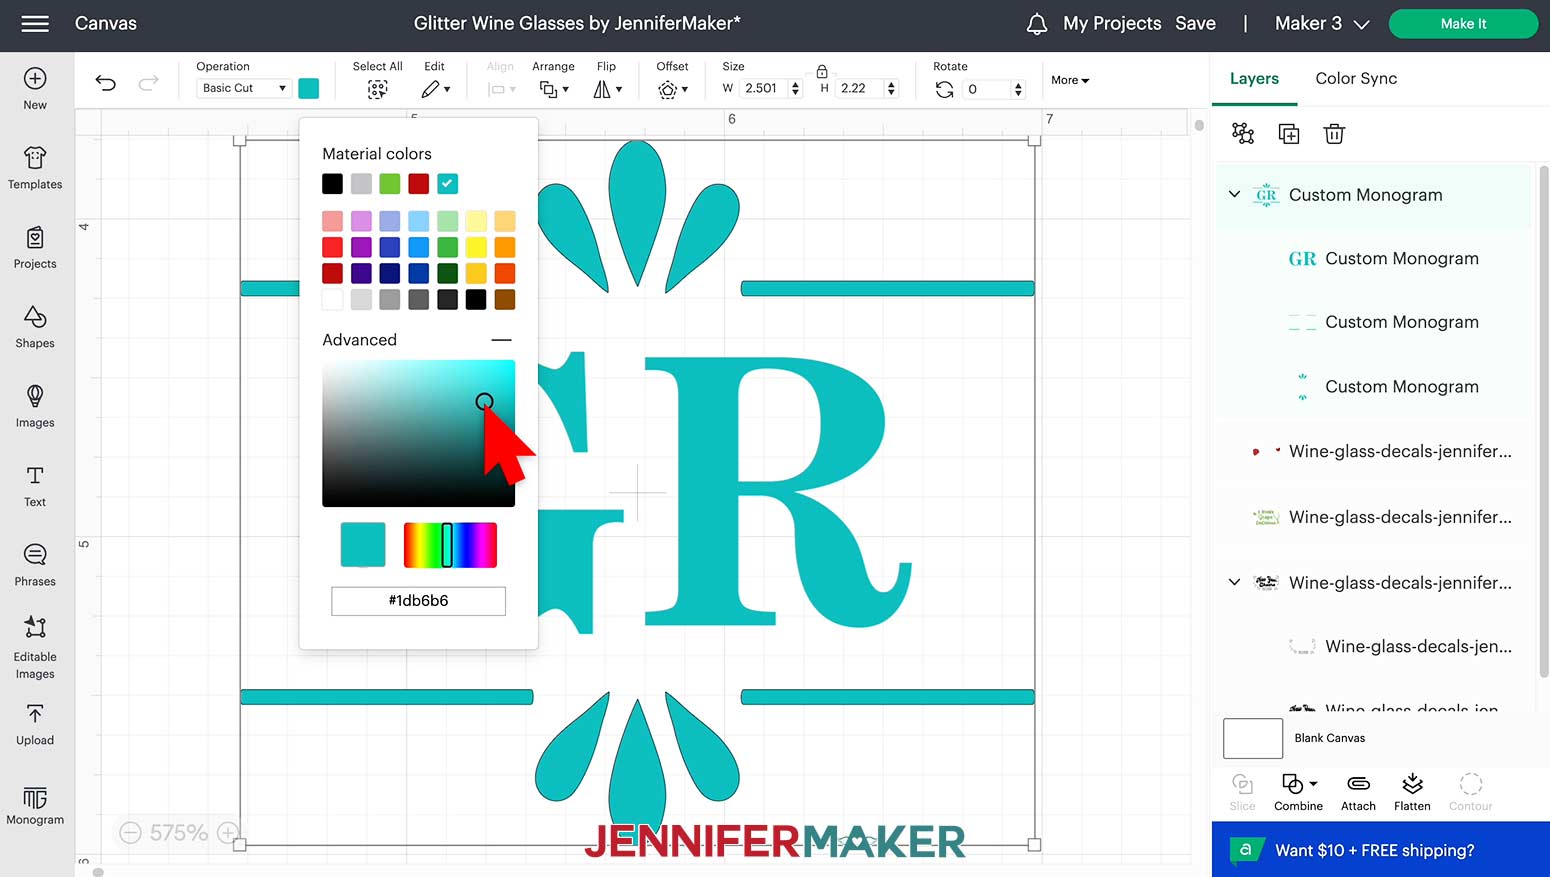
I can make my monogram all one color by selecting it and changing the color in the top menu. I'll pick a turquoise color to match my glitter by clicking "Advanced" under the "Color" box, then moving the sliders around until I find a color I like.
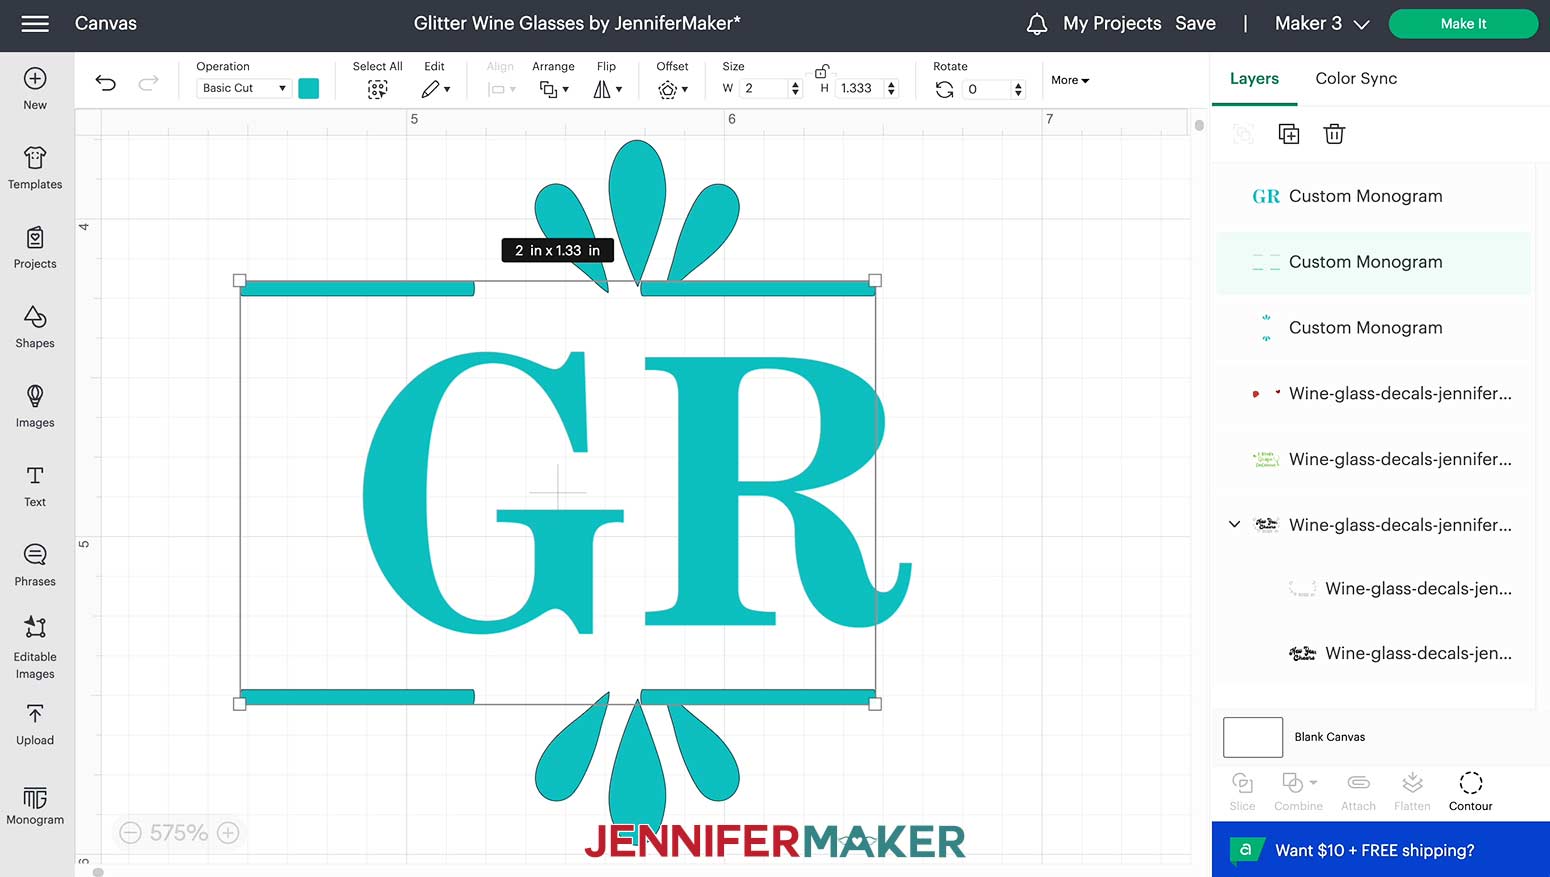
One of the great things about the “Monogram” function is that it adds a design in which you can edit each of the elements separately. I only have two letters in my monogram, so I want to shorten the length of the bars to match.
To do so, first select the monogram, then select “Ungroup."
I don’t want to change the height of the bars, only the width, so after selecting the bars I have to make sure I click the lock above the size boxes to unlock them.
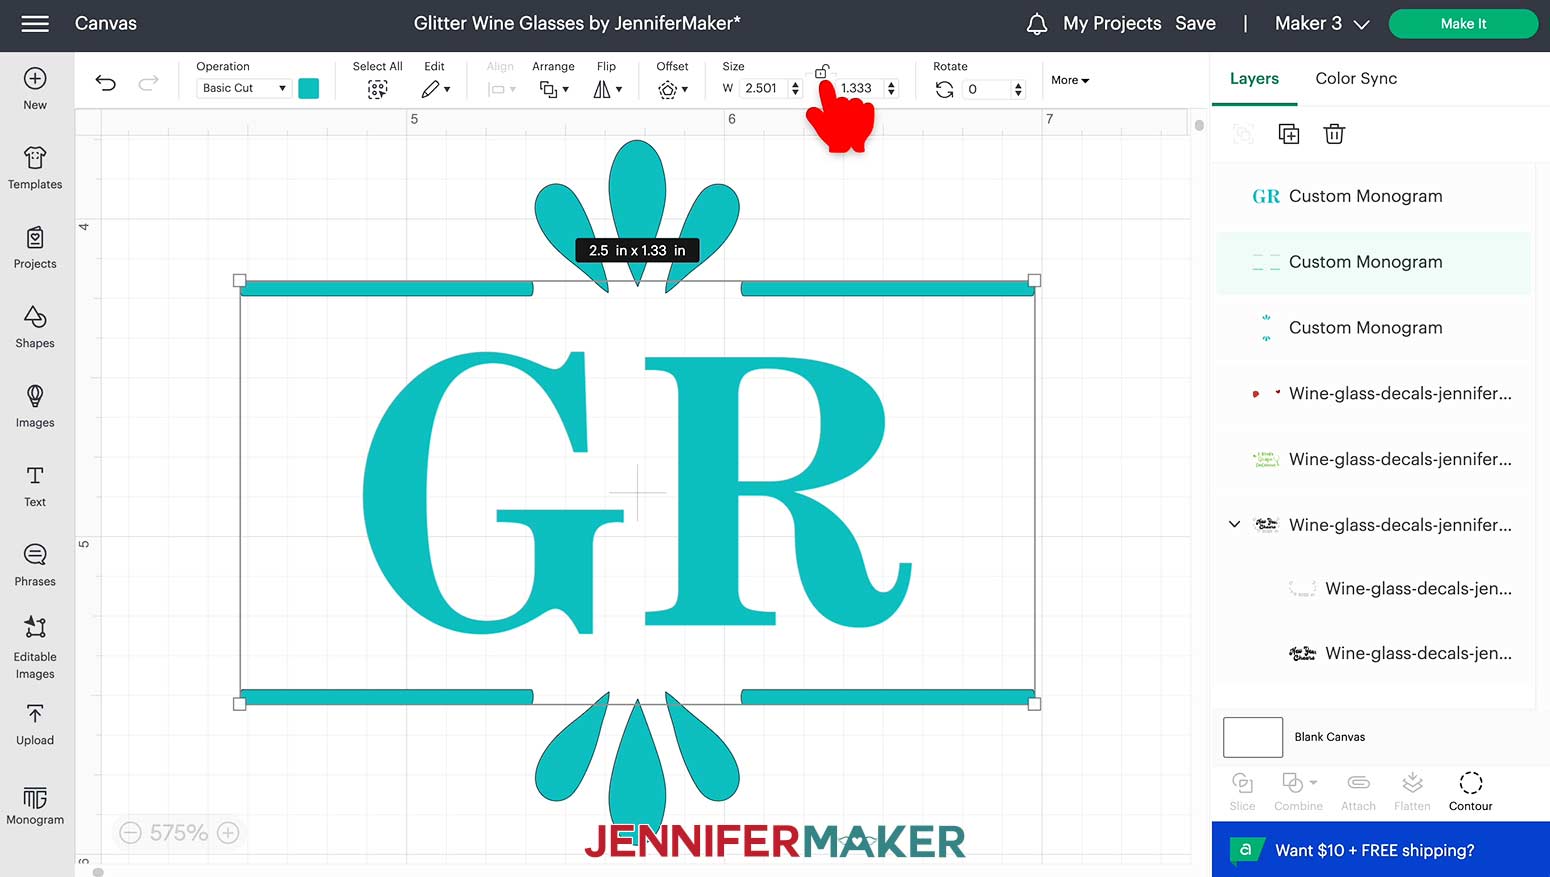
Now I can type "2" into the width box to change the width without changing the height.
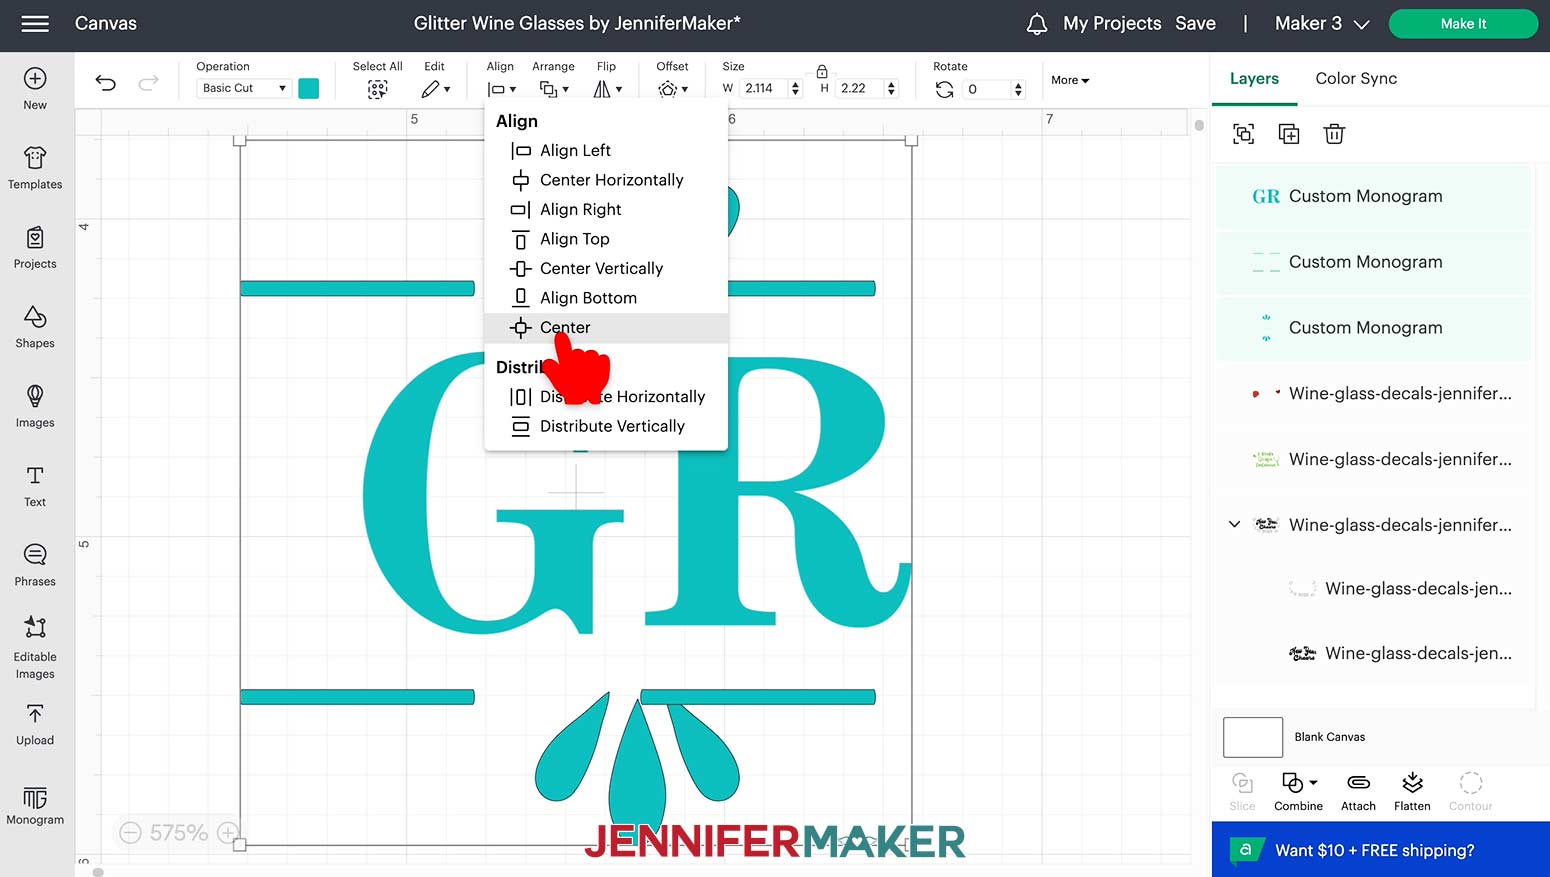
After resizing the bars, I can select all the elements of the monogram again and center them by using “Align” on the top menu and clicking “Center”.
Finally, while keeping all the pieces selected, I need to click “Attach” on the lower right to make sure the monogram stays together when it cuts.
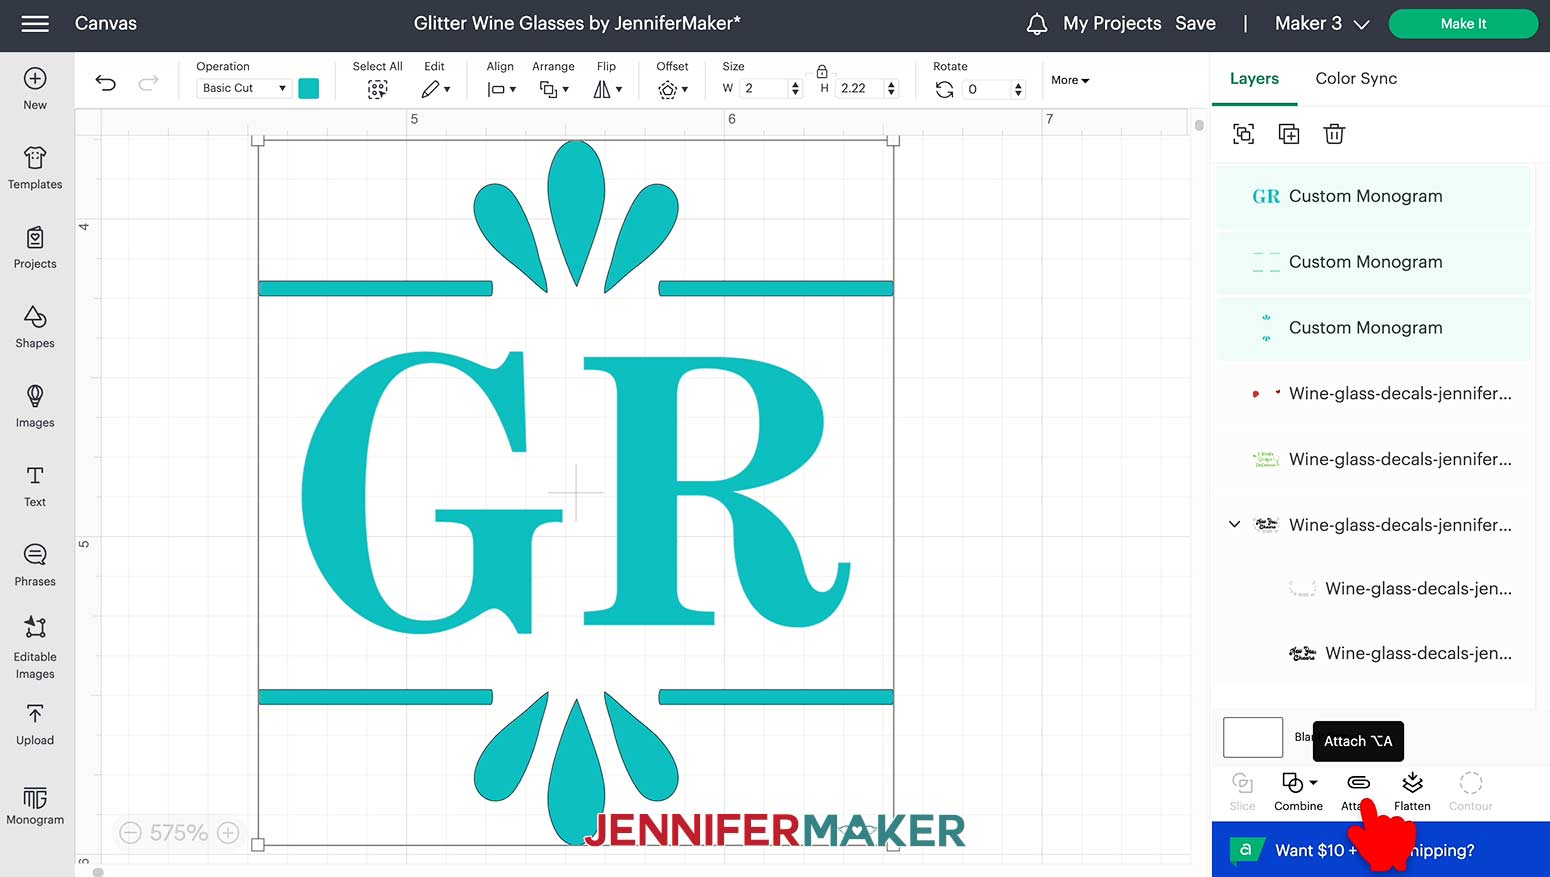
TIP: If you want to make different parts of your monogram different colors, change each element of the monogram to the correct color, select all the elements of the monogram and then select “Group” instead of “Attach”!
Once you have your monogram pieces attached and all in the correct colors, you are ready to cut!
STEP 4: CUT THE GLASS DECALS
Check that the right machine is listed in the top corner, then click "Make It!"
If you are asked if you are cutting your designs without a mat, on a mat, or multiple ways, select "On Mat" and "12 x 12." Then click "Confirm"
On the Prepare screen, keep the "Material Size" at 12" x 12”. Making all the decals and the monogram at once using the colors I am will use seven mats (one for each color).
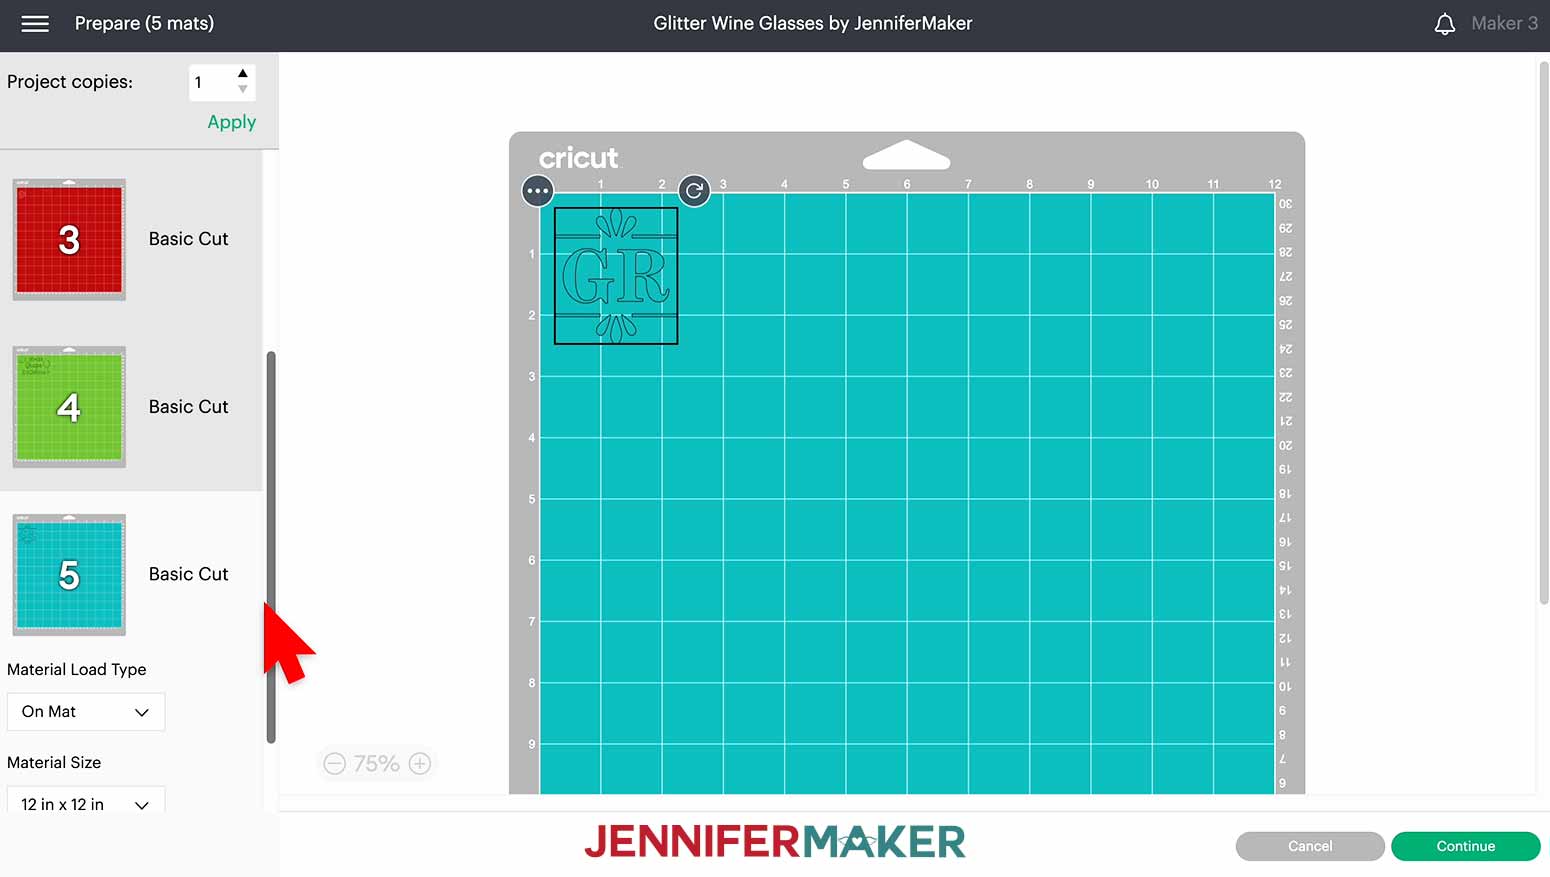
Click back on the first mat then click "Continue."
On the Make screen, select the correct material setting for your cut. The first mat I have is silver foil so I’ll need to click “Browse All Materials” to select the proper cut setting.
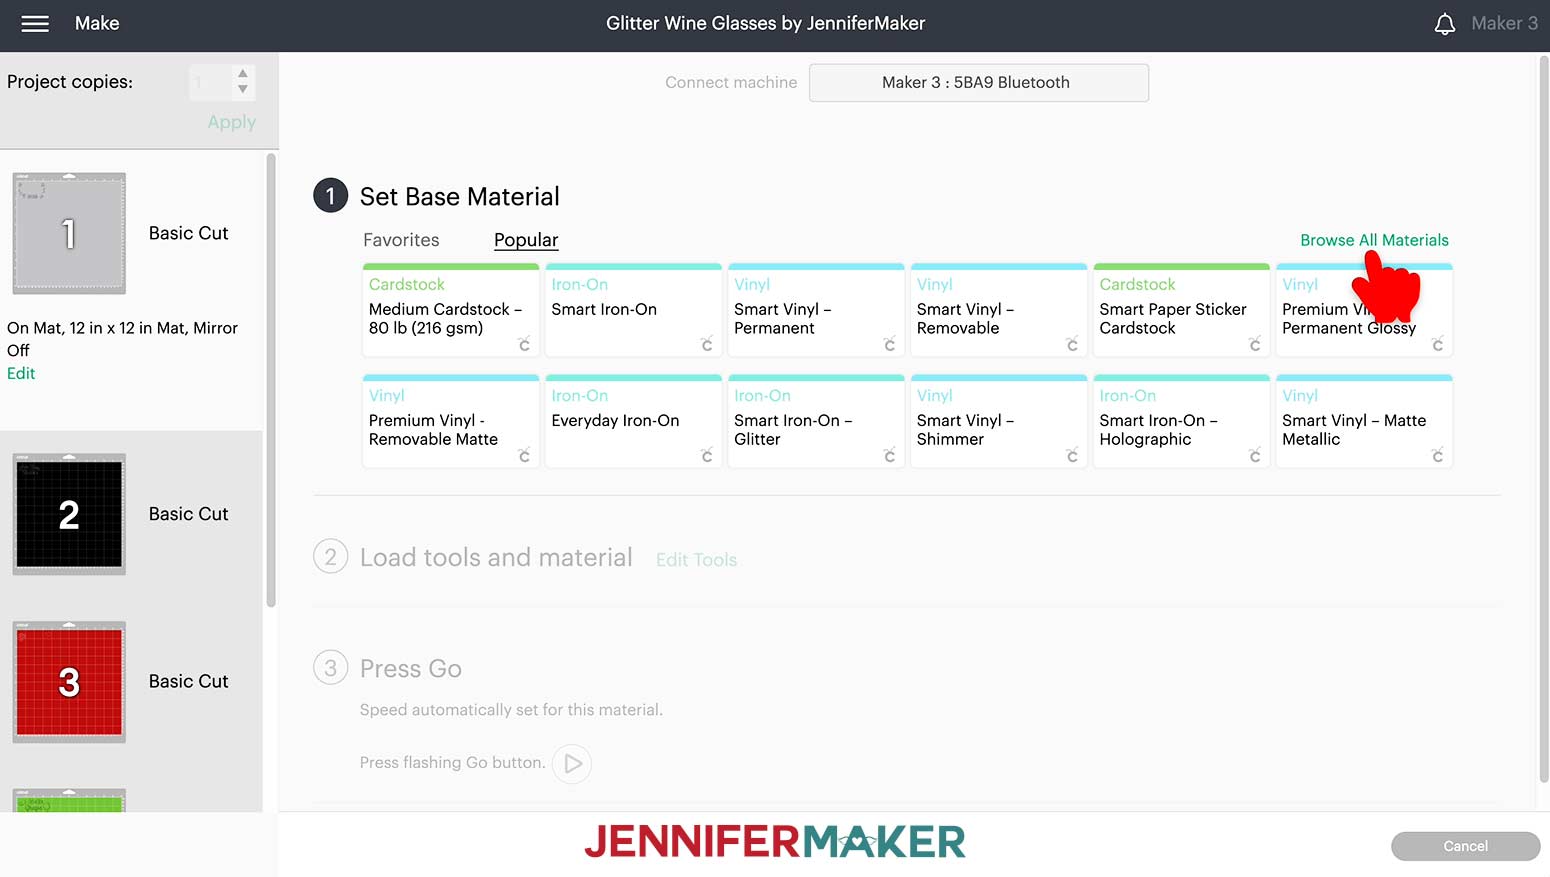
I can quickly sort through the options by typing “foil” in the search box and clicking the magnifying glass next to the box. The first entry is the correct one!
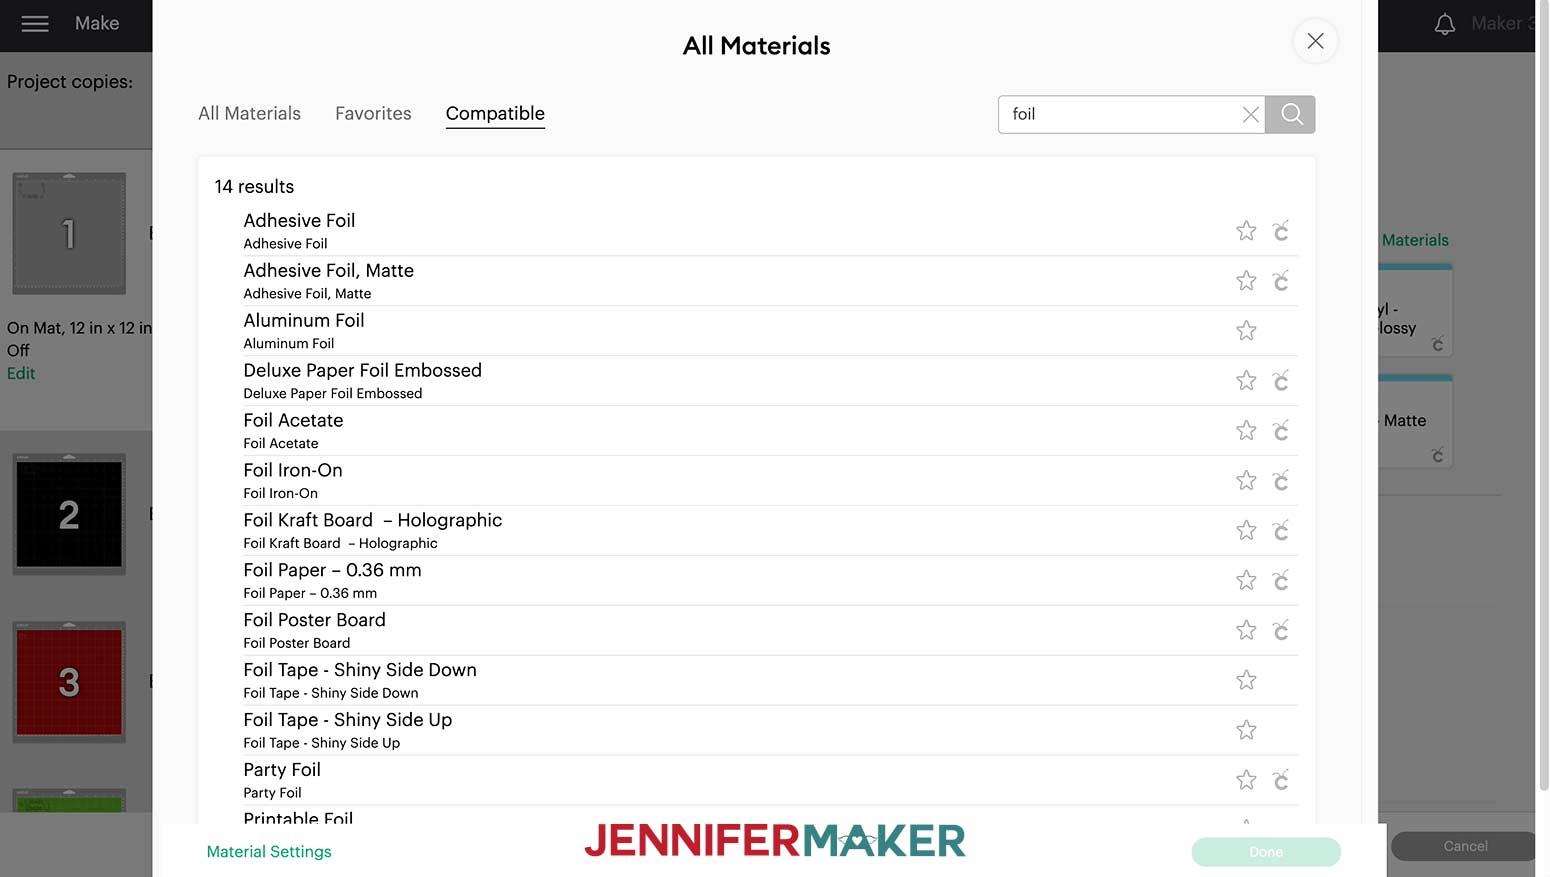
Click “Adhesive Foil” and “Done” to add it to the “Make” Screen.
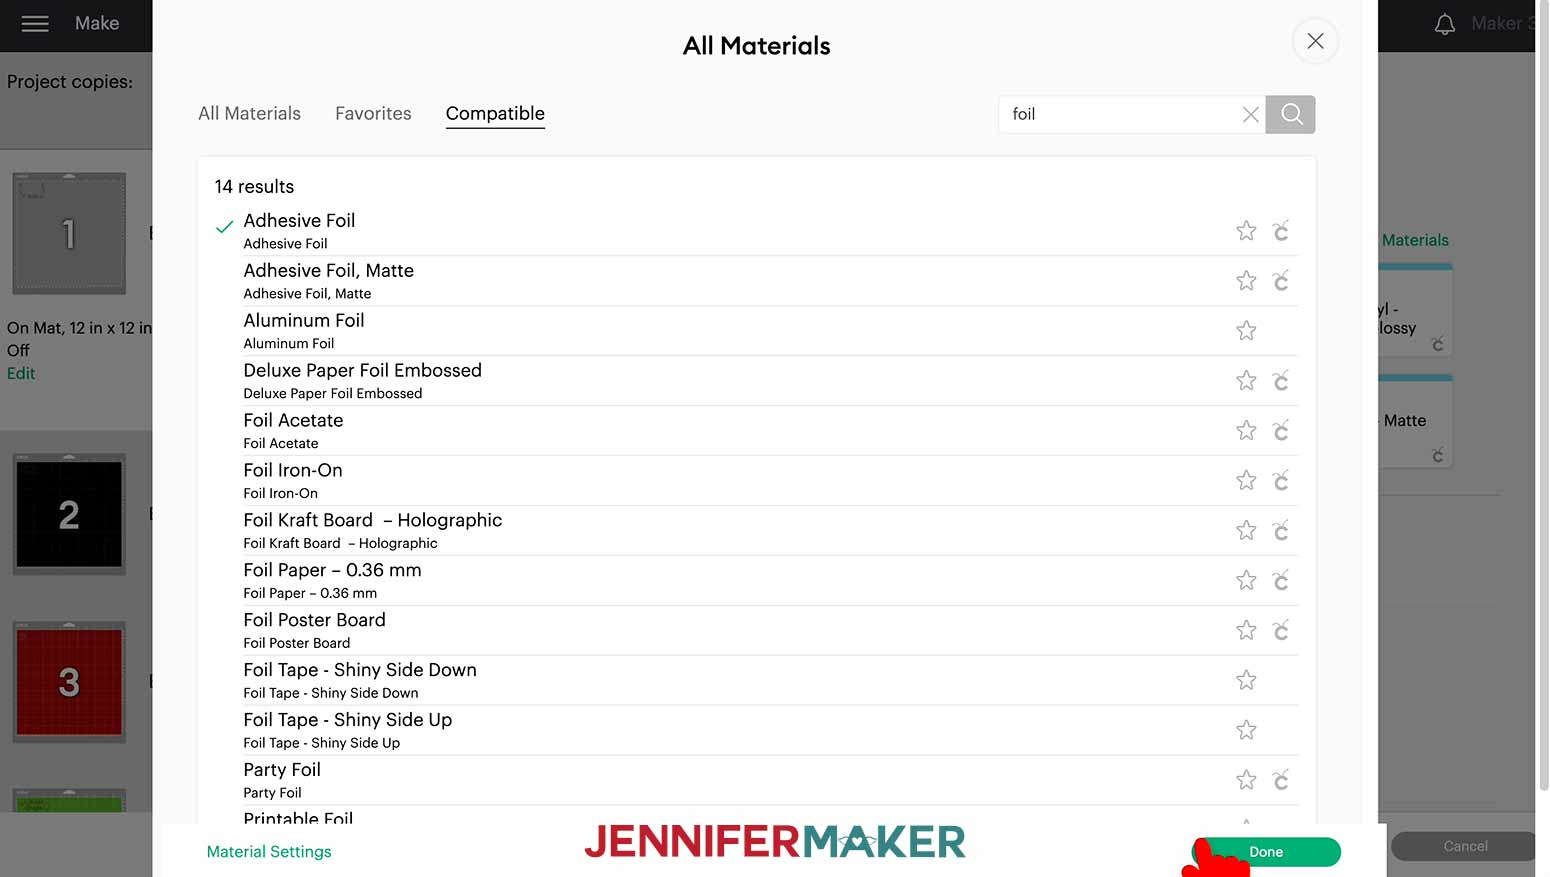
Next, choose your pressure setting. I find I get the best results with "More" Pressure.
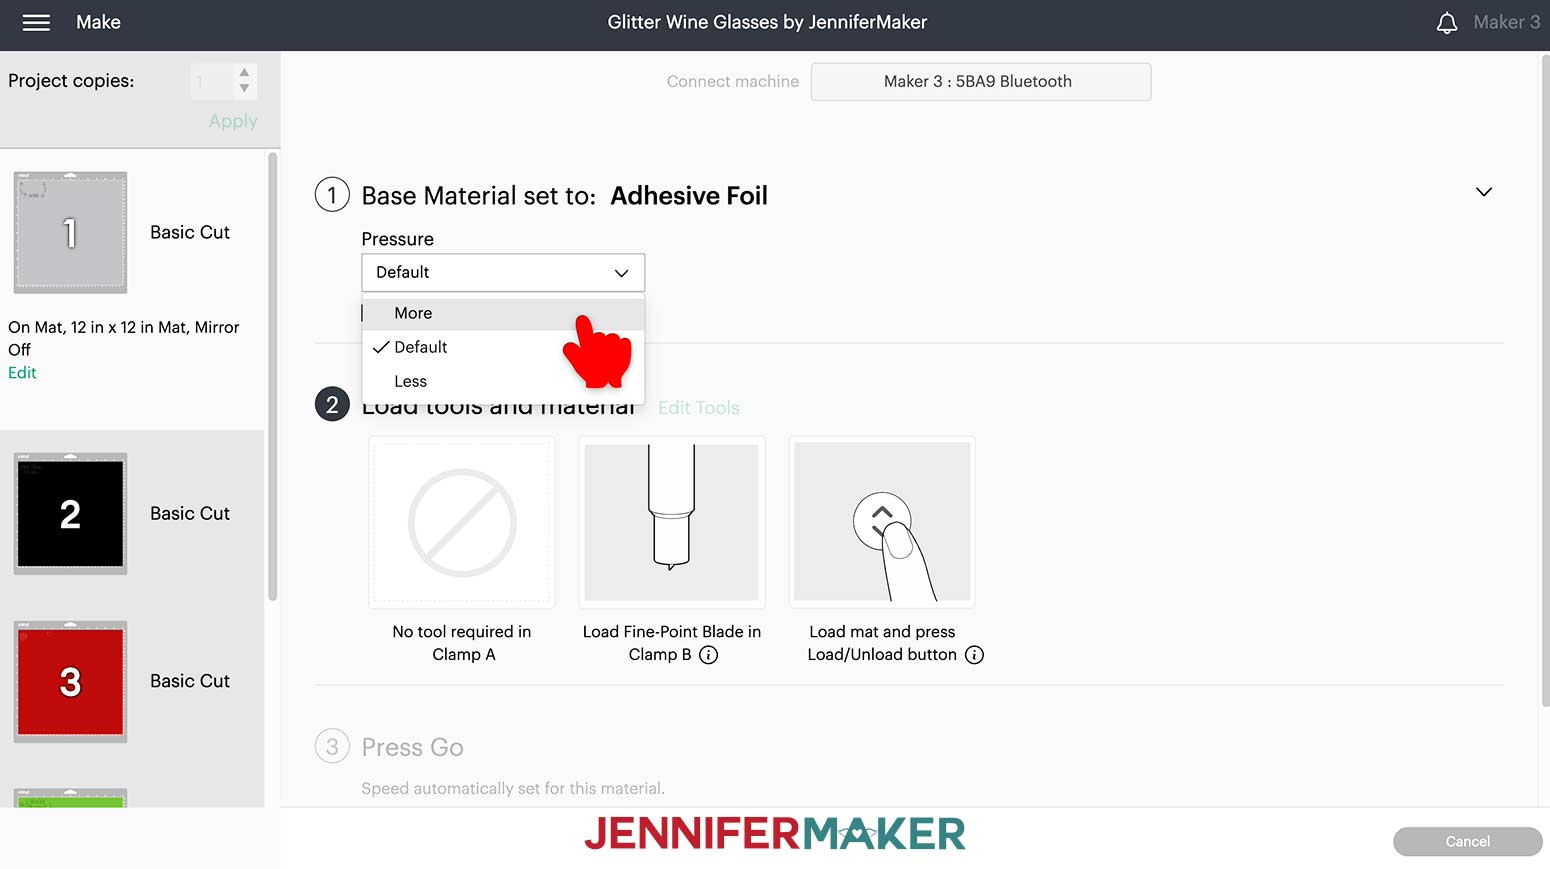
Make sure the Fine-Point Blade is loaded into the machine correctly.
Place your first piece of vinyl, backer side down on your green StandardGrip mat and make sure it is well-adhered with a brayer. Since these designs are small, it can be a material saver for you to cut your vinyl into a shape only slightly larger than your design before adding it to your machine mat. Make sure it covers the same design area as on the screen!
Load the mat into your Cricut and press the flashing button to begin.
TIP: If you run into any issues cutting your materials, check out my Cricut Tips & Tricks for Cleaner Cuts.
Once the cutting is complete, it is easiest to weed the vinyl before removing it from the cutting mat. Leaving the vinyl on your mat can make weeding the material easier since it stays still and flat.
I like to work from larger to smaller sections during weeding. Using a weeding tool, very carefully peel away the extra background vinyl.
Poke your weeding tool into each section you want to remove. Gently lift it away from the design. Make sure you do not pull up any pieces you want to keep. If they come up, gently pat them back in place and try again. Don't forget the middle parts of the letters and watch out for any dots above the lowercase letter “I”!

Now, prepare the mat with the next vinyl sheet. Select the appropriate setting for your next mat. For Premium Vinyl, I used “Premium Vinyl – Permanent Glossy” with “More" Pressure. For Shimmer Vinyl, use “Premium Vinyl – Shimmer” with “More" Pressure.
Continue to load, cut, and remove mats, and weed vinyl until all the pieces are cut and ready to assemble.
STEP 5: ASSEMBLE THE GLASS DECALS
Now we’ll use transfer tape to prepare each decal, but there are a few tricks, especially for multi-color designs!
First, we'll apply transfer tape to all the single-color decals so they are ready to go.
Make sure to use the correct transfer tape for the type of vinyl. Premium Vinyl and Adhesive Foil Vinyl can both use StandardGrip Transfer Tape. Shimmer Vinyl needs stronger adhesive, so using StrongGrip Transfer Tape is required. You can tell the difference between StandardGrip and StrongGrip Transfer Tape by their colors. StandardGrip has a blue print while StrongGrip is printed in purple.
Cut a piece of transfer tape for each decal that is slightly larger than it.
Remove the backer from the transfer tape and place face down on the decal using my "taco method". Hold your transfer tape in the shape of a “taco”, then put the bottom of the “taco” onto the middle of your design. Smooth the transfer tape over the decal from the center outward and burnish it down using the Scraper Tool.
After applying transfer tape to each of the single-color decals, we can now focus on the multi-color decals. The key for multiple colors is to combine things before you put them on your glasses by using one piece of transfer tape.
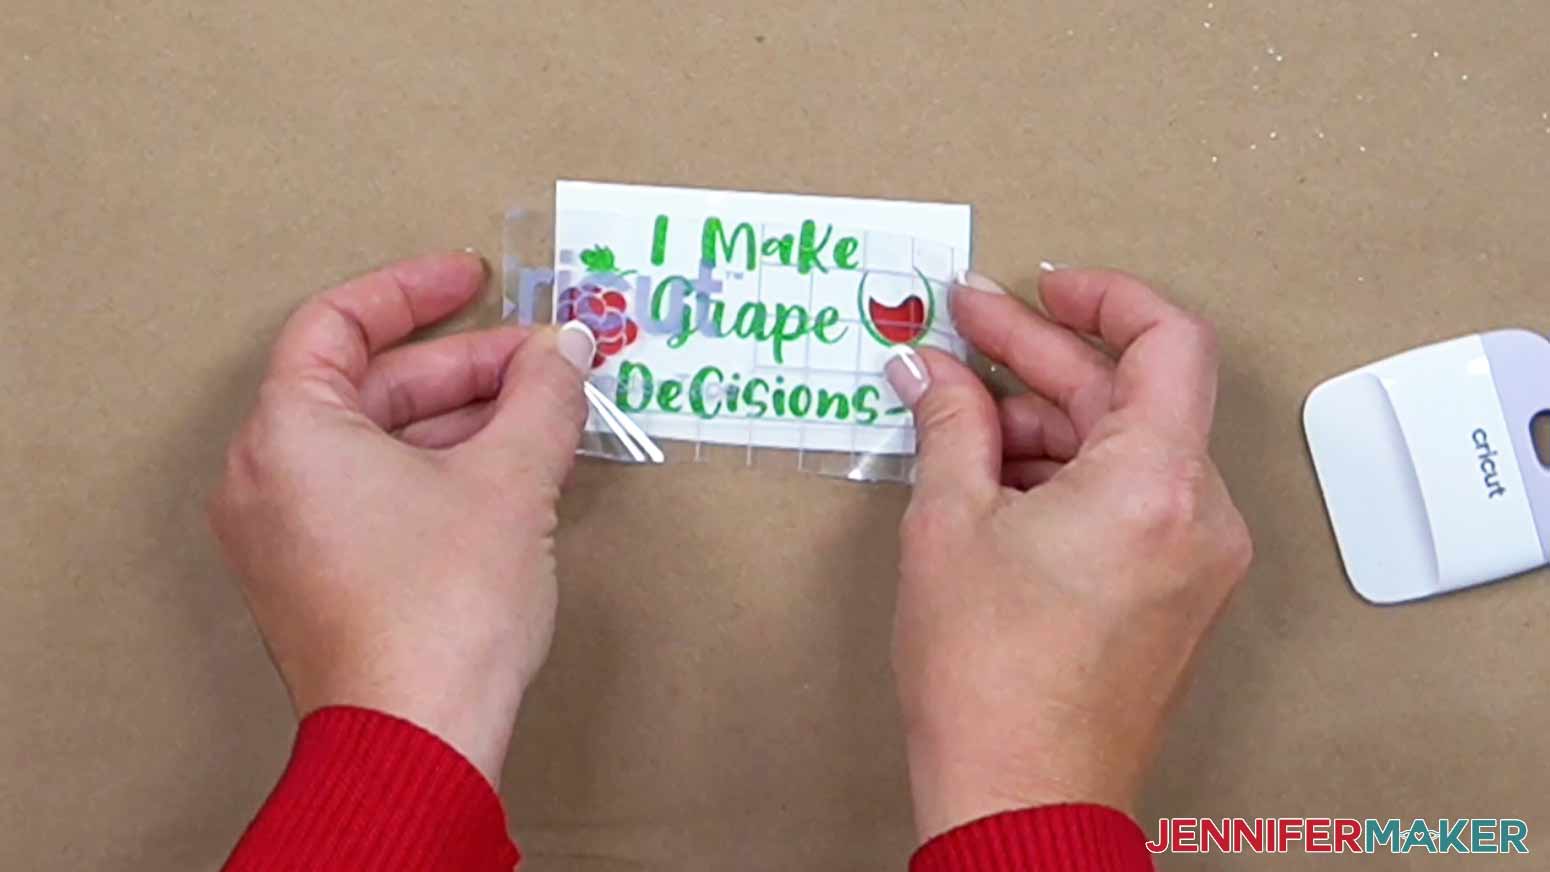
Let’s start with the “Grape Decisions” decal. I used Shimmer Vinyl for my glasses, so I need to use StrongGrip Transfer tape.
Cut a piece of transfer tape to fit the full size of the decal.
Next, place the transfer tape down on the red color piece by using the same method as the single-color vinyl decals.
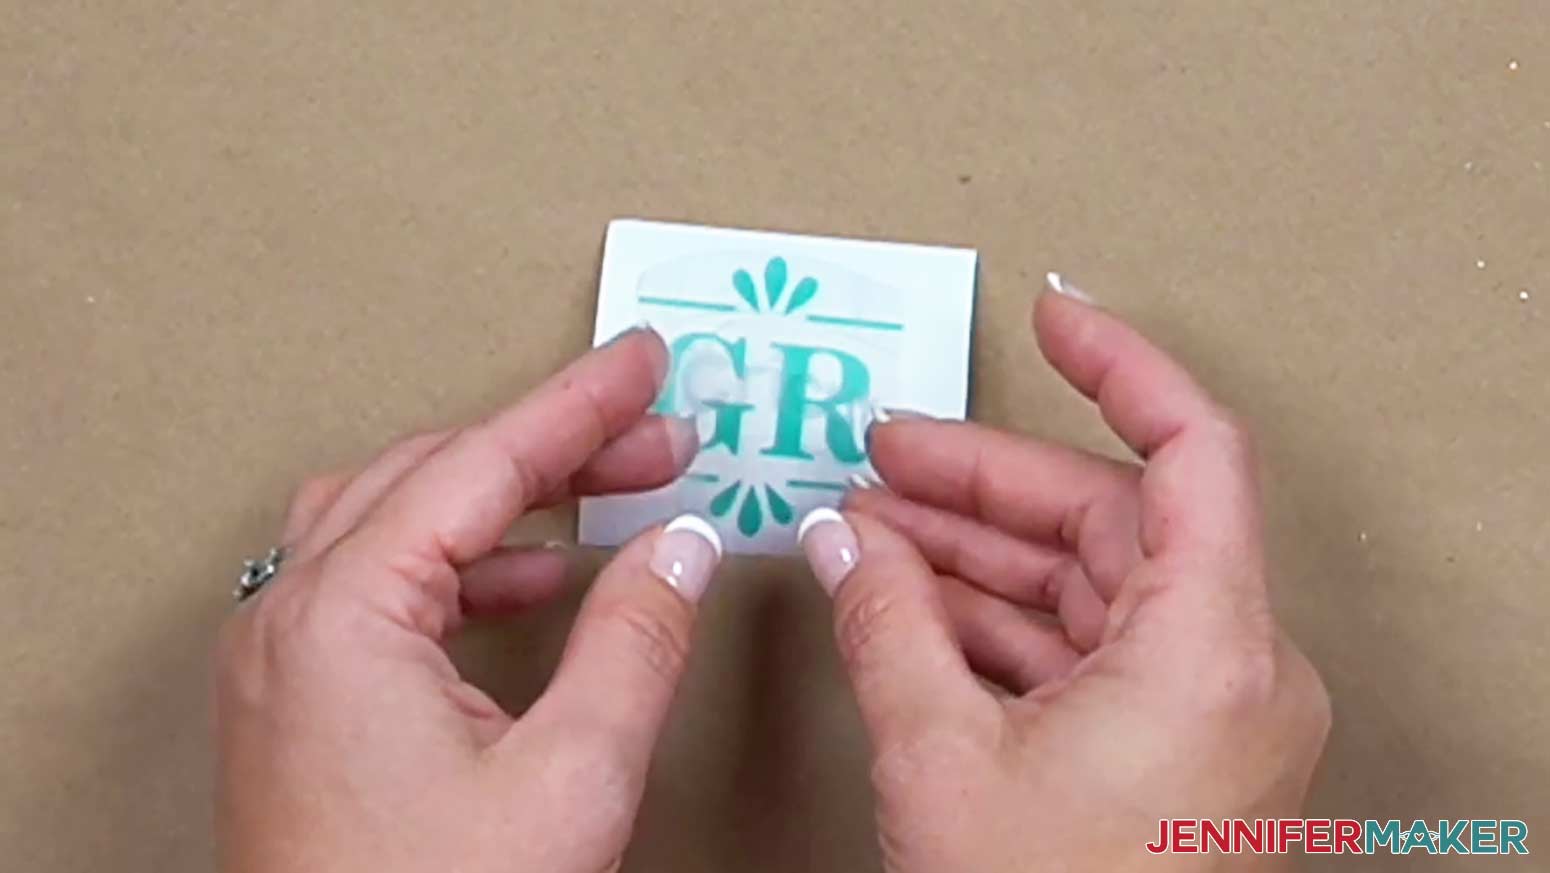
Now remove the backing from the red vinyl. If the vinyl does not stick to the transfer tape, lay it back down and burnish it again.

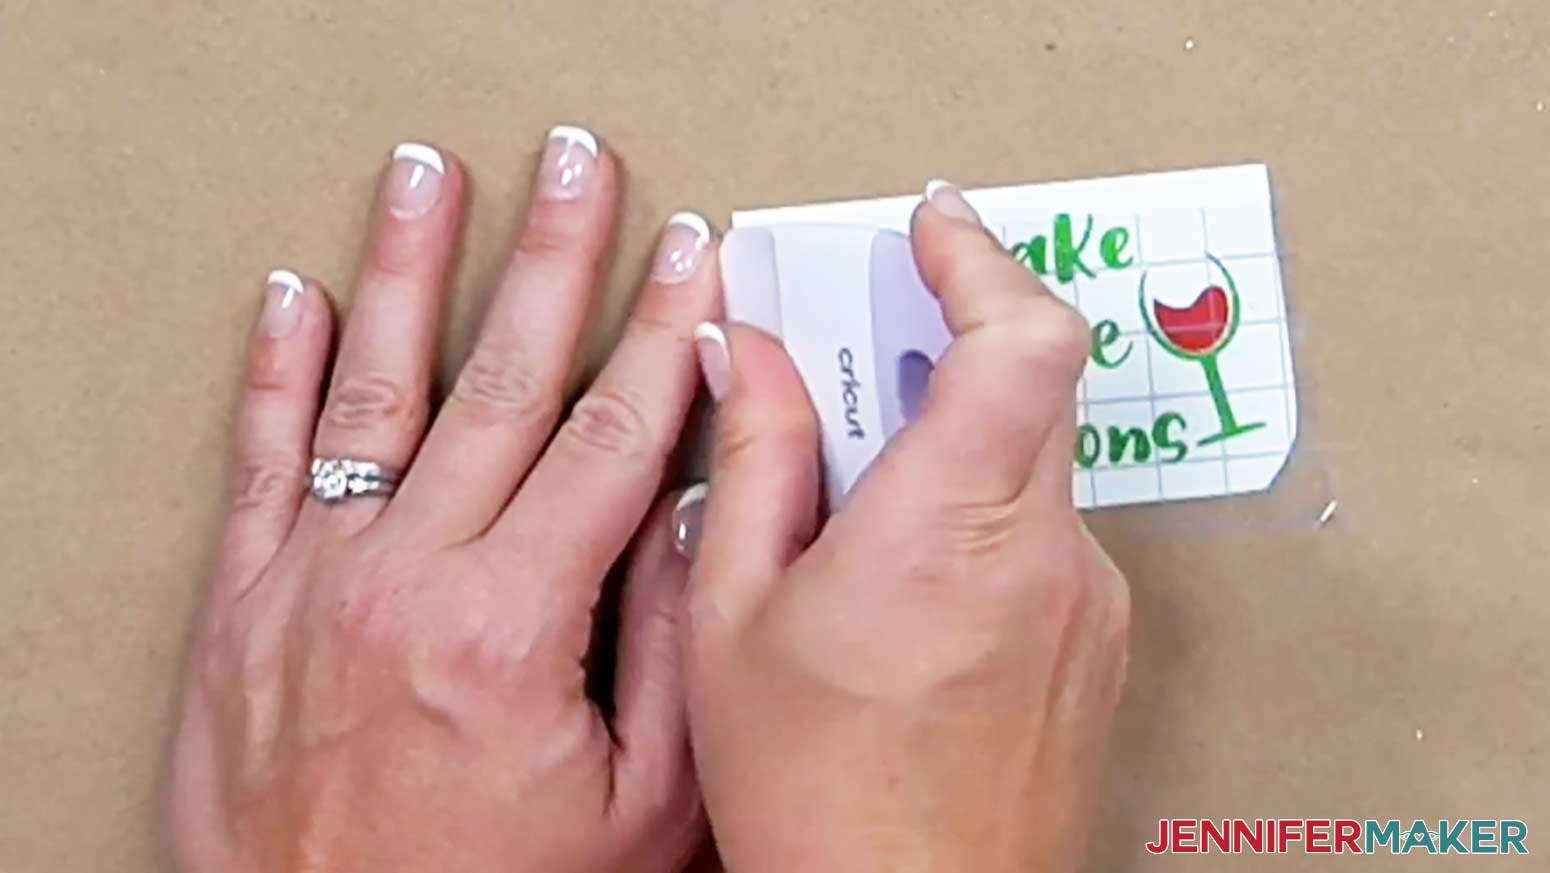
Now position your vinyl and transfer tape over the next layer — in this case, it would be the green vinyl. Use the screen for an alignment reference.
Once it’s in place, burnish it down again.
Finish preparing each of the multi-color decals in the same way.
Now that you have your vinyl decals prepared with transfer tape, it’s time to apply them to the glasses.
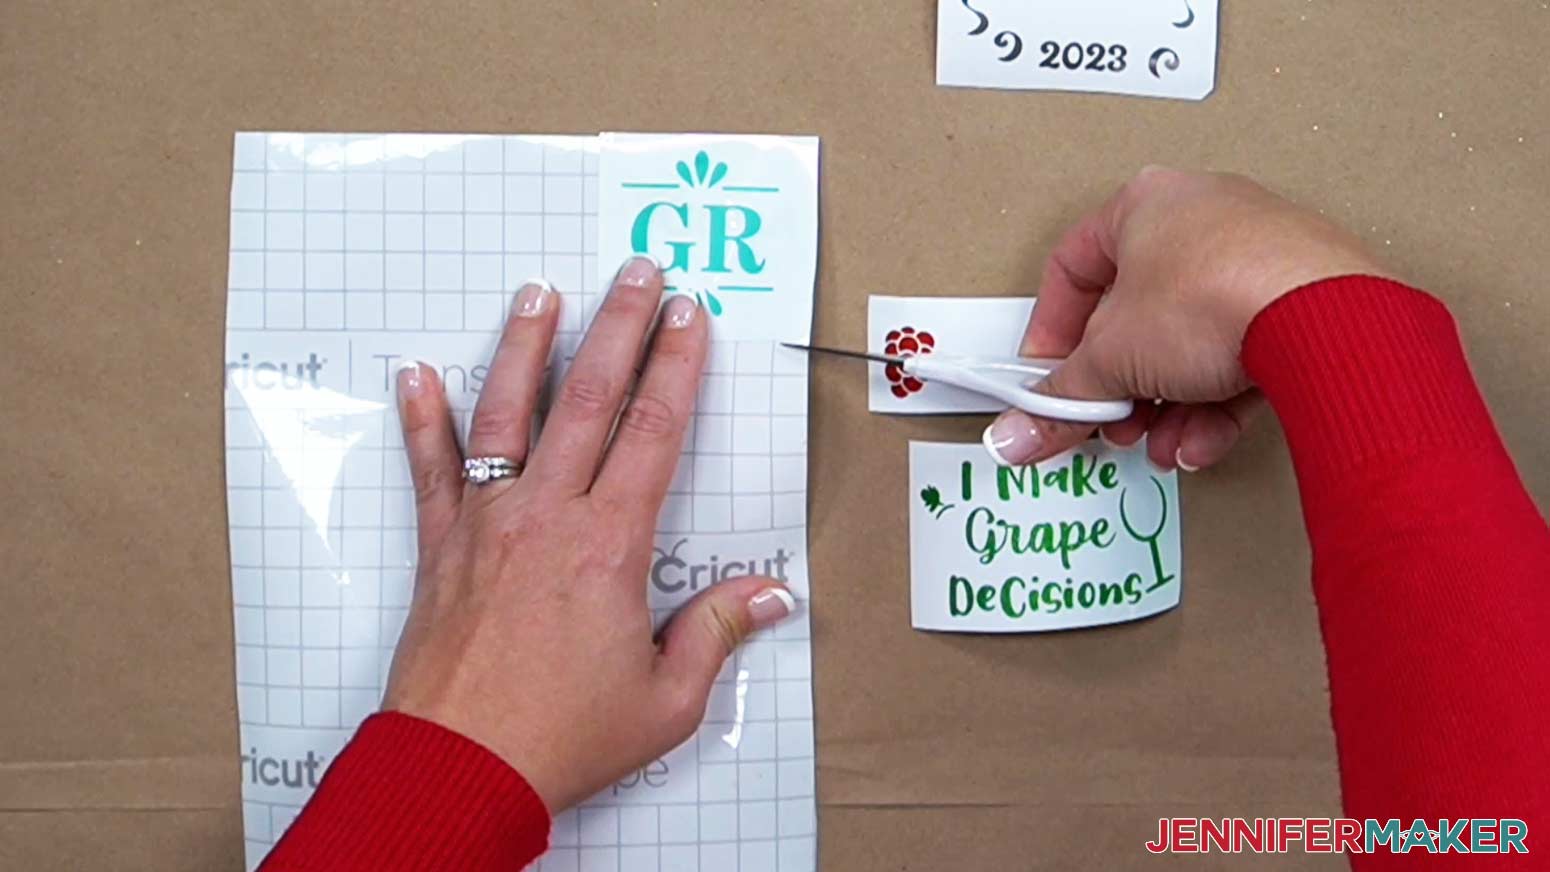
To apply decals to the glasses, start by removing the backer from the decal. If the vinyl does not stick to the transfer tape, lay it back down and burnish it again.
After the backer is off the transfer tape and decal, make small snips around the edges of the transfer tape. These snips allow your transfer tape to bend around the glass when you apply it without giving you creases in the vinyl. Don't nick the vinyl itself!
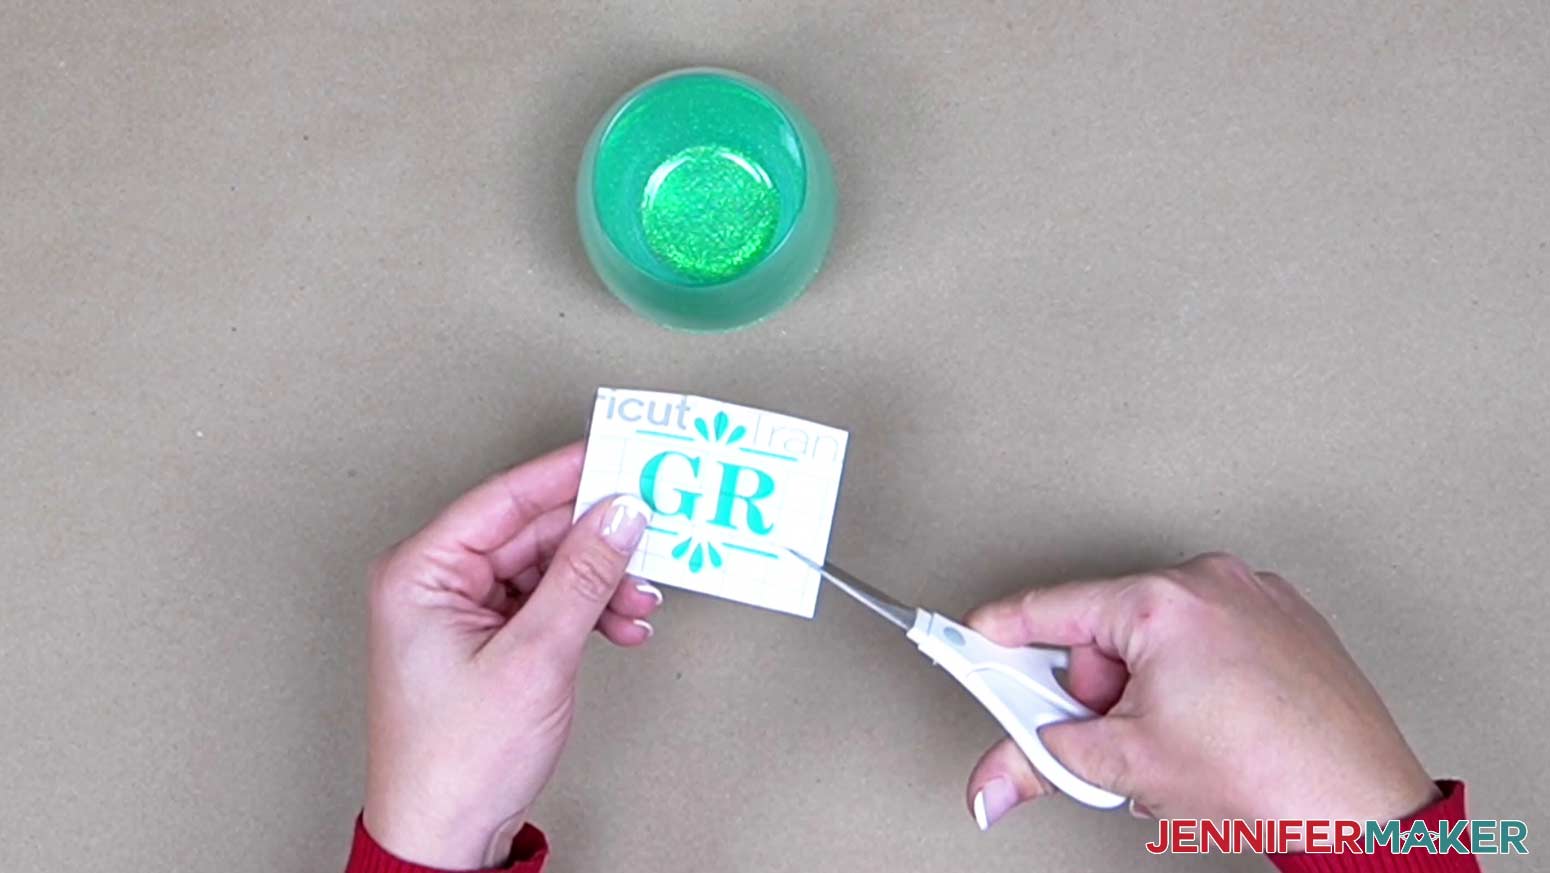
Place the center of your decal halfway between the edge of the glitter and the top edge of the glass.
Using your finger, rub from the center of the vinyl outward, tacking the vinyl into place.
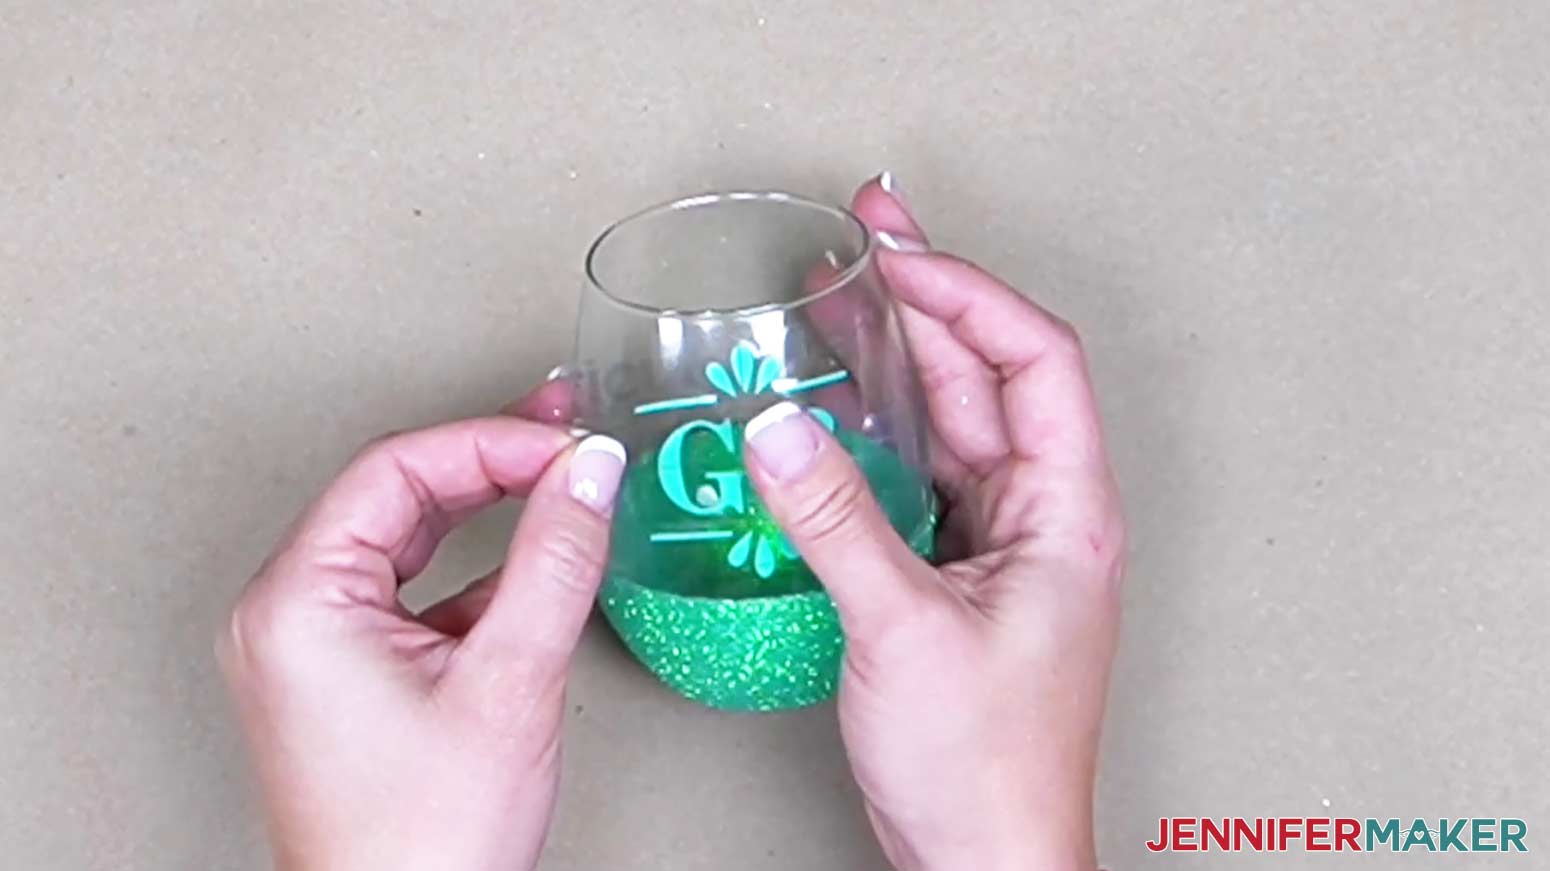
Gently, remove the transfer tape leaving the vinyl on the glass.
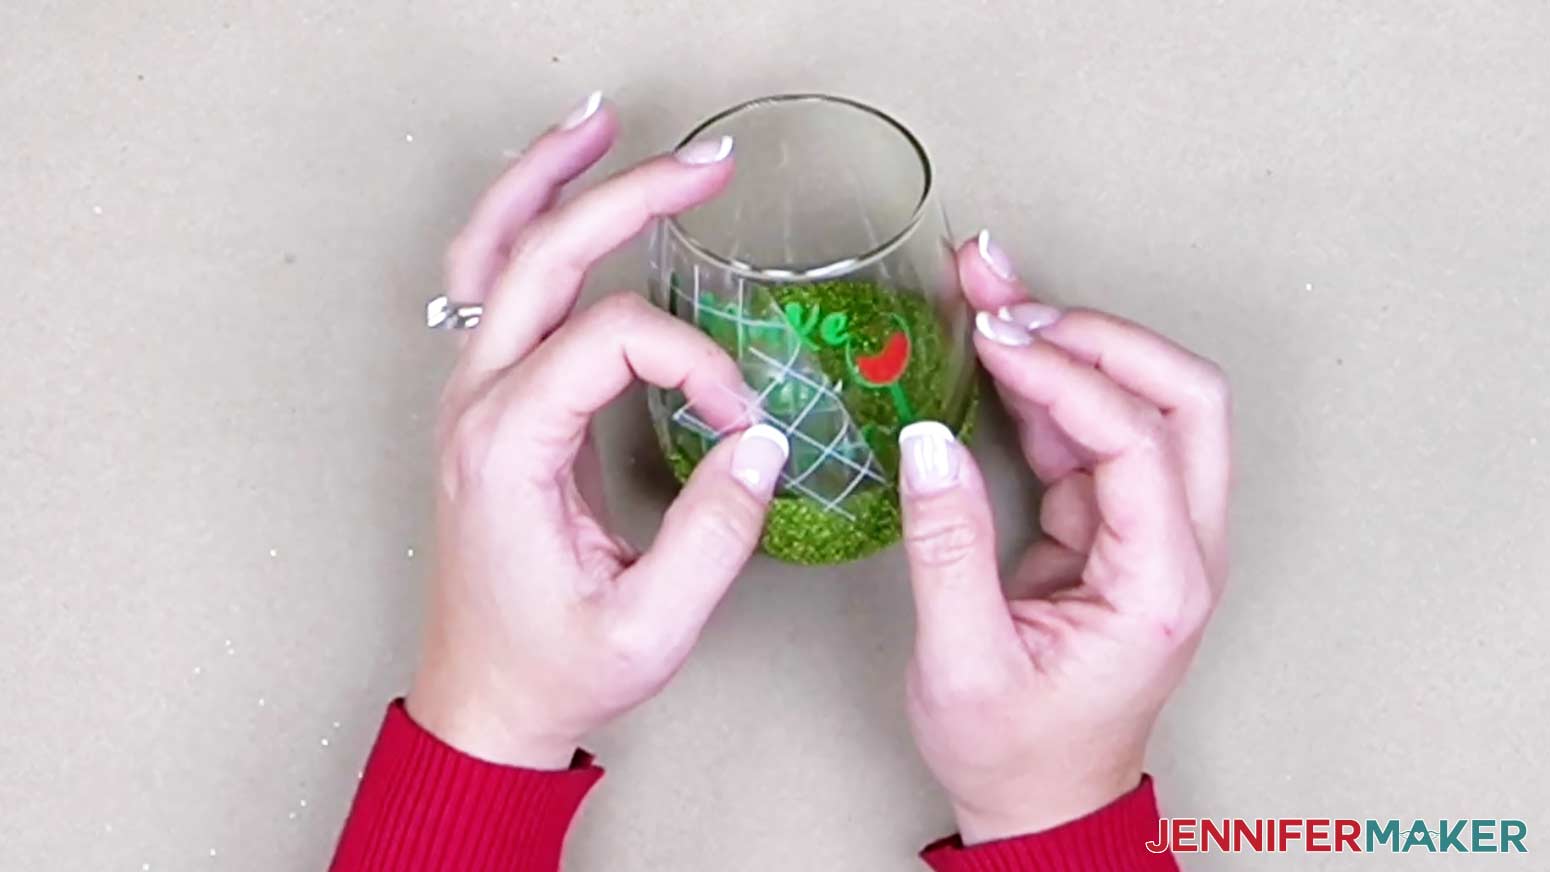
Smooth any bubbles that were missed, working from the center outward.
If thin parts of the decal do not lay down correctly and form “bumps” that can’t be pushed down, you can very carefully peel the vinyl back up off the glass with a weeding tool and then gently lay it back down.

Your glass is now ready to share!
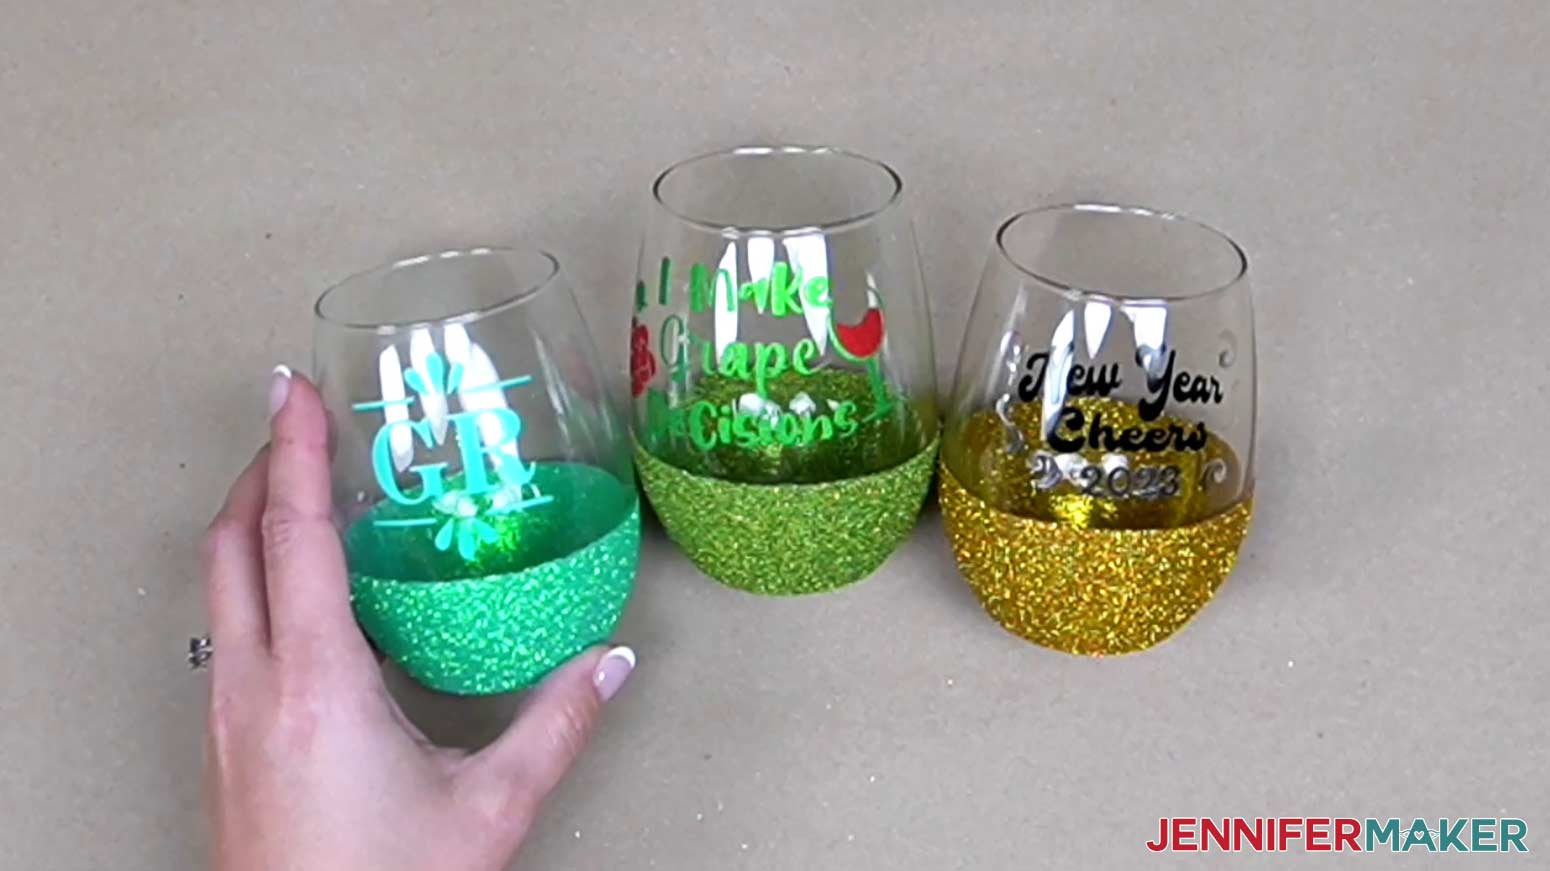
STEP 6: SHOW IT OFF!
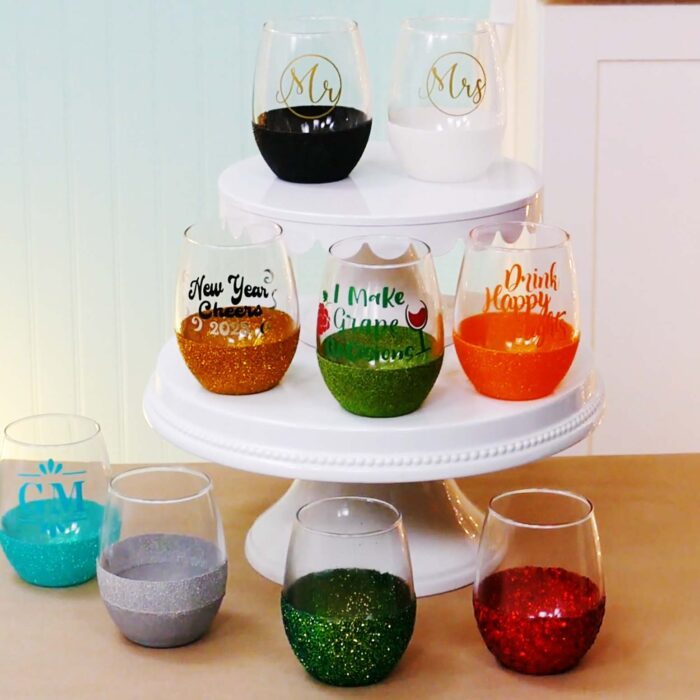
Use your glitter glasses for customized celebrations and gifts. The glasses are not only reusable but make great shelf decorations as well. The color and decal combinations you can come up with are practically endless!

Notes
Finished Size:
15oz Stemless Wine Glass 4.6" tall
Fonts Used:
Grape: Wellona Script
I Make ___ Decisions: Hello November Sans Regular
New Year Cheers: Brenson Charlotte
Drink Happy Thoughts: Kite Script
Answers to Your Questions About Making Glitter Wine Glasses
Q: How do you make glitter stay on wine glasses?
A: I added an even coat of Mod Podge to where I wanted the glitter to stay (the lower area and base of the glass) then used the bottle to pour glitter on the outside of the glass. Let it dry well between layers!
Q: What is a best sealer for glitter wine glasses?
A: I added a final layer of Mod Podge over the last totally dry glitter layer and all the sparkly pieces stayed in place.
Q: How do you prepare glitter for glass?
A: Clean the glass very well with rubbing alcohol and a lint-free cloth or coffee filter to remove any debris or oil from the surface that will impede the bonding process. Then layer Mod Podge and glitter, allowing it to dry completely in between coats. If you’re working in a humid area, the project could take 2-3 days including drying time.
Q: What kind of epoxy do you use for glitter wine glasses?
A: I did not use epoxy for my DIY wine glasses and was very happy with how the Mod Podge worked with the glitter.
Q: Can I cut this project on a Cricut Joy?
A: Yes, these designs are small enough to fit on the Cricut Joy machine mat. See our Resizing Guide for more details.
Q: What is Merry Maker Mingle?
A: Each day in December leading to Christmas, I present you with a brand new “gift” — a project to craft, make, or do. You can make these projects on a Cricut cutting machine or by hand if you don’t have one. Most of our Merry Maker Mingle projects will come with a fun video with yours truly, a step-by-step printable photo tutorial, and a free pattern/SVG cut file. Sign up to get daily updates and prizes!
Get my free SVG files to create Glitter Wine Glasses with fun sayings!
I love seeing what you make with my designs and how you use them! Please share a photo of your glitter wine glasses in our Facebook group or tag me on social media with #jennifermaker.
Love,

Want to remember this? Save this Glitter Wine Glasses Tutorial to your favorite Pinterest Board!