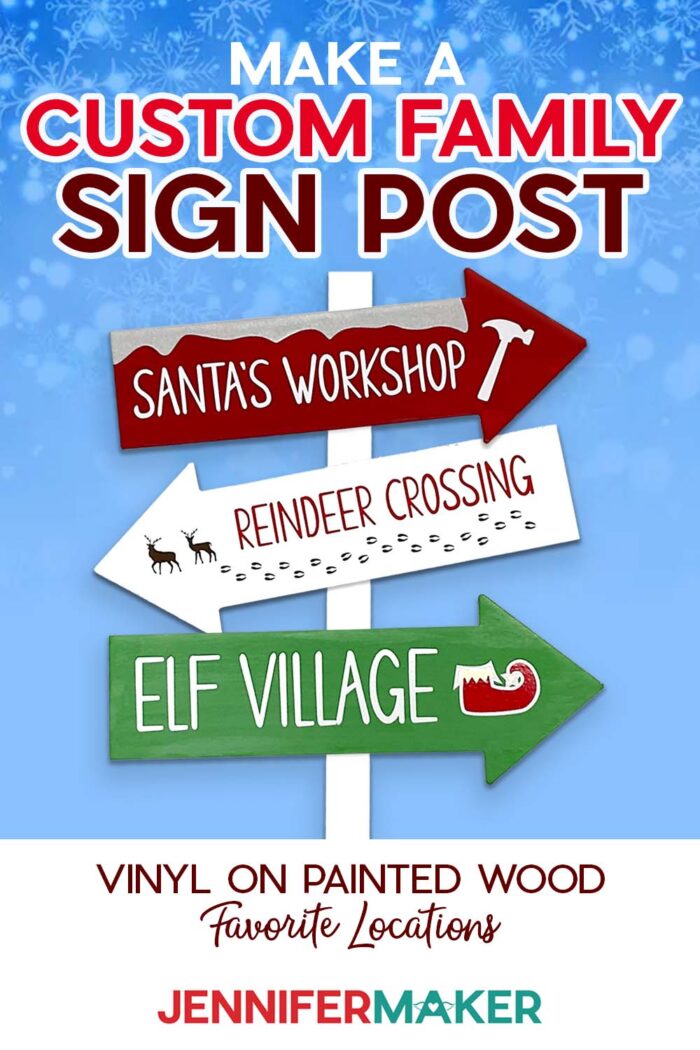
Make a custom family sign post to honor special people and places!
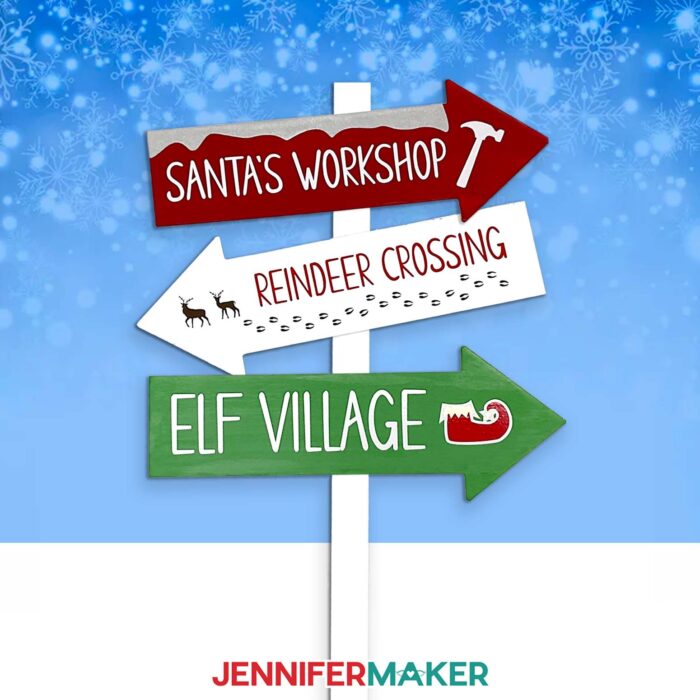
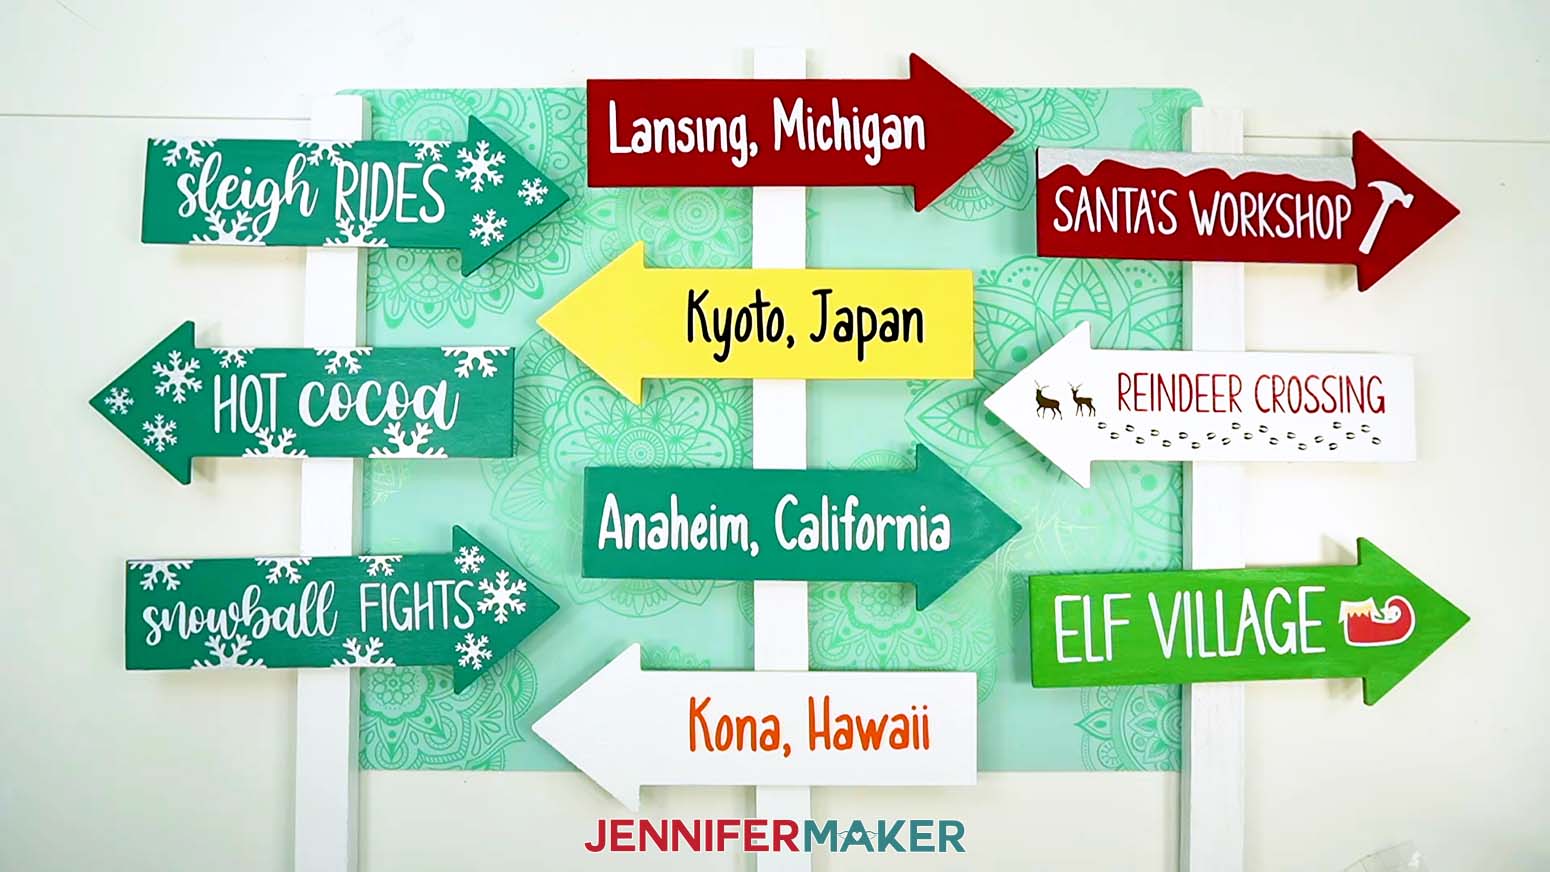
A custom family sign post makes a great gift for family members, friends, neighbors, or yourself! In this tutorial, I’ll teach you how to transform plain wood signs into a colorful statement worthy of gifting or displaying proudly in your yard! First, I’ll show you how to make a Winter fun sign, with adorable activities indicated by the direction of the arrow.

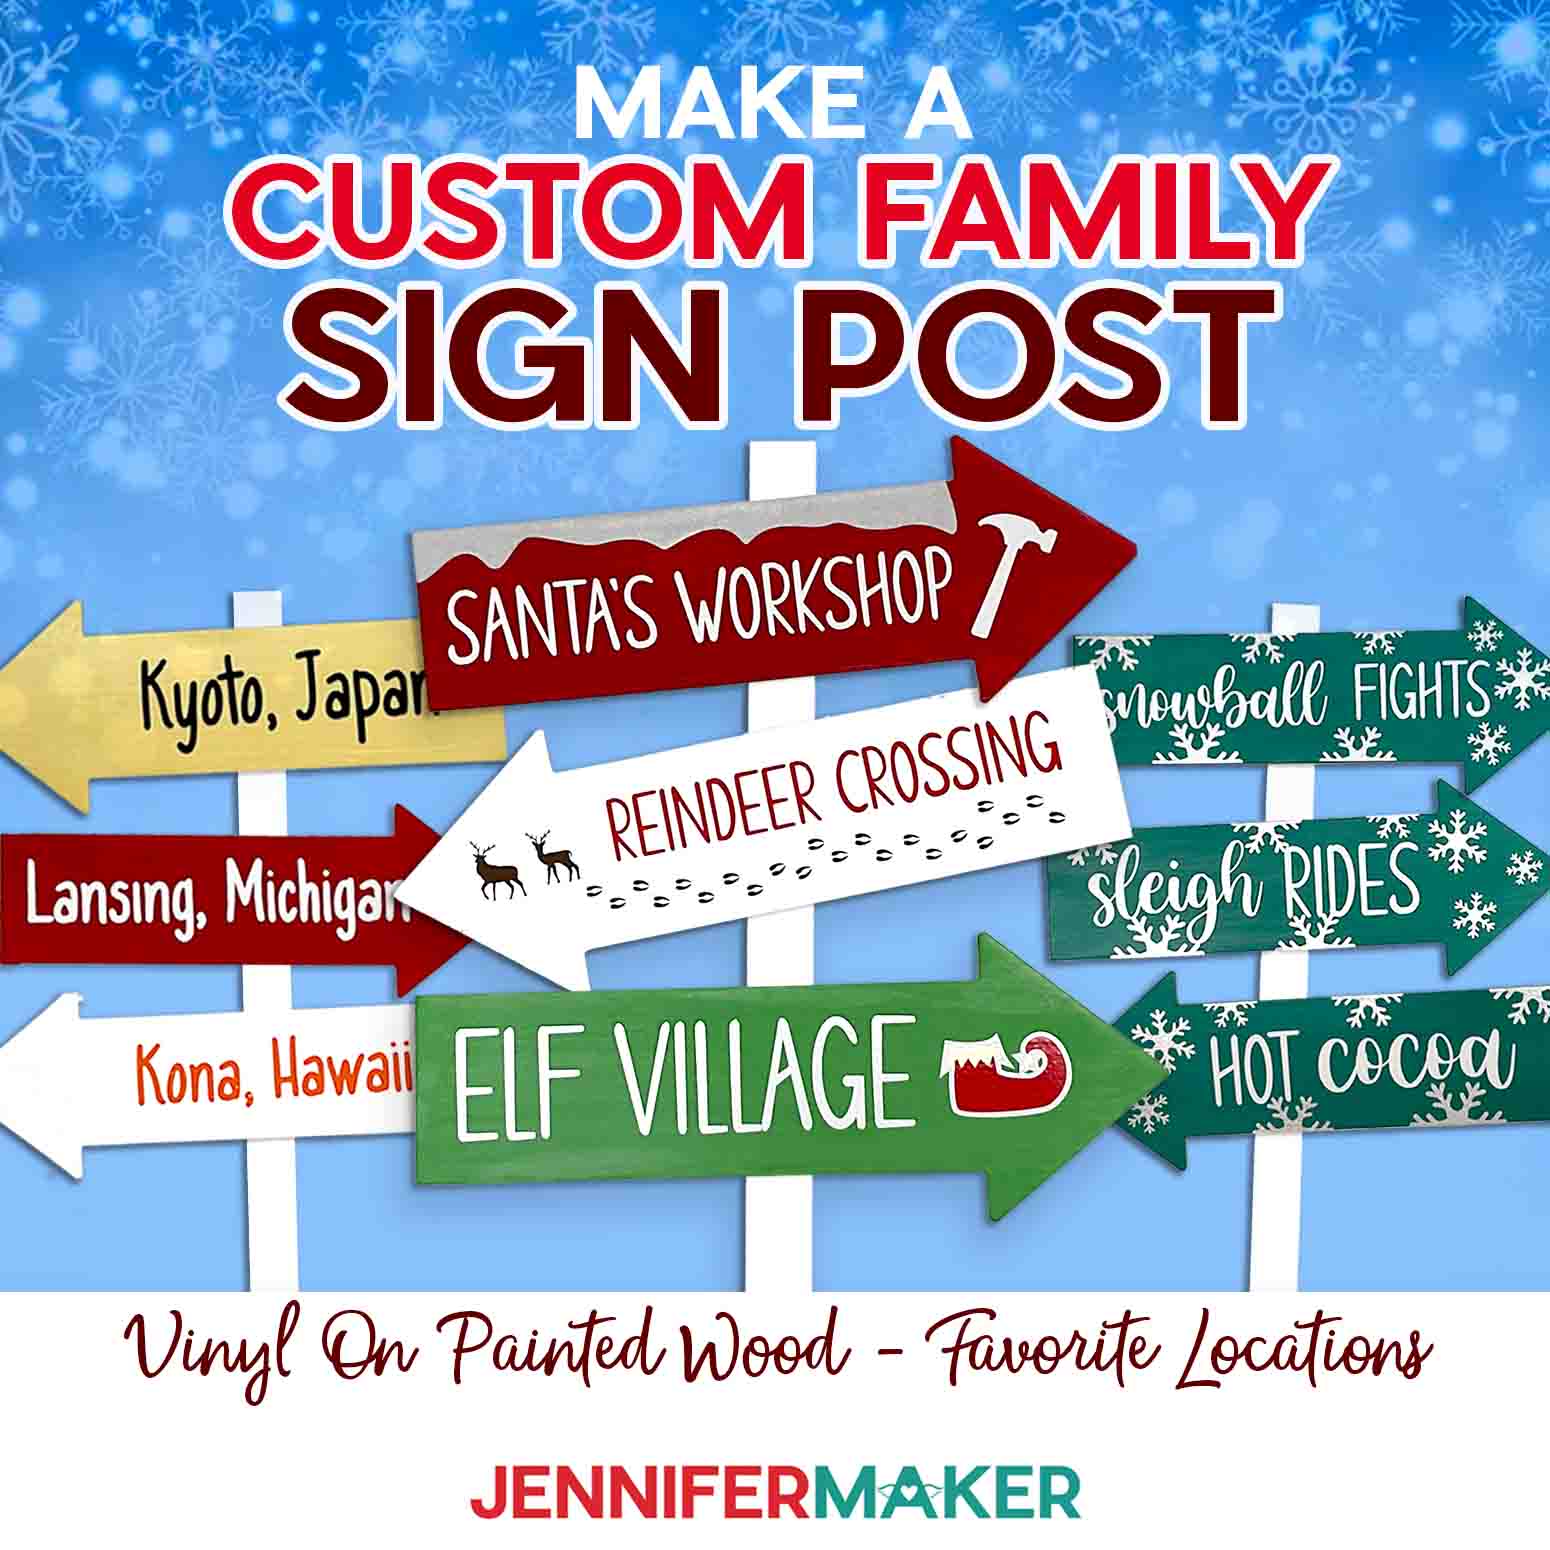
Then, later on in the tutorial, I’ll show you how to create custom signs in Design Space! I’ll walk you through creating personalized arrows for people and places that hold significance.
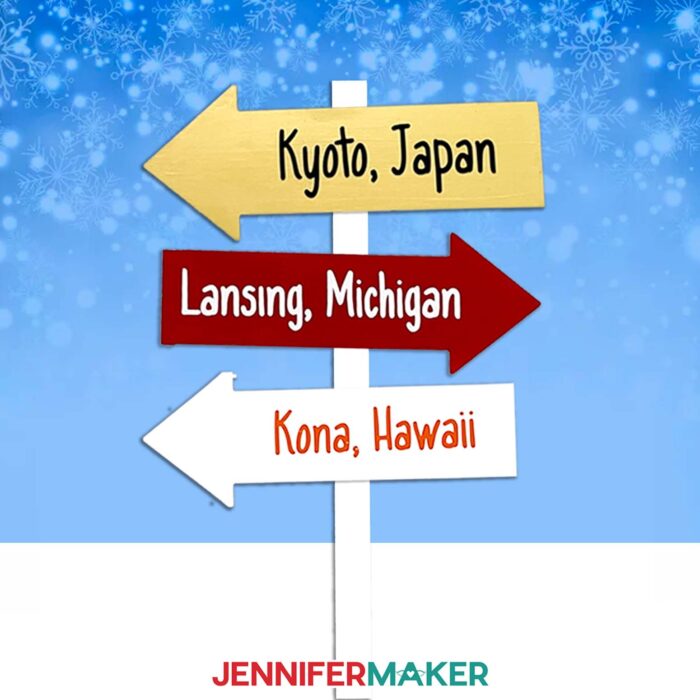
They could be real locations you’ve been, or cities where your family and friends live – OR fictional places from your favorite book or series. You can even just decorate it with family member names, pointing in the general direction of where they live. Include the family member’s distance on the sign for an extra personal twist! Or, create a seasonal version, or even a holiday-themed sign for a touch of Christmas magic.
I’ll give you my best tips on how to prepare your sign so it looks great year after year — even when exposed to the elements.
To make your custom family sign post, you’ll need three or four wooden arrows. I found mine at my local Dollar Tree, but they’re should be available at your local craft store or even just online, too.
Next, you need a wooden signpost stake to attach them to! Now, I know what you’re thinking: “Do I really need to lug out a hammer and nails for this?” Nope! I’ve got a really easy solution that you’ll need to stick around to hear about.

I recommend starting this project a few days before you need to gift it or display it in your yard, because there is a decent amount of preparation (and drying time) because we’ll be sanding, painting, and sealing the wood before we decorate it.
I’ll use chalk paint for my signs, which gives a lovely matte, classic look. Why’s it called chalk paint? There’s actually chalk powder right in the paint! When they’re dry, I’ll show you how to protect them from rain, sun, and snow — and still keep the matte look I prefer. I like to applying chalk paint with a foam brush, and the sealant with an acrylic paintbrush for a more durable finish.
For your decals, you’ll need some vinyl. I’ll use permanent vinyl for everything, but mix it up with glitter vinyl on the snowflakes, and white permanent vinyl for the words. On the custom sign, anything goes as far as colors go!
To cut the vinyl, I’ll use my trusty Cricut Maker 3, but you can use ANY Cricut for this project! The original Cricut Maker, the Explore series machines, the Venture, the original Joy, or the Joy Xtra — they’ll all work to cut the vinyl for your custom wood sign.
To apply the vinyl to the signs, you’ll need some transfer tape. If you’re using glitter vinyl in addition to the glossy permanent vinyl, you’ll need both StrongGrip and StandardGrip transfer tape.
There’s just a few more things you’ll need to make a custom family wood sign, and you can find them all (plus links!) in my materials list.
I plan to stick my sign in my garden outside, but you can put yours in a large pot with a plant or some sand or gravel to display free standing on your porch or even inside your home.
If your sign gets dirty (which it probably will, if it’s outside), simply wipe it down with a damp rag. The sealant will protect it from weather wear, but like any yard decor I still recommend bringing it inside if you’re expecting wind, hail, sleet, or heavy snow to help it look its best as long as possible!
A custom directional sign post makes a great Christmas gift, wedding gift, or you can give one “just because.” It’s great addition to any yard, and is a great new home housewarming gift idea. It would also be super cute as a family reunion garden sign, too!
Ready to learn how to make a custom family sign post? This post contains some affiliate links for your convenience (which means if you make a purchase after clicking a link I will earn a small commission but it won’t cost you a penny more)! Read my full disclosure policy.
Materials And Tools to Make a Custom Family Sign Post
See my full and complete Amazon shopping list for the exact items used in this project!
- Three to Four (3-4) Wood Arrows (I got mine from Dollar Tree, but you’ll find them other places, like Amazon, too!)
- One (1) 3 ft. Wood Stake
- Chalk Paint in colors White Adirondack, Imperial Red, Grotto (Teal), Summer Porch (Yellow), Irish Green, Cascade (Light Blue)
- Polycrylic Matte
- Cricut Permanent Shimmer Vinyl in colors Silver and Gold
- Cricut Permanent Vinyl in colors Black, White, Bracken (Brown), Tomato Red, Orange,
- Cricut StandardGrip Transfer Tape
- Cricut StrongGrip Transfer Tape
- A way to cut your materials – I’m using the Cricut Maker 3, but you can also use the Cricut Maker, a Cricut Explore Series machine, the Cricut Venture, the Cricut Joy, and the Cricut Joy Xtra
- Cricut Green StandardGrip Machine Mat, 12″ x 12″
- Brayer
- Scraper
- Weeding Tool
- Scissors
- Needle Nose Pliers (To Remove Staples)
- Mini Sander Kit
- Foam Brushes
- Synthetic Paint Brush (for Polycrylic)
- Butcher Paper
- Paper Towels
- Paper Plates
- Disposable Gloves
- Outdoor Velcro
- Design #552 – My free SVG/DXF/PDF design files are available in my free resource library – get the password by filling out the form at the bottom of this page

How to Make a Custom Family Sign Post!
Custom Family Sign Post
Learn how to make a custom family sign post!
Materials
- Three to Four (3-4) Dollar Tree Arrows
- One (1) 3 ft. Wood Stake
- Chalk Paint - White Adirondack
- Chalk Paint - Imperial Red
- Chalk Paint - Grotto (Teal)
- Chalk Paint - Summer Porch (Yellow)
- Chalk Paint - Irish (Green)
- Chalk Paint - Cascade (Light Blue)
- Polycrylic Matte
- Cricut Permanent Shimmer Vinyl - Silver
- Cricut Permanent Shimmer Vinyl - Gold
- Cricut Permanent Vinyl - White
- Cricut Permanent Vinyl - Black
- Cricut Permanent Vinyl - Bracken (Brown)
- Cricut Permanent Vinyl - Tomato Red
- Cricut Permanent Vinyl - Orange
- Cricut StandardGrip Transfer Tape
- Cricut StrongGrip Transfer Tape
- Outdoor Velcro
- Design #552 (My free SVG/DXF/PDF design files are available in my free resource library – get the password by filling out the form at the bottom of this page
Tools
- A way to cut your vinyl - I’m using the Cricut Maker 3, but you can also use the Cricut Maker, a Cricut Explore Series machine, the Cricut Venture, the Joy, or the Joy Xtra!
- Cricut Green StandardGrip Machine Mat, 12" x 12"
- Brayer
- Weeding Tool
- Scissors
- Needle Nose Pliers (To Remove Staples from Arrows)
- Mini Sander Kit
- Foam Brushes
- Synthetic Paint Brush (for Polycrylic)
- Butcher Paper
- Paper Towels
- Paper Plates
- Disposable Gloves
Instructions
STEP 1: GET MY CUSTOM FAMILY SIGN POST DESIGNS
First, download my Custom Family Sign Post designs from my free library – look for Design #552. Alternatively, you can use the Save This Project form near the top of this post and the design link will be emailed to you.
TIP: If you're not sure how to upload, go to jennifermaker.com/svgs to learn how to unzip and upload SVG files.
There are two sets of SVG designs in my collection: A Christmas theme and a winter theme.
In this tutorial, I’ll show you how to make the winter directional sign with snowflakes and how to create a personalized design in Design Space!
STEP 2: PREPARE AND PAINT YOUR WOOD ARROWS AND STAKE
1. Cover your work area with butcher paper to protect it.
2. Use needle nose pliers to remove the staples and hanger from the wooden signs.

3. Use the sander tool to smooth any rough areas on the wood arrows and wood stake.
4. Brush off any dust with a paper towel.
5. Place each arrow on a paper plate and use a foam paint brush to apply the chalk paint. Spread the paint in long strokes along the length of the arrow. I’m painting one red, one white, and one green.
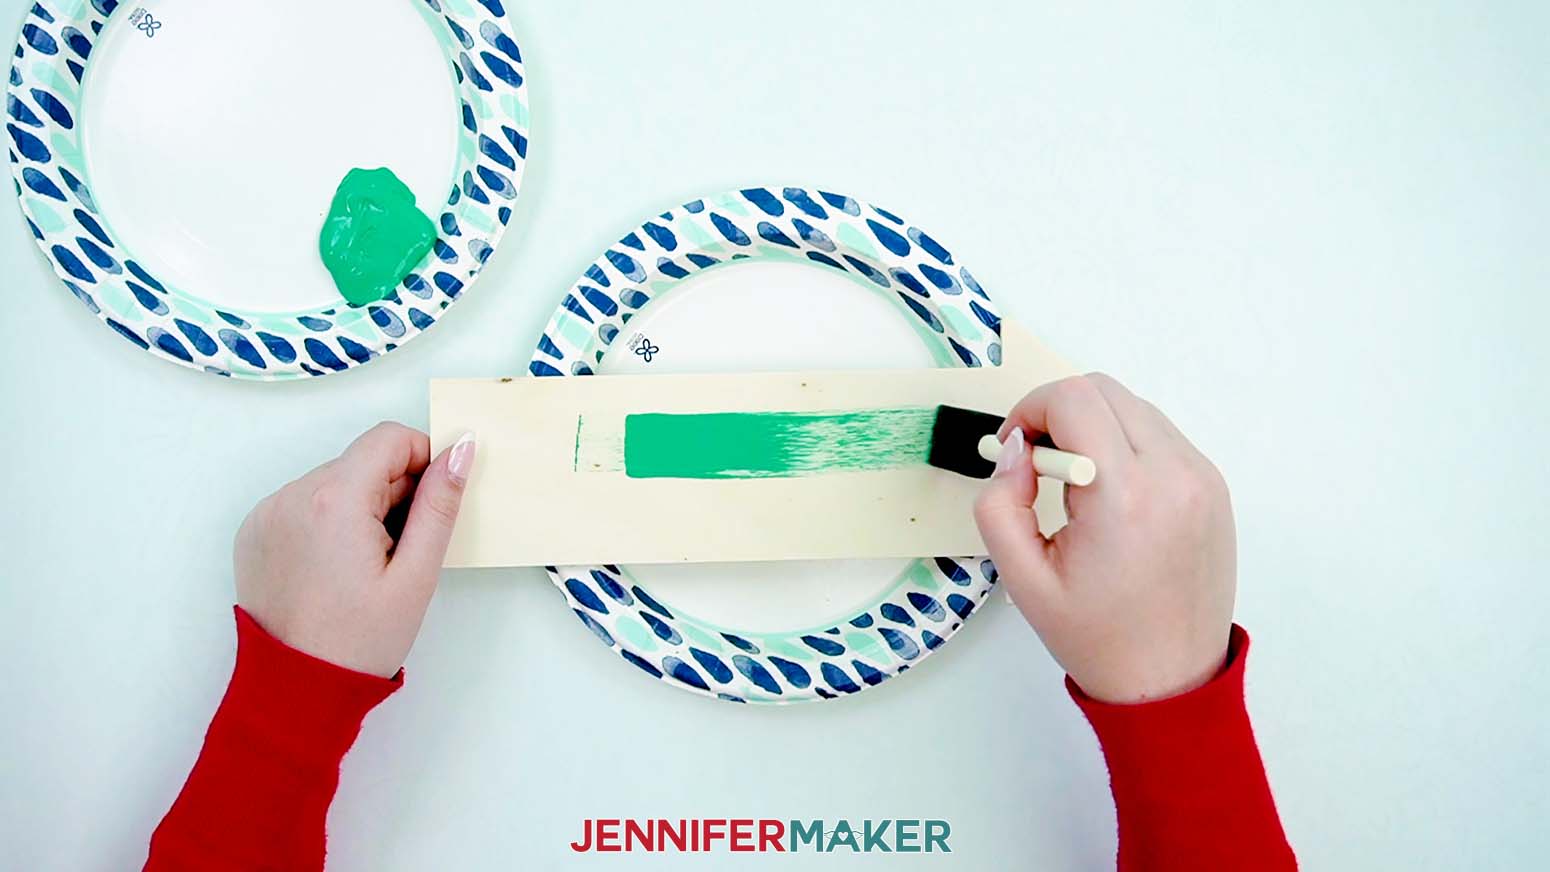
6. Carefully use the tip of the brush to apply the paint to the edges of the arrow.
7. Place the stake on paper plate supports and apply a coat of paint.

8. Allow the first coat of paint to dry. I left mine for 2-3 hours.
9. Apply a second coat of paint to the arrows and stake the same way as the first coat.
10. Allow the arrows and stake to dry for another couple of hours.
11. Use a synthetic paint brush to apply Polycrylic to the arrows and stakes. Cover all painted areas.

12. Allow the Polycrylic plenty of time to dry. I left mine overnight to be sure they were completely dry.
STEP 3: PREPARE YOUR DESIGN
PROJECT 1: WINTER SNOWFLAKE DIRECTIONAL SIGN
1. Open Cricut Design Space and click “New Project.”
2. Click “Upload” and then “Upload Image.”
3. Click “Browse.”
4. Select the SVG file.
5. On the Prepare to Upload screen, it will say “Cut image” with the design preview.
6. Click “Upload.”
7. Find your design in Recent Uploads and add it to the Canvas.
8. Click the minus (-) sign to zoom out (50% works).
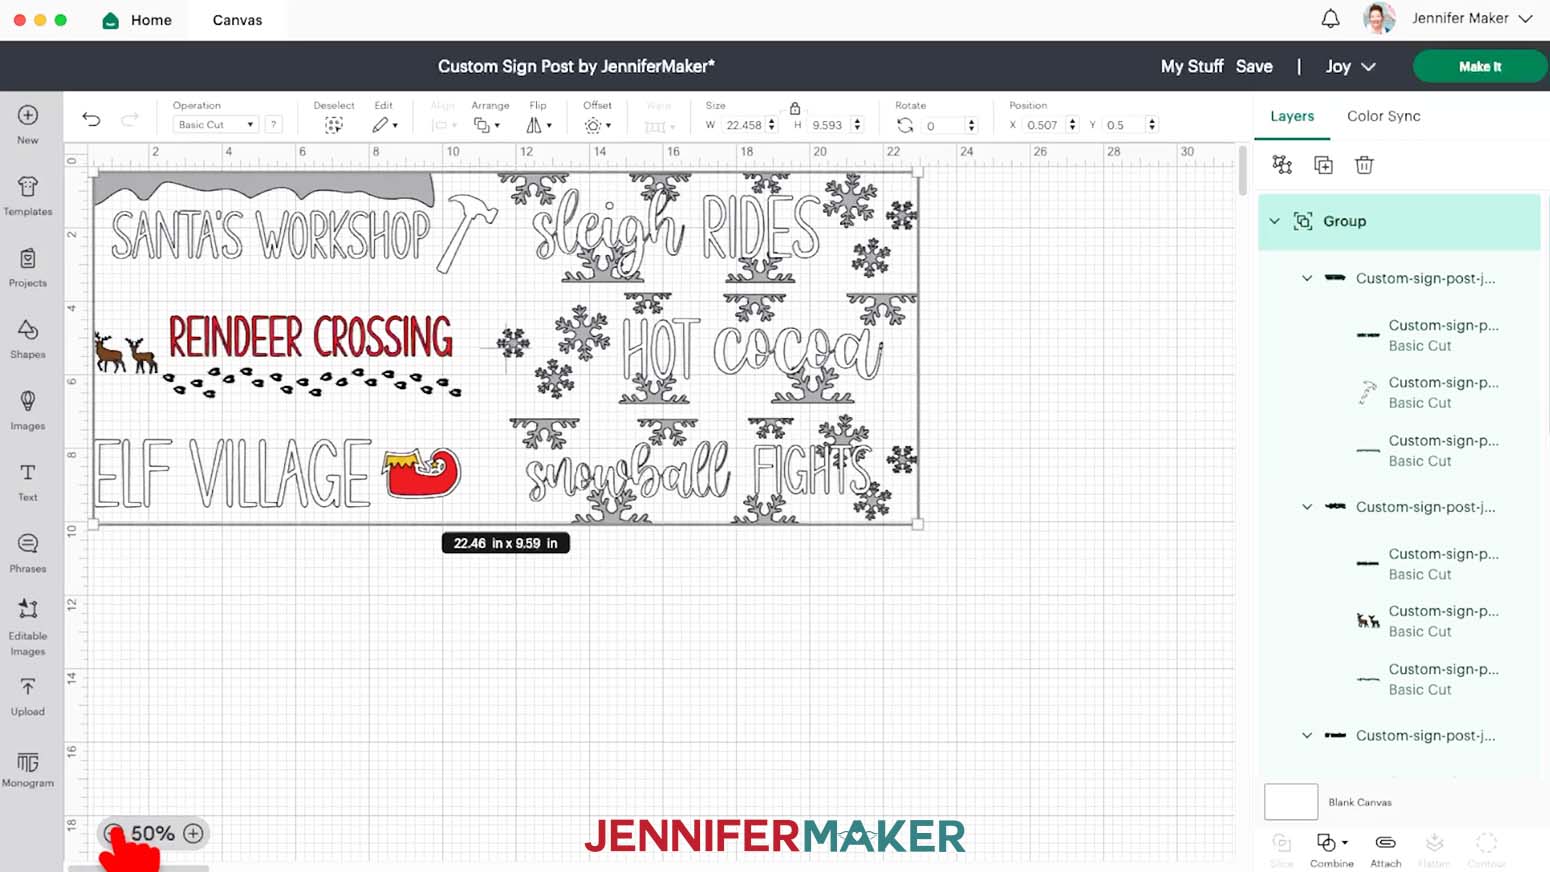
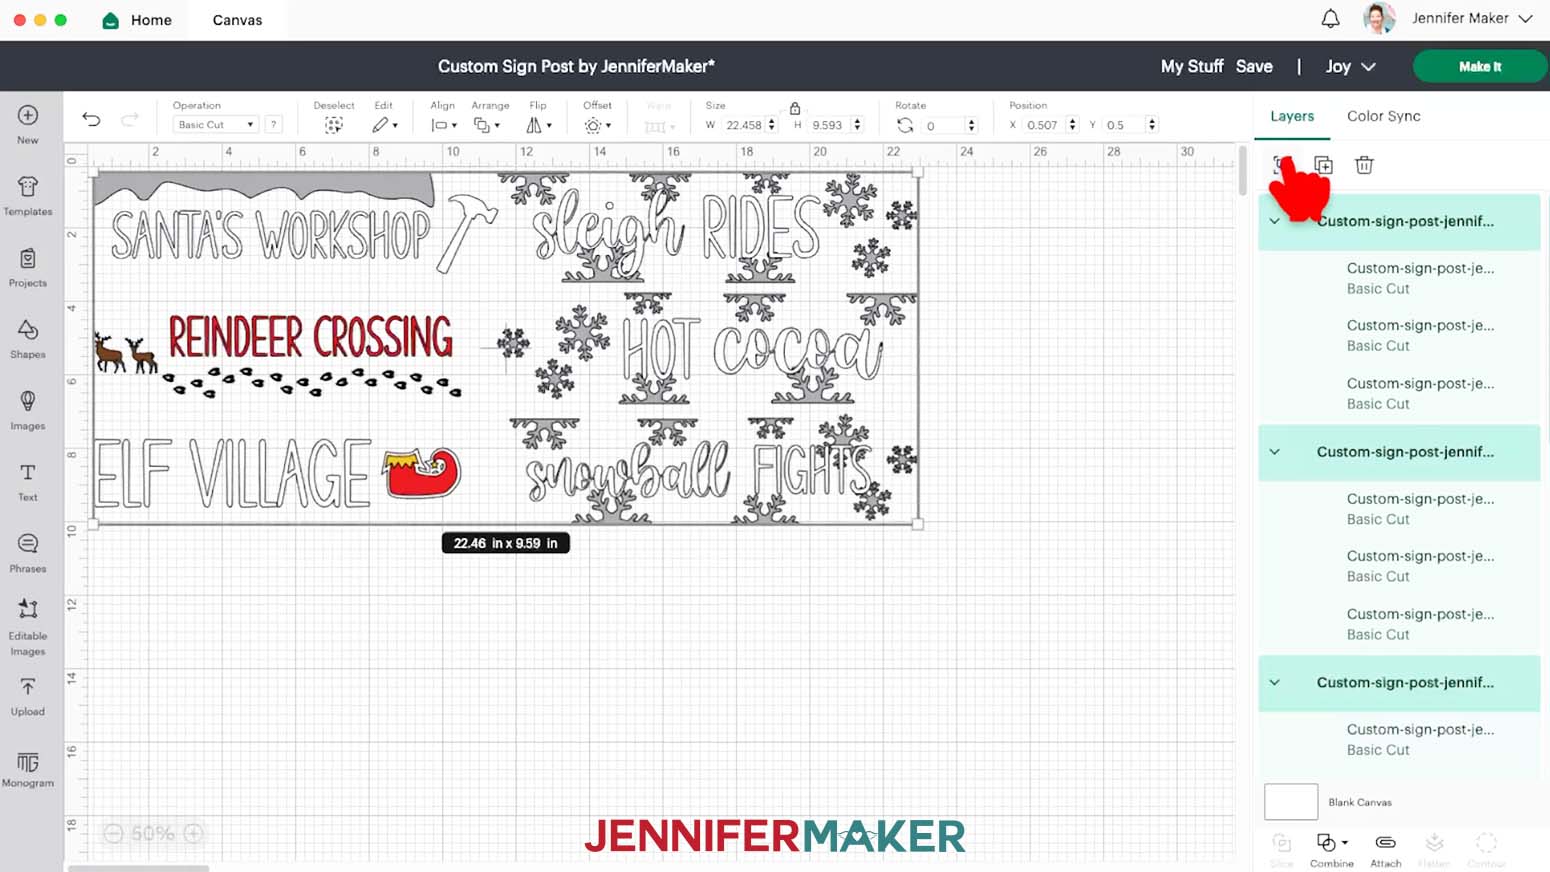
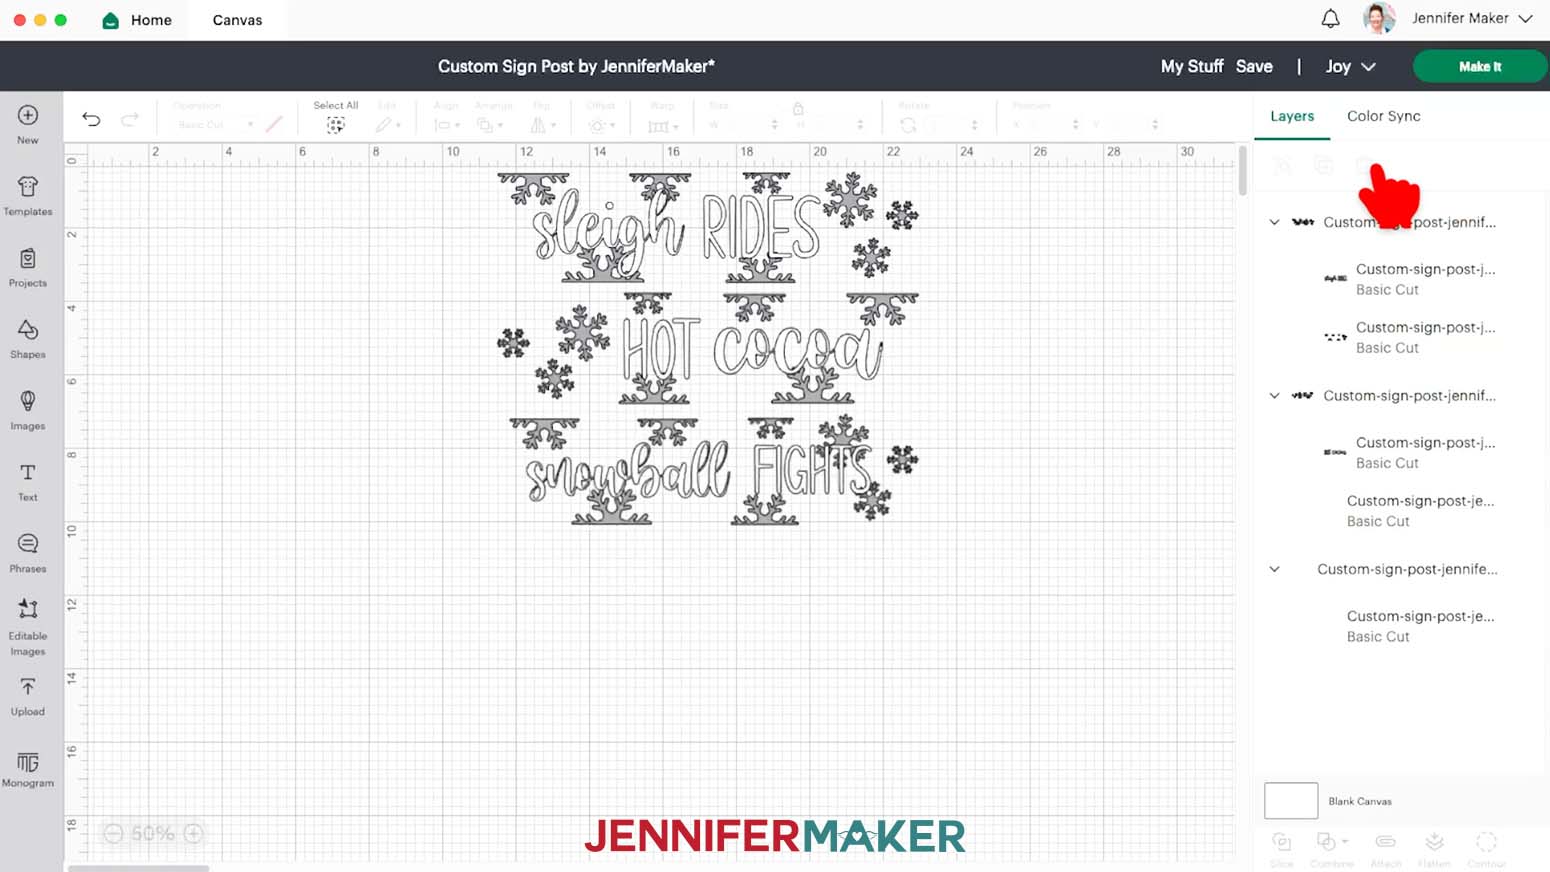
9. Click the Ungroup icon.
10. Hide or delete the Christmas designs.
11. If you are using different arrows than me, measure your arrows and follow steps 3-14 in Project 2 to create a guide. If necessary, use the corner handles to resize the designs.
12. Make sure the correct machine is selected in the top right.
13. Click “Make.”
14. If prompted, click "On Mat," choose your mat size, and click “Confirm.”
15. On the Prepare Screen, there should be 2 mats.
16. Leave the material size at 12” x 12” for all the mats.
17. Select the first mat and click “Continue.”
PROJECT 2: PERSONALIZED DIRECTIONAL SIGN
1. Open Cricut Design Space.
2. Click the “Canvas” tab at the top.
3. Click the Shapes icon on the left of the Canvas.
4. Select the Square.
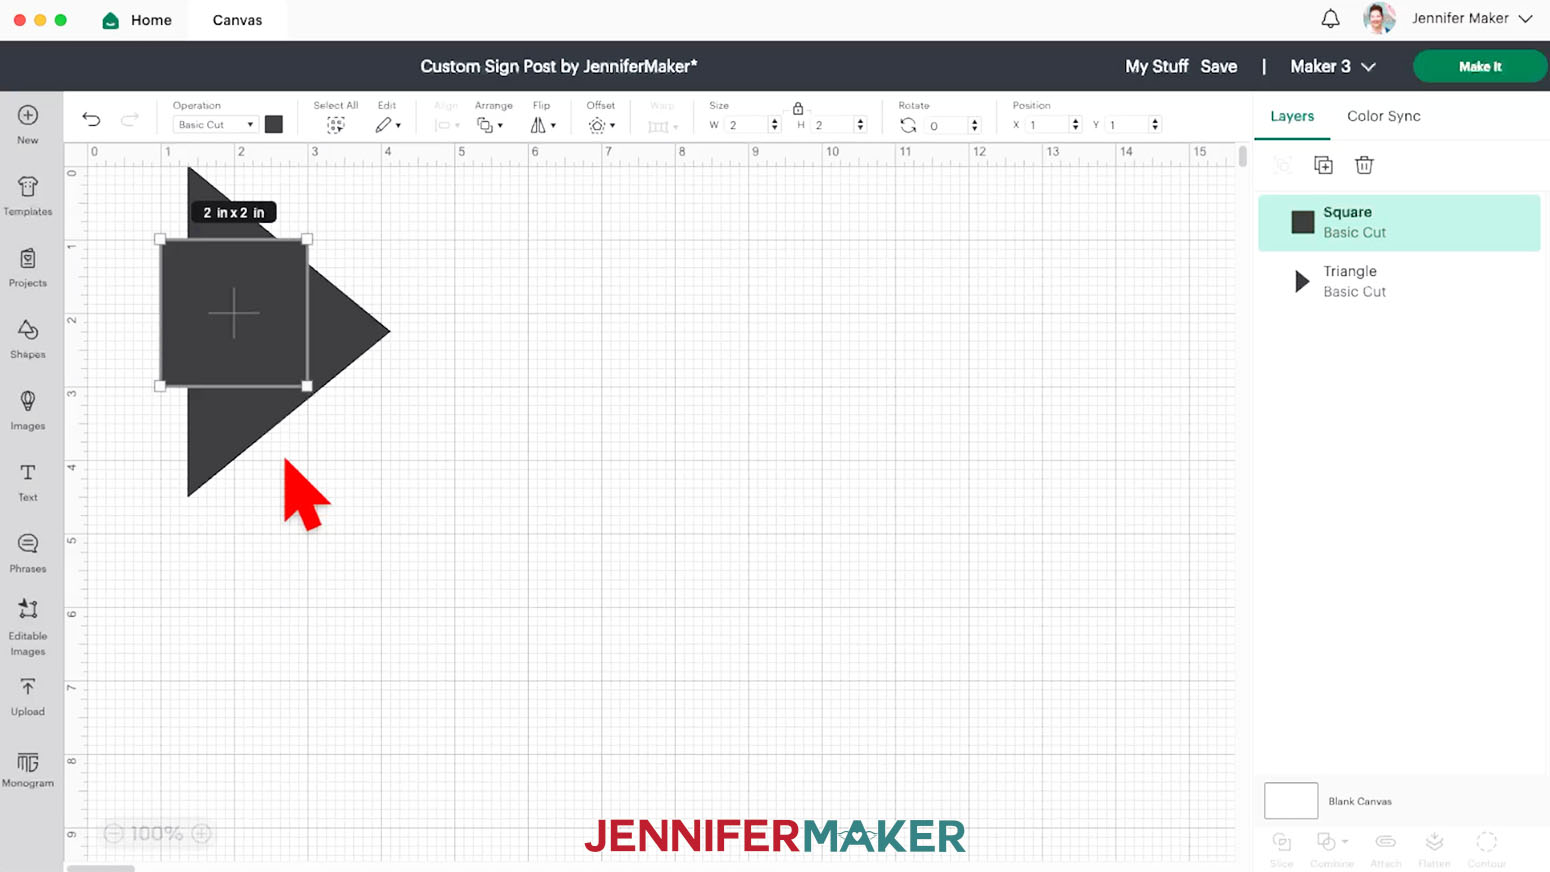
5. Click the Shapes icon again and select a triangle.
6. Click the Square to select it and click the Unlock icon above the Size menu.
7. Enter 9.25” for the Width (W) and 3” for the Height (H). Press Enter.
NOTE: If you are using different arrows, you may have different measurements for your guide.
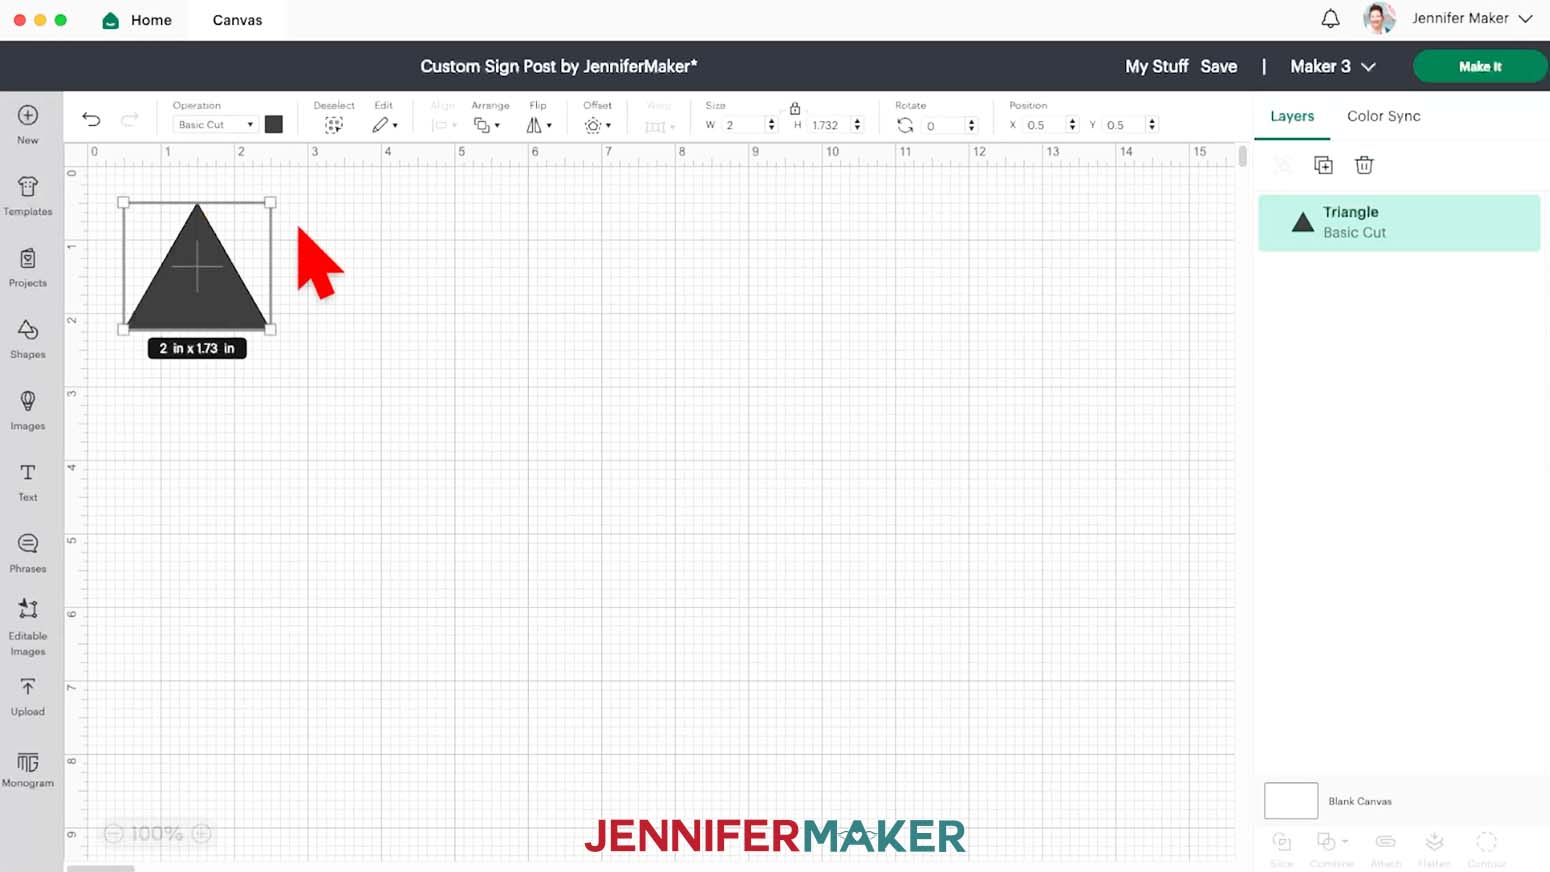
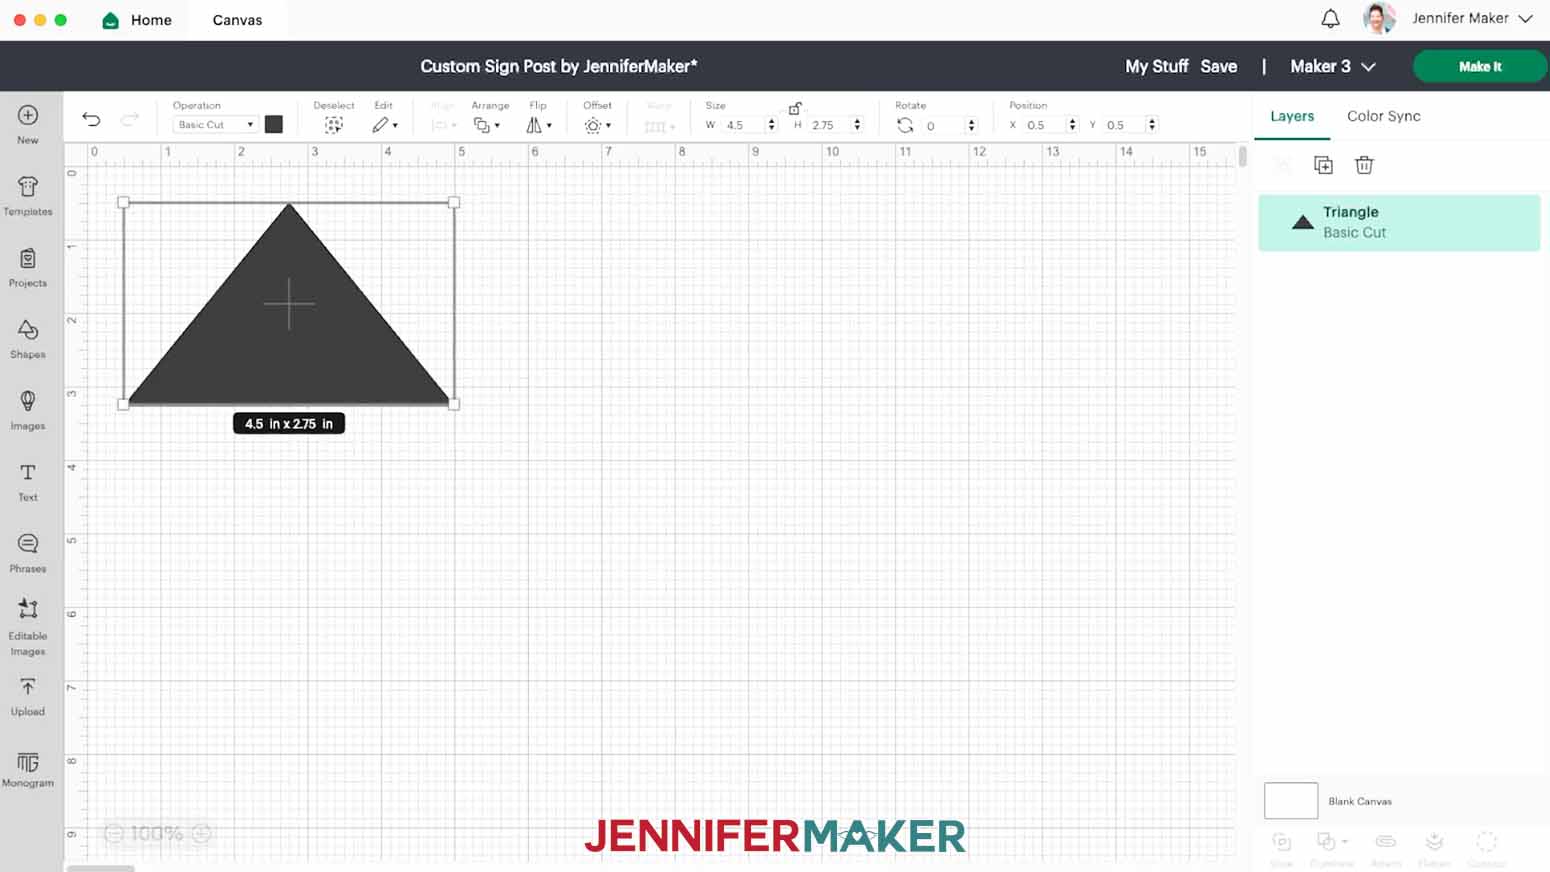
8. Click the triangle to select it and click the Unlock icon above the Size menu.
9. Enter 4.5” for the Width (W) and 2.75” for the Height (H). Press Enter.
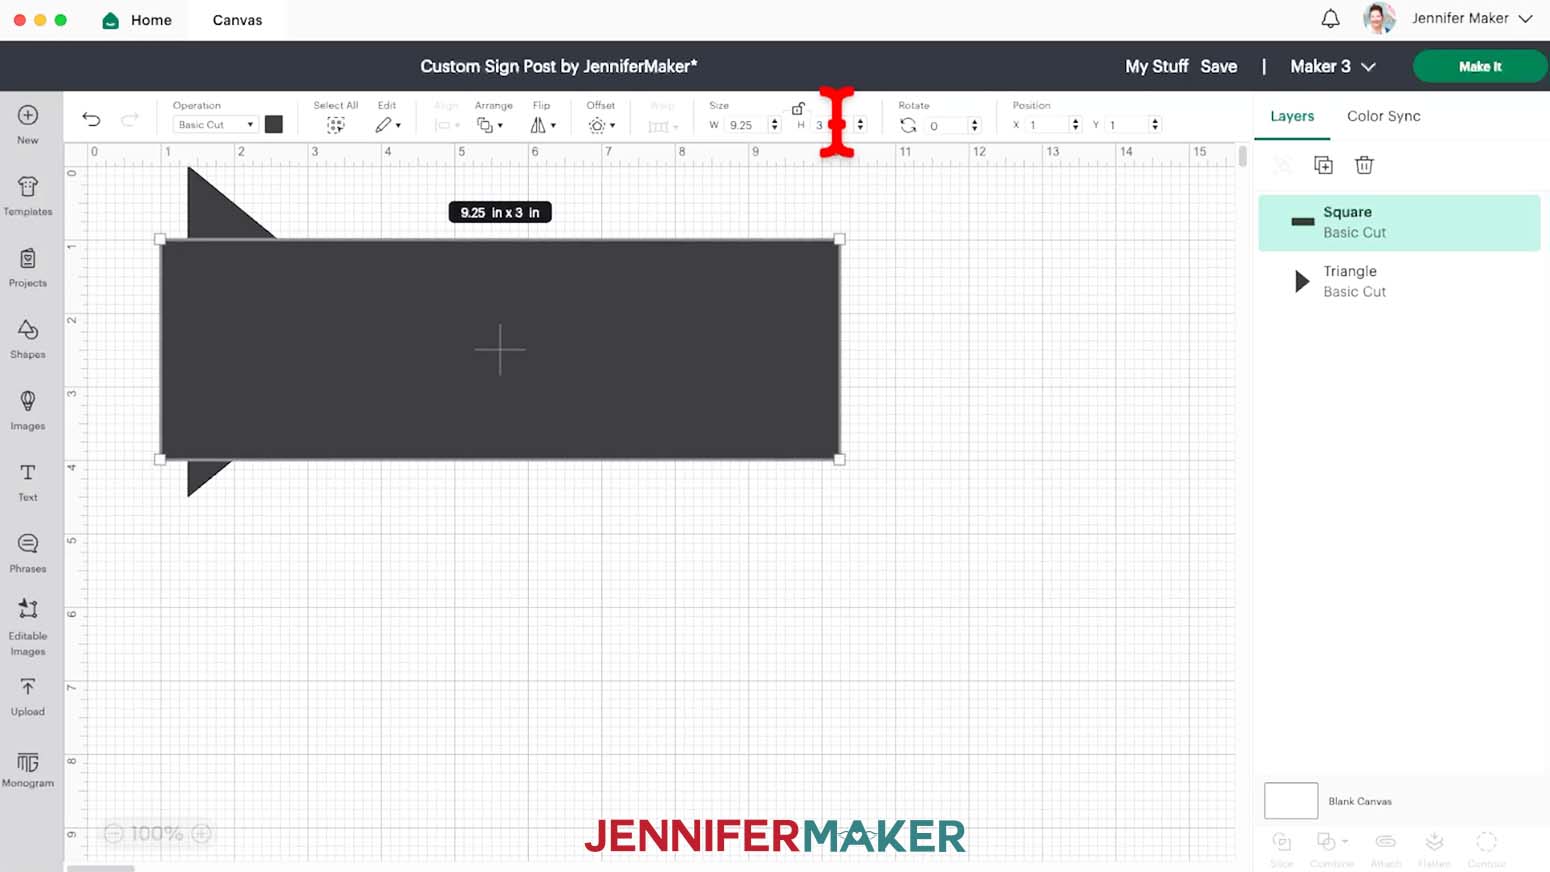
10. Press and hold the Shift key and position the cursor over the corner of the triangle so the curved cursor appears. Click and drag to rotate it 90 degrees clockwise.
11. Move the triangle to slightly overlap the right edge of the rectangle.
12. Select both the rectangle and triangle and click “Align” and “Center Vertically.”
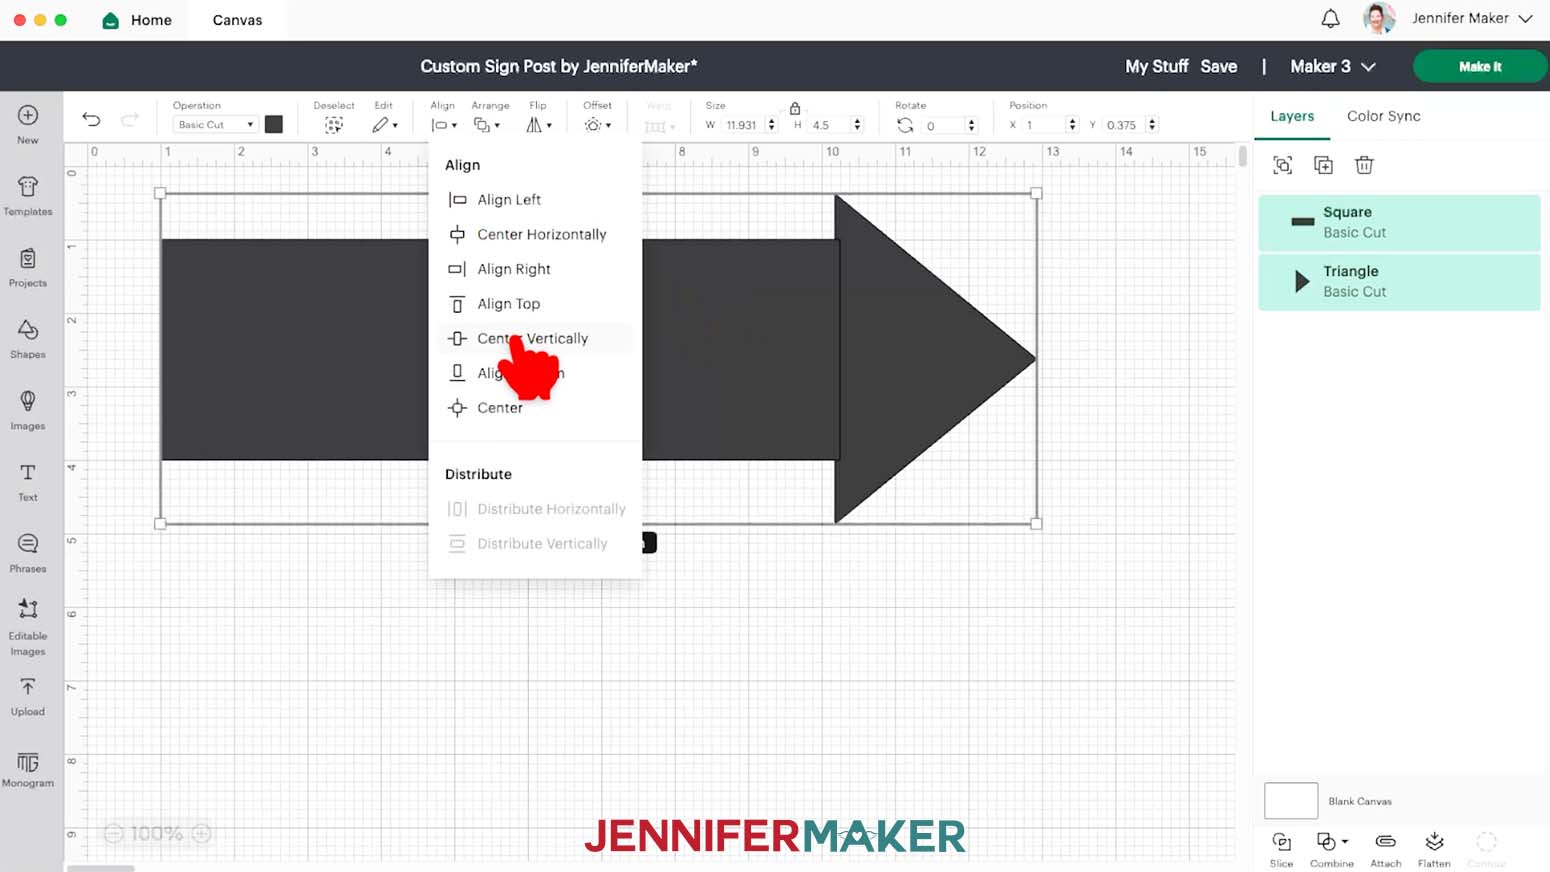
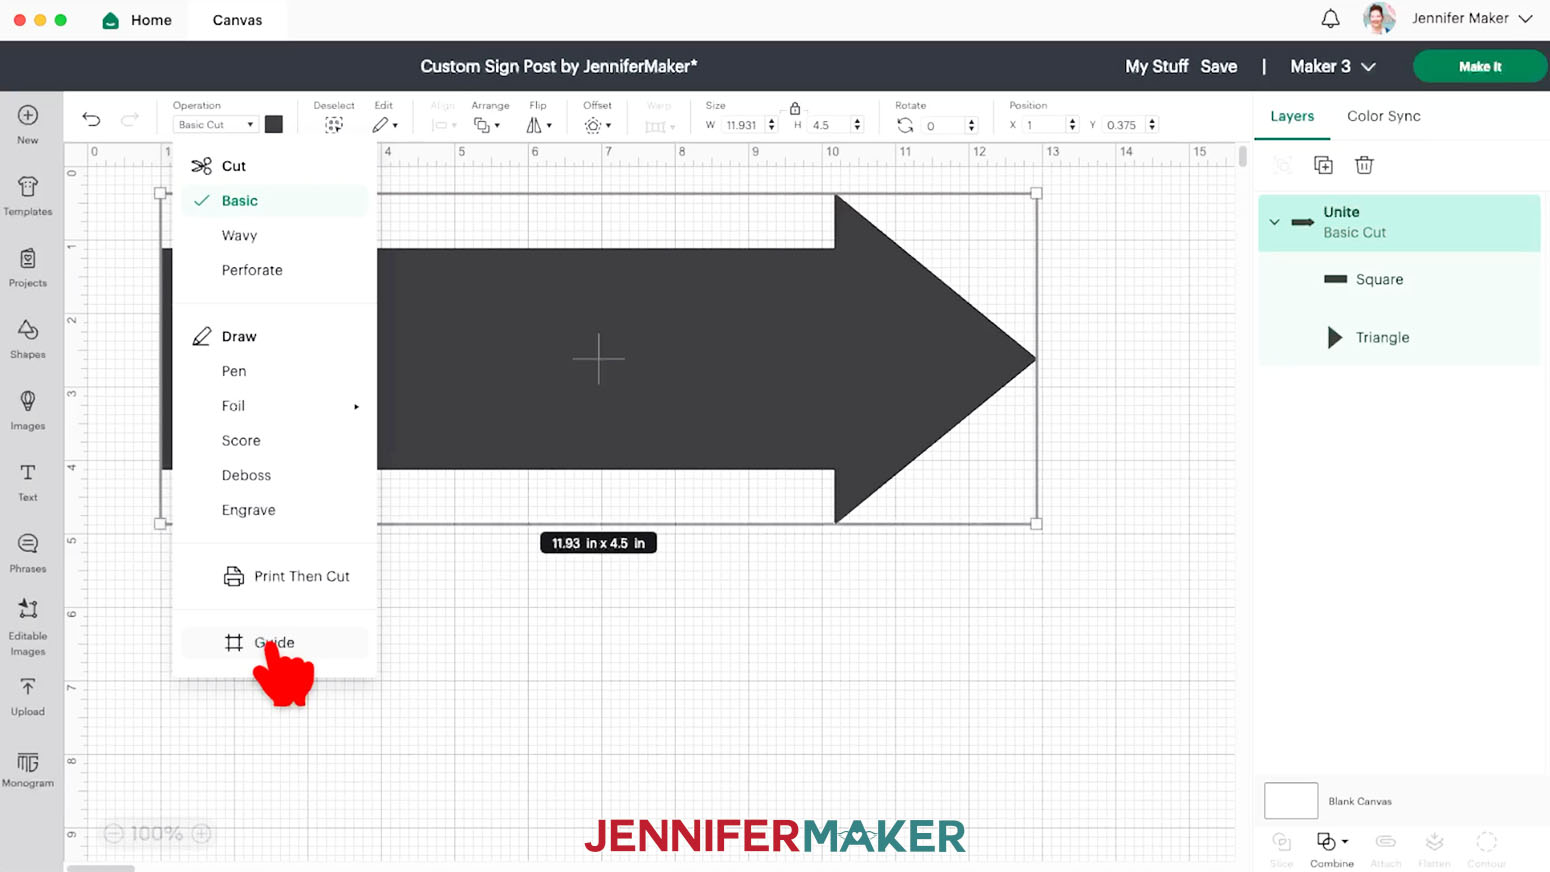
13. Click “Combine” and “Unite.”
NOTE: If a line still appears between the rectangle and the triangle, the shapes are not overlapping enough. Undo Unite, move them a little closer, and try again.
14. With the arrow shape still selected, click on the Operation menu and select “Guide.” The arrow shape will turn into a guide with a red outline.
15. Click the “Text” icon and then click on the Font Menu dropdown arrow.
16. Click “System” and search for the font you’d like to use. I’ll use JM Sweet.
TIP: If you need help downloading and installing fonts to use in Cricut Design Space, check out this helpful tutorial.
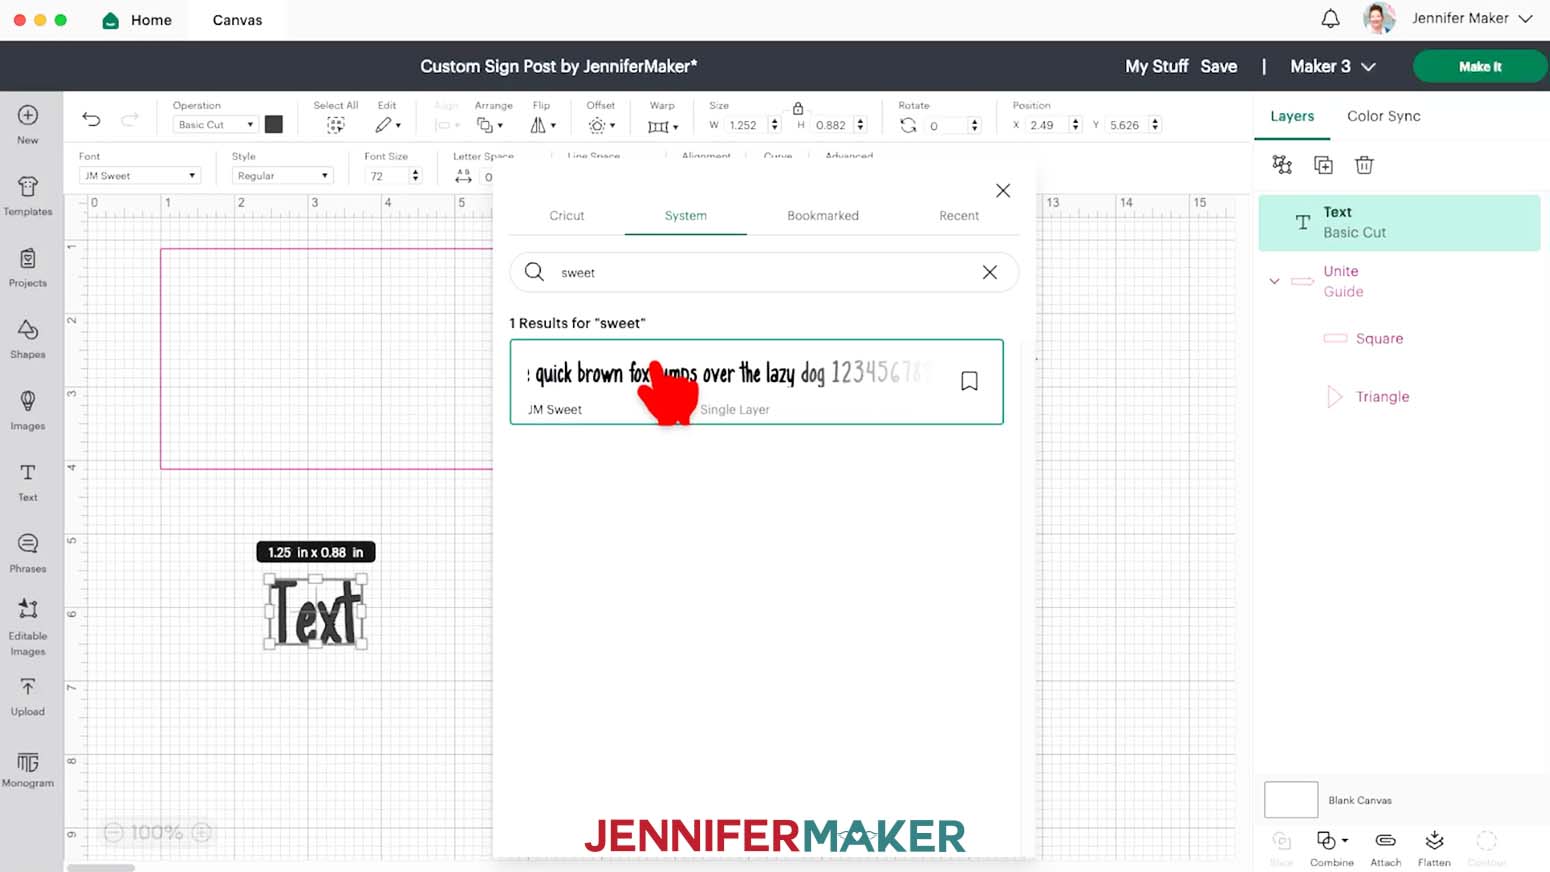
17. Click the “X” to close the Font menu.
18. Double-click on the text box to type your personalization.
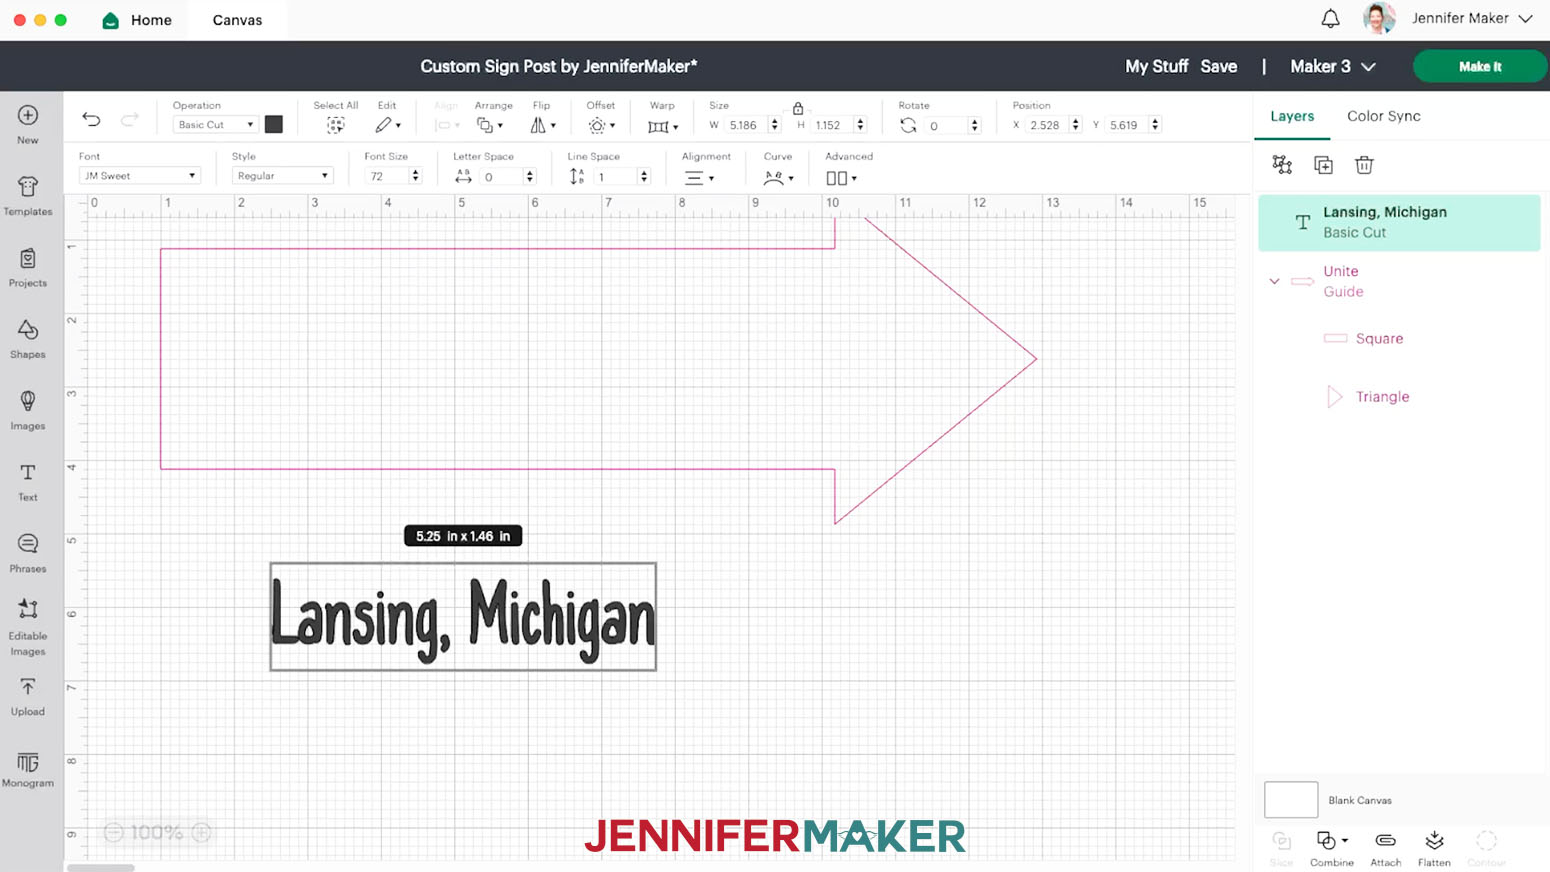
19. Click on a blank space on the canvas to exit text-editing.
20. Click and drag the text layer over the arrow guide.
21. Drag the corner handle of the text box to resize the text to fit within the arrow. My text box looks good around 9” W and 2” H.
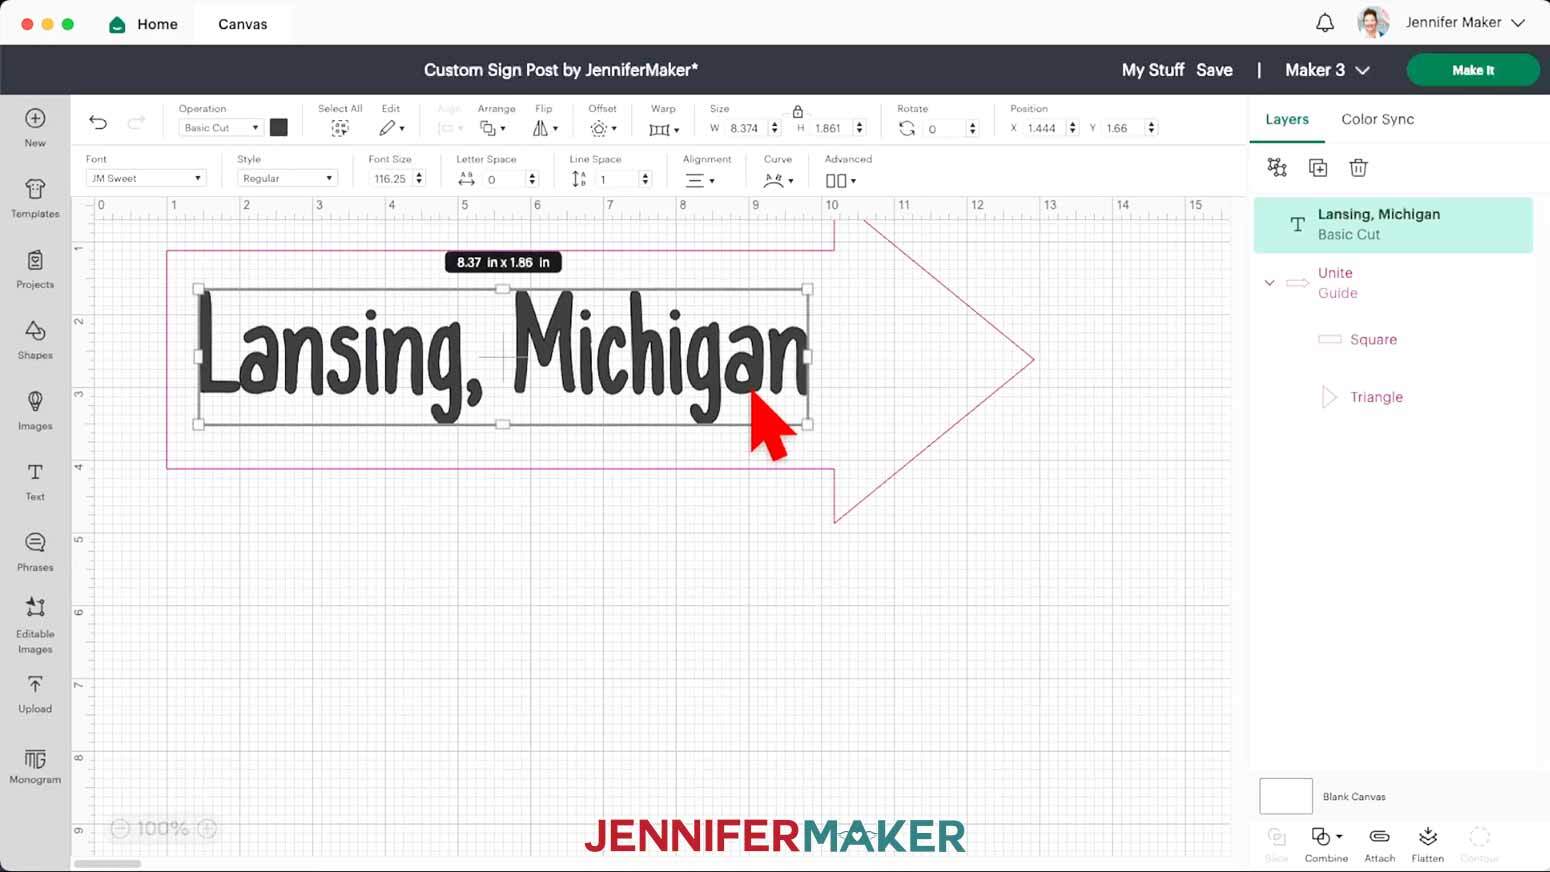
22. Click on the Color menu and select the color for the personalization. I’m changing it to white since it will go on a red arrow.

23. With the text box still selected, click the Duplicate icon above the Layers panel.
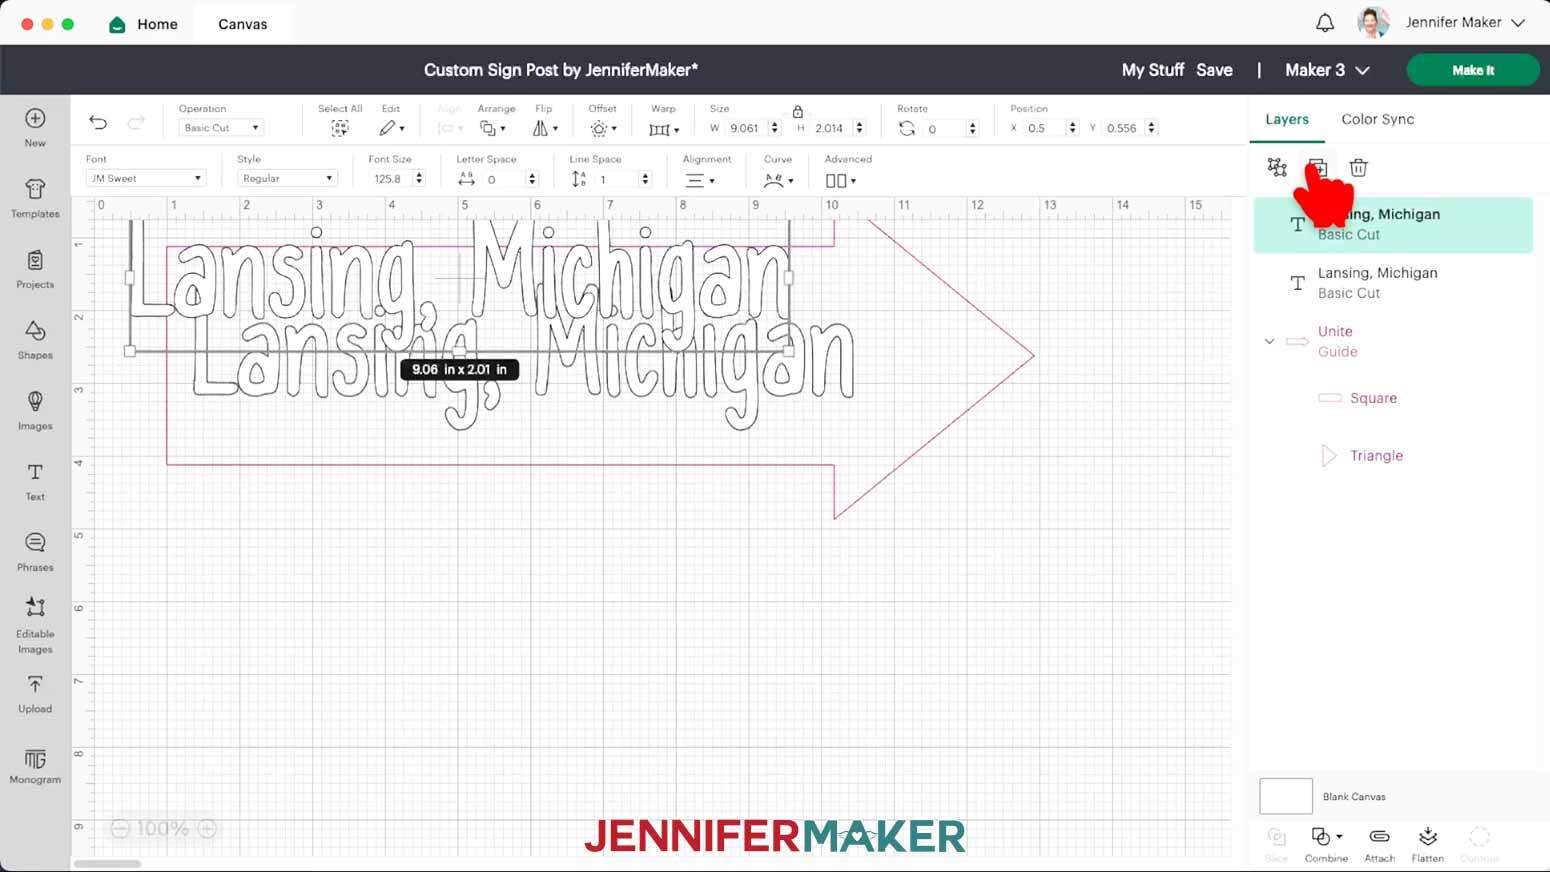
24. Double-click on the duplicate text box and repeat steps 18-23 for the rest of the words you wish to use.
NOTE: You can move the first text box to a blank space on the canvas when you need to place the second text box in place for resizing.
25. When all your words are ready, make sure the correct machine is selected in the top right and click “Make.”

26. If prompted, click "On Mat," choose your mat size, and click “Confirm.”
27. On the Prepare Screen, make sure nothing is missing and all words are on the right color mats.
28. Leave the material size at 12” x 12” for all the mats.
29. Select the first mat and click “Continue.”
STEP 4: CUT AND ASSEMBLE YOUR DESIGN
CUTTING
1. On the Make Screen, click “Browse All Materials.”
2. Search for and select the “Premium Vinyl - Permanent Glossy” setting.
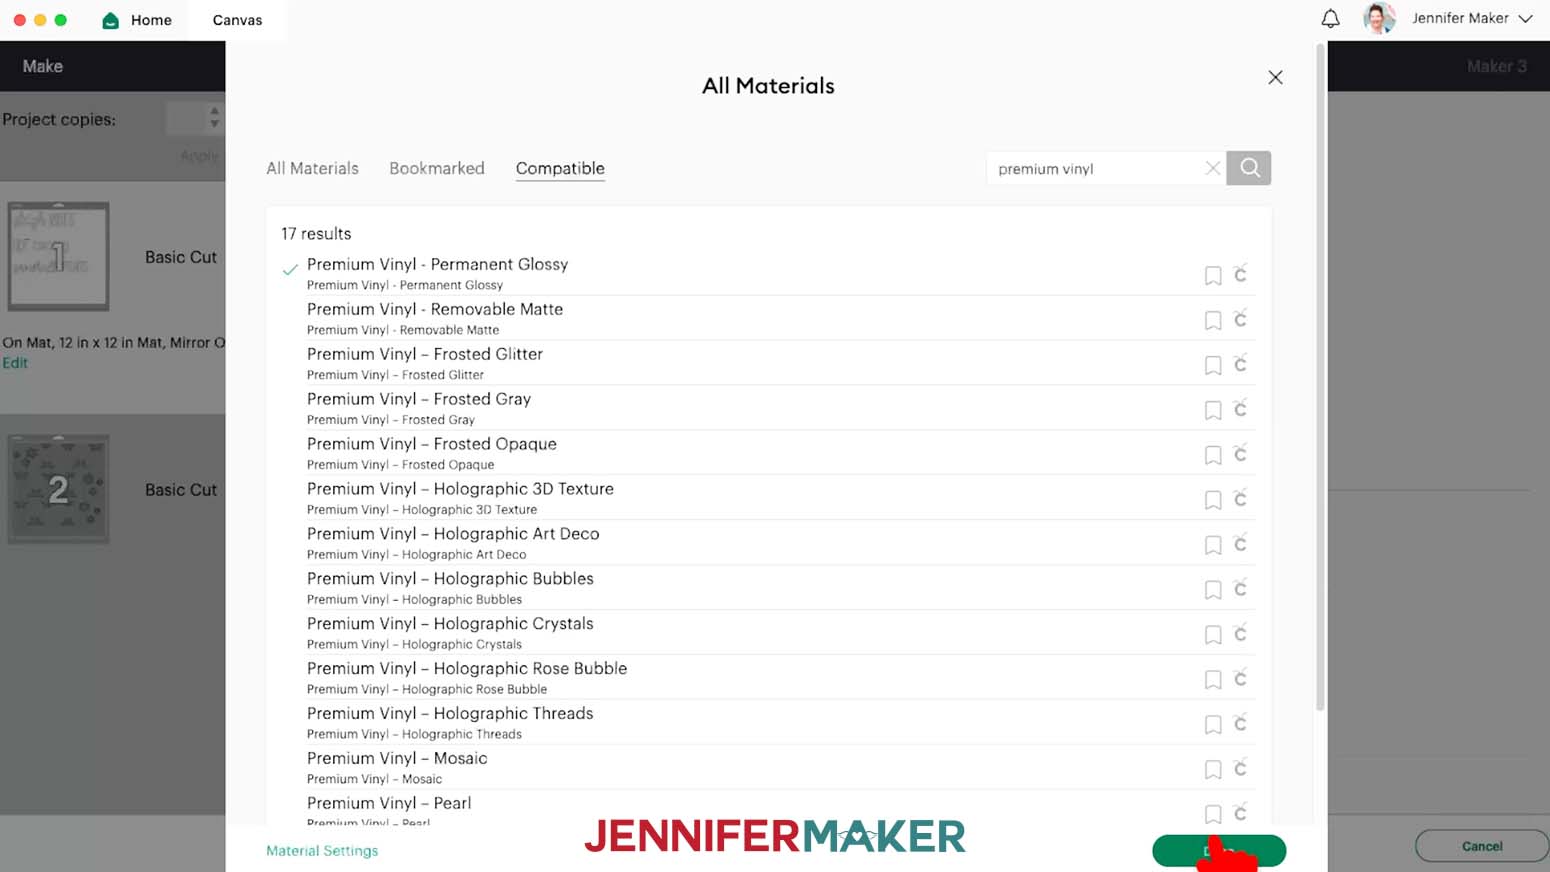
NOTE: I used the “Premium Vinyl - Shimmer” setting for the silver mat.
3. Select “More” for the Pressure.
4. Place the first piece of vinyl face up on a green StandardGrip machine mat.
5. Use a brayer to smooth out any bubbles and adhere the vinyl to the mat.
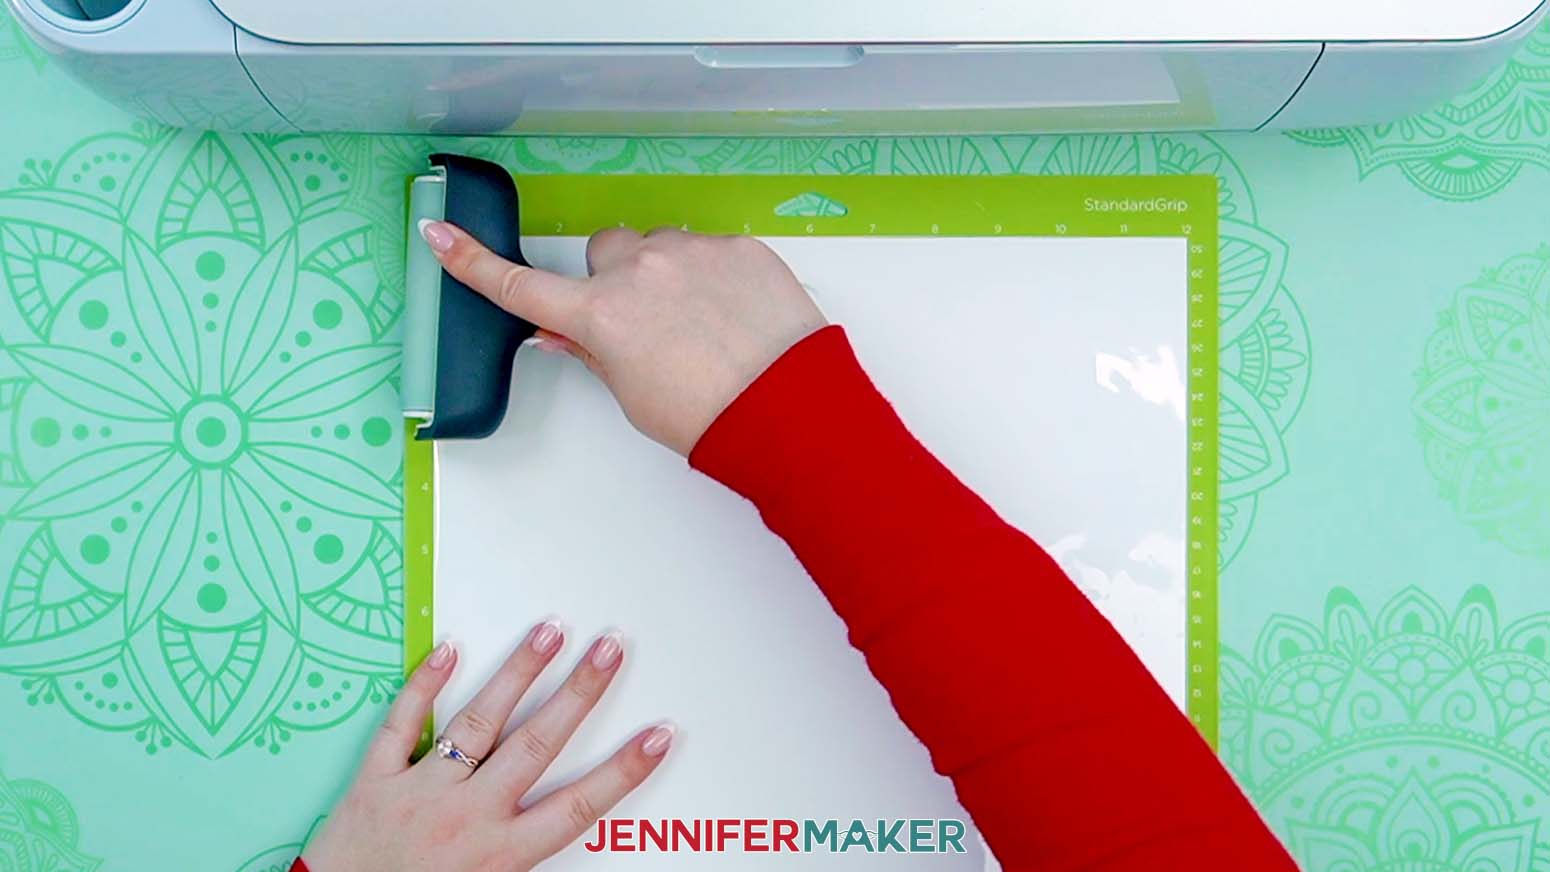
6. Press the flashing arrows to load the mat into your Cricut.
7. Press the flashing “Go” button to begin cutting.
8. When it has finished cutting, unload the mat, flip it over onto your work surface, and gently pull the mat away from the vinyl.
9. Repeat steps 4-8 for the second mat.
ASSEMBLY
1. Use a weeding tool to remove excess vinyl.
2. Starting with the white vinyl words, cut a piece of StandardGrip transfer tape slightly larger than the “snowball fights” text.
3. Remove the transfer tape backing and fold the edges up like a taco. Lower the center of the transfer tape onto the vinyl and press in place.
4. Use a scraper to burnish the transfer tape to the vinyl.
5. Turn the vinyl over and remove the backing.
6. Center the vinyl in the middle of the arrow.
TIP: Refer back to the design on the Design Space Canvas to help you guide the snowflake placement.
7. Press the vinyl to the arrow and burnish it with a scraper.
8. Gently pull away the transfer tape.
![]()
9. Repeat steps 2-8 for the “hot cocoa” and “sleigh rides” arrows.
10. Next are the snowflake pieces, cut a piece of StrongGrip transfer tape slightly larger than the first snowflake. I found it easiest to cut and apply the snowflakes one by one.
NOTE: StrongGrip Transfer Tape is made to work with heavier vinyl, like shimmer/glitter vinyl. StandardGrip Transfer Tape works best with glossy permanent vinyl.
11. Refer to the snowflake placement on the Design Space canvas and place the snowflakes on each arrow.
12. Repeat steps 10-11 for all of the snowflakes on the three arrows.
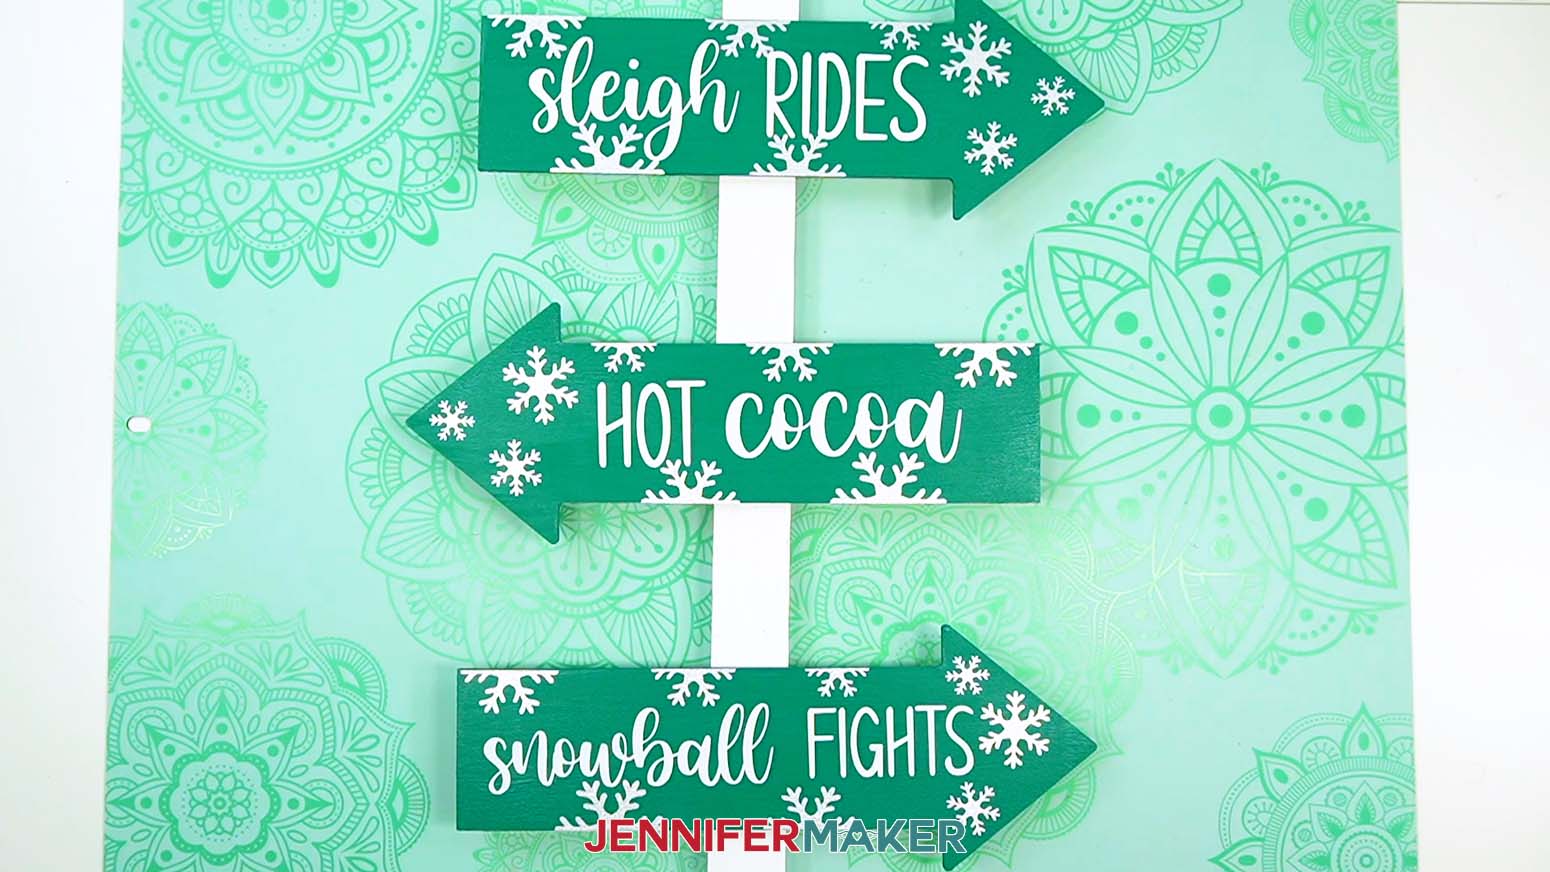
13. Arrange the arrows on the wood stake where you would like them to go and make a small mark with a pencil behind each one to help guide Velcro placement.
14. Use outdoor Velcro to attach the arrows. Cut the Velcro into 1” squares.
15. Keep the two pieces of Velcro together.
16. Remove the backing from one side of the Velcro and press it on the wood stake.
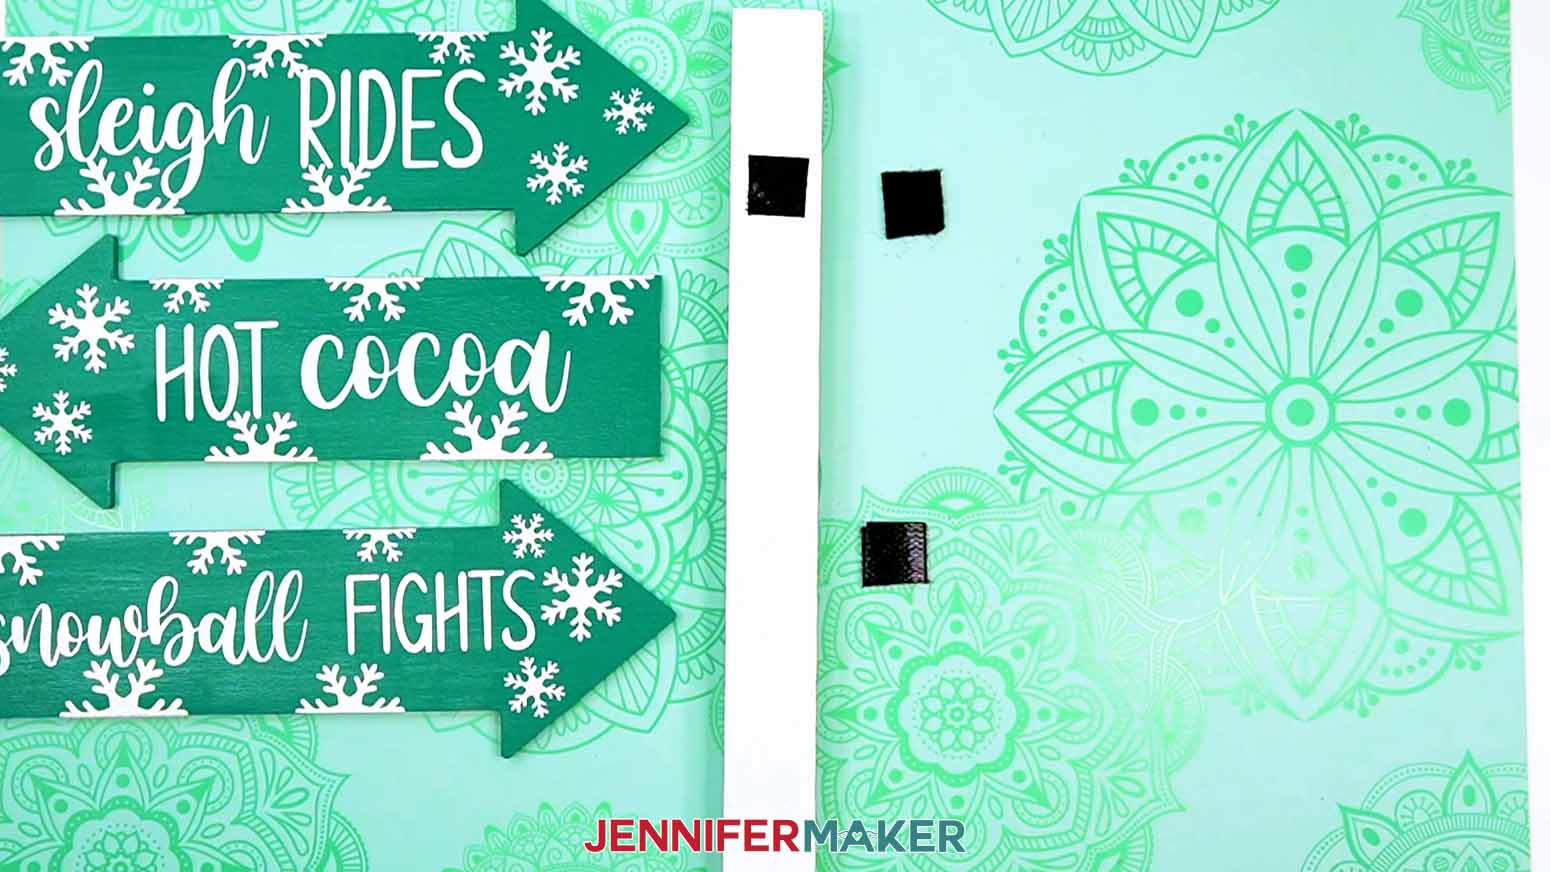
17. Remove the backing from the other side of the Velcro.
18. Press the top arrow onto the Velcro.
19. Repeat steps 16-18 for the remaining arrows. My Velcro pieces are about 6” apart, but you can position yours however you’d like.
STEP 5: SHOW IT OFF
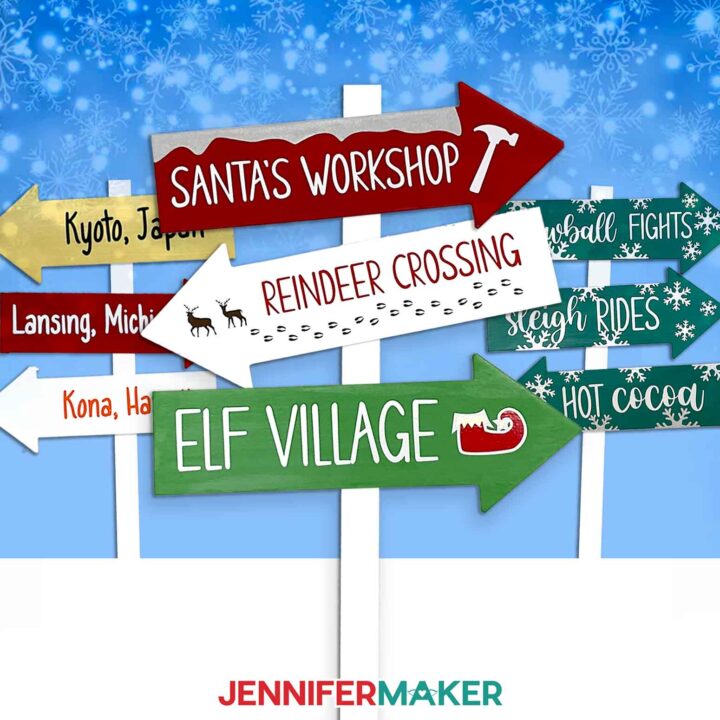
Here are what my complete Custom Family Sign Posts look like! Place them in the ground outside to display in your yard. You can also fill a pot or bucket with sand for an indoor display.
Notes
These Custom Family Sign posts stand 36” tall and are about 12” wide with the arrows attached.
Typefaces:
JM Sweet
Goldie Rainbow / Free Alternative: Goldie Rainbow
Farm Dream / Free Alternative: Skinny Flower
Answers to Your Questions About How to Make a Custom Family Sign Post
Q. What is a directional signpost?
A. Also known as a fingerpost or guidepost, directional signposts point in a certain direction, indicating a location. The location can be nearby or far away! A custom family sign post makes a great family gift, anniversary gift, or just a fun decoration for your yard.
Q. Can you show me how to make your own wooden signs?
A. I sure can! In this tutorial I’ll show you how to prepare, paint, decorate, and seal wooden directional signs. I’ll even show you how to make the arrow pieces detachable for easy storage or to swap them out for the seasons. There are endless custom options for your destination mileage signage or family member signpost!
Q: How do you paint a sign post?
A: In the tutorial, first I’ll walk you through sanding your sign post pieces. Then we’ll paint the signs with chalk paint and and seal them with Polycrylic so it can stand up to the elements without chipping or peeling
Q: What kind of paint is best for outdoor signs?
A: I like to use acrylic paint and seal it with Polycrylic. I especially like the look of chalk paint, which is acrylic paint with — you guessed it — chalk added into the mix. It gives a beautiful matte look, which looks best with matte Polycrylic sealant.
Q: Can you use a Cricut to make wood signs?
A: Yes! There are a few ways to use your Cricut to decorate real wood signs. You can cut stencils from vinyl or other materials, or add cut vinyl decals. This tutorial shows how to prepare a wood sign and then decorate it with permanent vinyl cut with a Cricut.
Q: How do you make wood signs without a Cricut?
A: Making wood signs without a Cricut is easy, too! Instead of using vinyl, you can hand paint the locations on your sign before you seal it. You can also purchase stencils to use to add your own text and designs.
Q: Can you tell me what kind of vinyl to use on wood?
A: I use Cricut premium Permanent Vinyl on my outdoor wood signs because it adheres strongly and is waterproof, meaning it can stand up to rain and snow.
Q: How do you weatherproof a painted sign?
A: Sealing your painted wood sign is easy. When your paint is dry, use a wide paintbrush to apply a layer of Polycrylic sealant to the wood.
Q: How do I keep my Cricut vinyl from peeling off wood?
A: While no vinyl decorated sign will last forever, I find that sanding my wood beforehand, then coating the paint with a layer of Polycrylic sealant provides a great surface for Cricut Permanent Vinyl, and cuts way down on peeling.
Q: What fonts did you use in this project?
A: For the custom sign, I used my typeface JM Sweet that I designed myself! For the other projects, I used Goldie Rainbow and Farm Dream (free alternative: Skinny Flower).
Get my free SVG files to make a Custom Family Sign Post!
I’d love to see YOUR custom family sign post! Please share a photo in our Facebook group or tag me on social media with #jennifermaker.
Love,

Want to remember this? Save this tutorial on How to Make a Custom Family Sign Post to your favorite Pinterest Board!