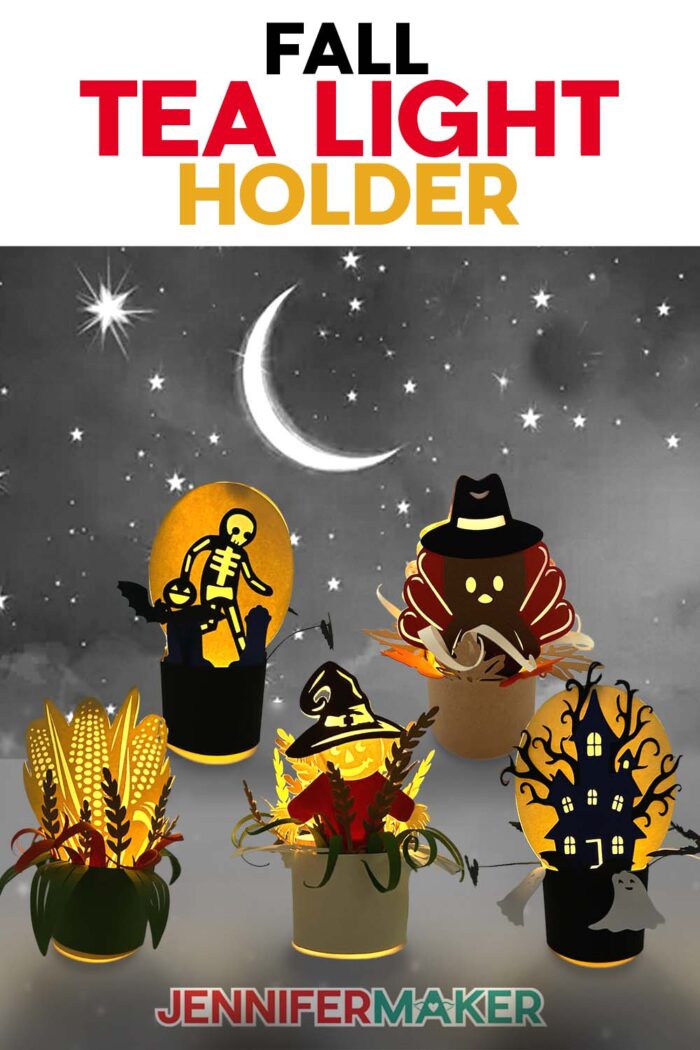
Learn how to make a fall tea light holder to add handmade glow to your autumn décor!
Every autumn, I find myself chasing that cozy feeling that comes when the evenings turn cool and the light softens into gold. It’s the time of year that makes me want to slow down, soften the lights, and fill my home with the warm glow that is so quintessentially “fall.” I wanted to make something that felt both rustic and elegant, something that would set the mood for both Halloween and the rest of autumn. That’s how my fall tea light holder designs came to life! They’re like little glowing scenes that bring the season’s magic to your dinner table, bookshelf, and other nooks and crannies. These aren’t your average tea light candle holders. They’re designed to wrap around a small LED flameless candle or votive candle for a safe, glowing effect with no open flames.
Watch the full step-by-step tutorial on how to make a fall tea light holder:

I’m an avid candle lover, and the sparkling glow of candles is one of my favorite things about the season. These handmade tea light holders are the perfect way to dress up plain LED tea lights, battery-operated votives, and other small flameless candles. Each one is made from simple materials: just cardstock, glue, and a touch of vellum or other translucent paper. They’re an inexpensive way to transform a small space or an entire dining table into a cozy seasonal celebration.
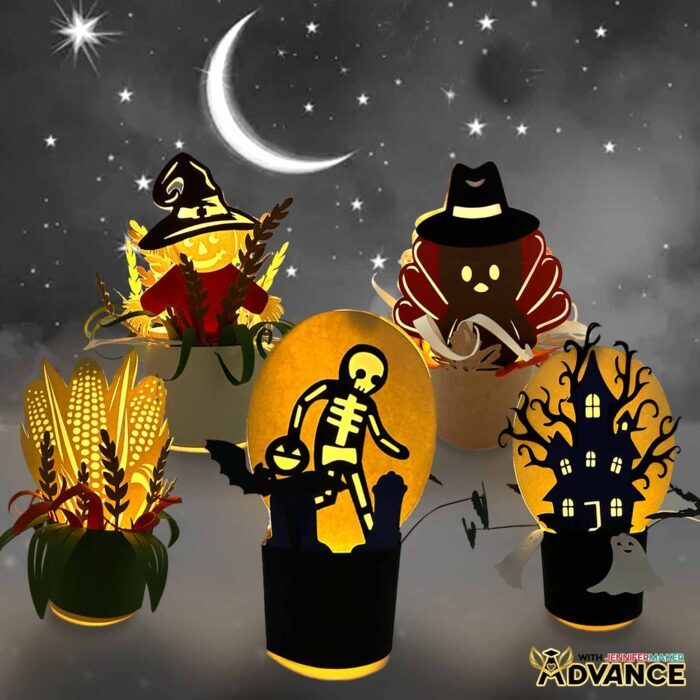
I love how the little candles come to life inside the paper, glowing like mini lanterns! And because the pieces come apart easily, you can store them flat until the next season. It’s a clever solution if you’re short on space or love decorating different places around your home without adding clutter to your holiday storage.
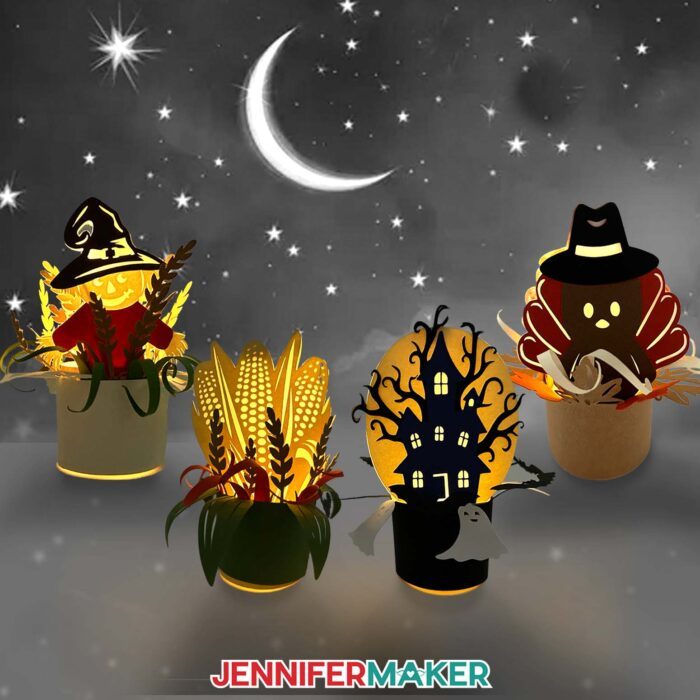
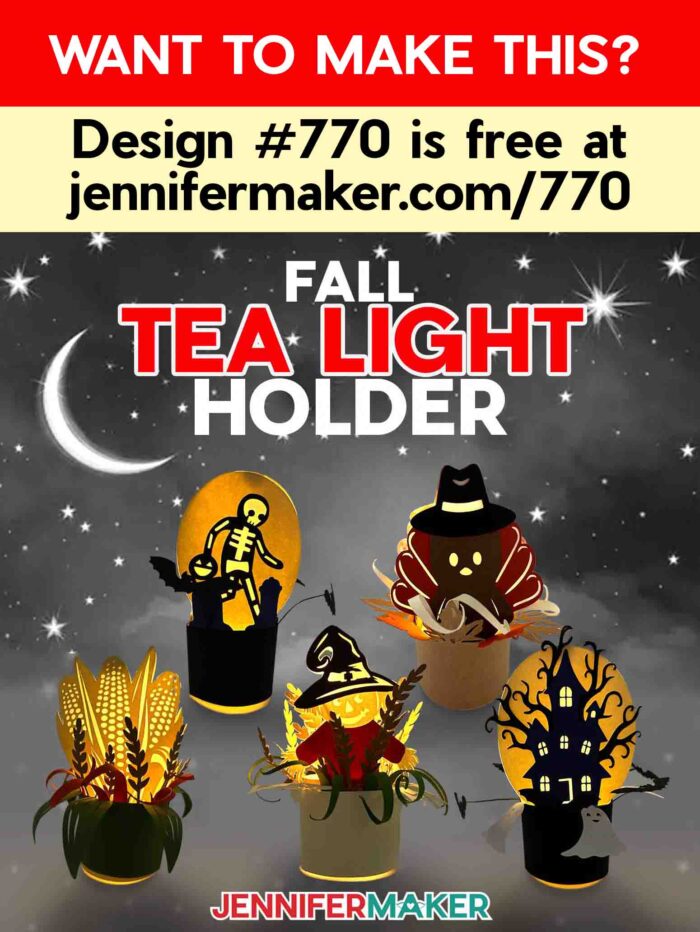
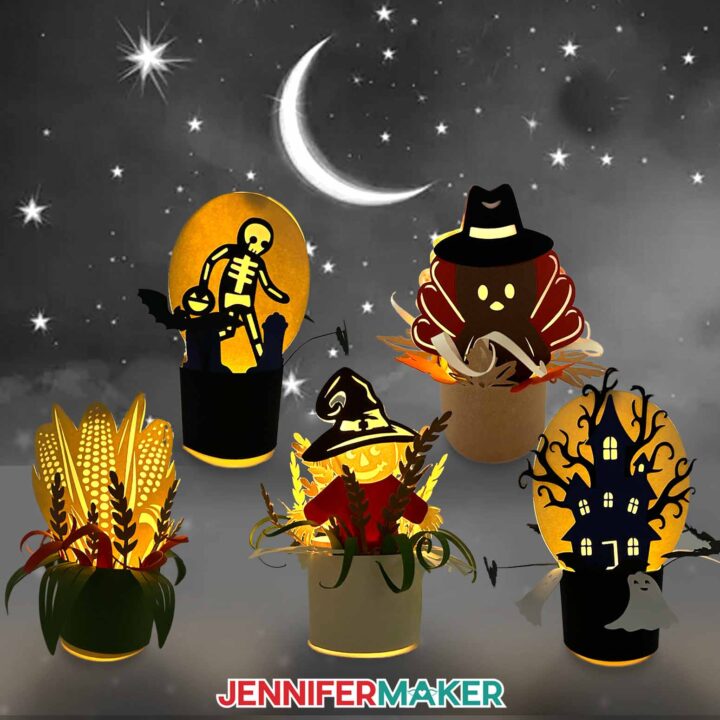
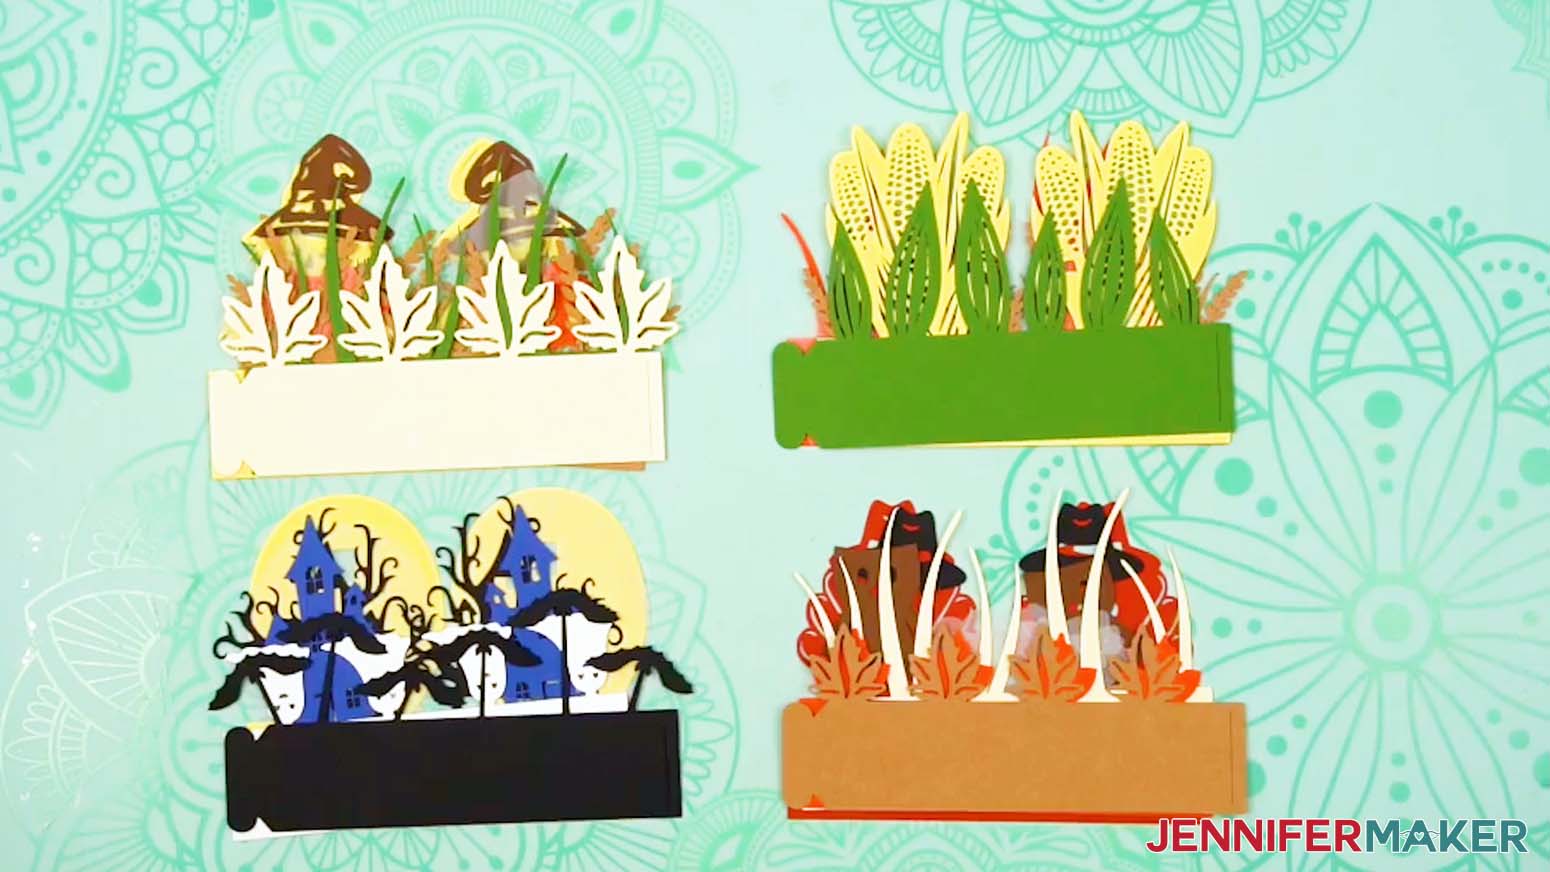
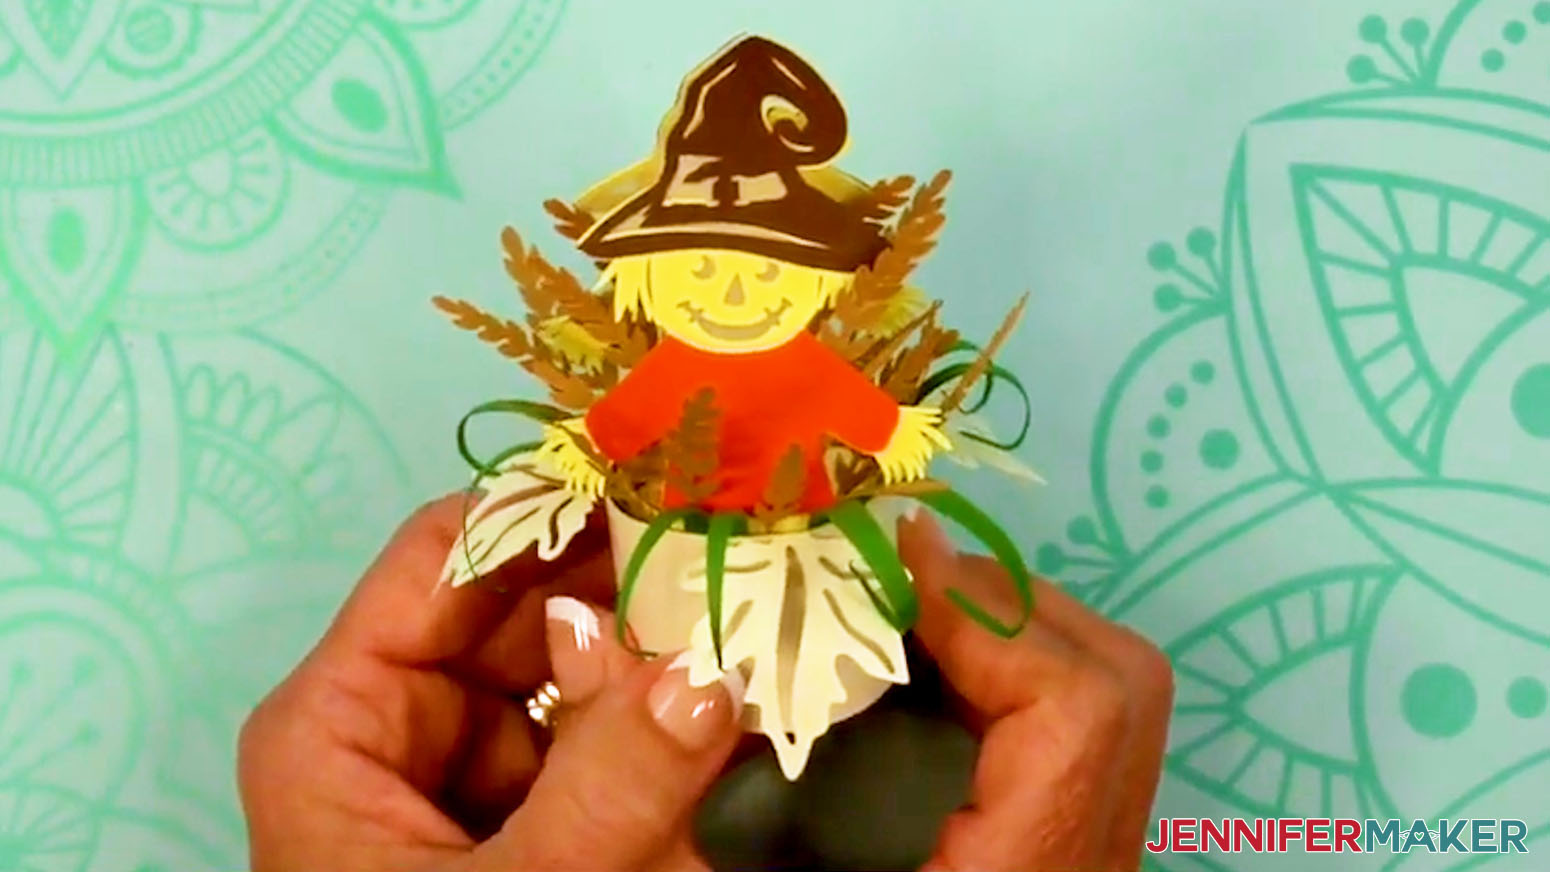
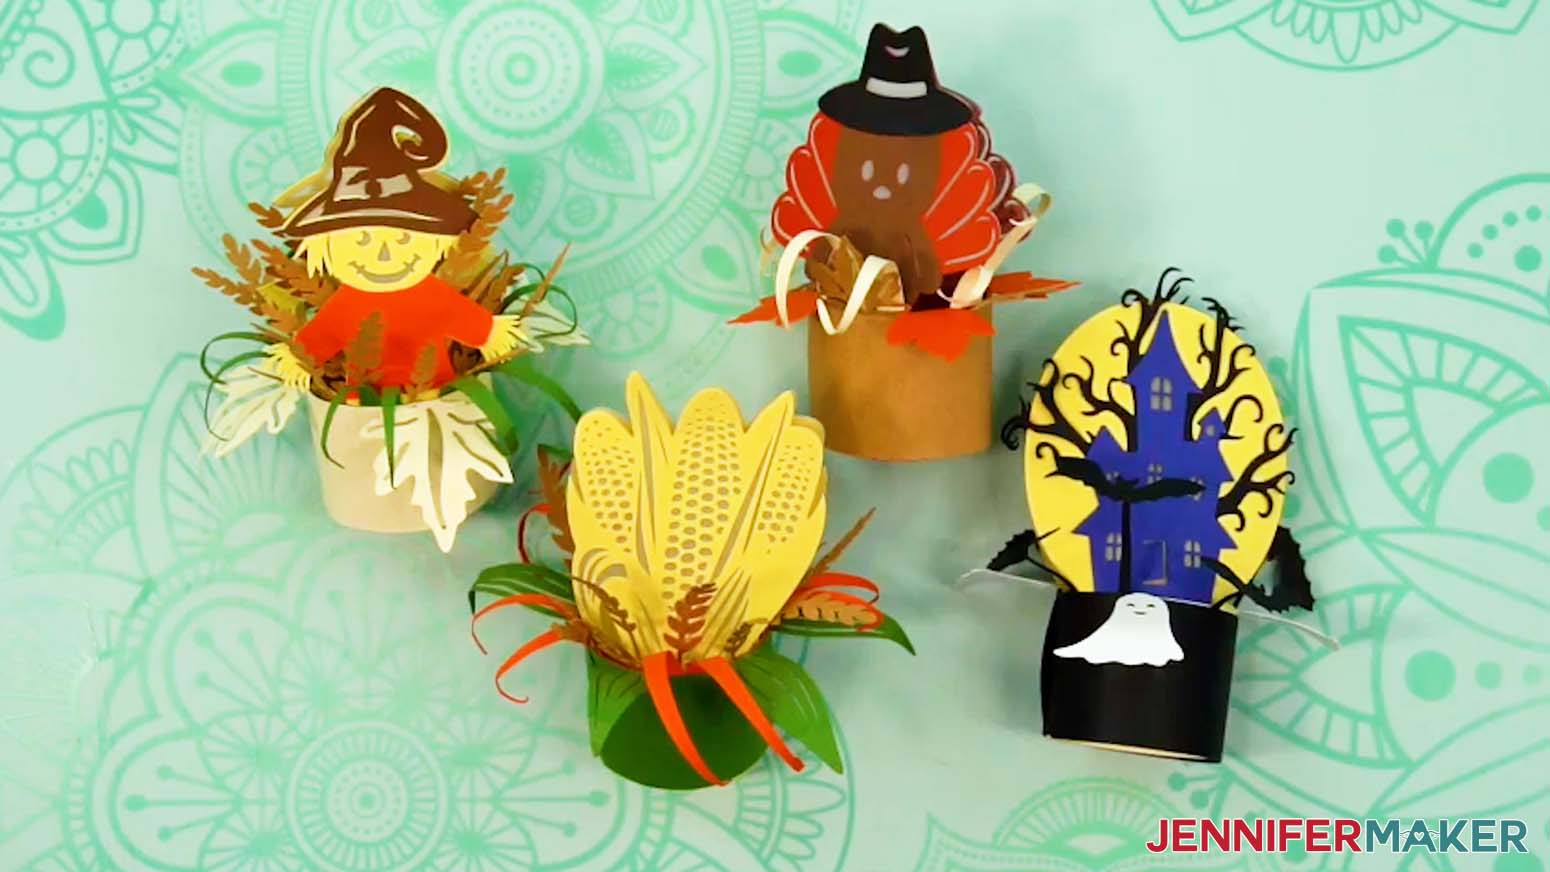
I designed four versions of this project: a cheerful scarecrow, a bundle of corn, a spooky haunted house, and a proud little turkey. Each one casts a wonderful display of shine in corners of your home or across your table. The best thing about these projects? Every holder glows in a slightly different way depending on the layers, colors, and design. The light filters through the vellum just enough to look soft and warm, helping create the perfect atmosphere for special occasions or a cozy autumn night at home.
When I was creating these designs, I wanted every detail (from the wheat stalks to the scarecrow’s hat) to feel alive with texture and depth. Each holder is made by layering cut cardstock in rings and bending certain areas into shape so the light peeks through in the most beautiful way. It’s a great technique for anyone who wants to learn how to add depth and shadow to their paper crafts.
The first step is simply to glue vellum diffusers to the back of your design to soften the light. Side note: when cutting vellum with your Cricut, I recommend using a blue LightGrip mat due to the nature of the material being a bit more delicate than cardstock.
After that, the layers curve and nest together, forming a sturdy circle around your tea lights. When you turn one on, the transformation is magical! The colors glow, the shapes come alive, and the entire ambiance of your room changes.
The scarecrow design is my favorite to start with. I love watching his little details come to life once the light is shining through. But the haunted house might be the most dramatic … it gives off just the right spooky shimmer for Halloween! The corn and turkey holders are perfect for a cute Thanksgiving table decoration, and add a fancy touch of handmade charm to your meals or special events this fall.
If you love the look of a large number of candle holders gathered together, you can create coordinating tea light holder sets for even more glow. You can arrange them around a rustic lantern centerpiece filled with LED string lights like my Hanging Fall Lantern for an extra-festive display, or mix it up and make the fall leaf design from my Delicate Tea Light Holder tutorial. It’s such a nice way to up the elegance of your table décor without spending much.

One of my favorite things about this project is how versatile it is. Because it’s made from paper, you can use simple methods to change up the colors or textures. Try metallic paper for a bit of flash, or brown kraft cardstock for a beautiful, natural look. Even a subtle switch in tone (like deep burgundy instead of bright orange) can completely change the mood of the project.
These delicate tea light holders are lightweight and easy to make, yet they look so polished and professional once they’re lit. Whether you craft just one or an entire set, these glowing décor accents will fill your home with the warmth, personality, and charm of opulent candle holders with just paper, glue, some lights, and a bit of creativity.
If you’d like to make your own set, I’ve created a step-by-step video tutorial that walks you through everything, from cutting the free SVG files to assembling each design. I’ll show you all my little tricks, like how to shape the grass and wheat layers for extra depth, and how to keep the tops closed with hook-and-loop dots so they stay secure but still fold flat for storage.
If you’re ready to take this project a step further, join me inside ADVANCE with JenniferMaker! In my special workshop, I’ll show you how to design your own custom fall tea light holder, from creating the focal layer to shaping the vellum diffuser so your design glows beautifully. It’s the perfect way to learn new techniques, personalize your décor, and make a piece that truly shines with your own creativity. Click here to learn more about the ADVANCE program!

I hope you’ll give this project a try and fill your home with warm autumn glow! It’s always amazing what a few layers of paper and a little light can do to make your home feel cozy, festive, and full of fall cheer!
Do you want to learn how to make your own fall tea light holder? Let me show you how fun and easy it is with my fall tea light holder tutorial and design! This post contains some affiliate links for your convenience (which means if you make a purchase after clicking a link I will earn a small commission but it won’t cost you a penny more)! Read my full disclosure policy.
Materials to Make a Fall Tea Light Holder
View my Amazon shopping list with the exact items I used.
- Several Sheets of 12″ x 12″ 65 lb. Cardstock (in various colors) -AND-
- One (1) 3/8″ Circle Velcro Fastener
- One (1) 1 1/2″ Round or Smaller LED Tea Light -OR-
- One (1) 1 1/2″ Round or Smaller Remote-Controlled LED Tea Light
- One (1) Sheet of 8.5″ x 11″ Vellum
- A way to cut your materials – I’m using the Cricut Maker 4, but you can also use any Cricut Maker series machine, a Cricut Explore Series machine, the Cricut Venture, or the Cricut Joy Xtra
- Cricut Green StandardGrip Machine Mat 12″ x 12”
- Cricut Blue LightGrip Machine Mat 12″ x 12″ (for the vellum)
- Brayer
- Spatula
- Scraper
- Weeding Tool (for popping out small cutouts from intricate areas)
- Flowtool or other Quilling Tool -OR-
- Dowel -OR-
- Pencil (for curling paper)
- Tweezers (optional for gluing intricate layers into place)
- Craft Glue (I used Bearly Art Precision Craft Glue) -AND-
- Foam or Paint Brush (optional for spreading glue)
- Design #770 (My free SVG/DXF/PDF design files are available in my free library – get the password by filling out the form at the bottom of this page)
How to Make a Fall Tea Light Holder
Fall Tea Light Holder
Learn how to make a fall tea light holder for cozy autumn lighting!
Materials
- Several Sheets of 12" x 12" 65 lb. Cardstock (a variety of colors)
- One (1) 3/8" Circle Velcro Fastener
- One (1) 1 1/2" Round or Smaller LED Tea Light -OR-
- One (1) 1 1/2" Round or Smaller Remote-Controlled LED Tea Light
- One (1) Sheet of 8.5" x 11" Vellum
- Design #770 (My free SVG/PDF/DXF design files are available in my free resource library - get the password by filling out the form at the bottom of this page)
Tools
- A way to cut your materials - I’m using the Cricut Maker 4, but you can also use any other Cricut Maker Series machine, a Cricut Explore Series machine, the Cricut Venture, the Cricut Joy Xtra, or even the Cricut Joy
- Cricut Green StandardGrip Machine Mat 12" x 12"
- Cricut Blue LightGrip Machine Mat 12” x 12” (for the vellum)
- Brayer
- Spatula
- Craft Glue (I used Bearly Art Precision Glue)
- Weeding Tool (for popping out small cutouts from intricate areas)
- Scraper
- Flowtool or other Quilling Tool -OR-
- Dowel -OR-
- Pencil (for curling paper)
- Optional: Tweezers (for gluing intricate layers into place)
- Optional: Foam or Paint Brush (to spread glue)
Instructions
STEP 1: GET MY FREE FALL TEA LIGHT HOLDER DESIGNS
First, download my Fall Tea Light Holder files from my free library – look for Design #770. Alternatively, you can use the Save This Project form near the top of this post and the design link will be emailed to you.
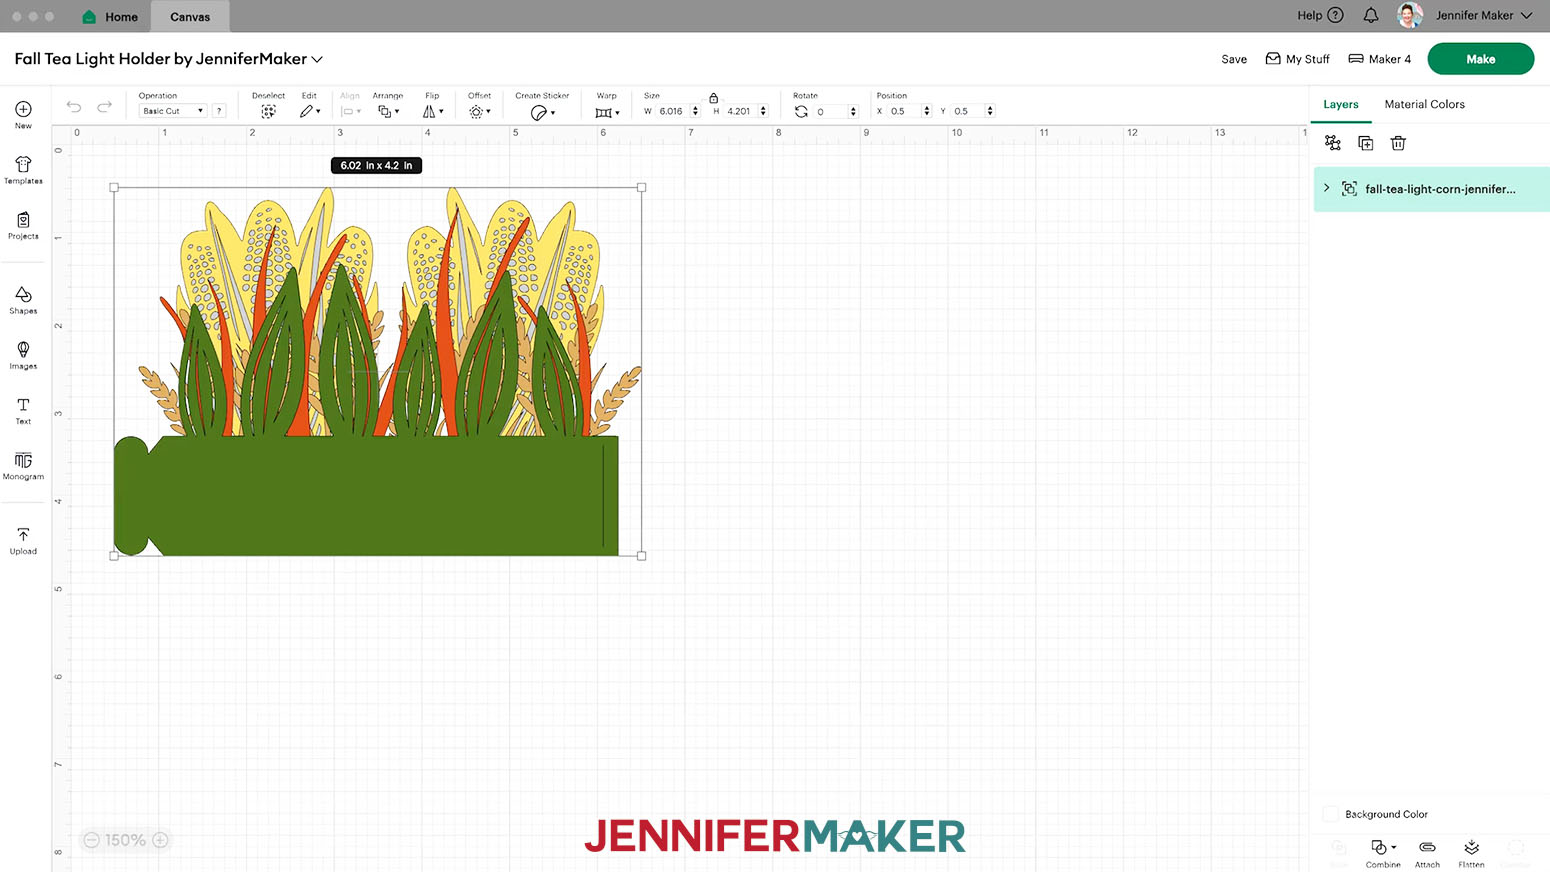
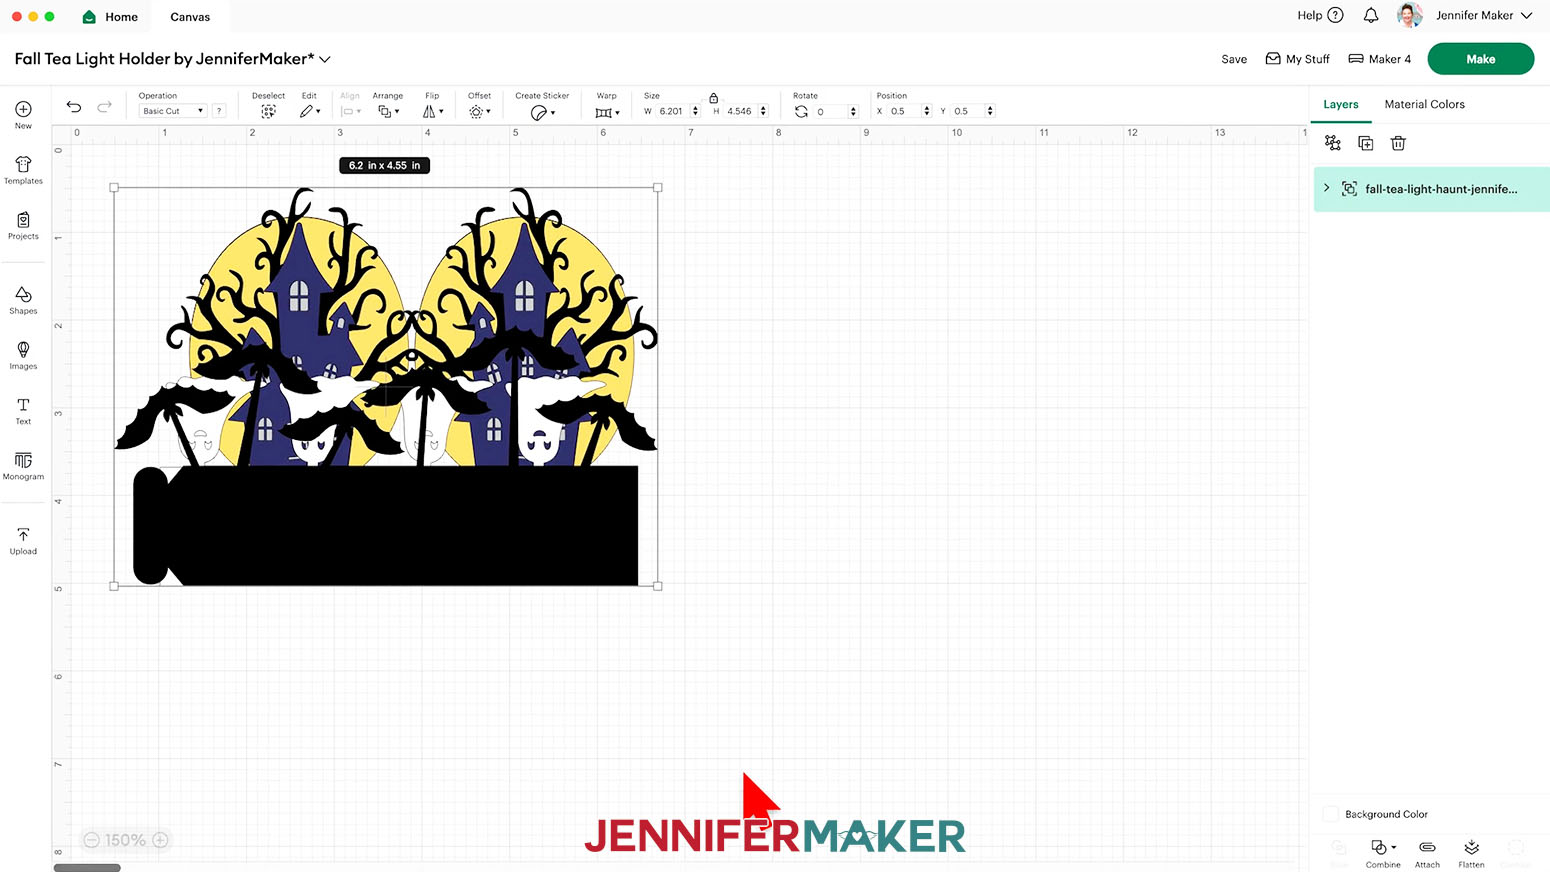
In the SVG folder, you’ll find four versions of my fall tea light holders: a “corn” design, a “haunt” (haunted house) design, a “scarecrow” design, and a “turkey” design.
There is also a DXF folder with cut files, and a PDF folder with versions you can print and cut by hand.
TIP: If you’re not sure how to upload, go to jennifermaker.com/svgs to learn how to unzip and upload SVG files.
STEP 2: PREPARE AND CUT YOUR FALL TEA LIGHT HOLDER DESIGN
CRICUT DESIGN SPACE
- In Cricut Design Space, open a blank Canvas.
- Click “Upload” and then “Upload Image.”
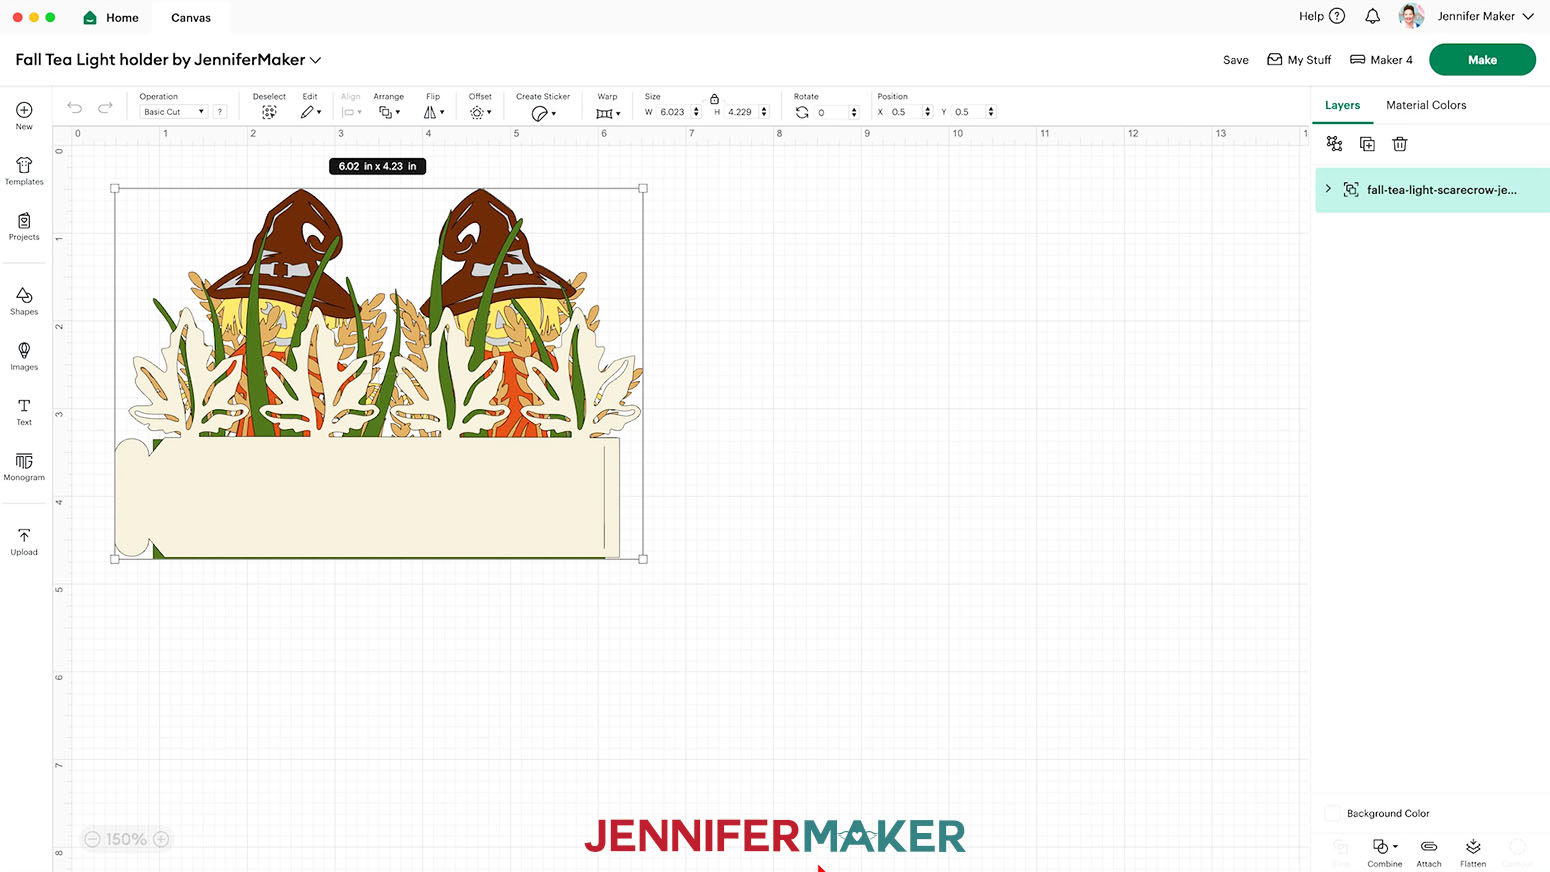
- Click “Browse” and select the SVG file you want to use. NOTE: I’ll demonstrate with the “scarecrow” file, but you can use these steps for the other three files, too.
- Click “Open,” and then “Continue.”
- Click “Upload” to add the design to your Canvas.

- Click “Save” and give your project a name.
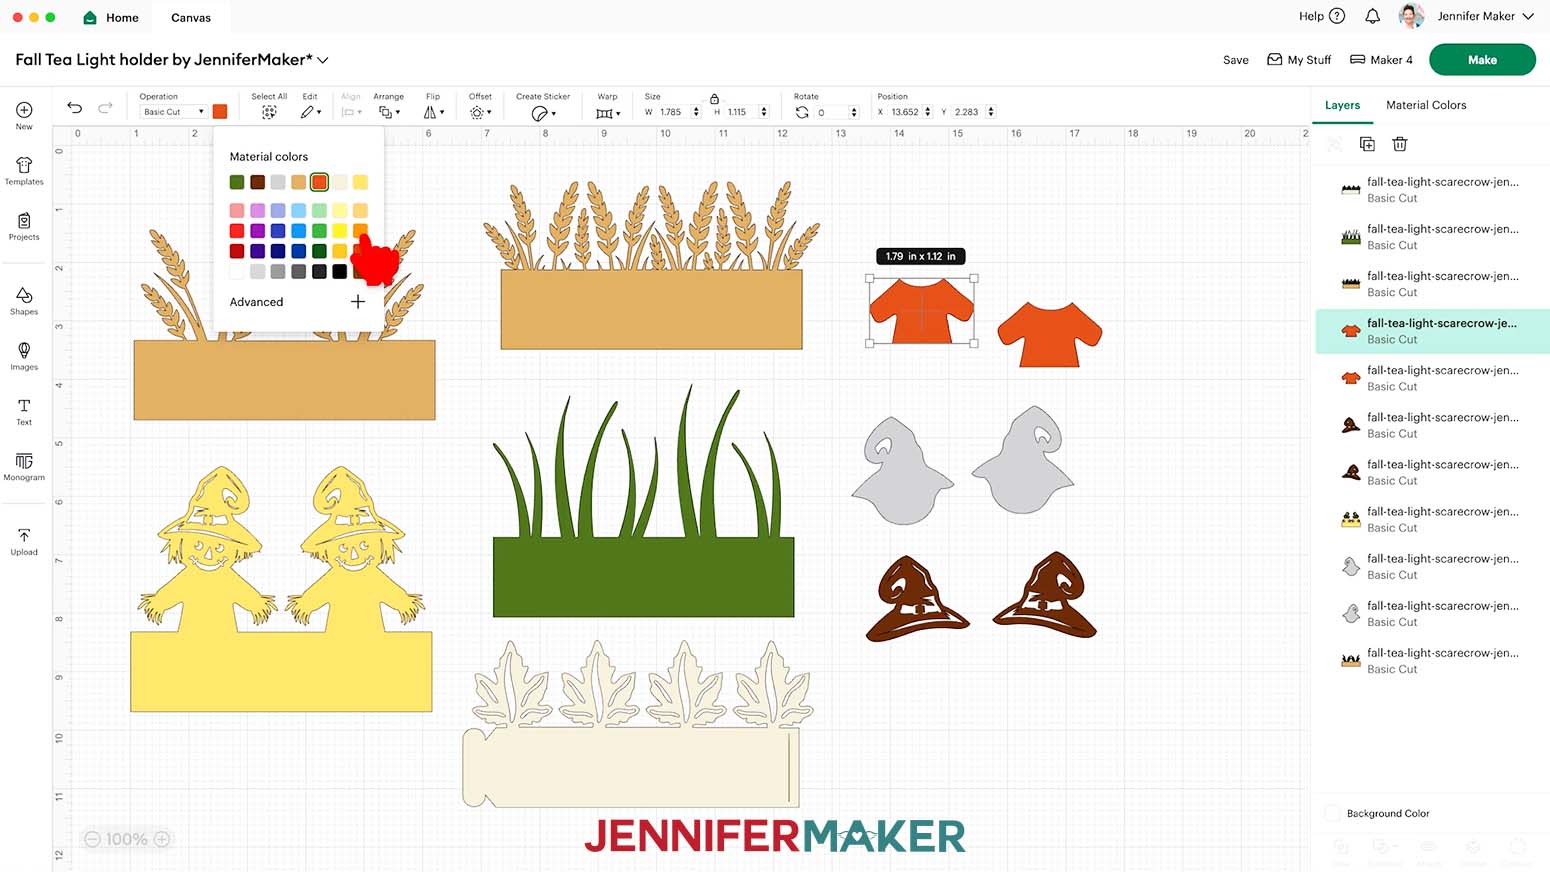
- Ungroup the design and spread out the pieces.
NOTE: The “scarecrow” design has an outer ring layer of leaves with a tab on the left and a slot on the right, a grass layer, an outer wheat layer, a scarecrow layer, an inner wheat layer, two shirt detail pieces, two hat detail pieces, and two gray vellum diffuser pieces.
NOTE: The “corn” design has an outer ring layer, three inner ring layers, and two gray vellum diffuser pieces.
NOTE: The “haunt” design has an outer ring layer, two inner ring layers, two house detail pieces, two tree detail pieces, and two gray vellum diffuser pieces.
NOTE: The “turkey” design has an outer ring layer, three inner ring layers, two turkey detail pieces, two hat detail pieces, and two gray vellum diffuser pieces.
- If you don’t want to cut the gray vellum diffuser pieces, select them and click the “Trash” icon to delete them.
- If you want to use different color cardstock for any of the pieces, select it and use the Color Box at the top to adjust it.
- Your fall tea light holder is ready to cut!

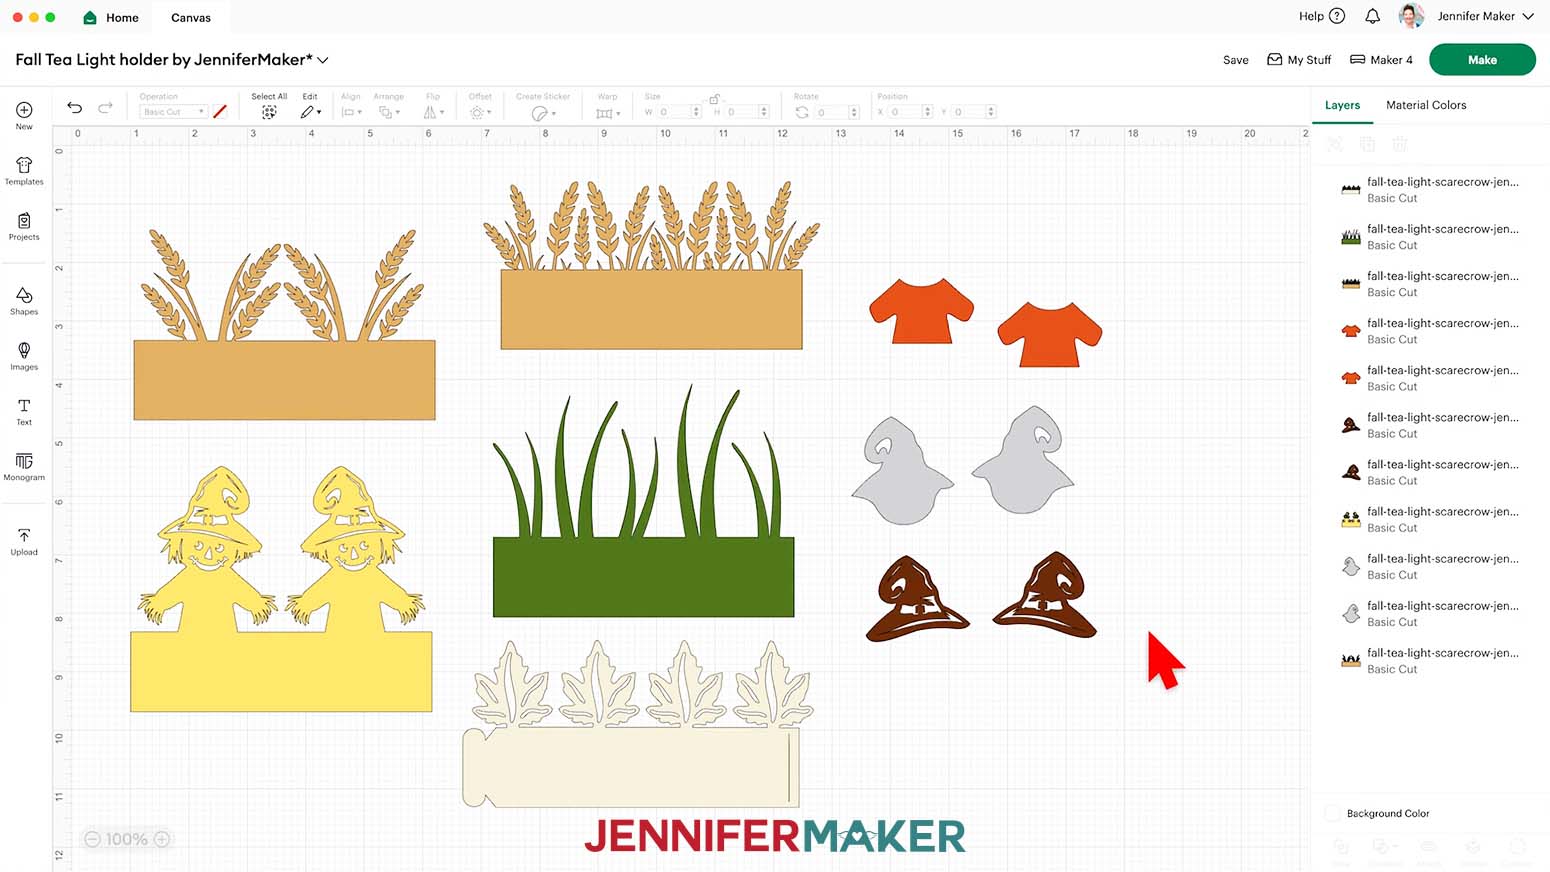 NOTE: The “scarecrow” design has an outer ring layer of leaves with a tab on the left and a slot on the right, a grass layer, an outer wheat layer, a scarecrow layer, an inner wheat layer, two shirt detail pieces, two hat detail pieces, and two gray vellum diffuser pieces.
NOTE: The “corn” design has an outer ring layer, three inner ring layers, and two gray vellum diffuser pieces.
NOTE: The “haunt” design has an outer ring layer, two inner ring layers, two house detail pieces, two tree detail pieces, and two gray vellum diffuser pieces.
NOTE: The “turkey” design has an outer ring layer, three inner ring layers, two turkey detail pieces, two hat detail pieces, and two gray vellum diffuser pieces.
NOTE: The “scarecrow” design has an outer ring layer of leaves with a tab on the left and a slot on the right, a grass layer, an outer wheat layer, a scarecrow layer, an inner wheat layer, two shirt detail pieces, two hat detail pieces, and two gray vellum diffuser pieces.
NOTE: The “corn” design has an outer ring layer, three inner ring layers, and two gray vellum diffuser pieces.
NOTE: The “haunt” design has an outer ring layer, two inner ring layers, two house detail pieces, two tree detail pieces, and two gray vellum diffuser pieces.
NOTE: The “turkey” design has an outer ring layer, three inner ring layers, two turkey detail pieces, two hat detail pieces, and two gray vellum diffuser pieces.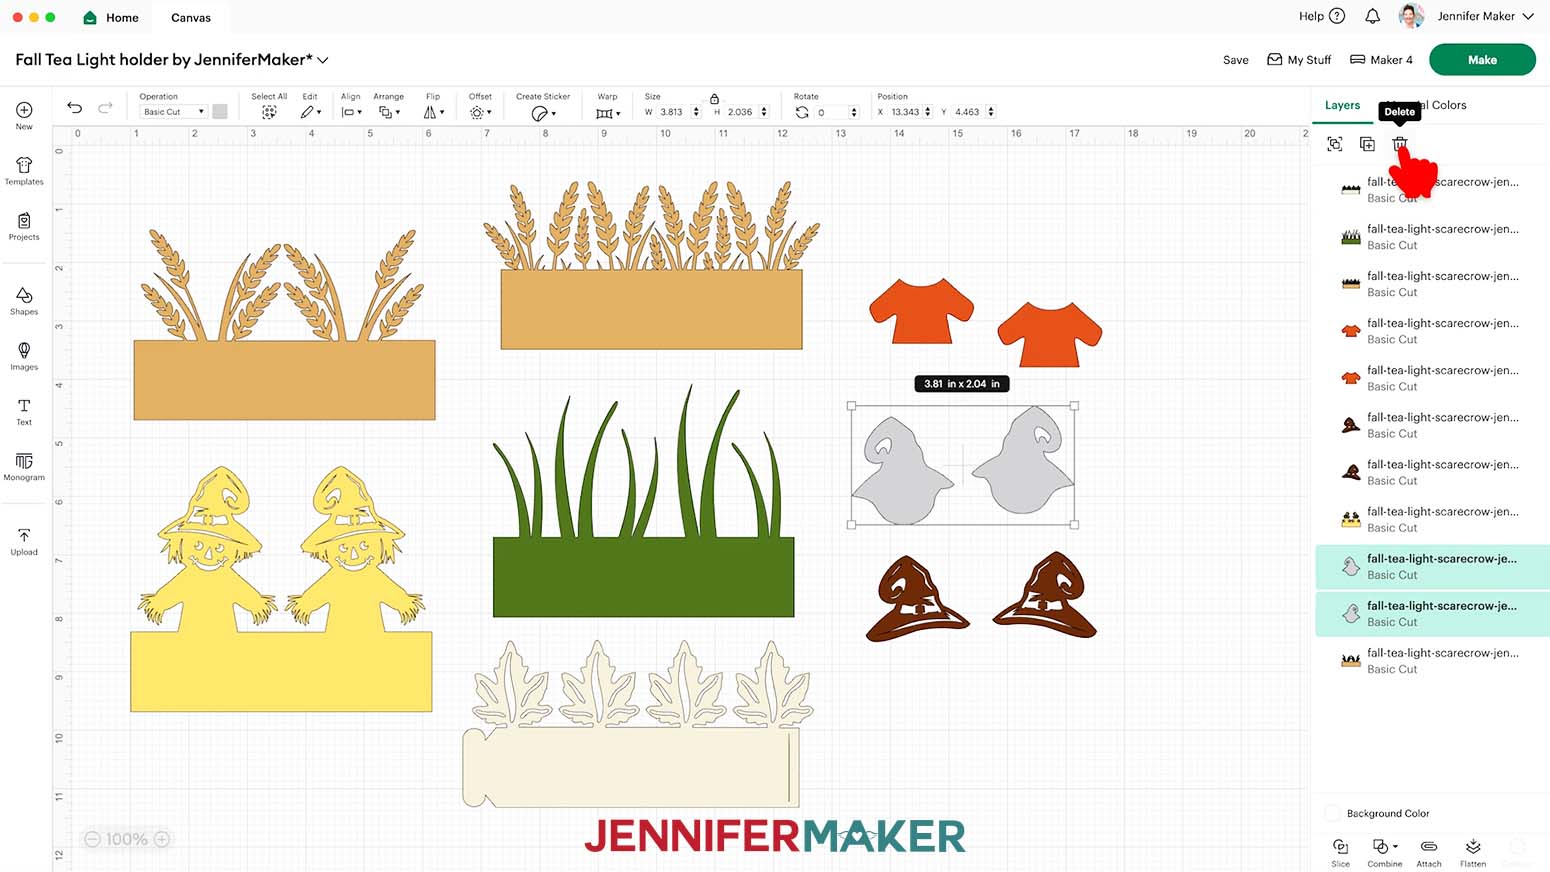
CUTTING
- Make sure the correct machine is selected in the top right.
- Click “Make.”
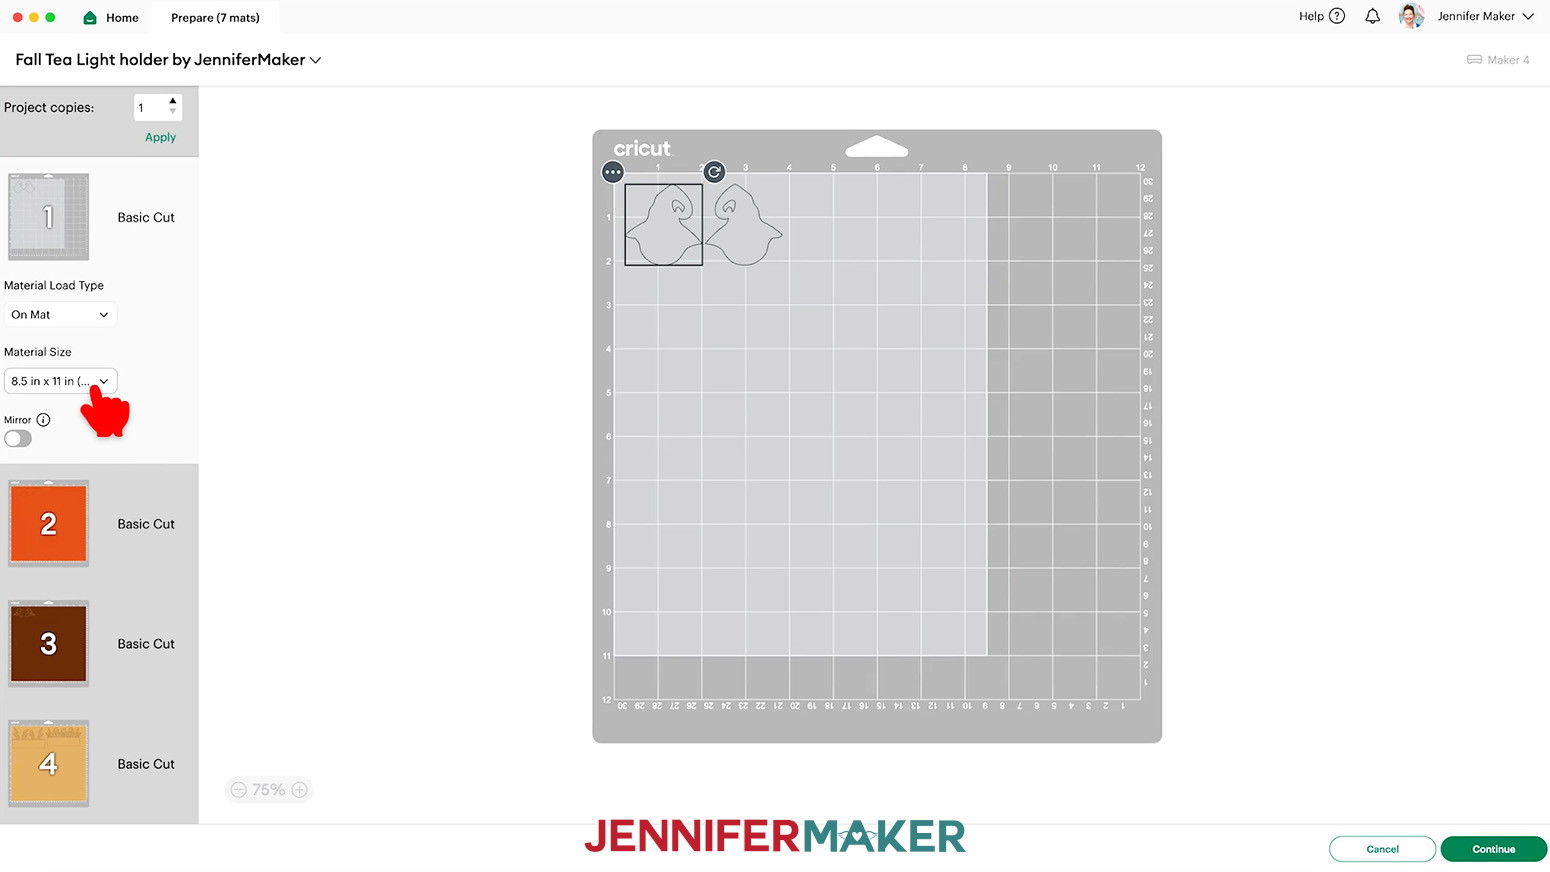
- On the Prepare screen, make sure the correct Material Size is selected for your mats and materials.
NOTE: I’m using “8.5 in x 11 in” for my vellum mat and “12 in x 12 in” for my regular cardstock mats.
- Select Mat 1 so it loads first on the next screen and click “Continue.” NOTE: Mine has the gray diffuser pieces, but yours may be different if you have deleted any pieces or changed any colors.
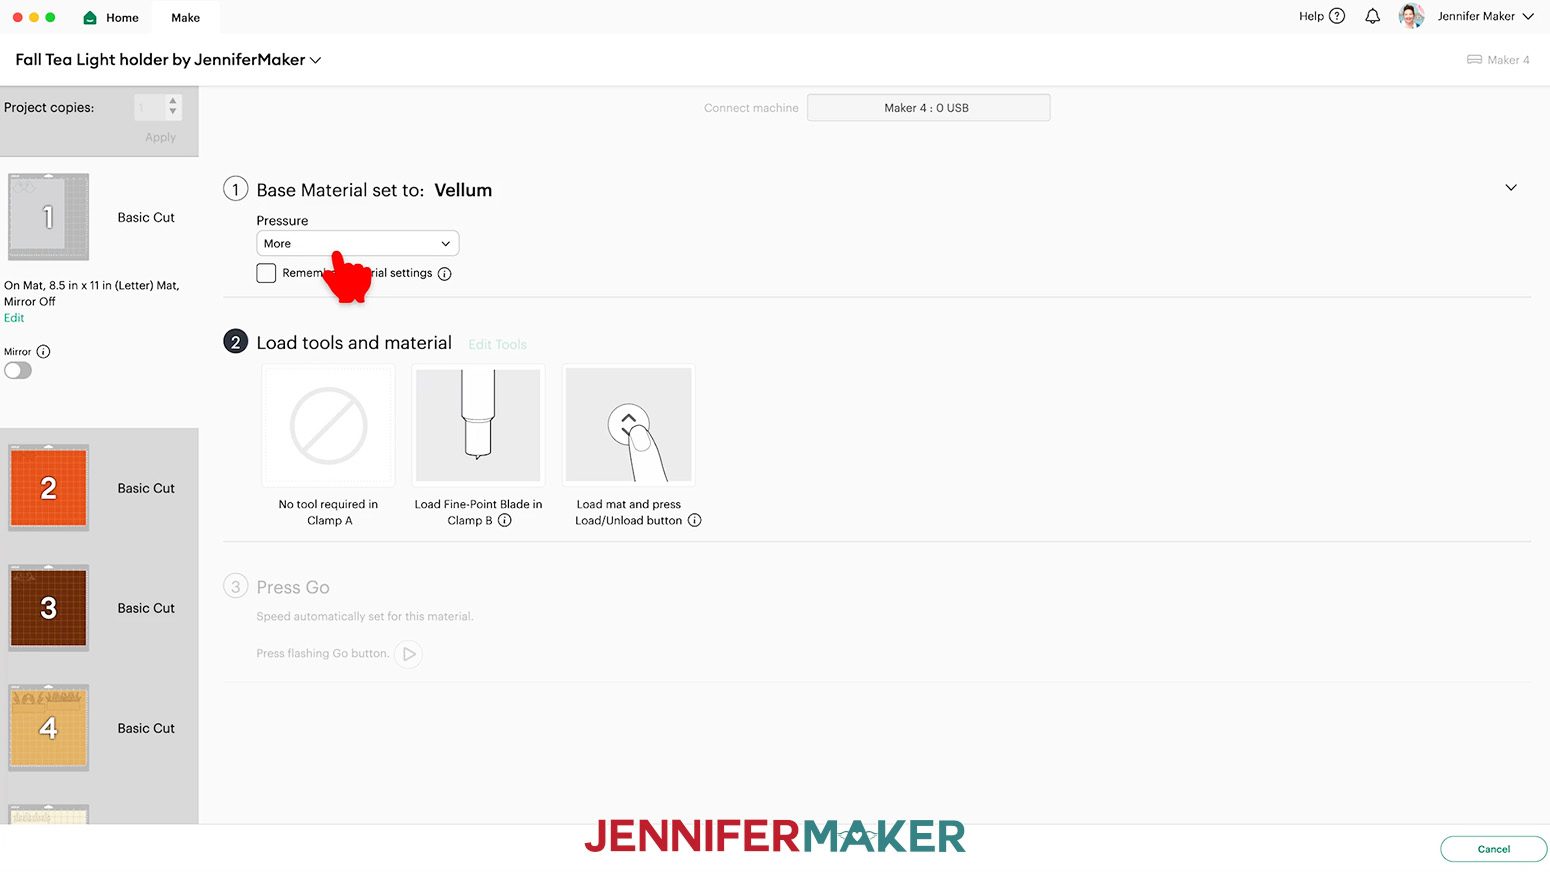
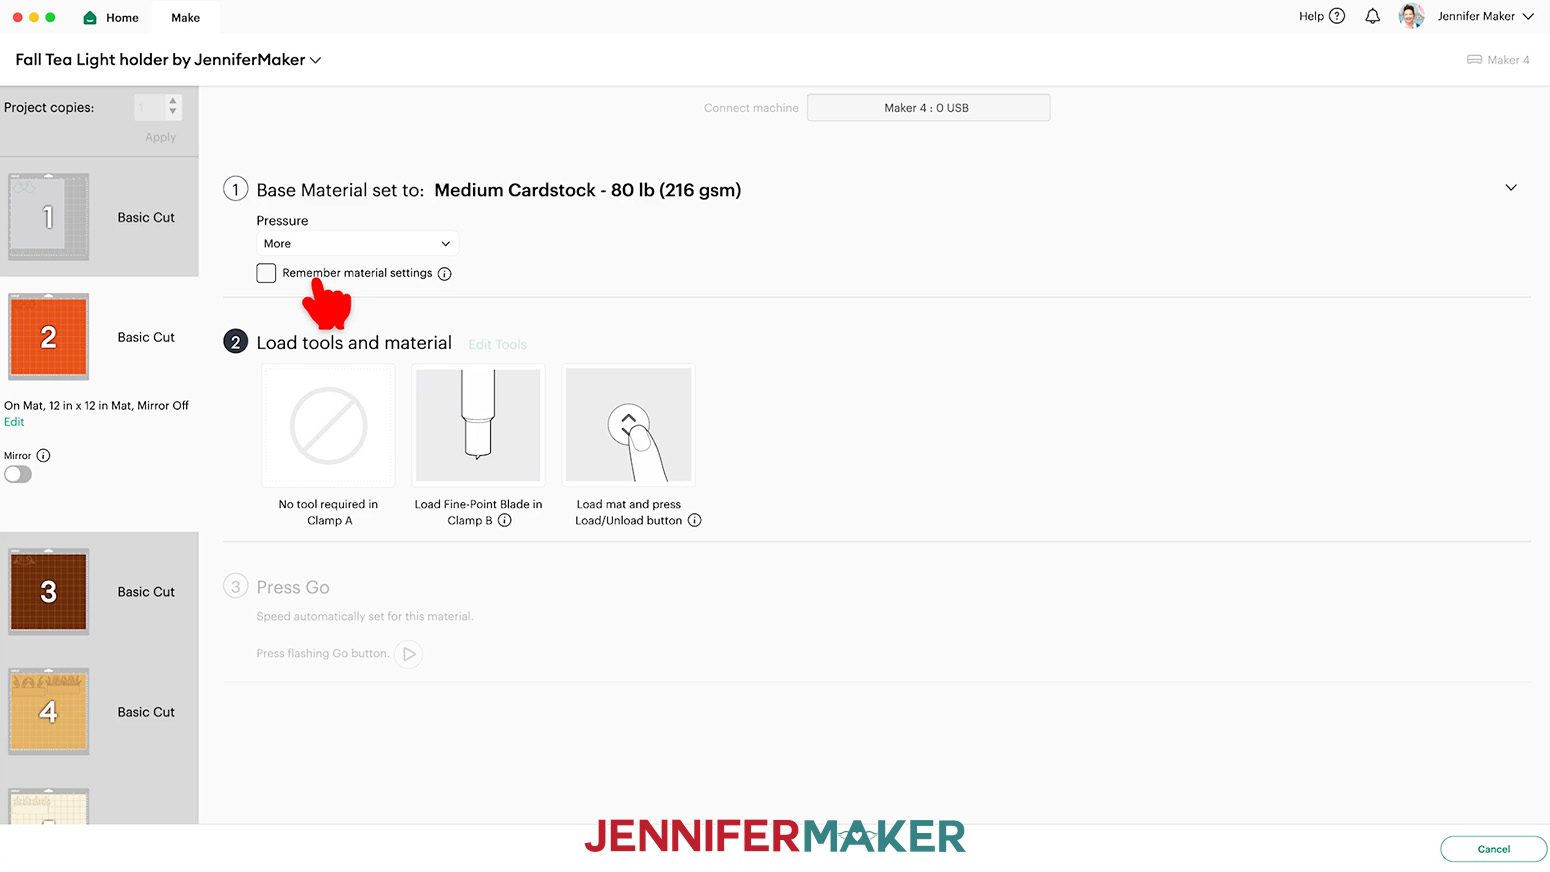
- On the Make screen, set the Base Material for your first mat. I cut my (optional) diffuser pieces using the “Vellum” material setting with “More” Pressure.
NOTE: Using “More” Pressure results in a cleaner cut.
NOTE: If you cut your pieces on a Cricut Joy, use the “Light Cardstock - 65 lb (176 gsm)” setting with “More” Pressure since the Joy doesn’t have a “Vellum” material setting.
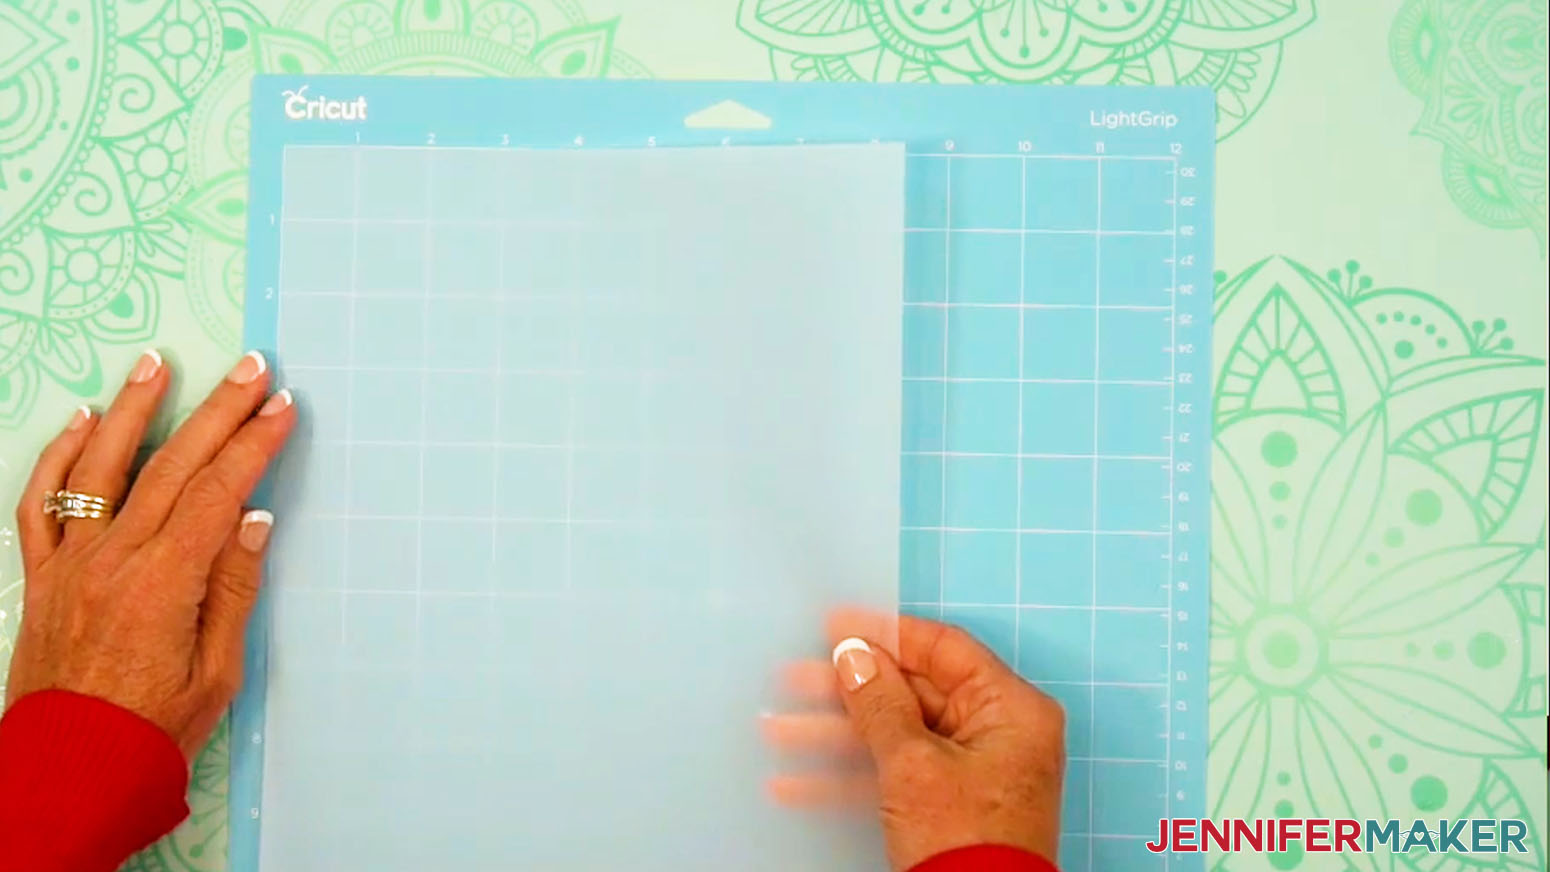
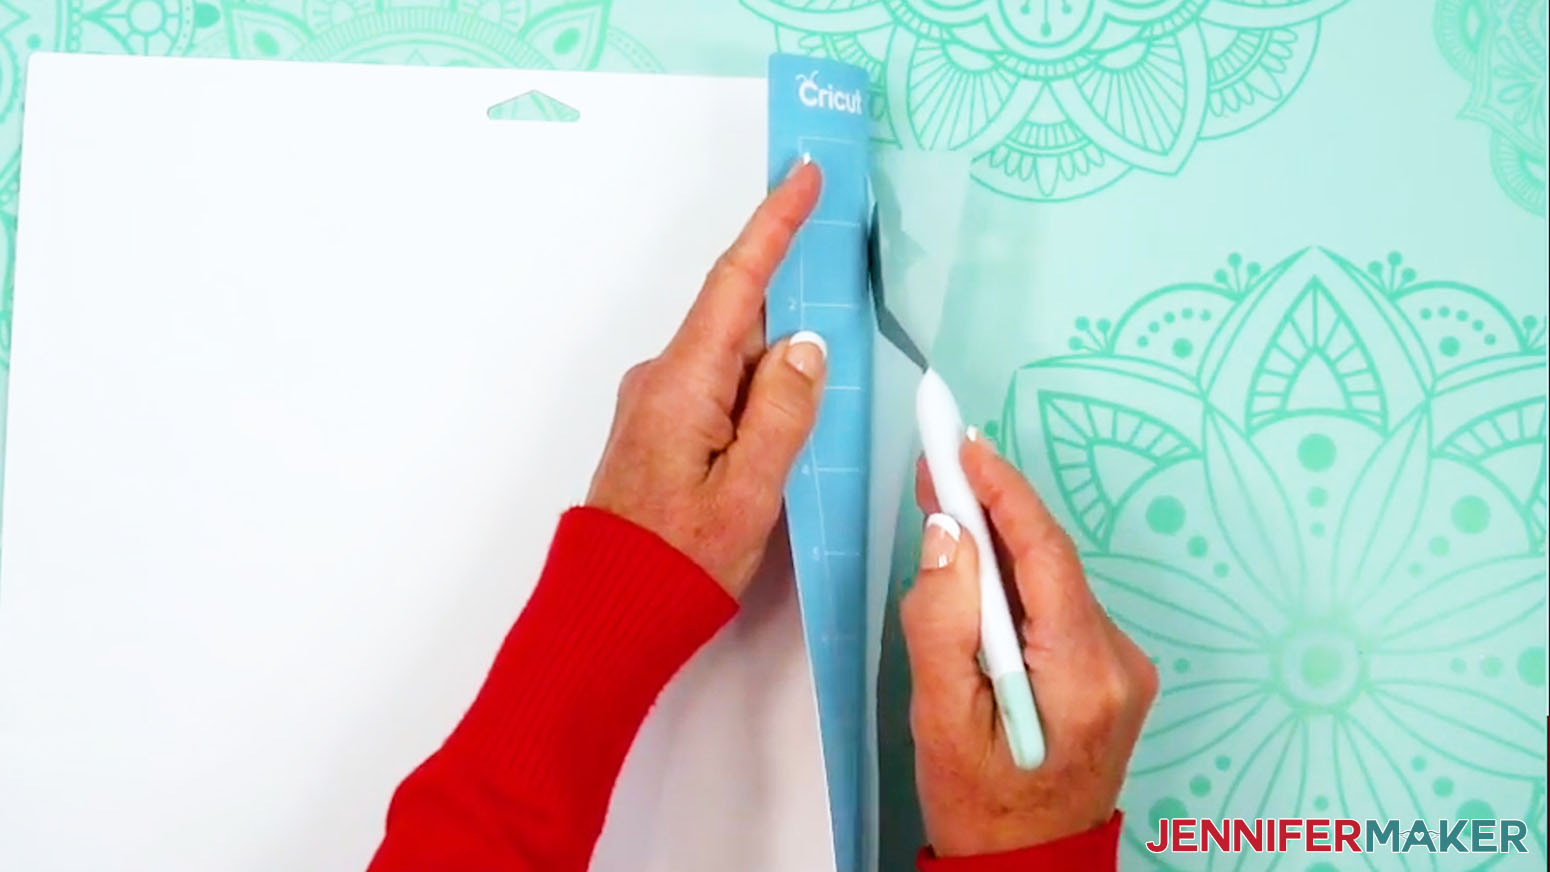
- Place the vellum face up on a blue LightGrip machine mat so it covers the design area.
TIP: You can also use a less sticky green StandardGrip machine mat.
- Use a brayer to make sure it’s fully adhered.
- Check that your Premium Fine-Point Blade is clean and in the clamp.
- Press the flashing “Load/Unload” button to load the prepared mat into your Cricut.
- Press the flashing middle button to begin cutting.
- When it has finished cutting, don’t unload the mat right away. Use a weeding tool to gently lift a corner of the material to make sure the cuts went all the way through. If not, press the middle button again to make a second pass of cuts in the same spots.
- When the cuts are complete, unload the mat, flip it over onto your work surface, and roll it back to release the material.
TIP: Use the spatula to help lift delicate parts, and your weeding tool to poke out small bits of material that may have been left behind. If you have any issues with your cuts, go to jennifermaker.com/cleaner-cuts.
- Use a scraper tool to remove the small bits left on your mat after you remove the cut pieces.
- To cut your pieces from regular cardstock, use the “Medium Cardstock - 80 lb (216 gsm)” setting with “More” Pressure.
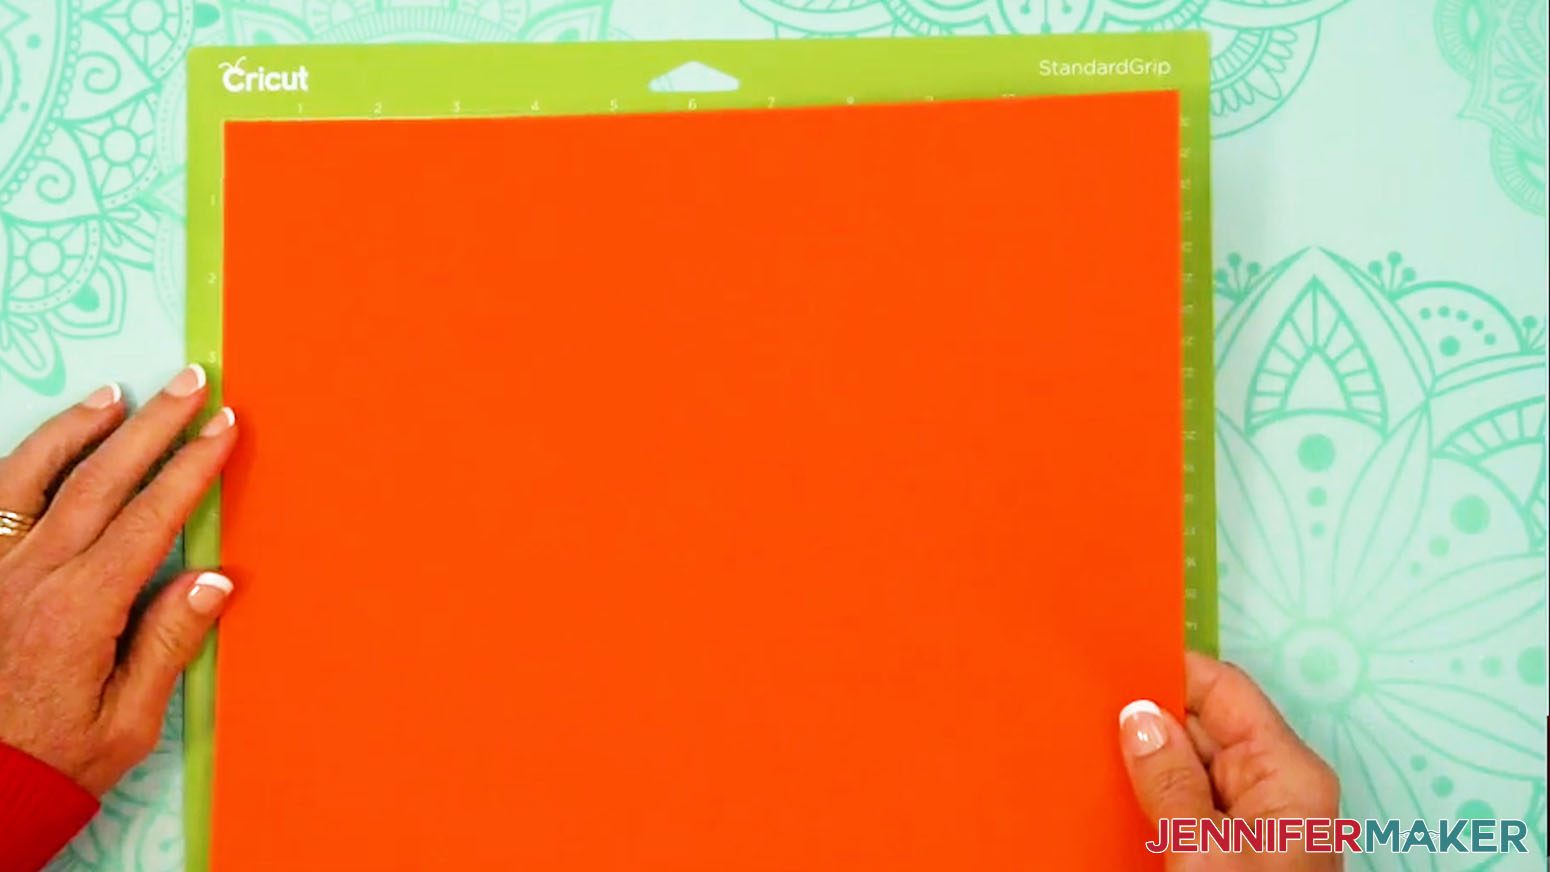
- Place your regular cardstock face up on a green StandardGrip machine mat.
- Follow Steps 7-13 above to cut and unload your cardstock mats.
- Lay out all of the cut pieces face up.
TIP: Refer to the Design Space screen if you’re not sure about some pieces’ orientation.
STEP 3: ASSEMBLE YOUR FALL TEA LIGHT HOLDER
SCARECROW TEA LIGHT HOLDER
- Start with the scarecrow layer face down on your work surface.
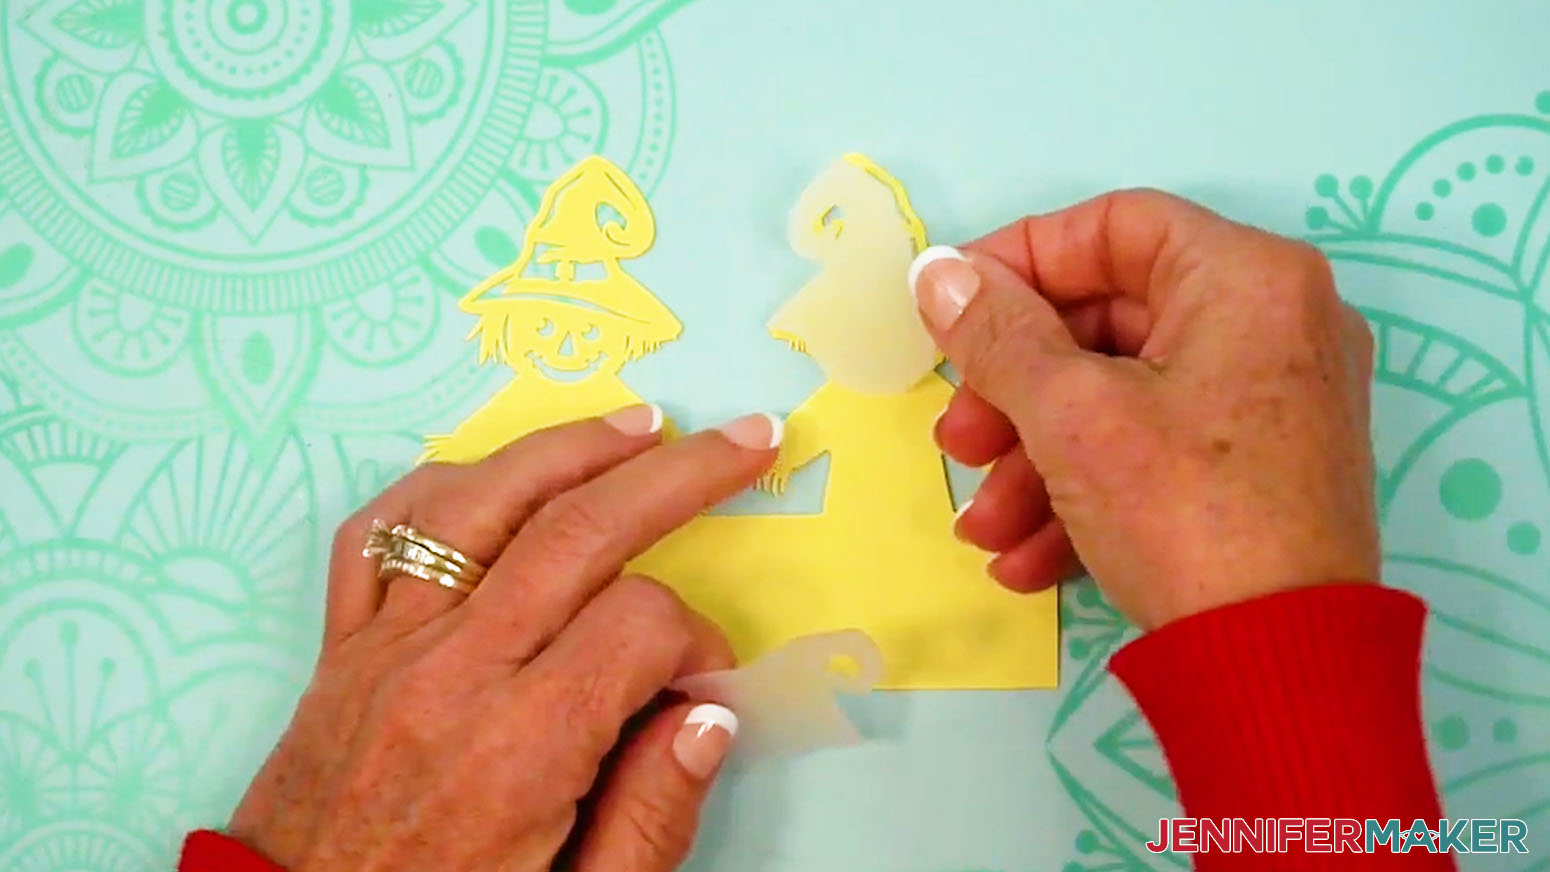
- If you cut them, place the vellum diffusers onto their spots on the scarecrow piece to make sure they align correctly.
- Move the diffusers off to each side, keeping their orientation the same.
- Add thin lines of craft glue on the left scarecrow’s hat and face where the diffuser will go.
TIP: The precision tip on your Bearly Art glue works great for this!
TIP: Use your finger or a foam brush to spread the glue evenly to avoid bumps in the vellum.
- Place the left diffuser onto its spot on the scarecrow, aligning the edges carefully. TIP: Work quickly so the glue doesn’t dry before aligning the vellum!
- Press and smooth to adhere the left diffuser to the left scarecrow.
- Gently wipe away any excess glue with a paper towel or your finger. TIP: Flip the scarecrow over to check the other side for excess glue, too!
- Repeat Steps 4-7 to adhere the right diffuser to the right scarecrow.
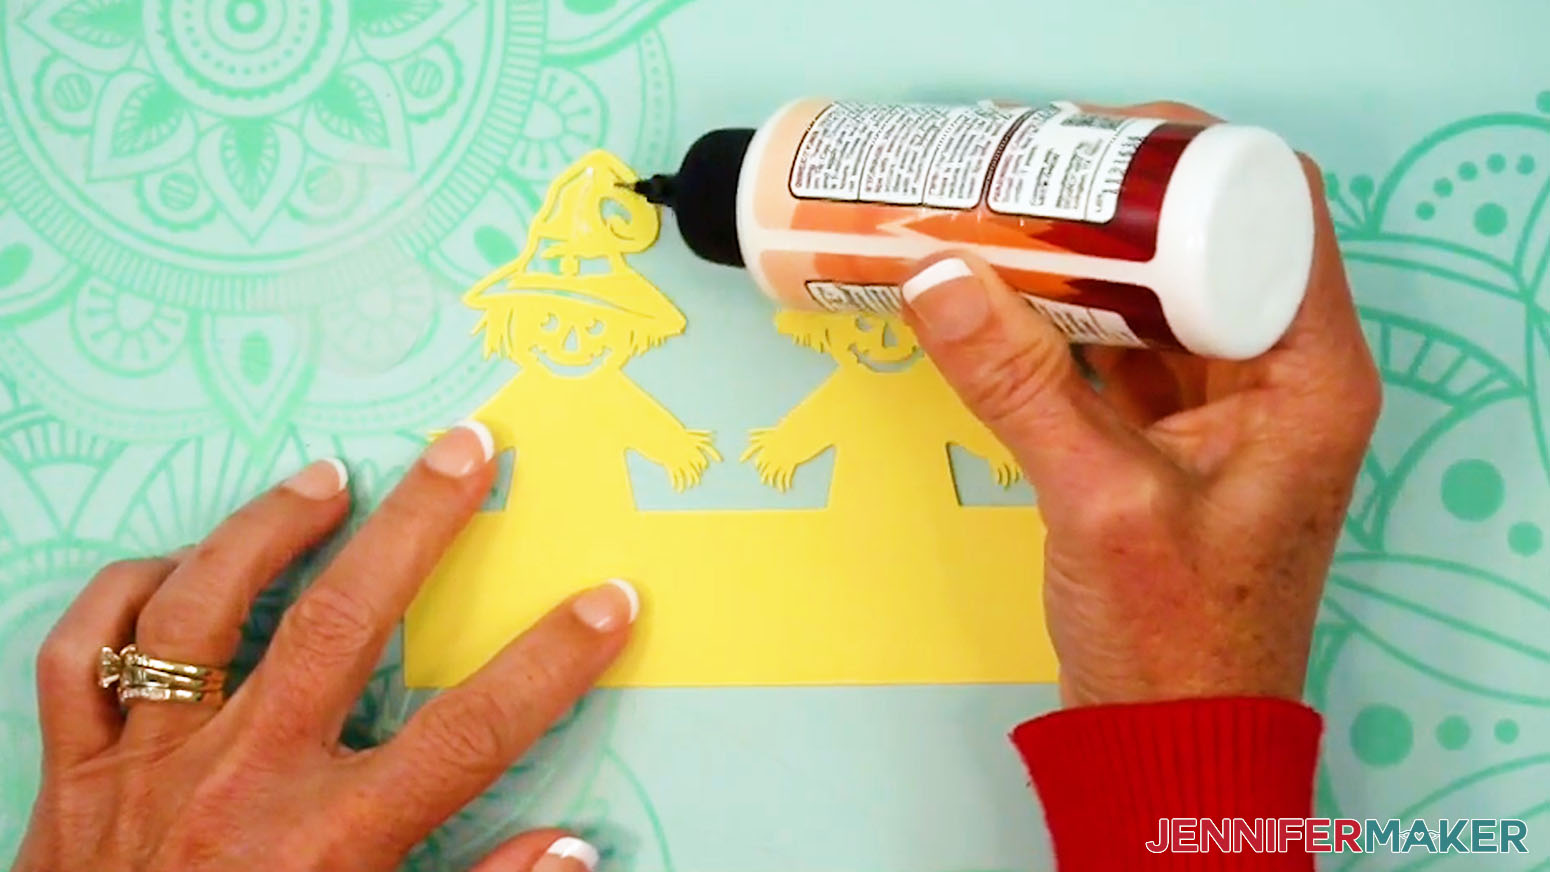
- Flip the scarecrow layer face up.
- Place the cardstock hats onto their spots on the scarecrow piece to make sure they align correctly.
- Flip the left hat piece face down and apply lines of glue all over its back, avoiding the cutouts.
- Then flip it over again and place it onto its spot on the left scarecrow, aligning the edges carefully.
- Press and smooth to adhere the left hat to the left scarecrow.
- Gently wipe away any excess glue with a paper towel or your finger.
- Repeat Steps 11-14 to adhere the right hat to the right scarecrow.
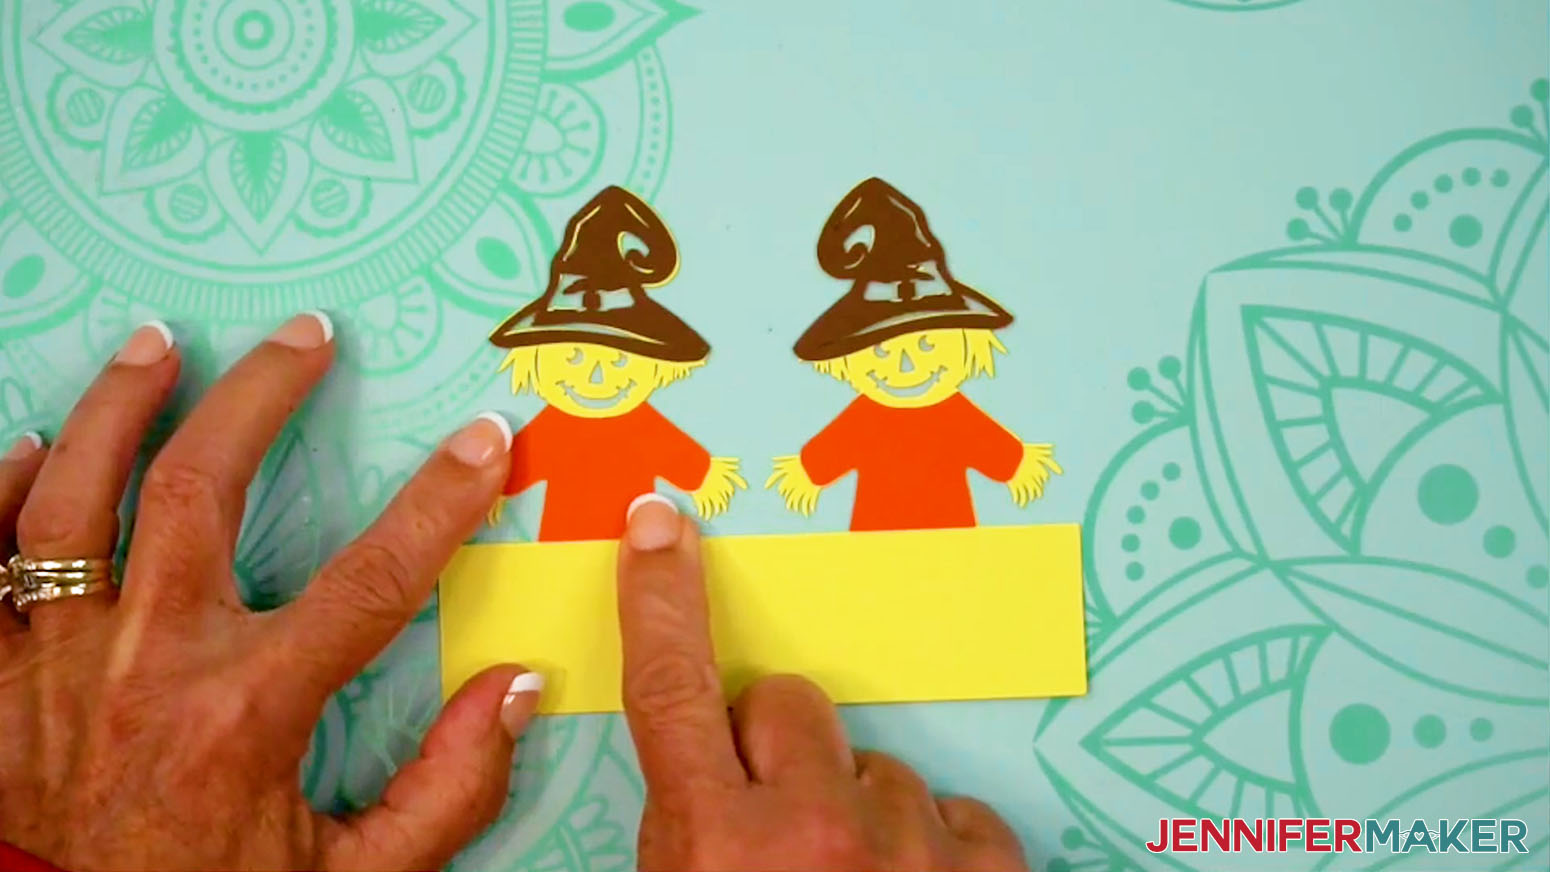
- Then adhere the two shirt pieces face up on each side of the scarecrow piece the same way.
- Take the outer ring layer (with the tab and slot) and curve the ends of the bottom strip toward each other with the pretty side facing out.
- Insert the strip’s tab into the strip’s slot, keeping the tab on the outside.
- Pull the ends apart gently so the tab catches on the inside to secure it.
- Use your fingers to gently shape the bottom strip into a ring.
- Fold down each of the leaves on the outer ring layer where their tabs meet the top edge of the ring.
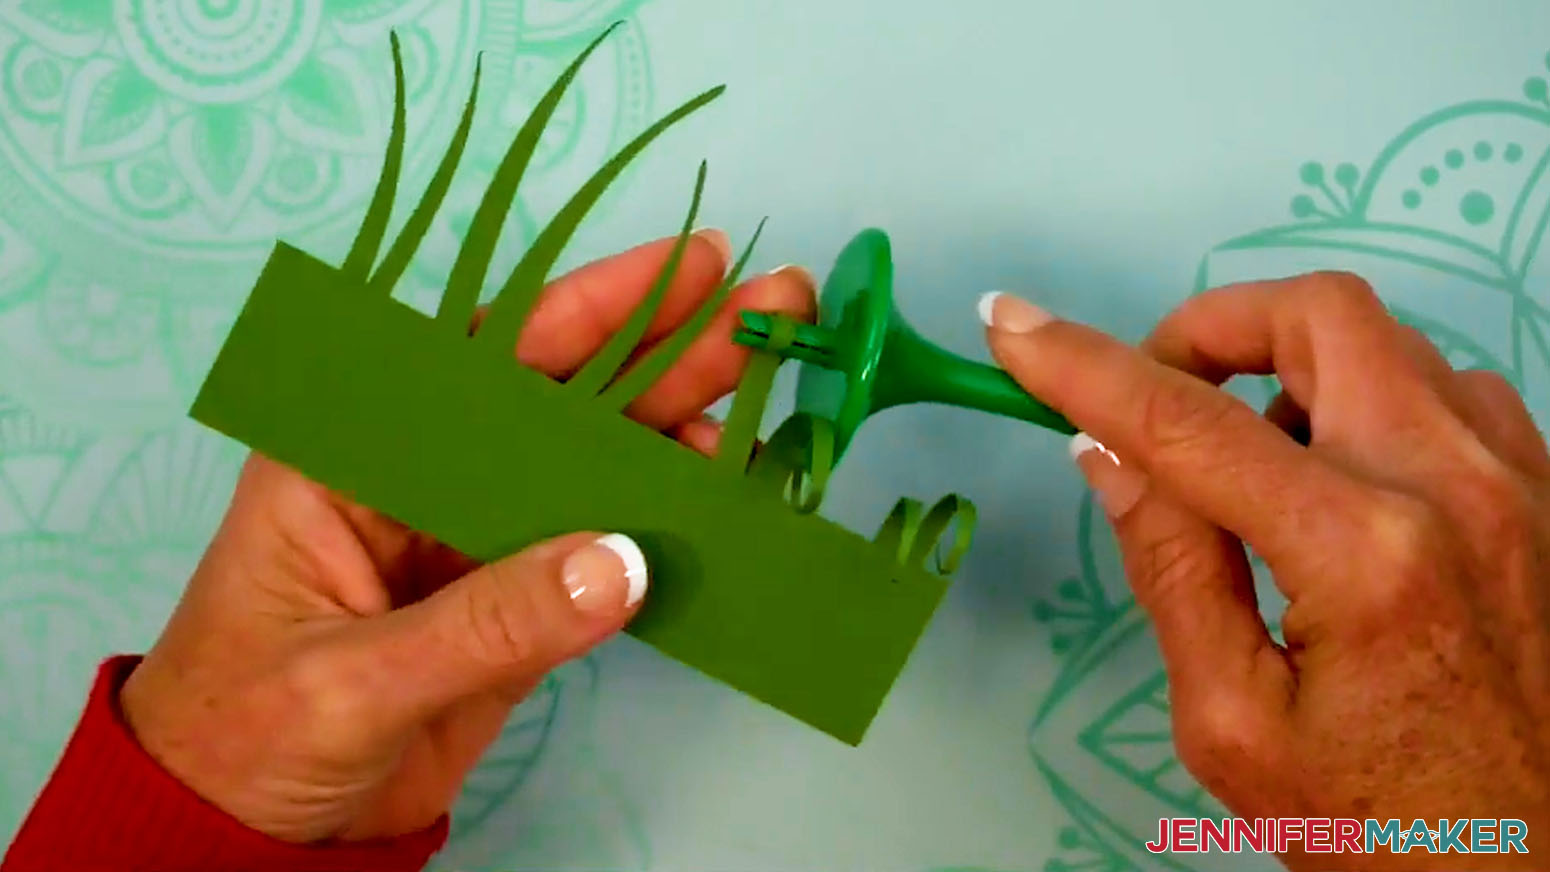
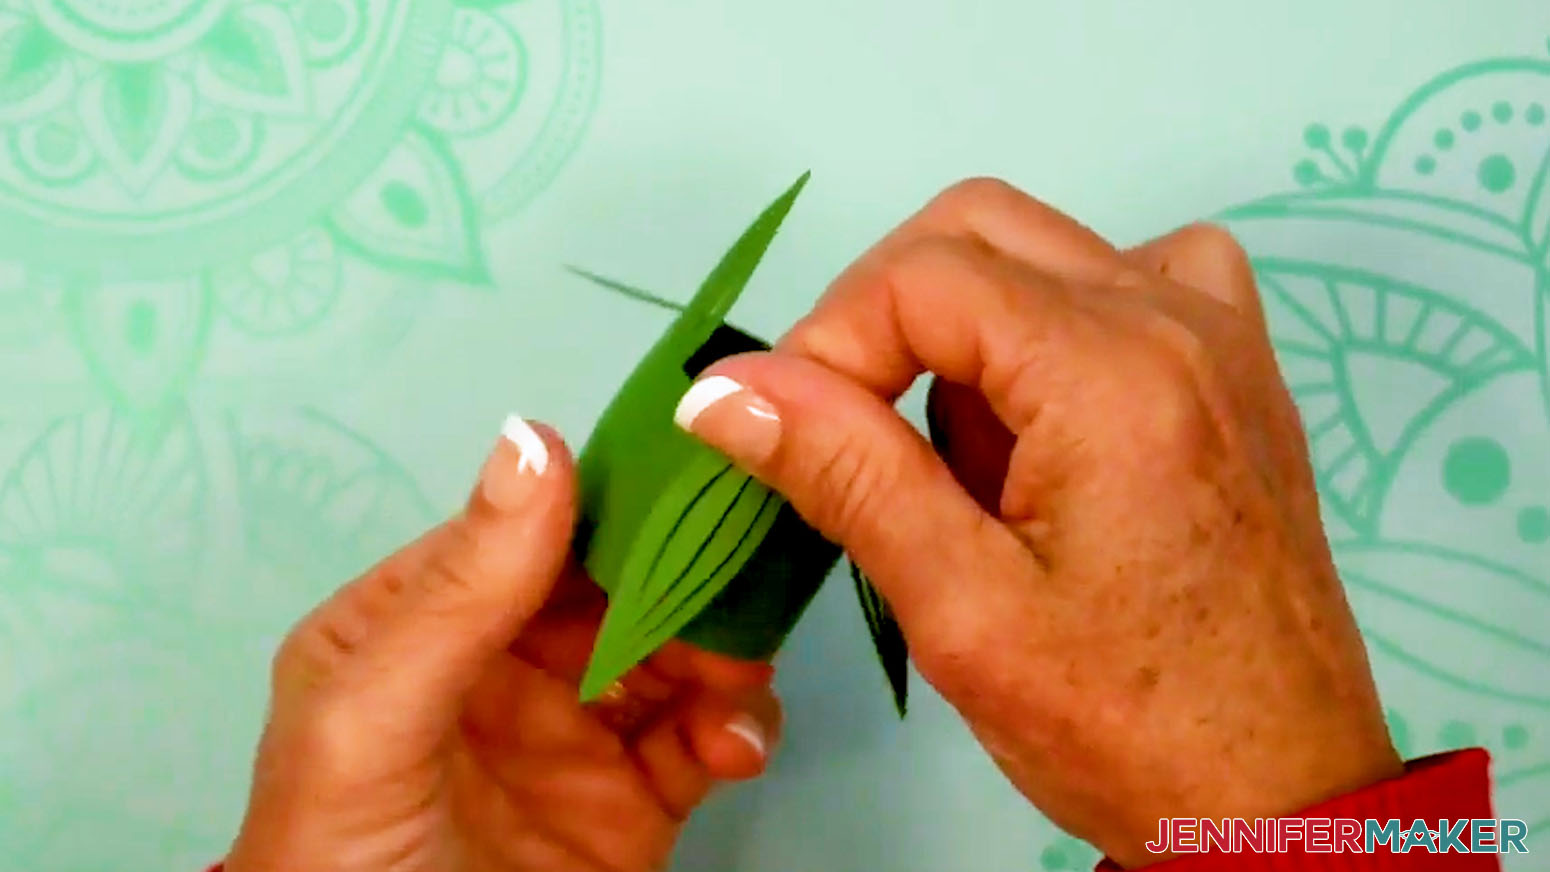
- Hold the grass layer face up and use a Flowtool or a thin pencil to curl each of the blades down toward you.
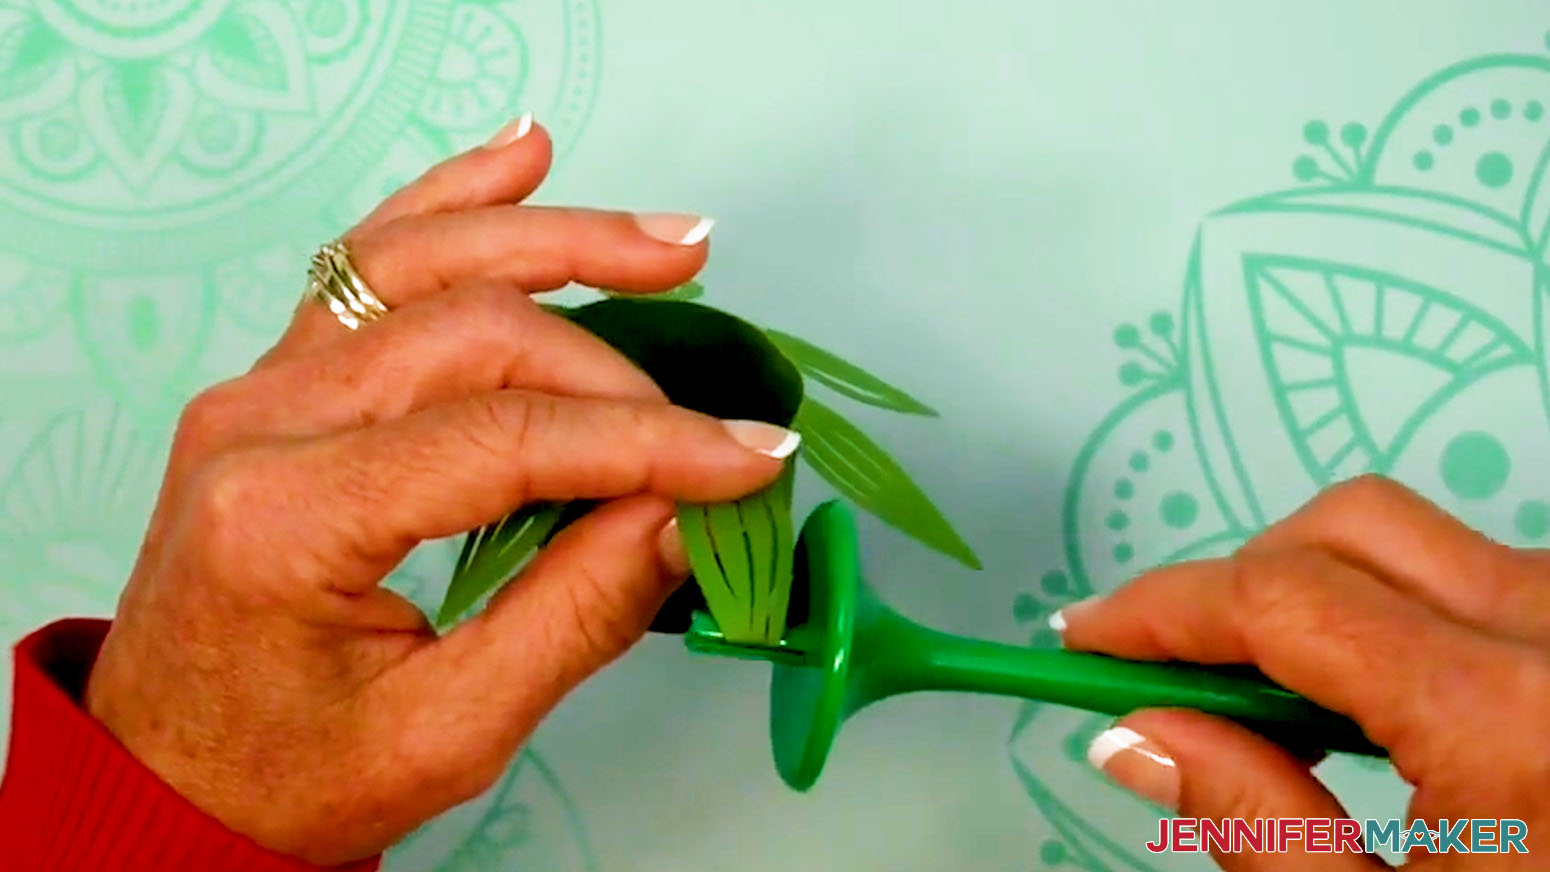
- Keeping the curled blades on the outside, curve the ends of the bottom strip of the grass layer toward each other until they overlap slightly, forming a ring smaller than the outer one.
- Insert the grass ring inside the outer ring, placing the overlapping area on the opposite side of the outer ring’s slotted tab.
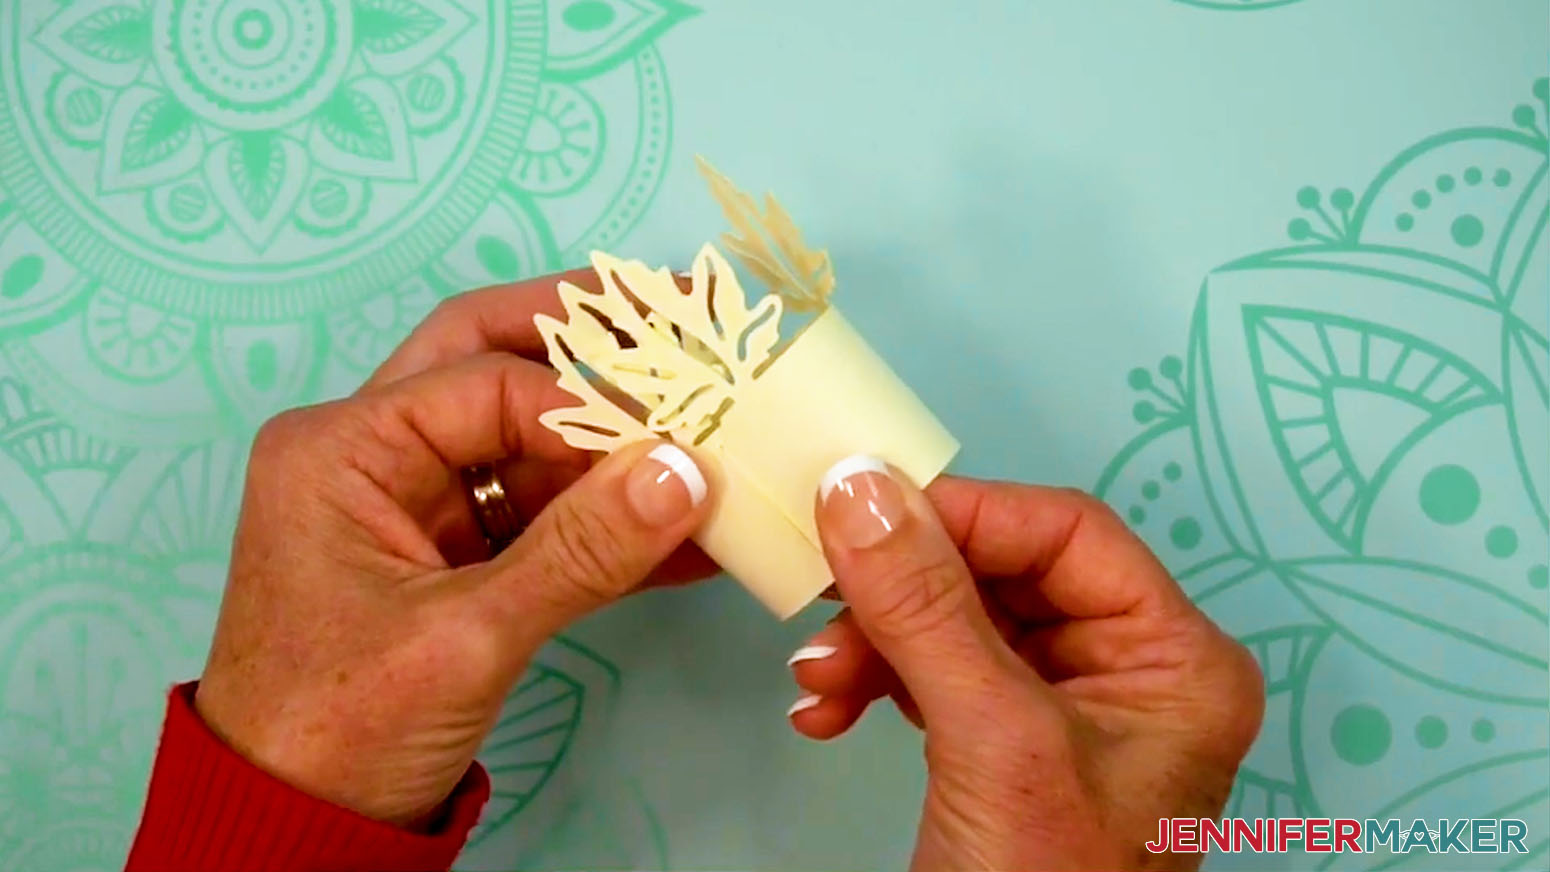
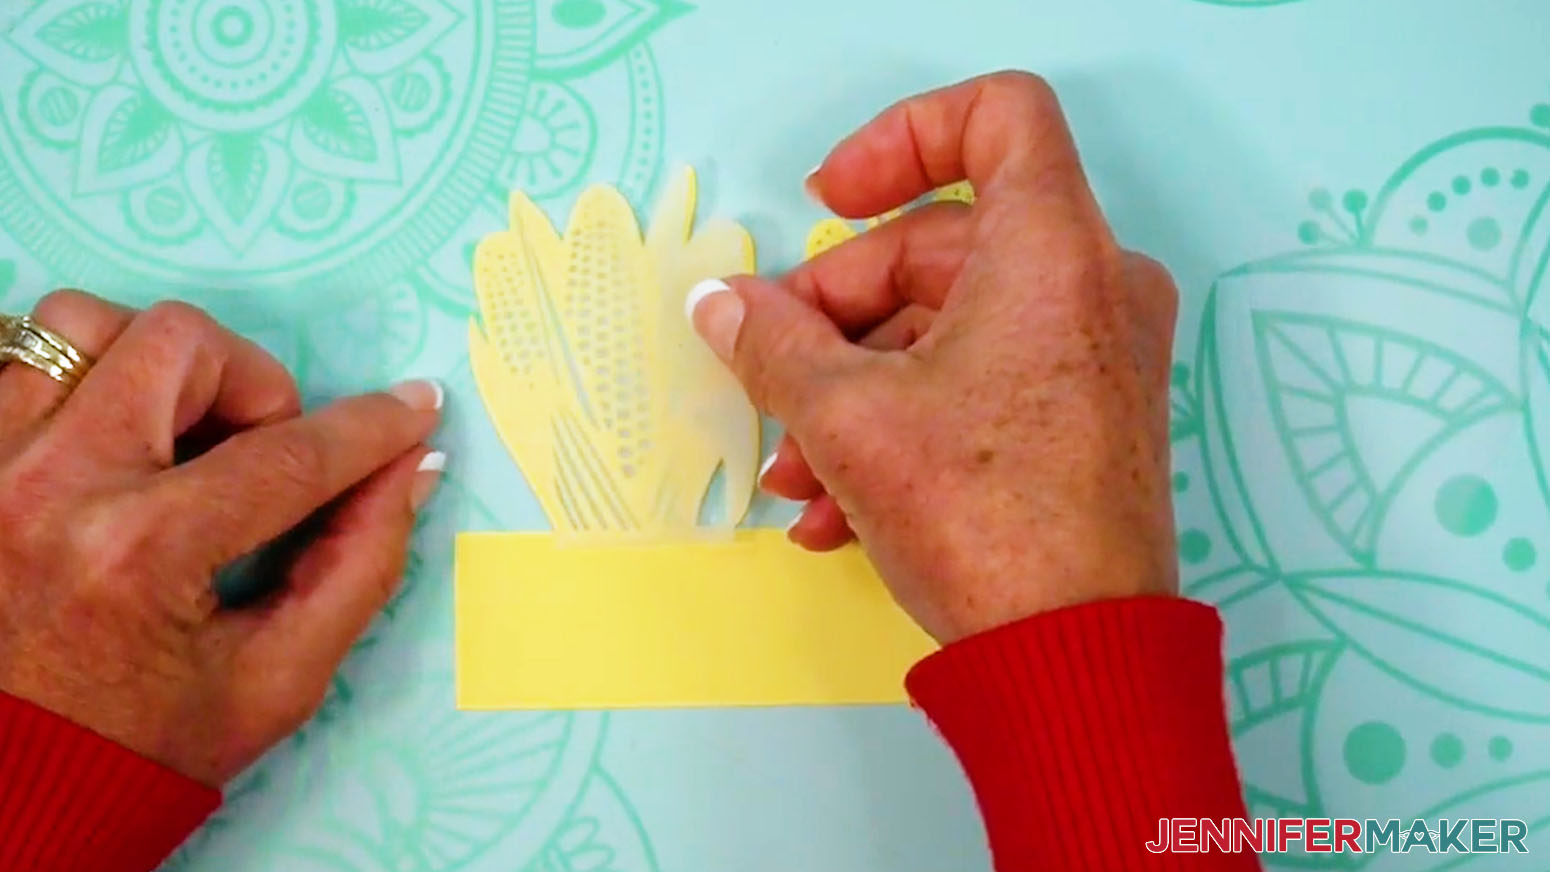
- Take the outer wheat layer (with small blades between the wheat stalks) and curl the ends of the bottom strip toward each other until they overlap slightly, forming a smaller ring.
- Insert the outer wheat ring inside the grass ring, placing the overlapping area on the opposite side of the grass ring's overlap.
- Use your fingers to gently push the stalks of wheat down slightly toward the outside of the rings.
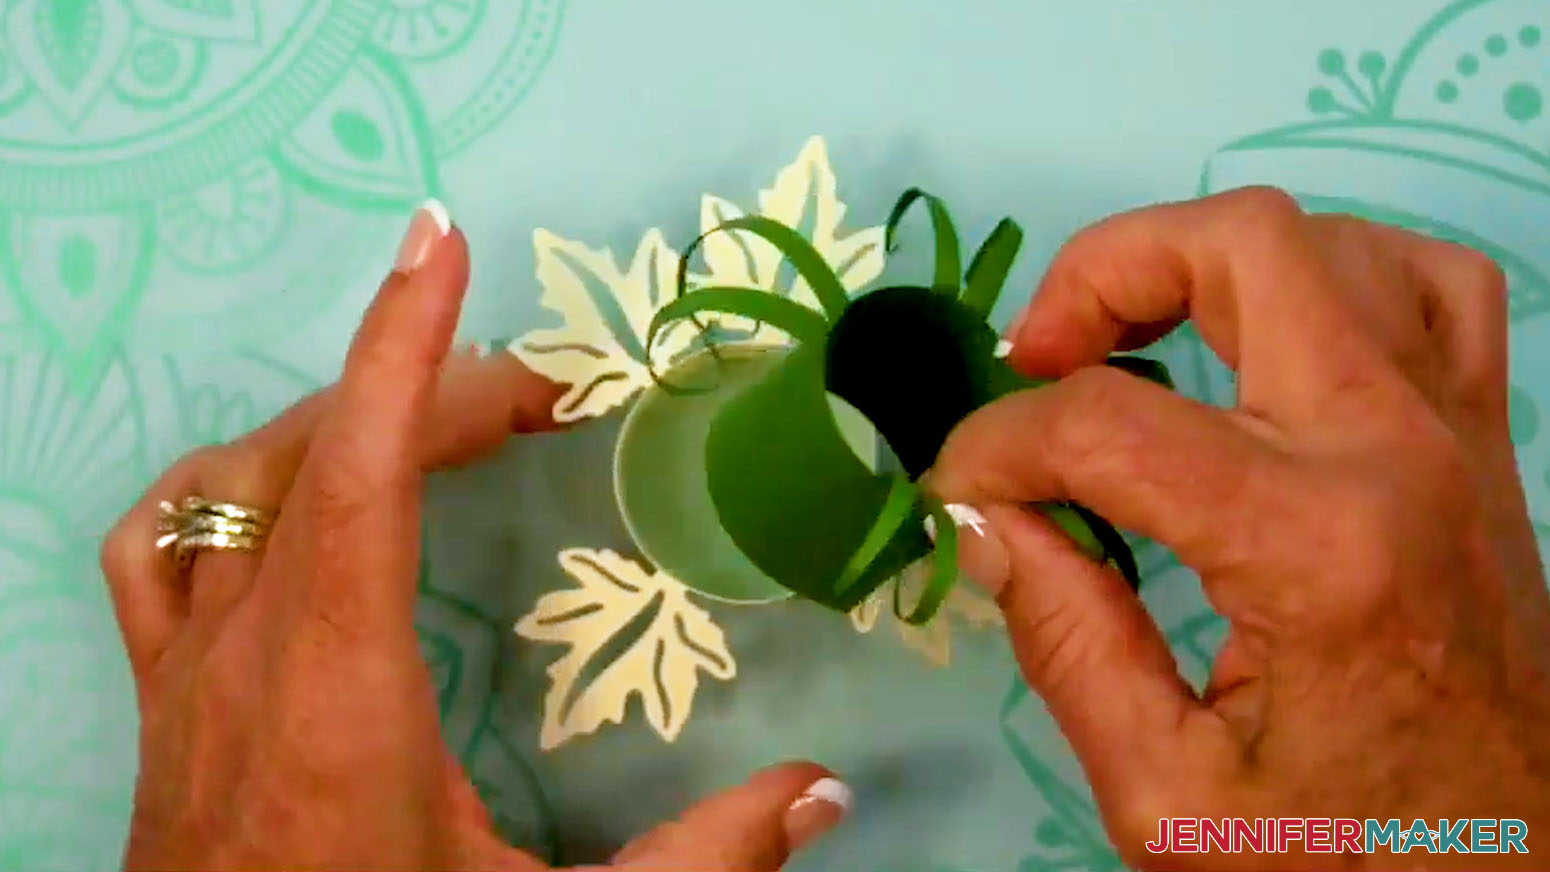
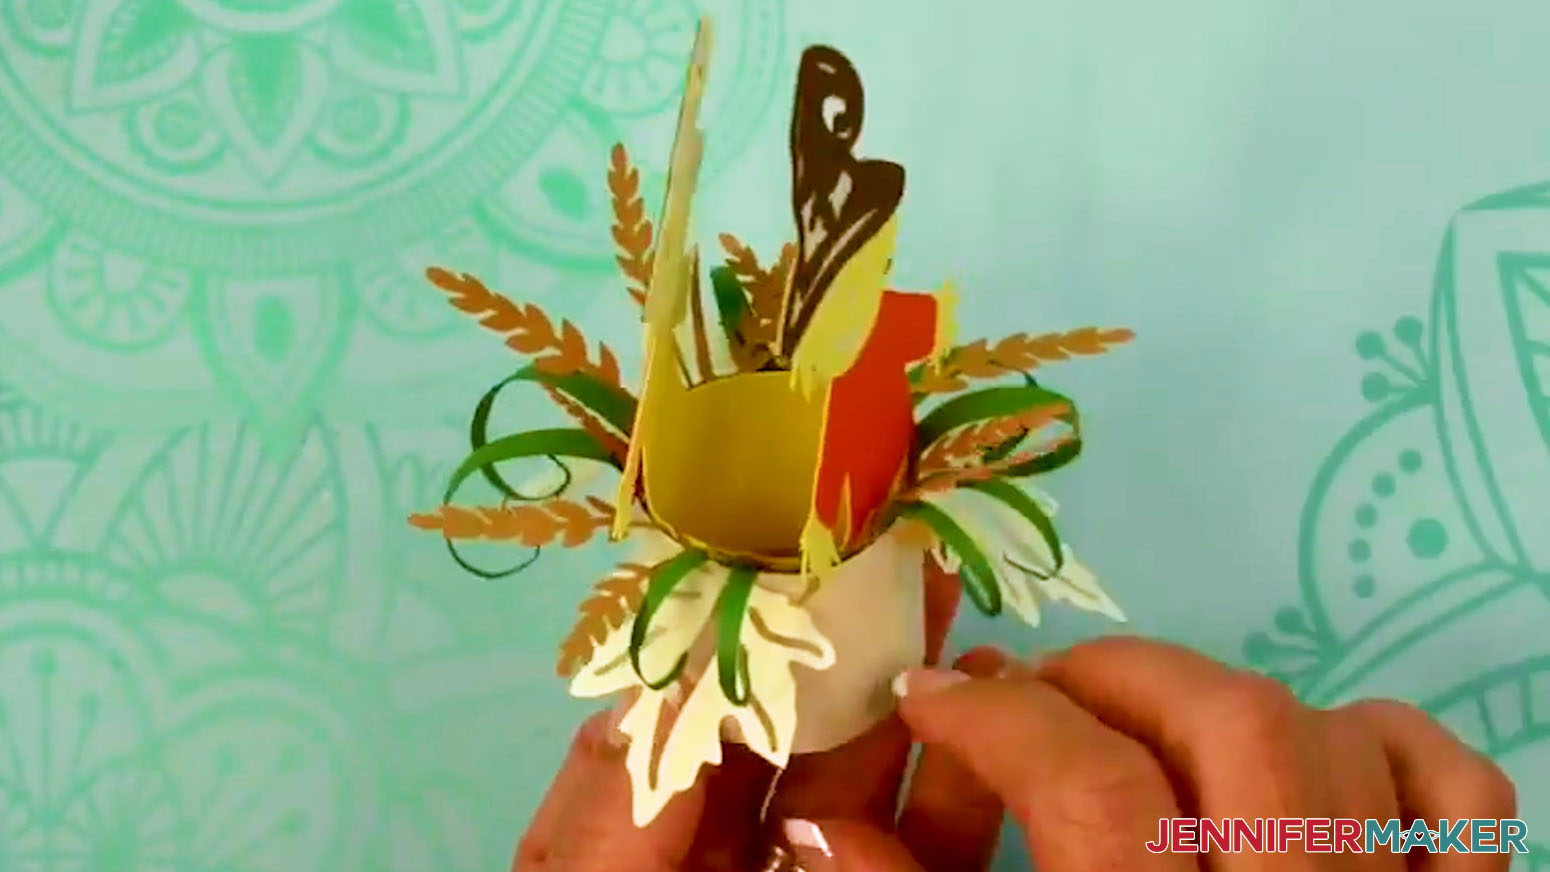
- Take the scarecrow layer with the colorful details facing outward and curve the ends of the bottom strip toward each other until they overlap slightly, forming a tighter ring.
- Insert the scarecrow ring inside the outer wheat ring, placing the overlapping area on the opposite side of the grass ring's overlap.
- Take the inner wheat layer and curve the ends of the bottom strip toward each other until they overlap slightly, forming a tighter ring.
- Insert the inner wheat ring inside the scarecrow ring, positioning the groups of wheat stalks so they appear behind the scarecrows.
- Test your LED tea light to make sure it works, including any remotes. You may have to remove a battery protector tab first.
- Insert the LED tea light from the bottom of the scarecrow holder.
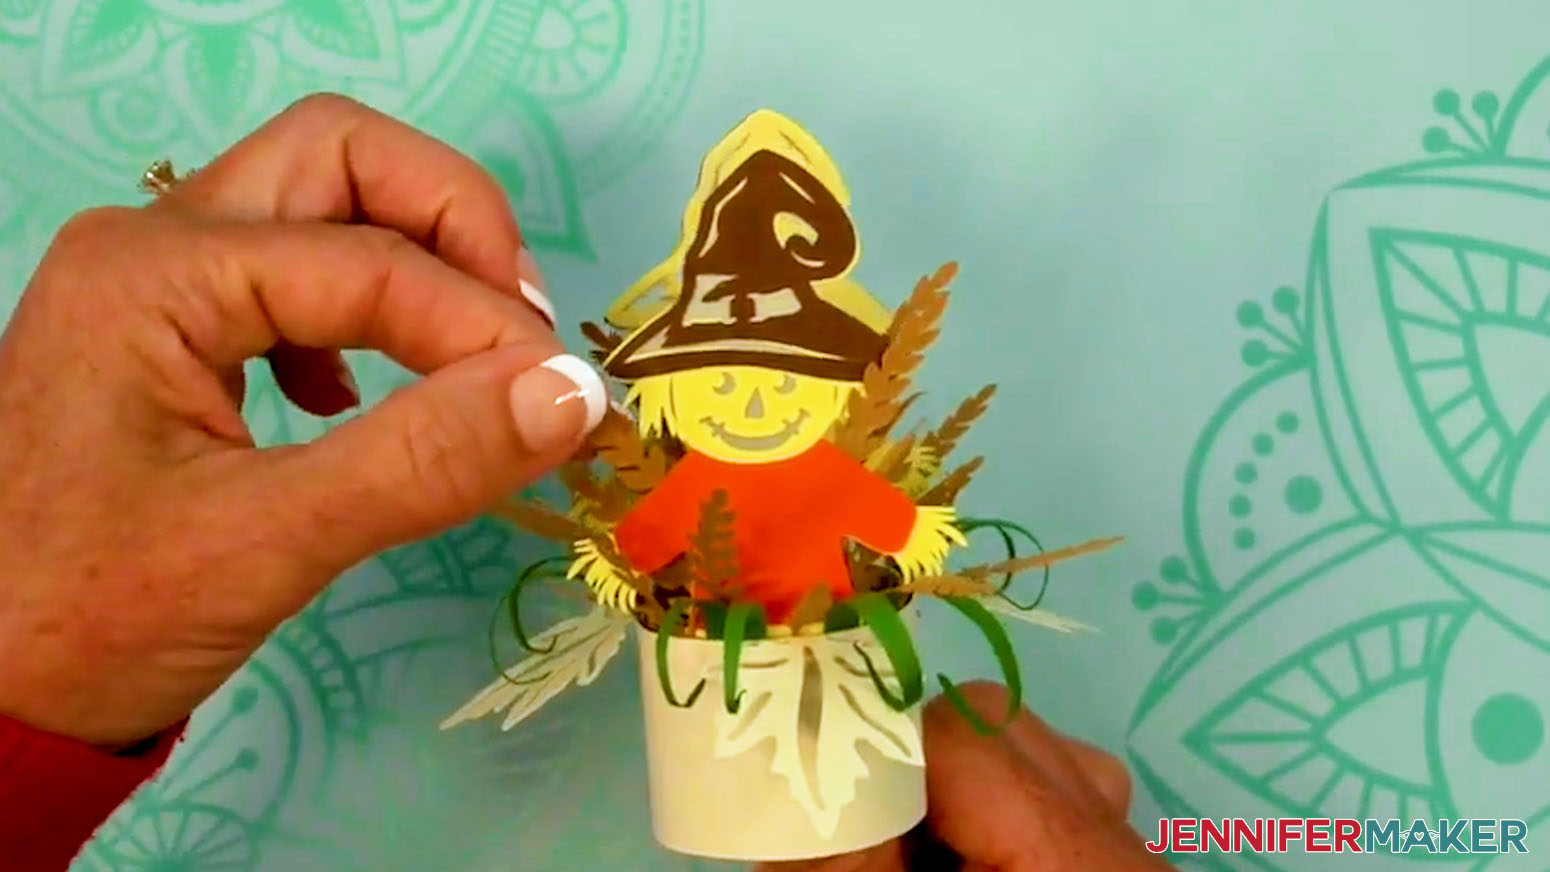
- Grab a set of hook and loop dots. Make sure you have both the smooth loop side and the rough, scratchy hook side.
- Peel a smooth loop dot off its carrier sheet and press the sticky side to the vellum at the top of one scarecrow’s hat.
- Then peel a scratchy hook dot off the carrier sheet and attach it to the loop dot, sticky-side out.
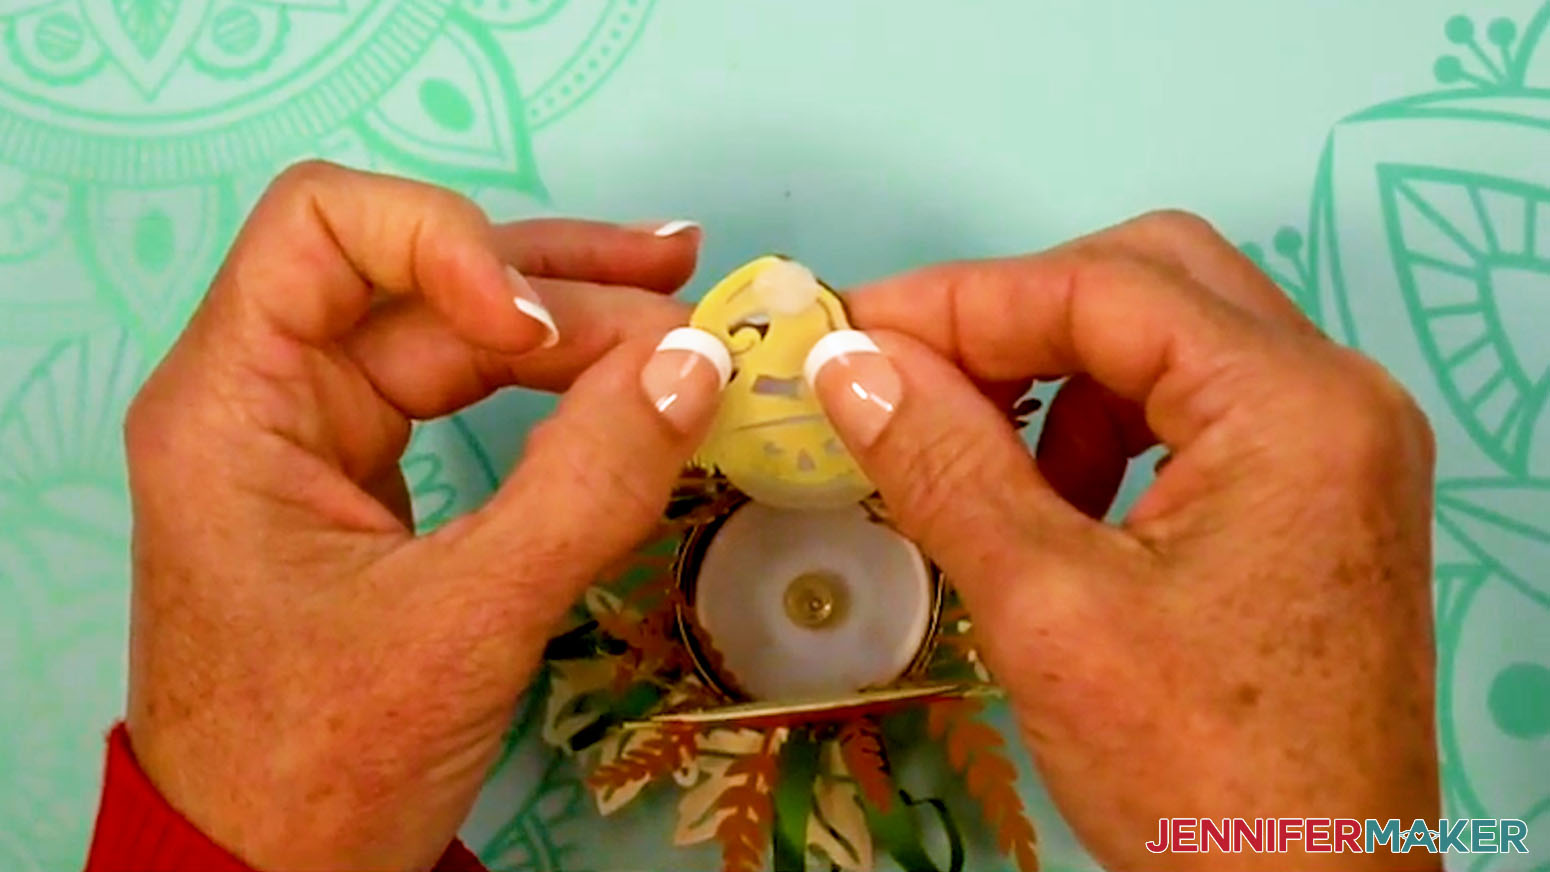
- Line up the two scarecrows and press the tops of their hats together to adhere the hook dot to the other scarecrow.
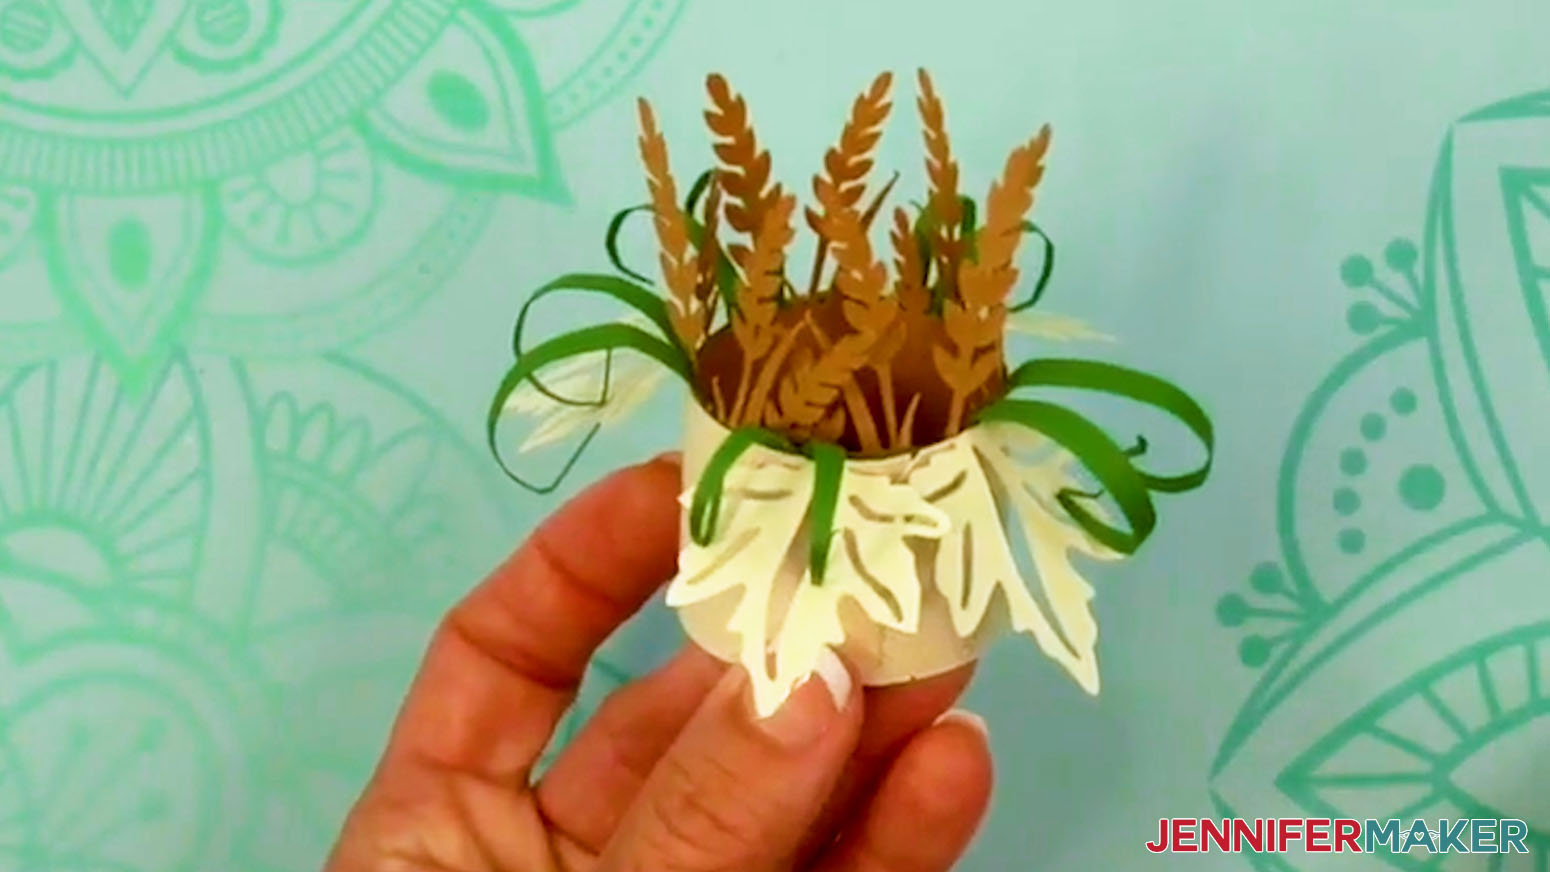
- Use your fingers to shape the leaves, grass, and wheat as desired.
- Flip your tea light to the “ON” position.
 TIP: The precision tip on your Bearly Art glue works great for this!
TIP: Use your finger or a foam brush to spread the glue evenly to avoid bumps in the vellum.
TIP: The precision tip on your Bearly Art glue works great for this!
TIP: Use your finger or a foam brush to spread the glue evenly to avoid bumps in the vellum.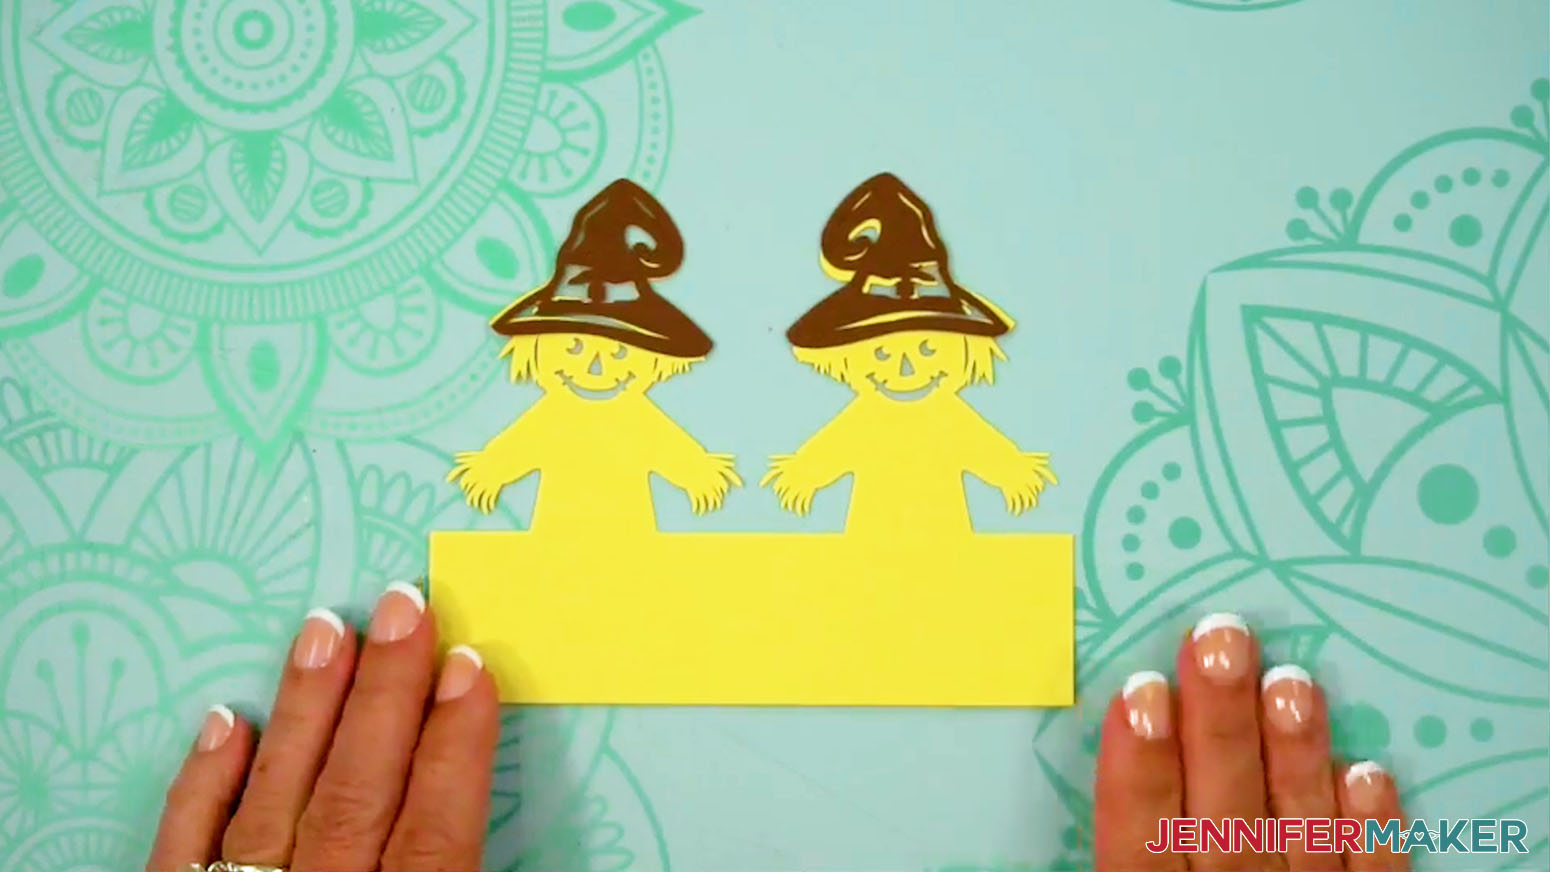

VARIATION: CORN TEA LIGHT HOLDER
- Start with the corn layer face down on your work surface.
- Glue the vellum diffusers in place if you cut them.
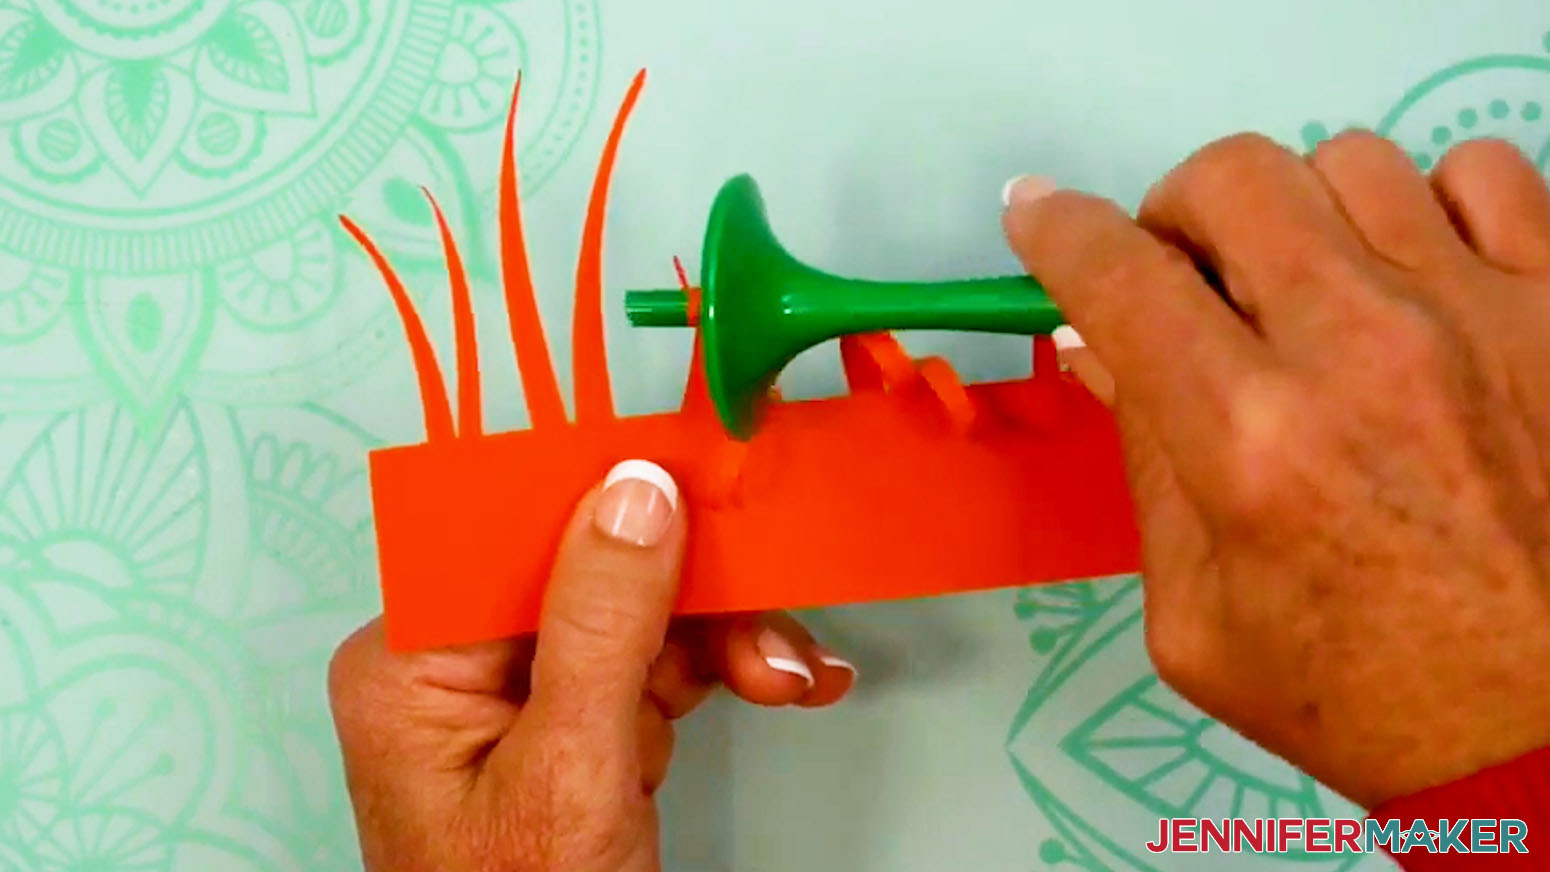
- Assemble the outer ring layer with leaves.
- Use a Flowtool or a round, thin pencil to curl the tips of the outer ring’s leaves.
- Take the thin grass layer and curl its blades down toward you.
- Curve the ends of the grass layer’s bottom strip toward each other until they overlap slightly, forming a ring.
- Insert the thin grass layer into the outer ring.
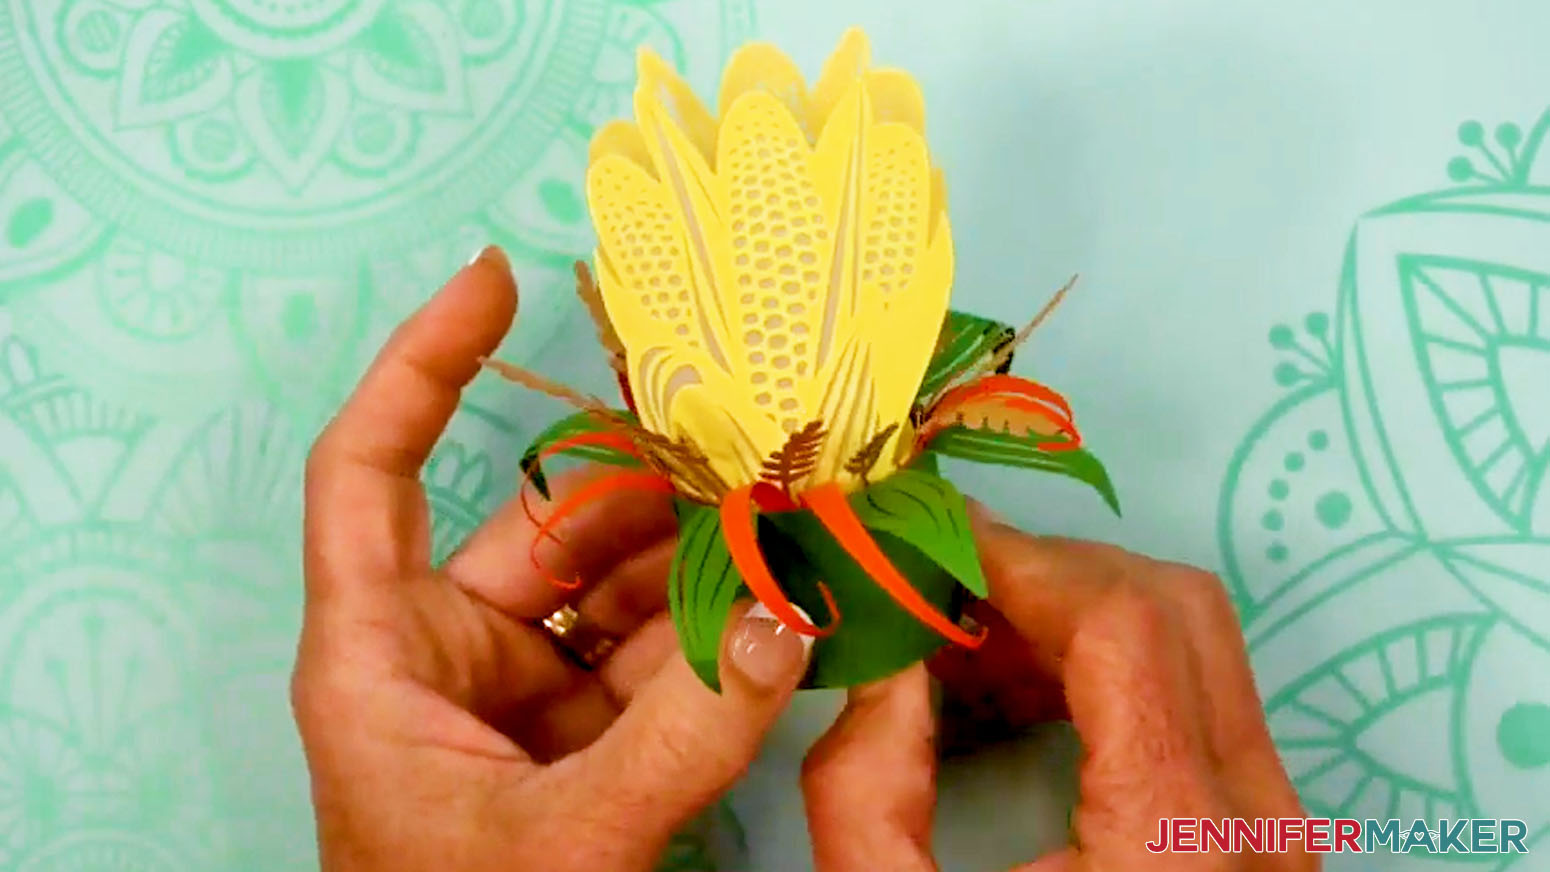
- Repeat Steps 6-7 to overlap and insert the wheat layer, and then the corn layer.
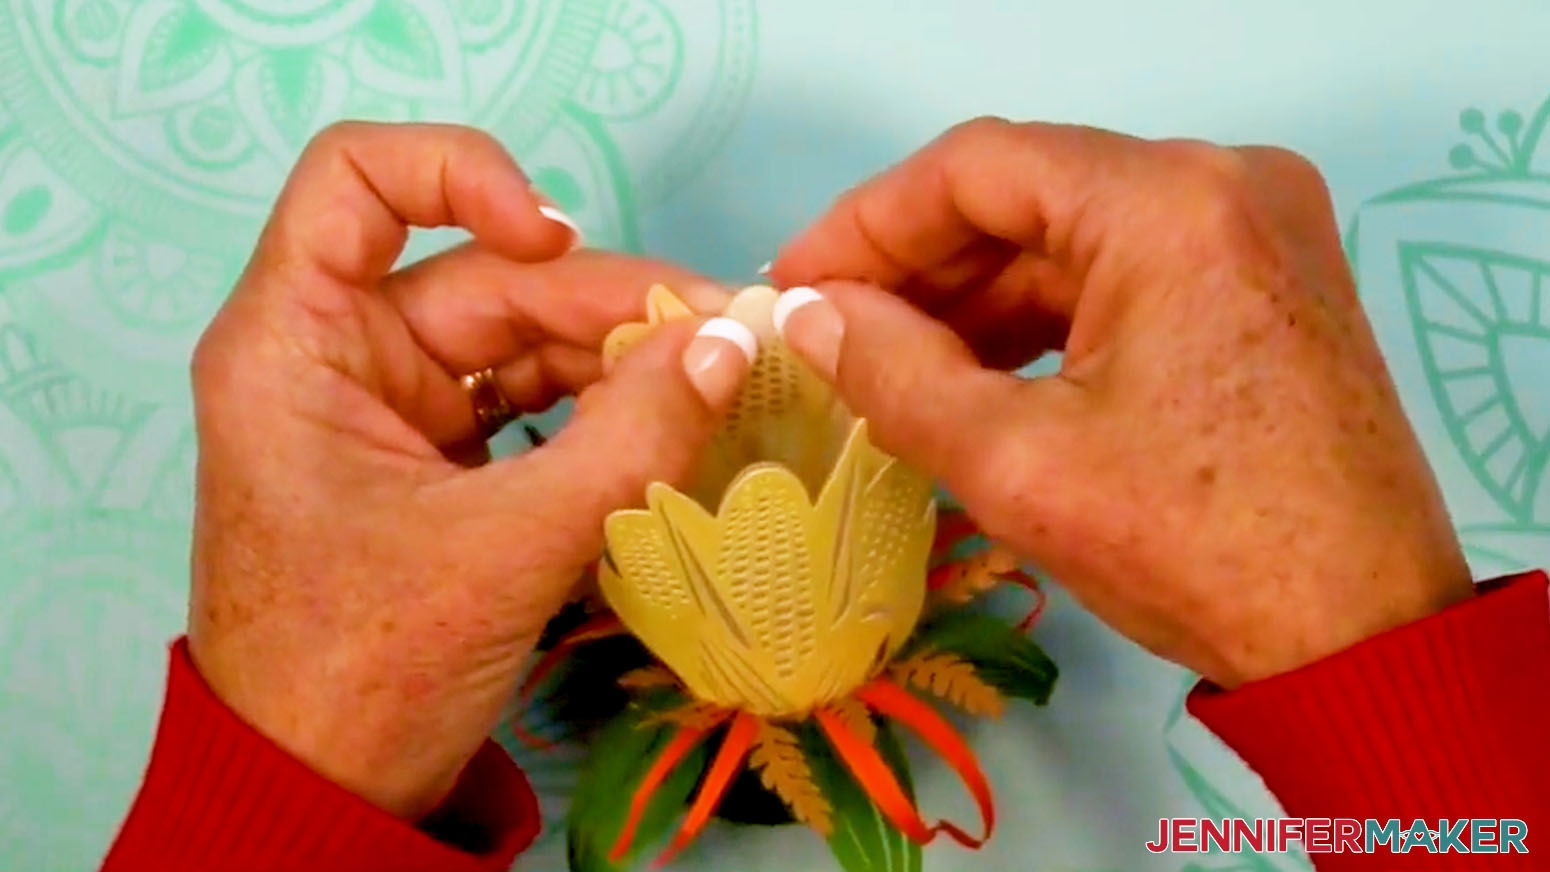
- Check your tea light’s battery, insert the tea light, attach a hook and loop dot to the inside of the corn pieces, and shape your details.
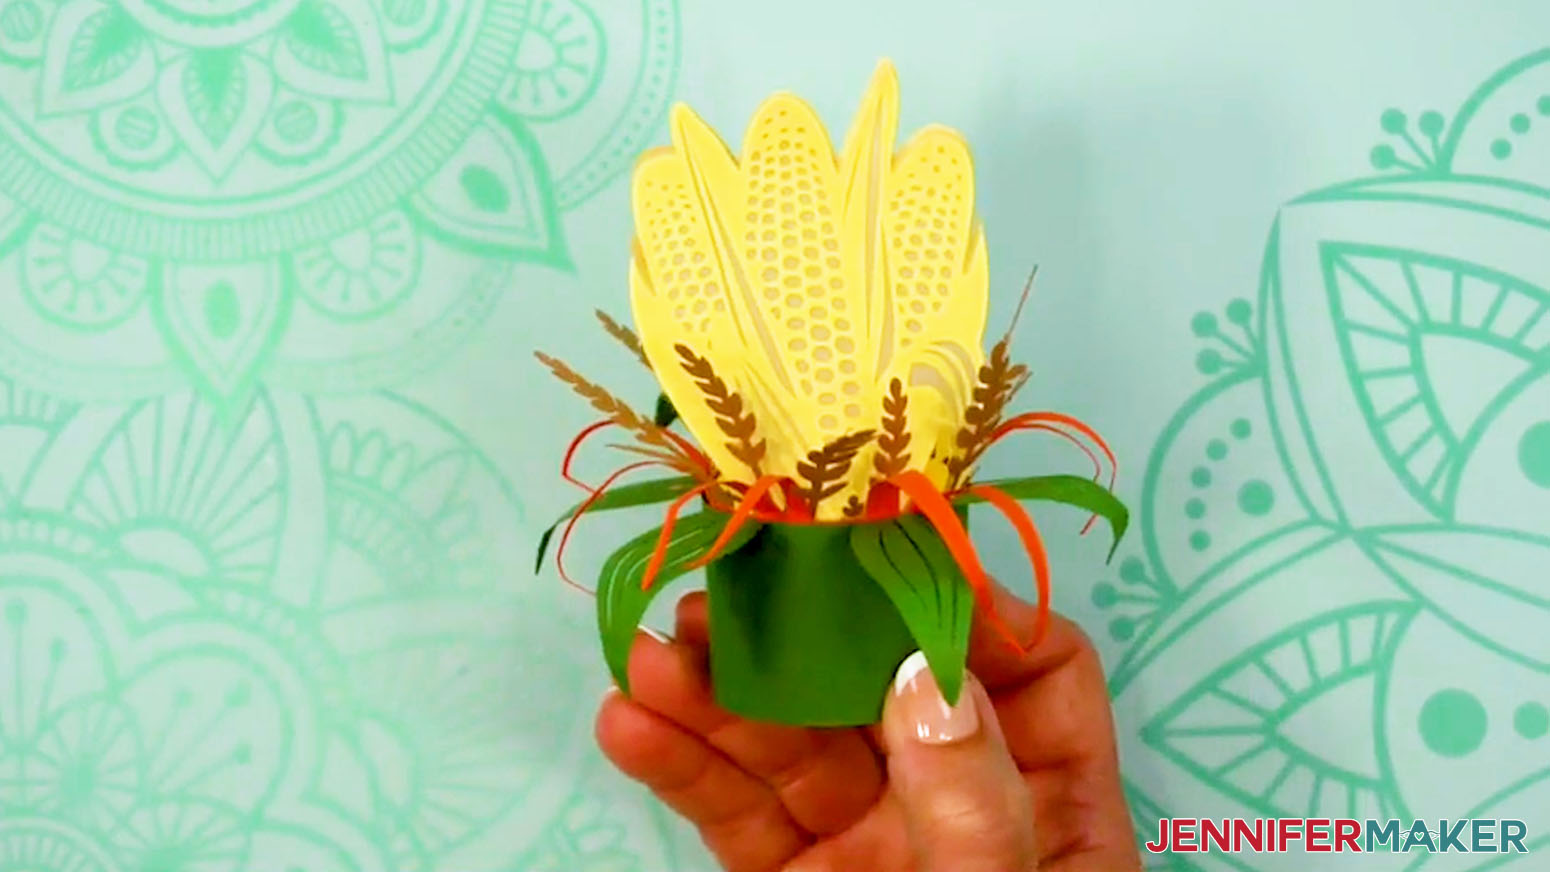
- Your corn tea light holder is ready!
VARIATION: HAUNTED HOUSE TEA LIGHT HOLDER
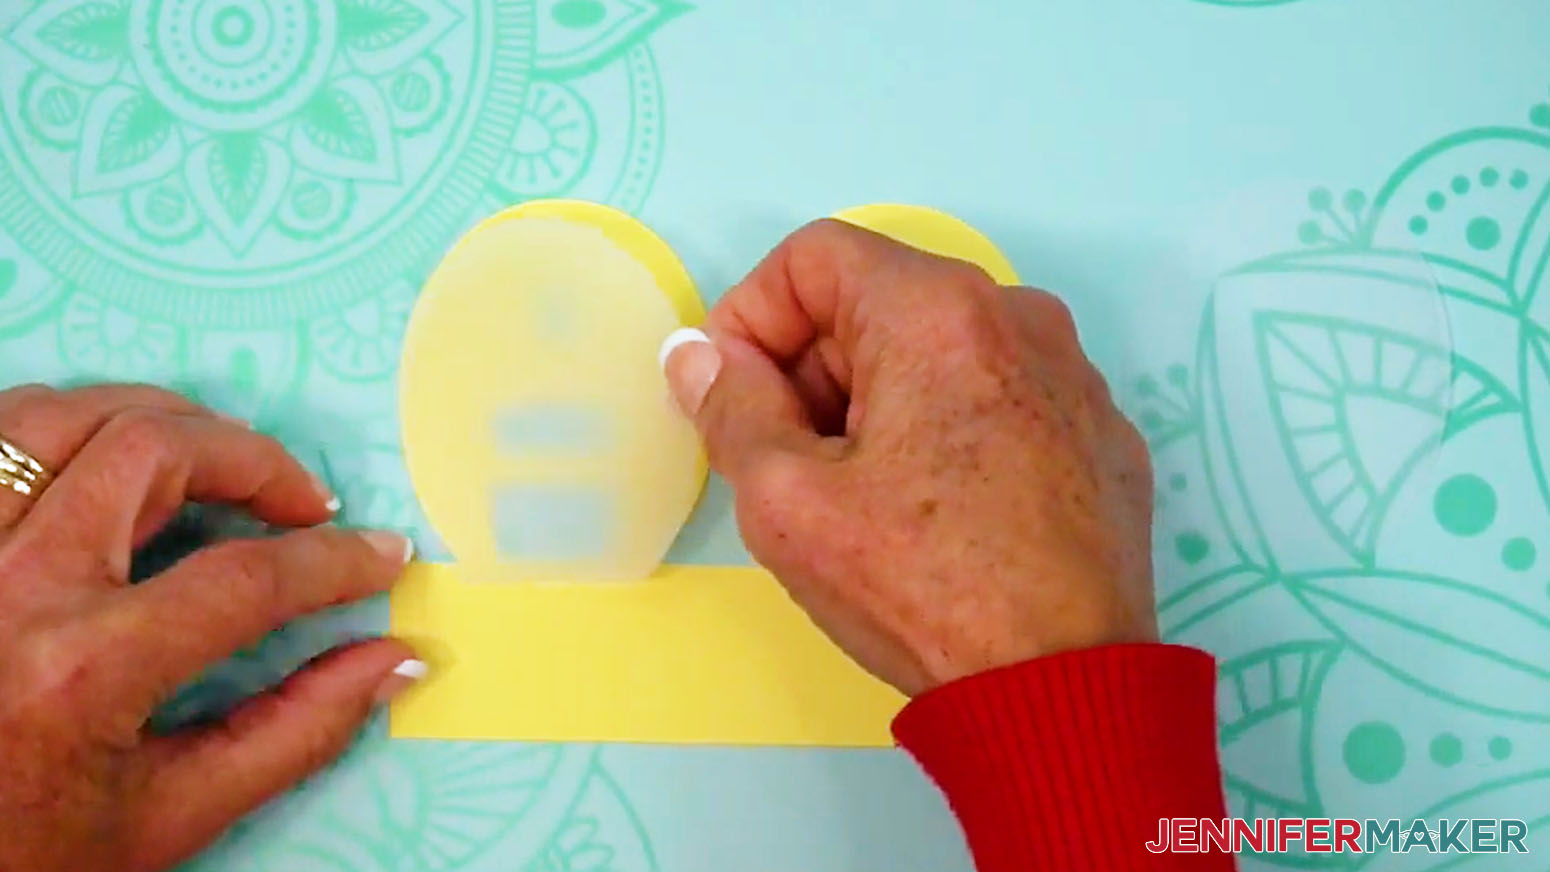
- Start with the moon layer face down on your work surface.
- Glue the vellum diffusers in place if you cut them.
- Flip the moon layer face up.
- Glue the face-up tree pieces to the moon layer.
- Glue the face-up house pieces on top of the tree pieces.
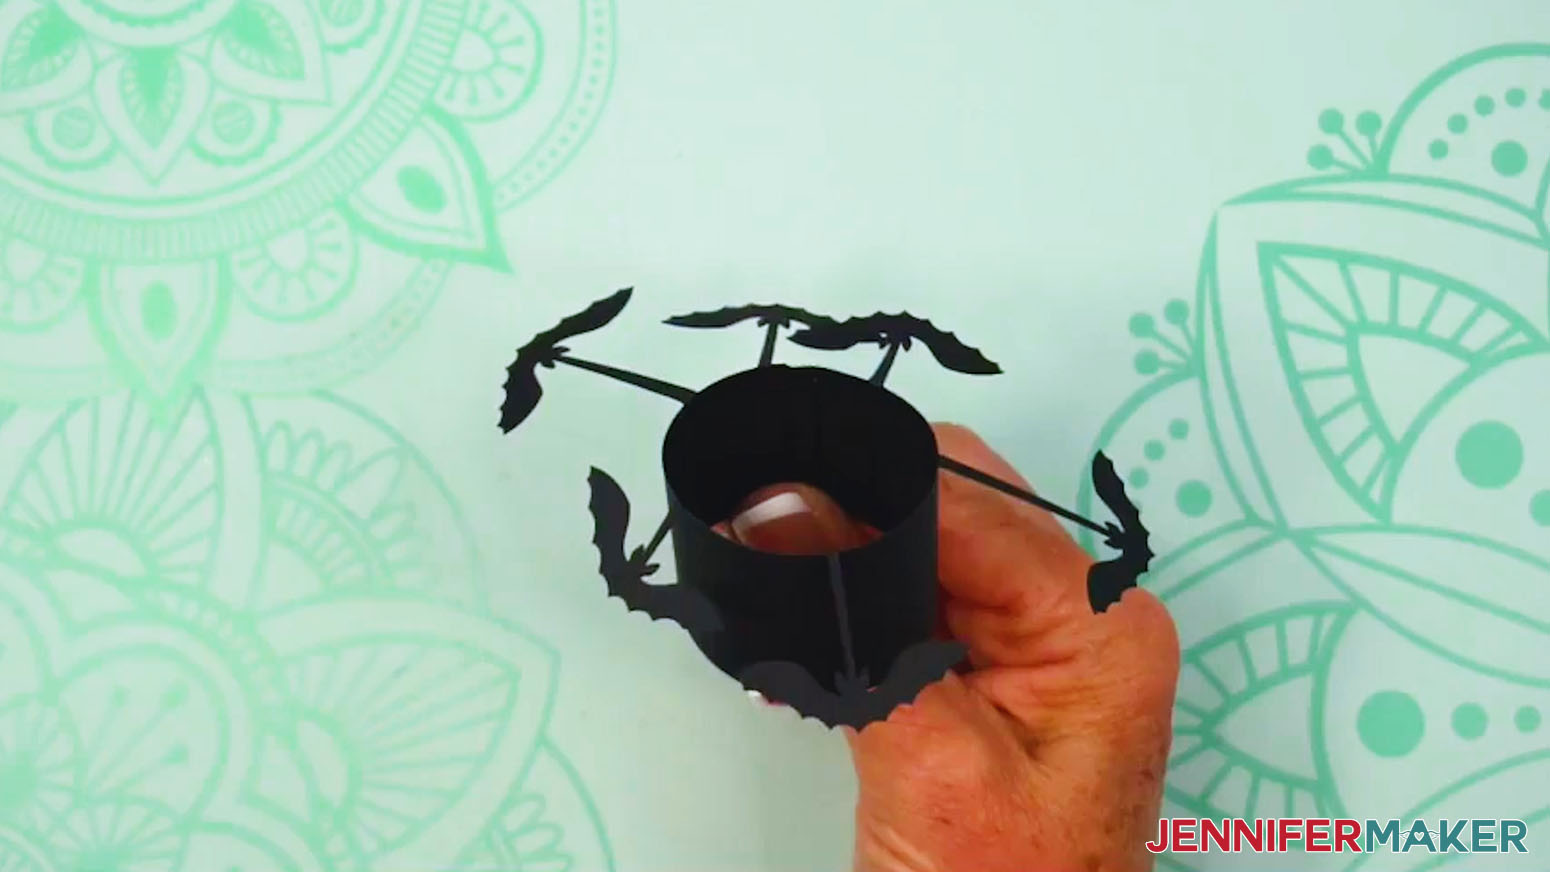
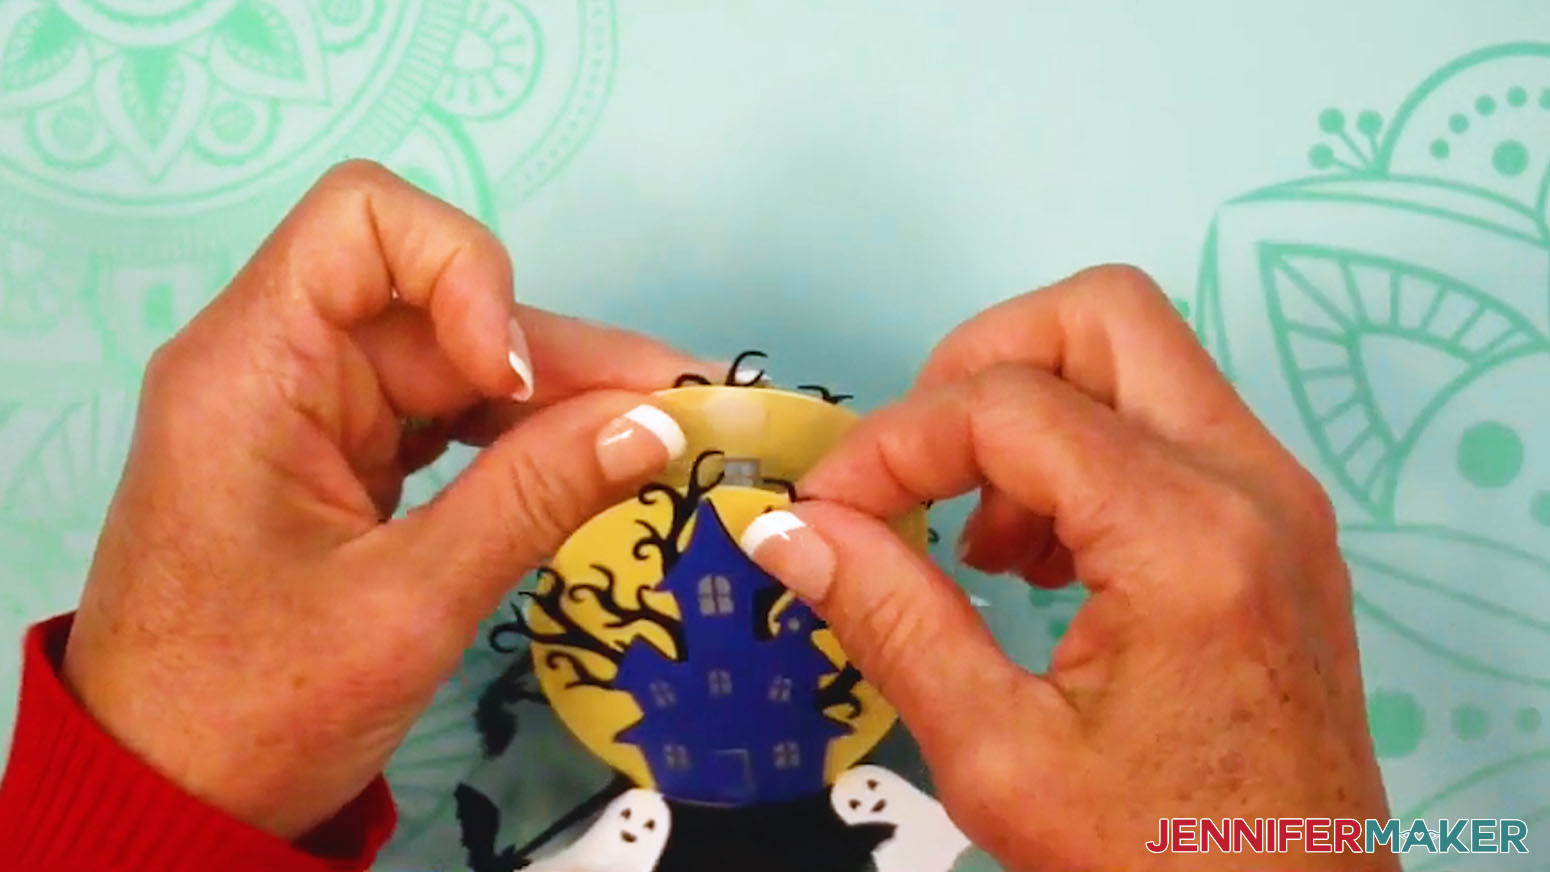
- Assemble the outer ring layer and lightly crease the bats where each bridge connects to the strip and to the bat.
TIP: Don’t fold the bats all the way down. You want them to look like they’re flying!
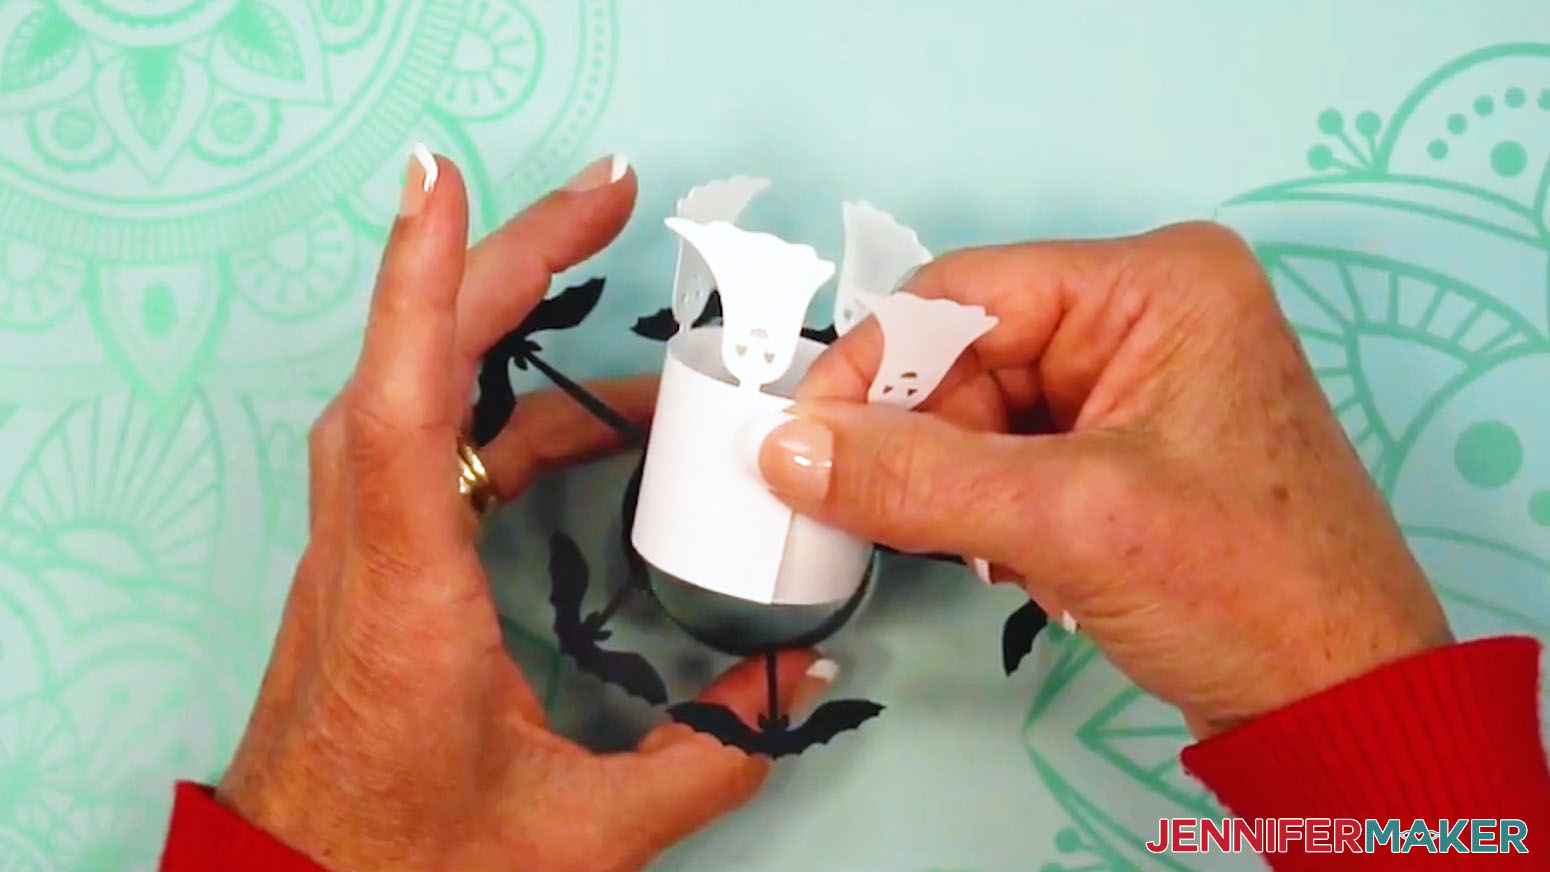
- Take the ghost layer and curve the ends of the bottom strip toward each other until they overlap slightly, forming a ring.
- Insert the ghost ring inside the bat ring, placing the overlapping area on the opposite side of the bat ring’s slotted tab.
- Fold down each of the ghosts where their tabs meet the top edge of the ring so they’re behind the bats.
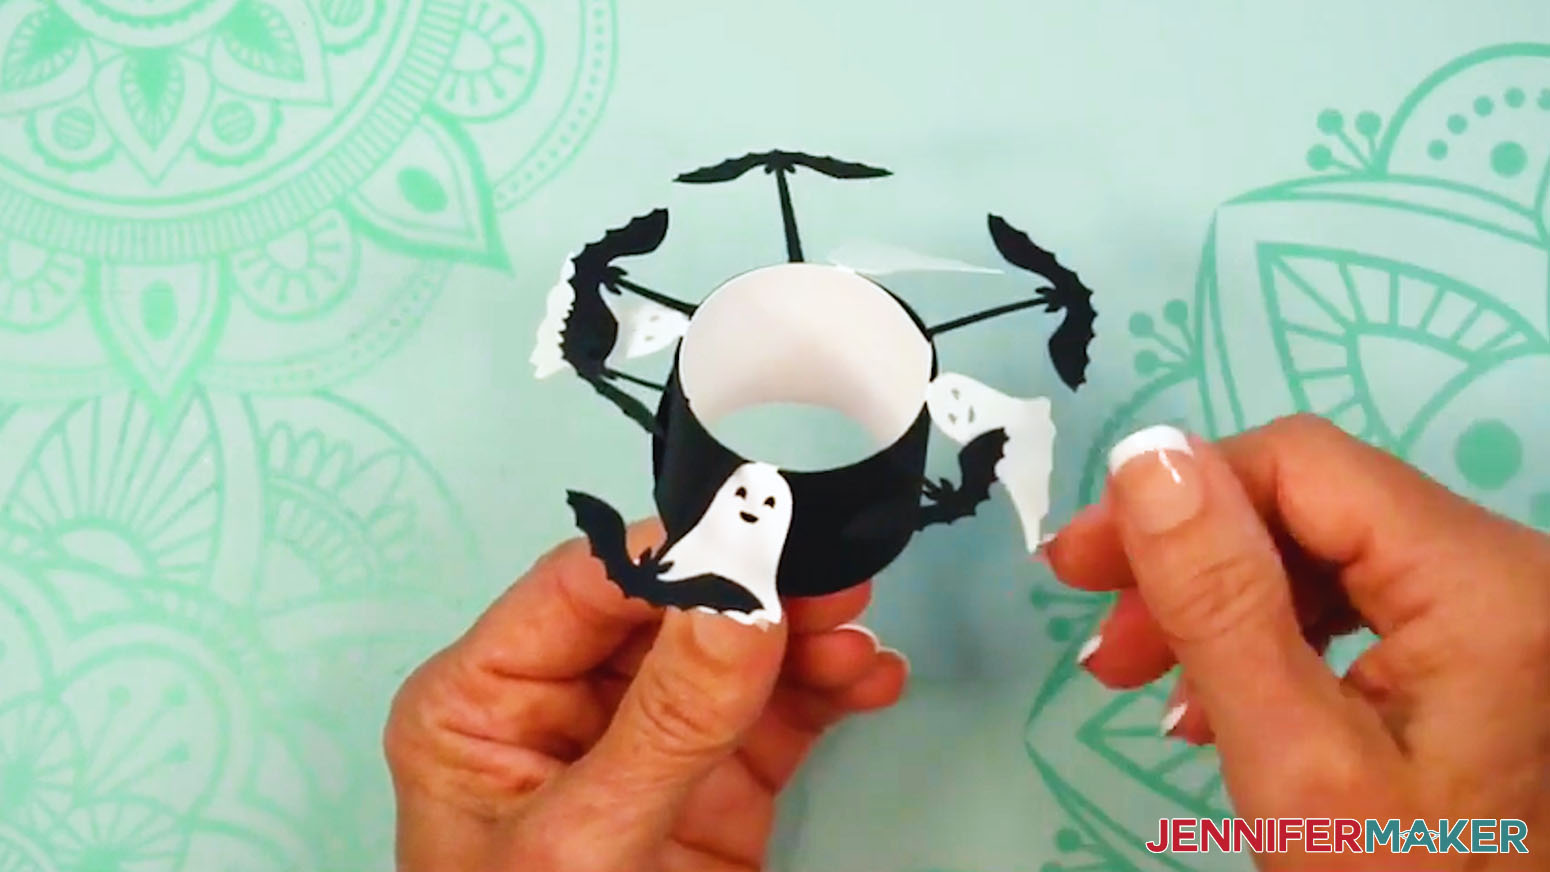
- Overlap the ends of the moon layer and insert it into the ghost ring.
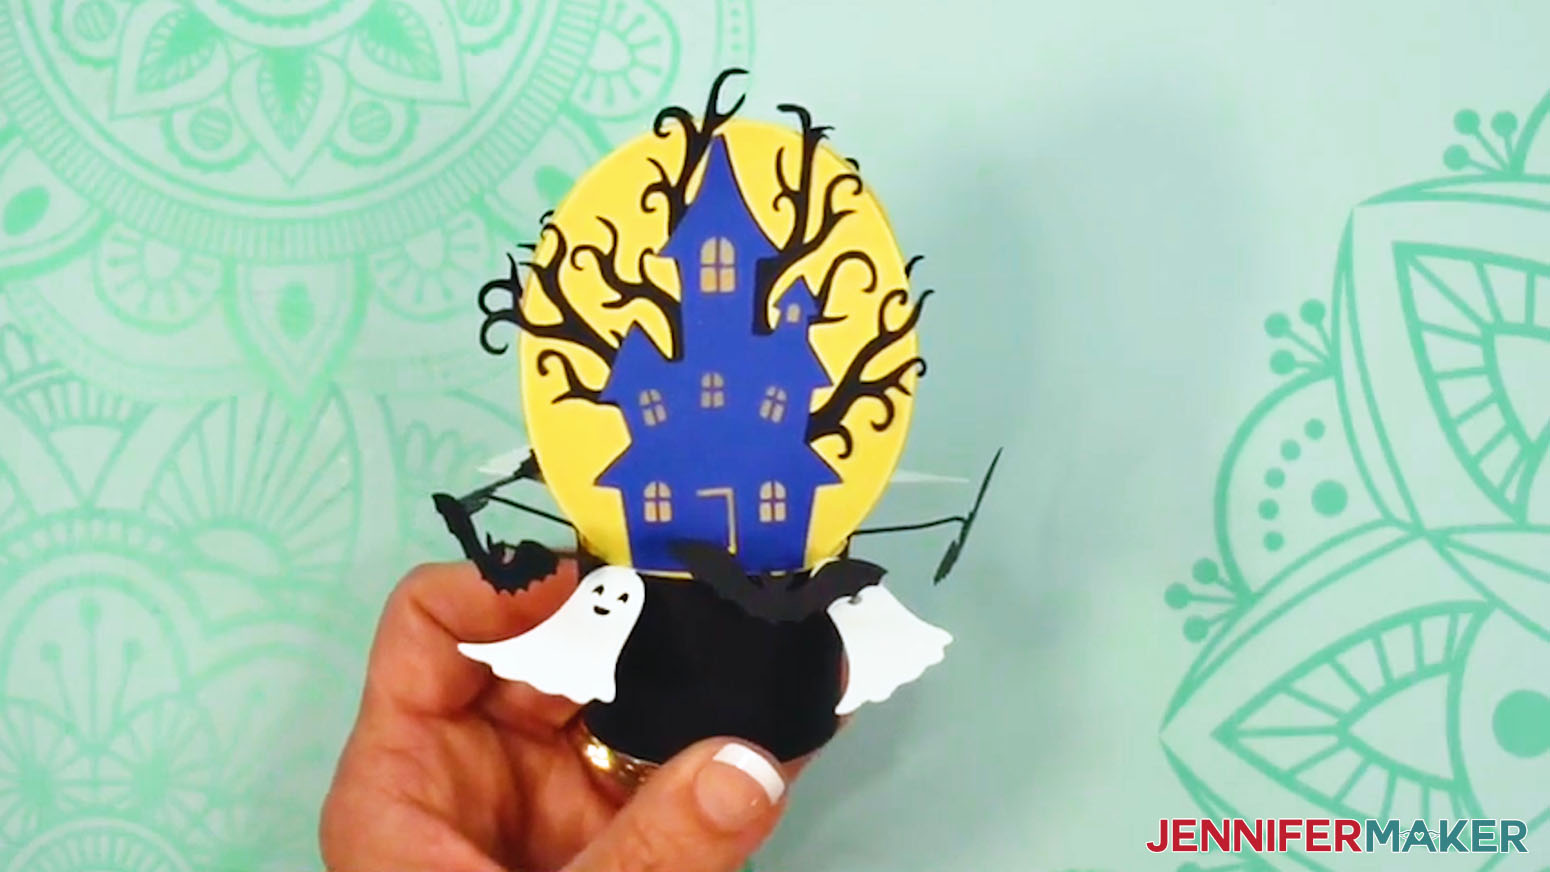
- Check your tea light’s battery, insert the tea light, attach a hook and loop dot to the moon layer, and shape your details.
- Your haunted house tea light holder is ready!
VARIATION: TURKEY TEA LIGHT HOLDER
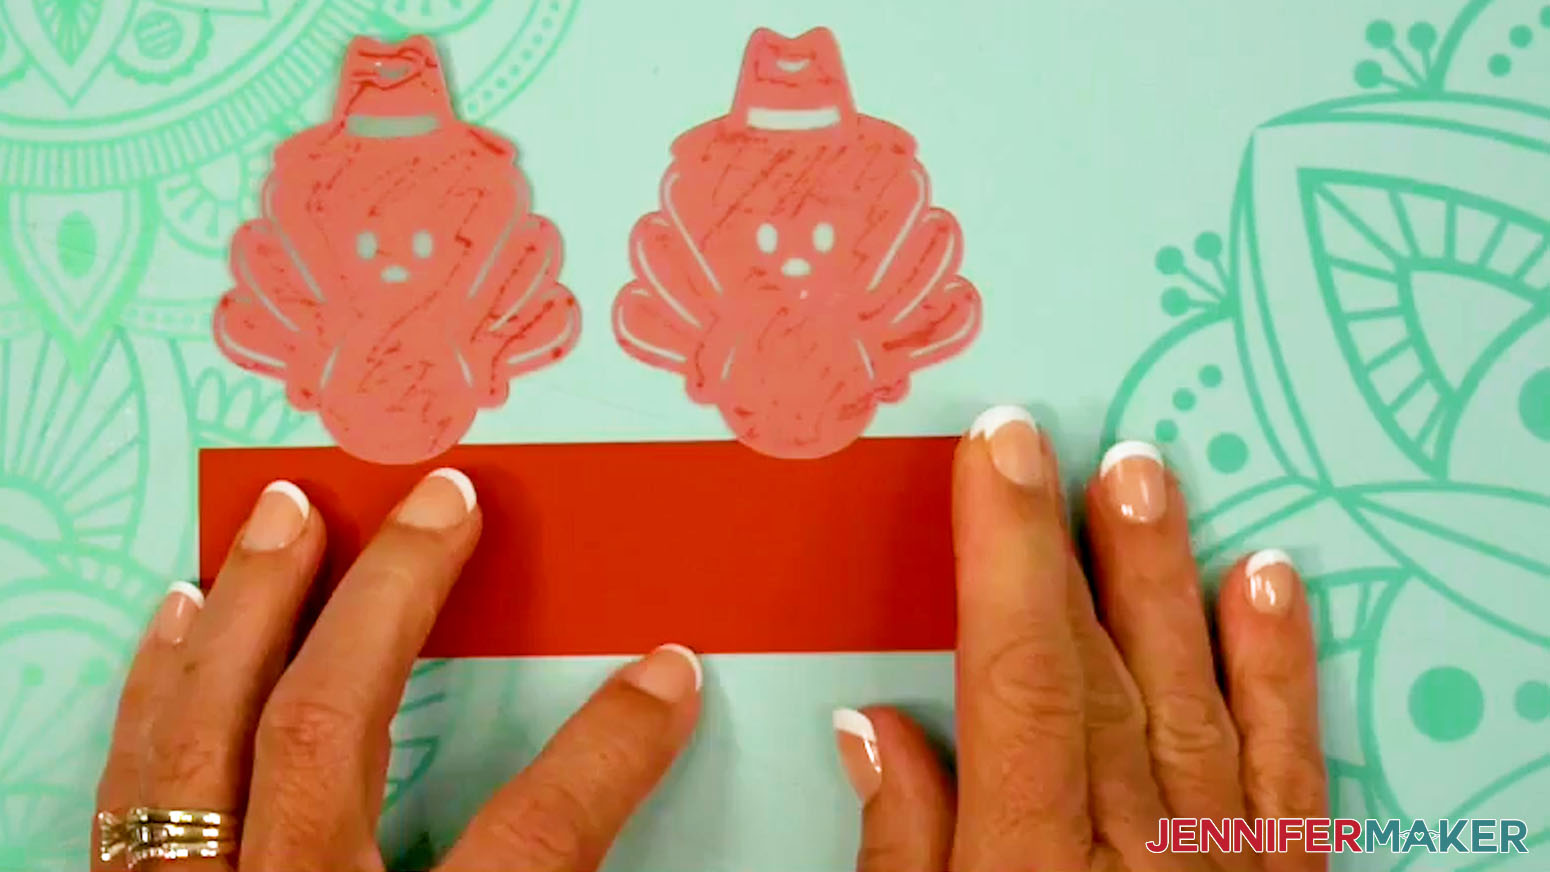
- Start with the turkey layer face down on your work surface.
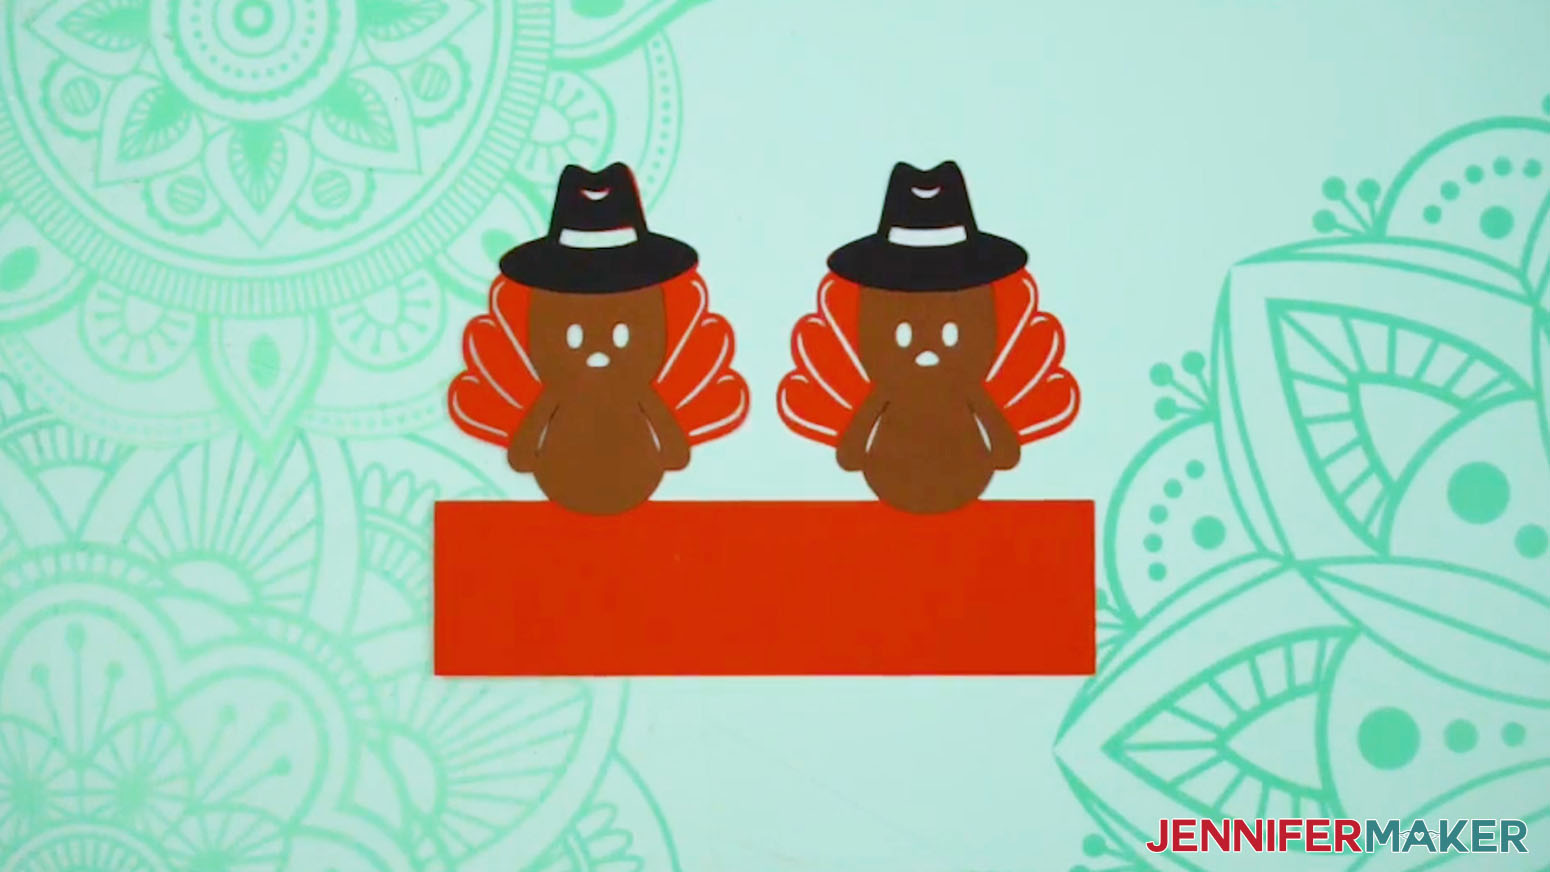
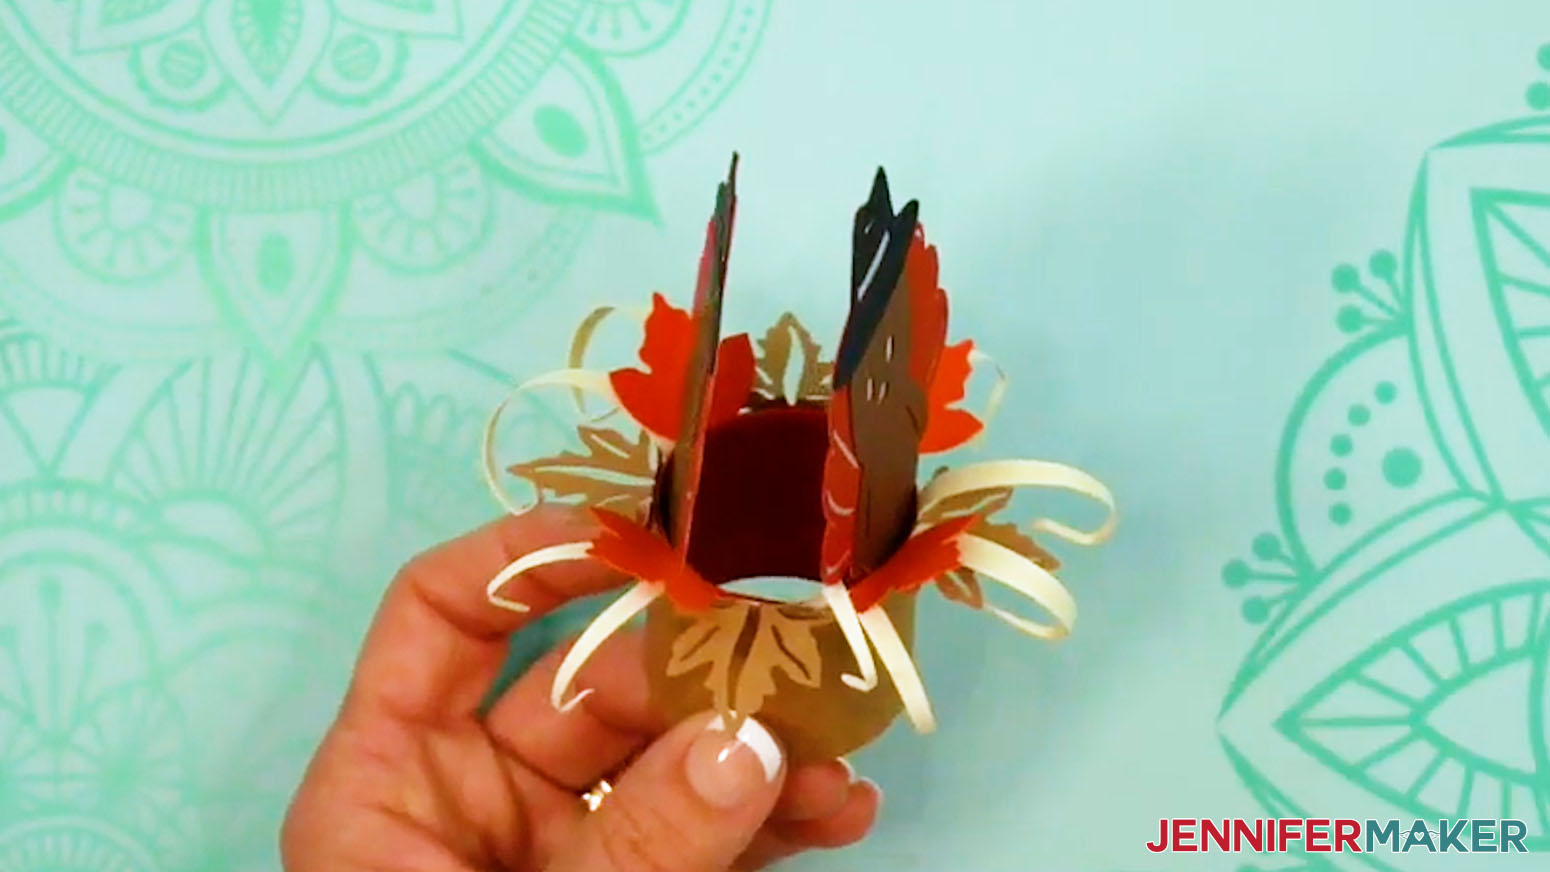
- Glue the vellum diffusers (if you cut them), hat pieces, and turkey pieces in place.
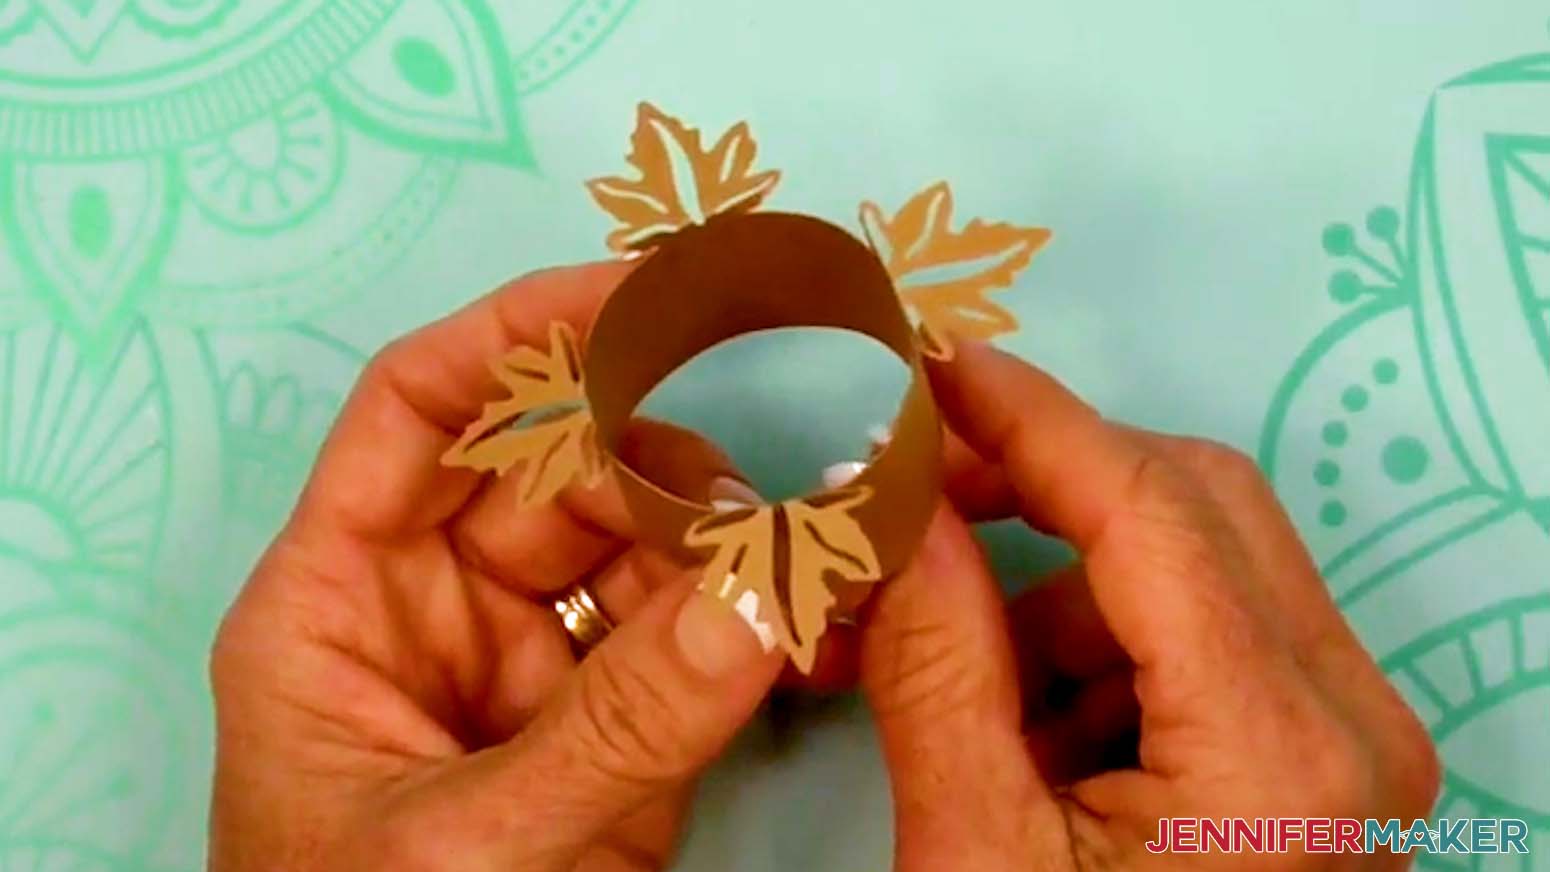
- Assemble the outer ring layer with leaf outlines.
- Overlap the ends and insert the grass layer, the solid leaves layer, and the turkey layer into the tea light holder.
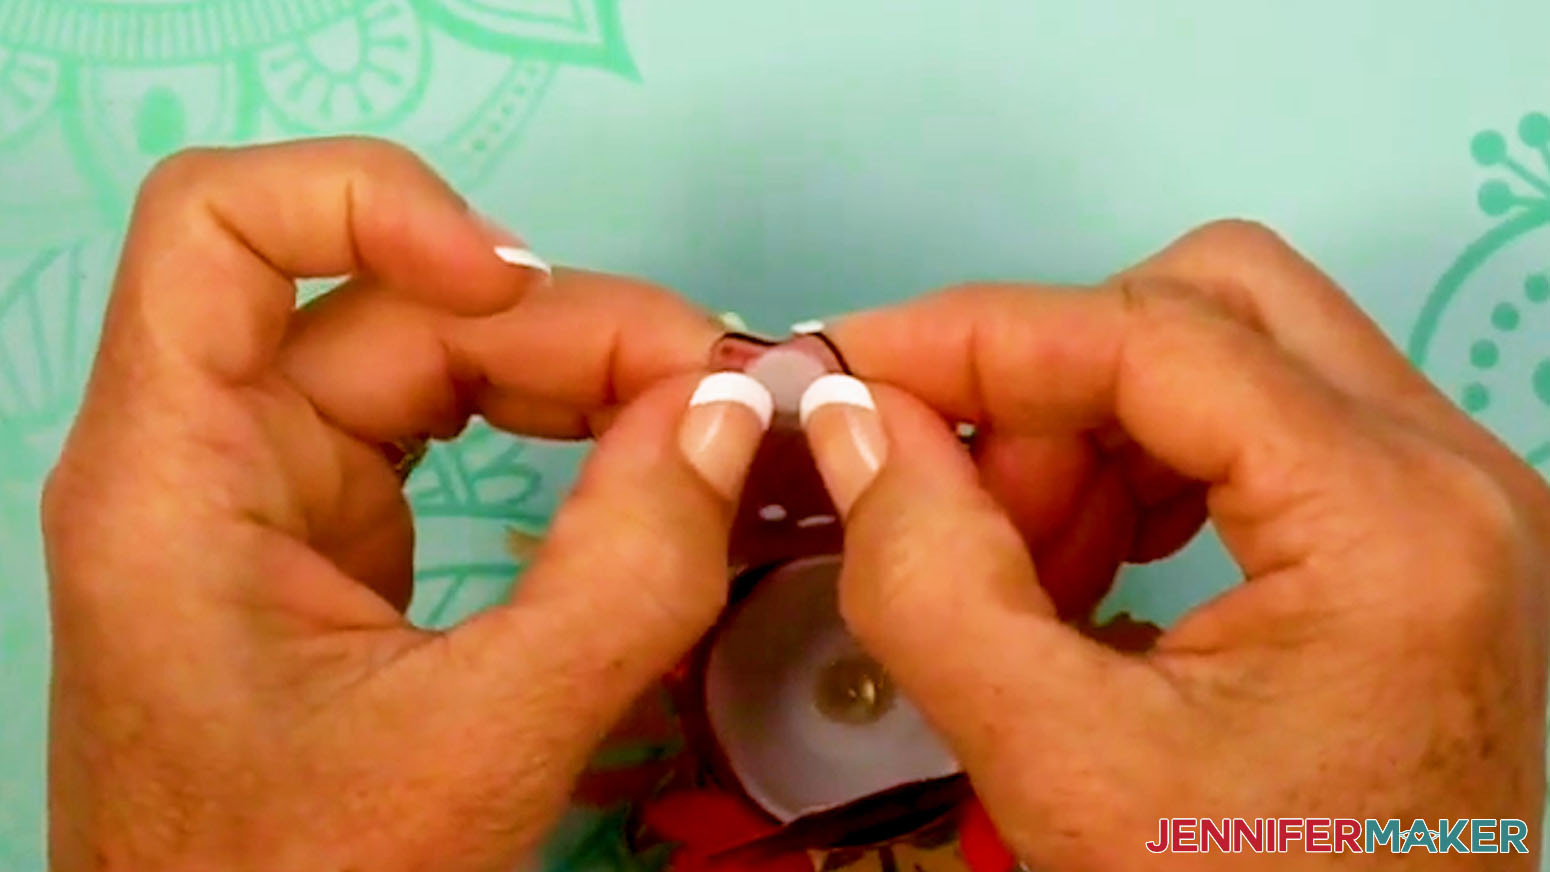
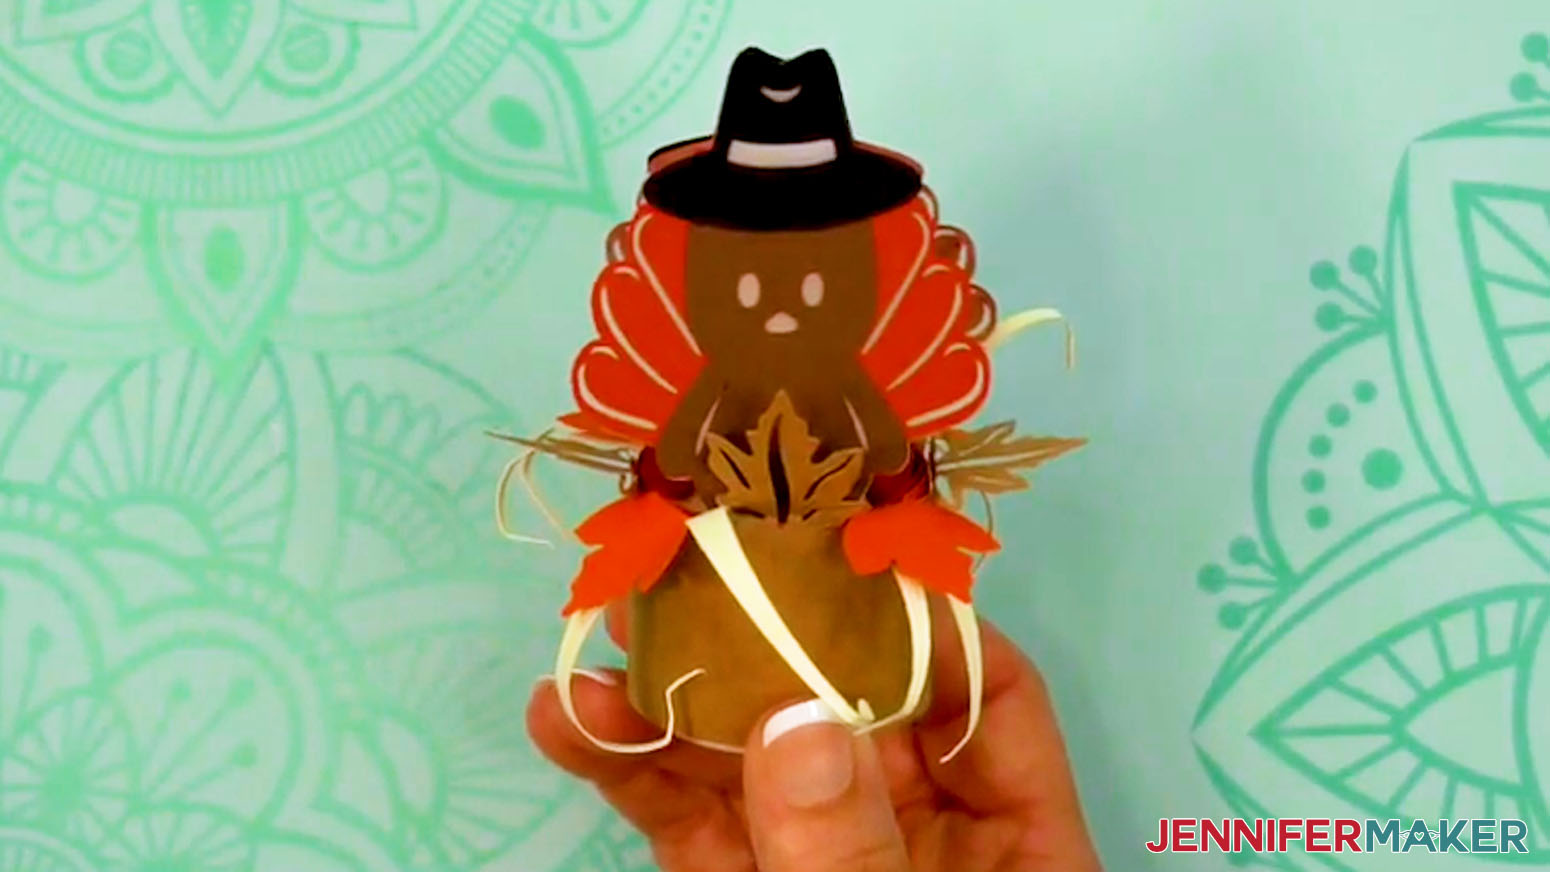
- Check your tea light’s battery, insert the tea light, attach a hook and loop dot to the turkey layer, and shape your details.
- Your turkey tea light holder is ready!
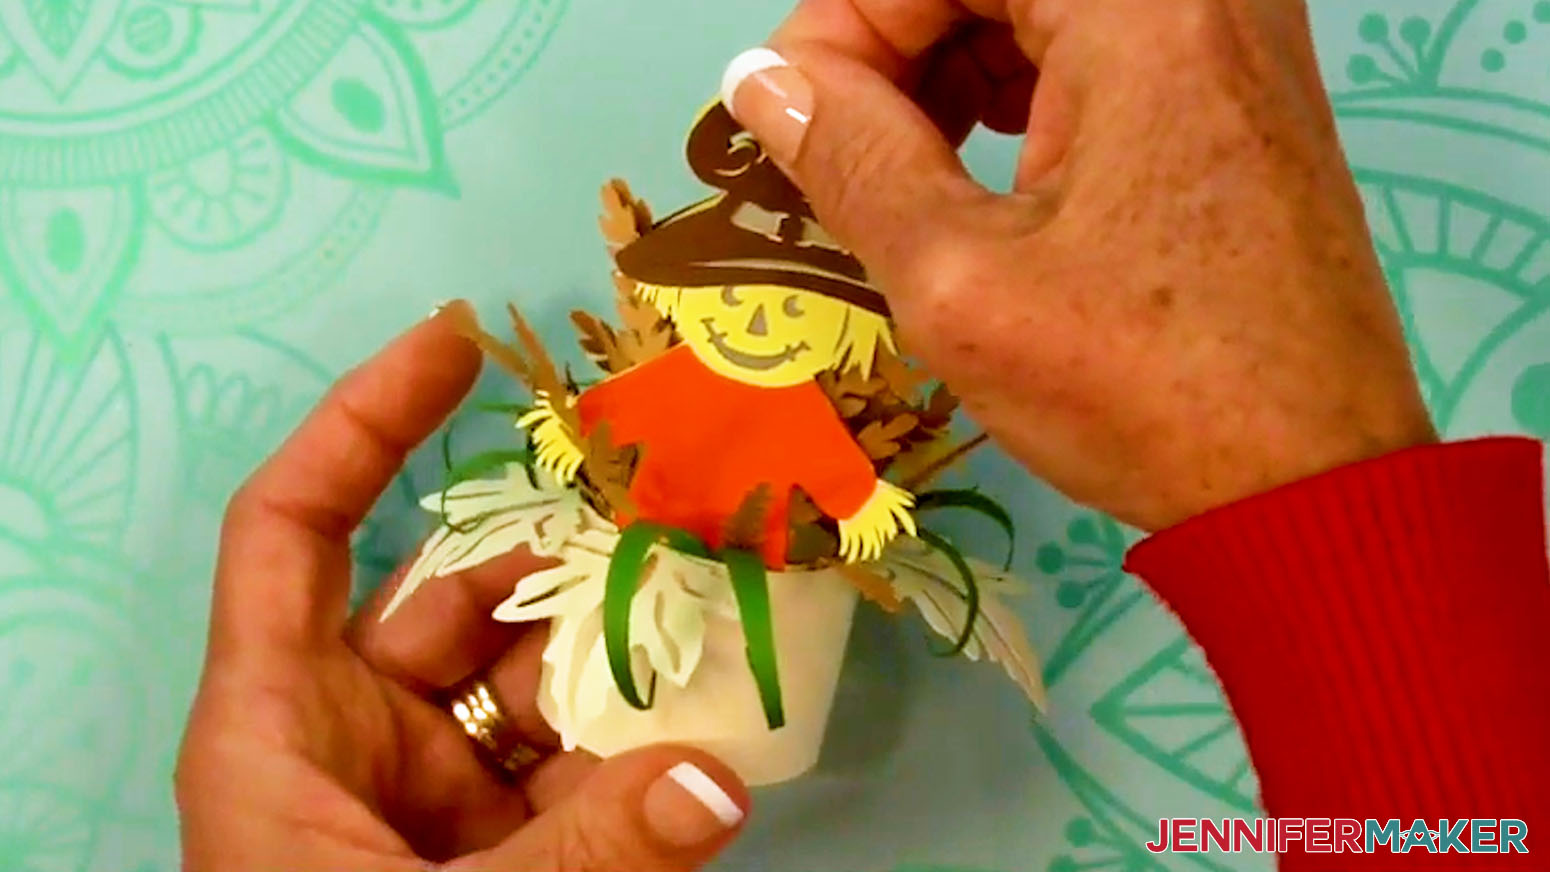
STEP 4: SHOW IT OFF
You now have an adorable fall tea light holder for seasonal lighting!
Notes
Finished Width: All outer rings measure 1.75" in diameter, but the size will be wider overall with decorations bent out. Finished Height: Corn: 4.2" Haunt: 4.54” Scarecrow: 4.21" Turkey: 4"
Answers to Your Questions About Making Fall Tea Light Holder Decorations
Q: Is there a way to create a custom fall tea light holder design?
A: You can learn how to create your own customized fall tea light holder in my ADVANCE program. I’ll show you exactly how I made the trick or treater design! Learn more about ADVANCE here!
Q: Can I use votive candles instead of tealights?
A: Yes, you can use these as tealight or flameless votive candleholders. LED votive candles look lovely behind the paper layers! Always use flameless LED candles with paper projects.
Q: What is the best setting to cut cardstock on Cricut?
A: I typically use the “Medium Cardstock” setting with “More” pressure to cut light and medium cardstock, and it works well! To cut heavier cardstock, I use the “Heavy Cardstock” setting, also with “More” pressure.
Q: What blade do you need to cut cardstock on Cricut?
A: I use my Premium Fine-Point blade for most of my Cricut projects, cardstock included. Clean the blade often and it will hold up for a long time!
Q: Can I make tea light holders without a Cricut?
A: Yes! It is much easier to cut the shapes precisely with a cutting machine, but along with SVG files, I’ve included DXF files for cutting machines and a PDF version in the free design folder so you can cut the pieces by hand with scissors or a craft knife.
Q: Can I resize the fall tea light holder SVGs?
A: My tea light holder design files are pre-sized to fit the LED tea lights in my materials list, but you can resize them to make a smaller or larger candle holder if desired. Just keep them grouped and resize the entire design together at once to make sure all the pieces will layer together correctly. I recommend doing some test cuts to make sure your designs are sized right to fit your flameless candles before cutting them from cardstock.
Q: Why is my Cricut not cutting all the way through my cardstock?
A: If you’re having trouble with getting smooth or complete cuts with your Cricut, your blade may need to be cleaned. Check out my Tips for Cleaner Cuts blog post to troubleshoot your cutting problems.
Q: How can I tell which weight my cardstock is if I lost the original packaging?
A: Find a piece of cardstock of a known weight, then compare it to the unknown pieces. The feel of each weight is very different, so the heavier the weight, the stiffer the cardstock.
Q: How should I clean and store my decorative tealight holders?
A: Since these are made of paper, you won’t need heavy cleaning; just a gentle swipe with a feather duster will do the trick. Store them flat in a cool, dry place to keep them in perfect shape for next year’s display. And don’t forget to remove the batteries from your LED tealight candles!
Q: I’ve downloaded the file and it opens to the fall tea light holder as a Chrome HTML document and not an SVG.
A: The file is probably automatically opening in the browser. Open a new project in Cricut Design Space and upload the SVG file to the Canvas, then you can follow the tutorial.
Q: How can I make my fall tea light holder more unique?
A: These tealight candle holders are totally customizable! You can pick your own colors and cardstock finishes for your special occasion. Sure, there’s a wide range of decorative candle holders at your local shops. But these are handmade, able to be customized, and are full of charm, which is something you just can’t get from mass-produced décor or store bought fall candles.
Q: Help! My Cricut Design Space screen looks different from yours!
A: If you’re using the latest version of Cricut Design Space, your screen may have slight variations from the screen you see on the video tutorial. Good news! All of the same functions are there, they may just be in different spots or have new icons. Pause the video if you need to find the changes.
Q: Can I make and sell tea light holders using your design?
A: If you want to use my fall tea light holder designs and project for commercial use, please familiarize yourself with my important licensing information before selling your crafts.
Get my free SVG/DXF/PDF files to make your own fall tea light holder!
(If you do not see the signup form above, click here.)
I absolutely love seeing your fall tea light holder creations! Once you’ve learned how to make my fall tea light holder, inspire others and share photos of your project in our Facebook group or tag me on social media with #jennifermaker.
Love,

Want to remember this? Save this Fall Tea Light Holder Tutorial to your favorite Pinterest Board!