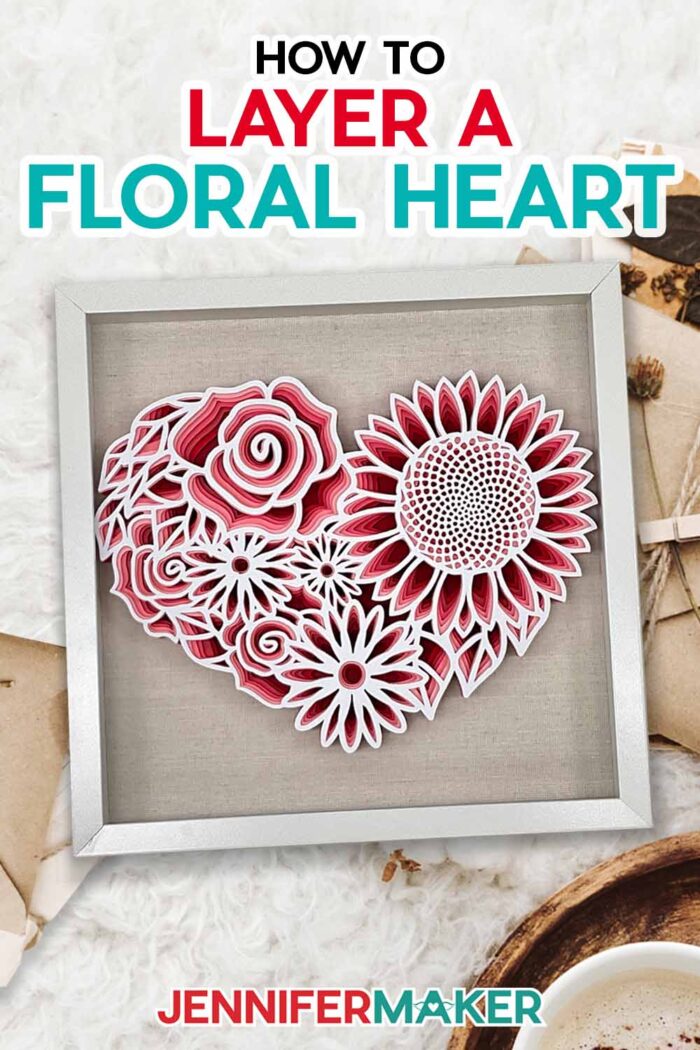
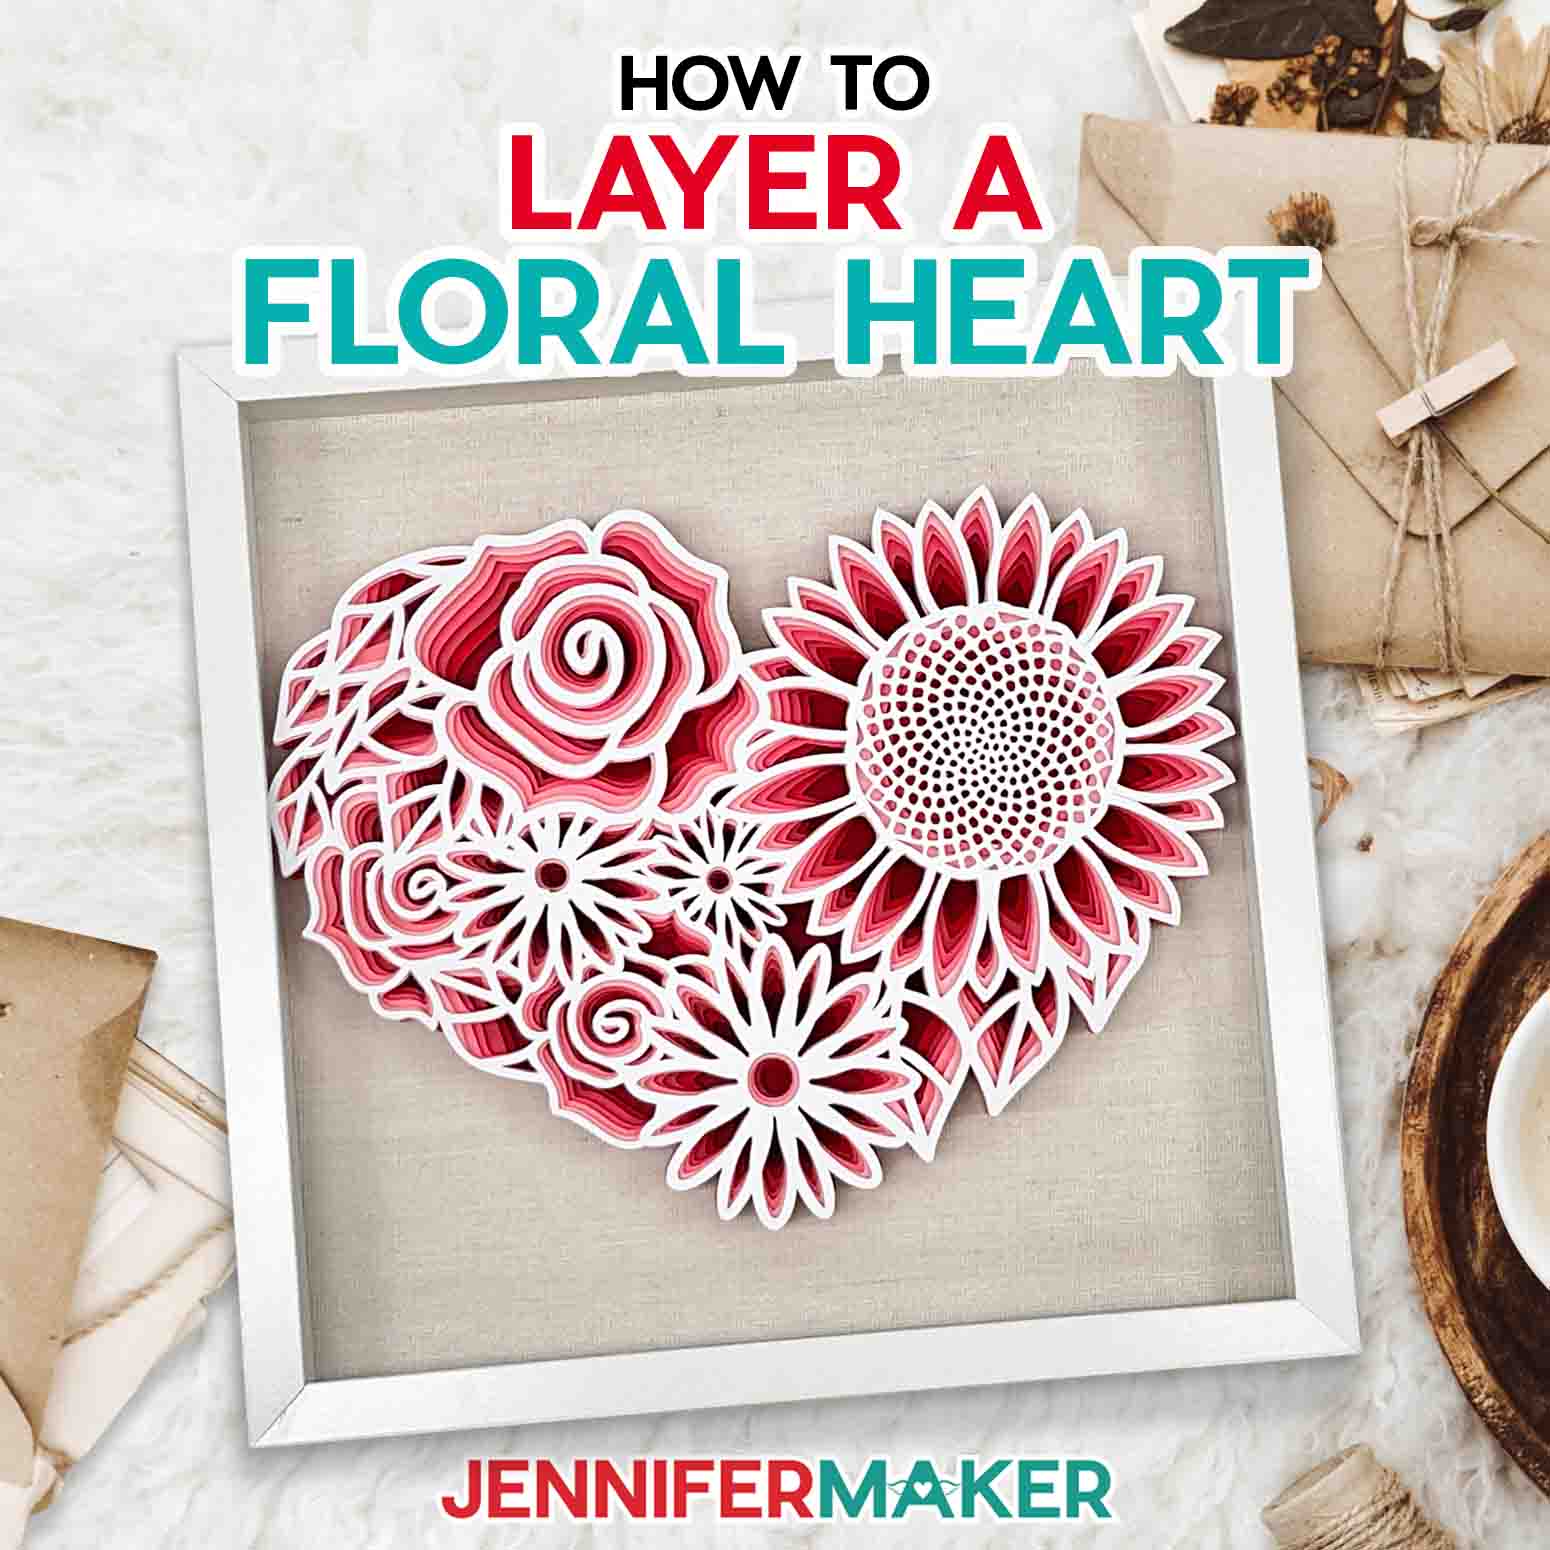
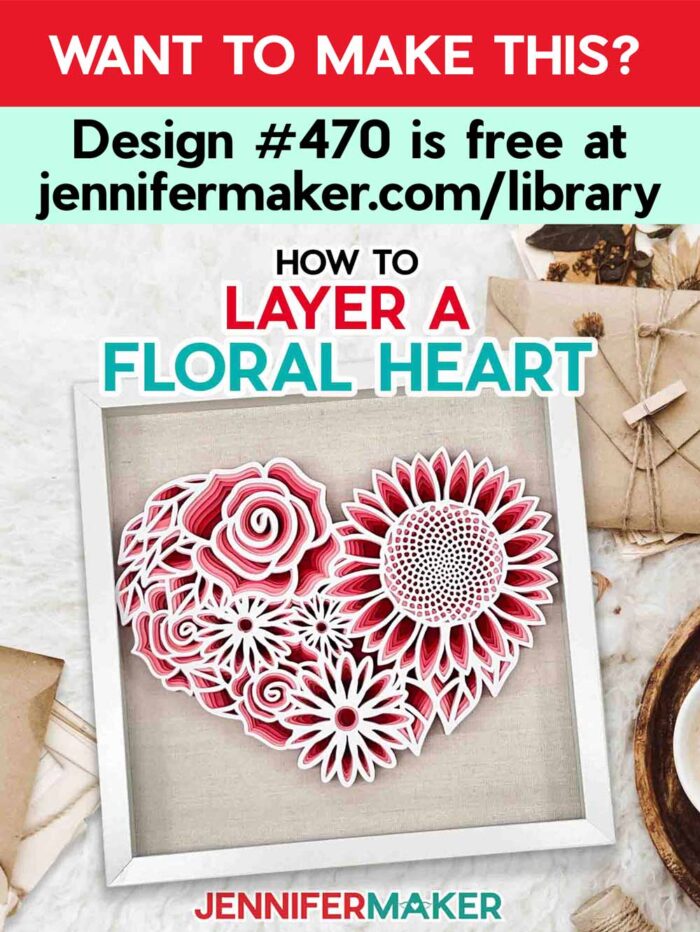
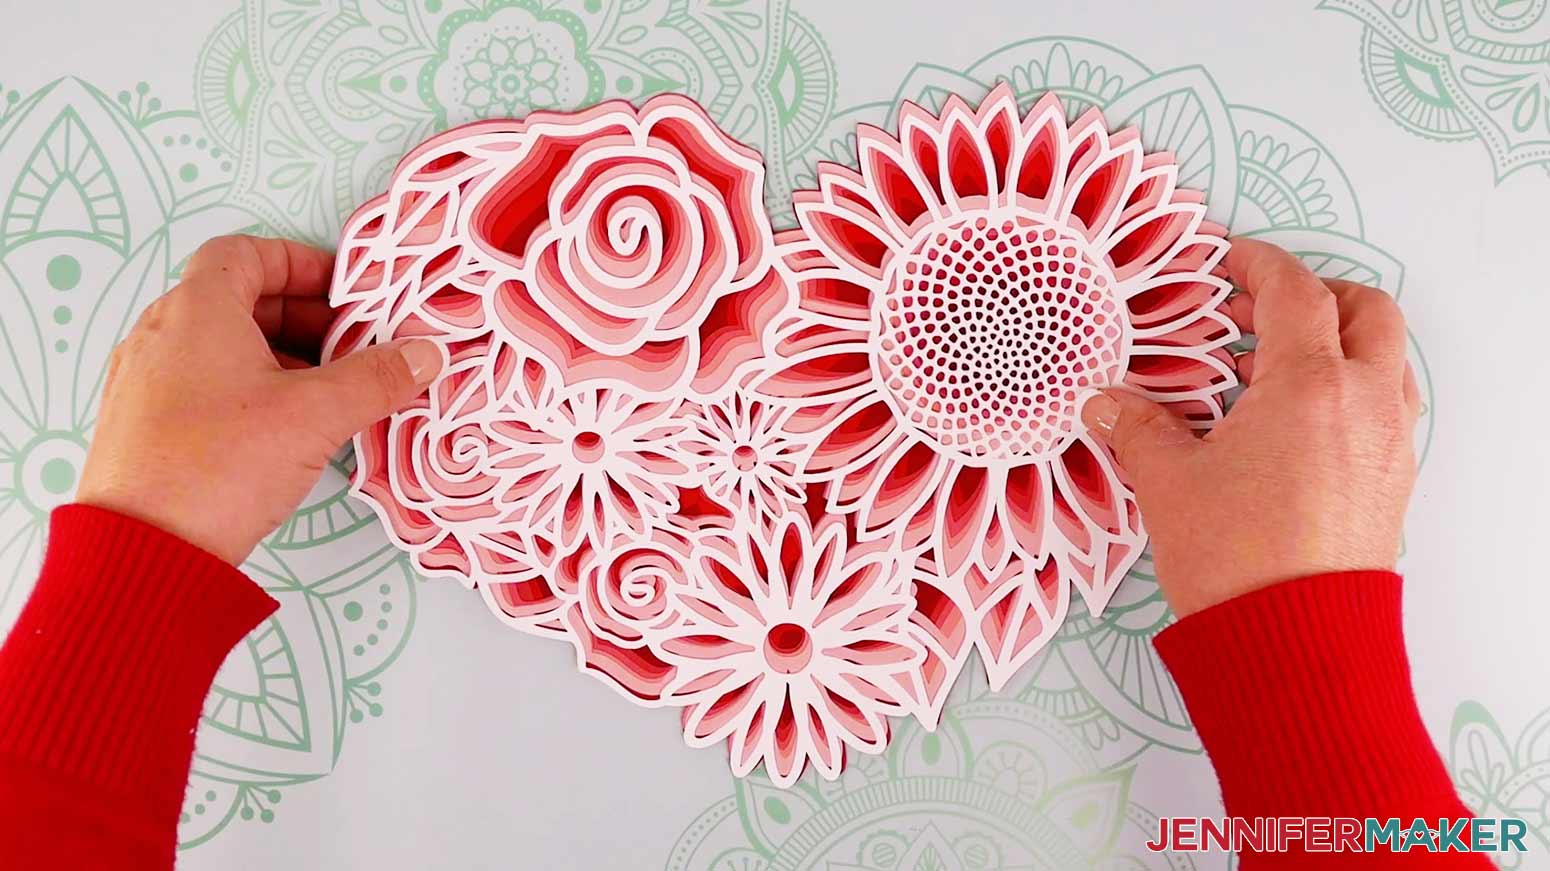
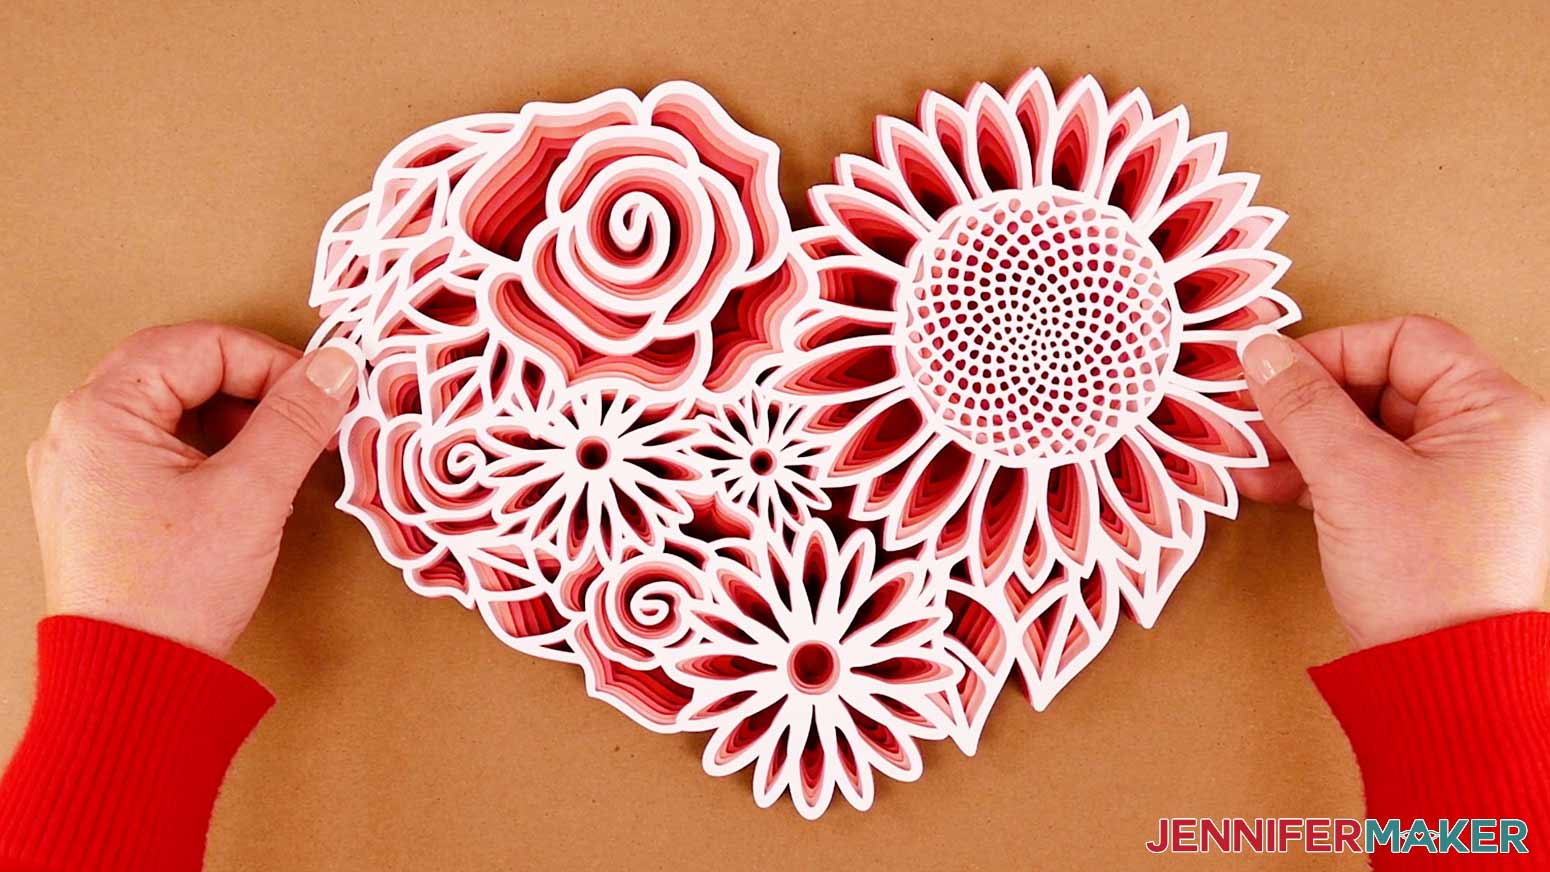
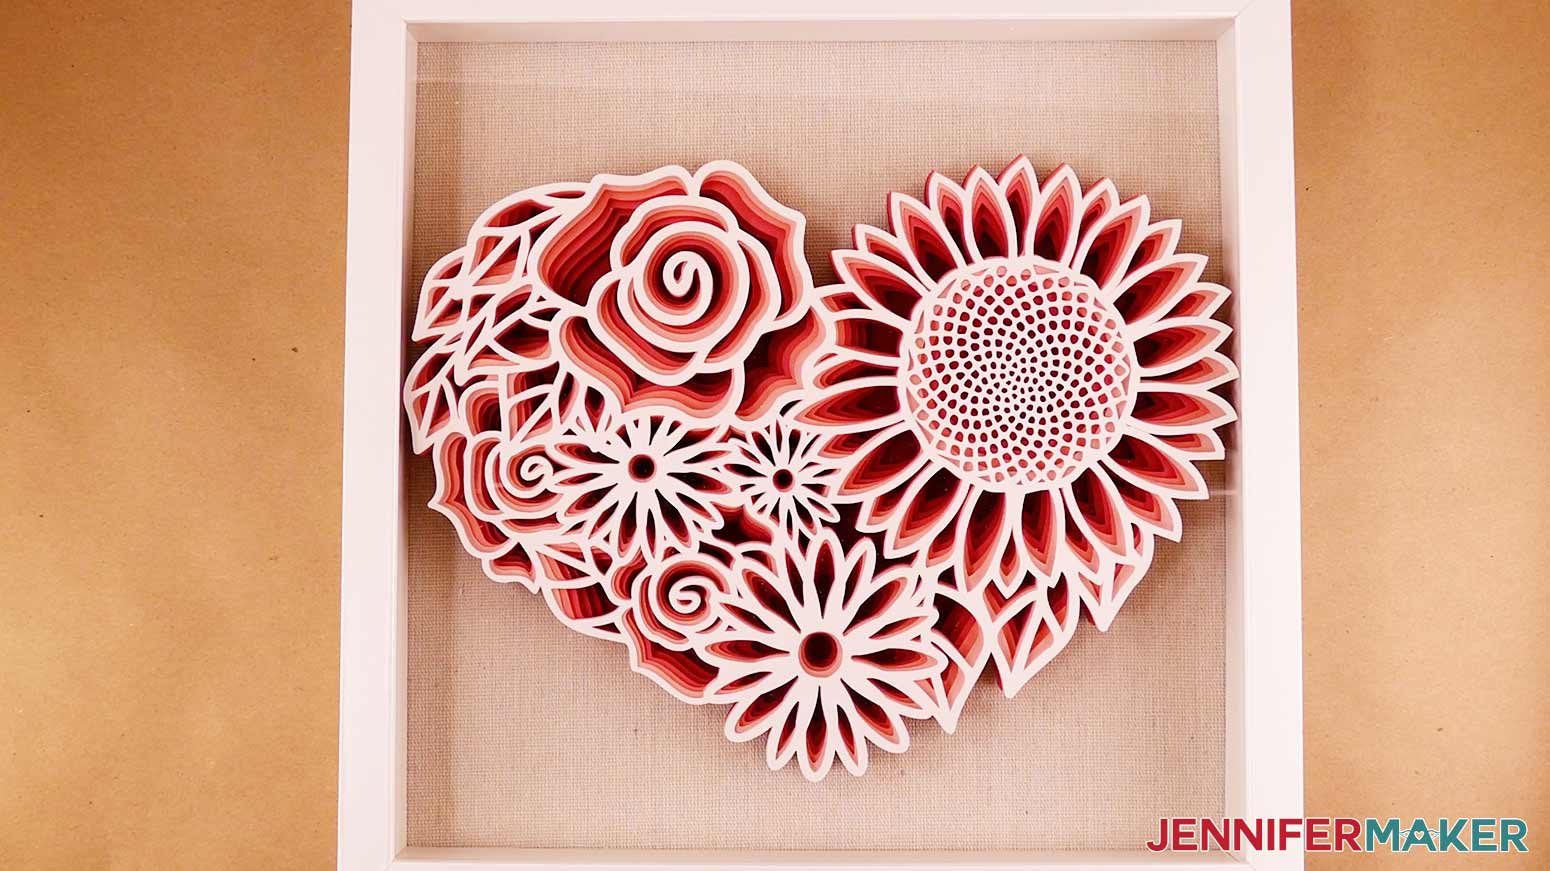
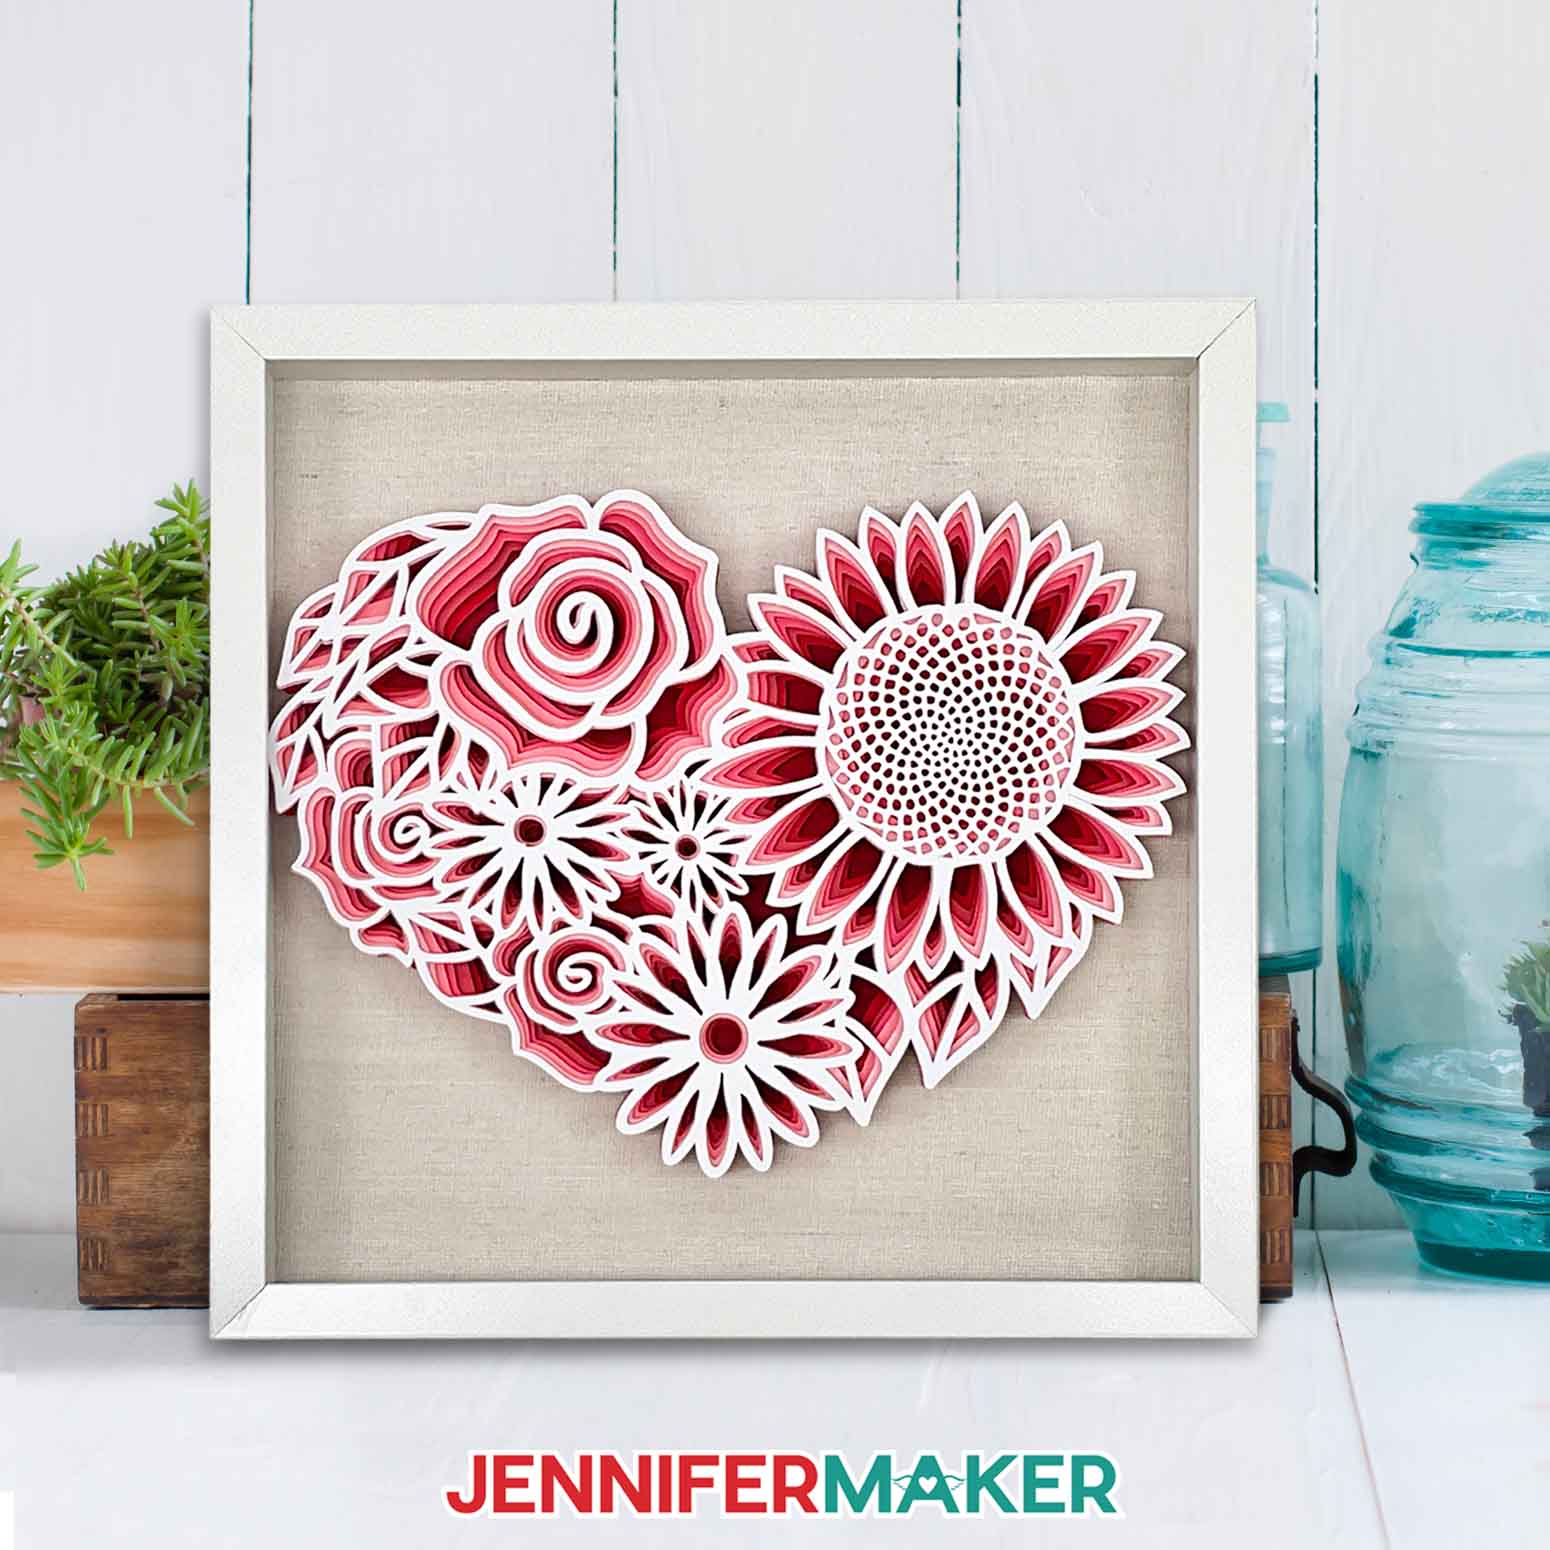
Create an intricate cut paper layered heart with flowers for beautiful decor!
The detailed, perfectly-aligned cuts you can make with a Cricut or other cutting machine always amaze me! I wanted to show my love with an intricate cardstock design perfect for a Valentine’s Day gift. My free floral heart SVG is a great way to practice getting cleaner cuts and aligning layers for beautiful results. I’d love to see how you customize it with different cardstock, display ideas, or even lights!
Want to save this project? Enter your email below and we’ll send the project straight to your inbox.
Watch my complete step-by-step tutorials on cutting and assembling my heart with flowers:

While cutting machines are impressive, they can cut slightly differently due to the many variables in papercrafting. So, while these papers, supplies, and settings worked well for me and my Cricut Maker 3, it’s not your fault if you don’t get the exact same results!
You may need to experiment to adjust for your machine’s slight variations, your paper, even your room’s humidity can impact a cut! In testing, I found that some papers cut perfectly with the fine-point blade, while others surprisingly needed the deep-cut blade. Don’t worry, I have lots of ideas in my Tips for Cleaner Cuts guide!
One of the most important tools for success is high-quality cardstock. Less expensive paper is made with shorter fibers, so it can rip instead of cut. Save yourself time, frustration, and even money (you’ll have fewer bad cuts) by investing in a few packs of good quality paper, like those in my material list.
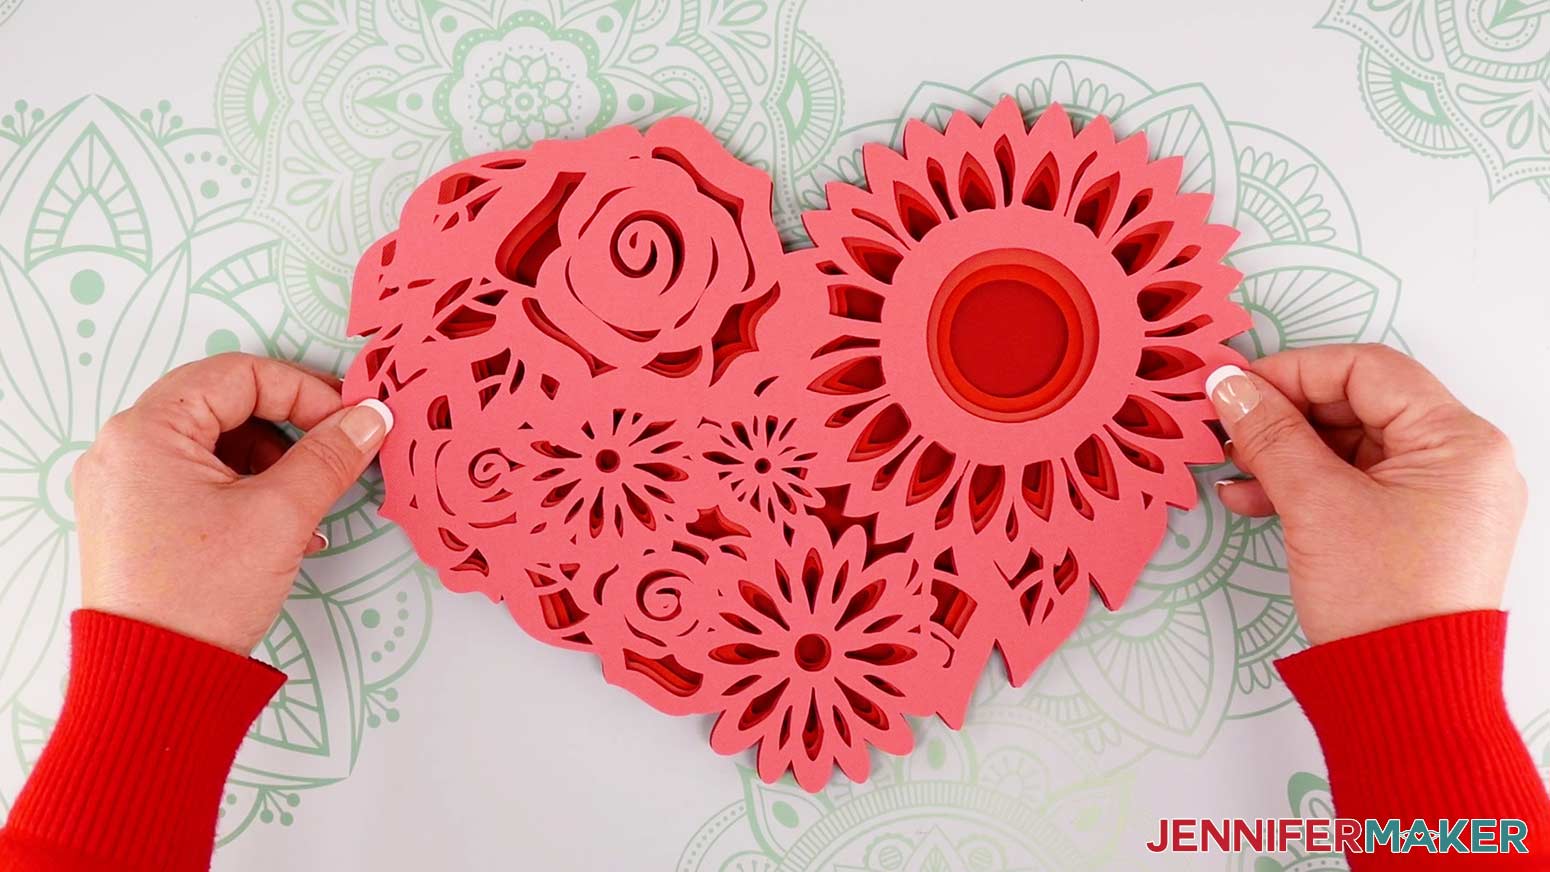
And when you’re picking cardstock, remember that one of the easiest ways to change the look of a project is to switch up your color! While I love the original version in shades of red, the floral heart SVG also looks stunning in purples, yellows, or greens! Just cut your lower layers in six shades of another color, then either stick with white for the top layer or keep experimenting. Try it out in a loved one’s favorite color for a custom Valentine’s Day present!

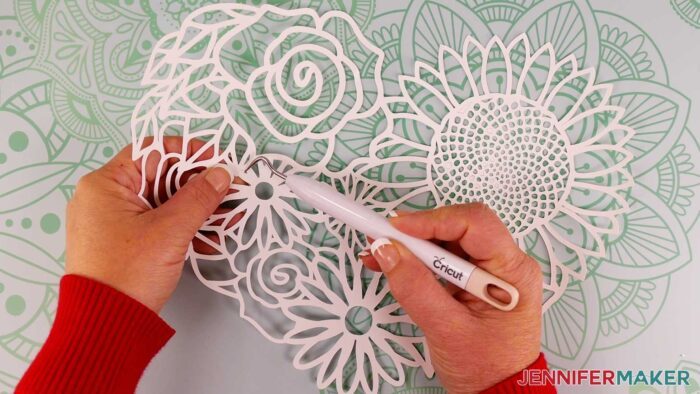
When you’re ready to cut, start with a clean cutting mat and make sure the paper stays put! I used a green StandardGrip machine mat and a brayer to really stick the paper down. When you remove the cut layers. remember to bend the mat away from the cardstock, not the other way around, and use a spatula to gently lift the delicate areas. That will help keep them from tearing or curling.
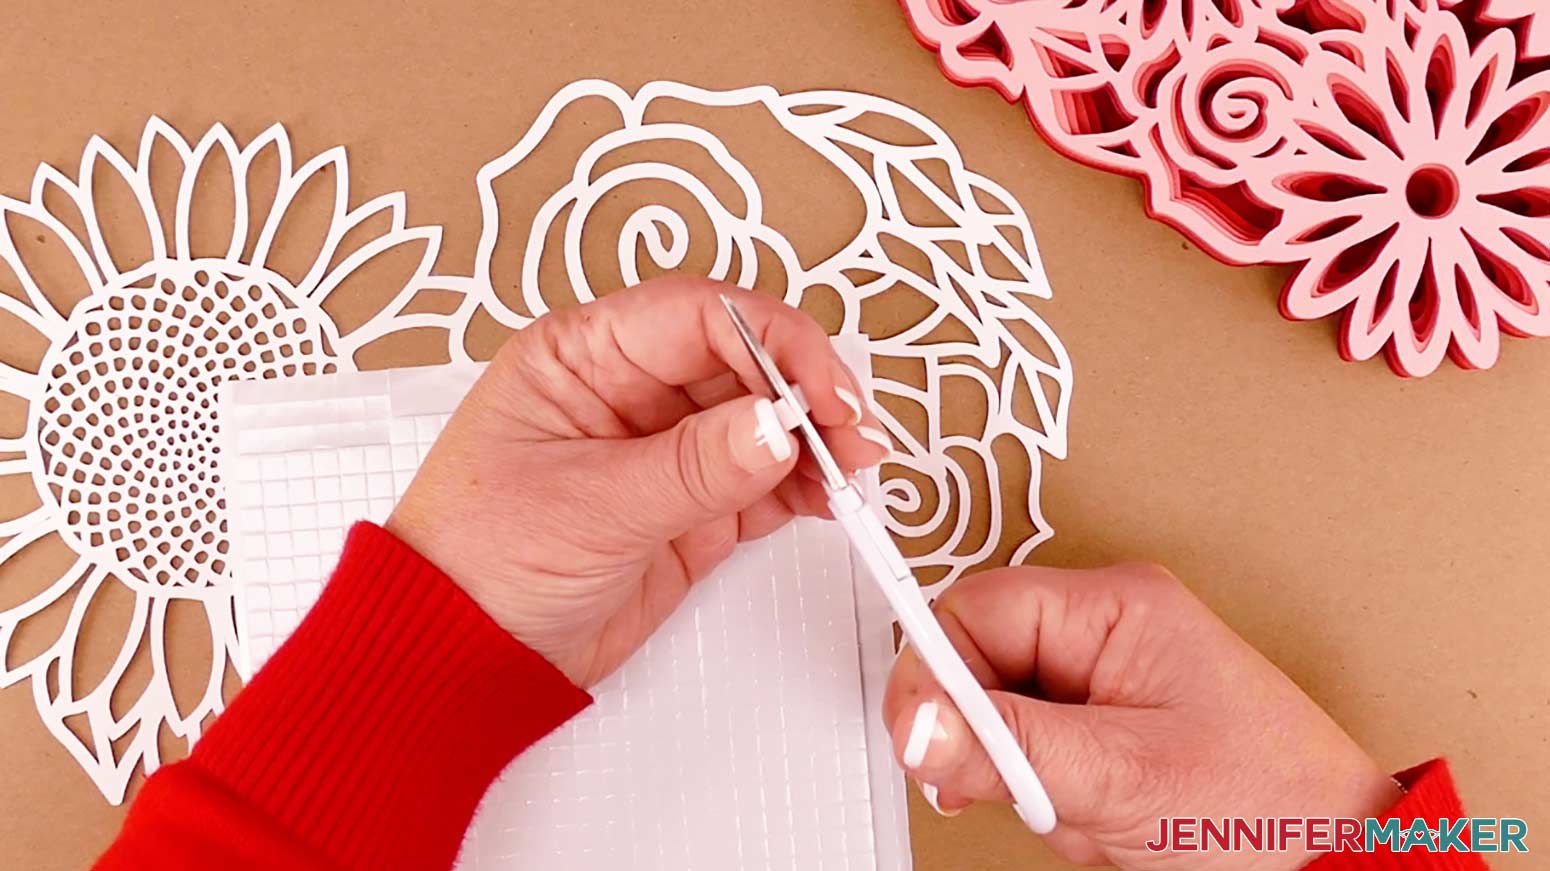
Occassionally, a cut shape might not be complete. That’s ok! Just lay the paper on a self-healing mat (or a clean cutting board) and carefully complete the cut with a craft knife.
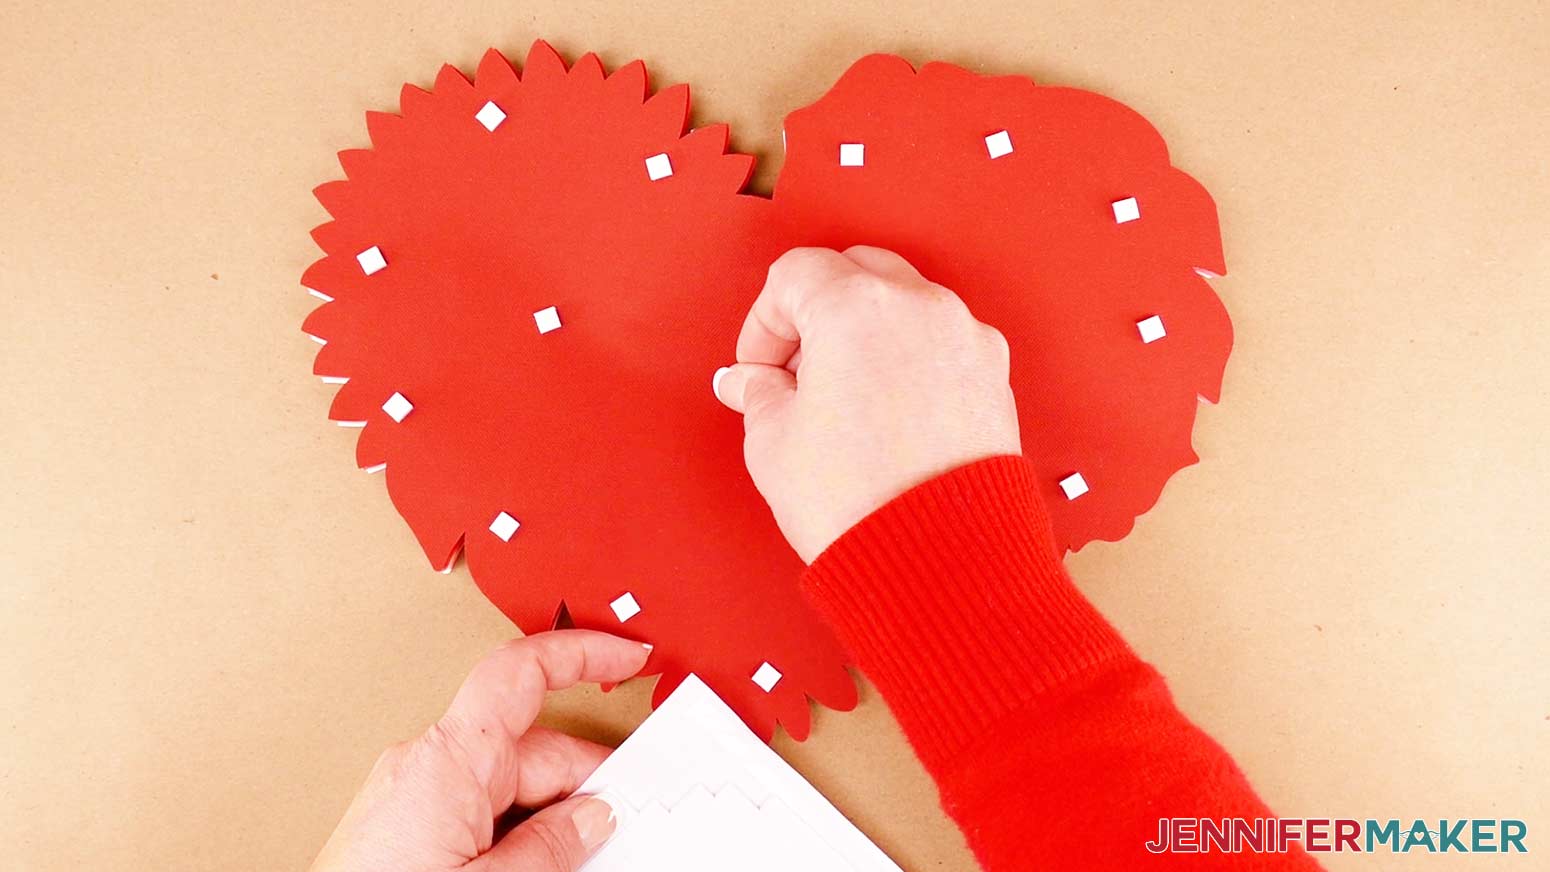
And before you add the next color of cardstock to the mat, remove ALL the tiny cutouts left behind. You cardstock needs to stay really still on the mat to ensure the cuts in each layer will line up. Any bit of paper between the two can make your blade jump or even tear the cardstock. I gently run a scraper or other flat tool (like an old gift card) over the mat after each cut, popping off the bits left behind. They make great confetti for shaker cards! If any pieces stay stuck in the design, your weeding tool can help poke them out without ripping the intricate layers.
Since the floral heart SVG is so intricate, cut the design at its original size, at least for your first try. While we designed the heart with flowers to fit in a 12″ x 12″ shadow box for wall art, I do hope you’ll share other ways to use it! If you have a different display method in mind, measure it with a ruler to make sure the layers will fit. But, making it much smaller without altering the layers will lose a lot of detail and the depth in the original design. For that reason, this design won’t work well on a Cricut Joy. But, I do have other intricate designs for the smaller machine, like a layered cardinal!
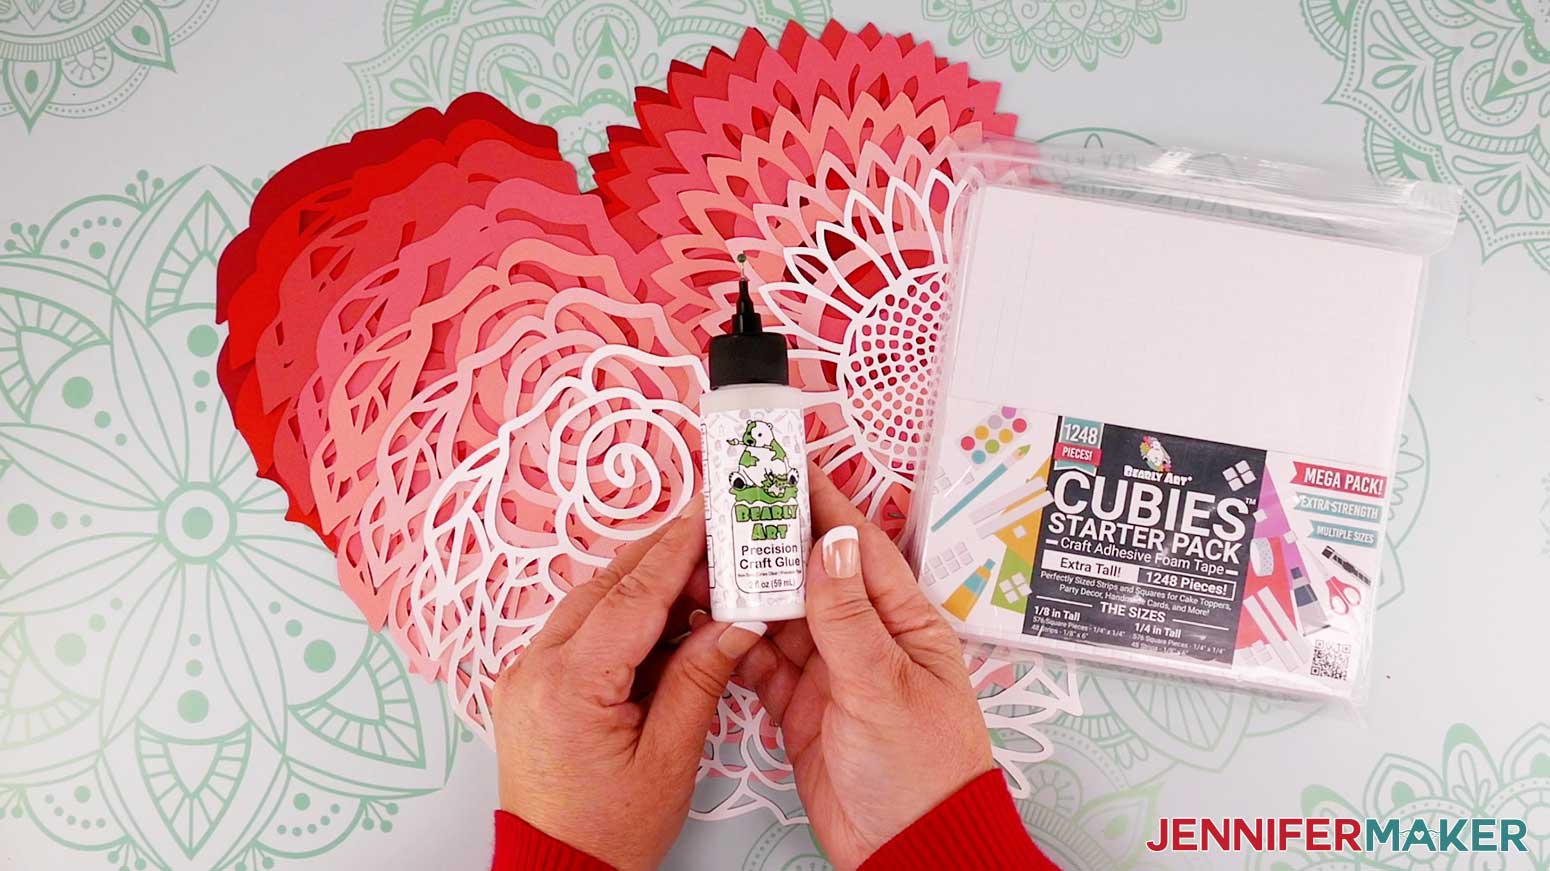
When you’re ready to put the layers together, You can use good-quality craft glue (I’m a fan of Bearly Art Precision Craft glue!), adhesive foam spacers, or a combination of the two! Watch my video for assembly tips and take your time aligning each layer for the best results. It’s worth taking your time!
Ready to make beautiful layered paper art with my floral heart SVG? I’m super excited to show you how! This post contains some affiliate links for your convenience (which means if you make a purchase after clicking a link I will earn a small commission but it won’t cost you a penny more)! Read my full disclosure policy.
Materials to Make a Paper Heart With Flowers
View my Amazon shopping list with the exact items we used to make this project!
- 65-80 lb, 12″ x 12″ cardstock – I used 6 sheets of red tones and 1 sheet of white
- 12″ x 12″ Shadow Box Frame
- A method to cut your cardstock: I used the amazing Cricut Maker 3, but you can also use a Cricut Maker series, Cricut Explore series, or the Venture
- Fine-Point Blade
- Deep-Point Blade – optional, but useful if the Fine Point Blade is tearing textured or thick cardstock
- Green StandardGrip Mat (12″ x 12″)
- Brayer Tool
- Spatula
- Weeding Tool
- Scraper
- Scissors -OR- Cricut TrueControl Knife -AND- Self Healing Cutting Mat
- Craft Glue and/or Adhesive Foam Squares
- Ruler
- Design #470 – My free SVG/PDF/DXF design files available in my free resource library – get the password by filling out the form at the bottom of this page
How to Make a Layered Floral Heart SVG Decoration
Floral Heart SVG
Create a beautiful offset-layered Floral Heart that is perfect for display or gift giving.
Materials
- 6 Sheets of 65-80 lb. cardstock -- I used Cricut Cardstock Sampler 80 lb, Red Tones - 12" x 12" pack (one of each color)
- 1 Sheet 12" x 12" 80 lb White Cardstock
- 1 Each 12" x 12" Shadow Box Frame
- Design #470 (My free SVG/PDF/DXF design files available in my free resource library - get the password by filling out the form at the bottom of this page)
Tools
- A method to cut your cardstock: I used the amazing Cricut Maker 3, but you can also use the Cricut Maker, or Cricut Explore Series
- Fine-Point Blade
- Deep-Point Blade - useful if the Fine Point Blade is tearing textured or thick cardstock
- Cricut Green StandardGrip Mat (12″ x 12″)
- Brayer Tool
- Spatula
- Weeding Tool
- Scraper
- Scissors -OR-
- Cricut TrueControl Knife -AND-
- Cricut Self Healing Cutting Mat
- Bearly Art Foam Squares -OR-
- Bearly Art Glue
- Ruler
Instructions
STEP 1: GET MY FREE FLORAL HEART FILE
First, download my Floral Heart SVG/PDF/DXF files from my free resource library. It's Design #470.
Each file includes all seven pieces that make this beautiful, layered design.
Upload the SVG to Design Space. To do so, click “Upload” on the bottom left of the menu next to your Canvas, then click “Upload Image.”
Tip: If you're not sure how to upload an SVG cut file to Cricut Design Space, watch this helpful video training series I made. If you're on an iPhone or iPad, here's how to download and upload SVG files to the Cricut Design Space app.
To add the Floral Heart to your Canvas, select the image in the preview area, then select "Add to Canvas."
You can zoom out to see the design by clicking on the minus (-) sign on the lower left.
STEP 2: PREPARE YOUR DESIGN FILES
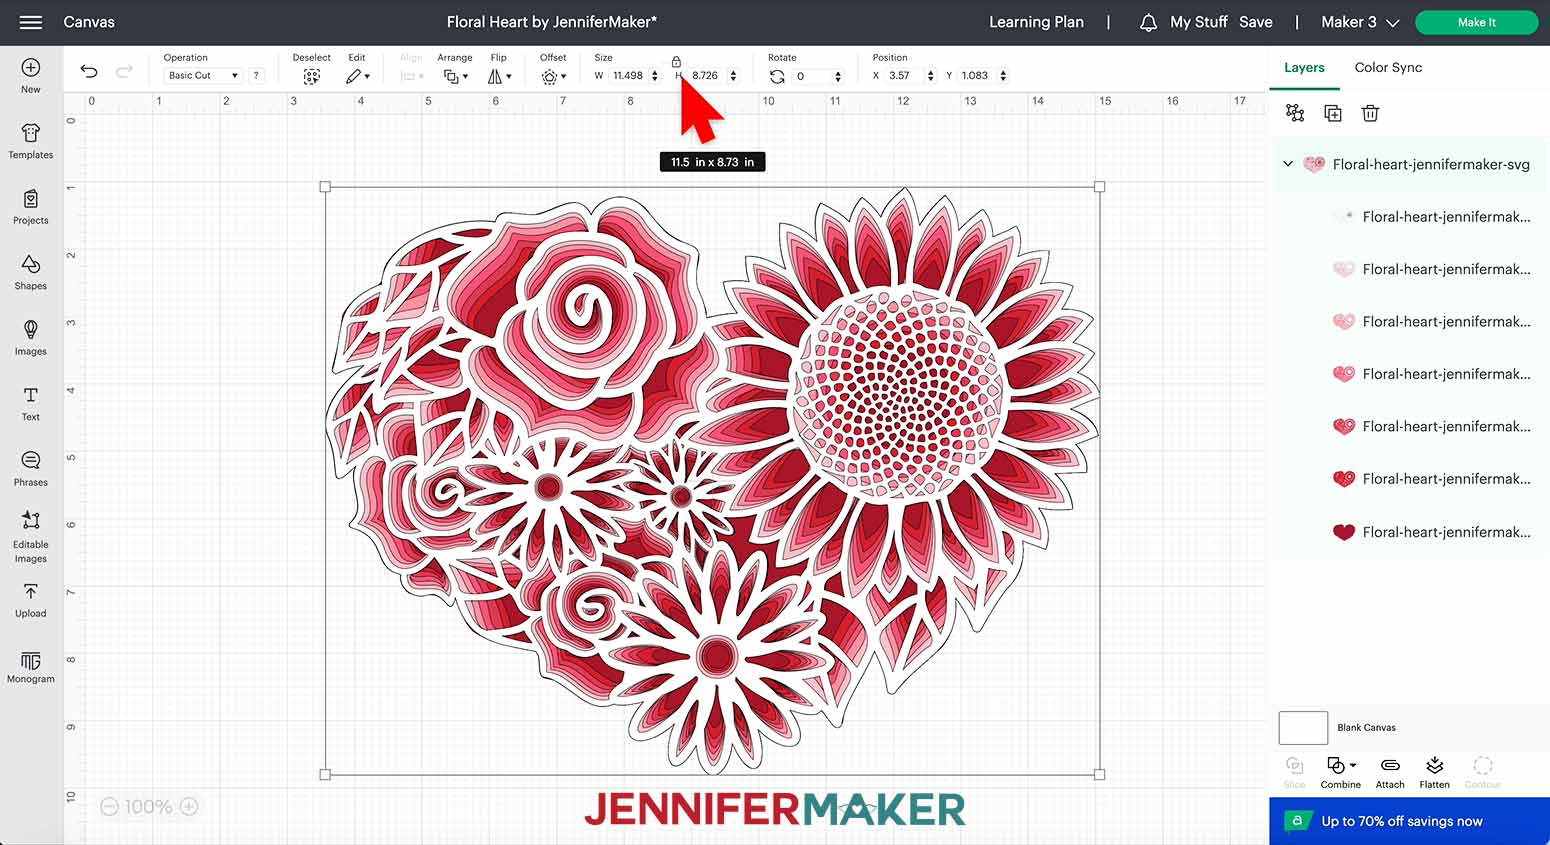
This is what my Floral Heart SVG file looks like when uploaded to Cricut Design Space.
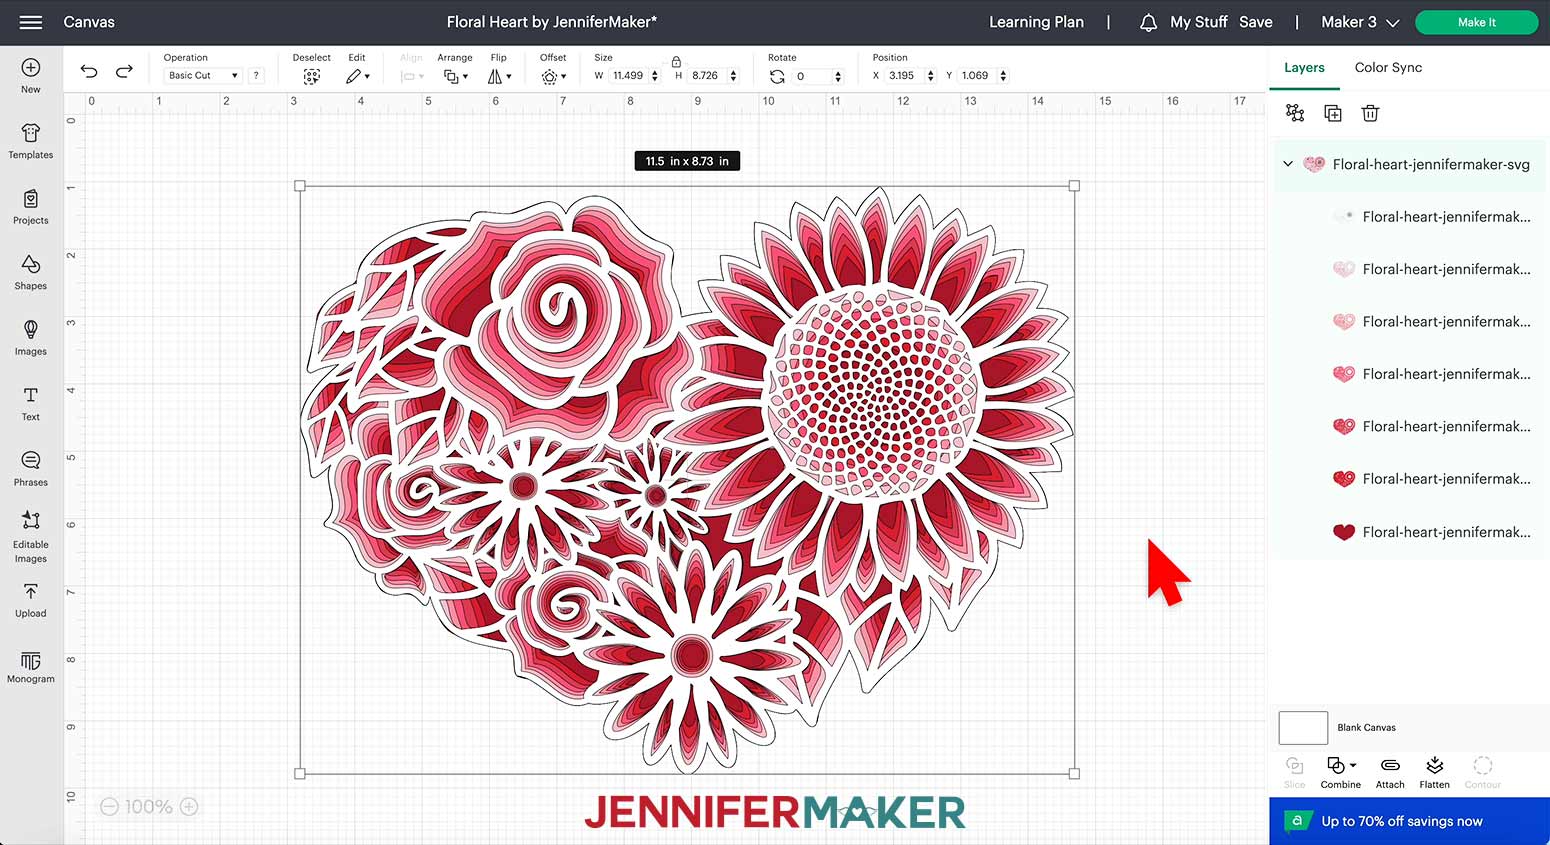
The design is set up to make one Floral Heart approximately 11.5” wide by 8.73” tall.
Before clicking “Make It,” be sure this size will fit inside your frame or in the space where you intend to display your finished Floral Heart.
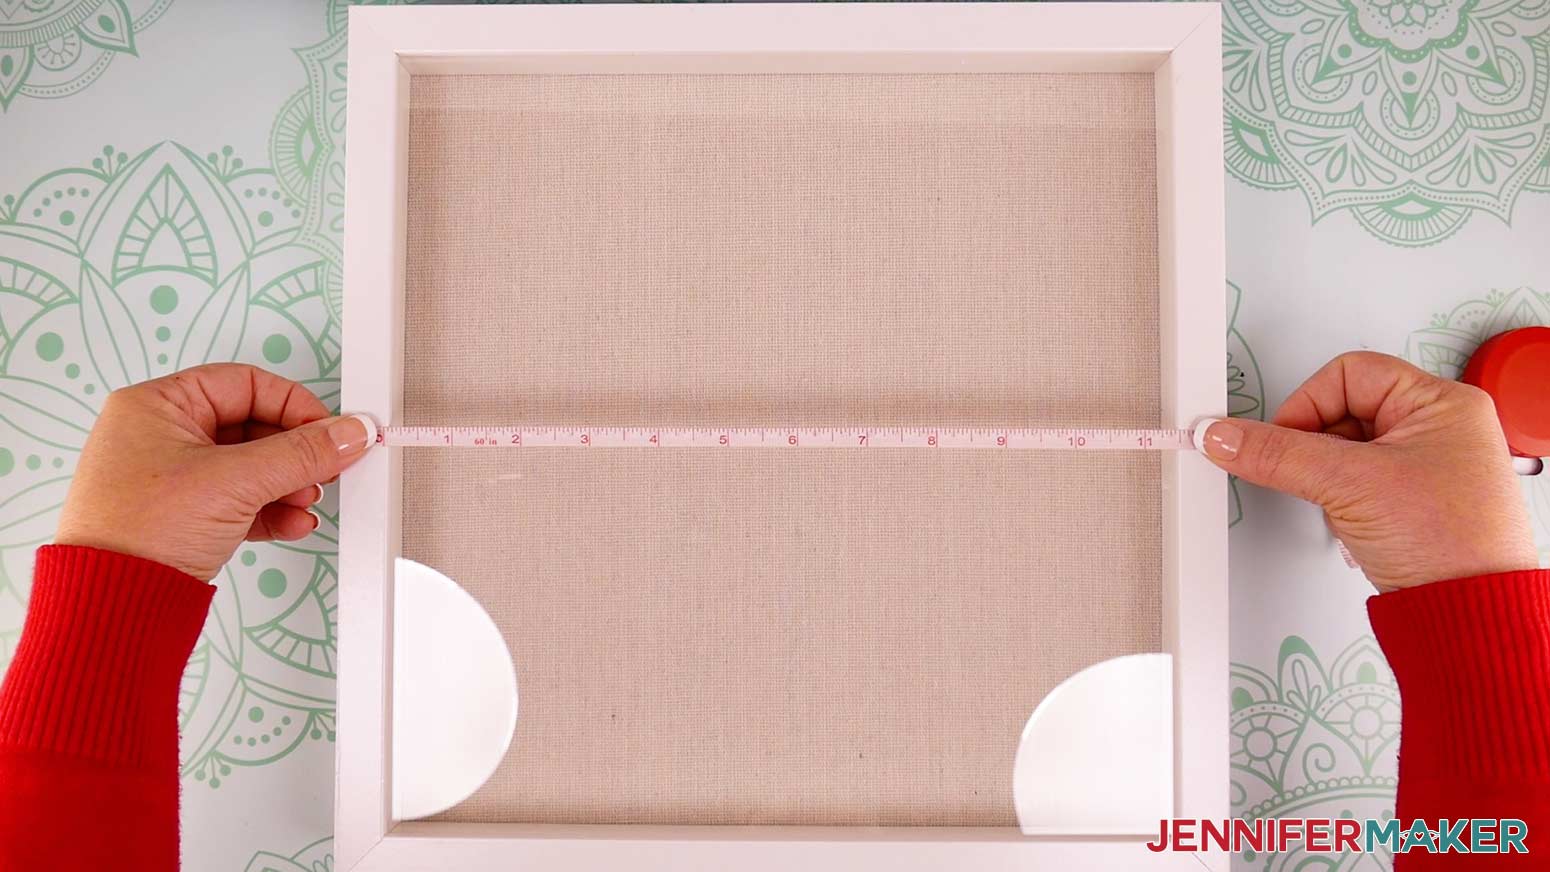
Since I'm using a shadow box frame, I need to measure the space inside the frame to see how much room my Floral Heart will have.
Use a ruler or measuring tape to measure from inside one edge of the frame to inside the other edge.
I do not recommend adjusting this design to a smaller size due to the intricate cuts required to produce the offset appearance inside the layers. If the design is too big for your chosen frame or display area, I recommend selecting a different frame or a different piece of art for your project.
If you decide to change the size, be sure to select all the layers and type in the new measurement for the width in the size box at the top of the Canvas while making sure the lock icon is closed.
Once the Floral Heart is the right size, it is ready to cut!
STEP 3: CUT THE HEART LAYERS
Check that the right machine is listed in the top corner, then click "Make It!"
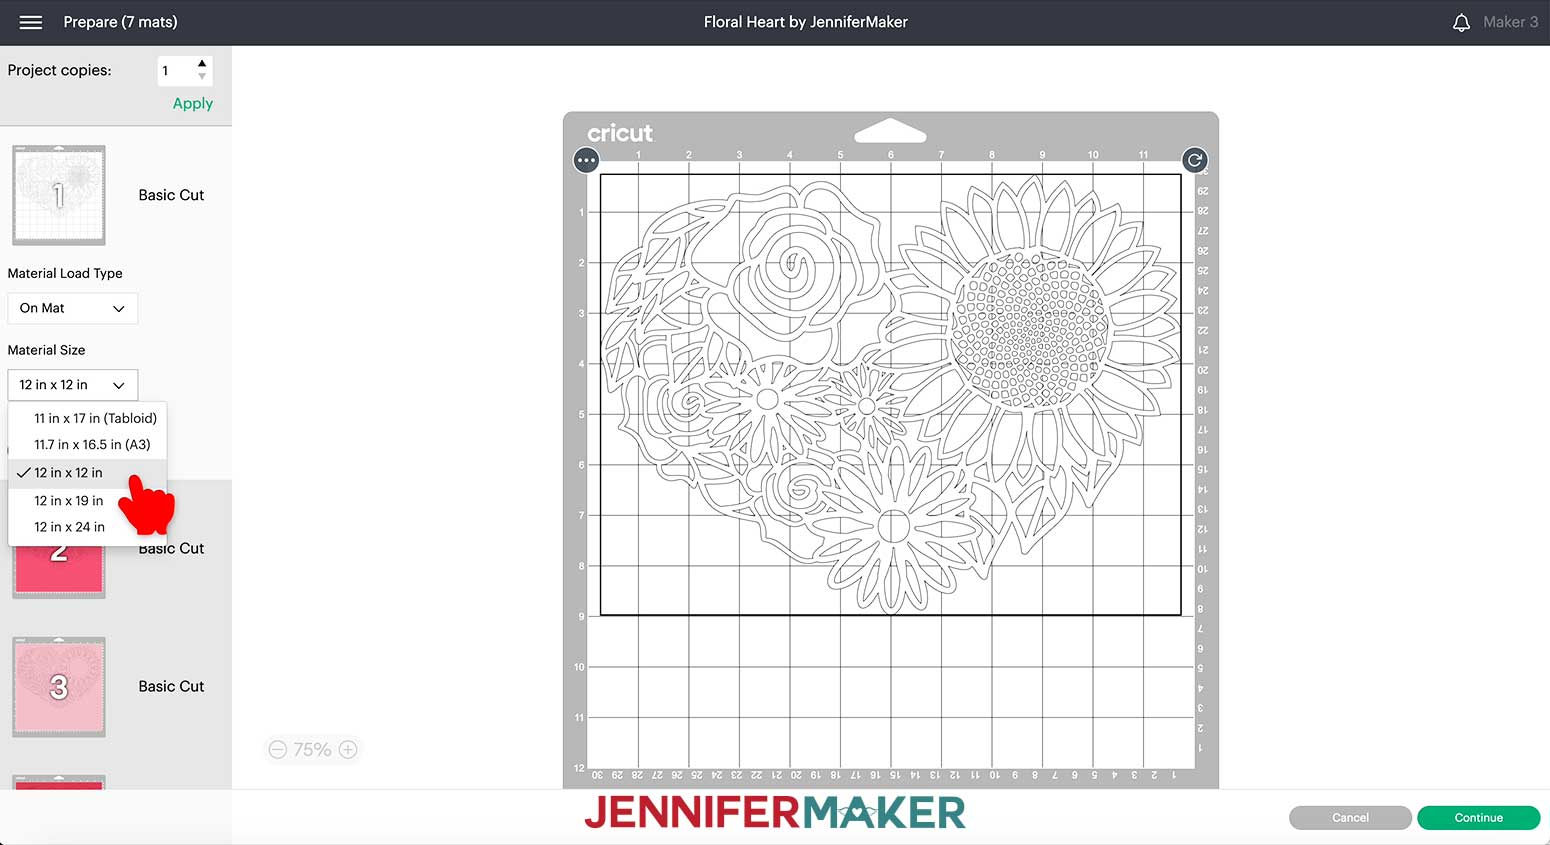
If you are prompted about how you will load your materials, select "On Mat" and 12" x 12". Then click the green Confirm button.
Your design will appear on seven different mats that are marked with the color of each layer.
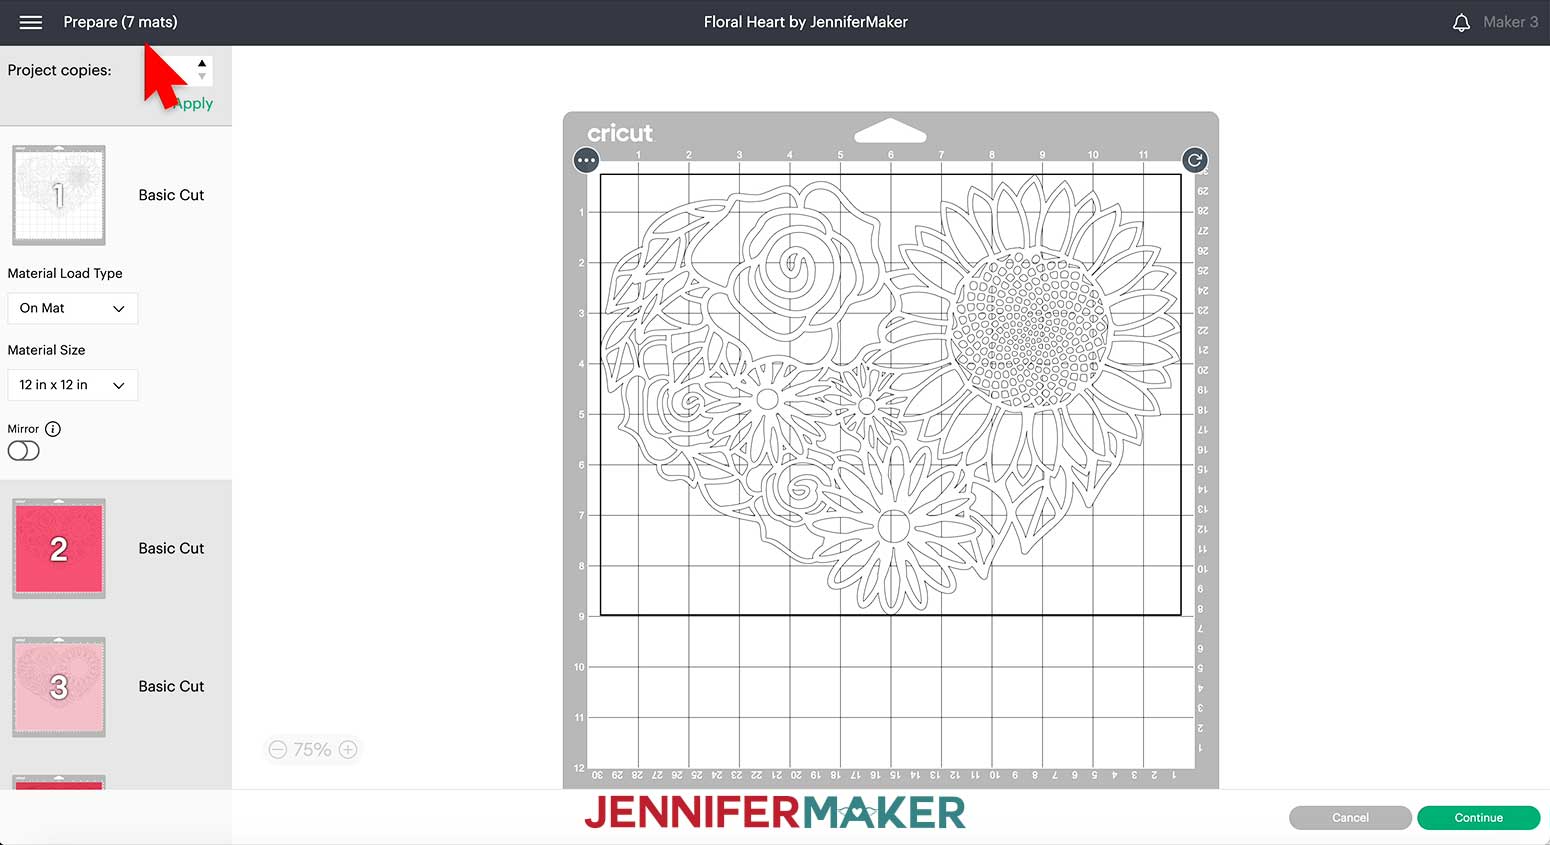
Make sure the correct Material Size is selected for each mat. This design is large so it needs 12” x 12” cardstock.
Leave “Mirror” turned off and click “Continue”
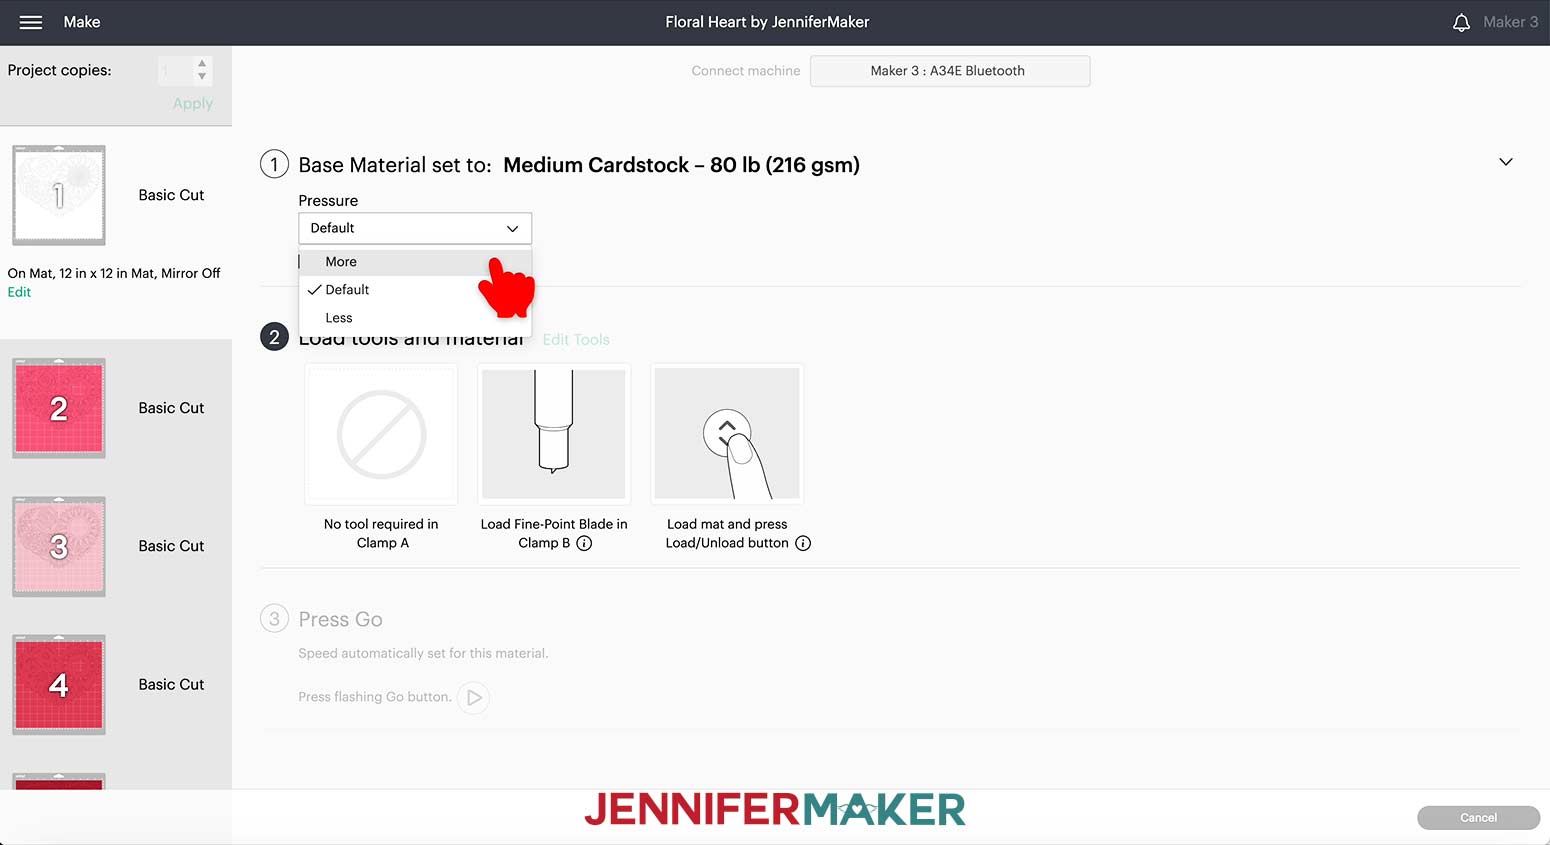
On the “Make” screen, select the cutting settings for each mat. Sometimes, papers of the same weight have different textures and need slightly different settings or tools. I used 80 lb cardstock to make my Floral Heart to give it more structure, but the white and colored, textured papers cut differently.
For the smooth white layer, I used “Medium Cardstock – 80 lb.” with “More Pressure" and a Fine-Point Blade.
I did notice with the slightly textured cardstock that I used for the colored layers, the Fine-Point Blade tended to tear the material, rather than cut it.
The Deep-Point Blade cuts at a different angle than the Fine-Point Blade. This can make a difference when trying to cut thick or textured cardstock because of how the angle of the blade interacts with the fibers of the paper.
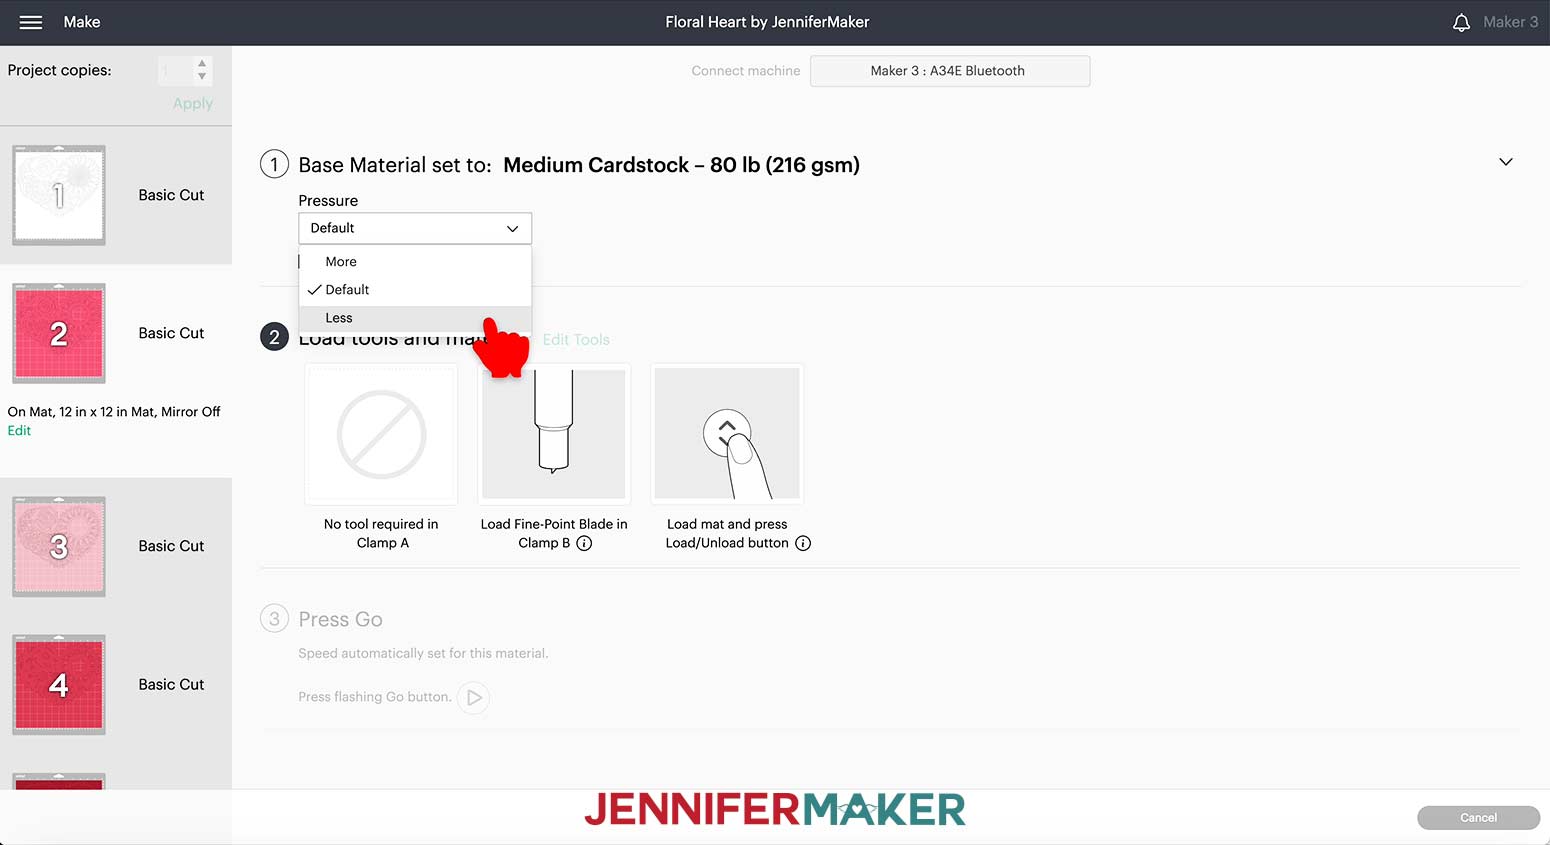
So, for the textured paper, I did not change the tool settings that are preselected with "Medium Cardstock - 80 lb" but I did switch the blade in the housing from the Fine-Point Blade to the Deep-Point Blade.
I also changed the pressure to “Less Pressure” to accommodate the slightly different cutting angle.
This combination of blade and settings provided a much smoother cut.
Every machine is different, so you may need to test settings before finding one that works correctly for you.
TIP: If you run into any issues cutting your materials, check out my Cricut Tips & Tricks for Cleaner Cuts.
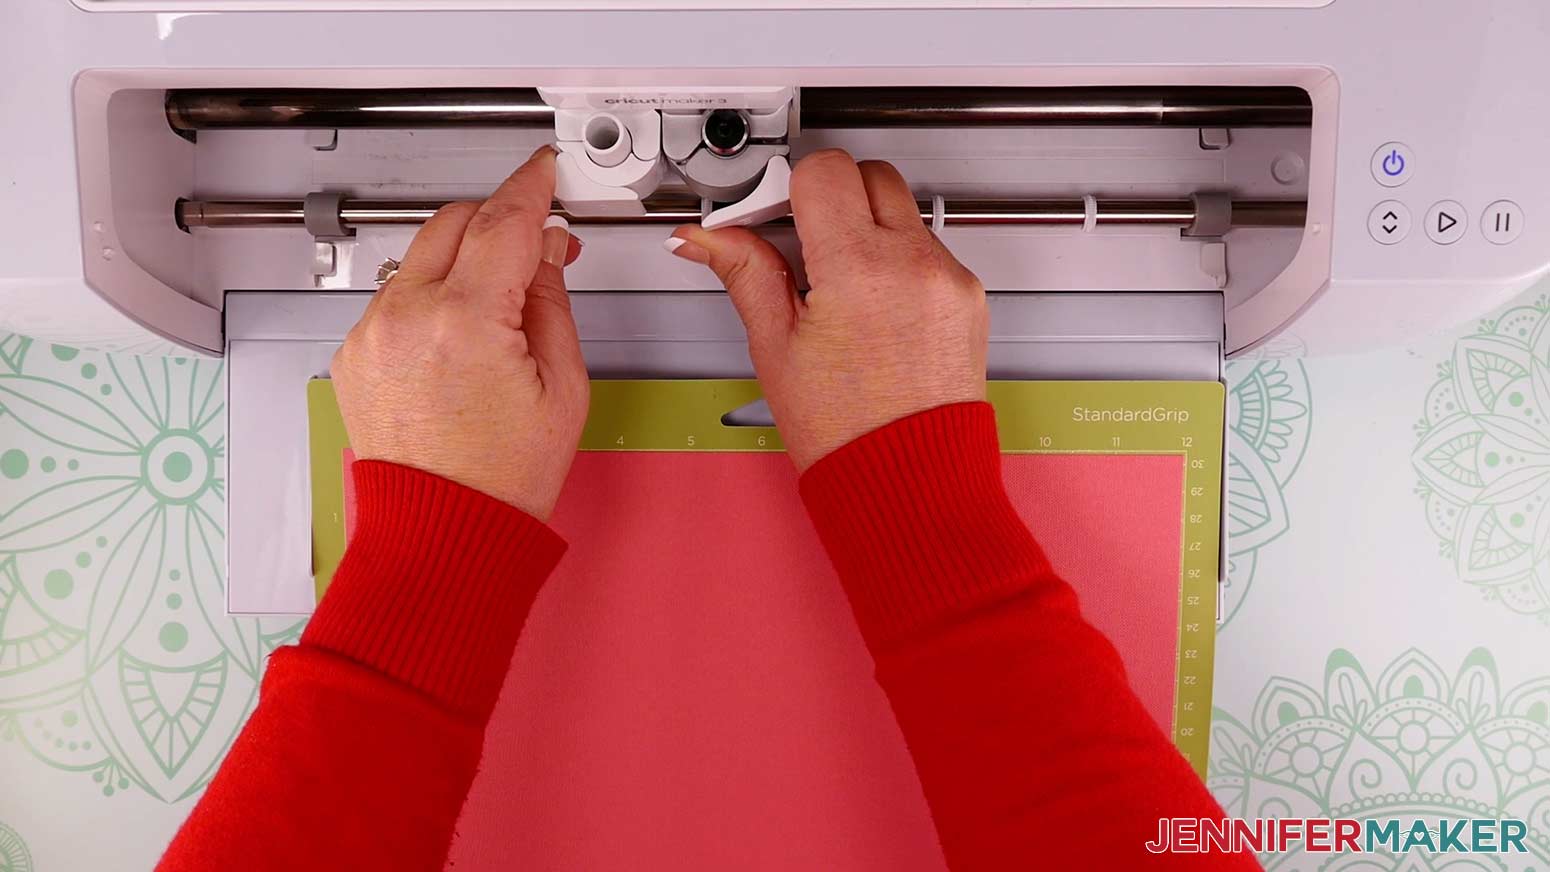
Place the cardstock on your green StandardGrip mat and make sure it has adhered well by pressing it with your brayer.

The mats will cut in layer order from light to dark as long as colors in the file have not been changed.
TIP: If you want more information on how Design Space orders cutting mats, read my article Cricut Mat Order: How Do I cut My Cricut In Order.
Load the mat into your Cricut and press the flashing button to begin.
Once the cutting is complete, and before unloading your mat, check to see if the cut went all the way through. If not, press Start for another pass.
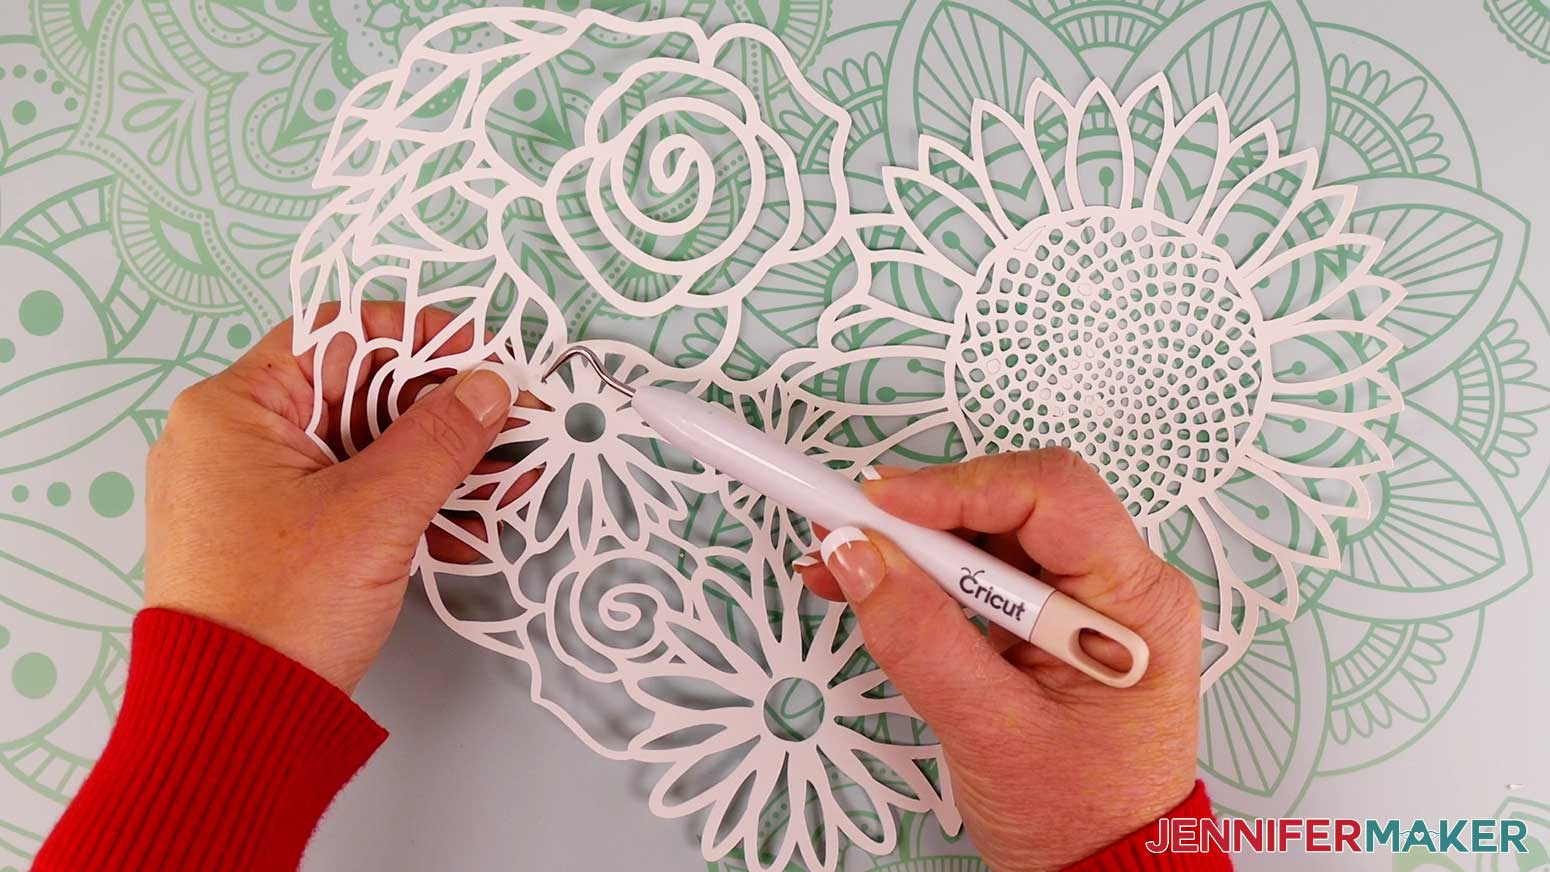
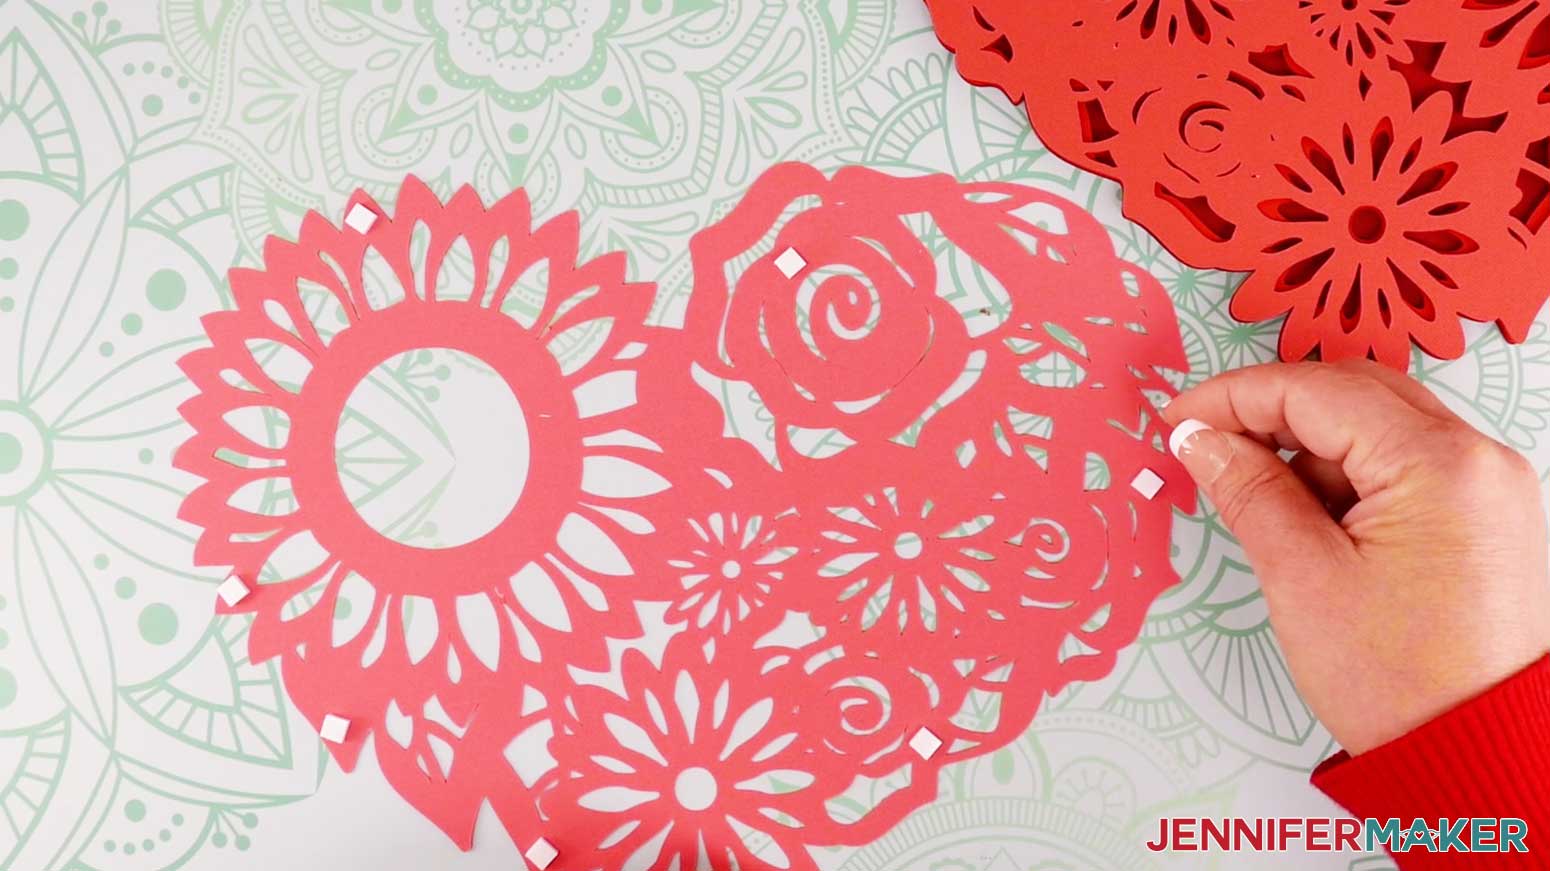
Remove the cut pieces from the mat by turning the mat over and rolling it away from the cardstock. Move slowly and use a spatula to carefully remove the intricate cuts from the mat.
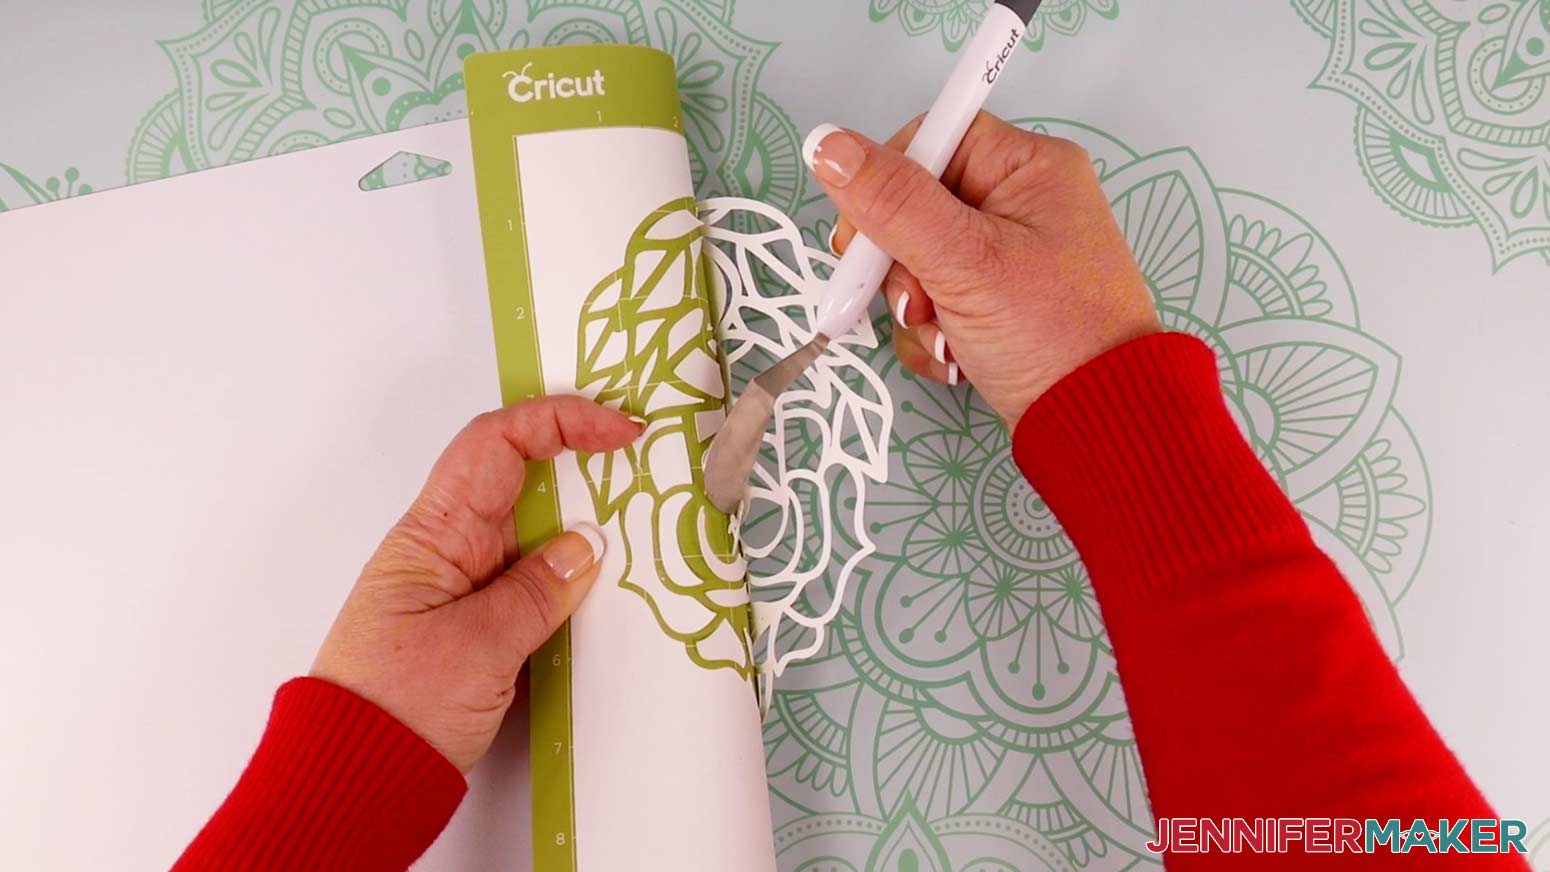
A weeding tool may be useful to poke out little pieces of cardstock that do not remain behind on the mat after the cut piece is removed.
Continue to print, load, cut, and remove mats until all the pieces are cut.
STEP 4: ASSEMBLE THE HEART MANDALA
The Floral Heart design consists of seven layers. Gather your cut pieces and foam adhesive. (Alternatively, you can use craft glue if you wish your complete Floral Heart to be less dimensional, but the steps will be the same - just substitute glue where I say foam adhesive!)
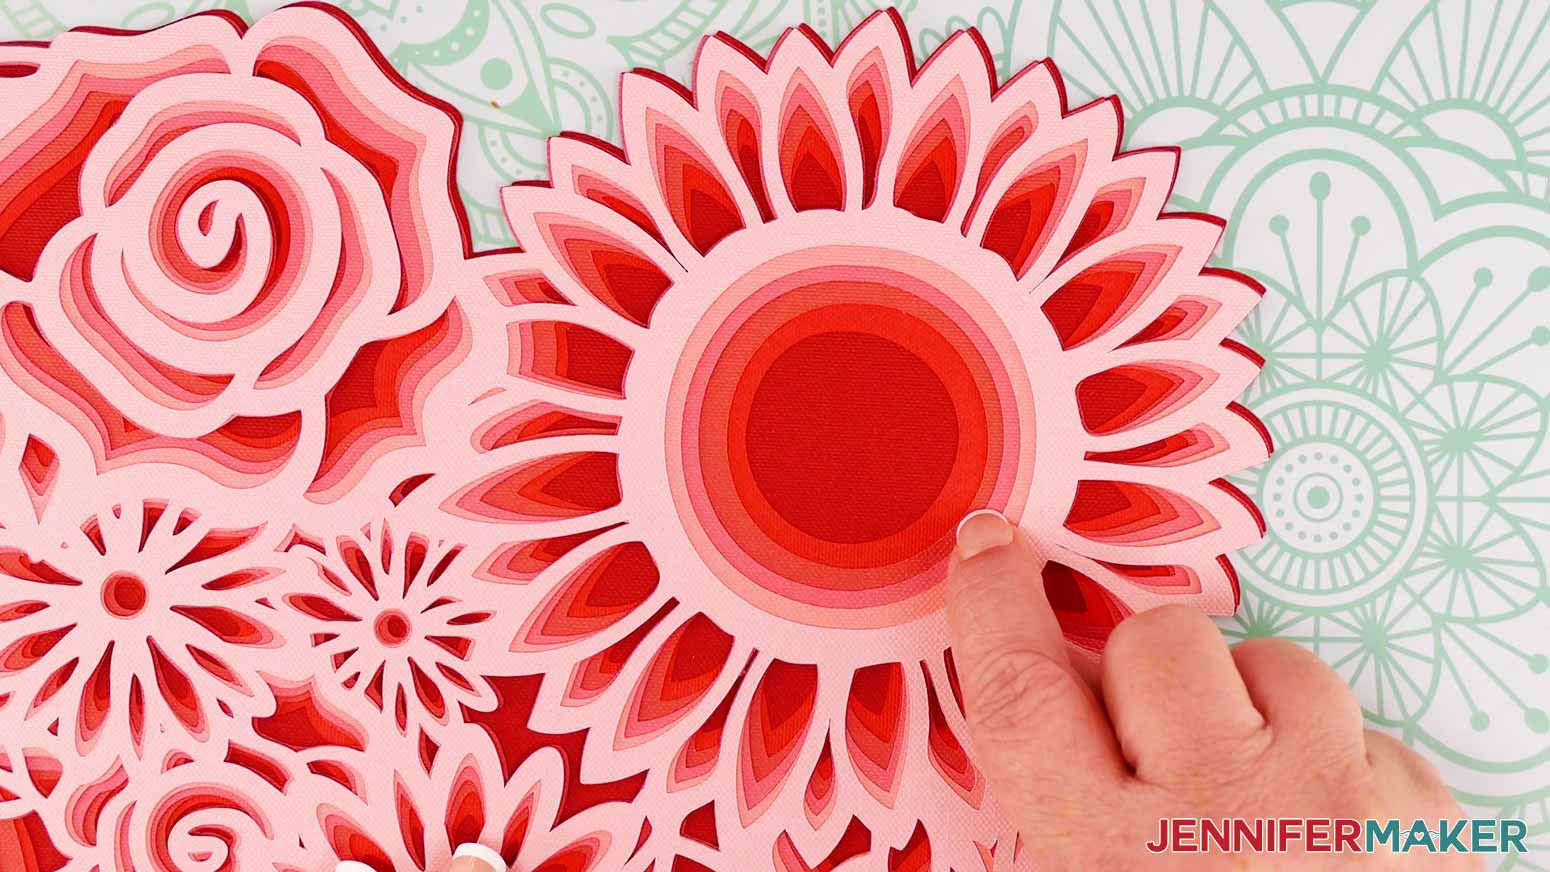
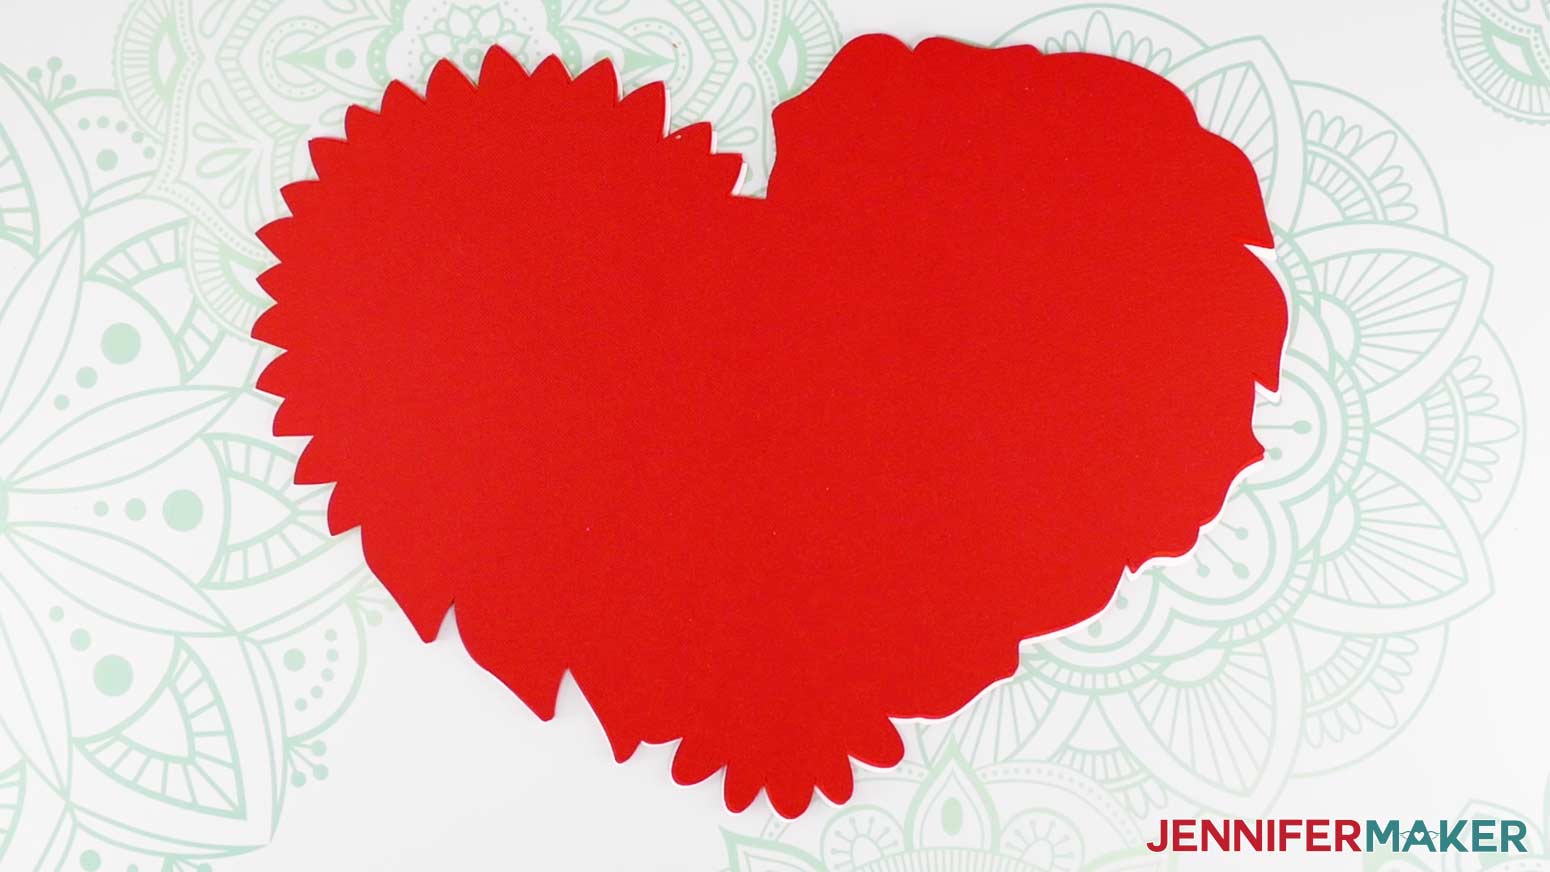
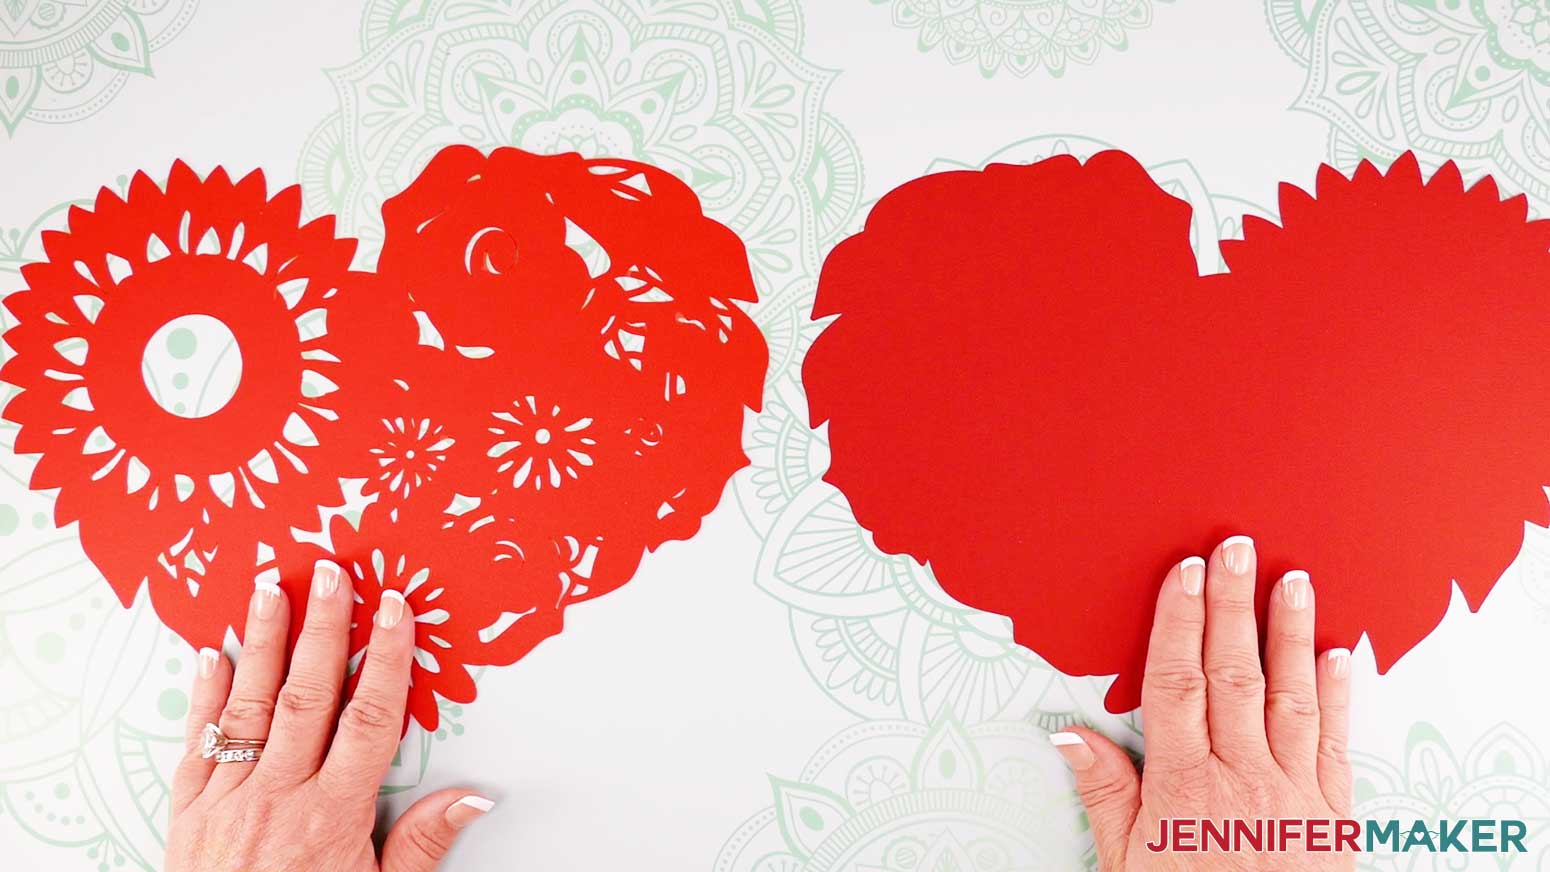
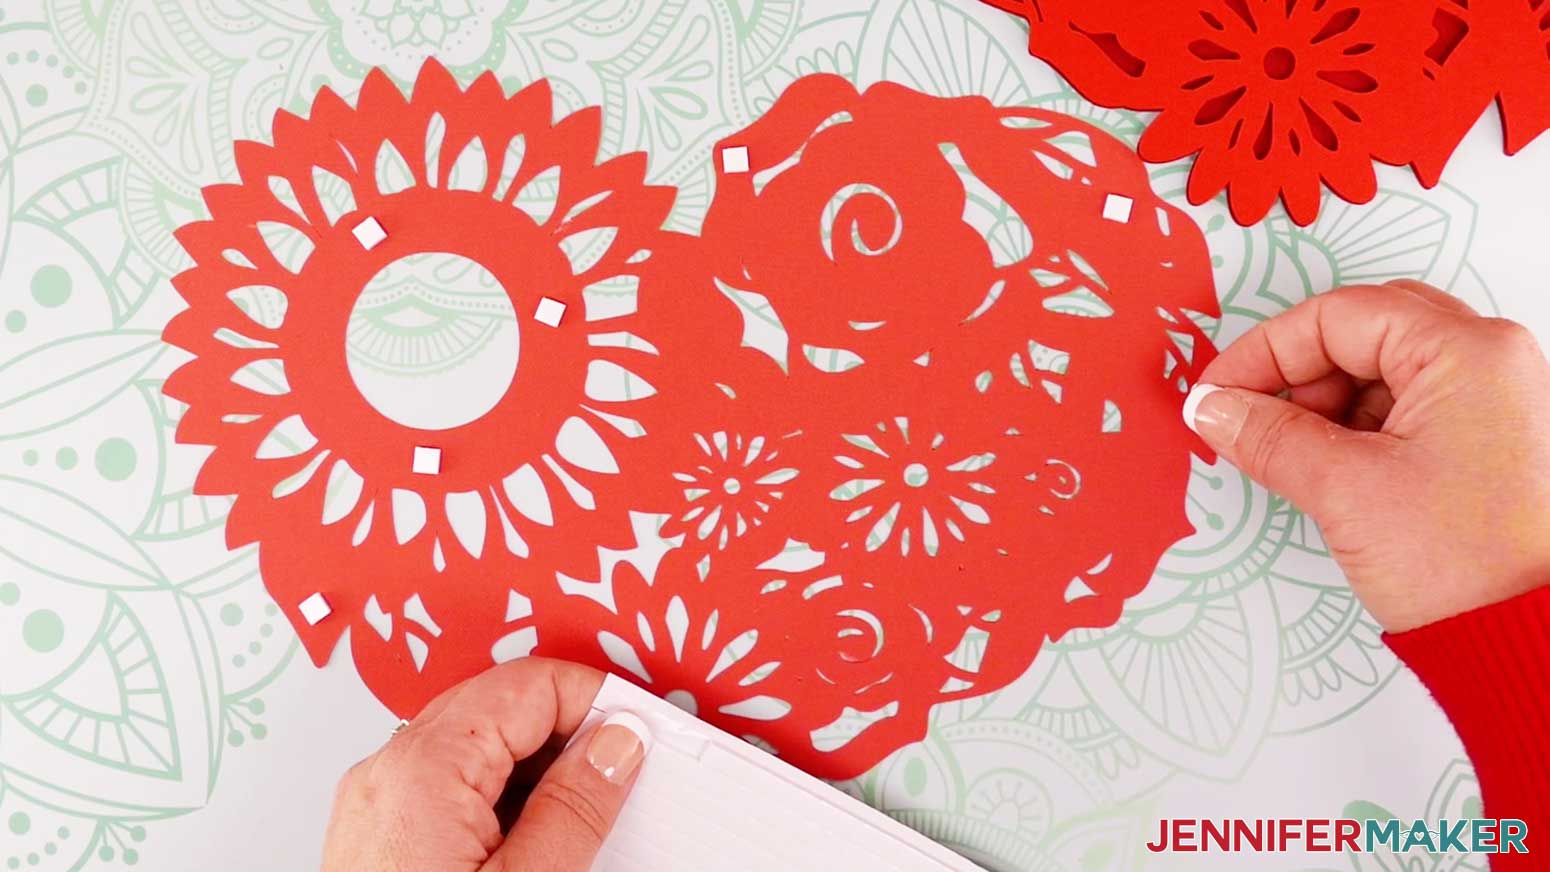
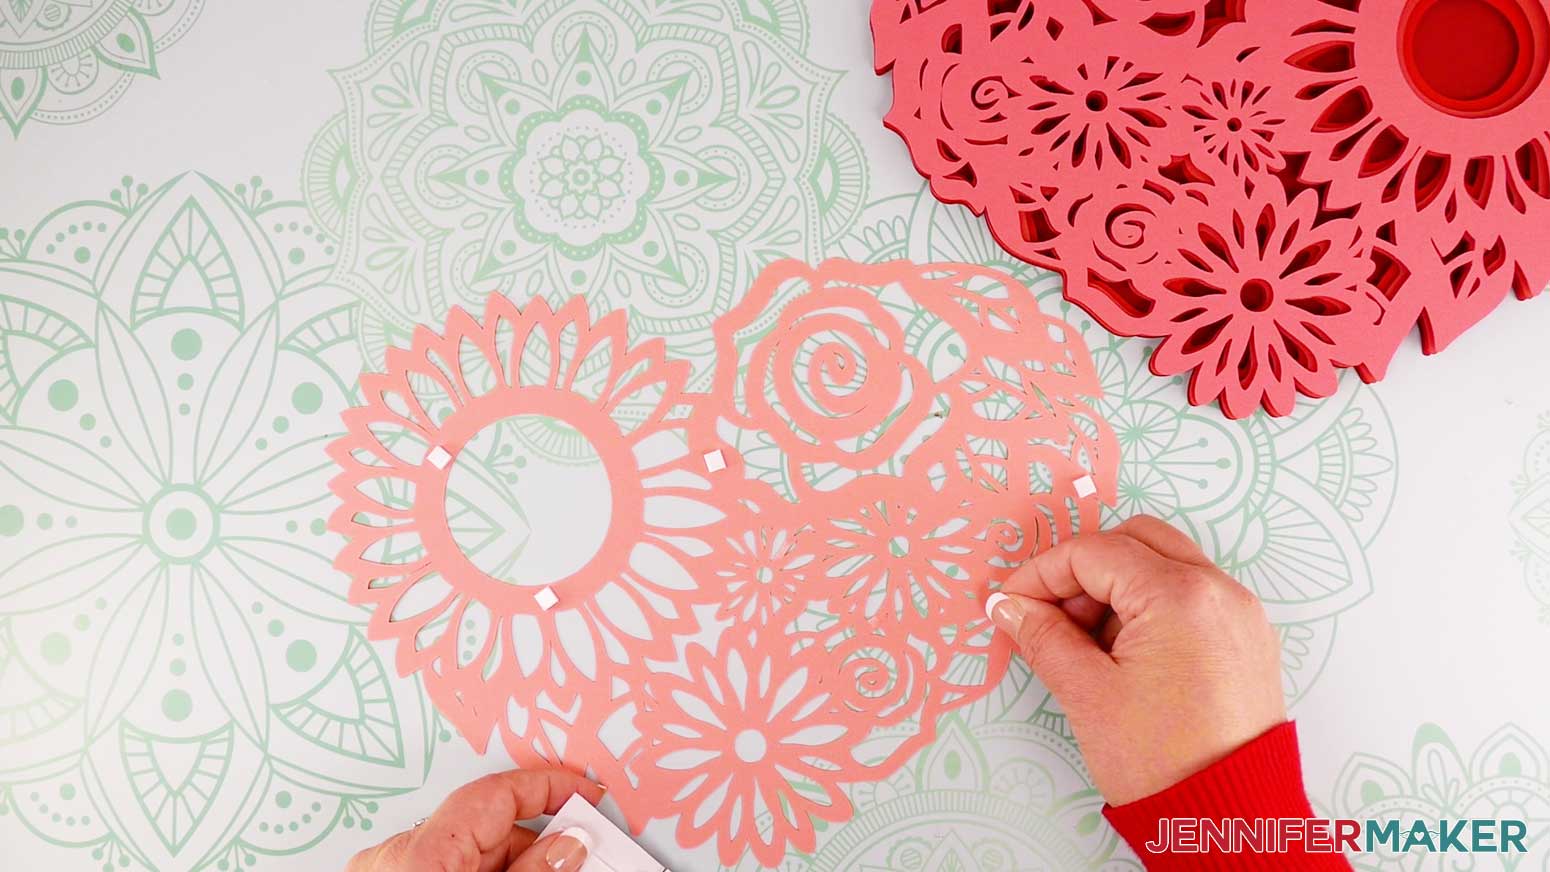
Stack the layers in the correct order from bottom up. The solid piece will be the bottom and each layer up will have more cuts. The top layer will be the most intricately cut piece.
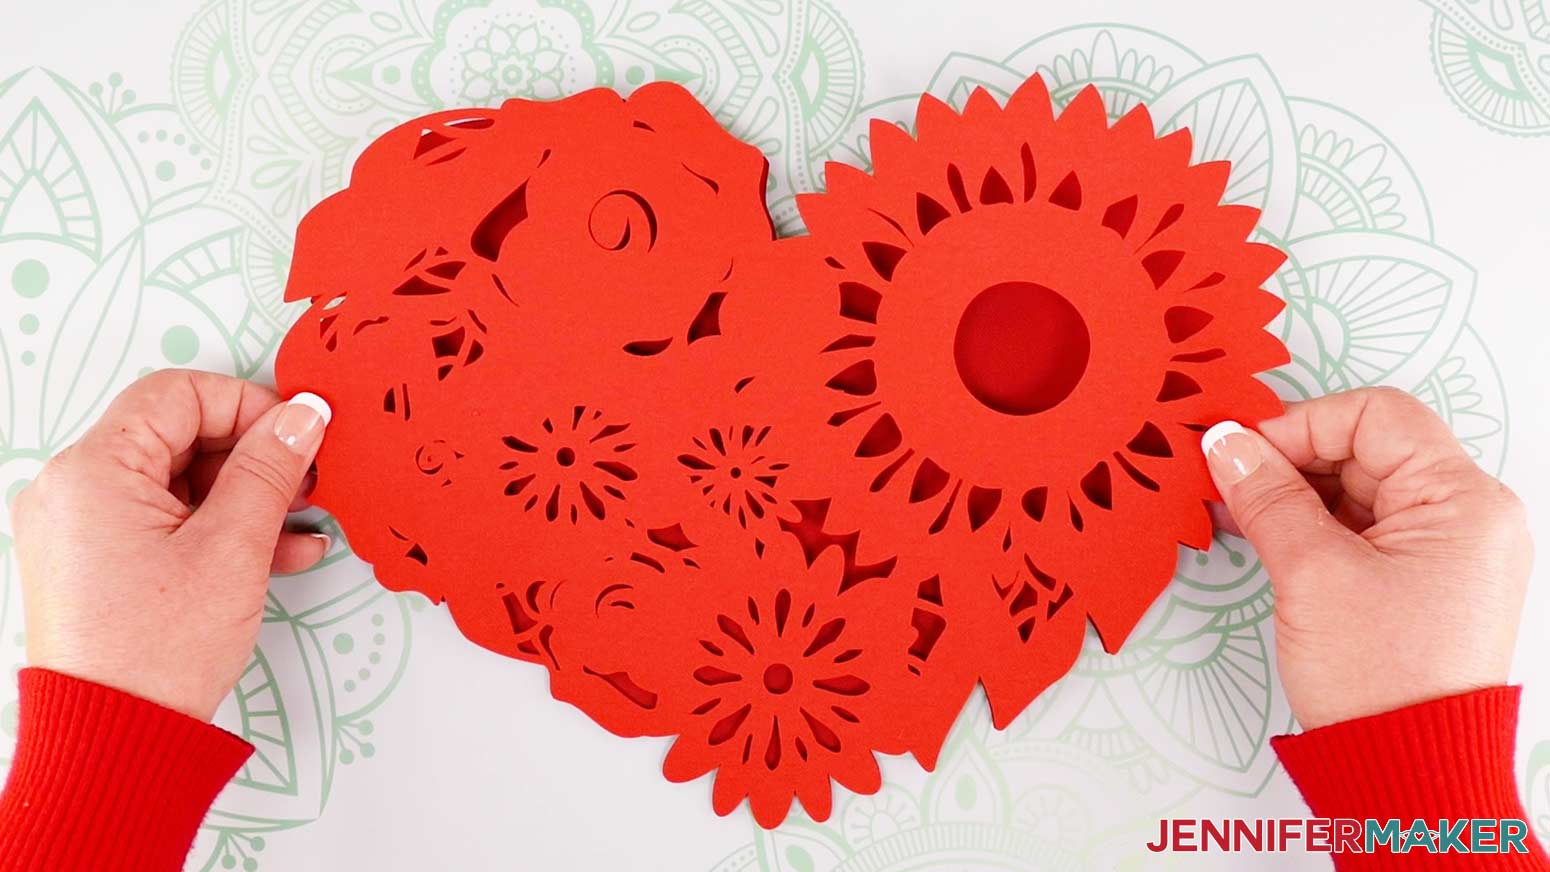
To make sure the layers are ordered correctly, remove the top layer and look inside the center of the sunflower. You will be able to see six layers all moving in to the center.
Replace the top layer. Now you have seven layers all stacked and ready to adhere to each other.
Flip the stack over so you can see the solid back.
To adhere the layers to each other, we'll flip one layer back over at time.
Start by placing the solid back layer directly on the table and right side up.
Place the foam adhesive squares on the back of the sixth layer.
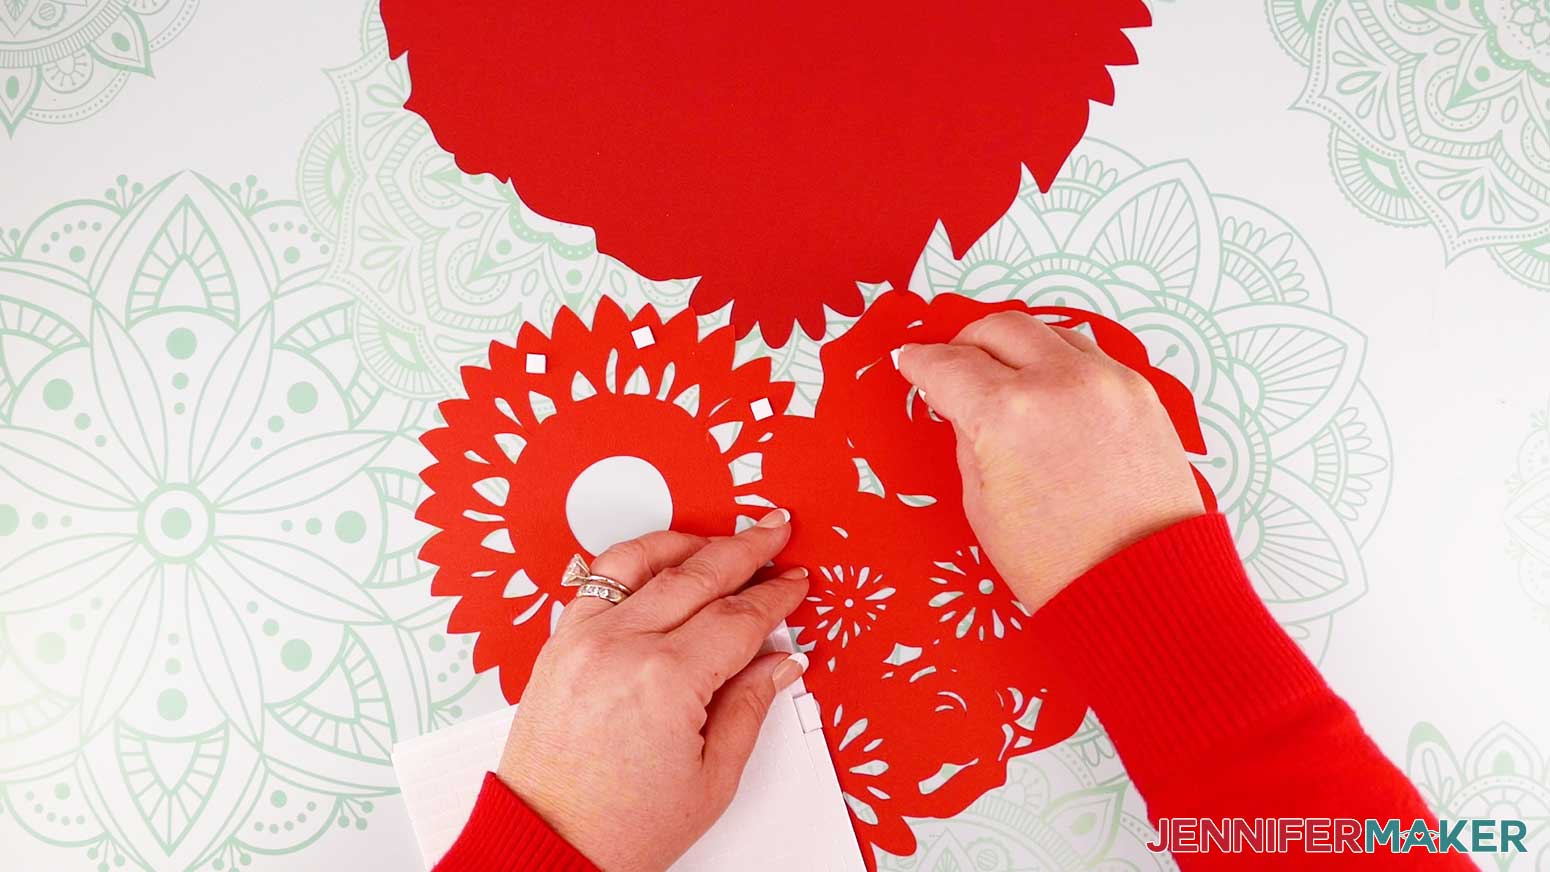
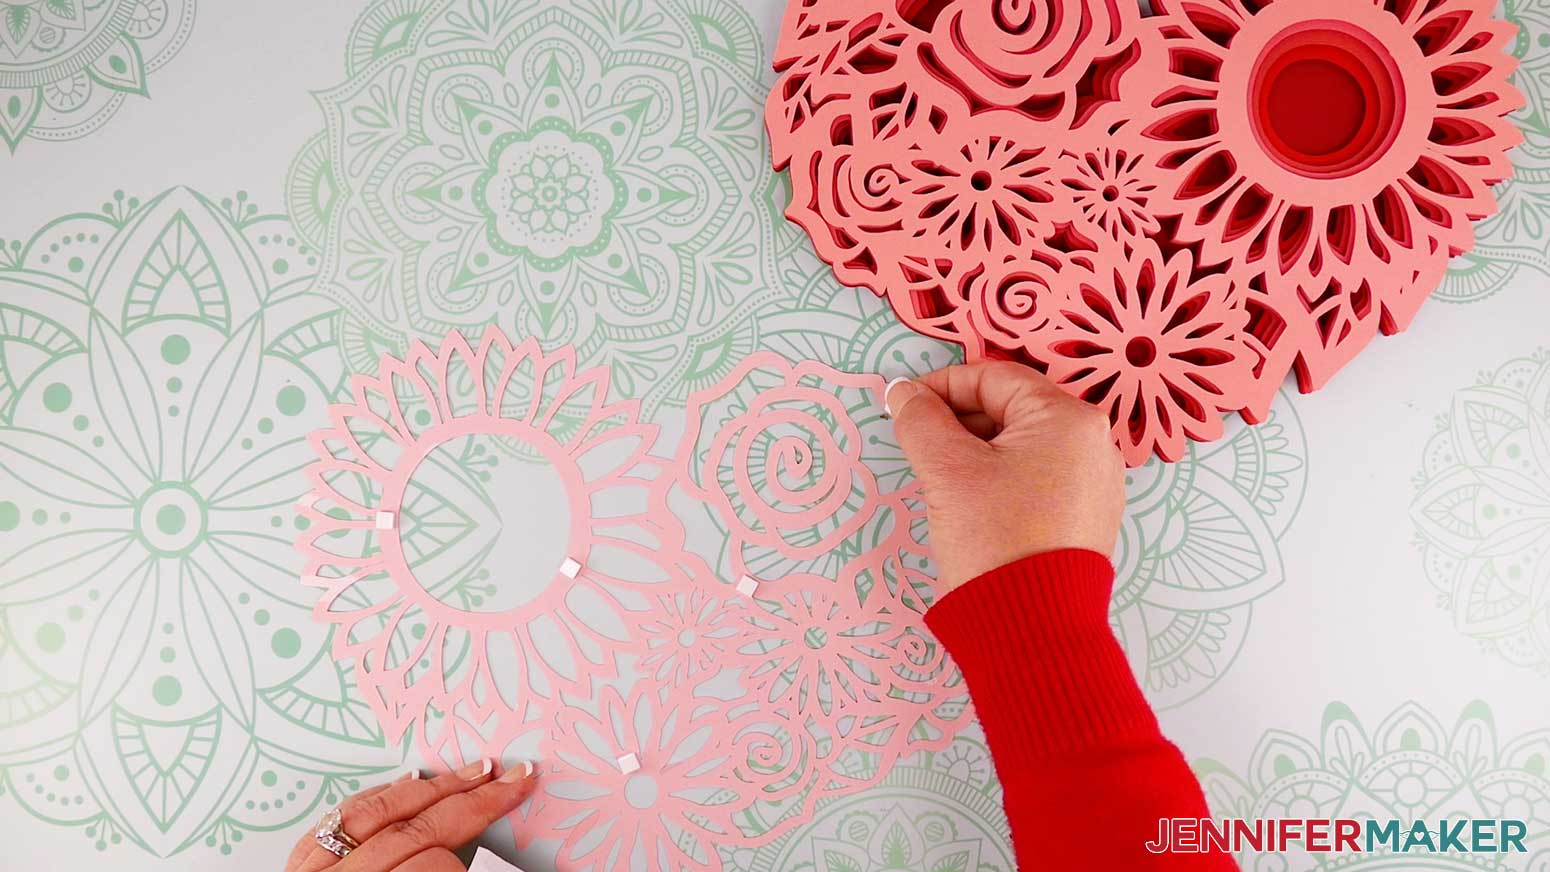
Flip layer six right side up and press on to the top of layer seven. Look straight down onto the stack to align the edges of the layers. If you look at it from an angle, it is much more difficult to line them up correctly.
Continue with each layer in the same manner, always adding the adhesive to the back of the next layer up.
Add adhesive to the back of layer five.
Flip and place layer five on top of layer six.
Add adhesive to the back of layer four.
Flip and place layer four on top of layer five.
Add adhesive to the back of layer three.
Flip and place layer three on top of layer four.
Add adhesive to layer two.
Flip and place layer two on top of layer three.
For layer one, you will find it necessary to cut the adhesive foam squares using a craft knife and cutting mat or craft scissors to make very thin strips so the foam adhesive does not show.
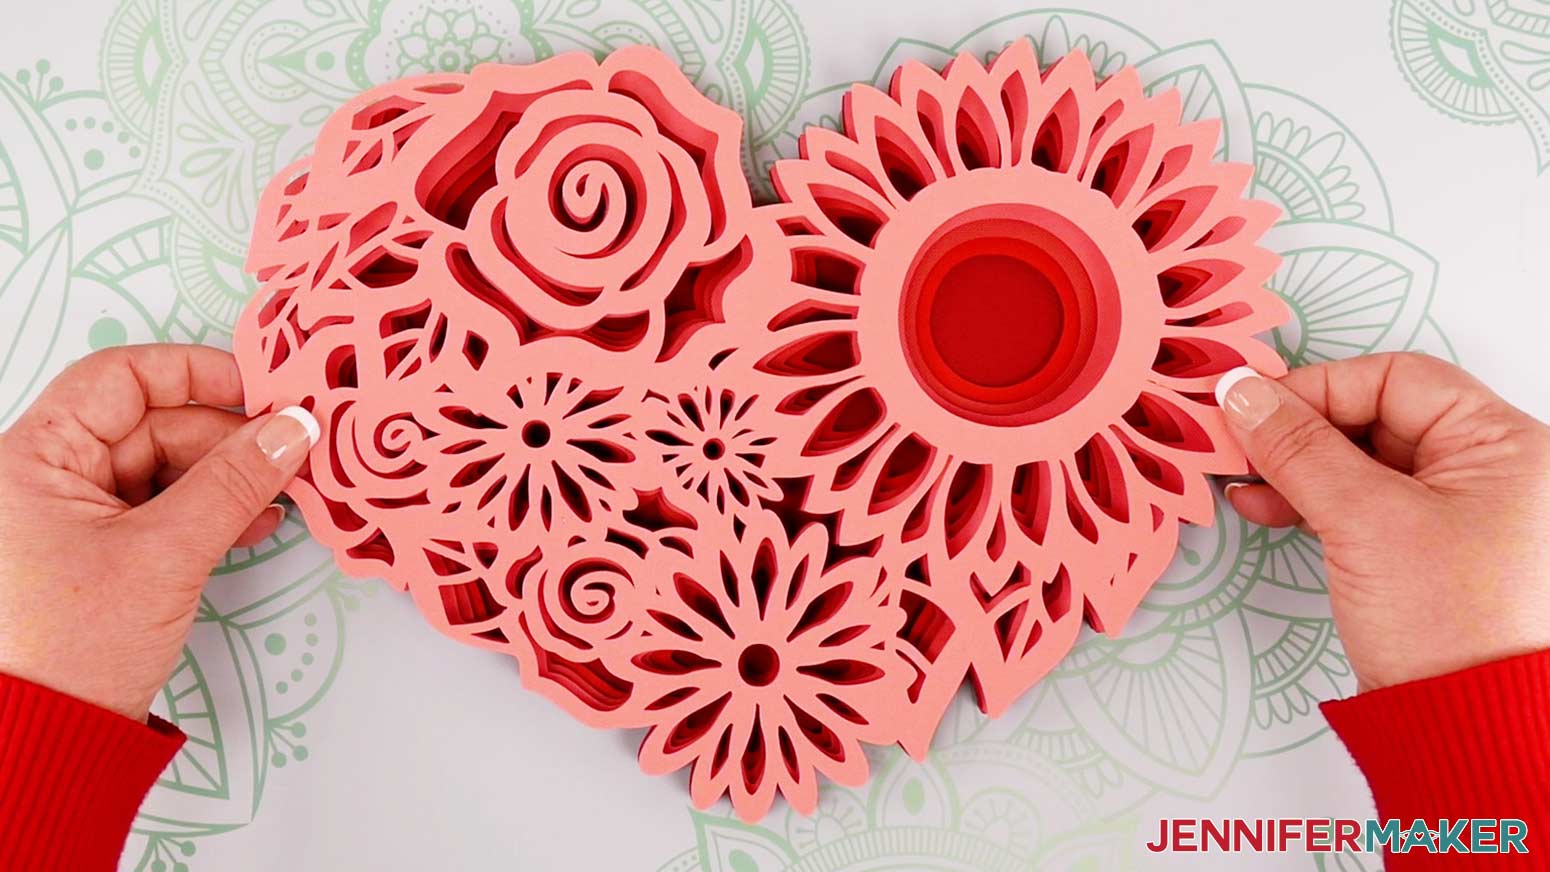
Flip, align and place layer one on top of layer two.
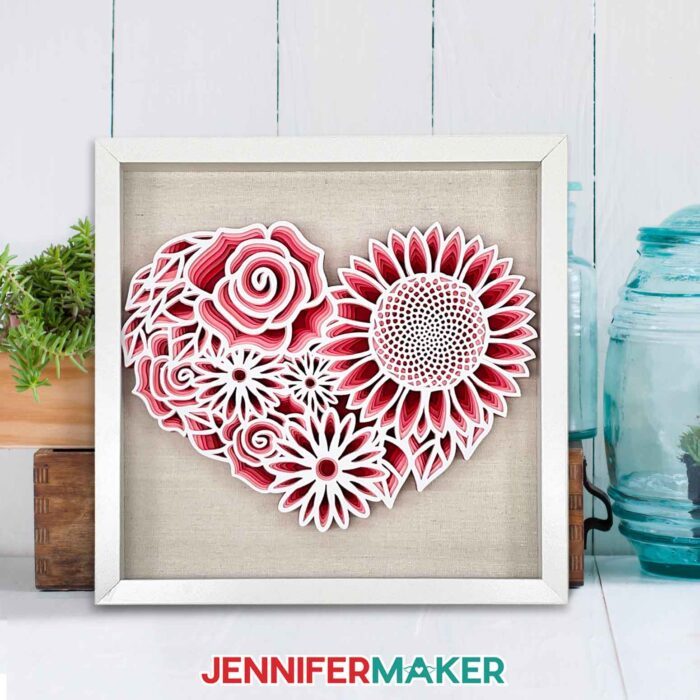
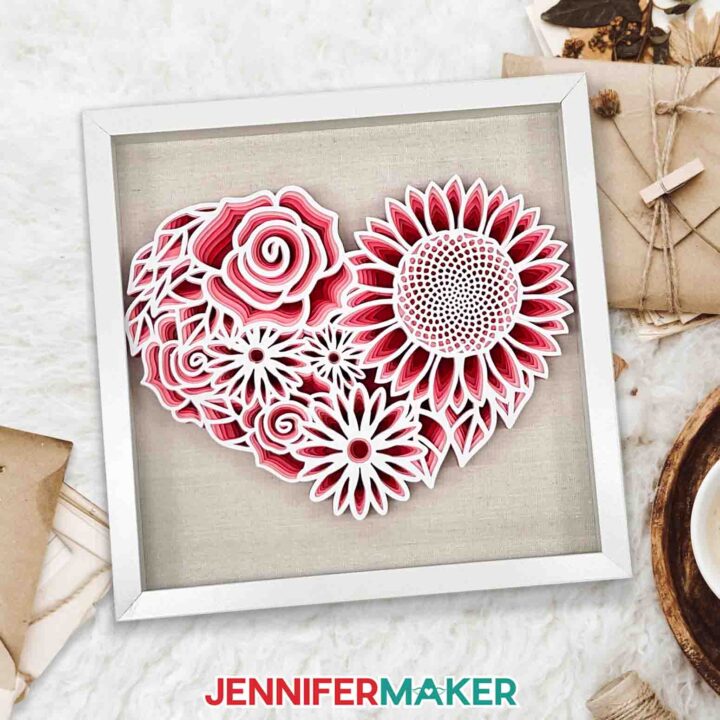
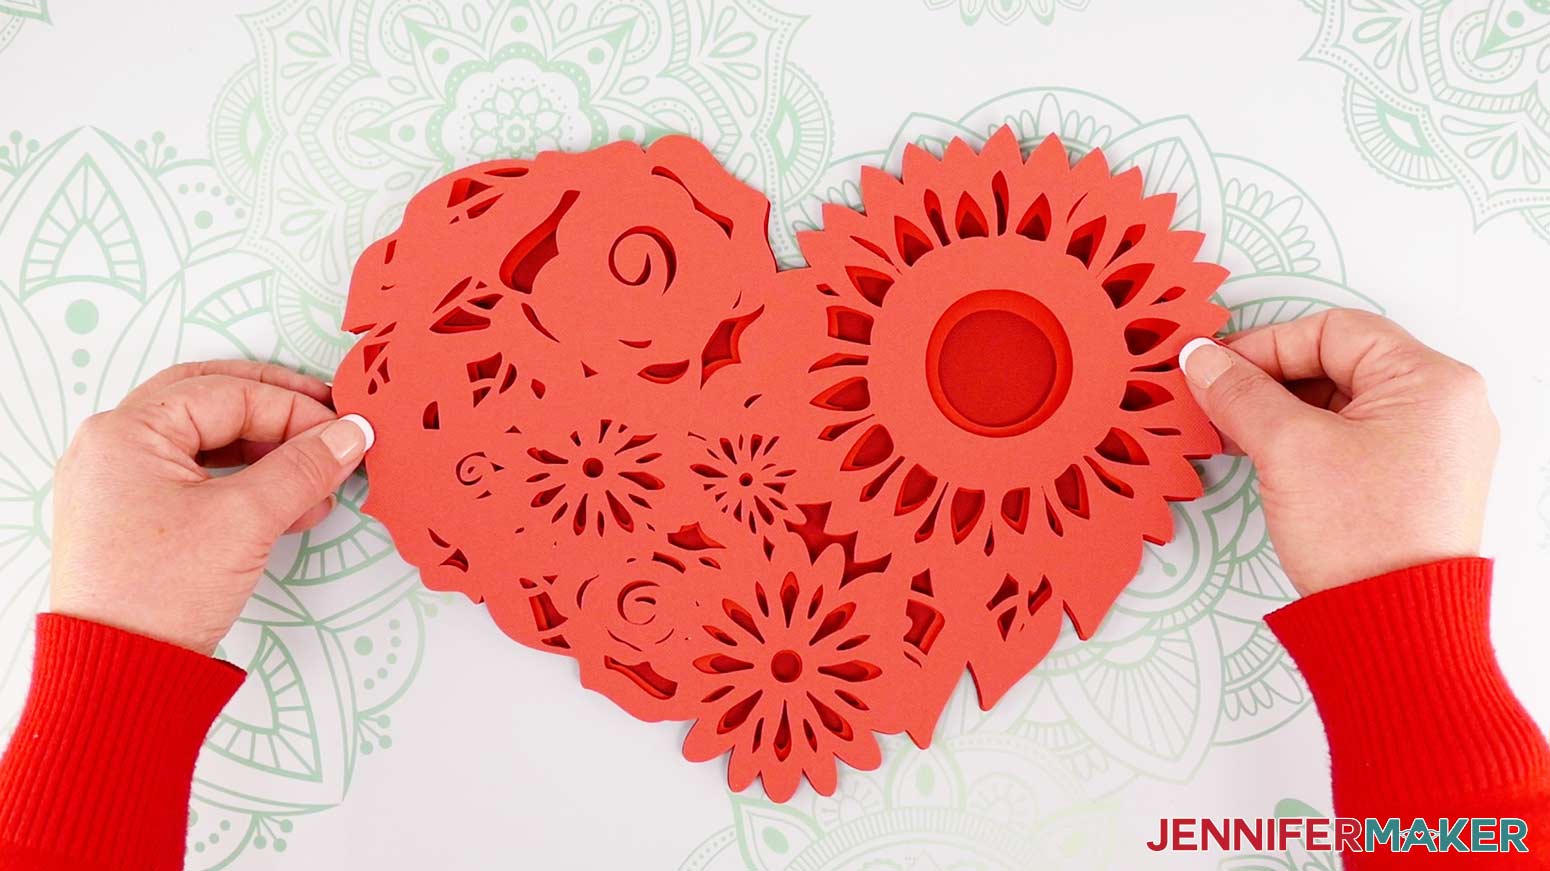
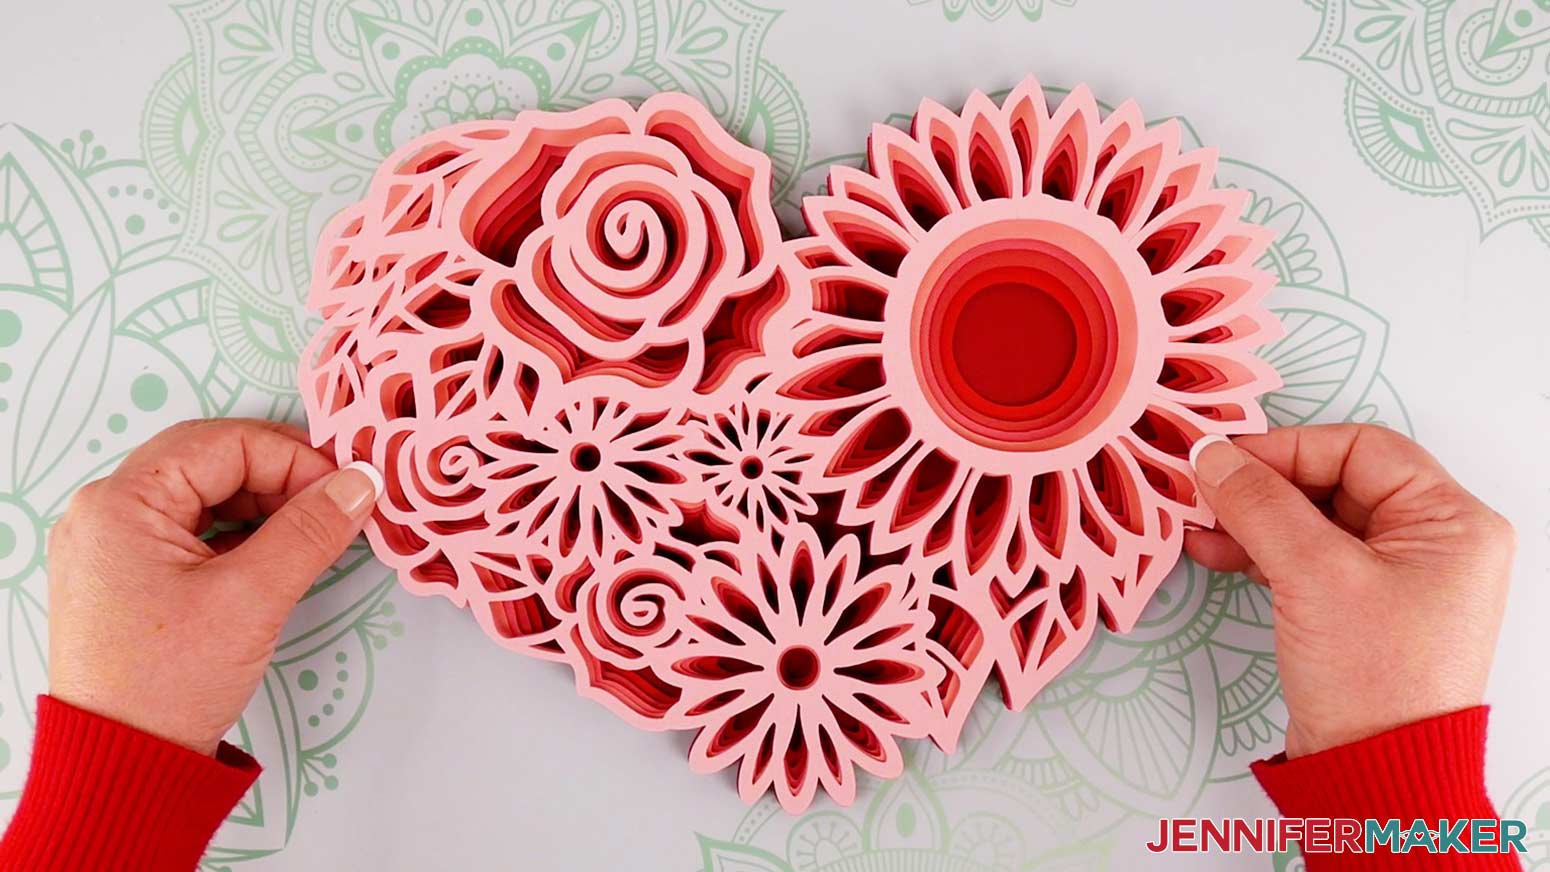
The Floral Heart is now complete and ready to add to your frame or display. I placed my Floral Heart inside a shadow box, so I used the same adhesive foam squares and added them to the back of the heart.
Note: Be really generous with the adhesive to make sure the heart doesn’t slide around inside the frame after it hangs for a while!
Adhere the Floral Heart to the frame backer and place it inside the frame.
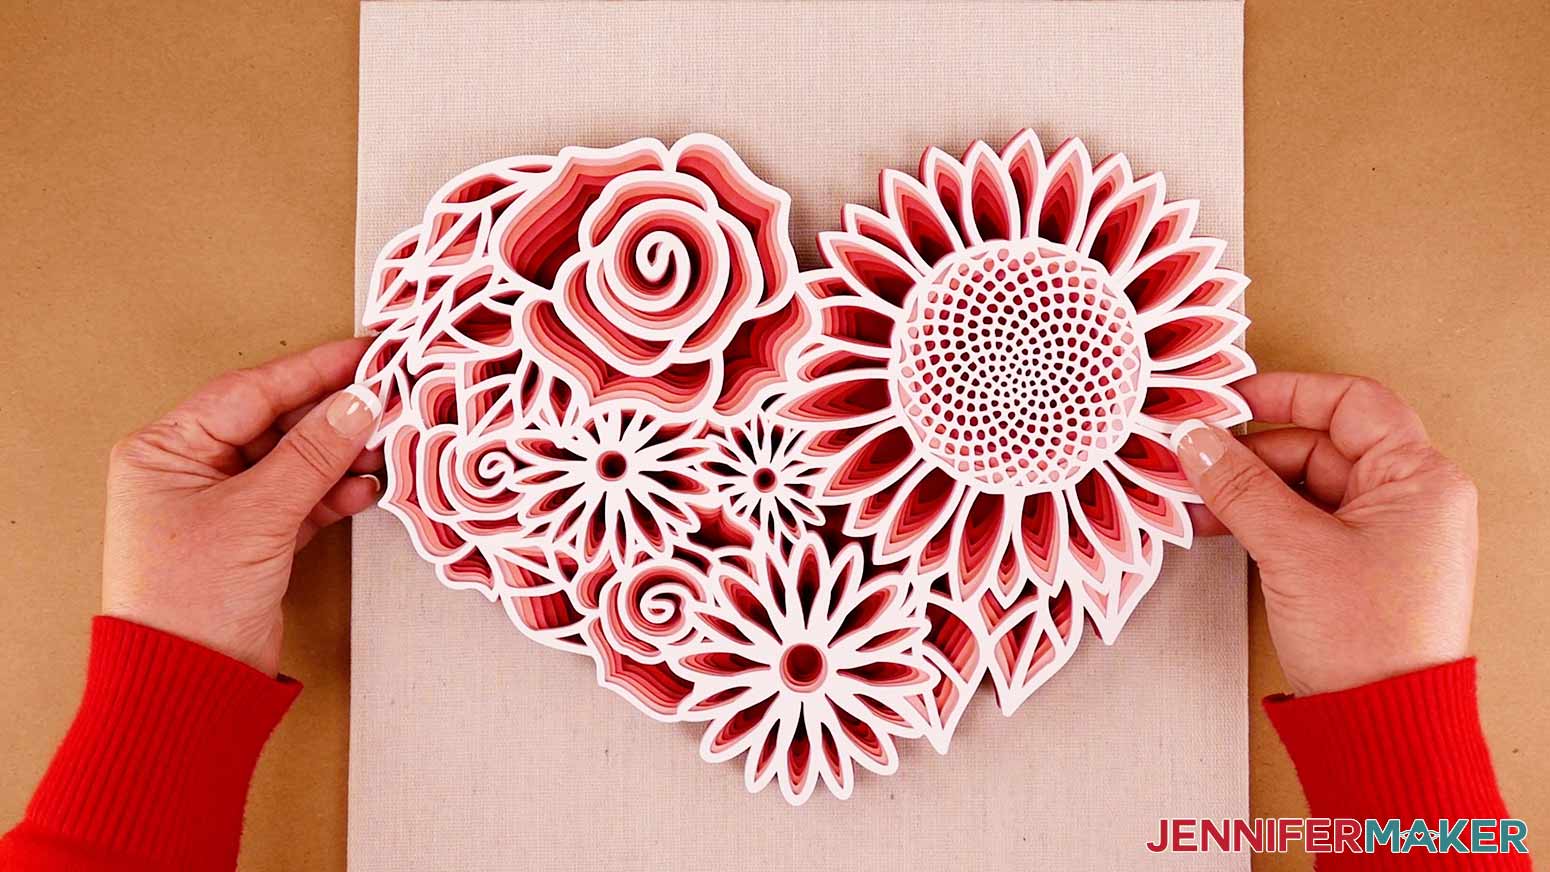
And this is what my finished Floral Heart looks like framed.
STEP 5: Show it Off
The Floral Heart is great for displaying and can make a wonderful gift. You can even add vinyl text to the glass to personalize it! (Check out this Paper Flower Shadow Box tutorial to see how.)
Notes
Finished Size without Frame: 11.5" x 8.73"
Frame Size: 12" x 12"
Answers to Your Questions About Using My Floral Heart SVG
Q: What is layered paper?
A: Layered paper DIY projects can describe many different techniques. But for most of my designs, it refers to cutting design layers from cardstock with a cutting machine, then using adhesives to put them together in order to create a decoration.
Q: How do you make layered papercut art?
A: To make most of my layered paper designs, you’ll use Cricut Design Space to prepare the SVG to be cut with a Cricut before gluing the layers together. You can also use my files with other cutting machines and software.
Q: What is paper cutting art?
A: Paper cutting usually refers to intricate designs cut into paper to create decorative projects. Depending on the desired look, techniques, and materials, some artists cut the designs by hand and others use cutting machines.
Q: What if my shadow box frame is dirty?
A: Try cleaning the glass with rubbing alcohol and a lint-free cloth.
Q: How do I keep my layers stuck together?
A: I used a combination of craft glue, and double-sided foam adhesive squares in different areas of my physical product. For the really delicate top layer, glue will probably be easiest.
Q: My cardstock keeps ripping on the intricate cuts. What can I do?
A: Be sure you’re using a clean and sticky machine mat, good-quality cardstock, and a clean blade. See my Cricut Cutting Problems post for all the tips I use to get clean cuts every time.
Q. Do I have to use a Cricut machine?
A: No! We always include several versions of each digital item in the ZIP file. If you have a Silhouette Cameo, which uses Silhouette Studio, you can use the DXF file in Silhouette Basic Edition. If you have upgraded to Silhouette Designer Edition, Designer Edition Plus, or Business, you can use the SVG format with your Silhouette machine. If you don’t have a cutting machine, you can print and then cut out my digital download PDF files, too! The ZIP archive in my resource library includes these file types and more!
Q: What is an EPS file?
A: An Encapsulated PostScript (EPS) file is an older format used in vector design. While some cutting machines use EPS files, we use Adobe Illustrator to design SVG, DXF, and PDF files for home crafters.
Q. Are your free SVGs just for personal use or do you offer a commercial license?
A: Yes, you can sell the physical item you make using these floral heart SVG files, we only ask that you give credit to JenniferMaker.com for the original designs and do not sell the digital files. If you use them, please share photos with us! We love supporting small businesses!
Q: Can I make this with a Cricut Joy?
A: No, unfortunately the floral heart SVG is too intricate to cut well after it’s been shrunk to fit on a Joy mat.
Get my free download of the Floral Heart SVG cut file here:
If you make a layered heart with flowers using my free SVG file, I’d love to see them! Please share your results in my Cricut Crafters & Makers Facebook group where you’ll find hundreds of thousands of crafters like you, sharing their tips, projects, and inspiration.
Love,

Want to remember this? Save this Floral Heart SVG Tutorial to your favorite Pinterest Board!