
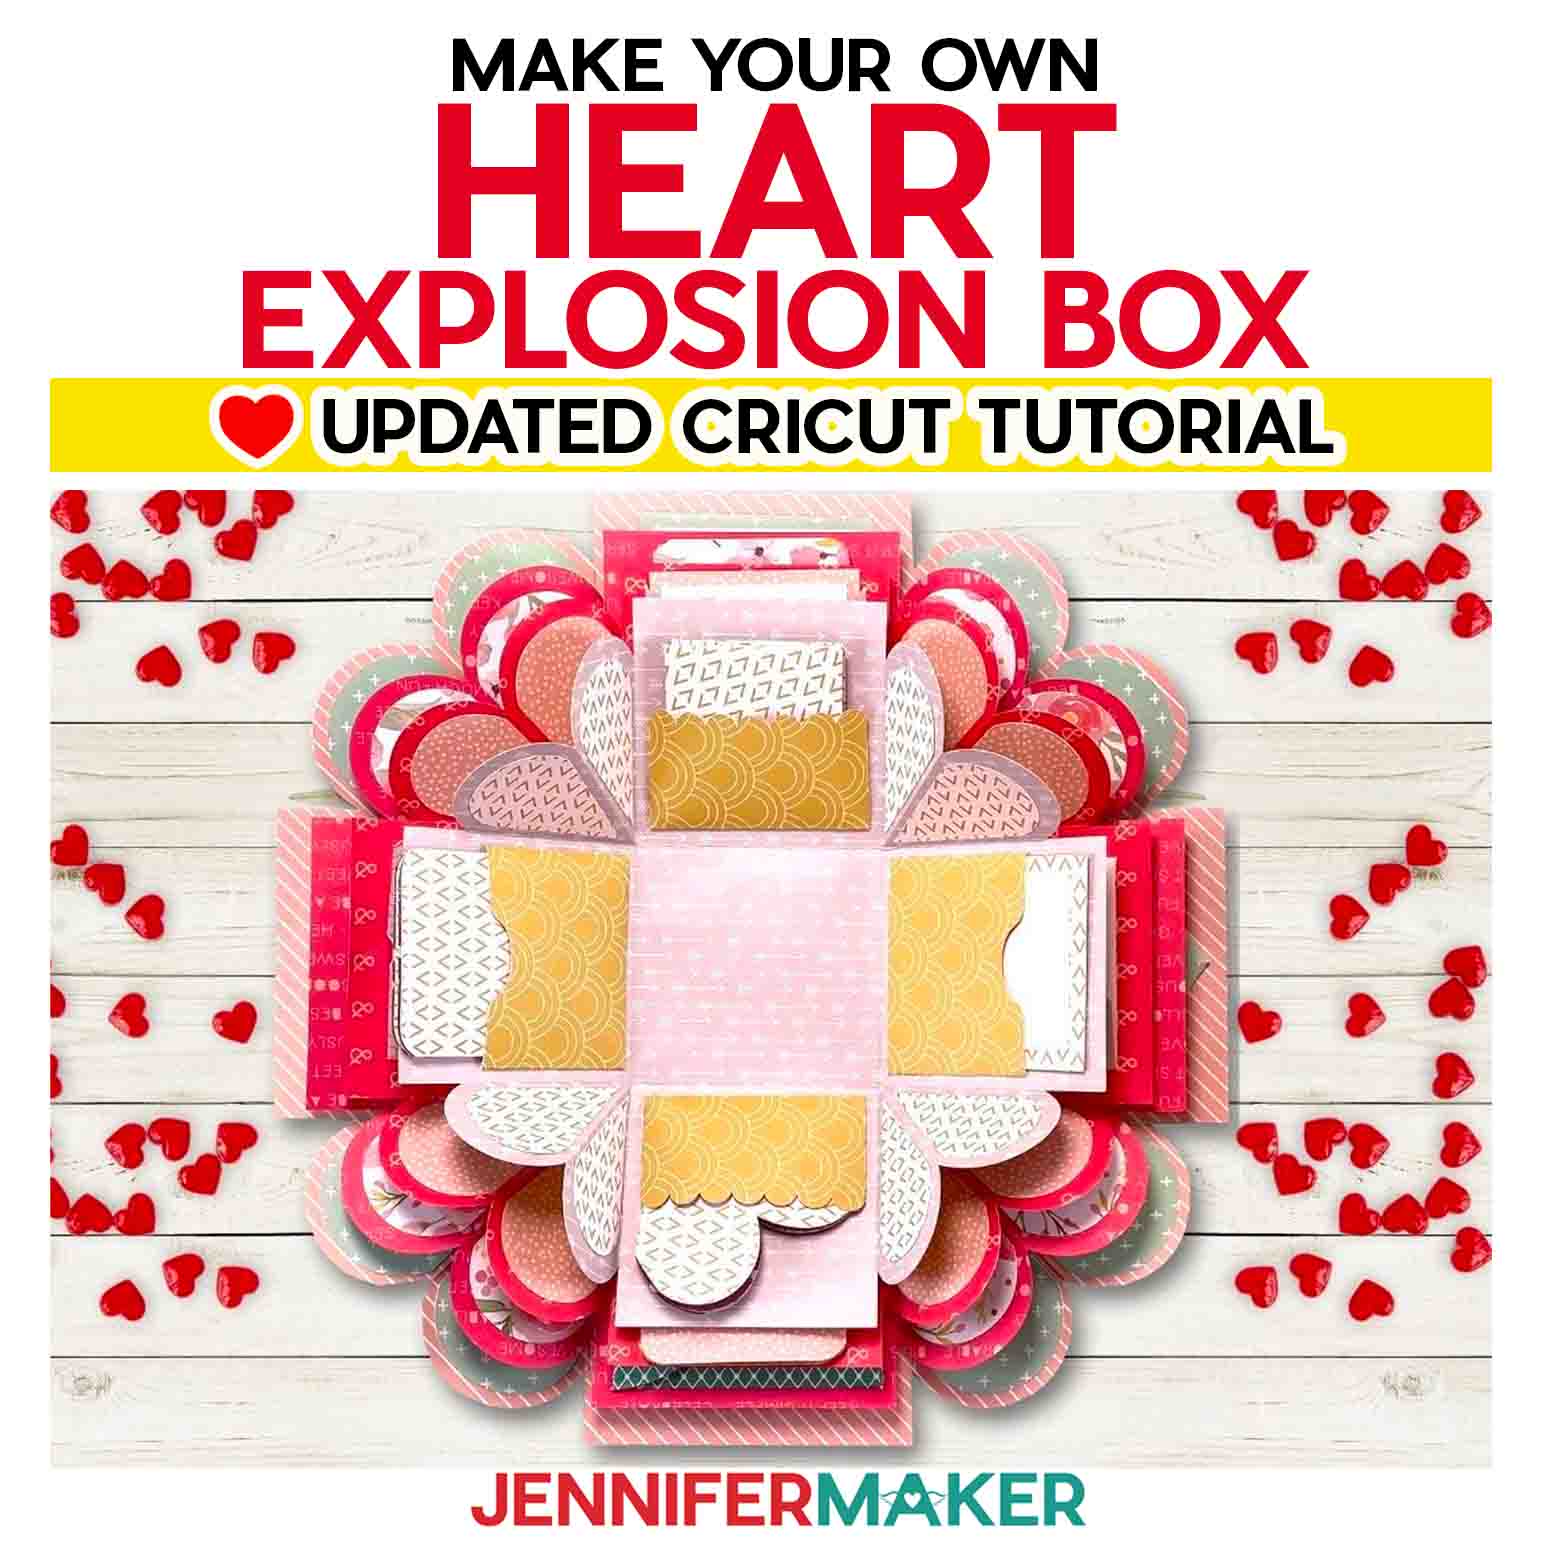
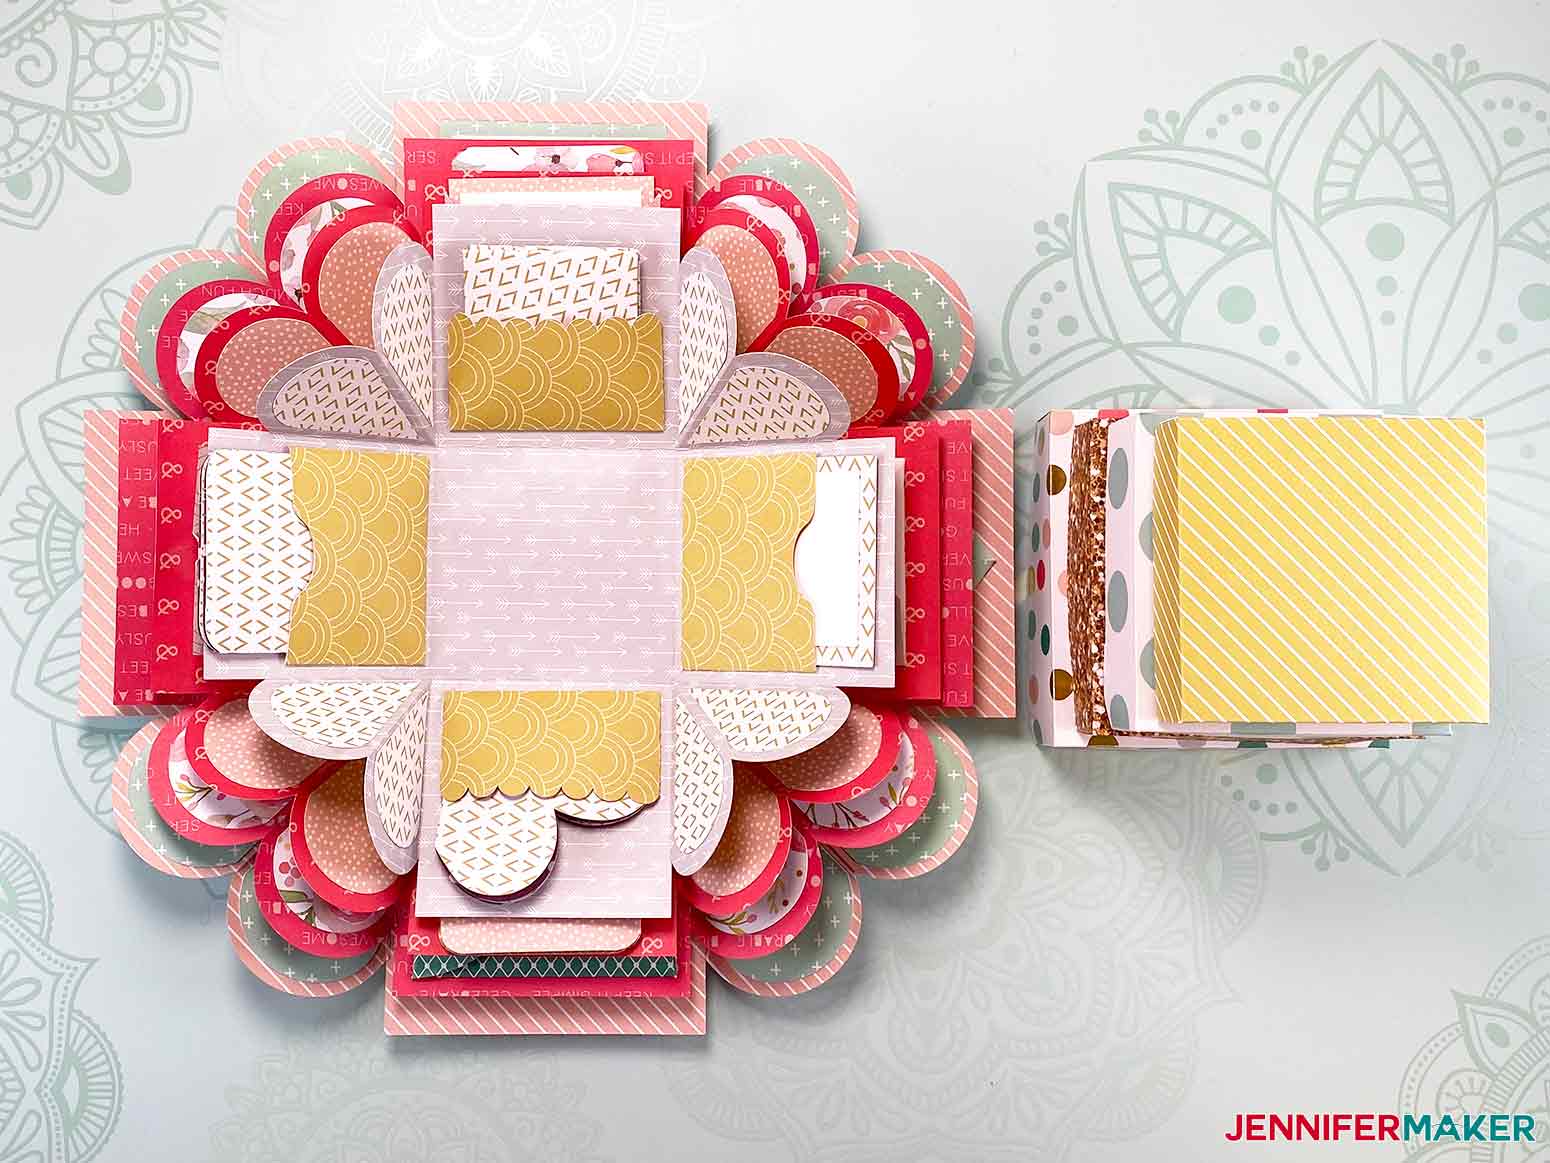
Use this fun explosion box template to surprise someone special! This heart explosion box is a wonderful and unique gift to give! You can even hide cash surprises inside the “exploding” box!
Explosion boxes are one of the funnest gifts to give. If you aren’t familiar with them, an explosion box is a paper box that “explodes” open when you lift its lid. Okay, so, it doesn’t so much explode as fall open — when you open it up, the sides fall down. These make great gifts because you can put in little notes, photos, and even cash! My first explosion box tutorial was such a big hit and we’ve had many requests for another explosion box template. I’ve come up with this fun and beautiful Heart Explosion Box Template for all of you to make! These boxes might look complicated, but they aren’t hard — they just take some time. An explosion box is the perfect gift for a special occasion!
Want to save this project? Enter your email below and we’ll send the project straight to your inbox.
Watch my updated step-by-step video tutorial to see me create this DIY explosion box, perfect for Valentine’s Day!
Please note: This is an UPDATED tutorial that shows even easier ways to make this fun project!

I love that this DIY explosion box template is so flexible! You can change the theme of the box just by switching up the cardstock. Whether for a birthday, Valentines Day, Easter, graduation, or Christmas this explosion box is so easy to modify, making it one of my go to gifts to give!
One of the best things about my explosion box template is its just made of paper and glue. My favorite way to make explosion boxes is to use pads of coordinating cardstock, especially ones like this double-sided stack. You can also make them with just solid colors, and I’ll show you both up close later to help you decide which one you like best before you pick your paper.

To make this heart explosion box, you need 17 sheets of 65 or 80 lb. cardstock — the 12″ x 12″ size. If you use a pad of coordinating cardstock, then you already know the papers go together! It really doesn’t get any easier!
You’ll also want an adhesive. The question is: What adhesive works best for explosion boxes! Options are tacky glue, hot glue, and double-sided sticky tape. I’m going to try all of these adhesives and let you know which one works best for this project!
I used a Cricut cutting machine to cut my cardstock, along with the fine point blade and a green standard grip machine mat.
I also used a scoring stylus as well, but you could also use a scoring wheel if you have a Cricut Maker. Both will require setting and attaching the score lines in the pattern, which is explained in my tutorial below. If you do not use any scoring tool at all, be sure to hide or delete the score line layers in the project before you make it.
And that’s all you need, other than the free template and some time … this project could occupy an entire afternoon or evening!
So let me show you where to find the heart explosion box template, and then I’ll show you how to cut and assemble your explosion box! This post contains some affiliate links for your convenience (which means if you make a purchase after clicking a link I will earn a small commission but it won’t cost you a penny more)! Read my full disclosure policy.
Materials to Make a Heart Explosion Box
See my Amazon shopping list for this heart box project here!
- Seventeen (17) Sheets of 65-80 lb 12″ x 12″ Double-Sided Cardstock – the pattern pack I used is out of stock, but you can use the style you prefer. -OR-
- Seventeen (17) Sheets of 65-80 lb 12″ x 12″ Solid-Colored Cardstock
- A way to cut your cardstock – I used the Cricut Maker cutting machine but you can also use a Cricut Explore cutting machine or a pair of scissors!
- A green Cricut StandardGrip Cutting Mat 12″ x 12″ or a Blue LightGrip mat if it works better for you
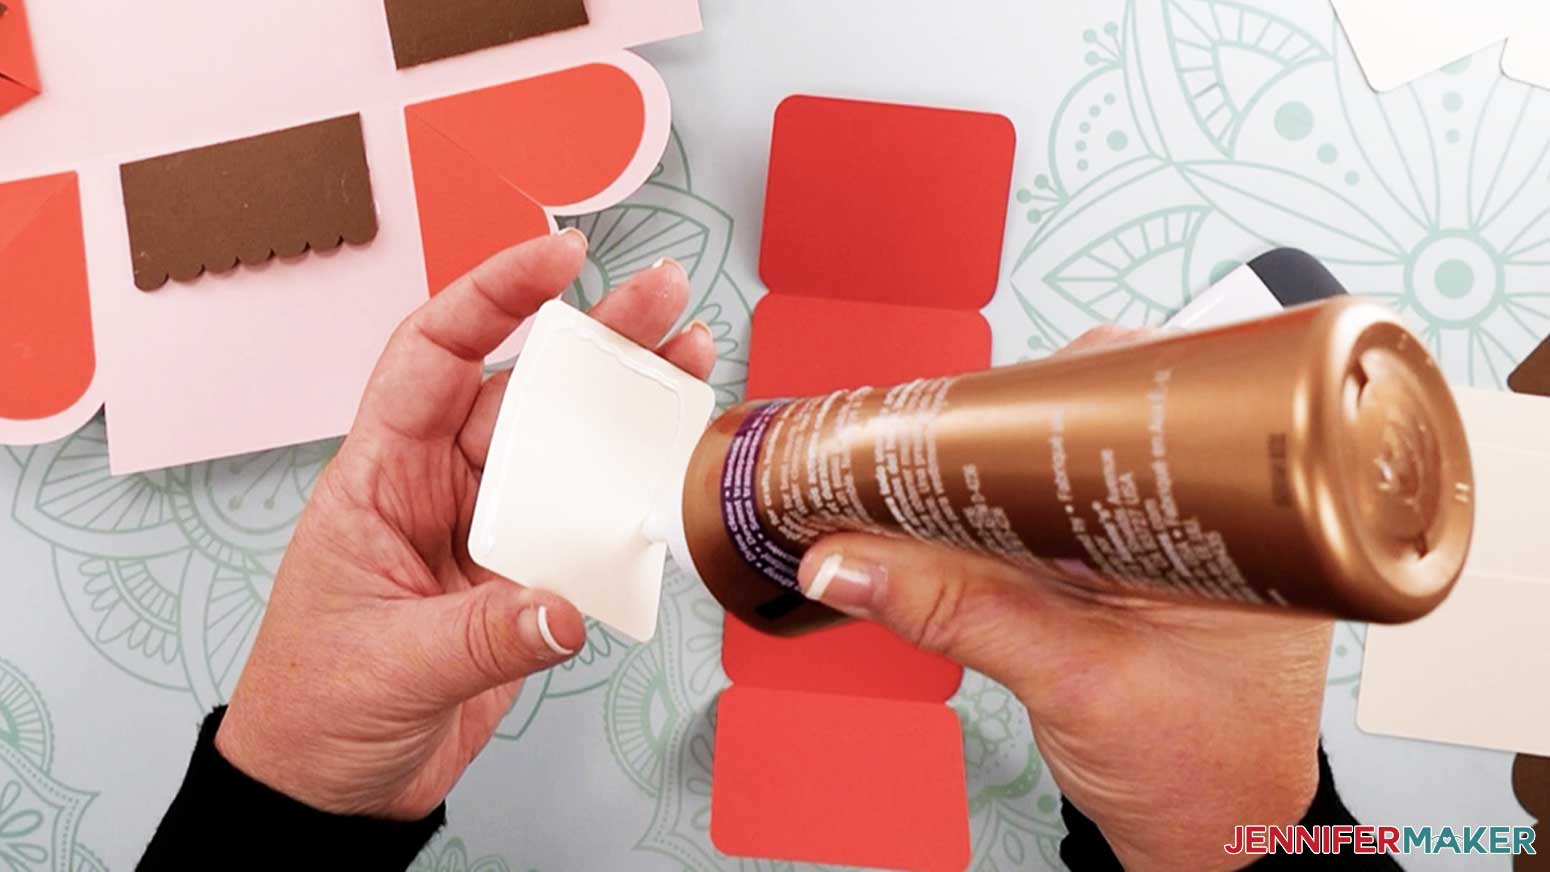
- Small amount of Craft Glue (or another adhesive of your choice)
- (Optional) A way to score your cardstock, such as the Scoring Stylus or Single Scoring Wheel for a Maker
- Cricut Scraper Tool
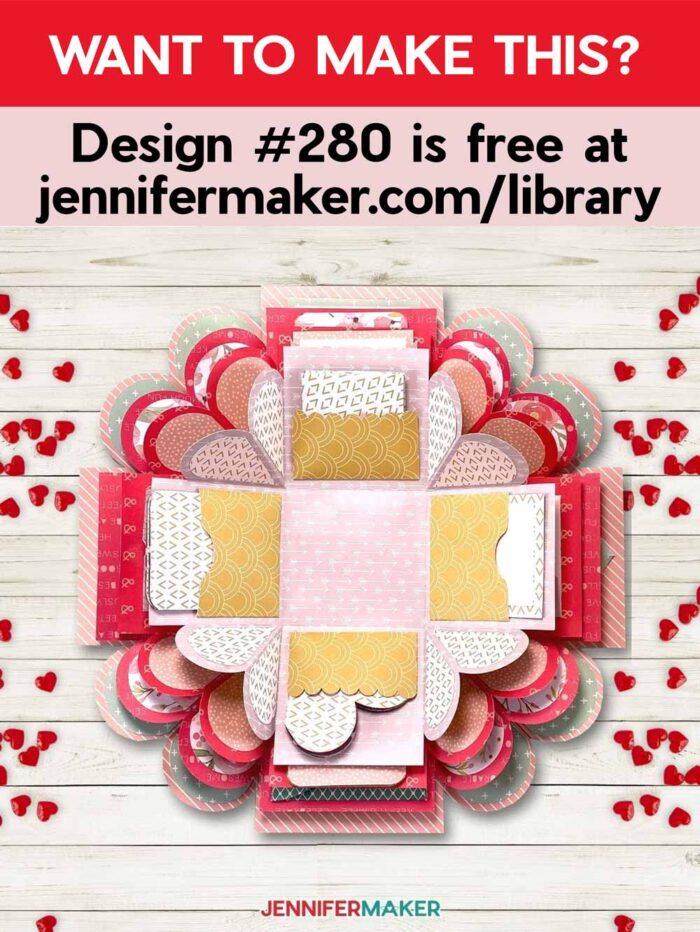
- Design #280 (My free SVG/PDF/DXF design files are available in my free resource library – get the password by filling out the form at the bottom of this page) — note that there is also a Cricut Design Space project link alongside the files in my library, and this link has all the score lines pre-set for you!
How to Make A Heart Explosion Box
Heart Explosion Box
Show your love or surprise someone special with a hand-made Heart Explosion Box. Write thoughtful notes, insert gift cards, photos, and other surprises in this fun explosion box.
Materials
- Seventeen (17) Sheets of 65-80 lb Double-Sided Cardstock - the pattern pack I used is out of stock, but you can use the style you prefer. -OR-
- Seventeen (17) Sheets of 65-80 lb Solid-Colored Cardstock
- Small amount of Craft Glue - or another adhesive of your choice
- Design #280 - My free Heart Explosion Box Template (available in my free resource library - get the password by filling out the form at the bottom of this page) note that there is also a Cricut Design Space project link alongside the files in my library, and this link has all the score lines pre-set for you!
Tools
- A way to cut your cardstock — I used the amazing Cricut Maker, but you could also use a Cricut Explore or cut by hand
- A green Cricut StandardGrip Cutting Mat 12" x 12" -OR-
- Blue LightGrip mat if it works better for you
- Scoring stylus to make the score version -OR-
- Single Scoring Wheel - for Makers
- Scraper Tool
Instructions
STEP 1: GET MY FREE HEART EXPLOSION BOX TEMPLATE
My free heart explosion box template (Design #280) is available in SVG/DXF/PDF formats from my free resource library. I'll show you how to use the SVG with a Cricut. There are two versions in the SVG folder. One is in a folder named “No Scoring Tool Needed.” This template includes dashed cut lines, which act as score lines to help with folding and assembly.
The second version is in a folder named: “Scoring Tool or Stylus Needed.” These include solid lines that can be changed to score lines and require a scoring tool.
I will go over both versions in this tutorial so you can decide which one you’d like to use. Upload the one you want and add it to your Canvas.
NOTE: There is also a link to open a scoring tool version of the project right in Design Space if you'd prefer. Click the link to open it in the software, then click "Edit a Copy." Everything in this file is free – there’s no cost to use it. All the score lines are pre-attached to the base layers to make it really easy to use, just skip to Step 3.
TIP: If you're not sure how to upload an SVG cut file to Cricut Design Space, watch this helpful video training series I made. If you're on an iPhone or iPad, here's how to download and upload SVG files to the Cricut Design Space app.
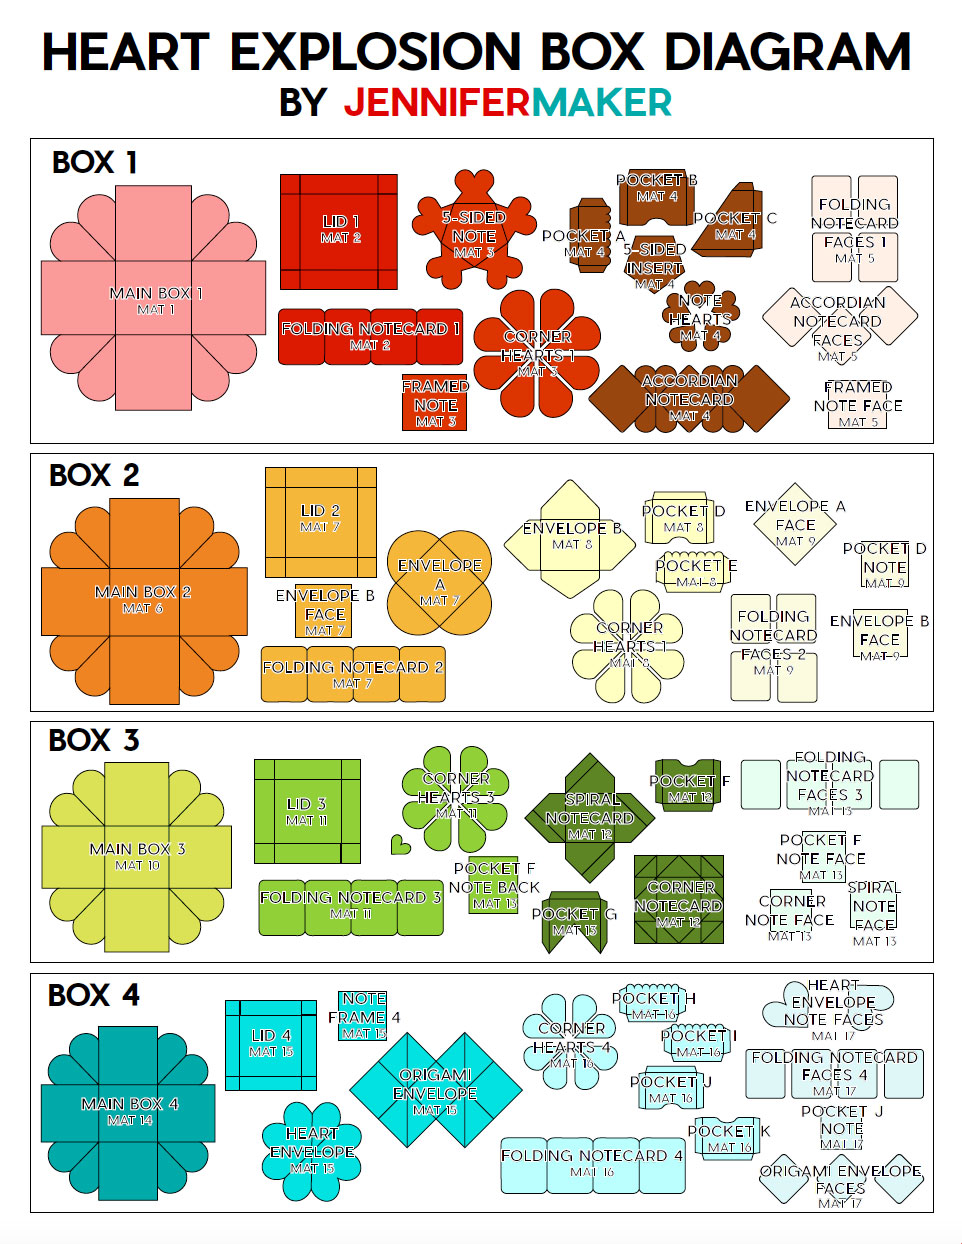
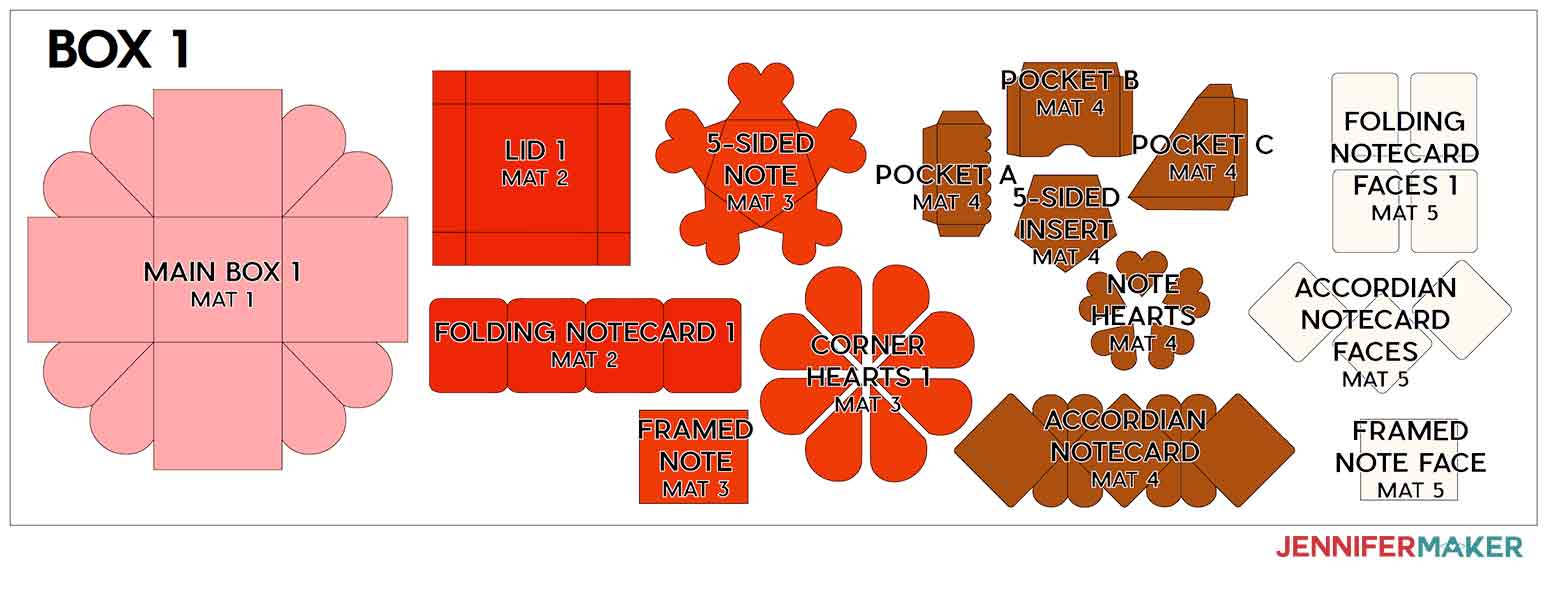
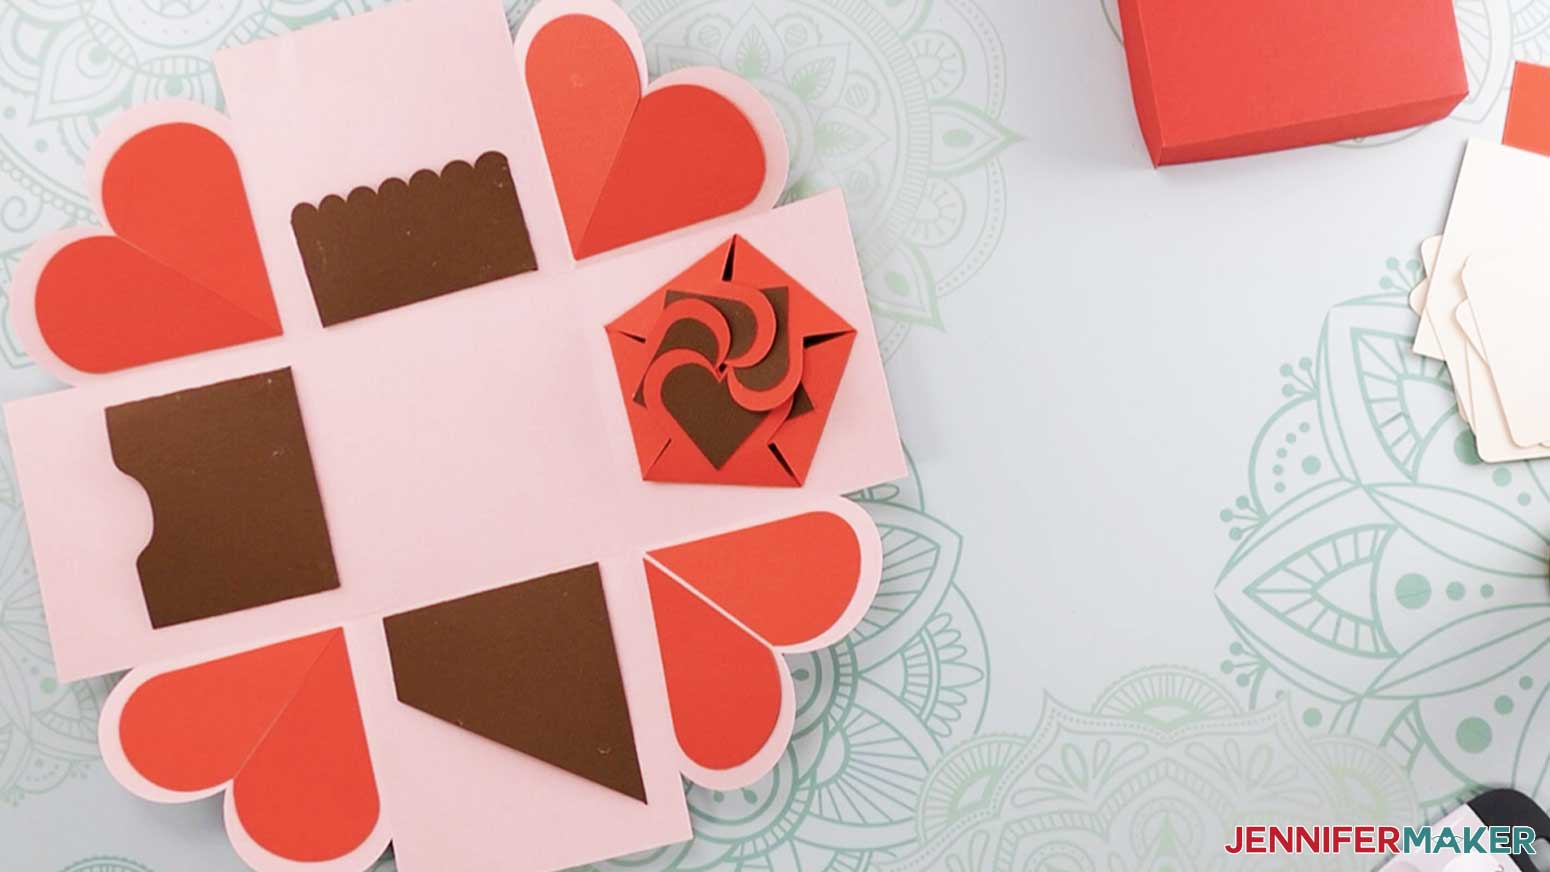
Please note that there is a printable diagram inside the file that contains a picture of every piece of this template and its name -- this will be useful for keeping track of all the pieces and understand which piece is which as we put this fun project together!
STEP 2: PREPARE THE EXPLOSION BOX PIECES
NOTE: To make this project as easy as easy as possible for you, I colored the layers in rainbow order. I did this so you can click Make It right away and know that the the pieces will cut out in order from box 1 to box 2 to box 3 to box 4. This is because Cricut Design Space always sorts your layers by color into the cutting mats, and it will put white first, then black, then all the colors in rainbow order. To learn more about cutting mat order, see my blog post on the topic.
I will show you how to make this explosion box with solid colored cardstock that matches the color in the design file and in the printable diagram, that way you always know which color I am working with.
Now the solid rainbow colors are fun, but I actually prefer the way the project looks using double-sided patterned cardstock. So if you also want to use patterned cardstock, or just want to use different colors than I have, you can keep this easy by NOT changing any of the colors in the design file to preserve the cutting order, but then just put whatever colors or patterns of cardstock you want on your cutting mats as you go along!
"No Scoring Tool Needed” Version
This is what the dashed cut line Heart Explosion Box SVG file looks like in Cricut Design Space.
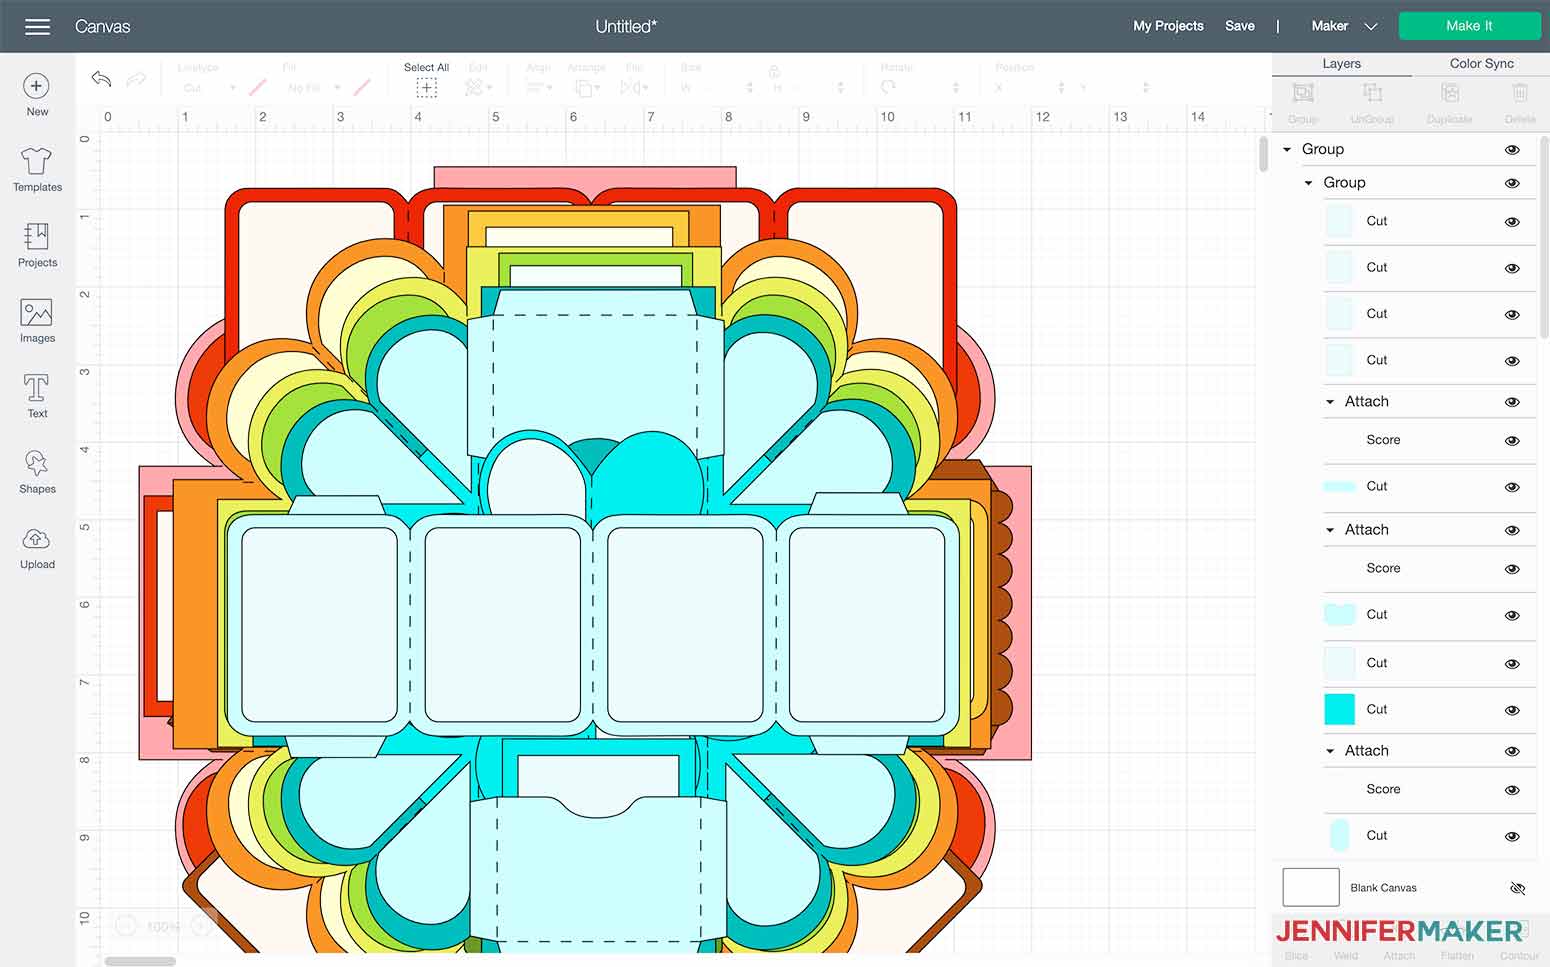
This design contains four boxes and lids with various pockets, envelopes, and notecard inserts. And when you first upload them to Cricut Design Space, they are all on top of each other. If you want to see the pieces clearly, you can click Ungroup in the upper right and then separate each of the four boxes from one another.
Everything is already set to cut, so you can skip to Step 3.
“Score Tool Needed” Version
This is what the score line Heart Explosion Box SVG file looks like in Cricut Design Space. It takes a few more preparation steps.
First, delete the layer with instructions in the Layers Panel.
Next, select the design and click the Ungroup icon.
Then pull the groups apart to see all four on the Canvas.
Select each of the groups and ungroup them.
Starting at the top of the blue section, look for layers that look like nothing more than empty, uncolored lines. Those are the score lines we need to adjust.
Select the top score line in the Layers Panel. Use the Operation menu to change it to Score. That will change the solid line to a dashed line.
Then, hold your Shift key to click the layer below it, then click "Attach."
Repeat the process for the other blue pieces for a total of nine adjusted layers.
NOTE: Some intended score layers have parts colored in. That’s because the lines are closed to form a shape and when that happens, the software colors in that section. Once you change the Operation to score, the colored part goes away.
Next, adjust and Attach the rest of the score layers. The green, yellow/orange, and red sections have seven layers each to adjust.
TIP: If you don't feel like hand writing special notes on the white notecards in this project, you can have your Cricut do the work for you. Read my Cricut Writing and Pen Tutorial for tips, tricks, and font ideas.
STEP 3: CUT YOUR CARDSTOCK
Make sure the correct machine is selected and click "Make It."
On the Prepare screen, you should see 17 mats. If there are more than 17 you may have missed a score line. Click “Cancel” and go back to the Canvas and check your work.
If everything looks good, click back on the first mat and click “Continue.”
Select “Medium Cardstock” and “More Pressure” to ensure a nice clean cut.
If you are making the version that requires a scoring tool, make sure to select the right tool.
You can stick with the “Single Scoring wheel” or click “edit tools” and choose the “scoring stylus.”
I like to use the scoring stylus because I can cut and score at the same time instead of having to switch out my blade for the scoring wheel.
Make sure the scoring stylus is in Clamp A and the fine point blade is in Clamp B and you are ready to go!
If you are using the design with preset dashed cut lines you won’t need a scoring tool. Just double check that your fine point blade is in Clamp B and you are good to go.
Place the material you want for your first box onto your green StandardGrip cutting mat, load it into your machine, and press the flashing button to begin cutting.
NOTE: If you're using double-sided patterned cardstock put the side you want to appear on the outside of your box face down on your mat, that way your scorelines will be on the side of the cardstock that is inside the box.
When the cut is finished, unload your mat, flip your mat over onto your surface, and peel your mat away from the cardstock to avoid ripping or curling your cardstock.
Now just continue cutting until all 17 sheets are cut out. And note that those very light colored layers you see in my design file can all be cut on white cardstock, as these are the notecards and you'll want to put messages on them.
As you cut each layer, put them in stacks by box number. Refer to the printed diagram sheet if you are ever unsure which pieces goes with which box, but remember that if you do not change the colors, everything will cut in the proper order!
STEP 4: ASSEMBLE YOUR EXPLOSION BOXES
Let's assemble our first box! With all your pieces cut, refer to the printable diagram and separate the pieces according to the box design.
Heart Explosion Box #1 (First Box)
Collect all of your pieces to assemble the first heart explosion box (box 1).
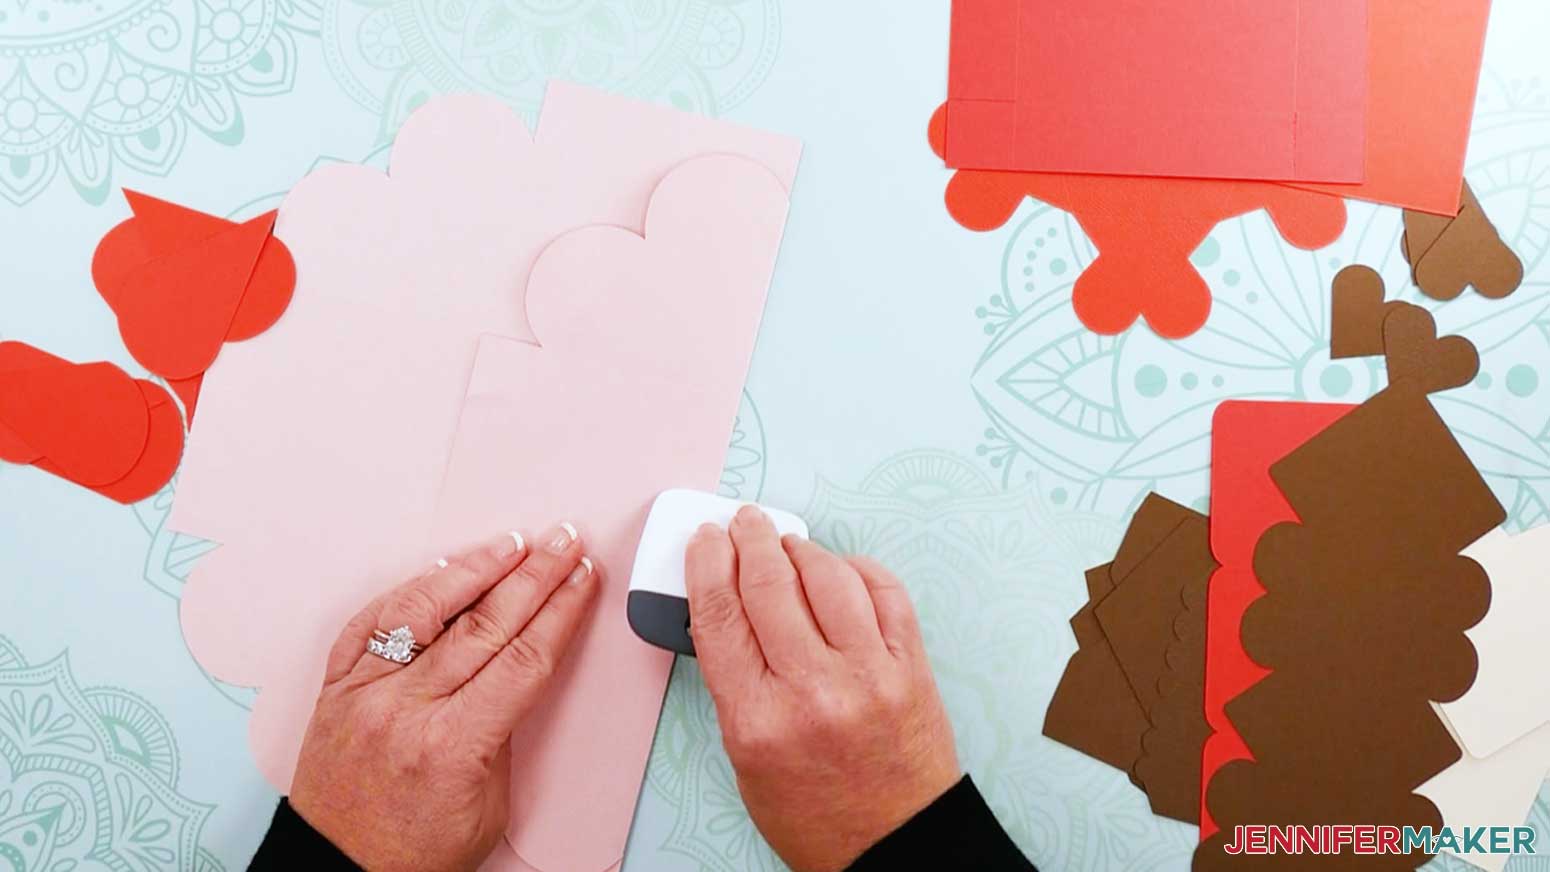
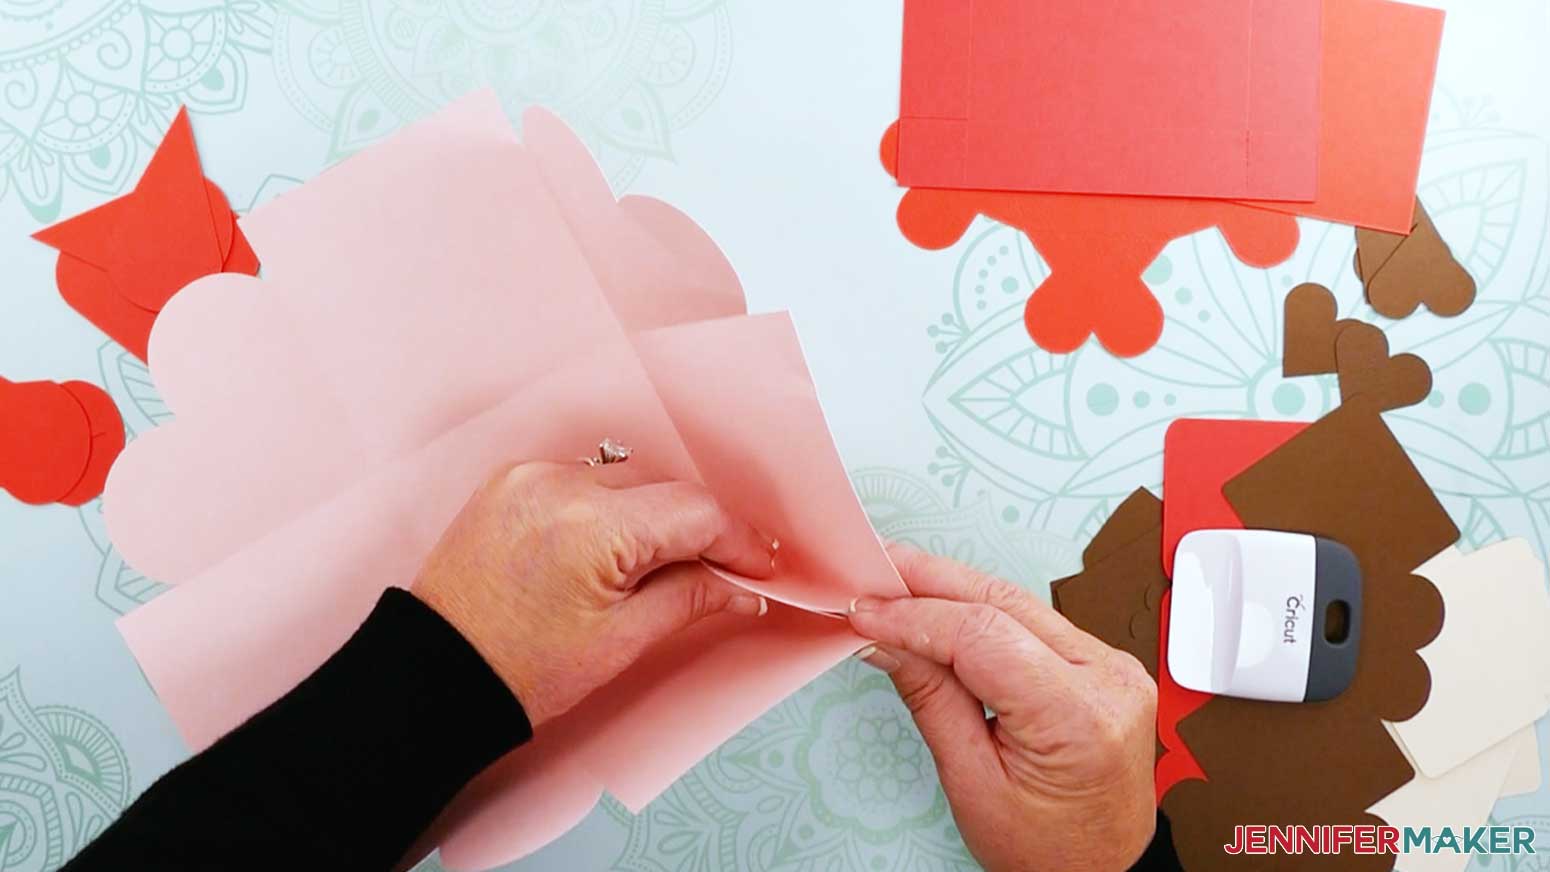
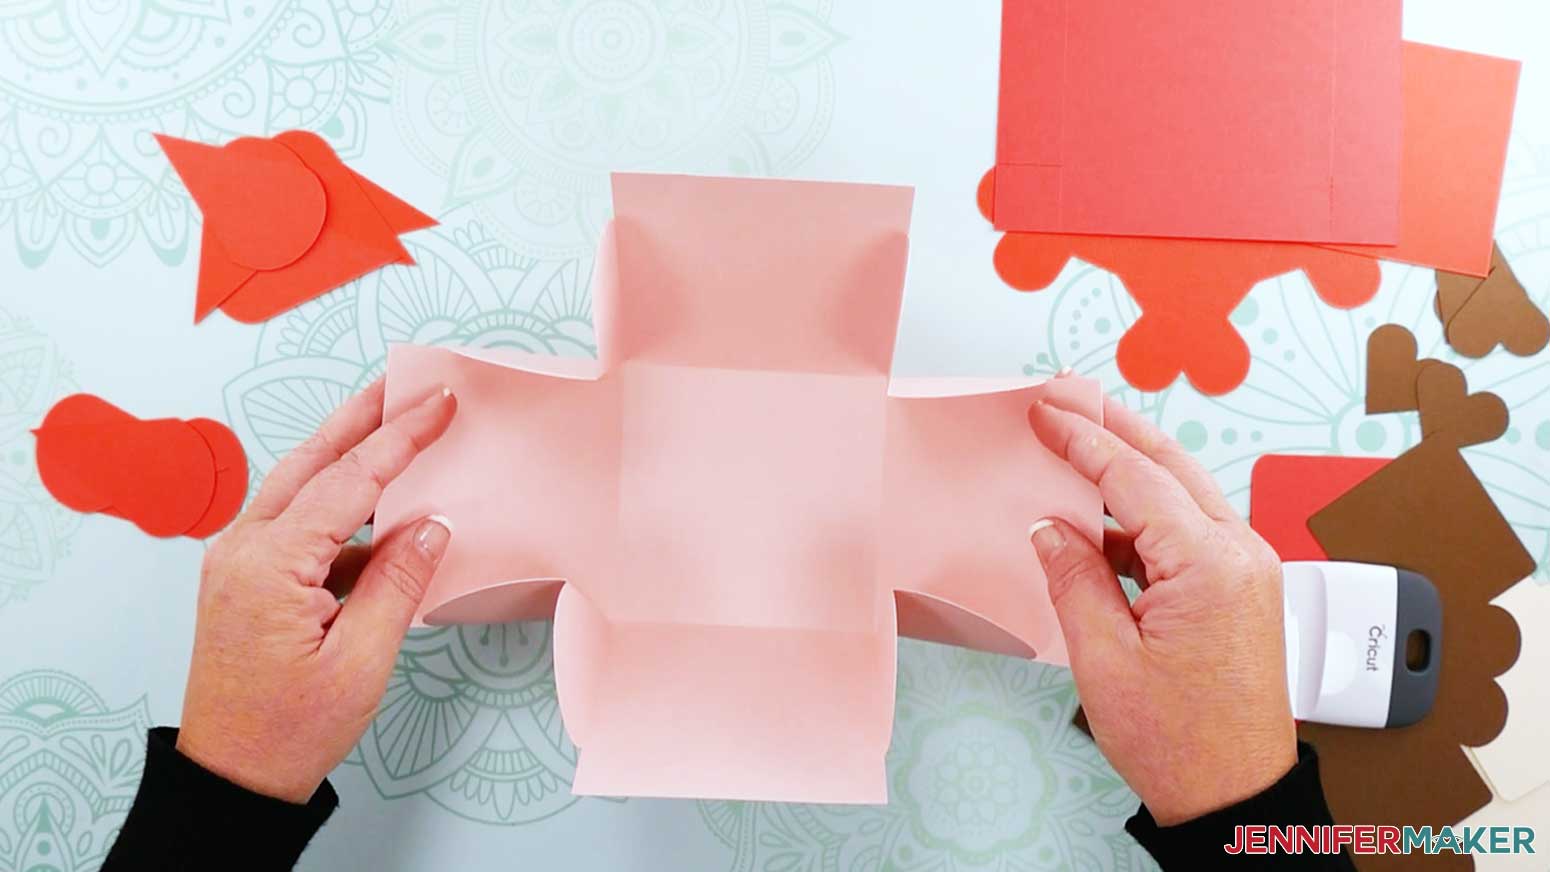
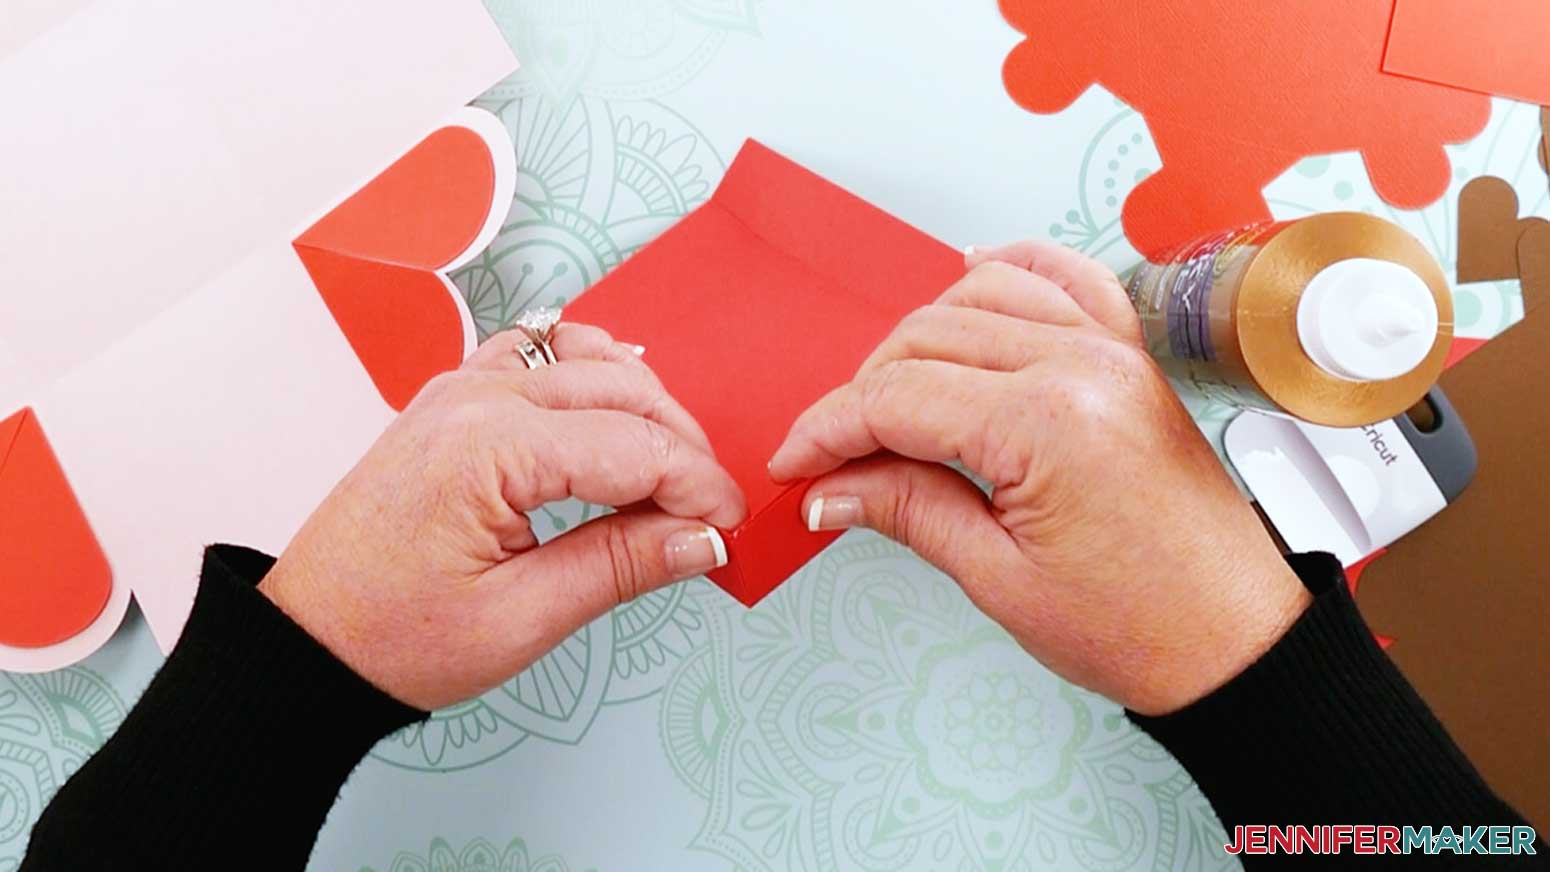
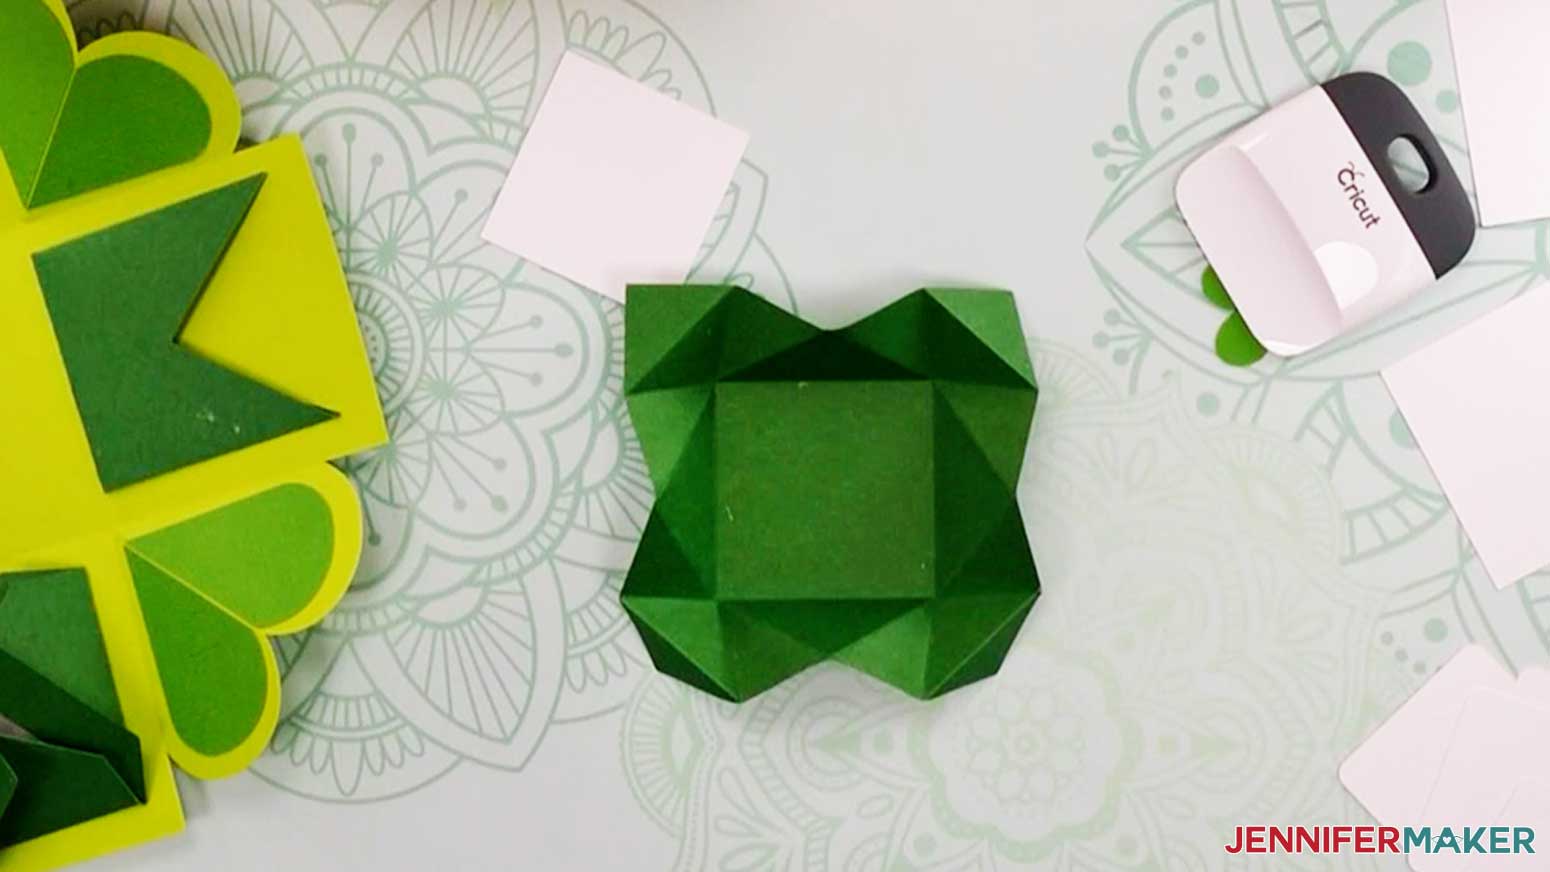
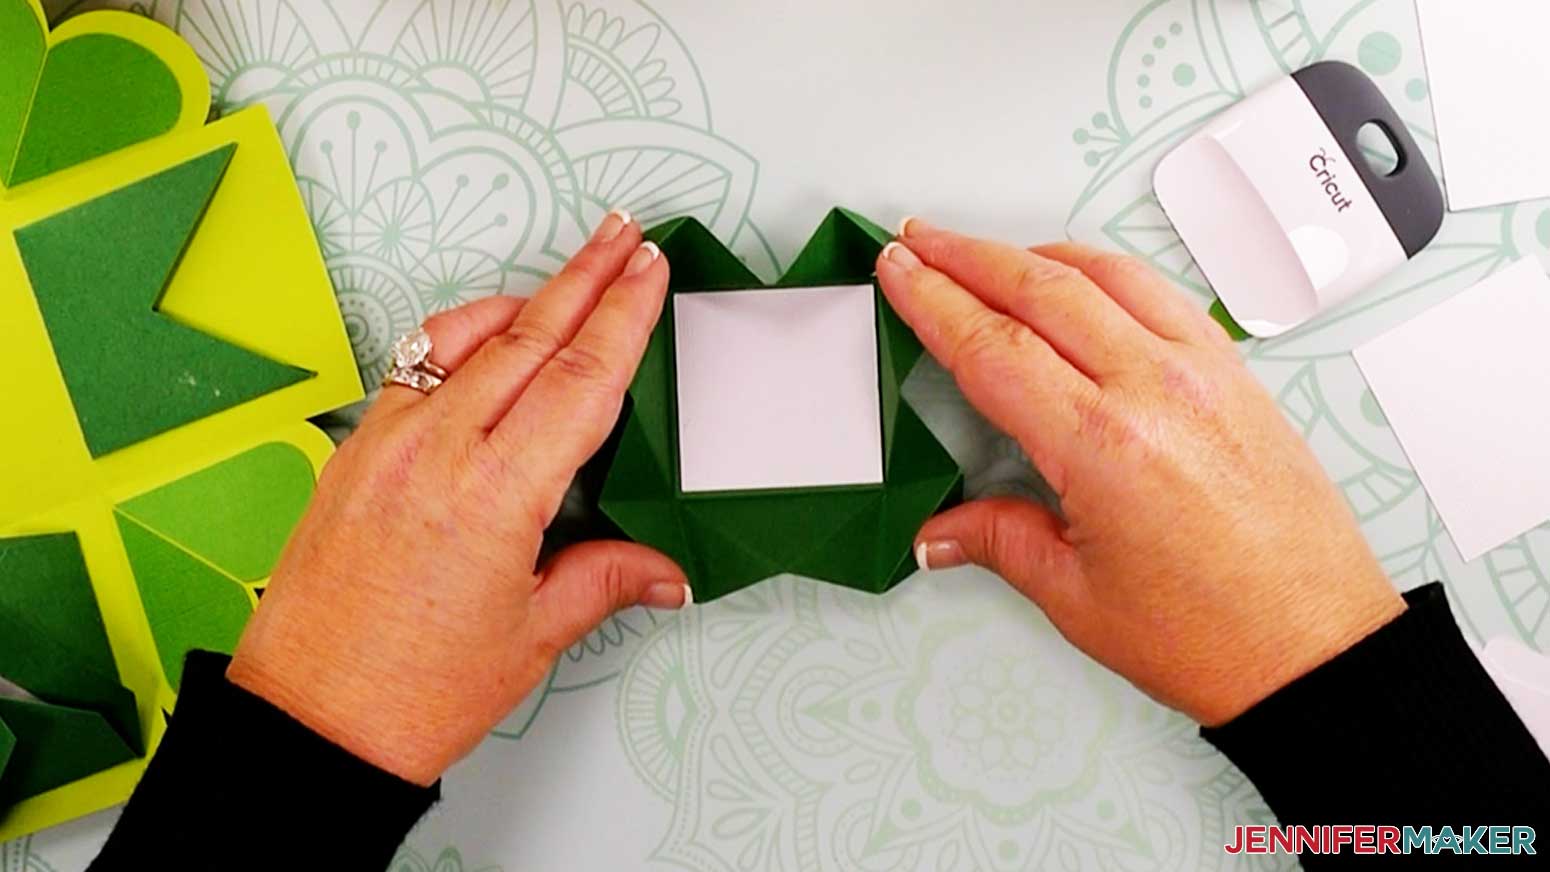
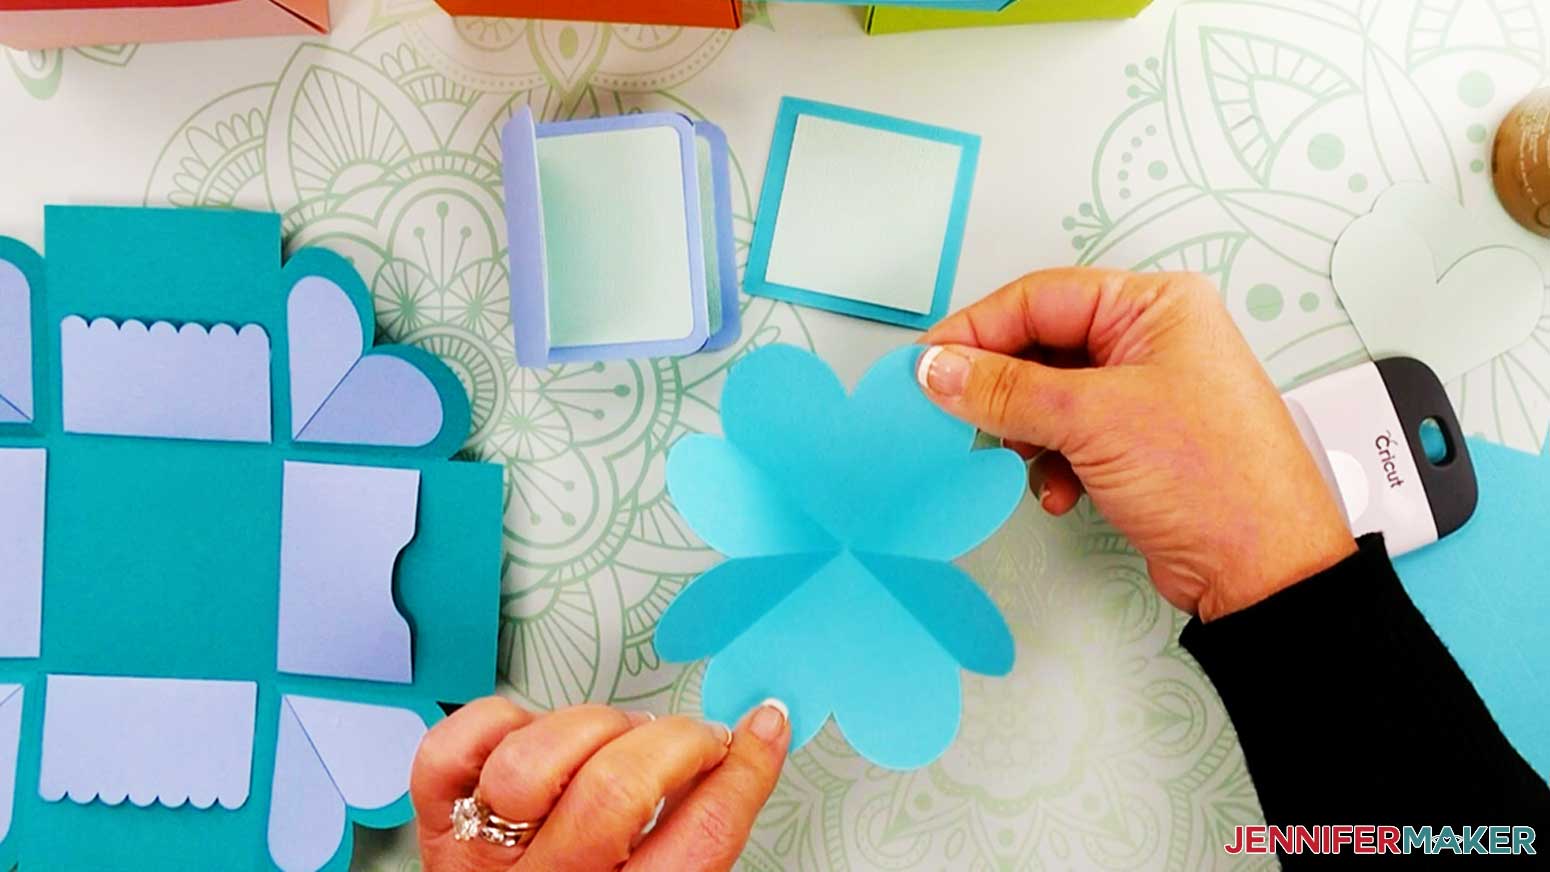
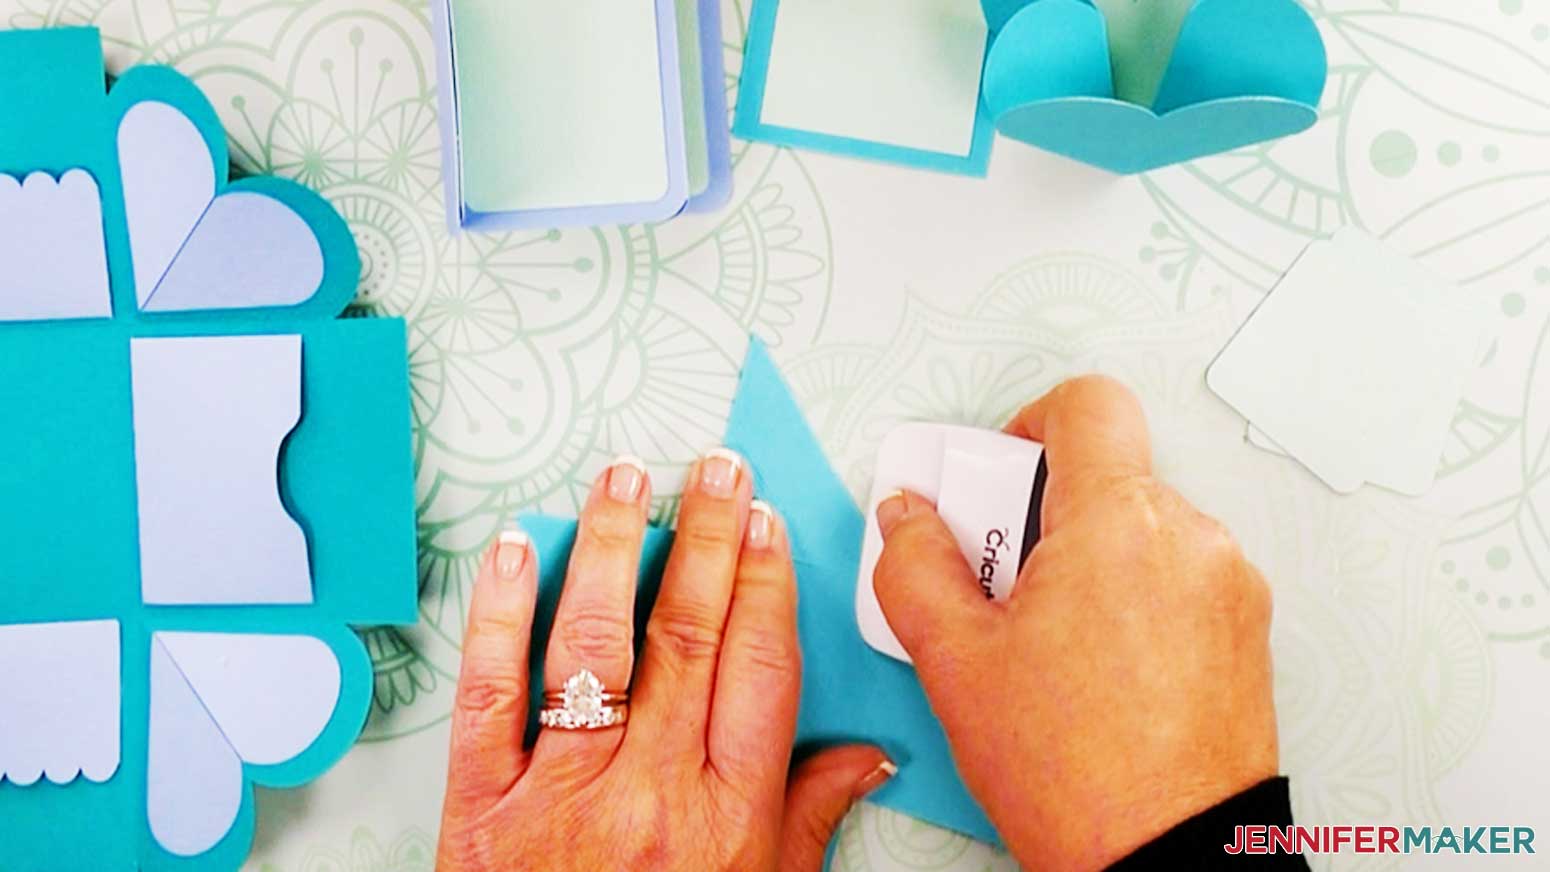
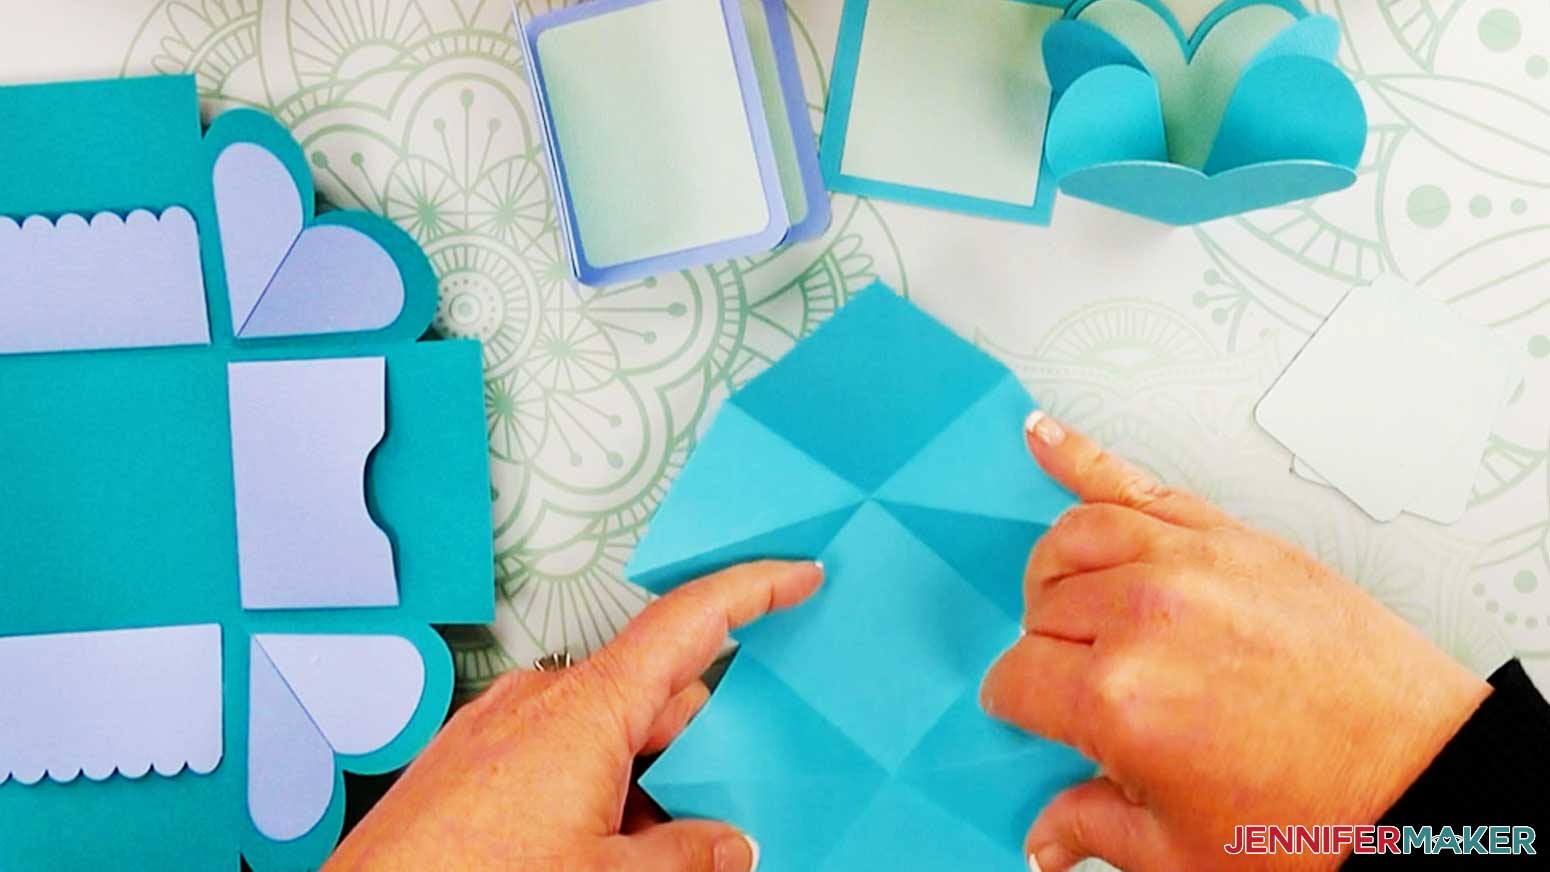
Take the main box piece and begin folding the four box sides on the score lines with the inside of the box face up. I am using a scraper tool to get a sharp fold.
Push in the corner heart as you bring the two sides of the box together.
Repeat this process for the remaining three corners of the heart explosion box piece.
This is what box 1 should look like with the corner folds in place.
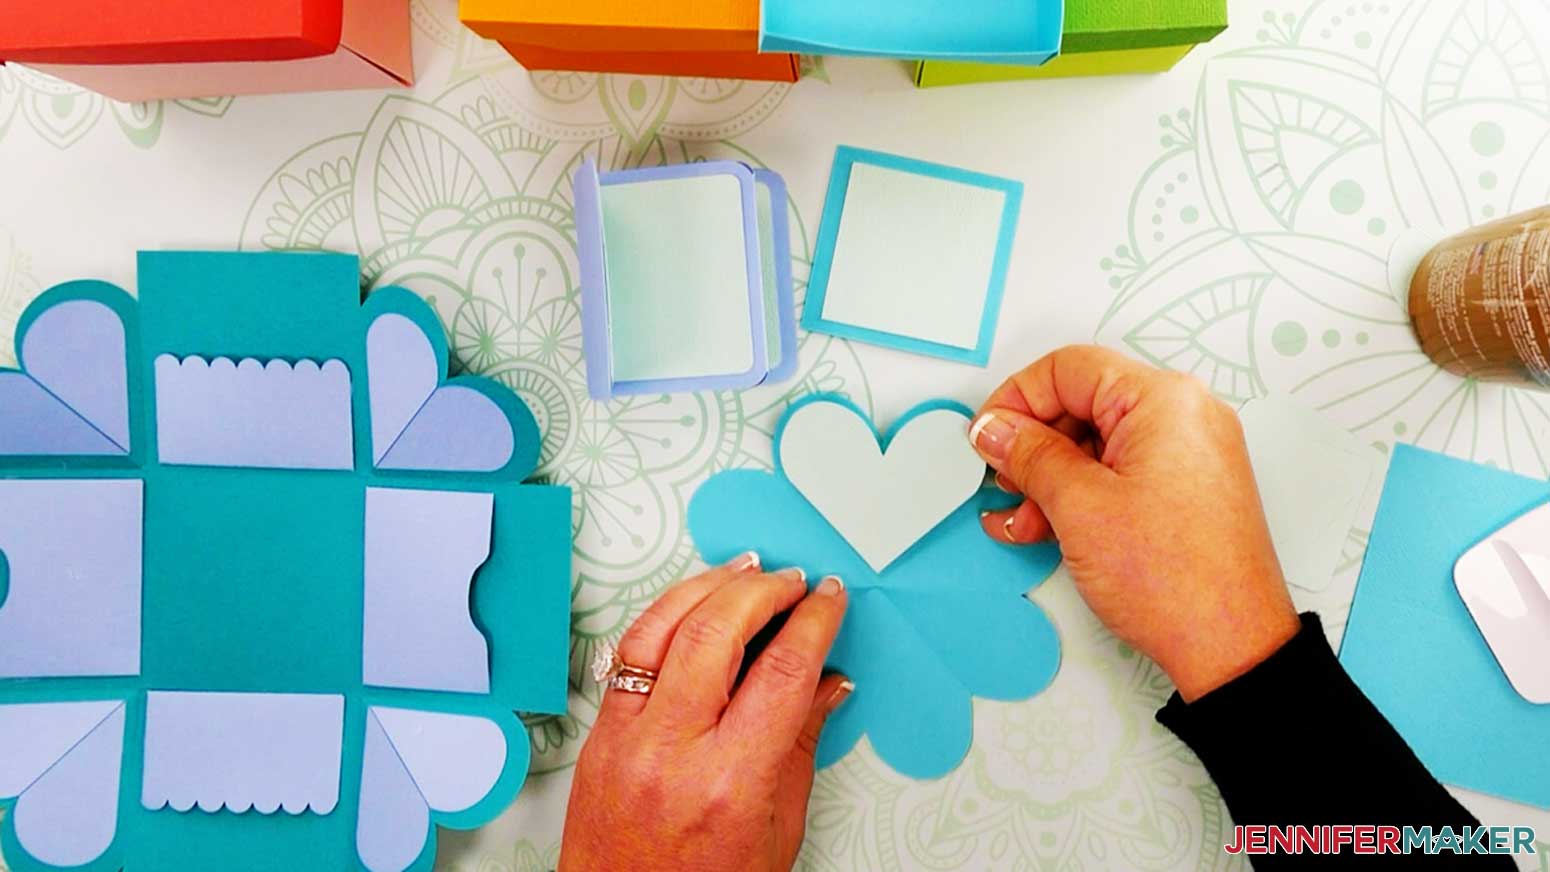
Take the half-heart pieces and begin gluing them to the heart-shaped corners of the box piece. The part of the half heart with a sharper point at the top (as shown below) is the inside part of the heart.
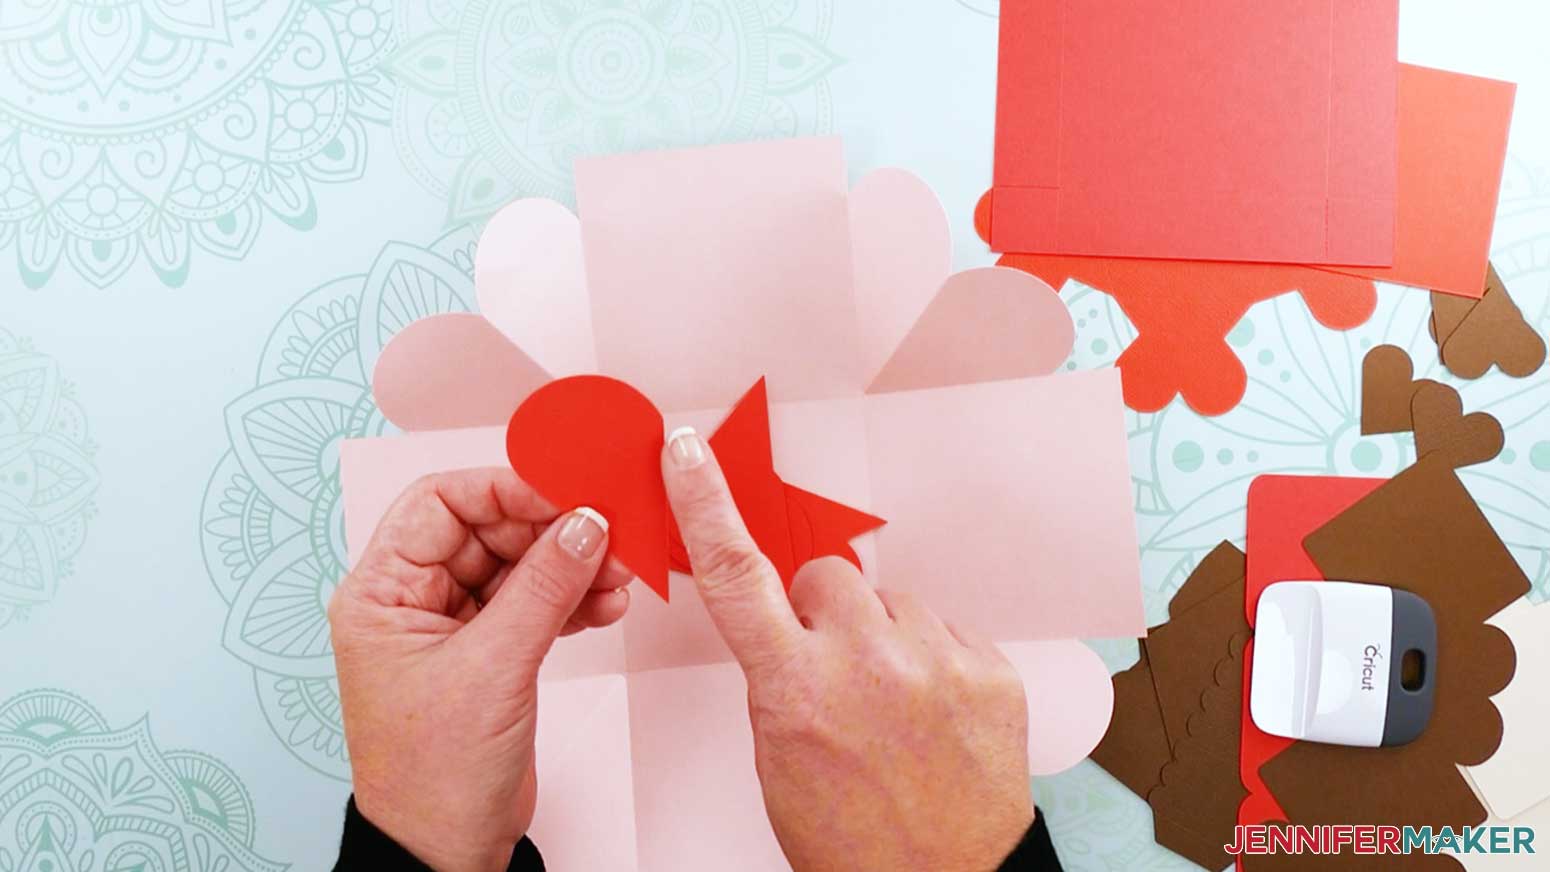
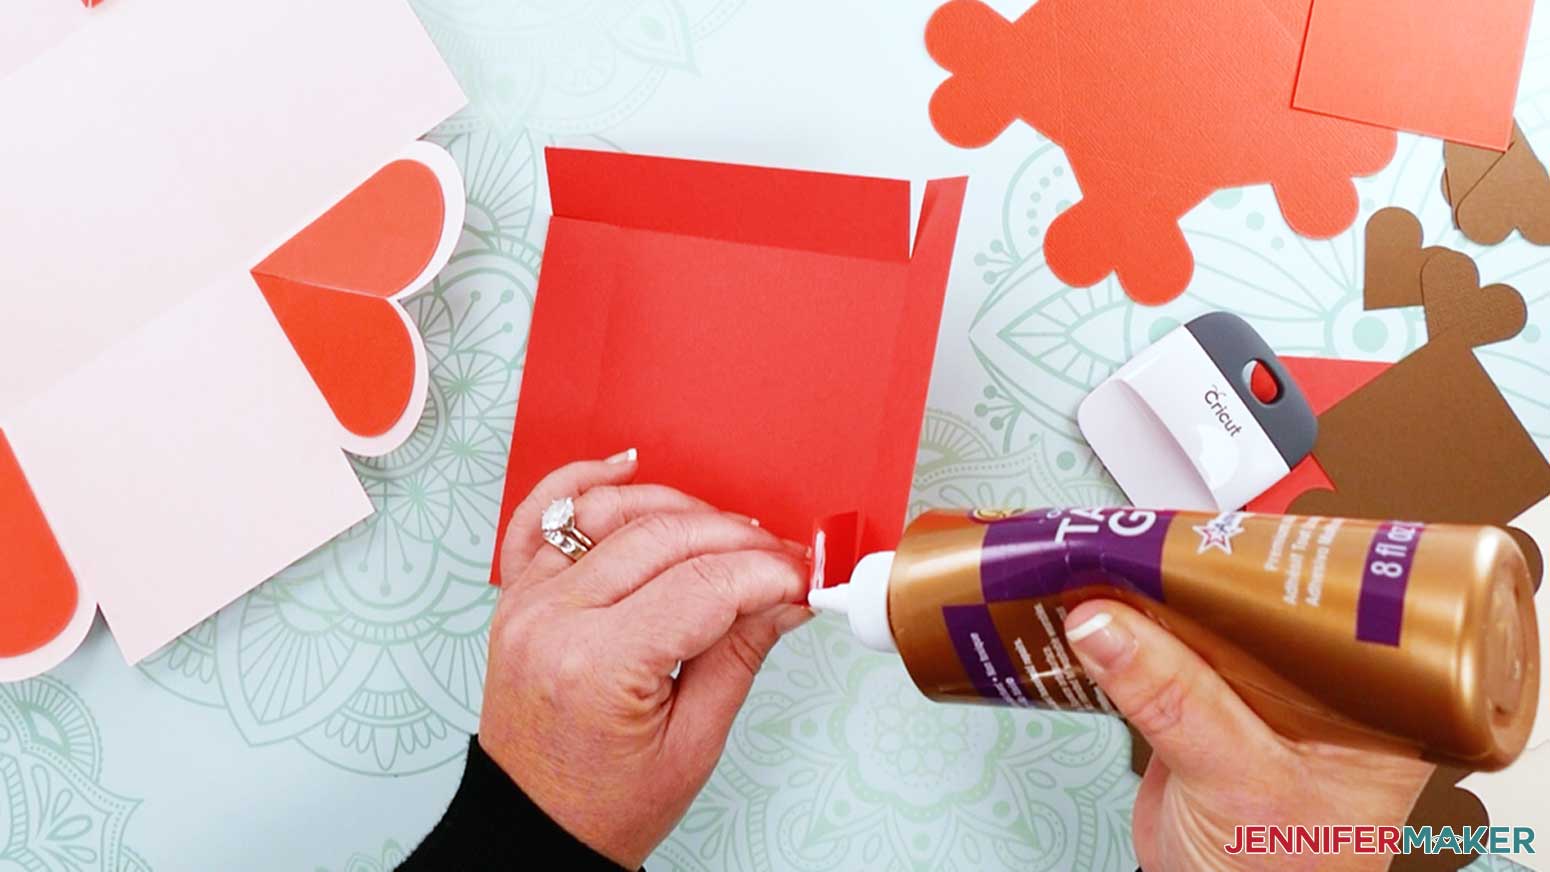
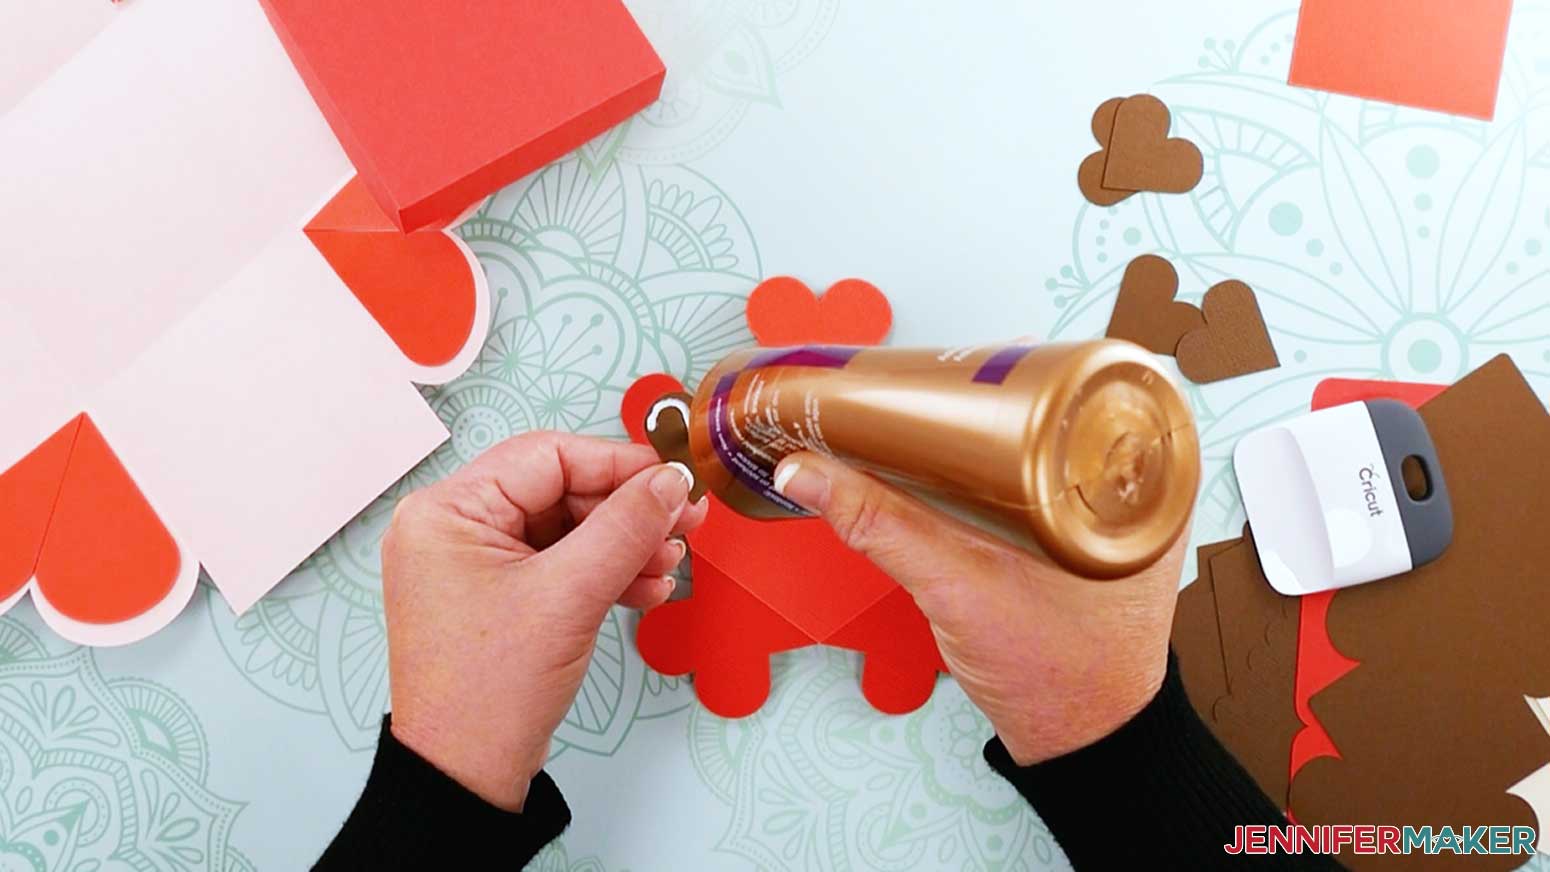
Add glue to the half heart piece.
Note: When I made my first box I thought I would try double-sided scrapbook adhesive. I do not recommend using this type of adhesive for the project. I found it was not strong enough and the pieces were lifting and falling off. I also tried using a hot glue gun. That ended up being a bit messy and bulky. Instead, I recommend tacky glue!
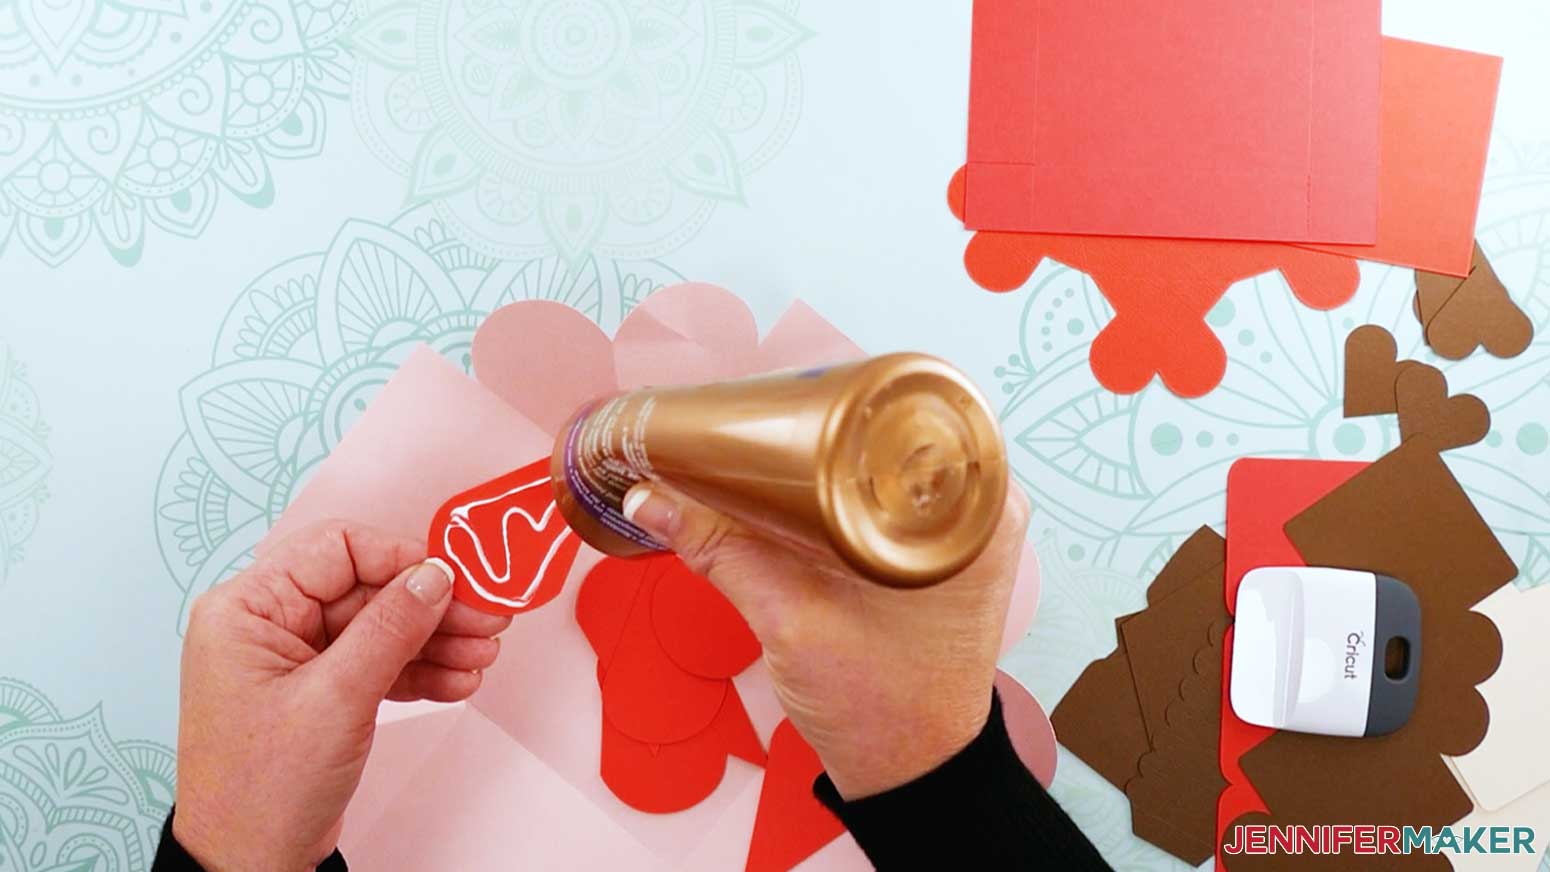
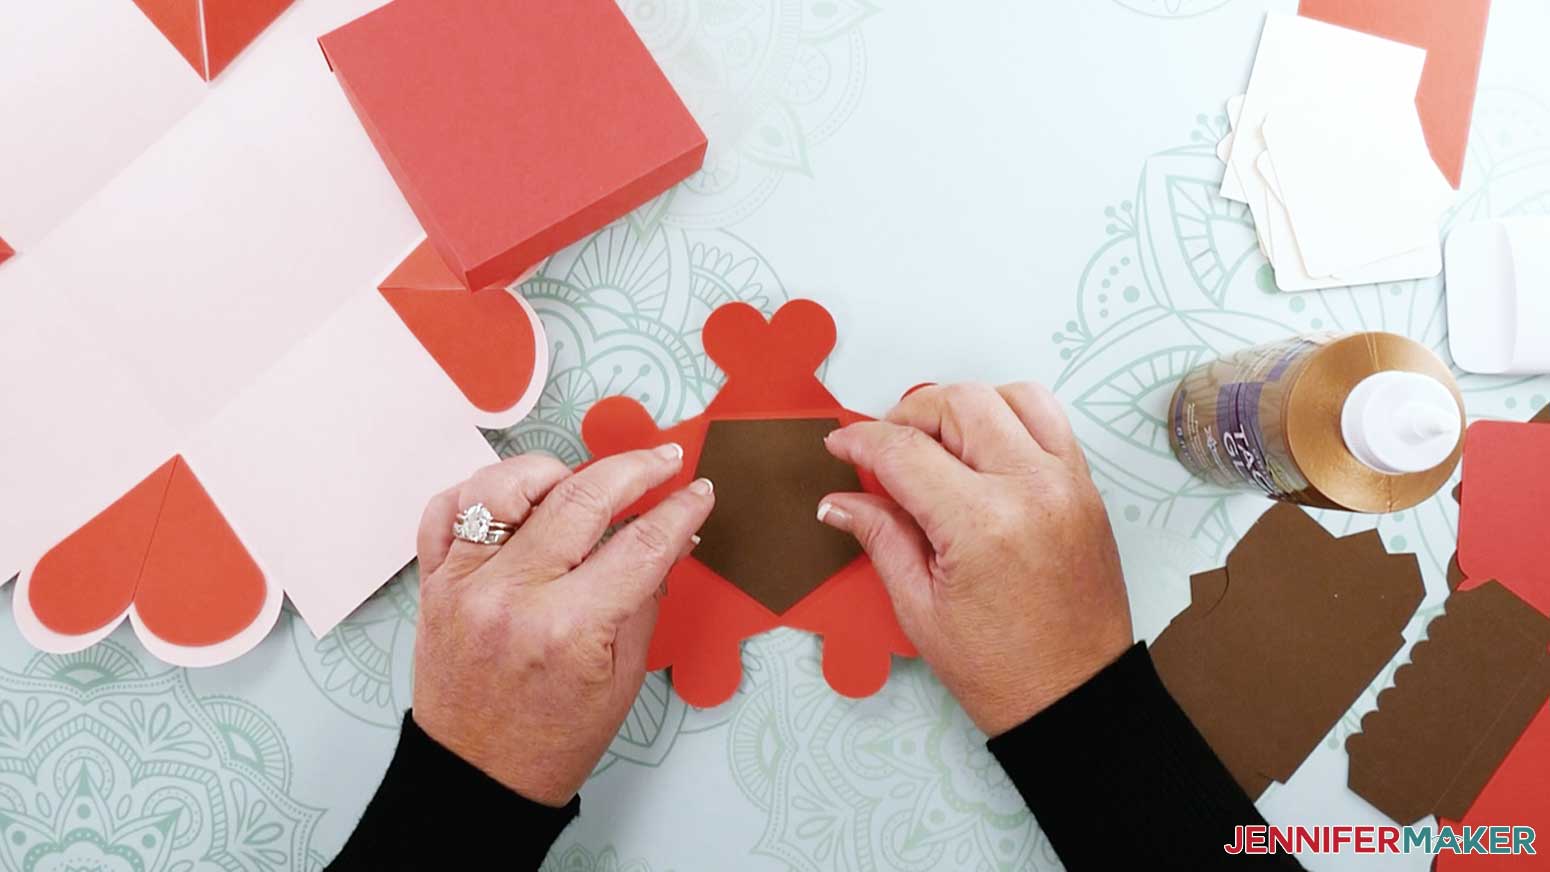
Press piece in the corner of the box piece.
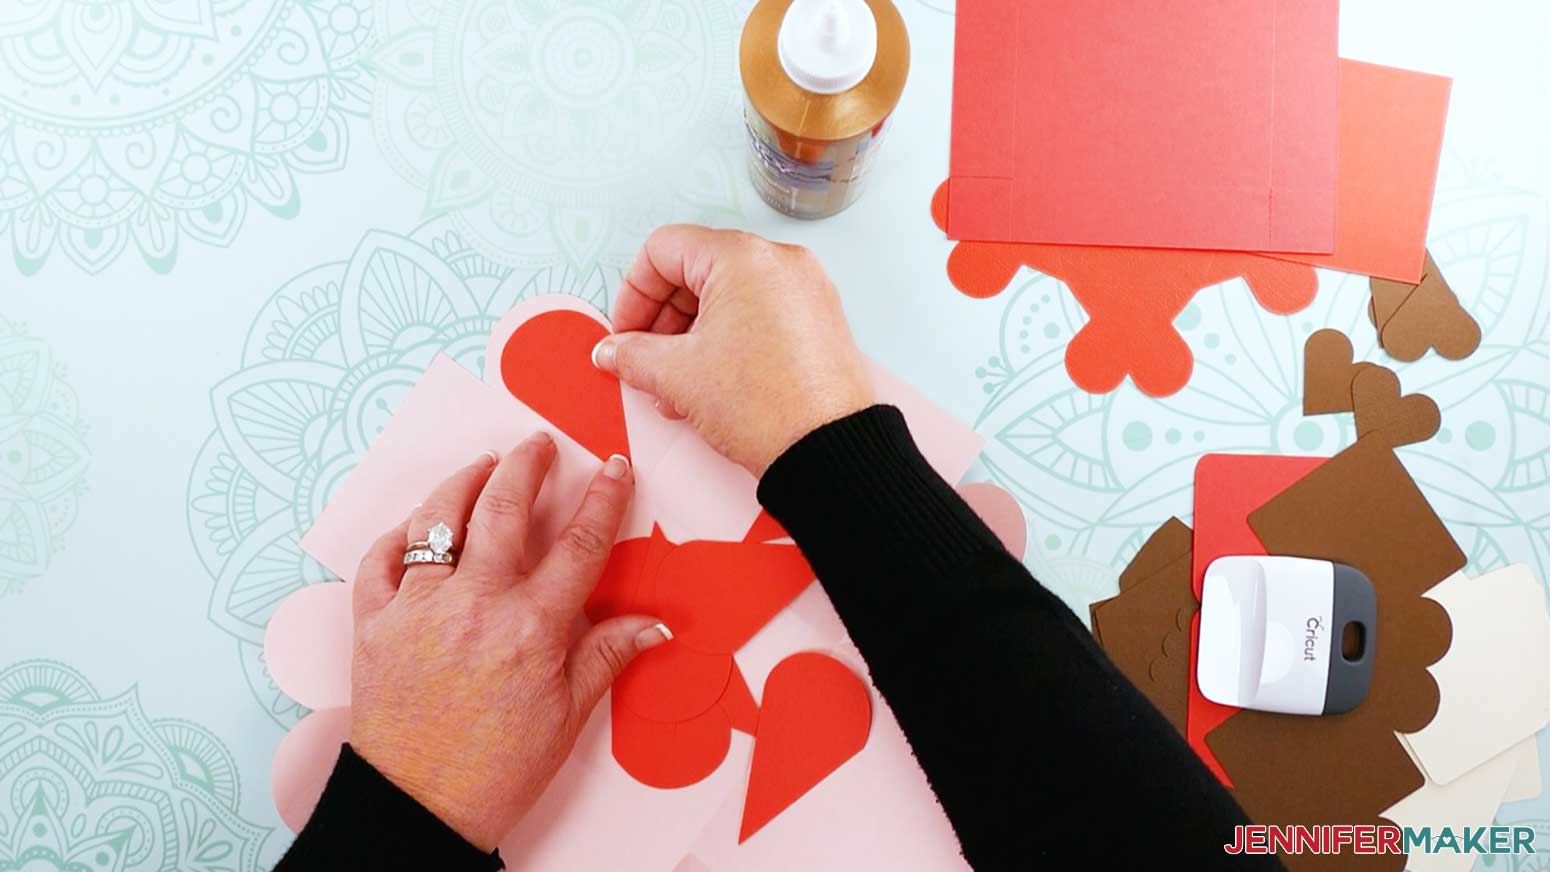
Add glue to the next heart-shaped piece and place it next to the piece we previously placed as shown. Repeat this process for the remaining three corners.

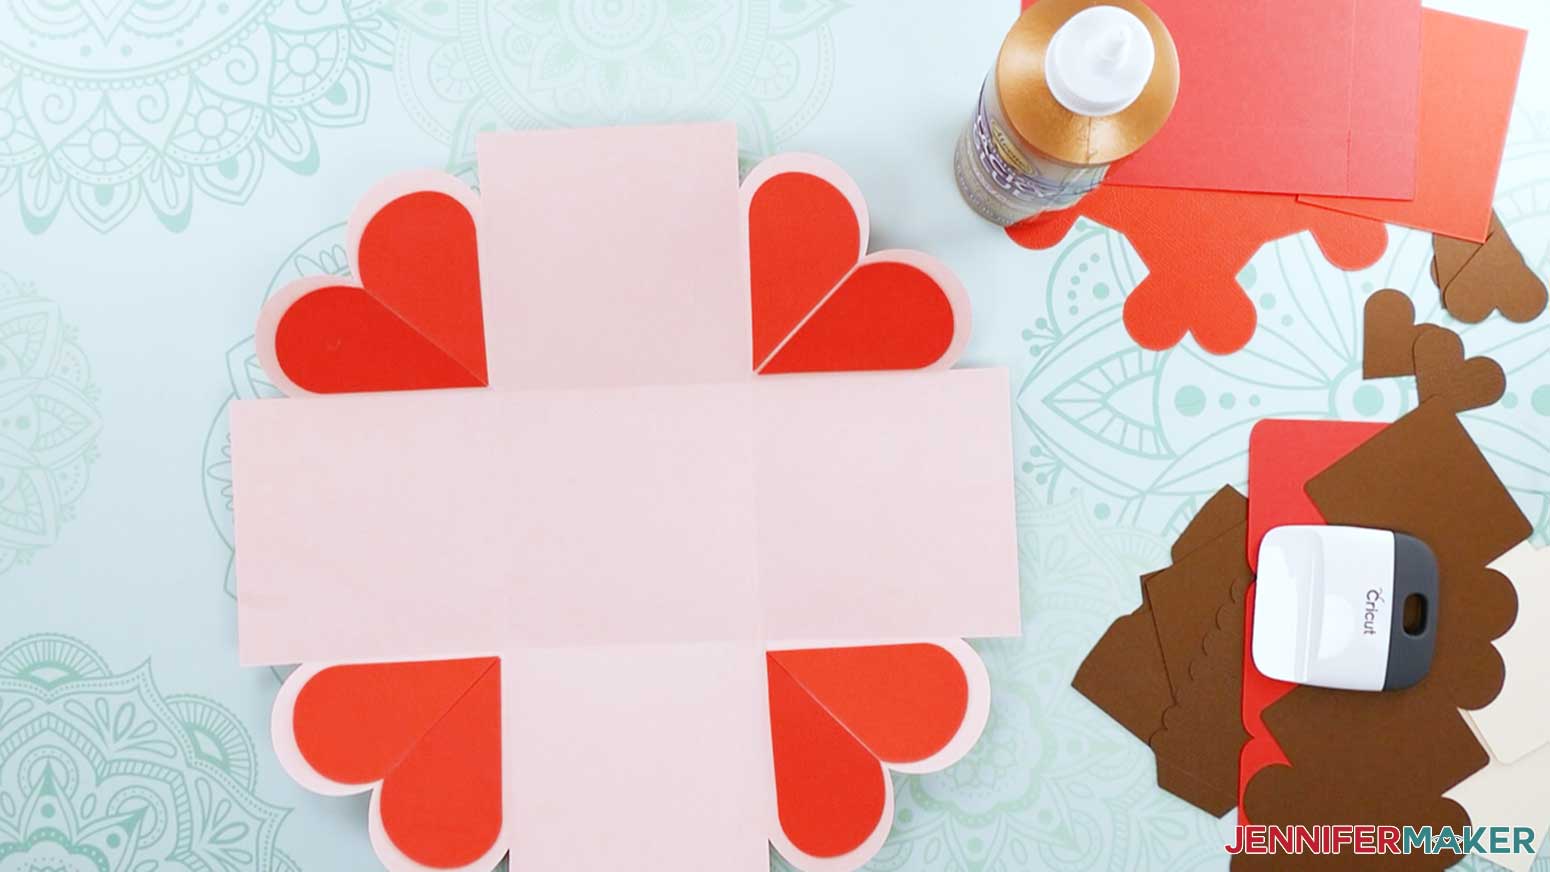
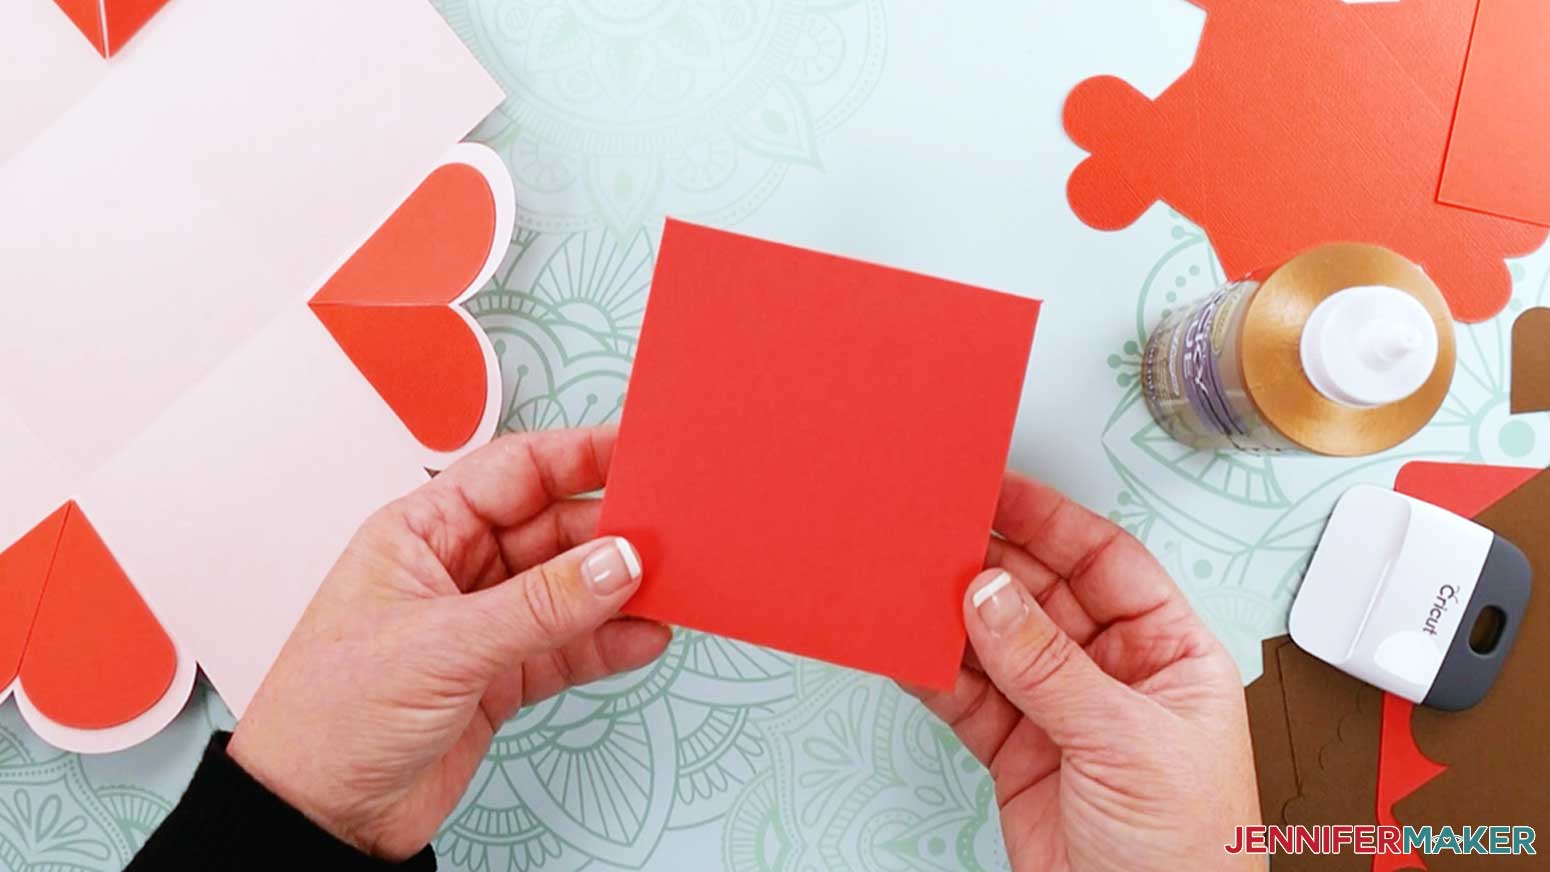
This is what your box one piece should look like.
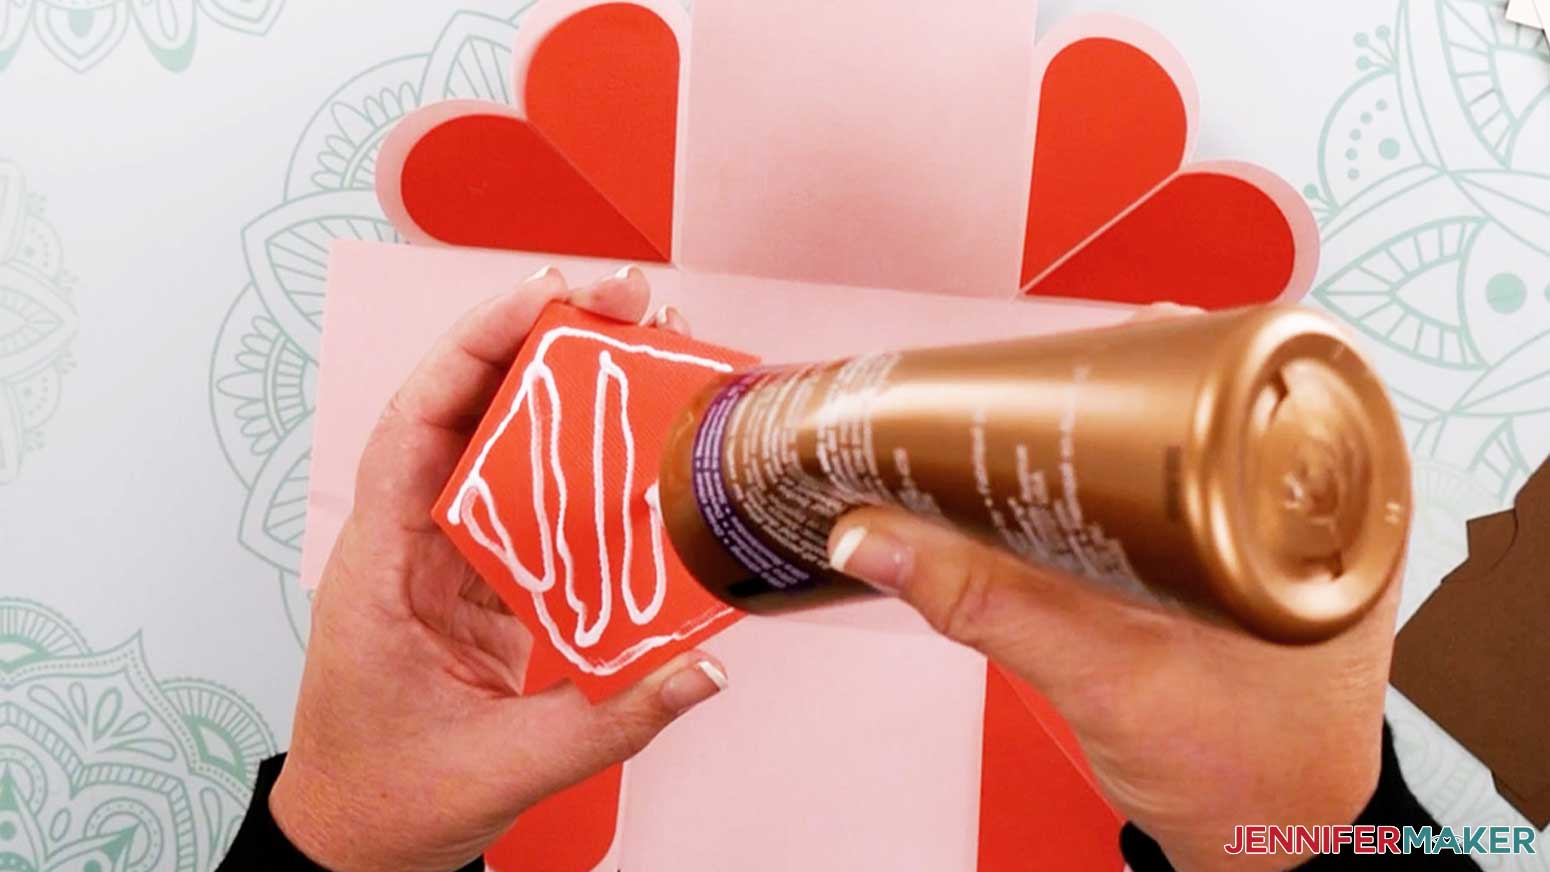
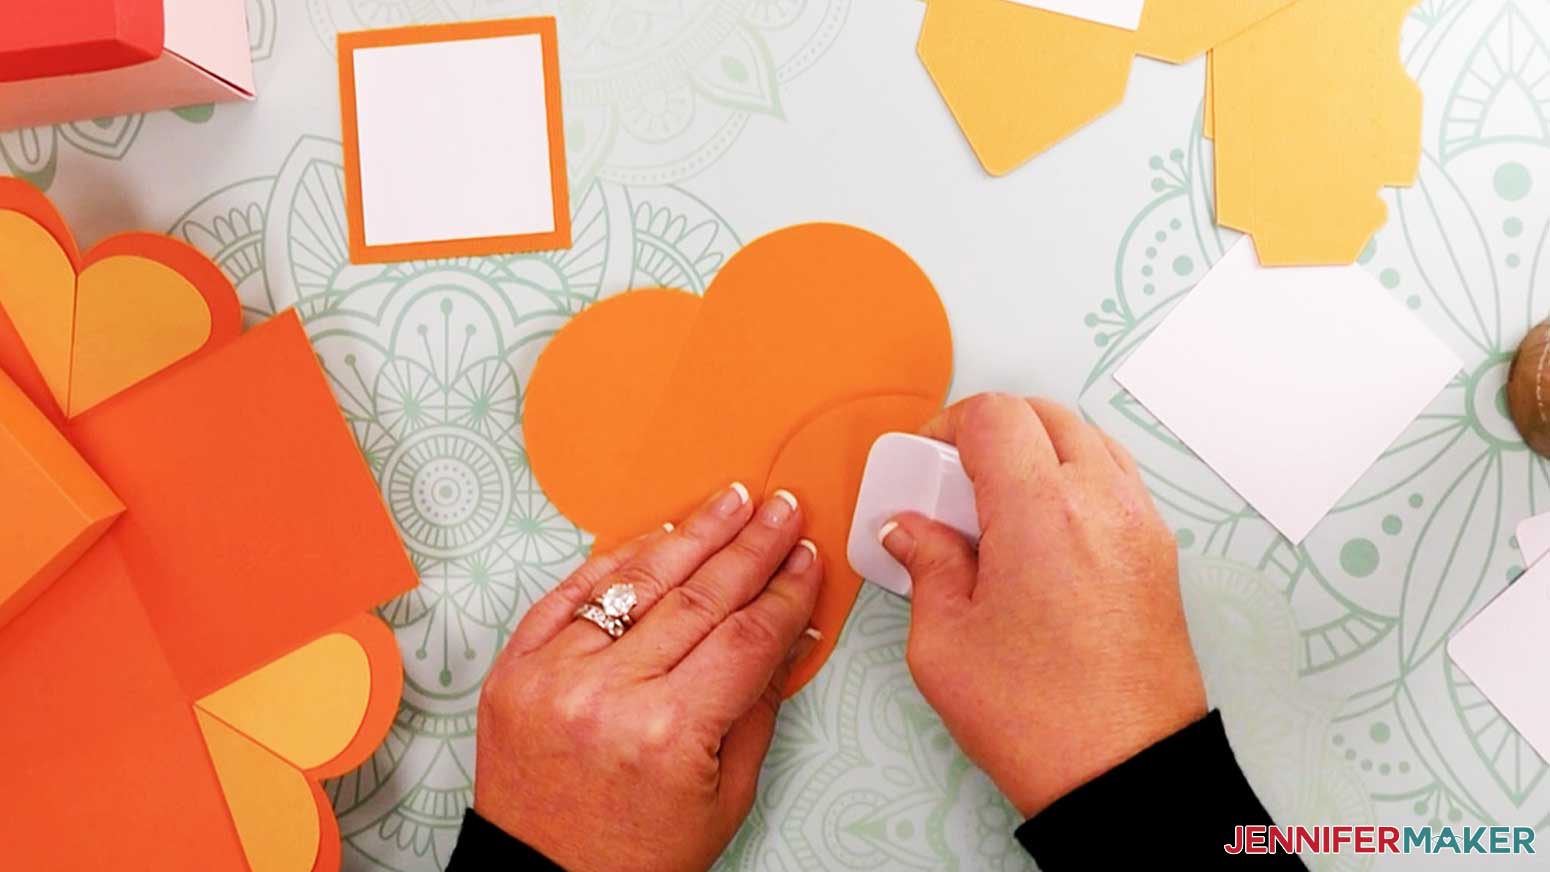
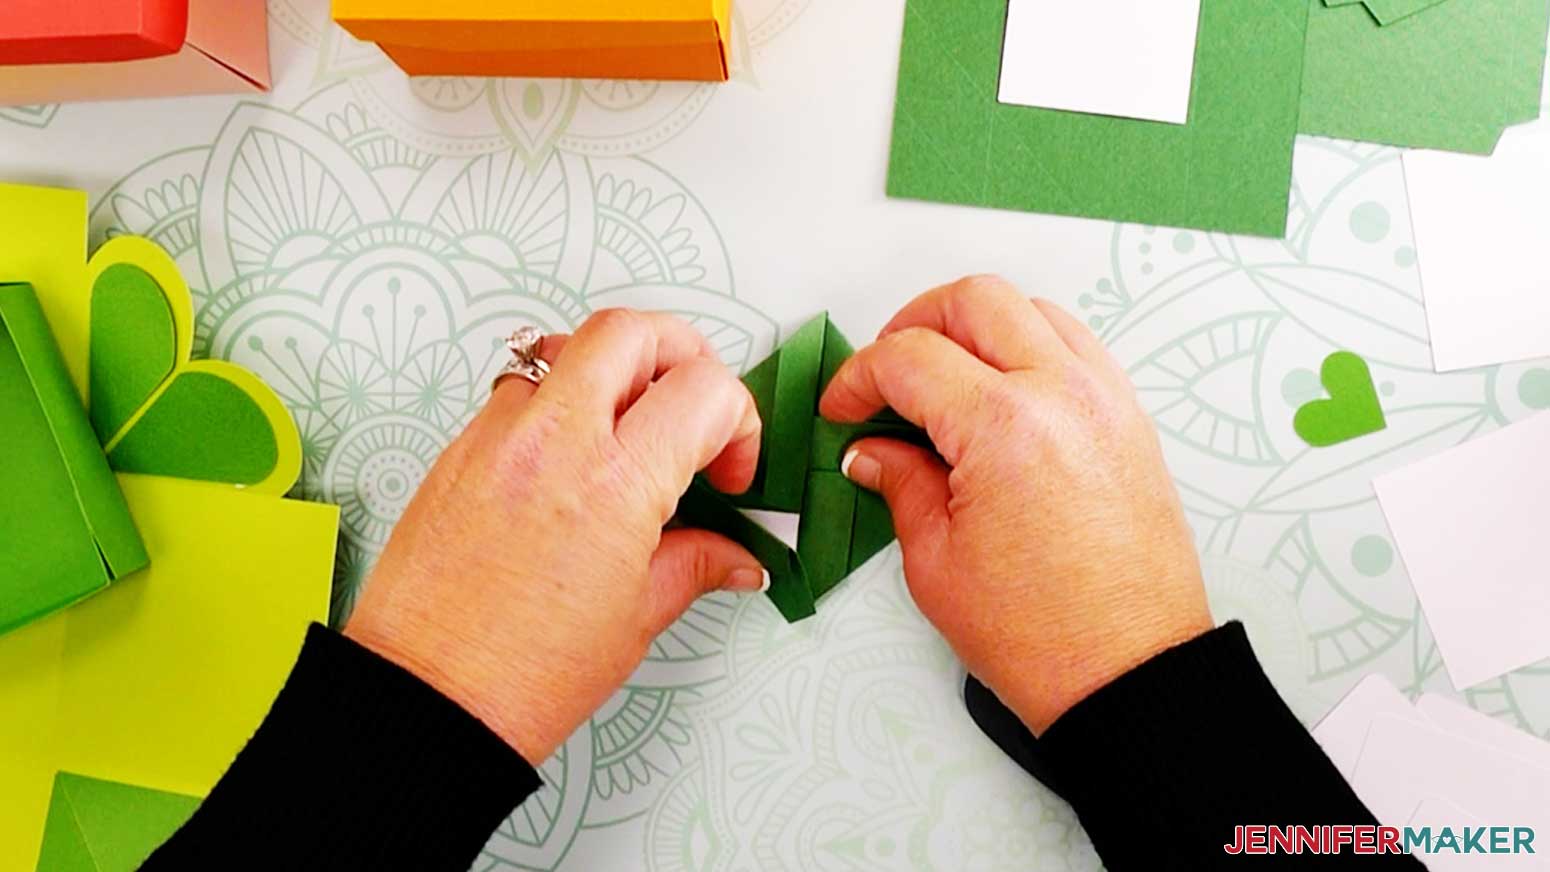
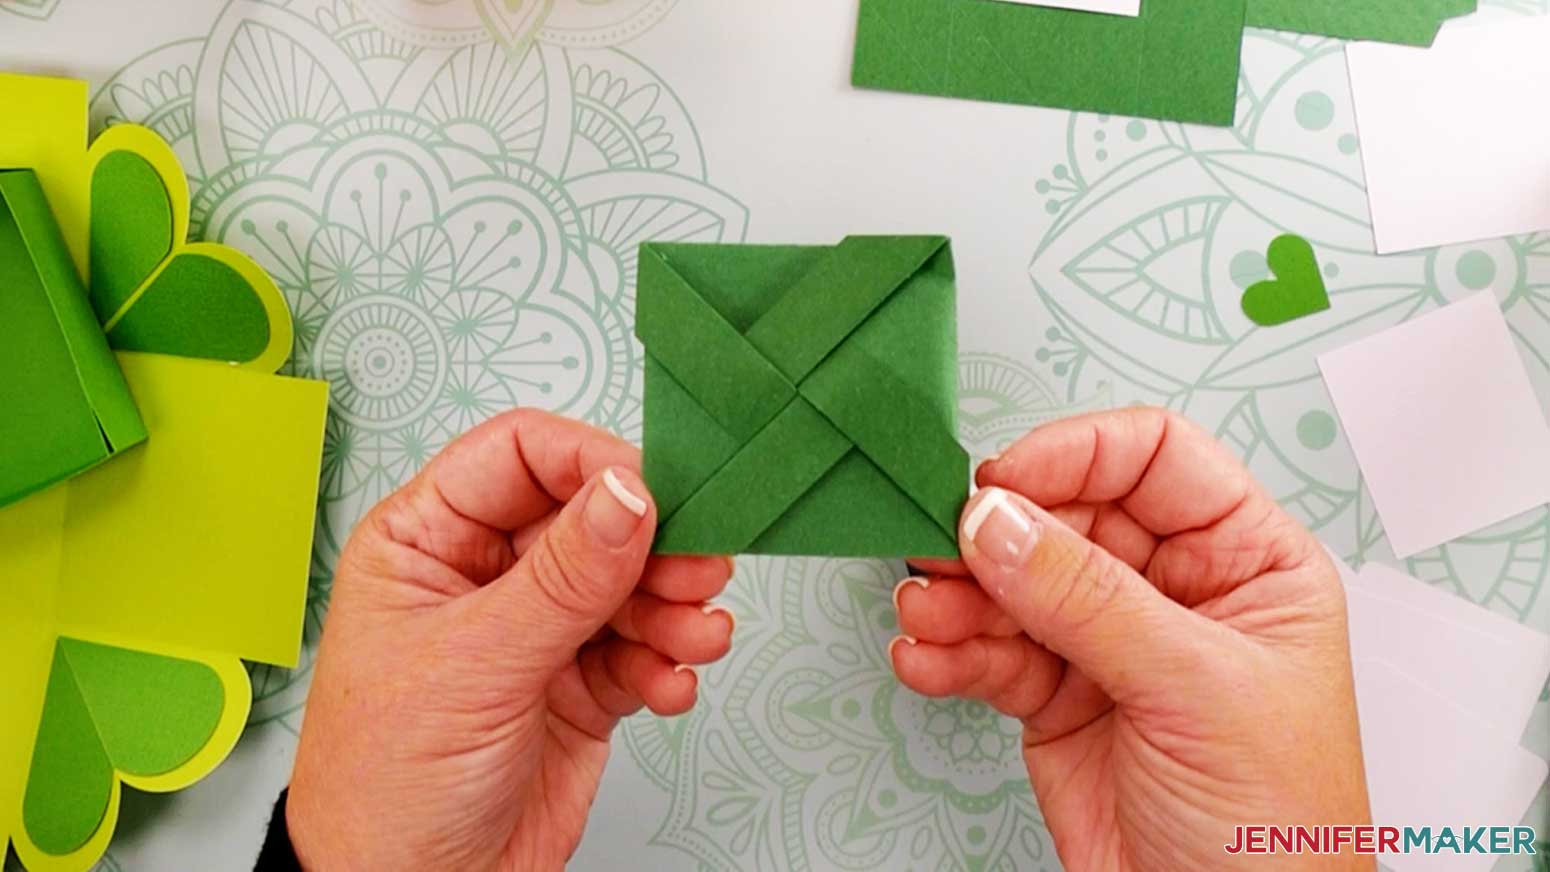
Grab the lid piece and begin folding the four sides of the lid.
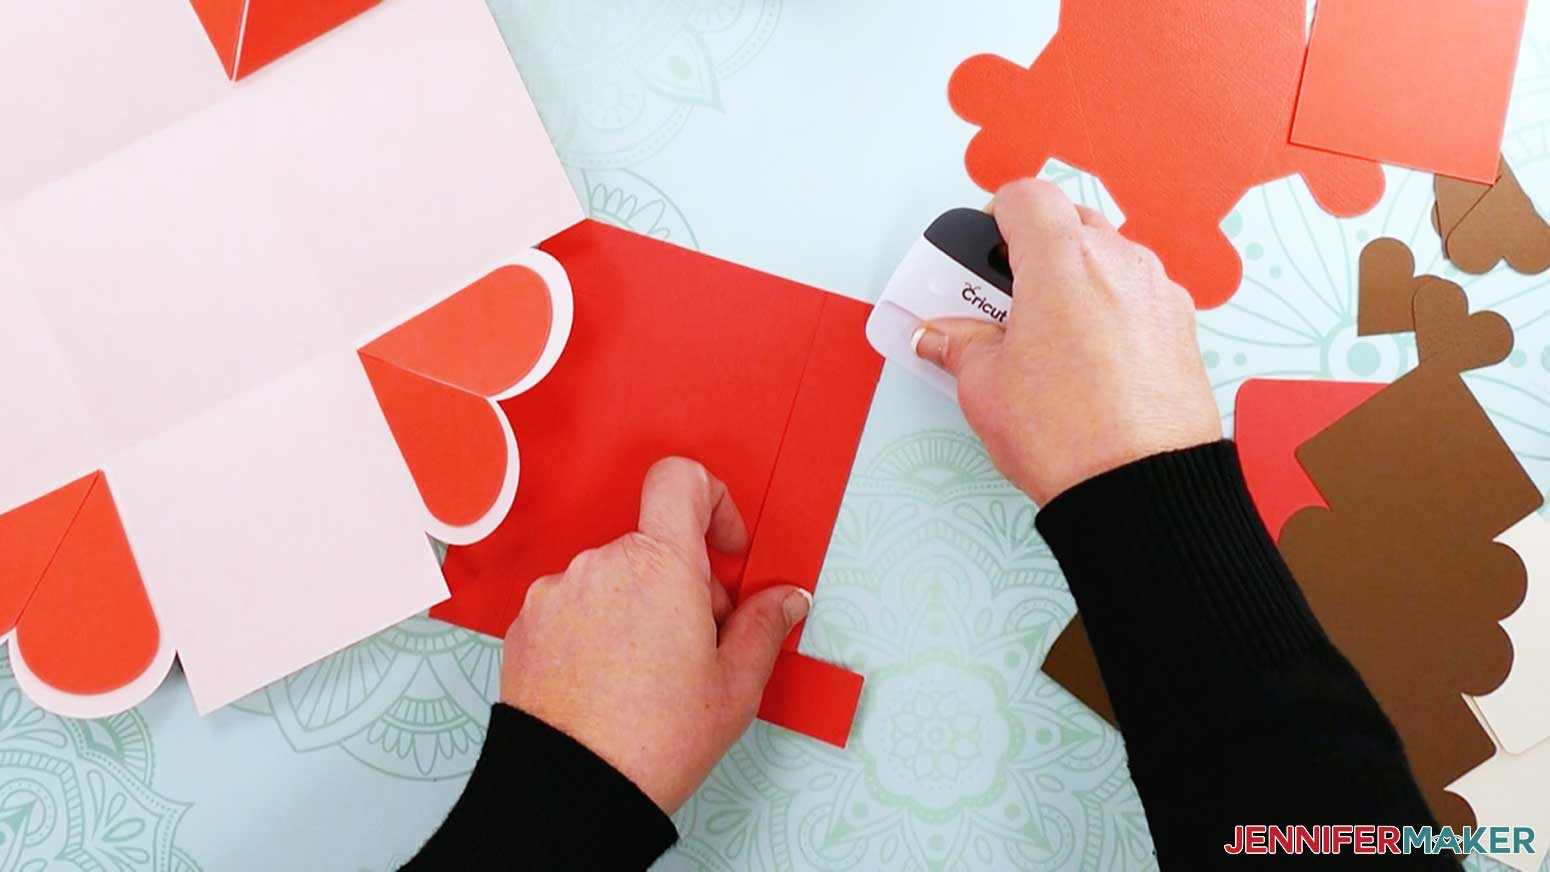
Add glue to the tab at the end of each side of the lid.
Place this tab under the adjacent lid side. Repeat this process for the remaining three corners
This is what the lid looks like assembled.
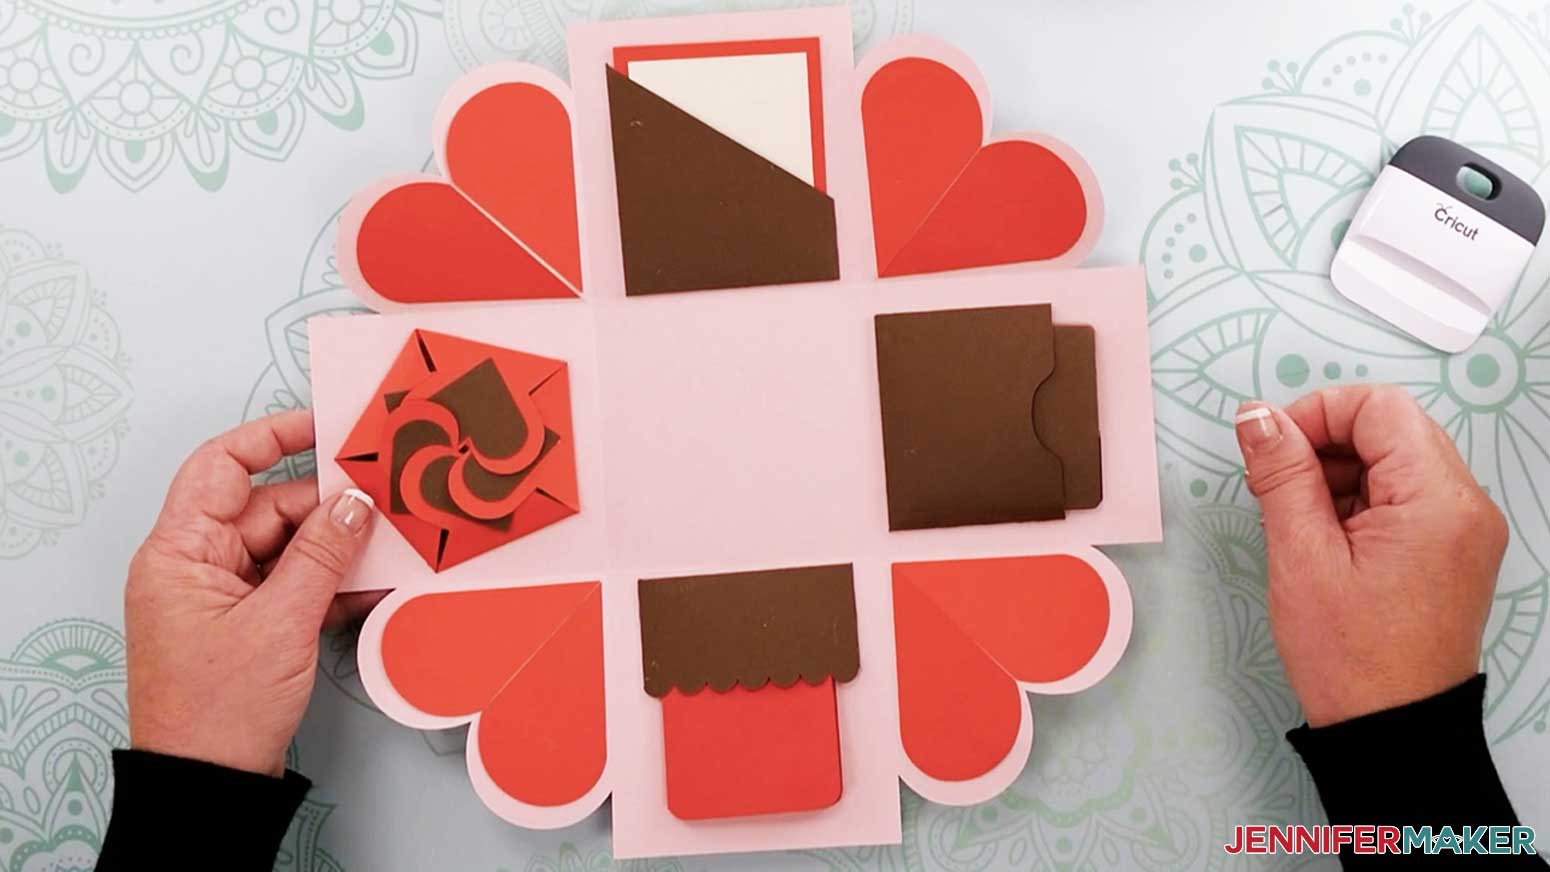
Heart Explosion Box #1 Extras (Pockets and Notecards)
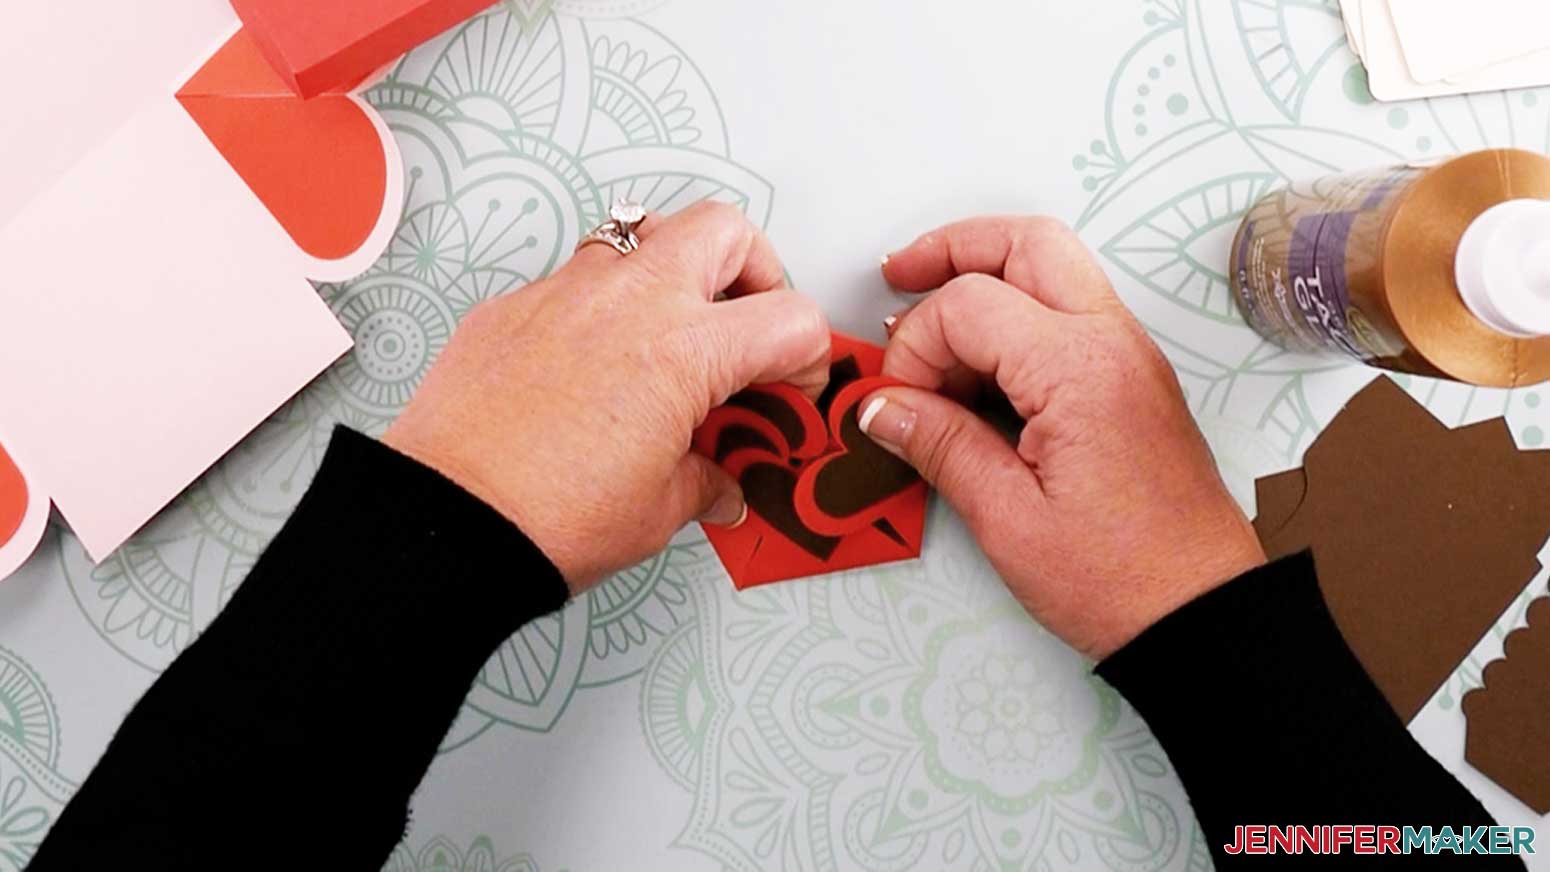
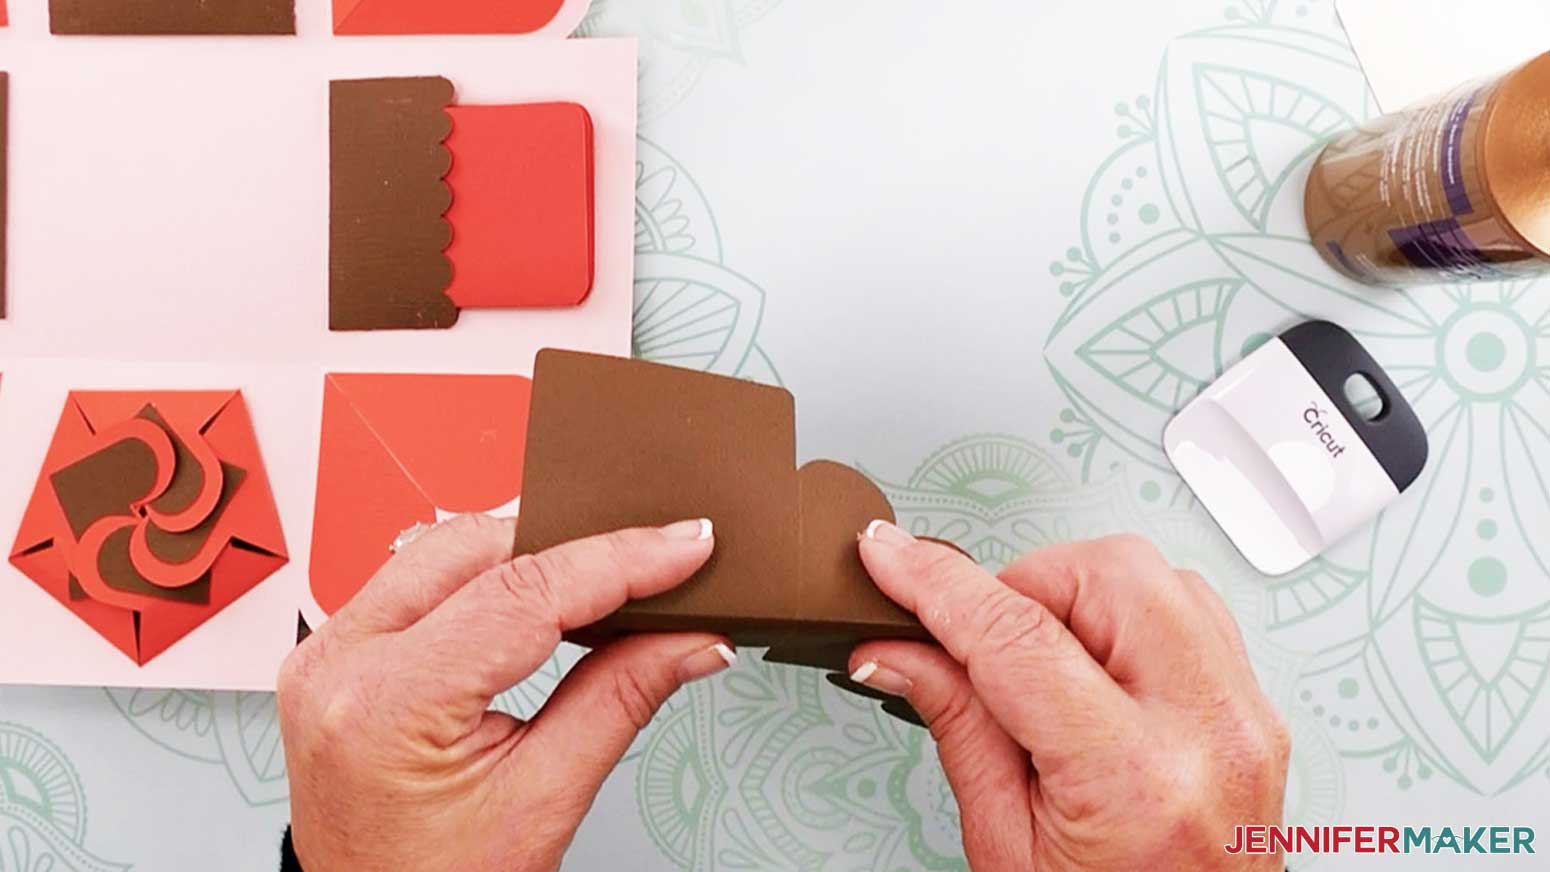
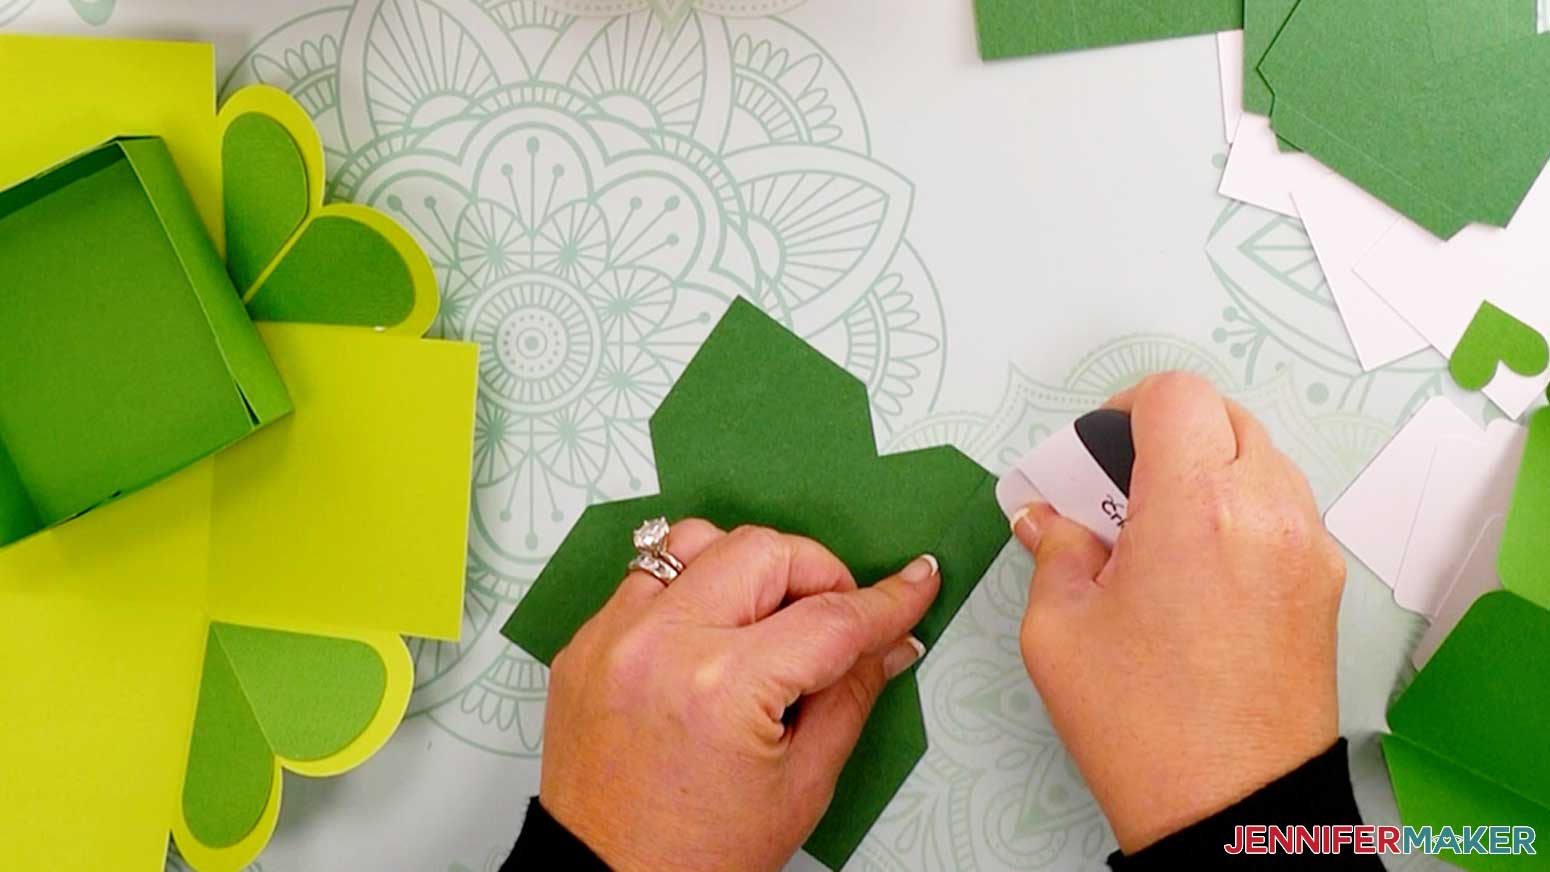
Grab the five-sided note piece with heart flaps and begin folding each flap toward the inside of the piece.
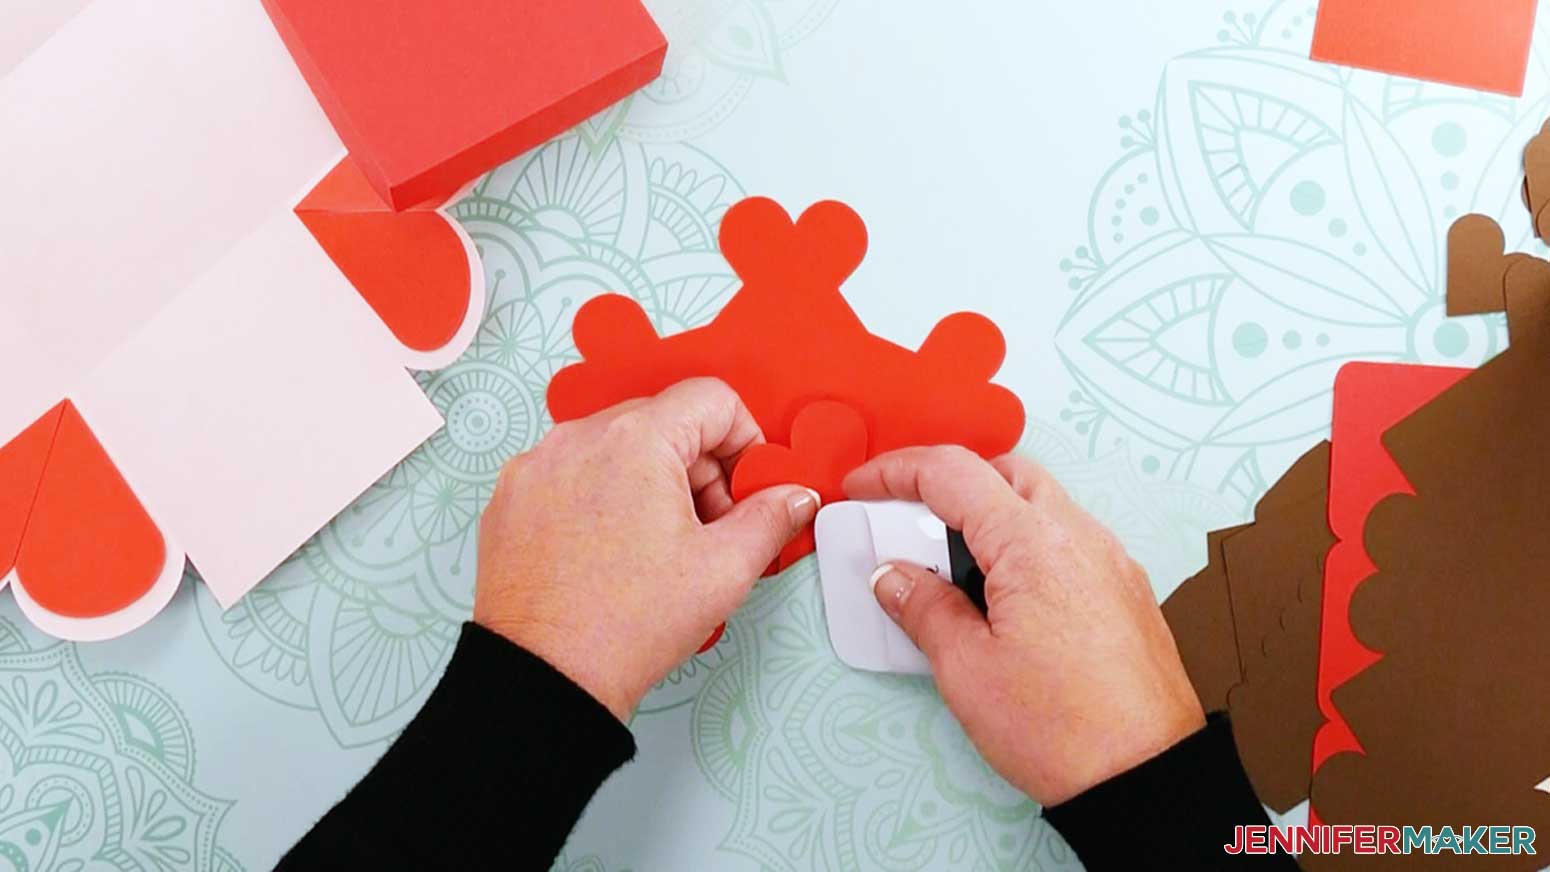
Take the five small note heart pieces and glue one to the end of each flap on the outside of the notecard.
Grab the five-sided insert piece. Add glue to one side of the note and place it in the inside center of the notecard.
To close the notecard, fold one of the flaps inward followed by the second tab.

Fold the next two flaps down until you get to the last flap. While lifting up the first flap, slightly bend and slide the fifth tab under the first tab.
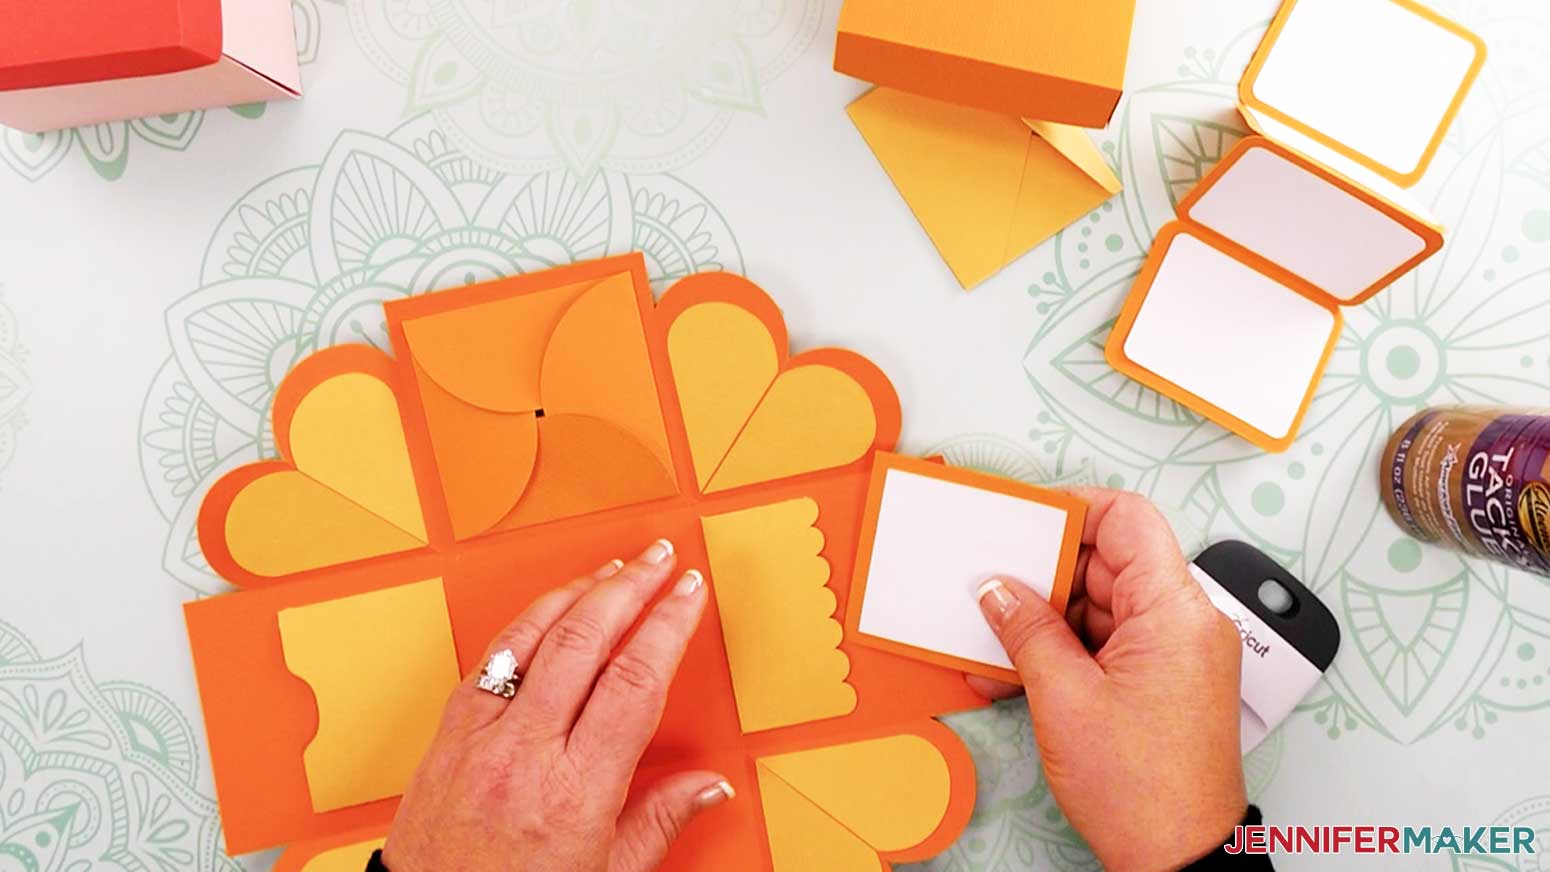
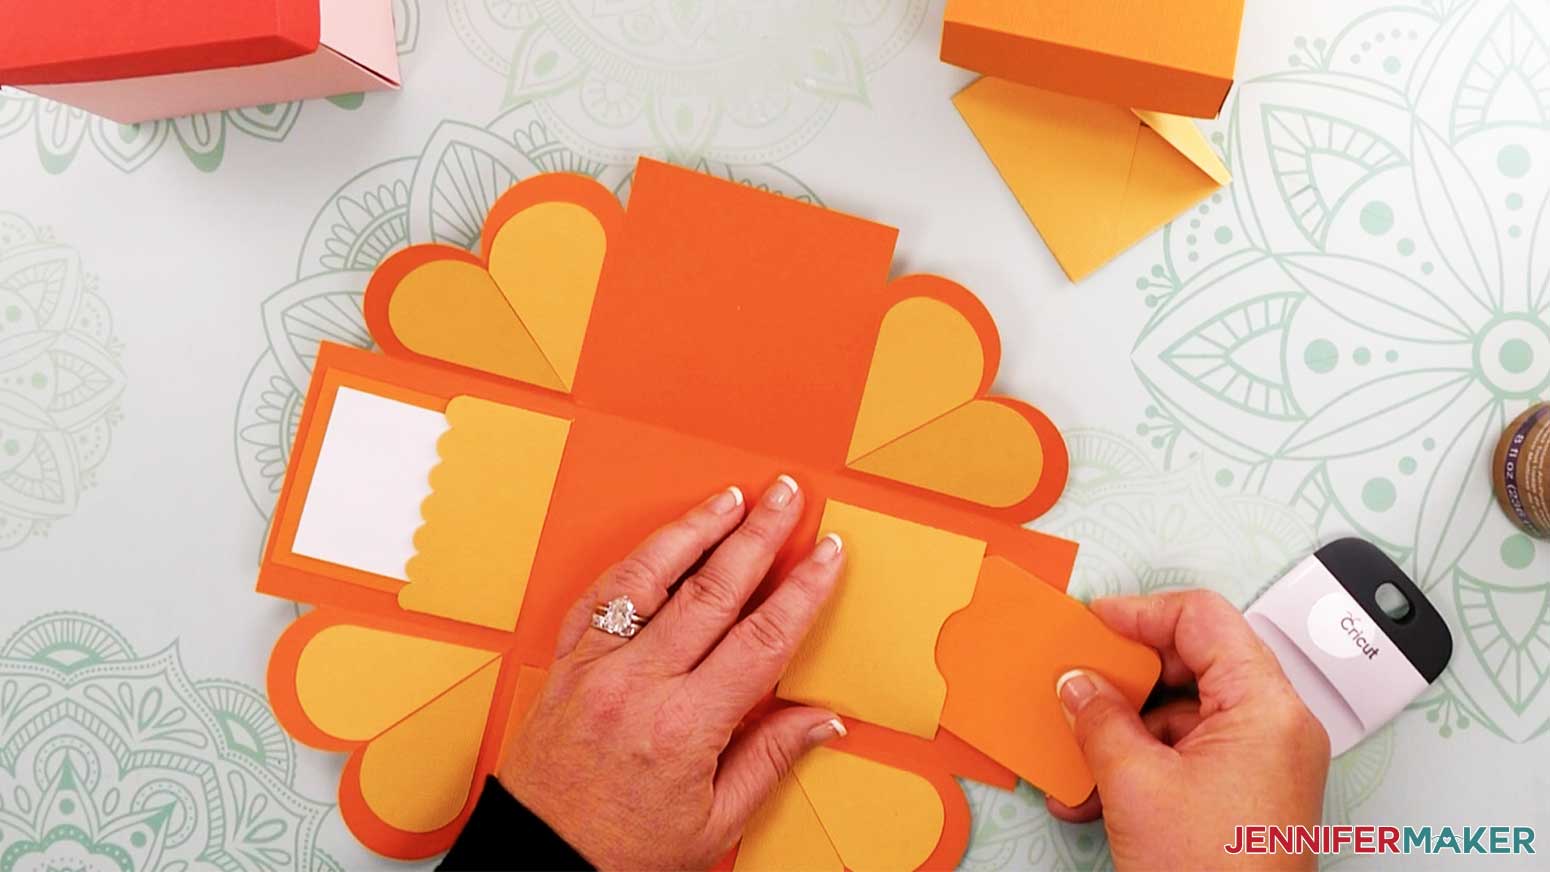
Add glue to the back of your notecard and place it on one of the inside sides of the box piece.
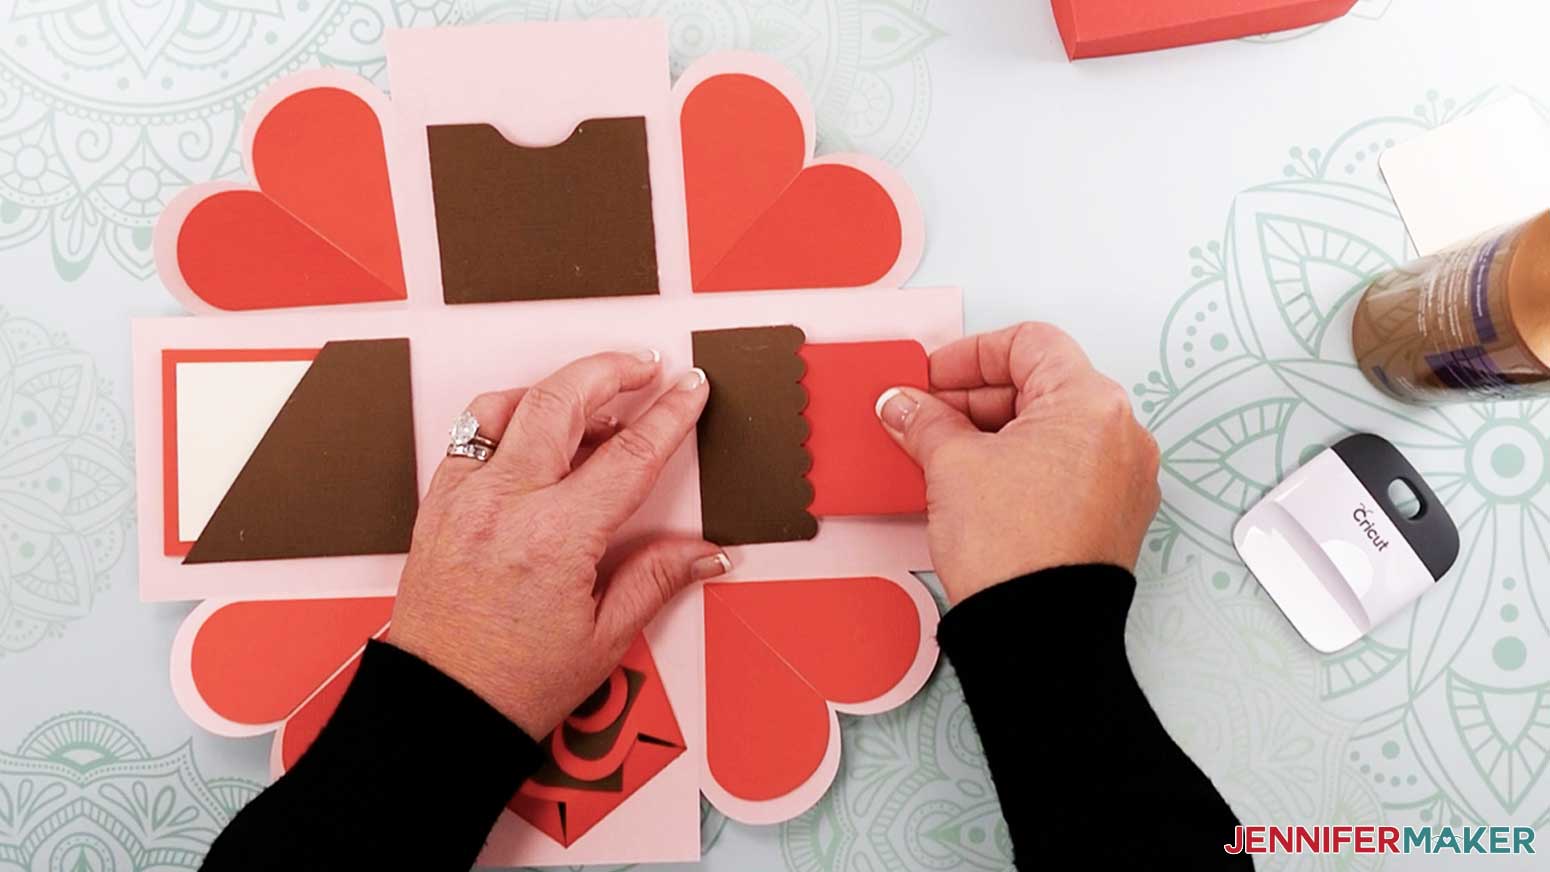
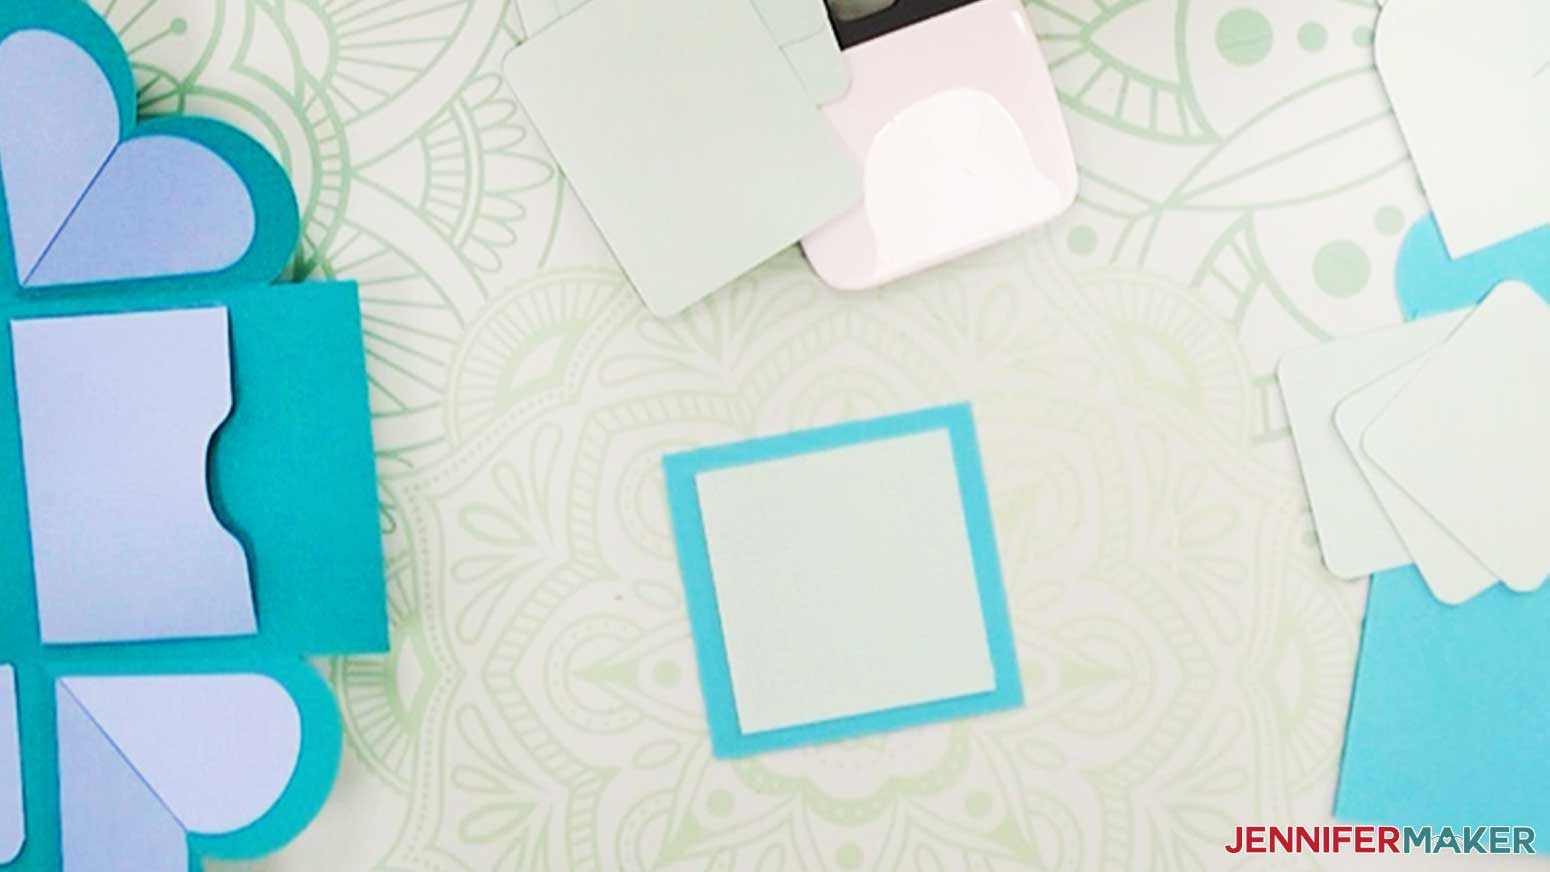
Grab a square pocket piece and begin folding the three tabs toward the inside of the piece.
Add glue to the three tabs of the pocket.
Align pocket to one side of the box and glue in place.
Repeat these steps and add the other two pockets. This is what your box should look like.
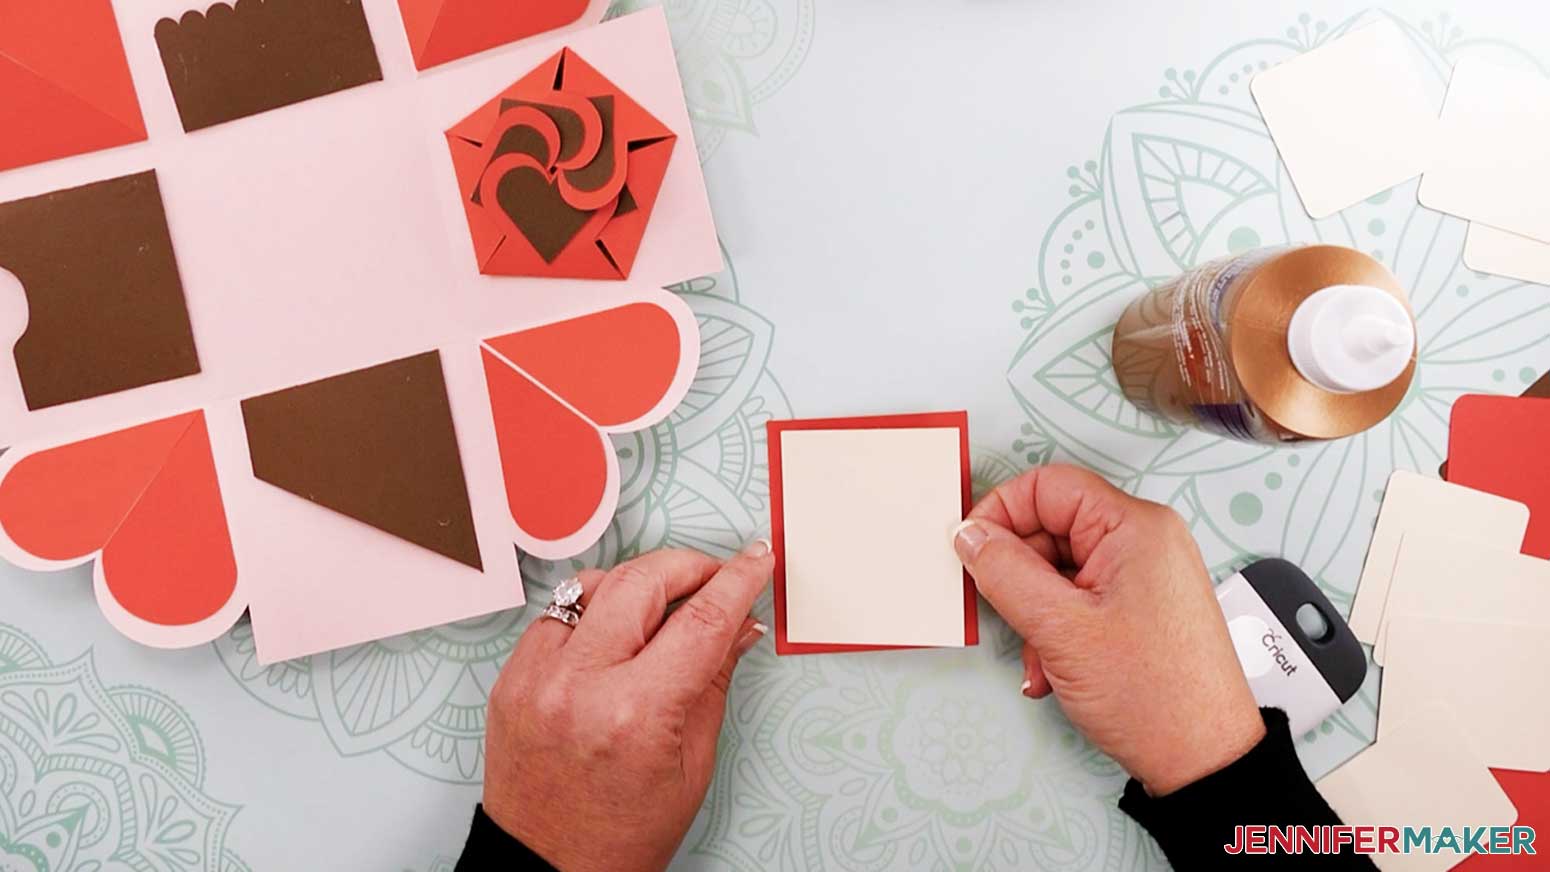
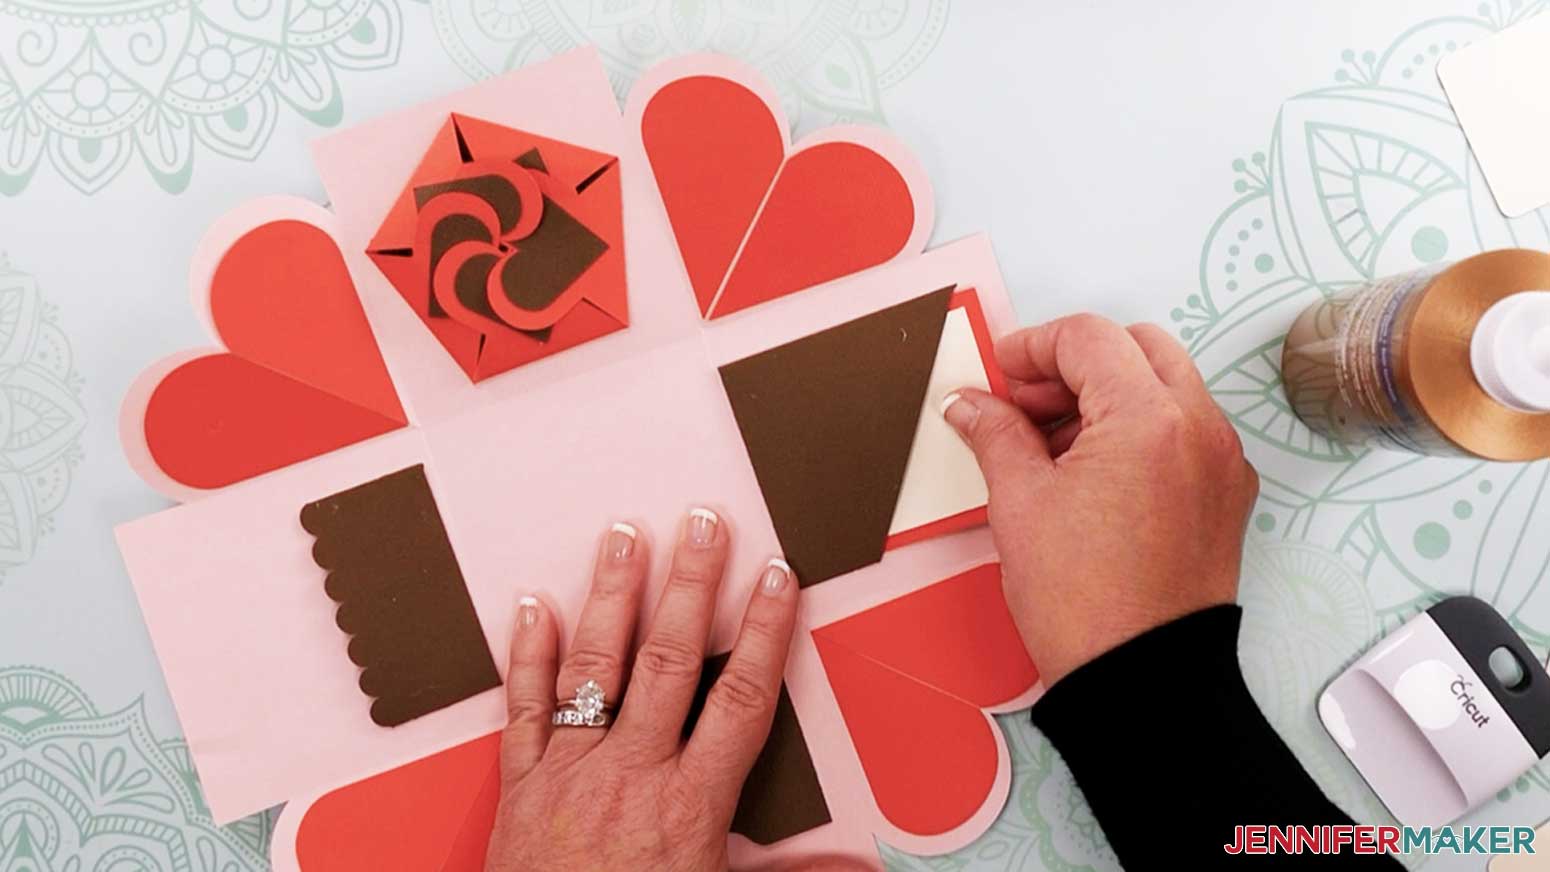
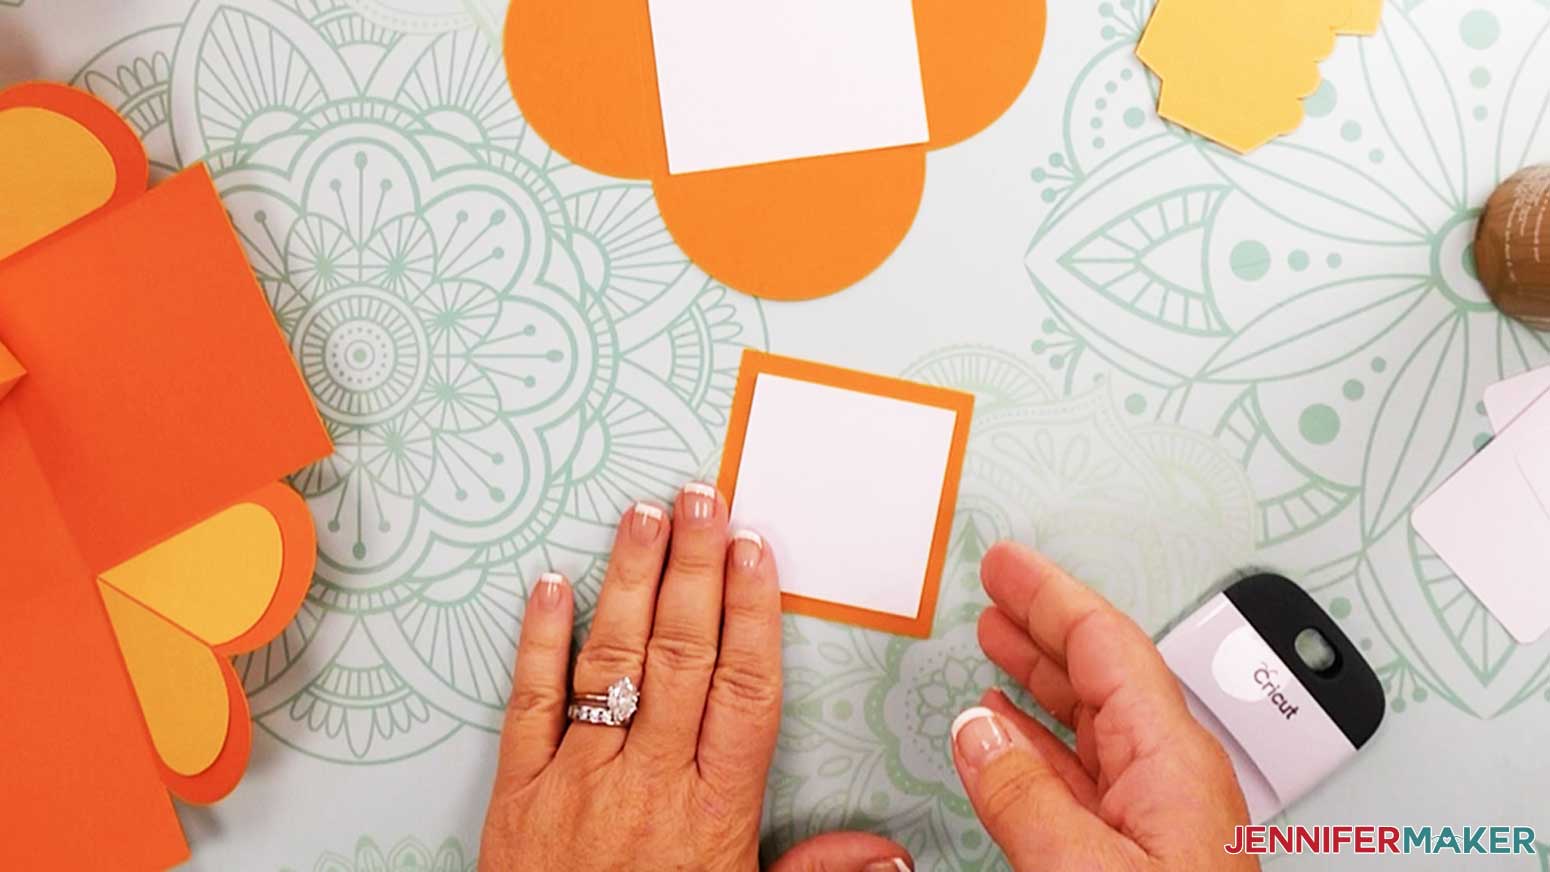
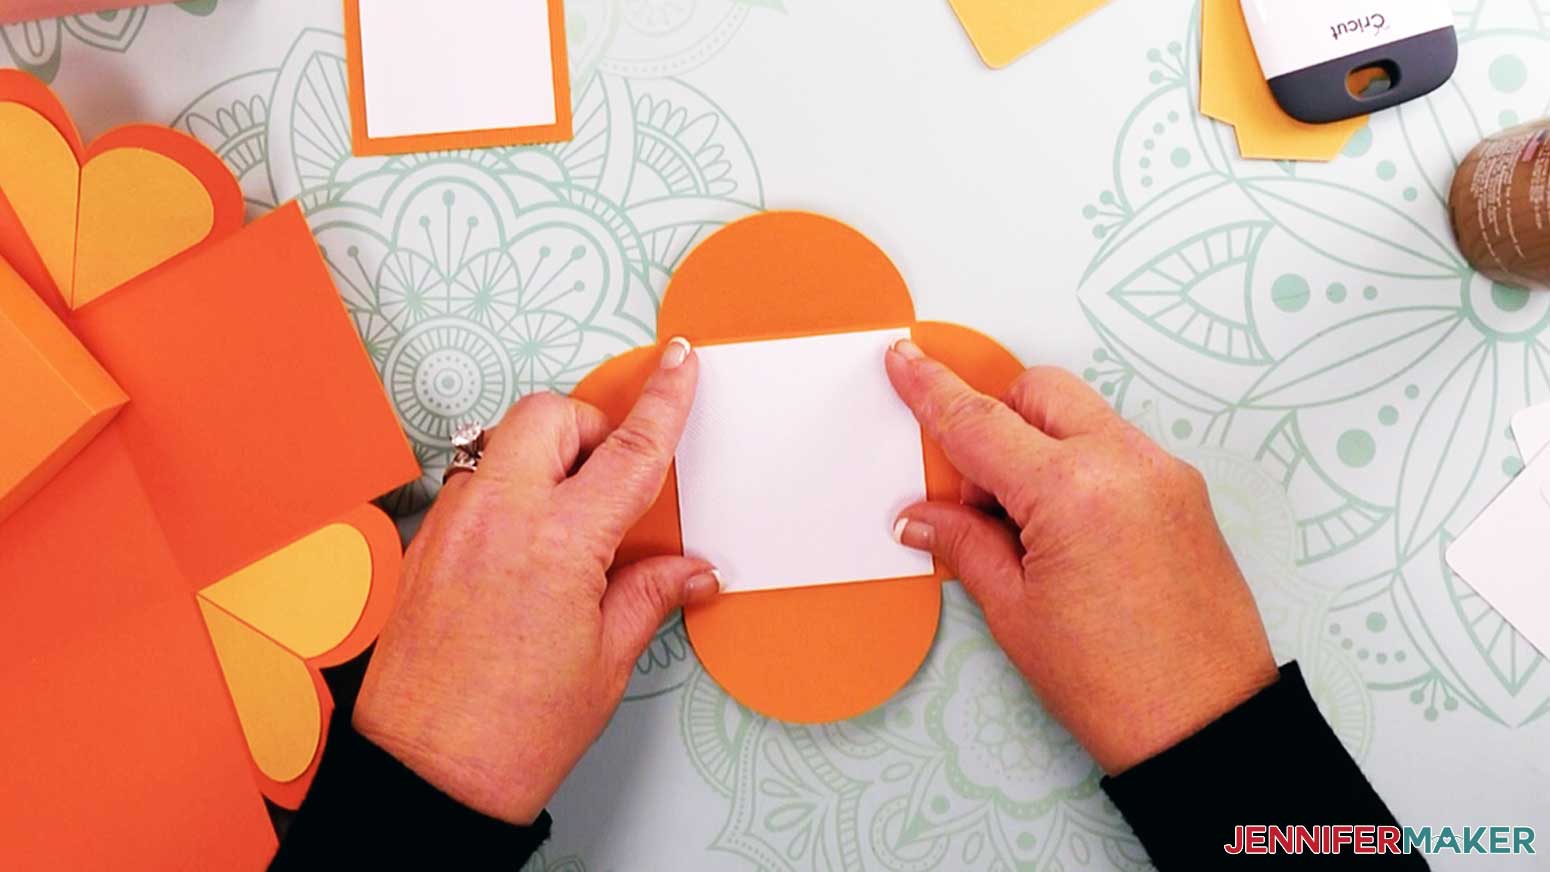
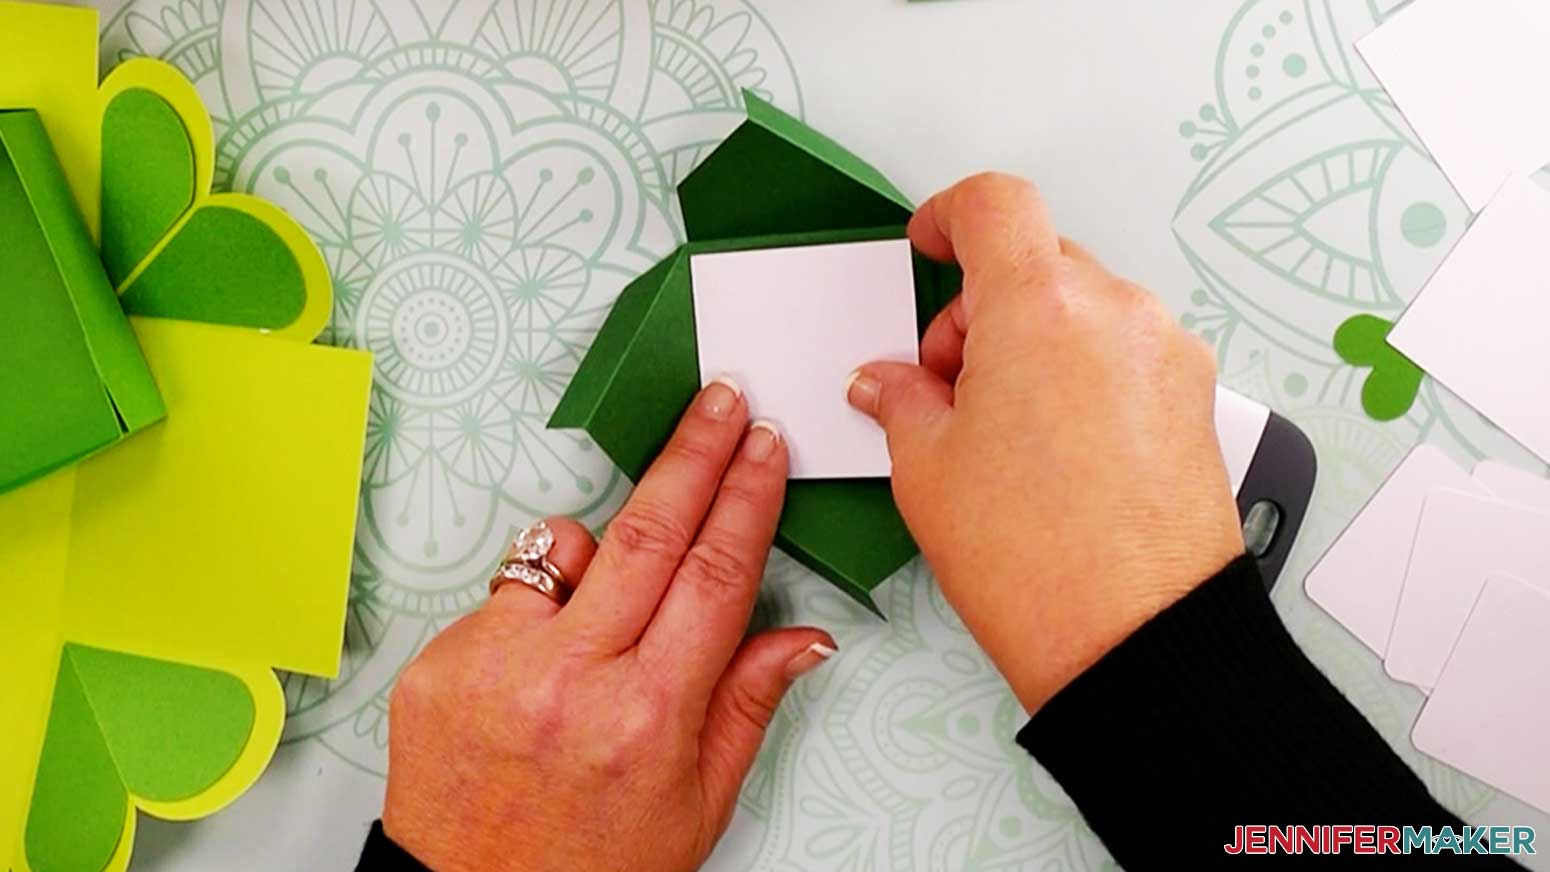
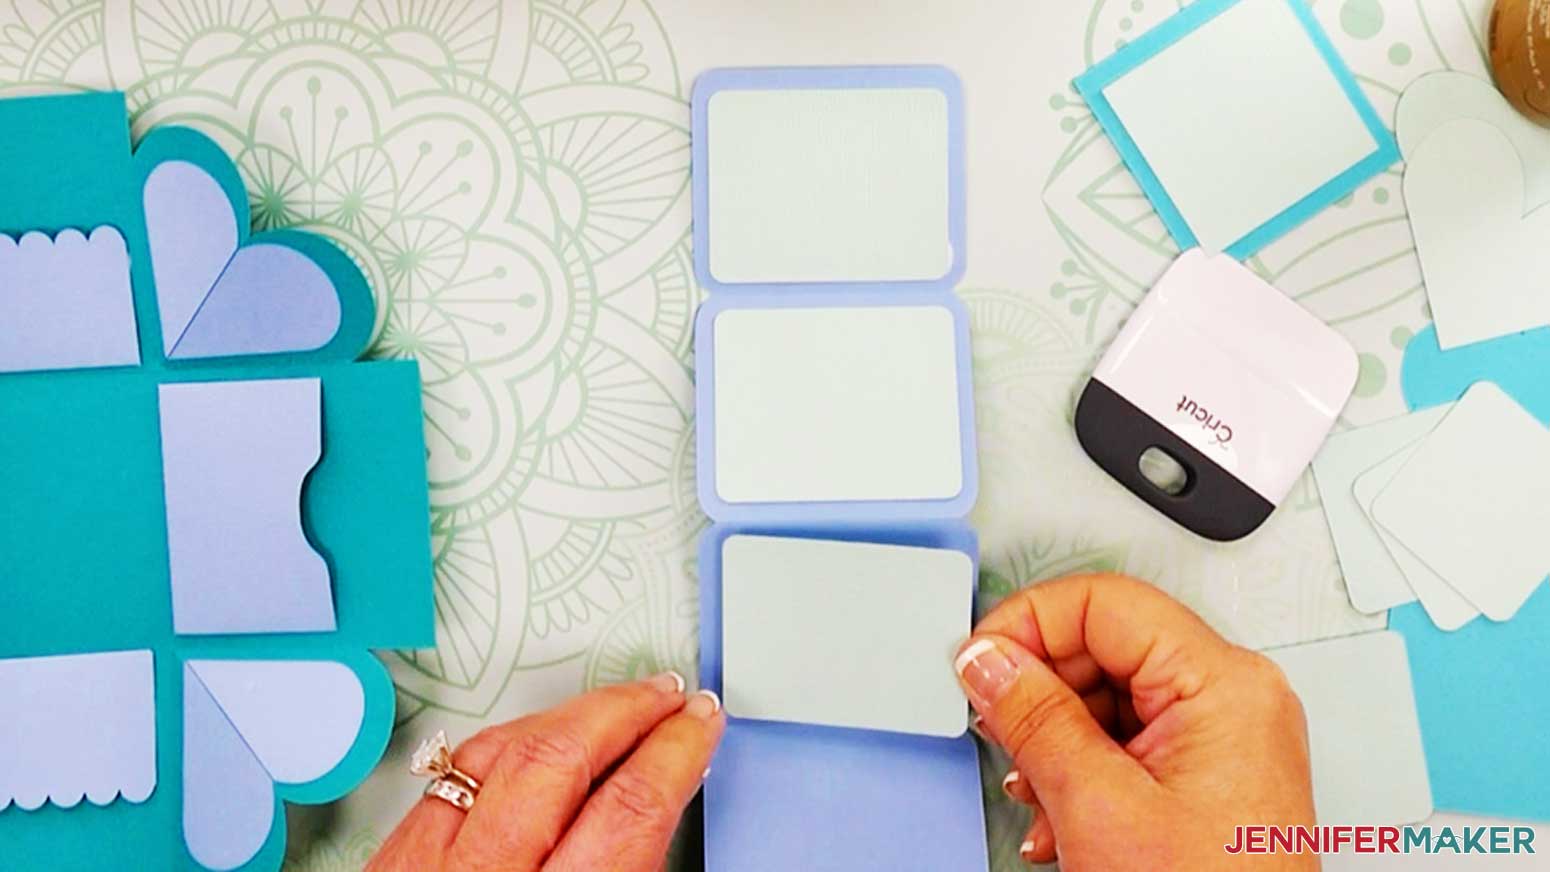
Next, grab the framed note piece and matching framed note face. Add glue to the framed note face and place on the note piece.
Insert the card into the slanted pocket.
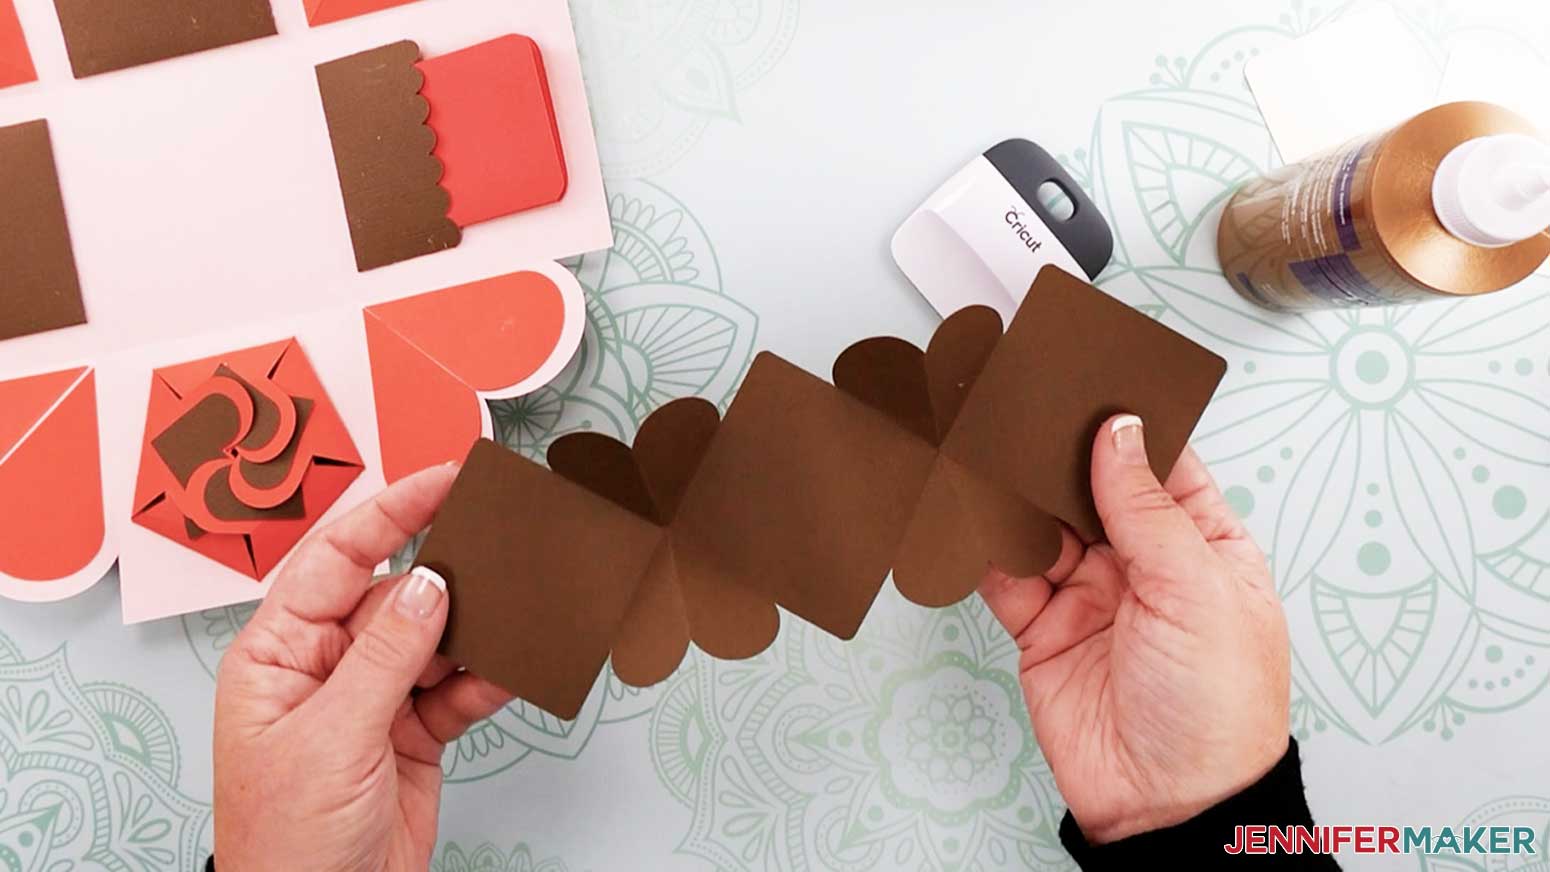
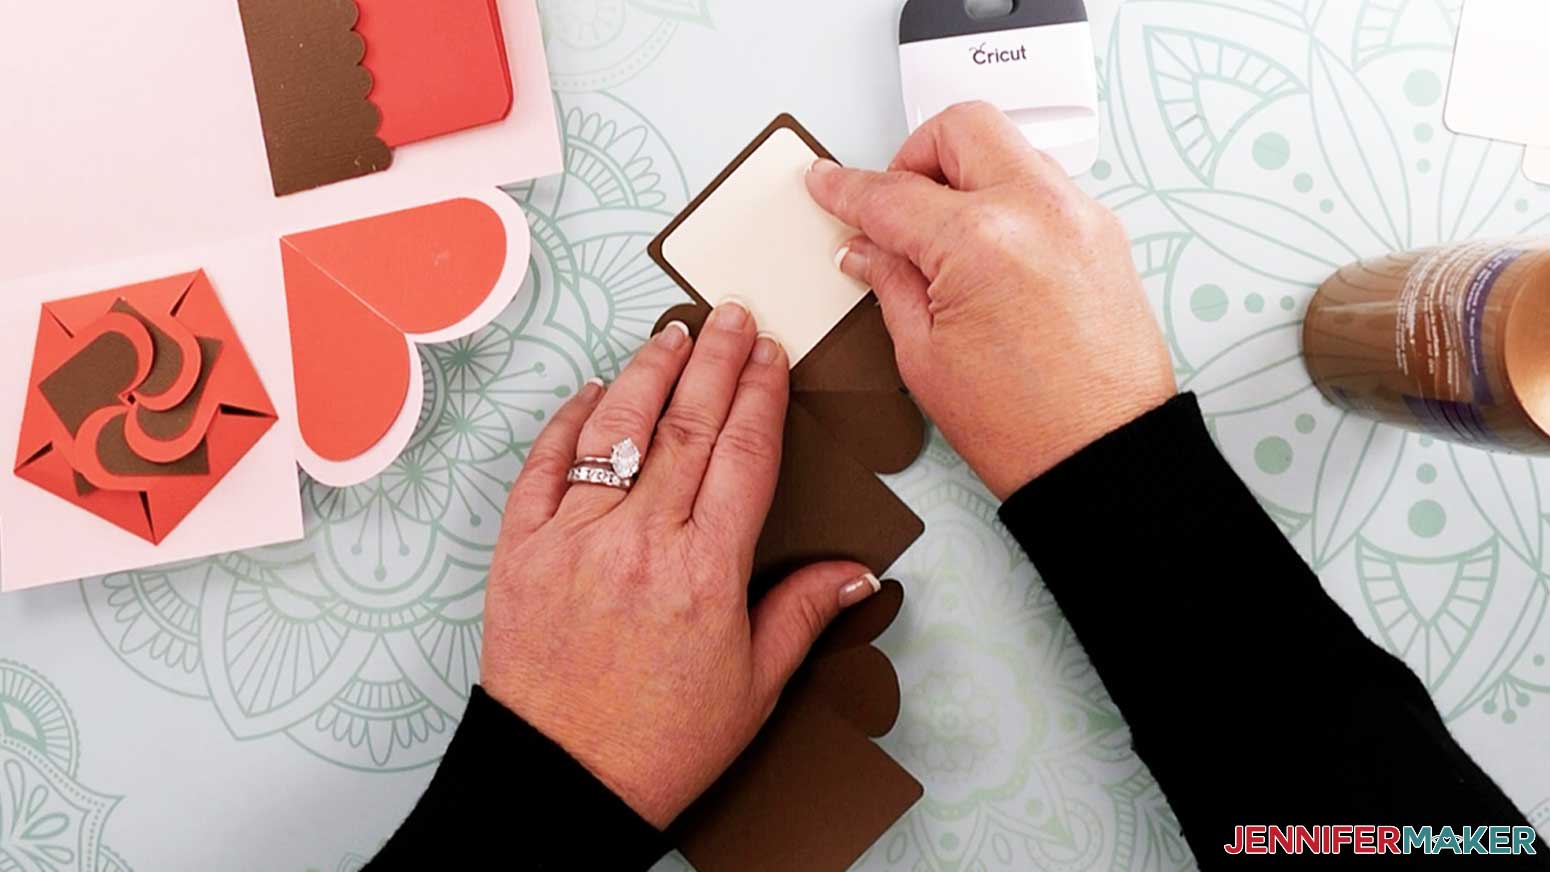
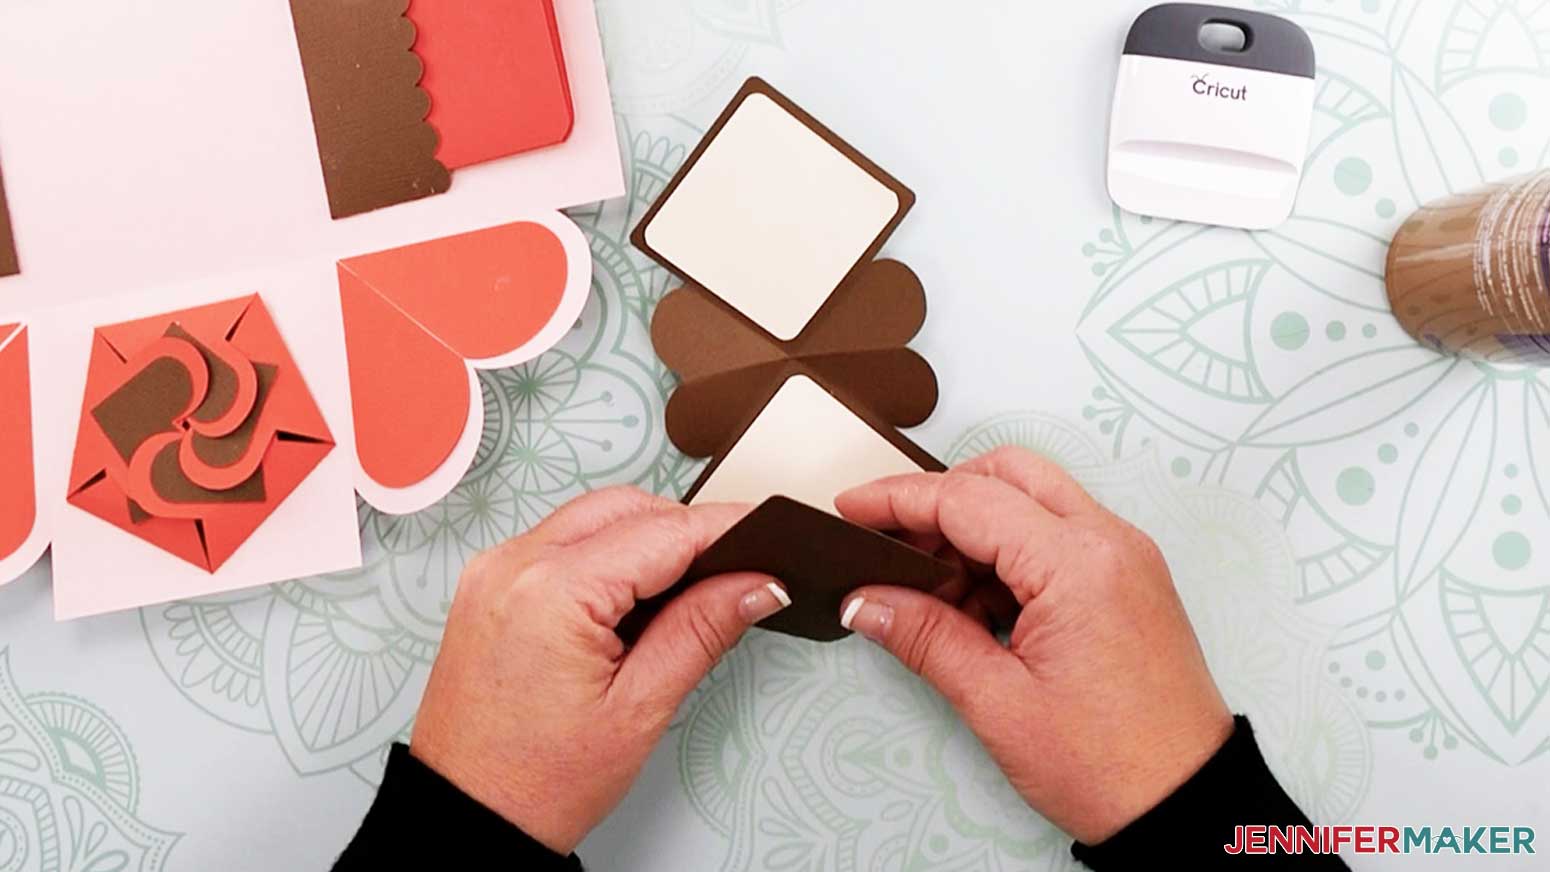
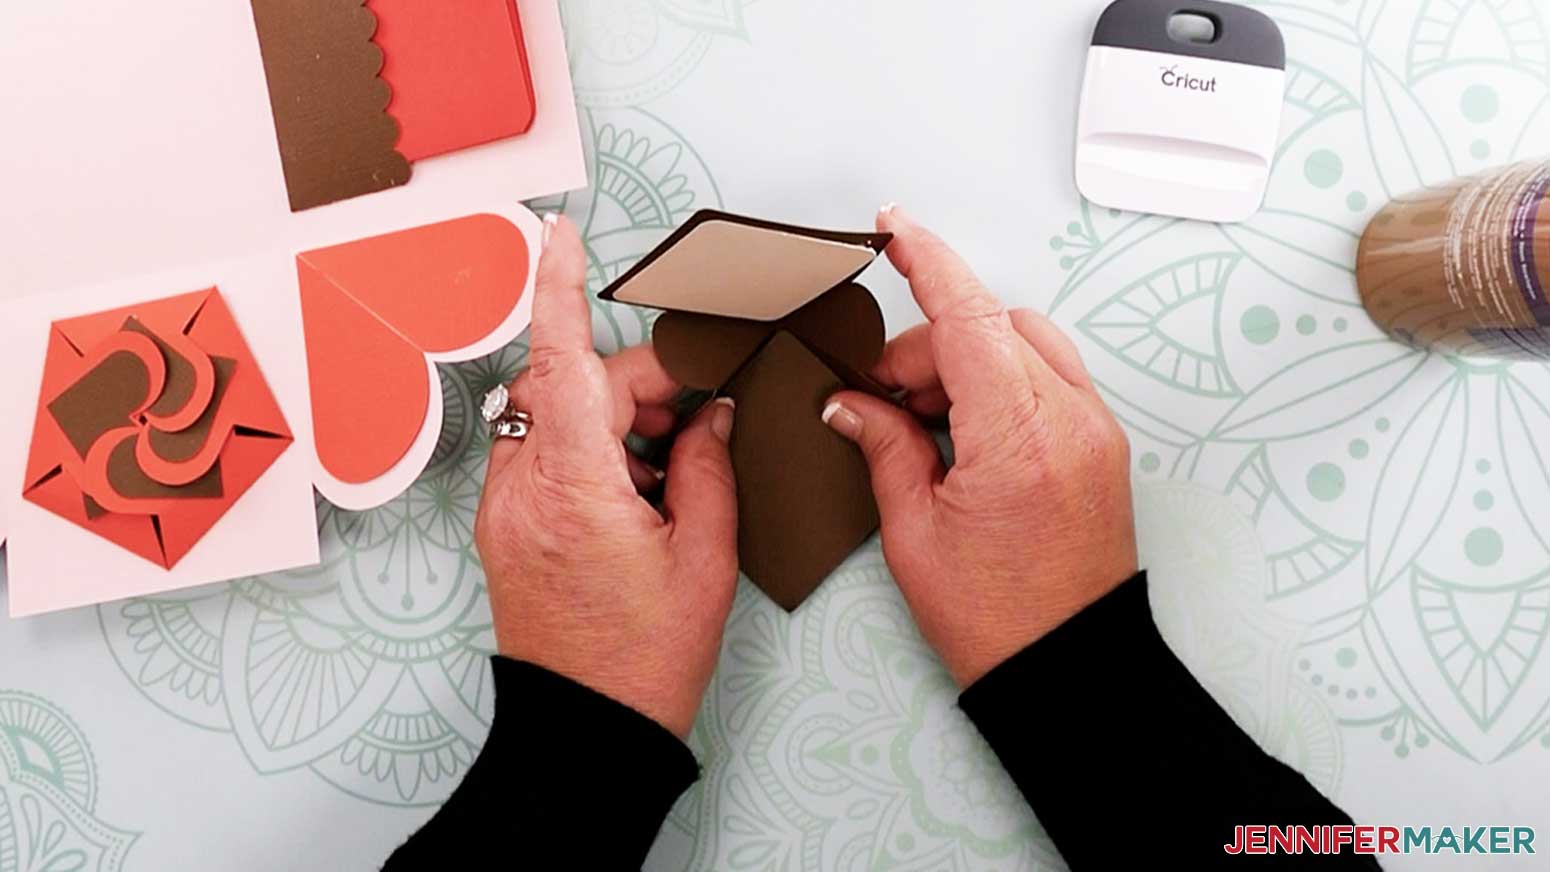
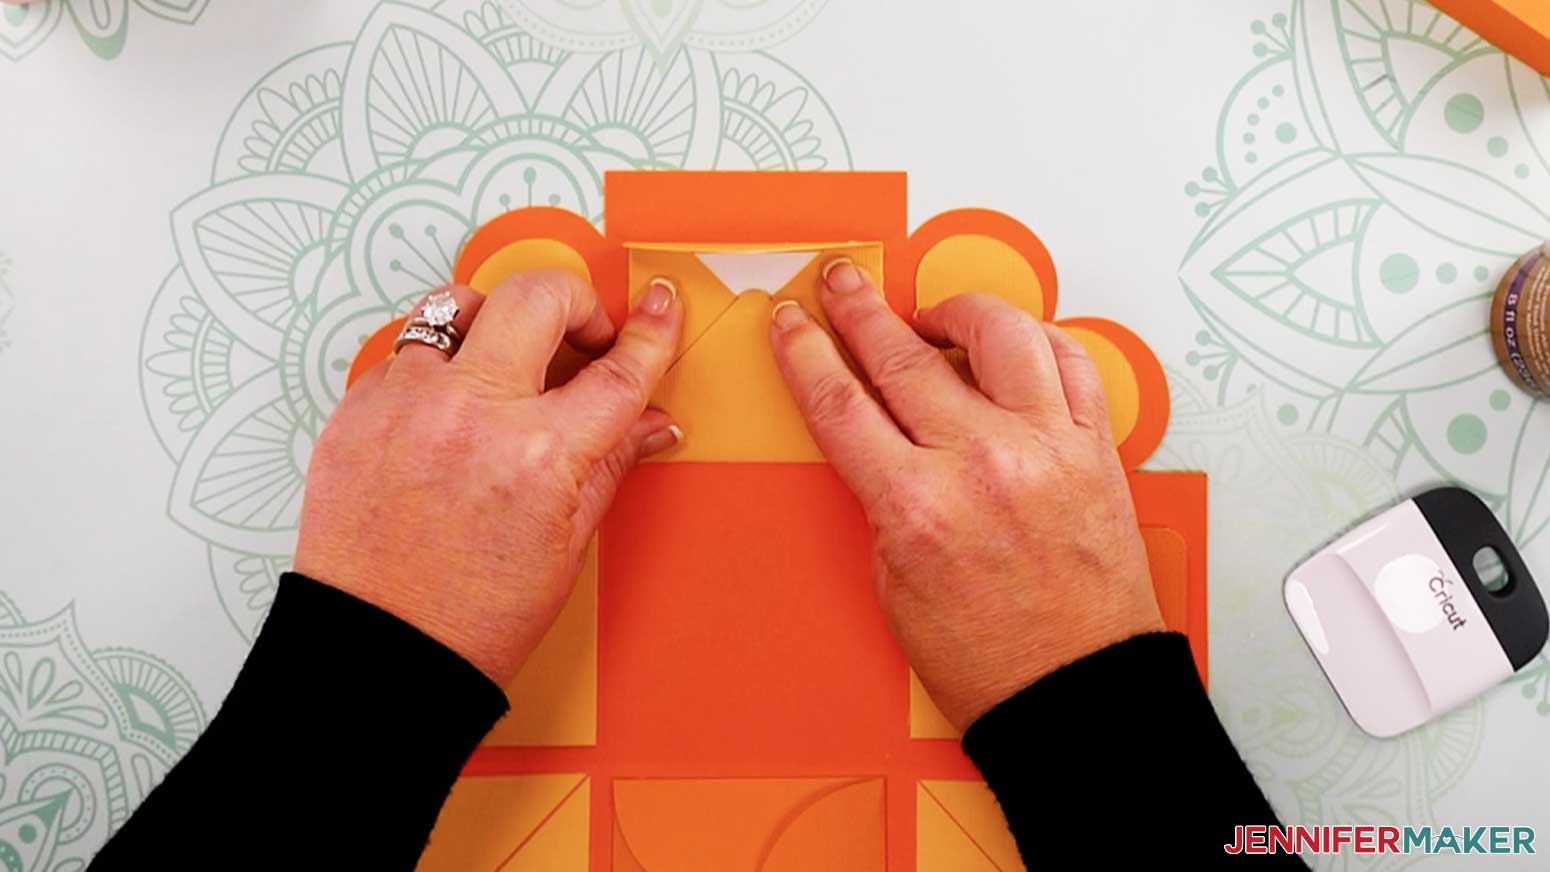
Grab the long folding notecard piece and fold on the score lines like an accordion.
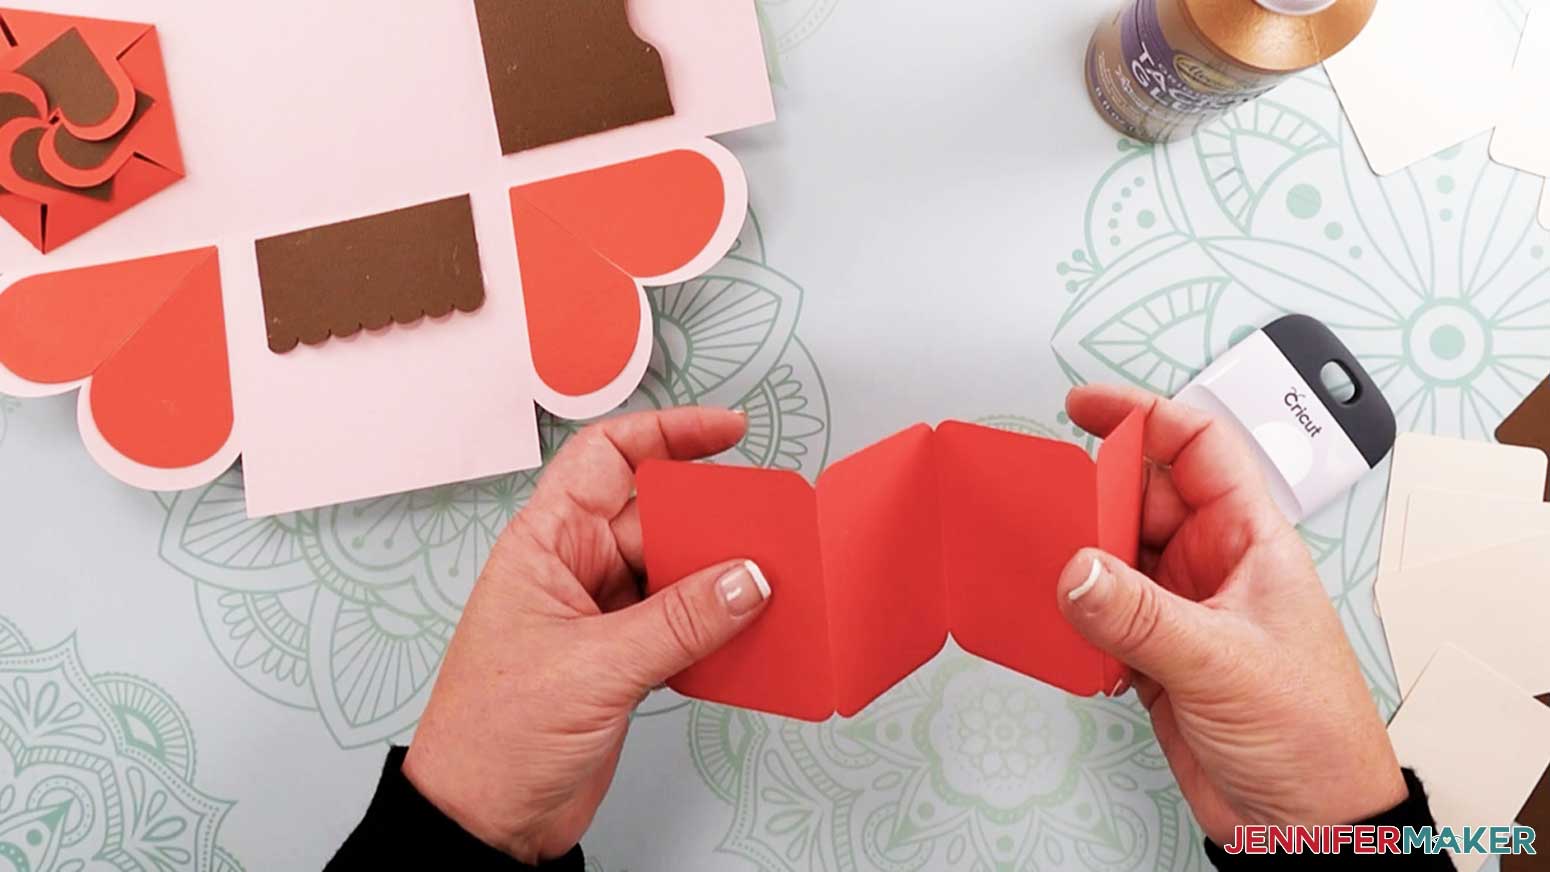
Glue a white note to each of the four panels.
Fold card flat and insert into the pocket.
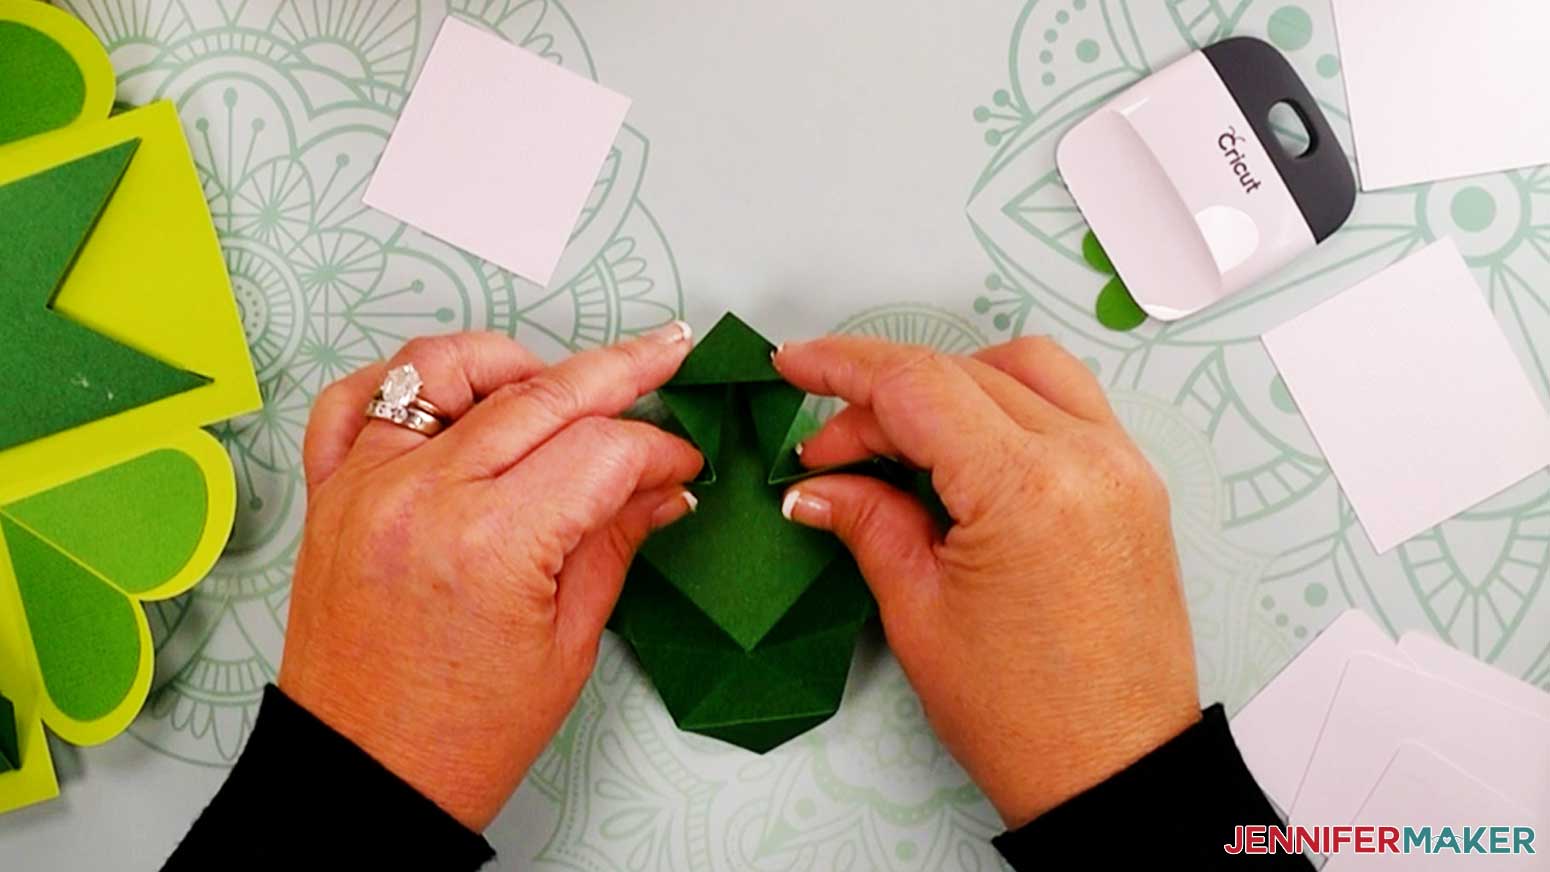
Grab the last notecard piece and begin folding on the diagional score lines toward the inside of the notecard.
After folding the diagional folds, fold on the score line between the two hearts the opposite direction from the diagional folds.
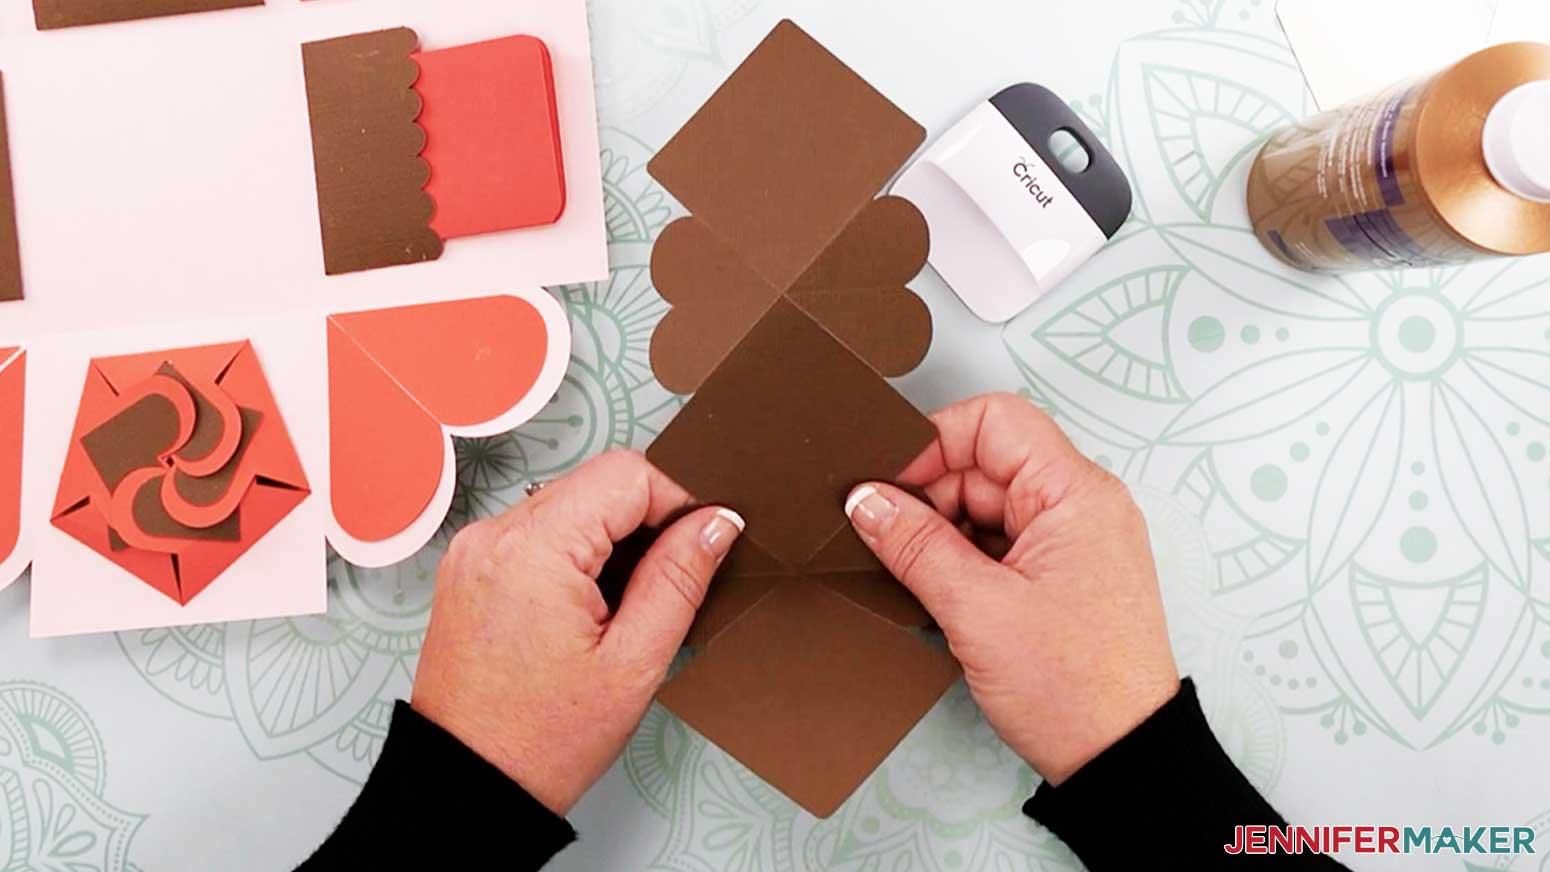
Your folded piece should look like this.
Glue the three white notes to notecard.
To close the notecard begin folding one side down as you push the heart-shaped sides inward.
Repeat to close the other side of the card.
Place the finished notecard into the last pocket.
Heart Explosion Box #2 (Second Box)
Grab the cut pieces to assemble box two.
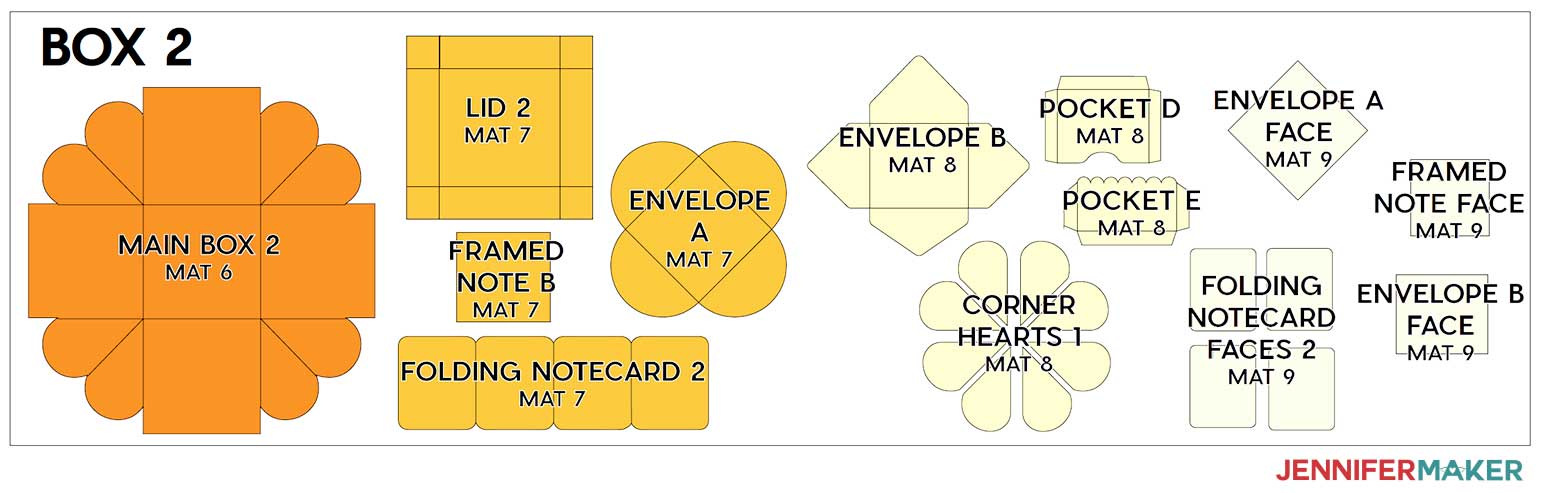
Repeat the steps used to assemble the box piece and lid as we did for box one above.
Heart Explosion Box #2 Extras (Notecards and Envelope)
Grab the square framed note card and glue the note face to the card.
Grab the envelope A piece and fold on the score lines.
Glue and place the white card to the center of the notecard.
To close the notecard, fold down the first three flaps. Fold and slide the fourth flap under the first flap.

Grab the next piece, which is envelope B. Fold the two side flaps toward the inside of the envelope and add glue to the bottom edge of the longer flap.
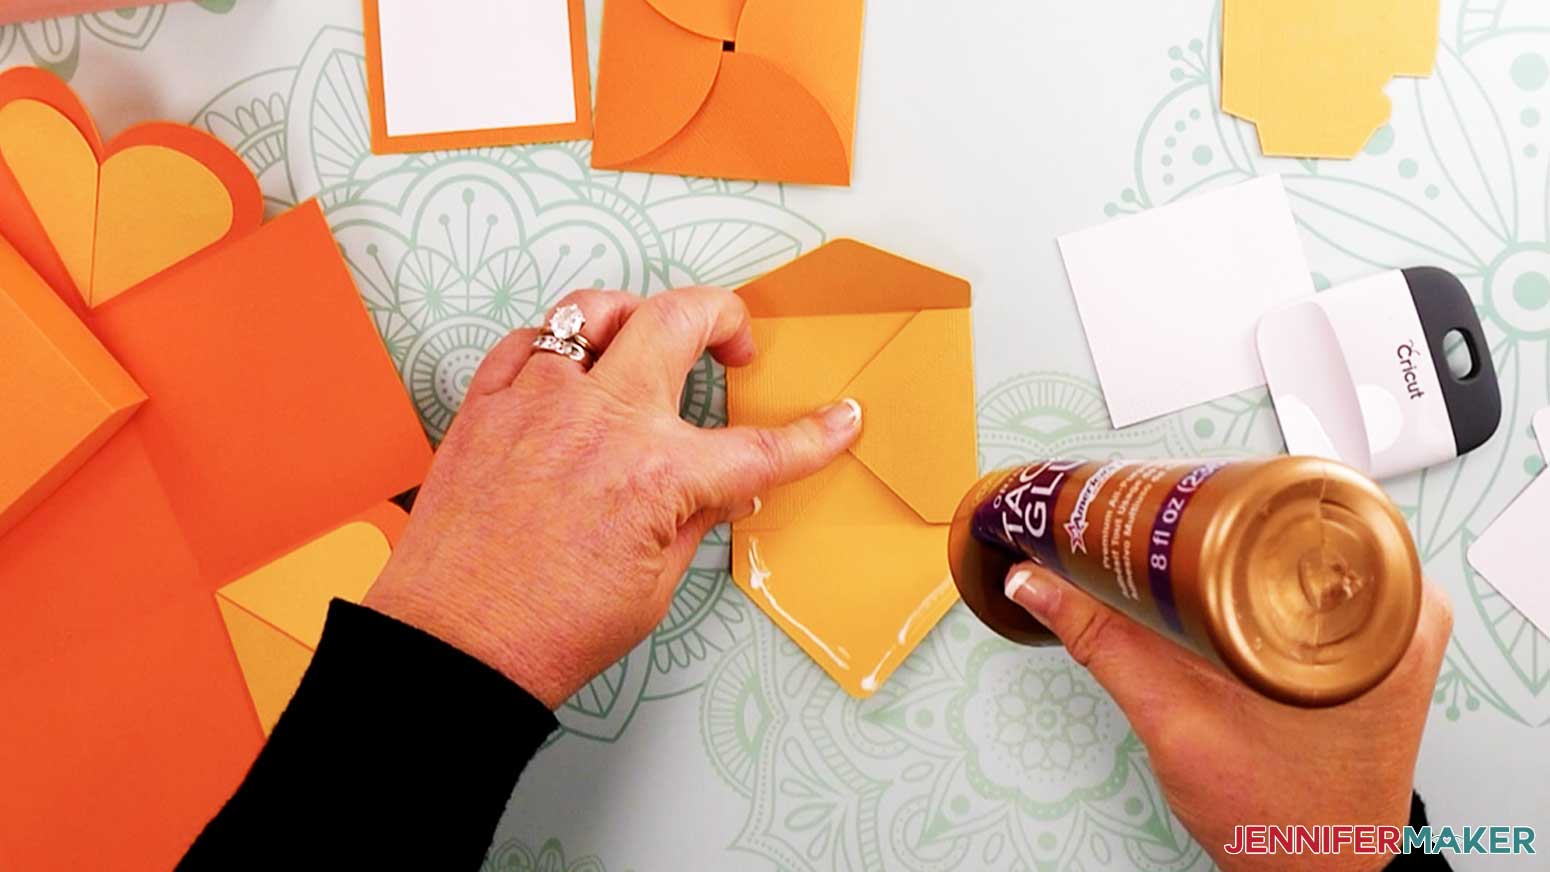
Fold up and press onto the two middle flaps. You now have an envelope.
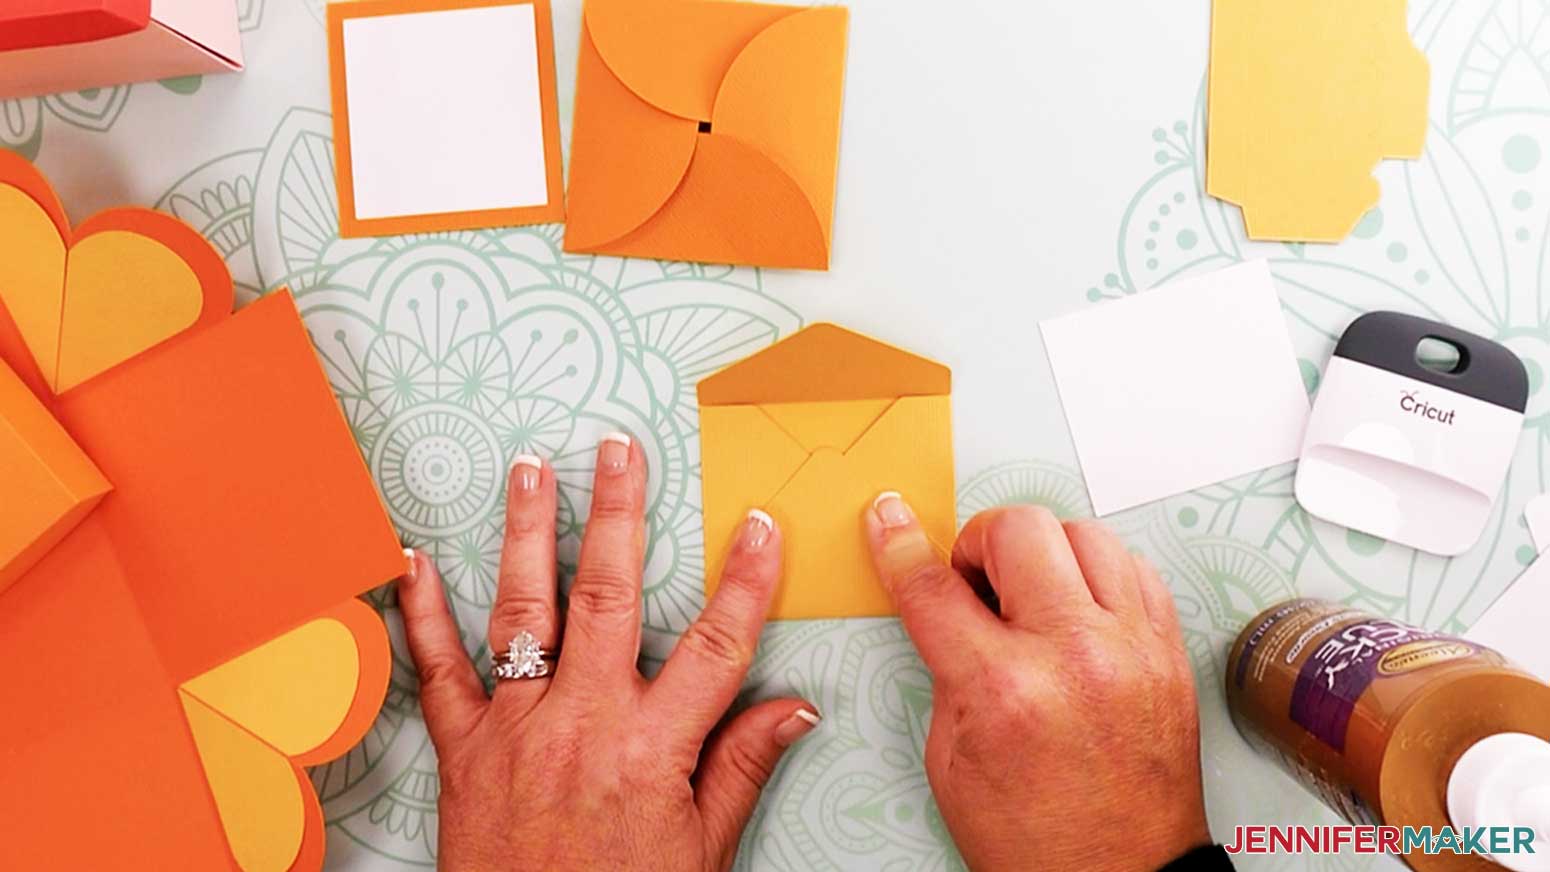
Insert the corresponding white card into the envelope.
Grab the long rectangular piece and fold it as we did with the same piece for box one. Glue the four white notes to the notecard.
Next, fold the two pocket pieces (like you did with box one) and glue them to the sides of box two. Insert the notecard into one of the pockets.
Insert the other notecard into the second pocket.
Add glue to the back of the two envelopes and glue to the sides of box two.
This is what your finished box two should look like.

Heart Explosion Box #3 (Third Box)
Grab the cut pieces to assemble box three.

Repeat the steps used to assemble box piece and lid as we did for boxes one and two..
Heart Explosion Box #3 Extras (Notecards and Pockets)
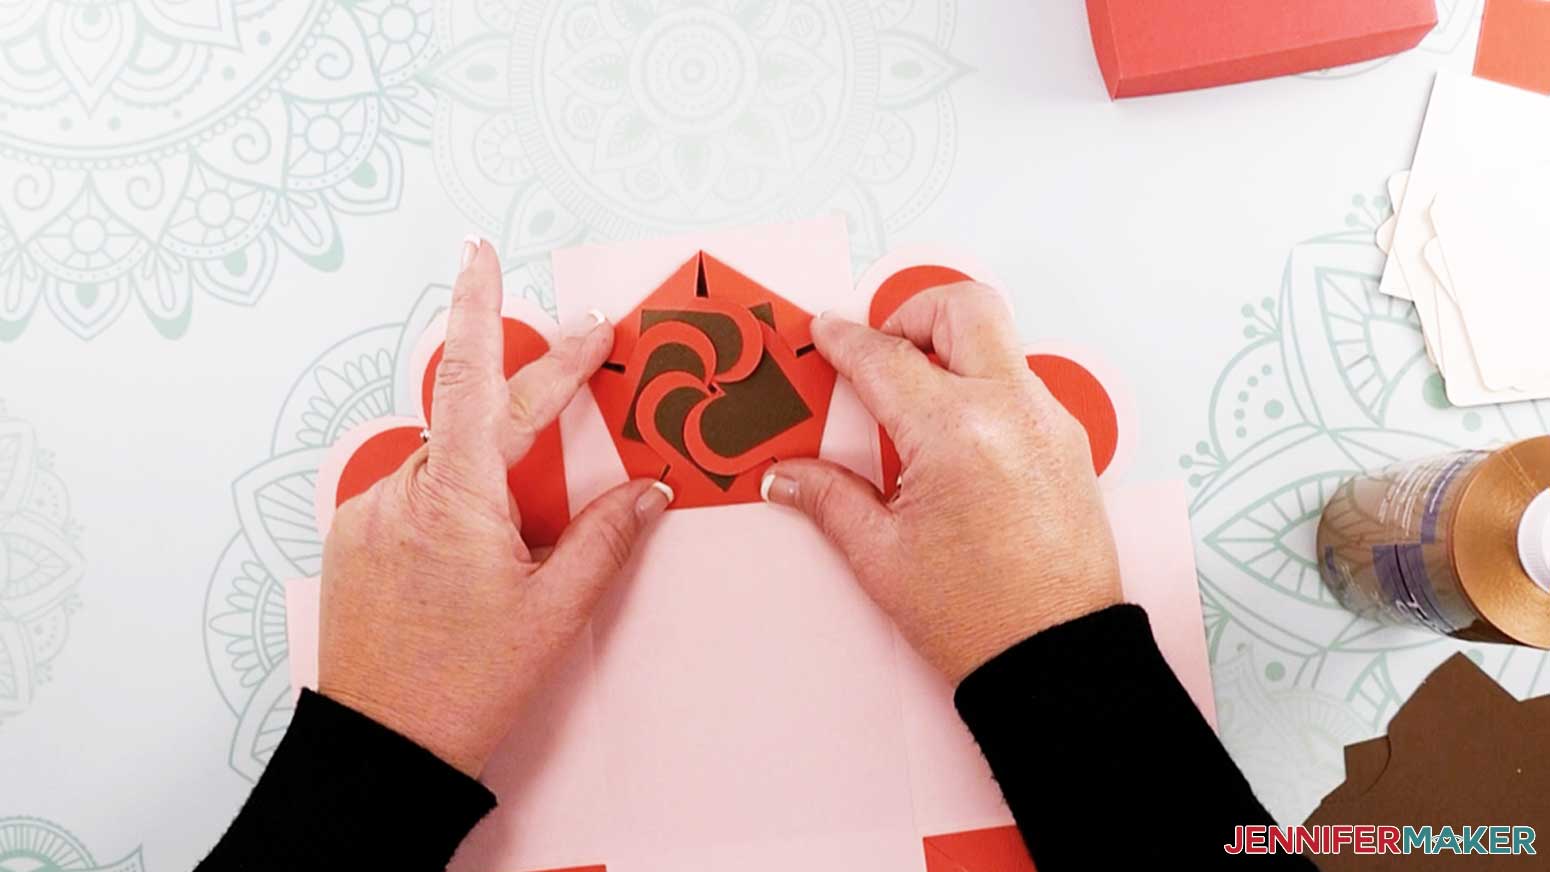
Grab the spiral notecard piece and fold each of the score lines on the four flaps toward the outside of the notecard.
Then fold the three flaps toward the inside of the notecard. Add glue to the note face and insert it into the card.
To close the notecard, fold down the first three flaps. Slide the fourth flap under the first flap.
This is what your notecard should look like.
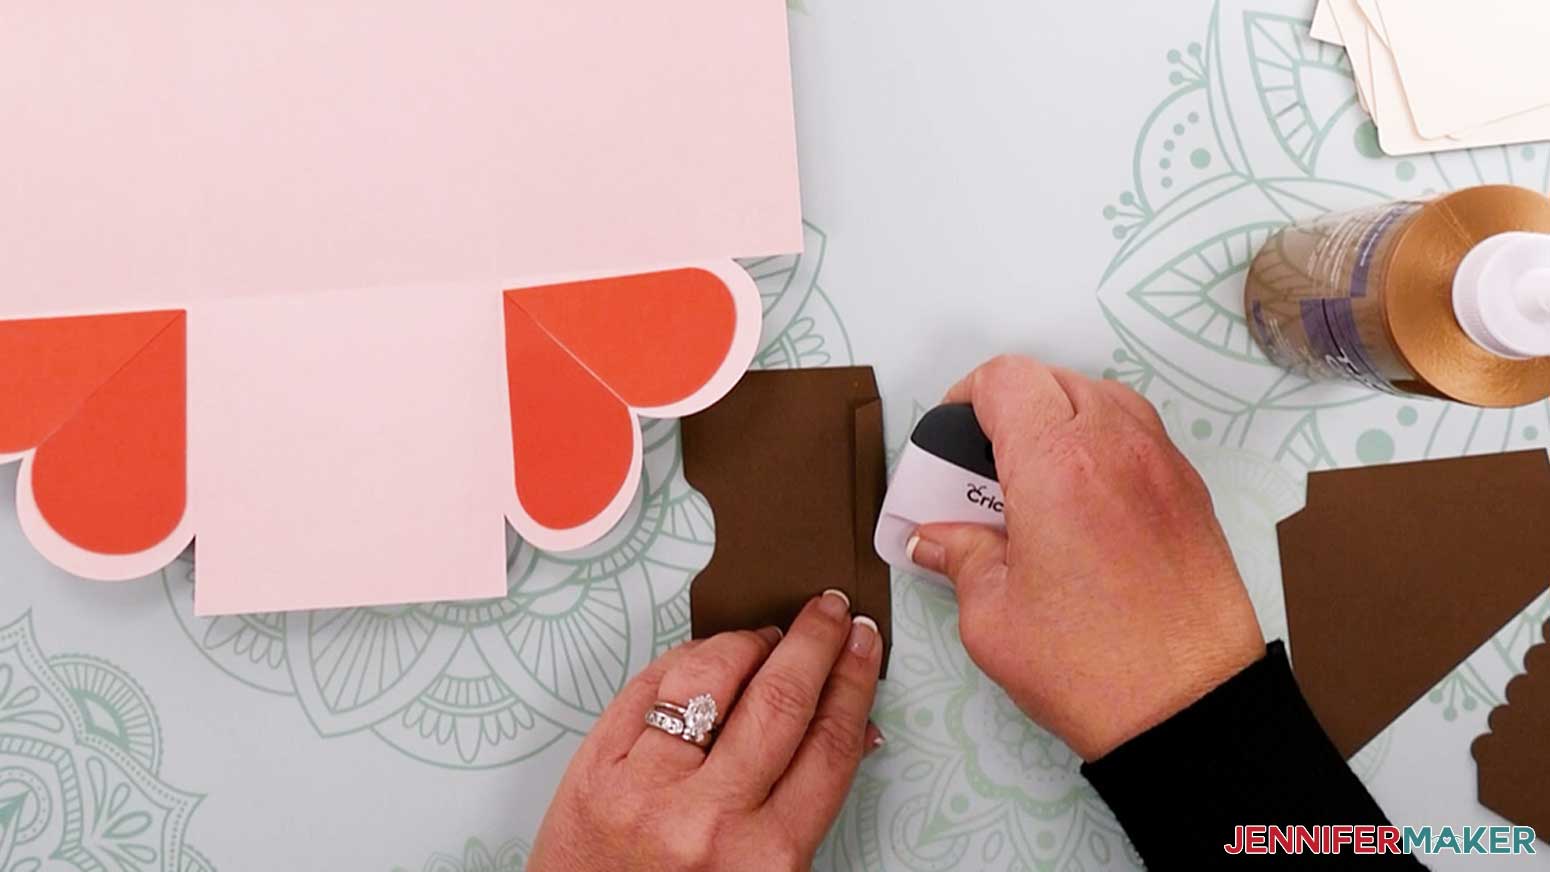
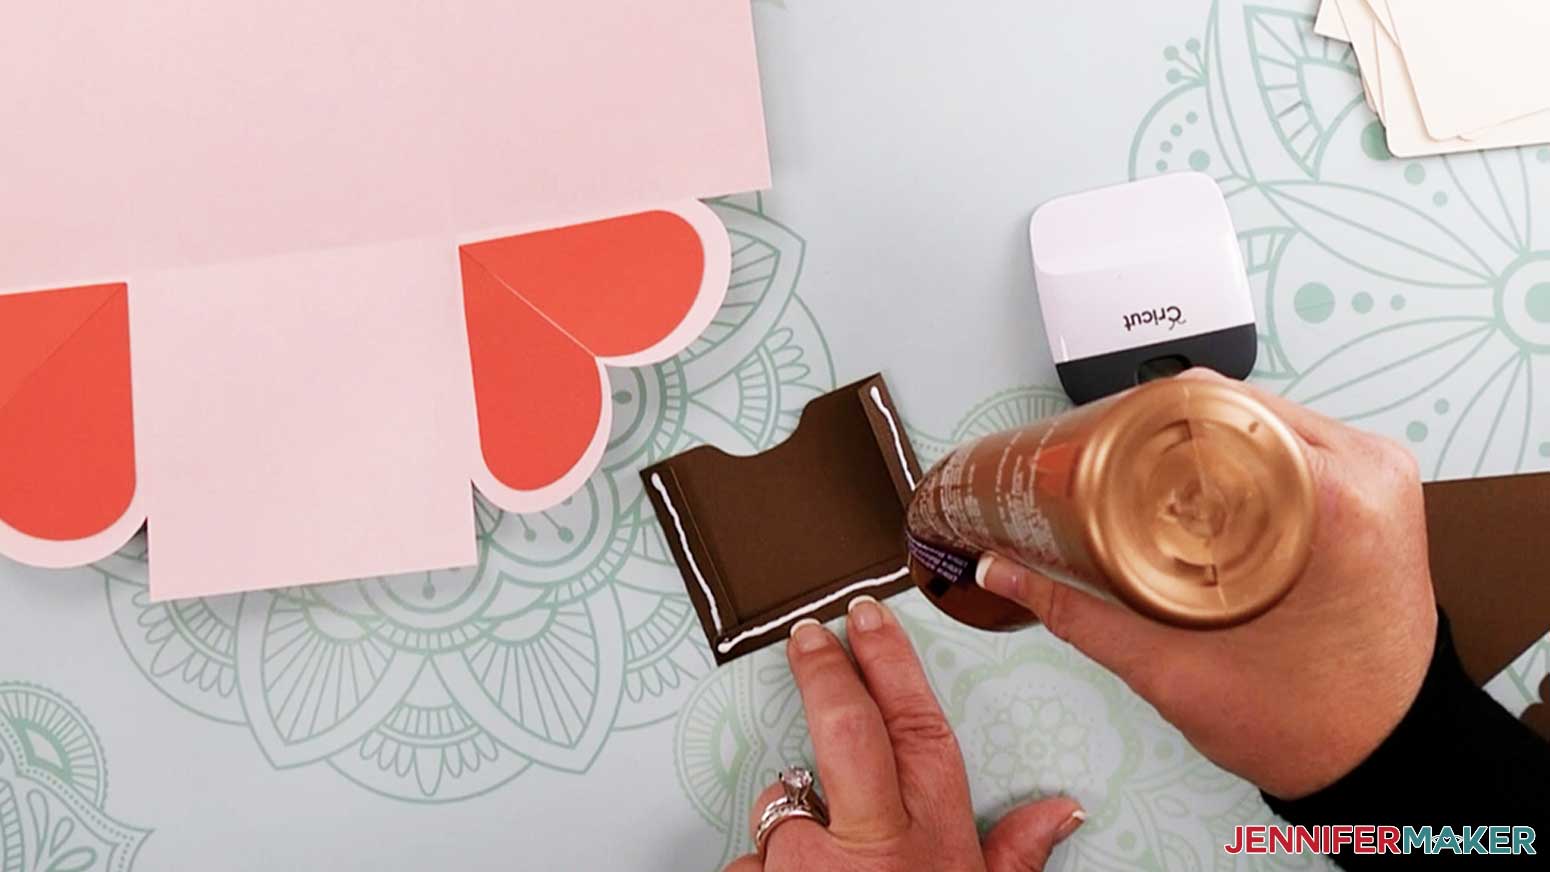
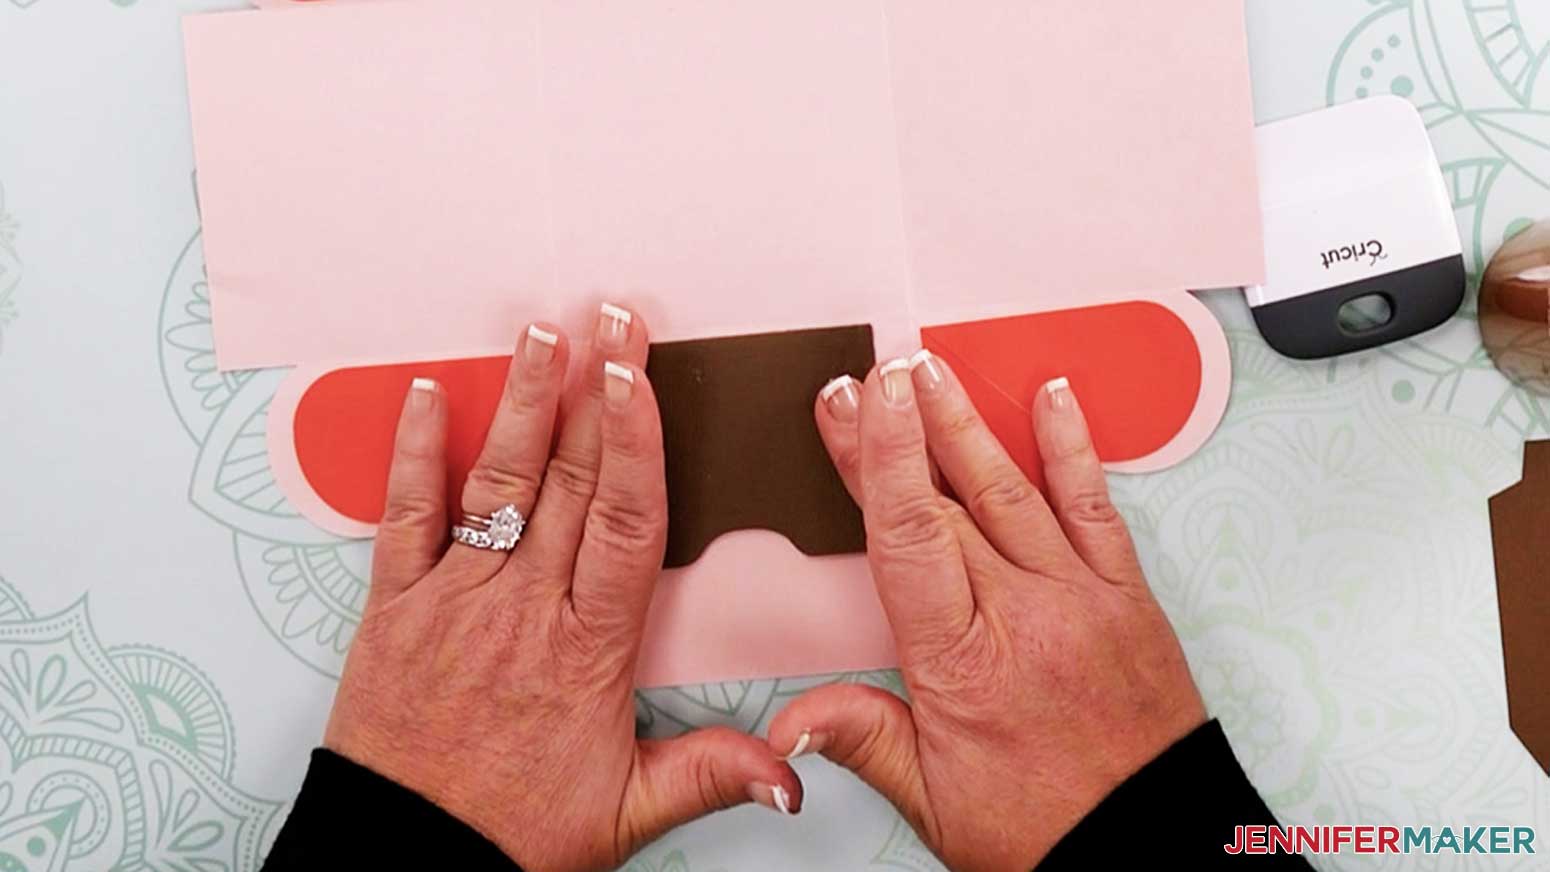
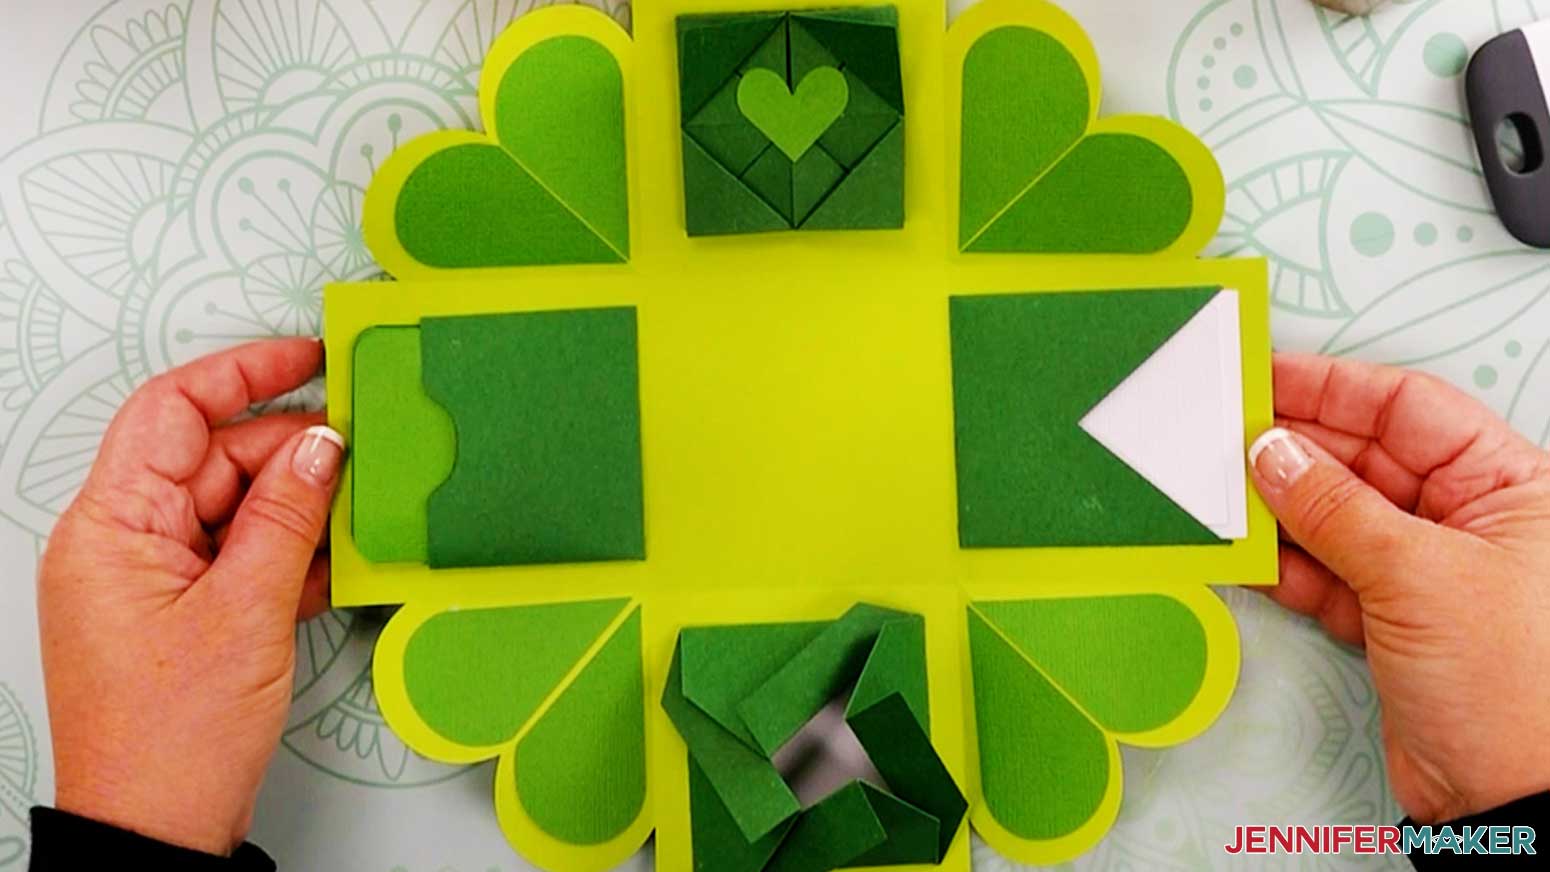
Add glue to the back of the notecard and place it on one side of box three. Grab the two pocket pieces. Fold the tabs, glue, and place each one on a side of box three as we did for the pockets of the previous two boxes.
Grab the corner notecard and begin folding the four sides toward the inside of the notecard. Then fold on all the diagional scores so your piece looks like mine.
Add glue and place the white note face card in the center.
Fold down two sides of the notecard to the corner to close the notecard. Repeat for the remaining three corners.
Glue the small heart on top the closed notecard to keep it closed after you have written your note inside the card.

Add glue to the back of the note card and place on a side of box three.
Grab the long rectangular piece and fold it as we did with the same piece for box one. Glue the four white notes to the notecard and place the notecard in the pocket in box three.
This is what your box three should look like.
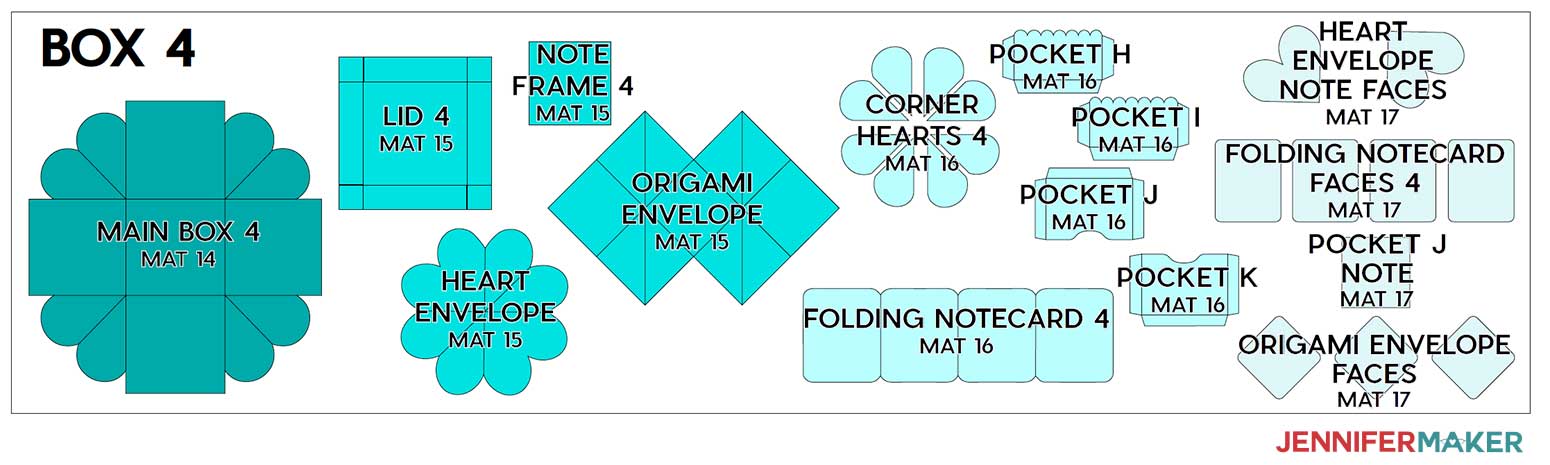
Heart Explosion Box #4 (Fourth and Final Box)
These should be the remaining pieces you have left which will be used to assemble box four.
Repeat the steps used to assemble the box piece and lid as we did for the first three boxes.
Heart Explosion Box #4 Extras (Pockets and Notecards)
Next, take the four pocket pieces and fold, glue, and place one on each side of box four. Your box should look like mine.

Glue the note face card to the notecard as we did with the previous boxes.
Grab the long folding notecard piece and fold it as we did with the same piece for the previous boxes. Glue the four note face cards to the notecard and place the notecard in a pocket in box four.
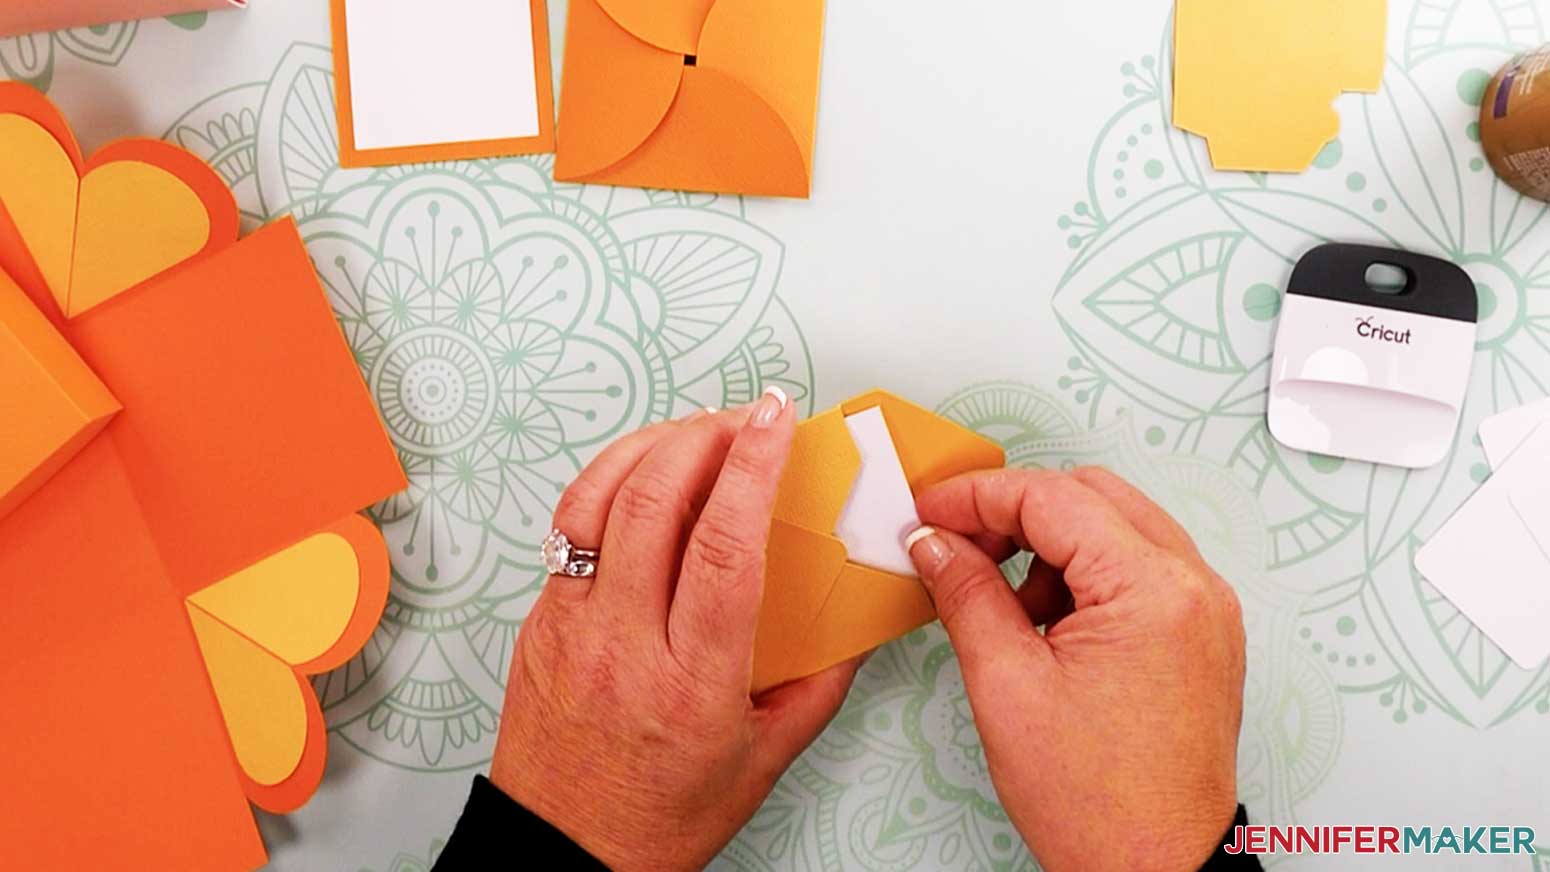
Grab the heart envelope piece and fold on the three score lines.
Glue two heart notes to the notecard
Push in the sides to close the heart envelope and place it into one of the pockets on box four.

Grab the origami envelope and fold on the score lines. This card folds the same as the accordian piece we folded in box one.
Your notecard folds should look like mine.
Glue the note face cards to the origami envelope and place the card in the last pocket.
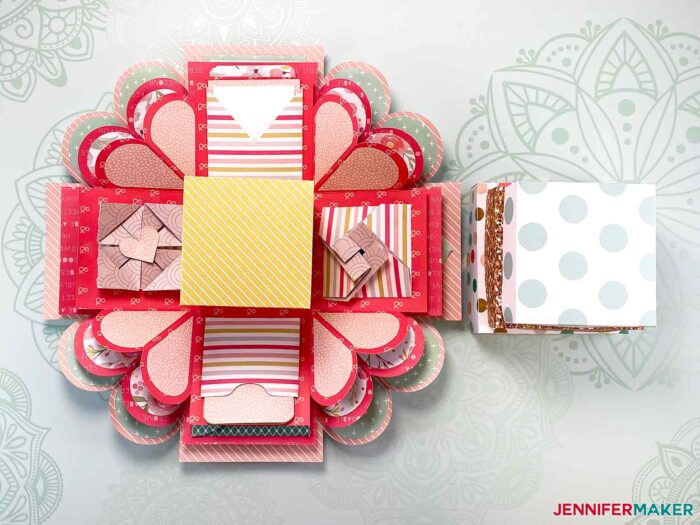
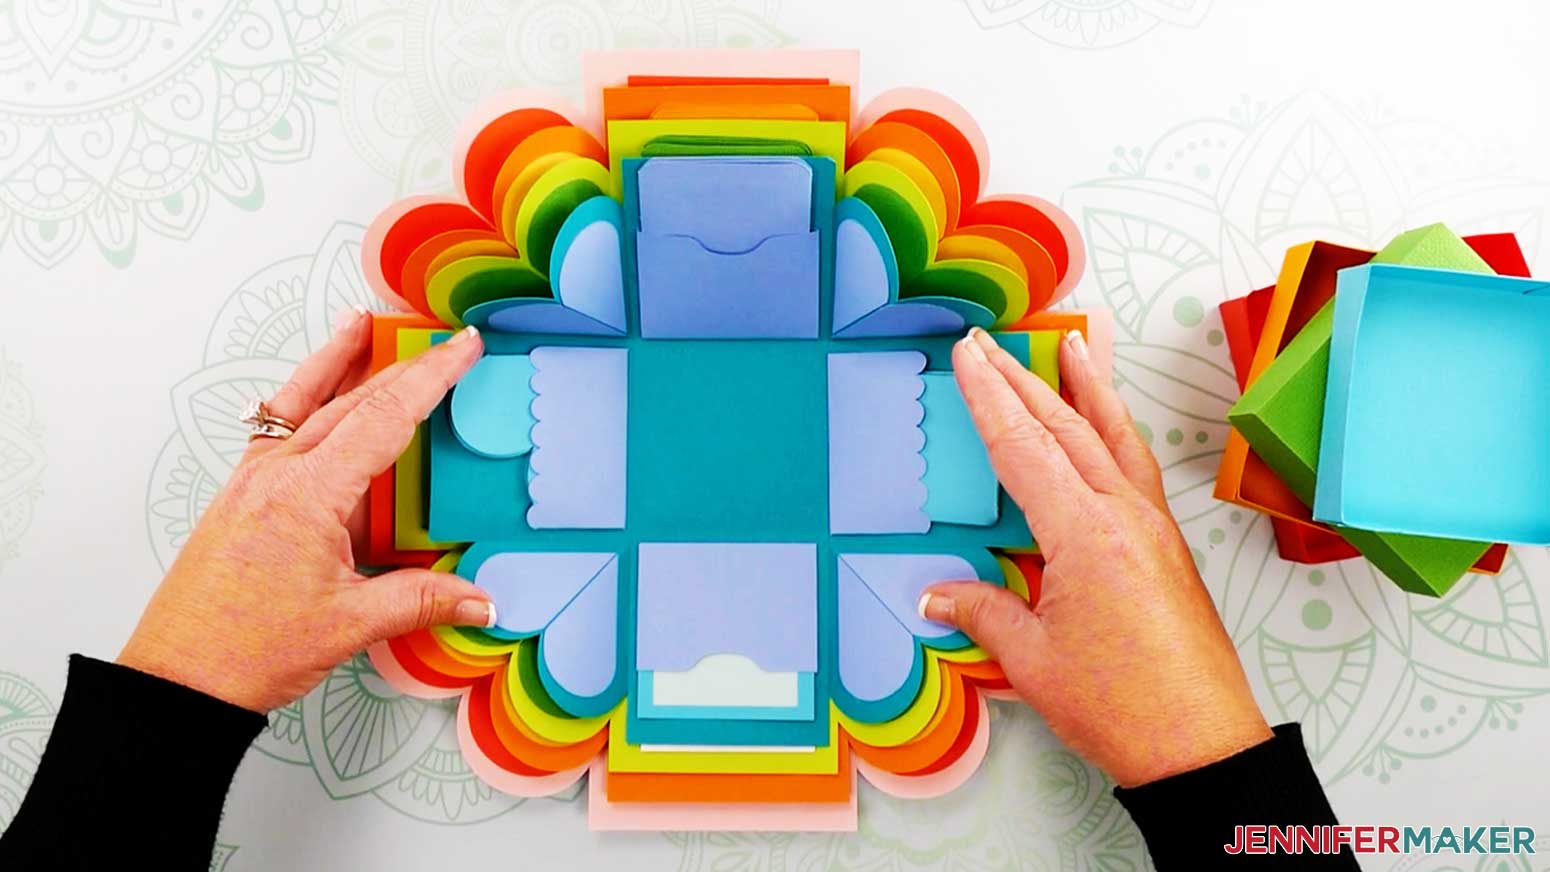
STEP 5: GLUE THE BOXES TOGETHER
Grab box two and glue the bottom of the box then place the box in the center of box one.
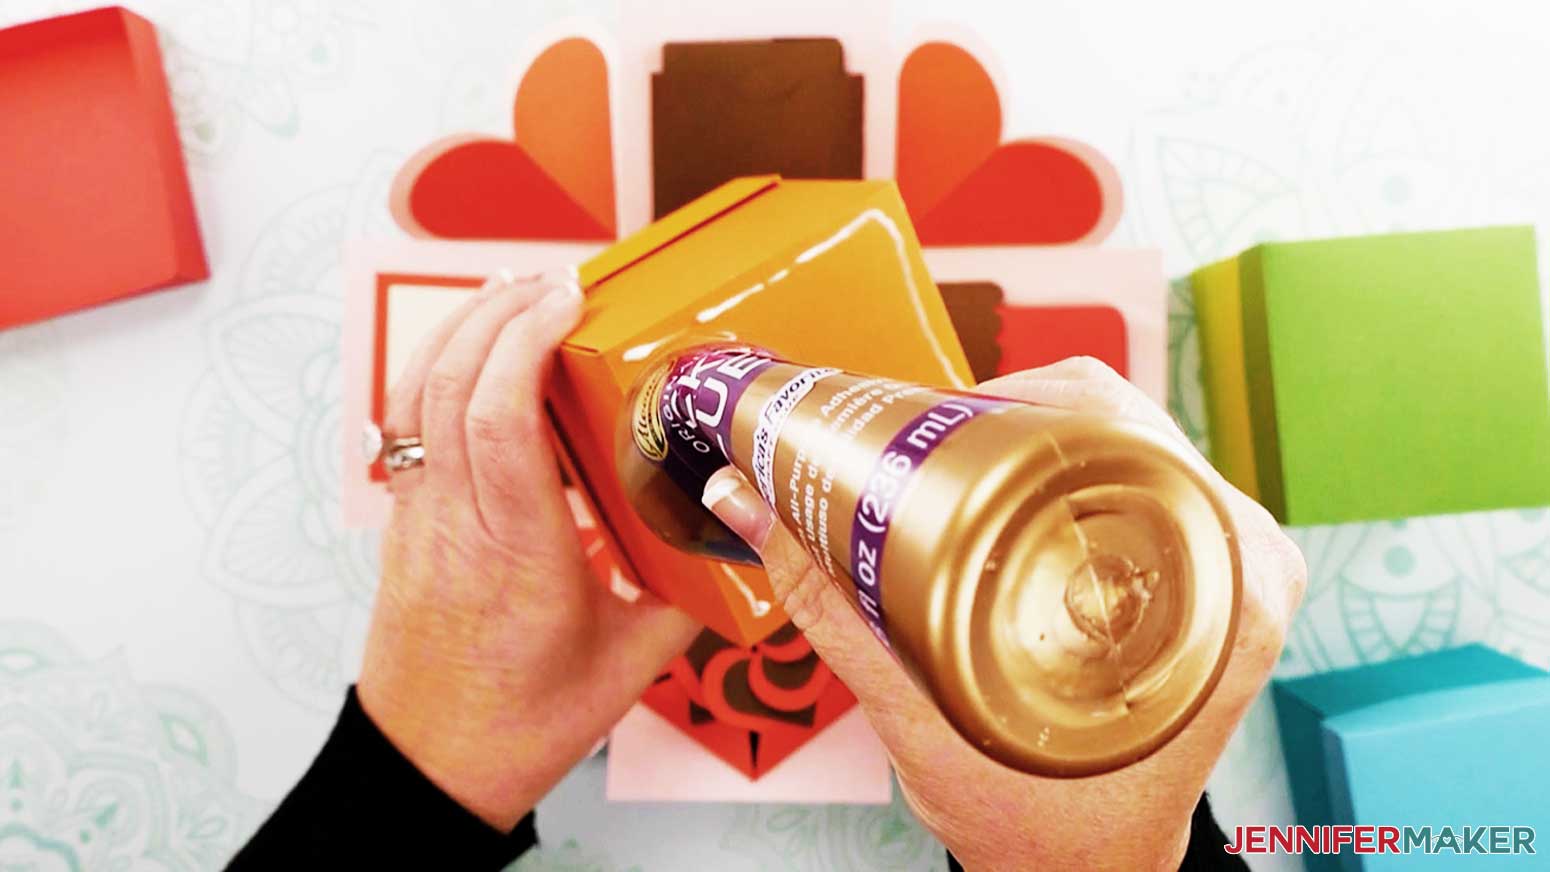
Glue box three to the center of box two and box four to the center of box three.
STEP 6: SHOW IT OFF
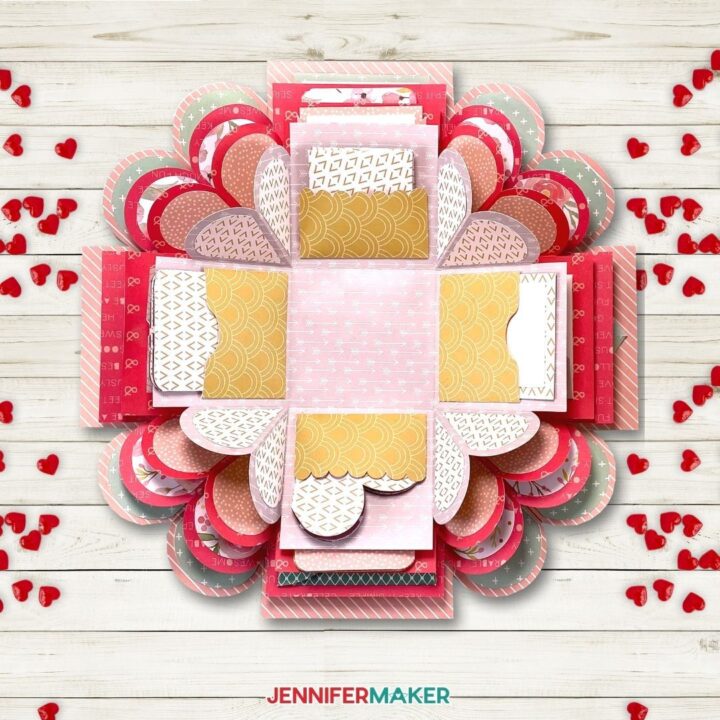
Your box is finished and its time to write your notes and add your personal touches for that special someone. This is what my heart explosion box looks like when I used patterned cardstock.
Notes
Heart Explosion box measurements:
BOX #1 (LARGEST SIZE):
- H = 3 13/16 inches
- W = 4 inches
- L = 4 inches
BOX #2:
- H = 3 9/16 in
- W = 3 3/4 in
- L = 3 3/4 in
BOX #3:
- H = 3 3/16 in
- W = 3 3/8 in
- L = 3 3/8 in
BOX #4 (SMALLEST SIZE):
- H = 3 in
- W = 3 3/16 in
- L = 3 3/16 in
Answers to Your Questions About Making A Heart Explosion Box
Q: What is the best cardstock for an explosion gift box?
In this tutorial, I used 65 lb. cardstock, but you can use 80 lb. cardstock as well!
Q: What is the best glue to use for this explosion box?
I used tacky glue but you can use double sided sticky tape, or hot glue.
Q: Is this project good for beginners?
This project is good for beginner to intermediate crafter. The cutting is easy, perfect for beginners. The assembly, since it has so many pieces can take some time, and can fall between a beginner and intermediate level. I have made this as simple as possible by including step-by-step instructions and a color coded diagram you can use when assembling this project!
Q: How long does this take?
This project will take several hours to assemble, perfect for a snow day or a long evening at home!
Q: How do you get pictures small enough to fit in the box?
The best way to do this is to upload your pictures to Cricut Design Space, resize them to fit wherever you want them to go, then print and cut them out on glossy sticker paper. Then it’s just peel and stick!
Q: How do I make an explosion box without the corner hearts?
Use my original explosion box template and tutorial here!
Q: At the beginning of the video, you stated that we needed a green mat for this project. When you load your paper into the Cricut, it is on a blue mat. Will this make a difference?
Not really! I prefer using the green mat, the standard grip mat, for almost all cardstock projects because it holds both glitter and regular cardstock so well, in my opinion. You can certainly use the blue mat, though!
Q: My template came into Design Space really small. Did I do something wrong?
A: Not at all! Design Space will sometimes resize patterns on iPads/iPhones, for some unexplainable reason! All you need to do with this SVG is to select the stacked pattern on your canvas and resize it to 11.5″ x 11.5″ ! All will be well!
Q: My template came in without score lines set. What do I do?
Either use the no-score-tool version of the file or the Cricut Design Space project link, or watch this video to see how to set and attach your lines!
Q: What should I put inside an explosion box?
In addition to the interactive elements like the pockets, cards and photo frames, I think great ideas are candy, trinkets, a little soft toy, gift cards, and cash! If you want a special touch, keep your contents all handmade gifts, consider lining the walls with waterfall cards, double-slider cards, origami envelopes, spinning pull cards, and shaker cards, each with your favorite memories together!
Q: When should I make this exploding box?
While Valentine’s Day is the obvious choice, I think this explosion gift box is perfect as an anniversary gift, a special token for friendship day, and a great way to present small gifts, including engagement rings!
Get my free SVG files to Make a Heart Explosion Box
I love this fun heart explosion box template! These unique boxes are so fun to give as a gift any time of year! Please do share a photo of your heart explosion box in our Facebook group or tag me on social media with #jennifermaker when you finish yours … I love to see your projects!
Love,

Want to remember this? Save this Heart Explosion Box Template Tutorial to your favorite Pinterest Board!


You are truly amazing. Thank you. I am using my design space on my iPhone. I have upload the svg heart explosion onto design space, but the boxes look really small. What are the measurements of each box ?
Thank you
Hi Regan! I do address this in the FAQ section at the bottom of the blog post. Resize it to 11.5″x11.5″ and you will be good to go.
LOVE THE EXPLOSSION BOX YOU are GREAT
So glad you loved it!
Do you think you could use circut premium paper for some of the layers for the heart explosion box. Like do the box in cardstock and some of the inner layers with the paper. I have lots of their paper but don’t know what weight it is. Thanks!
Hi Leah! Absolutely you could! You can use any papers you have on hand!
You give us the number of pieces of cardstock (17) we need but can you break that down to how many of each color/contrast for each box. i.e. for rainbow how many sheets for red, pink and notecards?
Hi Irene! I don’t give it for how many of each sheet you need as you can mix and match this up to whatever combination you would like. Play around with it and make it your own with what you have on hand, that is the real fun of this project!
I love this so much!
Thank you, Angel!
How do you know the weight of the cardstock? Or any scrapbook paper?
65-80 lb Double-Sided Cardstock or 65-80 lb Single-Sided Cardstock will achieve the best results.
Help! I downloaded the template and when I bring it into design space it is not the right size. What am I doing wrong?
Hi Jennifer! If you are using an iOS device, resize it to 11.5″x11.5″ to get the proper scale. This is addressed in the FAQ’s section of this blog post. If you are using anything other than iOS, please reach out to my team at [email protected].
I just made mine! Thank you so much for such clear instructions. I was surprised at how quickly it came together. I am even thinking of splitting it so that each explosion box is only 2 boxes instead of 4. There are so many places for notes and gift cards that the one project will do a Valentine box for each of my daughters.
So glad to hear you enjoyed making it, Heather! You could totally reduce the number of boxes, make it your own!
Made this for our daughter’s 20 birthday and sent it to her at college. Put reasons why I love her in the nooks. It looked awesome! Came up with a little short cut in that I cut the note sections out of sticker paper. Worked like a charm.
So glad you made it your own, Dena! I hope your daughter loves it!
Love this – however Sheet #7 for some reason did not load correctly – therefore the score and cut was a mess… how do I just redo that sheet in for this box???
Hi Terry! I took a look and mat #7 cut just for myself. You can upload the design to your canvas, hit make it and then just select that mat to cut. If you still have trouble, reach out to my team at [email protected]
Thank you for such a fun project. My son and I put the box together. He liked folding the pieces, and the score lines made it so easy for him. I put two of the four boxes together so I was able to make two explosion boxes to give away.
I am so glad you did this with your son, Melinda!
This is amazing! Thank you for your generosity!!
Hi Nancy! You are most welcome!
Hello Jennifer, thank you for this project. I made it last weekend for my grandson’s birthday and it was so fun. But, the 1st board with the largest box would not complete its cut. The machine stopped when it got to the right side of the board. Thinking it was too close to the edge, I did move the paper over to the right a bit. That didn’t work either, in fact, my machine kinda freaked out and jimmied the board. Everything else cut perfectly. I just had to leave the larger layer out of the box construction. Any suggestions on how to overcome this issue? Thank you!
Cheri, make sure Design Space is up to date for you and you have a solid internet connection while cutting this machine. Signing out of Design Space and back in and trying to cut just that layer might help.
I love this project – but when I try to download it in the library, the SVG file is not in the zip. only the PDF and DXF
we had a friend cut these for us and we spent a family afternoon crafting – and now we desperately want to make more!
Hi Sarah! I just checked and the SVG file is there. You may see it as a Chrome HTML Document file or a Microsoft Edge HTML Document file. If you still have trouble, you can reach out to my team at [email protected] and they can pass along further instructions.
Thank you so much for this I created one filled with messages for my friend from all her friends for her birthday We called it the Explosion Box of Truth!
I can’t see how to share a picture with you but I just wanted to say thank you for your video tutorial and blog post and file it was perfect! Xx
Awesome, Gillian! I hope your friend loved the gift!
Hi Jennifer, I don’t have a cricut machine, can you provide me with the measurements of the different pieces used so I can then manually cut them out of cardstock. Very much appreciate your assistance.
You don’t need a Cricut for most of our projects, Grace! We include a PDF file in our design folder that you can print out on your computer printer and cut out by hand! 🙂
I am interested in the heart explosion box but I would need it in PDF form. How and where do I get this and the password for your library?
We have a PDF version in our Library, Eleanor! Click on the blue link and it will bring you there. We will ask for your name and email address to send you the password, which we will immediately send. When you get that, go back to the blue link, enter the password and search (the instructions on how to search the library are on the right-hand side) for Design #280. Click on the link that says “Heart Explosion Box SVG/DXF/PDF” and it will begin downloading to your computer! 😄
Hey I am not sure if it’s just me, but I downloaded the package both on my laptop and my phone and neither of them gave me a file that was uploadable to Cricut? The SVG link is to a empty document?
I was hoping to make this for a birthday I have coming up!
I just tested it out, Riley, and it’s working just fine on my end! If you’re having problems grabbing that file, there are a few links that you can look at contained under the first “Tip” in the Tutorial! They will bring you to instructions about how to upload a file using either laptop, desktop, iPhone or iPad! You can do it! 😊