
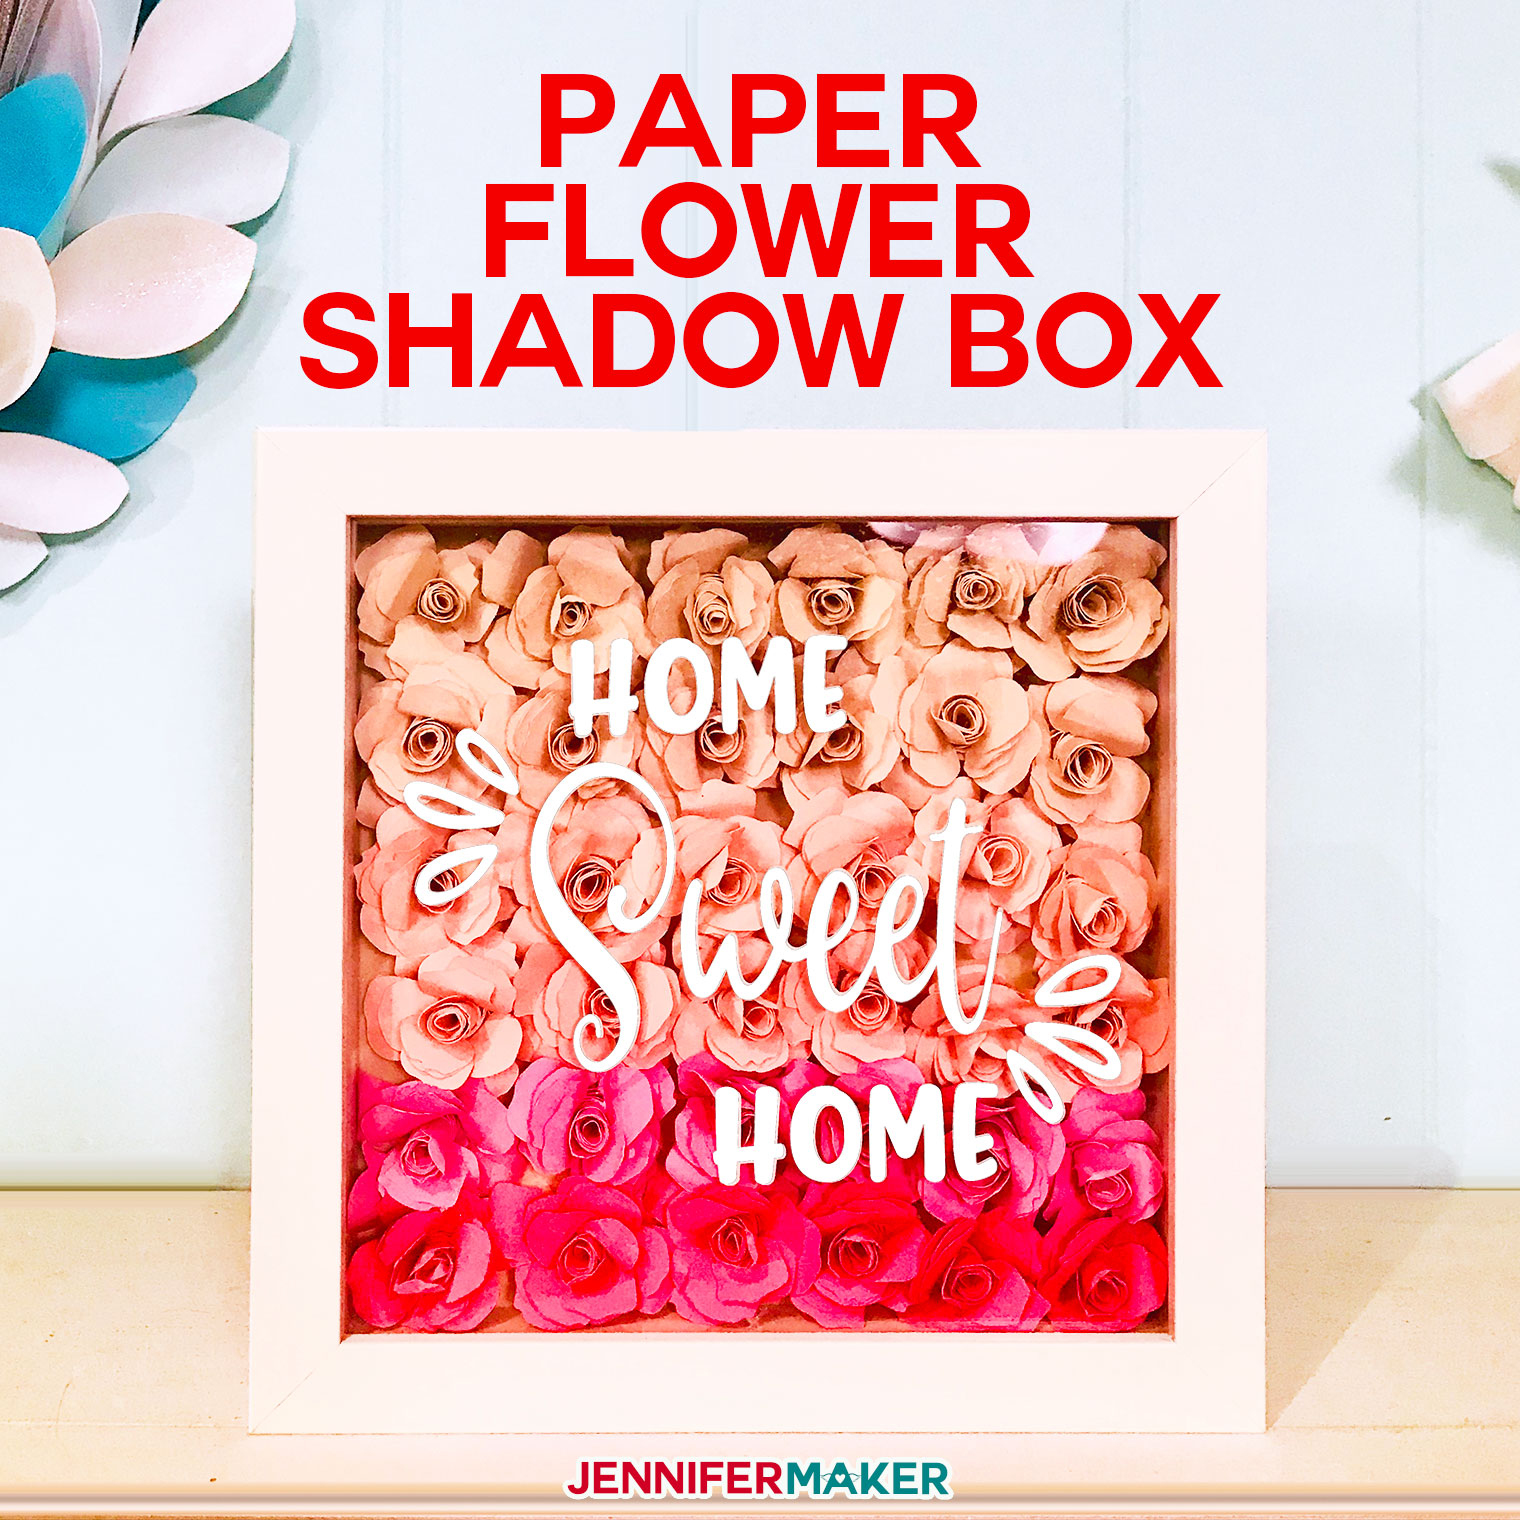
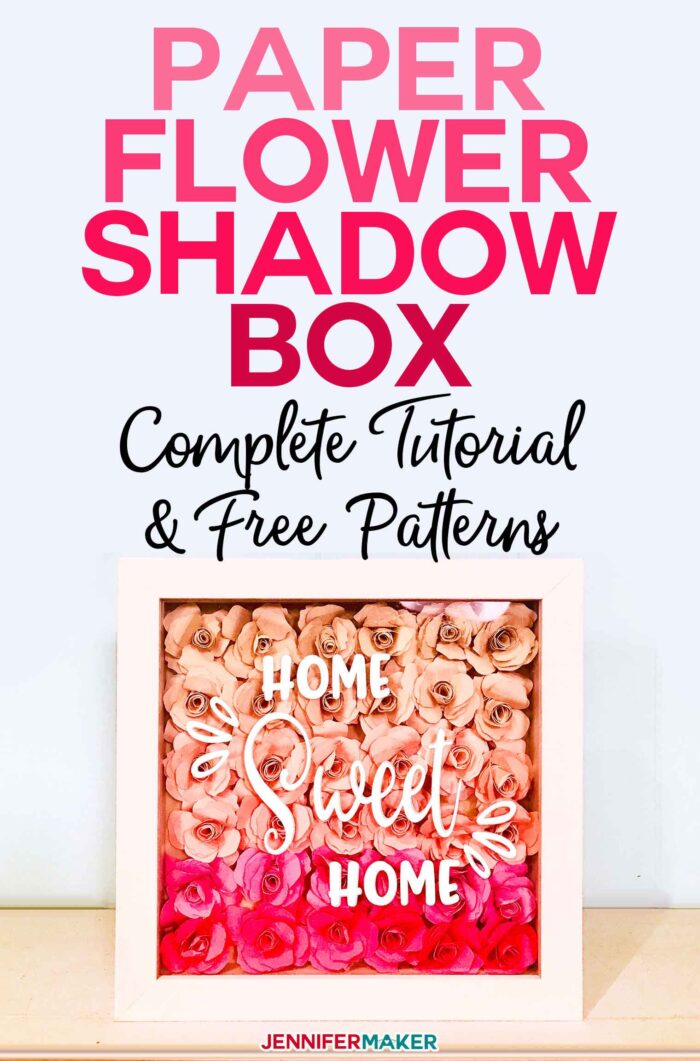
Learn how to make a gorgeous paper flower shadow box as home decor or a heart-felt gift.
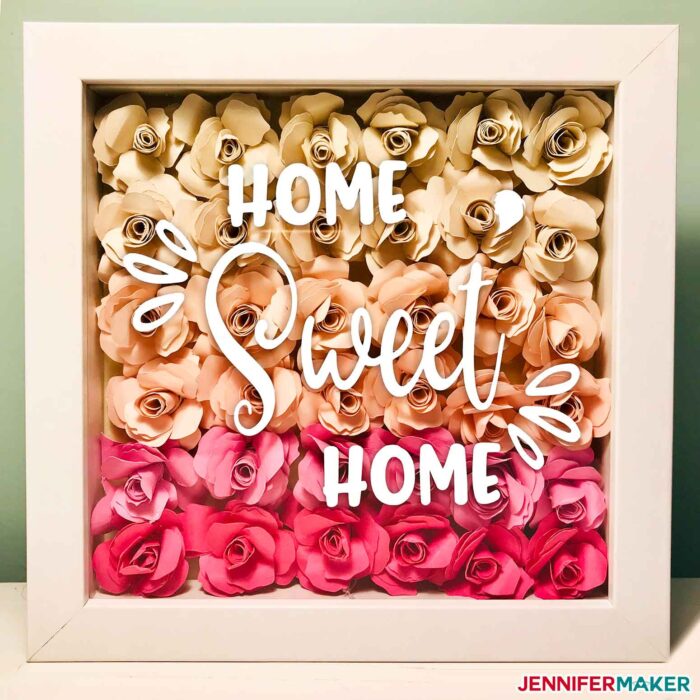
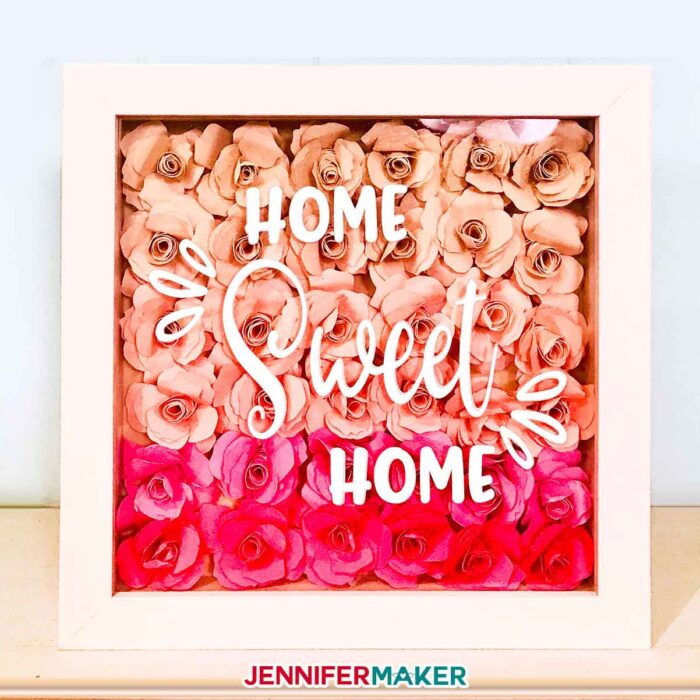
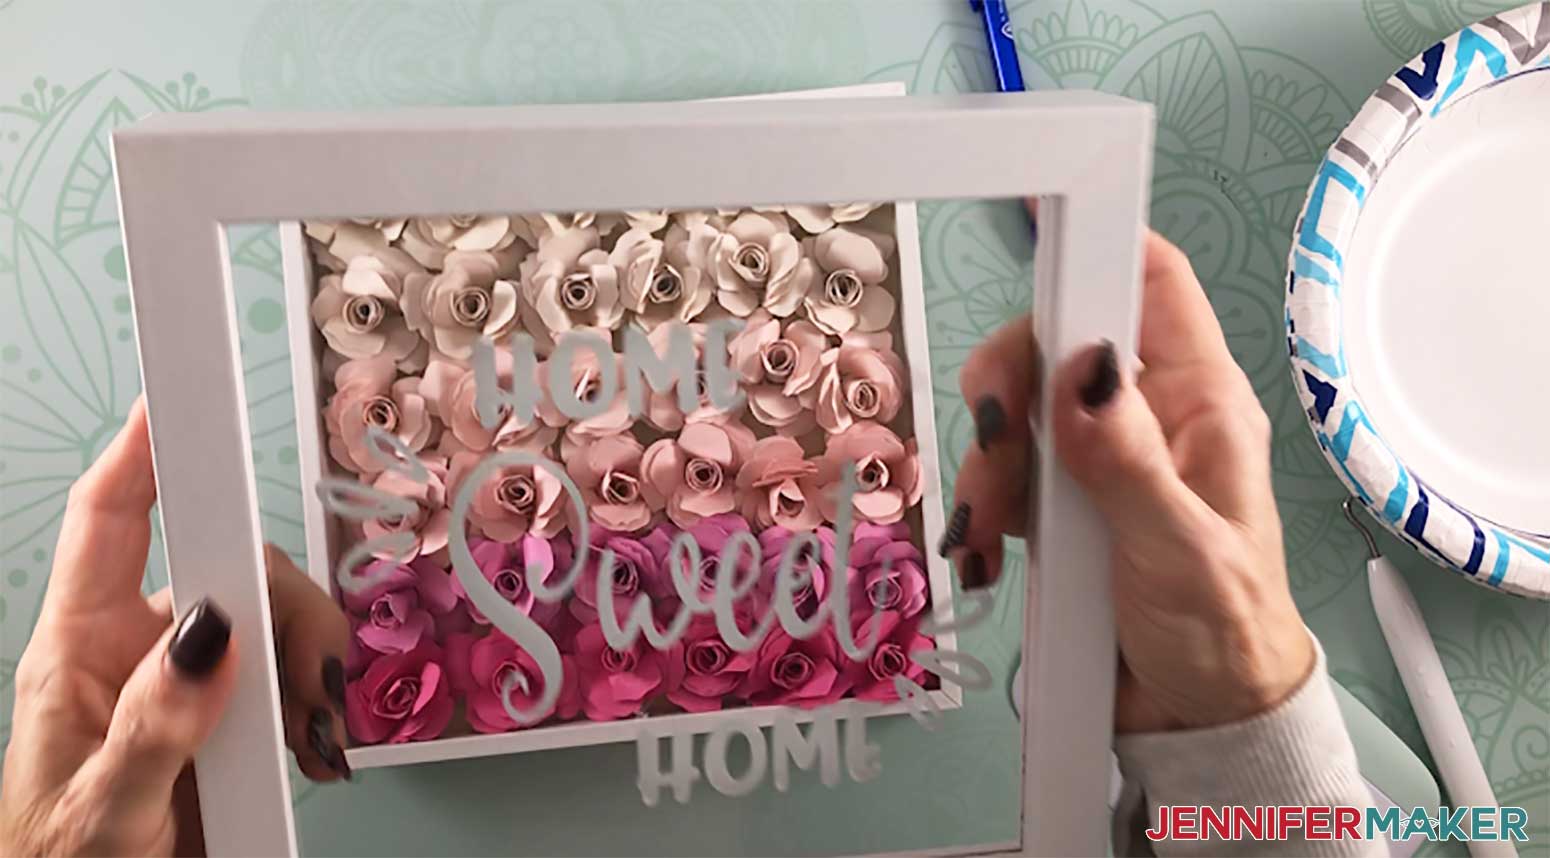
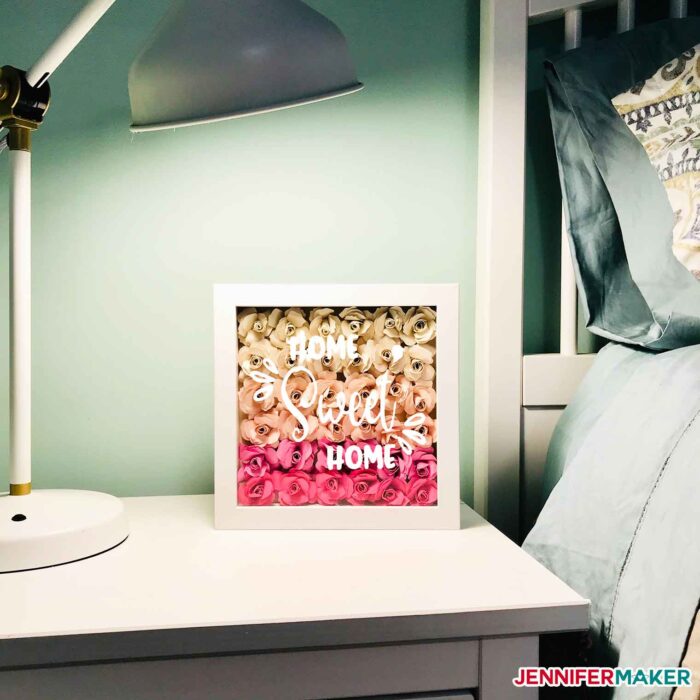
There’s just something magical about paper flowers. Not only are they gorgeous, but paper flowers can keep their beauty for years and years. Paper flowers are still rather fragile, but you can offset this by displaying and protecting them inside a shadow box. And — bonus — the glass on the front of the shadowbox frame is perfect for personalization. Paper flower shadow boxes are really popular and on-trend, making beautiful home decor conversation pieces and thoughtful gifts for someone special. And don’t you just love the ombre effect I’ve created here with different shades of cardstock paper roses? I’m delighted to share this paper flower shadow box tutorial with you today!

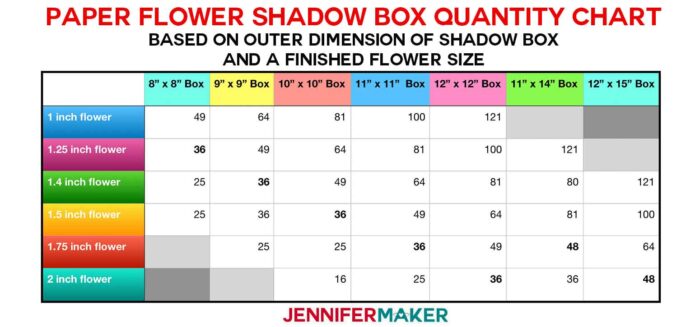
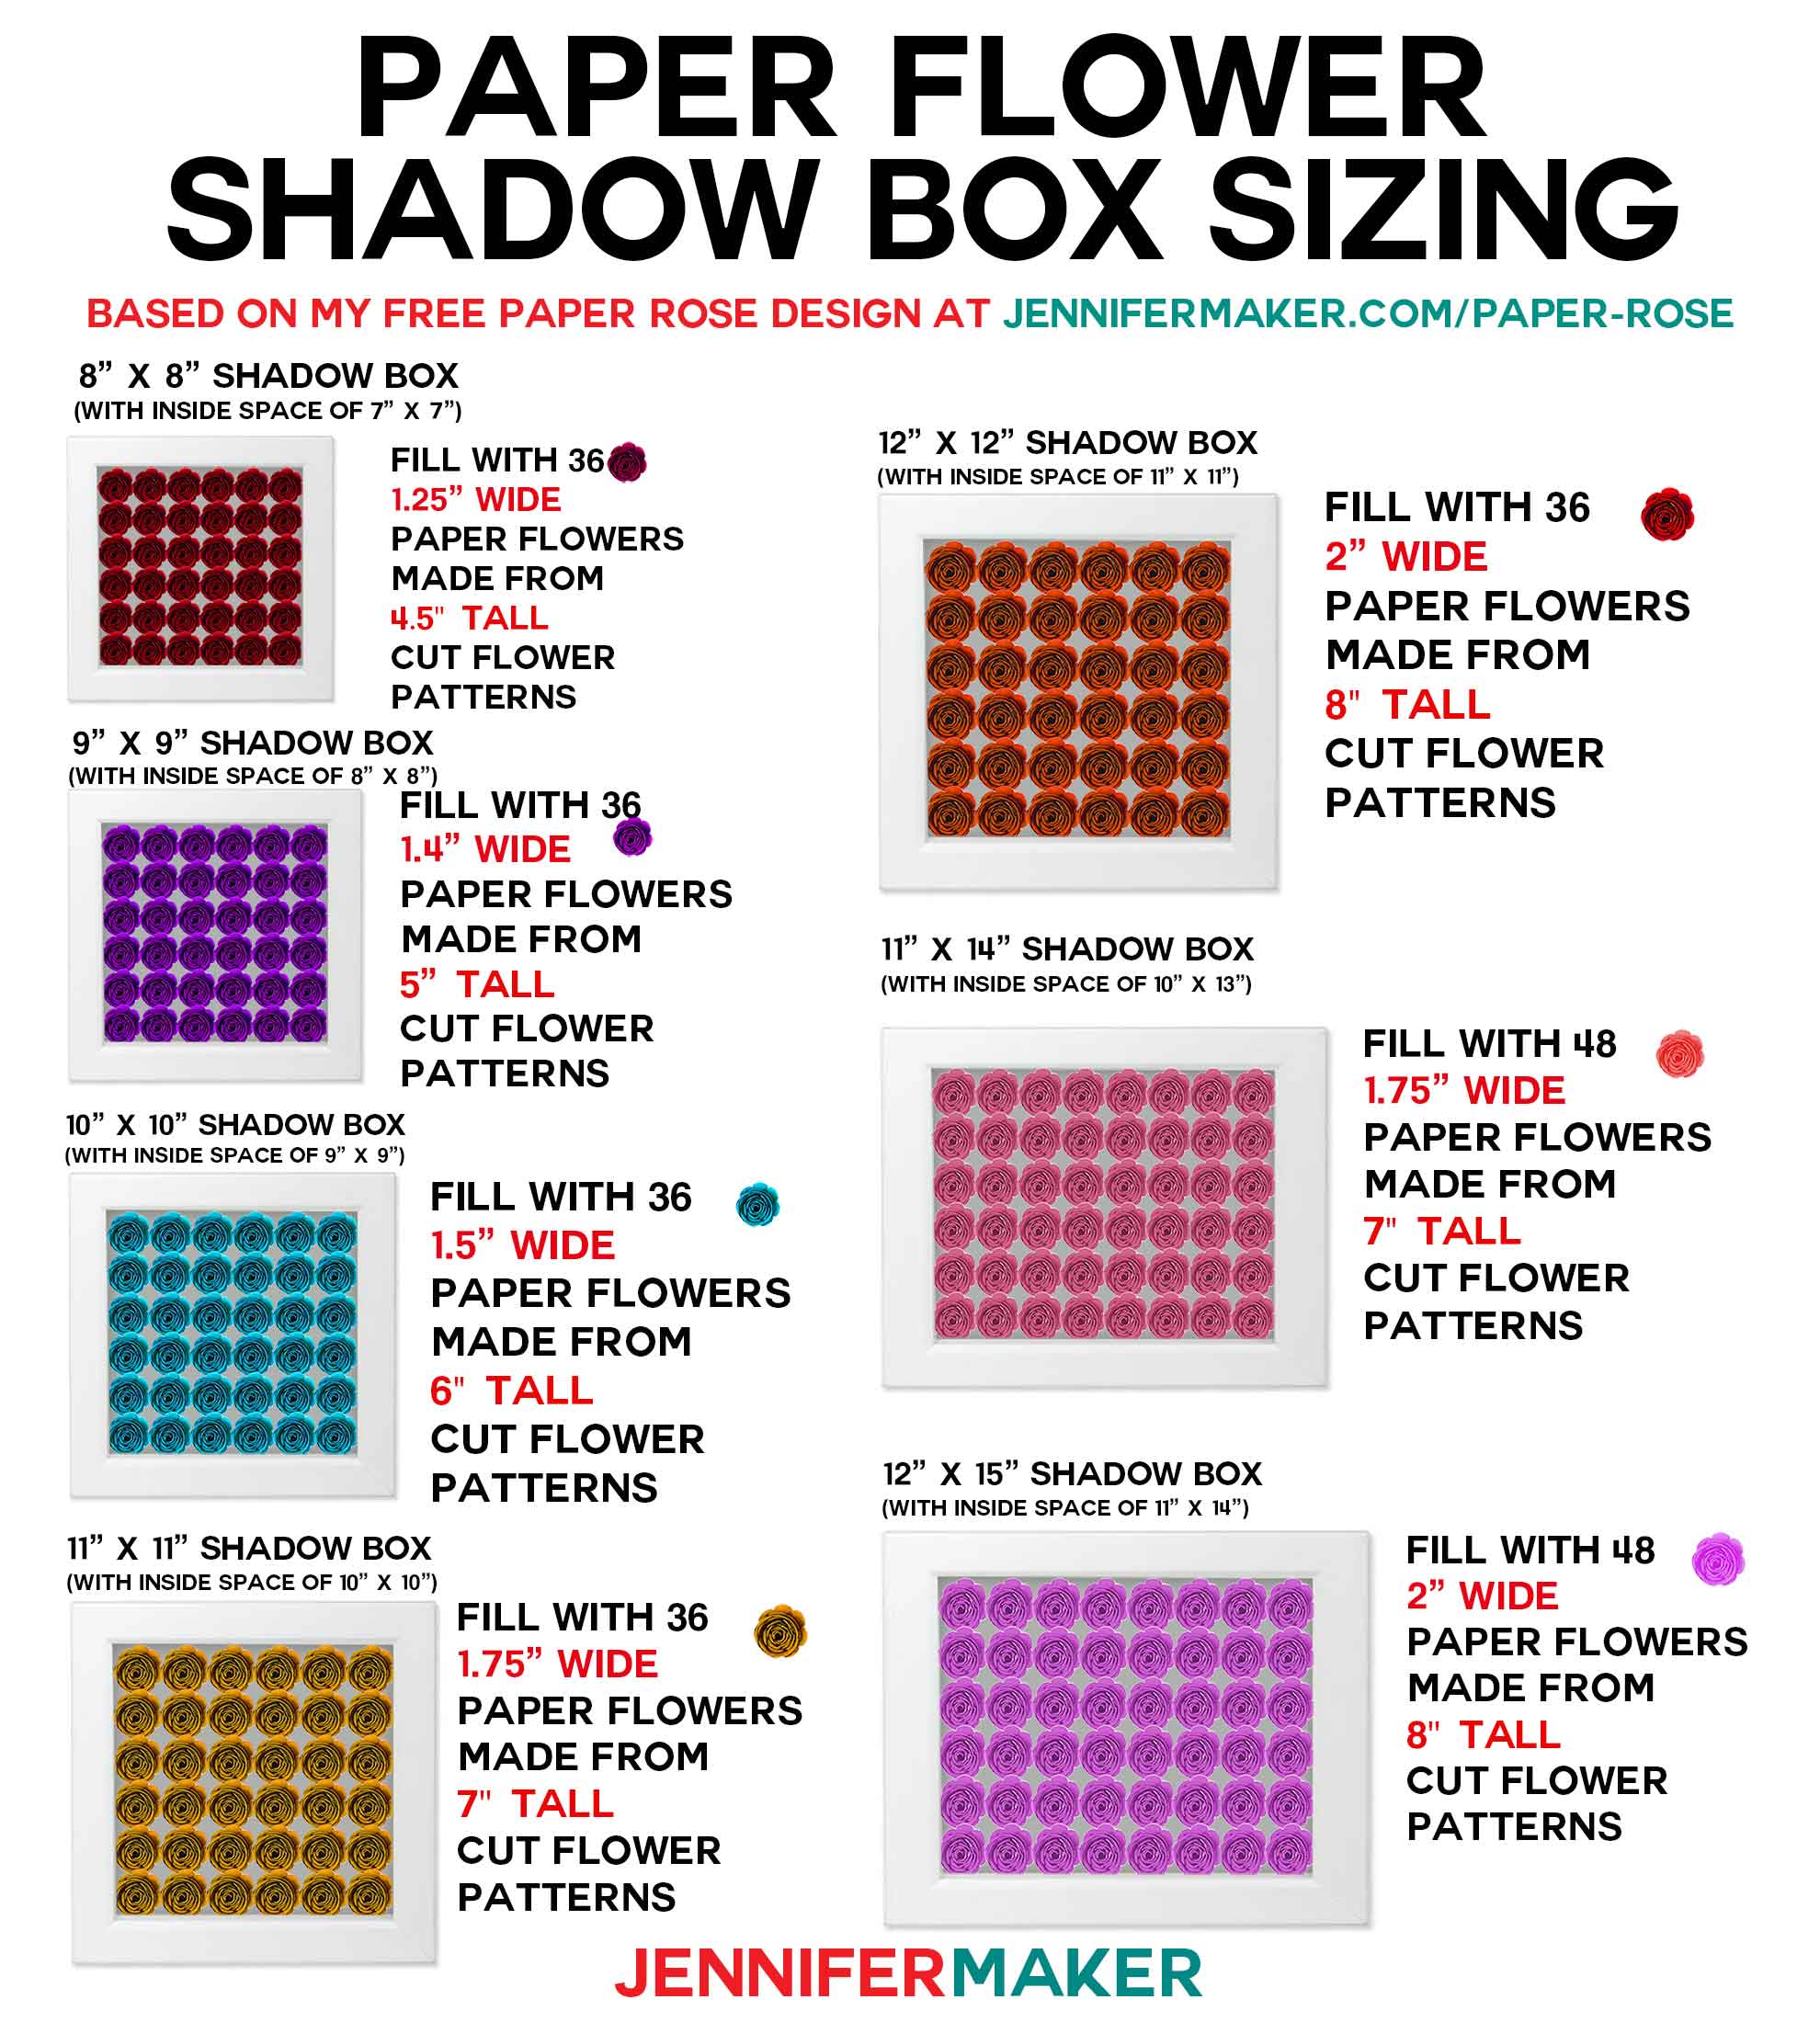
One of the biggest questions I get about paper flower shadow boxes is “what size do you make the paper flowers?” In this tutorial, I will remove the guesswork by providing a specific paper flower template (my paper rose design) that is already sized for particular shadow box sizes. So you can simply follow this tutorial and you’ll get a beautiful paper flower shadow box! The size of the frame you choose is personal preference, and here’s the number of rolled flowers you’ll need to make at specific sizes for these size shadow boxes.

Still, I know that won’t help everyone, because if you decide to use a different paper flower, you’ll be back at the drawing board. Some paper flowers will roll up tighter or looser than others. What I recommend you do cut out your paper flower of choice from solid core cardstock using the sizing recommendation in the chart above, then measure the width of the FINISHED paper flower. Now use this chart to see how many flowers you need for a specific size shadow box. Just keep in mind that you may want to move up or down a line based on how tightly or loosely packed you want YOUR paper flower shadow box. I think this will give you a great starting point, though!
And if you’re not familiar with how to roll paper flowers, I have a quick video that explains how to do that here:
Of course, if you just want to follow a step-by-step tutorial that takes out all the guesswork, I have that for you, too! Just keep reading for the full details on how to make this awesome DIY flower shadow box! They make a great gift for many occasions! Give one as a wedding gift, Christmas gift, Mother’s Day gift, or decorate your home with a variety of shadow box sizes filled with beautiful cardstock paper flowers.
Ready to make your own paper flower shadow box? I’m super excited to show you how to make this perfect gift! This post contains some affiliate links for your convenience (which means if you make a purchase after clicking a link I will earn a small commission but it won’t cost you a penny more)! Read my full disclosure policy.
Materials to Make a 9″ x 9″ Paper Flower Shadow Box
View my Amazon shopping list with the exact items we used to make this project!
- 9″ x 9″ Shadow Box Frame (inner size of 8″ x 8″, depth of 1.5″)
- 18 sheets of cardstock (8.5″ x 11″) for 36 flowers to fit your 9″ x 9″ frame (if you use 12″ x 12″ paper, you need only 12 sheets)
- Tool to roll flowers (you can also make your own DIY quilling tool with my tutorial)
- Hot glue gun and glue sticks (alternately, you can use tacky glue for the paper flowers)
- Finger guards (optional, to protect your fingers from the hot glue)
- Premium Permanent Vinyl
- Transfer Tape
- Isopropyl Alcohol
- Coffee filter or lint free towel
- Cricut Tools, especially a weeder and a scraper
- Standard Grip Cutting mat (the 12″ x 12″ size)
- A way to cut your cardstock and vinyl (I used the amazing Cricut cutting machine!)
- Design #187 – My free SVG design files (available in my free resource library—get the password by filling out the form at the bottom of this page)
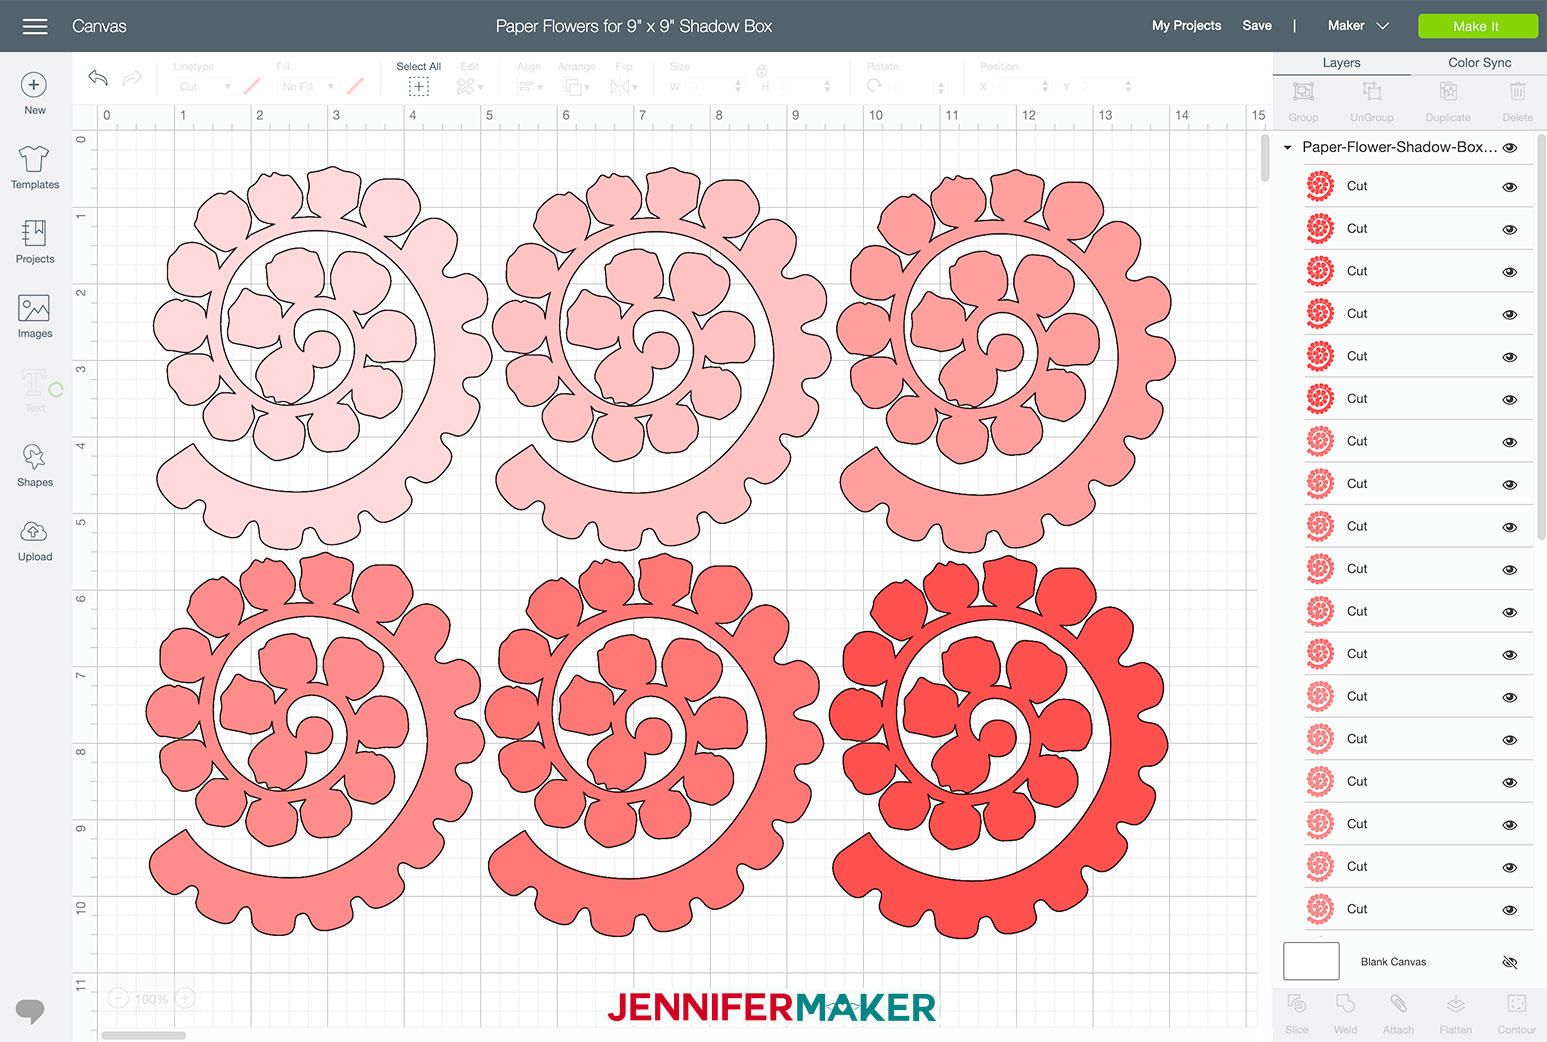
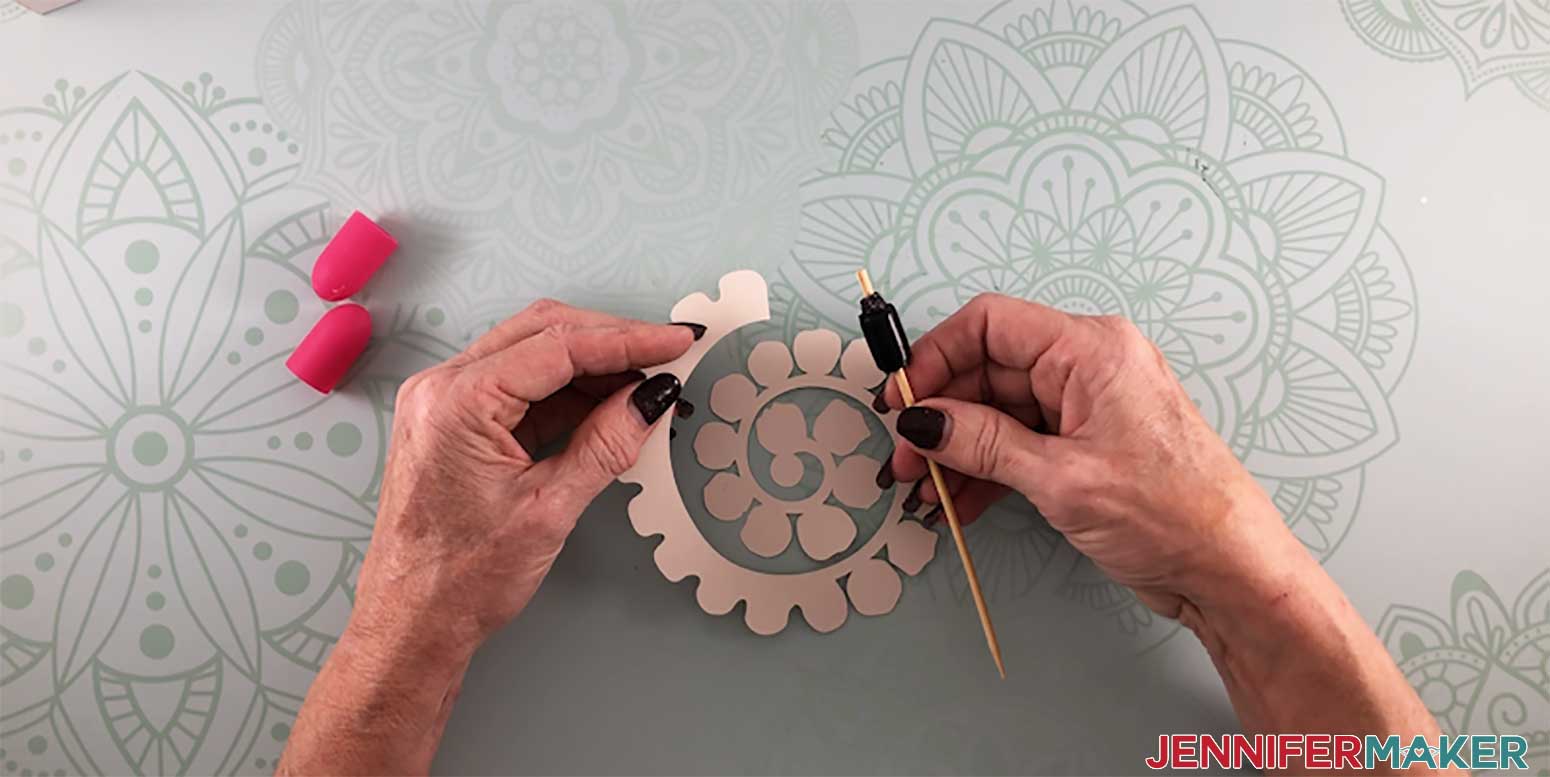
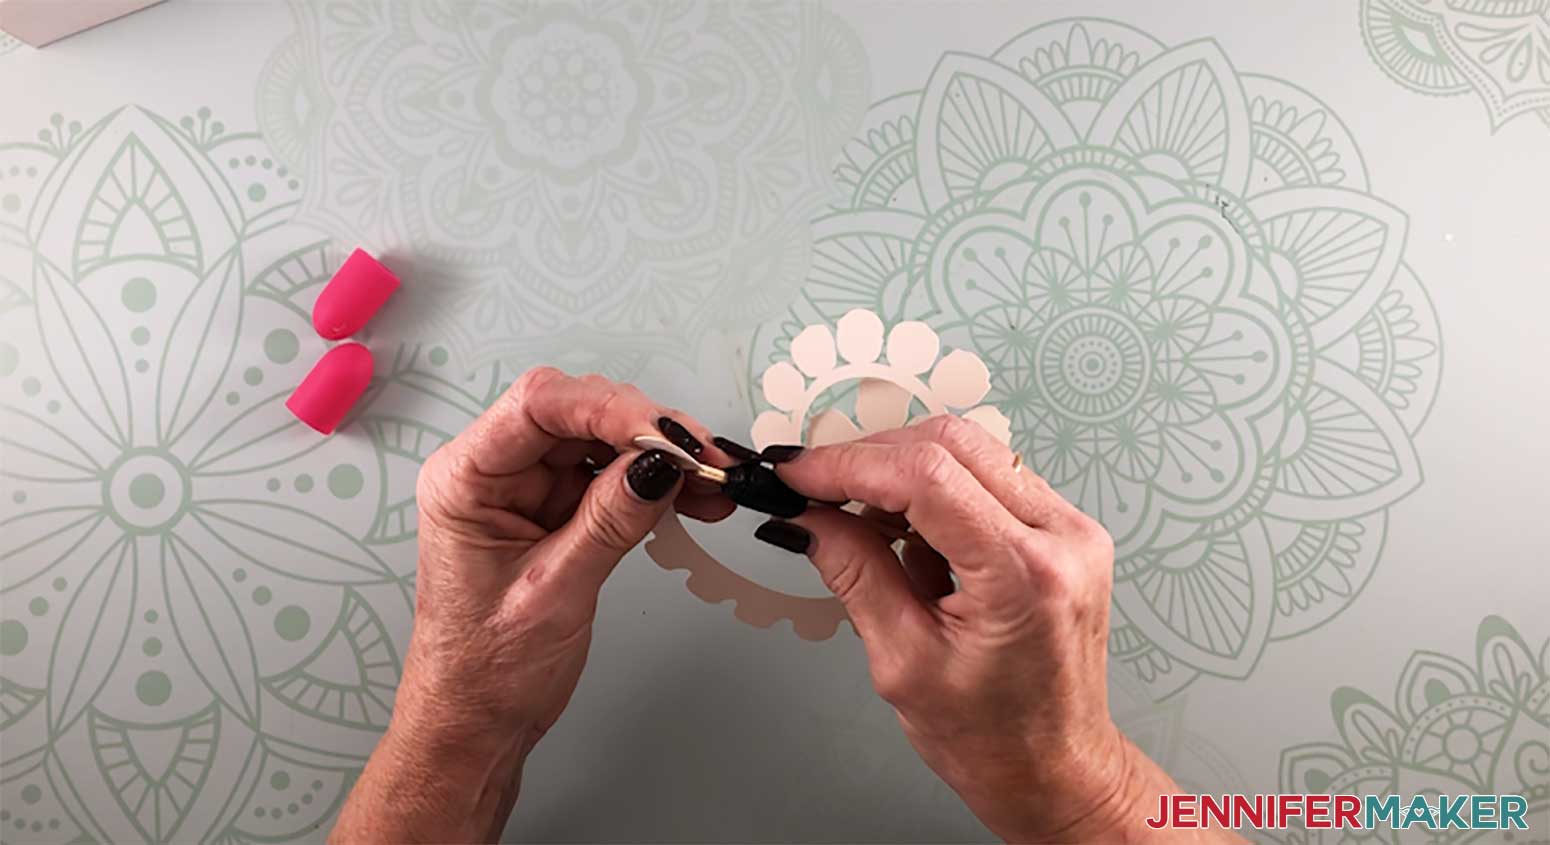
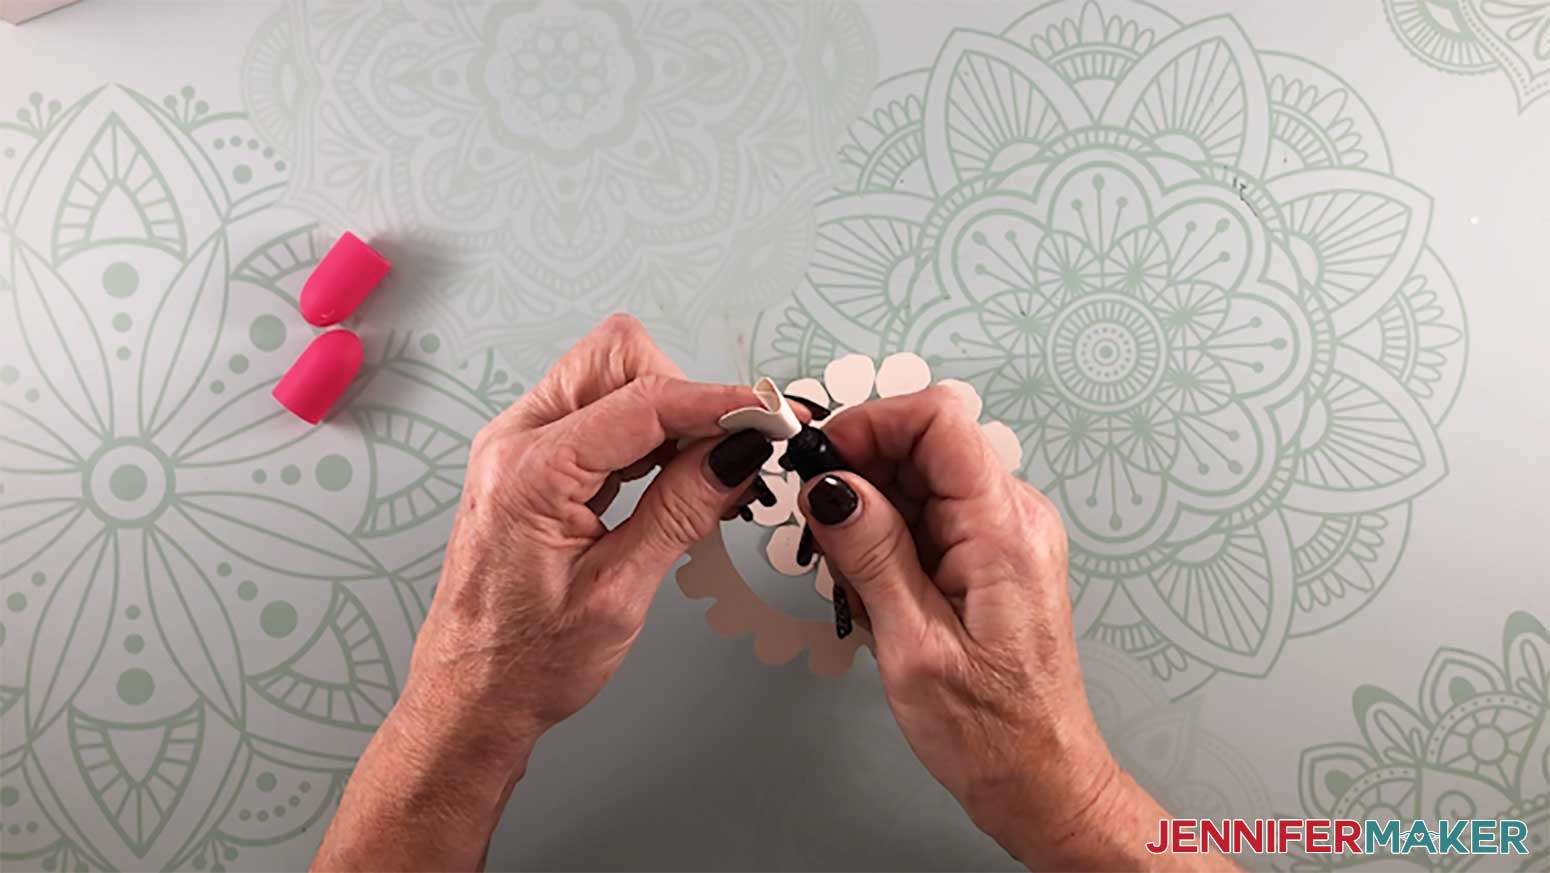
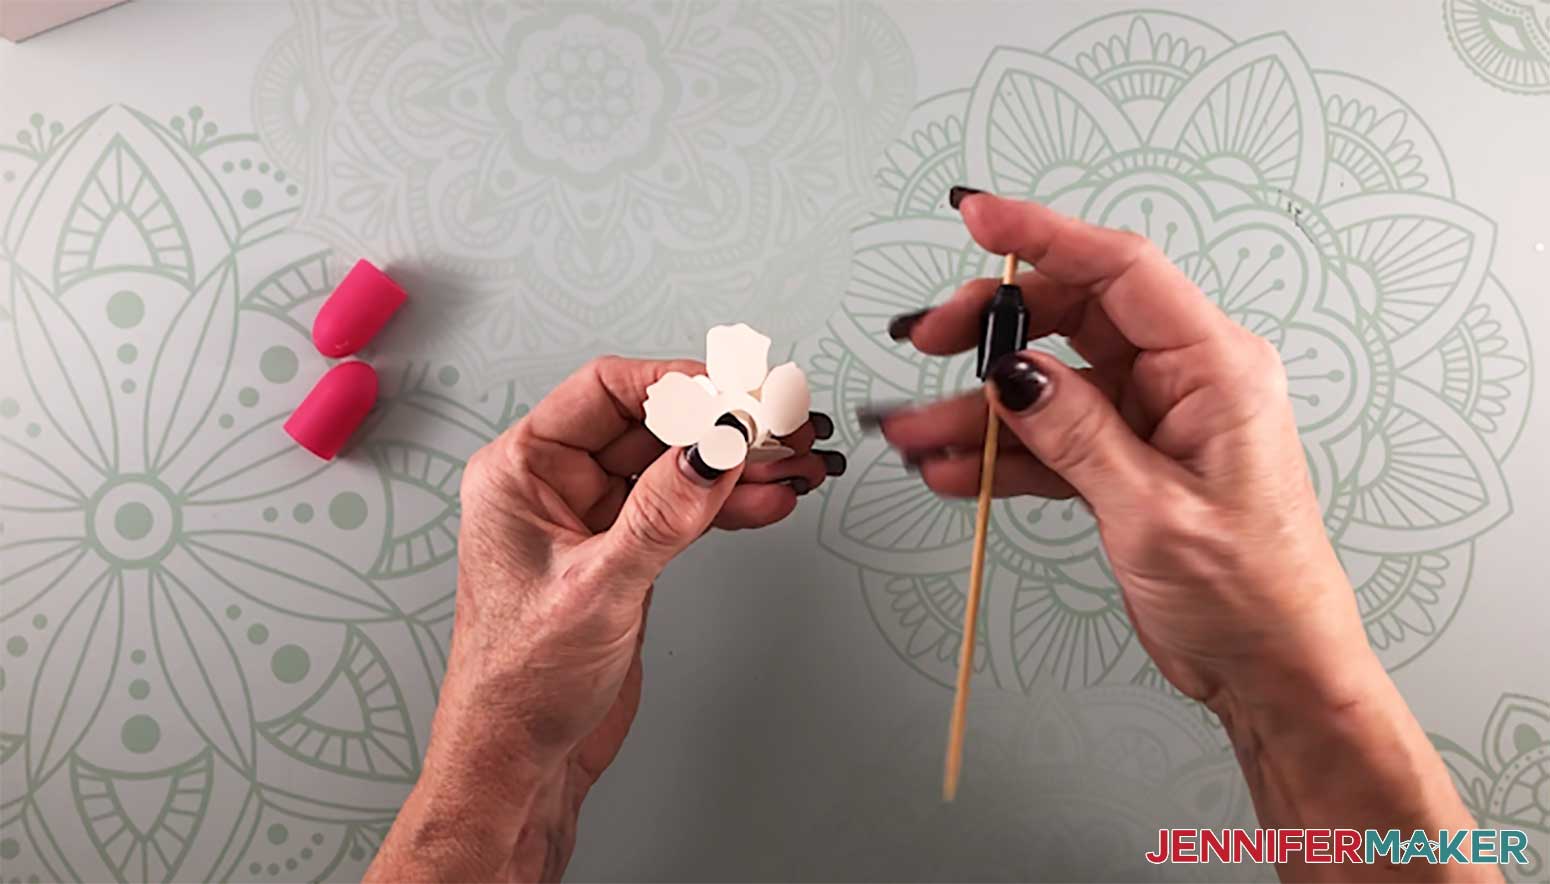
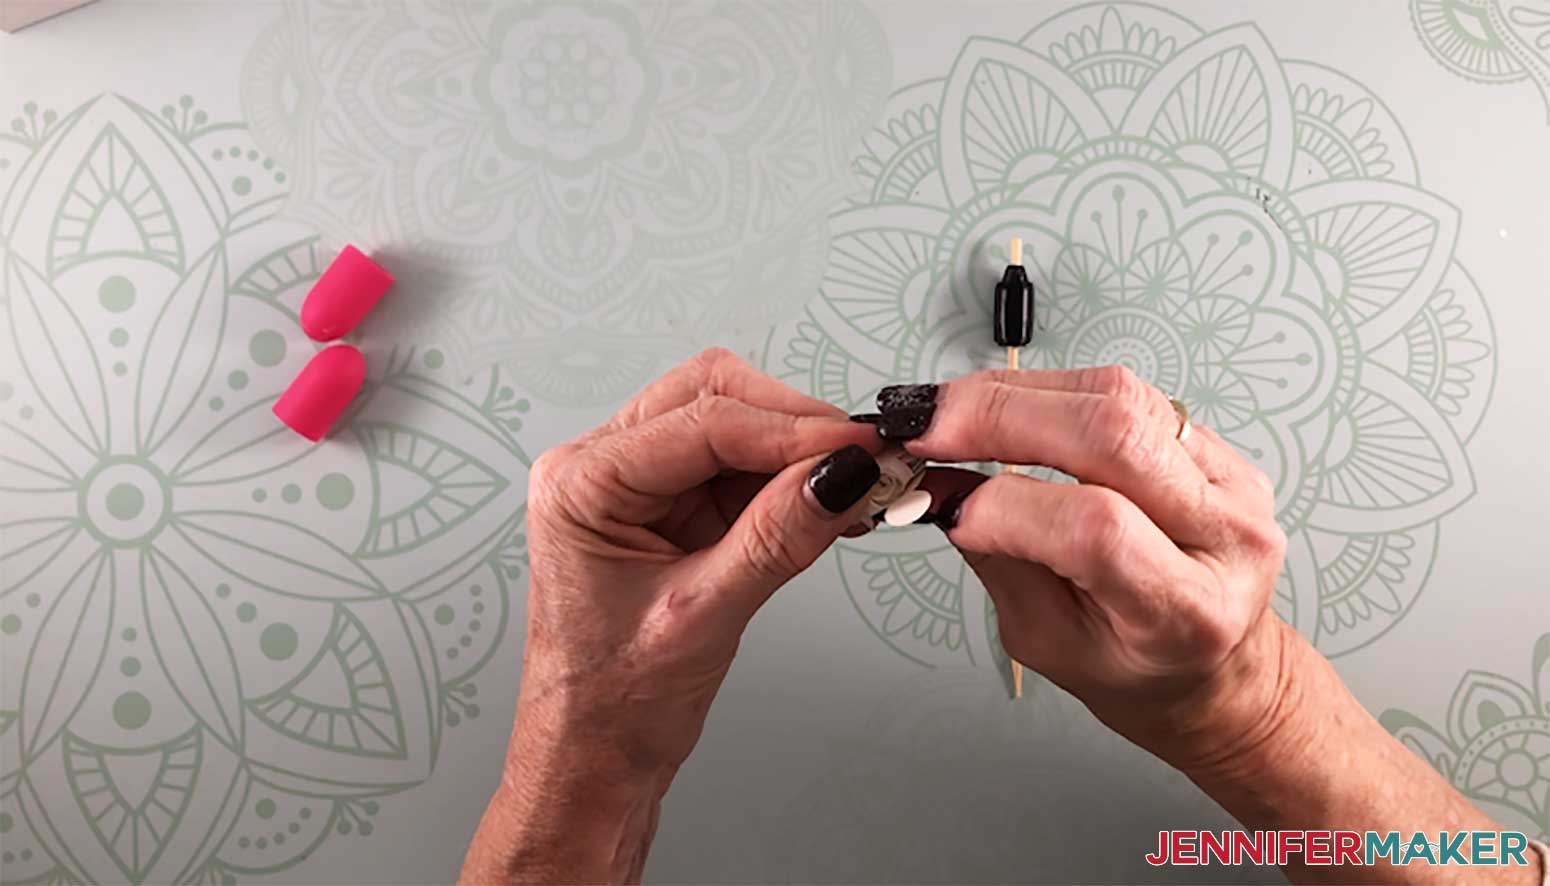
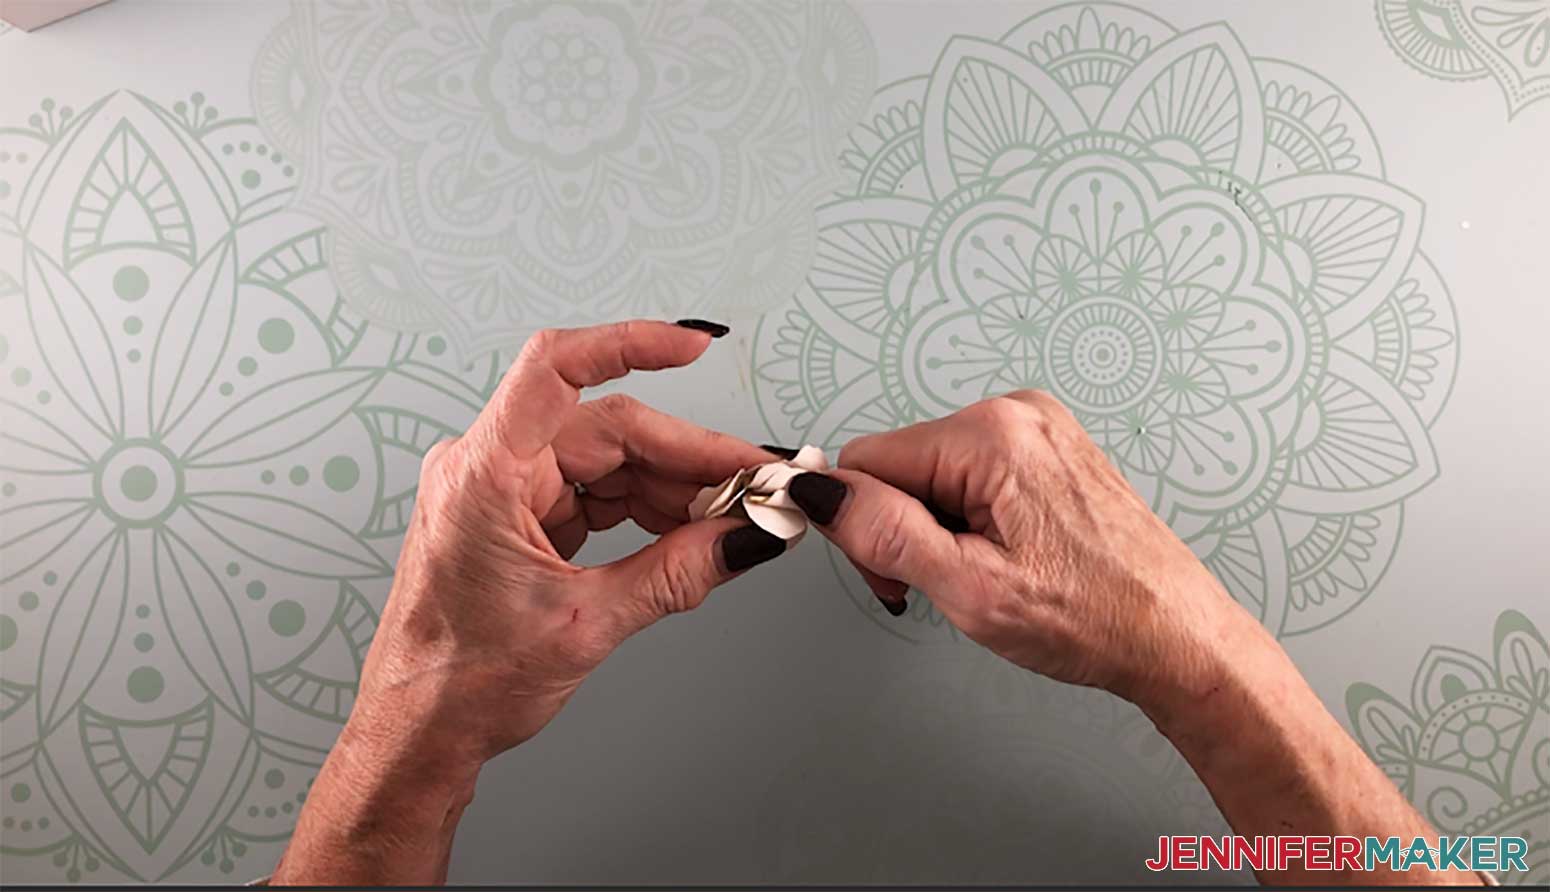
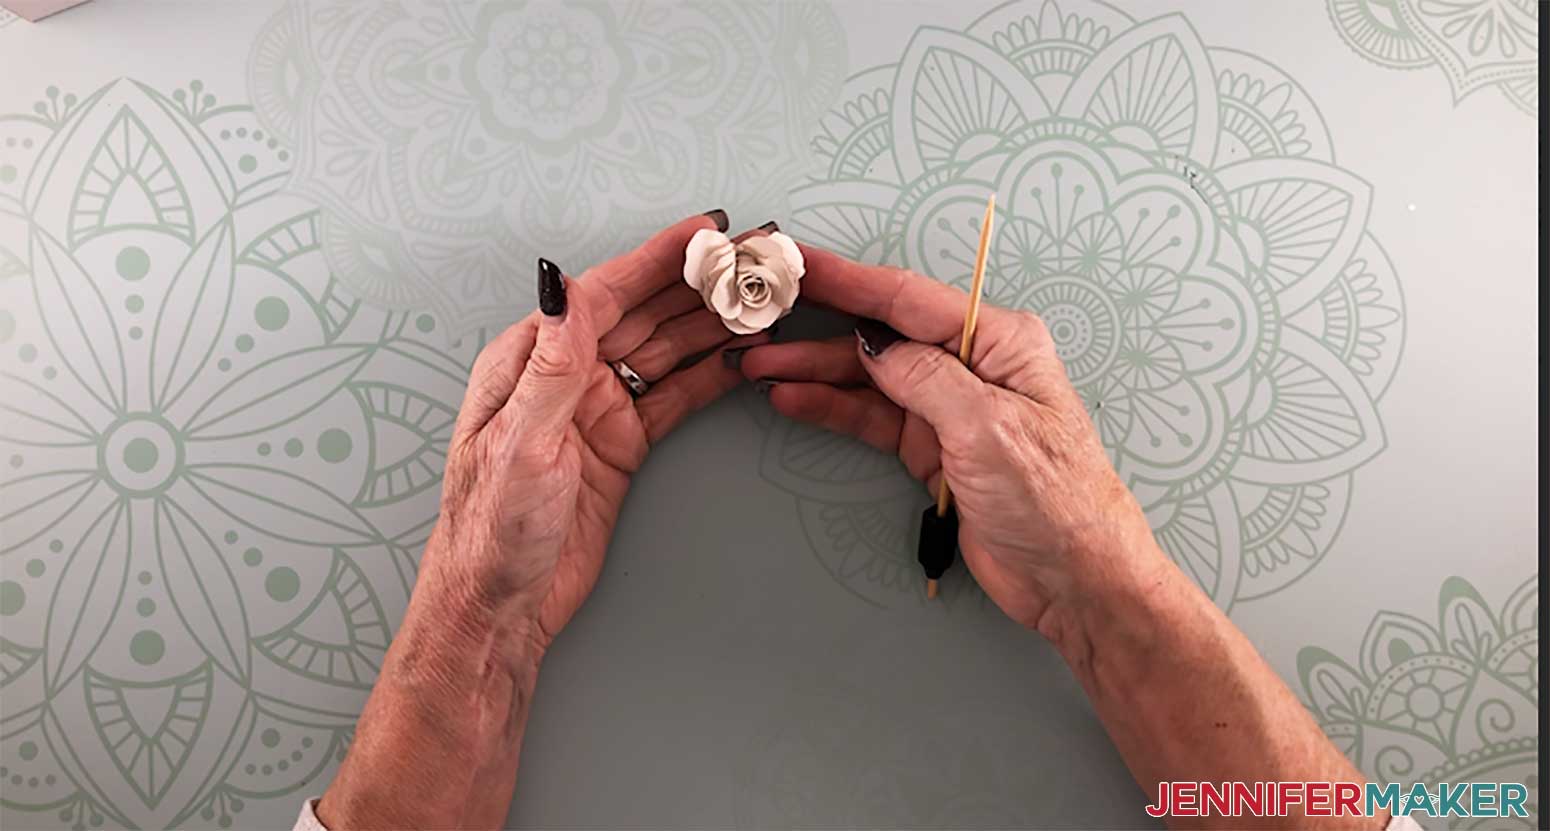
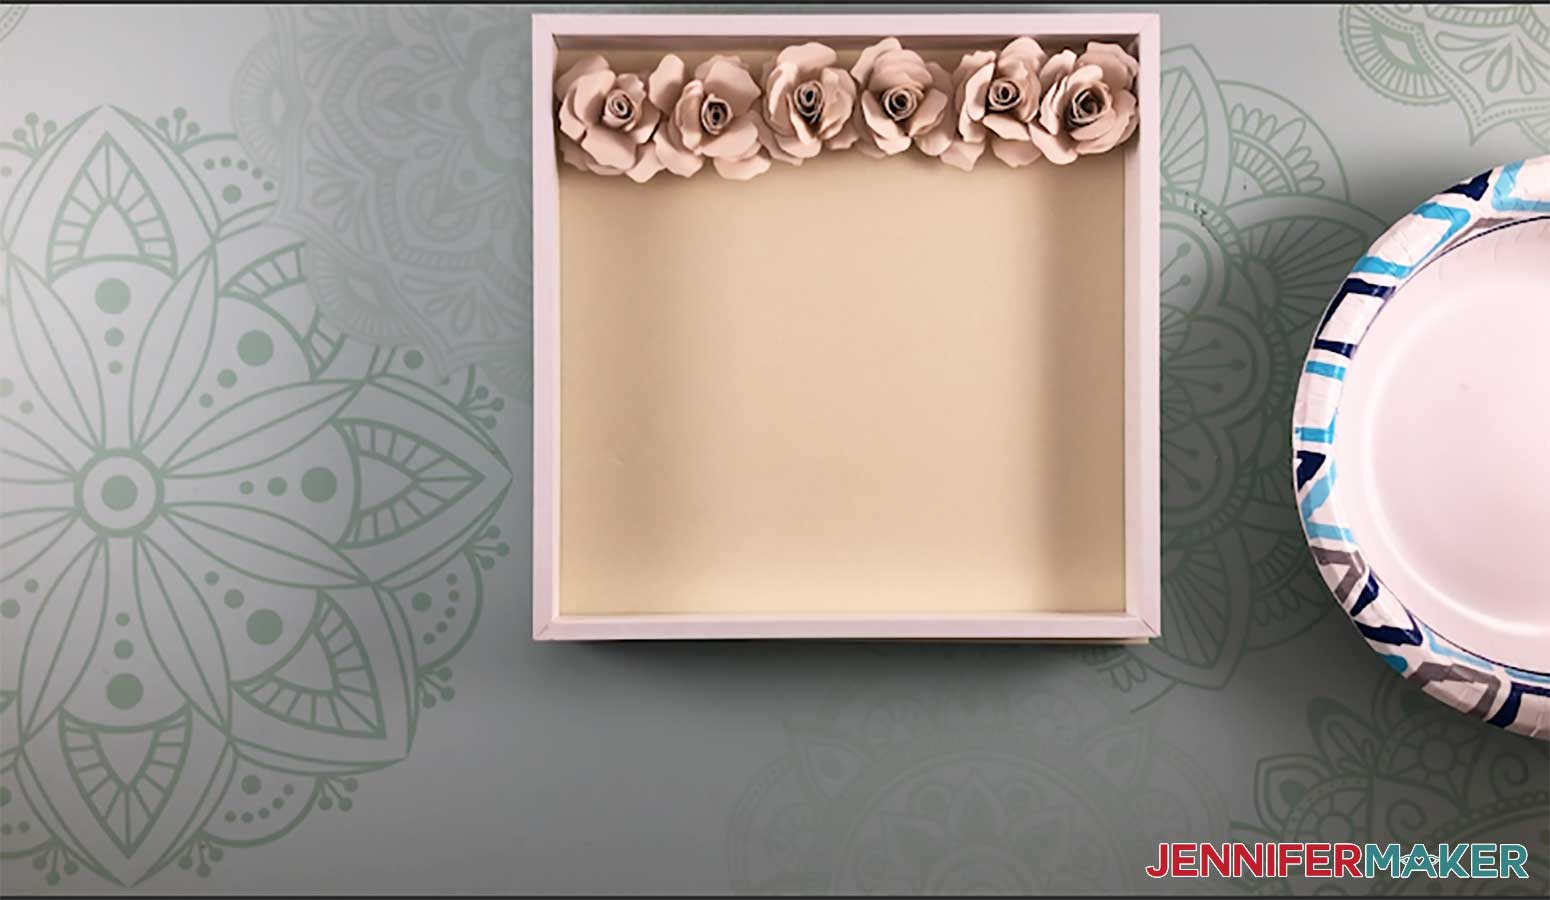
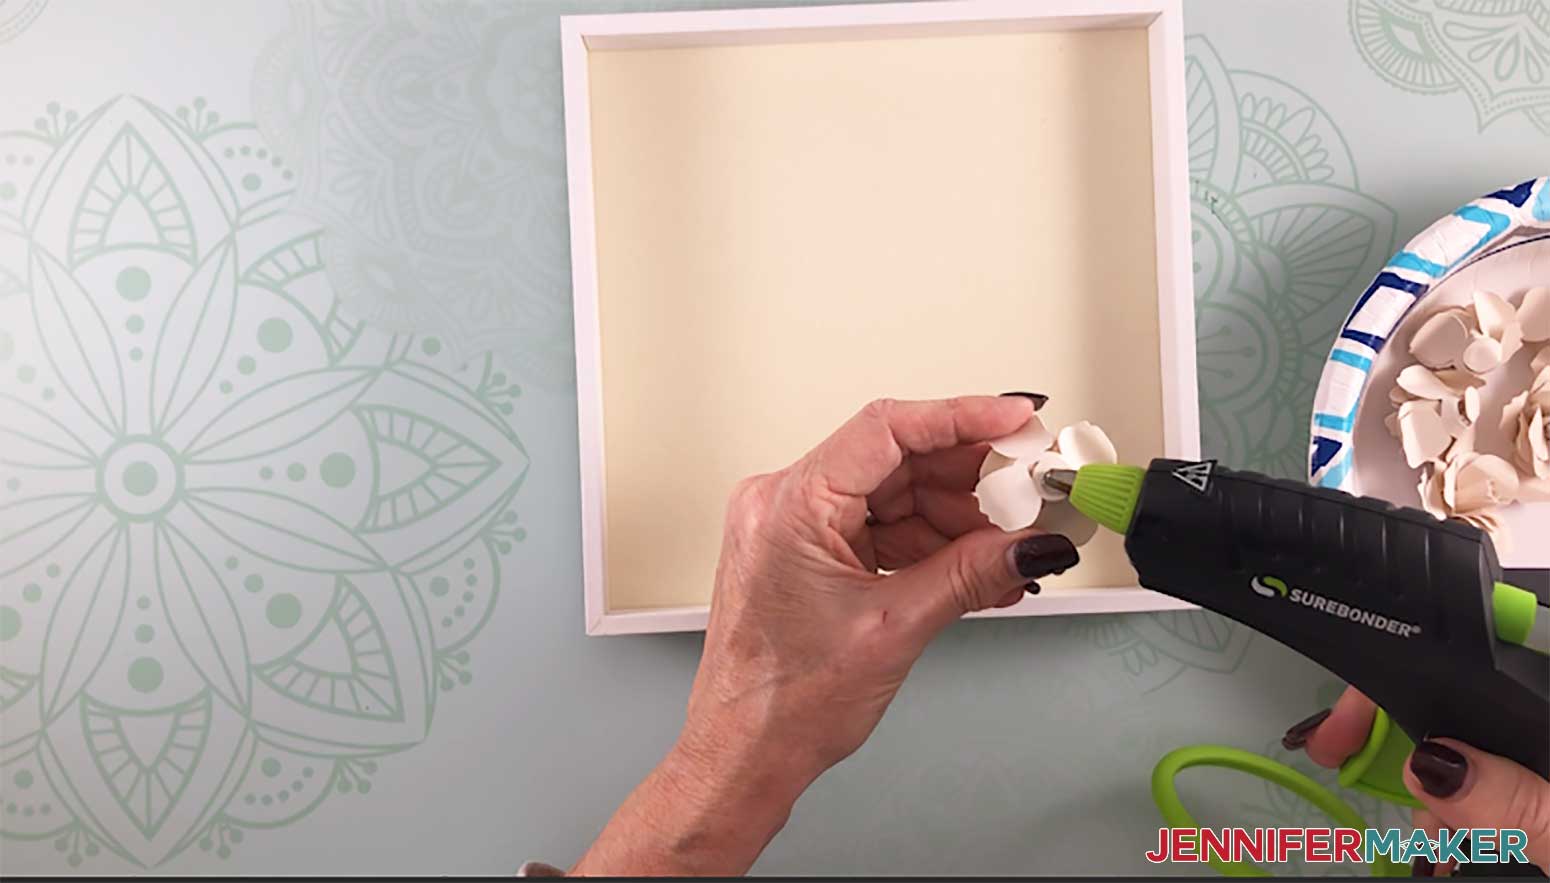
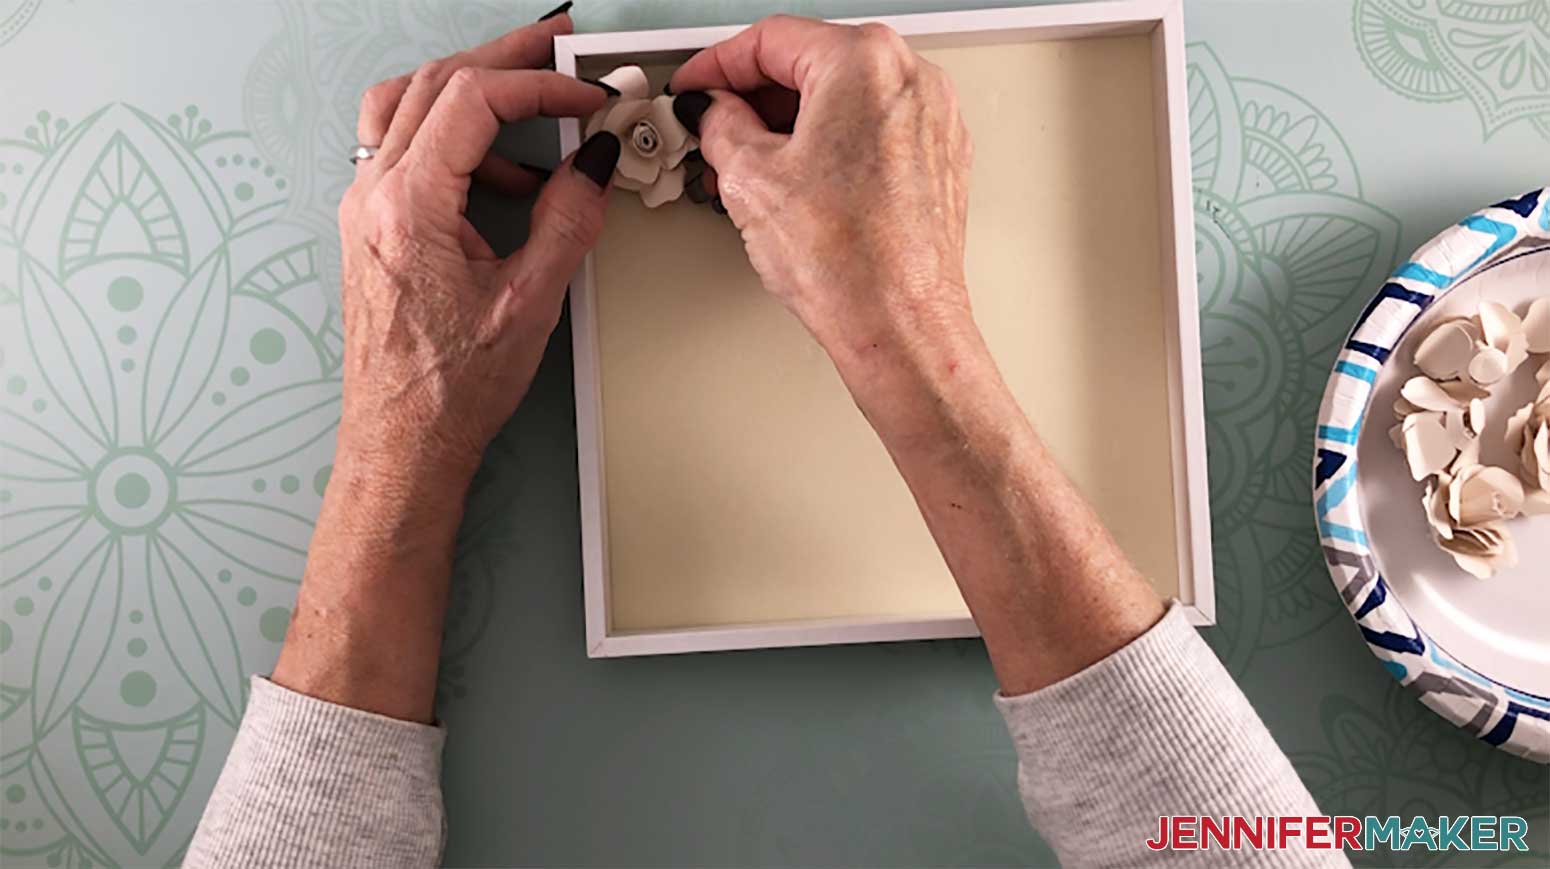
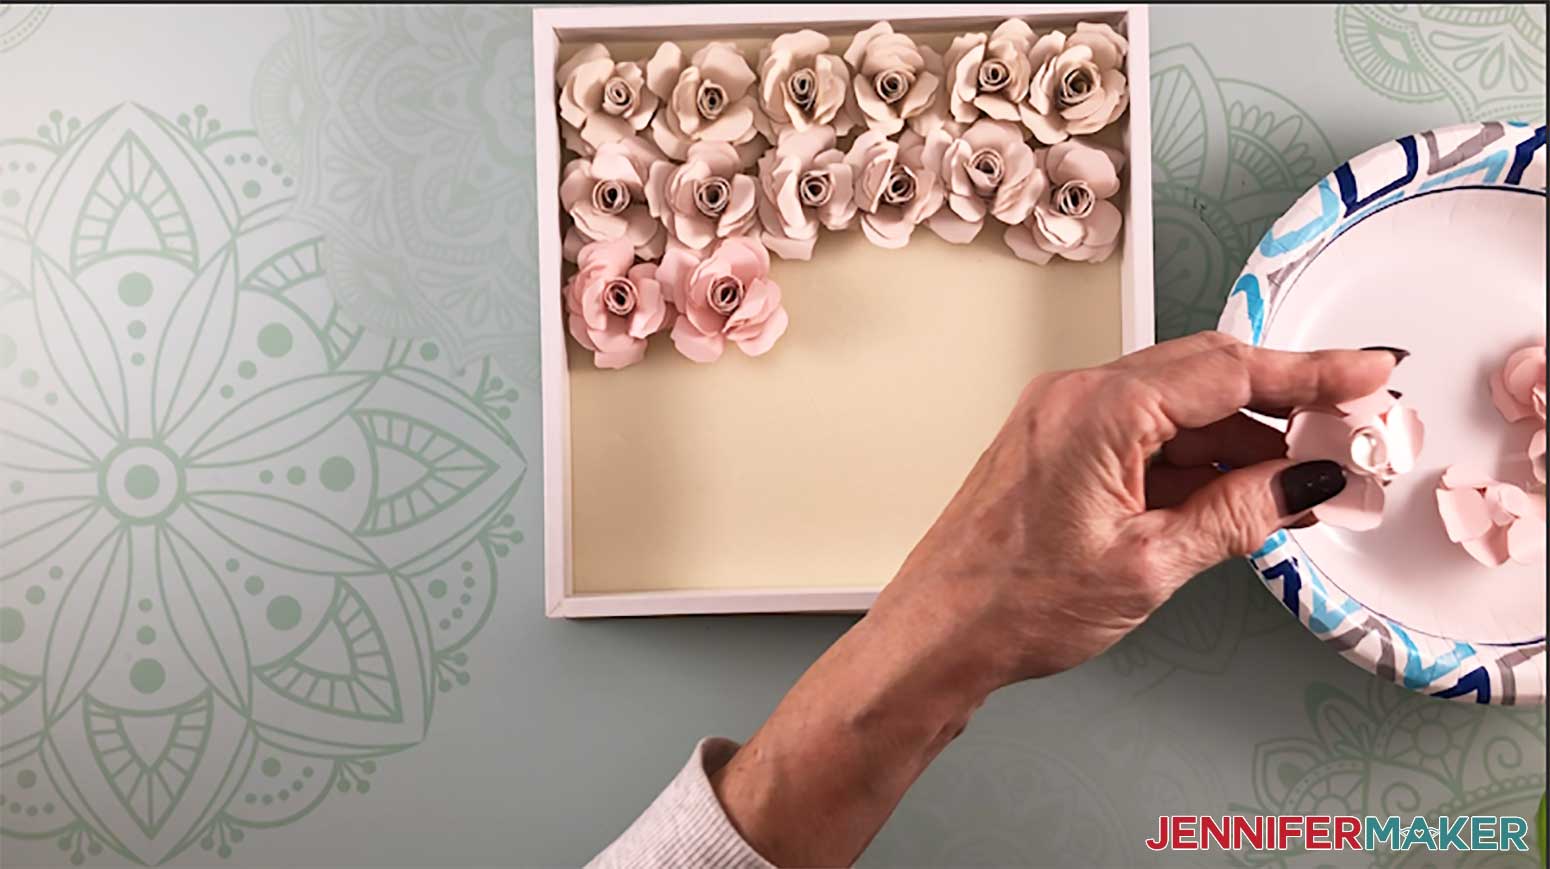
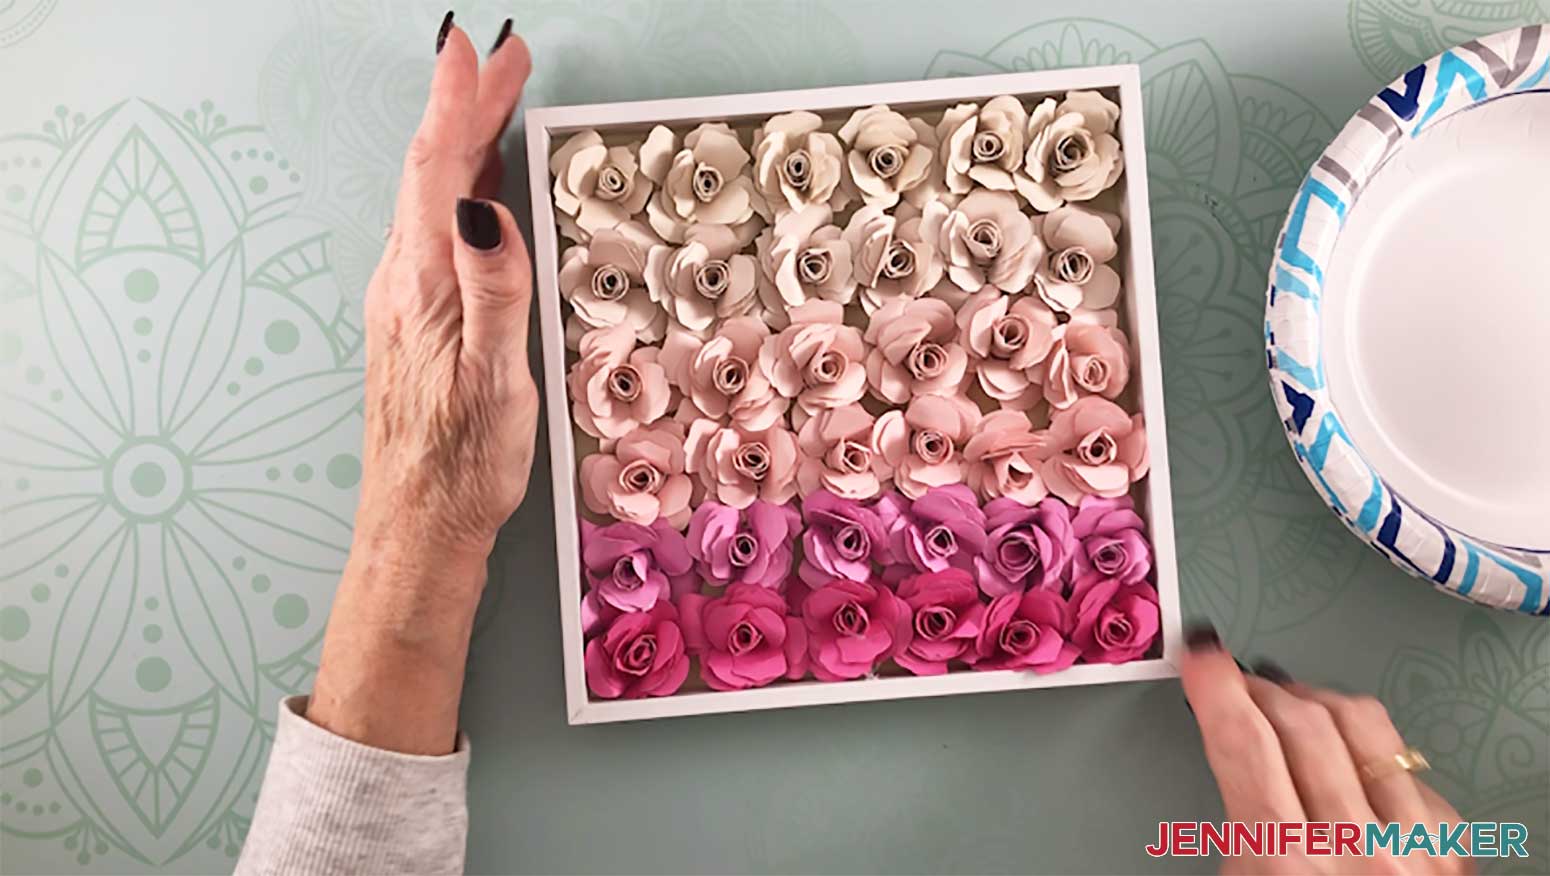
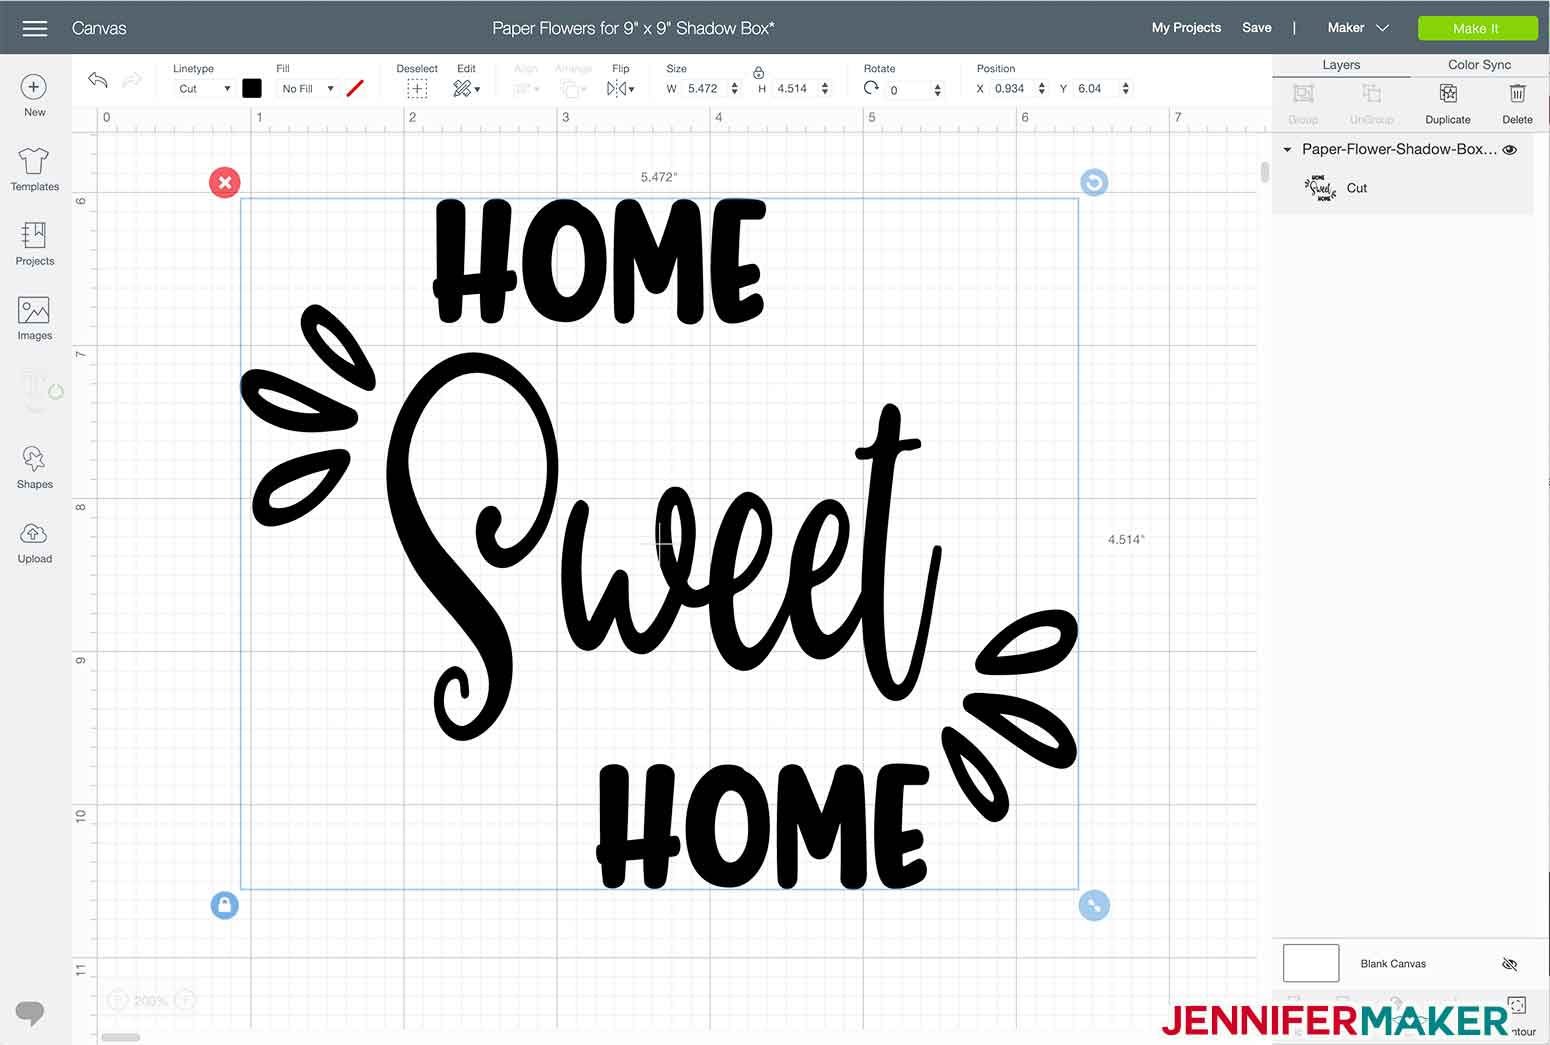
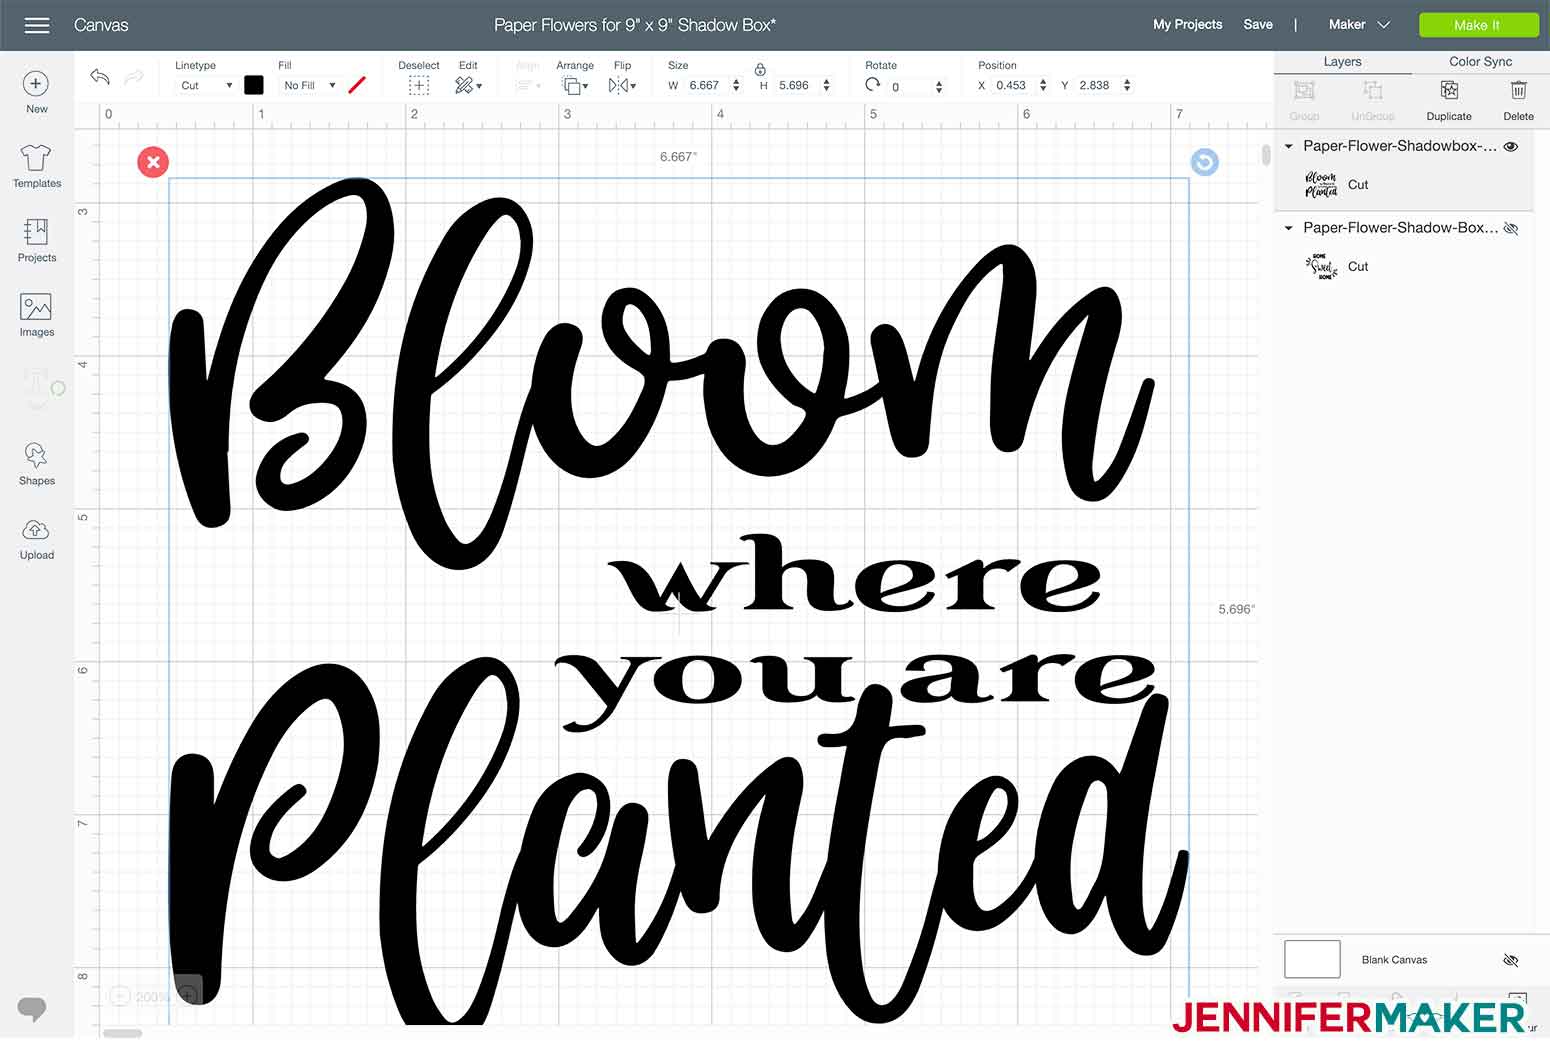
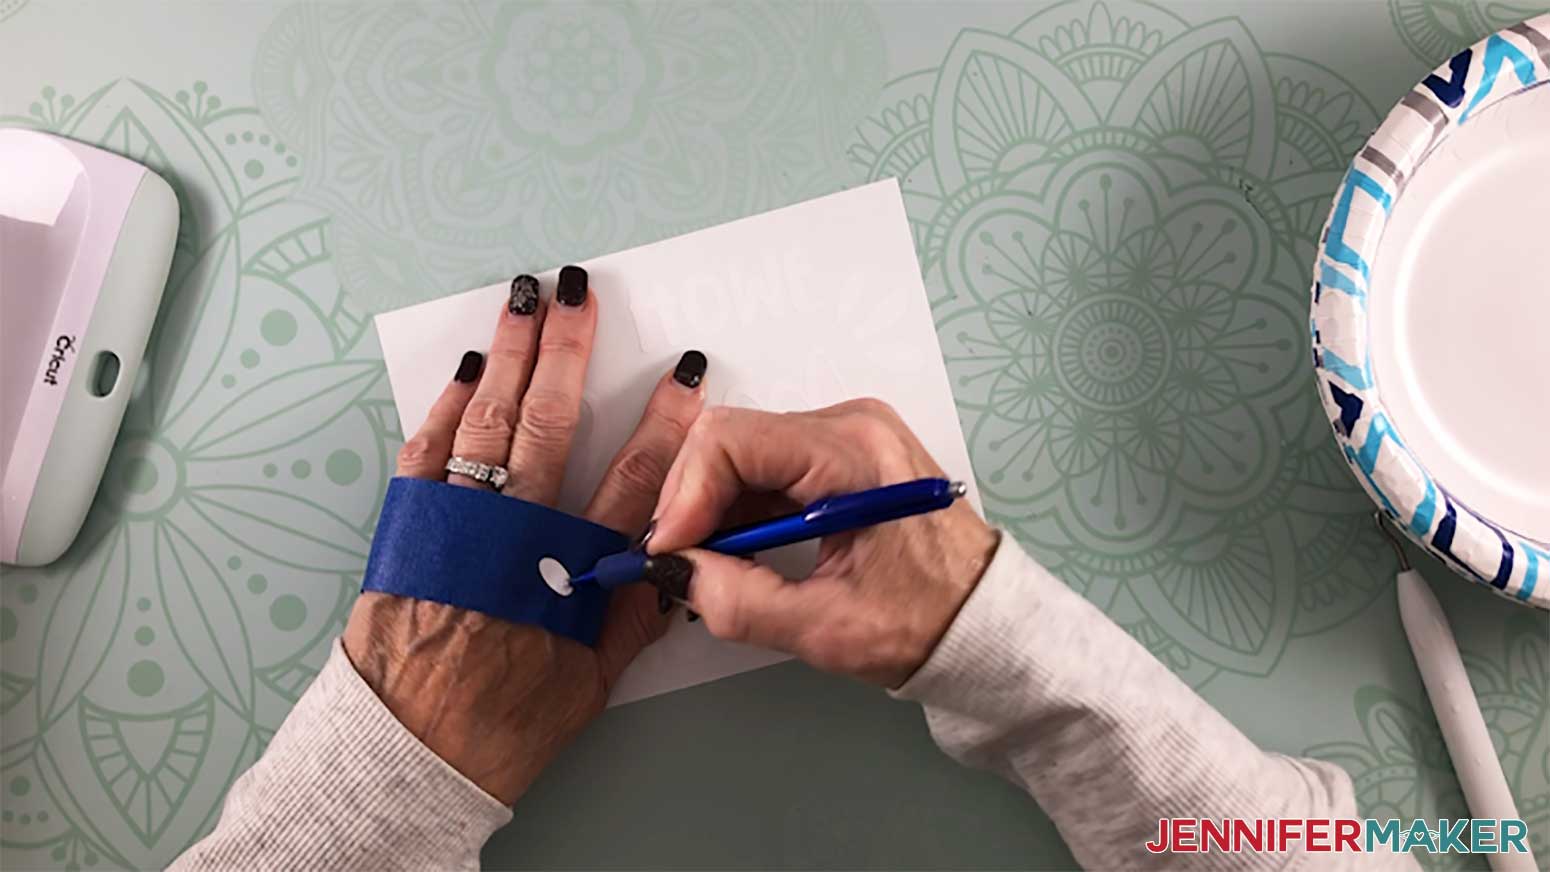
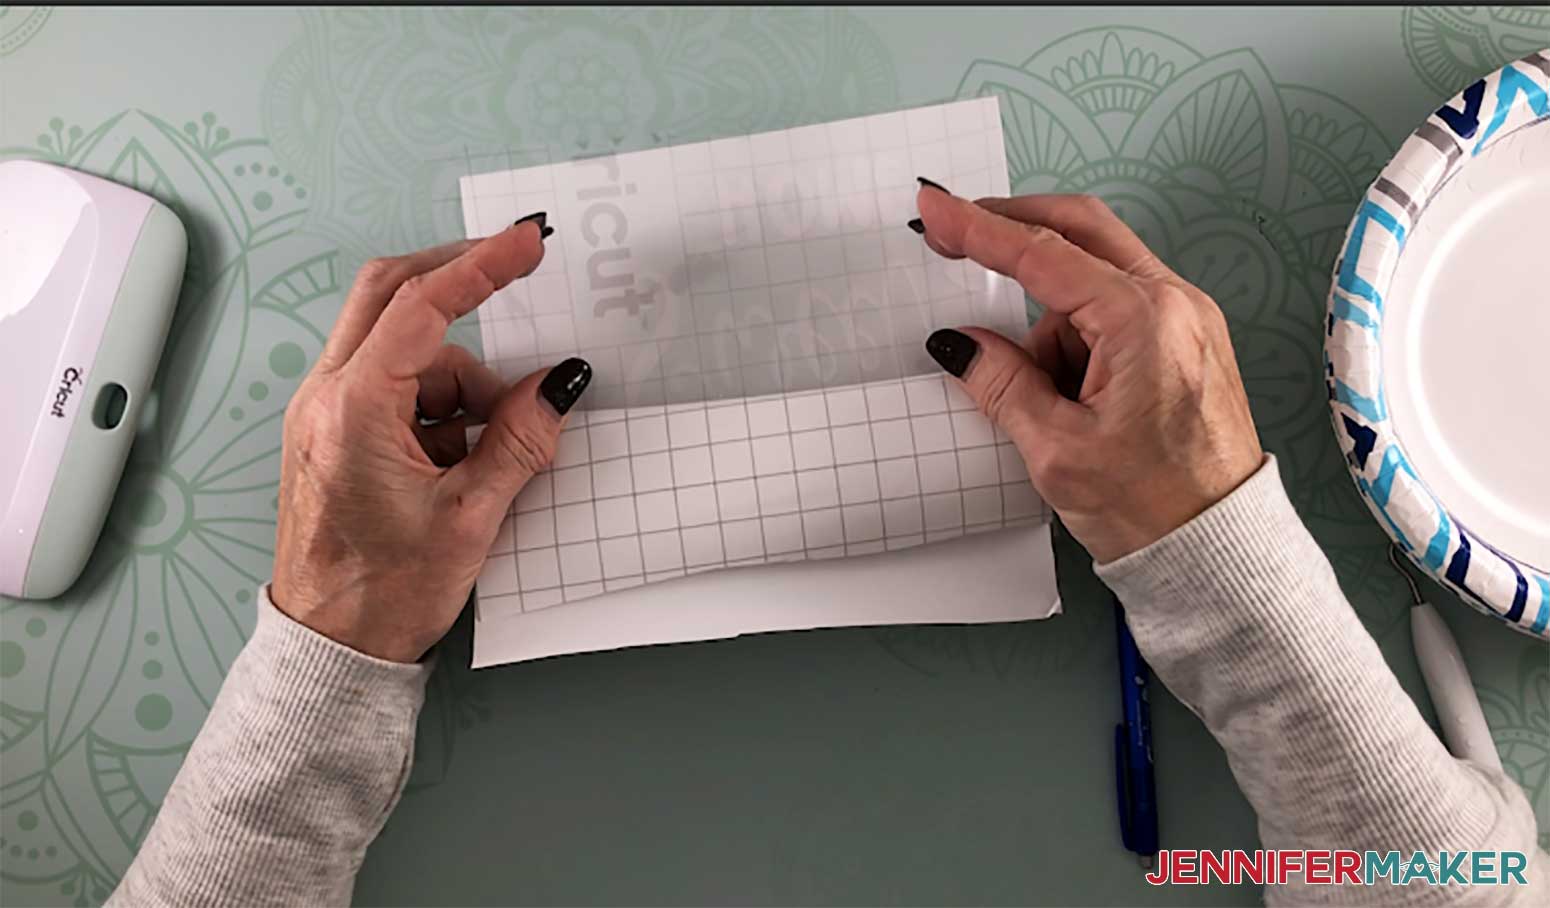
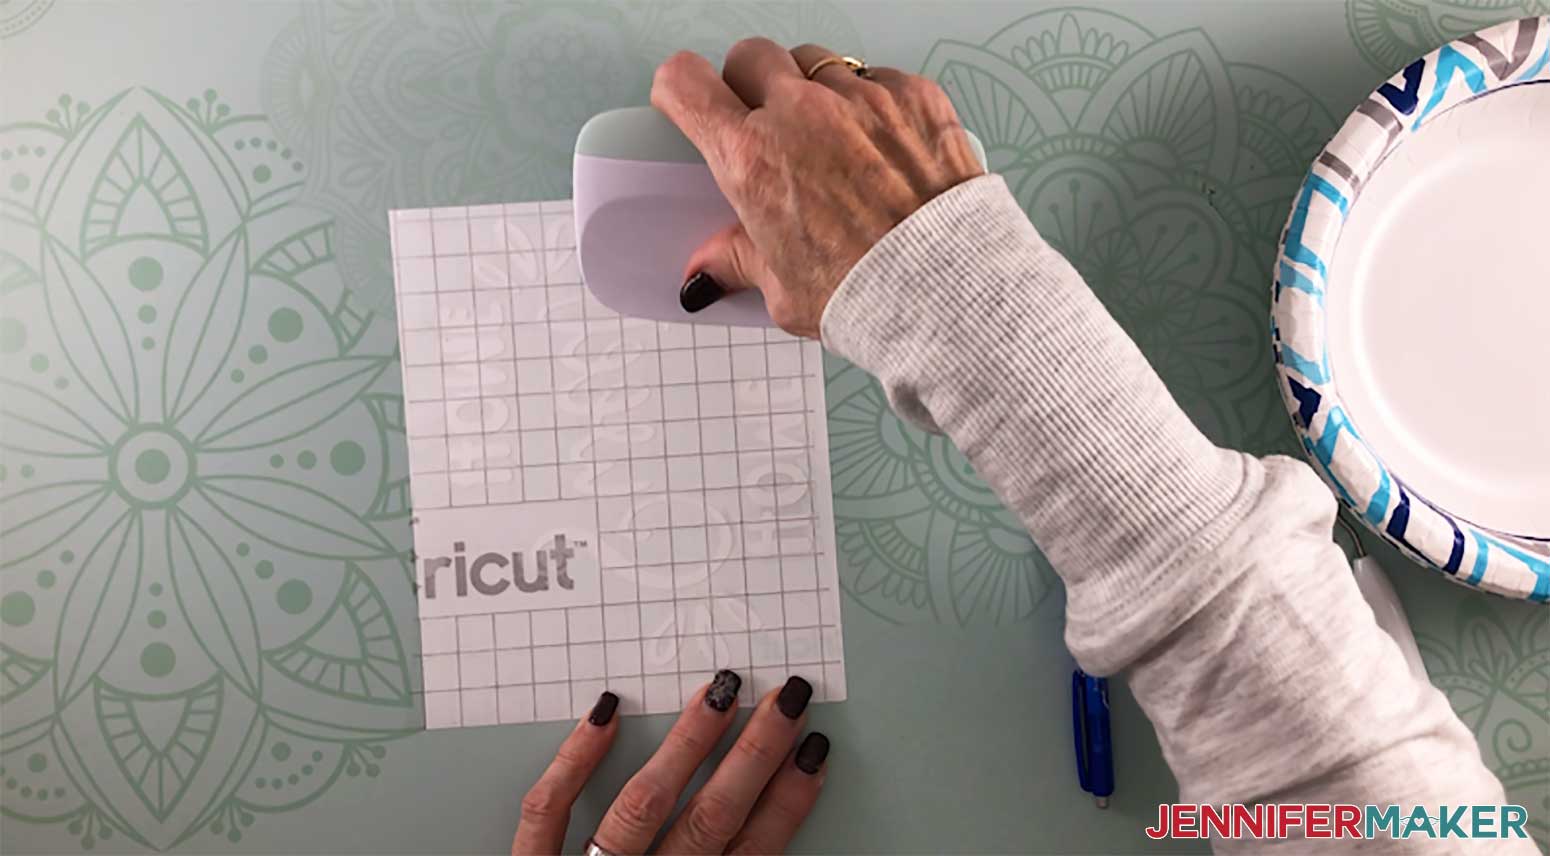
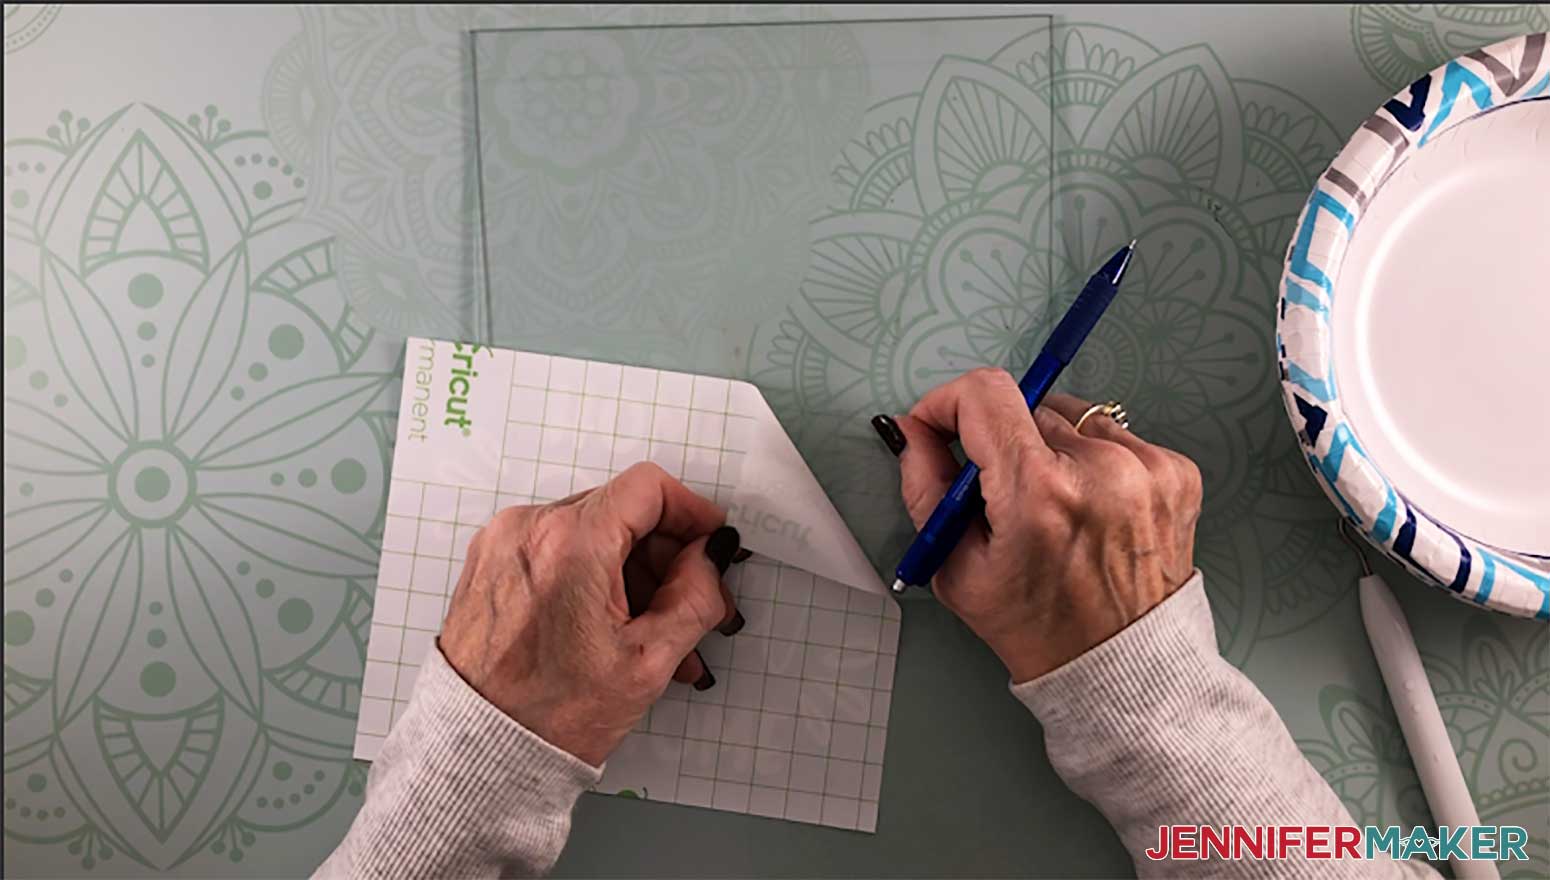
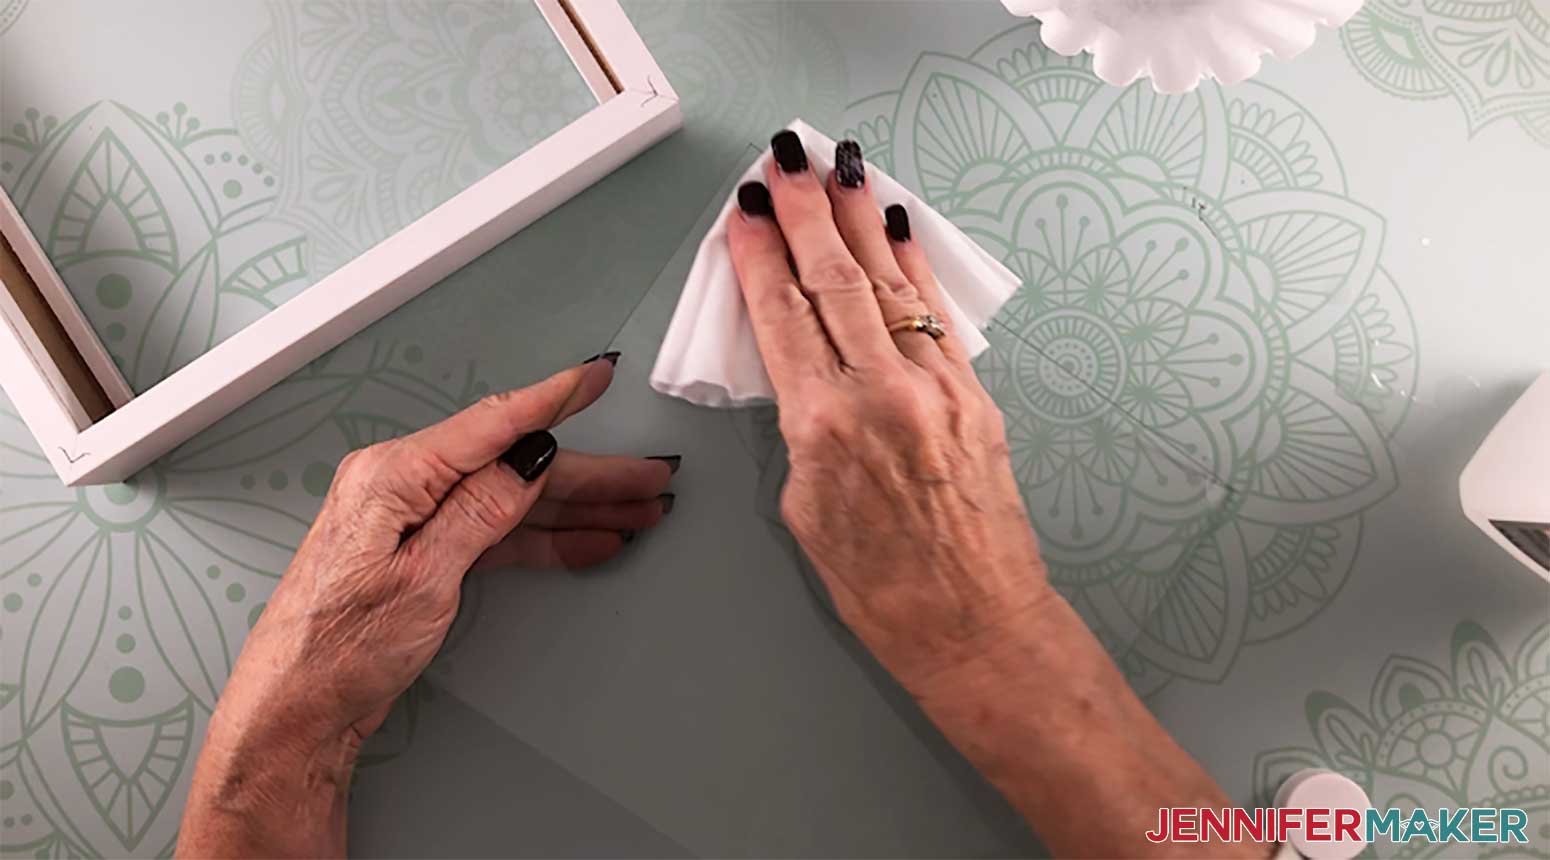
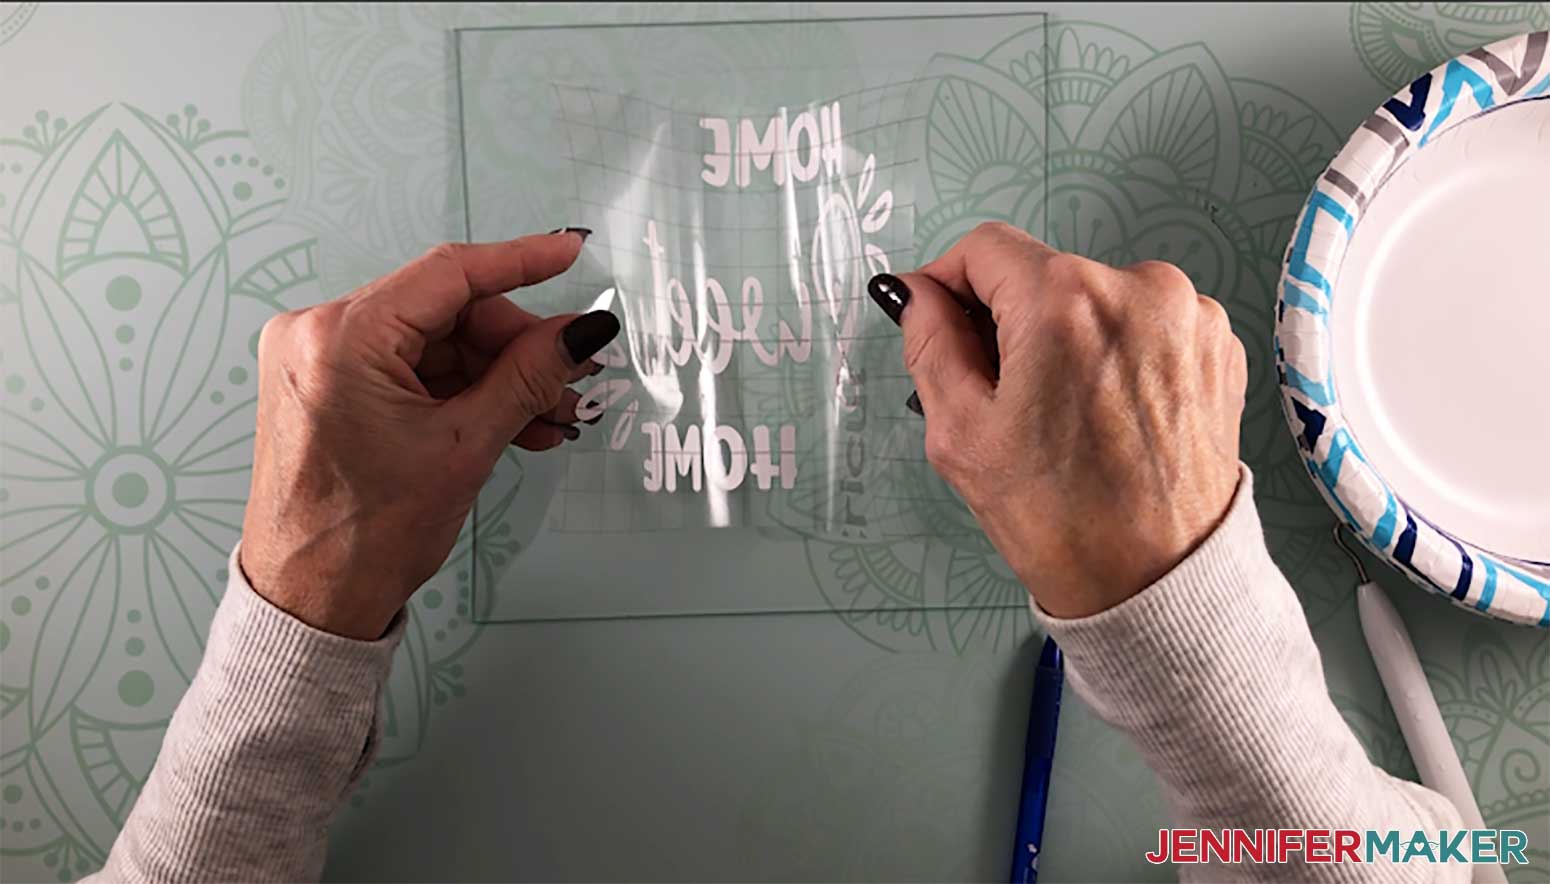
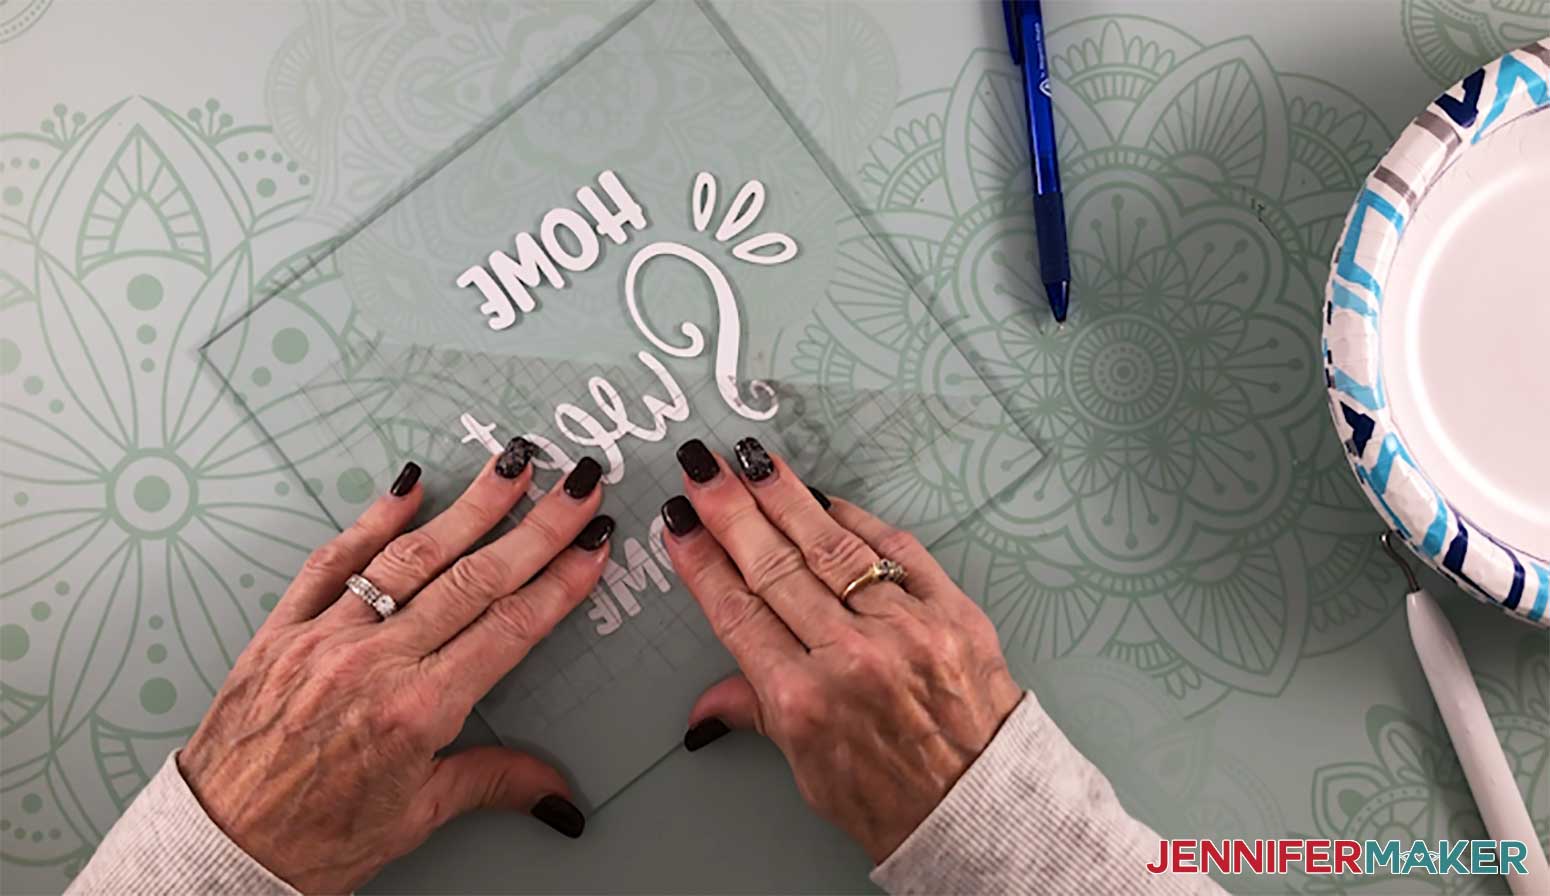
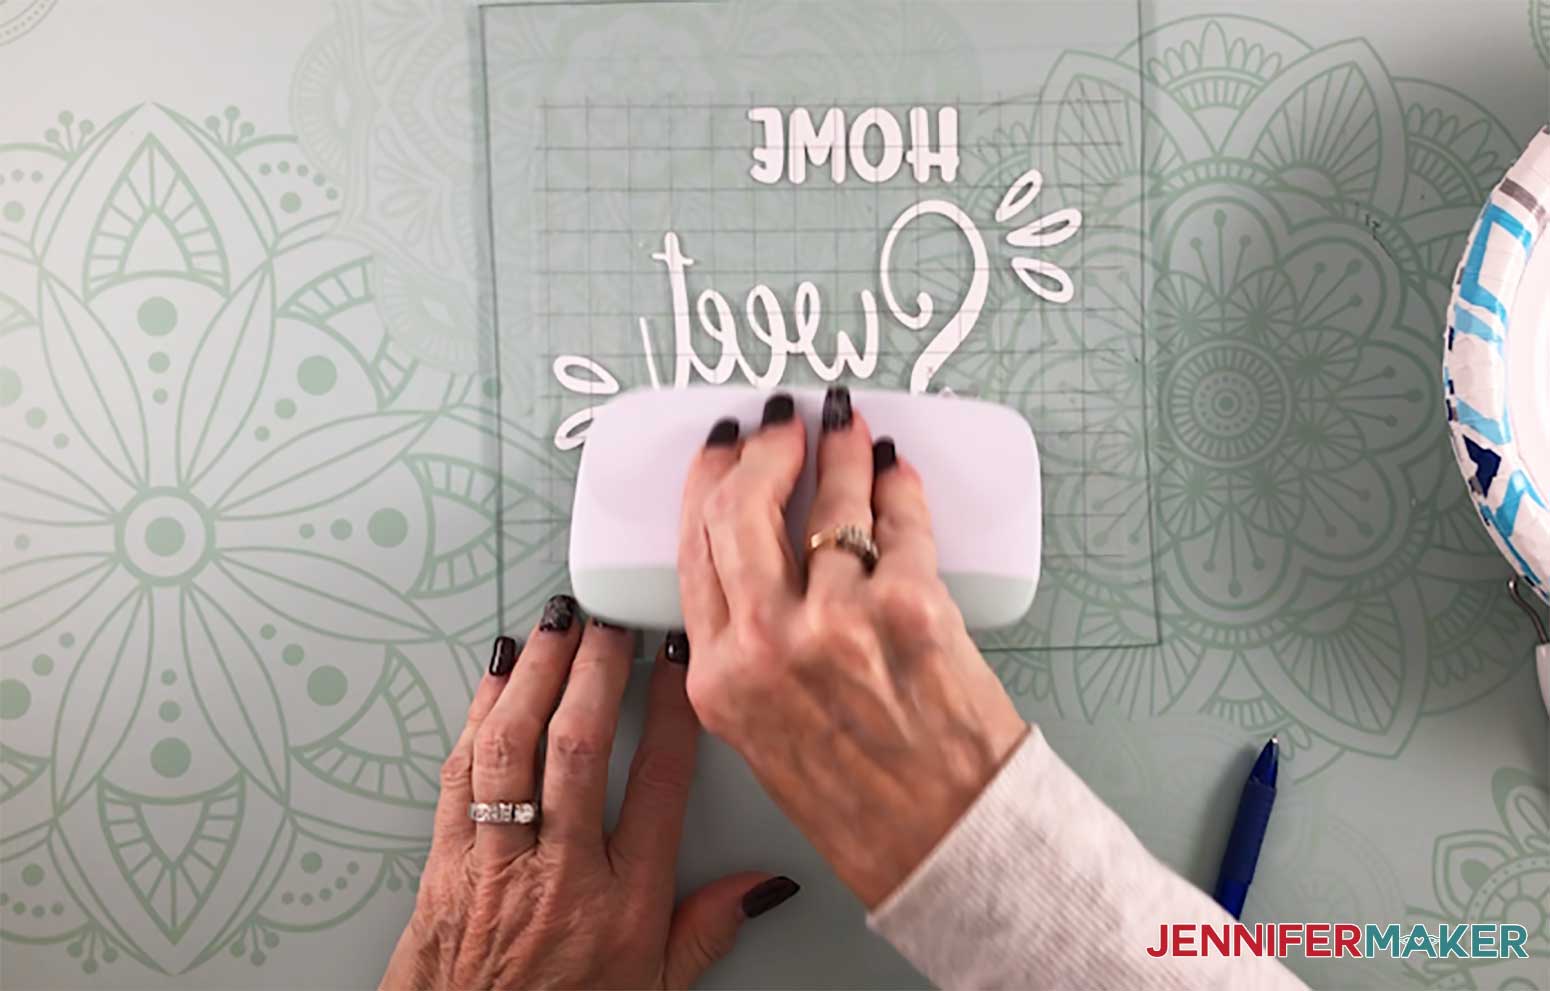
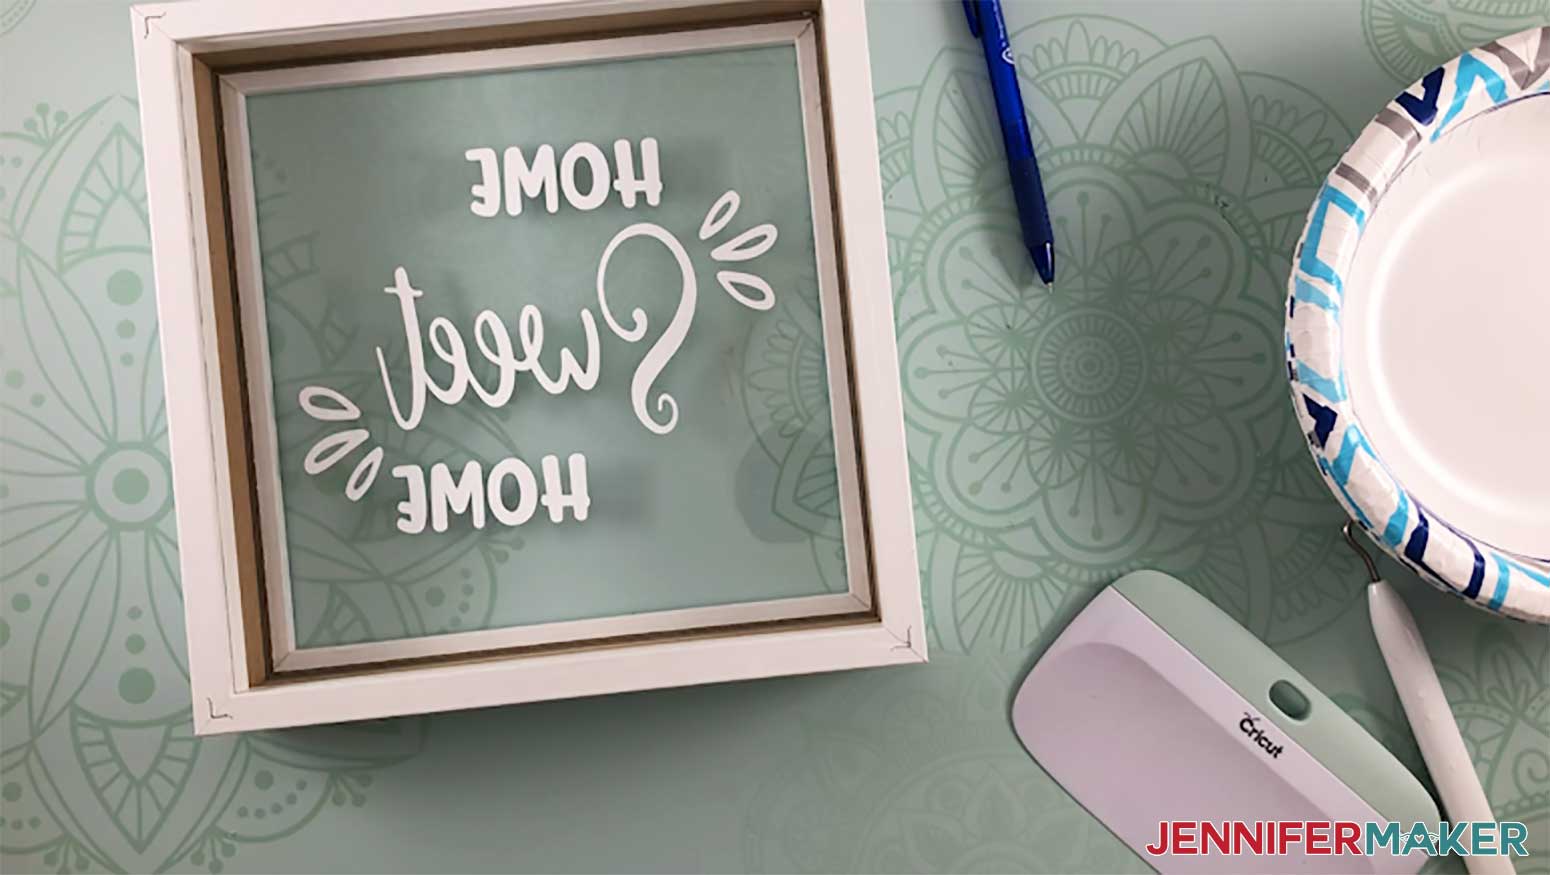
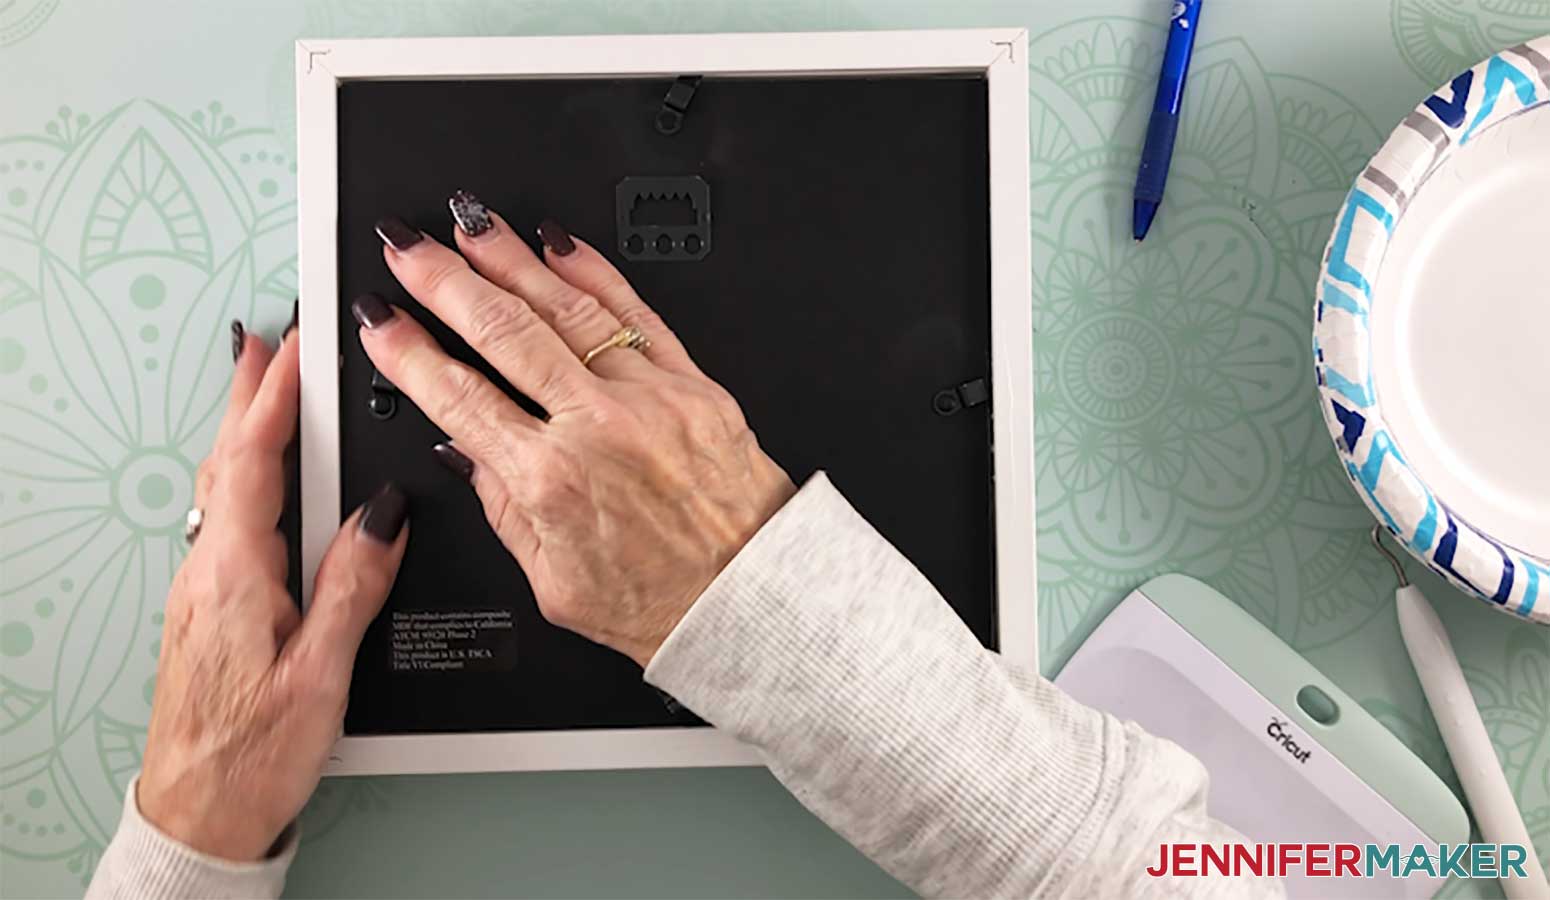
A lovely shadow box holds three dozen gorgeous paper flowers. Add a saying or sentiment to the front of the shadow box to personalize it. The paper flowers stay safe and dust-free inside the enclosed shadow box so you can enjoy them for years to come. I have many free paper flower designs that you can use to make paper flower shadow boxes. For this tutorial, we are using the Rolled Paper Rose design, and I've made special files for you with the roses sized for a variety of shadow box sizes. Look for the "Paper Flower Shadow Box" file (Design #187) free from my free resource library (get the password to the library in the form at the bottom of this post). Here's what the paper roses SVG cut file for a 9" x 9" shadow box will look like when you upload it to Cricut Design Space: Tip: If you're not sure how to upload an SVG cut file to Cricut Design Space, watch this helpful video training series I made. If you're on an iPhone or iPad, here's how to download and upload SVG files to the Cricut Design Space app. My paper flowers are already sized for a 9" x 9" shadow box frame. so you don't need to do any sizing if that is your frame size. If using an alternate size, re-size the flowers based on my resizing and quantity charts. This project used approximately 18 sheets of 8 1/2" x 11" sheets of 65 lb. cardstock to make 36 flowers. If you use 12" x 12" cardstock, you'll only need 12 sheets of paper. Roll your flowers up using a quilling tool. Be sure to glue your flowers once you've rolled them up, too. Just a bit of hot glue on the bottom circle, then carefully press it against the rolled bottom edge (use finger guards to avoid burned fingers). Here is a finished paper rose: Once all flowers are rolled and glued, decide how you want to arrange them in your frame. For this project, I arranged the paper flowers six across and six down. There are no rules here — arrange them as they please you best. Once you've decided on your paper flower arrangement inside your shadow box, glue each individual flower to the frame backing in the pattern you have chosen. The frame backing may be changed if desired by using a sheet of cardstock of your choice cut to the desired size that will fit into the frame. Here are all 36 of our paper flowers glued inside our shadow box: Choose one of my SVG files for your saying on the front of the shadow box or create one of your own. Sayings for the frame included in the files are sized for a 9 x 9 shadow box. Adjust the size accordingly if your shadow box is is a different size. NOTE: Prior to cutting the saying decide if you want the saying on the inside of the frame glass or the outside of the frame glass. If applying the saying on the OUTSIDE of the frame glass there is no need for any adjustments to the file when cutting. If applying the saying to the INSIDE of the frame glass, be sure to MIRROR the saying prior to cutting. The advantage of an inside application is that it makes for easier cleaning of the frame front (that's how I am doing mine in this tutorial). Weed the vinyl saying that will go on the frame and apply transfer tape to the weeded vinyl. Place transfer tape on your weeded vinyl. Remove the backing off your transfer tape. Clean the shadow box glass with rubbing alcohol using a lint-free cloth or coffee filter. Apply the vinyl to the glass of the frame (either inside or outside of the glass). Our design was centered on the glass but can certainly be applied however it is aesthetically pleasing to you. Place the glass back in your shadow box frame. Put the frame with the paper flowers inside the shadow box. Close up the back of your shadow box frame. Enjoy your beautiful paper flower shadow box! Special thanks to the JenniferMaker Design Fairy team, specifically Design Fairy Vicki, for helping me design and assemble this wonderful project. As an Amazon Associate and member of other affiliate programs, I earn from qualifying purchases.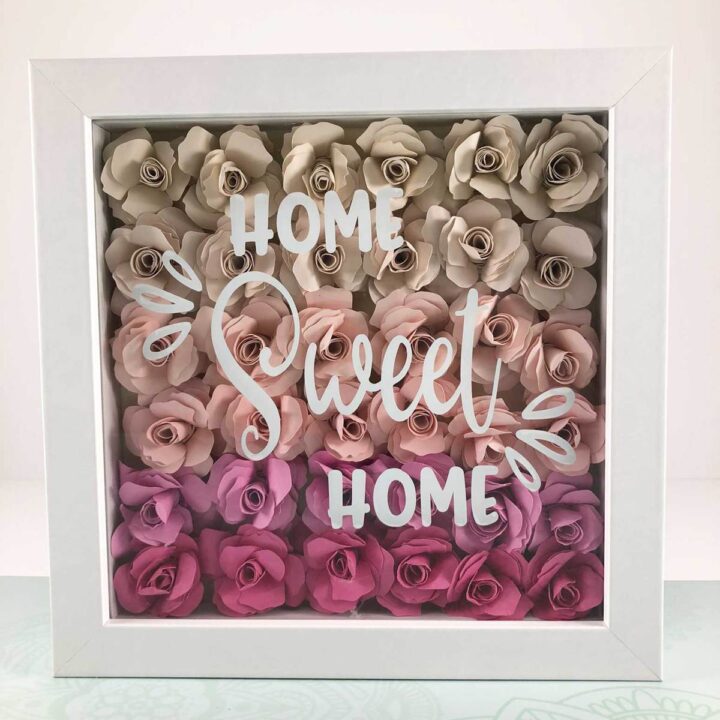
Paper Flower Shadow Box Tutorial
Materials
Tools
Instructions
Step 1: Get my free paper flower designs
Step 2: Size your paper flower pattern to your shadow box
Step 3: Cut and assemble your paper flowers

Step 4: Arrange your flowers in your shadow box
Step 5: Glue your flowers to the backing
Step 6: Choose and cut a vinyl saying for your shadow box
Step 7: Apply the vinyl to your shadow box
Step 8: Complete your paper flower shadow box

Notes
Fonts Used For This Project:
ACKNOWLEDGEMENT
Recommended Products

Get my free SVG files to make your own Paper Flower Shadow Box!
I’d love to see your paper flower shadow boxes and what sentiments you put on them! If you make one, please share a photo in our Facebook group, email it to me at [email protected], or tag me on social media with #jennifermaker.
Love,

Want to remember this? Save the Paper Flower Shadow Box Tutorial to your favorite Pinterest Board


This is a beautiful, step-by-step project! Thank you for teaching all that you do!
This has been a godsend. I have stumbled trying to make my first one. After watching your step step instructions, I think I’ve got it.
I’d I’m doing six different colored flowers, how are they going to cut and print on the card stock that I want?
You will need to use white card stock, Brenda! If you are wanting to do a Print then Cut type of flower, you may also want to take a look at our tutorial that teaches how to Print Then Cut for t-shirts! You wouldn’t use transfer paper, like in that tutorial, but use your white cardstock instead and follow the rest of the directions! 🙂
Hello Mam, Which material used to make that Shadow box frame means its made from wood or Acrylic or Card paper?
Hello! The shadow box frame itself is made from wood! 🙂