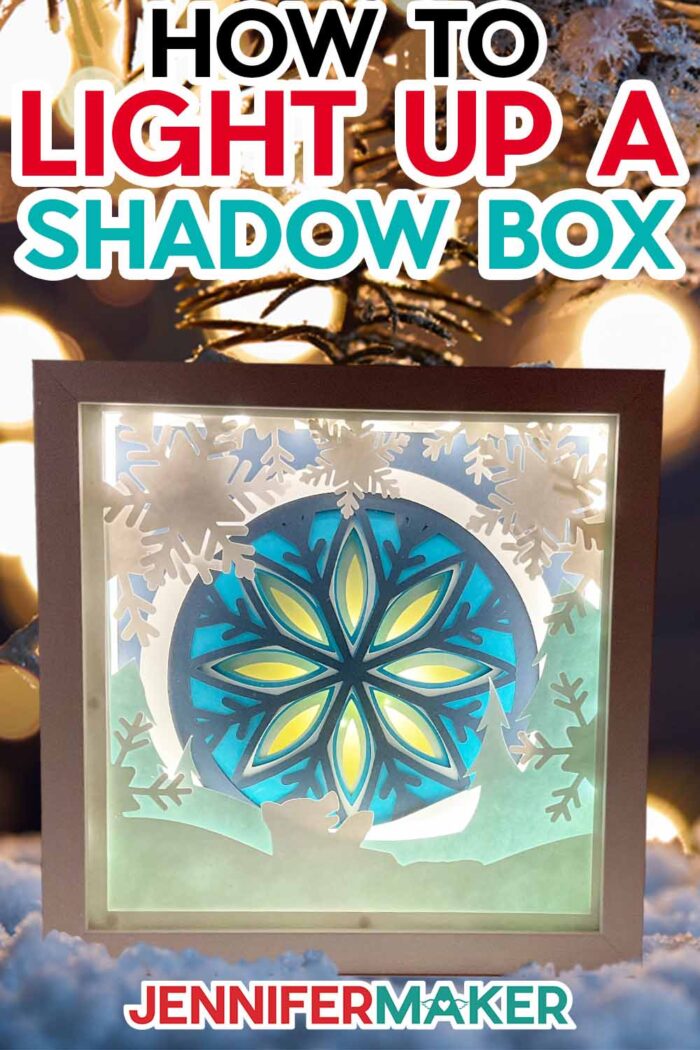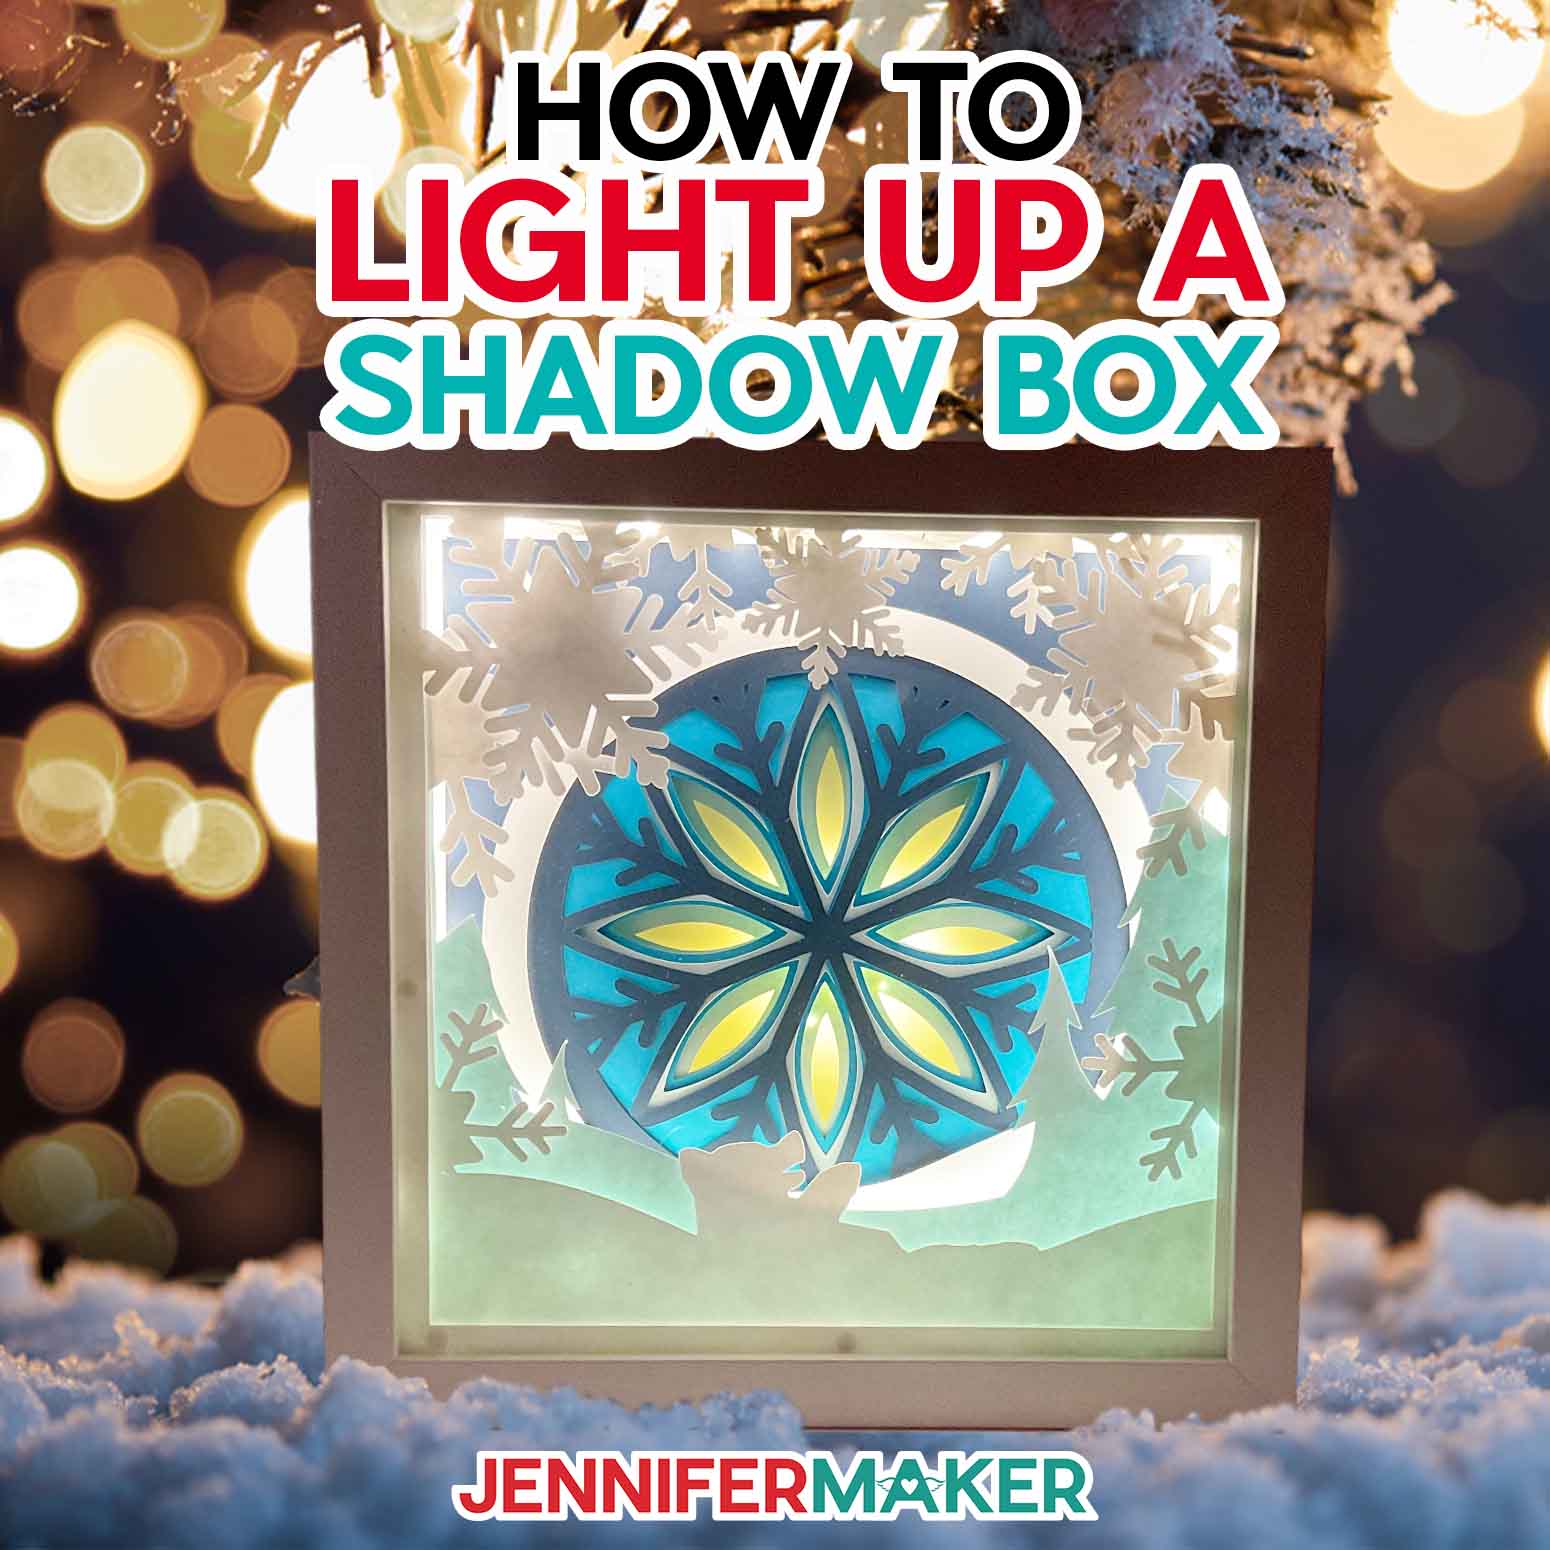
Learn how to make a light up a shadow box with different kinds of LED lights!
Some of my favorite papercraft projects are layered shadow boxes! I love the depth and detail we can create with just paper, don’t you? But to really level up a design, lights are the key. So I’ll show you how to make several ways to make a lighted shadow box. You can use my winter scene or make your own custom shadow box design!
Watch the full step-by-step lighted shadow box tutorial:

 What is the Merry Maker Mingle? This is an annual tradition here at JenniferMaker! Every day for the first 25 days of December, we gift you with a brand new project, design, tutorial, and video for something YOU asked us to make. On top of that, we host a giveaway with 25 days of prizes. Some of the amazing prizes are Cricut cutting machines, sewing machines, gift cards, and beautiful print editions of our popular Cricut Coach Playbook. You can even earn bonus entries for sharing photos of the daily projects! Click here to learn more about the Merry Maker Mingle!
Shadow boxes are so much fun to make, and a Cricut makes them super easy! With some paper, a frame, and glue, you can make decor better than what’s available in department stores.
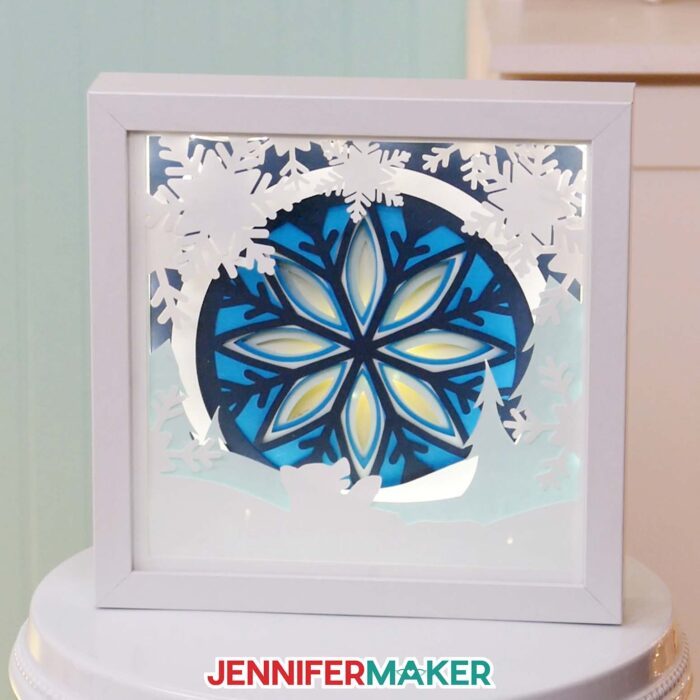
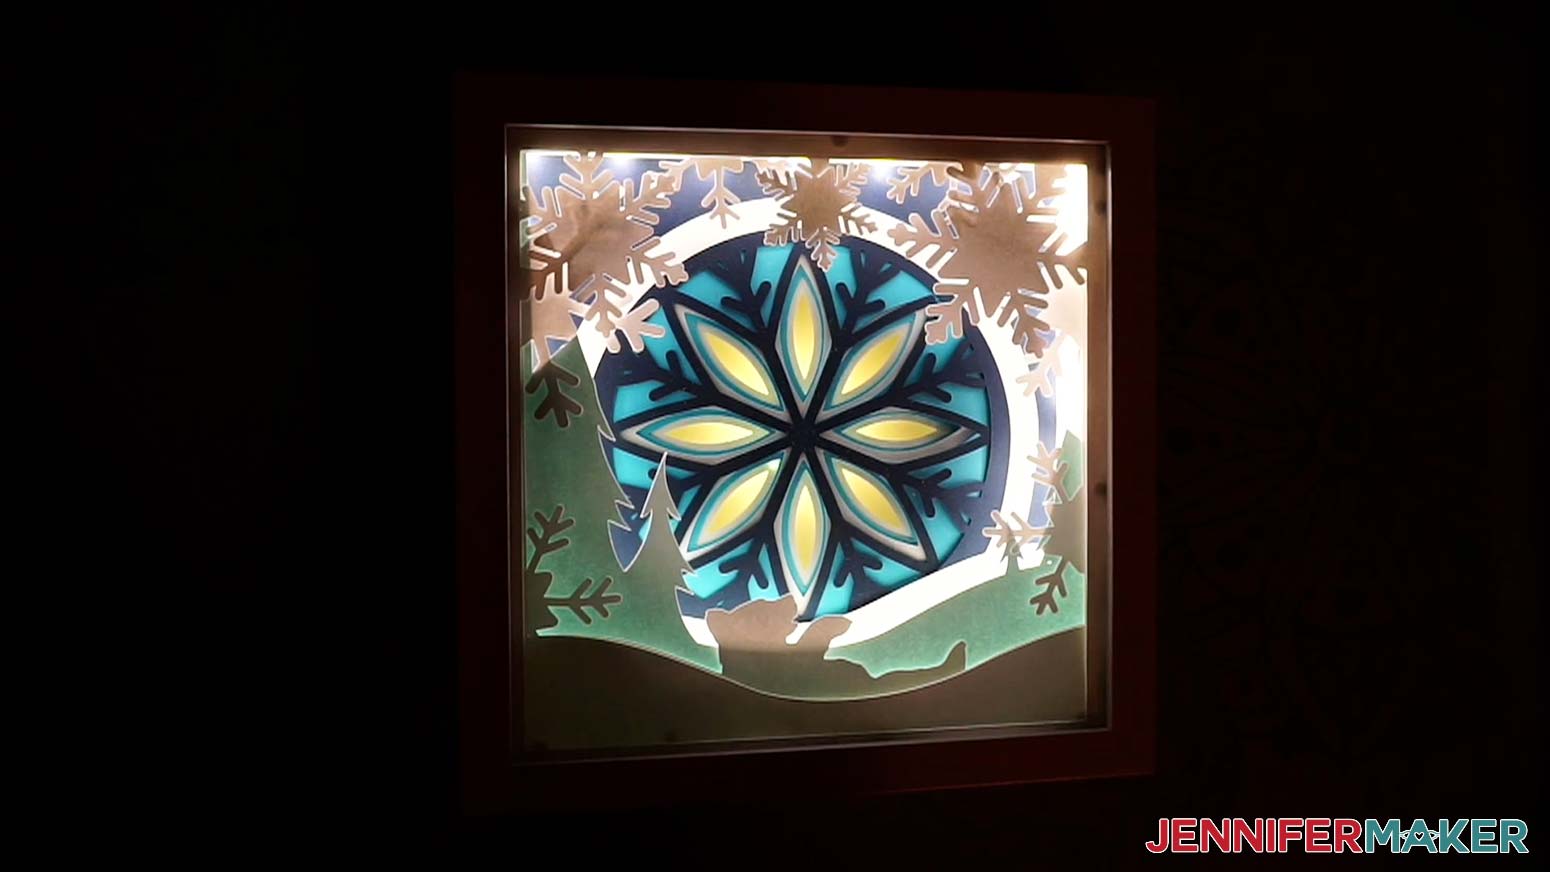
I love the impact of the large scale snowflake design in this project. But adding different light combinations makes it pop even more!

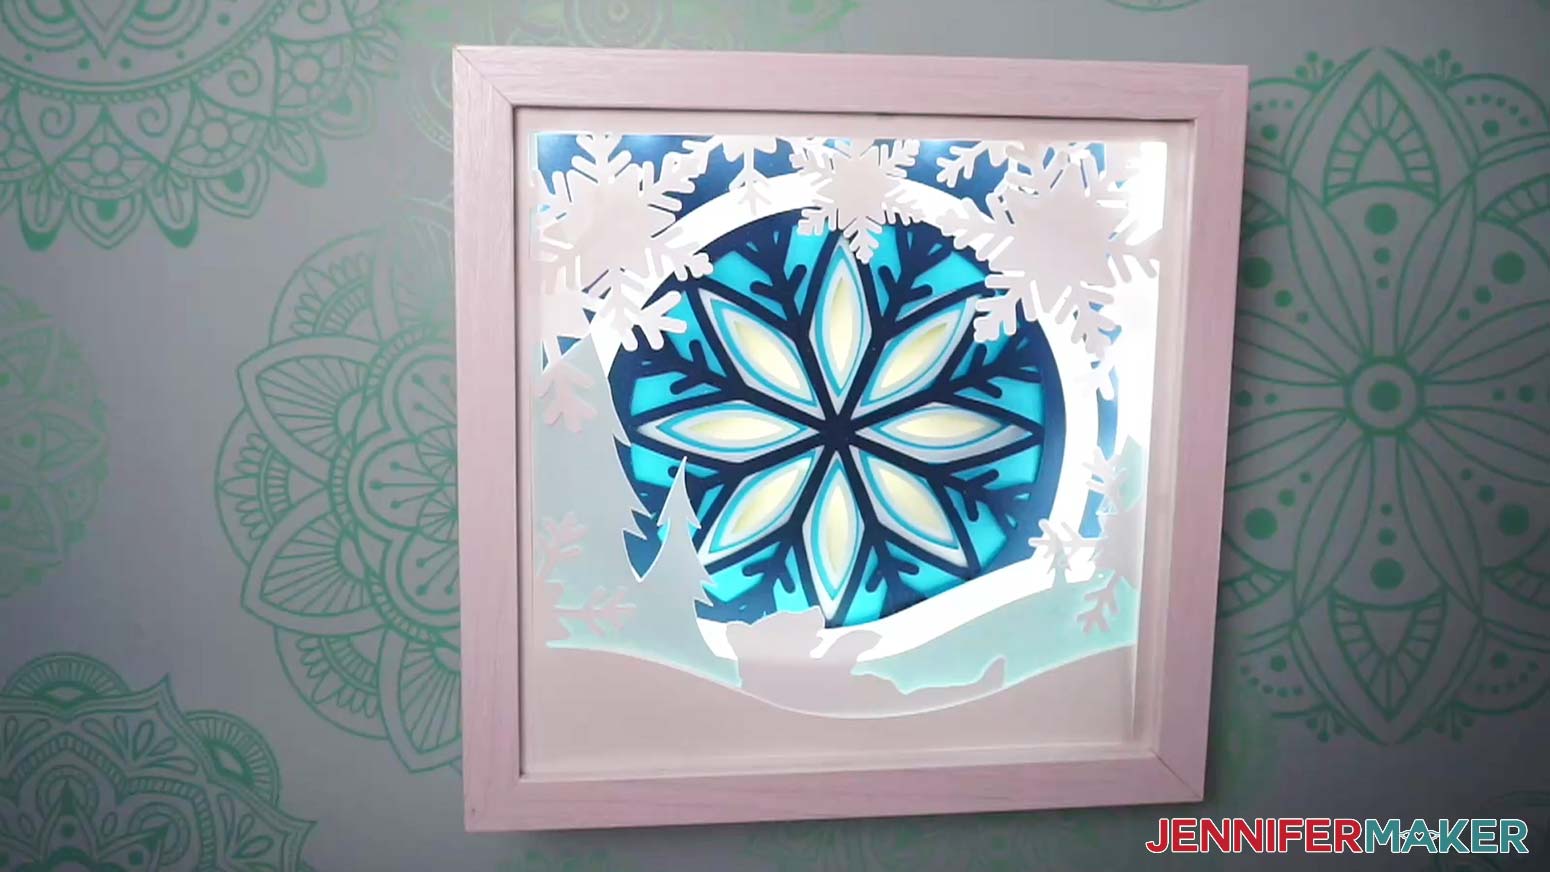
And even unlit, the lighted shadow box design is pretty enough to brighten up many different environments!
First thing, we’ll cover preparing the free SVG in Cricut Design Space, cutting the intricate pieces, and putting the different layers together in the correct order. I used high-quality cardstock, but you can also use vellum for a back layer that will let more light shine through. Good-quality craft glue and a variety of flat and 3D adhesives will help create the depth.
I used a Cricut Maker 3, but you could use an original Cricut Maker or a machine from the Explore series. A StandardGrip machine mat works well, but a LightGrip mat helps with the extra detailed layers. Our usual papercrafting tools will help, too!
Then, I’ll show you how to light it up! We’ll use a LED strip light that can be trimmed with scissors, and fairy lights as a second option. I used white, but you can get the ones you can change to a different color, too! We’ll also look at how to combine them to highlight a focal point. And I’ll share tips on how to secure the power source to a flat surface. I’ll show you different solutions depending on how you’ll display your lighted shadow box.
Let me show you how easy it is to make a lighted shadow box! This post contains some affiliate links for your convenience (which means if you make a purchase after clicking a link I will earn a small commission but it won’t cost you a penny more, there is no additional cost)! Read my full disclosure policy.
Materials to Make a lighted shadow box
View my Amazon shopping list with the exact items we used to make this project
- Wood Shadow Box Frame, 9″x9″
- 65 lb Cardstock 12″ X 12″ -I used dark blue, medium blue, light blue and white
- 6 Pack Fairy Lights Battery -and/or-
- Battery Powered LED Light Strips -AND- AA Batteries
- Vellum Paper – optional if you want to let the lights shine through more from the back
- A method to cut your cardstock — I used the amazing Cricut Maker 3, with the Fine-Point Blade but you can use any Maker or Explore
- Cricut Green StandardGrip Mat, 12″ x 12″ -OR-
- Cricut Blue LightGrip Mat, 12″ x 12″
- Cricut Brayer
- Cricut Scissors
- Coffee Filters
- Rubbing Alcohol
- Cricut Spatula
- Cricut Scraper
- Butcher Paper
- Cricut Metal Ruler
- Cricut TrueControl Knife -AND- Self-healing Mat
- iCraft Zots Clear Adhesive Dots, 3/8″ Diameter x 1/64″ Thick
- 1.18″ Double Sided White Foam Tape
- 3D .24″ Foam Dots
- Bearly Art Precision Craft Glue
- Design #461 (My free SVG/PDF/DXF design files are available in my free resource library – get the password by filling out the form at the bottom of this page)
How to Make Your Own Lighted Shadow Box
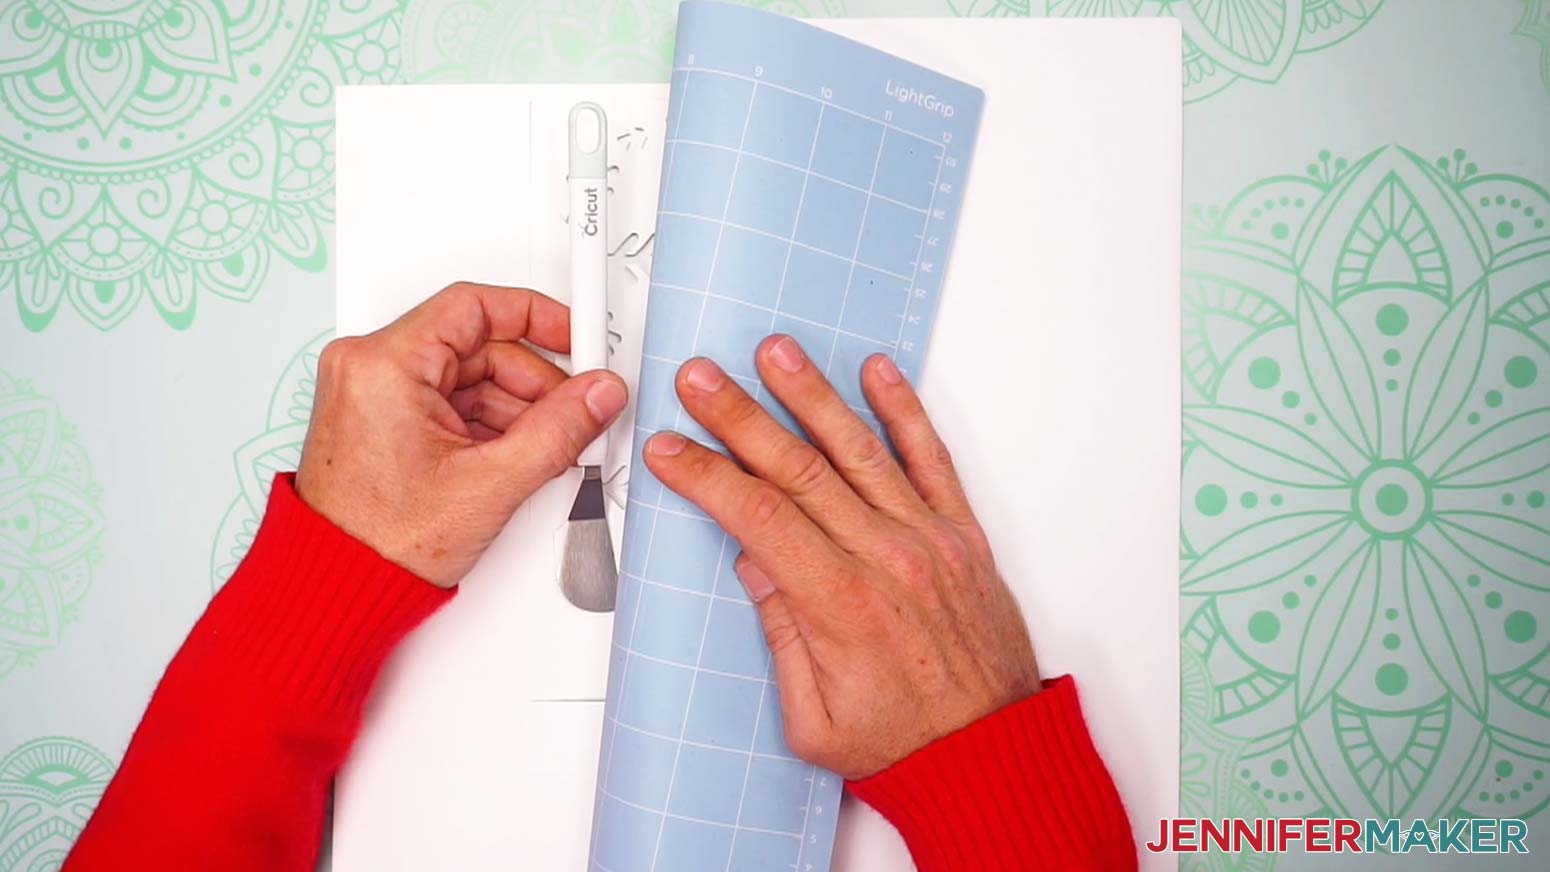
Learn to make a lighted shadowbox with a winter scene! First, download my free Lighted Shadow Box SVG/PDF/DXF collection from my resource library -- it's Design #461. The download folder includes PDFs to cut by hand, and DXF or SVG files for use with a cutting machine. I'll show you how to use the SVGs with a Cricut. Upload the SVG file of your choice to Cricut Design Space and add it to your Canvas. I'll add the Polar Bear and Snowflakes scene. TIP: If you are not sure how to upload an SVG cut file to Cricut Design Space, watch this helpful video training series I made. If you are on an iPad or iPhone, here is how to download and upload SVG files to the Cricut Design Space app. If you have more than one file on your Canvas, click and drag one to the side so they're both visible. You can create your own version by changing the stacking order and orientation of the layers. Snowflakes are all unique and so are you! The full design is sized for the 9" x 9" shadow box frame in my material list. If you want to resize it for another frame, make sure the lock icon at the top is closed, then change the W to your desired size. If you don't want to include the bear, click that layer in the Layers Panel and click Delete. I'm keeping him! I'm making my design in White, Light Blue, Medium Blue, and Dark Blue. You can choose whatever colors you like and change the necessary layers using the color box at the top. Just be sure there is enough contrast between each color. Certain color cardstock takes the color of led lights better, like blues. The design is ready to cut! Make sure you have the right machine selected and click "Make It." If prompted, click "On Mat," "12 in x 12 in," and "Confirm." If you're using the same cardstock as I am, make sure the Material Size is "12 in x 12 in" for everything. Click back on the first mat and click "Continue." To find it, click "Browse All Materials" and type "Intricate" in the search bar. Then select the result, click "Apply." Design Space doesn't cut your mats in the same order as your design, so make sure you have the right colors in the order on the screen. My layers cut well on a green StandardGrip machine mat, but if you have trouble getting clean cuts try the blue LightGrip mat. Place your first color face up on the mat and use a brayer to make sure it's fully adhered. Check that your Fine-Point Blade is clean and in Clamp B. Then, load the mat into the machine and press "Go." When the cut is finished, unload the mat, flip it over, and roll it back to release the cardstock. This helps prevent the material from curling and ripping. Place the cut pieces to the side face up just as they are on the screen so their orientation doesn't get mixed up. Repeat the same steps for the rest of the mats. The mats with intricate details will take longer to cut. You can slide your spatula gently under those pieces to remove them without tearing. Here's what all of my cut pieces for the Polar Bear and Snowflakes scene look like. The plain background, large snowflakes, and the layer before the trees are the back section and the rest are the front. The shadow box has an inner wood piece that will go in between them. Remove the backing and inner wooden piece (if you're using the one from my list) from the shadow box. Clean the glass with alcohol and a coffee filter or lint-free cloth. Put the frame face down. You can put butcher paper underneath to protect it if you'd like. You can use a corner of the shadow box to line up your layers. First, place the background layer face up in the frame so it's tight with one corner. To the side, stack the other back layers face down in order with the front-most design at the bottom. Continue for the rest of the back layers. Remove the assembled layers and repeat the alignment and adhering process for the front section. Then, stack the assembled sections face up to get the layout you want with the wood insert in between. You can stack them in the frame to help with alignment if you like. Take out the assembled layers to check for smudges or dust in the shadow box. Wipe down the glass again with alcohol and a lint-free cloth if needed. Before putting everything together, we can add the optional lights. The process is different for strip lights or fairy lights, or even a combination of the two. LED Strip Lights Grab your light strip and make sure it turns on. Remember to check the batteries! Place the front assembled cardstock layers face down in the frame in the correct orientation. I'm using the wood insert, so will attach the lights to the inside surface of that piece. It's a bit easier outside of the frame. NOTE: If you're not using the insert, the process is very similar. First, put the front cardstock layers into the frame, face down. Add the back layers on top and measure the remaining depth between the cardstock and where the backing will be. Roughly divide the depth by the width of your lights to estimate how many times you can wrap the strip around the frame in between the assembled layers. When you finish the first round, your lights should look similar to mine. Place the back assembled layers face down in the frame on top. Fairy Lights There are a few ways to use fairy lights but I wanted to try something new to create a concentrated light source in one spot. Use the same steps to cut a notch in the backer. Make sure your fairy lights work, then experiment with ways to condense them into a few inches. I tried balling them up or coiling them in a few layers, but you might find a better way! The goal is to keep them together enough to hide behind the design elements. I'm going to place mine behind the center of the big snowflake for this design. Place the assembled back layers face down. The solid back layer can be face up to the side. Put the fairy light battery pack at the corner where the notch will be. Add a glue dot or two to the back of the snowflake layer where you want to put the condensed lights. Gently put the lights into place but don't press down so we can check the placement. Carefully flip the stack and lights over and make sure you can't see wires or lights from the front. Adjust any pieces you need to. The flatter the lights are the better the layers will go together! Then place the background layer face down on top, making sure the corner is aligned. Remove the lighted layer. Place the front section face down in the frame, followed by the wood insert and then the back assembly. Now you can reattach your shadow box's backing and slide the wire through the notch! Then, secure the battery pack with more glue dots or double-sided foam tape on the back if it will sit on a shelf. If you want to hang it, attach the pack to the frame’s outside edge so you can turn the lights off and on. Strip and Fairy Light Combination TIP: If you find the back cardstock layer is too thick for the fairy lights to shine through, you could try adding another set of fairy lights, or try using vellum as the back layer to let all the light shine through. Remember we want to let the light shine through, without ever seeing the lights themselves, or any of the adhesive materials. Hang your shadow boxes and enjoy decorating for winter or year-round!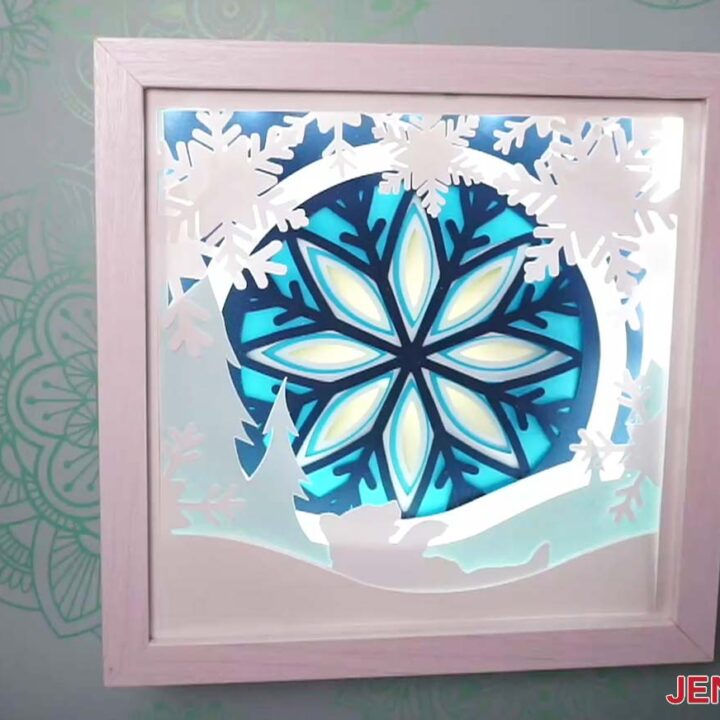
Lighted Shadow Box
Materials
Tools
Instructions
STEP 1: GET MY FREE Lighted Shadow Box DESIGN FILES
STEP 2: PREPARE THE DESIGN FILE
This is what my Polar Bear and Snowflakes SVG file looks like on my Canvas. You can zoom out to see all of the design by clicking on the minus (-) sign on the lower left.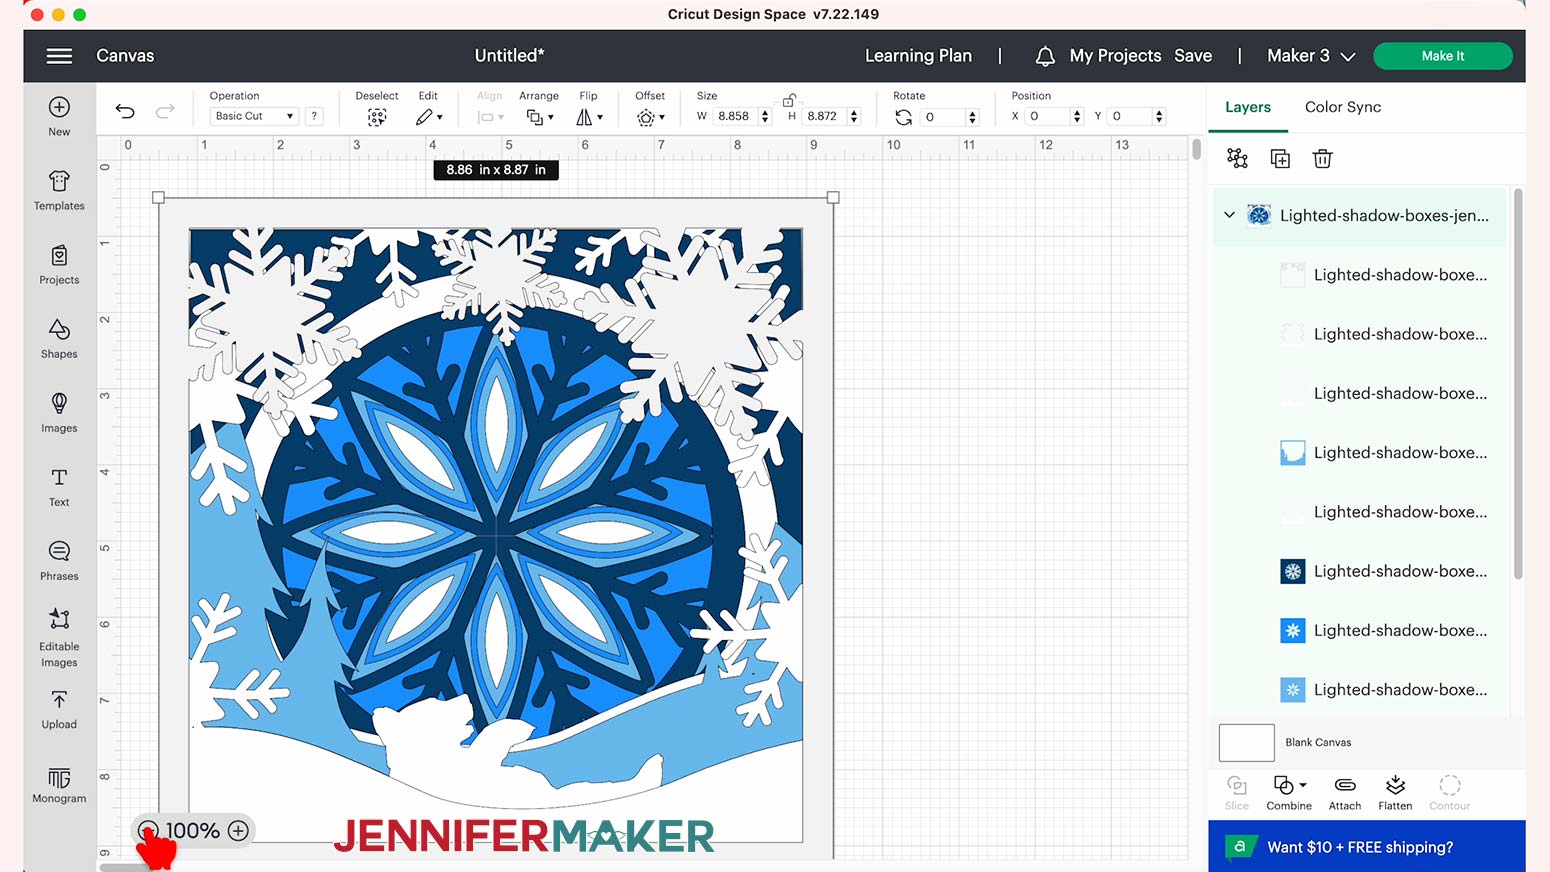
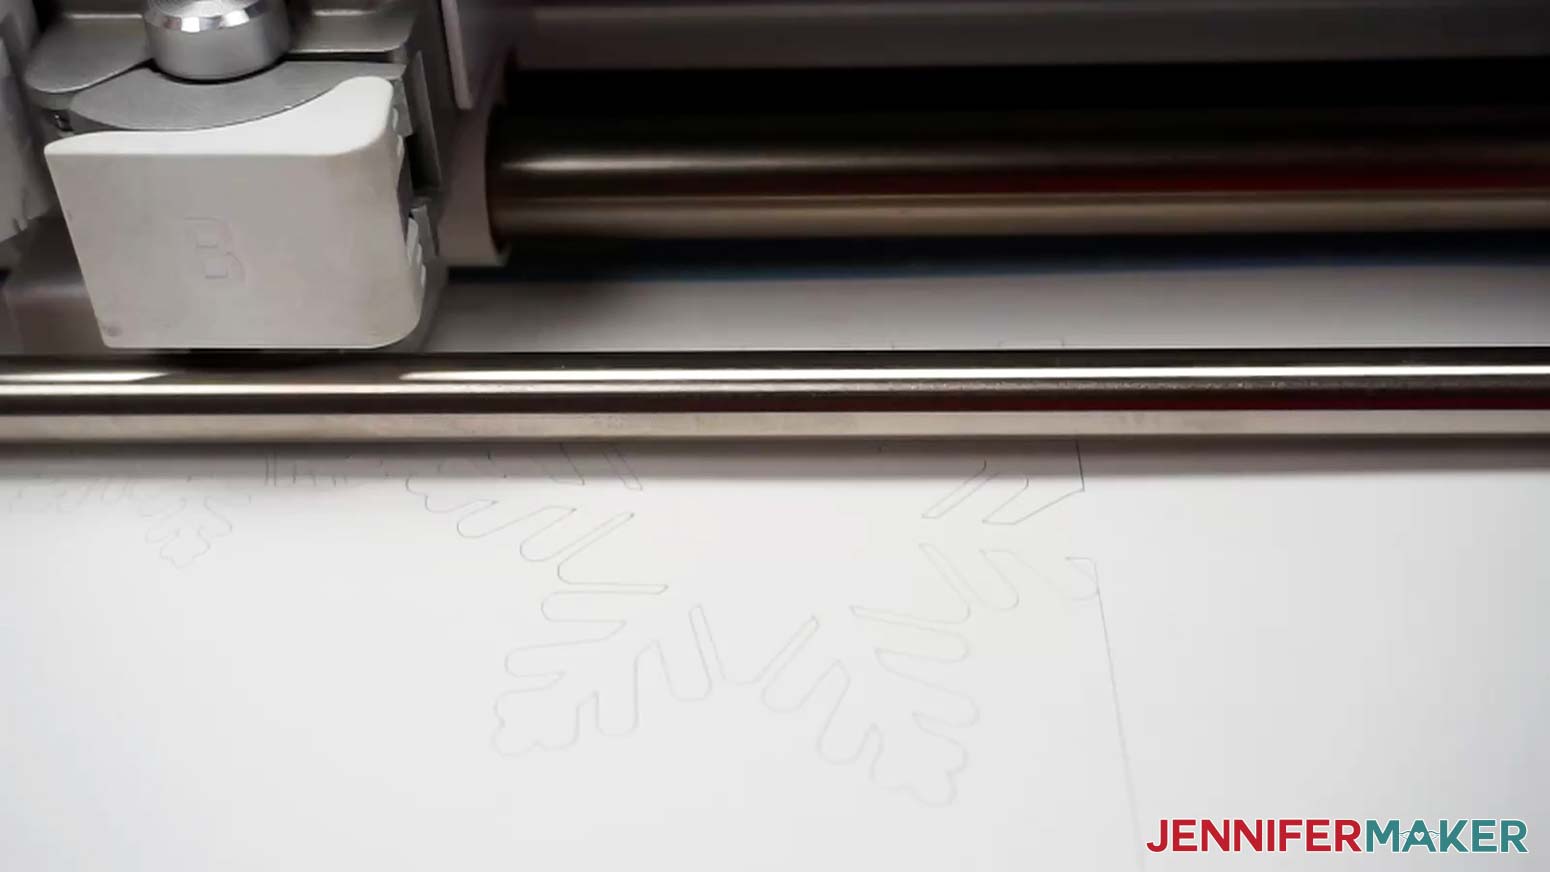
STEP 3: CUT YOUR DESIGN
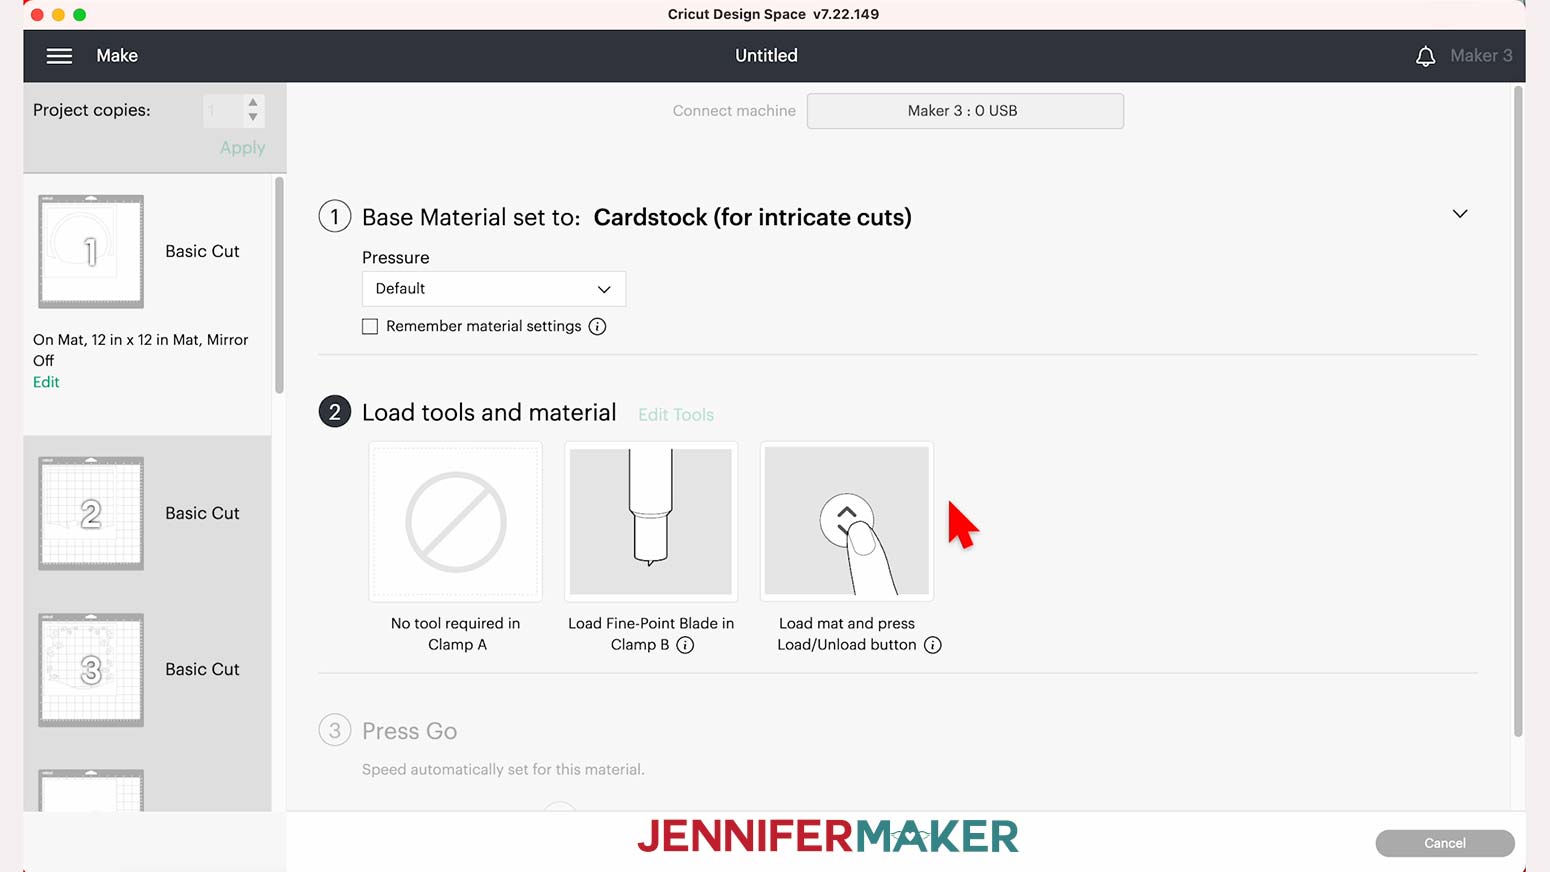
I used the "Cardstock (for intricate cuts)" setting for all my mats.
Leave the Pressure at "Default."
For more on how Design Space decides on the cut order, check out my tutorial on Mat Order.
STEP 4: ASSEMBLE THE LAYERS

NOTE: If you want to experiment with fairy lights near the back layer as I'll cover in a few steps, don't attach the next layer to the back yet, just place it on top.
Now, you will be applying the adhesive zots or foam dots every few inches on the back of each next layer. Start with the next back layer, then flip it over and place it on top of the background, making sure the corner lines up. Press gently in case you need to realign, then secure it down.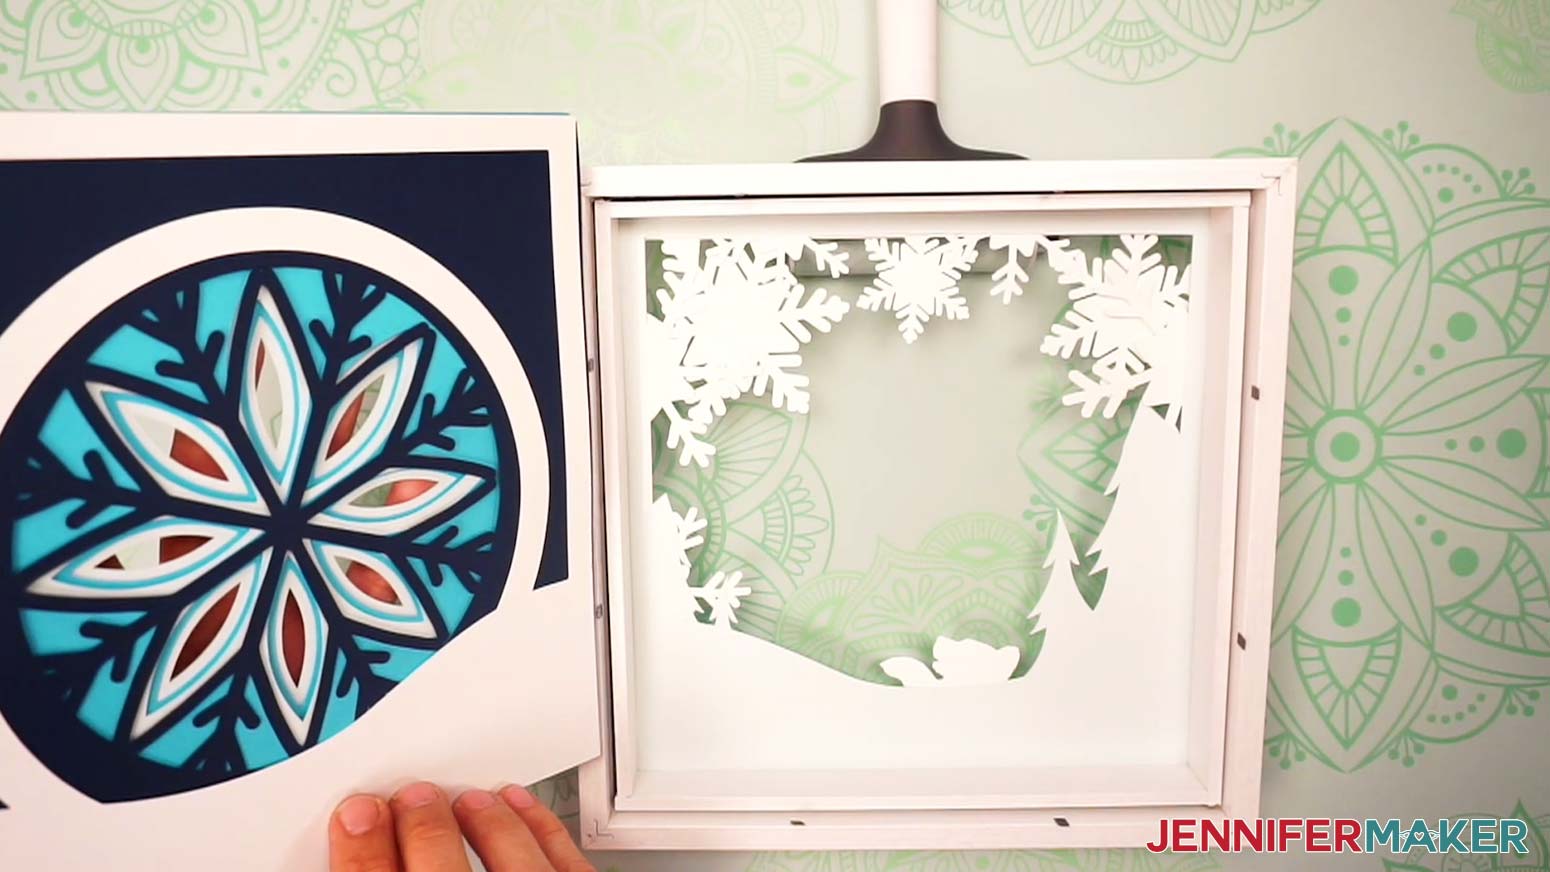
STEP 5: ADD YOUR LAYERS TO THE SHADOW BOX WITH OPTIONAL LIGHTS
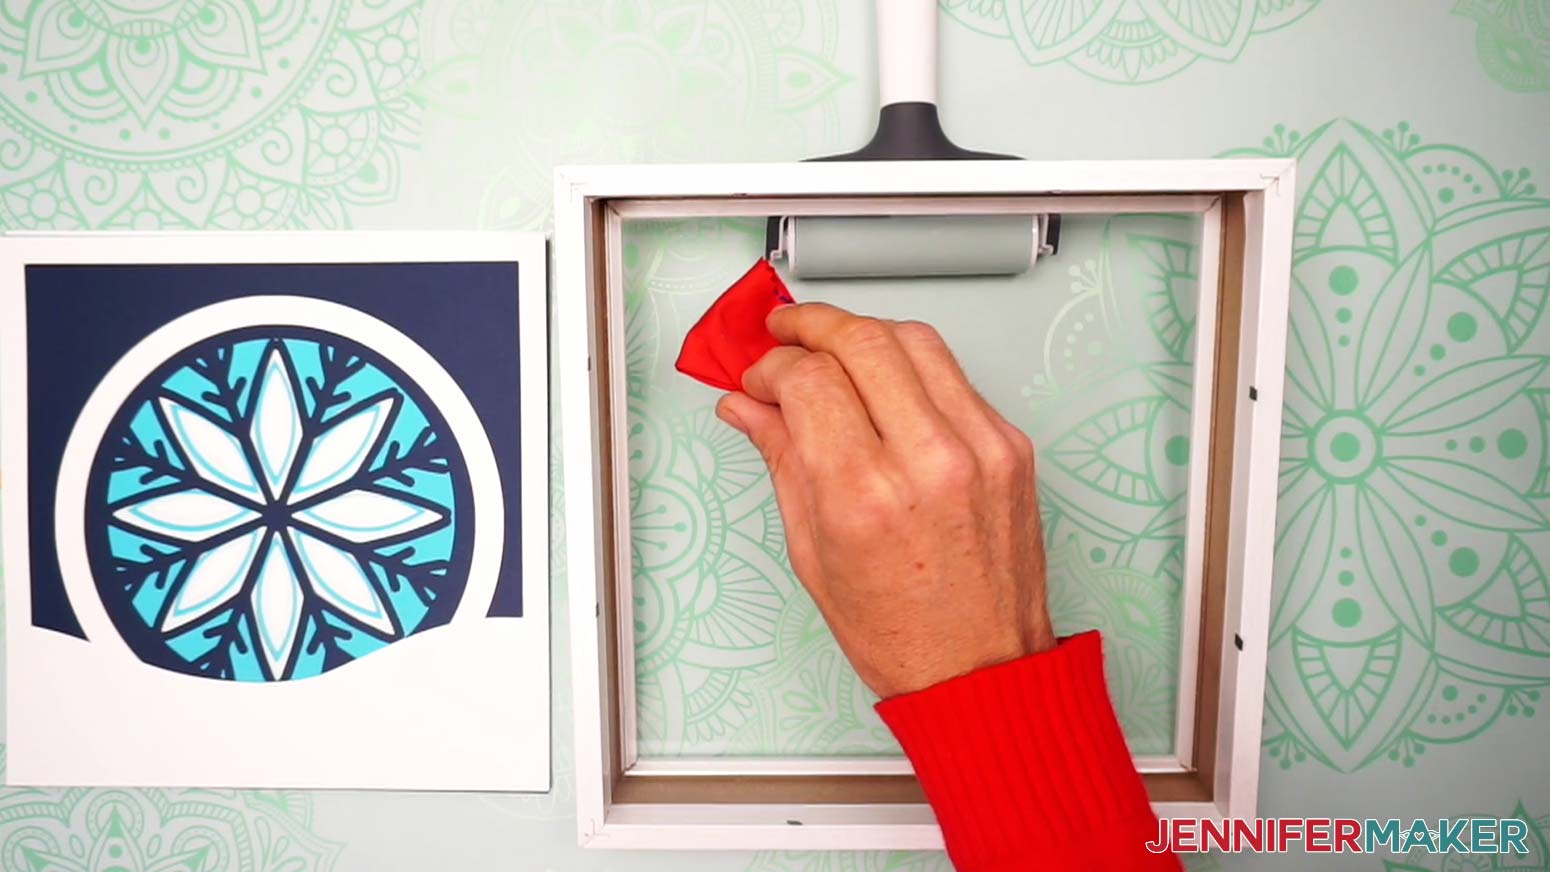
We’ll attach the battery pack to the frame's back to keep it accessible, so we need to cut a notch in the backing to allow the wire through. With the hardware facing up at the top, place the backer on your self-healing mat. Use your craft knife to carefully make a diagonal cut across one of the bottom corners about .5" tall.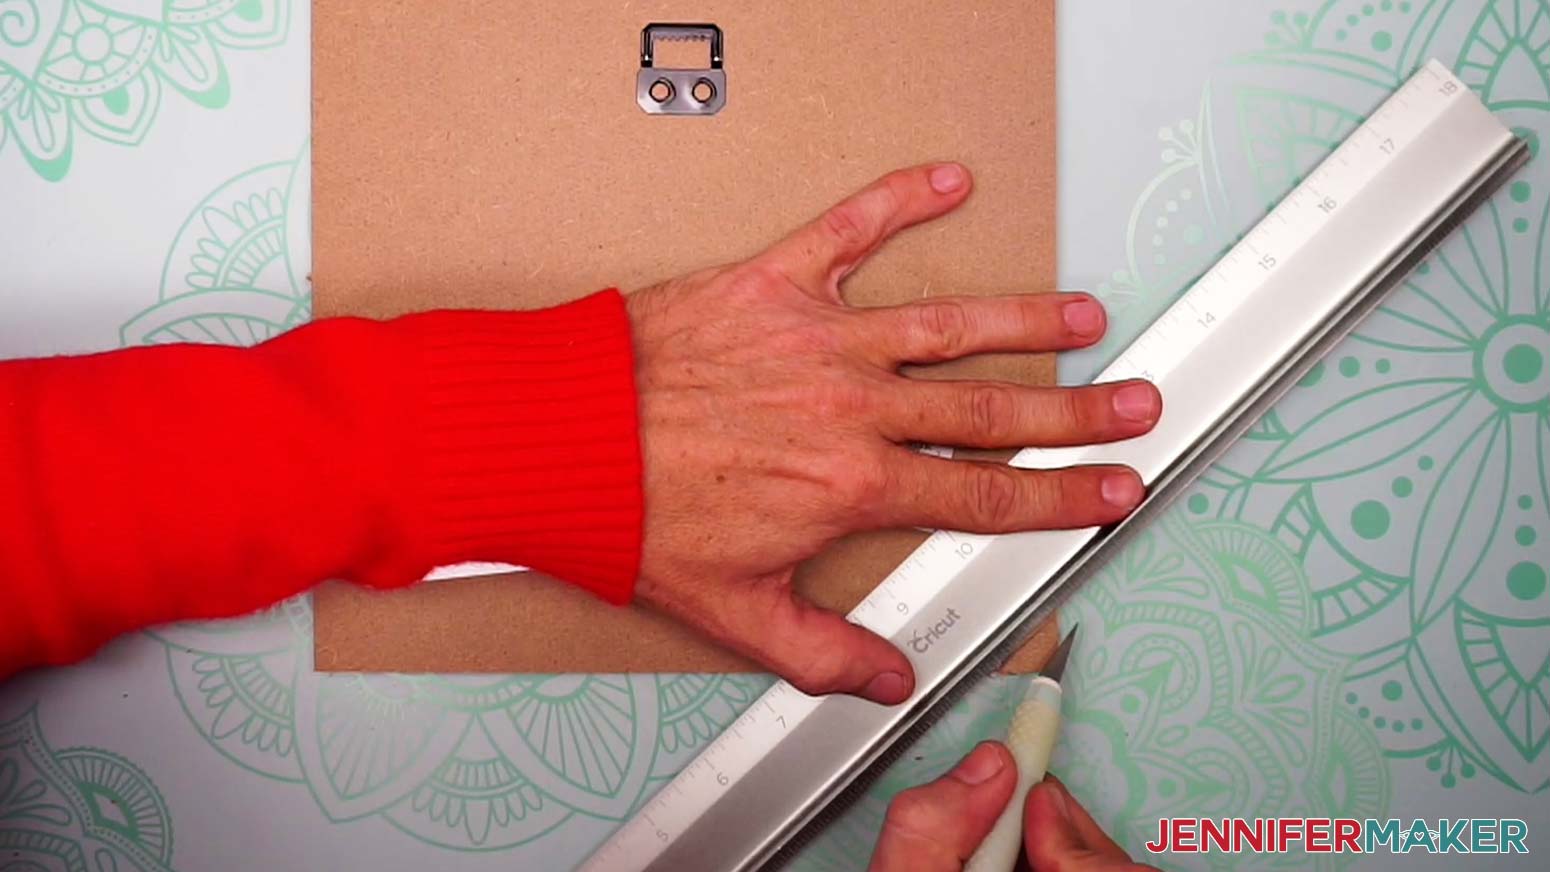
Set the backer to the side and put the frame face down in front of you.
Unroll a foot of lights starting near the battery pack. Use your weeding tool to lift some protective plastic.
Put the battery pack beside the frame where the notch will be.
Attach the exposed adhesive to the inside of the insert or frame in that corner. Put it against the front edge of the insert or the assembled cardstock layers, depending on your setup.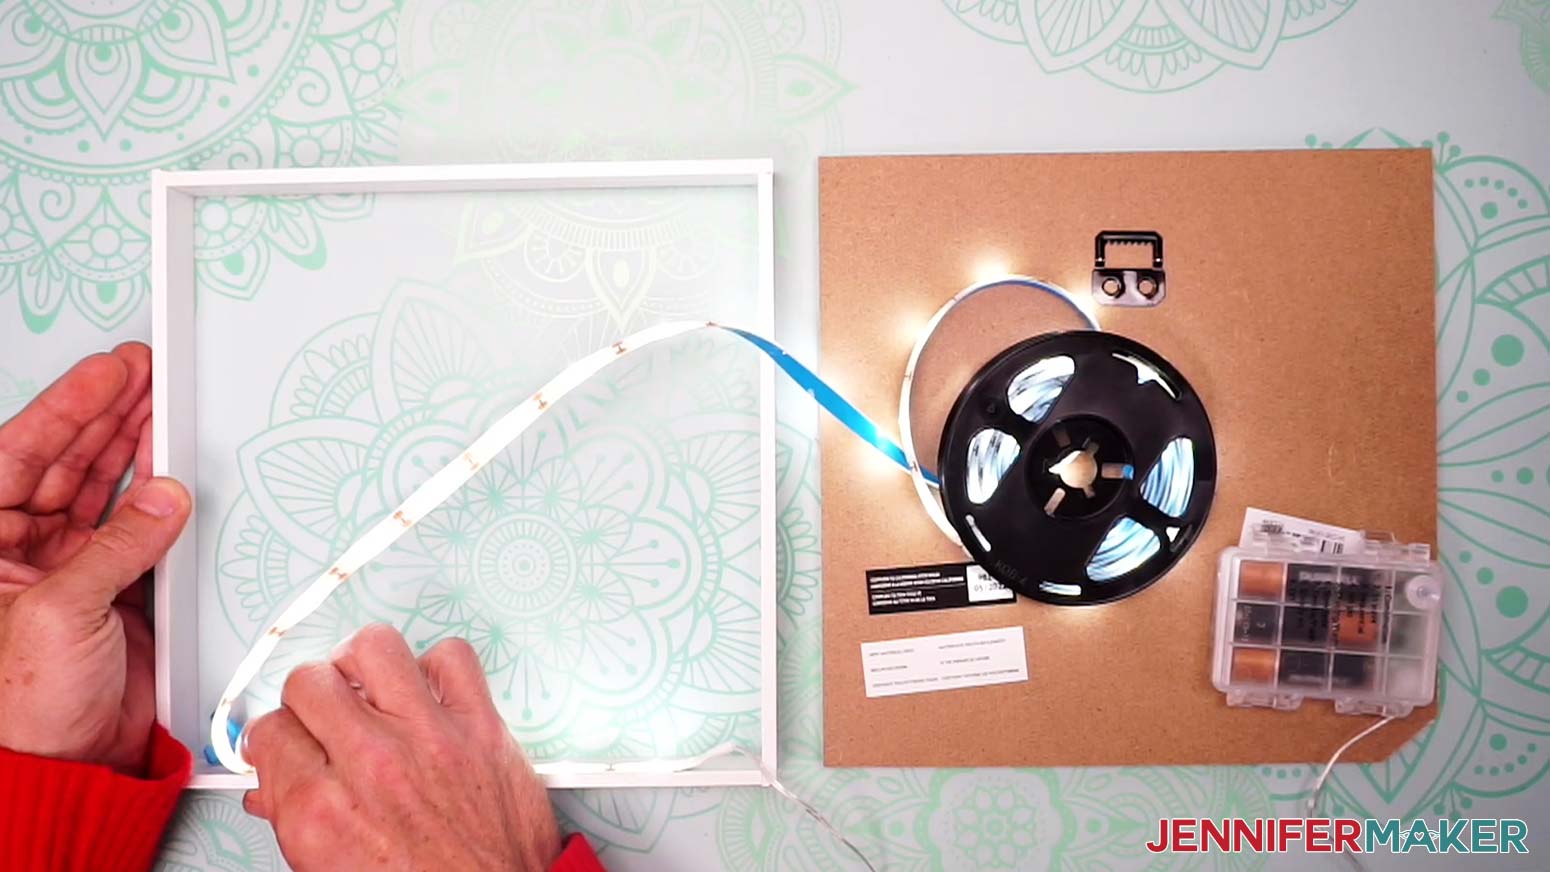
Keep peeling off the backing and attaching the lights evenly around the perimeter. Get them as smooth as possible to the wood so they won't be visible. Gently push in the corners so they stay secure.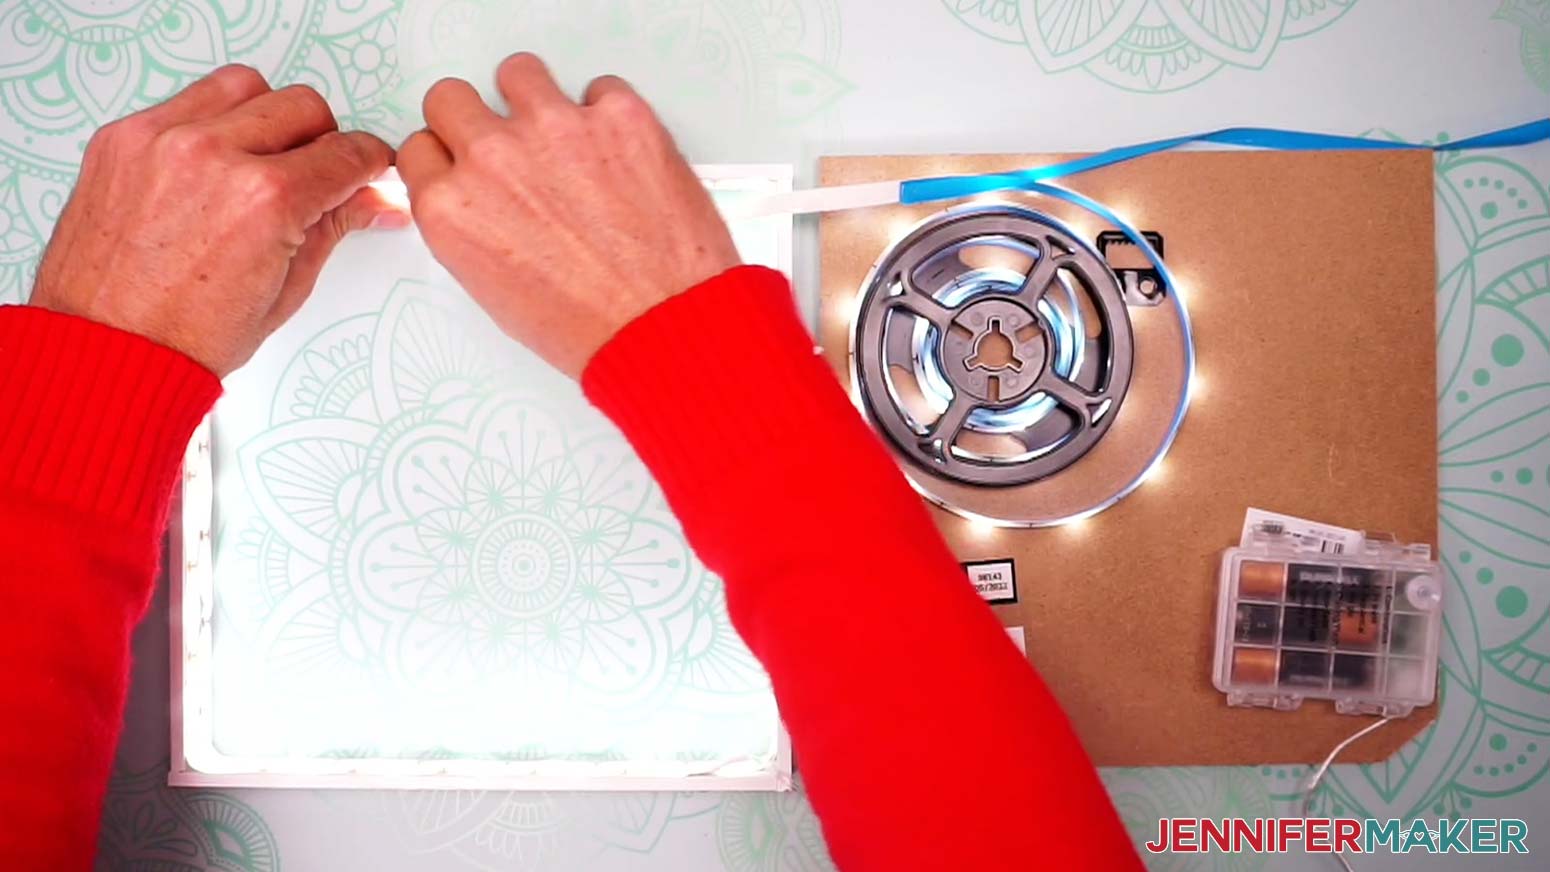
Angle the strip up a bit to add another row of lights right above. More lights will make the design easier to see!
Once you’re back at the beginning again, cut the excess lights at the closest icon with + and - symbols. Make sure your lights are off.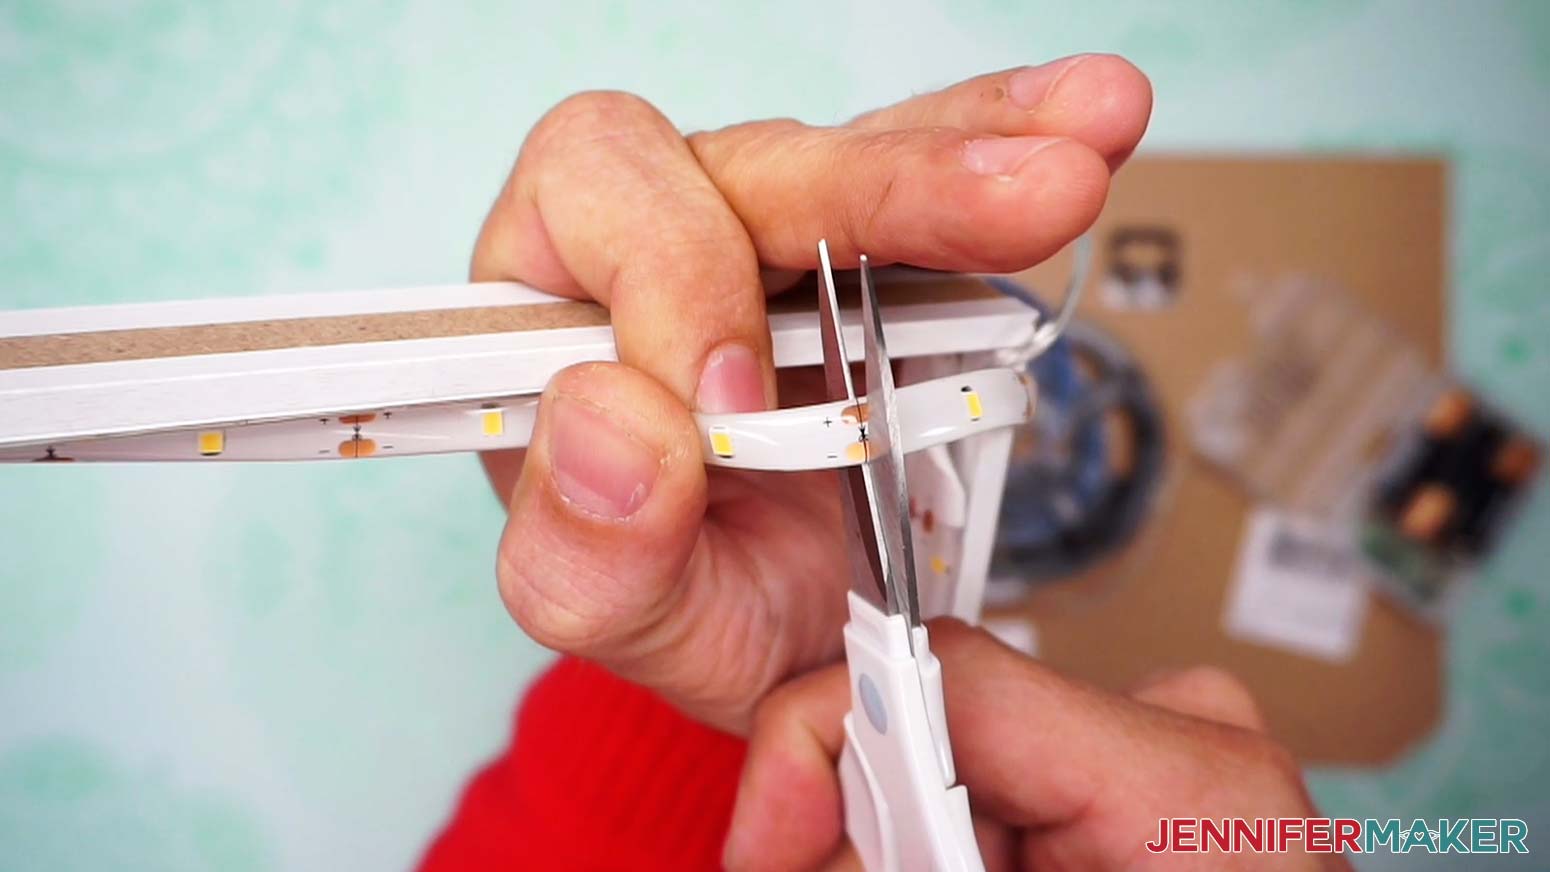
Put the lighted insert back in the frame with the wire at the correct corner for the notch.
Now you can reattach your shadow box's backing and slide the wire through the notch!
Then, secure the battery pack with more glue dots or double-sided foam tape on the back if it will sit on a shelf. If you want to hang it, attach the pack to the frame’s outside edge so you can turn the lights off and on.
Then flip the assembly back over and place it face down in the frame to use a corner for alignment. Add more glue dots around the perimeter of the snowflake layer. You can also add a few to the back of the light source.
For a really fun glow, you can use both types of lights together! Just combine the steps above.
Then, use glue dots or double-sided foam tape to keep the battery packs together before mounting them to the back or side.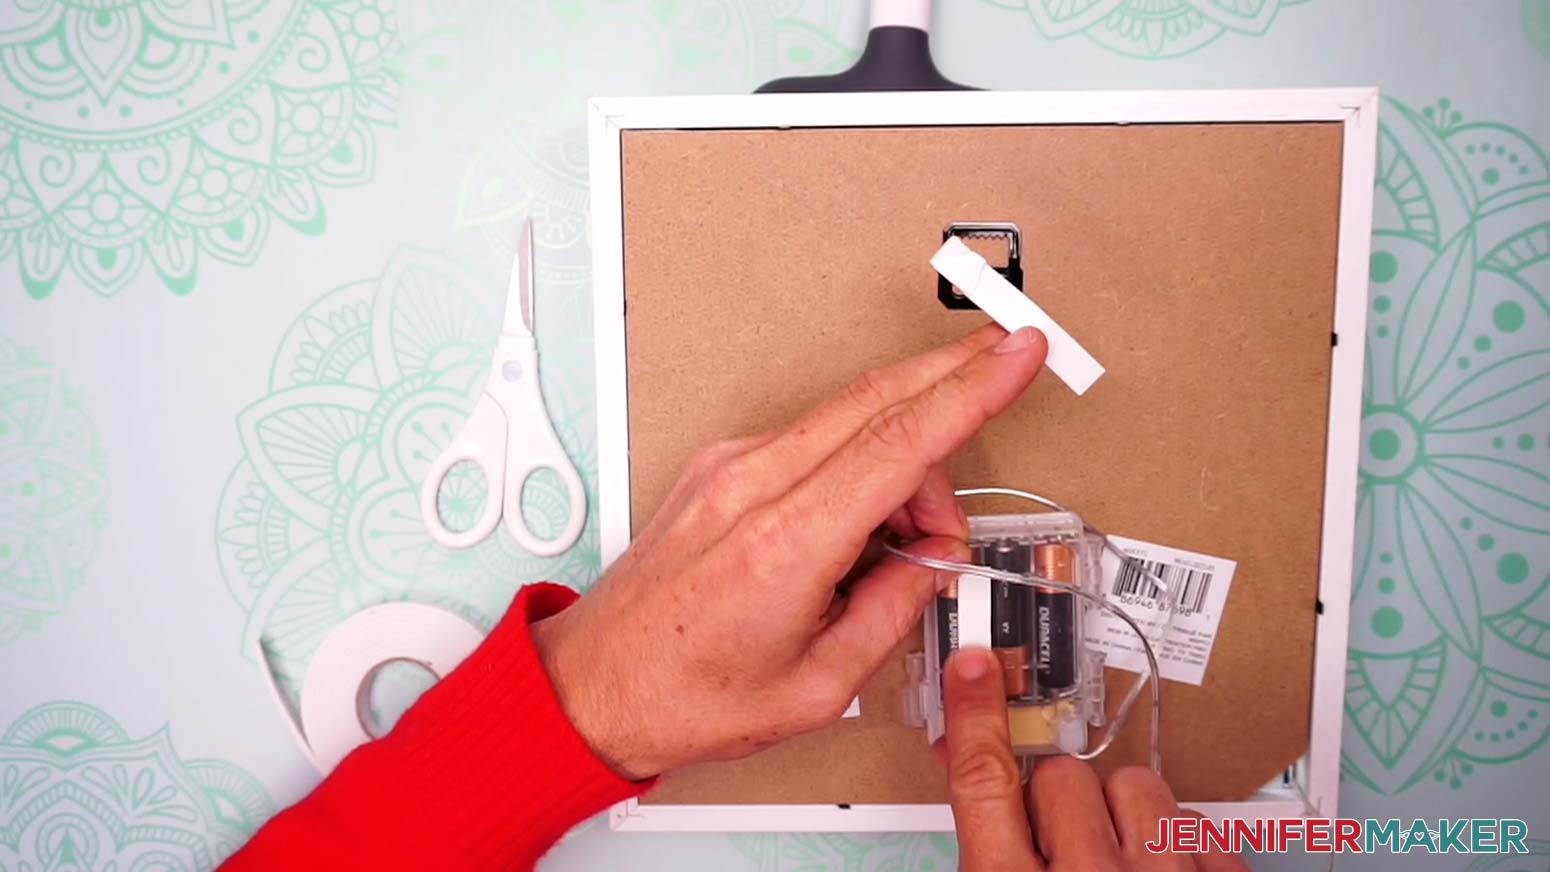
STEP 6: SHOW THEM OFF!
Answers to Your Questions About Making a Lighted Shadow Box
Q: How do you add light to a shadow box?
A: I like to add led lights on a strip around the inner frame, or fairy lights behind the back layer. Make sure the power supply options will work with your interior design challenges. Mine takes AA batteries, but some LED lighting options take AAA batteries or even connect to a standard wall outlet, so pick the version that will work best for your space. There are some lights used for entertainment centers that can work, too!
Q: What lights do people use for shadow boxes?
A: Led light strips and fairy lights are the most popular choices for a lighted shadow box. They are available at many retail stores, so you can pick the LED lighting option that works best for you.
Q: How do you make a light box frame?
A: My Cardinal blog post has a free SVG and directions for making a cardstock frame!
Q: How many layers should a shadow box have?
A: You can use just a few or many layered paper pieces, depending on the design and depth of the shadow box display case. If you only have a few, you can use foam board to take up the space in between them.
Q: Can I cut this project on a Cricut Joy?
A: This design is pretty big for a Joy, but you can try! See our Resizing Guide for more details.
Q: What kind of paper do I use?
A: You can really use any 65 lb or higher cardstock to make a lighted shadow box — it’s your choice which colors and textures you want to use. If you want to use the exact same materials I used, check the list above. Specialty papers with metal finishes would be fun to try! There are unlimited design opportunities!
Q: What if my shadow box frame is dirty?
A: First, try cleaning the glass with rubbing alcohol and a lint-free cloth. If it doesn’t come off, you may have received a defective product. Contact the seller’s customer service team or returns department within the period of time available for returns.
Q: How do I keep my layers stuck together?
A: I used a combination of craft glue, double-sided foam adhesive tape, glue dots, and foam dots in different areas of my physical product.
Q: My cardstock keeps ripping on the intricate cuts. What can I do?
A: Be sure you’re using a clean and sticky machine mat, good-quality cardstock, and a clean blade. See my Cricut Cutting Problems post for all the tips I use to get clean cuts every time.
Q. Do I have to use a Cricut?
A: No! My capable design staff and I always include several versions of each digital item. If you have a Silhouette Cameo, which uses Silhouette Studio, you can use the DXF cut files in Silhouette Basic Edition. If you have upgraded to Silhouette Designer Edition, Designer Edition Plus, or Business, you can use the SVG cut files. If you don’t have a cutting machine, you can print and then cut out my digital download PDF files, too and then use scissors or a craft knife to cut out your pieces. The ZIP file in my resource library includes these file types and more!
Q. Are your free SVGs just for personal use or also commercial use?
A: Yes, you can sell completed projects using these designs, we only ask that you give credit to JenniferMaker.com and do not sell the digital files. If you use them, please share photos with us! We love supporting small businesses!
Q: Where can I buy a shadow box frame?
A: Frames are available at many craft stores and online. If you’re in a rush and ordering online, make sure to check the delivery estimate so you have enough lead time! The frames can be large, so look for options with free ground shipping to avoid an additional charge.
Q: What is Merry Maker Mingle?
A: Each day in December leading to Christmas, I present you with a brand new “gift” — a project to craft, make, or do. You can make these projects on a Cricut cutting machine or by hand if you don’t have one. Most of our Merry Maker Mingle projects will come with a fun video with yours truly, a step-by-step printable photo tutorial, and a free pattern/SVG cut file. Sign up to get daily updates and prizes!
Get my free SVG file to create a lighted shadow box!
I love seeing what you make with my designs and how you use them! Please share a photo of your lighted shadow box in our Facebook group or tag me on social media with #jennifermaker.
Love,

Want to remember this? Save this Lighted Shadow Box Tutorial to your favorite Pinterest Board!