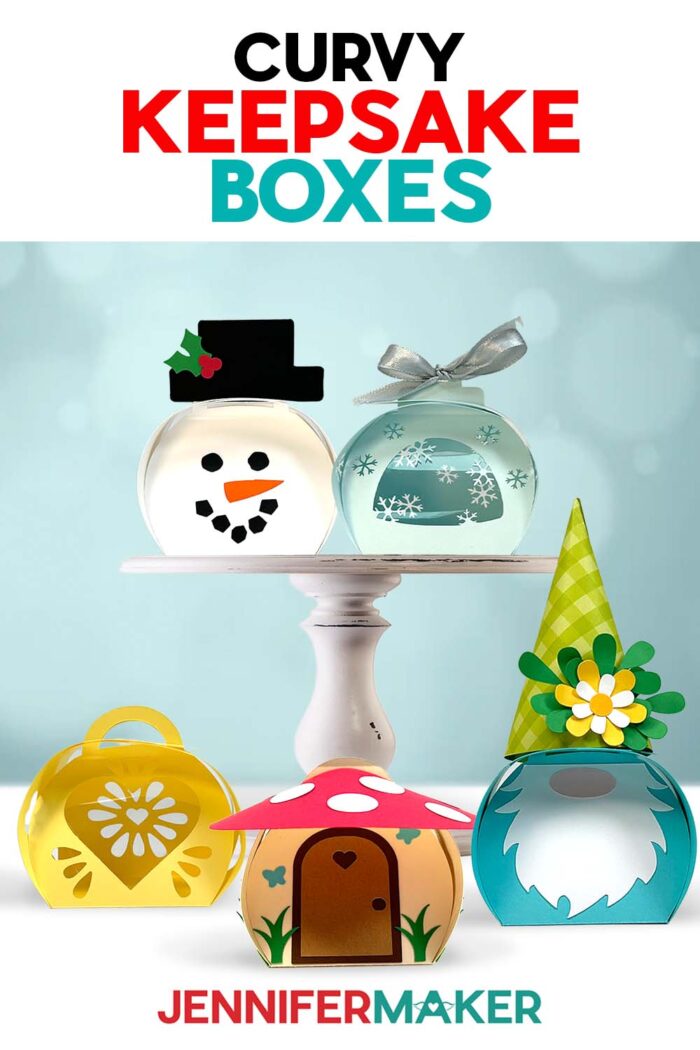
Learn how to make easy curvy keepsake boxes for gifts and tiny treasures!
Every time I dig through a drawer looking for a tiny gift box to tuck a small treat, some stickers, or a piece of jewelry into, I’m reminded of how hard it can be to find something that feels “just right.” Not too big, not too flimsy, and definitely not boring. Half the time, I end up with a box that doesn’t match the occasion, or looks like it’s already been through a few holidays. That’s why I’m so excited about these curvy keepsake boxes. They’re sweet little containers you can make yourself in any color or theme you like, and they look like a present all on their own while feeling just as special as whatever you tuck inside.
See the full step-by-step video tutorial on how to make curvy keepsake boxes:

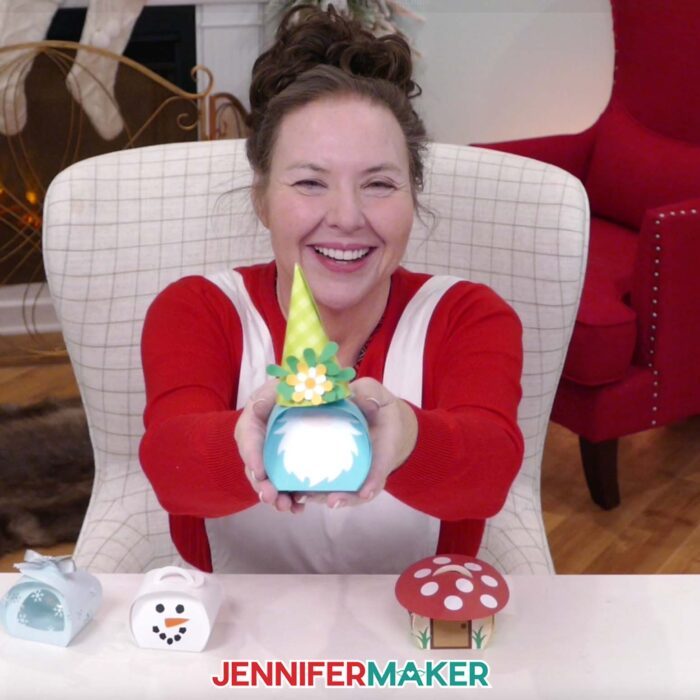
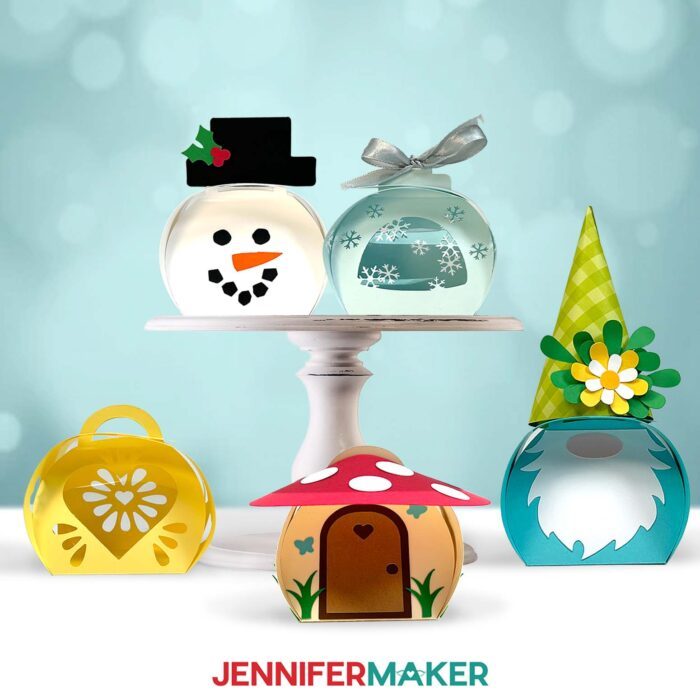
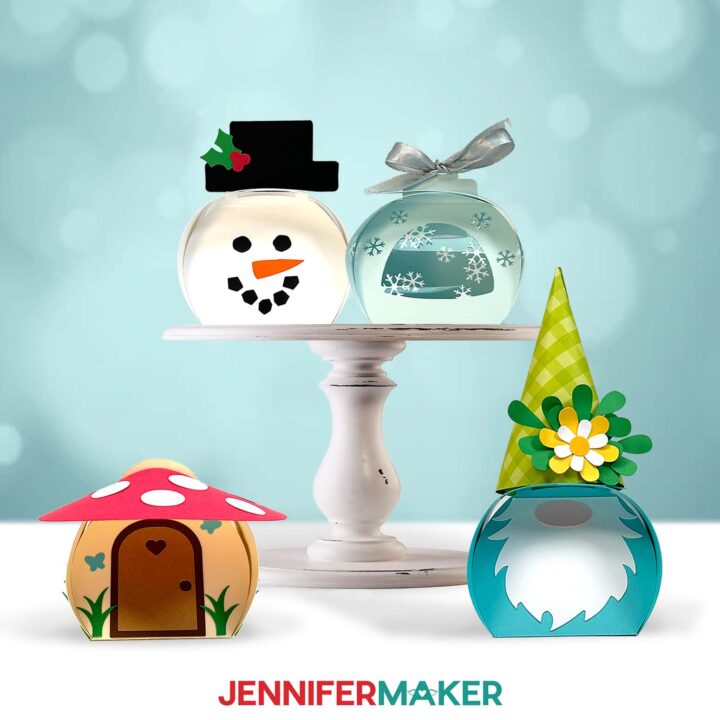
In today’s project, I’ll show you how one simple box base can turn into a whole collection of personality-packed designs. These little boxes start with the same curvy shape, cut from 65 lb. cardstock and folded along score lines (or dashed cut lines) so they lock together without any complicated supplies or special tricks. Then, the fun really begins! We’ll dress them up as a cheerful gnome, a whimsical mushroom cottage, a snowflake treat box with a peek-through window, and a jolly snowman ready for winter gifting. These designs are free in my resource library, so you can download the SVGs, DXFs, or PDFs and start creating right away.

You can make these curvy keepsake boxes without a cutting machine, but a Cricut really helps get the cuts nice and precise so the boxes come together easily and consistently.
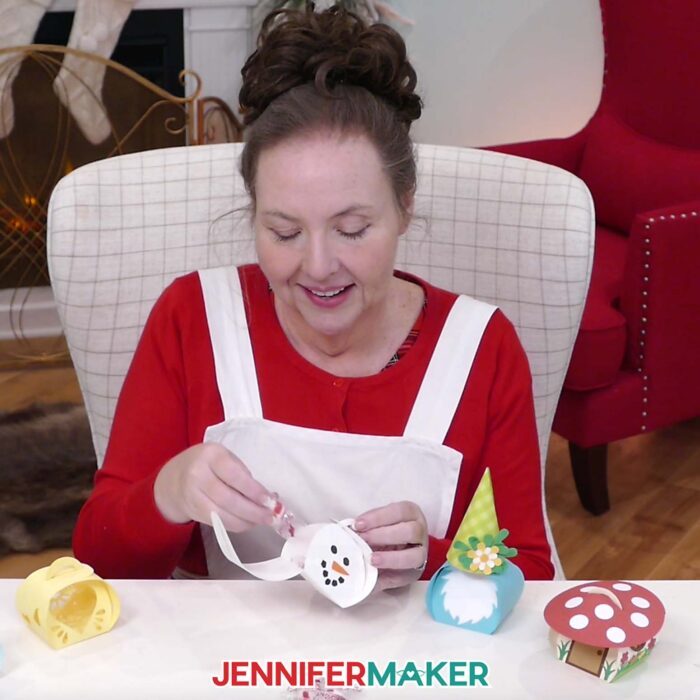
Once the machine does its job, I’ll show you how to assemble the box base. A scraper tool or bone folder gives you crisp creases that help the box hold its shape beautifully. With the base folded, you can see exactly where your decorations will go, which makes the rest of the assembly a breeze.
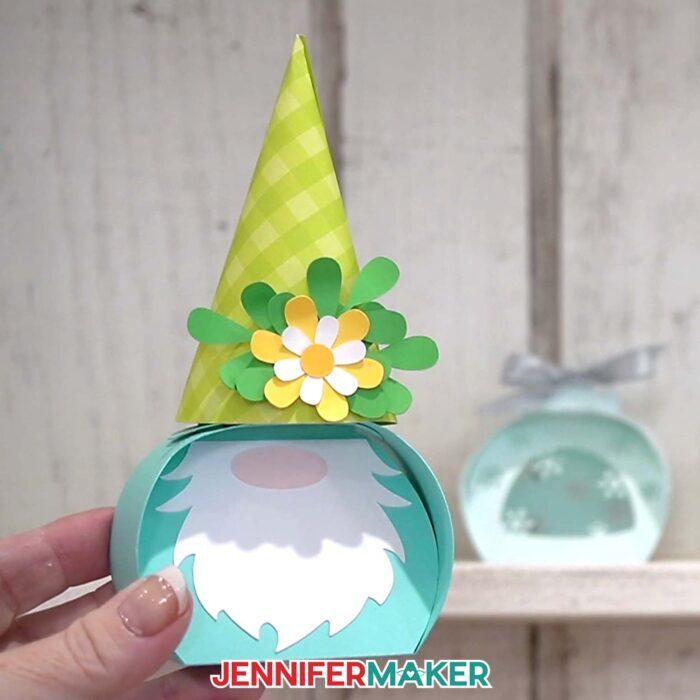
The gnome keepsake box is such a happy place to start. You’ll glue on his beard and tiny nose, then roll a triangular hat into a cone and secure the seam with a thin line of craft glue. A little bit of shaping on the leaves and flowers adds instant dimension, and before you know it, you’ve got a tiny friend full of goodies, ready to brighten someone’s day.
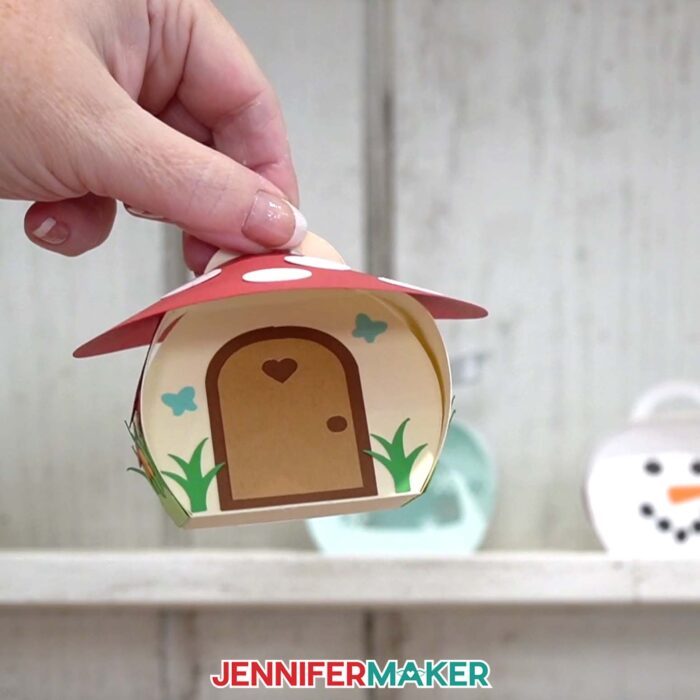
If you love cozy storybook scenes, the mushroom cottage box might be your favorite. Using colorful cardstock pieces, you’ll build a layered door, windows, grass, stems, and flowers on the box panels and build a tiny little house. Add a few butterflies fluttering over the flowers, then we’ll assemble the mushroom cap roof, glue on the spots, and complete your mushroom cottage box with a whimsical rooftop above your hidden treats.
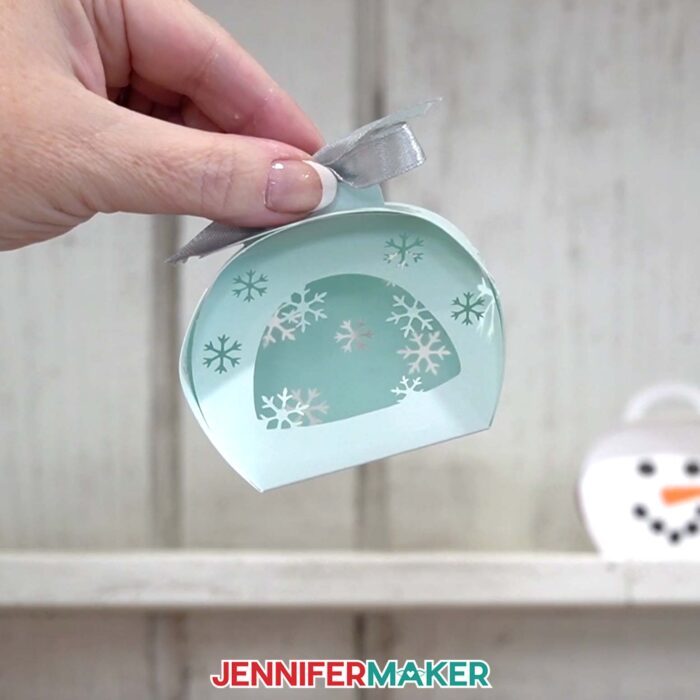
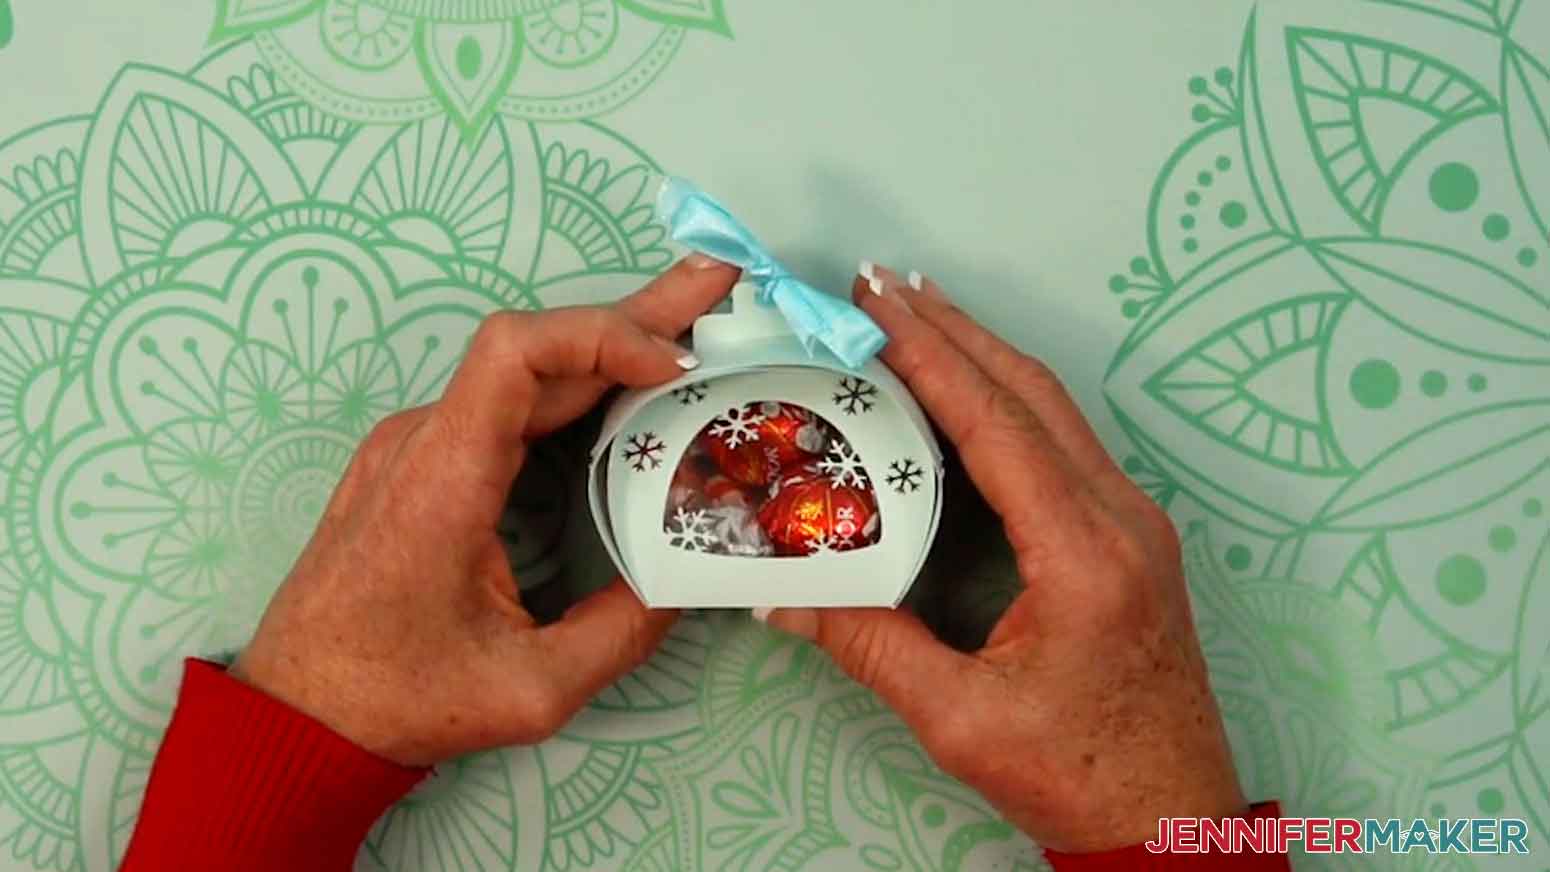
For something a bit more elegant, the snowflake box keeps things simple but striking. The base is the same, but this time you add a clear acetate window behind the cutout so you can peek at what’s inside. A few dots of glue around the opening is all it takes to hold the acetate in place. Once the glue is dry, you fill the box and thread a pretty ribbon through the top tabs, tying it in a neat bow.
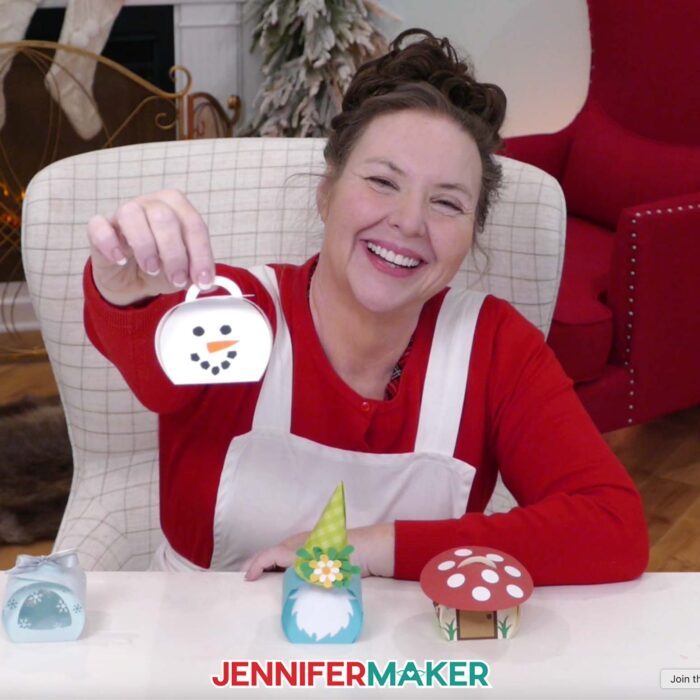
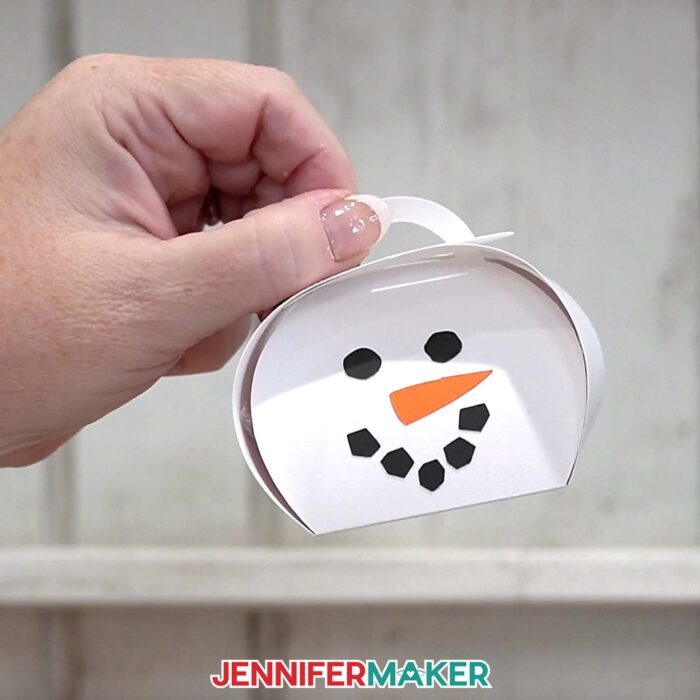
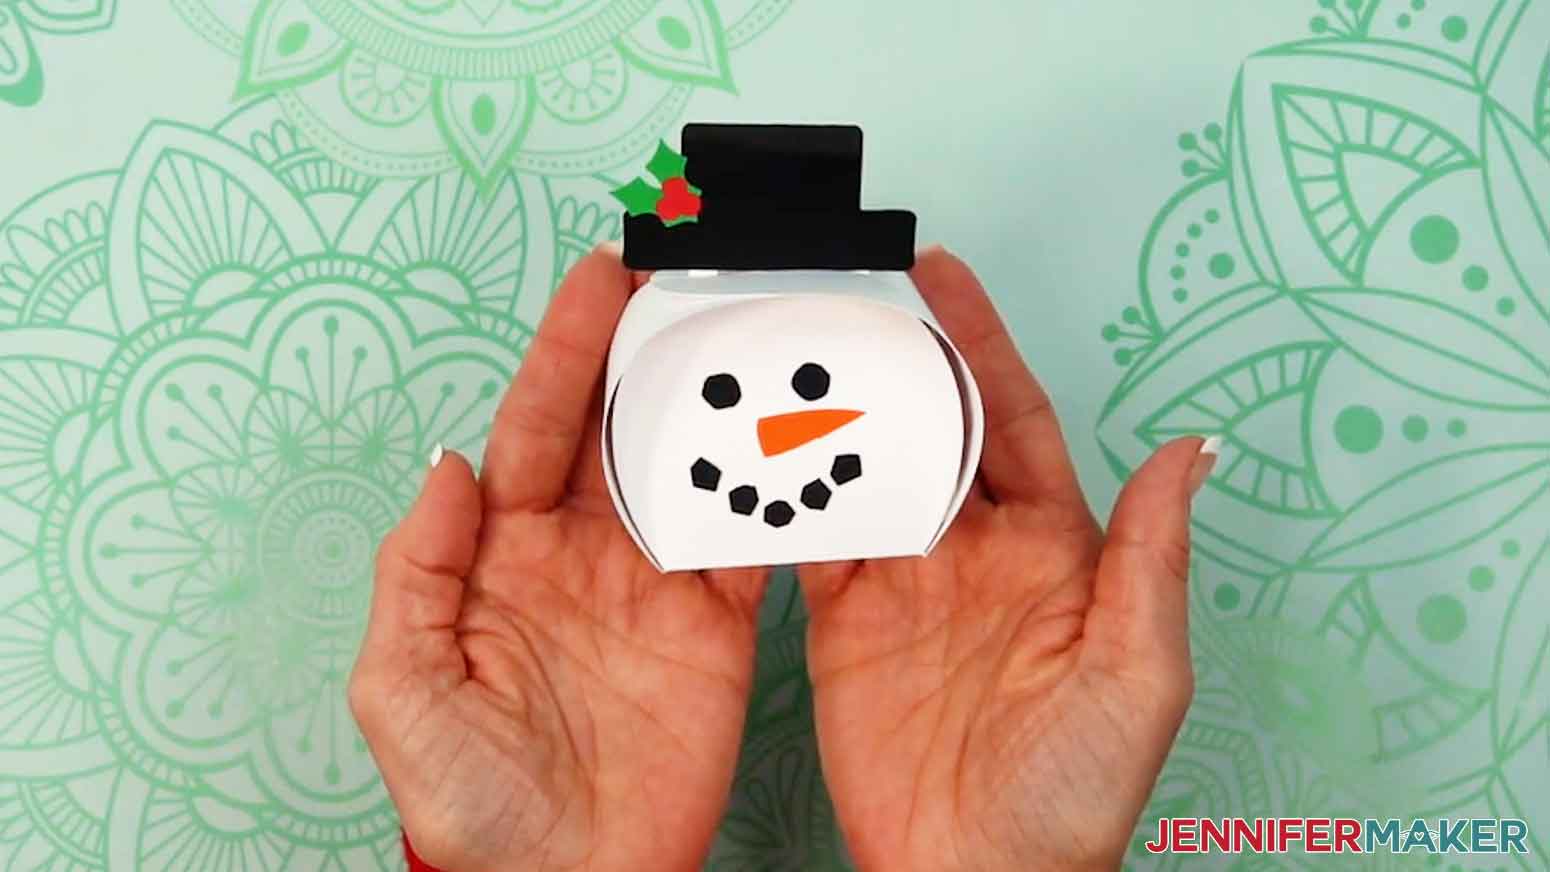
The snowman box design is perfect for winter parties or classroom gifts. The assembly is fast and friendly: glue on the coal eyes and smile, add the carrot nose, and then fold and glue the snowman’s top hat so it can slide over the tabs like a little topper. A holly leaf and berries finish the hat and make this little cutie come to life. Fill the box, slip on the hat, and you’ve got a frosty friend ready to spread some joy. If you want a faster version, he’s just as cute without the hat!
If you’re using a Cricut, the video tutorial walks you through everything in Cricut Design Space, from using the “score” or “no score” versions of the files to picking the right cut settings for cardstock and acetate. You’ll see exactly how to place your materials on a green StandardGrip mat, when to use a scoring stylus or scoring wheel, and how to check your cuts before you unload the mat. Even if you’ve never worked with score lines or acetate before, you’ll be able to follow along with confidence.
Whether you’re making teacher gifts, table favors, stocking stuffers, or just want a stash of cute containers for little surprises, these curvy keepsake boxes turn a simple piece of cardstock into something really special, fast! So even if it’s the last week before Christmas, pop over to the video tutorial to see each step in action, then gather your supplies and come craft along with me. Once you make one, you’ll be hooked on seeing how many different ways you can transform these little boxes into tiny treasures.
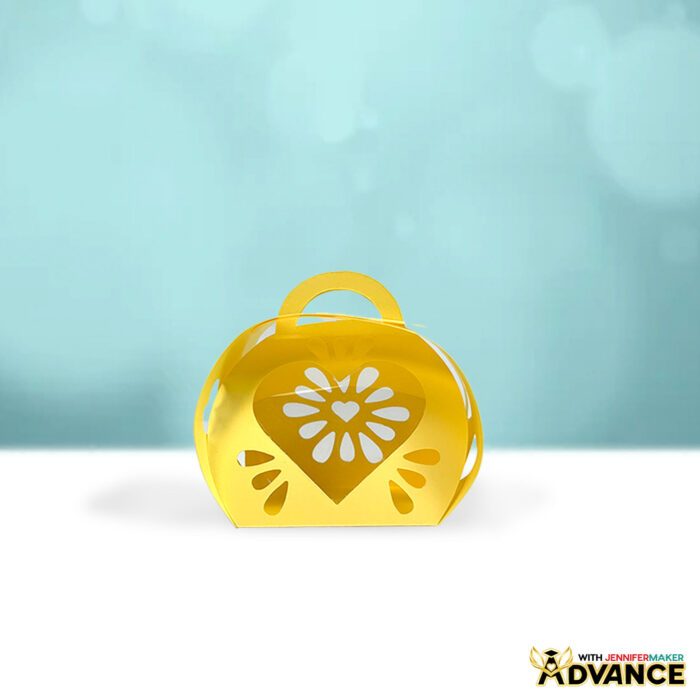
If you fall in love with these little boxes and want to go beyond my ready-made designs, this is exactly the kind of project we dive into inside my ADVANCE with JenniferMaker membership. In ADVANCE, I’ll walk you through how to design your very own keepsake box with customized windows and cutouts like hearts for Valentine’s Day, stars for birthdays, or any motif that fits your celebration. You’ll also get step-by-step workshops, exclusive templates, and a supportive community of crafters who love experimenting and sharing ideas just as much as you do! Learn more about ADVANCE with JenniferMaker here!
Let me show you how to make curvy keepsake boxes! This post contains some affiliate links for your convenience (which means if you make a purchase after clicking a link I will earn a small commission but it won’t cost you a penny more, there is no additional cost)! Read my full disclosure policy.
Materials to Make Curvy Keepsake Boxes
View my Amazon shopping list with the exact items I used.
- One to Ten (1-10) Sheets of 12″ x 12″ 65 lb. Cardstock (in assorted colors) -AND-
- One (1) Sheet of 12″ x 12″ 65 lb. Teal Cardstock
- One (1) Sheet of 12″ x 12″ 65 lb. Patterned Cardstock (optional for gnome hat)
- One (1) Sheet of 12″ x 12″ Acetate (optional for snowflake box)
- 2/5″ Wide Ribbon (optional for snowflake box)
- A way to cut your materials – I’m using the Cricut Maker 4, but you can use a Maker, Explore, or Venture. You can also use a Cricut Joy Xtra with the no-score version of the file.
- Cricut Green StandardGrip Machine Mat 12″ x 12″
- Scoring Stylus (optional for files with score lines) -OR-
- Single Scoring Wheel (optional for files with score lines)
- Craft Glue (I used Bearly Art Precision Craft Glue)
- Brayer
- Spatula
- Scraper
- Tweezers (optional for assembling small details)
How to Make Curvy Keepsake Boxes!
Curvy Keepsake Boxes
Learn how to make fun and detailed Curvy Keepsake Boxes with paper!
Materials
- One to Ten (1-10) Sheets of 12" x 12" 65 lb. Cardstock in Assorted Colors -AND-
- One (1) Sheet of 12" x 12" 65 lb. Teal Cardstock
- One (1) Sheet of 12" x 12" 65 lb. Patterned Cardstock (optional for the gnome hat)
- One (1) Sheet of 12” x 12” Acetate (optional for snowflake box)
- ⅖” Wide Ribbon (optional for snowflake box)
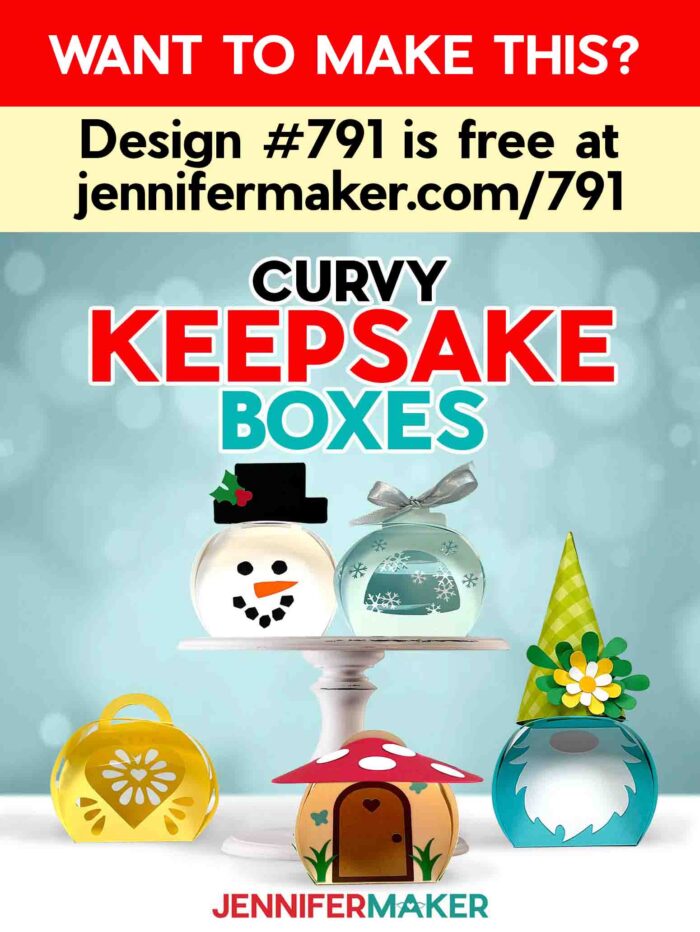
- Design #791 (My free SVG/PDF/DXF design files are available in my free resource library - get the password by filling out the form at the bottom of this page)
Tools
- A way to cut your material - I’m using the Cricut Maker 4, but you can also use a Maker, Explore, or Venture. You can also use the Joy Xtra with the no-score version of the file.
- Cricut Green StandardGrip Machine Mat 12" x 12”
- Scoring Stylus (optional for files with score lines) -OR-
- Single Scoring Wheel (optional for files with score lines)
- Craft Glue (I used Bearly Art Precision Craft Glue)
- Brayer
- Spatula
- Scraper
- Tweezers (optional for assembling small details)
Instructions
STEP 1: GET MY FREE CURVY KEEPSAKE BOX DESIGNS
First, download my free curvy keepsake box designs from my free library – look for Design #791. Alternatively, you can use the Save This Project form near the top of this post and the design link will be emailed to you.
Inside the SVG folder, you’ll see four keepsake box designs: A “gnome”, a “mushroom house”, a “snowflake” design with a window, and a “snowman”. There are “score” and “no-score” versions of each design.
There is also a DXF folder with cut files, and a PDF folder with versions you can print and cut by hand.
TIP: If you’re not sure how to upload, go to jennifermaker.com/svgs to learn how to unzip and upload SVG files.
For this tutorial, I’ll show you how to cut the “score” versions of the gnome and mushroom house designs with my Cricut Maker 4, but you can use the same steps to prepare and cut the other two designs with adjustments I will note. I’ve also included assembly notes for the additional designs.
STEP 2: PREPARE AND CUT YOUR CURVY KEEPSAKE BOX DESIGN
CRICUT DESIGN SPACE
1. In Cricut Design Space, open a blank Canvas.
NOTE: If you’re new to using Cricut Design Space, go to cricutkickoff.com for my introductory tutorial on Design Space basics.
2. Click “Upload” and then “Upload Image.”
3. Click “Browse.”
4. Select the SVG file of your choice.
NOTE: I’ll demonstrate with the “gnome-score” and “mushroom-score” designs, but you can use the same steps to prepare and cut the “snowflake” and “snowman” designs. If you’re using the “no-score” version of a design, skip steps 11-16 where we set and attach score lines.
5. Click “Open” and then “Continue.”
6. Click “Upload” to add the design to your Canvas, then use the small arrow to close the side panel.
7. Repeat steps 1-6 to upload any additional box designs you’d like to make.
8. Click “Save” and give your project a name.
9. If you want to resize the design, use the corner Resize handles to make it larger or slightly smaller.
TIP: I don't recommend making the boxes much smaller due to the delicate details.
10. If you are using the "no-score" versions, your box or boxes are ready to cut! Skip to step 17.
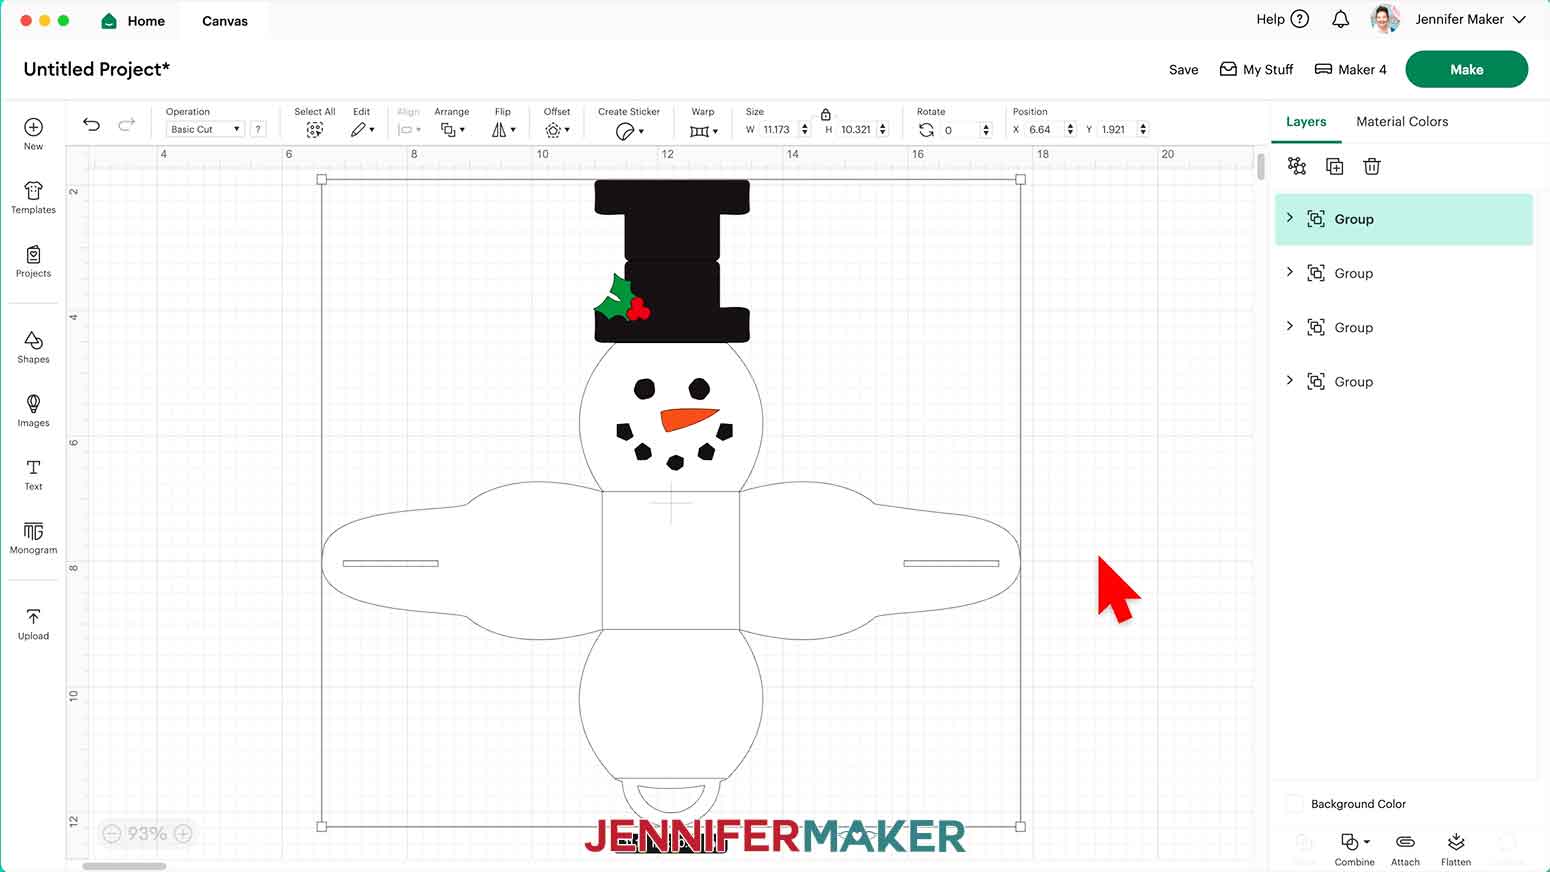
11. If you are using the “score” versions, Ungroup one of the designs.
12. In the Layers Panel, find the layer group with an arrow next to it. This is the box base layer. Click the arrow to expand the group, then select the layer that looks like a square and two lines.
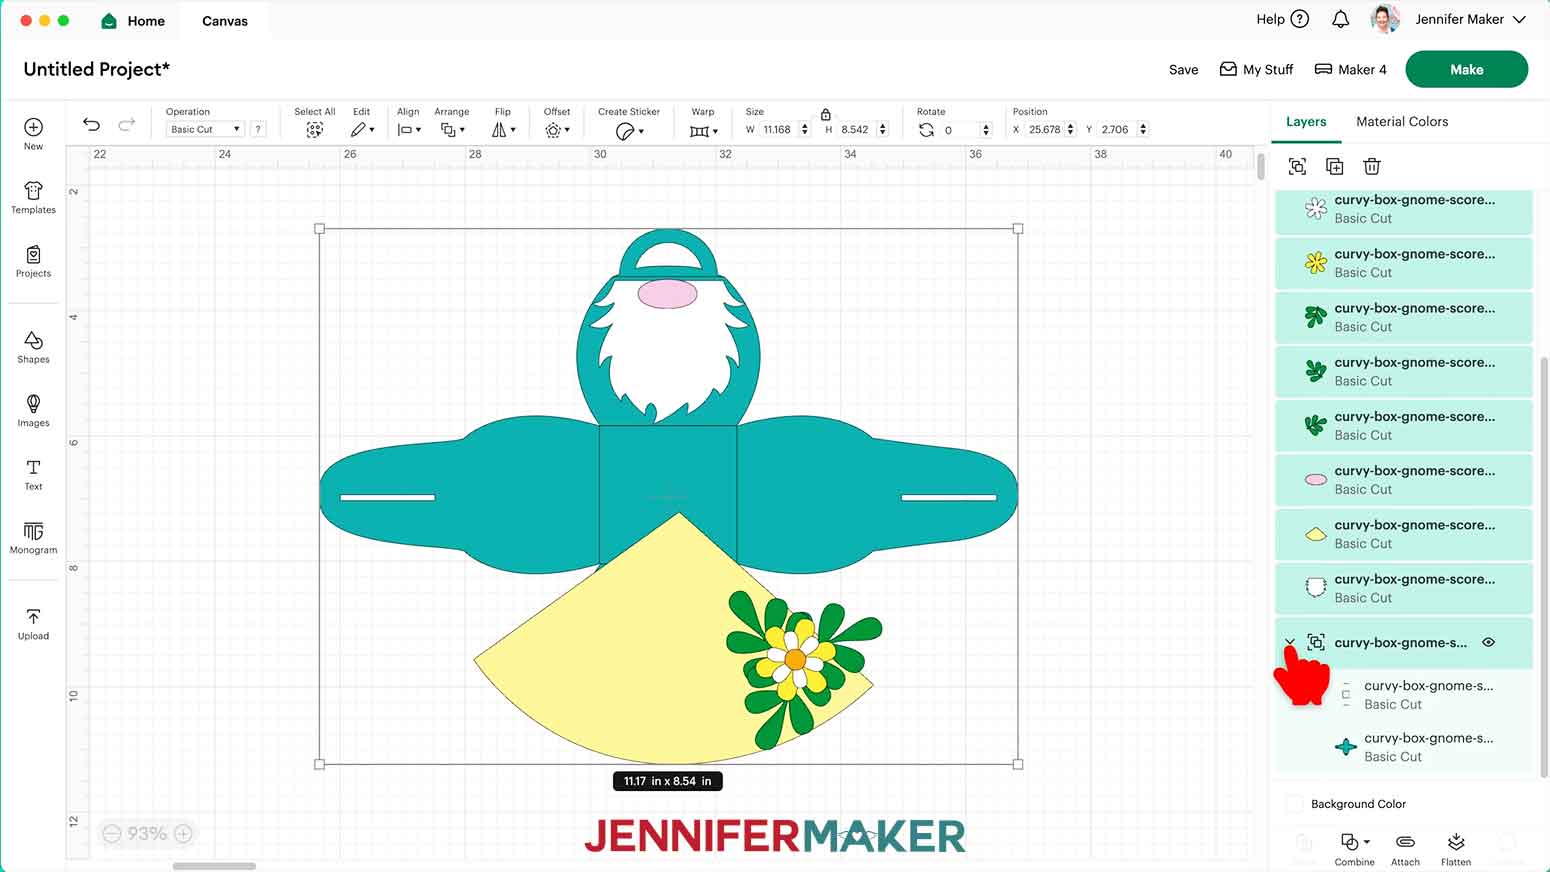
TIP: I make the intended Score lines in my designs red to make them easier to identify.
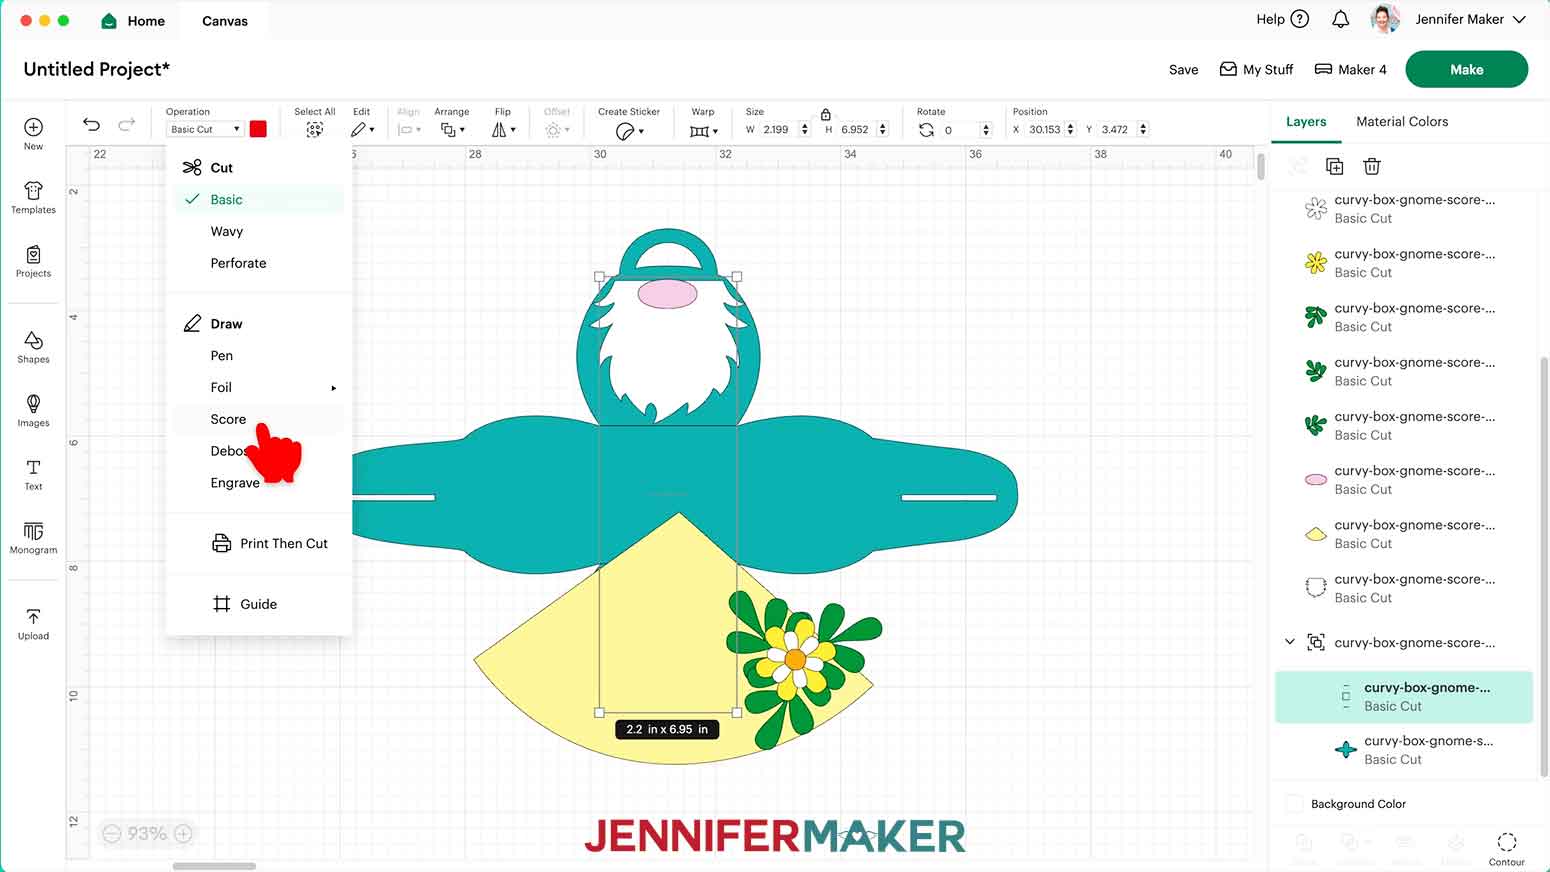
13. Change the Operation to “Score.”
14. Hold your Shift key on your keyboard and, in the Layers Panel, click to select the Score layer(s) and the box base layer.
15. Click “Attach.”

16. Repeat steps 11-15 with any additional box designs with Score lines.
NOTE: If you’re making the “Snowman” design, the hat has an extra score line that looks like a horizontal line. Hold your Shift key and select it along with the box’s score lines. Change their Operation to “Score,” then select and attach the hat and its score line separately.
17. Make sure the correct machine is selected.
18. Click “Make.”
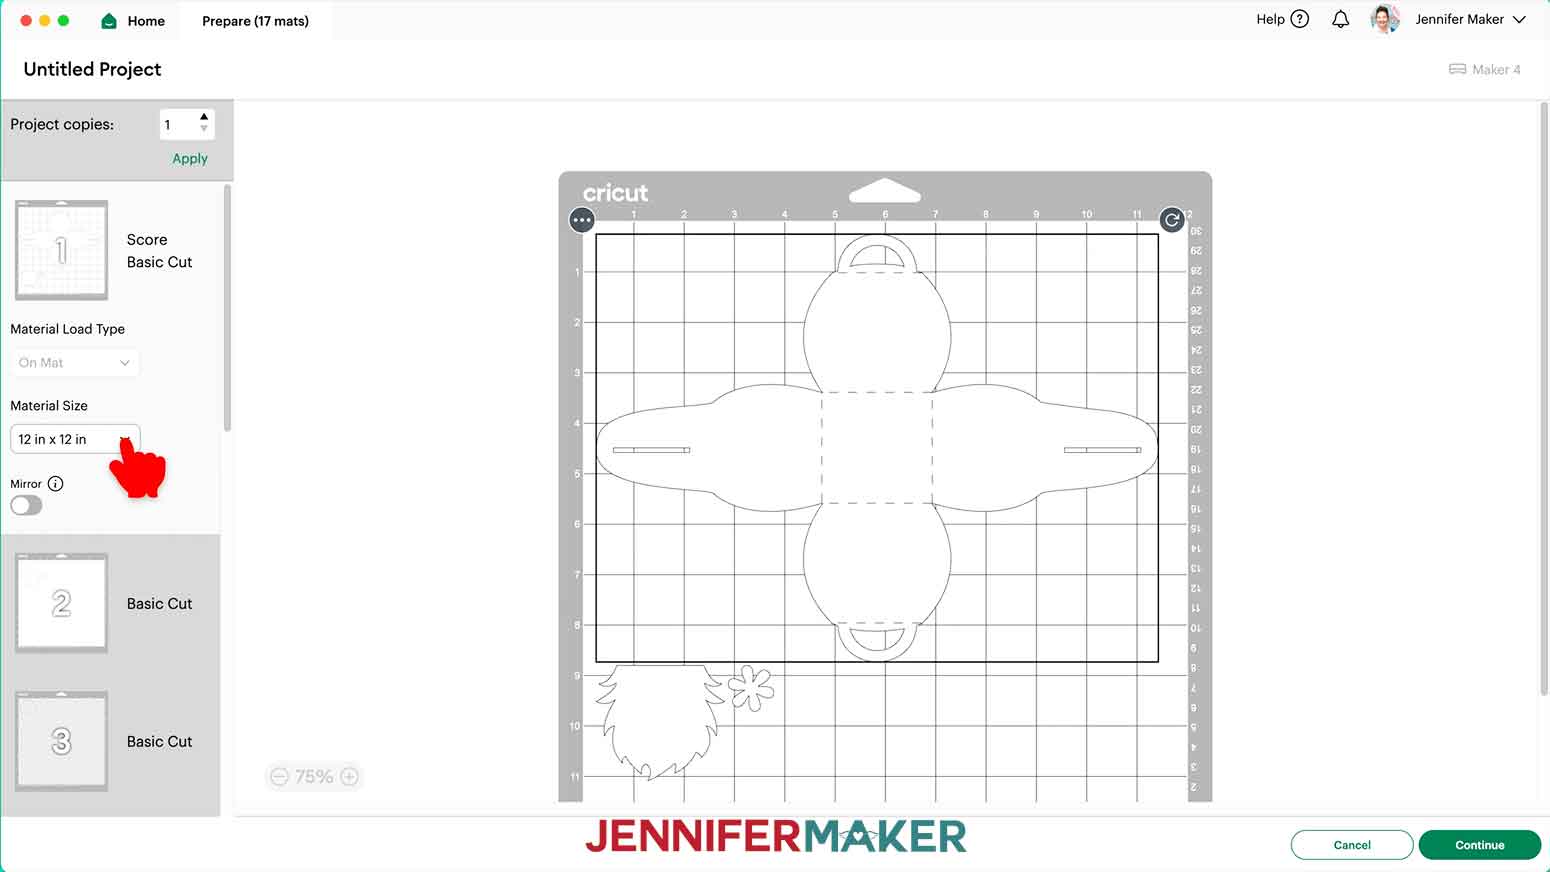
19. On the Prepare screen, change the Material Size to match each material you’re using.
NOTE: I’m using 12” x 12” cardstock for everything. If you’re making the snowflake box, you will have a mat for clear acetate.
20. Select the first mat again and click “Continue.”
CUTTING
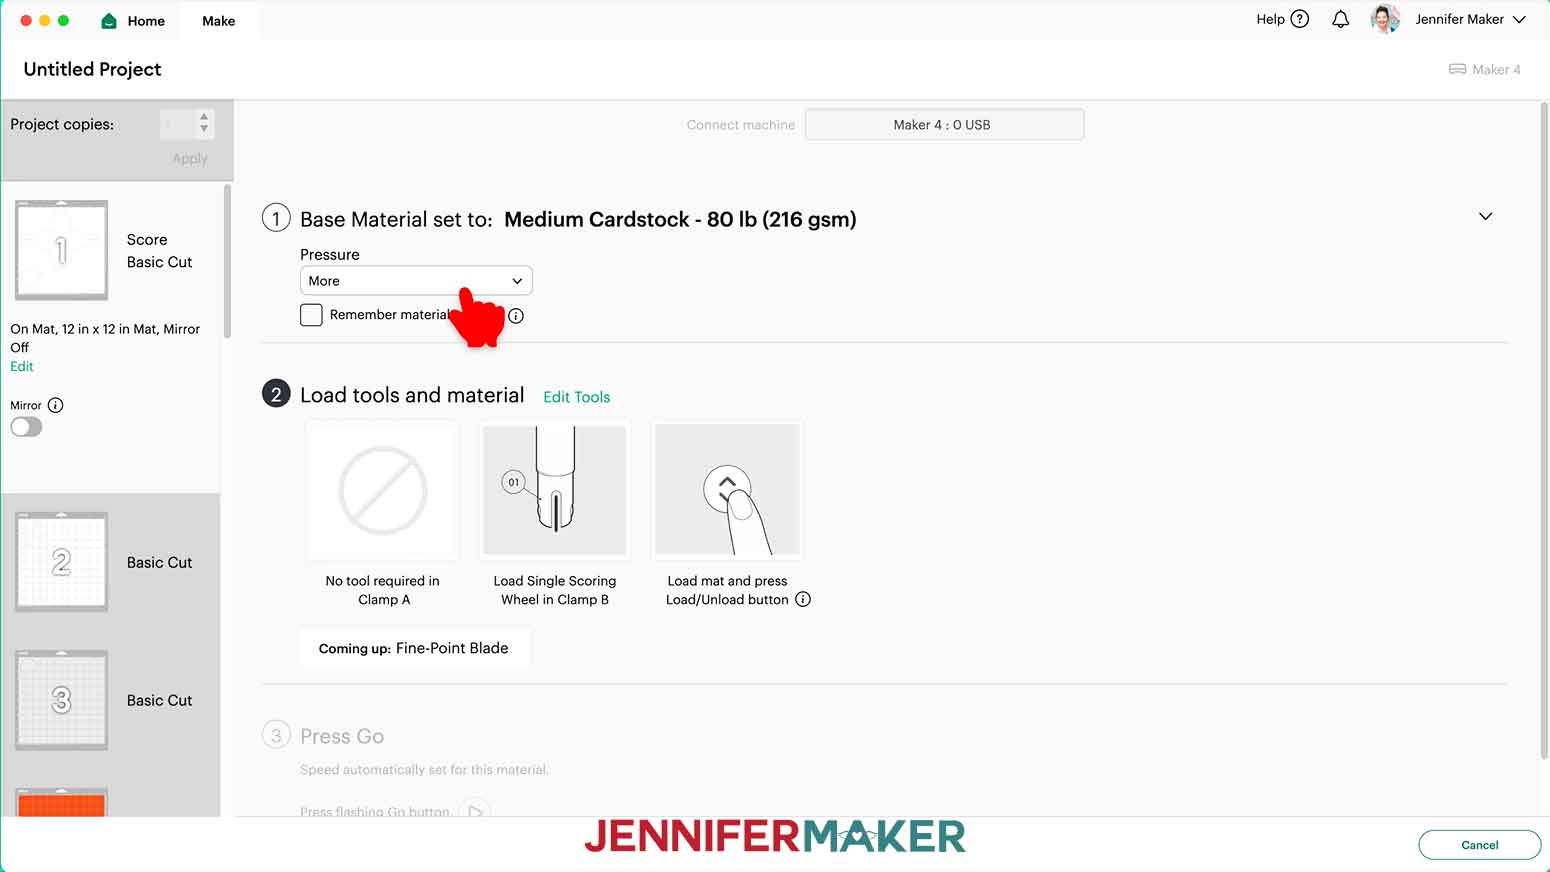
1. On the Make Screen, click “Browse All Materials.”
2. Search for and select the settings needed for the materials you’re using.
3. I used 65 lb. cardstock for all of the boxes, plus acetate for the window on the “Snowflake” box.
These are the settings you can use for each material:
65 lb. Cardstock - “Medium Cardstock - 80 lb (216 gsm)” setting with "More" Pressure
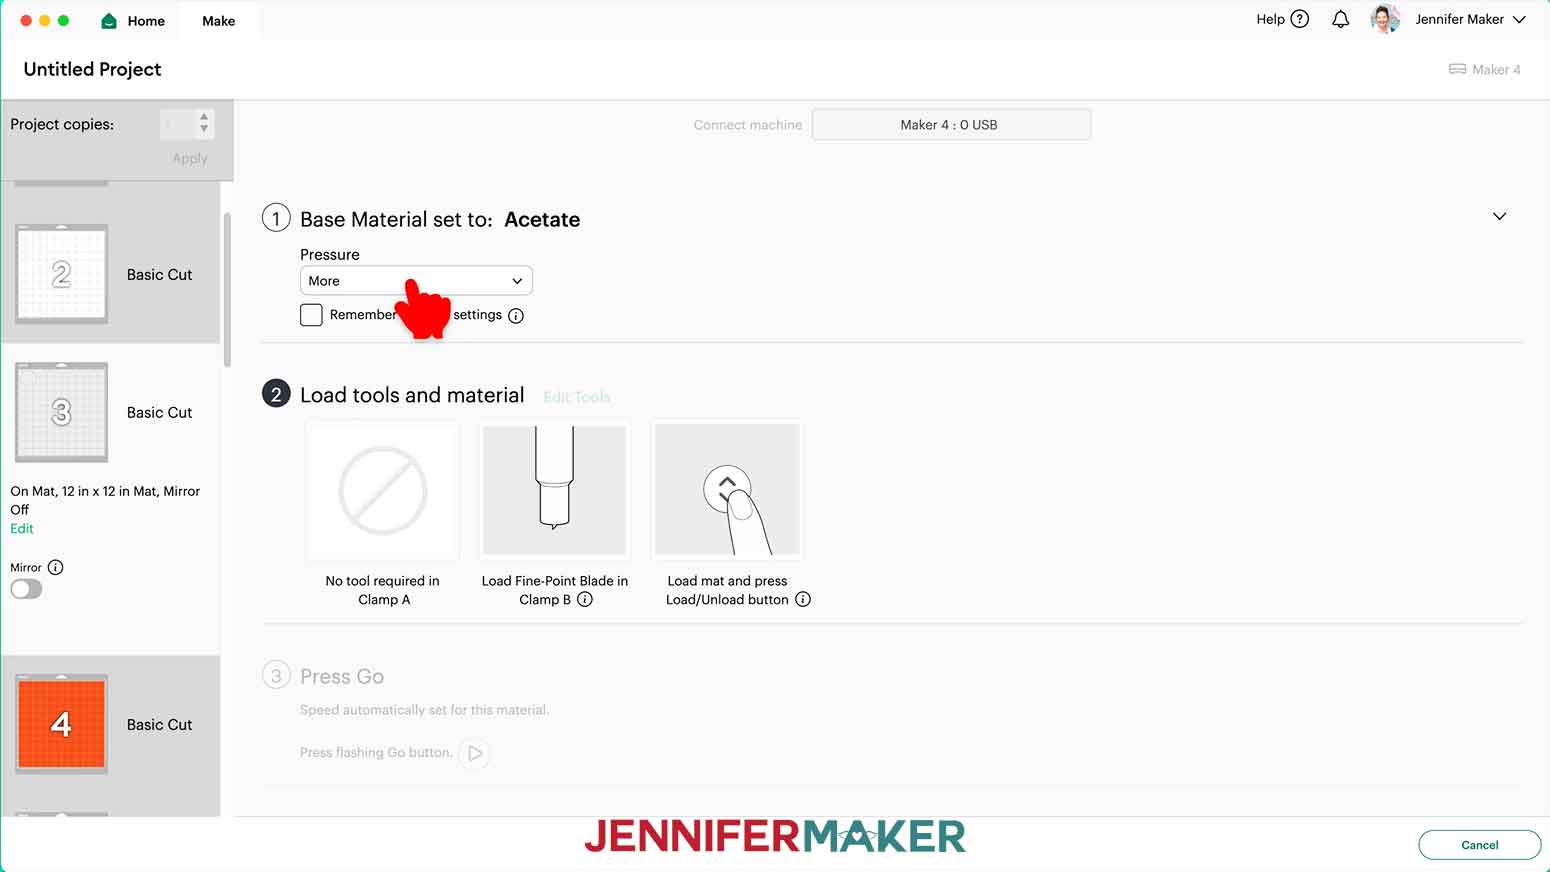
Acetate - "Acetate" setting with "More" Pressure
NOTE: You can also use glitter cardstock, but you’ll need to assemble it with hot glue instead of craft glue for the sturdiest results. Cut it glitter-side up on a green StandardGrip machine mat using the “Glitter Cardstock” setting with “More” Pressure.
3. If you’re using a scoring tool, it will automatically be set to the Single Scoring Wheel. If you’re using a Scoring Stylus instead, click “Edit Tools” and select it. Then click “Apply.”
4. Check that your tools are clean and in the correct clamps.
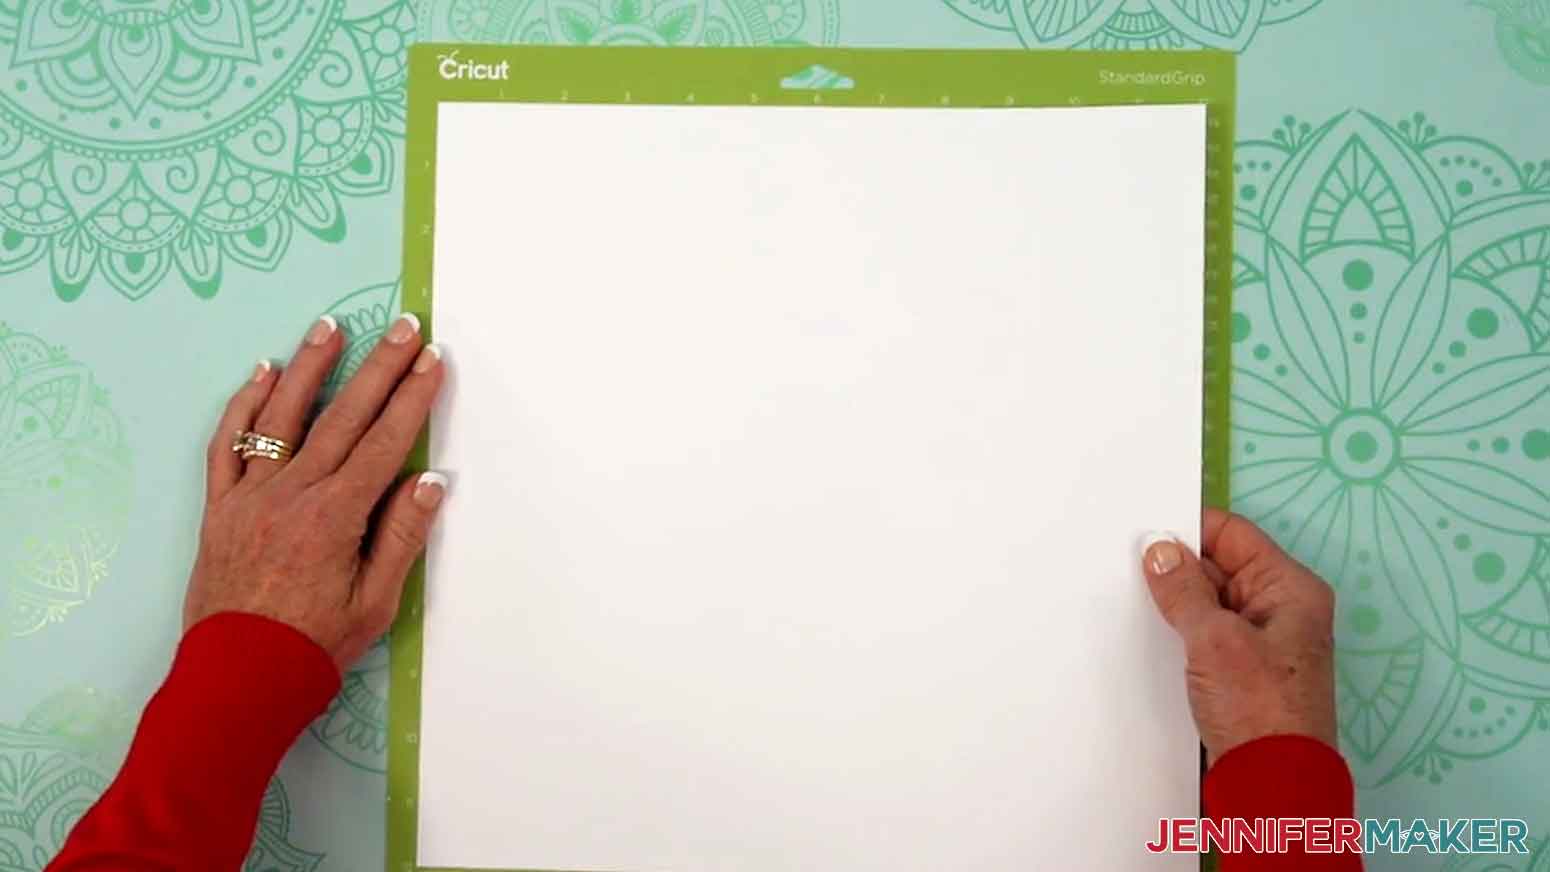
5. Place your material face up on a green StandardGrip machine mat.
NOTE: When cutting the acetate, check for protective film and remove it on one side, then place that side face-up on the mat. Leave the protective film (if any) on the back (the side that touches the mat) for now.
6. Cover the acetate with a clean piece of copy paper or cardstock to protect the surface, then press it with a brayer to make sure it’s fully adhered.
7. Press the flashing load/unload button to load the prepared mat into your Cricut.
8. Press the flashing middle button to begin cutting.
9. Before unloading the mat, use a weeding tool to gently lift part of the material where it’s cut to see if the cut went all the way through. If not, press the middle button to cut the design in the same spot again.
10. When it has finished cutting, unload the mat, flip it over onto your work surface, and roll it back to release the material.
NOTE: After removing the acetate from the mat, peel off the protective film from the back of the cut pieces.
11. Follow steps 1-10 to cut your remaining mats.
NOTE: If you have any issues with your cuts, check out my Tips & Tricks for Cleaner Cuts tutorial.
STEP 3: ASSEMBLE YOUR CURVY KEEPSAKE BOXES
NOTE: Have small items like candy, stickers, small gifts, and trinkets ready to fill your keepsake boxes!
GNOME
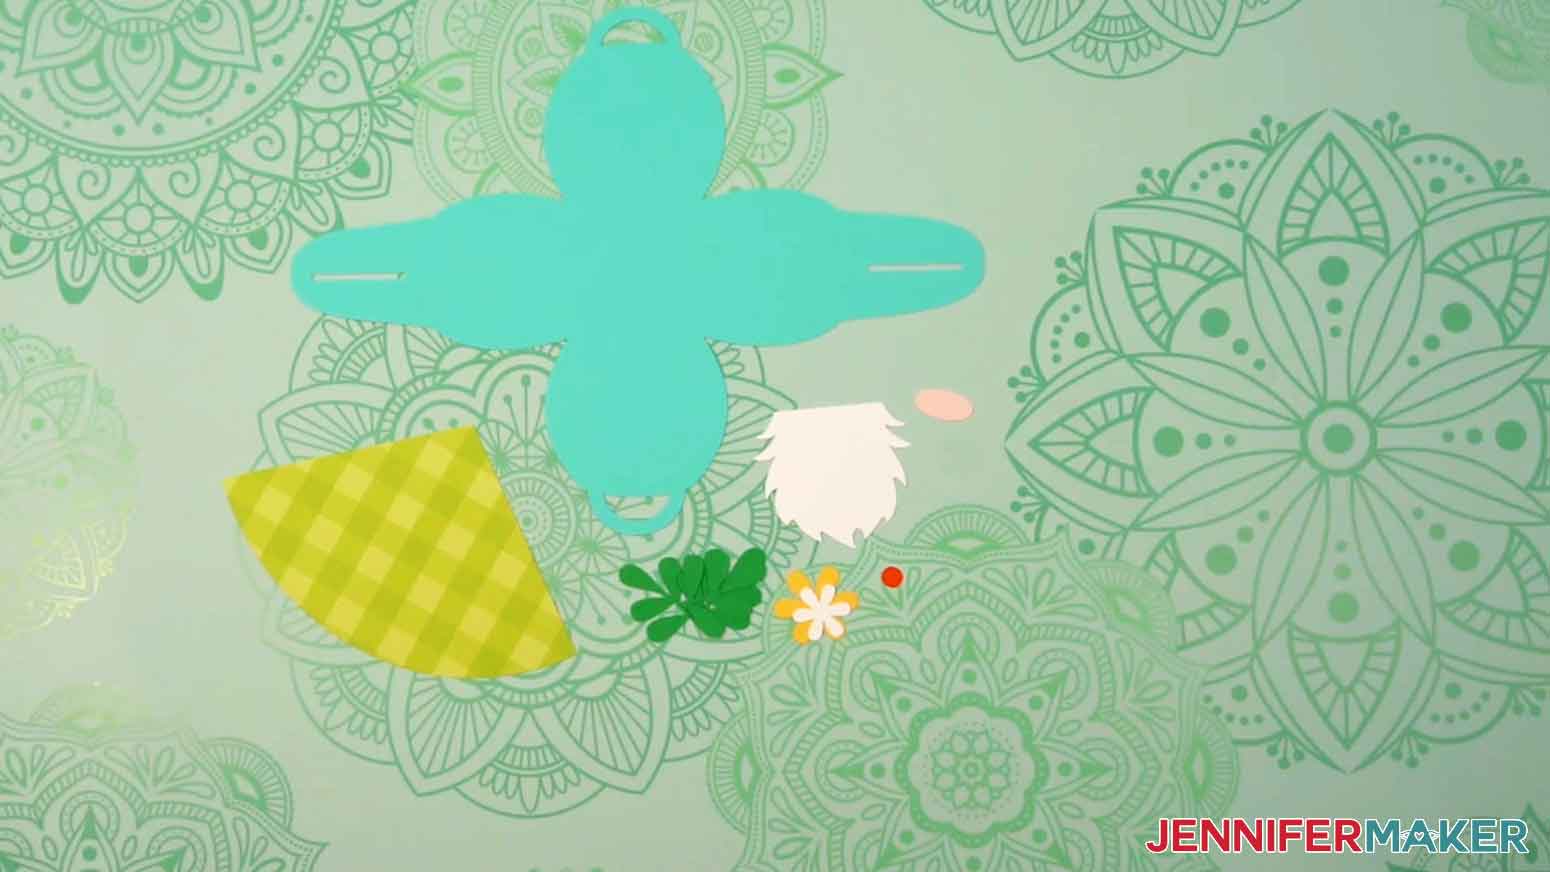
NOTE: The gnome box design has a large box piece, a beard, a nose, a triangular hat piece, three leaf pieces, a small flower, a large flower, and a circular flower center.
1. Place the large box piece so the score lines are face DOWN on your work surface. Place your smaller cut pieces face UP. Use the screen in Cricut Design Space as reference, if needed.
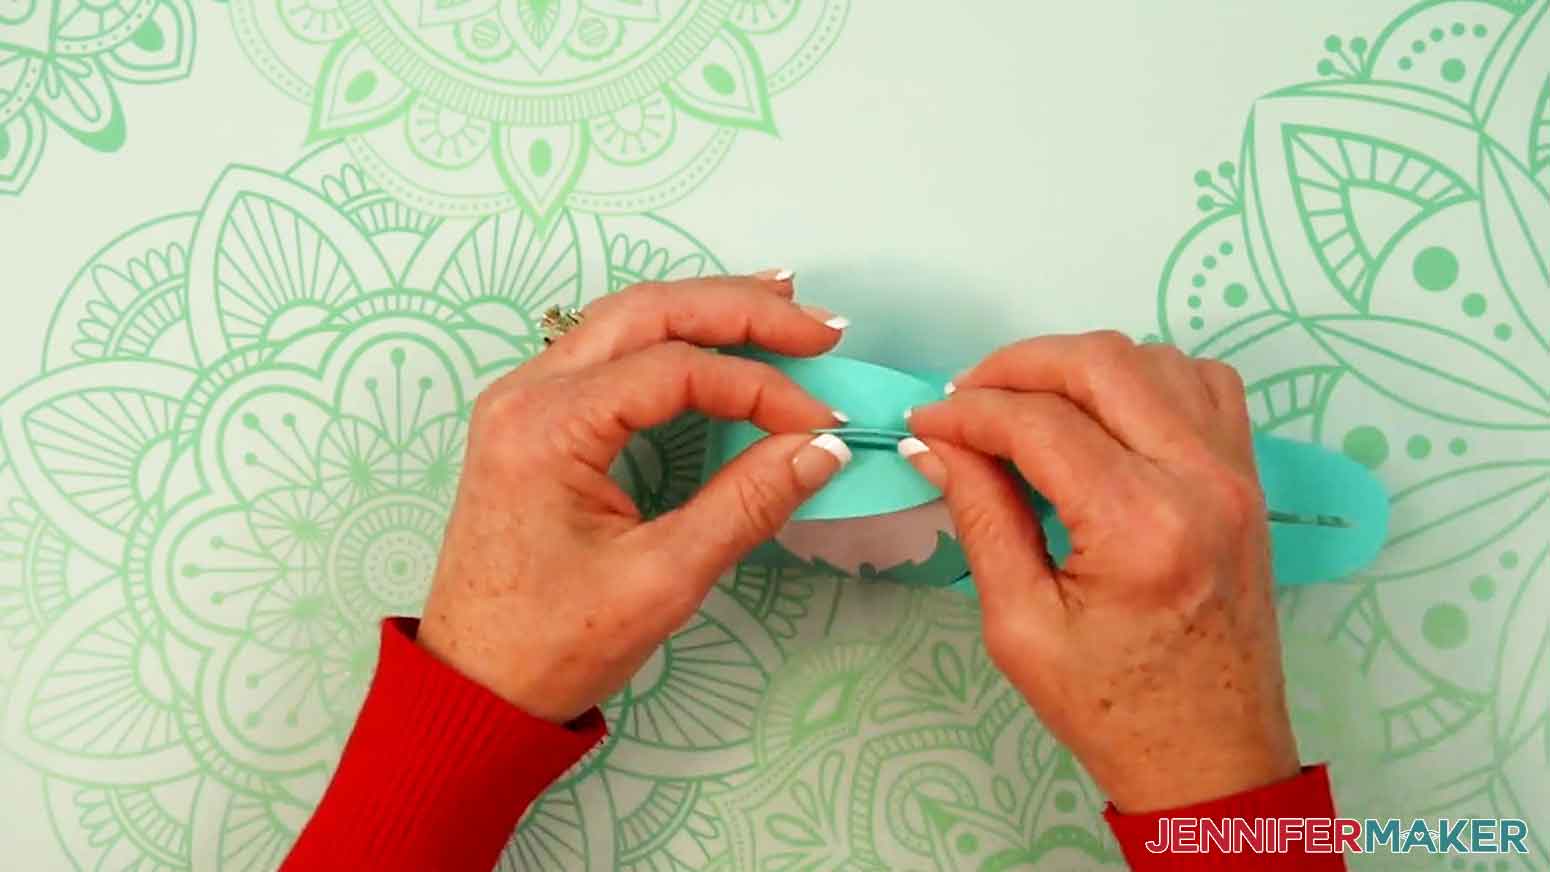
2. On the large box piece, fold up the two tabs along the score lines.
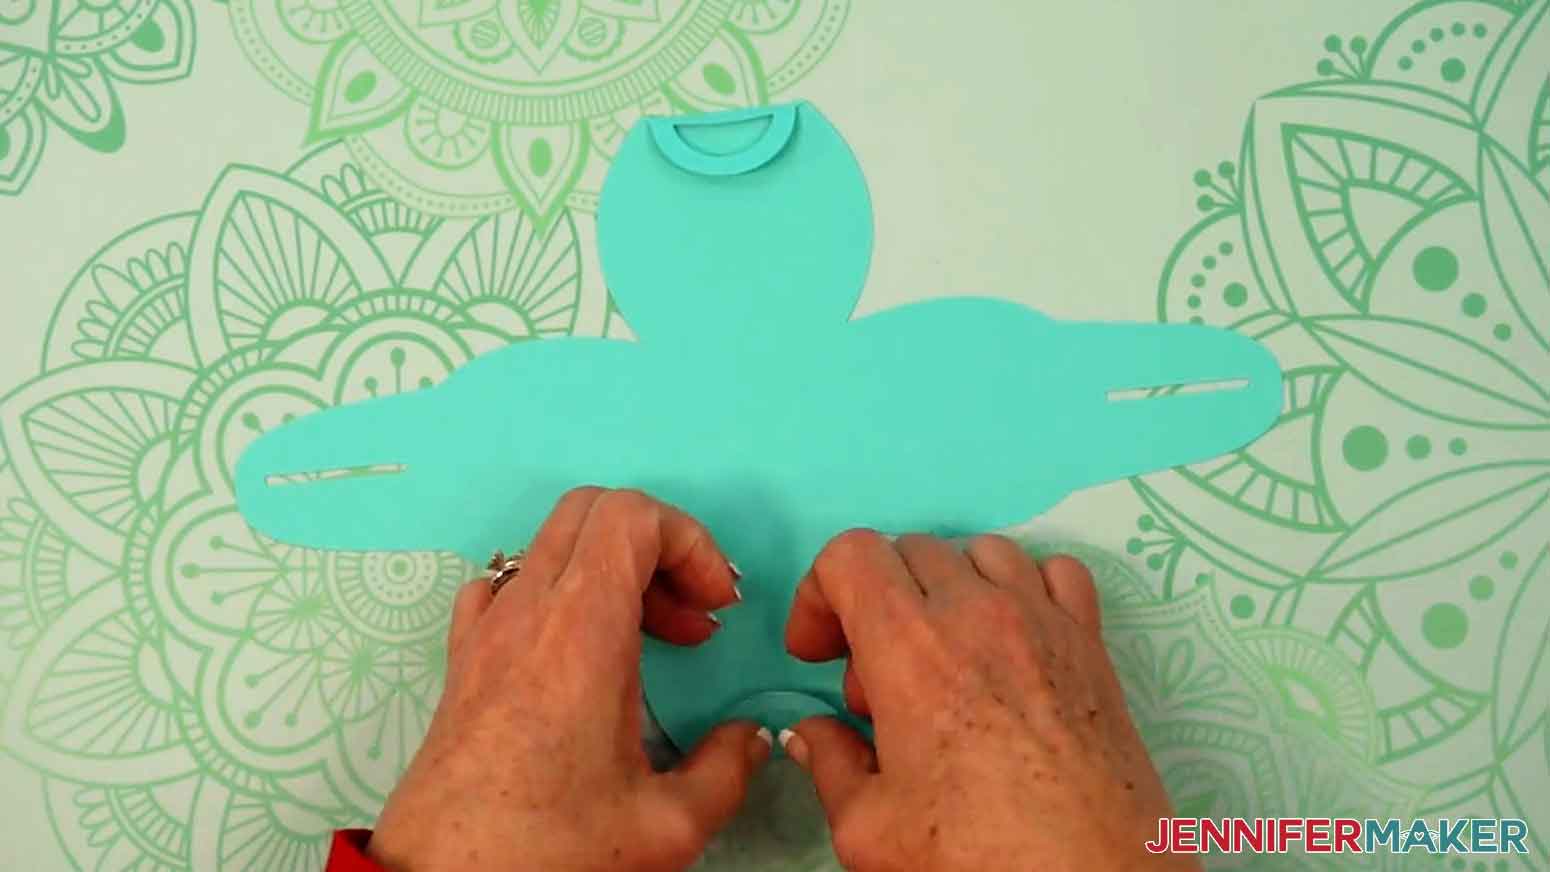
3. Turn the large box piece over so the score lines are facing up, then carefully fold up the four sides along the score lines.
NOTE: This will make it easier to see the different panels of the box when attaching the decorative pieces.
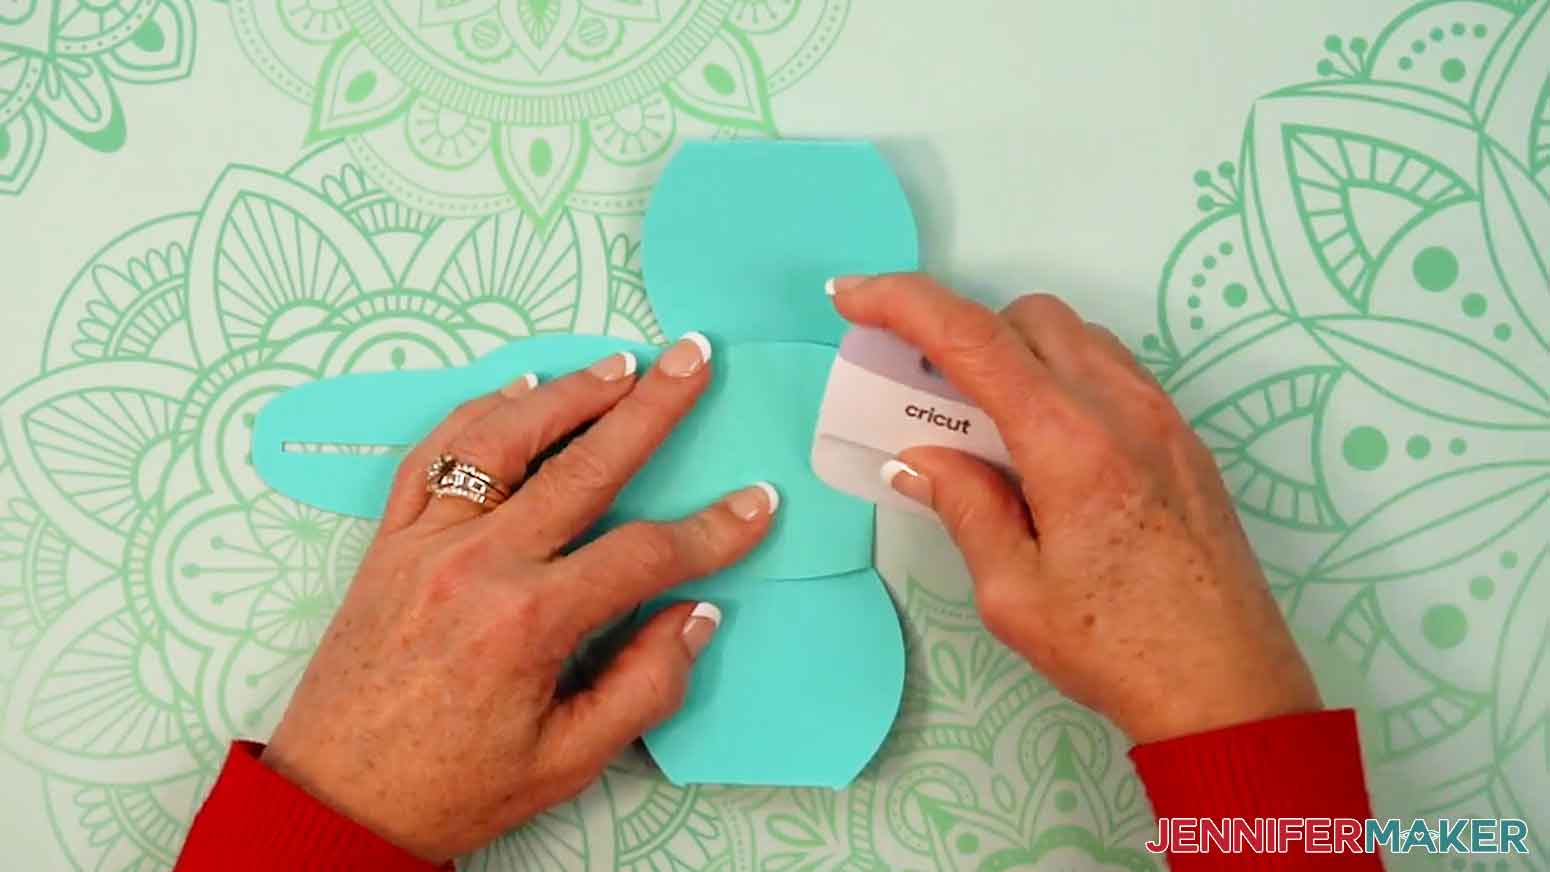
4. Turn the large box piece back over so the folds are pointed up, and so the tabs with long slots are on either side and the shorter looped tabs are at the top and bottom.
5. Apply craft glue to the back of the beard piece and adhere it to a side of the box with a looped tab, just under the tab’s score line. Be sure it doesn’t overlap the score line where the side meets the square-shaped bottom of the box.
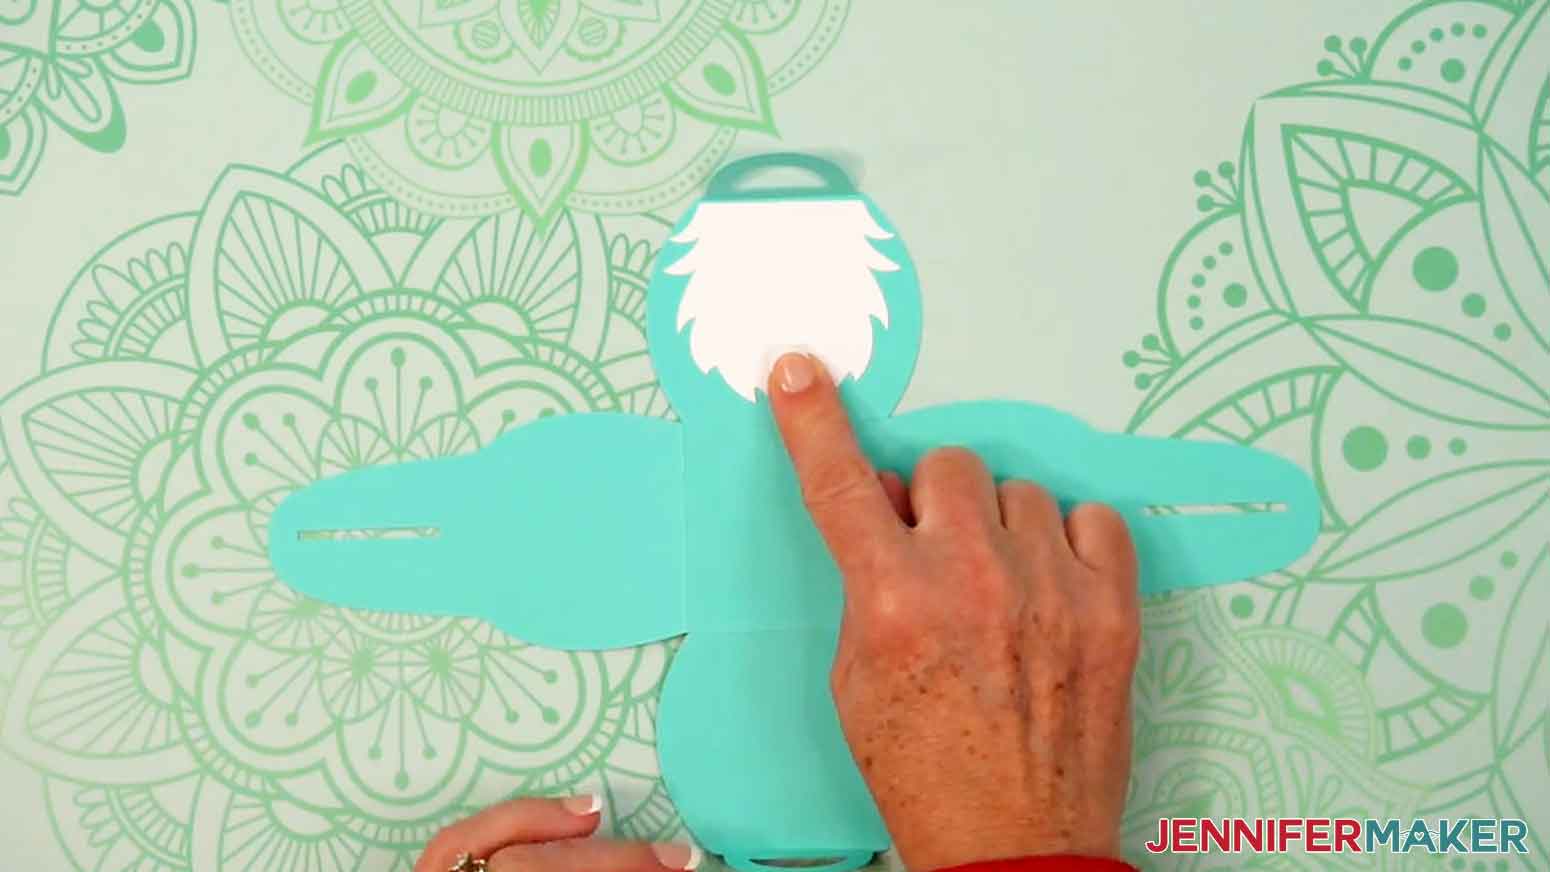
6. Apply craft glue to the back of the nose piece, then attach it to the top center of the beard.
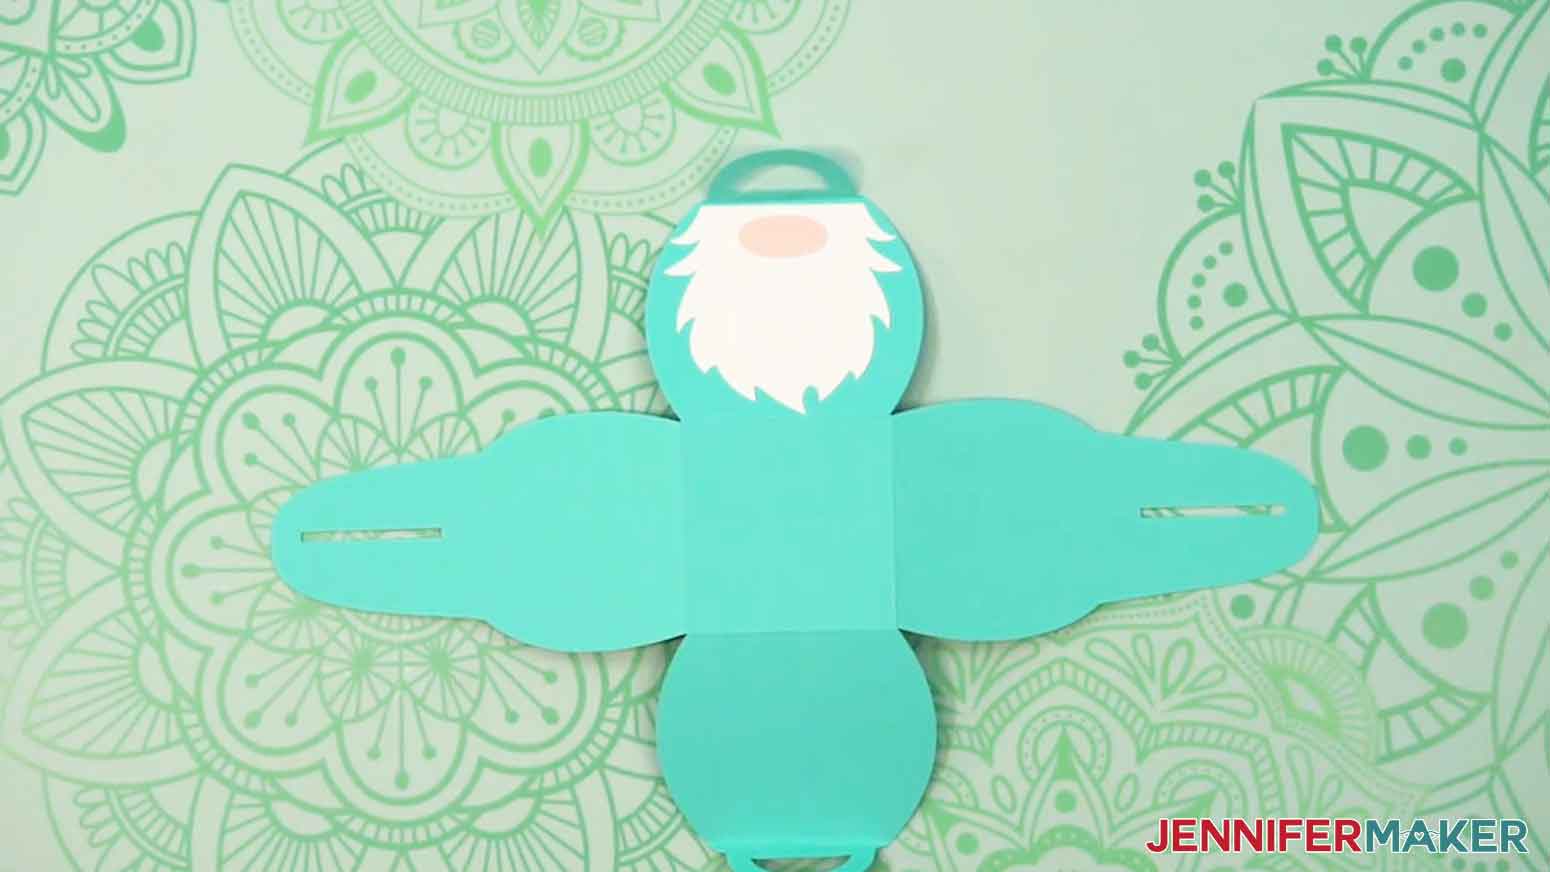
TIP: Tweezers can help you to place small pieces.
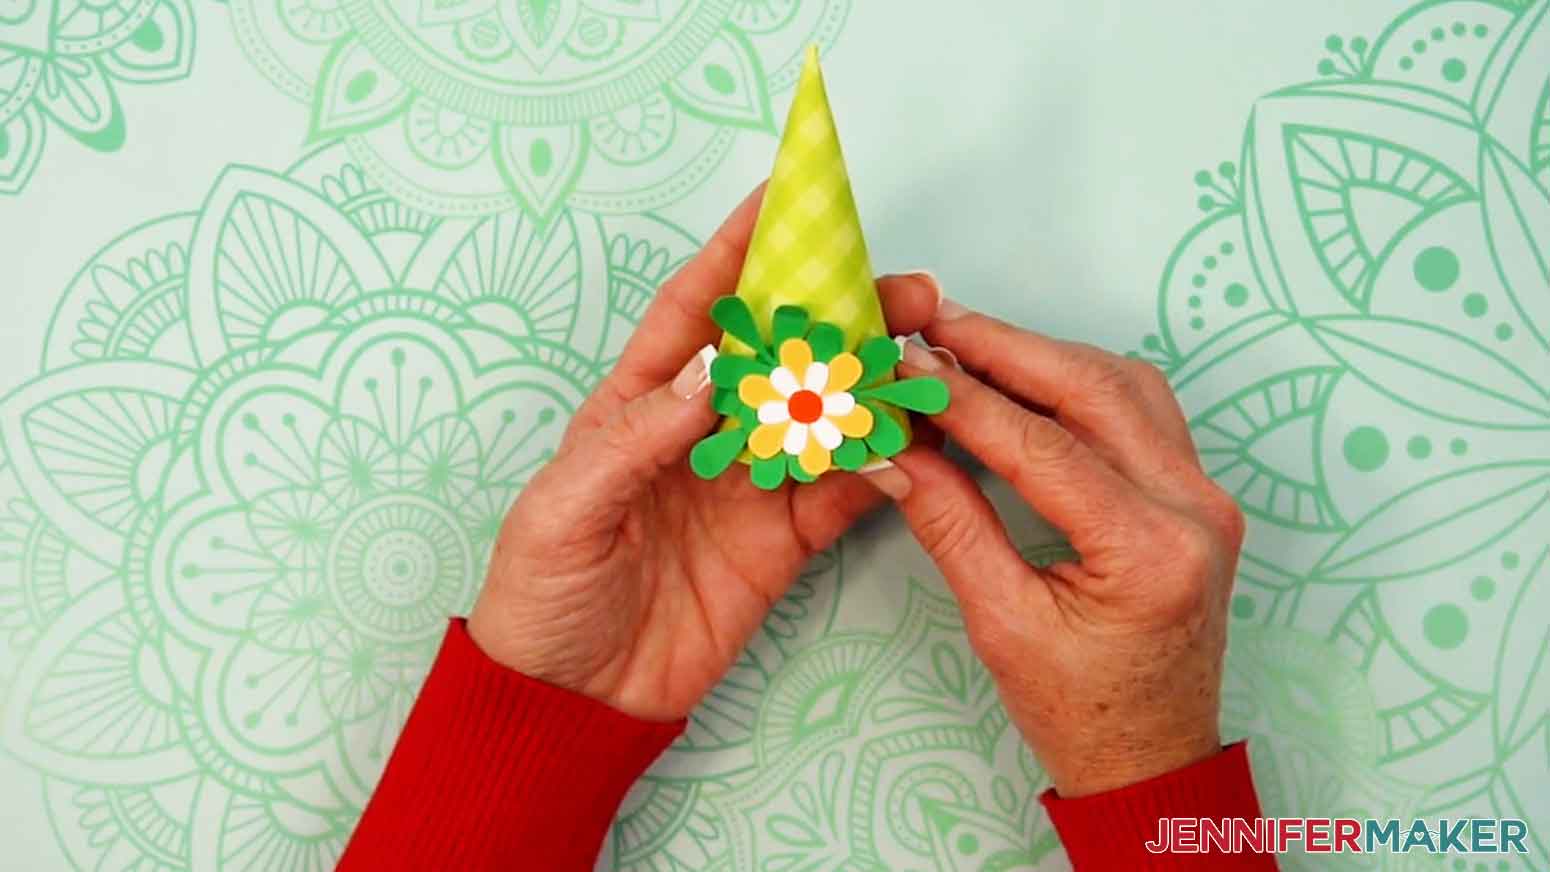
7. Roll the triangular hat piece into a cone shape, so the edges overlap about ¼”.
8. Apply a thin line of craft glue under the overlapping edge.
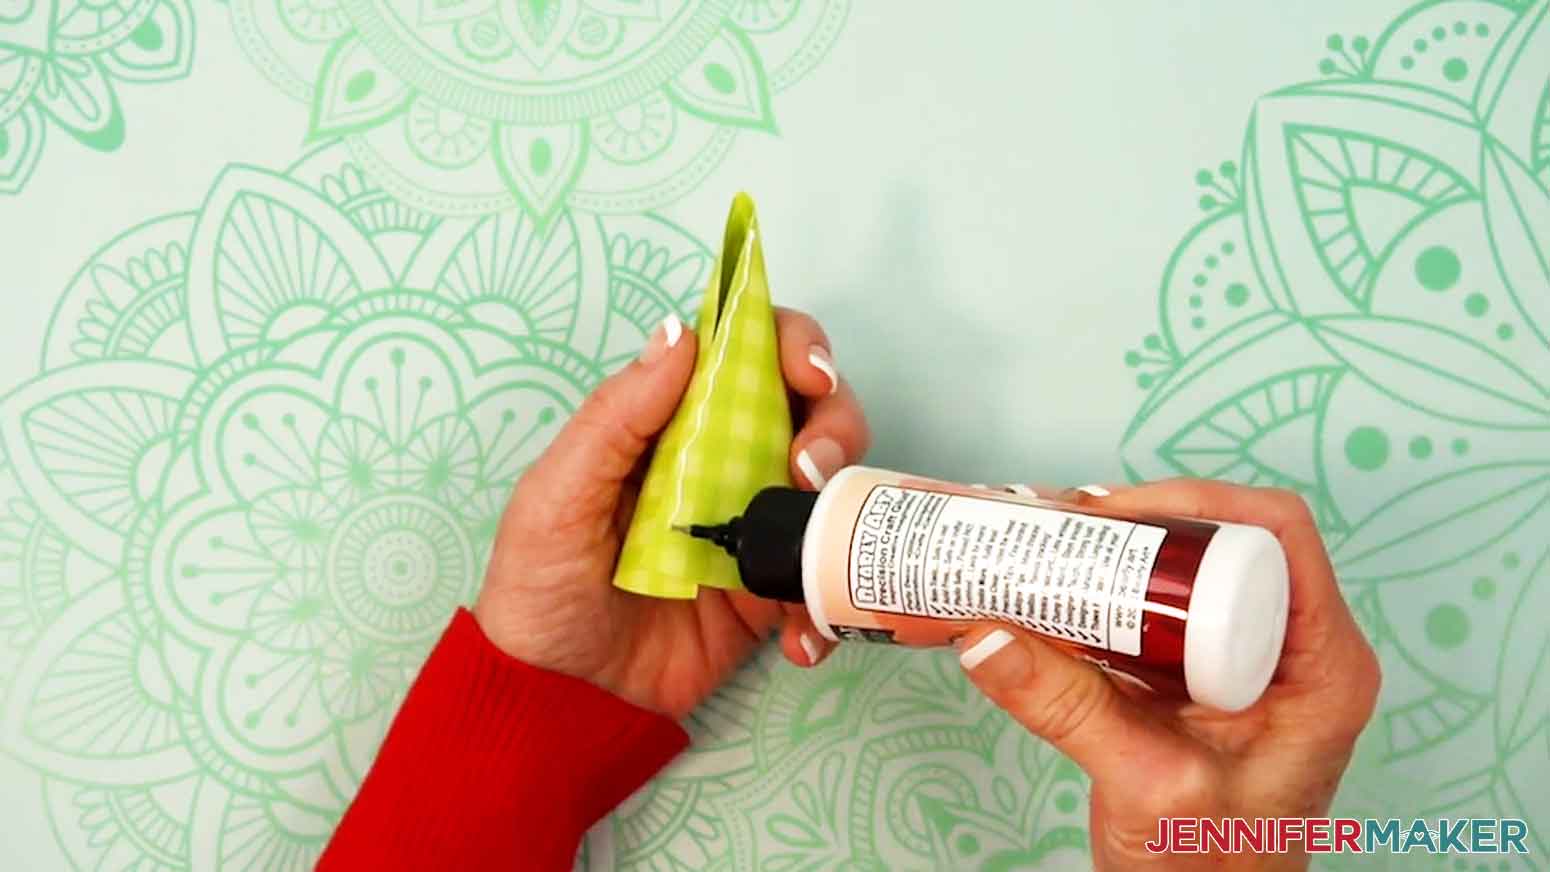
9. Press and hold the edges in place until the glue sets.

10. Use your fingers to gently curl the leaves on each of the three leaf shapes to add dimension.
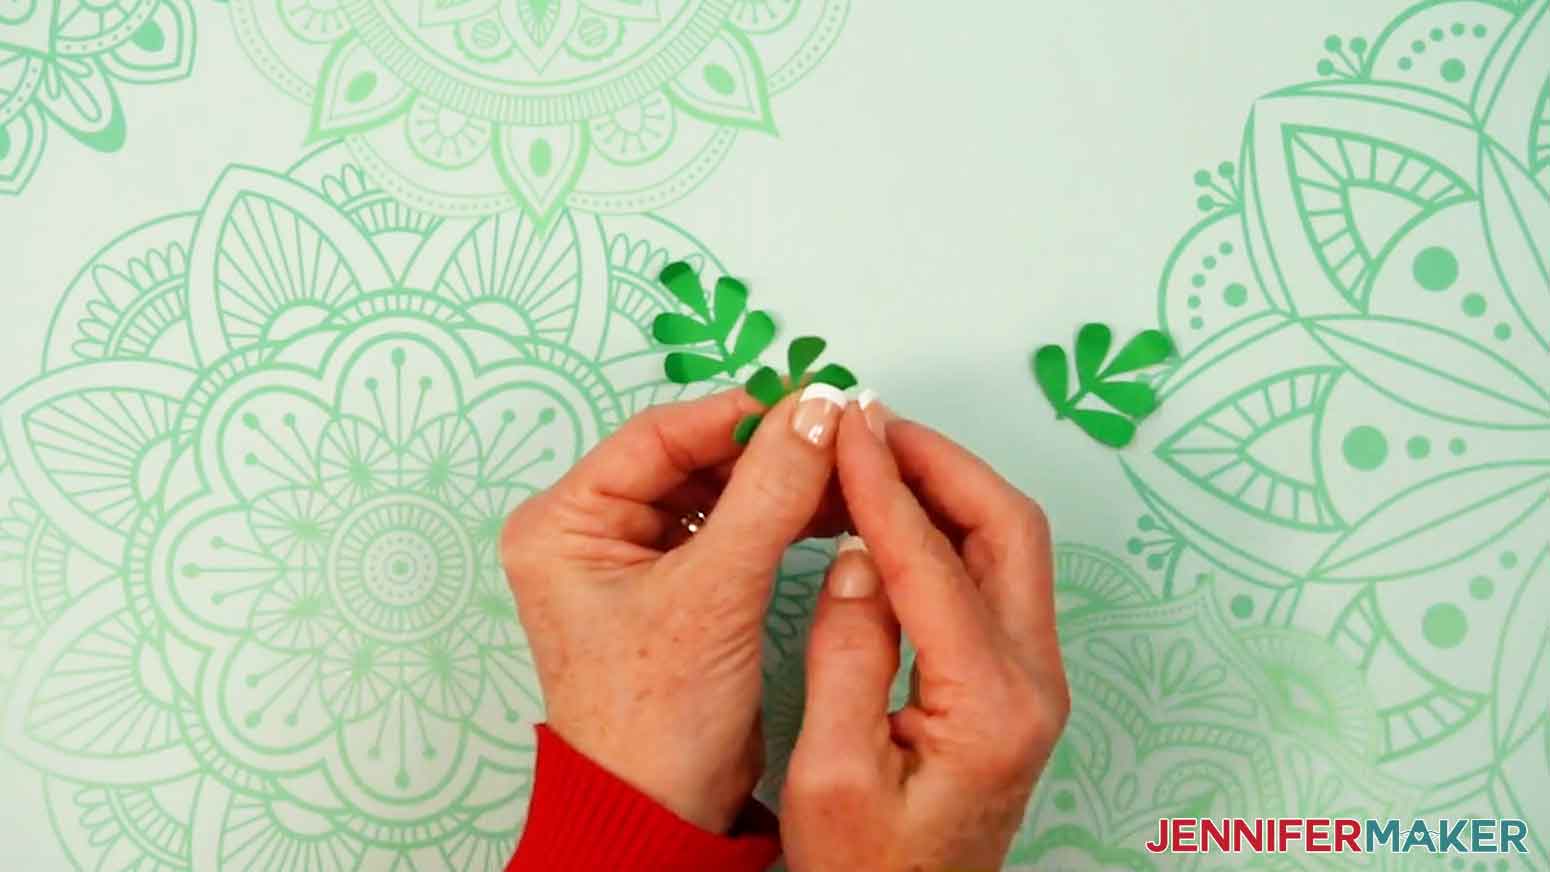
11. Apply a small amount of craft glue to the front of one of the leaf pieces, at the bottom of the stem.
12. Adhere the back of another leaf piece’s stem to the glue on the front of the first leaf piece. Spread the leaf pieces apart in a V-shape.
13. Repeat steps 11-12 to adhere the third leaf’s stem to the other two, pointing the piece down so the three leaves are arranged in a Y-shape.
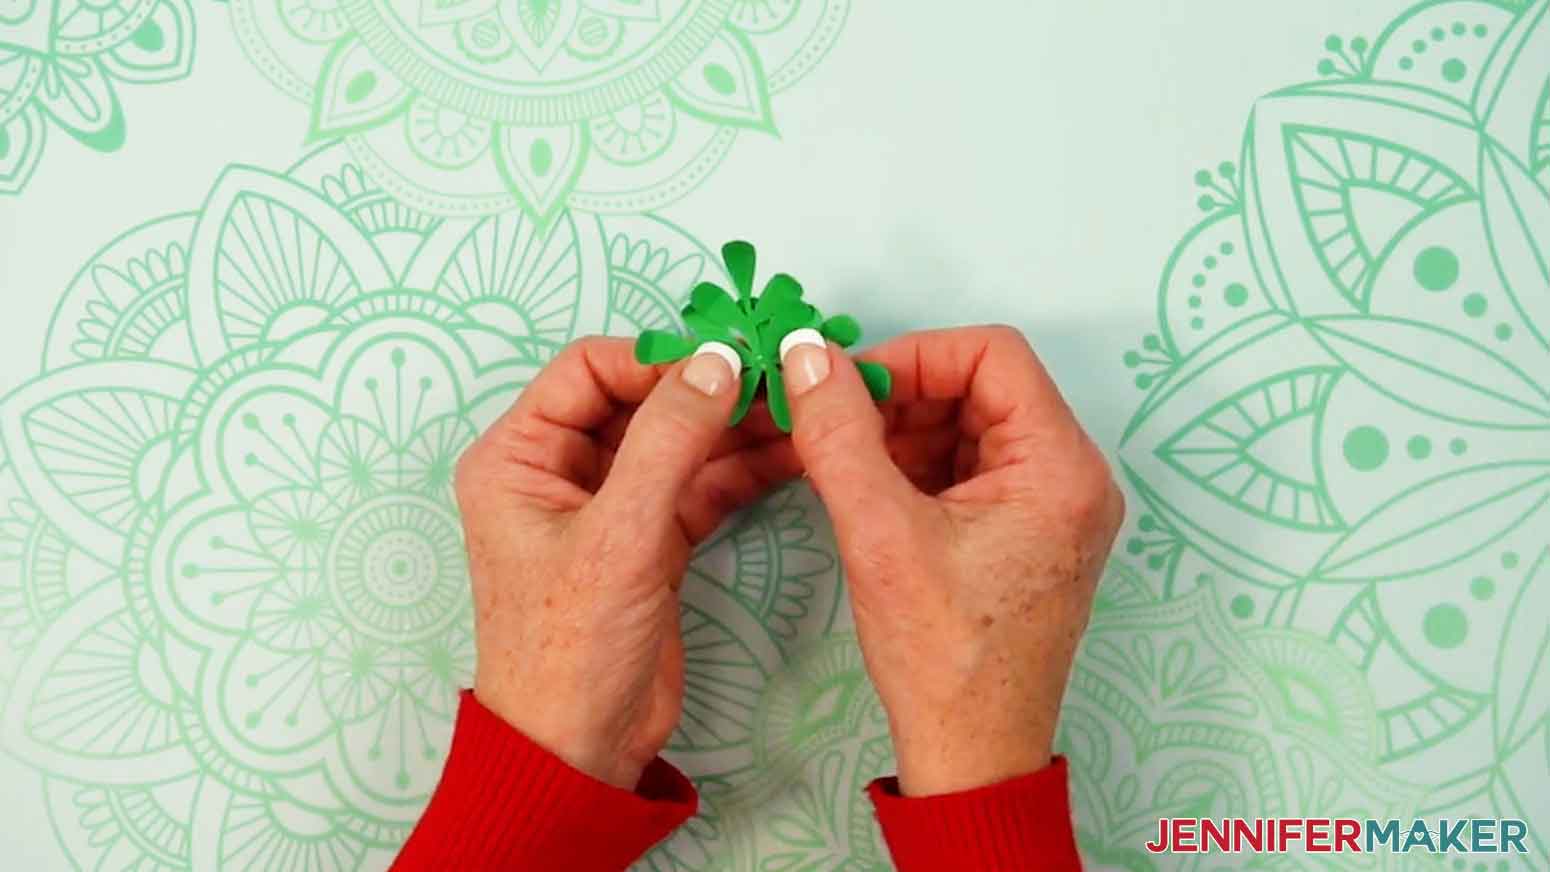
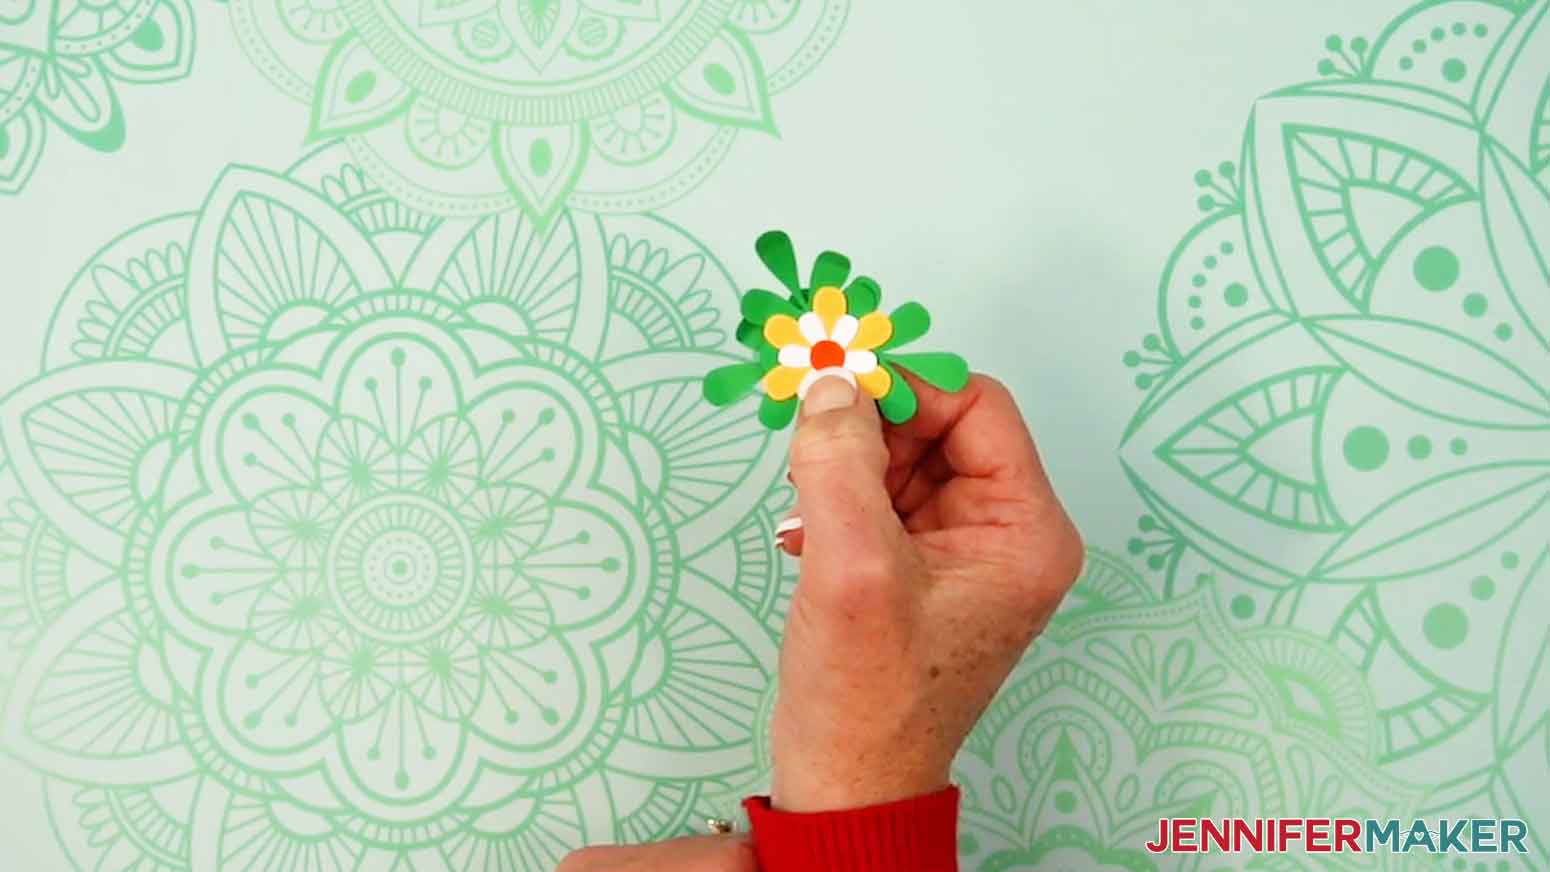
14. Apply a dot of craft glue to the back center of the larger flower piece.
15. Adhere the larger flower to the center of the three leaves, where their stems meet.
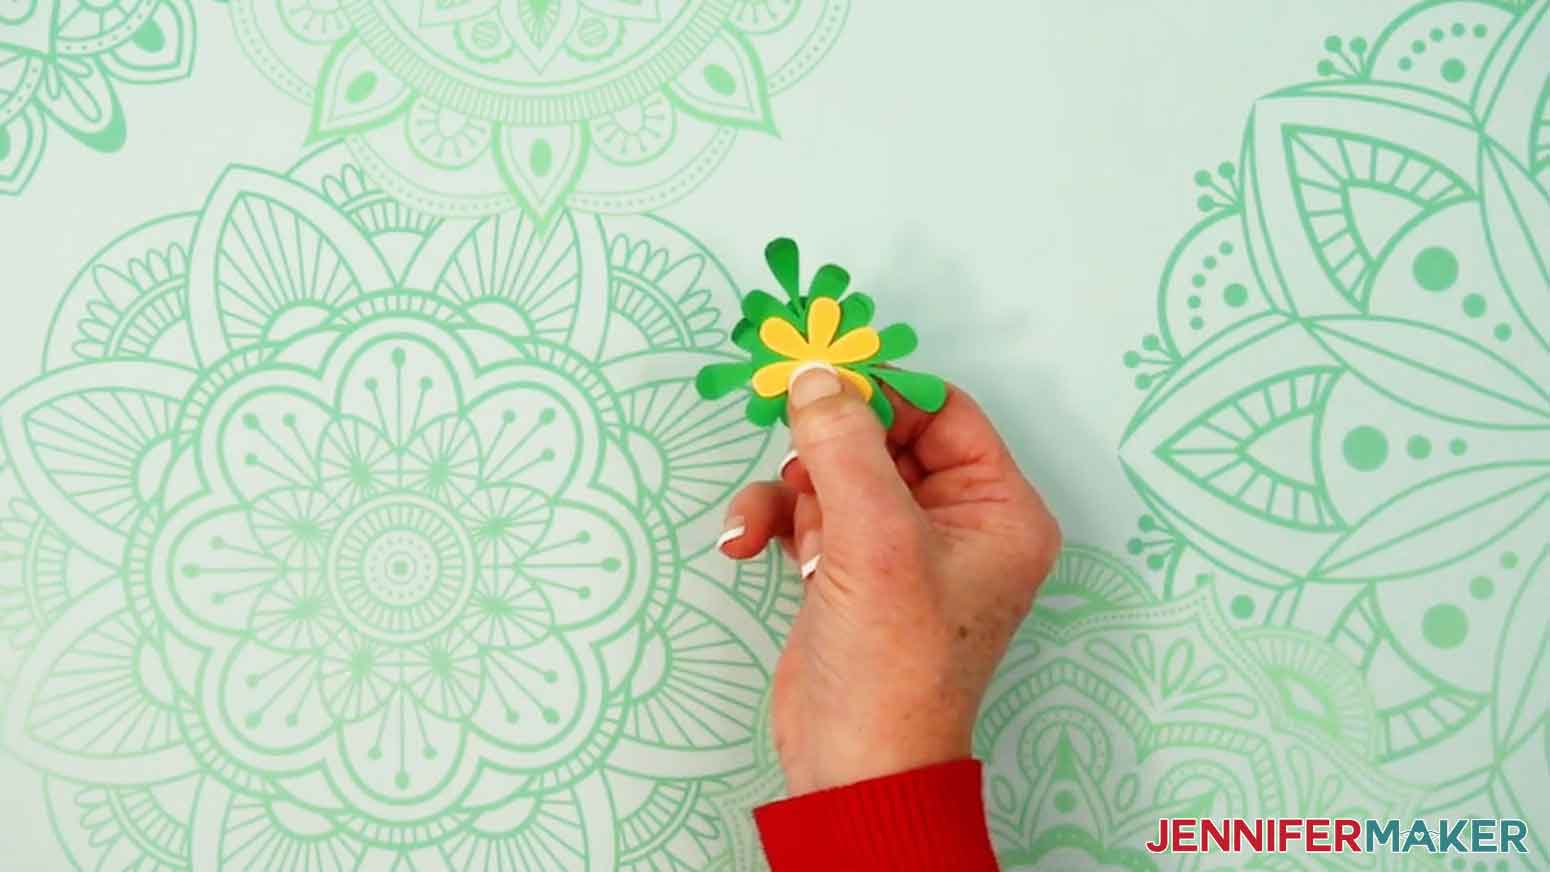
16. Apply a dot of craft glue to the back center of the smaller flower piece.
17. Adhere the smaller flower to the center of the larger flower, staggering the petals so they all show.
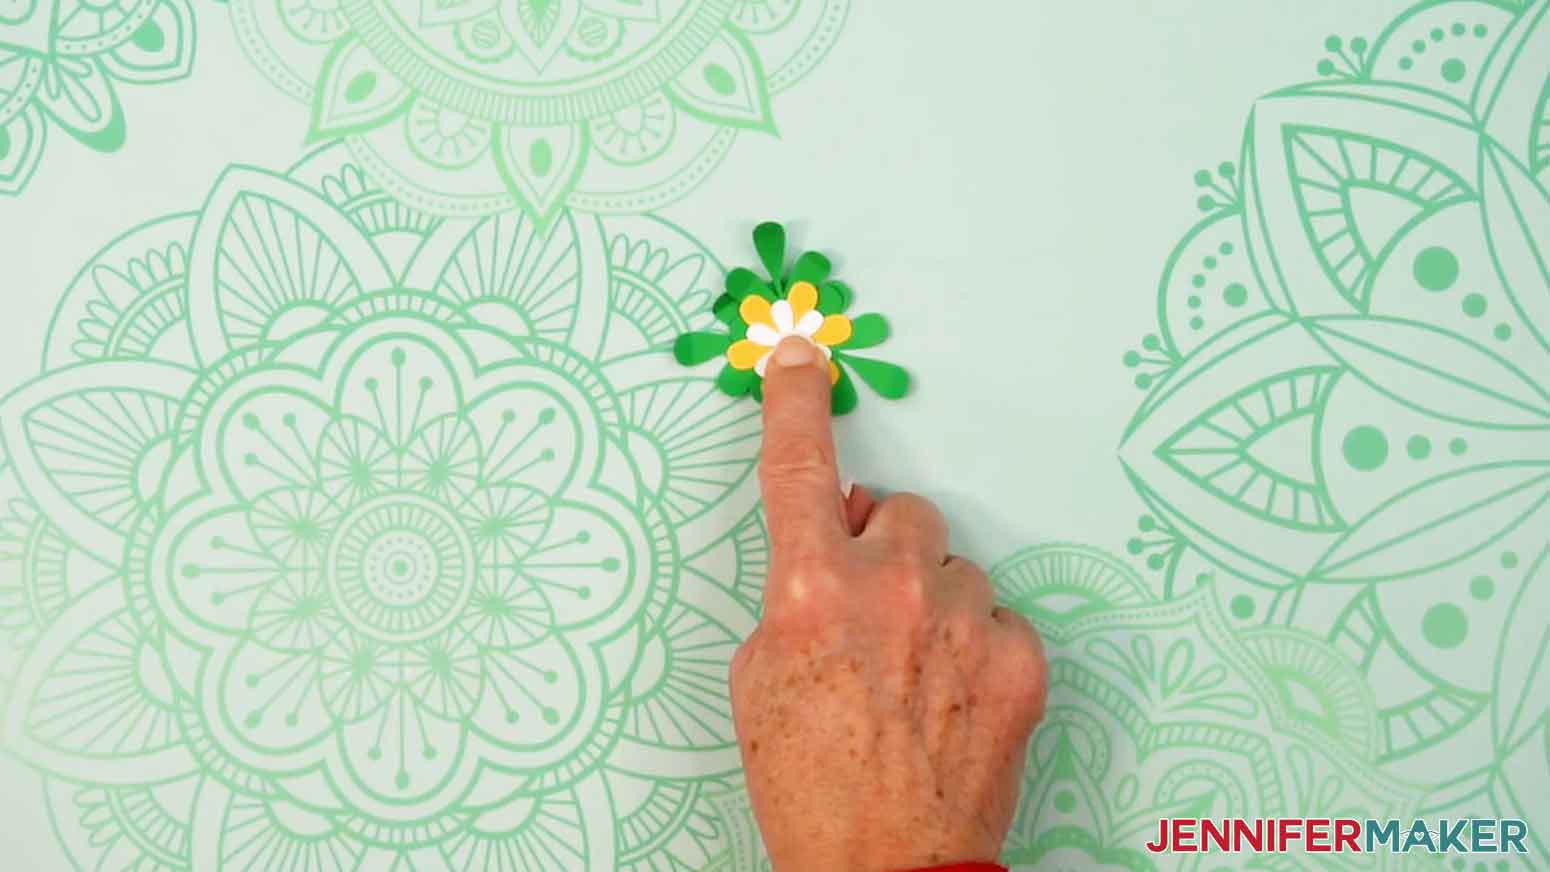
18. Apply a dot of craft glue to the back of the circular flower center.
19. Adhere the circular flower center to the center of the smaller flower.
20. Apply craft glue to the back center of the assembled leaf and flower arrangement.
21. Adhere the flower arrangement to the front of the hat, opposite the seam, so that the leaves and/or flower petals slightly extend past the bottom edge of the hat. Hold it in place until the glue dries.
22. Turn the box face down and fold up three sides along the score lines.
23. If you are putting items inside the box, add them now.
24. Fold the fourth side up.
25. Fold the looped tabs up and align their edges.

26. Lift one side with a long slit up and gently tuck the pinched tabs up through the slit
27. Repeat step 26 with the last side of the box.
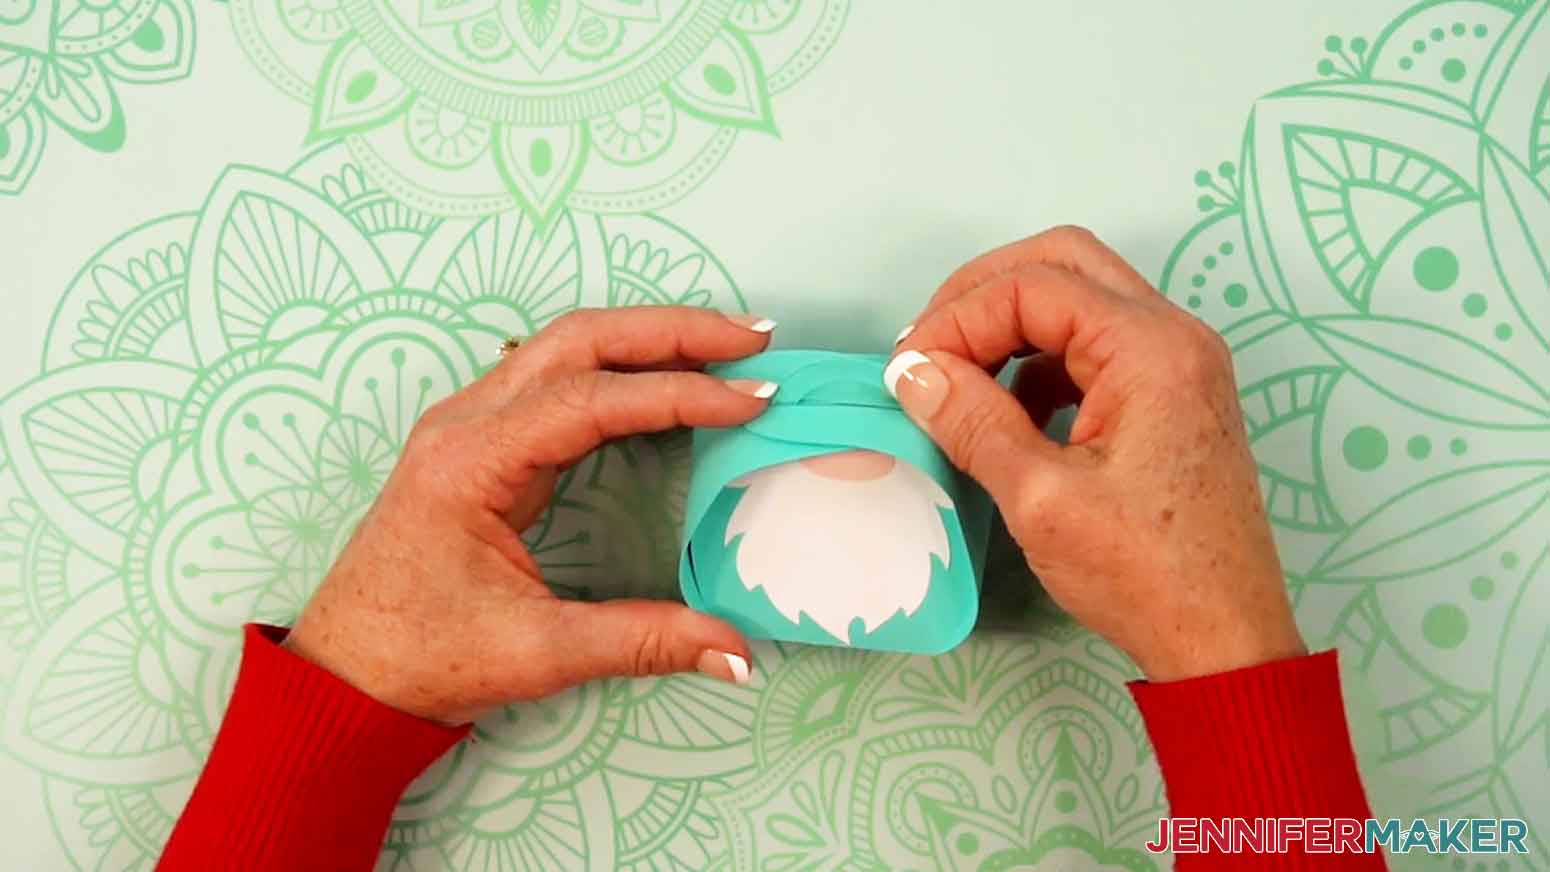
28. Place the assembled hat on top of the gnome keepsake box.
29. Your gnome keepsake box is ready to gift or display!

MUSHROOM HOUSE
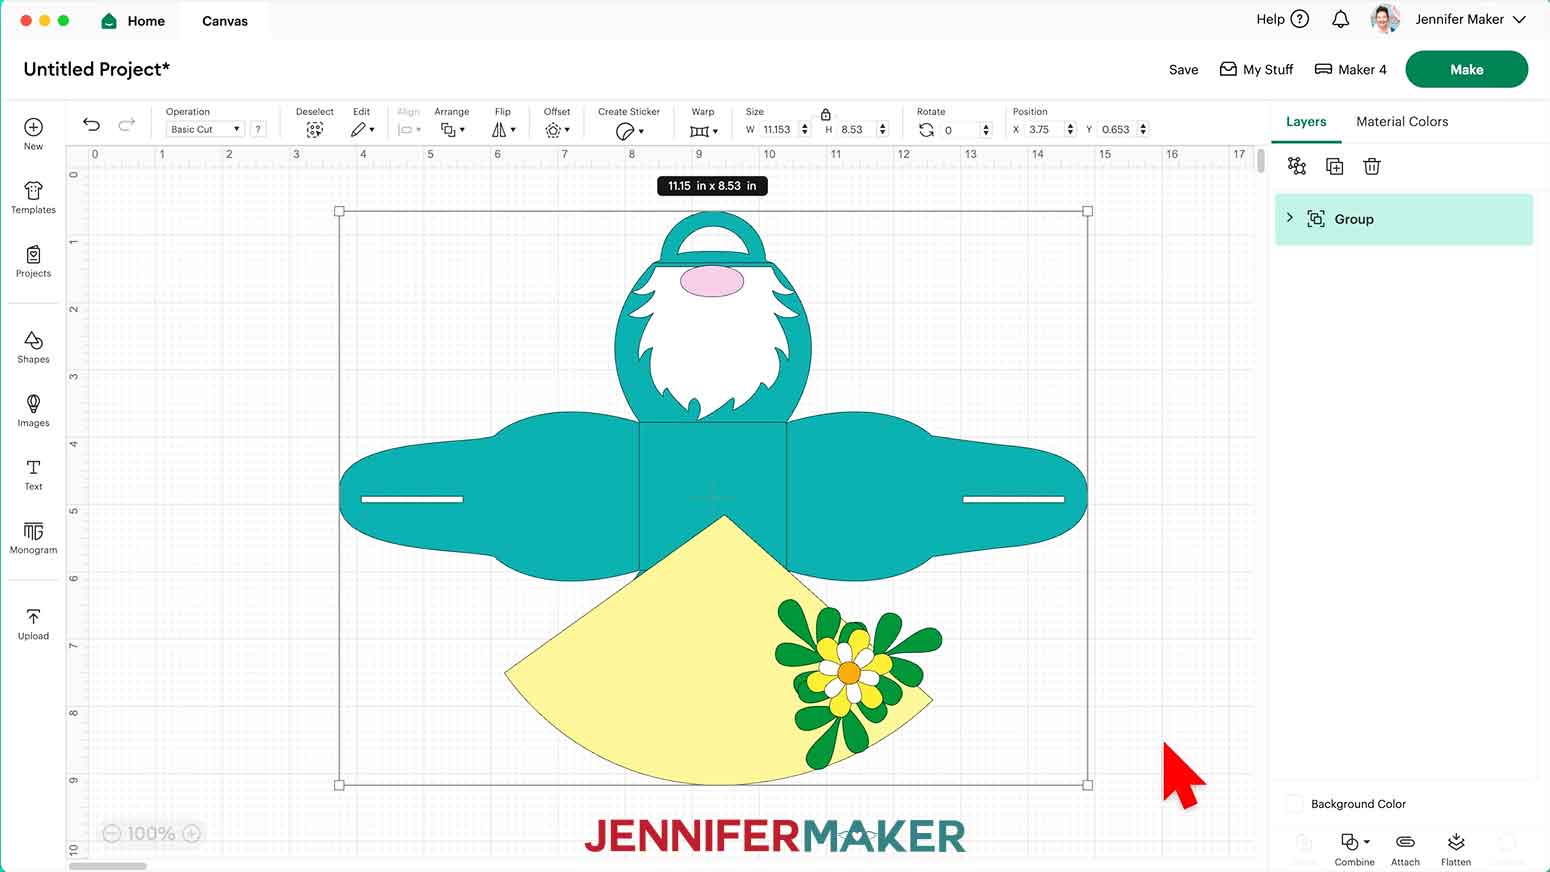
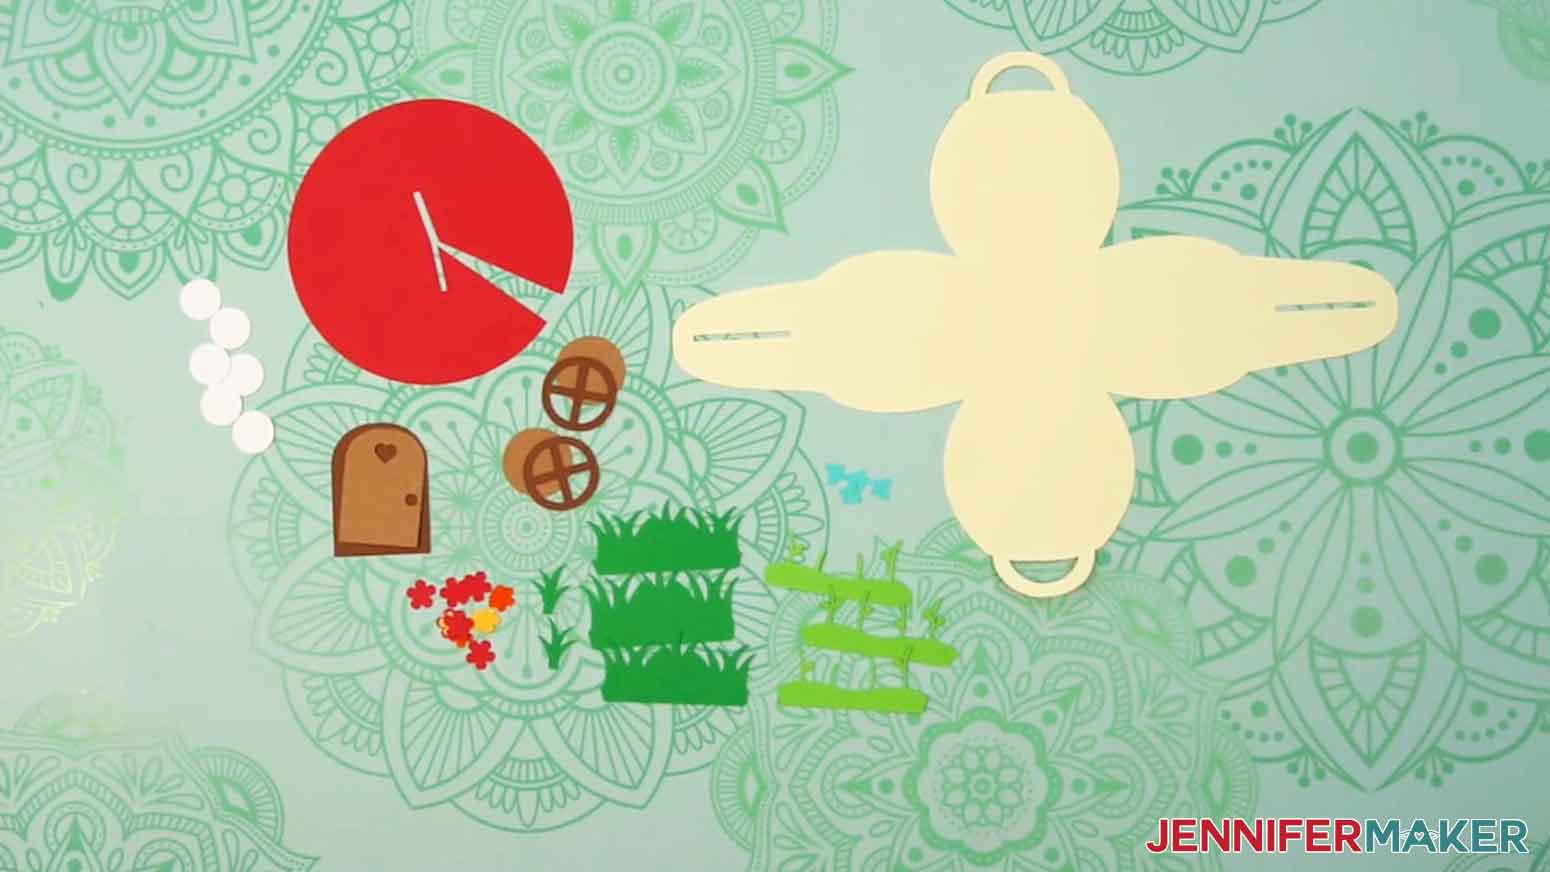
NOTE: The mushroom house box design has a large box piece, one solid door piece, one door piece with cutouts, a mushroom cap piece, eight mushroom spots, two solid window pieces, two window pieces with cutouts, three flower stem pieces, twelve flowers, four butterflies, three large grass pieces, and two small grass pieces.
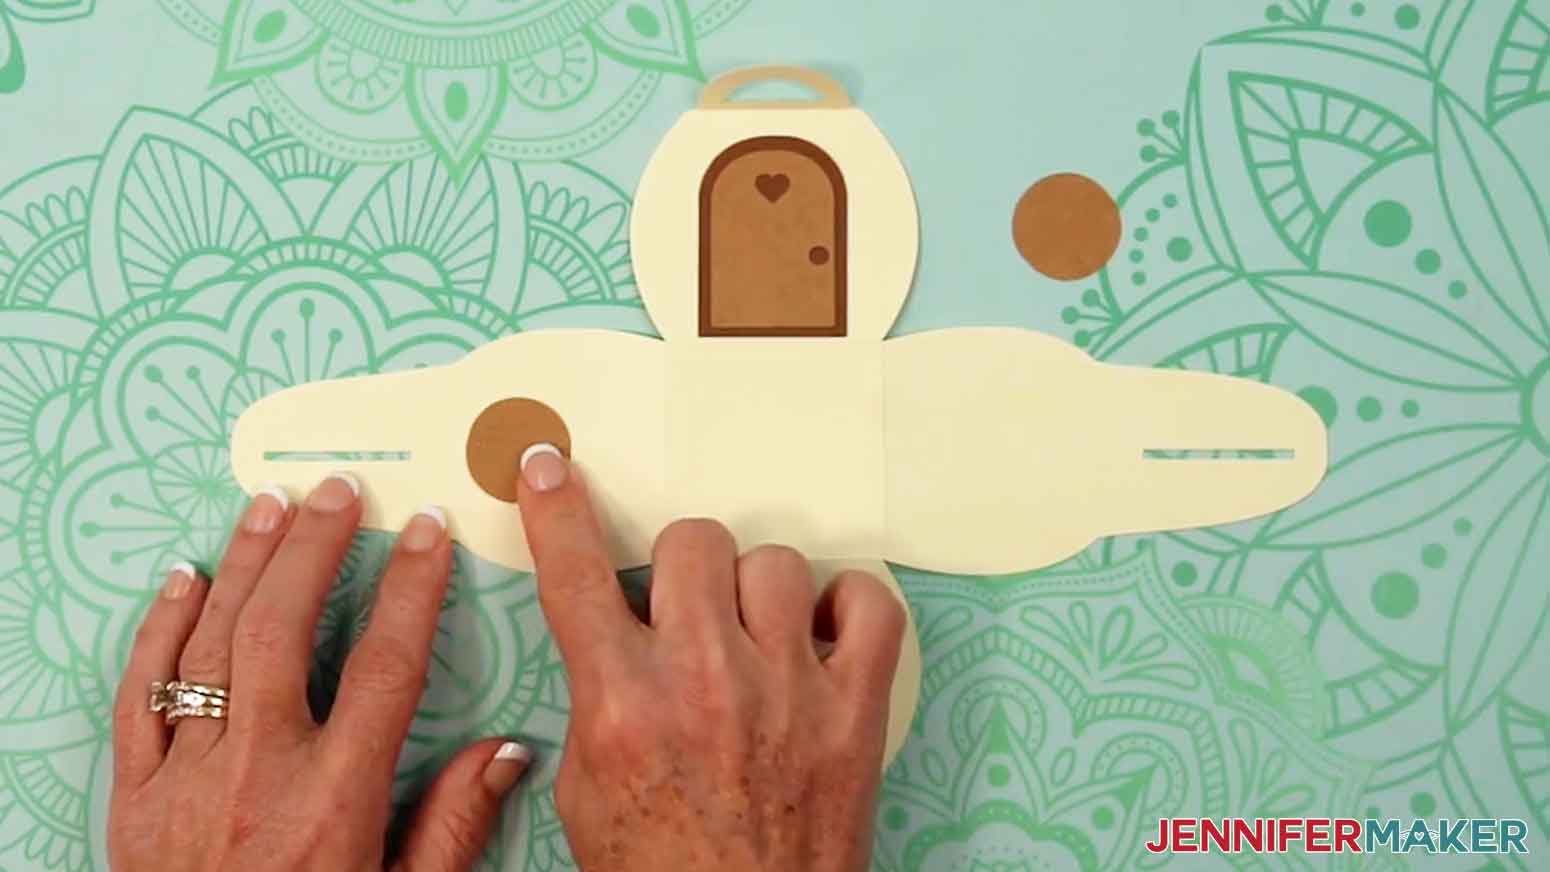
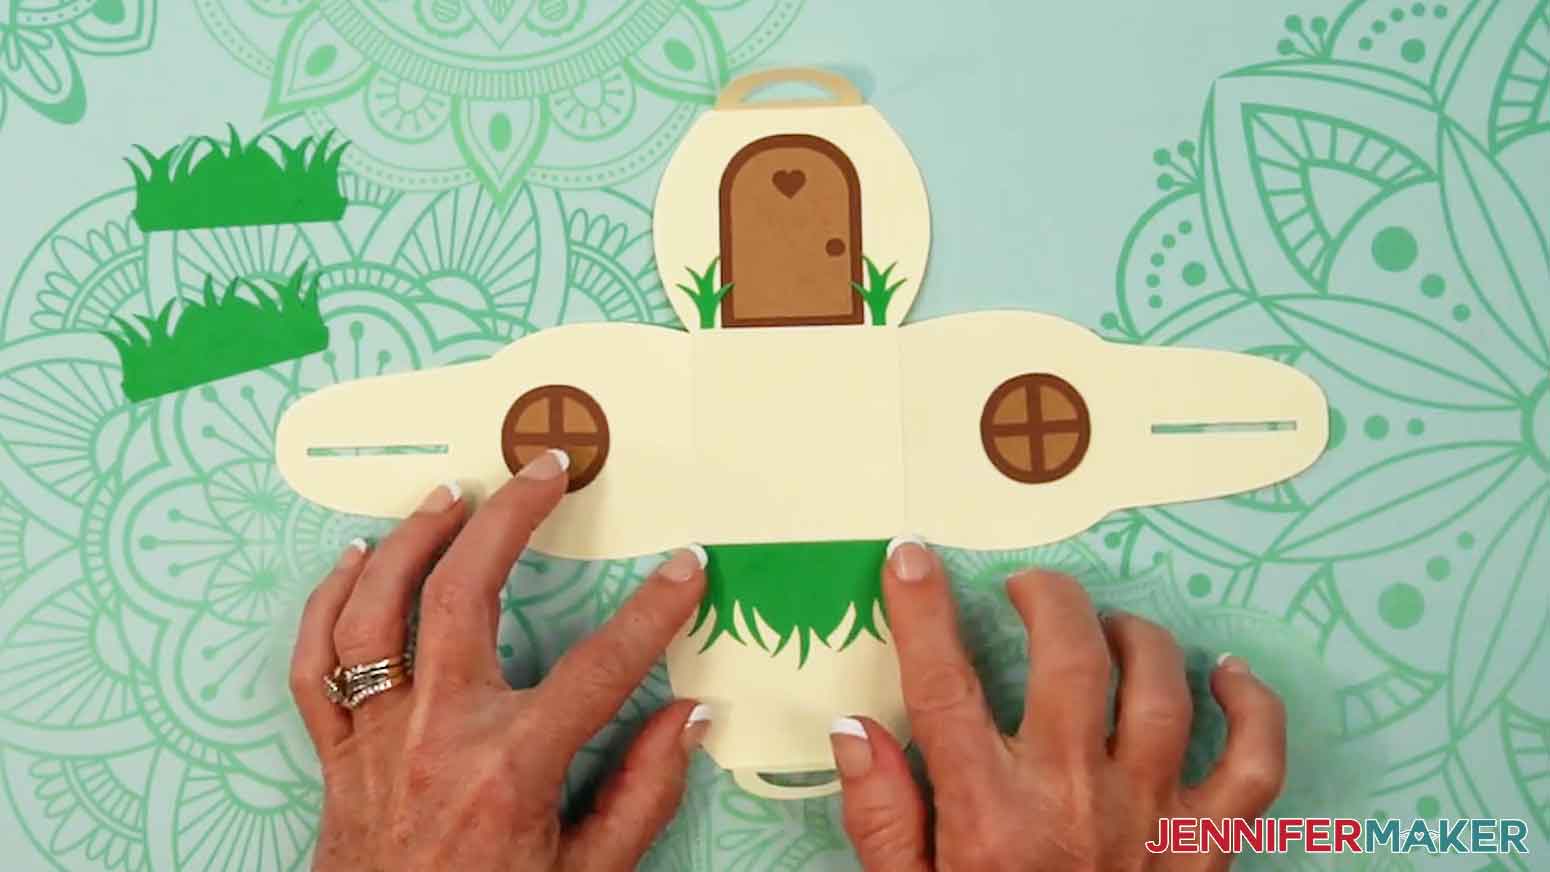
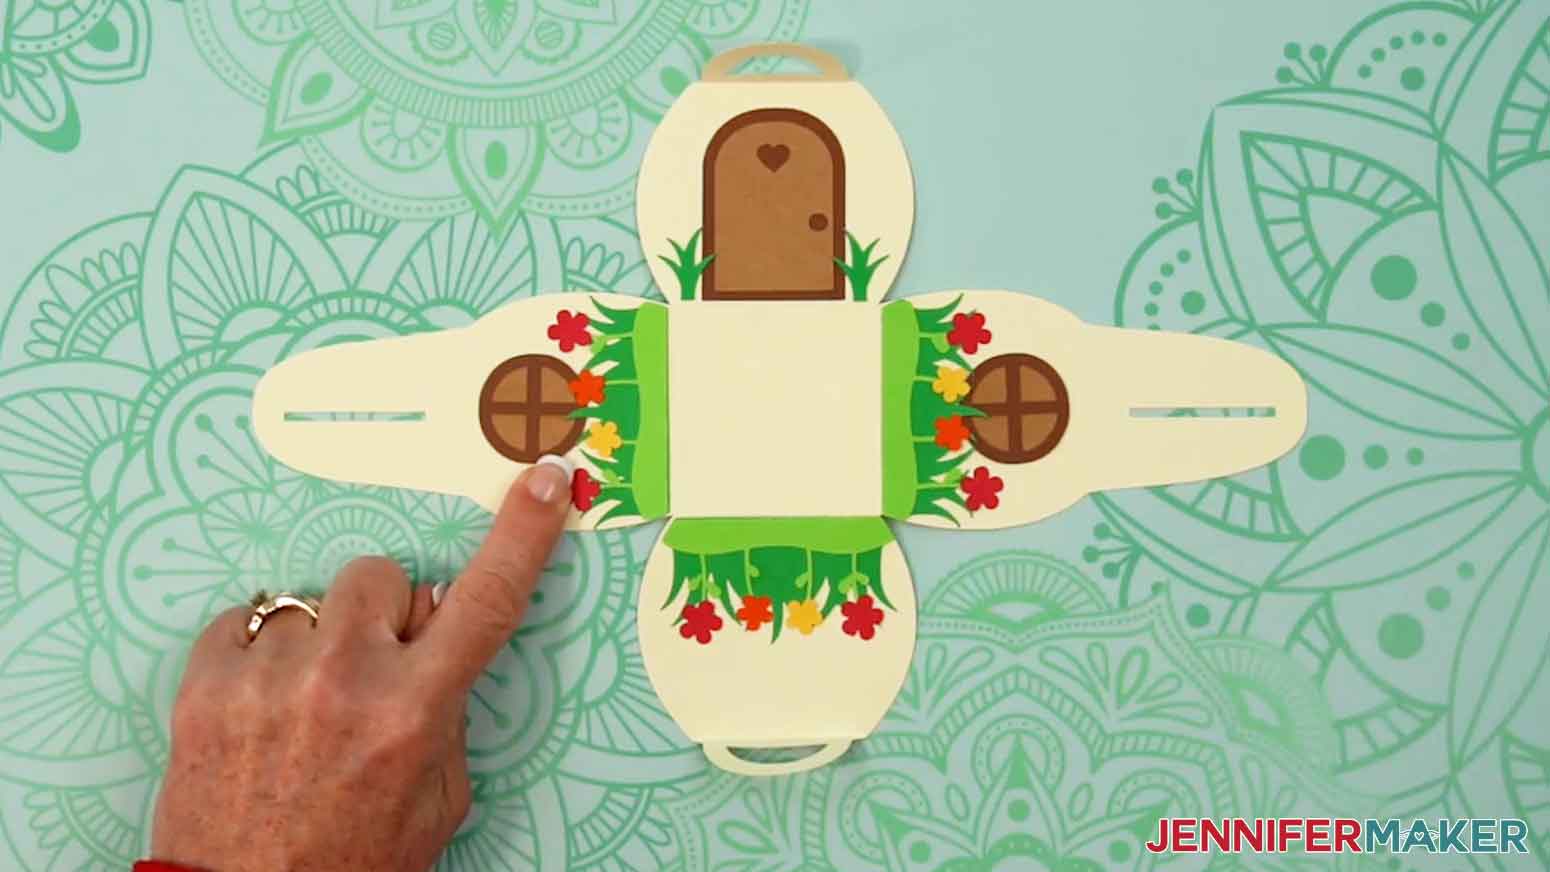
1. Place the large box piece so the score lines are face DOWN on your work surface. Place your smaller cut pieces face UP. Use the screen in Cricut Design Space as reference, if needed.
2. On the large box piece, fold up the two tabs along the score lines.
3. Turn the large box piece over so the score lines are facing up, then carefully fold up the four sides along the score lines.
4. Turn the large box piece back over so the folds are pointed up, and so the tabs with long slots are on either side and the shorter looped tabs are at the top and bottom.
NOTE: The top panel is the front of the house, the sides are the side walls, and the bottom panel is the back of the house.
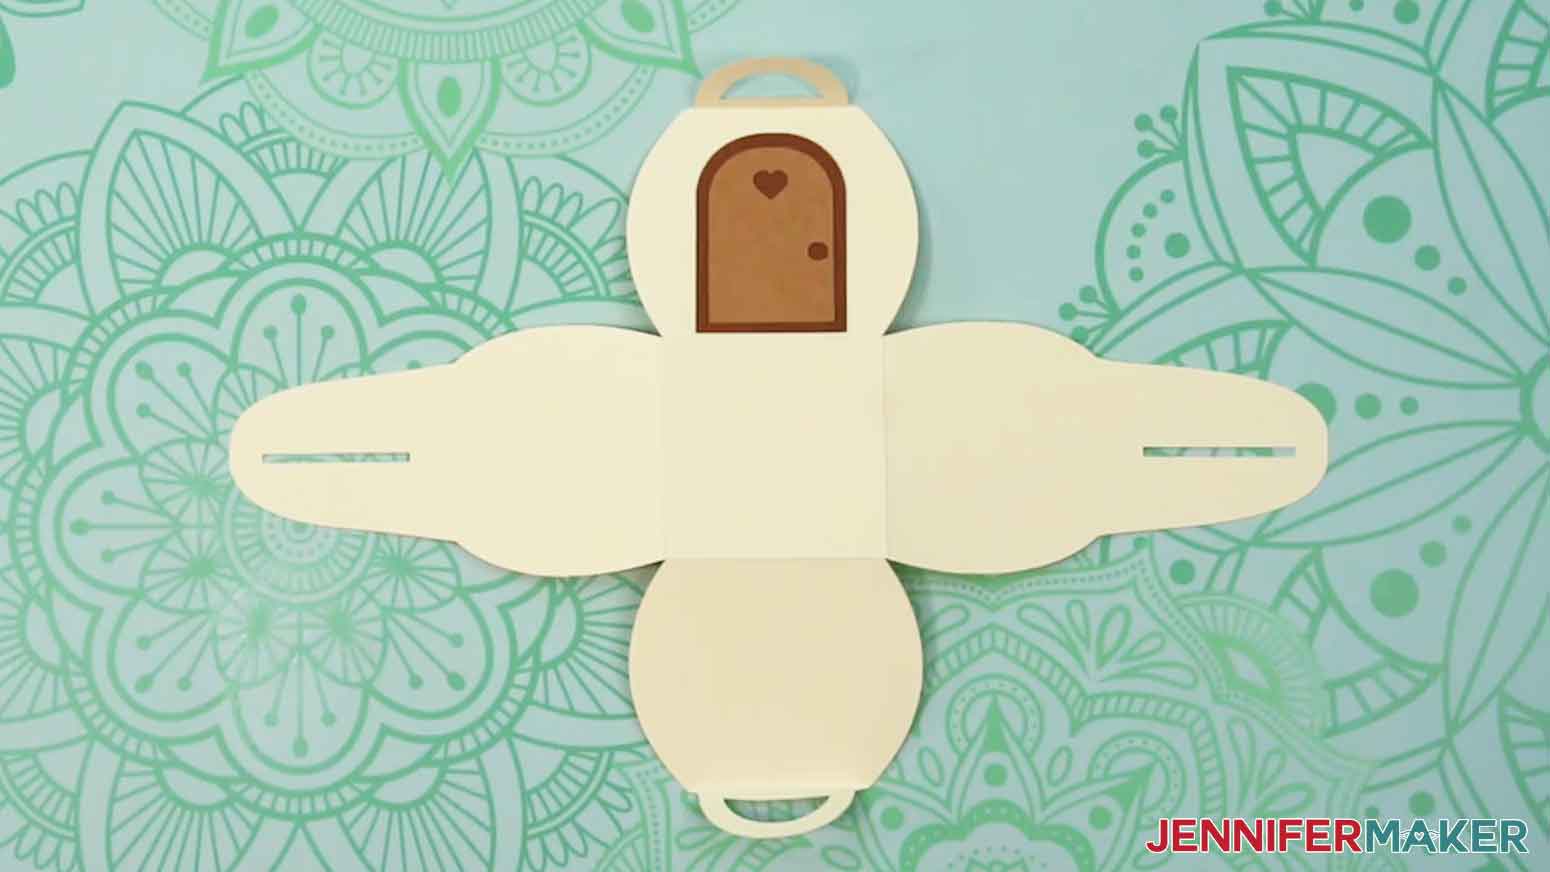
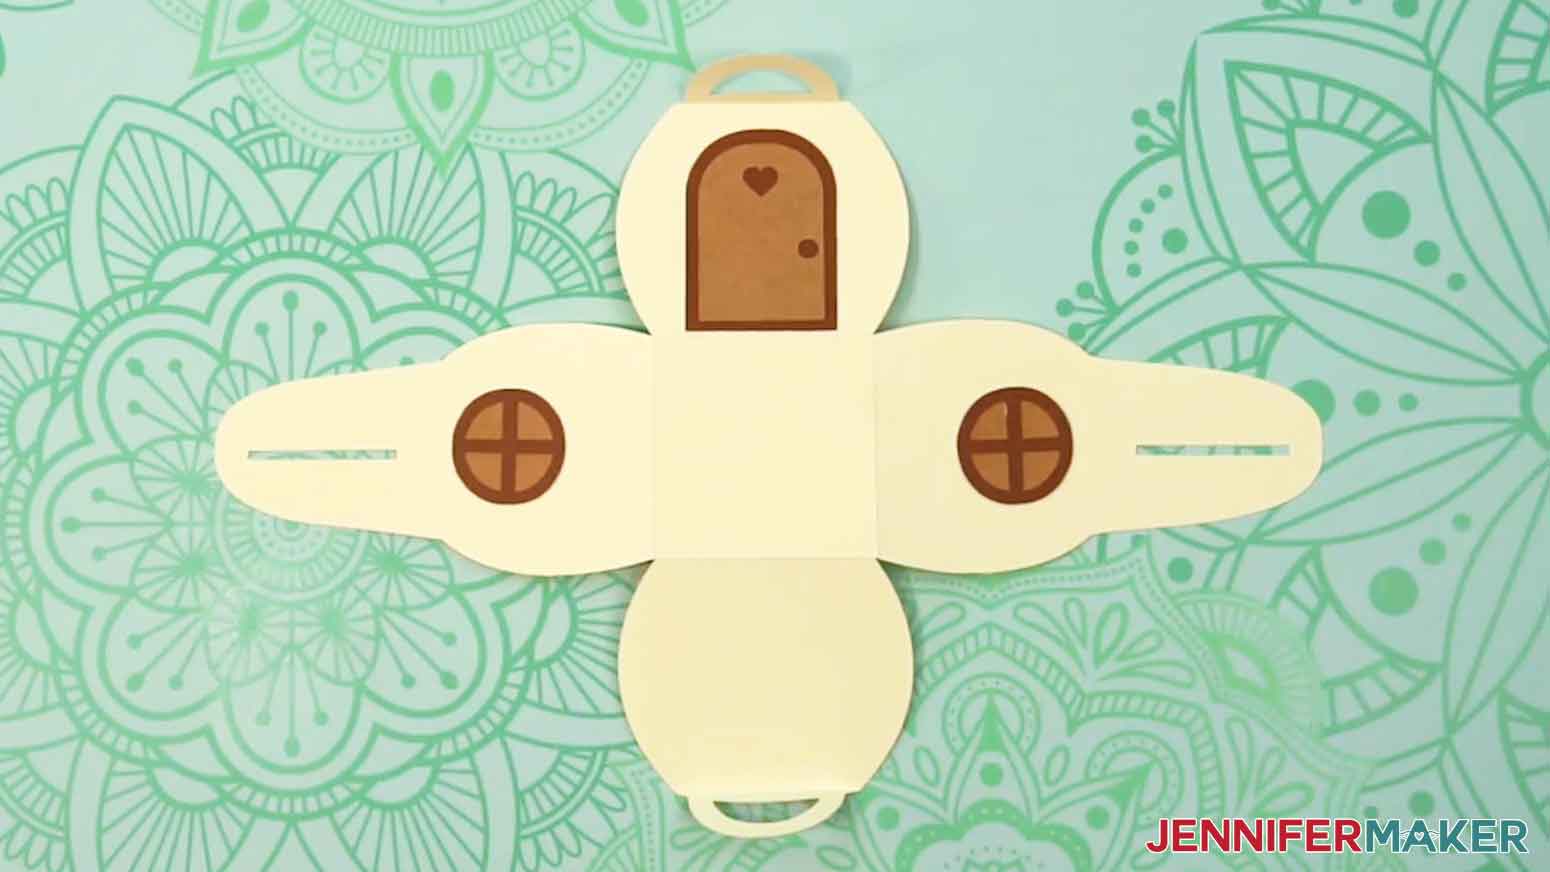
5. Apply craft glue to the back of the solid door piece, then adhere it to the center of a side of the box with a looped tab, just above the side’s score line where it meets the square-shaped bottom of the box.
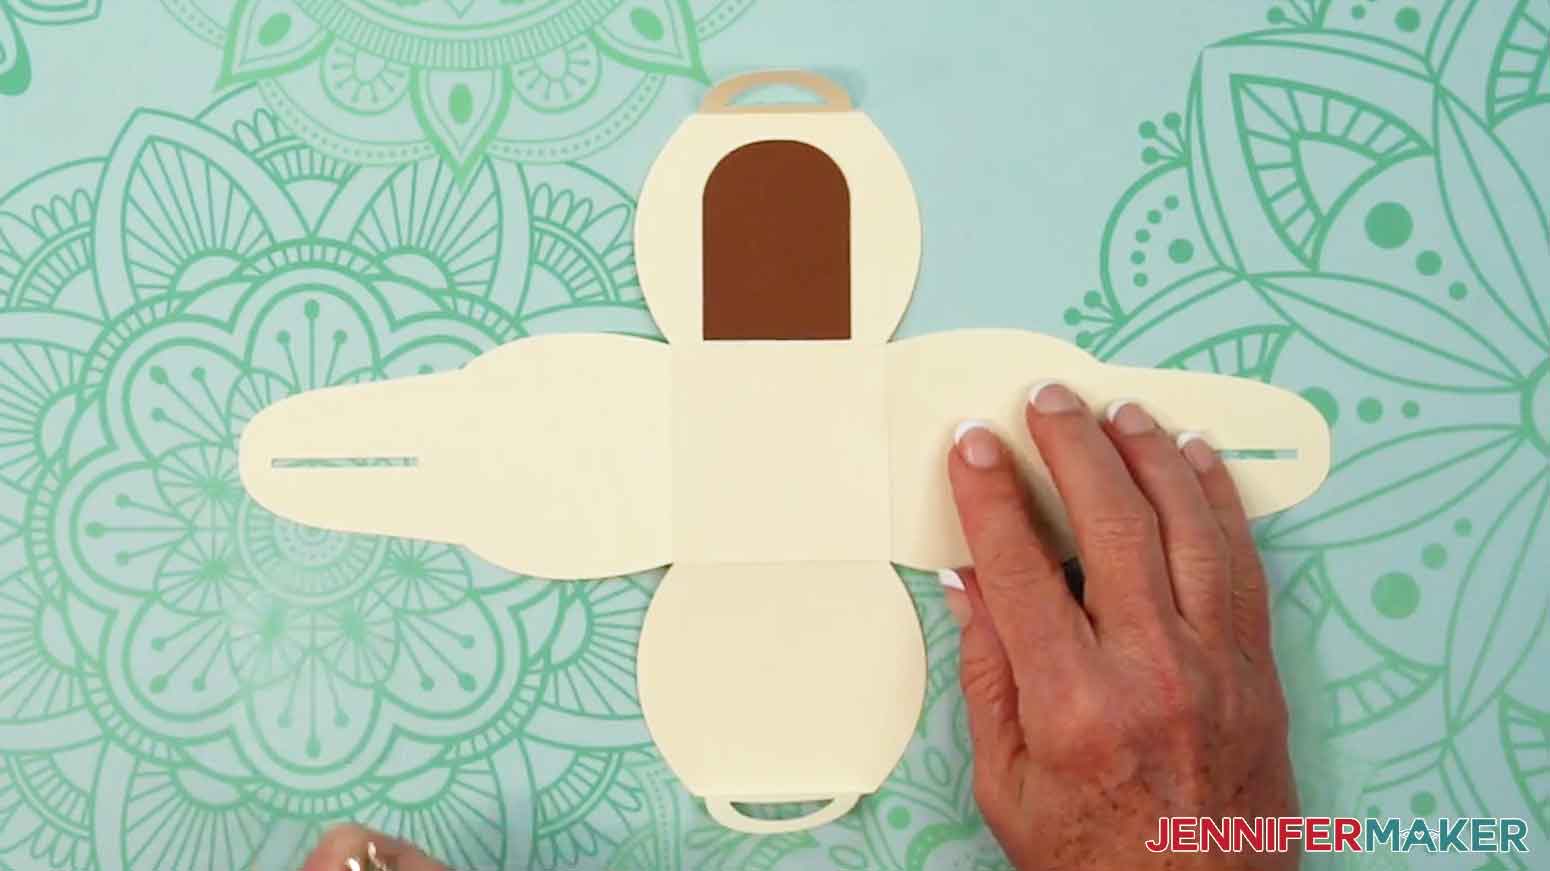
6. Apply craft glue to the back of the door piece with the cutouts (avoiding the cutouts), then adhere it to the center of the solid door piece.
7. Apply craft glue to the back of one of the solid window pieces, then adhere it to the center of a side of the box with a long slit
8. Apply thin lines of craft glue to the back of a window piece with cutouts, avoiding the cutouts, then adhere it to the center of the solid window piece.
9. Repeat steps 7-8 to add the other window pieces to the other side of the box with a long slit.
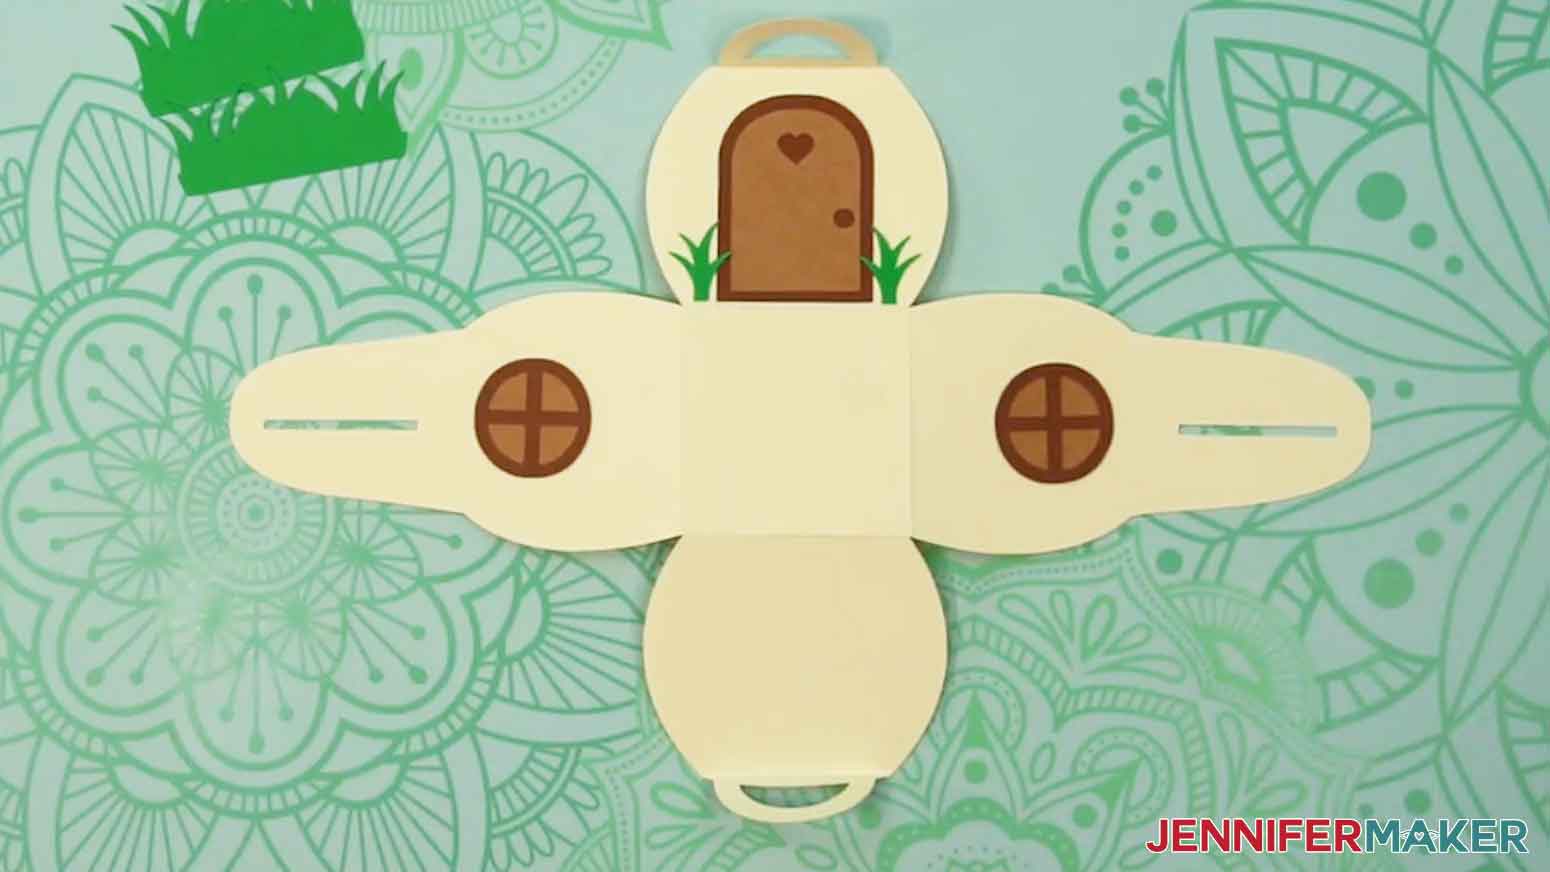
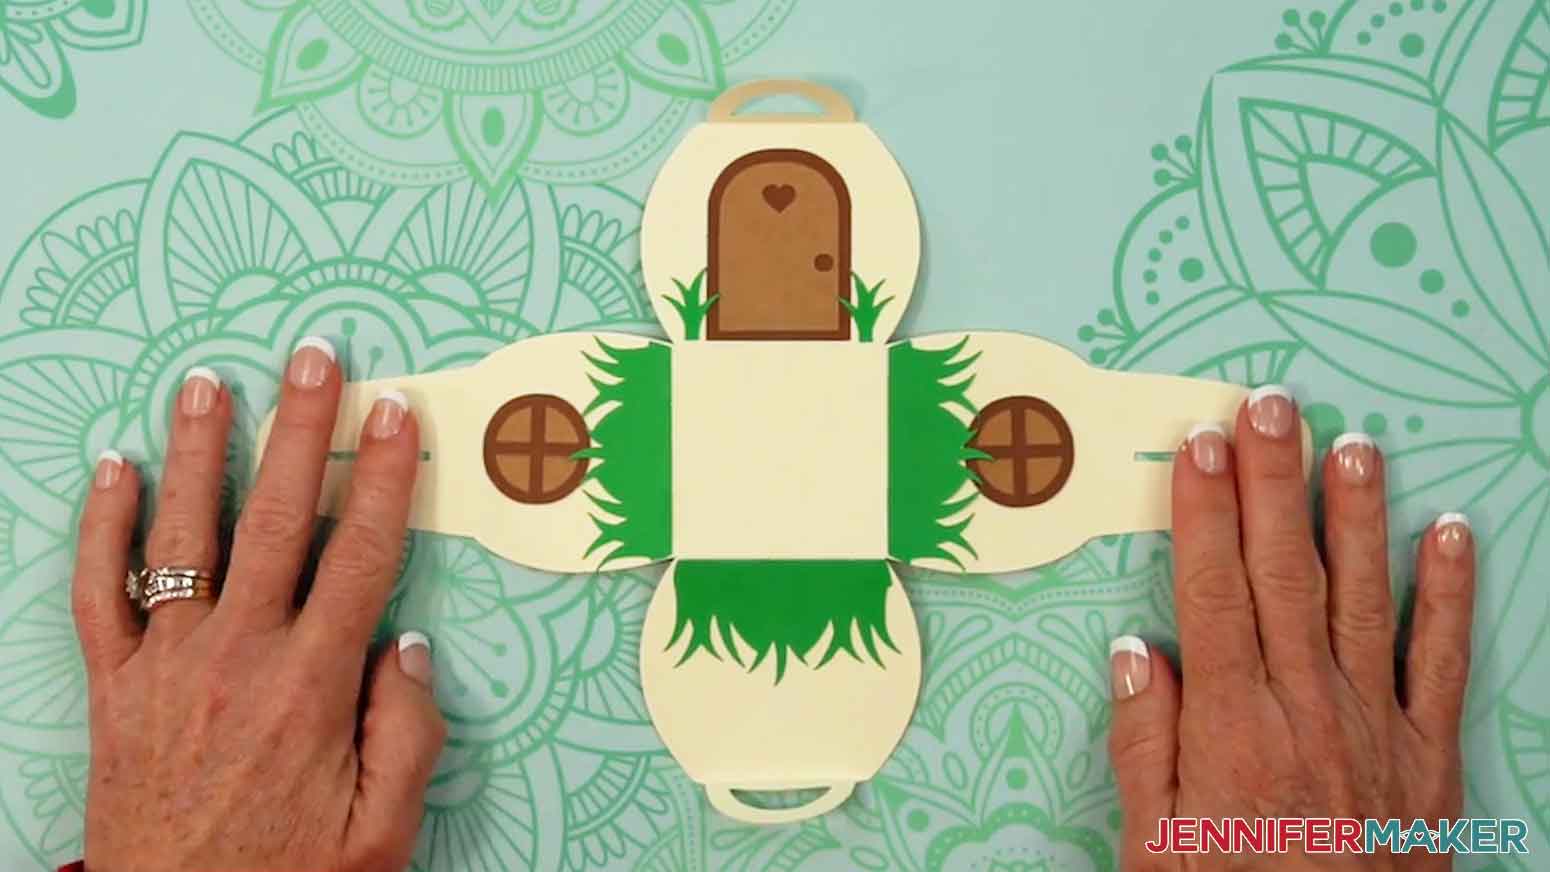
10. Apply craft glue to the back of one of the small grass pieces.
11. Adhere it to the side of the box with the door, aligning the bottom edge with the bottom of the door and slightly overlapping the solid door piece.
12. Repeat steps 10-11 with the other small grass piece on the other side of the door.
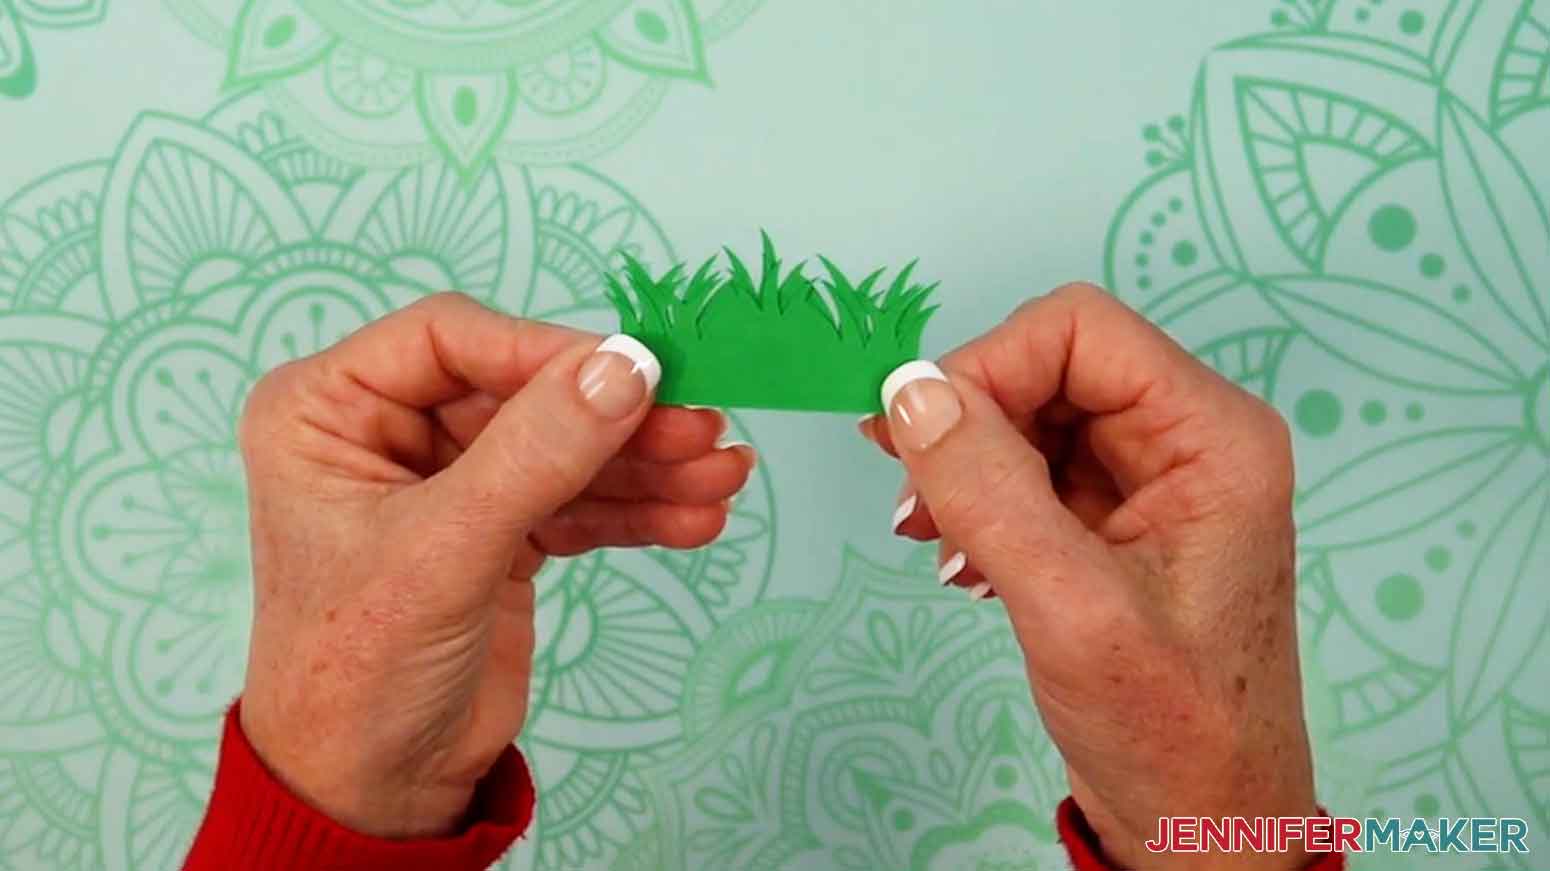
13. Grab the three large grass pieces and stack them on top of one another. Find the tallest piece – that’s for the back panel of the box (opposite the side with the door).
14. Apply craft glue to the back of the tallest grass piece and adhere it to the back panel of the box, just above the score line where the panel meets the bottom of the box.
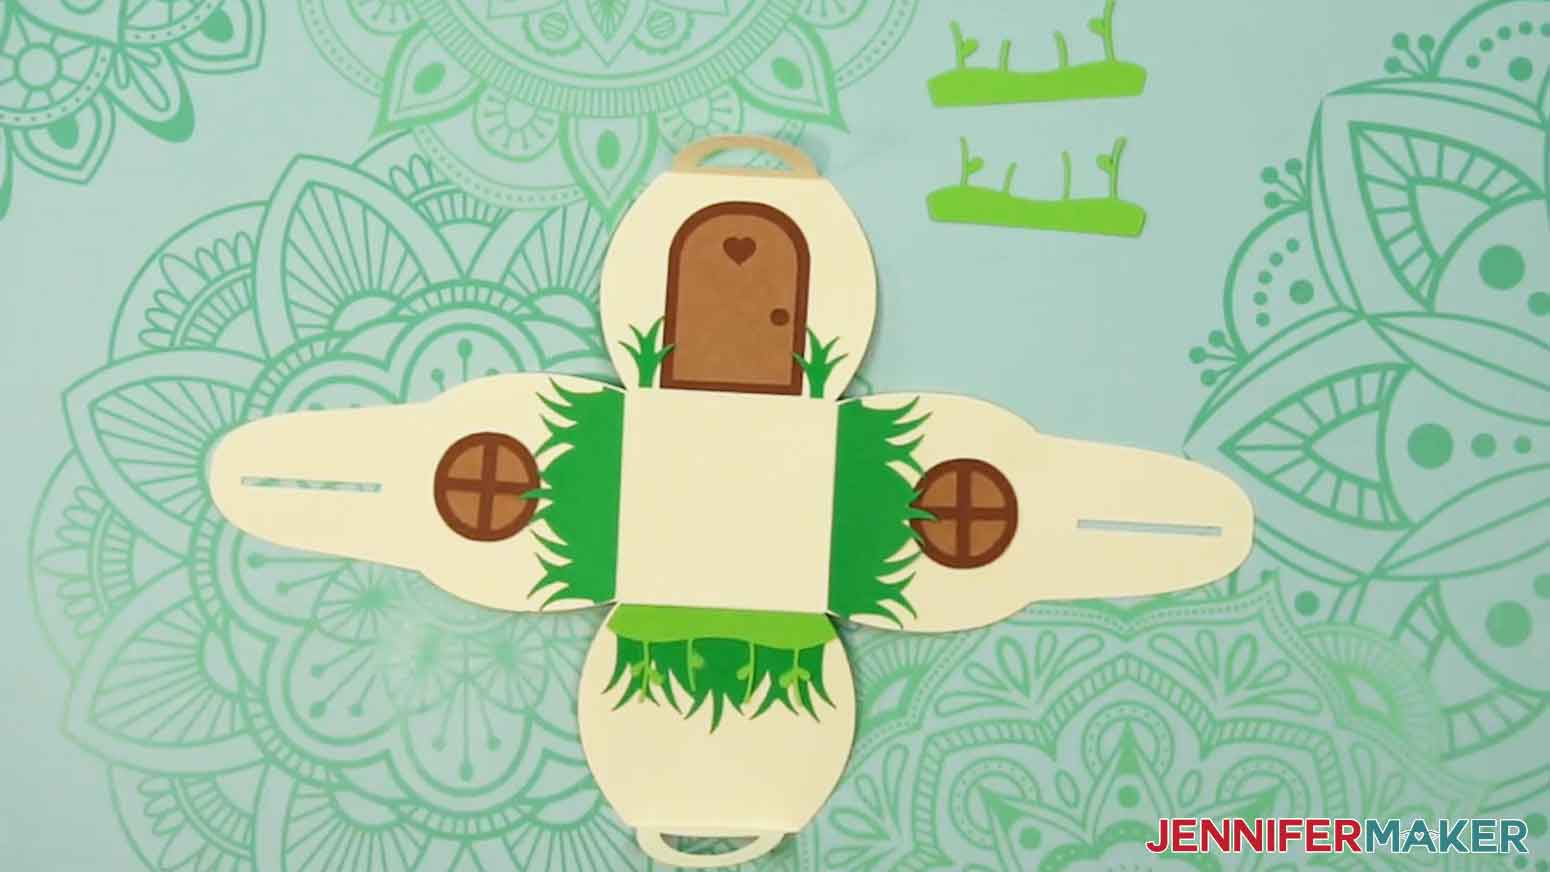
15. Apply craft glue to the back of one of the other longer grass pieces, and adhere it to one of the panels with a long slit, just above the score line.
NOTE: The grass may partially cover the window – this is OK.
16. Repeat step 15 with the remaining grass piece on the remaining panel of the box.
17. Grab the three stem pieces. The one with the leaves on the two center stems is for the back of the box.
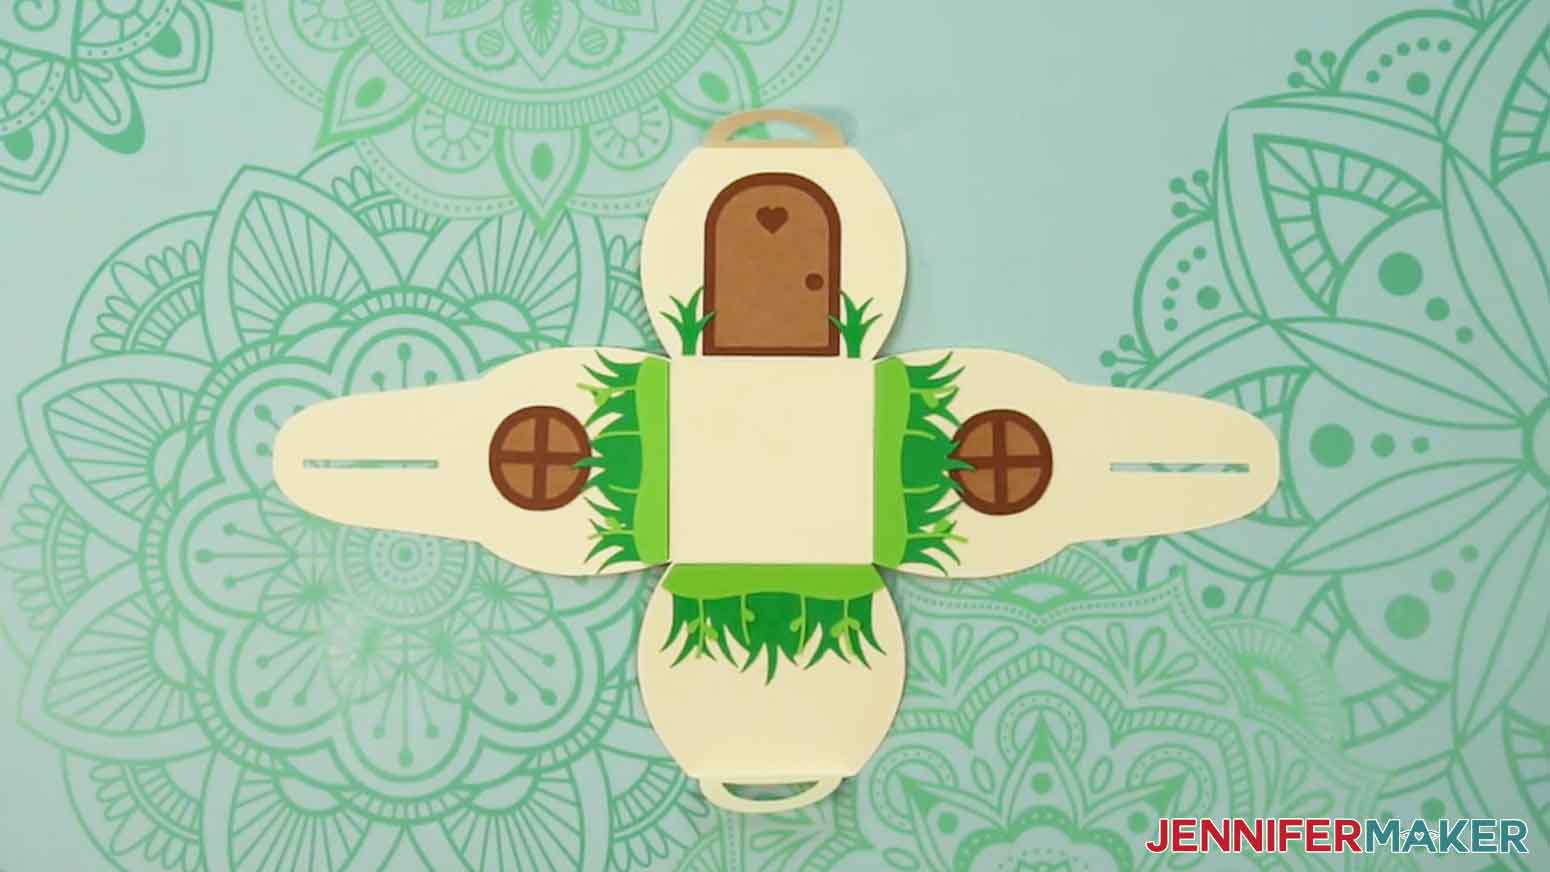
18. Apply craft glue to the back of the stem piece and adhere it to the back panel of the box (opposite the side with the door), on top of the grass, aligning their bottom edges.
19. Apply craft glue to the back of one of the other stem pieces, and adhere it to a side of the box with a long slit, on top of the grass, aligning their bottom edges.
20. Repeat step 19 with the remaining stem piece over the large grass piece on the remaining side of the box.
21. If you cut your flowers out of more than one color of cardstock, lay them out on the top of each stem to determine their arrangement.
NOTE: I cut six large red flowers, three small orange flowers, and three small yellow flowers. I placed the red flowers on the outside of each stem piece, with one yellow and one orange flower between them.
22. Apply craft glue to the back of each flower, then press to adhere it in place on each stem.
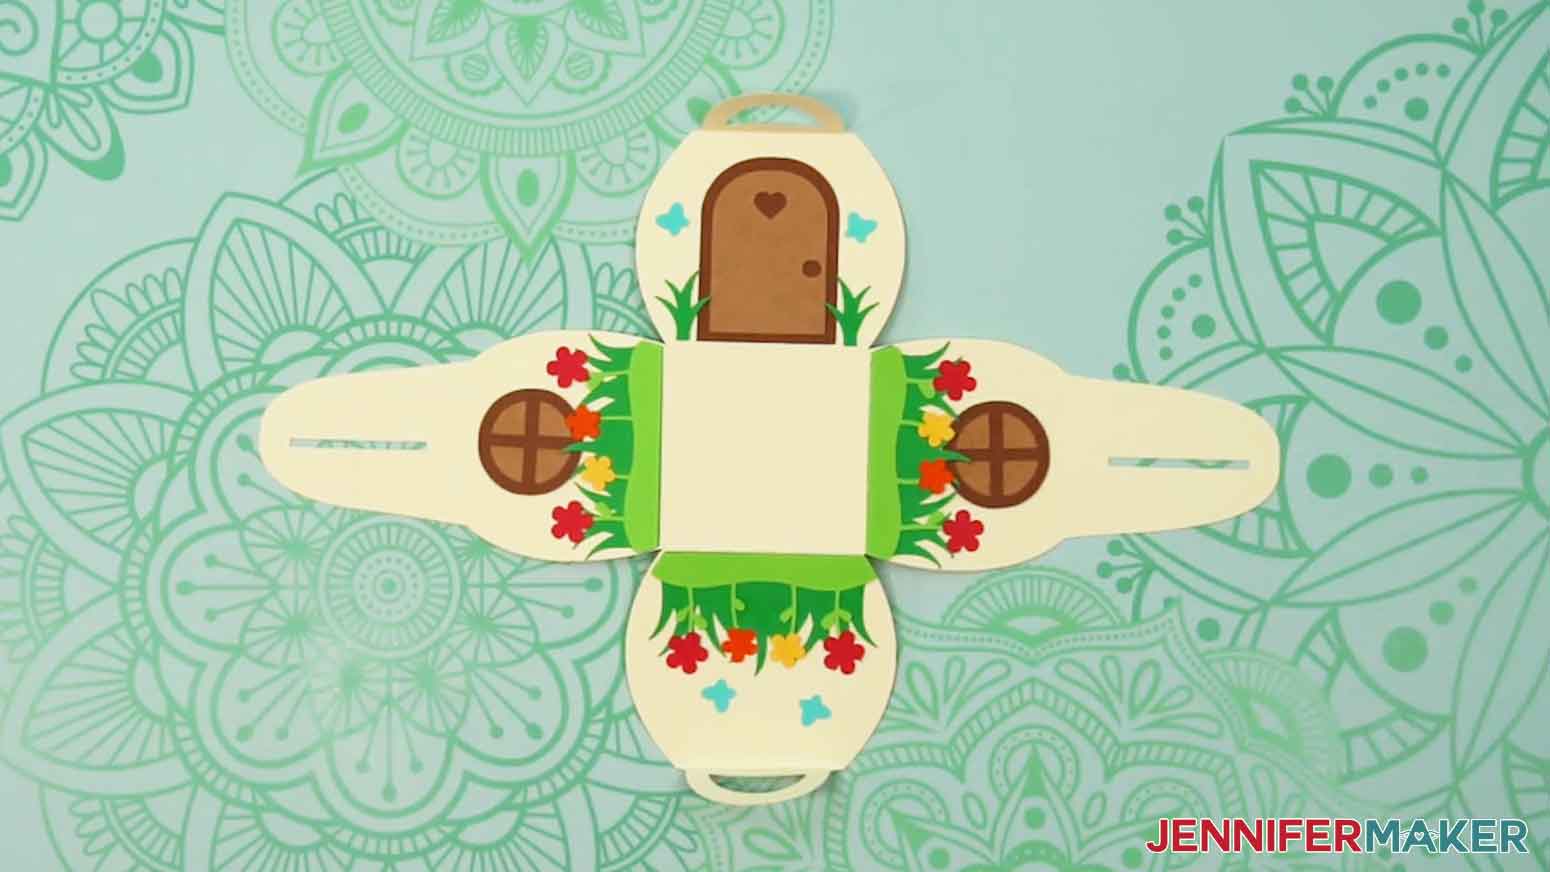
23. Apply craft glue to the back of one butterfly, and adhere it to the center of the empty space next to the door.
24. Repeat step 23 with the other butterfly on the other side of the door.
25. Apply craft glue to the back of the other two butterflies, then adhere them to the back panel of the box (opposite the side with the door) in a staggered position. Make sure they’re right-side-up in relation to the flowers.
26. Turn the box face down and fold up three of the sides along the score lines.
27. If you are putting items inside the box, add them now.
28. Fold up the last side, then align the looped tabs’ edges.
29. Lift one side with a long slit up and gently tuck the pinched tabs up through the slit.
30. Repeat step 29 with the last side of the box.
31. Grab the roof piece and the mushroom spots. Apply craft glue to the back of each mushroom spot, then adhere it to the one side of the roof piece.
TIP: Adhere the dots in random positions to better mimic a real mushroom!
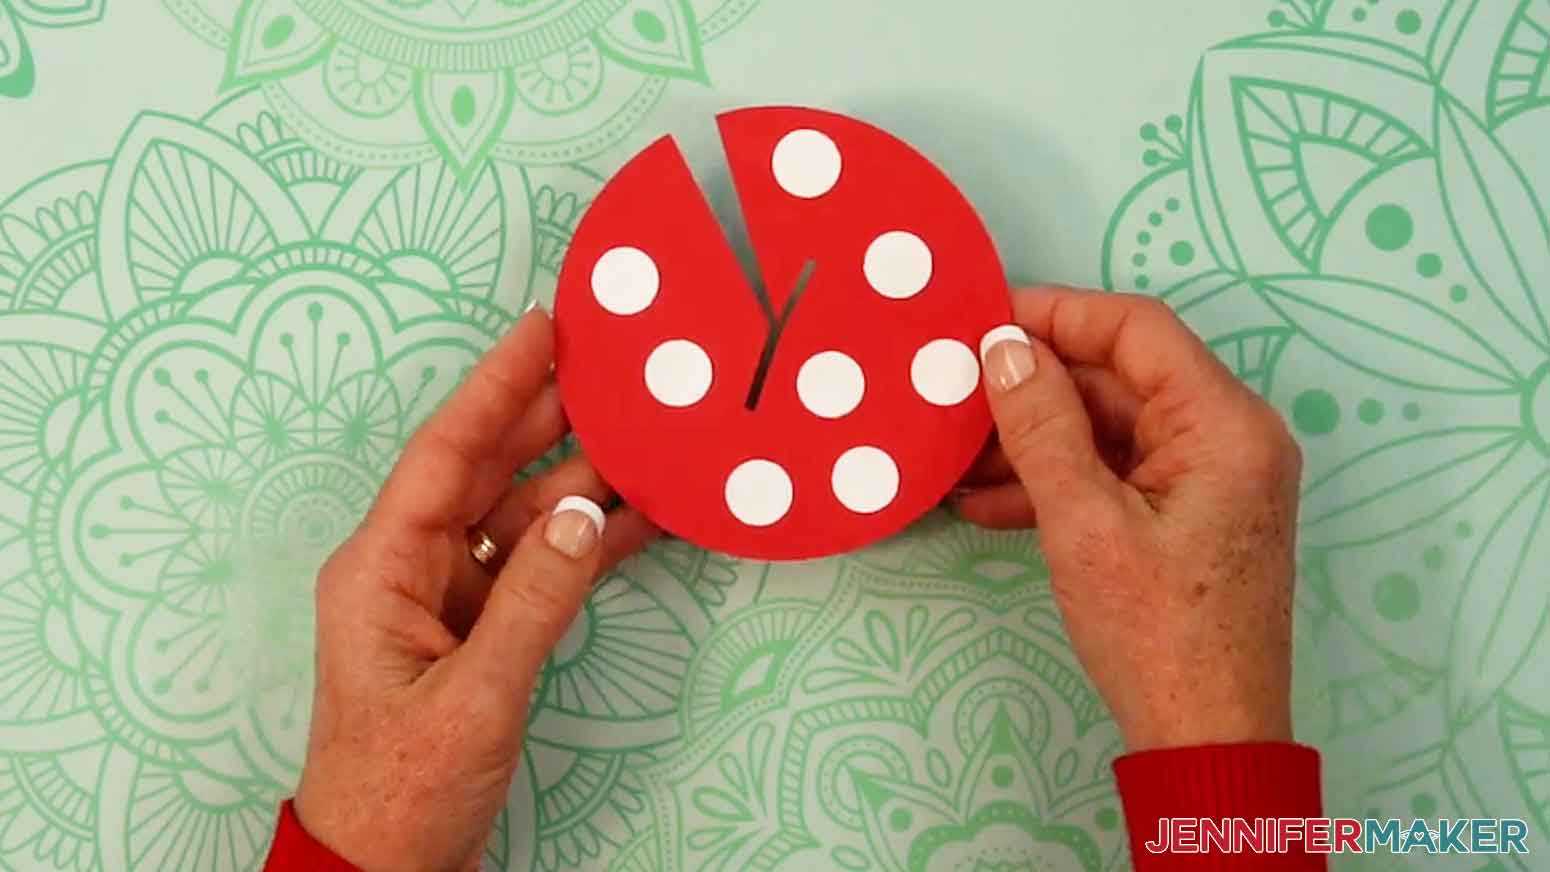
32. Turn the roof piece over and apply a thin line of craft glue along one edge of the pie-shaped cutout.
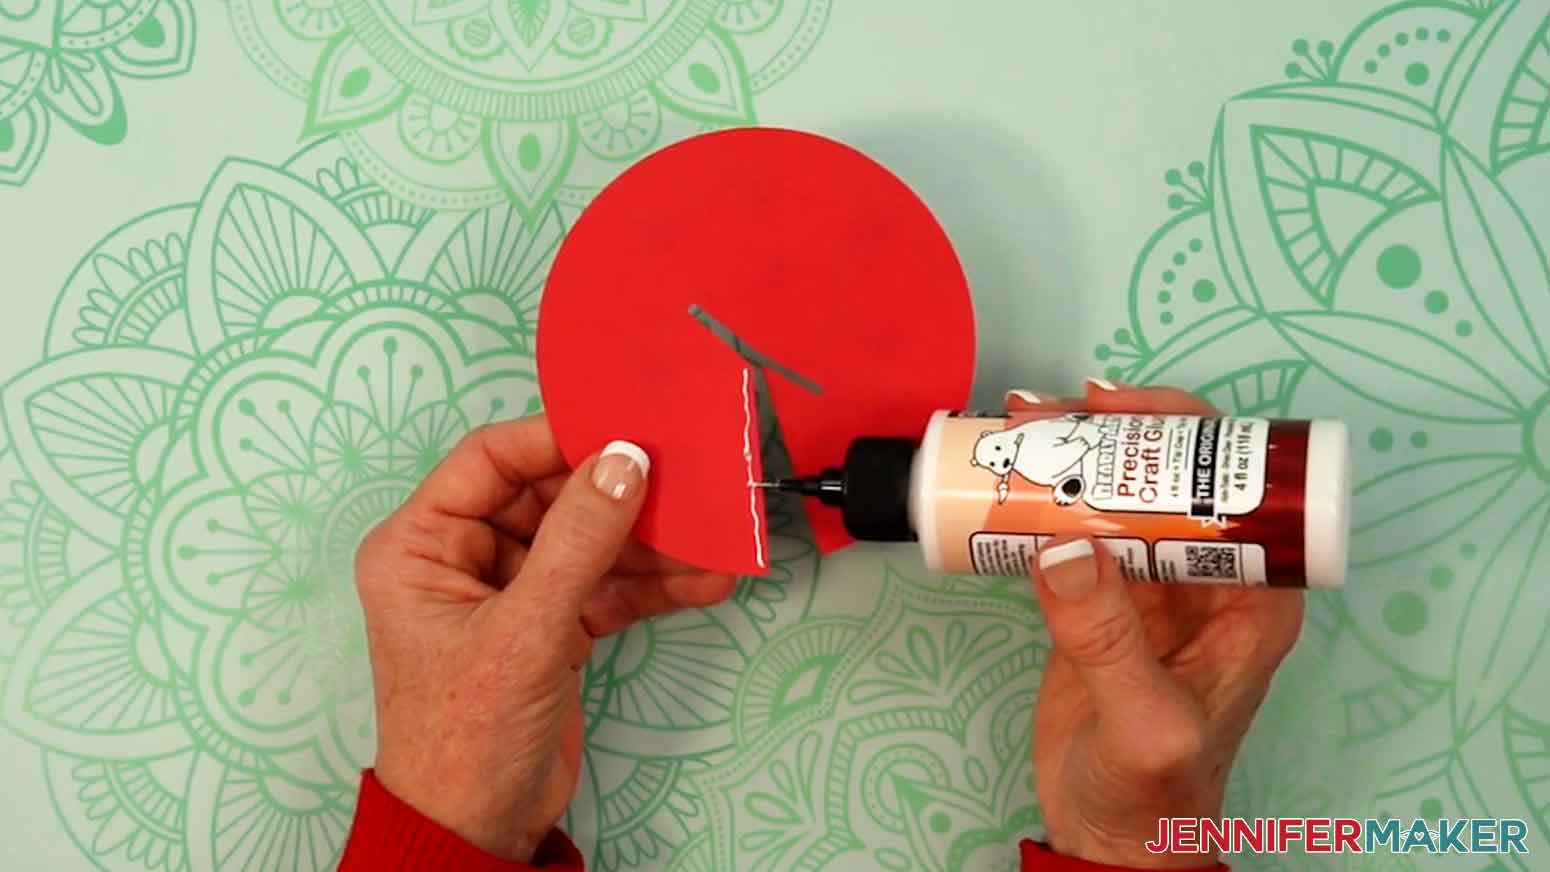
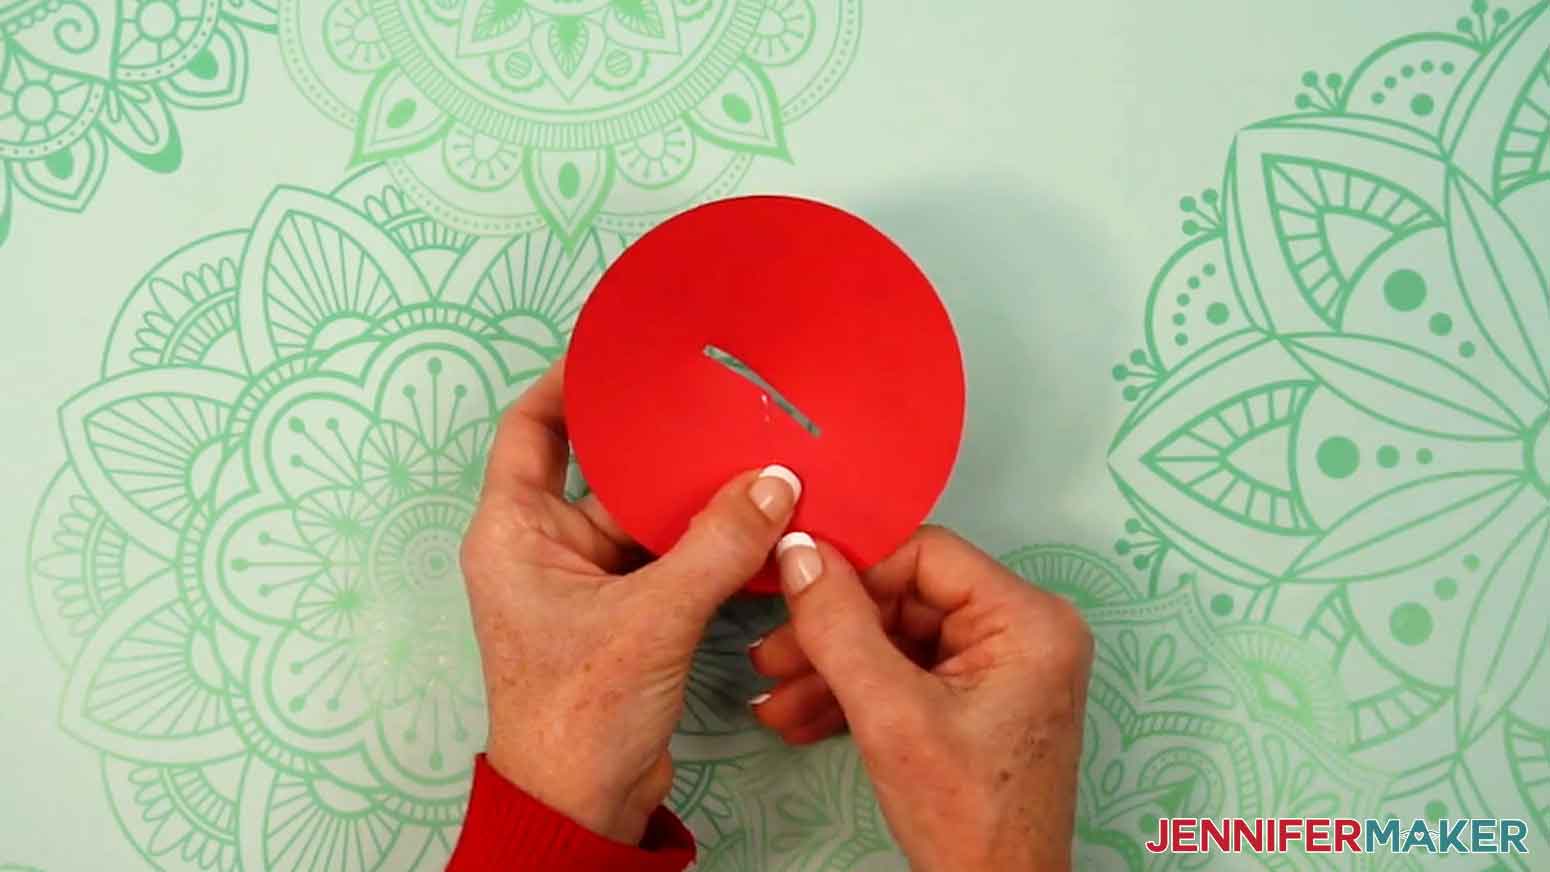
33. Pull the sides of the pie-shaped cutout together until the side without glue is slightly overlapping the side with glue and the slit shape in the middle forms a straight line. Hold the sides in place until the glue fully sets.
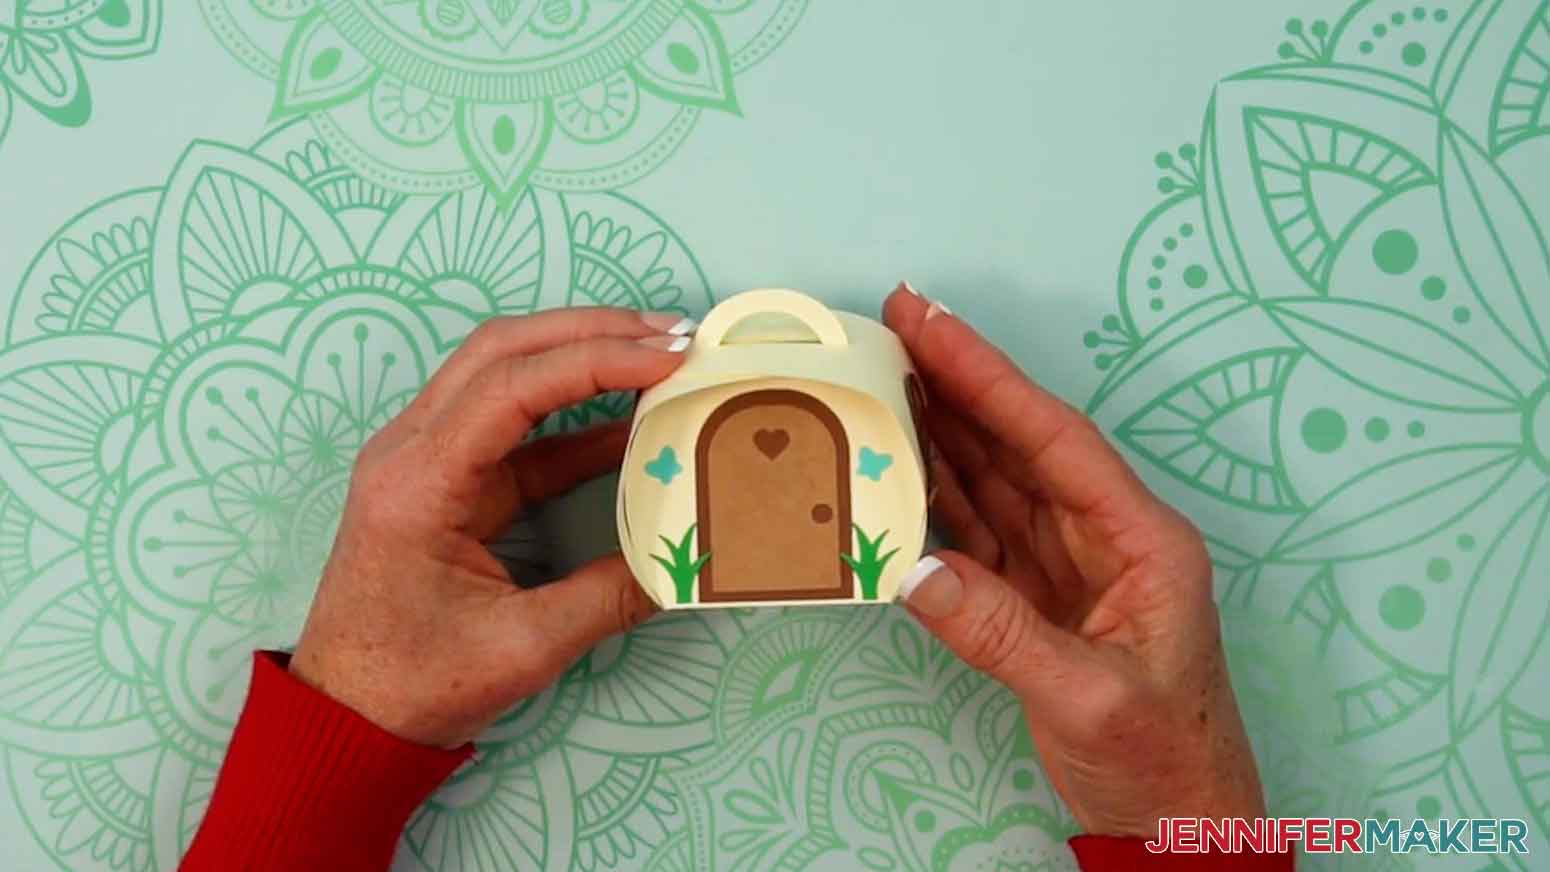
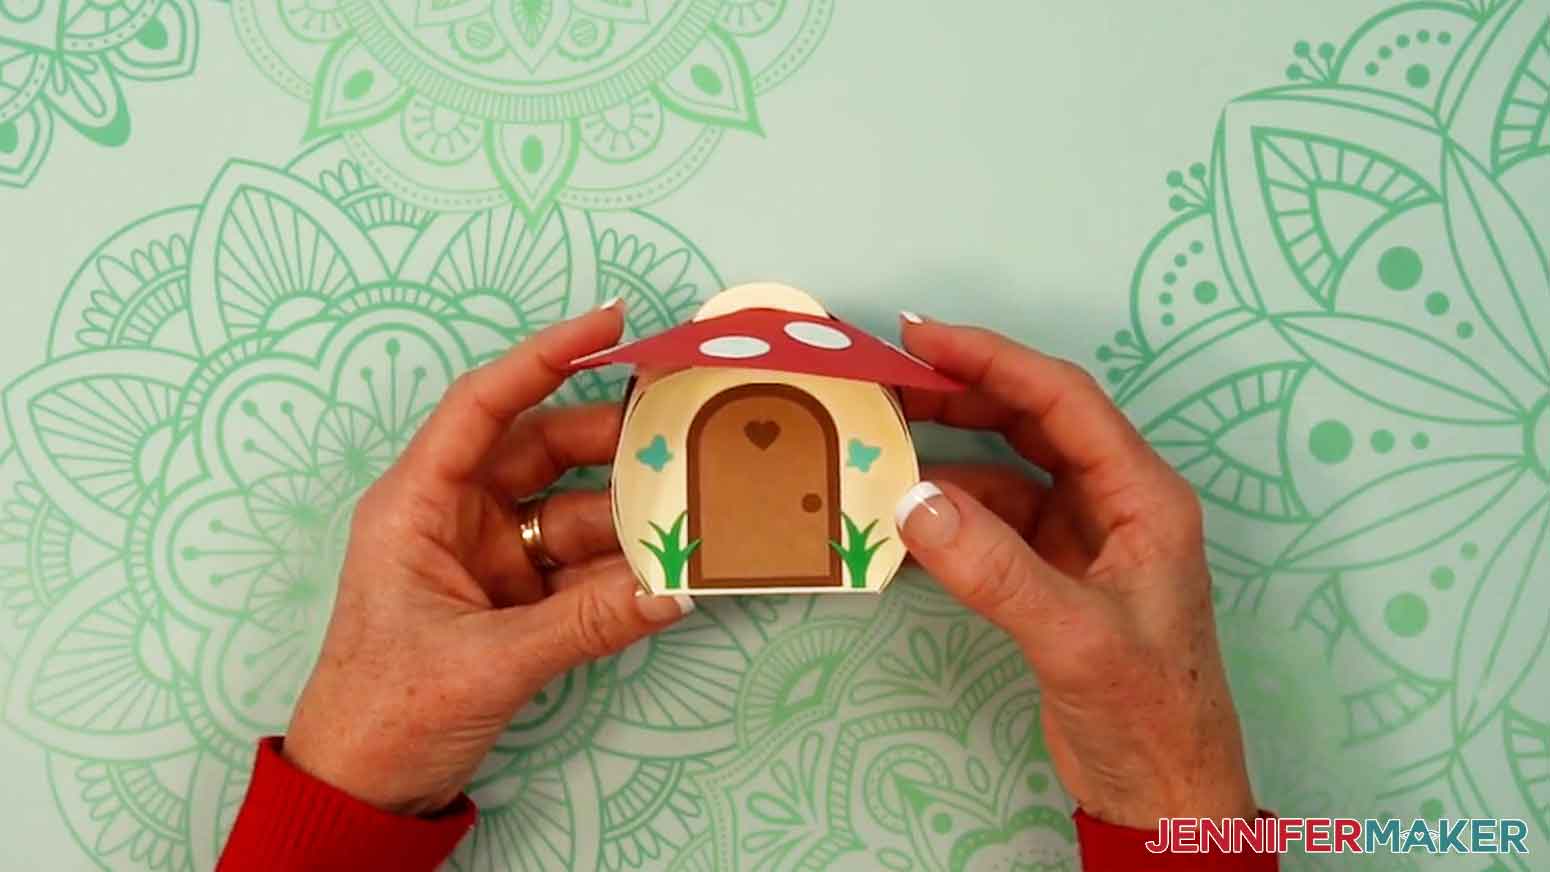
34. Place the assembled mushroom roof on top of the keepsake box, inserting the top of the house into the rectangular opening in the roof.
35. Your mushroom house keepsake box is ready to gift or display!
SNOWFLAKE ASSEMBLY
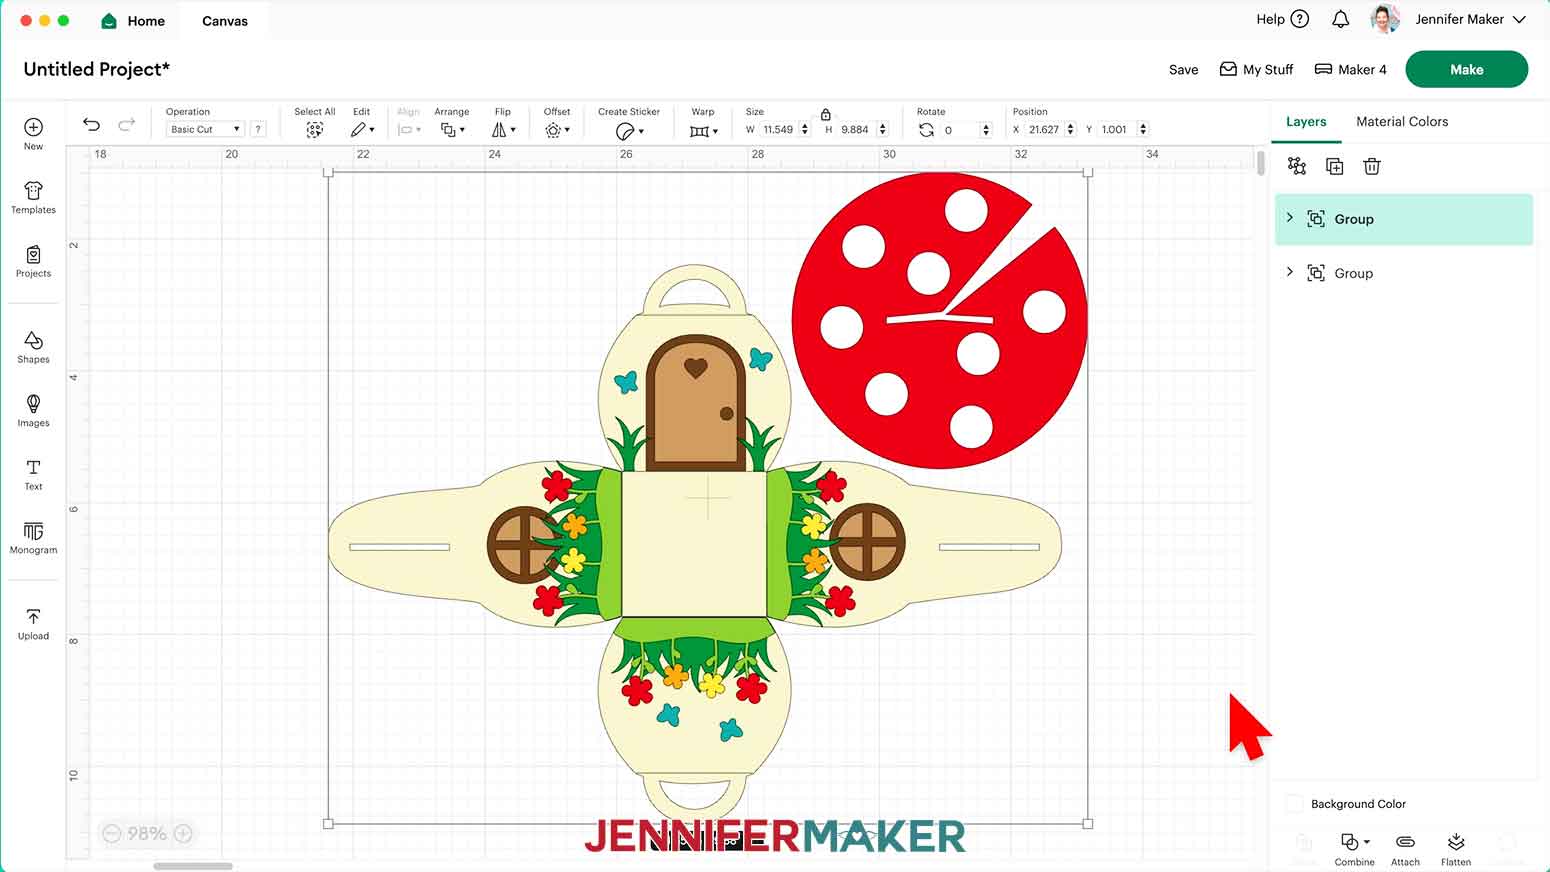
NOTE: The snowflake design has a large box piece and one acetate window piece.
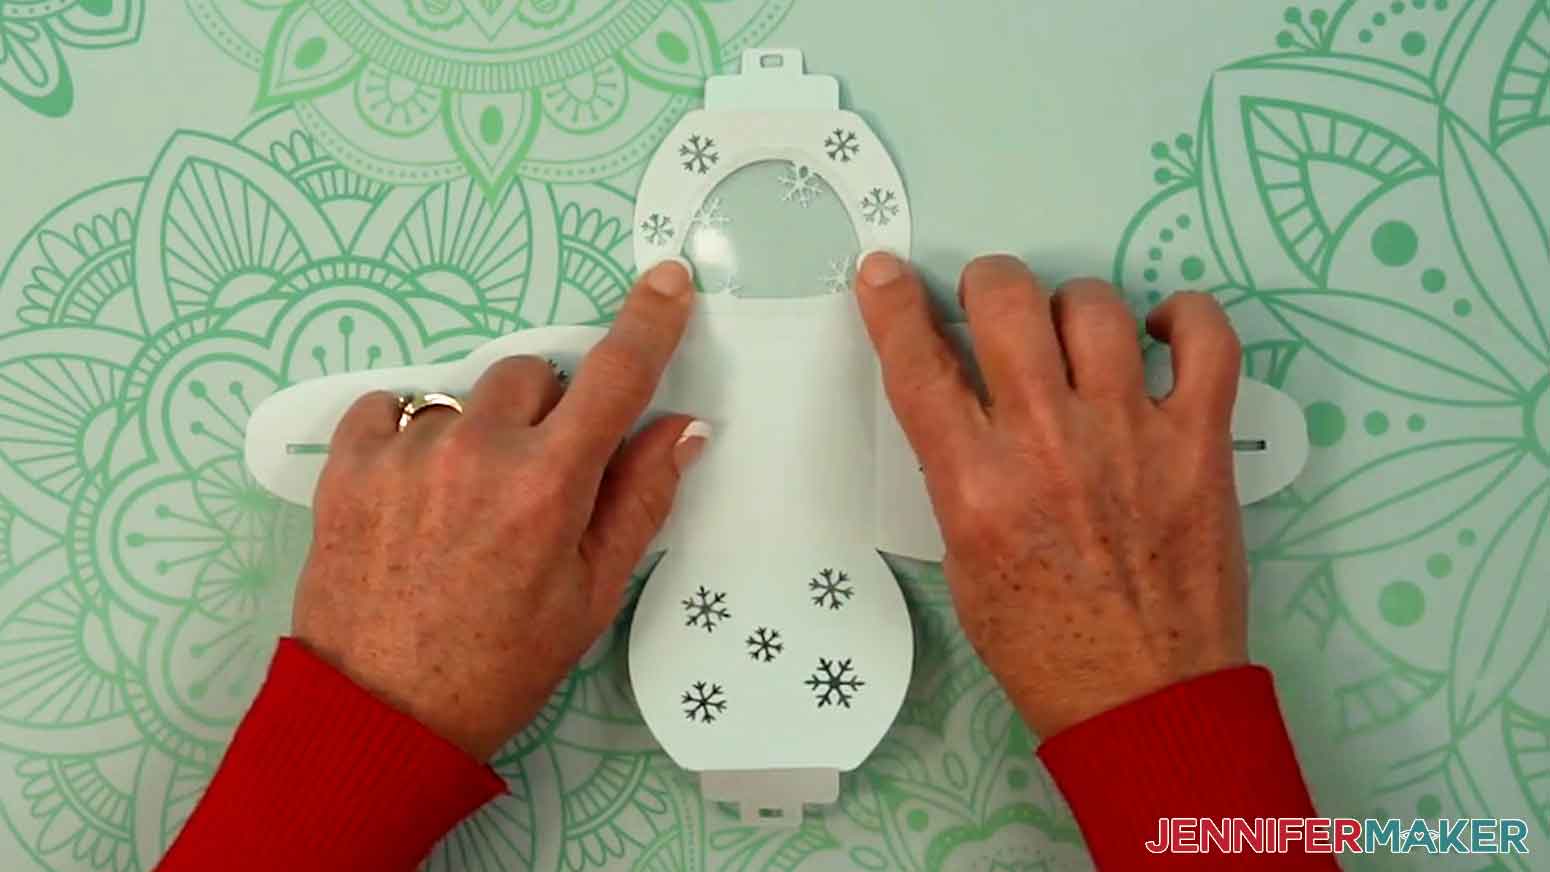
1. Place the large box piece so the score lines are face DOWN on your work surface.
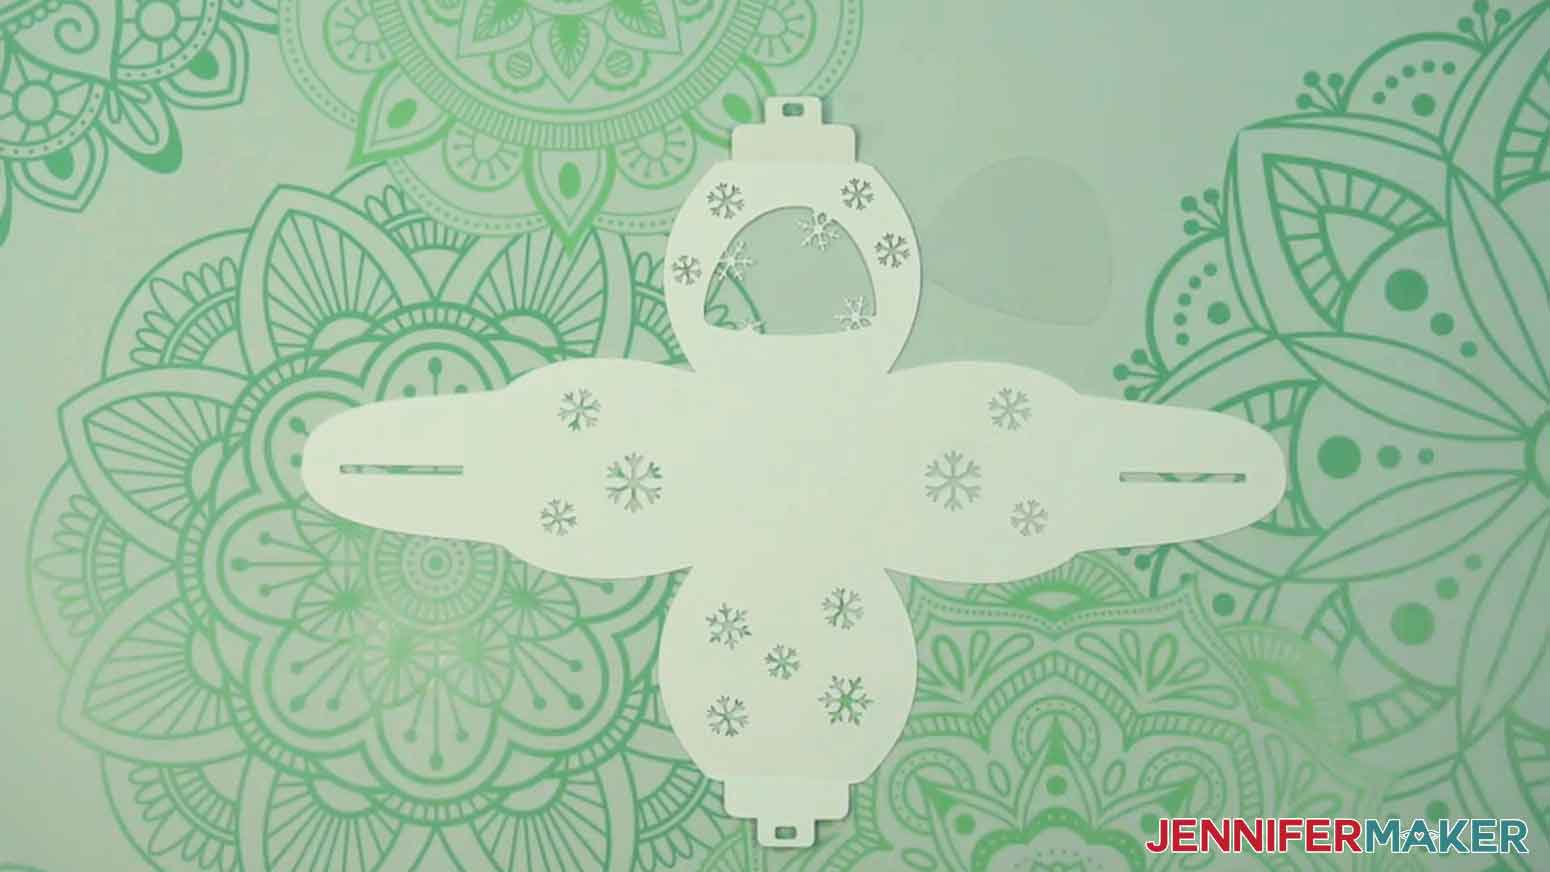
2. On the large box piece, fold up the two tabs along the score lines.
3. Turn the large box piece over so the score lines are facing up, then carefully fold up the four sides along the score lines.
4. Apply small dots of craft glue around the window cutout.
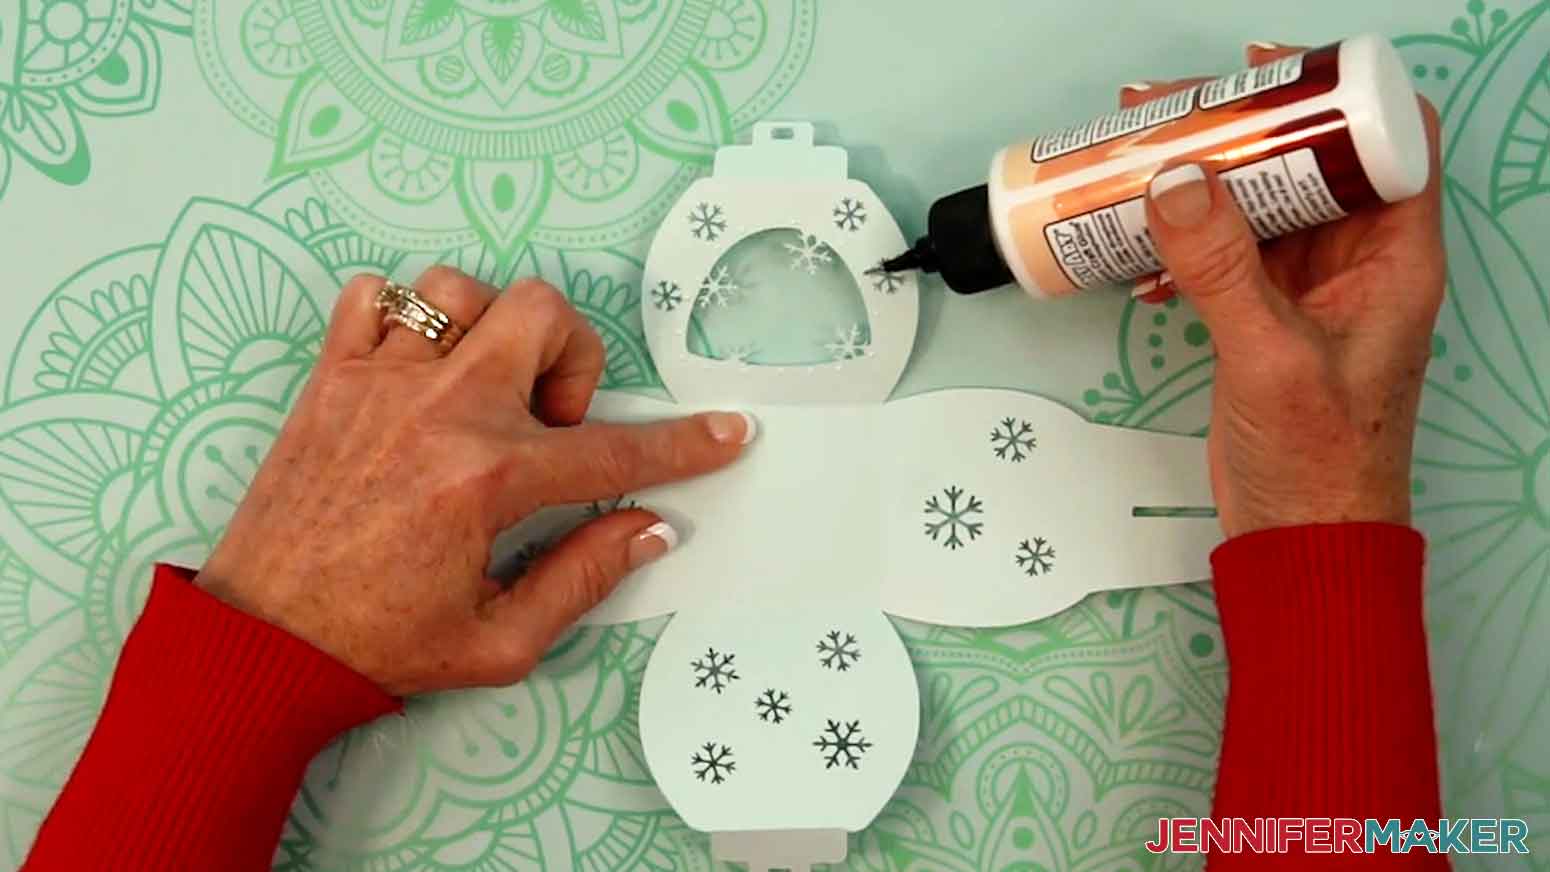
5. Adhere the acetate window piece to the glue around the window cutout. Let the glue fully set.
6. Fold up three sides of the box.
7. If you are putting items inside the box, add them now.
8. Fold up the last side, then fold the tabs up and align their edges.
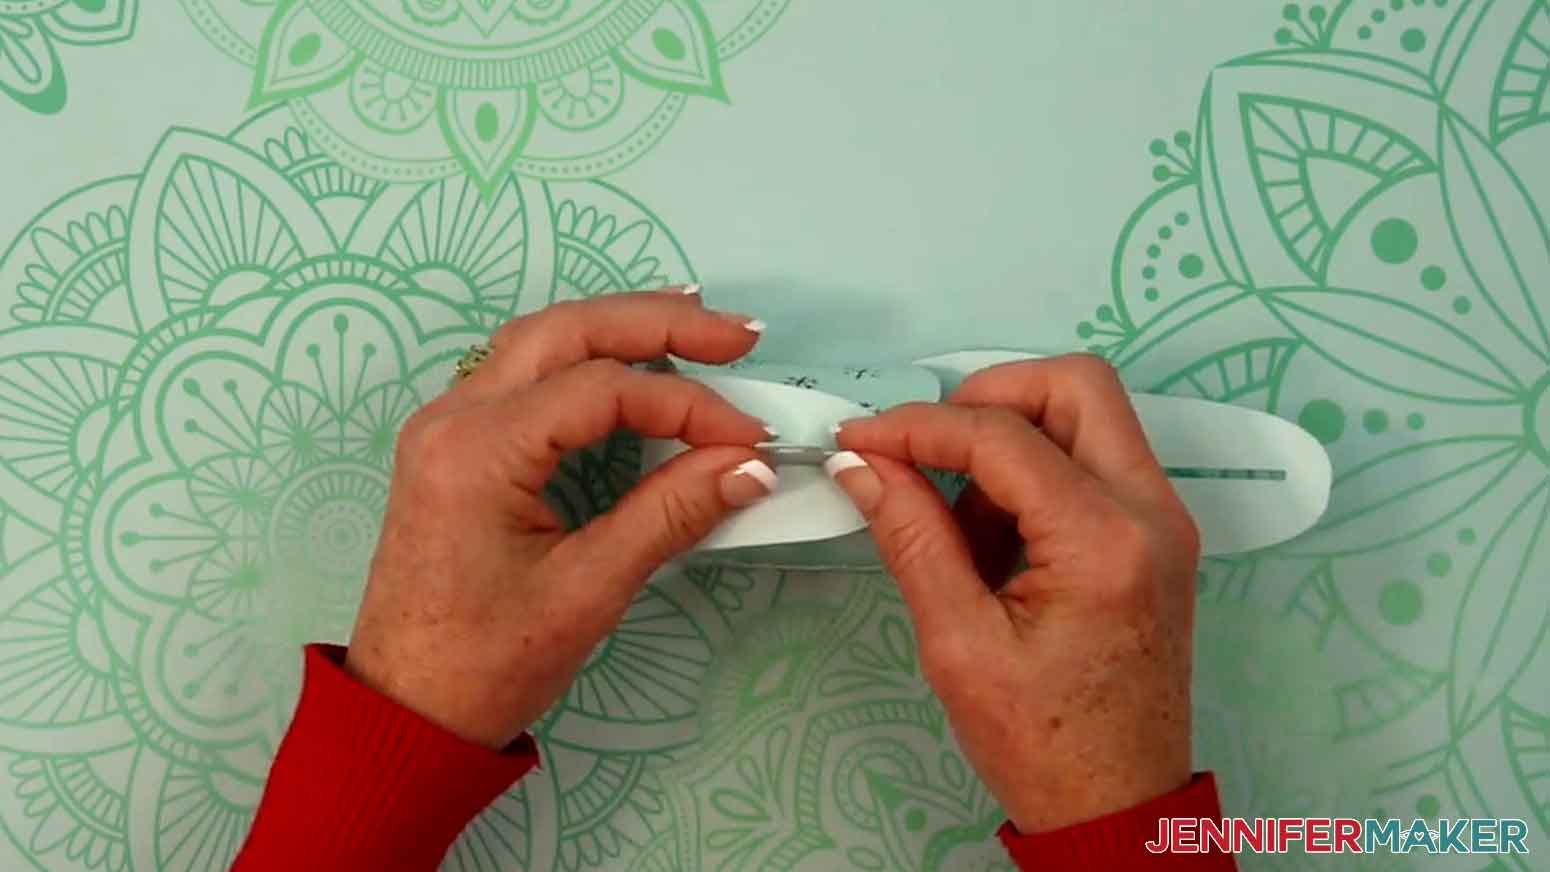
9. Lift one side with a long slit up and gently tuck the pinched tabs up through the slit.
10. Repeat step 9 with the last side of the box.

11. Use scissors to cut an 8” piece of ⅖” wide ribbon.
12. String the ribbon through the rectangular-shaped holes on the tabs at the top of the box
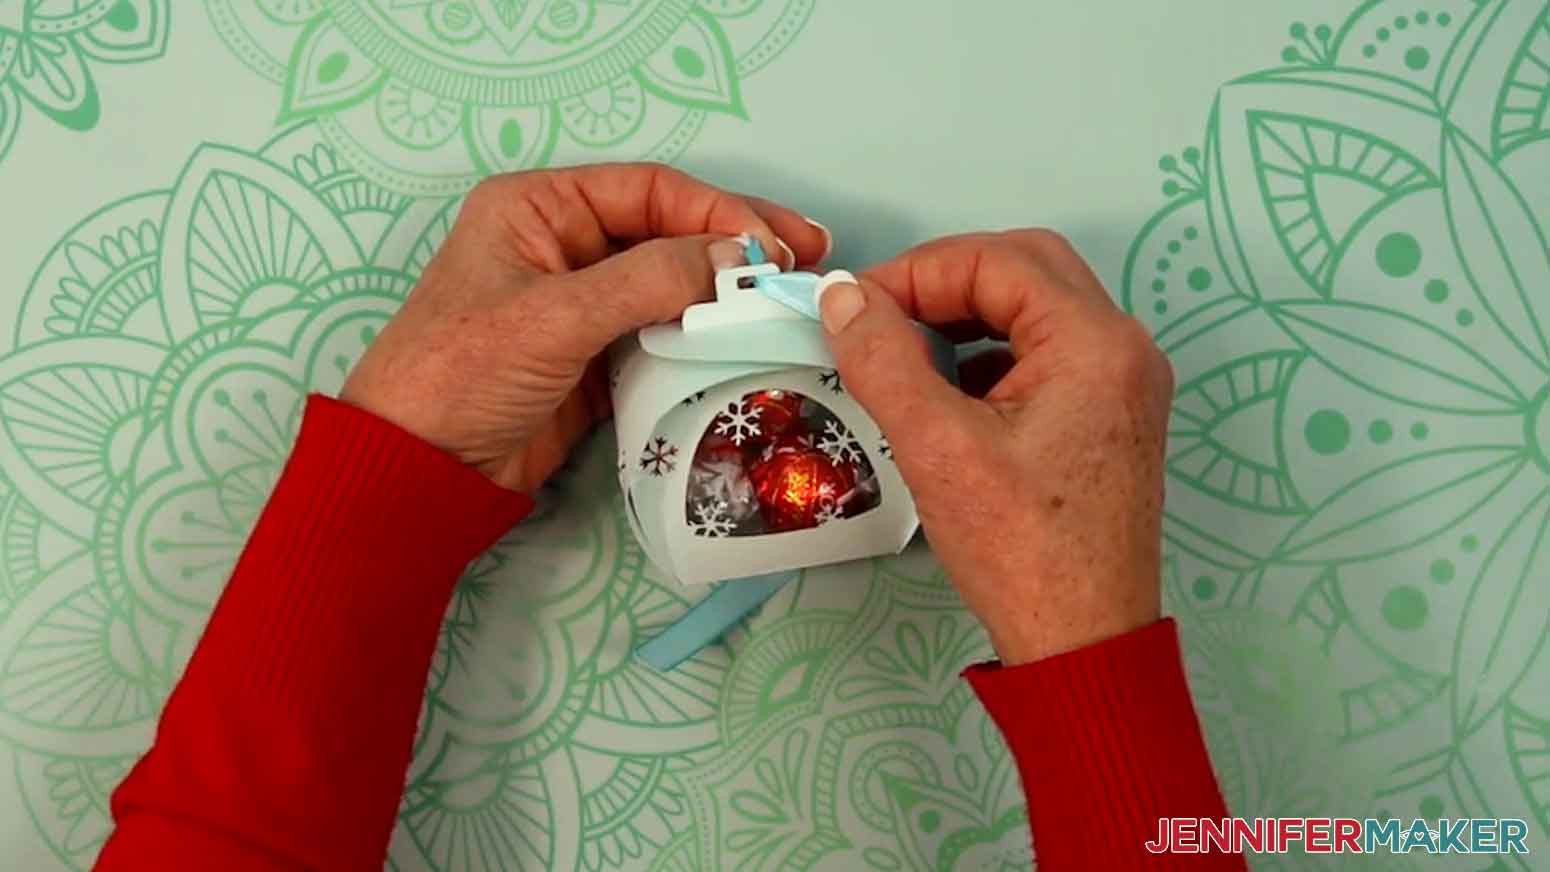
13. Tie the ribbon in a bow, then trim the ends if needed.
14. Your snowflake keepsake box is ready to gift or display!
SNOWMAN ASSEMBLY
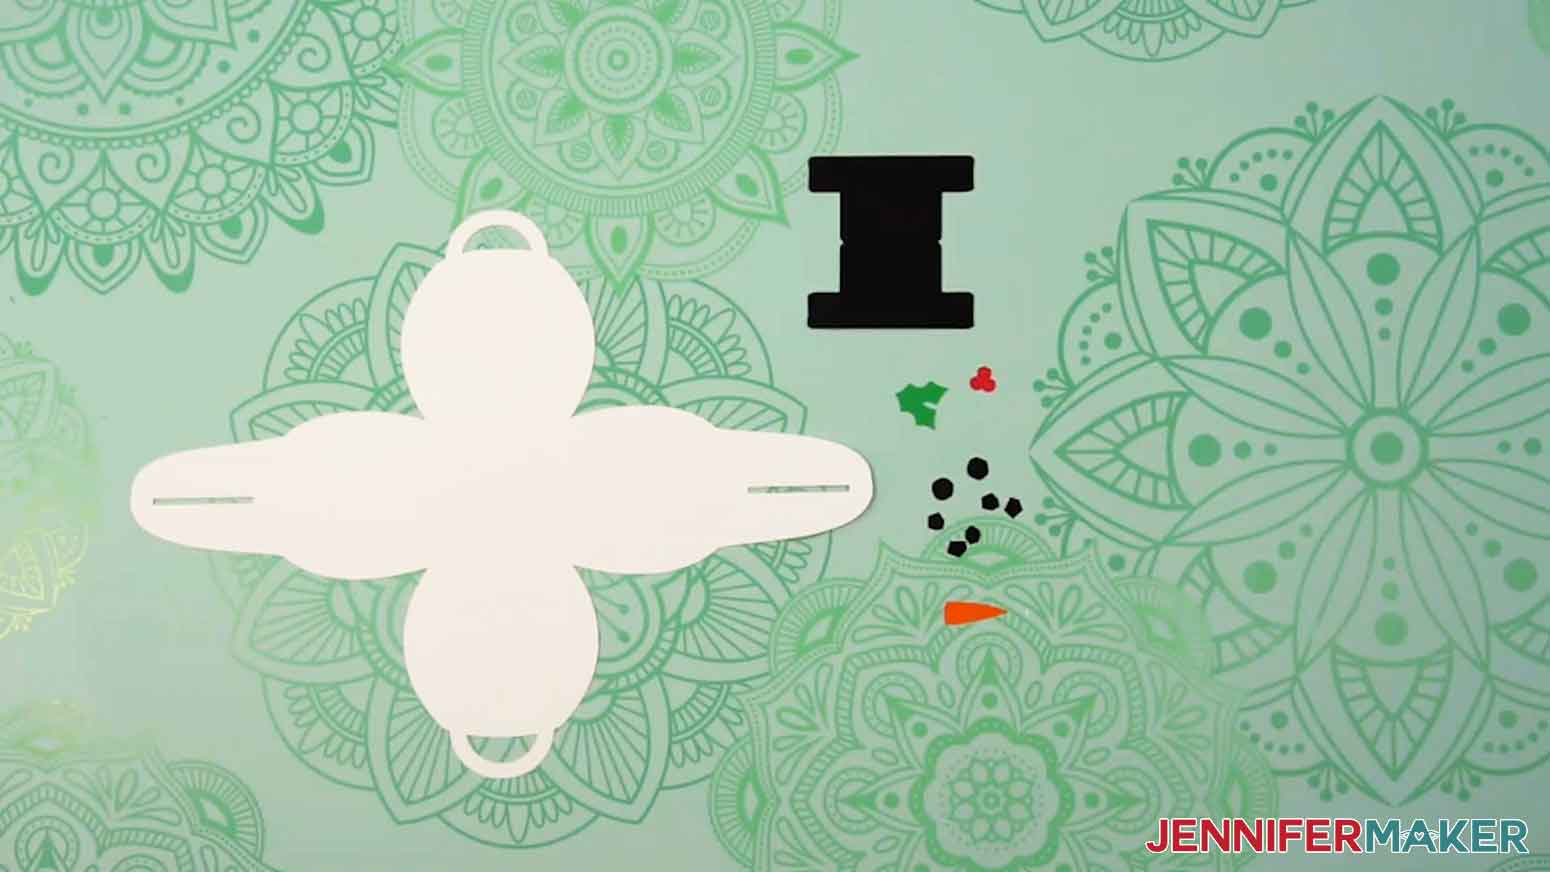
NOTE: The snowman box design has a large box piece, one hat piece, one leaf piece, one berry piece, two larger coal pieces, five smaller coal pieces, and one carrot nose piece.
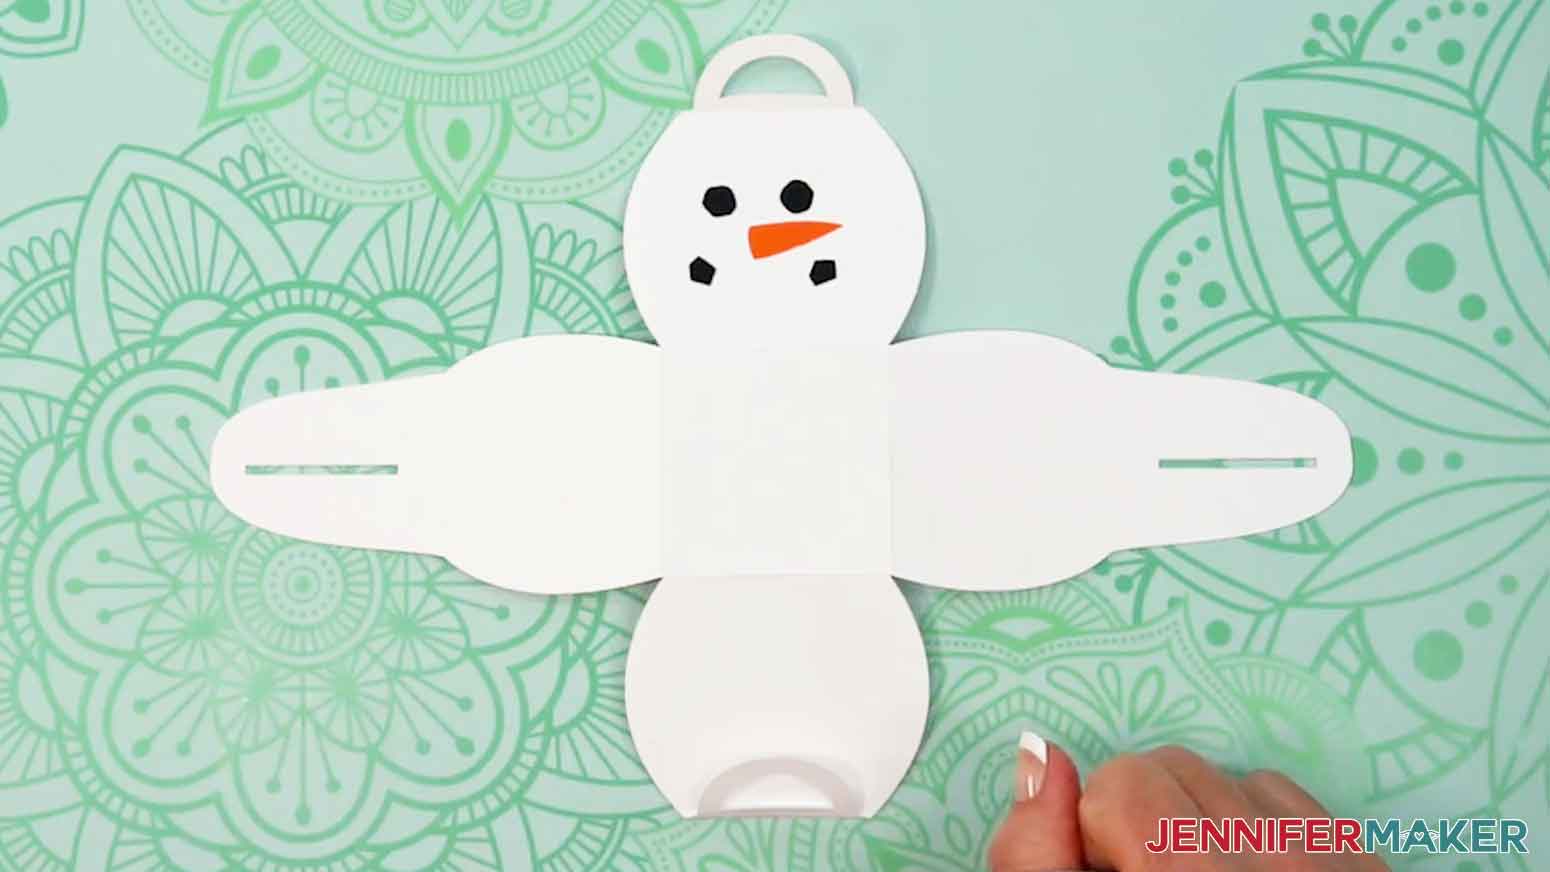
1. Place the large box piece so the score lines are face DOWN on your work surface. Place your smaller cut pieces face UP. Use the screen in Cricut Design Space as reference, if needed.
2. On the large box piece, fold up the two tabs along the score lines.
3. Turn the large box piece over so the score lines are facing up, then carefully fold up the four sides along the score lines.
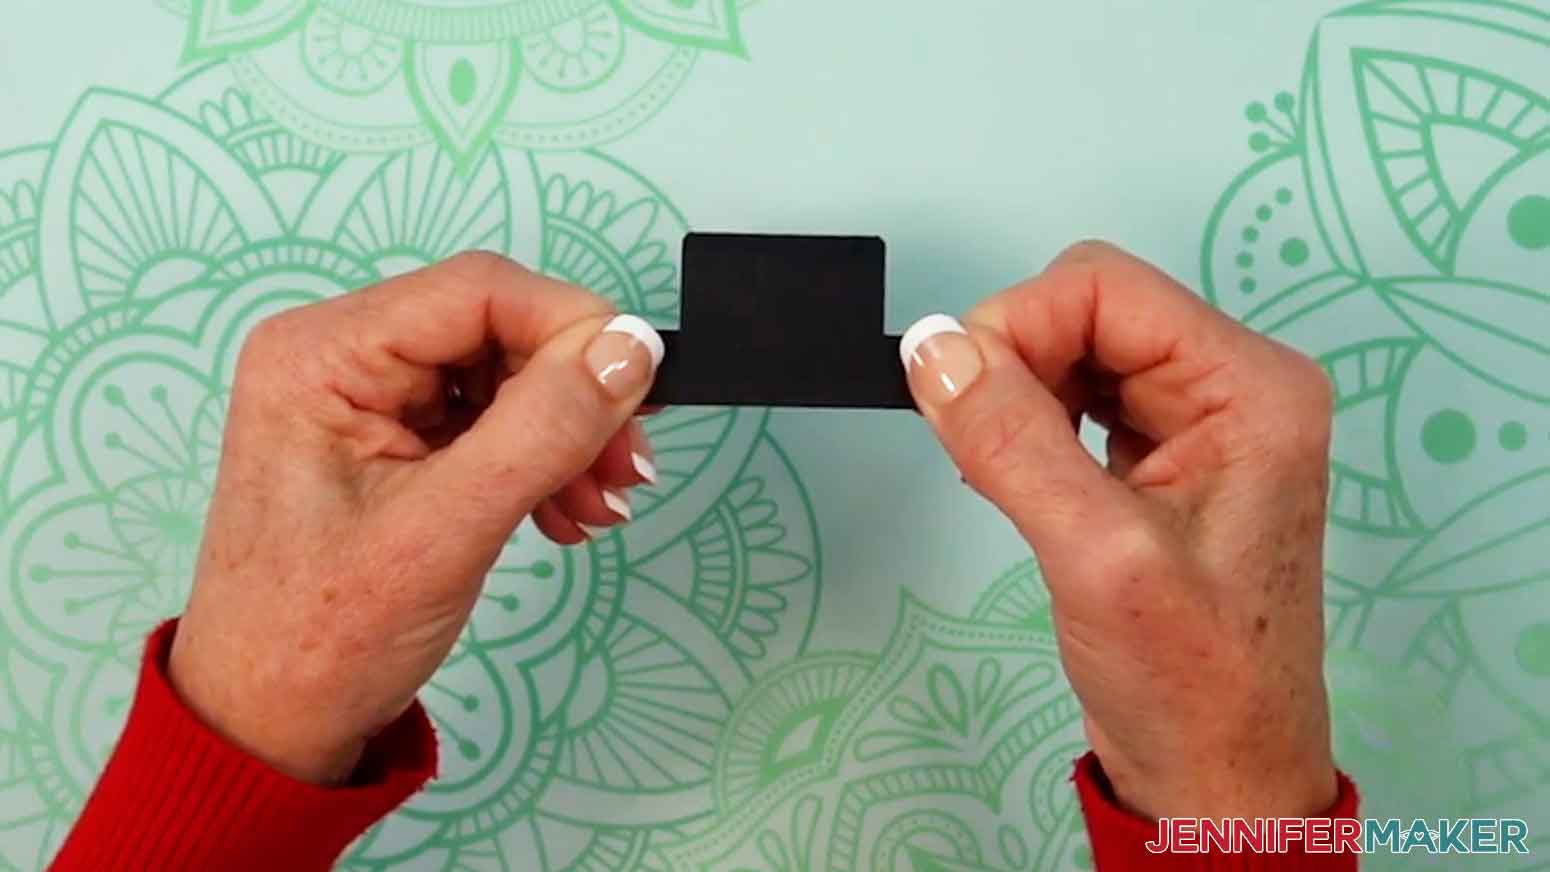
4. Turn the large box piece back over so the folds are pointed up, and so the tabs with long slots are on either side and the shorter looped tabs are at the top and bottom.
5. To give the snowman eyes, apply a dot of craft glue to the back of each larger coal piece, then adhere it to the top panel with the small looped tab.
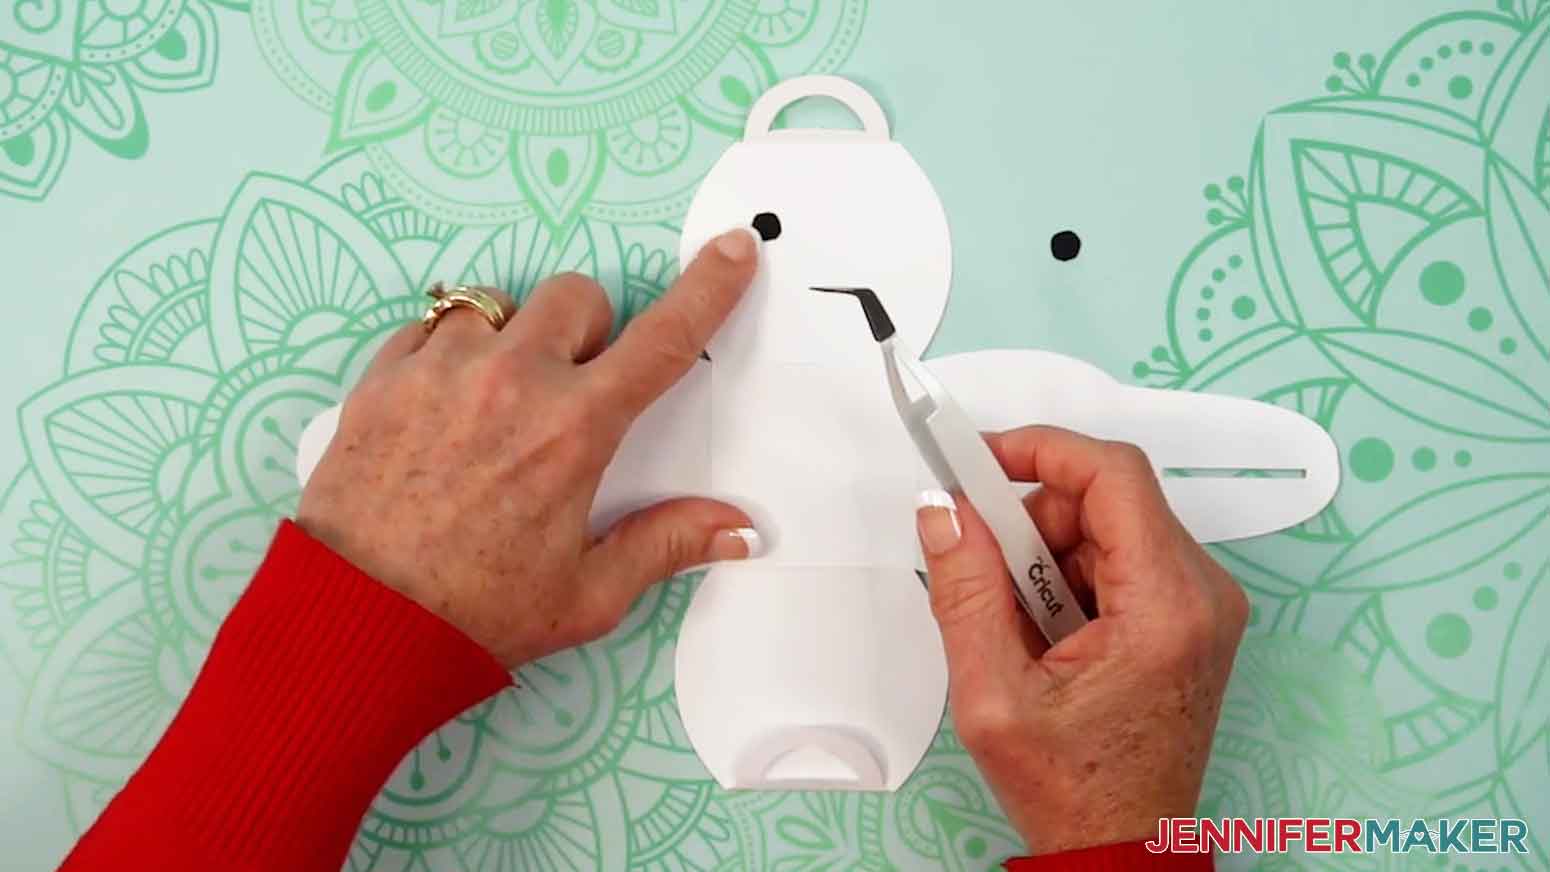
6. Apply craft glue to the back of the carrot nose, then adhere it under the eyes so it’s pointing to the right.
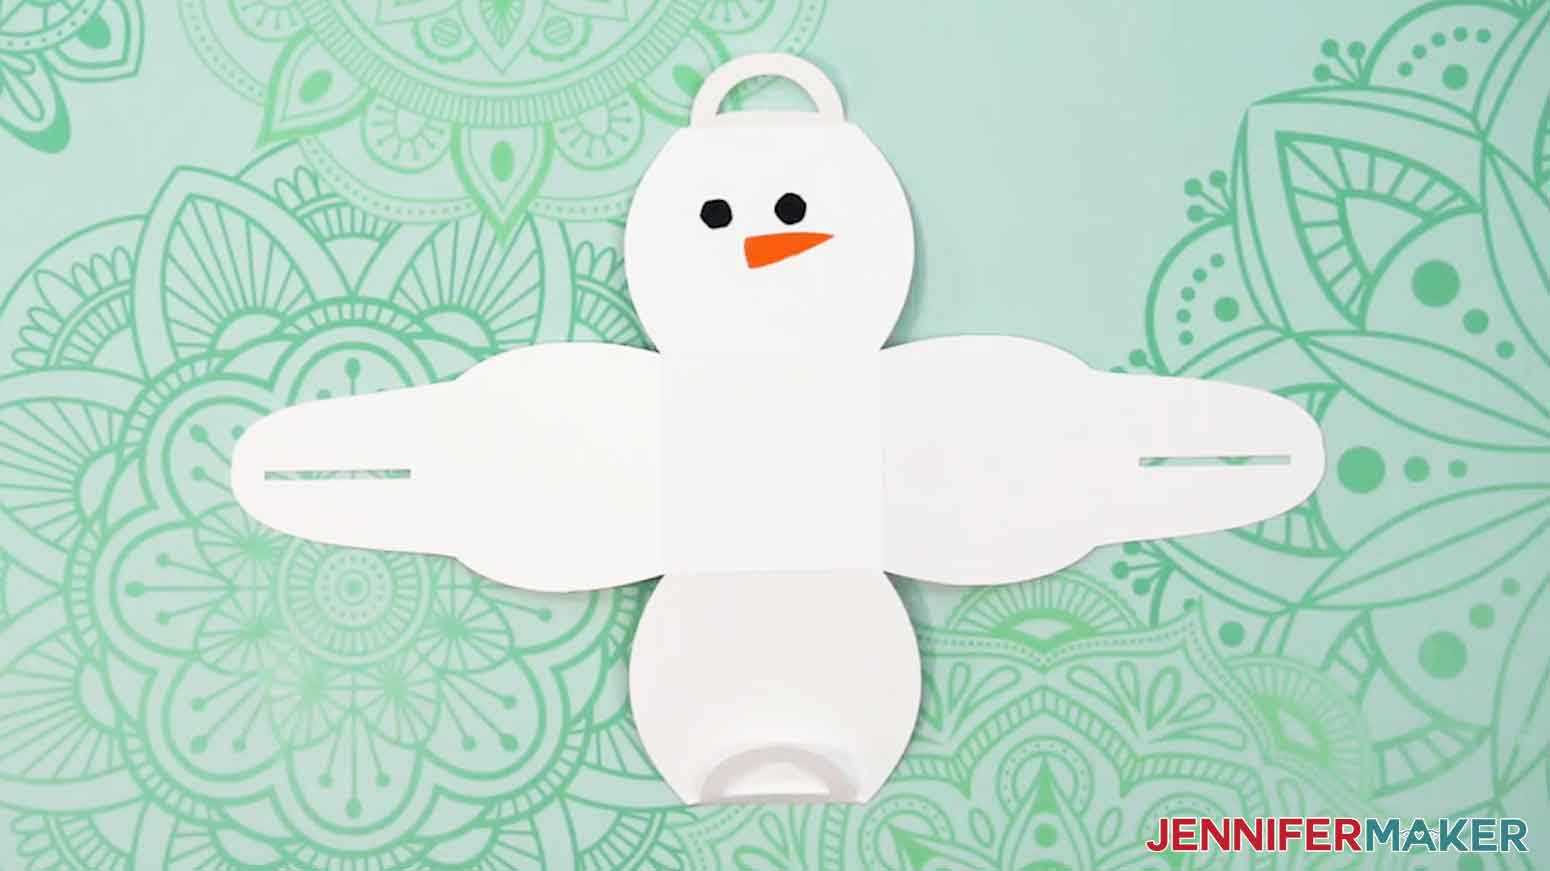
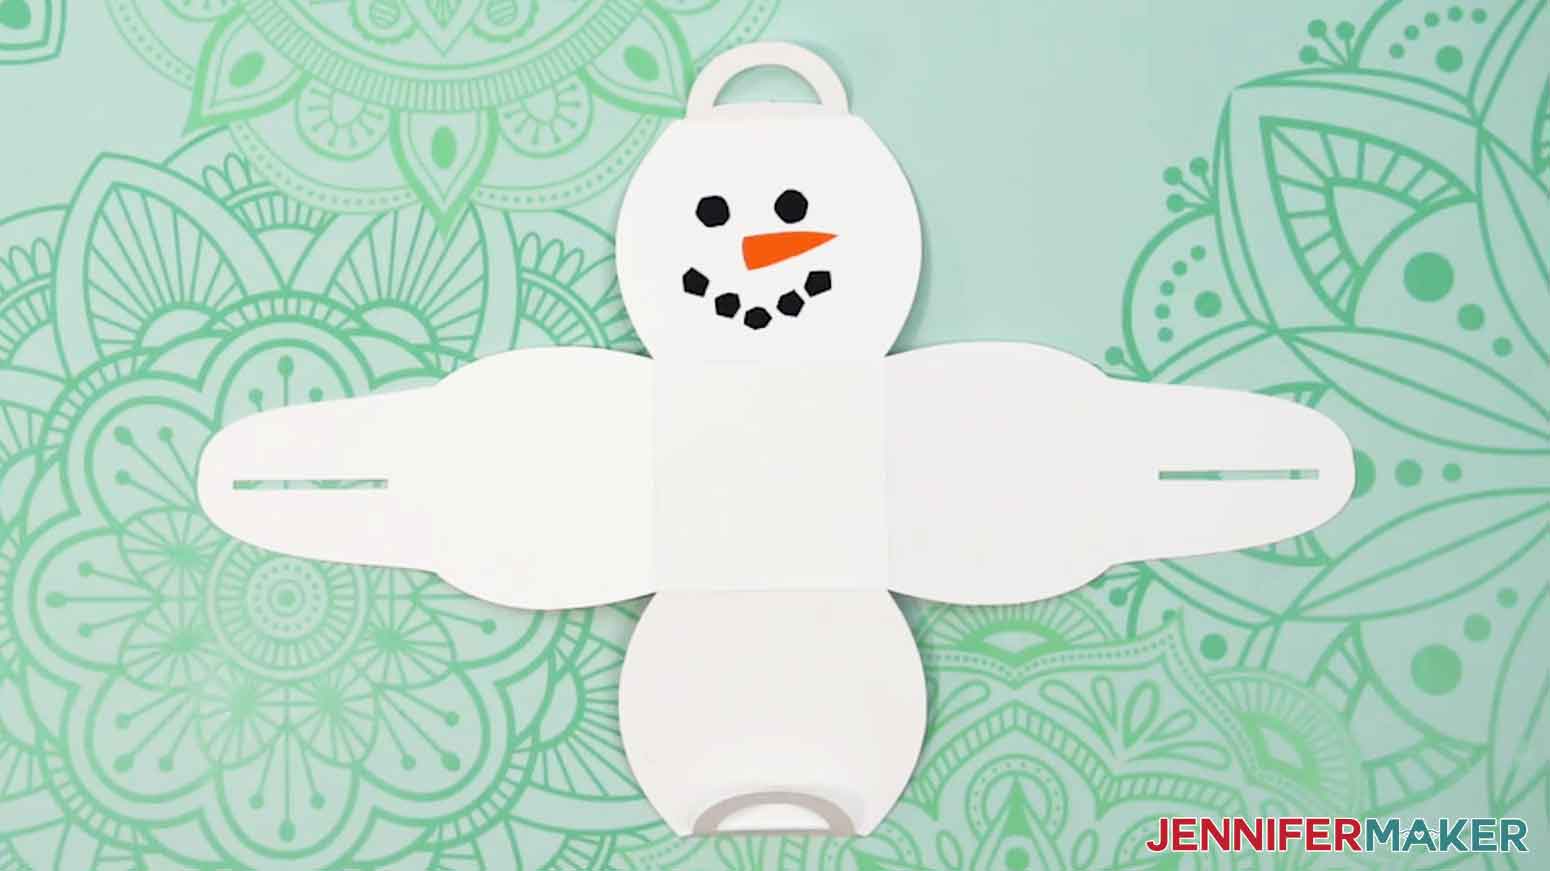
7. To add the snowman’s smile, apply craft glue to the back of two of the smaller coal pieces, and adhere them to the face, just under the nose, a little further out than the eyes on each side.
8. Apply craft glue to the back of each of the three remaining coal pieces and place them equally-spaced in a downward curve between the two on the snowman’s face.
9. Grab the hat piece and fold it in half along the score lines so the score line is on the inside.
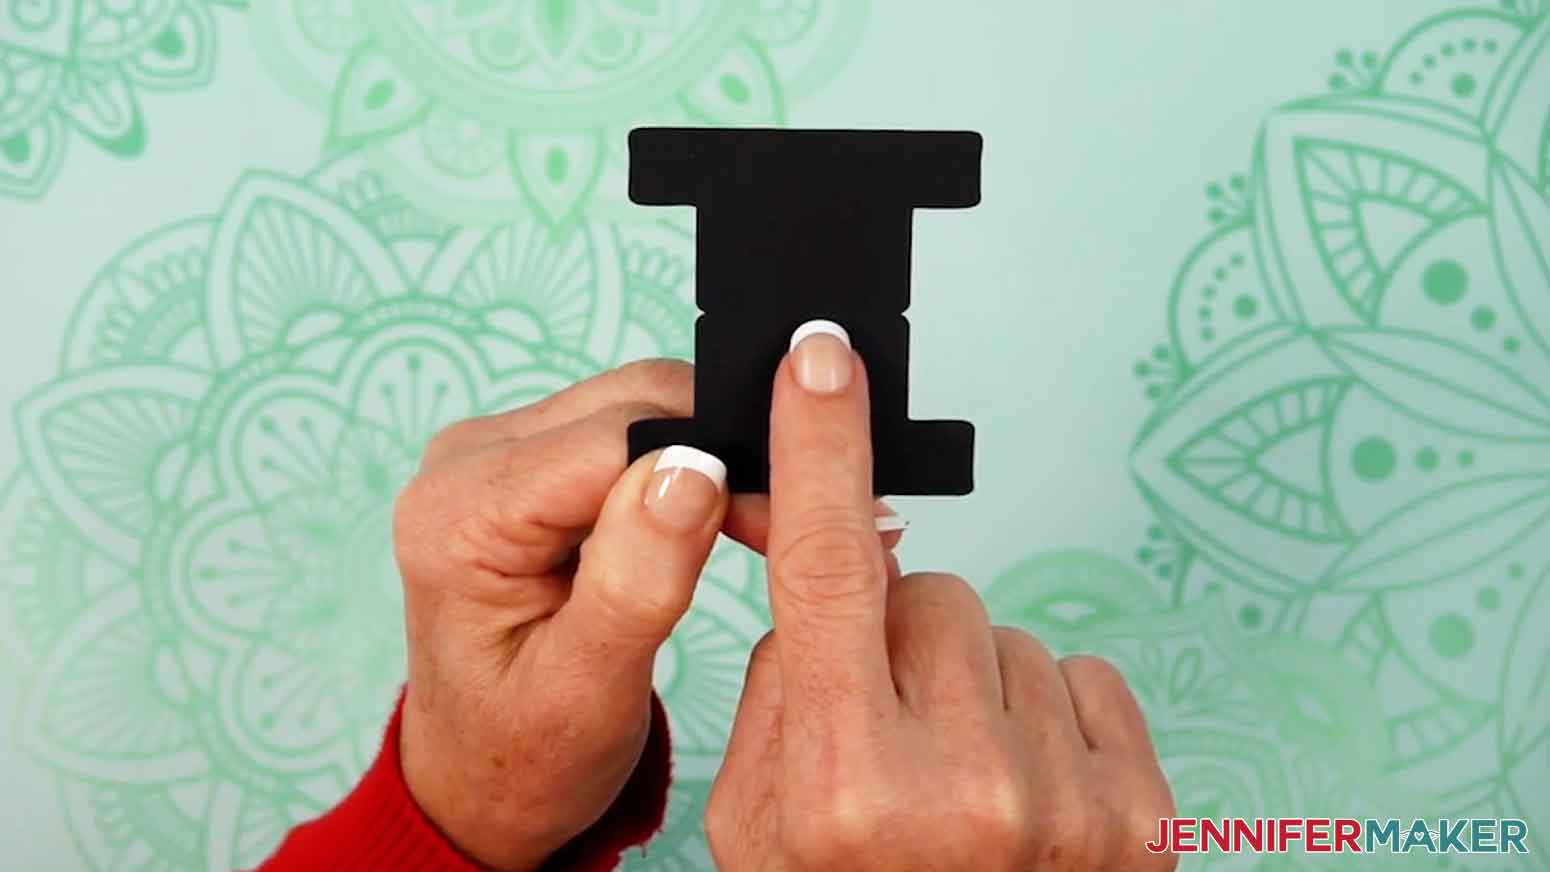
10. Open the hat up and apply a small line of glue on the inside left and rightmost edges of the hat’s brim.
NOTE: Be sure to apply the glue very close to the edge, or the hat won't be able to slide onto the handles.
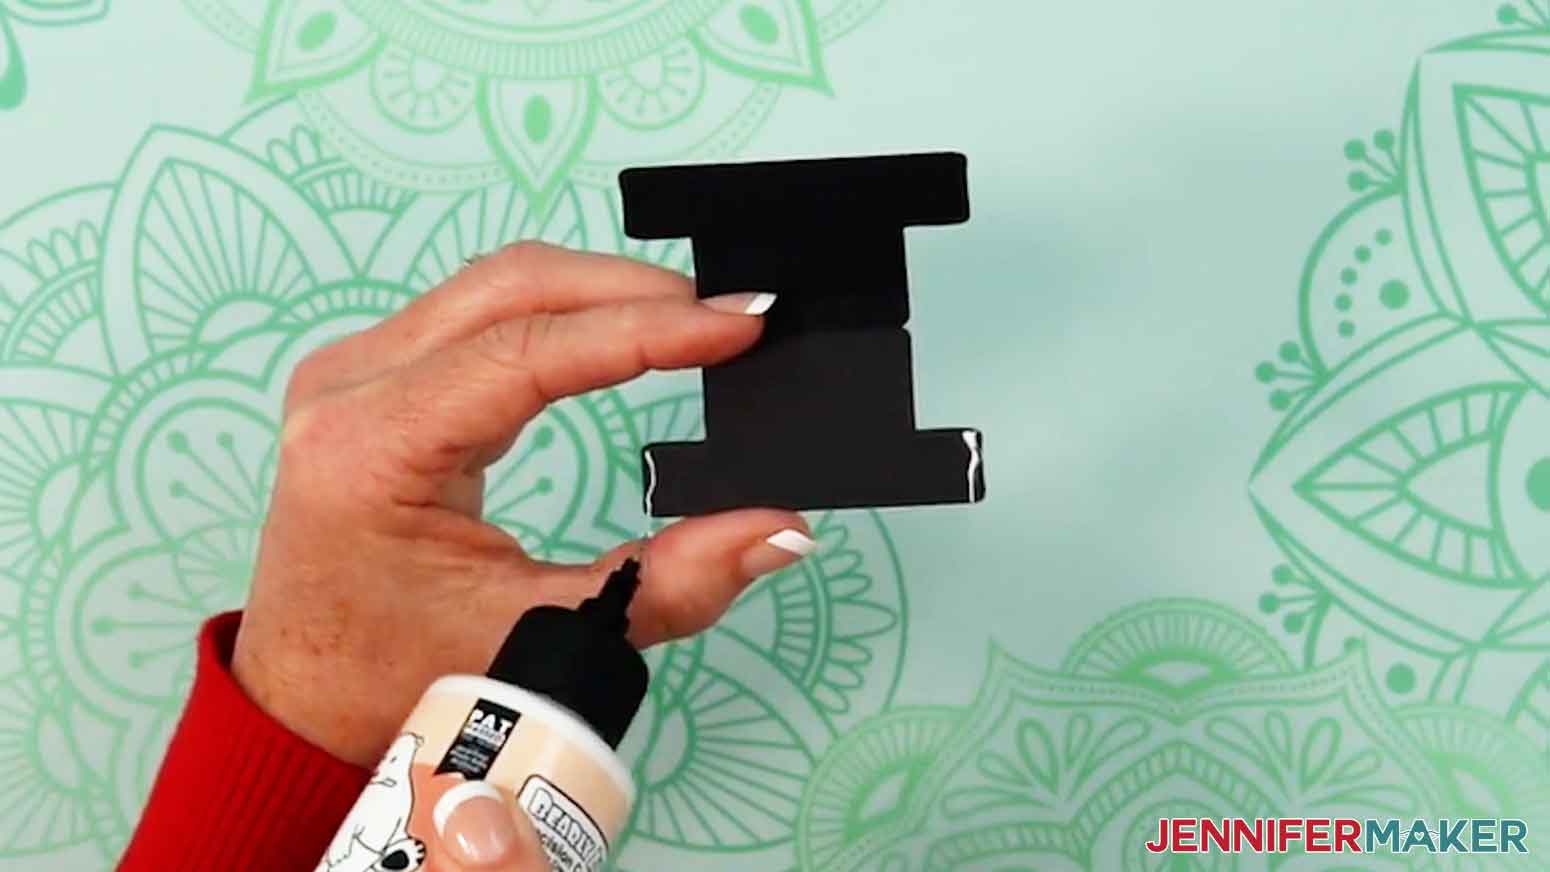
11. Fold the hat piece back over on the score line and press the ends of the brim together until the glue sets.
12. Apply craft glue to the back of the leaf piece, where the two leaves appear to converge.
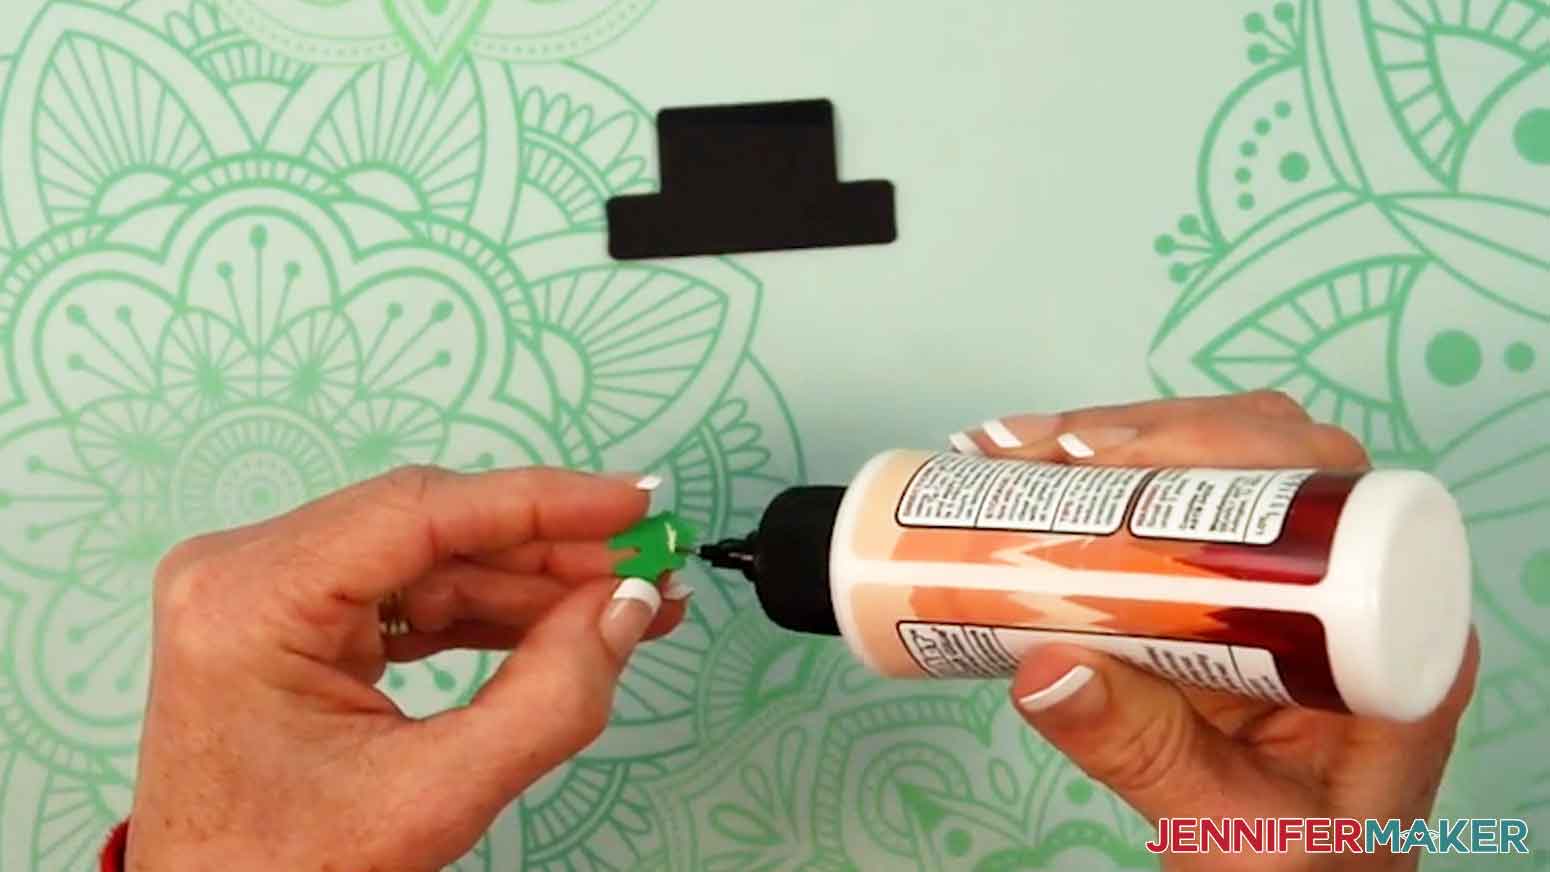
13. Adhere the leaf piece to the left side of the hat, between the top and the brim, so it’s partially extending past the edge of the hat.
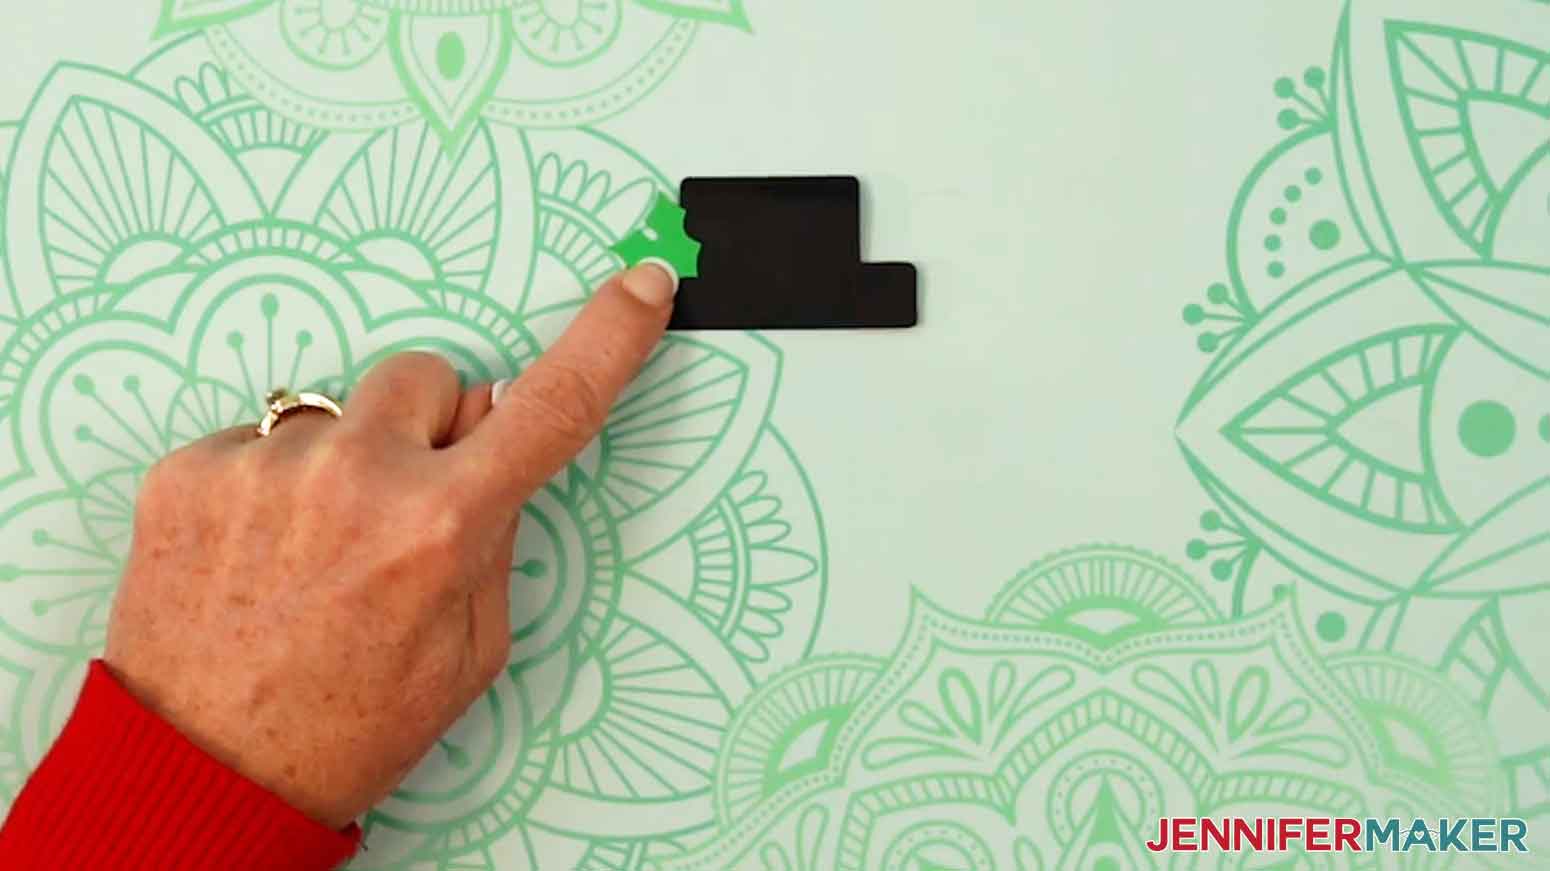
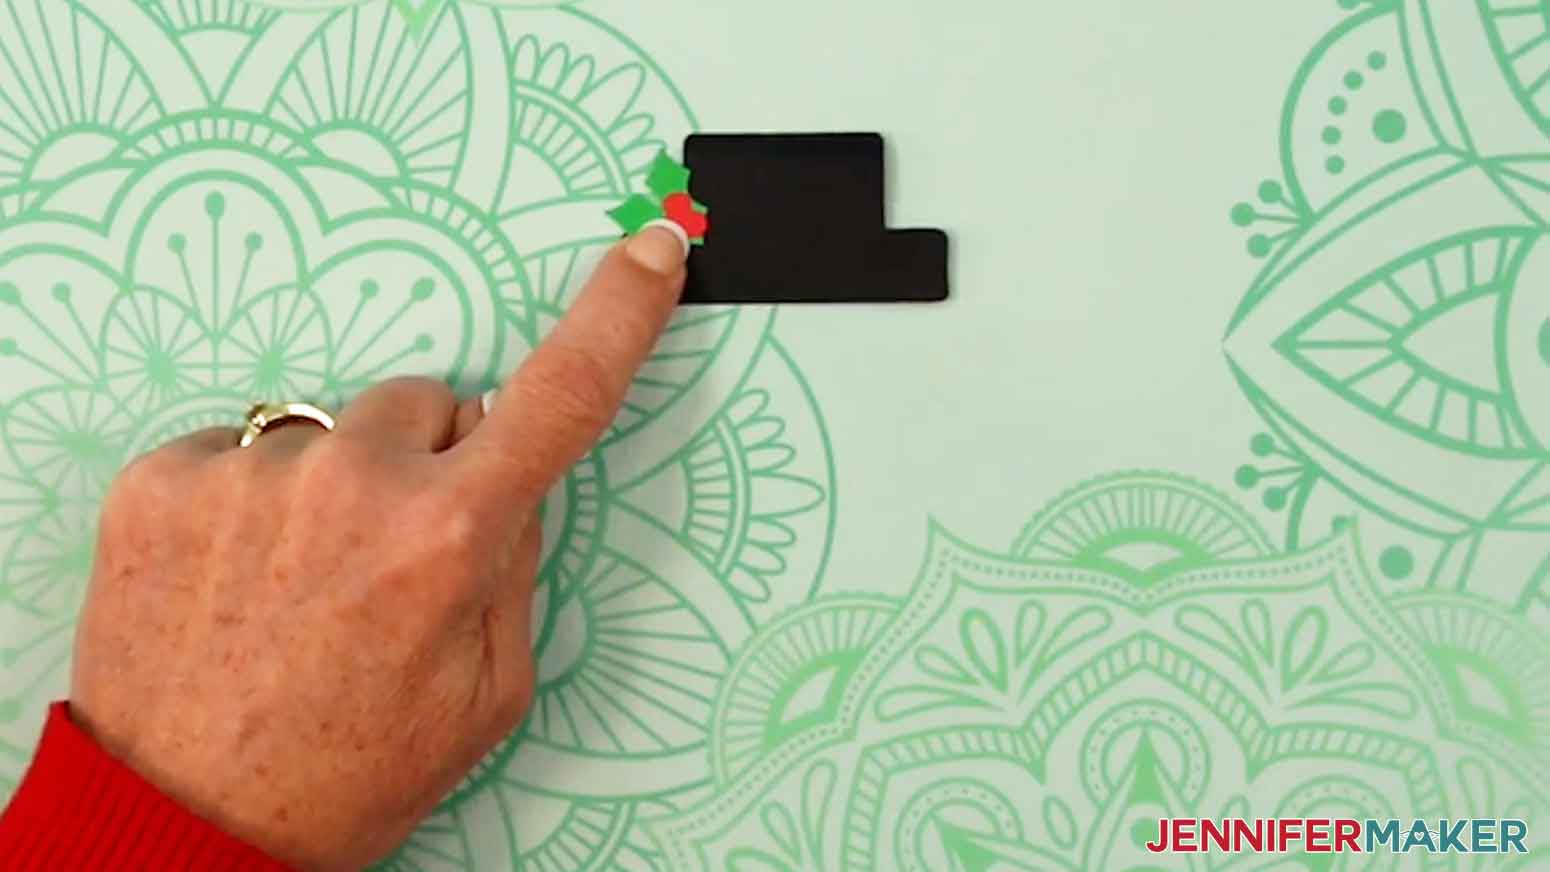
14. Apply craft glue to the back of the berries.
15. Adhere the berries to the leaf piece, where the leaves appear to converge, so it’s partially extending onto the hat. Leave the hat to dry completely.
16. Turn the box face down and fold up three of the sides along the score lines.
17. If you are putting items inside the box, add them now.
18. Fold up the last side, then fold the looped tabs up and align the edges.
19. Lift one side with a long slit up and gently tuck the pinched tabs up through the slit.
20. Repeat step 19 with the last side of the box.
21. Slide the hat’s opening over the tab at the top of the keepsake box.
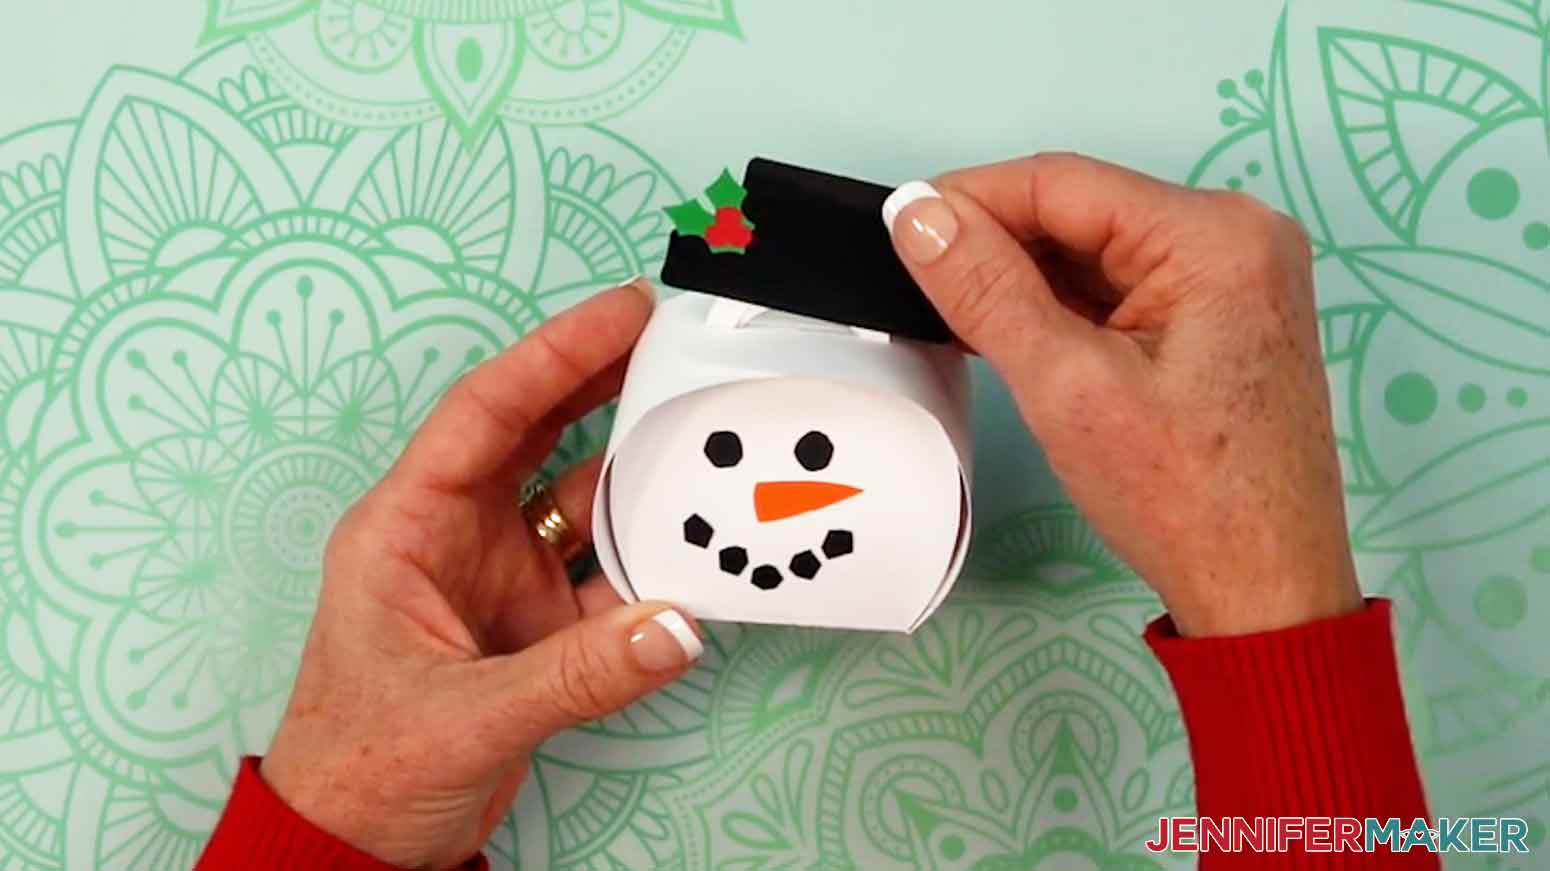
TIP: If you have trouble opening the hat, use your weeding tool to help.
22. Your snowman keepsake box is ready to gift or display!
Notes
Finished box sizes:
Gnome box: 3" W x 6.5" H x 2.5"D
Mushroom House: 4.5"W x 3"H x 4.5"D
Snowflake box: 3"W x 3"H x 2.5"D
Snowman box: 3"W x 3.75" H x 2.5"D
Answers to Your Questions About Making Curvy Keepsake Boxes
Q: I want to design a custom curvy keepsake box. How do I do that?
A: You can learn how to design a curvy keepsake box with customized cutouts in my ADVANCE program. Learn more about ADVANCE here!
Q: What can I fit inside these curvy keepsake boxes?
A: The boxes are sized for small treats and trinkets. Think wrapped candies, stickers, jewelry, or other tiny surprises!
Q: What materials do I need to make today’s project?
A: You’ll need cardstock for the box bases and decorations, craft glue with a precision tip, and your cutting method of choice like a Cricut with a Fine-Point Blade (or scissors or a craft knife if you’re cutting by hand, but be careful). For the snowflake design you’ll also want a piece of acetate and a bit of ribbon for the bow. I’ve got a list of materials and tools above, with links to where to find them. You’ll also be able to find them in any brick-and-mortar or online store that sells craft supplies. Hint: check the clearance rack for out-of-season paper so you can make designs for next year! I typically order my craft supplies from Amazon for the competitive prices and fast shipping. Plus, there’s a plethora of supplies available to add an extra creative twist to your curvy keepsake boxes, like designer series paper, stamp sets, rhinestones, and more!
Q: Can I make these without a Cricut cutting machine?
A: Yes! The project includes PDF files so you can print the pieces, trace them onto a piece of cardstock, and cut them out by hand. It takes more time than using a Cricut, but it’s a good option if you’re just getting started or don’t have a machine yet.
Q: Do I need a scoring tool or bone folder to make the boxes?
A: If you’re using a Cricut with scoring capability, the “score” versions of the files work with a Scoring Stylus or Single Scoring Wheel to create clean fold lines. If you don’t have or want to use a scoring tool, or would rather cut by hand, use the “no-score” version of the files, which uses dashed cut lines instead. Once cut, you can use a scraper or bone folder to get crisp creases so the boxes hold their shape nicely.
Q: How do I keep the boxes closed once they’re filled?
A: The box design uses two small tabs and two slotted handles that lock together at the top. There’s no tape or magnets needed! For the gnome, mushroom cottage, and snowman versions, the hats or roofs slide over those tabs to disguise them.
Q: Can I resize the curvy keepsake boxes?
A: Yes, you can resize them in Cricut Design Space by keeping the design grouped, Lock closed, and dragging the corner resize handles. Slightly larger or smaller boxes work well (as long as they fit your material), but keep the proportions the same so all of the decorations still fit the box base correctly.
Q: What kinds of occasions are these boxes good for?
A: These little boxes are perfect for holiday treats, party favors, classroom surprises, stocking stuffers, wedding favours, baby showers, or any time you want a small but thoughtful gift. You can switch up the colors and decorations to fit seasons, holidays, birthdays, thank-you gifts, and more.
Get my free files to make Curvy Keepsake Boxes!
(If you do not see the signup form above, click here.)
I love seeing what you make with my tutorials and how you customize them! Please share a photo of your curvy keepsake boxes in our Facebook group or tag me on social media with #jennifermaker.
Love,

Want to remember this? Save this Curvy Keepsake Boxes tutorial to your favorite Pinterest Board!