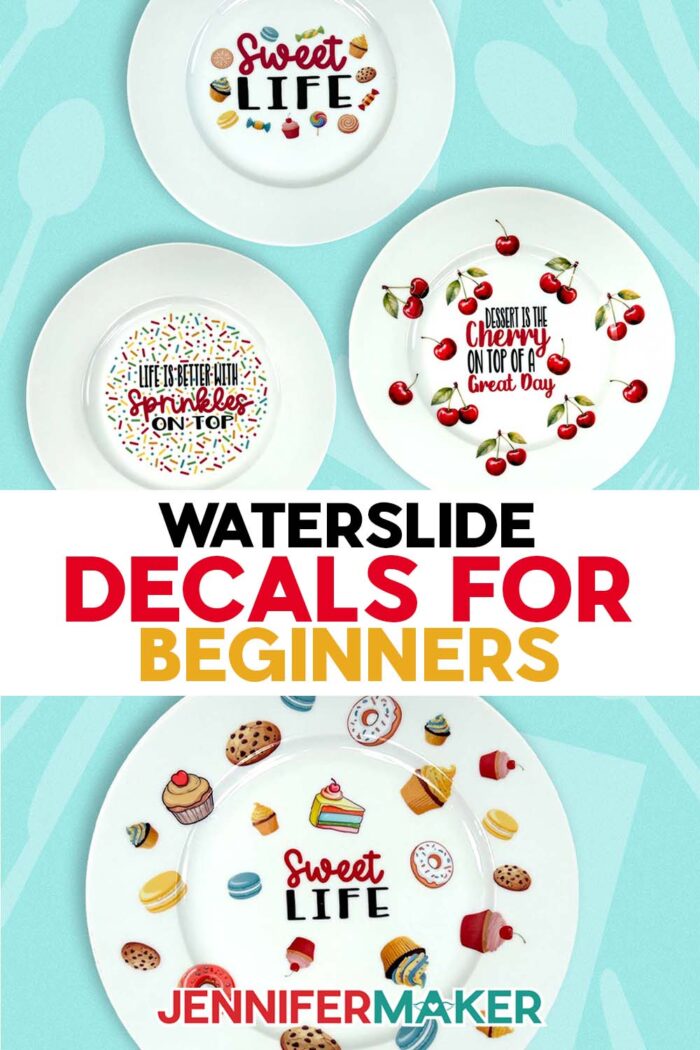
Learn how to apply printable waterslide decals to plates and candles for one-of-a-kind gifts!
When your best intentions turn into a soggy, frustrating disaster, it’s enough to make anyone swear off a whole crafting technique. If you’ve ever ended a crafting session with a botched blank, wasted materials, and a total mess instead of a cute custom project, you are absolutely not alone. Waterslide decals can feel like the “final boss” of crafting, which is exactly why so many people avoid them. But most of those crafting “fails” are just missing a few key details, and following the right steps can turn your waterslide woes into beautiful, professional-looking wins. We’ve already learned how to apply waterslide decals to mugs, wine glasses, and tumblers, and now we’ll try something new: plates and candles! This tutorial is my love letter to waterslide decals for beginners who are tired of being scared of the stuff and are finally ready to make it work for them instead of against them!
See the full step-by-step video tutorial on how to apply waterslide decals for beginners:

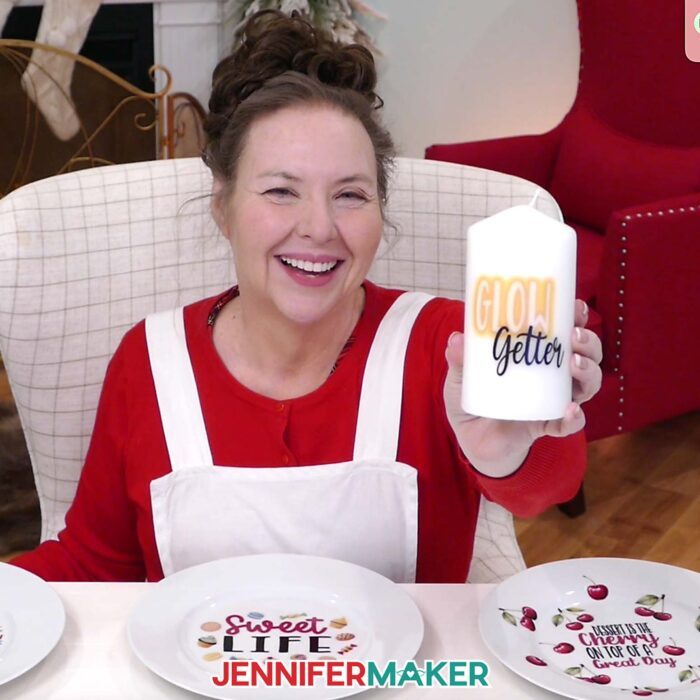
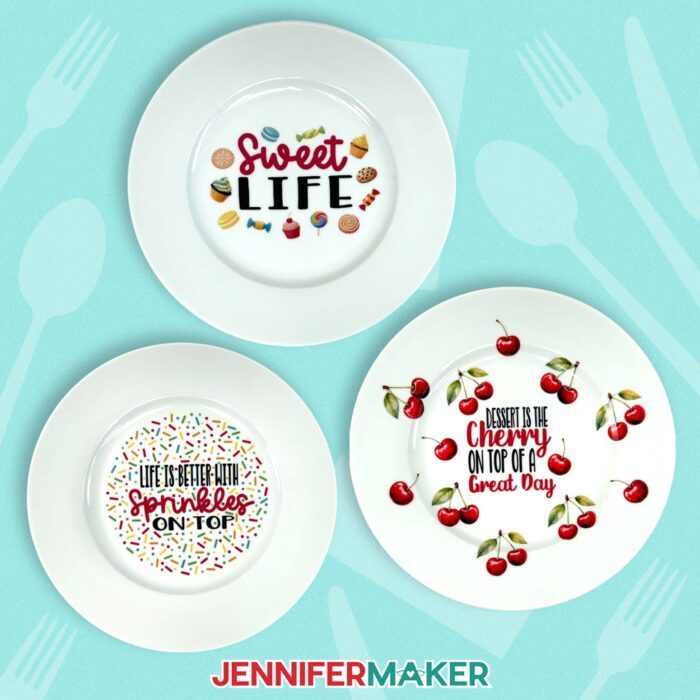
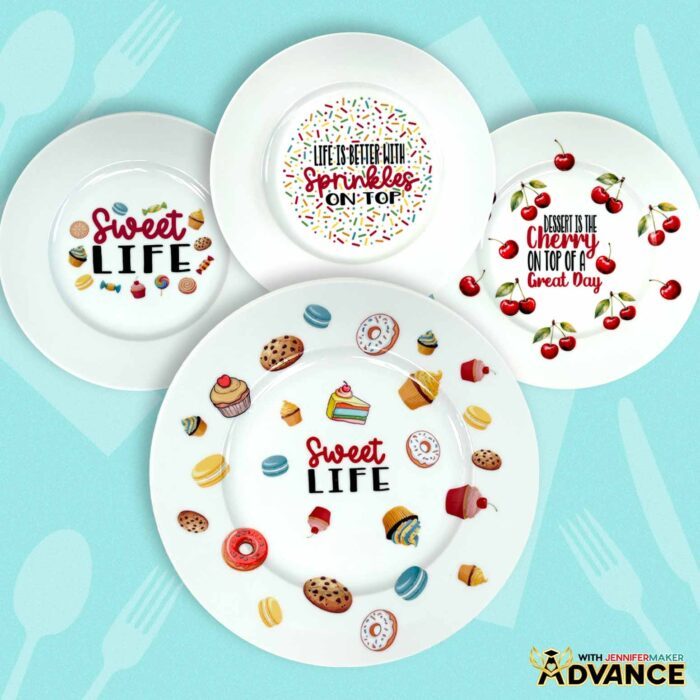
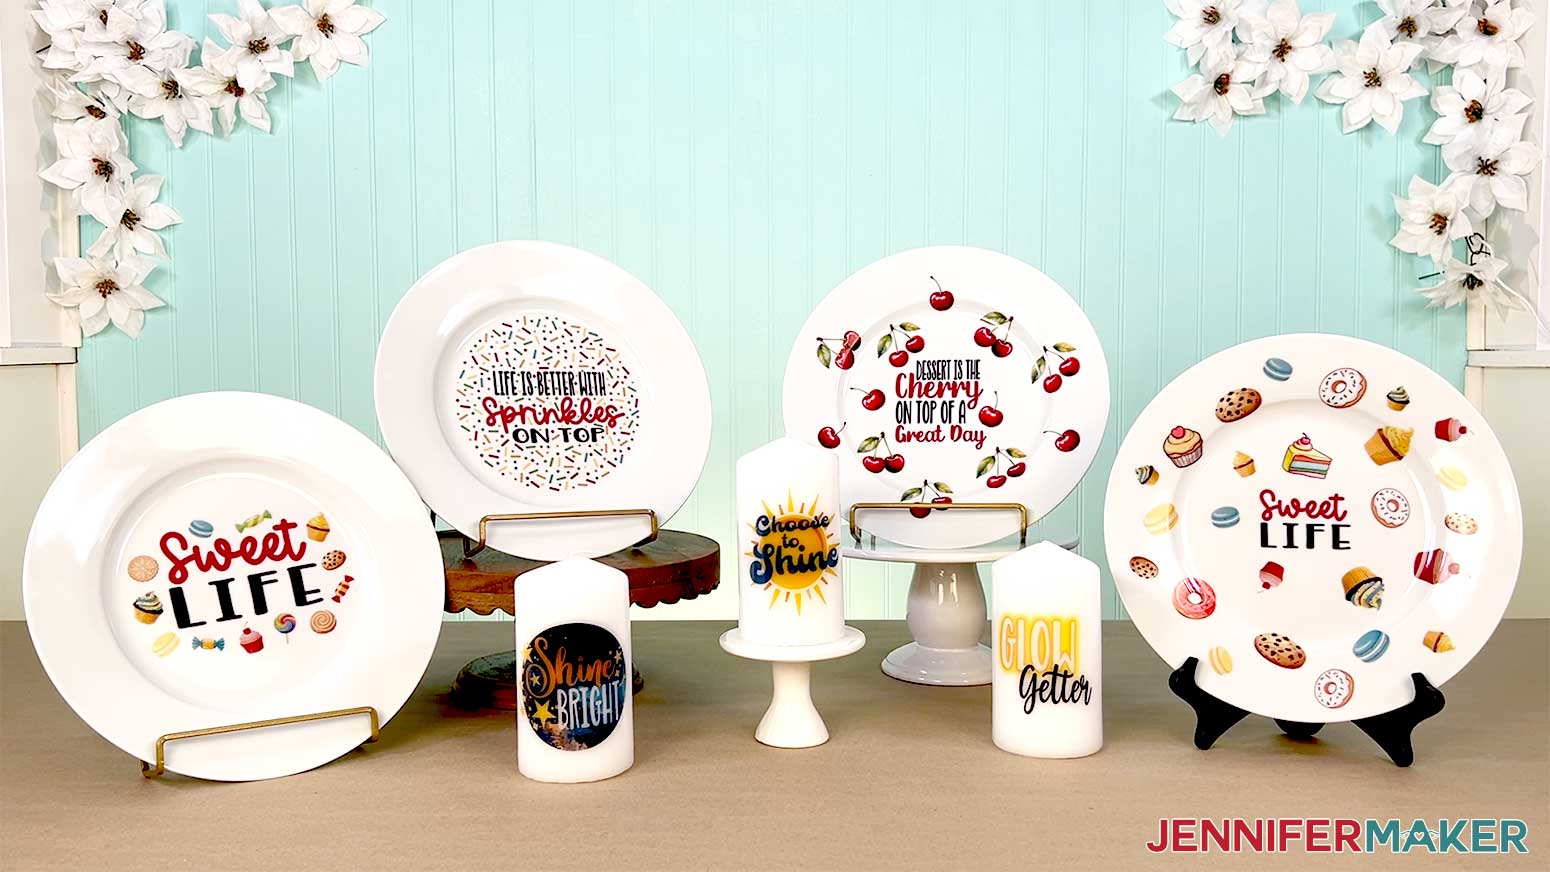
In the video tutorial, I show you how those “did you paint that?!” designs are actually printed at home and transferred with a little water and patience. We’ll turn simple plates and candles into personalized gifts and home decor that look like they came from a boutique, using my free downloadable designs. The plate designs are all about living the sweetest life possible and feature tasty snacks like adorable cherries, yummy baked goods, and the cutest little sayings. For the candles, I made two quote designs to help your project shine bright! I made them with AI art generating software, then cleaned them up in Photoshop so they’re ready to use. You’ll see exactly how I go from flat artwork to glossy, amazing-looking pieces that feel totally custom to you, without the drama waterslide decals are famous for.
We’ll walk through the supplies together so you know what to expect before you start. I’ll show you the type of waterslide paper I use, how to print it with an inkjet printer, and what to do with your waterslide decal sheets before anything touches water. I’ll share why a simple paper towel becomes your new best friend for blotting and smoothing, how a basic bowl of water is all you need to activate the magic, and why a craft-purposed oven and acrylic spray clear coat can help your designs last longer. It’s all about demystifying the tools so you can focus on the fun of the craft project instead of worrying about what might go wrong.
If you use a Cricut machine, I’ll show you how to use Cricut Design Space to get your waterslide decals ready to print and cut. We’ll go over everything on the screen so you can understand why certain print settings matter, how to size designs to fit a plate or candle, and what happens next when the project moves from the computer to your craft table.
The really satisfying part is watching the decals glide into place. We’ll use slightly warm or room temperature water for best results, so the designs release smoothly without shocking the material. Then, we’ll learn how to apply them to a smooth surface without stretching or tearing them. When a design crosses angled rims and other irregular surfaces, I share my tricks for keeping the artwork smooth while still hugging the curve for a perfect finish.

Because waterslide decals can be unforgiving if you rush, we’ll see how the decals behave as they’re applied, and how to use a felt-edged squeegee tool to gently work excess water, wrinkles, and air bubbles out without tearing or smearing the designs. Once everything is in place, we’ll go over the right time and temperature to cure waterslide decal decorated plates, and when to reach for that optional acrylic spray clear coat to add a little extra durability and shine.

I also share how I layer a second decal on a candle for a deeper, richer look, and why it’s important to keep your waterslide decal-decorated project out of direct sunlight so the colors stay nice and bright as long as possible. I highly recommend wearing PPE when spraying sealant. Wear a respirator with a cartridge, goggles if it doesn’t cover your eyes, disposable gloves to protect your hands, and an apron to protect your clothes.
And another quick safety note: these decorated plates are for looking cute, not for serving dinner, so keep your food off the decals and use them as decorative pieces only. And for the candles, treat them like any special décor. Enjoy the glow, but burn them with care and never leave them unattended. If you use the extra coat of spray, let them sit for a few days before burning so any excess has dissipated.
And if you’re itching to put your own spin on things, I’ve got you covered there. In my ADVANCE with JenniferMaker tutorial, I show you how to compose your own multi-element plate design. It’s a great way to turn favorite designs, quotes, and themes into custom pieces that match your style, your space, and your gift list perfectly, all while using the same waterslide techniques you’ll see in the main video. Learn more about ADVANCE with JenniferMaker here!

So if waterslide crafting has ever intimidated you, consider this your friendly invitation to try again with me in your corner! Watch the tutorial to see every step up close, learn what the process should look like at each stage, and finally feel confident saying, “Yes, I really did make that!”
Let me show you how to use waterslide decals for beginners! This post contains some affiliate links for your convenience (which means if you make a purchase after clicking a link I will earn a small commission but it won’t cost you a penny more, there is no additional cost)! Read my full disclosure policy.
Materials to Make Plates & Candles with Waterslide Decals
View my Amazon shopping list with the exact items I used.
- One (1) 10.5″ White Dinner Plate
- One (1) 3″ x 6″ White Tall Pillar Candle
- One (1) Sheet of Hayes A4 Clear Printable Inkjet Waterslide Decal Paper
- Krylon Crystal Clear Acrylic Coating Spray – Gloss
- Plate Holder (optional to display plate)
- Inkjet Printer
- Scissors -OR-
- Paper Trimmer -OR-
- Cricut Cutting Machine – I’m using the Cricut Maker 4, but you can also use Maker series, Explore series, Venture, or Joy Xtra machines -AND-
- Cricut Green StandardGrip Machine Mat 12″ x 12″ (if you’re using a Cricut to cut your decals) -AND-
- Brayer (if you’re using a Cricut) -AND-
- Spatula (if you’re using a Cricut)
- Lint-Free Cloth
- Large Bowl of Room-Temperature Water
- Paper Towels
- Respirator (with proper fit, for protection when spraying clear coat) -AND-
- Respirator Cartridge -AND-
- Safety Goggles (if your respirator doesn’t cover your eyes)
- Disposable Gloves
- Apron (optional for protecting clothes when spraying clear coat)
- Plastic Felt Edge Squeegee (optional for pressing bubbles out of the decal)
- Craft-Purposed Toaster Oven with Baking Tray (for curing the decal on the plate — make sure the oven is large enough to fit the plate)
- Oven Mitt (for removing the plate from the oven)
- Cooling Rack (for cooling the plate after curing)
How to Use Waterslide Decals for Beginners!

Waterslide Decals For Beginners
Learn how to apply designs to plates and candles with my Waterslide Decals For Beginners tutorial!
Materials
- One (1) 10.5" White Dinner Plate
- On (1) 3” x 6” White Tall Pillar Candle
- One (1) Sheet of Hayes A4 Clear Printable Inkjet Waterslide Decal Paper
- Krylon Crystal Clear Acrylic Coating Spray - Gloss
- Plate Holder (optional to display plate)
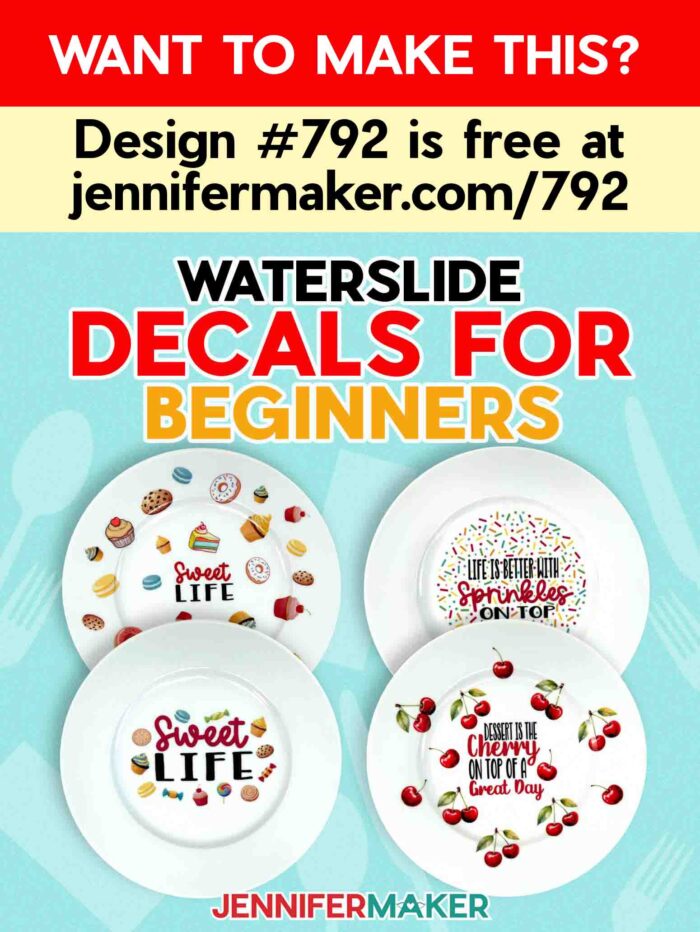
- Design #792 (My free PNG/PDF design files are available in my free resource library - get the password by filling out the form at the bottom of this page)
Tools
- Inkjet Printer
- Scissors -OR-
- Paper Trimmer -OR-
- Cricut Cutting Machine - I’m using a Cricut Maker 4, but you can also use any Cricut Maker Series, a Cricut Explore Series, a Cricut Venture, or a Cricut Joy Xtra cutting machine -AND-
- Cricut Green StandardGrip Machine Mat 12" x 12” (if you’re using a Cricut) -AND-
- Brayer (if you’re using a Cricut) -AND-
- Spatula (if you’re using a Cricut)
- Large Bowl of Room-Temperature Water (for applying the waterslide decal)
- Paper Towels (for applying the waterslide decal)
- Respirator (with proper fit) -AND-
- Respirator Cartridge
- Safety Goggles (if your respirator doesn’t cover your eyes)
- Disposable Gloves
- Plastic Felt Edge Squeegee (optional for getting bubbles out of the decal)
- Craft-Purposed Toaster Oven with Baking Tray (for curing the decal on the plate – make sure the oven is large enough to fit the plate)
- Oven Mitt (for removing the plate from the oven)
- Cooling Rack (for cooling the plate after heating)
- Measuring Tape
- Isopropyl Alcohol (optional for cleaning your plate or candle) -AND-
- Lint-Free Cloth
- Apron (optional for protecting clothes when using acrylic spray)
Instructions
STEP 1: GET MY FREE WATERSLIDE DECAL DESIGNS
First, download my waterslide decal designs from my free library – look for Design #792. Alternatively, you can use the Save This Project form near the top of this post and the design link will be emailed to you.
TIP: If you’re not sure how to upload, go to jennifermaker.com/svgs to learn how to unzip and upload PNG files.
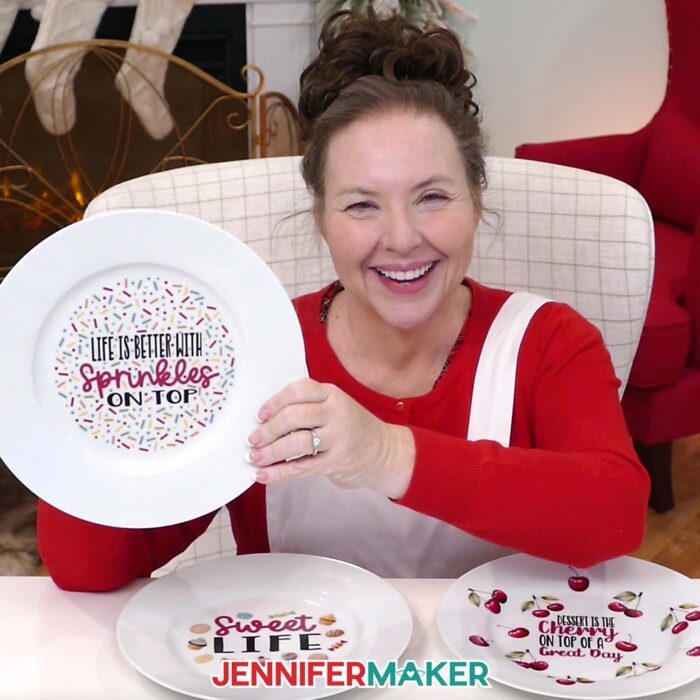
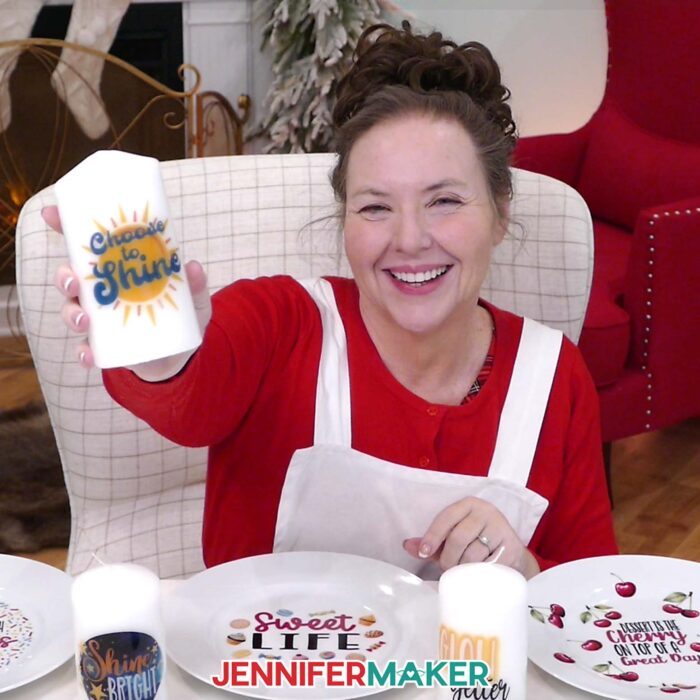
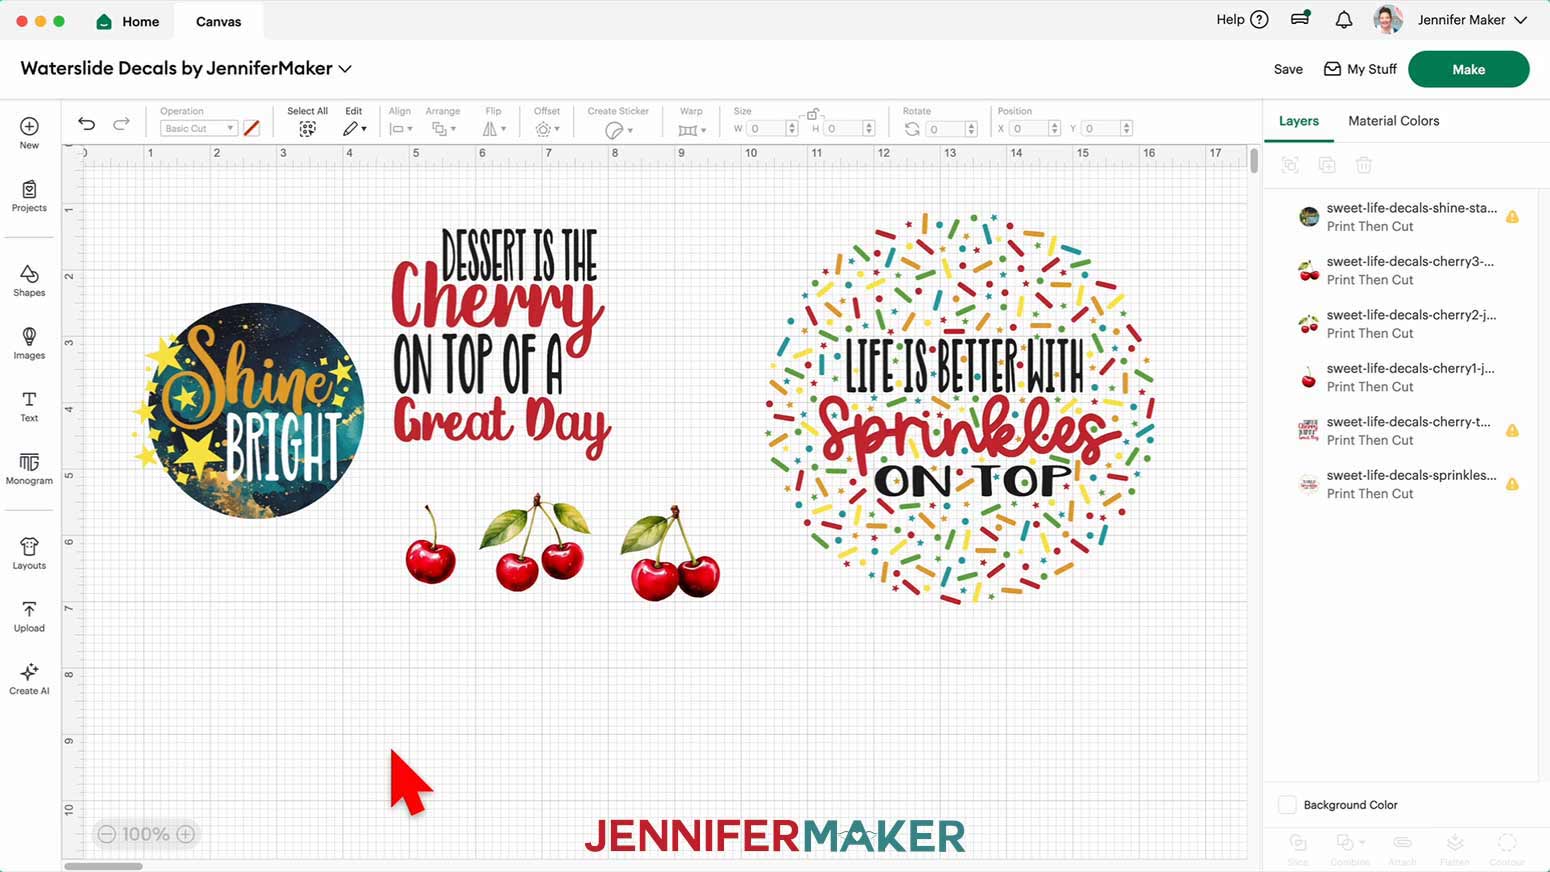
Inside the PNG folder, you’ll see nine waterslide decal designs. There is a “Sweet Life” design, a “Choose To Shine” design, a “Sprinkles” design, a "Shine Bright" design, a “Glow Getter” design, and four “Cherry” designs (one text design and three different cherry images).
There is also a PDF folder with versions you can print and cut by hand if you don’t want to use Cricut Design Space.
I made these designs with the help of an AI generator and image editing software.
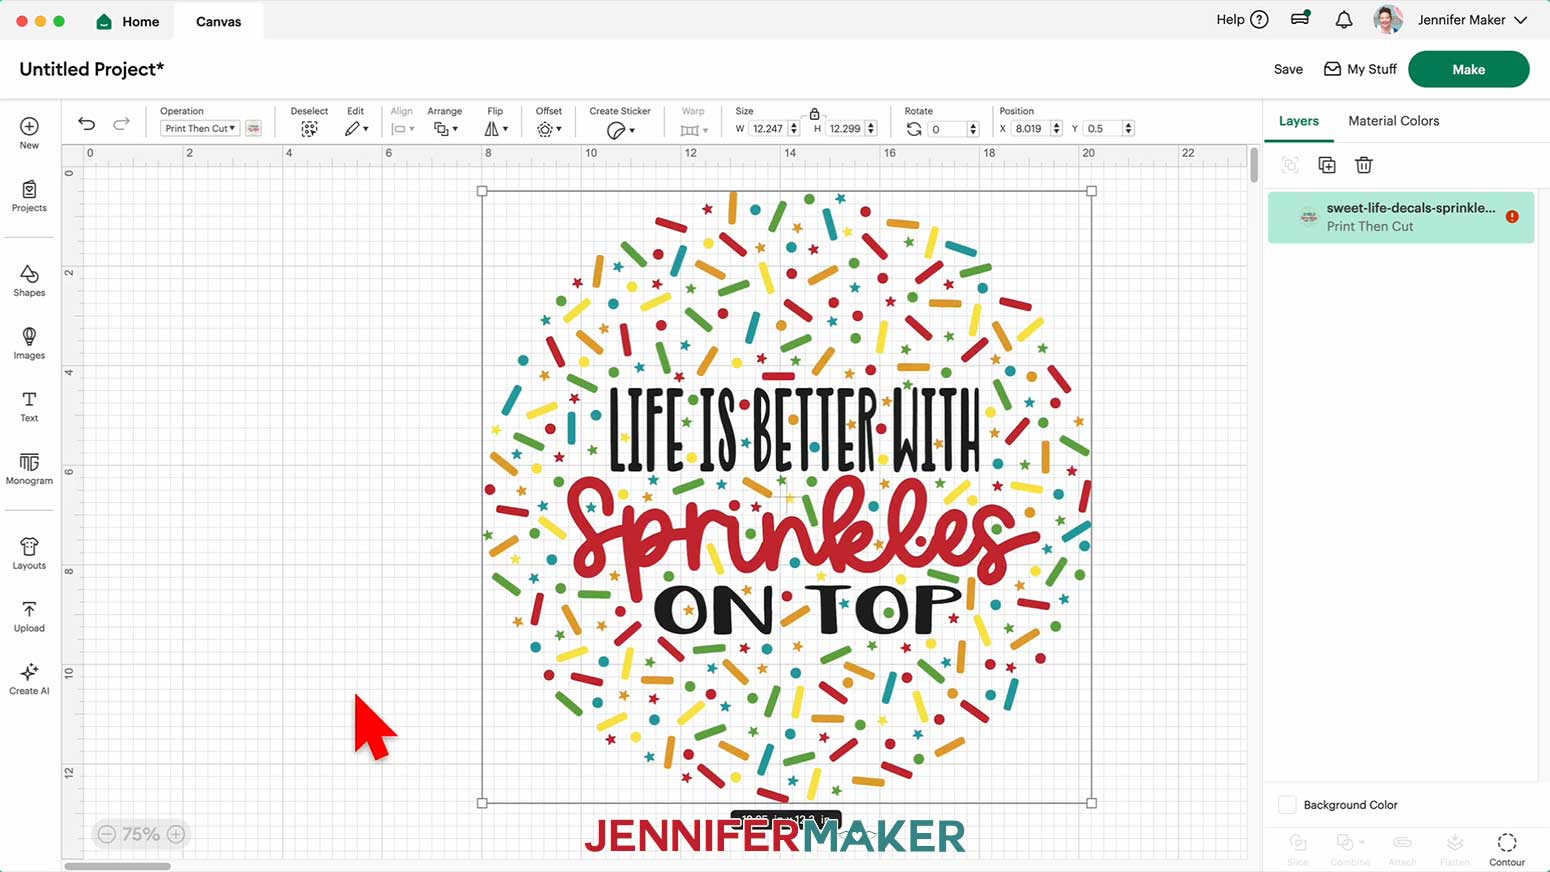
For this tutorial, I’ll show you how to Print Then Cut the “Sprinkles” PNG design. I’ll use an inkjet printer to print the designs and my Cricut Maker 4 to cut the material, but you can also use another Cricut Maker Series machine, a Cricut Explore Series machine, a Cricut Joy Xtra, a Cricut Venture, or cut your design(s) by hand.
STEP 2: PREPARE AND PRINT YOUR WATERSLIDE DECAL DESIGN
NOTE: Sometimes designs look different depending on the program you use. For example, my “Glow Getter” design has soft, faded edges. In Cricut Design Space, those edges sometimes turn sharp and print that way. But if I print it from Google Docs, the soft edges always show up correctly. Just remember, if you use Google Docs, you can only print and cut by hand with scissors, not with a Cricut.
TIP: Before you begin, use a tape measure or ruler to measure the design area of your plate or candle.
OPTION 1: PREPARE AND PRINT YOUR WATERSLIDE DECAL DESIGN FROM CRICUT DESIGN SPACE
1. In Cricut Design Space on a blank Canvas, click “Upload.”
2. Click “Upload Image.”
3. Click “Browse.”
4. Find and select your desired PNG.
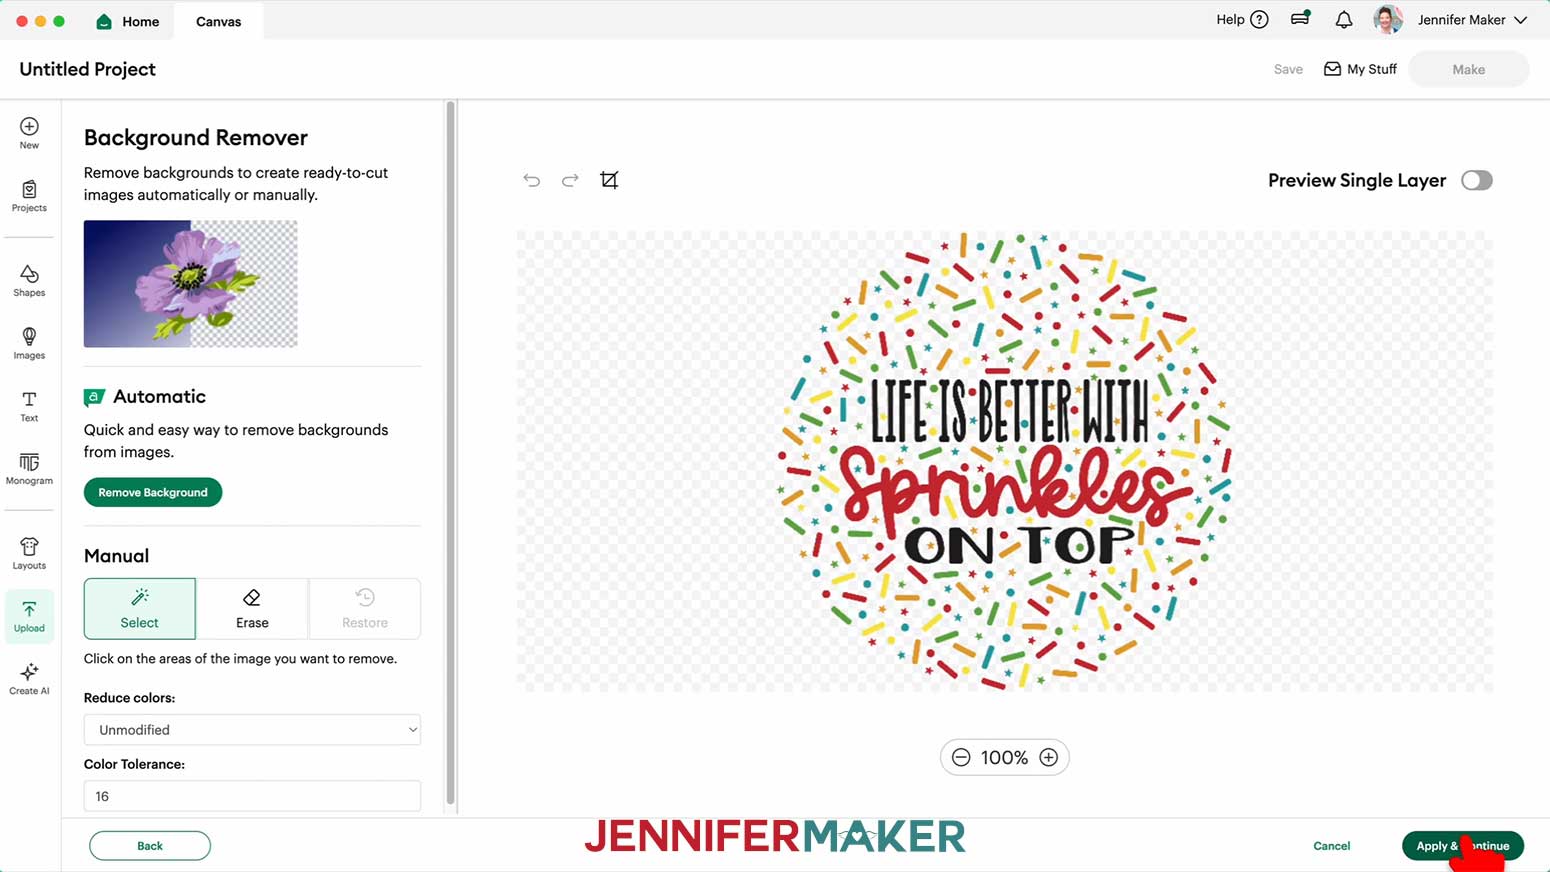
NOTE: I’ll upload the “Sprinkles” design for use on the plate.
5. Click “Open” and then “Continue.”
6. On the “Background Remover” screen, you don’t have to remove anything, so click “Apply & Continue.”
7. On the “Convert Upload To” screen, choose “Flat Graphic.”
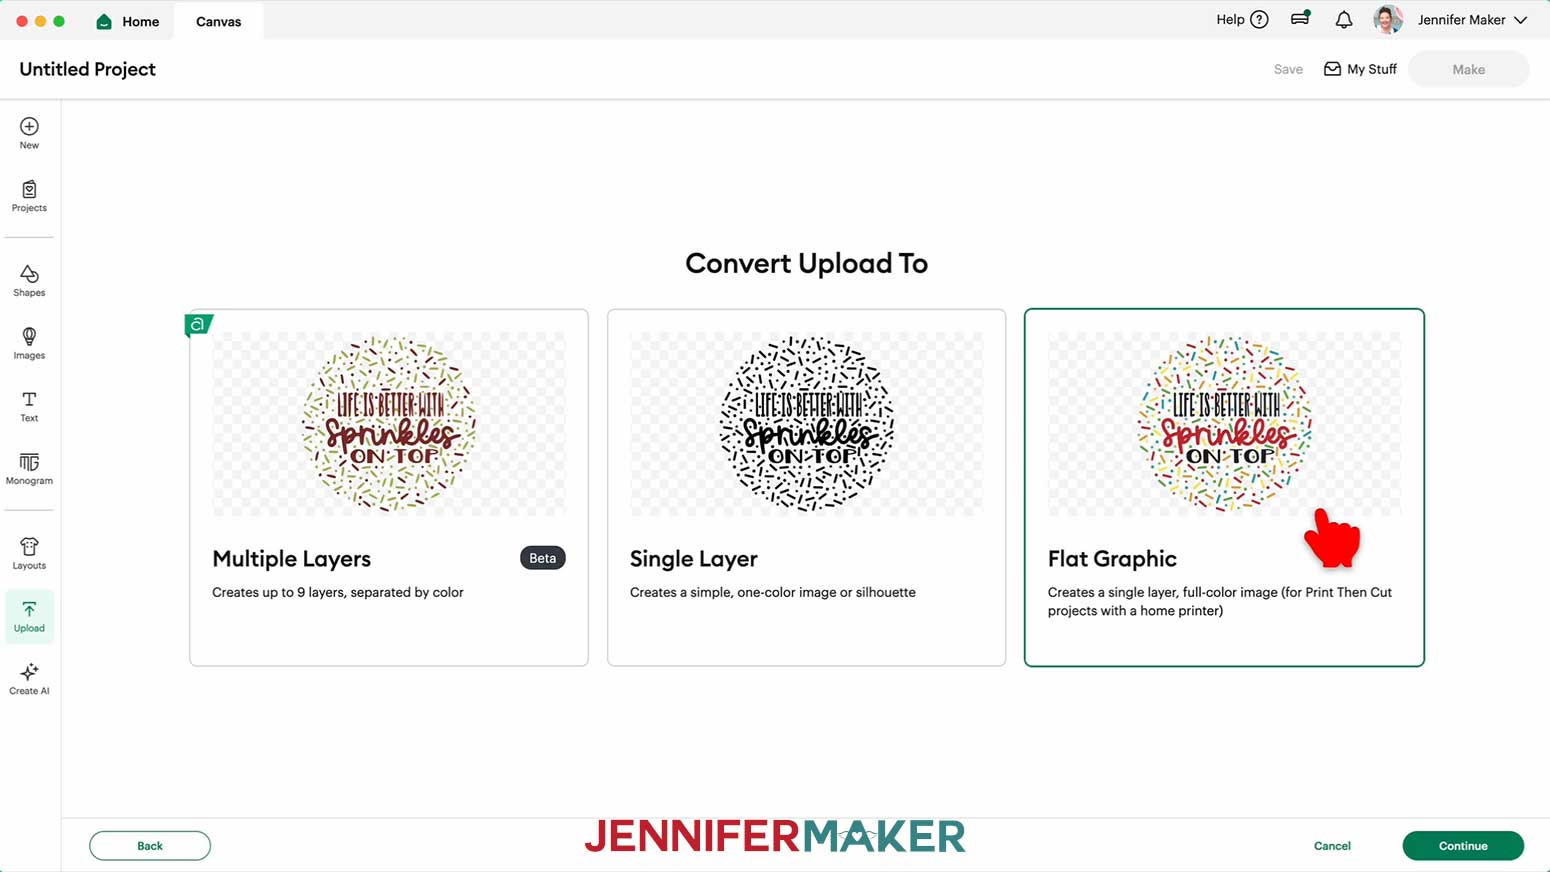
8. Click “Continue.”
9. Click “Upload” to add the design to your Canvas.
NOTE: Your image might load in too large for Print Then Cut. If so, you’ll see a red warning icon in the Layers Panel, but it’s OK. We will fix this later.
10. Repeat Steps 1-9 to add additional waterslide decal designs to your Canvas.
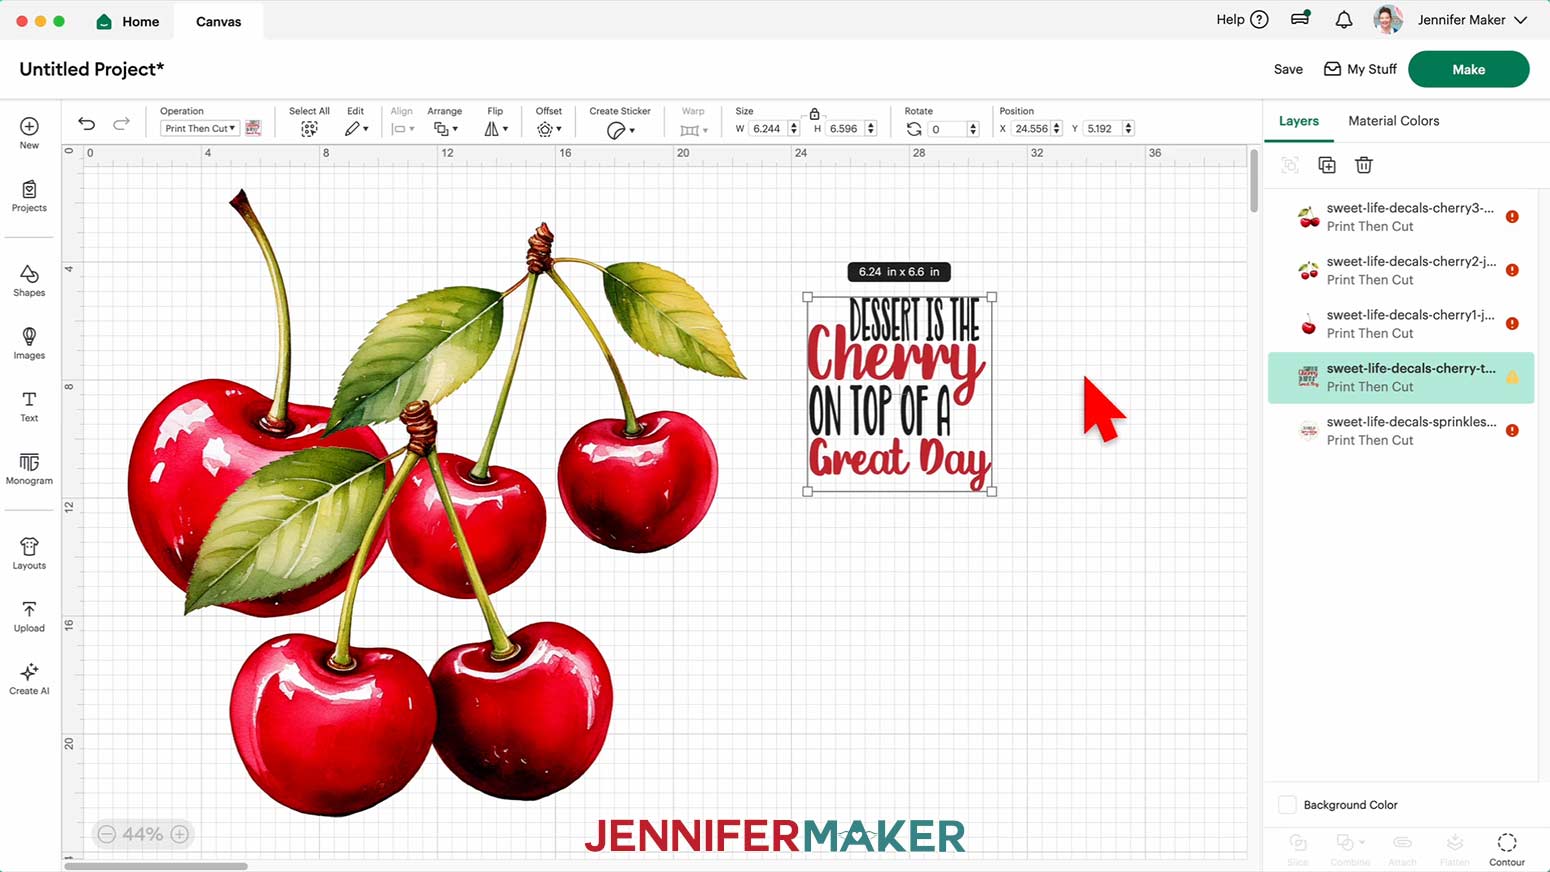
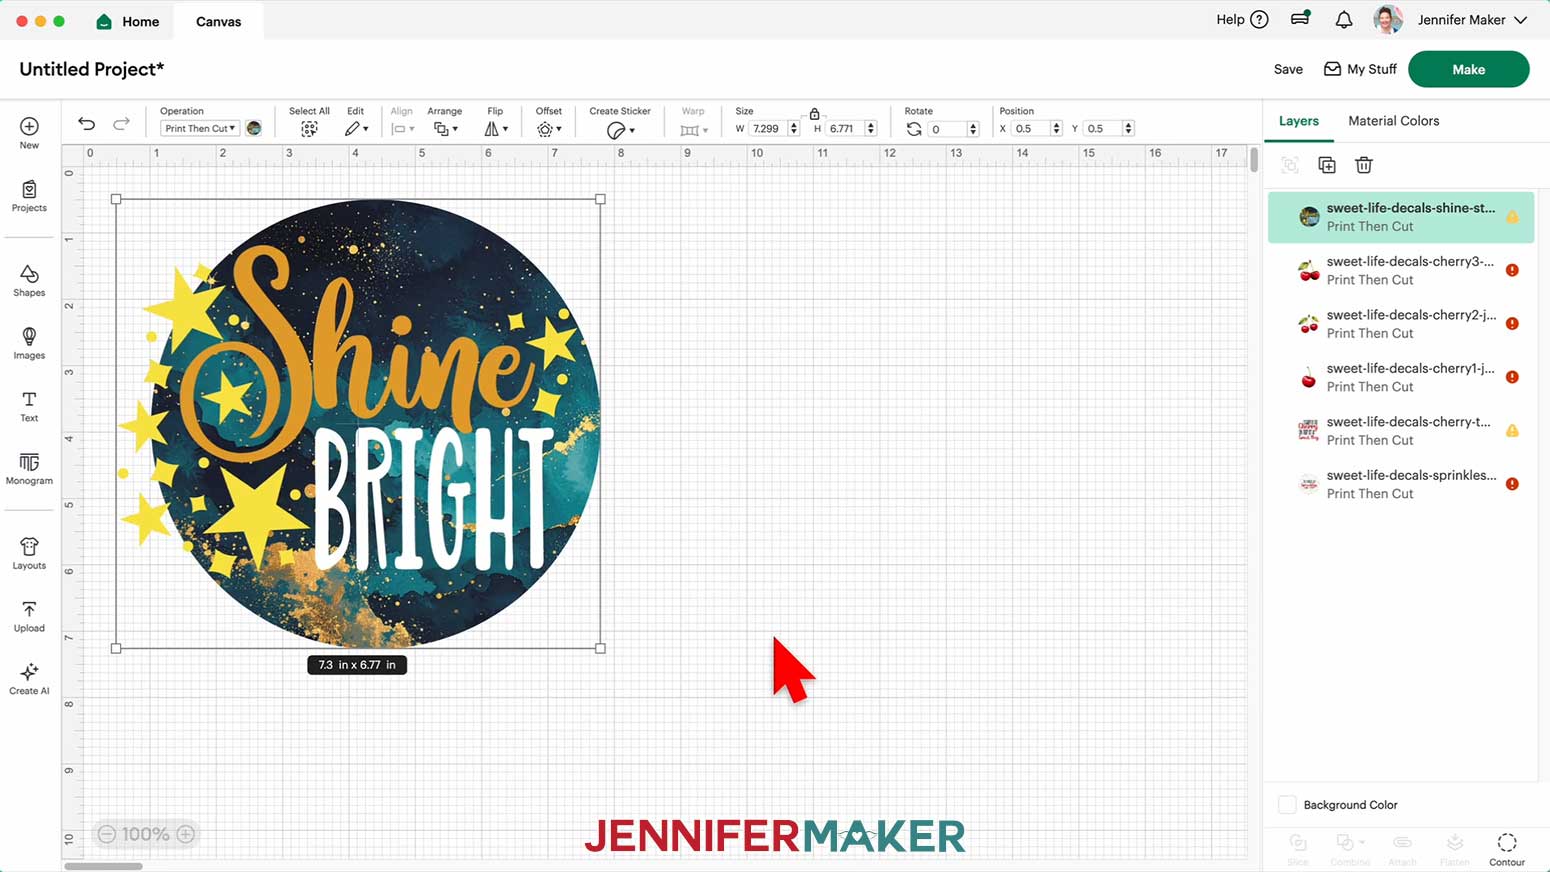
NOTE: I’ll also upload the “Cherry” text and image designs, and the “Shine Bright” design.
11. Click “Save” and give your project a name.
12. If needed, resize the design(s) to fit within the design area(s) on your blank. Keep the “Lock” icon closed to maintain proportions and adjust the “Height (H)” or “Width (W)” in the Size fields.
NOTE: To fit the plate in my materials list, I resized my “Sprinkles” design to 5.9” high. I resized my cherry “text” design to 3.31” high, the “cherry1” design to 1” wide, the “cherry2” design to 1.75” wide, and the “cherry3” design to 1.75” high. To fit the candle in my materials list, I resized the “Shine Bright” design to 3.25” high.
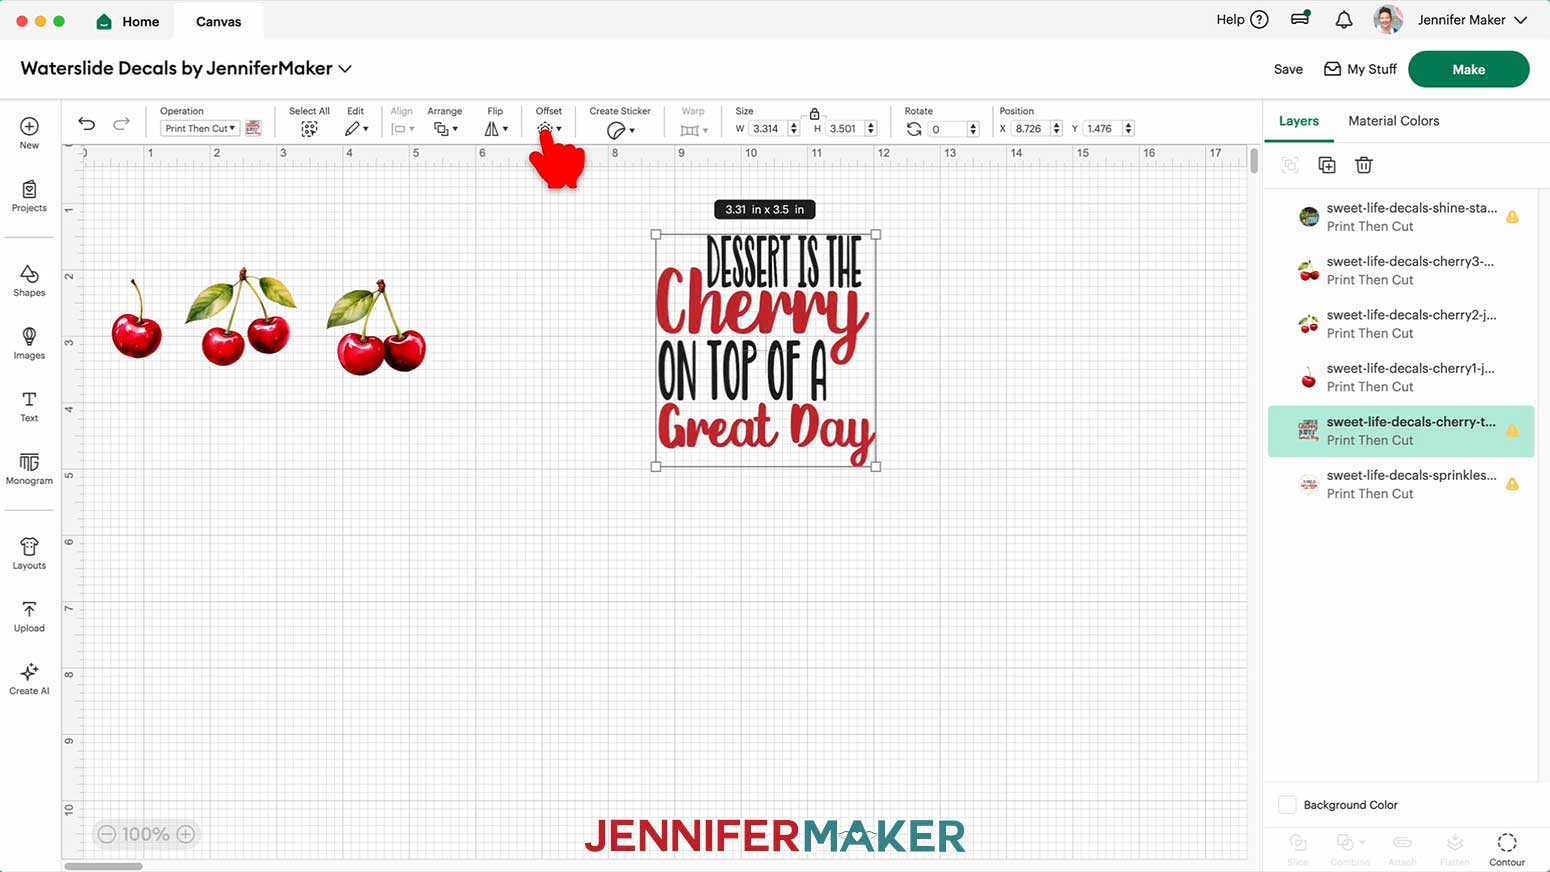
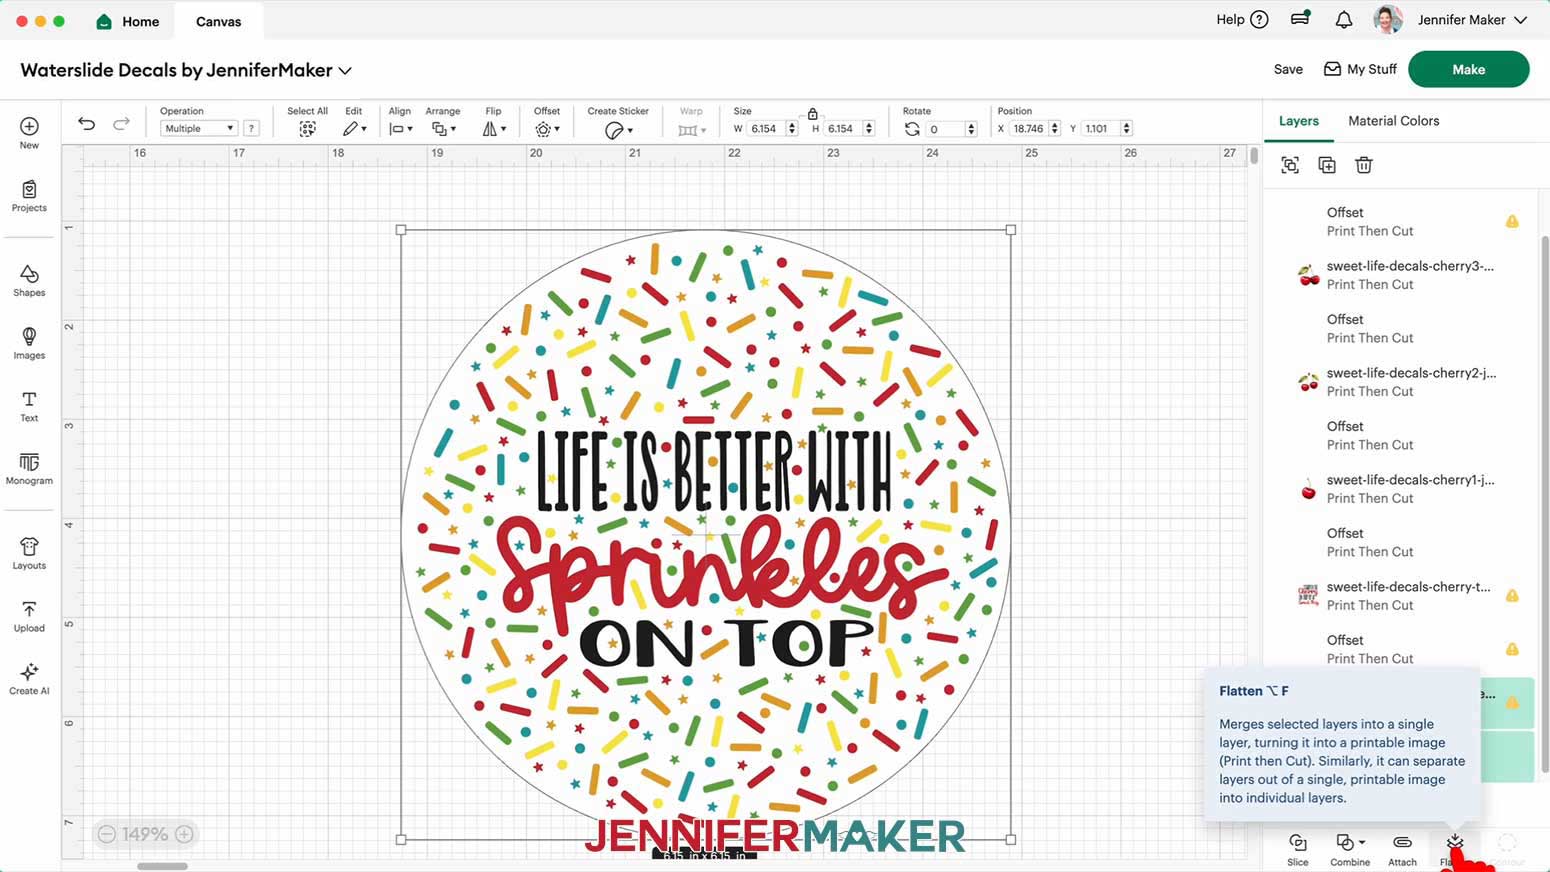
13. Click “Offset.”
NOTE: The Offset will add a border around the decal that will tell your Cricut where to cut. You may need to click a pencil icon on the left to find the “Offset” option.
TIP: If your offset has rough or bumpy edges, like the one for my "Sprinkles" design, you can use a free shape from the Shapes menu that matches your design's overall shape instead. To do this, add a circle, resize it to be slightly larger than the "Sprinkles" design, use "Align" and "Center" to center the circle and the design, and then drag the circle underneath the "Sprinkles" design in the Layers Panel. Then skip down to step 19 below.
14. Change the offset “Distance” to 0.125”, or ⅛”.
TIP: The blue line is where the Offset will be created.
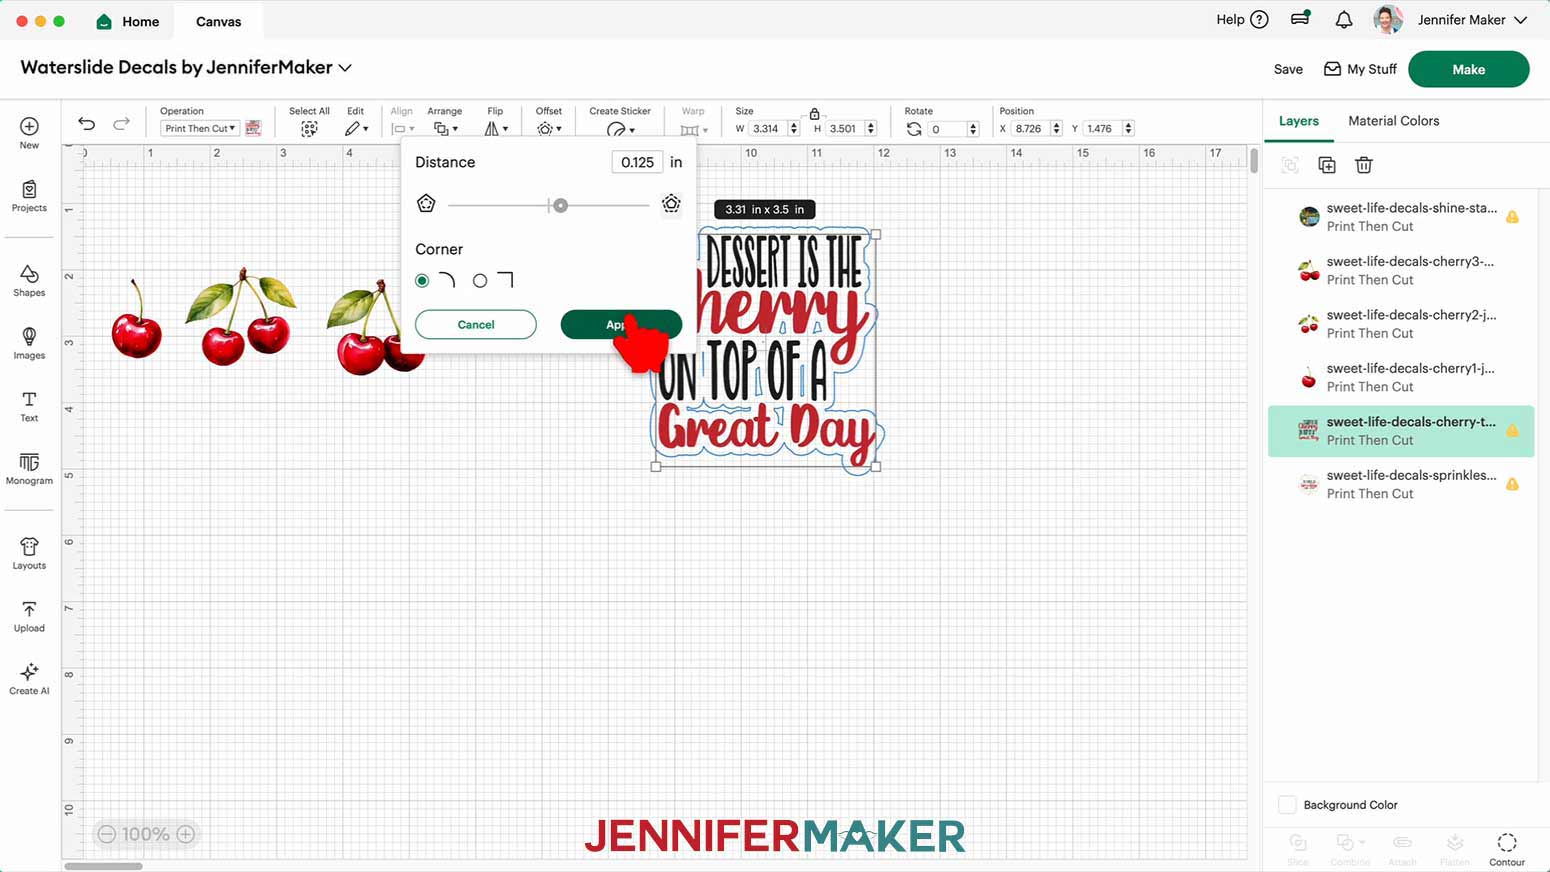
15. Click “Apply.”
16. If your Offset layer has cutouts within the shape, keep the Offset layer selected and click “Contour,” then click “Hide All Contours” to remove all of the inner cut shapes.
TIP: This way, the machine will cut around the design and not make cuts inside the shapes.
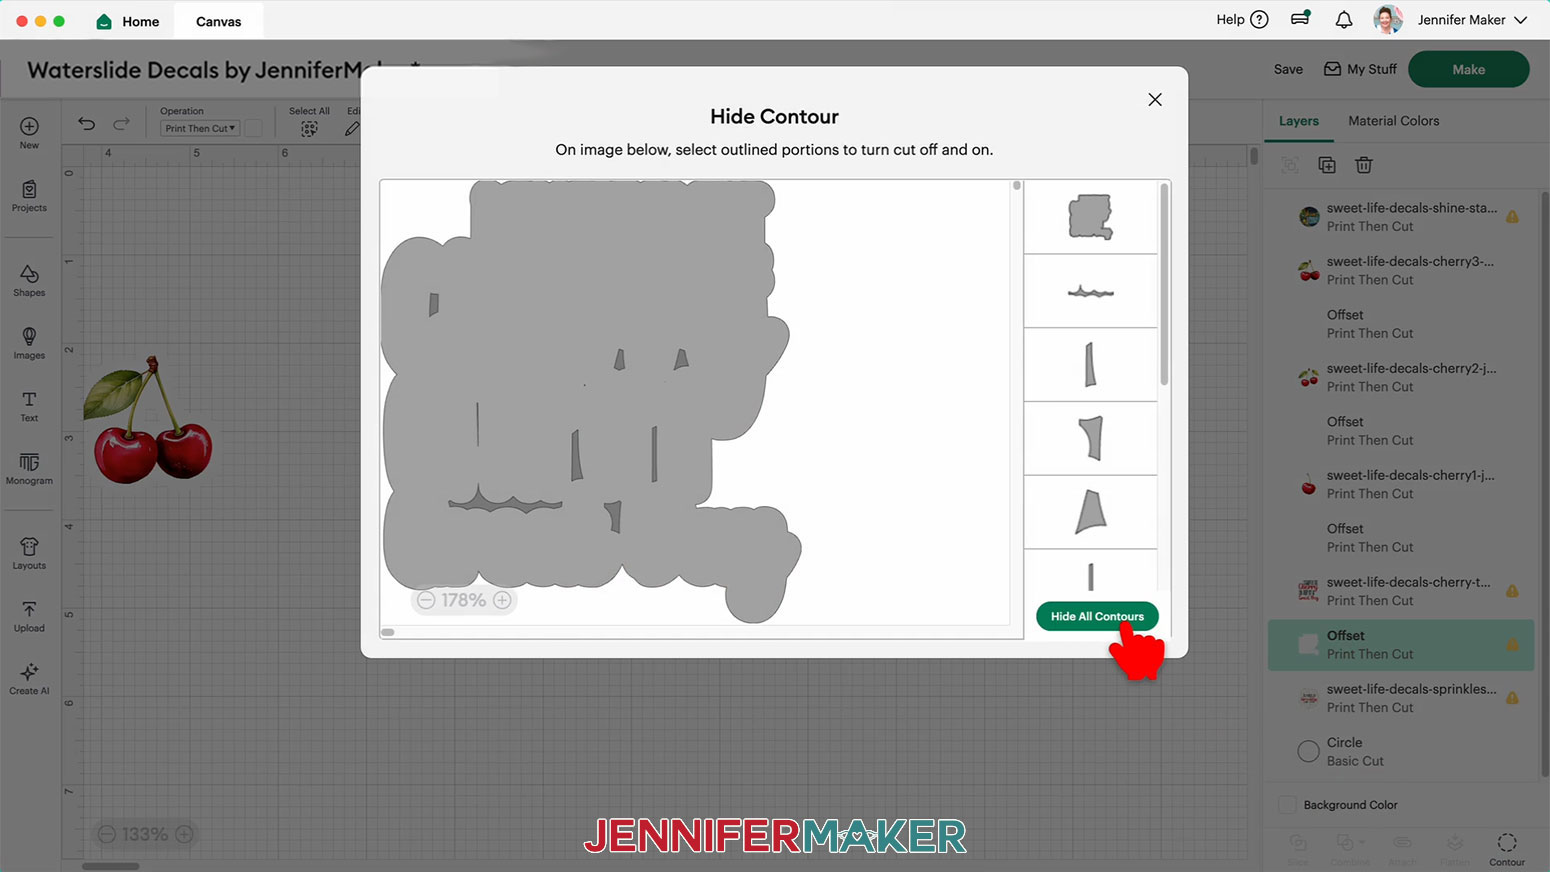
17. Click the “X” to close the “Hide Contour” window.
18. Keep the Offset Layer selected and use the Color Box to change it to white.
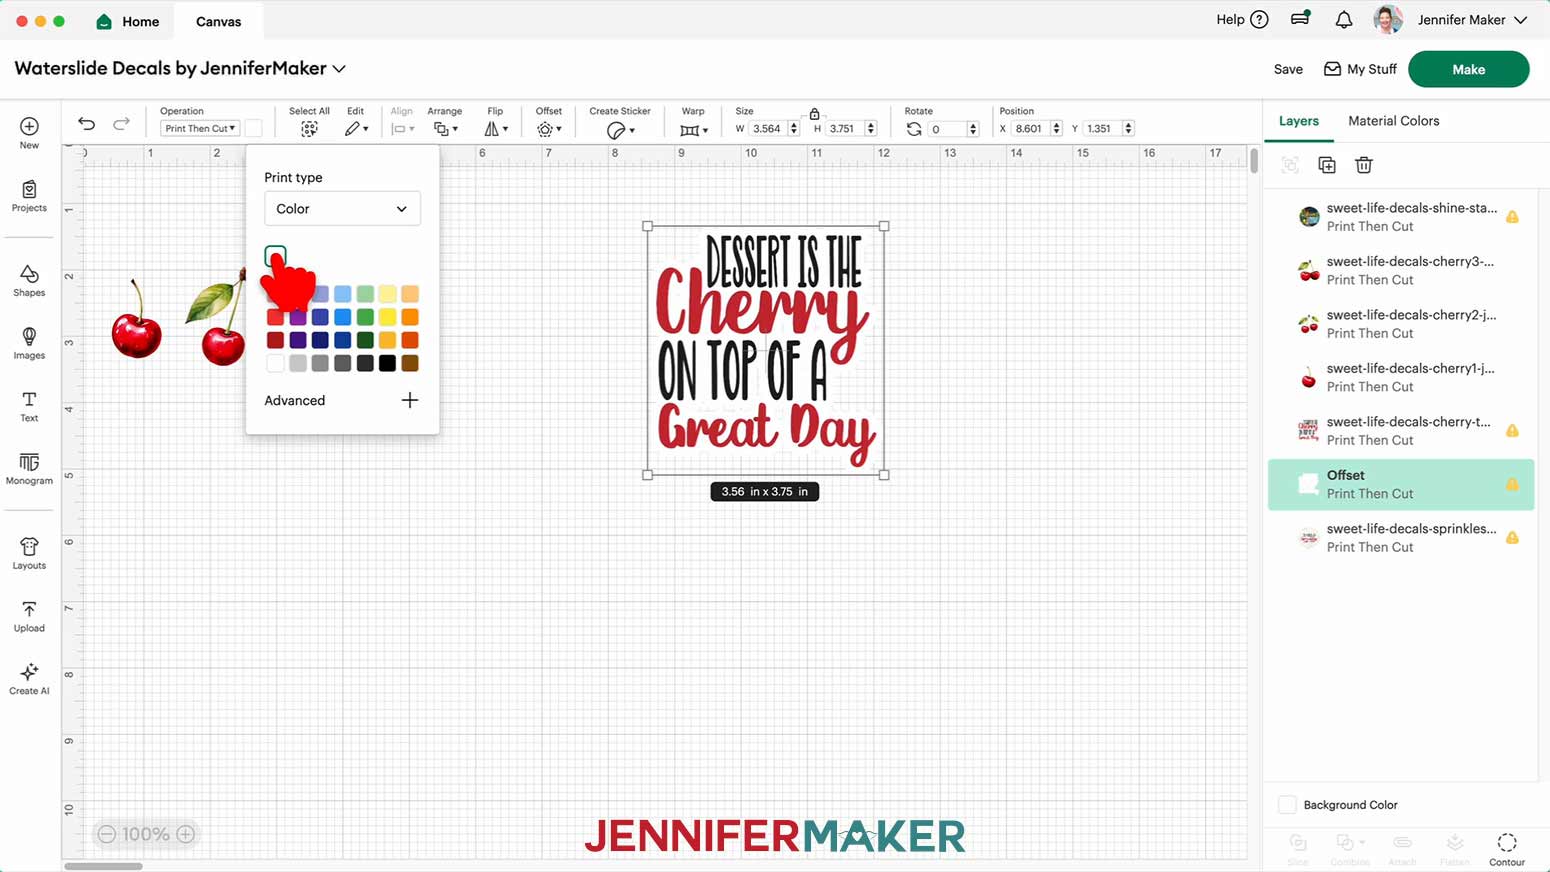
19. Select the design and the Offset (or solid shape you added) and click “Flatten” to turn the design into a single Print Then Cut layer.
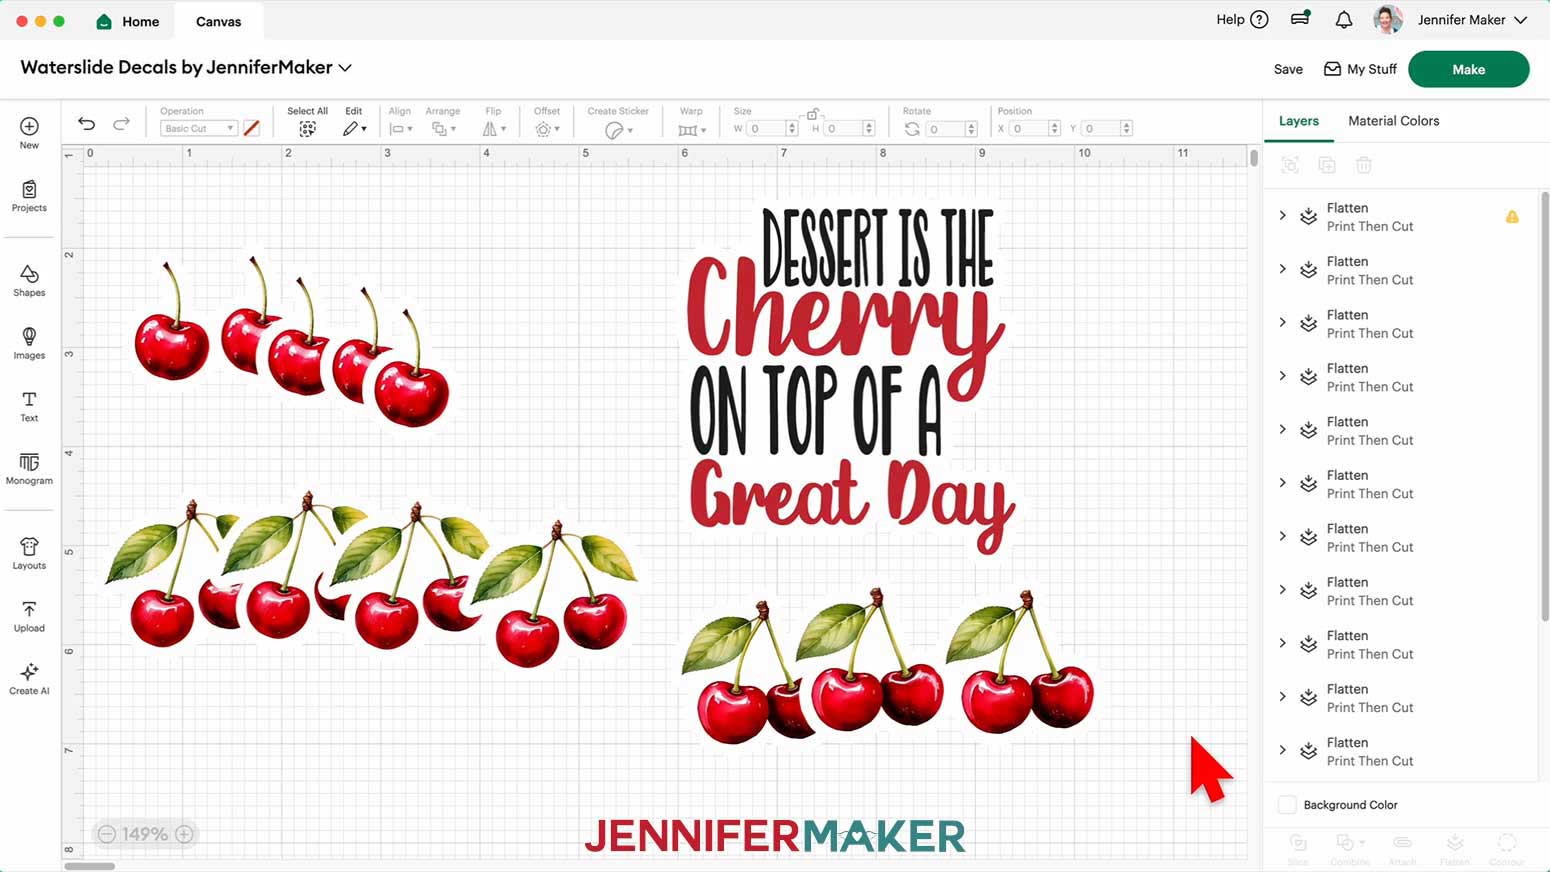
20. Repeat Steps 13-19 to add Offsets and “Flatten” the rest of the designs on the Canvas.
21. “Duplicate” the Flattened elements as desired for your design(s).
NOTE: I duplicated the cherry designs until I had five “cherry1” elements, four “cherry2” elements, and three “cherry3” elements.
22. We will seal the decals before cutting them, so it’s best to print one page at a time. Click the “Eye” icon next to each design you want to hide for now and print later.
NOTE: I hid the cherry designs and the “Shine Bright” design, and printed the “Sprinkles” design first.

23. Make sure the correct machine is selected in the top right.
24. Click “Make.”
25. On the “Prepare” screen, change the “Material Size” to match your waterslide decal paper.
NOTE: My waterslide decal paper is A4 size, so I set my “Material Size” to “8.3 in. x 11.7 in.”
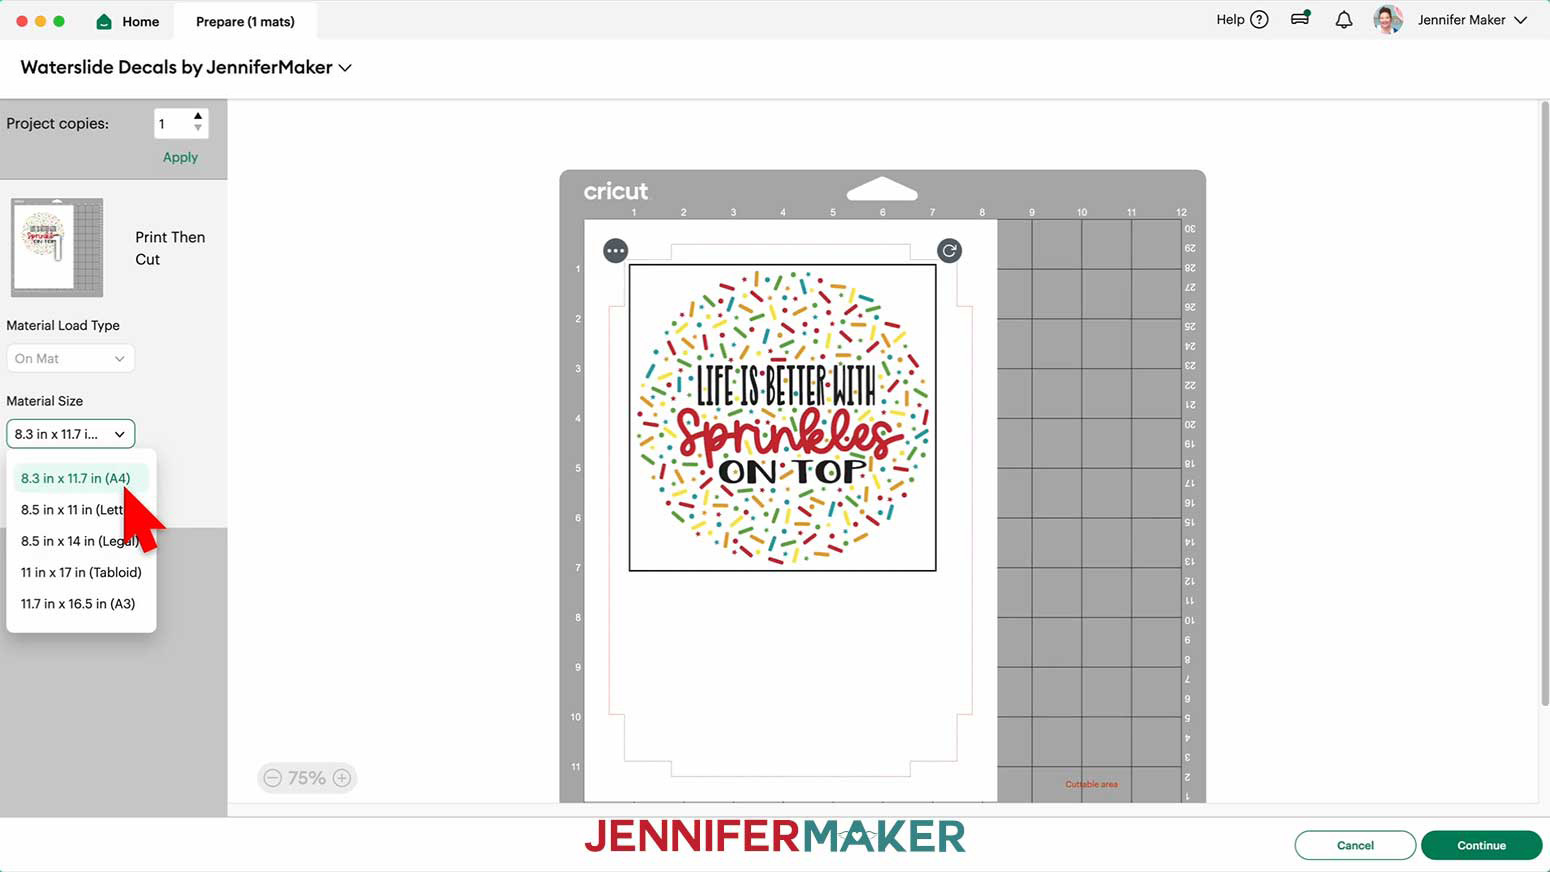
26. Click “Continue.”
27. On the “Make” screen, click “Send to Printer.”
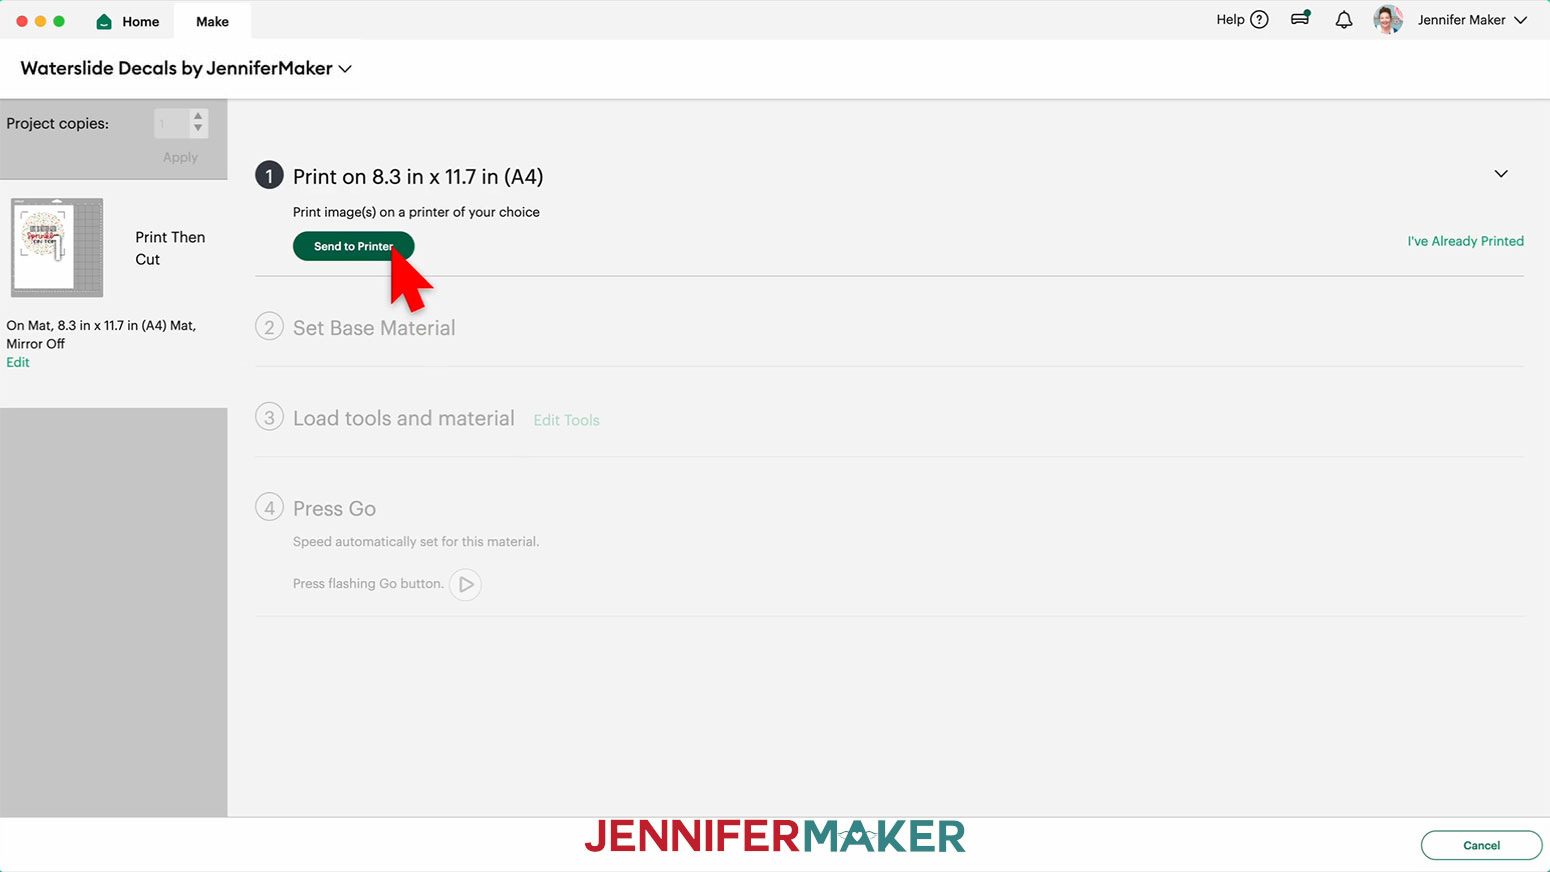
28. A window may pop up letting you know that sensor marks (registration marks) will be added to your printed page. Click “Next.”
29. In the “Print Setup” window, make sure the correct printer is selected.
30. Turn the “Add Bleed” toggle OFF.
NOTE: You don’t need to “Add Bleed” because if you’re cutting the decal with your Cricut, you’ve added an Offset, which means your designs won’t cut along the very edges of the print.
31. Turn the “Use System Dialog” toggle ON for more control.

32. Click “Print.”
TIP: The Print Dialog box may be behind your Cricut Design Space window, so minimize it.
NOTE: Your Print Dialog box may look different than mine, and that’s OK. Follow the instructions as closely as you can.
33. In the Print Dialog Box, change the paper size to match your material, if needed.
NOTE: I changed my paper size to A4 (8.27” x 11.69”).
34. Under “Printer Options, click “Print Settings.”
35. Under “Media Type,” select the highest quality glossy photo paper option.
36. Under “Print Quality,” select “Best Quality.”
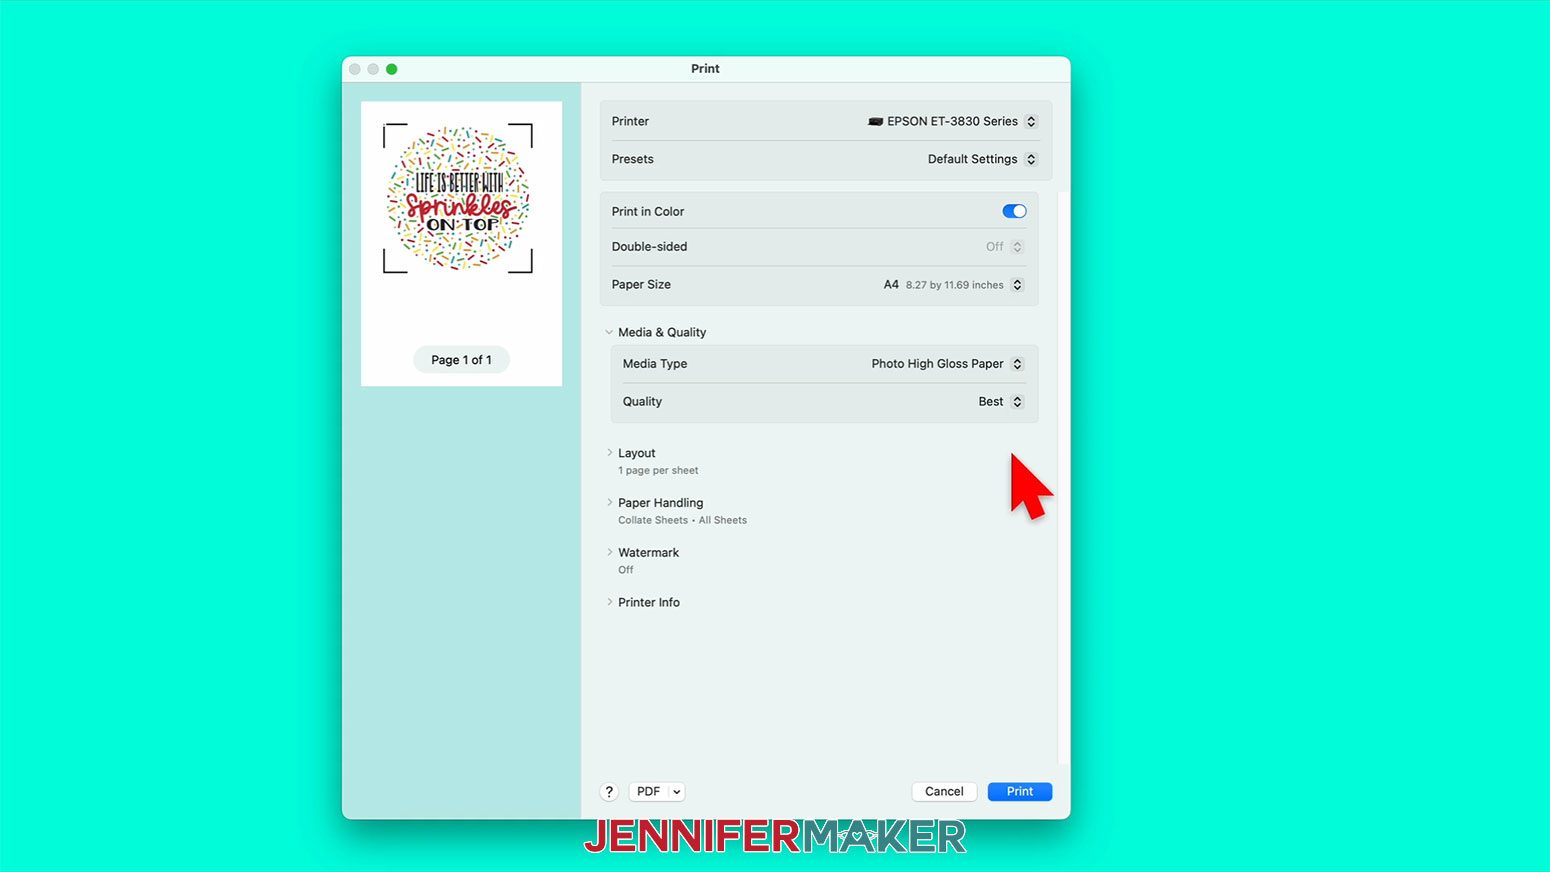
37. Click “OK.”
38. Insert a sheet of waterslide paper correctly into your inkjet printer.
TIP: Check the paper’s packaging to determine which way is correct.
39. Click “Print.”
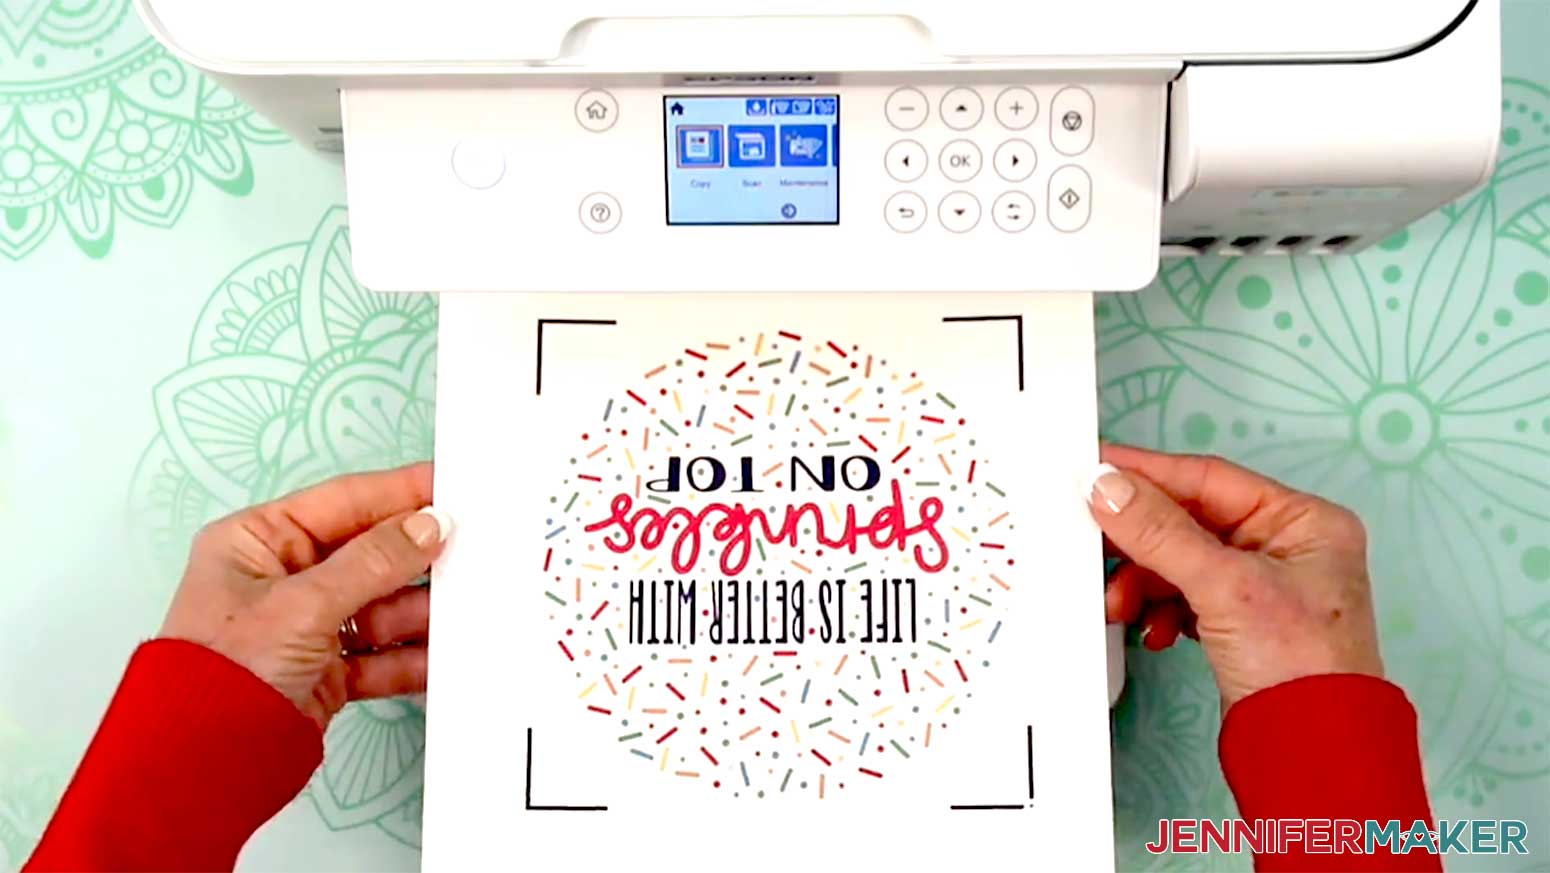
40. Once your waterslide decals have printed, carefully remove the sheet from the printer by its edges and leave it to dry face up for 5-10 minutes to avoid ink smearing.
OPTION 2: PREPARE AND PRINT YOUR WATERSLIDE DECAL DESIGN FROM GOOGLE DOCS
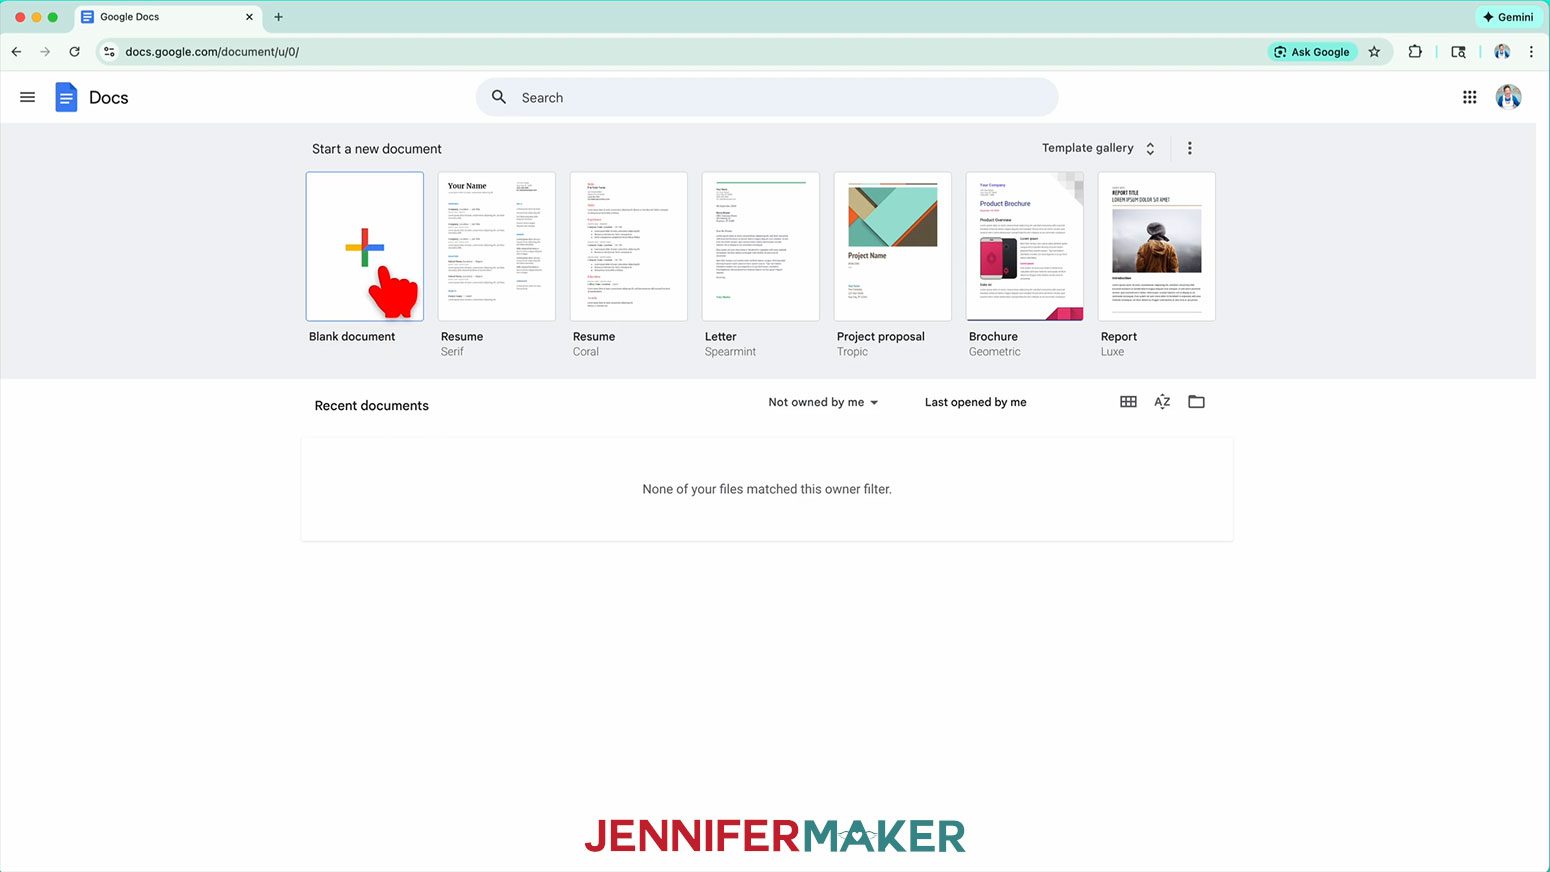
1. Open Google Docs in the Google Chrome web browser on your computer.
NOTE: You will need a free Google account to use the free Google Docs software.
TIP: You can also download and open the Google Docs app, but you will have limited access to features, so I do not recommend it on a mobile device.
2. Click “Blank document” at the top left to open a new document.
3. Click “File” then “Page setup.”
4. Change the “Paper size” to “A4 (8.27” x 11.69”).”
5. To use more of the paper but still leave some space around the design, change all of the margins to “0.25”
6. Click “OK.”
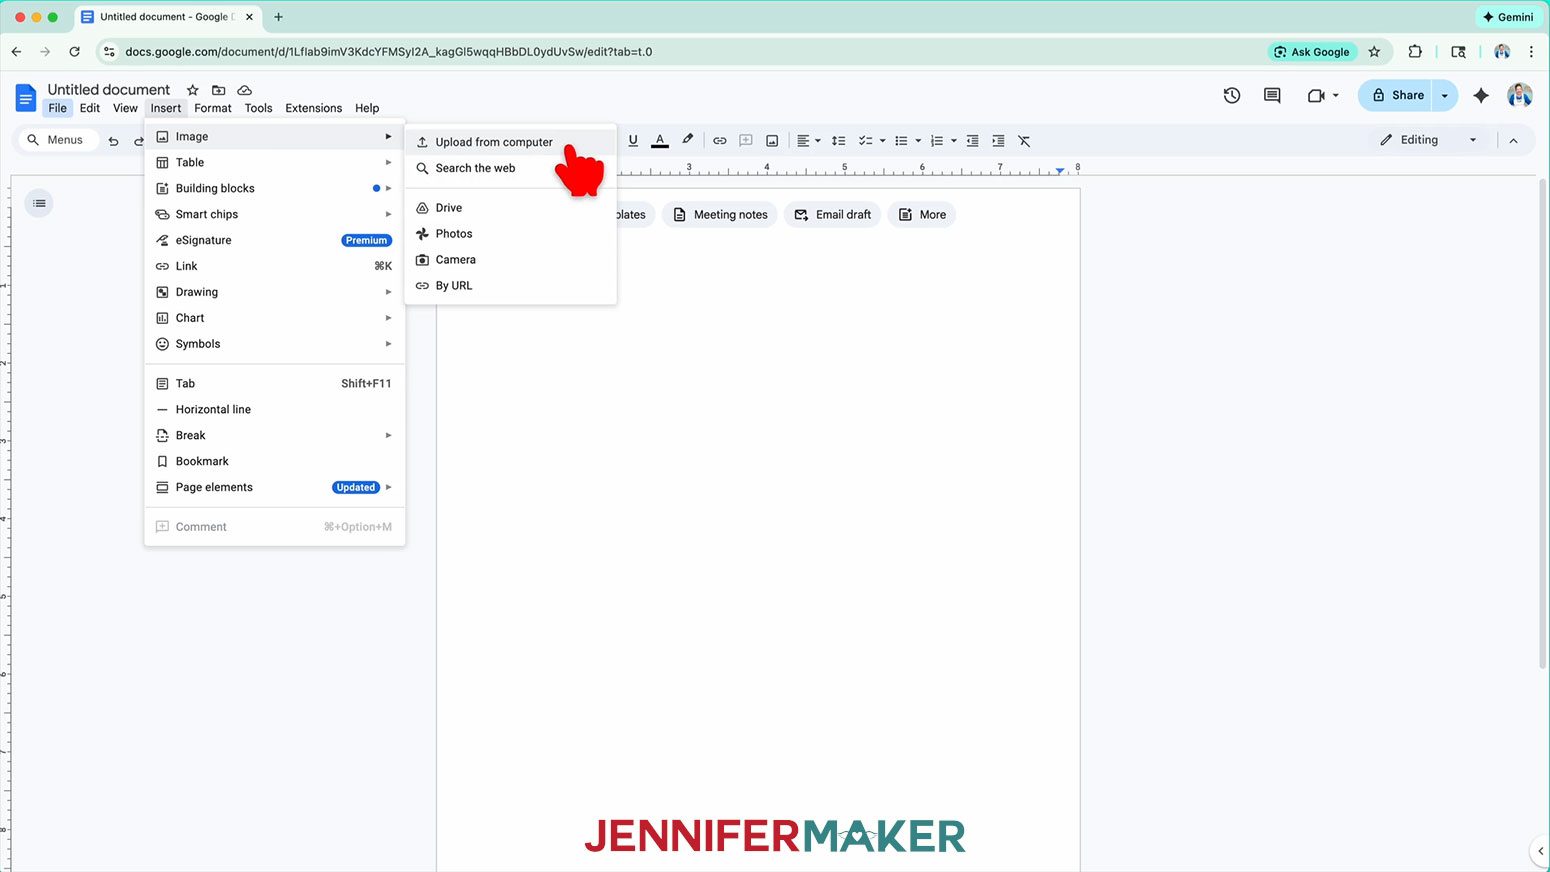
7. Click the “Insert” menu and hover your cursor over “Image.”
8. Click “Upload from computer.”
9. Select your PNG design.
NOTE: I uploaded my “Glow Getter” design.
10. Click “Open” to add the design to your canvas.
11. Select the design and click “Image Options” at the top of the canvas.
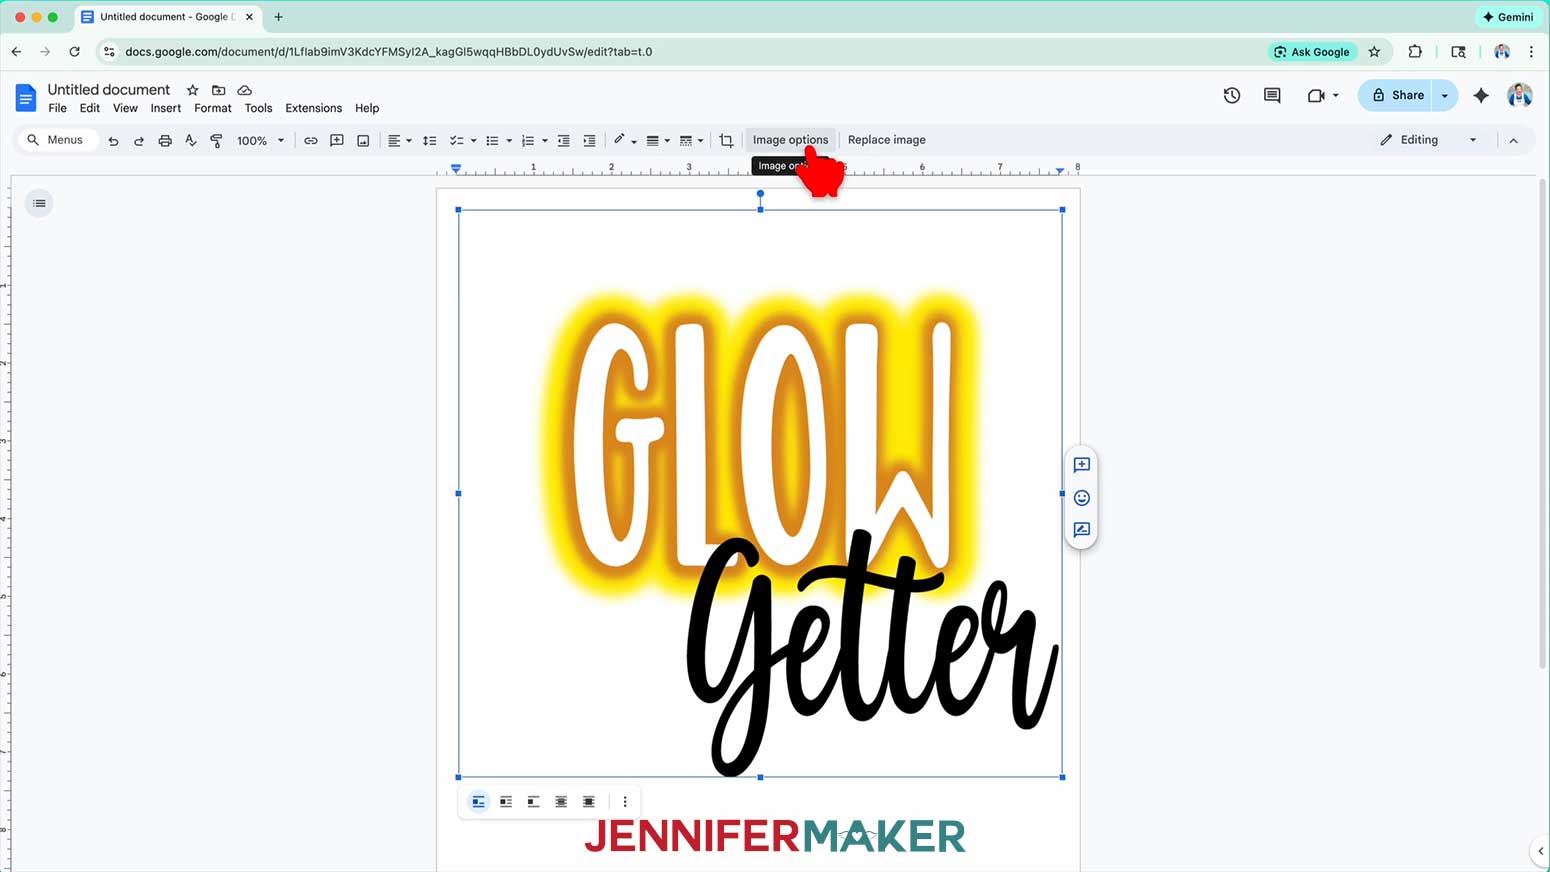
NOTE: You can also open the menu by going to “Format,” “Image,” and “Image Options.”
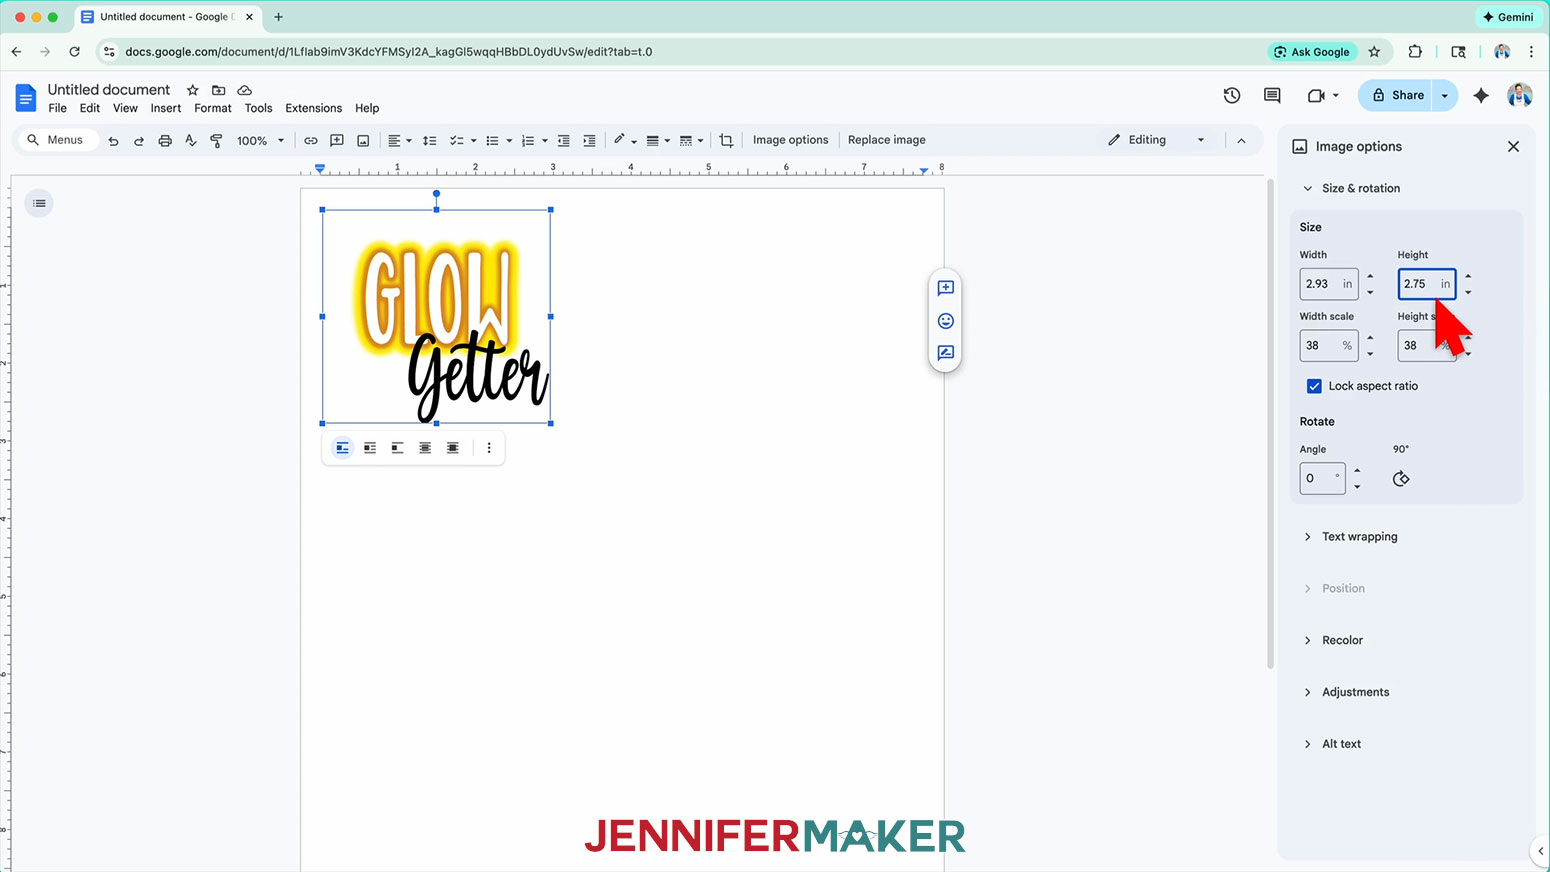
12. Select “Size & Rotation.”
13. Keep the “Lock aspect ratio” box checked to maintain the design’s proportions.
14. Resize your design to your desired size.
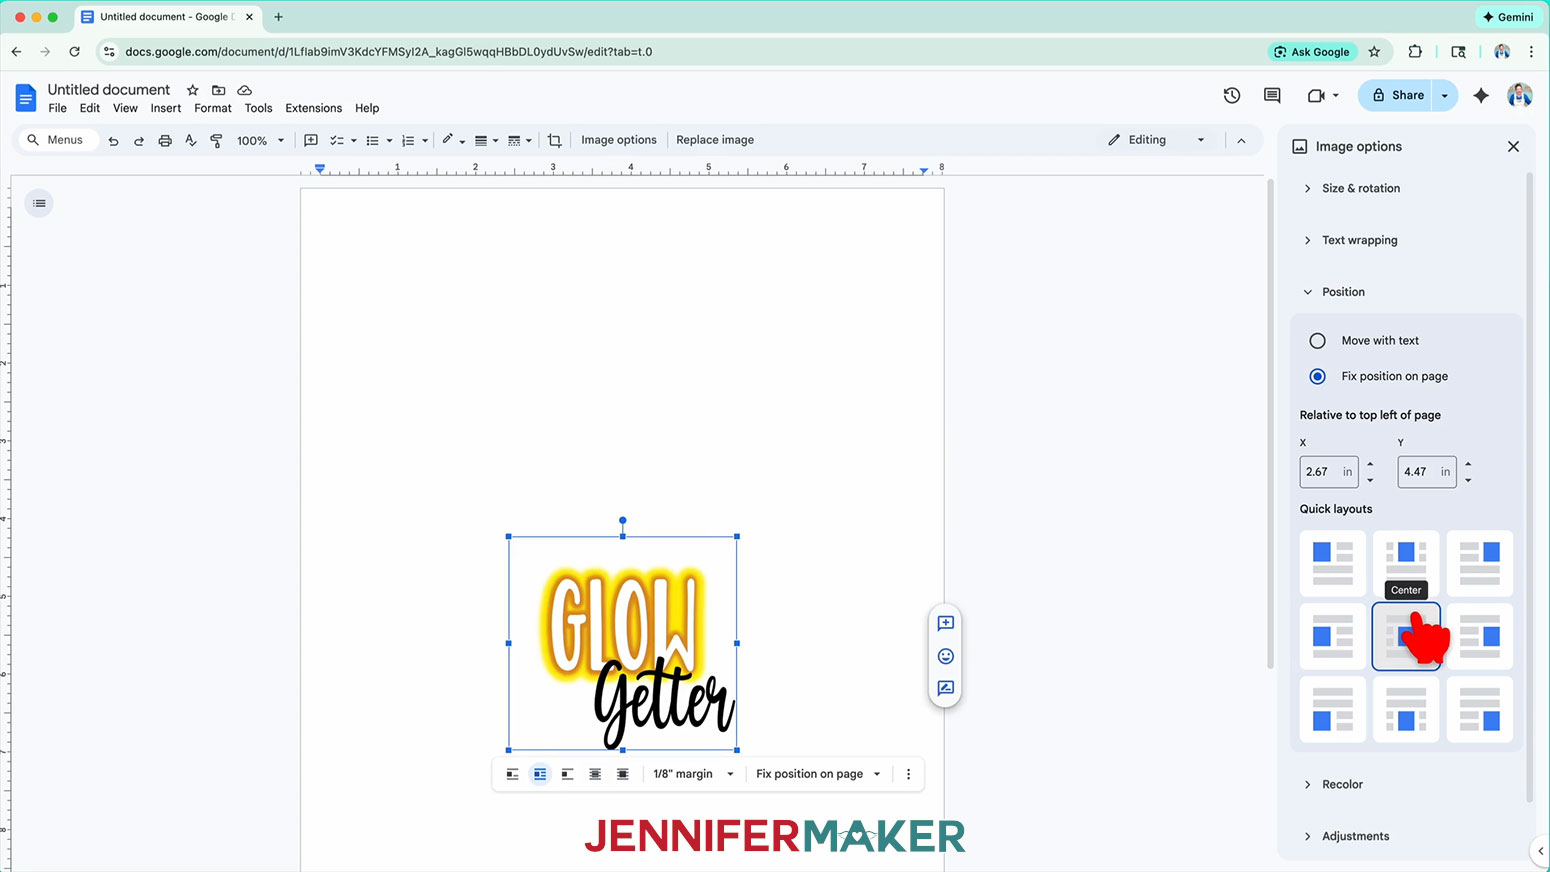
15. Click the image and click “Image Options.”
16. Click “Position” and “Center.”
17. Repeat Steps 7-16 to add additional waterslide decal designs to your document.
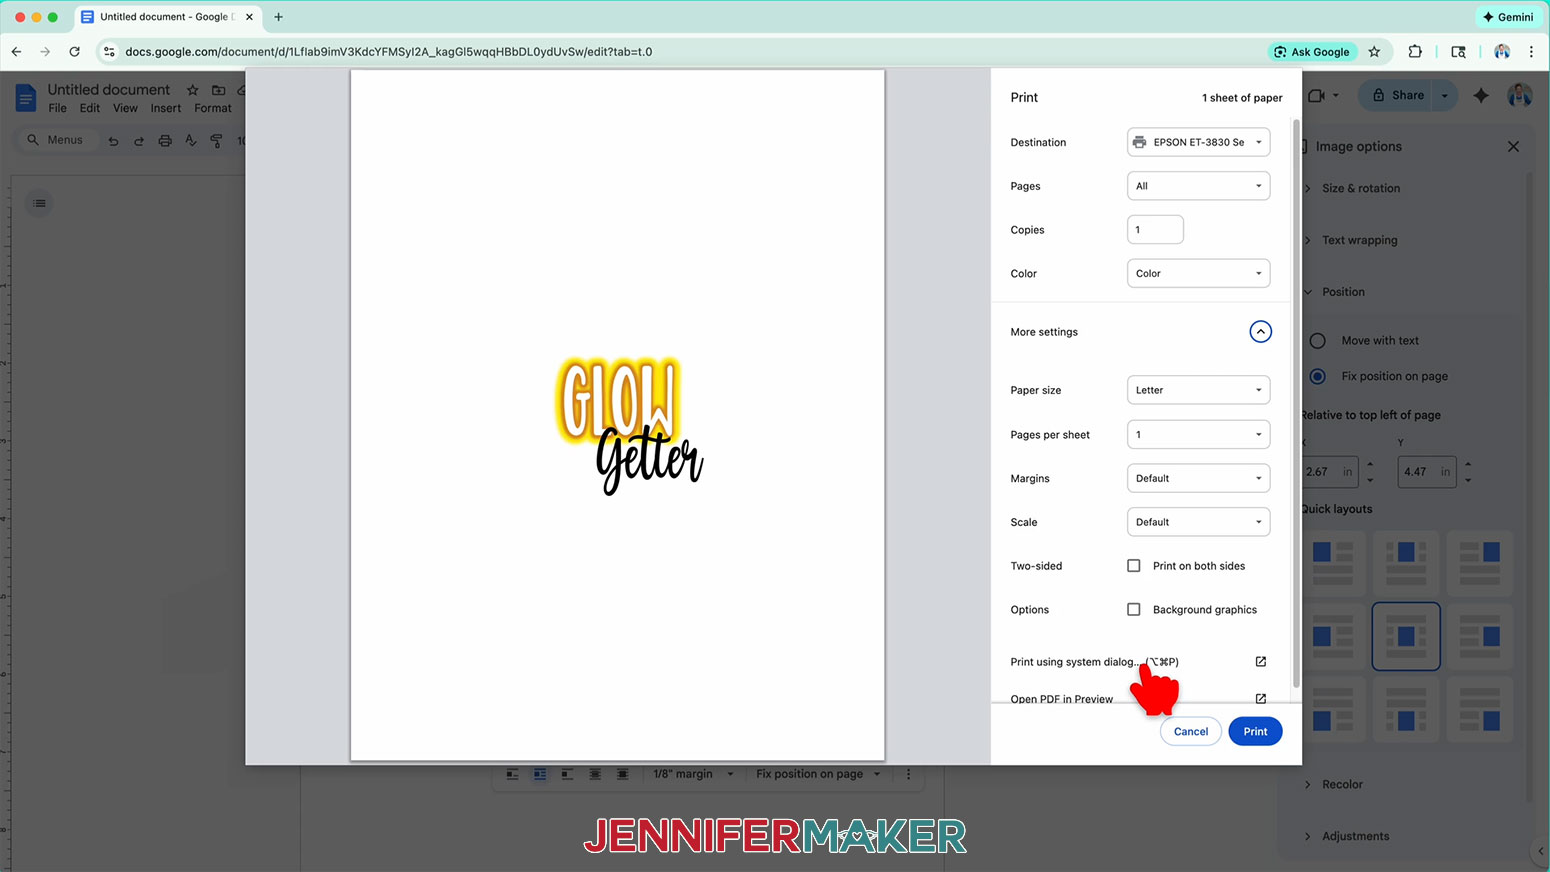
18. Go to the File menu and choose “Print.”
19. Select your inkjet printer under “Destination.”
20. Click the arrow beside “More Settings” to select “Print Using System Dialog.”
NOTE: Your screen may look different, and that’s OK. Just be sure to select the right paper size and the highest-quality print settings.
21. Confirm that your paper size matches your material, and change it if needed.
NOTE: I made sure my paper size was set to A4 (8.27” x 11.69”).
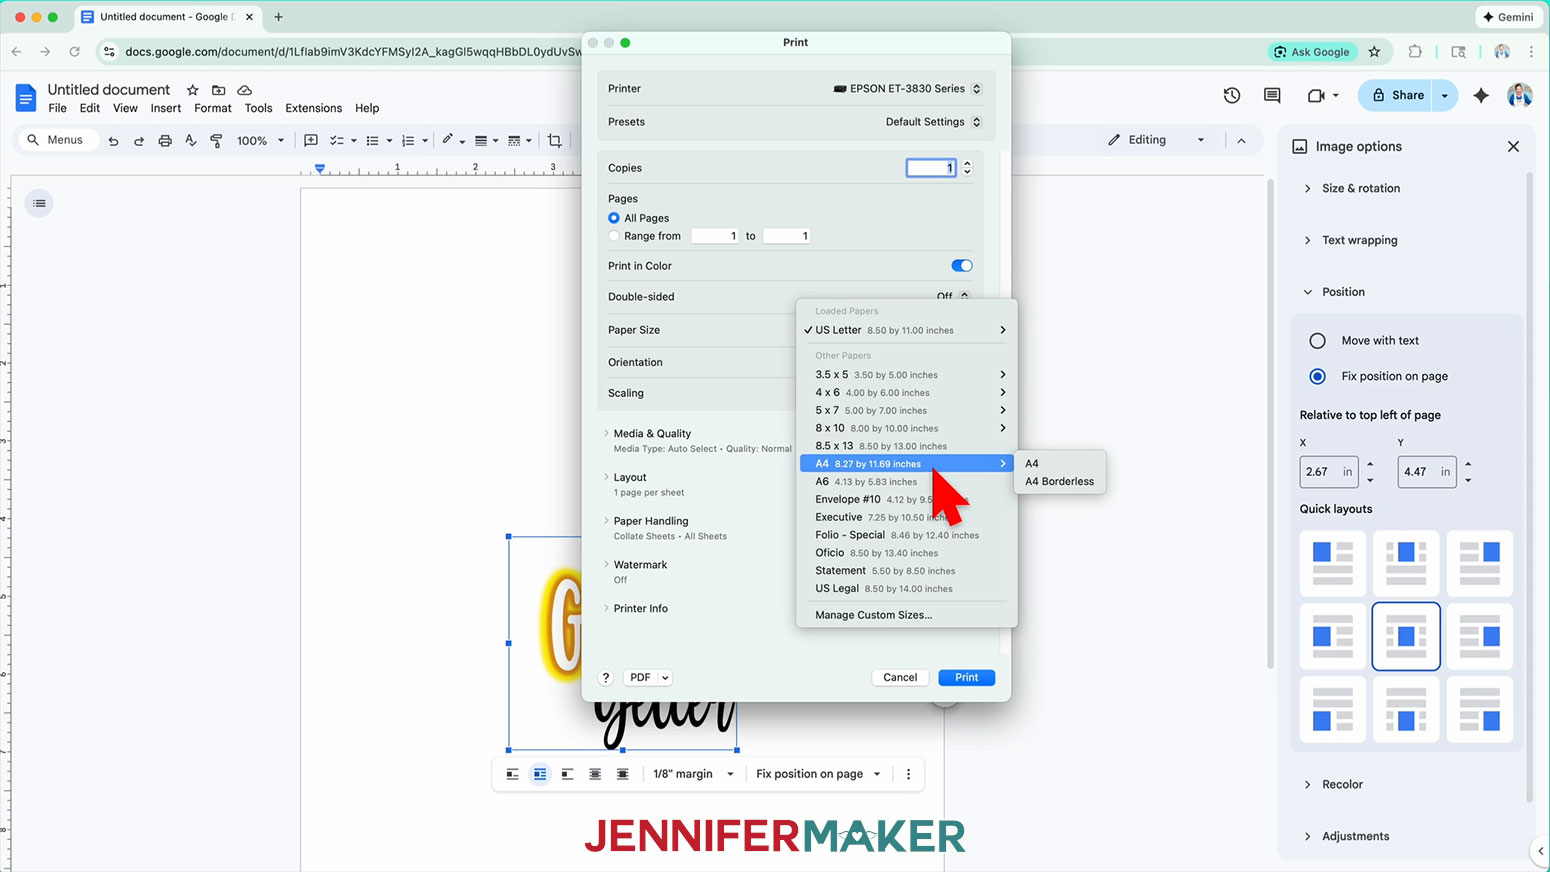
22. Under “Printer Options, click “Print Settings.”
23. Under “Media Type,” select the highest quality glossy photo paper option.
24. Under “Print Quality,” select “Best Quality.”
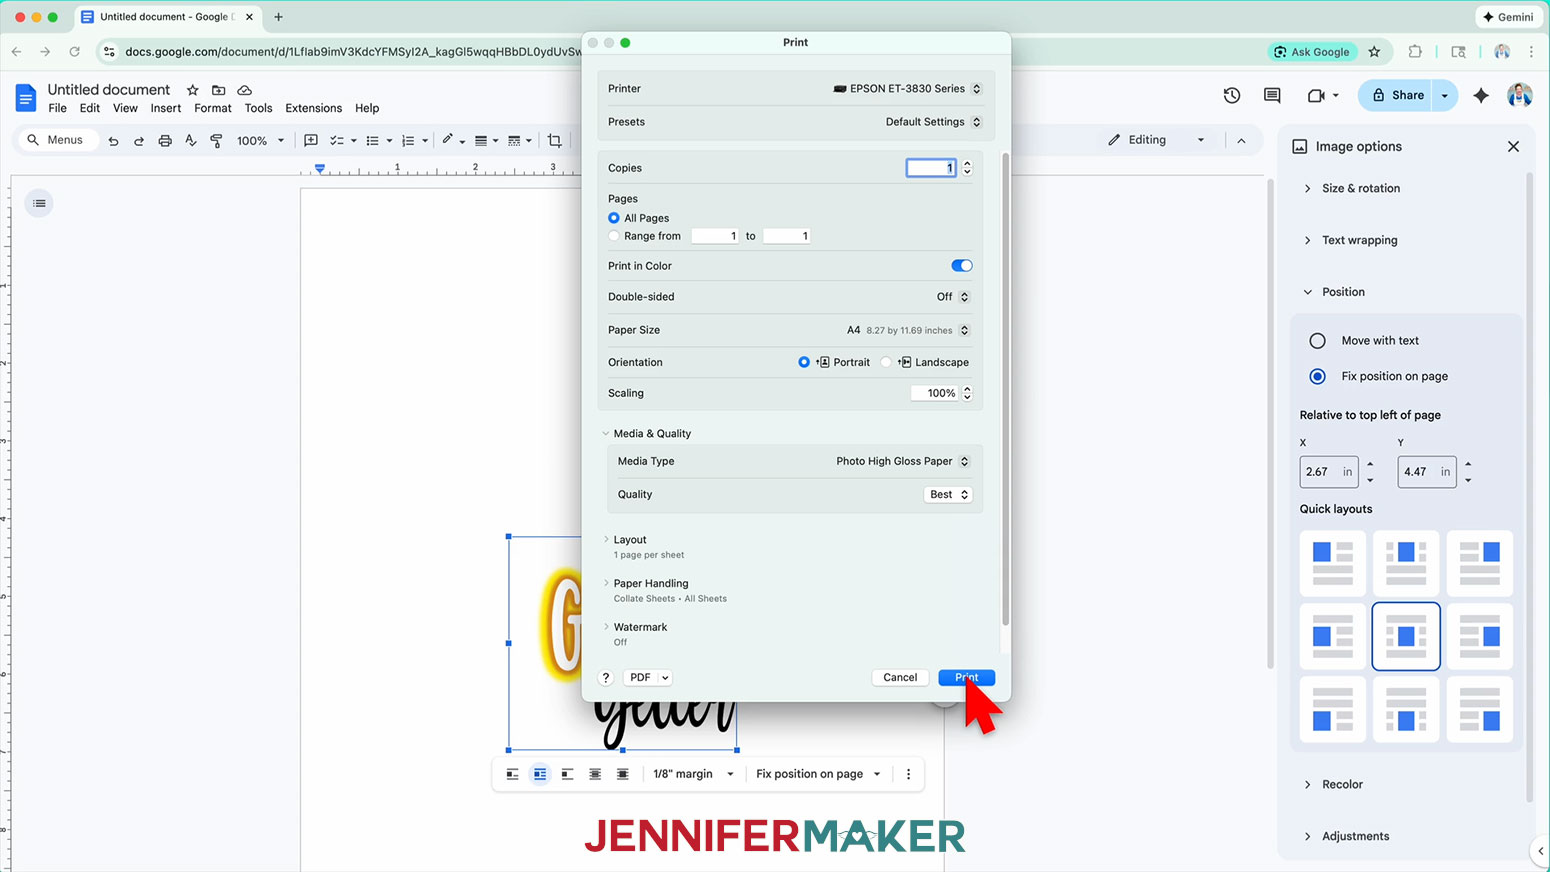
25. Click “OK.”
26. Insert a sheet of waterslide paper correctly into your inkjet printer.
TIP: Check the paper’s packaging to determine which way is correct.
27. Click “Print.”
28. Once your waterslide decals have printed, carefully remove the sheet from the printer by its edges and leave it to dry face up for 5-10 minutes to avoid ink smearing.
STEP 3: SEAL YOUR WATERSLIDE DECAL DESIGN
NOTE: To prevent the ink from washing off of the printed decal design during the application process, I recommend sealing the decal prior to application.
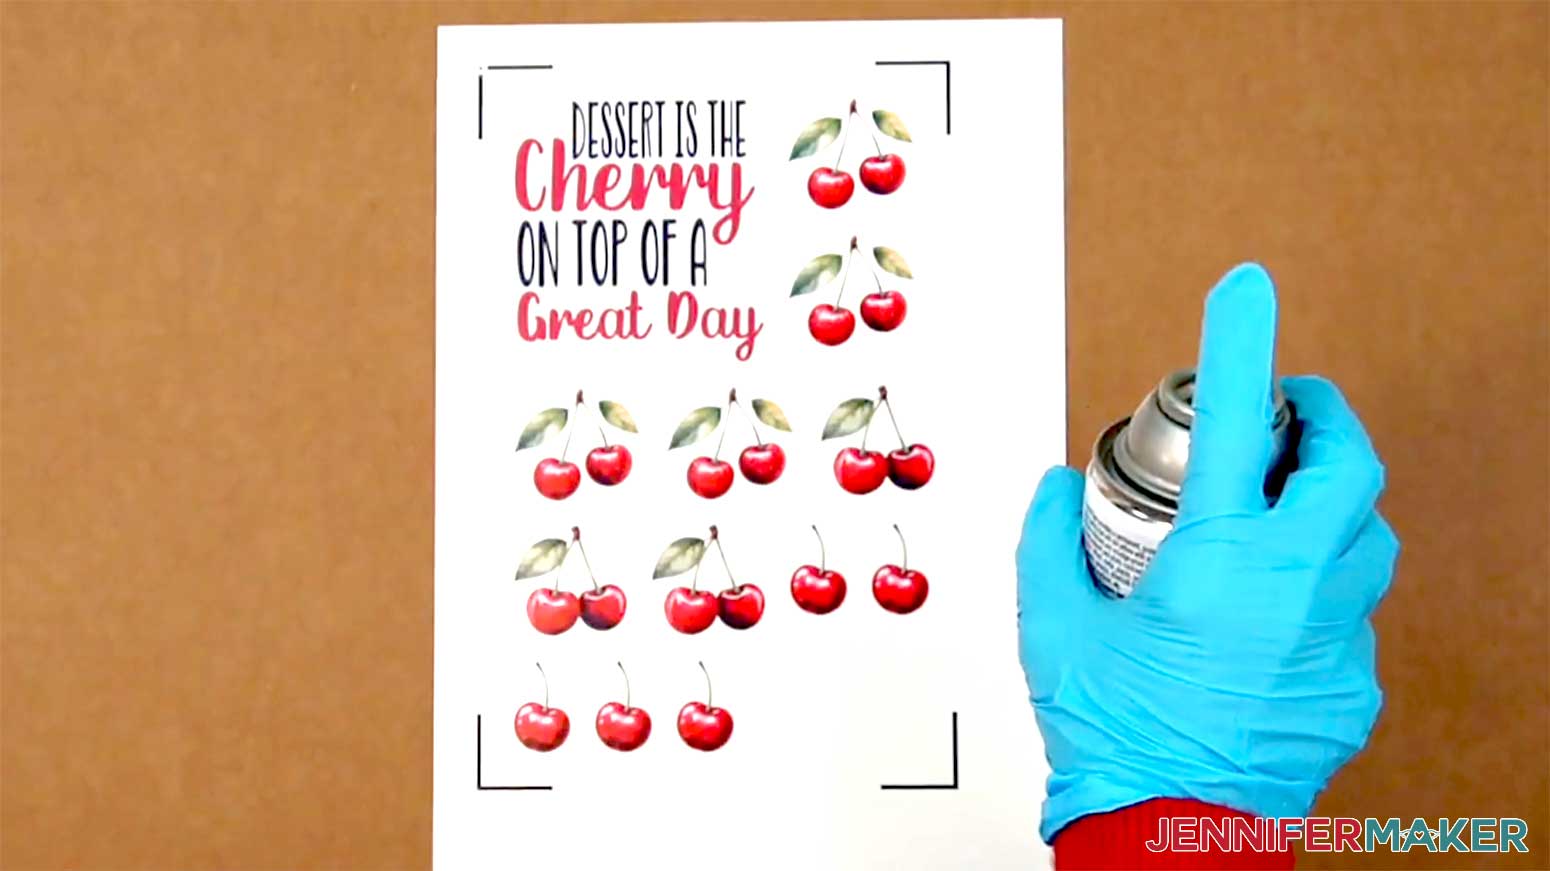
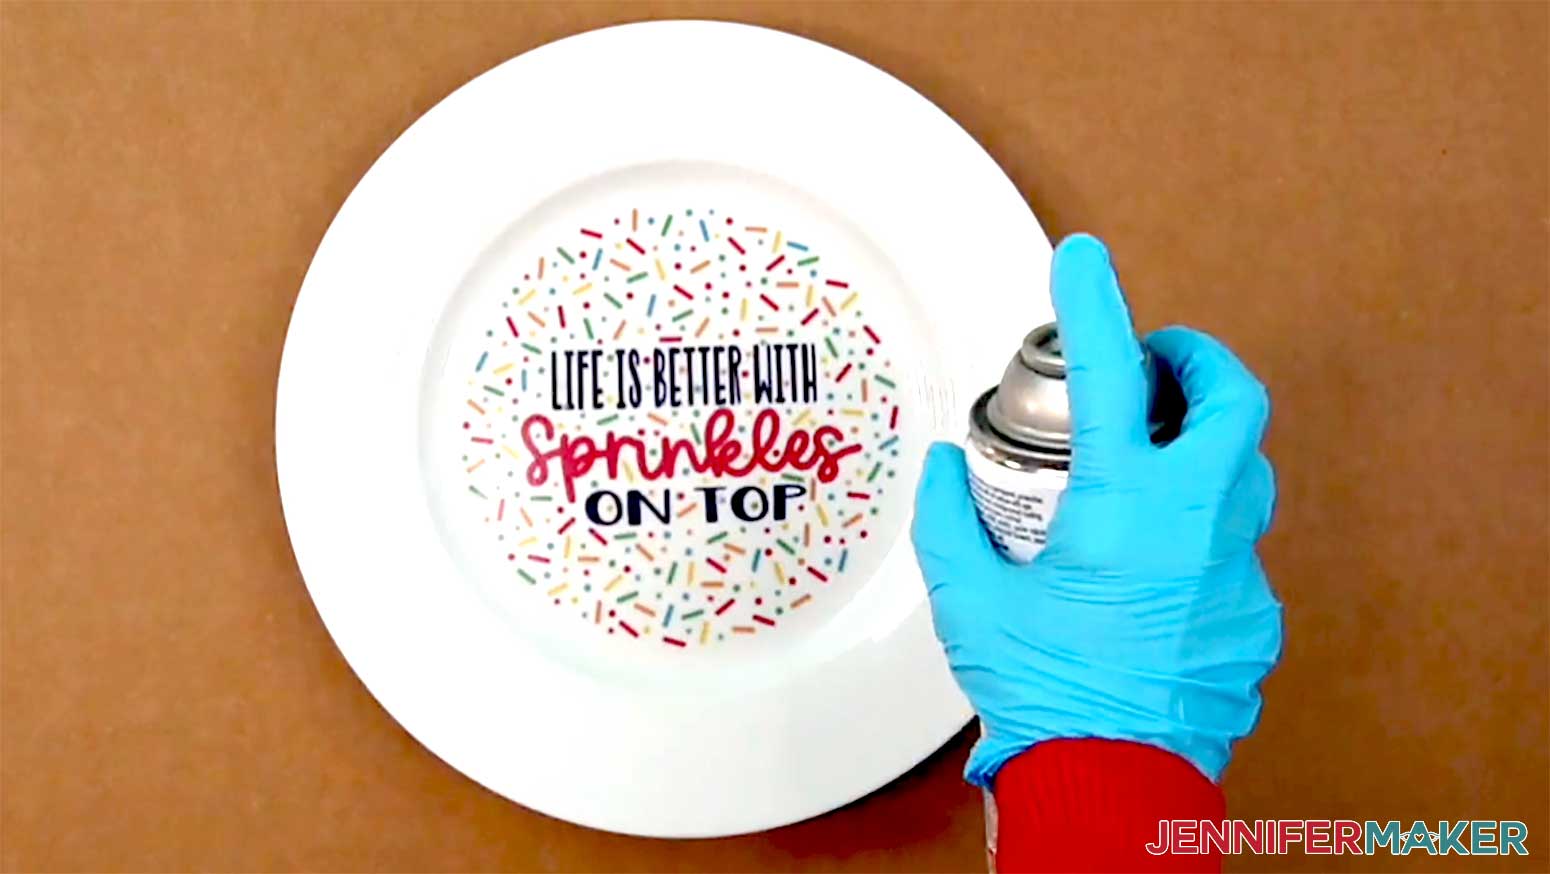
1. Go outdoors for improved ventilation, and place a large piece of cardboard on a flat surface.
2. Place your printed waterslide decals face up on the cardboard.
3. Put on your personal protective equipment, including a respirator (with cartridge), safety goggles (if the respirator does not cover your eyes), disposable gloves, and an apron.
NOTE: I highly recommend wearing PPE when using Krylon Crystal Clear Acrylic Coating.
4. Holding the can of Krylon Crystal Clear Acrylic Coating about ten inches from the paper, move the can back and forth, side-to-side, and spray a thorough, even coat over the entire page.
5. Let the paper sit for at least fifteen minutes to dry.
NOTE: If you’re in a humid area, your sealant may take longer to dry.
6. Repeat Steps 4-5 to add a second coat, but move the can back and forth from top to bottom on the paper.
7. Spray a third and final light, even coat over the entire paper, moving the can side-to-side as you go.
NOTE: Spray in a combination of side-to-side and top-to-bottom movements.
8. Let the paper dry for at least ten minutes.
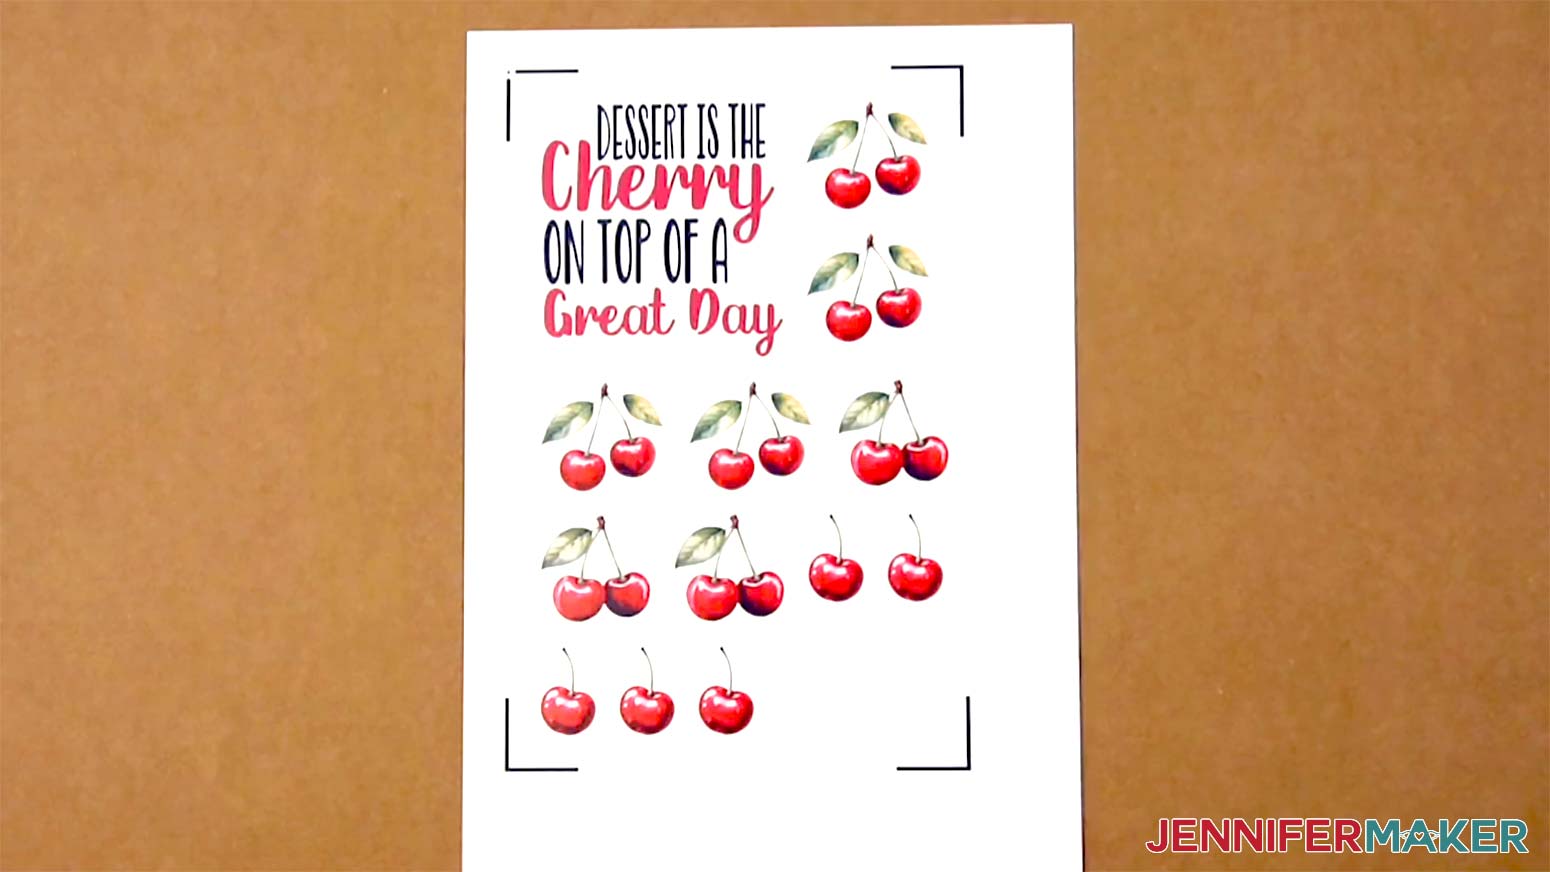
9. Your decals are ready to cut.
STEP 4: CUT YOUR WATERSLIDE DECAL DESIGN
1. If you’d like to cut your decal(s) by hand, use sharp scissors to carefully cut around the design with a consistent ¼” border.
TIP: Use long cutting motions as much as possible to make smooth edges.
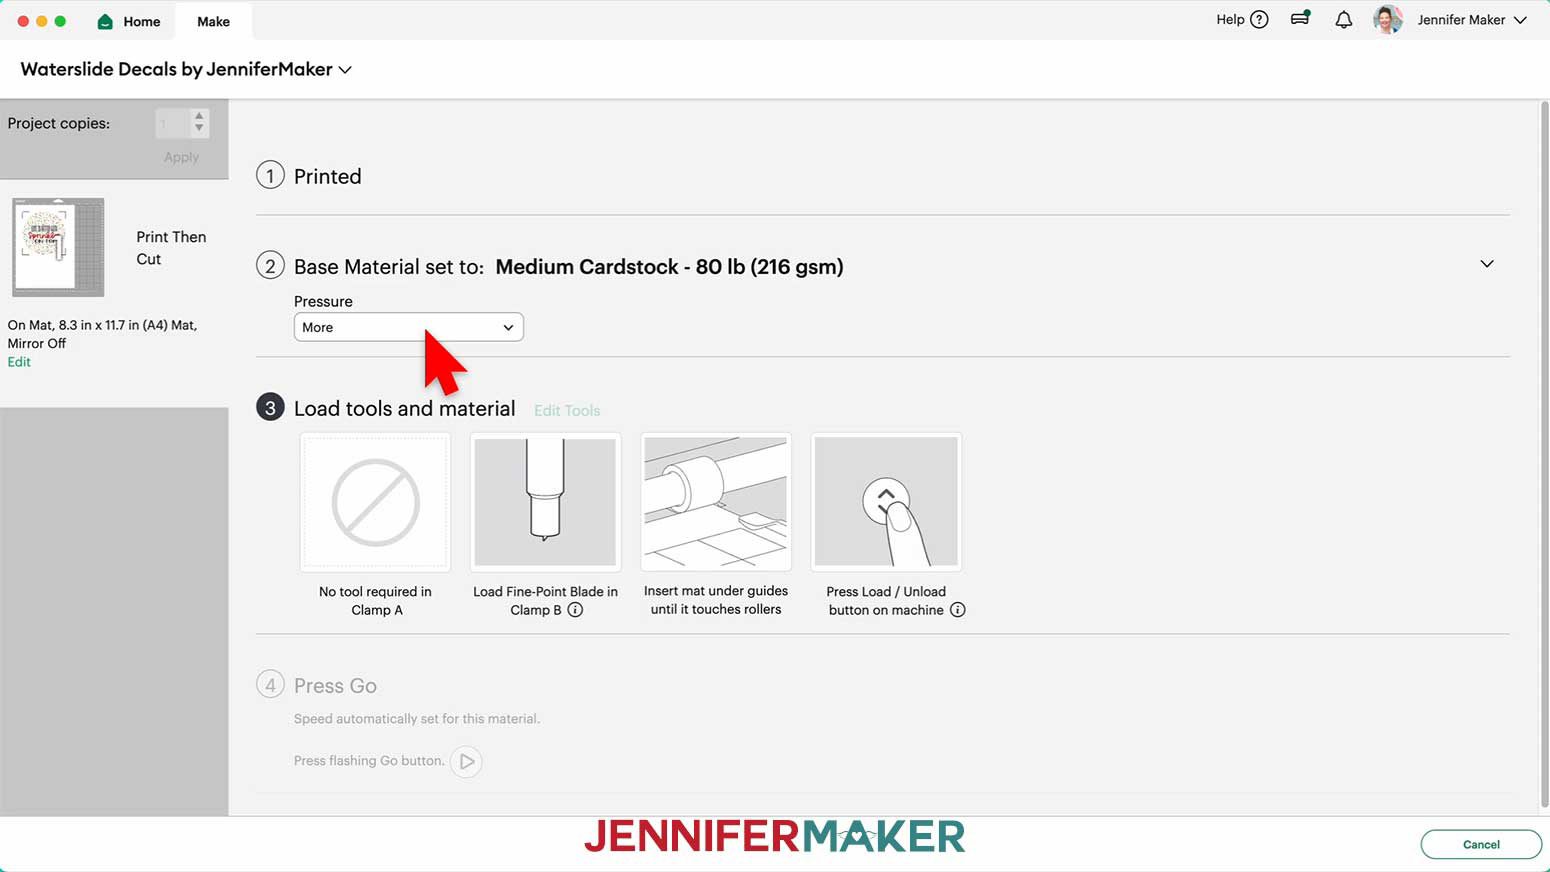
2. Or, if you’d like to cut your decal(s) with your Cricut, back on Cricut Design Space’s “Make” screen, click “Browse All Materials.”
3. There is no setting for waterslide decal paper, so select the “Medium Cardstock - 80 lb (216 gsm)” setting.
4. Set the Pressure to "More.”
TIP: I found that this setting cut the waterslide decal paper I used consistently.
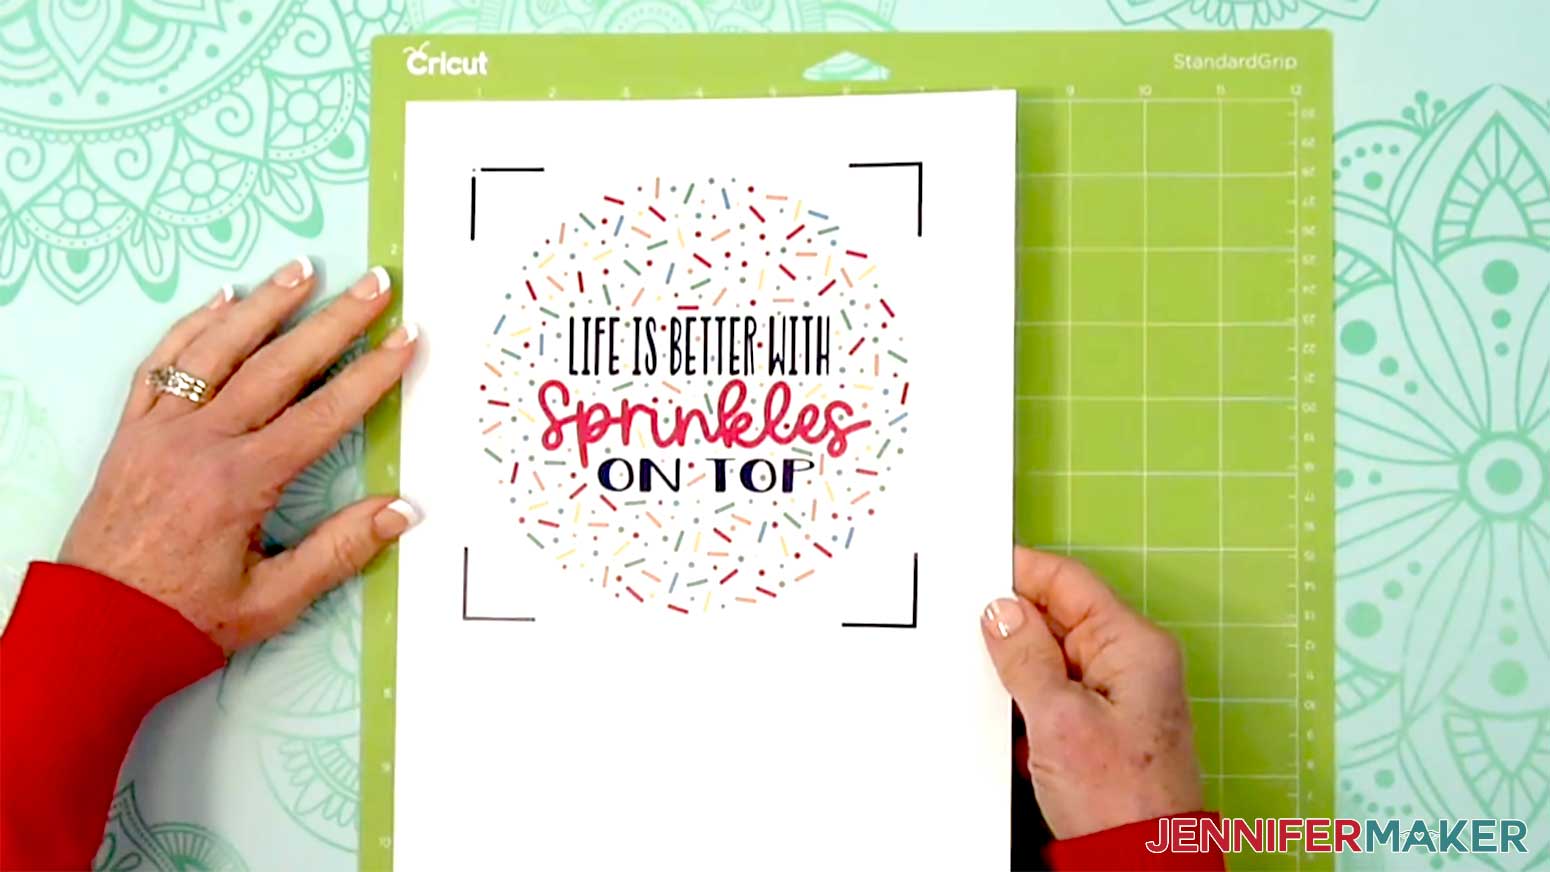
5. Check that your Fine-Point blade is clean and in the correct clamp.
6. Place your waterslide decal paper design-side up on a green StandardGrip machine mat so it matches the orientation on the screen.
7. Place a clean piece of copy paper over the decal paper, then use a brayer to make sure the decals are fully adhered to the mat.
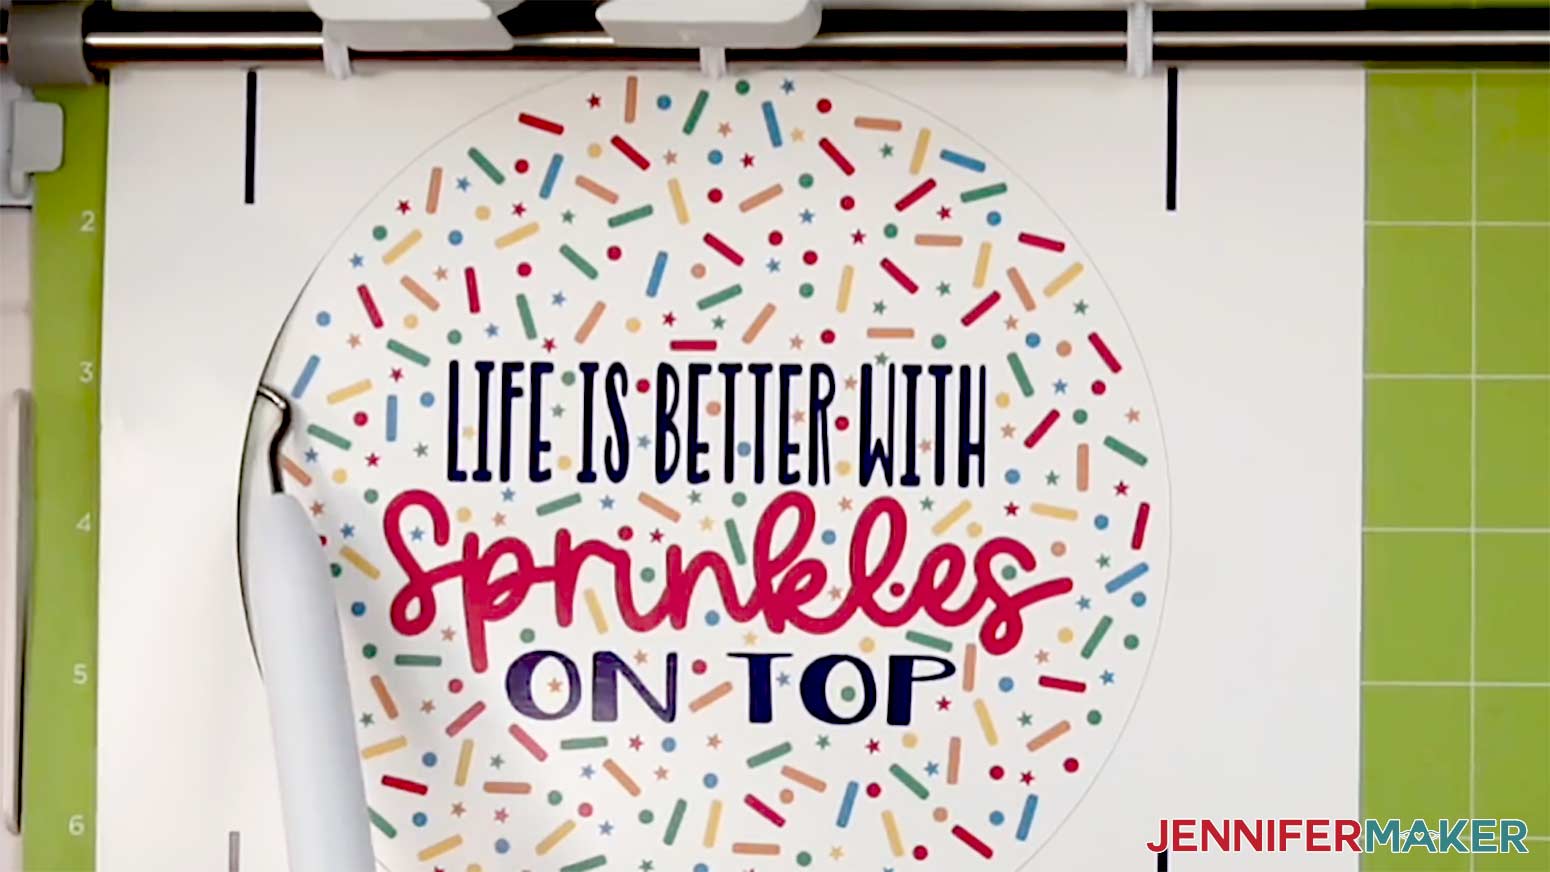
8. Press the flashing load/unload button to load the prepared mat into your Cricut.
9. Press the flashing middle button to begin cutting.
10. Before unloading the mat, use a weeding tool to gently lift part of the material where it’s cut to see if the cut went all the way through the paper. If not, press the middle button to cut the design in the same spot again.
11. When it has finished cutting, unload the mat, flip it over onto your work surface, and roll it back to release the paper.
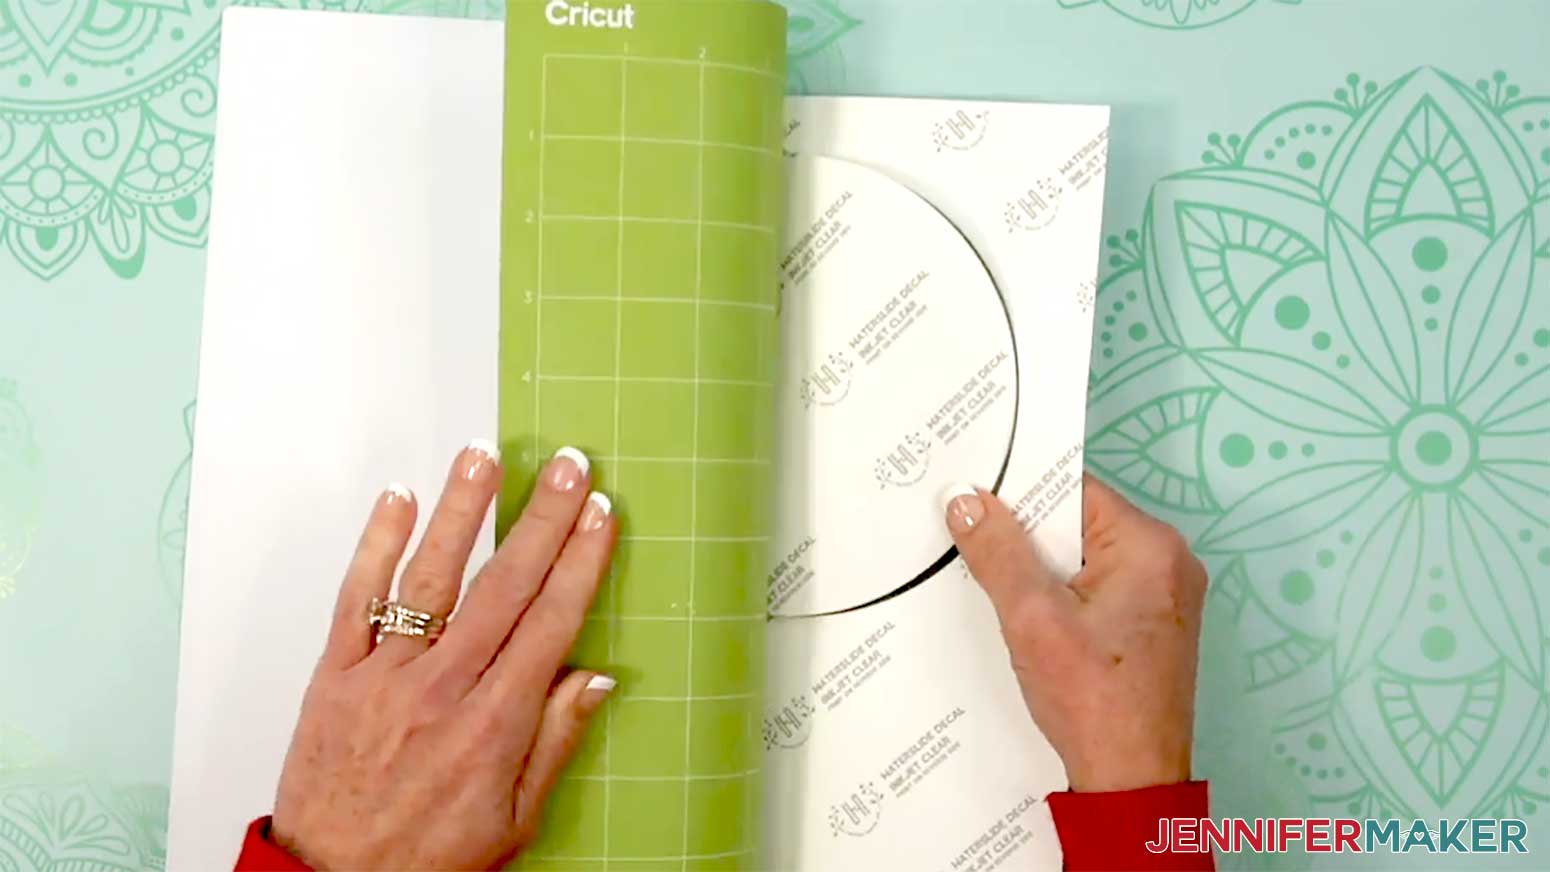
NOTE: If you have any issues with your cuts, check out my Tips & Tricks for Cleaner Cuts tutorial.
STEP 5: APPLY A WATERSLIDE DECAL TO A BLANK
VARIATION 1: LARGE WATERSLIDE DECAL ON A PLATE
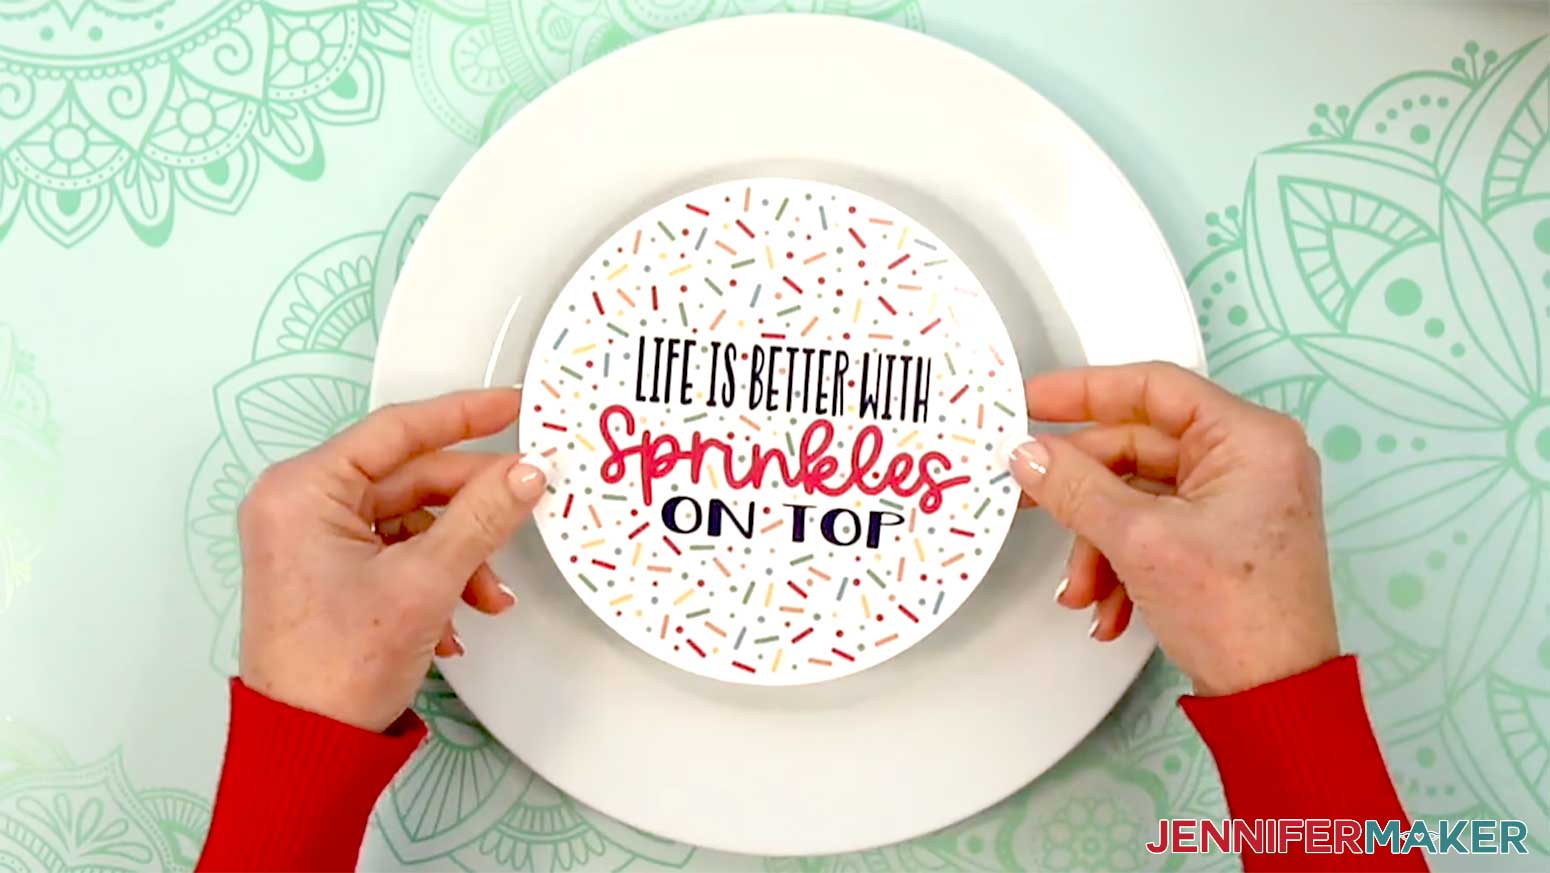
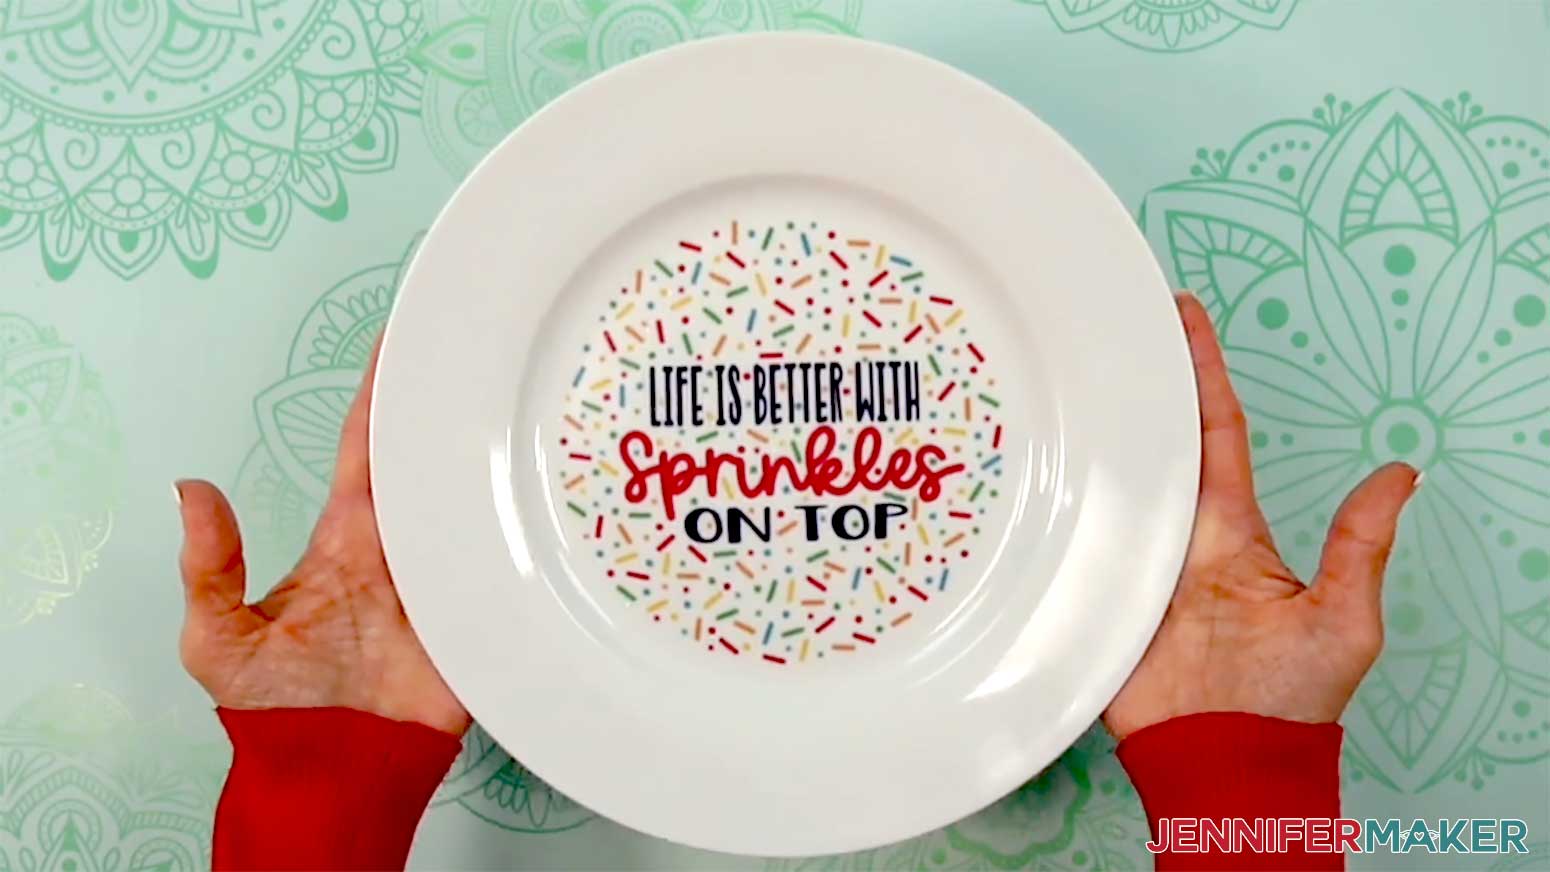
NOTE: I’ll demonstrate with the “Sprinkles” design, but you can use these steps to adhere any decal design to a plate.
1. Place the trimmed decal onto your plate to make sure it fits in its intended spot, then remove it.
2. Use a lint-free cloth and a little isopropyl alcohol to clean the plate of dust and smudges.
3. Fill a large bowl with a few inches of room-temperature water, then place it on your work surface.
4. Submerge the decal design-side up into the water for 15-30 seconds.
NOTE: The decal will curl in water. Try to hold the paper flat to keep it submerged.
5. Gently rub the printed surface of the decal with your fingers until you feel it start to slide against the paper, but don’t slide it off the paper yet.
TIP: If your decal starts to slide off of the paper backing, simply slide it back into place while it’s still in the water.
6. Remove the decal from the water.
7. Position the decal on your plate where you’d like the design to be.
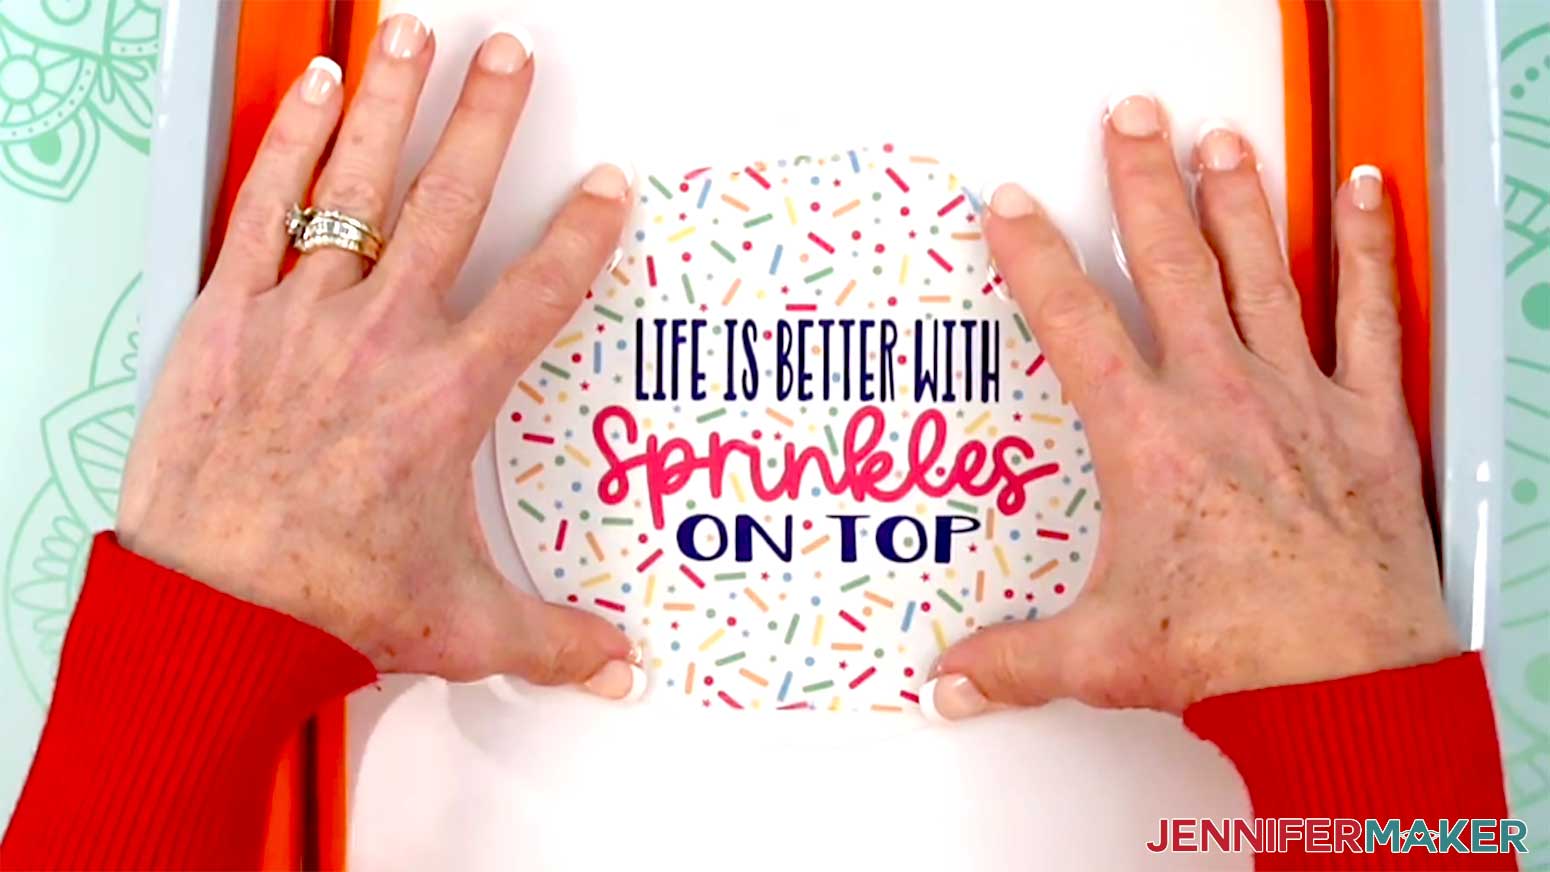
8. Use your finger to hold down one edge of the decal, and carefully slide the paper out from underneath, letting the decal adhere to the plate as you go.
9. If you need to make any small adjustments to the position, gently press the decal and slide it into position on the plate.
TIP: Don’t try to move the decal too much, or it may wrinkle or tear. If a wrinkle forms, use your squeegee or your finger to press it out.
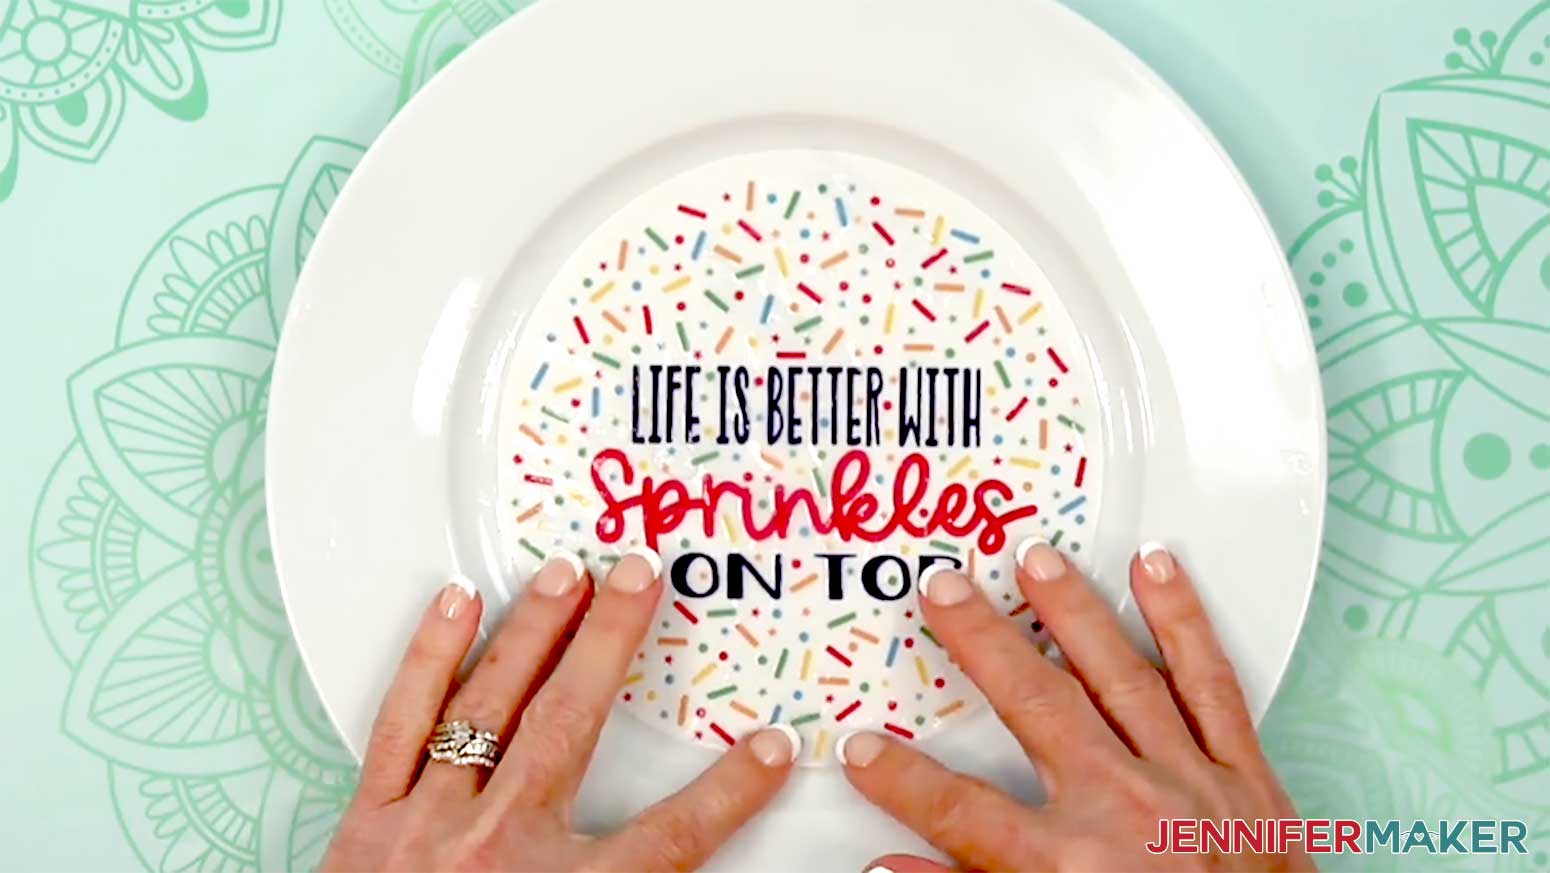
10. Pat a paper towel onto the decal and plate to absorb some of the excess water. Do not slide the paper towel around the wet decal, or it may wrinkle or damage it.
TIP: There will likely still be some water under the decal -- that’s OK for now.
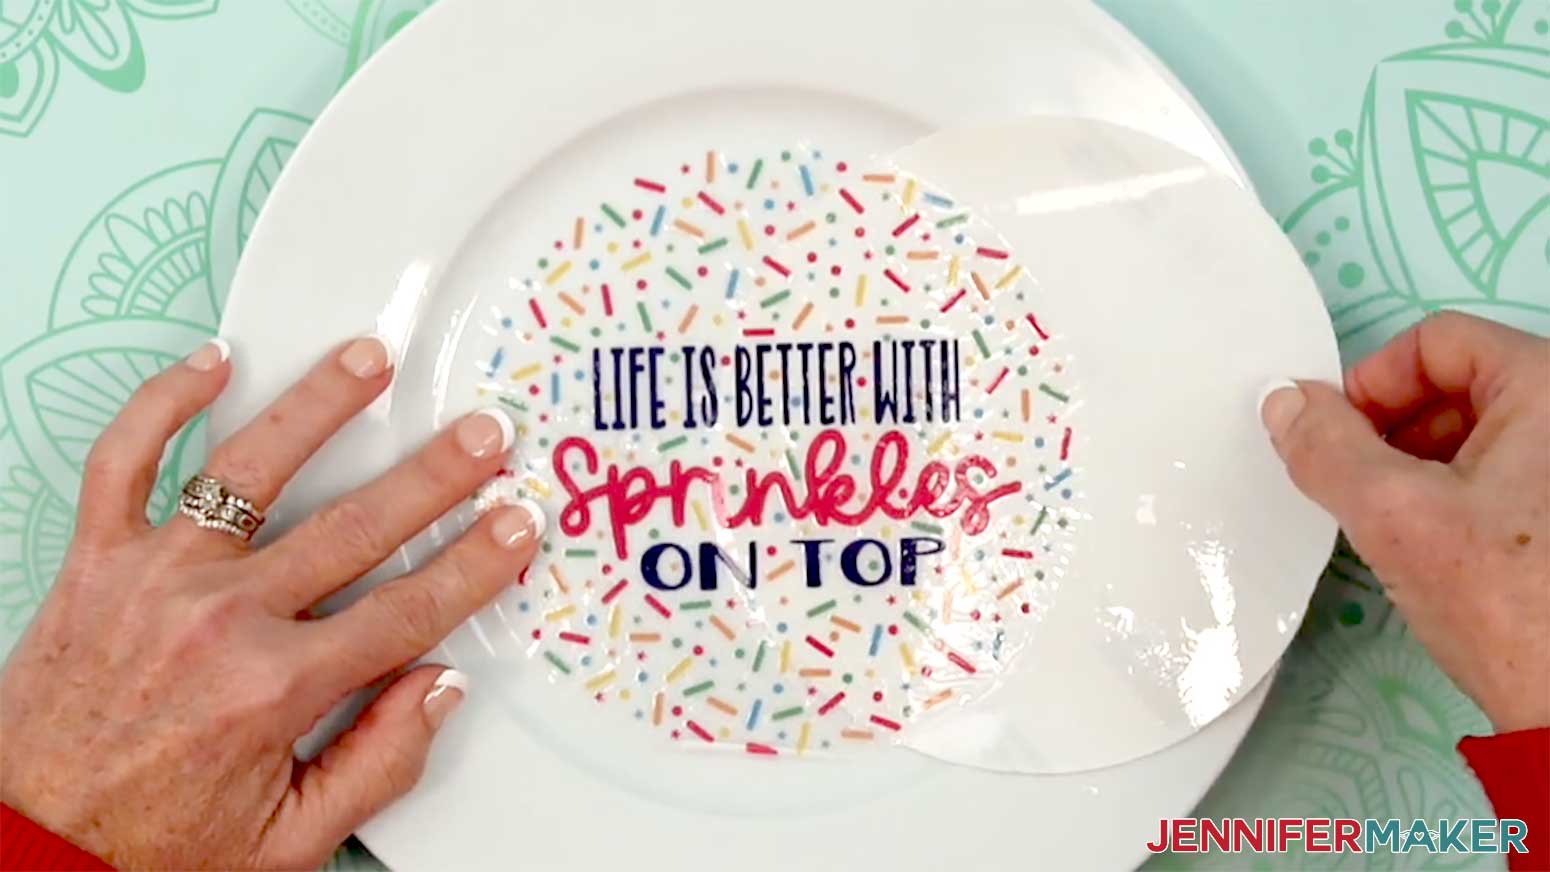
11. Gently place the squeegee's felt edge onto the center of the decal.
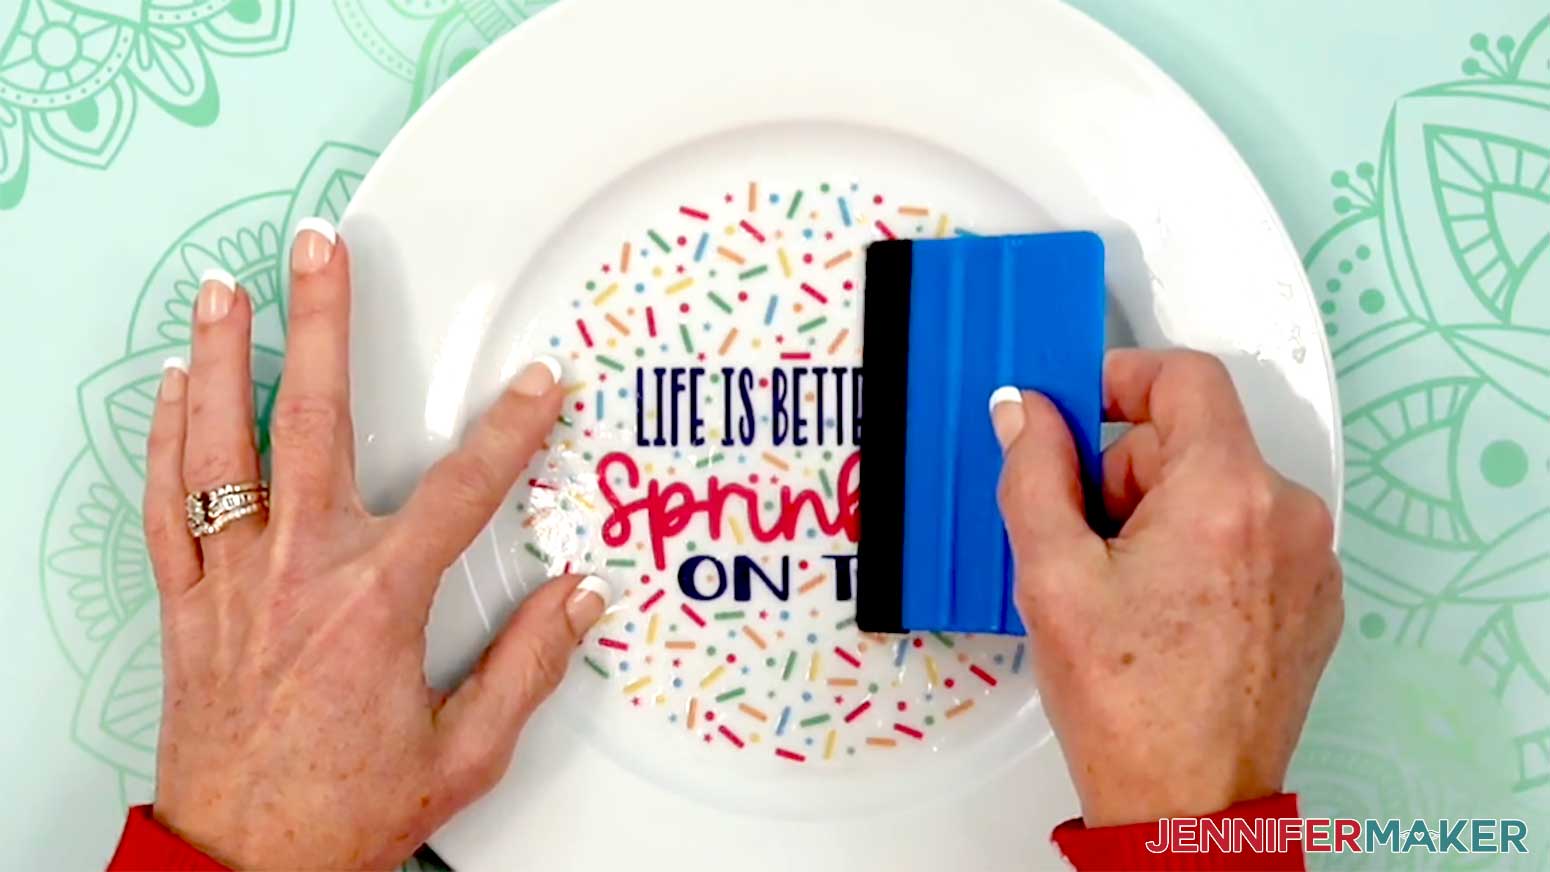
12. Keeping even pressure, slide the squeegee off to one side of the decal to press more excess water out from between the decal and the plate.
NOTE: If the squeegee’s felt becomes saturated with water, squeeze a fresh paper towel around it to wick out moisture.
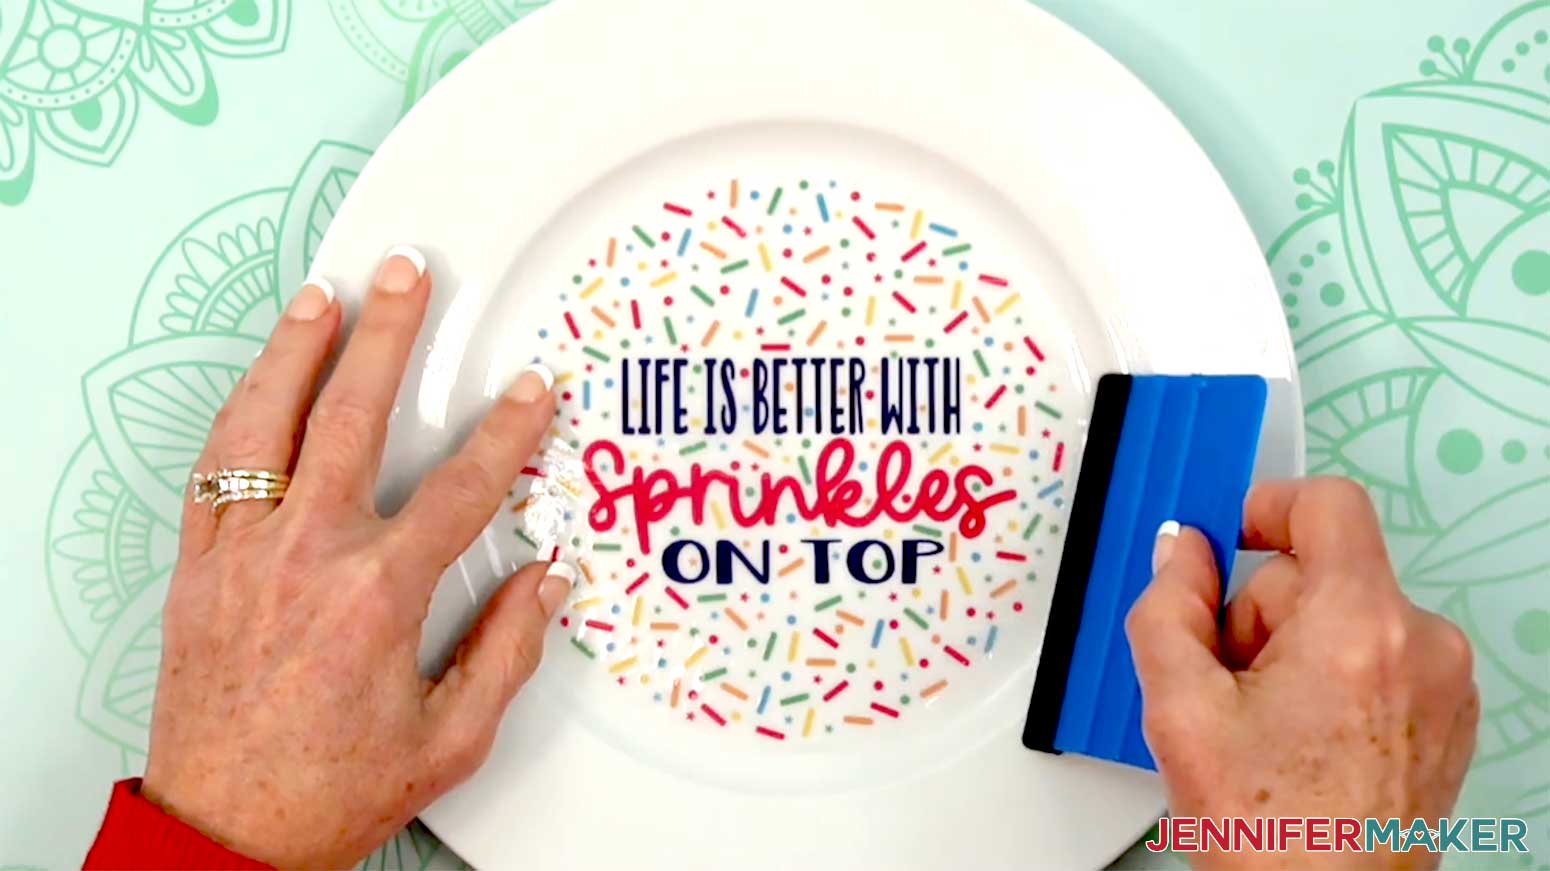
13. Repeat Steps 11-12 to use the squeegee to press the water out from under the other side of the decal, then press it out of the top and bottom.
14. Use a paper towel to gently wipe the plate and decal to remove any remaining moisture from the surface.
15. If you’d like to add additional decals to the plate, skip to the “VARIATION 2: MULTIPLE WATERSLIDE DECALS ON A PLATE” directions below.
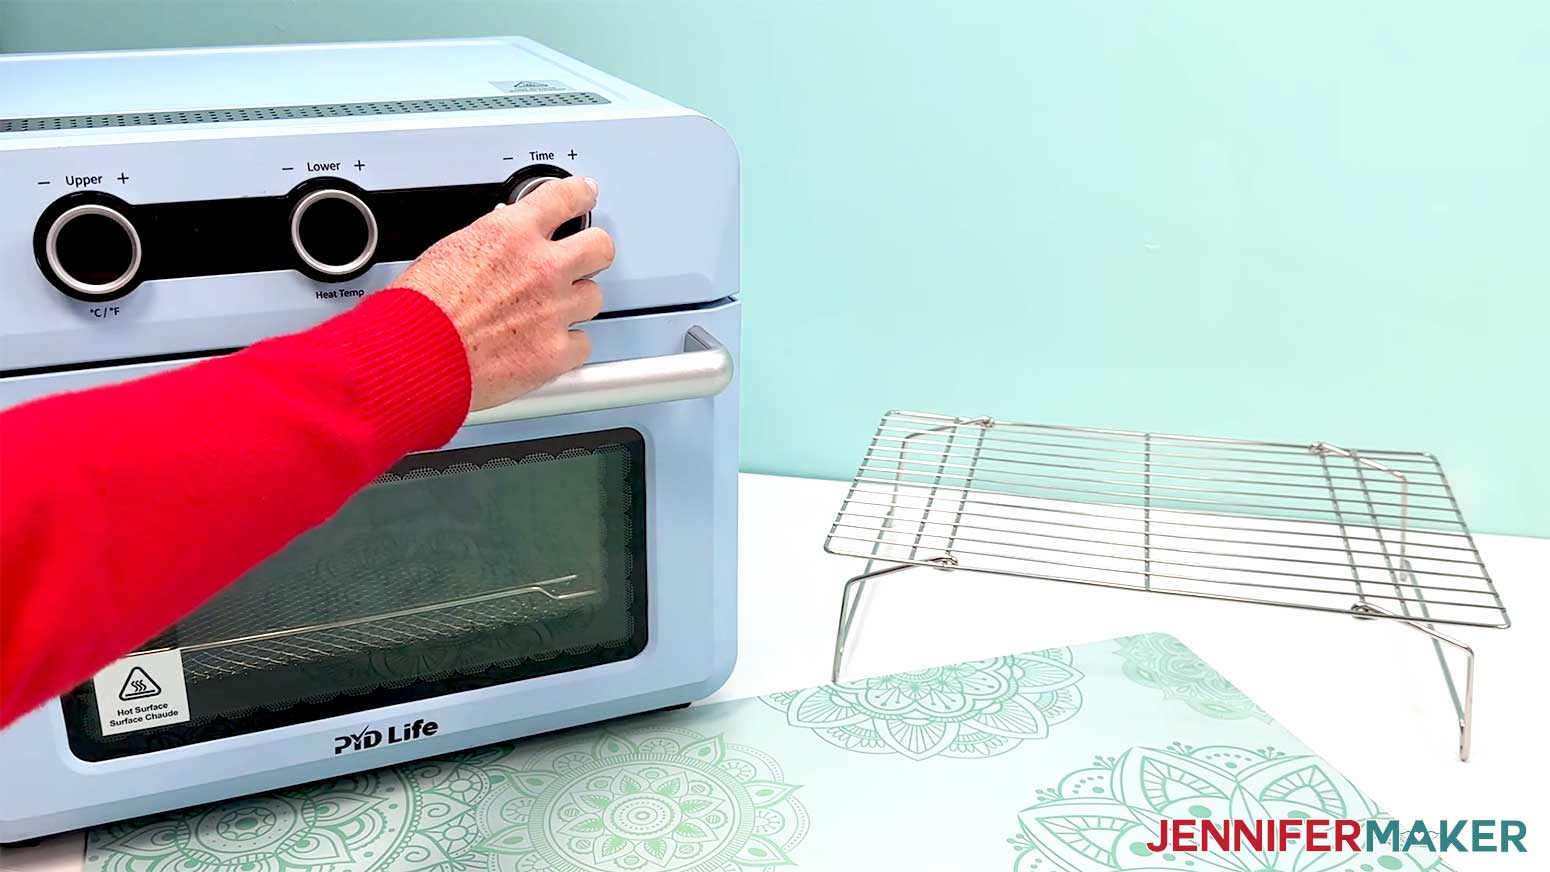
16. Place the plate face up on a baking sheet, then put it in your preheated craft-purposed oven at 230°F (110°C) for 15 minutes.
NOTE: Be sure your craft-purposed oven is large enough to fit your plate.
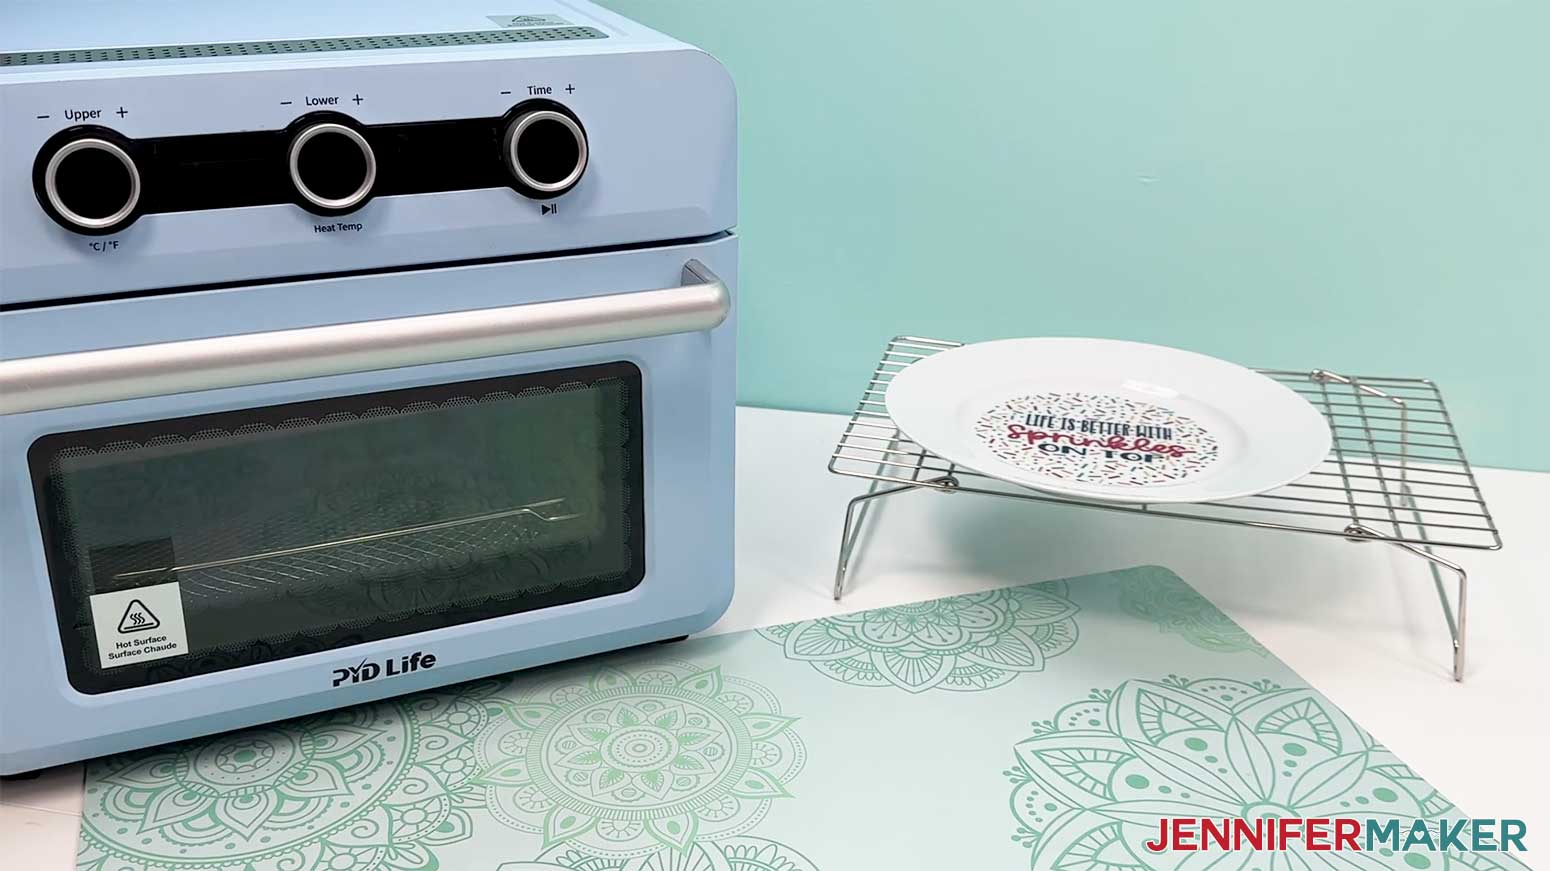
17. Wearing an oven mitt, carefully remove the plate from the oven and set it on a cooling rack.
18. Once completely cool, if desired, you can seal your plate with Krylon Crystal Clear Acrylic Coating. Follow Steps 1-5 in "STEP 3: SEAL YOUR WATERSLIDE DECAL DESIGN" to apply a single coat of sealant to your plate.
NOTE: Sealing the plate with Krylon Crystal Clear Acrylic Coating can help prevent peeling of the decals over time, especially if the plate will be washed, but I preferred the look of my plate without the sealant.
19. Your plate is ready to display!
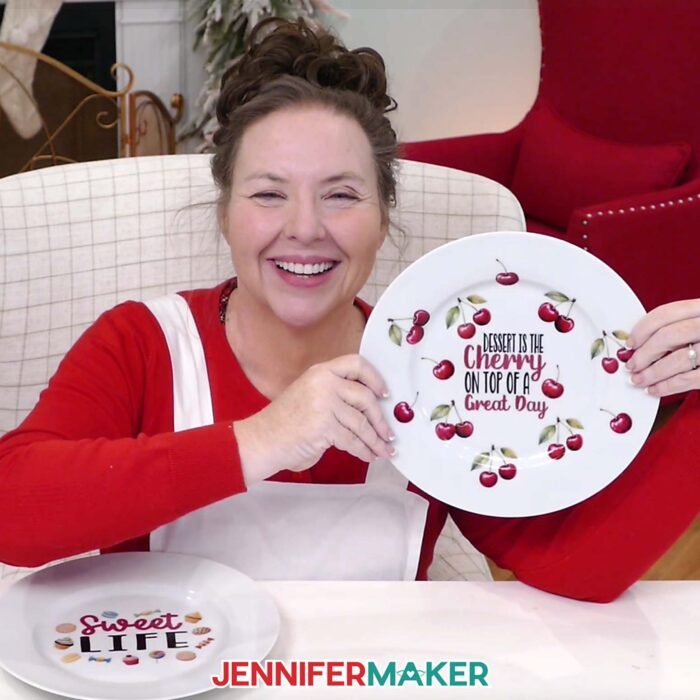
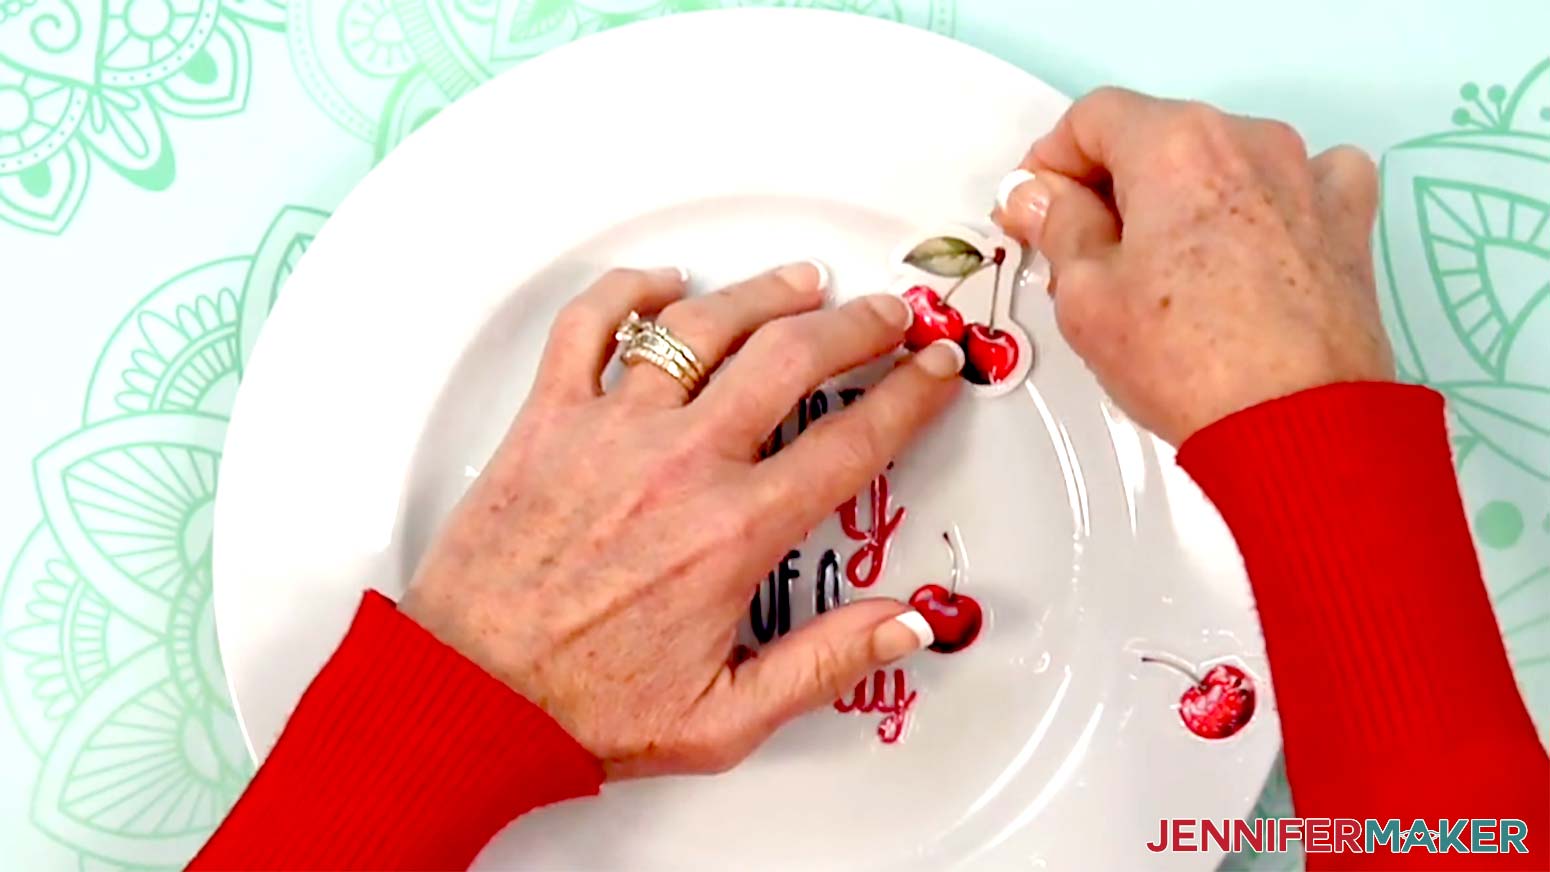
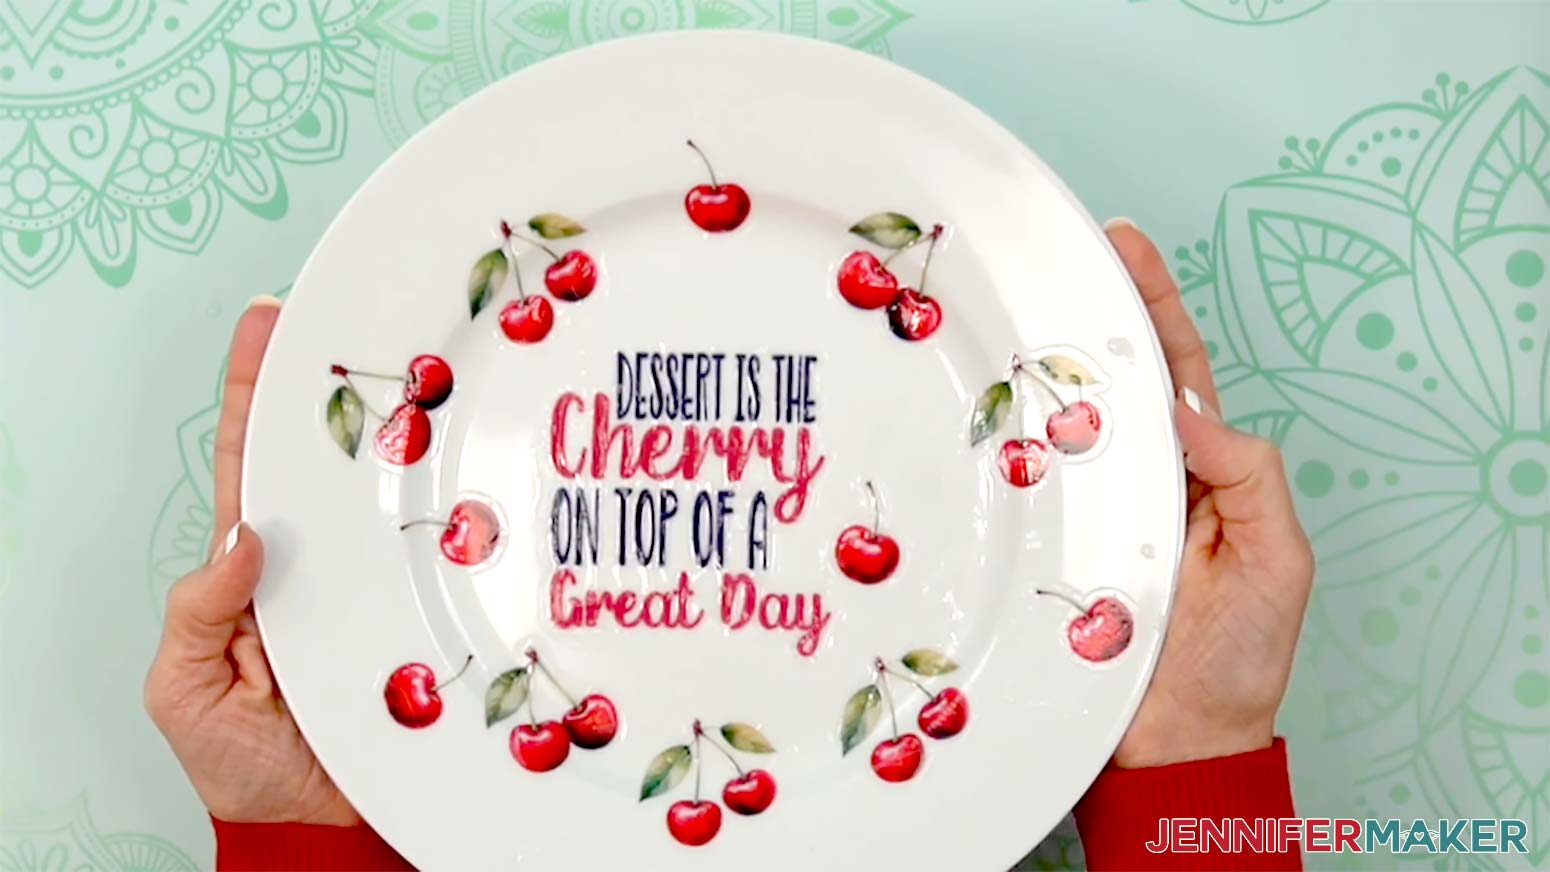
VARIATION 2: MULTIPLE WATERSLIDE DECALS ON A PLATE
NOTE: I’ll demonstrate with the “cherry-text” design and three cherry designs, but you can use these steps to adhere any decal designs to a plate.
1. Using the design on your screen as reference, lay out your design elements on your plate to make sure they fit correctly.
2. Remove the decals from the plate.
3. Using the design on your screen as reference, follow Steps 1-12 in “VARIATION 1: LARGE WATERSLIDE DECAL ON A PLATE” to apply decals to the flat areas of the plate.
NOTE: Be careful not to overlap the waterslide decals, or they may not stay adhered to the plate long term.

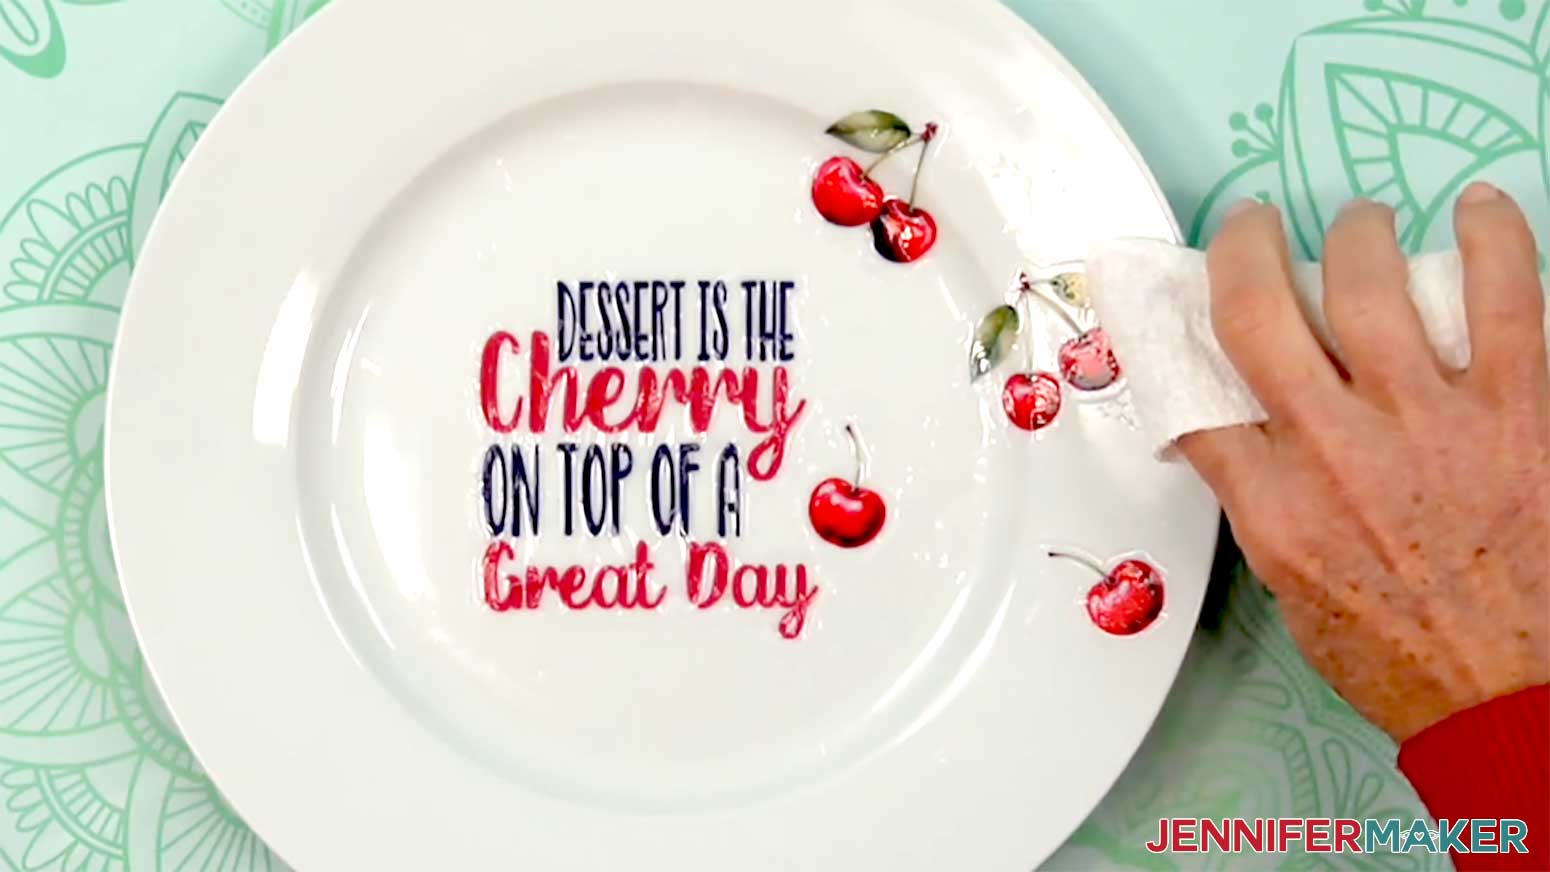
4. To apply a waterslide decal to a non-flat area like the angled lip of the plate, follow Steps 3-6 in “VARIATION 1: LARGE WATERSLIDE DECAL ON A PLATE” to prepare the decal with water.
5. Position the decal face up over the angled lip of the plate.
6. Use your finger to hold down one edge of the decal, and carefully slide the paper out from underneath, letting the decal adhere to the plate as you go.
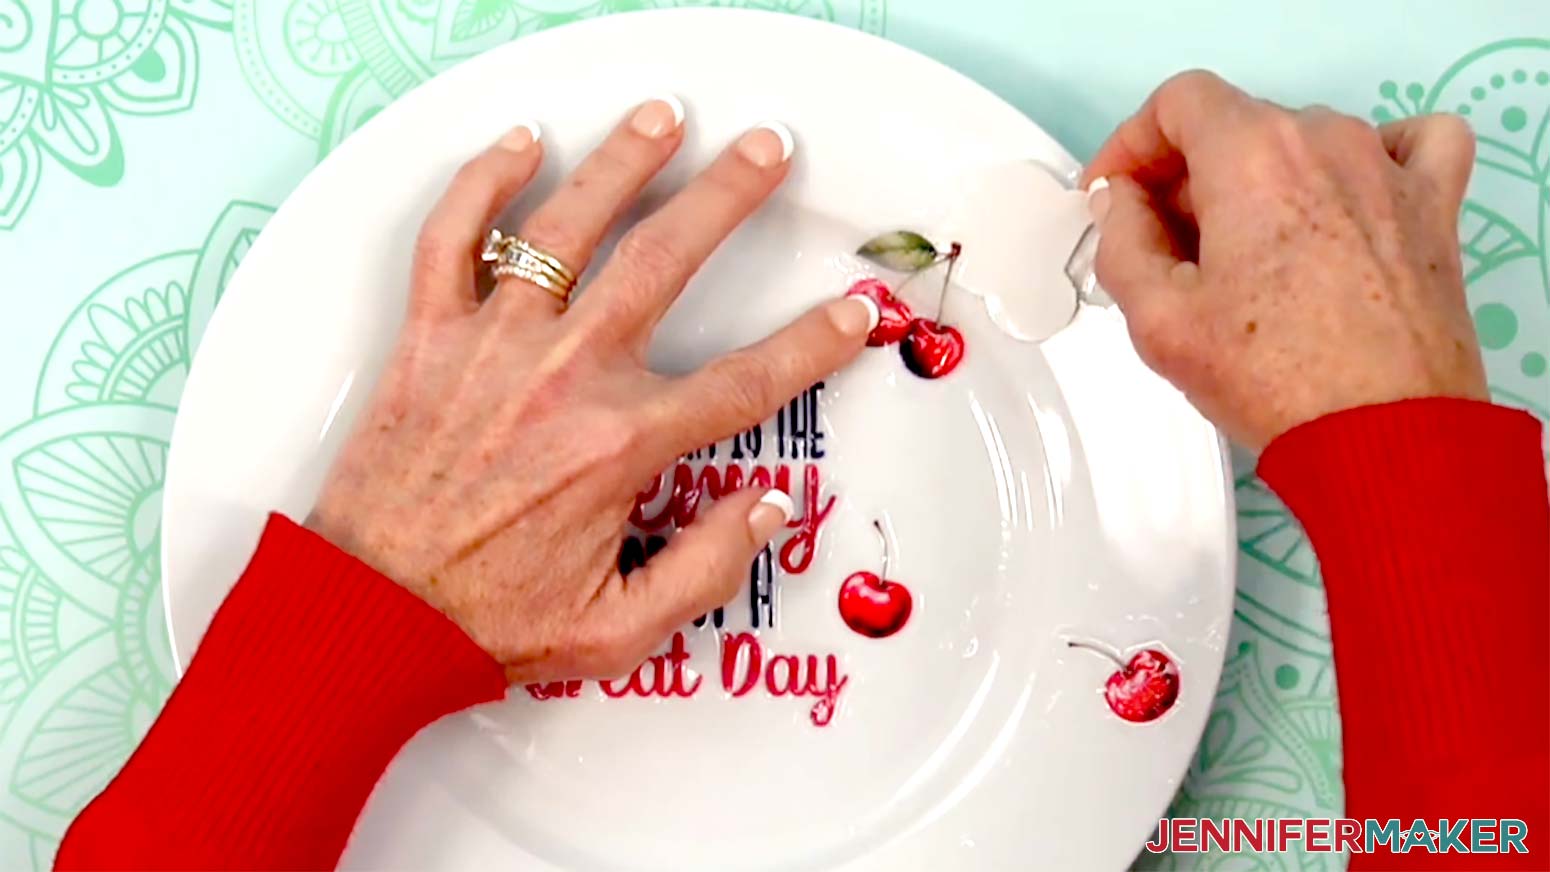
7. If you need to make any small adjustments to the position, gently press the decal and slide it into position on the plate.
8. Press a paper towel onto the decal and plate to absorb excess water.
9. Since the squeegee is only suitable for flat surfaces, wrap a fresh paper towel around your finger, then use it to gently press and smooth the decal onto the plate and over the lip. Carefully press out any air bubbles you see.
TIP: Be sure to get as much water and air as you can out from between the decal and the plate. Otherwise, bubbles can form during heating.
10. Follow Steps 16-18 in “VARIATION 1: LARGE WATERSLIDE DECAL ON A PLATE” to heat and optionally seal your plate.
11. Your plate is ready to display!
VARIATION 3: WATERSLIDE DECAL ON A CANDLE
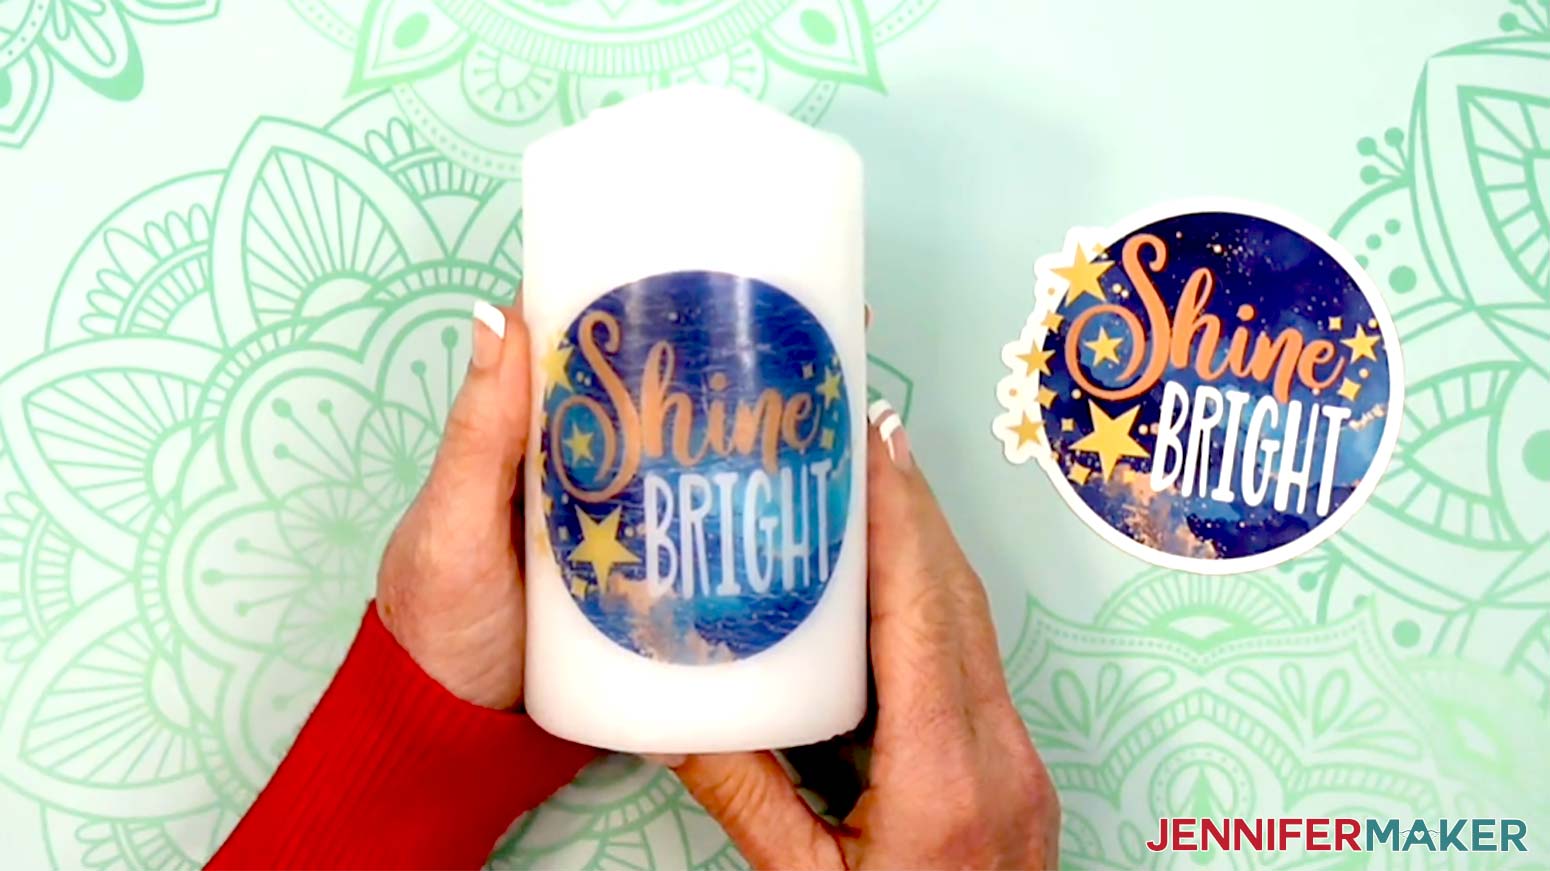
NOTE: I’ll demonstrate with the “Shine Bright” design, but you can use these steps to adhere any decal design to your candle.
1. Wipe the candle with a clean, soft cloth and a little isopropyl alcohol to remove dust or debris from the surface.
2. Follow Steps 3-6 in “VARIATION 1: LARGE WATERSLIDE DECAL ON A PLATE” to prepare the decal with water.
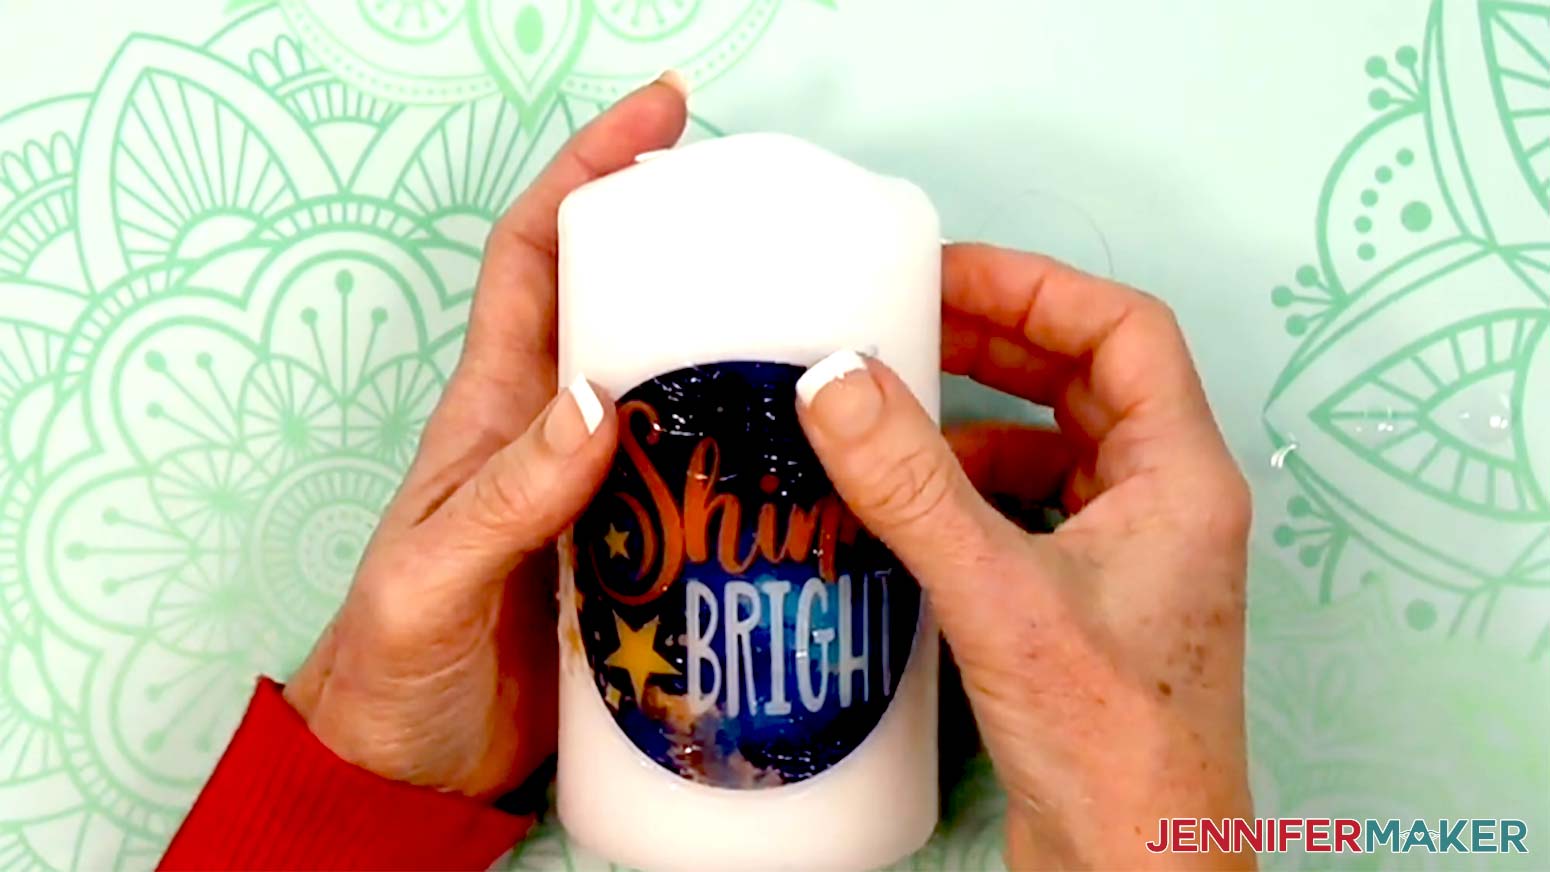
3. Position the decal on your candle where you’d like the design to be.
NOTE: I placed mine in the center.
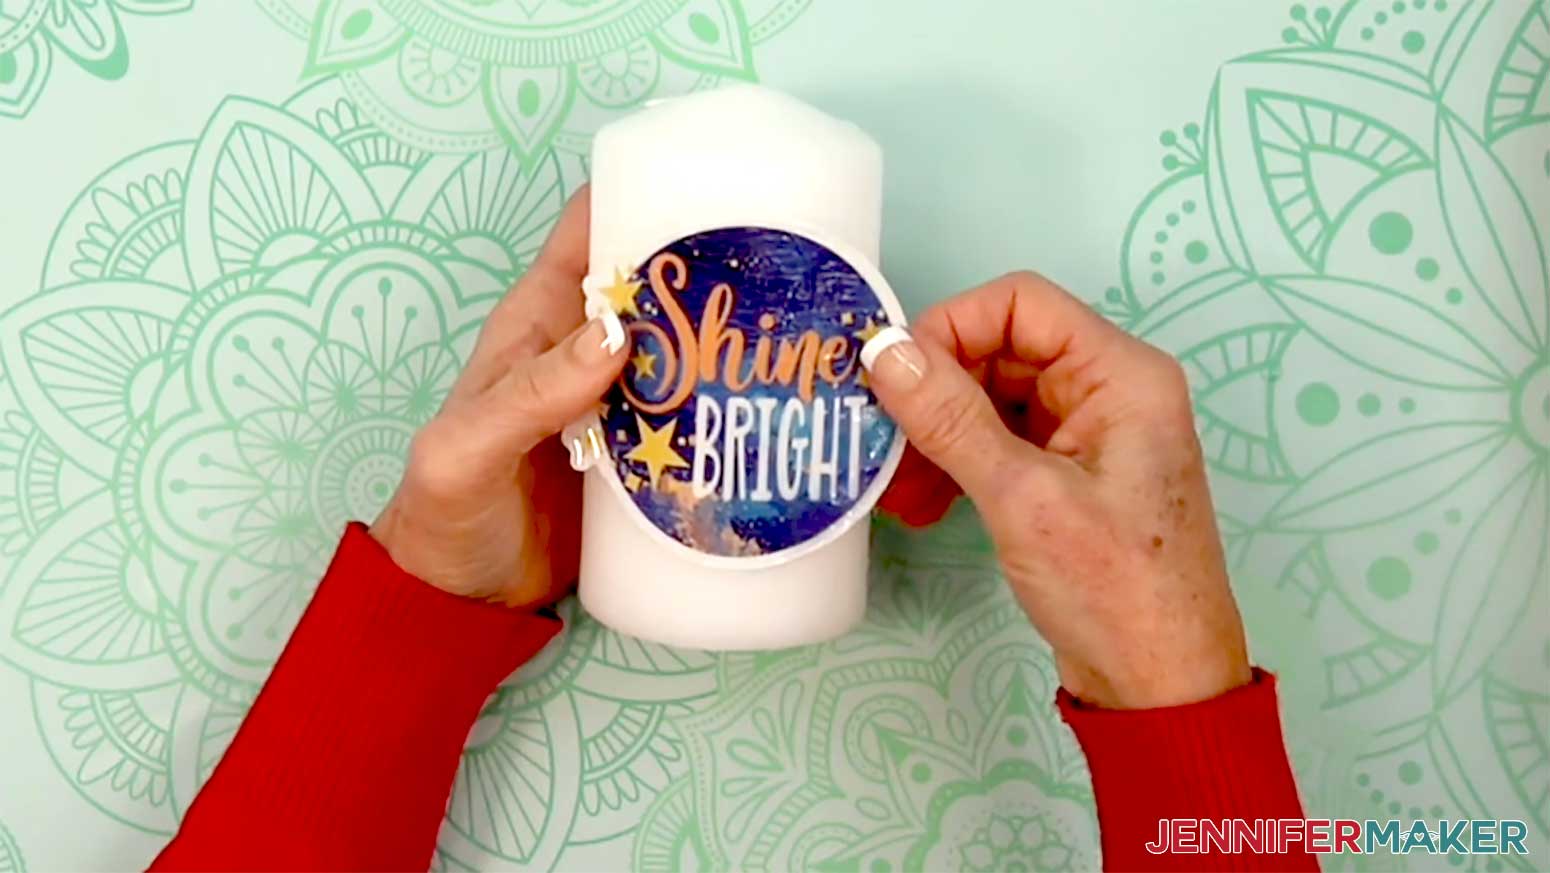
4. Use your finger to hold down one edge of the decal, and carefully slide the paper out from underneath, letting the decal adhere to the candle as you go.
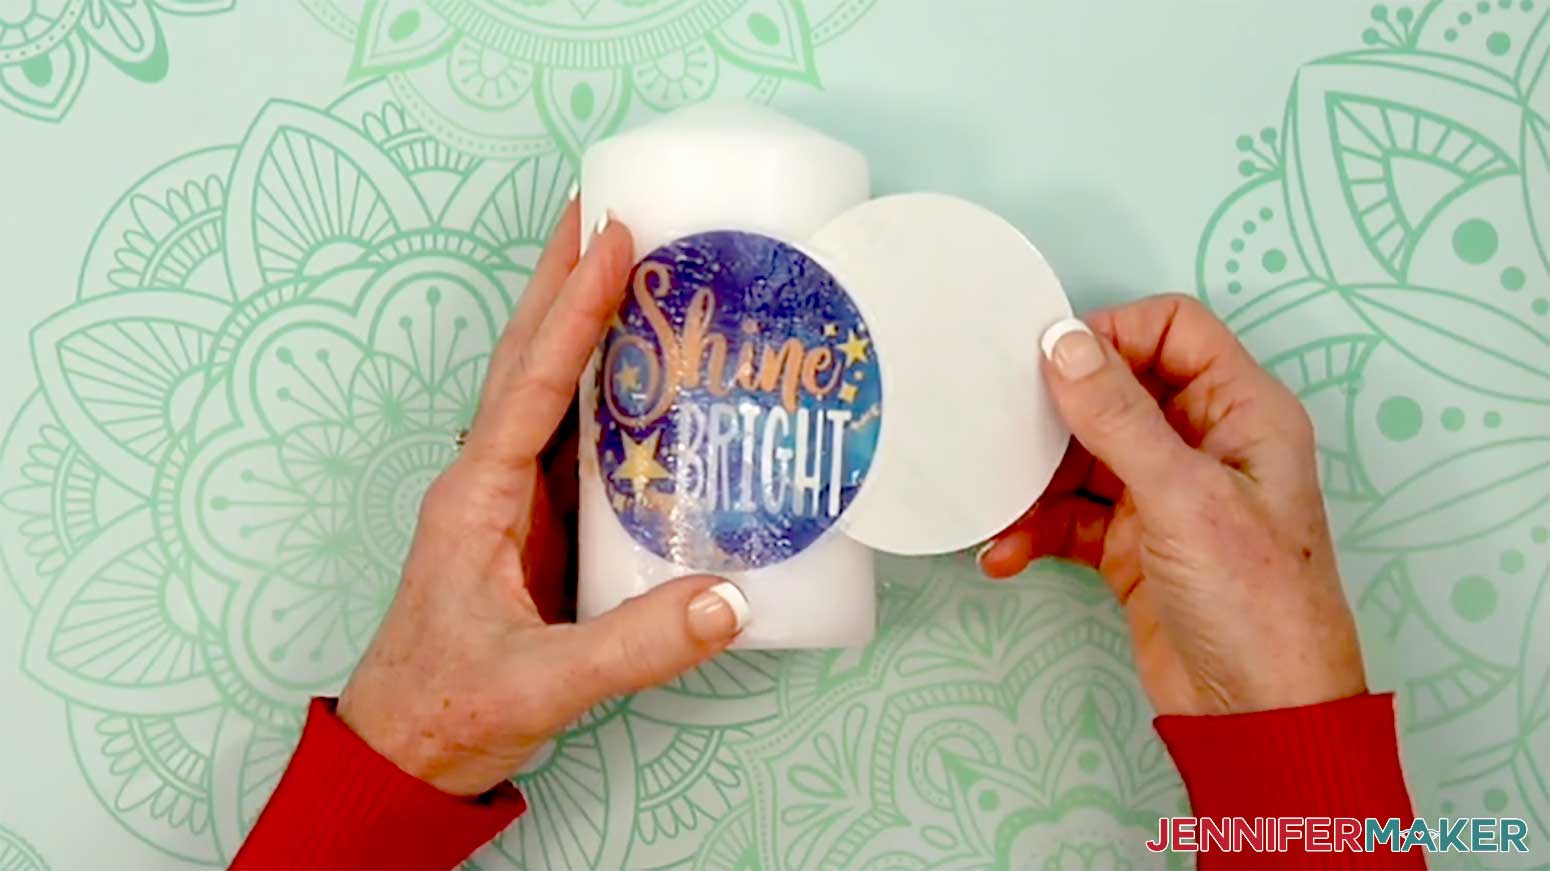
5. If you need to make any small adjustments to the position, gently press the decal and slide it into position on the candle.
TIP: Don’t try to move the decal too much, or it may wrinkle or tear.
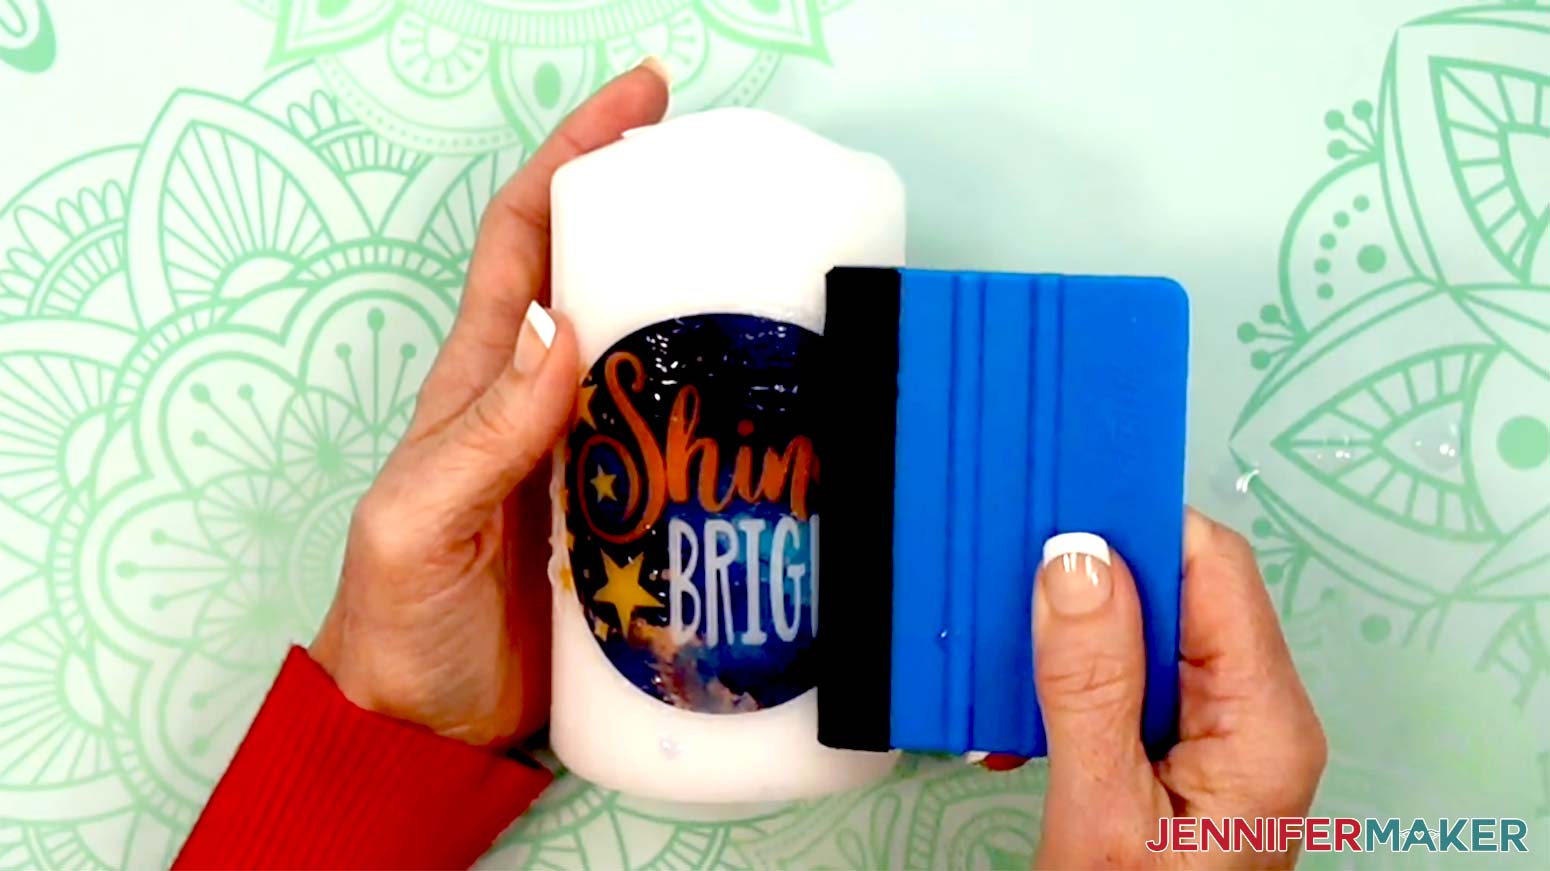
6. Press a paper towel onto the decal and candle to absorb excess water. To avoid damaging the decal, do not slide the paper towel around.
7. Grab the felt squeegee tool, and gently yet firmly press the felt edge onto the center of the decal.
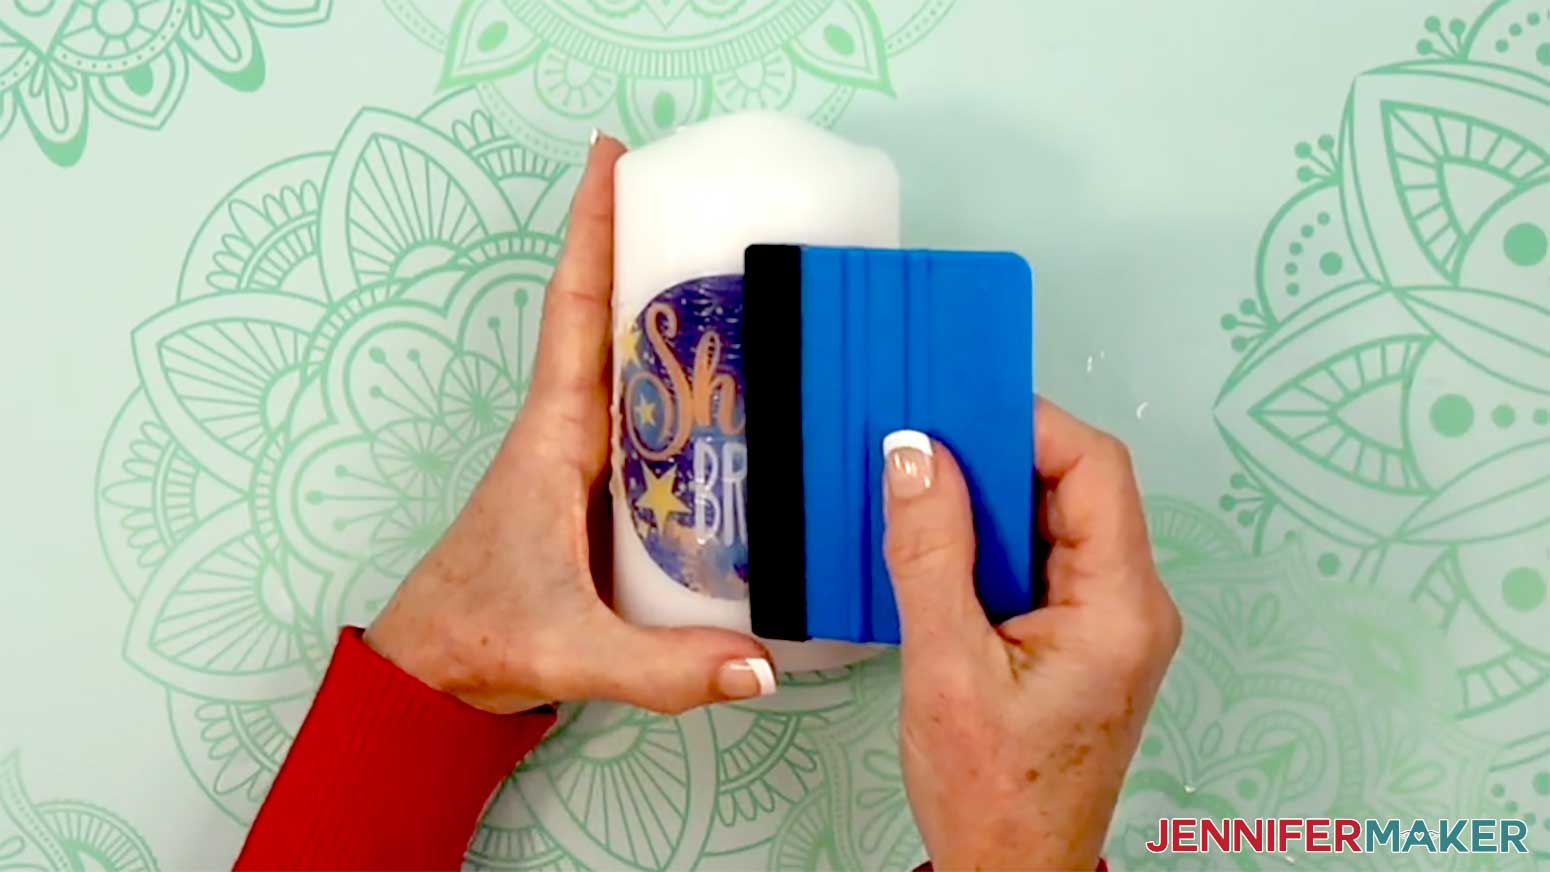
8. Keeping the pressure even, slide the squeegee off to one side of the decal to press more excess water out from between the decal and the candle.
9. Repeat Steps 7-8 to press the water out from under the left side of the decal.
10. Gently wipe the candle and decal to remove any remaining moisture from the surface.
11. You can stop here, but if you’d like a darker, more vibrant decal on your candle, you can add a second decal. Follow STEP 2 to STEP 4 above to prepare, print, seal, and cut a second waterslide decal in the same size.
12. Wait 1-2 hours after the first decal is applied for the candle to completely dry. Then follow Steps 3-6 in “VARIATION 1: LARGE WATERSLIDE DECAL ON A PLATE” to prepare the decal with water.
13. Place the second decal over the first decal on the candle, lining up the designs the best you can.
NOTE: It’s okay if they’re not lined up perfectly yet.
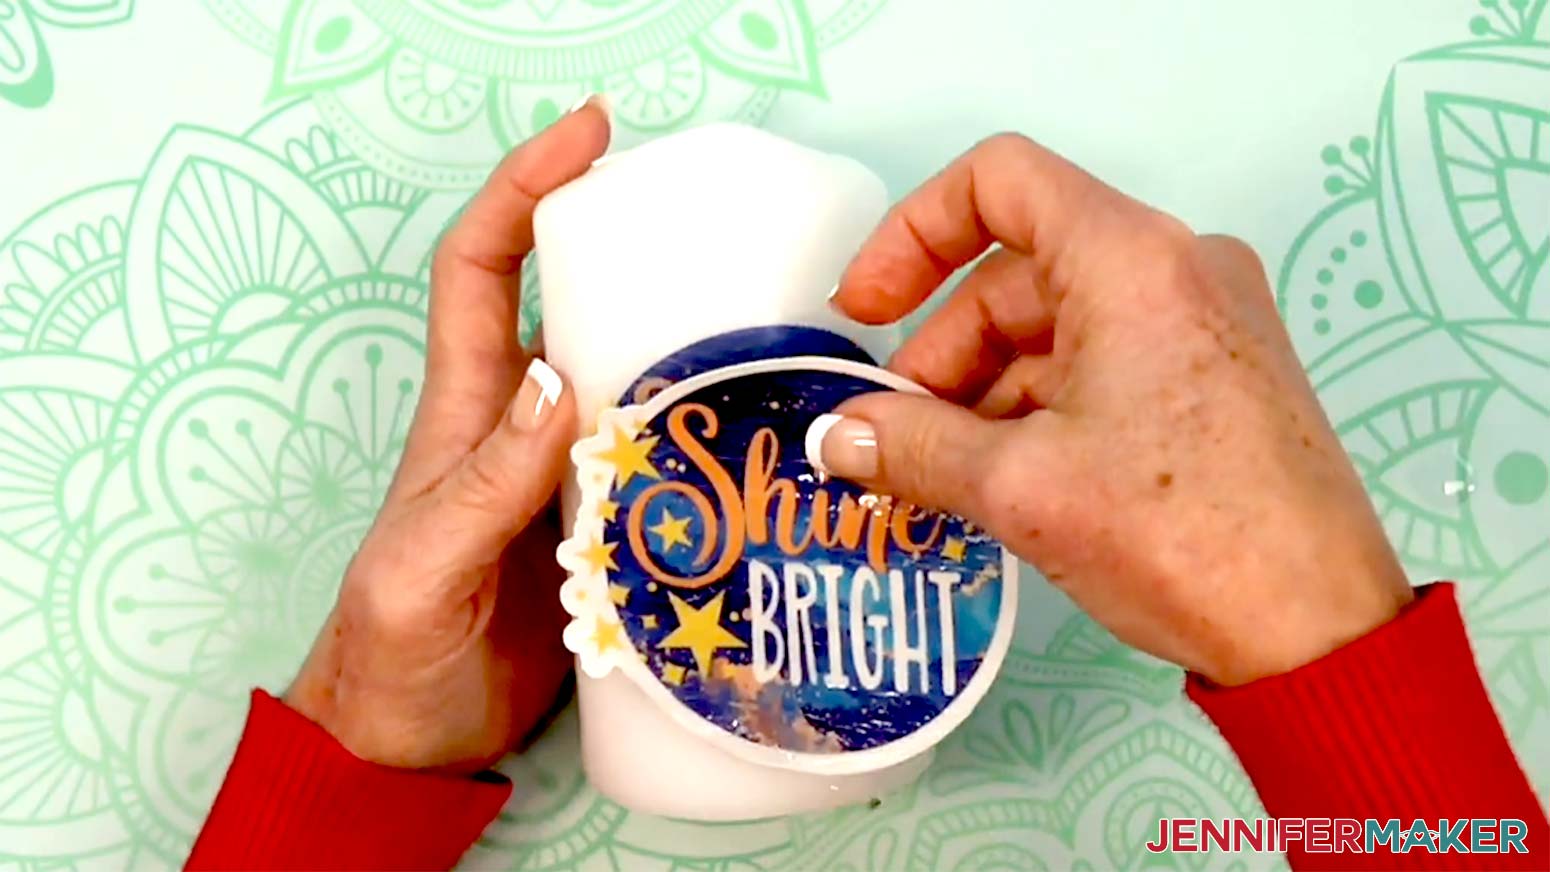
14. Use your finger to hold down one edge of the decal, and carefully slide the paper out from underneath, letting the second decal adhere to the first decal as you go.
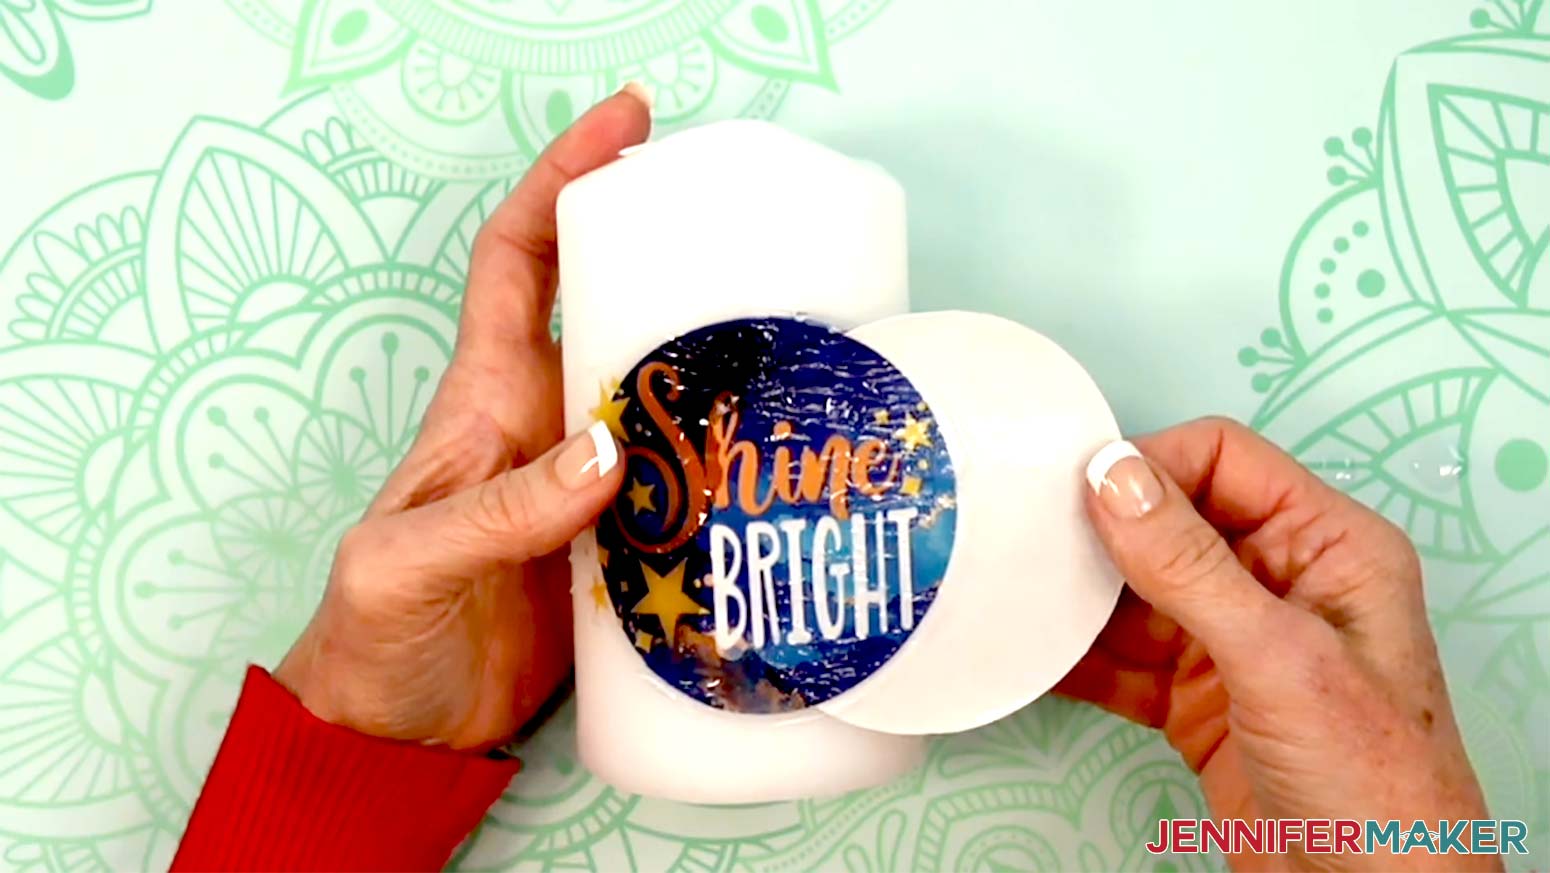
15. While the decal is still wet, use your fingers to slide it into place so it’s aligned with the first decal you applied.
16. Use the felt edge of the squeegee to gently press excess water out from between the decals.
17. Gently wipe the candle and decal to remove any remaining moisture from the surface.
18. Wait 1-2 hours for the candle to completely dry, then go outdoors for ventilation, and place the large piece of cardboard on a flat surface.
19. Place your candle decal-side up onto the cardboard.
20. Put on your personal protective equipment (PPE): Respirator (with cartridge), safety goggles (if the respirator does not cover your eyes), disposable gloves, and an apron.
NOTE: I highly recommend wearing PPE when using Krylon Crystal Clear Acrylic Coating.
21. Holding the can about 10 inches away, spray a light, even coat of Krylon Crystal Clear Acrylic Coating over the entire front of the candle.
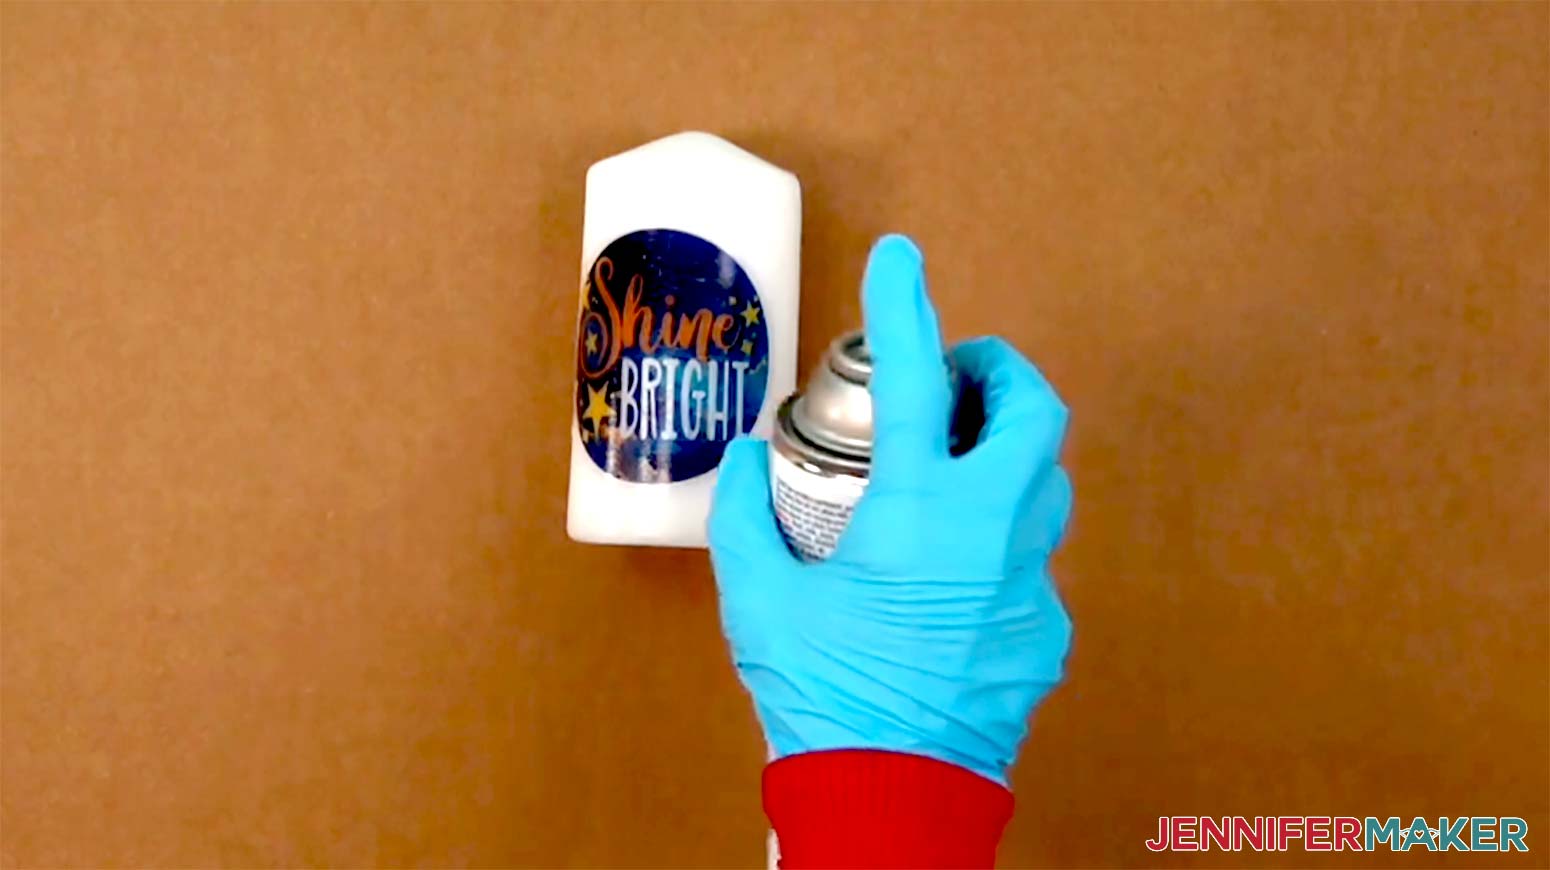
22. Let the candle dry.
23. Your candle is ready to display! For safety, wait until the decal on the candle has cured for several days before lighting it.
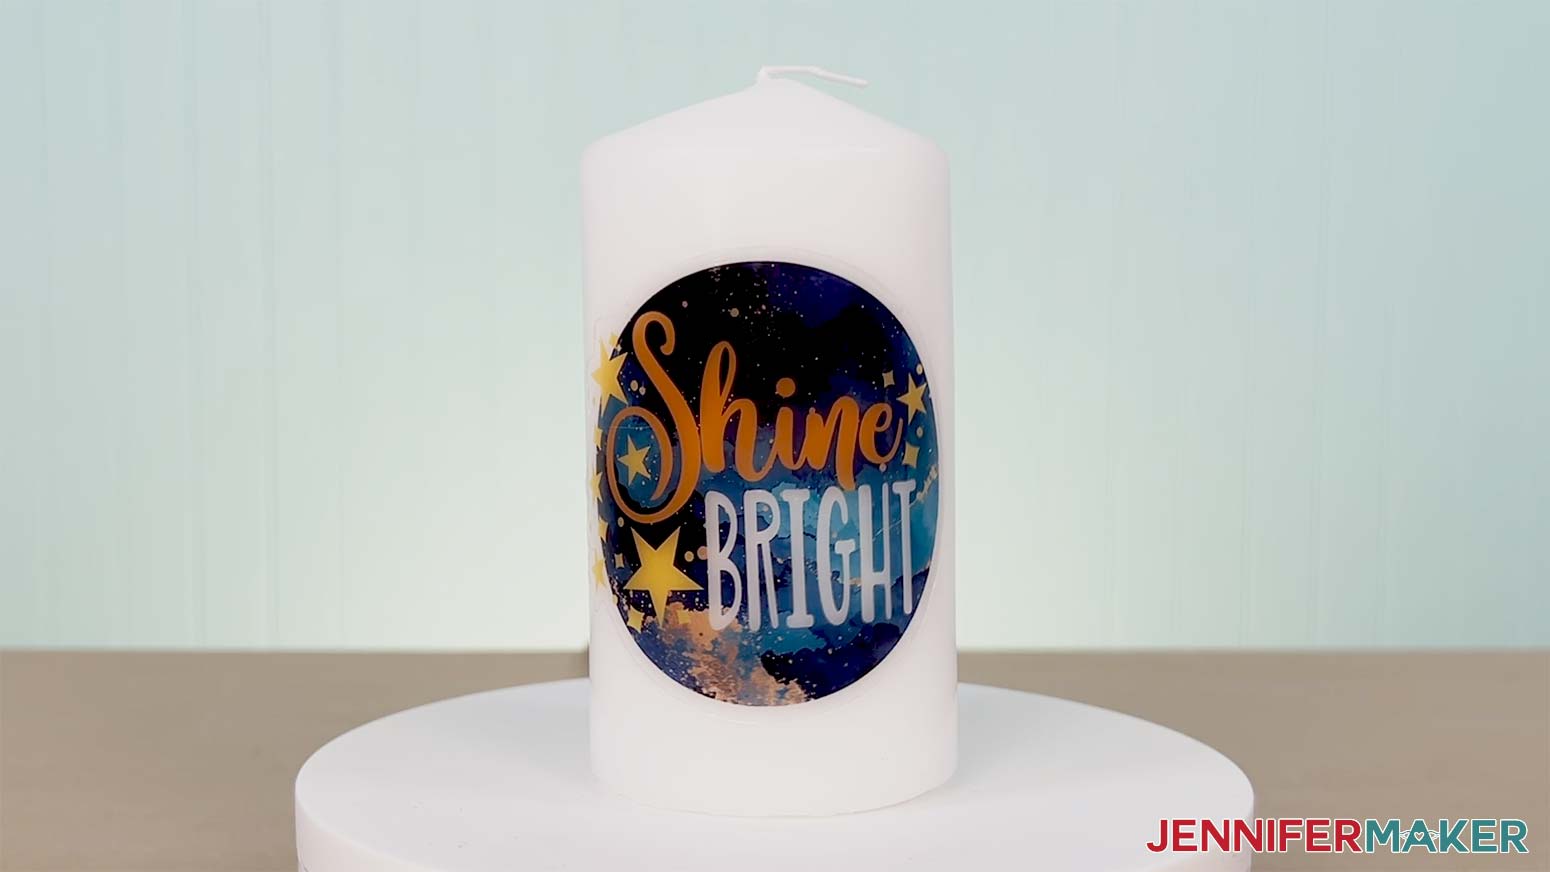
STEP 6: SHOW IT OFF
Your waterslide decal projects are ready to gift or display!
Notes
Finished sizes:
Plate: 10.5" round
Candle: 3" W x 6" H
Safety:
Plate: Not safe for food. Do not microwave.
Candle: Never leave burning candles unattended, and extinguish them before leaving a room or going to bed. Always place candles at least 12” from flammable items like curtains and keep them on a stable, heat-resistant surface.
Care:
Plate: Hand wash only with a soft cloth or sponge and mild dish soap. Do not wash in a dishwasher. Do not microwave.
Candle: Wipe clean with a dry or slightly damp soft cloth.
Typefaces:
Sprinkles: Beachwood Sans (free alternative: Caramel), Cake Pop (free alternative: Jolly Dream)
Sweet Life: Beachwood Sans (free alternative: Caramel), Timberly Script
Cherries: Beachwood Sans (free alternative: Caramel), Timberly Script
Shine Bright: Amastery Script (free alternative: Chocolate), Beachwood Sans (free alternative: Caramel)
Choose to Shine: Brenson Charlotte (free alternative: Retrovert)
Glow Getter: Baby Aletha (free alternative: Hello Honey), Beachwood Sans (free alternative: Caramel)
Answers to Your Questions About Waterslide Decals for Beginners
Q: I want to design my own decal for a waterslide plate. How do I do that?
A: You can learn how to create a custom waterslide decal design for a plate in my ADVANCE program. Learn more about ADVANCE here!

Q: Do I need to mirror my waterslide decal design before printing?
A: No, you do not need to mirror your waterslide decal designs before printing them.
Q: Are waterslide decals food safe on plates and mugs?
A: Waterslide decal-decorated plates are meant for décor only, not for serving or eating food. If you add decals to mugs or cups, keep them on the outside below the lip line and use them decoratively. When in doubt, treat your waterslide projects as display pieces.
Q: Can I actually burn the candles I decorate with waterslide decals?
A: Yes, but with caution. Always burn the candle where you can keep an eye on it, and if you want to preserve the design, stop using it before the flame reaches the decal. Think of these as “special occasion” candles; enjoy the glow for a bit, then blow it out and go back to admiring your beautiful design.
Q: Do I need a special printer or can I use what I already have?
A: An inkjet printer works perfectly for the waterslide decal sheets in my materials list. Just be sure to use the correct print settings, let the ink dry completely, and then seal it before you apply the decal.
Q: Why do I have to seal the waterslide paper before applying it to my blank?
A: Sealing with a few coats of acrylic sealer is the secret that keeps everything from turning into a smeared mess. It locks the ink into the waterslide paper so it doesn’t run when it hits the bowl of water.
Q: Can I still make these if I don’t have a Cricut machine?
A: Absolutely! A Cricut is a great way to cut super-precise shapes from your waterslide decal sheets, but you can also print a decal and cut around it with sharp scissors, leaving a small border.
Q: How do I avoid air bubbles and wrinkles when I slide the decal on?
A: After soaking the cut decal in room temperature to slightly warm water, the next step is to show you how to slide it off the backing paper and onto a smooth surface, using a paper towel to avoid bubbles and wrinkles. Watch the tutorial video to see how I did it slowly and gently.
Q: Can I put my finished waterslide projects in the dishwasher or microwave?
A: I recommend treating them like the special handmade pieces they are: hand-wash only, no soaking, and definitely no dishwasher or microwave. High heat and harsh detergents can damage the decal and clear coat.
Q: Will waterslide decals work on curved or irregular surfaces?
A: Yes, with a little extra patience and the techniques I share in the tutorial. Waterslide is a great way to decorate slightly irregular surfaces like angled plate rims or round candles. And if something doesn’t look perfect the first time, that’s okay. It’s all part of learning waterslide decals for beginners.
Get my free Waterslide Decal SVG/DXF/PNG files!
(If you do not see the signup form above, click here.)
I love seeing what you make with my tutorials and how you customize them! Please share photos of your waterslide decal projects in our Facebook group or tag me on social media with #jennifermaker.
Love,

Want to remember this? Save this Waterslide Decals For Beginners tutorial to your favorite Pinterest Board!