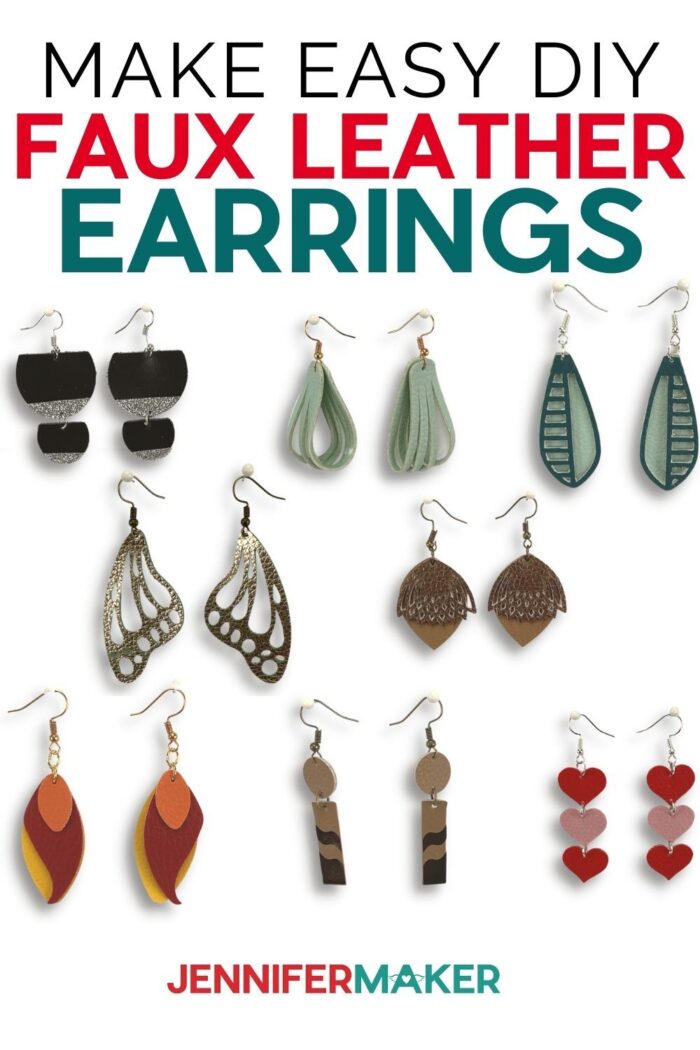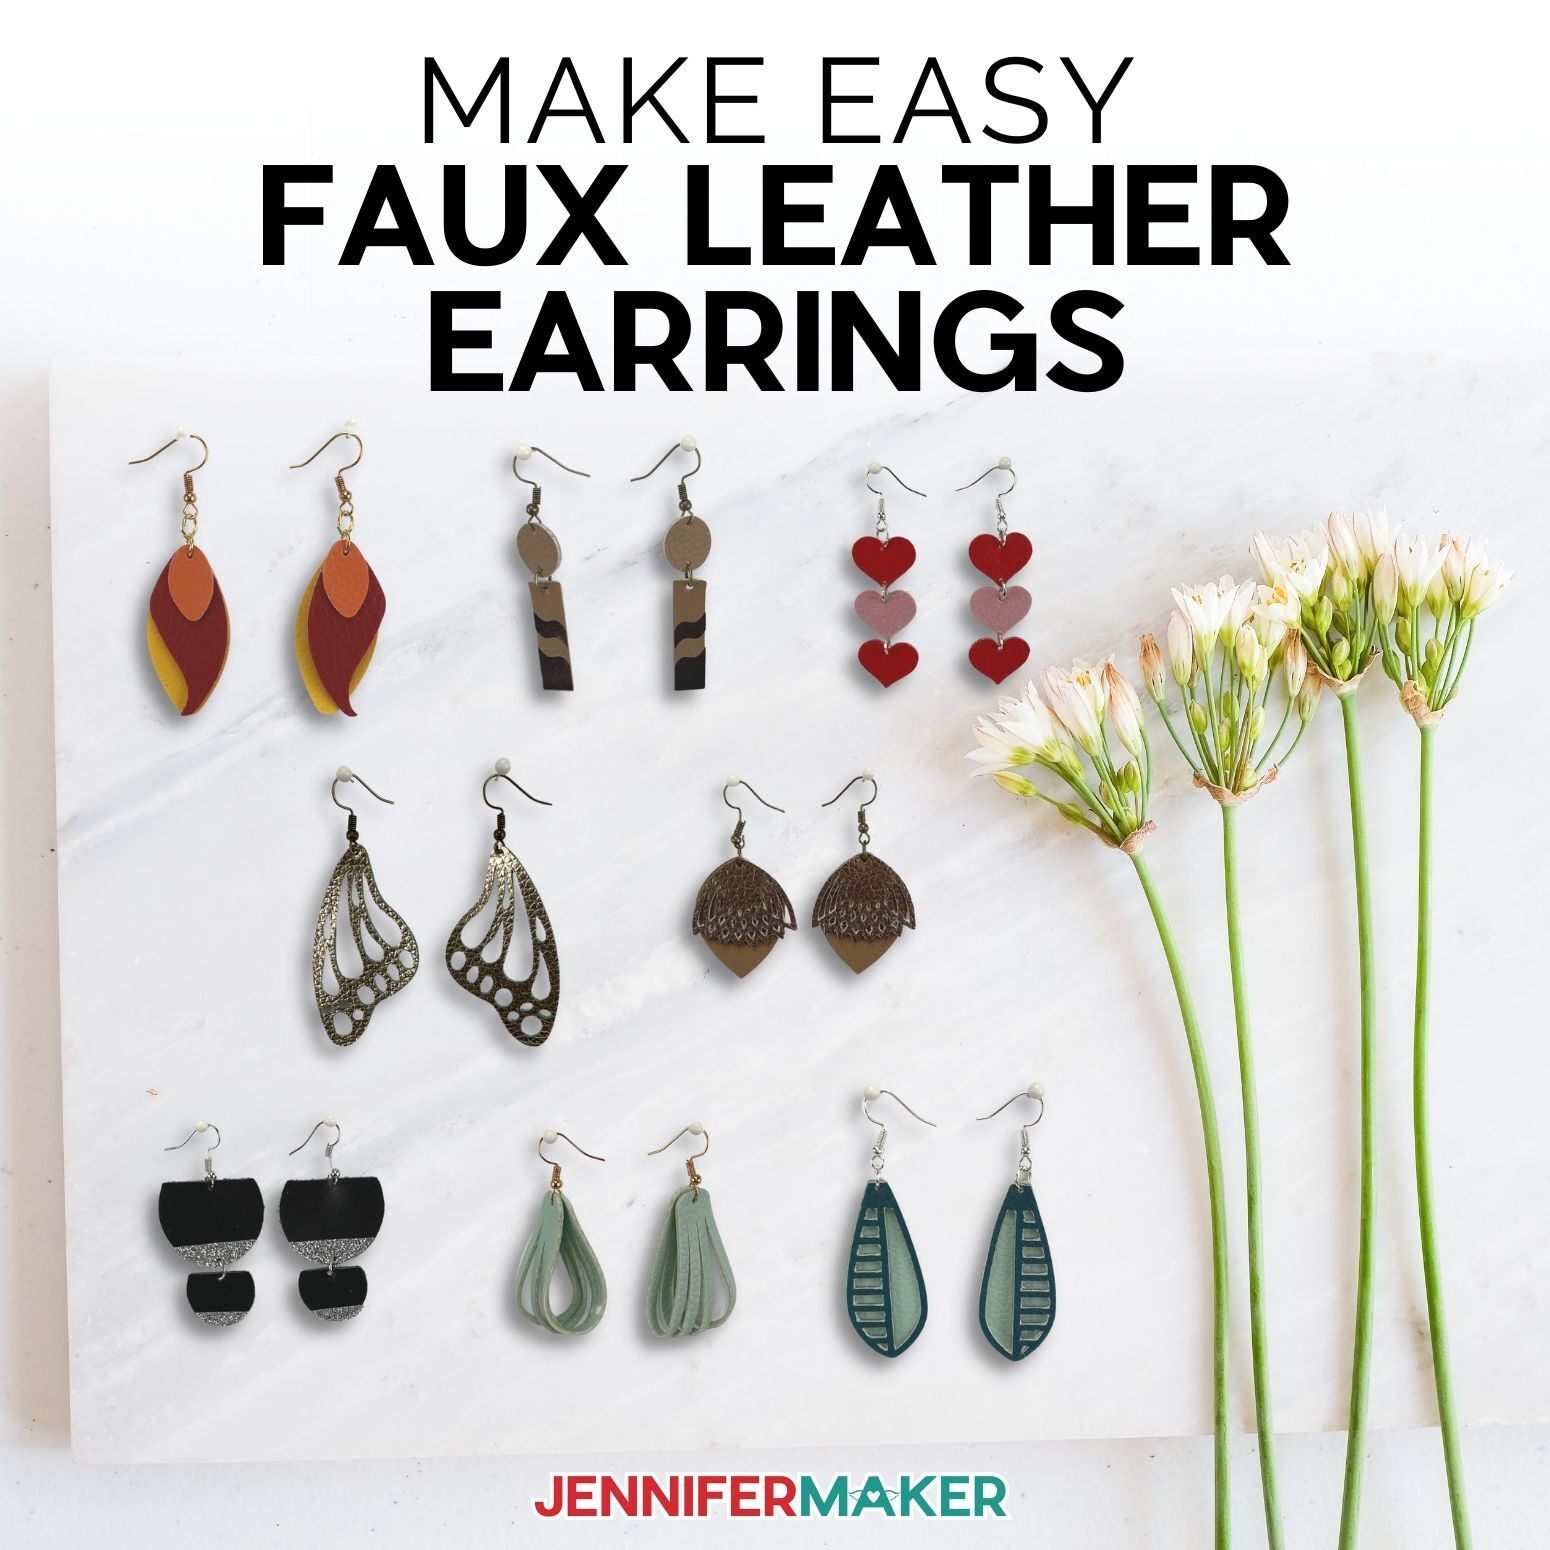
Want to make some fun DIY faux leather earrings using your Cricut cutting machine? This project contains several different designs for you to create and make your own!
I really find it so amazing all of the things you can cut on a Cricut cutting machine. You can cut wood, acrylic and even leather, both genuine and faux leather! And leather is what we are going to learn about in this tutorial. Specifically how to make your very own DIY faux leather earrings on a Cricut! Faux leather earrings are a perennial favorite and many of you tell me you want to learn more, so I’ve come up with eight new earring styles for you to make! This time we’ll also experiment with making earrings from genuine leather on our Cricut cutting machines.

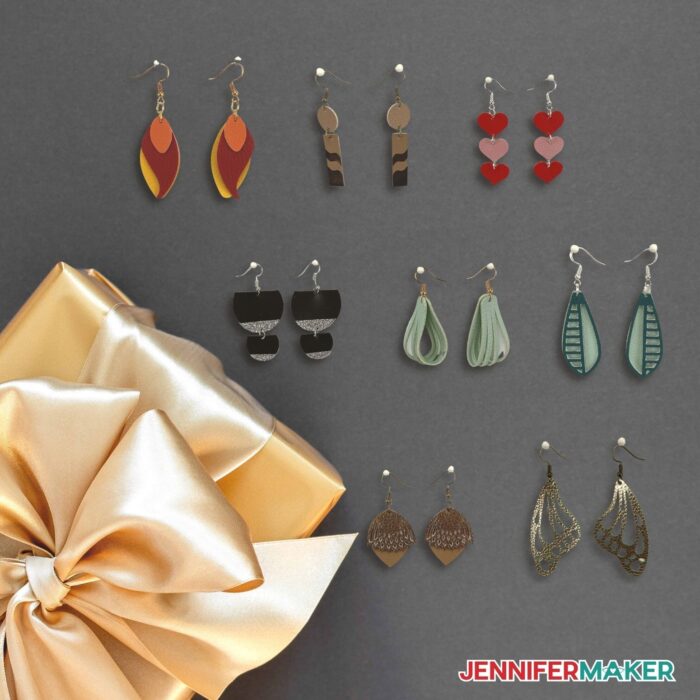
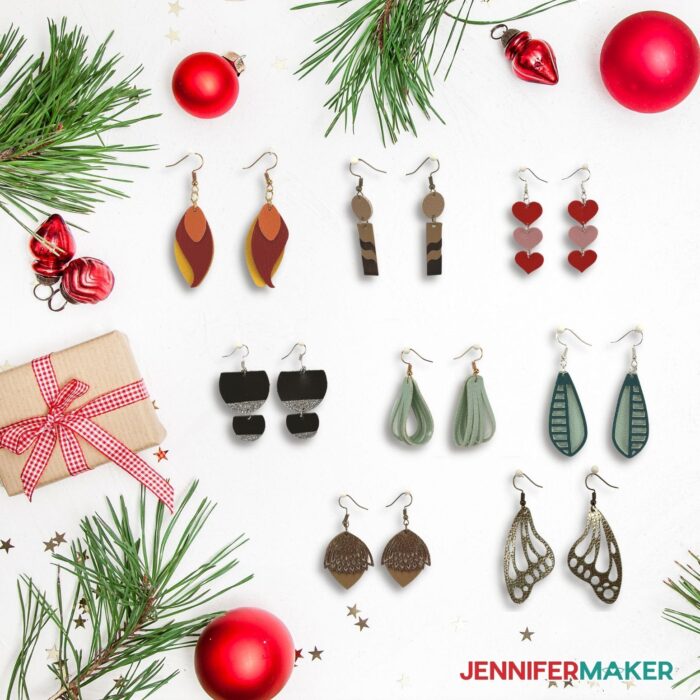
These DIY faux leather earrings make great gifts and with my free cut files you can create eight cute earring designs and add some new jewelry to your collection! Jewelry making is so much fun because it is something you get to wear and when people ask where you got it from, you just tell them you made it!
Pair your cute earrings with a fun outfit for the holiday season or dress up a casual outfit. Whatever style you decide to wear them with, this easy project will add a little bit of oomf to your next outfit.
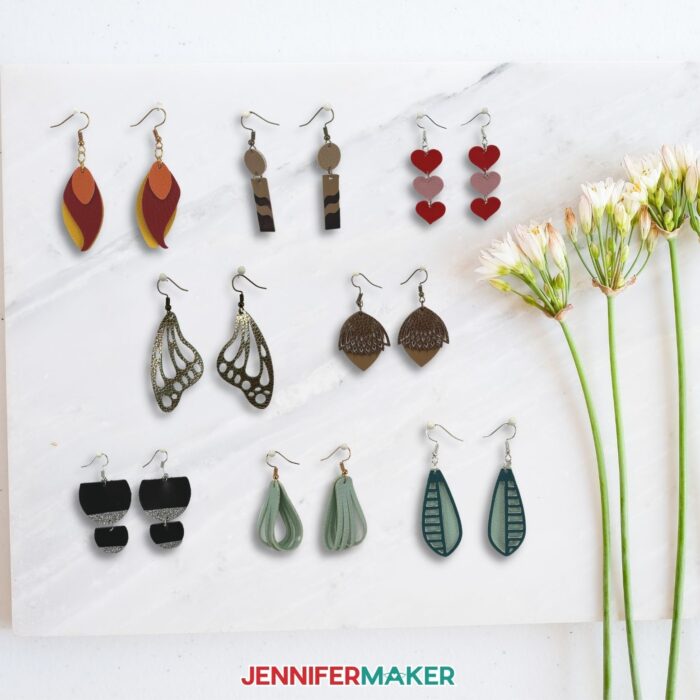
Aren’t they so beautiful?
For this project, I’m going to use a few different types of leather. Genuine, real leather from Cricut which comes in a 12 inch by 12 inch piece. I’m also going to mix in some faux leather in classic, metallic and glitter. And some iron-on vinyl in both foil and glitter. We’ll also use a jewelry making kit that contains all the earring parts: hooks, jump rings, pliers, a hole puncher and tweezers.
Of course we’ll need our Cricut Cutting machine. And yes, you can use the Cricut Maker or the Explore Series for this along with a strong grip mat and deep point blade. You can use the Cricut Joy so long as you use very thin faux leather (see our supply list) and tape your faux leather to a green standard grip mat with painter’s tape. And other things we’ll need are painter’s tape, a brayer, a hammer or mallet, rotary cutter or scissors, a ruler, teflon sheets or butcher paper for the iron-on vinyl and a good heat source. I will use my Cricut easy press mini and a mat.
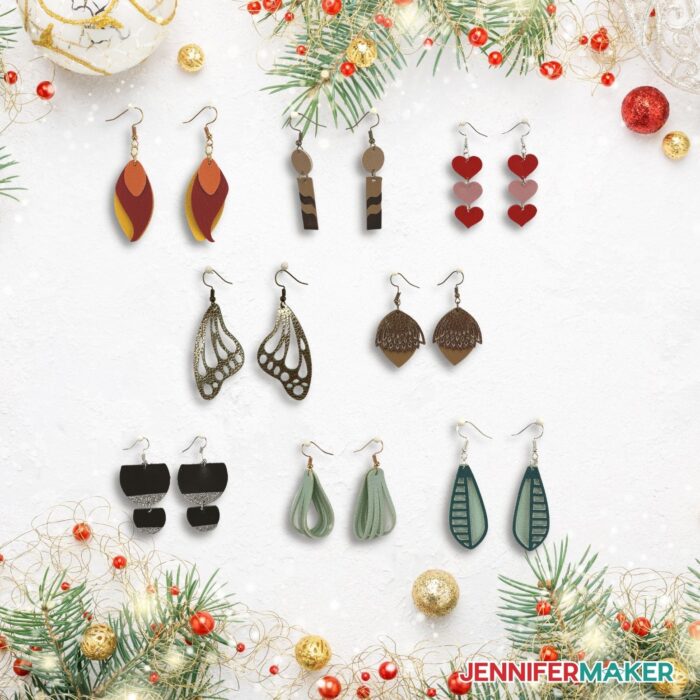
It’s so hard to choose a favorite because they are all so very pretty. I’m sure no one can tell that these are actually handmade. They look much more expensive than they actually are! There are many different colors of materials as well as earring shapes you can choose from. I’ve provided you with some of the most popular choices I’ve seen.
Put them in a cute little box and give them out to friends on birthdays or as a simple “thank you for being you” gift. It’s a gift that they will cherish forever!
Here’s a supply list of what you need to make faux leather earrings! This post contains some affiliate links for your convenience (which means if you make a purchase after clicking a link I will earn a small commission but it won’t cost you a penny more)! Read my full disclosure policy.
Materials to Make DIY Faux Leather Earrings
View my Amazon shopping list with the exact items we used to make this project
- Double-Sided Faux Leather (Explore and Maker only)
- Cricut Faux Leather or 0.7mm Thin Leather (Joy, Explore, and Maker)
- Genuine Leather 12″ x 12″ (optional, Explore and Maker only)
- Faux Leather Jewelry Making Kit
- Transfer Tape 12″ x 12″ (optional)
- Foil Iron-On Sampler (You can use this iron-on vinyl OR this iron-on vinyl)
- Glitter Iron-On (optional)
- A way to cut your leather or faux leather earrings (I used the Cricut Maker 3 but you can use the Cricut Maker or Cricut Explore Series)
- StrongGrip Machine Mat
- Deep Point Blade
- Brayer
- Painter’s Tape
- Hammer (or mallet)
- EasyPress Mini (or another heat source)
- Cricut EasyPress Mat (or towel)
- Rotary Cutter (or scissors)
- Ruler (or other measuring device)
- Spatula (optional)
- Teflon Sheets -or- Butcher Paper
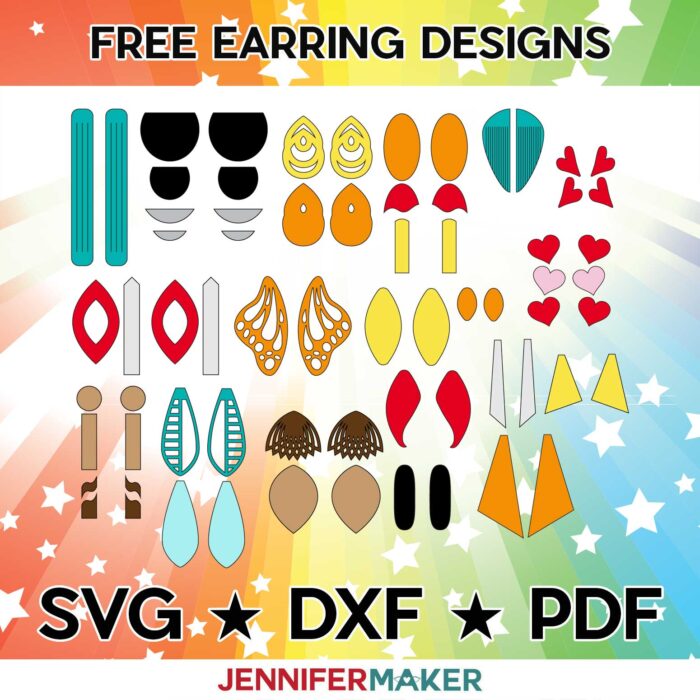
- Design #328 – My free SVG/PDF/DXF design files are available in my free resource library (get the password by filling out the form at the bottom of this page)
How to Make Your Own DIY Faux Leather Earrings
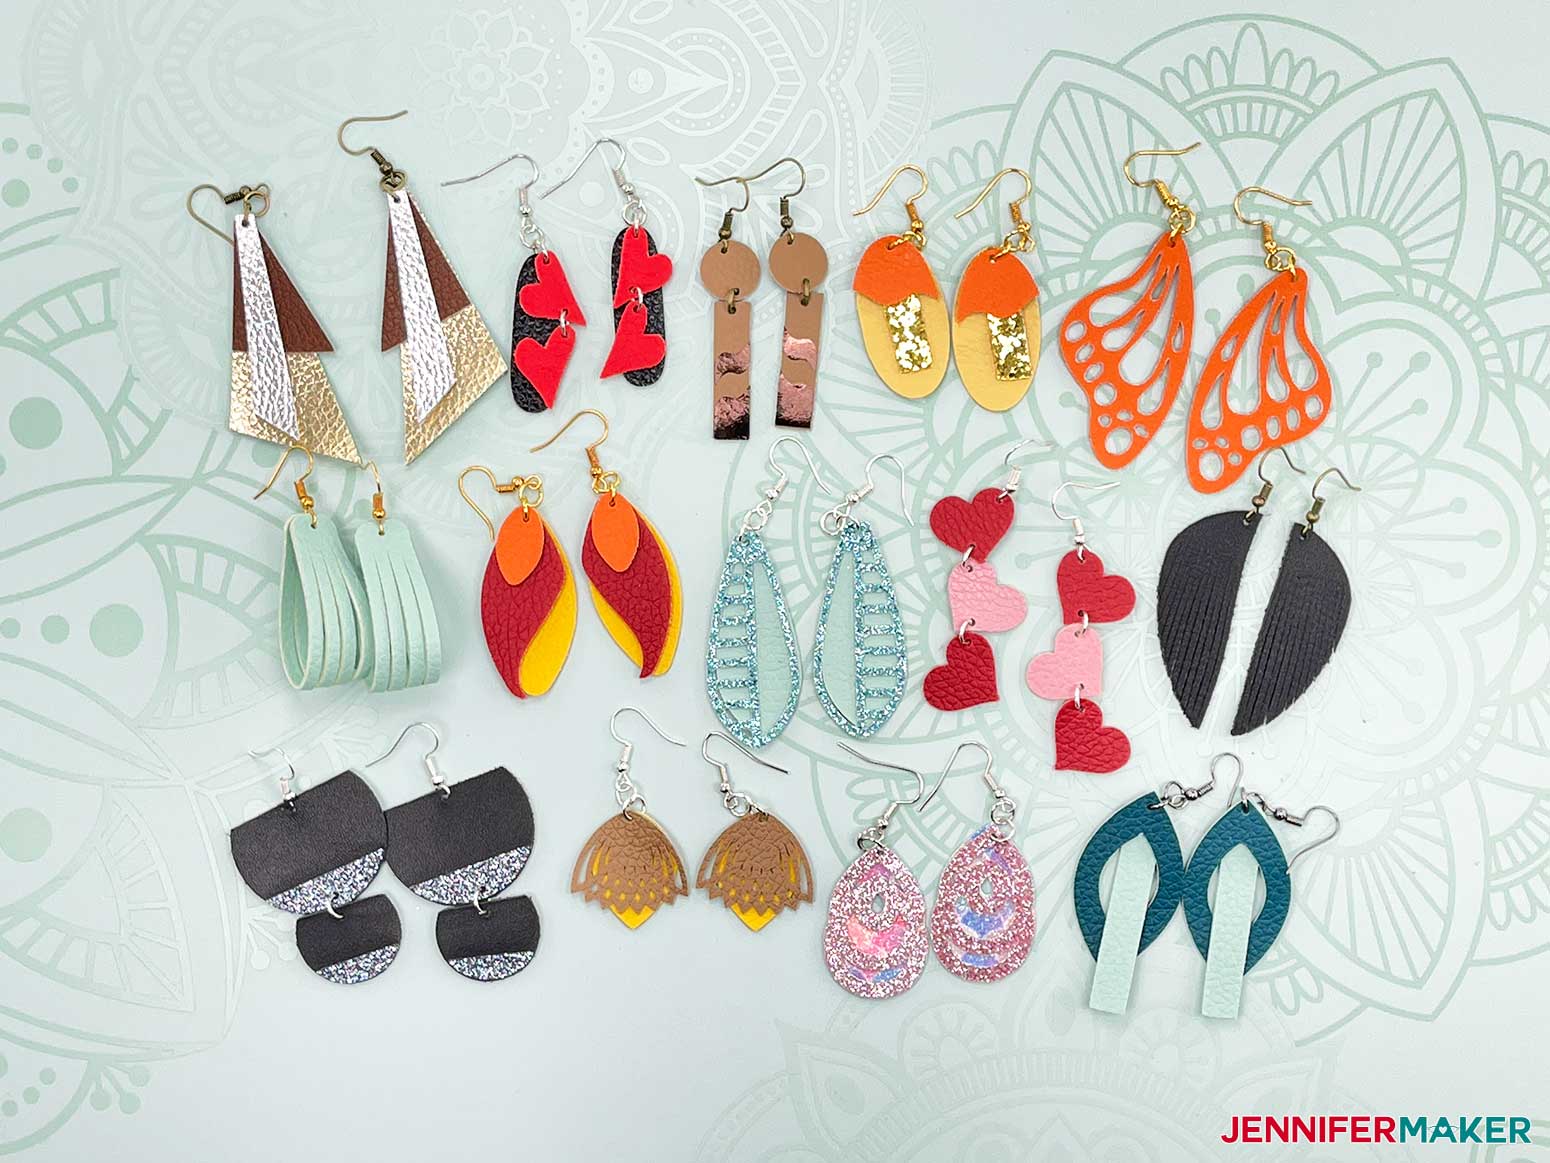
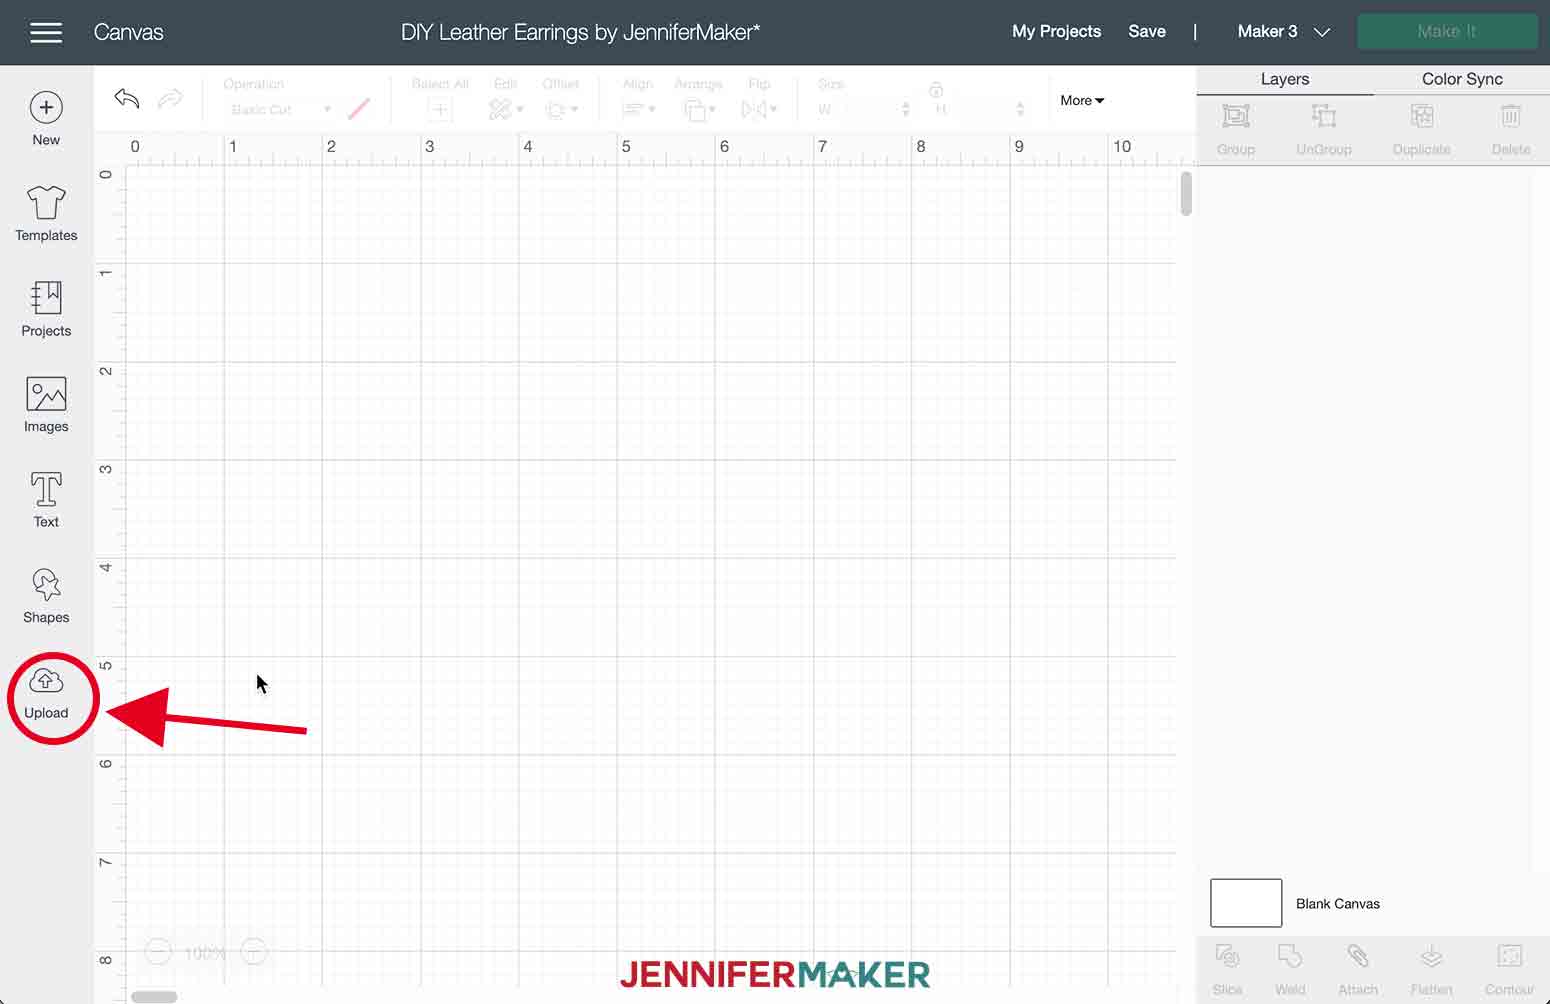
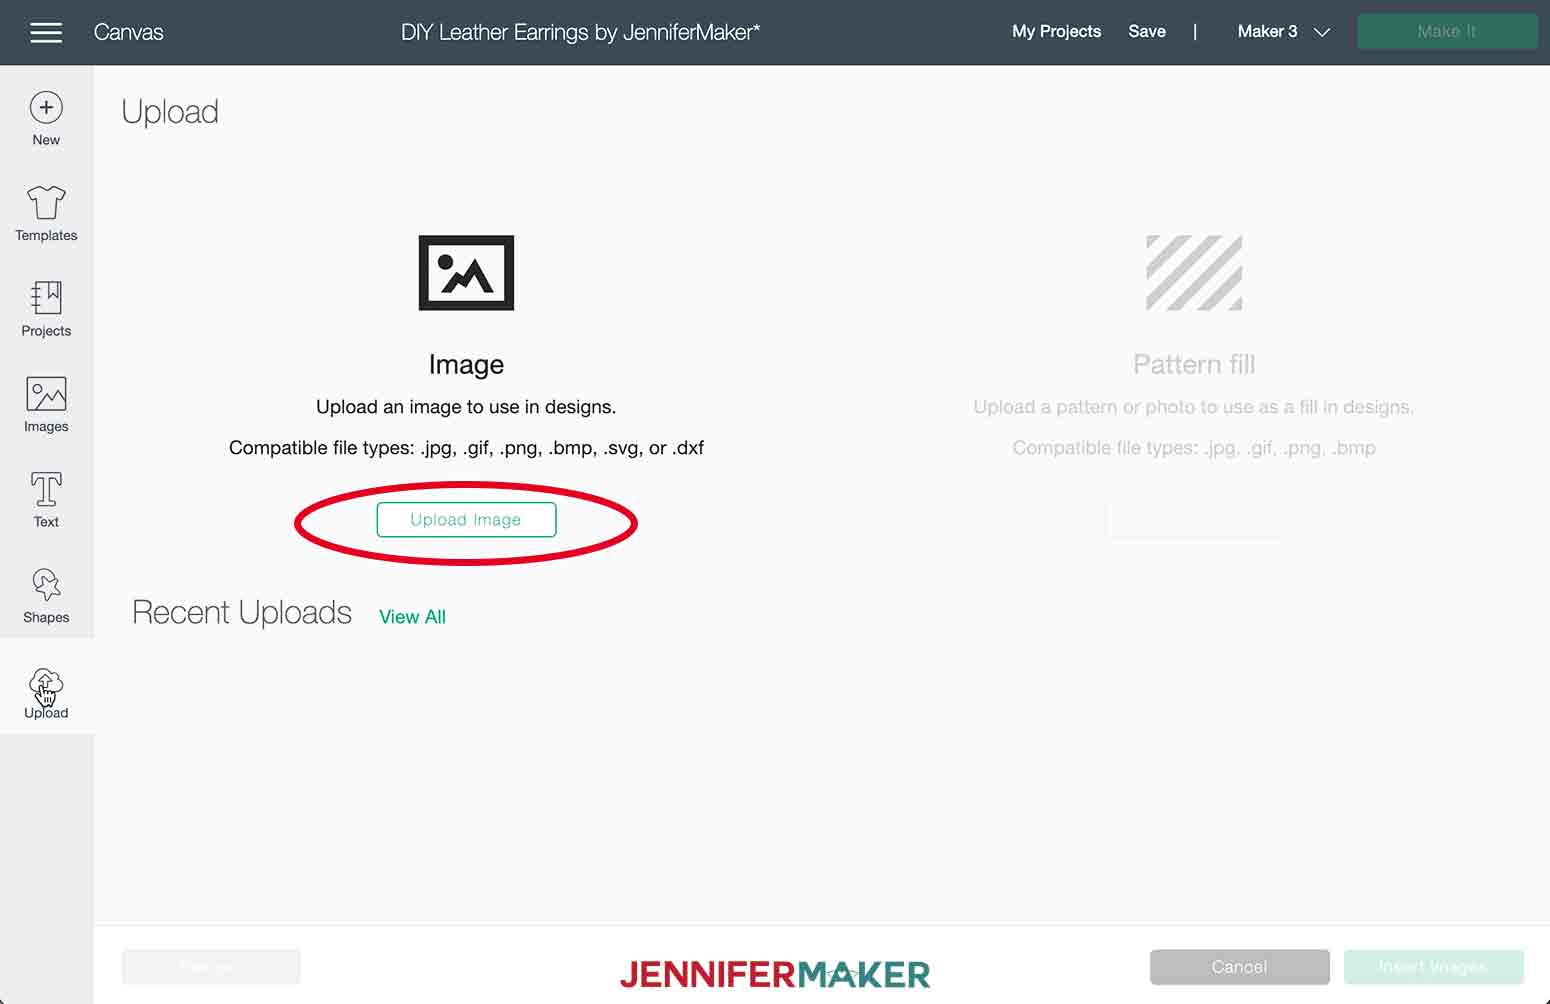
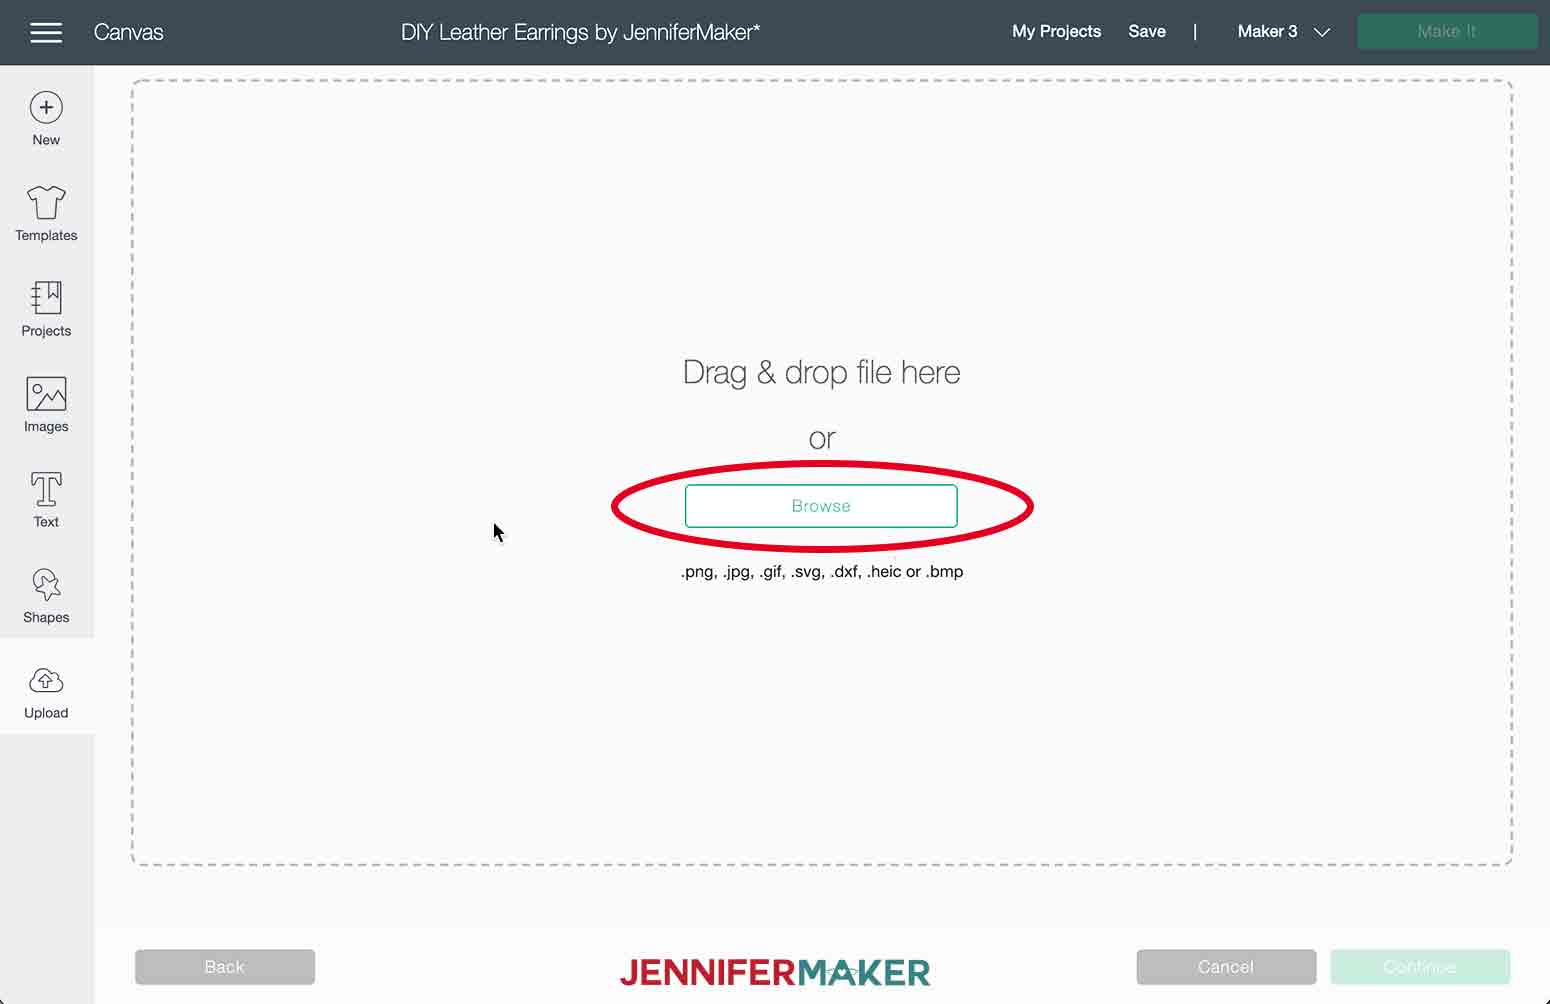
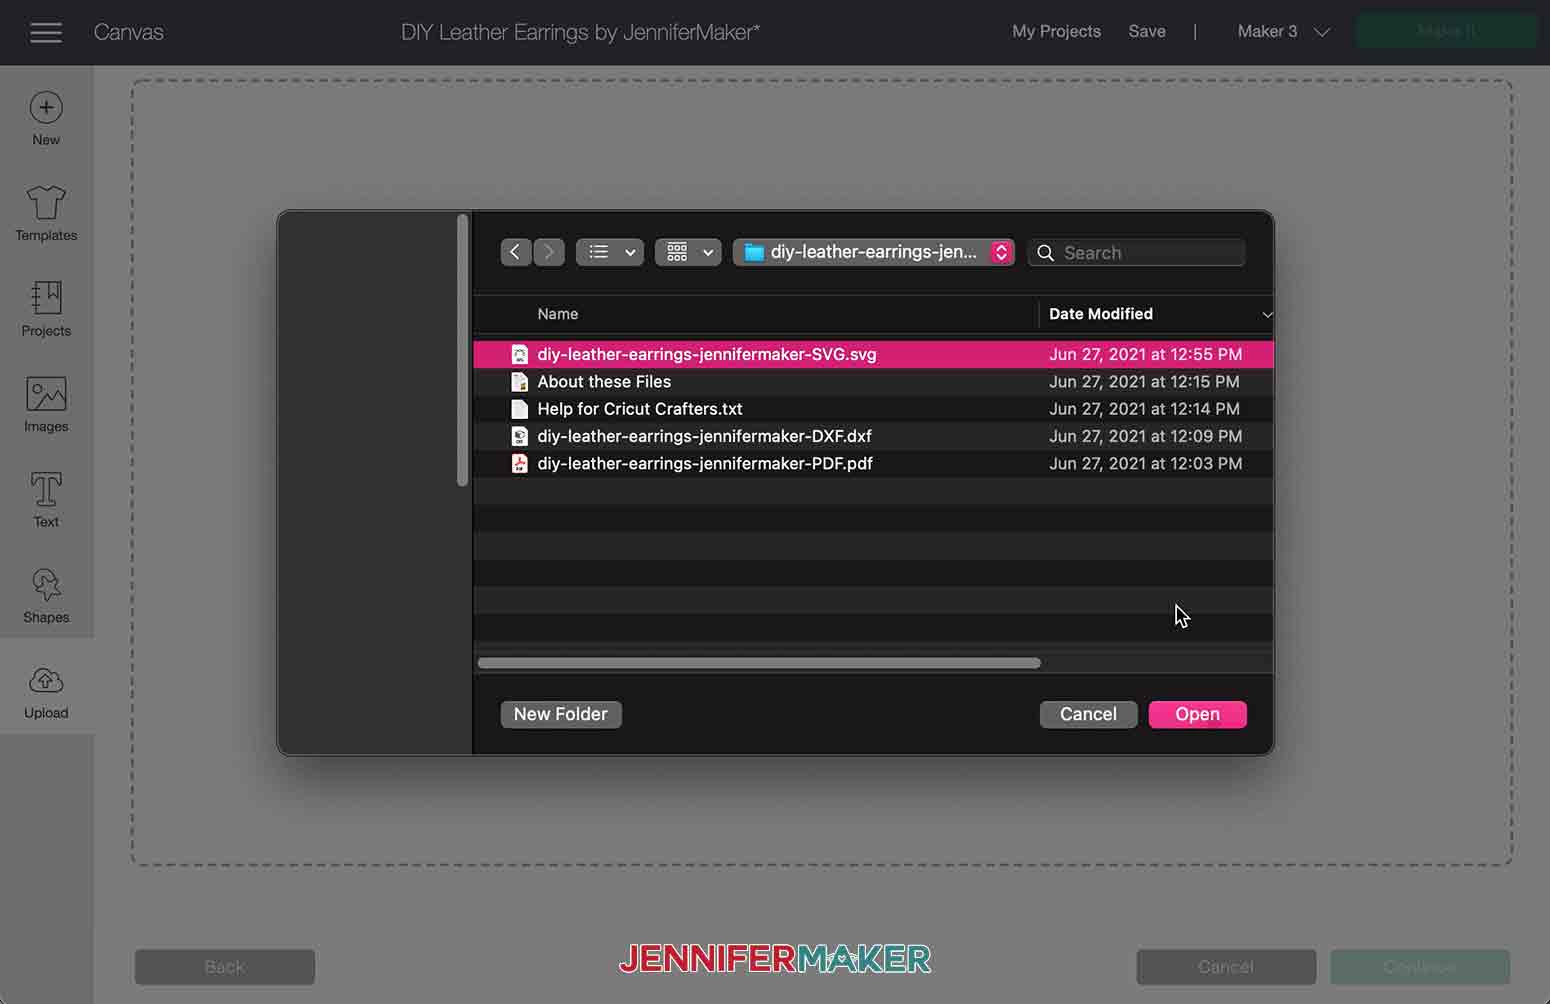
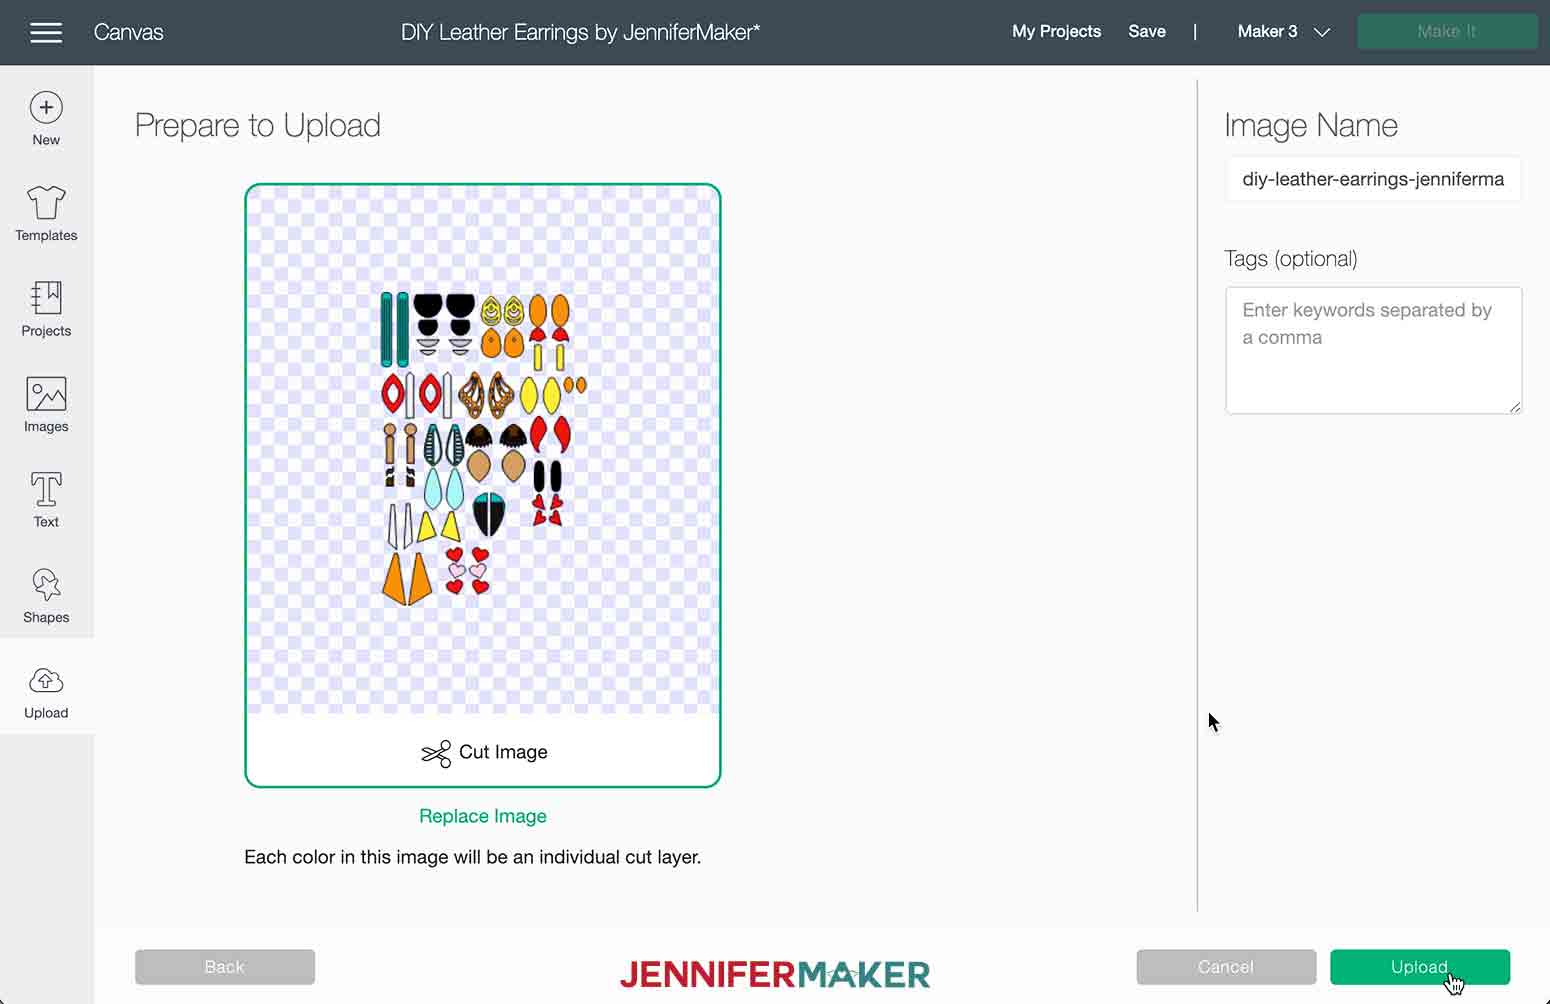
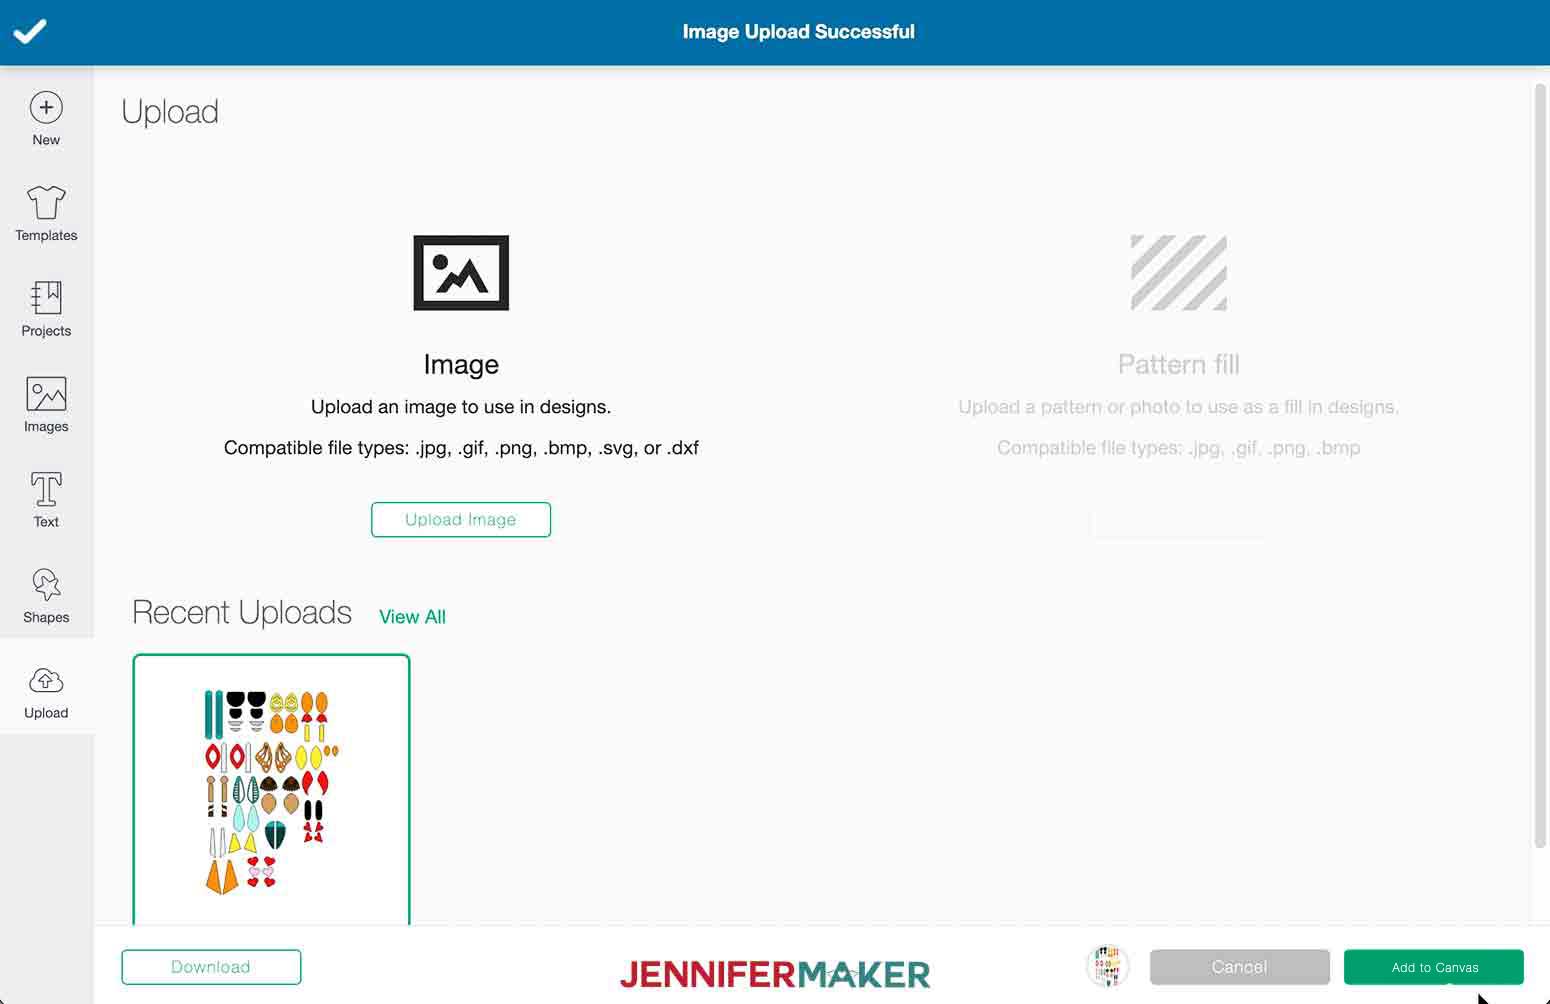
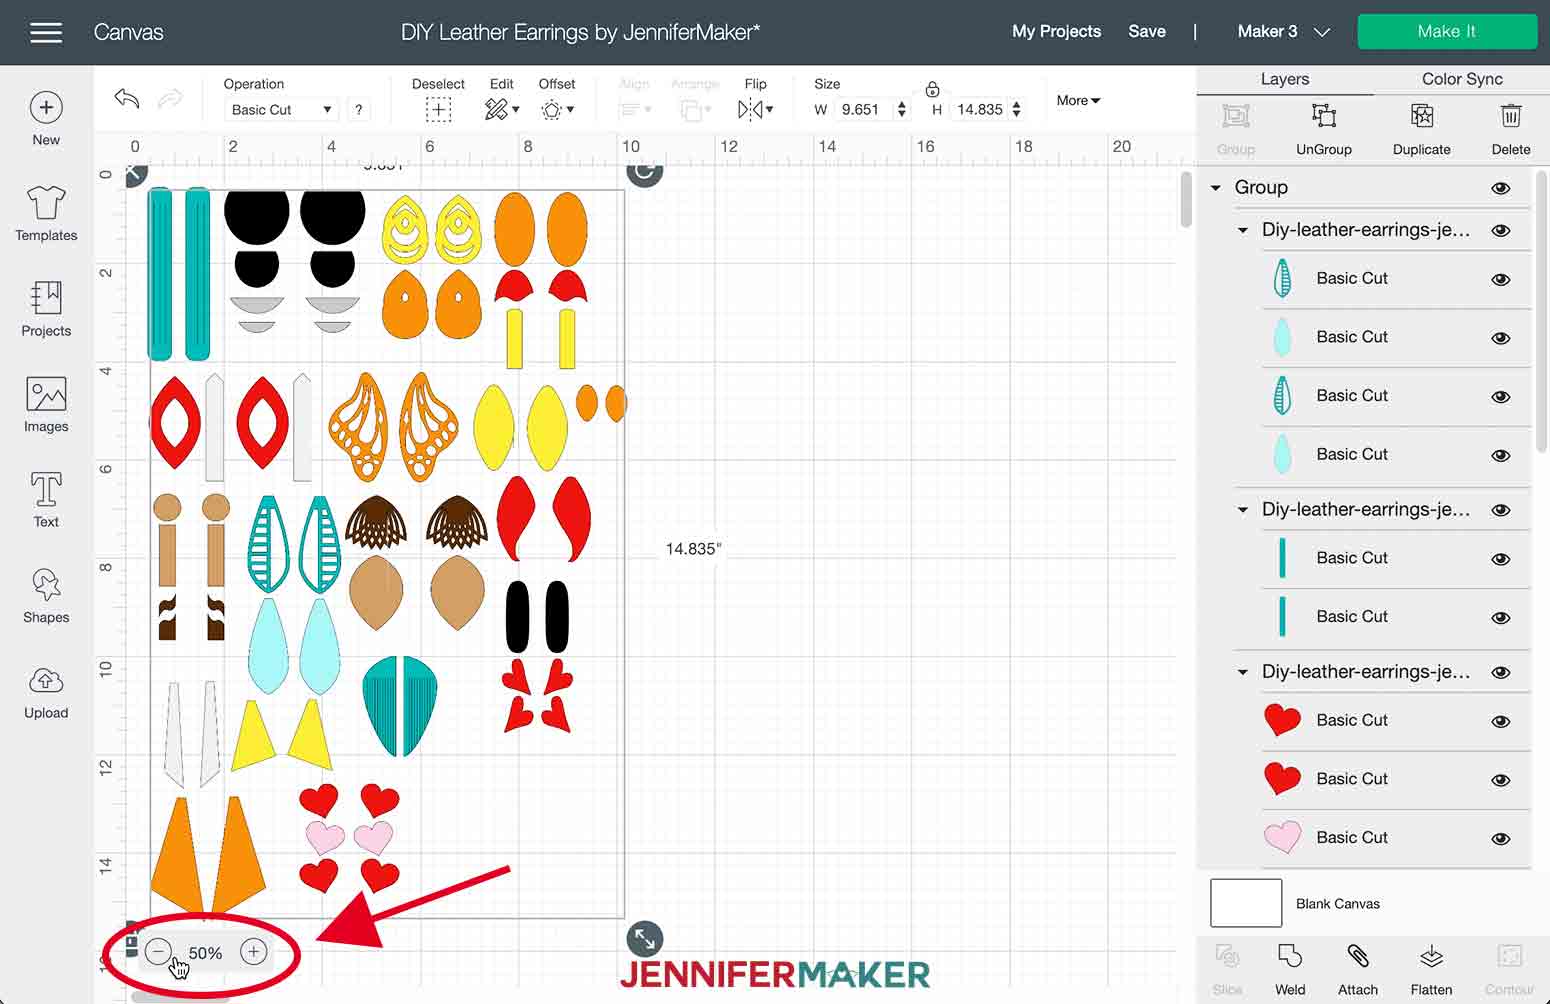
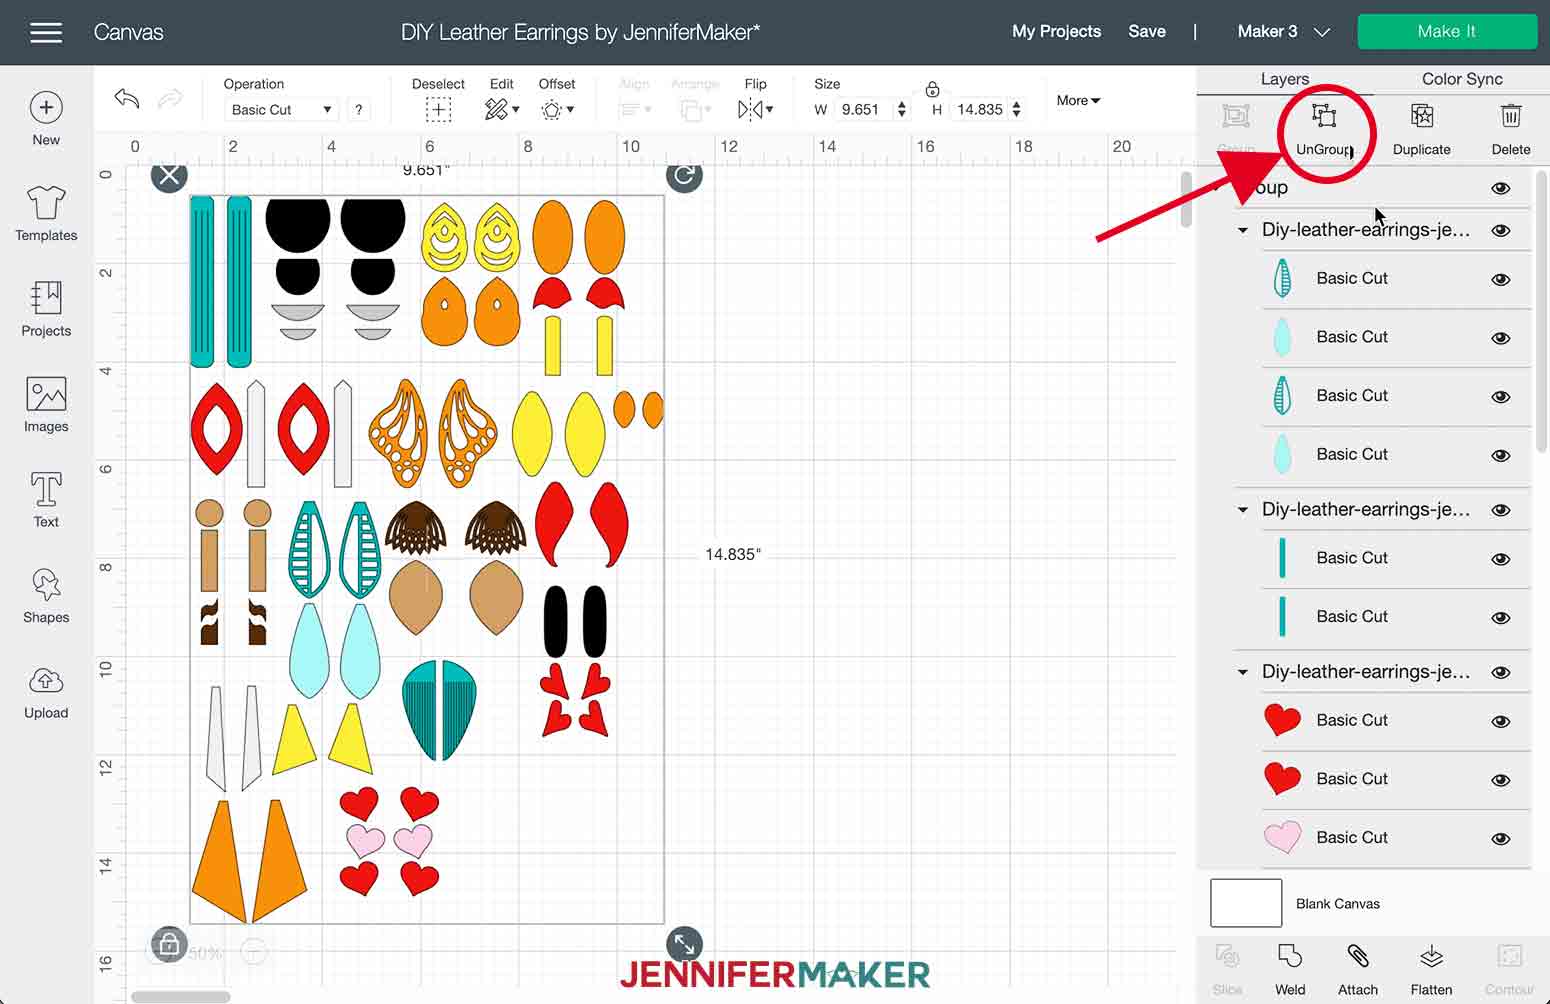
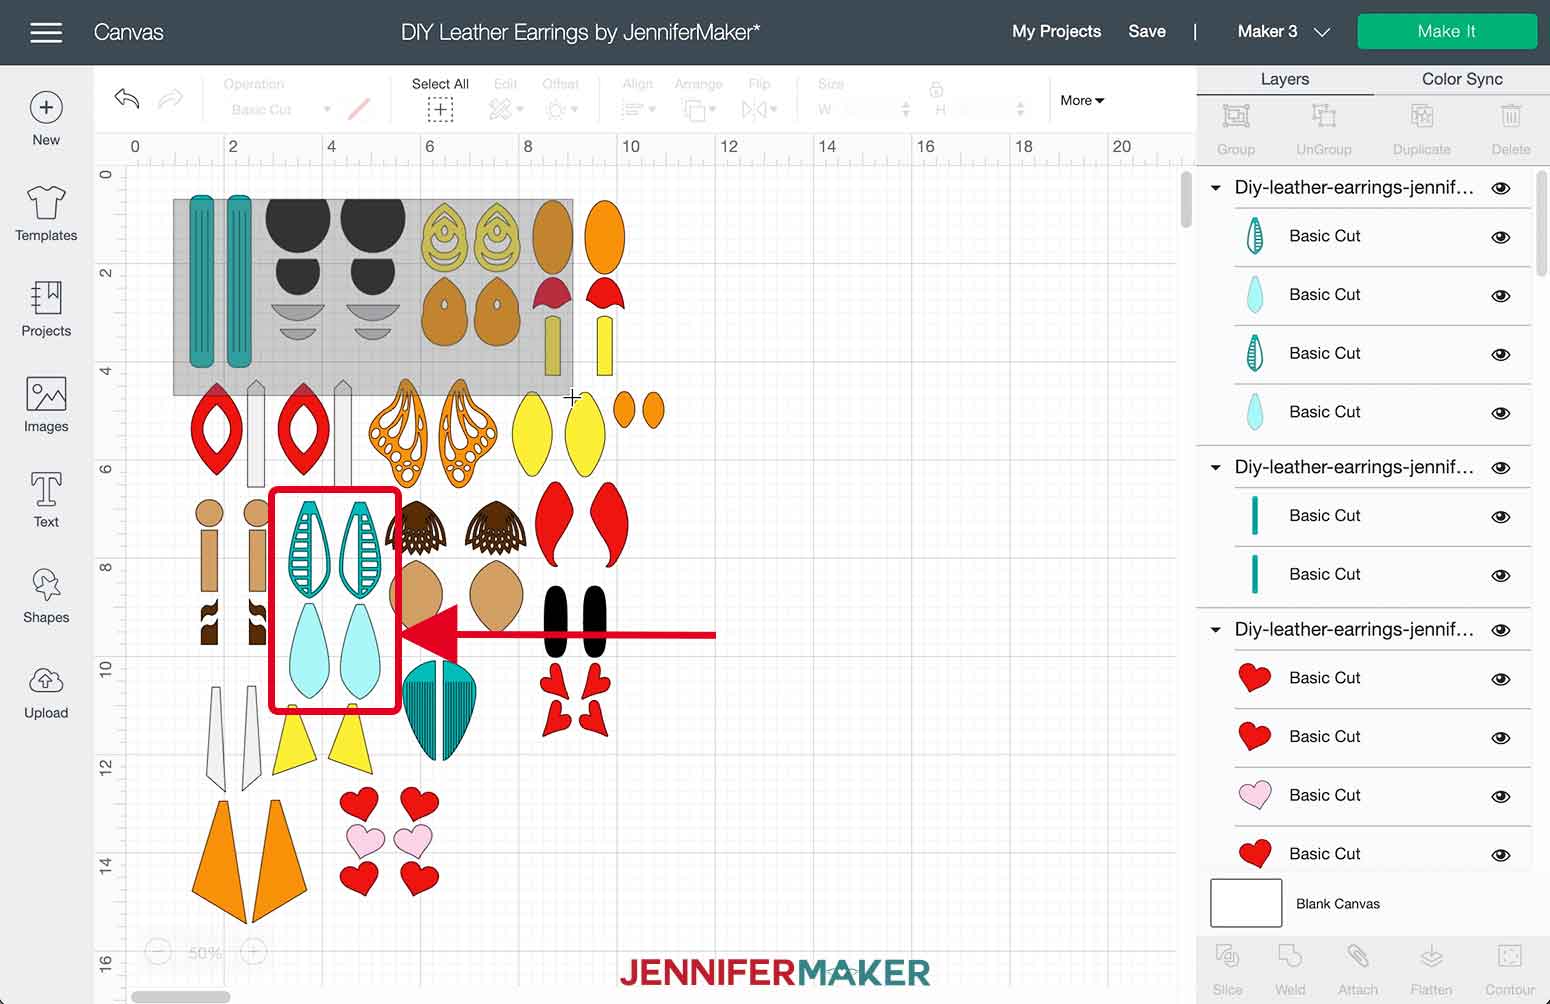
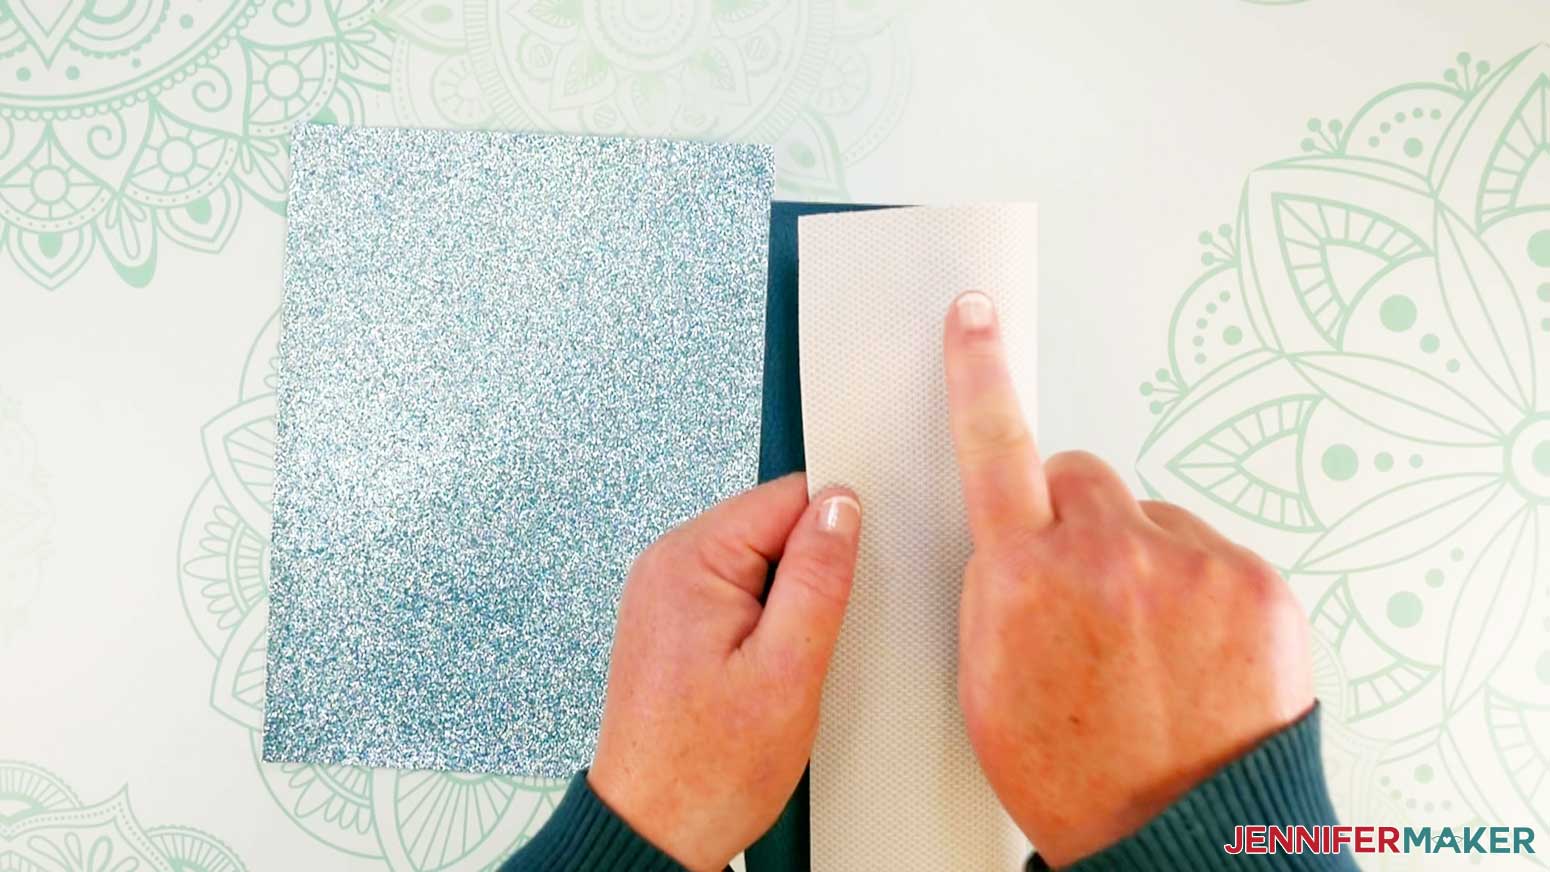
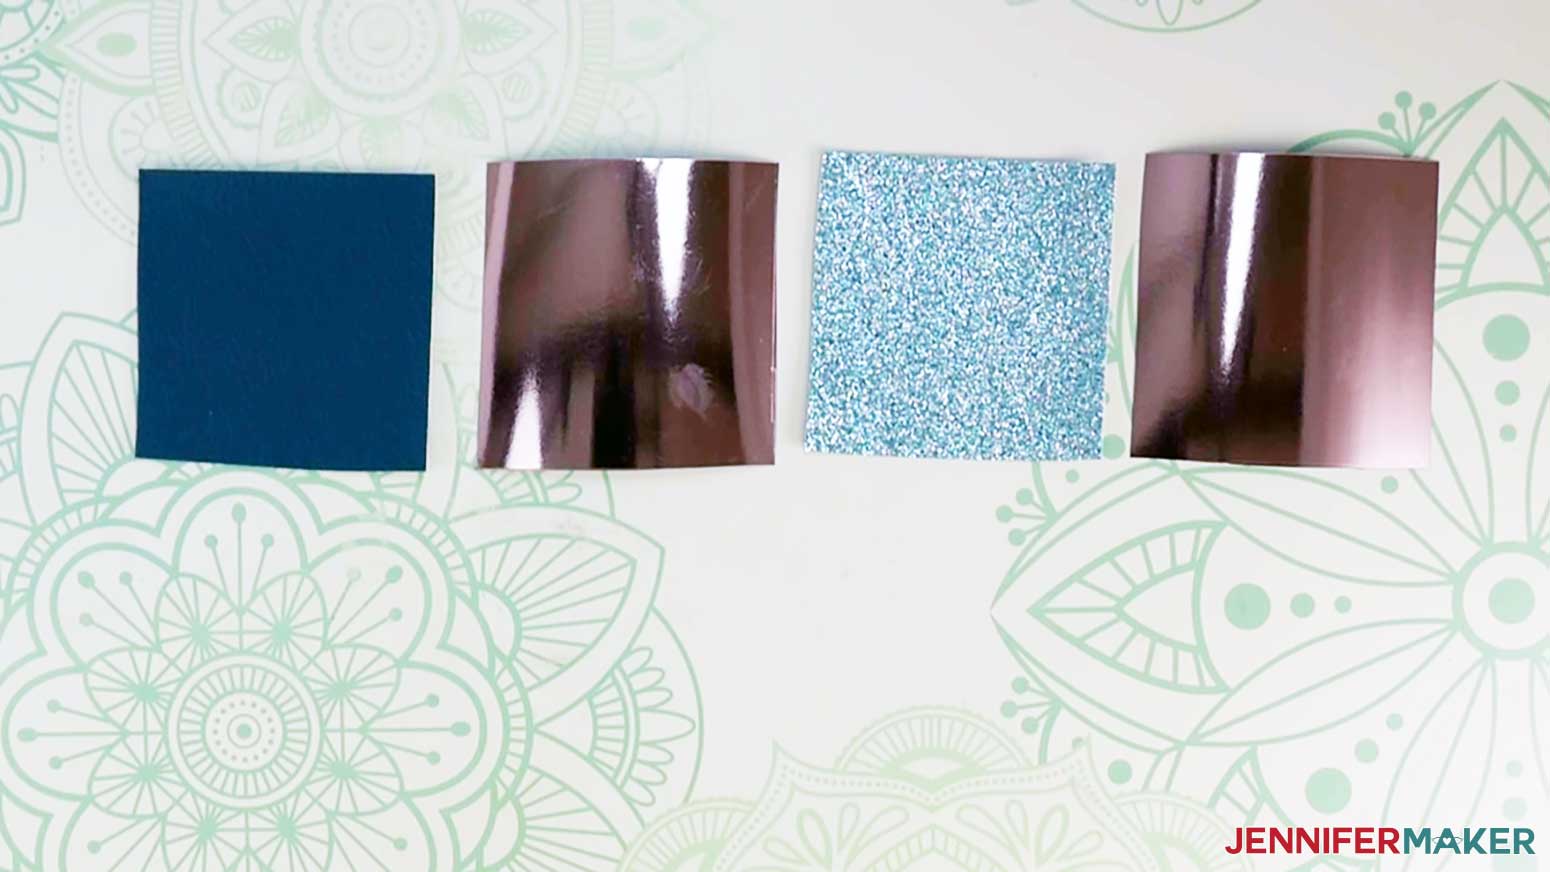
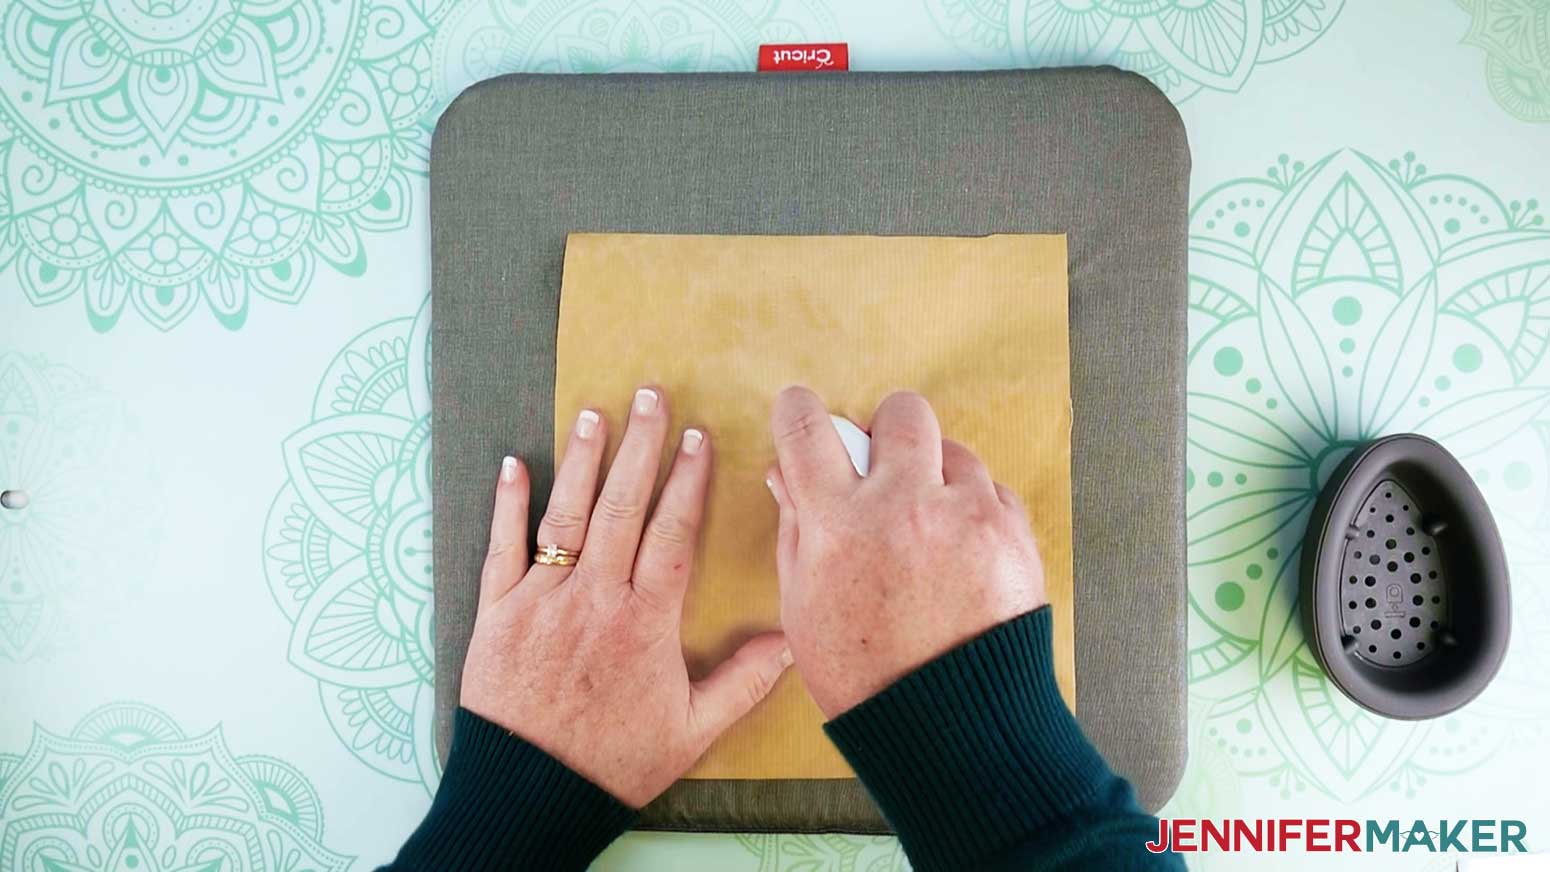
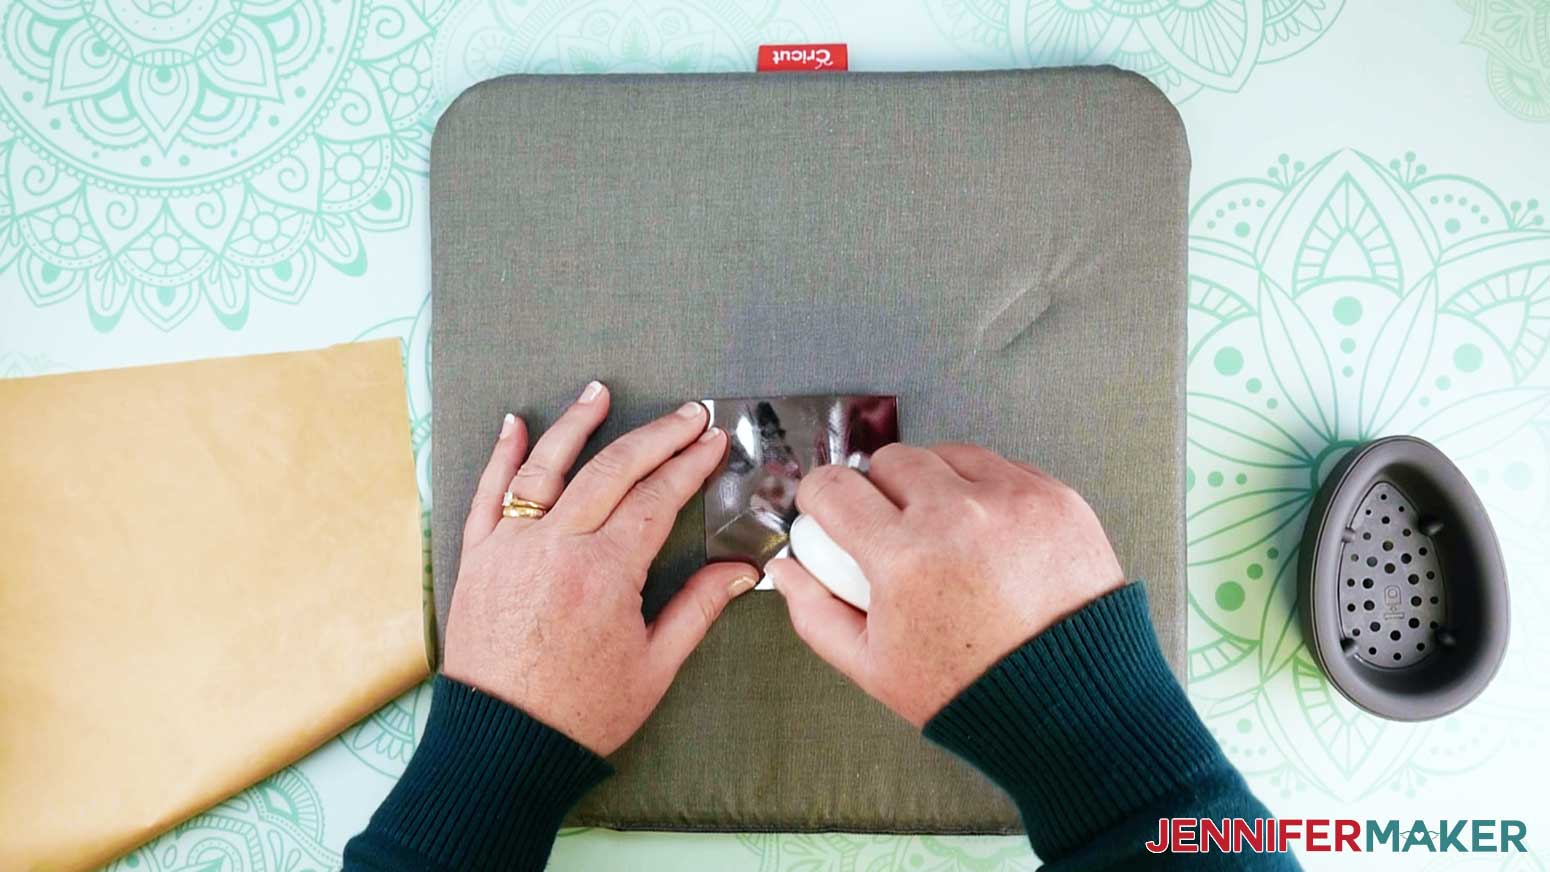
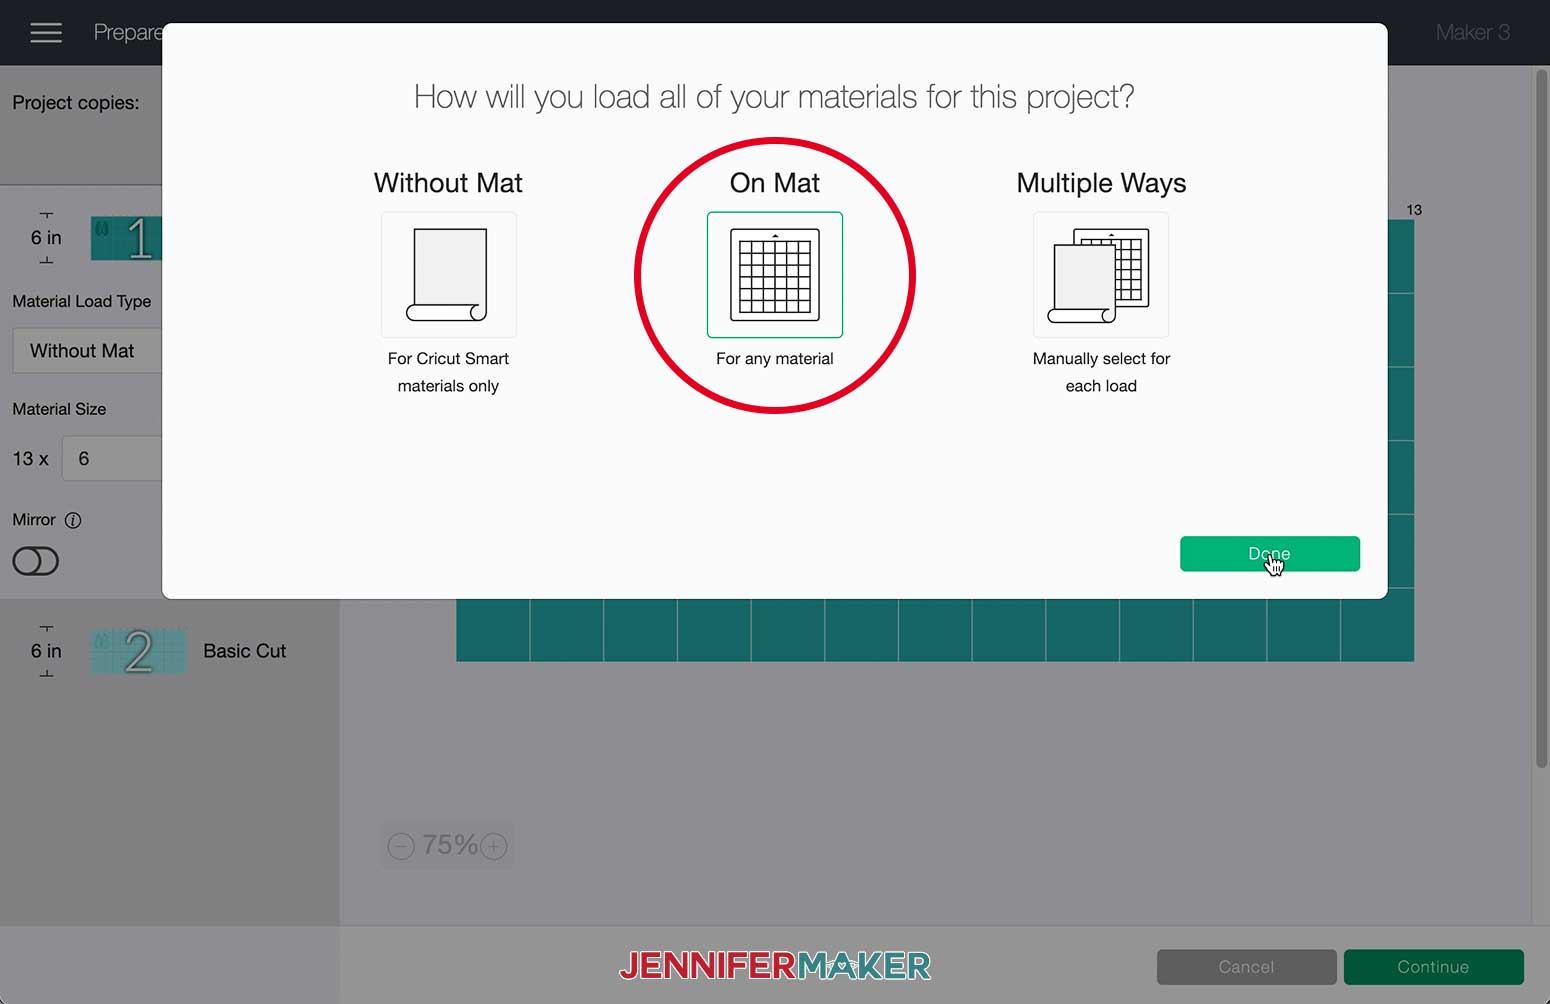
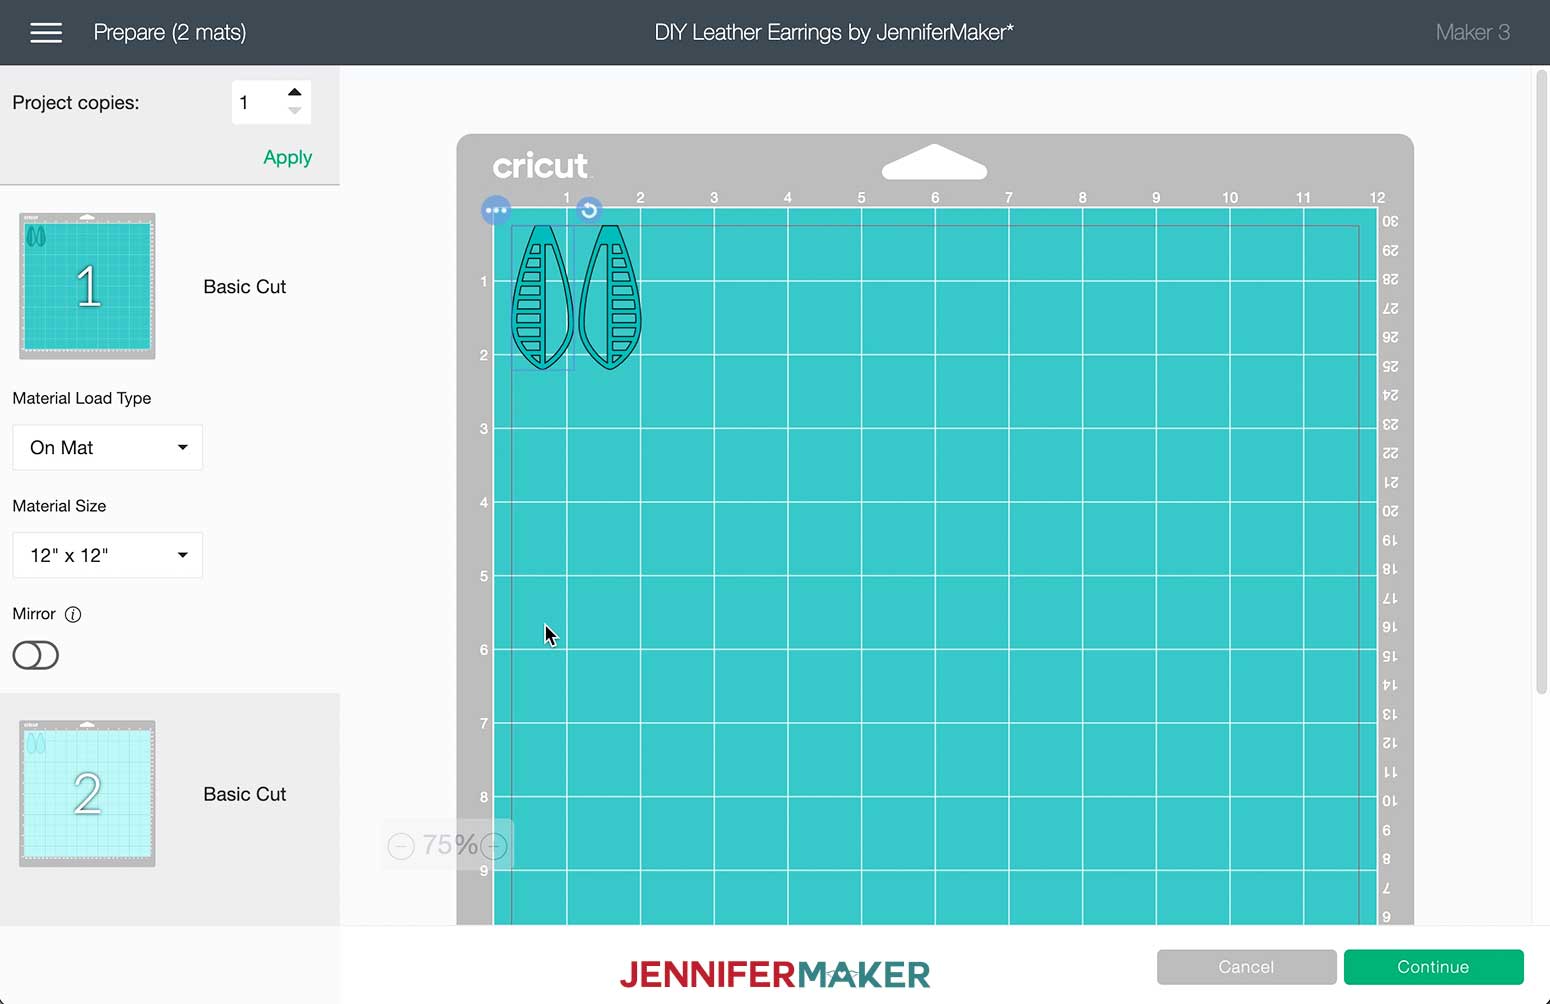
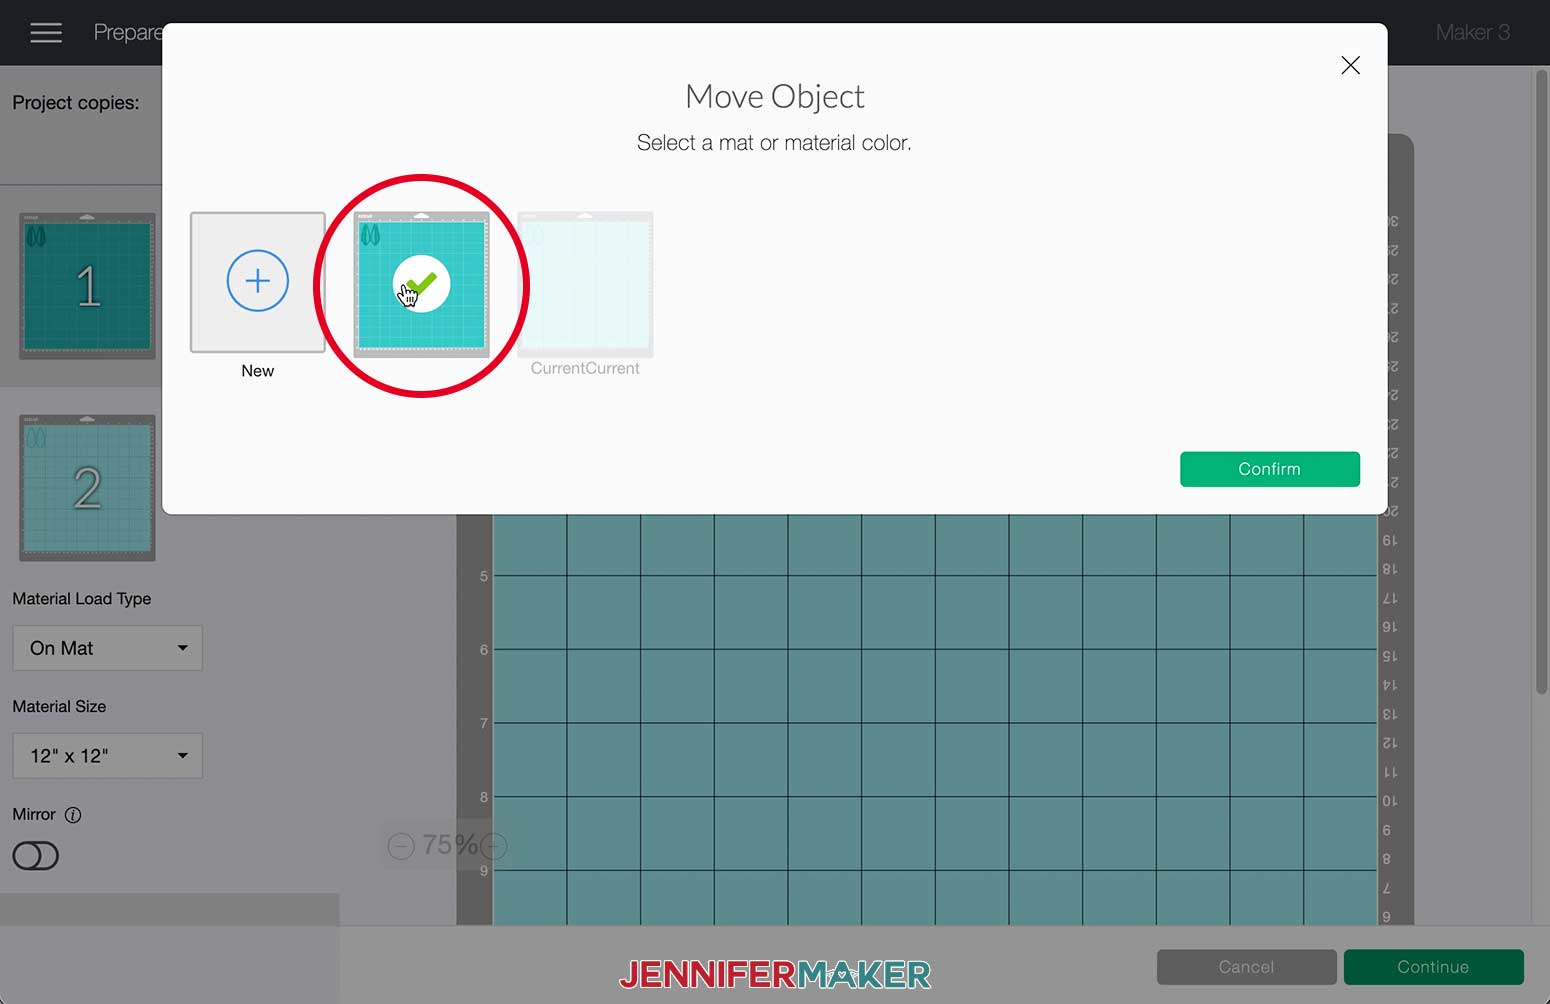
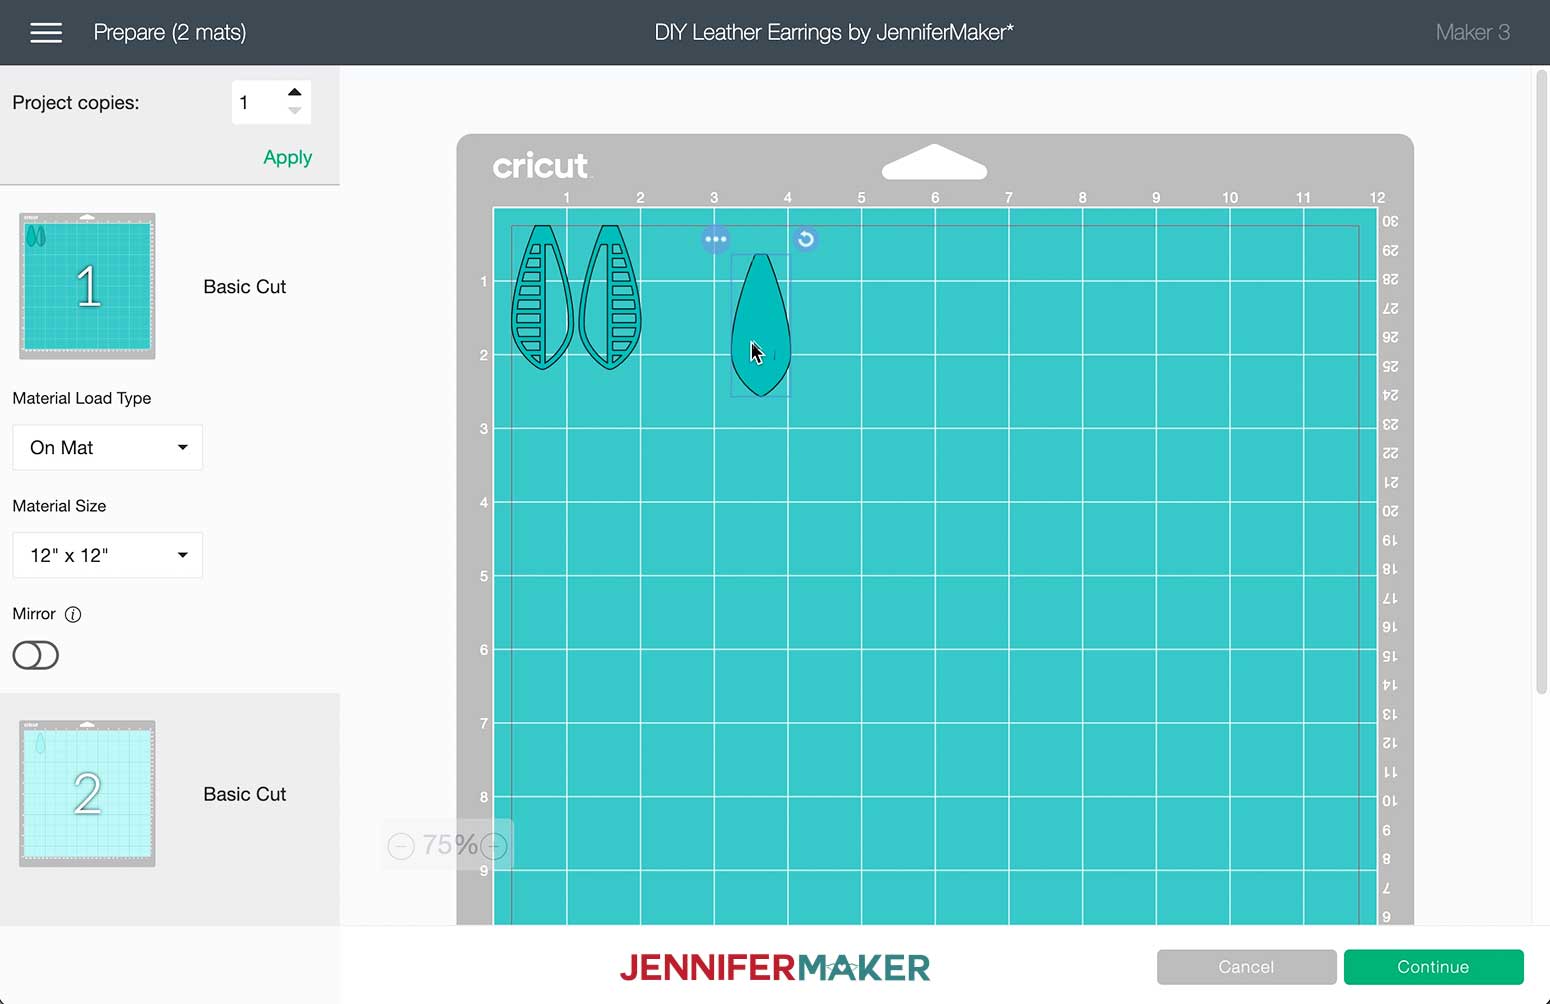
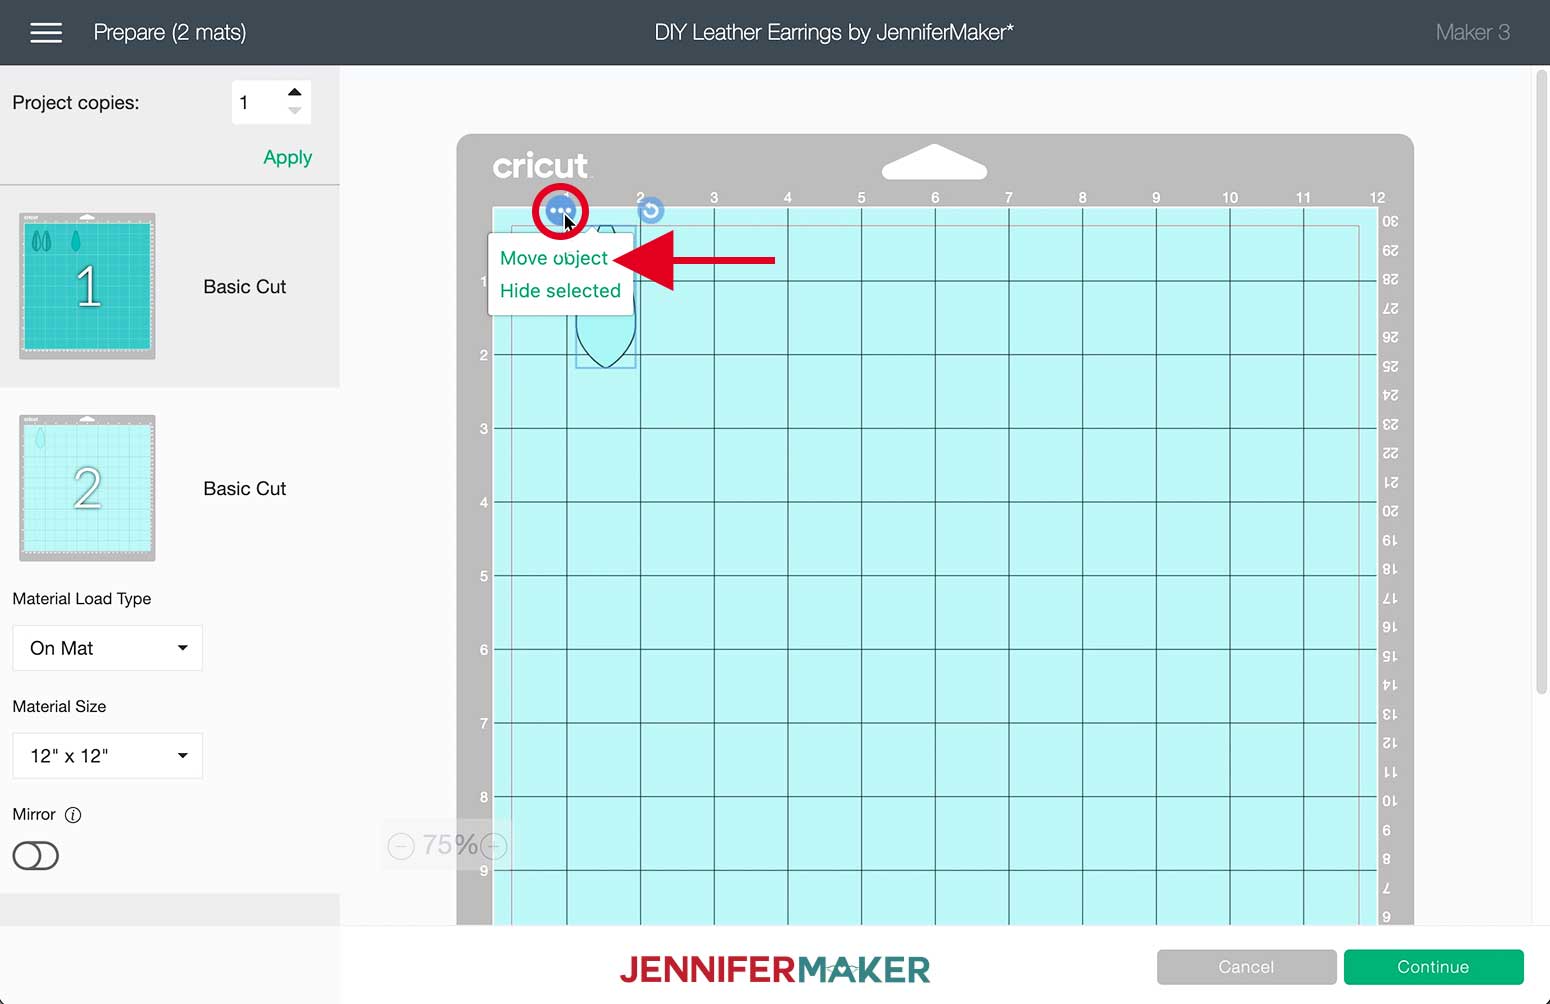
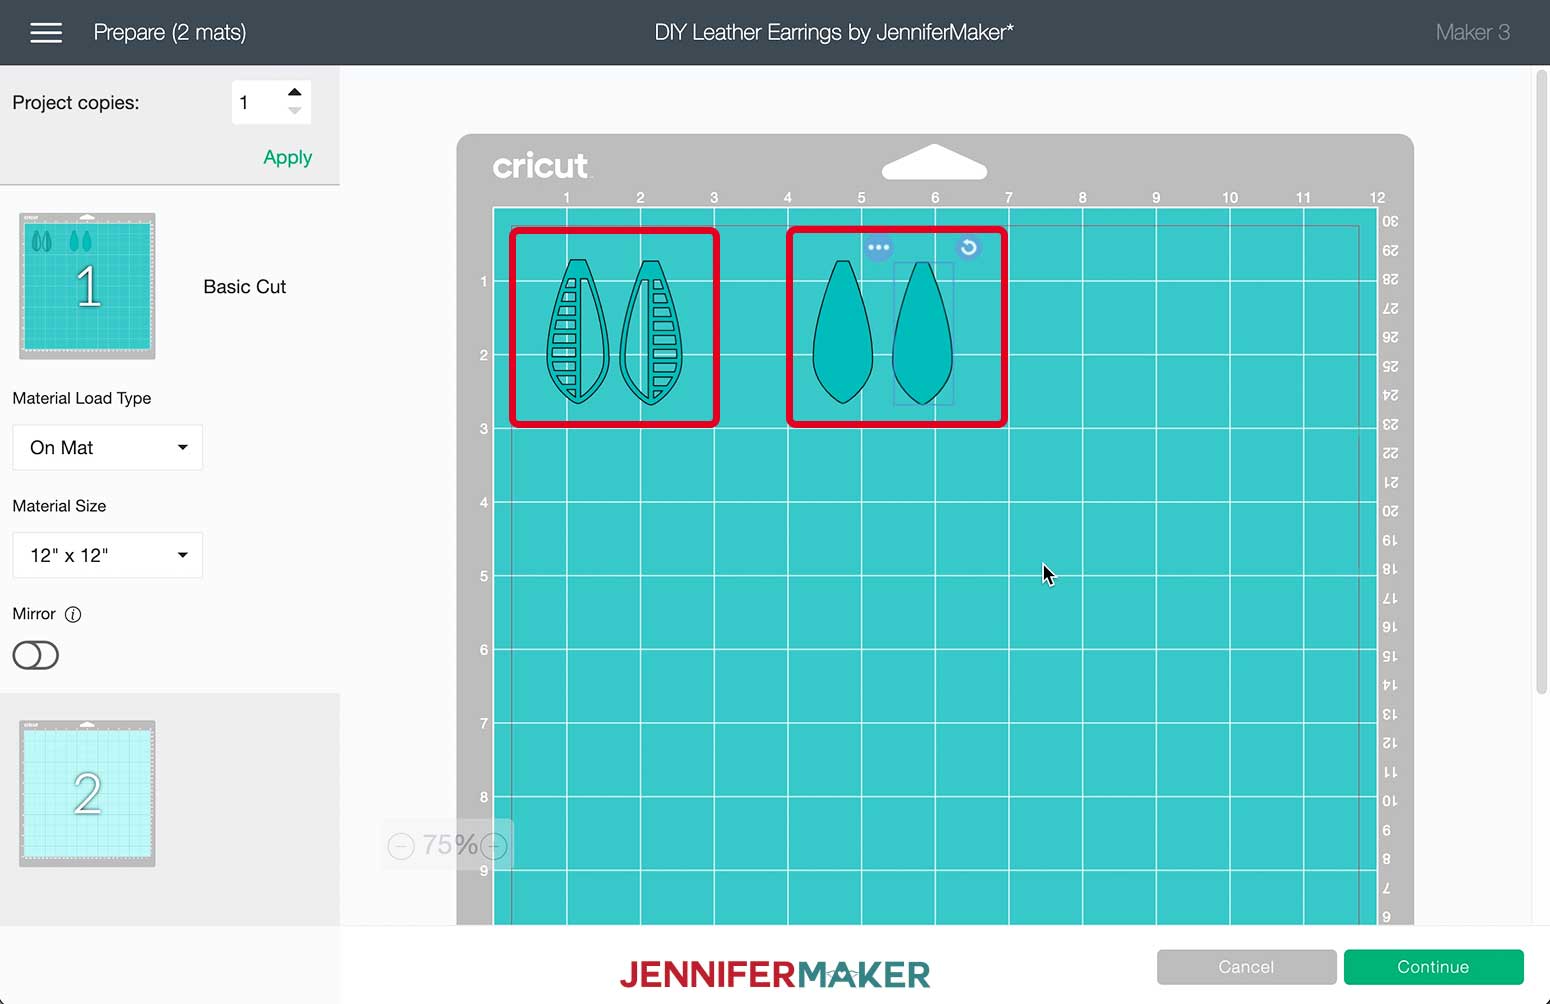
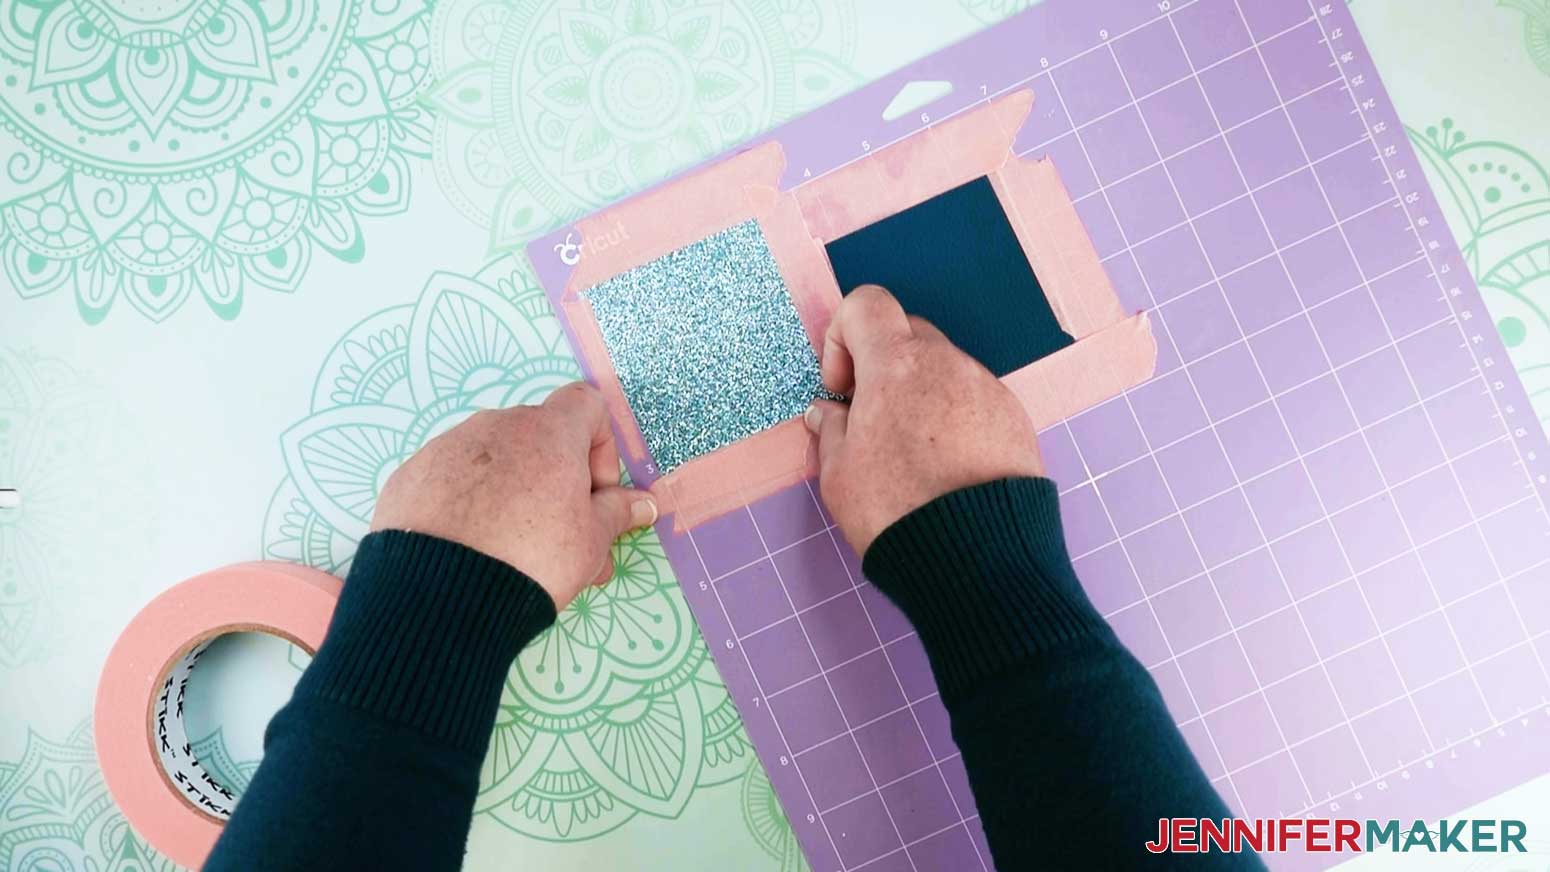
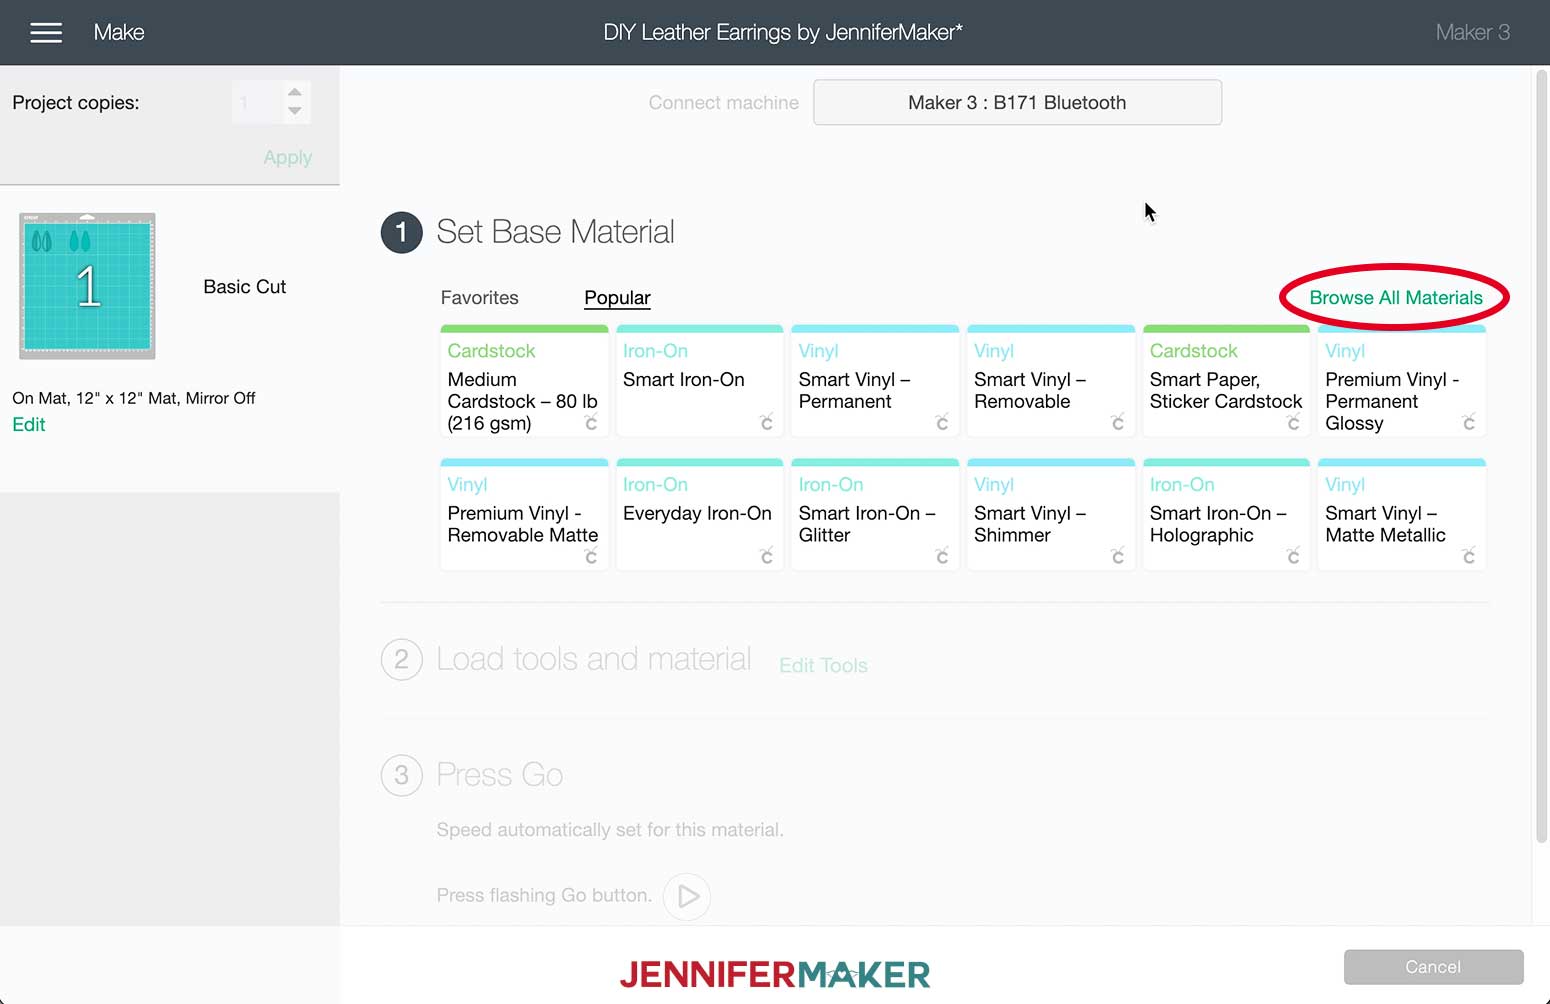
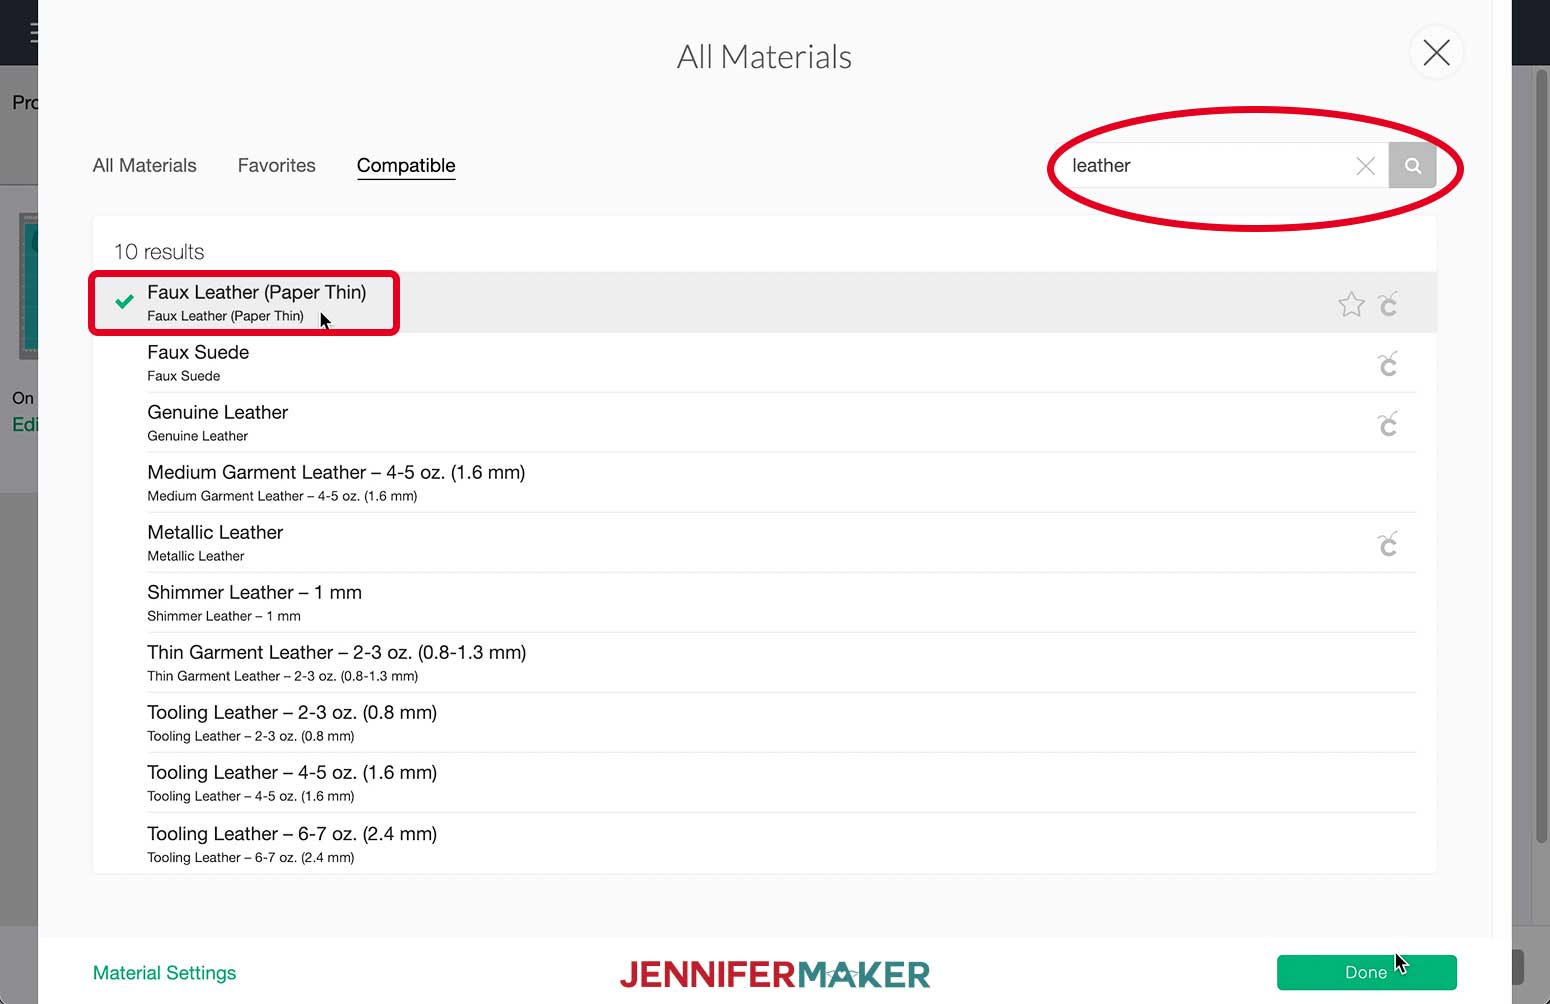
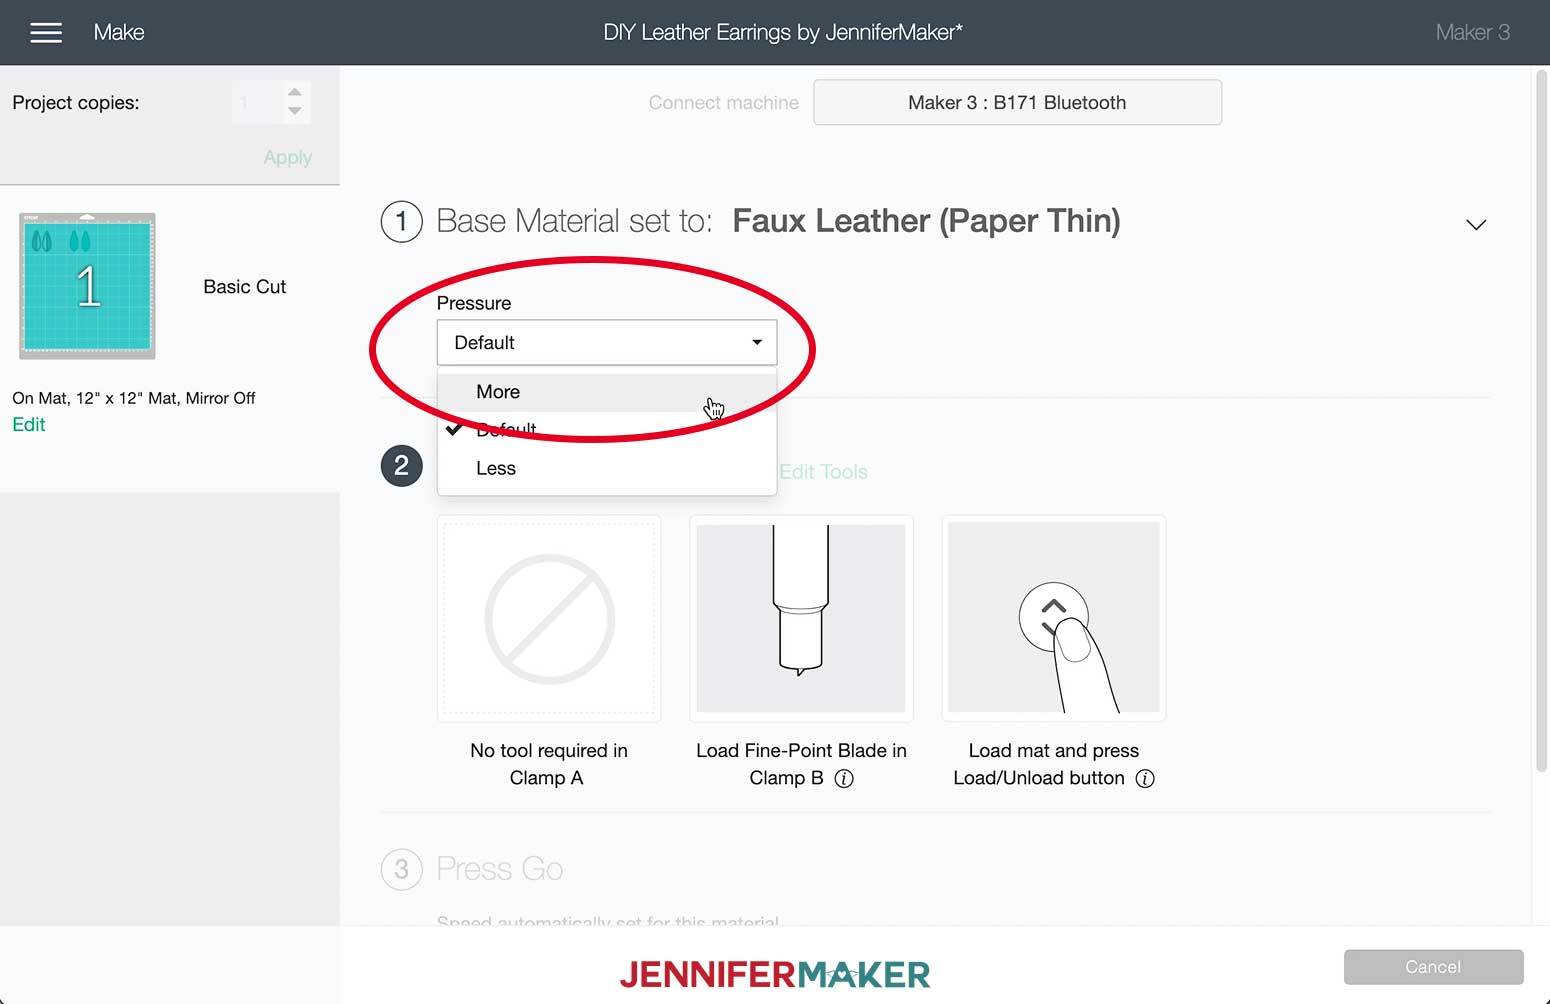
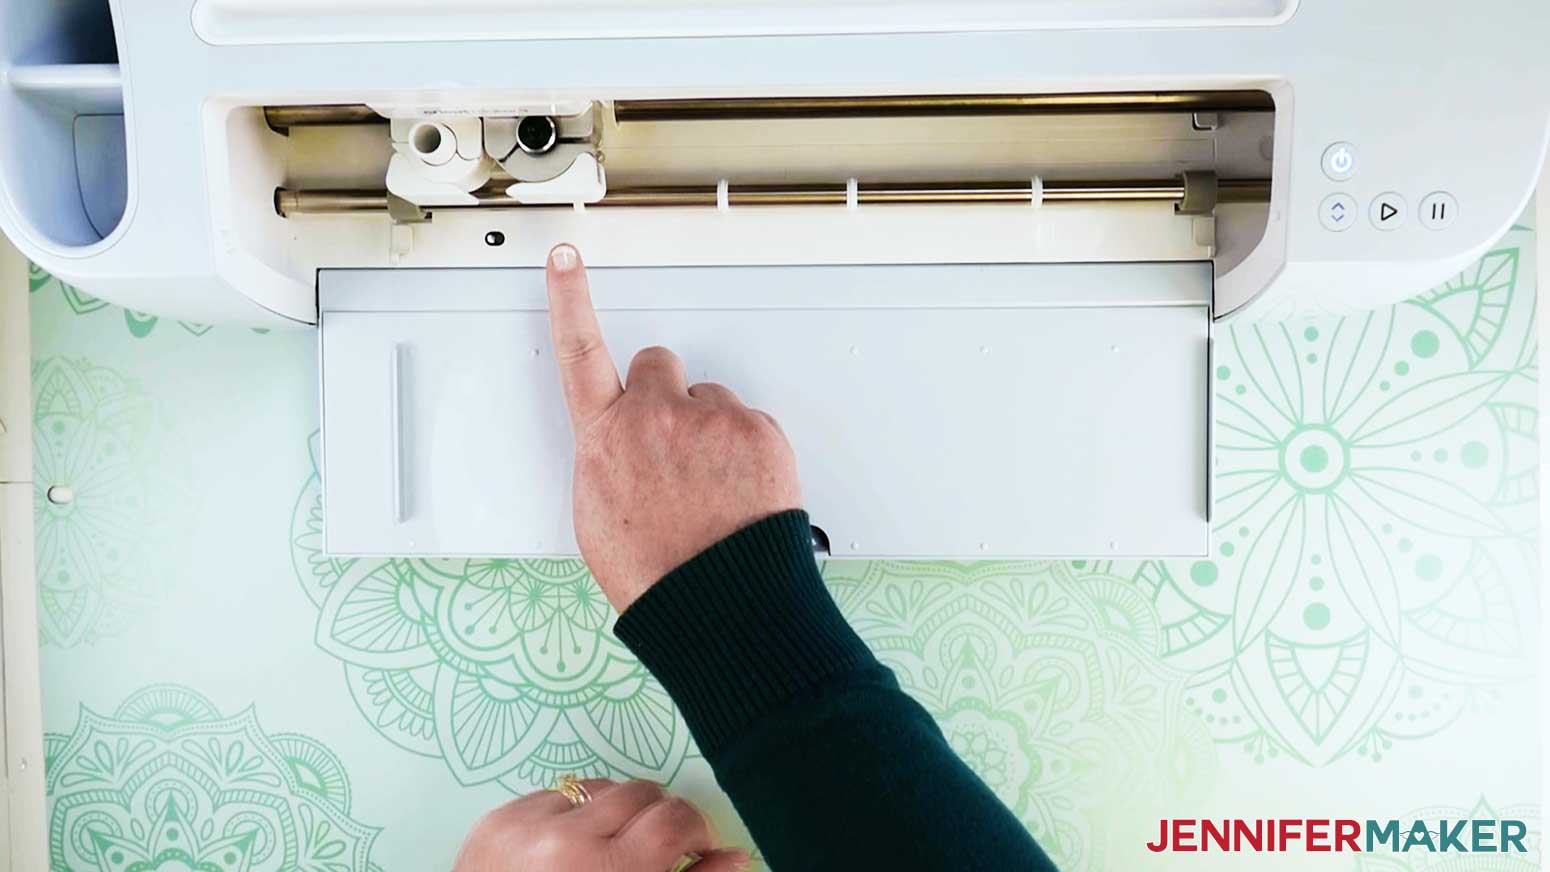
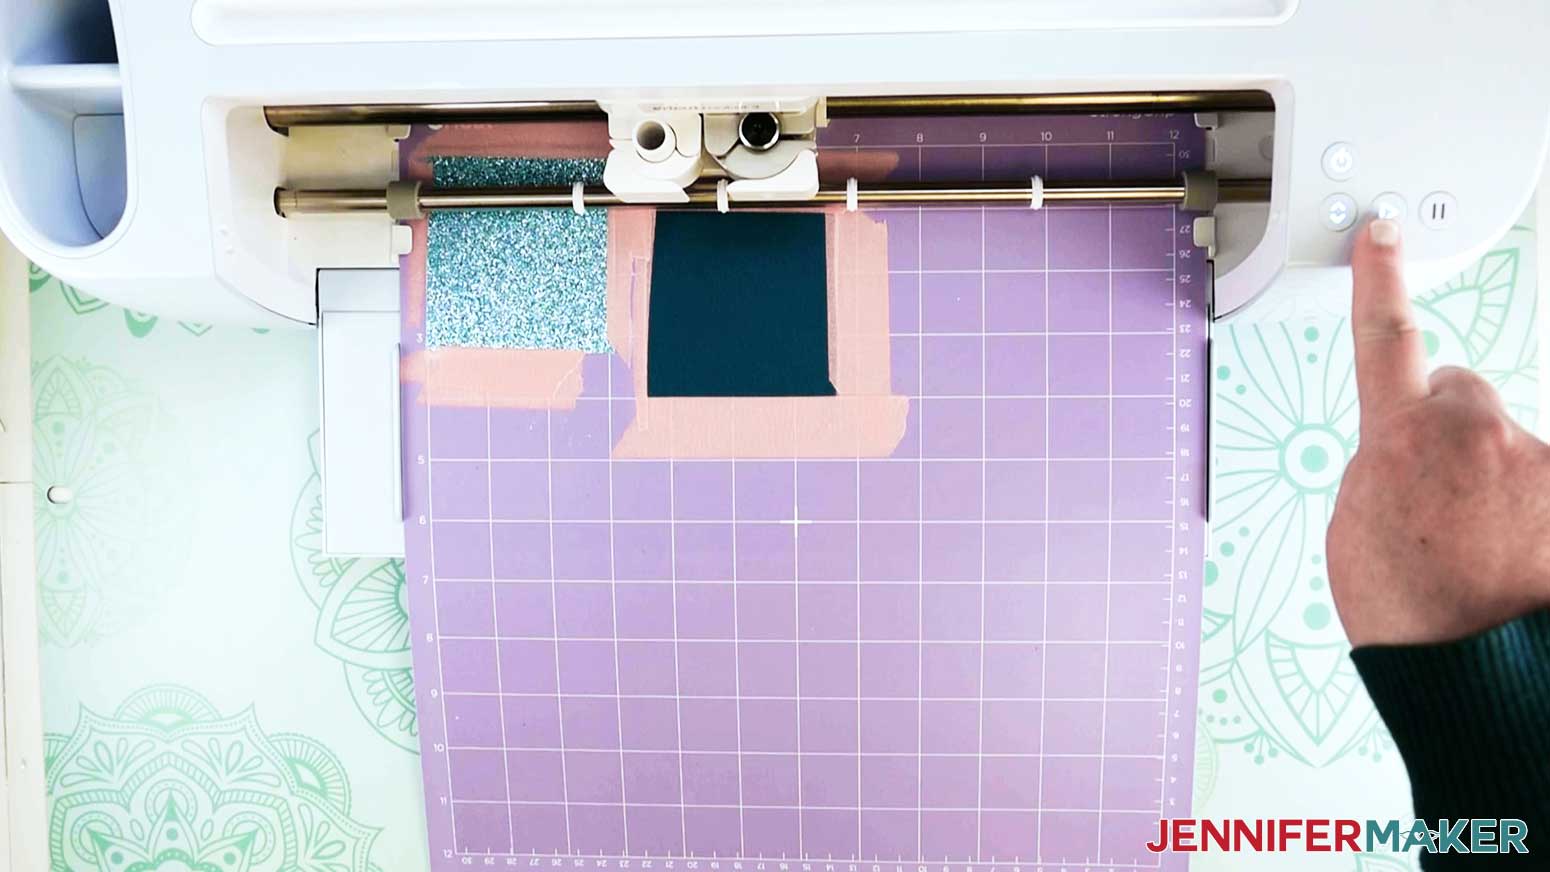
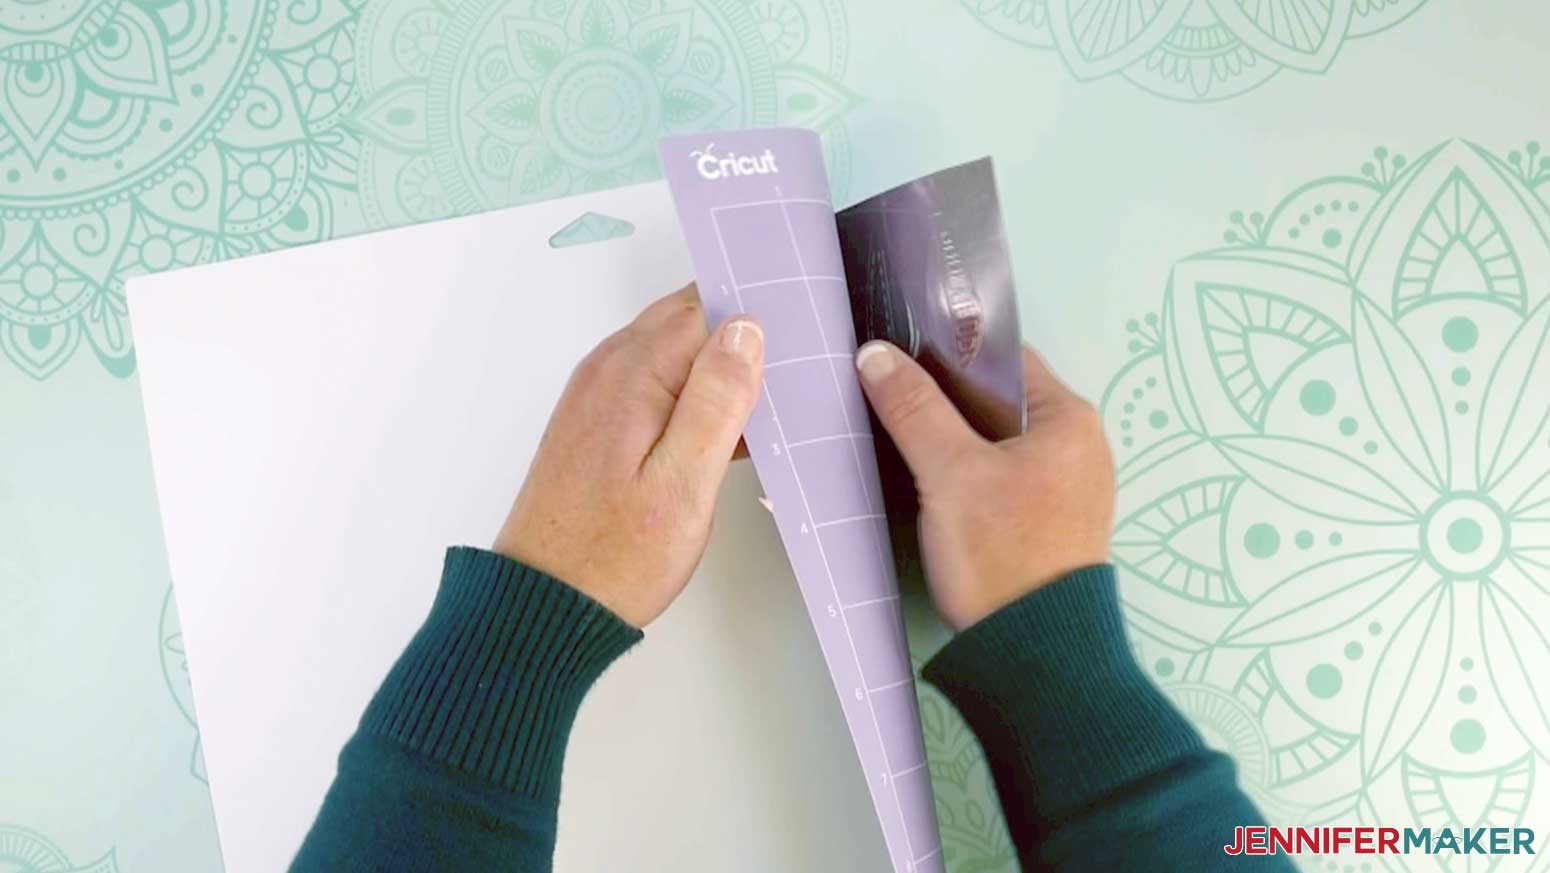
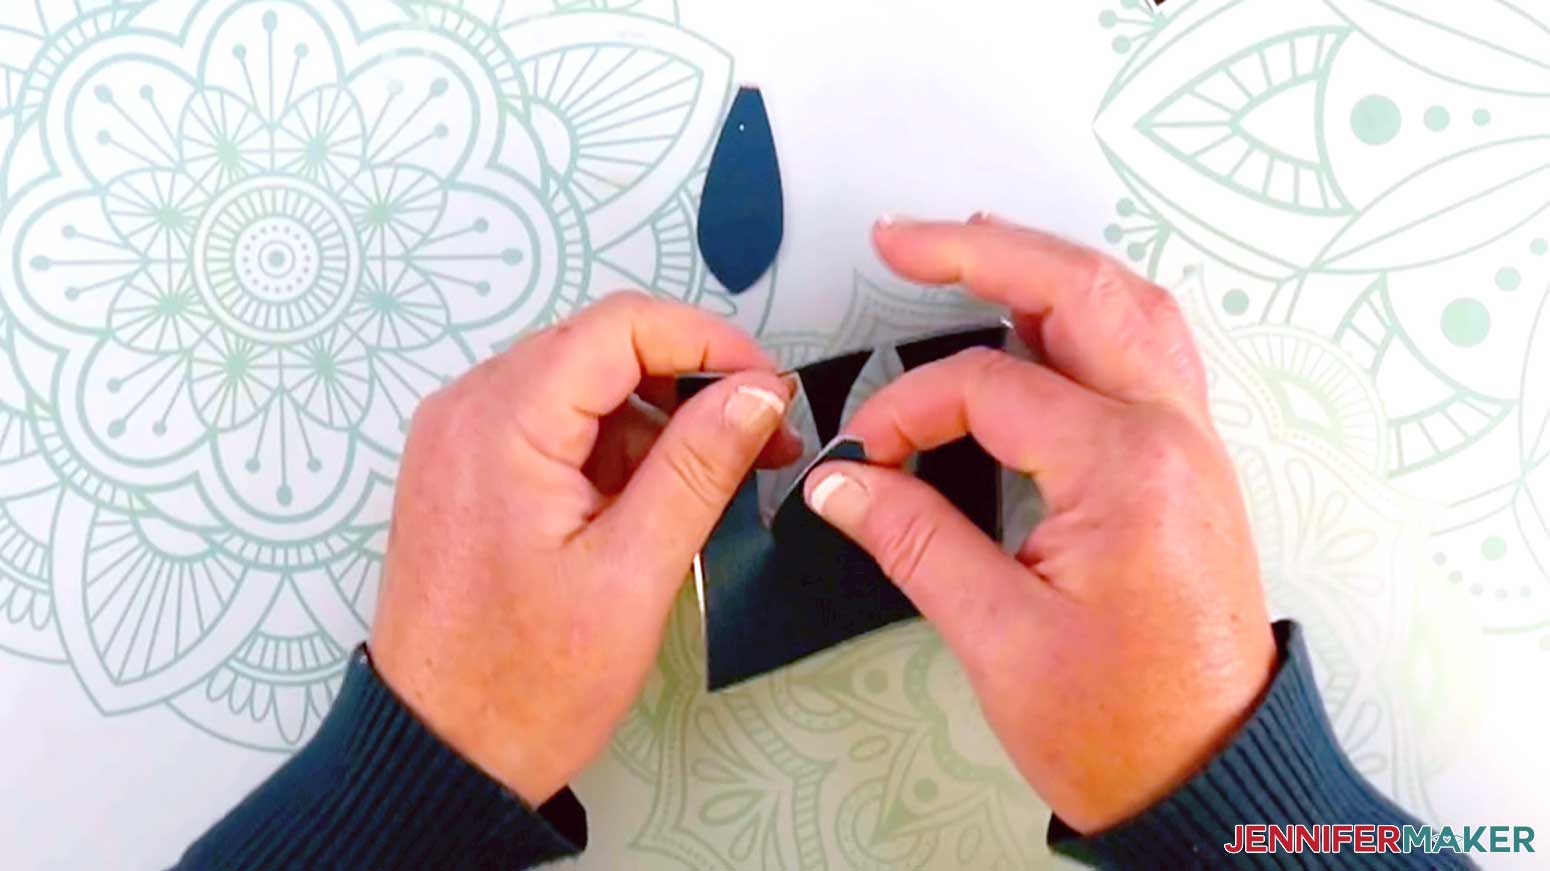
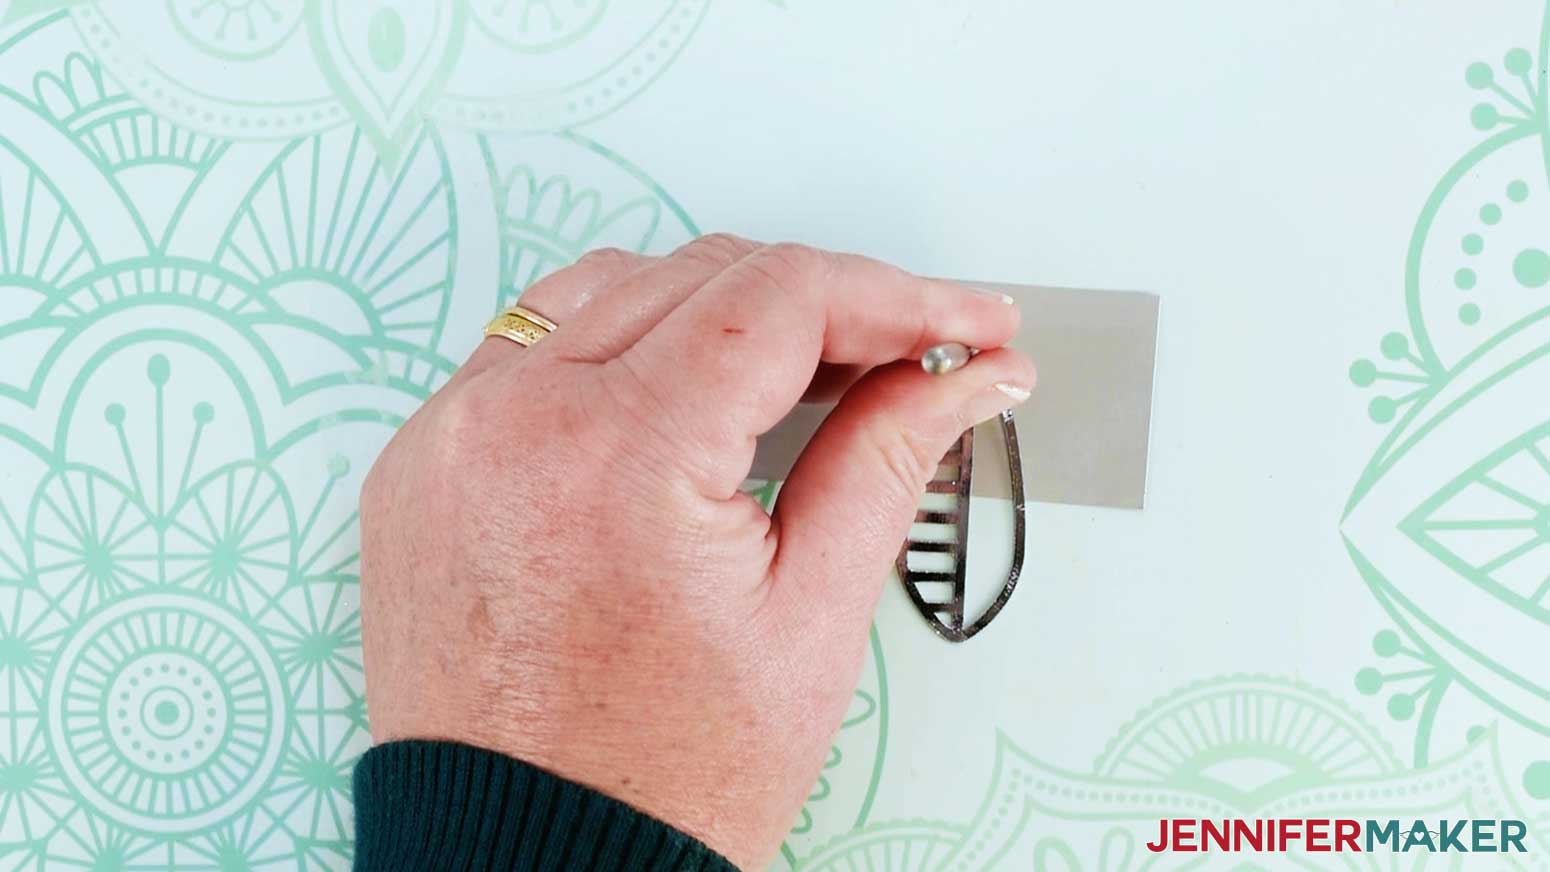
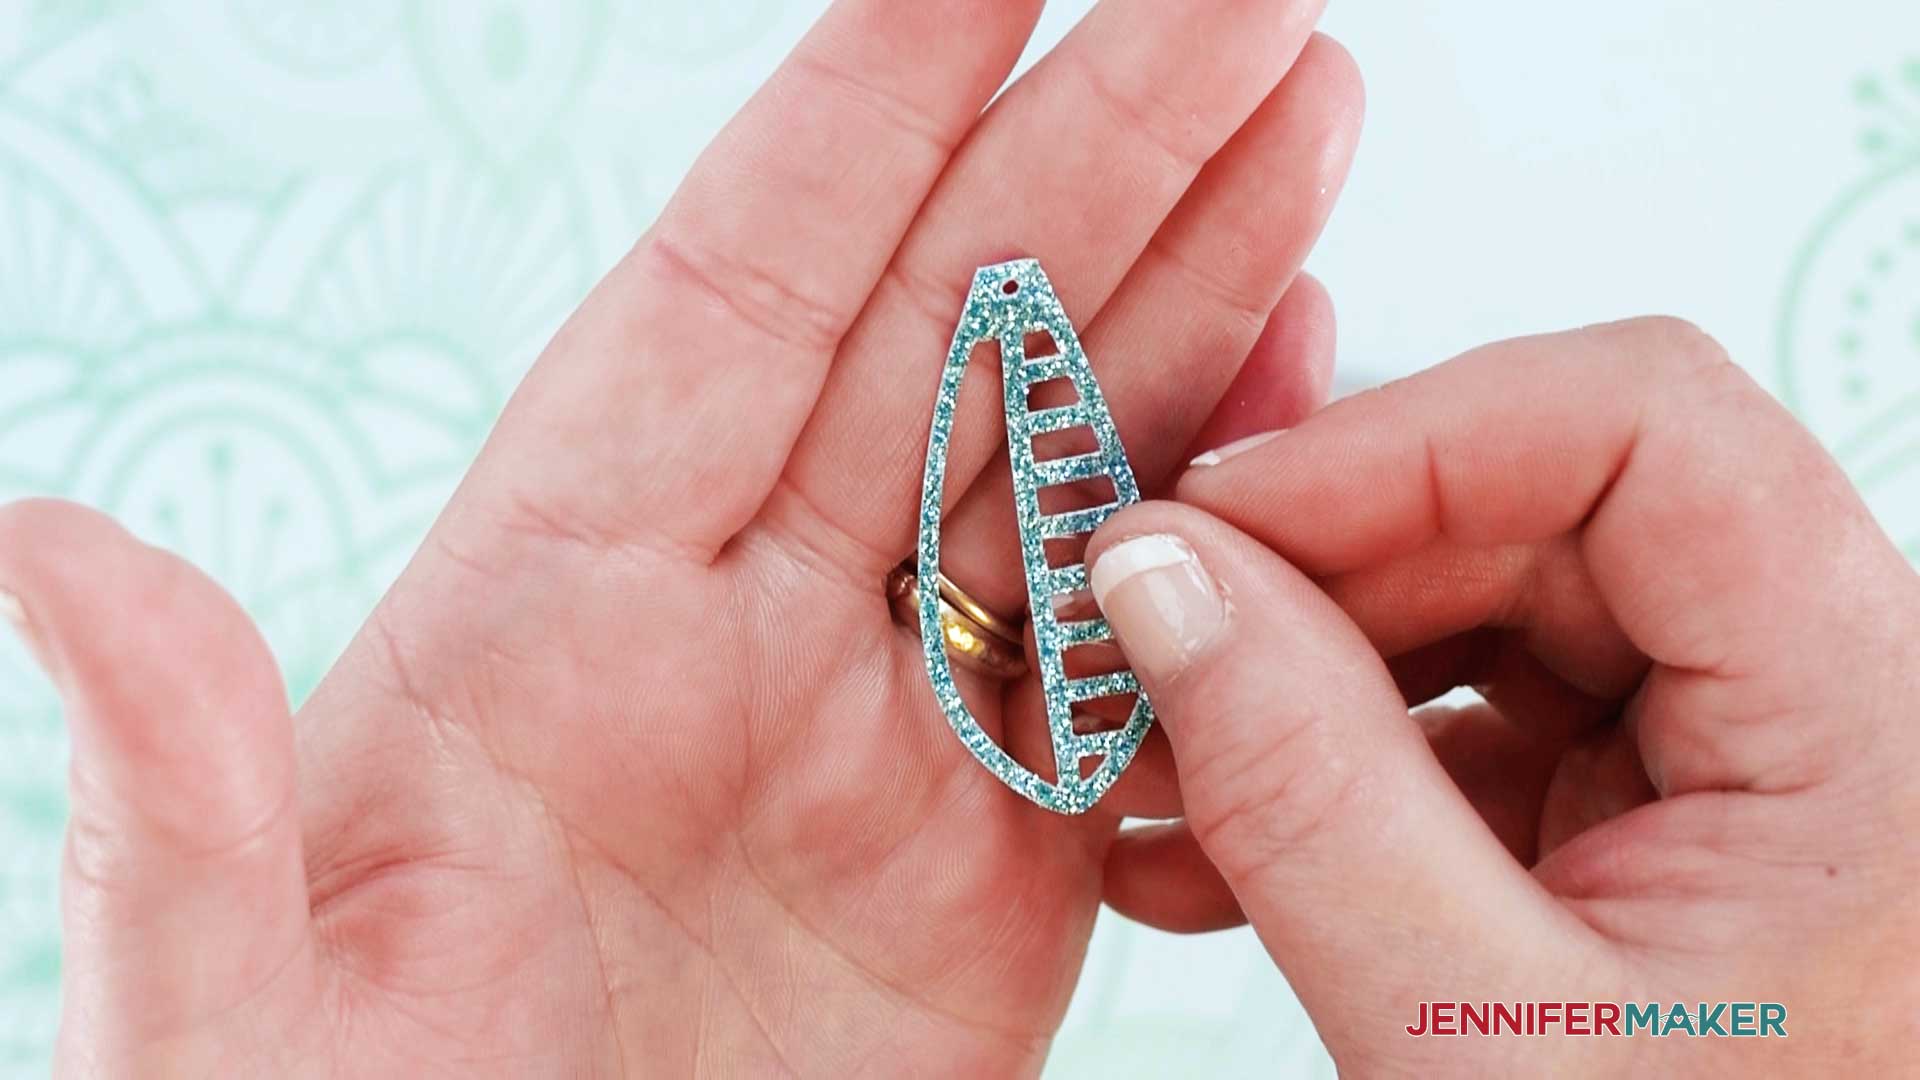
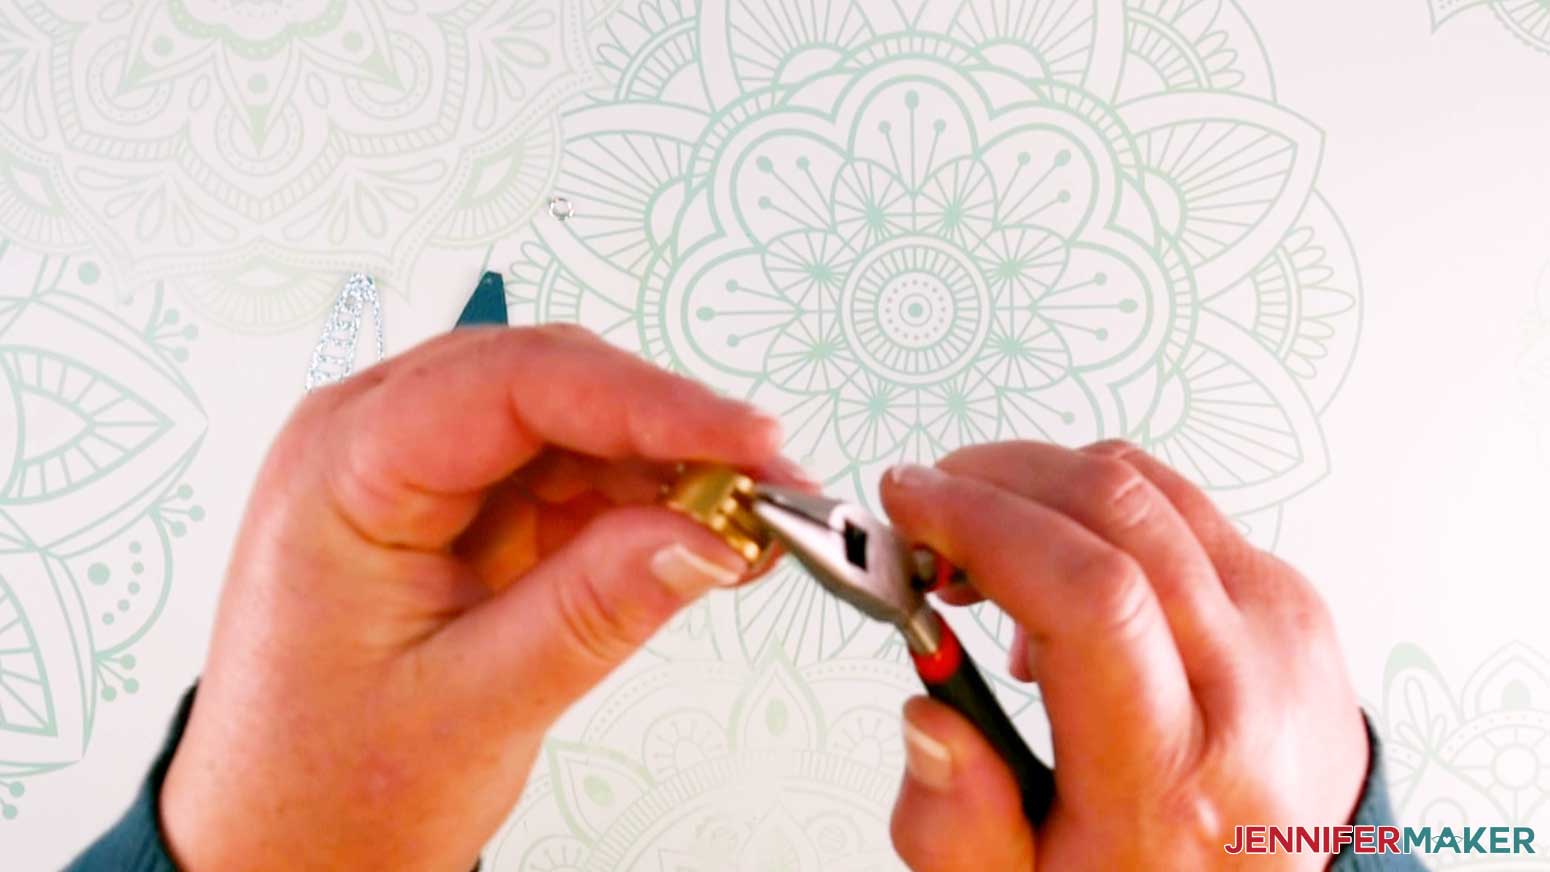
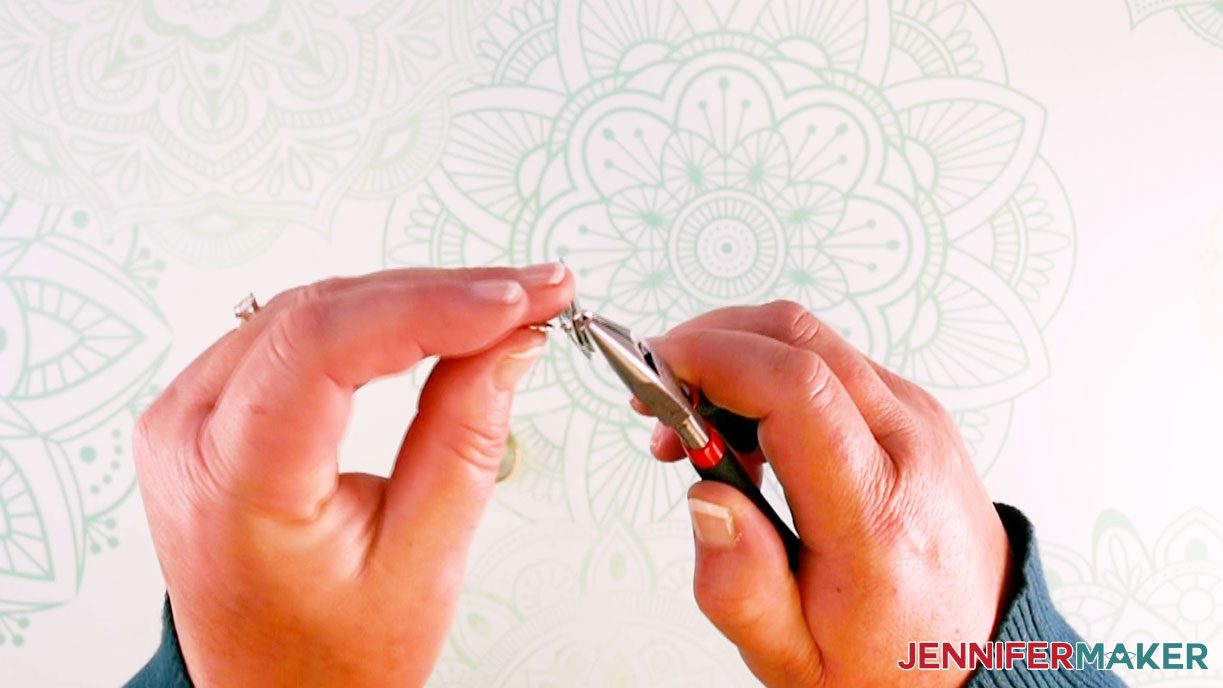
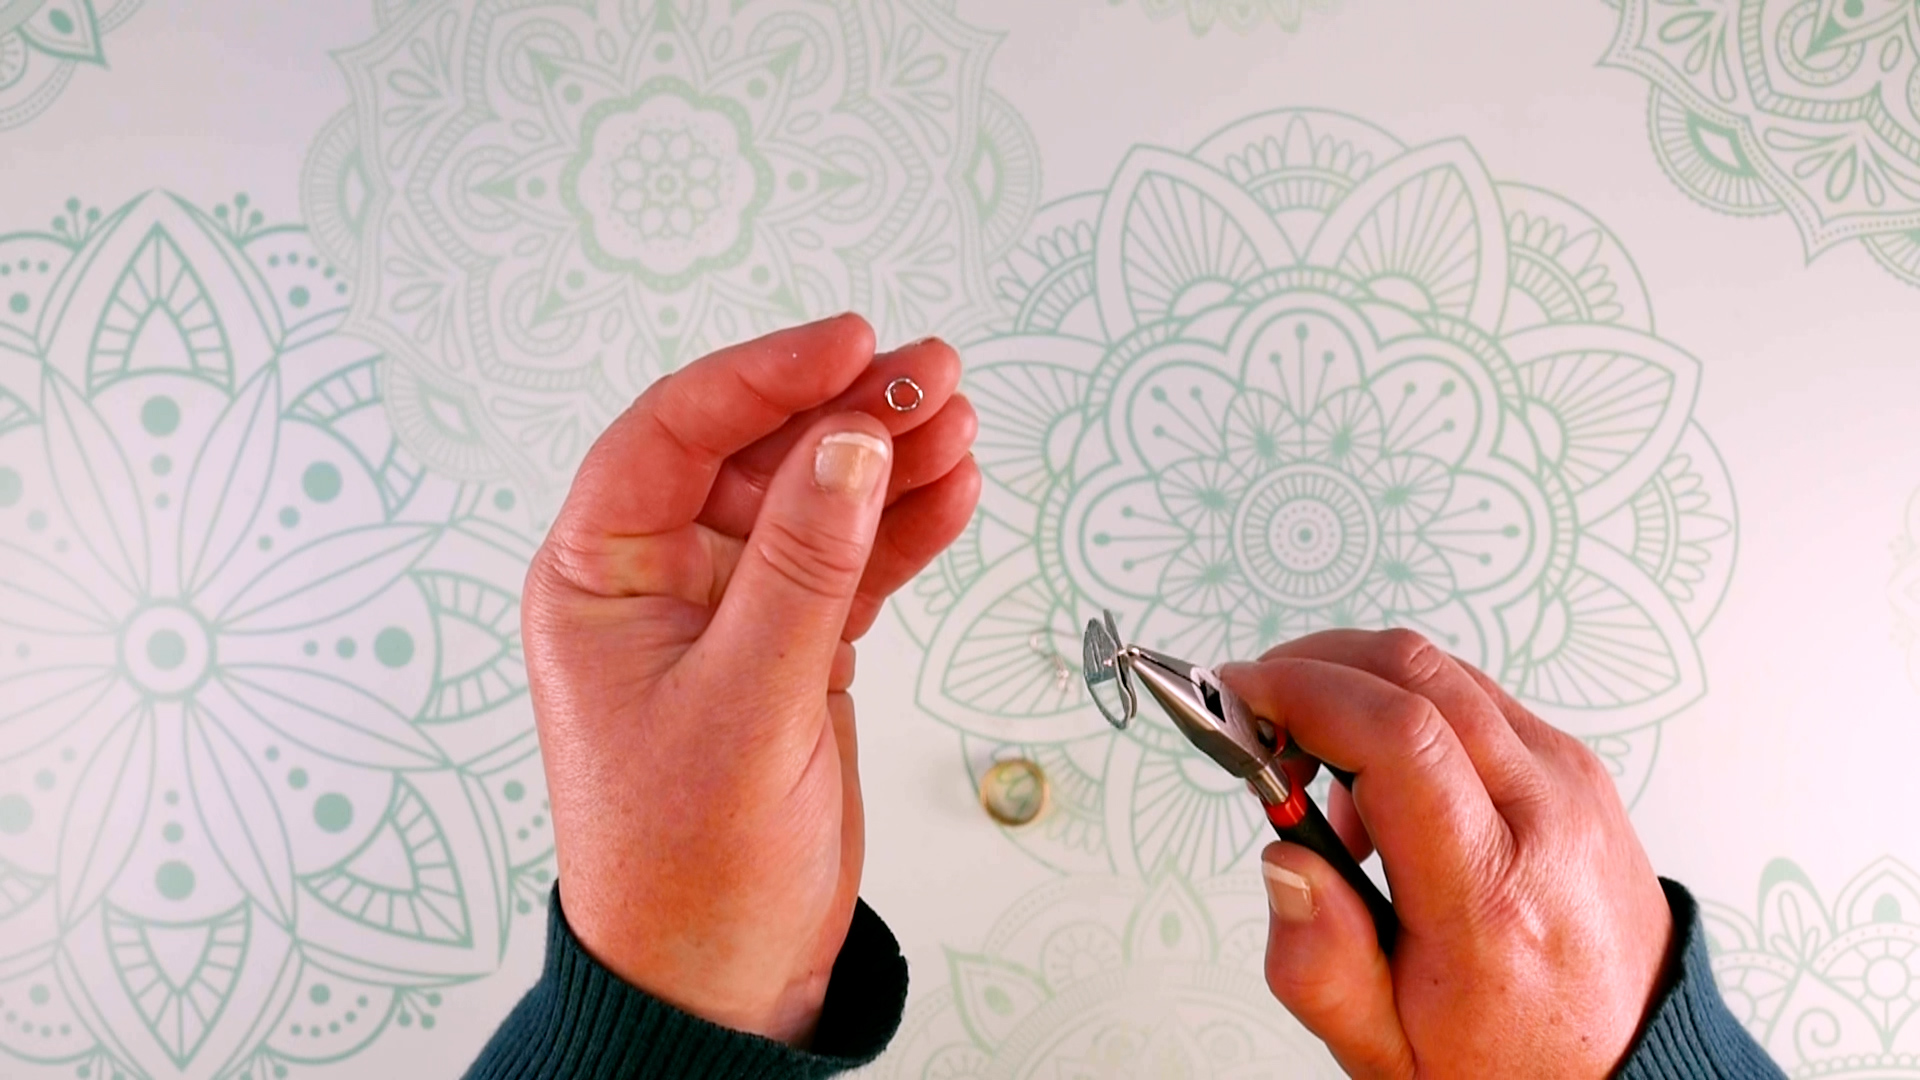
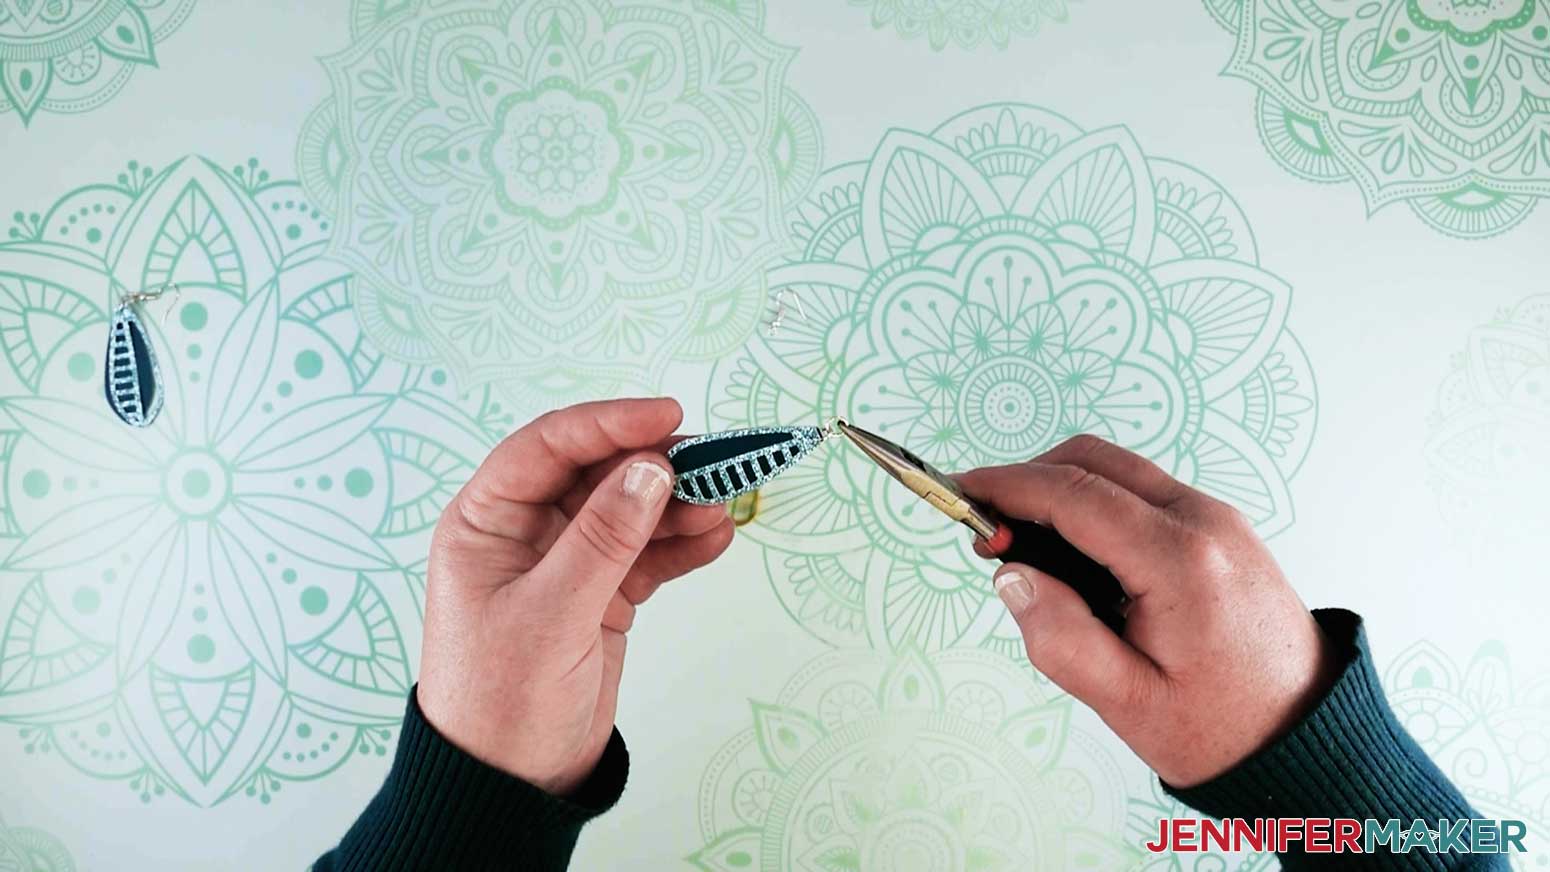
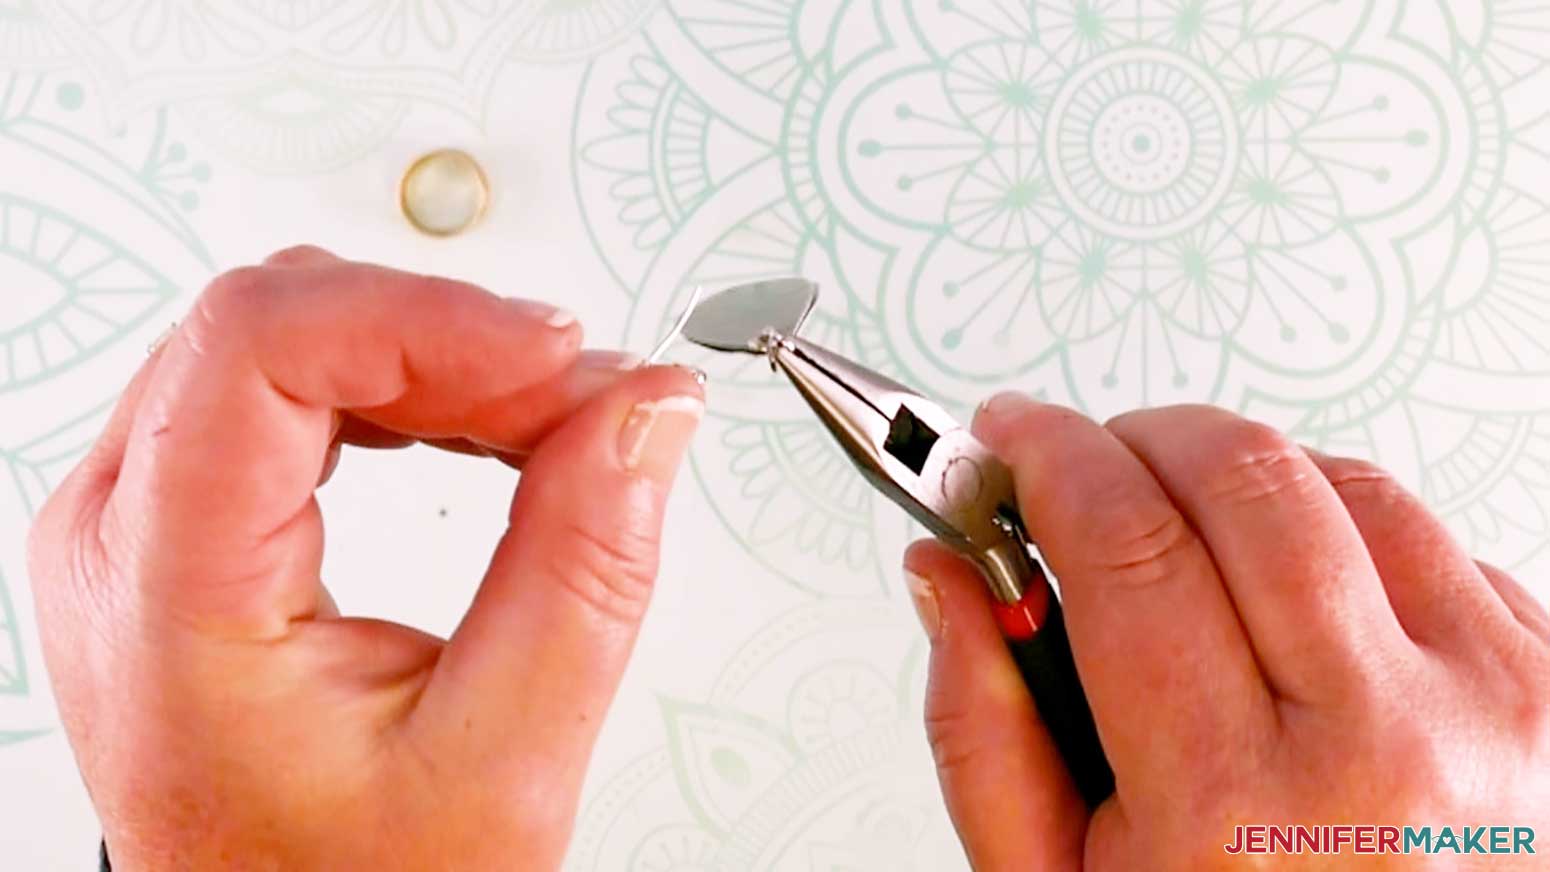
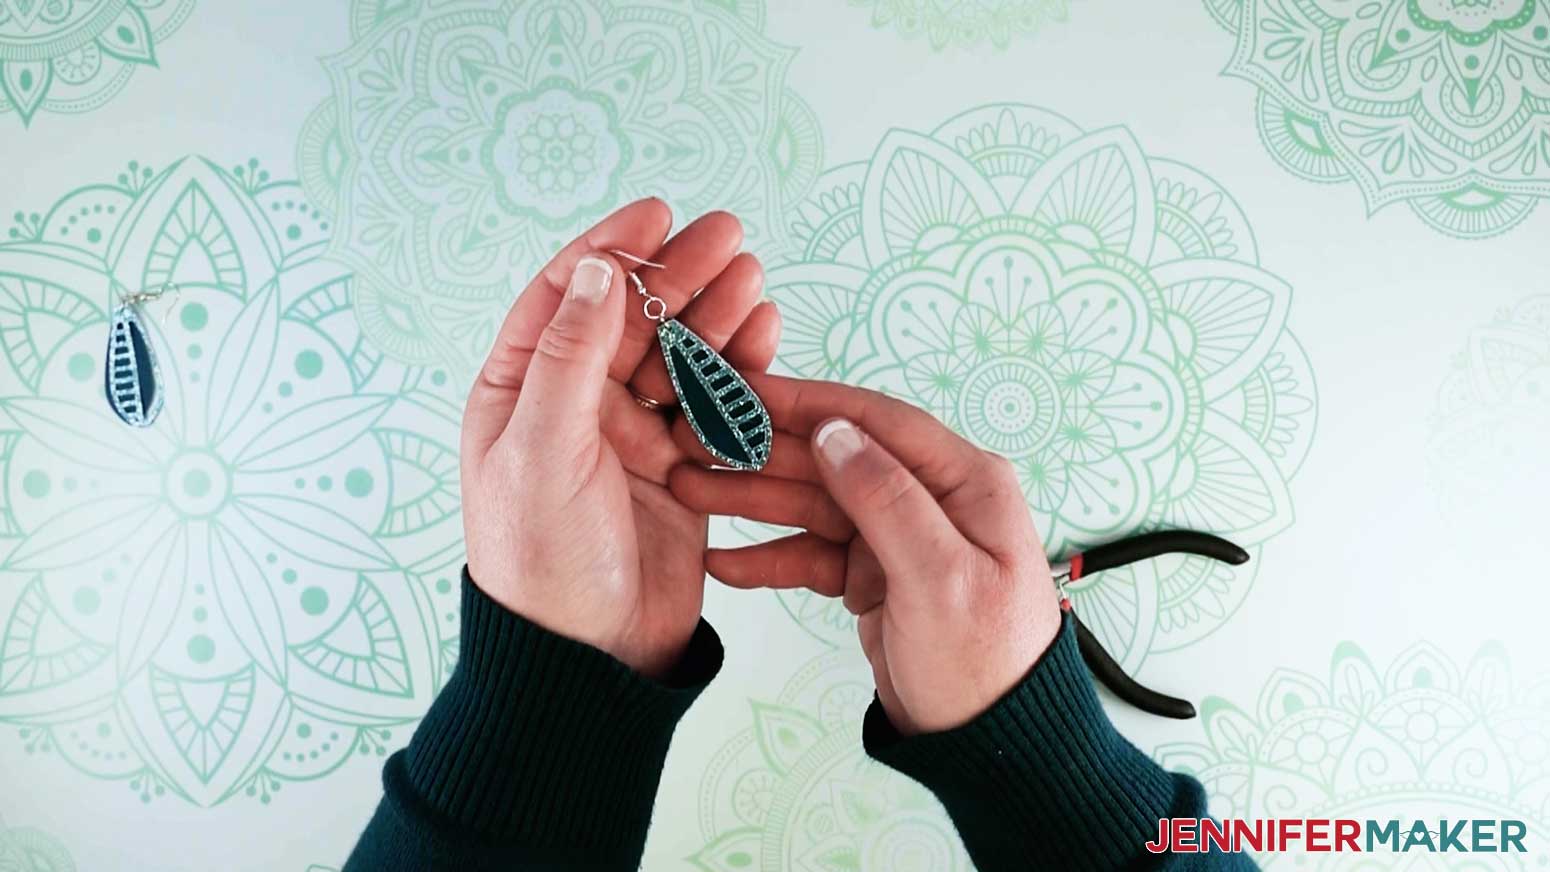
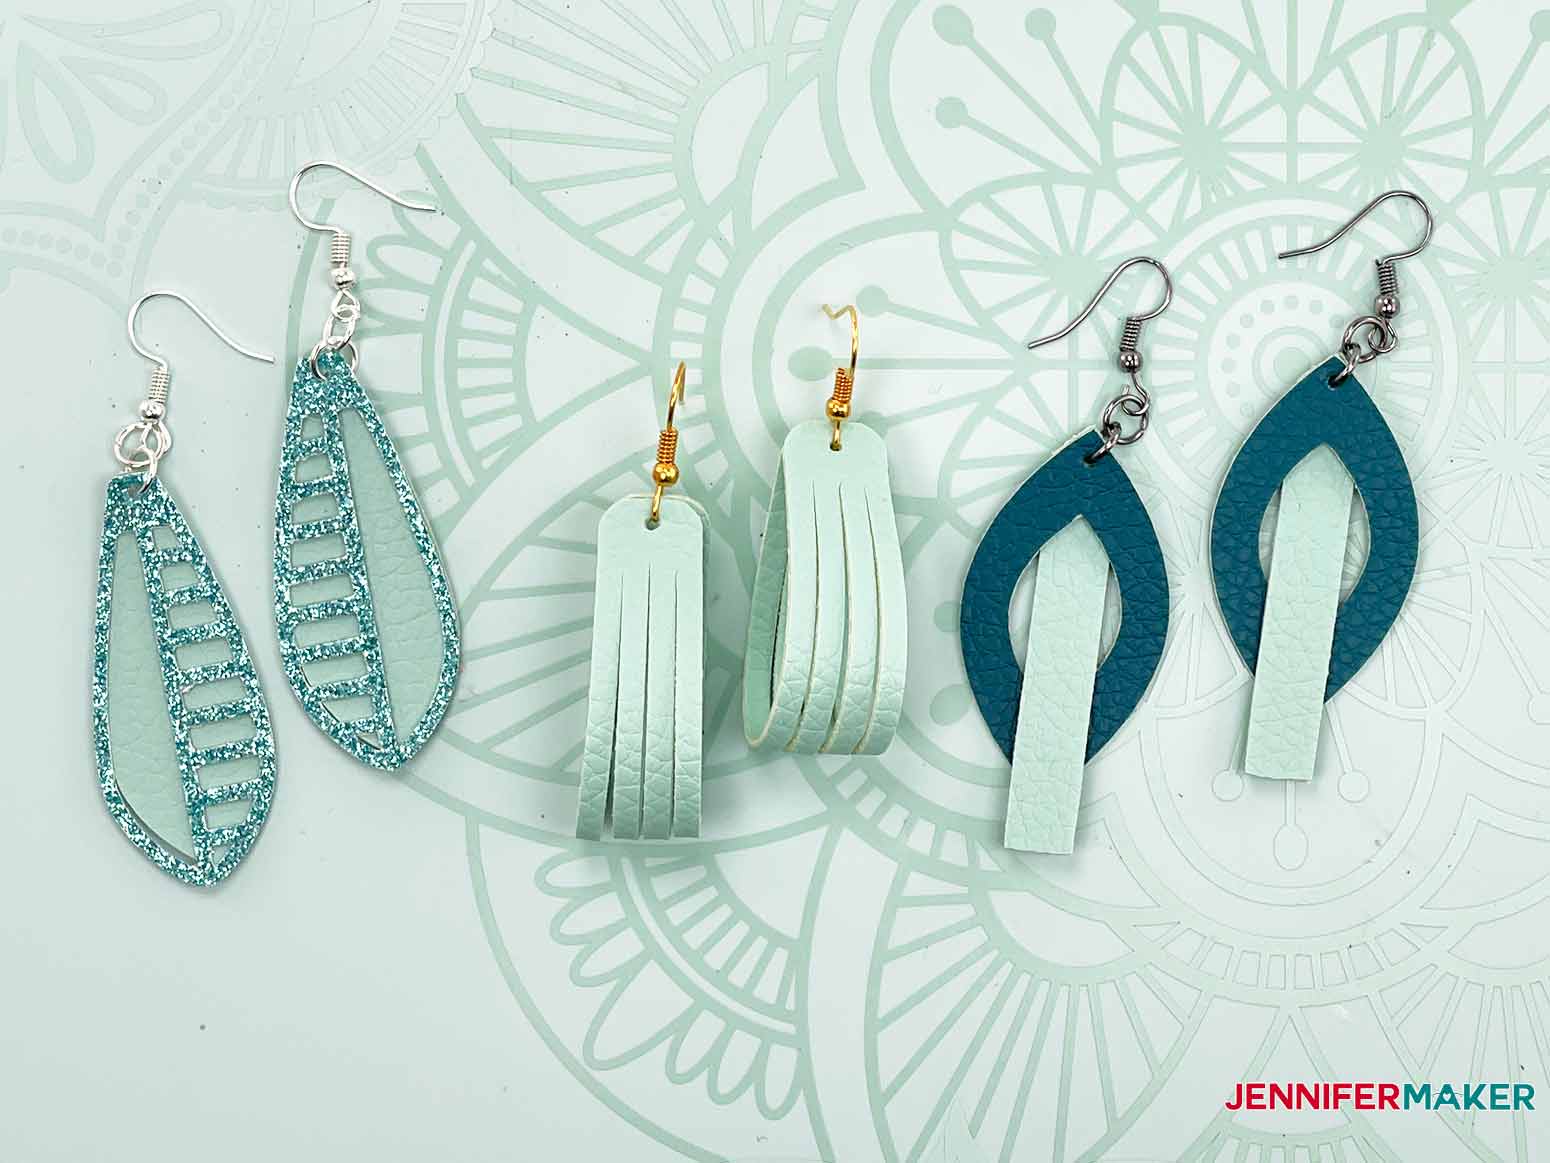
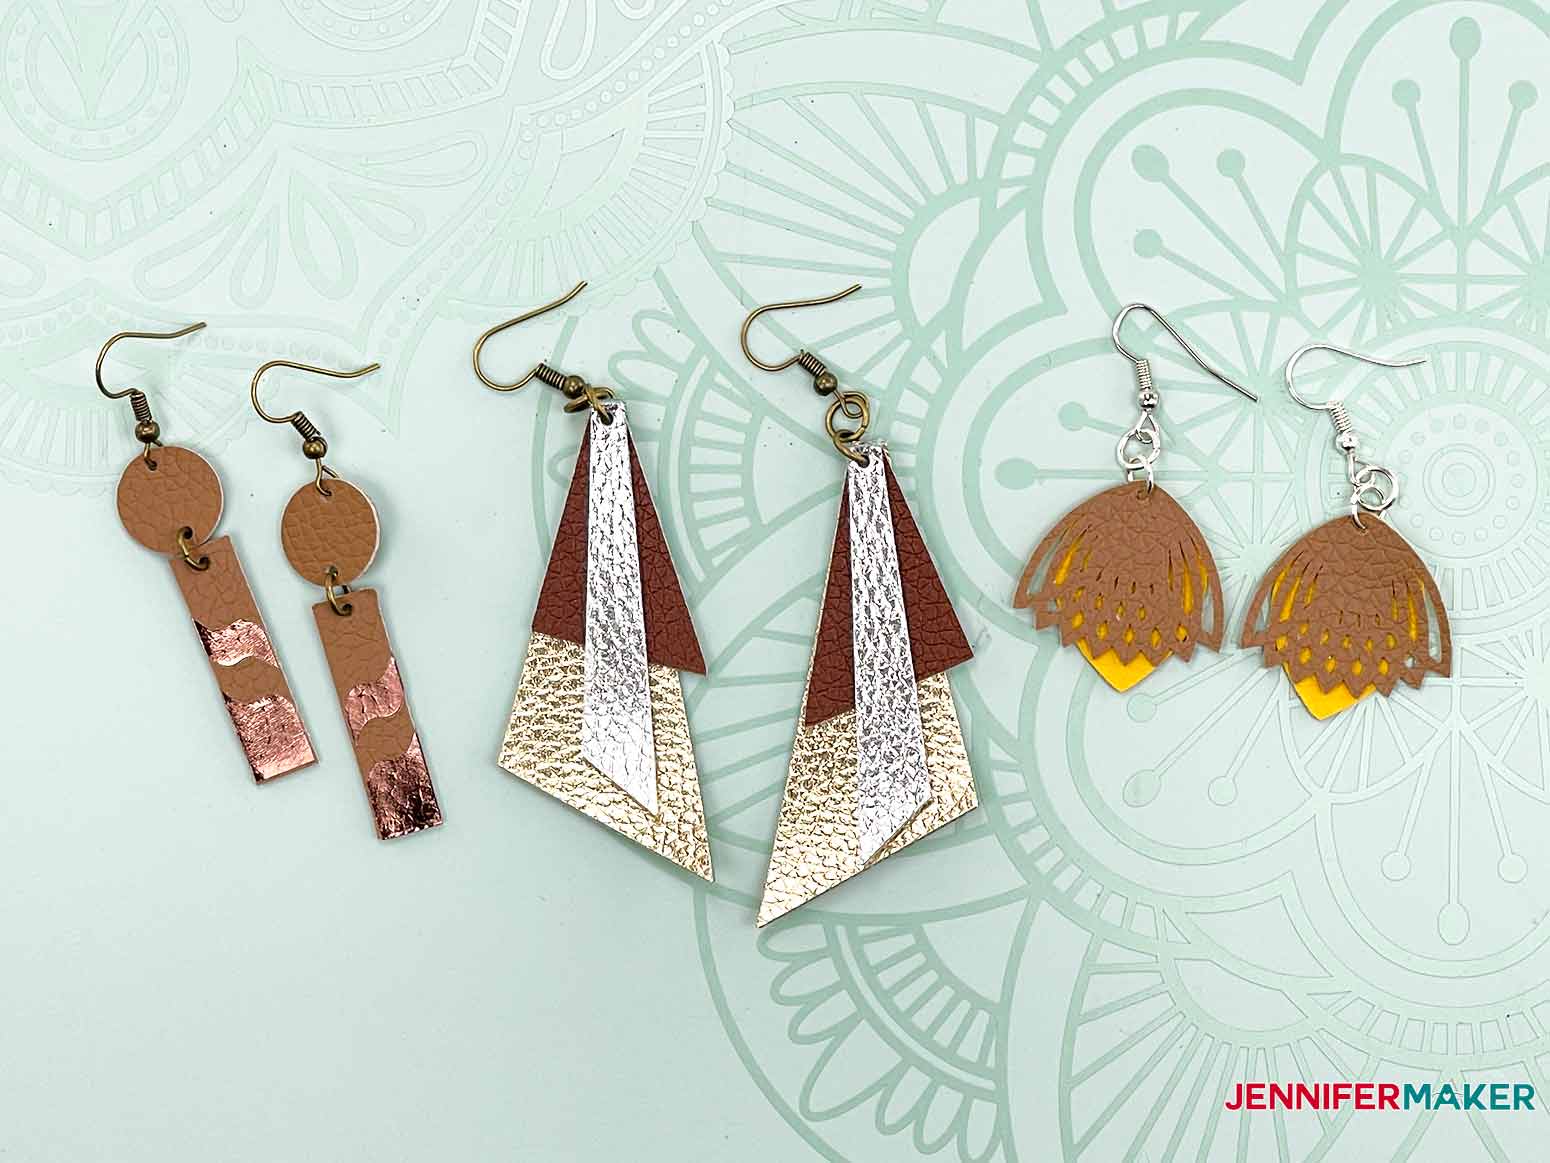
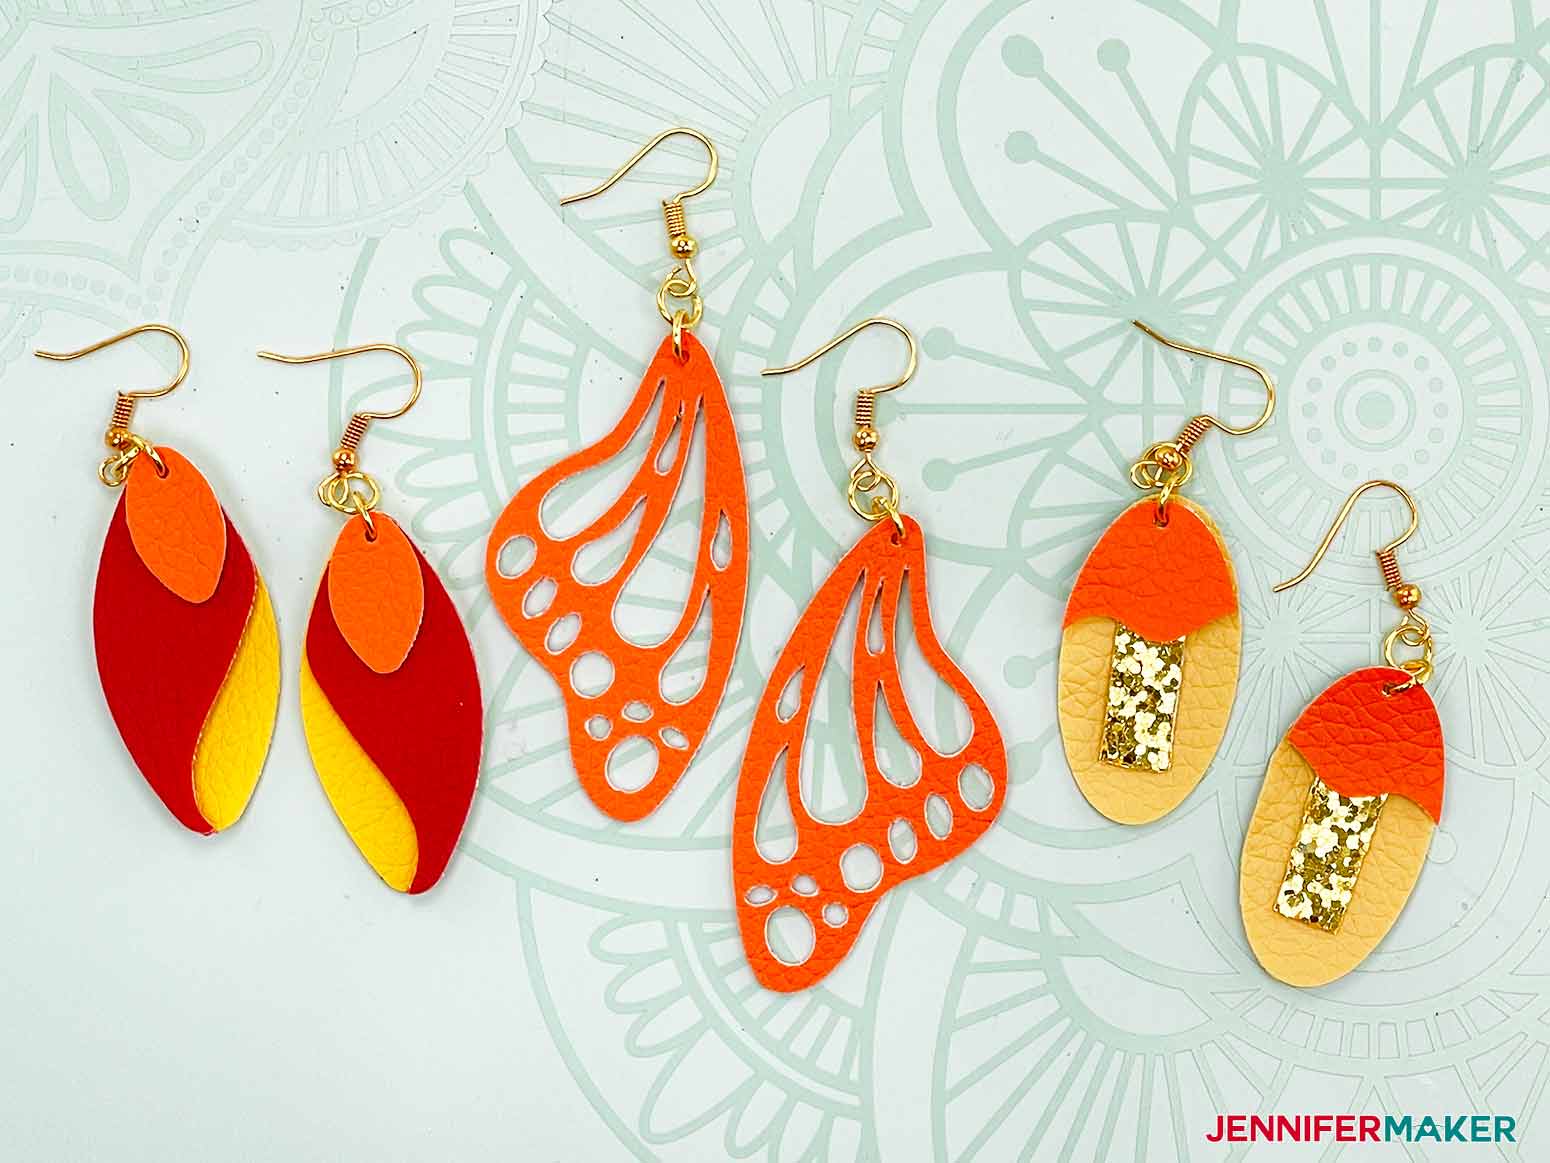
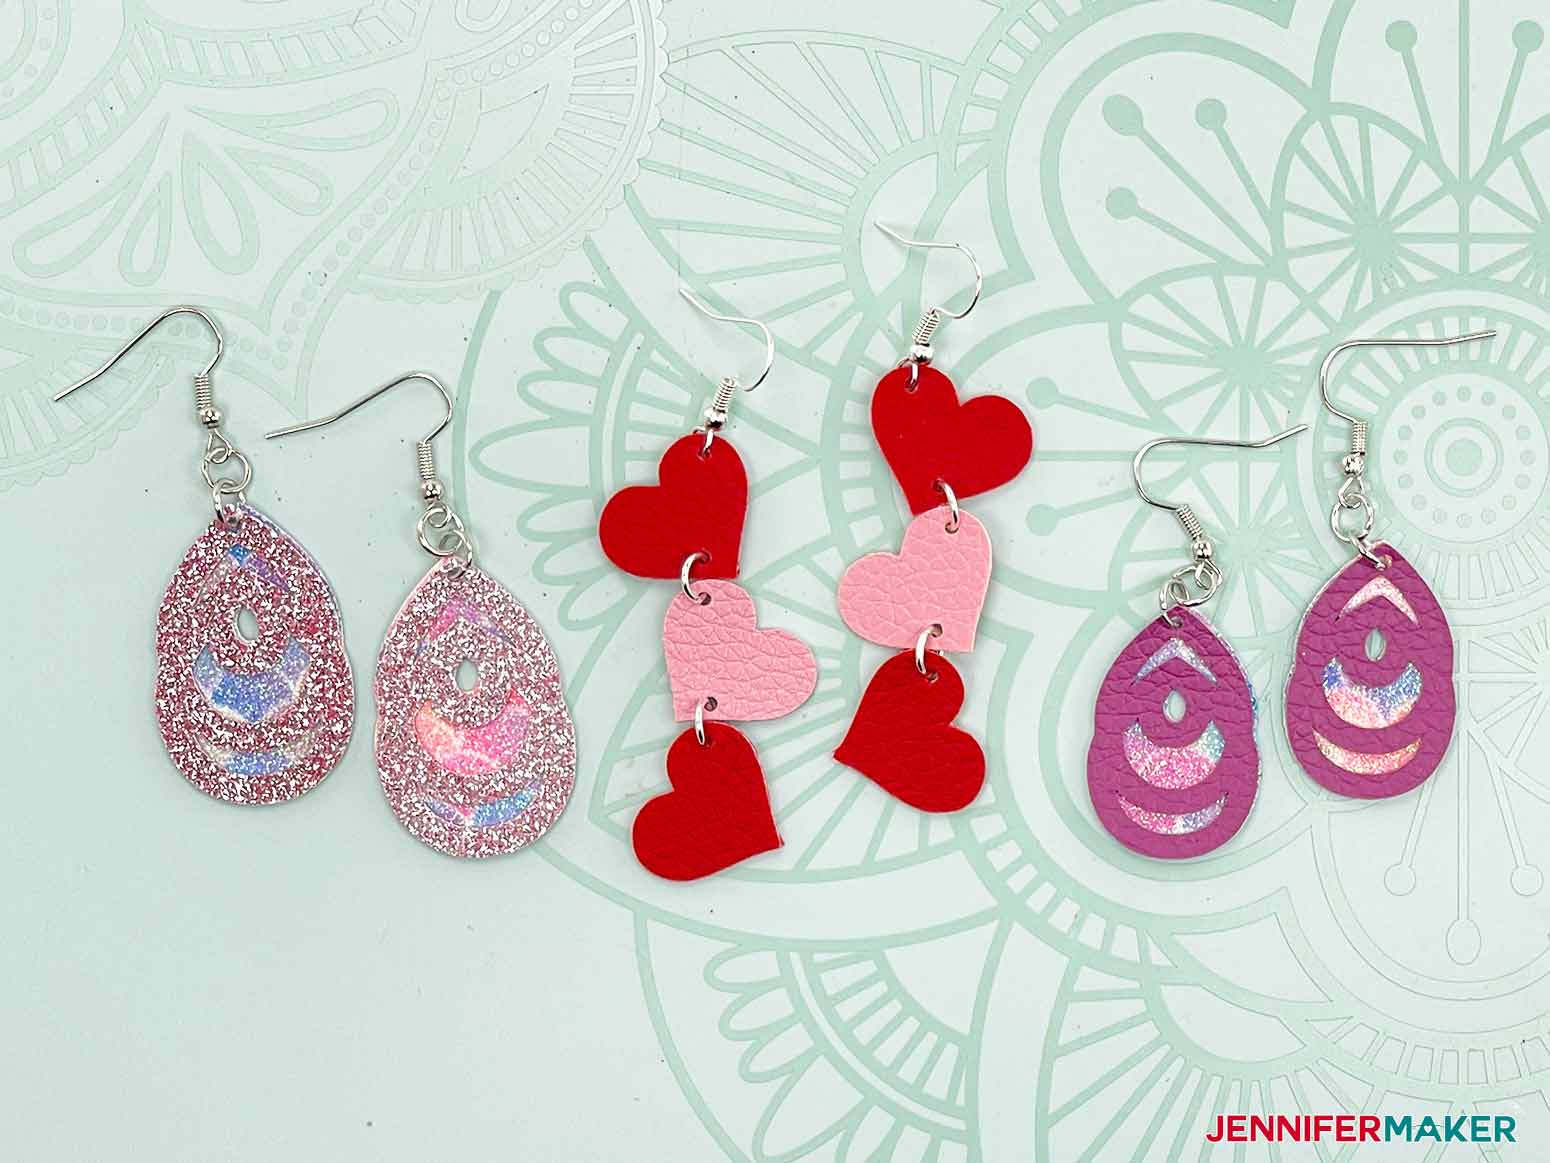
Want to make some fun DIY leather earrings using your Cricut cutting machine? This project contains several different designs for you to create and make your own. First, download my leather earrings designs from this page — or search the library for design number 328. Click "Upload" on the left side of the canvas. Click "Upload Image." Click "Browse." Select my DIY leather earrings SVG file from your device. On the Prepare to Upload screen, click "Upload." Select the DIY Leather Earrings design under Recent Uploads and then click "Add to Canvas." To view all of my designs, simply reduce the magnification in the lower left corner of the canvas. I have 14 different designs for you to choose among. TIP: If you're not sure how to upload a file to Cricut Design Space, watch this helpful video training series I made. If you're on an iPhone or iPad, here's how to download and upload files to the Cricut Design Space app. First let's ungroup the design file. For this demonstration I am going to show you how to assemble the earrings I have pointed to here. I am selecting the designs I do not want and deleting them from the canvas. You can always hide them if you want. In my materials list, I have provided two different options for faux leather. The faux leather from the jewelry making kit has an unfinished back meaning it does not look the same on both sides. The double-sided faux leather looks the same on both sides. This is what the backside of unfinished faux leather looks like. Not very pretty, right? To give the earrings a more polished look, I am going to use iron-on vinyl and apply it to the back of the material before cutting. Select the material you want to use and cut two 3" x 3" pieces. One piece is for the front of the earring and the second is for the back of the earring. I have selected a pretty teal glitter for the front and a dark teal for the back. Cut two 3" x 3" pieces of your iron-on-vinyl. I am using a foil silver iron-on vinyl that I will apply to the back side of each of these pieces. Following Cricut's Heat Guide, when applying foil iron-on vinyl to faux leather using an EasyPress Mini, I need to set my EasyPress Mini on low, pre-heat the faux leather for five seconds, then apply the iron-on vinyl using light pressure in a circular motion for 30 seconds. To pre-heat the faux leather, place the unfinished side face up on your EasyPress mat. Place a piece of butcher paper or a teflon sheet on top the faux leather then preheat for five seconds. Next, place a piece of iron-on vinyl, shiny side up, on top the unfinished side of the faux leather. Using light pressure, heat the vinyl in a circular motion for 30 seconds. Repeat the same steps to apply the iron-on vinyl to the second piece of faux leather. When you have finished applying the iron-on vinyl, you do not need to remove the carrier sheet. With your faux leather prepared, we are now ready to cut our earrings. In Design Space, click "Make It." If you are using a Maker 3 or Explore 3, click "On Mat" when asked how you will load your materials for the project. Your project will be separated to two mats. You can continue and cut the project on two mats or use one mat. To use one mat, select mat 2 then click the three dots on one of the items and click "Move object." Select the first mat and click "Continue." Move the object on mat 1 so that it is not on top of the other two items. Return to mat 2 and move the second object. Select the first mat and click "Continue." Move your earrings so that each pair is in a 3" x 3" section on the mat. You will be placing your faux leather in the squared areas below. Click "Continue." Place your faux leather on a StrongGrip Machine Mat with the iron-on vinyl side down. Optional: use a brayer to ensure the material is securely stuck to the mat. Use painter's tape to secure all four sides of the faux leather to the mat. Select "Browse All Materials." Type "leather" in the search bar and select Faux Leather (Paper Thin) and click "Done." You will also select this material if you using the double-sided faux leather to make this project. Change the cutting pressure to "More." You will notice that your machine will indicate that you use the Fine-Point Blade. Because we are not using Cricut-branded faux leather, I am going to have you place your Deep-Cut Blade into the machine instead of the Fine-Point Blade. You will find this cuts the material much better. Load your mat into the machine and then press the go button. After your earrings are cut, remove the tape from all four sides of the material then turn the mat over and carefully bend the mat slightly to remove the faux leather pieces. Next, remove the earring pieces from the heat-transfer vinyl carrier sheet. Grab the jewelry making kit that came with the faux leather. Use the puncher tool and place a punch in the upper center of all four earring pieces. You will want to place your punch hole approximately half the diameter of the jump ring from the top of the earring pieces. If you make the hole too far down from the top, the pieces will not have room to move. Place a piece of wood, metal, or something similar behind the earring to prevent the punch tool from going into your table surface. This is what my earring piece looks like punched. To assemble the earrings you will need two jump rings and one ear wire (the piece that hangs from your earlobe) for each earring. Place one of the jump rings into the slot of the jump ring opener tool. Make sure the opening of the jump ring is just above the ring slot so you can open it. Using your needle nose pliers, grab the top half of the jump ring and bend it open enough to add the faux leather earring pieces. With your pliers gripped on one side of the jump ring, remove it from the opener tool. Add the bottom leather piece, top leather piece, and then another jump ring. Insert the jump ring back in the opening tool and bend the jump ring so it is closed again. Grab the jump ring you added with the leather pieces and open it using the jump ring opener tool. Add the earring wire. Make sure to place the earring wire in the proper direction so that when you are wearing the earring, the leather pieces are facing forward. / Close the jump ring and repeat this process for the other earring. Here is what my finished earring look like. You'll notice in the picture below, I did not use a jump ring for the middle pair of earrings. Instead I used the pliers and jump ring opener tool to open the bottom of the earring wire. I then inserted both ends of the faux leather. For the earrings on the left, I used the foil iron-on vinyl for the shiny parts you see in the bottom section of the earring. I thought it added a cool effect to the design. These earring colors make me happy. They are so bright and vibrant. I really like how the butterfly wings turned out, don't you? All of my earring designs can be resized to your liking. Just make sure when you resize the earrings, you leave enough room at the top to allow for the punched hole. In the earrings below, the pair on the left is the original design size whereas the pair on the right is the same design but smaller. In my designs below, the left and right pair of earrings have been cut in genuine leather. The pair on the right has thin fringe strips that looks so much better in genuine leather than faux leather. For the pair on the left, I used Cricut glitter vinyl to add some bling to the design. When cutting in genuine leather, add transfer tape to the back side of your earrings to help prevent your cutting mat from becoming messy with tiny pieces of leather. My DIY Leather Earrings vary in size but range between 1.5"-2.5" in height. They can be resized with caution. When reducing the size you need to allow enough space to punch the hole at the top of the earrings for the earring findings.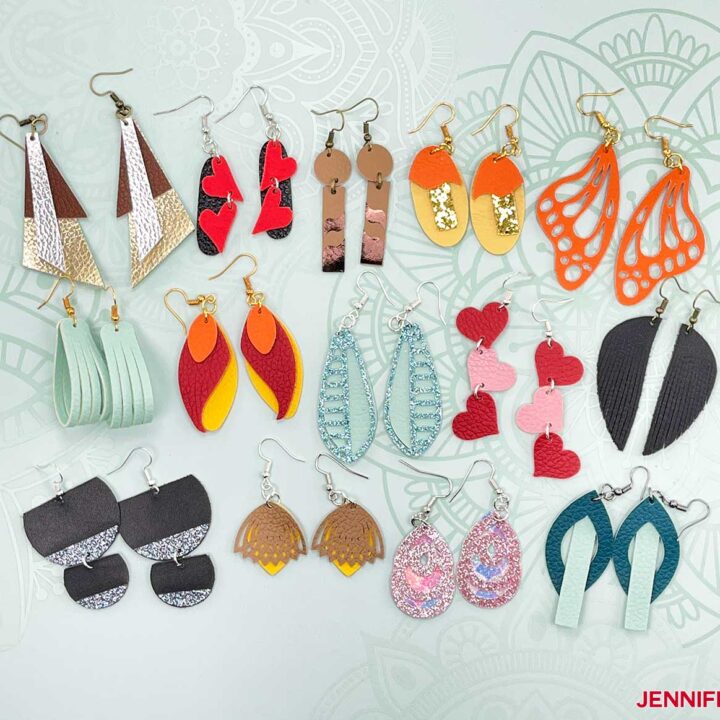
DIY Leather Earrings
Materials
Tools
Instructions
STEP 1: GET MY FREE DIY LEATHER EARRINGS DESIGN FILE
STEP 2: PREPARE AND CUT YOUR EARRING DESIGN


STEP 3: ASSEMBLE YOUR EARRINGS

Notes
The detailed step-by-step assembly video on how to create personalized round wood door hangers is part of Maker Academy Weekend. Get a pass to watch all 20+ workshops, each with a printable handbook, transcript, audio files, design files, and support with a VIP pass below:

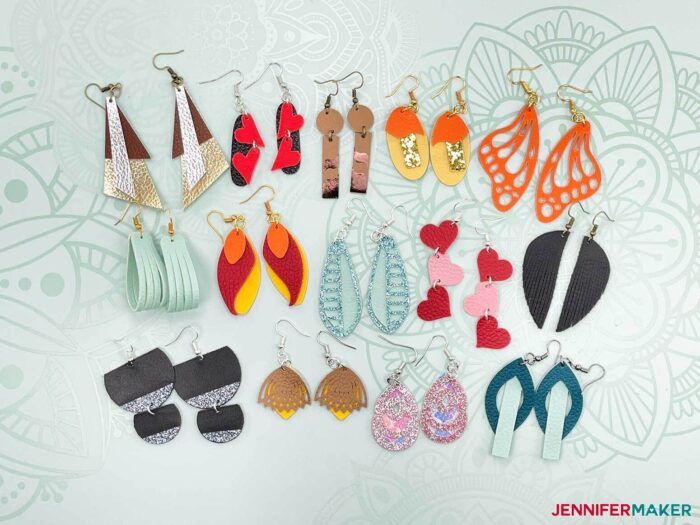
I love how these earrings turned out! I can’t wait to try out different color schemes. The possibilities truly are endless!
These lightweight, trendy earrings are the perfect addition to complete any outfit!
Answers to Your Questions About How to DIY Faux Leather Earrings
Q: Where is your tutorial for this project?
This is a special project we made for our free Maker Academy Weekend event! A complete and detailed step-by-step video premiered during the event November 4-7, 2021 — specifically, this tutorial video was available to watch for free for 24 hours beginning November 5 at 11:00 am ET! Watch the replay and get a 25-page printable handbook that details how to make this beautiful project with a VIP Pass to Maker Academy Weekend, which comes with other perks and bonuses, too!
Q: My store doesn’t have any Faux Leather! Where do I find them?
If you can’t find faux leather locally, try ordering them from Amazon. If that’s not an option, be sure to check your dollar store!
Get the free designs for my Faux Leather Earring collection!
I love seeing what you make with my designs and how you use them! Please share a photo of your faux leather earrings in our Facebook group or tag me on social media with #jennifermaker.
Love,

Want to remember this? Save this DIY Faux Leather Earring Tutorial to your favorite Pinterest Board!