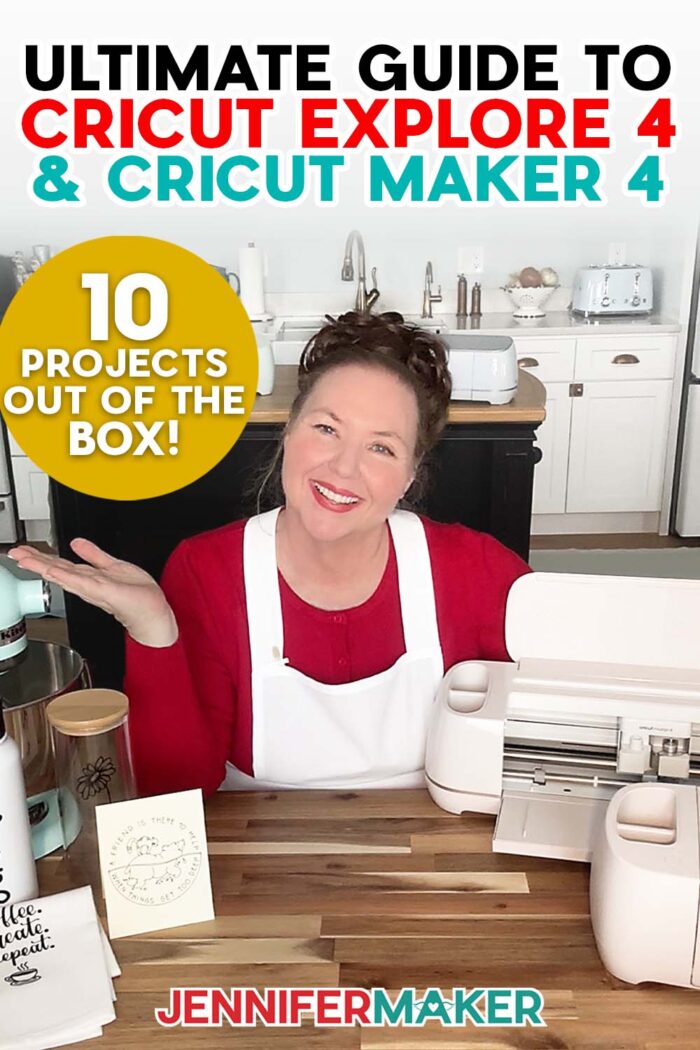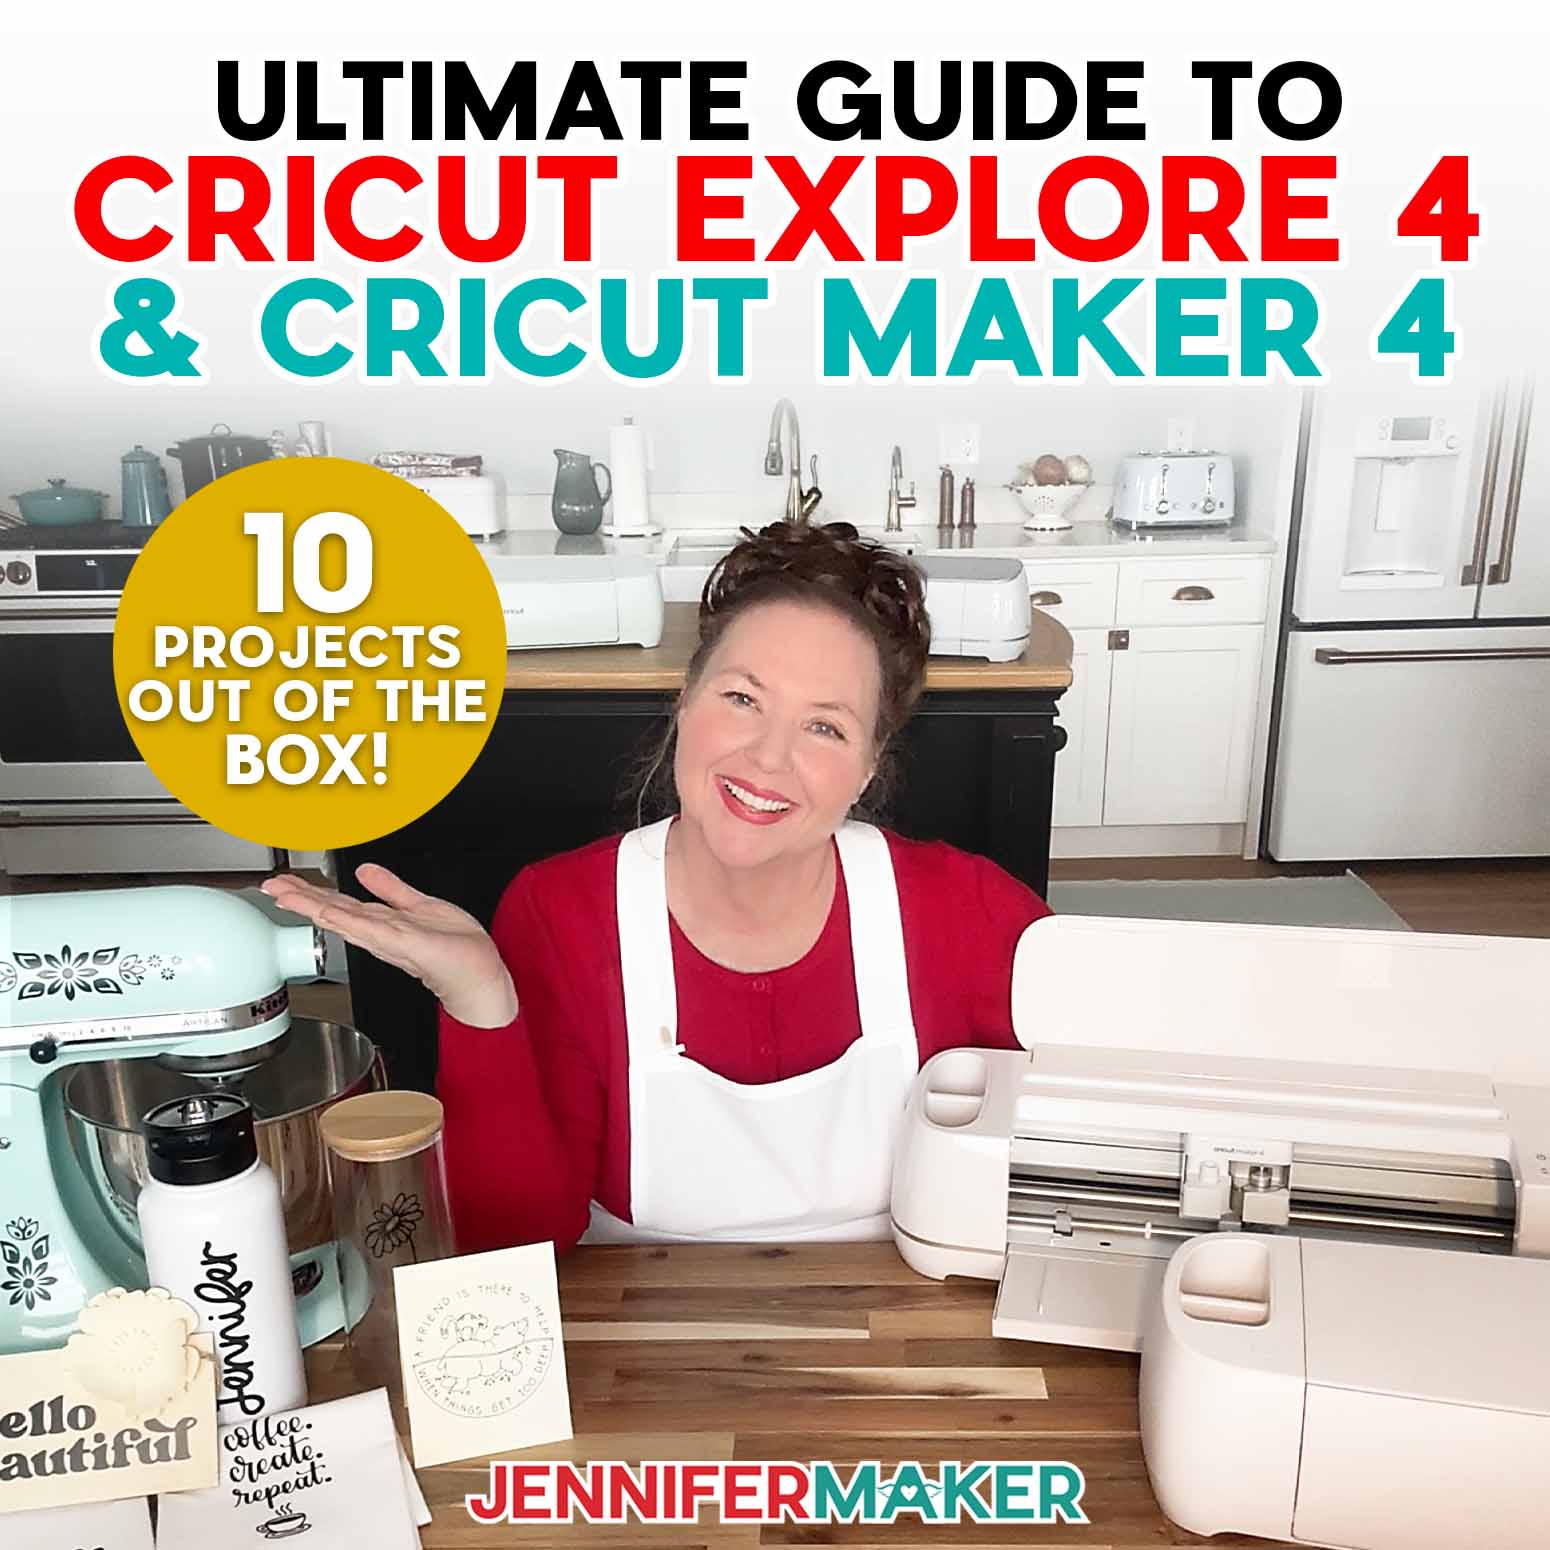
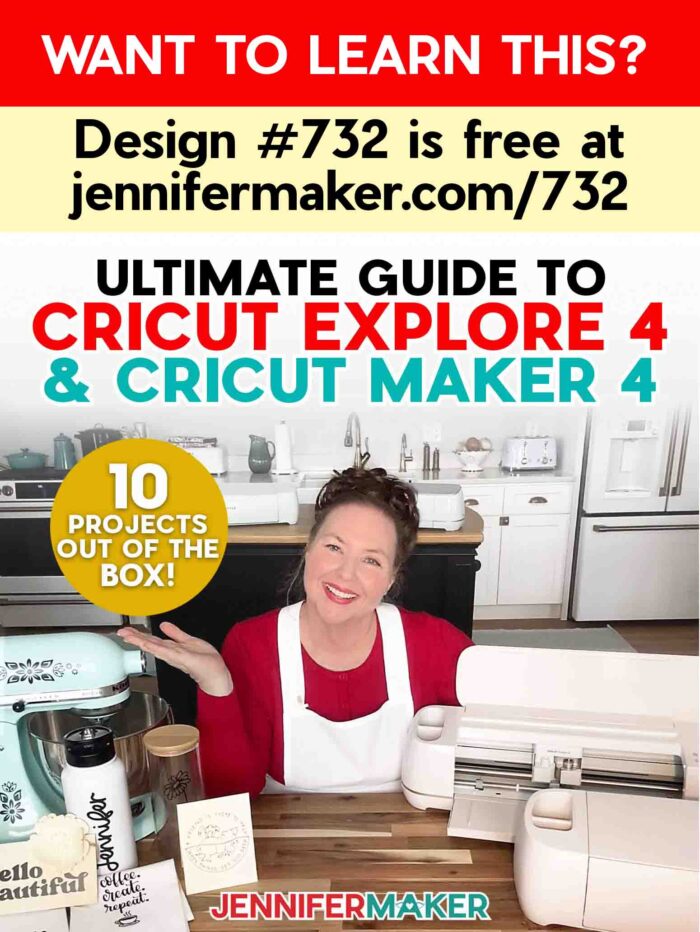
Learn all about the Cricut Maker 4 and Cricut Explore 4, the new generation of cutting machines!
Have you heard the news?! Cricut has not one, but TWO brand new cutting machines and that will speed up your crafting in amazing ways! The Cricut Maker 4 and Cricut Explore 4 cutting machines do everything a Cricut Maker 3 or Cricut Explore 3 can do, but it’s all faster! And they’re SO much more than a faster vinyl and paper cutter. You can make endless gifts, art, decor, and more, and with their new speedier cutting time you’ll spend less time waiting on your Cricut and more time creating. I’m so excited to share what I’ve learned and what I love (and don’t!) about the new Cricut Maker 4 and Explore 4!
Watch the full step-by-step video tutorial on unboxing and using your Cricut Maker 4 or Cricut Explore 4:

This post contains some affiliate links for your convenience (which means if you make a purchase after clicking a link I will earn a small commission but it won’t cost you a penny more)! Read my full disclosure policy.
TIP: The Cricut Maker 4 and Cricut Explore 4 went on sale at midnight February 27th ET!
Note: Cricut graciously let me access the new machines in advance (thanks, Cricut!) so I could show you how they work and give you an honest review. But as I do not accept free stuff, I am giving these away to someone, maybe you! Click here to go to the Cricut 4 giveaway form!
What’s New with the Cricut Maker 4 and Cricut Explore 4?
More Materials!
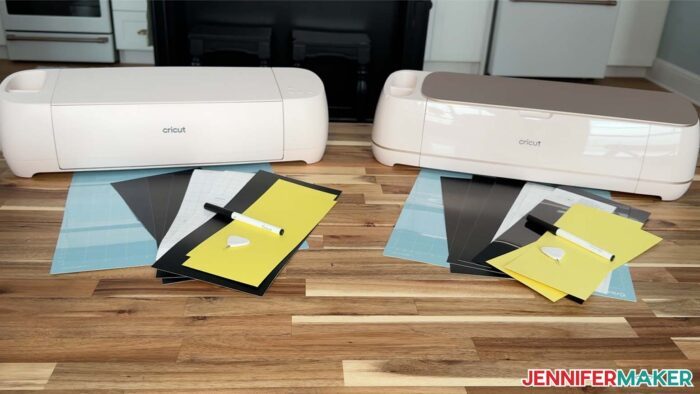
Both machines come with more materials in the box, plus a machine mat so you can start crafting right away! I made ALL of these things (plus some lightswitch decals) using just the material in the box.

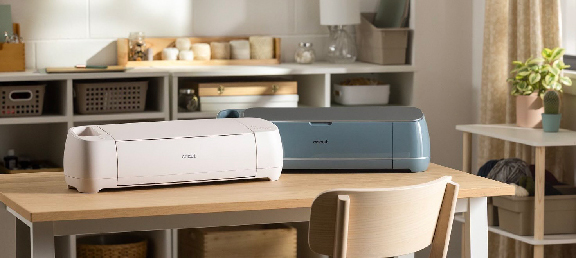
New Colors: Trendy Yet Timeless
The new machines come in lovely colors called Seashell and Sage. I love the Seashell in person and can’t wait to see the Sage!
Faster, Especially With Smart Materials!
The new Cricut cutting machines cut up to two times as fast as their predecessors!
Whether you’re using Smart Materials or a machine mat, the new Cricut cutting machines have a speed of 10 (that means they can cut up to 10″ per second on the x-axis, 10″ per second on the y-axis). Also, they have an acceleration of 100 IPS (inches per second) with and without a mat. The Cricut Explore 3 and Cricut Maker 3 cut at a speed of 8 (matless) and 5 (mat) IPS with an acceleration of 100 (matless) and 20 (mat).
What are the differences between the Cricut Explore 4 and Cricut Maker 4?
The big difference between the Explore 4 and the Maker 4 involves the tools and cutting force — the Explore works by dragging the blade across the material, while the Maker works by actively positioning and turning the blade as needed. This allows the Maker to cut more materials with ten times the force — up to 300 materials! That includes everything the Explore 4 can cut (an impressive 100 materials!), PLUS things like leather, basswood, and crepe paper. The Explore 4 works with six tools, while the Maker works with thirteen tools, including the rotary blade tool, the knife tool, the engraving tool, the deboss tool, and both scoring wheels. And the Makers’ Adaptive Tool System makes swapping the powerful tools easy!
So the difference is the same as it’s always been — you can cut more things with the Cricut Maker 4 than with the Cricut Explore 4. But otherwise, the new Cricut machines have the same features.
The next generation of cutting machines are faster, more efficient, and come in new colors! Remember, I don’t work for Cricut nor do they pay or sponsor me to do anything, so you’ll always get my honest opinion!
What can the new 2025 Cricuts do?
The Cricut Explore 4 and Maker 4 can cut, draw, score, and add sparkle with the foil tool! And, they can use their sensors to make awesome Print then Cut projects. Both machines are compatible with the same materials their predecessors were, just much faster! Think of all the things you can make when you’re not waiting for your machine to finish cutting mat after mat!

What tools do the new Cricuts use?
The Explore 4 and Maker 4 each come with a Premium Fine-Point blade, which is the default blade for most materials.
The Cricut Explore 4 can use these tools:
- Premium Fine-Point Blade
- Scoring Stylus
- Deep-Point blade
- Foil Transfer Tool
- Bonded-Fabric Blade
- Pens and Markers (Infusible Ink and Watercolor, too!)
The Cricut Maker 4 can use these tools:
- Every tool the Explore 4 can use
- Knife Blade
- Rotary Blade
- Tools and tips to go with a QuickSwap Housing:
- Single Scoring Wheel
- Double Scoring Wheel
- Wavy Blade
- Engraving Tip
- Embossing Tool or Embossing Tip
- Debossing Tip
- Perforation Blade
How big are the Maker 4 and Explore 4? How much space do I need to run them?
The new Cricut Maker 4 and Explore 4 are each around same size and weight as the Maker 3 and Explore 3. The Cricut Maker 4 is 22.1″ x 7.1″ x 6.2″ and weighs in at 15.4 pounds (6.98 kg), while the Explore 4 is 22.2″ x 7″ x 5.9″ and 11.1 pounds (5.03 kg).
You should keep at least 10″ of space clear behind the back of your machine to allow your mat or Smart Material to feed in and out.
If you use Smart Vinyl and the design is much longer than you’re used to, you may have a LOT of material coming out the back. It will sort of curl up in the back, so be sure you have enough room. If you have your Cricut on a cart or the edge of the desk, be aware that your vinyl may drop to the floor behind it as it works, so I recommend you put a plastic tub or something behind your Cricut so the vinyl doesn’t get dirty as it cuts.
How fast do the new Cricuts cut?
The Explore 4 and Maker 4 claim to each cut 10″ per a second in a straight line whether you’re using a mat or cutting matless. That’s up from 8″/second matless or 5″/second with a mat for the Maker 3 and Explore 3!
I mostly use materials on machine mats, and I know many of you do, too! So, I timed the new machines to see how they compared to the previous generation. Your speed will fluctuate depending on the design and the material you use, but I decided to have both cut my flower design from plain green cardstock. I placed the material on a green StandardGrip machine mat and used the “Medium Cardstock” setting with Default Pressure.
The Maker 3 finished in 1:14 but the Maker 4 flew through the design in 0:44! And it made each cut perfectly. Here’s what I didn’t see coming, though: The Explore 4 only took 0:39! However, the cuts weren’t all perfect — there were some spots where the cardstock was not cut cleanly, but the pieces separated without damage. The Explore 3, cut in 1:09. Some of the cuts weren’t complete, so I would have run the cuts a second time to get the same result, doubling the time!
I did have some trouble with the Explore 4 initially, but both switching to Bluetooth and using the other USB-C cable that came with the Maker 4 helped, so it may have been a faulty USB-C cord. I also used a USB-C extension cable since my computer isn’t close to the machines.
If you’re working on multiple projects and can batch-cut designs on Smart Materials, each second saved really adds up. That’s more time you can spend creating, instead of loading and unloading mats and monitoring Cricut Design Space.

How do Smart Materials work with Cricut cutting machines?
Long designs work with Cricut’s Smart Materials, as they are wide enough to fit perfectly between the guides and be kept straight and aligned while cutting without a mat. In essence, Smart Materials have a built-in “mat” which means you don’t have to use a separate mat to cut them.
You just put the end of the Smart Material up under the guides and against the roller and press the “Load” button. The Cricut Explore 4 and Maker 4 will draw the material in a bit, using their sensors to make sure it’s properly aligned AND that you have enough material for your planned cut. (I love that feature.) Then you’re ready to cut!
The Cricut Explore 4 and Maker 4 are able to cut matless when you use Cricut’s Smart Materials. Smart Materials were first introduced with the Cricut Joy in 2020. They work without a mat — you just load the Smart Material directly into your machine and the thick backer supports it. You can get Smart Materials in Smart Vinyl, Smart Iron-On, and Smart Paper Sticker Cardstock in a variety of colors and finishes.
Cricut Smart Vinyl comes in removable versions, like the sample you get in the original box with an Explore 4 or Maker 4, as well as permanent vinyl and specialty finishes.
There’s also Smart Iron-On, also known as heat transfer vinyl (HTV), which also comes in the box. You can get in a bunch of colors as well as in glitter and holographic.
The Smart Iron-On and Smart Vinyl come on rolls in varying lengths — anywhere from 3 feet to 75 feet long!
How big can I make projects on the new Cricuts?
If you use Smart Materials, the new machines can cut a design up to 11.7″ wide and nearly the full material length — up to 11.2″ for cardstock, 4′ for adhesive vinyl, or 12′ for iron-on! If you put your material on a mat, the limit is still 11.5″ wide and 11.5″ or 23.5″ long depending on your mat.
How do you switch between Smart Material and machine mats?
All you have to do is select the correct “Material Load Type” on the Cricut Design Space Prepare screen from “On Mat” to “Without Mat” or vice versa and you’re ready to go!
Can You “Print Then Cut” on Colored Paper with Explore 4 and Maker 4?
Yes, just like Cricut Maker 3 and Cricut Explore 3, the sensors on the new cutting machines allow for “Print Then Cut” projects on color paper,

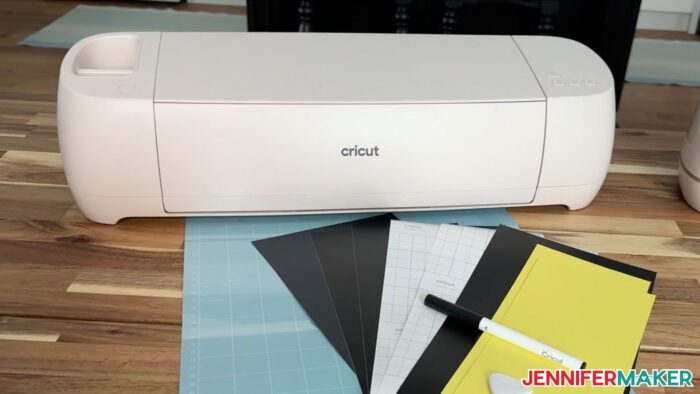
What comes in the box with the new 2025 Cricuts?
- an envelope containing materials and information on setup, warranty, and safety
- the power adapter and power cord
- a USB-C cable
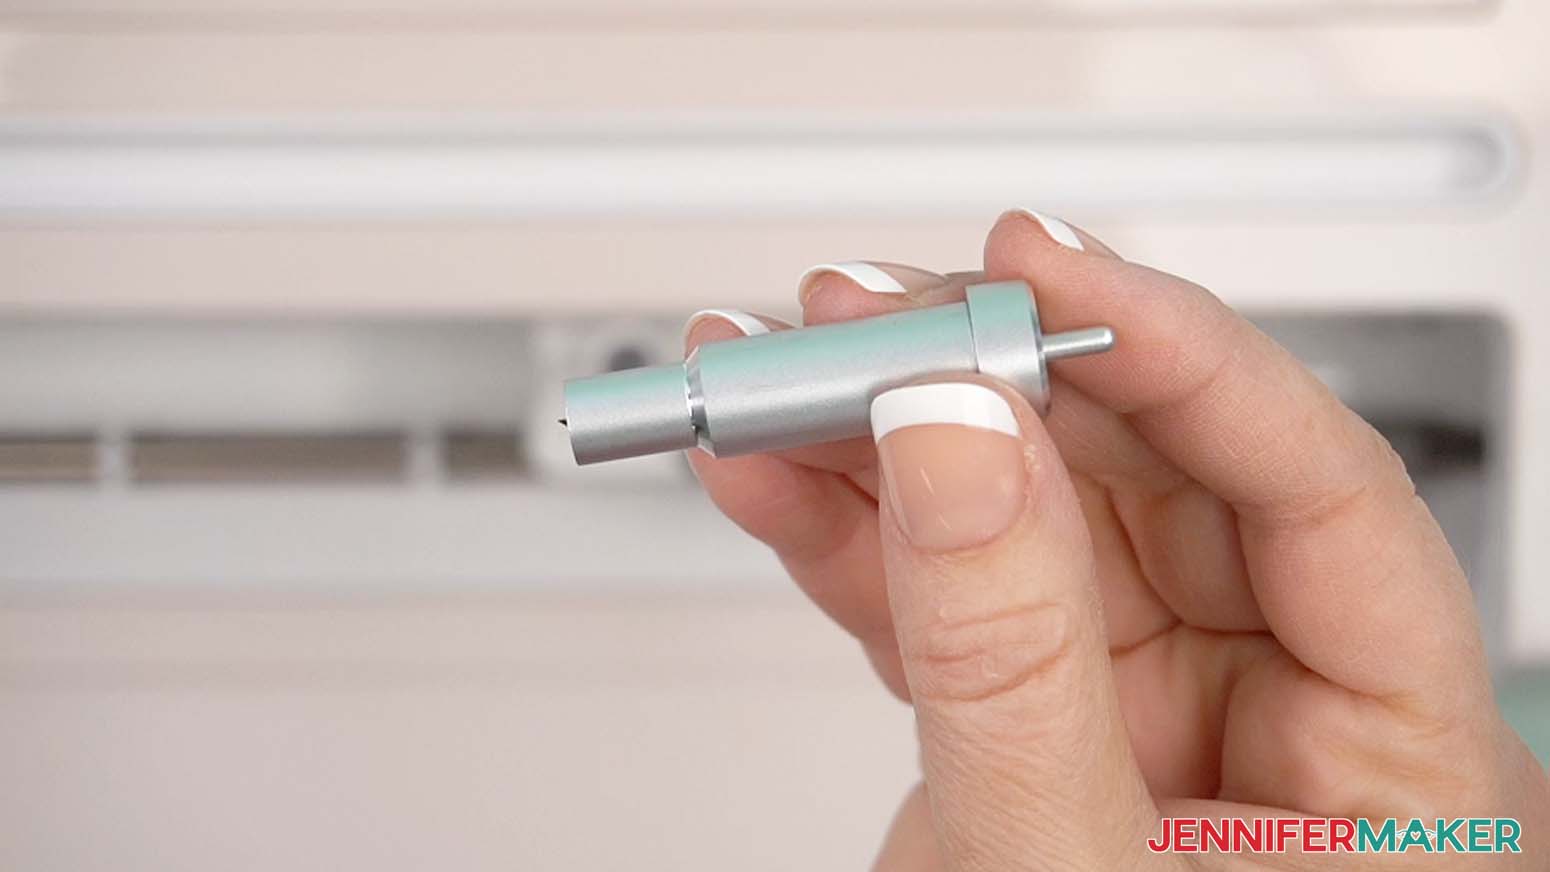
- an Accessory Adapter (already in clamp A)
- a Premium Fine-Point blade and housing (already in clamp B)
- blue LightGrip machine mat
- mini weeding tool
- three (3) sheets of Smart Vinyl (13″ x 6″)
- one (1) sheet of Smart Iron On vinyl (13″ x 6″)
- two (2) sheets of cardstock (11″ x 4.25″)
- two (2) sheets of transfer tape (12″ x 6″)
- a black fine point Cricut pen
Your material colors may differ from mine, of course!
What kinds of drawing tools work with the new Cricuts?
You can use different colors of markers and pens from Maker or Explore machines.
How do I get a Cricut Maker 4 or Cricut Explore 4?
You can get your own Cricut Maker 4 or Explore 4 now!
TIP: If you get Cricut Access (or already have it), you’ll save by buying through the Cricut shop! This is a great time to sign up for Cricut Access because it can pay for itself very quickly with savings on, tools, and Smart Materials. Learn all about Cricut Access here.
How much do the Cricut Maker 4 and Explore 4 cost?
The Maker 4 costs $399 at retail price, while the Explore 4 is $249.
What can I make with the bonus materials that come with the new Cricut machines?
It’s up to you, but I used the black Removable Smart Vinyl for the Cricut logo test cut and to decorate items in my kitchen. I used the Smart Iron-on to decorate an apron and a tea towel set. And I used the cardstock, pen, and mat to make a card and paper flower. I’ll show you how to use my free designs to make your own!
How to Set Up Cricut Maker 4 or Explore 4 and Make Your First Projects
Set Up Cricut Maker 4 Cricut Explore
Learn how to make paper embroidery cards with your Cricut!
Materials
- Two (2) Sheets of 4.25" x 11" 65 lb. Plain Cardstock)
- Smart Removable Vinyl
- Smart Iron-On Vinyl
- Standard Grip Transfer Tape
- Wood Sign, 4” x 8”
- Cotton Linen Apron
- 32 oz. water bottle (white, teal)
- Cotton tea towels, 18” x 28”
- Design #732 (My free SVG/PDF/DXF design files are available in my free resource library - get the password by filling out the form at the bottom of this page)
Tools
- A way to cut your materials - I’m using the Cricut Maker 4 and Explore 4, but you can also use a Cricut Maker or Explore Series machine, the Cricut Venture, or even the Cricut Joy Xtra or the original Cricut Joy
- Cricut Blue LightGrip Machine Mat 12" x 12”
- Cricut Fine Point Pen
- Scissors
- Craft Glue - I used Bearly Art Precision Craft Glue
- Hot Glue Gun
- Finger Protectors
- Rubbing Alcohol
- Lint Free Cloth
- Lint Roller
Instructions
SET UP YOUR CRICUT MAKER 4 OR EXPLORE 4
- Watch my Cricut Maker 4 and Cricut Explore 4 Review video for an overview of the machines and all their features.
- Open the box on a clear flat surface.
- Remove the envelope of materials, mat, and machine, then the cords in the bottom of the box.
NOTE: I have three 13” x 6” sheets of black Smart Vinyl Matless Removable Vinyl, one 13” x 6” sheet of black Smart Vinyl Matless Iron-on Vinyl, two 11" x 4.25" sheets of yellow cardstock, and two 12" x 6" sheets of transfer tape. Your colors may differ from mine of course. The black Fine Point Pen and mini weeder are also in the envelope along with the information booklet. - On your desktop computer, go to https://www.cricut.com/setup.
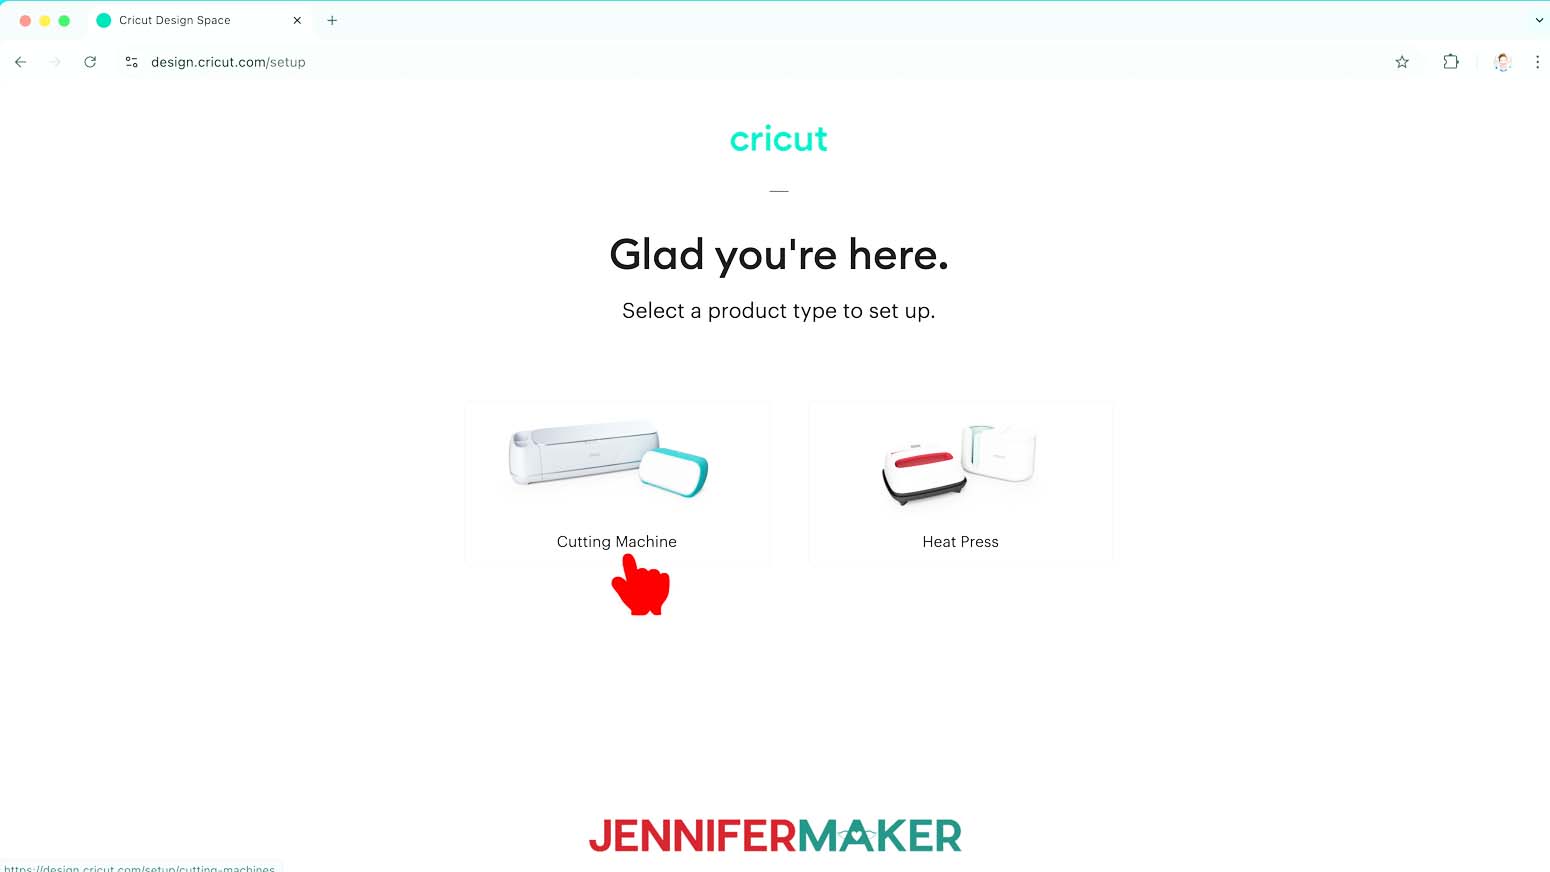
NOTE: You can also use the Cricut mobile app to set up a new machine. - Choose “Cutting Machine.”

- Download Cricut Design Space if you don’t already have it.
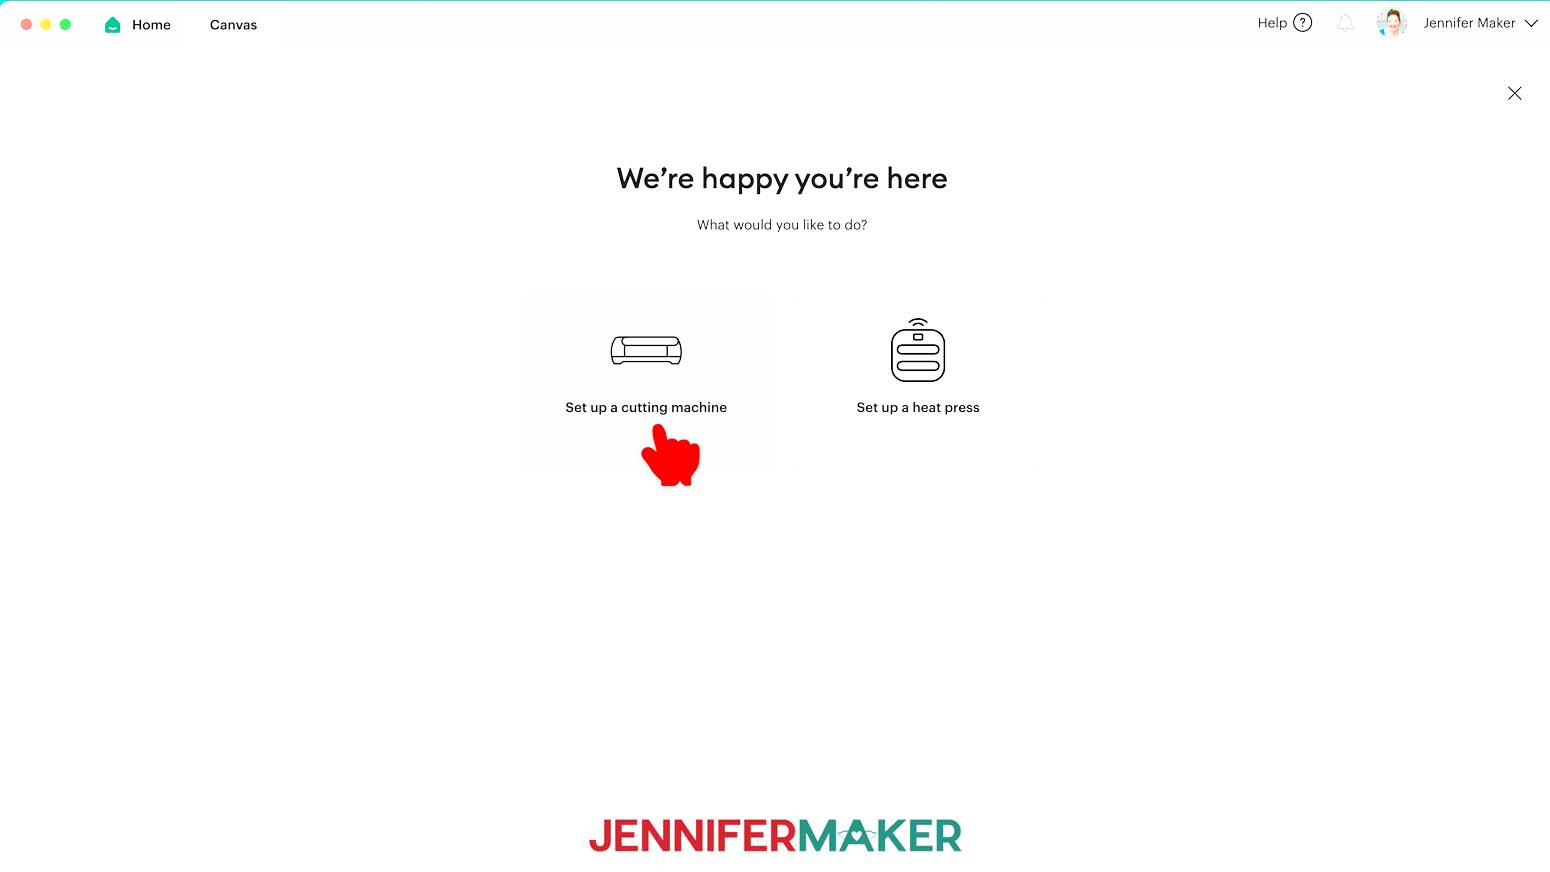
- Once it’s installed, open Cricut Design Space.
- Click “Set up a cutting machine” and “Continue.”
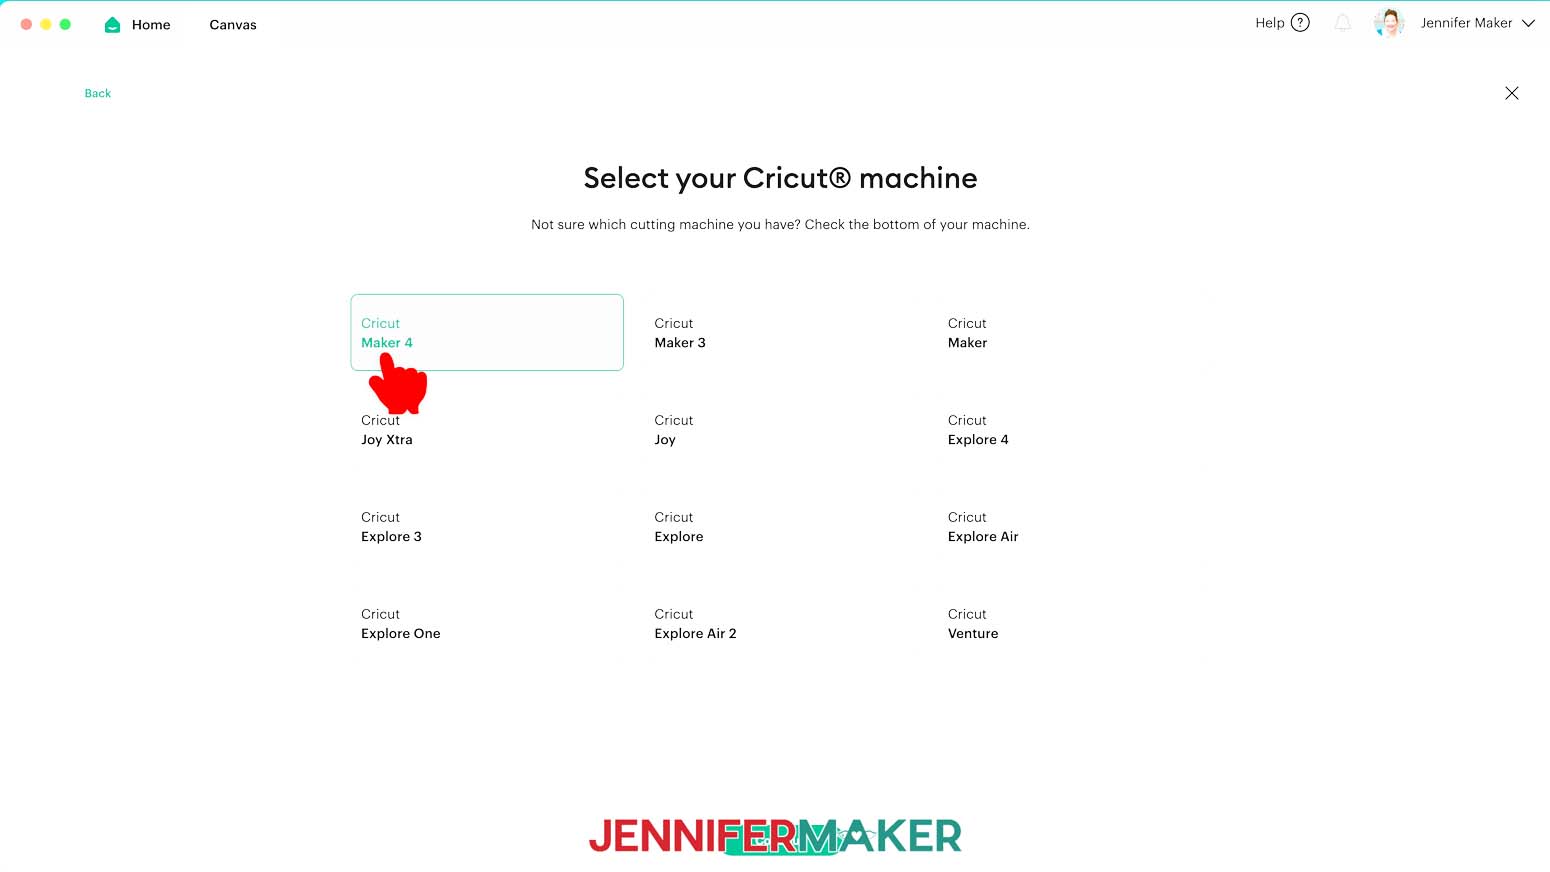
- Pick “Cricut Maker 4” or “Cricut Explore 4.”
NOTE: I’ll show you the steps for the Maker 4, but the steps for the Explore 4 are nearly identical. - Follow the screen steps to get started!
- Remove the plastic from around the machine.
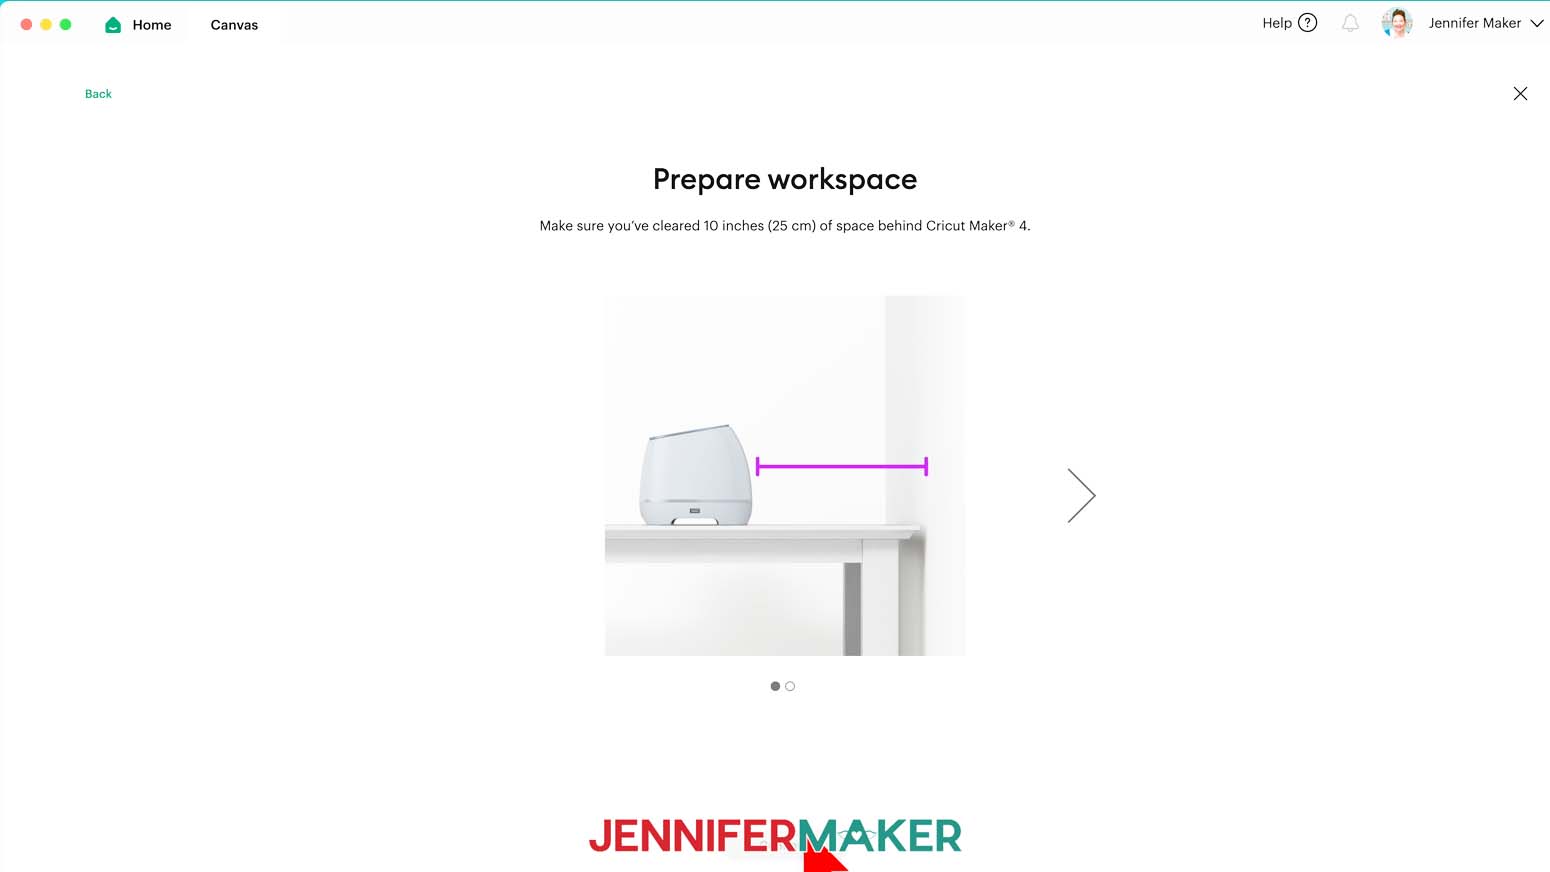
- Make sure you have space around the machine and 10” behind it.
- Plug the power cord into the back of the machine and then plug it into an outlet or extension cord.
- Open the machine and remove any packing materials inside.
- Press the Power button and the machine will turn on. The carriage will move around.
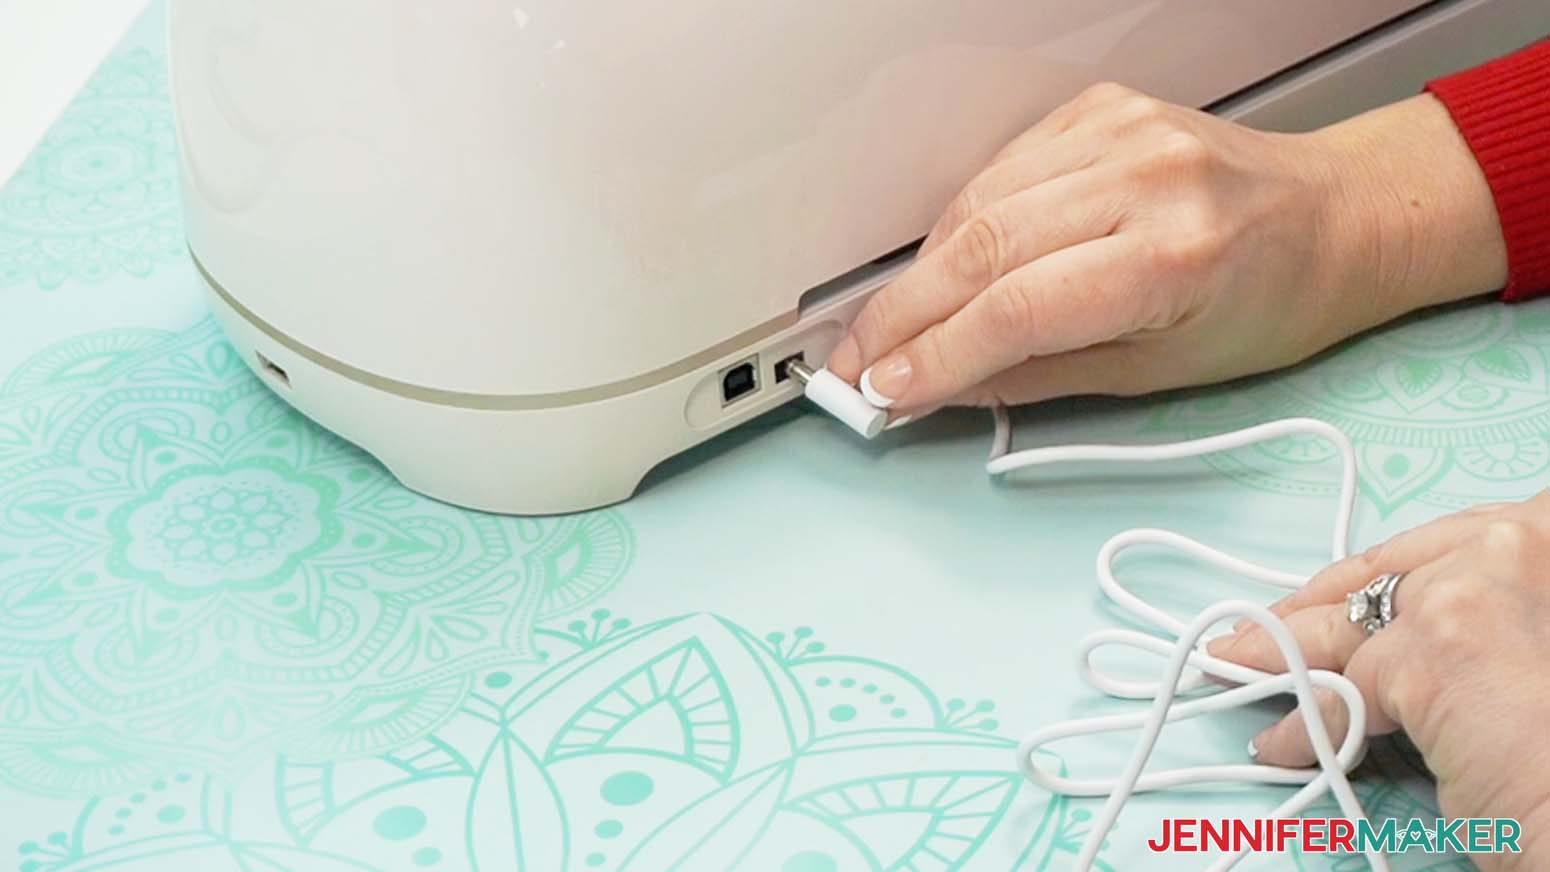
- On the screen, select whether you want to use the USB or Bluetooth connection.
TIP: I recommend connecting your cutting machine to your computer using the USB cord if possible because it is more reliable and faster than the wireless Bluetooth option. - Follow the screen prompts to plug in the USB cord or connect using Bluetooth.
TIP: I used a USB extension cable. - Click “Continue” and Design Space will notice when you’ve connected the machine.
- The machine will check for and download any needed updates.

MAKE YOUR TEST CUT
- When the updates are done, you can do the first test cut of the Cricut name.
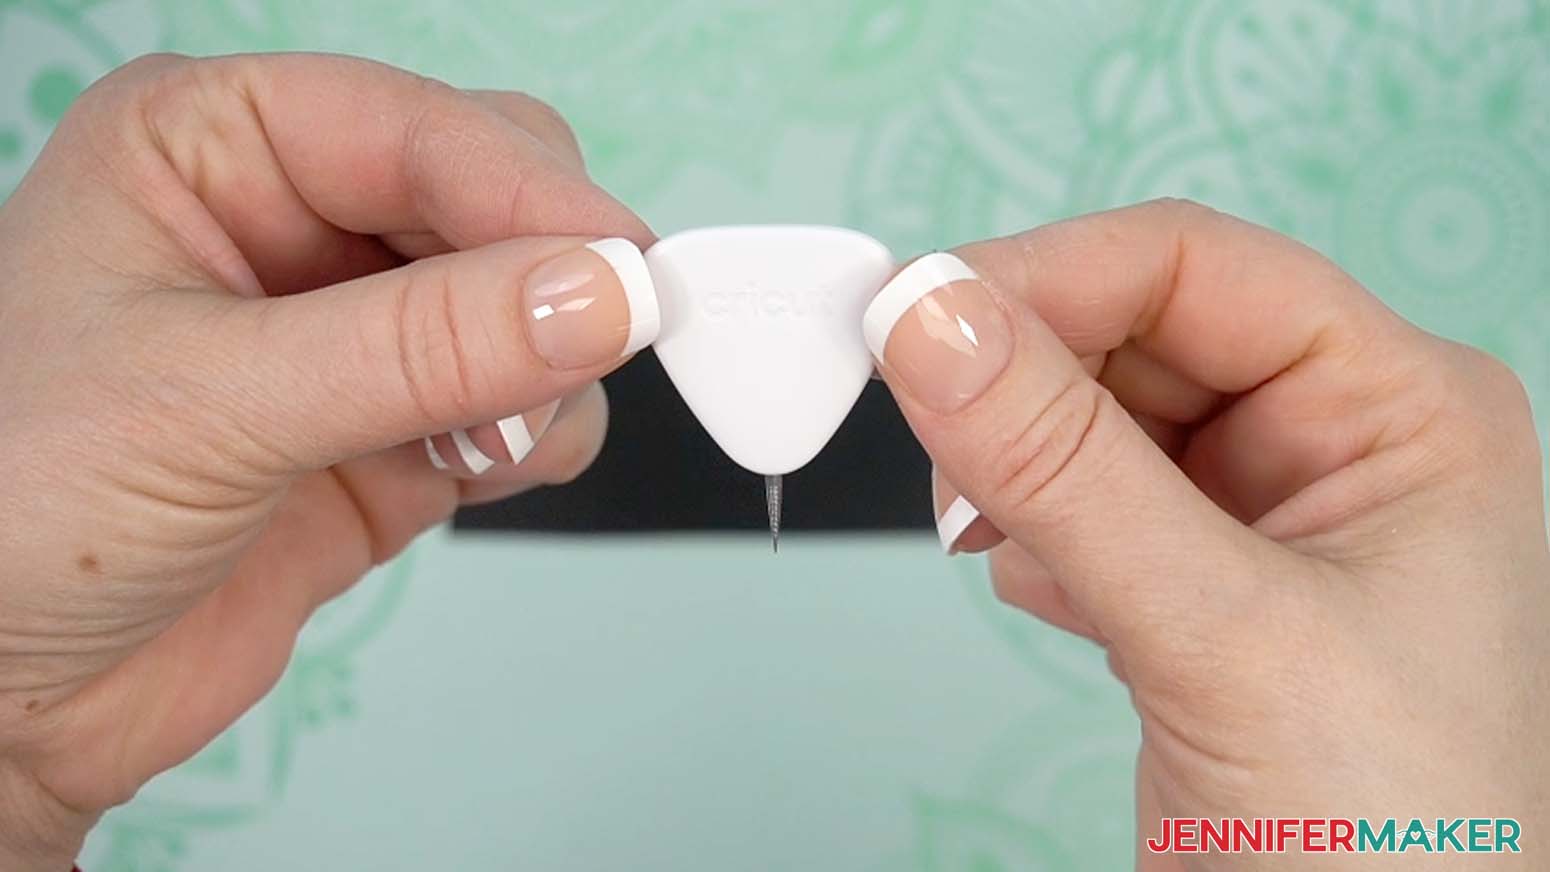
NOTE: I used one of the 6” Removable Smart Vinyl sheets that came with my machine. - Make sure all of the packaging material is removed and the blade is correctly seated in Clamp B.
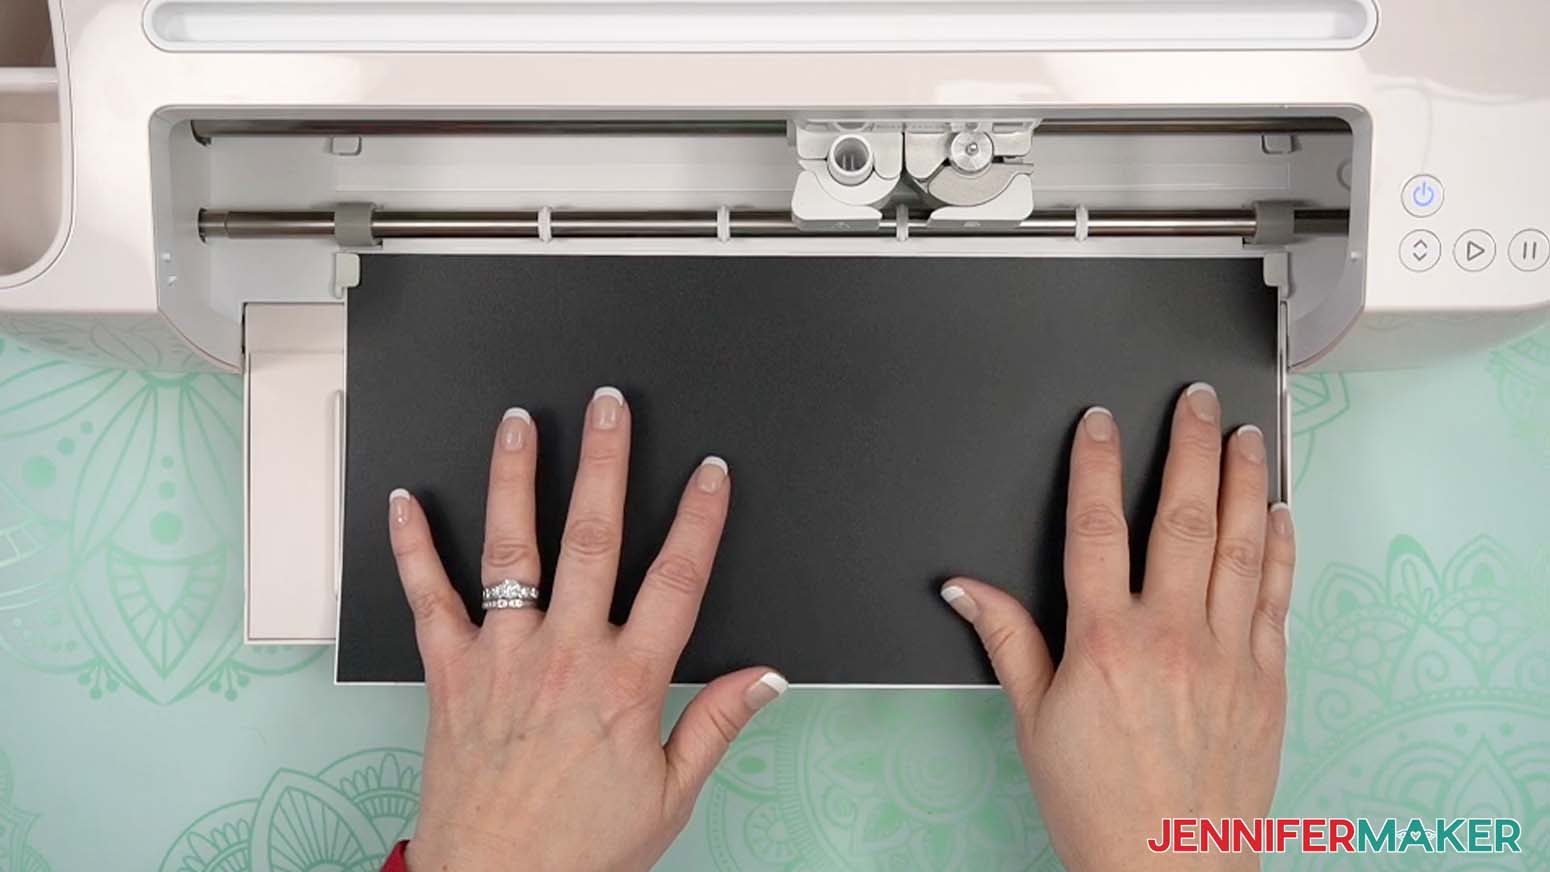
- With the vinyl face up, feed it into the machine under the guides until the rollers pull it in.
TIP: The machine will measure the material to make sure you have enough space for your test cut. - Then press the flashing Load button to start the cut.
- When it’s done, unload the material by pressing the flashing button.
- Weed the excess vinyl and your test project is complete.
- Click “Continue” and Cricut Design Space loads the Home screen so you can start creating!
10 PROJECTS
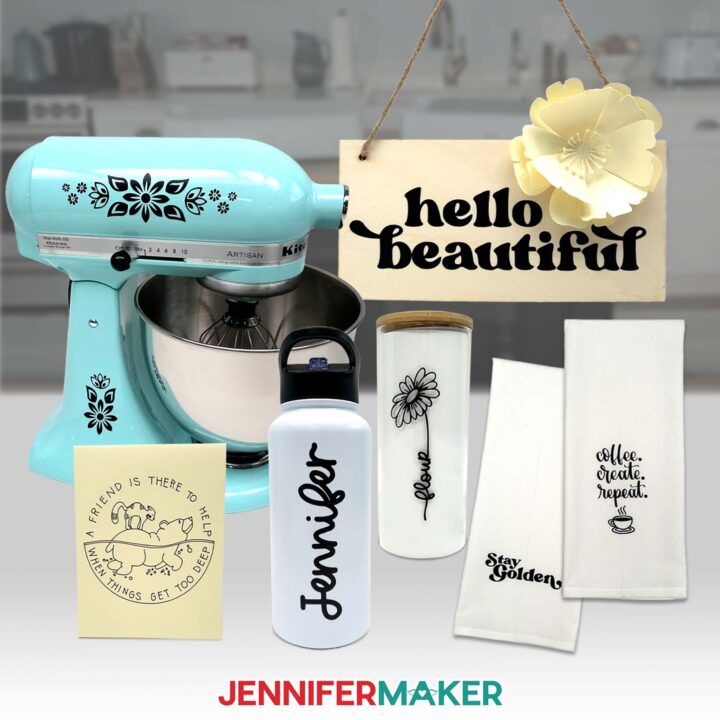
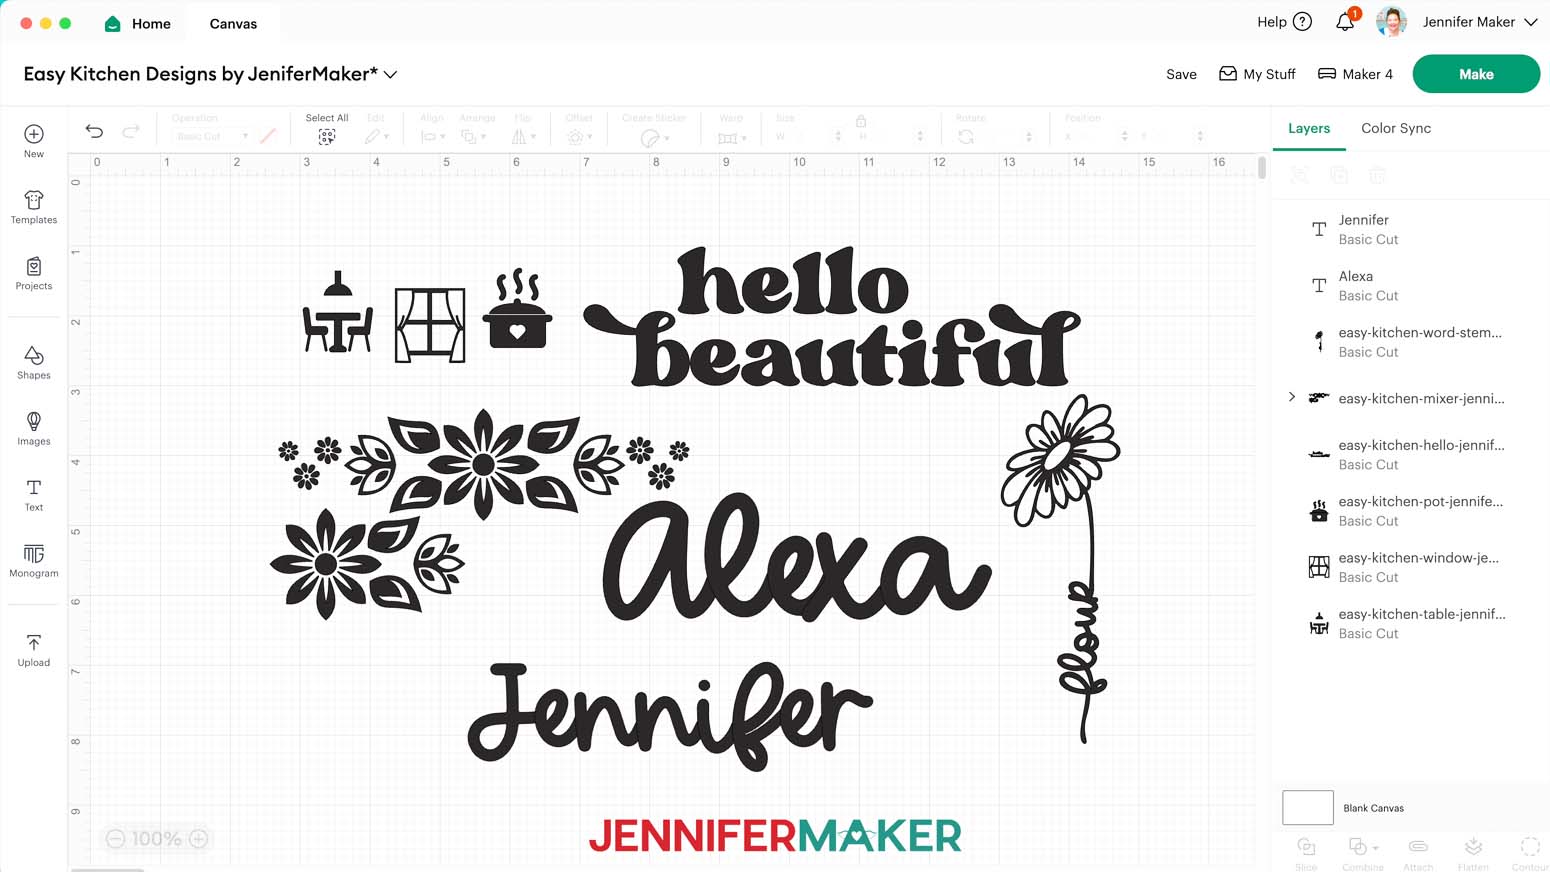
To test Cricut’s claim that you can make 10 projects with the included materials, I made a cute sign, a glass jar, a tea towel set, light switch labels, an apron customization, custom water bottles, a paper flower, and a card. You can download my free design files from my free resource library in Design #732, or use your own designs to create similar projects using the starter materials in your envelope.
TIP: If you’re not sure how to upload, go to jennifermaker.com/svgs to learn how to unzip and upload SVG files.
In the SVG folder, there are several designs I used for kitchen projects.
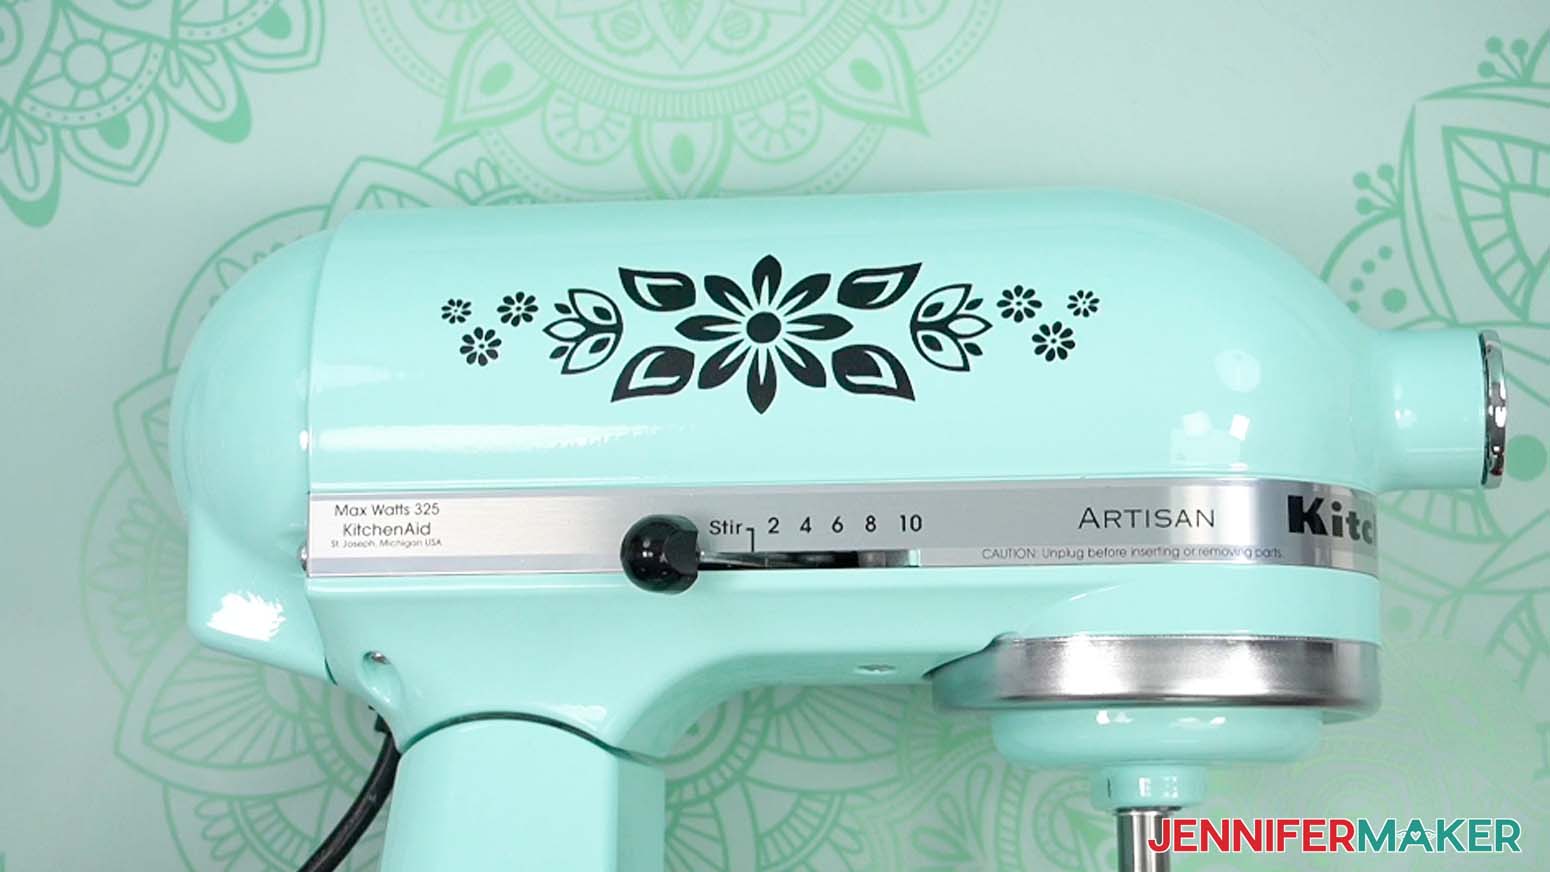
REMOVABLE VINYL PROJECTS: CUSTOM WATER BOTTLES, SIGN, GLASS JAR, LIGHT SWITCH LABELS, MIXER DECORATIONS
- On a blank Cricut Design Space Canvas, click “Upload” at the left to begin adding a SVG to work with.
- To use a downloaded SVG, click the green “Upload Image” button.
- Click “Browse” and select the SVG you want to use.
TIP: If you are using my free files, they are probably in your “Downloads” folder. - Once you’ve selected the SVG, click “Open.”
- Make sure this is the SVG you want, then click “Continue.”
TIP: If you selected the wrong file, click “Replace Image” to go back and try again. - On the “Image Details” page, you can rename the file, add tags, or add it to a collection if you’d like, then click “Upload” to add the design to your Canvas.
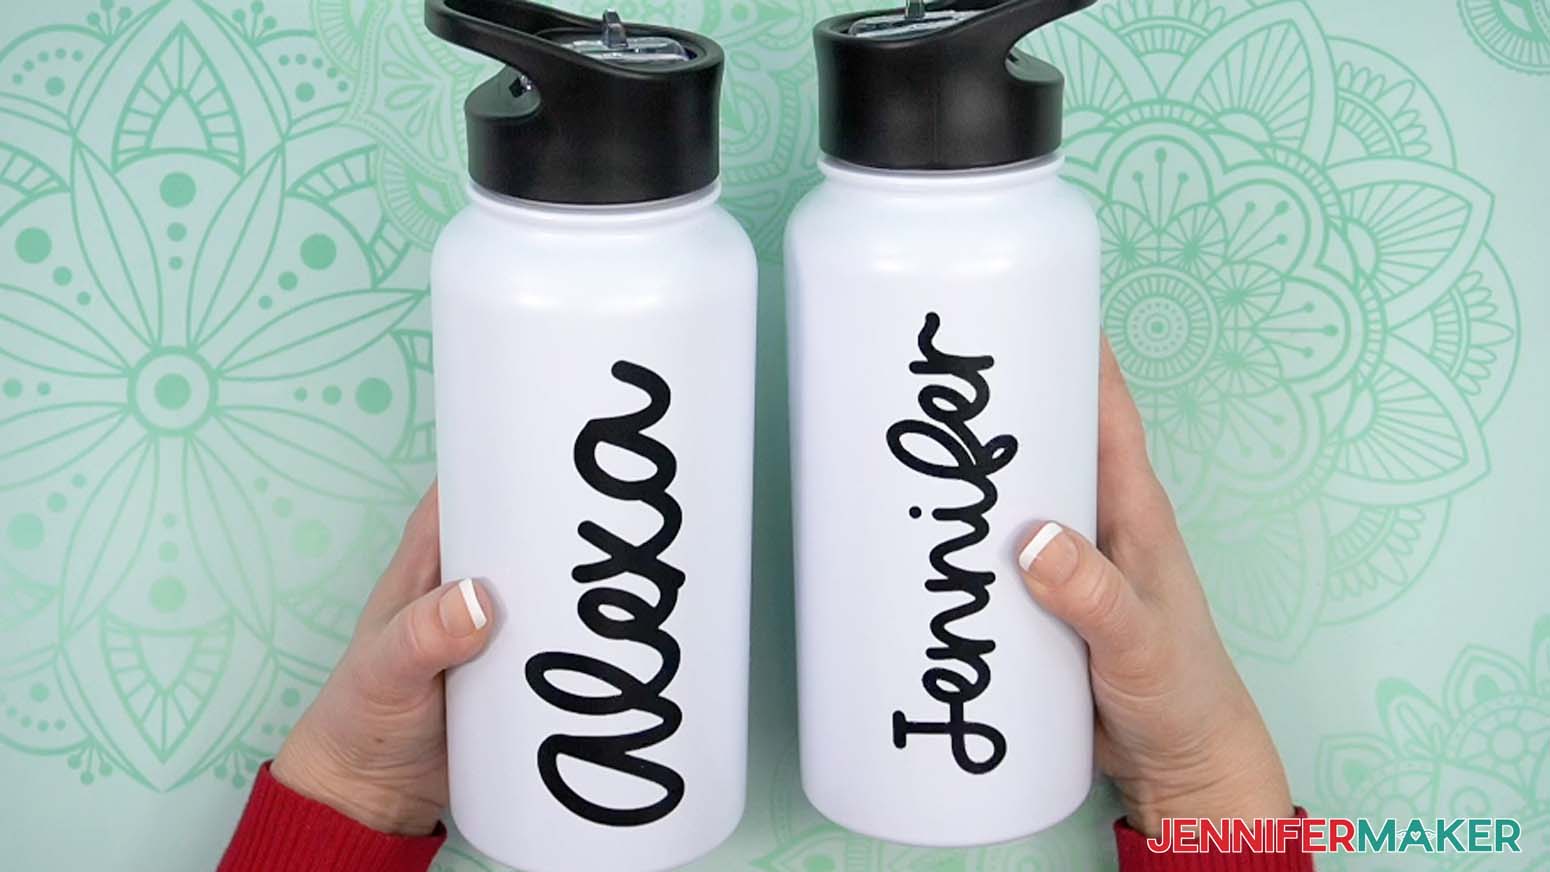
- If you want to add designs or custom text to a blank, measure the decoration area. For example, I measured the water bottle’s height and visible width to see how large to make my customizations.
NOTE: If you’re using the 6” Smart materials, the design must be smaller than about 4” x 12” to fit. - To make a custom name, click the “Text” icon to add a text box to the Canvas.
- Type your name in the text box.
- To change the typeface, click the “Font” menu at the top.
- You can use Cricut’s included typefaces, or find options on your computer in the “System” section.
TIP: To learn how to use downloaded fonts in Cricut Design Space, see my tutorial on the topic.
NOTE: I used Cakepop, which you can get, or use a free alternative like - With the Lock icon by “Size” closed to maintain the proportions, change the text’s “Width” to fit the height you measured on the water bottle.
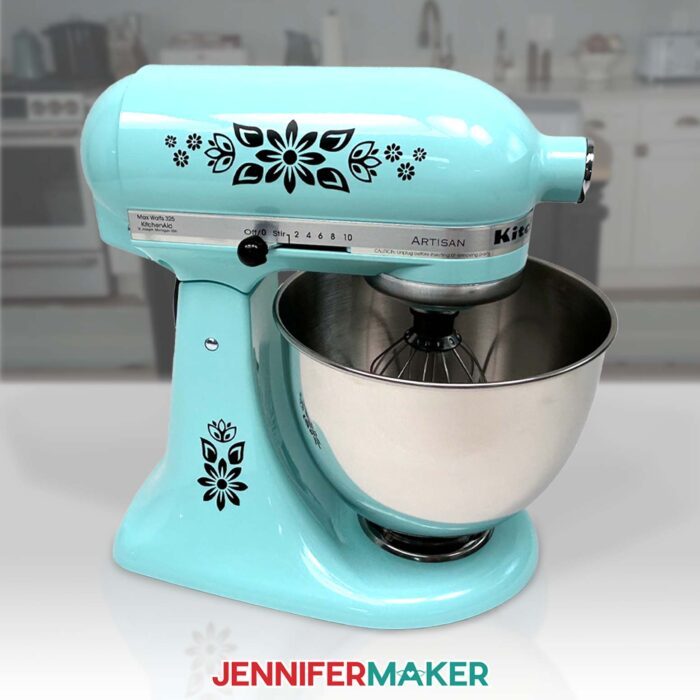
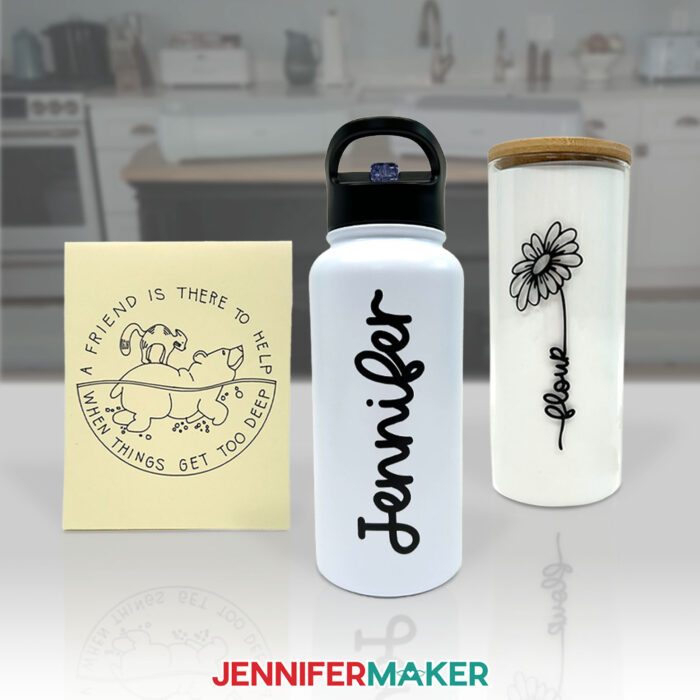
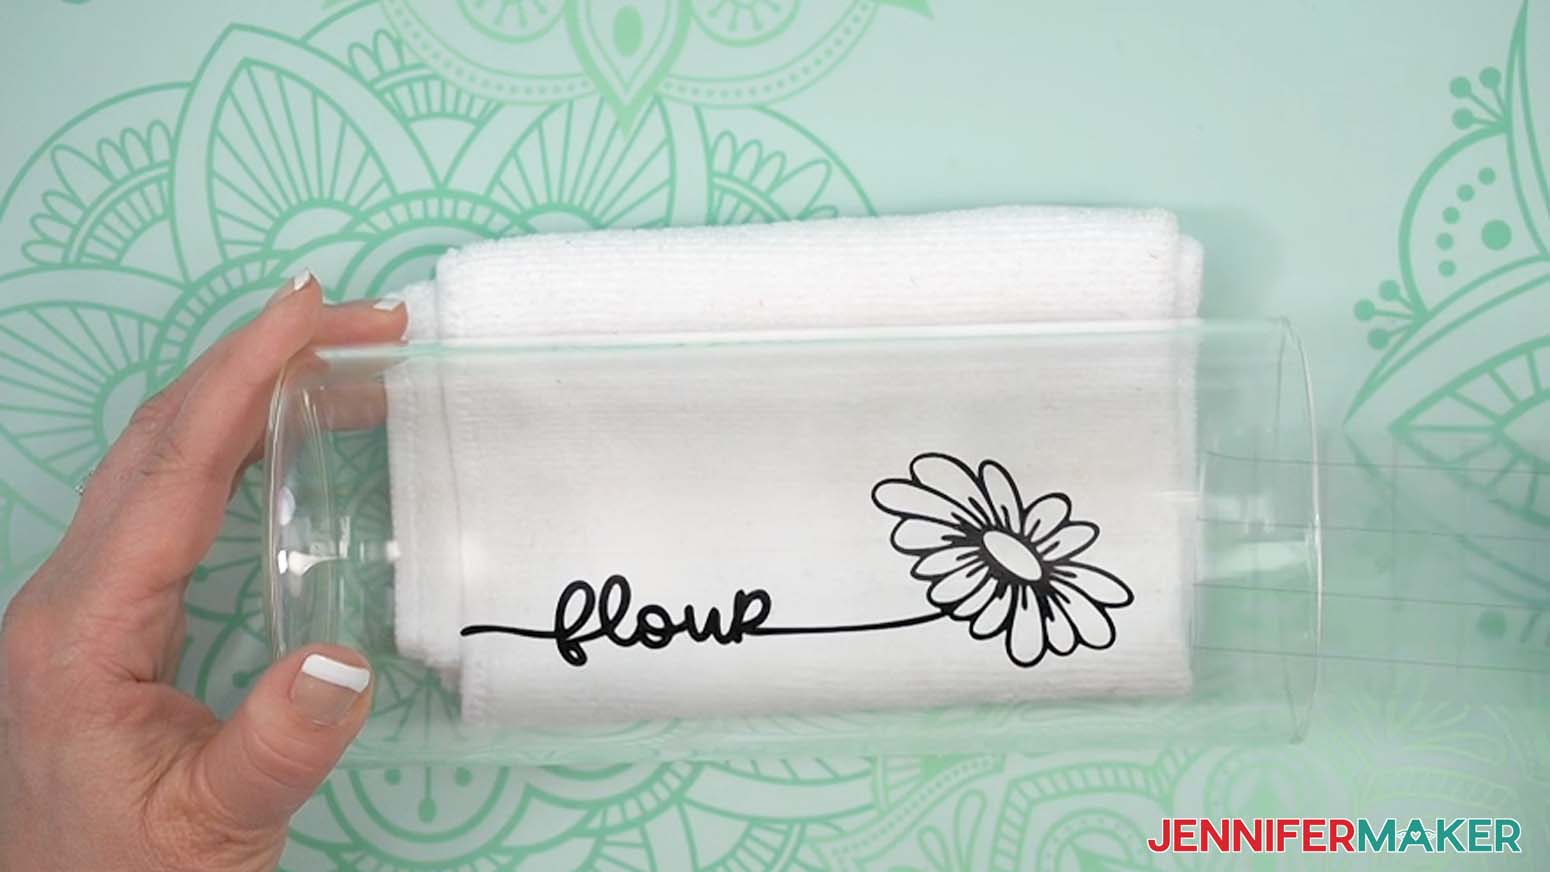
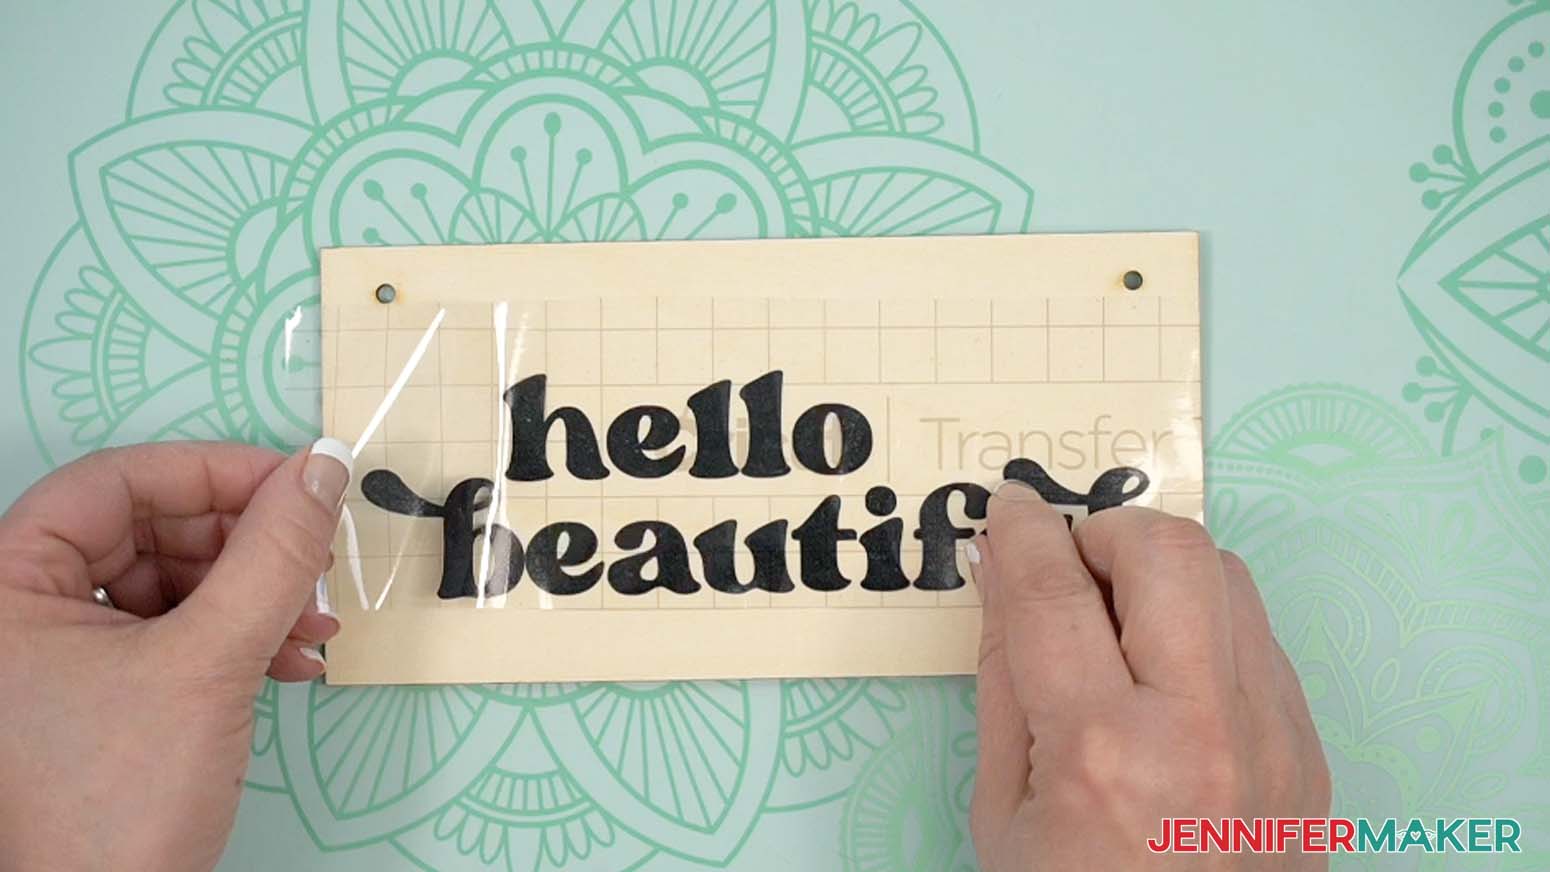
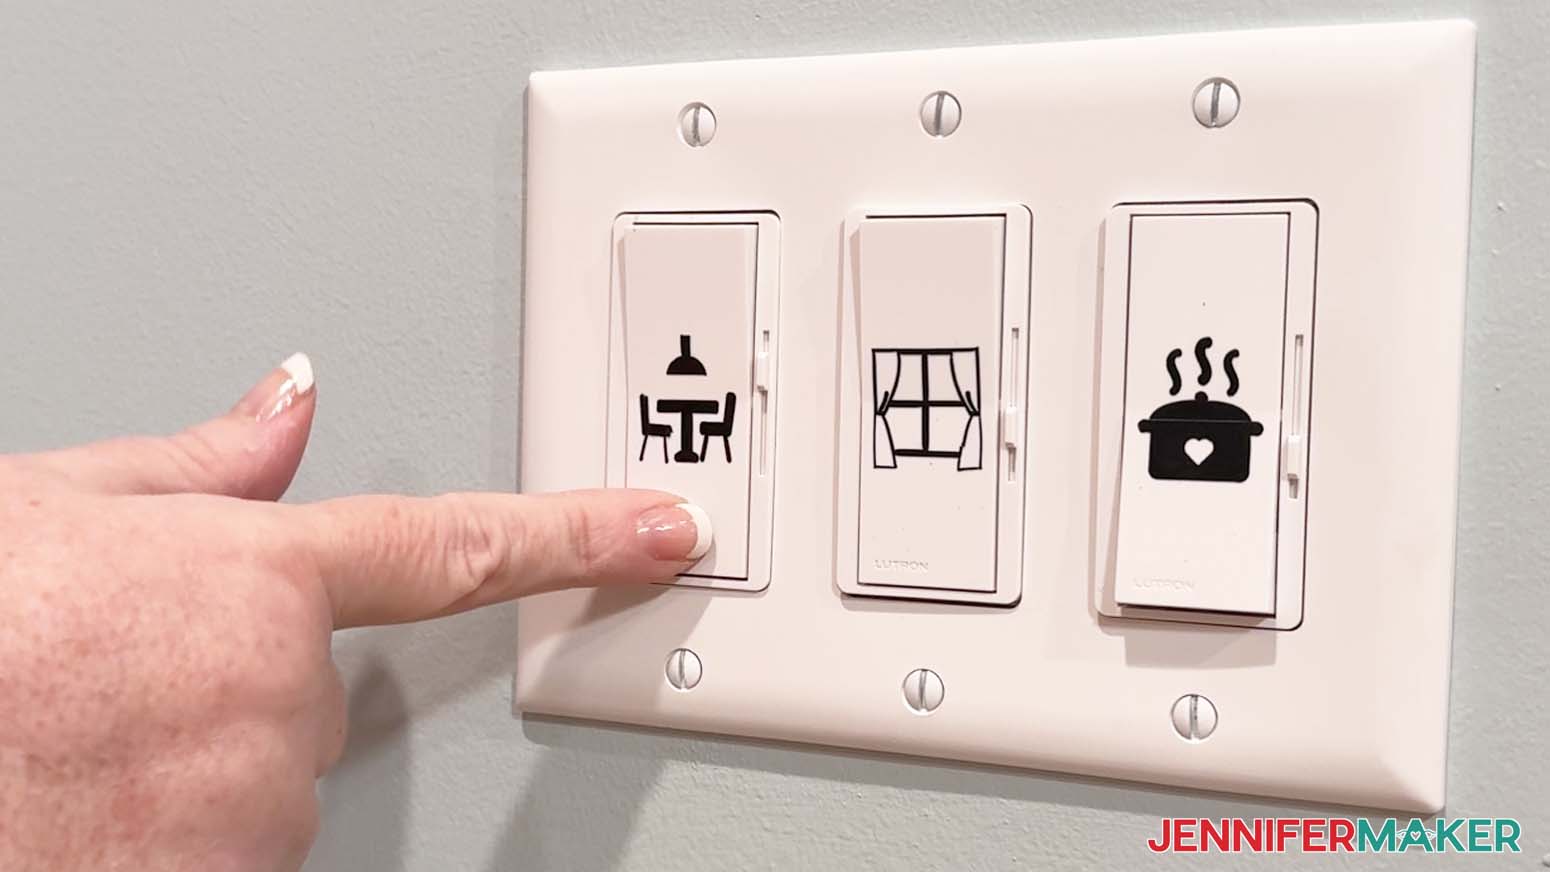
- Add and adjust any other designs you want to use. I made a second name for another water bottle, resized the light switch decals to be slightly smaller than the buttons, and adjusted the other designs to fit my sign, jar, and mixer.
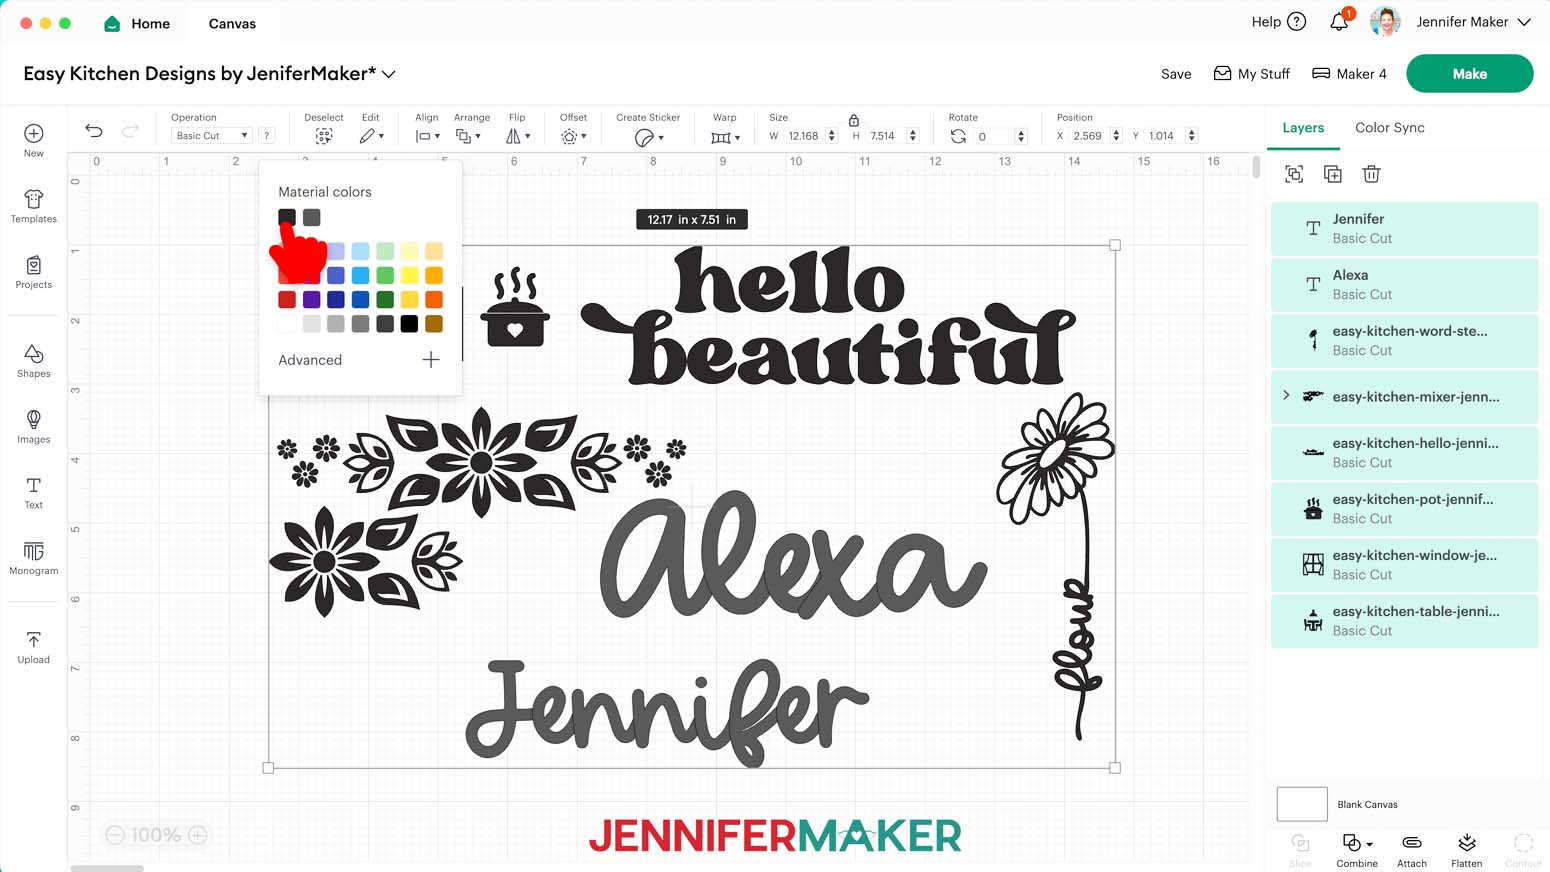
NOTE: For more details on decorating kitchen items with vinyl, see my Kitchen Decor project. - To make sure everything will cut on the same material, select everything on the Canvas, then click the Color Box next to “Operation” and select one color.
- Make sure your new machine is selected in the top right, then click “Make.”
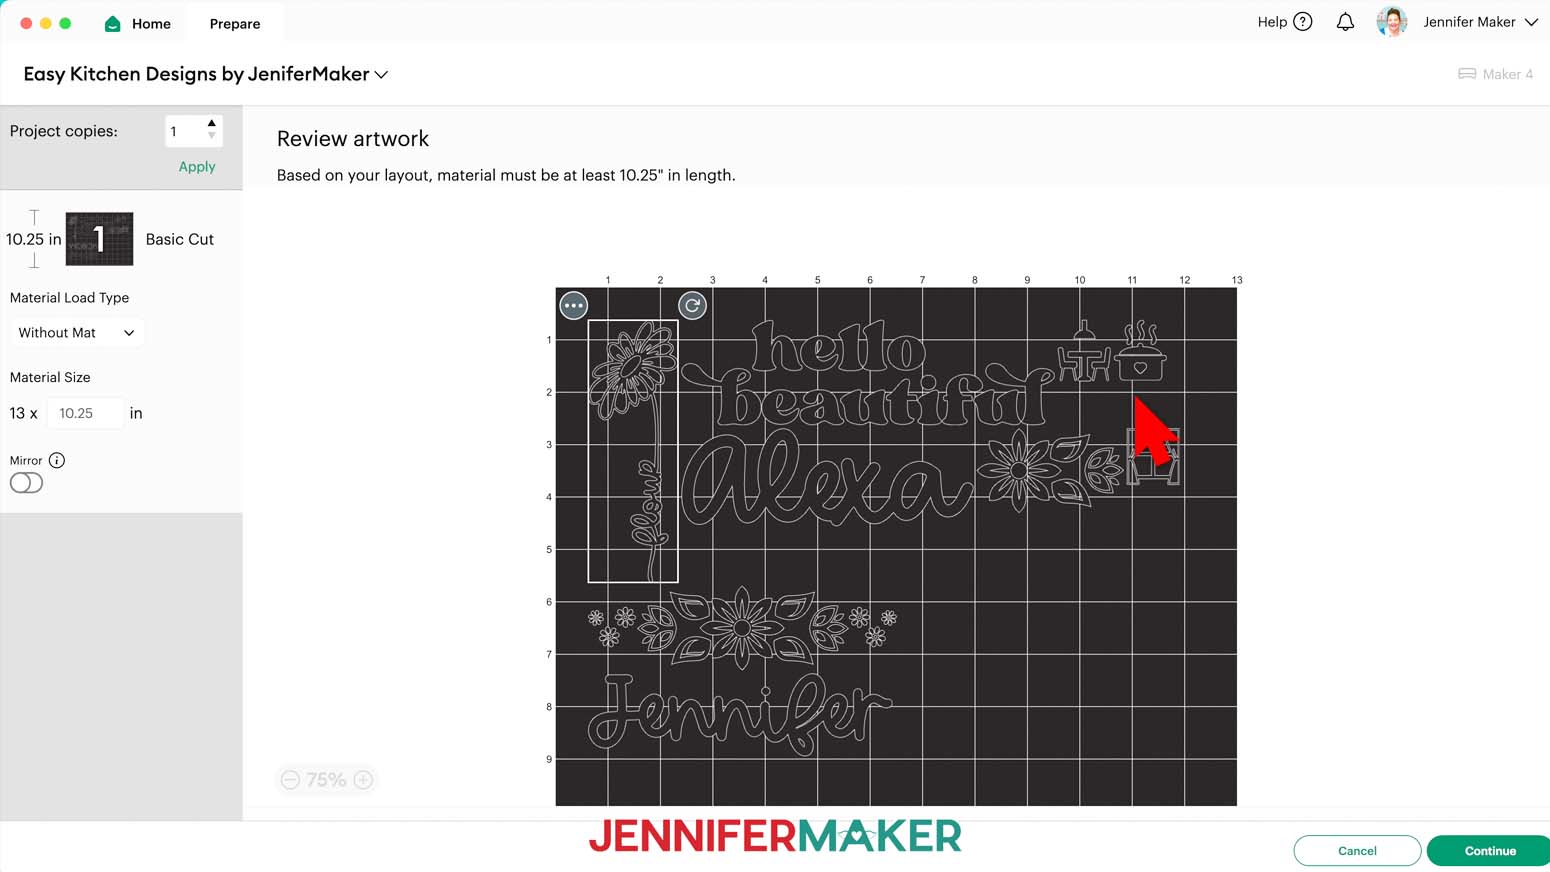
- On the Prepare screen, the software may assume you are using a machine mat.
- If you are using Smart Vinyl, change the “Material Load Type” to “Without Mat”. The mat preview will reload to show the Design Space recommendation for the cutting layout.
- If the “Material Size” doesn’t match your 6” material, the machine will not let you proceed to cutting on the next screen.
- In the “in” field under “Material Size,” type “6” to match the material length and press “Return” or “Enter” on your keyboard.
- You may see a pop up indicating that Cricut Design Space chose a different material length to fit your designs. Click “Dismiss.”
- To make the designs fit in the usable length of the 6” sample, try moving and rotating the elements on the mat preview. When they fit in a 4” x 12” area, try re-entering “6” in the Material Size length field.
TIP: This may take several rounds of experimenting with element layout, and Cricut Design Space might bump some elements to another mat of the same size. Be patient and keep trying until the “Material Size” length works at 6” and you only see up to two mats if you want to use just the sample materials and one Removable Vinyl piece was already used for the test cut. - Once the designs fit your materials, click “Continue.”
- On the “Make” screen, check that your new machine is selected in the “Connected machine” field.
- Under “Set Base Material,” select “Smart Vinyl Matless Removable Vinyl.”
TIP: If the correct option is not visible, click “Browse All Materials” to find and select the correct option. - Set the “Pressure” to “Default.”
NOTE: I often use “More” Pressure to ensure complete cuts, but the Cricut Maker 4 and Explore 4 are so powerful I haven’t needed to do so in my testing. However, all machines are different. If you have trouble with cutting, check out my tips on better cuts! - Load your Removable Smart Vinyl colored side up under the machine’s guides until it pulls the material in to measure.
- Once the middle button begins flashing, press it to begin the cuts.
- When the cuts are complete, press the flashing button to unload the material.
TIP: If you’re not sure the cuts went all the way through the material, you can gently curve the material to see if the vinyl pieces separate. If not, gently pat the material back in place and press the arrow button to run a second set of cuts in the exact same spots. - Use scissors to cut the designs apart.
TIP: If there are large enough sections of intact vinyl, you can save them to use with a machine mat for future projects. - Use the mini weeder to remove the excess vinyl around the design and inside its elements.
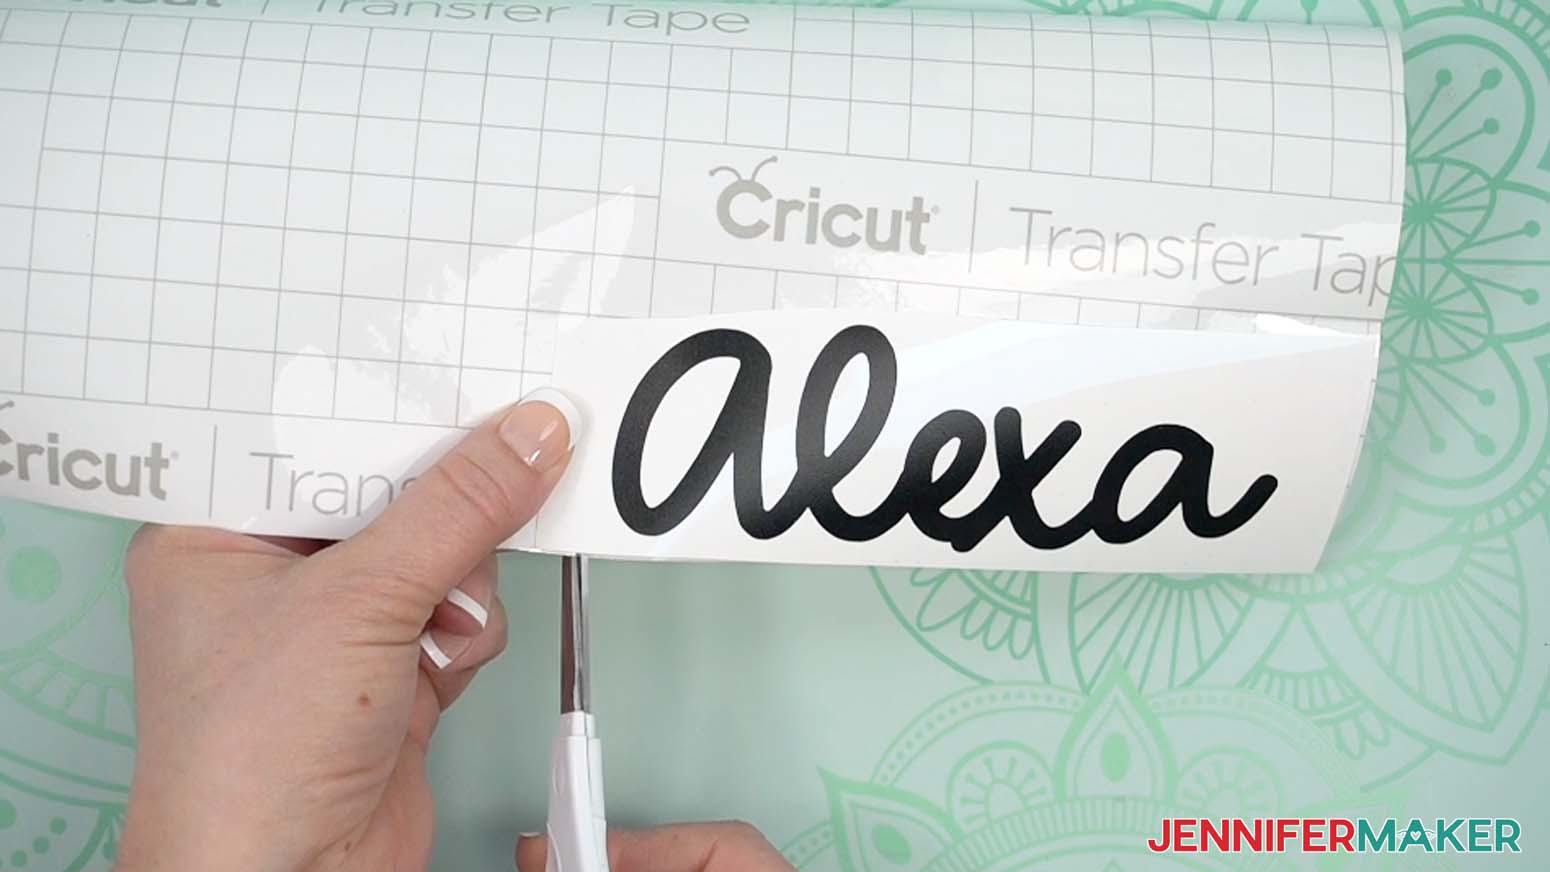
TIP: For more details on weeding, see my tips. - Cut a piece of transfer tape slightly larger than the design.
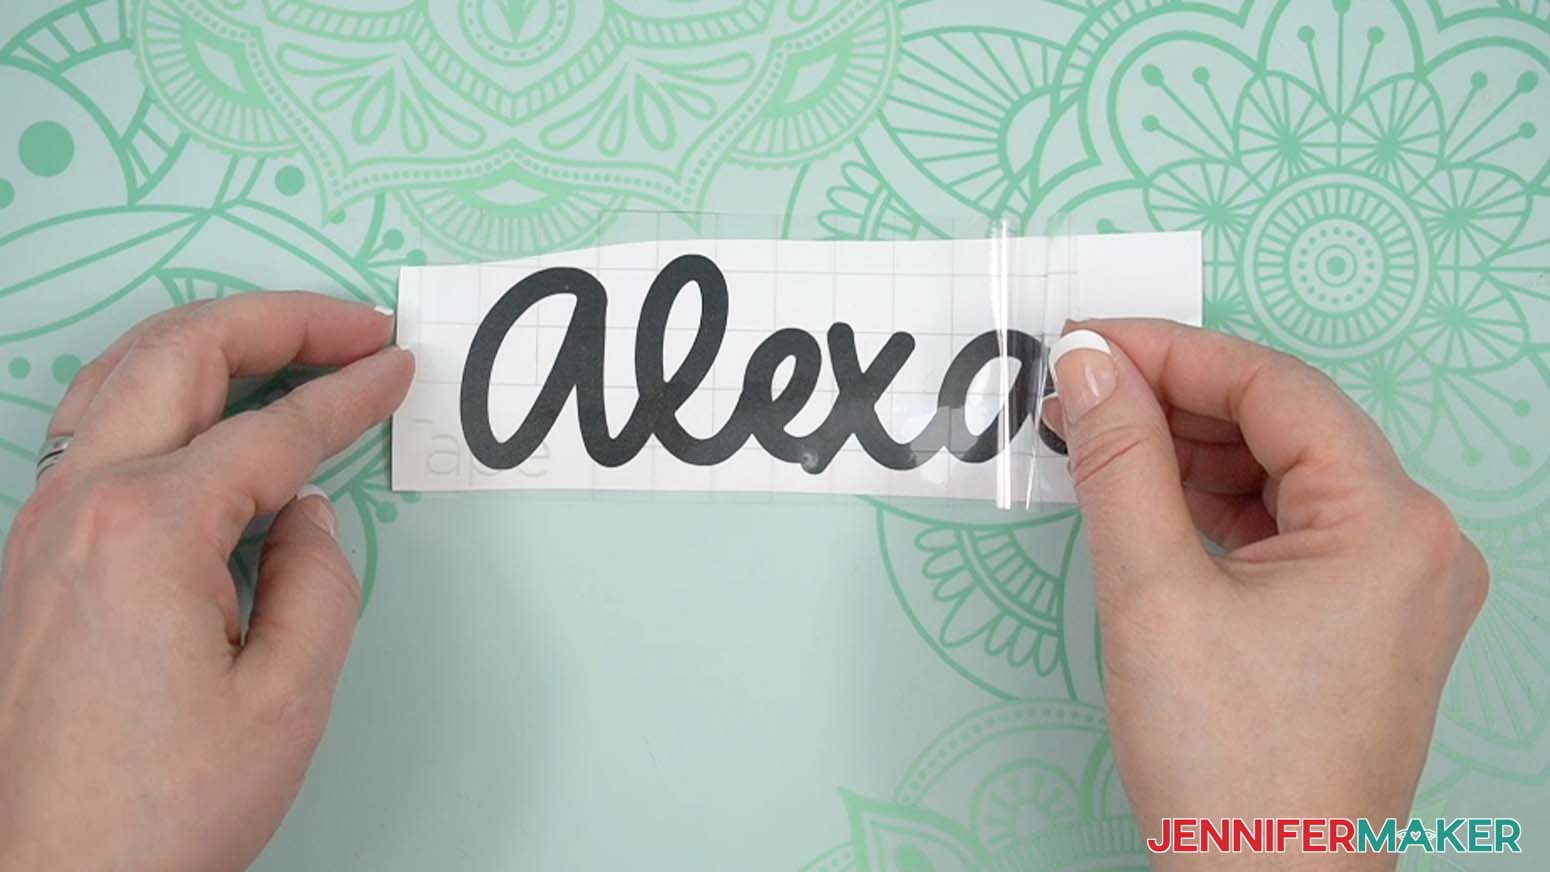
TIP: For more information on transfer tape, see my guide. - The best way to apply transfer tape to vinyl is using the "taco" method. Remove the backing from the transfer tape. Hold the transfer tape in the shape of a taco, or a "U" shape. Then, put the bottom of your “taco” onto the middle of your design so the guide lines align with the element. Smooth the tape over the decal from the center outward to minimize wrinkles and bubbles. This is called burnishing and you can use your finger, a scraper tool, or an old store loyalty card.
- Clean your blank to make transferring the vinyl easier. Any lint, oils, or other debris will keep the vinyl from sticking correctly.
NOTE: For solid items like the water bottle, I use rubbing alcohol and a lint-free cloth. For porous surfaces like the sign, I use a lint roller. - Place your blank with the decoration area face up.
TIP: I use a lint roller or towel to keep round blanks in place, like the water bottle or jar. - Peel the liner off of the transfer tape and design. If the vinyl is not sticking to the transfer tape, try burnishing again.
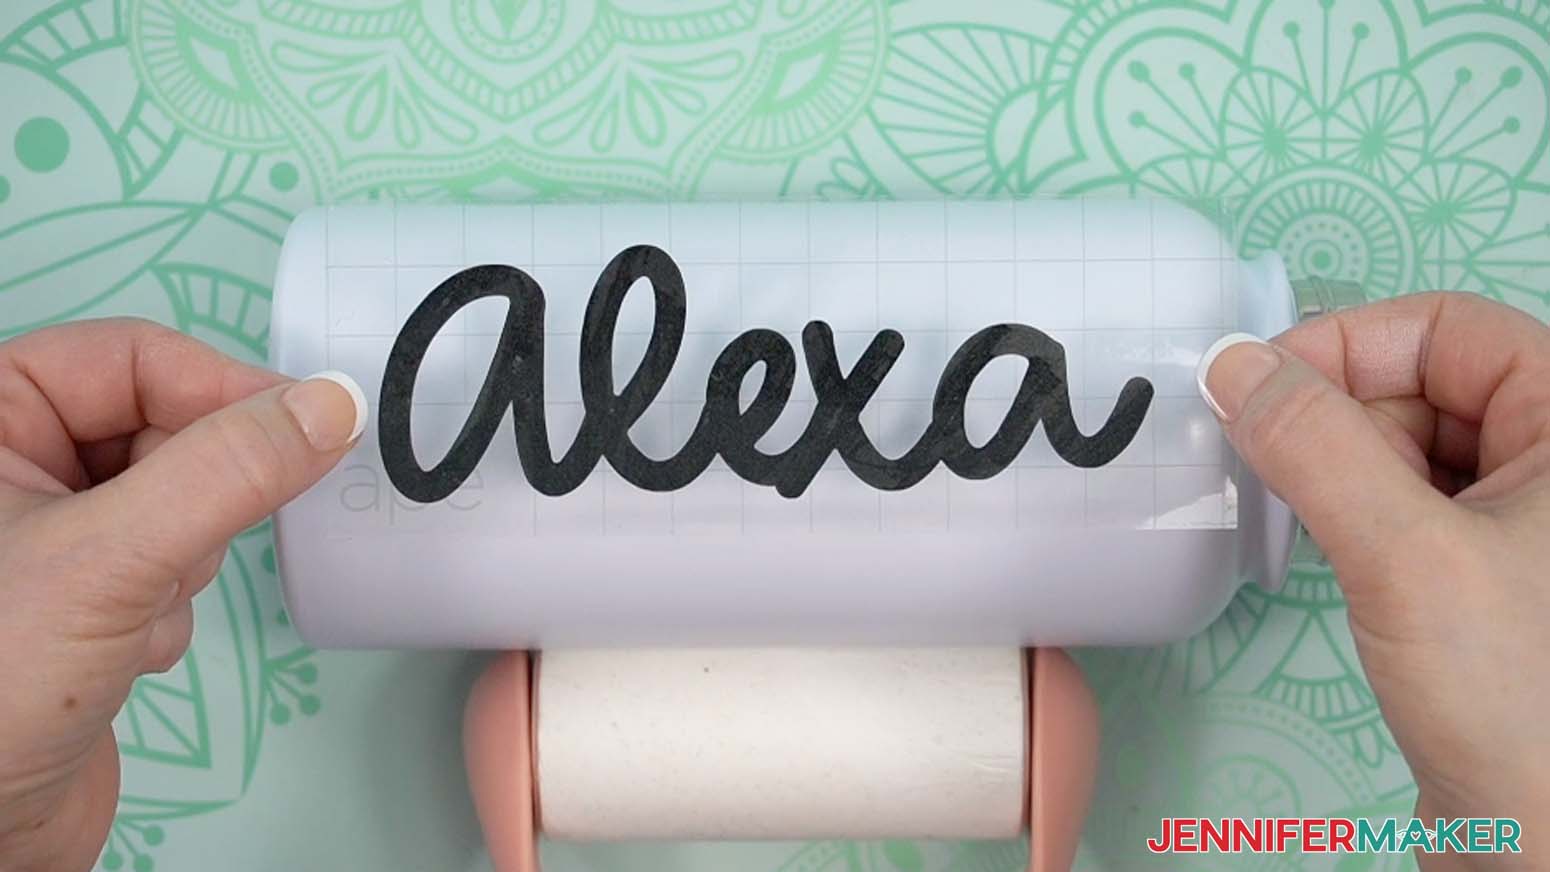
TIP: Keep the transfer tape backer to save the tape for re-use! - Use the tape’s guide lines to position the design correctly on the blank and let the middle fall into place.
- Then smooth out from the middle to adhere the sides.
- Burnish the vinyl to the blank.
- Then peel the tape back to reveal the result.
- Then, I used the same steps to add my word stem flower to this pretty glass jar!
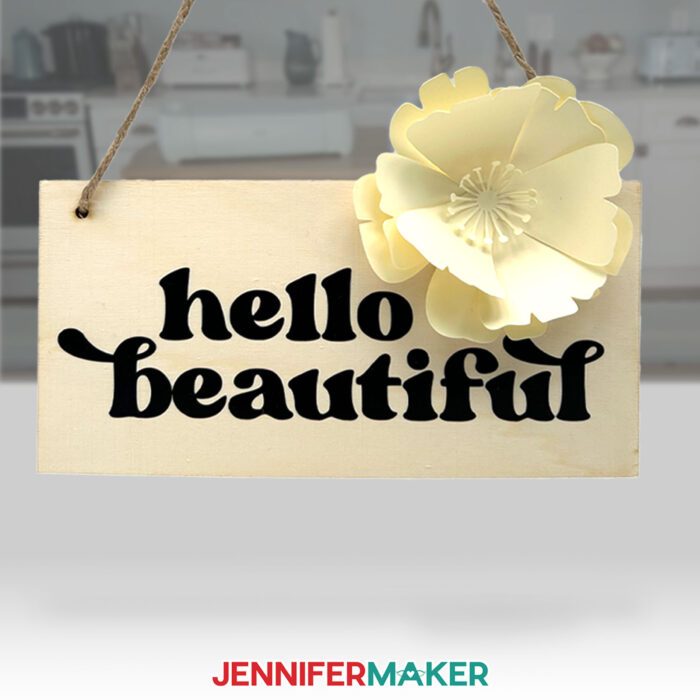
- And the “hello beautiful” decal to a wood sign!
- Even the little icons for my kitchen lights went on without trouble!
- And my new mixer!
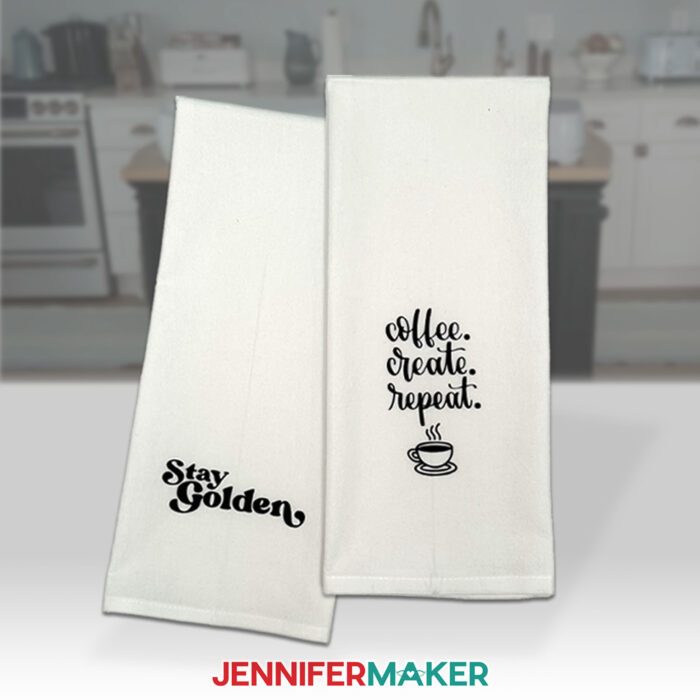
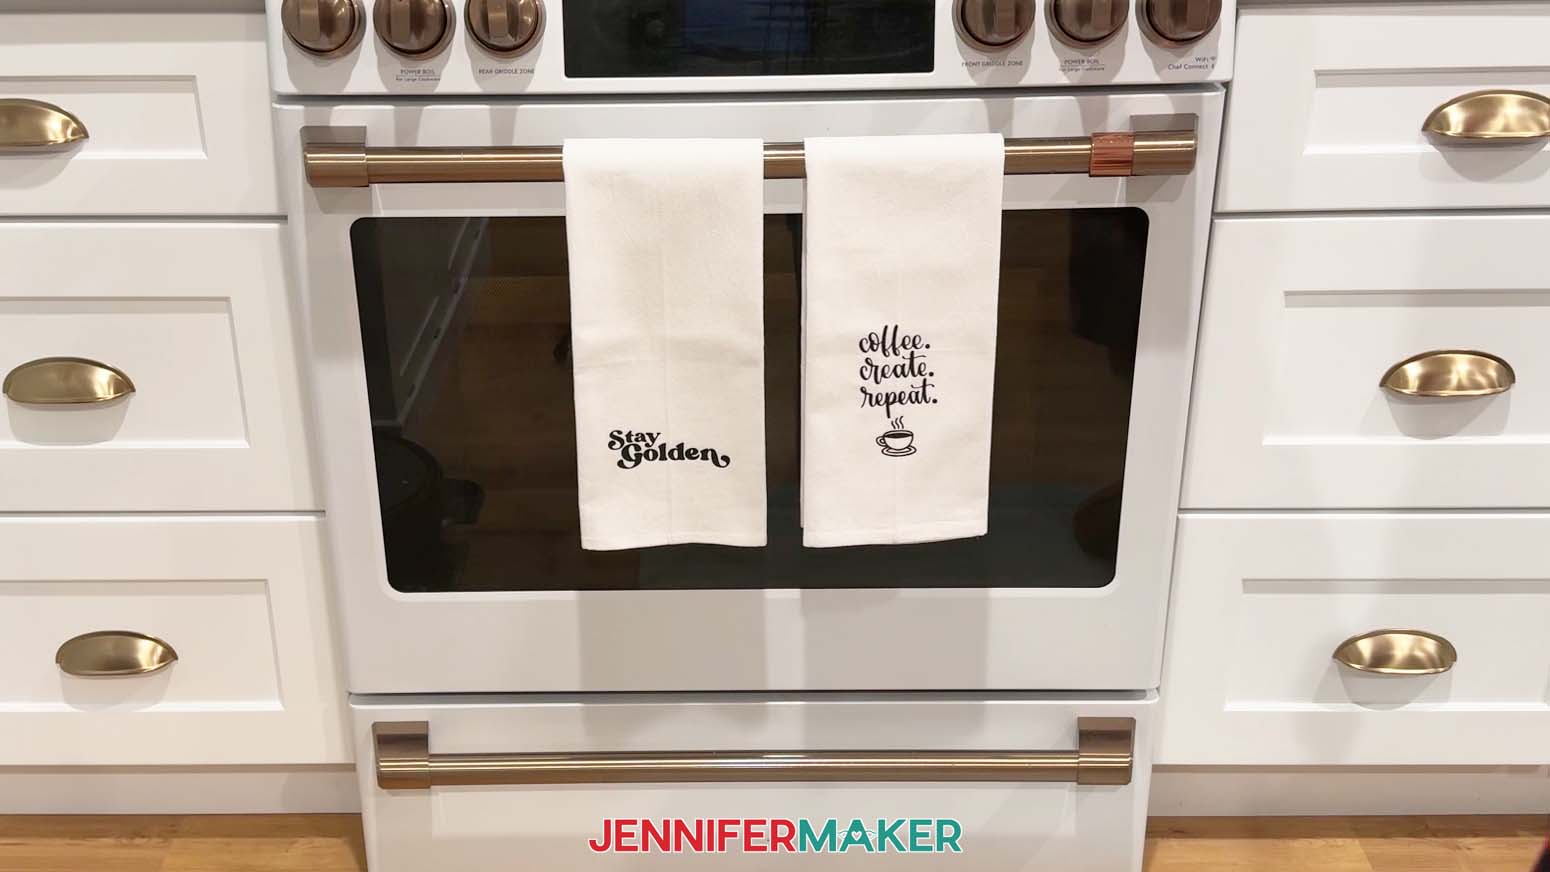
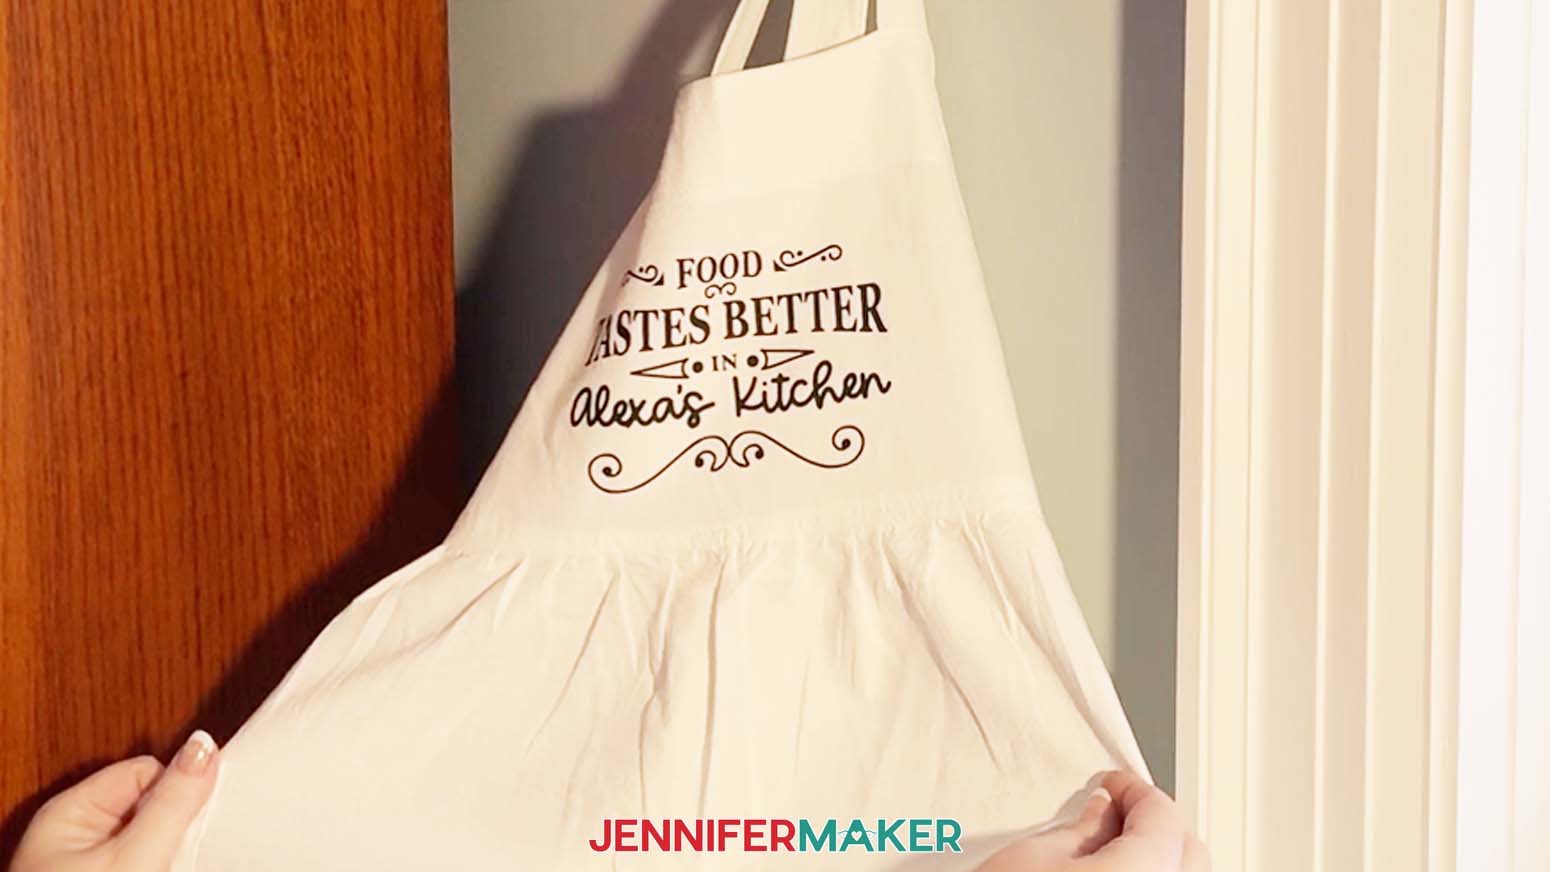
IRON-ON VINYL PROJECTS: TEA TOWEL SET AND APRON
- Follow Steps 1-6 under the Removable Vinyl instructions to add the SVG or SVGs you want to use to your Canvas.
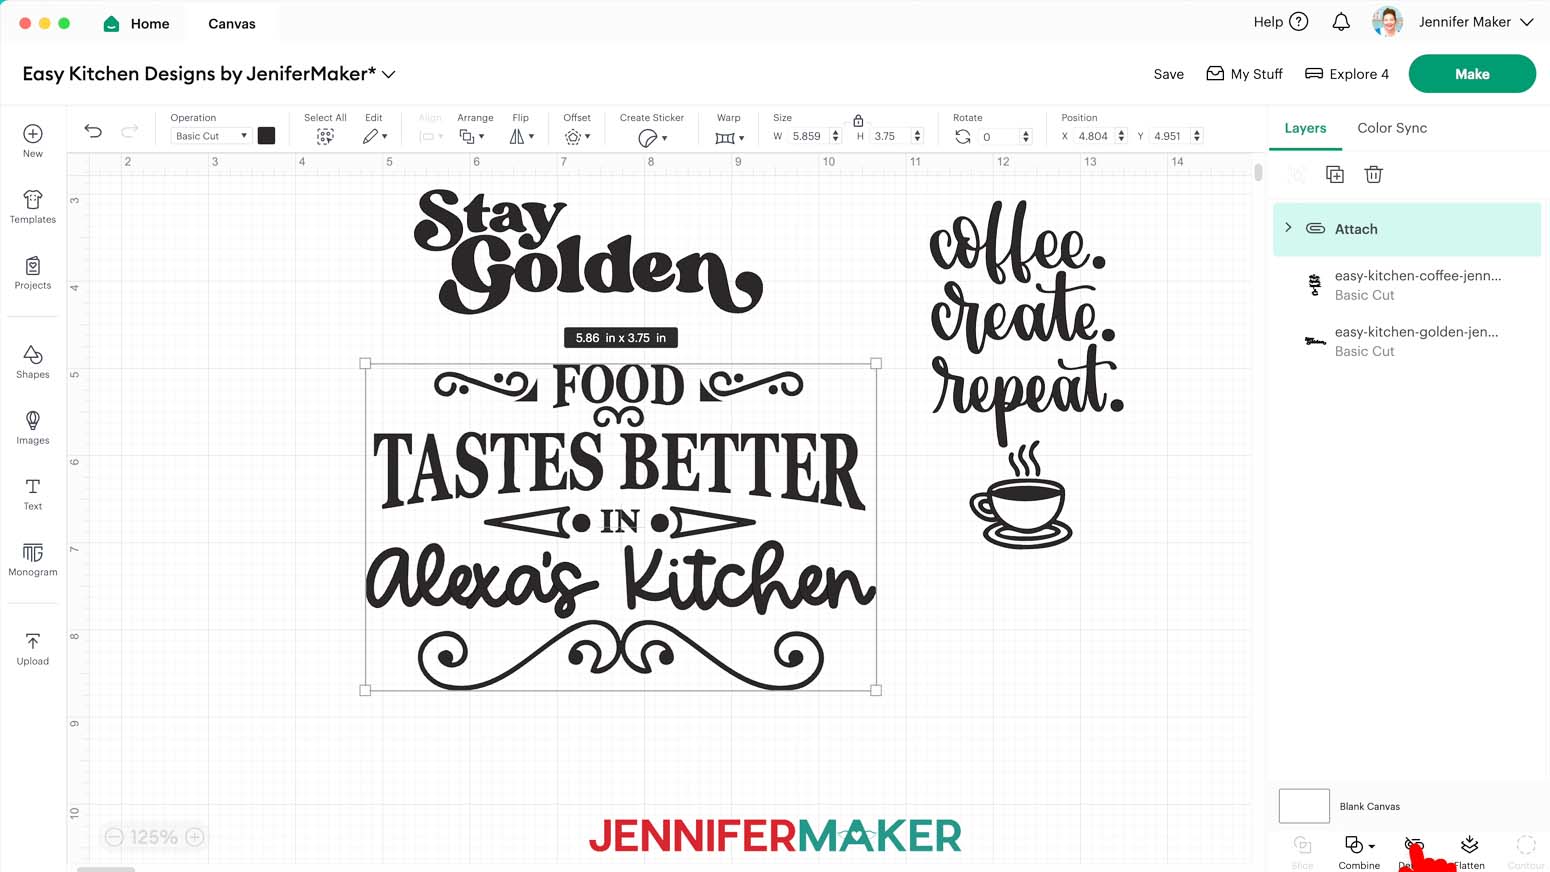
NOTE: I used the “Stay Golden” and coffee designs for tea towels and the kitchen design for the apron. The designs are sized to fit the blanks in my shopping list, but you can adjust them as needed for other items. - If you want to add a name to the apron design, click the “Text” icon to add a text box, then type the customization and change the typeface if you’d like.
- Position the customization on the existing design, then select both layers.
- Click “Attach” at the bottom of the Layers Panel to make the layers into a single cut layer.
- Follow Steps 14-30 from the Adhesive Vinyl projects with slight adjustments:
- On the “Prepare” screen, toggle on “Mirror” since the designs will use heat transfer vinyl.
- On the “Make” screen, under “Set Base Material,” select “Smart Iron-On Matless Heat Transfer Vinyl.”
- For details on applying HTV to tea towels, see my tutorial on the topic.
- For details on applying HTV to an apron, see my T-shirt tutorial.

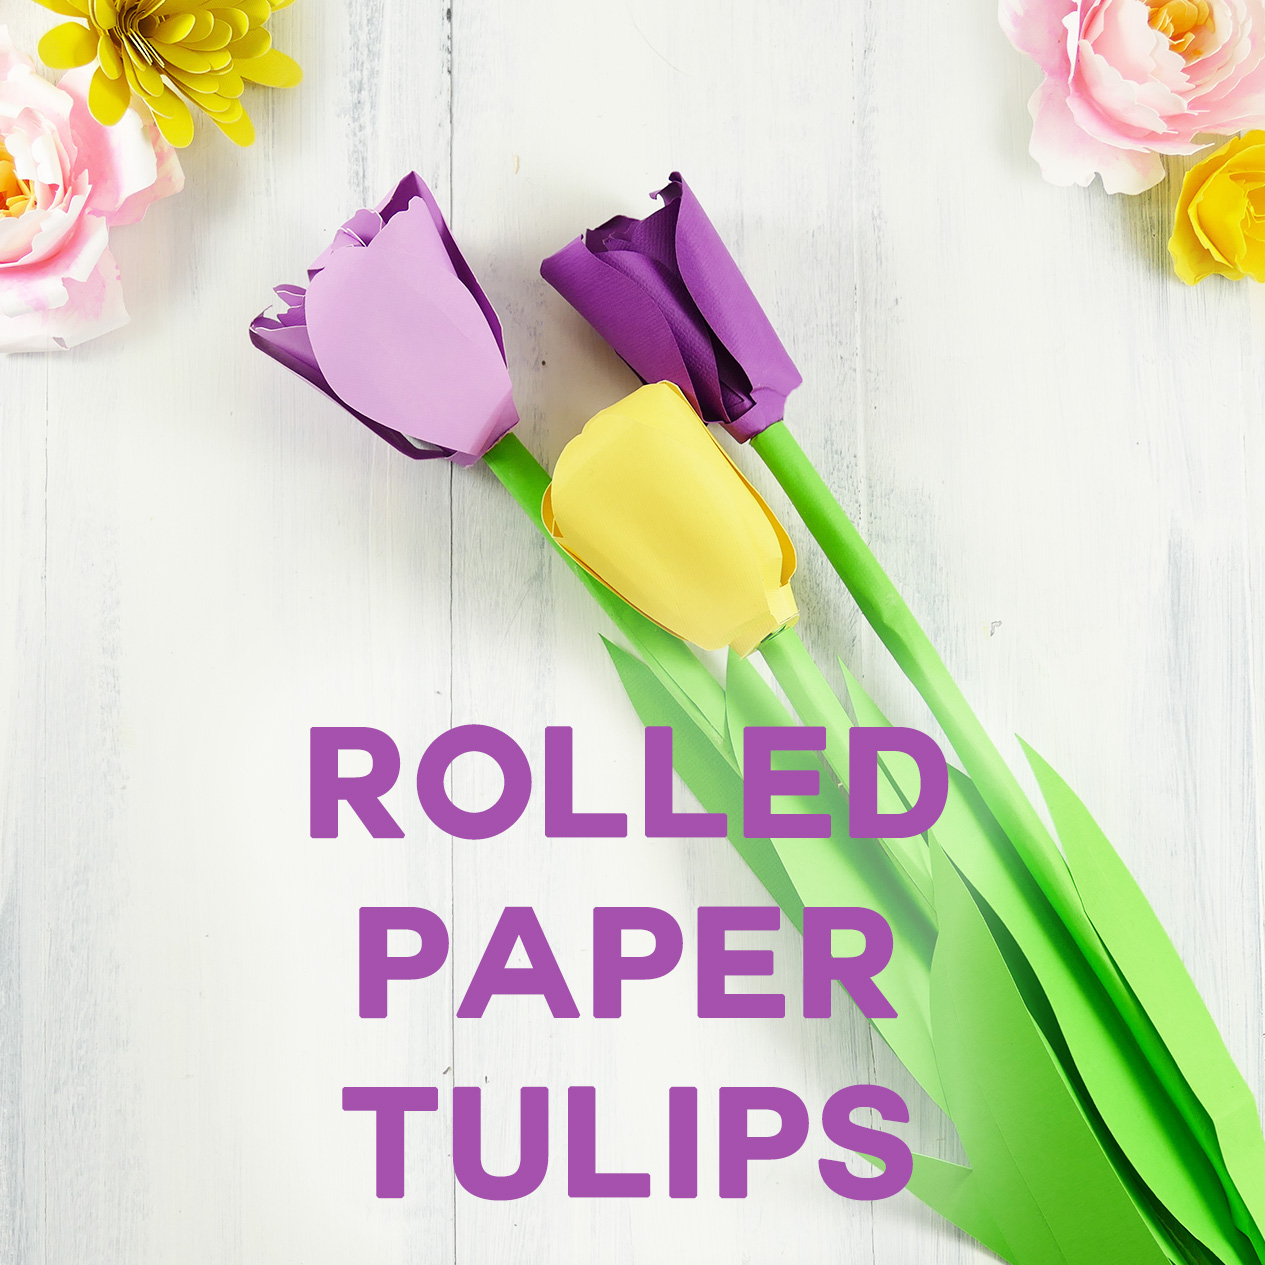
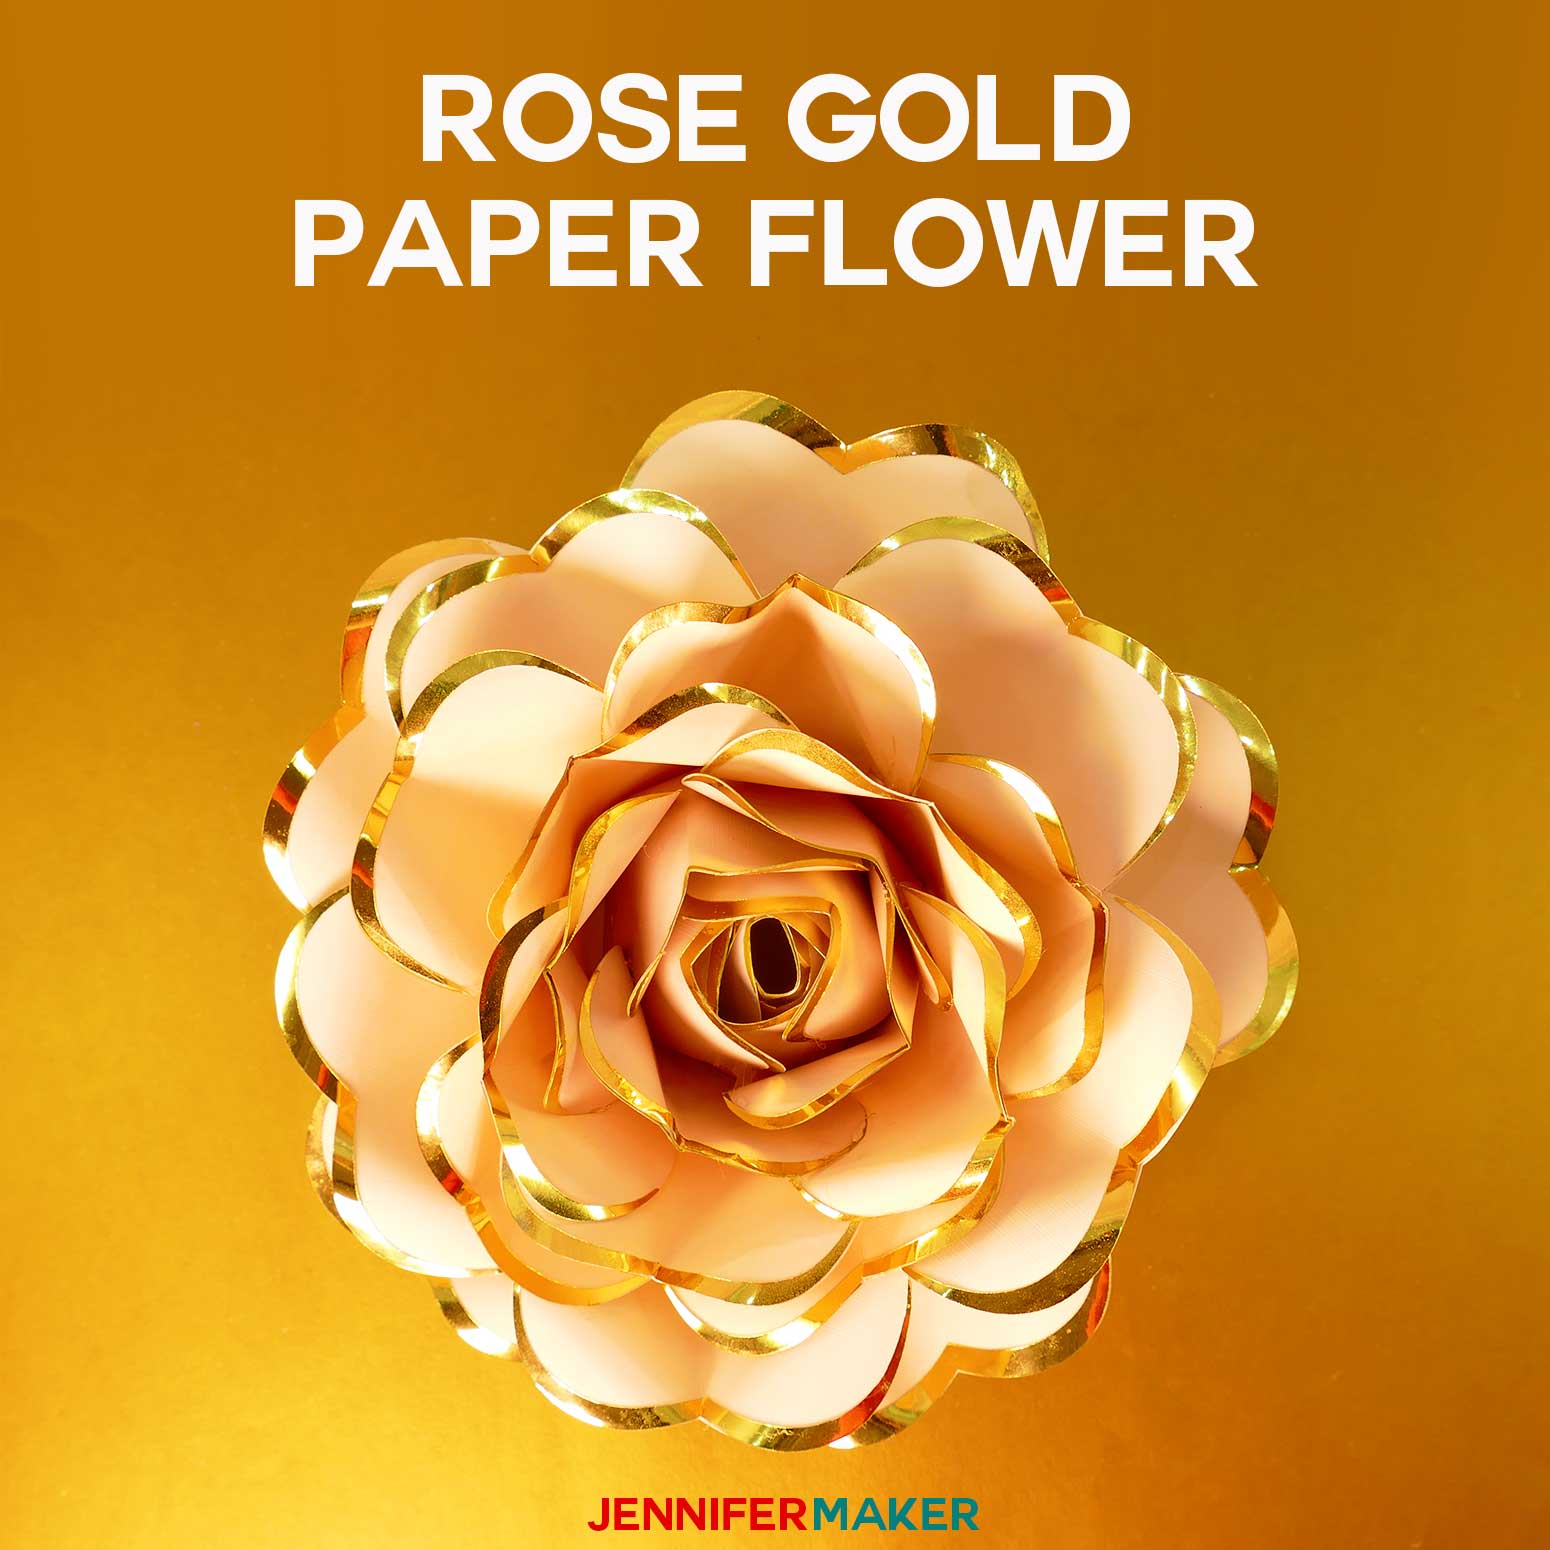
CARDSTOCK PROJECTS: DRAWN CARD AND PAPER FLOWER
- Follow Steps 1-6 under the Removable Vinyl instructions to add the SVG or SVGs you want to use to your Canvas.
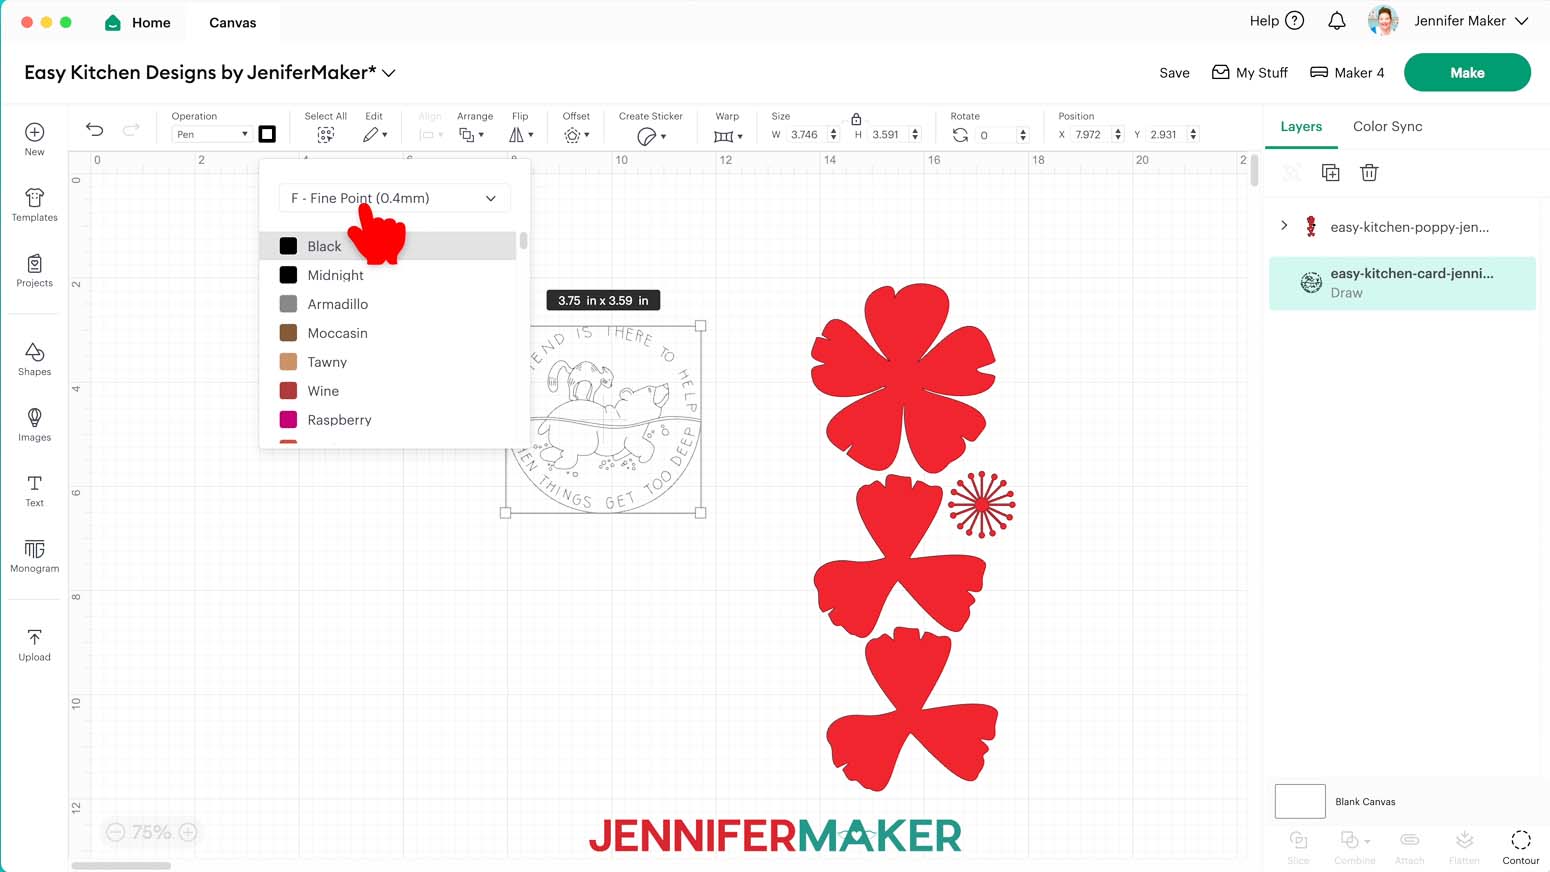
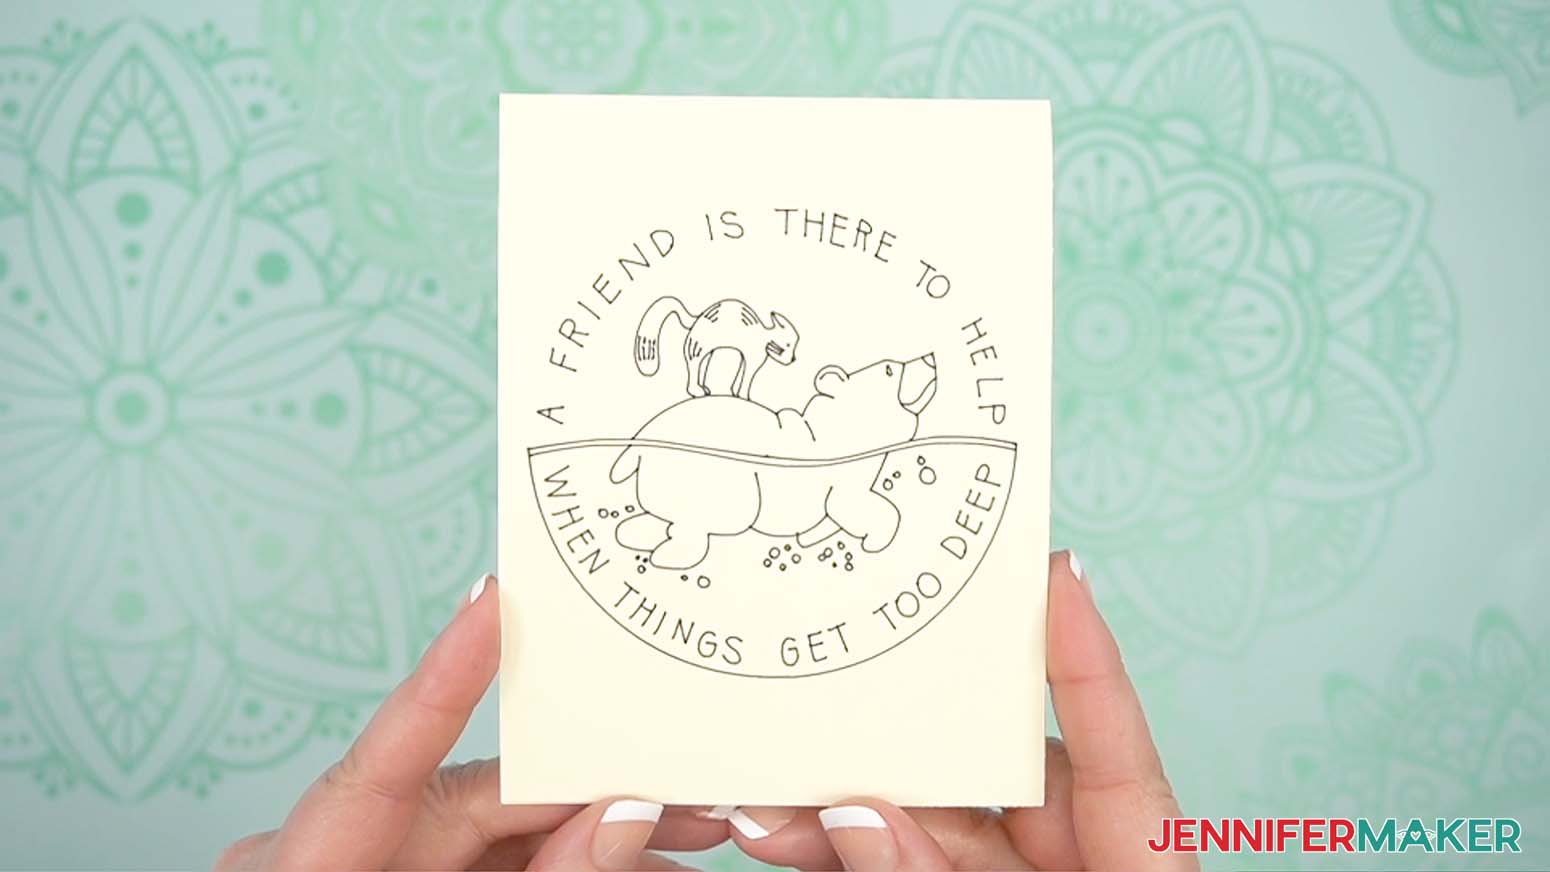
NOTE: I used the bear and cat design for a card and the layered paper flower. Each design fits on one of the included cardstock sheets. - To make the card design, select the SVG, then open the “Operation” drop-down menu to select “Pen.”
- Click the Color Box next to Operation and select the “F - Fine Point (0.4mm)” option from the drop down menu and the color “Black.”
- Make sure your new machine is selected in the top right, then click “Make.”
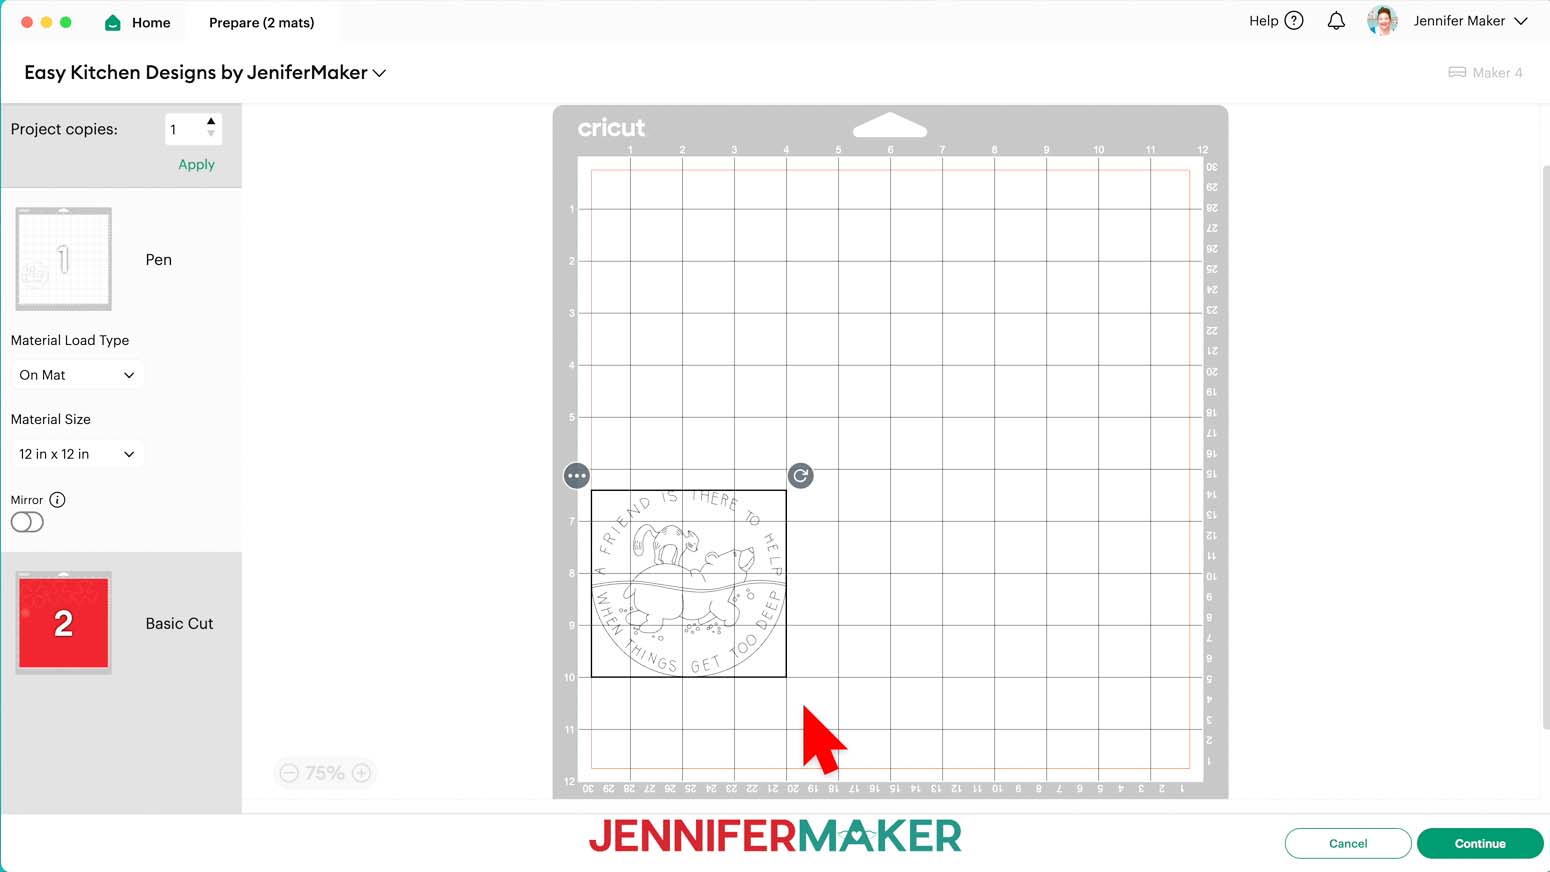
- On the “Prepare” screen, the card will be on the first mat because it’s not attached to a cut layer.
- I’ll place one of my 11” x 4.25” paper sheets the long way on the included Blue LightGrip machine mat and smooth it in place.
- Then back on the “Prepare” screen, there isn’t an option for that material size, so I’ll keep it at 12” x 12” but move the design so it will draw on the cardstock, not the mat.
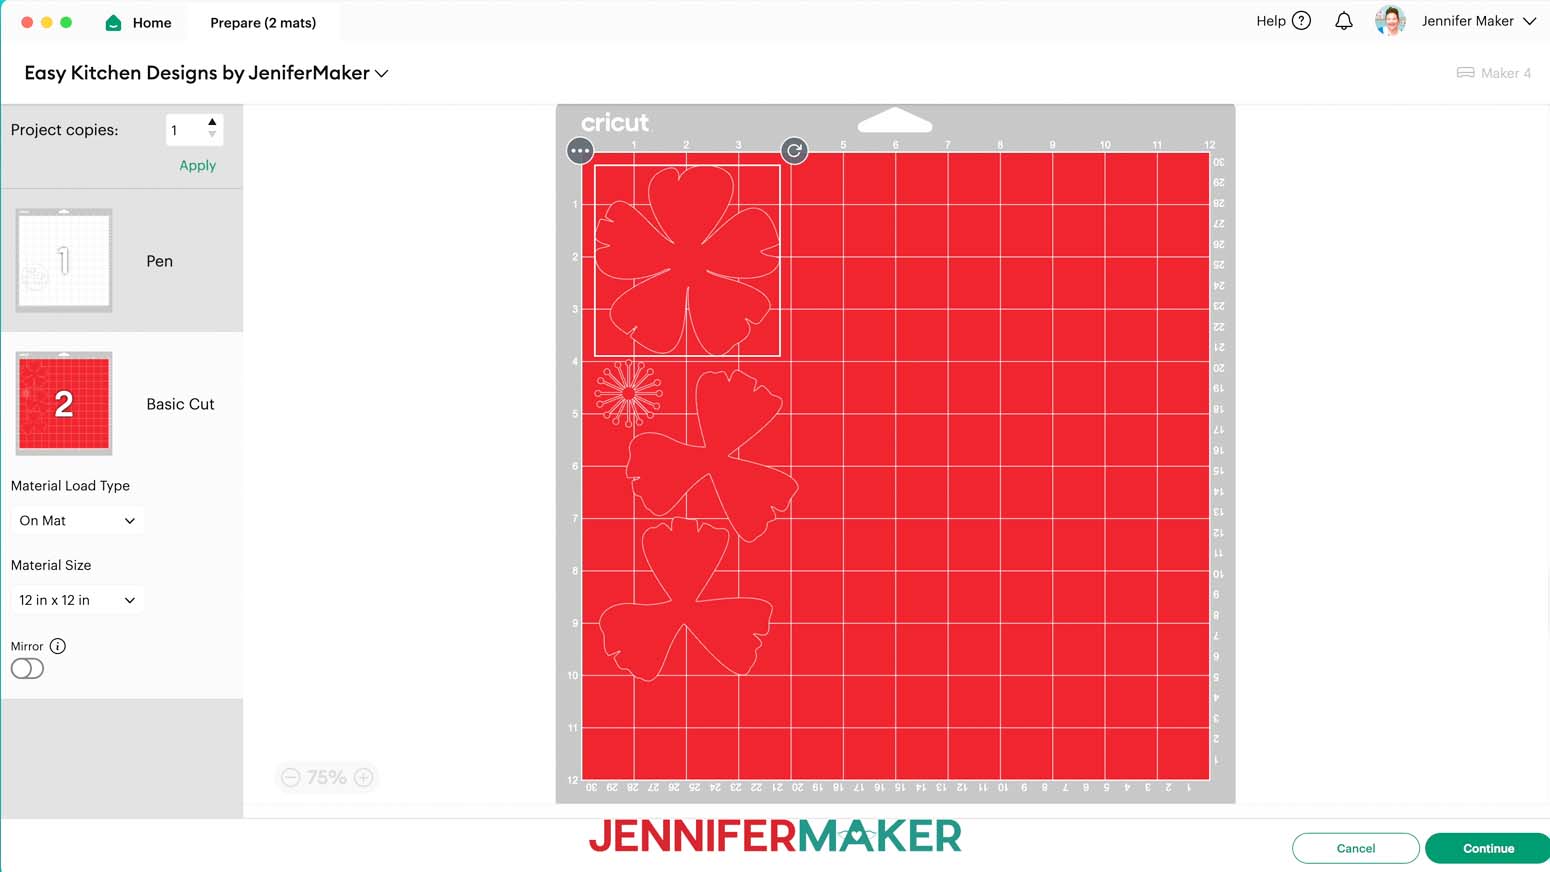
NOTE: I placed my design just below the 6” horizontal line so it will be below the middle fold. - For the flower, click the next mat preview.
- I plan to position the other piece of cardstock the same way, so I’ll move the pieces so they’ll fit on the paper.
- Click the first mat so it loads first, then “Continue.”
- Set the material to “Medium Cardstock” with “Default” Pressure.
- Load the prepared mat so it matches the screen preview.
- Follow the screen prompts to load your pen in the correct clamp and run the card mat.
TIP: Always test your pen to make sure the ink is flowing, and put the cap on the back so you don’t lose it.
NOTE: For more information on using Cricut pens, see my tutorial on the topic. - When the mat is complete, unload the mat and roll the mat back to release the cardstock.
- Align the short edges so the drawn design is on the front and facing the correct way, then crease the fold to make your card!
- For the flower mat, use the same settings and steps other than loading the pen.
- When the flower cuts are complete, unload the mat.
- Flip the mat and roll it back to release the cardstock and cut pieces.
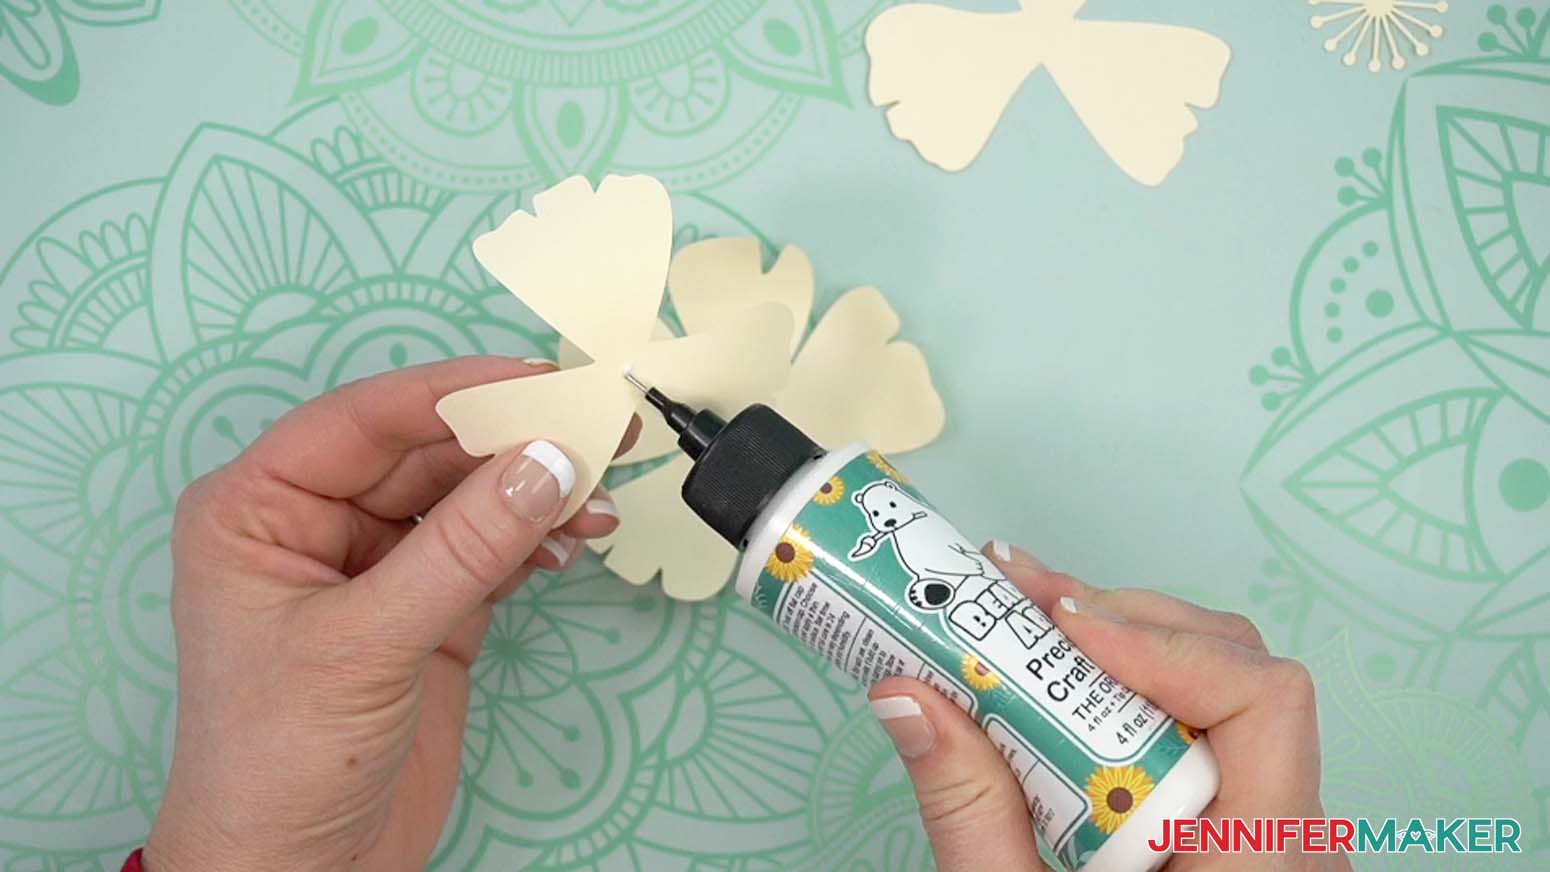
TIP: Place the pieces face up nearby so they stay in the correct orientation. - Gently use your fingers to curl the petals up a bit.
- Place the largest petal layer face up.
- Add a little craft glue to the back of the middle petal layer’s center.
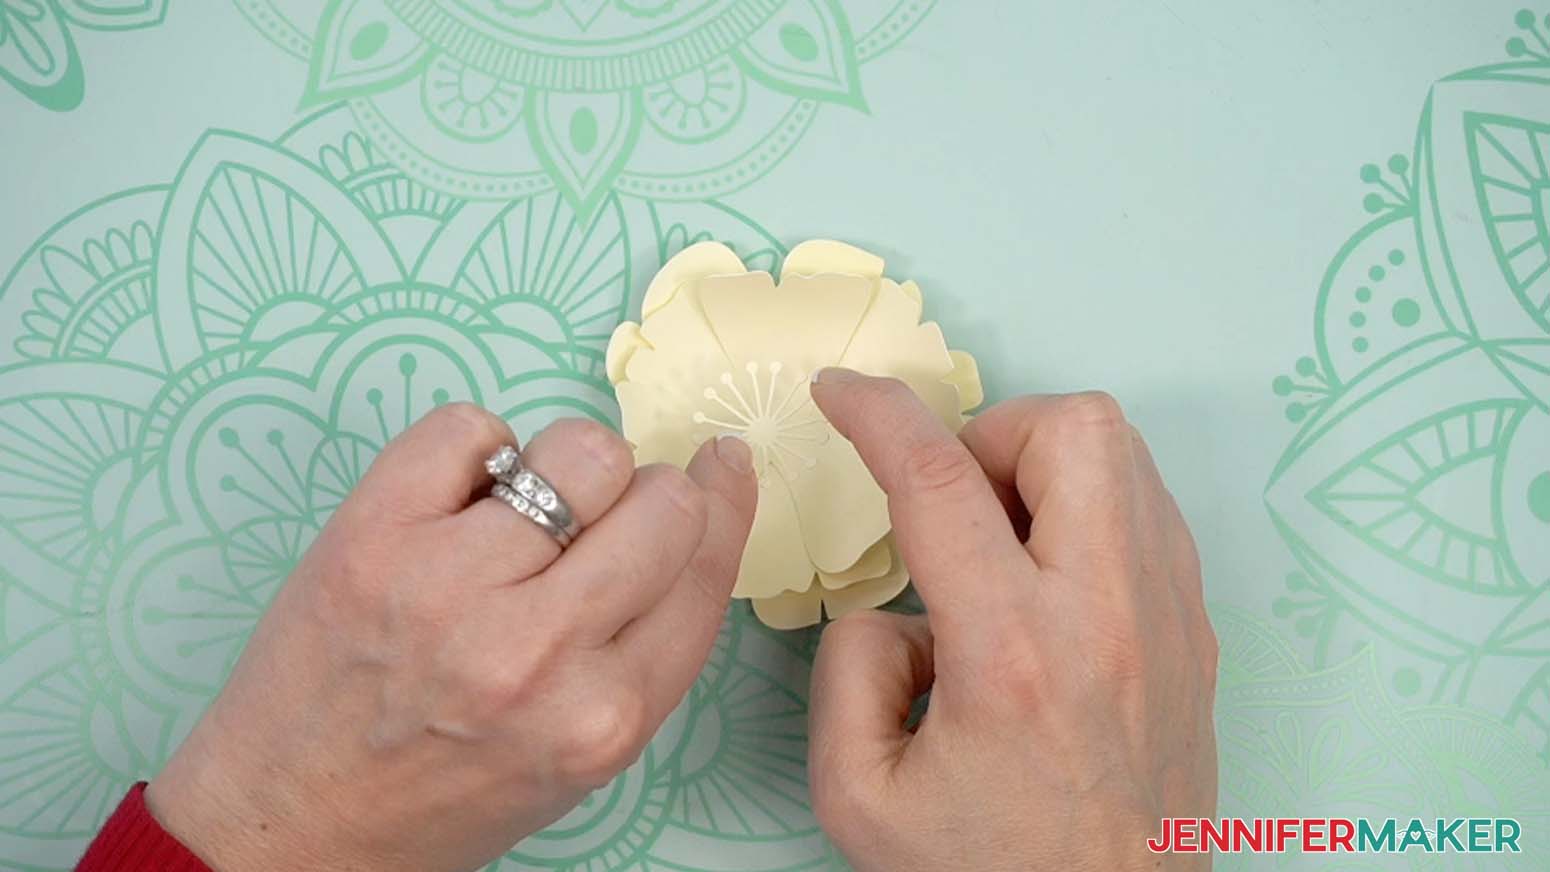
- Press the glued flower to the middle of the bottom layer so the petals are staggered.
- Add the small petal layer the same way.
- Add the flower detail on top of the small petals.
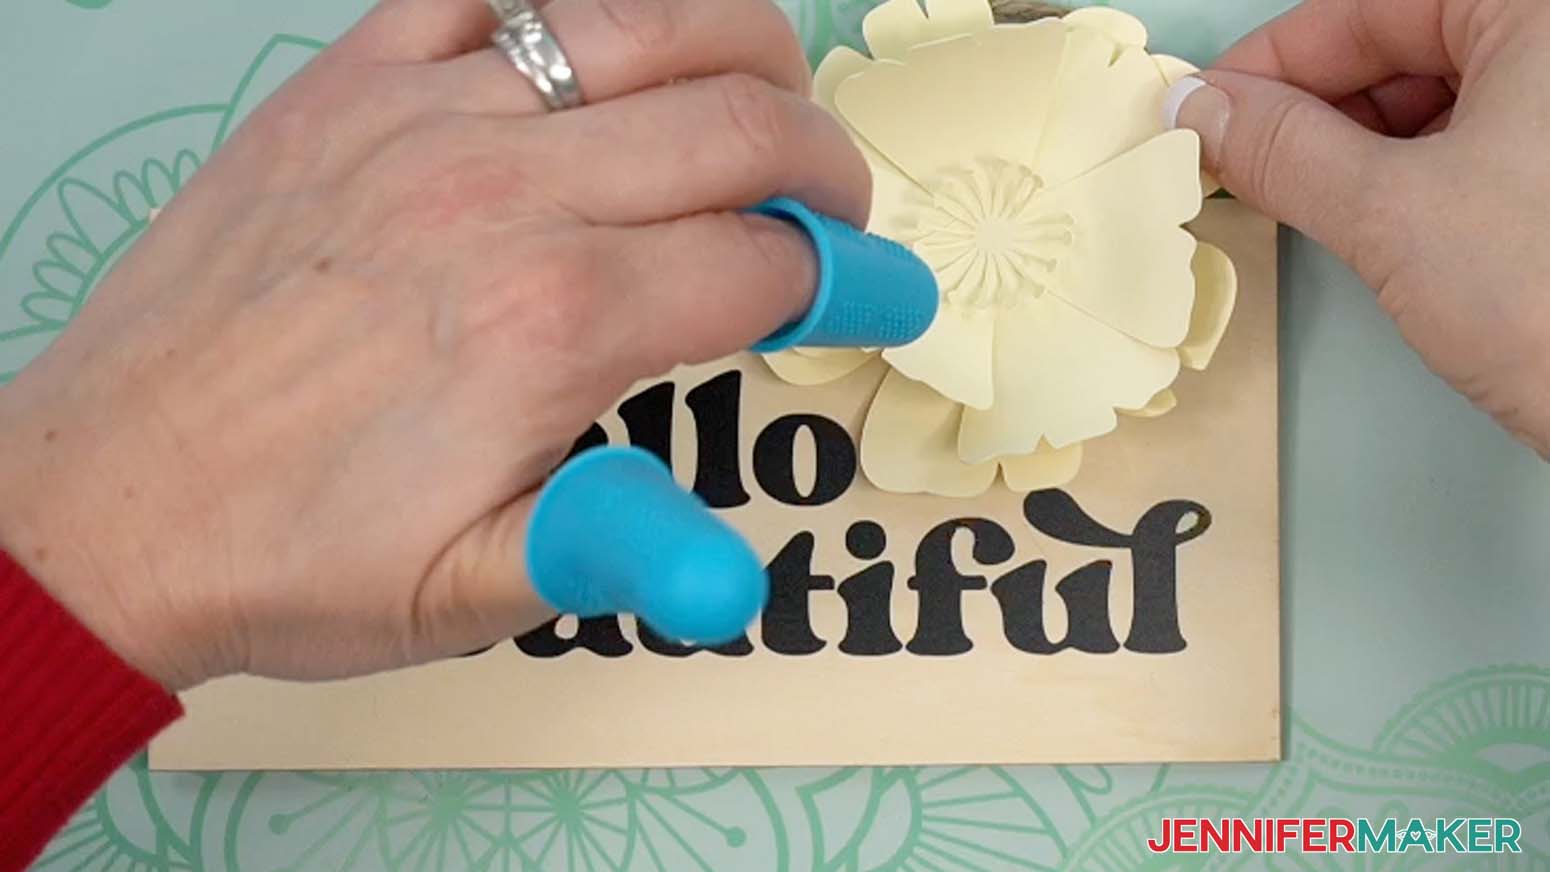
- Once the craft glue dries, use a hot glue gun and finger protectors to adhere the decoration to your wood sign.
- And the flower takes a little craft glue, then it looks great on my decorated sign!

Notes
FONTS: “Happy Birthday” on wreath design: That Girl / Free Alternative: JM Penwriting
Answers to Your Questions About the Cricut Maker 4 and Cricut Explore 4:
Q: Does the new Cricut mean Cricut won’t support the Cricut Explore Air 2, Explore 3, Maker 3, Joy, or other machines?
A: No, Cricut knows that their different machines work for different people. The other Cricut machines will continue to be available for purchase. Now, Cricut will have nine cutting machines available! And I anticipate they will all be supported for a long time for all Cricut users.
Q: Where can I buy a new Cricut?
A: The Cricut Maker 4 and Explore 4 are now widely available from Cricut. Click here to buy a new Cricut Maker 4. Click here to buy a new Cricut Explore 4.
Q: How much does a Cricut Maker 4 cost?
A: The Cricut Maker 4’s retail price is $399 USD.
Q: How much does the Cricut Explore 4 cost?
A: The Cricut Explore 4’s retail price is $249 USD.
Q: How fast does the Cricut Maker 4 cut?
A: Up to 10″ a second!
Q: How fast does the Cricut Explore 4 cut?
A: Up to 10″ a second!
Q: Does Cricut Maker 4 work with Cricut Design Space? Does Cricut Explore 4 work with Cricut Design Space?
A: Yes! You don’t need any additional software to control the new Cricut machines.
Q: Can I control the Cricut Maker 4 and Explore 4 with a mobile app?
A: Yes, you can design and cut with your Maker 4 or Explore 4 with the same Cricut Design Space mobile app for iOS or Android that are used for current Cricut cutting machines.
Q: If I don’t use Smart Materials, how fast do the new Cricuts cut?
A: All materials now cut at a speed of 10 rather than 8 (matless) or 4 (mat) that the current Explore and Maker do. And if you use Smart Materials, the acceleration goes from 20 IPS on the old machines to 100 IPS!
Q: Can I use the same power supplies for all my Cricut cutting machines?
A: No, do not interchange your power supplies.
Q: What kinds of markers are available for the new Cricuts?
A: You can use markers and pens from Explores or Makers with the updated machines!
Q: Can I use my Maker 3 or Explore 3 mats on a Maker 4 or Explore 4?
A: Yes! The new Maker and Explore models both use the standard 12″ machine mats that the earlier ones do.
Q: Can I use other brands of vinyl or cardstock with the new machines?
A: Yes, you can cut any brand of adhesive vinyl, heat transfer vinyl, or cardstock with the new Cricuts.
Q: What if I don’t have enough Smart Material for a cut? Do I need to measure and cut my Smart Material before I load it?
A: You don’t have to worry about running out of material during a cut! The Cricut Maker 4 and Explore 4 will make sure you have enough Smart Material loaded by measuring it before beginning the project. If you don’t have enough, you’ll be told right in Cricut Design Space BEFORE you start.

Q: Can I cut fabric with a Cricut Explore 4?
A: Yes! You can cut fabric using an Explore 4 or a Maker 4. While the Cricut Explore 4 doesn’t work with the rotary blade (which only works with Maker series machines), you can use the bonded-fabric blade to cut material using the same steps as those for the Explore.
Q: What color can I get the Cricut Maker 4 in? What color can I get the Cricut Explore 4 in?
A: At the time of release, the Cricut Maker 4 and Explore 4 are both available in “Seashell” (a creamy beige) and “Sage” (a soft green).
Q: Do all the current blades work in both new machines?
A: Yes, the same blades that work for the current Explore machines will work for the new Explore 4 machines, and the same blades that work for the original Maker machine will work for the new Maker 4 machine.
Q: How do I link my cartridges?
A: Contact Cricut Member Care who can help you link your cartridges for you.
Q: How do I choose my material settings without a Smart Dial?
A: All material settings are now done within Cricut Design Space after you click “Make,” and that gives you access to a LOT more material settings than were ever available on the dial!
Q: If there is no rotary blade with the Maker 4, how do I get one?
A: You can buy the rotary blade housing on Amazon, or your local craft store if they sell Cricut tools.
Q: Do I have to buy new mats for the Explore 4 and Maker 4?
A: No, the new Cricut cutting machines use the same 12″ machine mats that you’ve been using for earlier Explore and Maker machines.
Q: Do I have to use the Cricut Roll Holder if I use rolls of Smart Vinyl or Smart Iron On?
A: No, you do not NEED a roll holder to use the new rolls of Smart Vinyl, but if you want to use it to better manage all that vinyl, you can get the optional roll holder sold separately.
Q: Can I use the Cricut Roll Holder with the older Explore or Maker, or the Joy?
A: No, you cannot. The Cricut Roll Holder only works with the new machines as well as the Explore 3 and Maker 3.
Q: Can the new Cricut machines cut any wider than the old ones?
A: If you use Smart Materials, the new machines can cut a design up to 11.7″ wide like the older machines. If you put your material on a mat, the limit is still 11.5″ wide.
Q: Can I use other brands of vinyl with the new Cricut machines?
A: Yes, but you need to put them on a machine mat just as you did before.
Q: Where can I purchase Smart Materials for my new machine?
A: You can buy them from Cricut.com and all the other places you buy your Cricut supplies.
Q: How do I set up the new Cricut cutting machines?
A: Check out my FREE Cricut Kickoff classes, which will incorporate the setup of the new machines in the coming days and weeks!
How to Win a Cricut Maker 4 or Cricut Explore 4 Cutting Machine
Cricut sent me this Maker 4 and Explore 4 free of charge so I could review them. But I don’t accept free products as I feel it can influence my ability to give an unbiased review. Normally I’m able to just purchase everything I need on my own, so I always know its value compared to my hard-earned money, but I can’t do that for something that isn’t in the stores yet. So I’m going to go buy my own Cricuts as soon as they’re available.
To enter to win the Cricut Maker 4 or Explore 4, you need to do BOTH of the following things before March 31, 2025 at 5:00 pm ET:
- Comment on my new 2025 Cricuts video and tell me what YOU would make if you had one of the machines. Get specific. I’m reading and watching everything.
- Enter your name and email into this entry form below:
(If you do not see the signup form above, click here.)
Note: The Cricuts are used, not new.
Winners will be contacted personally by email ONLY in the late evening of March 31, 2025. We will address you by name and it will come from our email address. We will not contact you about winning in any other way.
Get my free designs to make 10 projects with a new Cricut Maker 4 or Explore 4!
As always, I’d love to see your new Cricut cutting machine projects! I know you’ll come up with some amazing ideas with the new, faster cutting time speed. Please share your ideas and photos in our Facebook group or tag me on social media with #jennifermaker.
Love,

Want to remember this? Save this Cricut Maker 4 and Cricut Explore 4 Ultimate Guide to your favorite Pinterest Board!