

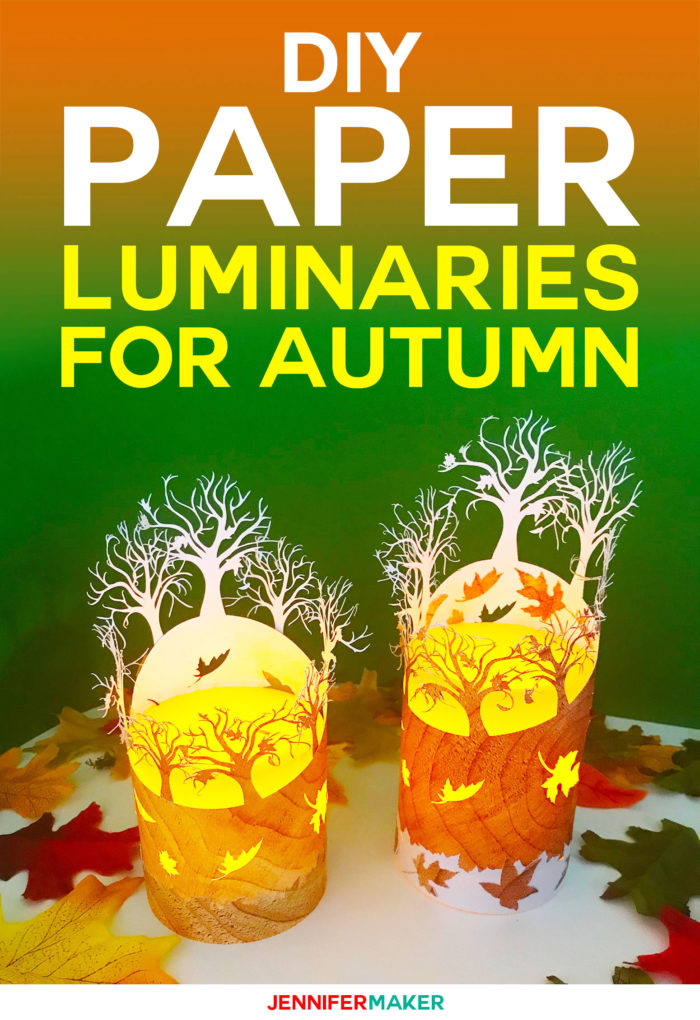
Dress up a mantle, windowsill, or a tablescape with this simple yet delicate paper fall luminary that is perfect for warming up those chilly autumn nights
I love designing paper luminaries! They are simple to design and always look so pretty with an LED tealight or pillar candle inside. When I couldn’t sleep last night, I decided to make a pretty fall luminary with falling leaves. I love how it turned out and I want to share it with you!
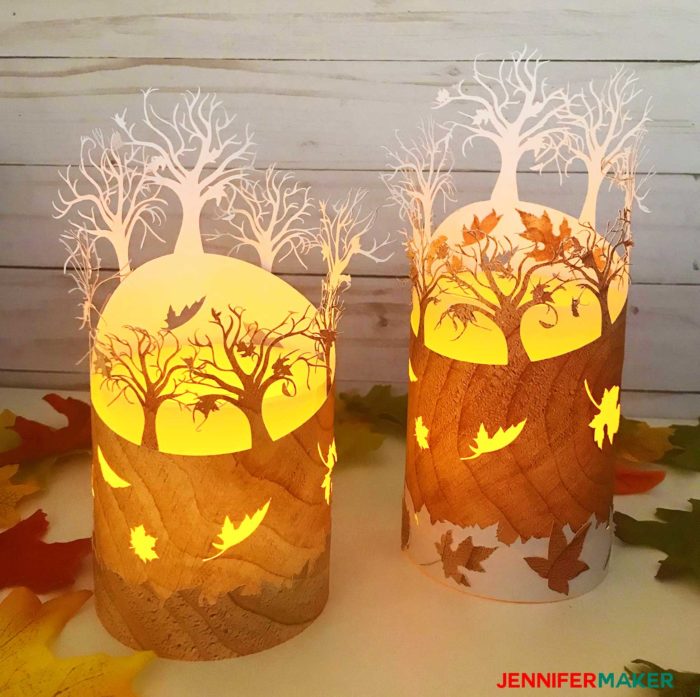

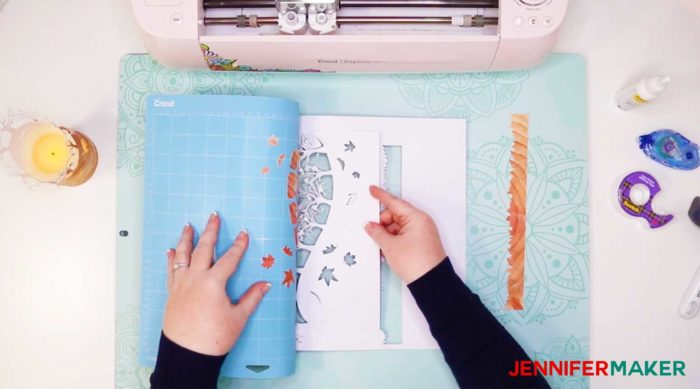
I cut this paper luminary on my Cricut cutting machine in order to get all of this detail — isn’t it amazing!
Let’s make a fall luminary out of cardstock! This post contains some affiliate links for your convenience (which means if you make a purchase after clicking a link I will earn a small commission but it won’t cost you a penny more)! Read my full disclosure policy.
Materials for the DIY Fall Luminary
- One sheet of 65 lb. or 80 lb. 12″ x 12″ QUALITY card stock (any color you want, but sheets with a different color or pattern on either side are very striking!) — I used a sheet of paper from the Recollections Wood Works Pad
- One large LED pillar light (about 3″ diameter) or several small LED tealights
- Scotch tape, permanent tape runner, or tacky glue
- A way to cut your paper (I used the amazing Cricut with a clean premium fine point blade and a sticky blue LightGrip mat)
- Design #158 – My free SVG/DXF/PDF cut files/patterns (available in my free resource library—get the password at the bottom of this post)
How to Make a DIY Fall Luminary
First, download my fall luminary design (Design #158) from my free resource library (you can get a password for it at the bottom of this page). If you’re going to cut the paper out on your cutting machine, upload the file to your design software. If you’re not sure how to upload an SVG cut file to Cricut Design Space, watch this helpful video training series I made. If you’re on an iPhone or iPad, here’s how to download and upload SVG files to the Cricut Design Space app.
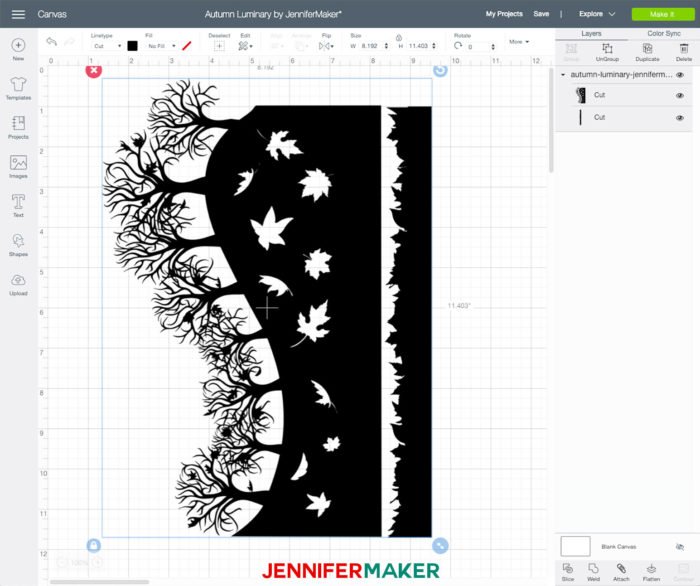
Here’s what my fall luminary SVG design file looks like uploaded to Cricut Design Space. Note that no ungrouping, attaching or scoring is necessary in this design. Just click that green Make It button and you’re good to go!
Very Important Note: This pattern has very intricate cuts. Here are the exact settings and things I used to make it:
- Materials: Medium Cardstock 80 lb. (do not use Intricate Cuts or any setting that cuts twice — it’s too delicate for that)
- Pressure: Extra
- Blade: Premium Fine Point (cleaned with an aluminum foil ball)
- Mat: A new and sticky blue LightGrip mat (this won’t work with an old and busted cutting mat!)
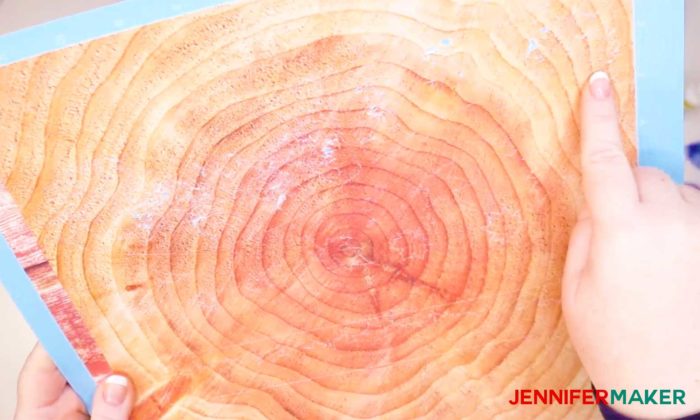
- Cardstock: High quality cardstock from Cricut or Recollections (I do NOT recommend Park Lane brand) — note, if you use textured cardstock, put your cardstock textured side UP on your mat for the best cut!
If you have any issues cutting this, please see my Cricut Cutting Problems: Tips for Cleaner Cuts guide for details.
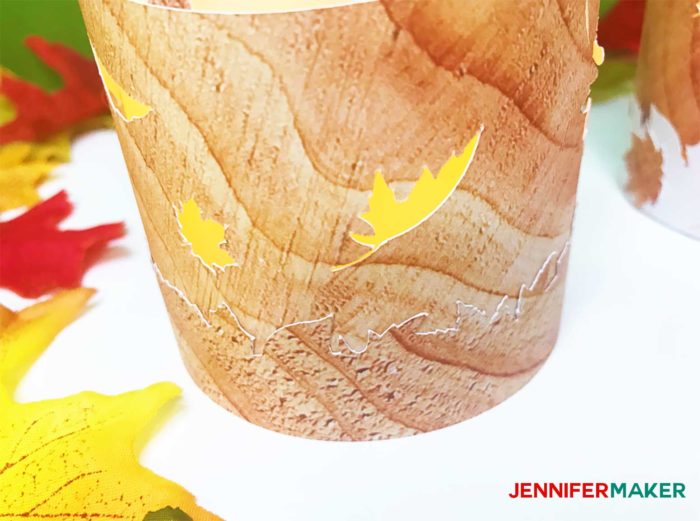
Note that even if you have some issues cutting out the details on the branches and it looks a little rough, your luminary should still look great — autumn branches with leaves DO look a little rough in real life! You can see my cut was a little rough in a couple of spots (where the blue mat is showing in the photo below) and it still turned out great!
Cutting Tip: Watch your machine as it cuts and make sure no loose bits of paper get stuck on your blade. If your paper suddenly starts cutting badly, a bit of paper stuck on the blade is likely the culprit. If you do get a piece of paper stuck, pause your cutting machine (Cricuts have a big pause button on the right side), take your blade out of the clamp, carefully remove the paper and clean it again with your aluminum foil ball, and place the blade back in your cutting machine. Note that you may need to life up on the clamp to seat the blade properly if you were in mid-cut when you paused it.
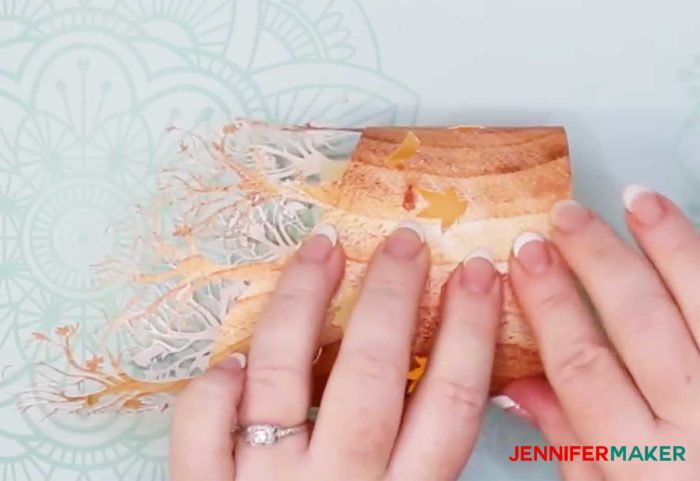
Once you cut it out, gently remove it from your cutting mat. You’ll want to flip your mat over and curl it away from your paper.
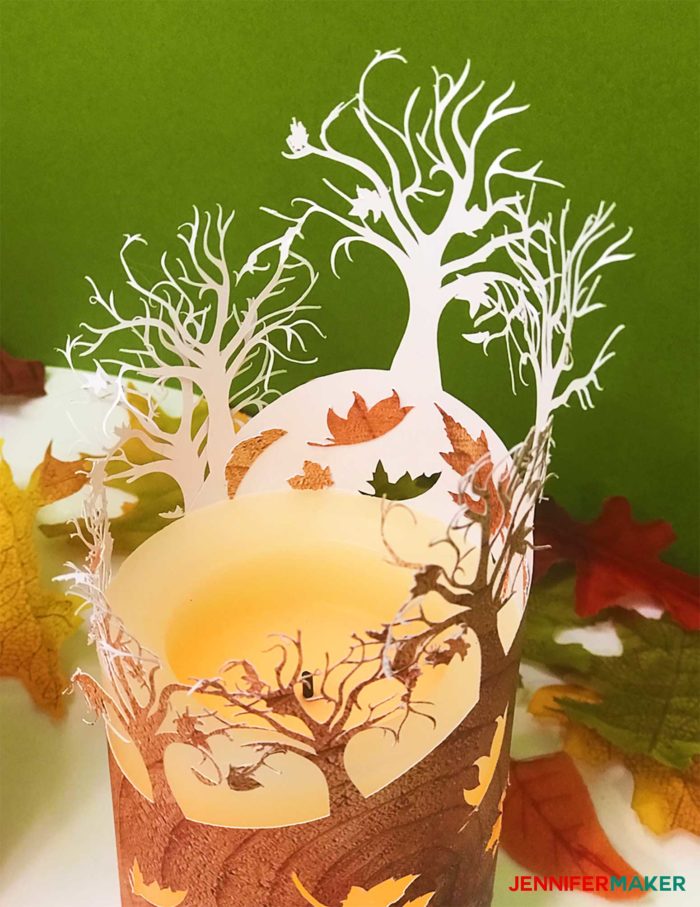
Now just wrap it around an 3″ diameter LED pillar candle (if you have one), or simply tape it into a tube shape.
The leaves strip can be wrapped around the bottom if you choose — you can also use this strip on a taller candle to hide the bottom!
I put one of my strips on with the white side showing, which I also thought was pretty!

You can glue the leaves you cut out from the luminary to it, too!

Get my free SVG cut files and patterns for the Paper Luminary
If you make this pretty little paper fall luminary, please share a photo in our Facebook group, email it to me at [email protected], or tag me on social media with #makershowandtell.
Love,

Want to remember this? Save the DIY Fall Luminary to Your Favorite DIY Pinterest Board!


Once again, thank you for sharing your creativity with me.
with crafty regards,
Mischelle Smith
Thank you for another GREAT design. I love fall and this is going to make a wonderful addition to my autumn decorations. Love your patterns and how easy they are to work with. Your tutorials are very thorough and easy to follow. Thank you for all your hard work and research.
I like this desing. I will use the PDF ( as I always do) since I do not own a CRICUT machine or any of that type of machine. It’s OK. I am use to cut with my scissors. I love your blog. You have wonderful ideas. Also your tutorial is always very clear
Thank
Merci