
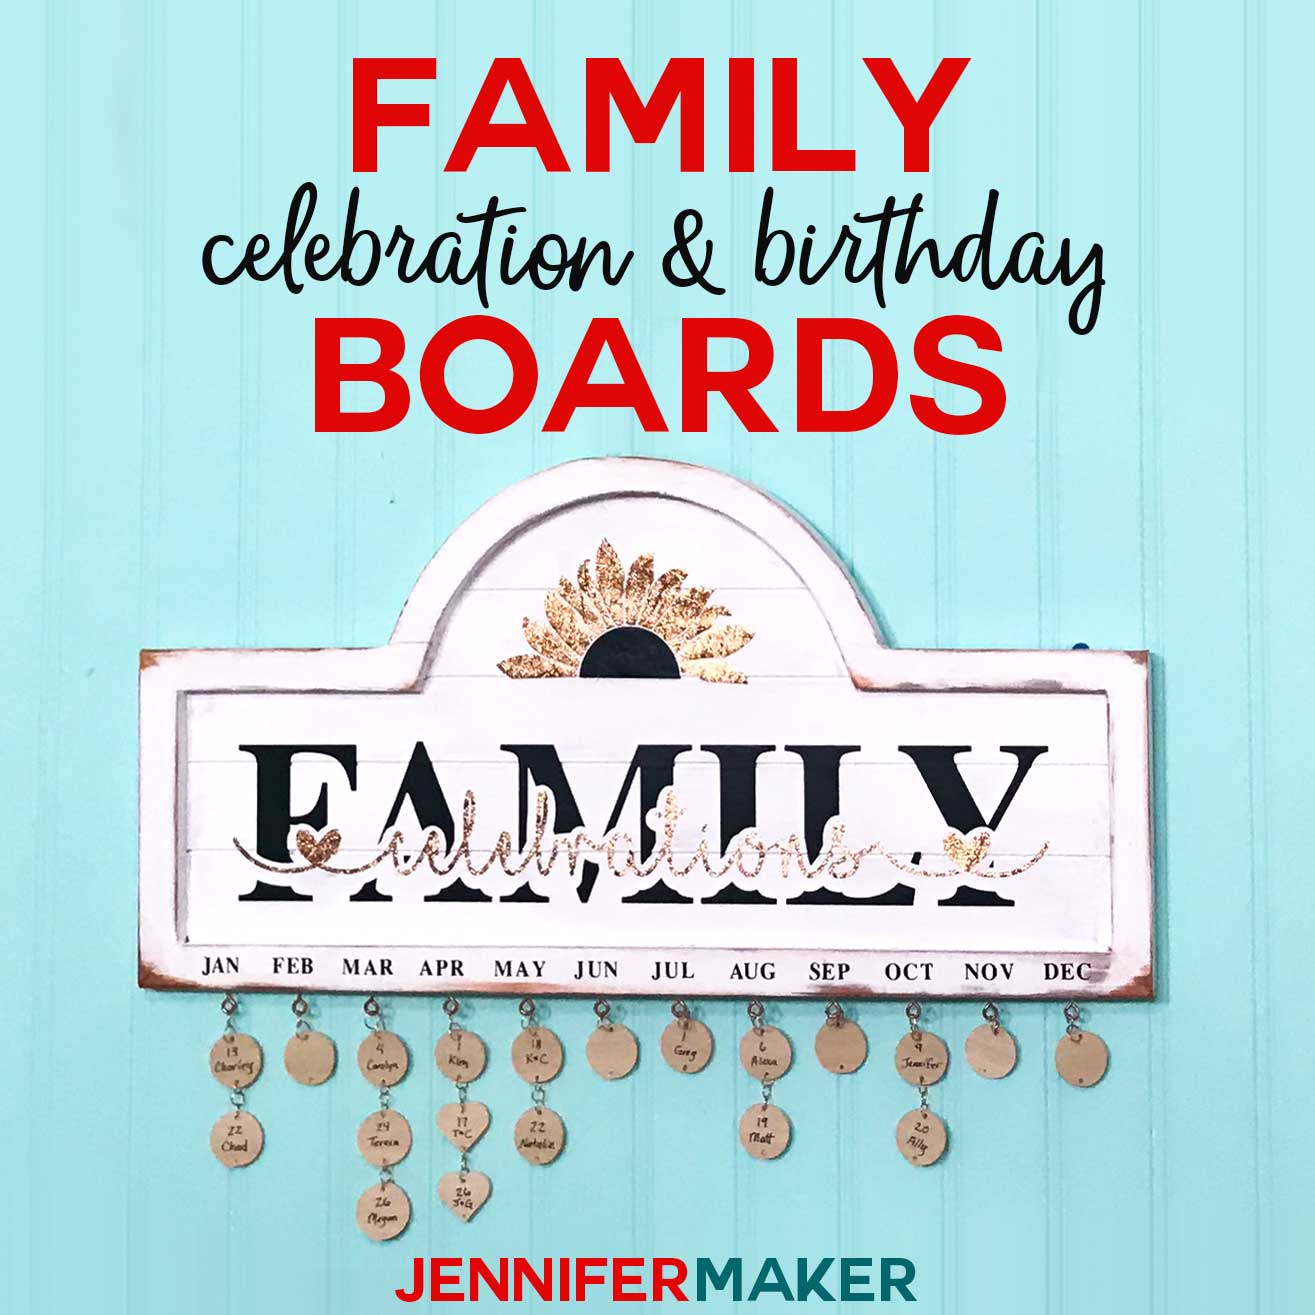
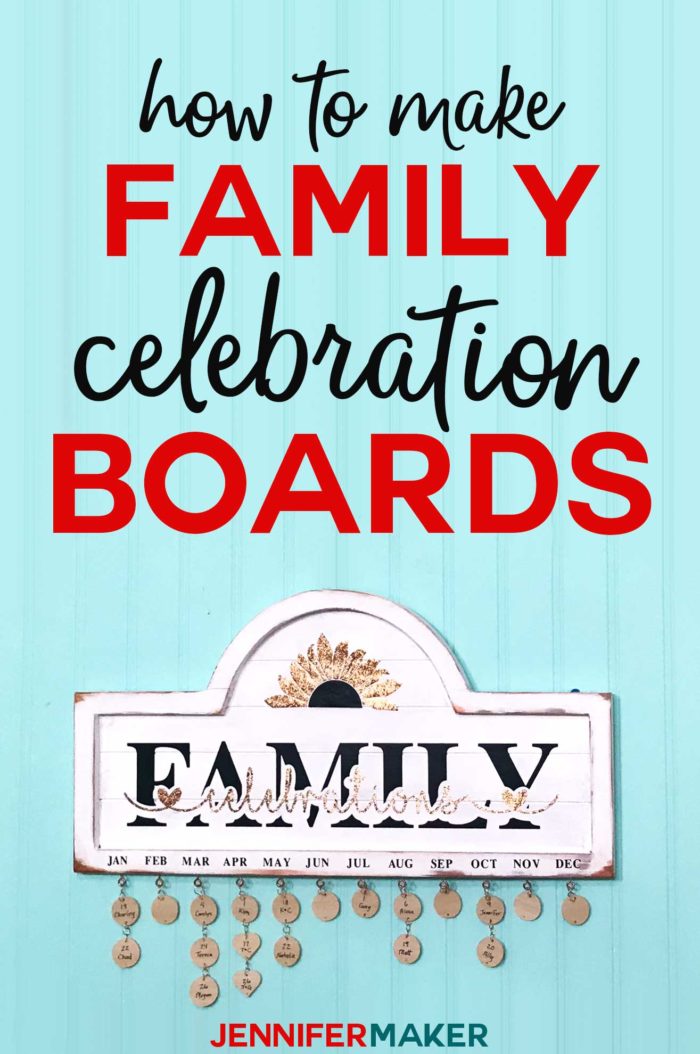
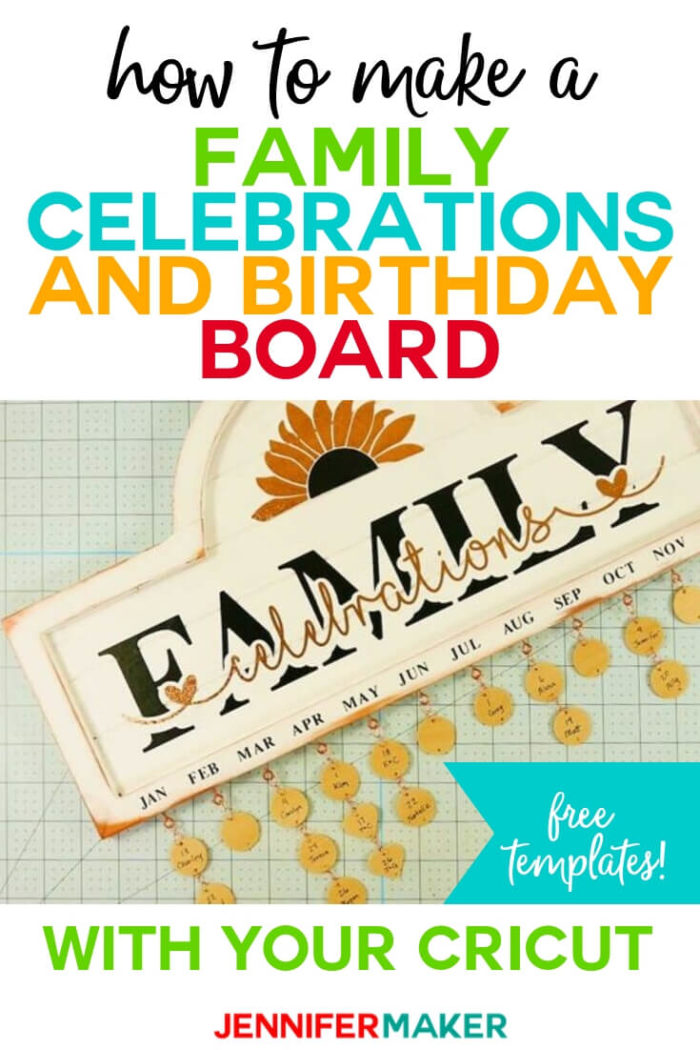
Never forget another birthday or anniversary with this family celebration and birthday board! Make this pretty yet functional date board with basic supplies and display it proudly in your home.
Have you heard of family birthday and celebration boards? I first learned about these when a friend of mine mentioned she’d made one and I realized what a wonderfully brilliant idea this is! With a family birthday and celebration board, you don’t ever have to worry about missing an important date again. Sure, we could use a calendar or a phone, but this is SO much cuter!
So the way a family celebration board works is you have a hook for each month of the year, and on the hooks, you hang the names and dates of each celebration. Then you can tell at a glance what important dates are coming up.
To make this family birthday board, you’ll need a board — I got mine from my local Joann craft store. You can paint it if you like — I painted mine with a white and copper distressed/weathered look, and I’ll show you how to do that. You also need eye screws and jump rings. I cut out the circles and hearts from 1/16″ basswood on my Cricut Maker, but you can buy pre-cut circles and hearts if you prefer. Finally, you need some self-adhesive vinyl to decorate your board and tags!
I’ve created some decorative birthday and celebration decals for you to use if you’d like to use mine, or just make your own. You can use my knockout technique tutorial to personalize your birthday board with your family name.
January 2024 Update: The original SVG included all of the elements together, and recently crafters had trouble using it with Cricut Design Space. I’ve updated the free download to have the SVGs separate, but you can still follow this tutorial. Just remember to add each of the SVGs you want to your Canvas, meaning a knockout design for the top, the flower, and the markers.
Key concepts taught in the tutorial include how to prepare your board, how to paint a weathered/distressed look with copper metallic paint and white chalk paint, how to measure and mark your board, and how to attach the date markers.
See exactly how to make your own family celebration or birthday board in this step-by-step video below:
Ready to do this? Let’s make some family birthday boards! This post contains some affiliate links for your convenience (which means if you make a purchase after clicking a link I will earn a small commission but it won’t cost you a penny more)! Read my full disclosure policy.
This is a sponsored conversation written by me on behalf of Cricut. The opinions and text are all mine.
Materials for DIY Family Celebration & Birthday Boards
- Board at least 16″ inches long. I used a Fab Lab blank sign ($20) I found at my local craft store.
- 12 eyescrews (I used size #216)
- Jump rings (I used 8mm rose gold jump rings)
- Needle nose pliers
- Self-adhesive permanent vinyl (I used black and textured copper vinyl)
- (Optional) 1/16″ basswood to cut out your date markers on a Cricut Maker
- (Optional) Circle and heart-shaped wood
- (Optional) Metallic paint and chalk paint, plus brushes
- A way to cut your vinyl (I used the amazing Cricut)
- Design #135 My free SVG/DXF/PDF cut files/patterns (available in my free resource library—get the password at the bottom of this post)
How to Make DIY Family Celebration & Birthday Boards
Step 1: Prepare your board
Prepare your board any way you like, or not at all. You can keep it plain, stain it, or paint it.
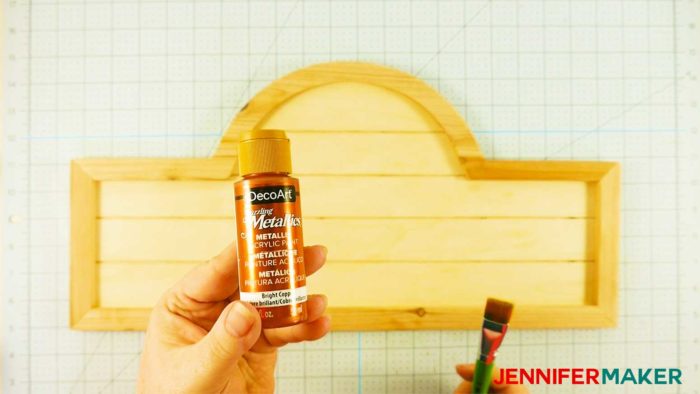
I chose to paint mine with a white and copper weathered/distressed look. You know, “shabby chic.” To do this, I first painted the entire front and sides of my board with a copper metallic paint. I could have used copper spray paint, but I didn’t want to mess with spray paint (it’s very cold outside), so I just used acrylic paint.
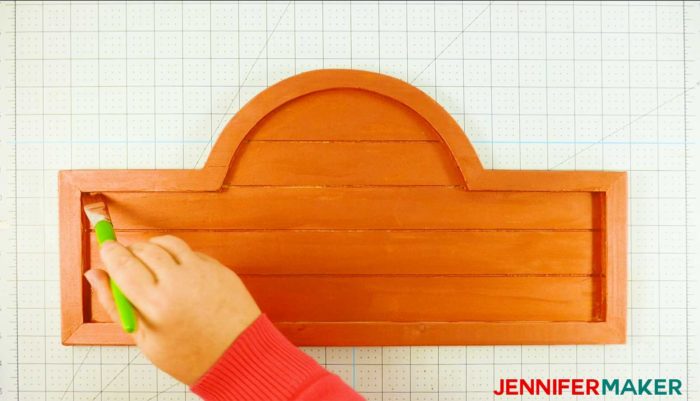
Once the copper paint was dry, I brushed white chalk paint over the copper paint. I really didn’t have to use chalk paint for this, honestly. But I like the texture and feel of it.
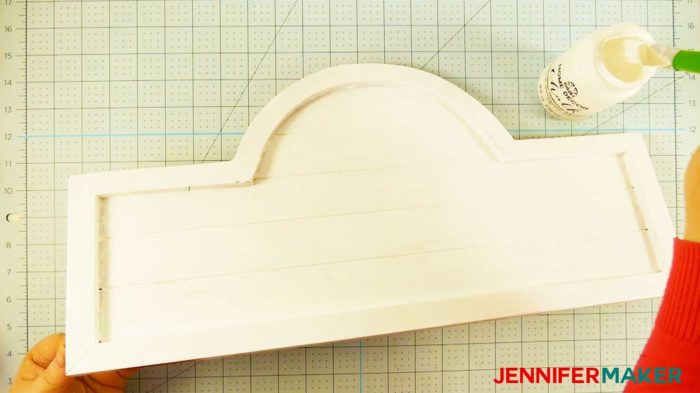
Then before the chalk paint was completely dry, I simply took a wet paper towel to the edges of my board and rubbed some of the white paint off to get that distressed/weathered look that’s so popular these days. I COULD have used sandpaper instead, but this worked just fine. (I did use the sandpaper method when I painted my red computer desk). Just be careful not to take off any of the copper paint base layer.
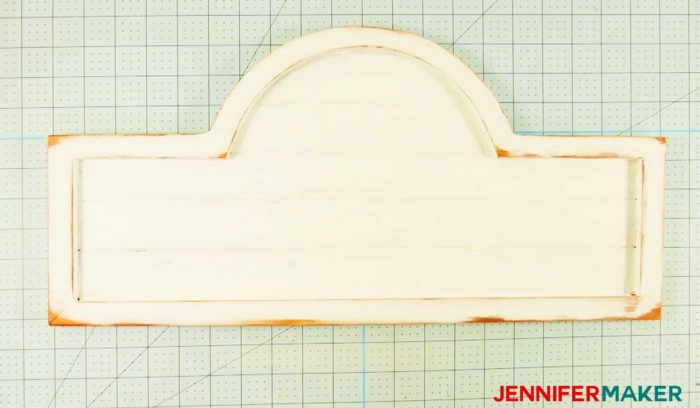
This is what my family celebration board looked like when I finished with the distress technique:
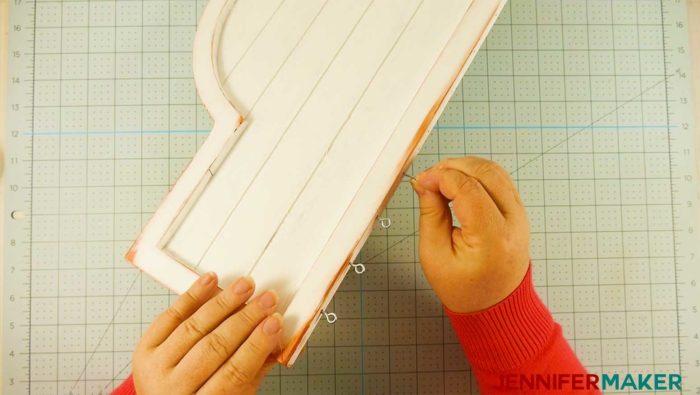
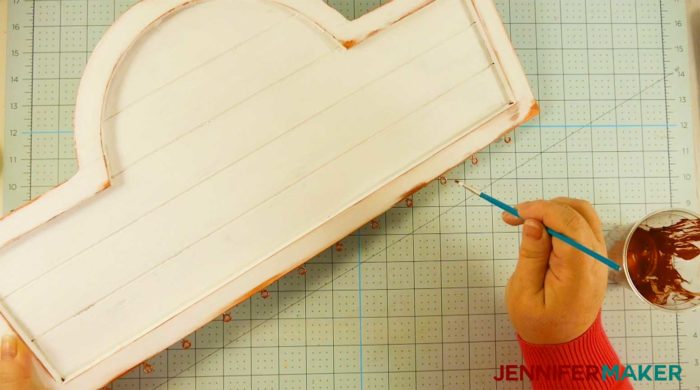
Step 2: Measure, mark, and insert your eyescrews.
It’s now time to measure, mark and insert the 12 eyescrews for the 12 months of the year. The eyescrews will hold the date markers for your family celebrations. The best way to do this is to measure your board, subtract off 2-3 inches to make sure you have sufficient space on either end of your board, and divide the resulting number by 12. So I had an 20″ board, I subtracted 2″, leaving me with 18″. I divided 18″ by 12 to get 1.5″. That meant I needed to space my eyescrews out with 1.5″ inches in between for a nice even placement of my date markers. Thus, I made a mark every 1.5″ inches along the bottom of my board. The easiest way to do this is to measure 1 inch from the end and then mark every 1.5 inches. I didn’t do it the easy way — I started in the center and moved out from there. You do what works best for you.
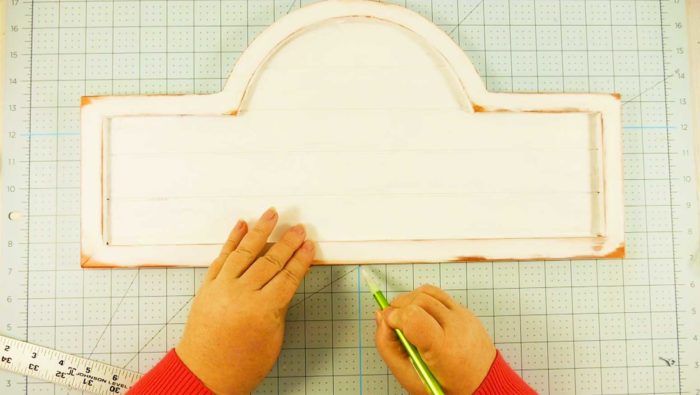
Once you’ve placed your 12 marks, put your eyescrews in. I recommend you keep your eyescrews closer to the back of your board than the front, as that will help your date markers lay flatter against the wall when you hang it up.
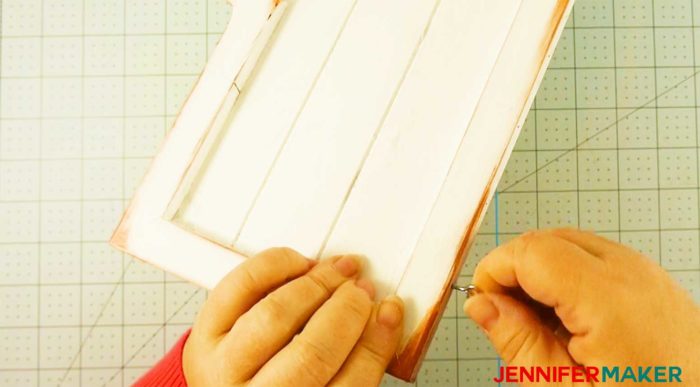
Tip: You will need to apply some pressure to get the eyescrews started into the bottom of your family celebration and birthday board. If you have issues, drill small pilot holes with a handheld power drill … or even just make a starter hole with a sharp nail.
Optionally, you can paint your eyescrews to match your board. I couldn’t find copper eyescrews (surprise, surprise), so I just took a little acrylic paint and colored them to match. The paint will likely wear off as I haven’t primed them first, but that’s okay — this family celebration and birthday board has a distressed look anyway, right?
That’s all you need to do to prepare your board to make the family celebration and birthday board!
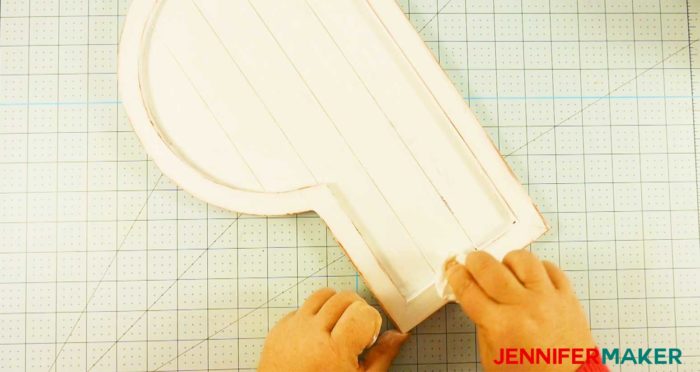
Step 3: Cut or punch your date markers
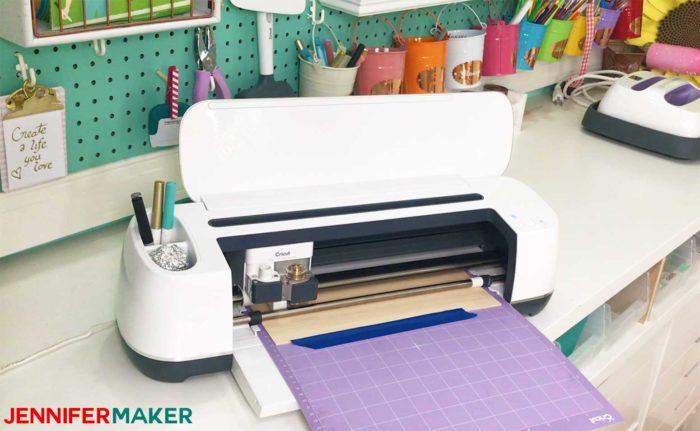
Now it’s time to prepare your date markers. You can buy these pre-cut on Amazon or at craft stores, but I chose to make them on my Cricut Maker from 1/16″ basswood (the free SVG cut file for these are in my free resource library). When you cut basswood on the Maker, make sure you use the knife blade, tape down your basswood onto a StrongGrip mat, and move your star wheels all the way over. (More tips on cutting with the knife tip are here.)
Here’s what my basswood date markers looked like after cutting them out on my much-loved Cricut Maker:
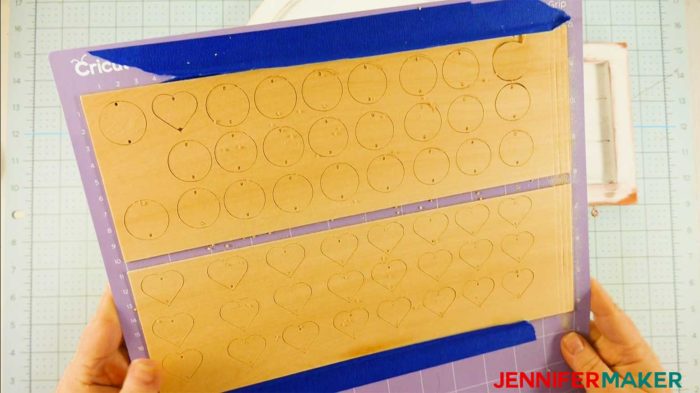
Note that it did take some time to cut these out — about four hours. But it was worth it because they were exactly the size I wanted and I love having that control.
Step 4: Decorate your board
You can decorate your family celebration and birthday board as you wish, but I chose to cut out vinyl and apply it to my board. I created several different designs, and you’re welcome to use them (check my free resource library for them).
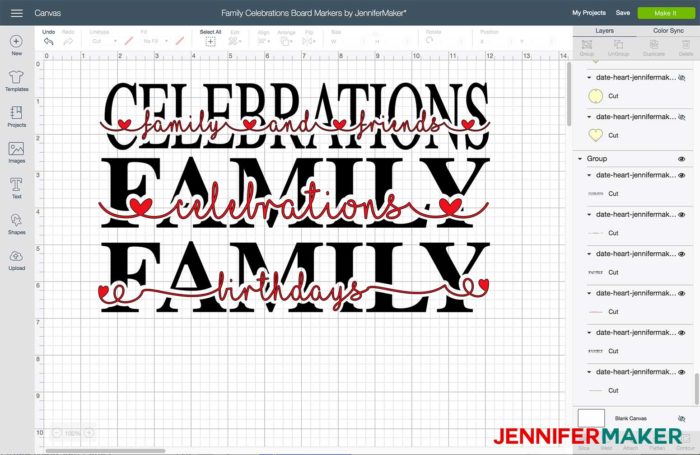
Tip: If you want to customize the design on your family celebration and birthday board, use my Knockout Technique Tutorial to create your own name and saying!
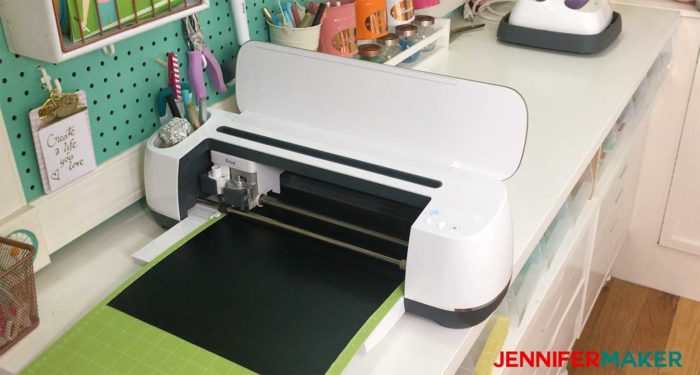
My vinyl was over 11.5″ long, so I used a long 24″ StandardGrip mat to cut it out. Note that I turned my Cricut sideways on my surface so there would be plenty of room both in front of and behind for the mat to slide in and out.
Once your vinyl is cut, it’s time to weed it, which just means remove the excess vinyl that we don’t want. Go slow to avoid removing any parts you wanted to keep.
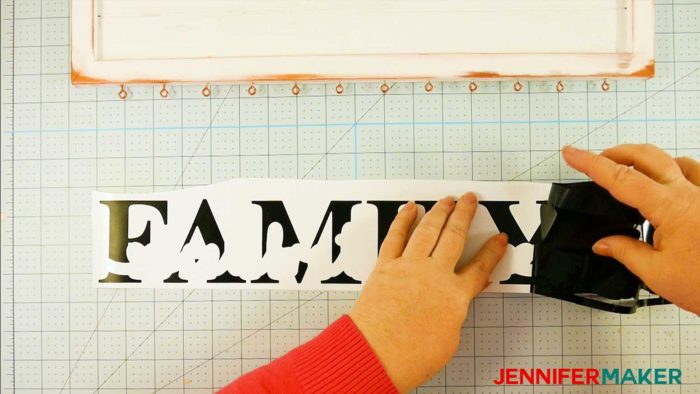
I also used the pretty textured copper vinyl to cut out the word “celebrations” and weeded that as well. The metallic vinyl is harder to weed because it is stiffer, but if you go slow, it’ll be fine.
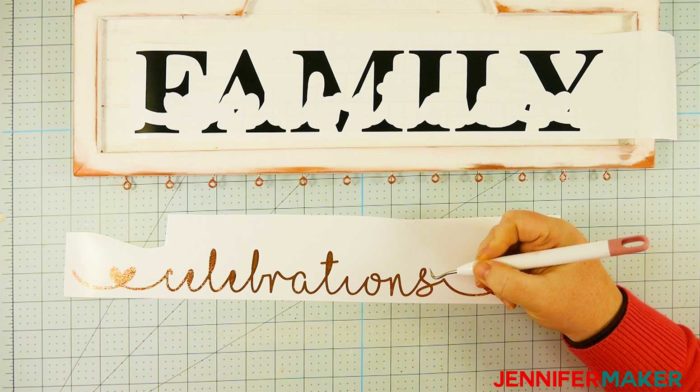
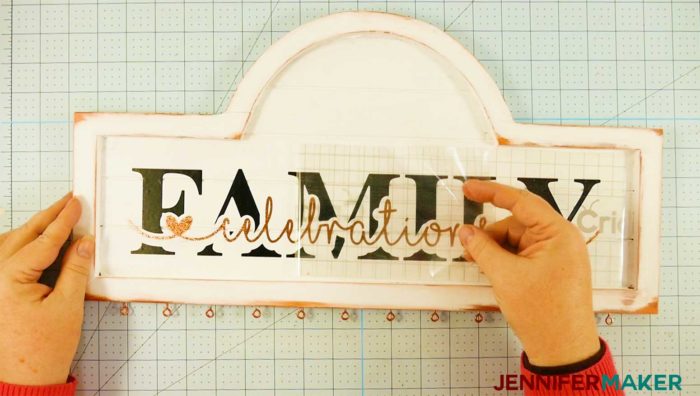
Once the vinyl is weeded, cut a similarly sized piece of transfer tape and place it on top of the vinyl decal (I recommend you do the largest design first in this case). Smooth from the center outward to avoid creases and bubbles.
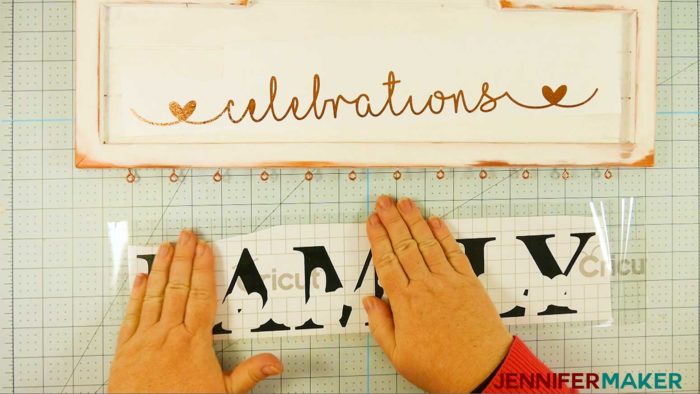
Once the largest part of the design is transferred, position it over the second layer and carefully press it down again. I taped my second layer to the mat to avoid it jumping up onto the transfer tape due to static electricity.
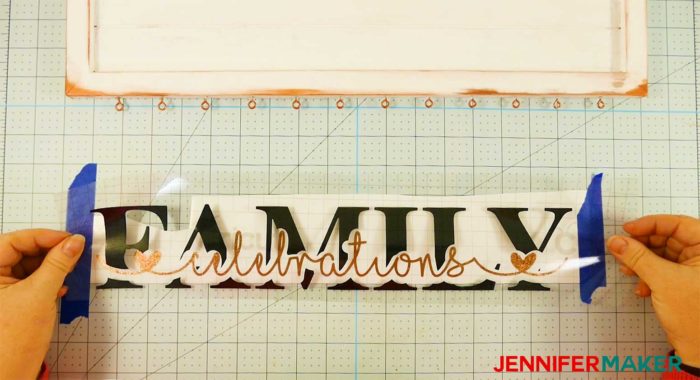
When both layers of vinyl are on your transfer tape, center it on your family celebration and birthday board and press down to apply it. Again, smooth from the center outward. Use your scraper tool to press the vinyl onto the surface, then carefully remove the transfer tape.
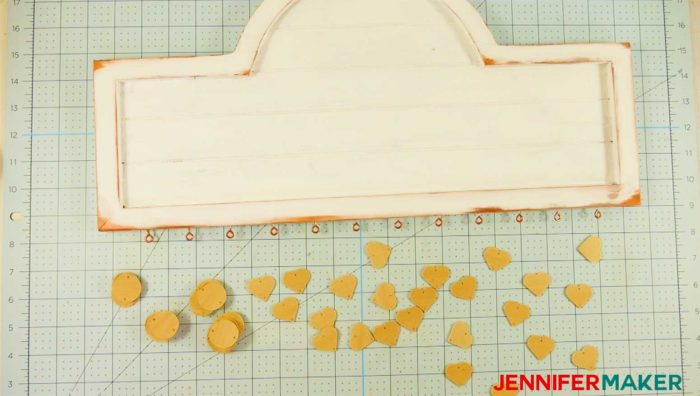
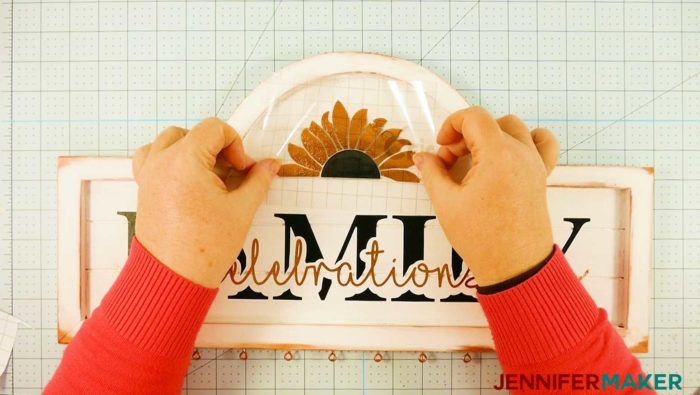
I also made a sunflower in the same two vinyl colors for the arch at the top of my family celebration and birthday board.
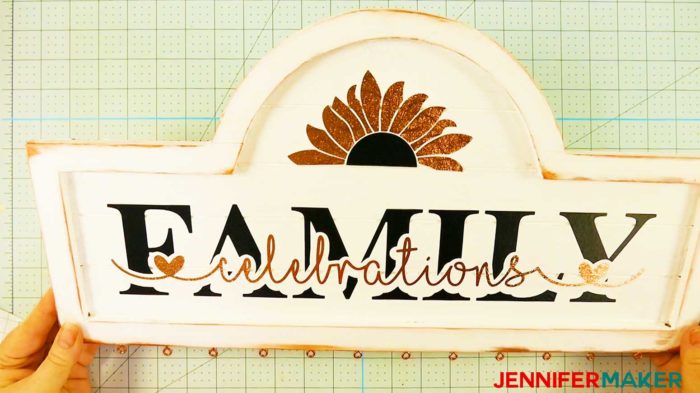
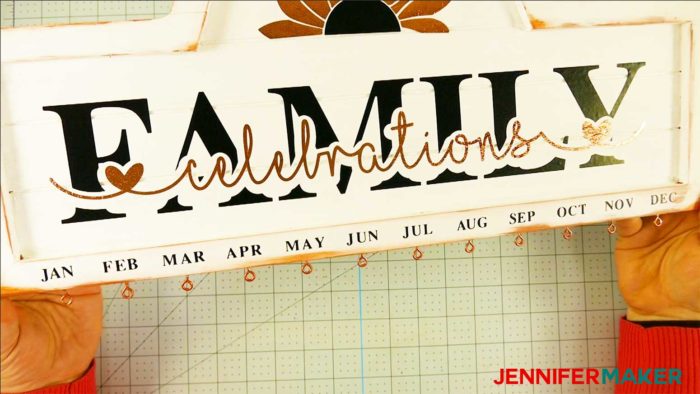
And here’s what the designs looked like after I applied them onto my family celebration and birthday board.
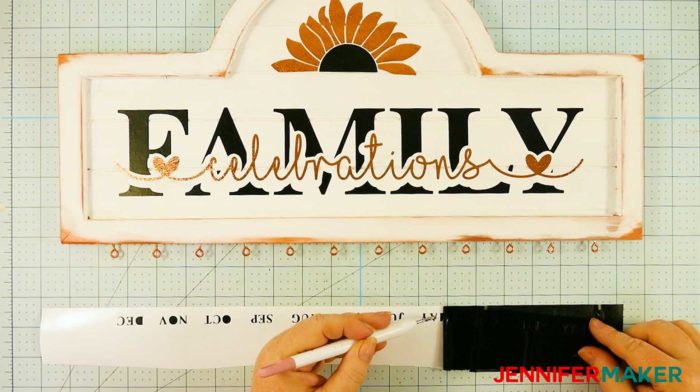
Oh, but we can’t forget the months along the bottom of the board. I cut these out of the same black vinyl and applied them in the same way with transfer tape. I typed them in Design Space using Times New Roman Bold font.
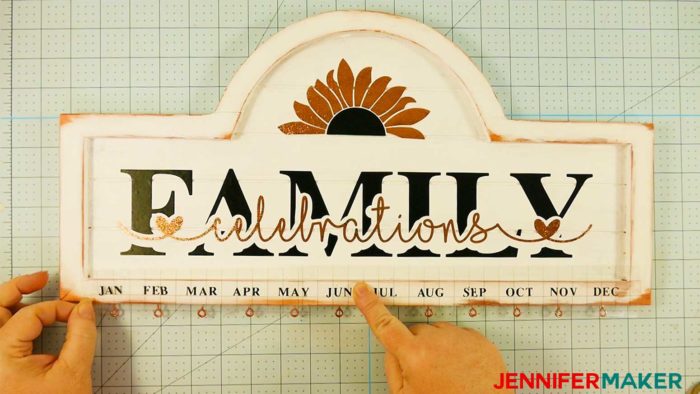
And here is my family celebration and birthday board with all of its vinyl applied! I love how the textured copper vinyl shines.
Step 5: Attach your date markers
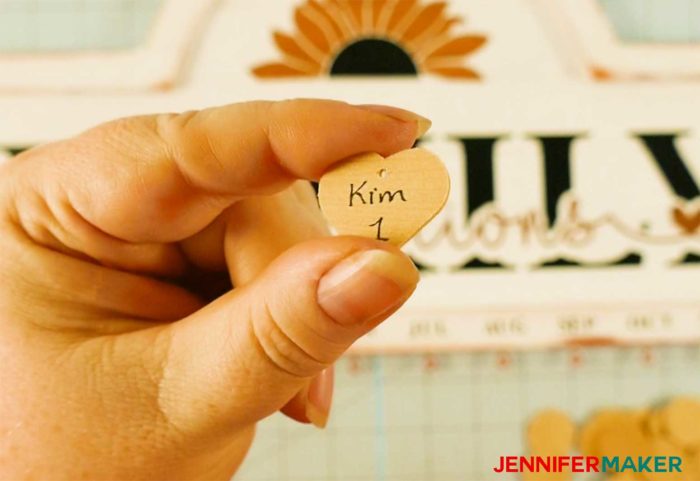
We’re almost done! Now we just need to get the date markers on. I started by making a list of all the birthdays and celebrations I wanted on my family celebration and birthday board then writing the names and dates on the markers. (I did first try to use vinyl, but it was just too small to weed properly.)
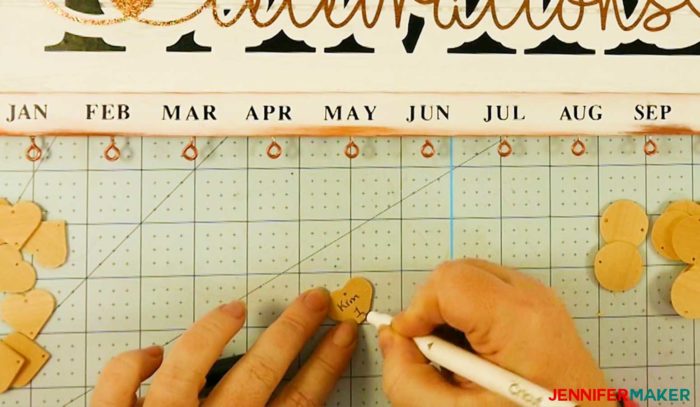
I decided that handwriting was probably best anyway as it would likely be years before I added a new marker and it would be easier to just make write them by hand. I did use one of the Cricut markers, which worked great on my basswood!
To attach the date markers to one another, and to the board, I used rose gold jump rings (8mm).
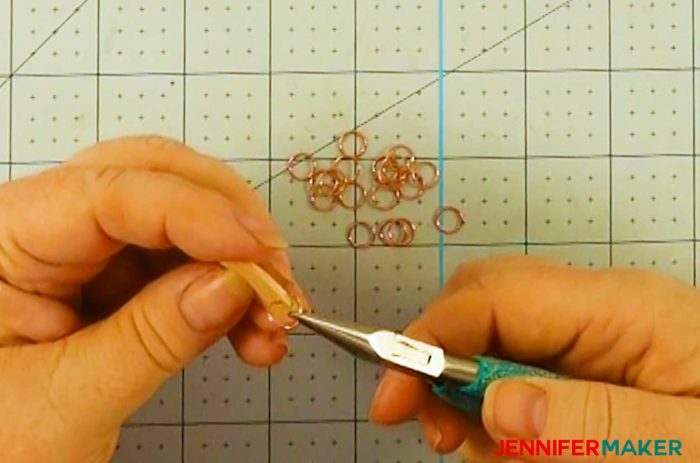
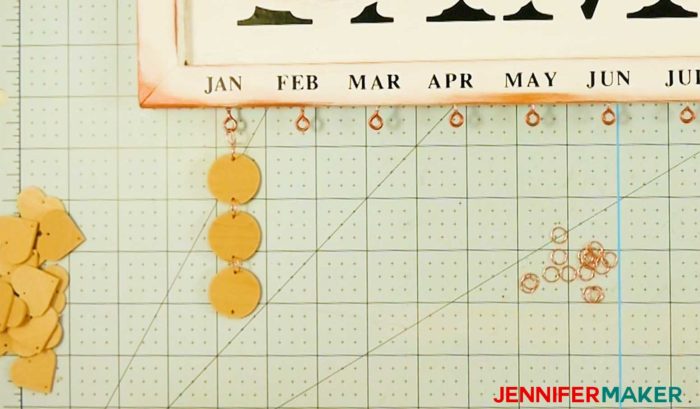
Here’s what my family celebration and birthday board looked like with all of its date markers attached:
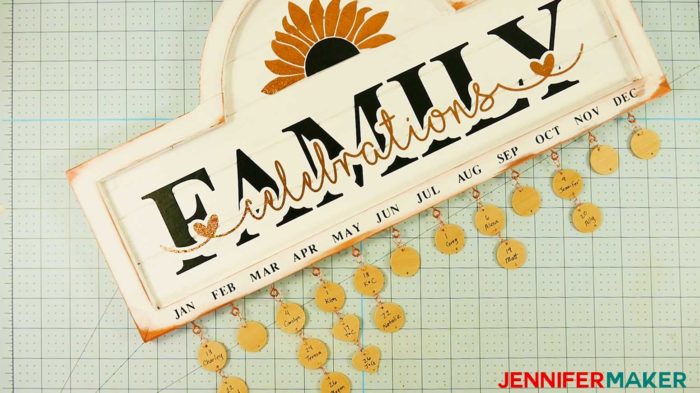
I’ve already hung this up in my house and it looks MAH-velous!
Get my free SVG cut files for the DIY Family Celebration & Birthday Boards
You can use my decals and circle/heart templates for your birthday boards! They are located in my free resource library!
If you make your own family celebration and birthday board, please share a photo in our Amazing Cricut Facebook group, email it to me at [email protected], or tag me on social media with #makershowandtell.
See all of the projects, tutorials and free designs in The Great Maker Show and Tell Challenge! There is one for each day of the 25 Days of Christmas! This is my gift to you for the tremendous support, enthusiasm, and love you’ve shown to me and my little blog over the past two years. To “open” a gift, hover over the day’s image and click the download icon.
[ess_grid alias=”25days2″]
Love,

Want to remember this? Save the DIY Family Celebration & Birthday Board Tutorial to Your Favorite DIY Pinterest Board!

Love your Video’s
This is such a cute idea! And it turned out so well. Love the Family Celebrations decor. Who knew you could use Cricut for so many projects? Love it!
Love this idea. Do you have an svg for the months? I’ve tried so many different fonts but they all are to long for this design. Thank you!
Hi Naomi! Check out this blog post for the months we have created! https://jennifermaker.com/diy-whiteboard-calendar/