
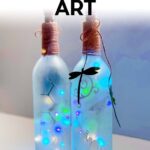
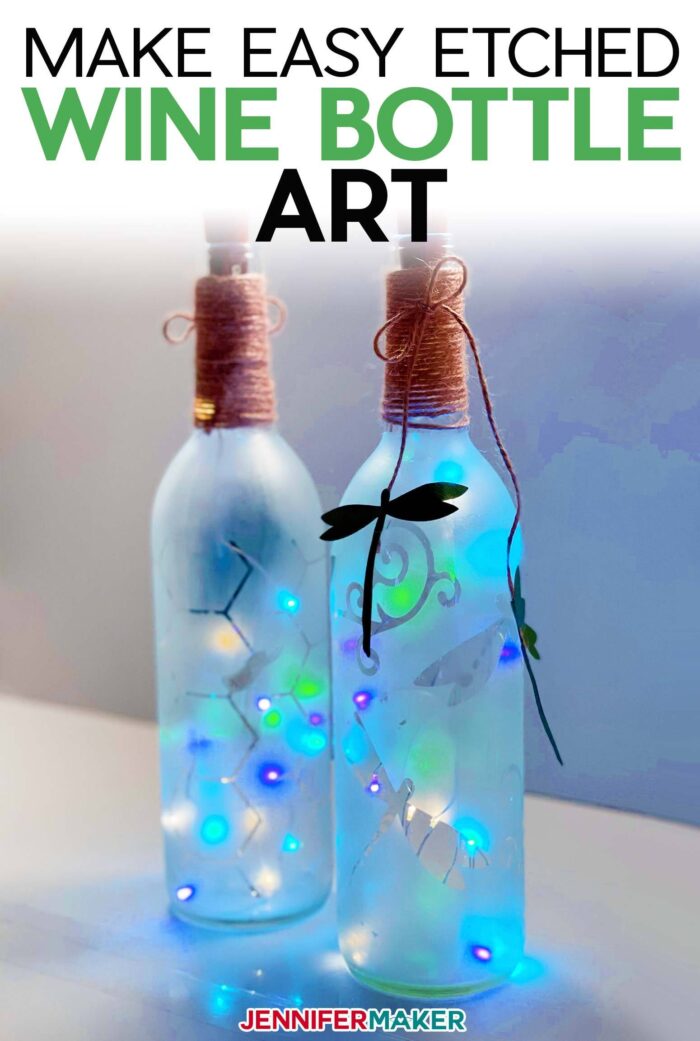
DIY decorations are always in high demand and this wine bottle art is an incredibly versatile project that can be used as a centerpiece for parties, weddings, or in your own home!
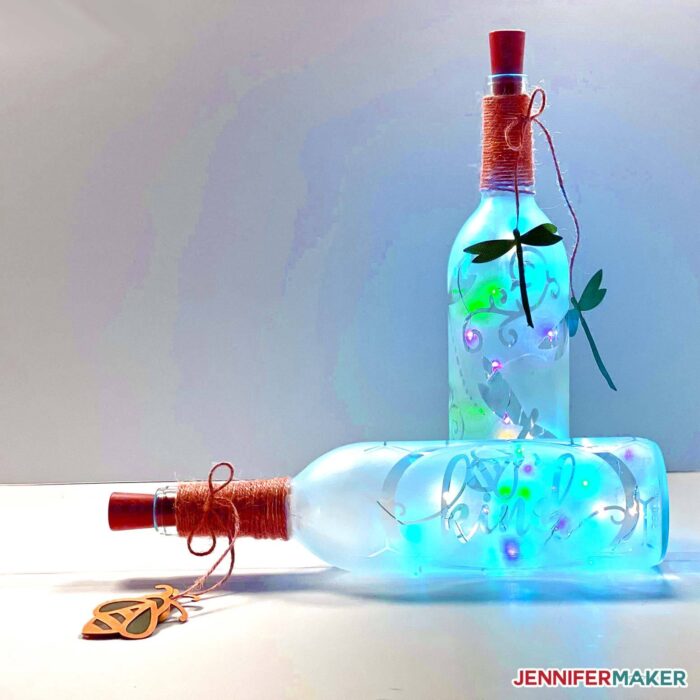
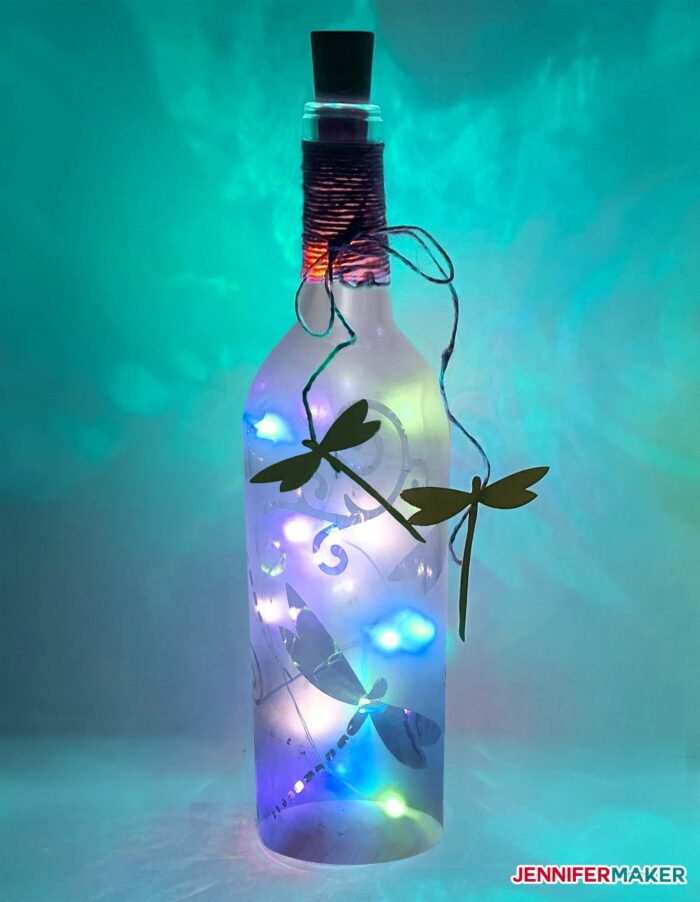
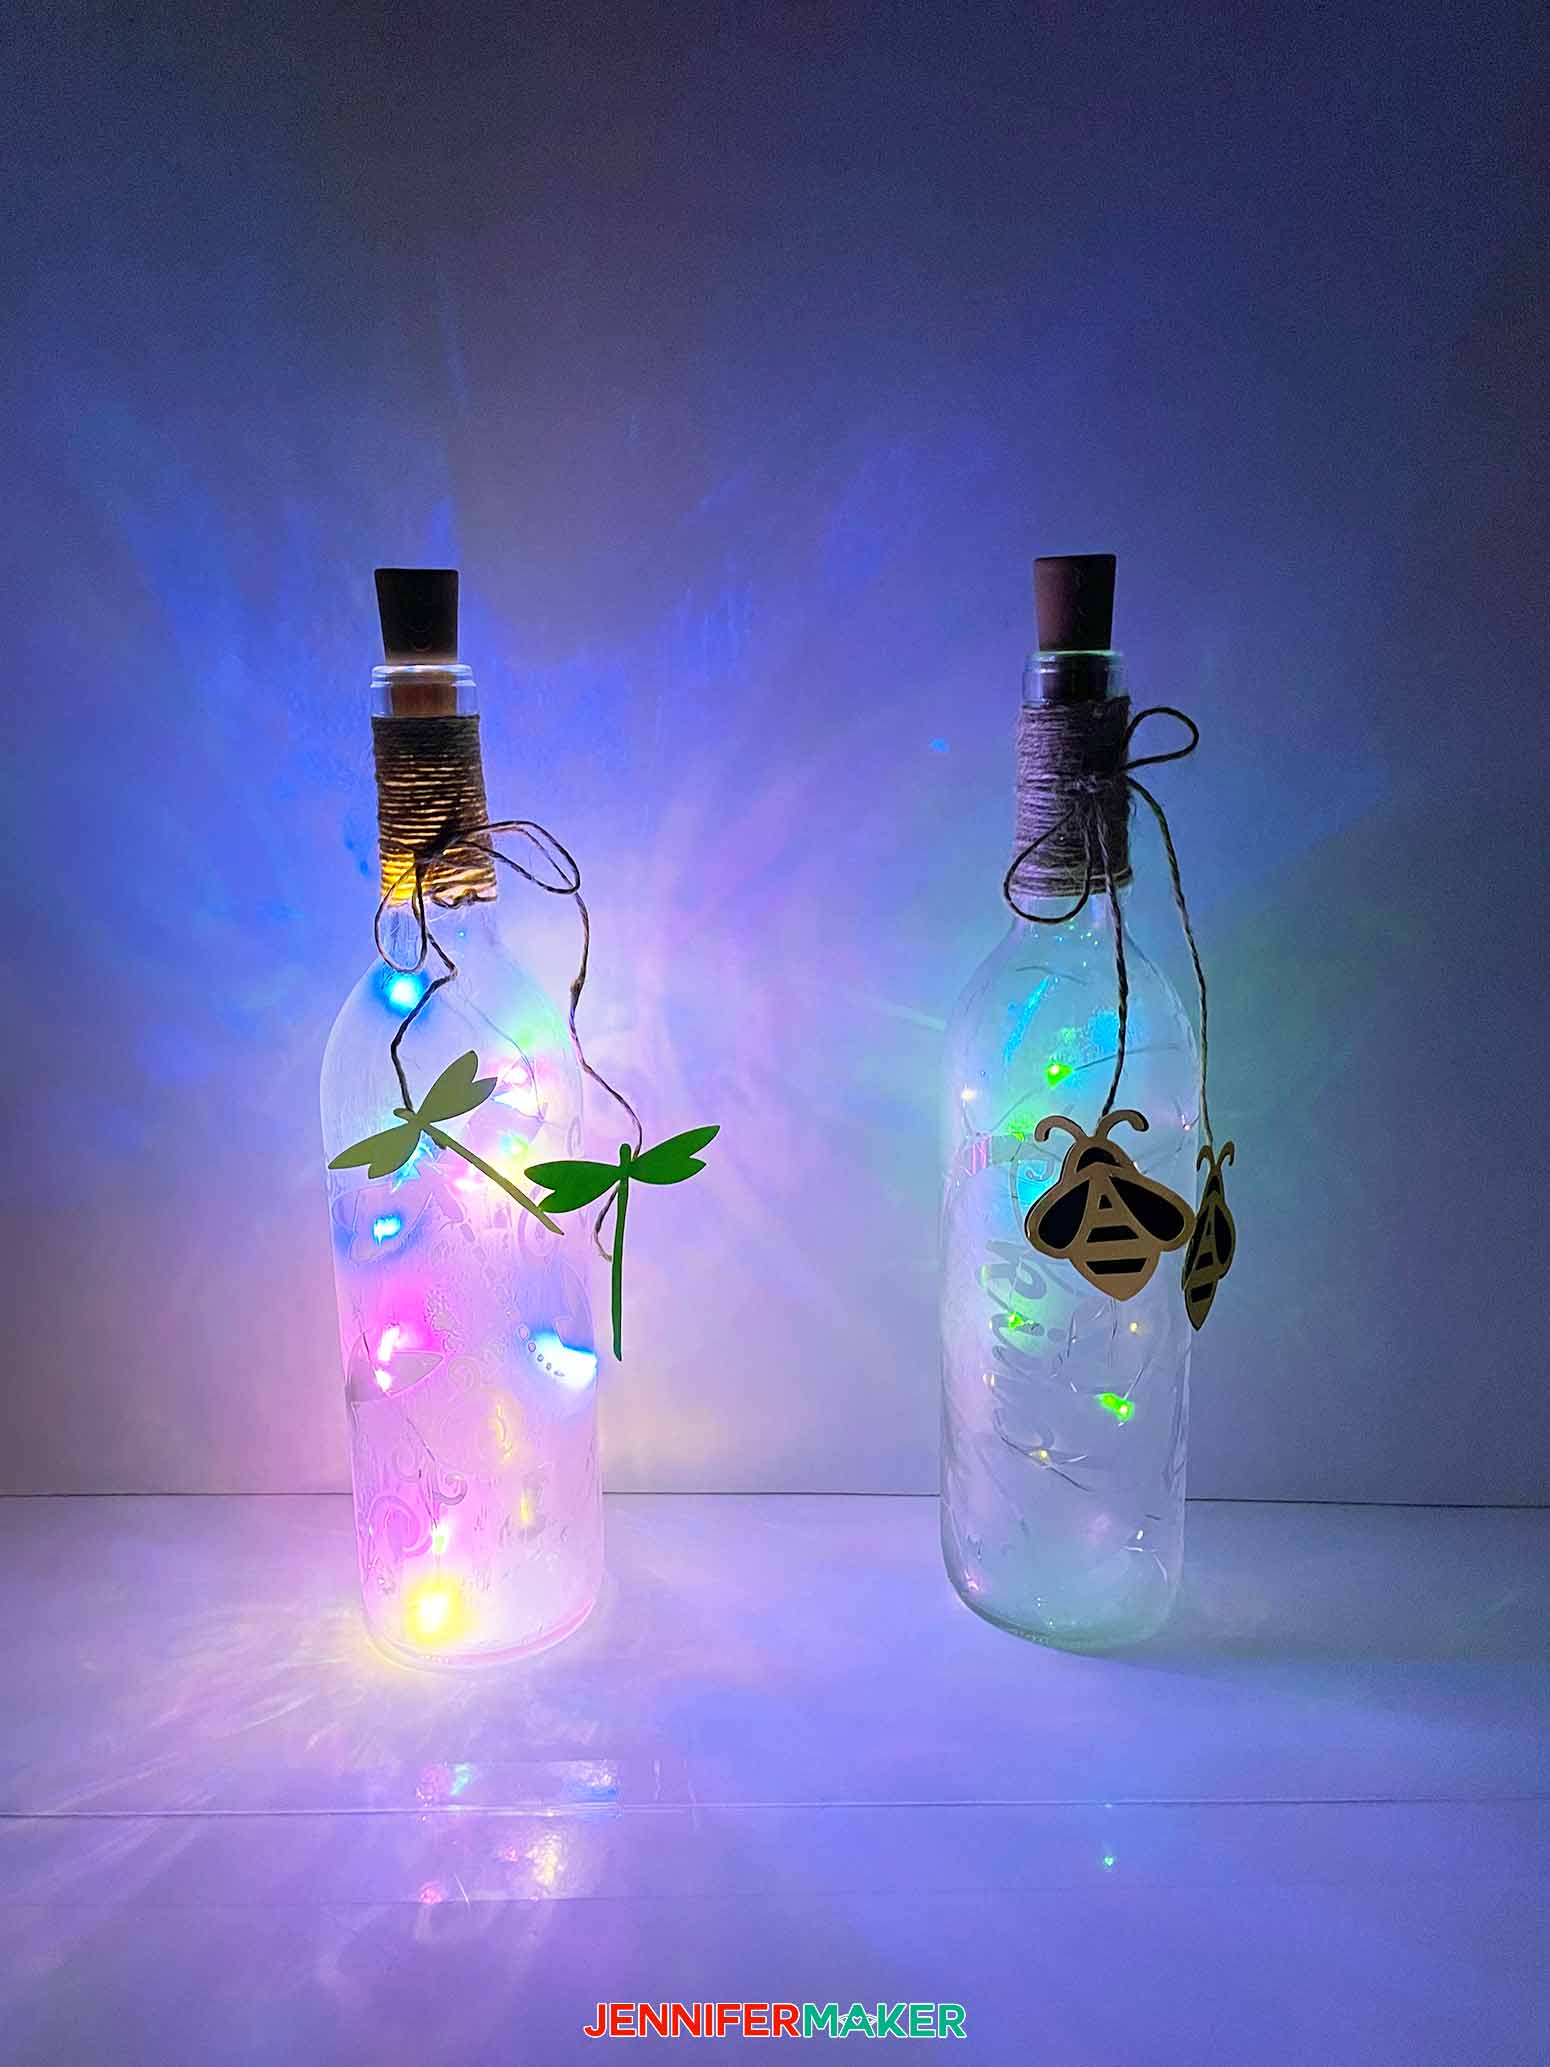
I have come across some really beautiful wine bottles and I hate just recycling all of them because they can be so pretty! Instead, I have decided to repurpose them, creating gorgeous Wine Bottle Art with fairy lights! They can become beautiful centerpieces for any event, or just to enjoy in your own home, and they tie in beautifully with my wine bottle serving tray! This is an excellent project for any level of crafter and will not take a lot of time to create from start to finish!
Watch the Wine Bottle Art assembly video here:
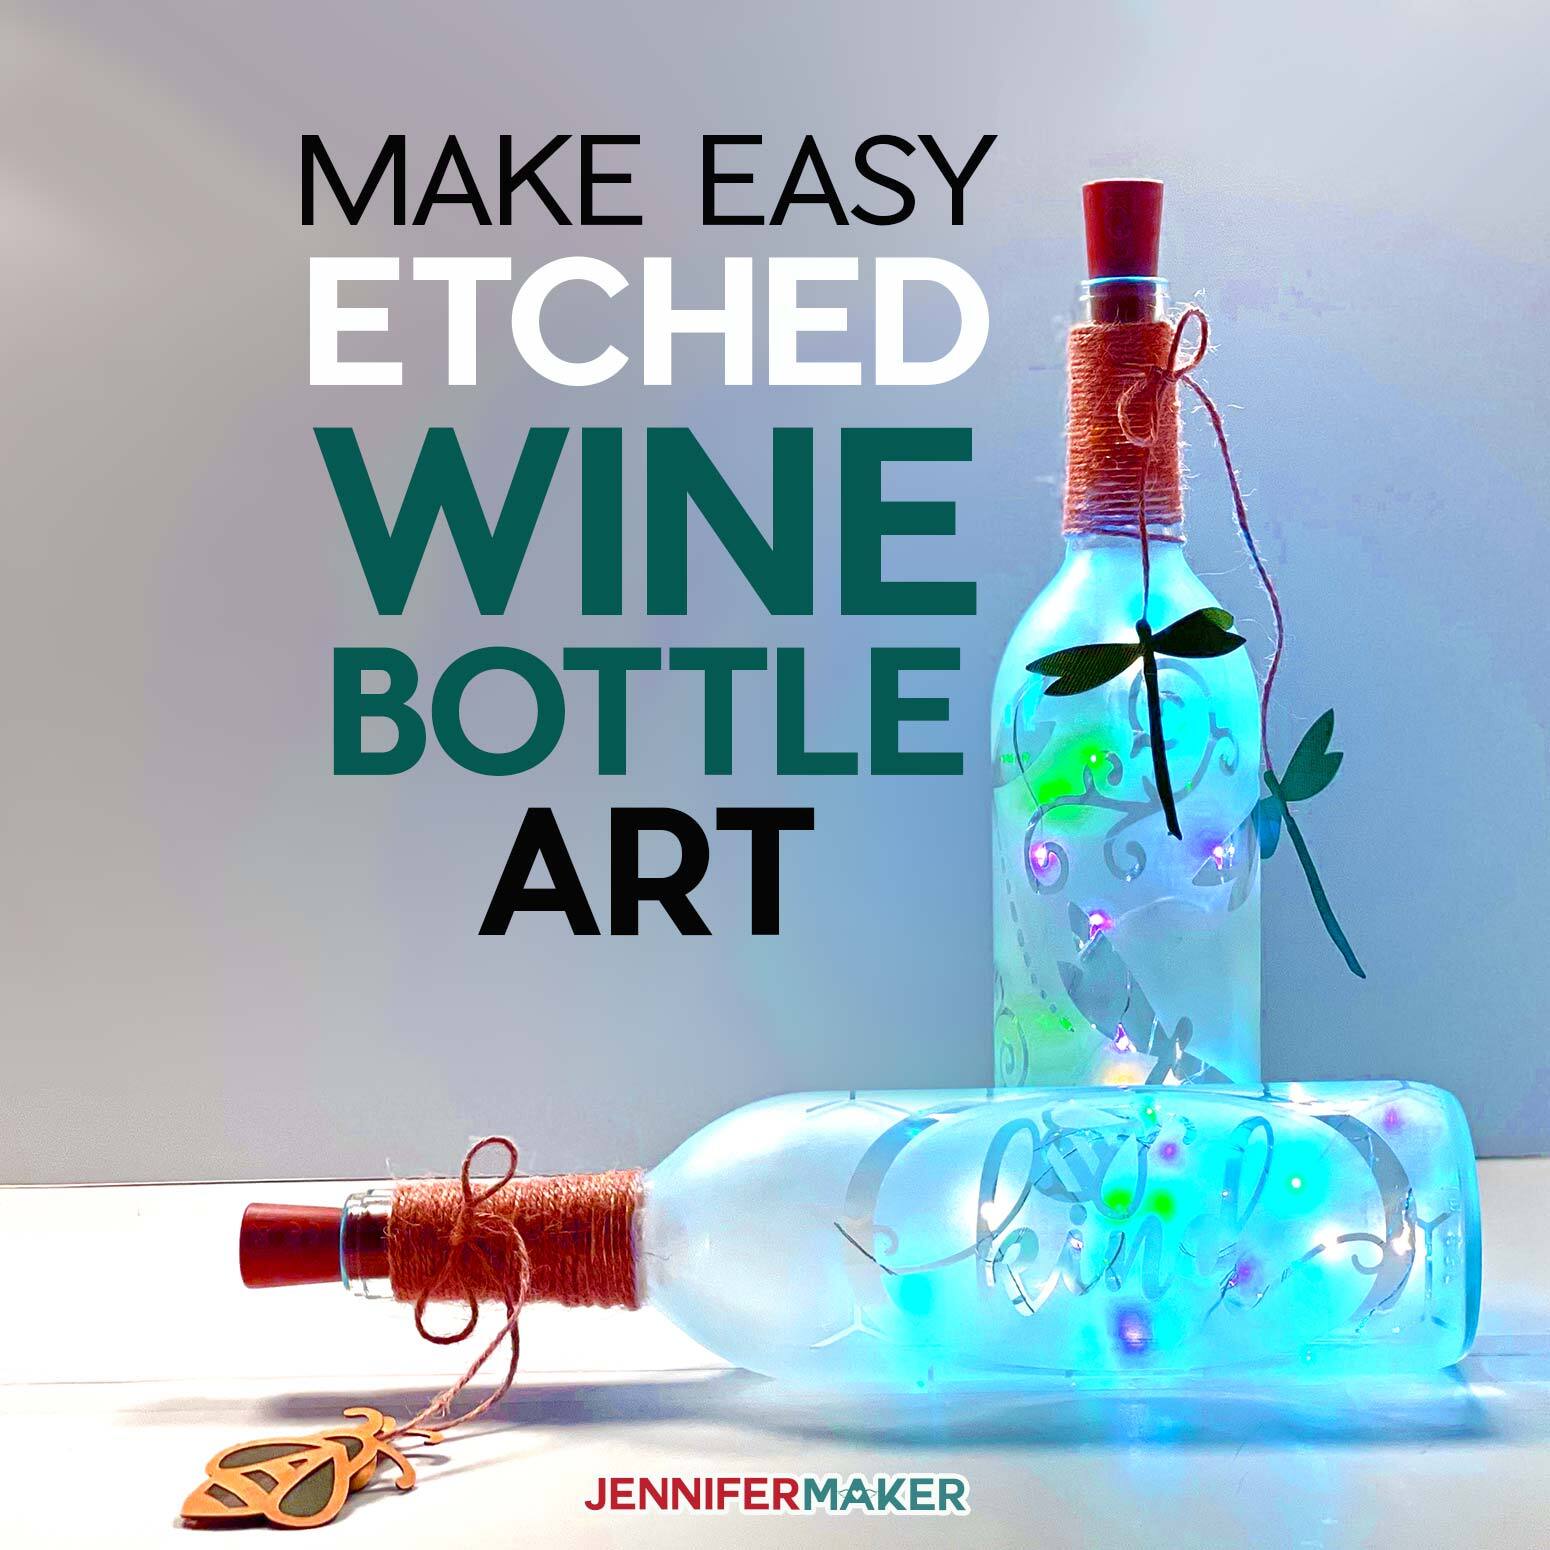

If you haven’t tried your hand at etching yet, Wine Bottle Art is a really great design to try it out on! It doesn’t take much time to do, and you can even use wine bottles you have on hand to save money! If you use a bottle with a darker tint, I want you to know that the fairy lights will not shine through as brightly as with a clearer wine bottle. I have seen some beautiful etching on dark wine bottles, though, and can’t wait to see what kind of Wine Bottle Art you create, clear or dark!
I used one sheet of Cricut Premium (permanent) Vinyl and cut the design out on my Cricut machine. After weeding the image, I chose to use painter’s tape instead of transfer tape on this project. Why? Since the bottles are rounded, I knew that trying to mold transfer tape around them would be difficult. Since painter’s tape has more flexibility than transfer tape, it would allow me to have more control over the application process!
The beauty of my Wine Bottle Art is that you have two options for creation! You can either etch the design into the bottle using a special etching cream, or you can leave the vinyl on the bottle as a permanent design! How cool is that!
Etching is very simple but there are a few precautions that I urge you to put into place. Since etching cream is caustic, it is important to wear gloves to protect your hands and goggles to protect your eyes in case of any splatter! It is also important to work in a well ventilated area as well! Once you have these safety precautions in place, using etching cream is really very easy.
Paint the entire bottle being very generous with the etching cream. If you are applying twine to the neck of the bottle, you will want to apply etching cream just to where the bottle neck ends. If you plan to leave off the twine, apply the etching cream over the entire bottle. It’s completely up to you! Let the etching cream sit for at least five minutes before rinsing it off with cold water.
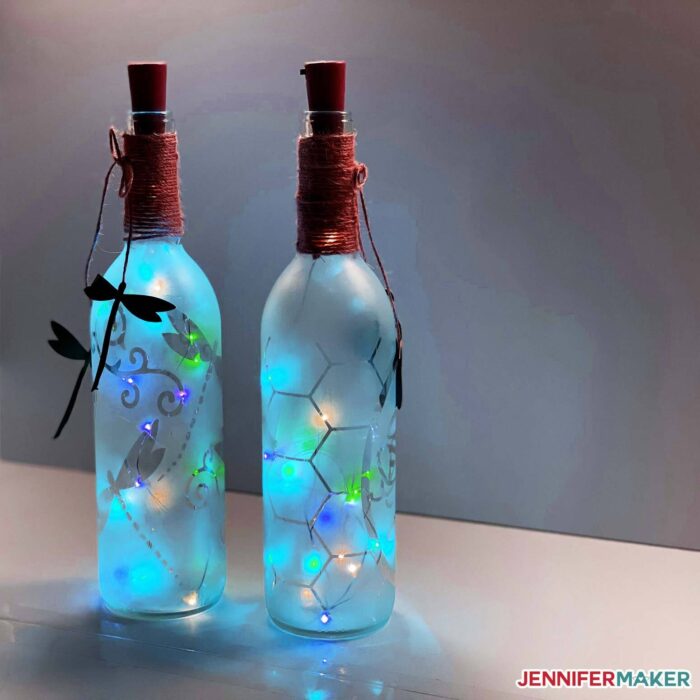
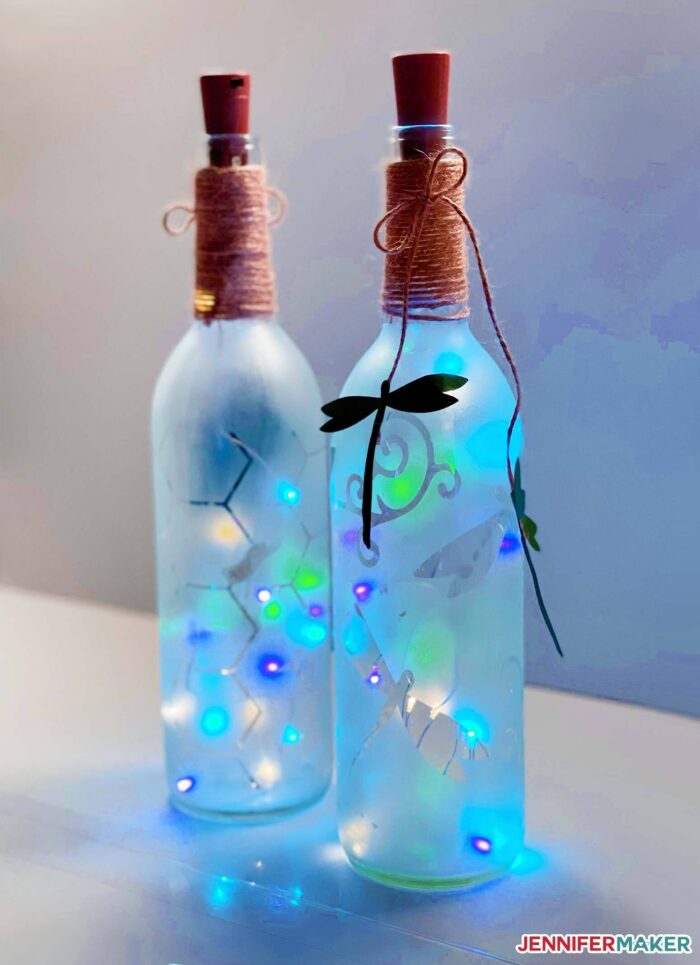
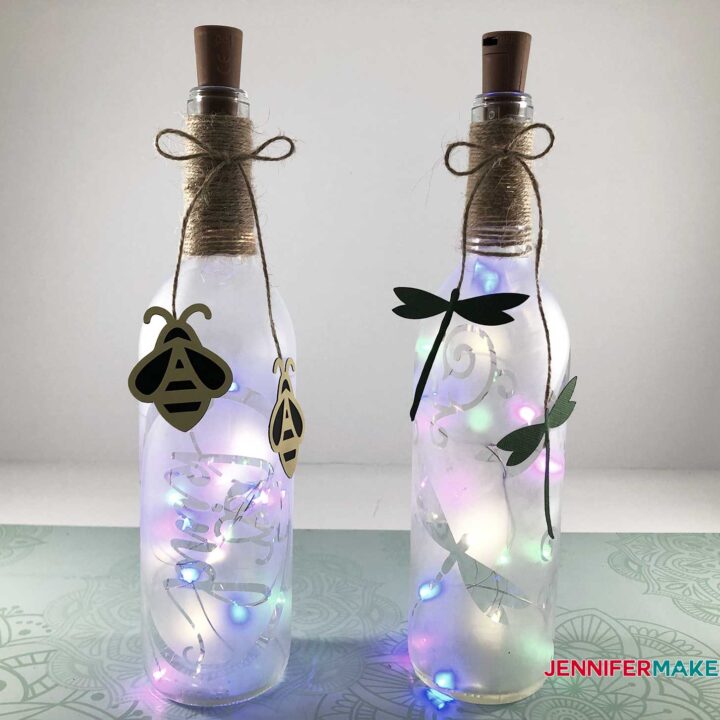
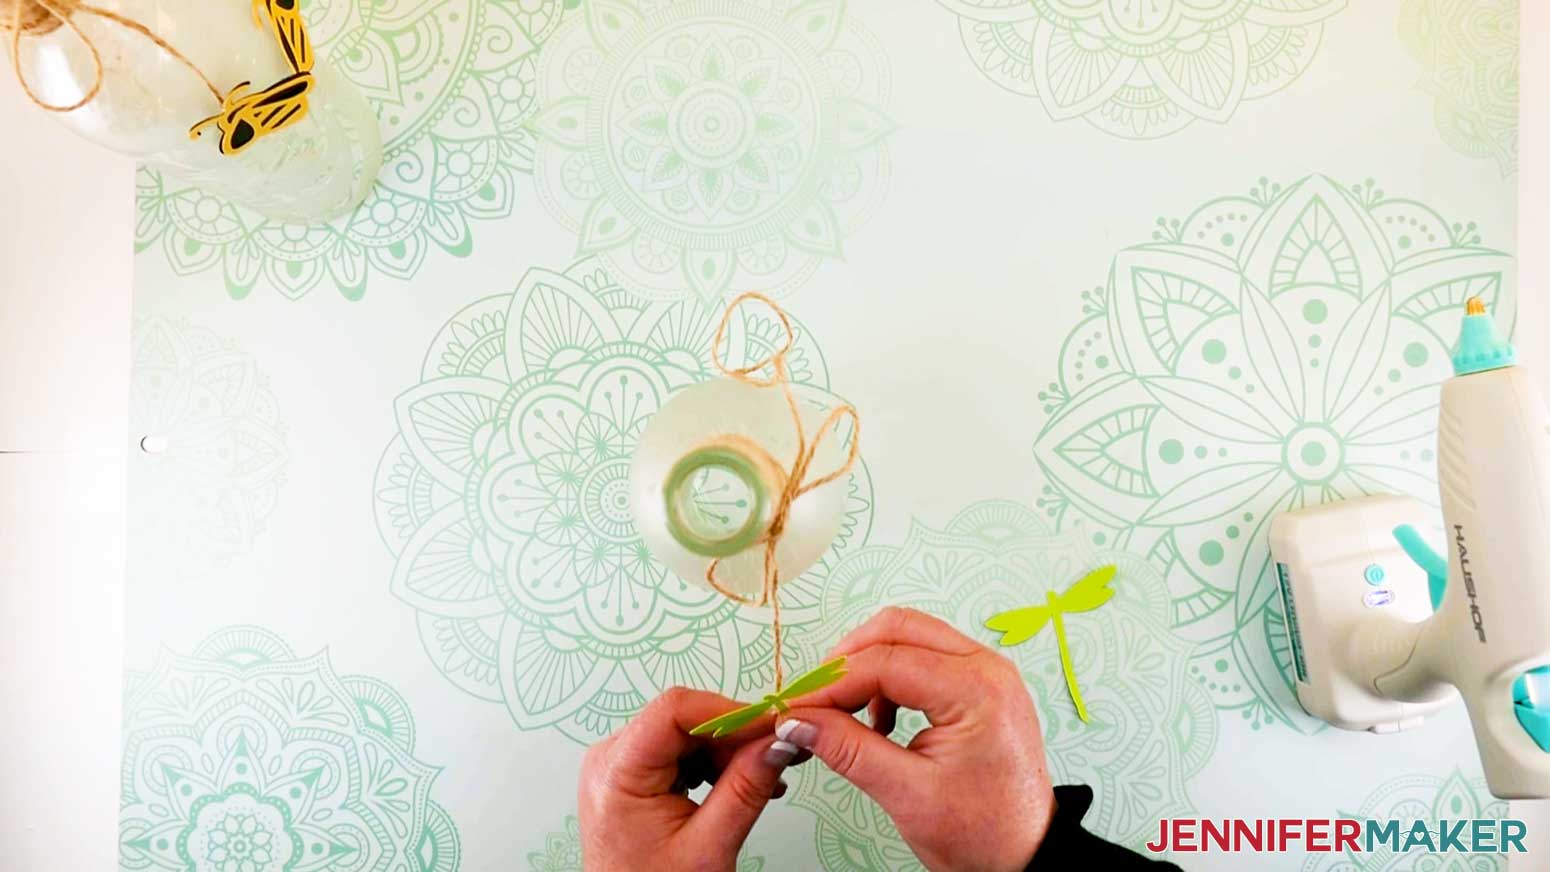
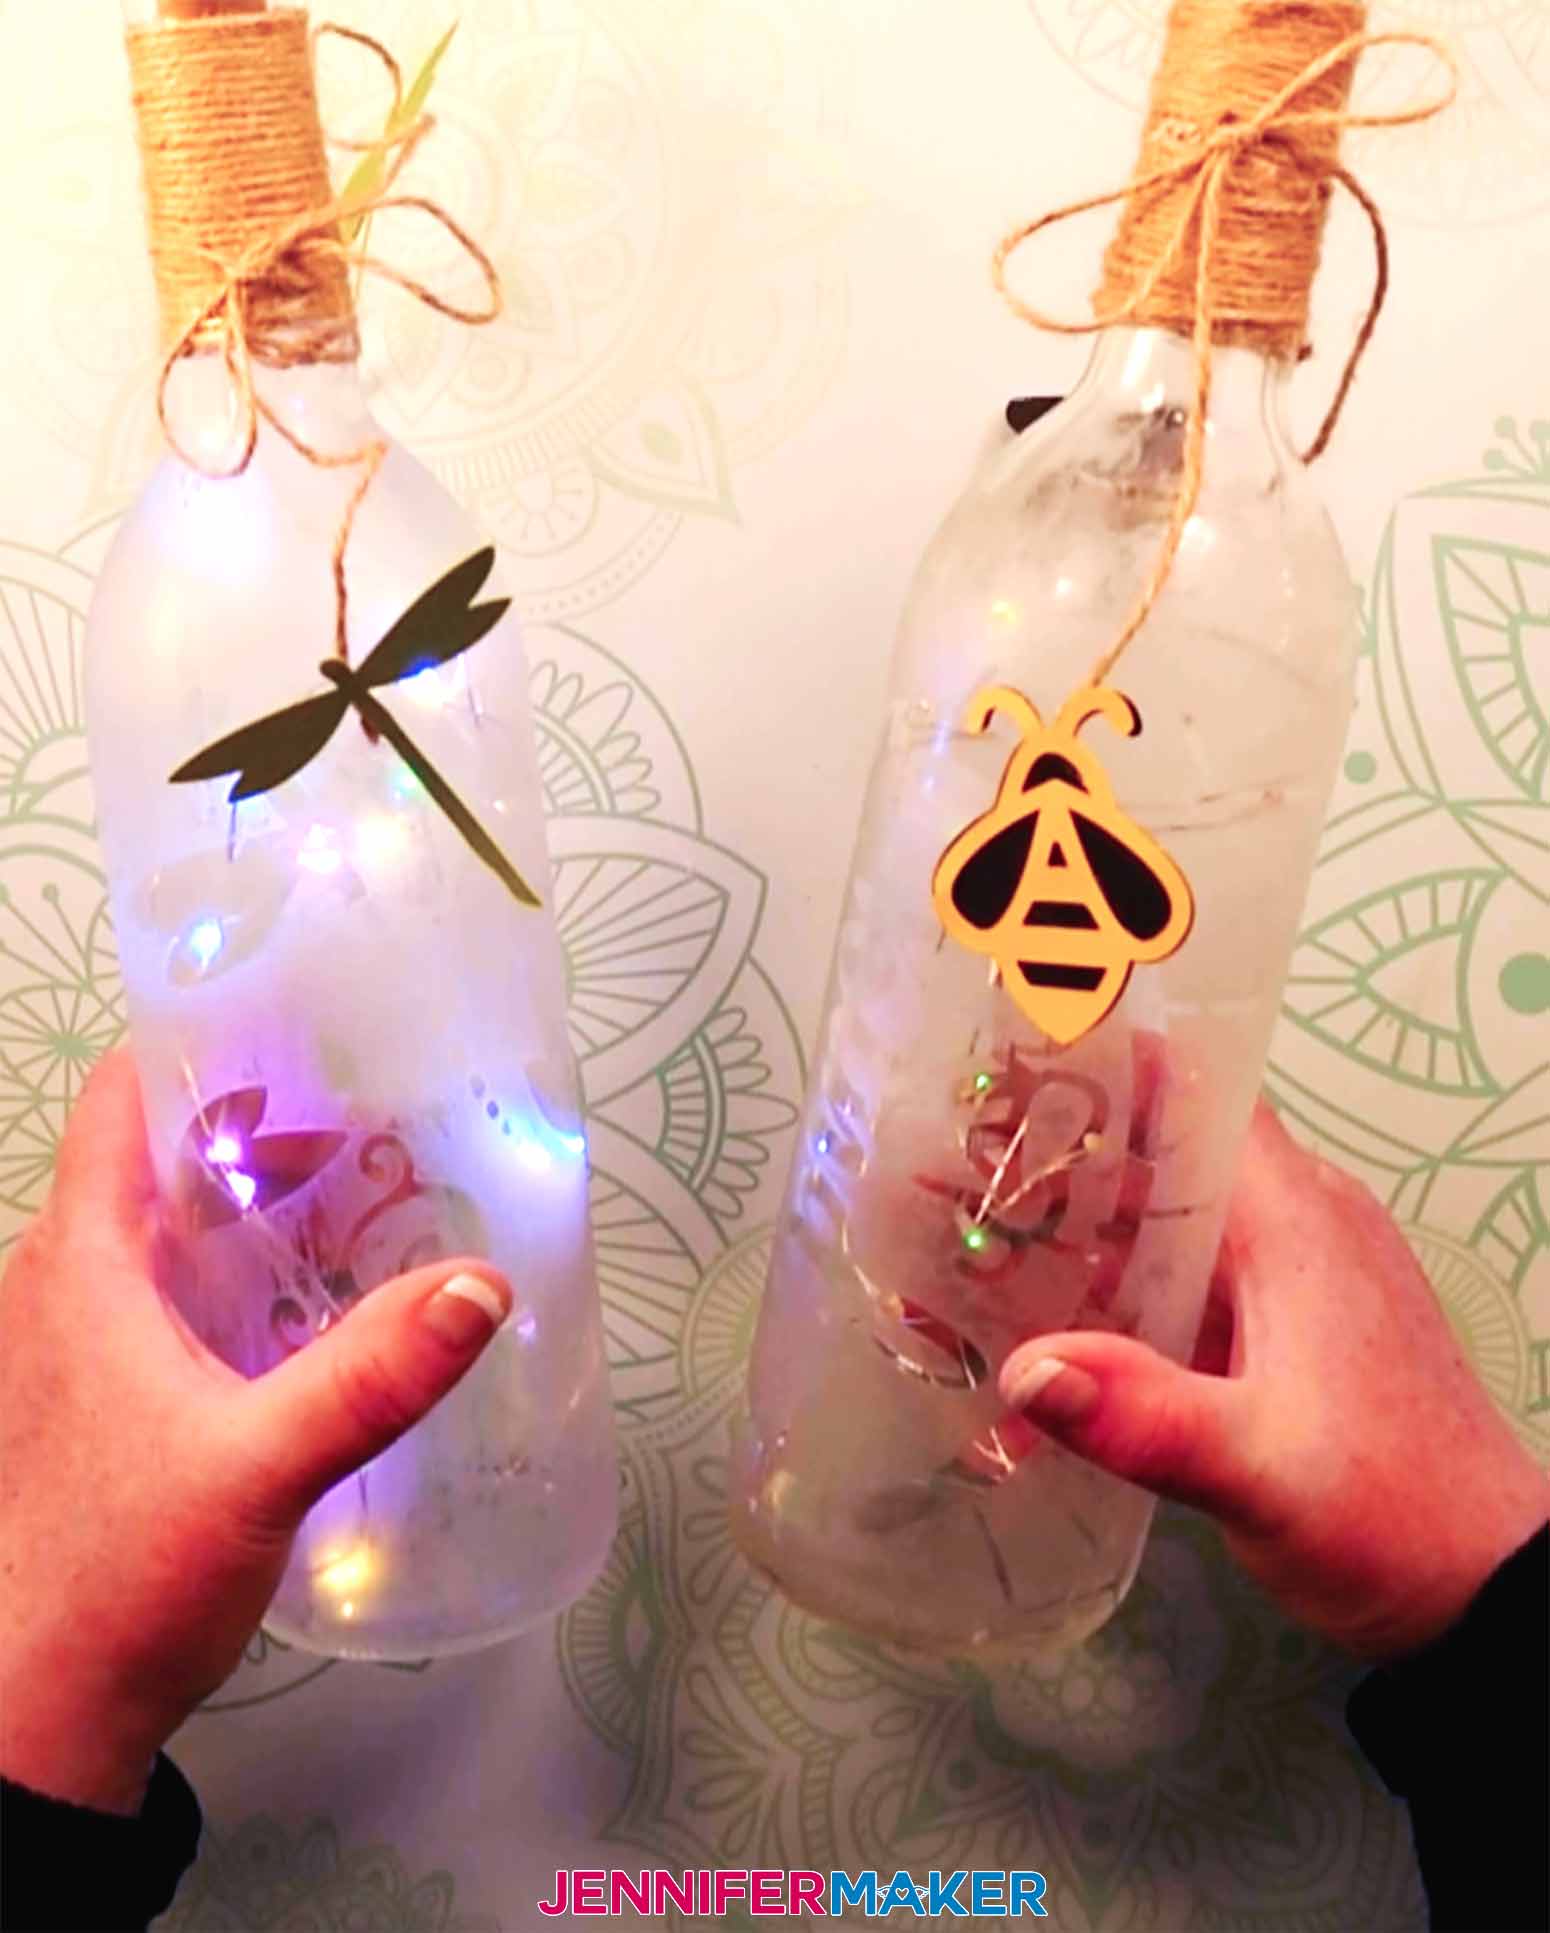
Now you can add your twine or ribbon or any other personal touch you want to add around the neck of the bottle, securing the material with a small dab of hot glue. Using another piece of that same material, I tied a bow around the neck for an added fun touch! Then, I used scraps of cardstock to cut the bees and dragonflies, and attached them with a small drop of hot glue to the end of of the bow.
I used my Cricut cutting machine to cut the vinyl and cardstock, along with the Fine-Point Blade and StandardGrip Material Mat.
Let me show you how to make wine bottle art. This post contains some affiliate links for your convenience (which means if you make a purchase after clicking a link I will earn a small commission but it won’t cost you a penny more)! Read my full disclosure policy.
Materials to Make Wine Bottle Art with Armour Etch
- Glass Wine Bottle (I used this one)
- Cricut Permanent Vinyl 12″ x 12″ sheet (color only matters if you are leaving the vinyl on the wine bottlel)
- Cardstock 8 1/2″ x 11″
- Armour Etch Cream
- Twine (I used approximately 20 feet of twine)
- Fairy Cork Wine Bottle Lights
- Cricut StandardGrip Machine Mat 12″ x 12″ (green)
- Cricut Weeding Tools
- Paint Brush
- Painter’s Tape
- Cricut Scraper
- Nitrile Vinyl Gloves
- Safety Goggles
- Glue
- Isopropyl Alcohol
- Lint free cloth or Coffee Filter
- A way to cut your vinyl for the stencil (I used the amazing Cricut cutting machine!)
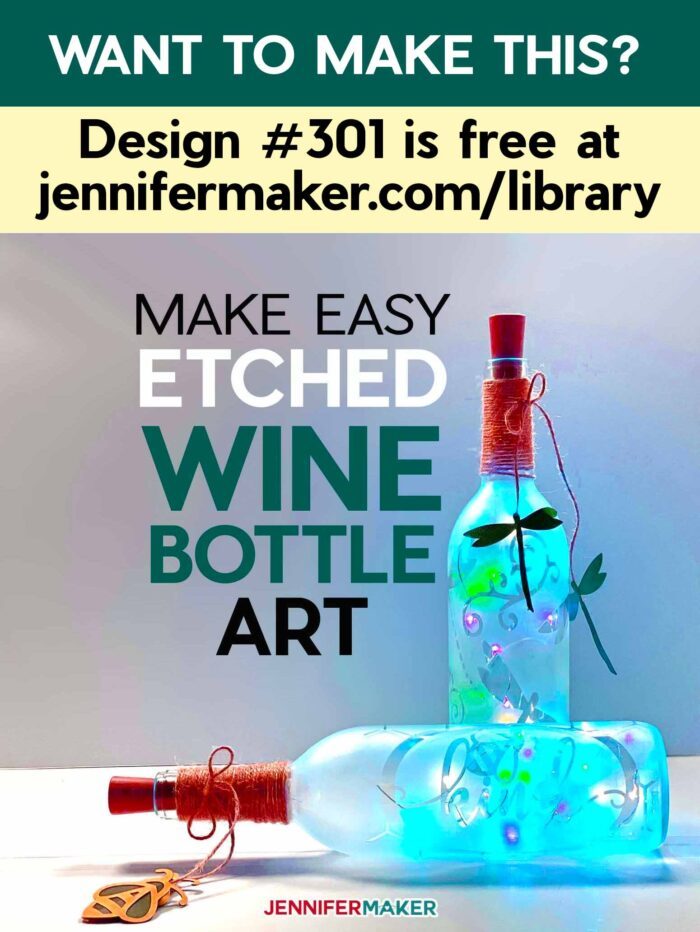
- Design #301 – My free template (available in my free resource library—get the password at the bottom of this post)
How to Make Etched Wine Bottle Art
Wine Bottle Art
Wine Bottle Art is a fun way to upcycle empty wine bottles! Or purchase a bottle or two and try your hand at creating some awesome art. Add some fairy lights to your creation for an extra special touch.
Materials
- Glass Wine Bottle (I used this one)
- Cricut Permanent Vinyl 12" x 12" sheet (color does not matter since we are using it as a stencil)
- Cardstock 8 1/2" x 11"
- Armour Etch Cream
- Twine ( I used approximately 20 feet of twine)
- Fairy Cork Wine Bottle Lights
- Design #301 - Wine Bottle Art SVG/DXF/PDF (available free in my resource library)
Tools
Instructions
STEP 1: GET THE WINE BOTTLE ART DESIGN
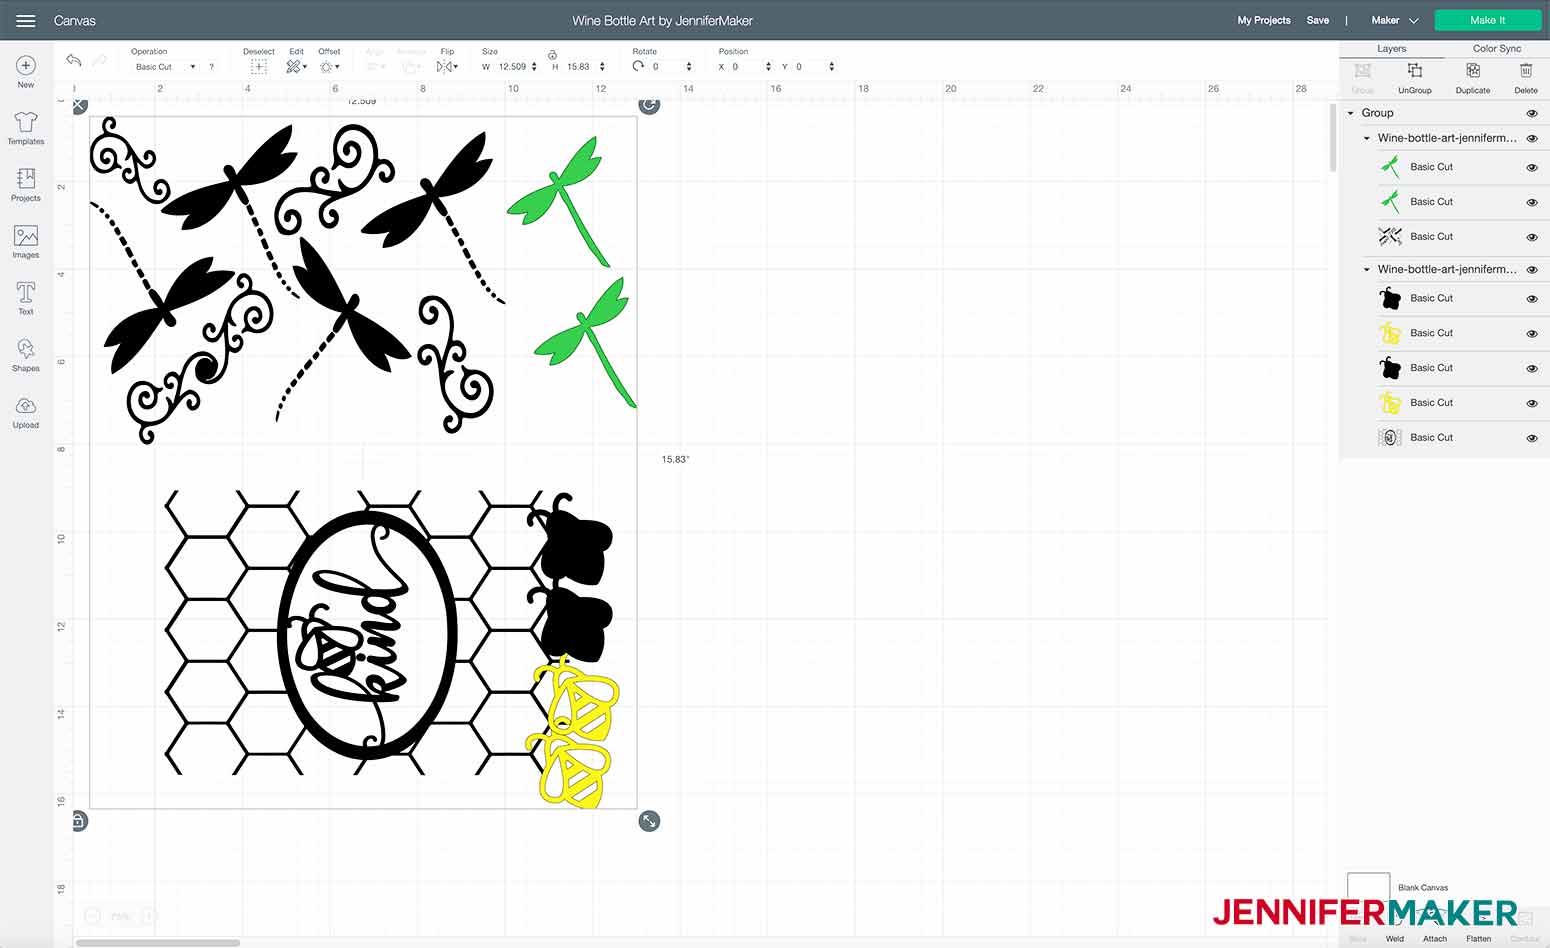
First, download Design #301 which is my free Wine Bottle Art SVG/DXF/PDF from my free resource library. If you're going to cut it on your cutting machine, upload the file to your design software. This is what my Wine Bottle Art SVG looks like in Cricut Design Space.
Tip: If you are not sure how to upload an SVG cut file to Cricut Design Space, watch this helpful video training series I made. If you are on an iPad or iPhone, here is how to download and upload SVG files to the Cricut Design Space app.
STEP 2: CUT THE DESIGN
There are two designs in the Wine Bottle Art file. You will need to ungroup the designs first, then choose the design you want to use and hide or delete the other.
Each design is ready to be made as it is on the canvas for the size wine bottle I used in my project. If your bottle is a different size, you may need to adjust the size of the design to fit your bottle.
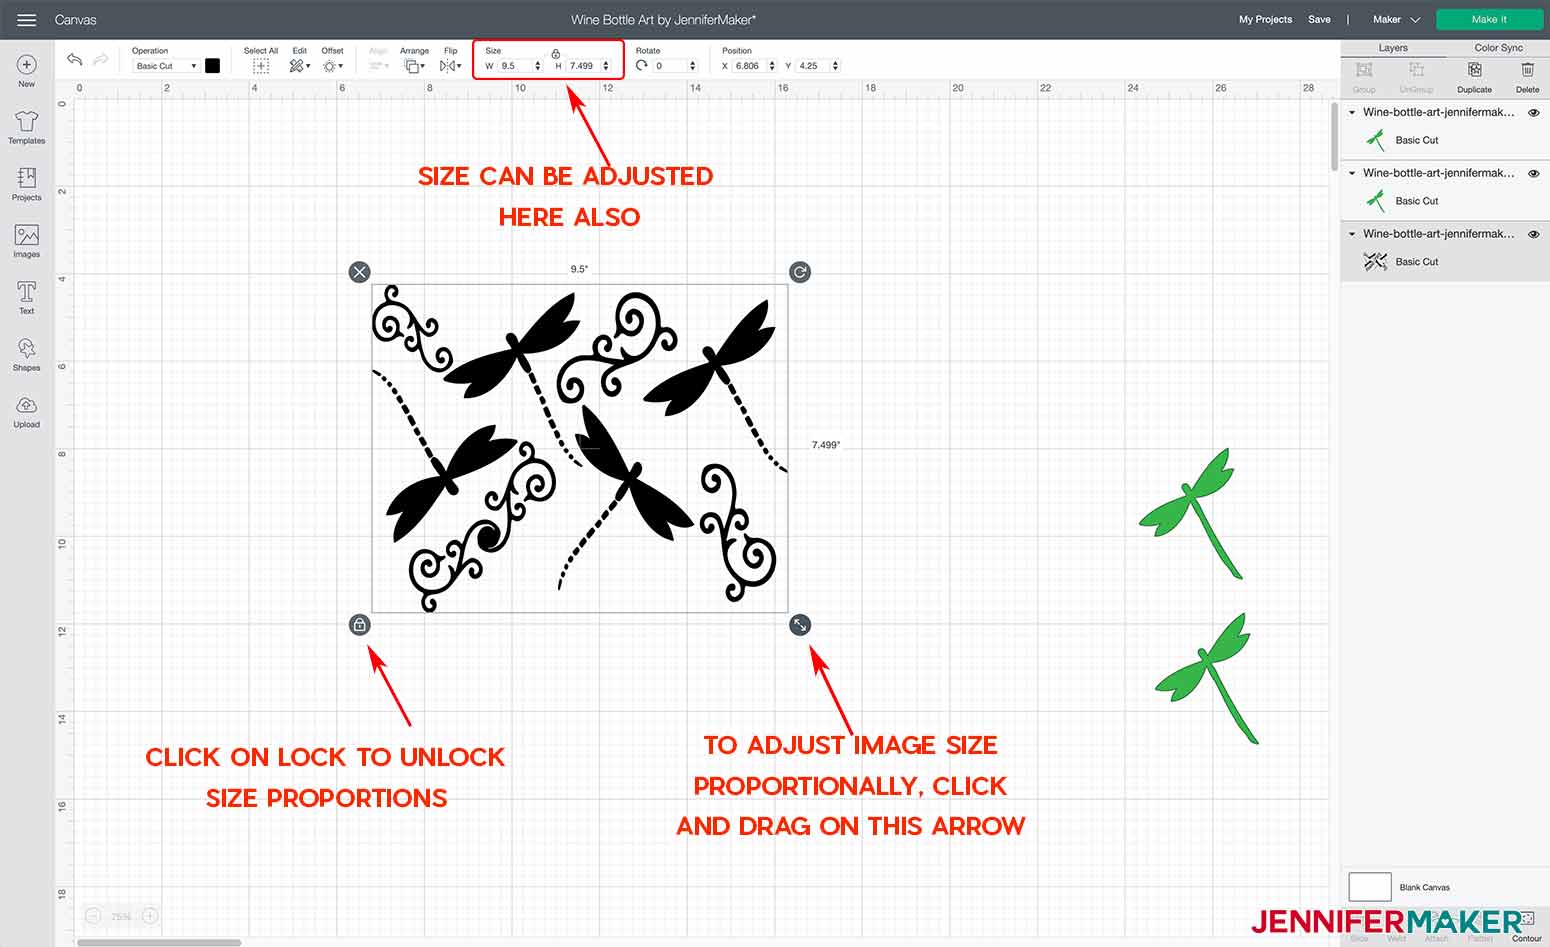
I measured the height of my bottle where I wanted the design to lay, as well as the circumference of the bottle to determine the width I needed for the design of my Wine Bottle Art. My design needed to be about 9 1/2" wide by 7 1/2" high.
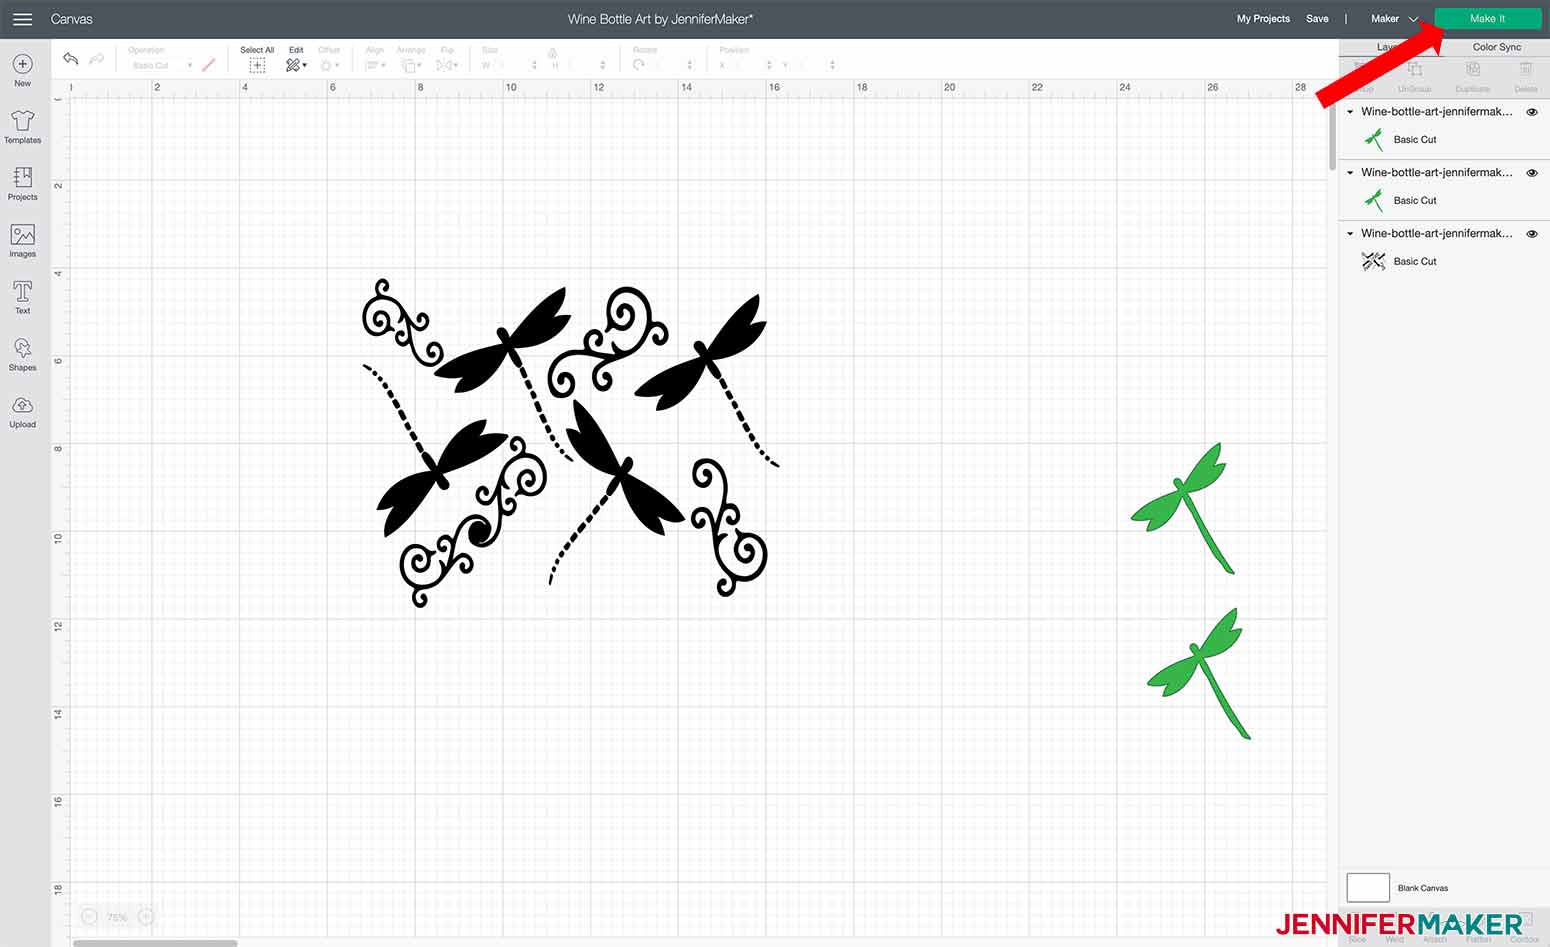
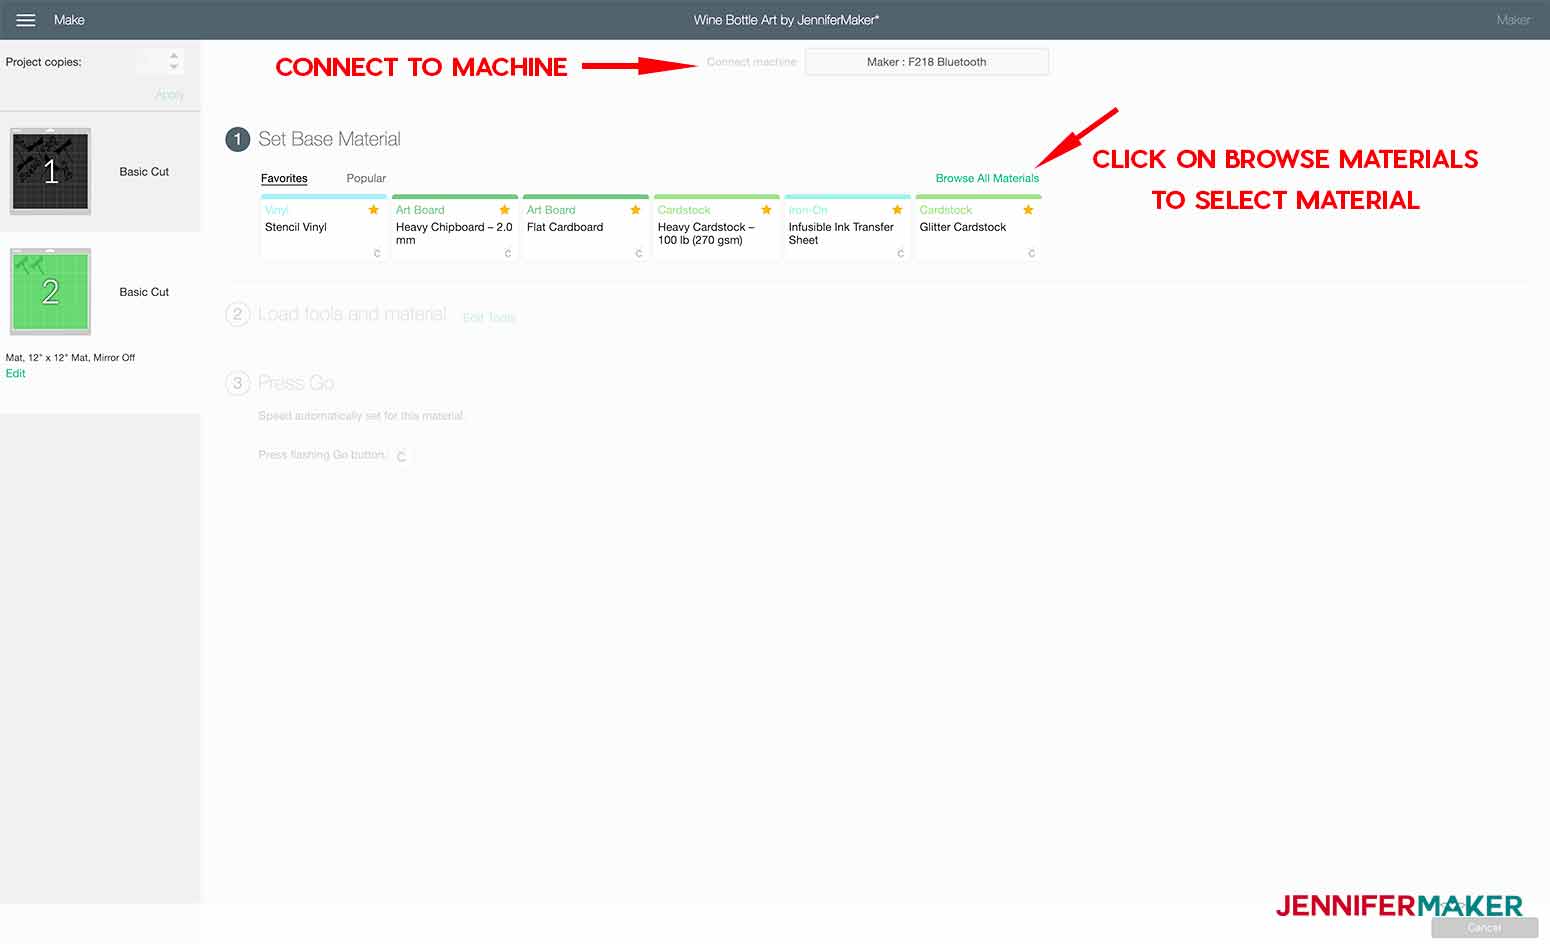
Once you have the design set to the size you need, click "Make It" and then click on "Continue" on the "Mat Preview" window.
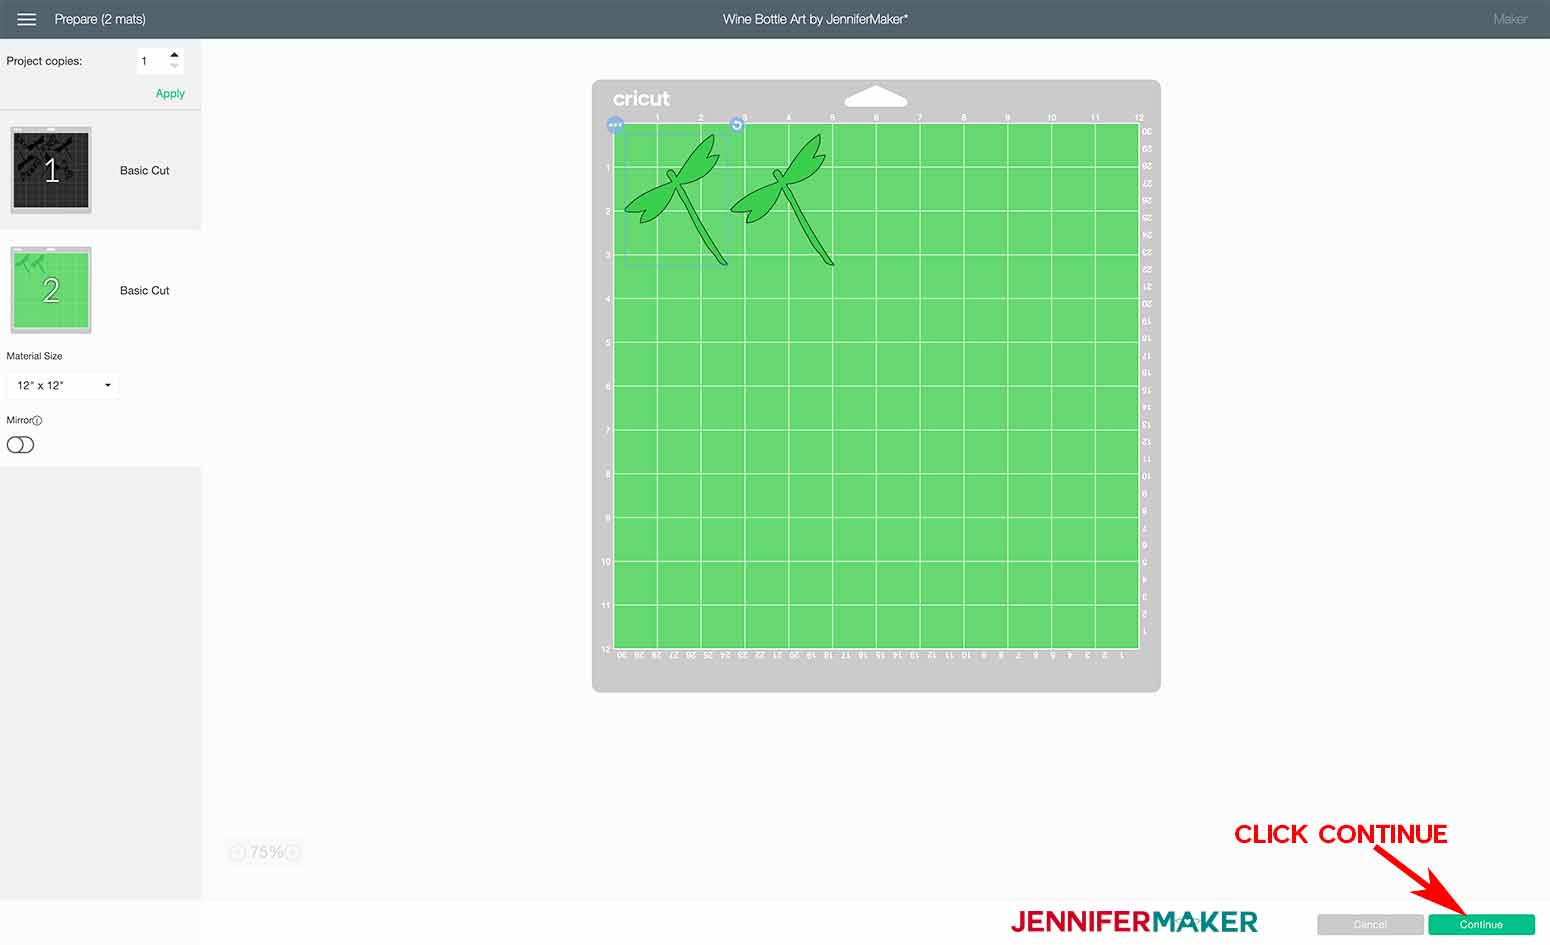
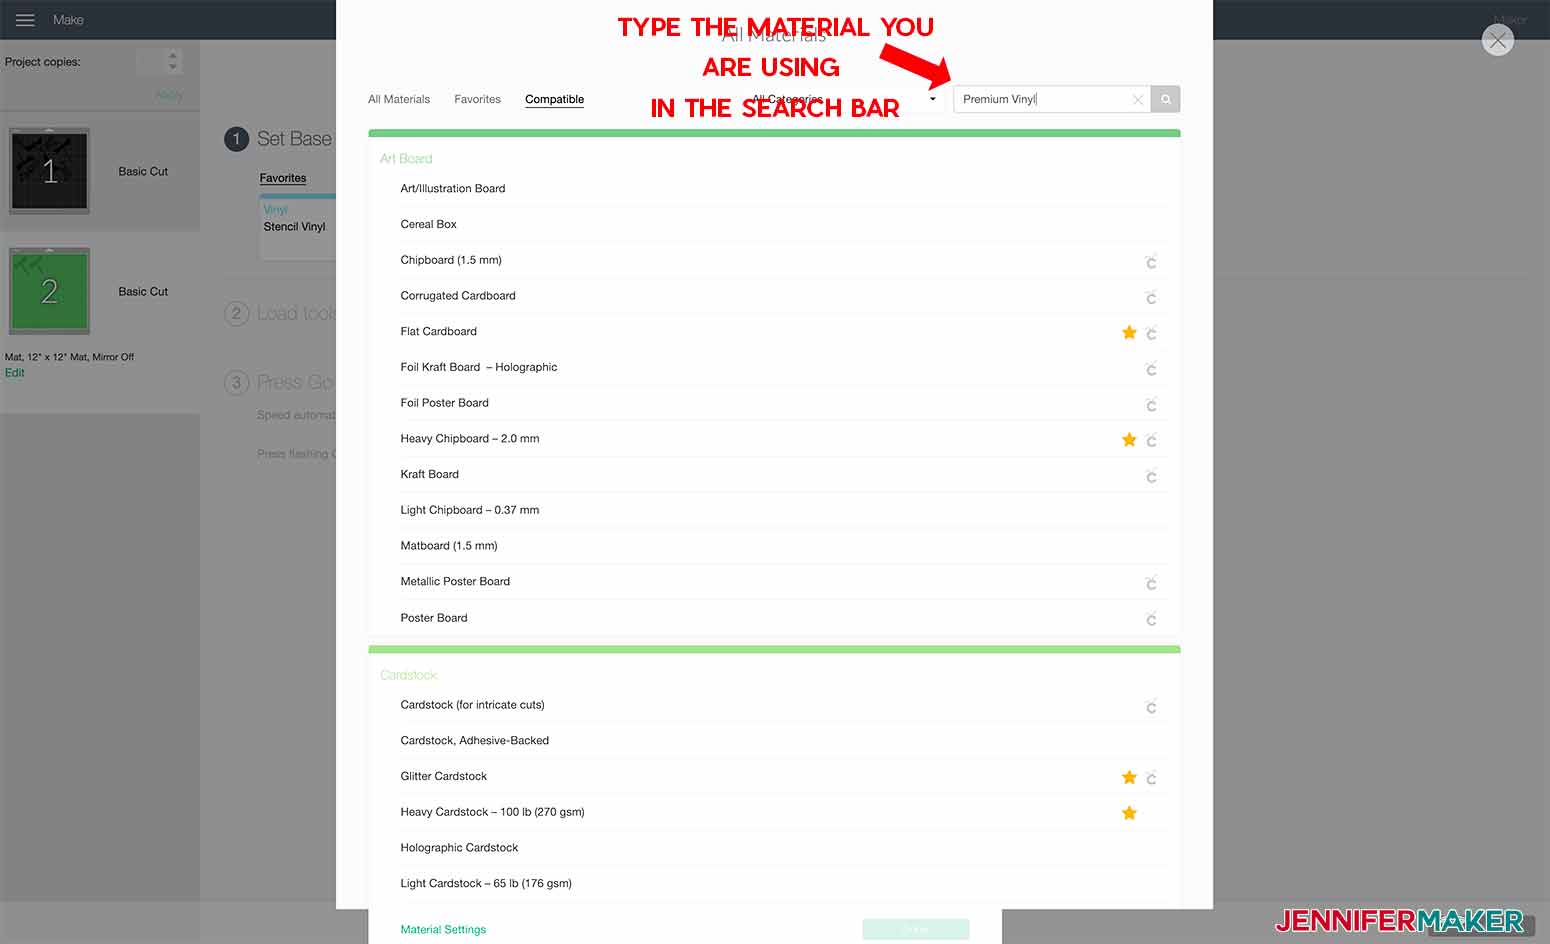
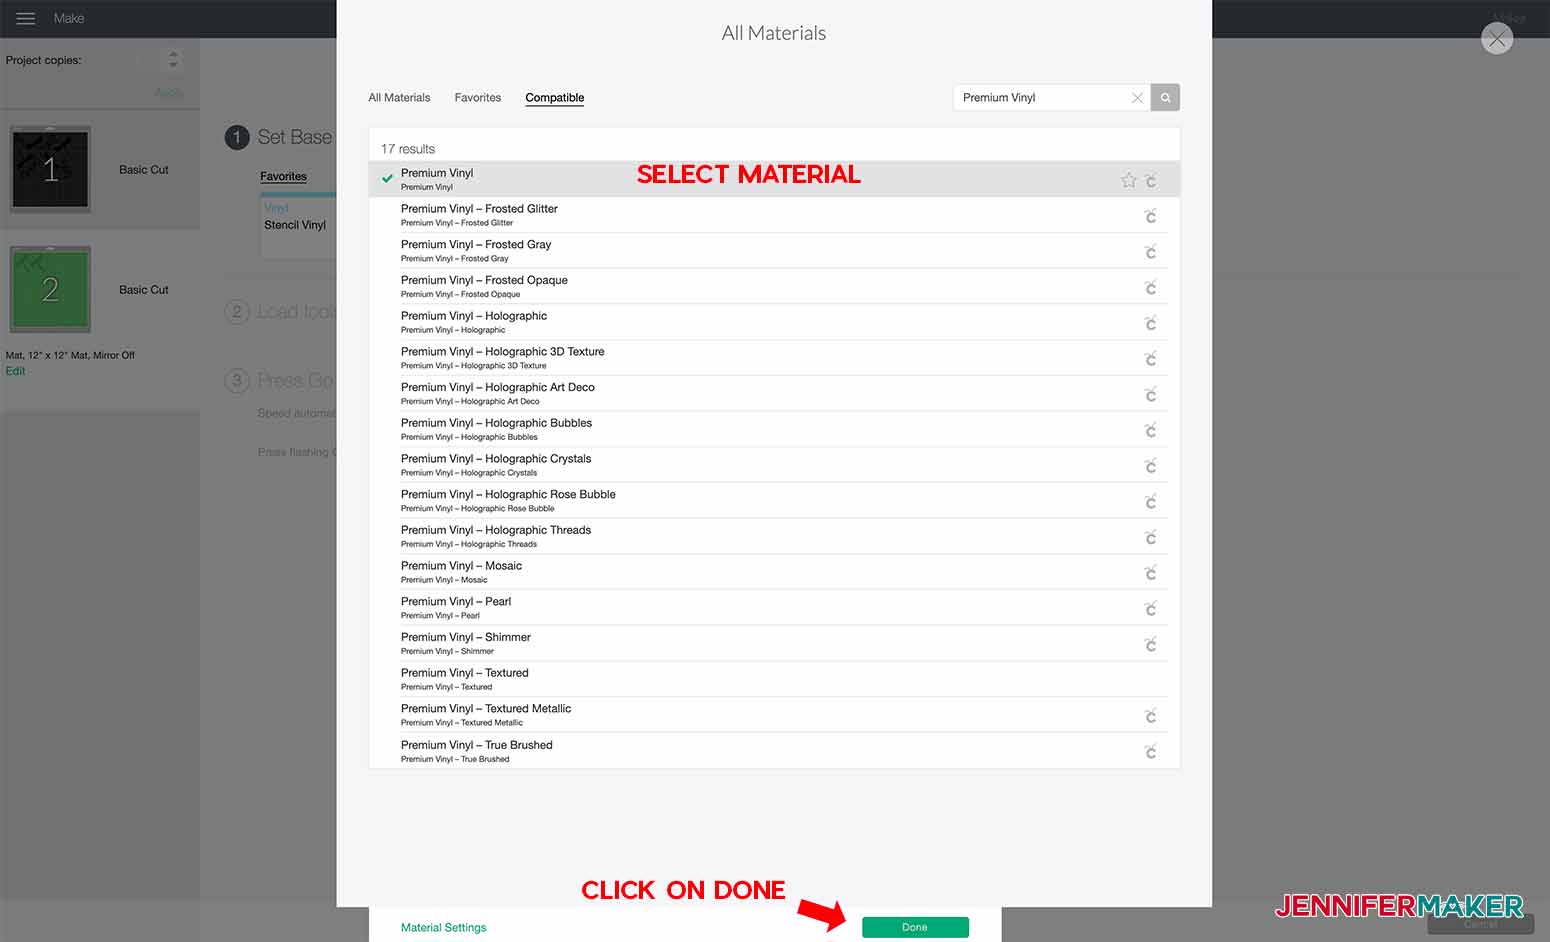
Now, connect to your machine and browse to find the material you are cutting. I used "Premium Vinyl" and to find that I clicked on "Browse All Materials, typed "Premium Vinyl" into the search box, selected the material and clicked "Done."
I always set my pressure to "MORE" to make sure I get a clean cut.
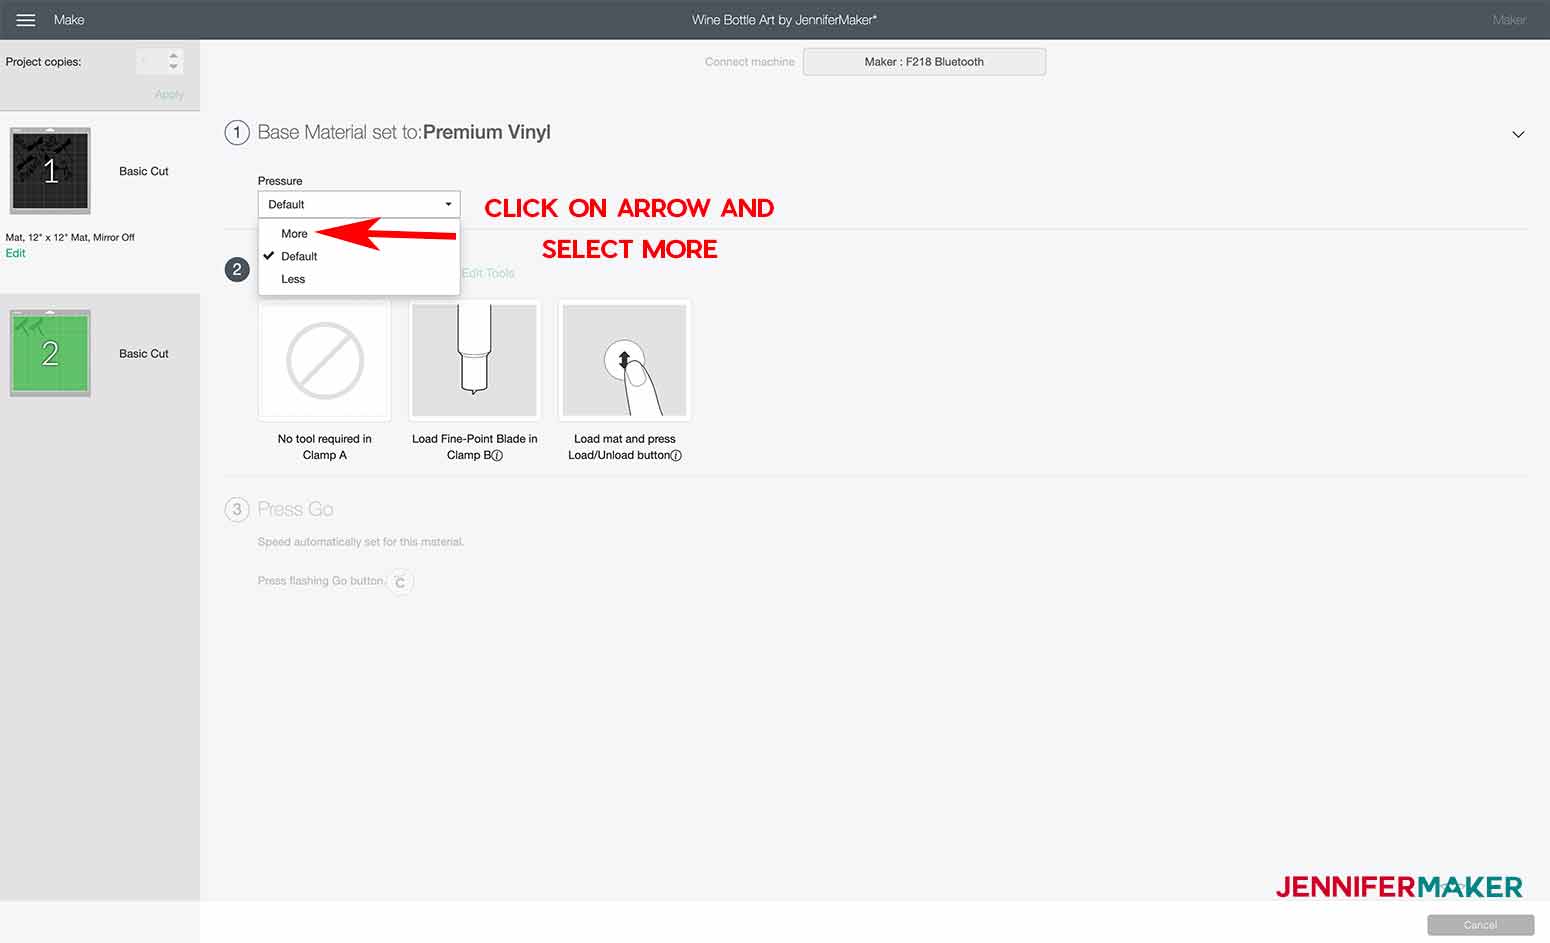
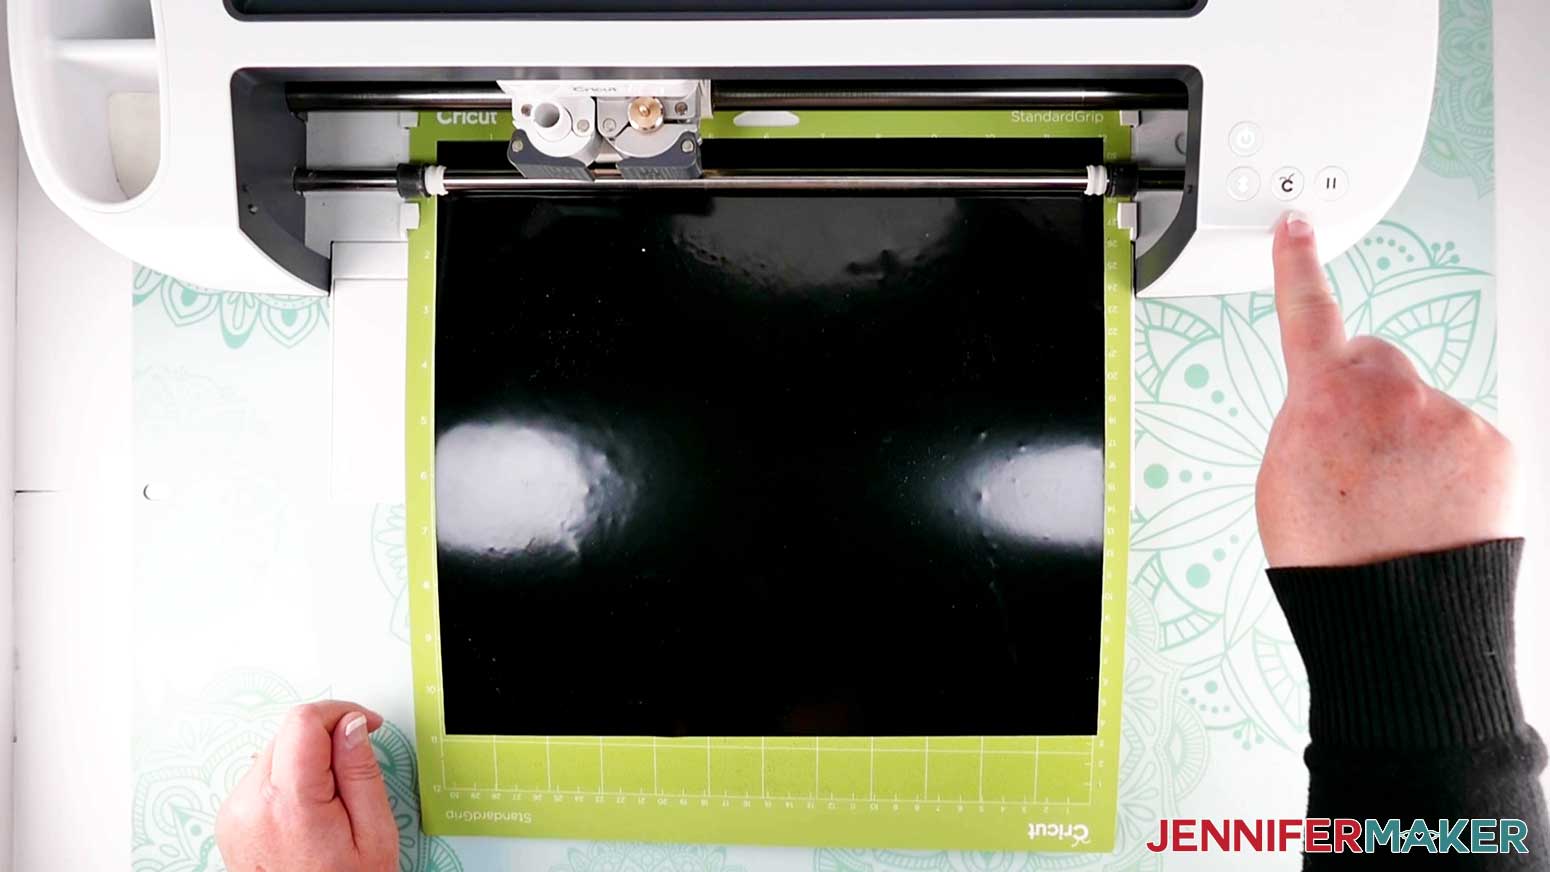
Place your Premium Vinyl shiny side up on your Cricut StandardGrip Machine Mat and load it into your machine.
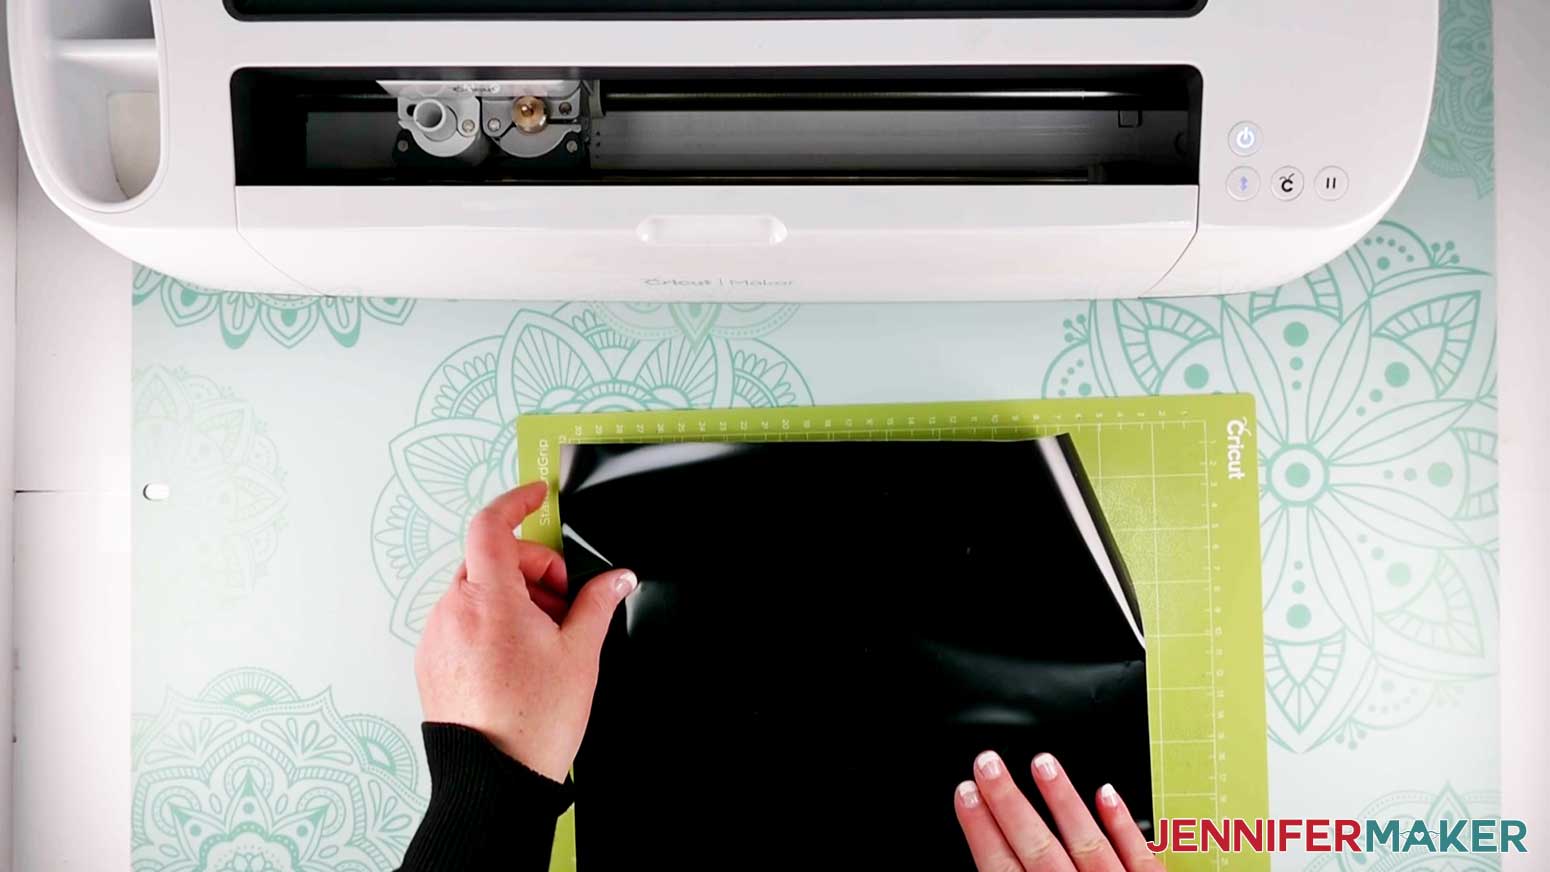
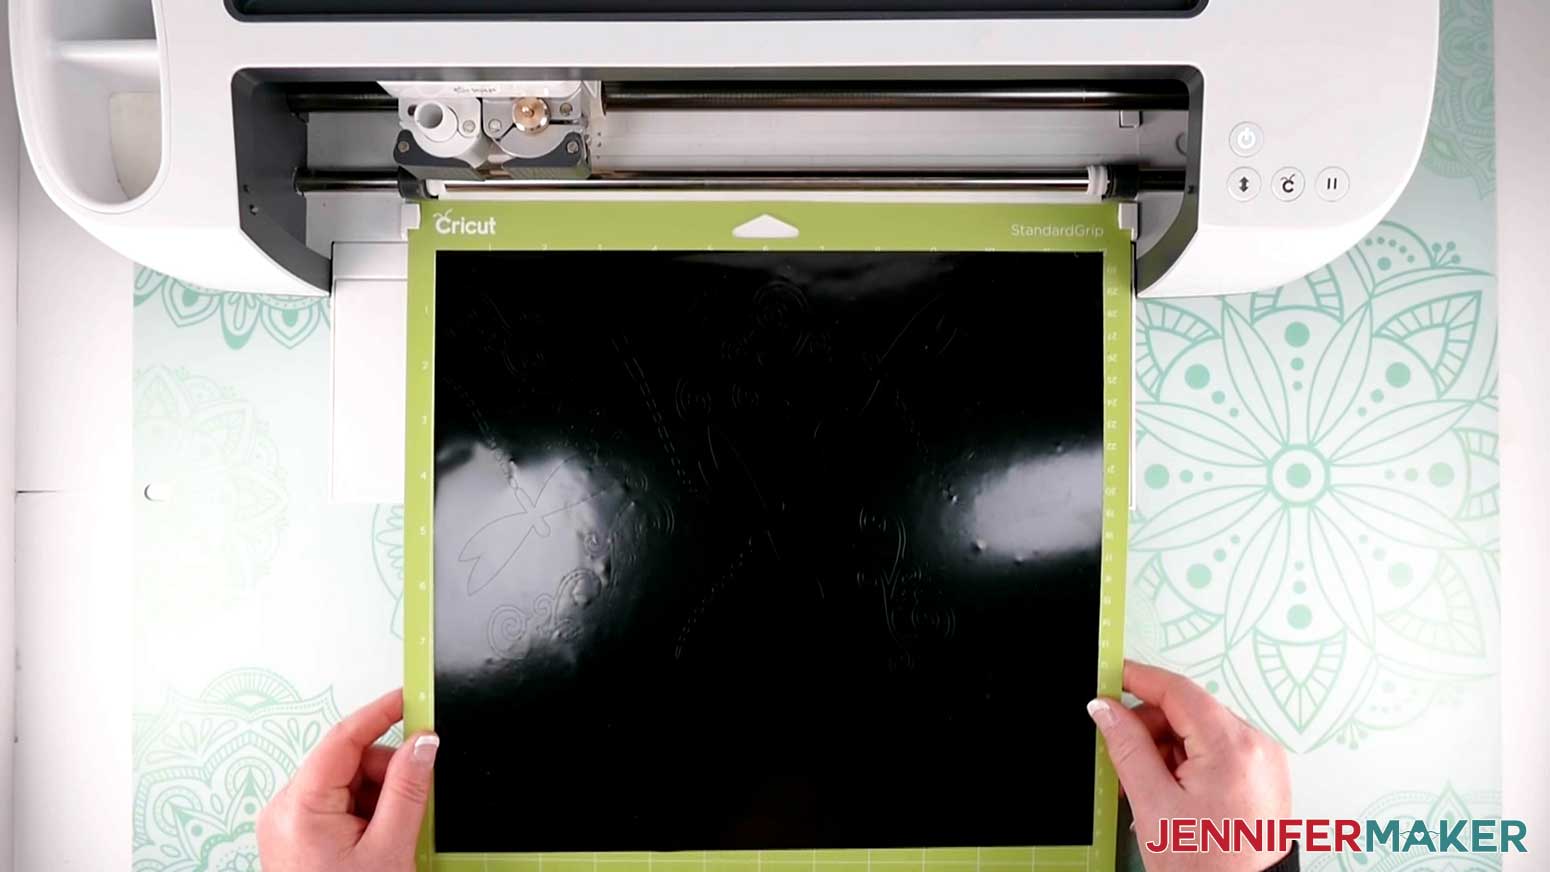
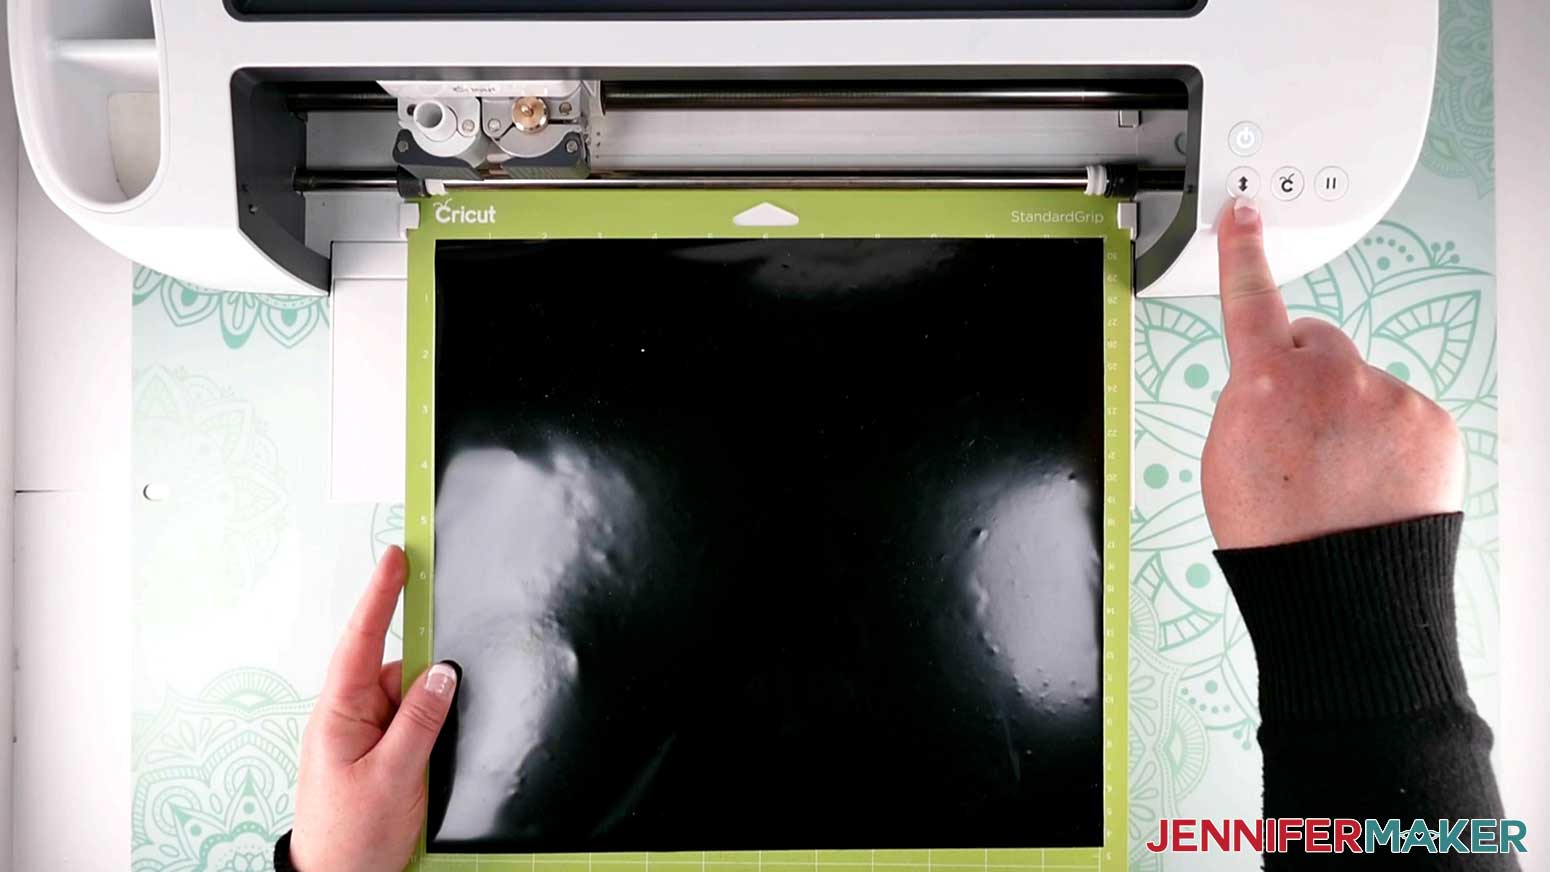
Then press the flashing button to start your cut.
Once your vinyl is cut, weed your vinyl with your Cricut weeding tools by removing the vinyl that you do not need from the design.
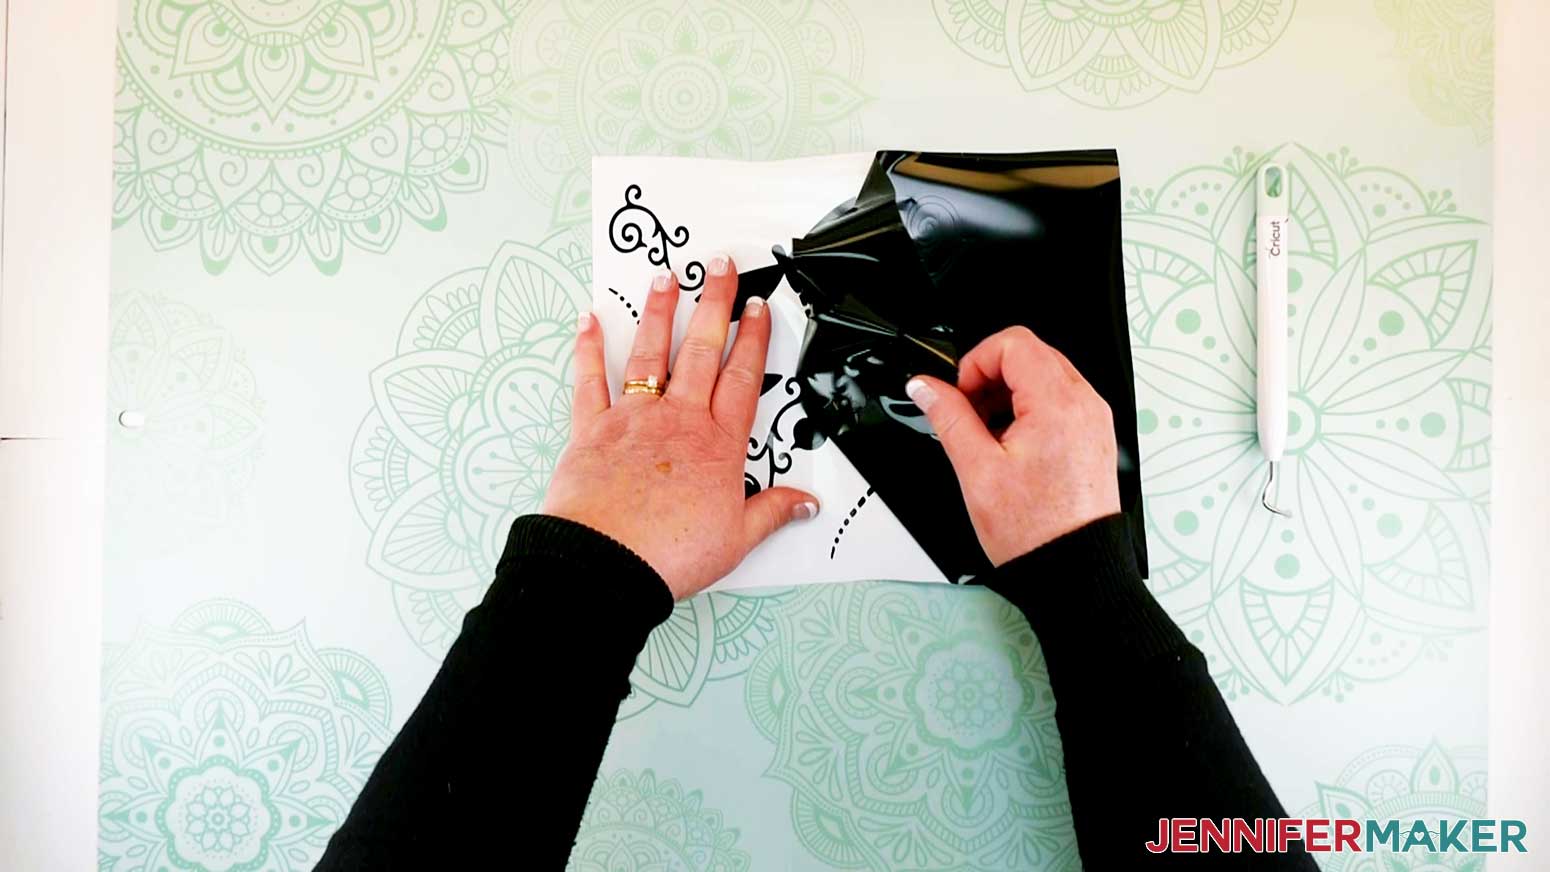
There are some extra elements included in both Wine Bottle Art designs that can be cut out of cardstock or your choice of material. I chose to use cardstock. Cut your extra elements on the "Cardstock" setting and set them aside.
STEP 3: PREP BOTTLE AND APPLY DESIGN
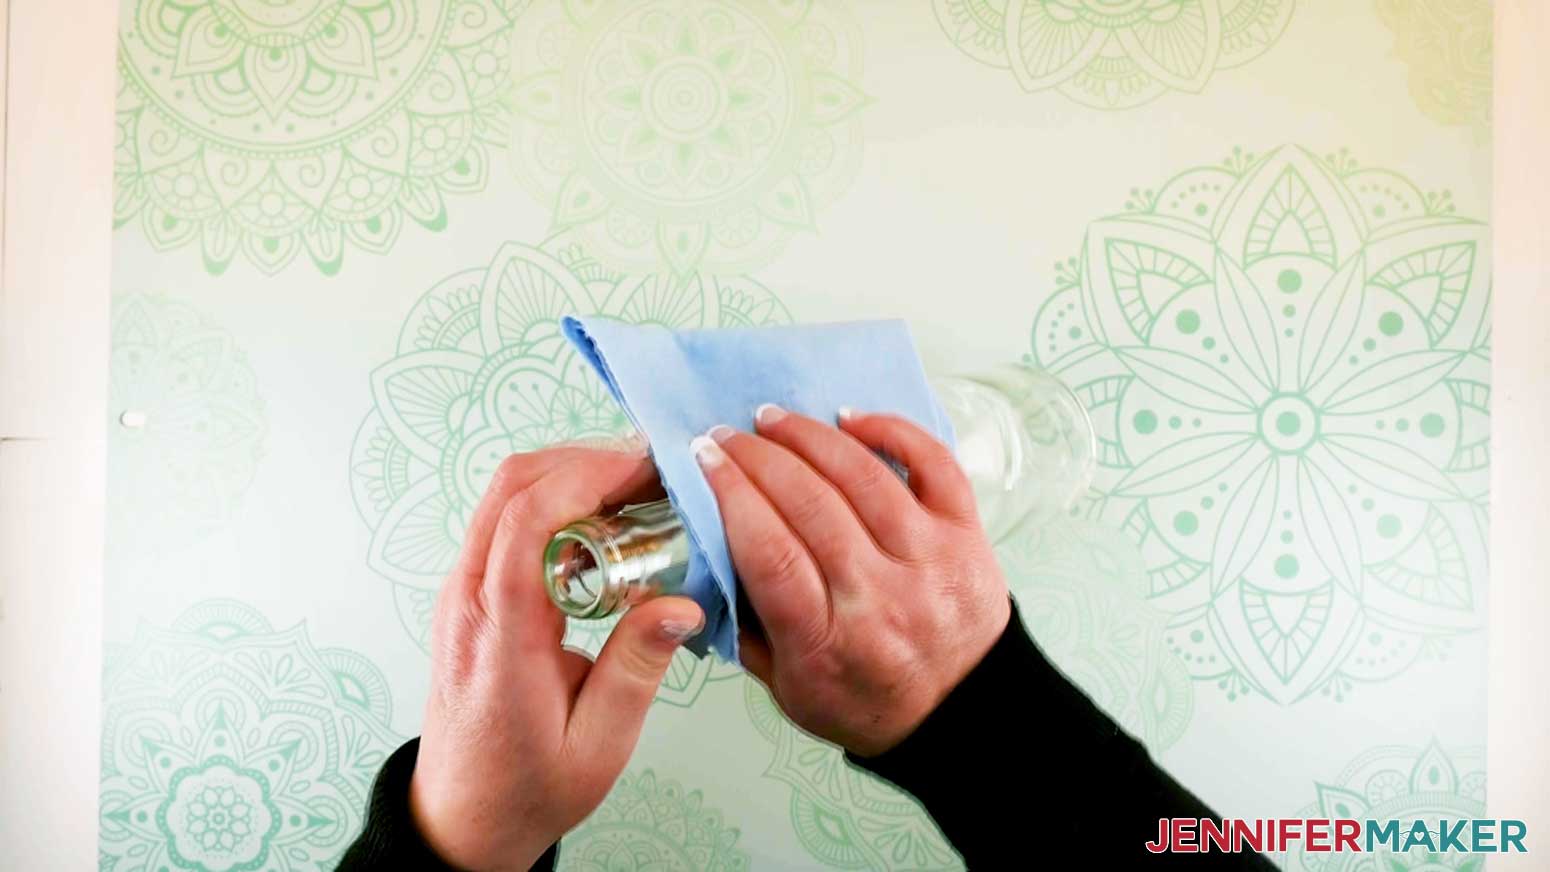
To prepare the wine bottle for good vinyl adherence, I wiped it with a little isopropyl alcohol and a lint free cloth. Coffee filters also work great to get the wine bottle nice and clean in preparation for your Wine Bottle Art! Set aside to let the bottle dry.
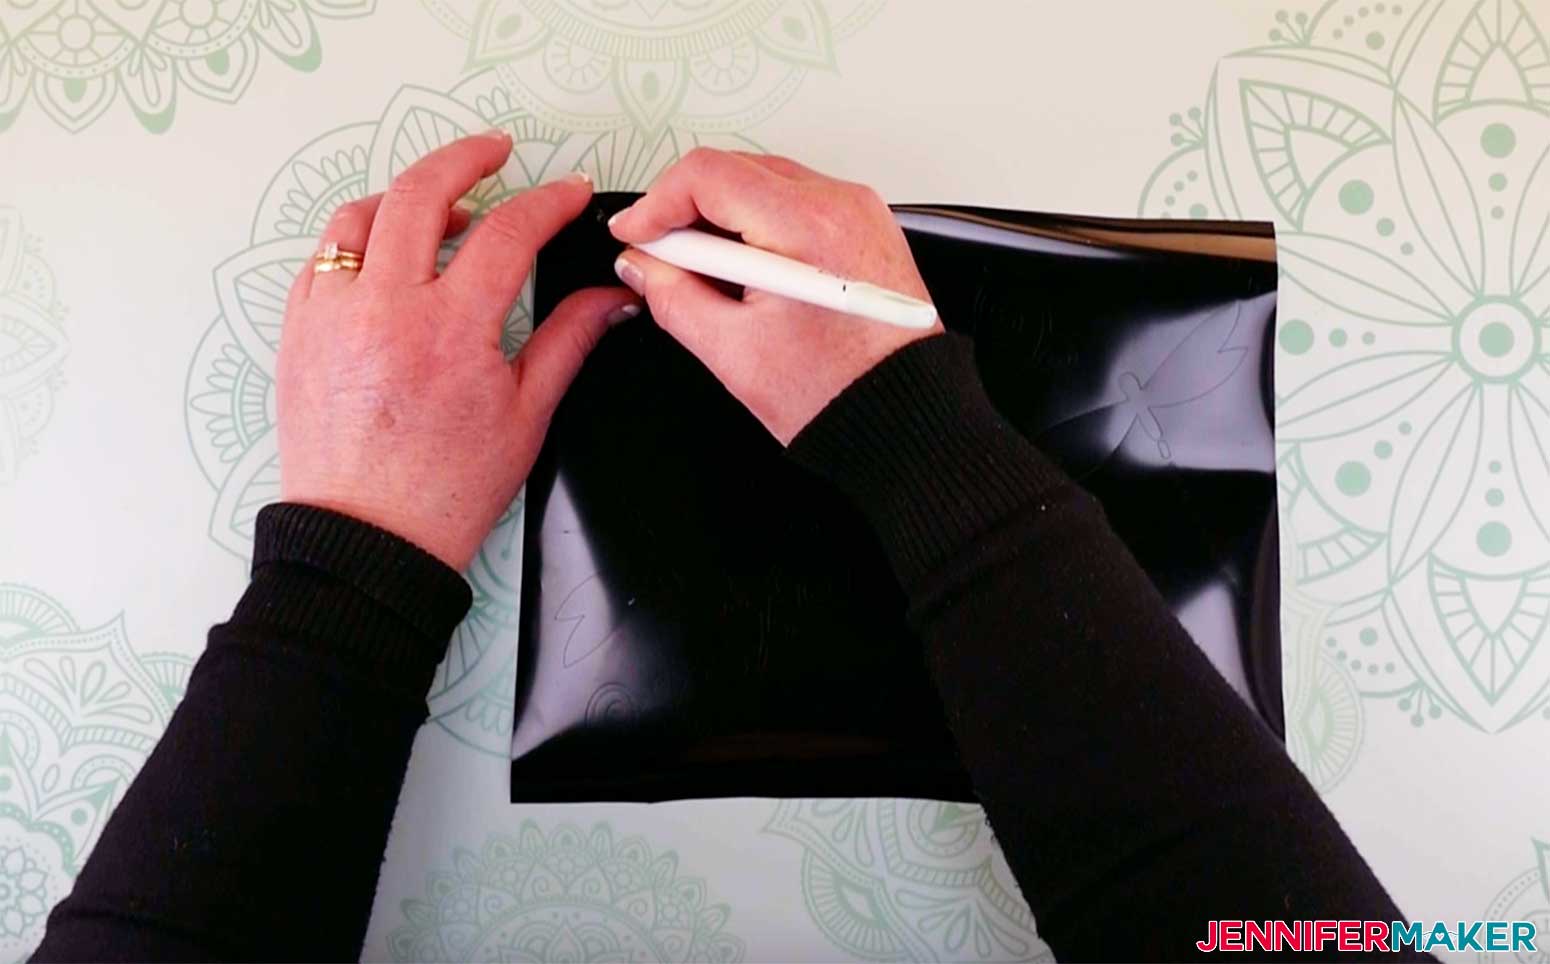
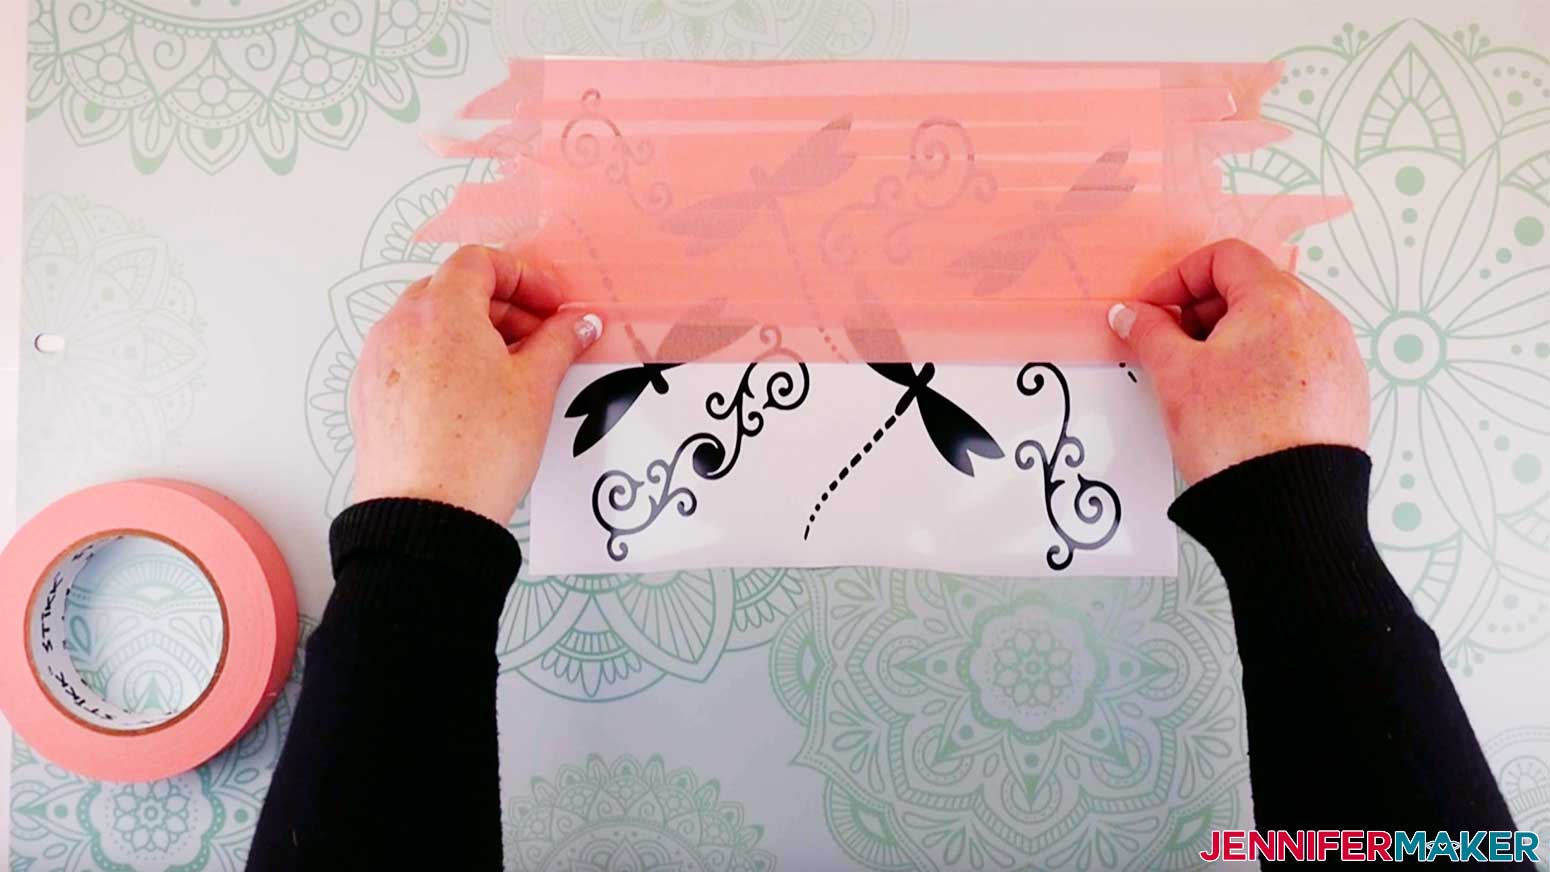
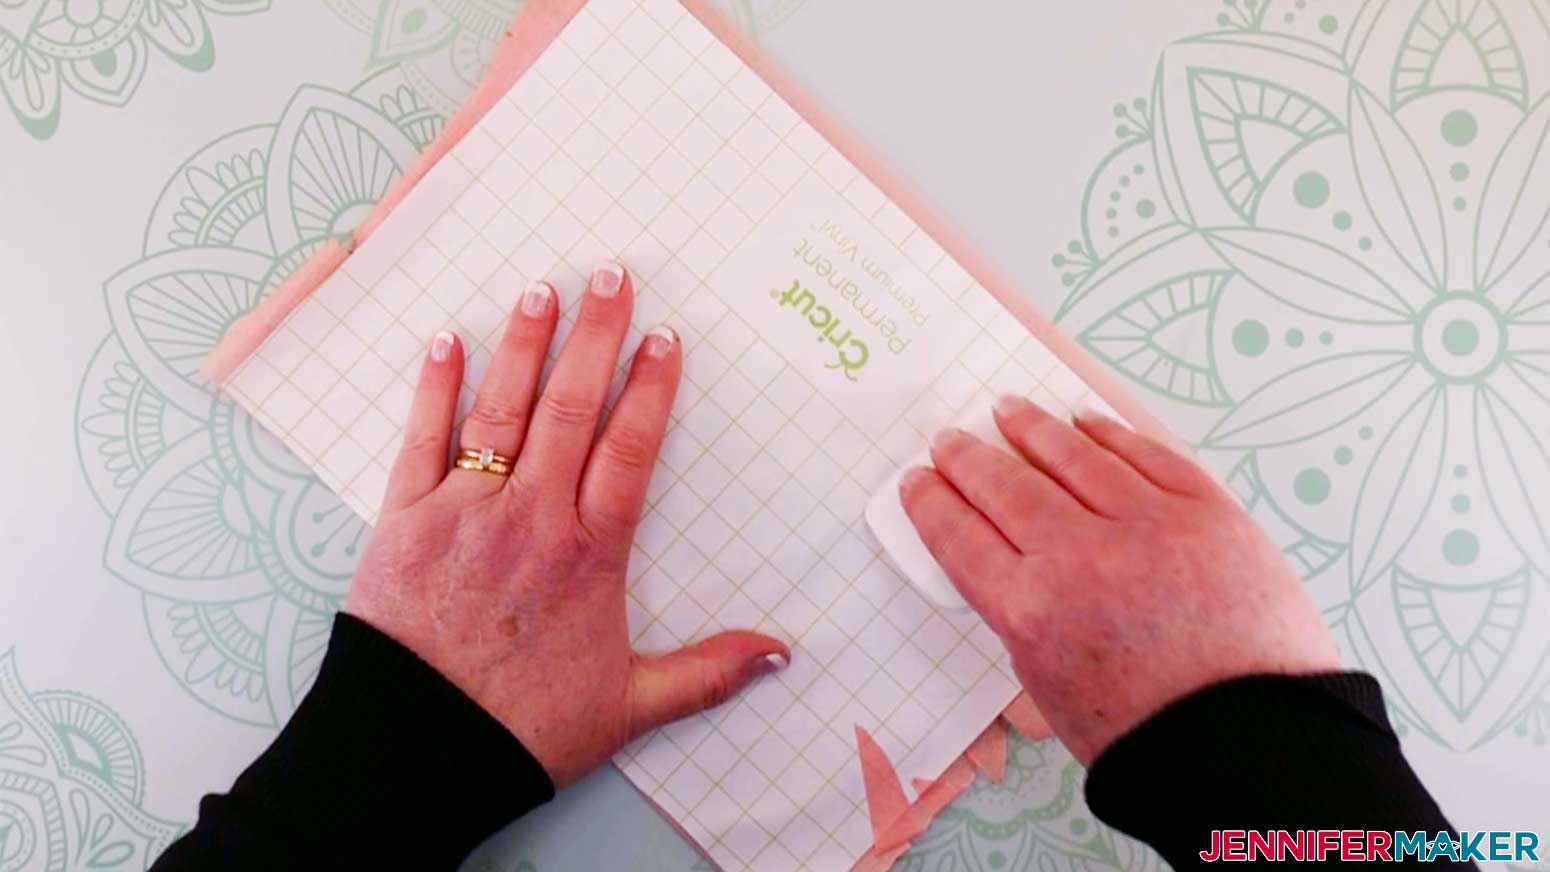
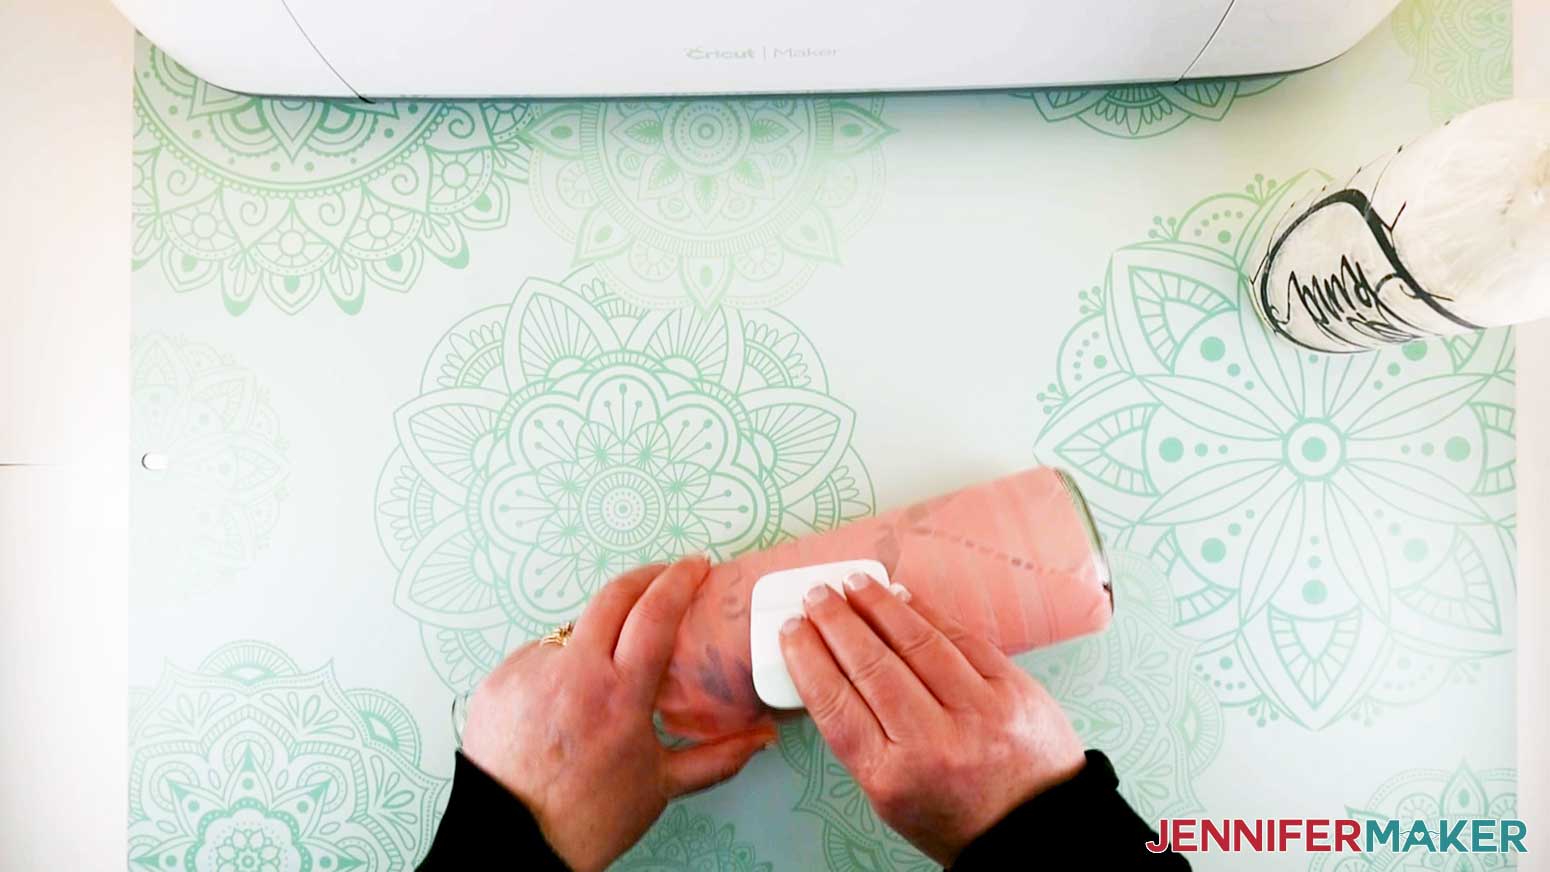
Next it's time to get your design ready to be adhered to the wine bottle by applying painter's tape on the design. I found that painter's tape allows for an easier vinyl application to the bottle than regular transfer tape because the painter's tape allows for more flexibility around the bottle. I just covered the weeded design with strips of painter's tape and trimmed all the edges so the tape did not go outside the paper backing of the vinyl. I burnished (rubbed) the vinyl to the painter's tape until it was adhered well, then removed the paper backing from the vinyl.
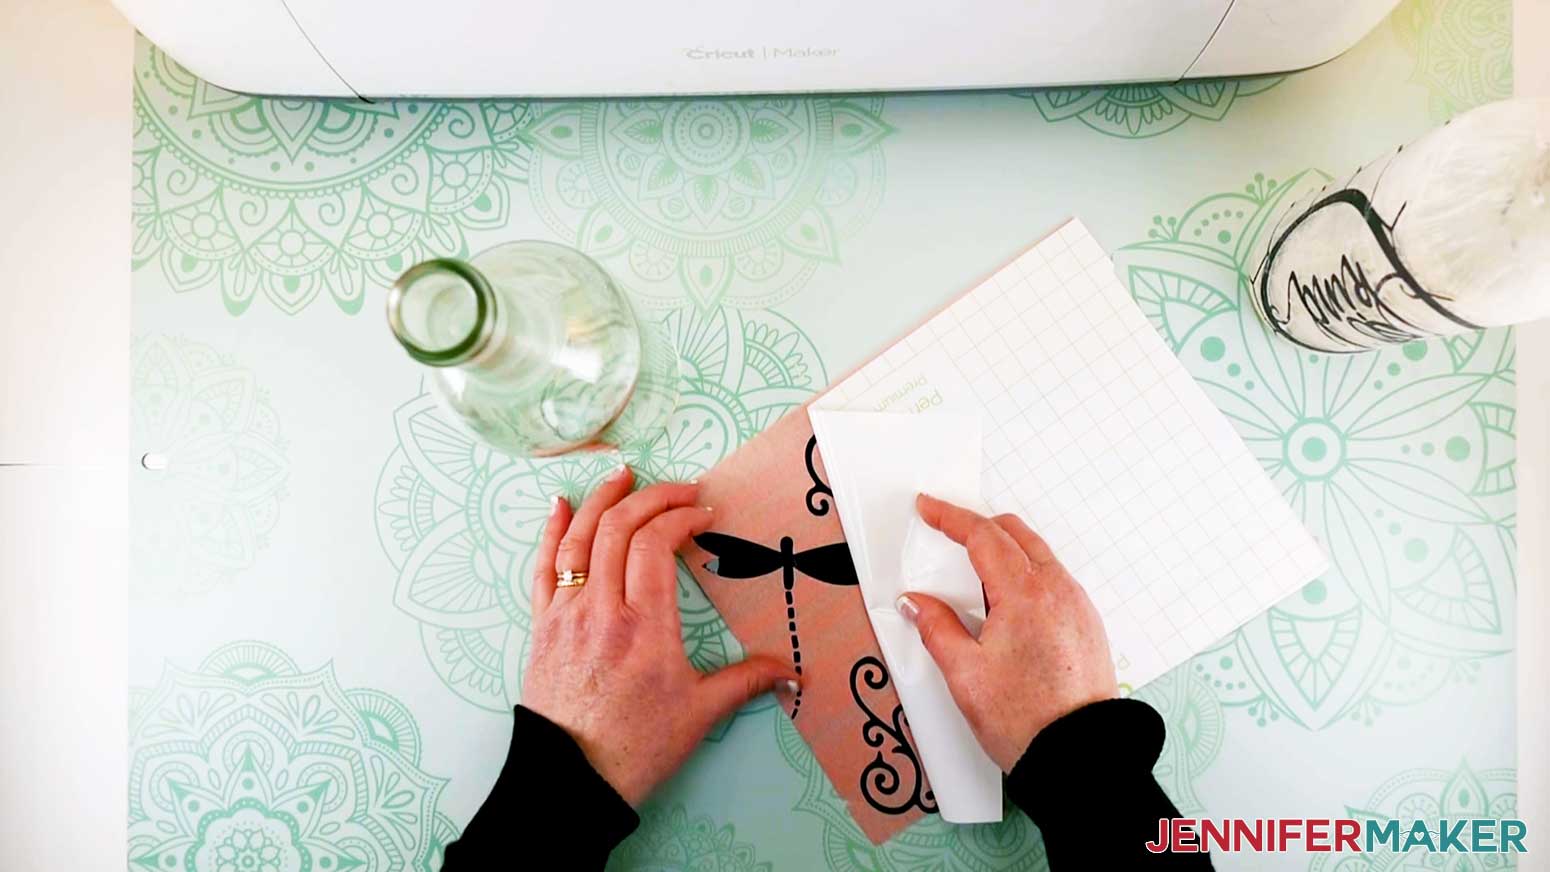
Lay the design on your table and line your bottle up to one end of the Wine Bottle Art design and lay it down on the design. Roll your bottle on the design to apply it to the bottle.
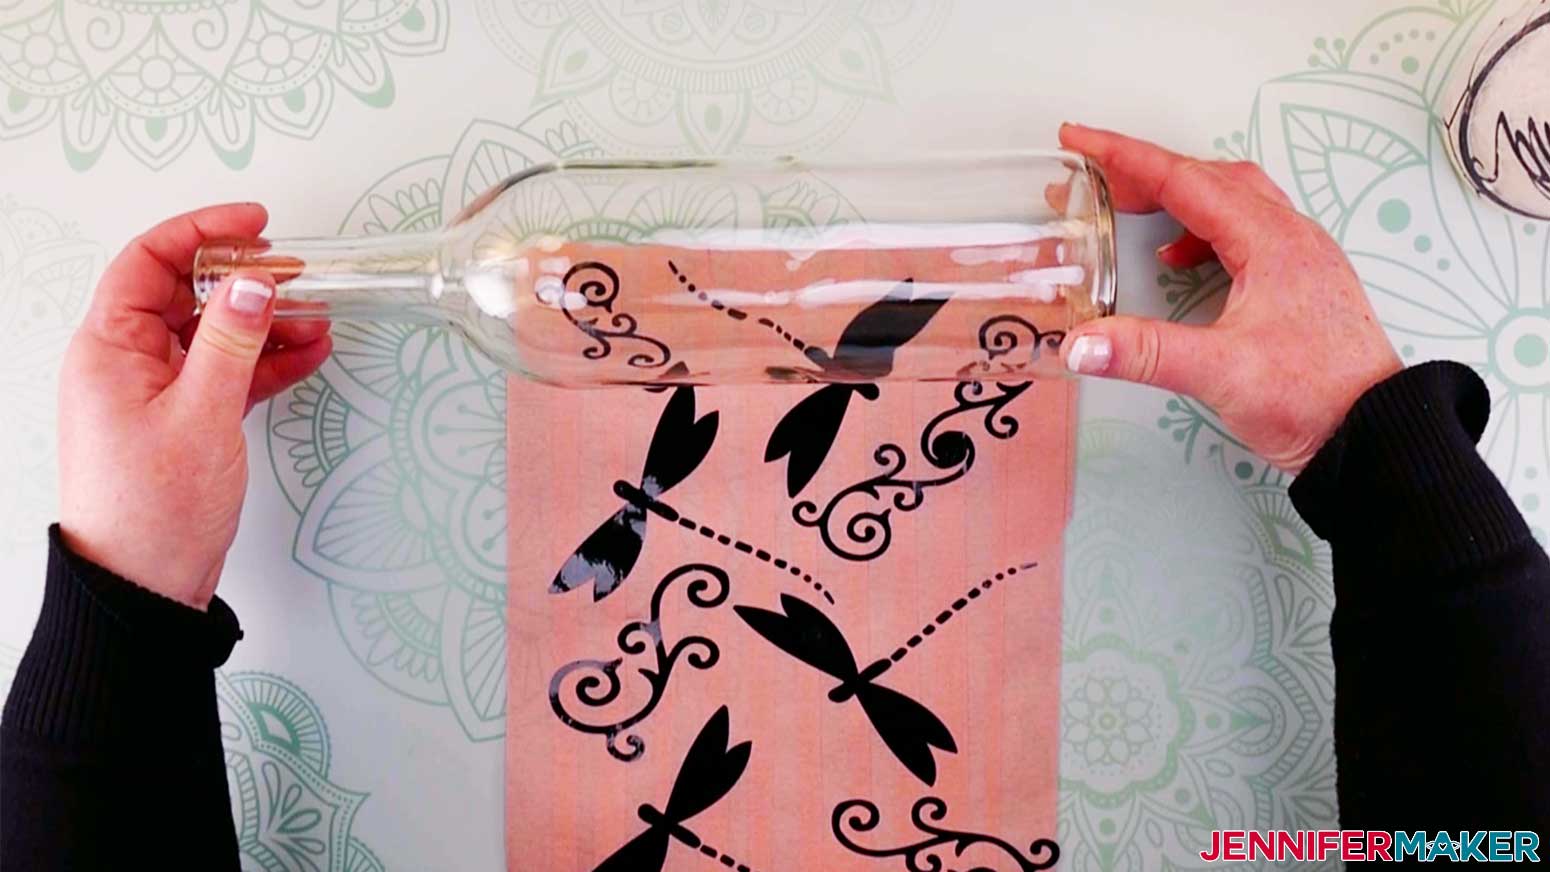
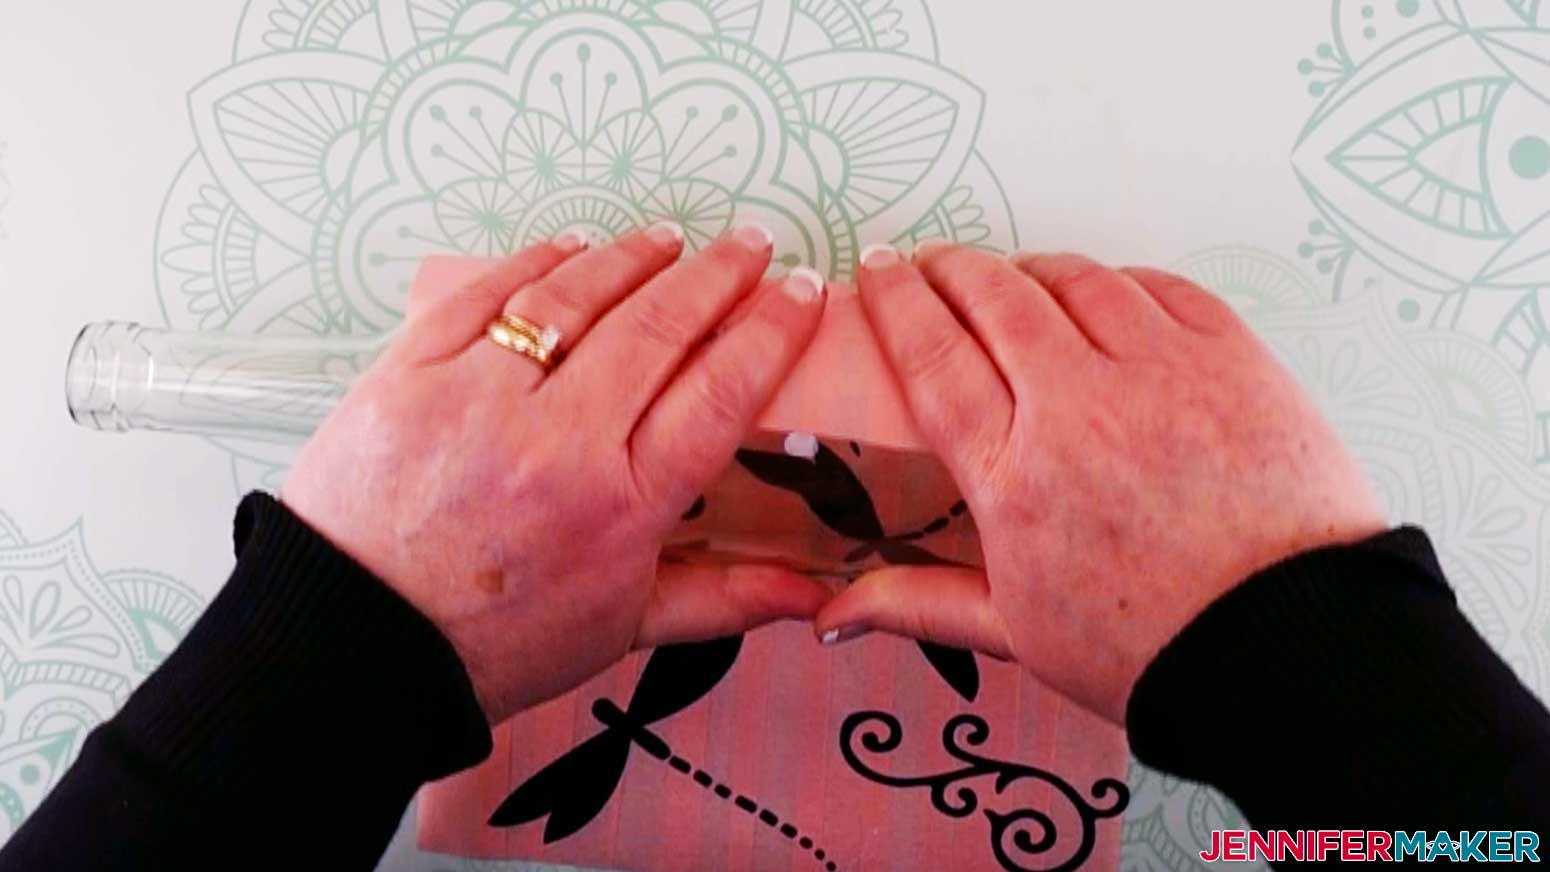
When you get to the end of the design, the bottle will be completely covered with the vinyl. Burnish down the vinyl to the bottle with your fingers. Begin to remove the painter's tape from the bottle. I began to remove the tape from where the two ends met. You may have one end that has overlapped the other a bit not allowing for the vinyl to adhere to the jar. If that happens pull up the painter's tape that is in the way, push down the other side to the jar well and then begin to remove the painter's tape slowly. If there are some areas that are not stuck to the bottle, push them down again with a little more pressure and continue to remove the painter's tape.
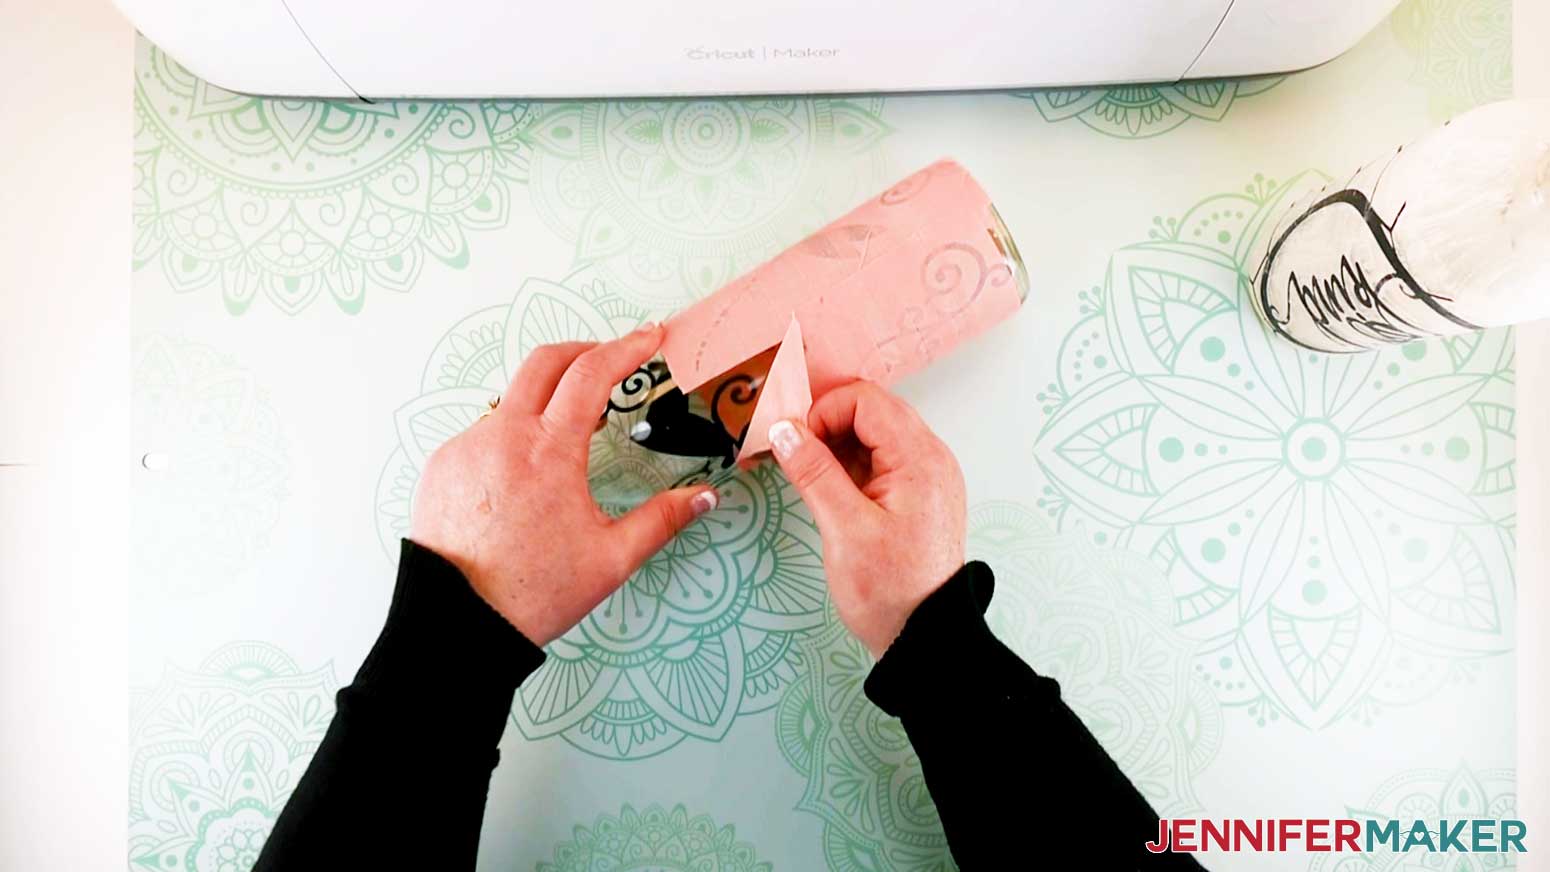
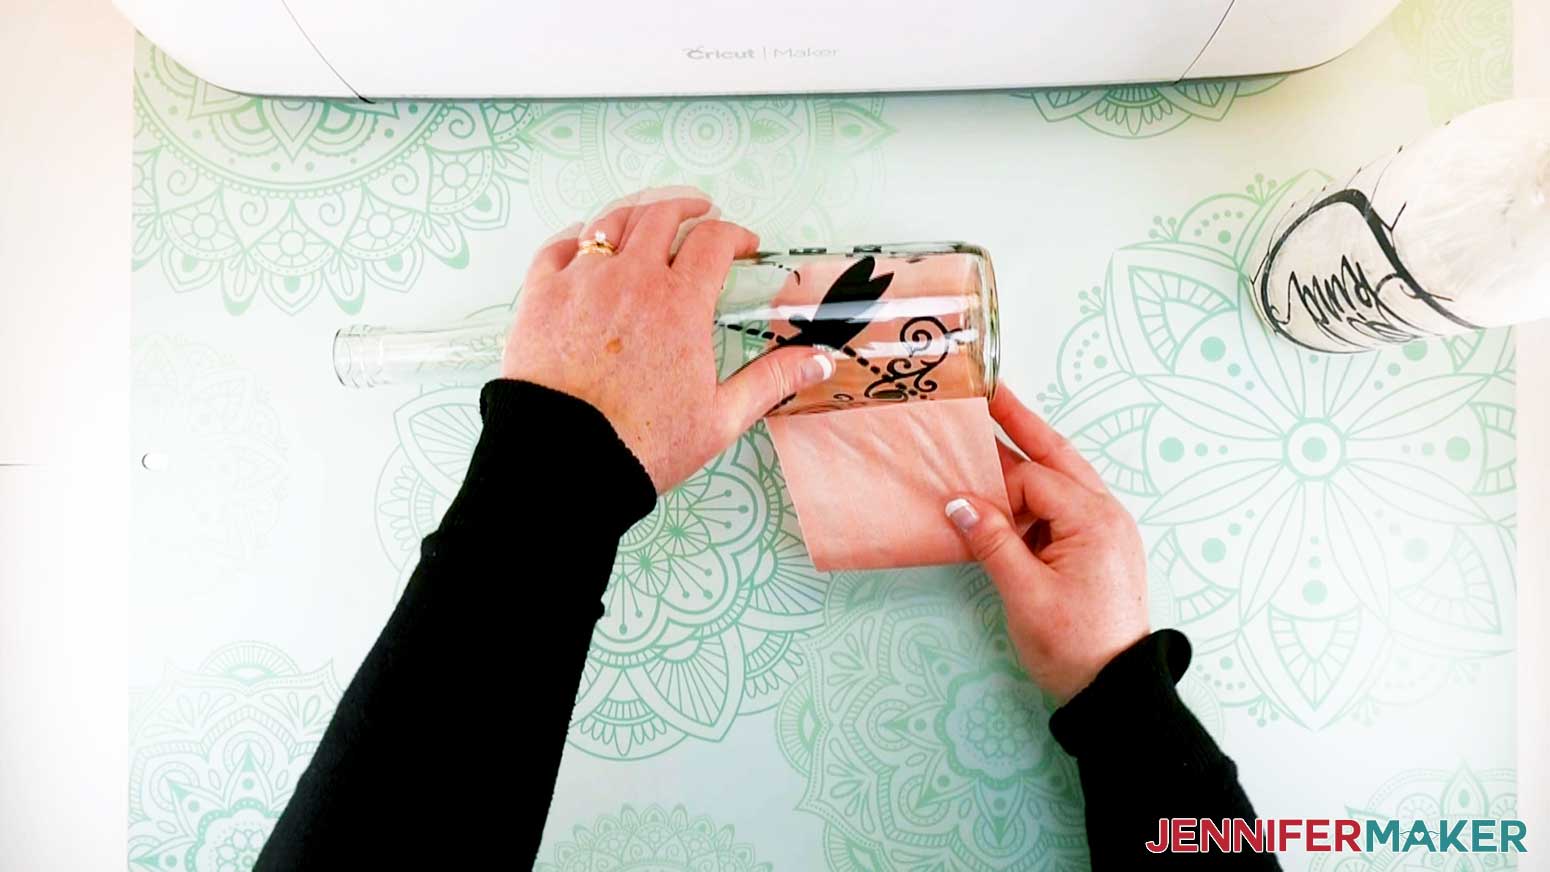
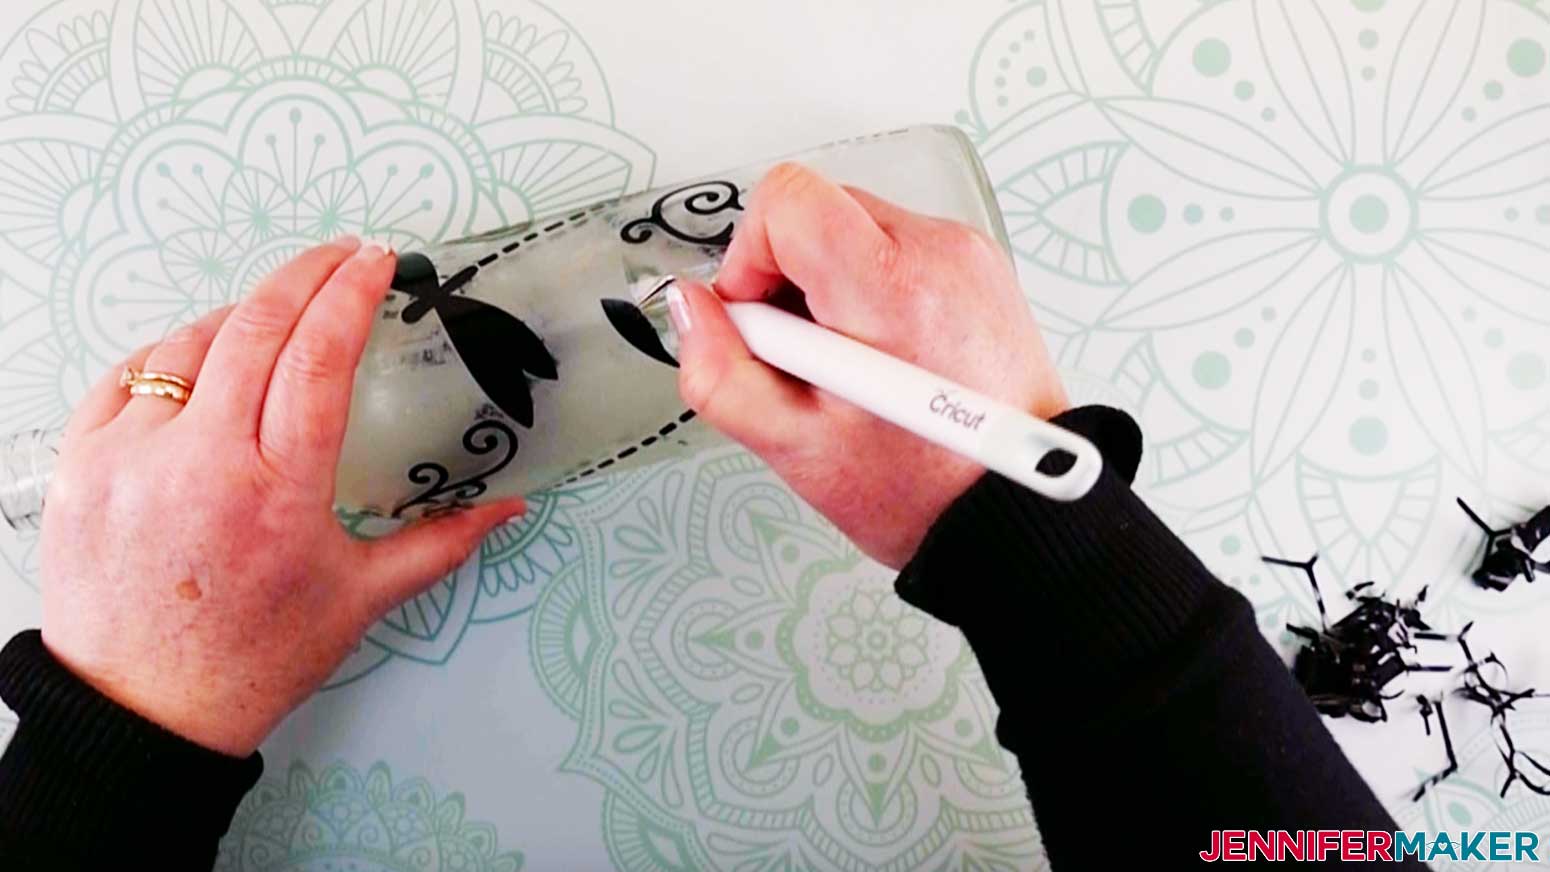
Once the painter's tape has been removed, go over your wine bottle and press down any vinyl that may not be adhered properly. If you have some spots that have creases in them, just use your weeding tool to lift them a bit so you can lay them flat.
If you choose not to use etching cream and just leave the vinyl design on the bottle, skip to Step 5 to add the finishing touches.
STEP 4: APPLY ETCHING CREAM
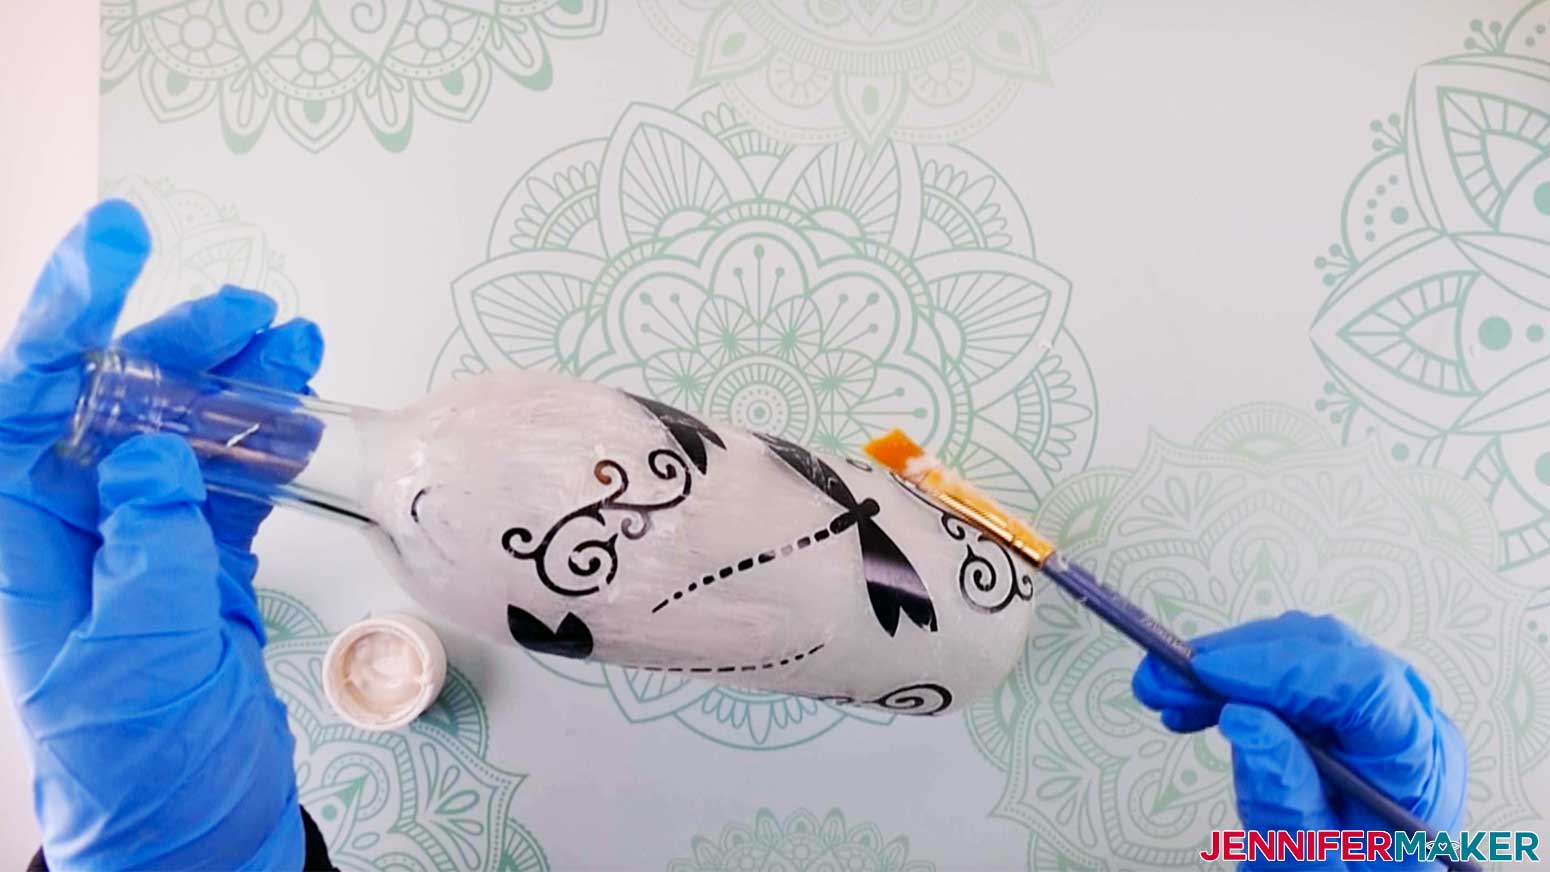
Once you're ready to apply the etching cream to your Wine Bottle Art, be sure to put on gloves and safety goggles. Also, apply the etching cream in a well ventilated area, with windows open or a fan running.
Apply the cream to the wine bottle with a paint brush (avoid foam brushes), using your brush to move the cream on top of your stencil. I applied the cream in one direction first, then used the brush to apply it in the opposite direction. Brush up and down, side to side and diagonally to keep the cream moving around your design and to get in every nook and cranny. Applying in this manner will provide a more even etching. Keeping the cream moving around the surface will result in a deeper and stronger etch. Overall, including stirring, the cream needs to stay on the glass at least five minutes.
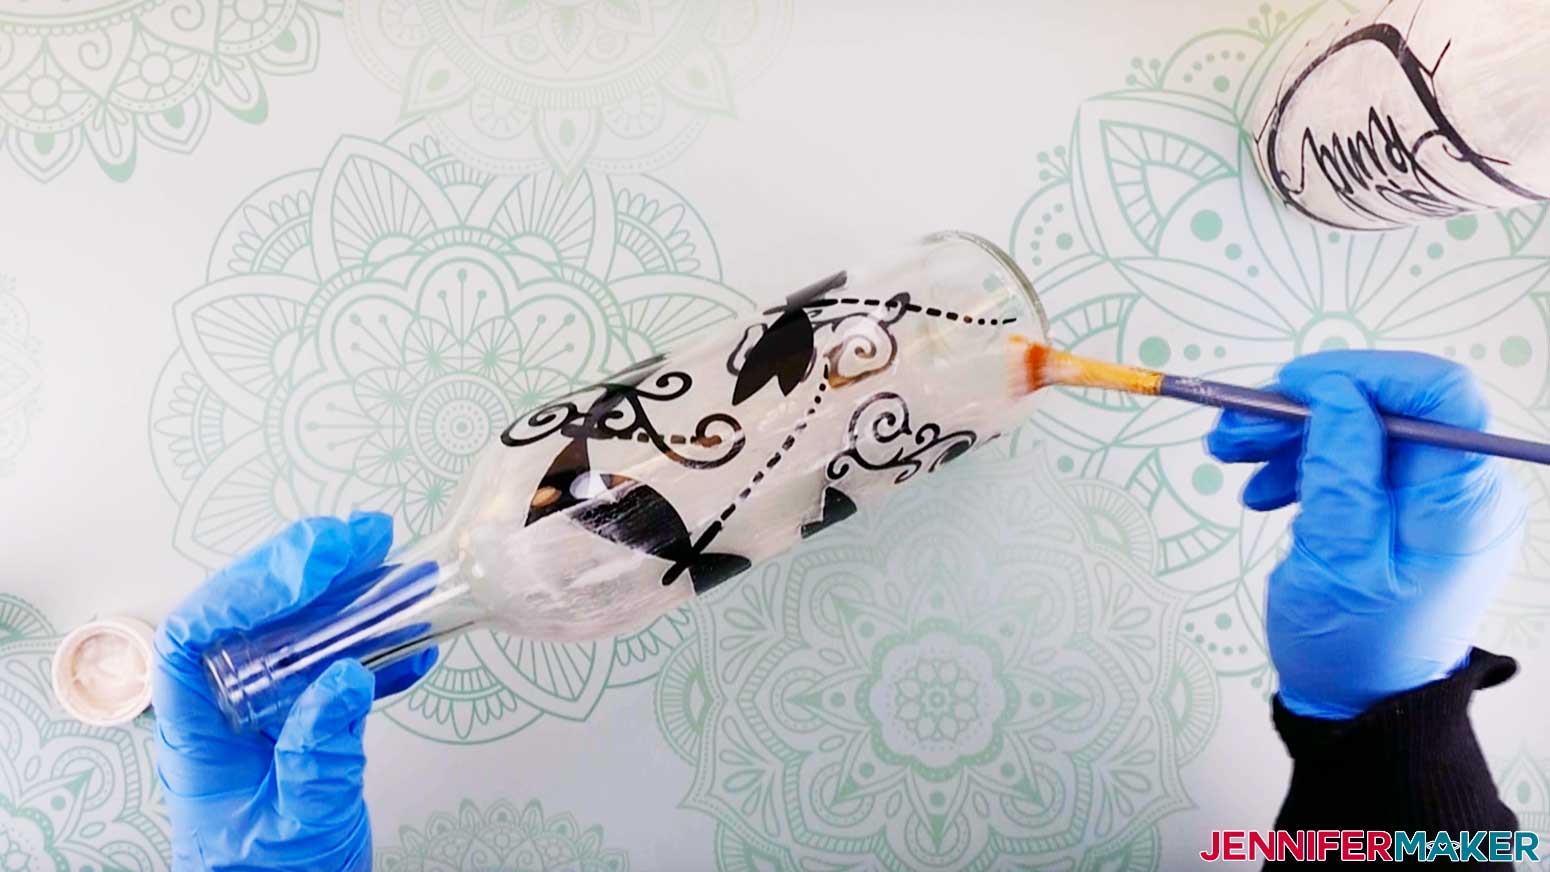
Once time is up, take your wine bottle to the sink, and rinse the cream off the bottle with cold water. If you had a lot of excess etching cream, feel free to scrape it back into the container before you rinse off the bottle!
Dry the bottle with a towel and then use your weeding tool to remove the vinyl from the bottle.
STEP 5: FINISHING TOUCHES
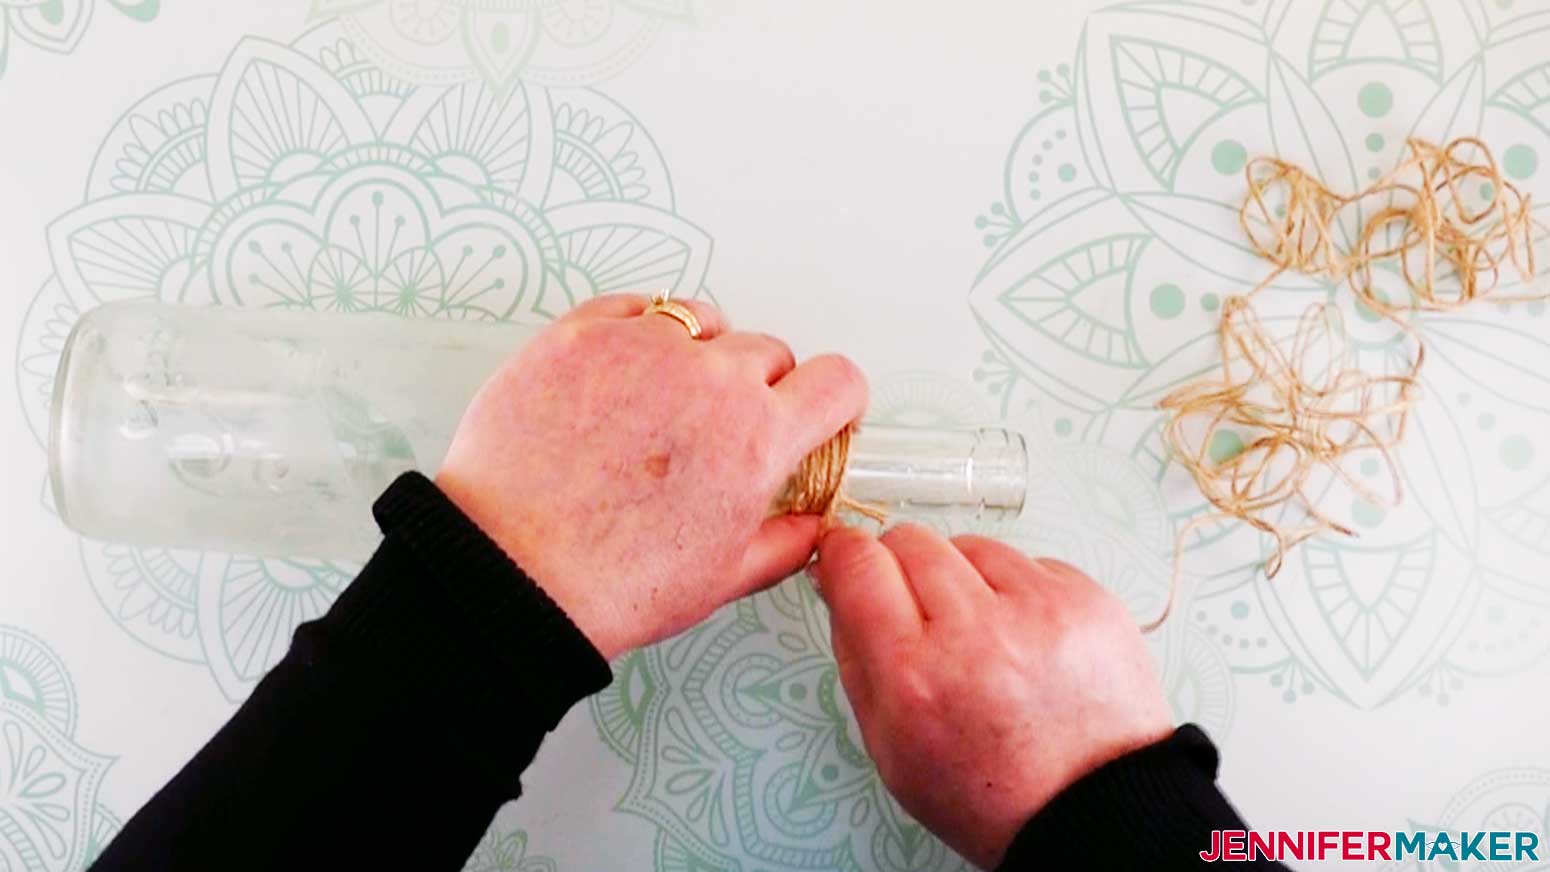
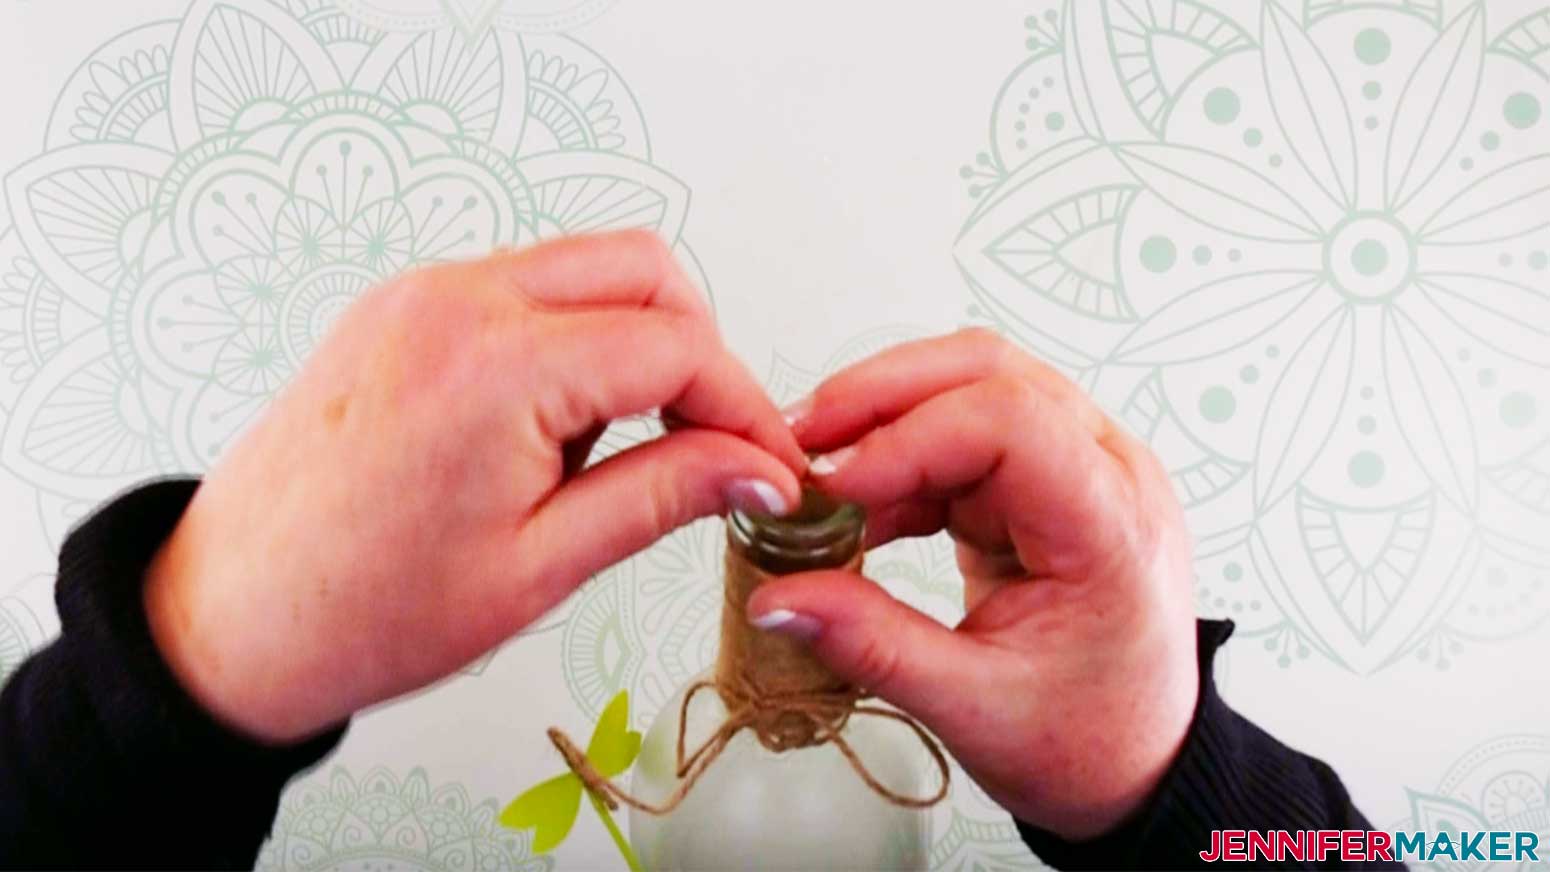
To finish off the wine bottle, I wrapped twine around the neck of the bottle and glued it to the bottle at the end of the wrap. With this wrap I used approximately 10 feet of twine to get the neck covered the way I wanted it.
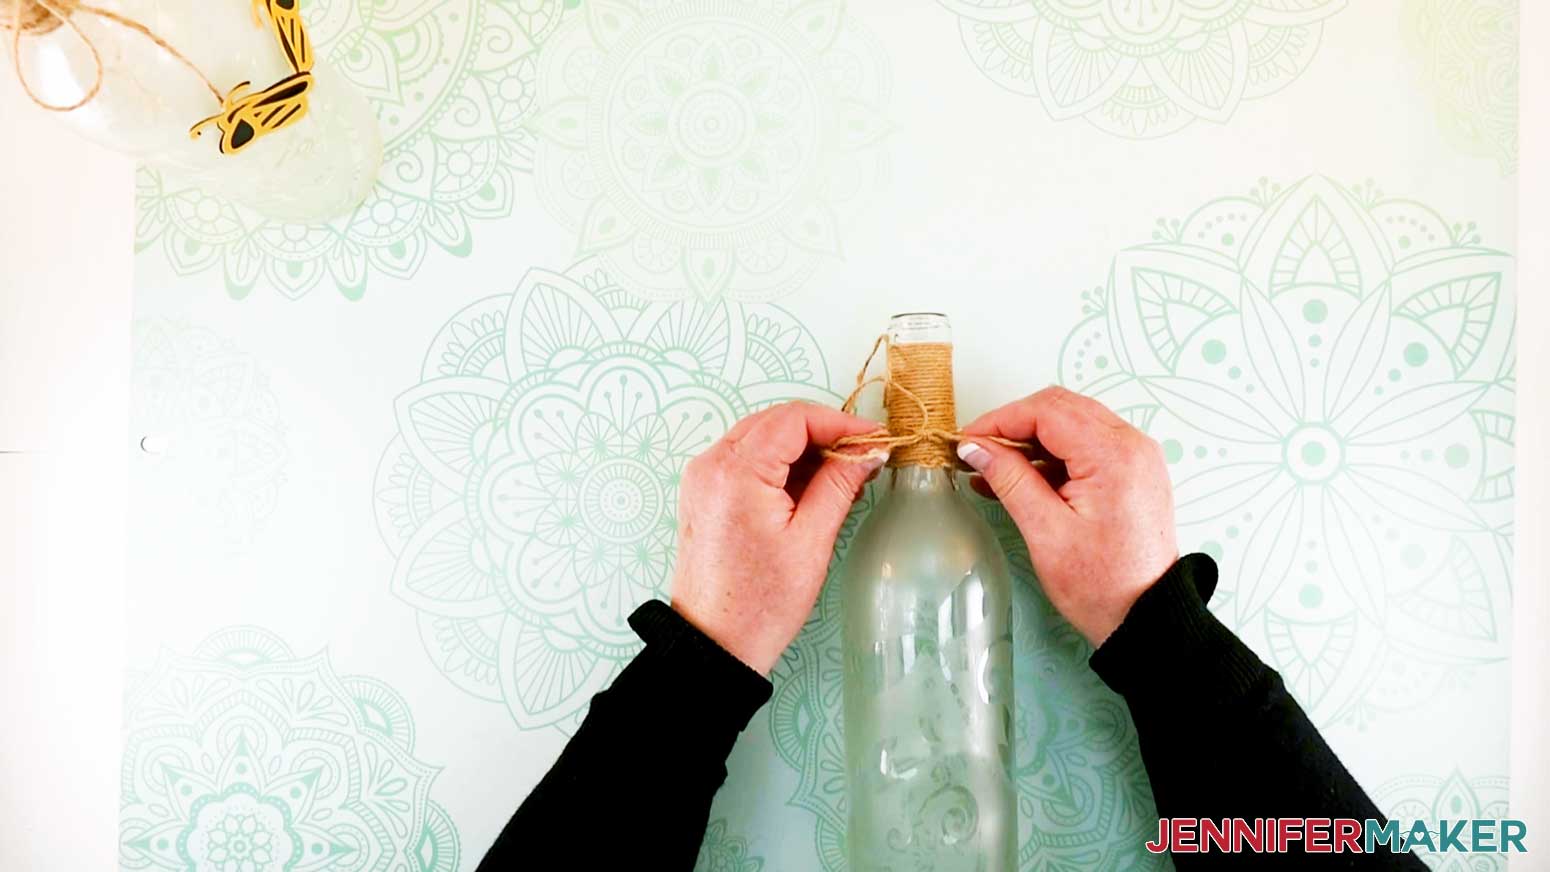
I then took about a two-foot piece of twine and tied it around the neck of the bottle with a bow. I trimmed my bow tails to the length I thought looked the best, and then glued the elements (bees or dragonflies) to the end of the bow tails. My Wine Bottle Art was almost done!
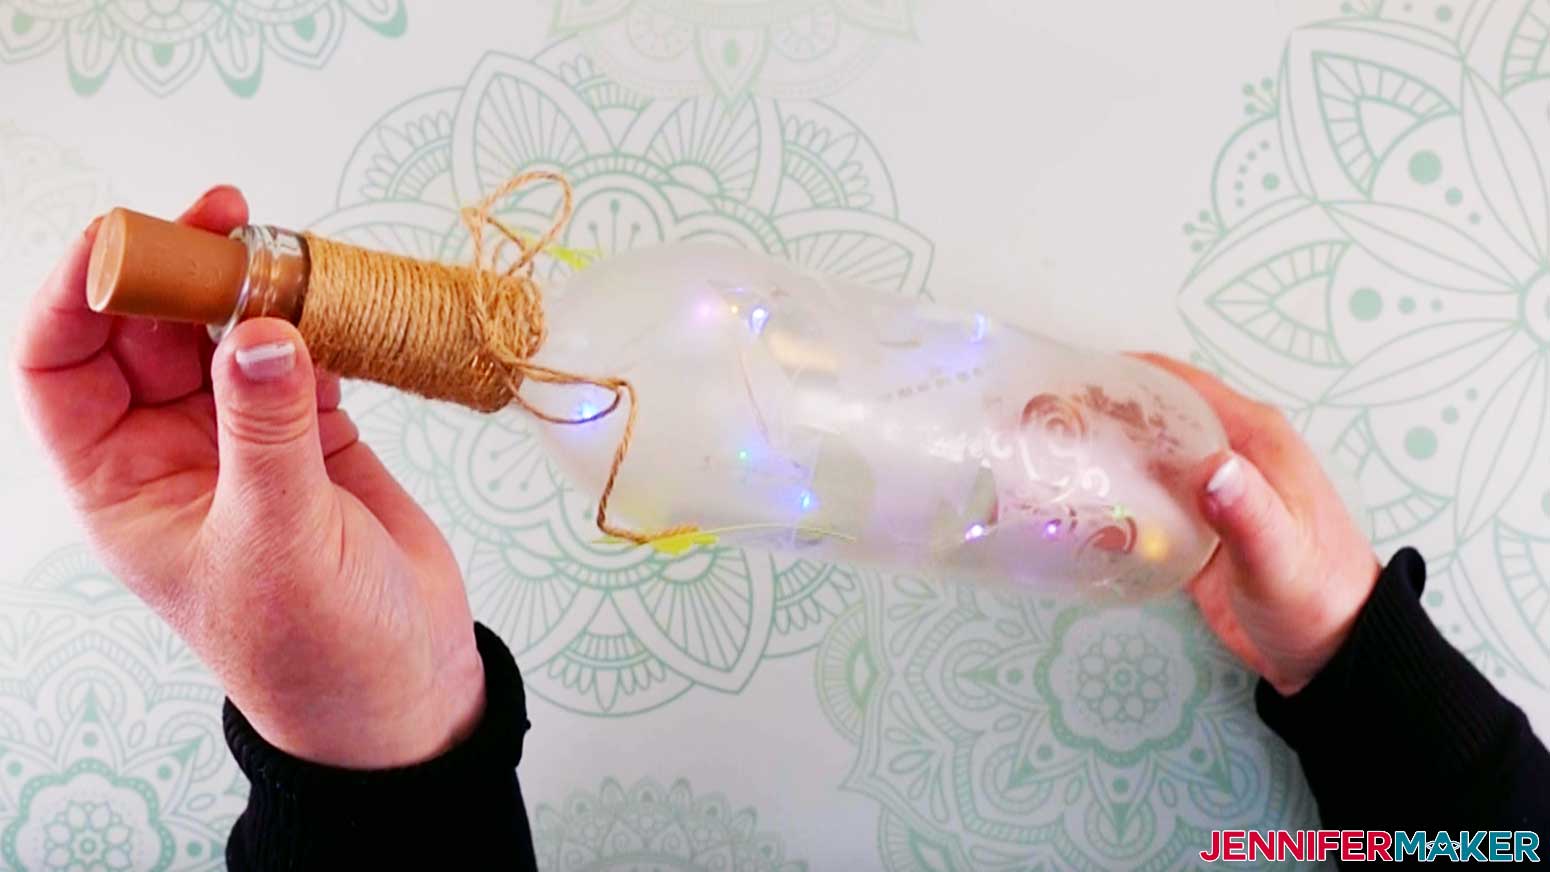
Now feed your fairy lights into the bottle, turn the lights on and enjoy!
STEP 6: SHOW IT OFF!
This is such a great way to use up some of those empty wine bottles we may have sitting around. And how cute they would be for a night light in a room!
Notes
The finished size of one wine bottle is approximately 9 1/2" wide x 12" high
Font used: Bhatoshine Regular
Answers to Your Questions About How to Etch Your Wine Bottle Art
Q: Can I use dark wine bottles instead of the clear bottles?
Absolutely! There are so many beautiful wine bottles out there, definitely use what grabs your attention! Keep in mind that the darker the bottle, the less the fairy lights will be visible, but etching on dark bottles is beautiful!
Q: I don’t have twine. What else can I use?
You can use any kind of ribbon or burlap, or any material you’d like! It’s completely flexible and you can even choose to add no material to the neck of the bottle! If you choose this option, just make sure to add etching cream all the way to the top!
Q: Does the color of vinyl I use make a difference?
Only if you will be leaving it permanently on your Wine Bottle Art! If you are using the etching cream option, then the vinyl acts only as a disposable stencil. You can use whatever color you may happen to have sitting extra around your house!
Q: What is the difference between Cricut Premium Vinyl and Cricut Permanent Vinyl?
They are the same. Just different wording!
Q: Can I use removable vinyl to make the Wine Bottle Art?
For the best results, I recommend that you use permanent vinyl. It adheres more firmly to the bottle and will give you cleaner, crisper edges than removable vinyl will give you!
Q: Won’t permanent vinyl be “permanent” so it will be hard to remove?
As long as you remove it quickly after washing off the etching cream, you shouldn’t have a problem! Permanent vinyl doesn’t reach it’s maximum bond for a few days after you actually adhere it to a surface. And, you want to see your pretty new bottle right away, anyway, don’t you?
Q: Your SVG uploaded to Design Space way too small! Is there something wrong with it? Or did I do something wrong?
No, on both counts! You must be using an iPad or an iPhone! For some reason, Design Space will sometimes make iOS files smaller. It’s easy to fix! All you need do is to make the file larger again. For the Wine Bottle Art, I ask you to measure the size of the bottle you’re using to make sure the design will fit, anyway, so you would have probably needed to do some adjusting up or down in any case! If you aren’t clear on how to resize an SVG file, I have some help in my resizing guide to help you along!
Get my free SVG files to make Wine Bottle Art
I’d love to see YOUR etched wine bottle art! Please share a photo in our Facebook group or tag me on social media with #jennifermaker.
Love,

Want to Remember this? Save this Etched Wine Bottle Art Tutorial to Your Favorite Pinterest Board!

Do the fairy lights run on batteries? How long will they stay lit? Do you disconnect them when not in use?I have reverse weeded and etched glass before (on a 13 x 9 baking pan) and love the effect!
Yes, Michelle, they run on batteries. According to the website, the lights will stay lit for 48 hours of constant use, more with intermittent use. But, then you would just replace the batteries! There is an on/off switch on them to turn them off when you aren’t using them. Etched glass plus lights are even cooler than just the baking dish! 🙂
You always have the neatest ideas. I have two antique “jugs” that I have been wanting to find something to do with them and I think this is perfect. Thank you
Yes, Linda, this would be awesome on antique jugs! Try a little test patch before you do the whole jug, though. Older glass can have borosilicate in it, which makes it difficult or impossible to etch! 🙂
Does the etching cream used this way change the texture of the bottle’s surface? I cannot stand the feel of a gin bottle and I’m wondering if this would be the same? Thanks for sharing!
Yes, the texture ends up similar to that of a gin bottle, Sue Marie, so you might not like it! But, remember that you won’t be etching on the entire bottle, but in most cases just in a little portion of the bottle so you could avoid that part when handling it! 😁
The Bee Kind design is super cute. It doesn’t go all the way around a normal sized wine bottle….it cuts at only 6.5 inches wide and a typical wine bottle is about 9.25 inches around. Am I doing something wrong here?
By any chance, are you using iOS, Janice? That will sometimes re-size designs. I just downloaded the SVG and it came into Design Space at the proper dimensions – 10.384″ W x 7.274″ H. All you need do is resize your SVG manually. If you aren’t sure how to do that, we have a tutorial on how to resize SVG files to help out! 🙂