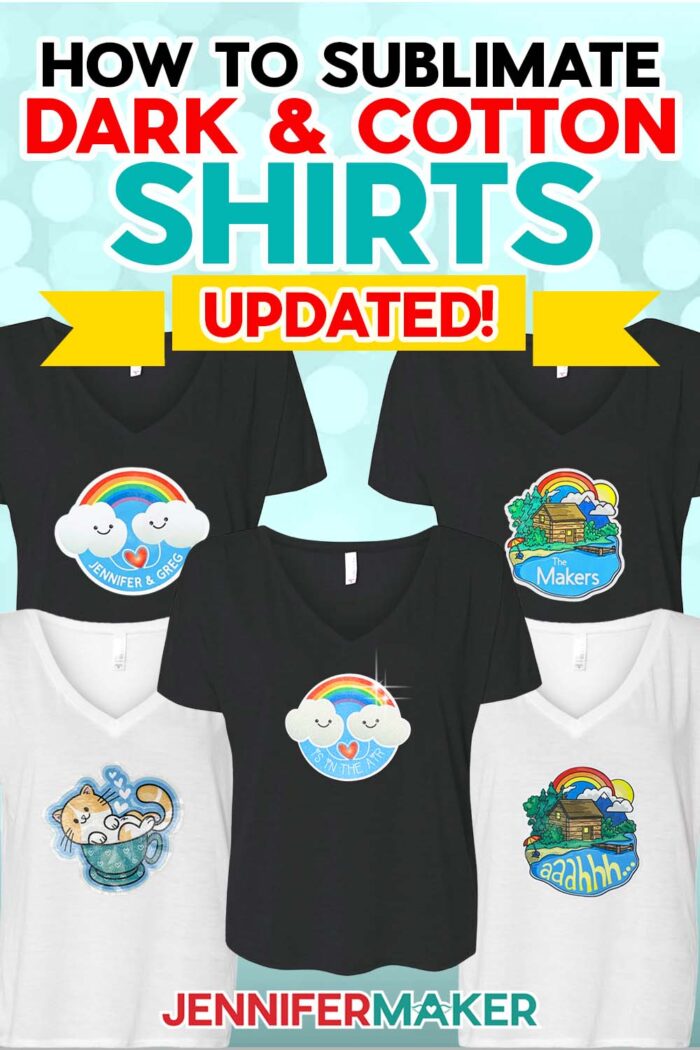
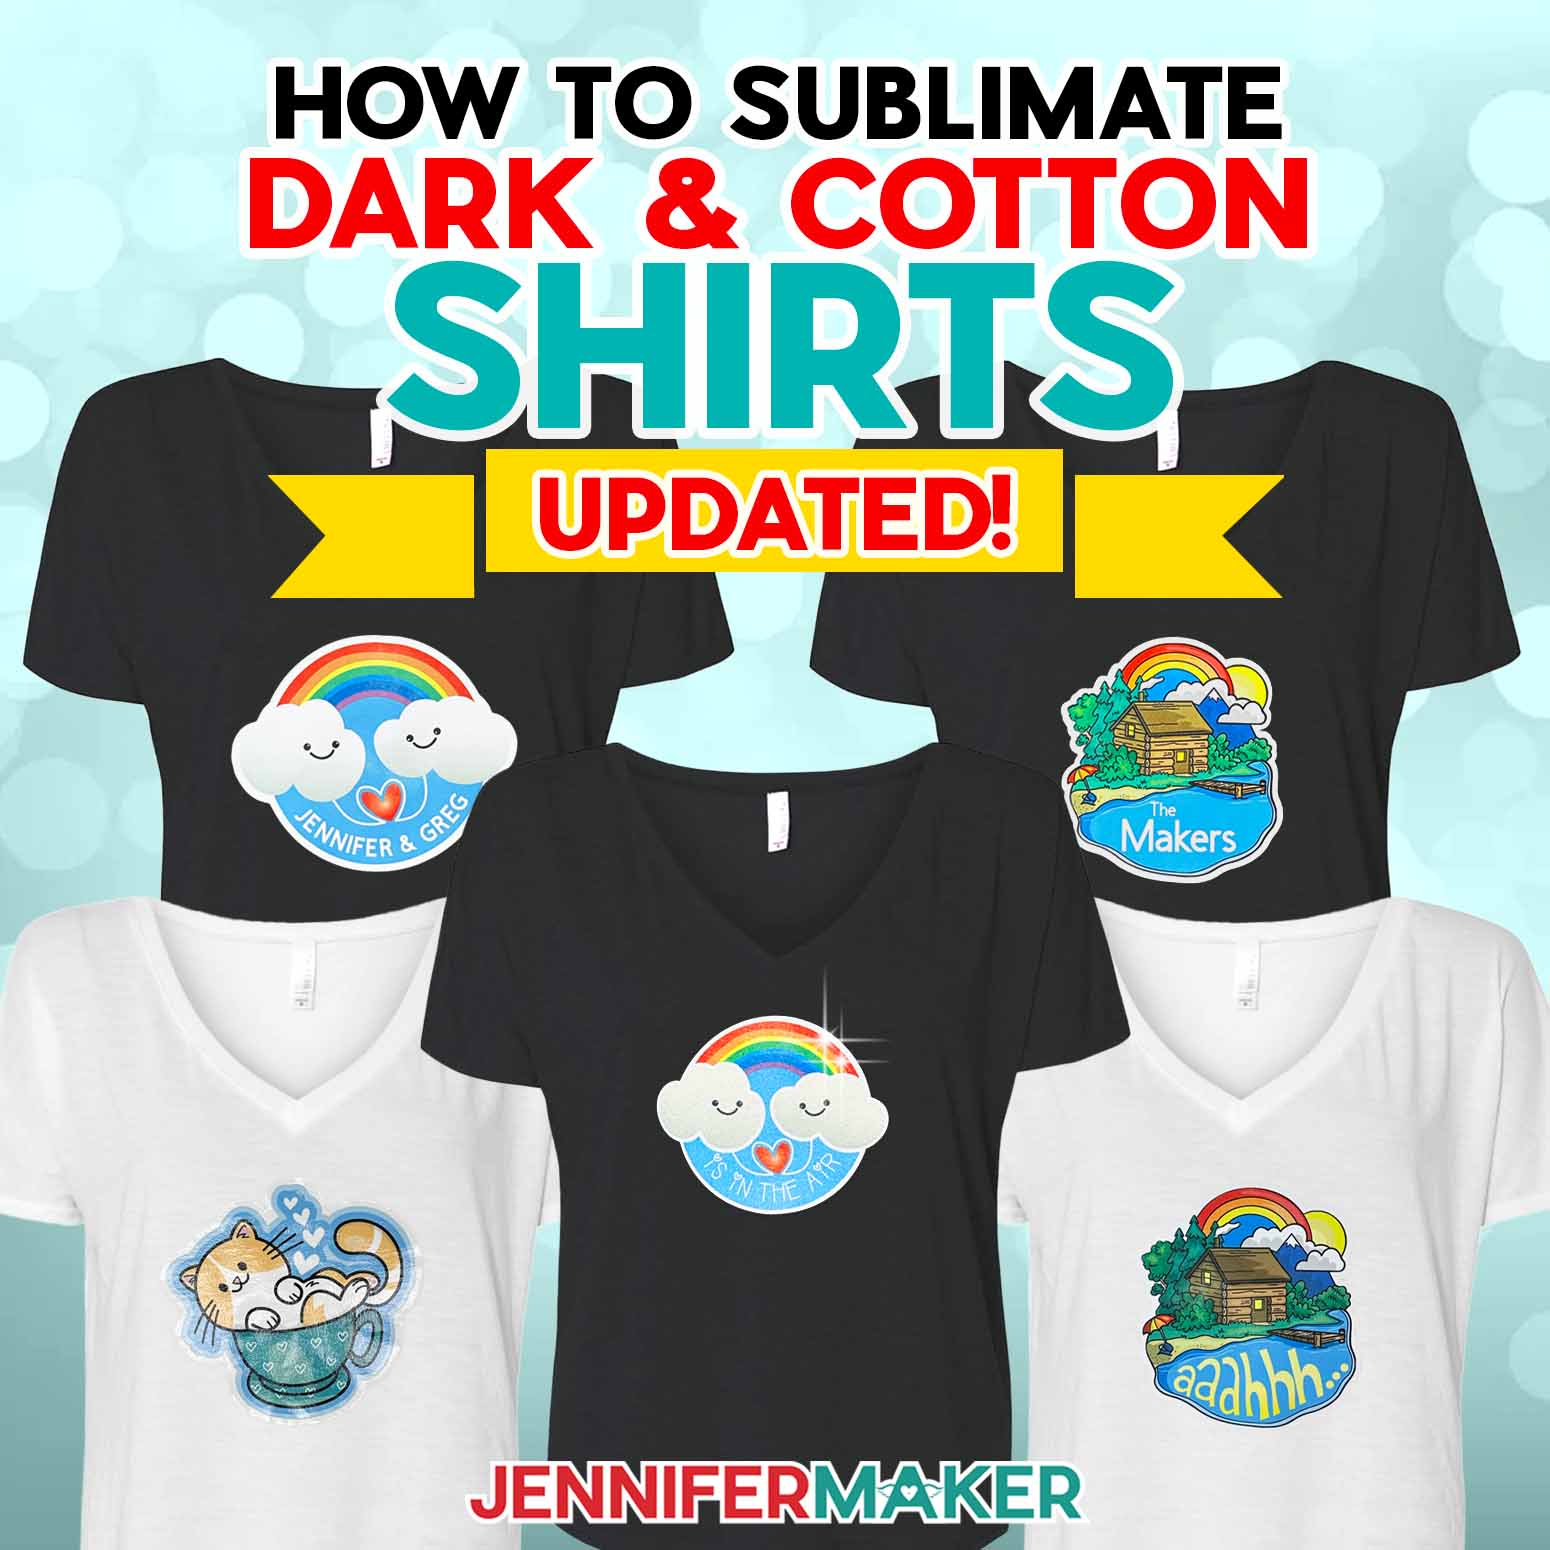
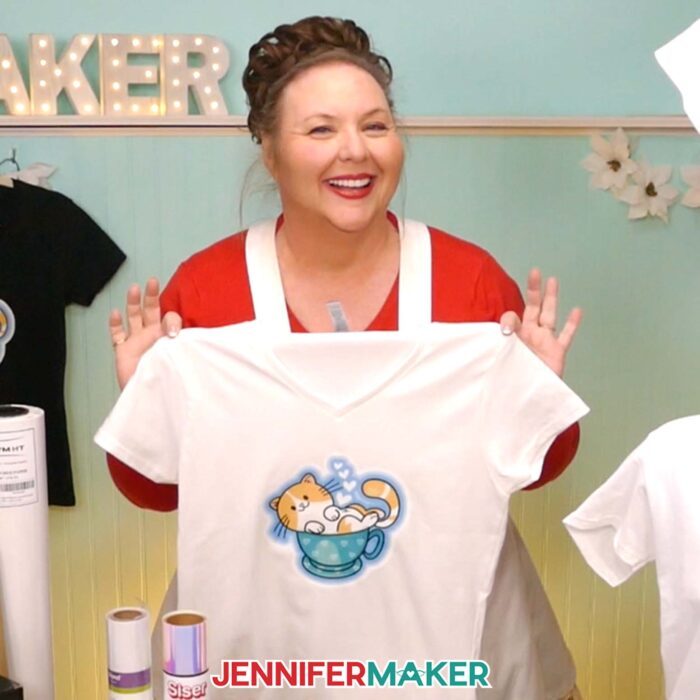
Learn how to sublimate dark shirts and cotton with the best substrates for success!
There is a lot to learn about sublimation, and it doesn’t always go smoothly! I’ve shared tips on how to avoid sublimation mistakes, but sometimes the issue isn’t clear right away. Or, blurry in the case of some HTV sublimation shirts I made last year! I started hearing that some of your shirts were blurring after several months, so I checked our shirts and found the same! That made me sad, because I always want you to be happy with your projects and know what to expect. So, I’ve gone over the old shirts to compare the results over time, and re-tested several ways to sublimate dark shirts and cotton material to update my recommendations.

One of the main things I love about sublimation is that the sublimation dyes become part of the polymers on the item’s surface. That means the design should last just as long as the surface you’re decorating! And when it comes to T-shirts, that’s usually the case as long as you’re using white, 100% polyester fabric. However, I know we all want more options, so I’ve been experimenting with ways to sublimate dark shirts or cotton fabric, often by adding a sublimation-compatible material to the shirt and pressing the design on top. Many of my tests came out great, but I’ve found that some don’t have the same long-lasting results as normal sublimation. There are some good options, though!
The main reason to add a material to a shirt before sublimating on it is color, because sublimation ink is translucent and there isn’t white ink to use in the prints.
So, if you’re decorating a black shirt, keep in mind the color will show if the substrate isn’t completely opaque, like the holographic vinyl I tested. Dark colors and patterns will show through, so if you don’t want to impact the design, use a white glitter HTV or EasySubli sublimation HTV to create a white area.

A white shirt won’t interact with a sublimation design the same way as dark T-shirts, but if it’s cotton, you still need to add a compatible layer first since you need the high polyester content to grab the ink.
White Glitter Iron-on vinyl (I used Cricut brand) works well on both light and dark shirts, as long as you’re ok with slightly muted colors and some sparkle.

I tried a few brands and types of holographic HTV, and I like how the Rainbow Pearl Siser material looks! It’s not completely opaque, so some of the fabric can impact the design, as does the slight color of the vinyl. But I like the snazzy result!
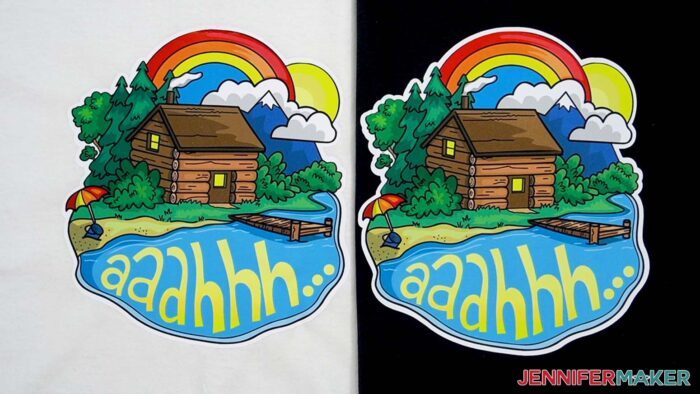
The shirts I made with the EasySubli HTV and Mask look the most like the original colorful designs. The opaque white surface really gives you a blank, sublimation-friendly area!
The shirts I sublimated using clear HTV on black and white cotton are still holding up well, but I found working with the other vinyls easier. The clear HTV is harder to see on the fabric.
I have tested a few other methods that I don’t recommend for long-lasting results now: sublimation spray and glow in the dark HTV.
The sublimation spray was difficult to use for an even transfer, so I don’t recommend it for soft projects.
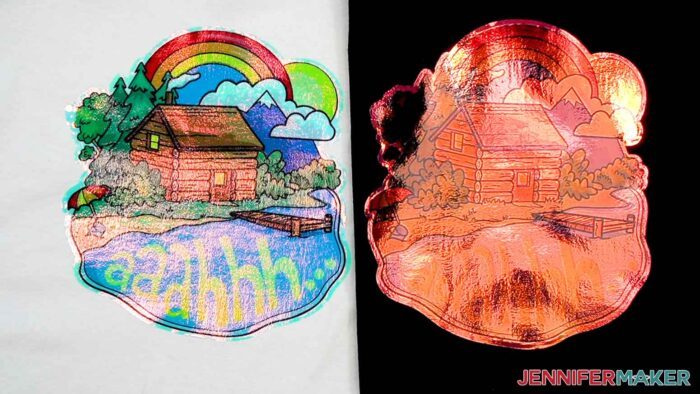
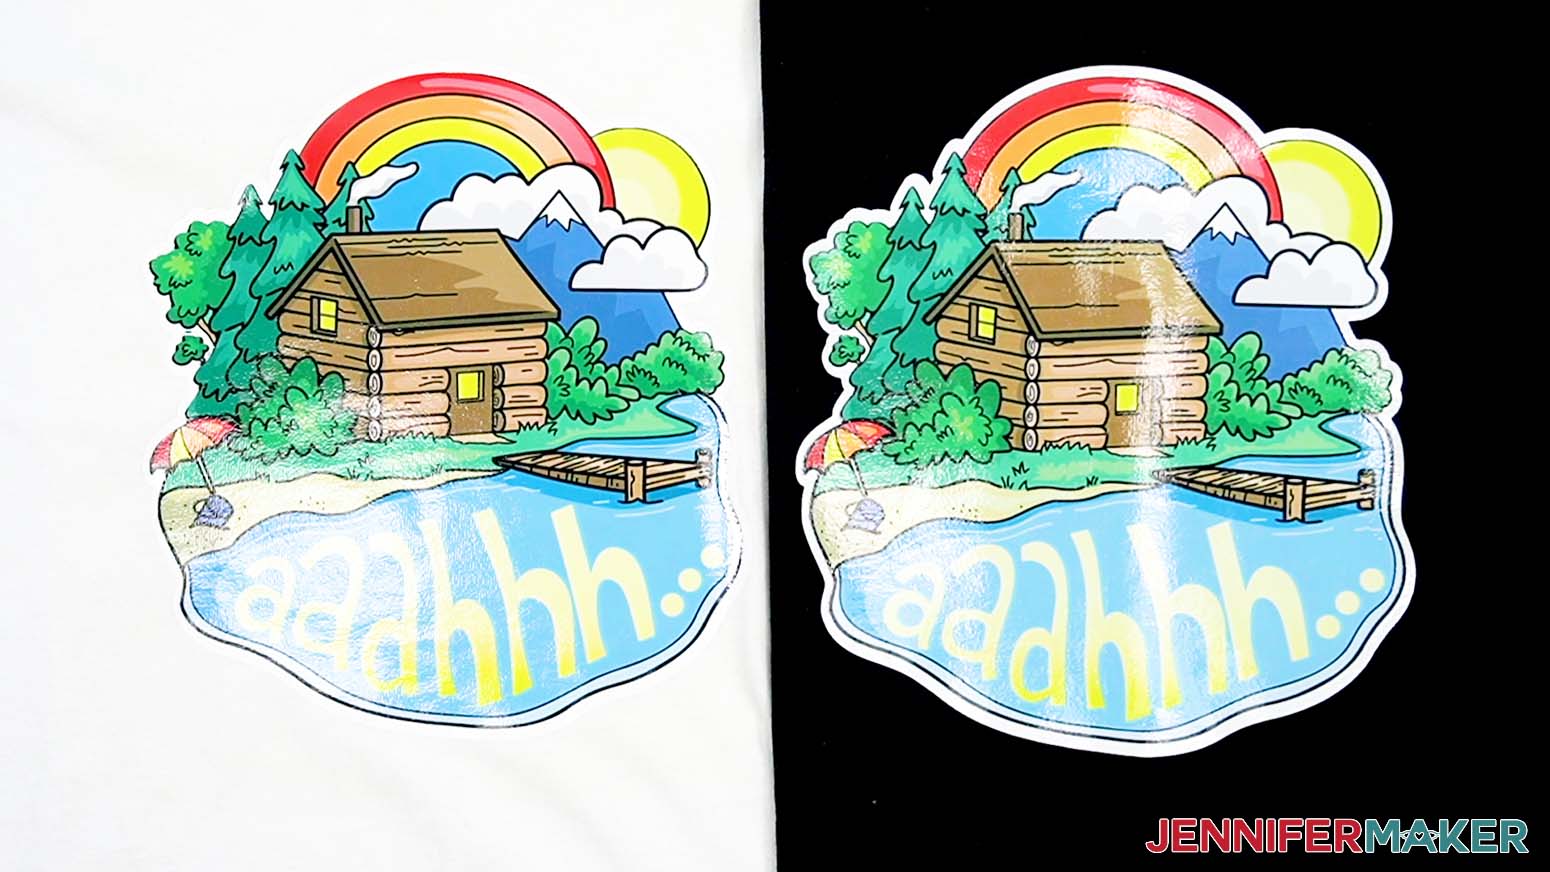
While the designs sublimated on glow in the dark HTV blurred over time, they looked (and glowed) wonderfully at the beginning! So I would still use this combination for special projects that don’t need to hold up over time, like a costume. Just be aware that it won’t look the same next Halloween, unfortunately.
So take a little while to watch my video comparing EasySubli HTV, Siser Rainbow Pearl holographic HTV, and Cricut’s white glitter HTV, and pick the option that fits your goals!
To make your own, you’ll need the T-shirt of your choice, a sublimation printer with compatible ink and paper, and a heat source. I have information for different press types in my Sublimation Cookbook. And be sure to check my tools and materials list for all the items you’ll need to get started!
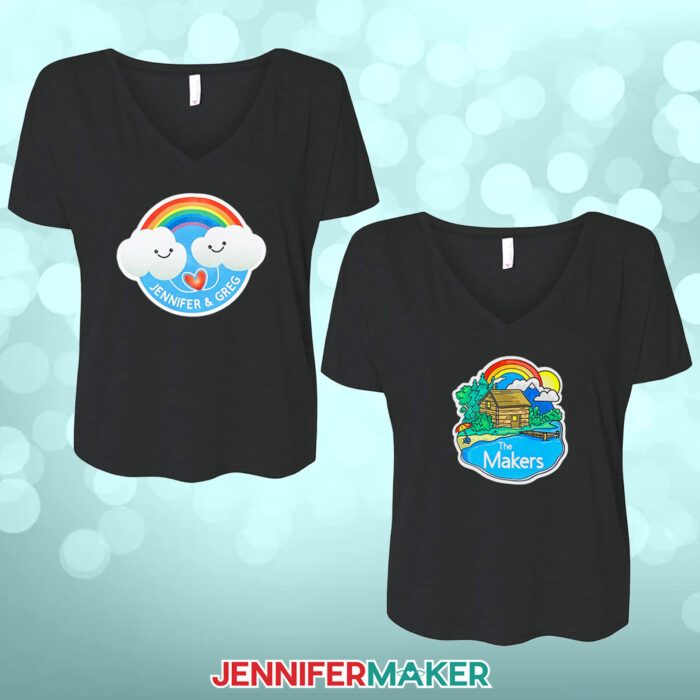
The customized sublimation images are examples of shirts you can design yourself in my ADVANCE program. The cottage with “The Makers” was completed right in Cricut Design Space and I cannot share the Design Space project link as it contains uploaded elements. But this is something you can easily make in my ADVANCE program! Learn more about ADVANCE here!
Let me show you how to sublimate dark shirts using different kinds of HTV! This post contains some affiliate links for your convenience (which means if you make a purchase after clicking a link I will earn a small commission but it won’t cost you a penny more, there is no additional cost)! Read my full disclosure policy.
Materials to Sublimate Dark Shirts Or Cotton
View my Amazon shopping list for the exact items I used!
- Sublimation Printer – I used a converted Epson EcoTank ET-2800
- Sublimation Ink
- Sublimation Paper – I used 8.5″ x 11″ A-SUB Sublimation Paper
- Cricut White Glitter Iron-On Vinyl -OR-
- Siser Holographic HTV in Rainbow Pearl -OR-
- HTVRont Sublimation HTV for Dark/Light Fabric -OR-
- Siser EasySubli HTV Sheets 8.4″ x 11″ -AND-
- Siser EasySubli Mask Transfer Tape 8″ x 10″
- Black Cotton T-shirts -OR-
- White Cotton T-shirts
- White uncoated Butcher Paper
- White 65 lb Cardstock 12″ x 12″
- Black Cotton Practice Fabric (optional)
- A way to cut your designs – I’m using the Cricut Maker 3, but you could also use the Cricut Maker, an Explore Series Machine, the Cricut Joy Xtra, or the Cricut Venture.
- Heat Press – I used the Cricut EasyPress
- Heat Resistant Pad
- Cricut Blue LightGrip Machine Mat 12″ x 12″
- Cricut Green StandardGrip Mat 12″ x 12″
- Brayer
- Weeding Tool
- Lint Roller
- Scissors
- Fan
- DIY T-Shirt Ruler Guide (optional)
- Design #599 (My free PNG/PDF design files are available in my free resource library – get the password by filling out the form at the bottom of this page

How to Sublimate Dark Shirts or Cotton With HTV

How To Sublimate Dark Shirts With HTV
Learn how to sublimate dark shirts using different kinds of HTV.
Materials
- Sublimation Paper (I used 8.5″ x 11″ A-SUB Sublimation Paper)
- Cricut White Glitter Iron-On -OR-
- Siser Holographic HTV -OR-
- HTVRont Sublimation HTV for Dark/Light Fabric -OR-
- Siser EasySubli HTV Sheets 8.4″ x 11″ -AND-
- Siser EasySubli Mask Transfer Tape 8″ x 10″
- White Cotton T-shirts -OR-
- Black Cotton T-shirts
- White Butcher Paper
- White 65 lb Cardstock 12" x 12"
- Black Cotton Practice Fabric (optional)
- Design #599 (My free PNG/PDF design files are available in my free resource library – get the password by filling out the form at the bottom of this page)
Tools
- Sublimation Printer (I used a converted Epson EcoTank ET-2800)
- A way to cut your designs - I’m using the Cricut Maker 3, but you could also use the Cricut Maker, an Explore Series Machine, the Cricut Joy Xtra, or the Cricut Venture.
- Sublimation Ink
- Heat Press - I used the Cricut EasyPress
- Heat Resistant Pad
- Heat Resistant Tape
- Cricut Blue LightGrip Machine Mat 12" x 12"
- Cricut Green StandardGrip Mat 12" x 12"
- Brayer
- Lint Roller
- Fan (for ventilation)
- Scraper
- Weeding Tool
- Scissors
- DIY T-Shirt Ruler Guide (optional)
Instructions
NOTE: If you haven’t calibrated your machine recently I recommend that you perform a calibration of your Cricut machine. In case you aren't familiar with the term calibration, it simply means to adjust something, in this case, our Cricut cutting machine, so that it can be used in an accurate and exact way. Follow the steps from my Money Holders tutorial to calibrate your Cricut. This will give you the best Print Then Cut results for your project.
STEP 1 FOR ALL METHODS: GET MY FREE DESIGNS TO SUBLIMATE DARK SHIRTS
First, download my designs to sublimate dark shirts from my free library – look for Design #599. Alternatively, you can use the Save This Project form near the top of this post and the design link will be emailed to you.
There are three designs in the PNG folder.
A cat in a teacup.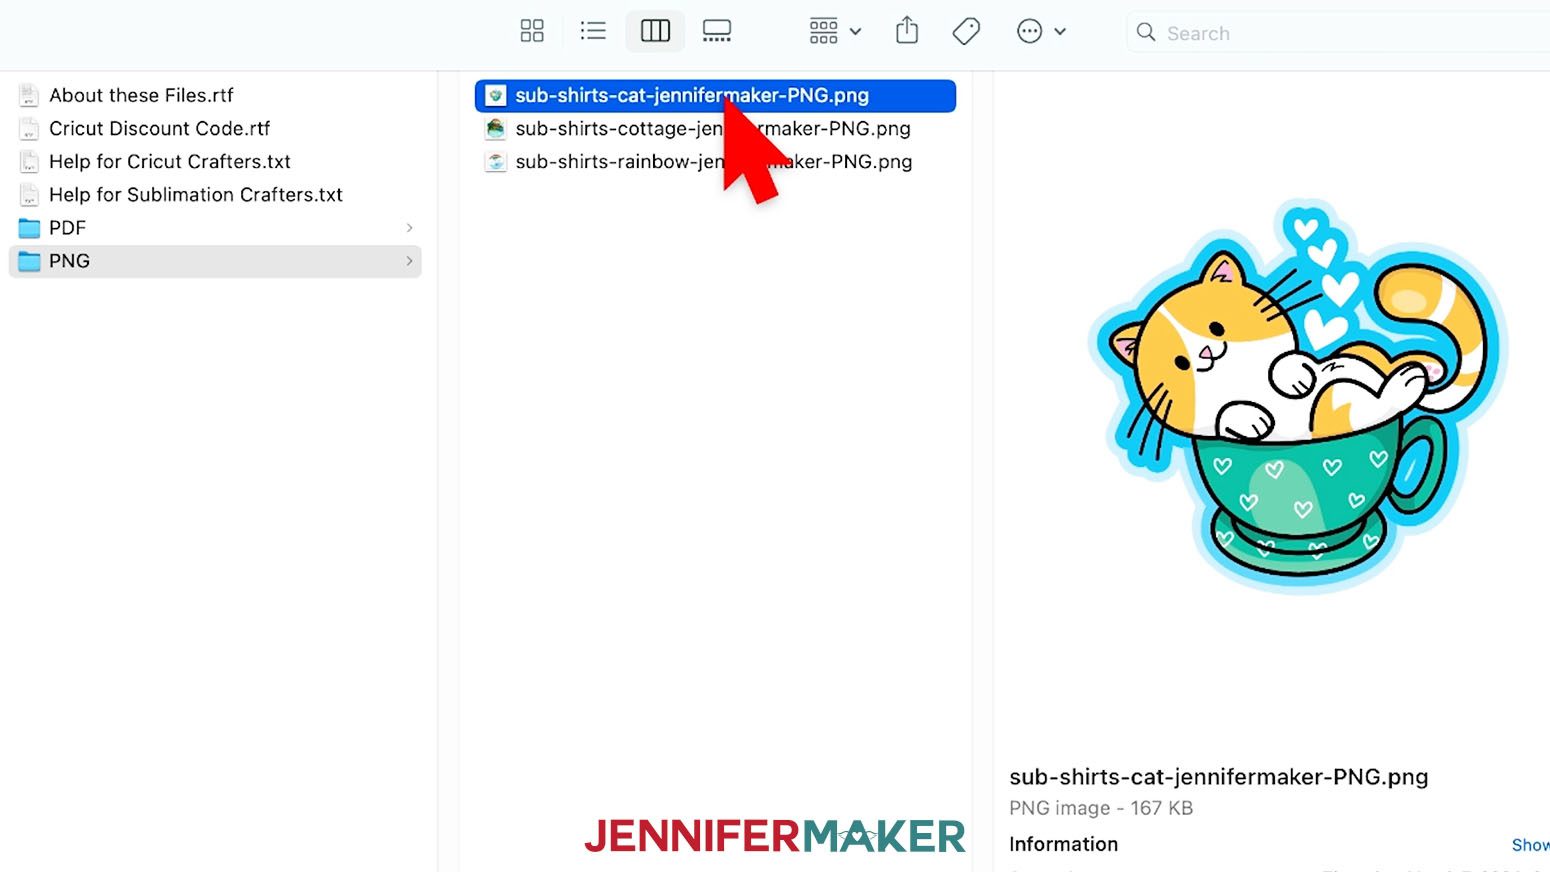
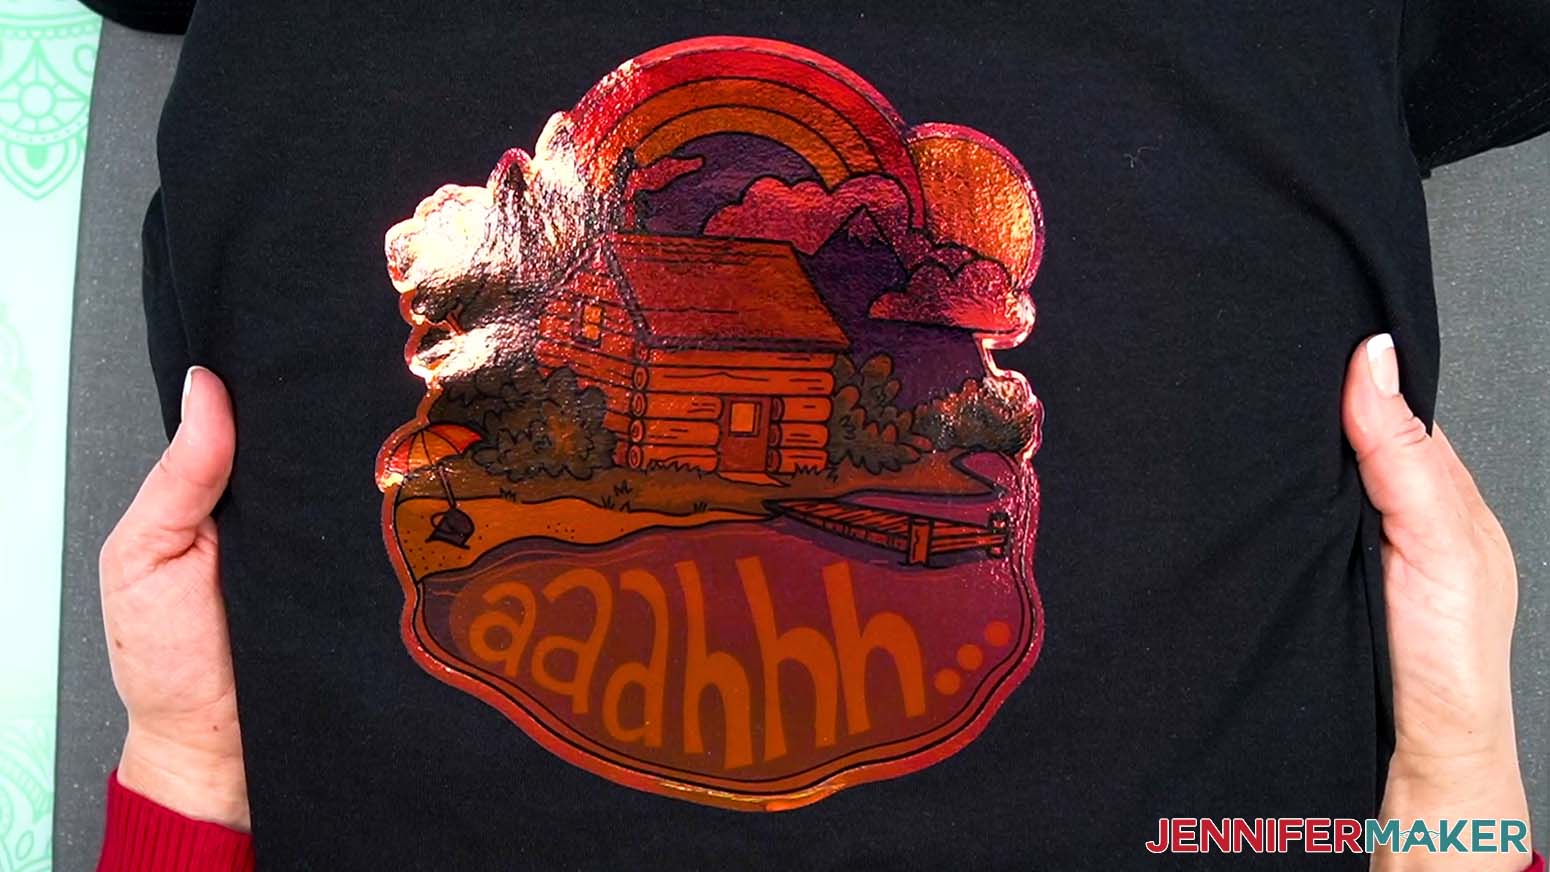
A cottage scene.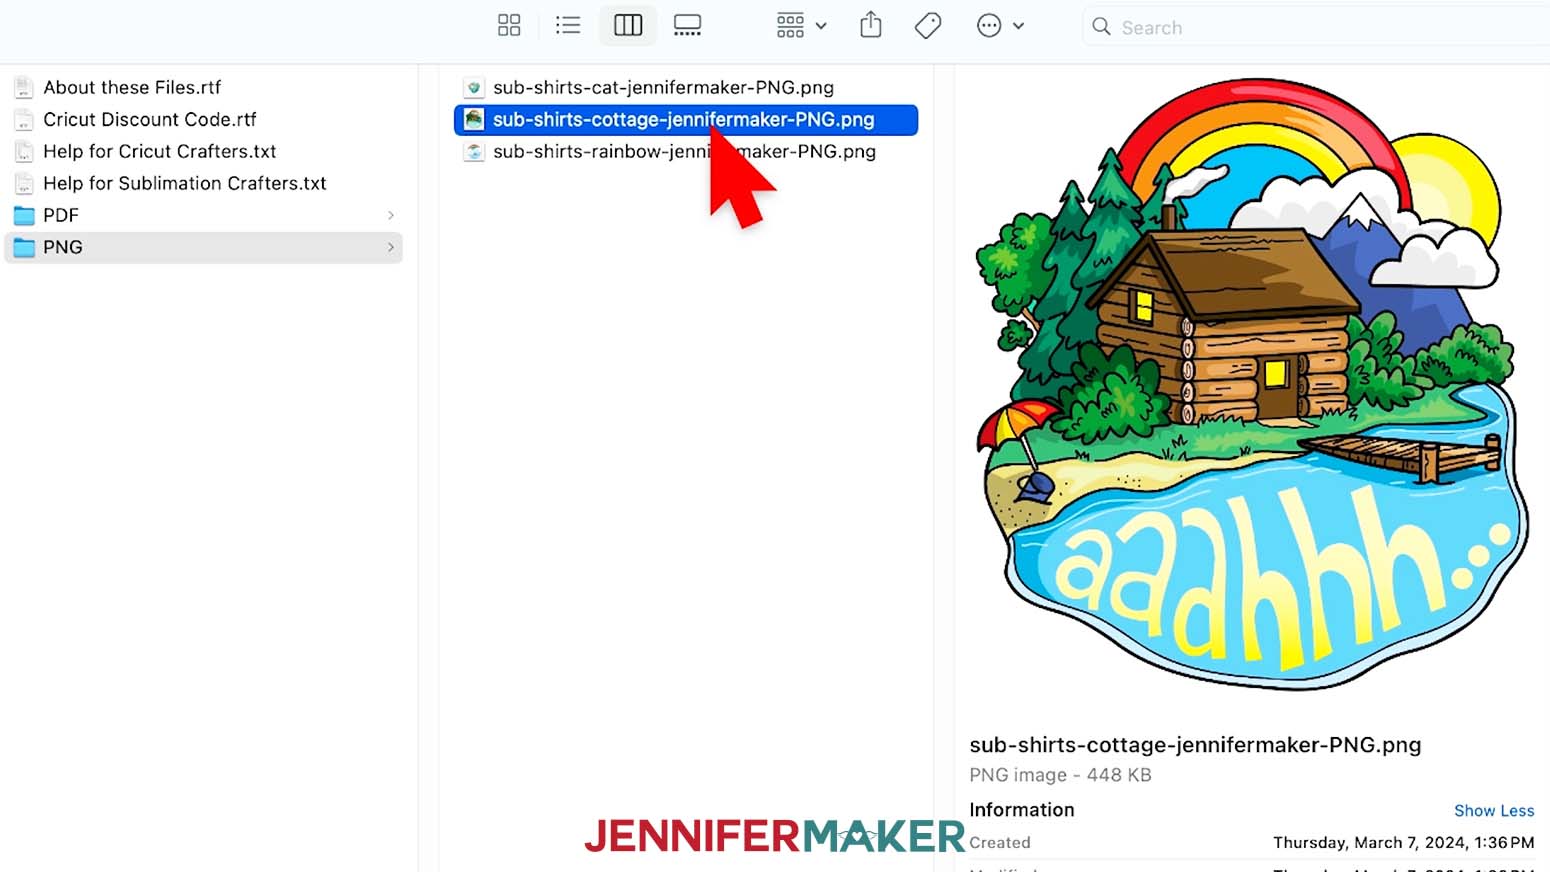
And a cute cloud and rainbow design.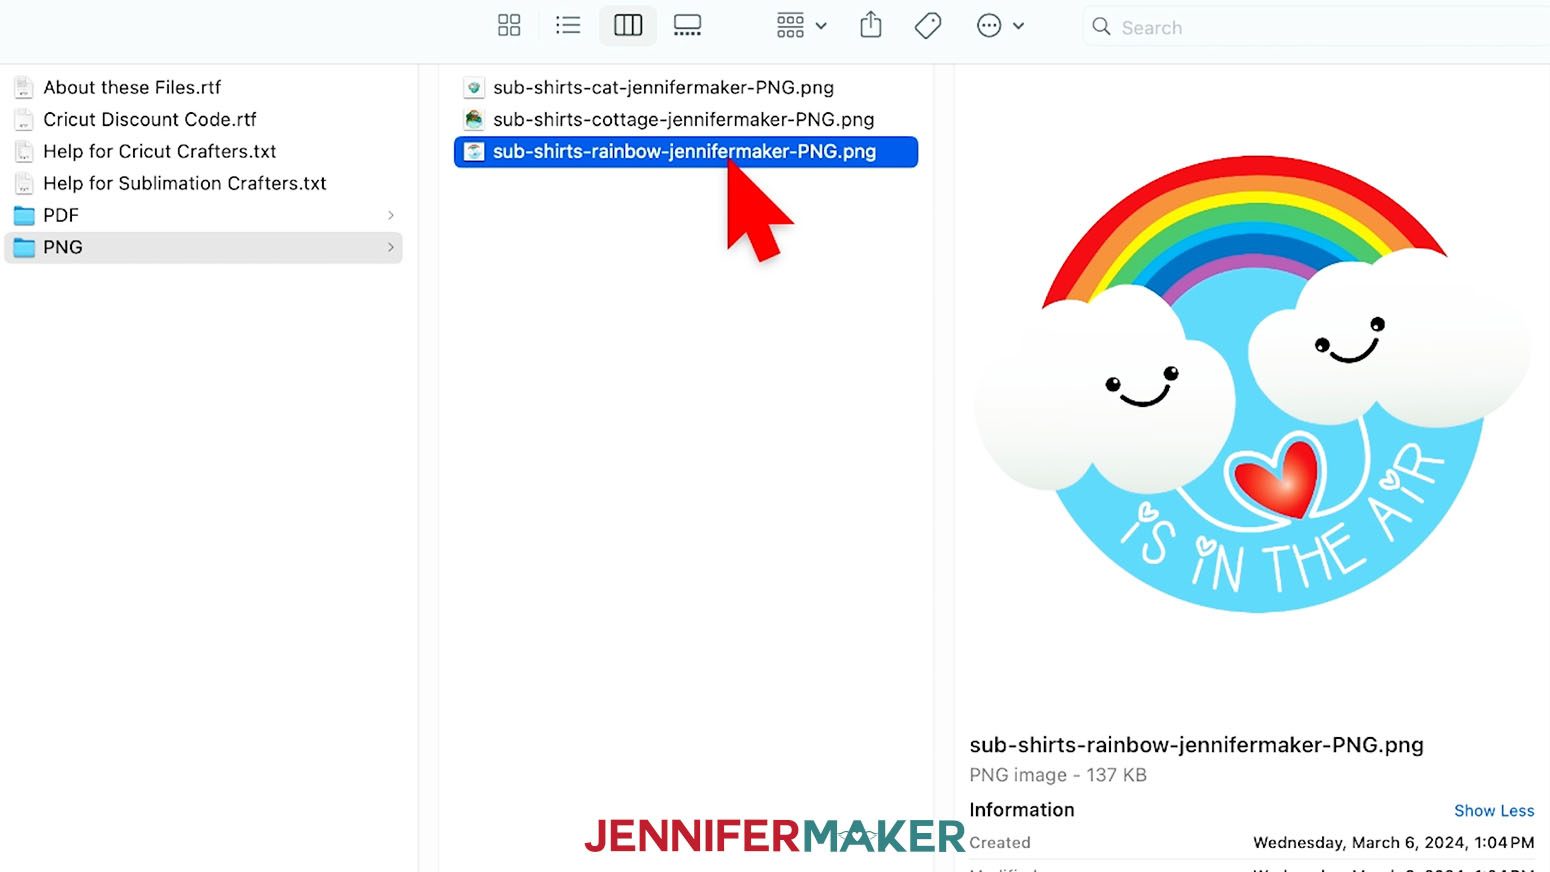
I’m going to make the Cottage PNG design using a Cricut Maker 3 and different combinations of materials to share the results, but you can use these steps for any of the options in the collection.
NOTE: Sublimation printing requires high-quality design files for the best results. I've used PNGs. Since we're using Cricut's Print Then Cut feature, we'll upload the designs to Cricut Design Space. The software brings PNGs in very large, but it's easy to fix, I'll show you!
I'll also show you how to use my handy T-Shirt Ruler Guides! You can download them from my free library under Design #433. They're easy to prepare, so make a set to have on hand if you'd like.
TIP: If you’re not sure how to upload, go to jennifermaker.com/svgs to learn how to unzip and upload SVG files, the process is similar for PNGs.
OPTION 1: SUBLIMATE DARK SHIRTS USING SISER EASYSUBLI HTV
EasySubli is HTV designed specifically to use with sublimation projects. It has a specific mask material that is like transfer tape, but it's heat-resistant, so it also keeps the vinyl in place when you tack it on.
STEP 2: PREPARE YOUR DESIGN TO SUBLIMATE DARK SHIRTS USING SISER EASYSUBLI HTV
CRICUT DESIGN SPACE
- Open Cricut Design Space and click “New Project.”
- Click “Upload” and then “Upload Image.”
- Click “Browse.”
- Select the PNG file you want to use. I’ll demonstrate with the cottage design, but the steps are the same for the other designs.
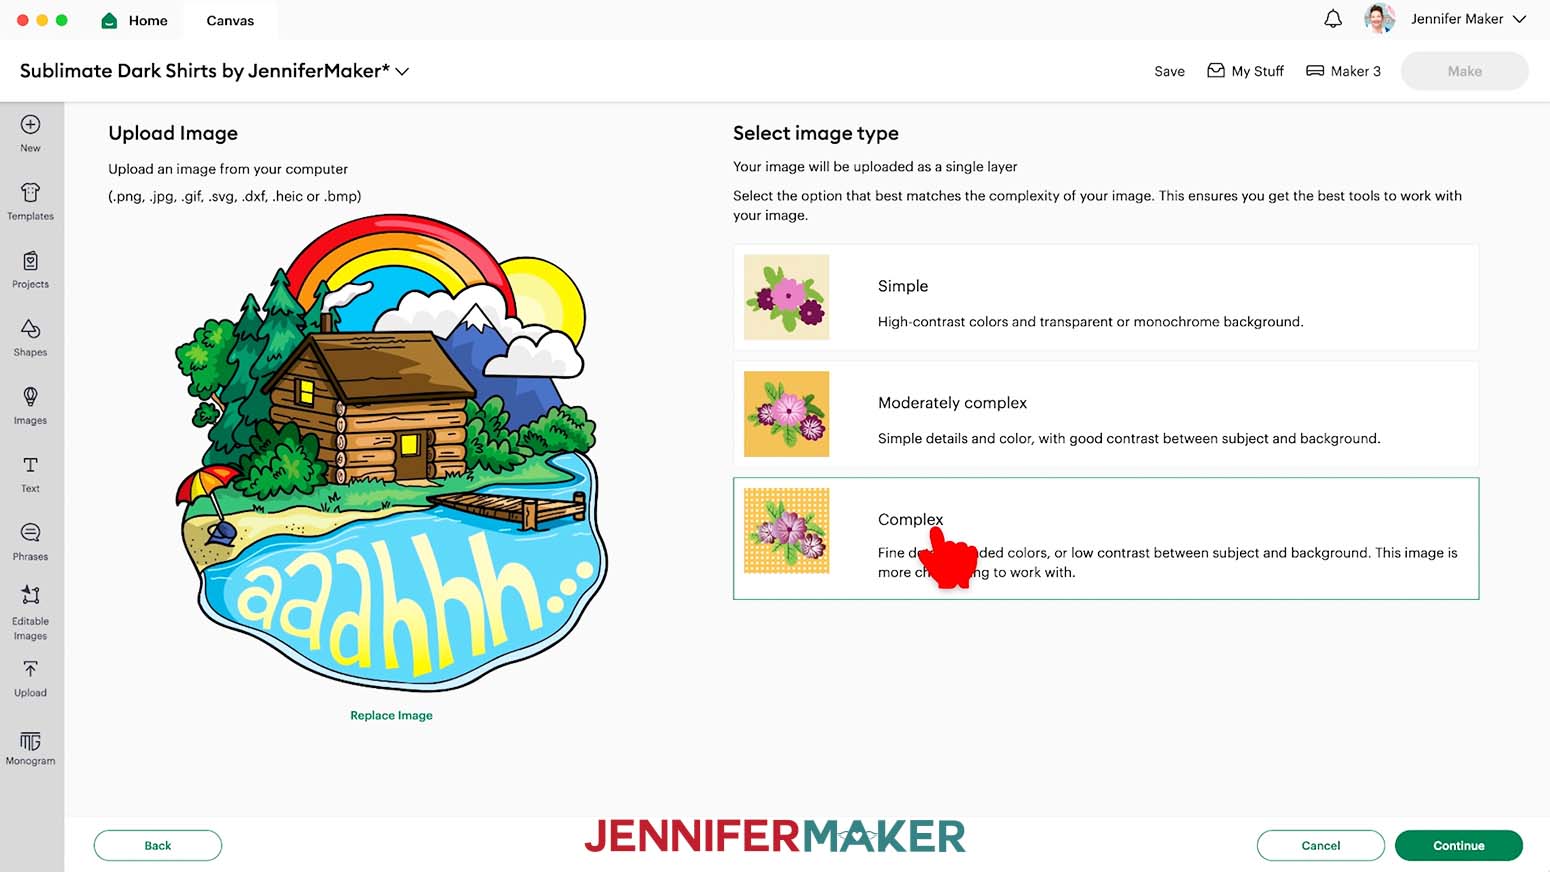
- On the Prepare to Upload screen, select “Complex” for the image type to keep all the colors and details.

- Click “Continue.”
- There is nothing to change on the next screen, so click “Apply & Continue.”
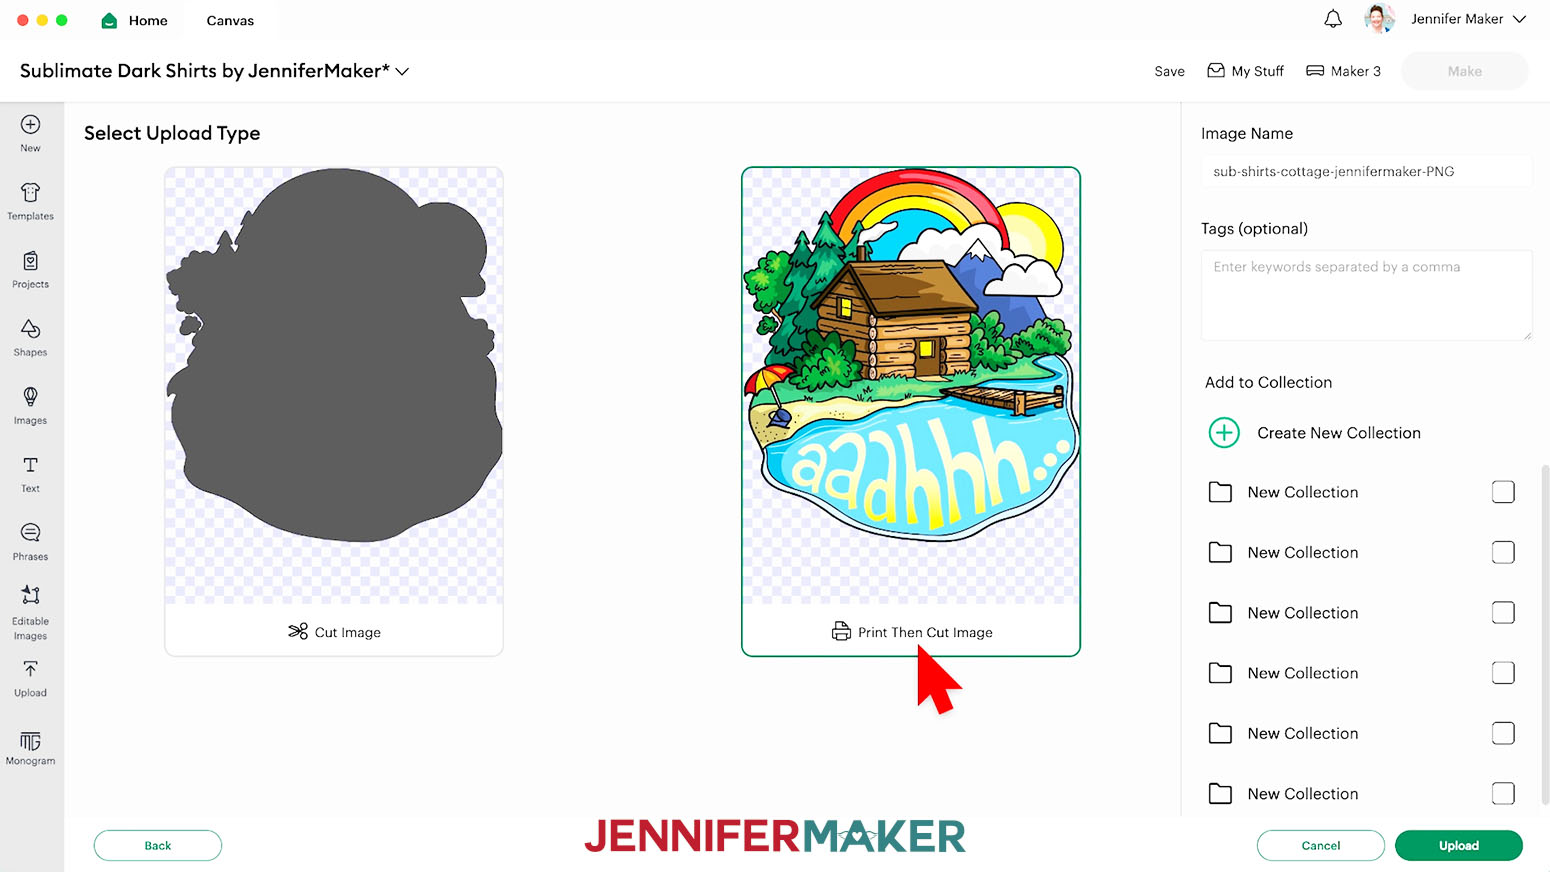
- Select “Print Then Cut Image.”
- Click “Upload.”
- Find the design in Recent Uploads and add it to the Canvas.
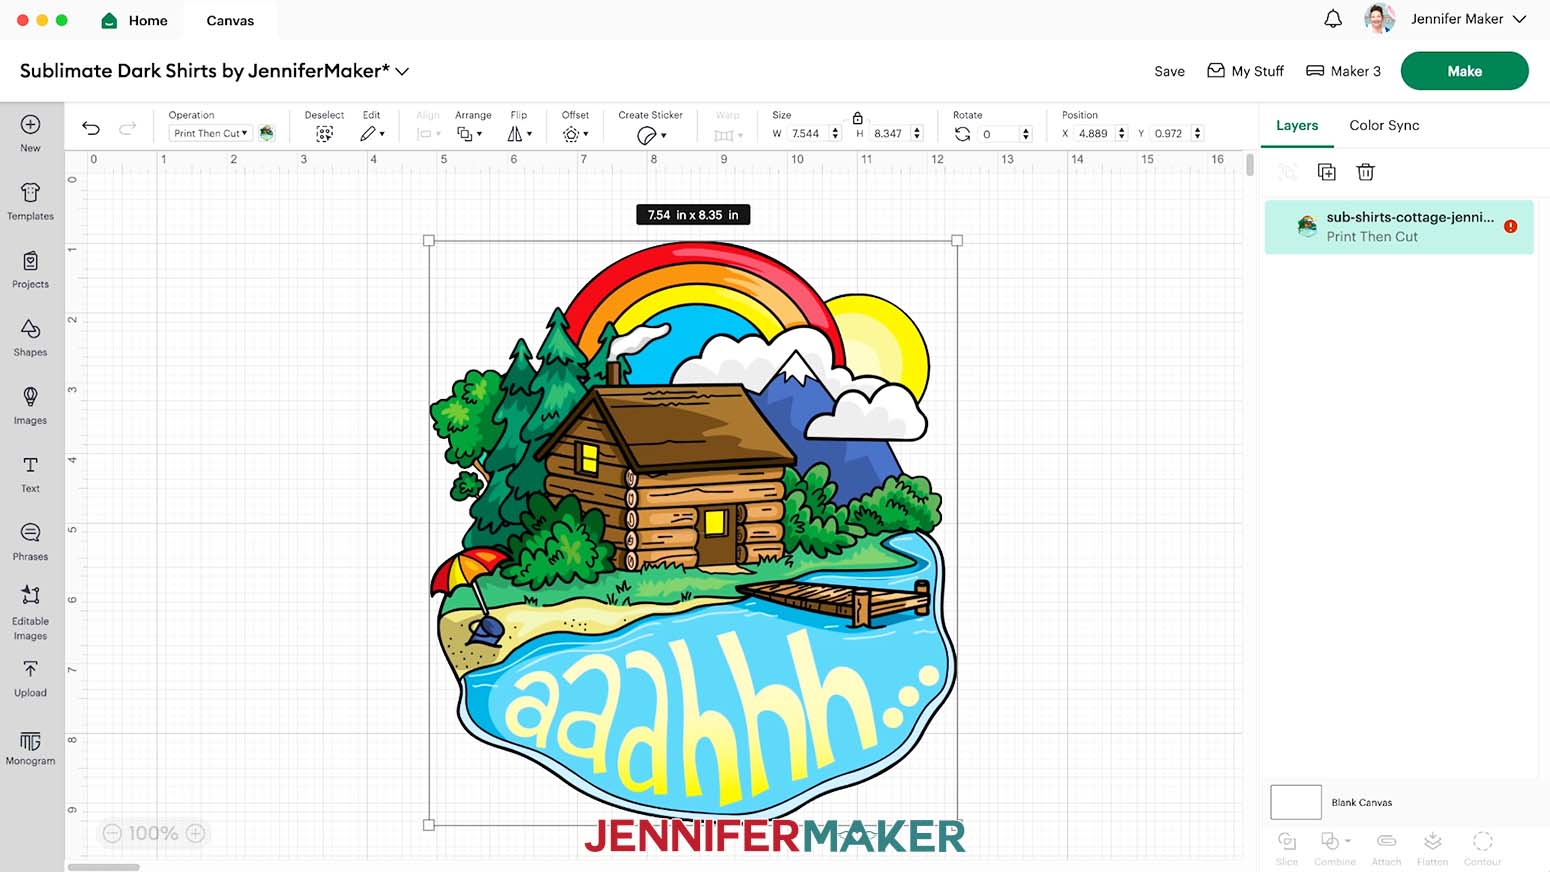
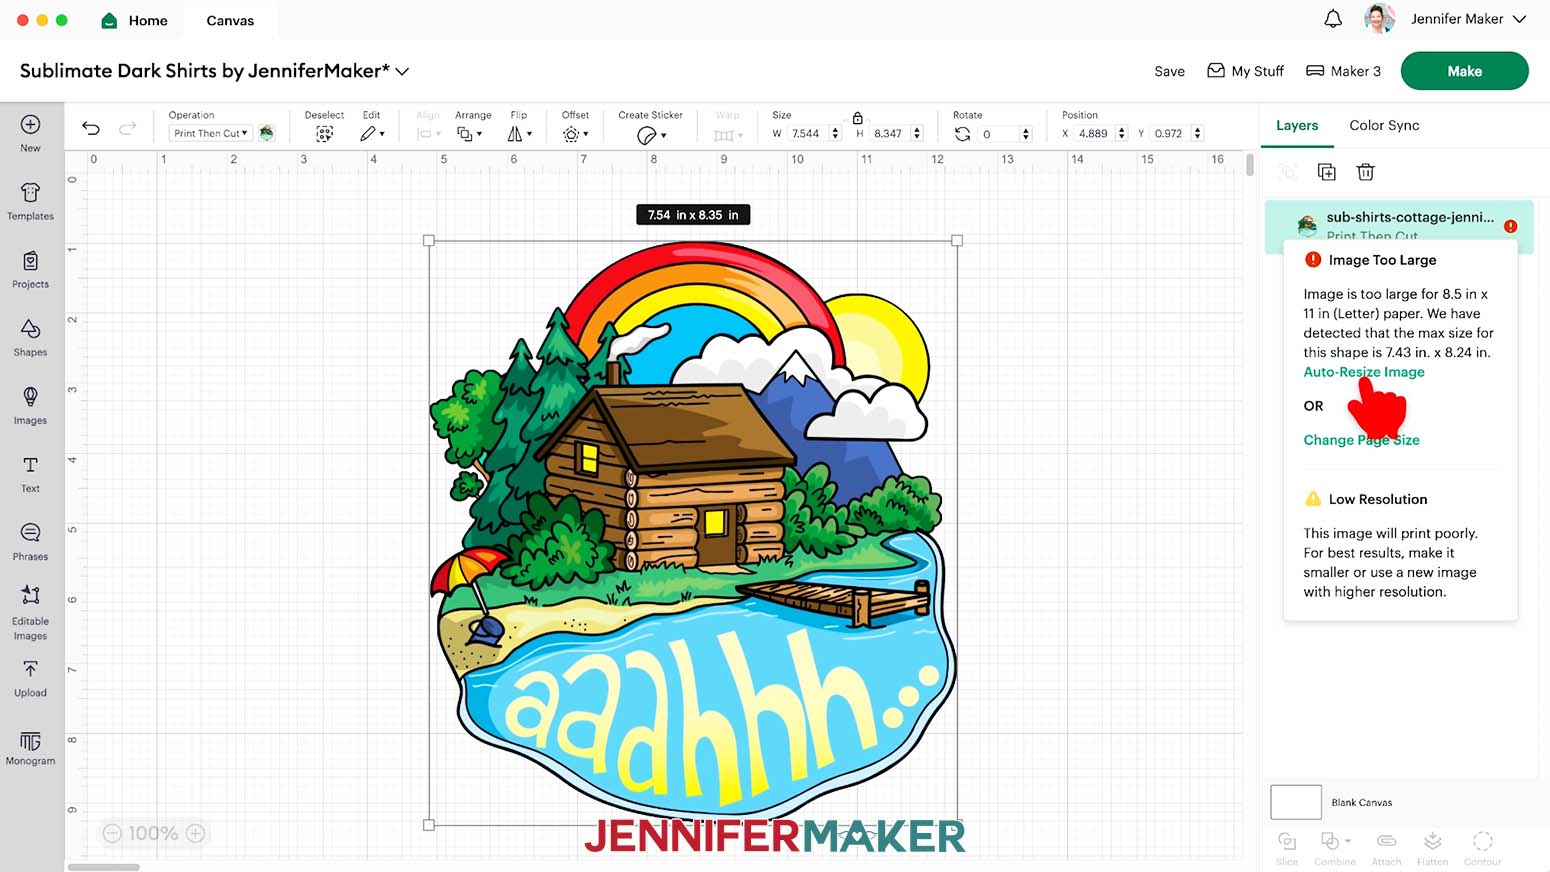
- Here is my cottage design on the Canvas.
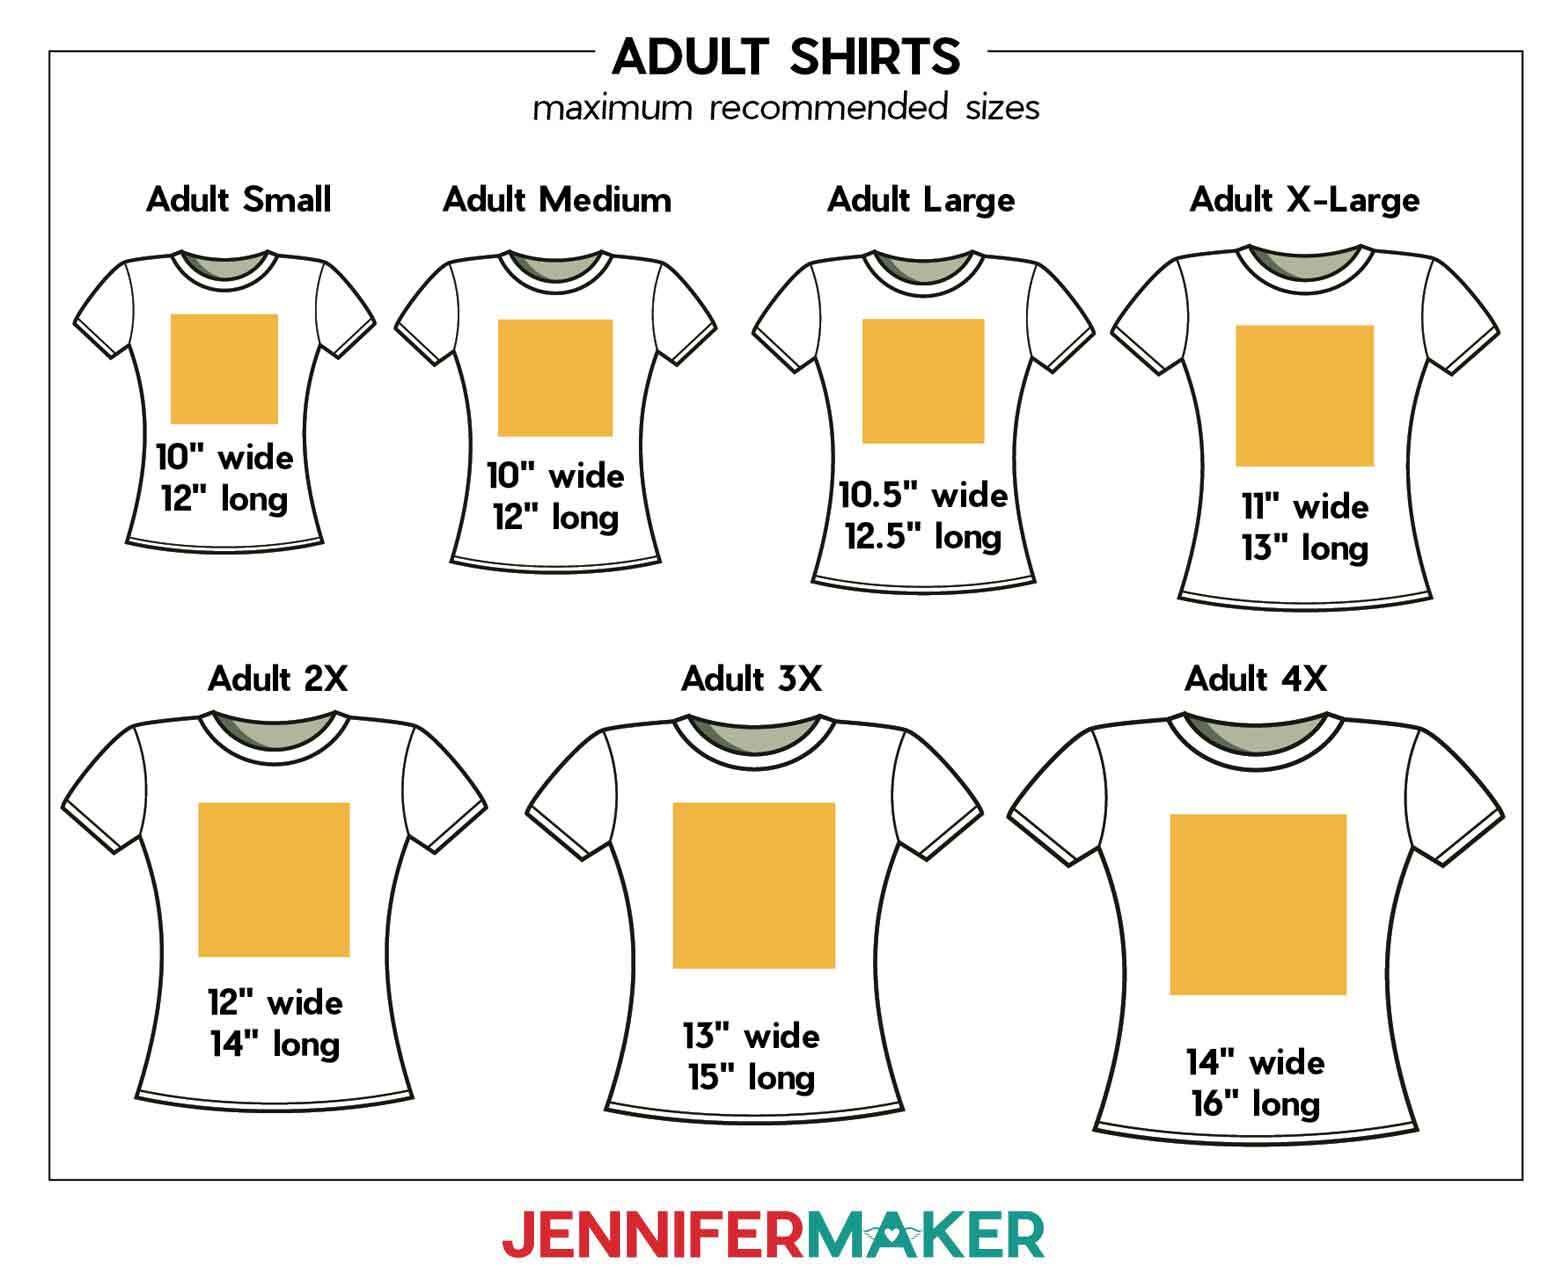
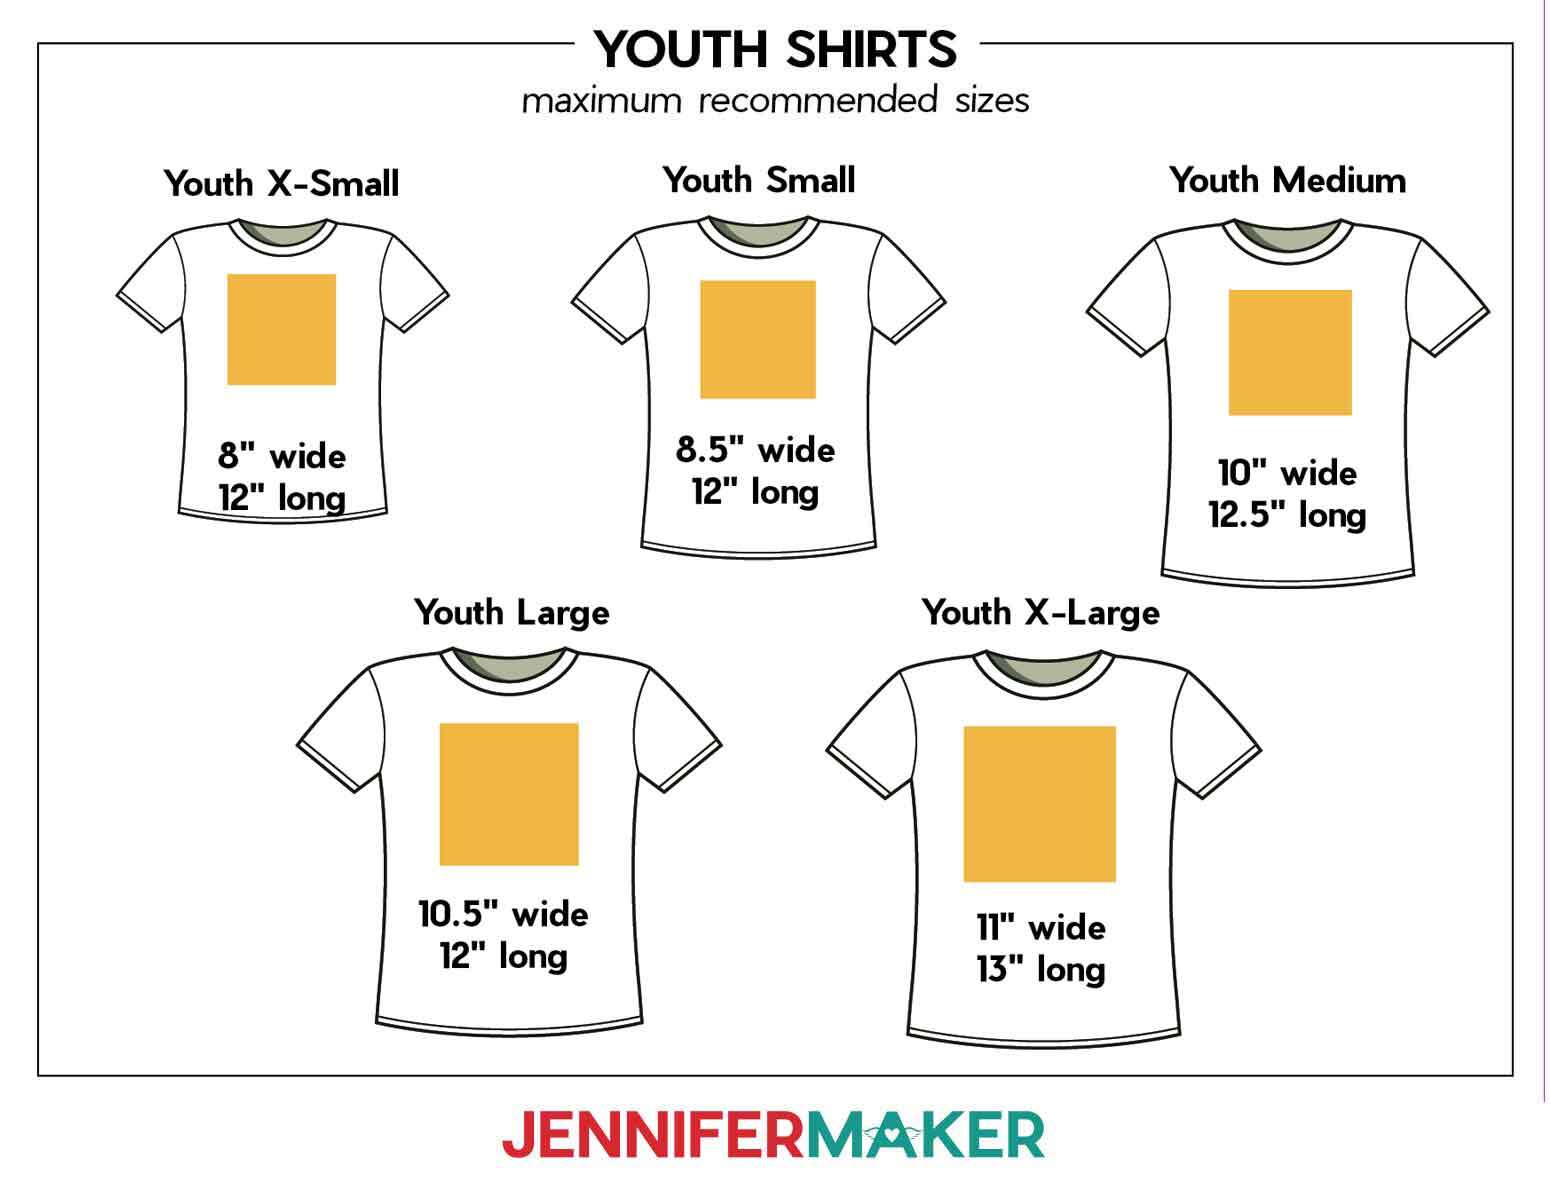
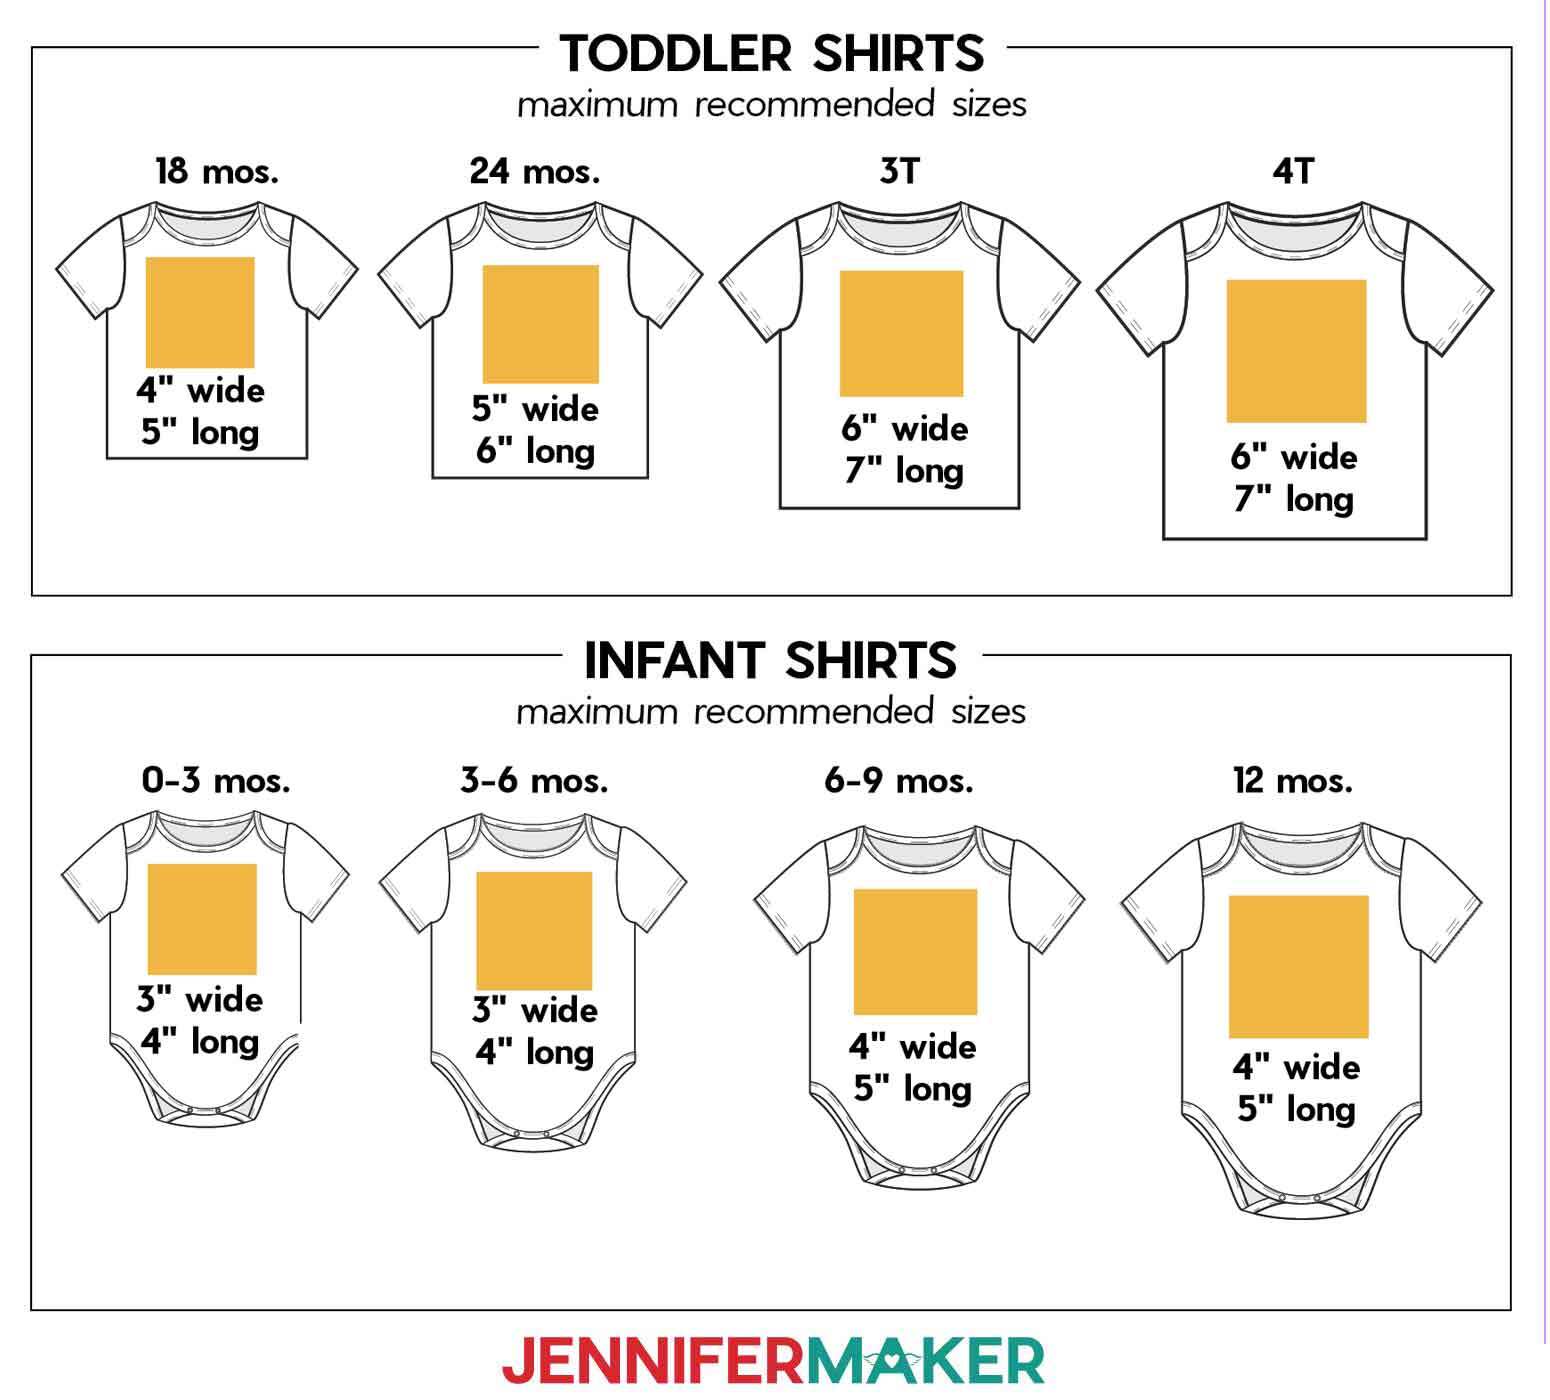
NOTE: If you're using a different shirt, here are some recommended sizing guides:


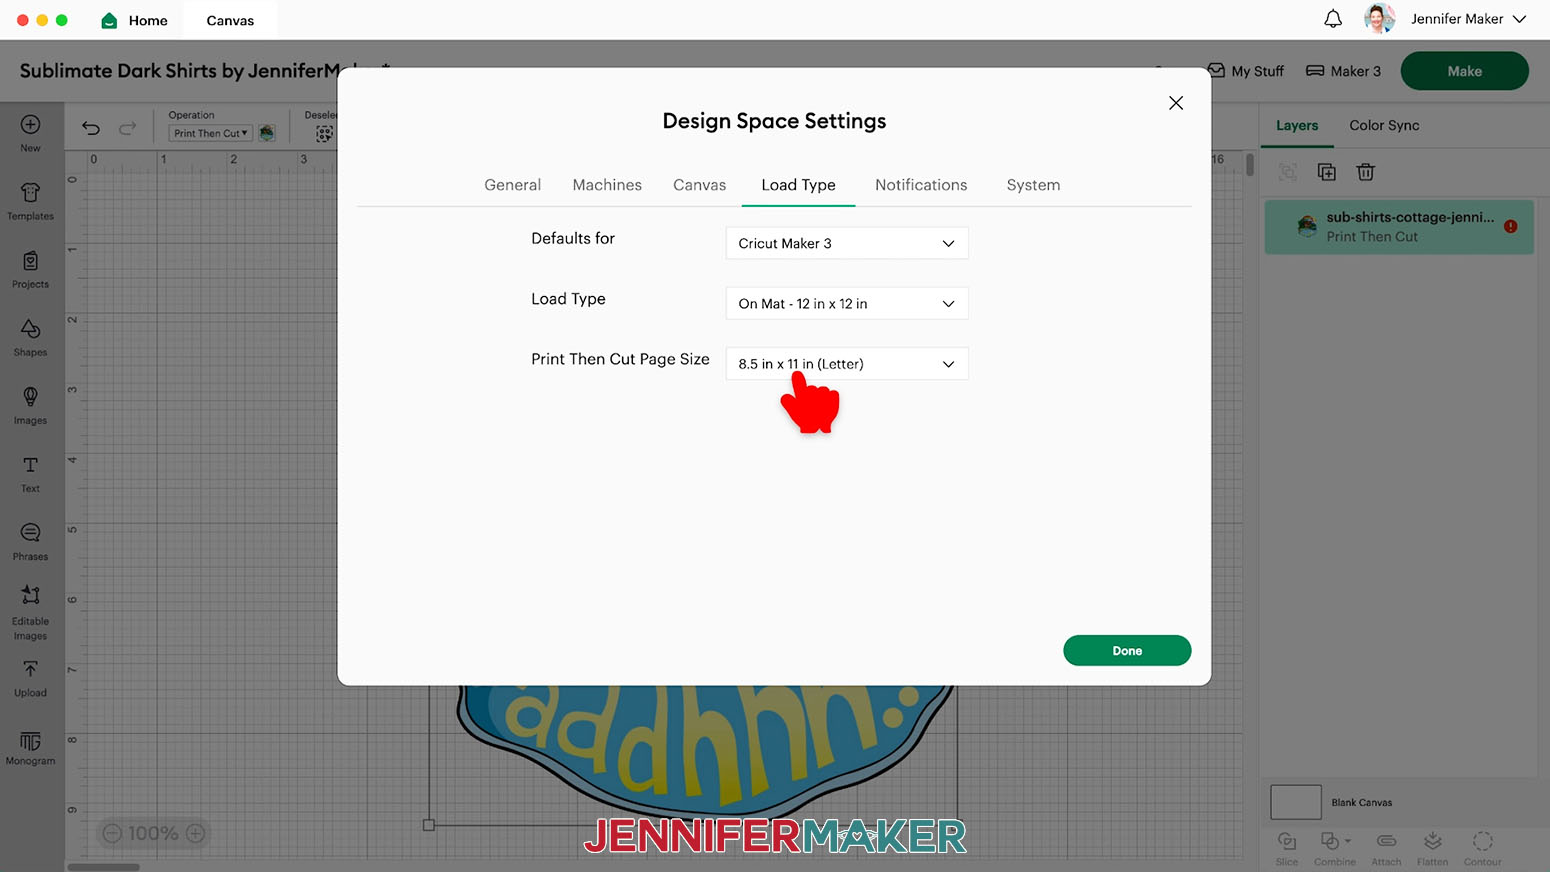
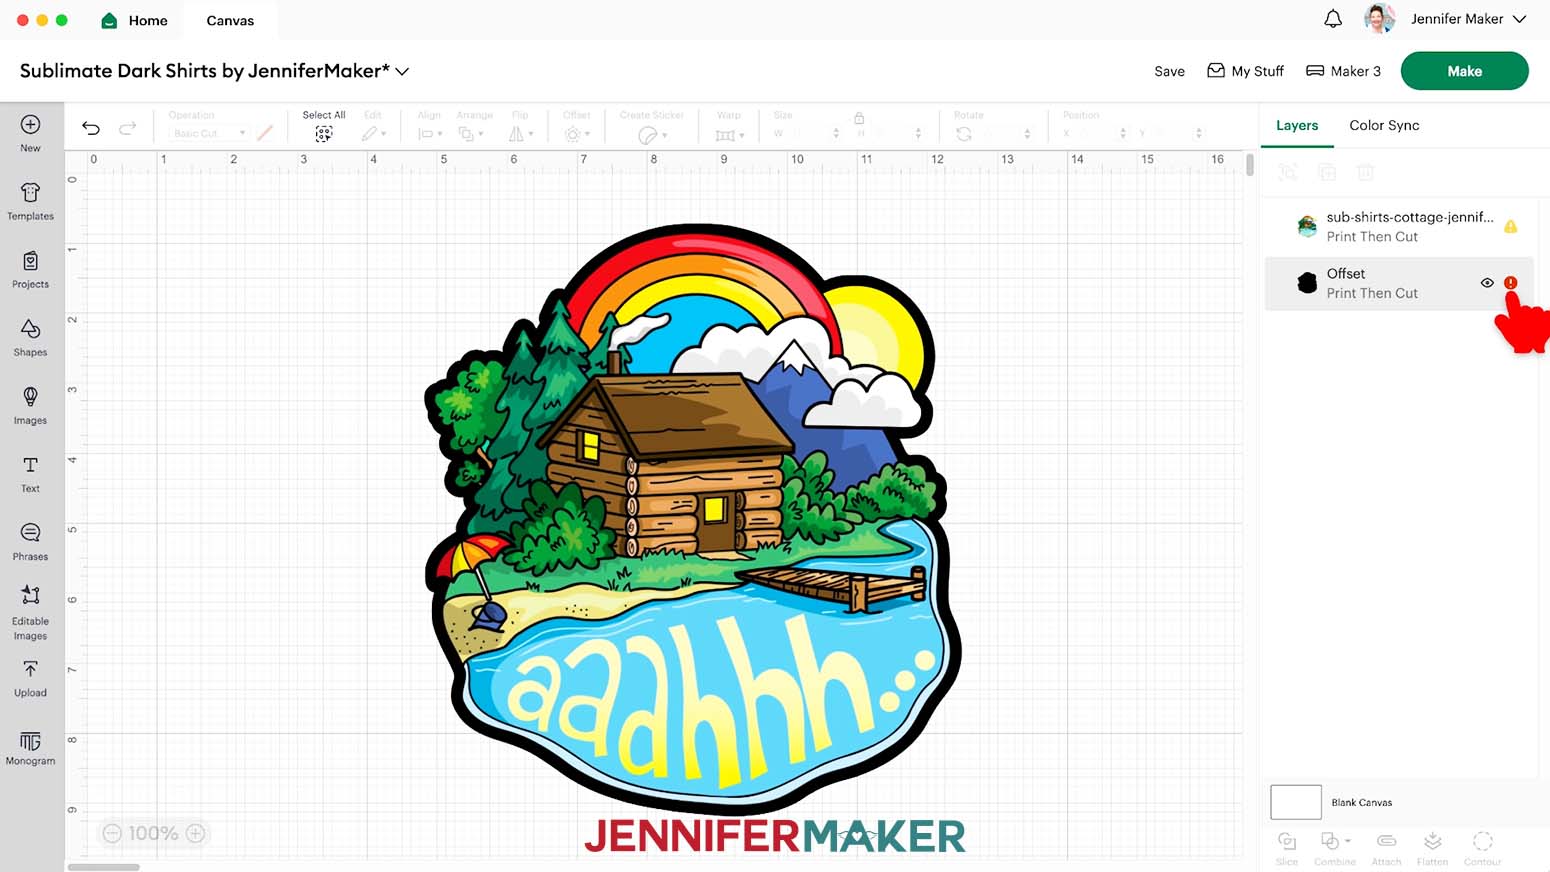
- If there is a red icon in the Layers Panel, click it and make sure the paper size mentioned matches your material. If not, click “Change Page Size” and adjust it. I’m using 8.5” x 11” paper.
- If the warning icon is still there, click it and select “Auto-Resize Image” to automatically make it the largest dimensions possible.
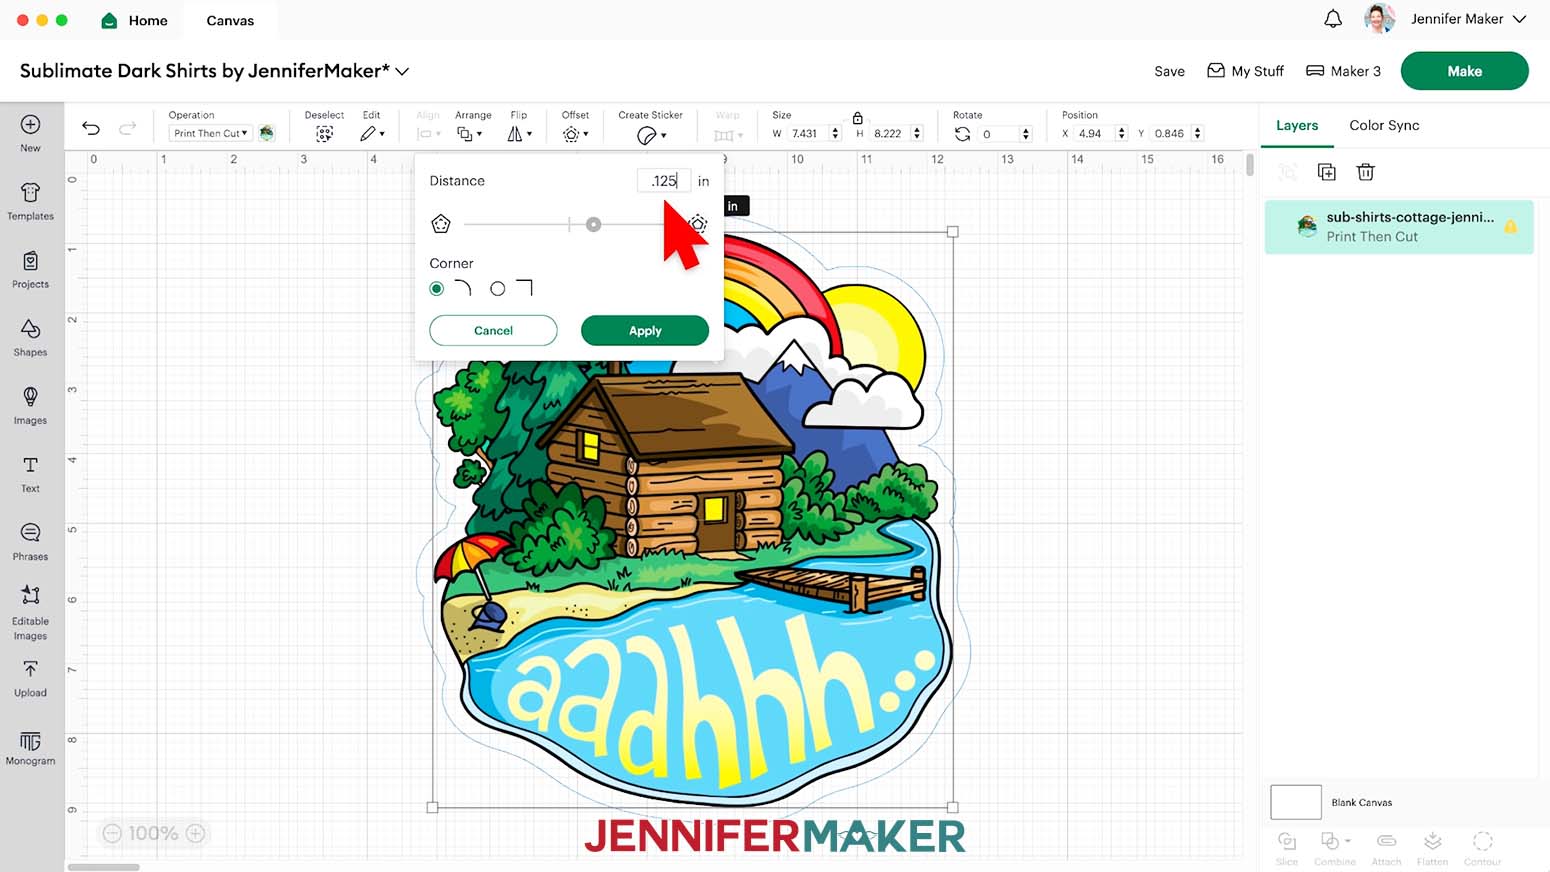
NOTE: If you see a yellow warning icon in the Layers Panel, it’s Design Space saying that the image has low resolution, or not enough detail in the file to make a nice-looking print at a big size. It will print just fine at the size needed for the project, I promise, but going much bigger won’t look as nice. - Click "Offset."
- In the Offset popup, change the Distance to .125” which is ⅛”.
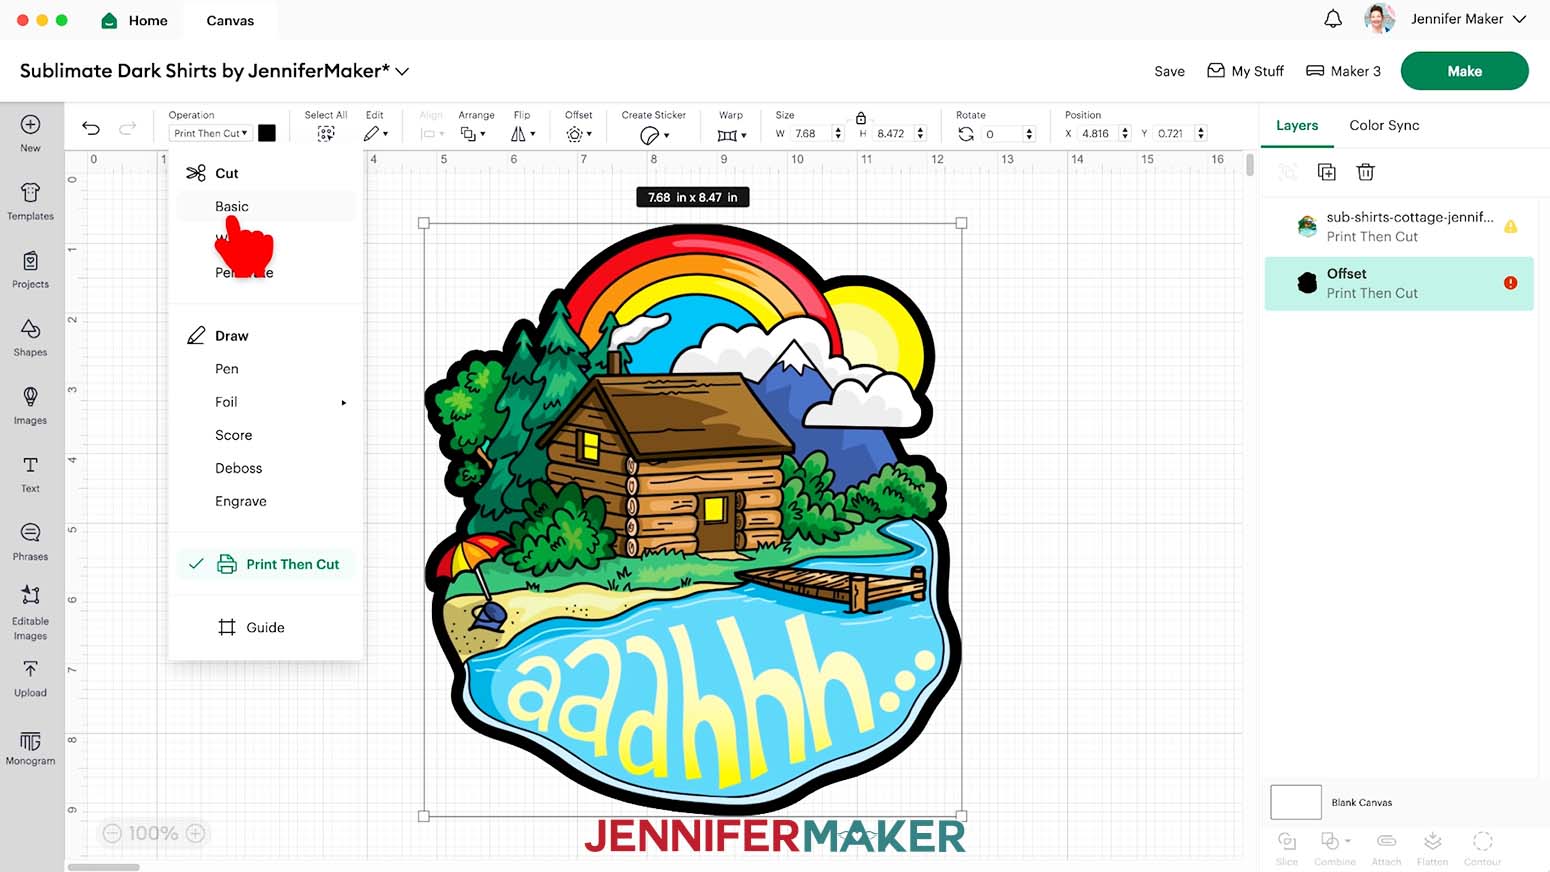
NOTE: This layer will be cut from EasySubli HTV and doesn’t need to fit in the Print Then Cut Dimensions. - If you see a new red warning icon pop up, that’s because Design Space used the same Operation when creating the design’s Offset.
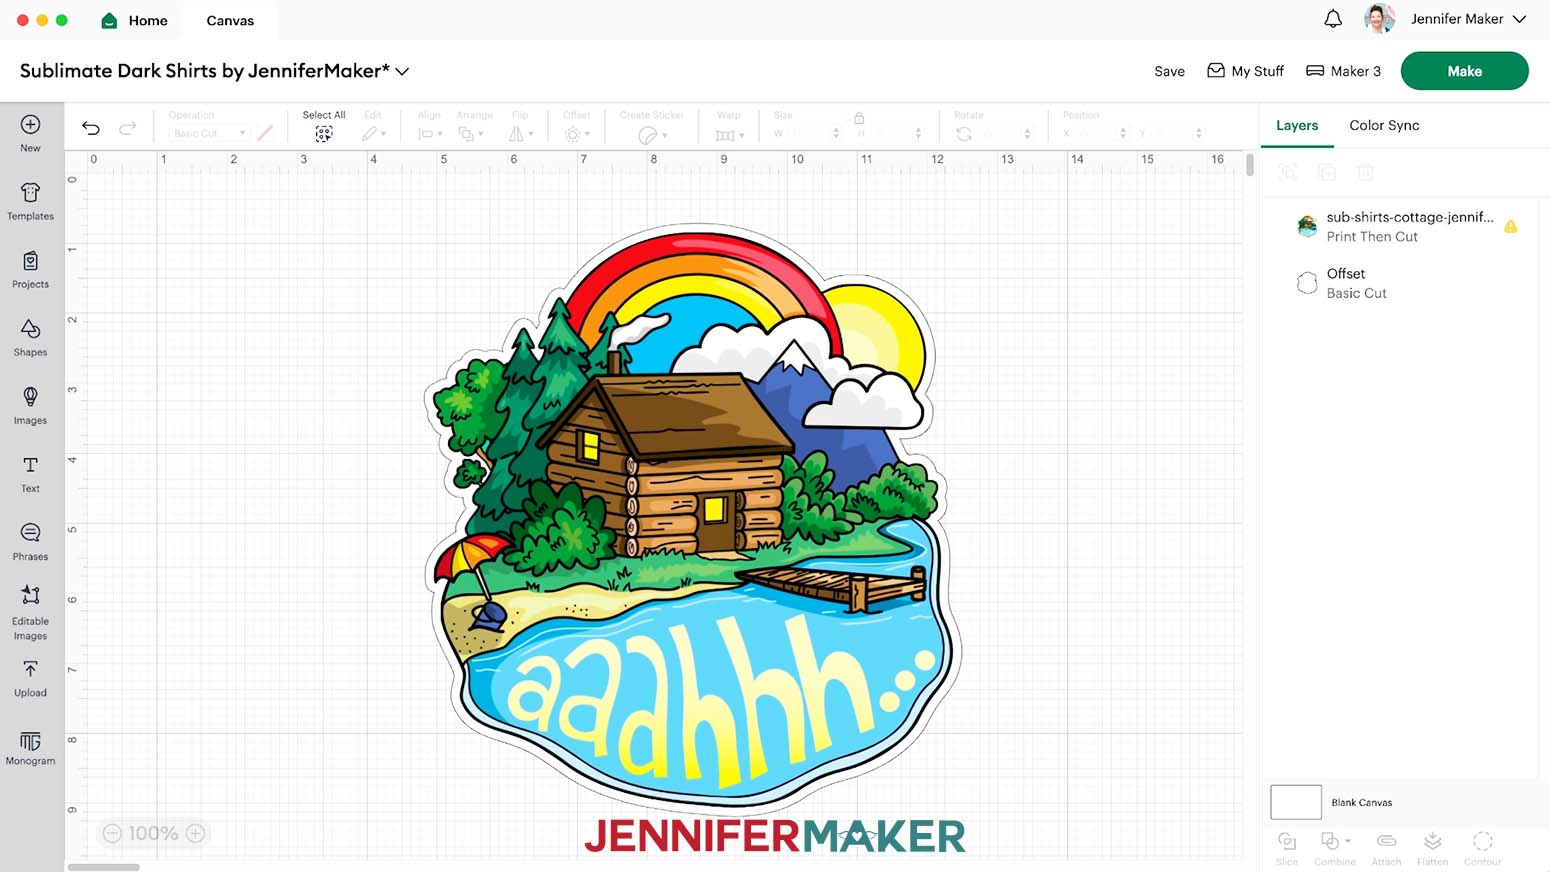
- With the Offset selected, use the “Operation” drop-down menu to change it to “Basic Cut.”
- If you want the Offset to match the EasySubli, use the Color Box to change it to white.
- Your layers are ready to print and cut!
- Make sure the correct machine is selected in the top right.
- Click “Make.”
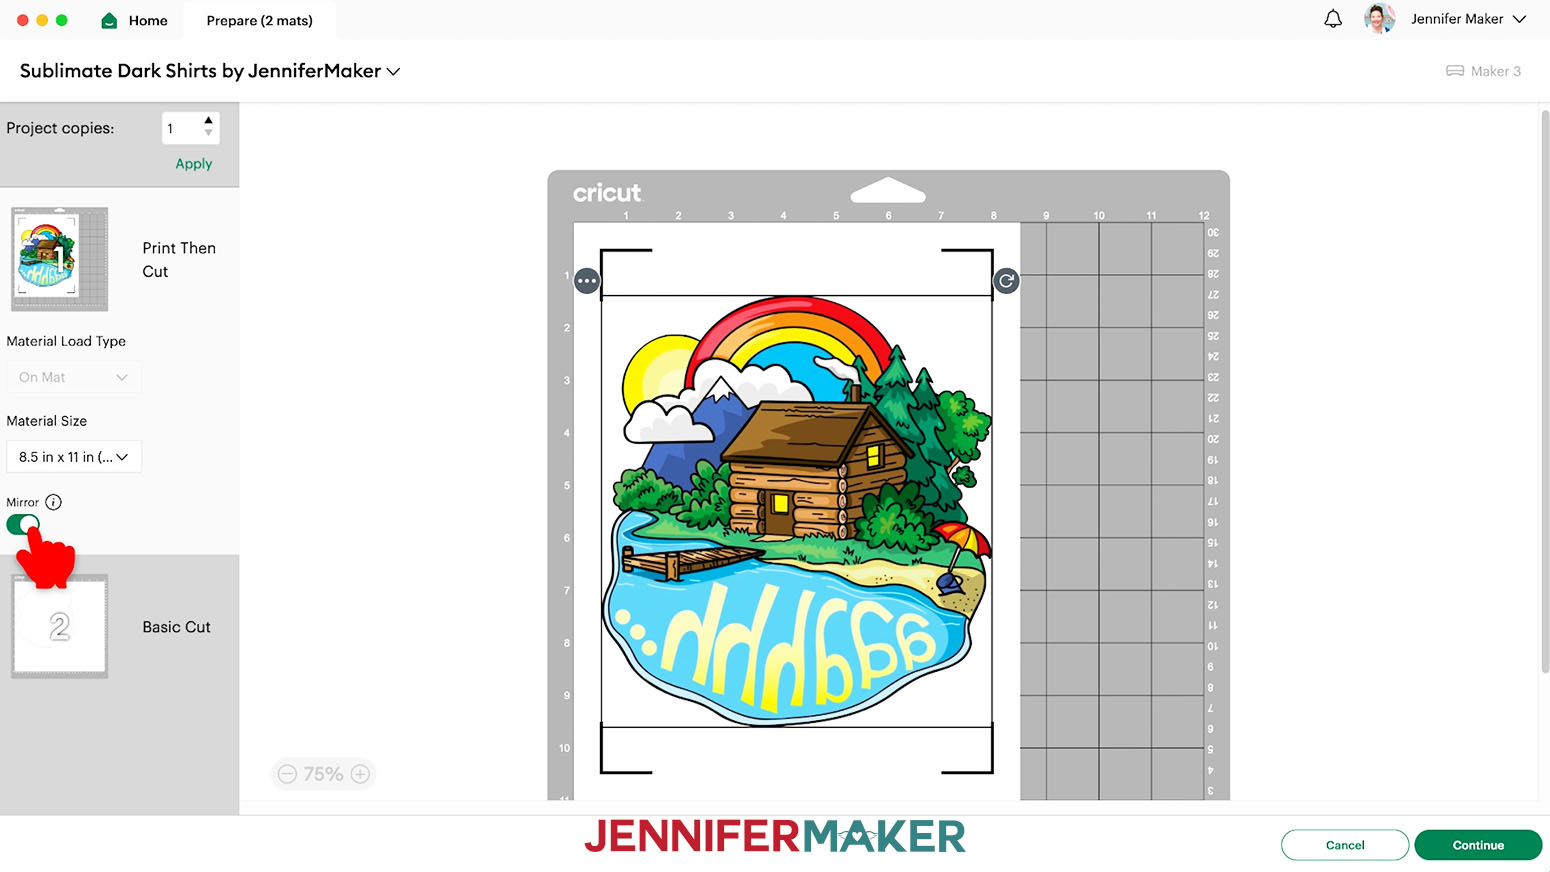
- On the Prepare screen, make sure your first mat says Print Then Cut and your second mat says Basic Cut. Check that the Material Size for your first mat is 8.5" x 11" and your second mat is the size of your EasySubli. Mine is 8.4” x 11”, so I'll use the same option.
- Then, select your first mat again and click the toggle under "Mirror" to make it green.
NOTE: That will print the image so it looks backward, but when we apply it to the surface face down, the end result will be correct. - Click “Continue.”
CUTTING
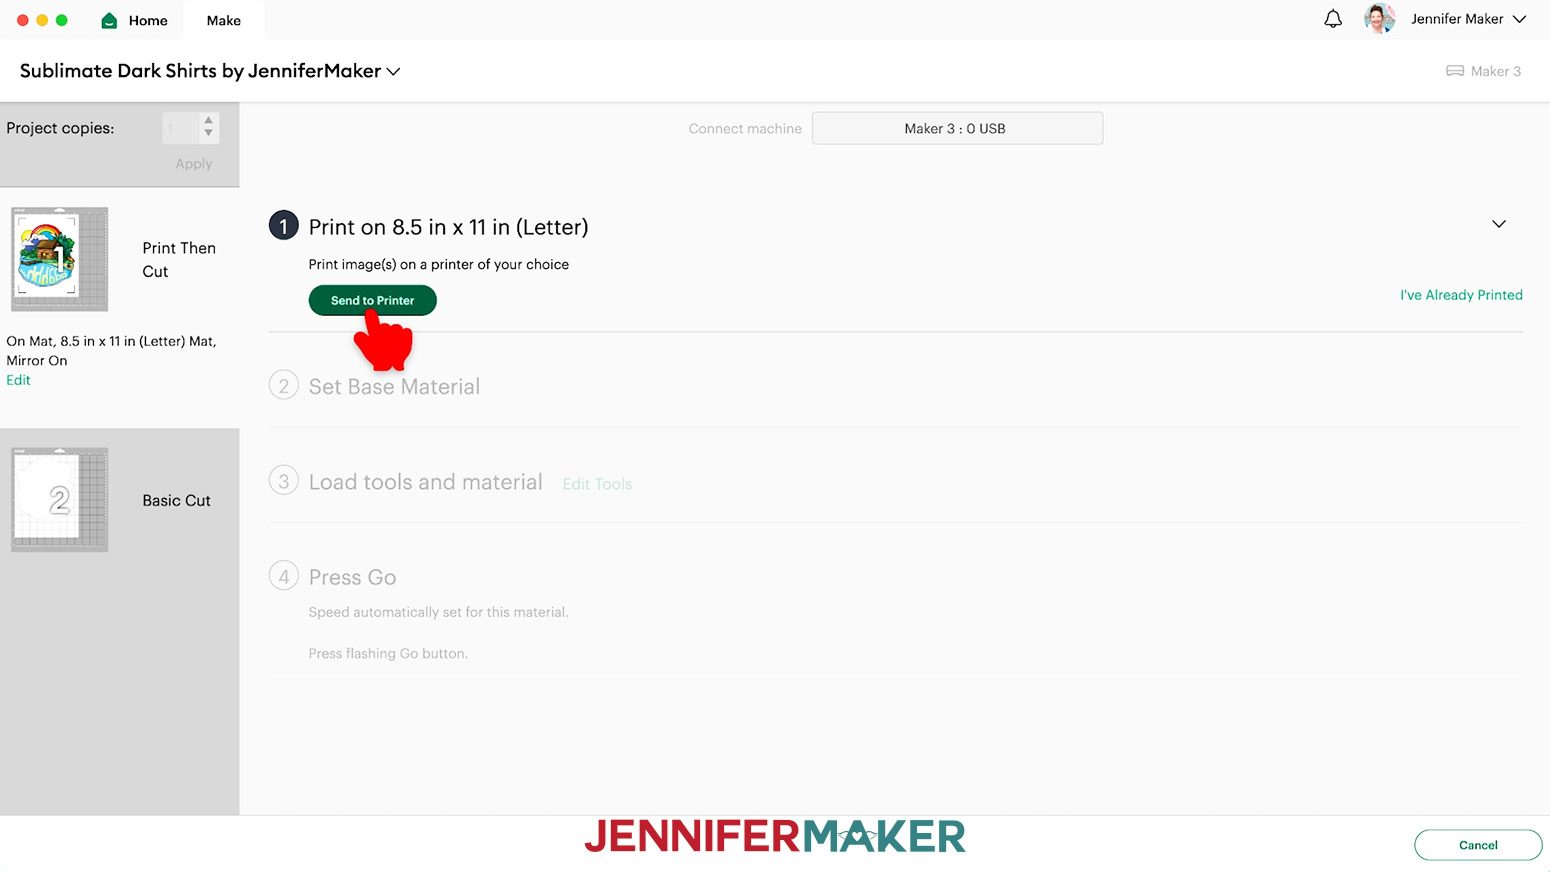
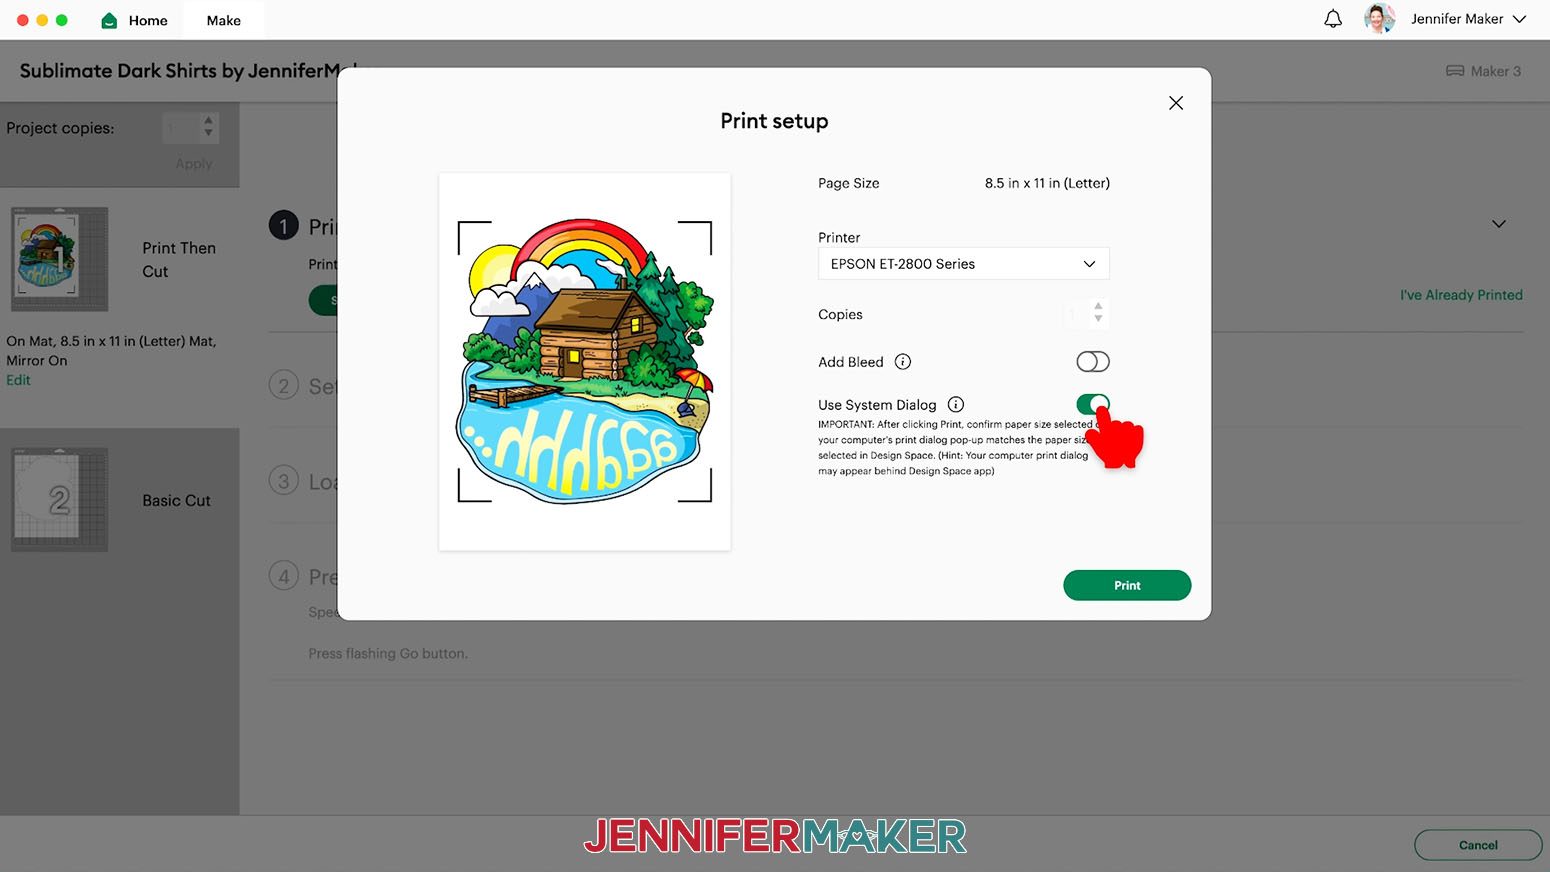
- Click the green “Send to Printer” button to open the Print Setup window.
- Make sure your printer is listed. We don't need to add a bleed (extra design area to help with precise cutting) but make sure the slider next to "Use System Dialog" is green.
- Then click “Print.”
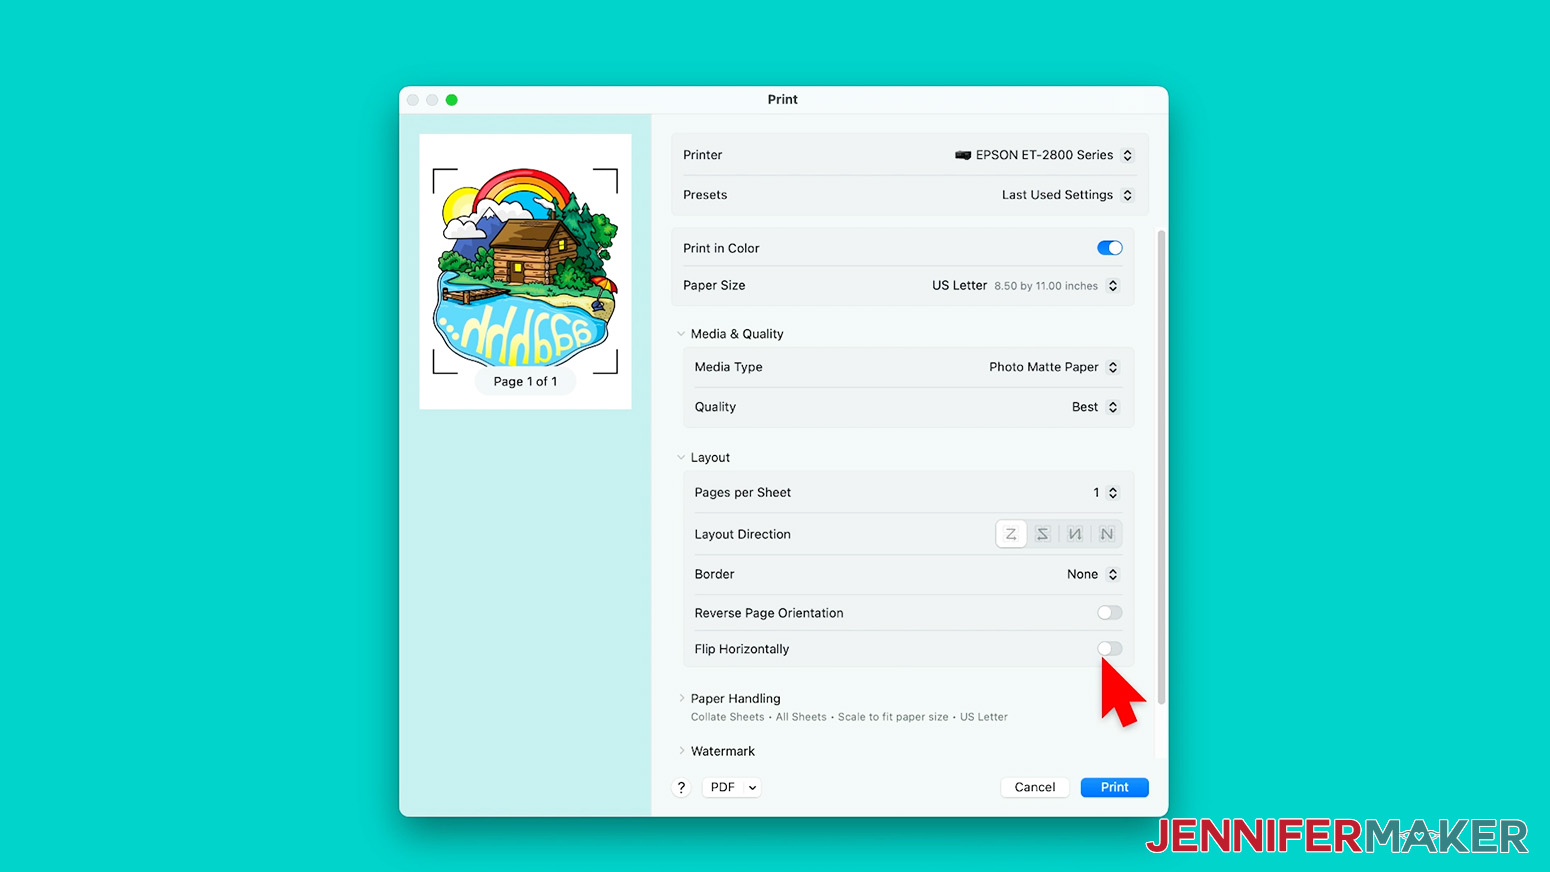
- The print screen for your printer will appear, but it might be hidden behind Design Space. Minimize your Cricut window to see the print settings window.
- Your window will look different depending on your computer and printer. Make sure your printer is listed in the window. Set the paper and print quality to the best matte options available.
NOTE: Mine are “Photo Matte” and “Best.” - Make sure that under Layout, "Flip Horizontally" is unchecked since we already mirrored the design.
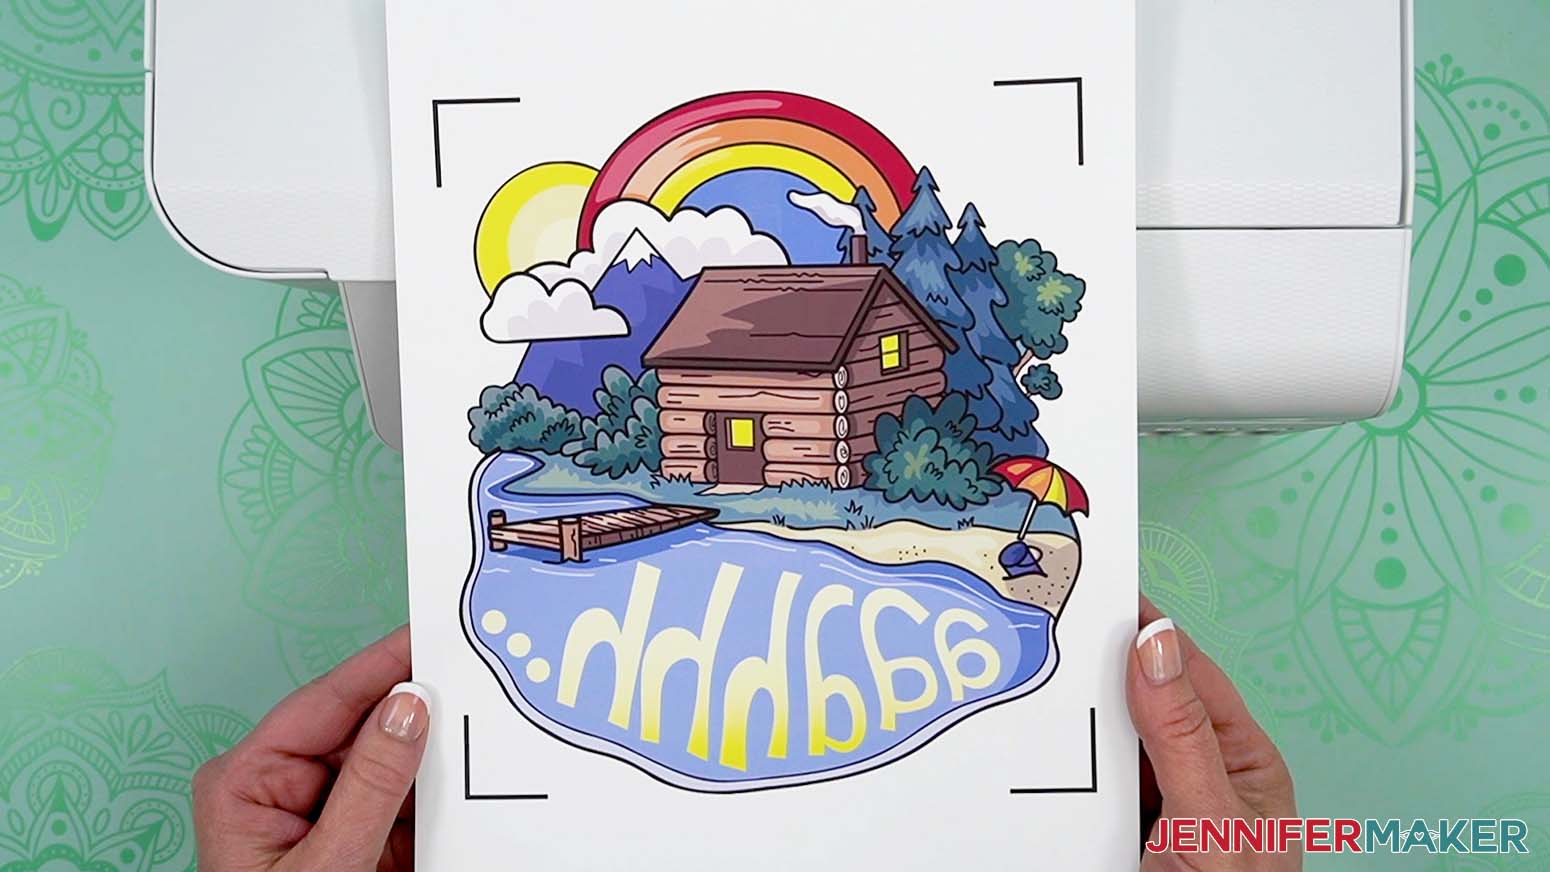
- Make sure the sublimation paper is in your printer correctly and print!
- After your design has printed, set it aside until the ink is completely dry to avoid any smears during the cutting process.
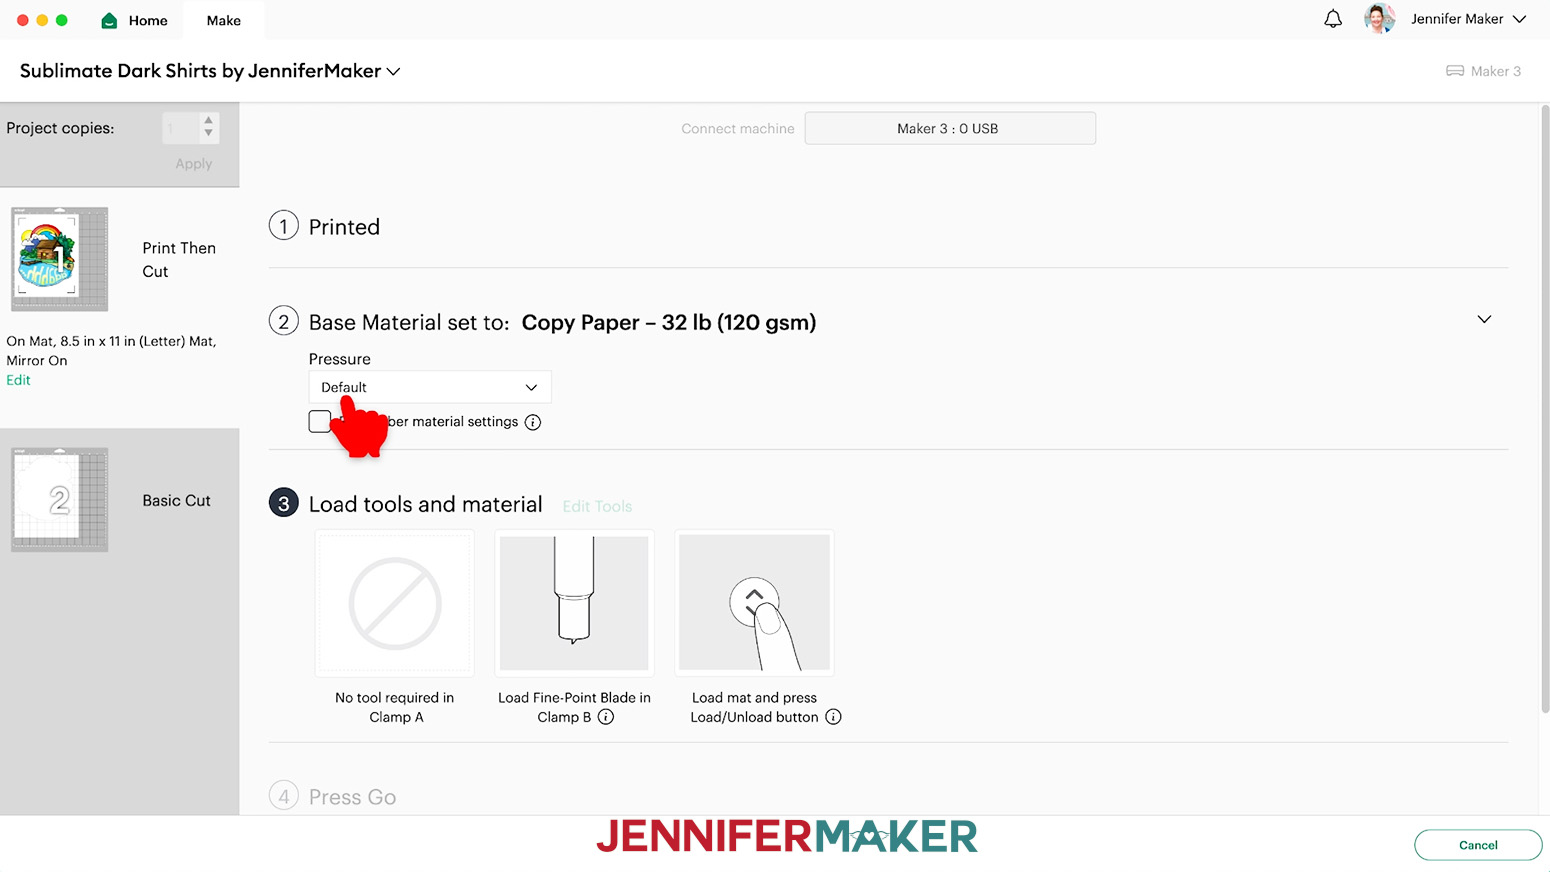
NOTE: The black lines are registration marks used by your Cricut machine to tell it exactly where to cut your project. The cutting process will remove them. - On the Make Screen with the printed design selected, search for and set your Base Material to "Copy Paper - 32 lb."
- Keep the Pressure on “Default.”
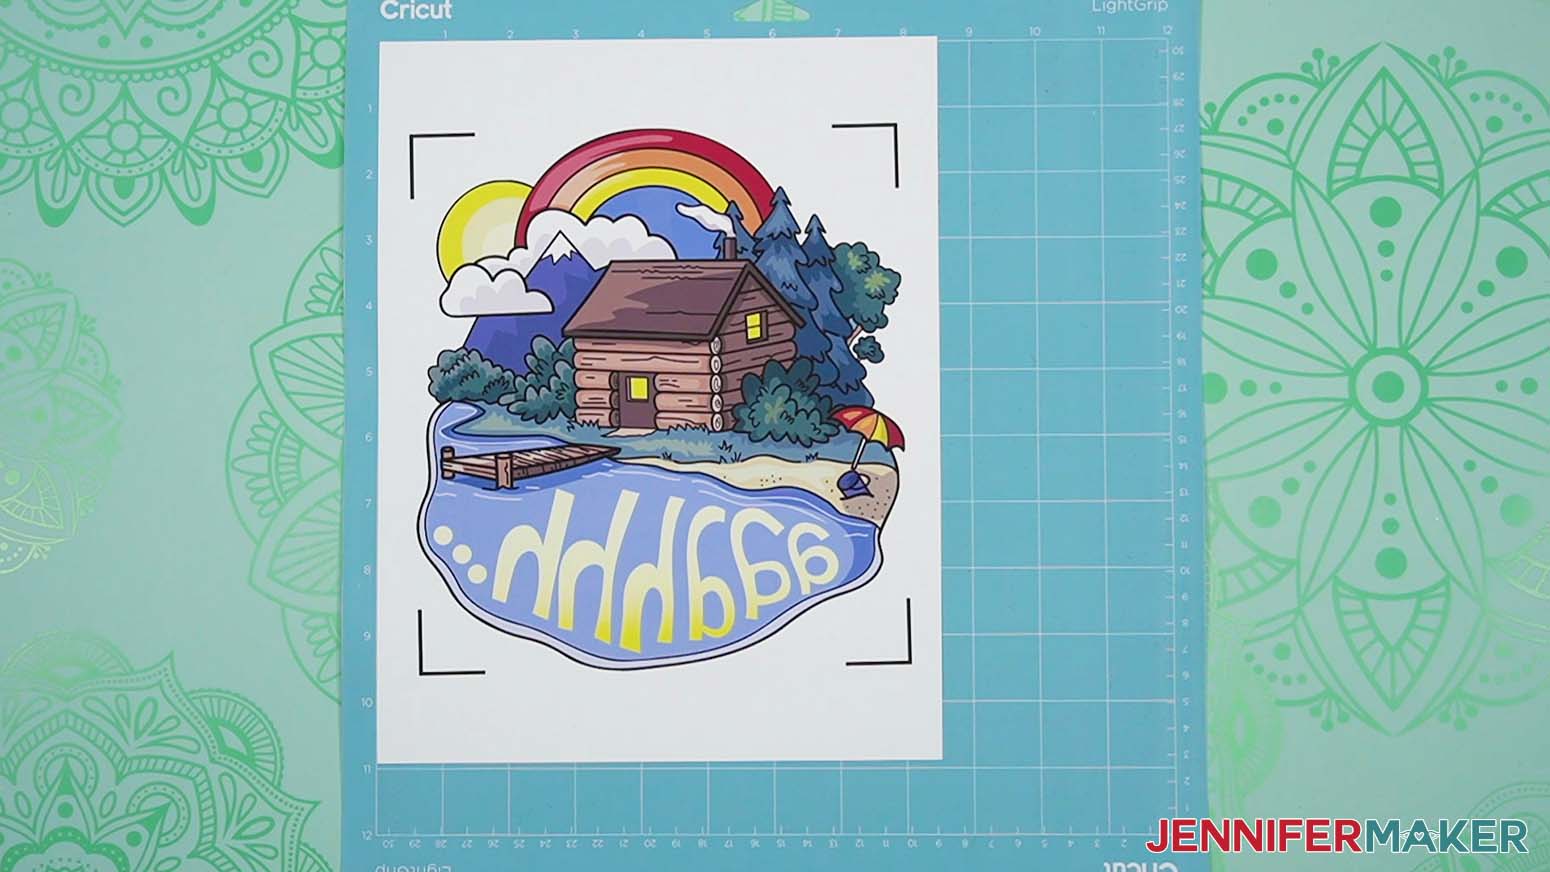
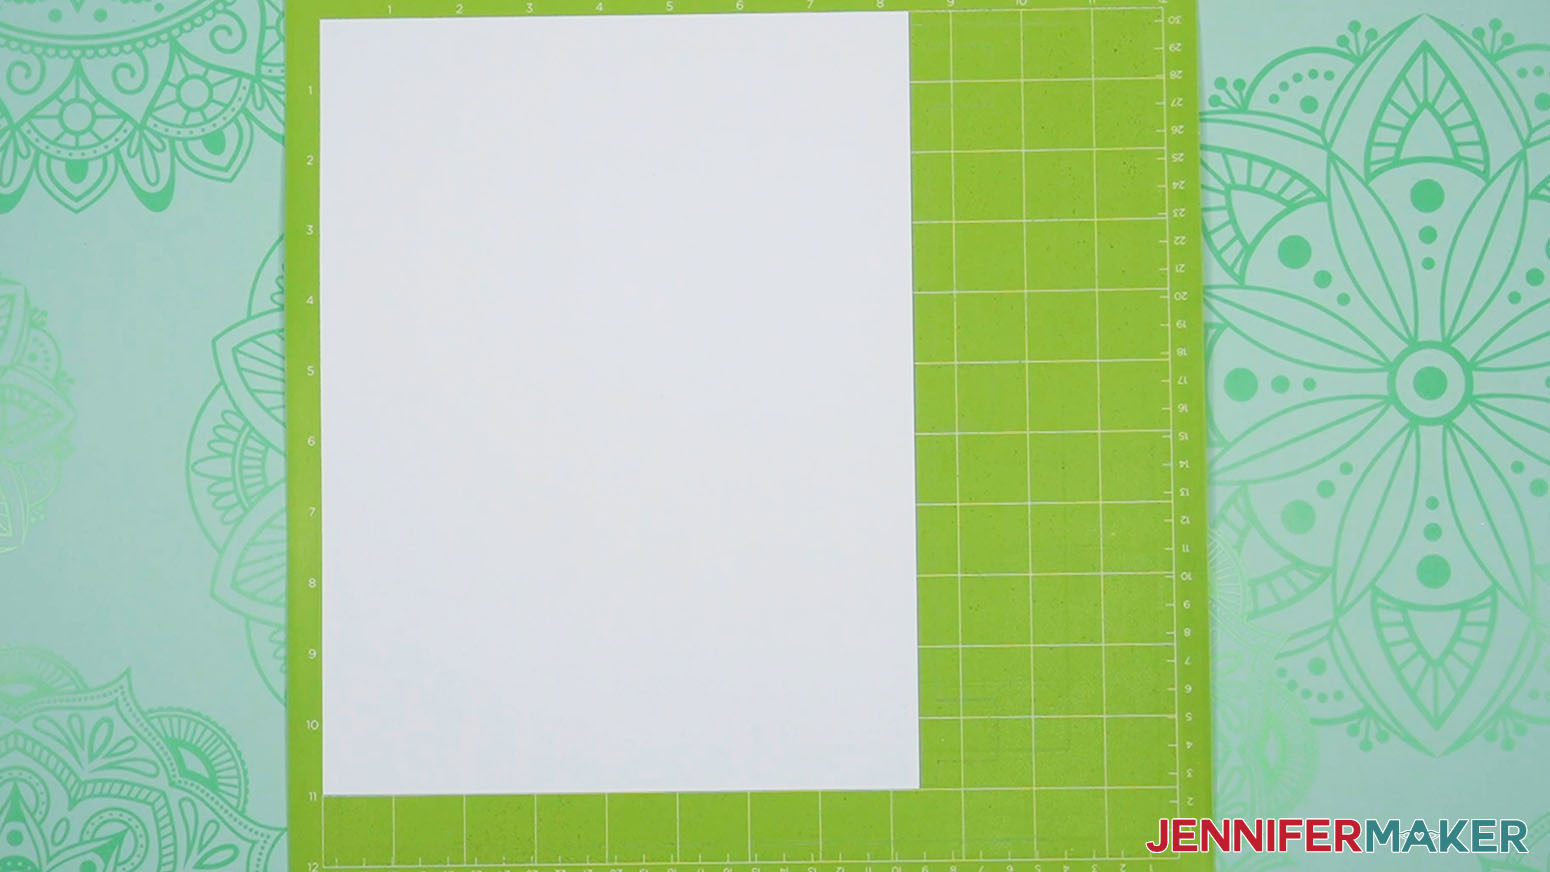
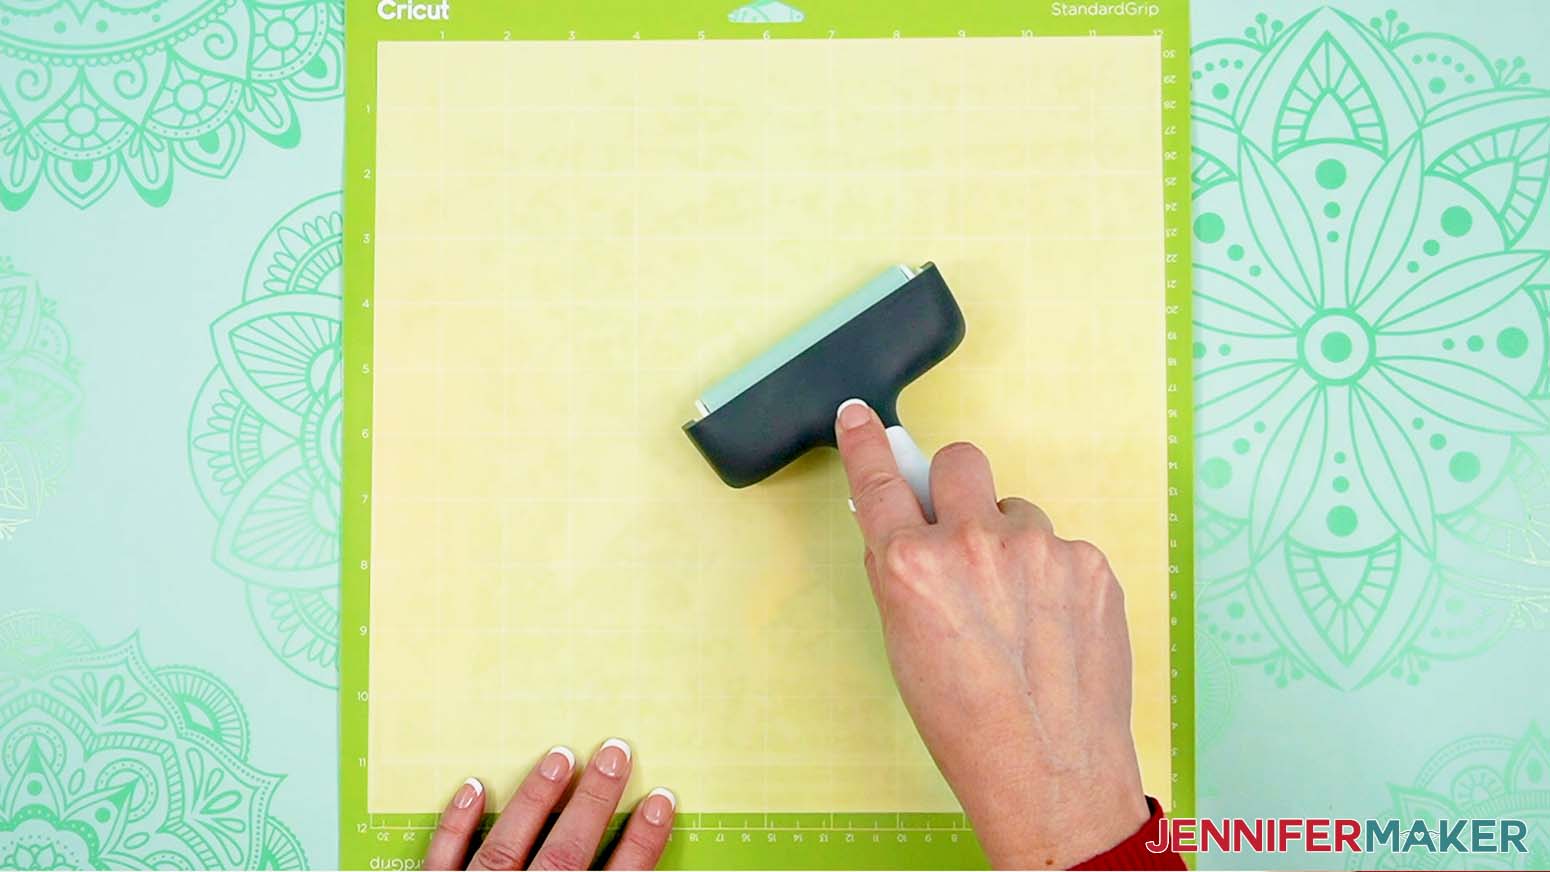
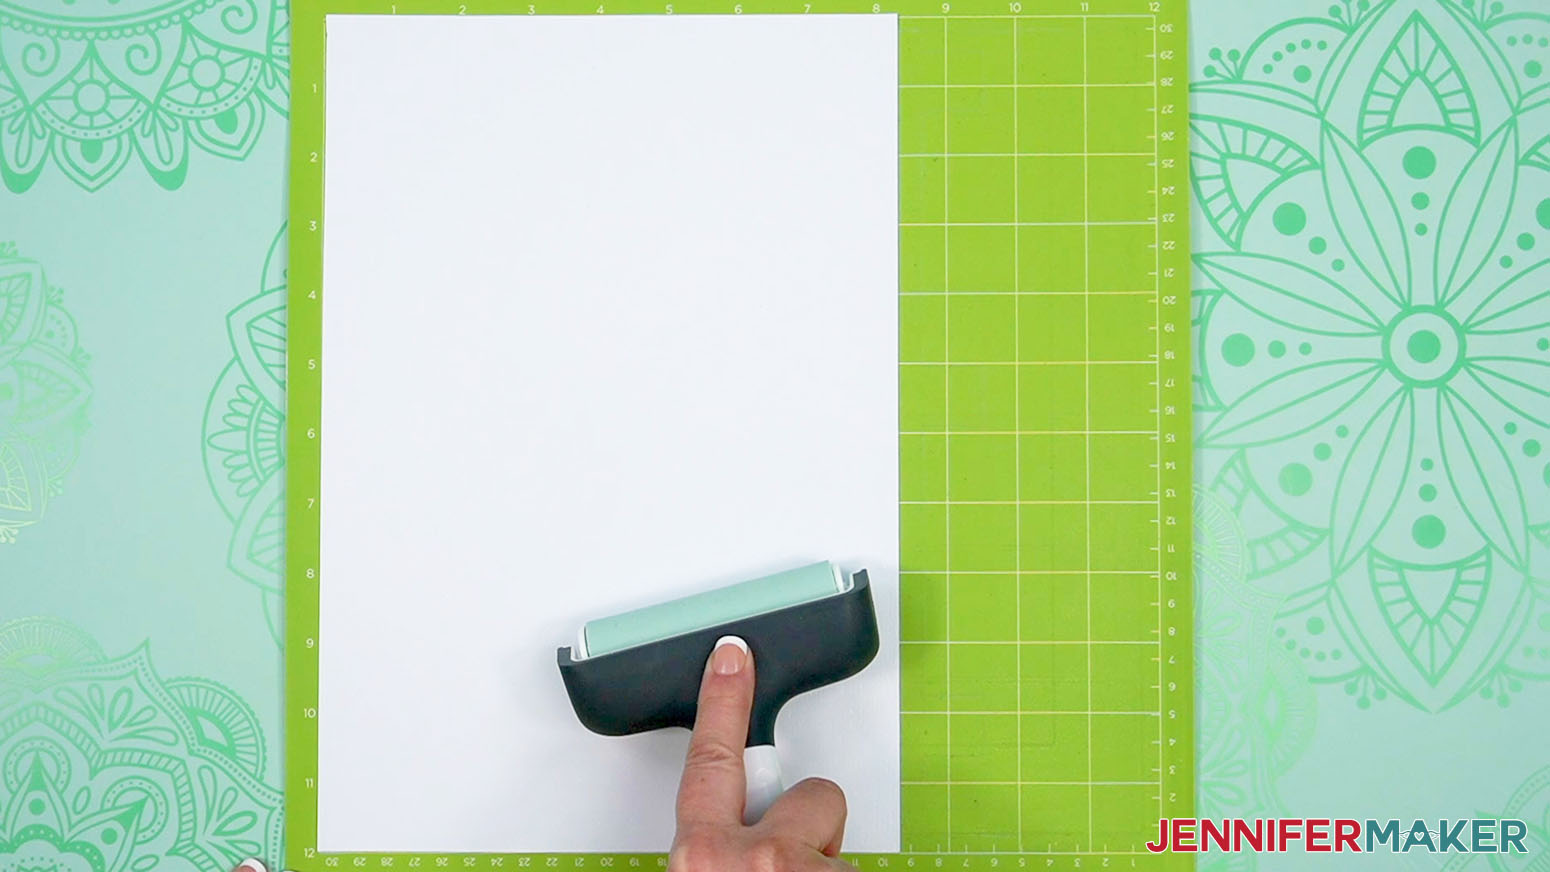
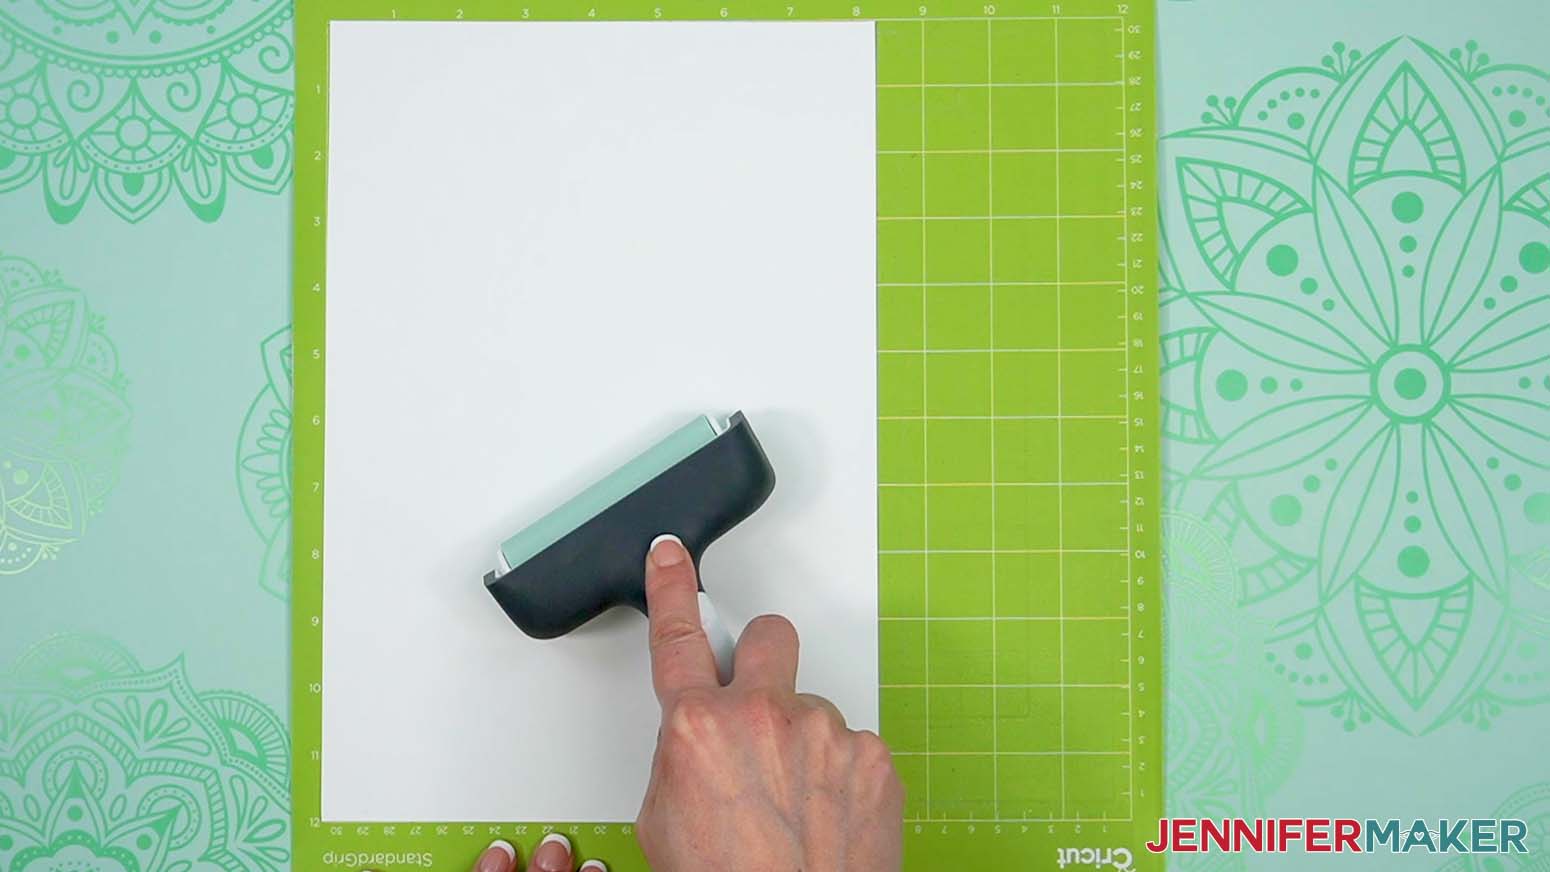
- Place your printed sheet on your blue LightGrip machine mat like it is on the screen prompt.
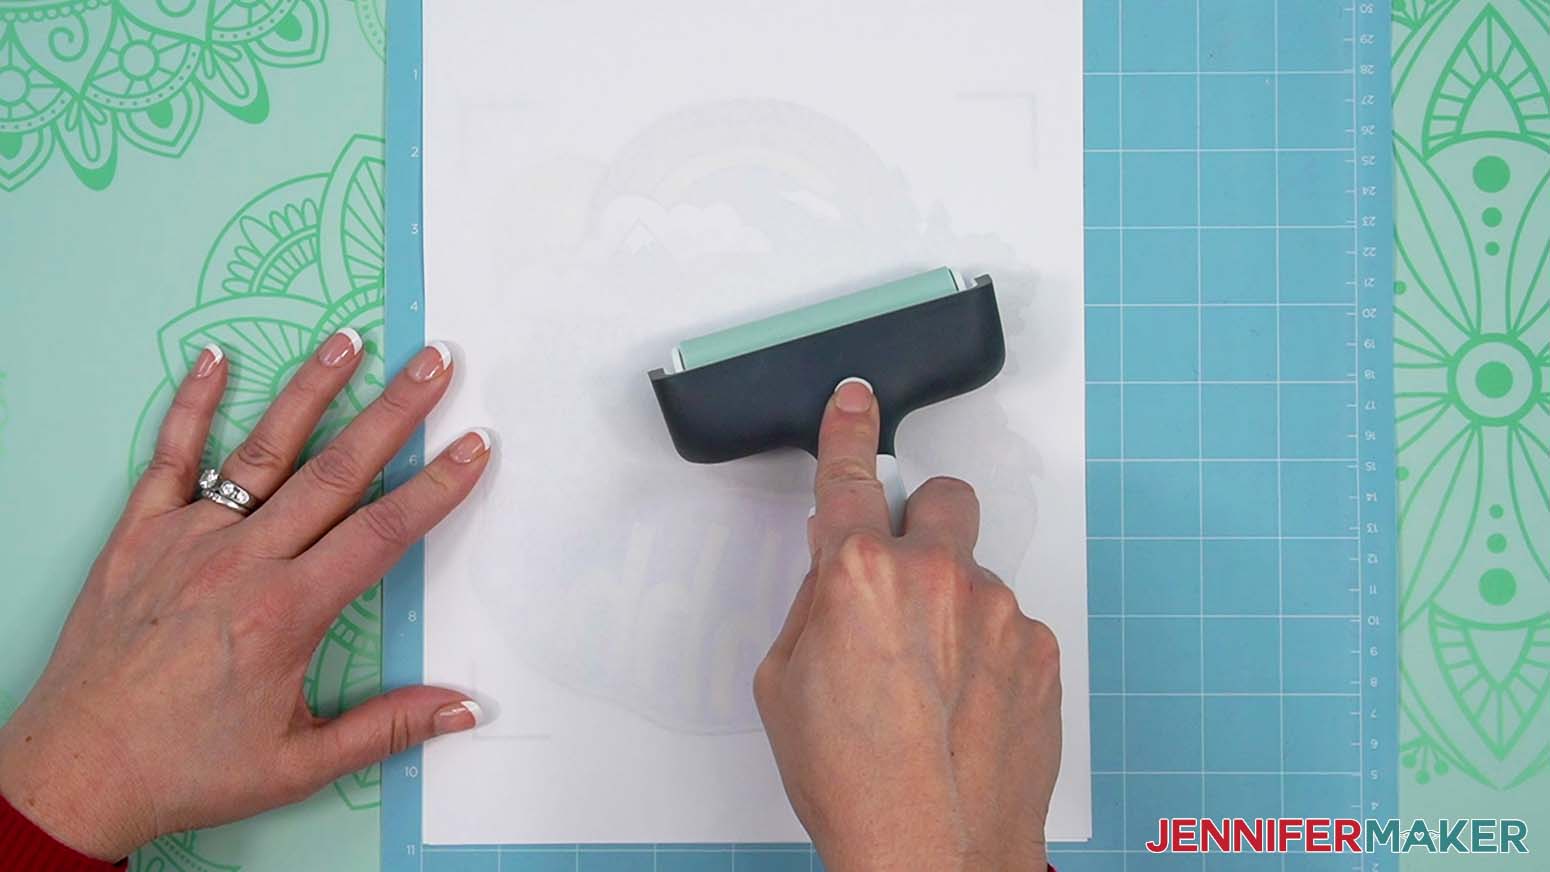
- Lay a clean piece of printer paper over the top and use a brayer to adhere it well.
- Remove the excess paper.
- Check that your Fine-Point Blade is clean and in the clamp.
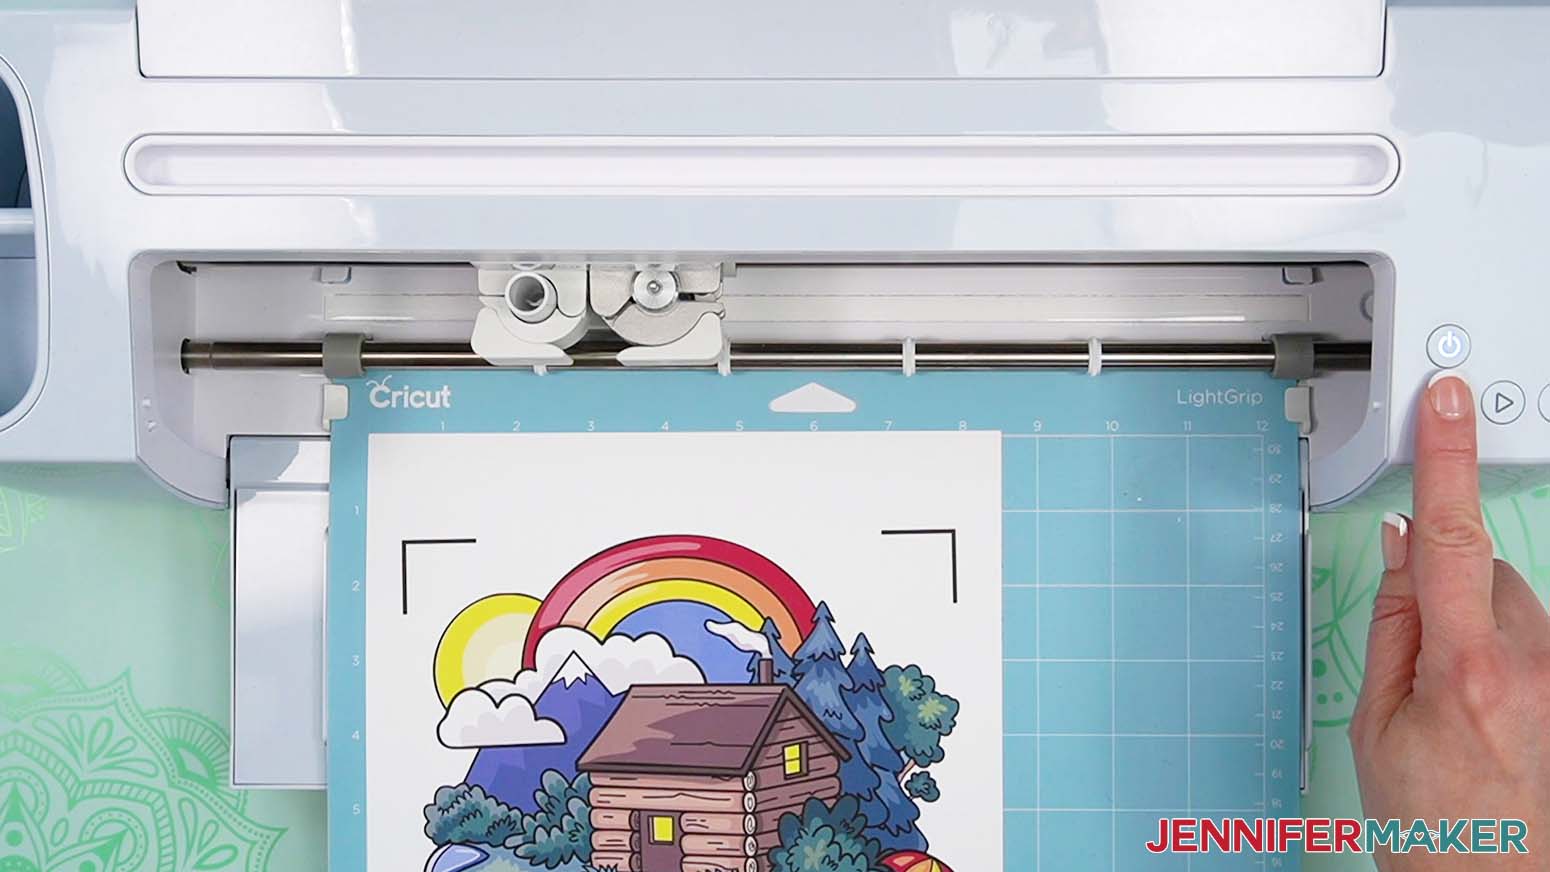
- Then, load the mat with your printed sheet into the machine and press the flashing button to cut your design.
- When the cut is finished, unload the mat, flip it over, and roll it back to release the paper.
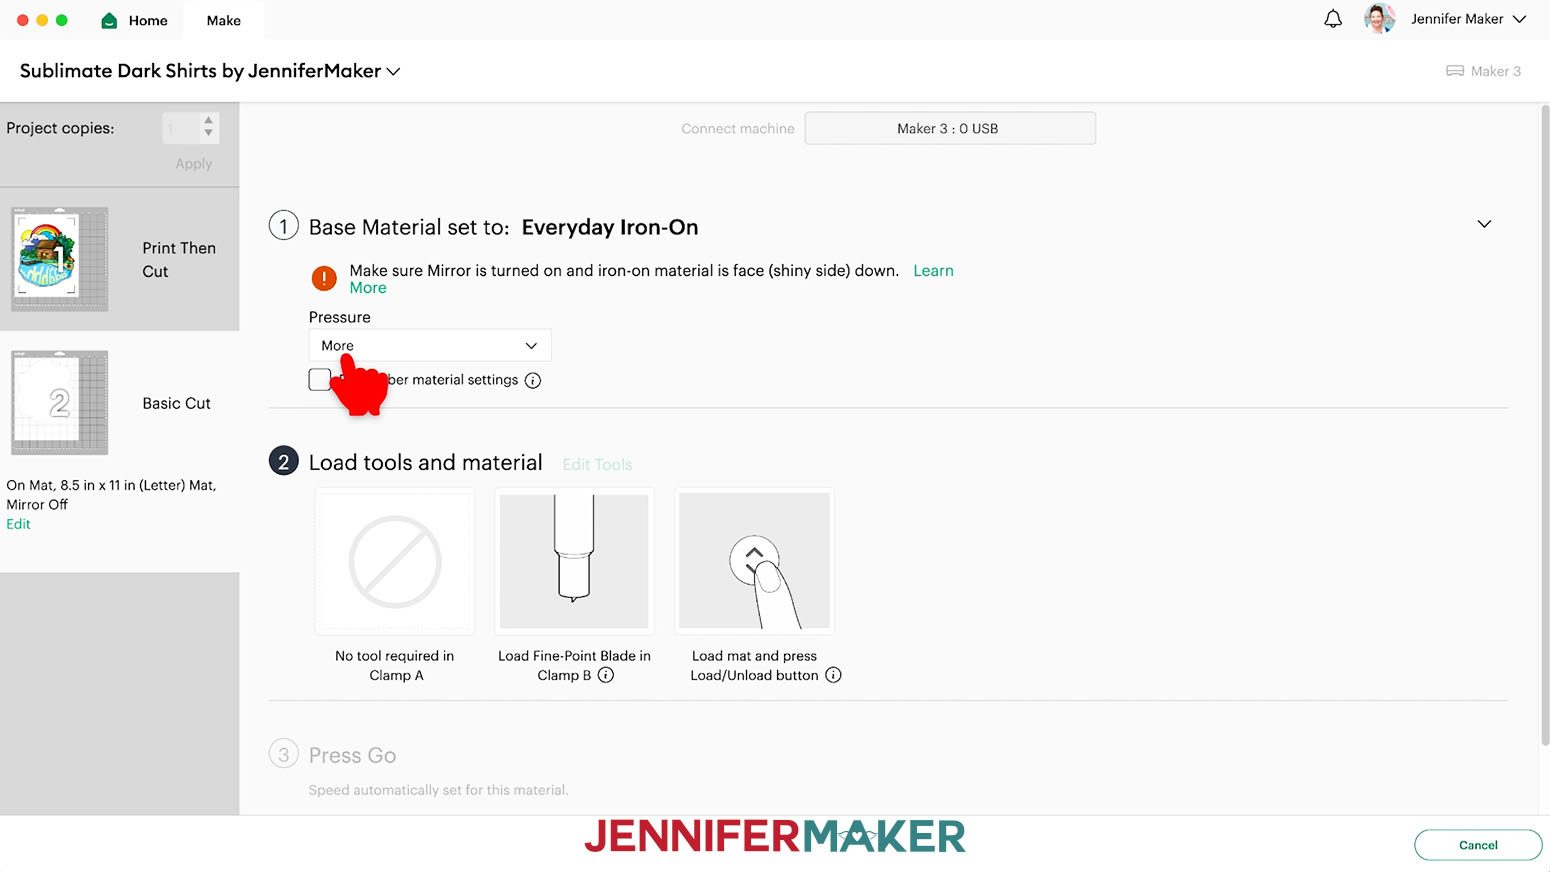
TIP: This helps prevent the material from curling and ripping. - For the second mat, set it to "Everyday Iron-On" with “More” Pressure.
TIP: If you have trouble getting clean cuts, see my tips on getting better cuts. - Place the EasySubli sheet shiny side down on a green StandardGrip machine mat.
- Adhere it well with the brayer.
- Follow the same steps as above to cut and remove your vinyl.
STEP 3: SUBLIMATE YOUR T-SHIRT DESIGN WITH SISER EASYSUBLI HTV
IMPORTANT: Just like with any sublimation project, open a window and set up a fan to improve your ventilation.
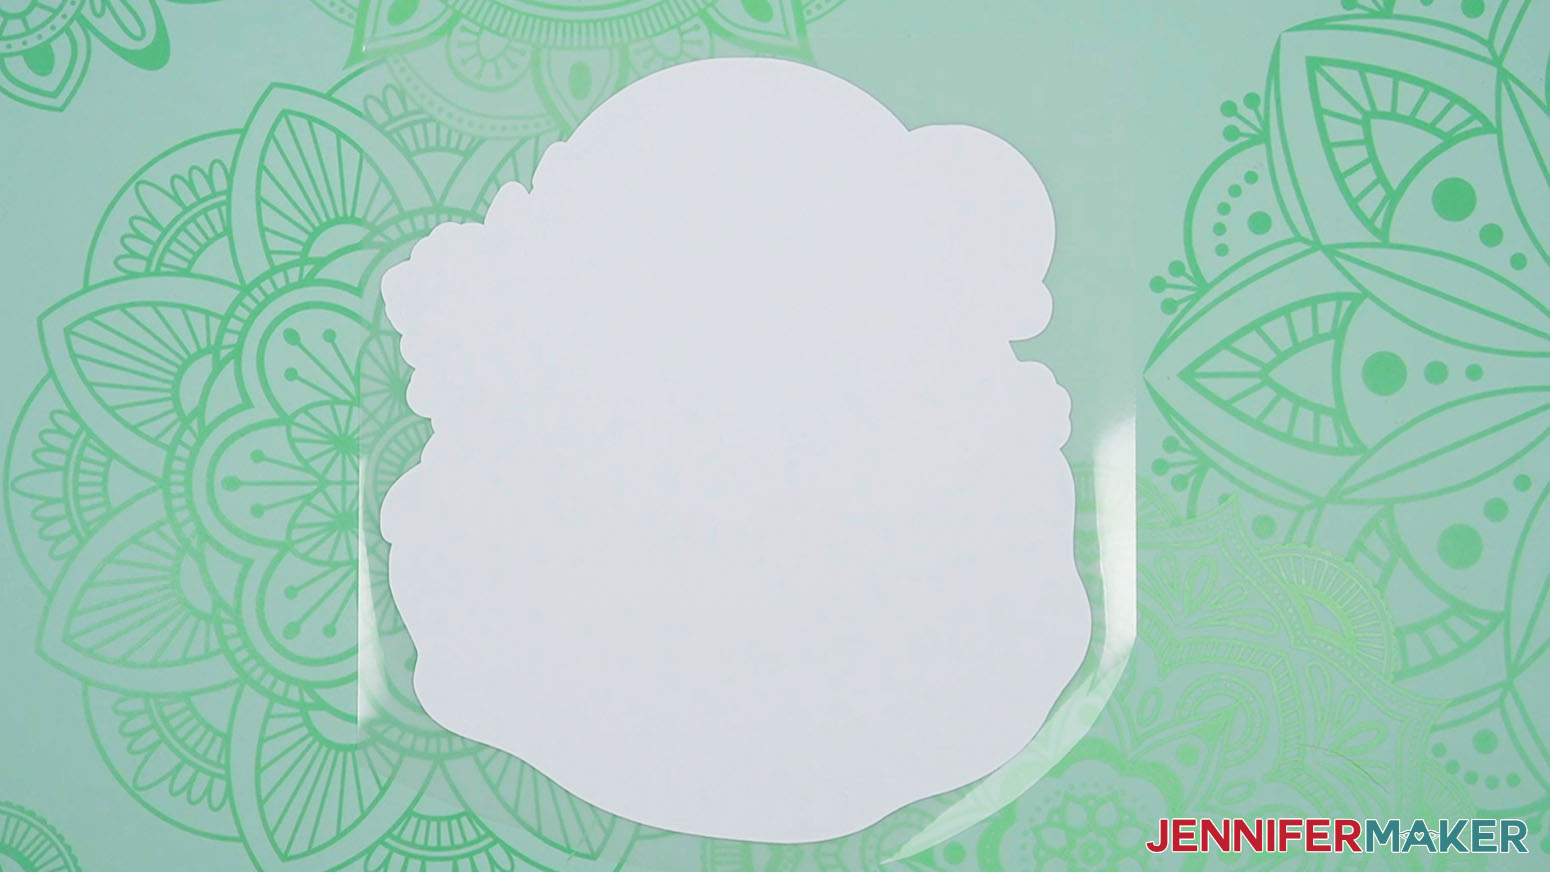
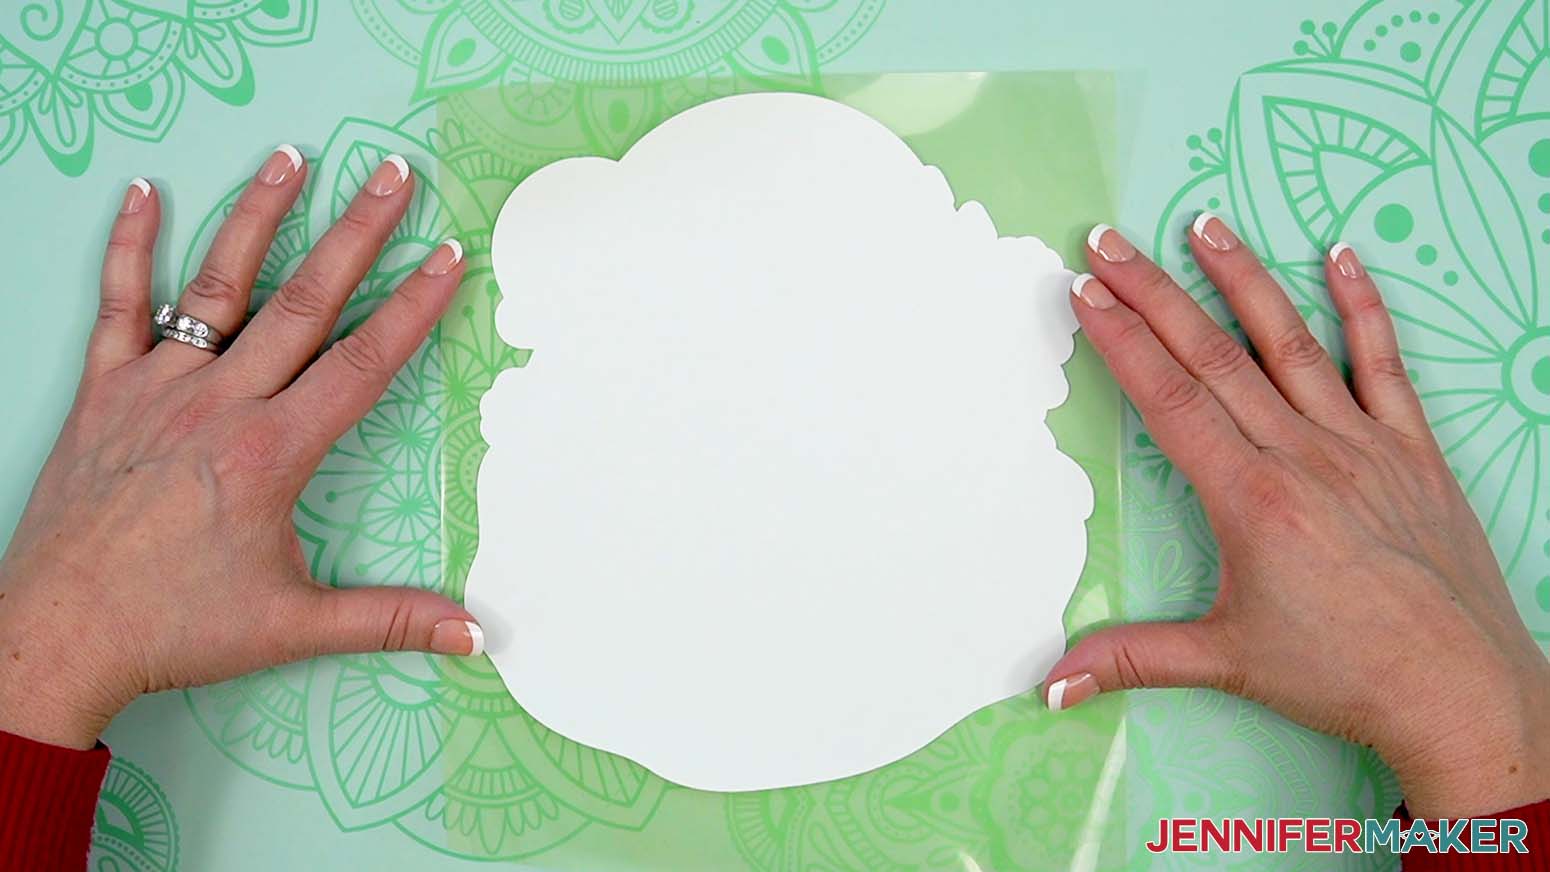
- Trim away the excess EasySubli HTV.
- Use your weeding tool to remove the HTV not needed for the design.
- Place your weeded EasySubli HTV and printed design face up.
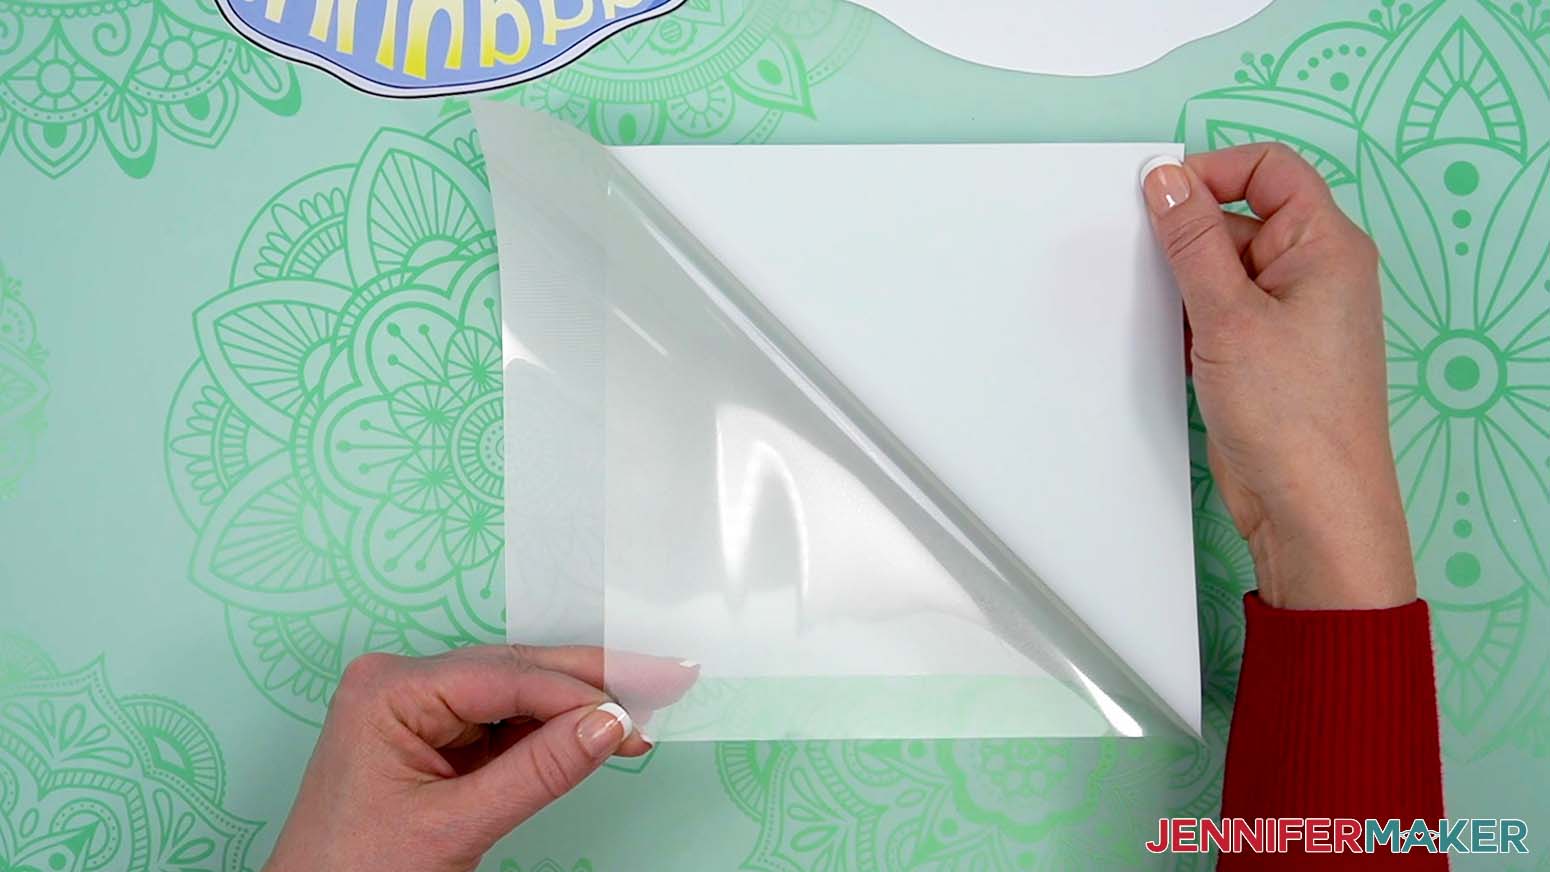
- Separate the EasySubli Mask from its backer.
NOTE: EasySubli Mask is similar to transfer tape, but it's heat-resistant. Do not use Cricut Transfer Tape for this! - Holding the mask sticky side down, bend both sides up into a “taco” shape.
- Apply it to the weeded EasySubli HTV from the center out.
- Use the scraper to smooth out any bubbles. Set it aside for now.
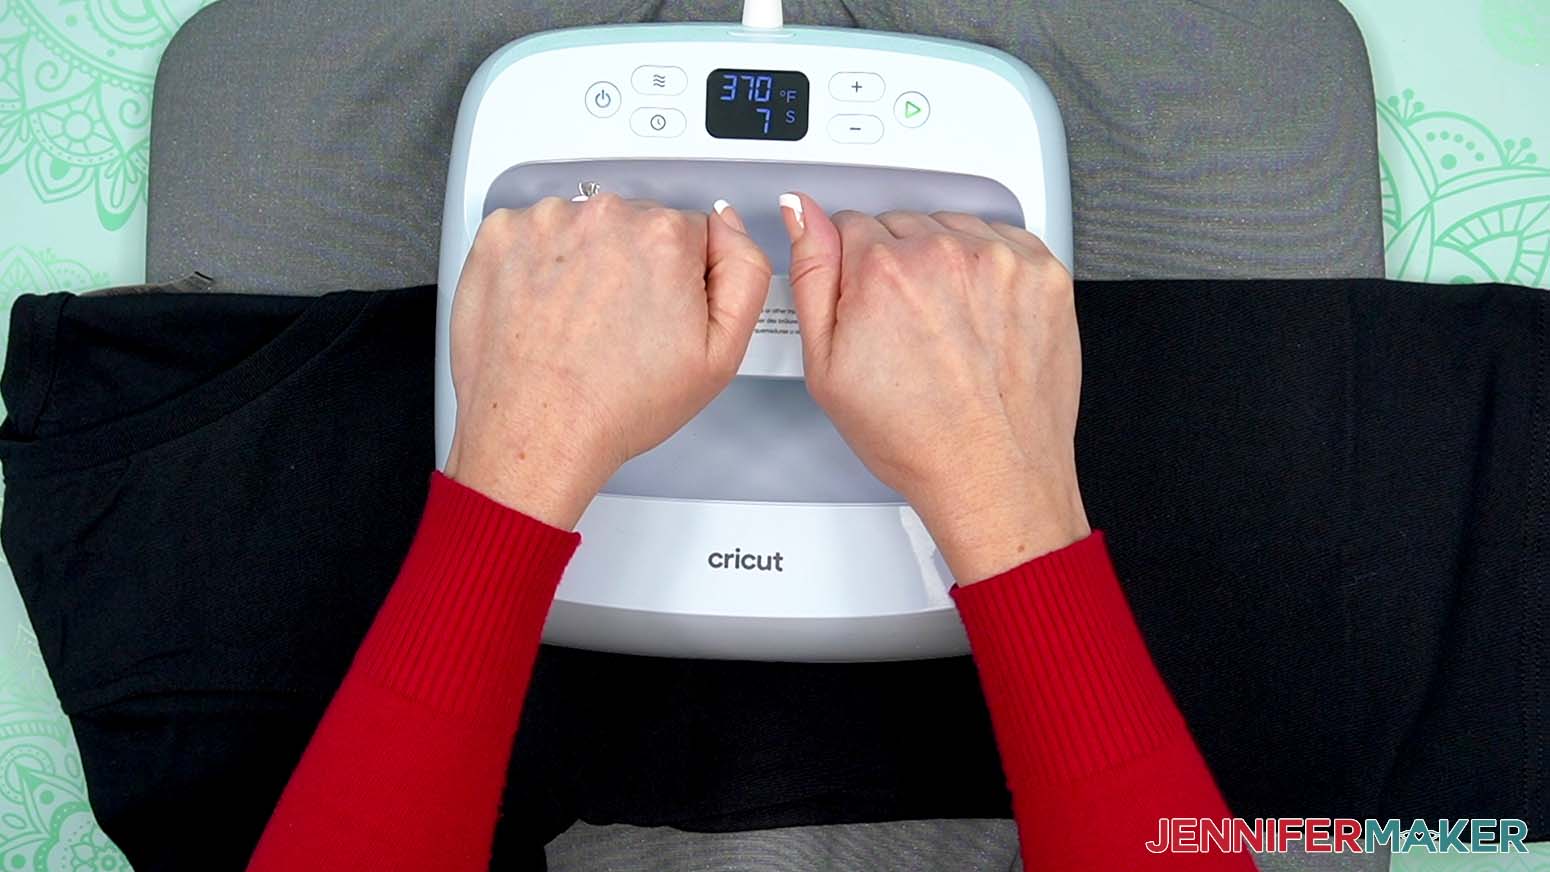
- Turn on your heat press and set it to the correct preheat temperature and time.
NOTE: For my EasyPress, that is 370° F (188° C) and a 10 second preheat. - Put the shirt on a pressing mat and lint roll the design area to remove any debris that will interfere with the transfer.
- When the machine comes to temperature, fold the shirt in half the long way and press it for 10 seconds with medium pressure to remove moisture and create a center crease.
- If needed, change the press’ settings to your pressing temperature, which for my EasyPress is 370° F (188° C) so I won’t change it.
- Open the shirt and slide a piece of clean white cardstock inside to prevent ink bleed through at the design's sides.
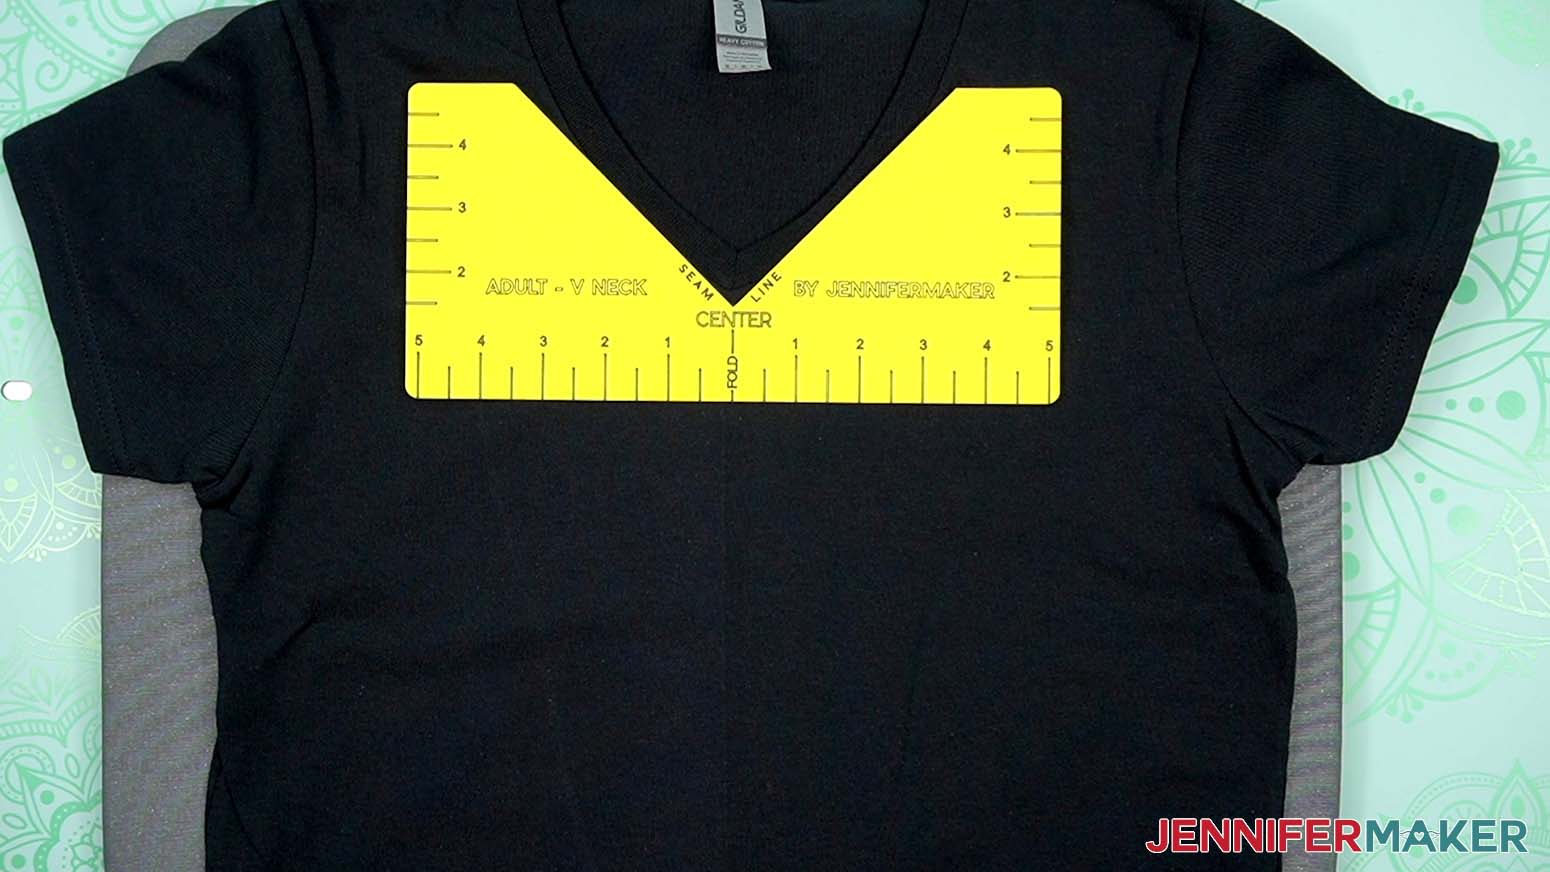
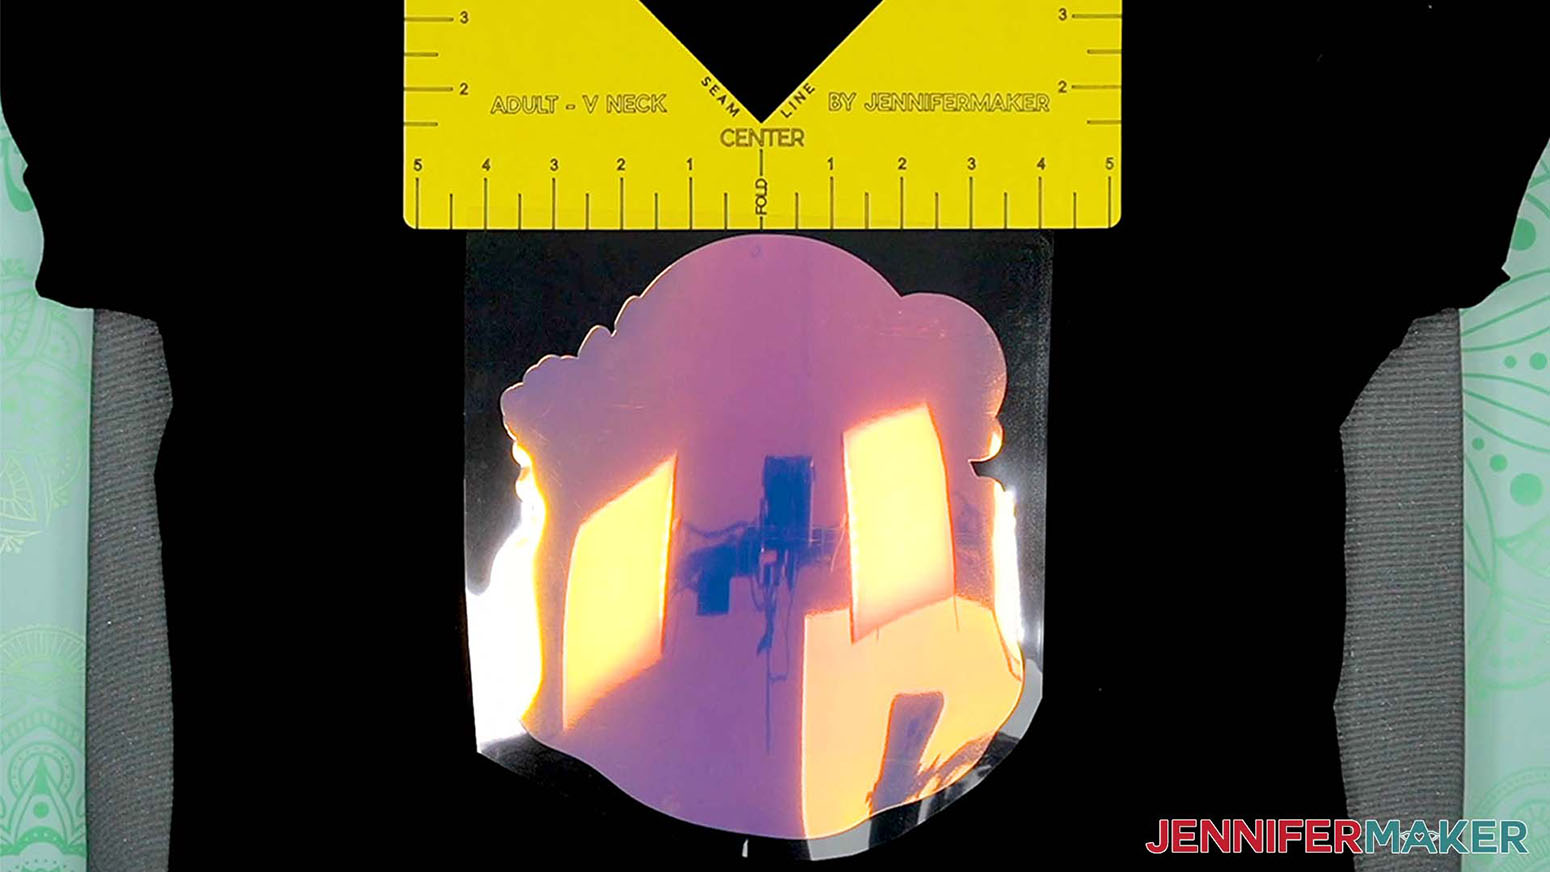
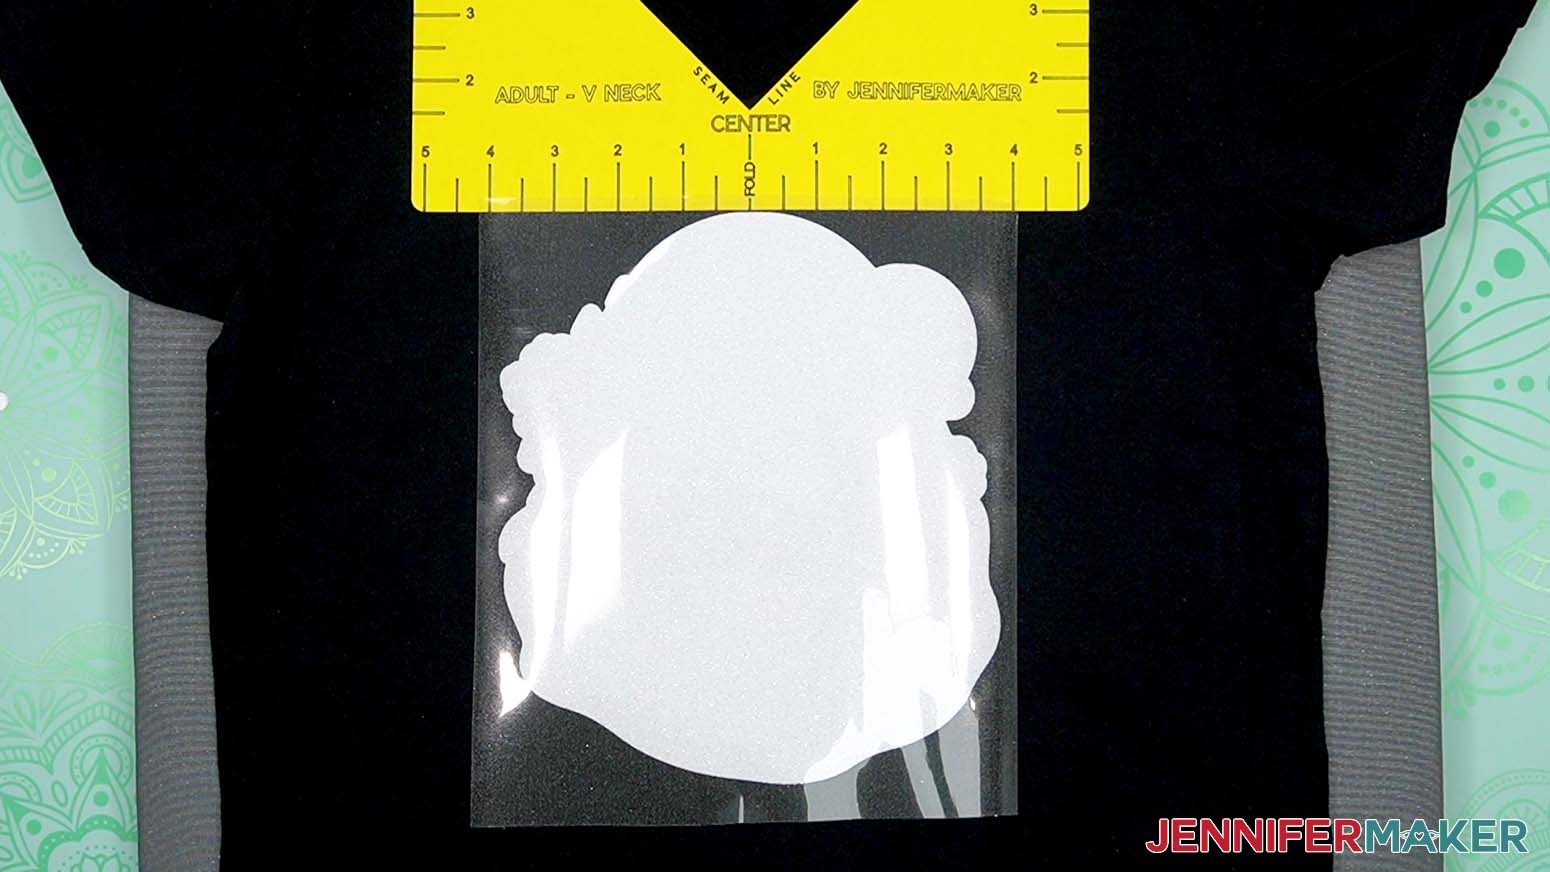
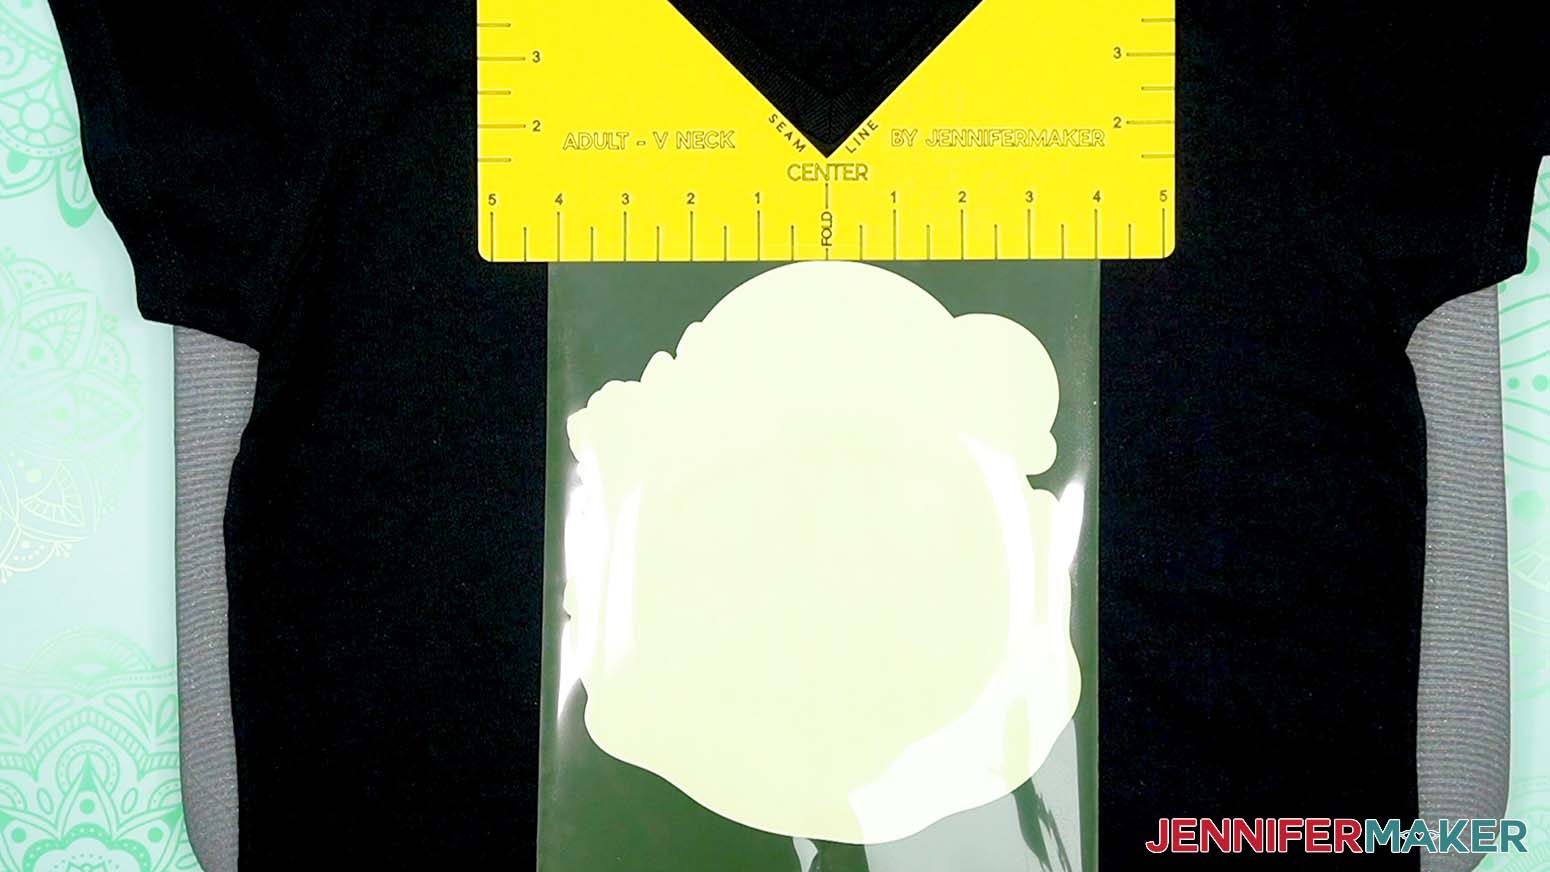
- Then - if you're using one - line up the correct T-Shirt Ruler Guide's center line on the crease. Now your design will be placed in the standard spot for a T-shirt of this size and style.
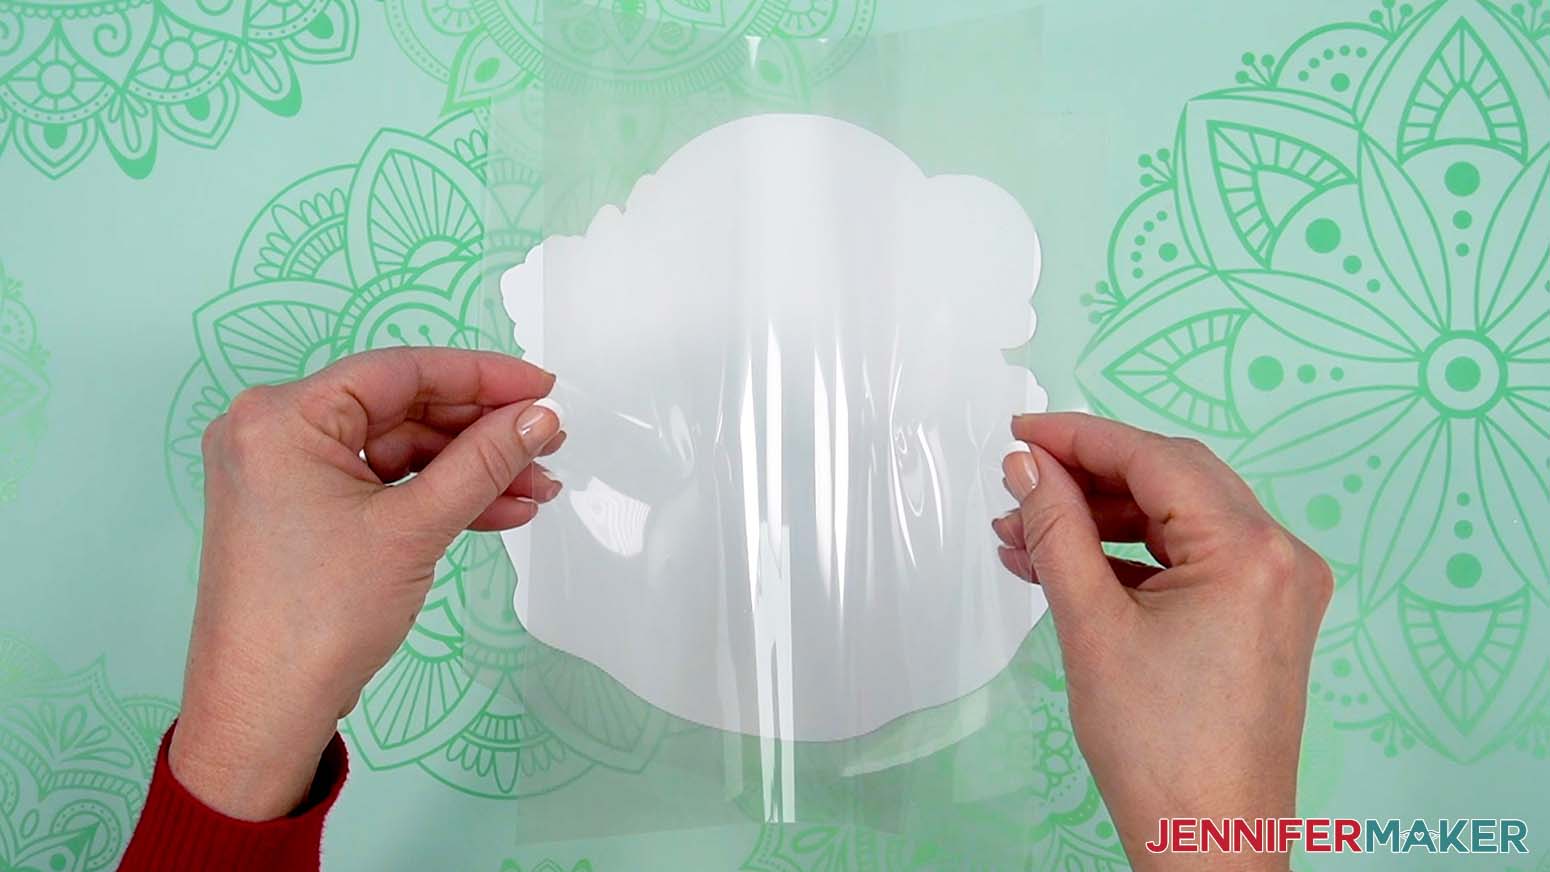
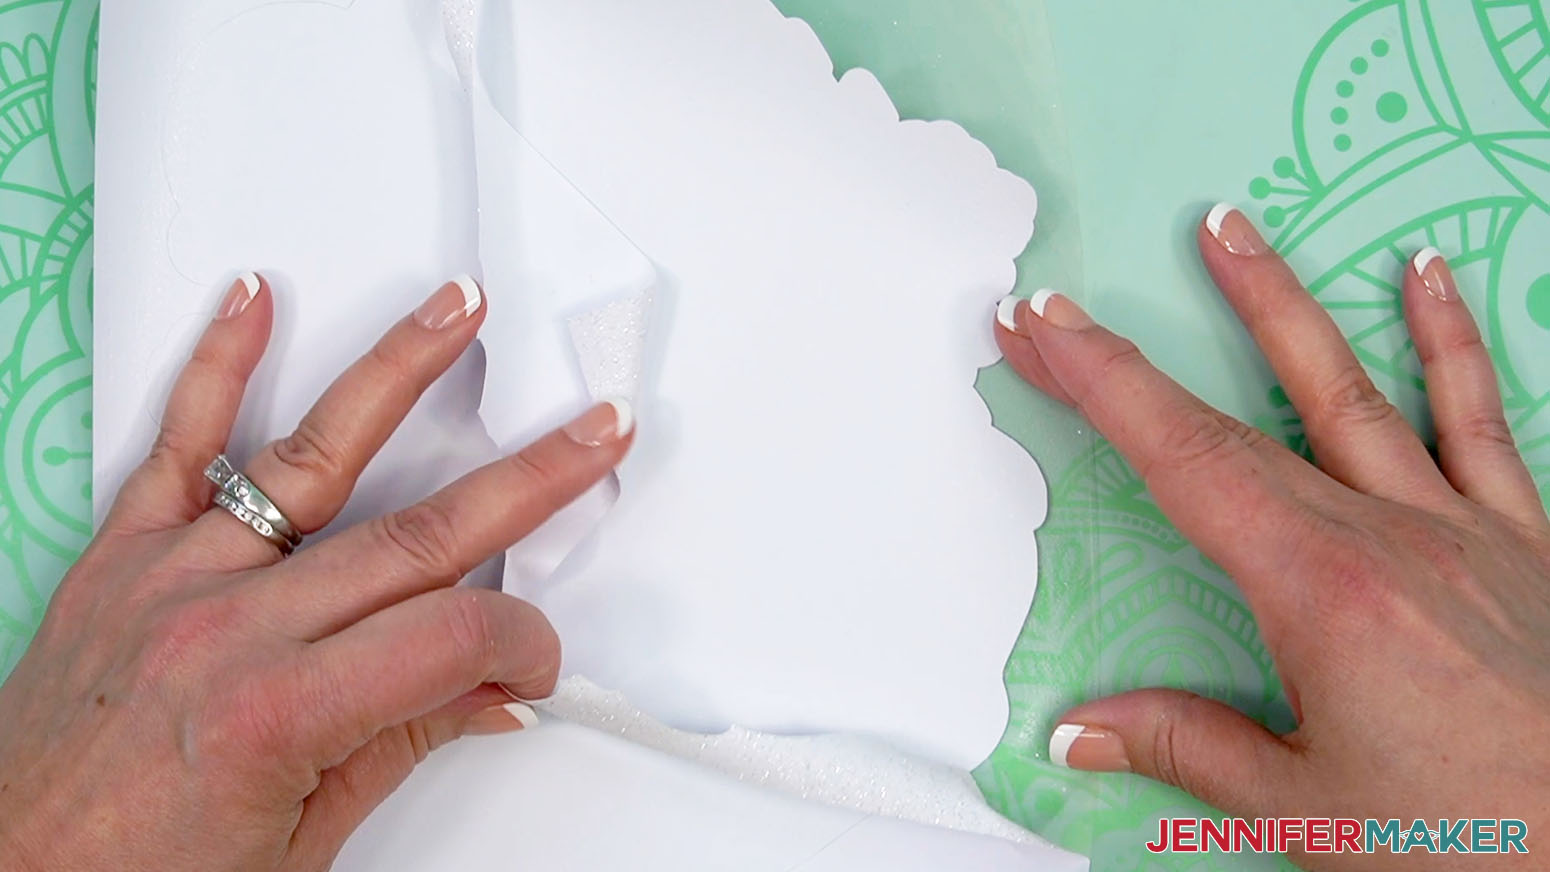
- Use the mask to peel the EasySubli from its backer.
- Curve the sheet into a “U” or “taco” shape, and pinch the middle of the top and bottom of the plastic to mark the center. Do NOT fold the vinyl.
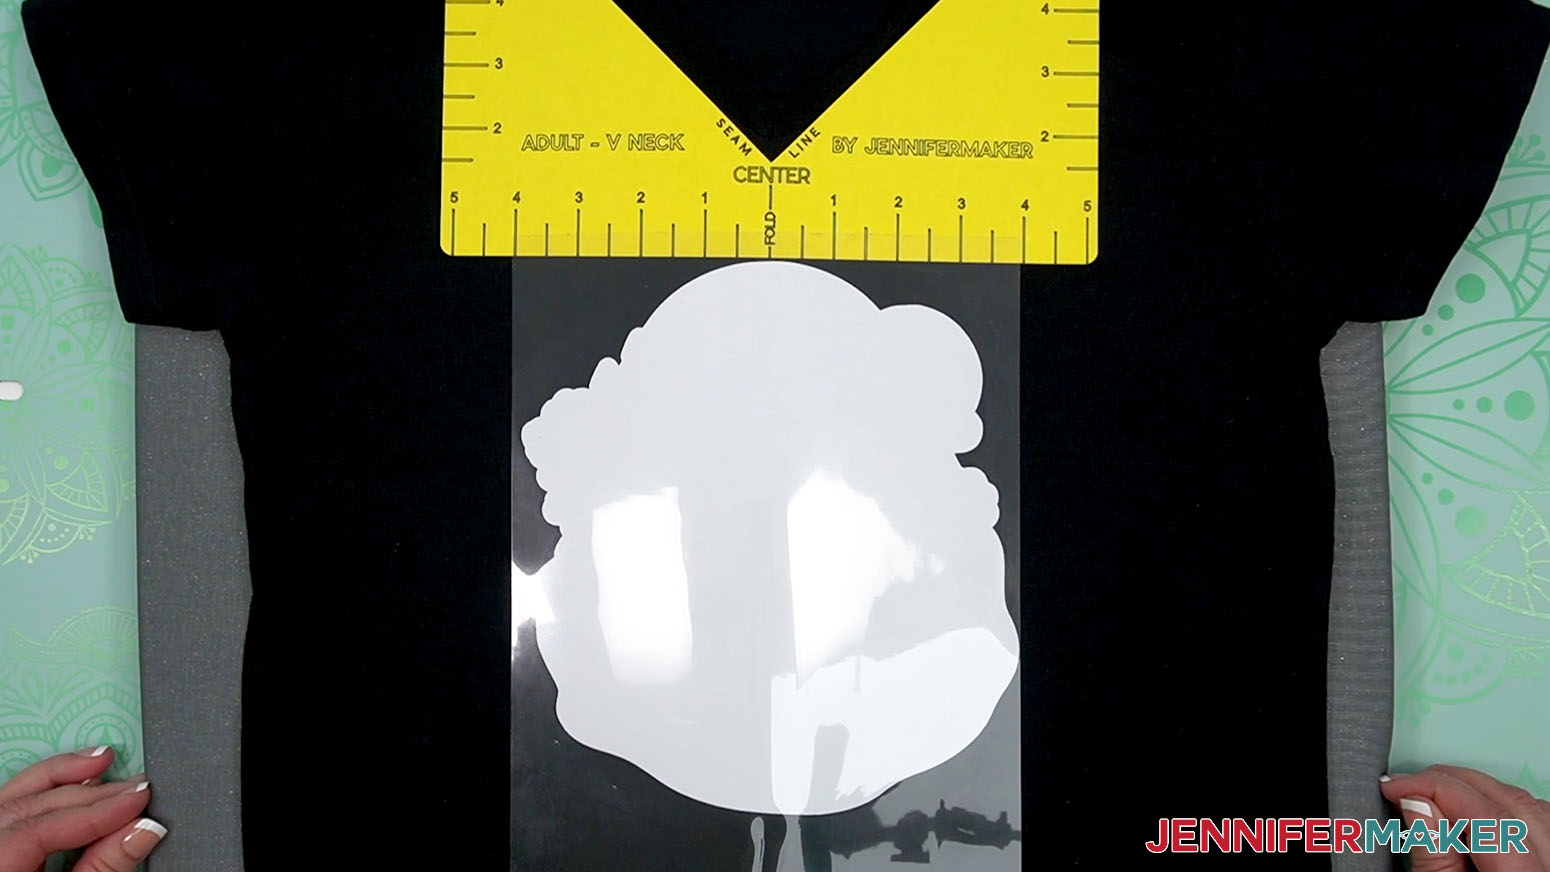
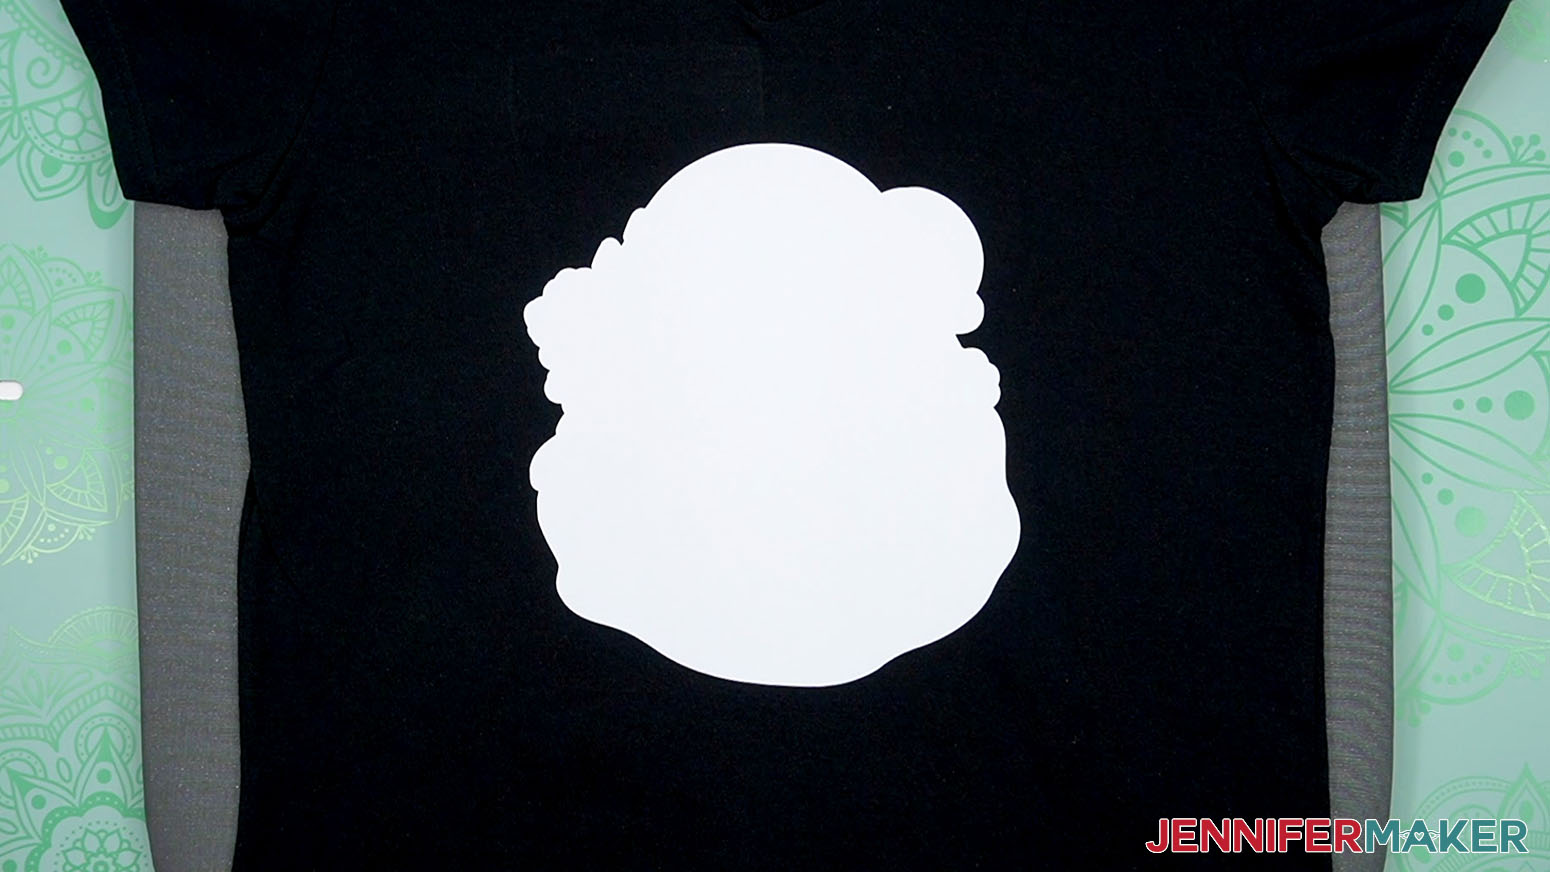
- With the carrier sheet on top, line up the crease with the center of the guide. The vinyl should start right below the ruler.
- Remove the guide.
- Cover the whole area with clean butcher paper.
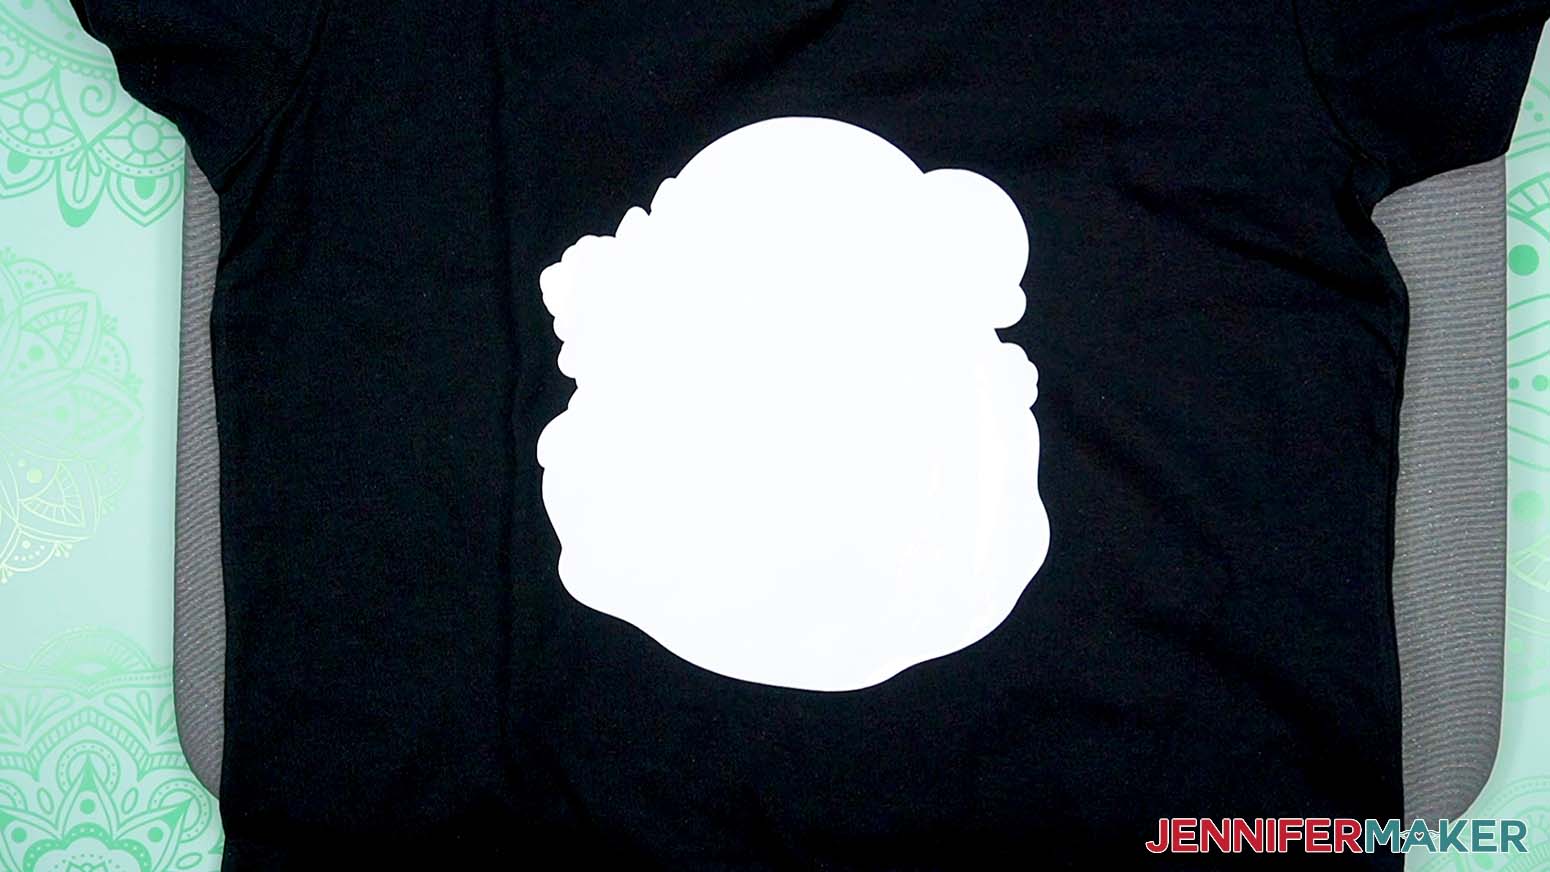
- Heat the design for five seconds with medium pressure to tack on the EasySubli.
- Remove the butcher paper and let the mask cool slightly.
- Peel up the mask sheet while it's still warm.
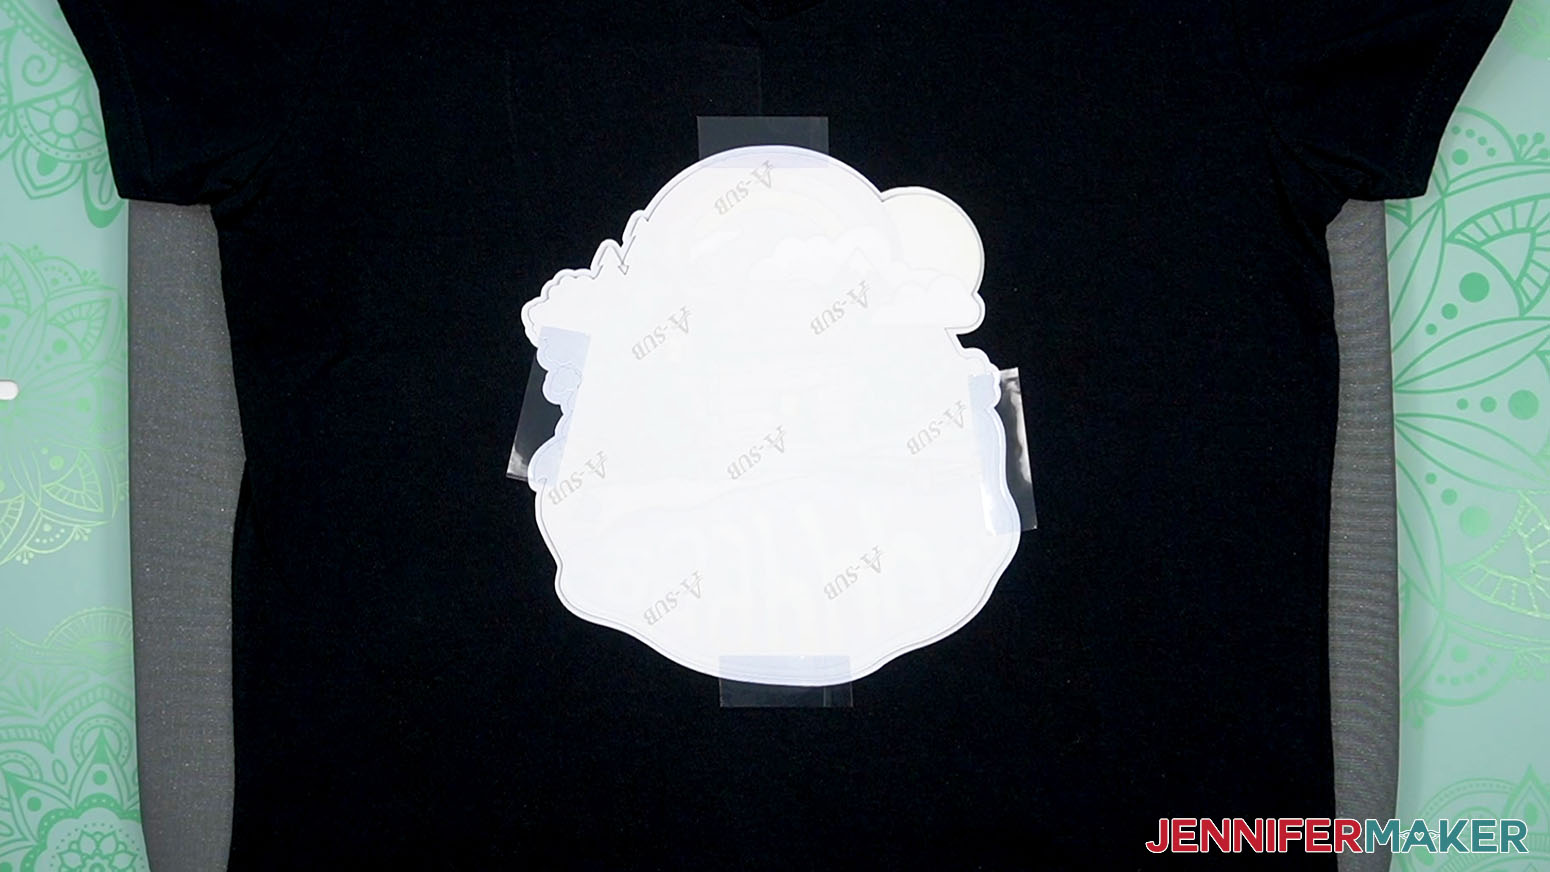
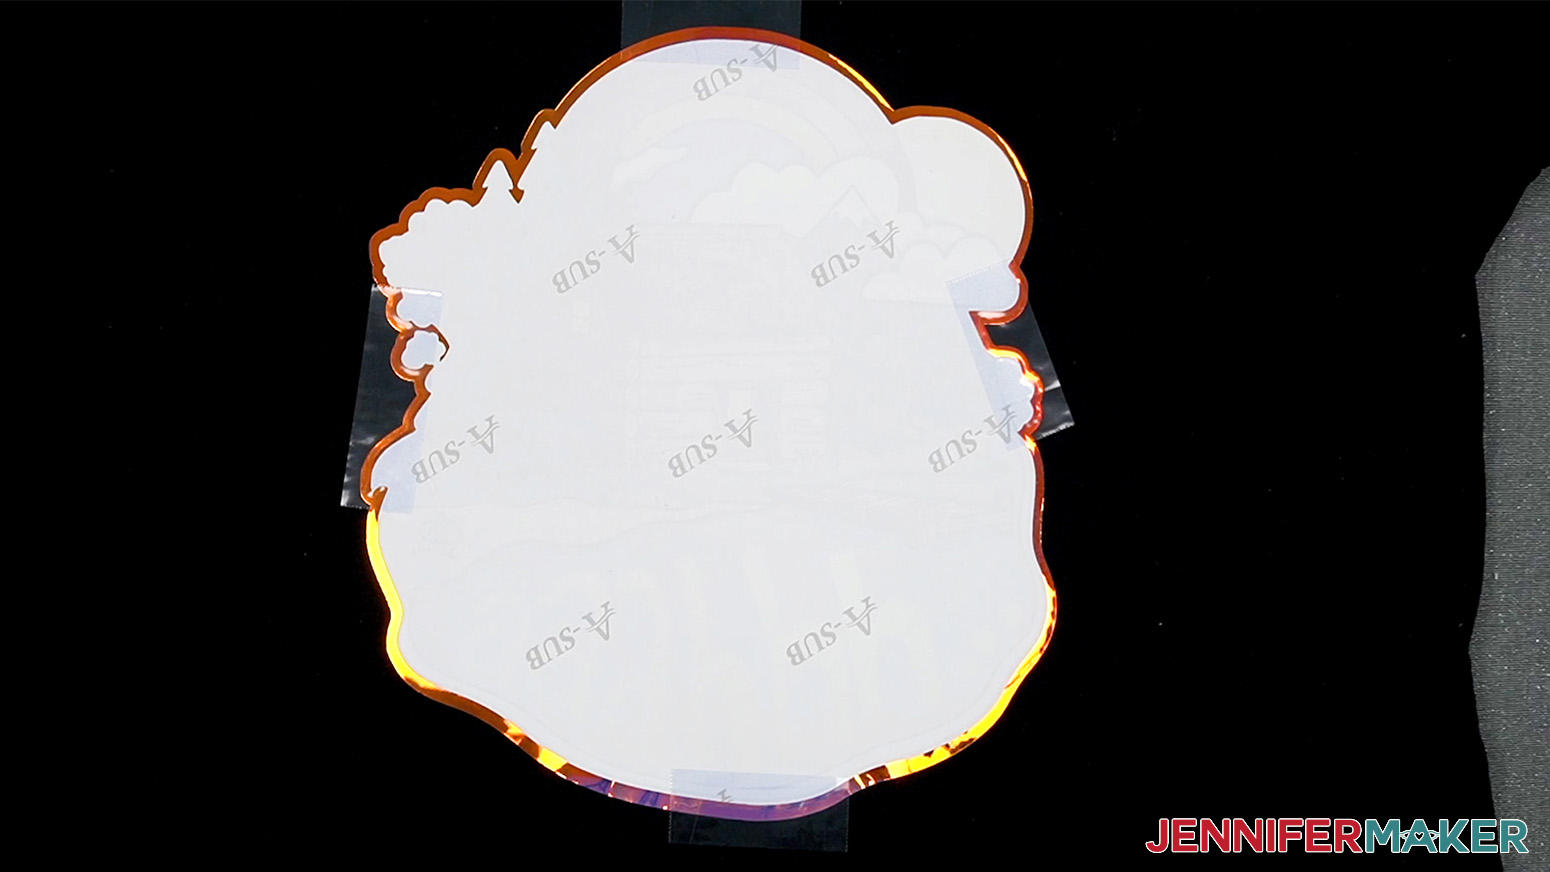
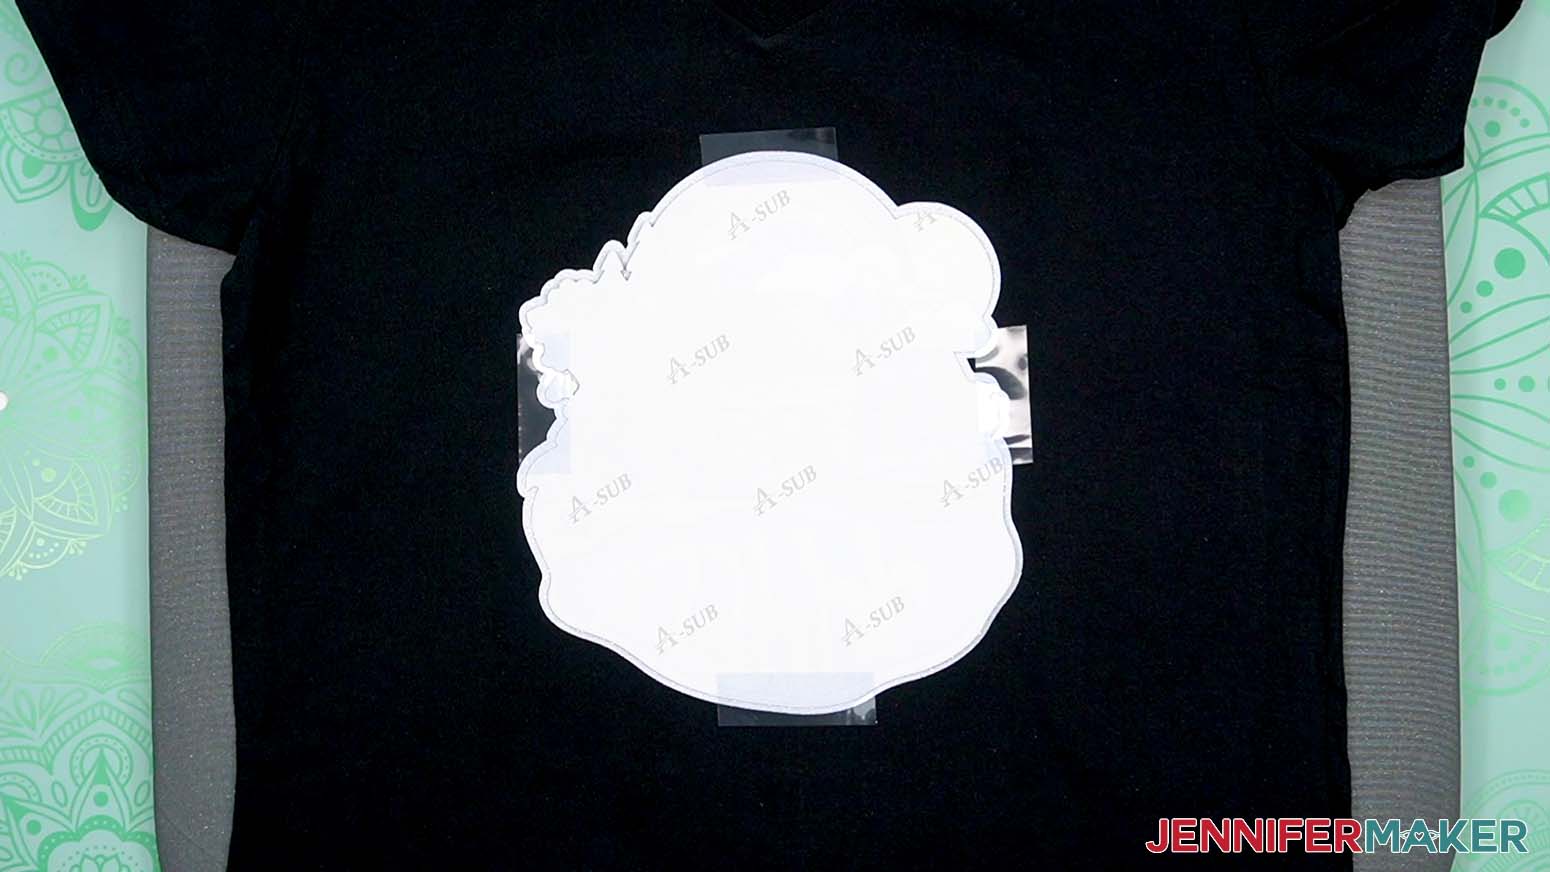
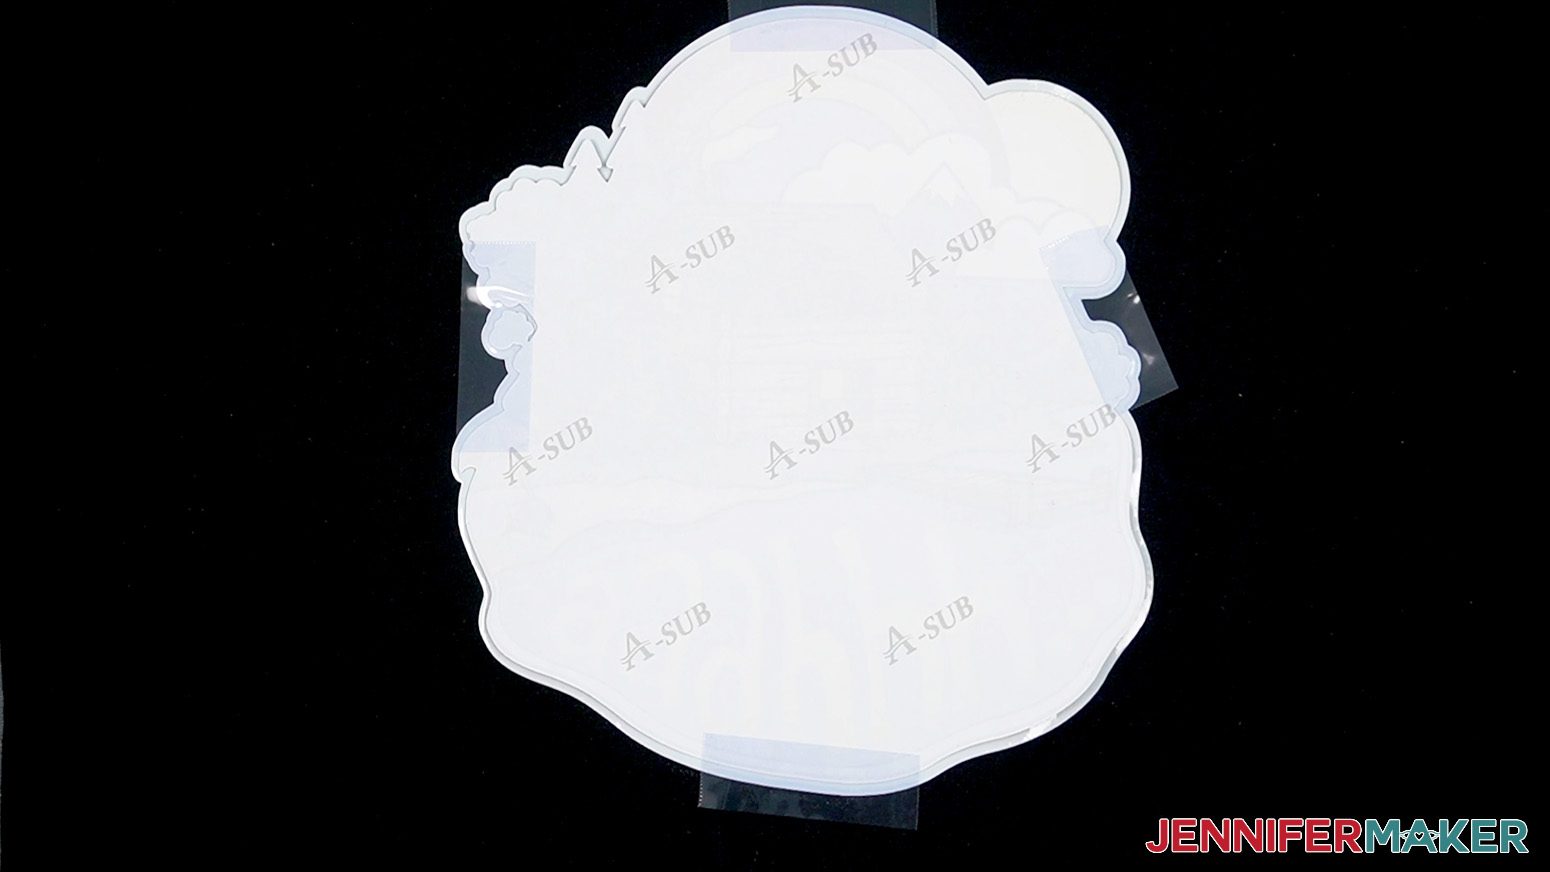
- Place your print face down on top of the EasySubli.
NOTE: Make sure the EasySubli is evenly visible around the design, that’s why we used the offset and Print Then Cut tools. - Use heat resistant tape to secure the print in place.
- Place clean butcher paper on top of the whole area.
- Heat the design at 370° F (188° C) for 35 seconds with medium pressure.
- When the time is up, lift the press straight up and return it to its base.
- Remove the butcher paper, then let the design cool for a few seconds to avoid ghosting.
- Remove the tape and paper to reveal your design!

OPTION 2: SUBLIMATE DARK SHIRTS USING SISER HOLOGRAPHIC HTV
This version also uses layers of sublimation paper and vinyl, with a few differences from the EasySubli process. Holographic vinyl is good for light-colored shirts. It's a transparent material, so sublimating on black will result in not seeing the print.
STEP 2: PREPARE YOUR DESIGN TO SUBLIMATE USING HOLOGRAPHIC HTV
CRICUT DESIGN SPACE
- Follow Cricut Design Space Steps 1-18 from the EasySubli HTV steps to get, upload, and prepare your Print Then Cut image and Offset layer in Design Space.
- Once your layers are ready to print and cut, make sure the correct machine is selected in the top right.
- Click “Make.”
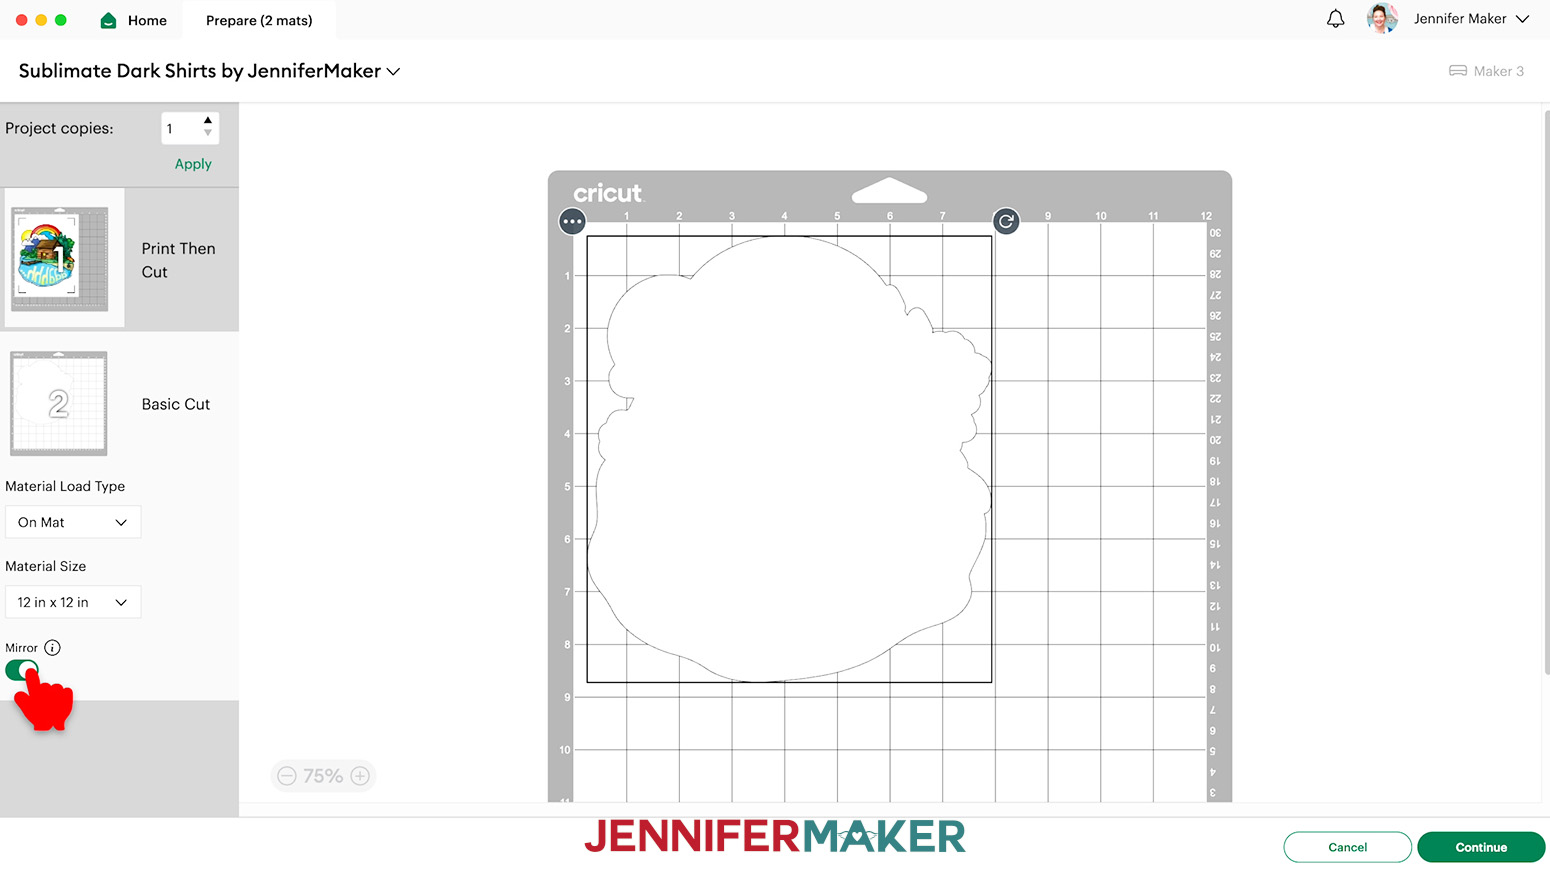
- On the Prepare screen, make sure your first mat says Print Then Cut and your second mat says Basic Cut. Check that the Material Size for your first mat is 8.5" x 11" and your second mat matches your holographic HTV. I’m using “12 in x 12 in.”
- Click the toggle under "Mirror" for both mats.
NOTE: Since we’re using HTV for the base layer, it needs to be cut mirrored to apply correctly to the shirt. - Click back on the Print Then Cut mat.
- Click “Continue.”
CUTTING
- Follow Cutting Steps 1-16 from the EasySubli HTV steps to Print Then Cut your sublimation design.
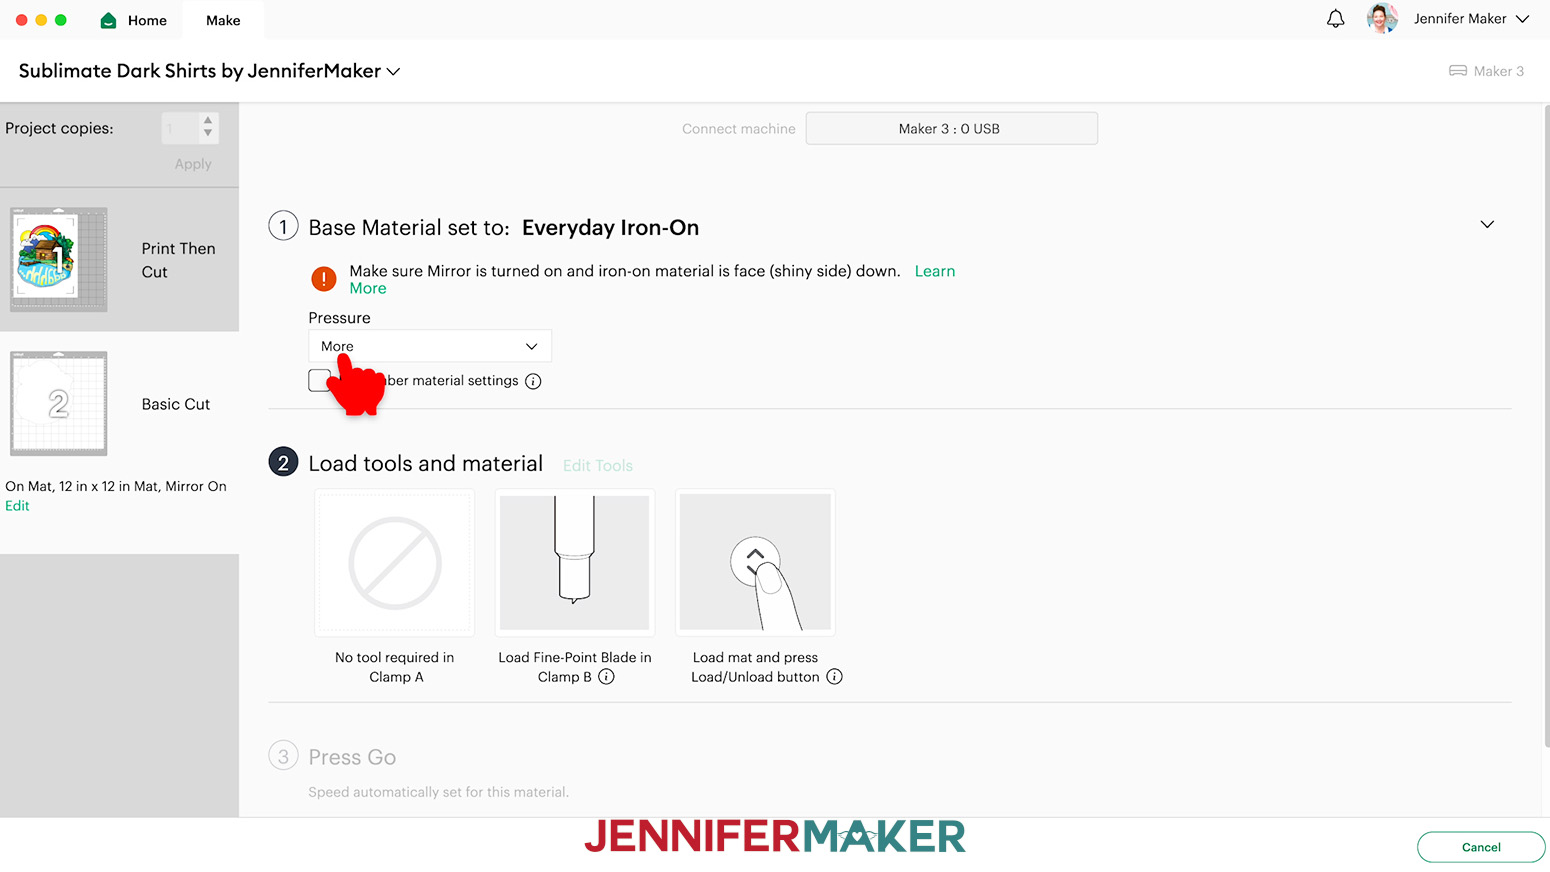
- On the Make Screen with your holographic vinyl mat selected, search for and set your Base Material as "Everyday Iron-On."
- Set the Pressure to “More.”
- Place your holographic HTV shiny side down on a green StandardGrip machine mat.
- Use a brayer to adhere it well.
- Check that your Fine-Point Blade is clean and in the clamp.
- Then, load the prepared mat into the machine and press the flashing button to cut your design.
- When the cut is finished, unload the mat, flip it over, and roll it back to release the vinyl.
TIP: This helps prevent the material from curling and ripping.
STEP 3: SUBLIMATE YOUR T-SHIRT DESIGN ON HOLOGRAPHIC HTV
IMPORTANT: Just like with any sublimation project, open a window and set up a fan to improve your ventilation.
- Trim away the excess holographic HTV.
- Use your weeding tool to remove the HTV not needed for the design.
- Just like with any sublimation project, open a window and set up a fan to improve your ventilation.
- Turn on your heat press and set it to the correct preheat temperature and time.
NOTE: For my EasyPress, that is 320° F (160° C) and a 10 second preheat. - Lint roll your shirt to remove any debris that will interfere with the design.
- When the machine comes to temperature, fold the shirt in half the long way and press it for 10 seconds with medium pressure to remove moisture and create a central crease.
- Open the shirt and slide a piece of clean white cardstock inside to prevent ink bleed through at the design's sides.
- Then - if you're using one - line up the correct T-Shirt Ruler Guide's center line on the crease. Now your design will be placed in the standard spot for a T-shirt of this size and style.
- Curve the sheet into a “U” or “taco” shape, and pinch the middle of the top and bottom of the plastic to mark the center. Do NOT fold the vinyl.
- With the carrier sheet on top, line up the crease with the center of the guide. The vinyl should start right below the ruler.
- Remove the guide.
- Cover the whole area with clean butcher paper.
- Heat the design for five seconds with medium pressure to tack on the HTV.
- Remove the butcher paper and let the HTV cool slightly.
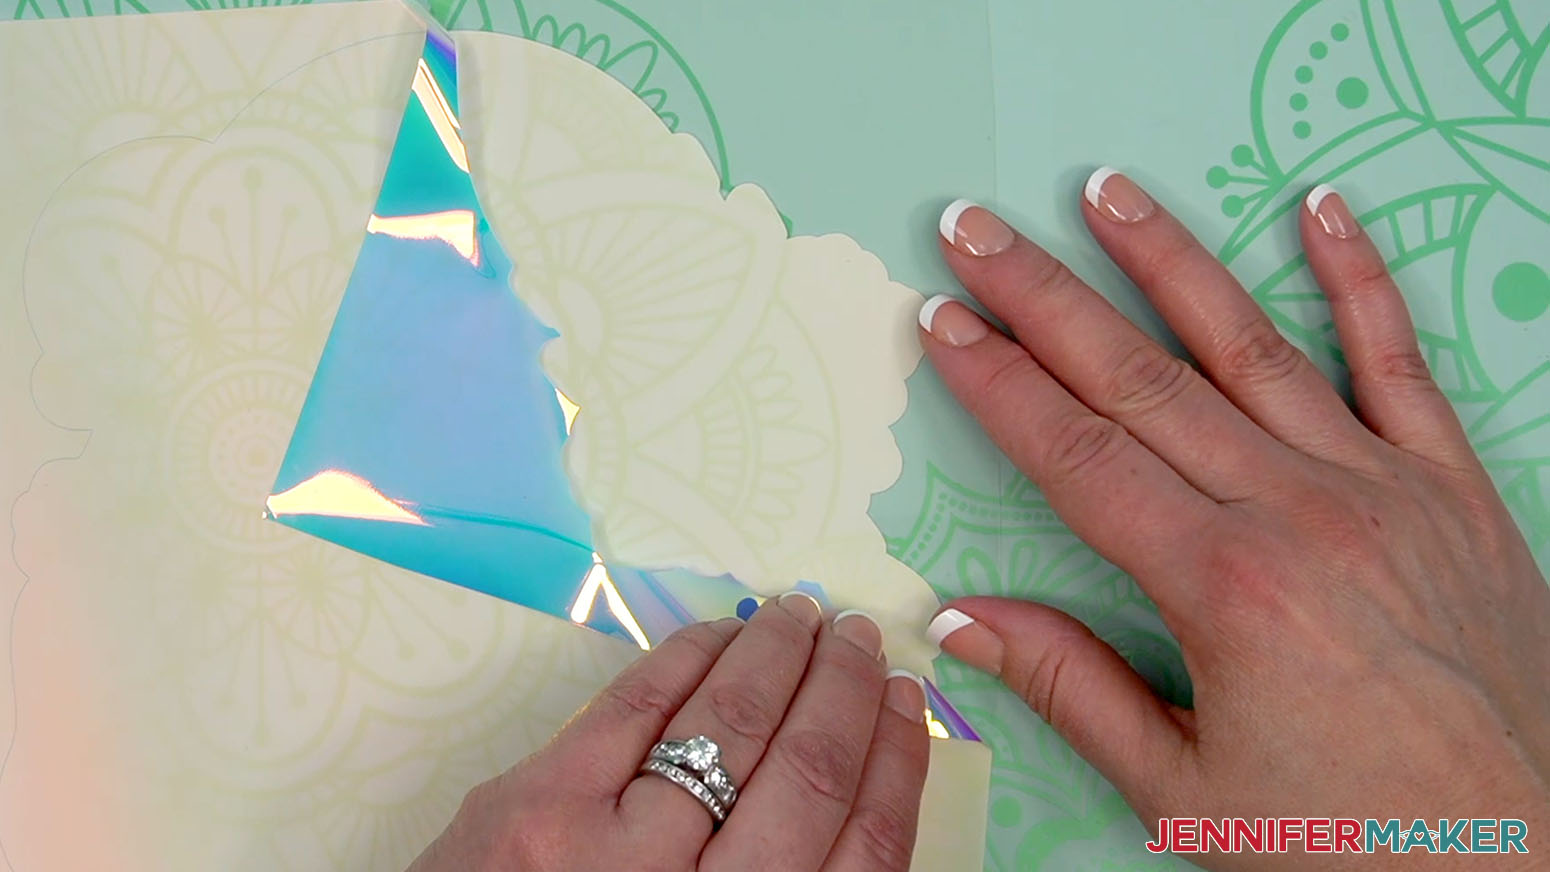
- Peel up the vinyl’s carrier sheet when it’s cold.
- Place your print face down on top of the HTV.
NOTE: Make sure the visible HTV around the design is even, that’s why we used the Print Then Cut tools. - Use heat-resistant tape to secure the print in place.
- Place clean butcher paper on top of the whole area.
- Press the design at 370° F (188° C) for 40 seconds with medium pressure.
- Remove the butcher paper, then let the design cool for a few seconds to avoid ghosting.
- Remove the tape and paper to reveal your design!
OPTION 3: SUBLIMATE DARK SHIRTS USING CRICUT WHITE GLITTER HTV WITH SUBLIMATION PAPER
This technique also uses layers of sublimation paper and iron-on vinyl. But since white glitter vinyl is a solid material, you can use this on any color surface.
STEP 2: PREPARE YOUR DESIGN TO SUBLIMATE DARK SHIRTS USING WHITE GLITTER HTV
CRICUT DESIGN SPACE
Follow the preparation steps from the Holographic HTV process.
CUTTING
- Follow Cutting Steps 1-16 from the EasySubli HTV steps to Print Then Cut your sublimation design.
- On the Make Screen with your glitter vinyl mat selected, search for and set your Base Material as "Glitter Iron-On."
- Set the Pressure to “More.”
- Place your glitter HTV shiny side down on a green StandardGrip machine mat.
- Use a brayer to adhere it well.
- Check that your Fine-Point Blade is clean and in the clamp.
- Then, load the prepared mat into the machine and press the flashing button to cut your design.
- When the cut is finished, unload the mat, flip it over, and roll it back to release the vinyl.
TIP: This helps prevent the material from curling.
STEP 3: SUBLIMATE YOUR T-SHIRT DESIGN ON WHITE GLITTER HTV
IMPORTANT: Just like with any sublimation project, open a window and set up a fan to improve your ventilation.
- Trim away the excess glitter HTV.
- Use your weeding tool to remove the HTV not needed for the design.
- Just like with any sublimation project, open a window and set up a fan to improve your ventilation.
- Turn on your heat press and set it to the correct preheat temperature and time.
NOTE: For my EasyPress, that is 320° F (160° C) and a 10 second preheat. - Lint roll your shirt to remove any debris that will interfere with the design.
- When the machine comes to temperature, fold the shirt in half the long way and press it for 10 seconds with medium pressure to remove moisture and create a central crease.
- Open the shirt and slide a piece of clean white cardstock inside to prevent ink bleed through at the design's sides.
- Then - if you're using one - line up the correct T-Shirt Ruler Guide's center line on the crease. Now your design will be placed in the standard spot for a T-shirt of this size and style.
- Curve the vinyl sheet into a “U” or “taco” shape, and pinch the middle of the top and bottom of the plastic to mark the center. Do NOT fold the vinyl.
- With the carrier sheet on top, line up the crease with the center of the guide. The vinyl should start right below the ruler.
- Remove the guide.
- Cover the whole area with clean butcher paper.
- Heat the design at 370° F (188° C) for five seconds with medium pressure to tack on the HTV.
- Remove the butcher paper and let the HTV cool slightly.
- Peel up the vinyl’s carrier sheet when it’s cold.
- Place your print face down on top of the HTV.
NOTE: Make sure the visible HTV around the design is even, that’s why we used the Print Then Cut tools. - Use heat-resistant tape to secure the print in place.
- Place clean butcher paper on top of the whole area.
- Press the design at 370° F (188° C) for 35 seconds with medium pressure.
- Remove the butcher paper, then let the design cool for a few seconds to avoid ghosting.
- Remove the tape and paper to reveal your design!


BONUS: NEW TEST OF HOW TO SUBLIMATE DARK SHIRTS USING HTVRONT SUBLIMATION HTV
While I’ve sublimated shirts using the above materials and they’ve held up for several months to a year, I tried a new-to-me material, also: HTVRONT’s Sublimation HTV for dark or light materials. I used the glossy version in my test.
STEP 2: PREPARE YOUR DESIGN TO SUBLIMATE DARK SHIRTS USING HTVRONT SUBLIMATION HTV
CRICUT DESIGN SPACE
Follow the preparation steps from the Holographic HTV process.
CUTTING
- Follow Cutting Steps 1-16 from the EasySubli HTV steps to Print Then Cut your sublimation design.
- On the Make Screen with your sublimation vinyl mat selected, search for and set your Base Material as "Everyday Iron-On."
- Set the Pressure to “More.”
- Place your sublimation HTV shiny side down on a green StandardGrip machine mat.
- Use a brayer to adhere it well.
- Check that your Fine-Point Blade is clean and in the clamp.
- Then, load the prepared mat into the machine and press the flashing button to cut your design.
- When the cut is finished, unload the mat, flip it over, and roll it back to release the vinyl.
TIP: This helps prevent the material from curling.
STEP 3: SUBLIMATE YOUR T-SHIRT DESIGN ON HTVRONT SUBLIMATION HTV
IMPORTANT: Just like with any sublimation project, open a window and set up a fan to improve your ventilation.
- Trim away the excess sublimation HTV.
- Use your weeding tool to remove the HTV not needed for the design.
- Just like with any sublimation project, open a window and set up a fan to improve your ventilation.
- Turn on your heat press and set it to the correct preheat temperature and time.
NOTE: For my EasyPress, that is 310° F (154° C) and a 10 second preheat. - Lint roll your shirt to remove any debris that will interfere with the design.
- When the machine comes to temperature, fold the shirt in half the long way and press it for 10 seconds with medium pressure to remove moisture and create a central crease.
- Open the shirt and slide a piece of clean white cardstock inside to prevent ink bleed through at the design's sides.
- Then - if you're using one - line up the correct T-Shirt Ruler Guide's center line on the crease. Now your design will be placed in the standard spot for a T-shirt of this size and style.
- Curve the vinyl sheet into a “U” or “taco” shape, and pinch the middle of the top and bottom of the plastic to mark the center. Do NOT fold the vinyl.
- With the carrier sheet on top, line up the crease with the center of the guide. The vinyl should start right below the ruler.
- Remove the guide.
- Cover the whole area with clean butcher paper.
- Heat the design at 375° F (190° C) for five seconds with medium pressure to tack on the HTV.
- Remove the butcher paper and let the HTV cool slightly.
- Peel up the vinyl’s carrier sheet when it’s still warm.
- Place your print face down on top of the HTV.
NOTE: Make sure the visible HTV around the design is even, that’s why we used the Print Then Cut tools. - Use heat-resistant tape to secure the print in place.
- Place clean butcher paper on top of the whole area.
- Press the design at 375° F (190° C) for 40 seconds with medium pressure.
- Remove the butcher paper, then let the design cool for a few seconds to avoid ghosting.
- Remove the tape and paper to reveal your design!
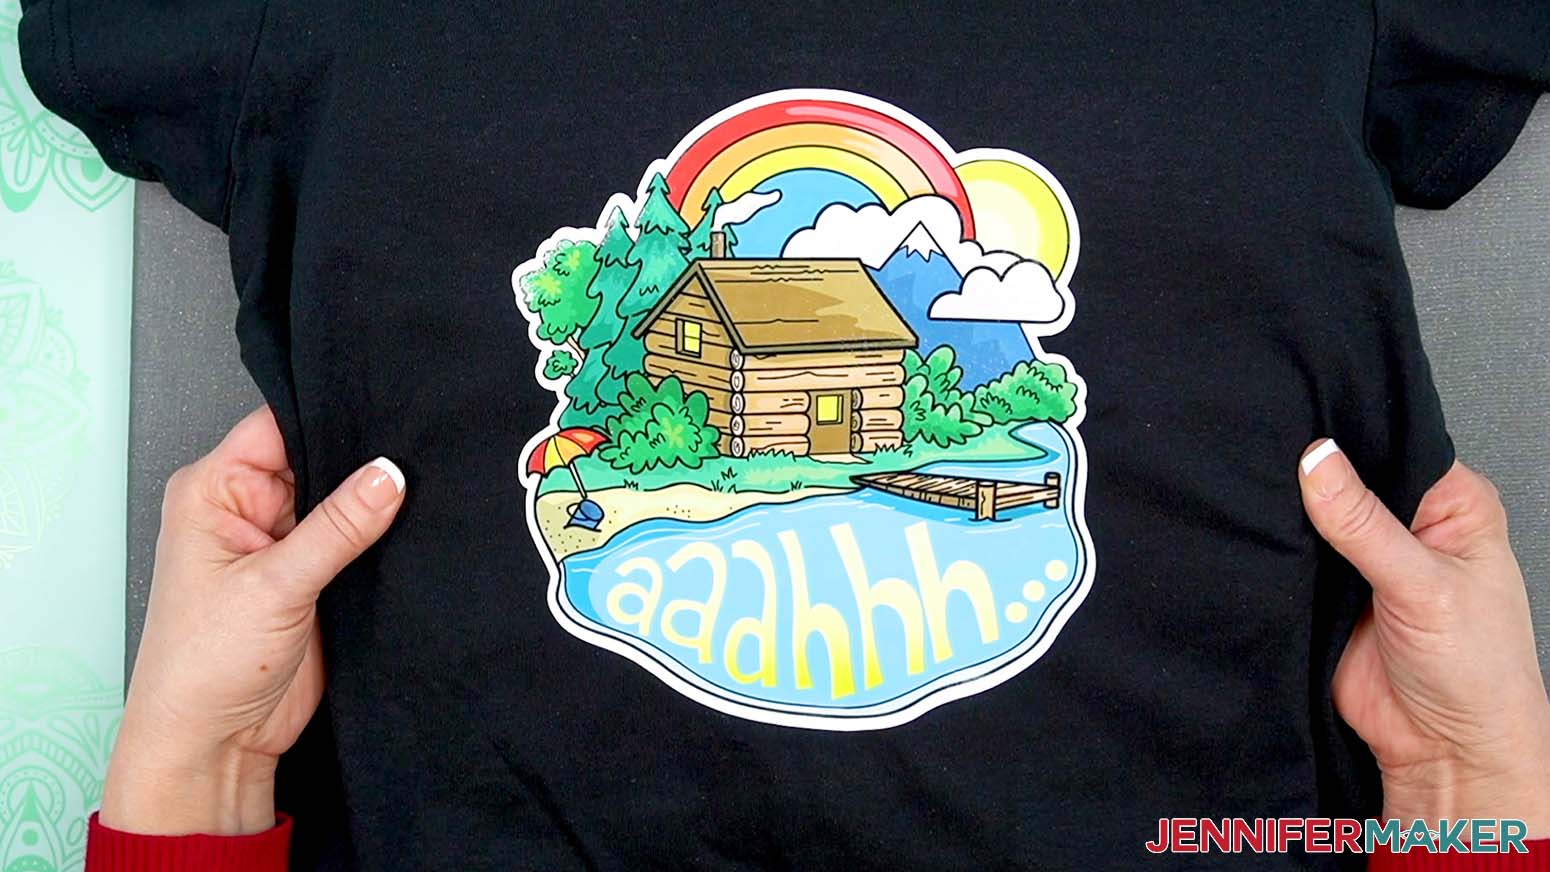
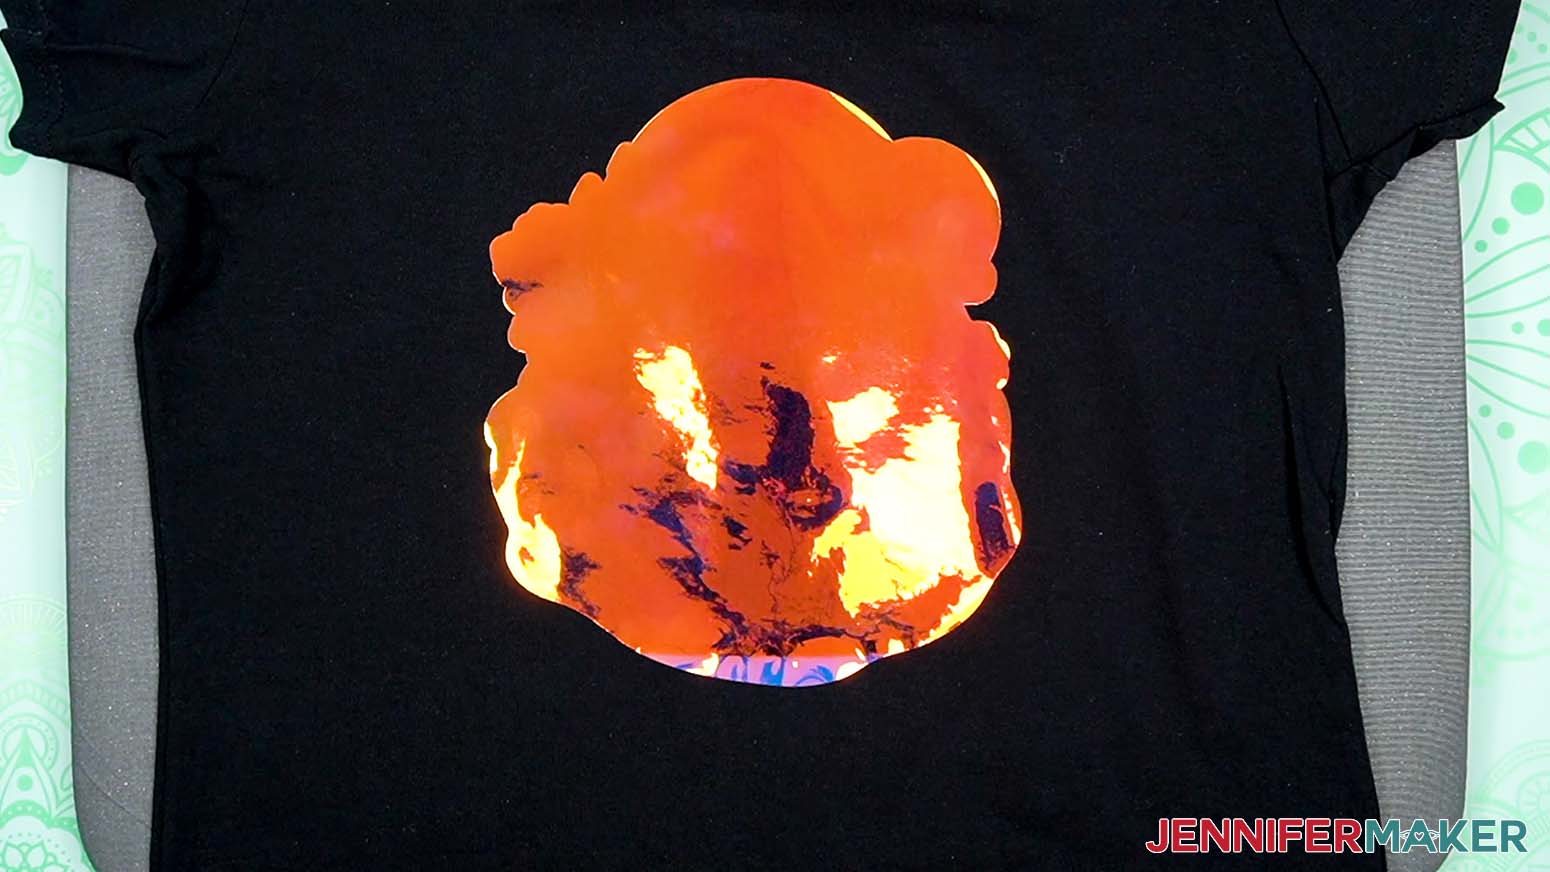
STEP 4: SHOW IT OFF!
Here is what my finished shirts look like!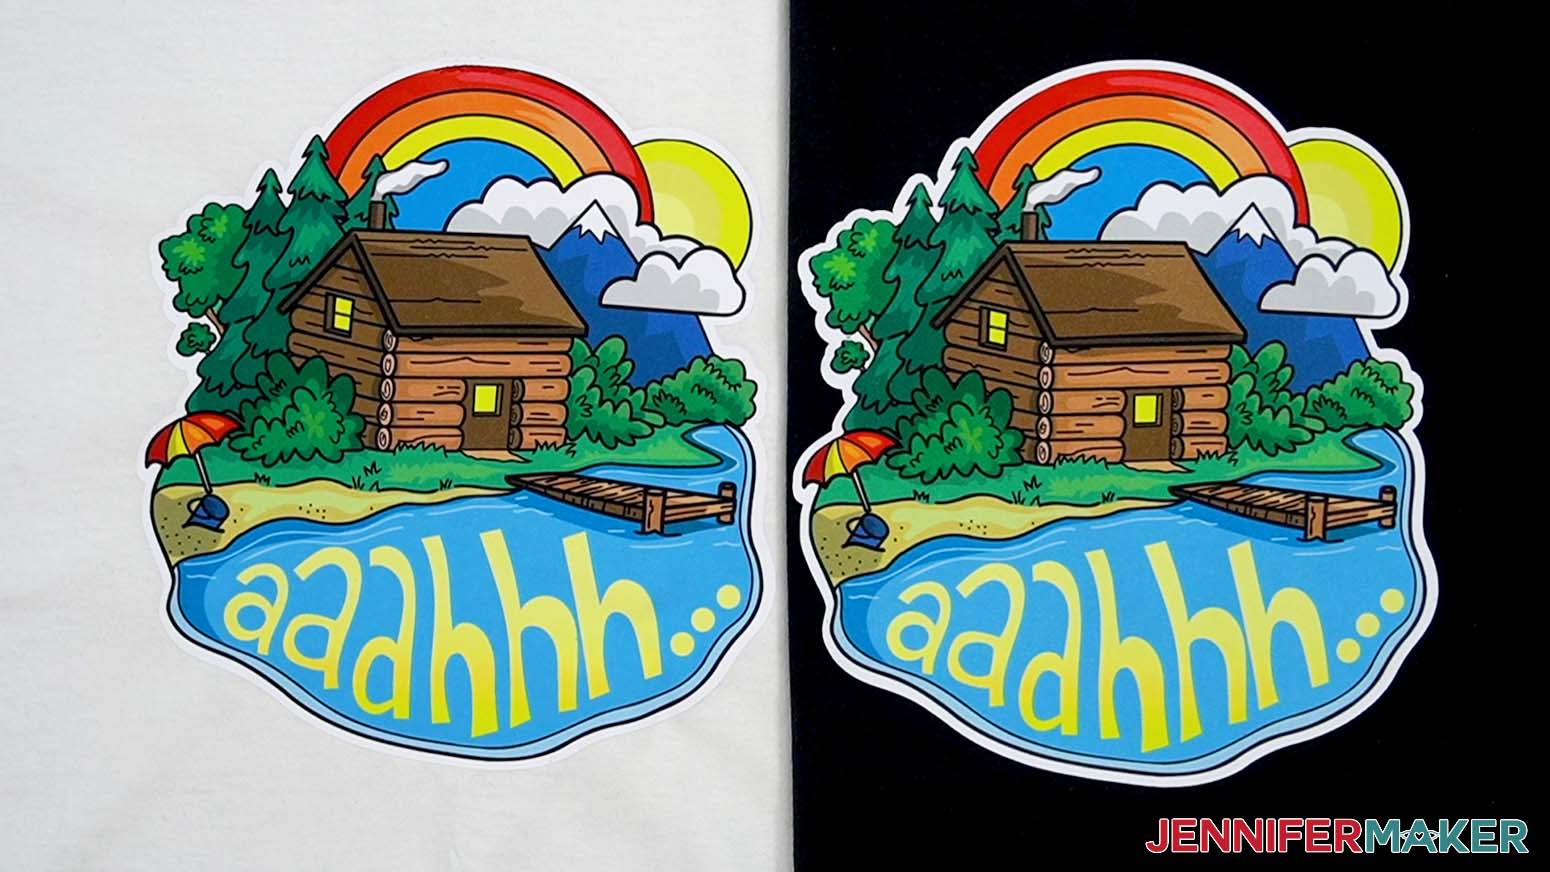


Notes
Typefaces Used: Cricut Sans, JM Merry (Design #576)
Care Instructions: Let the vinyl sit for at least 24 hours. Machine-wash in cold water, inside-out, on a gentle cycle with similar colors and mild detergent. When necessary, only use non-chlorine bleach. Do not use fabric softeners or dry-cleaning. Tumble-dry on low and iron with a cool setting, if needed
Dimensions:
Cat: 5.71" x 5.39"
Cottage: 7.54" x 8.35"
Clouds and Rainbow: 8.47" x 6.95"
Answers to Your Questions About How to Sublimate Dark Shirts or Cotton With HTV
Q: Where is the customizable cottage design?
A: The customized sublimation images are examples of shirts you can design yourself in my ADVANCE program. The cottage with “The Makers” was completed right in Cricut Design Space and I cannot share the Design Space project link as it contains uploaded elements. But this is something you can easily make in my ADVANCE program! Learn more about ADVANCE here!
Q: Can you sublimate on any shirt?
A: If you want to sublimate without adding a compatible substrate like specific HTV to the shirt, it should have at least 65% polyester content and be white so the translucent sublimation ink will show correctly. If you want to sublimate a shirt with less polyester or that has color, use one of the HTV products I tested in my updated tutorial.
Q: How do I care for a sublimation T-shirt?
A: You’ll want to wait about twenty-four hours before cleaning your custom shirt. Then wash it on gentle with mild detergent. Hang it to dry for the best results.
Q: Why is my sublimation print color so dull?
A: Sublimation prints look much duller on the paper than they do after they’re sublimated, so don’t worry if your printed image looks faded or different colors than you expect. The vibrant colors will show when transferred to the sublimation blanks!
Q: Why is my sublimation not transferring evenly?
A: You may need to tweak your settings if you’re using materials other than the ones in my materials list. The sublimation printing process and transferring has a lot of variables, so follow my notes first on a test cloth, then try adjusting your temperature, time, or pressure if you need to.
Q: What does ghosting mean in sublimation?
A: Ghosting can occur when a freshly sublimated object is moved around too much while it’s still hot. If the object and the sublimation transfer is still hot, the image is still sublimating. To avoid this, simply wait until your sublimated item has cooled off before handling or removing the paper, and don’t move it around more than you need to while it’s sublimating. It’s a natural effect of the sublimation process because the ink is in a gaseous state until it’s cooled.
Q: What if I don’t have a sublimation printer?
A: You can have someone else print the designs for you! There are many Etsy sellers (and others in the global marketplace) who will print your designs and send them to you. Just check their customer reviews, see if they have a minimum order quantity, and make sure their typical production time fits your goals.
Get my free PNG files to make your sublimation shirts!
(If you do not see the signup form above, click here.)
I love seeing what you make with my designs and how you use them! Please share a photo of your sublimation shirts in our Facebook group or tag me on social media with #jennifermaker.
Love,

Want to remember this? Save this Tutorial on How to Sublimate Dark Shirts or Cotton With HTV to your favorite Pinterest Board!