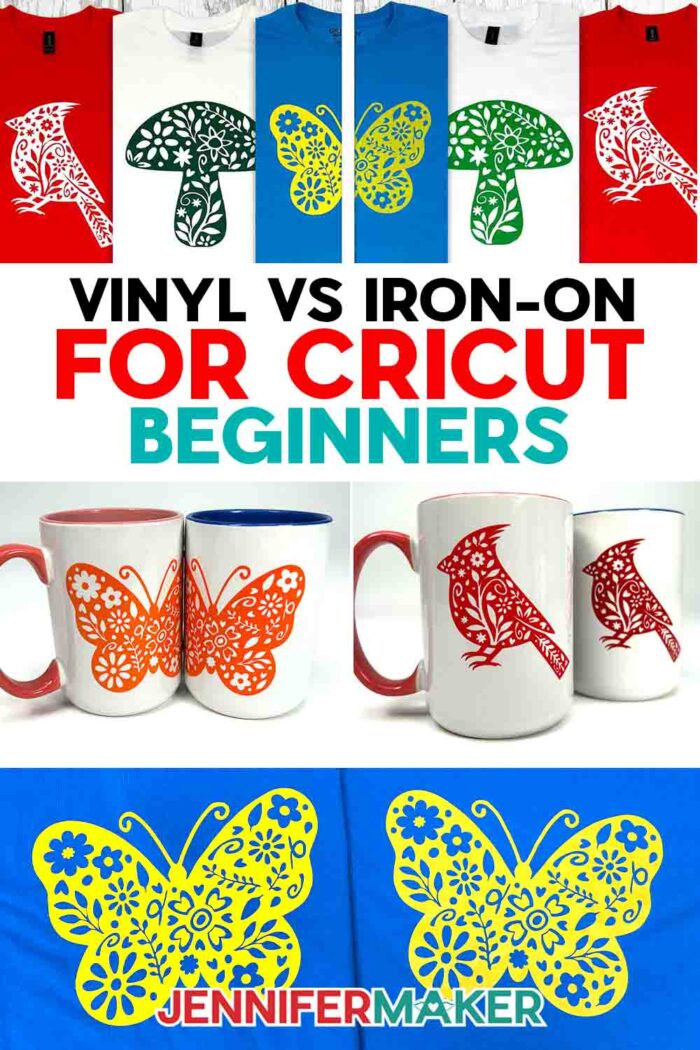
Learn how to make Cricut projects with adhesive vinyl or iron-on for beginners!
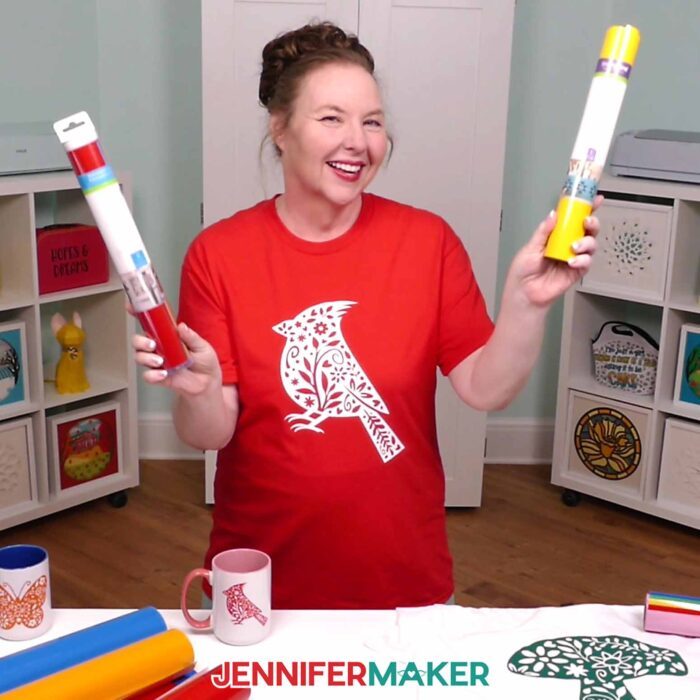
Picture this: You’re standing in your craft space holding a mug in one hand, a T-shirt in the other, wondering, “Which kind of vinyl actually goes on this thing?!” Trust me, you’re not the only one who’s stared at a shiny roll of vinyl and wondered if it needs a heat press or some transfer tape to make it stick. It can sometimes feel like vinyl has a secret code you need to crack before your crafting dreams can come to life! Let’s clear up the confusion and make two adorable projects you’ll actually use and love: a T-shirt using Cricut iron-on vinyl and a mug using adhesive vinyl. By the end, you’ll finally know which type of vinyl goes on which surface, why it matters, and how to use each of them for the best results possible!
See the full step-by-step video tutorial on how to use vinyl vs iron-on for Cricut beginners:

If you’re a beginner crafter, the first thing to know is that there are different names for vinyl. There are two main types: adhesive vinyl and iron-on vinyl, also called heat transfer vinyl or HTV. Both come in a wide variety of colors and textures, have different applications, and work on different materials.
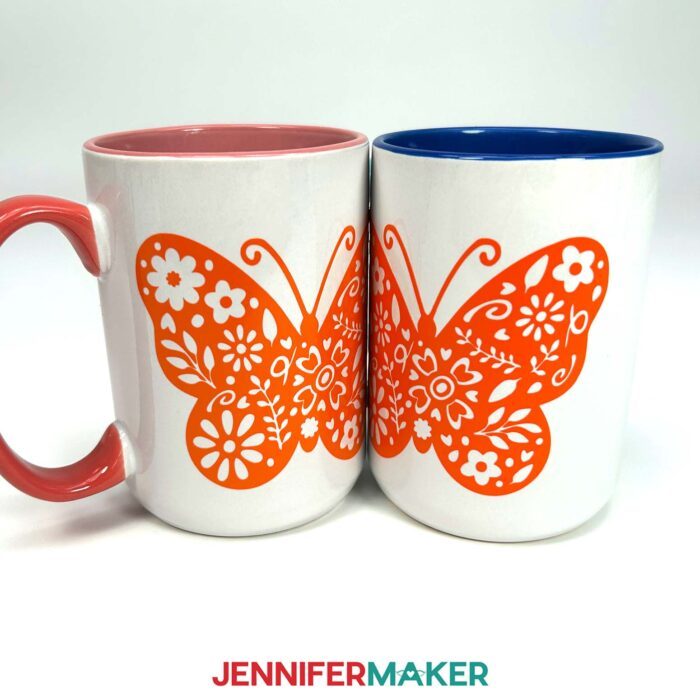
So what’s the best way to know which one to use? Think about your base material. Adhesive vinyl (like Cricut Value and Premium permanent vinyl) sticks to hard surfaces, which makes it perfect for mugs, car decals, water bottles, and many other projects. You’ll get the best results if you clean your mug first and allow the decal to fully cure before washing.
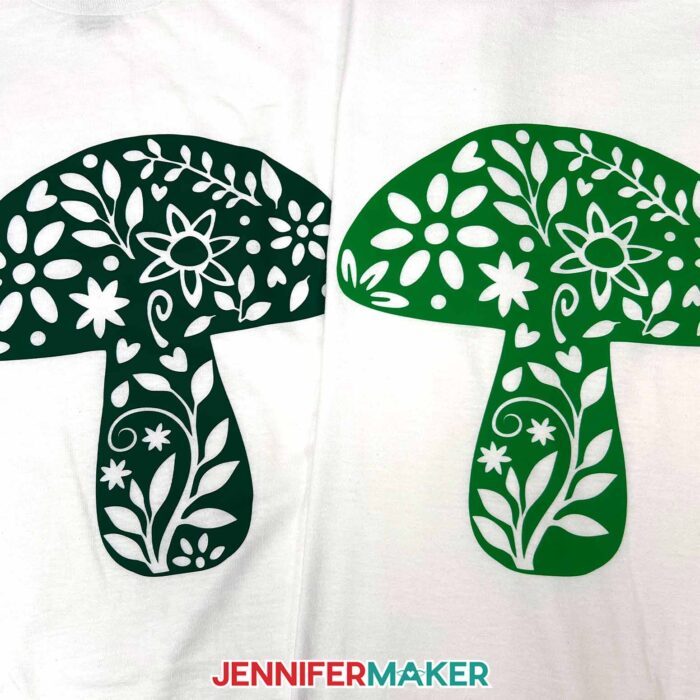
On the other hand, heat transfer vinyl, like Cricut Everyday Iron-On, works beautifully on fabric projects like T-shirts, hoodies, and tote bags. This type of vinyl has a clear carrier sheet, that’s the shiny side. The vinyl bonds to your fabric using a heat source like a heat press or a household iron. Be sure to watch the tutorial video to get the right temperature and the correct time for your application process, ensuring your iron-on designs stay in place wash after wash.
I’ve got lots of tips in my video, but here’s a big one that saves so many vinyl projects: always mirror your design when using heat transfer vinyl because you cut it with the shiny side down. But with adhesive vinyl, you don’t mirror it since you place it directly onto your surface as is. This simple step makes all the difference!
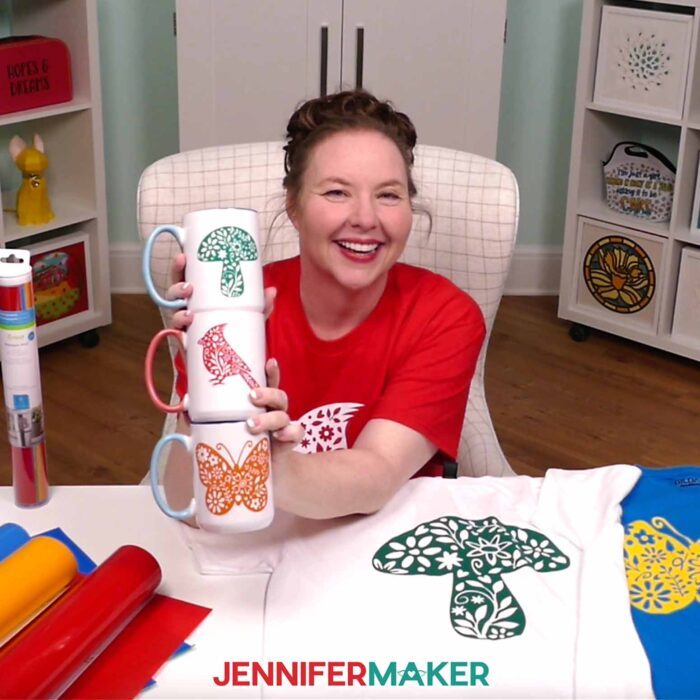
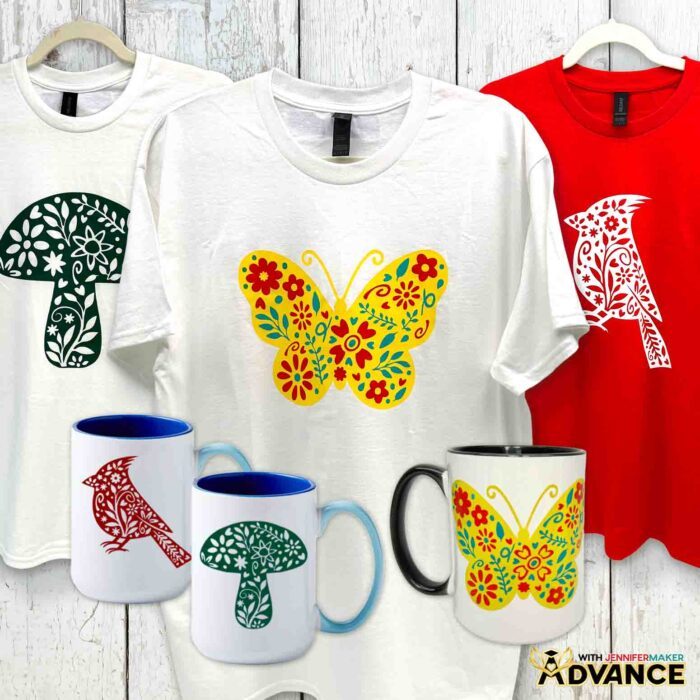
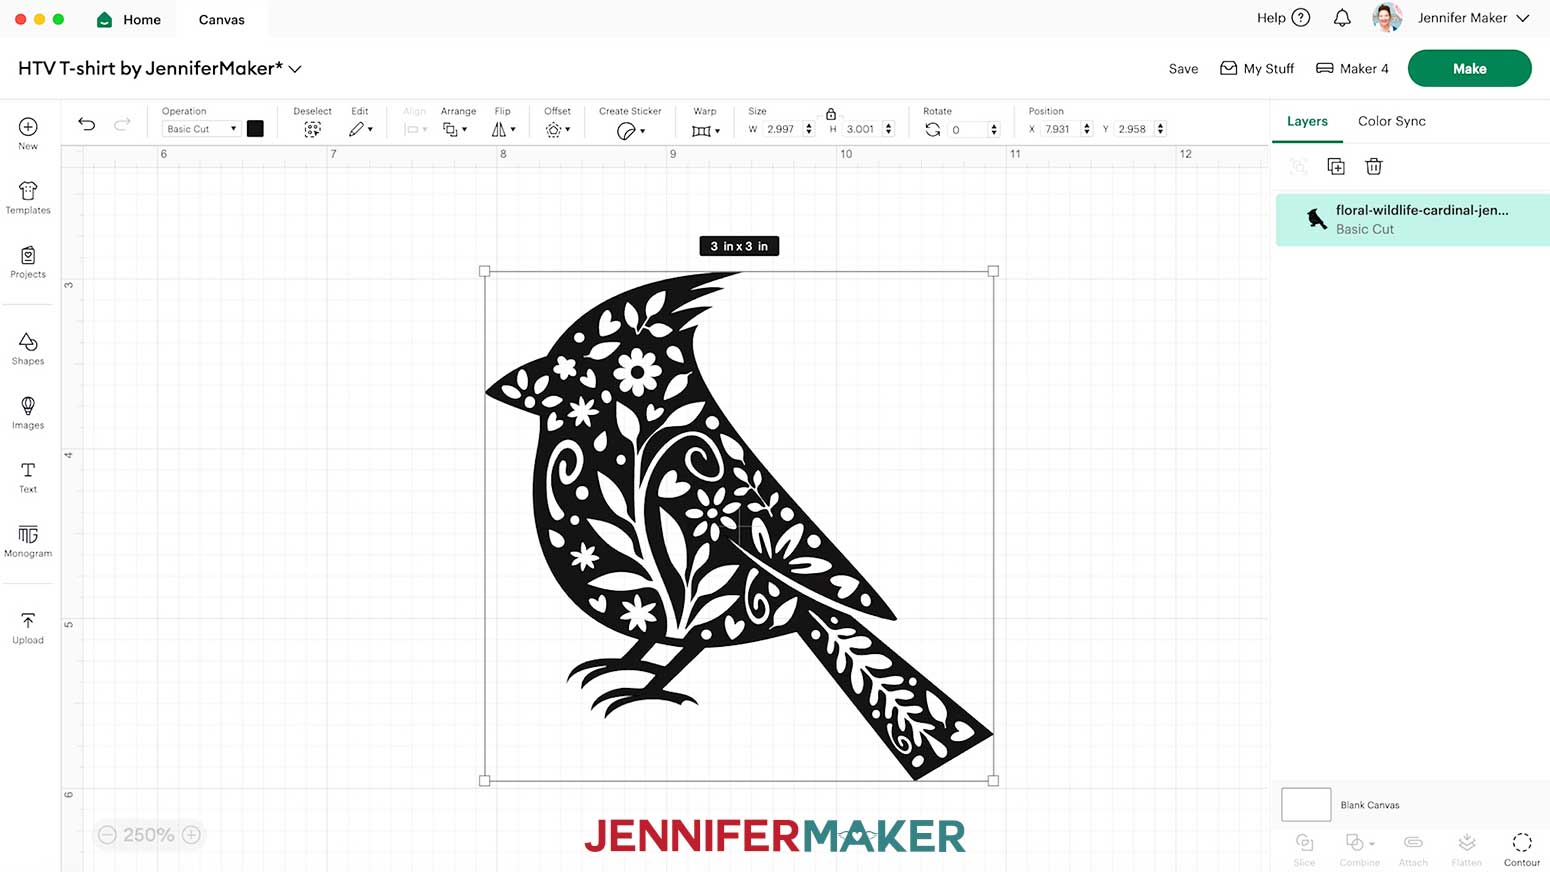
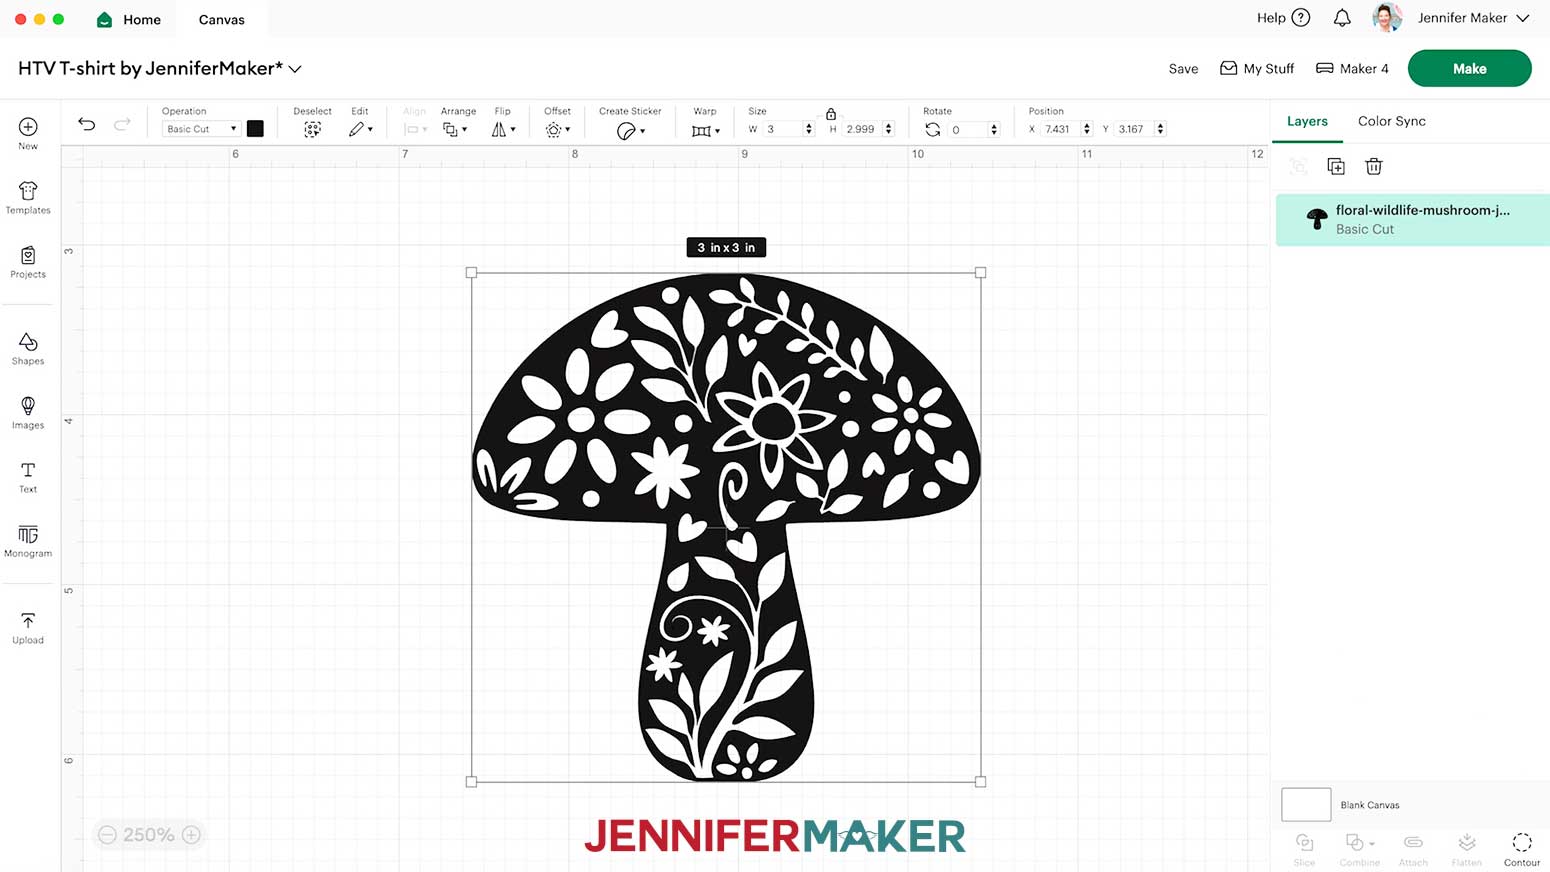
We’ll start with the mug, and by opening one of my floral wildlife designs in Cricut Design Space. There’s a mushroom, a cardinal, and a butterfly, and they’re so cute! We’ll cut them on adhesive permanent vinyl using a Cricut cutting machine and a standard fine point blade, but you can use the same techniques with other designs, too! I’ll show you how to weed the excess vinyl with your weeding tool, and use transfer tape to apply your vinyl decal to your mug, carefully smoothing it down to avoid bubbles.
Then we’ll make a T-shirt with Cricut Everyday Iron-On vinyl. Remember to mirror your design in Cricut Design Space before cutting, and place the shiny side down on your mat! Weeding HTV is different from weeding adhesive vinyl, because it has some stretch, but I’ll share tips for success. Then I’ll show you the easiest way to position your design on your T-shirt, and press it with a heat press or household iron with the right time and temperature.
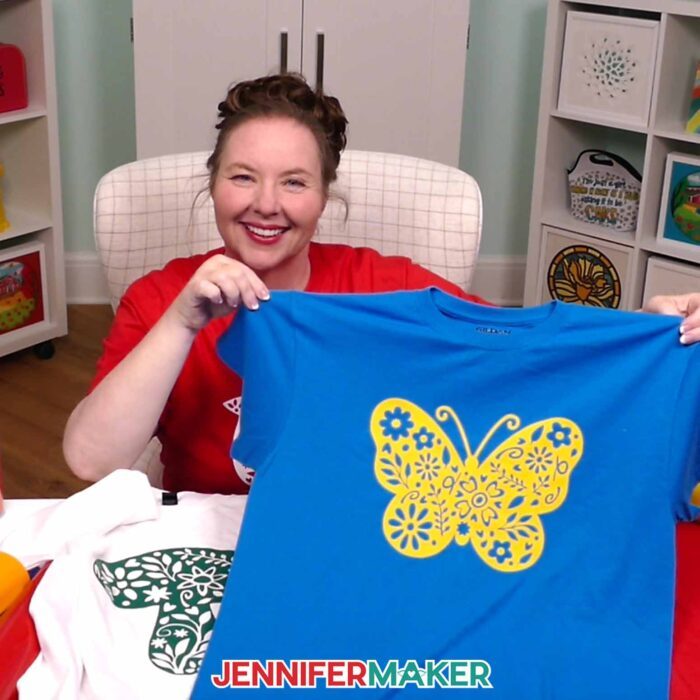
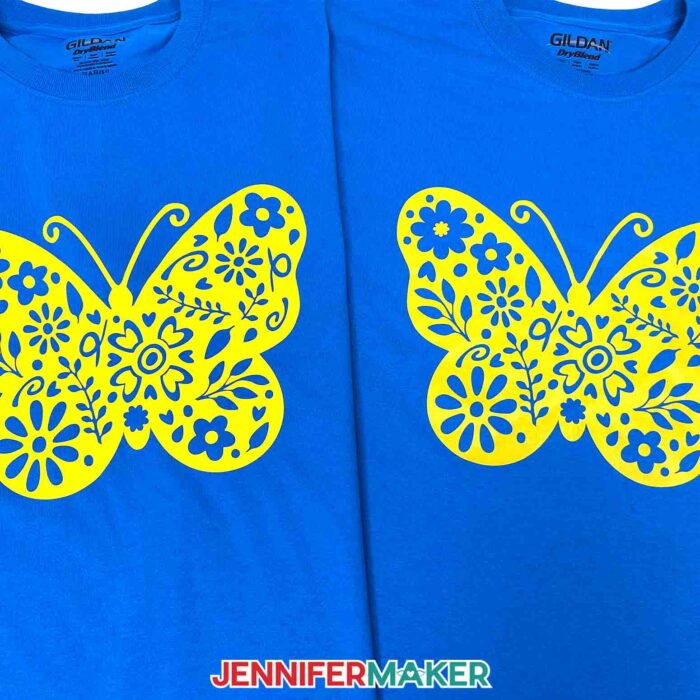
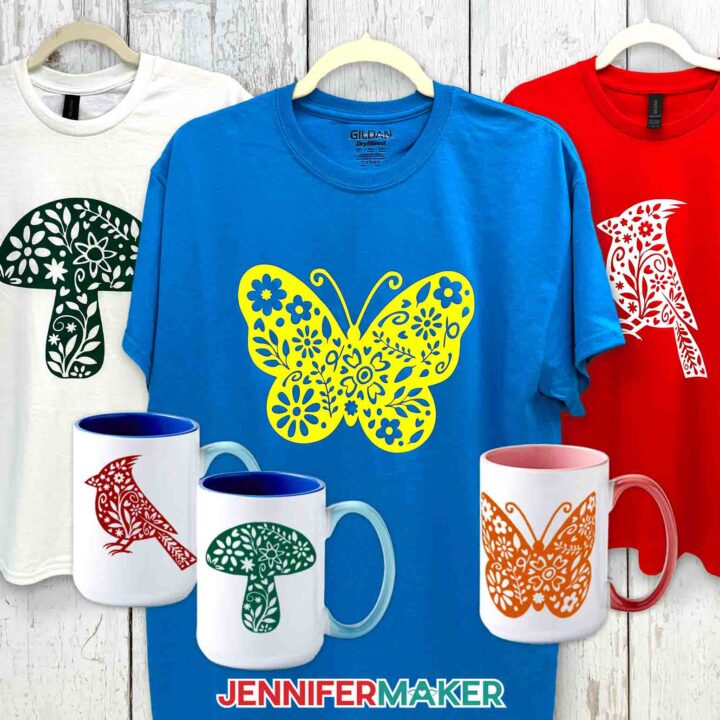
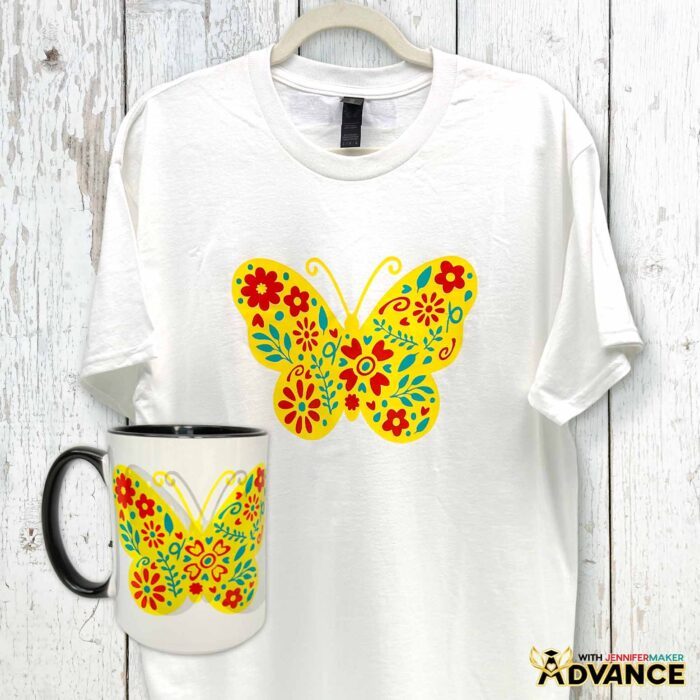
One of the best things about crafting with Cricut is how easily you can customize your design’s look by mixing up the different colors of vinyl with the colors of your mugs or T-shirts! Want your butterfly decal to really pop? Pair it with a bright T-shirt or a colorful mug for contrast. You can also explore different types and different finishes of vinyl, like glitter iron-on for extra sparkle on your shirts, or metallic and holographic adhesive vinyl for mugs that stand out. With so many options, you can create projects that feel unique every single time.
I remember the first time I tried making a T-shirt with heat transfer vinyl. I was so nervous I would mess it up that I hovered over my Cricut, triple-checking if the shiny side was down!

But when I finally pressed that design and peeled back the carrier sheet to see it perfectly in place, I felt so proud I did a happy dance in my craft room. If I can do it, you can too. Every project you make, even the “oops” ones, helps you learn and grow, and before you know it, you’ll feel confident crafting anything you dream up.
Would you like to create a layered SVG to cut from adhesive or iron-on vinyl? I have a workshop just for you in my ADVANCE program. Plus, I’ll even share my magic trick for aligning the layers perfectly on a mug or T-shirt, too! Learn more about ADVANCE with JenniferMaker here!
With these simple techniques, you can turn designs into one-of-a-kind T-shirts and decorate mugs that you’re excited to use or share! Vinyl projects make lovely gifts and keepsakes, while helping you learn how to use different materials and techniques.
Whether you’re sipping your coffee or heading out the door, Cricut vinyl projects will unlock a world of crafting possibilities you can actually use and wear, again and again!
Let me show you how to use adhesive vinyl vs iron-on for Cricut beginners! This post contains some affiliate links for your convenience (which means if you make a purchase after clicking a link I will earn a small commission but it won’t cost you a penny more, there is no additional cost)! Read my full disclosure policy.
Materials to Make Adhesive Vinyl Mugs & Iron-On T-Shirts
View my Amazon shopping list with the exact items I used.
For adhesive vinyl mugs:
- Value Permanent Vinyl Rainbow Sampler -OR-
- Premium Permanent Vinyl Brights Sampler
- One (1) 15 oz Cricut Mug (I used the colors Miami and Ocean)
- StandardGrip Transfer Tape
- Isopropyl Alcohol -AND-
- Lint-Free Cloth
- Painter’s Tape (optional to mark placement on mug) -OR-
- Dry Erase Marker (optional to mark placement on mug)
For iron-on vinyl T-shirts:
- Value Iron-On Vinyl Rainbow Sampler -OR-
- Everyday Iron-On Vinyl Rainbow Sampler -OR-
- White Iron-On Value Vinyl
- One (1) T-Shirt (I used colors Red, Sapphire, and White)
- Household Iron -OR-
- Heat Press – I used the Cricut EasyPress 2 -AND-
- Pressing Pad
- Lint Roller
For both projects:
- A way to cut your vinyl – I’m using the Cricut Maker 4, but you can also use a Cricut Maker series machine, a Cricut Explore series machine, the Cricut Venture, or the Cricut Joy Xtra for both projects (and the original Cricut Joy for the mug
- Cricut Green StandardGrip Machine Mat 12″ x 12″
- Scissors
- Brayer
- Weeding Tool
- Scraper Tool
- Ruler -OR-
- Tape Measure
- Cricut BrightPad Go (optional to help with weeding)

How to Make Vinyl Mugs & Iron-On T-Shirts!
Vinyl vs Iron-On for Cricut Beginners
Learn the basics of using adhesive vinyl vs iron-on for Cricut beginners!
Materials
- Value Iron-On Vinyl Rainbow Sampler -OR-
- Everyday Iron-On Vinyl Rainbow Sampler -OR-
- White Iron-On Value Vinyl
- One (1) T-Shirt - Large Red -OR-
- One (1) T-Shirt - Large Sapphire -OR-
- One (1) T-Shirt - Large White
- Value Permanent Vinyl Rainbow Sampler -OR-
- Premium Permanent Vinyl Brights Sampler
- One (1) 15 oz Cricut Mug - Miami -OR-
- One (1) 15 oz Cricut Mug - Ocean
- StandardGrip Transfer Tape
- Design #753 (My free SVG/DXF/PDF design files are available in my free resource library - get the password by filling out the form at the bottom of this page)
Tools
- A way to cut your vinyl - I’m using the Cricut Maker 4, but you can also use a Cricut Maker Series machine, a Cricut Explore Series machine, or the Cricut Venture
- Cricut Green StandardGrip Machine Mat 12" x 12"
- Scissors
- Brayer
- Weeding Tool
- Scraper
- Household Iron -OR-
- Heat Press - I used the Cricut EasyPress 2 -AND-
- Pressing Pad
- Parchment Paper
- Ruler -OR-
- Tape Measure
- Lint Roller
- Isopropyl Alcohol -AND-
- Lint-Free Cloth (for cleaning mugs)
- Cricut BrightPad Go (optional to help with weeding)
- OPTIONAL: Painter's Tape -OR-
- Dry Erase Marker (for marking placement on mugs)
Instructions
STEP 1: GET MY FREE FLORAL WILDLIFE DESIGNS FOR ADHESIVE & IRON-ON VINYL DECALS
First, download my free adhesive and iron-on vinyl designs from my free library – look for Design #753.
Alternatively, you can use the Save This Project form near the top of this post and the design link will be emailed to you.
TIP: If you’re not sure how to upload, go to jennifermaker.com/svgs to learn how to unzip and upload SVG files.
Inside the SVG folder, you’ll see three floral wildlife designs: a butterfly, a cardinal, and a mushroom.
For this tutorial, first I’ll show you how to make the butterfly SVG design out of Cricut iron-on vinyl using my Cricut Maker 4, then apply it to a T-shirt with a Cricut EasyPress. You can use the same steps to prepare, cut, and apply the other two designs to a T-shirt.
Then I'll show you how to make the butterfly SVG design out of Cricut adhesive vinyl using my Cricut Maker 4, then apply it to a mug. You can use the same steps to prepare, cut, and apply the other two designs to a mug.
The DXF folder contains files that can be cut on other cutting machines, and the PDF folder contains designs you can print and use to cut the materials by hand.
VARIATION 1: IRON-ON VINYL T-SHIRT
STEP 2: PREPARE YOUR IRON-ON VINYL DESIGN
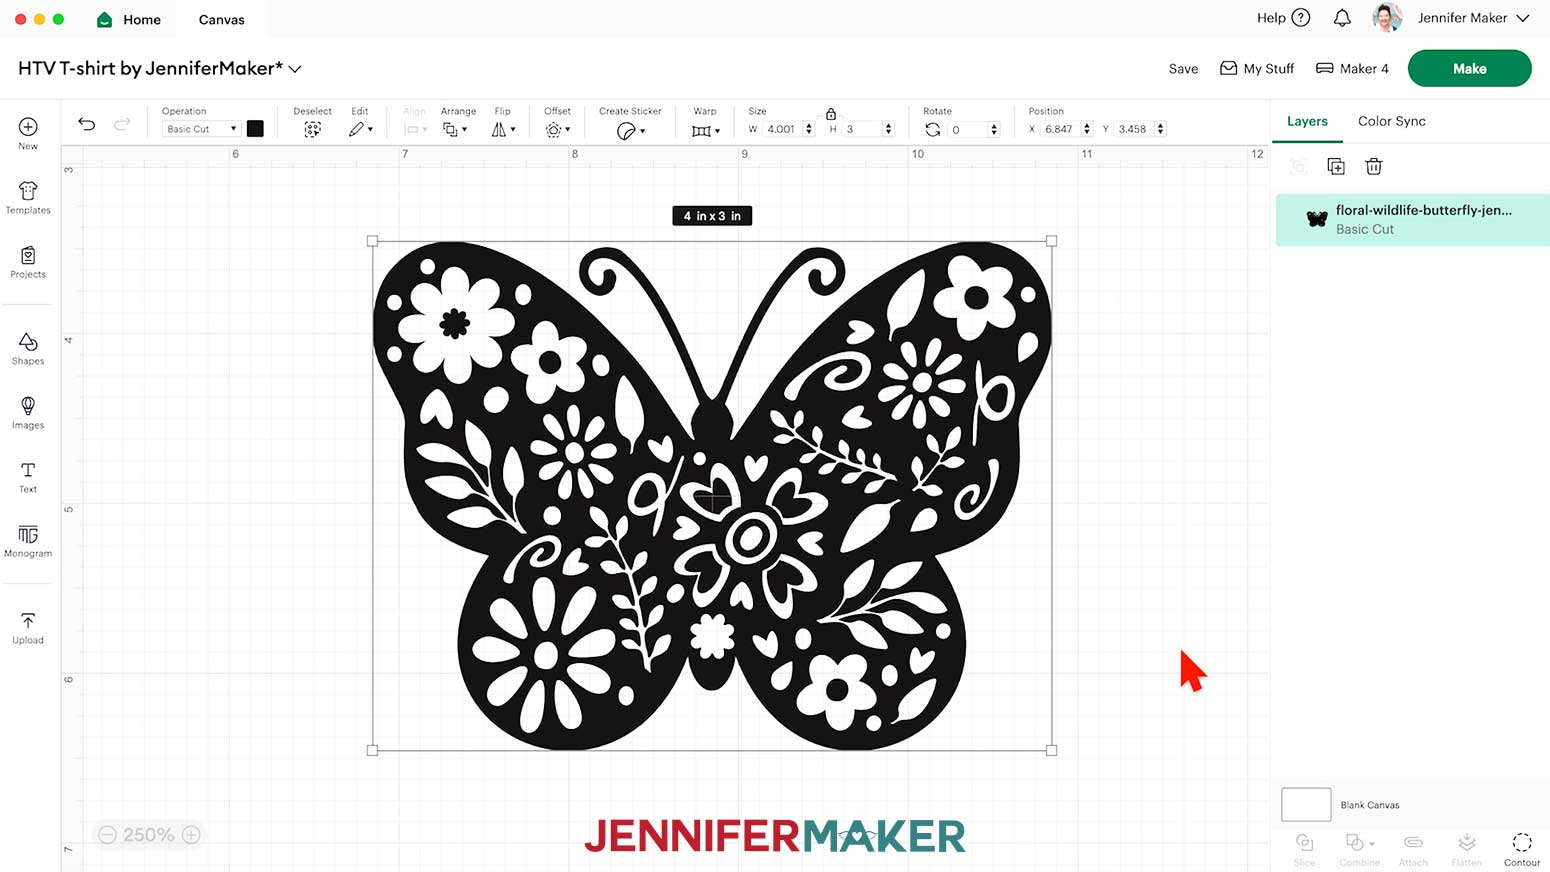
CRICUT DESIGN SPACE
- In Cricut Design Space on a blank Canvas, click “Upload.”
- Click “Upload Image.”
- Click “Browse.”
- Find and select the SVG of your choice from the main SVG folder.
NOTE: I’ll demonstrate with the butterfly design, but you can use the same steps to prepare, cut, and apply the other two designs using iron-on vinyl. - Click “Open” and then “Continue.”
- Click “Upload” to add the design to your Canvas.

- Click “Save” and give your project a name.
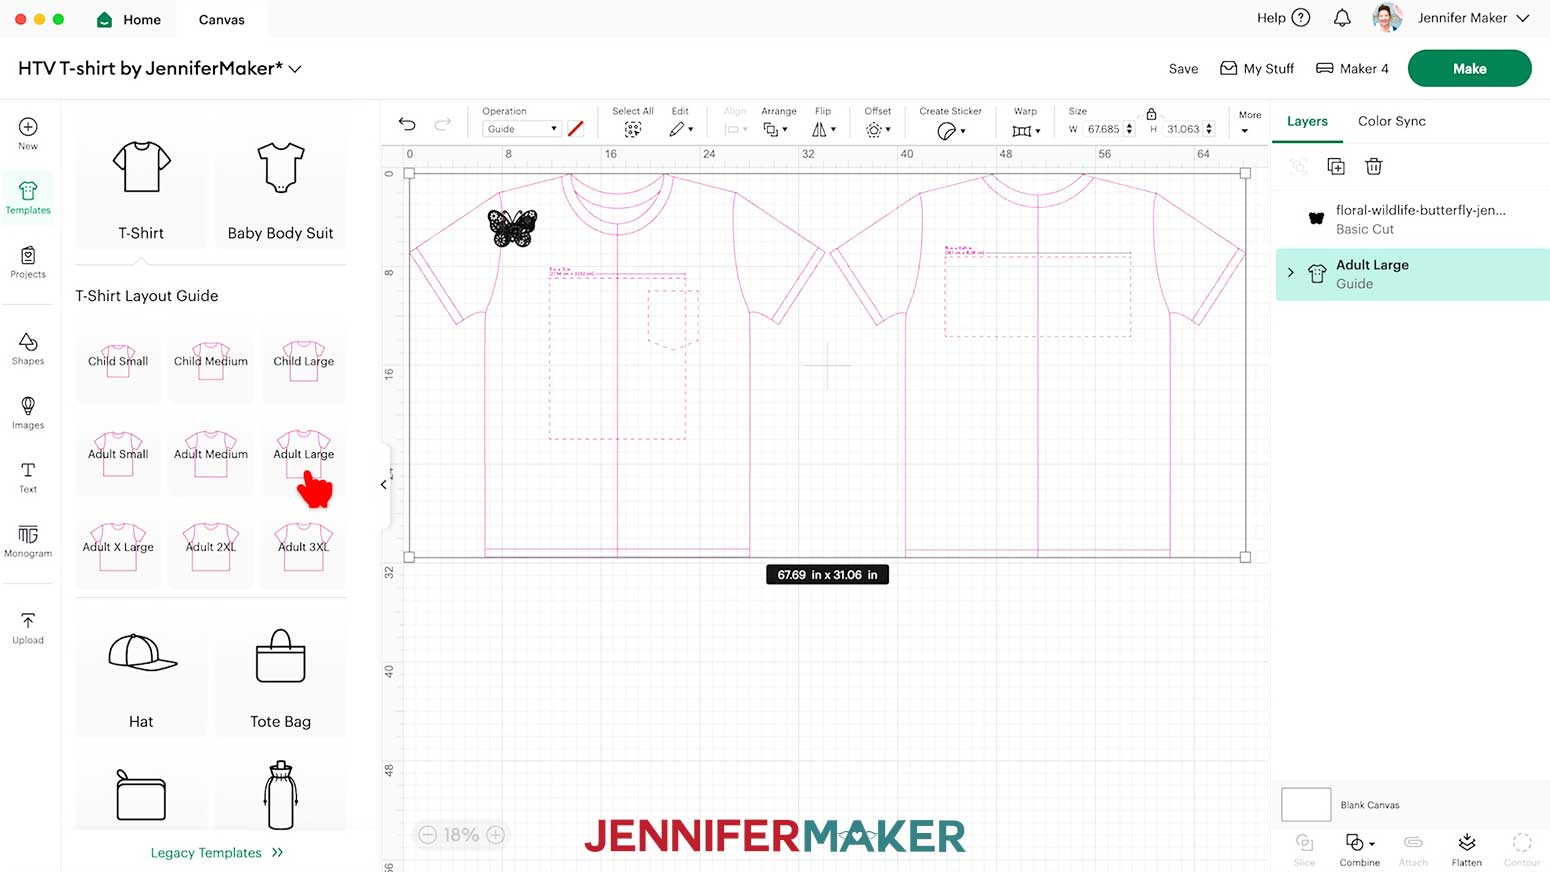
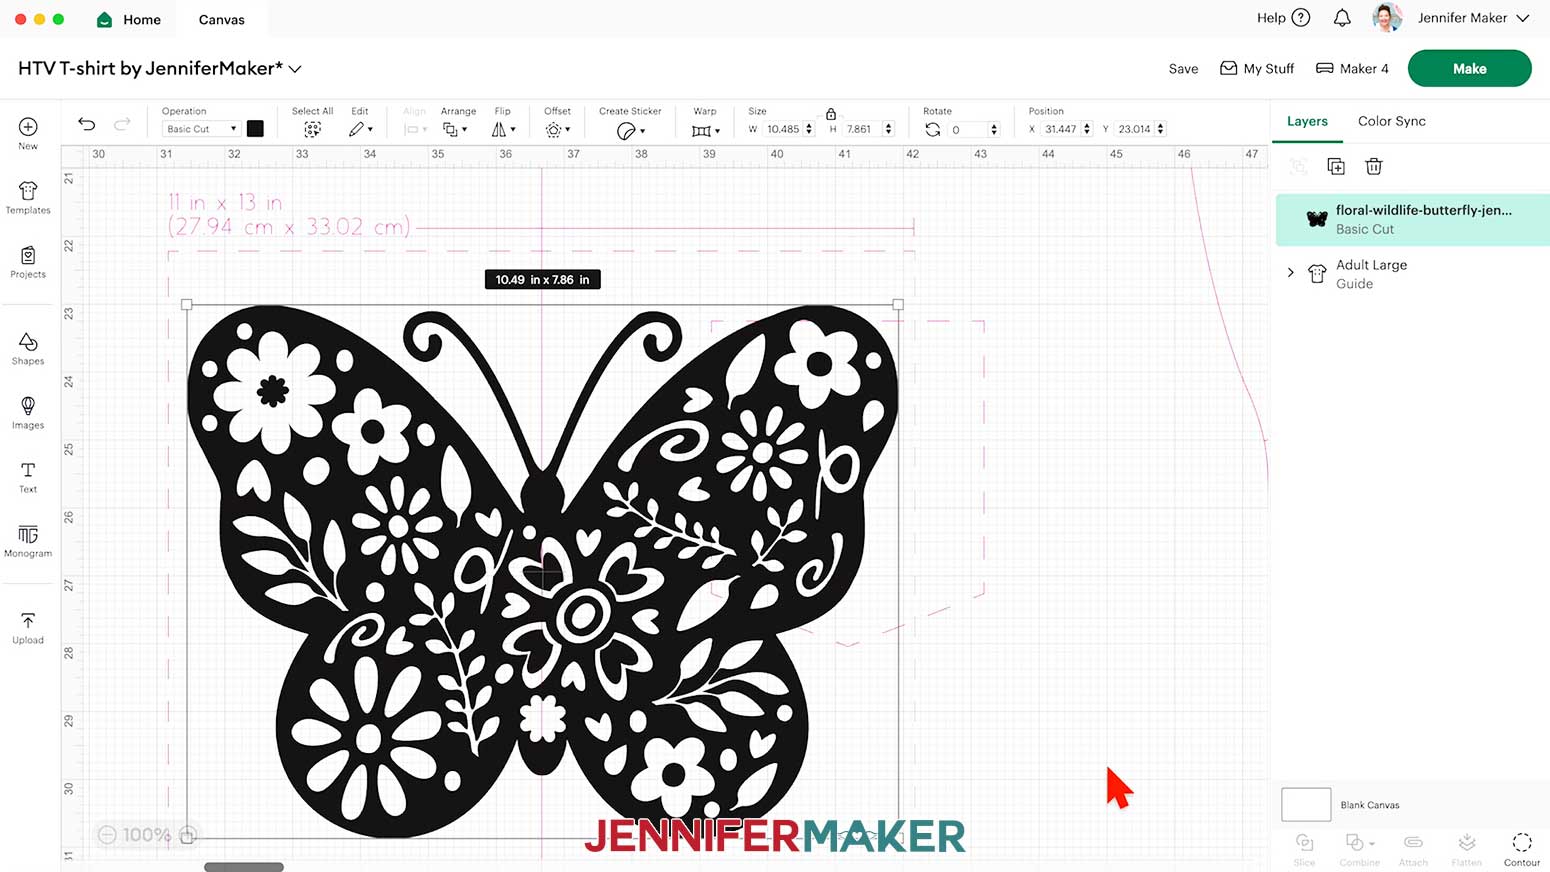
- Click the “Templates” icon and select “T-Shirt.”
- Select the shirt type and size to match yours.
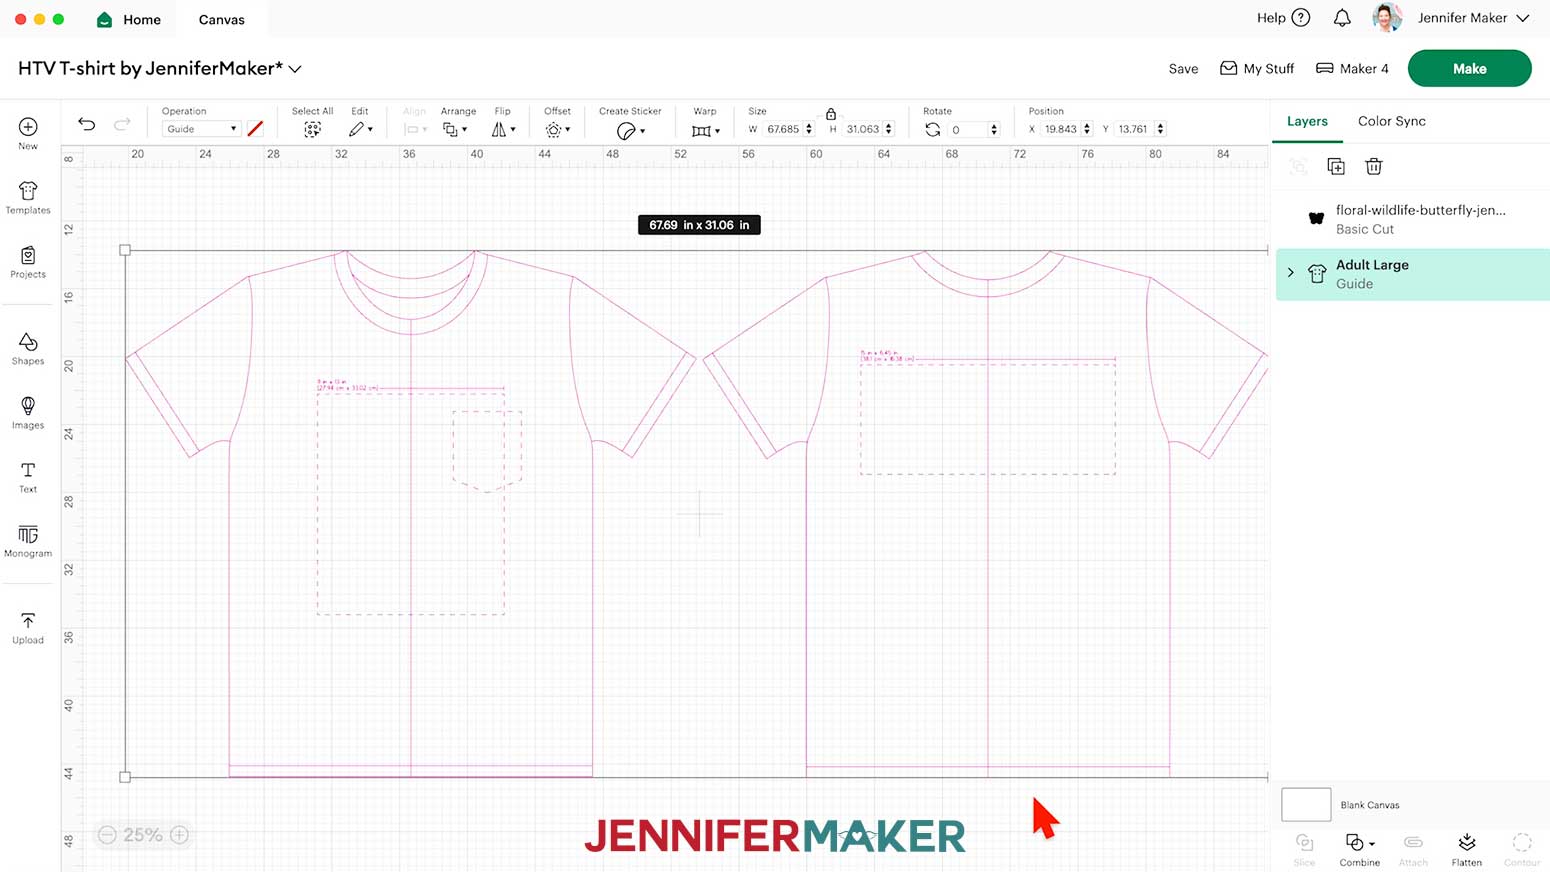
NOTE: I used the “Adult Large” T-shirt template. - Click the little arrow on the right of the Templates panel to close it. Here’s how the template looks on my Canvas. The T-shirt shape on the left is for the front of a shirt, and the one on the right is for the back.
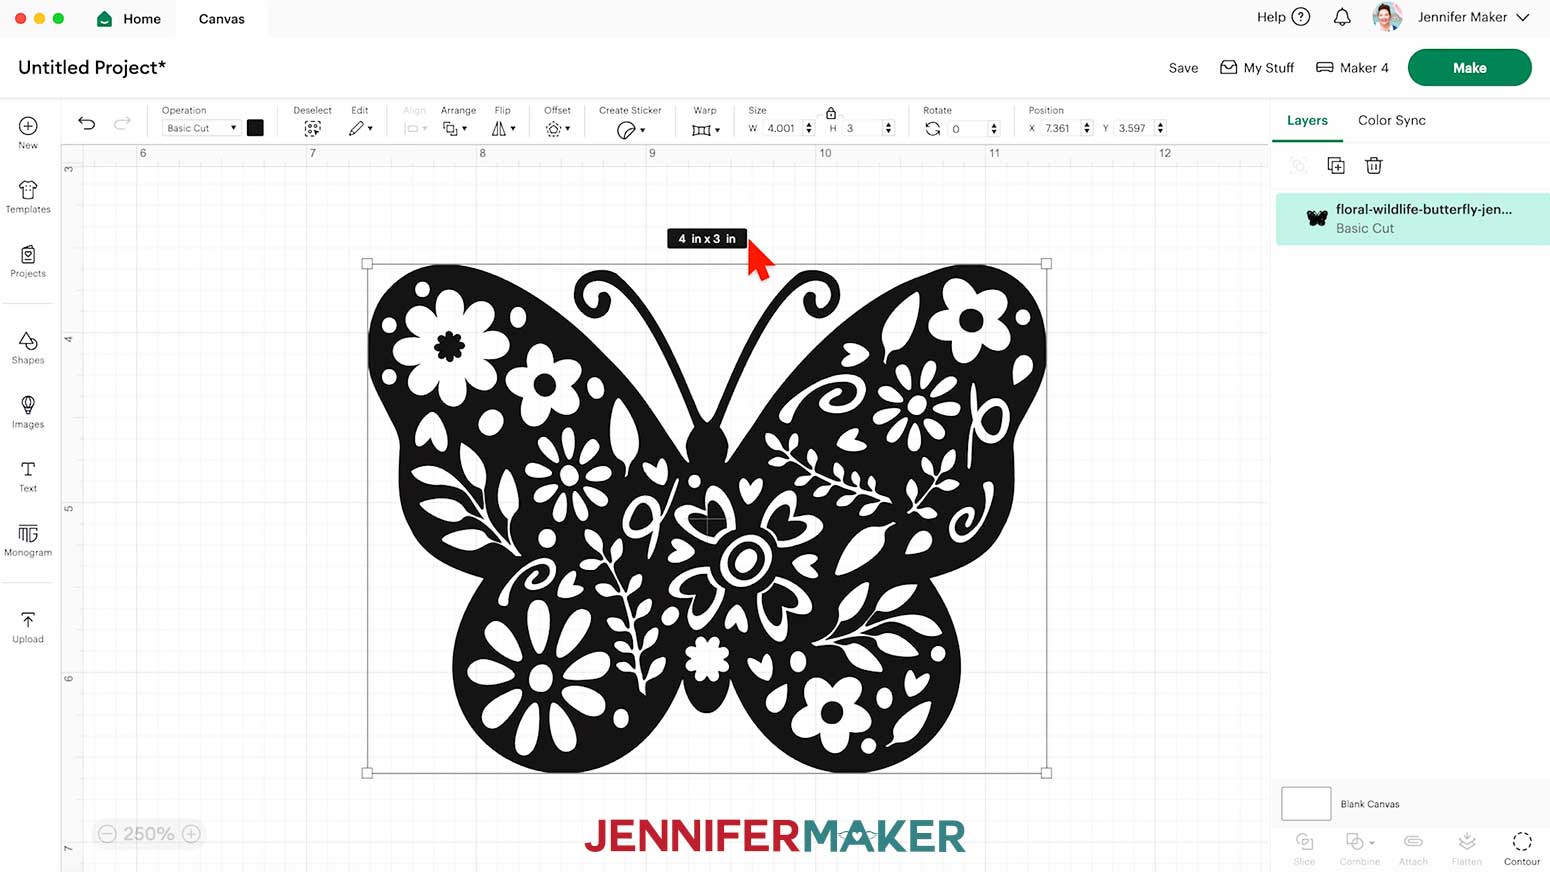
- Select your design and use the corner handles to resize it so it fits within the dashed lines on the front T-shirt template.
NOTE: Make sure the lock icon is closed to maintain proportions.
TIP: When sizing the decal for the front of your shirt, I recommend making and using a T-shirt ruler guide.
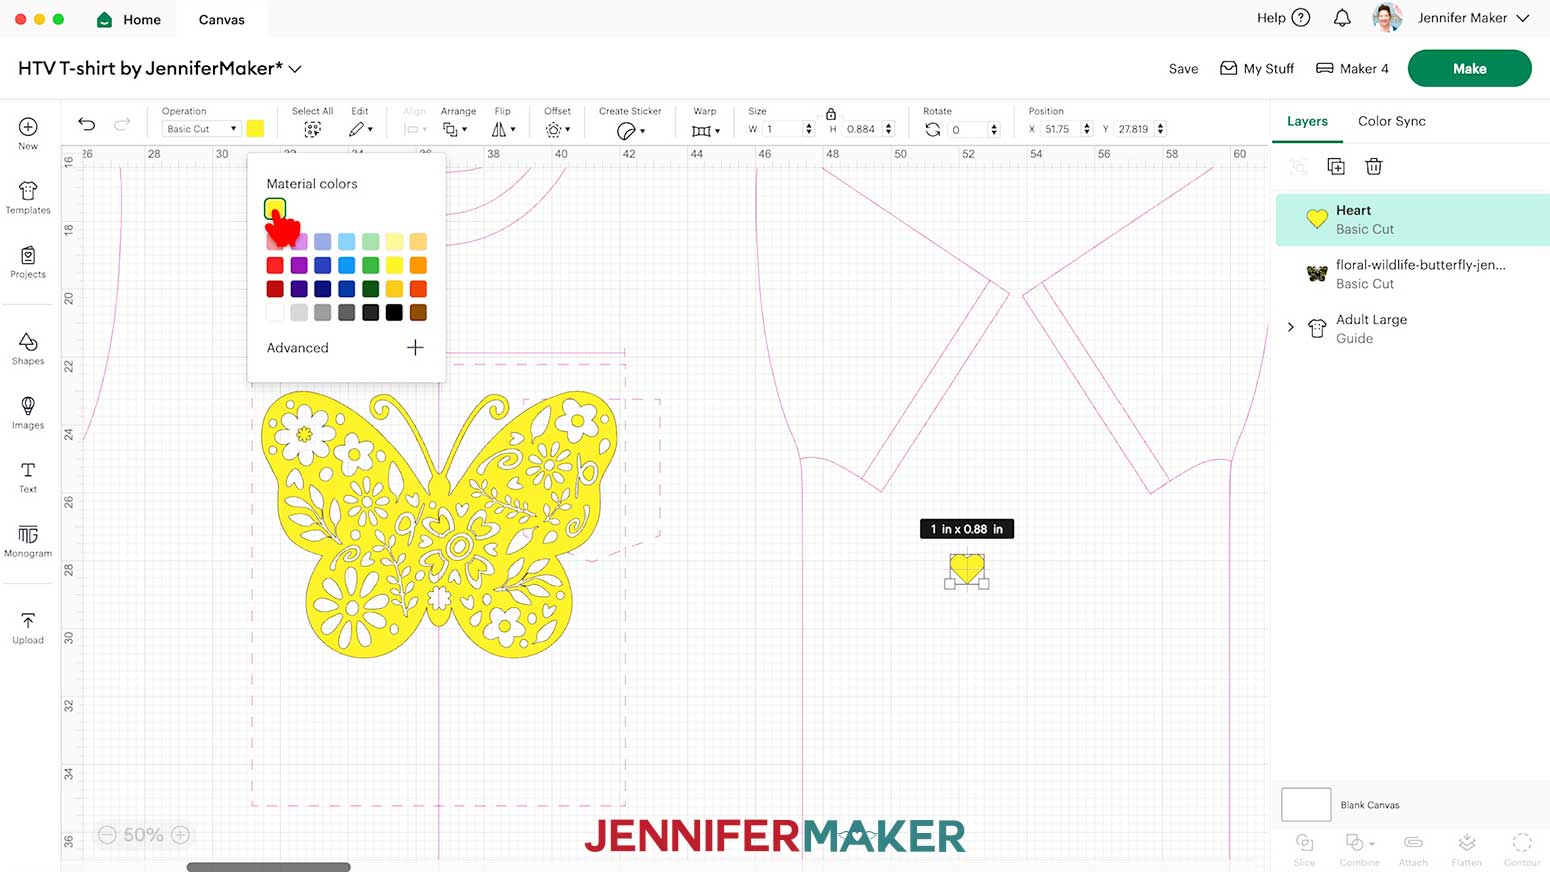
NOTE: Zoom in to the dashed lined areas to see the maximum recommended dimensions for designs placed in those spots. - To create a small decal to test your pressing settings on the hem or sleeve of your T-shirt, click the “Shapes” icon and select a free shape (like a heart) to add it to the Canvas.
- Resize the shape to about 1” wide, and make it the same color as your design so it cuts on the same mat from the same material.
TIP: If you’d like to change the color of the design, use the color box at the top to select a color. - Your design is ready to cut!
NOTE: You do not have to delete the T-shirt template from the Canvas – it will not be cut.

STEP 3: CUT AND WEED YOUR IRON-ON VINYL DESIGN
- Select your machine at the top right, then click “Make.”
- If prompted, click "On Mat," choose your mat size, and click “Confirm.”
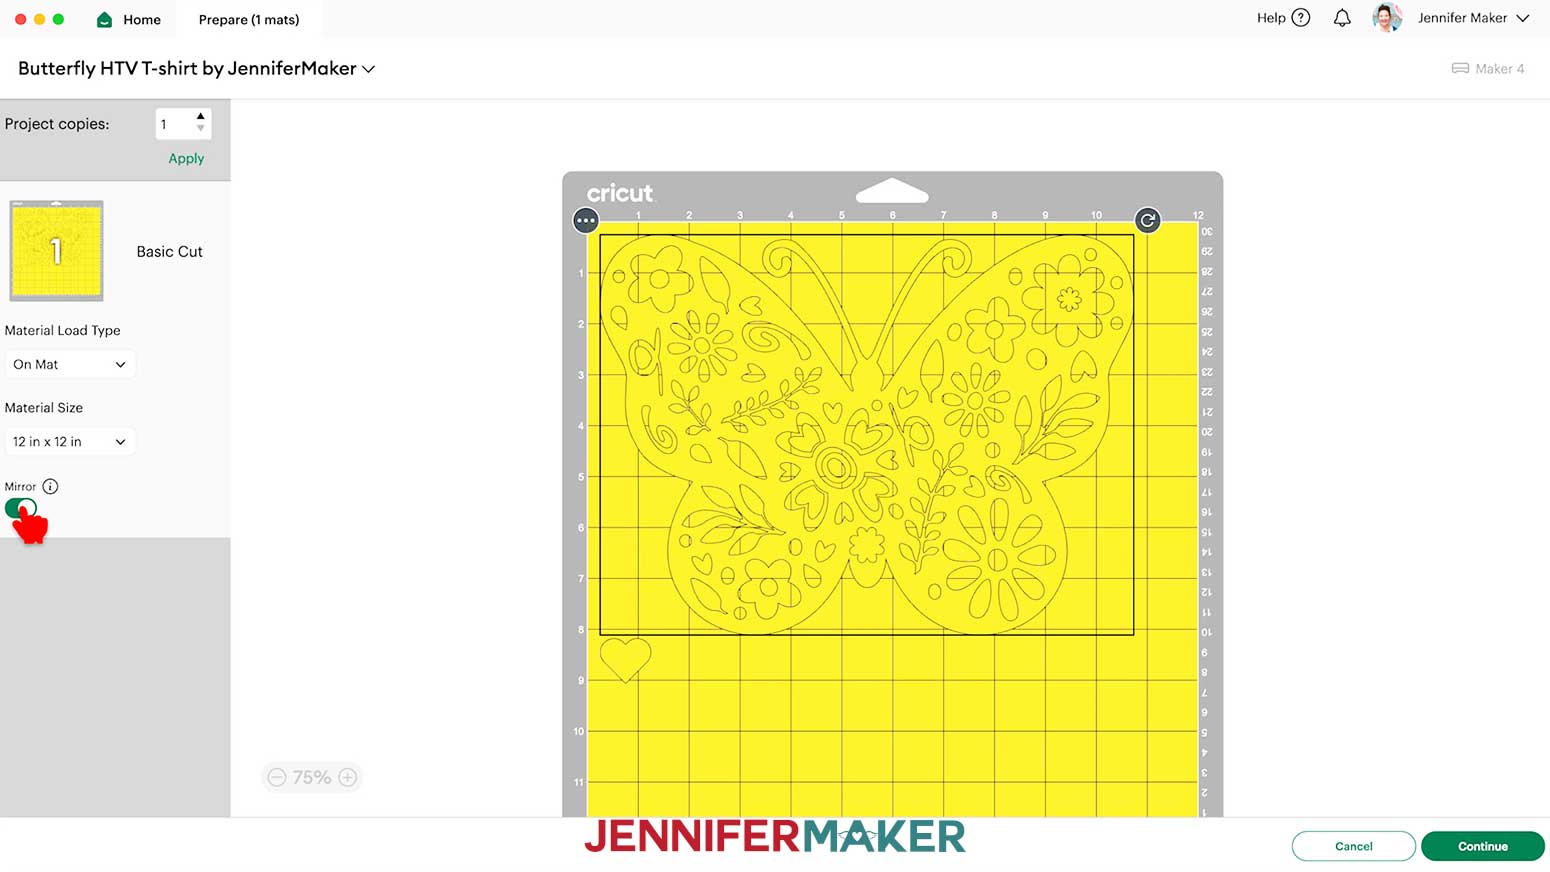
- On the Prepare screen, make sure the correct Material Size is selected and “Mirror” is toggled ON for each of your mats.
TIP: Always toggle “Mirror” on when cutting iron-on vinyl transfers. - Click “Continue.”
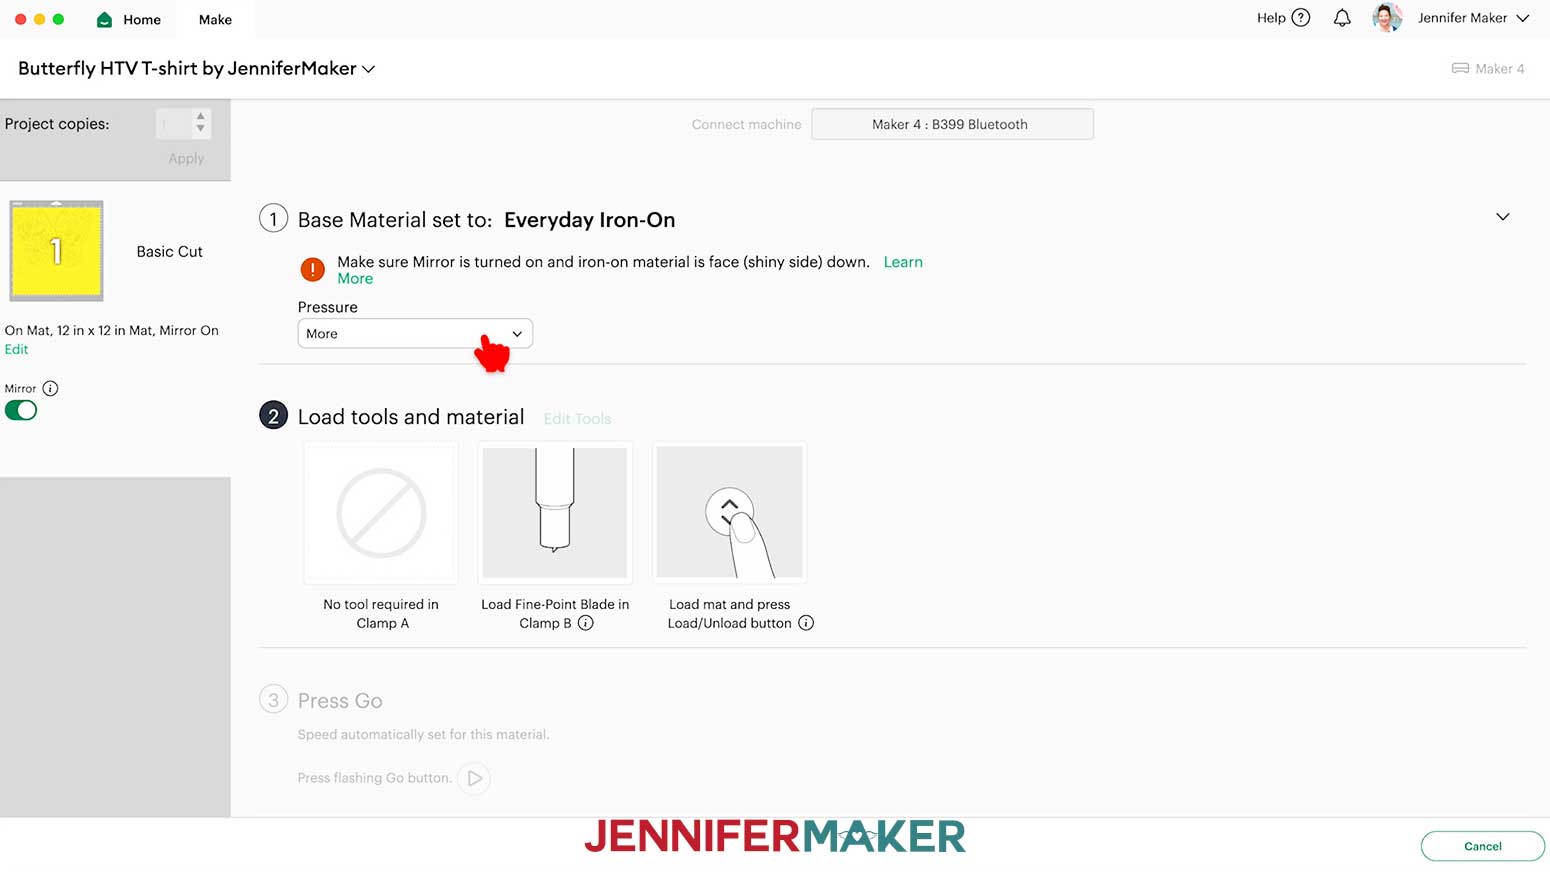
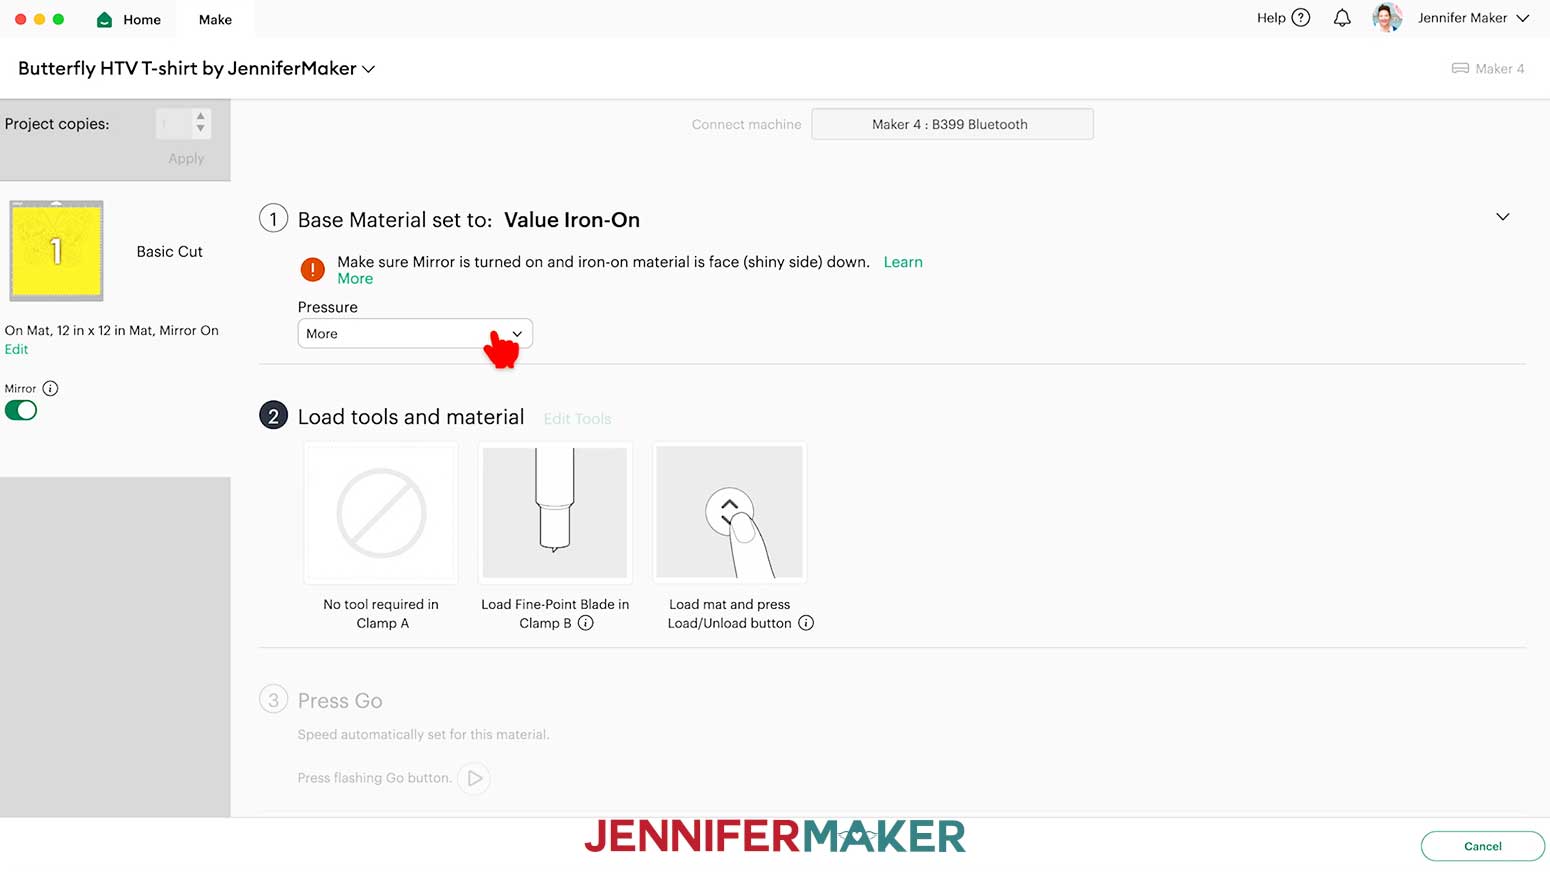
- On the Make screen, make sure your settings match the mat and vinyl type. I used the following settings:
“Everyday Iron-On” setting with “More” Pressure for Cricut Everyday Iron-On Vinyl.
“Value Iron-On” setting with “More” Pressure for Cricut Value Iron-On Vinyl.
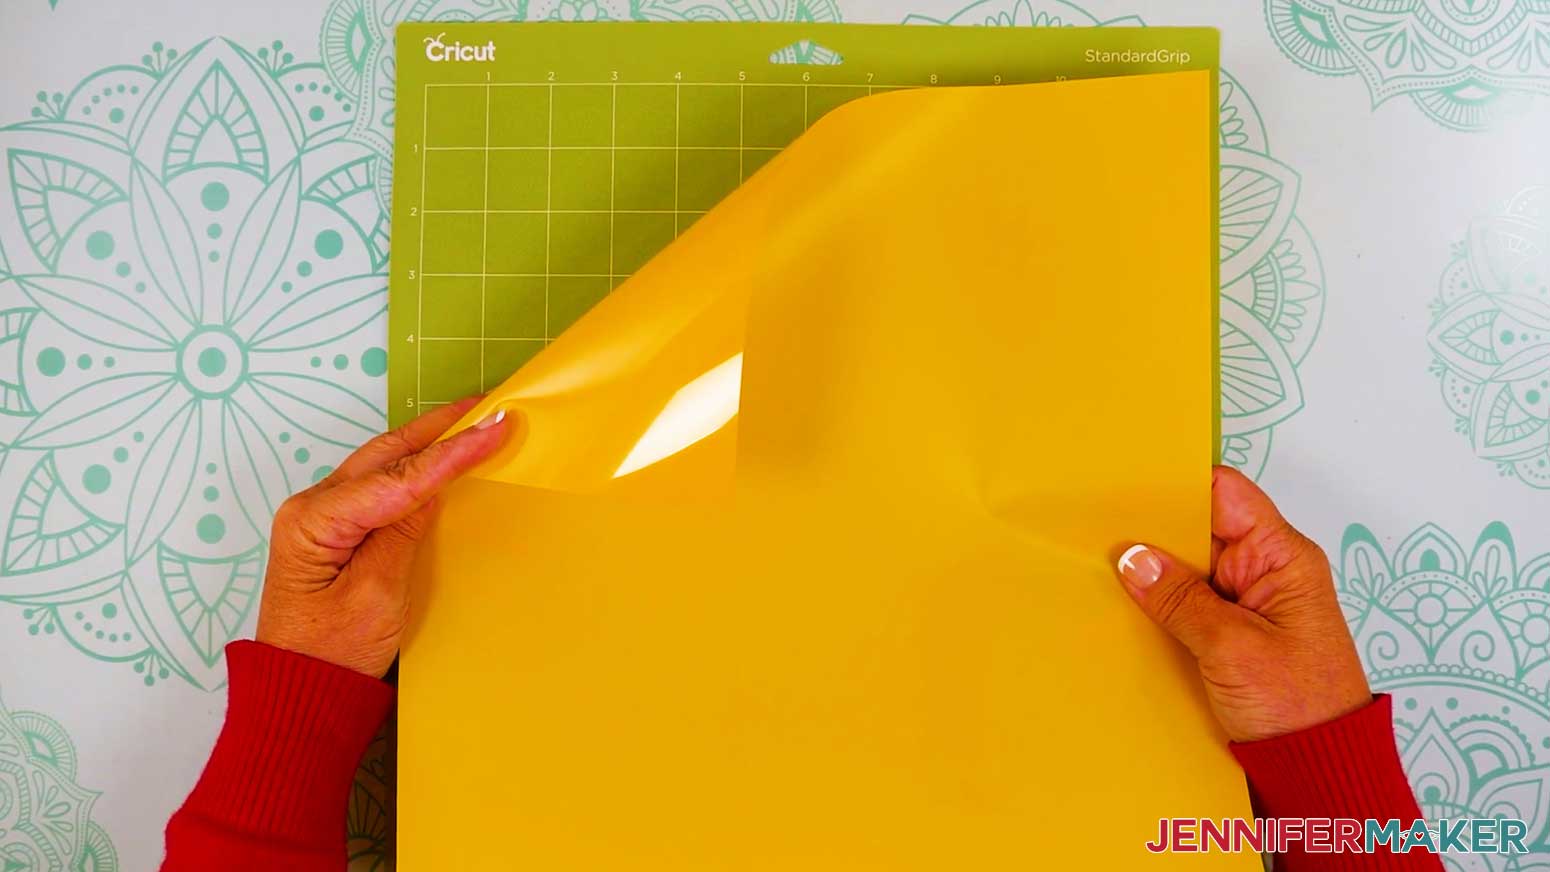
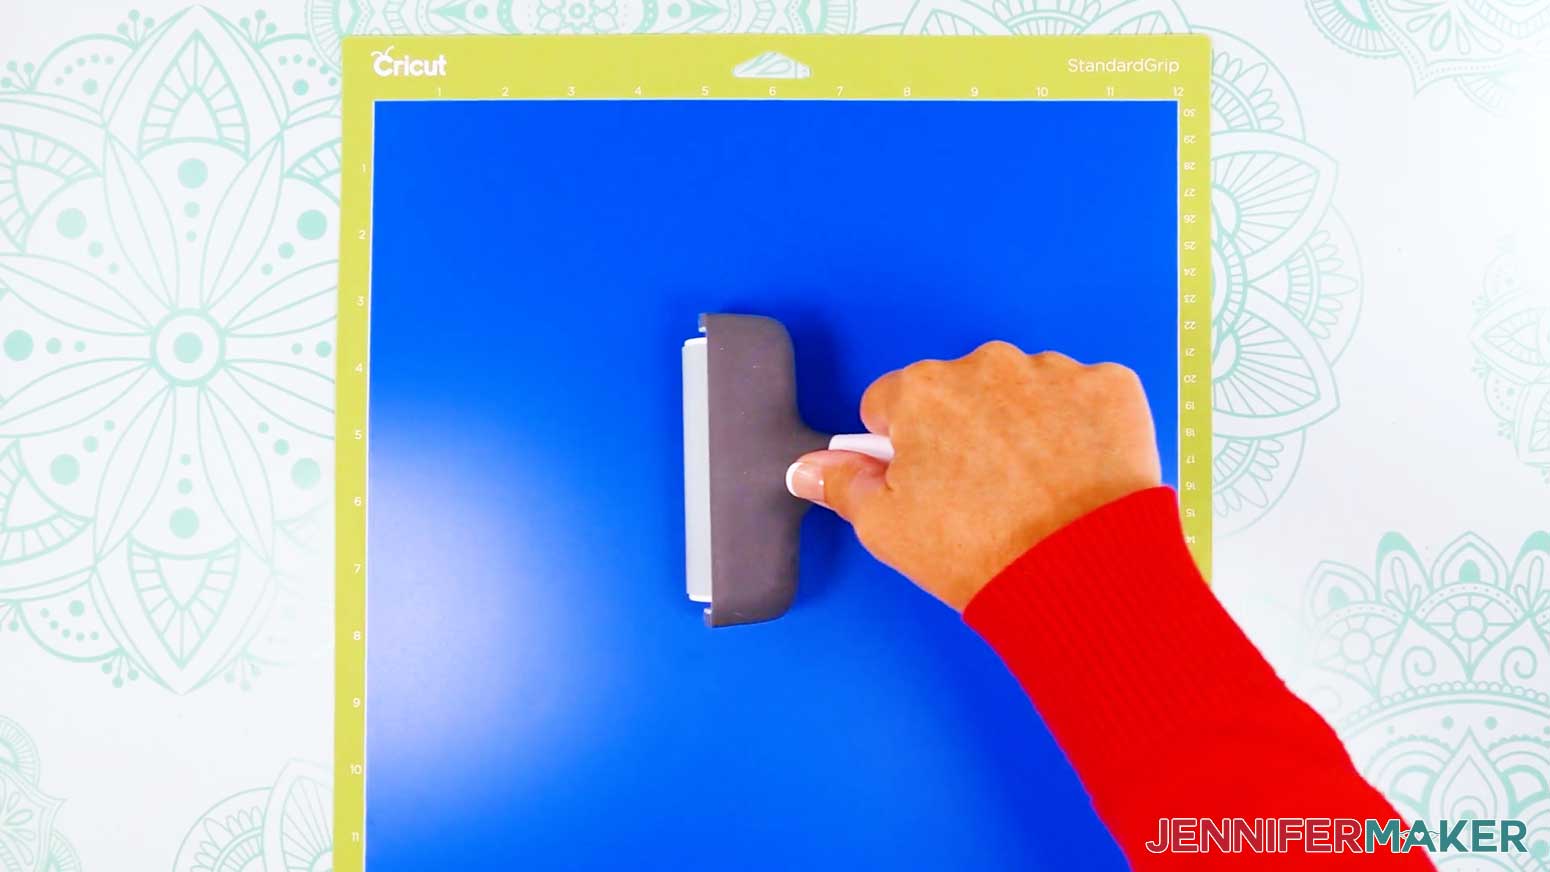
NOTE: The “Value Vinyl” setting is for Cricut’s adhesive value vinyl, not the iron-on vinyl we’re using. Be sure to select “Value Iron-On.” - Place your vinyl onto a green StandardGrip machine mat.
NOTE: Iron-on vinyl must be cut with the carrier sheet (usually the shinier side) face-down on the mat. If you’re not sure which side is which, use a weeding tool to scratch a corner on each side. The one you can lift is the vinyl, which goes face-up. - Use a brayer to adhere it well.
- Check that your Fine-Point Blade is clean and in the clamp.
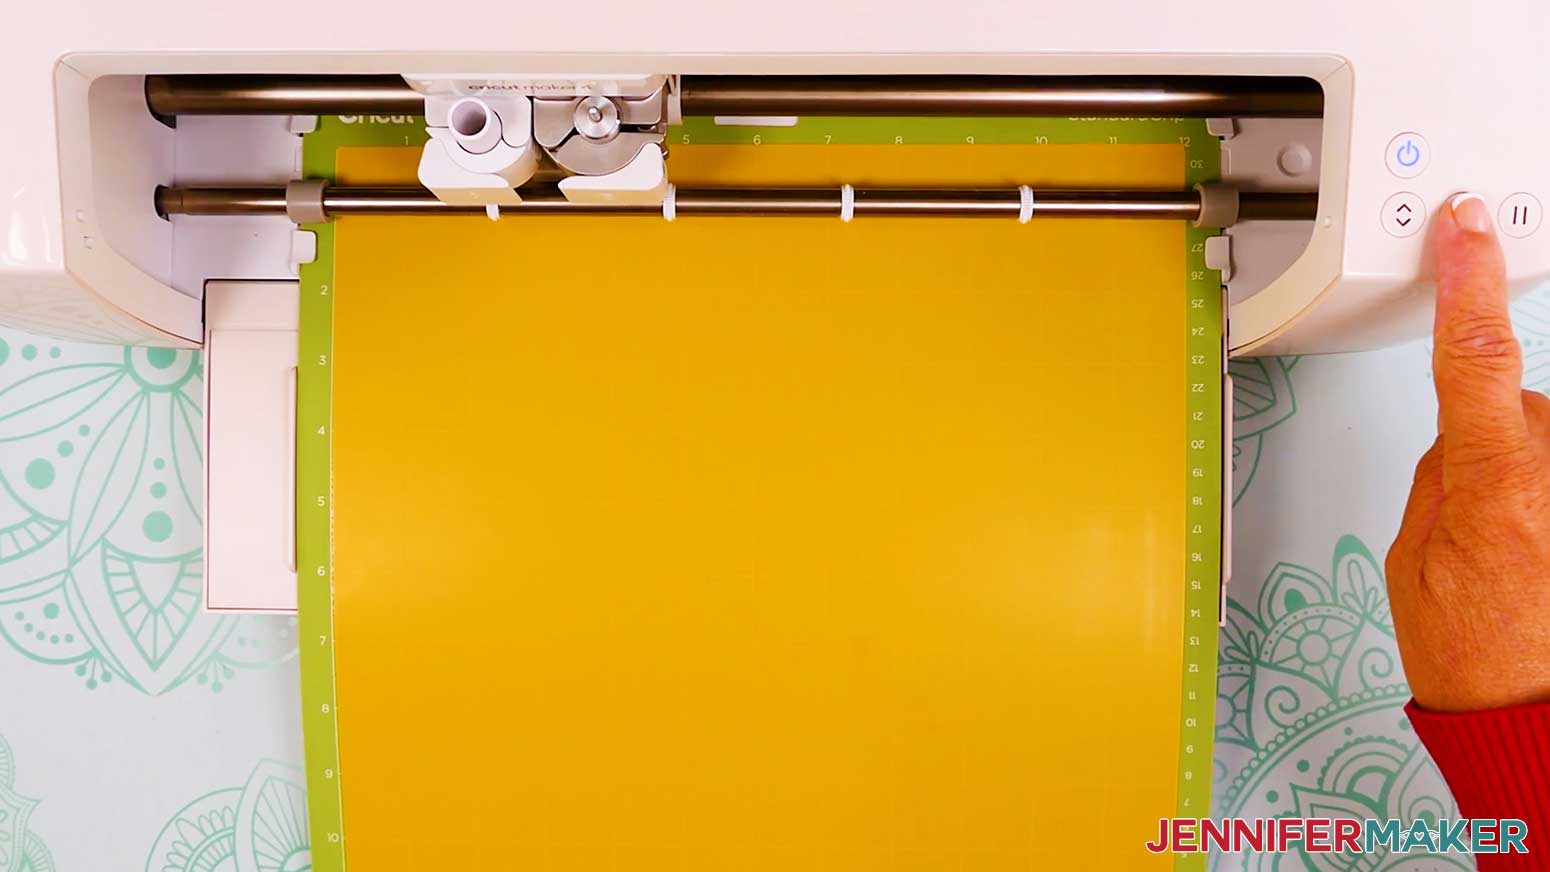
- Load your mat into your Cricut and press the flashing middle button to begin cutting.
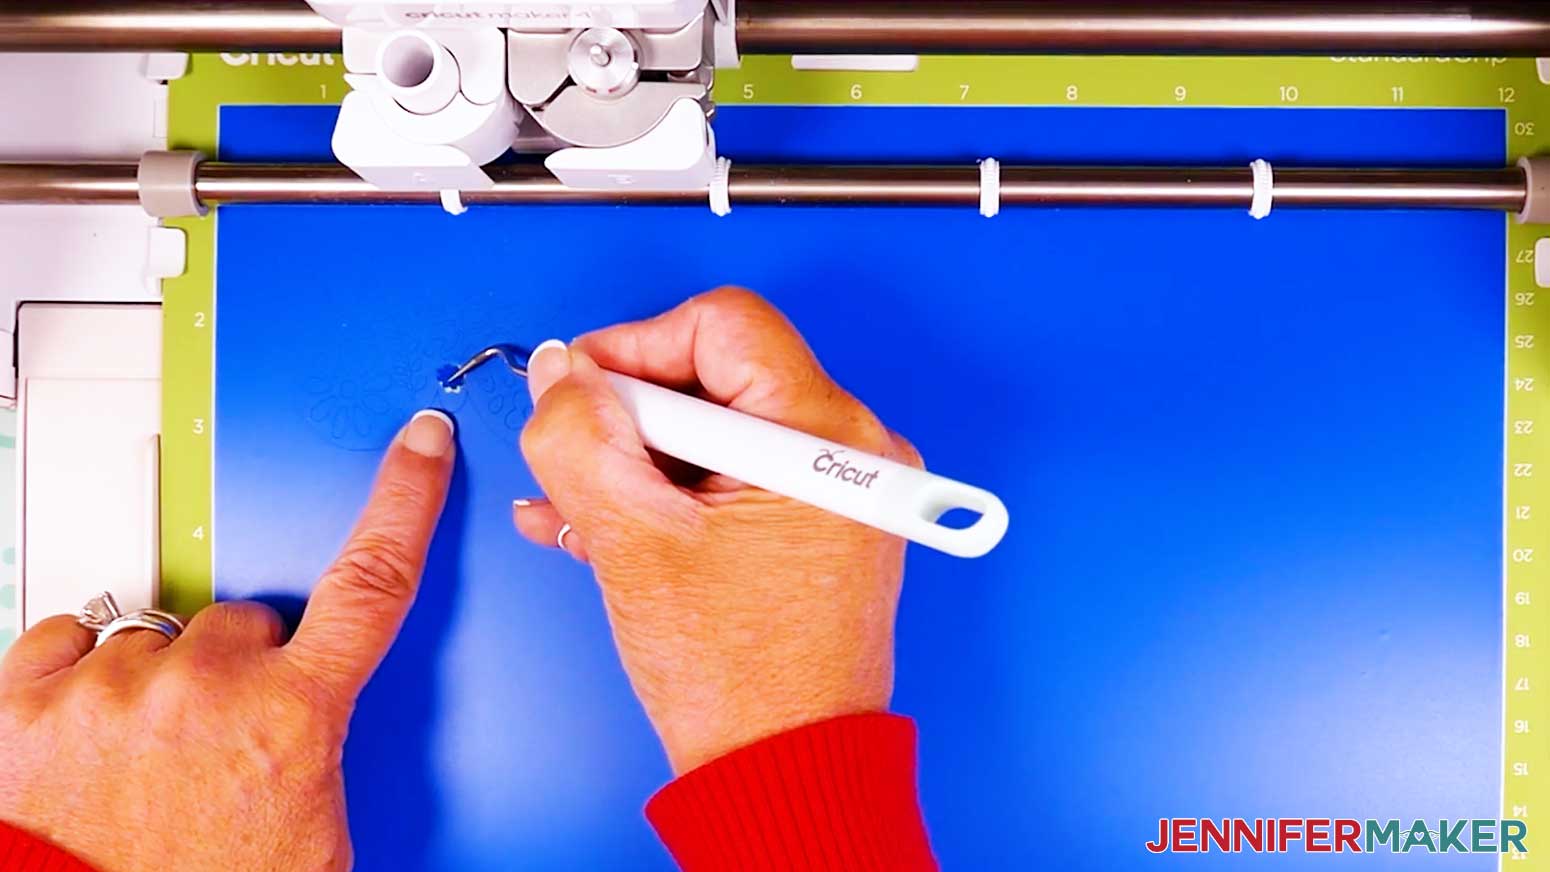
- Before unloading the mat, use your weeding tool to gently lift one of the small cutout shapes inside the design to see if the cut went through the vinyl, but not the carrier sheet.
- If it's not cut all the way through the vinyl, press the middle button to cut the design in the same spot again.
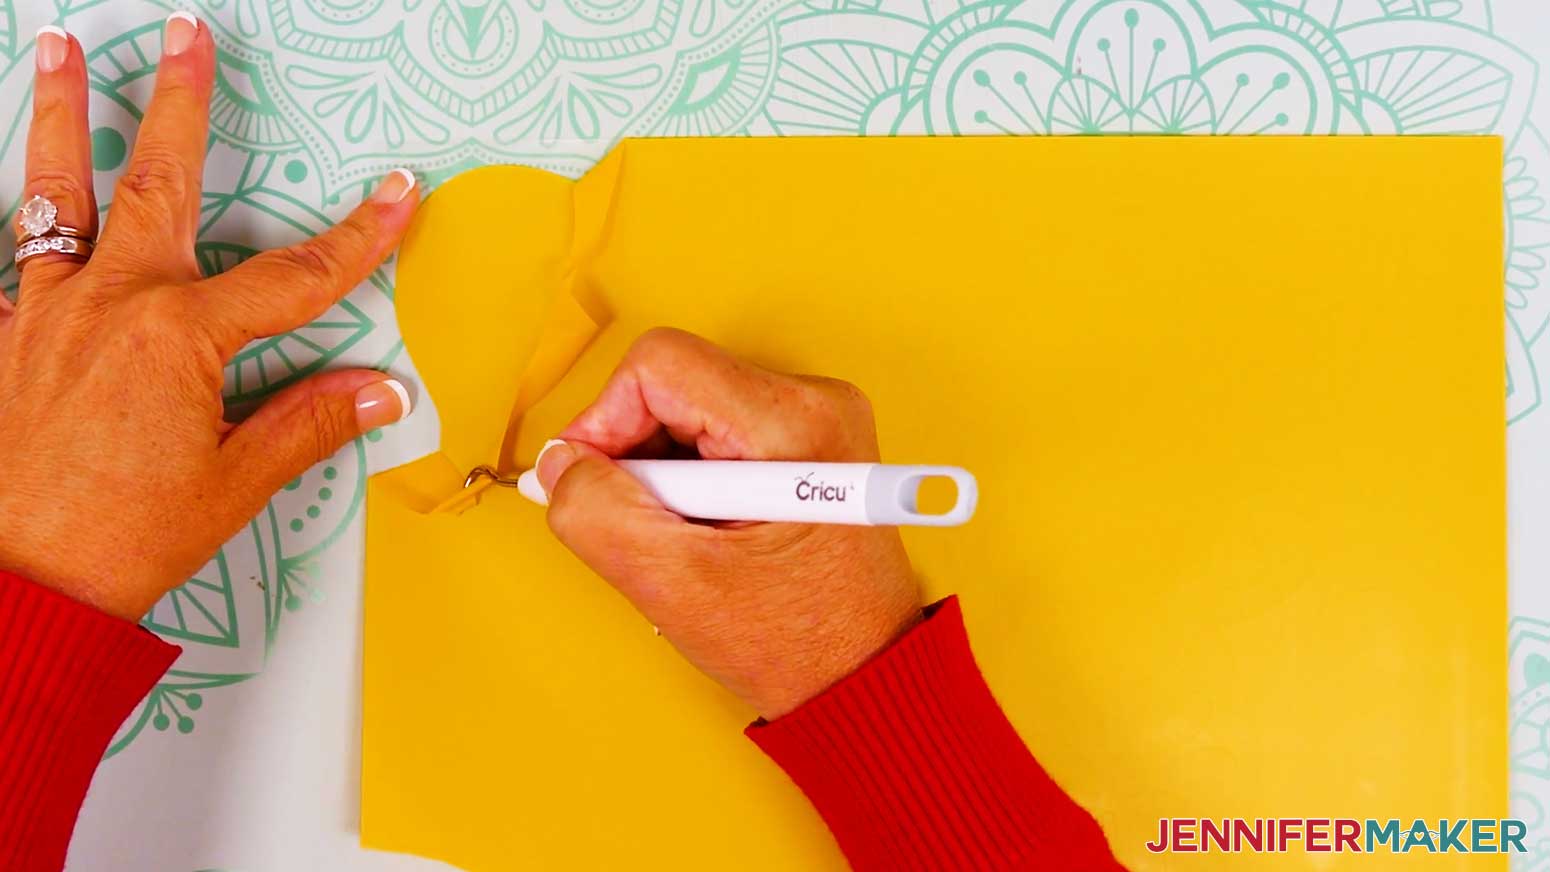
- Once the material is cut all the way through, unload the mat, flip it over onto your work surface, and roll it back to release the vinyl.
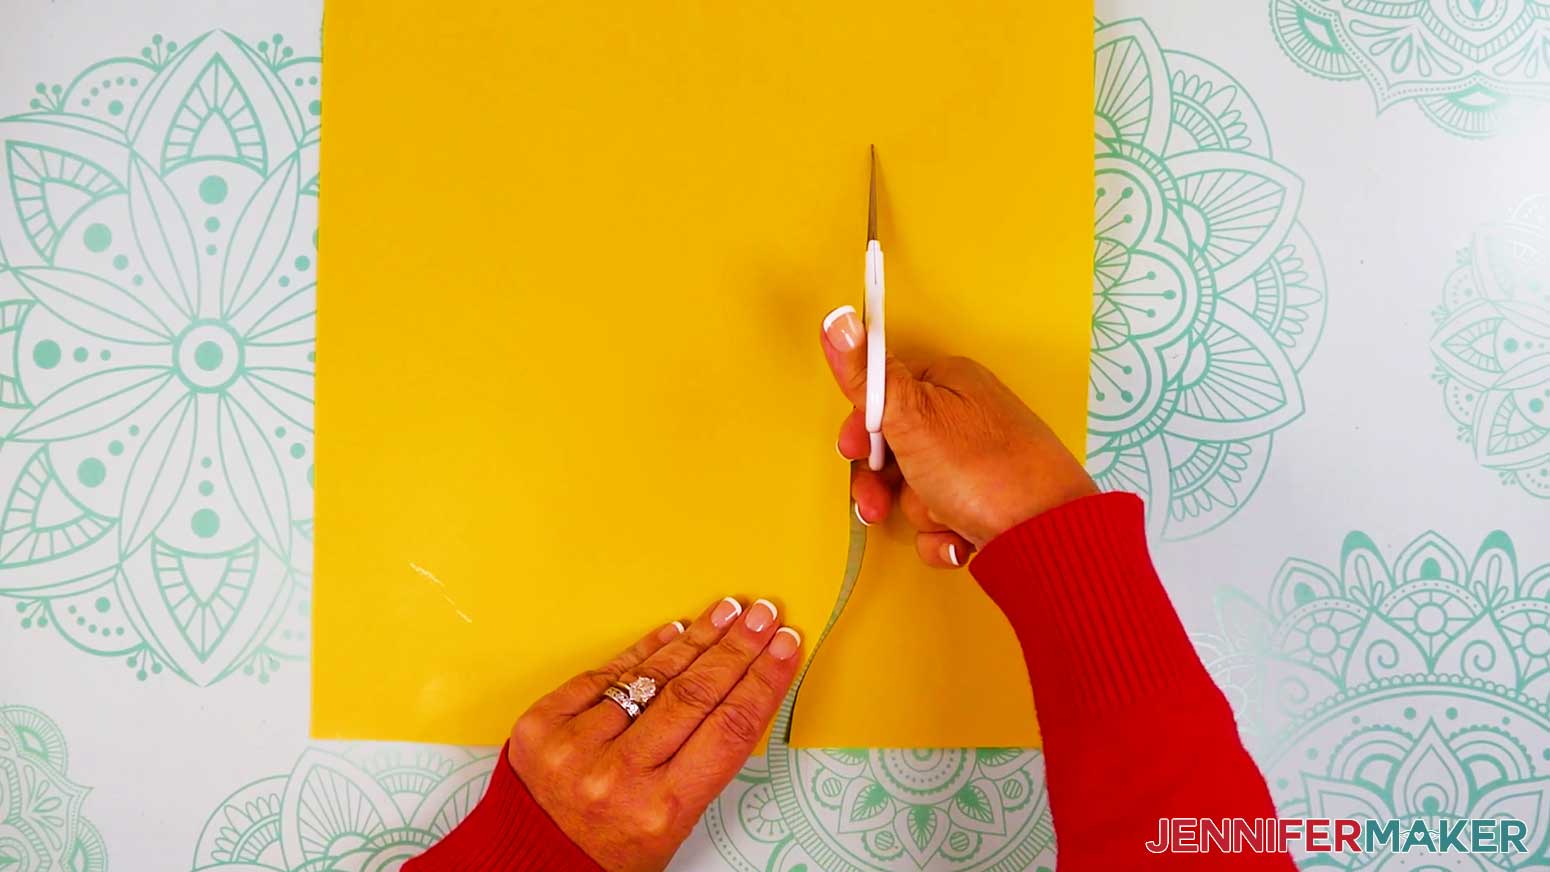
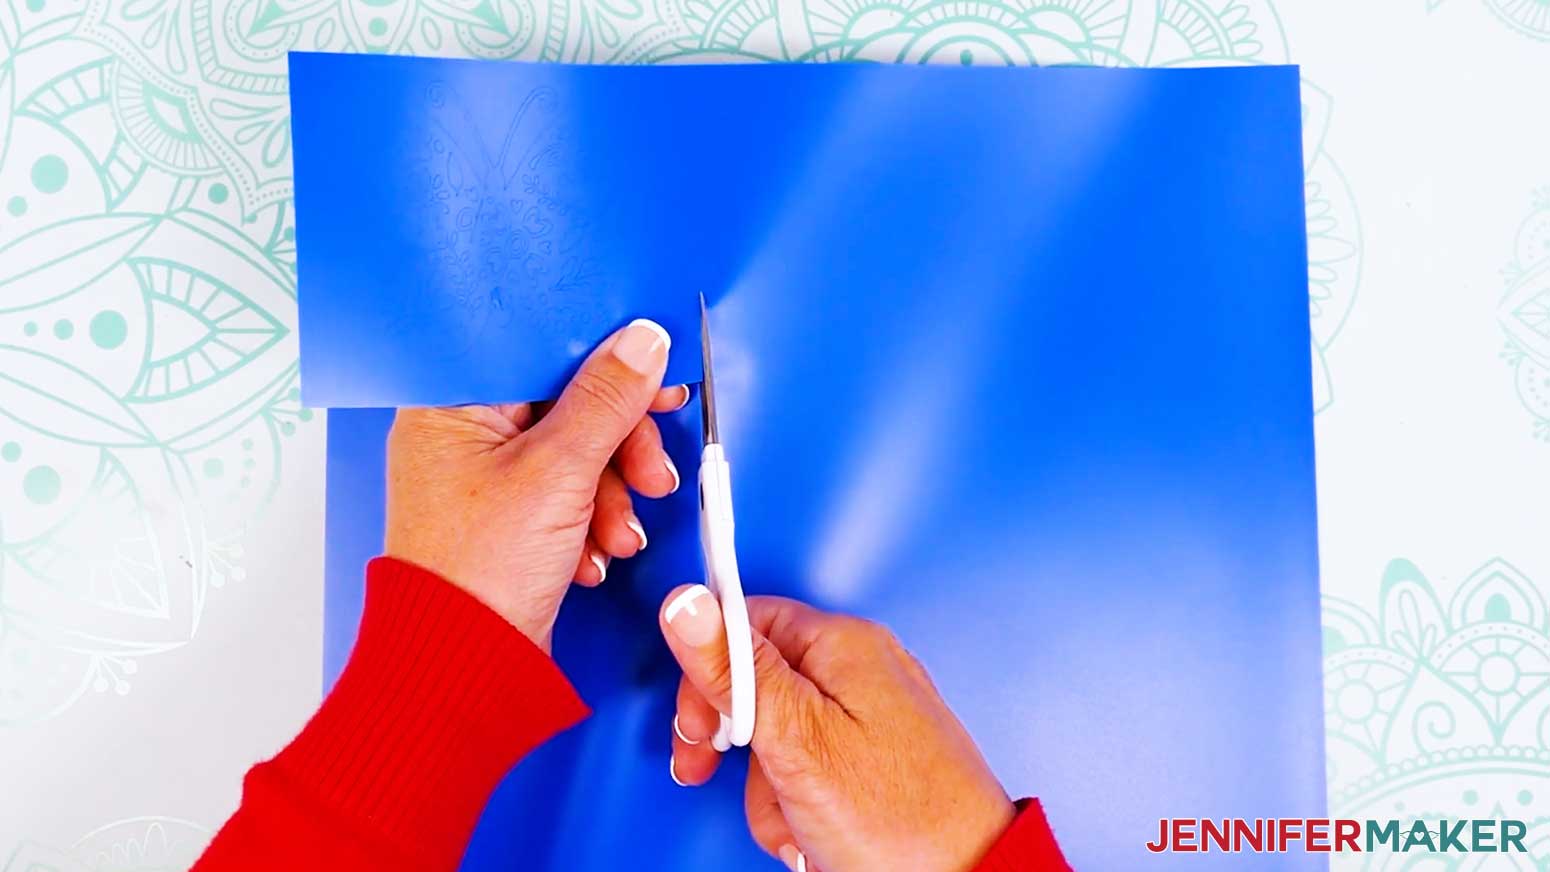
NOTE: If you have any issues with your cuts, check out my Intricate Cuts tutorial. - Use scissors to loosely trim around your design on the carrier sheet.
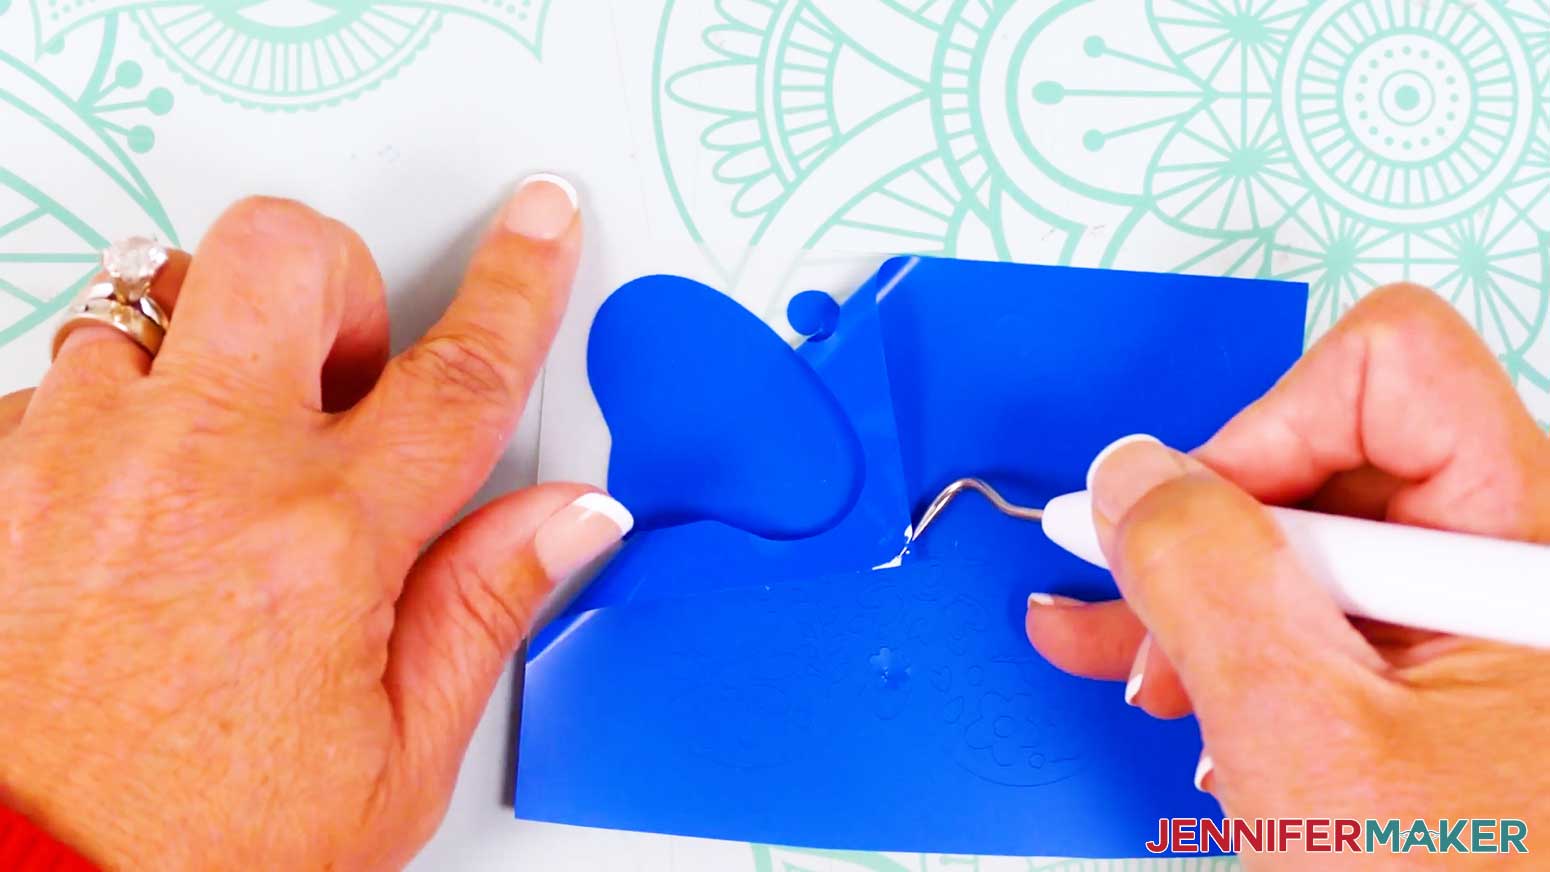
- Use a weeding tool to remove the excess vinyl around the large shape.
TIP: If any cutout details lift off the carrier sheet, gently pat them back down and continue to remove the excess vinyl.
NOTE: I found that Cricut Value Iron-On Vinyl tears more easily than other heat-transfer vinyl. Be careful not to tear areas of the design while weeding. - Next, weed the smaller inner shapes. Gently poke the tool into the vinyl you want to remove and pull it away. If any design details lift, gently pat them back down.
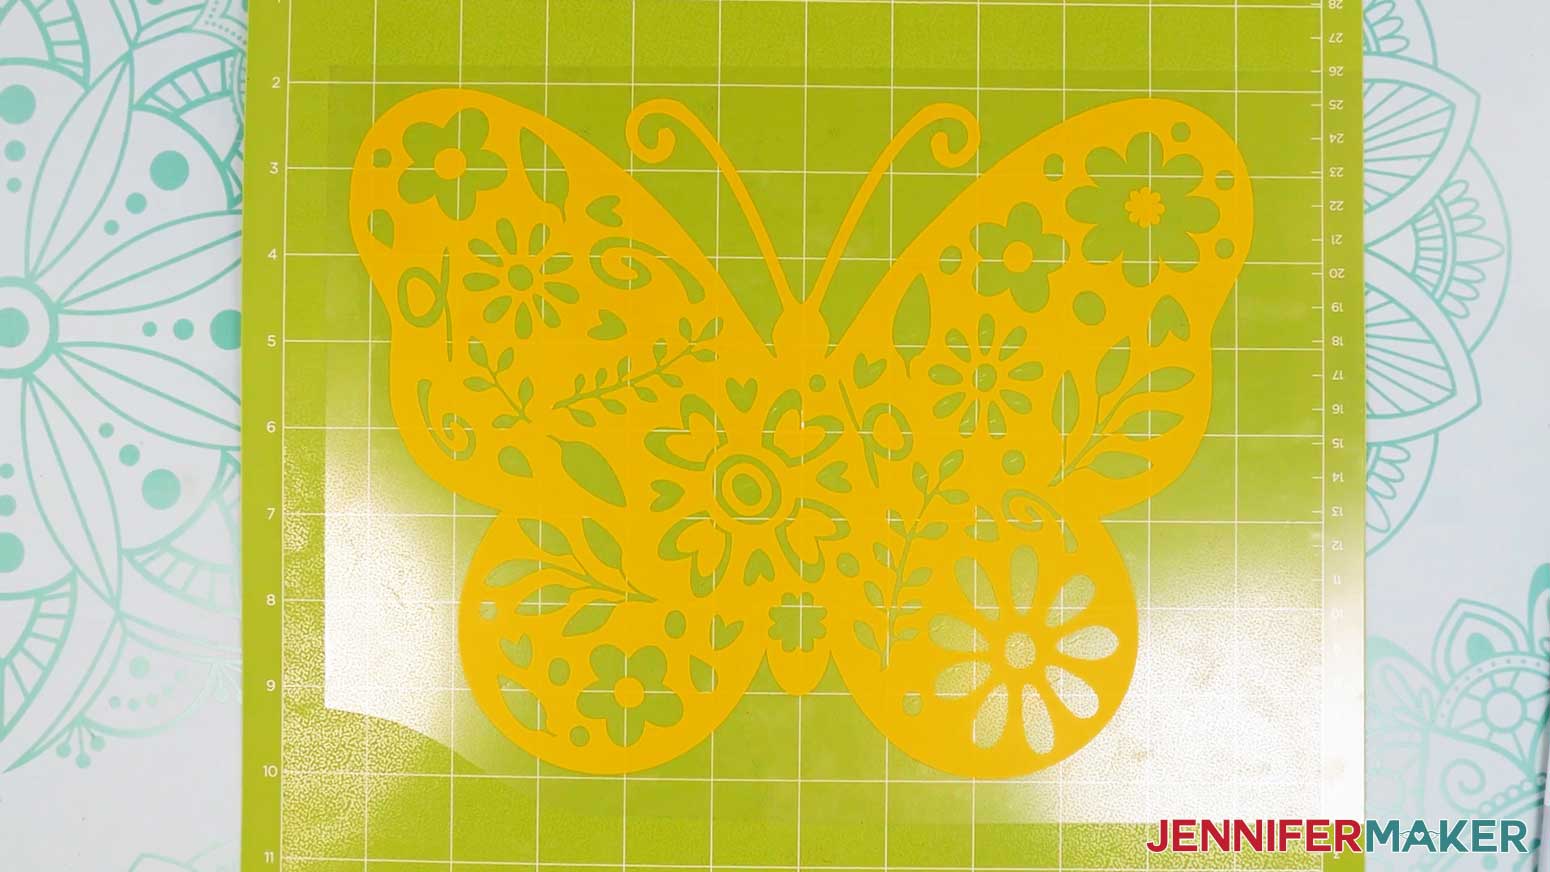
TIP: If there are any pieces missing from the design, check the piece of excess vinyl you removed to see if the piece can be put back into place on the design. Use your weeding tool and the outline on the carrier sheet to help. - Here’s what my weeded iron-on vinyl design looks like.
STEP 4: APPLY YOUR IRON-ON VINYL DESIGN TO A T-SHIRT
NOTE: If making the T-shirt to gift or sell, I recommend not washing the shirt prior to applying the vinyl to keep the shirt looking new. If you’re making the shirt for yourself, you may wish to wash first to pre-shrink and remove chemicals that could interfere with the vinyl’s adhesion. Don’t use fabric softener as it can interfere with the vinyl.
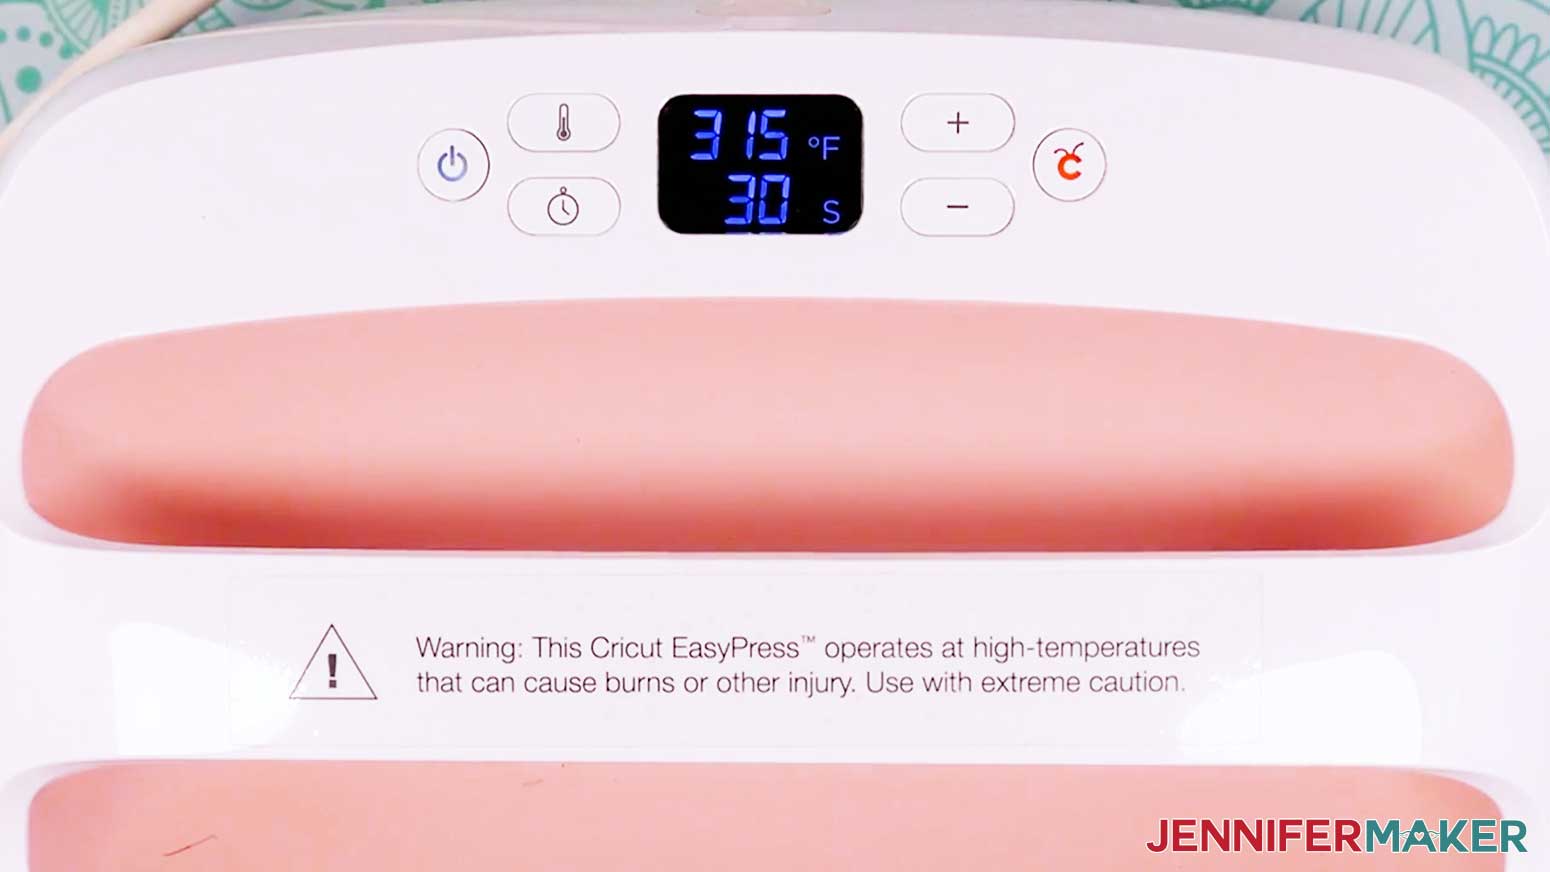
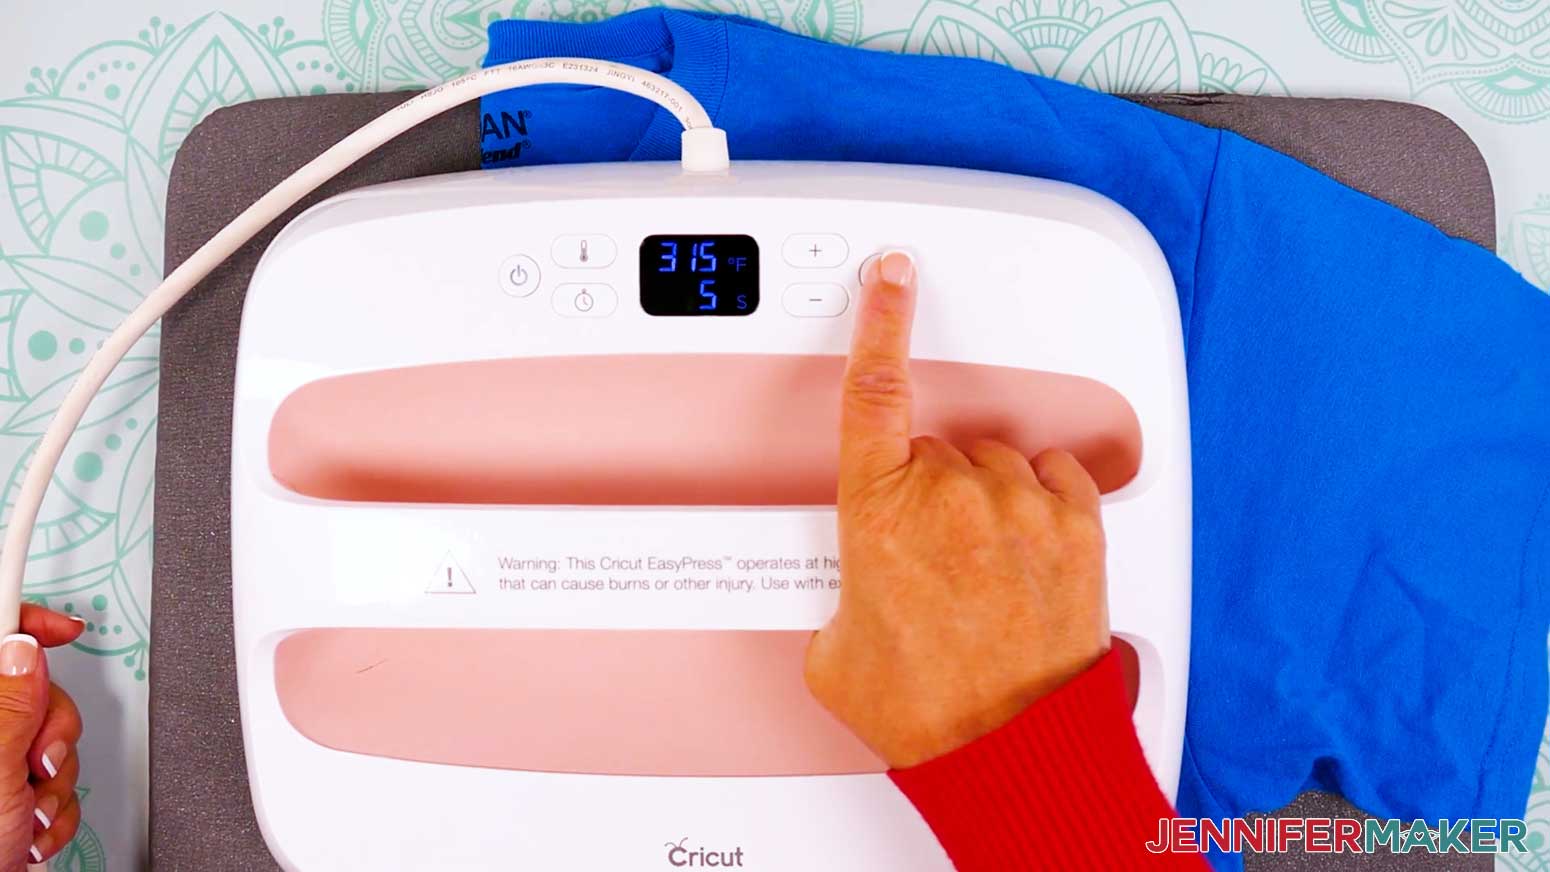
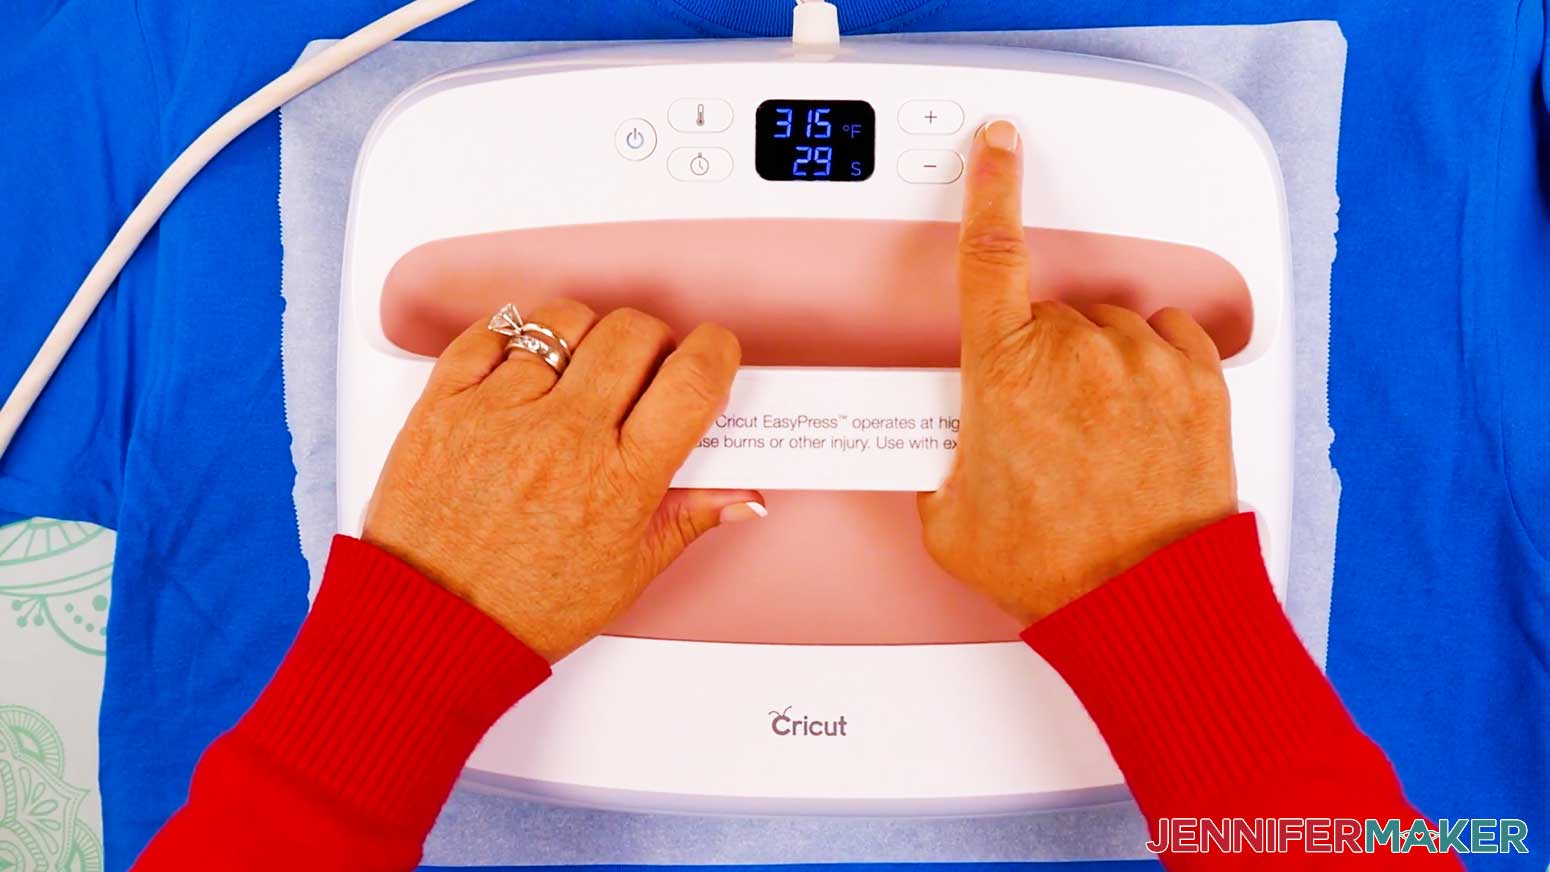
- Preheat your heat press to 315°F (157°C) for Cricut Everyday Iron-On Vinyl or Value Iron-On Vinyl. Always check the manufacturer’s instructions for general times and temperatures, but my HTV Cookbook has lots of tips for this and other projects.
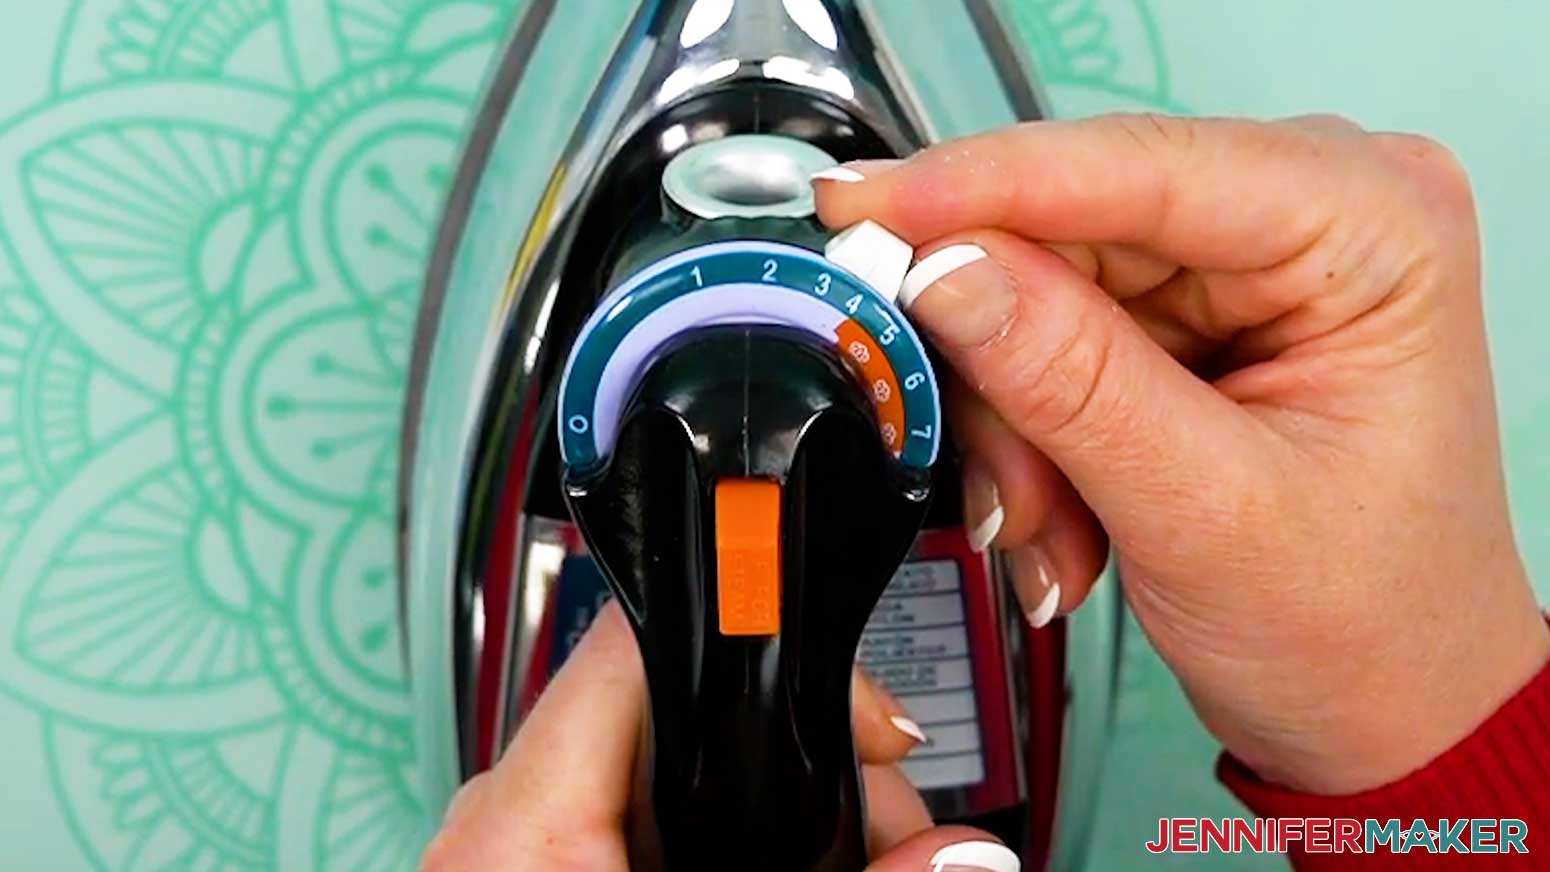
NOTE: If you are using a household iron, use the setting that matches your T-shirt material, but avoid steam. If your iron has High, Medium, and Low settings, I recommend doing a test using the High setting. Follow the steps below to apply the test heart on the arm or inside the lower hem to see if you need to adjust your settings before pressing your main design. - Use a lint roller to remove lint or fuzz from the front of the shirt.
- Fold the shirt on the vertical center by matching up the sleeves.
- Place your T-shirt on a Cricut EasyPress Mat or folded towel to protect your work surface.
- Use your heat press to lightly crease the fold for about 5 seconds. This will also pre-heat the shirt to smooth wrinkles and remove excess moisture.
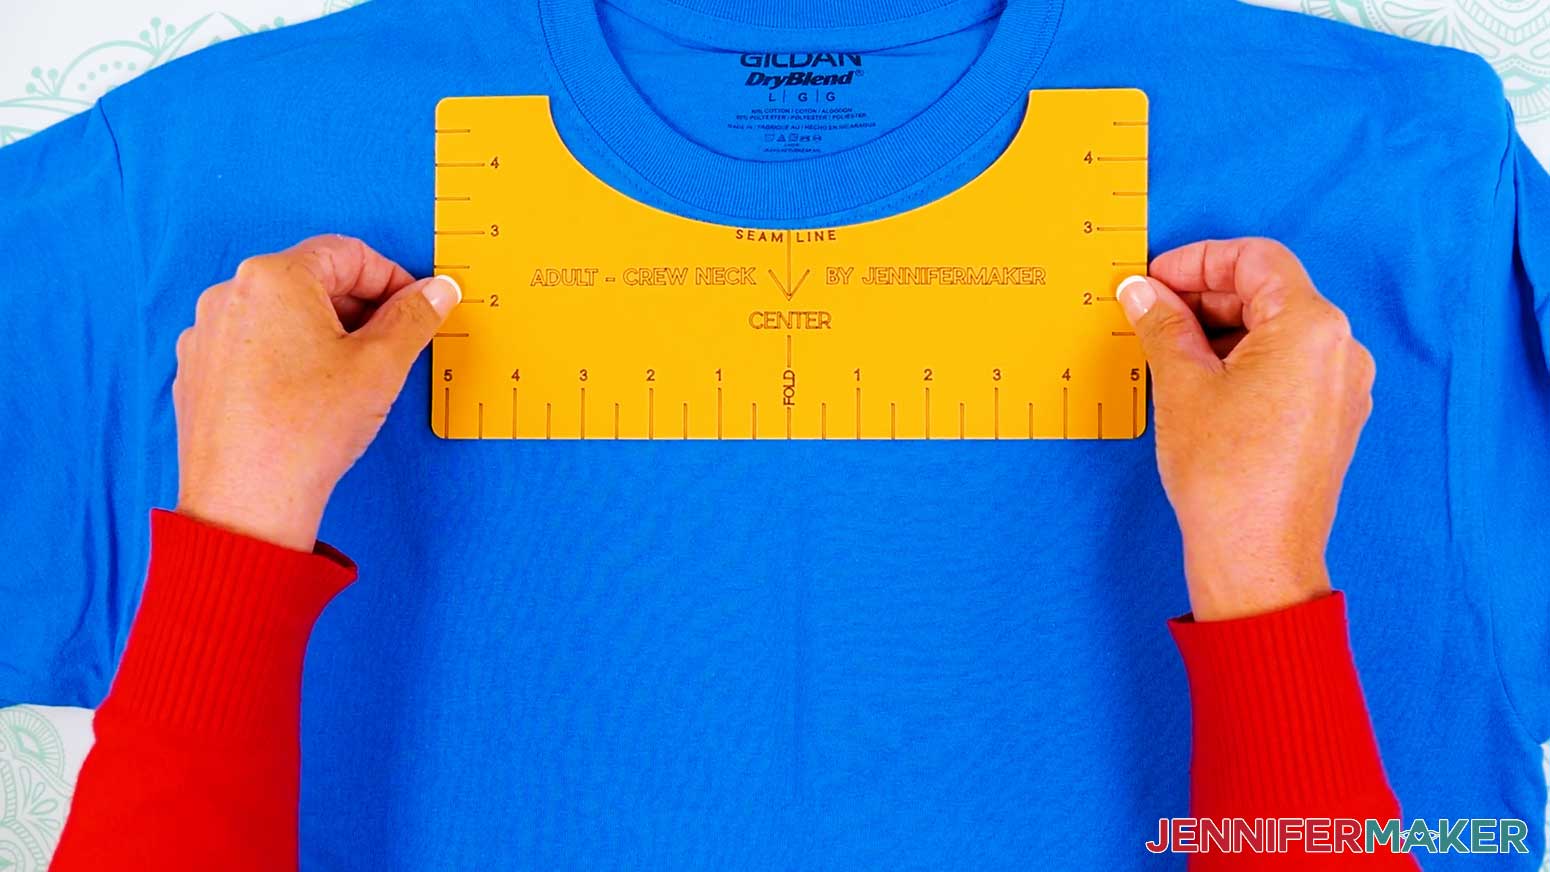
- Open it up to reveal the crease line you can use to line up the T-shirt ruler guide!
- Place your T-shirt ruler just below the collar seam so the center mark matches the crease.
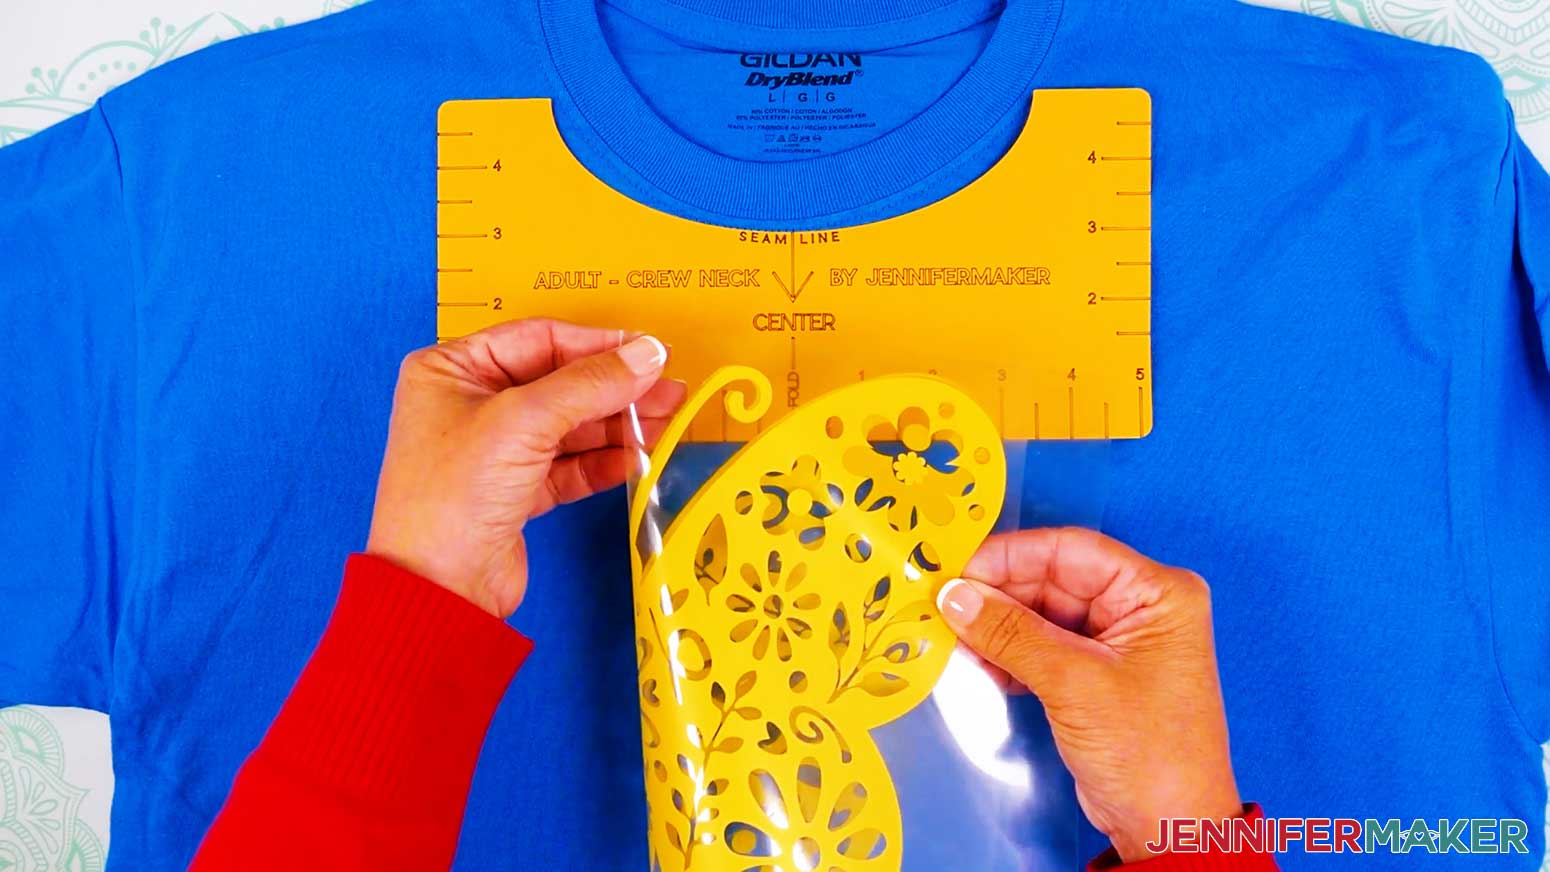
- Fold the non-sticky sides of your design together vertically to find the center and lightly crease the carrier sheet, but not the vinyl.
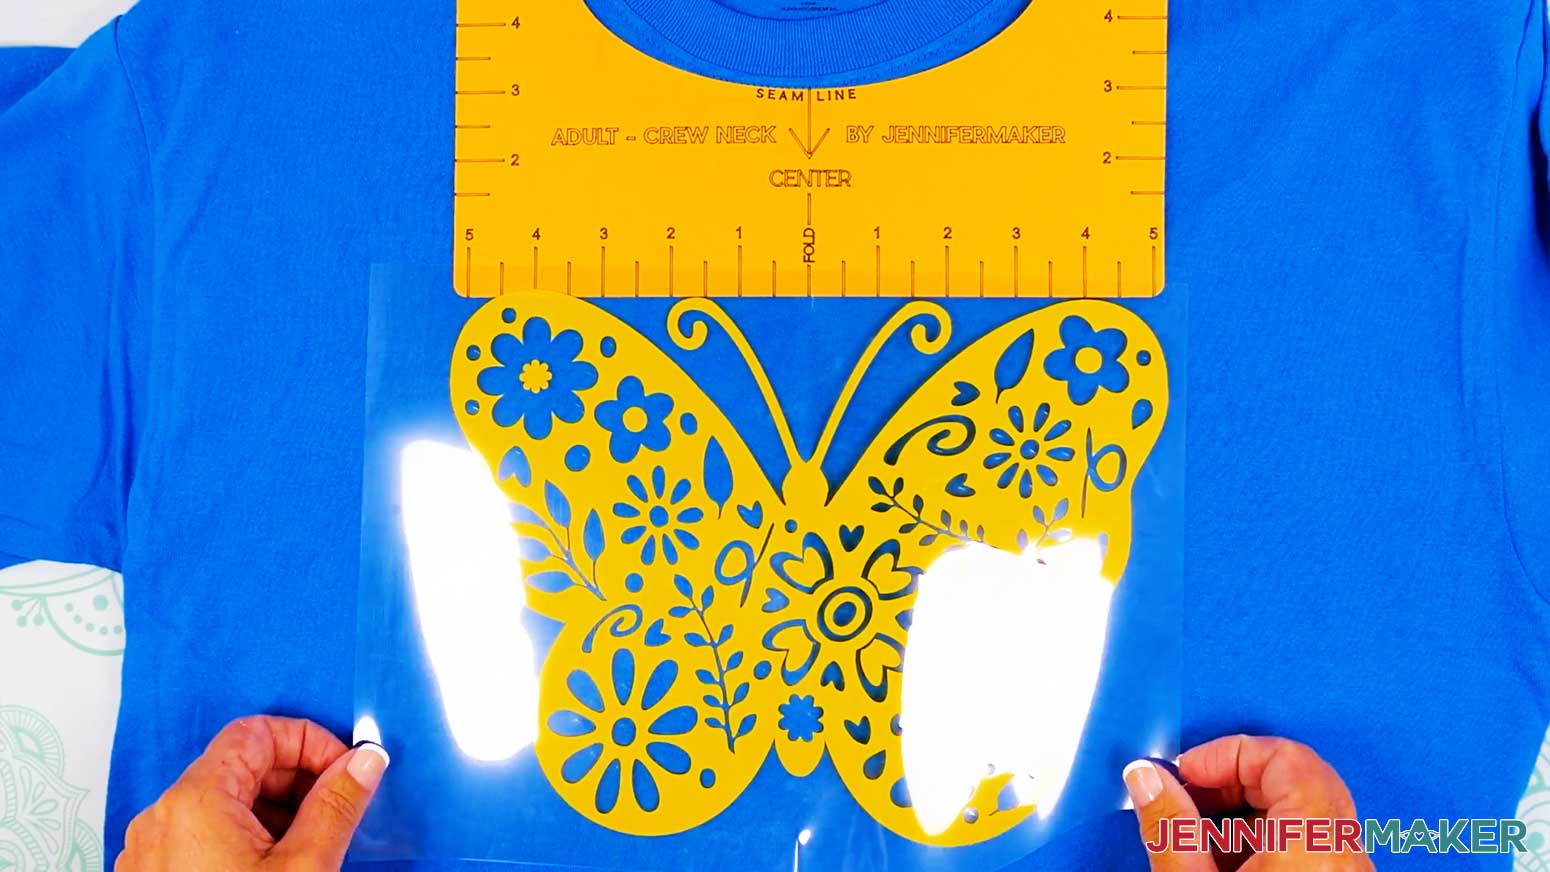
- Holding the design vinyl-side down, align the creases in the carrier sheet with the crease on the T-shirt and the ruler edge.
- Remove the T-shirt ruler.
- Place a piece of parchment paper over the design.
- Press your design at 315°F (157°C) for 30 seconds with firm pressure. Keep both hands on the press and lean on it with some of your body weight.
NOTE: If the design is larger than your iron or press, press it in sections with a tiny overlap to make sure you press the design all evenly for the correct time. - Remove the parchment paper.
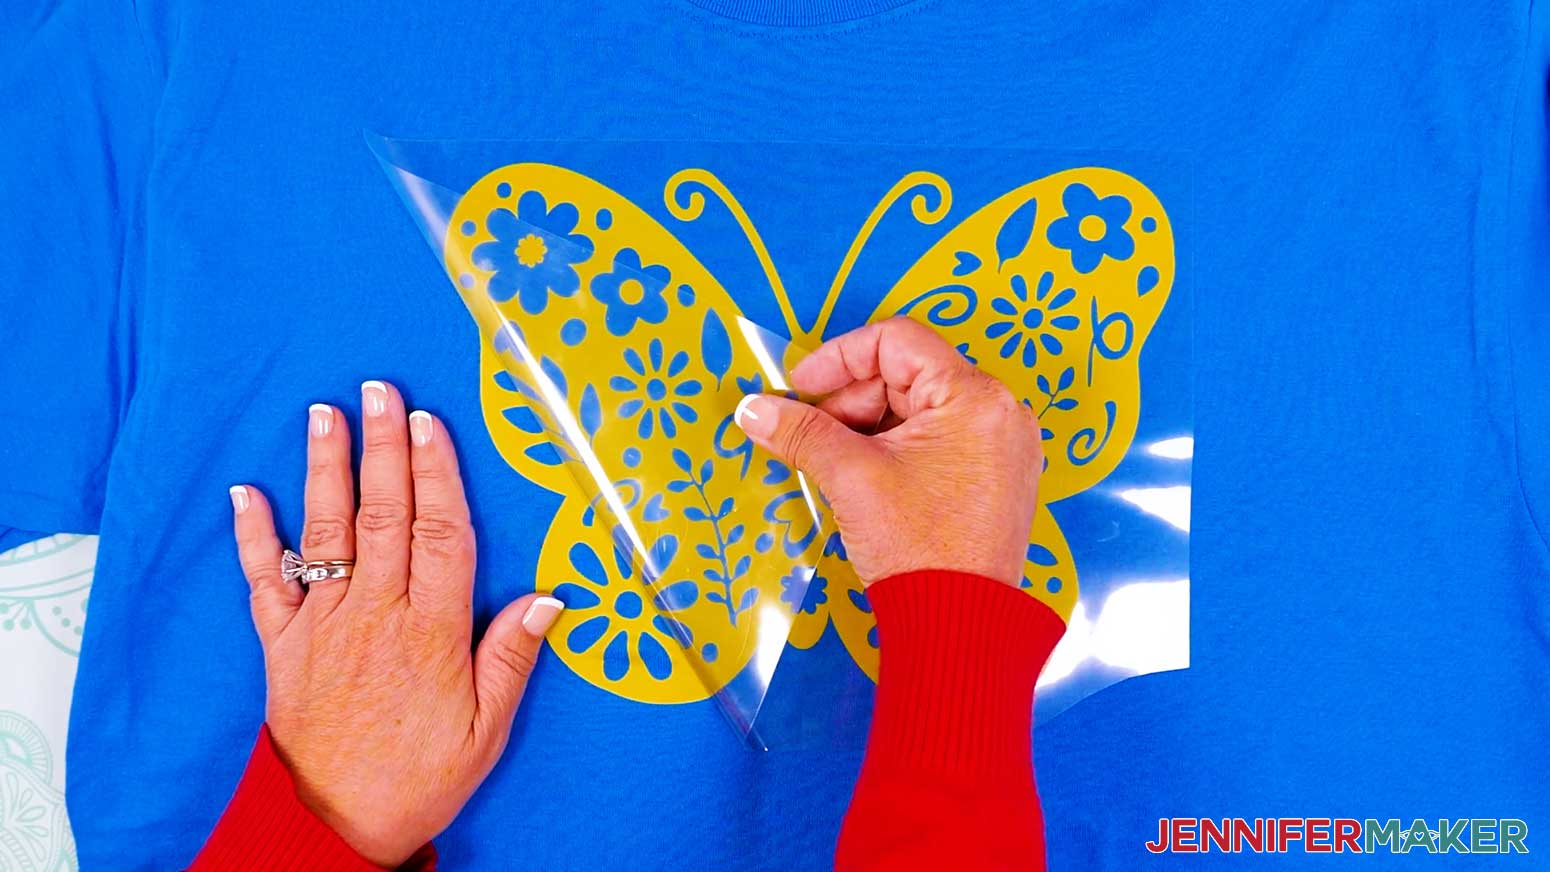
- Once it’s cooled completely, carefully peel the carrier sheet off the design.
TIP: I found that Cricut Value Iron-On Vinyl tears more easily than the Cricut Everyday Iron-On Vinyl and other heat-transfer vinyl. Be careful not to tear areas of the design while removing the carrier sheet. If the carrier sheet doesn’t peel off easily, let it cool a little longer and try again. If it still won’t peel off easily, lay the carrier sheet and parchment back down, then press for a few more seconds and try again.
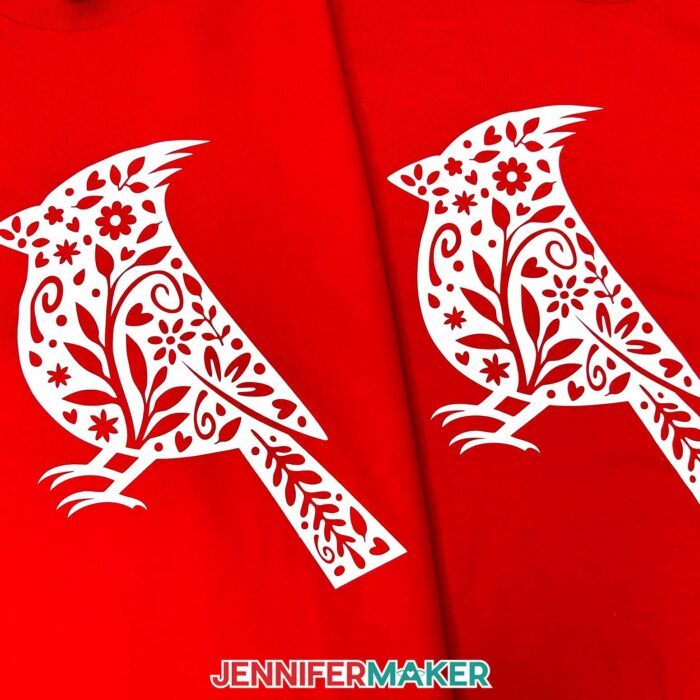
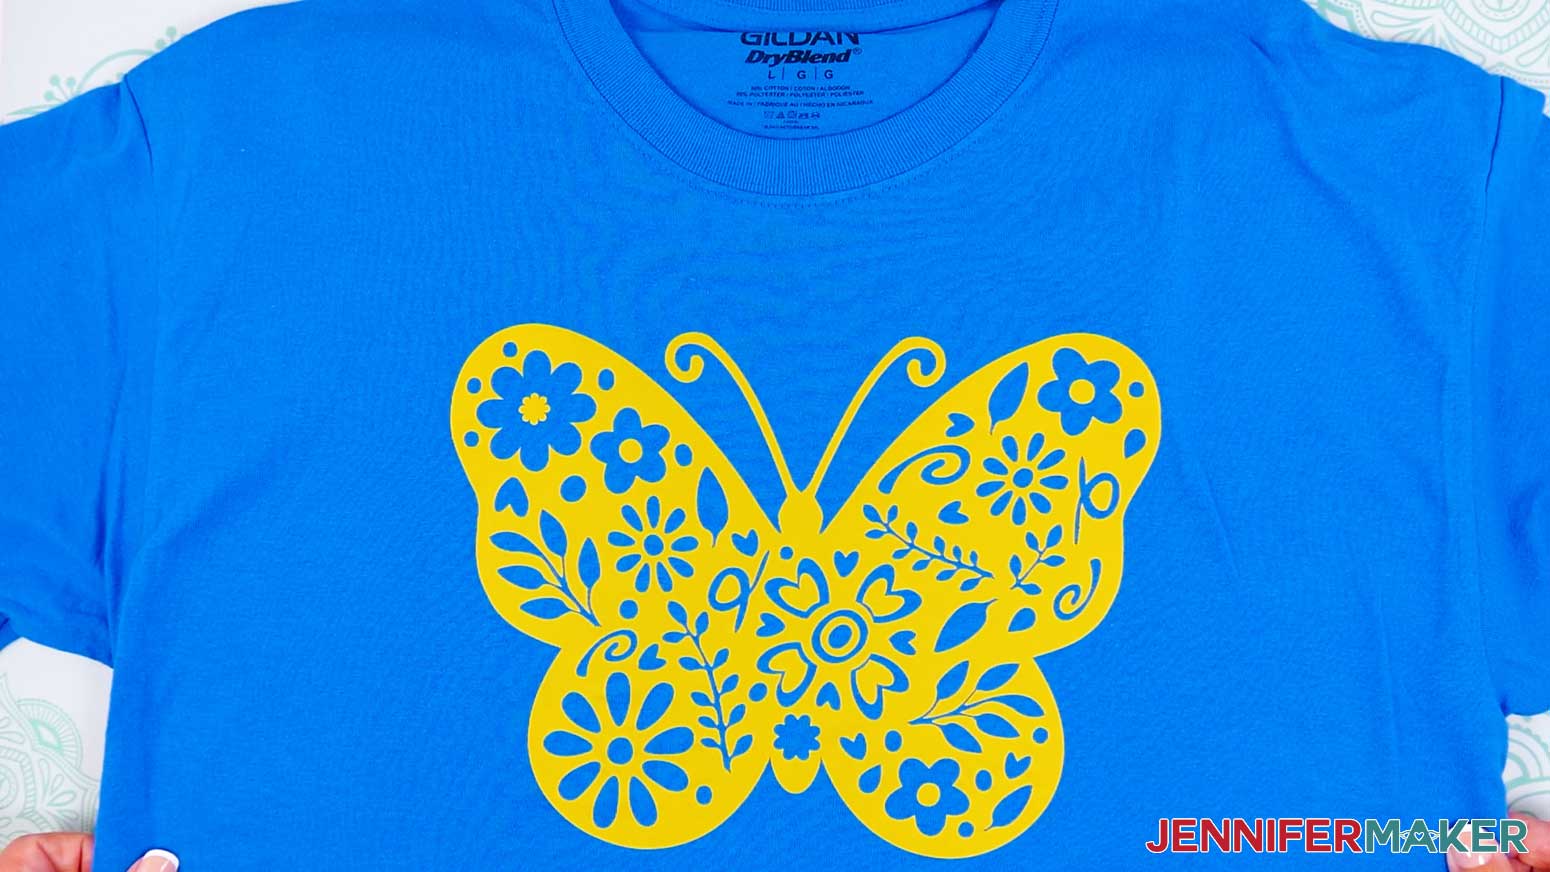
STEP 5: SHOW IT OFF!
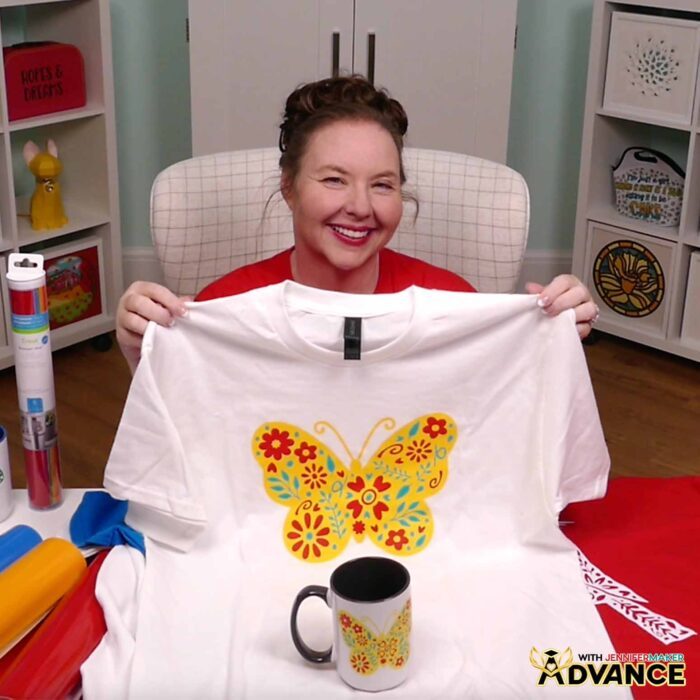
Here is what my Cricut iron-on vinyl T-shirt looks like!
VARIATION 2: ADHESIVE VINYL MUG
STEP 2: PREPARE YOUR ADHESIVE VINYL DESIGN
CRICUT DESIGN SPACE
- In Cricut Design Space on a blank Canvas, click “Upload.”
- Click “Upload Image.”
- Click “Browse.”
- Find and select the SVG of your choice from the main SVG folder.
NOTE: I’ll demonstrate with the butterfly design, but you can use the same steps to prepare, cut, and apply the other two designs using adhesive vinyl. - Click “Open” and then “Continue.”
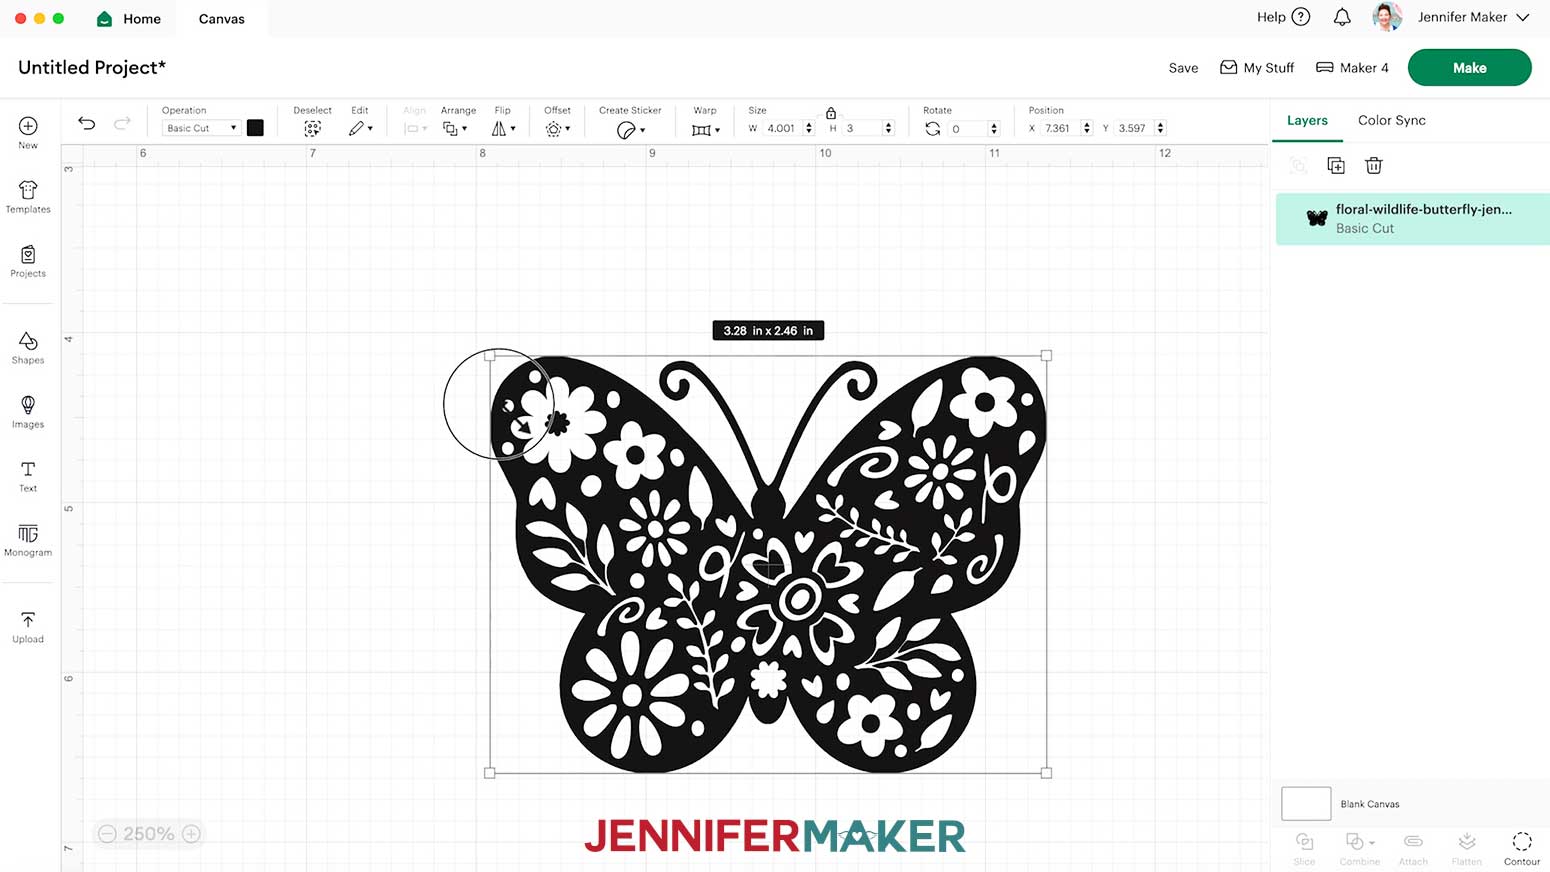
- Click “Upload” to add the design to your Canvas.
- The designs will upload pre-sized to fit the Cricut mugs in my materials list. If you’re using a different mug, measure the area on the mug you’d like the design to fill, then resize the design to fit.
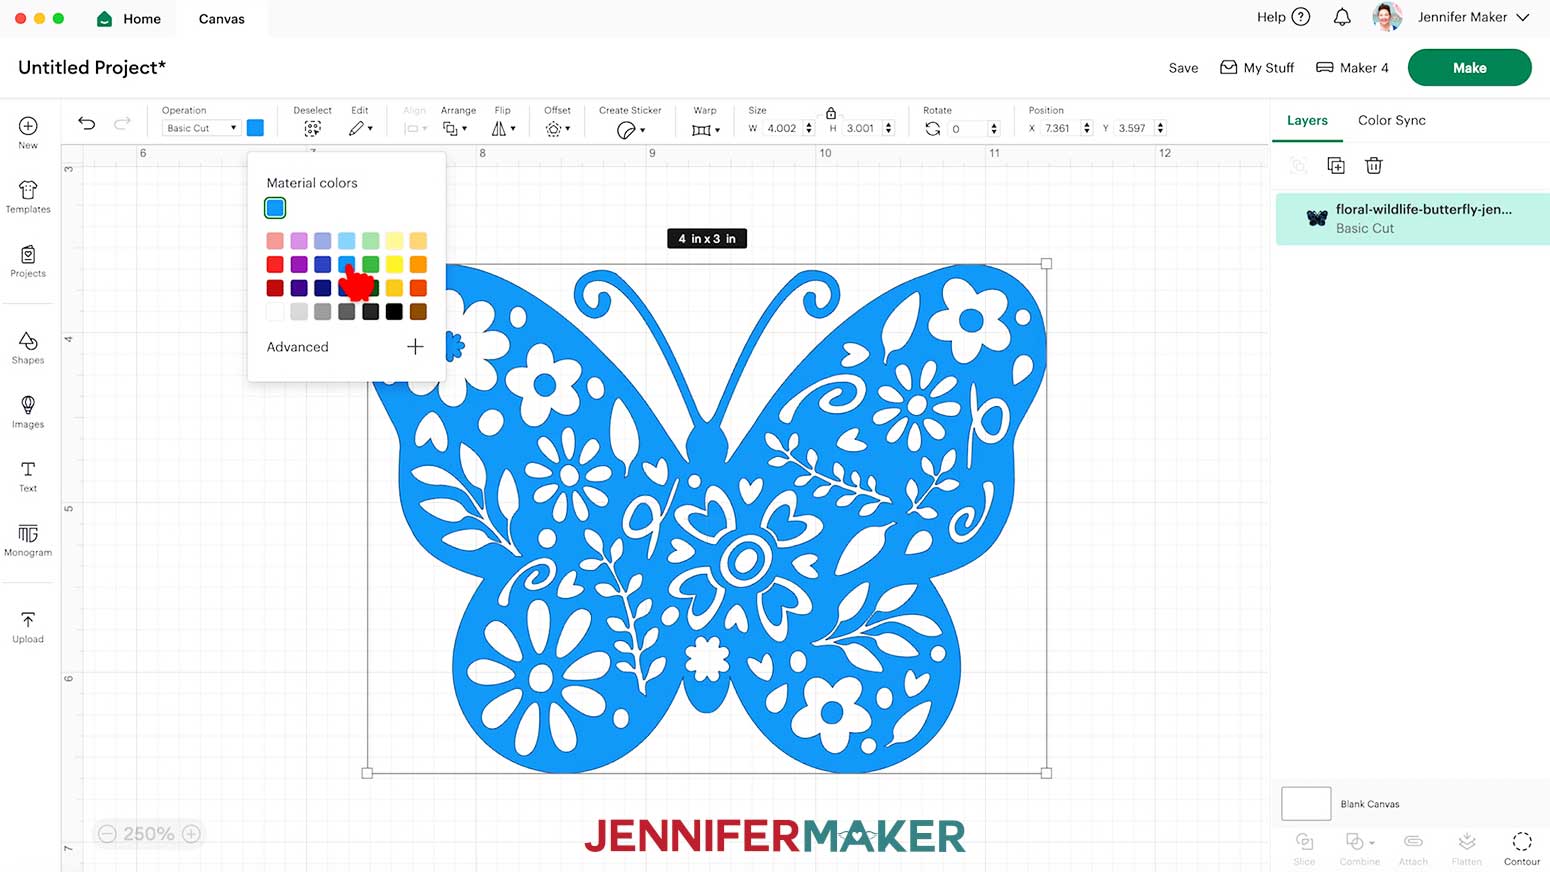
TIP: If you’d like to change the color of the design, use the color box at the top to select a color. - Your design is ready to cut!
STEP 3: CUT AND WEED YOUR ADHESIVE VINYL DESIGN
- Select your machine at the top right, then click “Make.”
- If prompted, click "On Mat," choose your mat size, and click “Confirm.”
- On the Prepare screen, make sure the correct Material Size is selected and “Mirror” is toggled OFF for each of your mats since we are using adhesive vinyl.
- Click “Continue.”
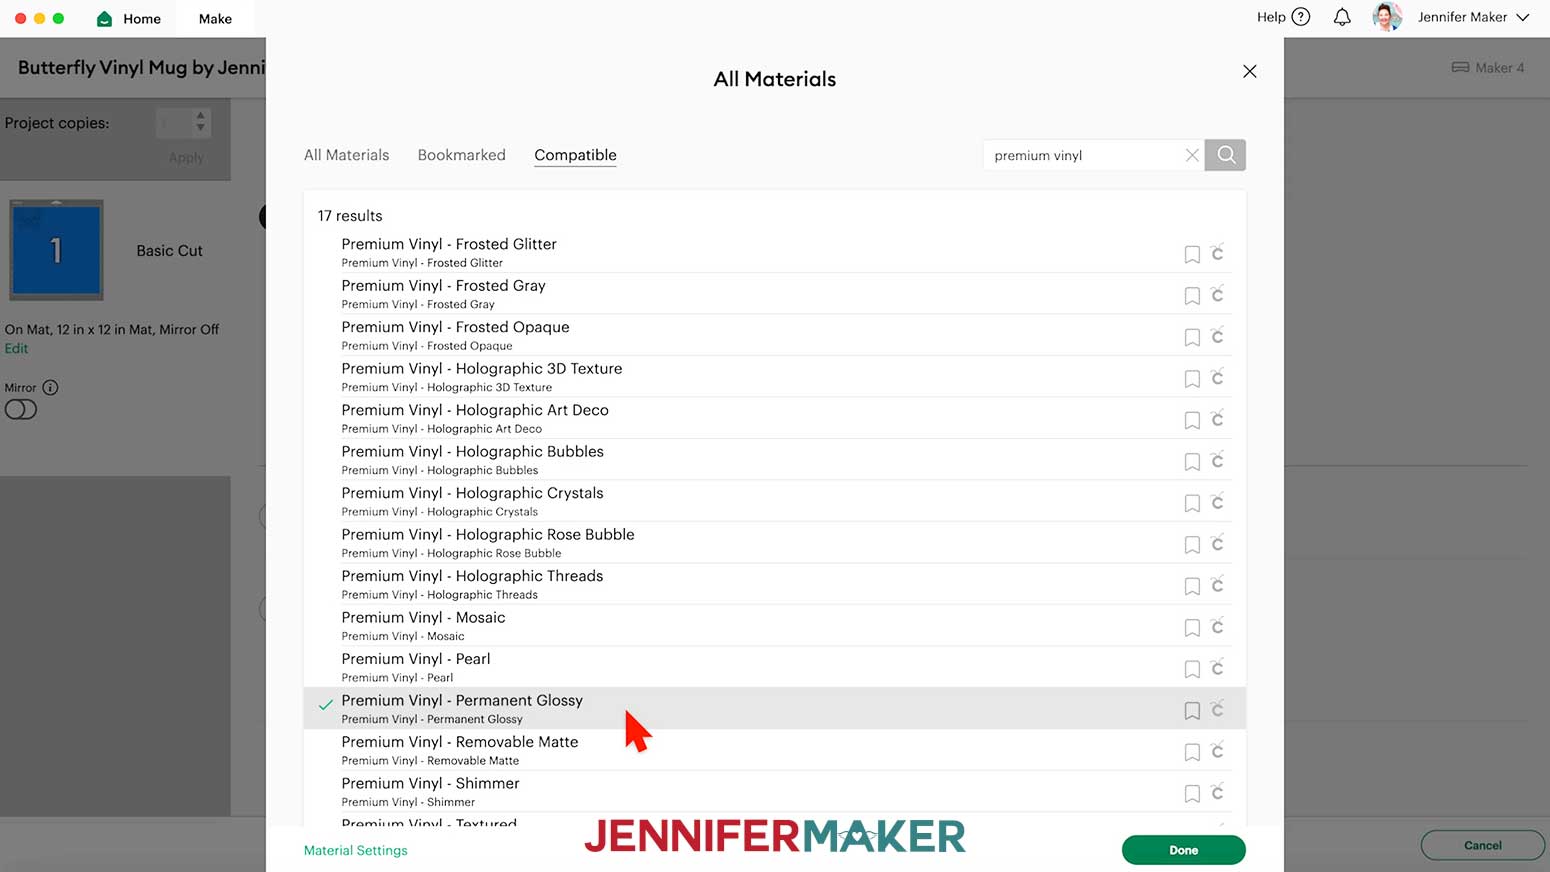
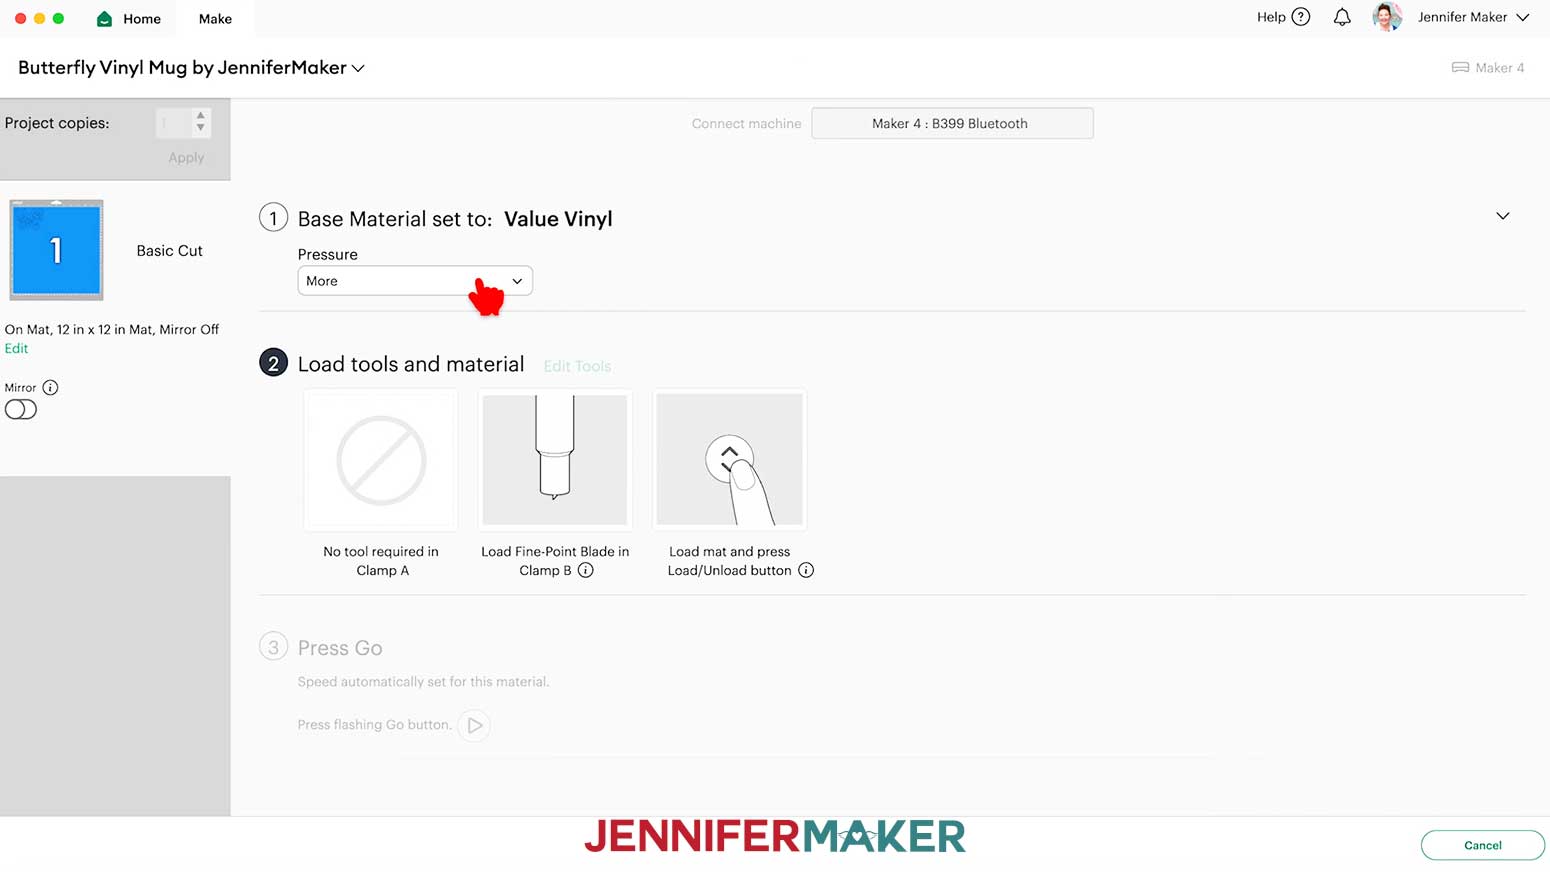
- On the Make screen, make sure your settings match the mat and vinyl type. I used the following settings:
“Premium Vinyl - Permanent Glossy” setting with “More” Pressure for my Cricut Permanent Adhesive Vinyl.
“Value Vinyl” setting with “More” Pressure for my Cricut Value Adhesive Vinyl. - Place your vinyl colored-side up onto a green StandardGrip machine mat.
- Use a brayer to adhere it well.
- Check that your Fine-Point Blade is clean and in the clamp.
- Load your mat into your Cricut and press the flashing middle button to begin cutting.
- Before unloading the mat, use your weeding tool to gently lift one of the small cutout shapes inside the design to see if the cut went through the vinyl, but not the carrier sheet.
NOTE: Incomplete cuts make weeding harder, and you can press the middle button to cut the design in the same spot again if needed. - Once the material is cut all the way through, unload the mat, flip it over onto your work surface, and roll it back to release the vinyl.
NOTE: If you have any issues with your cuts, check out my Intricate Cuts tutorial. - Use scissors to loosely trim around your design on the carrier sheet.
- Use a weeding tool to remove the excess vinyl around the cutout shapes, starting at the edges and moving inward.
TIP: If any cutout details lift off the carrier sheet, gently pat them back down and continue to remove the excess vinyl. - Check your weeded design to make sure all of the tiny cutouts are in place. If there are any extra insides of shapes still remaining, use your weeding tool to remove them.
TIP: If there are any pieces missing from the design, check the piece of excess vinyl you removed to see if the piece can be put back into place on the design. Use your weeding tool and the outline on the carrier sheet to help. - Here’s what my weeded adhesive vinyl design looks like.

STEP 4: APPLY YOUR ADHESIVE VINYL DESIGN TO A MUG
- Clean the outside of the mug with isopropyl alcohol and a lint-free cloth to remove any oil, dust, or debris from the mug’s surface.
- Decide which side you want your decal on, and position your mug accordingly. Use a folded towel to stabilize it on your work surface.
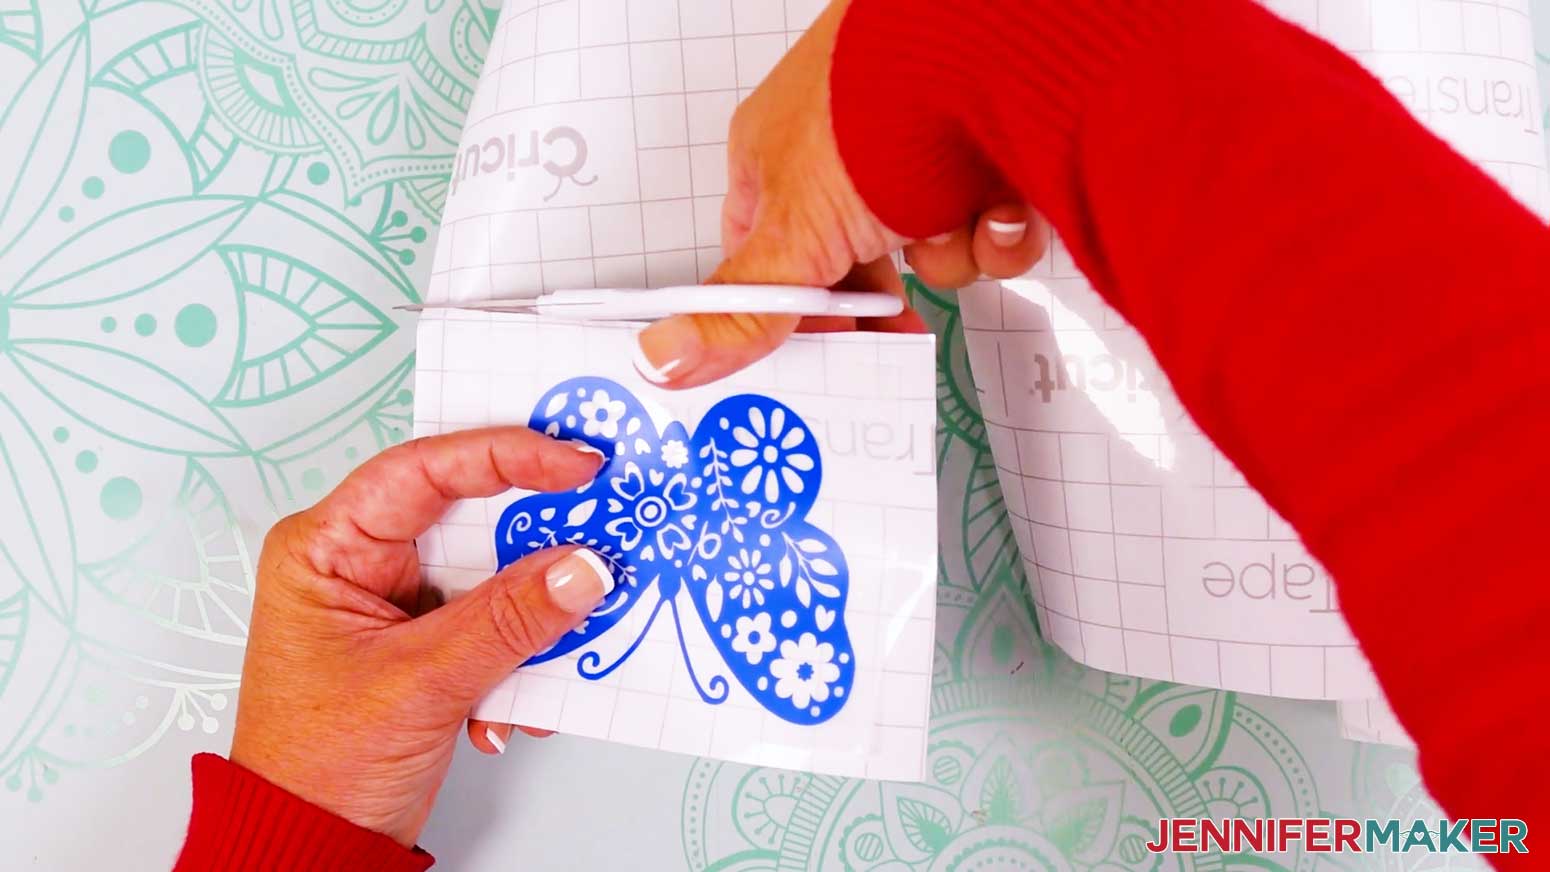
TIP: To make your vinyl decal last longer, place it on the side that won’t touch your lips when you’re drinking from the mug. If making the mug to sell, I recommend placing it so the handle points to the left, since most people are right-handed. Place the mug on its side, with the handle touching the work surface. You should be able to look straight down at the middle of the design area. - Cut a piece of StandardGrip transfer tape slightly larger than the vinyl design.
- Remove the backer from the transfer tape.
- Curve the transfer tape into a taco shape over the vinyl design, centering the bottom curve at the design’s middle.
- Lower the curve onto the design and smooth each side down from the center out.
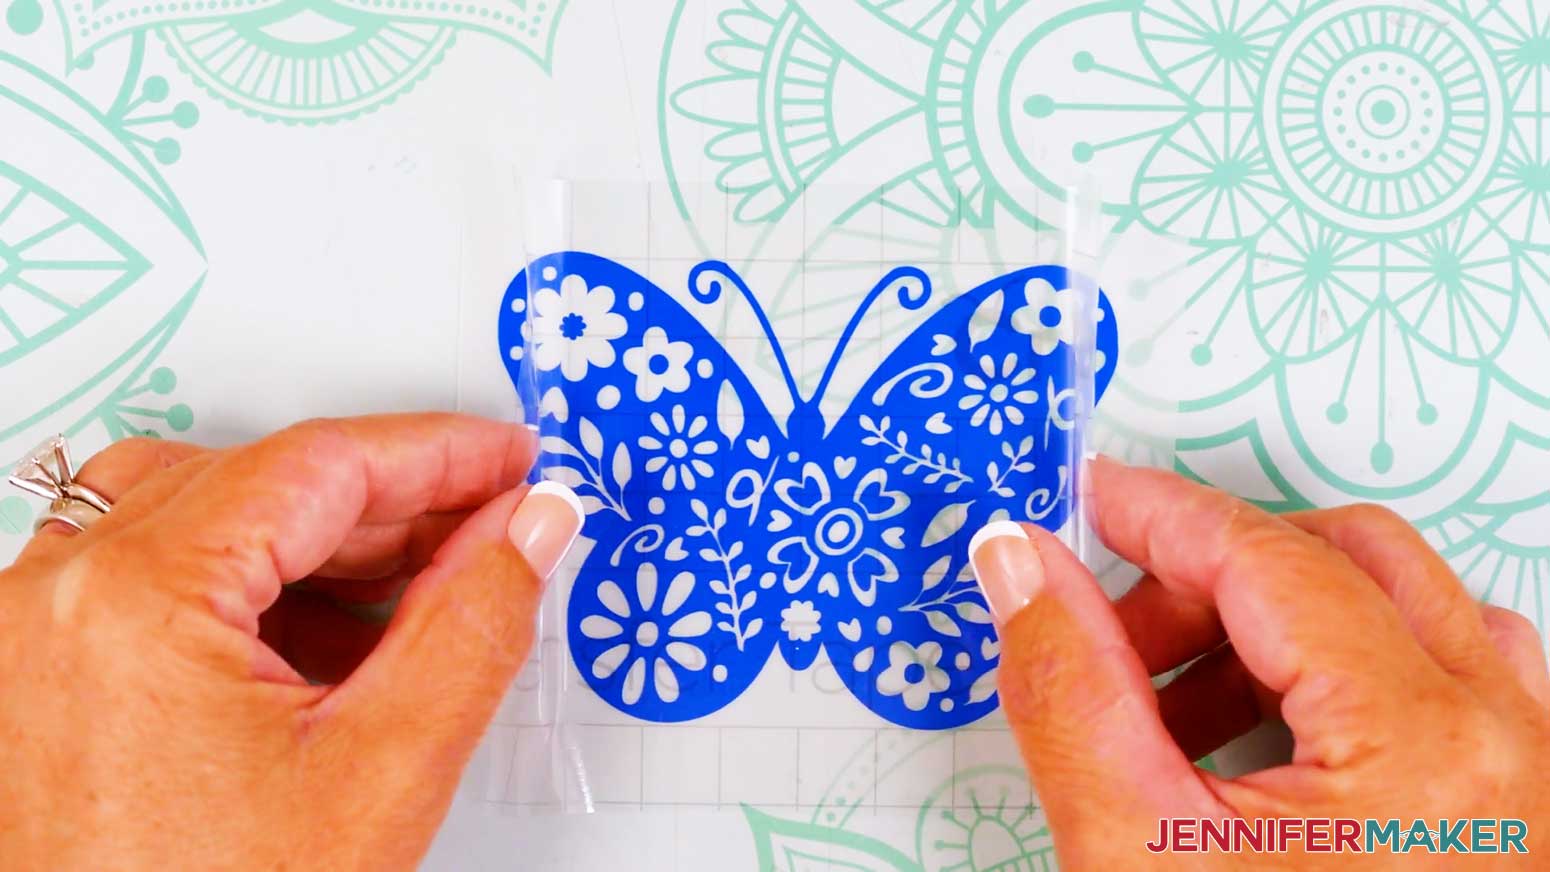
- Use a small scraper to burnish the transfer tape to the vinyl design from the front and back.
TIP: The coffee mugs in my materials list have straight walls. If your coffee mug is a different shape, use scissors to cut small snips around the edges of the transfer tape, avoiding the vinyl. These small cuts allow your transfer tape to bend with the curve of the mug and adhere without any creases. - Curve the design in half vertically, and use your fingers to crease the top and bottom centers of the transfer tape to mark the center.
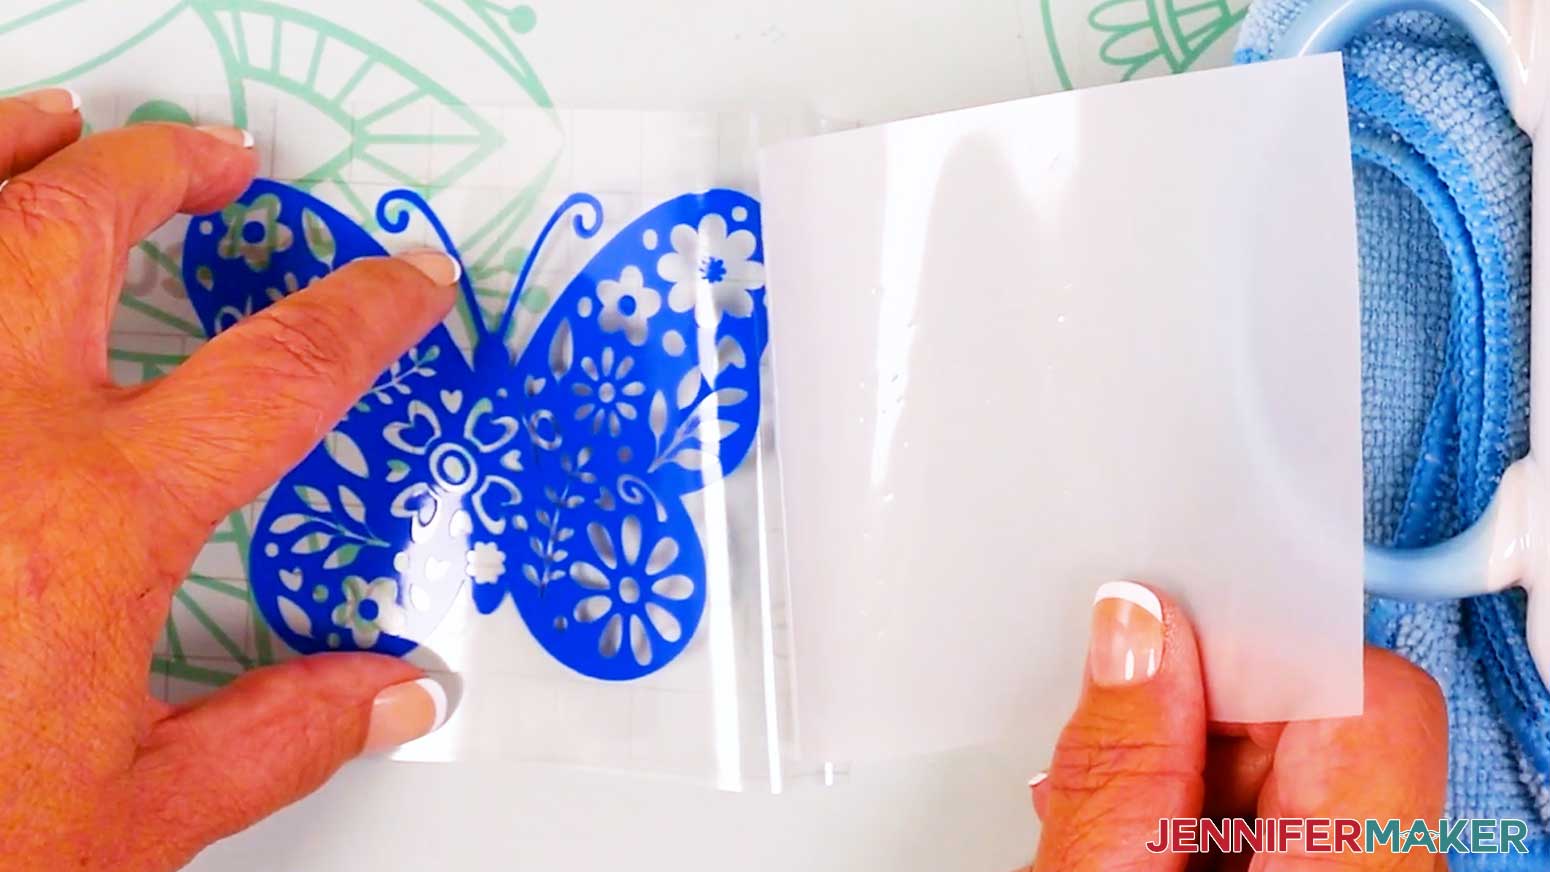
- Gently remove the vinyl backing from the vinyl design.
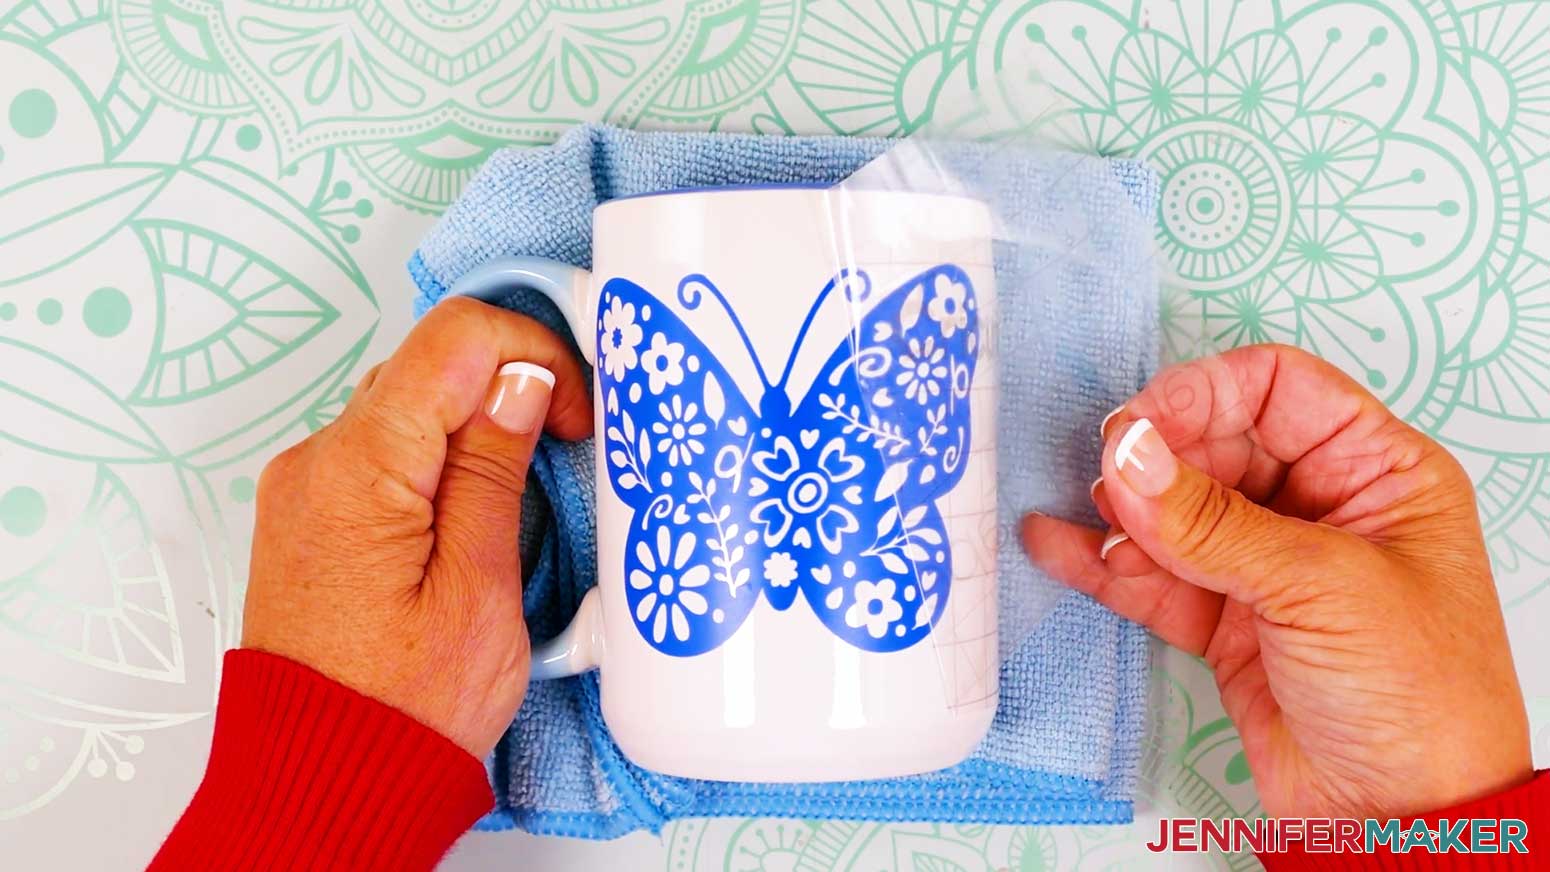
TIP: If any areas stick to the backing, re-burnish, or use a weeding tool or scraper to help the vinyl stick to the transfer tape. - With the mug’s handle still touching the work surface, position the decal so the creases in the carrier sheet run vertically top to bottom on the mug, in the very center of the design area. Make sure there won’t be any vinyl in the top 1” or so where you’ll drink from
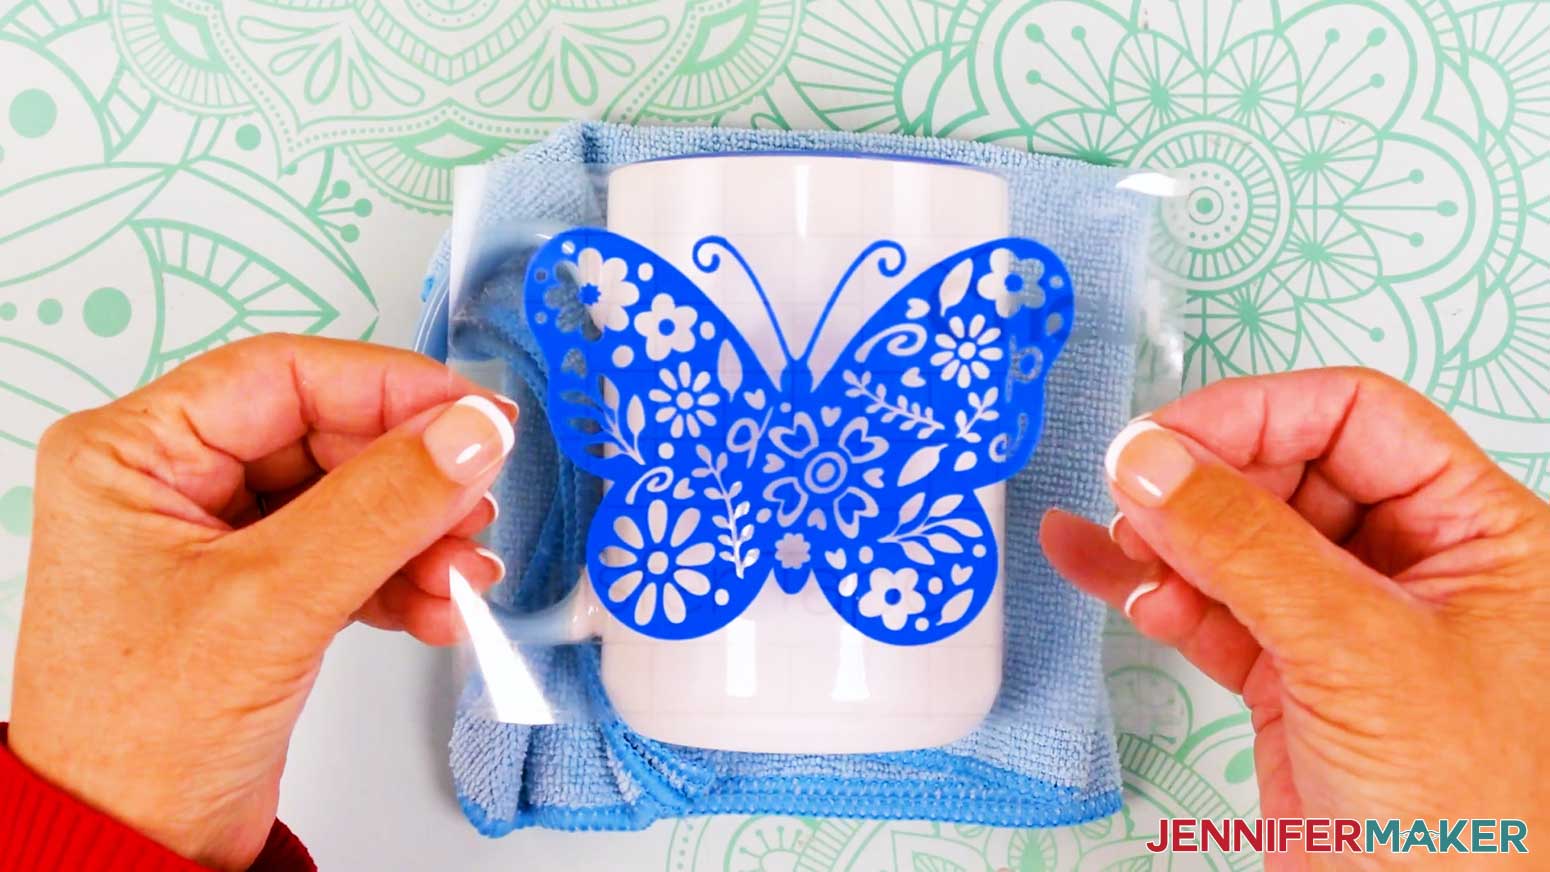
TIP: If you need help positioning the design, use a ruler and a dry erase marker (NOT a permanent marker) or painter’s tape to make horizontal guide marks at the top and bottom of the mug, then remove them once the decal is applied. - Again, use the Taco Method to curve the decal’s sides up into the shape of a taco, so you’re only getting a little sticky area near the mug to start.
- Gently lower the bottom curve to touch the mug in the correct position.
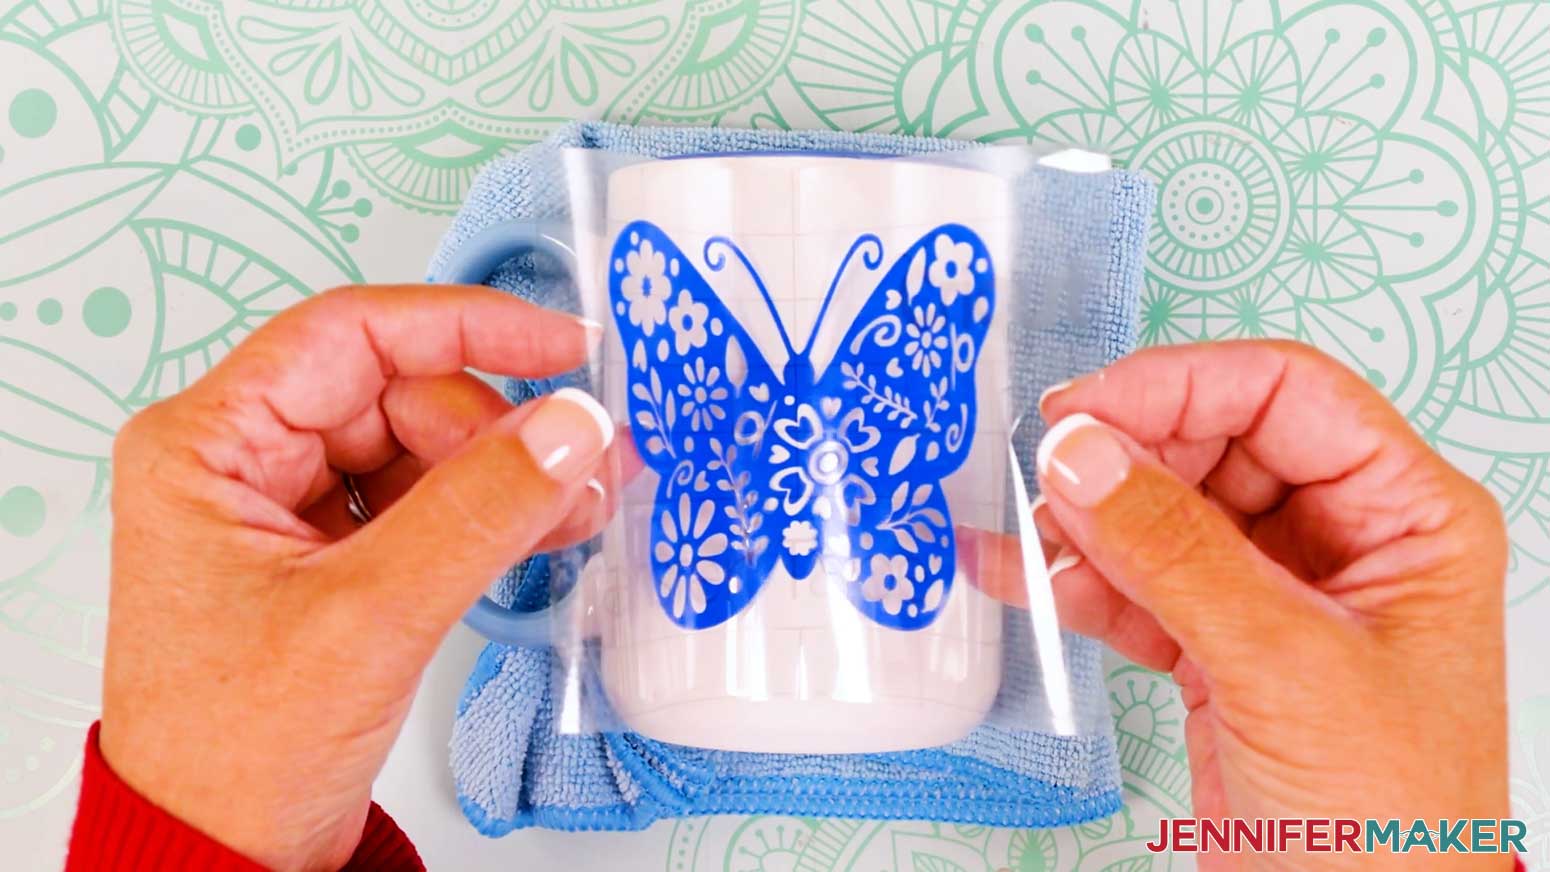
TIP: Since only a little of the vinyl is attached, you can carefully lift and reposition if needed. - Once the middle looks correct, carefully let the taco’s sides (one at a time) lower into place on the mug’s curve.
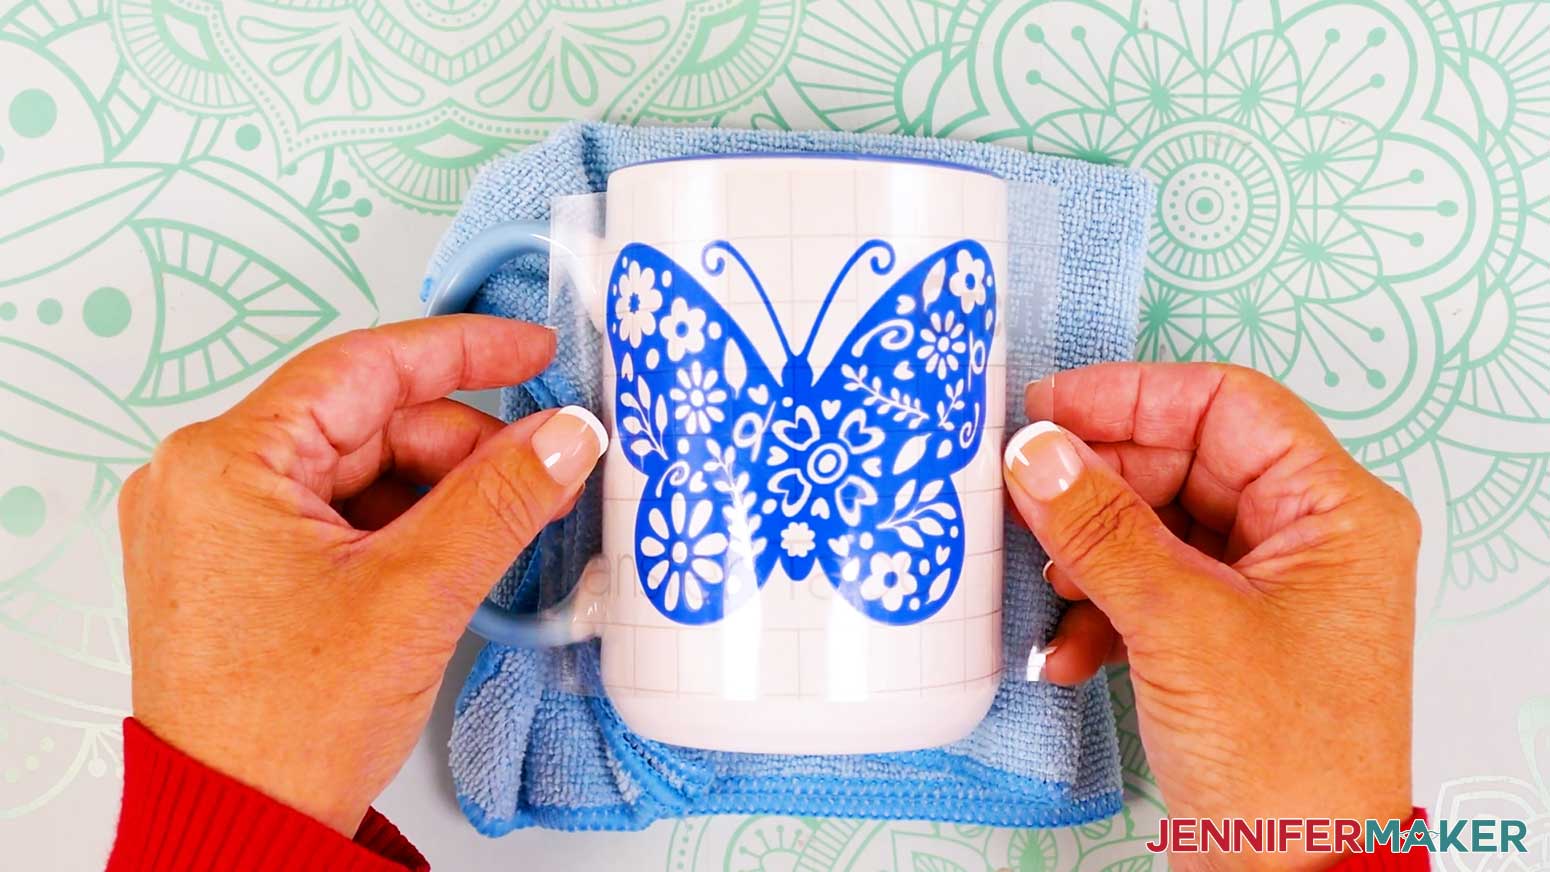
TIP: Want a more precise decal placement technique? Check out my Vinyl Glass Can Wraps tutorial. - Use your fingers to smooth the decal from the middle out to the sides, pressing out any bubbles that may form. Then, use a small scraper over the whole design to help maximize the vinyl’s adhesion to the mug.
- Slowly peel the transfer tape away from the mug. If any areas lift, use the scraper over the area.
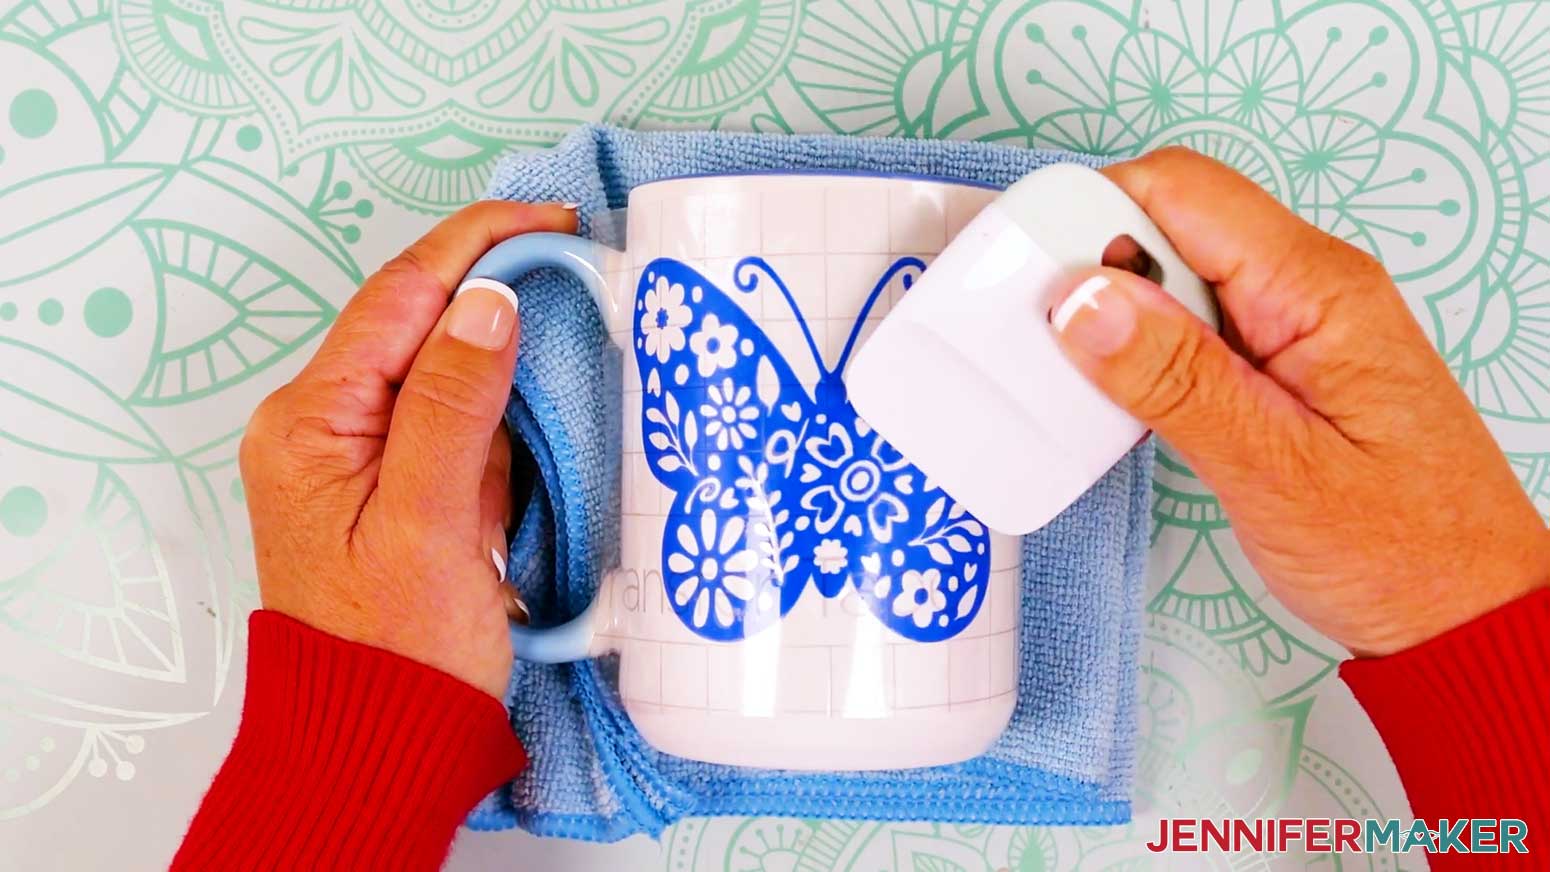
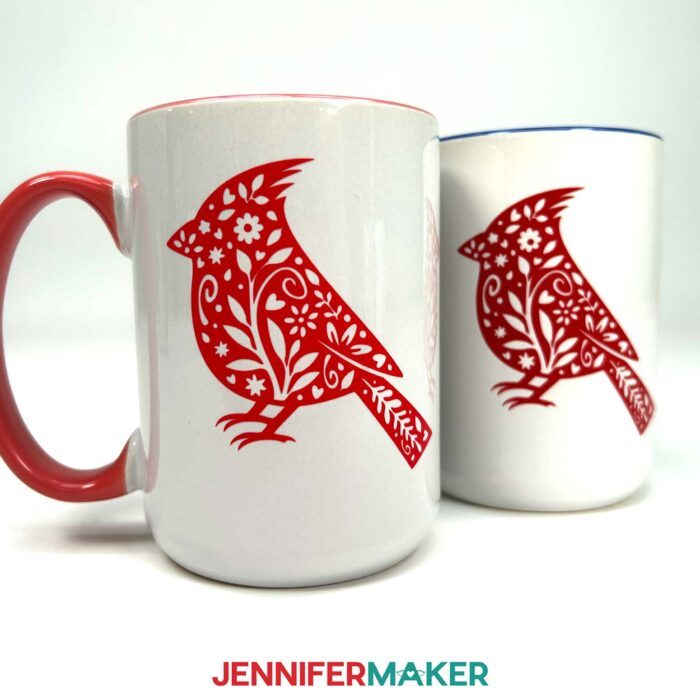
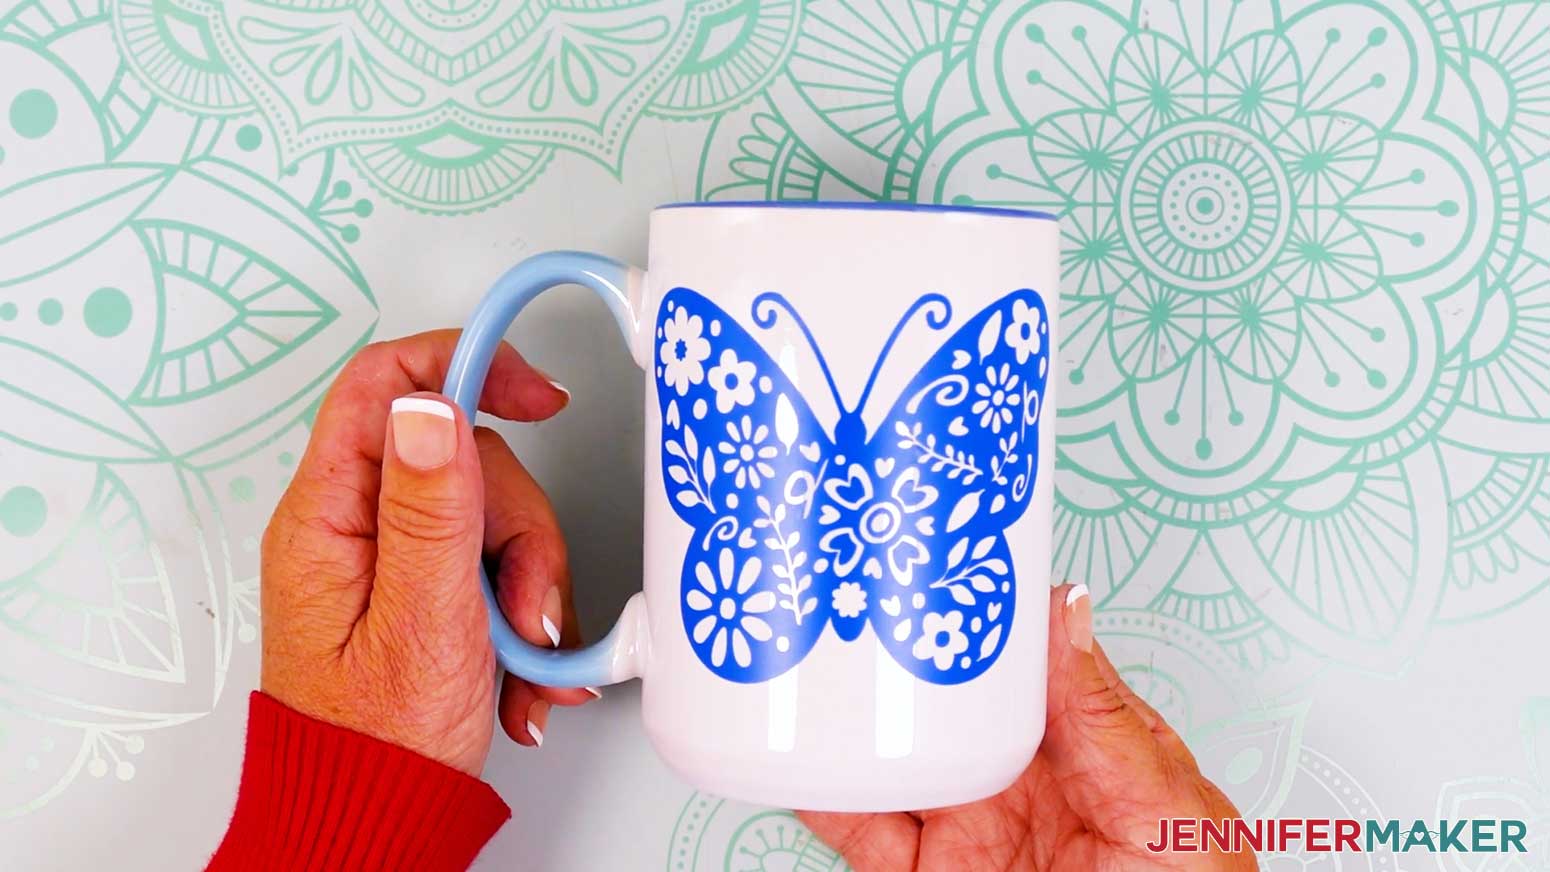
STEP 5: SHOW IT OFF!
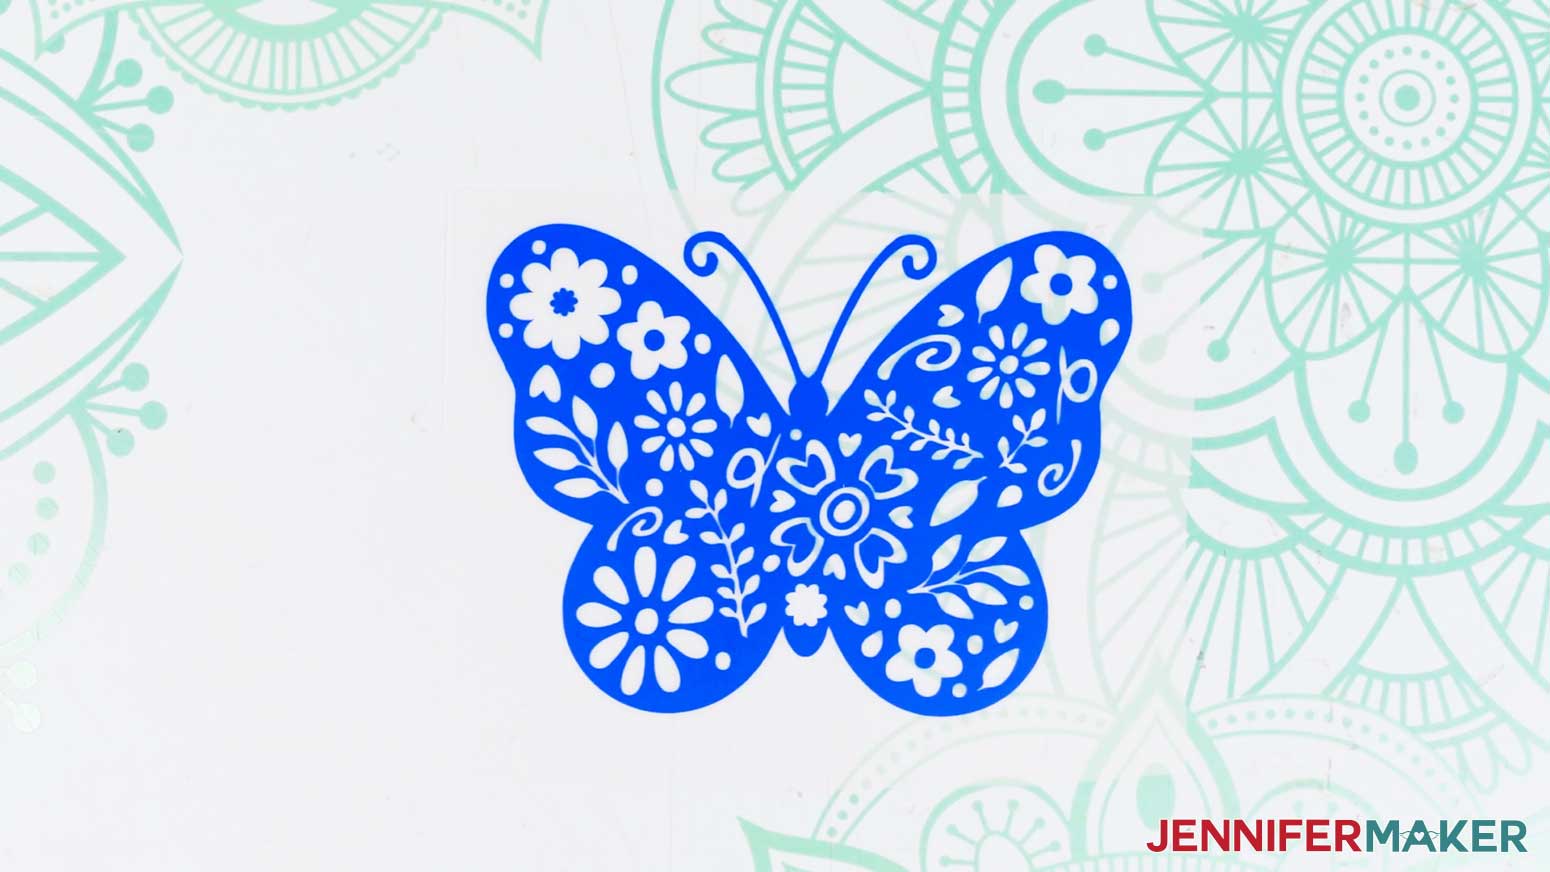
Here is what my Cricut adhesive vinyl mug looks like!
Notes
Design Sizes:
T-Shirts:
Butterfly: 10.5” x 7.87”
Cardinal: 10.5” x 10.5”
Mushroom: 10.5” x 10.5”
Mugs:
Butterfly: 4” x 3”
Cardinal: 3” x 3”
Mushroom: 3” x 3”
Care:
T-shirt: Let the vinyl sit for at least 24 hours. Then, wash your shirt inside out in cold water and do not use any bleach. Tumble on low or hang to dry.
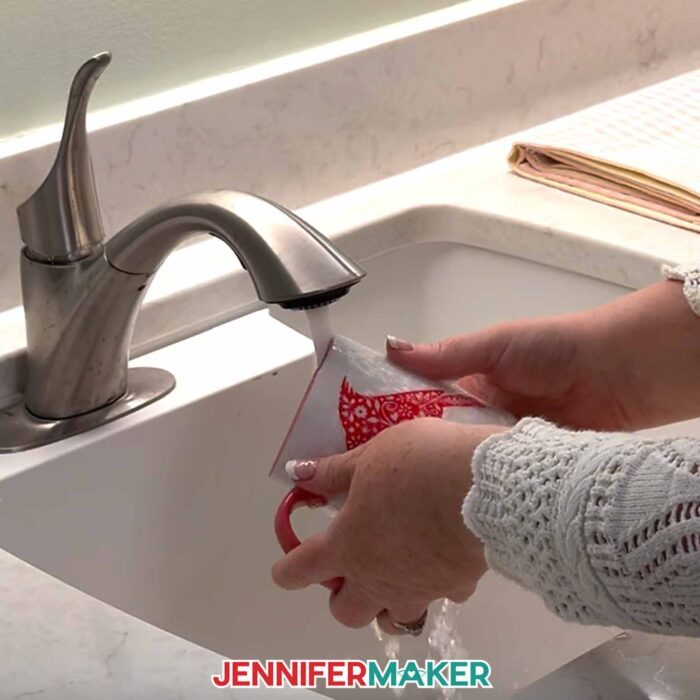
Mug: Hand washing is recommended for the longest lasting result. Do not microwave.
Answers to Your Questions About Vinyl vs Iron-On for Cricut Beginners
Q: I want to design a multicolored adhesive vinyl or iron-on design. How do I do that?
A: You can learn how to design a multicolored design to use with adhesive vinyl or iron-on vinyl in my ADVANCE program. Learn more about ADVANCE here!
Q: What is the difference between Cricut vinyl and iron on?
A: Cricut vinyl typically refers to adhesive vinyl, which has a sticky backing and is used on hard surfaces like mugs, tumblers, and signs. Cricut iron-on, also called heat transfer vinyl (HTV), requires a heat source like a heat press or iron to bond it to fabrics such as T-shirts or bags. The main difference is that adhesive vinyl sticks without heat, while iron-on vinyl needs heat to adhere.
Q: What does a beginner need for a Cricut?
A: A beginner needs a Cricut machine, basic materials like adhesive vinyl and iron-on vinyl, a cutting mat, the fine point blade that comes with the machine, weeding tool, and access to Cricut Design Space. A heat source (household iron or heat press) is needed for iron-on vinyl projects to get the best results.
Q: How do I wash a vinyl mug or iron-on T-shirt?
A: For the T-shirt, let the vinyl sit for at least 24 hours. Then, wash your shirt inside out in cold water and do not use any bleach. Tumble on low or hang to dry.
For the mug, hand washing is recommended for the longest lasting result. Do not microwave.
Q: Can I sell the items I make using your designs?
A: If you want to use my designs for commercial use, please familiarize yourself with my important licensing information before selling your crafts. In general, you can sell the physical items you make using my designs, but digital products such as my templates and design files themselves can NOT be sold.
Q: How long does Cricut vinyl last on shirts?
A: Cricut iron-on vinyl, when applied with the right temperature and time, can last over 50 washes if cared for properly. Avoiding fabric softener, using a heat press or household iron correctly, and waiting 24 hours before washing will help your designs stay vibrant on shirts for a long time.
Q: How long does Cricut adhesive vinyl last?
A: Cricut permanent adhesive vinyl can last up to 3-8 years on hard surfaces, depending on the type, application, and environmental conditions. It is durable enough for mugs, car decals, and outdoor signs, especially when applied to clean, smooth surfaces.
Q: What is Cricut adhesive vinyl used for?
A: Cricut adhesive vinyl is used for decorating hard surfaces such as mugs, water bottles, car decals, laptops, windows, and signs. It is perfect for creating custom vinyl decals with your Cricut for both home décor and gifts that stick without heat. Adhesive removable vinyl works well for labels and seasonal items.
Q: Can regular vinyl be used as iron-on?
A: No, regular adhesive vinyl cannot be used as iron-on vinyl. Adhesive vinyl will melt, will not bond to fabric with heat, and will not survive washing. Always use heat transfer vinyl (HTV) for fabric projects to ensure your design adheres properly and lasts.
Get my free Floral Wildife SVG/DXF/PDF files!
(If you do not see the signup form above, click here.)
I love seeing what you make with my tutorials and how you customize them! Please share a photo of your vinyl projects in our Facebook group or tag me on social media with #jennifermaker.
Love,

Want to remember this? Save this Vinyl vs Iron-On for Cricut Beginners tutorial to your favorite Pinterest Board!