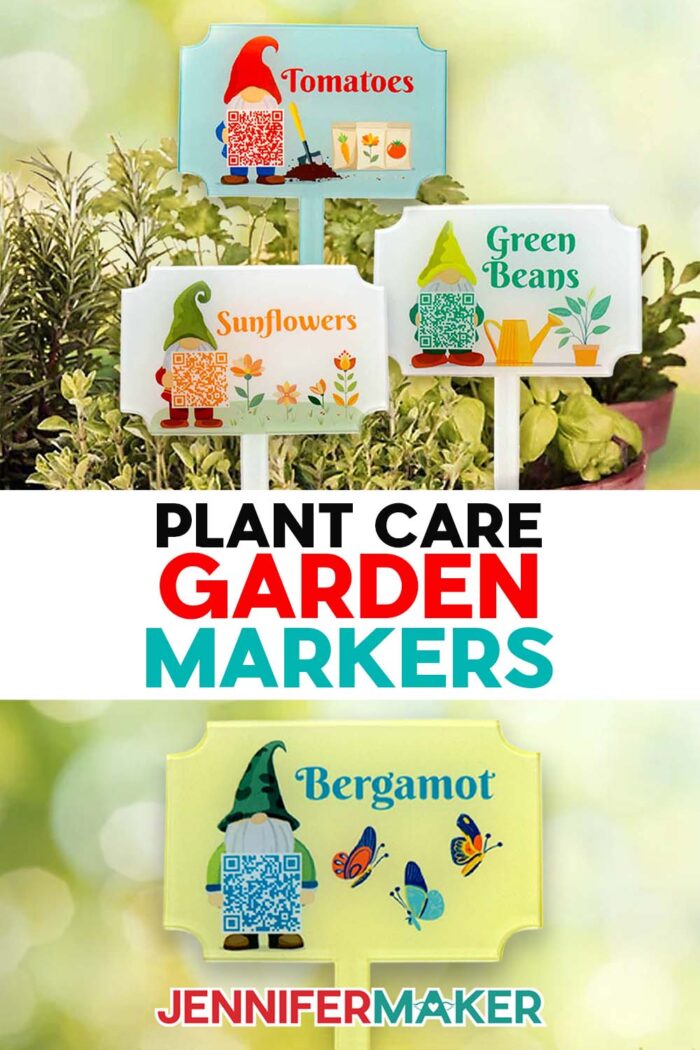
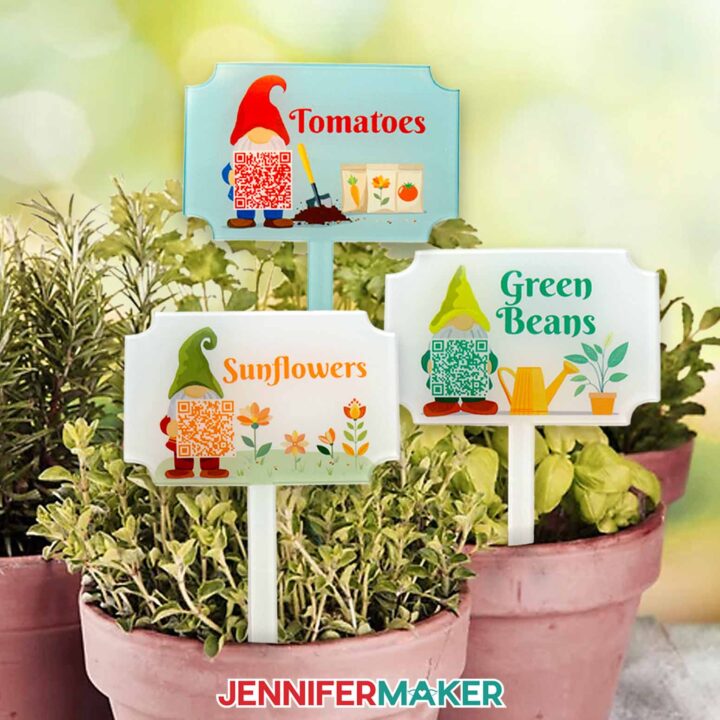
Learn how to make plant care garden markers with QR codes using sublimation crafting!
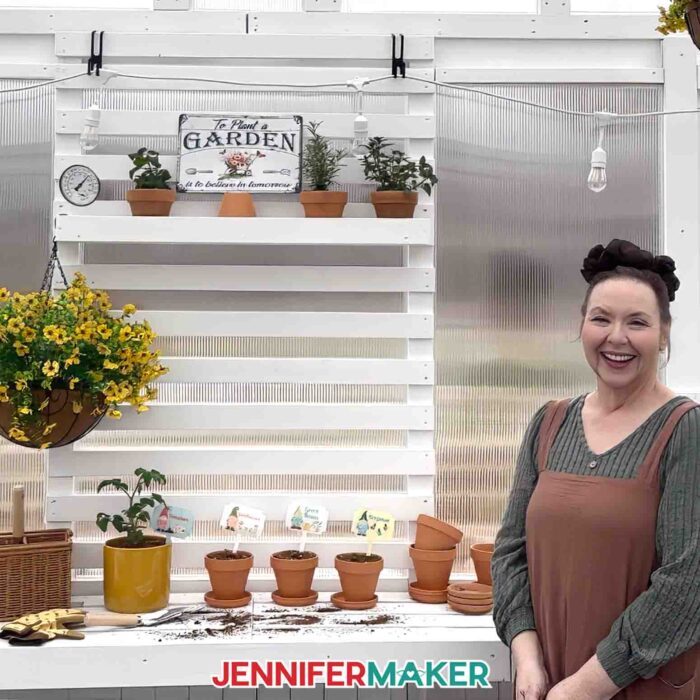
I can’t tell you how many times I’ve stood in my garden on Maker Farm, watering can in hand, staring at a plant and thinking… now what does this one need again?
So I grab my phone, start searching, and ten minutes later I’m still trying to figure it out. Finally, I realized… what if the answer was already right there with the plants? That’s exactly why I started making plant care garden markers with QR codes, and honestly, they’ve completely changed how I garden.
Watch the full step-by-step plant care garden markers tutorial:

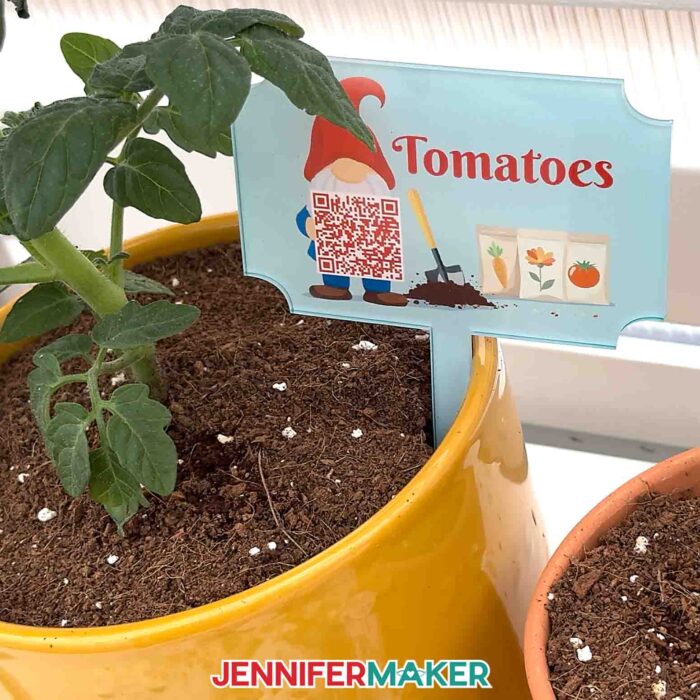
These aren’t your typical plant markers you stick in the dirt and forget about. Each one includes a special code you can scan with your smartphone that instantly pulls up care instructions for that exact plant.
So instead of guessing or trying to remember where you saved that seed packet, you just scan and get the answer in seconds. It’s such a good idea, especially during a busy growing season when everything seems to need something at once. I feel so much less overwhelmed!
What makes these garden markers even more fun is how easy it is to make an assortment to match your plants.
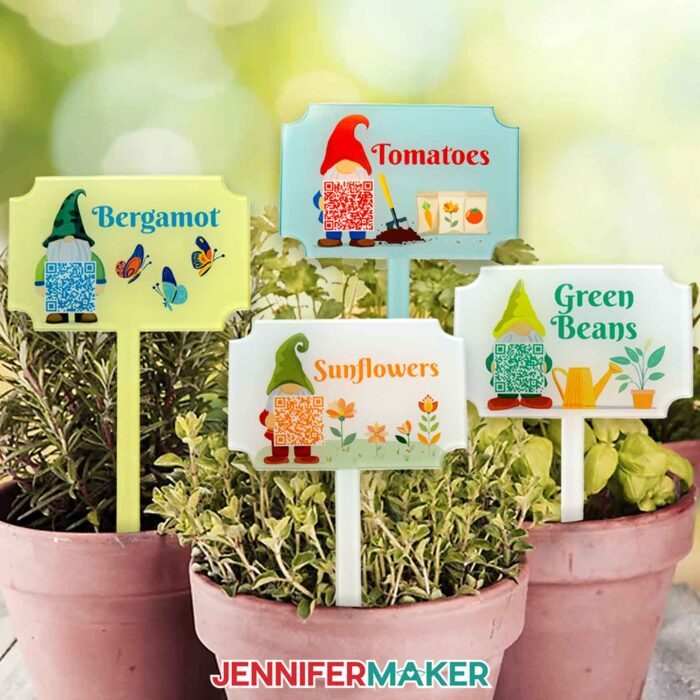
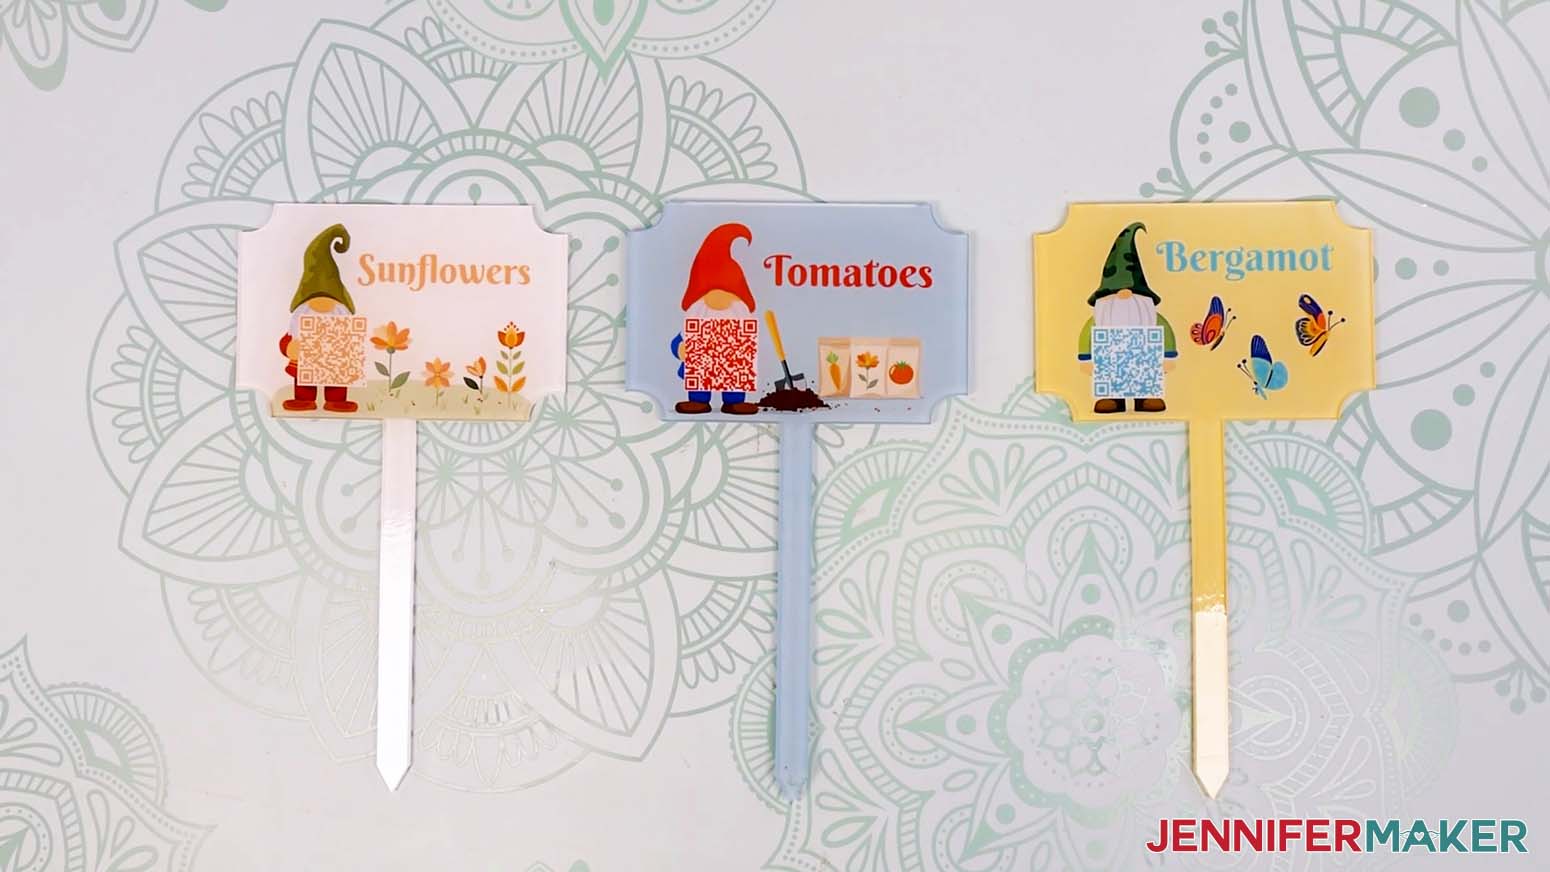
My free download includes three different versions of my garden gnome design that you can start using in Canva right away.
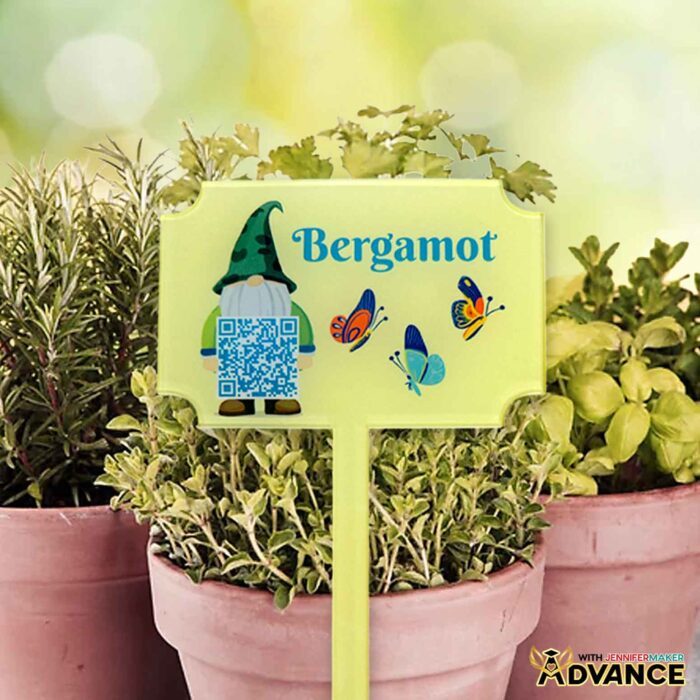
Just add your plant name in a clear, readable typeface, generate a QR code, and choose matching colors that pop to create something that’s both useful and beautiful.
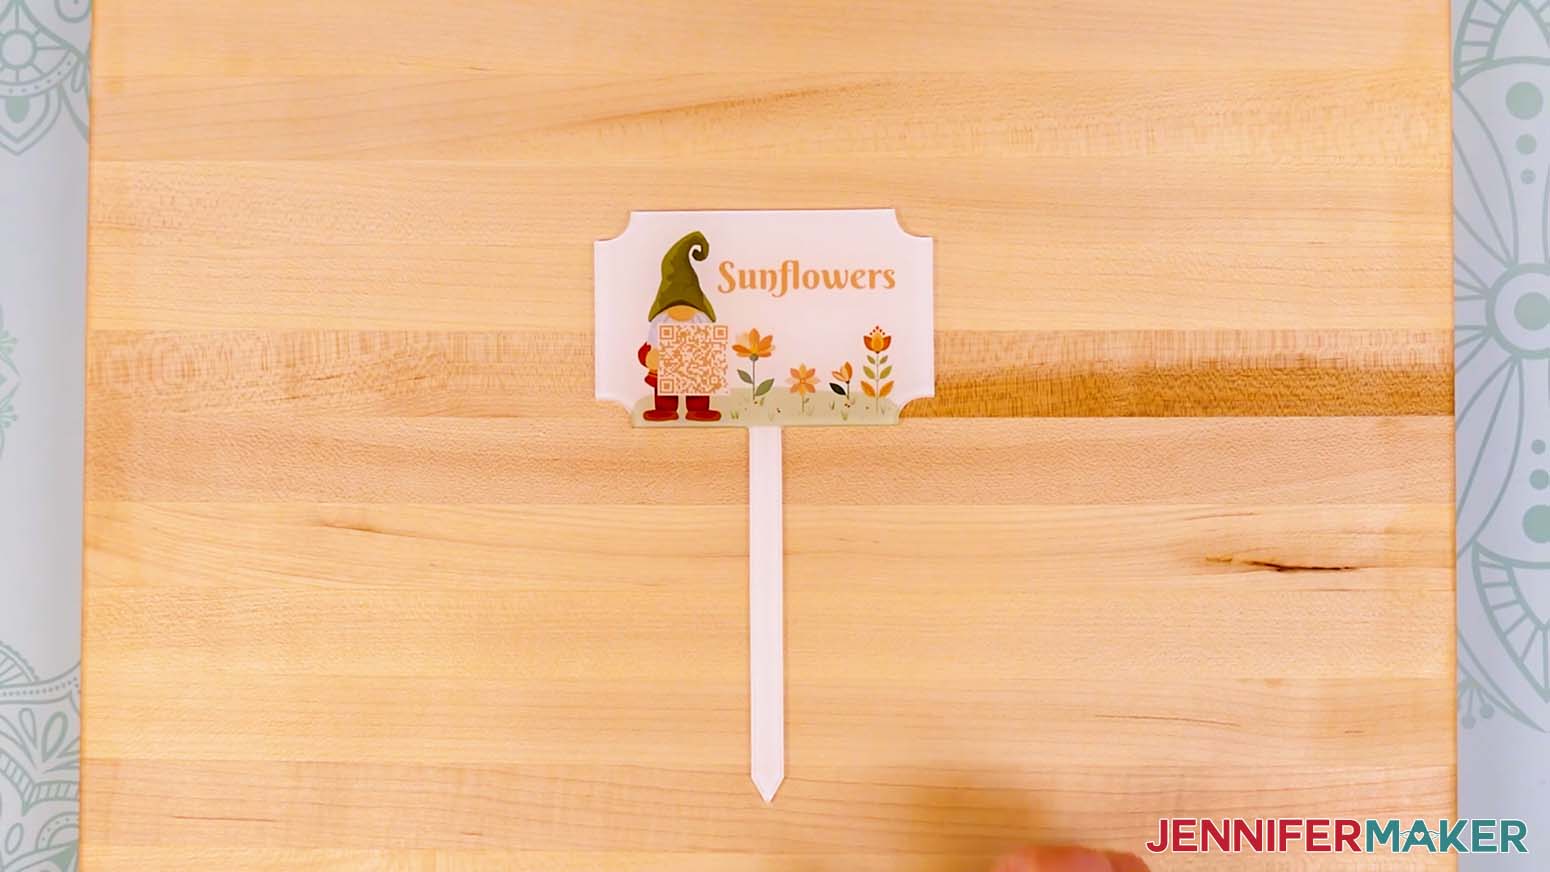
These aren’t just plant labels…they’re little pieces of art that help you stay organized. I love having the little gnome hold up the QR code for me!
And don’t worry if you’ve never done anything like this before. I walk you through everything in the video tutorial, from measuring your blank to uploading artwork in Canva, creating the QR code, and pressing your design. Once you see the process, you’ll realize it’s not nearly as labor intensive as it sounds.

Here’s what you need to get started:
- Acrylic garden marker blanks
- Sublimation printer and sublimation paper
- Heat press (like a Cricut EasyPress)
- Heat-resistant tape
- Butcher paper
- UV-resistant spray sealant
One of my favorite parts of this project is how durable the finished garden labels are. After pressing and sealing, they can handle sun, water, and regular outdoor use without fading or peeling. That means your plant identification system stays clear and reliable all season long.
If you’ve ever forgotten what you planted where, or struggled to keep up with care instructions, these markers are such a simple fix. They take the mental load off and make gardening feel calmer and more enjoyable. I highly recommend watching the full video tutorial before you start so you can see each step in action and follow along at your own pace.
Once you’re comfortable making these, you can dive into all sorts of other sublimation projects with my handy Sublimation Cookbook. It’s has time, temperature, and pressure settings for tons of fun materials just waiting to be pressed with a colorful design!
And if you’re like me and love adding your own creative spin to things, my ADVANCE with JenniferMaker program goes even deeper. I show you how to fully customize your designs so you can create a whole coordinated set of garden markers that reflect your personality. It’s a great way to build confidence with design tools and make your projects truly your own. Click here to learn more about ADVANCE!
Ready to dive into a fun sublimation project and learn how to make plant care garden markers with QR codes? The full materials list and tutorial are ready for you below. Happy crafting and gardening!
Want to learn how to make plant care garden markers? Let me show you how fun and easy it can be! This post contains some affiliate links for your convenience (which means if you make a purchase after clicking a link I will earn a small commission but it won’t cost you a penny more)! Read my full disclosure policy.
Materials to Make Plant Care Garden Markers With QR Codes
View my Amazon shopping list with the exact items I used.
- One (1) 3.94″ x 6.88″ Sublimation Acrylic Garden Marker
- One (1) Sheet of 8.5” x 11” A-SUB Sublimation Paper 125g
- White Uncoated Butcher Paper
- 12″ x 12″ White Cardstock
- Sublimation Printer – I used a converted Epson EcoTank ET-2800 Inkjet Printer
- Sublimation Ink
- Heat Press – I used the 9” x 9” Cricut EasyPress 3
- Cutting Board (for flat, heat-resistant surface)
- Heat-Resistant Tape
- Fan (for ventilation)
- Ruler or Measuring Tape
- Scissors -OR-
- Paper Trimmer
- Tweezers
- UV Spray Coating
- Weeding Tool (optional for removing protective film on acrylic blanks)
- Heavy book or other smooth, heat-resistant item
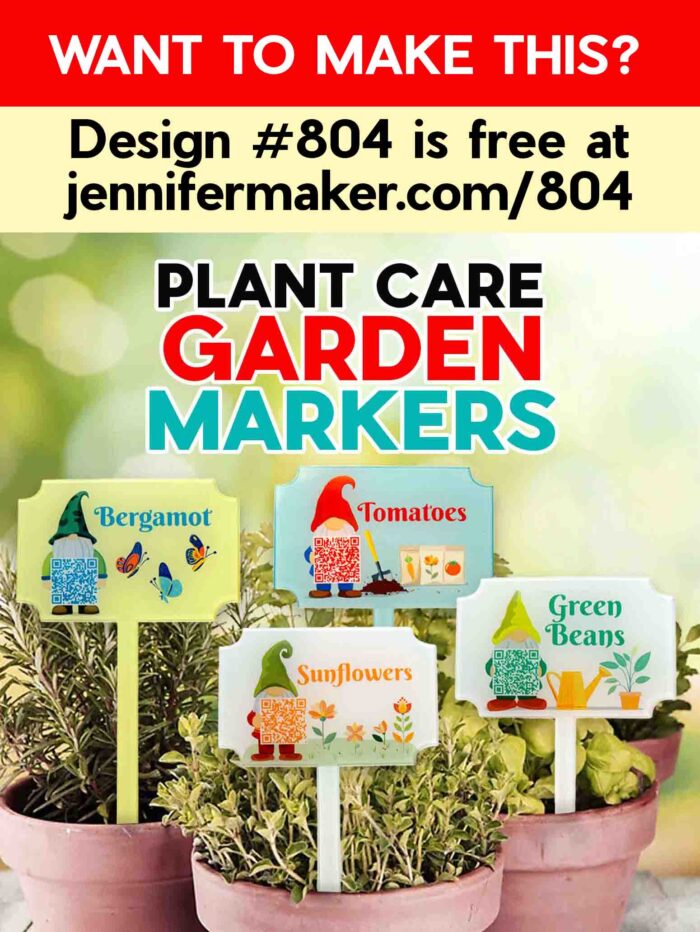
- Design #804 (My free PNG design files are available in my free library – get the password by filling out the form at the bottom of this page)
Plant Care Garden Markers
Plant Care Garden Markers
Learn how to make plant care garden markers with QR codes using sublimation crafting!
Materials
- One (1) 3.94" x 6.88" Sublimation Acrylic Garden Marker
- One (1) Sheet of 8.5” x 11” A-SUB Sublimation Paper 125g
- White Uncoated Butcher Paper
- 12" x 12" White Cardstock
- Design #804 (My free PNG design files are available in my free resource library - get the password by filling out the form at the bottom of this page)
Tools
- Sublimation Printer - I used a converted Epson EcoTank ET-2800 Inkjet Printer
- Sublimation Ink
- Heat Press - I used the 9” x 9” Cricut EasyPress 3
- Cutting Board (for flat, heat-resistant surface)
- Heat-Resistant Tape
- Fan (for ventilation)
- Ruler or Measuring Tape
- Scissors -OR-
- Paper Trimmer
- Tweezers
- UV Spray Coating
- Weeding Tool (optional for removing protective film on acrylic blanks)
- Heavy book or other smooth, heat-resistant item
Instructions
STEP 1: GET MY FREE GARDEN MARKERS DESIGNS
First, download my Plant Care Garden Markers designs from my free library – look for Design #804. Alternatively, you can use the Save This Project form near the top of this post and the design link will be emailed to you.
In the PNG folder, you’ll find a guide outline image to help design your garden markers. There are also three versions of my gnome QR code image: one with flowers, one with gardening supplies, and one with a watering can. I made the gnome images with the help of AI art generation and adjusted them with image editing software.
TIP: If you’re not sure how to download ZIP files and upload designs, go to jennifermaker.com/svgs. The steps are similar for PNGs and Google Docs.
STEP 2: MEASURE YOUR BLANK’S DESIGN AREA
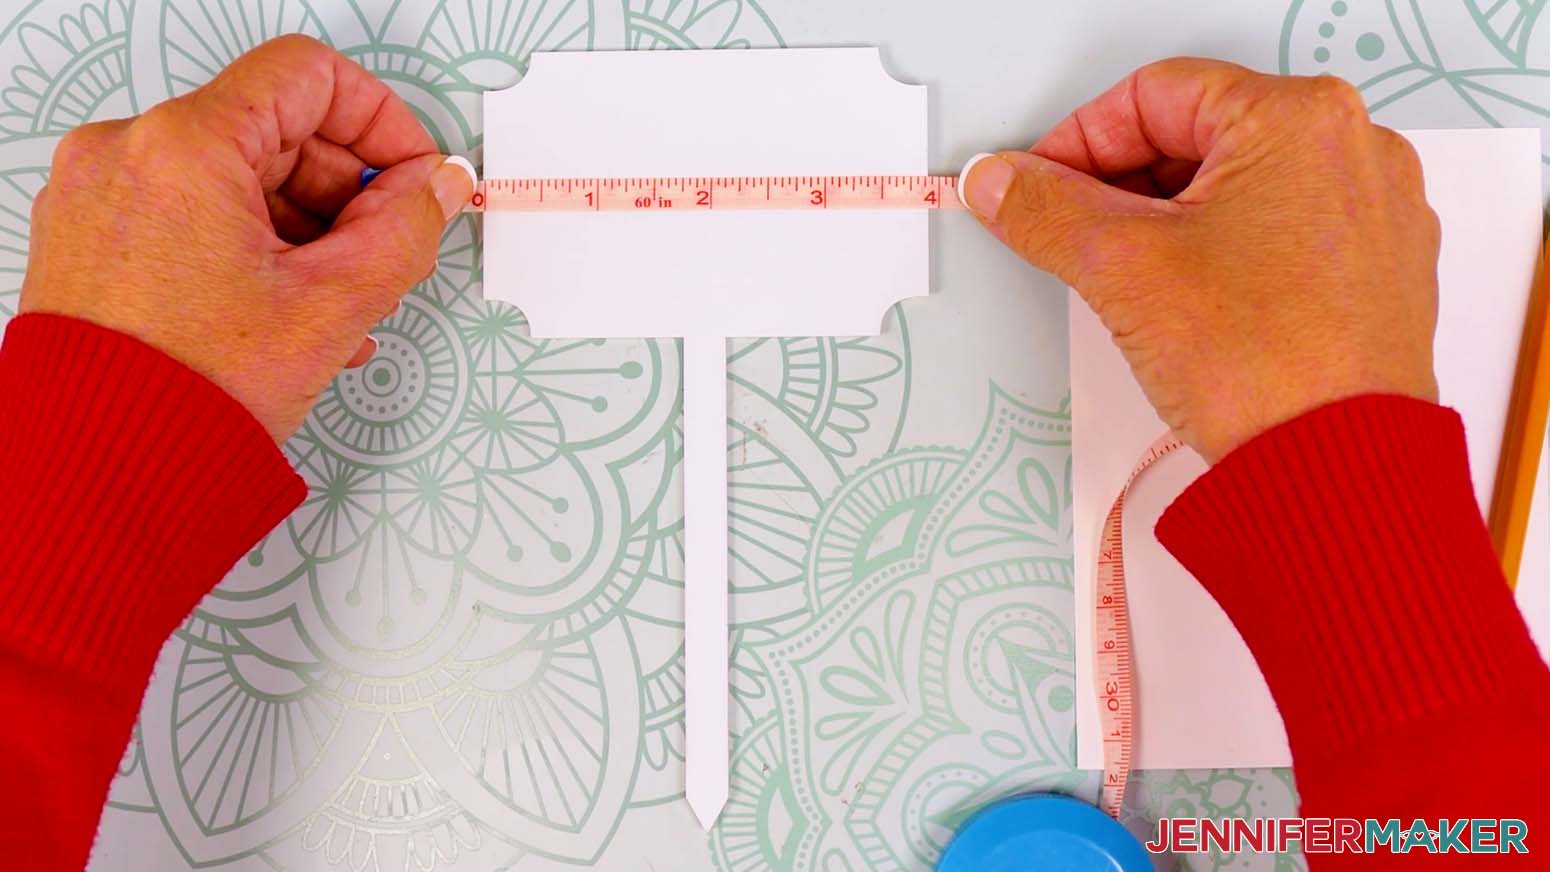
- Lay your garden marker blank flat on your work surface with the pointed end toward you.
- With a ruler, measure the width of the head from the left edge to the right edge.
NOTE: My marker measures 3.94” at the widest part. Your sizing might be different even if you use the blank I recommend, so always be sure to measure.
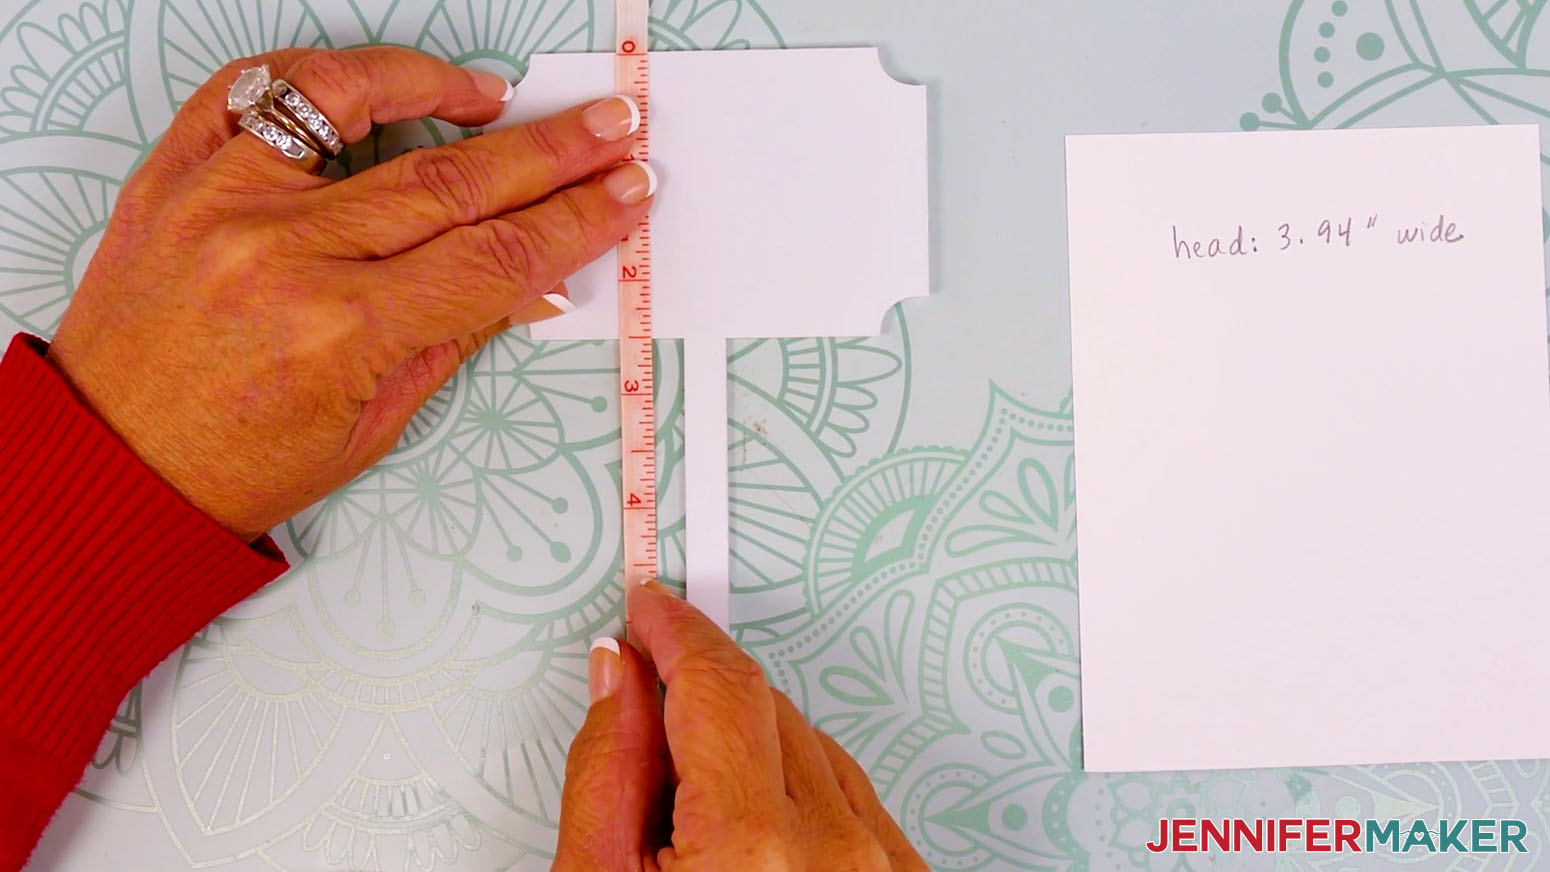
- Then measure the height from the top of the head to the bottom of the head to find the head’s design area.
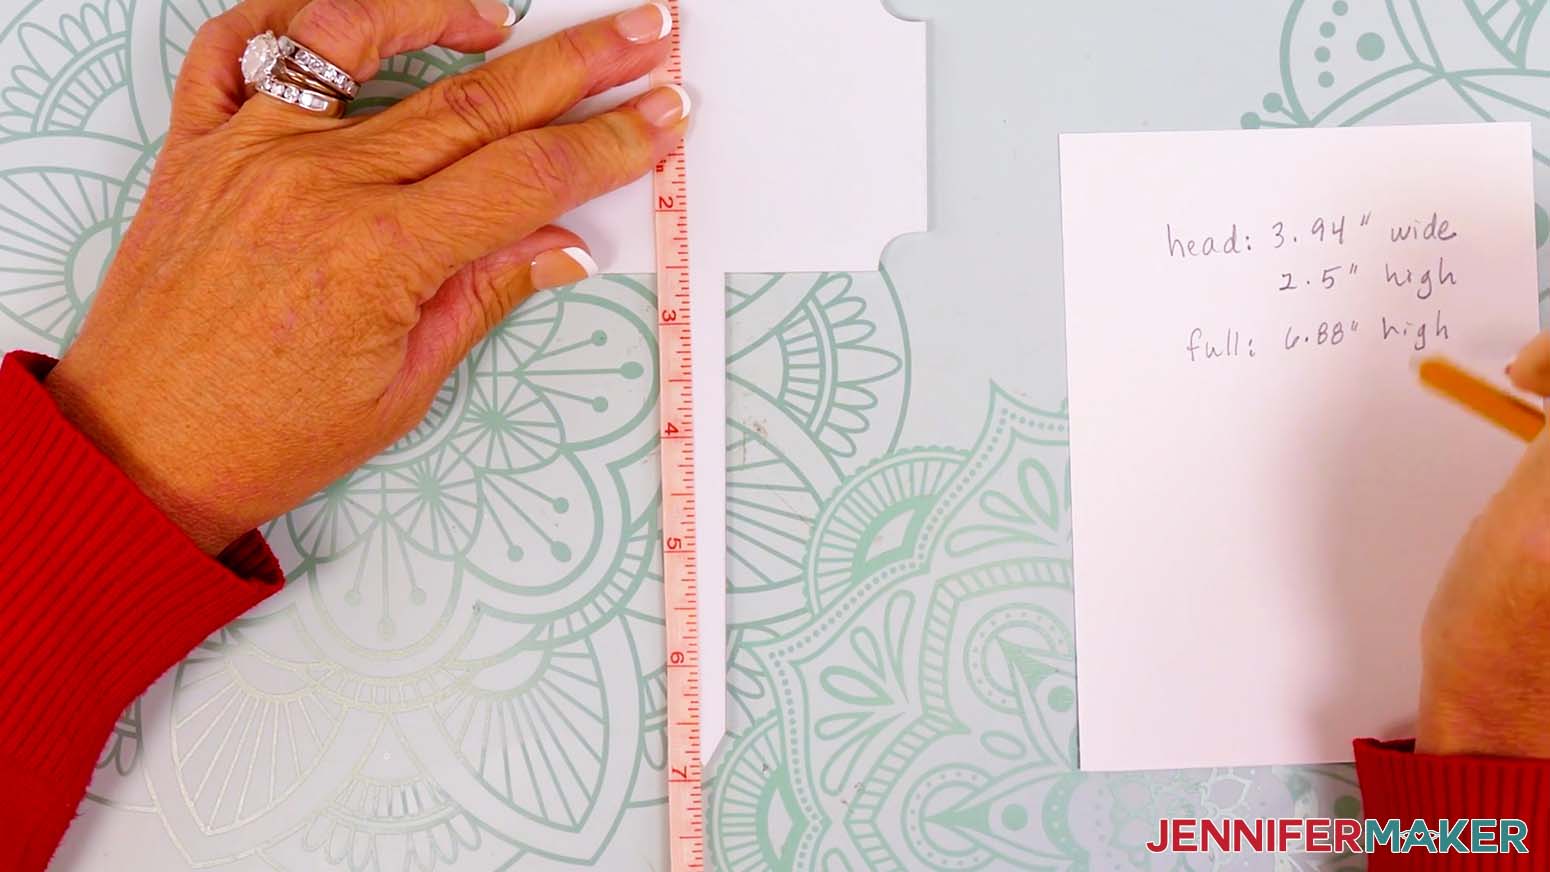
NOTE: My marker measures 2.5” from the top to the bottom of the head. - Measure the height from the top of the head to the bottom of the handle, as well.
NOTE: My marker measures 6.88” from the top edge to the bottom point. - Record your measurements, then set aside your notes for now.
STEP 3: DESIGN YOUR MARKER IN CANVA
- To design a garden marker with a plant label and QR code, open your computer’s browser and go to jennifermaker.com/canva.
NOTE: If you’re new to Canva, check out my Canva for Beginners tutorial. - Then, either sign in to your account or follow the prompts on the screen to sign up for a free account.
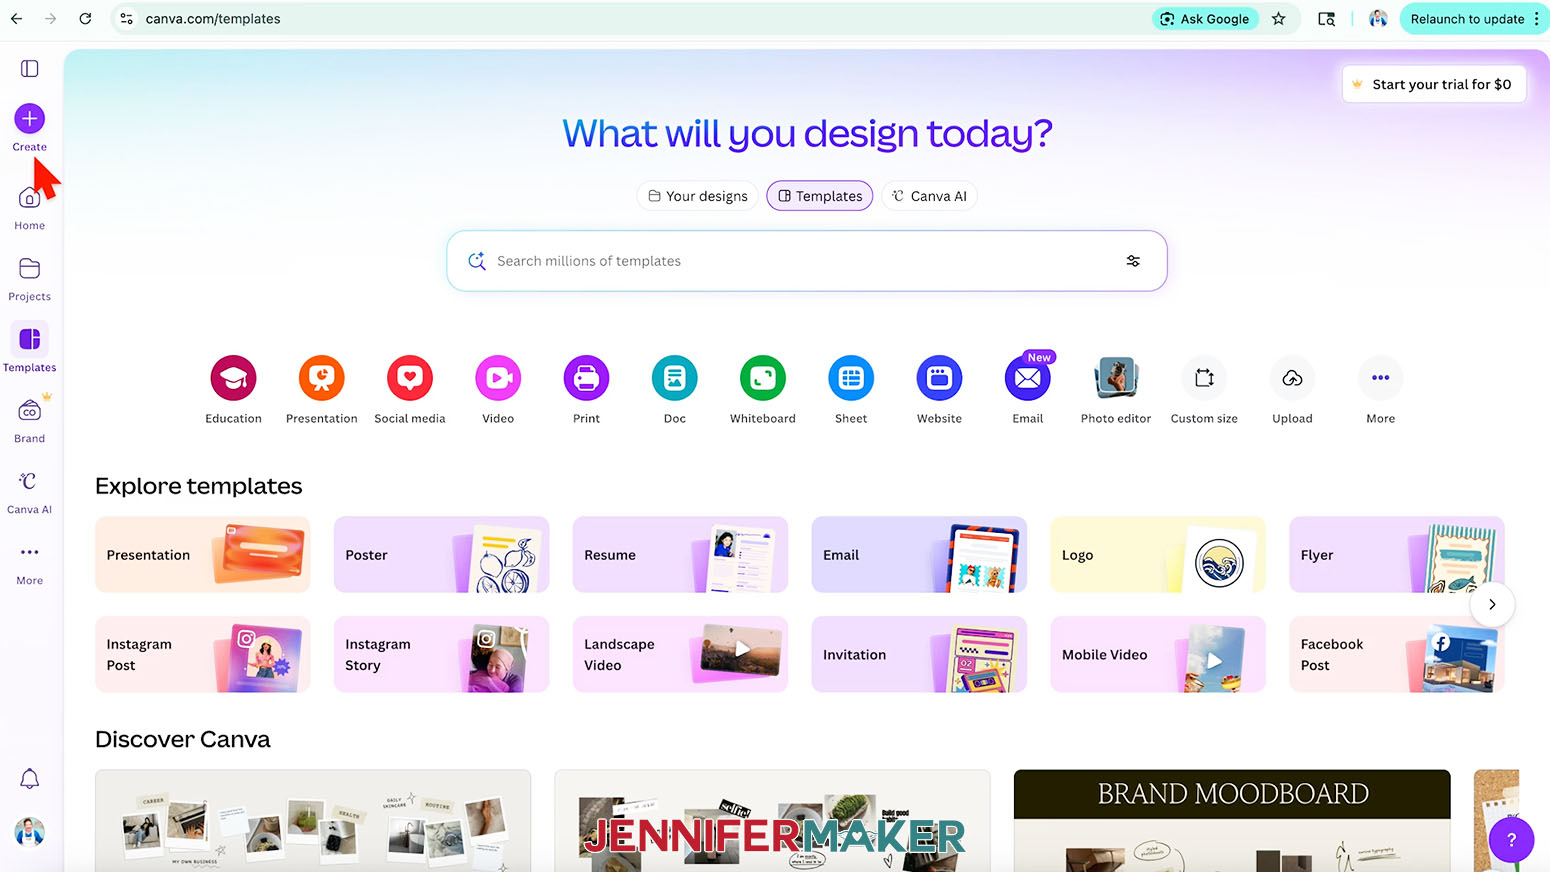
NOTE: Canva does offer paid subscriptions with more tools and elements, but I’ll show you how to do everything with the free account. - On the Canva Home screen, click the “Create a design” button.
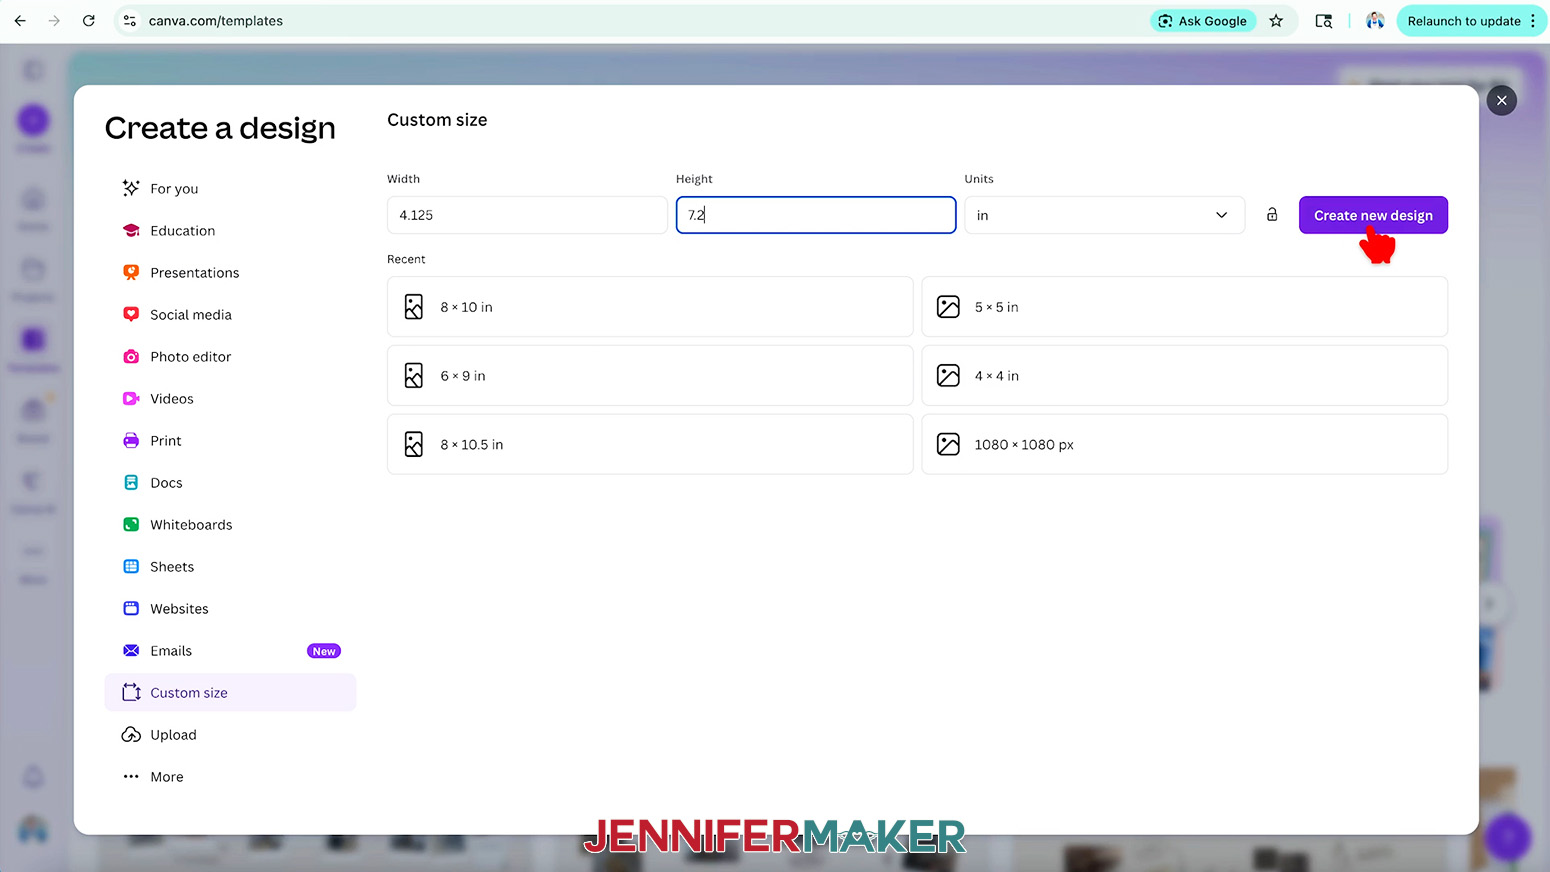
TIP: Depending on your view, the button may just say “Create.” - Click “Custom size” to set the dimensions of your canvas to match your marker.
- In the “Units” box, click the dropdown menu and select “in” for inches.
- Add approximately 0.25” to the dimensions you measured earlier and enter those values in the “Width” and “Height” fields.
NOTE: I’ll enter “4.125” in the “Width” field and “7.2” in the Height field.
TIP: Making the canvas larger than your measured dimensions allows for a print bleed area, or extra ink around your design that ensures your project doesn’t have white edges after pressing. - Click “Create new design.”
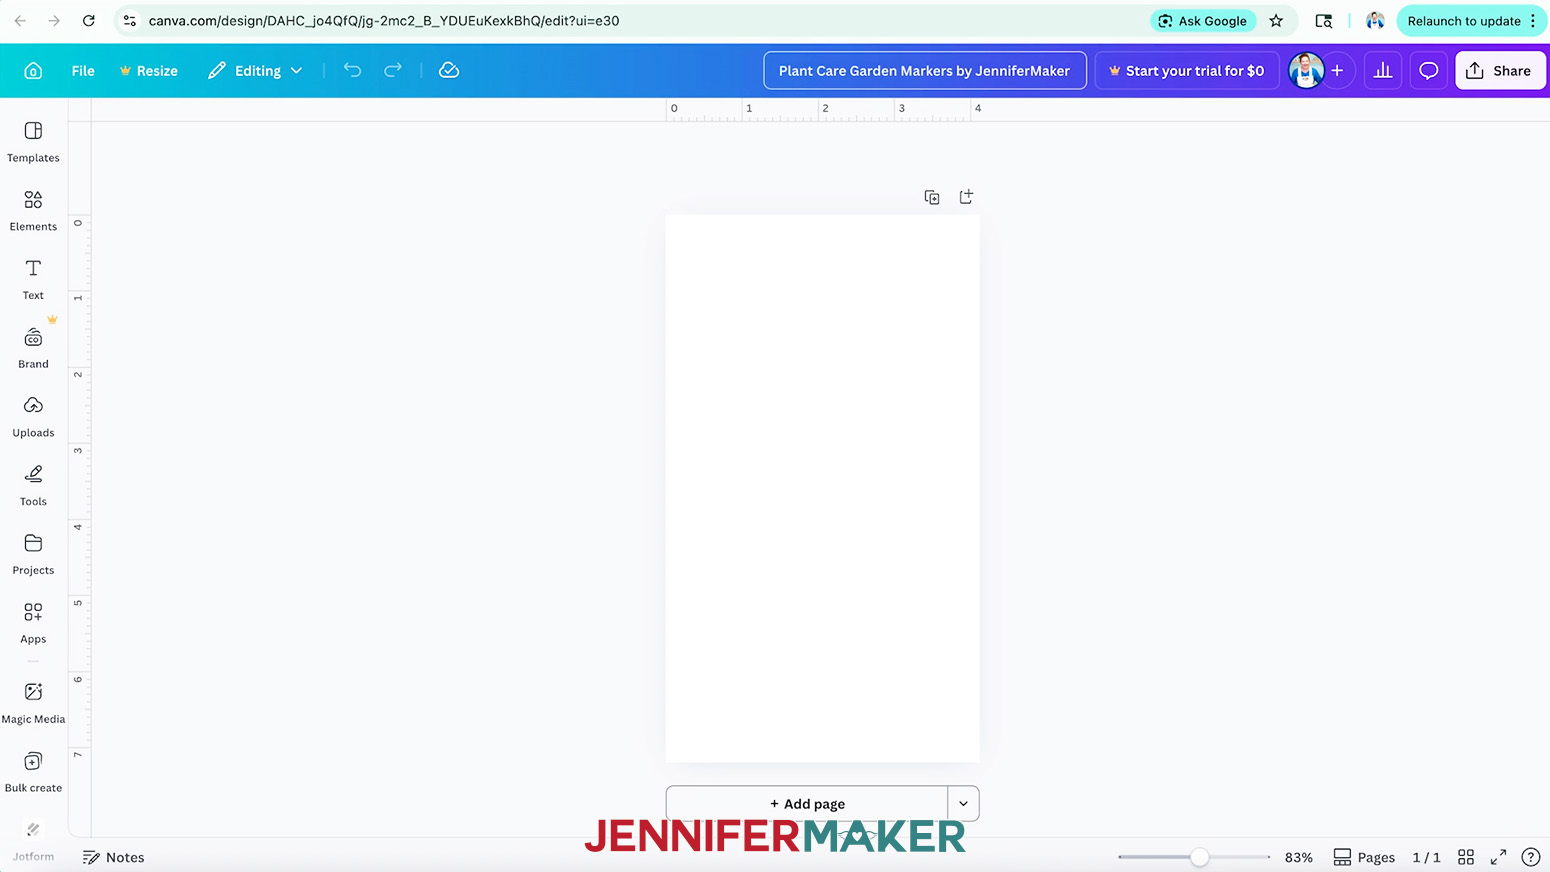
- With the new canvas ready, click the filename field at the top and replace the current name with your own.
NOTE: I’ll name mine “Plant Care Garden Markers by JenniferMaker.” - To add the marker guide, click on “Uploads” in the side panel, then “Upload files.”
- Select the “guide” PNG and click “Open.”
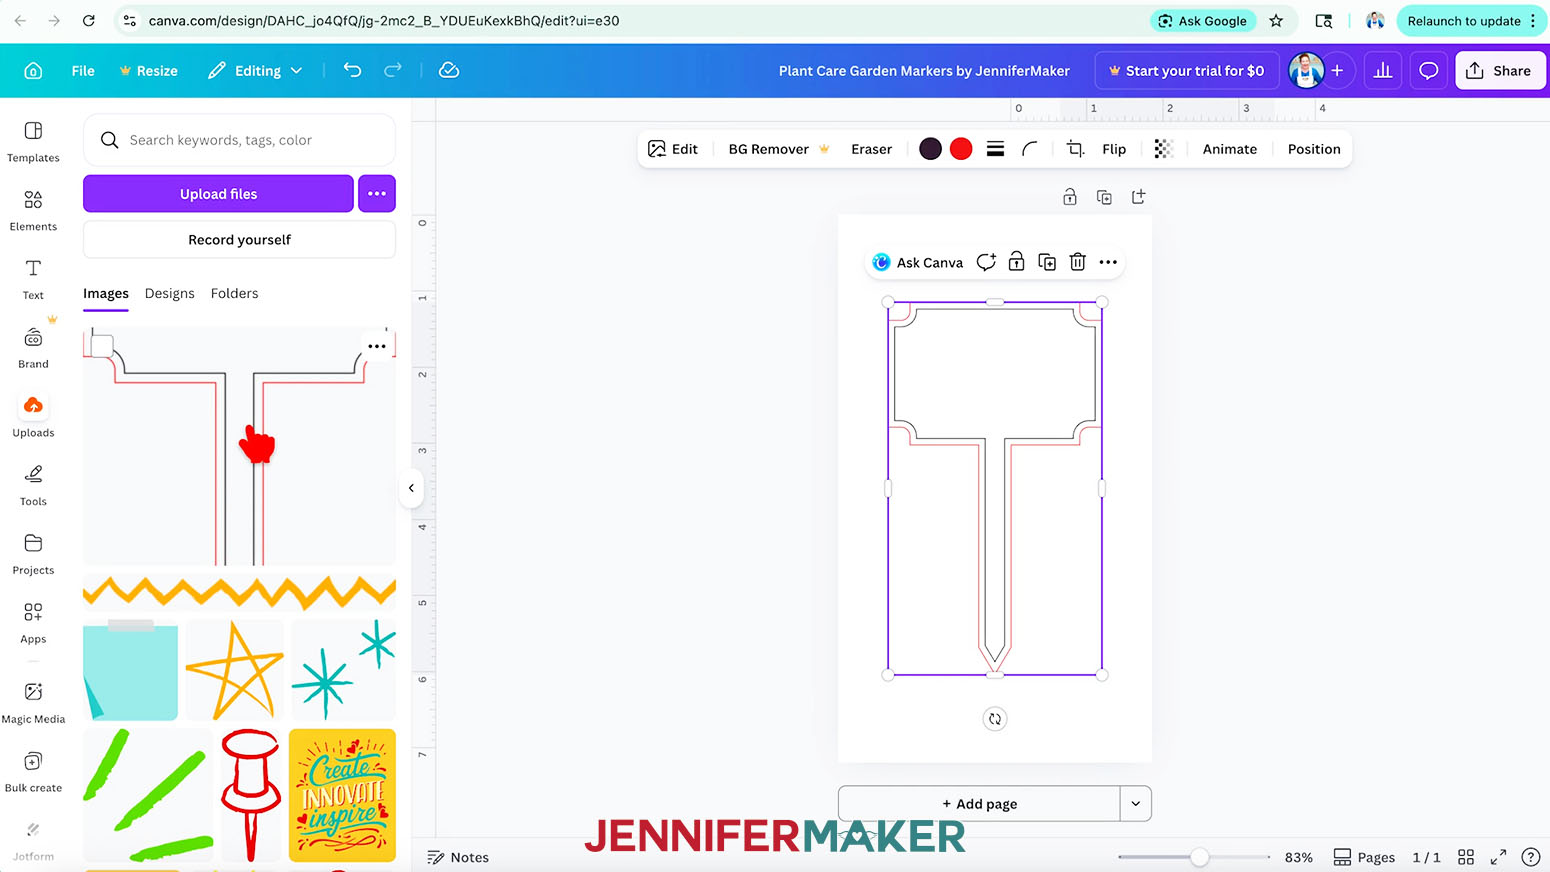
- In the “Uploads” panel, click the image to add it to your canvas.
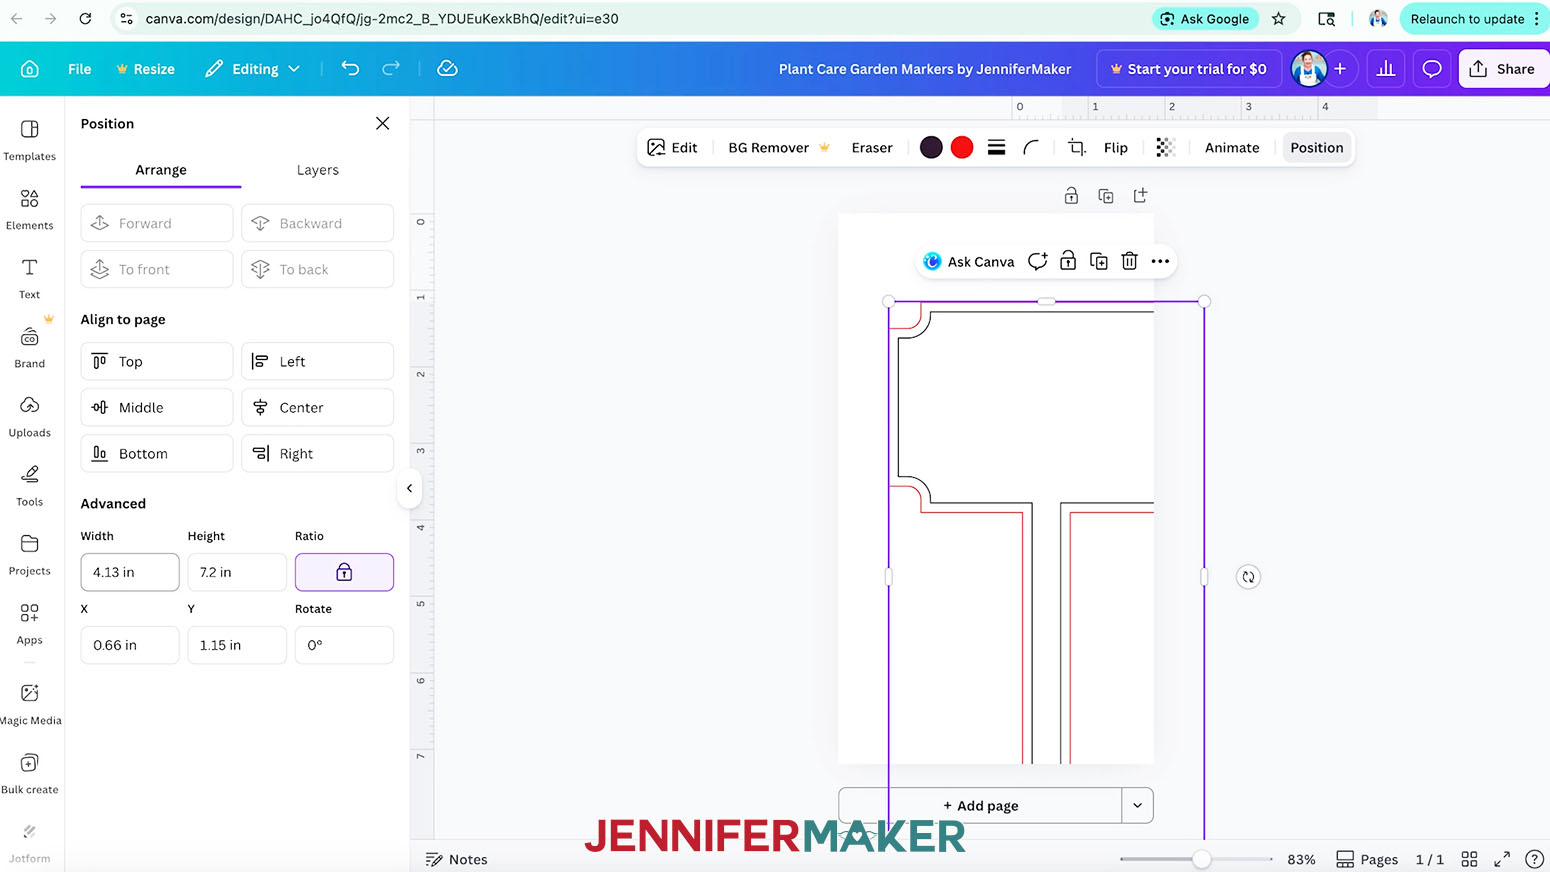
NOTE: The black outline marks the shape of your garden marker, while the red line marks the bleed area around your design. - Select the guide on your canvas and click the “Position” button in the “Edit” toolbar above the image.
- Make sure the “Lock” icon under “Ratio” is closed to maintain the guide’s proportions.
- Enter the same width measurement you used for your canvas in the “Width” field.
NOTE: I’ll enter 4.125”. Canva will automatically adjust the “Width” value to 4.13” and the “Height” value to 7.2”. - Under “Align to page,” select “Top” and “Left” to position the guide evenly on the page.
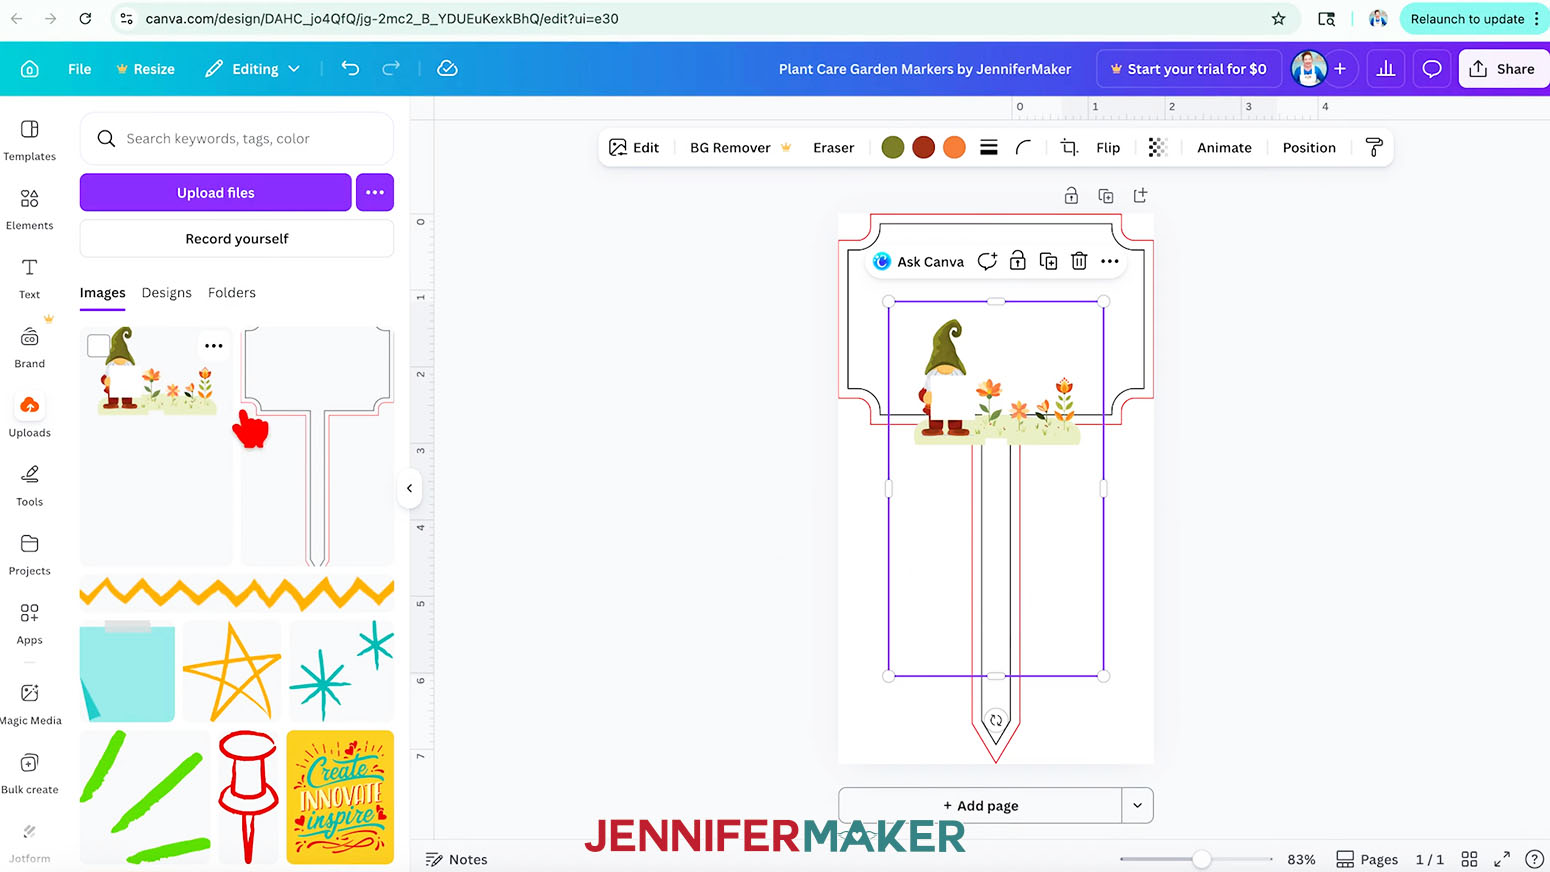
- Repeat Steps 9-15 to add, resize, and position one of my gnome PNGs inside your marker design.
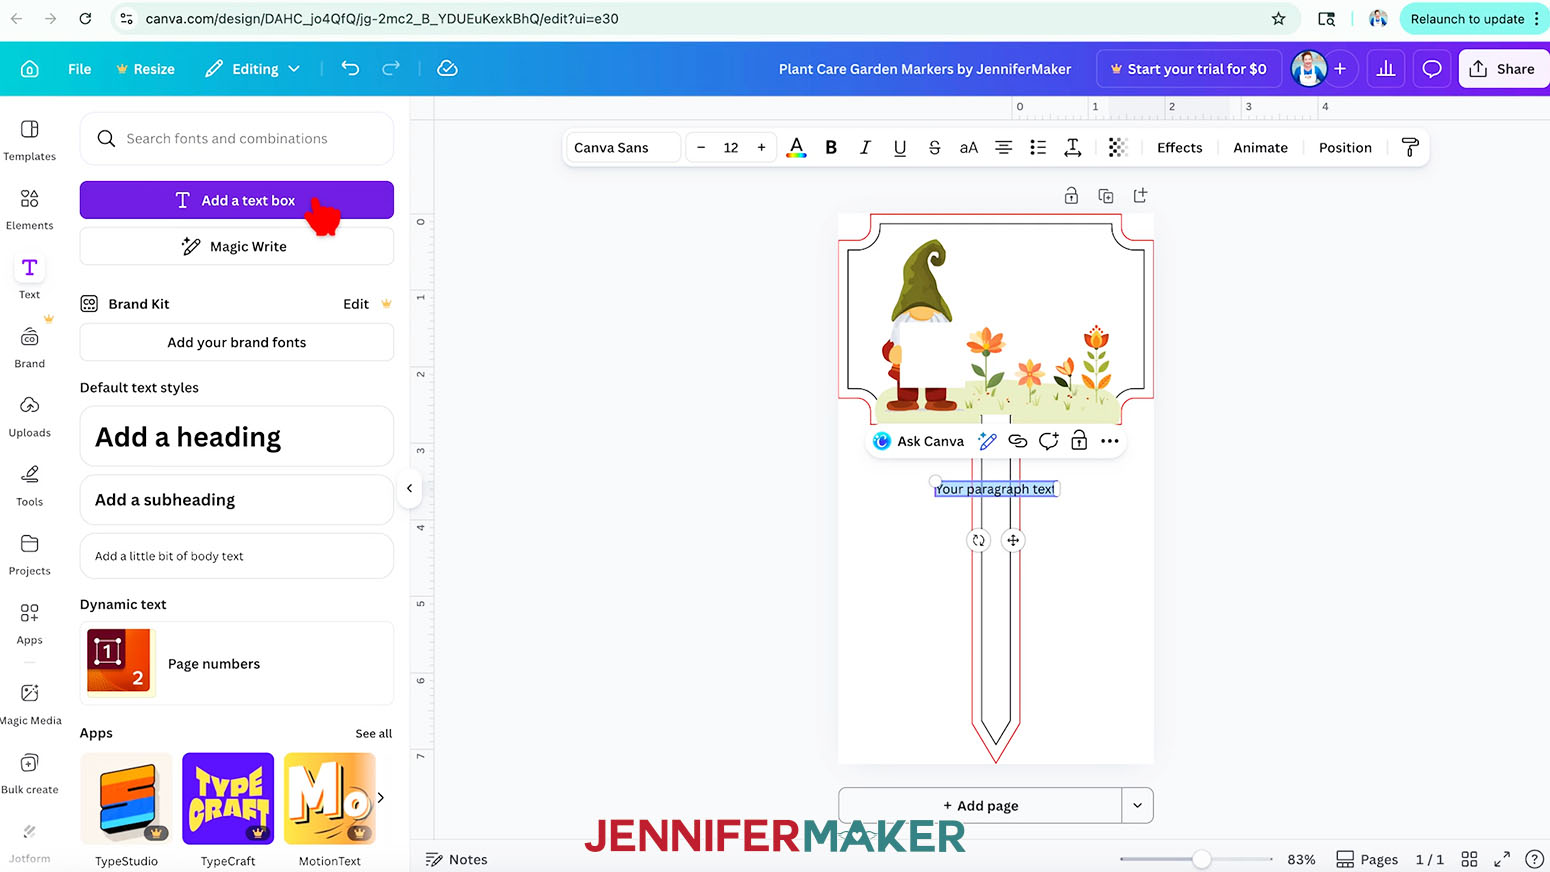
NOTE: I’ll add the “flower” PNG, which has a small amount of bleed on the bottom edge. The other two designs do not have the bleed. - To add text to your design, click the “Text” icon in the side panel, then click “Add a text box.”
- Type your desired text in the box.
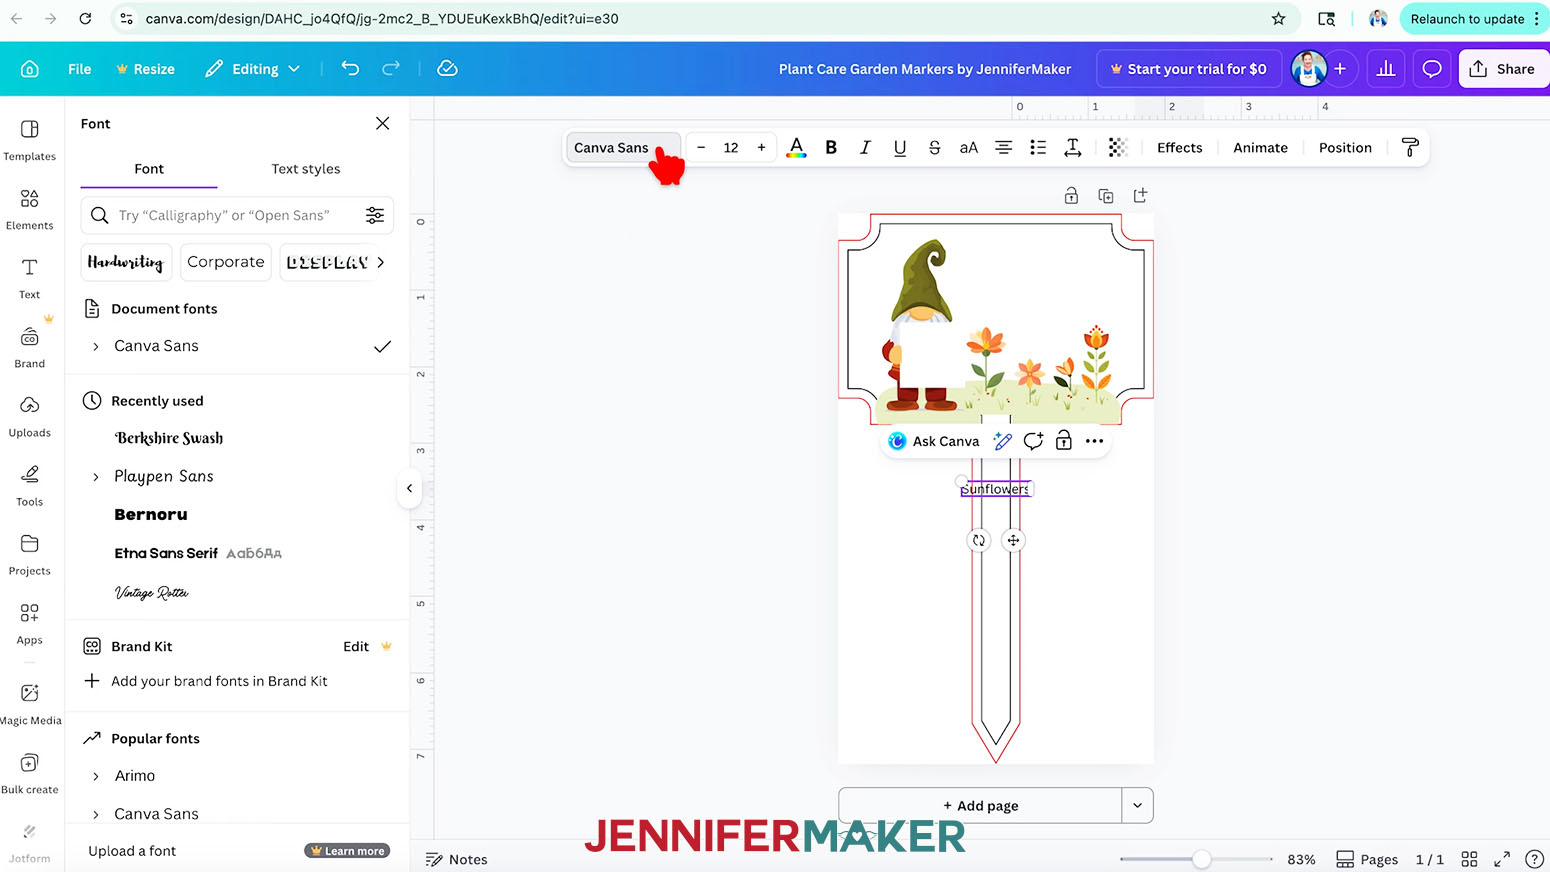
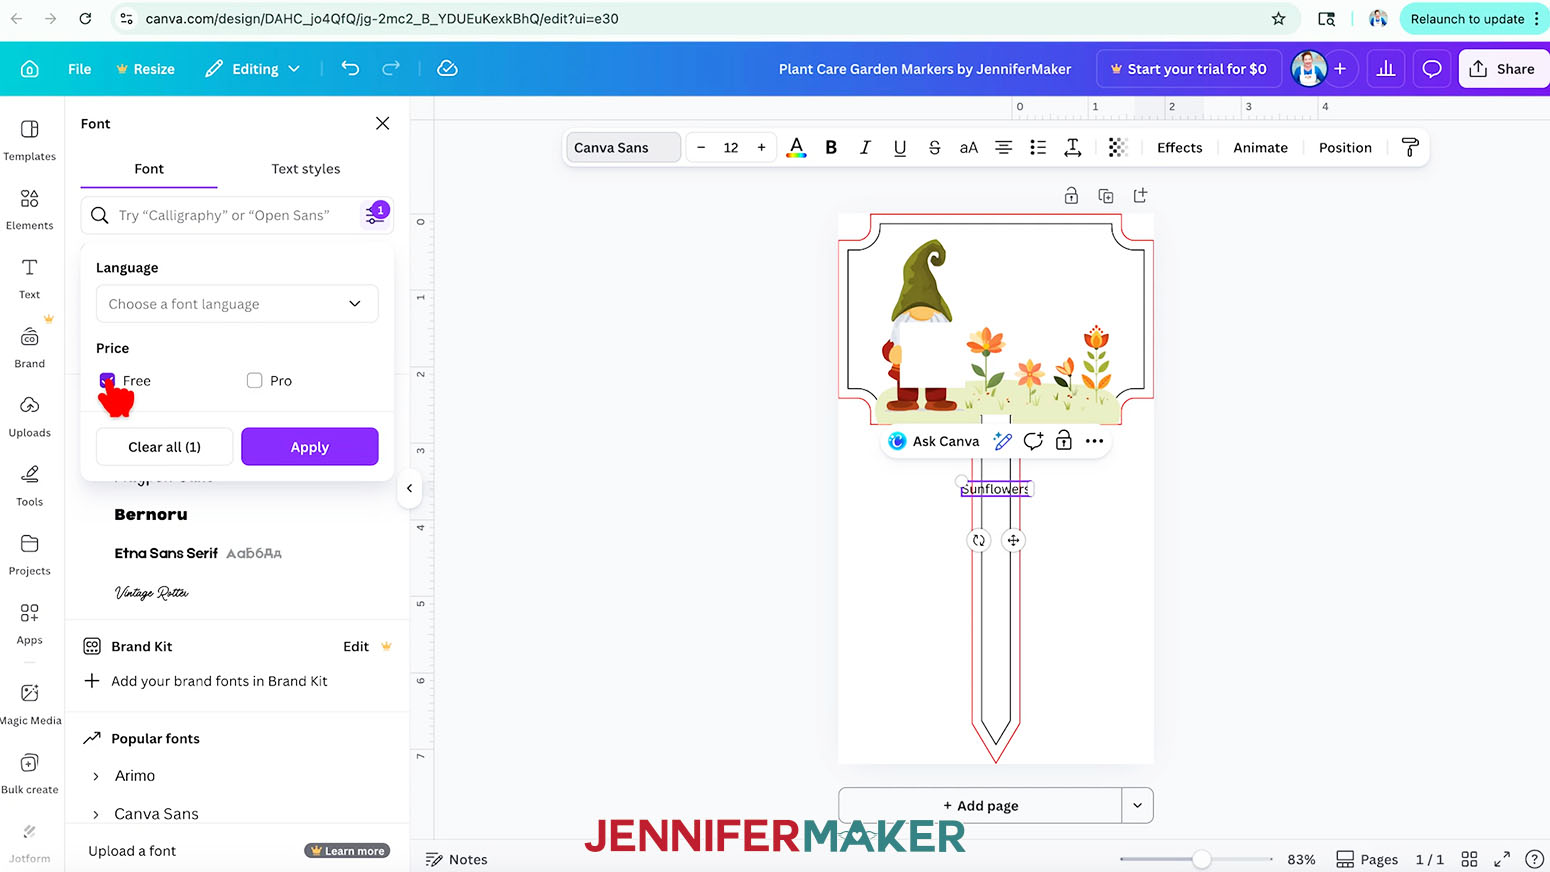
NOTE: I’ll type in “Sunflowers.” - To change your text’s typeface, keep the text box selected and click the font name field to open the “Font” menu in the side panel.
NOTE: It probably says “Canva Sans.” - Click on the icon with three horizontal lines and small circles to open the “Filter” menu. Then check the box next to “Free,” and click “Apply” to show only typefaces you can use without a paid account.
- Click a typeface you like from the list to apply it to your text.
TIP: If a typeface has a small arrow beside it, click it to see additional formatting options.
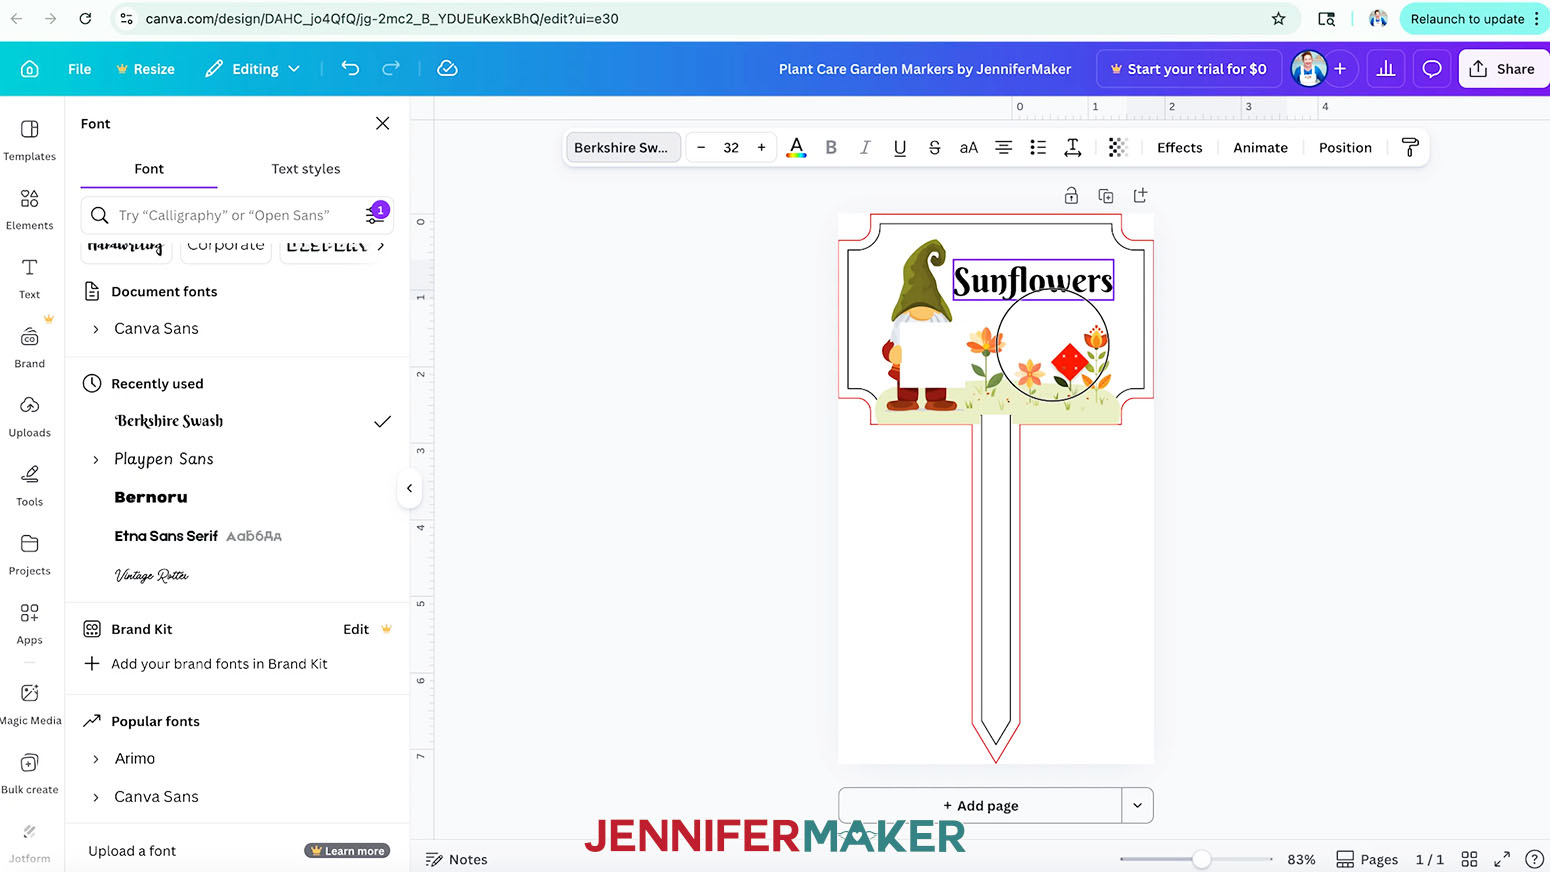
NOTE: I’ll choose the free Canva typeface “Berkshire Swash.” - Use the corner Resize handles to make your text larger or smaller as needed, or change the “Font size” value in the input field.
NOTE: A “Font size” of 32 worked well for mine. - Click and drag the text box into the top right of the design so it’s centered inside the empty space within the guide.
- To change the color of your text to match your elements, click the toolbar button with the letter “A” above a color box.
- Then choose a color swatch from the “Photo colors” section to ensure your colors are consistent across elements.
TIP: If you’d like to use the same color for your QR code later, write down the hex code that appears below the color name when hovering over the swatch.
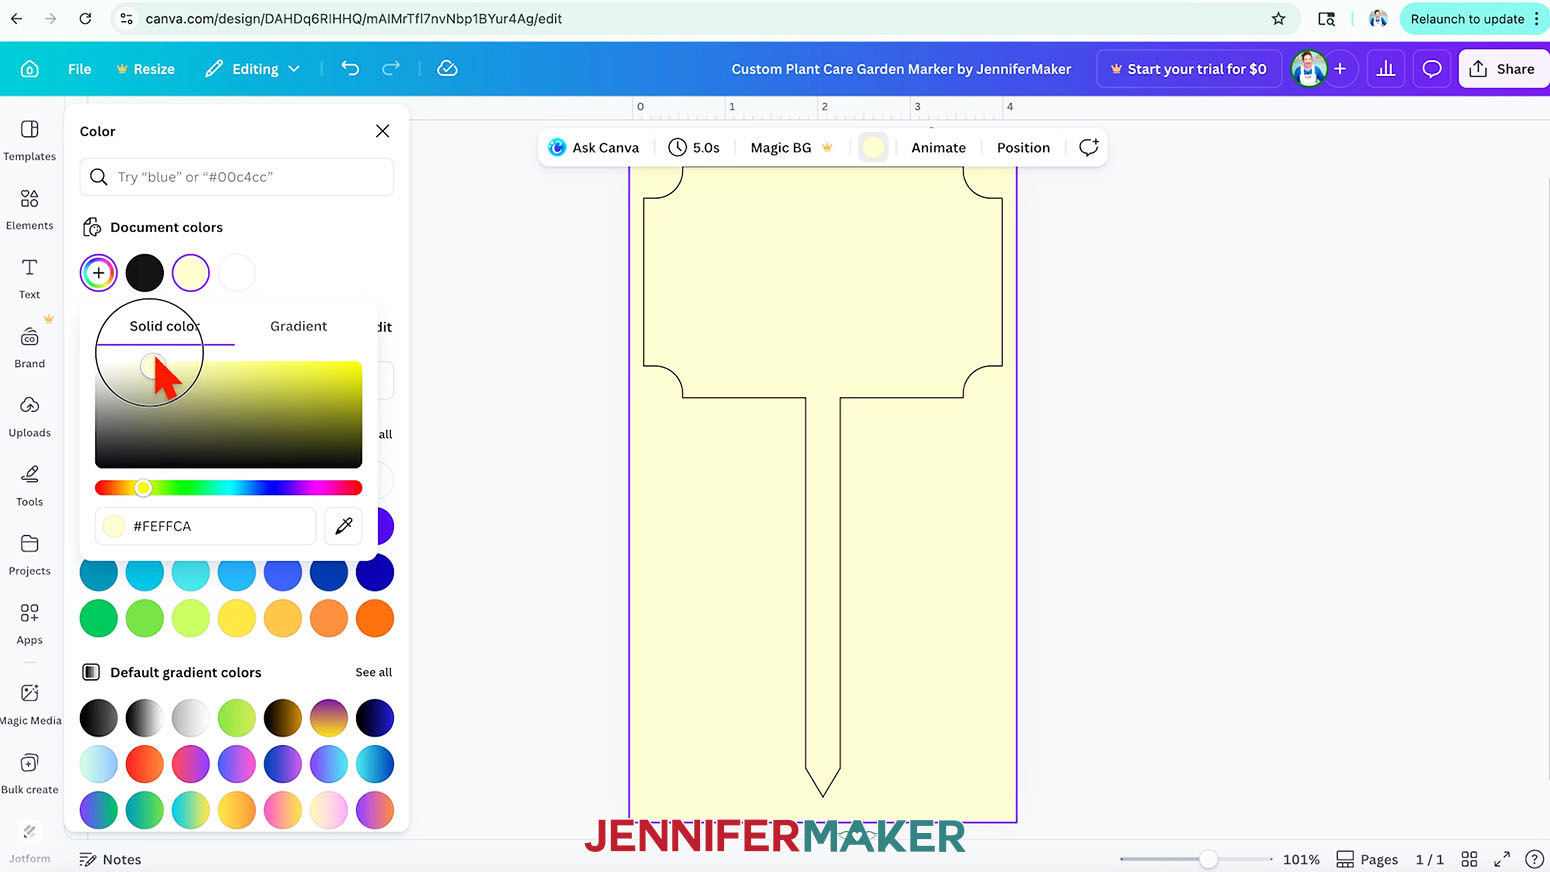
NOTE: I’ll choose the orange swatch to match my flowers and write down its hex code. - To add a background color to create an all-over design for your marker, click inside your canvas, then click the “Position” button.
- Click the empty background layer in the “Layers” list to select it.
- Click the “Background color” icon (the color wheel) in the toolbar above your canvas, and select a color to apply it.
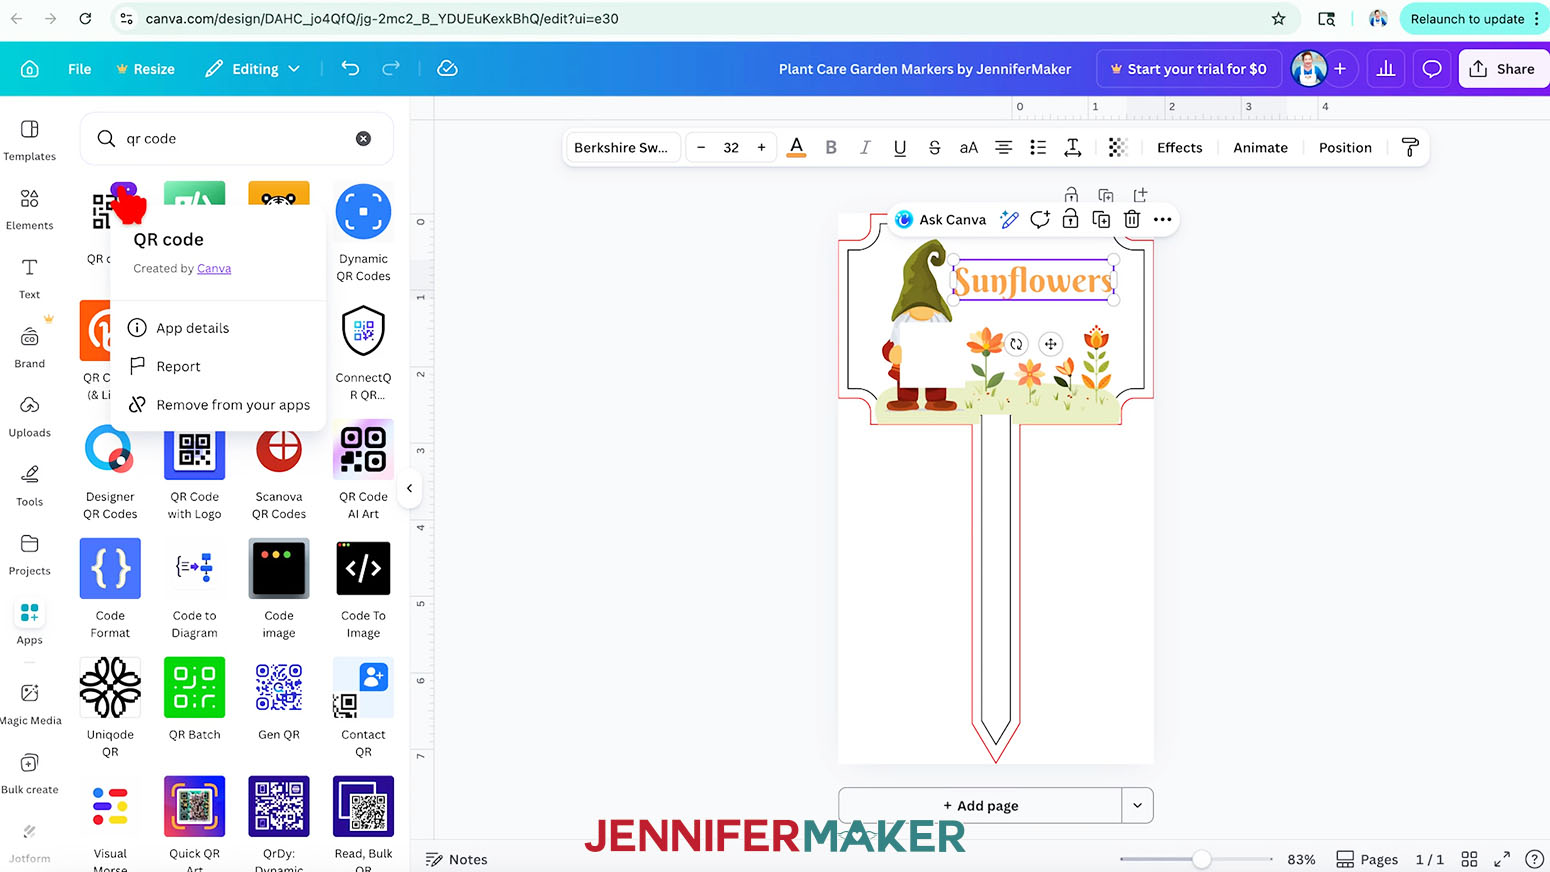
- To add the QR code in the white square the gnome is holding, click on the “Apps” icon and enter “QR Code” in the search bar.
- Click the plain black and white “QR Code” app in the search results to open the Canva QR Code app.
NOTE: If you click the three dots in the top right corner of the app, it should say “Created by Canva.” - Click “Open” to see the Canva QR Code panel.
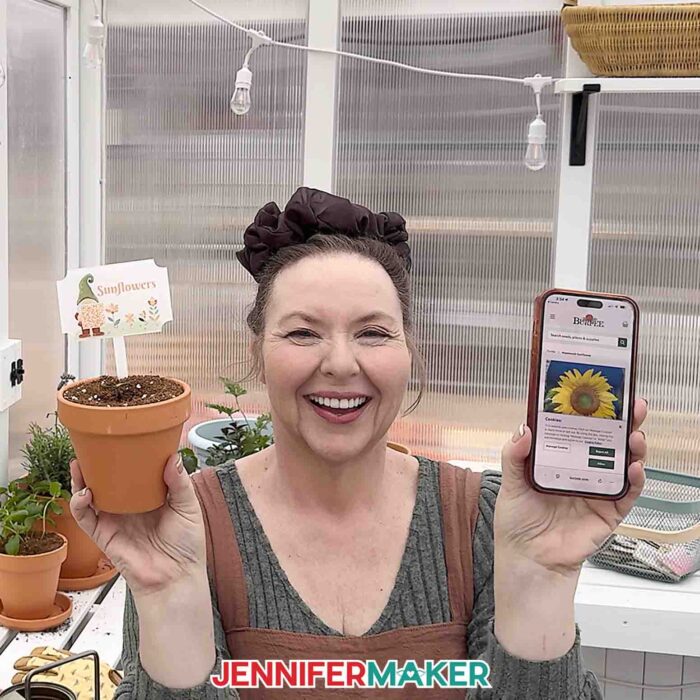
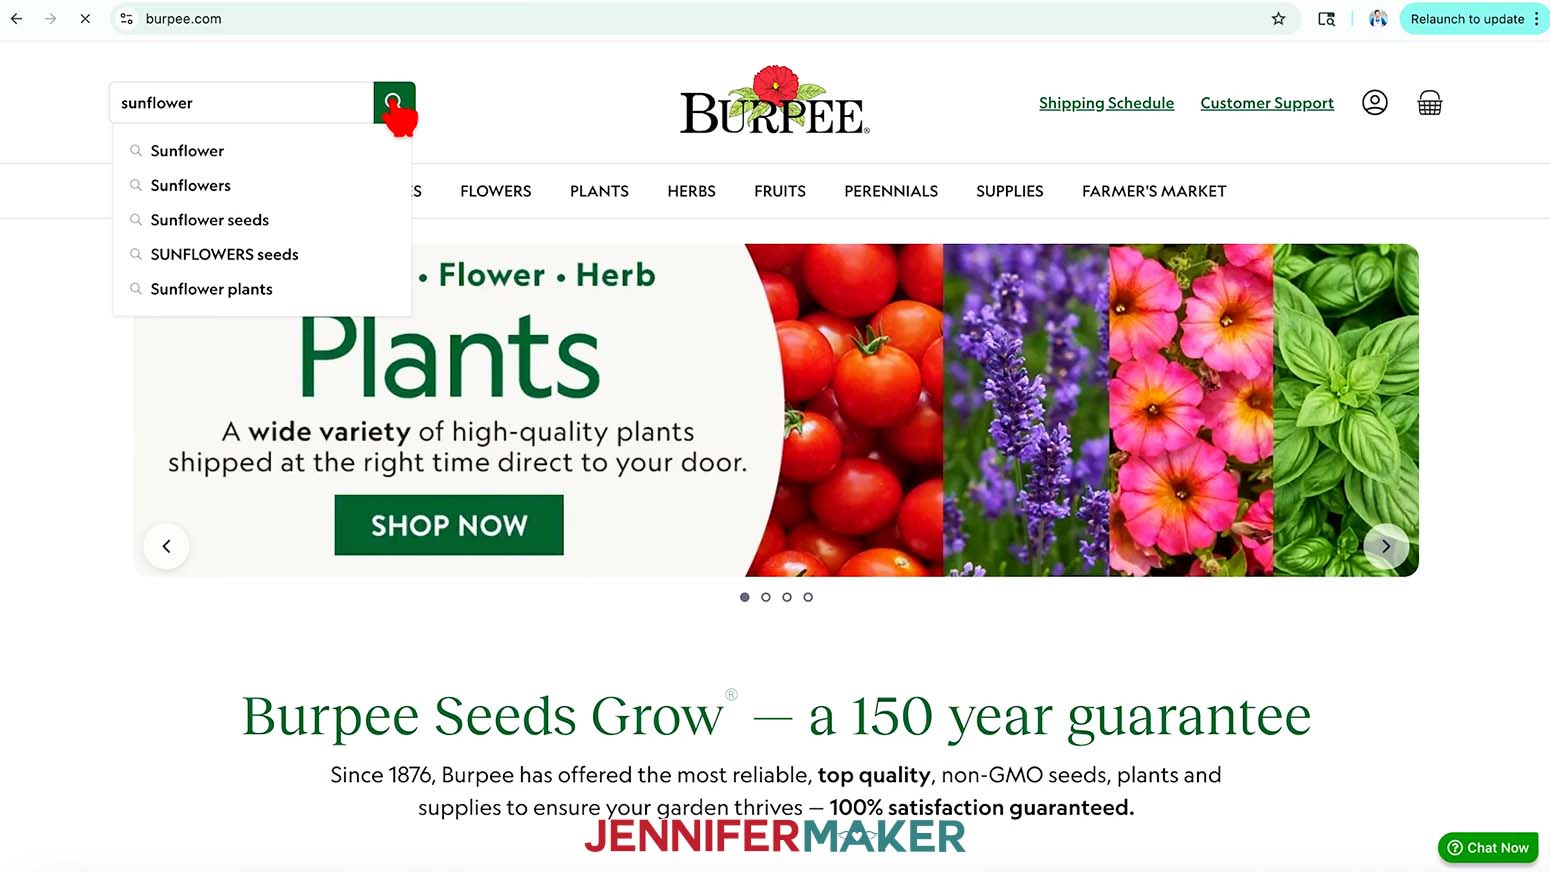
- In another browser tab or window, browse to the Burpee website to find care instructions for your plant.
- Type your plant’s name in the “Search seeds, plants & supplies” box, and click the magnifying glass to search the website.
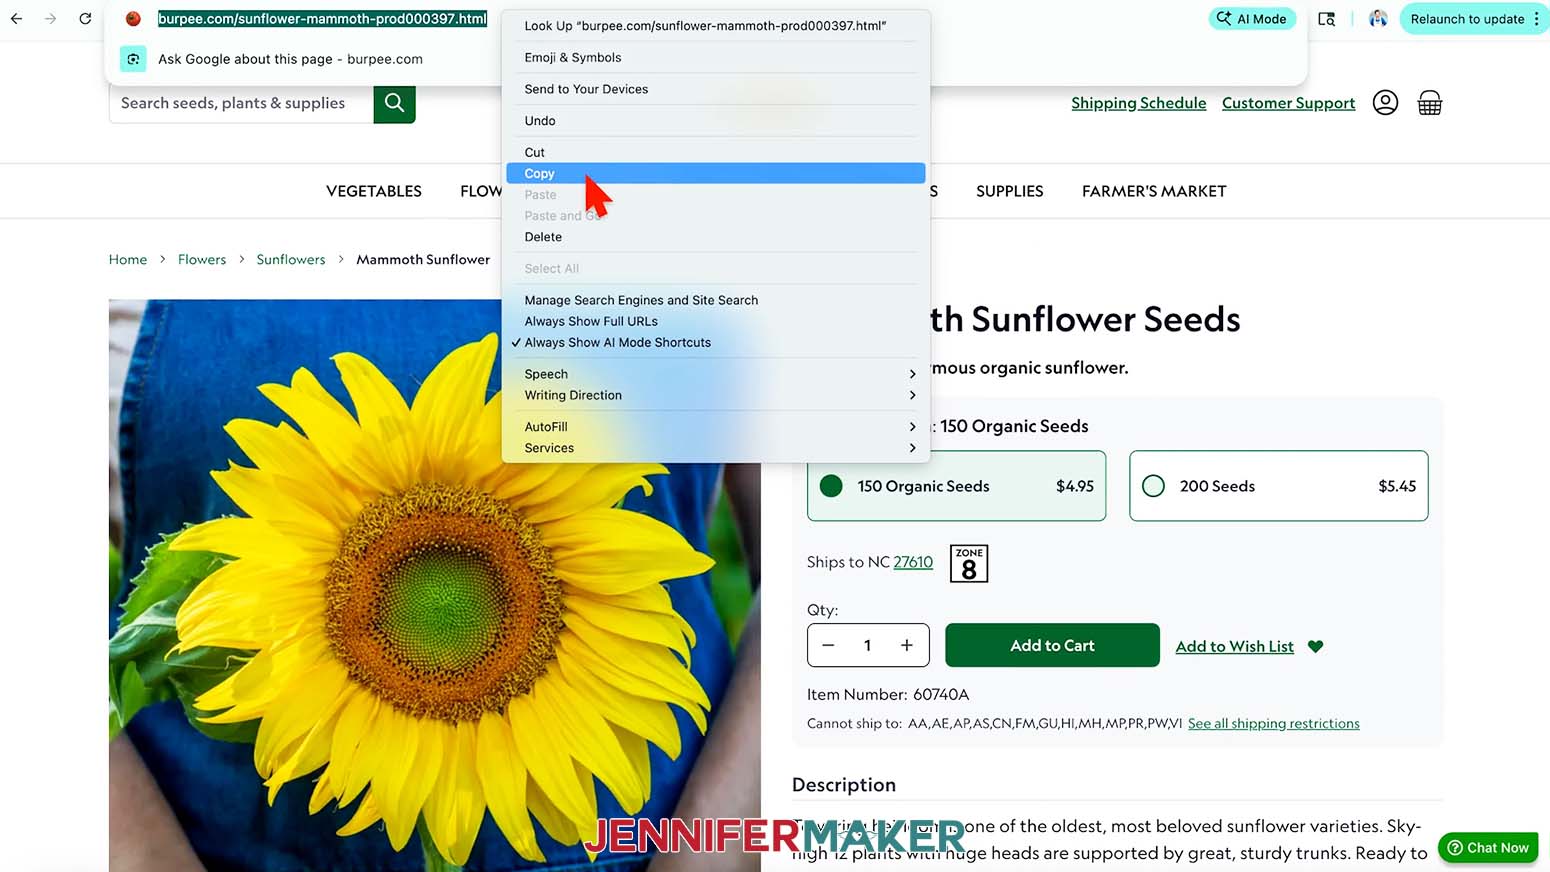
NOTE: I’ll search for “sunflower.” - Click the plant you’re looking for in the results list to open an information page about it.
NOTE: I’ll click on “Mammoth Sunflower.” - Highlight and copy the page’s link in the address bar at the top of the page.
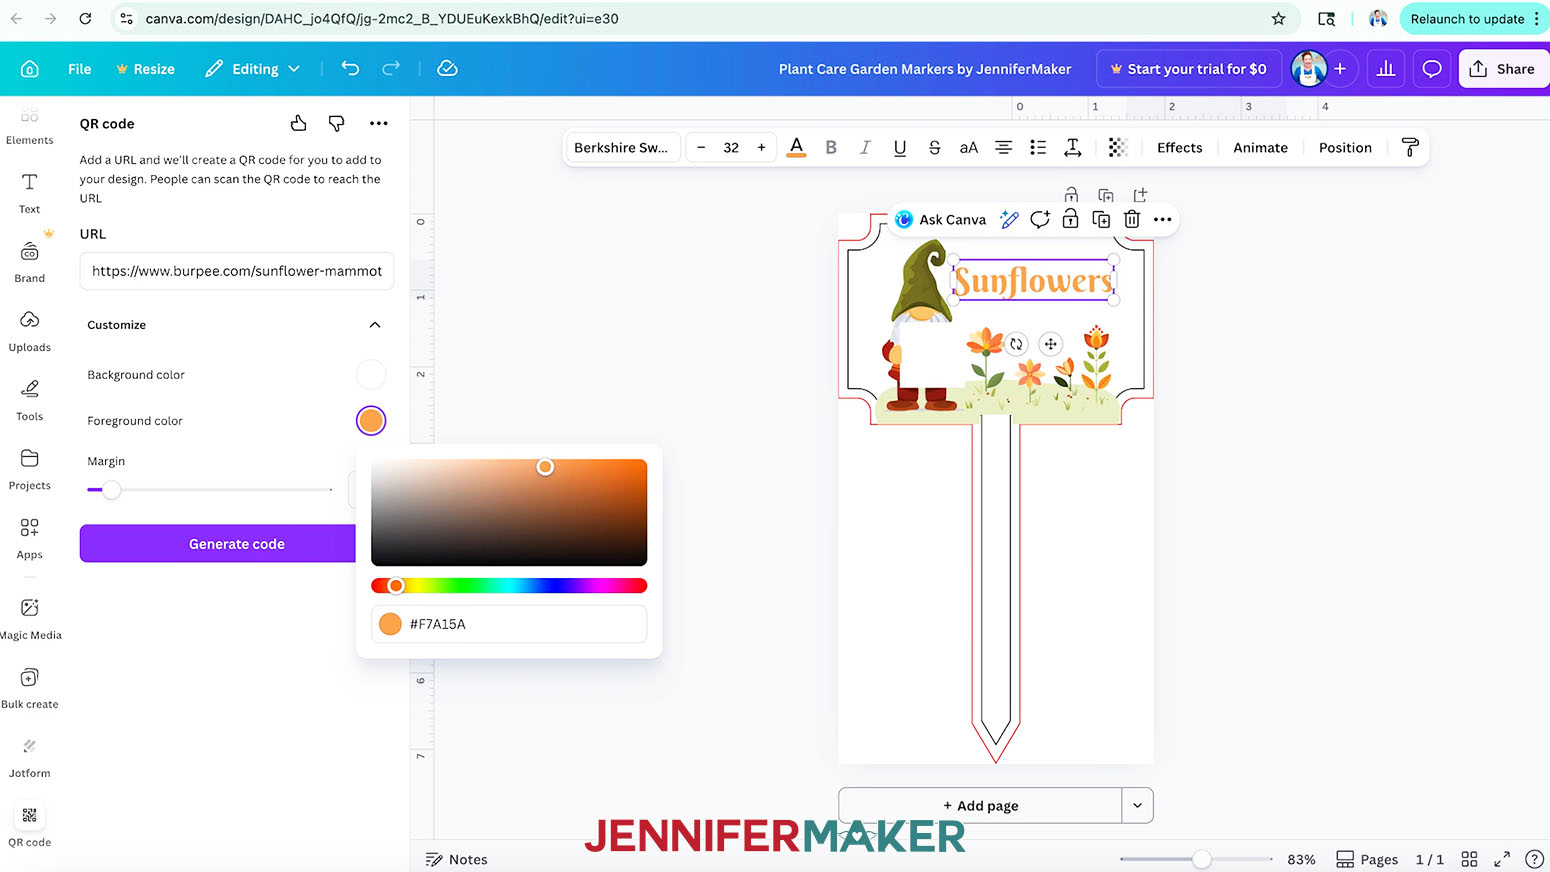
TIP: Right-click the highlighted selection and click “Copy” to copy the link. - Back in your Canva project’s tab, paste the link to your plant’s care instructions in the “URL” field.
TIP: Right-click the “URL” field and select “Paste” to enter the link. - Click the down arrow next to “Customize.”
- Use the swatches to choose your QR code’s colors.
TIP: Use dark colors for the foreground and keep the background white to make sure the QR code is readable by your devices.
NOTE: I’ll click the “Foreground color” swatch and enter the hex code from Step 25 into the box so it matches my text. - Set the “Margin” slider to “0.”
- Then click “Generate Code” to add the QR code to your canvas.
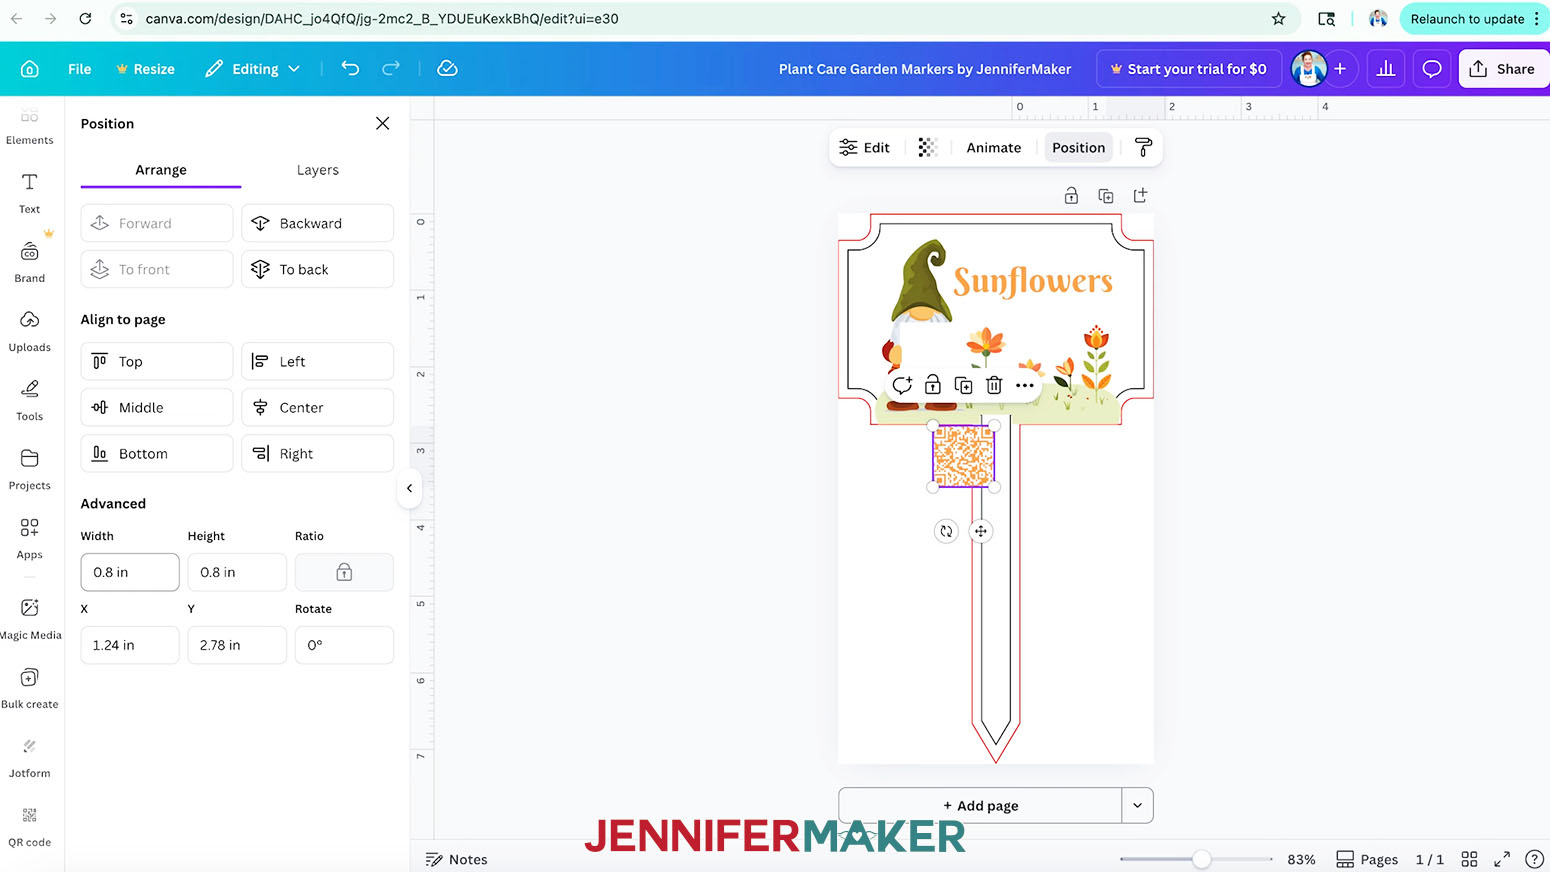
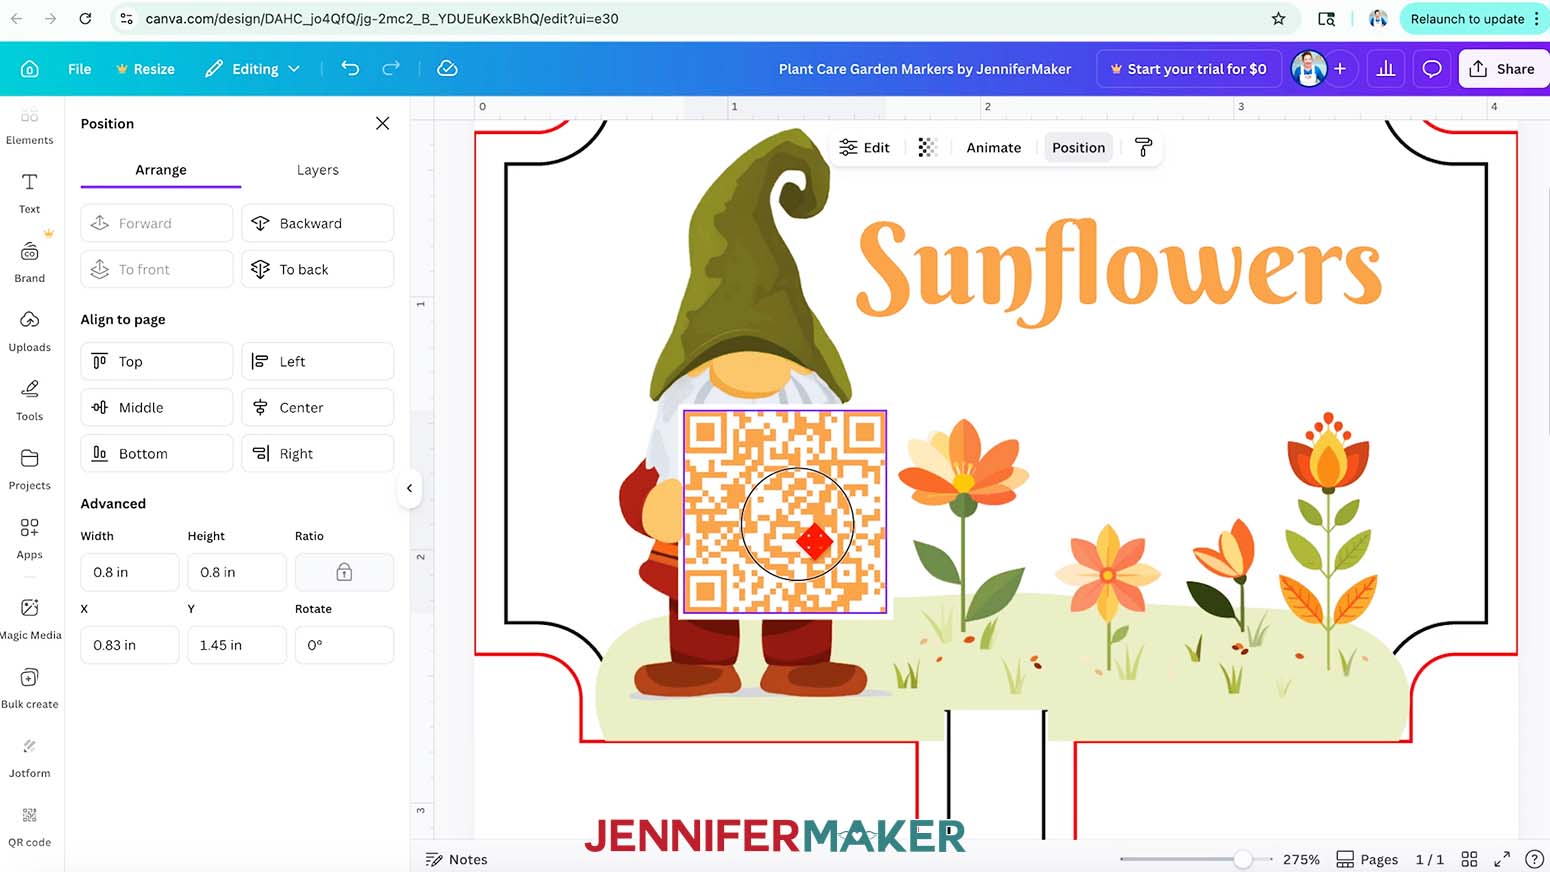
- Select the QR code image, click the “Position” button, and make sure the Ratio “Lock” icon is closed.
- In the “Width” field, enter “0.8.” The height will adjust automatically.
NOTE: 0.8” x 0.8” is the smallest I recommend making your QR code. Smaller sizes might be difficult for your device to read. - Position the QR code inside the gnome’s white square.
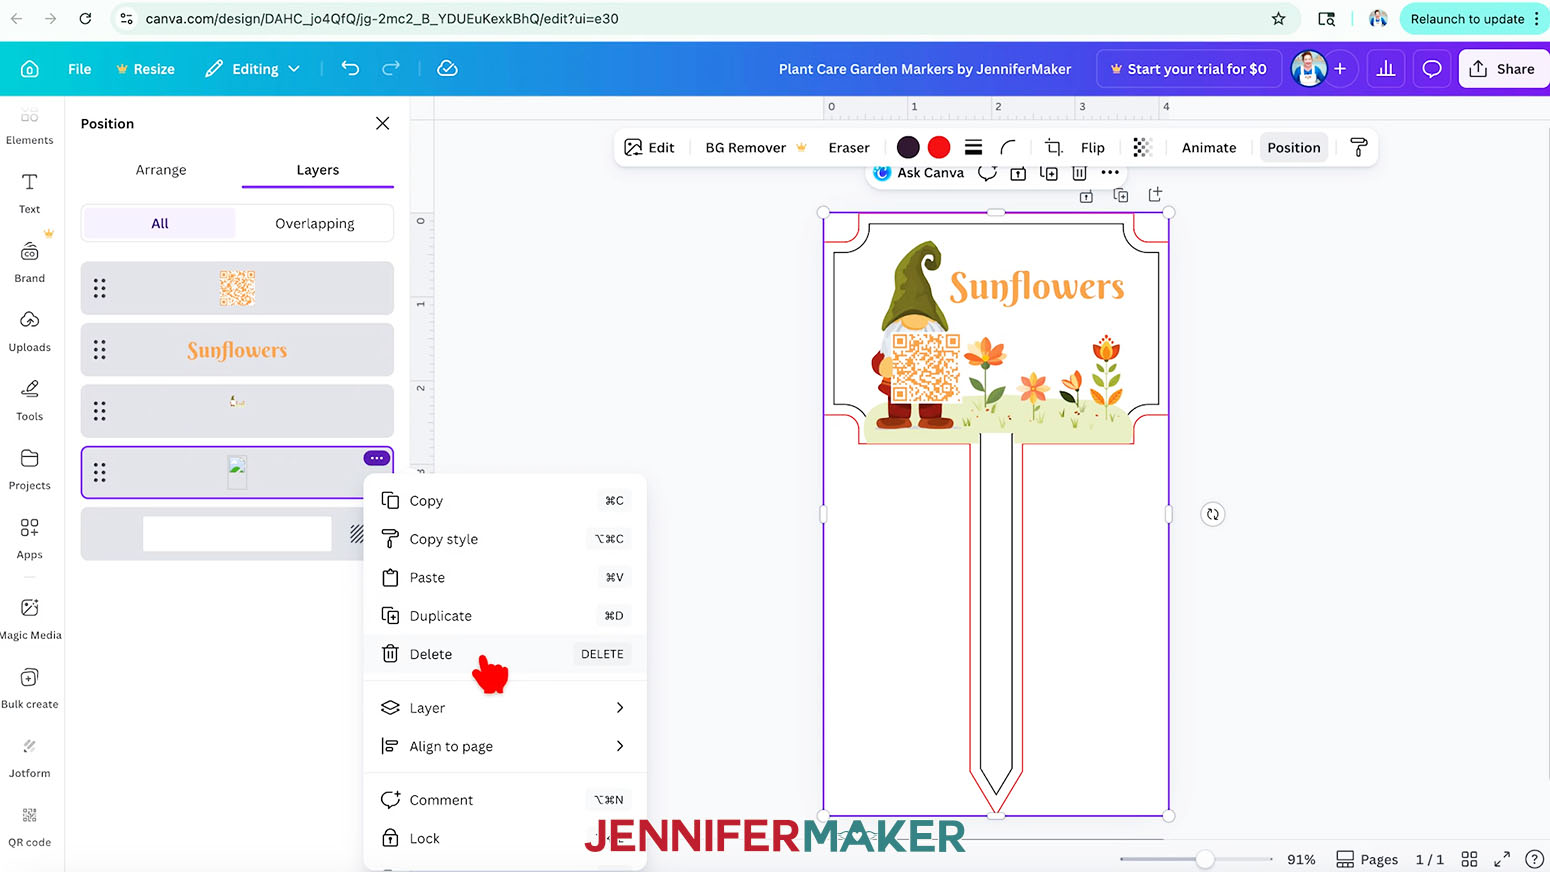
TIP: Drag the zoom slider at the bottom of your screen to the right to zoom in all the way and make sure the code is centered. - When your design looks the way you want, click inside your canvas, then click the “Position” button.
- Click the “Three Dots” icon on the guide layer, then select “Delete” to remove it from your canvas so the guide line doesn’t print with your design.
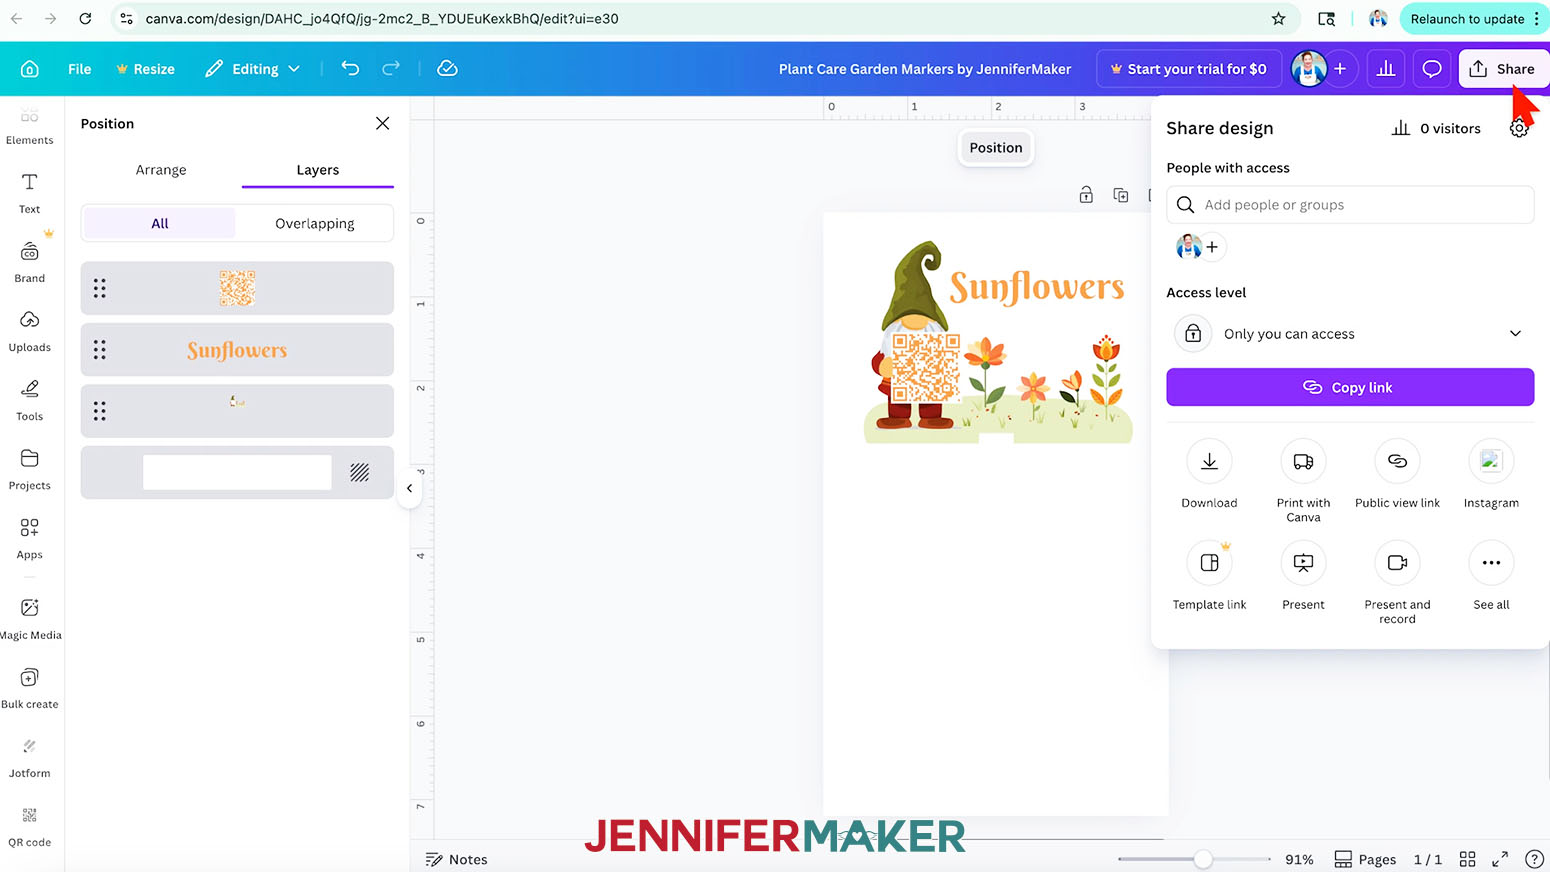
- To use your plant care garden marker design, click “Share” in the top menu.
- Select “Download.”
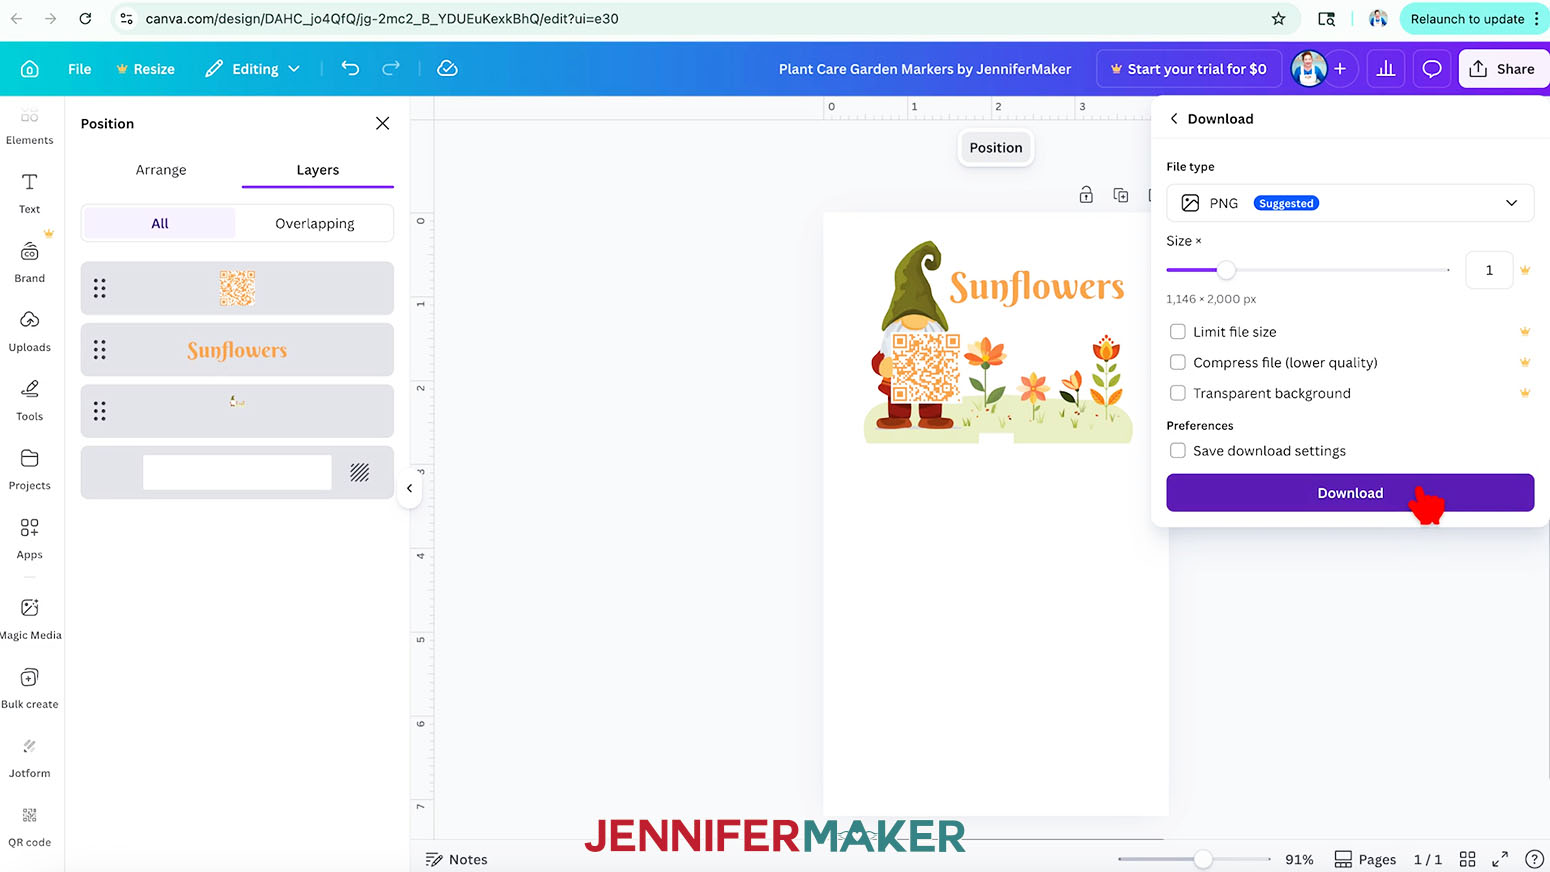
- Since we’ll print the design in Google Docs, make sure the file type is set to “PNG.”
- Then click “Download” to save the image to your computer.
- Your design is ready to print!
STEP 4: PRINT YOUR SUBLIMATION DESIGN IN GOOGLE DOCS
- Open Google Docs in the Google Chrome web browser on your computer.
NOTE: You will need a free Google account to use the free Google Docs software.
TIP: You can also download and open the Google Docs app, but you’ll have limited access to features, so I do not recommend it on a mobile device. - Click “Blank document” at the top left to open a new document.
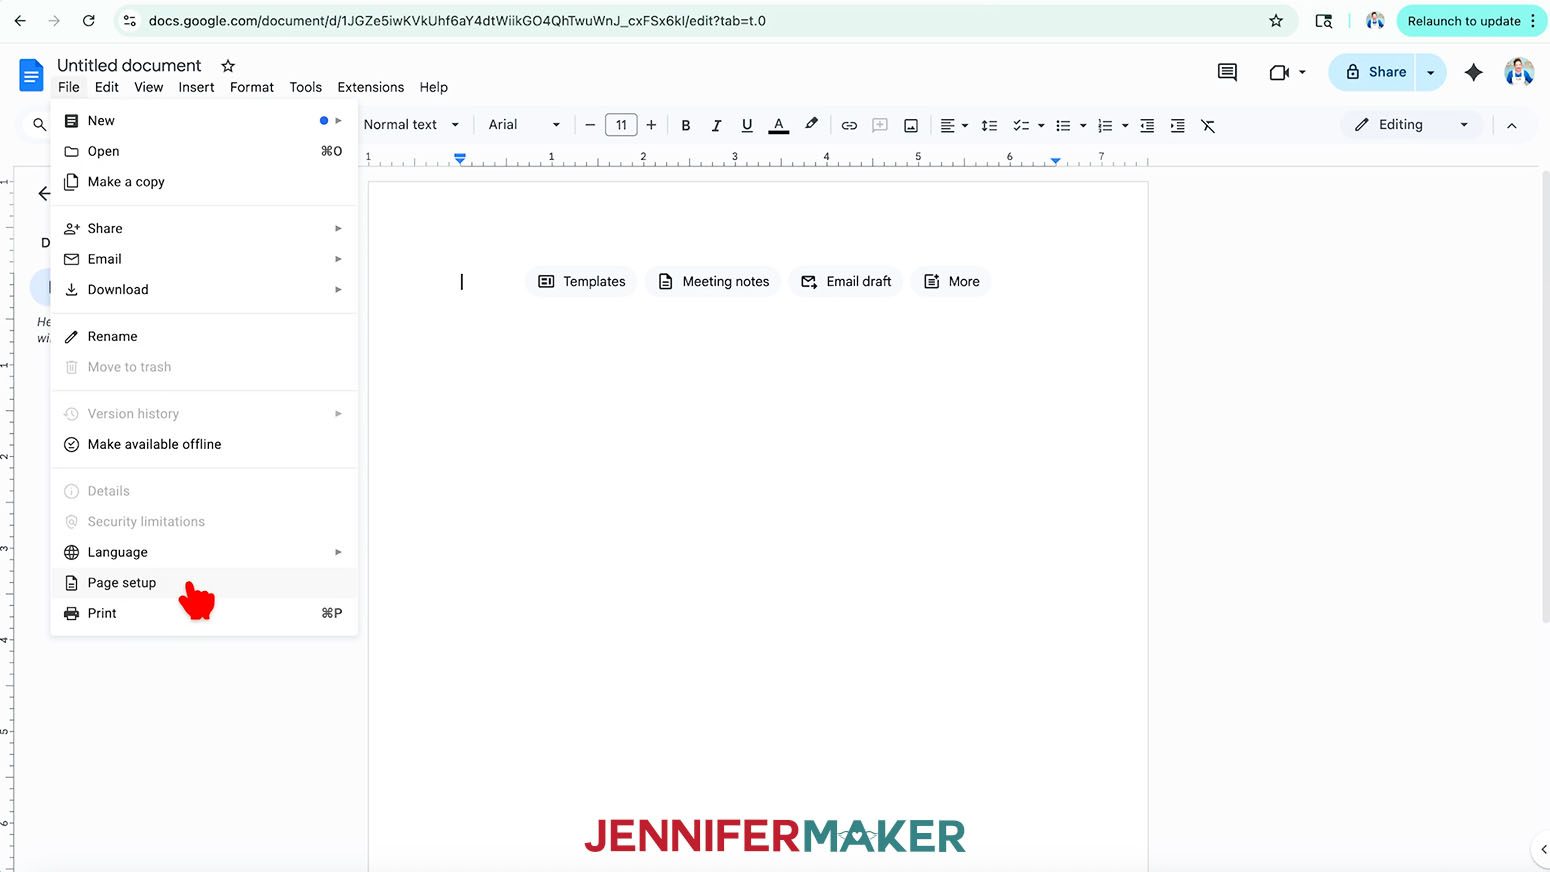
- Go to the File menu and select “Page setup.”
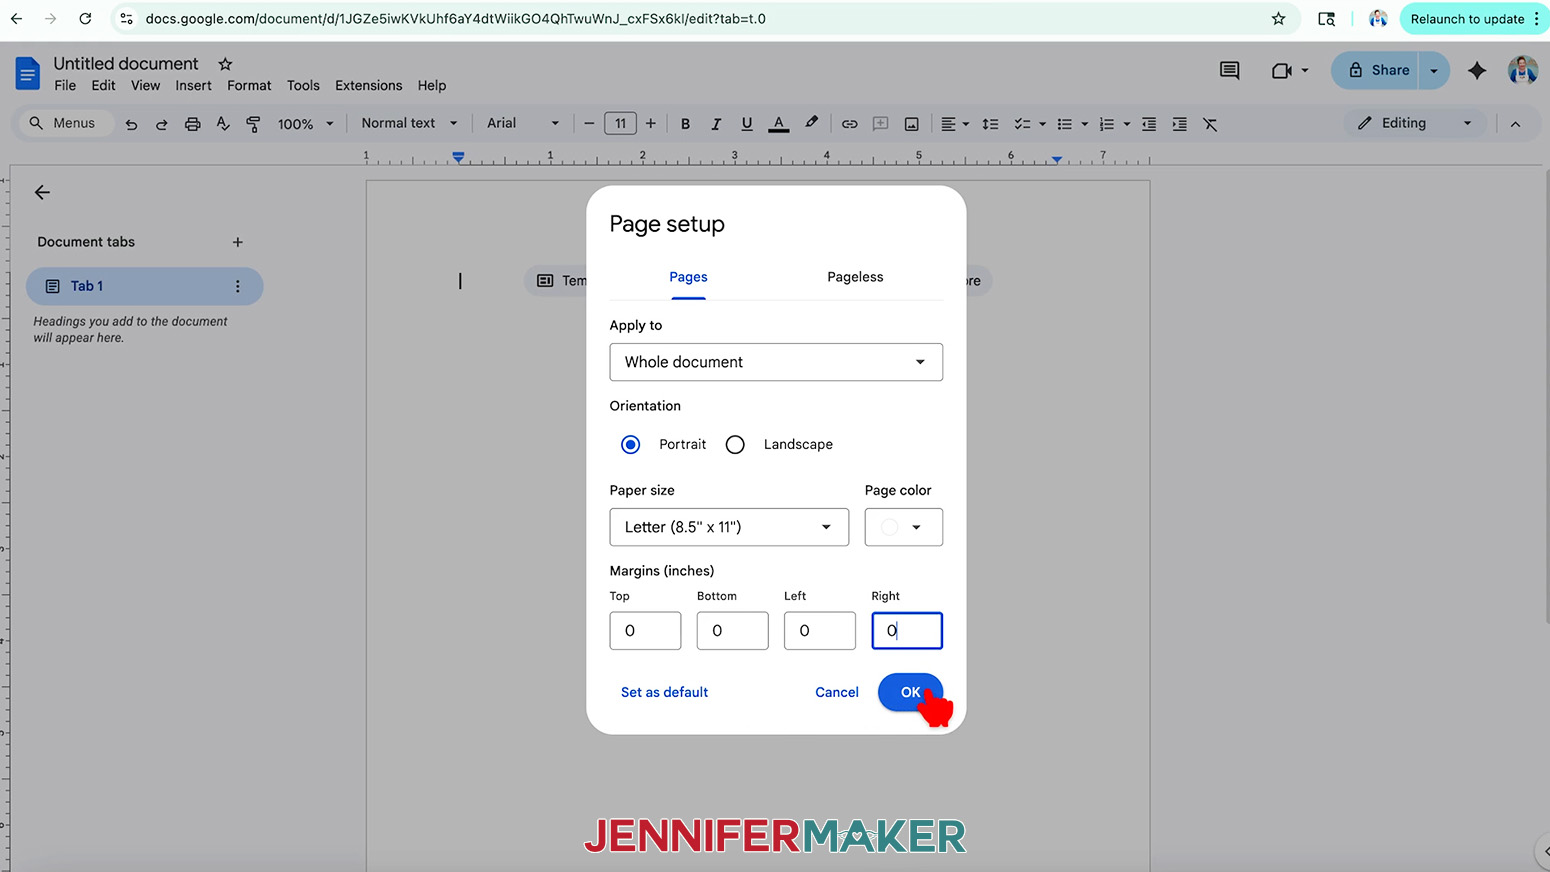
- Make sure the box next to “Portrait” is checked to match the design orientation.
TIP: If you use a different blank and image in landscape orientation, you can select the “Landscape” option to match instead. - Change your “Margins” to “0” to use more of the page.
- Make sure your “Paper Size” matches your sublimation paper size.
NOTE: I’ll set mine to 8.5” x 11” or letter-size paper. - Click “OK” to apply the settings.
- Click the area that says “Untitled document” at the top and type a name for the file.
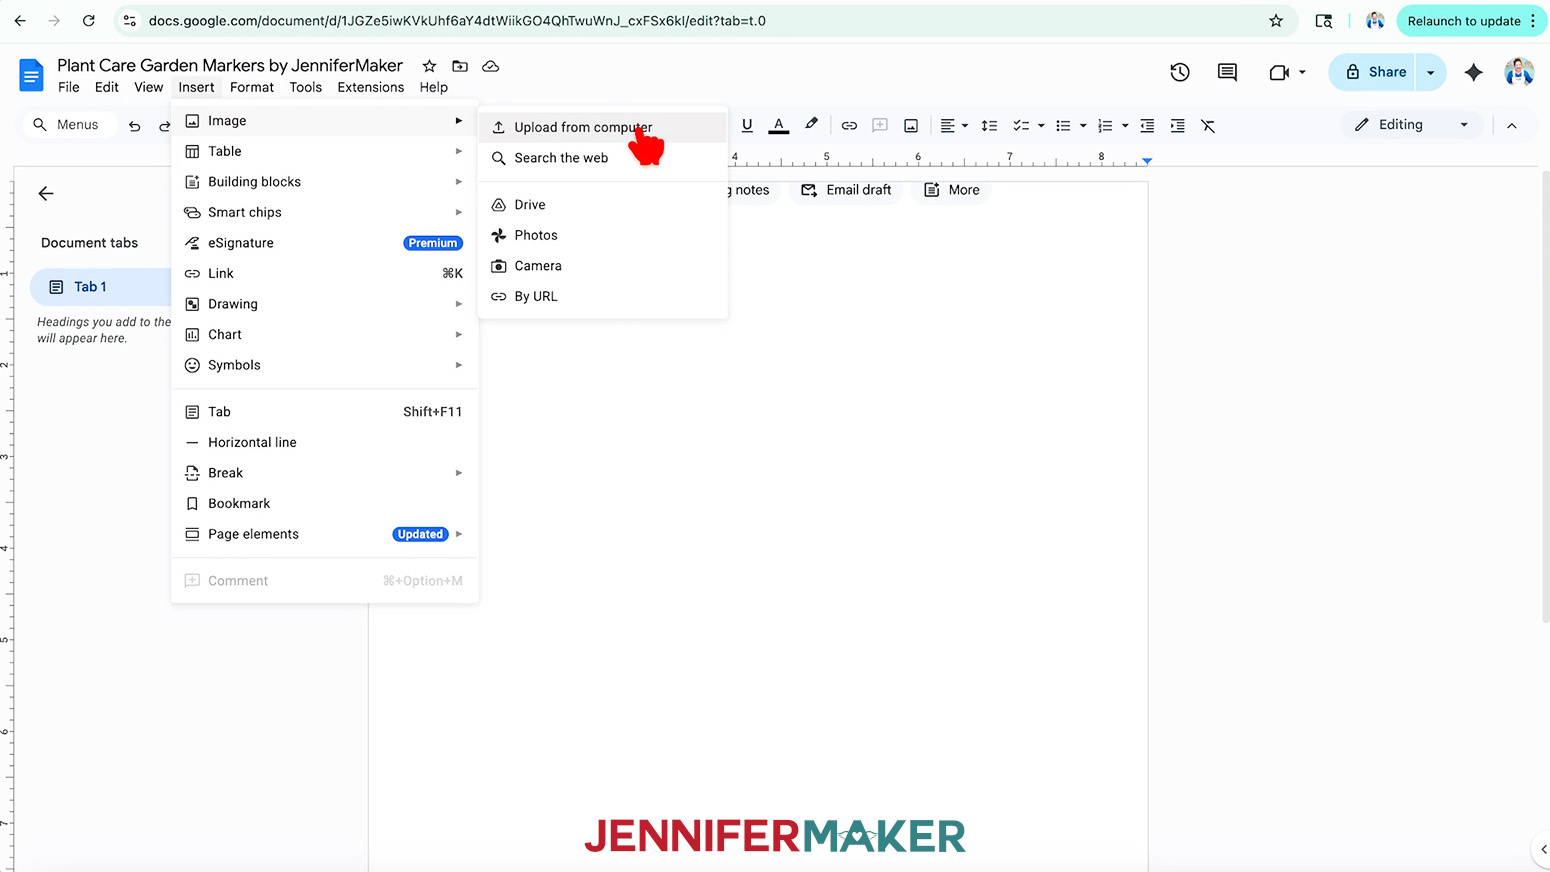
- Go to the “Insert” menu, select “Image,” and select “Upload from computer.”
- Select the PNG file with your garden marker design.
TIP: You’ll most likely find it in your “Downloads” folder. - Click “Open” to add the image to your document.
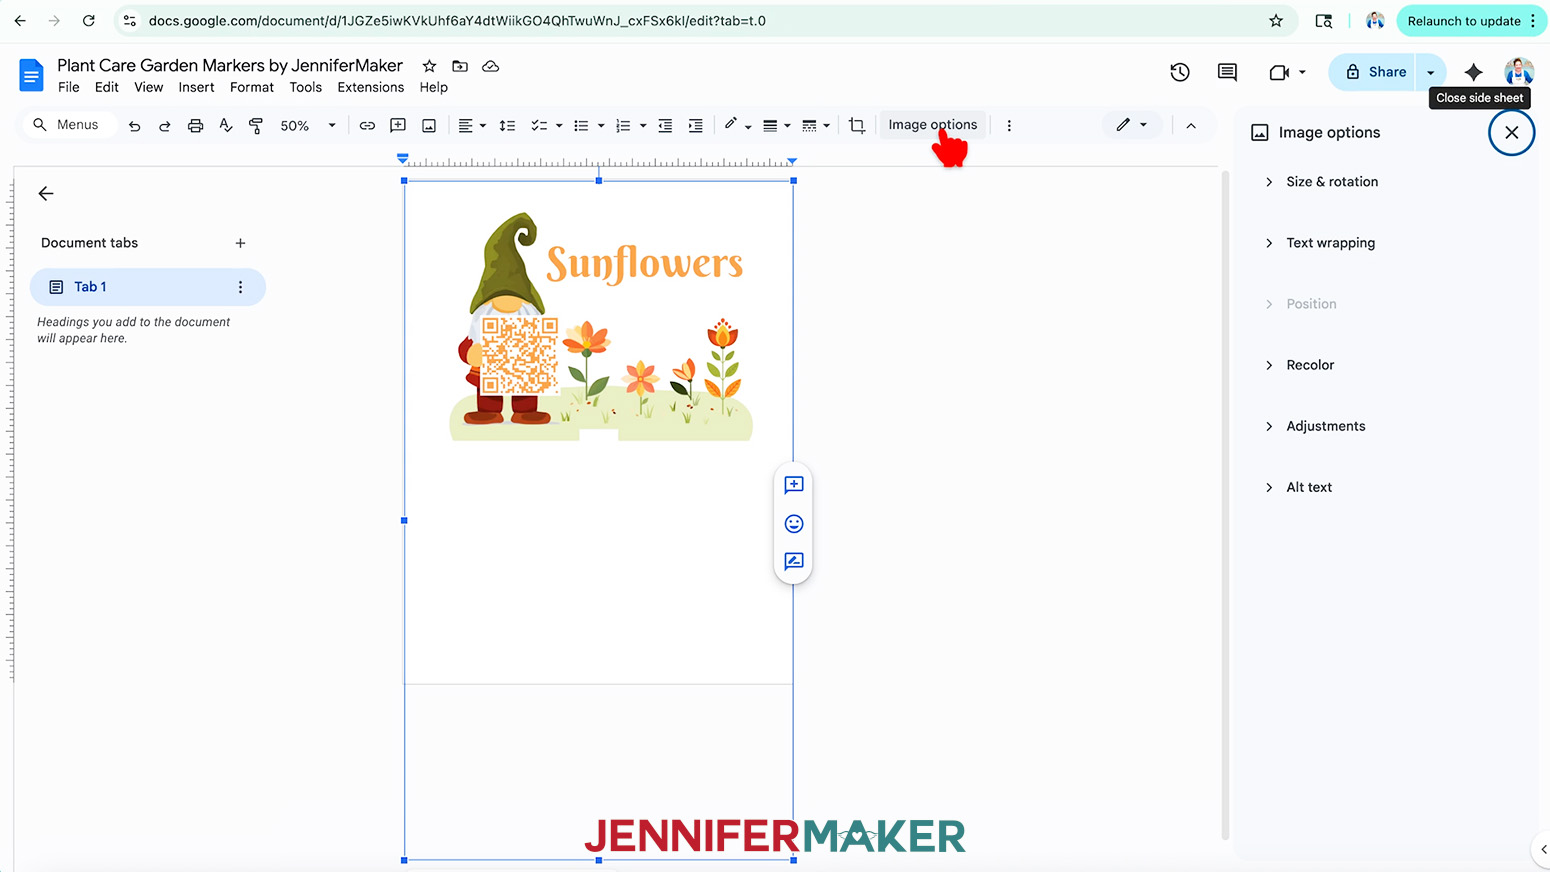
- To resize the design to fit your blank, select the image and click “Image Options” at the top of the page.
TIP: Keep your browser window full-size to find the options easily!
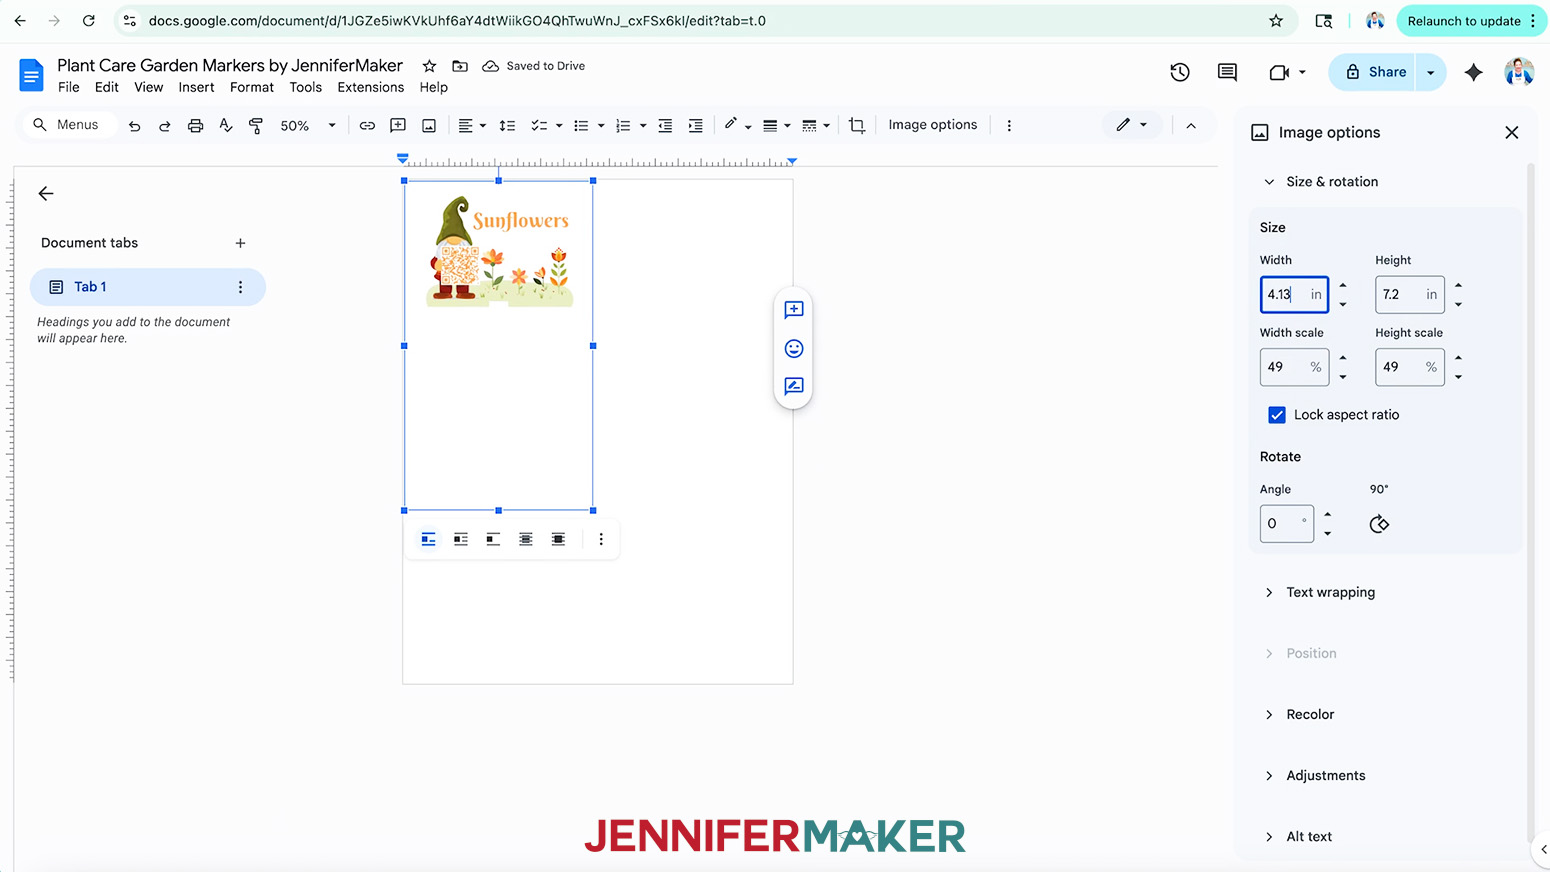
NOTE: You can also open the menu by going to “Format,” “Image,” and “Image Options.” - Select “Size & rotation.”
- Keep the “Lock aspect ratio” box checked to maintain the design’s proportions.
- Change the “Width” field to match the size of your image’s canvas in Canva.
NOTE: I’ll set the width to 4.125” (Docs will round this up to 4.13”). - The “Height” field will automatically adjust proportionately.
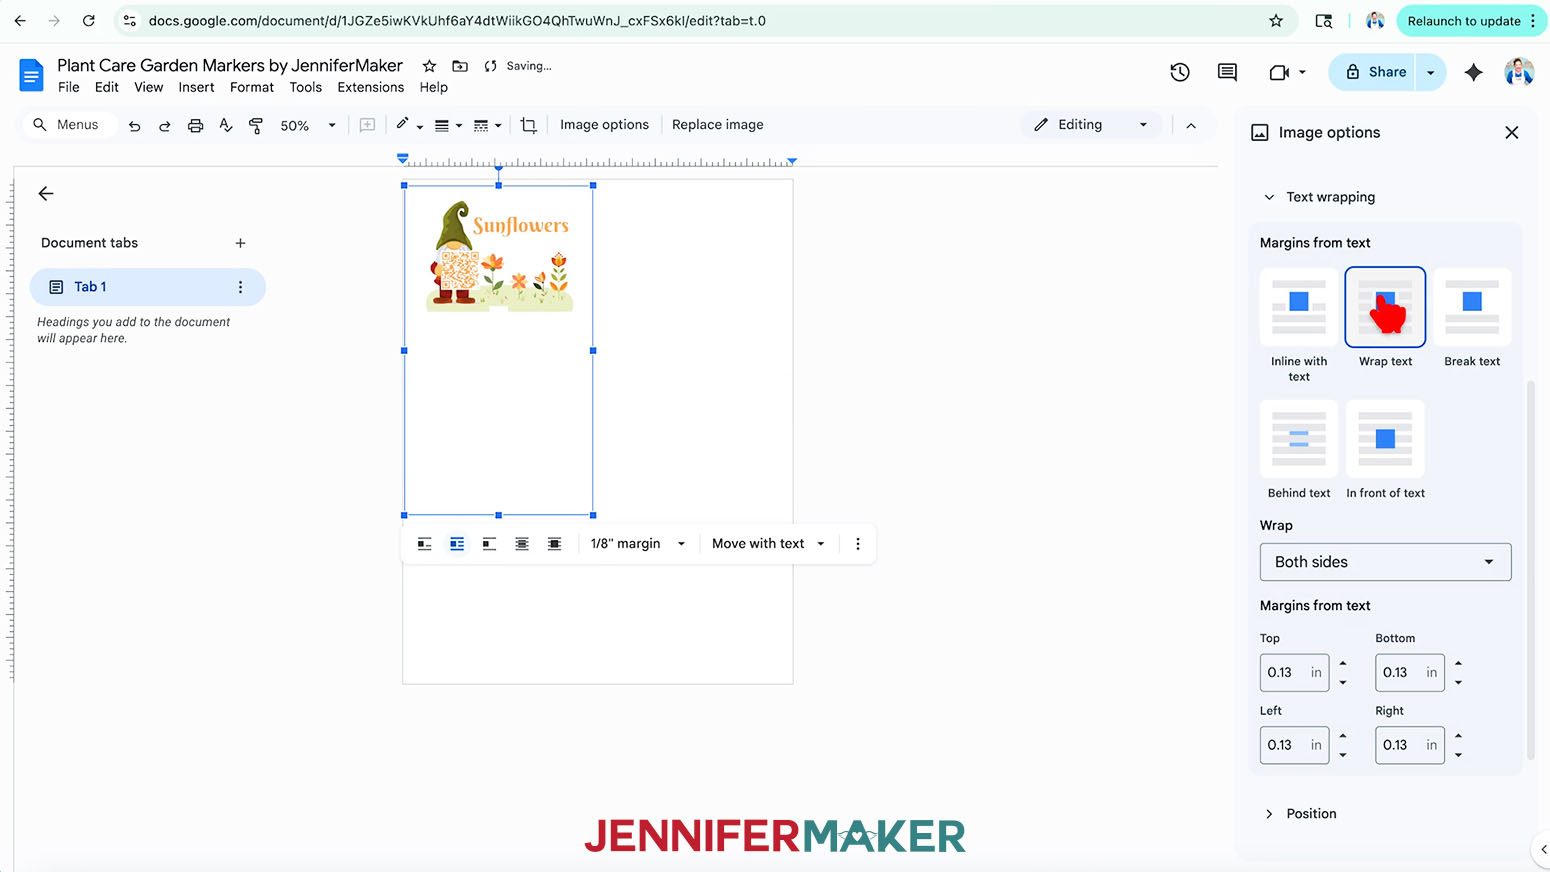
NOTE: My height will be 7.2”. - For more control of the image’s placement, select the “Text wrapping” section in the “Image Options” panel and click the “Wrap text” option.
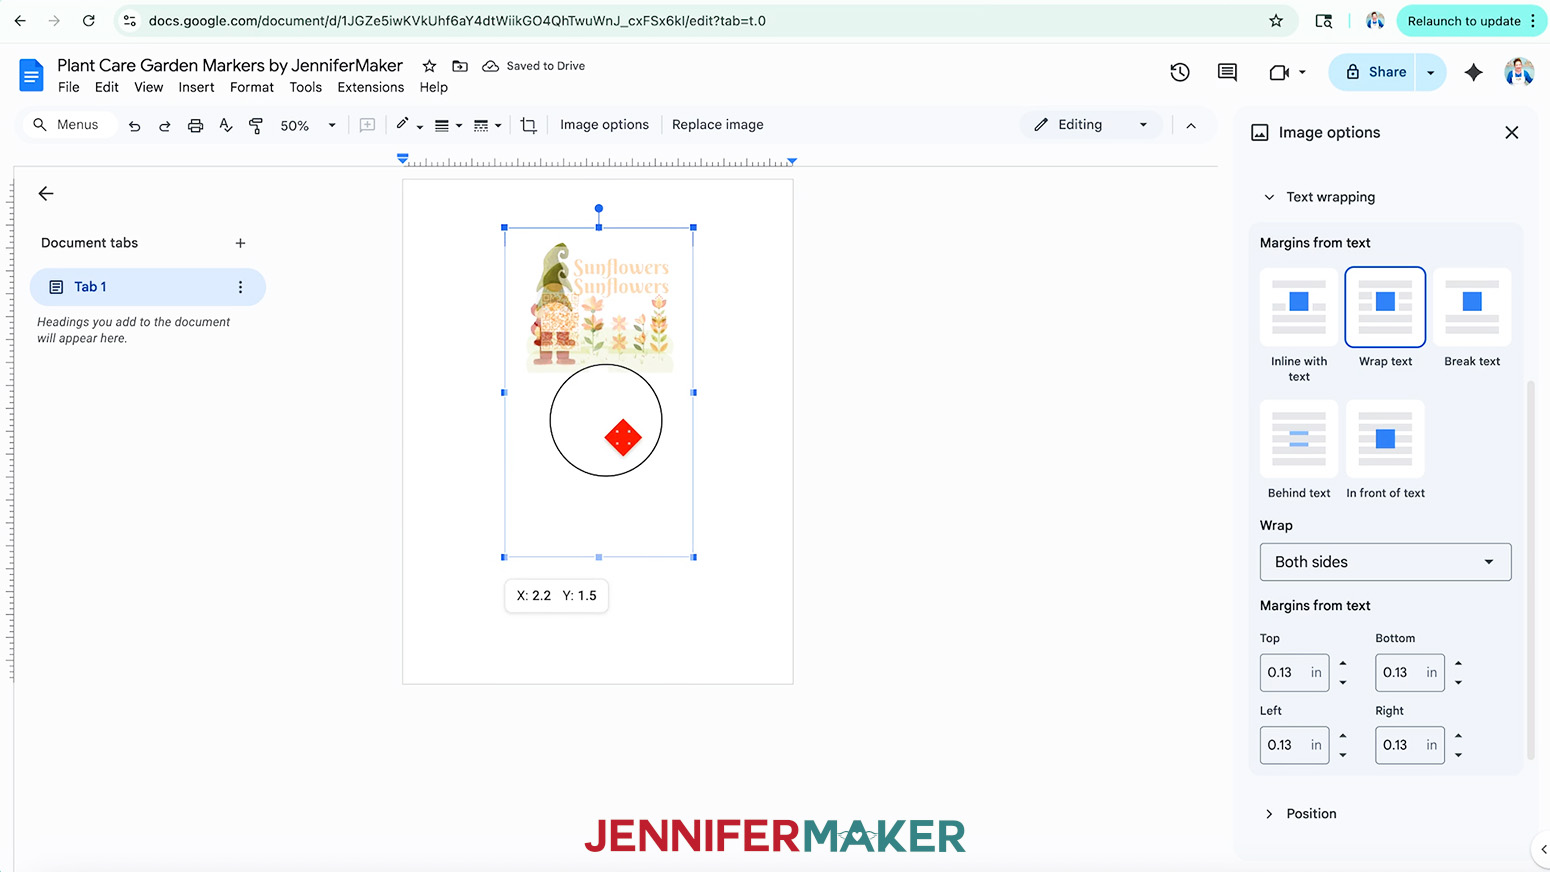
NOTE: This setting lets you move the design anywhere on the page. - Click and drag the image to the center of the page to ensure it won’t get cut off at the edges.
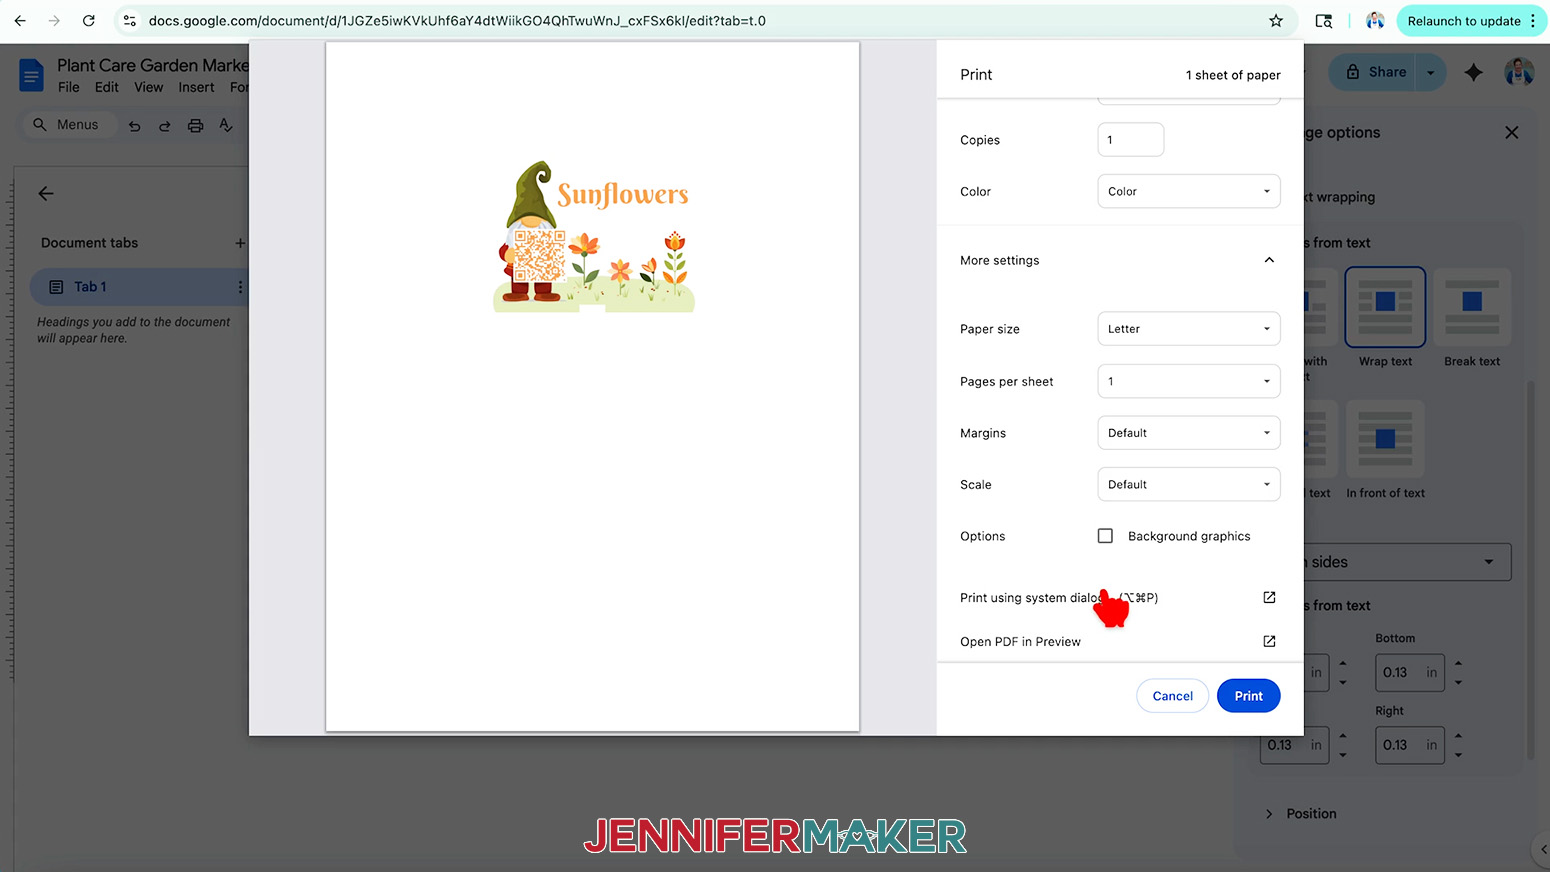
TIP: Zoom out to see the whole page if needed. - Go to the “File” menu and choose “Print.”
- Select your sublimation printer under “Destination.”
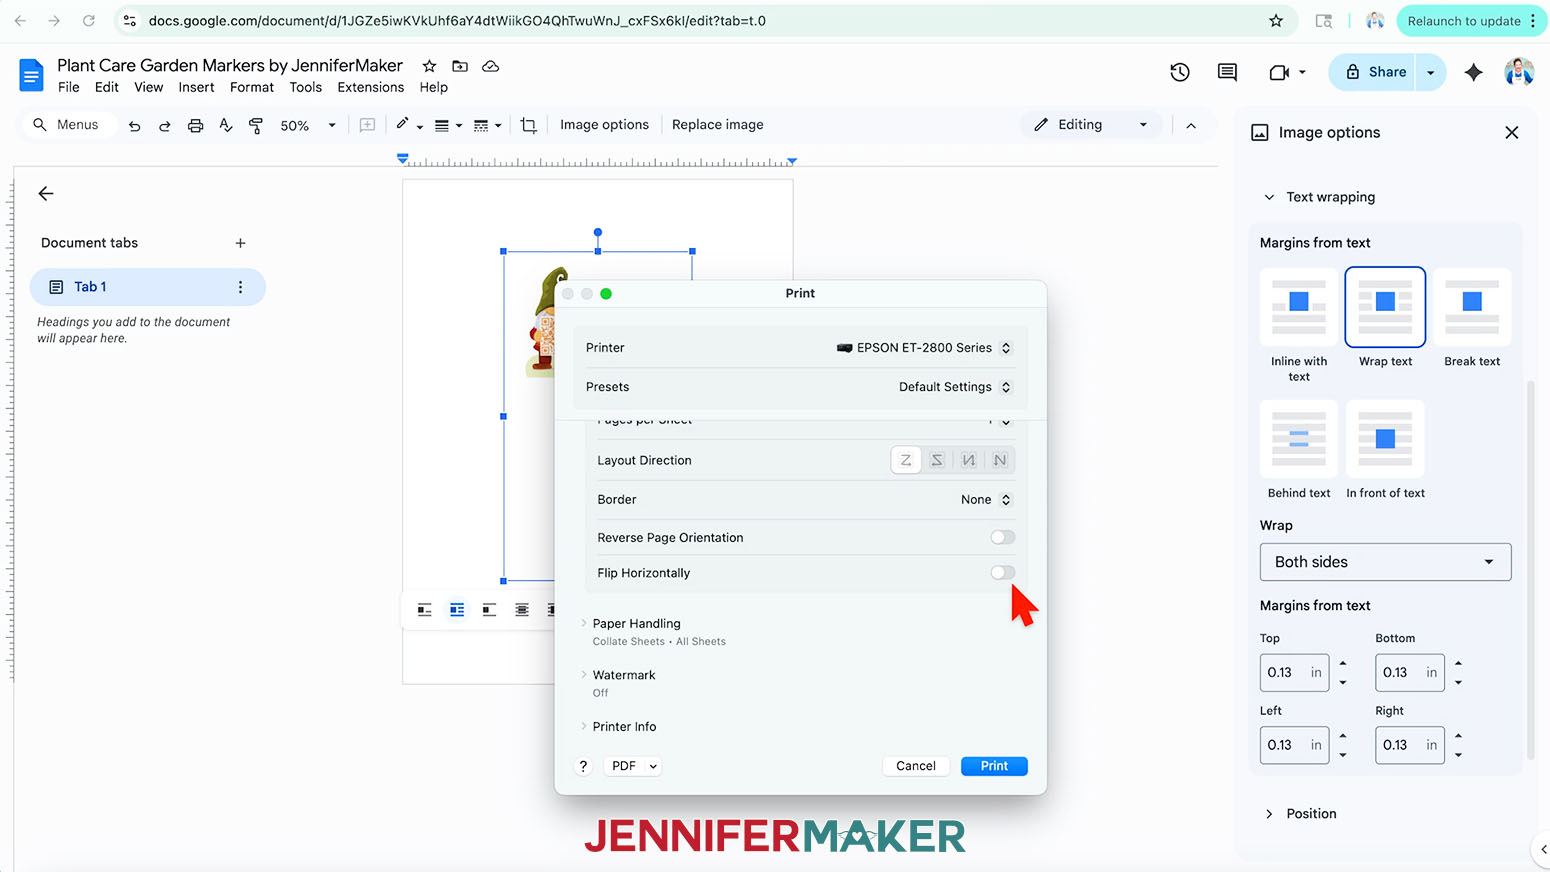
- Click the arrow beside “More Settings” to select “Print Using System Dialog.”
- Your print menu may look different from mine - just make sure to select the highest print quality and the best matte photo paper setting. Double-check the sublimation printer and paper size settings to make sure they’re still correct.
NOTE: The acrylic blanks in my supplies list look best with the image pressed onto the back and viewed from the front, so you do NOT need to mirror the image. - Load a sheet of sublimation paper correctly into your sublimation printer.
NOTE: Check the packaging for information on how to load the paper. - Click “Print.”
- Allow the print to dry before handling it, as the ink can smear.
NOTE: The printed design will appear lighter before pressing. - Your image is ready to press!

STEP 5: PRESS YOUR GARDEN MARKER
IMPORTANT: As with all sublimation projects, open a window and turn on a fan to improve your ventilation before beginning.
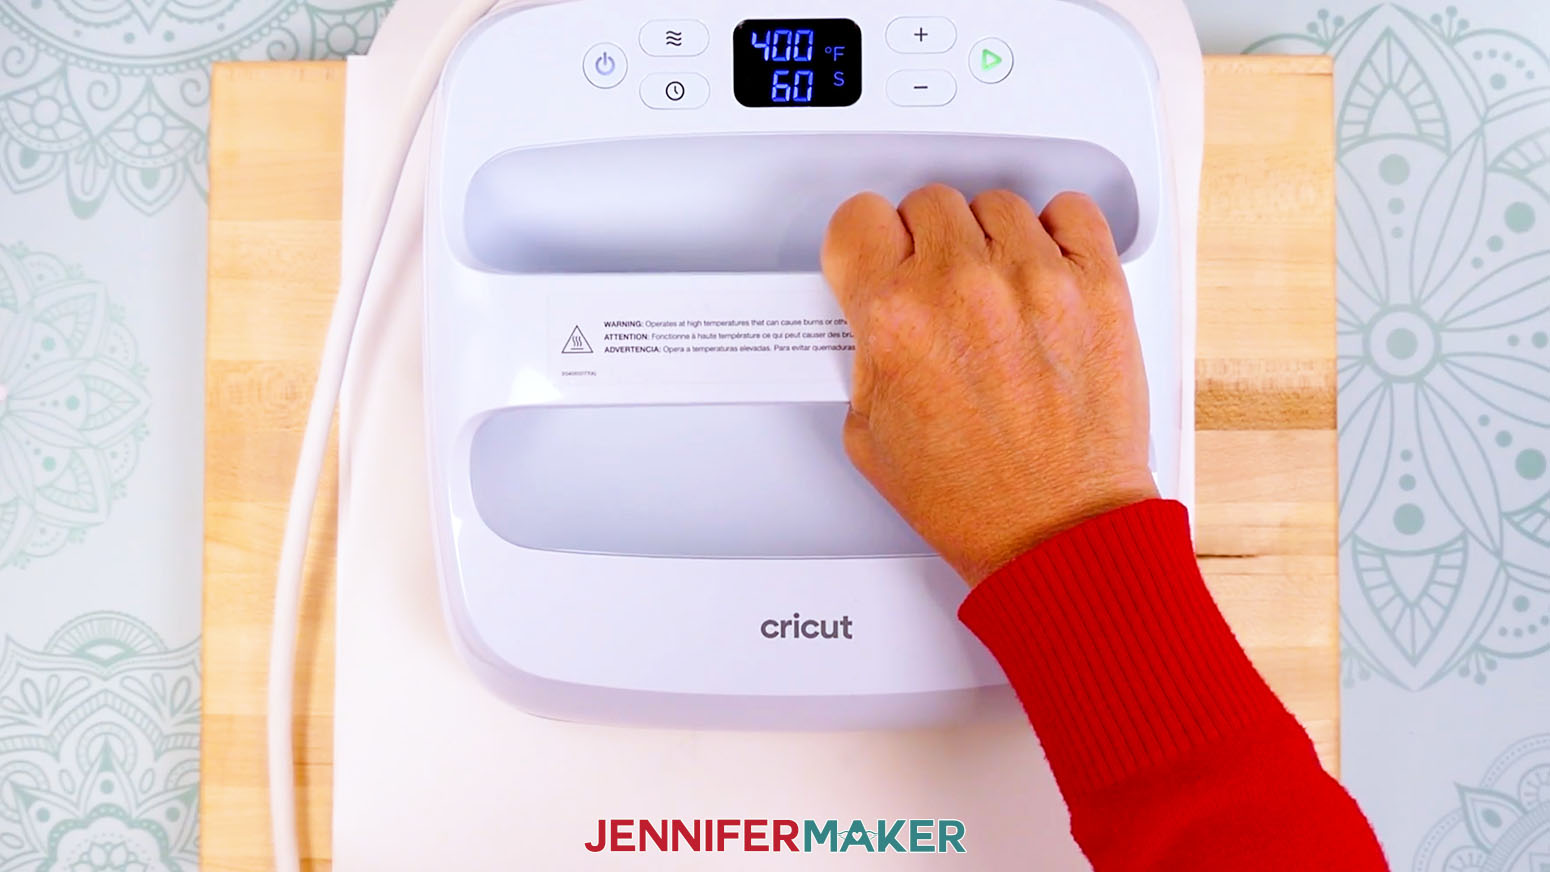
- Set the temperature of your EasyPress to 400℉ (204℃), and set the timer for 60 seconds.
- If your garden marker has a protective film on it, carefully remove it from both sides, starting at the bottom point and lifting toward the top to avoid scratching the visible area.
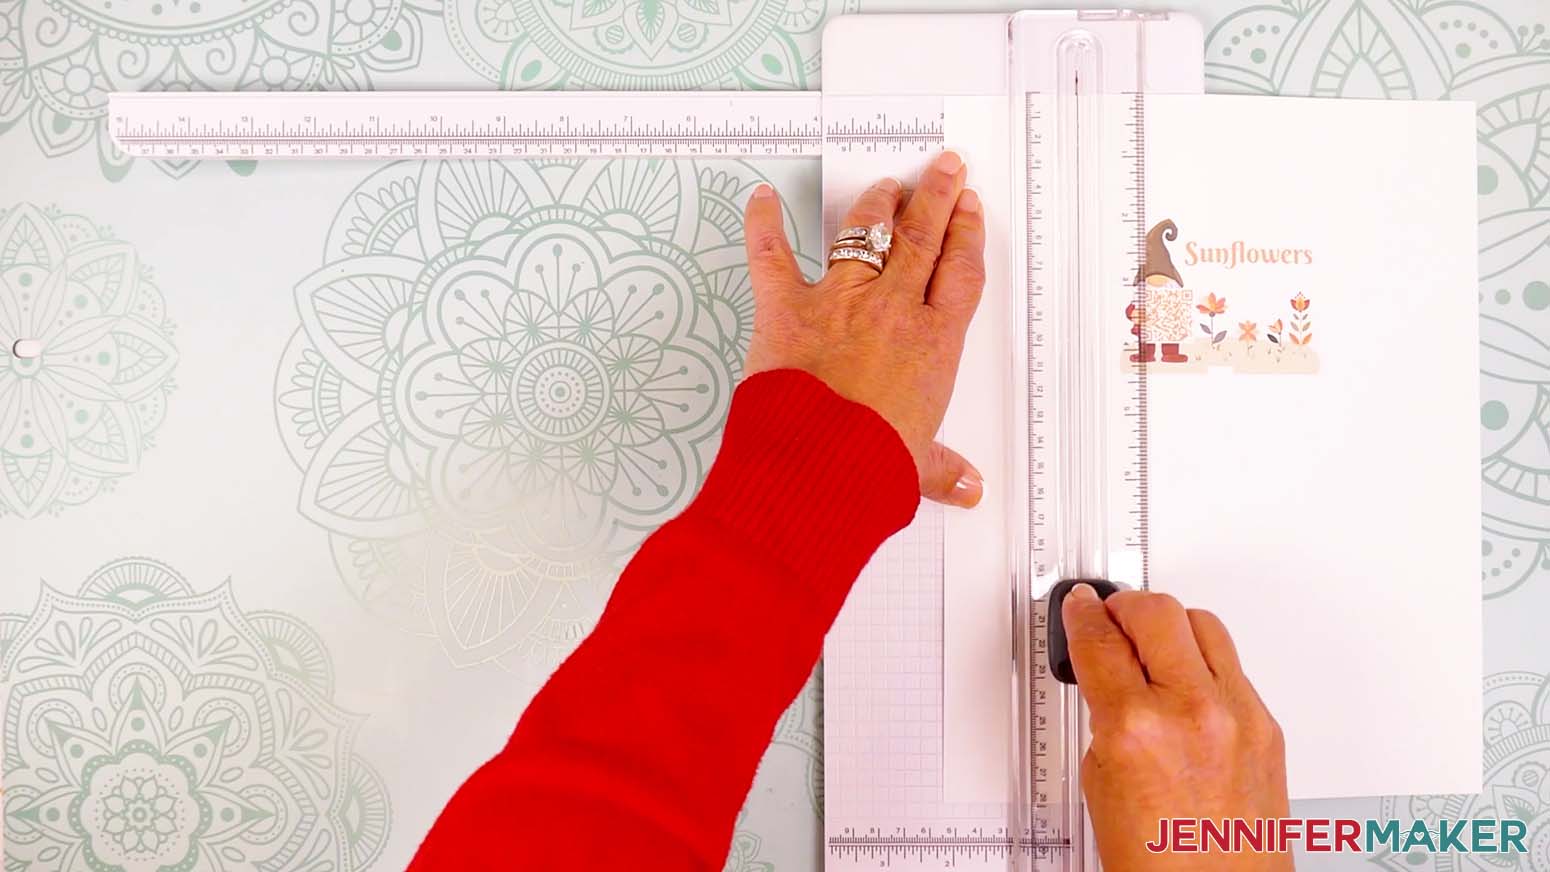
TIP: You can use tweezers or a weeding tool to carefully lift the film if it’s difficult to remove. - Use scissors or a paper trimmer to cut your printed design down to a smaller rectangle. Make sure there is at least ½” of white around the ink’s edges.
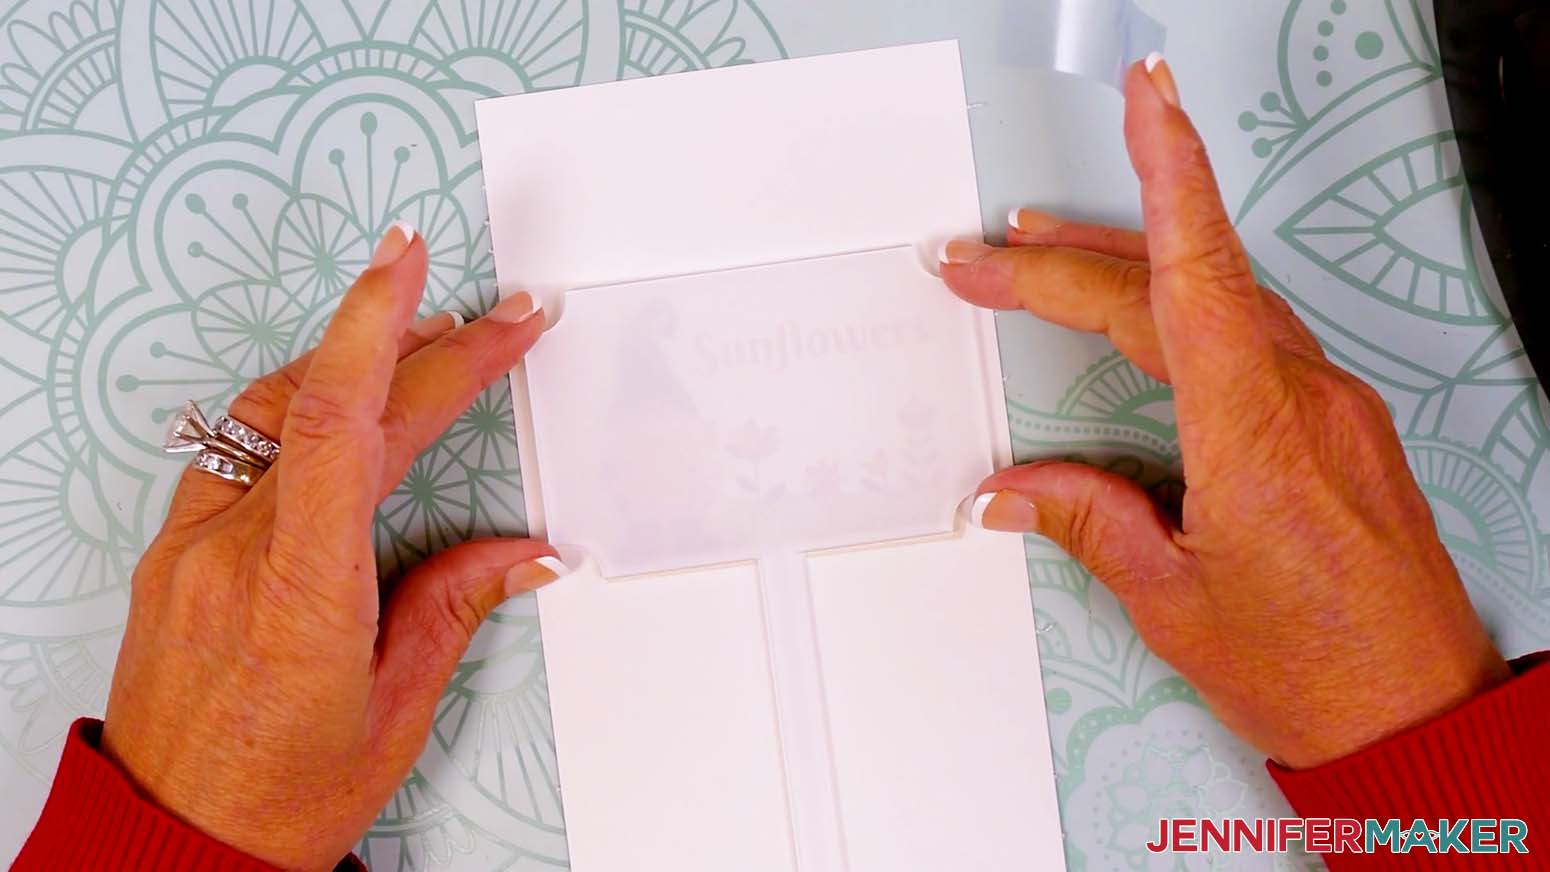
- Place the printed design face up on your work surface.
- Place the blank’s white sublimation side down on the print so the design is positioned where you want it on the marker’s head.
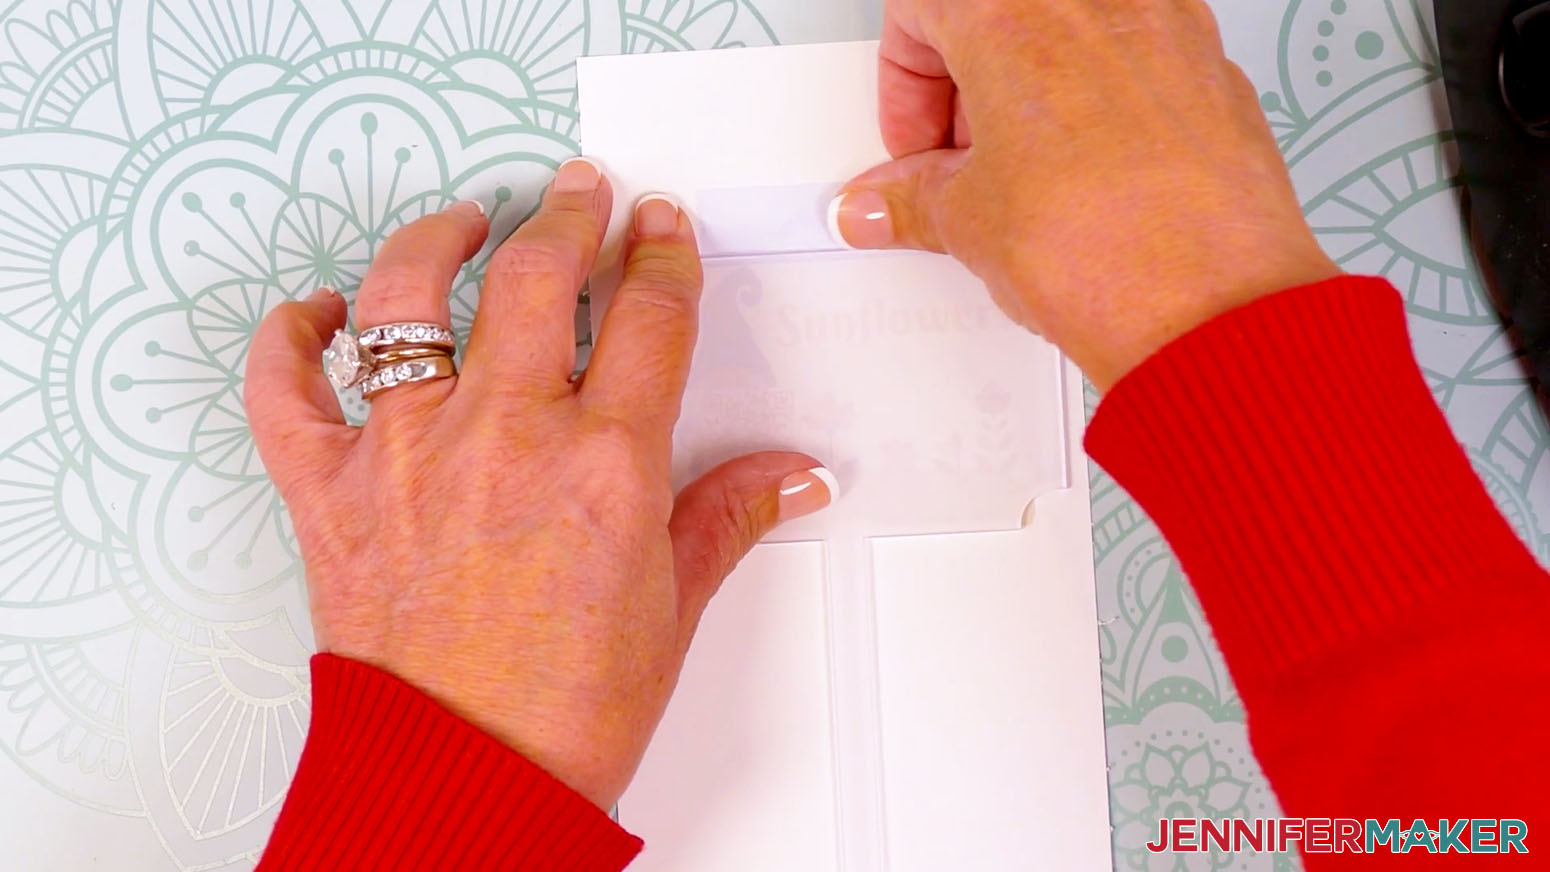
TIP: For all over designs with a colored background, make sure an even amount of ink shows on the head’s left, top, and right sides for even centering. - Place a piece of heat-resistant tape across the top edge of the blank so only a small strip of tape is on the acrylic and the rest hangs over the edge.
NOTE: If too much tape is on the acrylic, tape marks can appear on your blank after pressing. - Press the overhanging tape against the blank’s raised side.
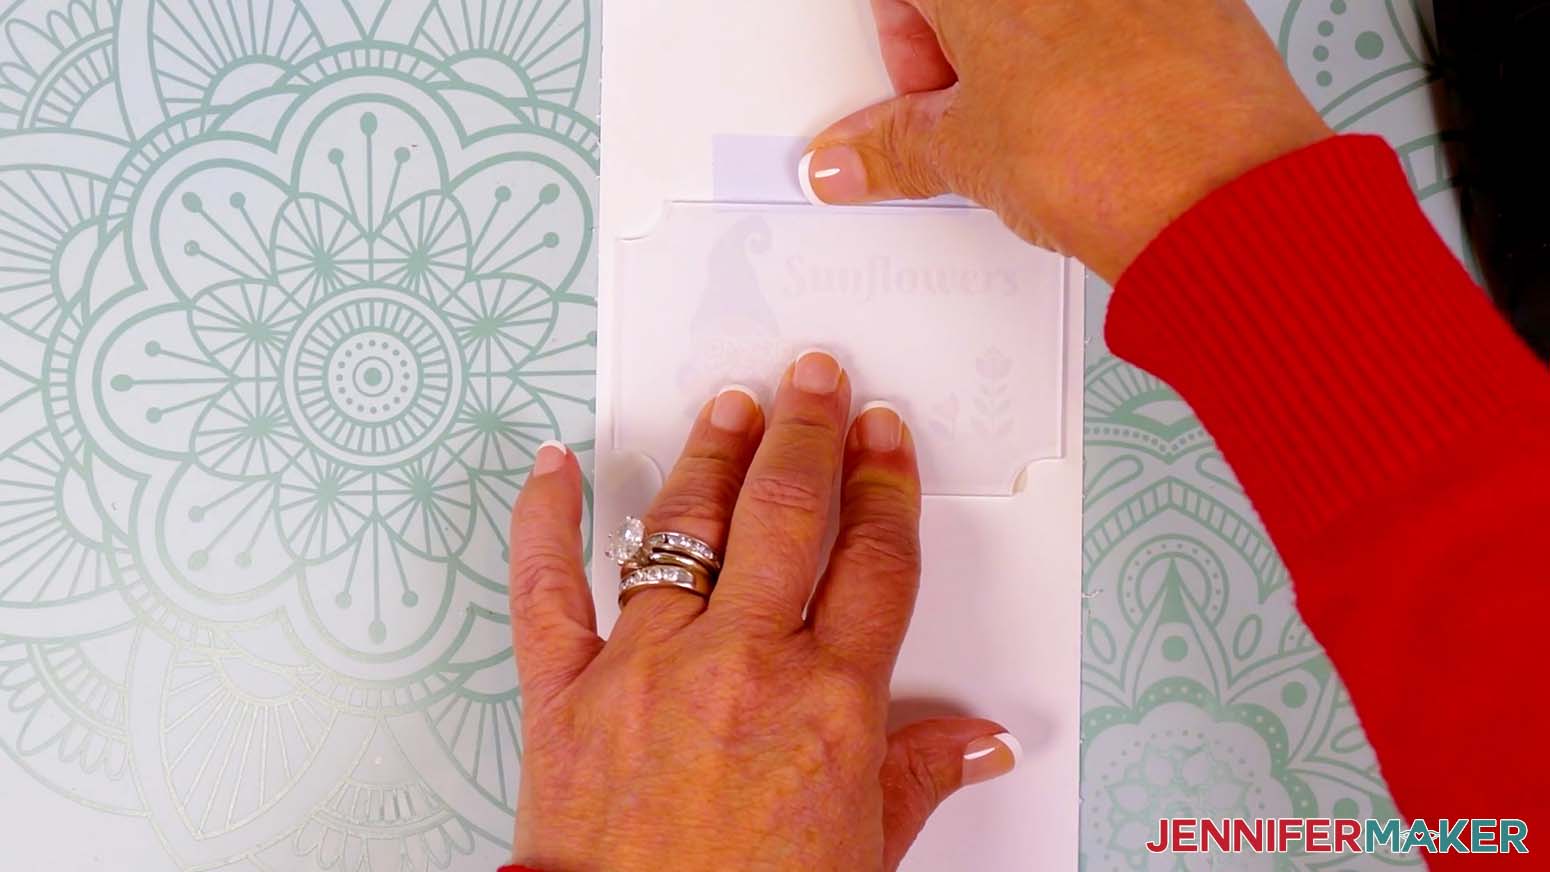
- Then flatten the remaining tape onto the print.
TIP: Making sure the tape is tight against the garden marker’s flat surface and raised edges helps prevent gaps that can cause ghosting. - Hold the top in place and secure the pointed bottom with a piece of heat-resistant tape. Remember to place the tape against the raised sides and avoid gaps.
- Place a clean sheet of white cardstock onto your cutting board or another hard, flat, heat-resistant surface to protect it from any ink that may escape during the sublimation process.
TIP: Your cardstock should be clean and free of any ink or other marks that could transfer to your blank during sublimation.
NOTE: In my testing, I found that pressing the hot acrylic into a soft pressing pad causes the blank to bow under pressure. Using a hard surface keeps the blank flat and helps to prevent warping. - Place the taped blank onto the cardstock so the print is face down and the blank’s sublimation surface is face up.
- Place a fresh piece of white uncoated butcher paper on your project to completely cover it.
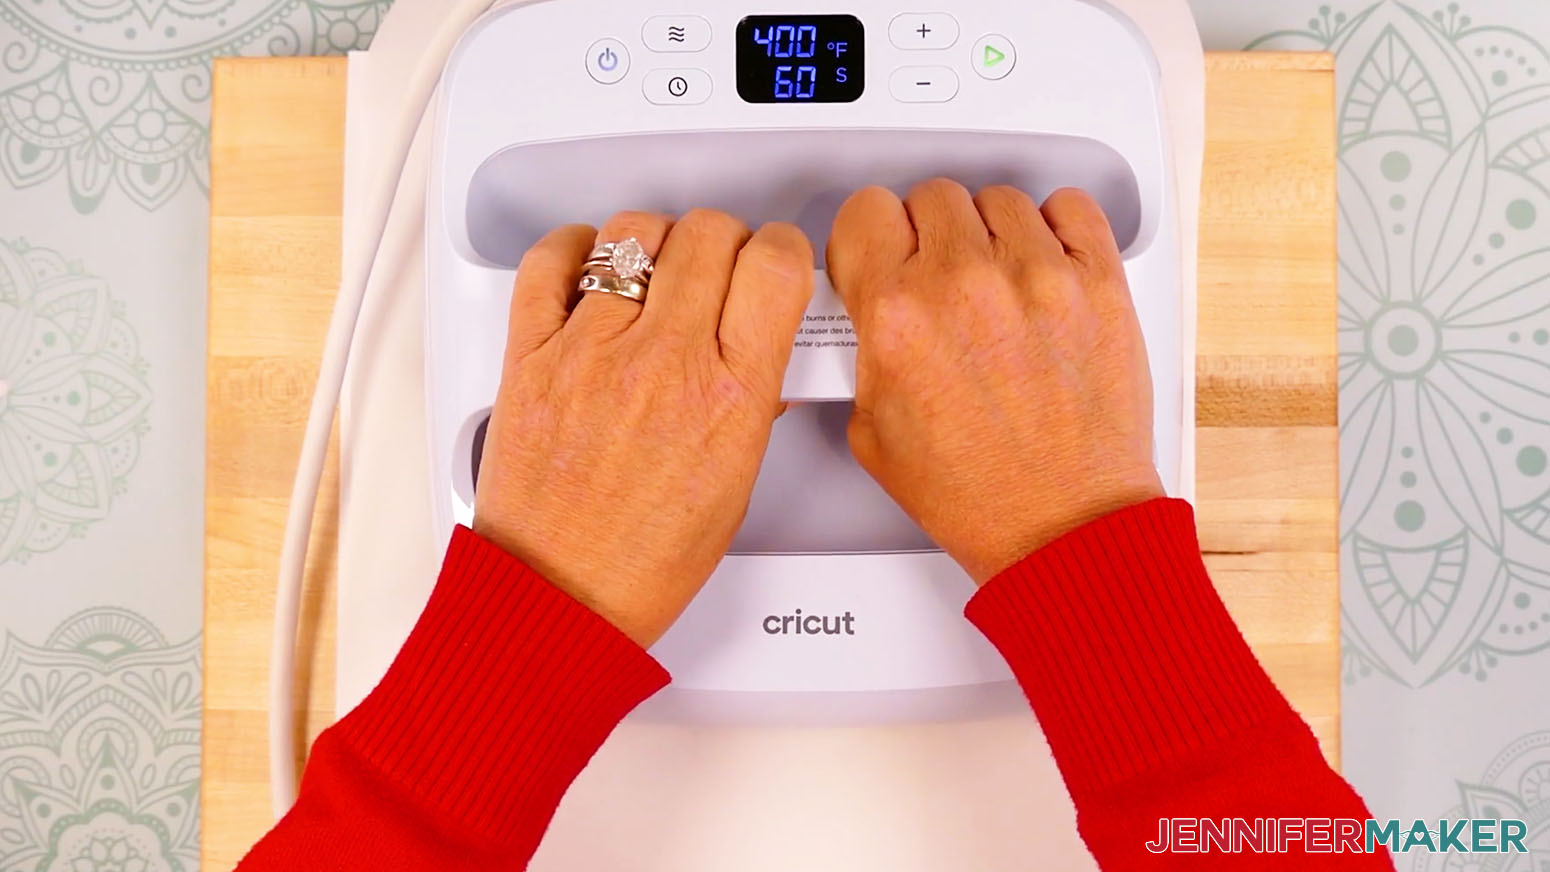
- Make sure the temperature of your EasyPress is at 400℉ (204℃), and the timer is set for 60 seconds.
- Cover the entire area of your garden marker with the EasyPress and hold it in place with medium pressure for 60 seconds.
TIP: Keep pressure even on both sides of the press for best results. - When the time is up, lift the EasyPress straight up to avoid ghosting.
NOTE: Always remember to place your press back on the base after using. - Leave the butcher paper in place, and set a flat, heavy object (like a book) directly on top of the garden marker and press down for an additional 60 seconds to prevent warping.
TIP: Press the timer button on your EasyPress to get the timing right! - Let the project cool completely for a couple minutes, then remove the book, the butcher paper, the tape, and the print to reveal the transferred design.

STEP 6: SEAL YOUR GARDEN MARKER
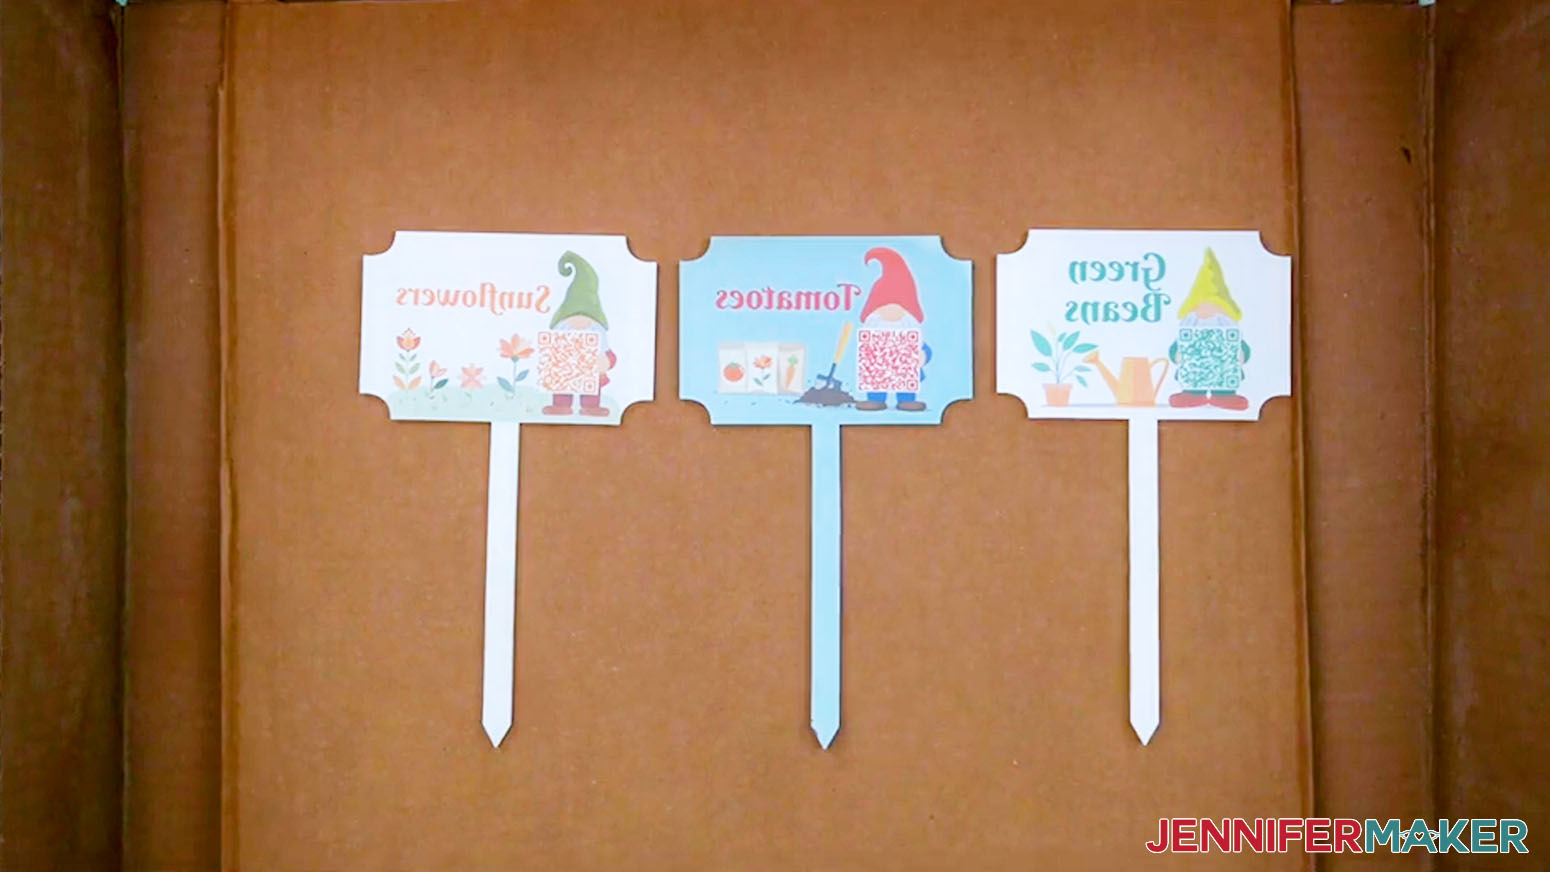
- Place a cardboard box big enough to fit your garden marker outside or in a well-ventilated area.
NOTE: The cardboard box protects your yard or work area from sealant. - Place the garden marker inside the box, transfer side up.
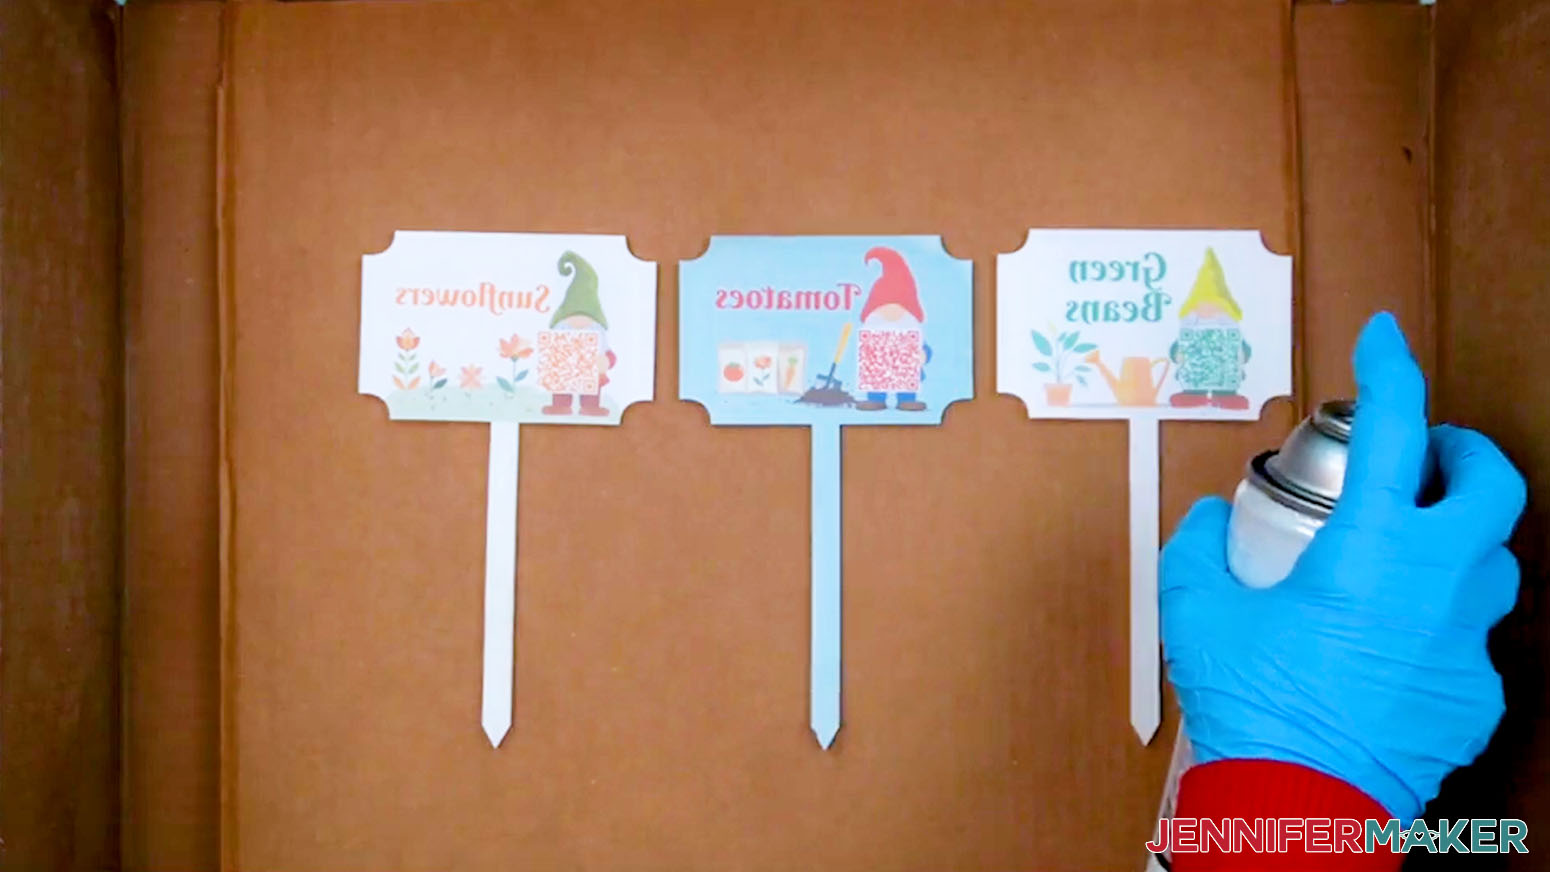
- Follow the manufacturer’s safety instructions to evenly spray a thin layer of sealant on the garden marker.
- Allow at least 10 minutes for the spray sealant to dry to the touch, and move to a safe area to rest.
- Allow the marker to dry for one to five hours for a full cure.
- Your plant care garden marker is ready!
STEP 7: SHOW IT OFF
You now have a garden marker with a QR code leading to care instructions that you can use to organize and tend to your garden or greenhouse!
Notes
Finished Project Size: 3.94" W x 6.88" H
Fonts Used: Berkshire Swash (free Canva font)
Care: To wash, gently wipe the acrylic surface with warm water, mild soap, and a microfiber cleaning cloth.
Answers to Your Questions About Sublimation Basics for Beginners
Q: How do I create a custom plant care garden marker?
A: You can learn how to design custom plant care garden markers to match your own plants in my ADVANCE program. Learn more about ADVANCE here!
Q: Do I need to be experienced with Canva or sublimation to make these plant labels?
A: No, you don’t need any prior Canva experience. This project is very beginner-friendly. I guide you step-by-step through setting up your canvas, uploading the placement guide, adding your artwork and text label, and generating the QR code right in Canva. Even if you’ve never used Canva before, you’ll be able to follow along and create designs that look polished and professional.
Q: What kind of link should I use for the QR code?
A: You’ll want to link to a reliable plant care page that includes watering, sunlight, and fertilizer information. I recommend using trusted gardening websites like Burpee. Make sure the page is specific to your plant so your plant identification and care details are accurate and helpful when you scan the QR code later.
Q: Will the QR code still work outside in bright sunlight?
A: Yes, as long as you design it correctly. Keep your QR code dark on a light background and make sure it’s at least 0.8″ wide. This size and contrast help ensure it scans easily, even outdoors on sunny days. Testing the printed design before pressing is always a smart step.
Q: Why don’t we mirror the design like other sublimation projects?
A: This is one of the rare exceptions to the mirror rule! You don’t mirror the design because you’re pressing it onto the sublimation coating on the back of the marker, then viewing it through the clear acrylic front. If you mirrored it, everything would appear backward when finished.
Q: How do I keep my garden markers from fading over time?
A: After pressing, apply a thin layer of UV-resistant spray sealant. This protects your design from sun exposure and helps it last throughout the growing season. Be sure to follow the safety instructions on your sealant and allow it to cure fully.
Q: Can I use these in different types of garden beds?
A: Absolutely. These garden markers work well in raised beds, standalone containers, and traditional in-ground gardens. The acrylic is sturdy enough to handle different environments, and the sealant adds extra protection against the elements.
Q: What if I don’t have a sublimation printer?
A: If you don’t have a sublimation printer or don’t want to invest in one for a single project, check out third party printing services like Jiffy. These services let you upload a design, order as many copies as you need, and then send the ready-to-press transfers straight to your door, hassle-free.
Q: Are these really better than traditional plant markers?
A: In my experience, yes. Traditional plant markers tend to fade, break, or get lost. These combine durability with instant access to information, which makes them much more reliable. Plus, they reduce the need to remember details or keep track of notes elsewhere. They’re definitely an upgrade!
Q: Can I make multiple markers easily?
A: Once you’ve made one, the process becomes much faster. You can duplicate your design in Canva, swap out the plant name and QR link, and create a whole set efficiently. And depending on your paper size, you can print two or more markers per sheet of paper. So it’s easy to make as many as you need! It’s a great system to set up at the start of the season and use all year long.
Q: Can you use a regular desktop printer for sublimation?
A: You can only use an inkjet printer for sublimation if you can complete the steps necessary to convert it to a sublimation printer. A regular printer in its default form with regular ink won’t work for sublimation because sublimation requires a special ink that activates with heat. Not all printer models can be converted, but new Epson EcoTank models with refillable ink tanks can. Check out my How to Convert an Epson Printer for Sublimation tutorial to learn more!
Q: Can you reuse a sublimation print?
A: Though it may look like there’s ink left on your sublimation transfer paper after pressing, there’s not actually enough to create another press. You can try to reuse your print, but your second attempt will probably look very faded.
Q: Can a Cricut do sublimation printing?
A: While a Cricut cutting machine can be useful in some sublimation projects, it does not sublimate or print sublimation ink. However, you can use a Cricut and Infusible Ink pens to draw designs onto paper, which can be sublimated. You can also use a Cricut to cut SVG designs out of Infusible Ink transfer sheets.
Q: Where do I find sublimation designs?
A: In addition to the free garden gnome images included in the design files folder for this project, you can find tons of other designs you can use for sublimation in my free resource library! You can also use your own photos and designs, and images created through AI generators as long as you follow the tool’s guidelines. Graphics from Canva, stock photos, or other online sources may also be available depending on usage permissions. If you want to take your designs further, I share online resources and best practices so you can get better results when designing and sublimating in my Advance program!
Get my free gnome garden marker PNG files!
(If you do not see the signup form above, click here.)
I love seeing your sublimation crafts, and how you use them! Once you’ve made your plant care garden markers, inspire others and share a photo of them in action in your garden or greenhouse in our Facebook group or tag me on social media with #jennifermaker.
Love,

Want to remember this? Save this Plant Care Garden Markers Tutorial to your favorite Pinterest Board!