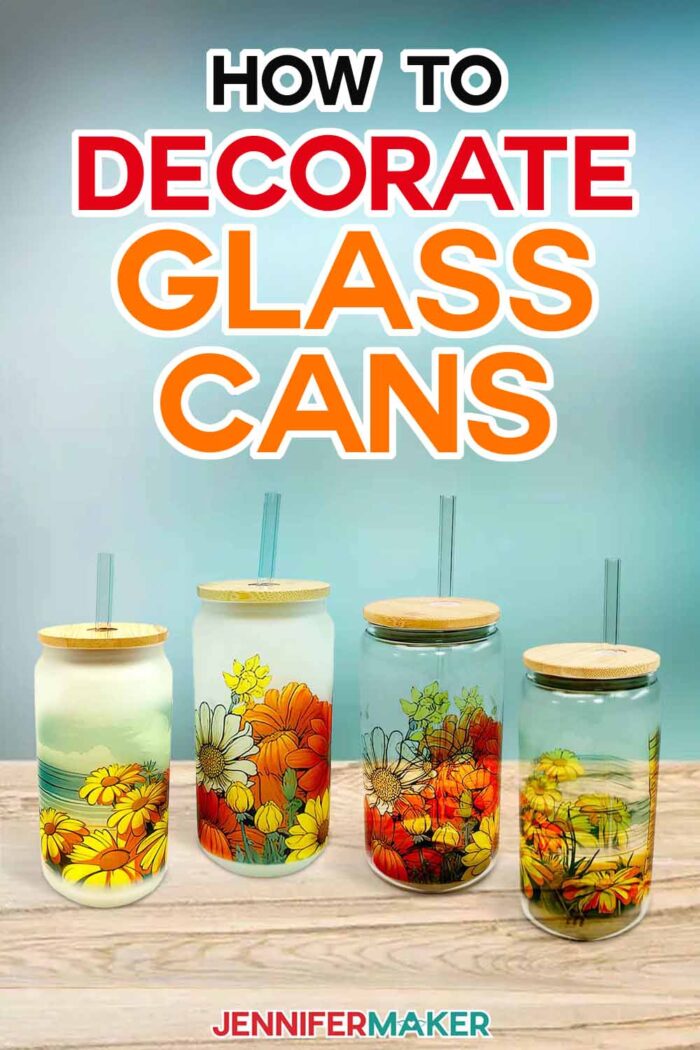
Learn how to create a sublimation beer can glass with fun designs!
Beer can shaped drinking glasses have been super popular lately, but did you know there are sublimatable versions? That’s right, now you can add a permanent, full-color design to a beer can glass! These make great gifts, or make a set for yourself! With a whole host of design possibilities, beer can glasses are an easy sublimation project that anyone can make with the right supplies and tools.
Watch the full step-by-step sublimation beer can glass tutorial:
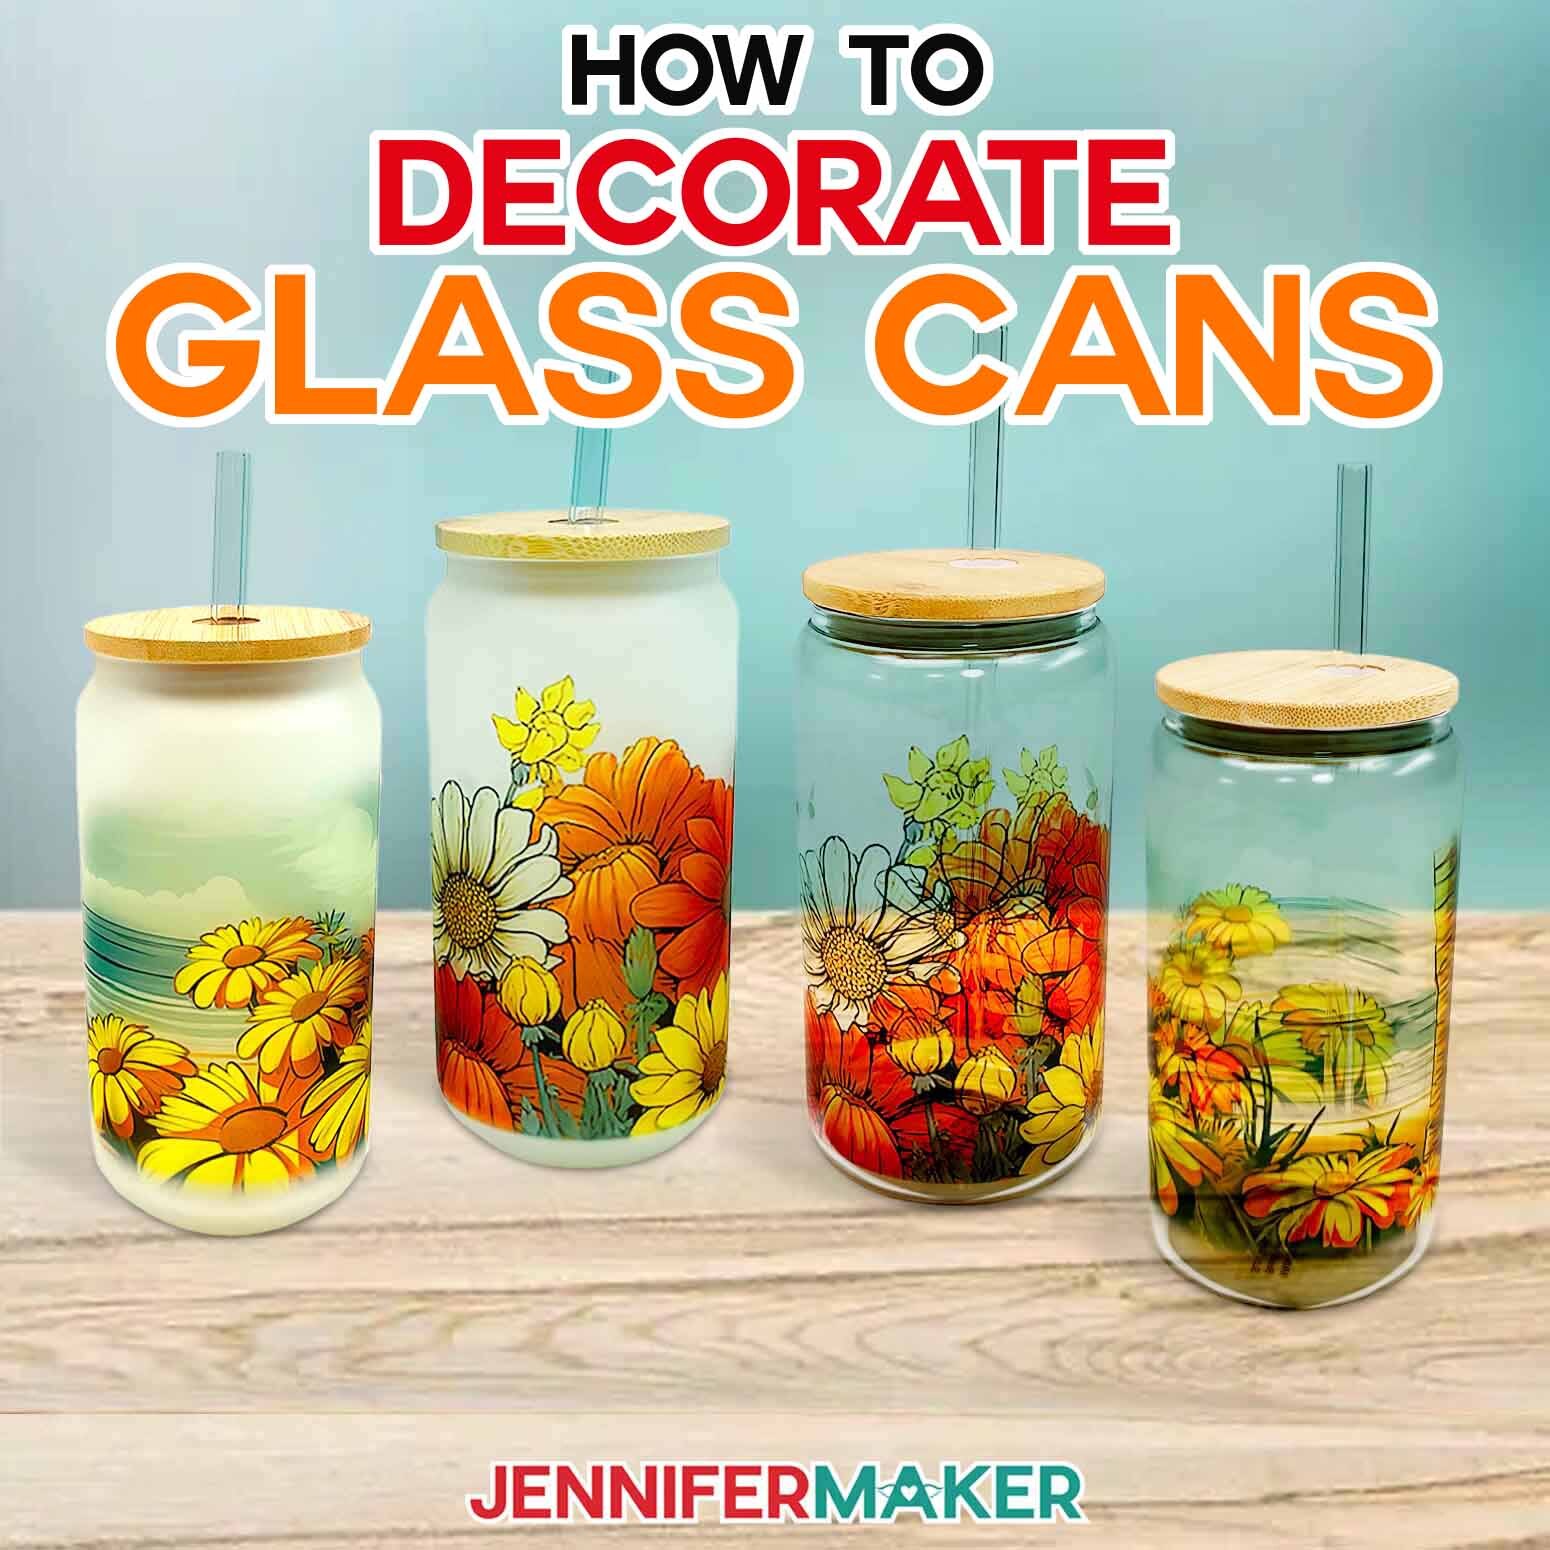

Beer can glasses are a hot item, and I can’t wait to show you how to sublimate your own with a high-quality durable design! I’ve got two different full-color Beach and Flower-inspired designs to share, or you can use your own unique design and sip in style. I created the images with the help of AI software, then edited them in Photoshop to make them look their best.
First, download my sublimation beer can glass designs from my free library — look for design number 570. Alternately, you can use the Save This Project form near the top of this post and the design link will be emailed to you.
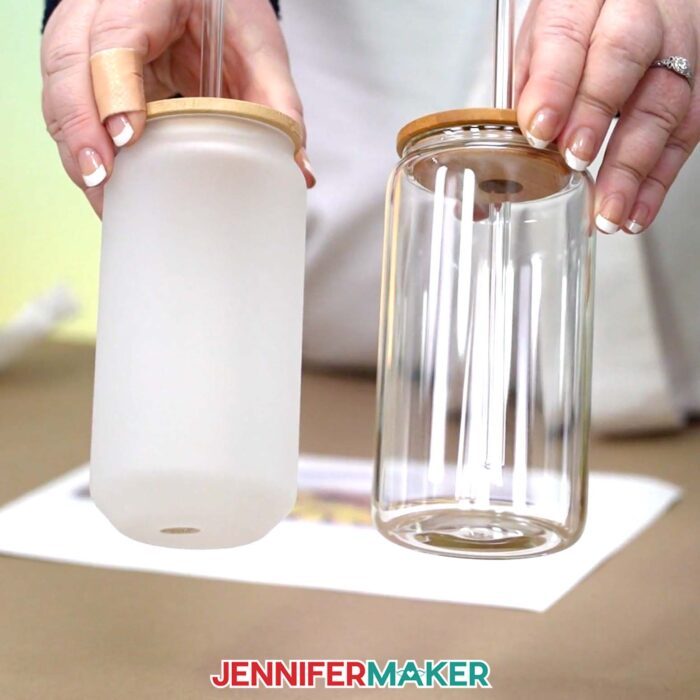
Next, you’ll need a sublimation beer can glass! Make sure your glass is marketed as being meant for sublimation, otherwise the sublimation dye will have nothing to infuse into and you’ll be left with a big mess. When an item is designed for sublimation, it contains a polymer coating and has been tested to withstand high heat. There are new products designed for sublimation hitting the market every day, so they should be easy to find.
Not sure which glasses to buy? I have good news! Just check out the link in my materials list to find the 18 oz beer can glasses I used.
I’ll demonstrate sublimation on both clear and frosted beer can glasses so you can pick your favorite! They have very different results, and I can’t wait to hear what you think.
You’ll need a Sublimation Printer with the right kind of ink, a craft-purposed convection oven, sublimation paper for your sublimation wrap, heat tape, and and the other basic sublimation supplies. The full list of supplies and tools is in my materials list if you scroll down. I’ve even included links to find everything I used. Preparing the glass correctly is super important, so be sure to watch the video tutorial so you don’t miss anything!

We’ll prepare the sublimation image in Google Docs, and I recommend you use the Google Chrome browser as well. I also recommend checking that you’re updated to the latest version before beginning. This tutorial was written based on the latest version of Google Docs, and older versions of your web browser may look different than mine.
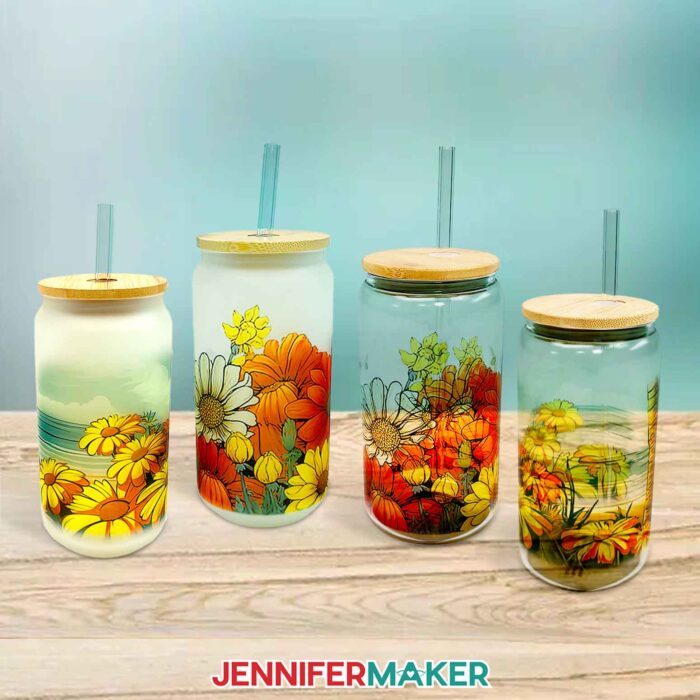
I just love how these turned out! Fill them with cold beverages like soda, beer, fruit juice, milk, a cocktail, or your perfect tea or iced coffee — anything nice and refreshing! Applying long-lasting, full color designs to glass has never been easier, and these make a wonderful customized gift for any occasion, like Christmas, New Year’s, Father’s Day, and more! You can even put a logo on them for personalized advertising for small businesses. With so many possibilities, I’m excited to make more beer can glasses for gifts all year long!
Let me show you how easy it is to make a sublimation beer can glass! This post contains some affiliate links for your convenience (which means if you make a purchase after clicking a link I will earn a small commission but it won’t cost you a penny more, there is no additional cost)! Read my full disclosure policy.
Materials to Make A Sublimation Beer Can Glass
View my Amazon shopping list with the exact items we used to make this project!
- 18 OZ Sublimation Beer Can Glass – Frosted -OR- 18 OZ Sublimation Beer Can Glass – Clear
- Convection Oven
- Sublimation Ink
- Sublimation Printer
- Butcher Paper
- Heat Resistant Gloves
- Heat Resistant Tape
- Scissors
- Scraper
- Looped Tape Measure
- Oven Thermometer
- Fan
- Coffee Filter
- Isopropyl Alcohol
- Cooling Rack
- Paper Trimmer
- Design #570 (My free SVG/DXF/PDF design files are available in my free resource library – get the password by filling out the form at the bottom of this page

How to Make Your Own Sublimation Beer Can Glass

Sublimation Beer Can Glass
Learn how to create a sublimation beer can glass with these beautiful flower and beach-inspired designs and a sublimation-ready cup.
Materials
Tools
- Sublimation Printer - I used a converted Epson EcoTank ET-4700 Inkjet Printer
- Sublimation Ink
- Convection Oven
- Oven Thermometer
- Heat Resistant Gloves
- Heat Resistant Tape
- Butcher Paper
- Scissors
- Scraper
- Looped Tape Measure
- Fan for Ventilation
- Coffee Filter -AND-
- Isopropyl Alcohol
- Cooling Rack
- Paper Trimmer
Instructions
STEP 1: GET MY FREE SUBLIMATION BEER CAN GLASS DESIGNS
First, download my Sublimation Beer Can Glass designs from my free library -- look for Design #570. Alternatively, you can use the Save This Project form near the top of this post and the design link will be emailed to you.
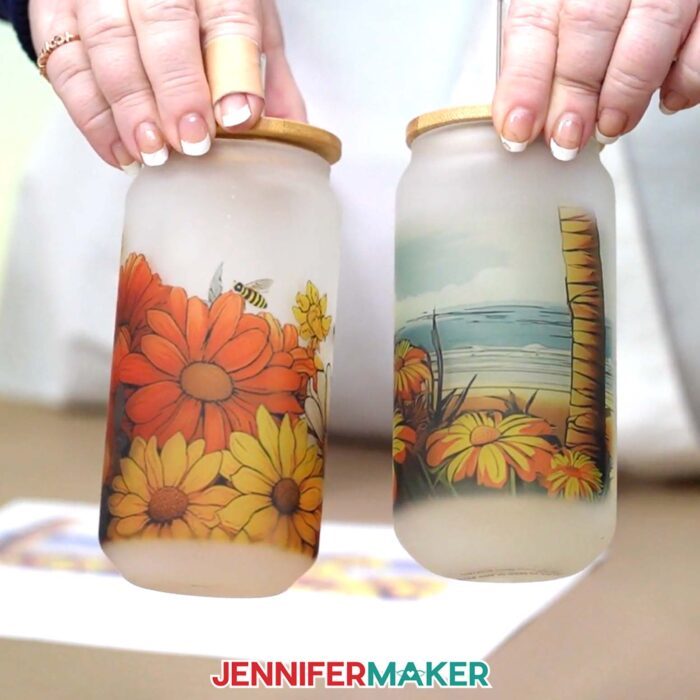
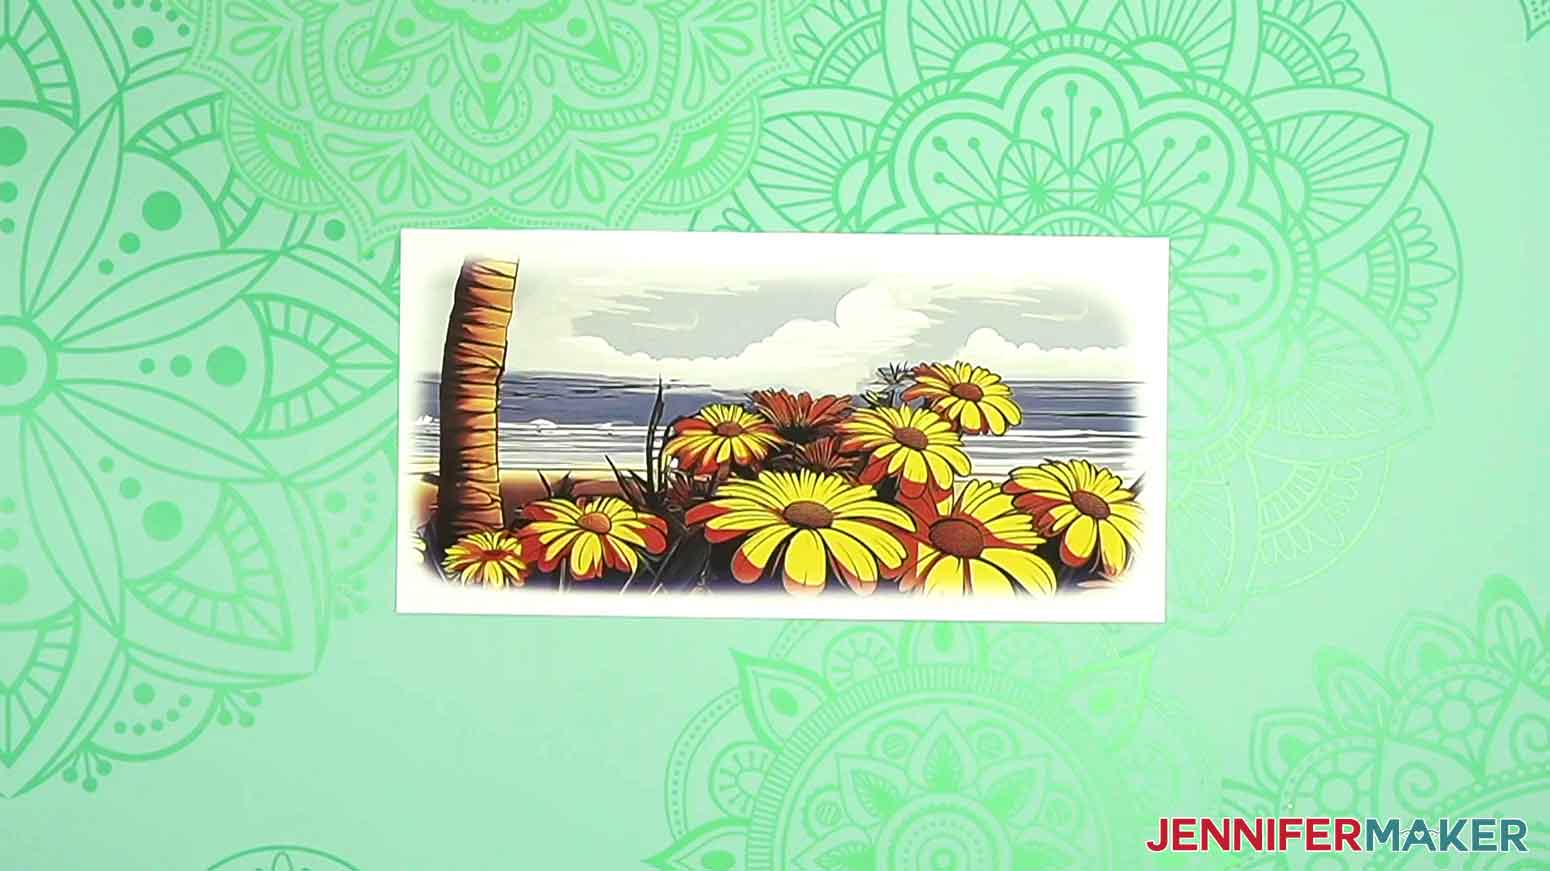
There are two designs in the PNG folder: Beach and Flowers PNG files for sublimation.
In this tutorial, I will show you how to prepare and sublimate the Beach and Flower sublimation glasses.
TIP: If you're not sure how to upload, go to jennifermaker.com/svgs to learn how to unzip and upload SVG files.
STEP 2: PREPARE YOUR DESIGN
GOOGLE DOCS
1. Open Google Docs in the Google Chrome web browser on your computer. You can also download and open the Google Docs app, but be aware that you won’t be able to install or access any printer profiles from a mobile device, and you’re also limited in features, so I do not recommend it on a mobile device.
NOTE: You will need a free Google account to use the free Google Docs software.
2. With Google Docs open, click on “Blank document” in the upper left corner to open a new document.
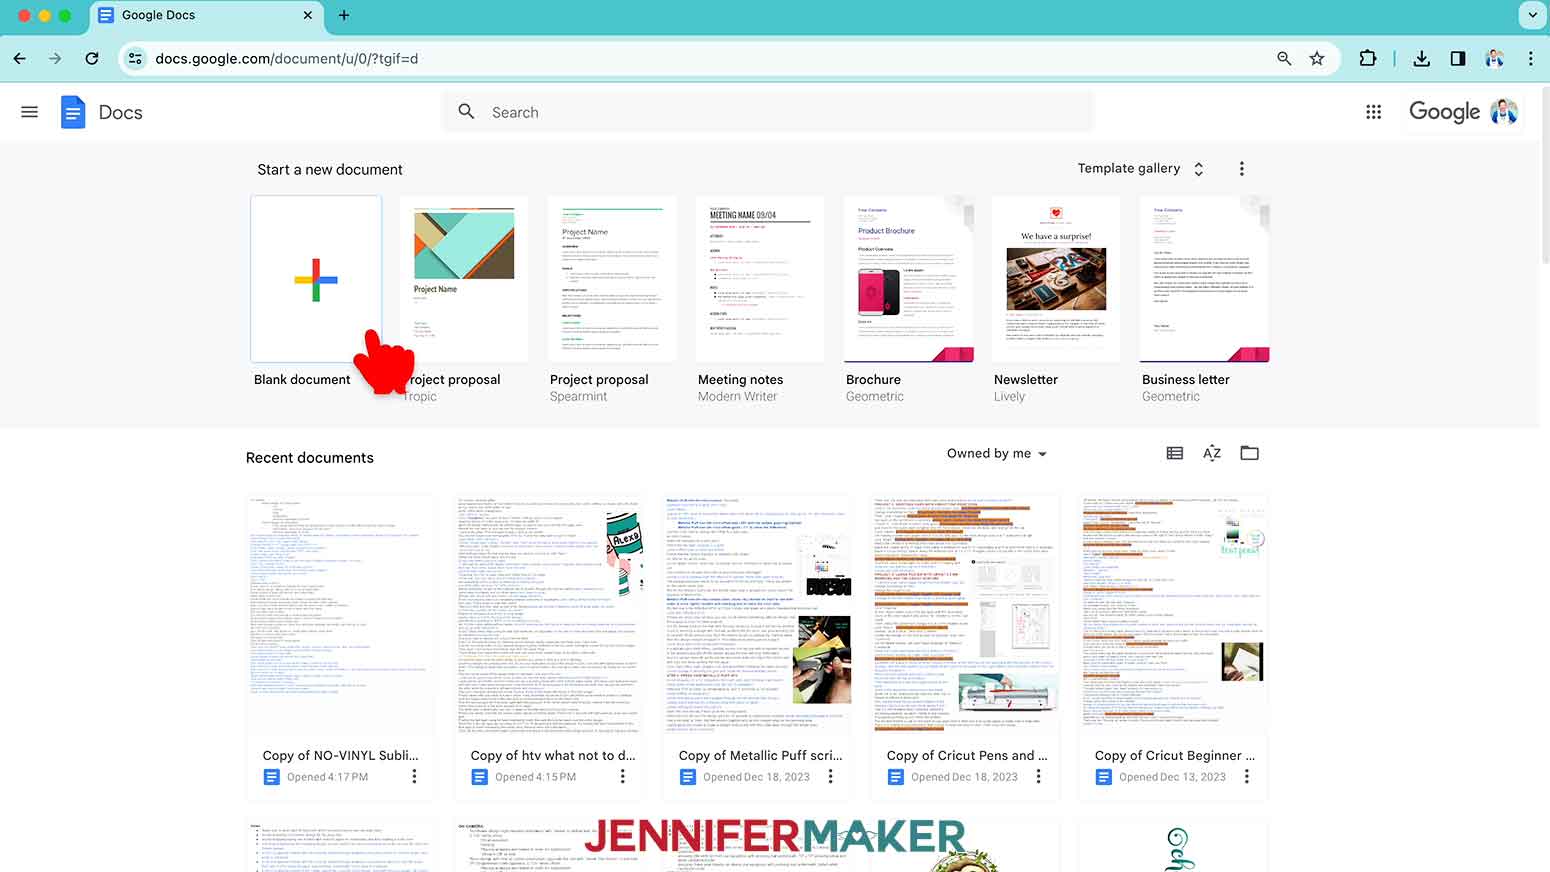
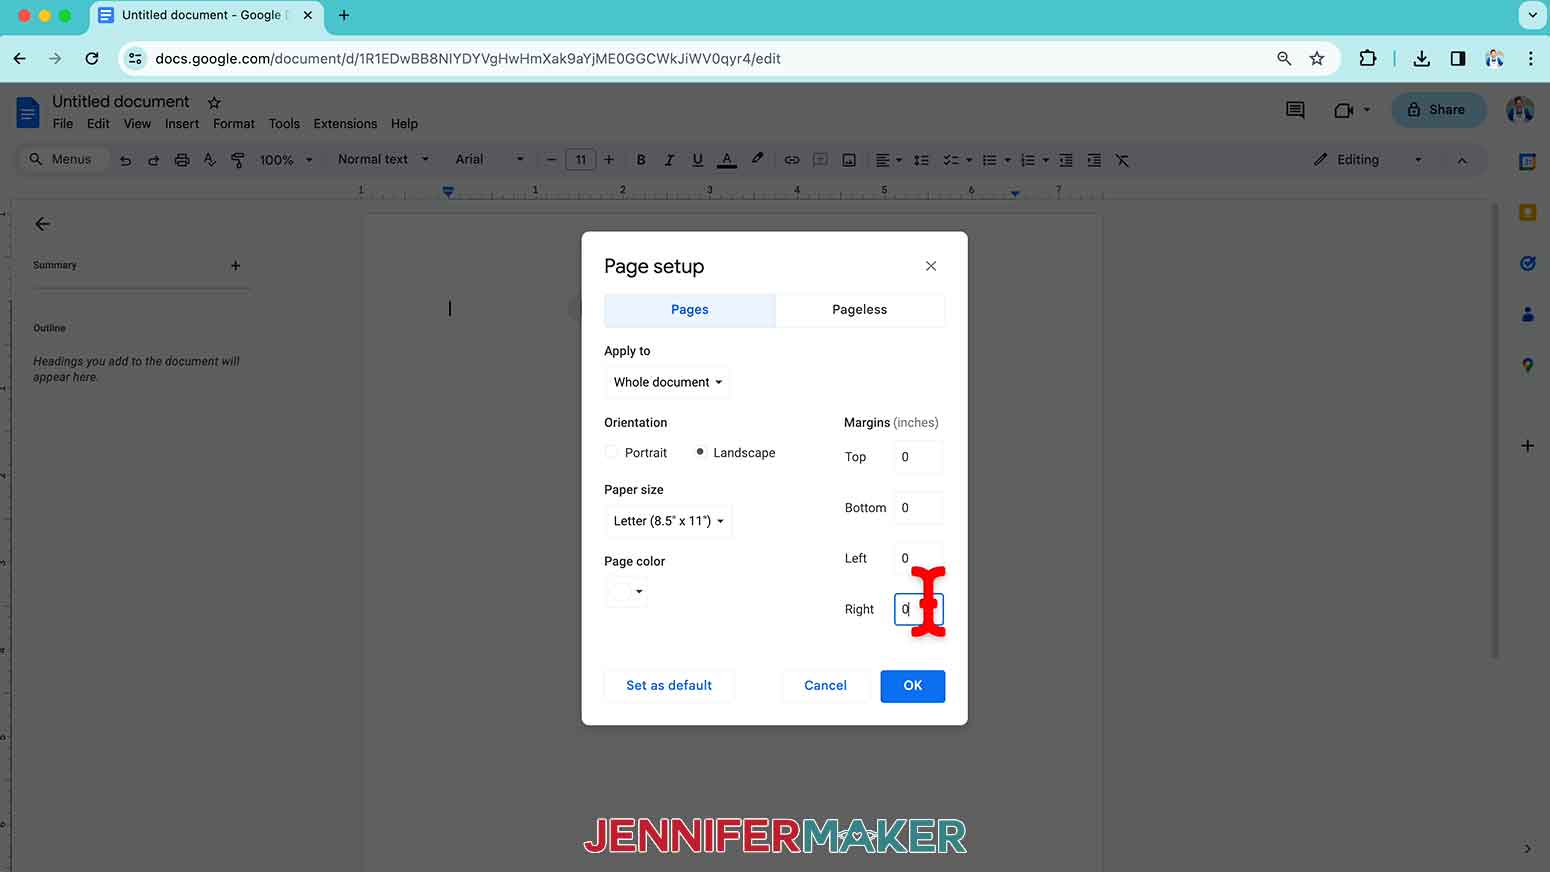
3. Go to the File menu and select “Page setup.”
4. Check the box next to “Landscape,” change your margins to “0,” and change your Paper Size to match your sublimation paper size.
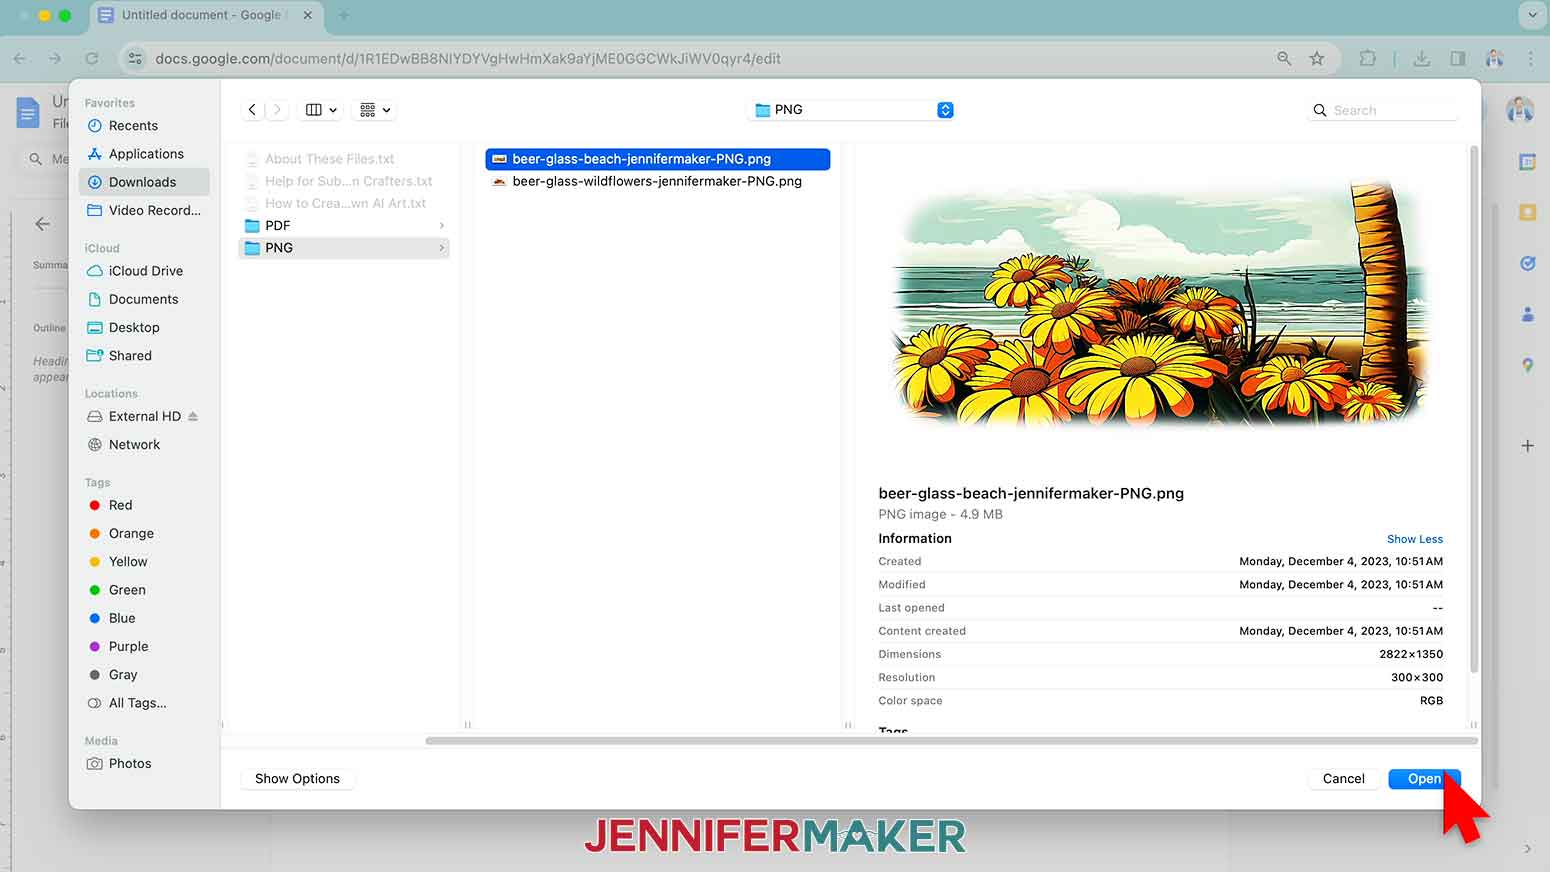
5. Go to the Insert menu, select “Image,” and select “Upload from Computer.”
6. Locate the sublimation design you want to use (hint: it’s probably in your Downloads folder), and click “Open.”
7. The image will load a little larger than needed. Click the image, then click “Size & Rotation.” Change the width to 9.4”.
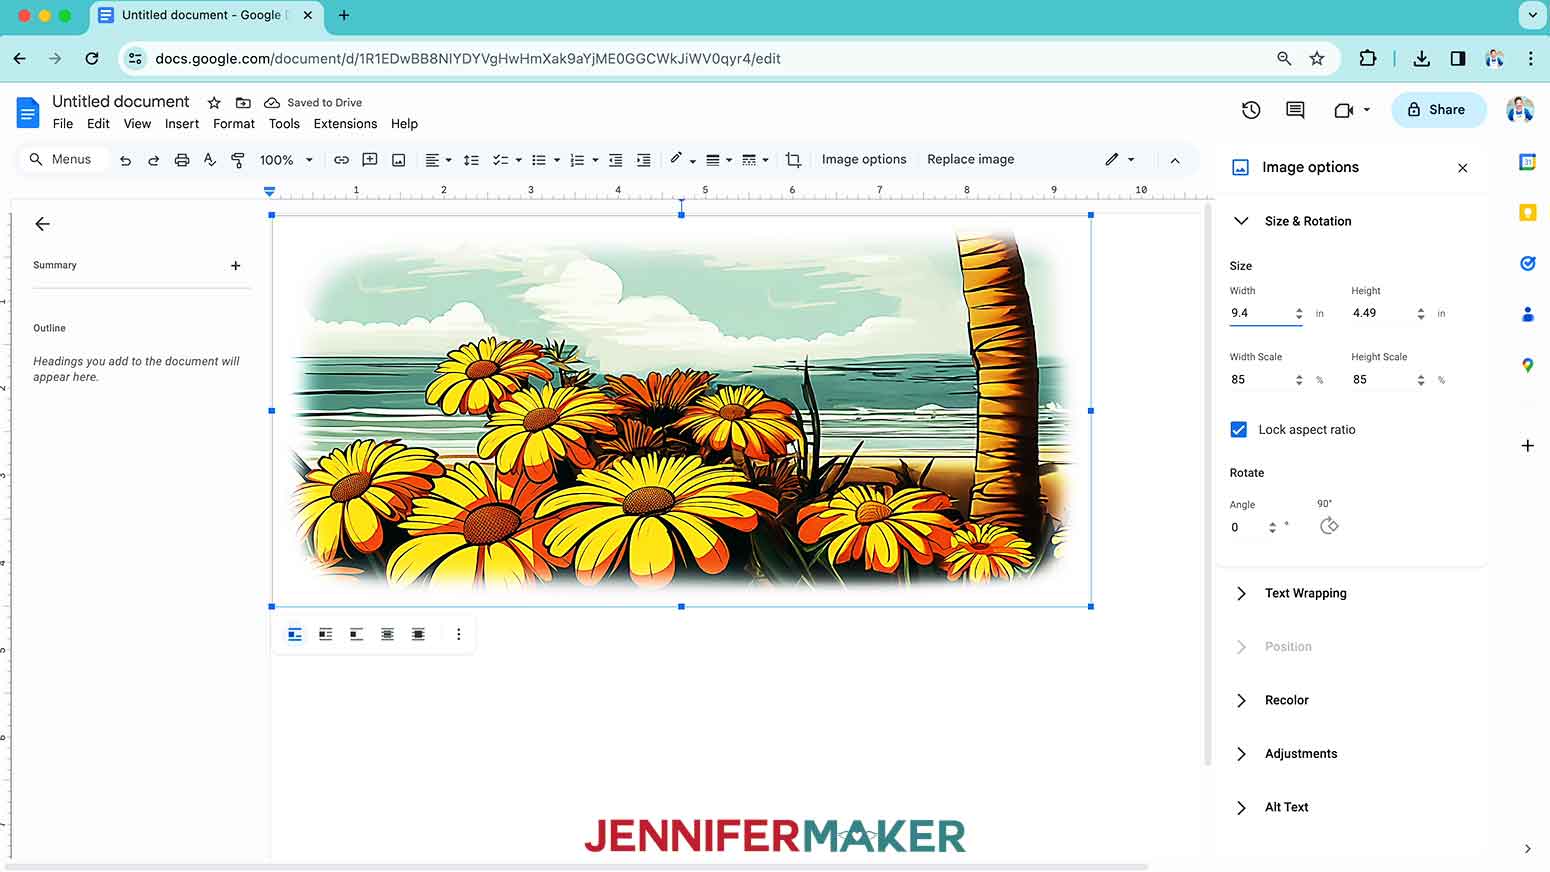
8. Reposition the image on your page by selecting the image, then click on “Wrap text” from the menu that appears below it.
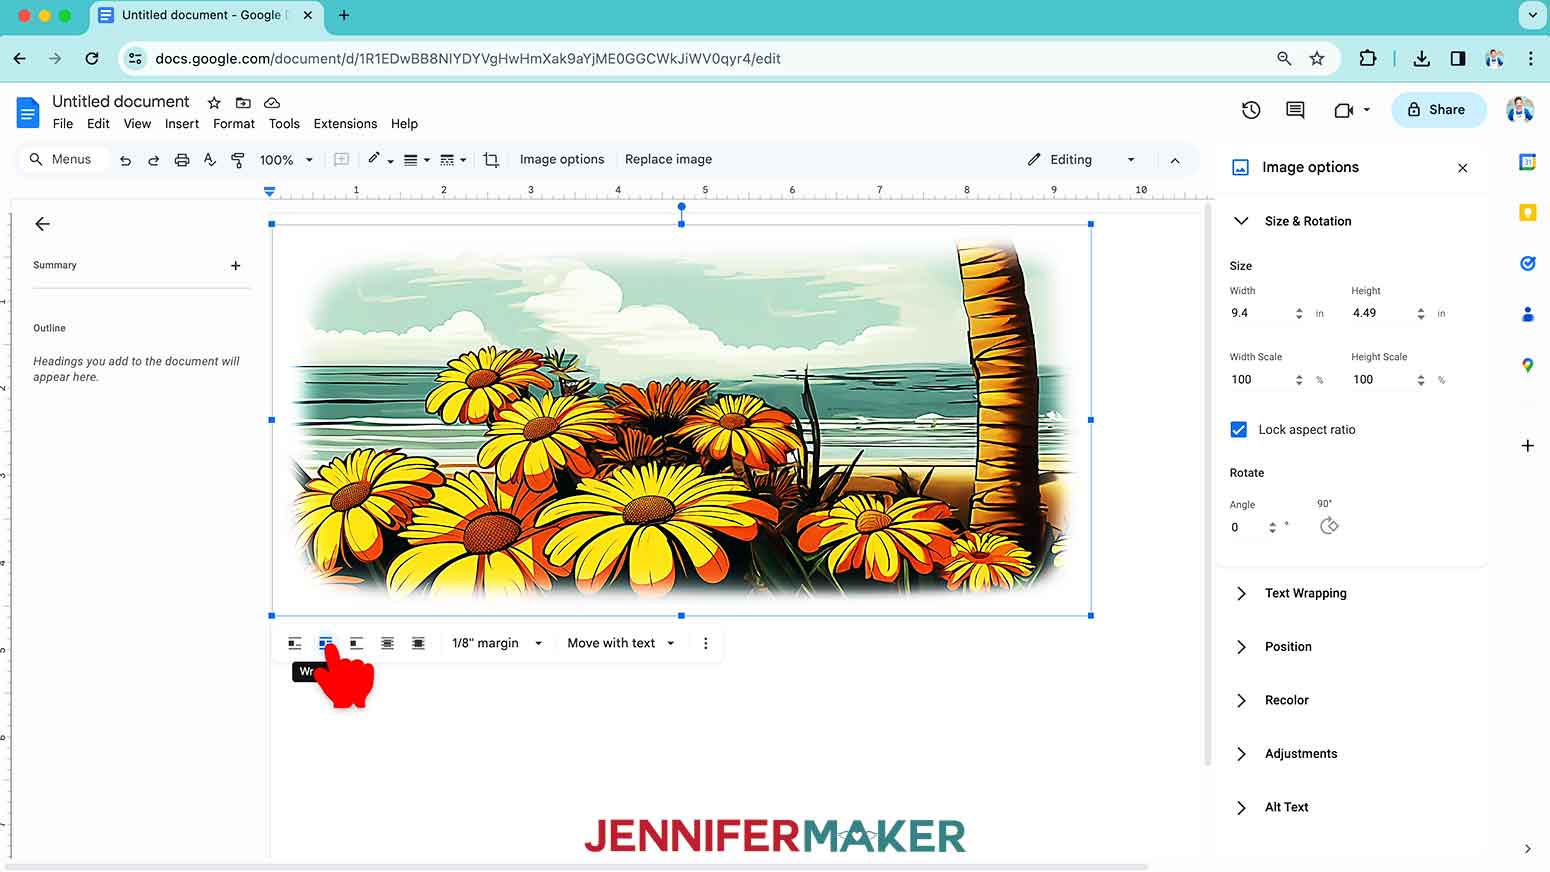
TIP: Once you do this, you can click and drag the image anywhere on your page. I recommend putting your design in the center of your page, as that ensures it won’t get cut off at the edges and you have plenty of space for cutting/tearing edges.
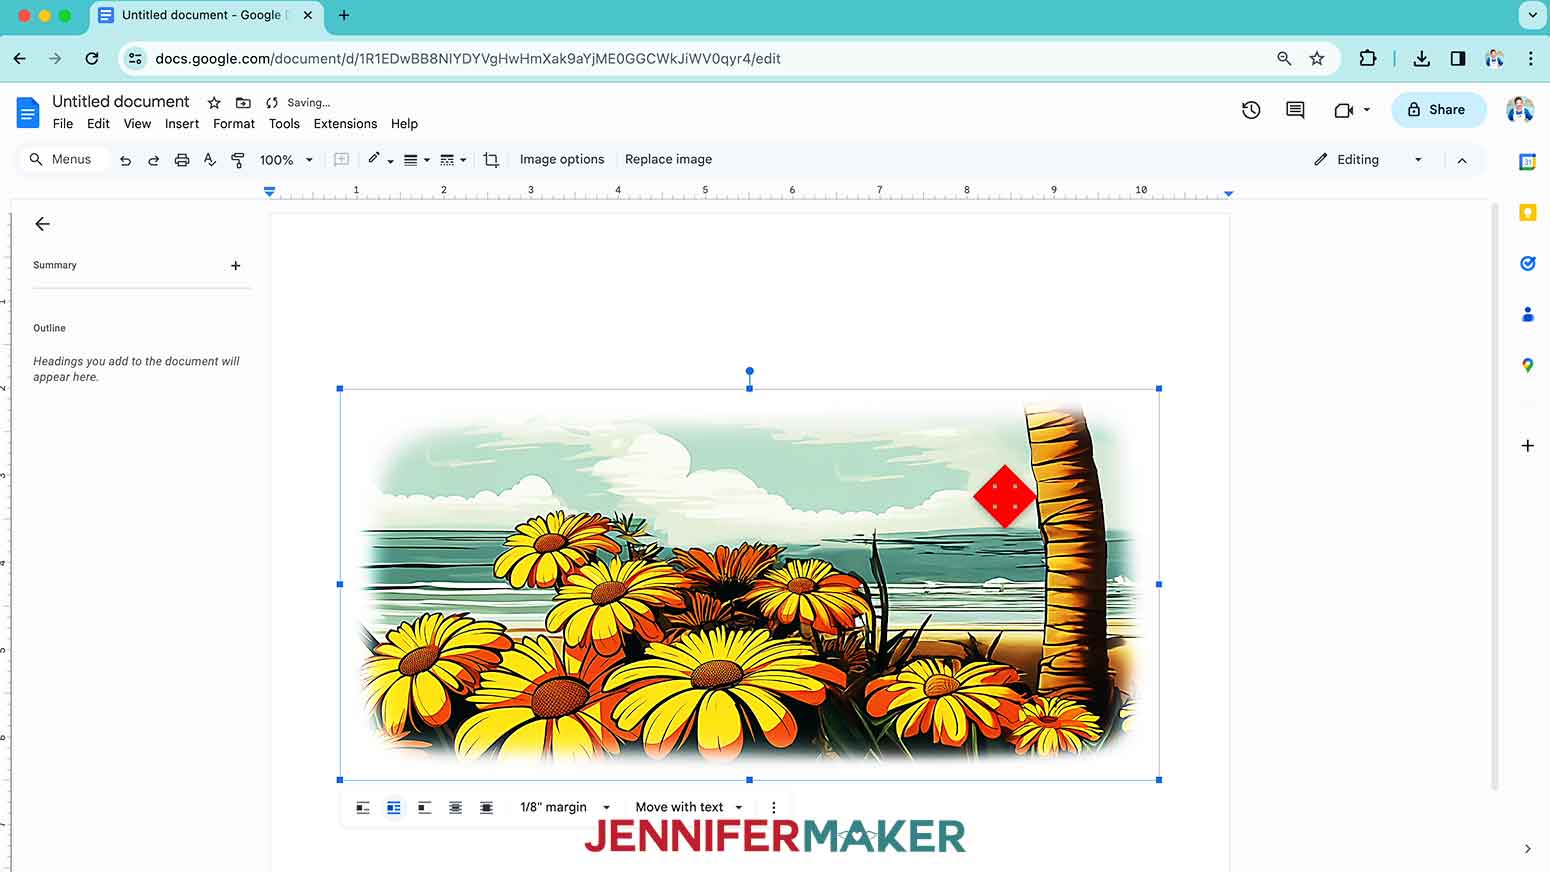
9. Give your document a name so you can find it later.

10. Go to the File menu and choose “Print.”
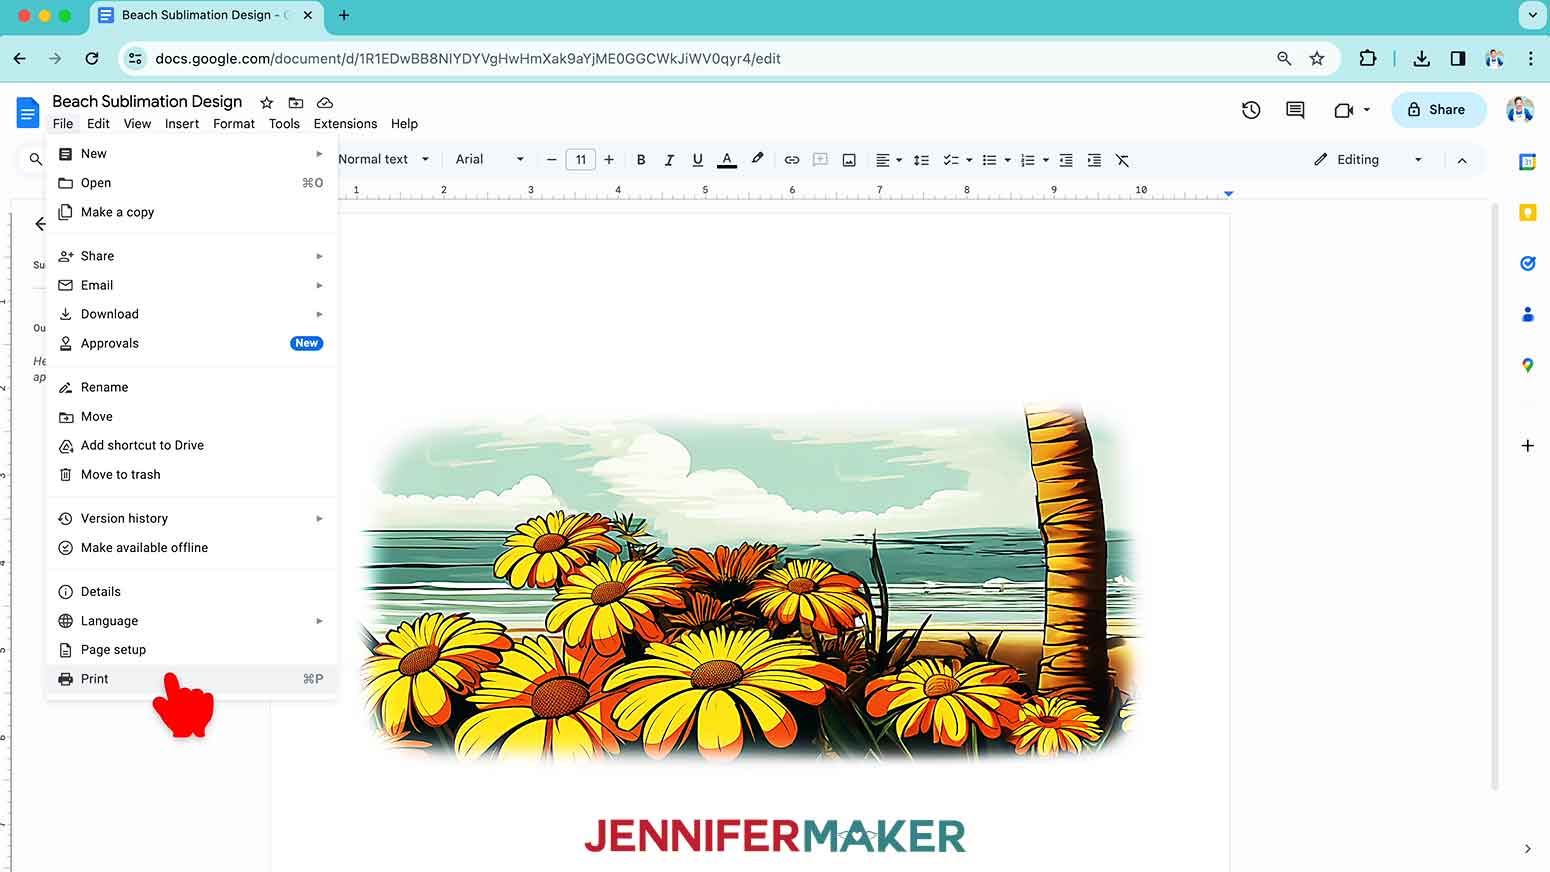
11. Select your printer under “Destination.”
12. Click the arrow beside “More Settings” and click on “Print Using System Dialog.”
13. Your print menu may look different - make sure you “mirror” the print and select the highest quality print.
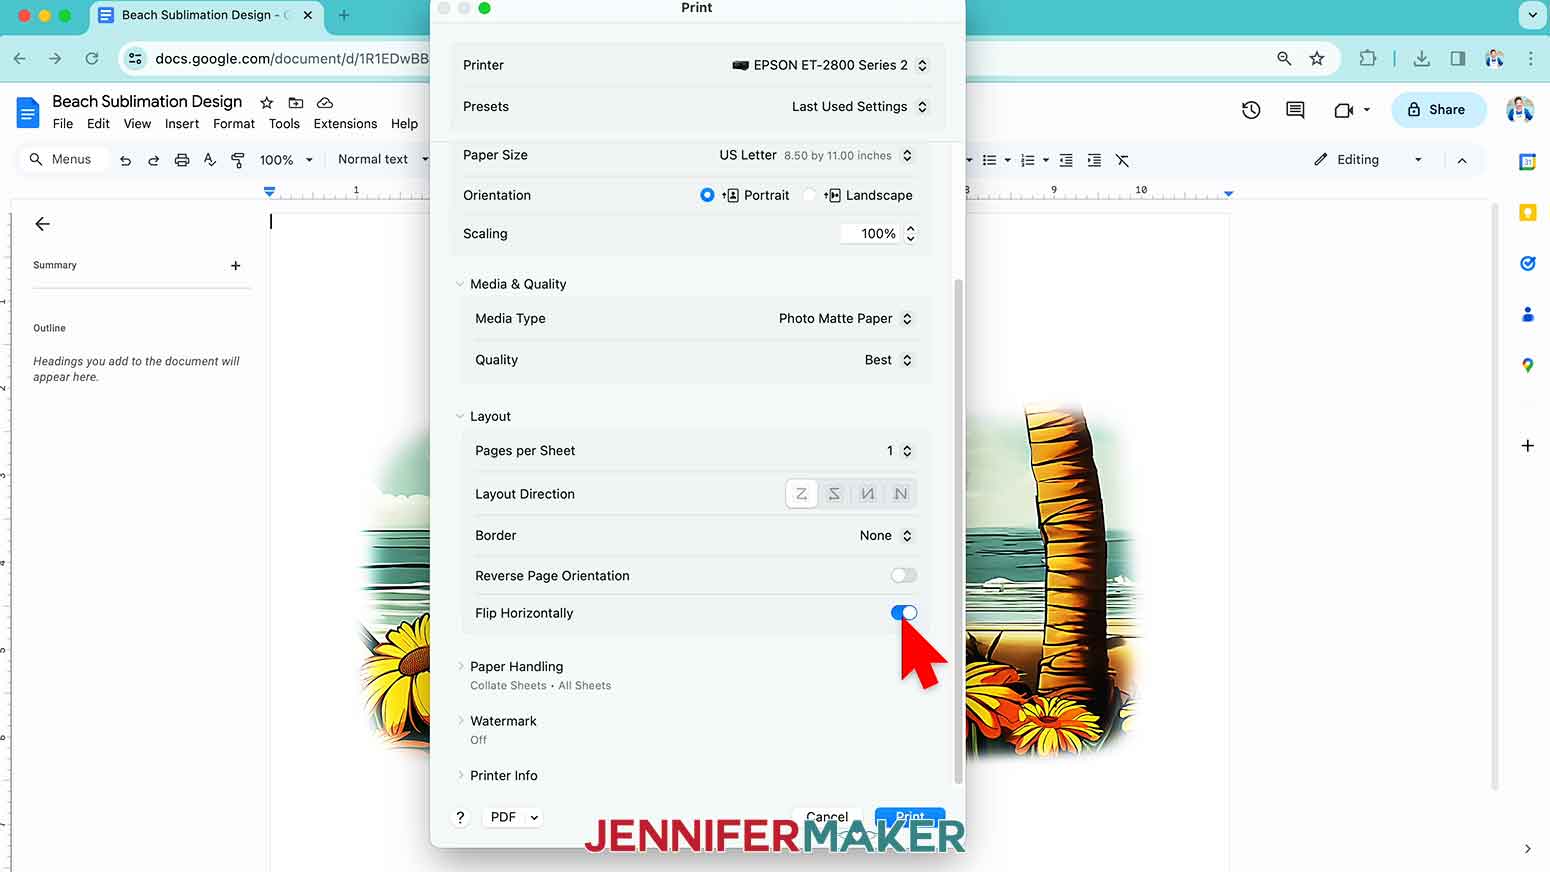
NOTE: The printed designs will appear lighter before pressing.
STEP 3: SUBLIMATE A BEER CAN GLASS
NOTE: Before you get started, open a window and turn on a fan to improve ventilation.
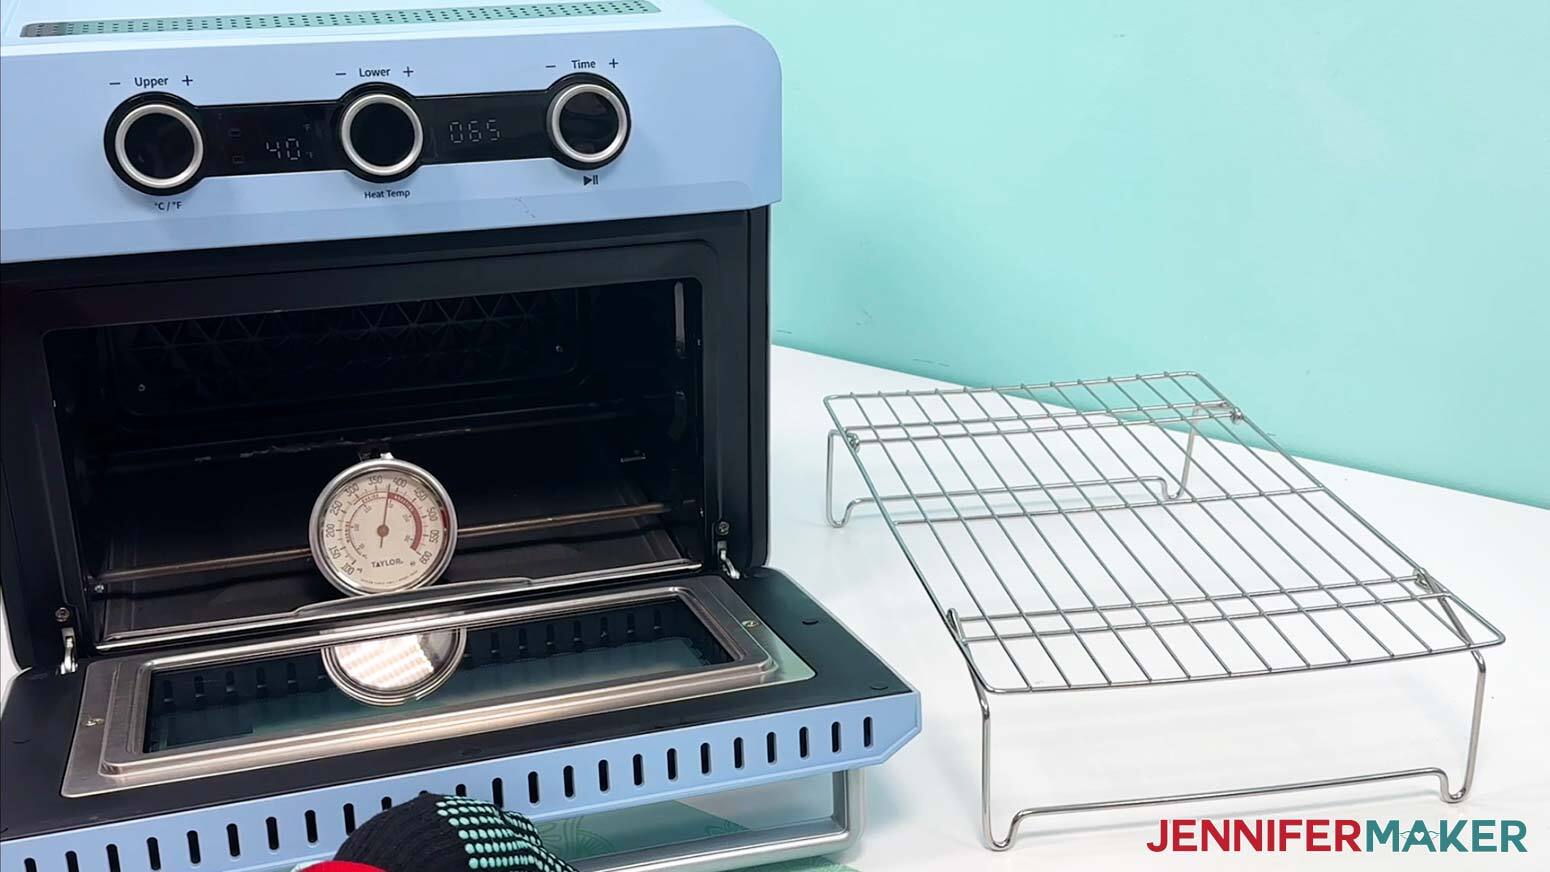
1. Set your craft-purposed convection oven to the correct temperature and time. According to my Sublimation Cookbook, the oven needs to be preheated to 400°F (or 204°C) for glass drinkware.
2. Place an oven thermometer inside the center of the oven to verify the temperature.
3. Trim around the design.
For the Flowers design: Trim closely to the design on the bottom and sides.
For the Beach design: Trim around the design, but not close enough to trim off the faded edge.
4. Use a coffee filter and some isopropyl alcohol to clean the outside of the glass.
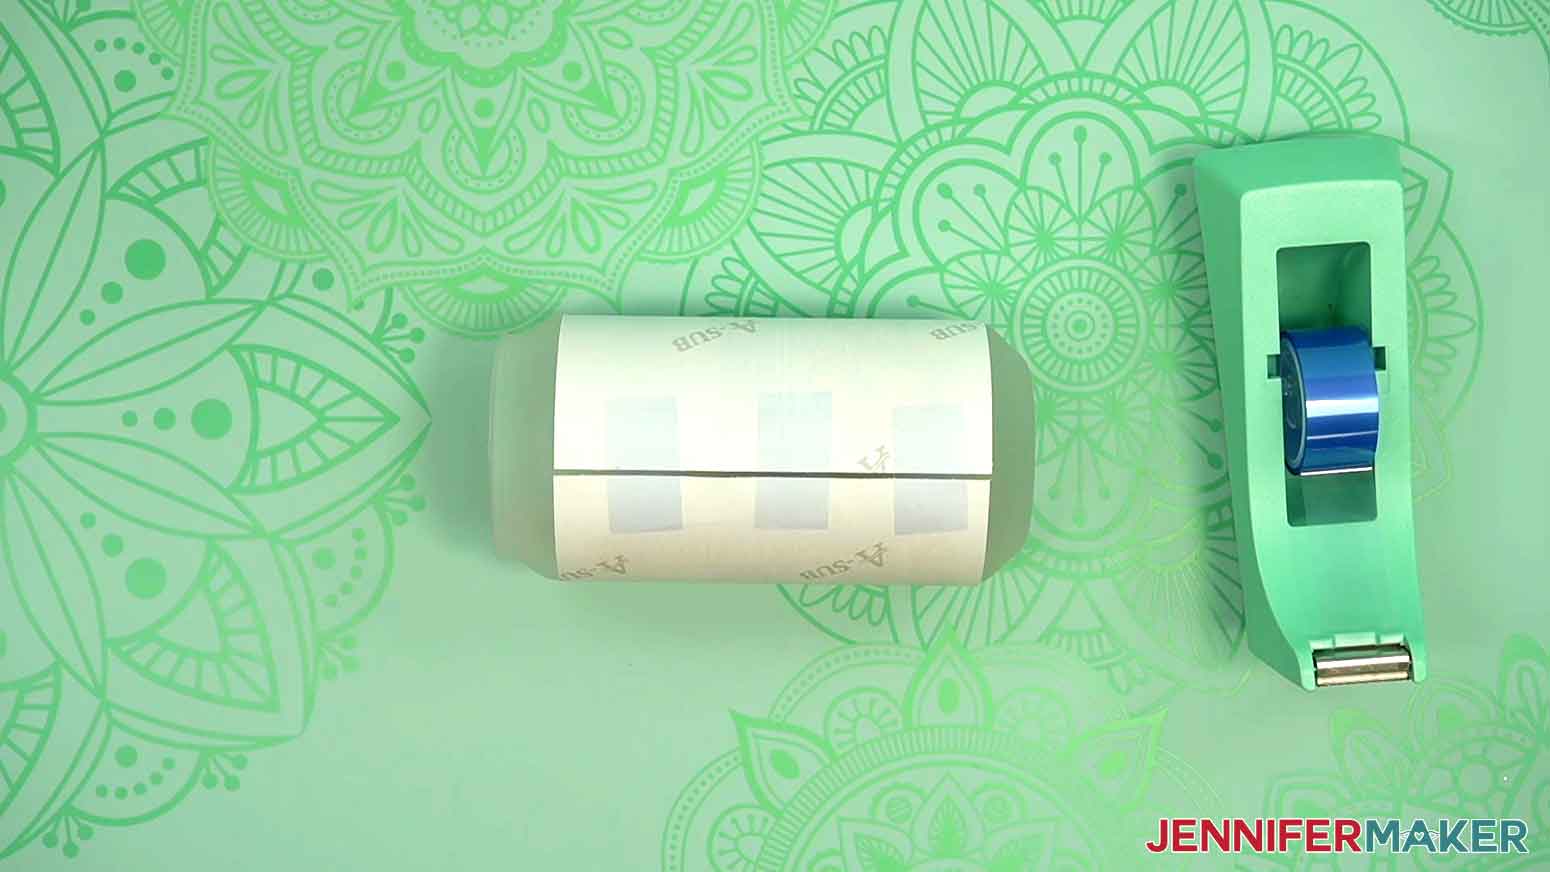
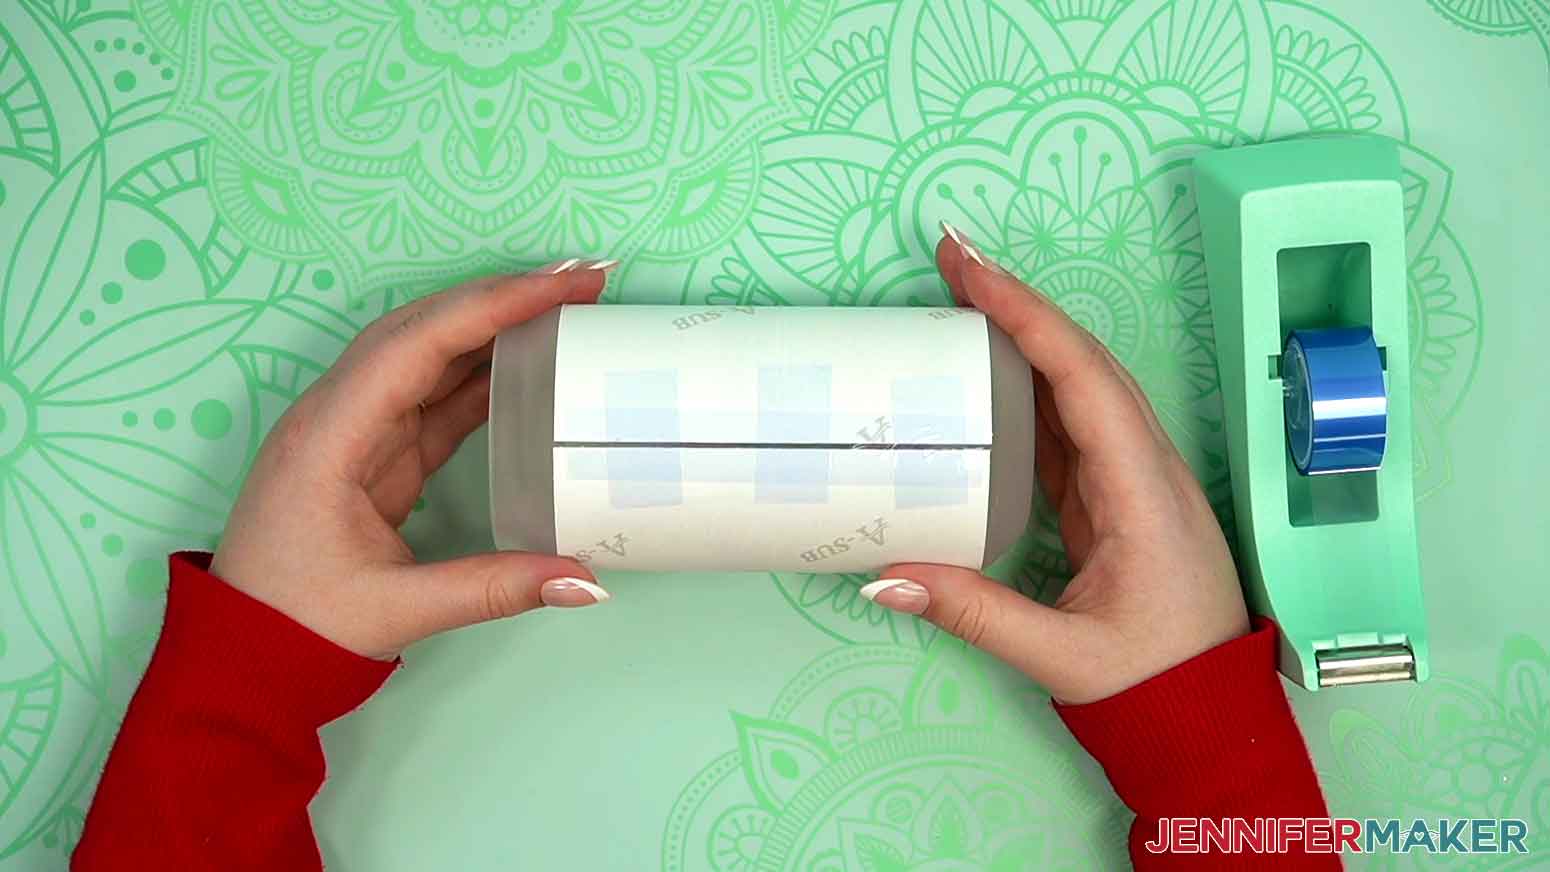
5. Wrap the design around the glass, with the printed side touching the glass, to make sure it fits. The paper won’t touch at the seam, and that’s okay because this is not a seamless design.
6. When the paper is tightly wrapped, hold it in place and apply three pieces of heat-resistant tape across the seam.
7. Then apply another piece of heat-resistant tape along the length of the seam, on top of the other pieces of tape.
8. Use your scraper tool to burnish the tape on the seam to help make sure the entire design is touching the glass.
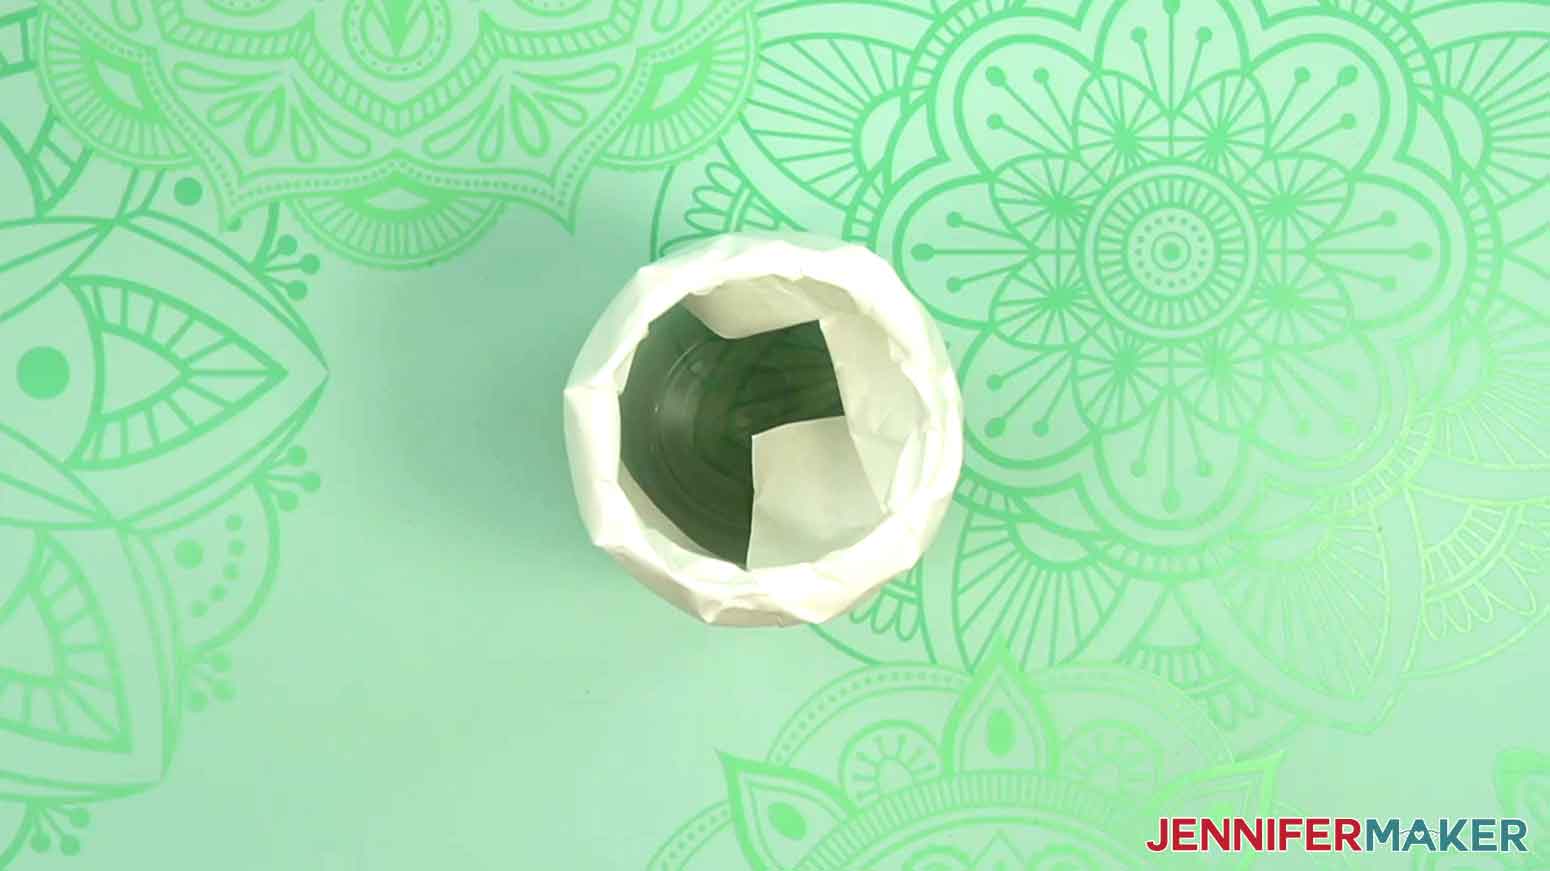
9. Wrap a piece of butcher paper around the glass, then apply three pieces of heat-resistant tape across the seam.
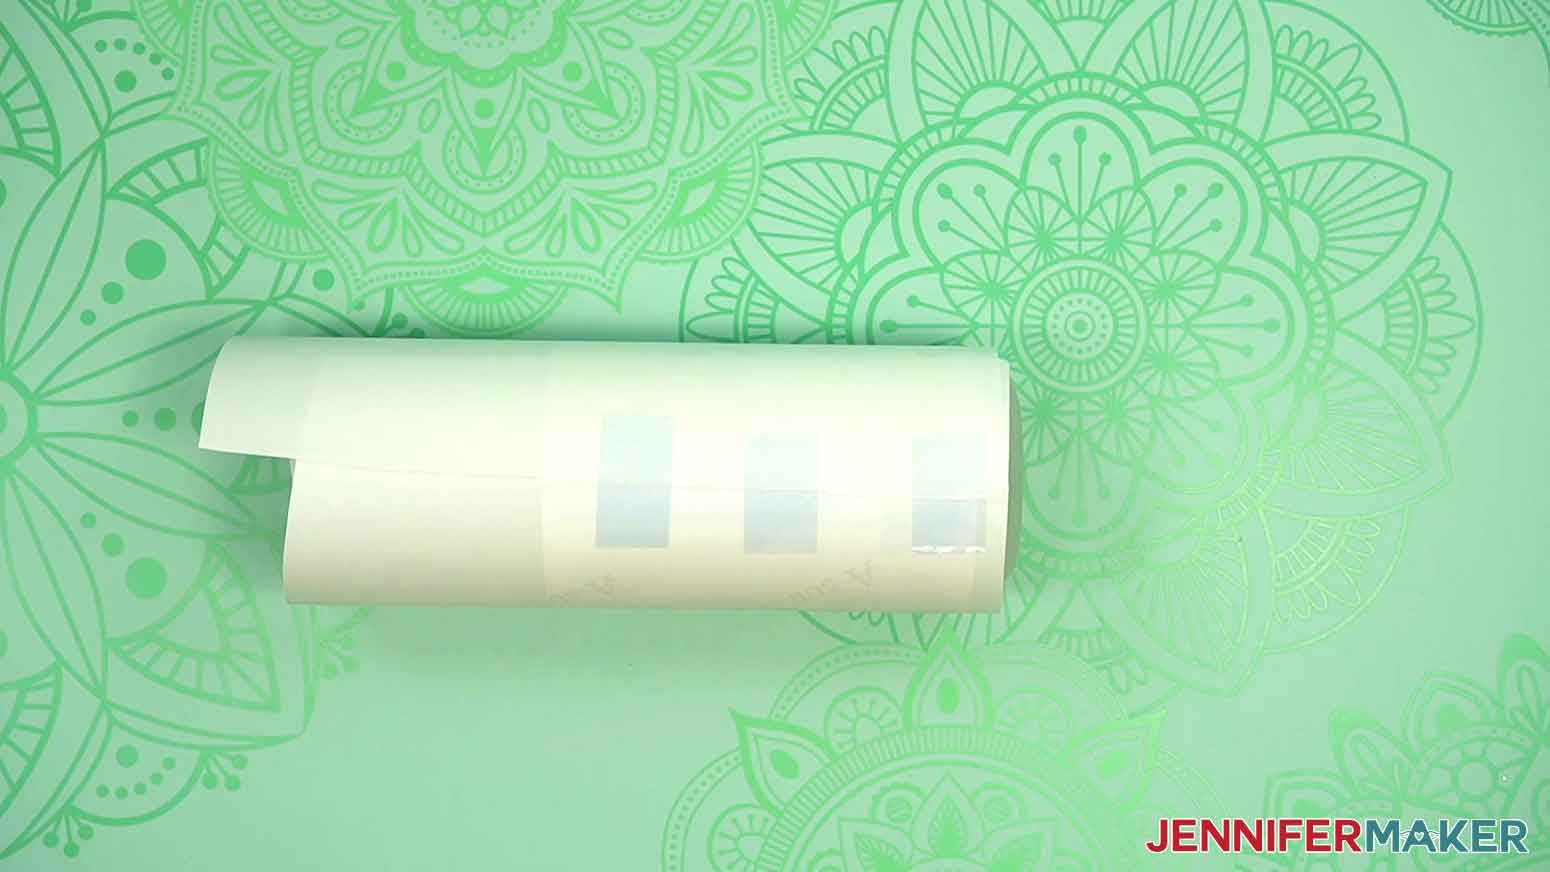
10. If there’s excess butcher paper, stuff it inside the top of the glass.
11. Check the oven temperature via the oven thermometer you placed inside. Adjust the oven temperature up or down so the thermometer inside reads the correct temperature of 400°F (or 204°C).
12. Put your heat resistant gloves on, and place your wrapped beer can glass inside your oven right side up.
13. Set your timer for 8 minutes.

14. At the halfway mark, with heat-resistant gloves on, rotate the glass halfway, then continue sublimating.
15. When the time is up, with heat-resistant gloves on, remove the glass from the oven.
16. Set the wrapped glass on a cooling rack or heat-resistant surface to cool.

17. Once the glass is cool, you can peel off the tape, butcher paper, and sublimation paper to reveal your sublimated beer can glass!

NOTE: You may notice the clear tumblers have a bit of grittiness after sublimating. Don’t worry, this will wash off.
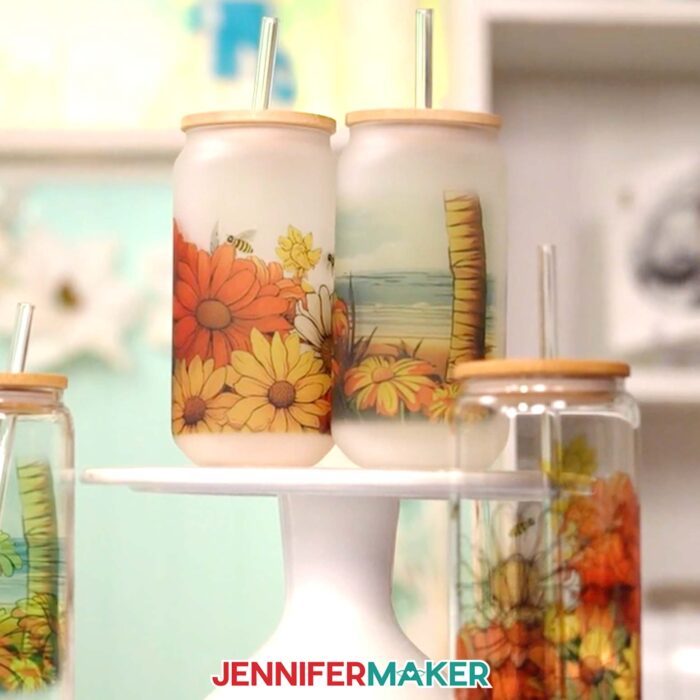
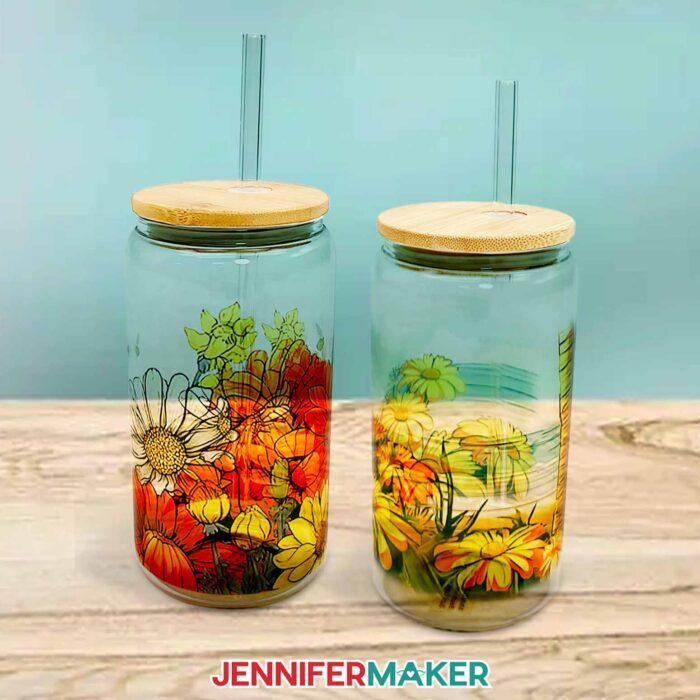
STEP 4: SHOW THEM OFF!
Here is what my finished sublimation beer can glasses look like!
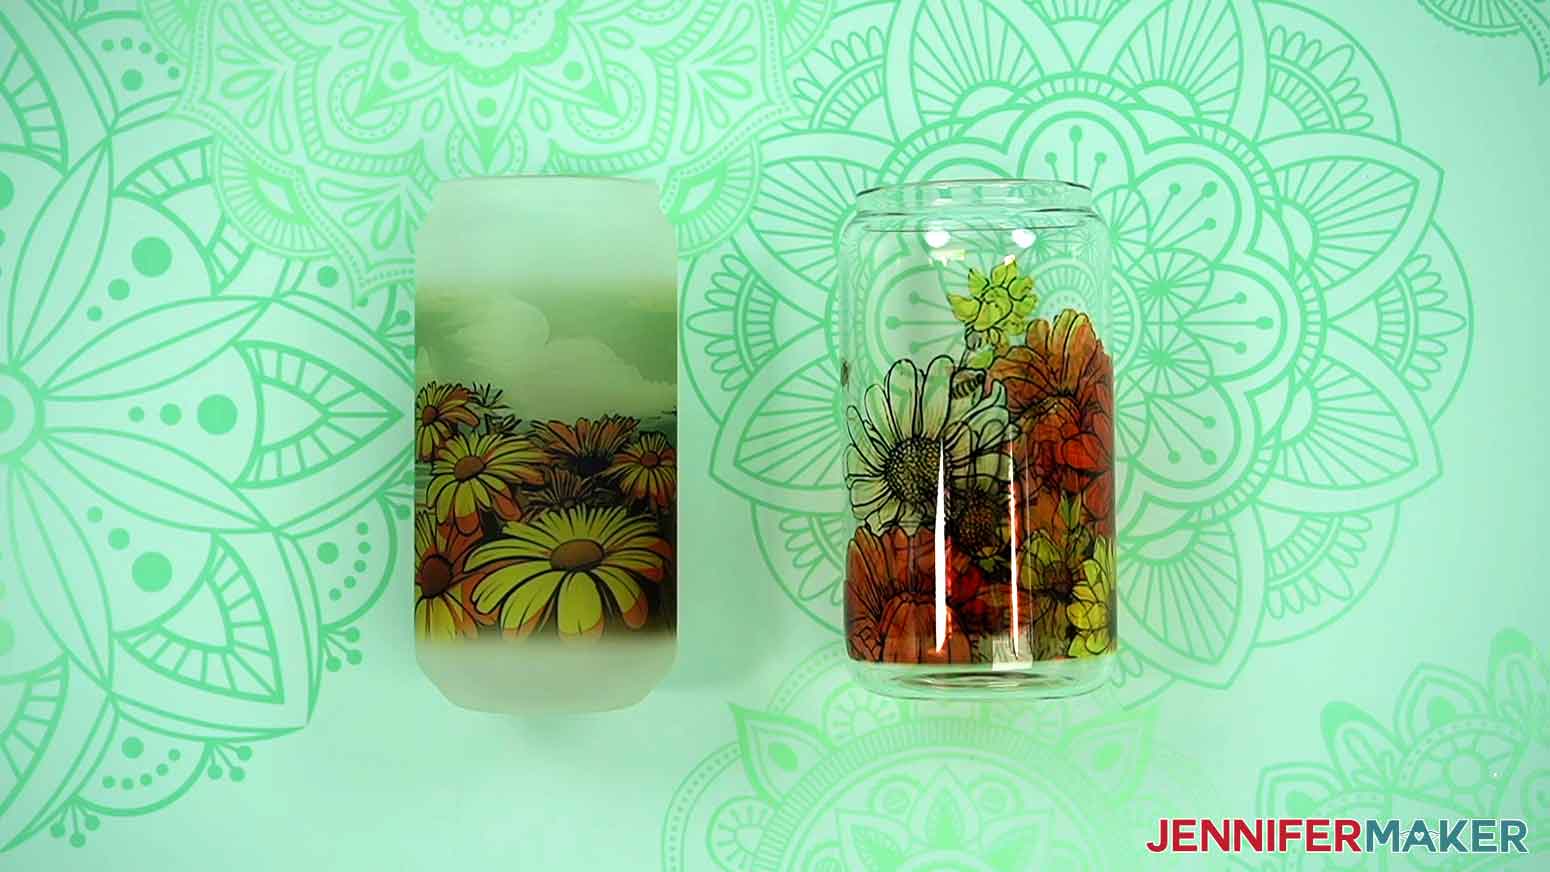
Gift them for the holidays, or build a collection to share drinks with friends!
Notes
Finished Size:
Mugs: 18 oz size, approximately 6” tall (minus the optional lid and straw)
Designs: 9.4” wide x 4.5” tall
Care Instructions:
Wait 24 hours before gently hand washing with a mild dish soap. To keep the designs looking vibrant, continue to hand wash the glass, lid, and straw – avoid washing in your dishwasher and using harsh chemicals or abrasive cleaning pads.
Answers to Your Questions About Making a Sublimation Beer Can Glass
Q: Can sublimation printing be done on glass?
A: Yes and no. While sublimation printing cannot be done on regular, plain glass, it can be done on glass coated with a polymer that accepts sublimation ink. Look for “sublimation blank” beer can glasses — you can find some in my materials list above.
Q: Can you sublimate glass beer can?
A: If it’s meant for sublimation, yes! Regular glass beer can cups will not sublimate, but those produced for sublimation crafting will. I used 18 oz glass can blanks I found on Amazon that come pre-prepared with a quality sublimation coating. They also come with a bamboo lid and plastic straw, perfect for sipping that iced coffee. I love using Amazon because of the free shipping I get with Amazon Prime. The links to find them are in my materials list.
Q: What temperature do you sublimate frosted beer can glass?
A: Different manufacturers may have different directions, but I had great results sublimating my frosted and clear beer can glasses at 400 degrees Fahrenheit (204 degrees Celsius) for 8 minutes, rotating halfway through. The instructions included with your blanks may have a time or temperature difference, but if they’re the same ones I used, you should have good results using the settings I used (which are also outlined in my Sublimation Cookbook).
Q: How big is a sublimation beer can glass?
A: The sublimation beer can glasses I used and link to in this tutorial are 18 oz tumblers, and just under 6″ tall.
Q: How do I care for a sublimation beer can glass?
A: You’ll want to wait about twenty-four hours before gently hand washing your sublimation glass tumblers. I recommend continuing to hand wash them and avoiding the dishwasher to keep the designs looking vibrant and beautiful as long as possible. Your sublimation beer can glass blank may have included a lid and plastic clear straw, clear glass straw, or stainless steel straw — these should be hand washed, too. Caring for your cup this way will keep it closer to its original condition longer.
Q: Why is my sublimation print color so dull?
A: Sublimation prints look much duller on the paper than they do after they’re sublimated, so don’t worry if your printed image looks faded or different colors than you expect — it will look might more saturated when it’s sublimated onto an item.
Q: Why is my sublimation not transferring to glass?
A: There are a few reasons why your sublimation beer can glass may not be turning out as expected. Make sure you’re using a glass meant for sublimation, as well as sublimation ink — not regular printer ink. Also make sure you’re pressing at high enough heat for long enough time. I sublimated mine for 8 minutes, which isn’t a very long time. You may need to tweak your settings if you’re using materials other than the ones in my materials list.
Q: Why does my glass sublimation look faded?
A: If your sublimated image looks faded on glass, be sure you’re using the right heat and sublimation time, and that your printed images are tight against your sublimation glass cans. You may also get faded-looking results if you used a heat gun instead of a convection oven, which I recommend instead.
Q: What does ghosting mean in sublimation?
A: Ghosting can occur when a freshly sublimated object is moved around too much while it’s still hot. If the object and the sublimation transfer is still hot, the image is still sublimating. Moving the object while it’s still hot can cause a blurring, smudged effect known as ghosting. This isn’t a huge problem with cups, because usually the transfer is taped securely to the cup, but it can happen. To avoid this, simply wait until your sublimated item has cooled off before handling or removing the paper, and don’t move it around more than you need to while it’s sublimating.
Q: Do you have any other glass sublimation tutorials I can try?
A: I’ve got sublimation glass tutorials that work with a Cricut Mug Press here, and a super fun stained glass project, too!
Q: Do you have any other sublimation cup tutorials?
A: I have tutorials for so many handmade pieces of drink ware, I can’t list them all here! I’ve got tutorials for a mug, a skinny tumbler, even cups decorated with infusible ink! They can be made with or without a mug press or tumbler press machine. You can search for them on my blog, or start with beginner tutorials like my Easy Sublimation Tumblers and Sublimation Mugs!
Get my free SVG file collection to create a sublimation beer can glass!
(If you do not see the signup form above, click here.)
I love seeing what you make with my designs and how you use them! Please share a photo of your sublimation beer can glass in our Facebook group or tag me on social media with #jennifermaker.
Love,

Want to remember this? Save this Sublimation Beer Can Glass Tutorial to your favorite Pinterest Board!