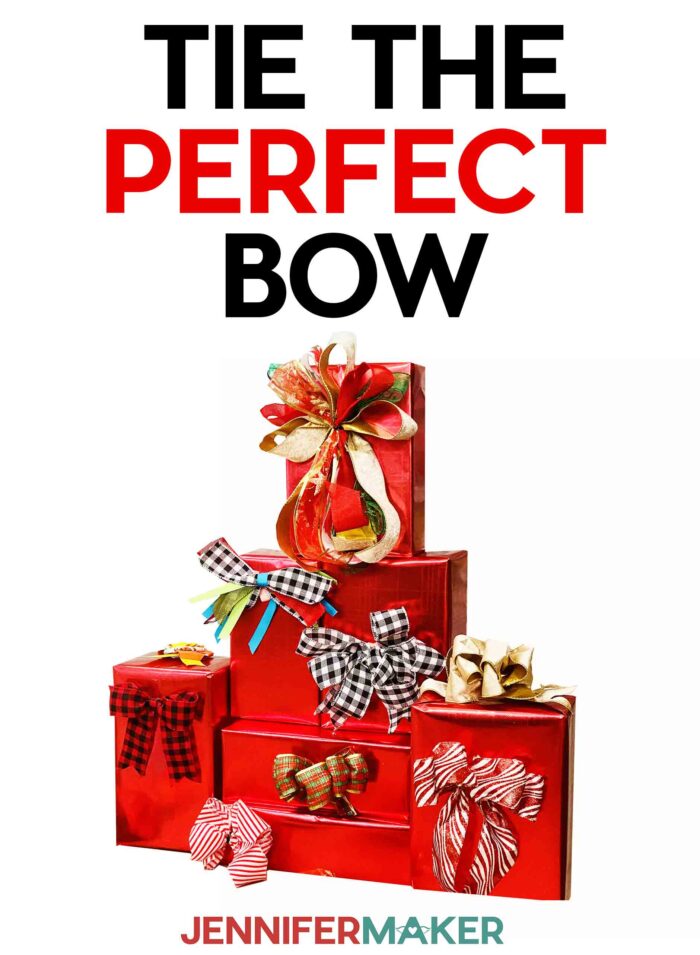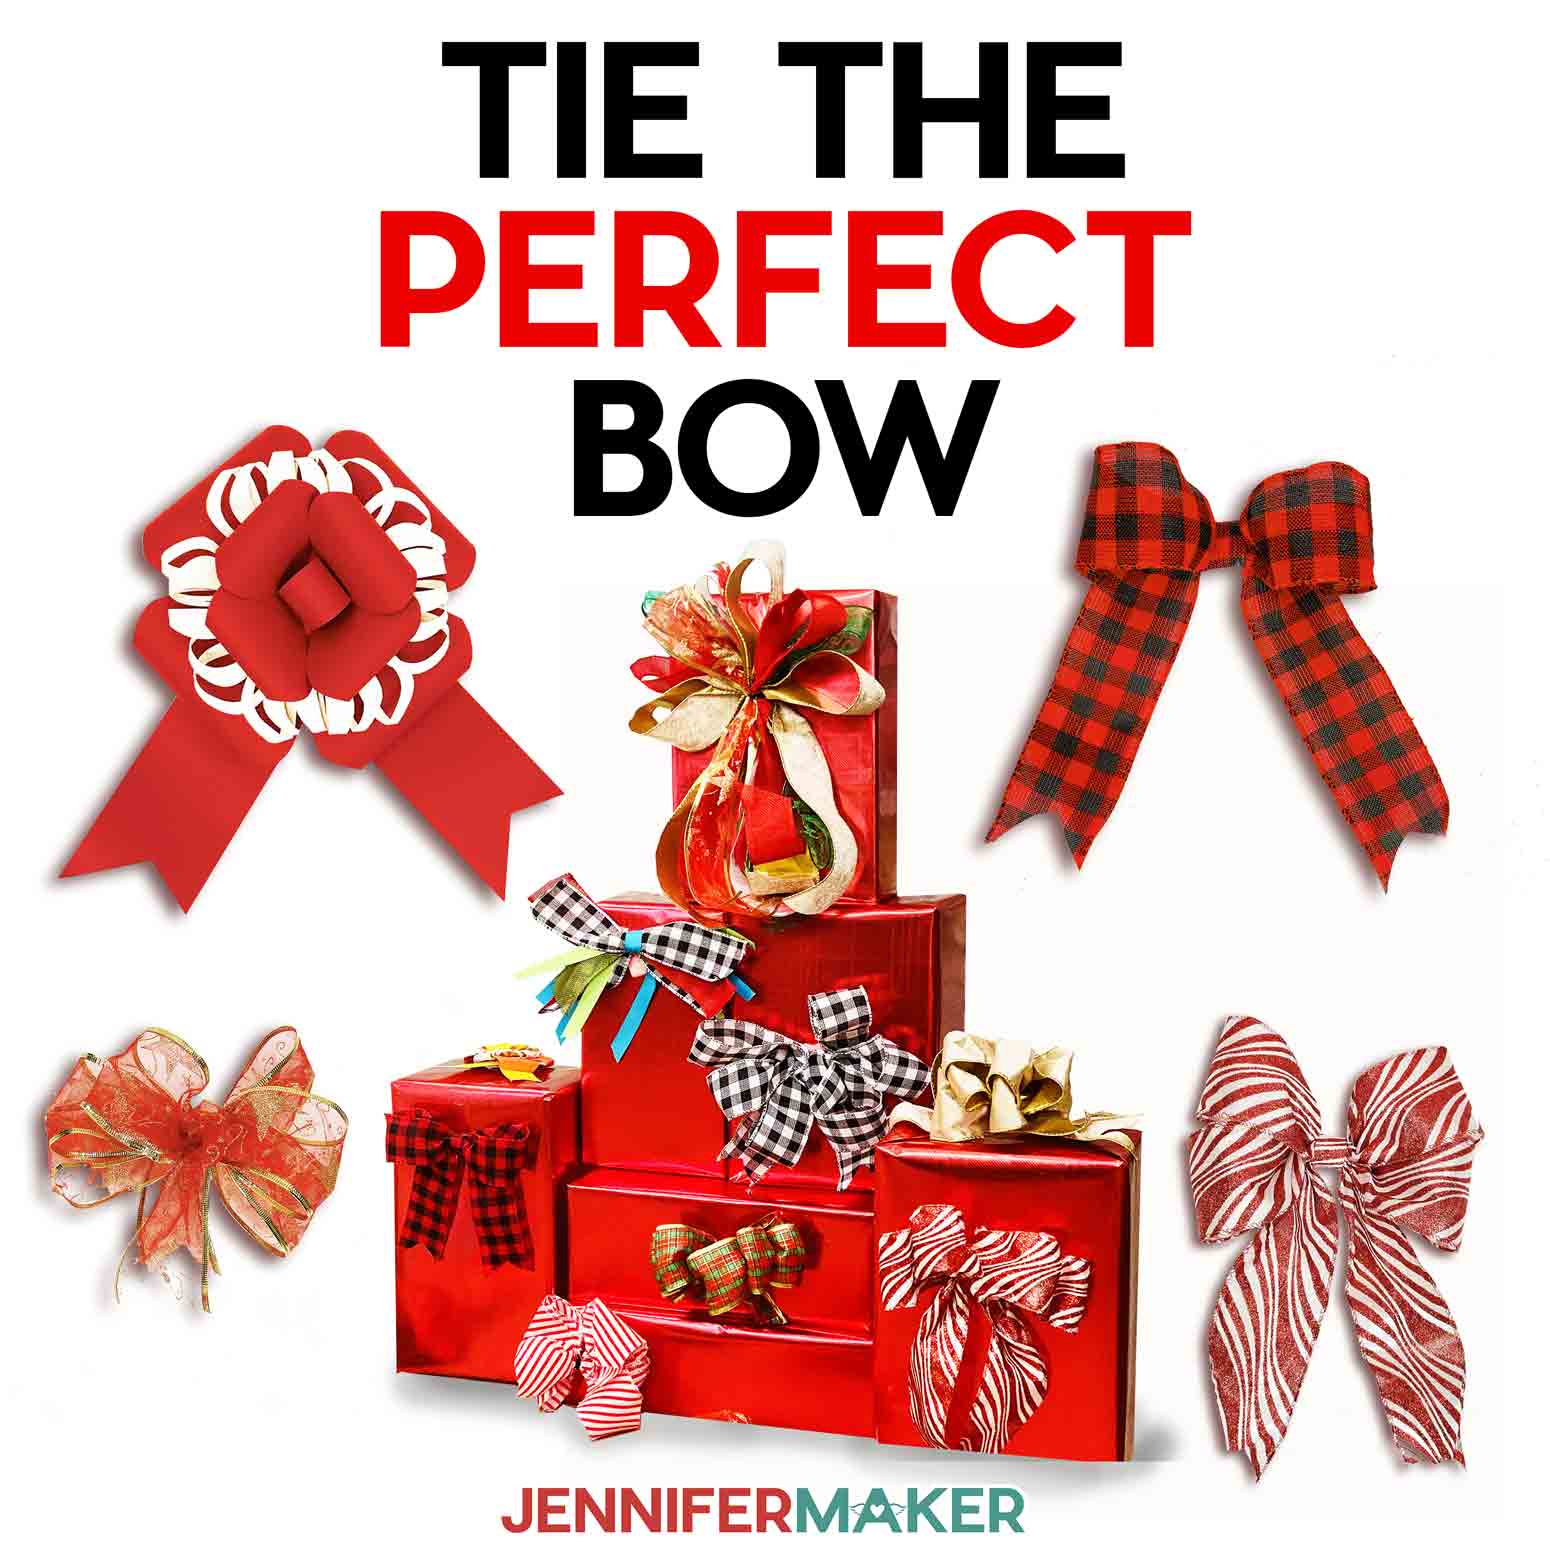
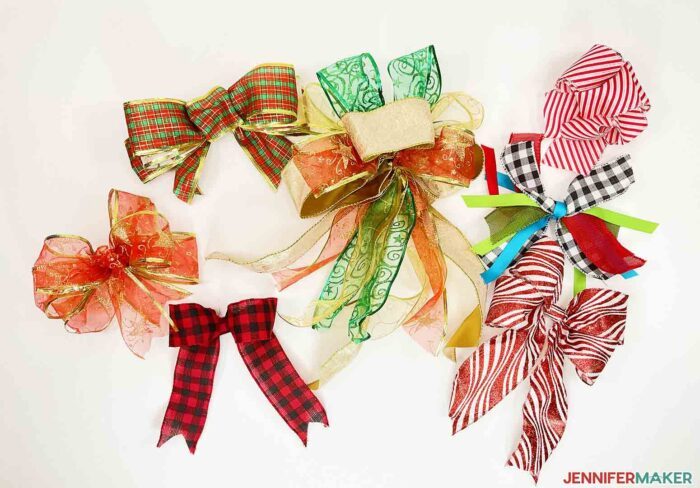
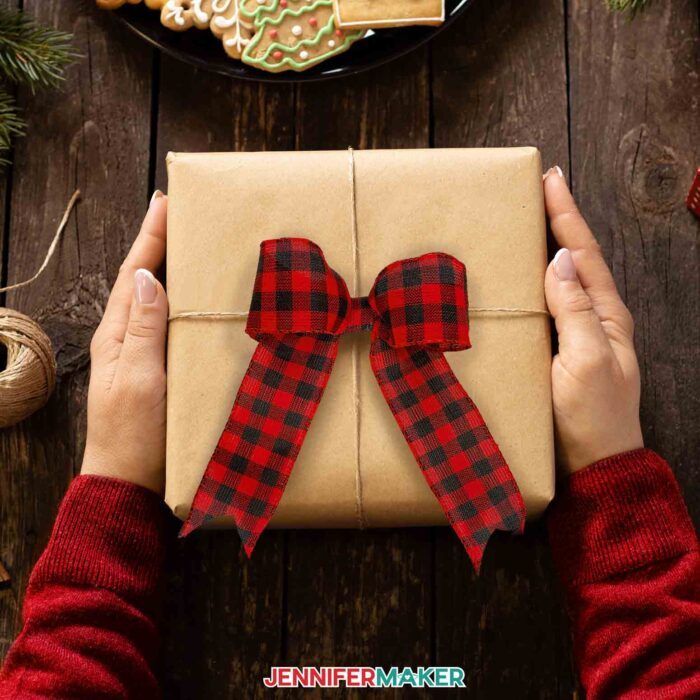
Learn to tie a perfect bow using seven of my favorite styles and make one with your Cricut!
Bows are the best finishing touch to any present and I love all the styles available. Big, small, loopy, sleek, shiny, or sophisticated–they’re so fun to create! But some ribbon bow tutorials are complex or require gadgets, so I’ve gathered seven of my favorite methods to tie a perfect bow fast and easy. Plus, I’m sharing a new paper bow to add to my gift-related designs you can use for any occasion!
Watch my step-by-step tutorial to tie a perfect bow on my channel:

Bows are the best way to top off any gift or decor item! I’ve gathered several ways to tie a perfect bow with ribbon and designed a new paper bow just for you!.
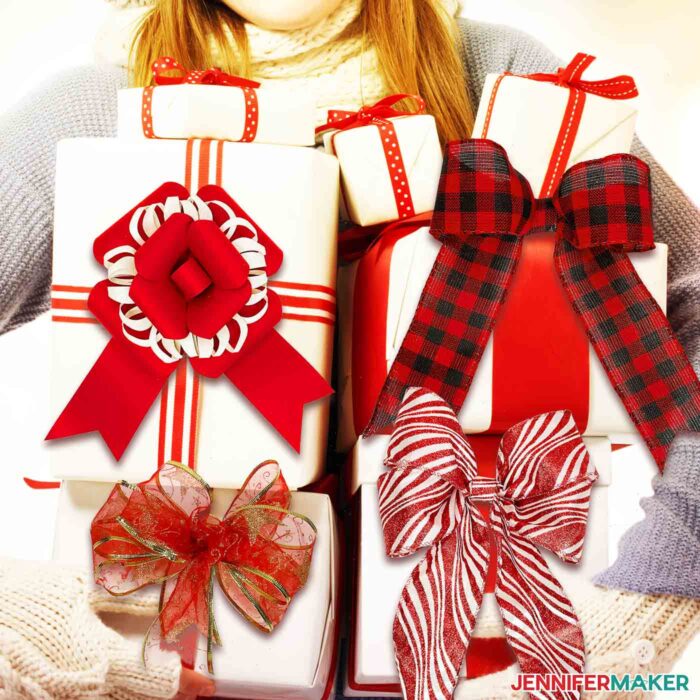
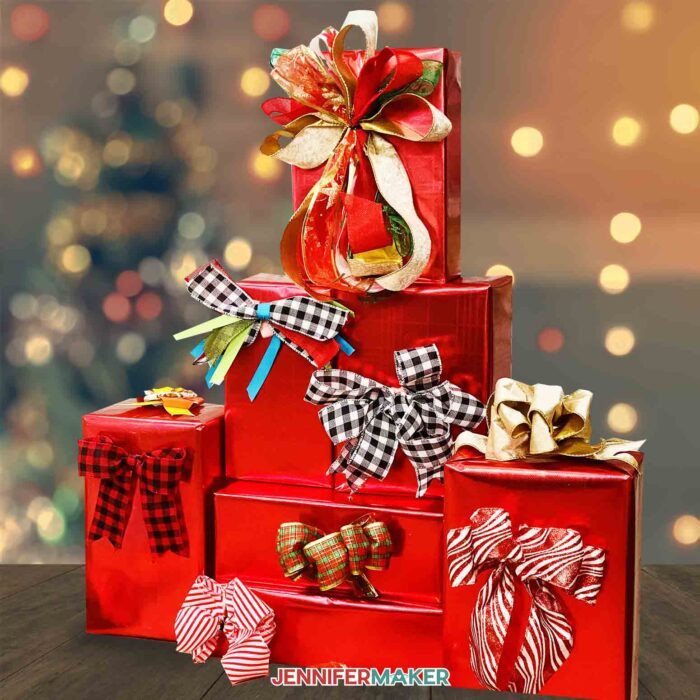
But which should you make? It depends! There’s a pretty bow for every special ocassion and event. The larger bows can even top a Christmas tree! And save your scrap pieces of ribbon to make the Scrappy Bow!
The simple steps are different for each beautiful bow, but ribbon, scissors, a way to measure your ribbon, hot glue, and zip ties or pipe cleaners will help you make them all!
I used stiff ribbons so I could shape the bow loops. If you want a full bow, it’s a good idea to use wired ribbon like those in my material list. If you want a looser bow, follow the step-by-step instructions with satin ribbon or another type of ribbon.
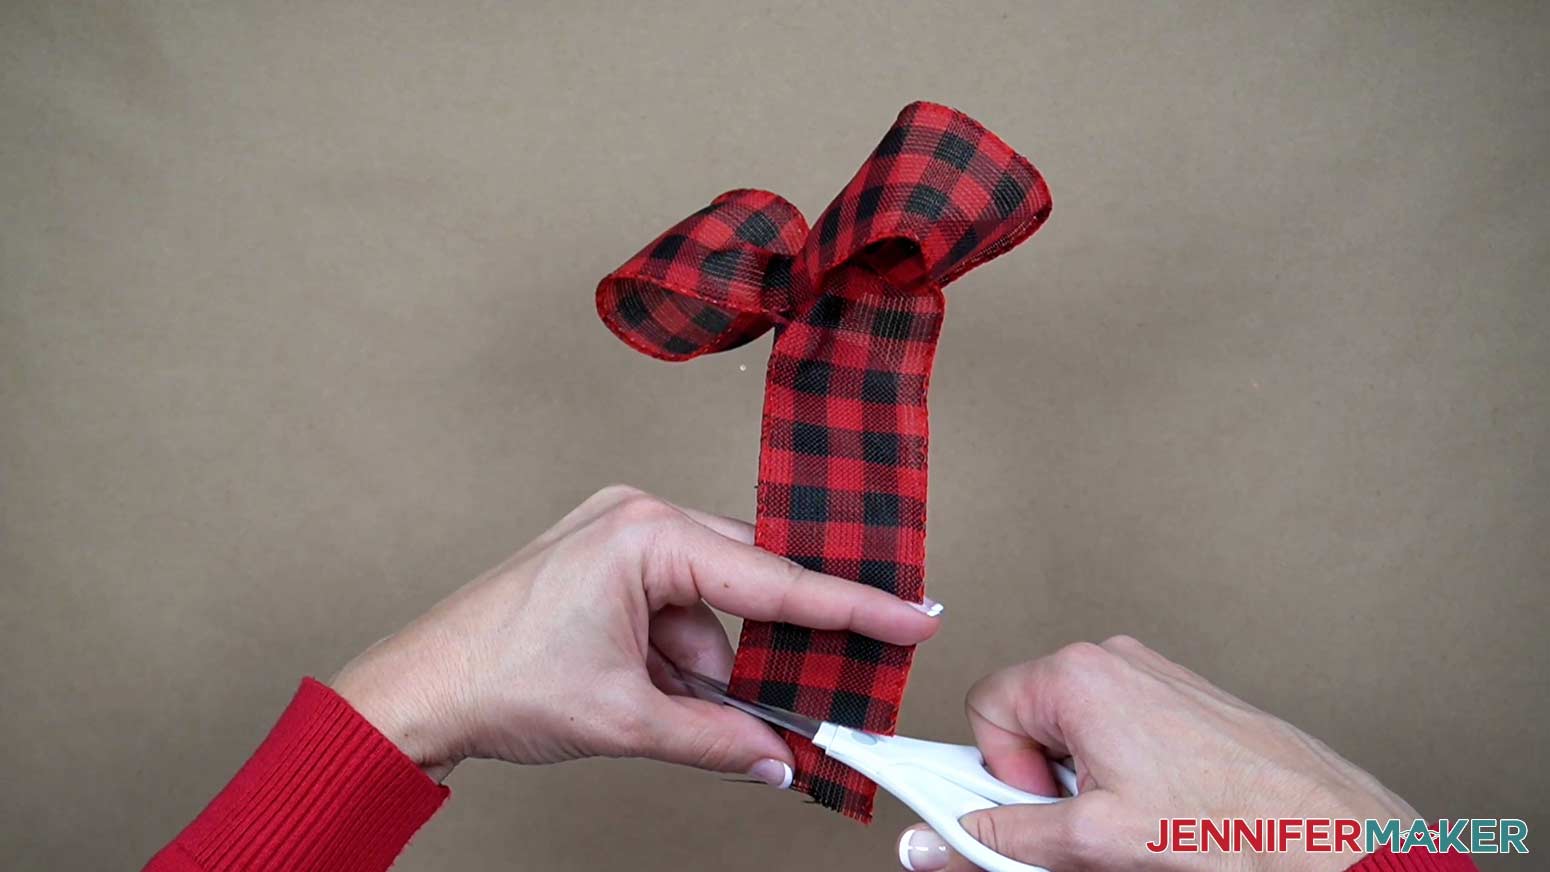
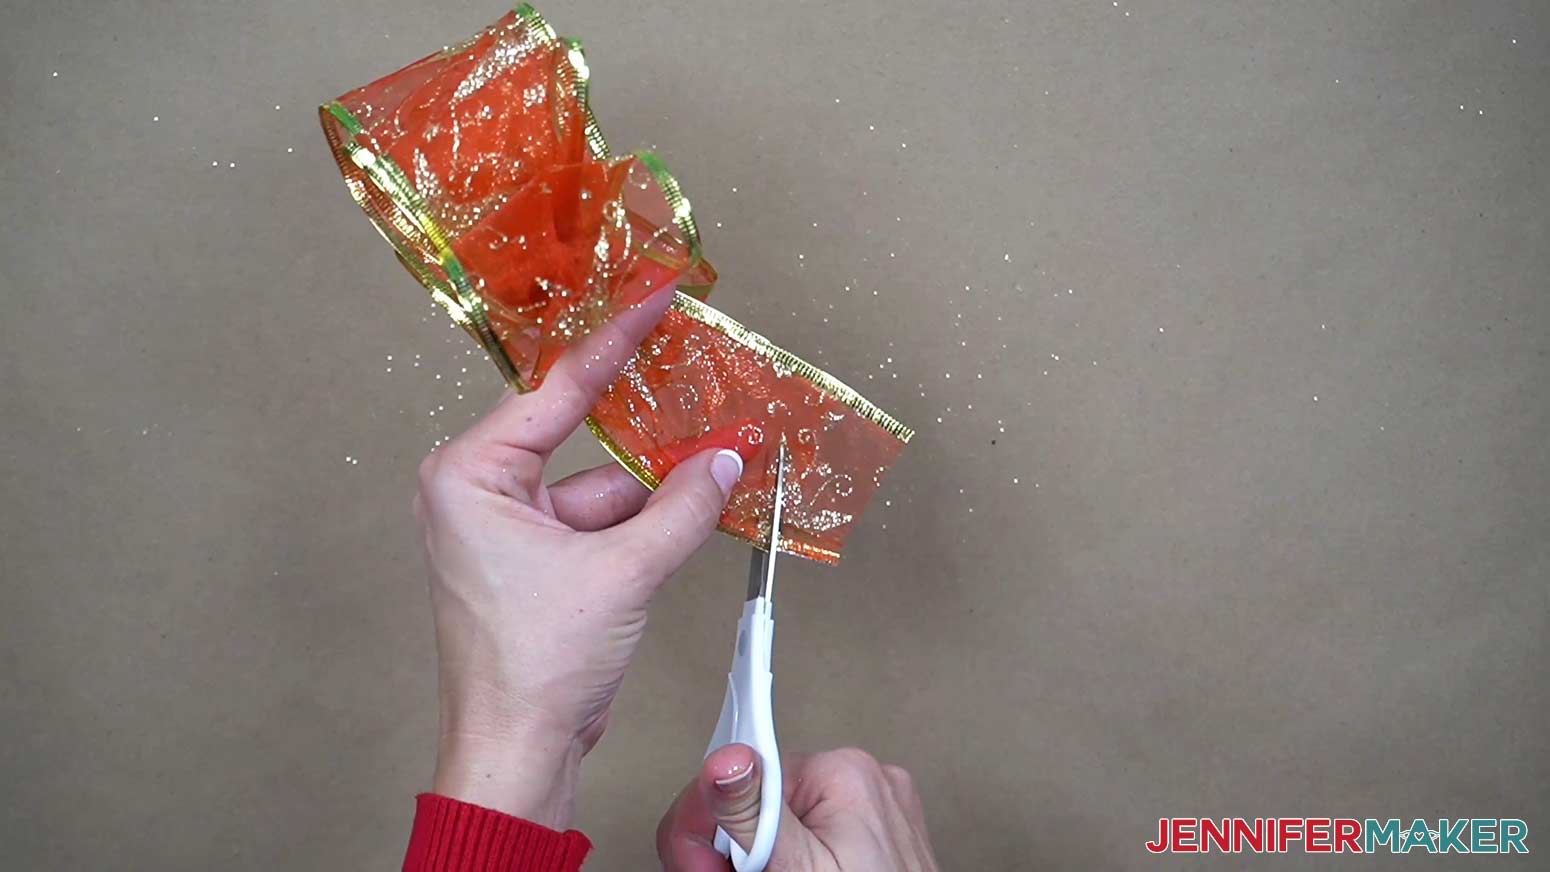
To add the perfect finishing touch use a sharp pair of scissors to snip each end of the ribbon into points. Sharp scissors are important to cut smoothly on all different types of ribbons!
My paper bow is easy to make and customize! I’ll show you how to adjust the size of the bow to be the perfect touch for any size holiday or Christmas gifts.
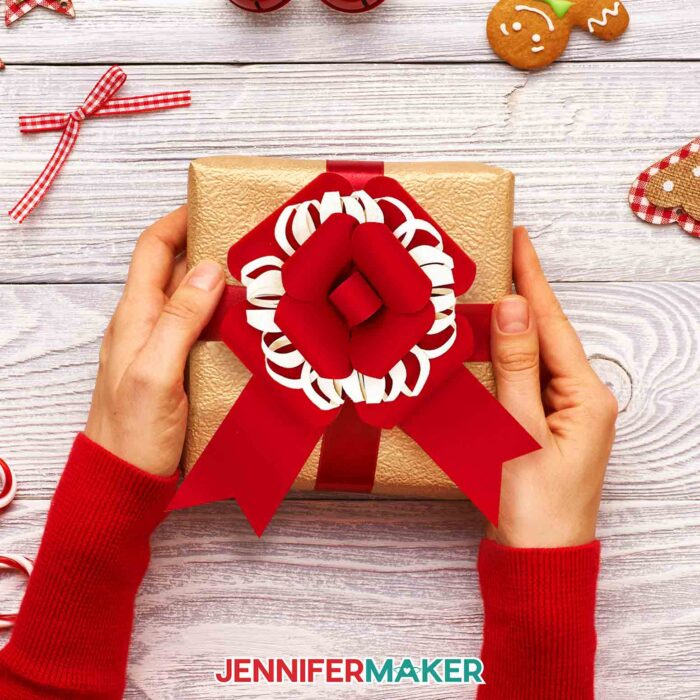
If you make the paper bow, premium quality cardstock is important so it will bend nicely and hold up to the holidays! I used plain cardstock and glitter cardstock with good results on a green StandardGrip mat. A brayer will keep the paper in place, just put the right side up! I cut my cute bow on a Cricut Maker 3, but you can use any Cricut. You can even cut a small bow on a Joy!
It’s easy to tie a perfect bow in paper, too! You’ll just need a 1″ paper fastener brad and craft glue. Some pieces are delicate, so a spatula will help you lift them without tearing.
Ready to tie a perfect bow with my tutorial? I’m super excited to show you how! This post contains some affiliate links for your convenience (which means if you make a purchase after clicking a link I will earn a small commission but it won’t cost you a penny more)! Read my full disclosure policy.
Materials to Tie a Perfect Bow
View my Amazon shopping list with the exact items we used to make this project.
To make the ribbon bows, you will need different types of ribbon like:
- 1 Pack Wired Christmas Deco Ribbon or
- 1 Pack Burlap Wire Edge Ribbon or
- 1 Pack Christmas Wired Edge Ribbon or
- 1 Roll Christmas Gold Velvet Wired Edge
- 1 Roll 5/8″ Turquoise Solid Grosgrain Ribbon as a detail on the Scrap Bow
To assemble the simple bows, you’ll need:
To make the paper bows, you will need:
- Several Sheets of 12″ x 12″ 65 lb Cardstock – various colors
- 1 Sheet 12″ x 12″ 65 lb White Glitter Cardstock
- 1″ Paper Fastener Brads – I used a gold color
- A method to cut your cardstock, I used the amazing Cricut Maker 3 but you can also use the Cricut Maker, Cricut Explore 3, the Cricut Explore, or the Cricut Joy — you can use the standard fine point blade for this project
- Cricut Green StandardGrip Machine Mat 12” x 12
- Brayer
- Good Craft Glue
- Scraper
- Spatula
- Bone Folder
- Design #439 (My free SVG/PDF/DXF design files available in my free resource library – get the password by filling out the form at the bottom of this page)
How to Tie a Perfect Bow
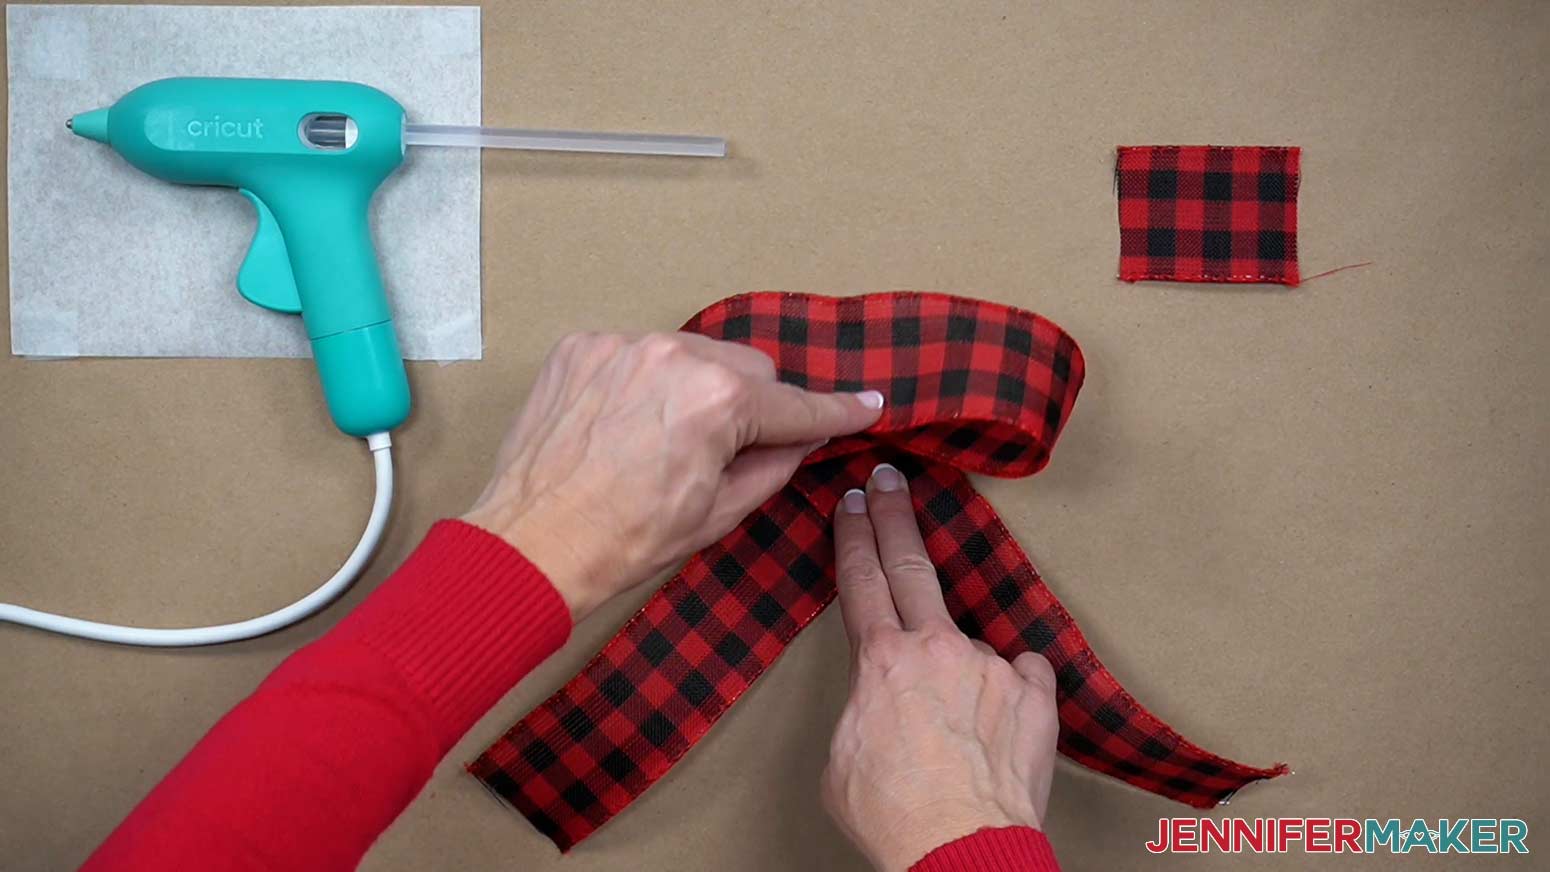
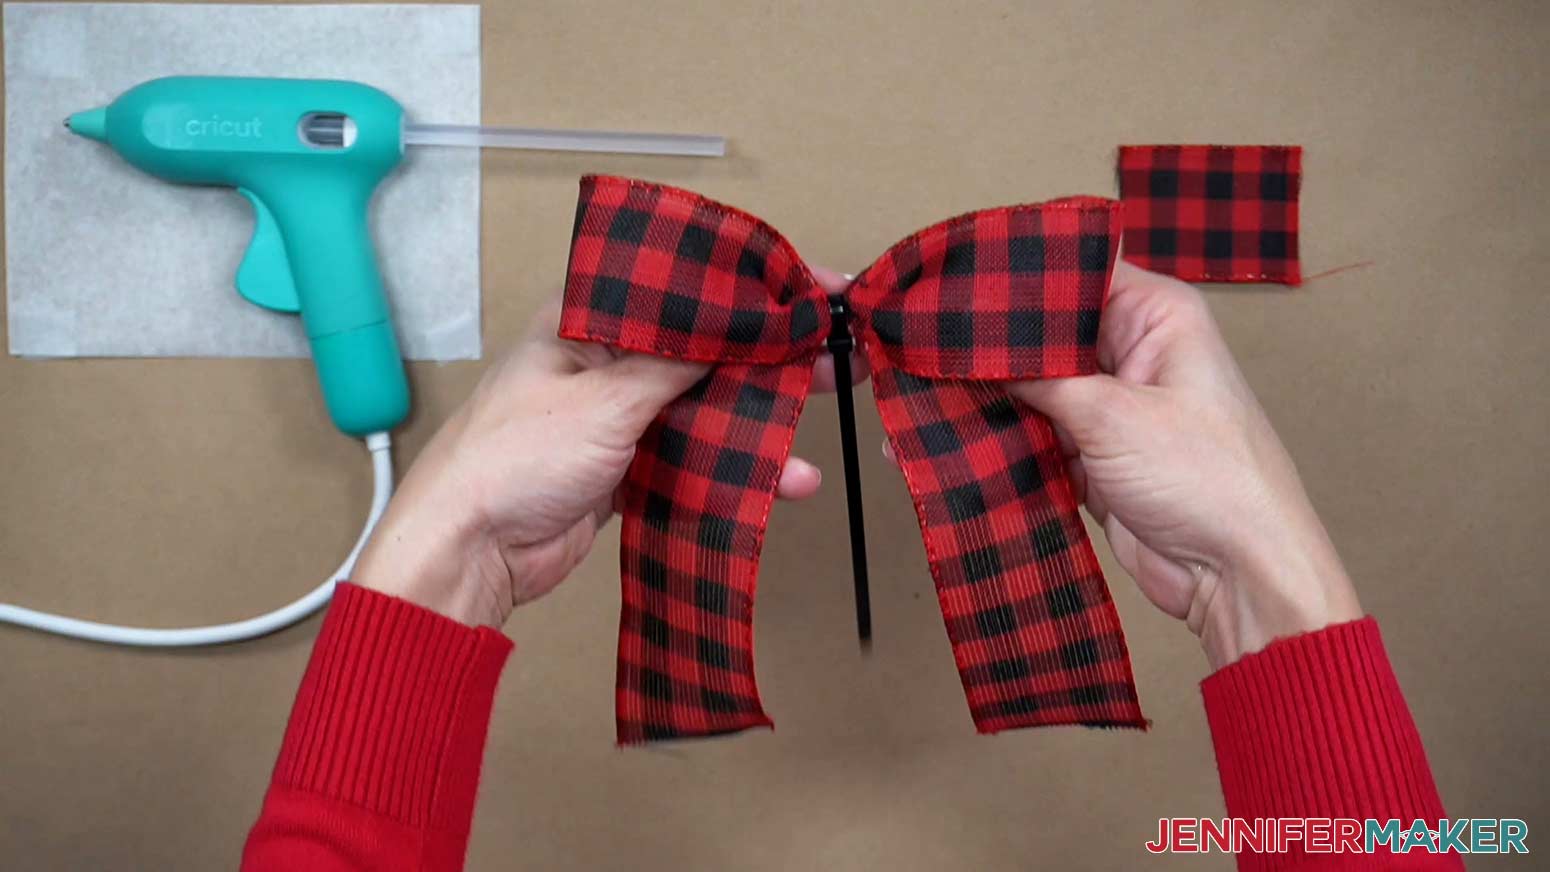
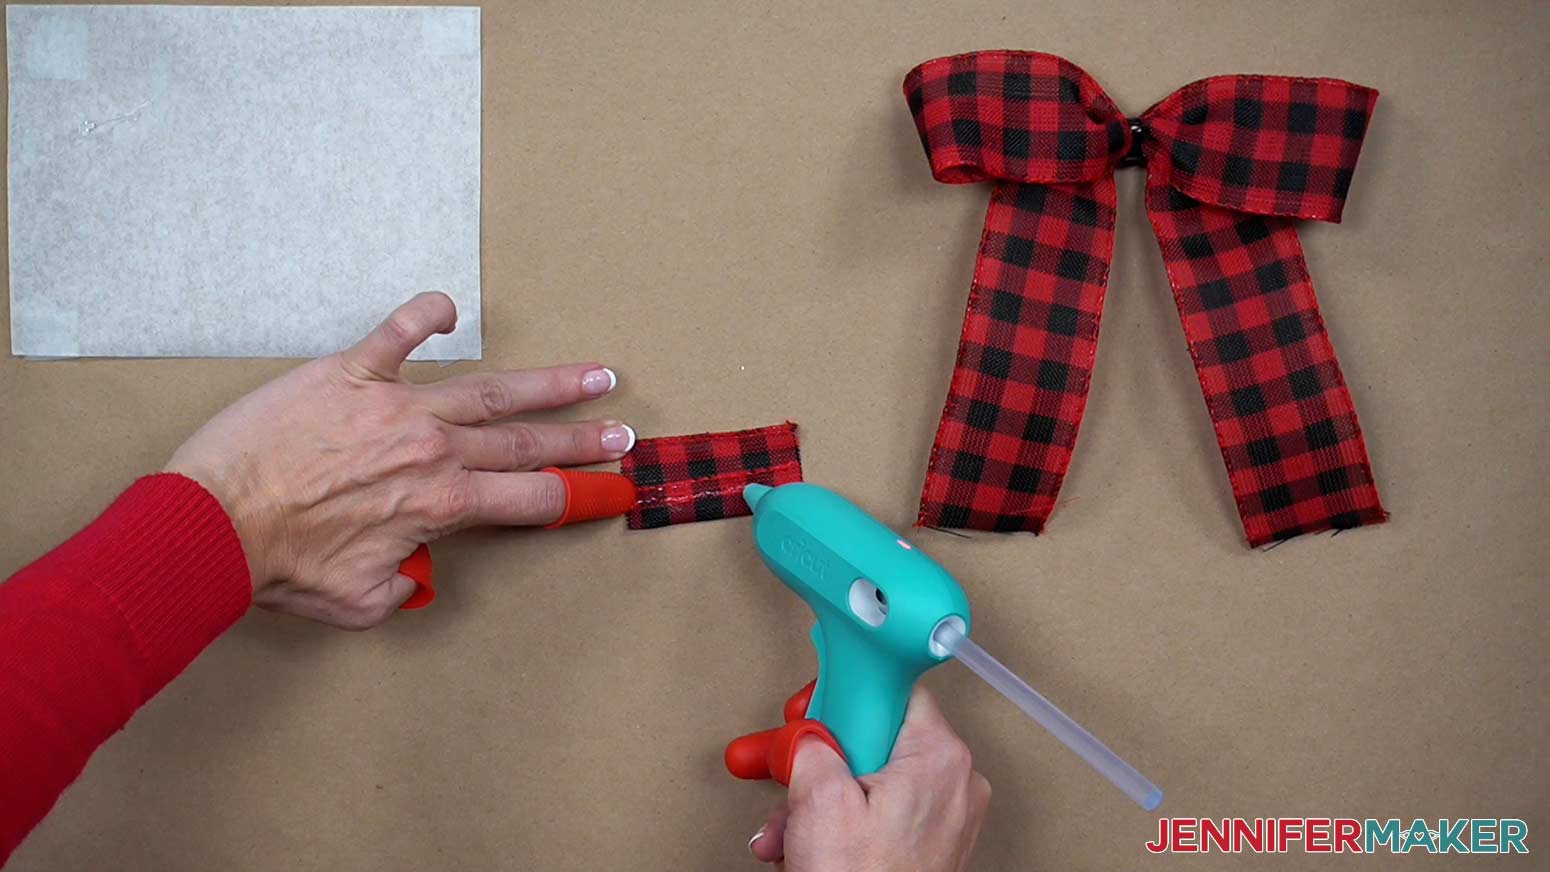
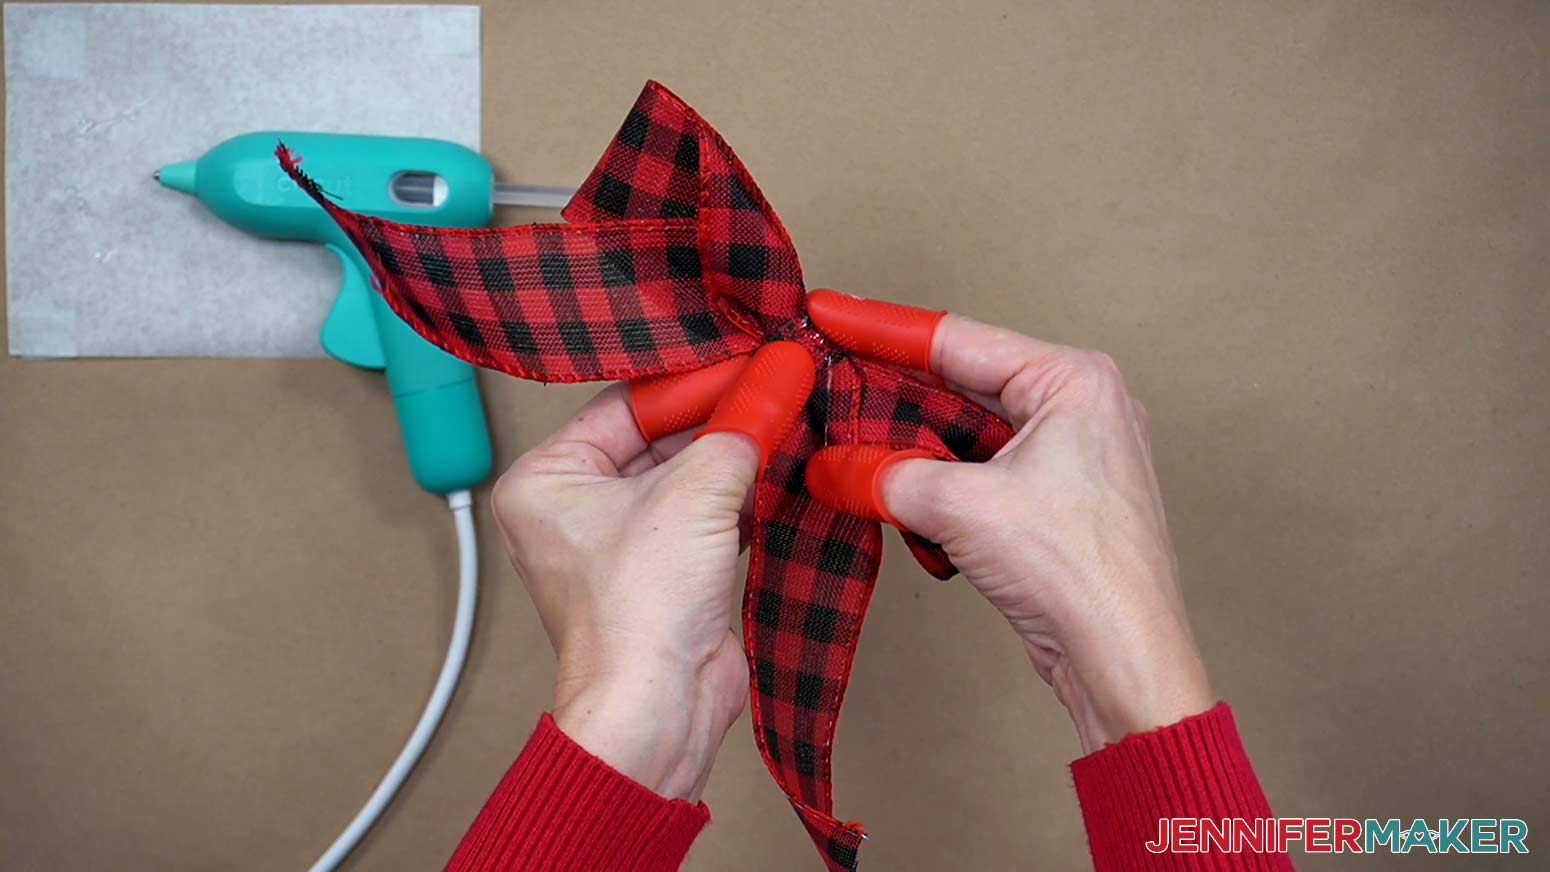
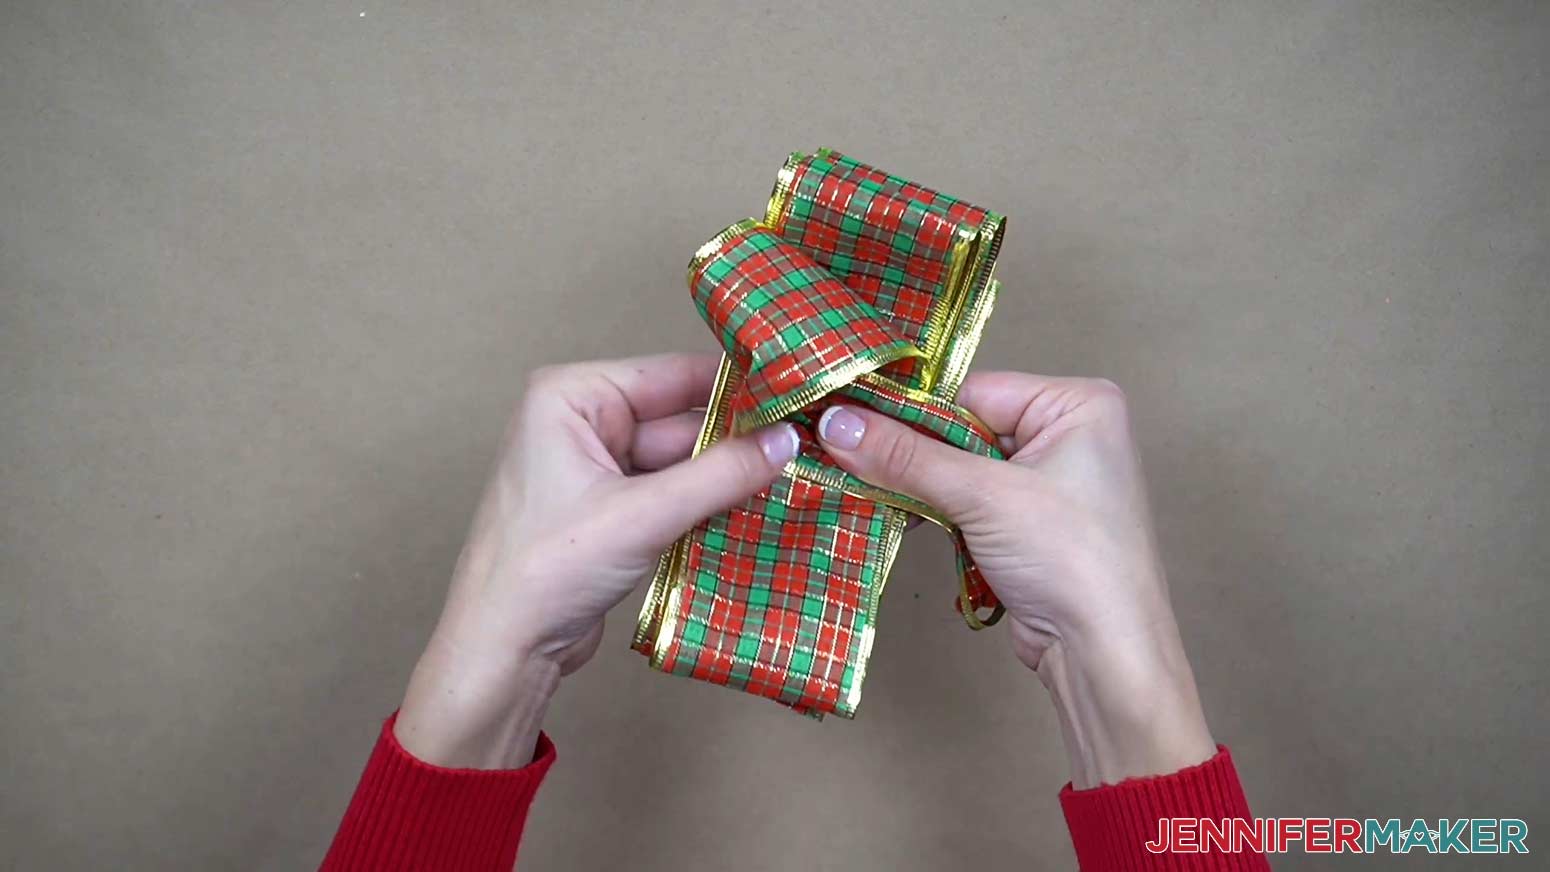
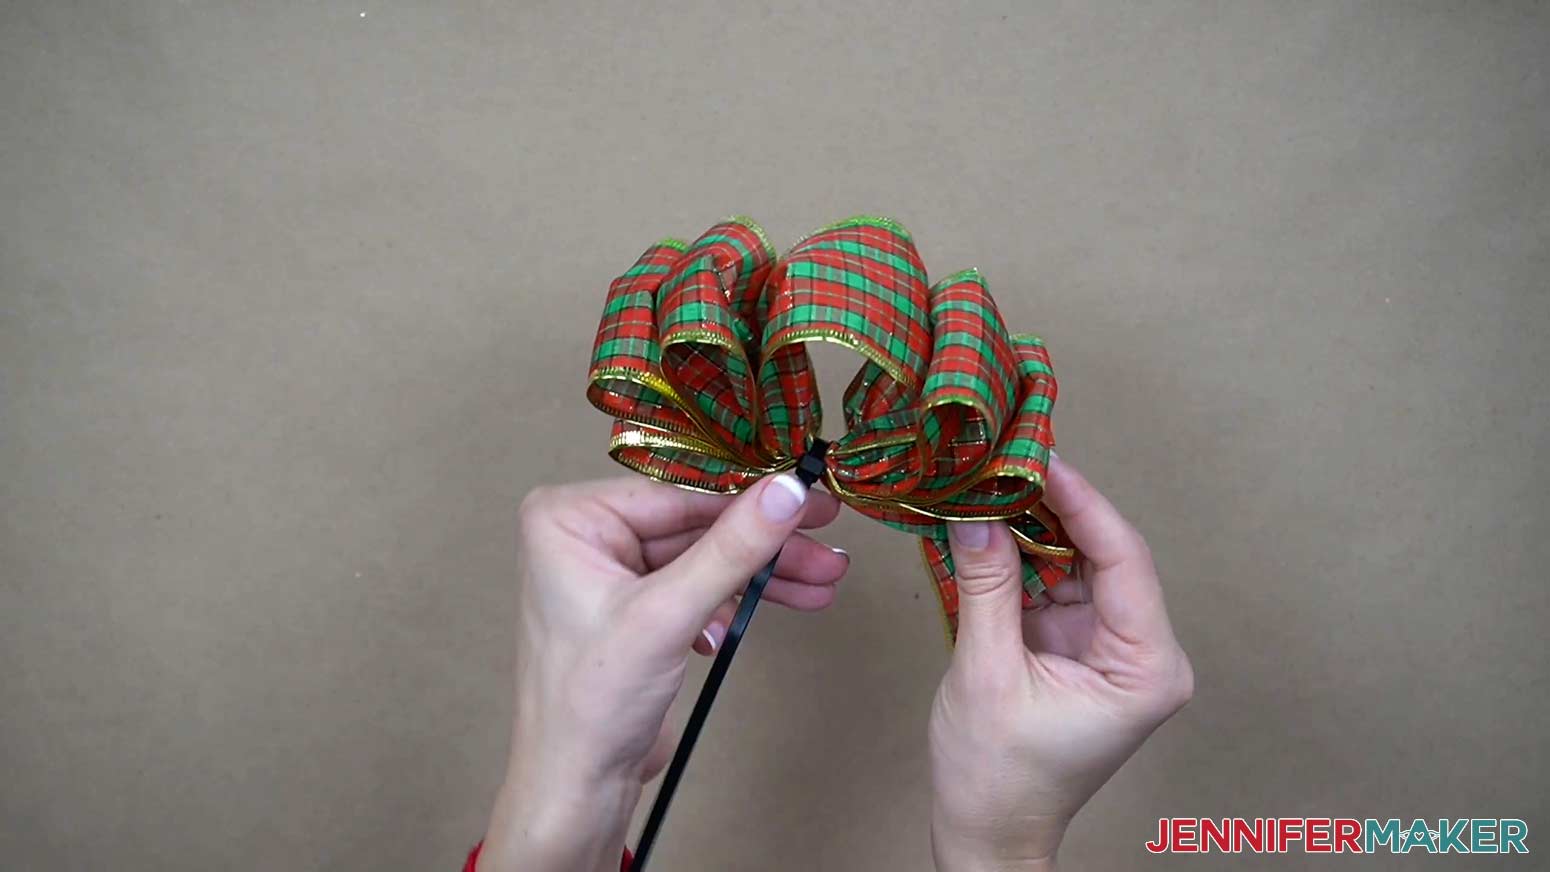
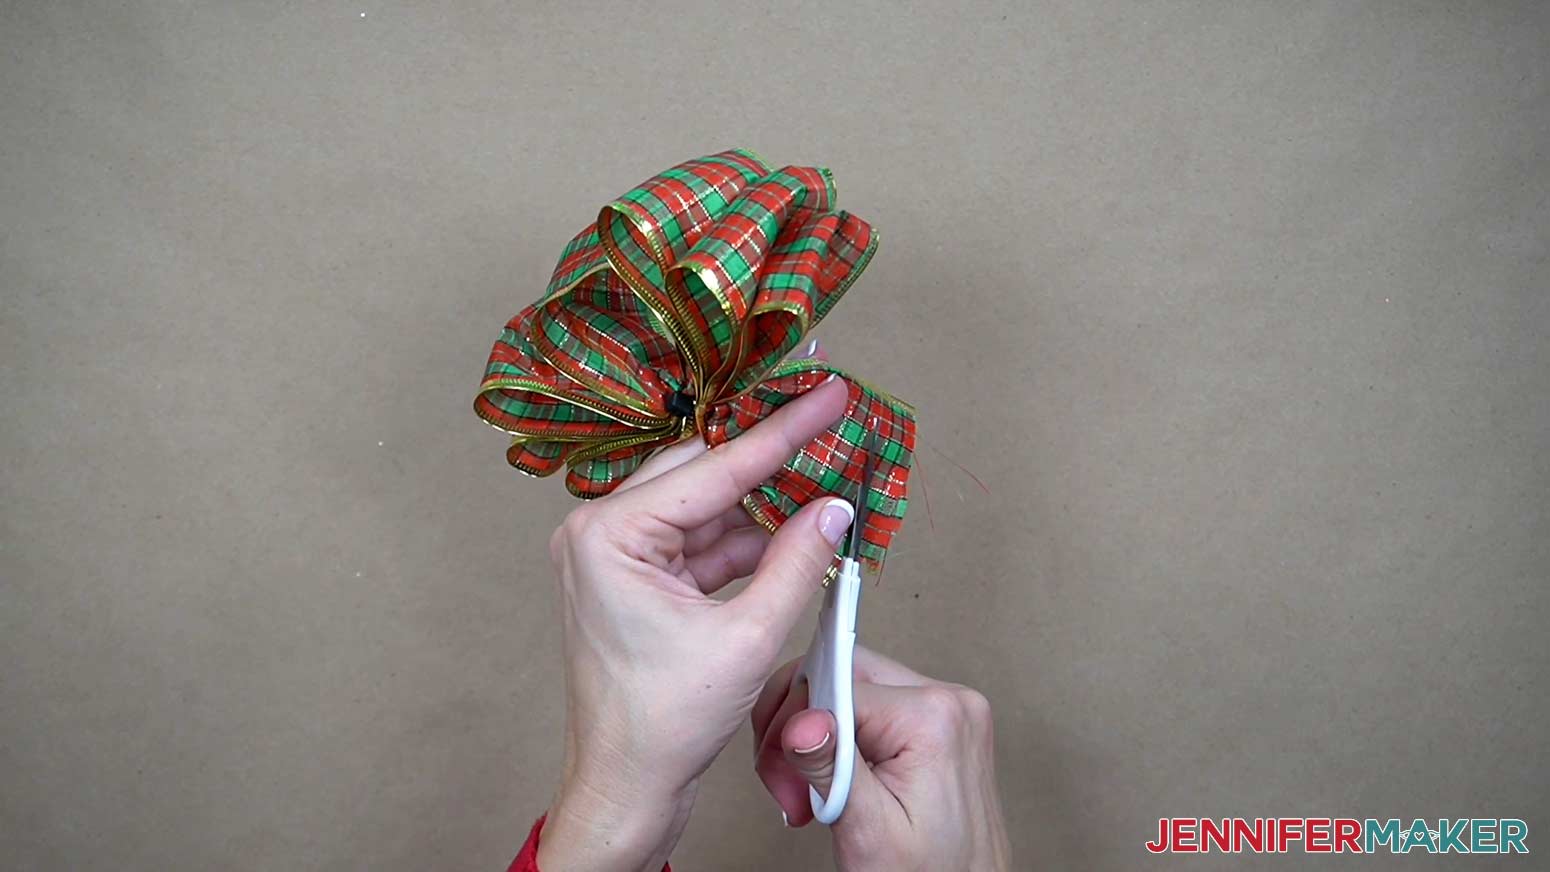
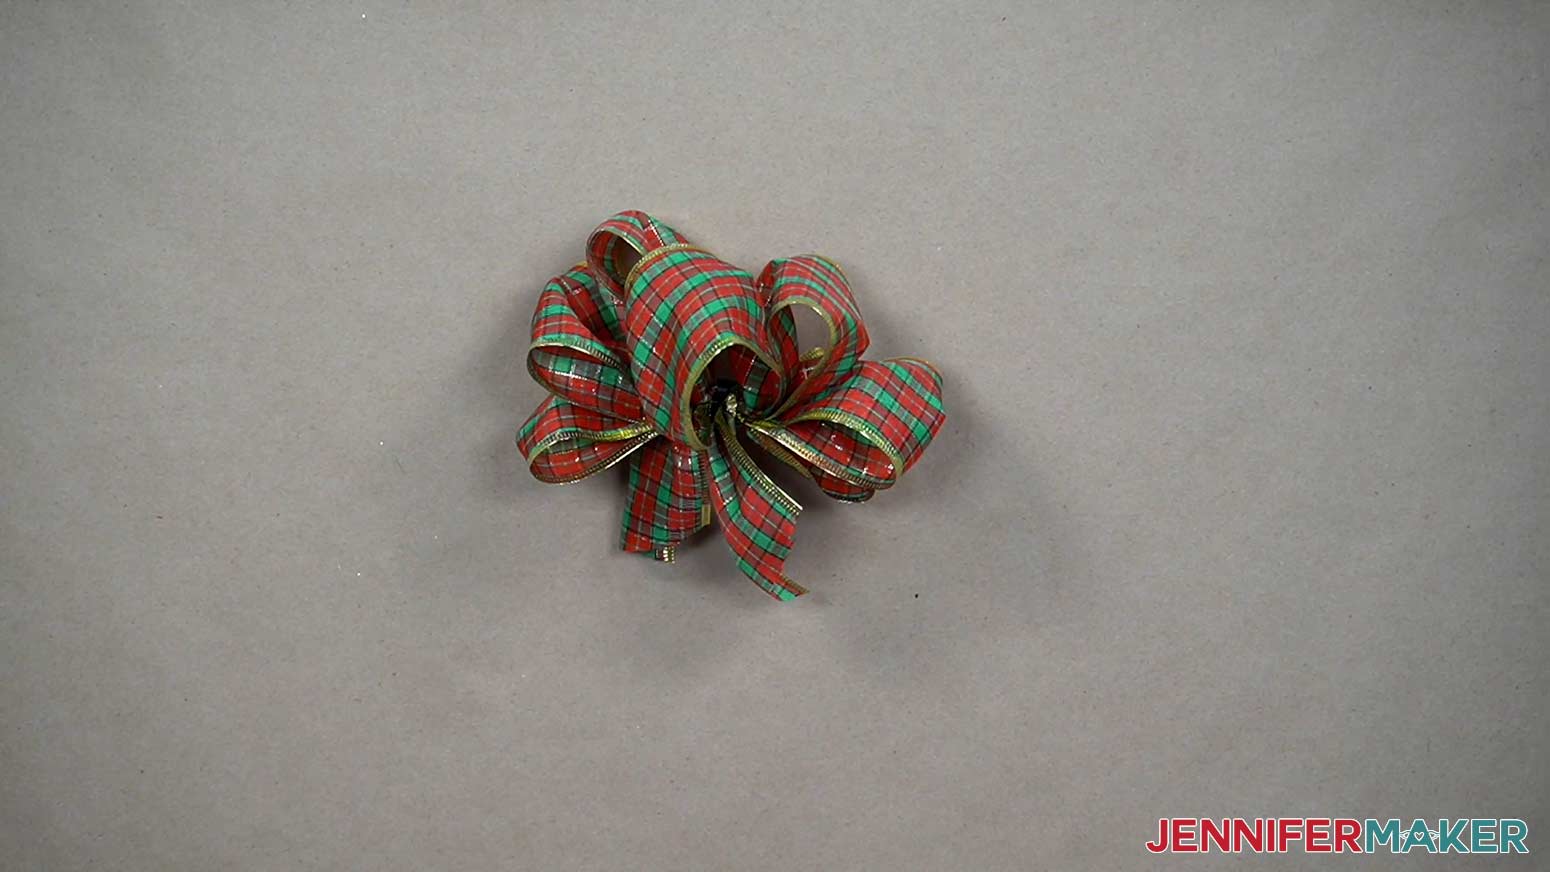
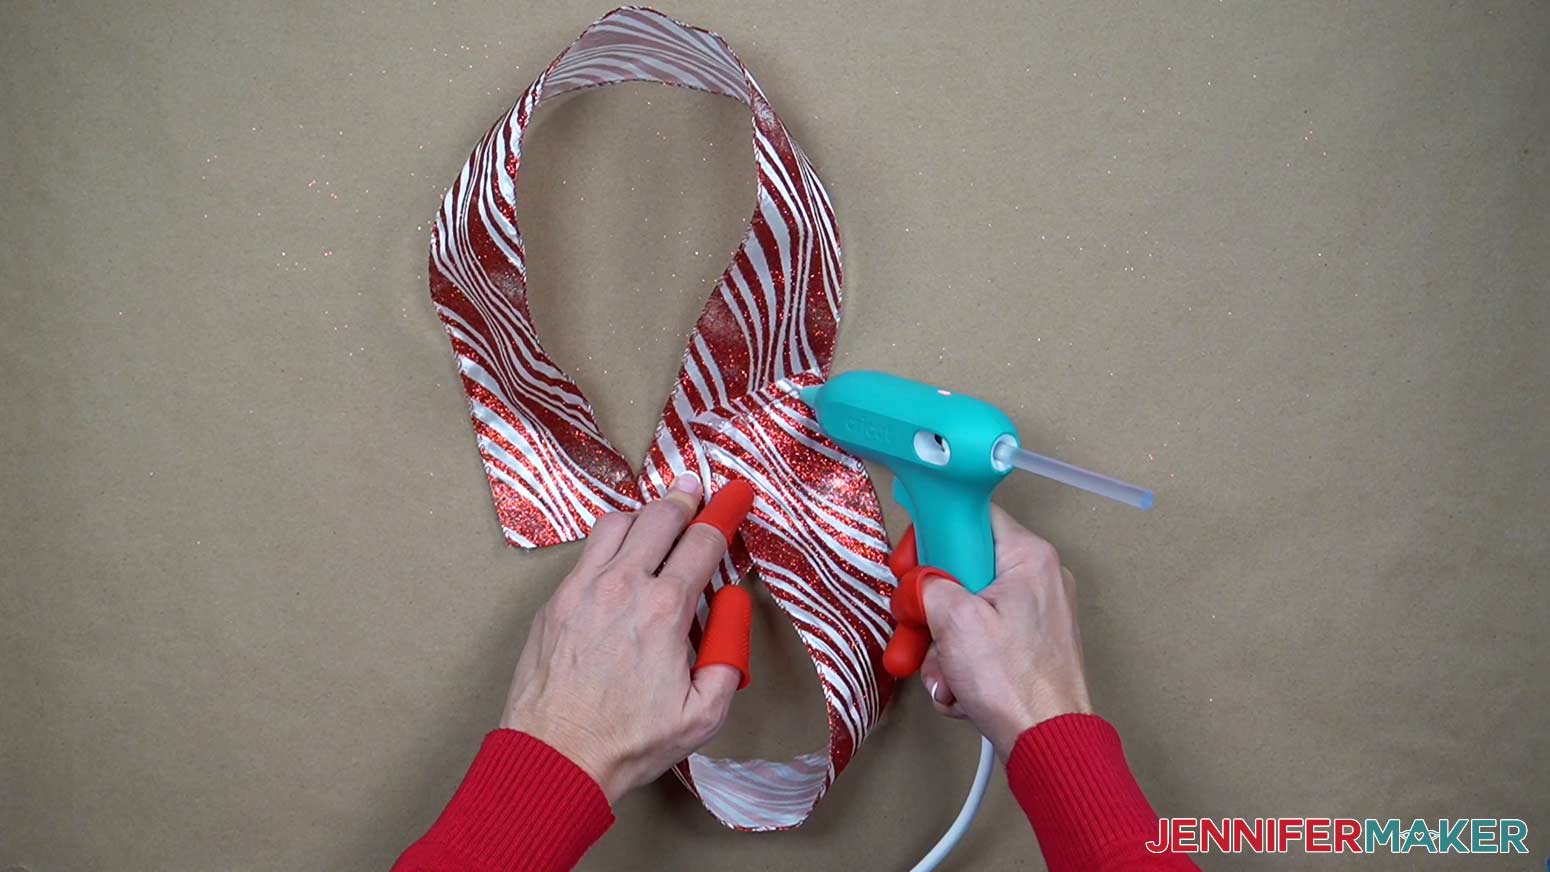
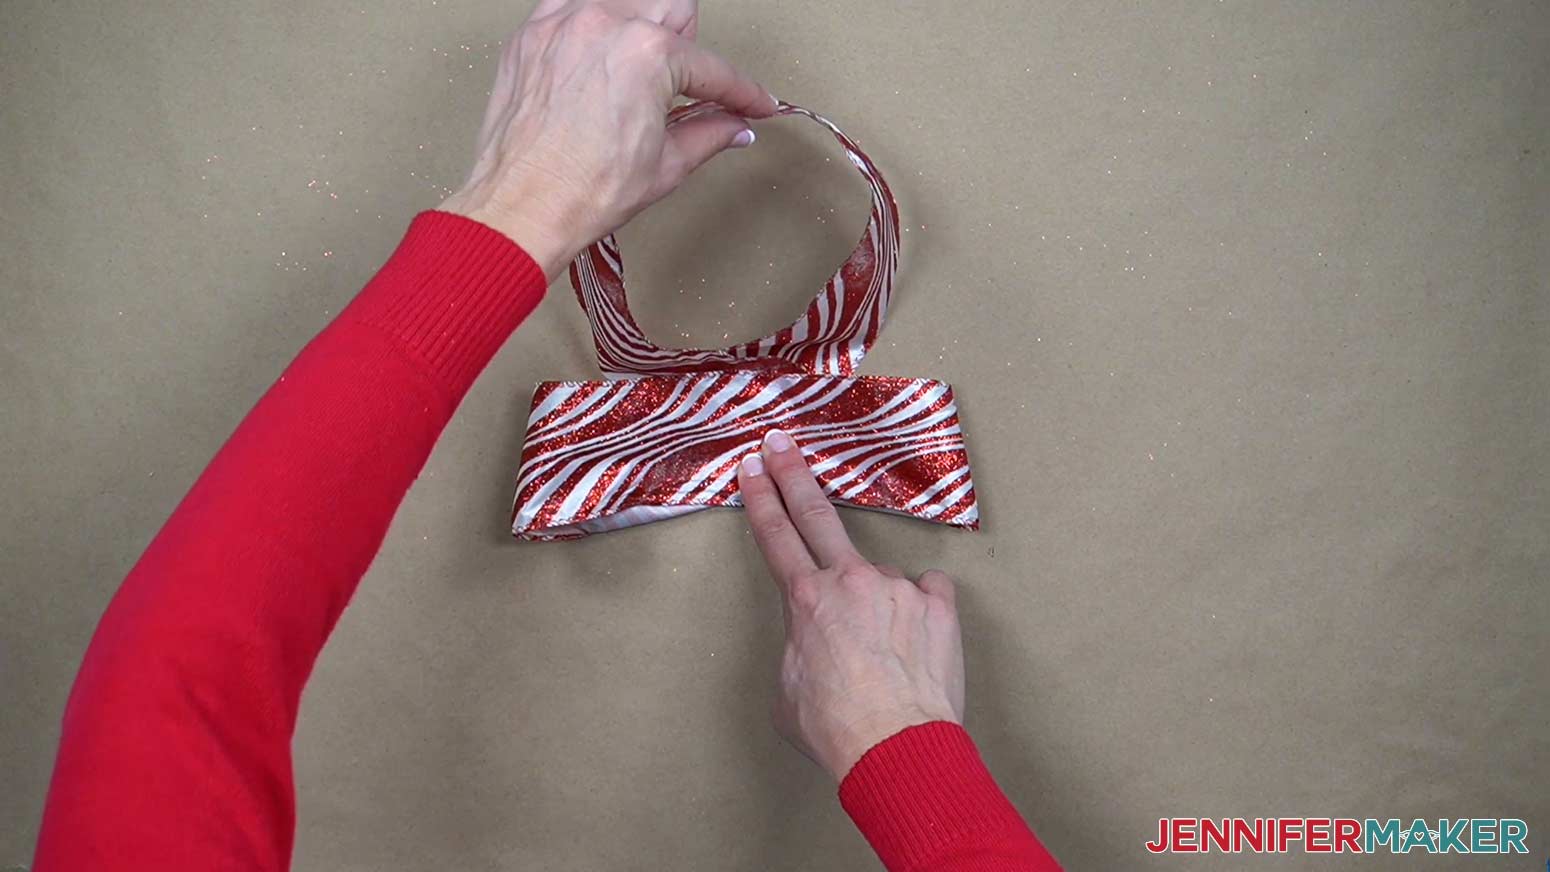
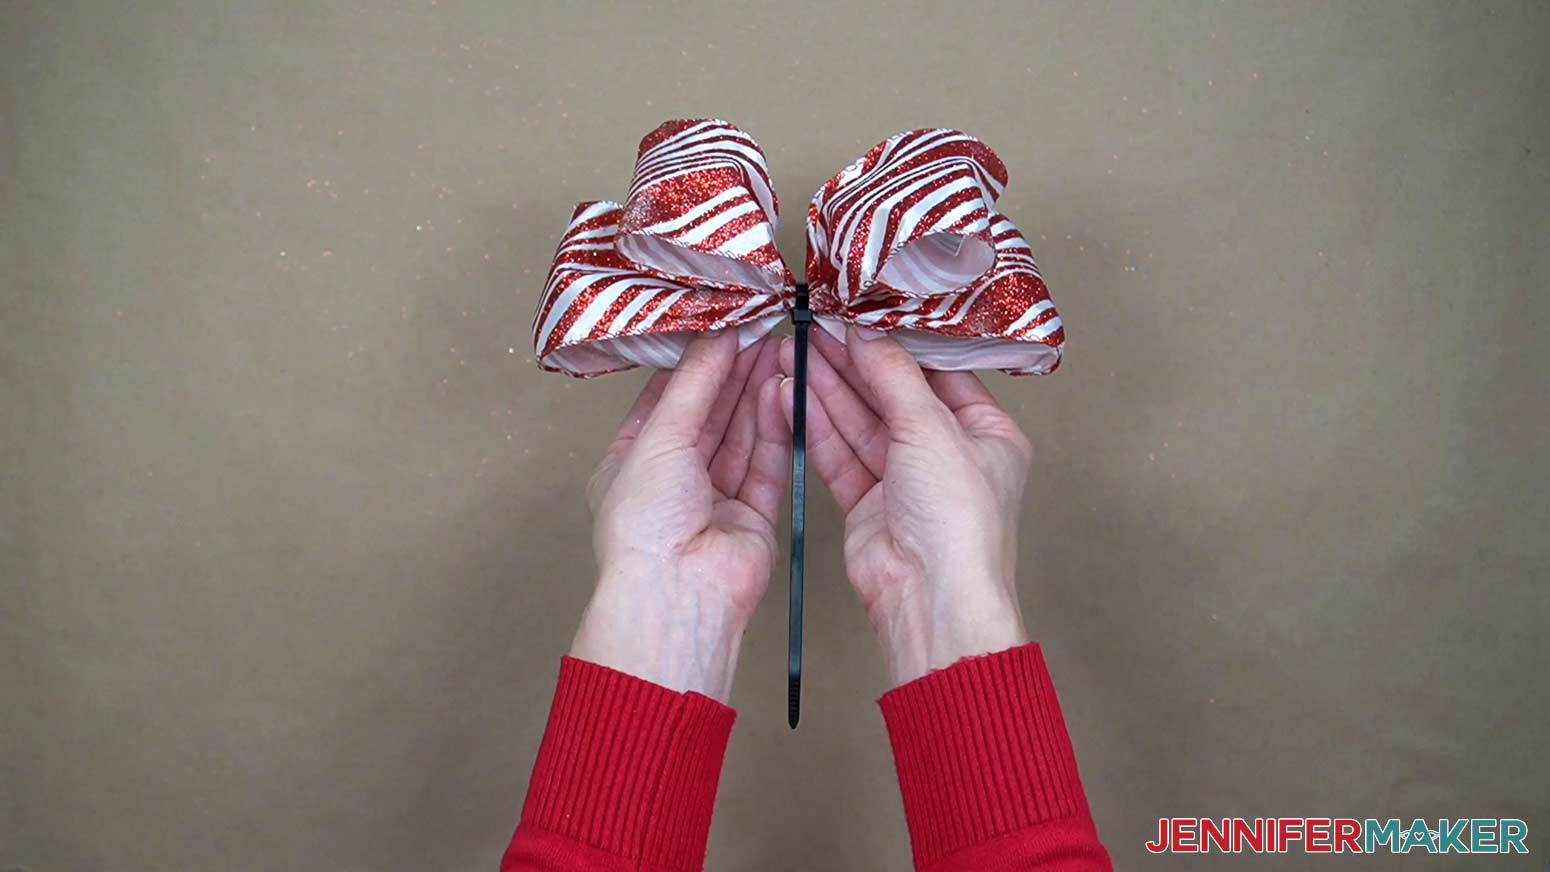
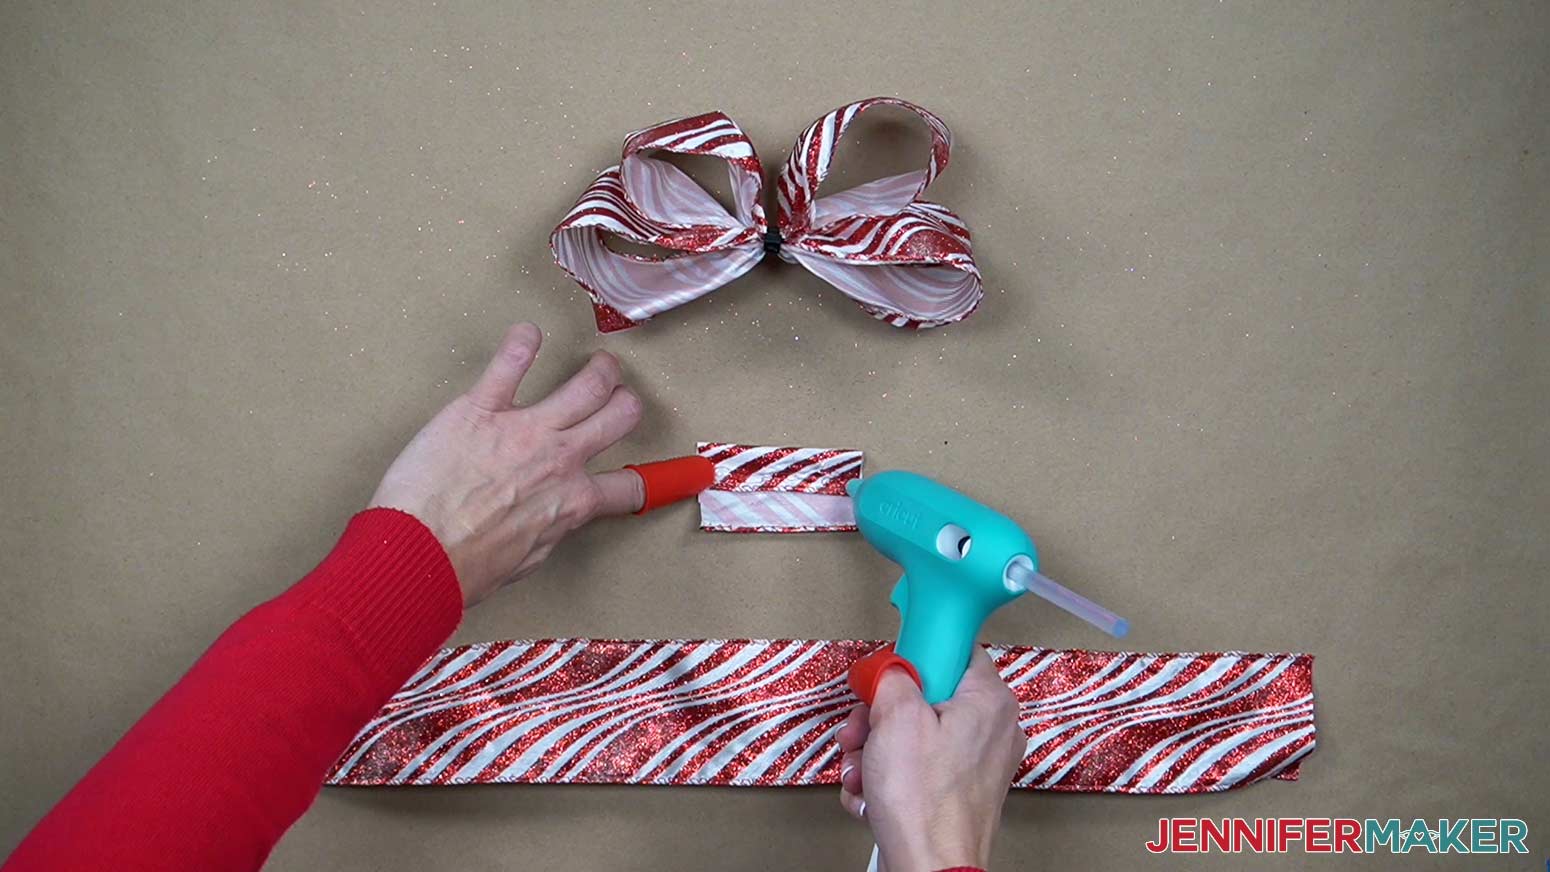
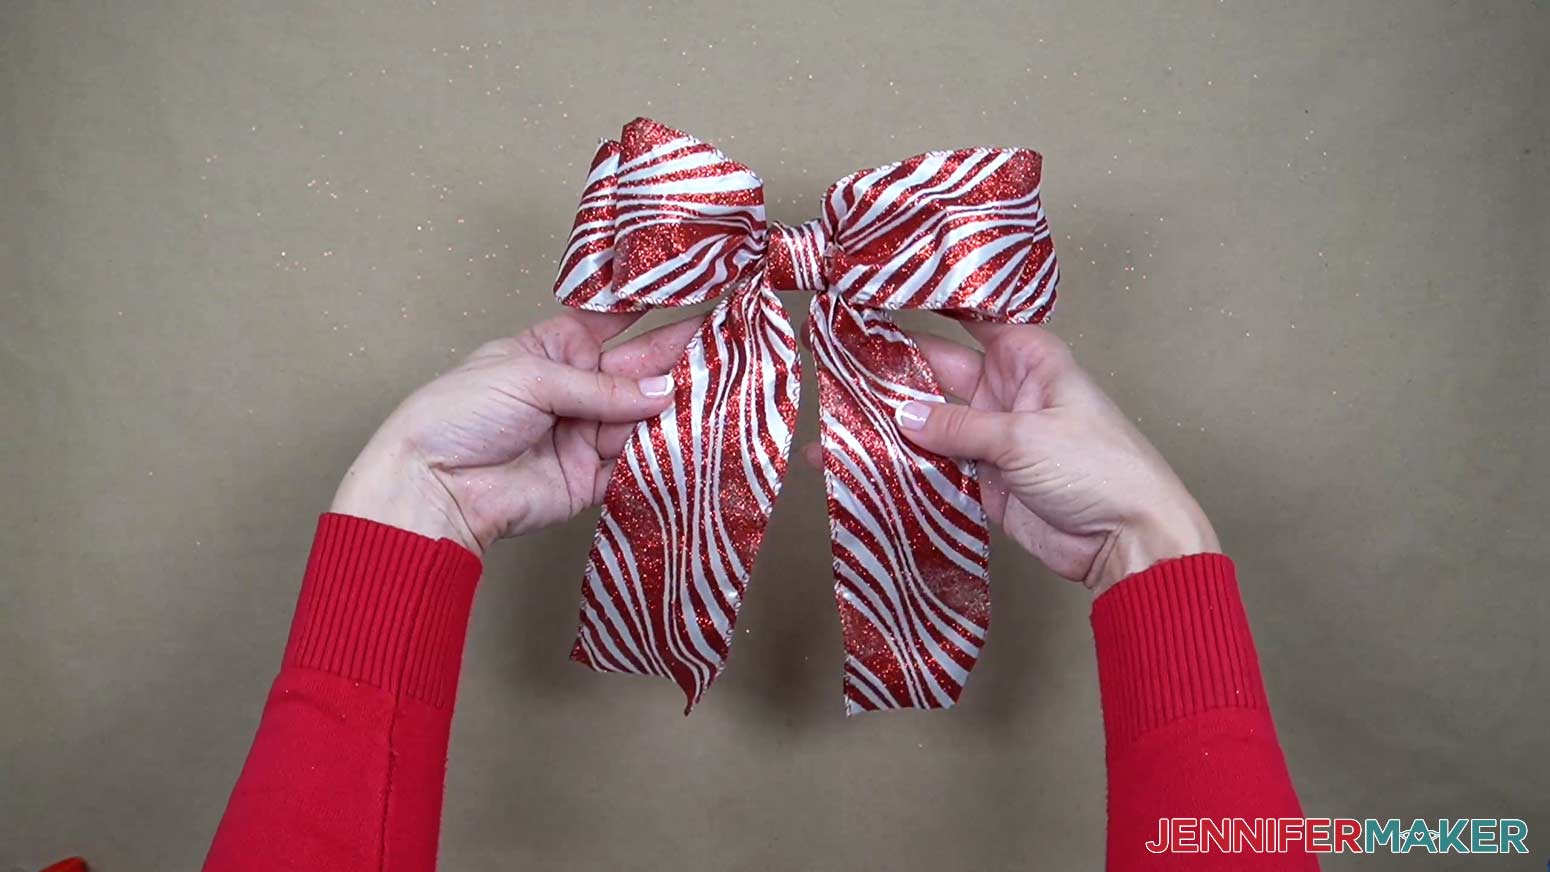
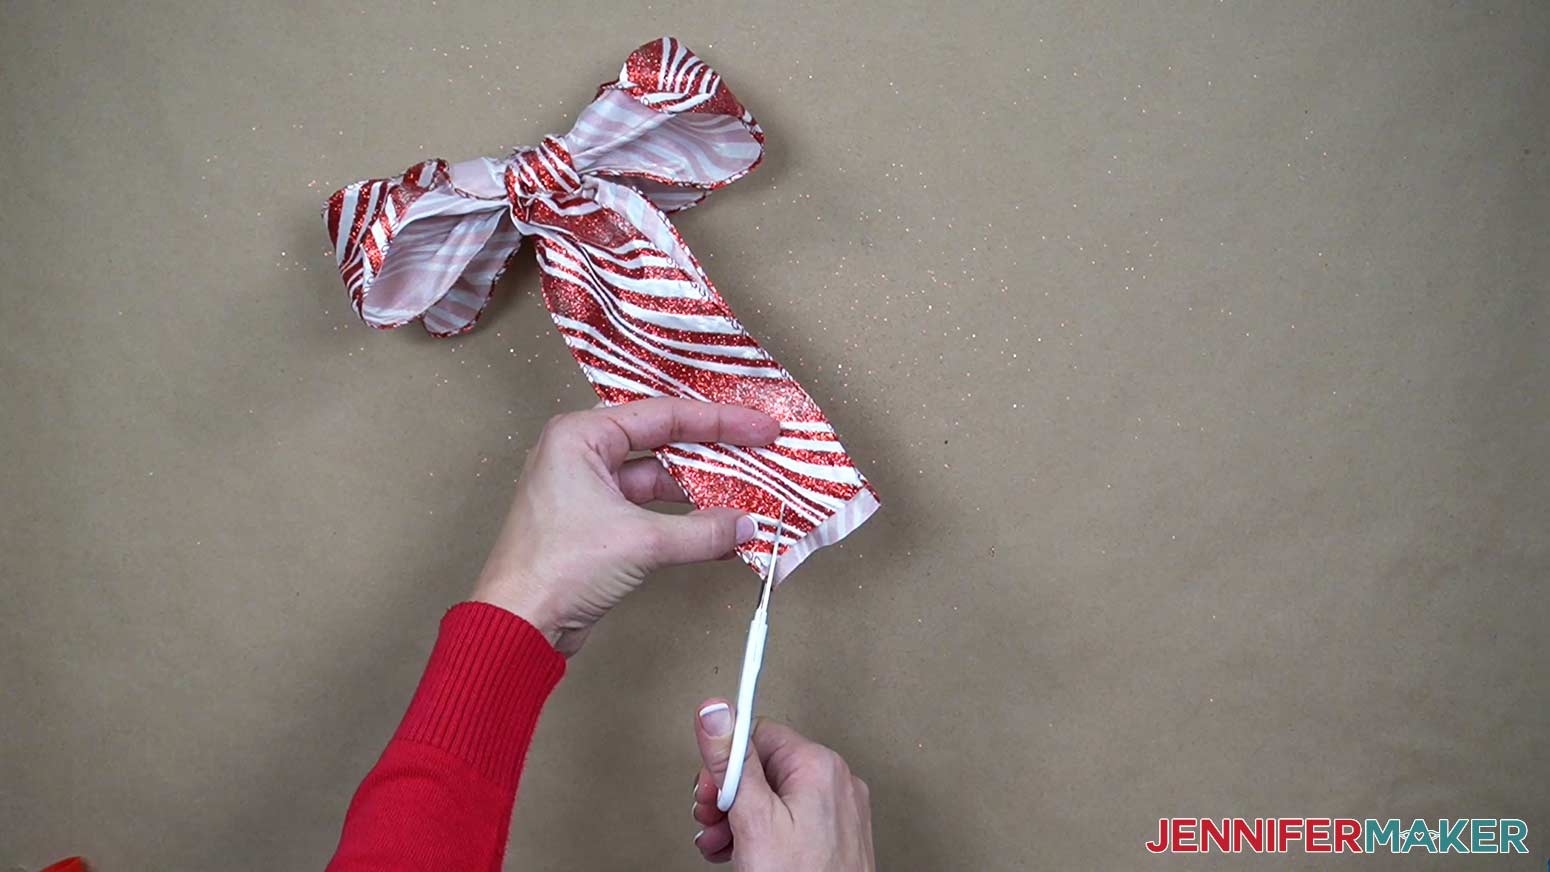
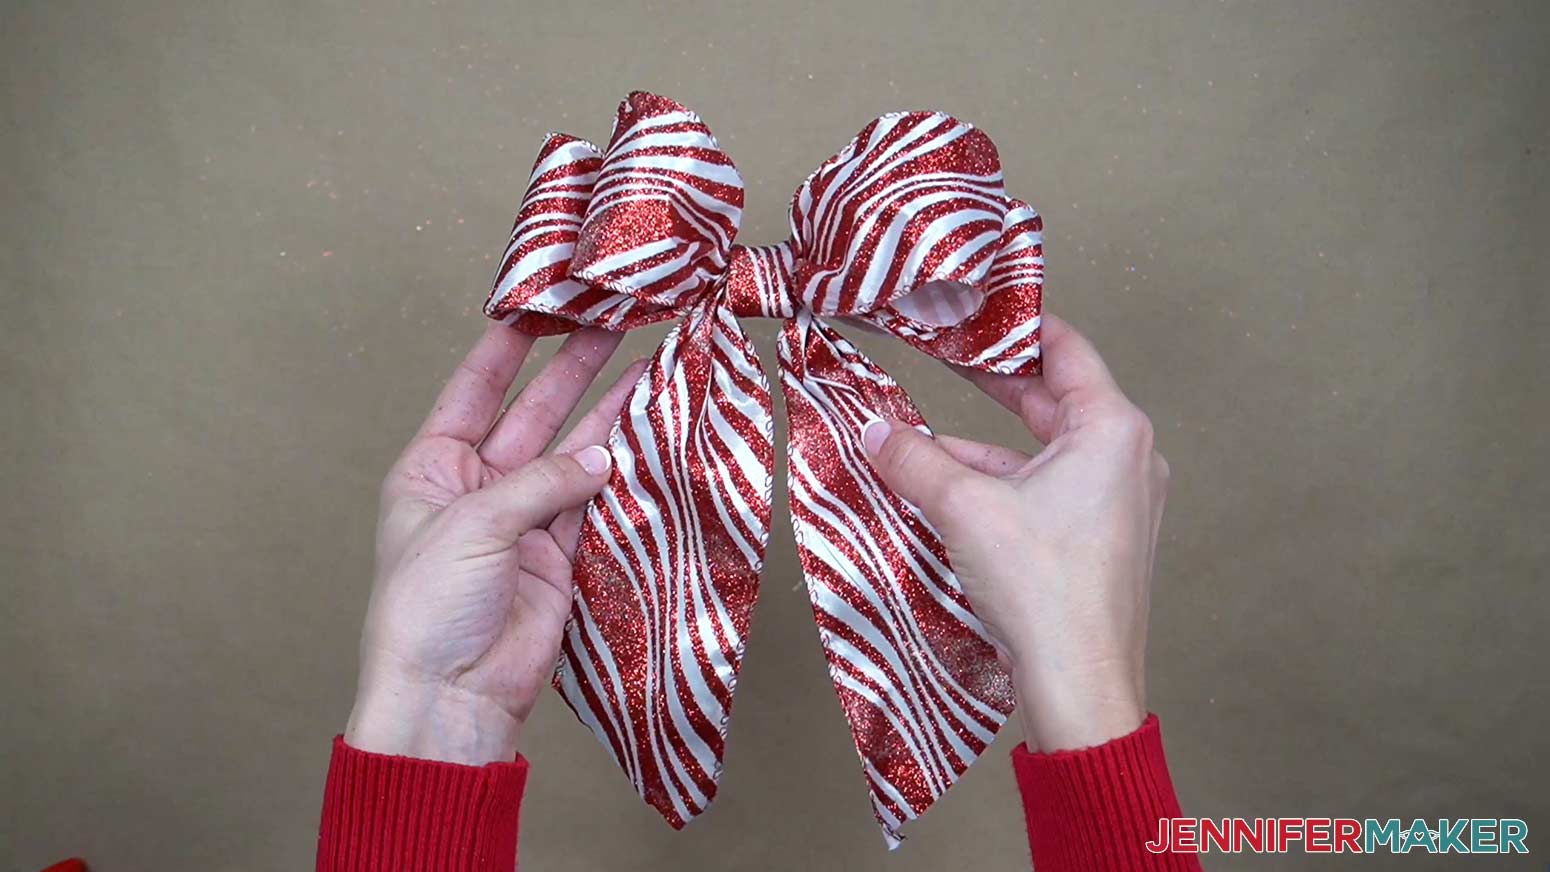
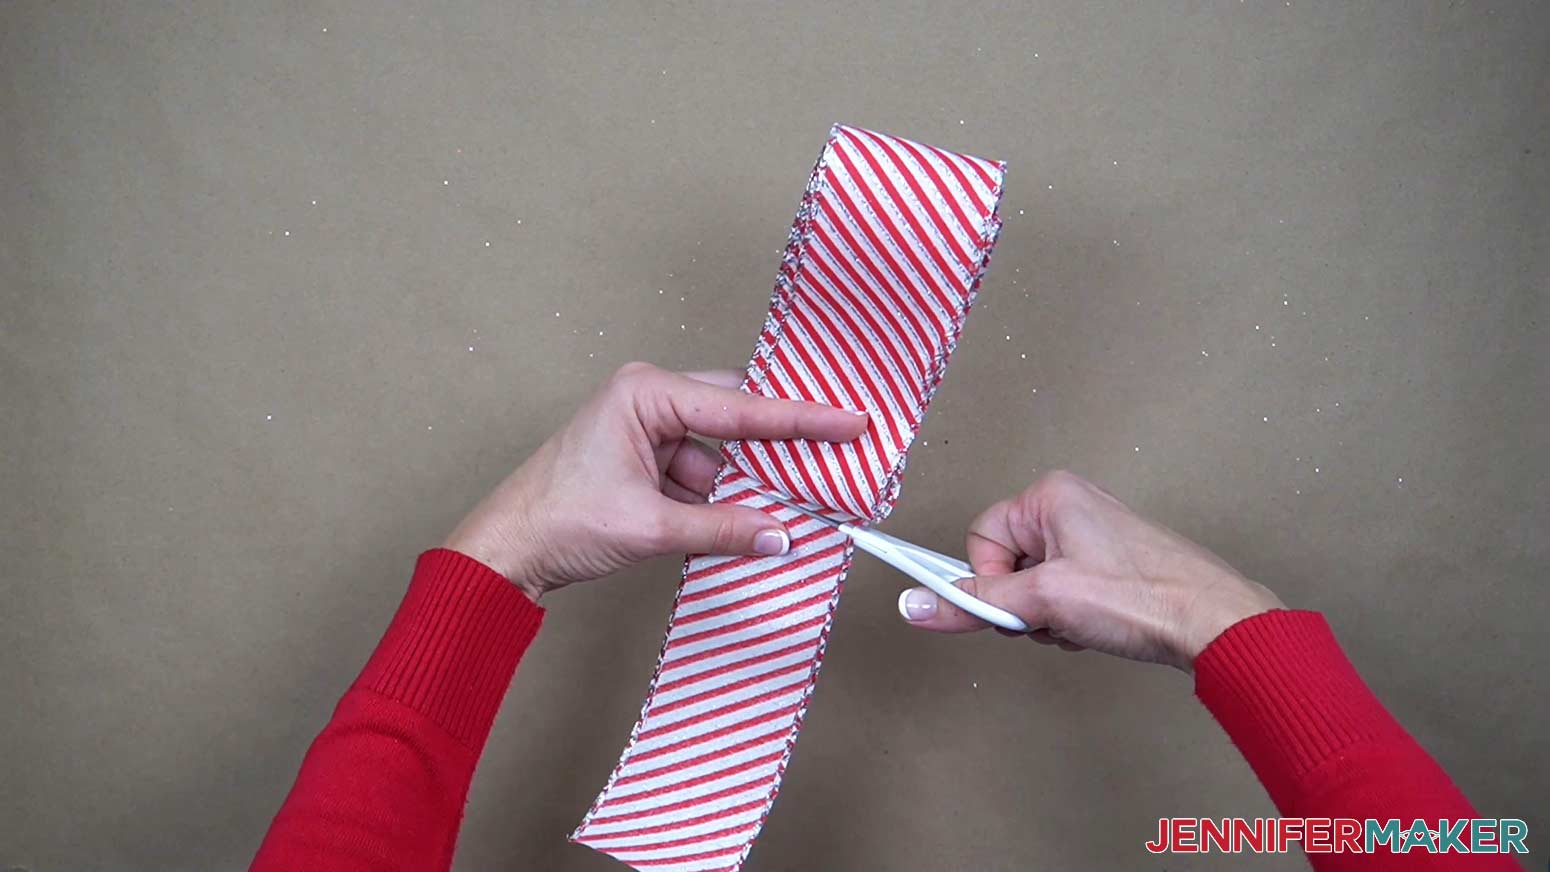
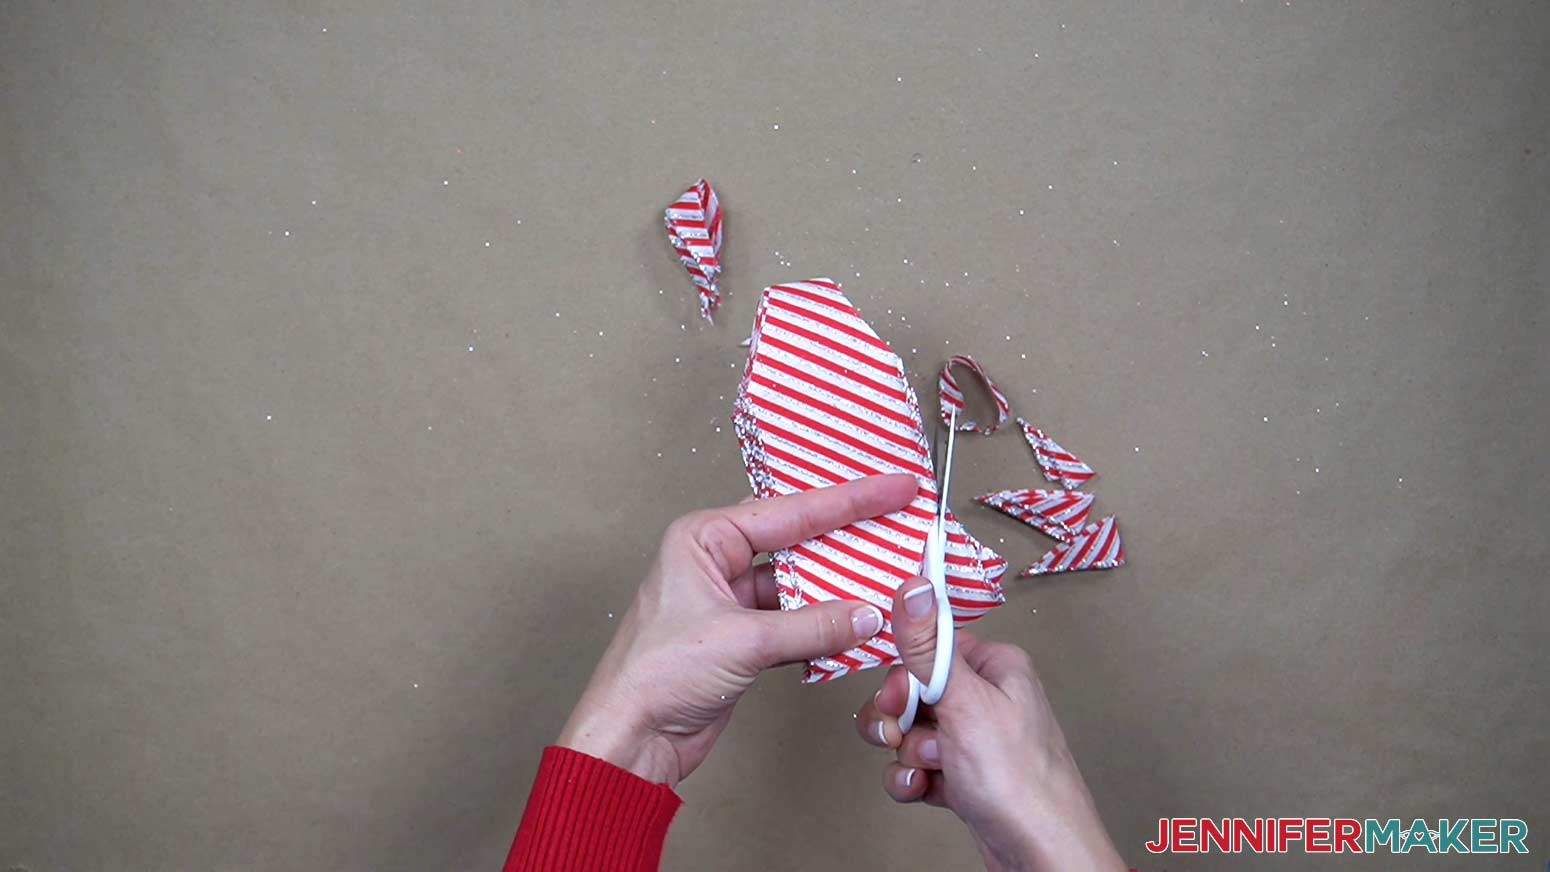
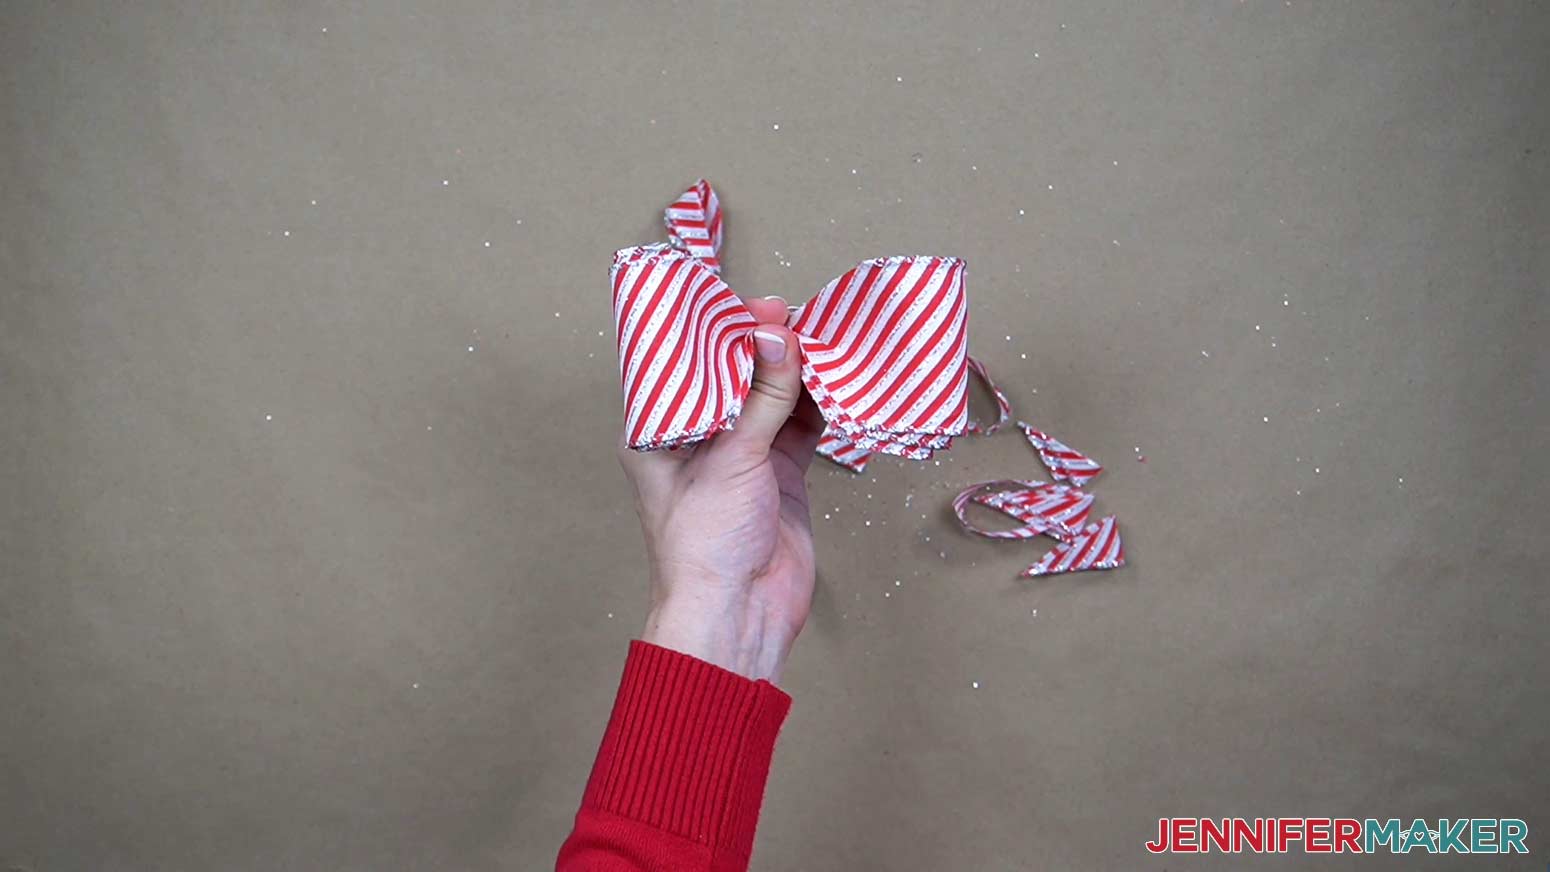
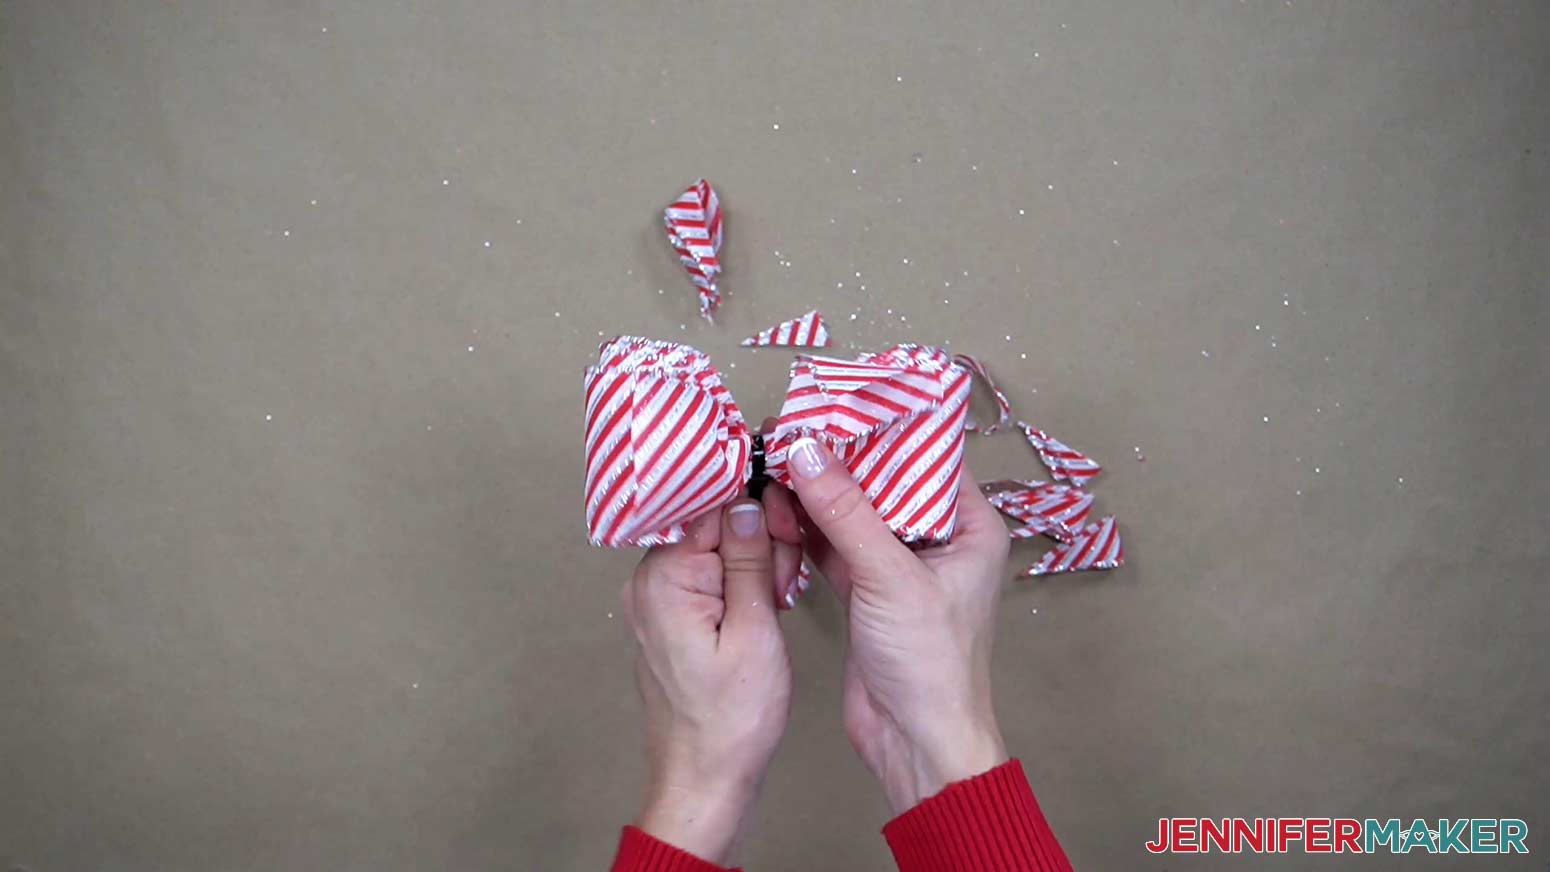
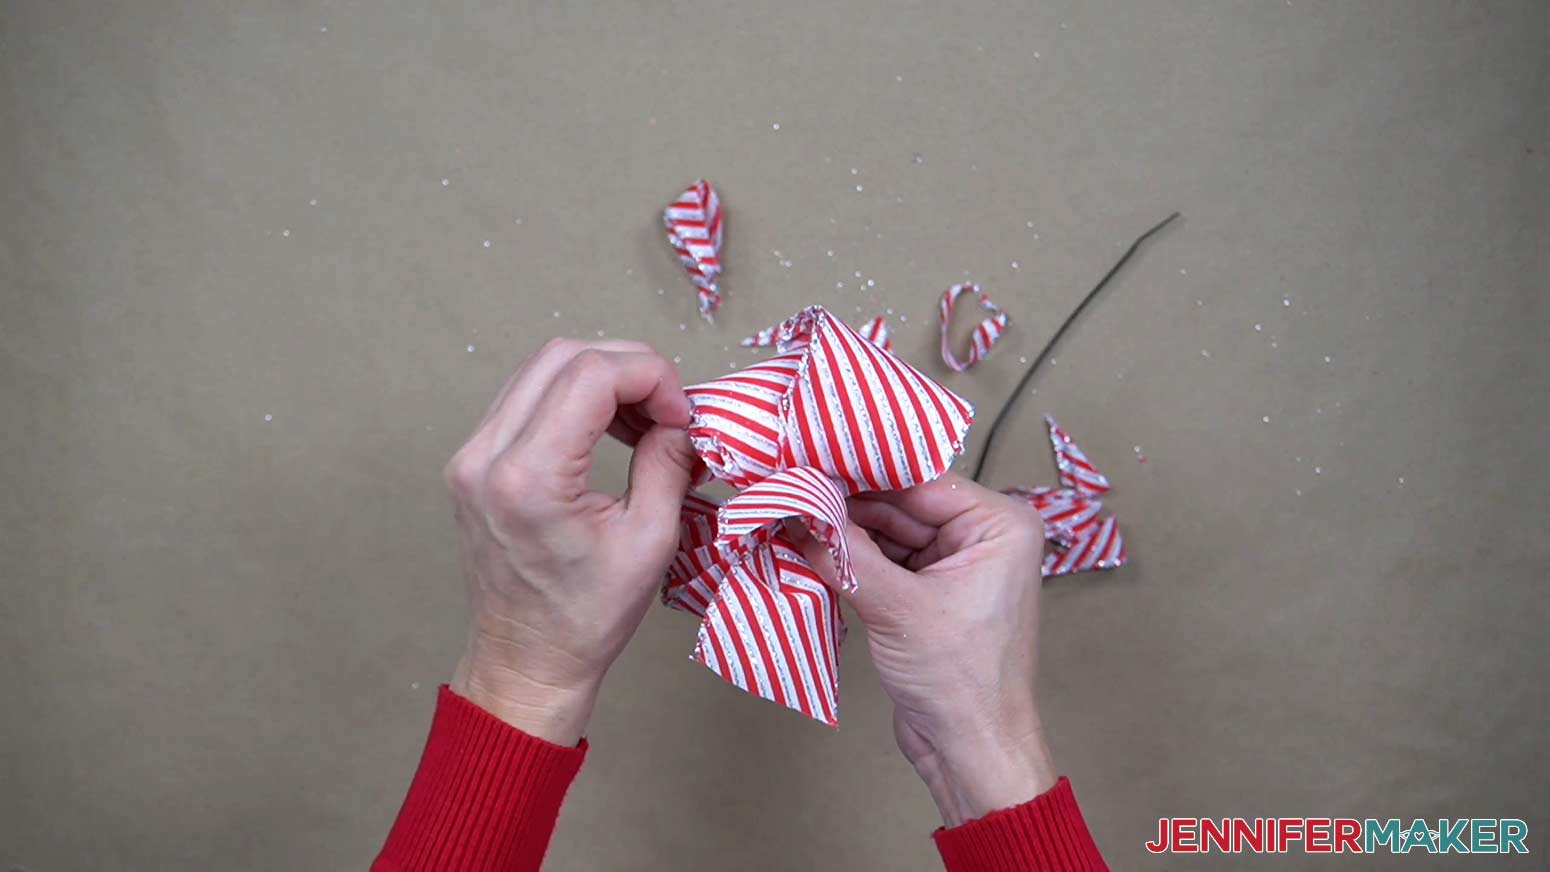
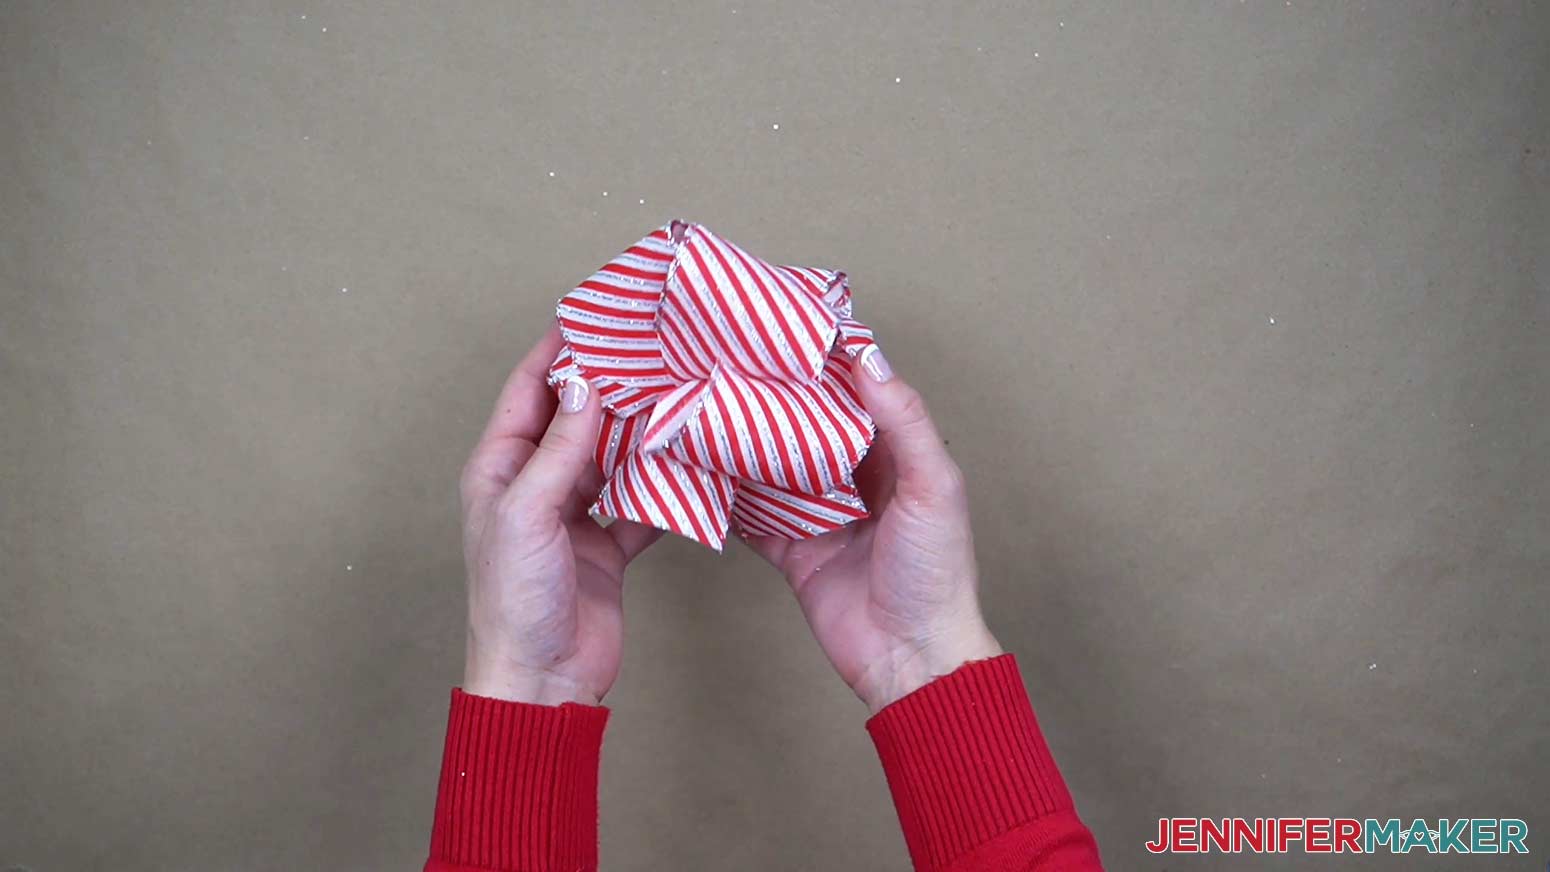
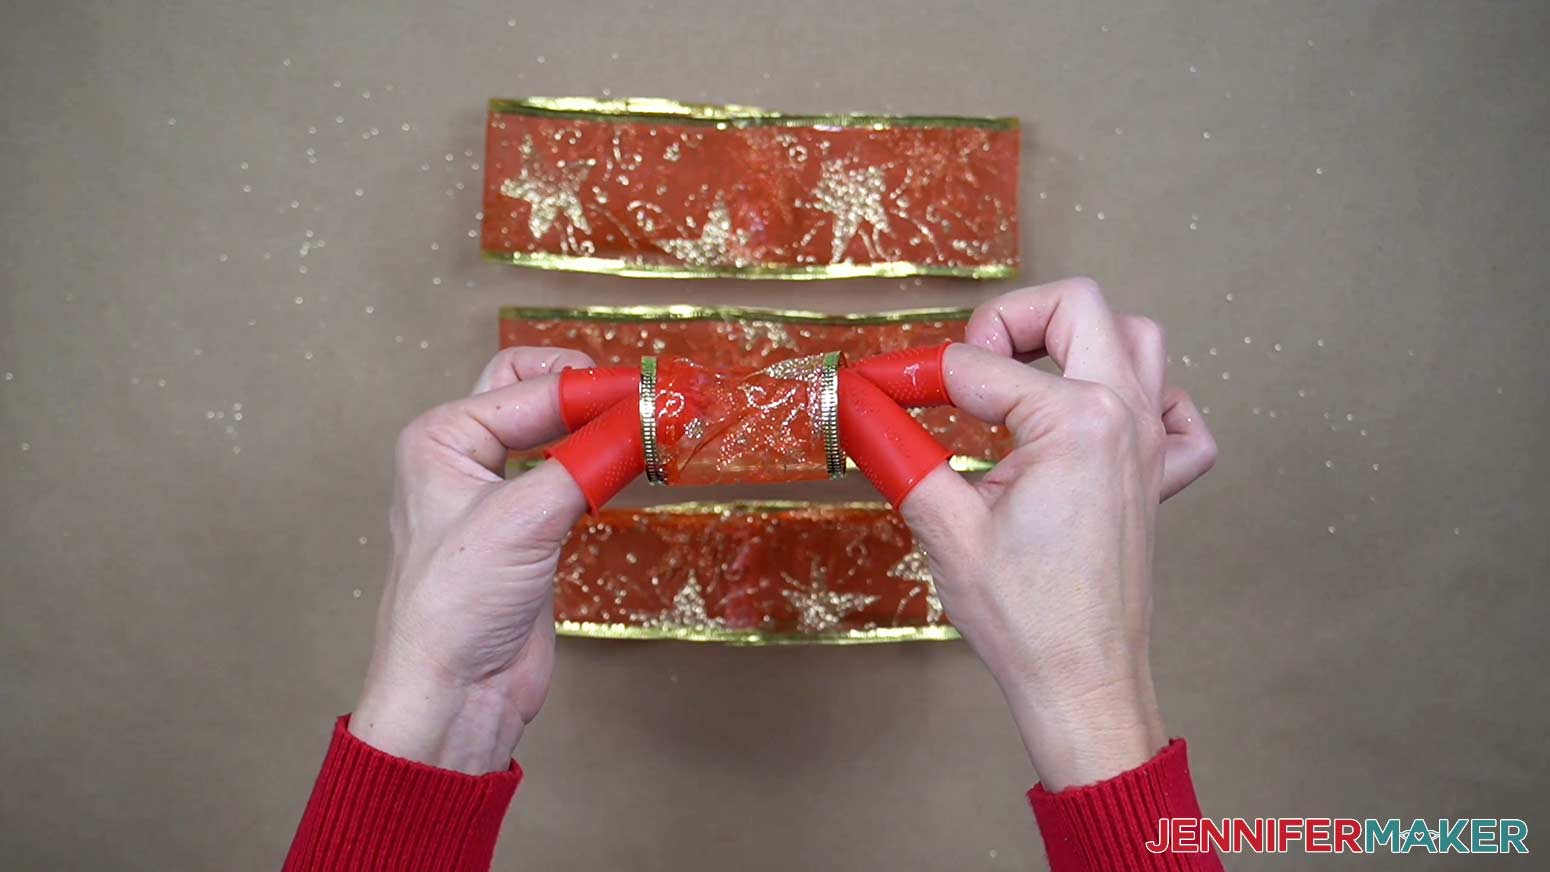
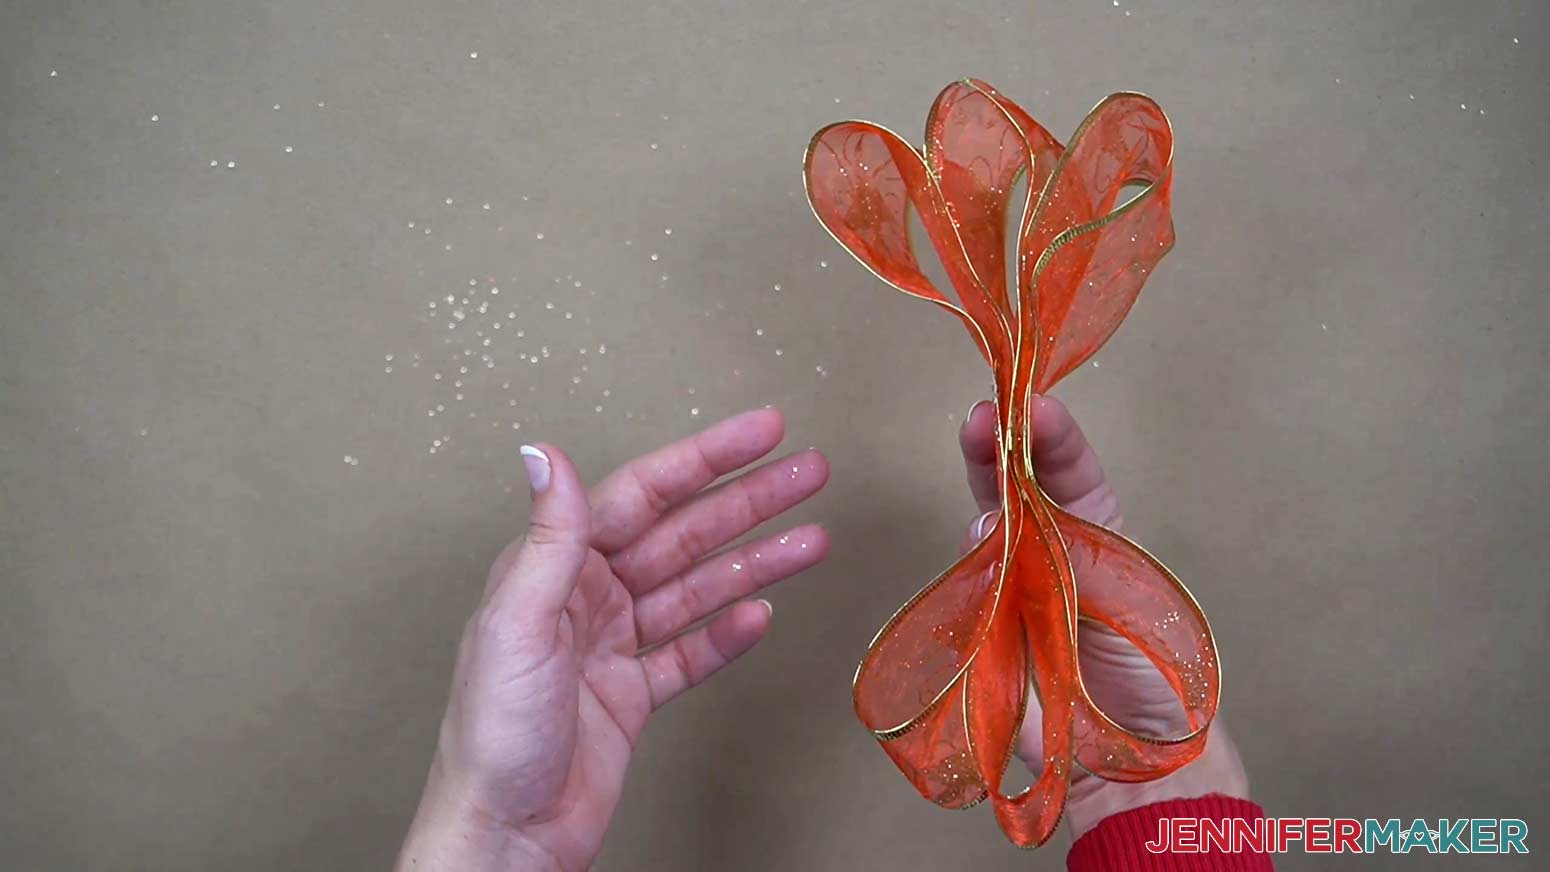
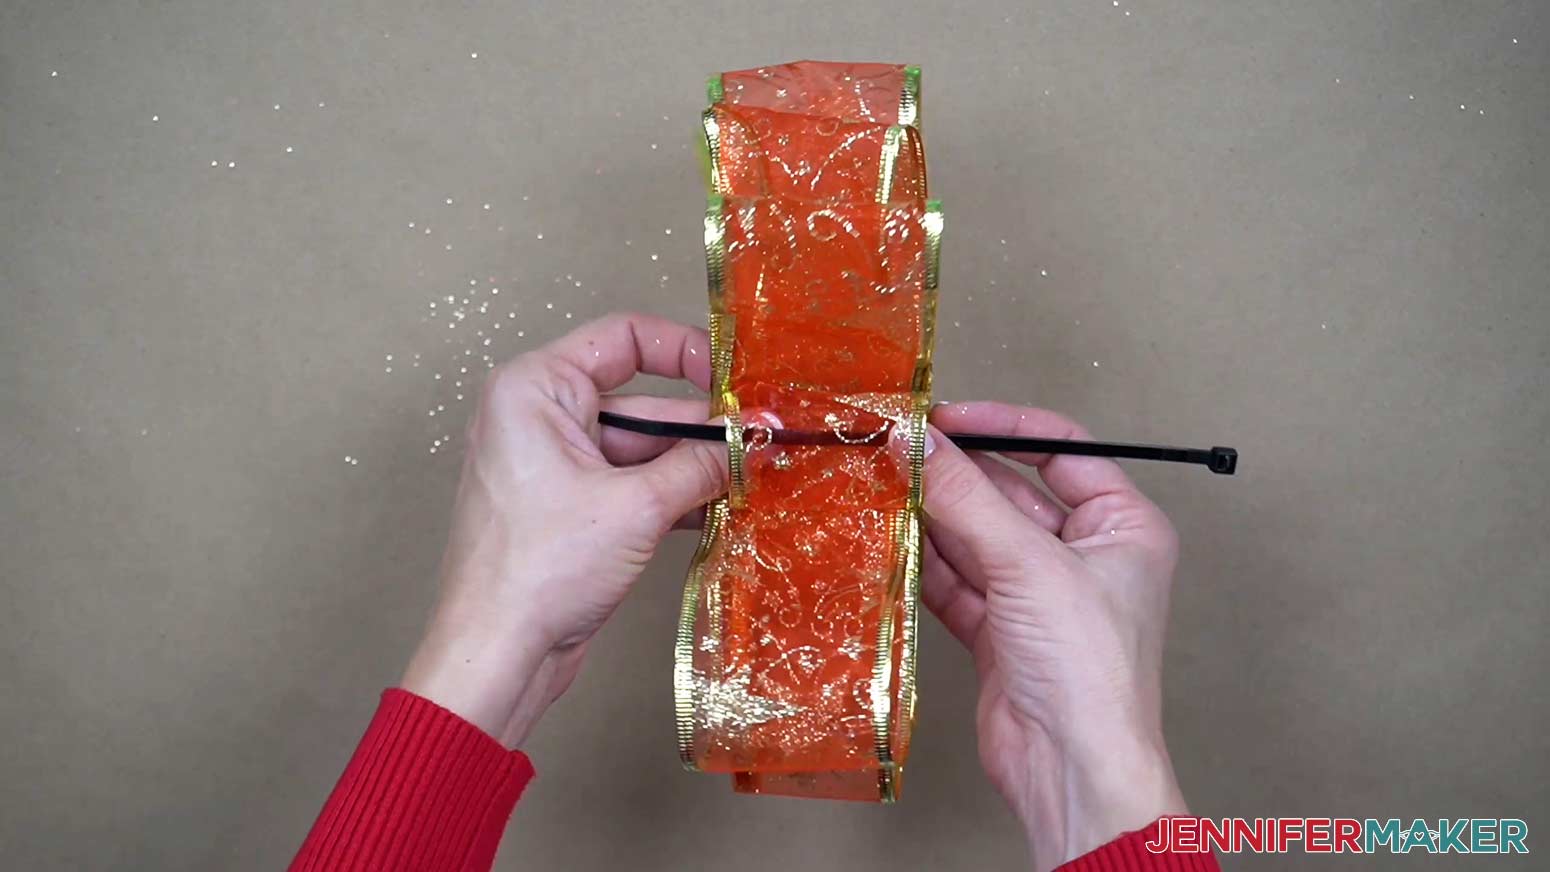
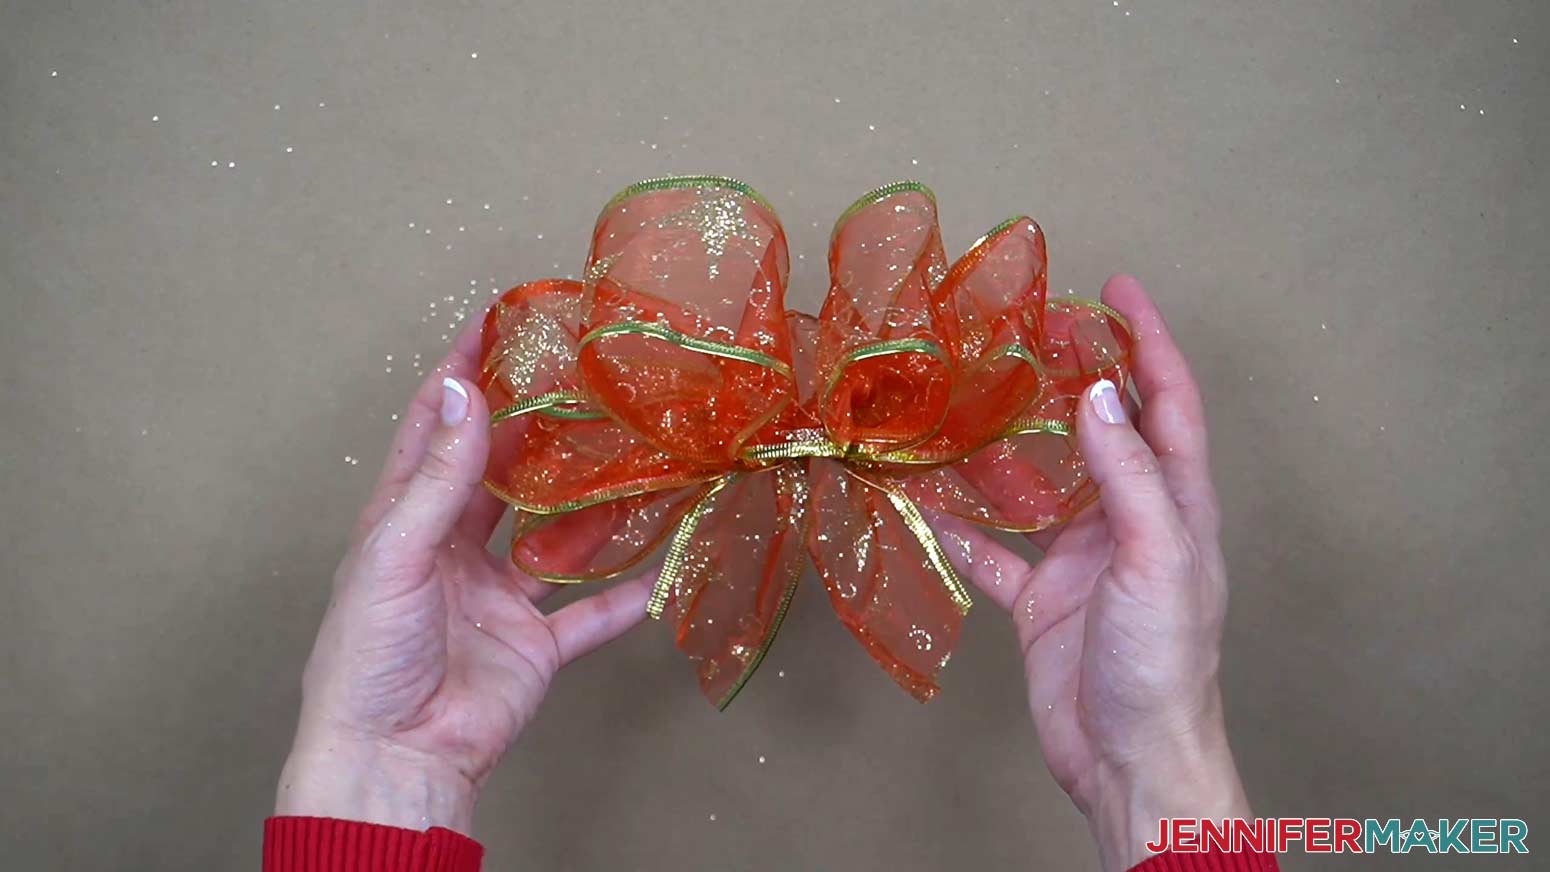
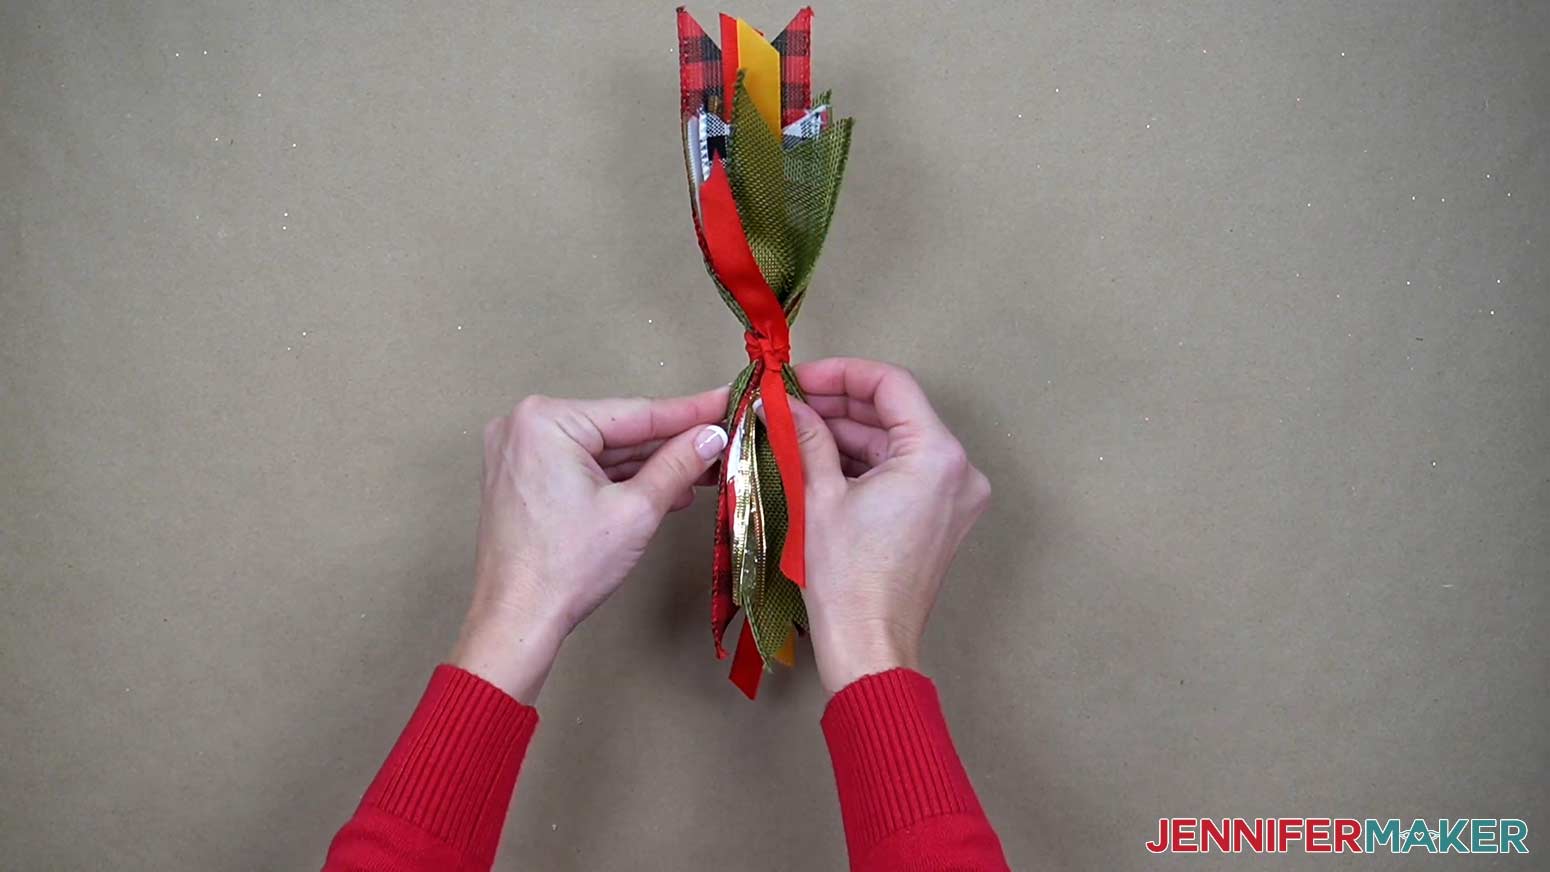
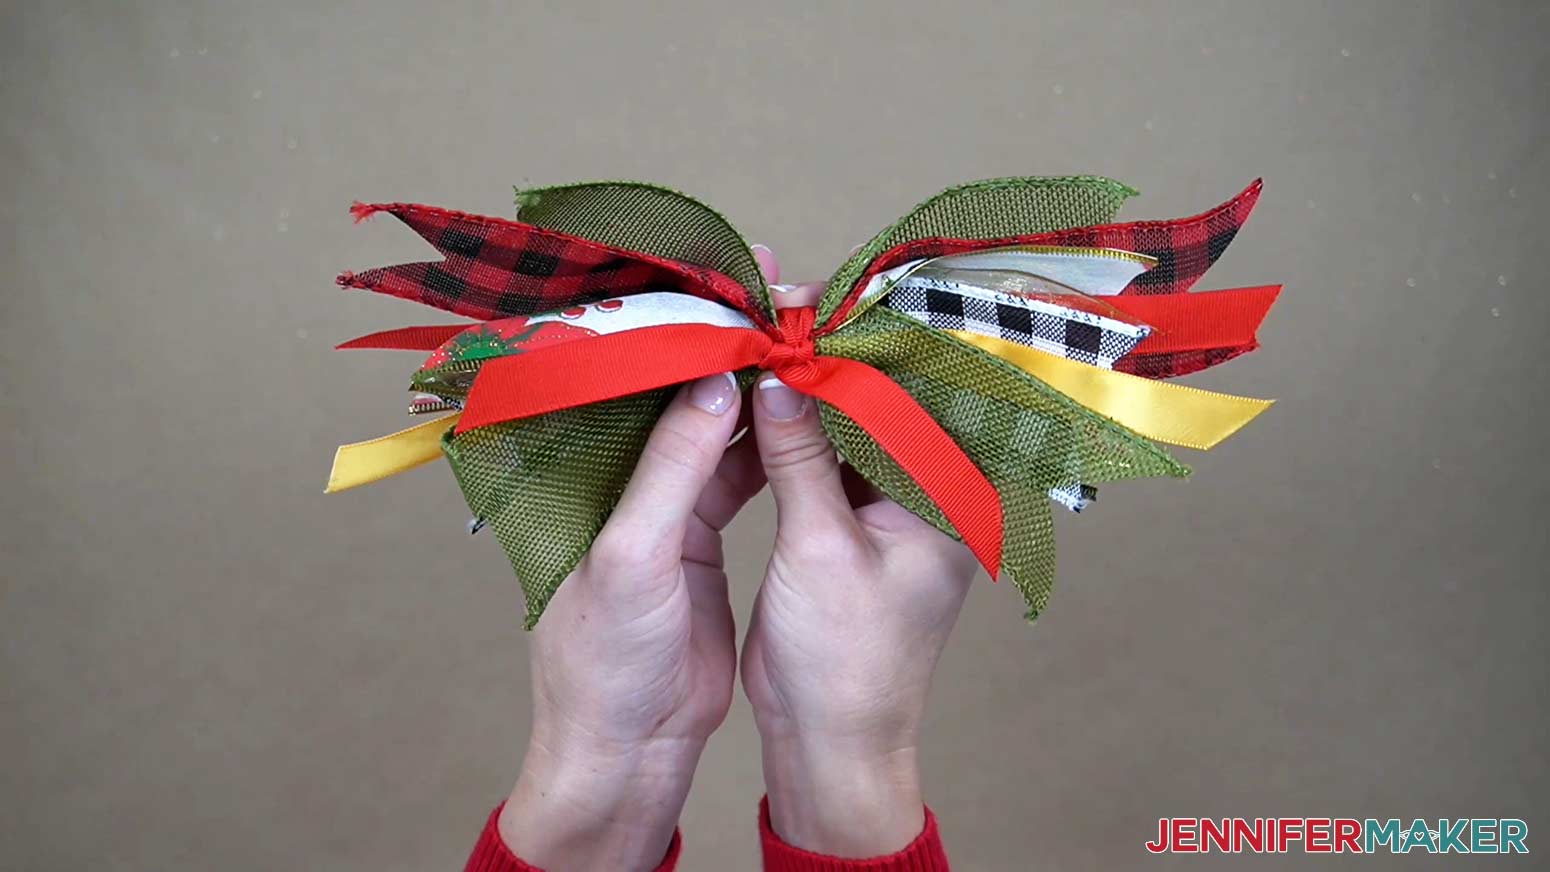
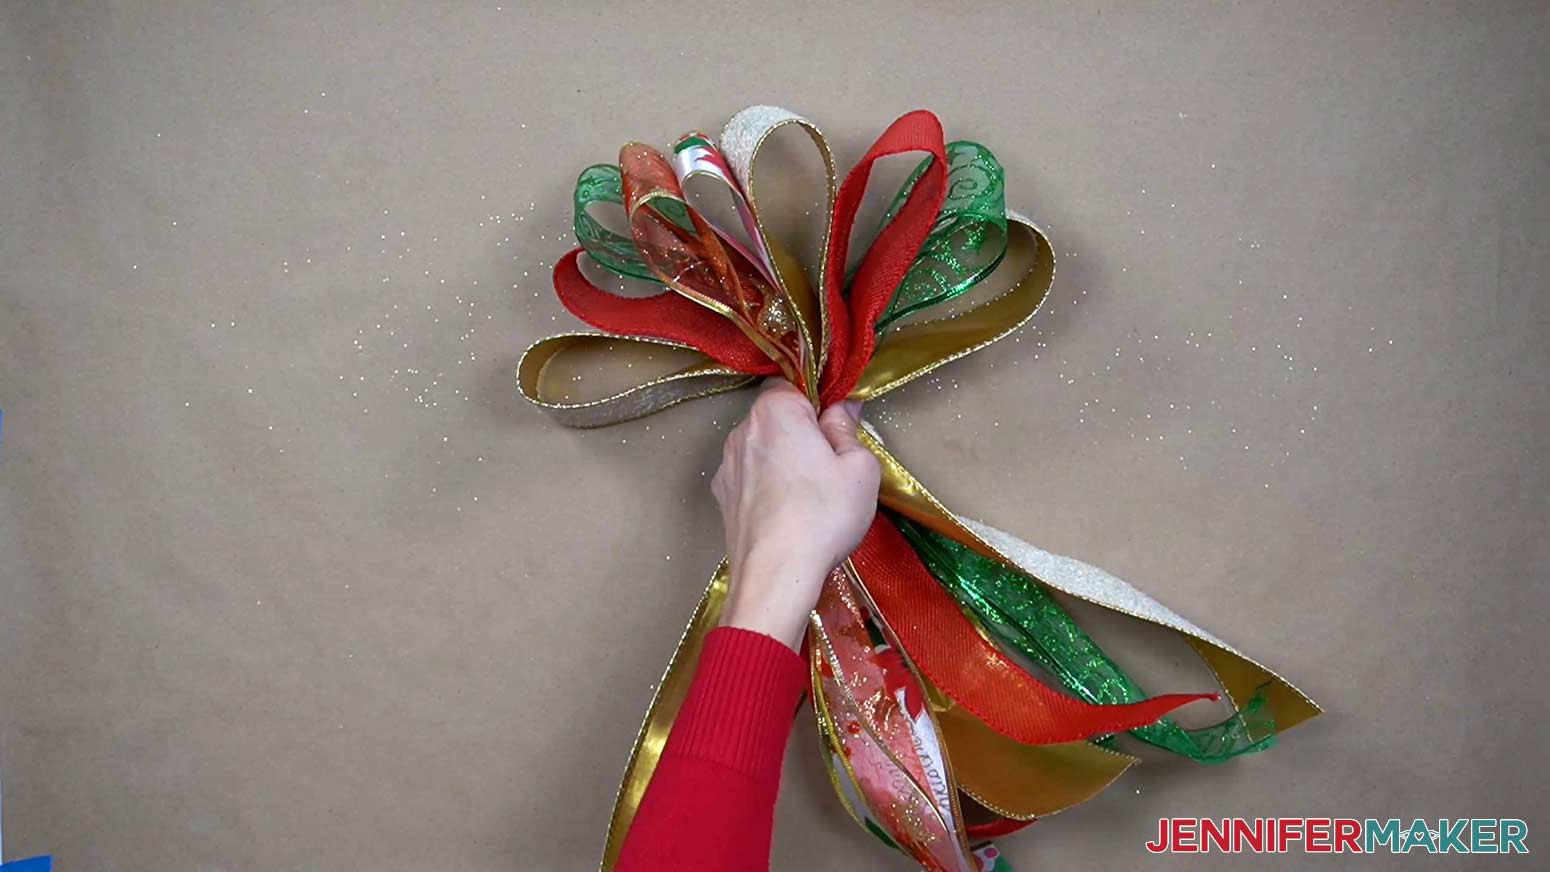
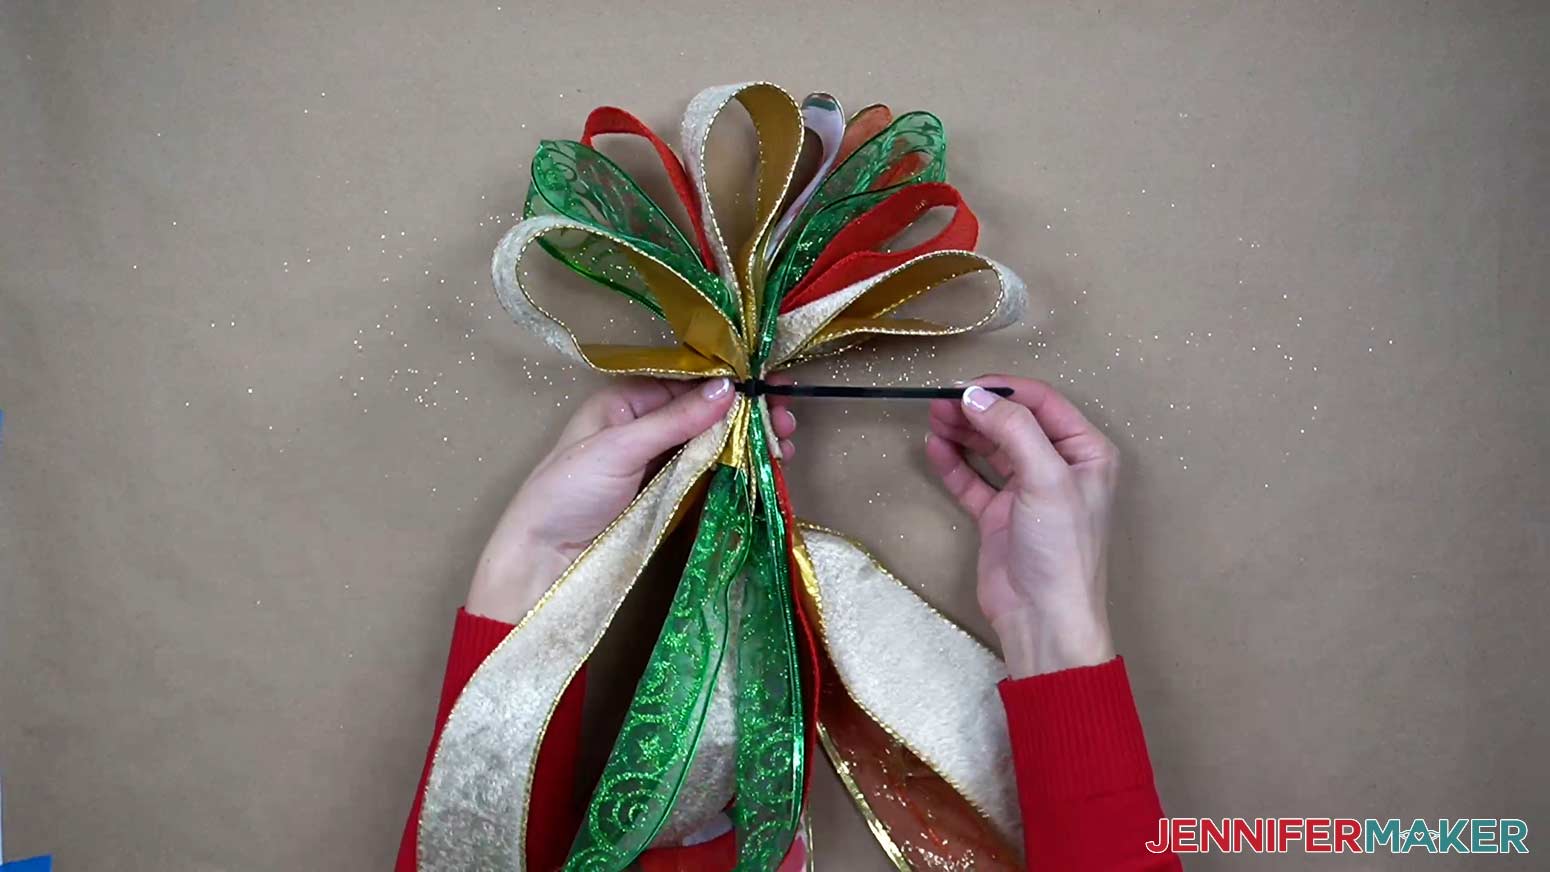
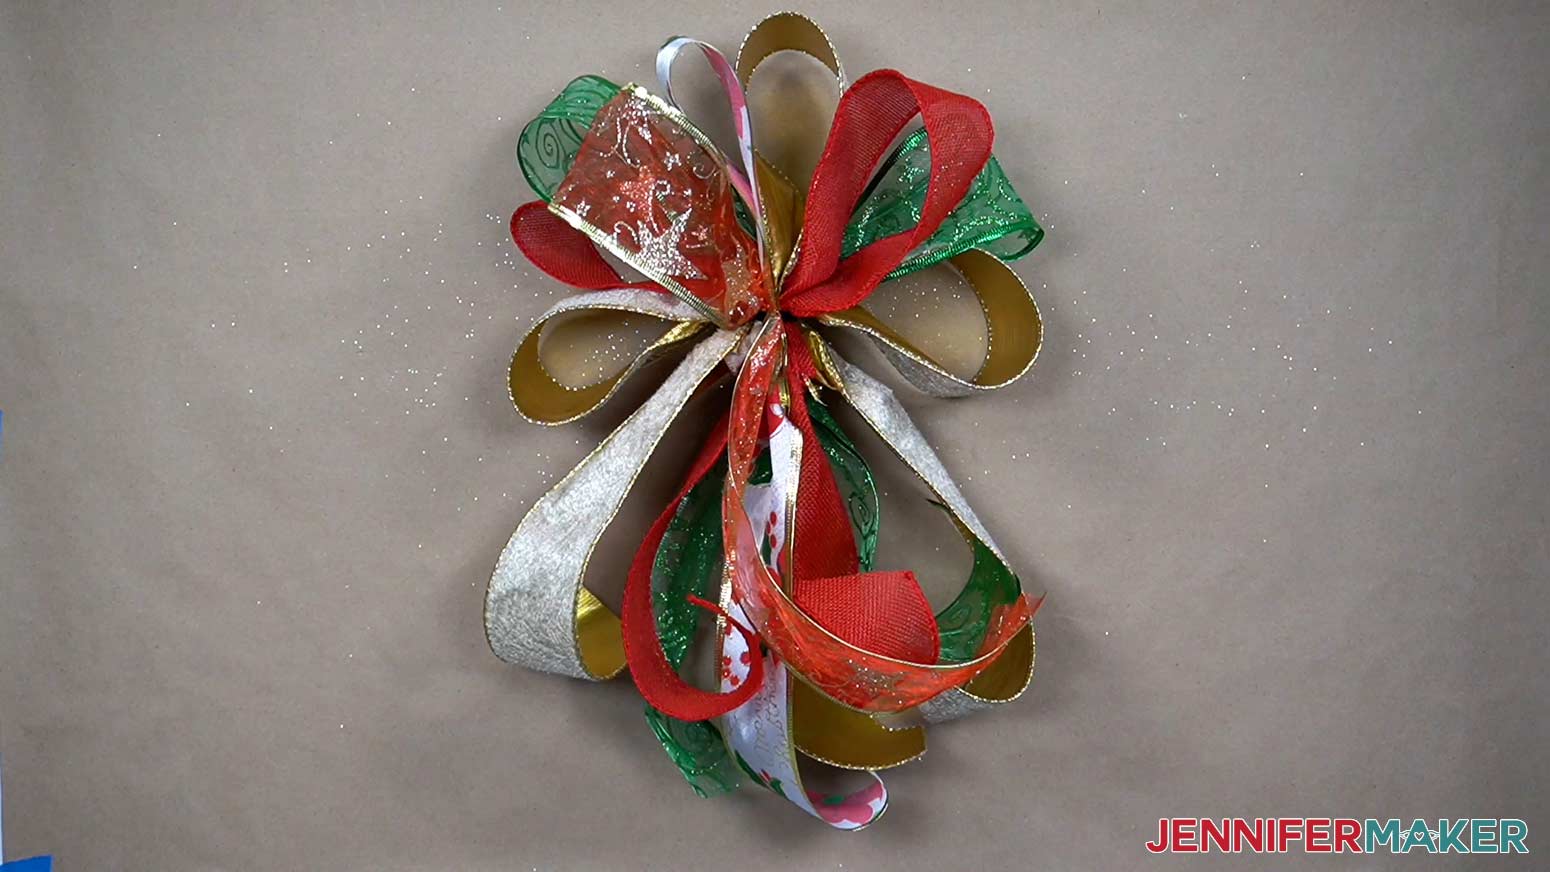
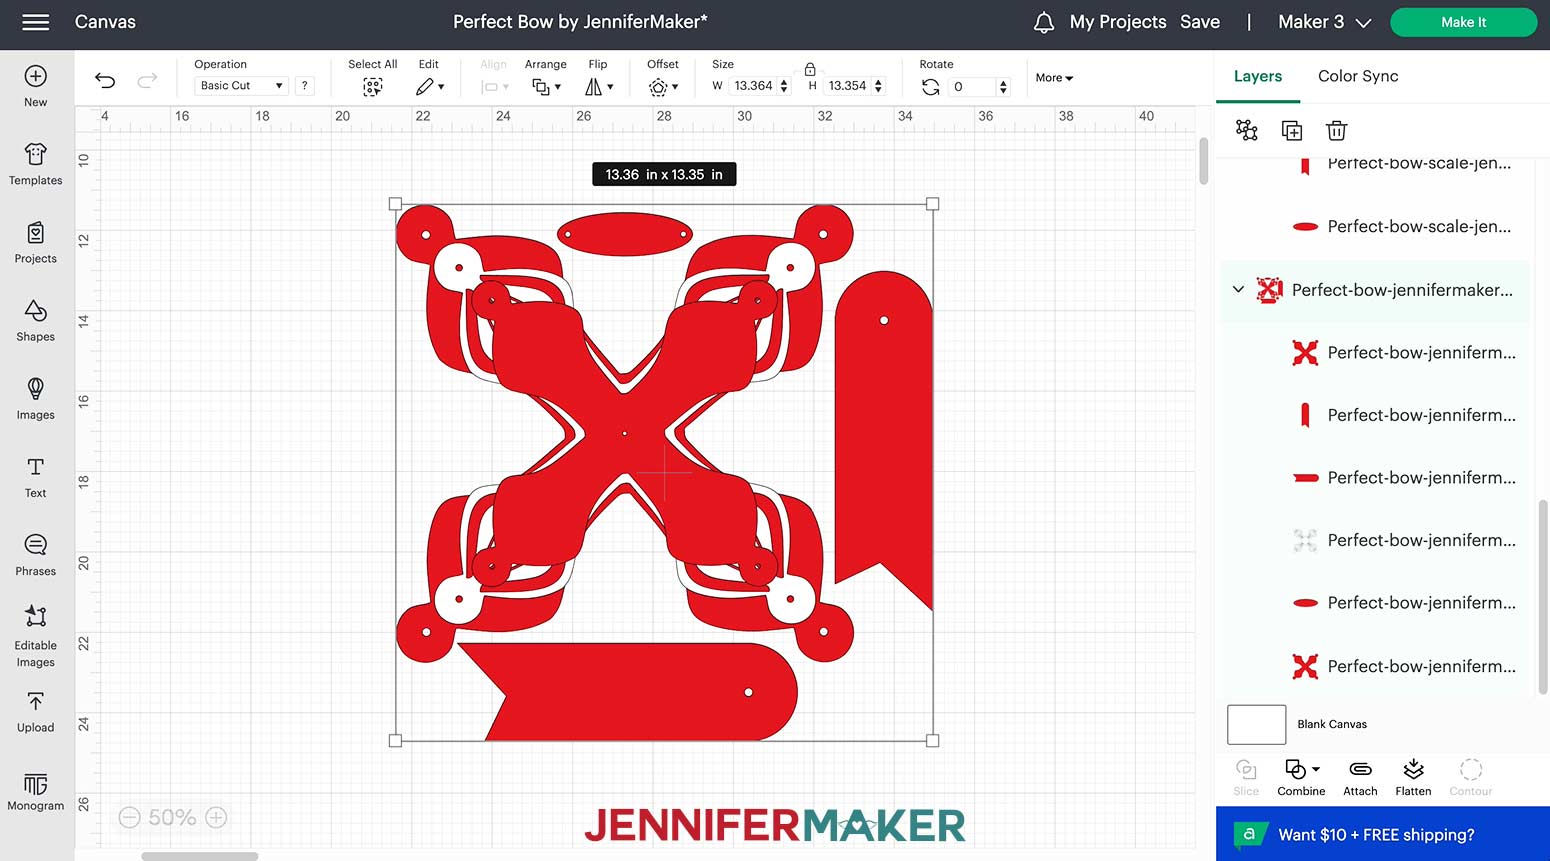
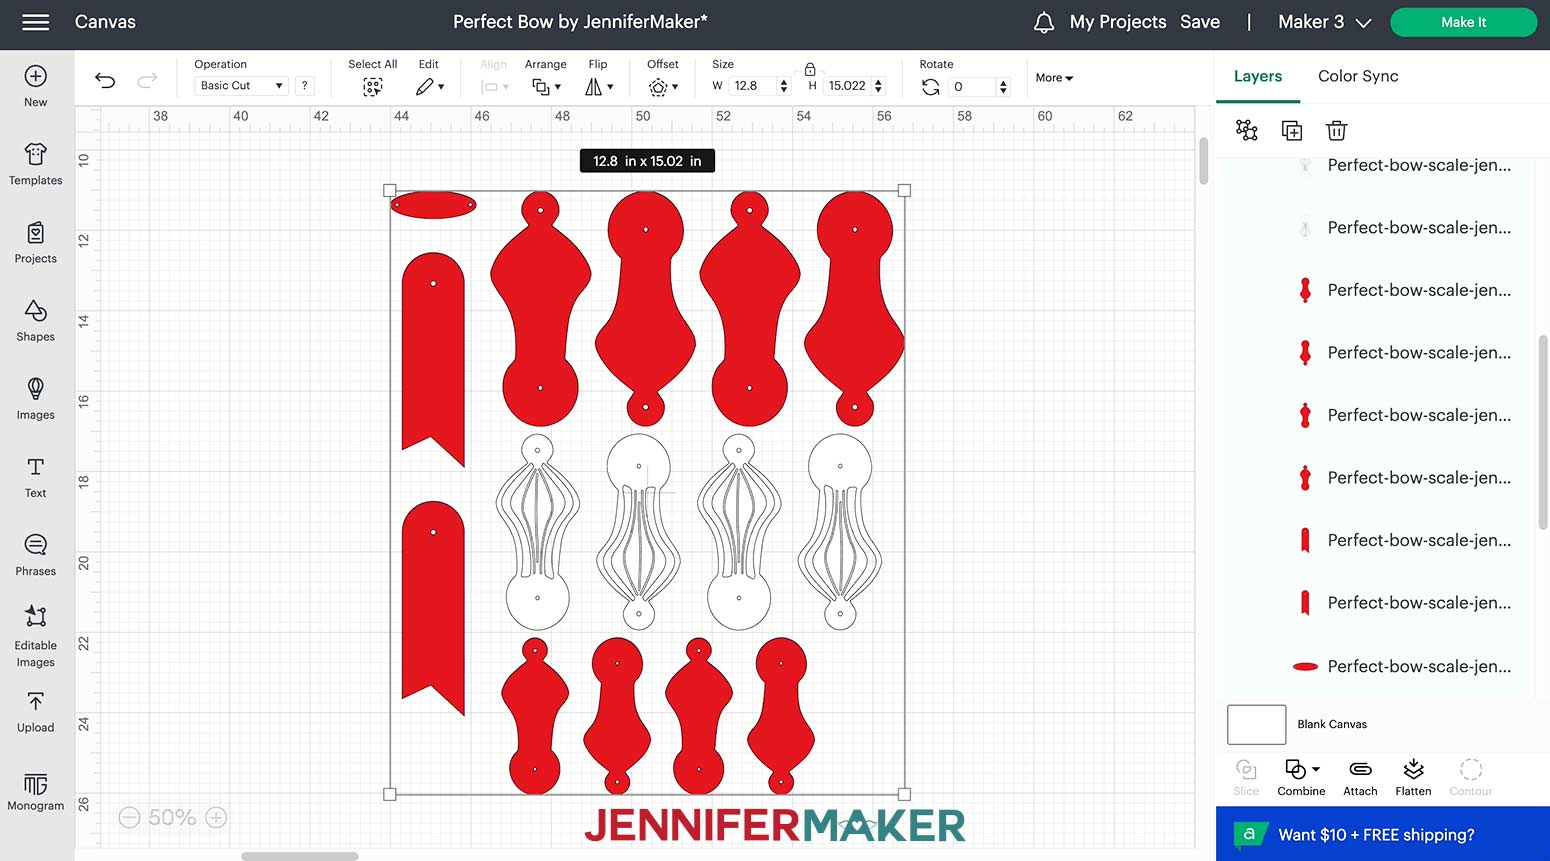
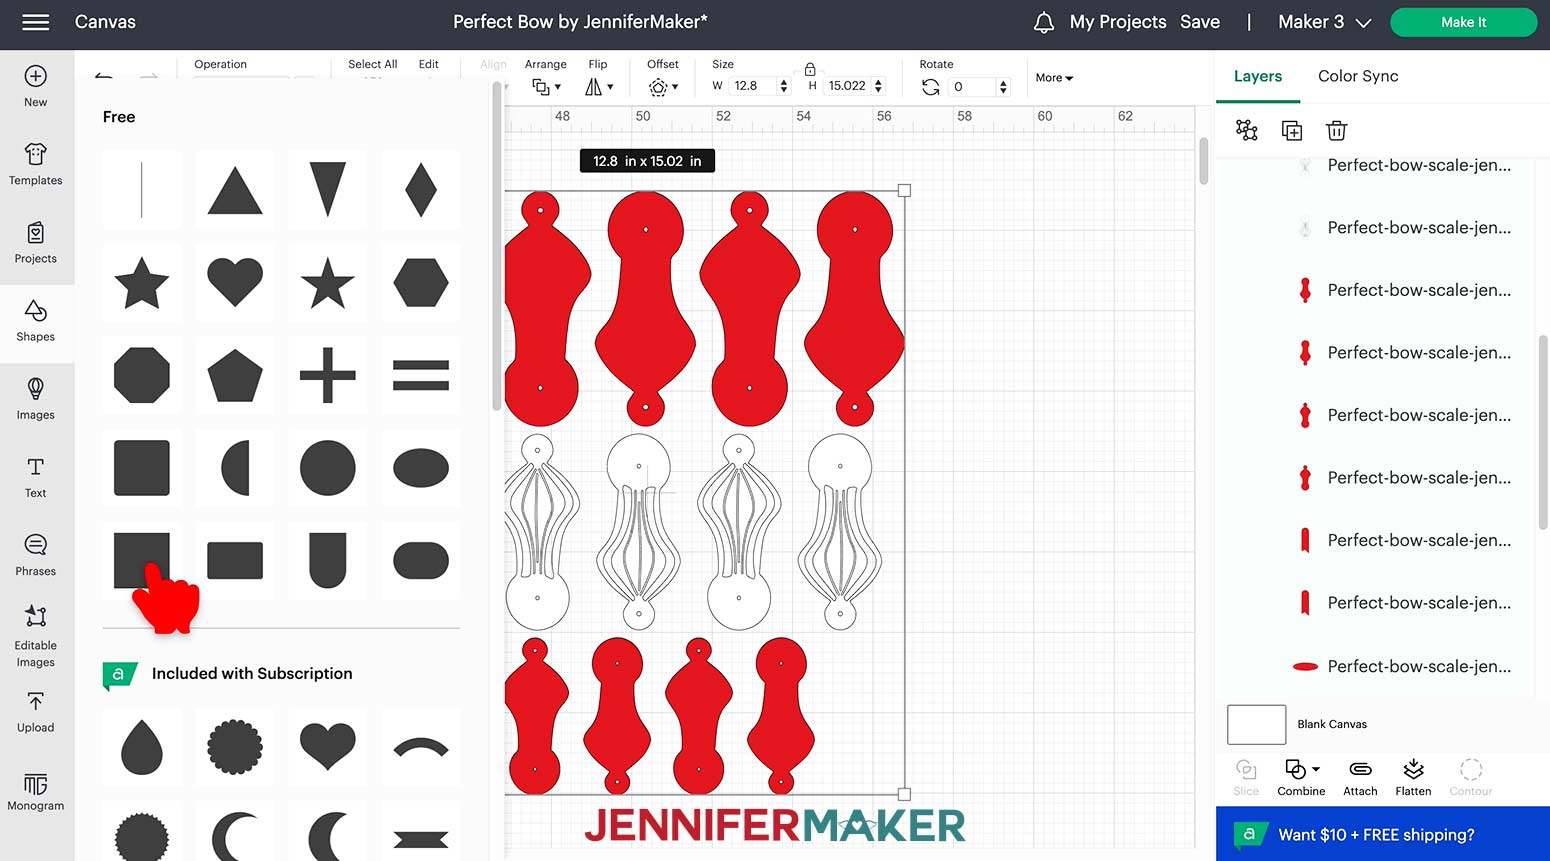
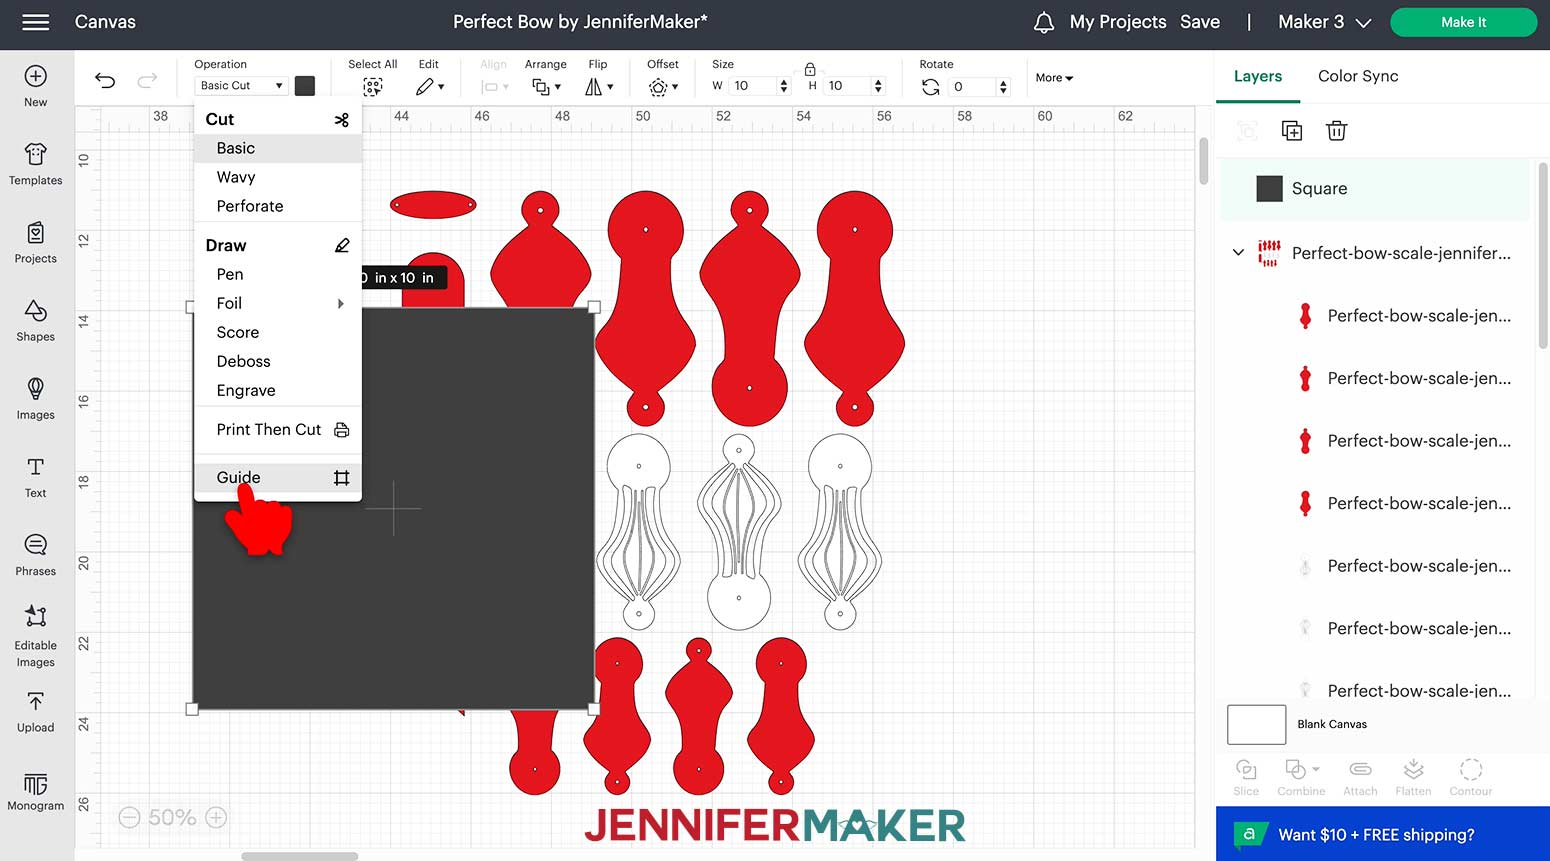
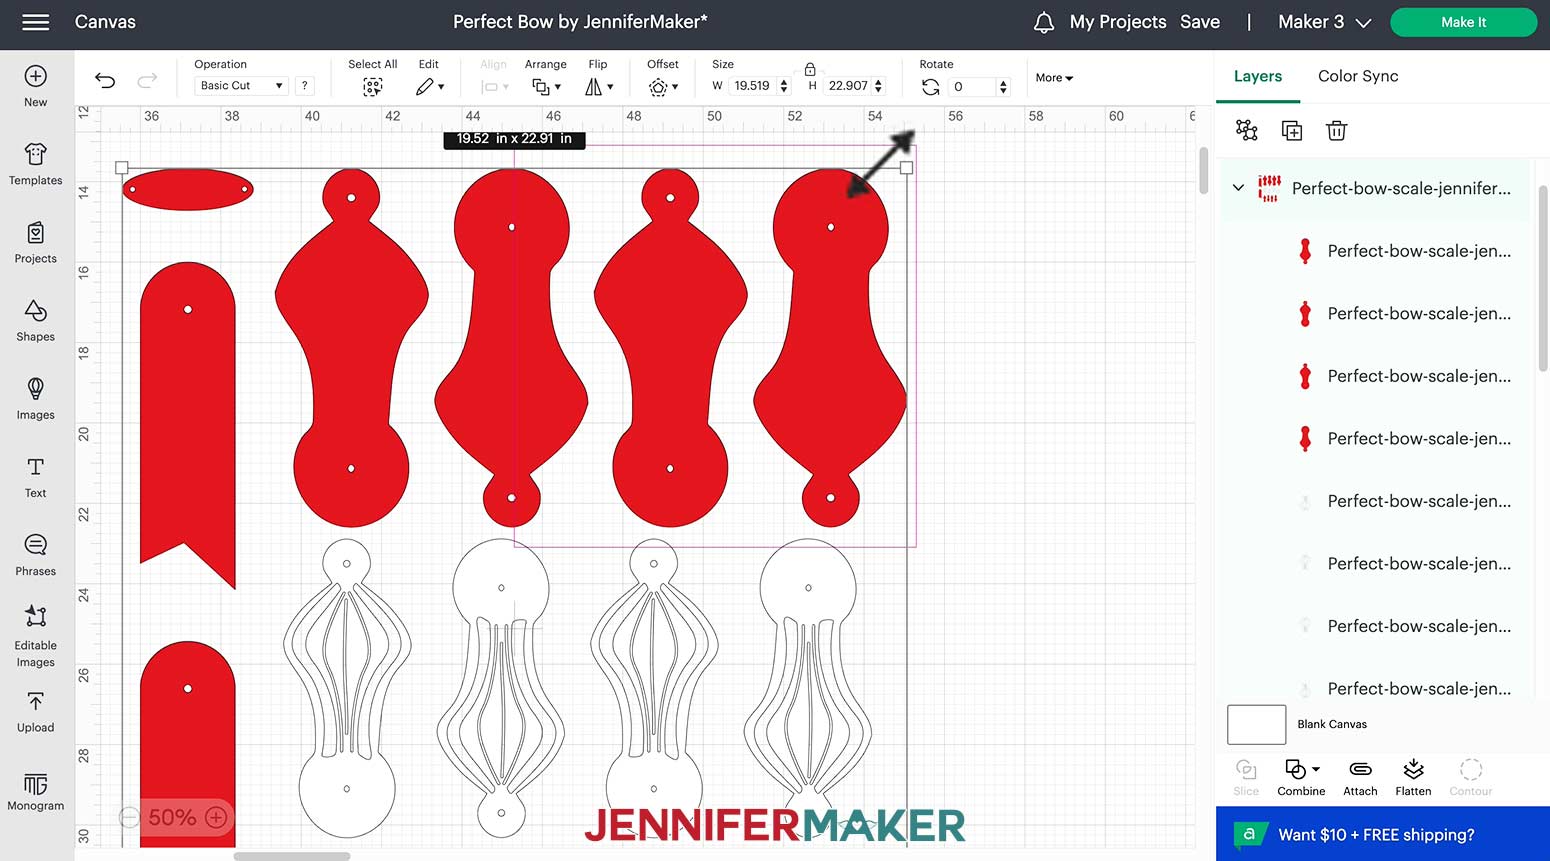
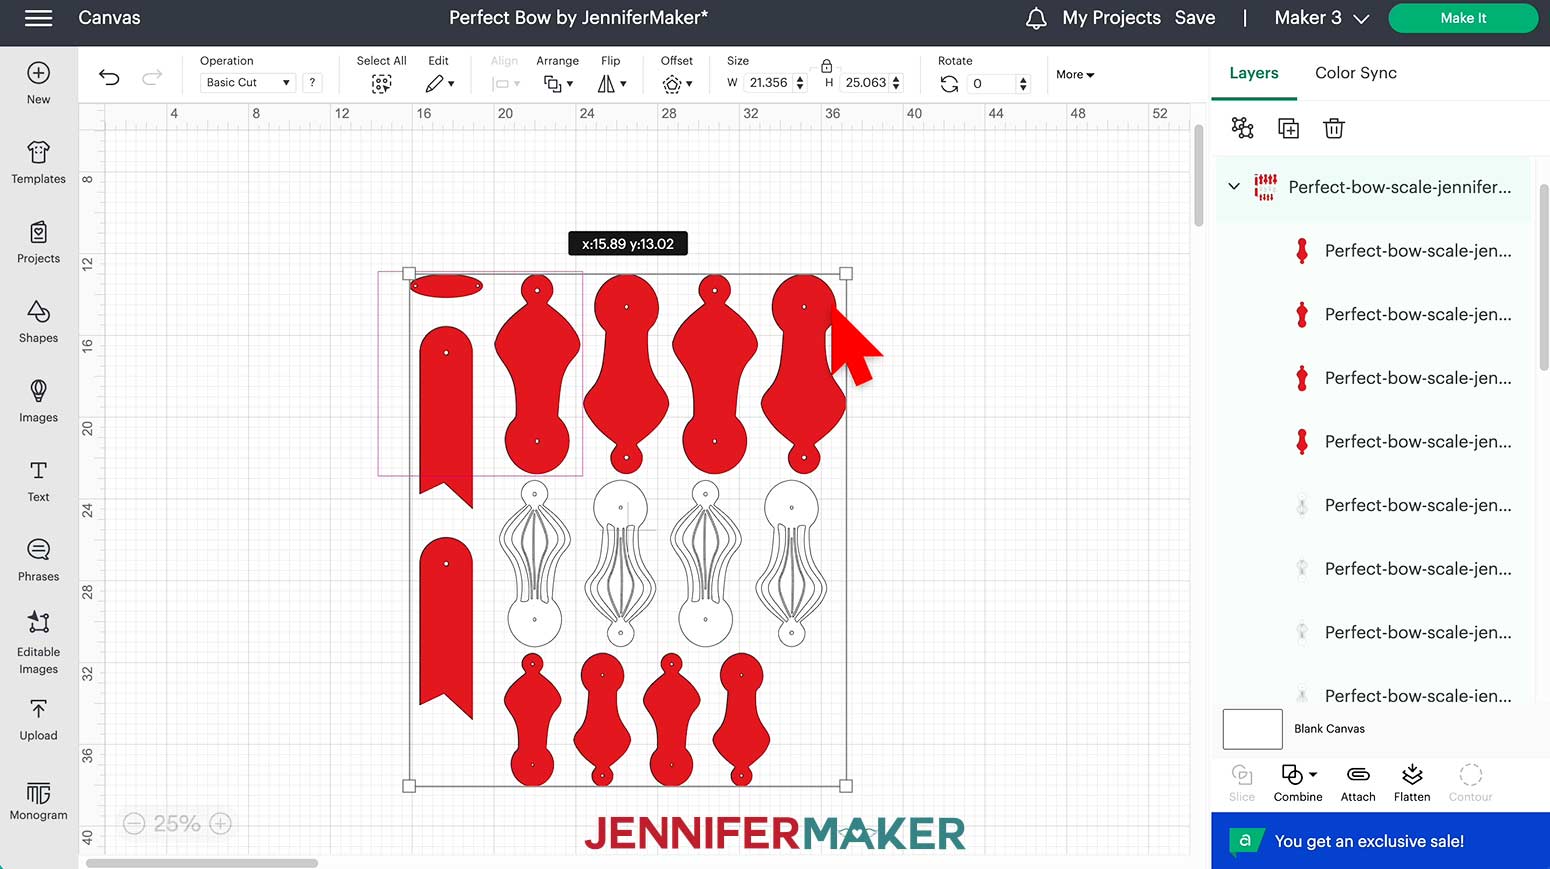
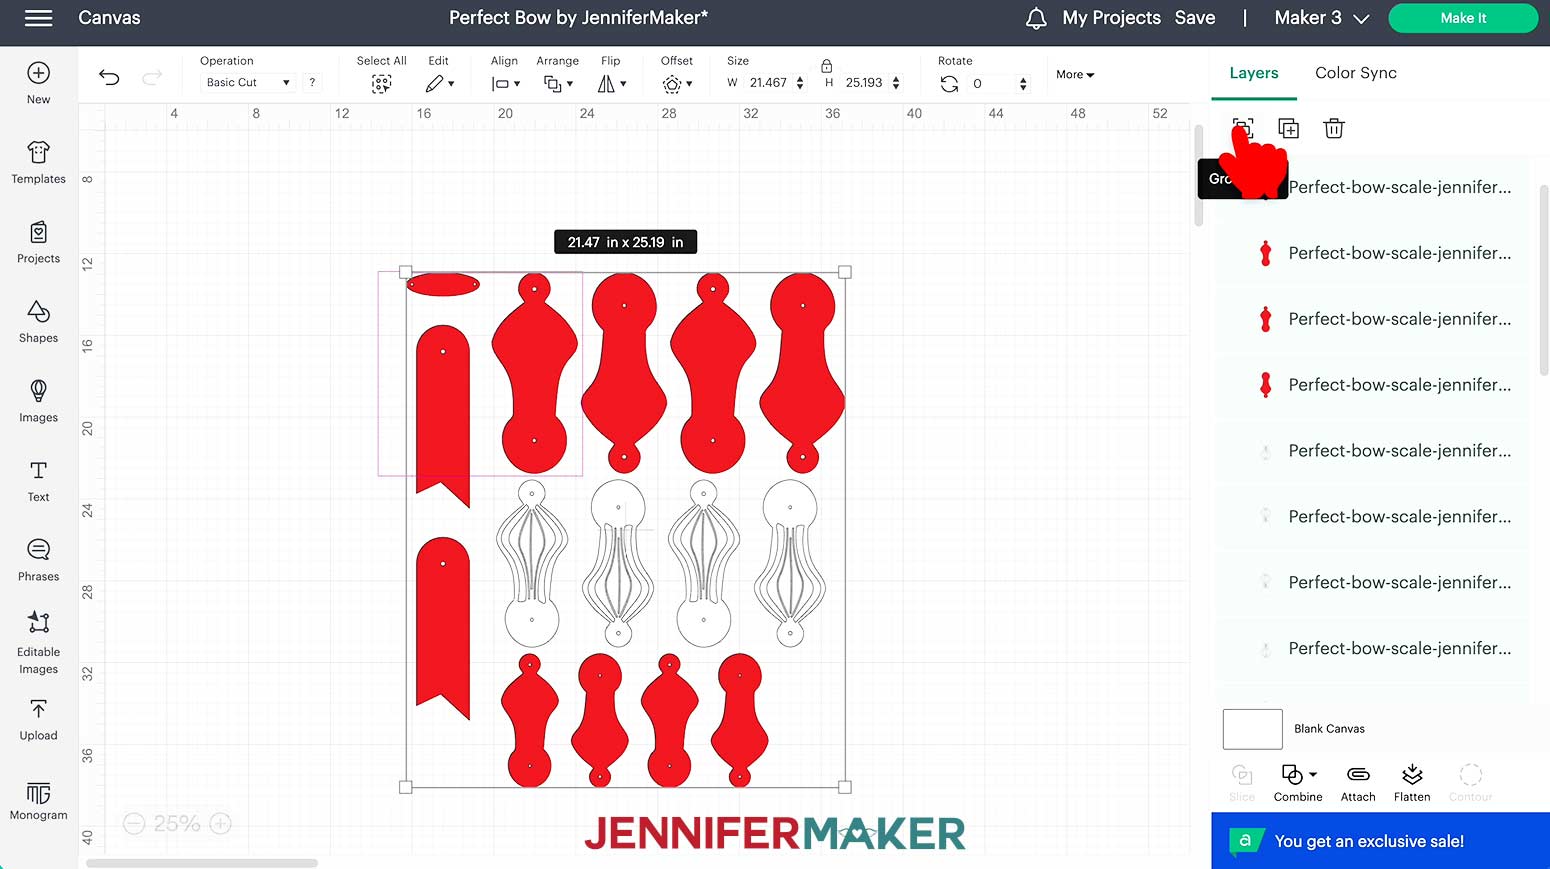
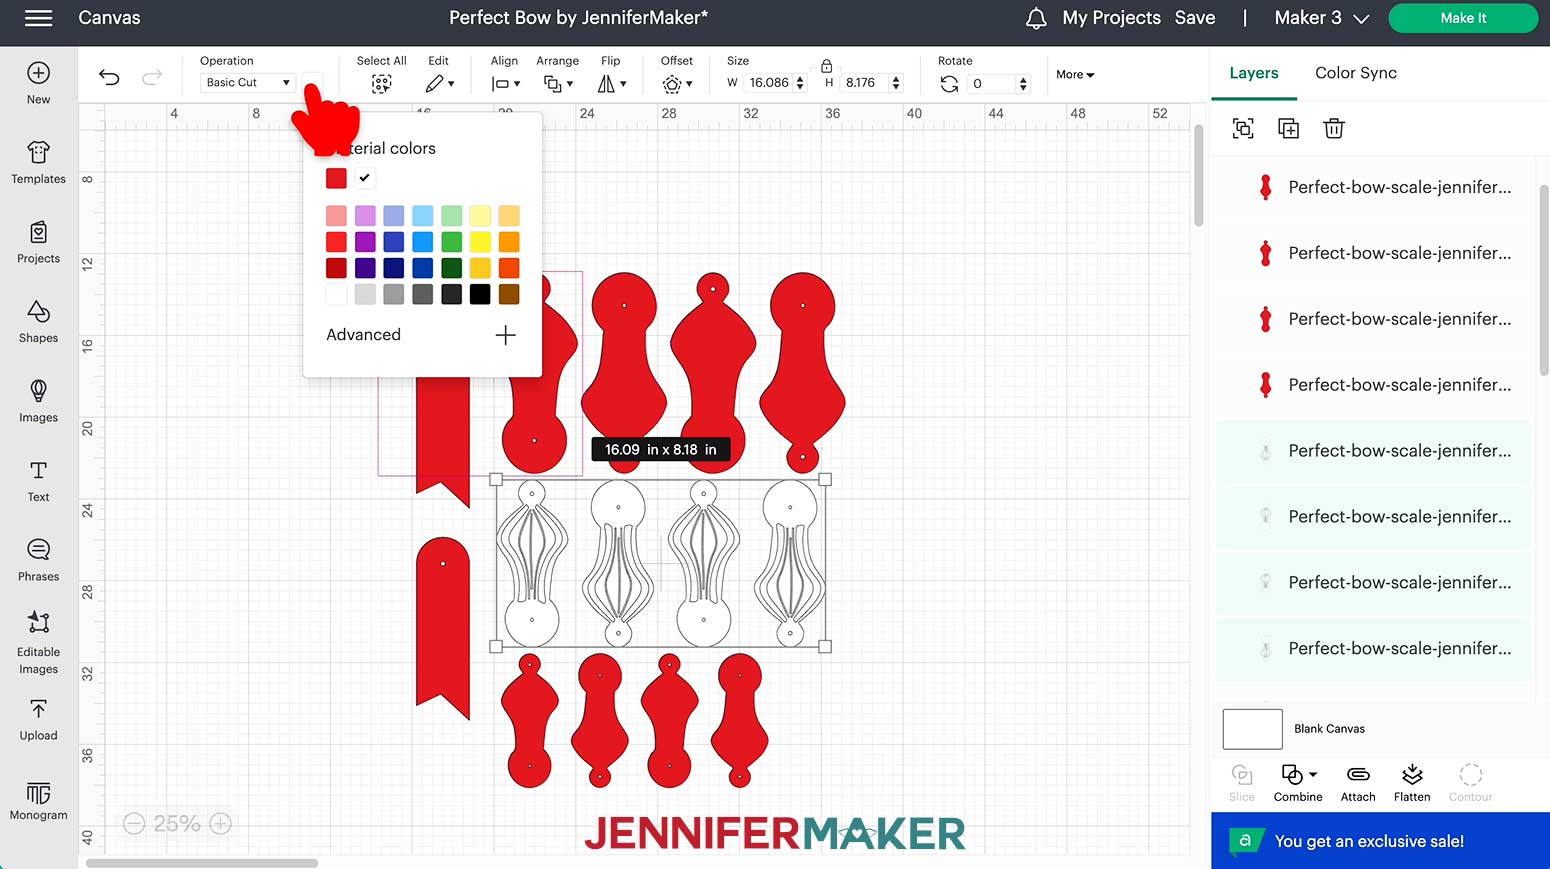
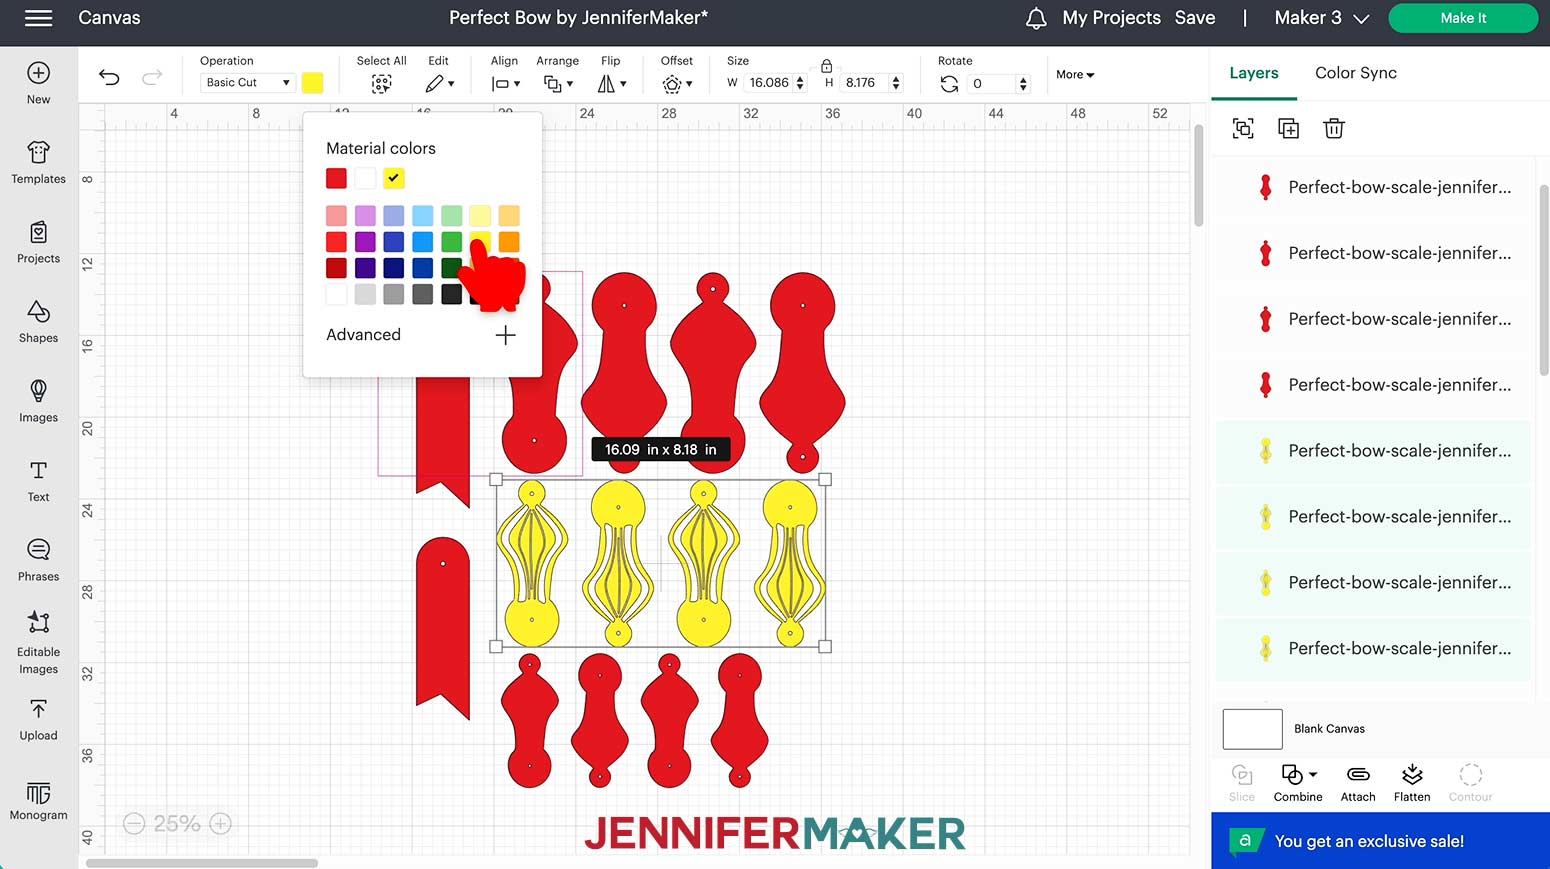
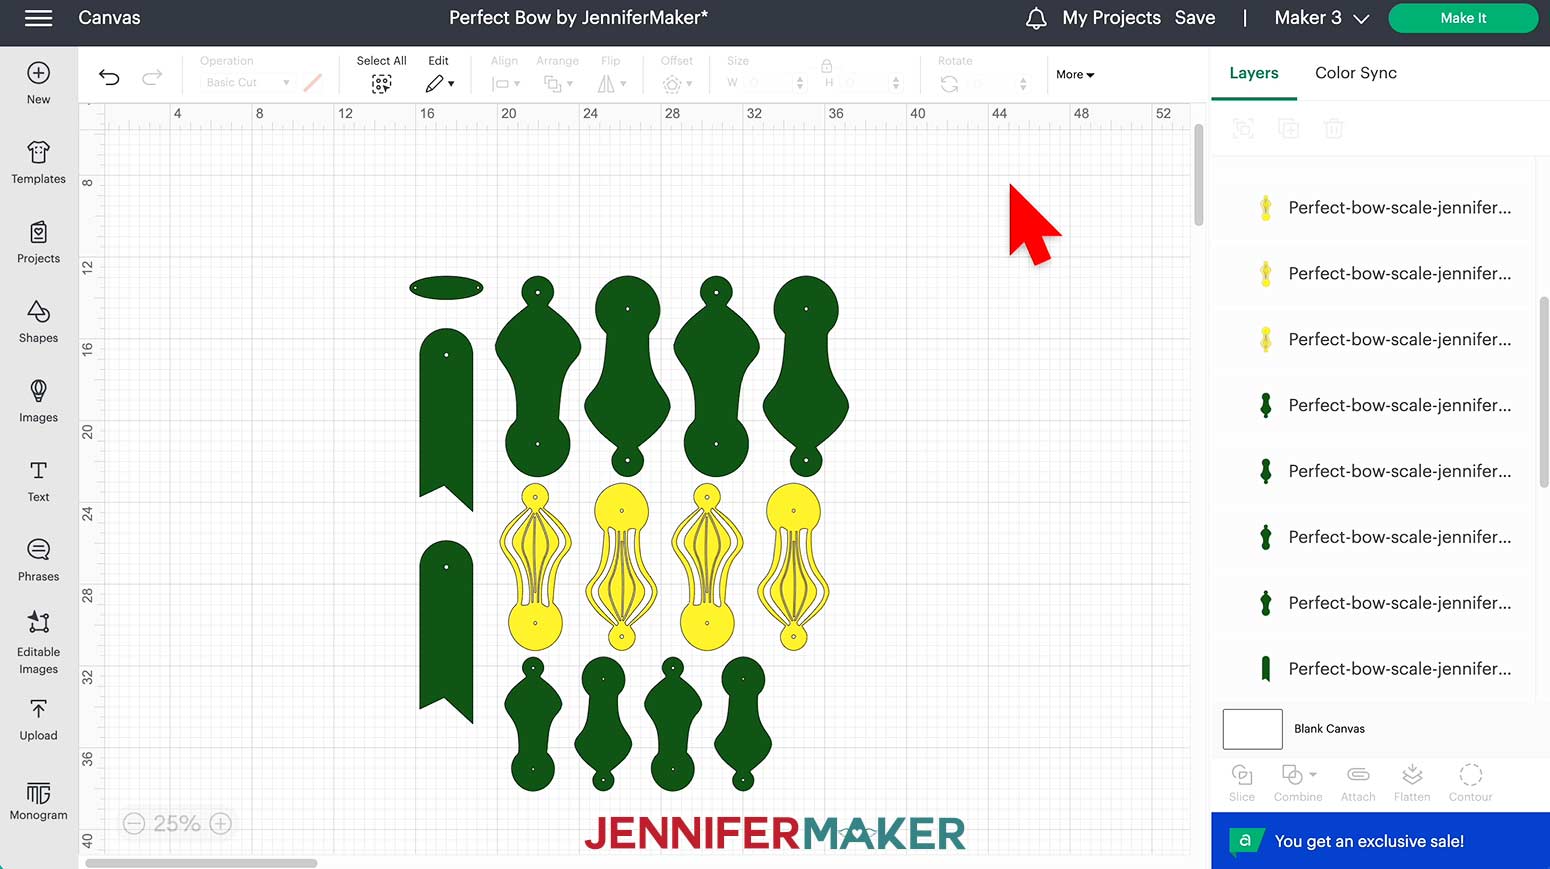
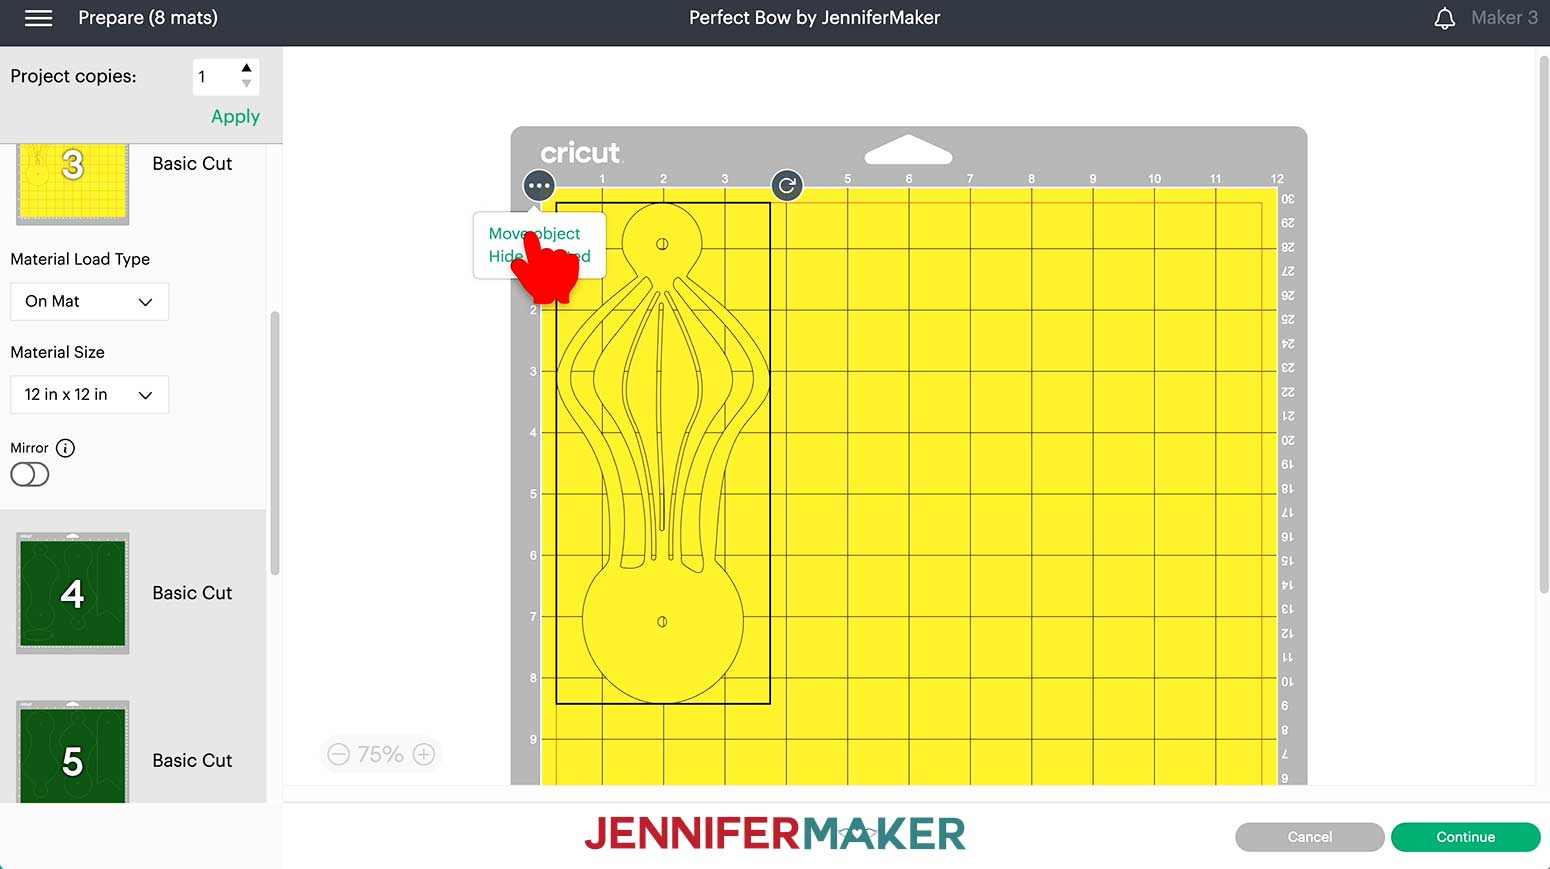
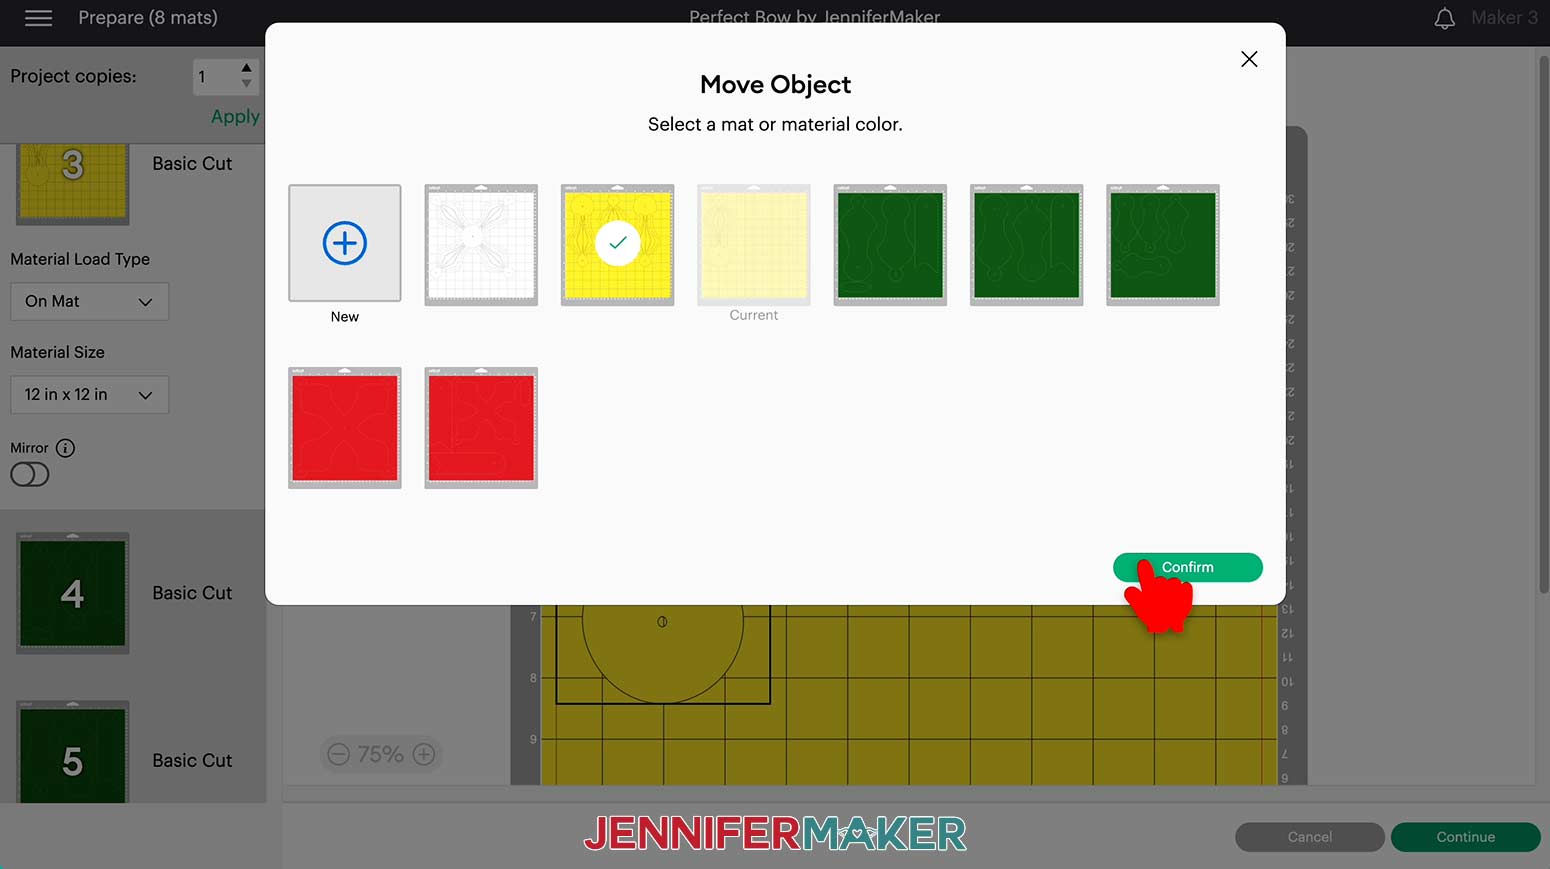
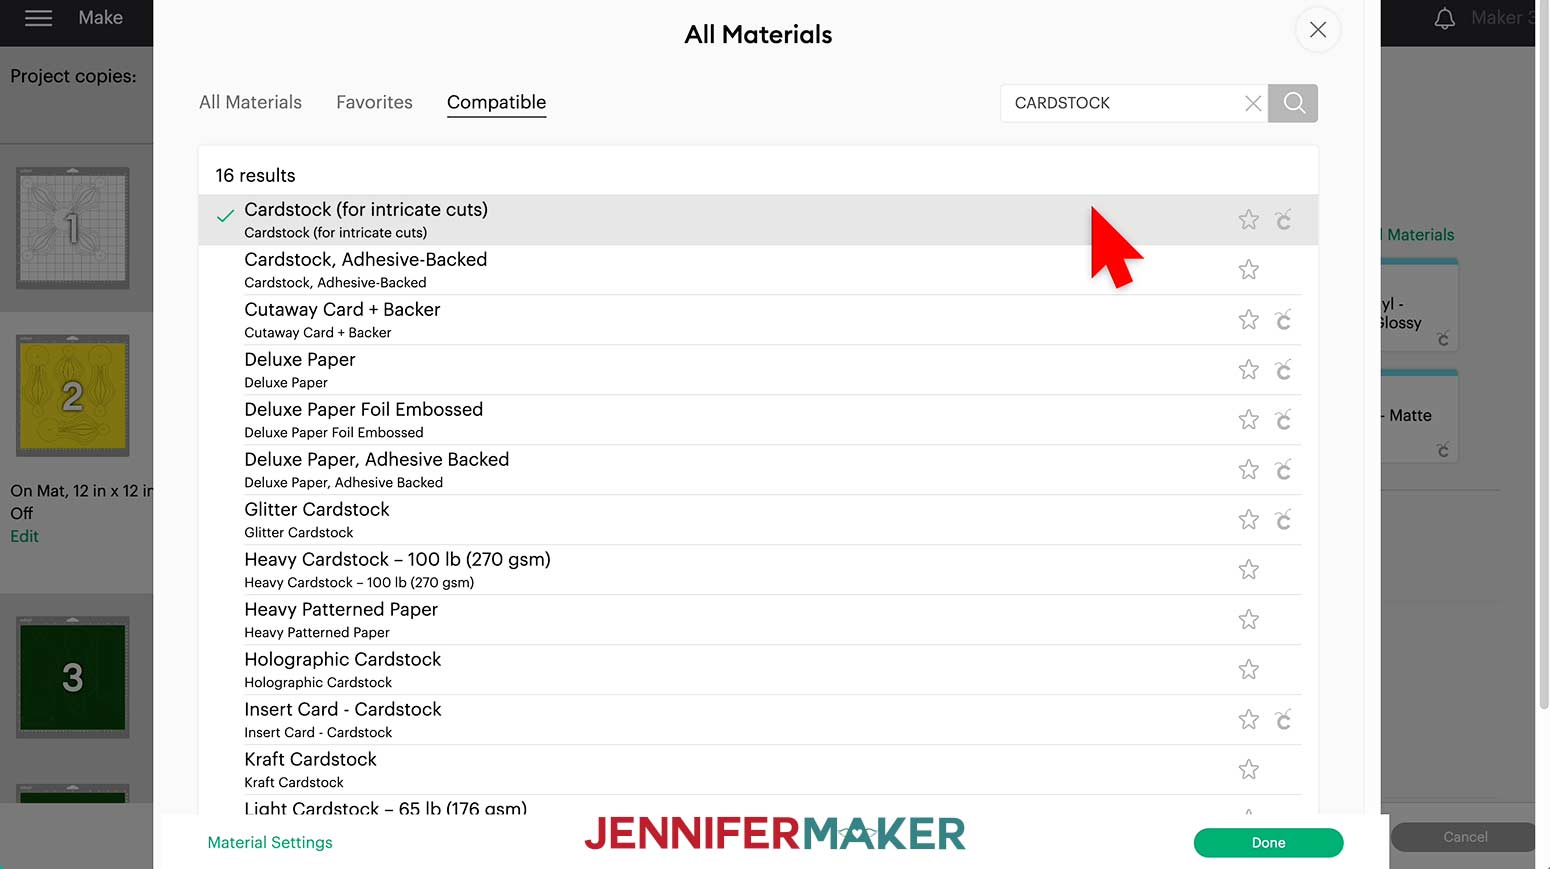
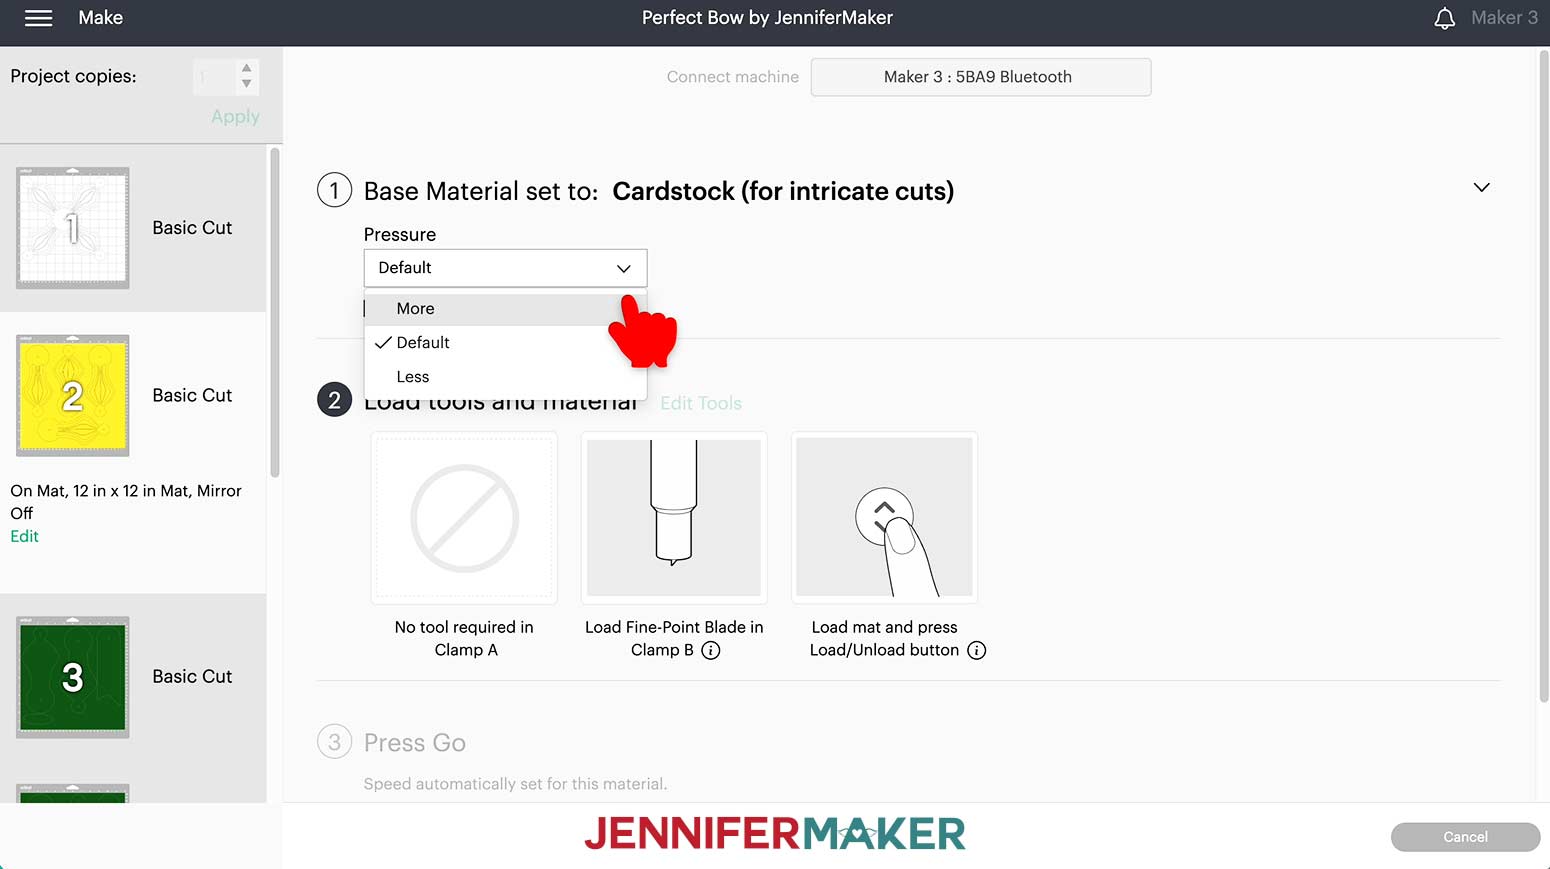
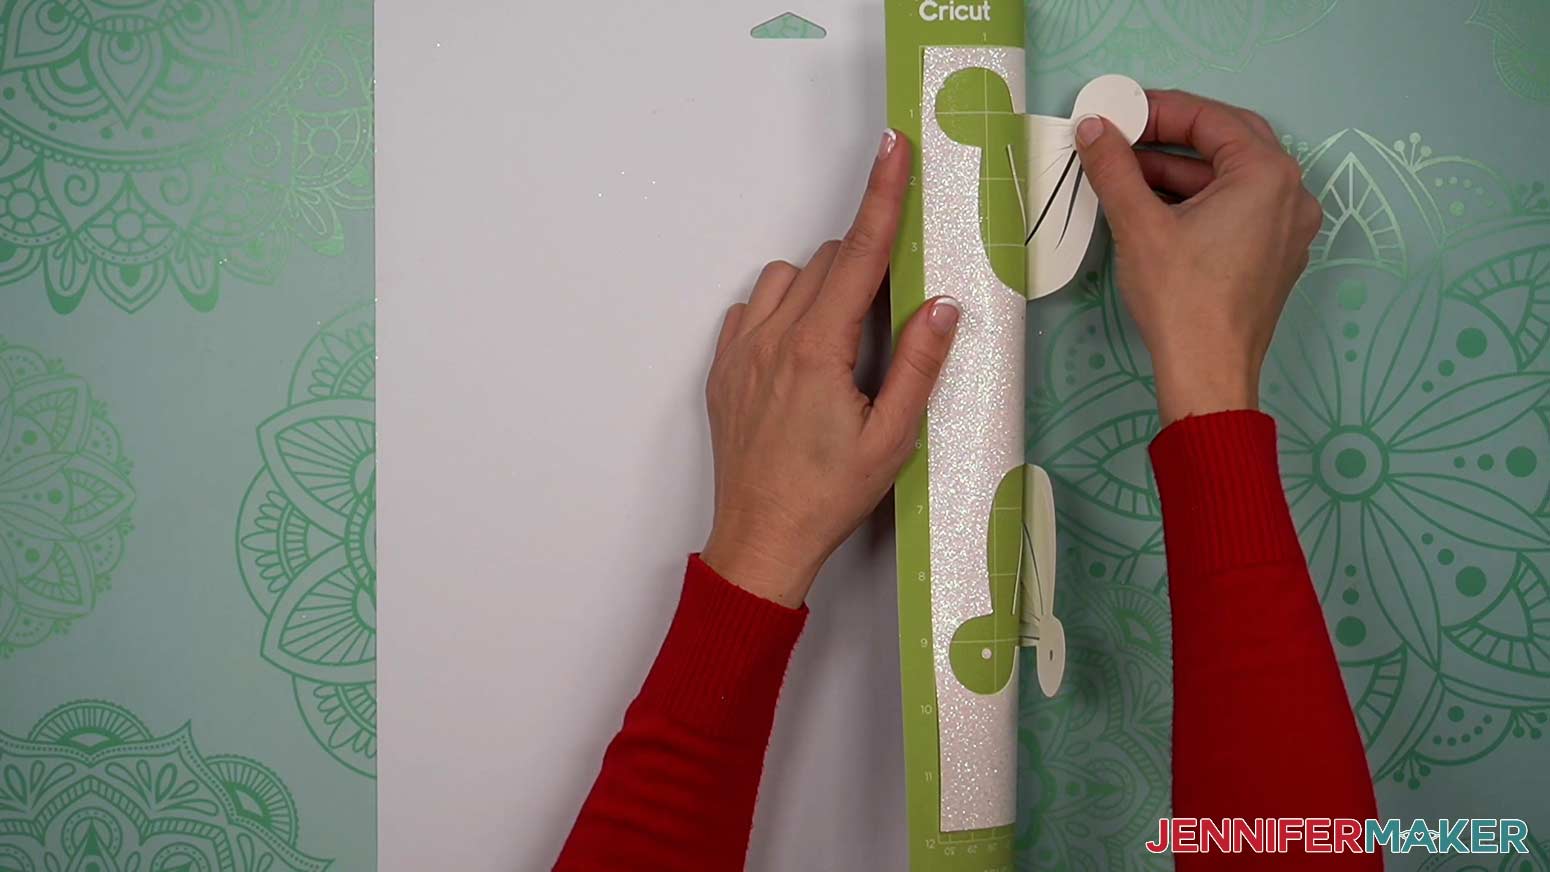
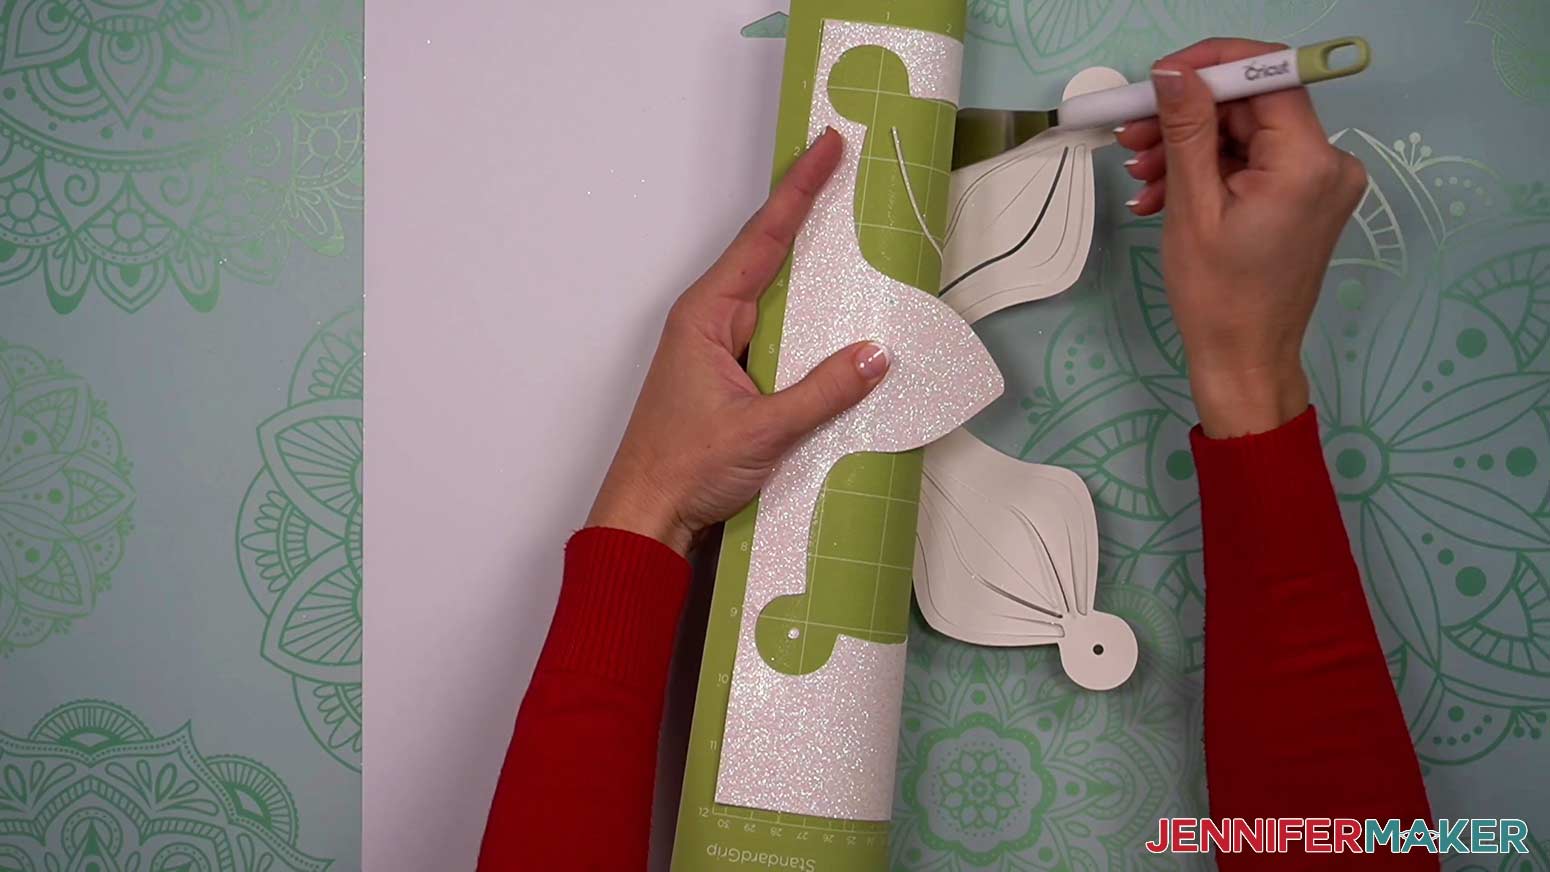
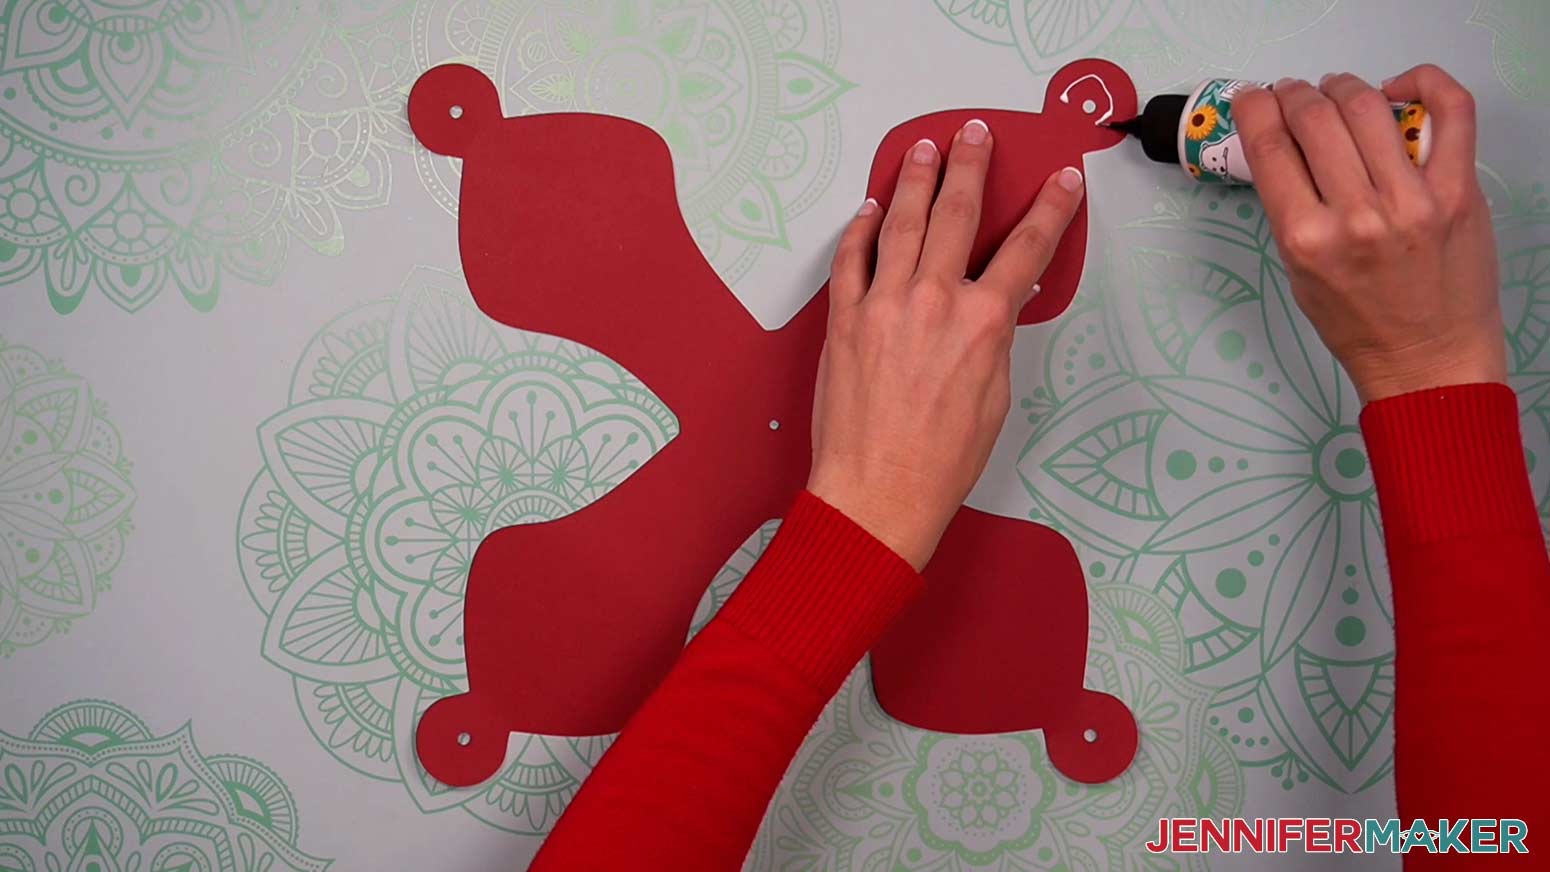
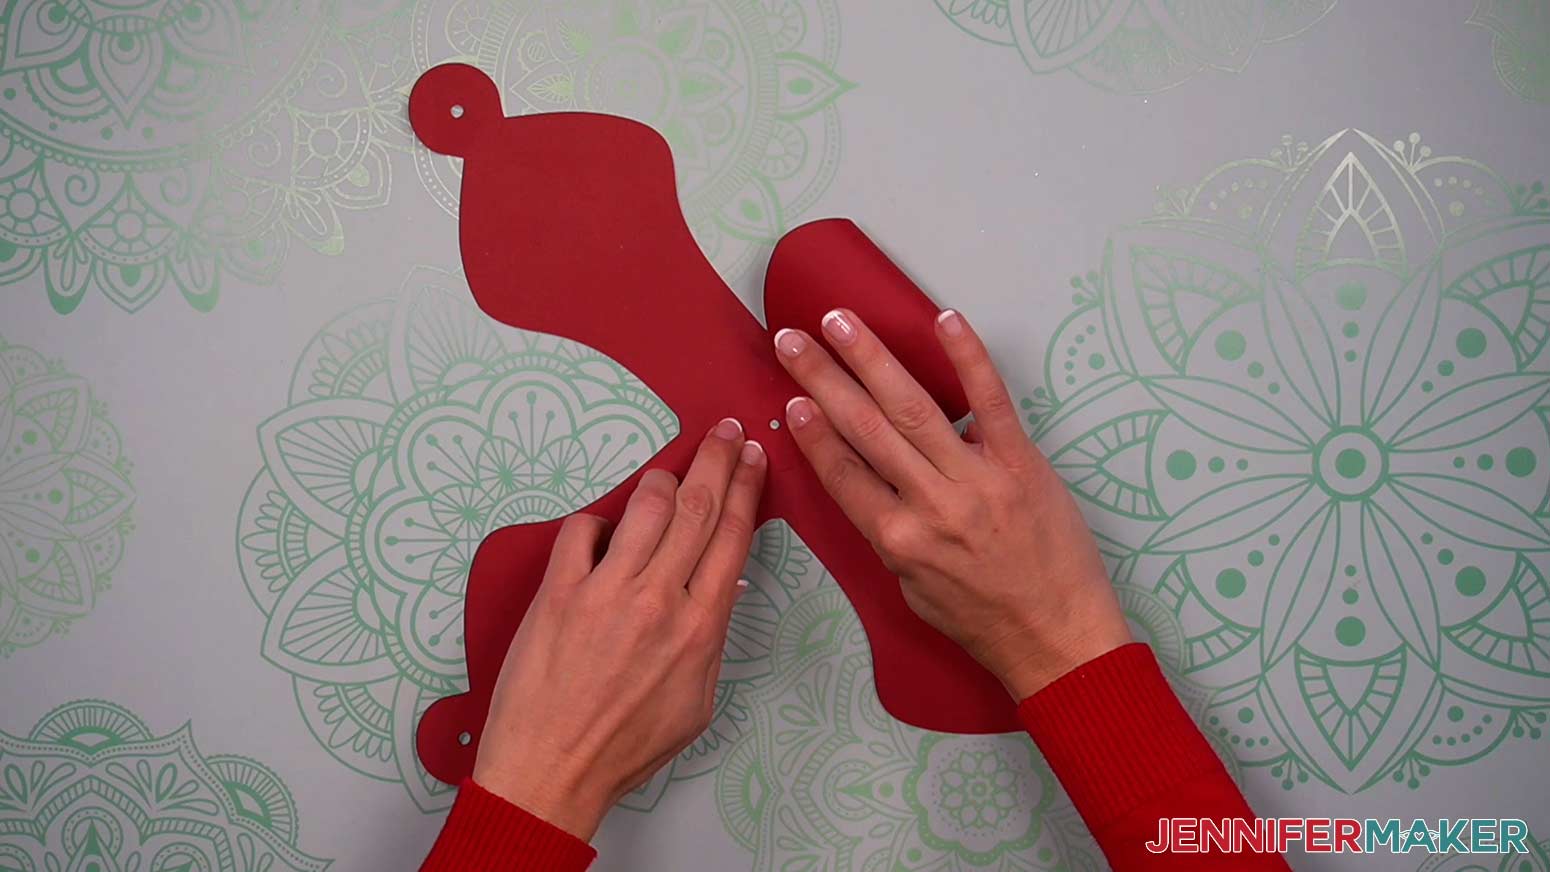
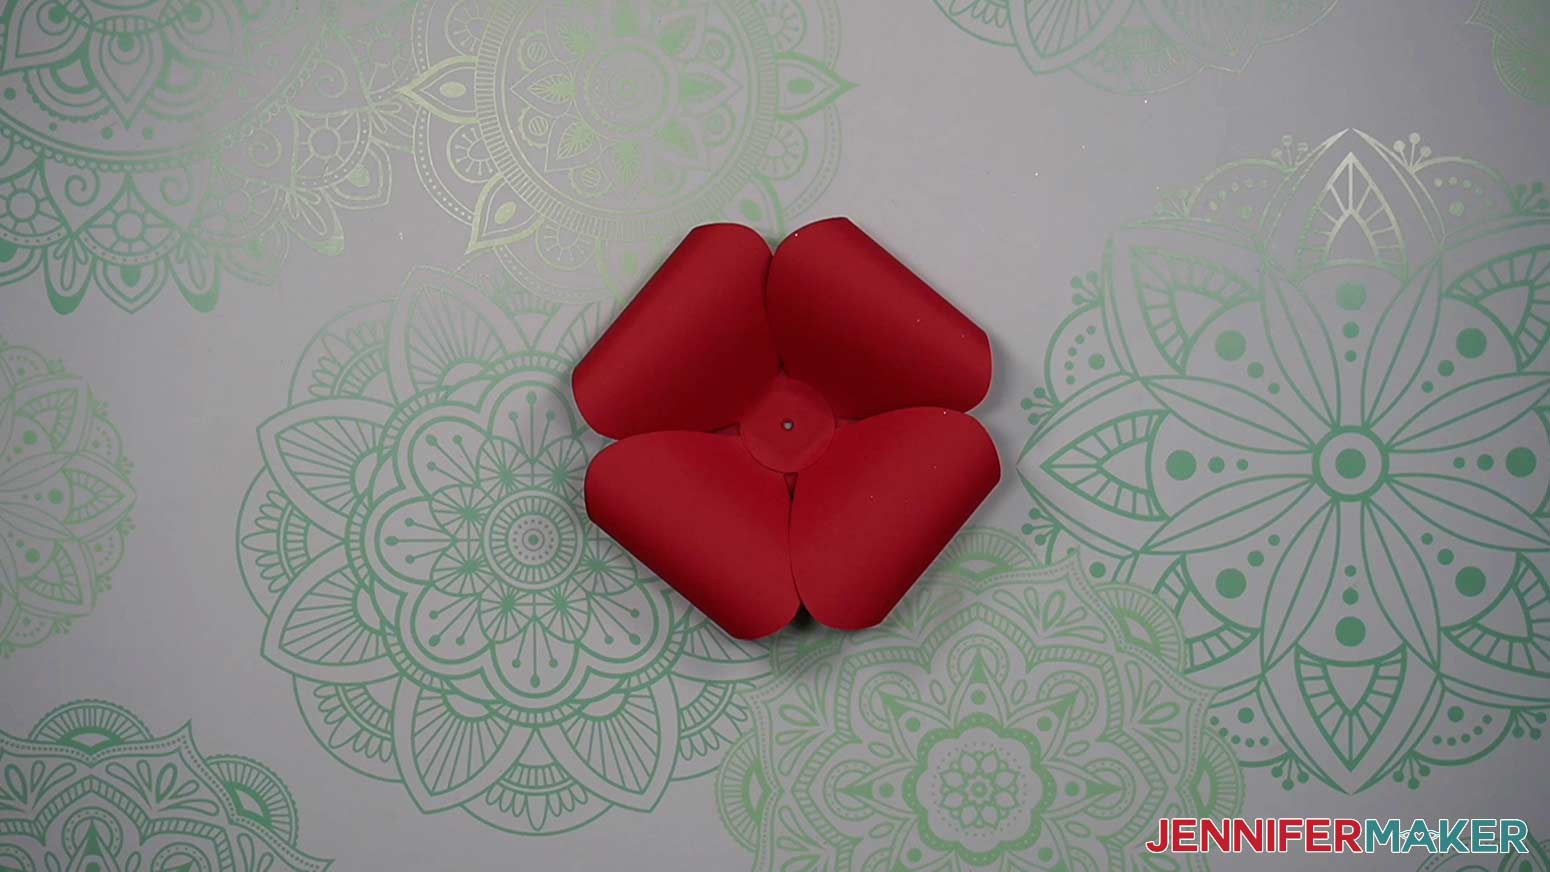
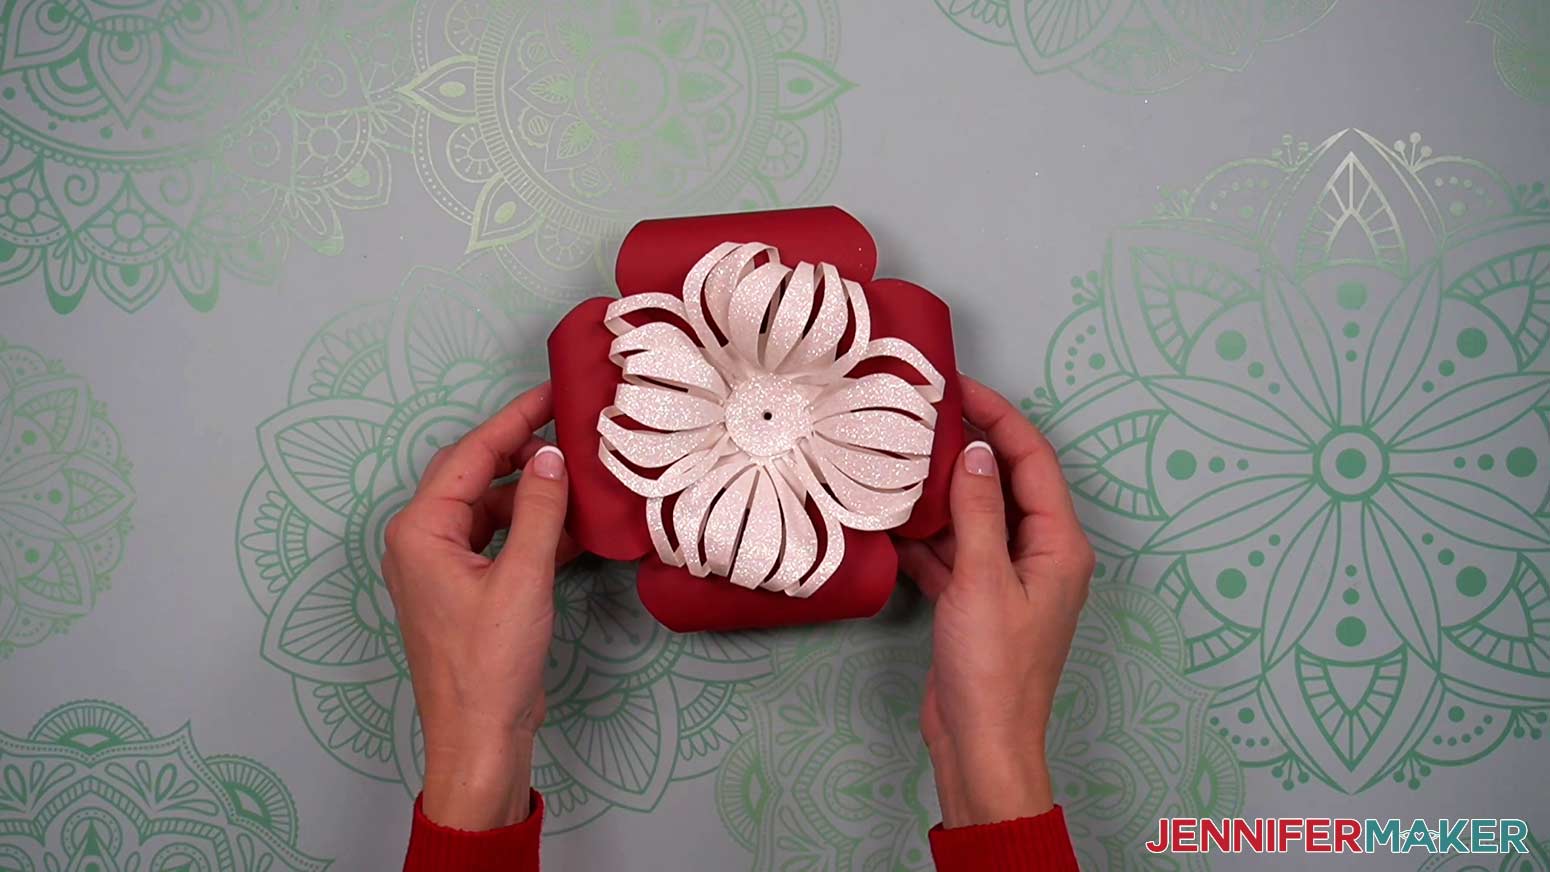
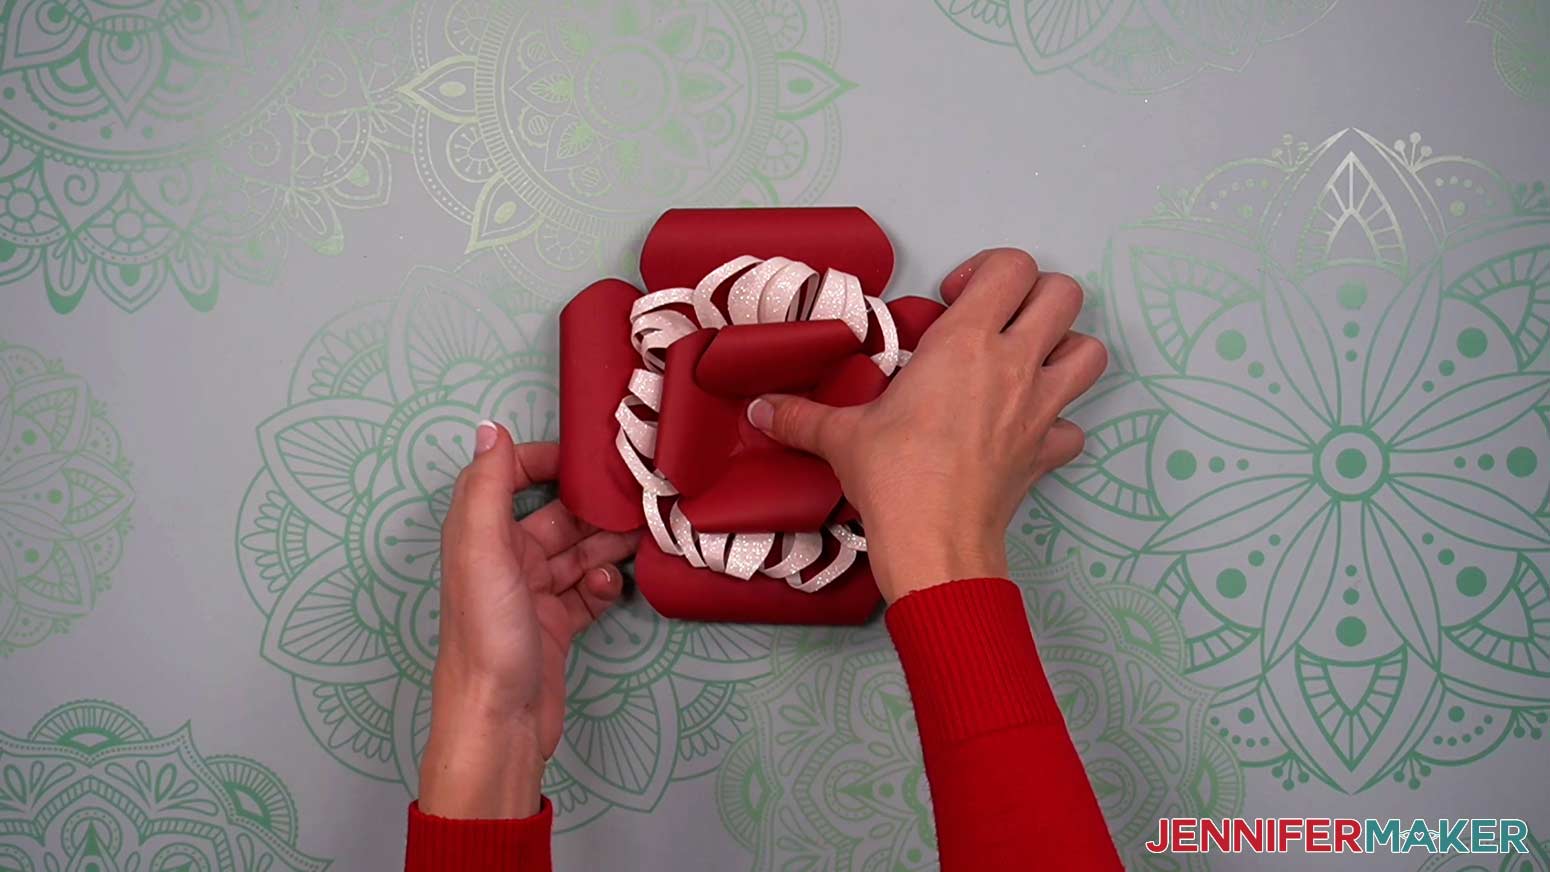
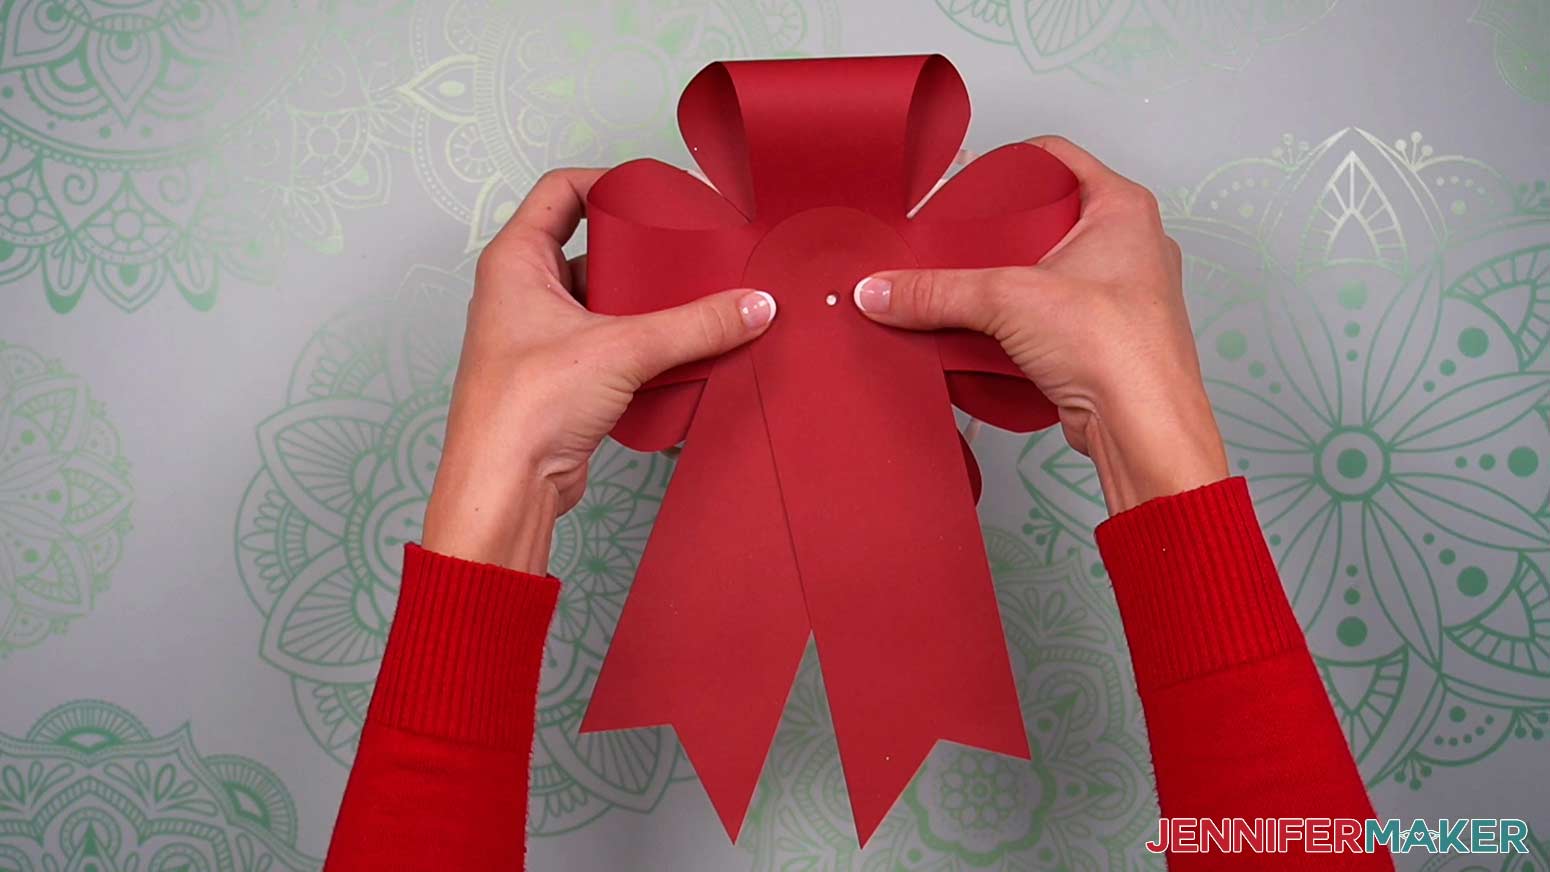
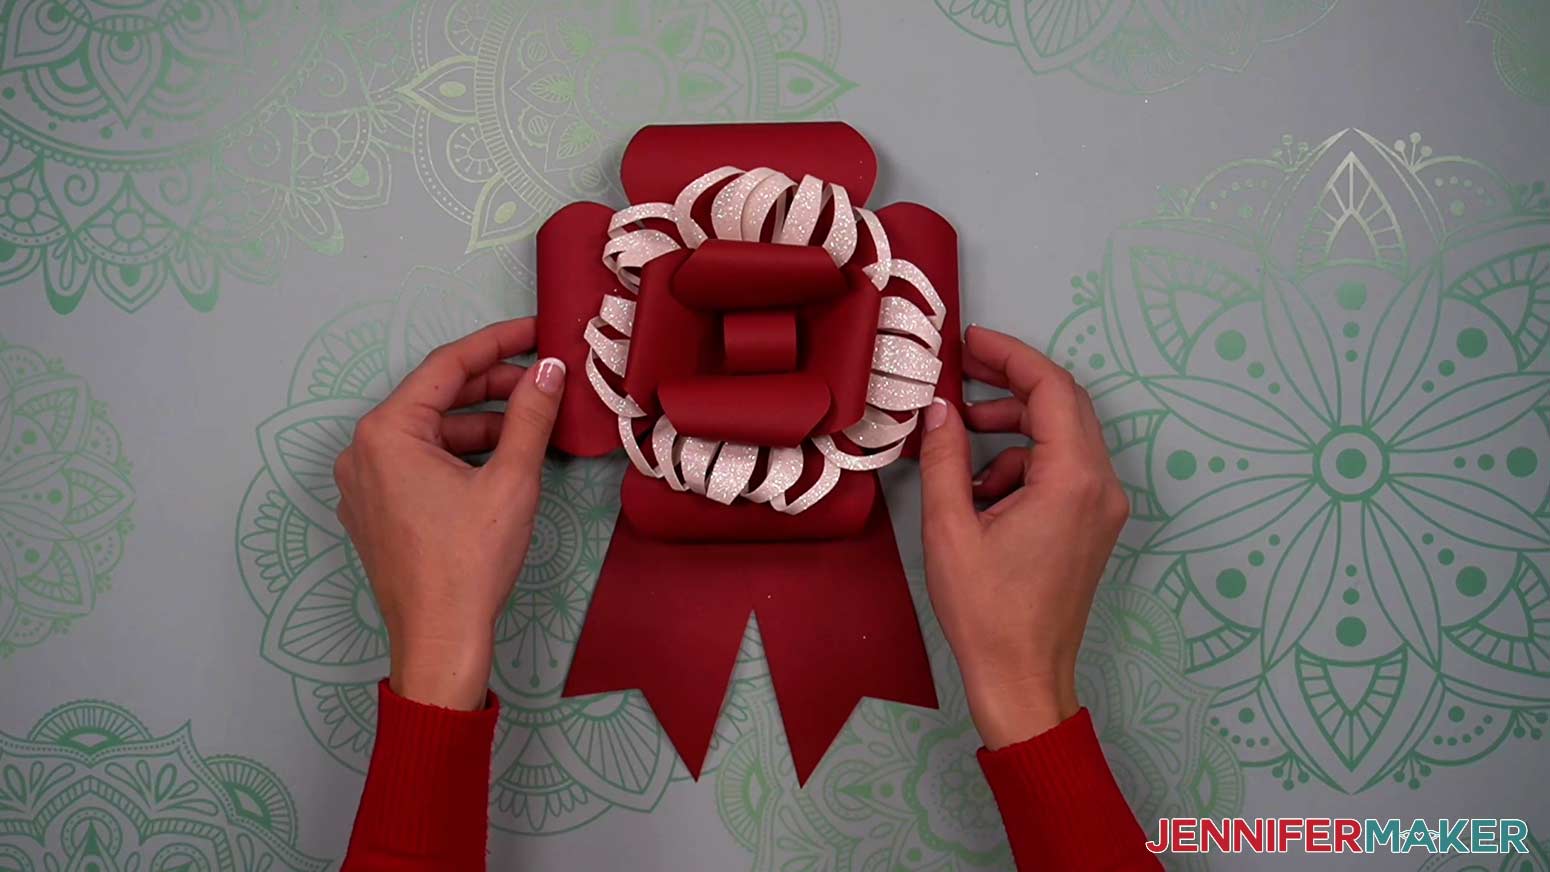
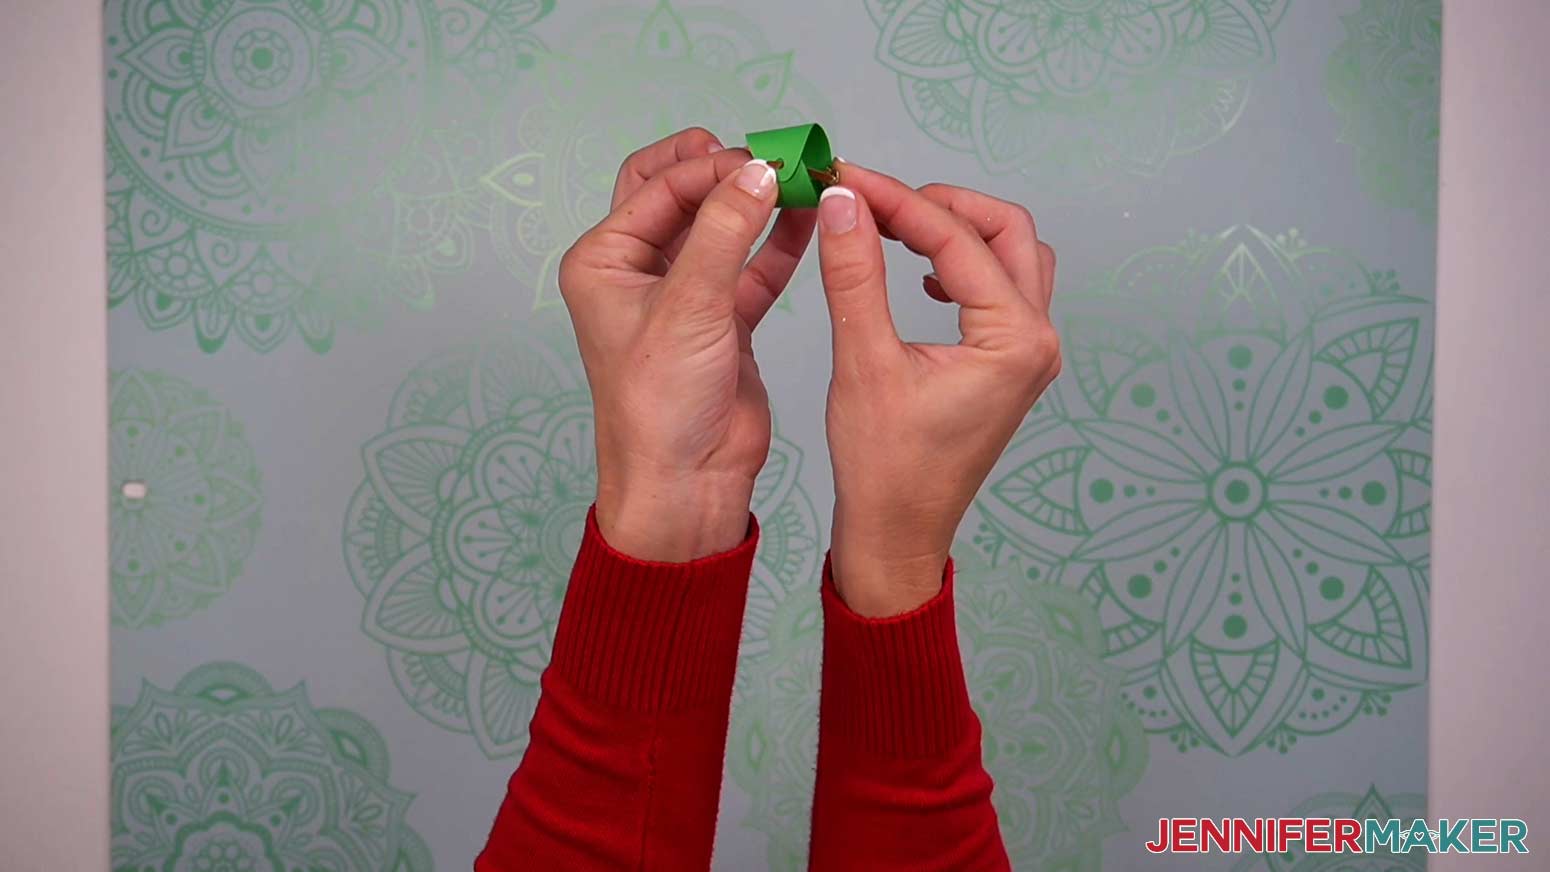
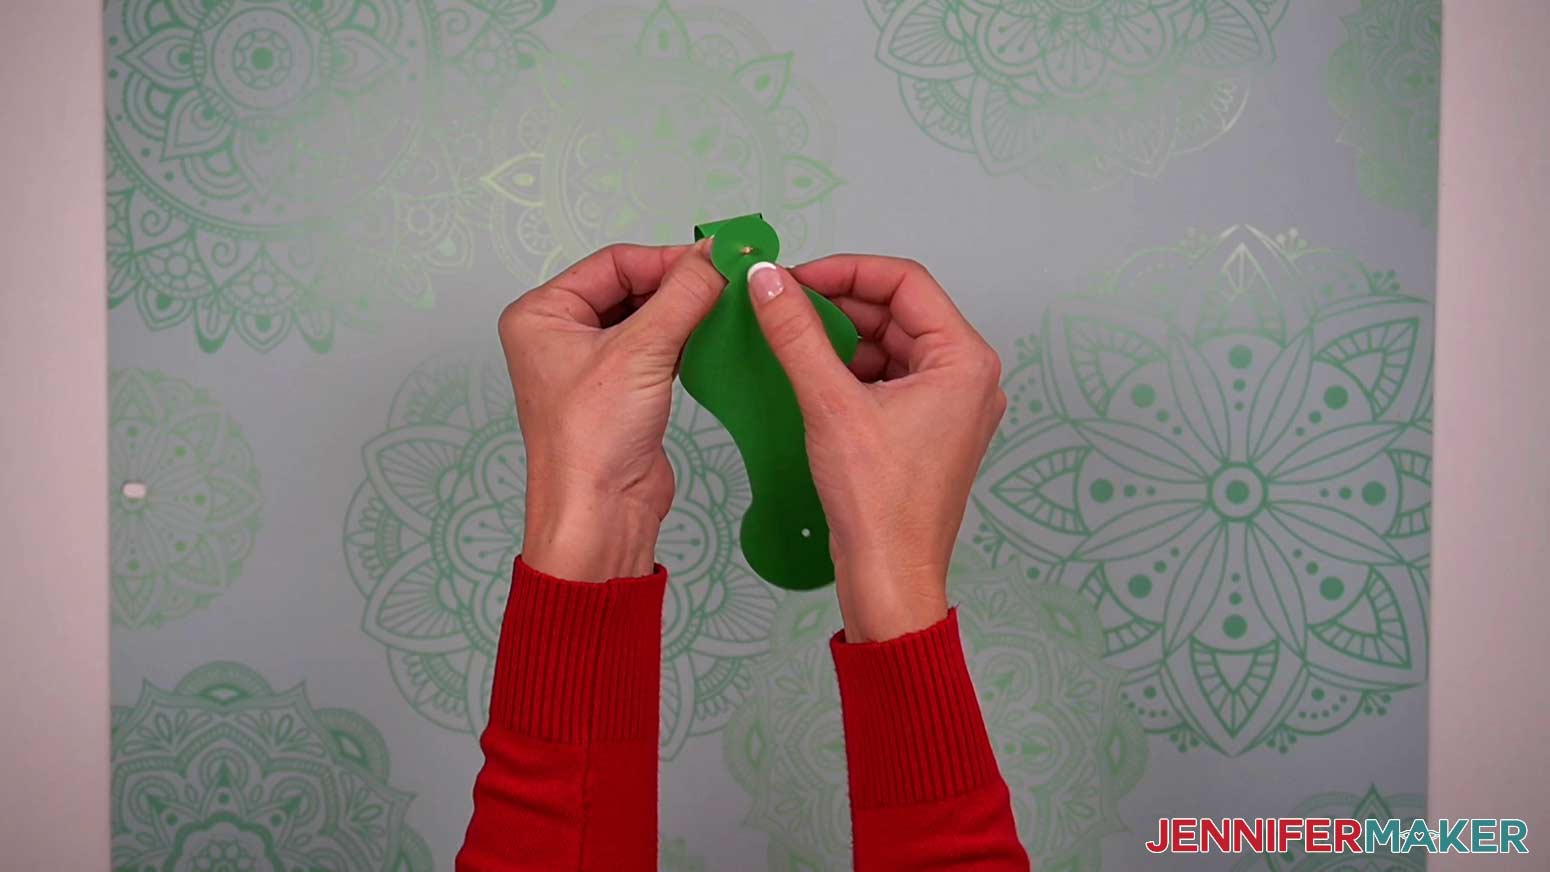
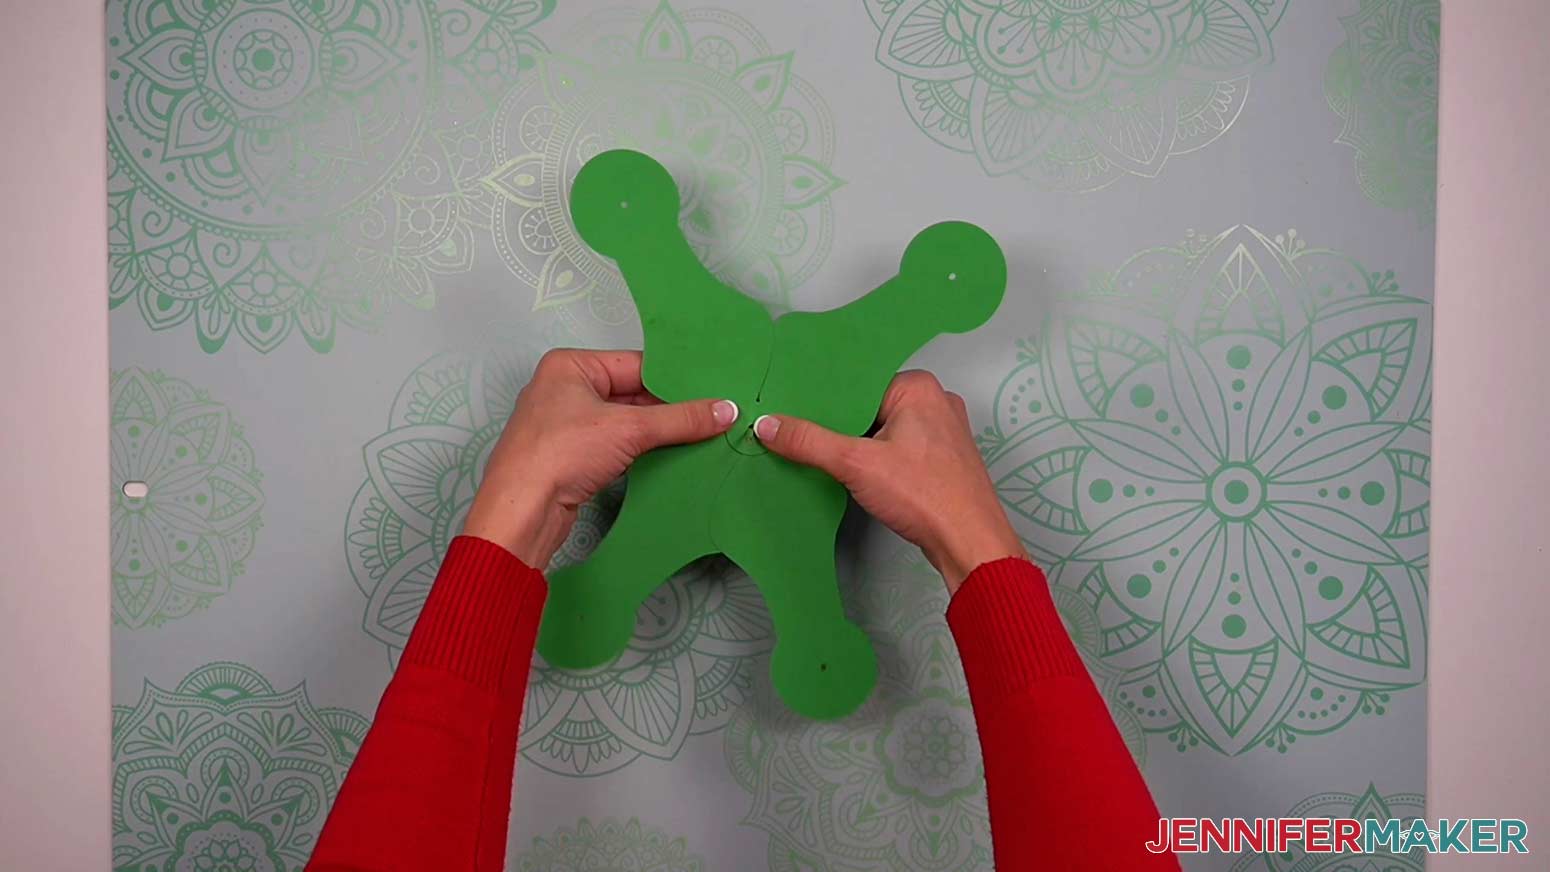
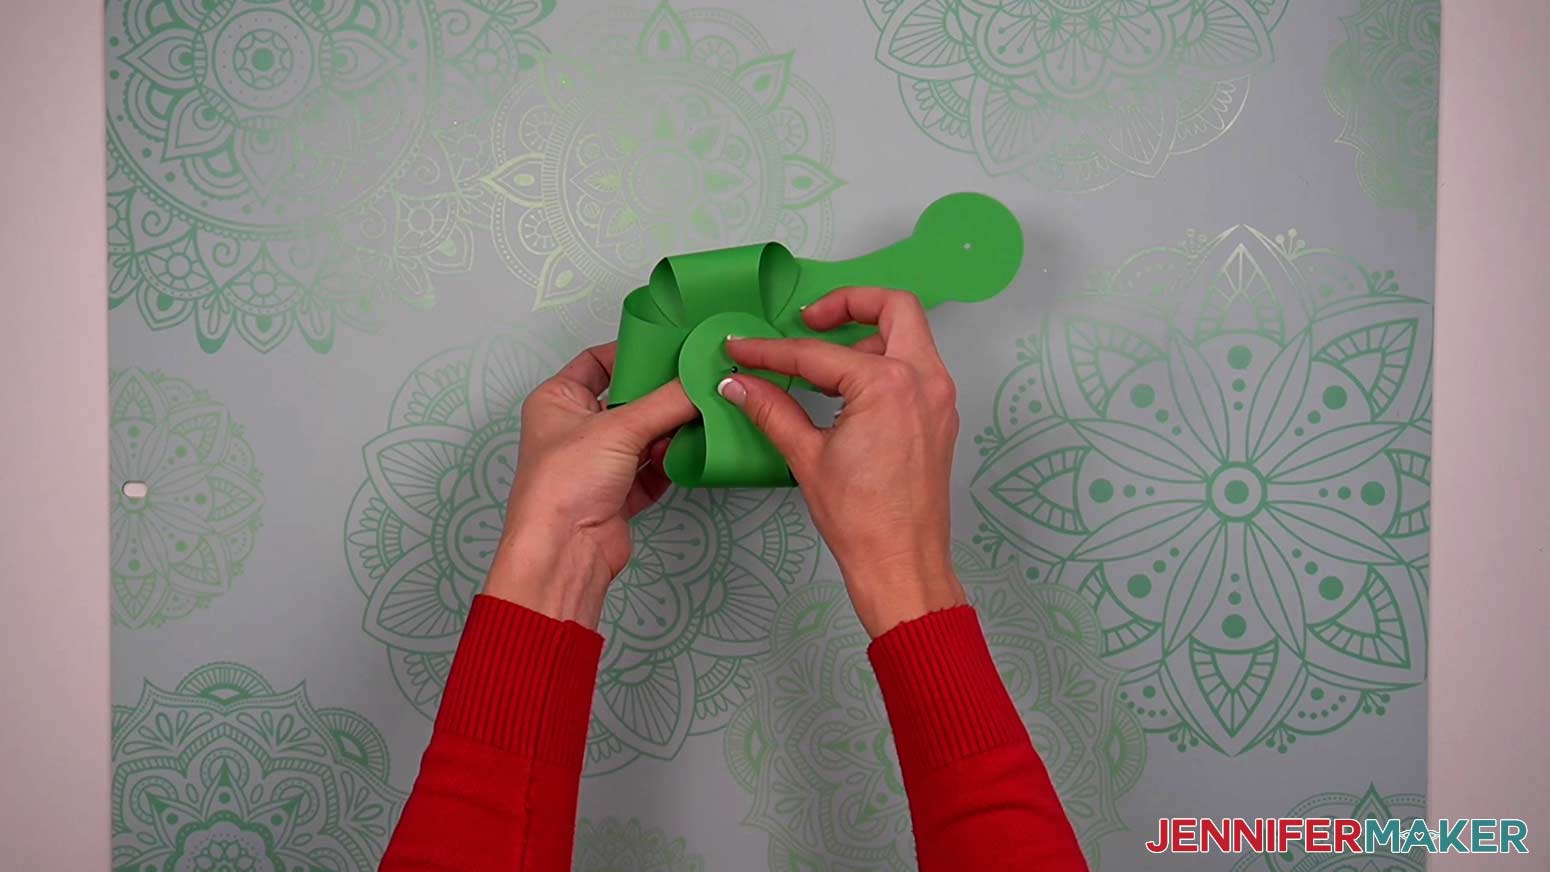
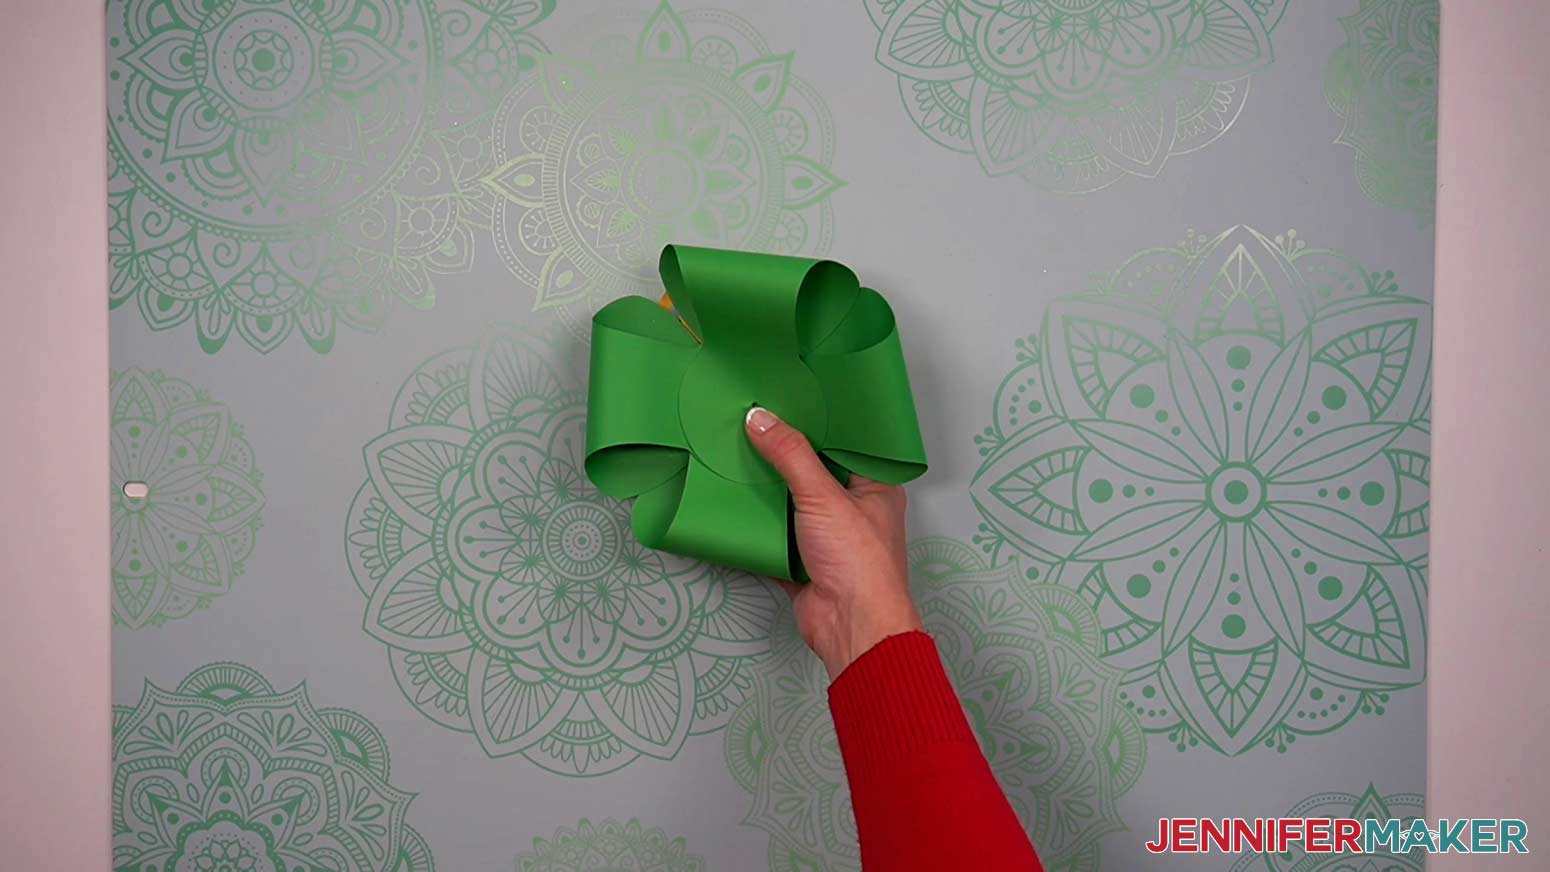
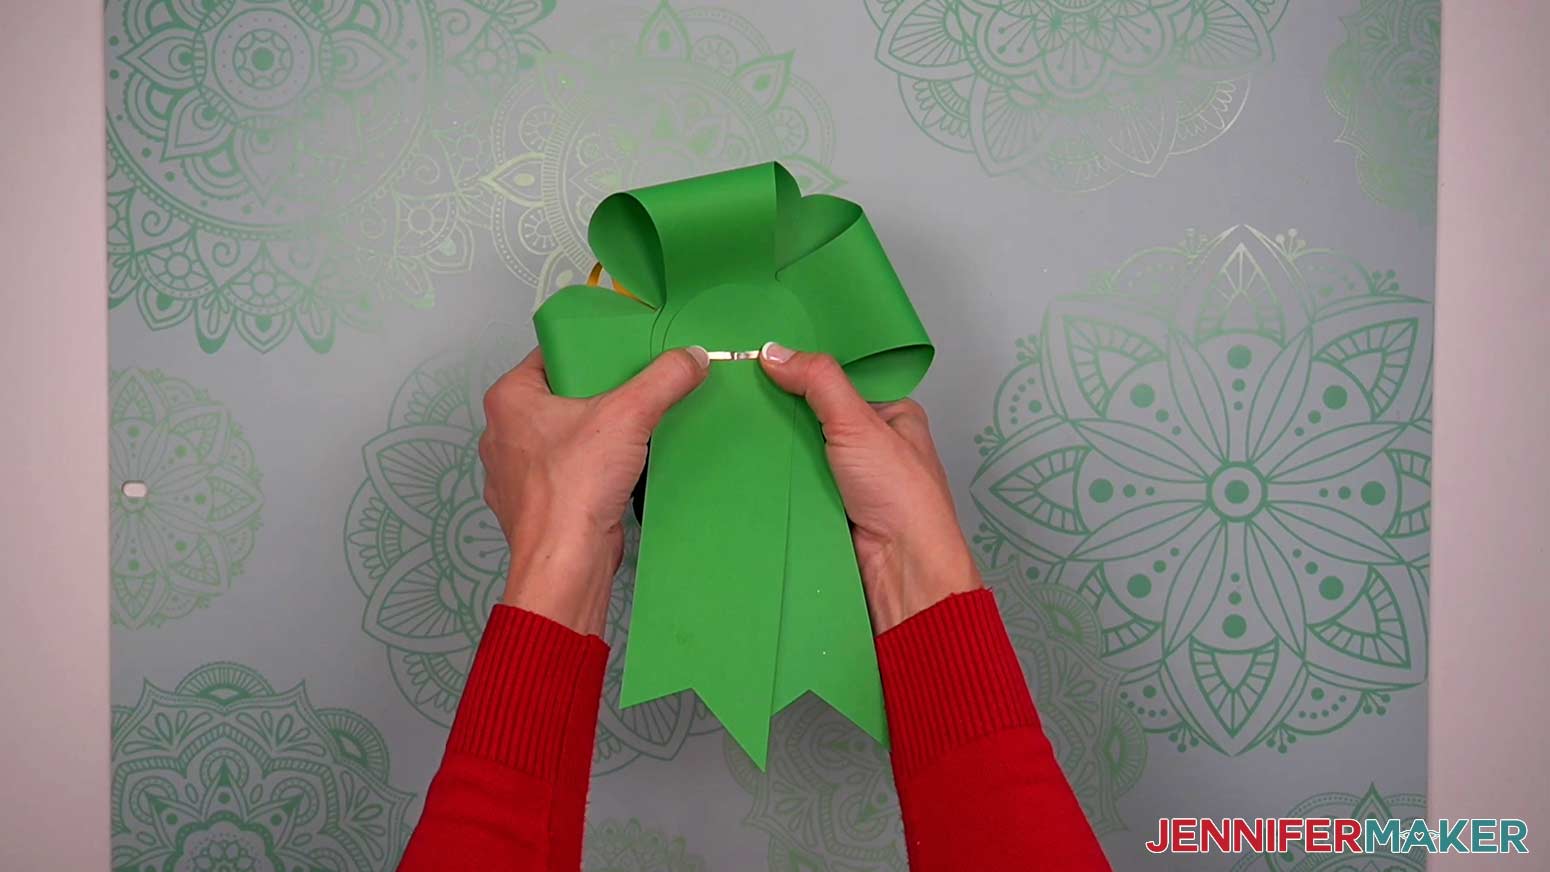
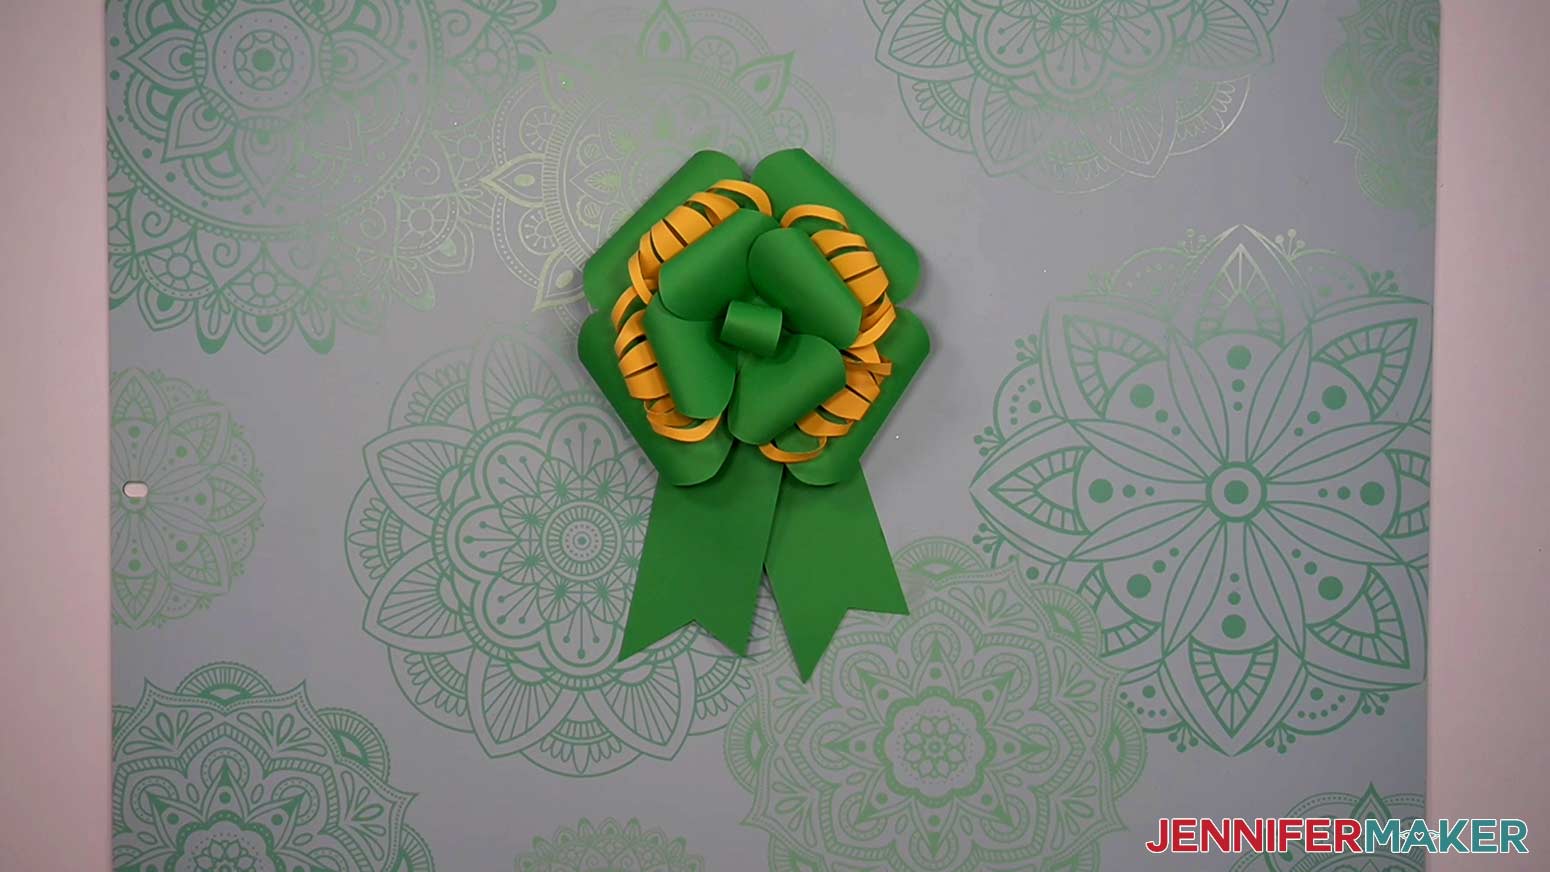
Learn how to use paper and your Cricut to make a perfect bow, or learn how to turn ribbons into eye-catching bows for gifts and decoration. Making bows for your gifts and decorations can be fun, quick and easy! You can use many types of ribbons and even paper to create beautifully elaborate looking bows that really are not difficult to make. My Paper Bow is easy to assemble, but it does take a little bit of time to cut the paper. The easiest ribbon bow by far is the Scrap Bow. It is quick and easy to make and uses up all those loose pieces that aren't big enough to use on their own! The bow with the most elaborate appearance in the collection is the Tree Topper Bow. It is also easy to make, but creates a great eye-catching look. I have listed instructions below for creating seven different bows made out of ribbon. These bows work best with wire-edged ribbons because they hold the bow shape easiest, but a variety of ribbon material types, widths, and colors can be used. All of the bows are held together with zip ties, but some will require hot glue as well. I've included approximate lengths of ribbons in the measurements below, but these sizes do not have to be exact and, in fact, can be changed based on how large or small you want your final bow size to be. SIMPLE BOW (check out my TikTok assembly video, too!): Take a single piece of ribbon approximately 30" long and form a loop in the middle. Position the loop so it is at the “top” and the loose ends are at the “bottom.” The loop above where the ribbon crosses itself should be smaller than the length of the loose ribbons on the bottom. Now bring the center of the loop down and place it on top of the point where the ribbon crosses itself to form the sides of the ribbon. Pinch the loop and crossed ribbons together and secure them with a zip tie (remember to trim the excess end of the tie). Now cut a small rectangular piece of matching ribbon to form the knot. The rectangle needs to be long enough to wrap around the center of the bow to cover the zip tie. Use hot glue to fold the long edges of the rectangular piece of ribbon in on itself. This makes a nice finished edge to the sides of the "top knot." Then wrap the rectangle, unglued side out, around the center of the bow and glue the ends together. Match up the ends of the loose ribbons and trim them to the same length and end shape. Fluff the bow and add to a gift! EASY BOW (check out my TikTok assembly video, too!): Begin with a long single piece of ribbon. Starting at one end, layer the ribbon back and forth on itself to form three equal-length sizes of layers. The final layer will have a loose end. Hold all the layers in the middle and rotate the top loose layer so that it forms a loop in the middle. Pinch the layers together under the loop and place a zip tie through the loop and around the pinched layers. Close the zip tie and cut the end short on the back of the bow. Fluff the bow. Match up the loose ribbon ends and trim them to the same length and end shape. The bow is ready to use! FIGURE 8 BOW (check out my TikTok assembly video, too!): Begin with the longest piece of ribbon. Form a figure 8 with the ribbon, overlapping the ends of the ribbons in the middle of the figure 8. Use hot glue to connect the ends of the ribbon to permanently close the figure 8 loop. Bring the center of each loop to the middle and pinch them together. Secure the pinched center with a zip tie and fluff the ribbon loops. Trim the zip tie on the back of the ribbon. Cut a small rectangular piece of matching ribbon to form the knot. The rectangle needs to be long enough to wrap around the center of the bow to cover the zip tie. Use hot glue to fold the long edges of the rectangular piece of ribbon in on itself. Cut a single long piece of ribbon to form the loose ribbon ends. Place the ribbon loops on the long piece so the middle of the loops is in the middle of the long ribbon piece. Then wrap the rectangle, unglued side out, around the center of the bow and ribbon piece together and glue the ends together. Match up the loose ribbon ends and trim them to the same length and end shape. The bow is ready to use! POM POM BOW (check out my TikTok assembly video, too!): Begin with a long single piece of ribbon. The longer the ribbon, the larger loops and more quantities of loops you can add to the bow. Wrap the ribbon around itself to form a circle of several layers. You can wrap it around your hand, or pretend you are rolling it back onto the tube it came on! The more layers there are, the more loops there will be in the ribbon. The larger your loops, the larger your finished bow. You can even wrap the ribbon around before cutting it from the spool to make sure you have more than enough ribbon for the size and fullness you want as your finished bow. Flatten the circle of ribbon down. Unwind just enough ribbon to make a piece about the same length as the compressed circle and cut it off. Set it to the side for later. Keeping the circle of ribbon flat, cut the ends of each side of the circle to form a wedge. Open the circle back up, match up the cut wedge shapes and pinch them together. Layer the small piece of ribbon from earlier onto the top of the pinched area and secure all the layers together with a zip tie. (Don’t forget to trim the excess end of the zip tie!) Pull out the loops from inside each side of the bow and fluff to form the pom. Enjoy the bow! PERFECT BOW (check out my TikTok assembly video, too!): Start with the three long pieces of ribbon all the same length. Form three loops by making a circle with each ribbon and gluing the ends together with hot glue. Make a loop with the smallest piece to form the top knot piece. Glue just like the larger pieces. Flatten the larger loops and stack them on top of each other, glue side down. Add the smallest length of ribbon to the bottom of the stack and add the small knot loop to the middle of the top of the stack. Pinch it all together in the middle and secure with a zip tie by sliding the tie into the top loop and around the center of the stack. Match up the loose ribbon ends and trim them to the same length and end shape. Fluff and enjoy! SCRAP BOW (check out my TikTok assembly video, too!): Gather as many scrap pieces of ribbons together as you like to make your bow. They can all be different colors, ribbon types, and widths! Choose one piece of ribbon to be the center tie and lay it down straight. Stack all the other pieces of ribbon on top crosswise. Tie a knot with the single piece of ribbon to hold all the pieces together in the middle. Fluff and enjoy! TREE TOPPER BOW (check out my TikTok assembly video, too!): To begin, have several pieces of ribbon all the same length. You can use all the same ribbon, or use different widths, styles, and colors to add interest. The more ribbons you add, the fuller the final bow will be. Start with one piece of ribbon and make a loop at the end. Pinch the ribbon in the middle to hold the loop in place. Continue making loops in each of the ribbons, adding them to the first ribbon and keeping them pinched together in the middle. Where the loops are pinched together, use a zip tie to secure them. Cut the excess end of the zip tie. Fluff out the ribbon to hide the zip tie, attach it to the top of your tree and enjoy! Now that you've had lots of fun making ribbon bows, let's focus on making a perfect bow with your Cricut! First, download my Perfect Bow SVG/DXF/PDF files from my free resource library. It's Design #439. You can cut the printable PDF by hand, but I'll show you how to cut the SVG with a Cricut. The file options include a cut file for a standard bow with connected “arms” and a cut file that is scalable in which the arms are individual pieces. Upload the SVG you’d like to use and add it to your Canvas. I will show you how to make both files. If you are not sure how to upload an SVG cut file to Cricut Design Space, watch this helpful video training series I made. If you are on an iPad or iPhone, here is how to download and upload SVG files to the Cricut Design Space app. Here is how the connected base bow file looks on my Canvas. The file consists of three "base" pieces, a top "knot" piece, and two "ribbon end" pieces. Each base piece has "arms" that easily fold in to create the curving ribbon effect. The bases are then layered on top of each other to create the full bow. The connected base file is ready to cut without any modifications. It can be scaled down to make smaller sizes, but not up or it won’t fit on the cutting mat. If you want to make larger paper bows, the scalable bow file is the perfect file to use. Here is how the scalable bow file looks on my Canvas. The file consists of sets of “arms” in three different sizes, a top "knot" piece, and two "ribbon end" pieces. The arms are the same pieces from the connected base that are folded in, but because they are separate from each other, they can be enlarged quite a bit and still fit on the cutting mat! The final size of the bow (not counting the ribbon ends) will be roughly half the size of the largest arm piece, so that's how you can change the dimensions to create a specific sized-bow. We'll use a Guide to help get it right without changing the pieces' proportions. To easily enlarge or reduce the size of the scalable bow, first, add a box from the "Shape" menu. To make a bow roughly 5", we need the largest arm to be about 10". Make the height of the box the same height you would like to make the largest arm by changing the height at the top of the Canvas. When choosing a size, keep in mind the arm must be small enough to fit on the cutting mat! I will make my box 10” tall. With the box selected, choose Guide from the operation menu. In the layers panel, the box will turn pink and show on the canvas as an outline. The Guide will not cut when you select “Make It”. Make sure all the pieces of the bow are selected and still grouped, then click and drag a corner of the bounding box out to resize the selection. Enlarge the selection until the largest arm piece is approximately the height of your guide box. You have now successfully resized the scalable bow and it is ready to cut! If you are cutting more than one bow at a time and would like to have the bows cut with different colors on different mats, first make sure your bows are ungrouped by selecting the bow sets and clicking "Ungroup" in the upper right corner of the Canvas. Now select each of the matching pieces that need to be changed to a new color. You can select more than one piece at a time by holding the Shift key down on your keyboard as you click each piece. Finally, click the color box on the top menu next to the Operation. The box will pop open to reveal more color options. Select your new color and your pieces will change to match. Do this for each color you wish to change. You are now ready to cut! Check that the right machine is listed in the top corner, then click "Make It!" If you are asked if you are cutting your designs without a mat, on a mat, or multiple ways, select "On Mat" and "12 x 12." Then click "Continue." On the Prepare screen, keep the "Material Size" at 12" x 12”. The connected base will use three mats. The scalable base will use different quantities of mats depending on the final size of your bow pieces. My scaled bow creates six mats. I noticed some of the smaller pieces can be moved to other mats to reduce the number of mats to cut. To move pieces, click the piece, then click the three dots on the upper left of the piece. Select "Move Object." A menu will pop up with a list of all the mats. Select the mat you wish to move the piece to, then click "Confirm." The piece will now appear on the selected mat. Make sure to fit it into a blank space before moving on! Click "Continue." On the Make screen, select the correct material setting for your cut. The first mat I have is the White color and I plan to use glitter cardstock for this intricate cut in the middle layer, I need to click the drop down menu to select the proper cut setting. There is a glitter cardstock setting, and I would normally select that for my material, but because I have lots of small cuts in this layer, I found that using "Cardstock (For Intricate Cuts)" worked best. Next, choose your pressure setting. I find I get the best results with "More Pressure." Make sure the Fine-Point Blade is loaded into the machine. Place your first piece of cardstock on your green StandardGrip mat (in my case it is the glitter cardstock) and make sure it is well adhered with a brayer. Load the mat into your Cricut and press the flashing button to begin. TIP: If you run into any issues cutting your materials, check out my Cricut Tips & Tricks for Cleaner Cuts. Once the cutting is complete, remove the cardstock from the mat by flipping the mat over and rolling it away from the cardstock. If you have any difficulties removing the pieces, you can use a spatula to slide under the piece and gently lift the cut cardstock away from the mat. Now, prepare the mat with the next cardstock sheet. Select the appropriate setting for your next mat. For standard 65lb cardstock, I find using the "Light Cardstock – 65lb" with "More Pressure" works best. Continue to load, cut, and remove mats and cardstock until all the pieces are cut and ready to assemble. Assembling the bow is very similar for each type of file, but each has a slightly different path to the final look. To begin either bow, choose whether you will use a brad to hold all the pieces together, or glue. I’ll use glue for the attached bow and a brad for the other version. (For very small bows, I do recommend using glue because brads will not fit nicely into the centers.) Assemble the connected base bow: Curl the knot piece into a loop until the pre-cut holes match up and secure the overlapping area with glue. Set it aside to dry. Take the largest base layer and add glue around the cut-out circle at the end of an arm. Curl it in to line up the cut circle with the one in the middle. Glue the rest of the arms, layering them in the middle. Set it aside to dry. Follow the same steps on the other two base layers. Once it’s dry, you can adjust the thin pieces of the middle detailed layer so they lay nicely or fluff out a bit depending on your preference. Then, add glue to the bottom of the middle layer’s center and press it on top of the largest layer. You can rotate them a bit so the curled arms are nestled. Glue the top layer to that assembly and finish off with the top knot last. Finally, glue the ribbons to the bottom so the ends peek out the amount you like. You can curl the ends with a bone folder if you’d like. The bow is ready to use! Assemble the scalable base bow: The scalable bow is assembled in very much the same manner, but with individual pieces on each layer. I’ll assemble the bow from the top down. First, take the knot piece and curl it into a loop until the pre-cut holes match up. Slide the brad into the loop so that the head of the brad is on top of the overlapping pieces and the post of the brad is pressed through the holes toward the bottom. Now take one of the arms of the smallest base layer and place the small circle at the end of one of the arms on the end of the brad. Add all four of the smallest ends of each arm of the layer to the brad post. Then bring up each of the larger ends and place on the post. Your smallest layer is now complete. Next, add the middle layer and bottom layer in the same way. Finally, add the ribbon pieces at the bottom and separate the brad posts to hold it all together. To complete the look, rotate each arm layer to set it in the shape you wish, “fluff” the middle base layer if needed, to arrange the thin pieces in a pleasing manner, and curl the bottom ribbons with either a bone tool or edge of a table or ruler. Attach your bows to presents for a great pop at gift-giving time! You can attach paper bows to wrapping paper using glue or tape. Ribbon bows can be attached with glue or tape, but you can also tie them down with more ribbon! Nestle bows into the bows of your Christmas tree for decoration. There are so many options for showing off your work!
Tie A Perfect Bow
Materials
Tools
Instructions
This project has instructions for making several different types of perfect bows
from actual ribbons and from paper!CREATE SEVEN RIBBON BOWS
Finished Size: Approximately 6.5" wide
Ribbon: 2" Wire Edge Ribbon, 1 Piece Approximately 30" length, 1 piece approximately 2.75" length

Finished Size: Approximately 9" wide
Ribbon: 2.5" Wire Edge Ribbon, 1 Piece Approximately 56" length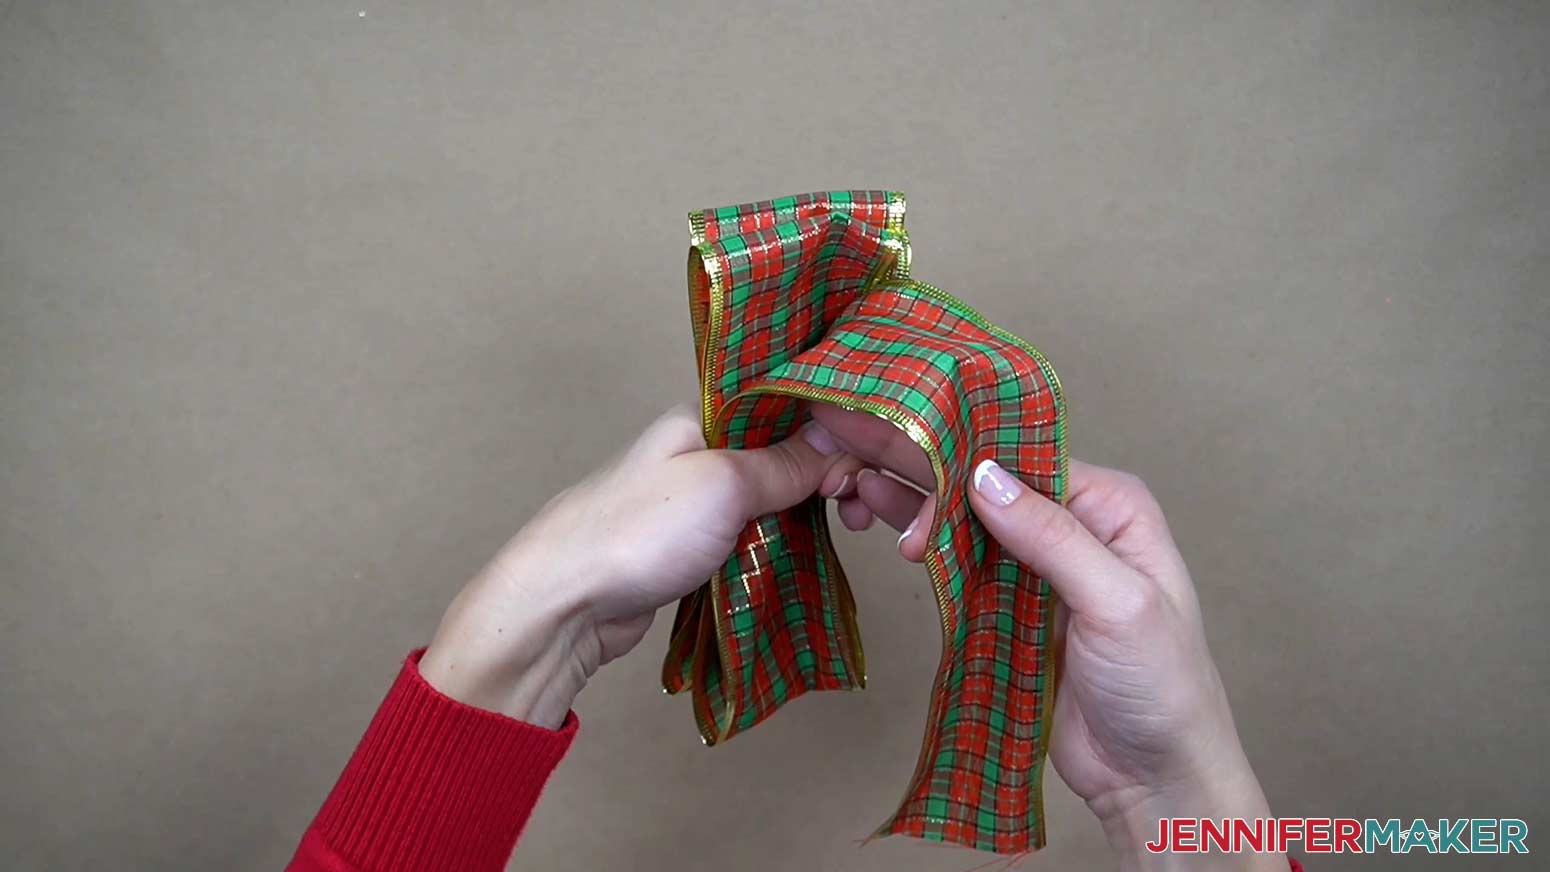
Finished Size: Approximately 8.5" wide
Ribbon: 2.5" Wire Edge Ribbon: 1 Piece Approximately 36" length, 1 piece approximately 18" length, 1 piece approximately 2.75" length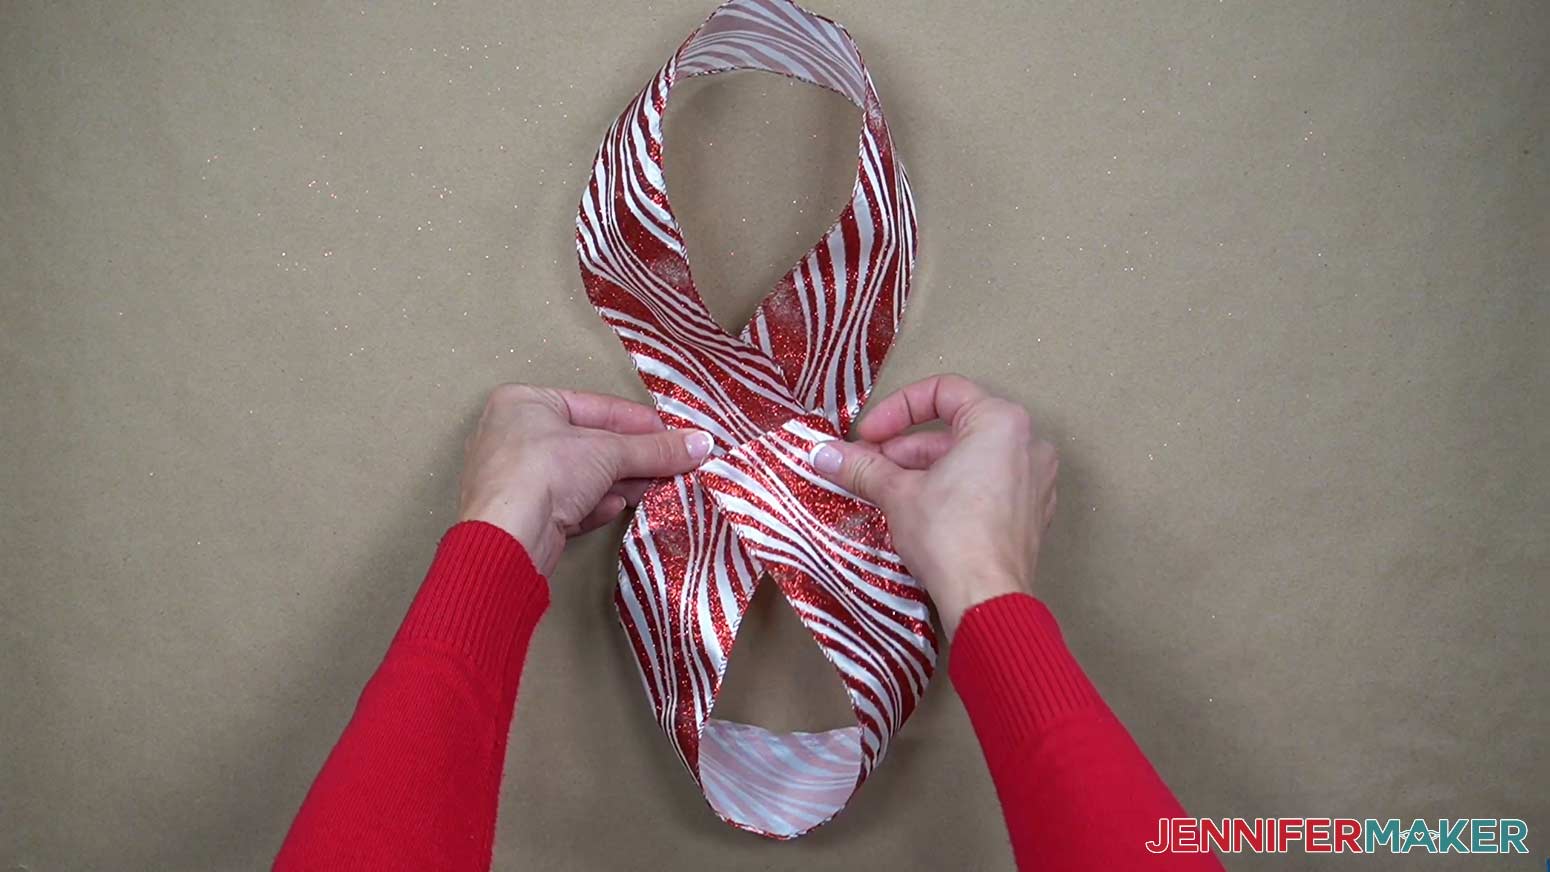
Finished Size: Approximately 7" wide
Ribbon: 2.5" Wire Edge Ribbon: 1 Piece Approximately 60" length for a very full bow (less ribbon will mean fewer loops of material)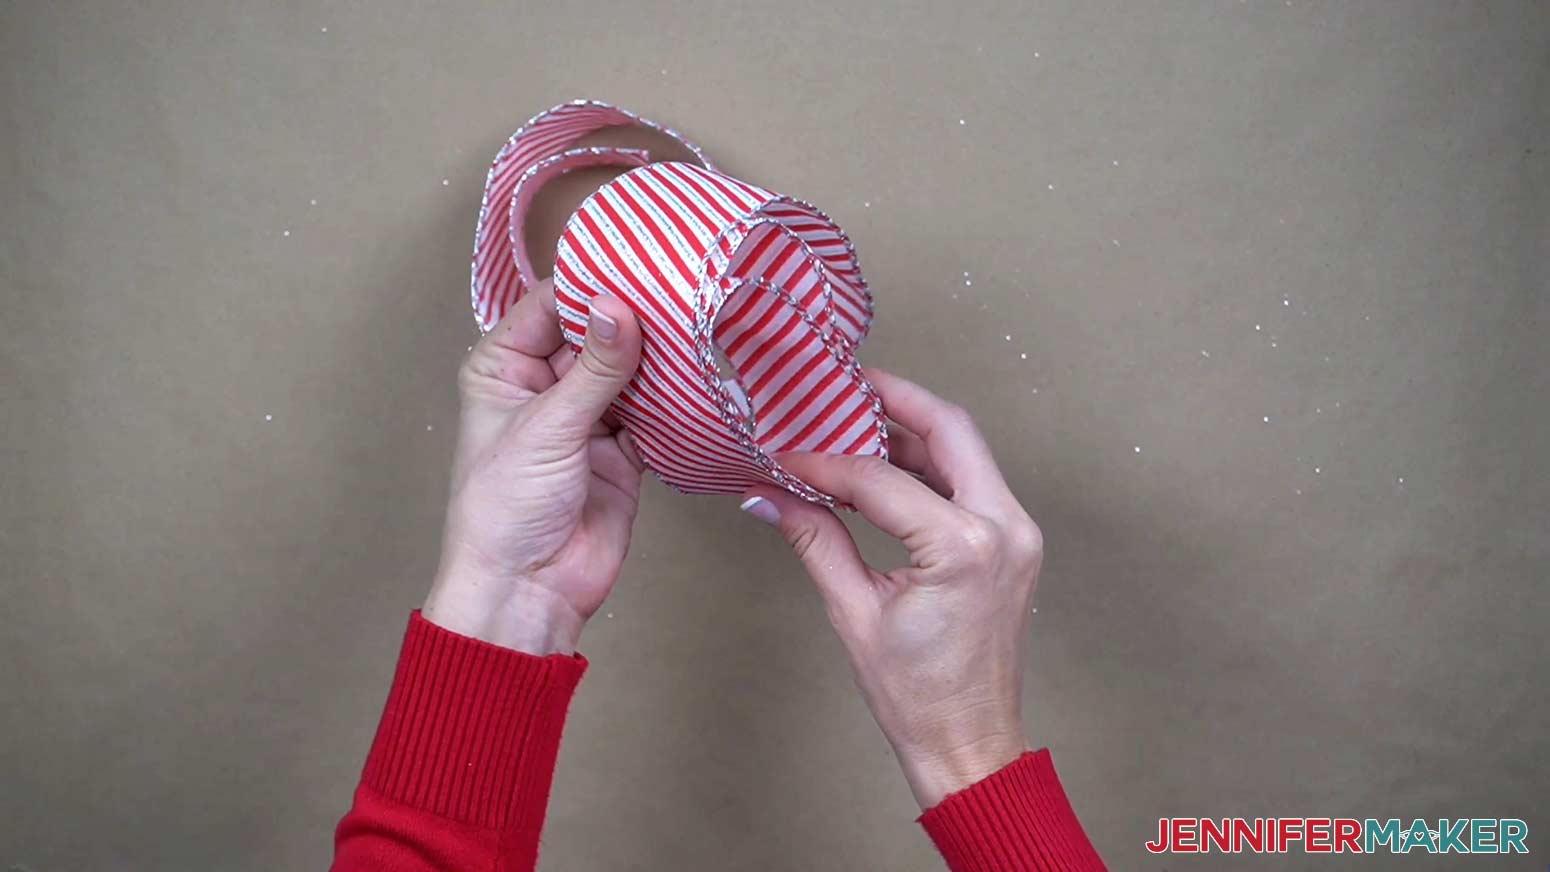
Finished Size: Approximately 8.5" wide
Ribbon: 2.5" Wire Edge Ribbon: 3 Pieces Approximately 18" length, 1 piece approximately 9" length, 1 piece approximately 4" length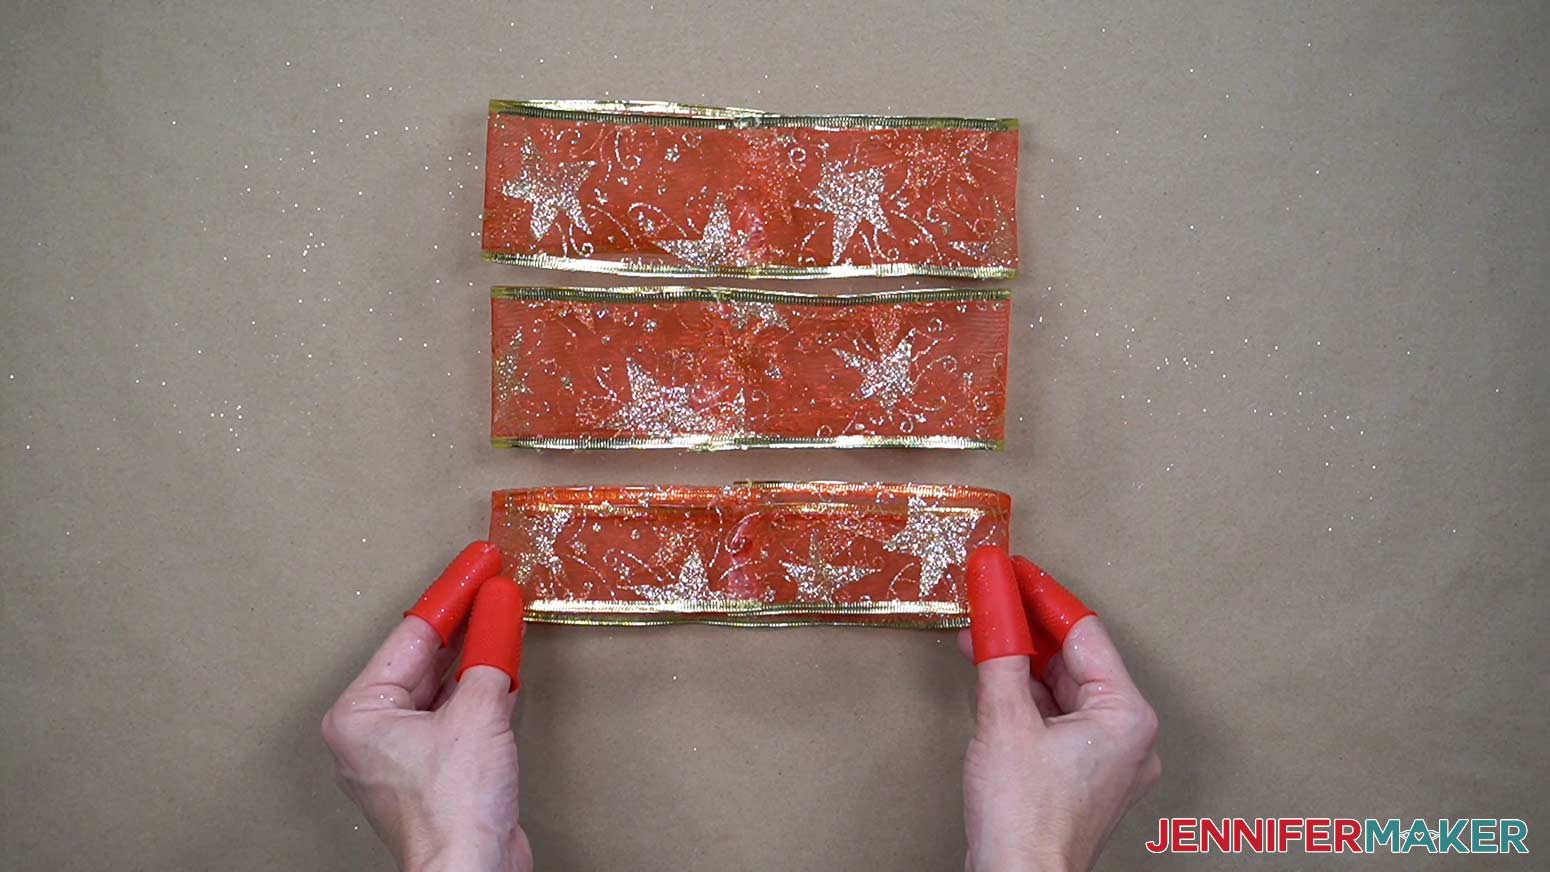
Finished Size: Depends on the length of your scraps!
Ribbon: Multiple pieces of a variety of ribbons - scraps are perfect for this one!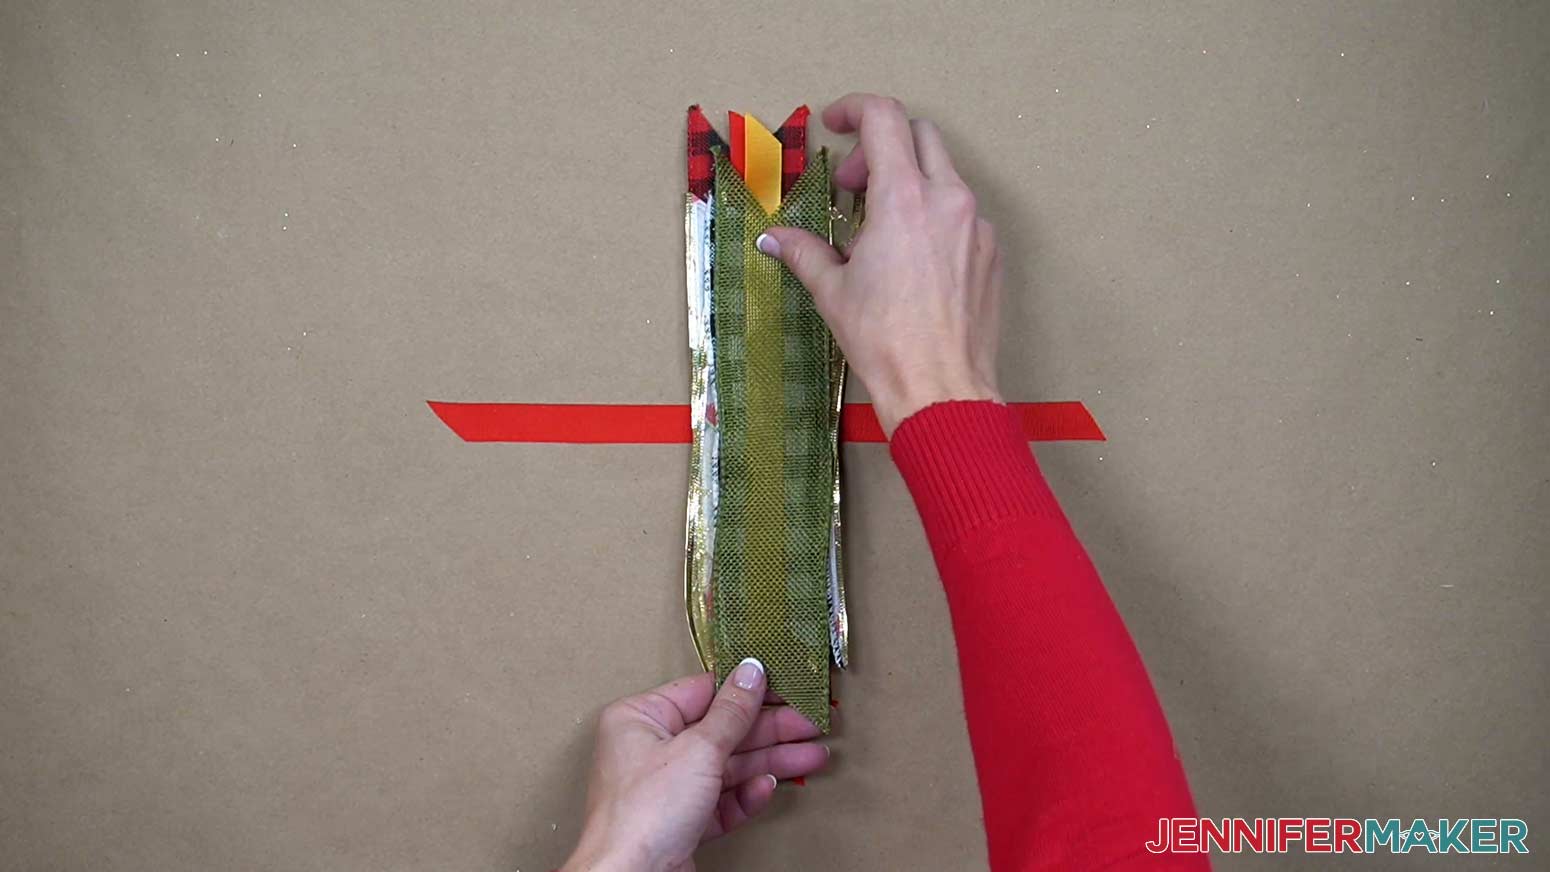
Finished Size: Approximately 10" wide
Ribbon: Multiple pieces of a variety of ribbons - All about 24" length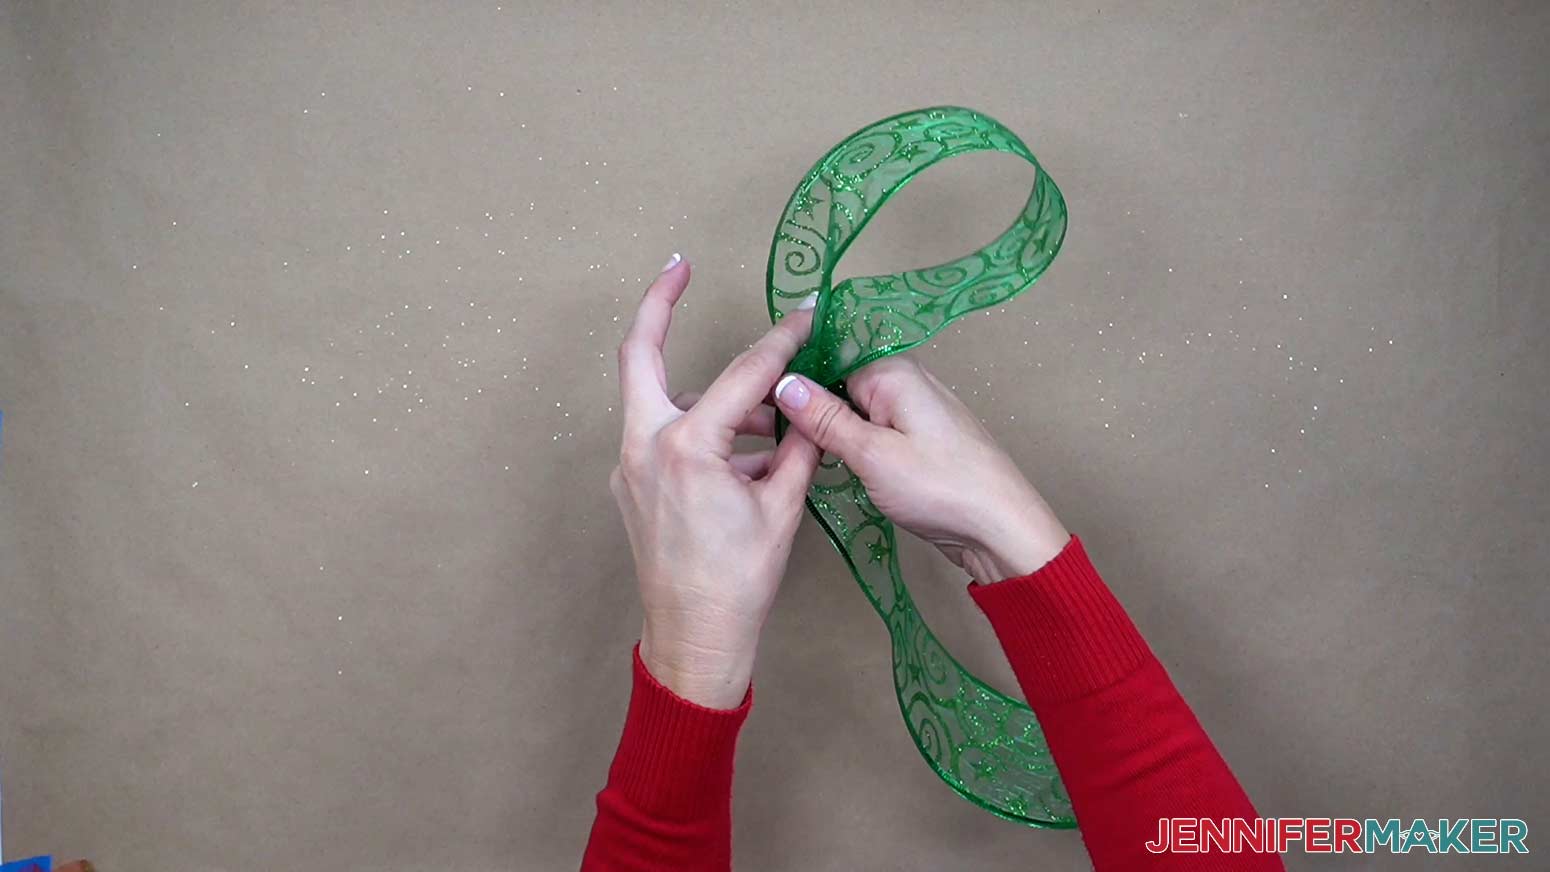
STEP 1: GET MY FREE PERFECT BOW DESIGN FILES
STEP 2: PREPARE THE DESIGN FILE
STEP 3: CUT THE BOWS
STEP 4: ASSEMBLE THE PERFECT BOW
STEP 5: SHOW IT OFF!

Answers to Your Questions About How to Tie a Perfect Bow
Q: How do you tie a perfect simple bow?
Don’t just tie your bunny ears in a knot! Follow some of my simple tutorials to turn a long piece of ribbon into the perfect bow shape. It’s a handy skill!
Q: How do you tie a Tiffany bow?
Check out my Tiffany box tutorial for an easy way to make a flawless Tiffany bow.
Q: How do you make a classic gift bow?
You can make them with paper using my gift bow tutorial.
Get my free download for the paper bow SVG cut files and free designs here:
If you learn to tie a perfect bow for your memorable events or special persons, I’d love to see them! Please share your projects in my Cricut Crafters & Makers group where you’ll find hundreds of thousands of crafters like you, sharing their tips, projects, and inspiration.
By the way, you’re free to use my free SVG files to create physical items to sell — I just ask that you share that you used one of my designs on your listing or with your product.
Love,

Want to remember this? Save this tutorial on How to Tie a Perfect Bow to your favorite Pinterest Board!