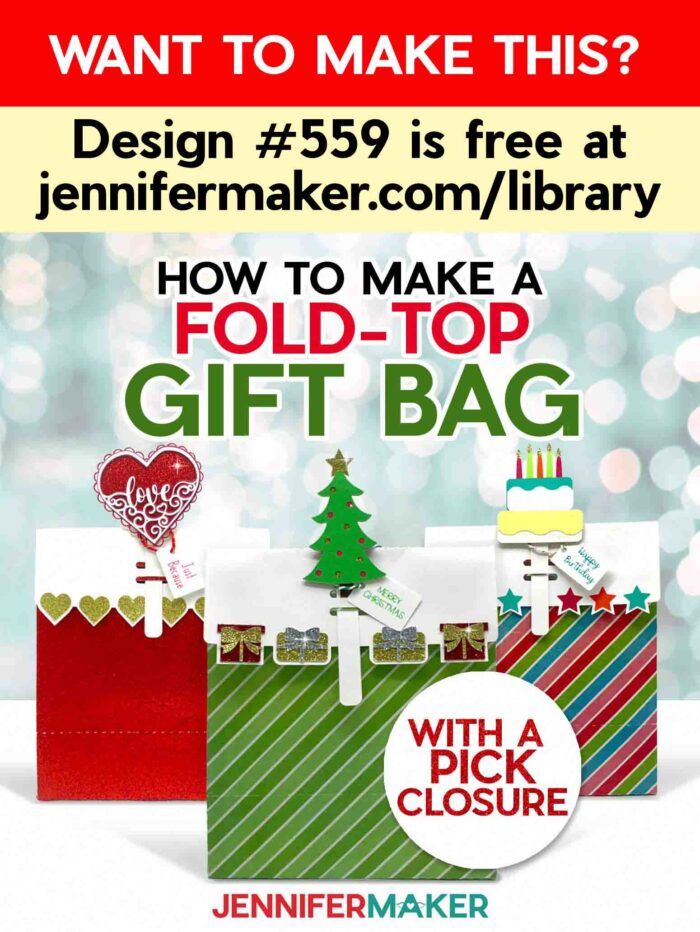
Learn how to make your own professional-looking gift bag!
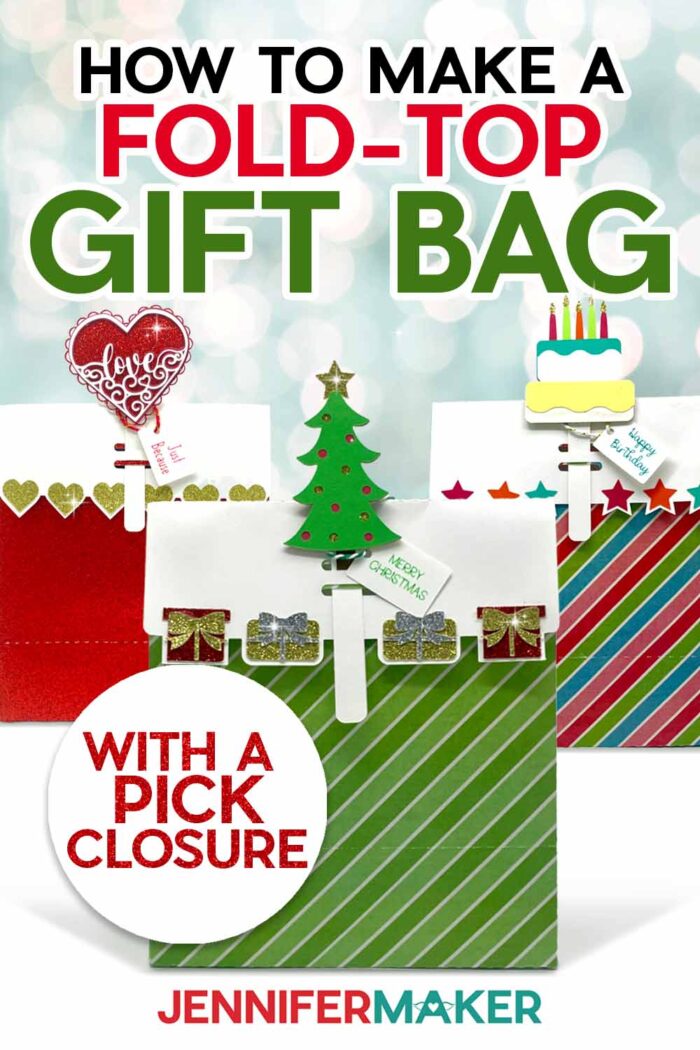
I love wrapping gifts, but sometimes dropping a present into a gift bag is so much easier than dealing with wrapping paper and tape — which always seems to go missing mid-wrap! Instead, make a big impact with a fold-top bag with pick closure! My free designs are the perfect size for a small gifts, like an ornament or mug. Plus, I love the re-usability factor! This tutorial will show you how easy it is to make a beautiful, functional gift bag at home. But, how do they work? And how do you make them?
Watch the full step-by-step fold-top gift bag with pick closure tutorial:


When Greg saw some gift bags like these in a local shop here in Ann Arbor, he brought one home to show me because he knew you would want to learn how to make your own! I got to brainstorming, and ended up modifying one of my open-top gift bag designs. I added unique fold-top closure, as well as a pick to hold the paper bag shut, and voila! No peeking in these bags!
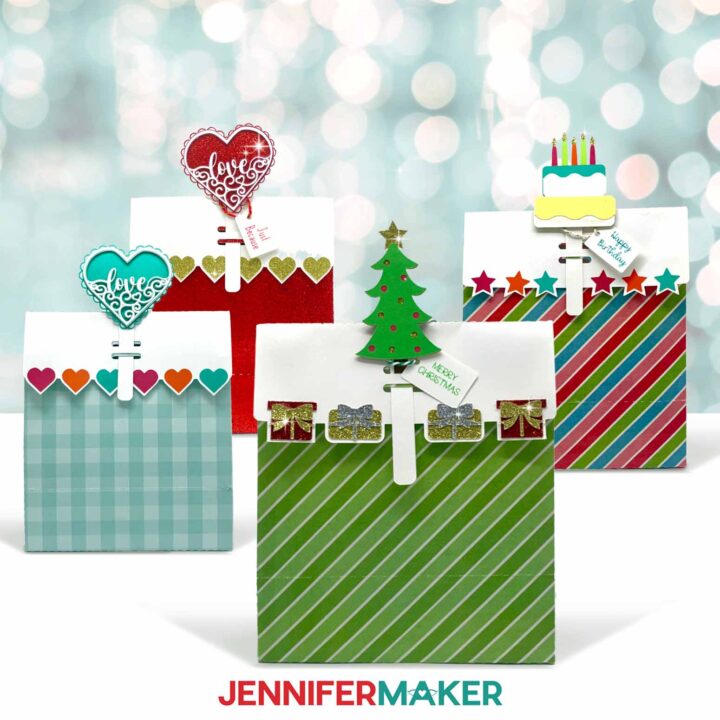
I’ve got three different designs to share with you! One is a heart theme, perfect for an anniversary, Valentine’s Day, or “just because.” Then, I’ve got another for the holidays with a cute Christmas tree pick, and finally a birthday cake design that I’ll show you how to prepare, cut, and assemble! To assemble the other two designs, just follow the same steps.

Eash design also has a cute hang tag where you can have your machine write a message. I used Cricut fine point pens in matching colors, then some twine to secure them — or you can glue or tape the gift tag directly onto the bag.
My fold-top gift bag with pick closure may look complicated, but it’s really rather easy to make — especially with my free designs and a cutting machine.
There are score and no-score versions of the SVG file, which contains all three designs. You can use a scoring tool, but if you want to make a bag out of glitter cardstock, the score lines will be tough to see. In that case, it’s best to use the no-score, dashed cut lines version. I’ll show you how to make the no-score version this time, but if you need help setting score lines check out my score-lines tutorial.
I cut all of the bag designs on a StandardGrip machine mat, using a Cricut Maker 3, but this project also works with a Maker, an Explore series machine, a Cricut Venture, or another cutting machine that can cut SVG files. I’ll caution against reducing the size of these bags to fit on a Cricut Joy or Joy Xtra, because some parts get a little too tiny to work with.

The steps to making each of the three bag designs are pretty much the same, just make sure you choose the right cut settings if you use glitter, foil, or another type of specialty cardstock or paper.
I used a mix of cardstocks for each bag design, including glitter and foil cardstock for the pick decorations. Mix and match the colors and cardstock types to match the holiday or occasion. Personalizing the bag in the recipient’s favorite colors is always a hit, and so much more fun than a regular store-bought bag! If you choose patterned paper for the bag, I recommend that you stick to an all-over design, so you don’t have to worry about the images or words being right-side up.
For the pick itself, I used heavy 110 pound white cardstock. I also used the same cardstock to reinforce the bottom of the bag, just like store-bought bags!
There’s a few other tools you’ll need, like a ruler and a scraper to help with making a perfect fold and a nice sharp crease on your edges, as well as a good quality craft glue to hold your bag (and pick) together. Normal craft glue can have trouble sticking to the glitter texture, so use hot glue instead if you use glitter cardstock. Make sure to have the usual Cricut papercrafting tools around, too! I love making projects with supplies and tools already in my craft room!
Once your bag is assembled, simply fill it with some small, fun gifts, then insert the pick through the two slots on the top flap for the finishing touch. And that’s it! Your handmade gift bag (and the fun gifts inside) is ready for gifting to a family member or friend. What a great way to give a present! The best part? They’re reusable so your giftee can pay it forward with their own gift worthy of attention!

So are you ready to skip the gift wrapping and make your own fold-top gift bag with pick closure? It’s the perfect way to give a small gift to someone special. Use them for Christmas presents, Hanukkah gifts, Mother’s Day, bridal showers, baby showers, birthdays, and any other occasion where the perfect gift bag is needed. You can even make a bunch in advance so you have ready-made gift bags on reserve for any event that pops up. Your friends and family will be so excited when they open a special gift presented in one of your homemade, no-peek gift bags!
Let me show you how easy it is to make a fold-top gift bag with pick closure! This post contains some affiliate links for your convenience (which means if you make a purchase after clicking a link I will earn a small commission but it won’t cost you a penny more, there is no additional cost)! Read my full disclosure policy.
Materials to Make A Fold-Top Gift Bag With Pick Closure
View my Amazon shopping list with the exact items we used to make this project
Paper options, like:
- Recollections Essentials 12″ x 12″ Cardstock
- Single-sided 12” x 12” 80 lb Pattern Cardstock -OR-
- Double-Sided 12” x 12” Pattern Cardstock -OR-
- Cricut 12” x 12” Glitter Cardstock – Brights
- Cricut 12” x 12” Glitter Cardstock – Classic
- 8.5” x 11” Foil Cardstock
- 8.5” x 11” Recollections Mint Hues
Plus:
- 8.5” x 11” 110 lb White Cardstock for the reinforcement and pick pieces
- Cricut Ultimate Fine Point Pen Set, 0.4mm
- Twine
- A way to cut your materials – I’m using the Cricut Maker 3 but you can also use the Maker, Explore series, Venture, or Joy Xtra for this project!
- Cricut Green StandardGrip Machine Mat, 12″ x 12″
- Craft Glue (I used Bearly Art Precision Glue)
- Brayer
- Spatula
- Scraper
- Weeding Tool
- Hot Glue Gun & Glue Sticks (for Glueing Glitter Cardstock)
- Foam Adhesive
- Design #559 – My free template (available in my free resource library—get the password at the bottom of this post)
How to Make Your Own Fold-Top Gift Bag With Pick Closure
Fold-Top Gift Bag with Pick
Learn how to make a fold-top gift bag with pick for a birthday, Christmas, or just because!
Materials
- Recollections Essentials 12" x 12"
- Single-sided 12” x 12” 80 lb Pattern Cardstock -OR-
- Double-Sided 12” x 12” Pattern Cardstock -OR-
- Cricut 12” x 12” Glitter Cardstock - Brights
- Cricut 12” x 12” Glitter Cardstock - Classic
- 8.5” x 11” Recollections 110lb White Cardstock
- 8.5” x 11” Foil Cardstock
- 8.5” x 11” Recollections Mint Hues
- Cricut Ultimate Fine Point Pen Set, 0.4mm
- Twine
- Design #559 – My free template (available in my free resource library—get the password at the bottom of this post)
Tools
- I’m using the Cricut Maker 3 but you can also use the Maker, Explore series, Venture and Joy Xtra for this project!
- Cricut Green StandardGrip Machine Mat, 12" x 12"
- Craft Glue (I used Bearly Art Precision Glue)
- Brayer
- Spatula
- Scraper
- Weeding Tool
- Hot Glue Gun & Glue Sticks (for Glueing Glitter Cardstock)
- Foam Adhesive
- Scissors
Instructions
STEP 1: GET MY FREE GIFT BAGS WITH PICK DESIGNS
First, download my Gift Bag Designs designs from my free library – look for Design #559. Alternatively, you can use the Save This Project form near the top of this post and the design link will be emailed to you.
TIP: If you’re not sure how to upload, go to jennifermaker.com/svgs to learn how to unzip and upload SVG files.
The SVG folder includes a “score” version that you can cut using a scoring tool, and a “no-score” version with dashed cut lines that only needs the Fine-Point Blade.
If you’d like to make the version with score lines using a scoring wheel or stylus, you can refer to my tutorial on Cricut Scoring to learn how to adjust the files. Note that this version works better without glitter, because the score lines are harder to see once the glue and glitter cover them up.
I’m using a Cricut Maker 3, but you can use a regular Maker, and Explore series machine, Cricut Venture, or another cutting machine that works with SVGs.
STEP 2: PREPARE AND CUT YOUR GIFT BAG WITH PICK DESIGN
1. Open Cricut Design Space and click “New Project.”
2. Click “Upload” and then “Upload Image.”
3. Click “Browse.”
4. Select the SVG file with “no-score” in the name
5. On the Prepare to Upload screen, it will say “Cut image” with the design preview.
6. Click “Upload.”
7. Find your design in Recent Uploads and add it to the Canvas.
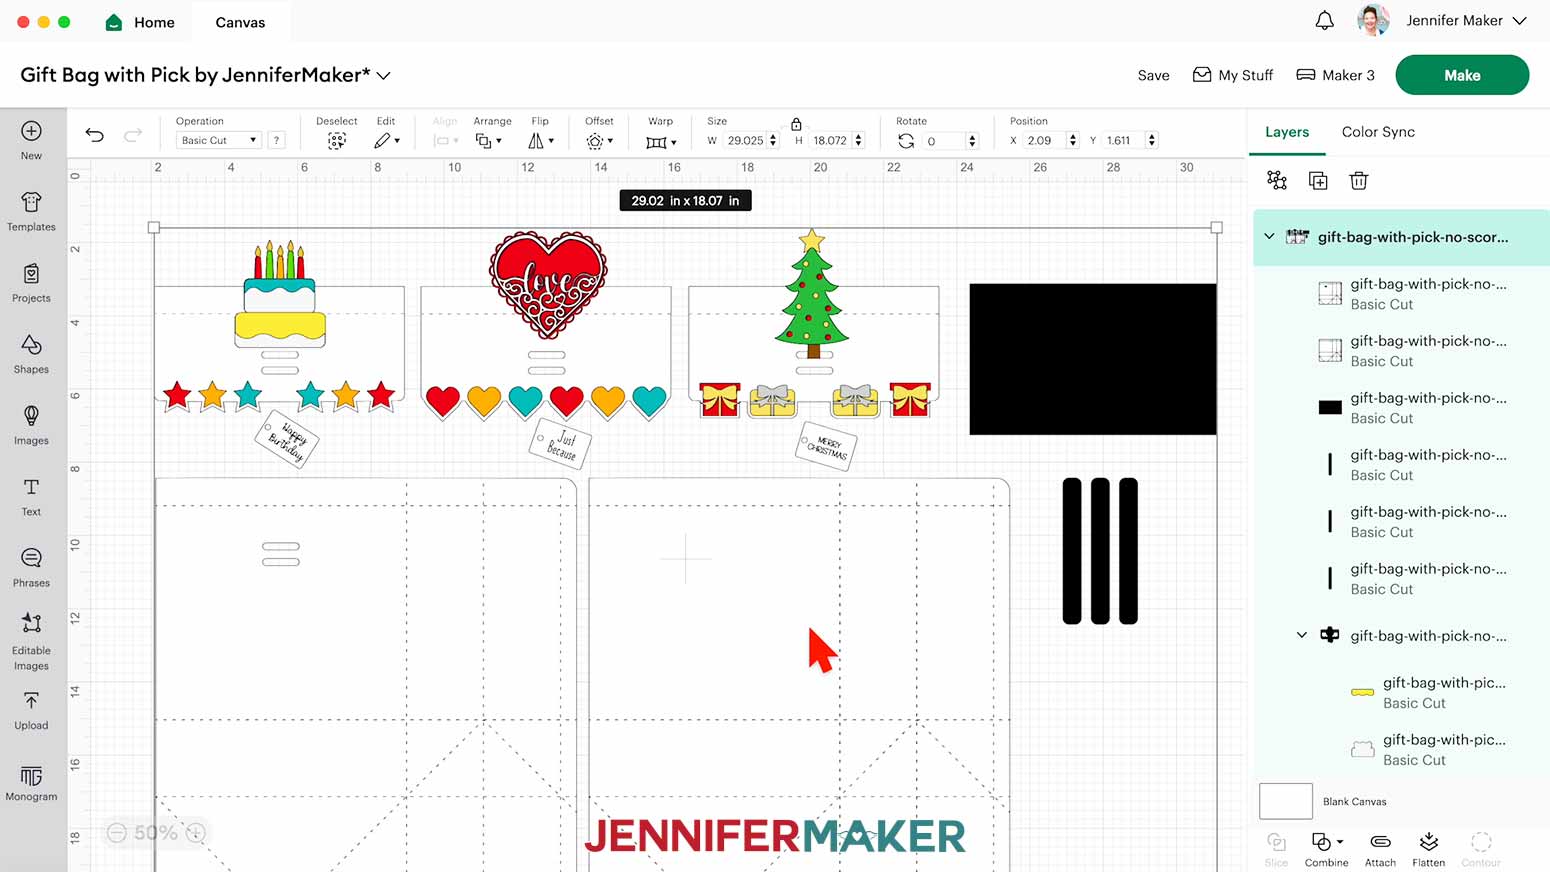
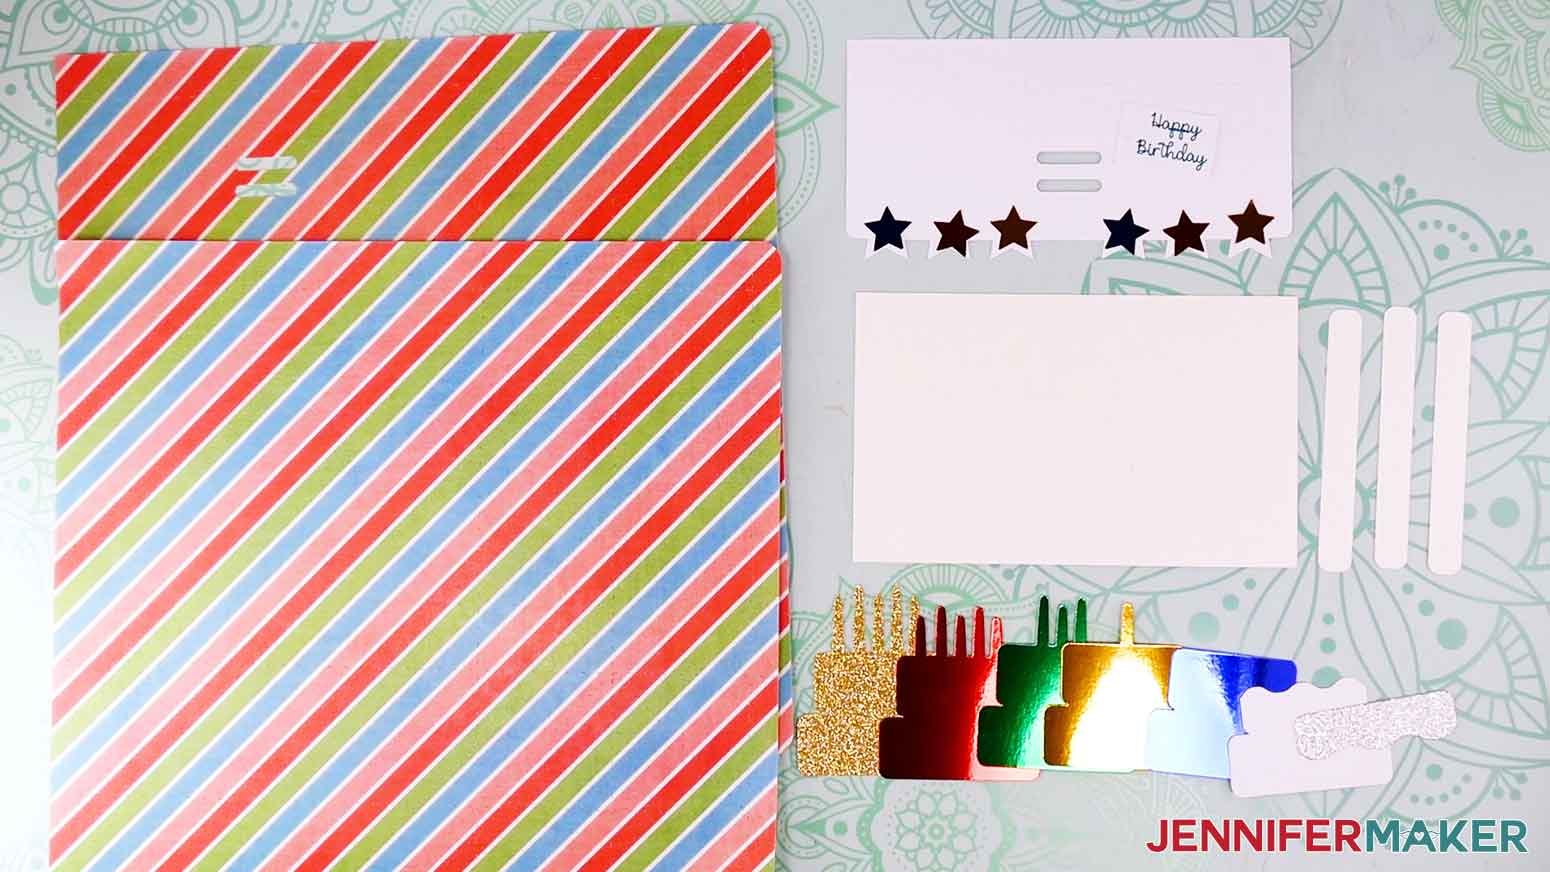
NOTE: The two large white shapes make one bag, and are grouped with black pieces for the bottom reinforcement and layered pick pieces. The non-bag pieces are a different color so I remember to cut them from heavy white cardstock. Then, there are grouped layers to make three designs for the foldable top: birthday, heart, and tree.
8. Select the entire design and click the “Ungroup” icon.
9. Select the two designs at the top you don’t want to make and delete them.
NOTE: I’ll leave the birthday design, but you can use these steps to prepare the heart tree versions, too.
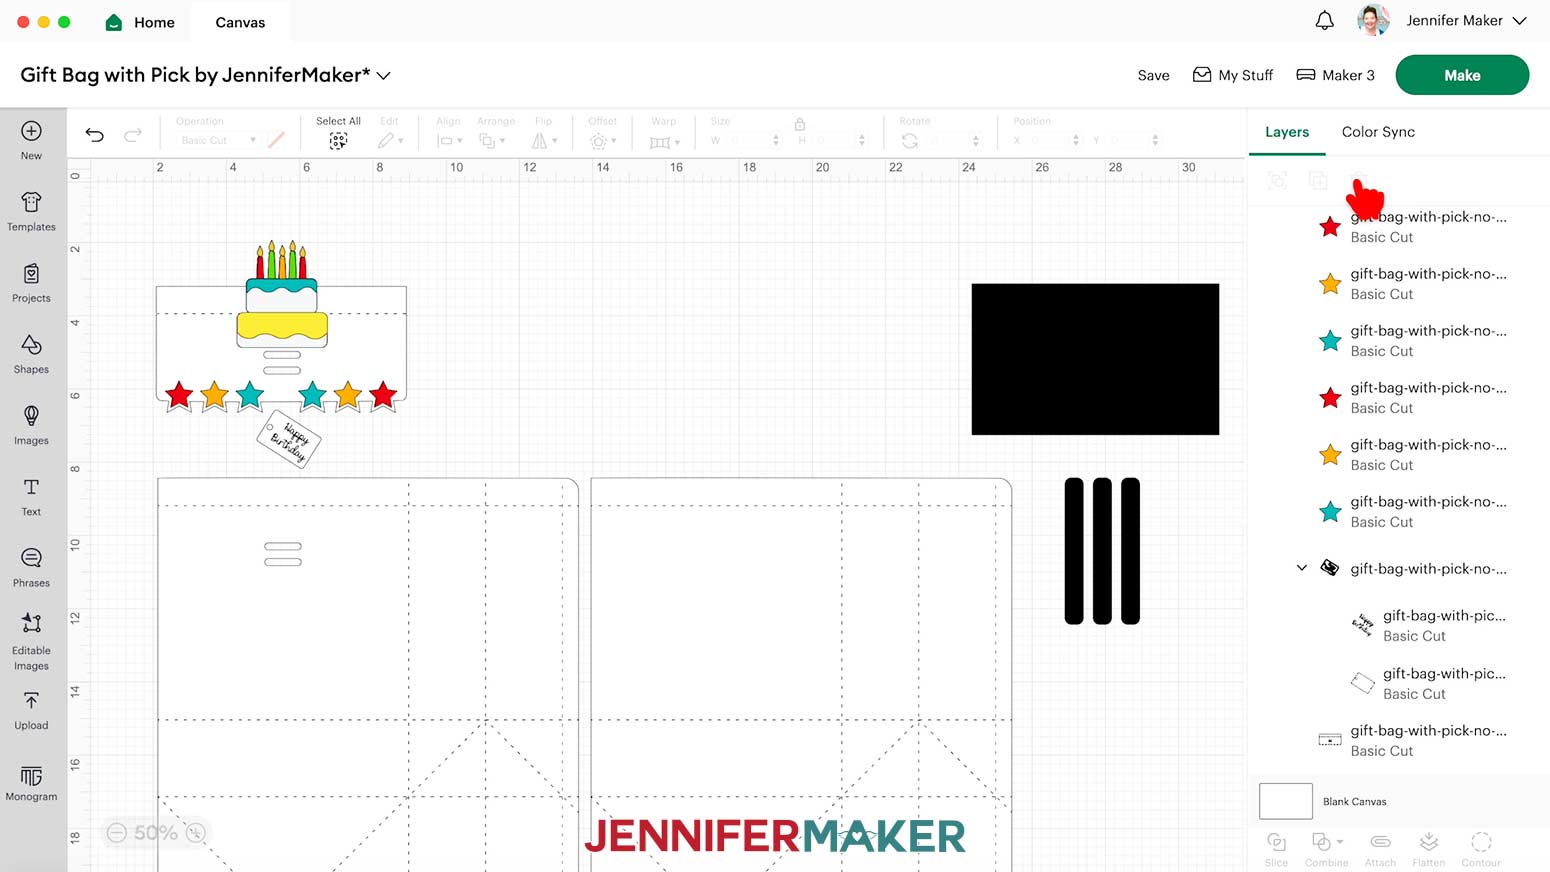
10. Select the foldable top design and click “Ungroup.”
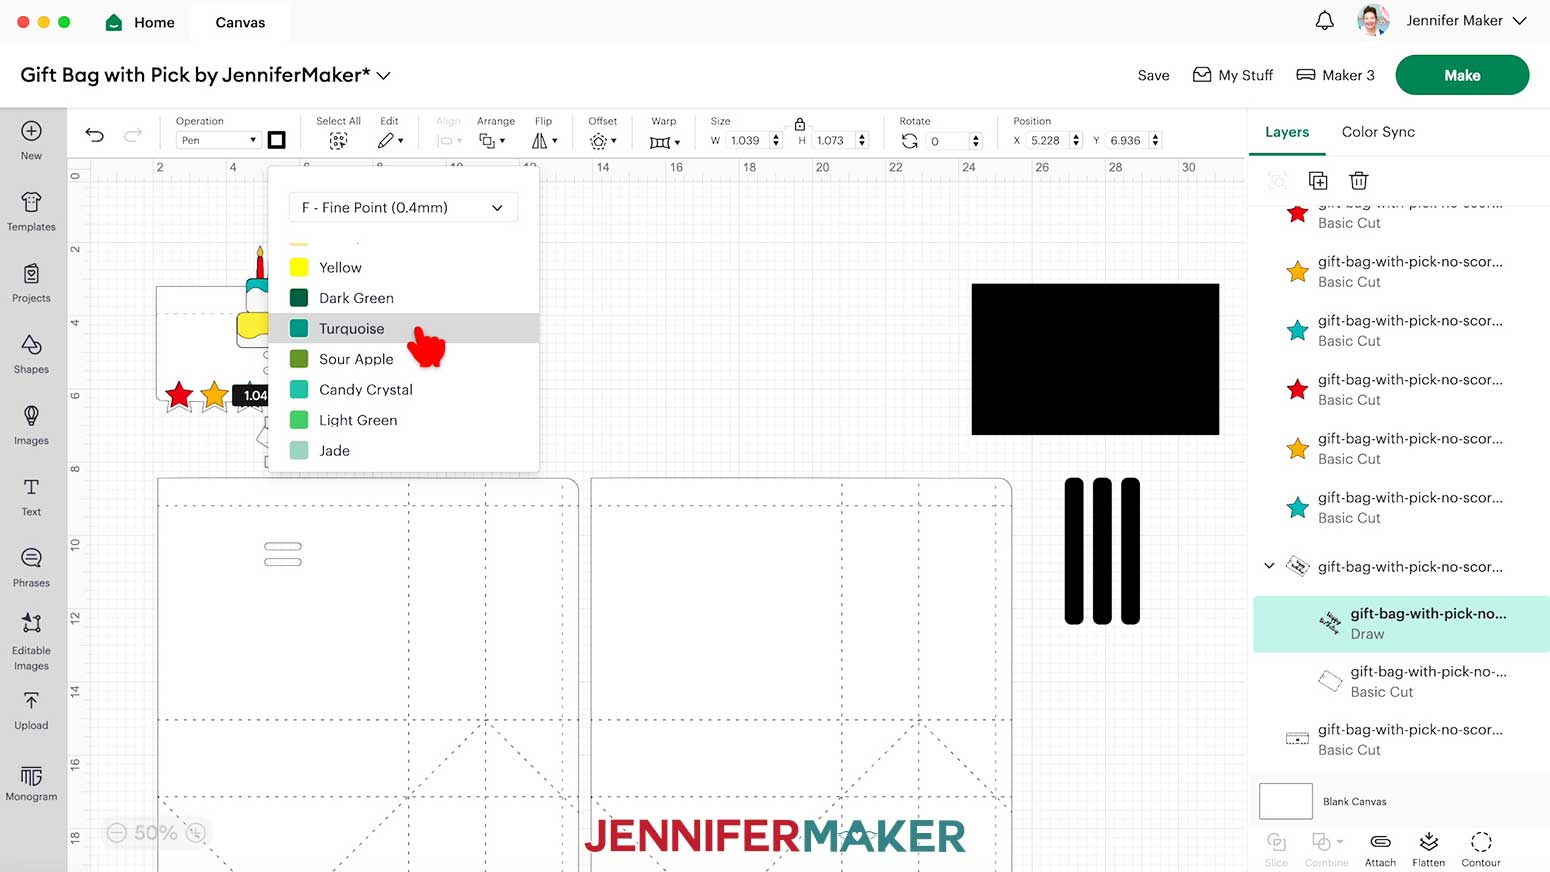
11. Click the text layer, and change the “Operation” to “Pen.”
12. Click the color box and select your pen. I’ll select the “Fine Point 0.4mm” and then click “Turquoise.”
13. Hold your Shift key and select both the rectangle and text in the Layers Panel.
14. Click “Attach.”
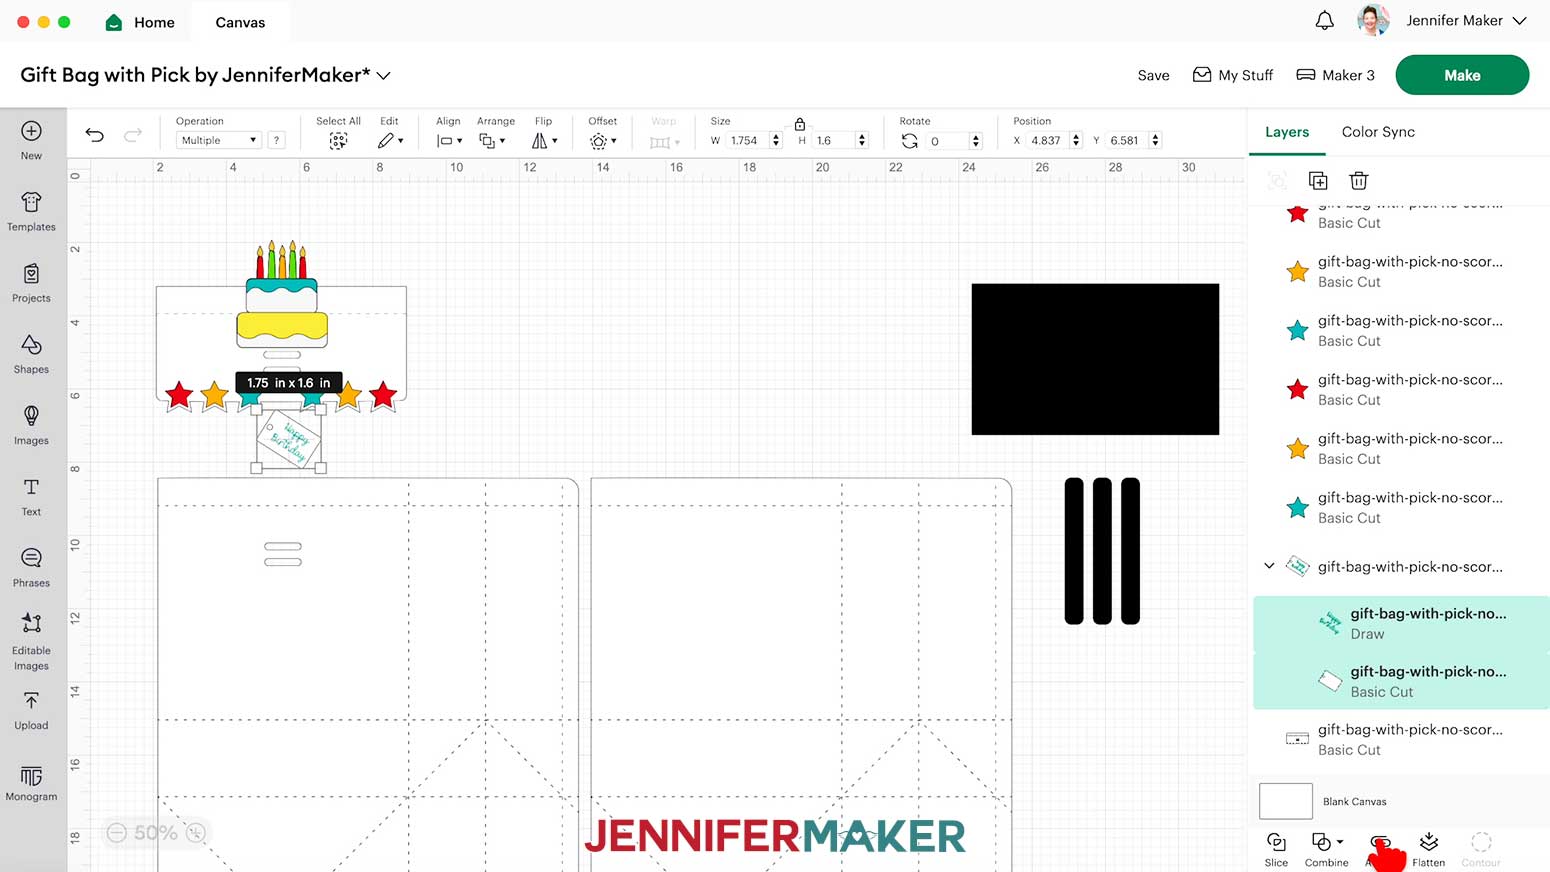
15. Your layers are now ready to cut!
16. Make sure the correct machine is selected, then click “Make.”
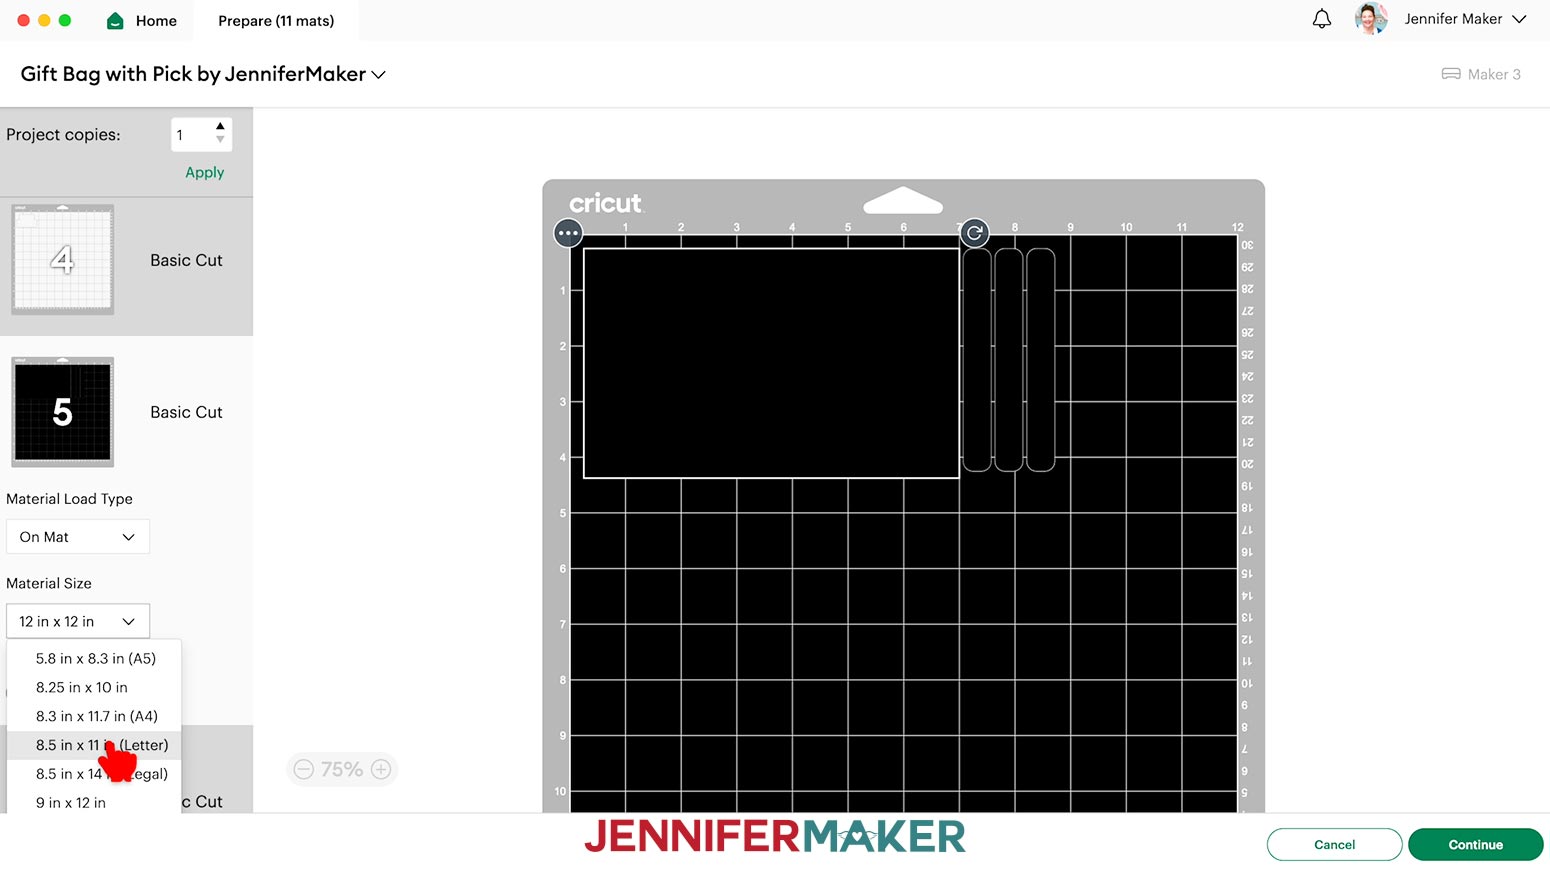
17. If prompted, click "On Mat," choose your mat size, and click “Confirm.”
18. On the Prepare Screen, set the Material Size to match each paper you’re using.
NOTE: Because the main bag pieces are so large, they’ll cut by themselves. I’m leaving the two bag mats and the one with the foldable top and tag at 12” x 12” and changing everything else to 8.5” x 11” but adjust to match your design and materials.
19. Select the first mat again and click “Continue.”
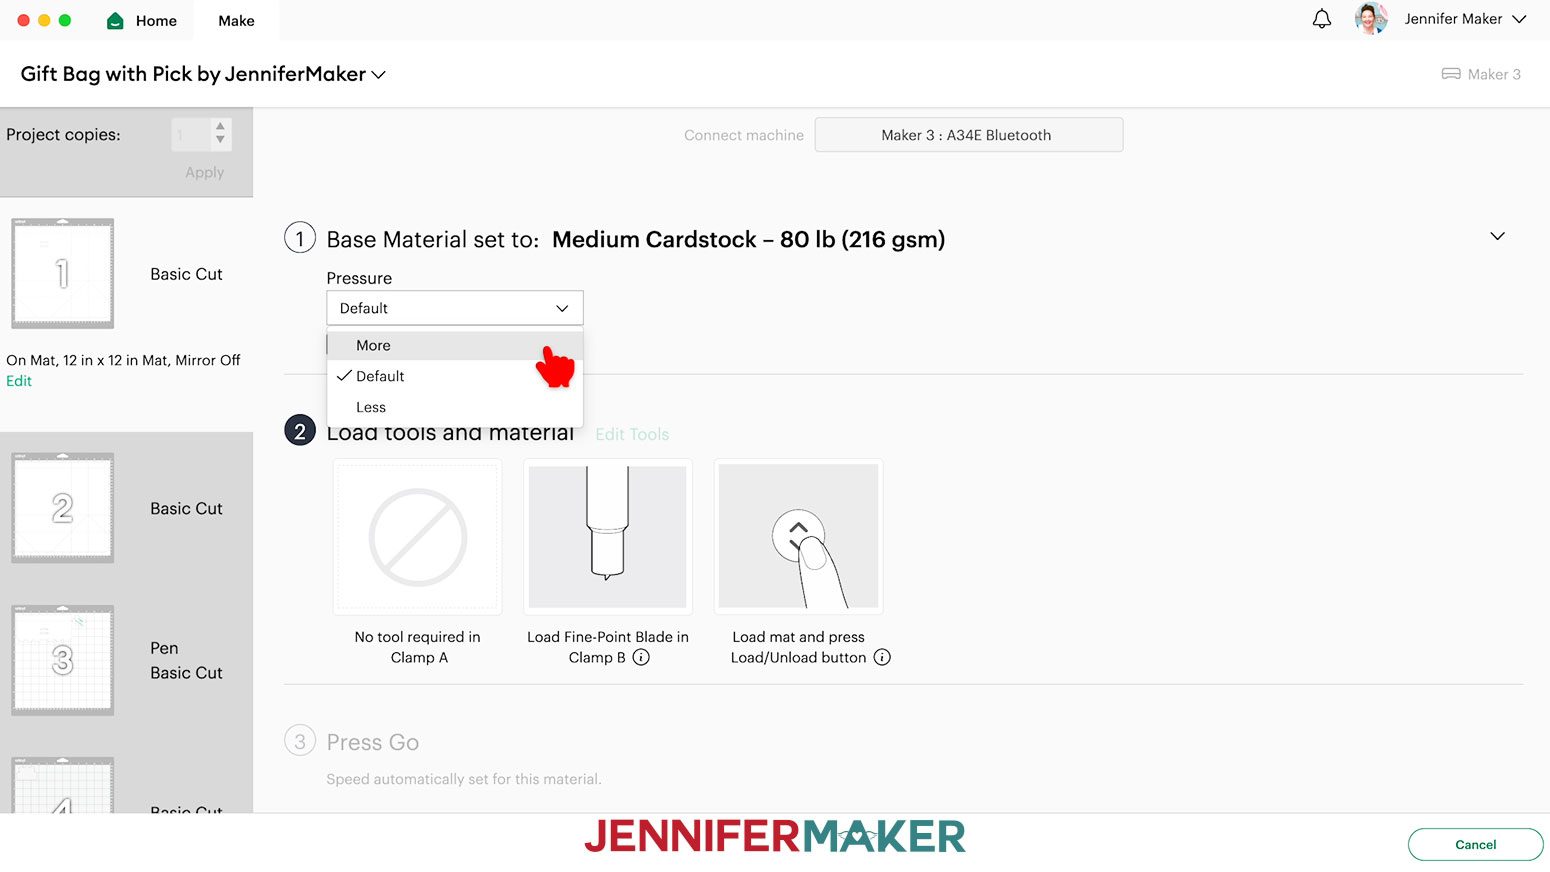
20. On the Make Screen, set the first mat to match your bag’s main material. Not all machines cut the exact same way, but I got the best results with the settings listed for each bag cardstock:
- For plain or pattern 65 lb cardstock: “Medium Cardstock - 80 lb” with “More” pressure.
- For the glitter cardstock: “Glitter Cardstock” with “More” pressure.
21. Place your first mat’s material face up on a green StandardGrip machine mat.
22. Use a brayer to adhere it well.
23. Check that your Fine-Point Blade is clean and in the clamp.
24. Press the flashing “Load/Unload” button to load the prepared mat into your Cricut.
25. Press the flashing “Go” button to begin cutting.
TIP: When it has finished cutting, keep the mat loaded and gently lift a corner to make sure the cuts went all the way through the cardstock. If not, press the “Go” button again to make another cut in the same design.
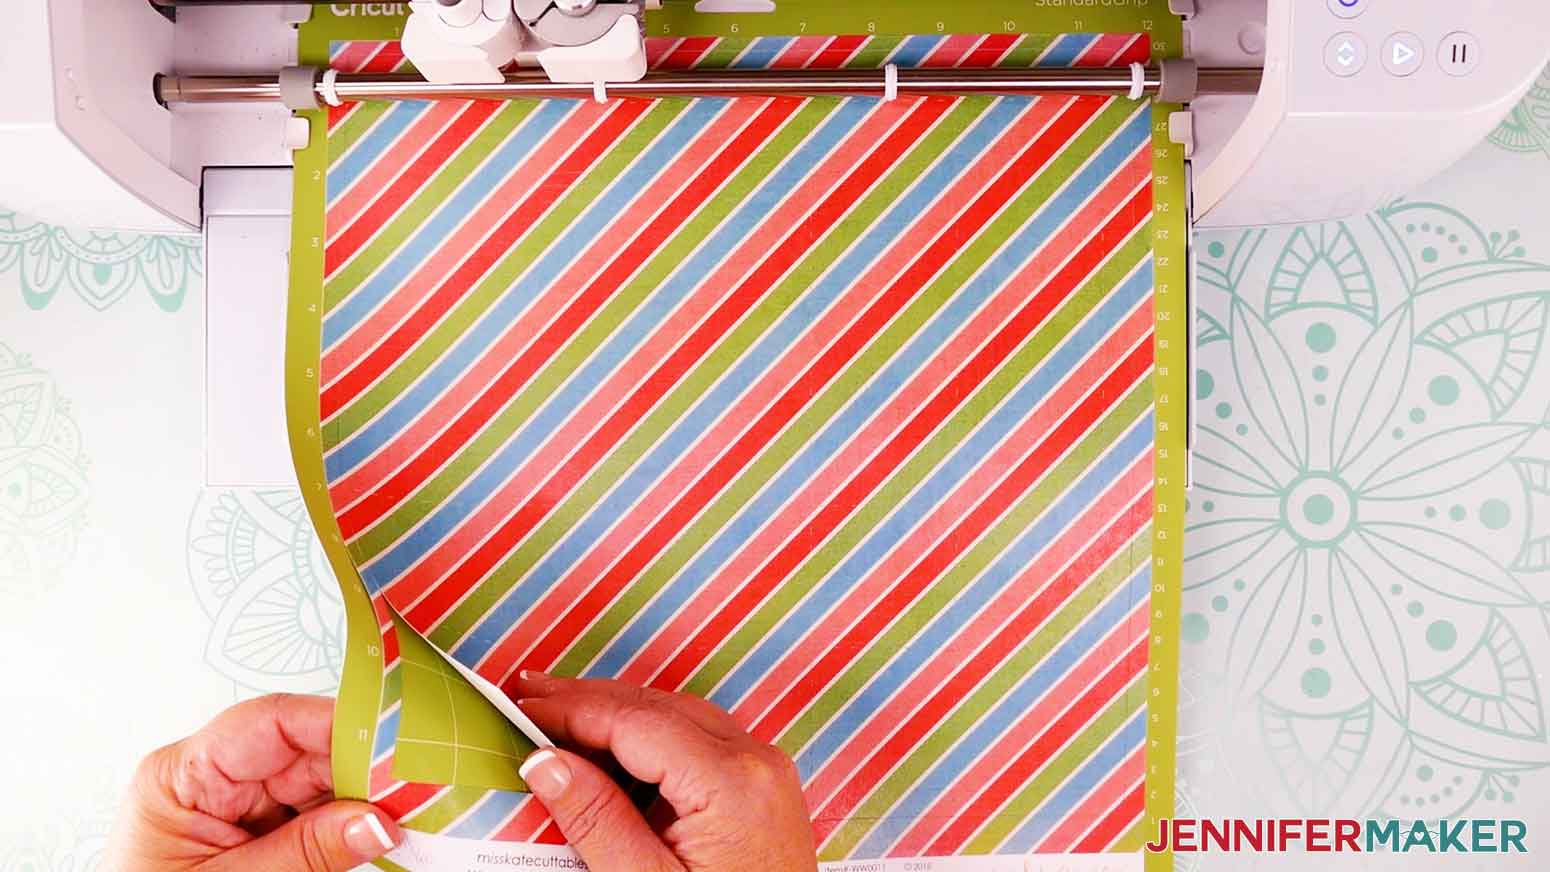
26. When the cut is complete, unload the mat, flip it over onto your work surface, and roll it back to release the paper.
TIP: A spatula helps lift delicate areas
27. Place the piece face up in the correct orientation.
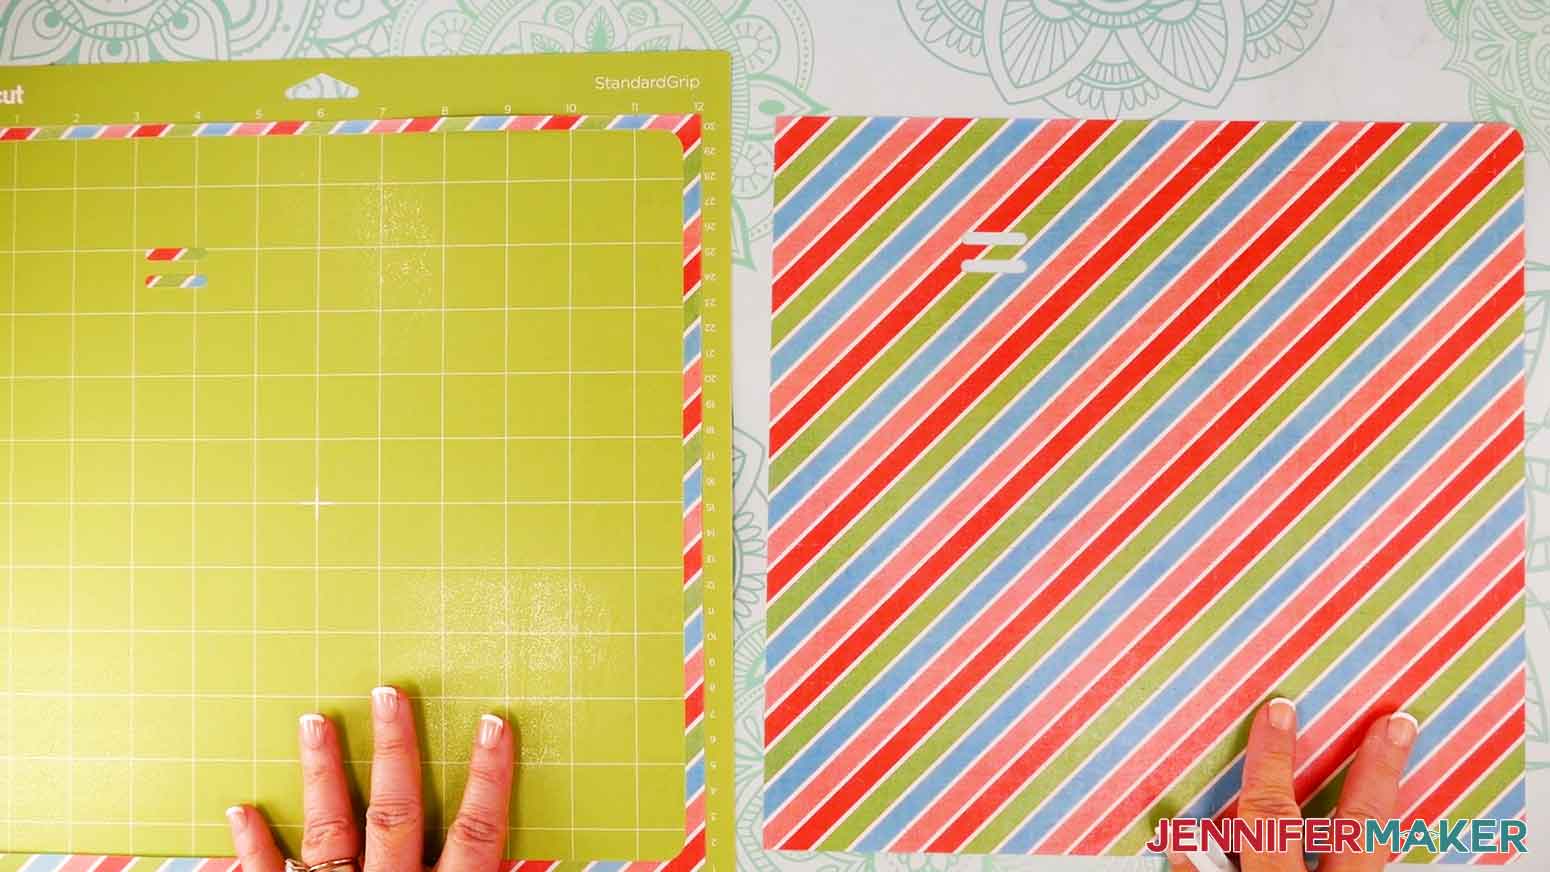
28. Use a scraper to remove cutouts left on the mat.
29. Repeat to cut the second bag piece from the same paper.
30. For Mat 3 with the foldable top and tag with writing, set the material to “Medium Cardstock - 80 lb” with “More” pressure.
31. Adhere your 12” x 12” 65 lb white cardstock to a green StandardGrip machine mat and use a brayer to adhere it well.
32. Uncap your Fine Point 0.4mm pen and scribble on some scrap paper to make sure it flows.
NOTE: The steps may differ for your machine, so follow the screen prompts.
33. Put the cap on the back of the pen so you don’t lose it, then follow the prompts to load it in the clamp when needed.
34. Load the mat and press the “Go” button to start the operations.
35. When the cuts are complete and all the way through, unload the mat and remove the pieces like the others.
36. Follow the same steps to prepare, cut, and remove your remaining mats using these settings depending on your choices:
- For plain or patterned 65 lb cardstock: “Medium Cardstock - 80 lb” with “More” pressure
- For glitter cardstock: “Glitter Cardstock” with “More” pressure.
- For foil cardstock: “Holographic Cardstock” with “More” pressure.
- For heavy white cardstock on the black mat with the reinforcement and pick layers: “Heavy Cardstock - 100 lb” with “More” pressure.
37. Make sure you have all the correct pieces and they’re face up, referring to the Canvas if you need help.
STEP 3: ASSEMBLE YOUR GIFT BAG WITH PICK
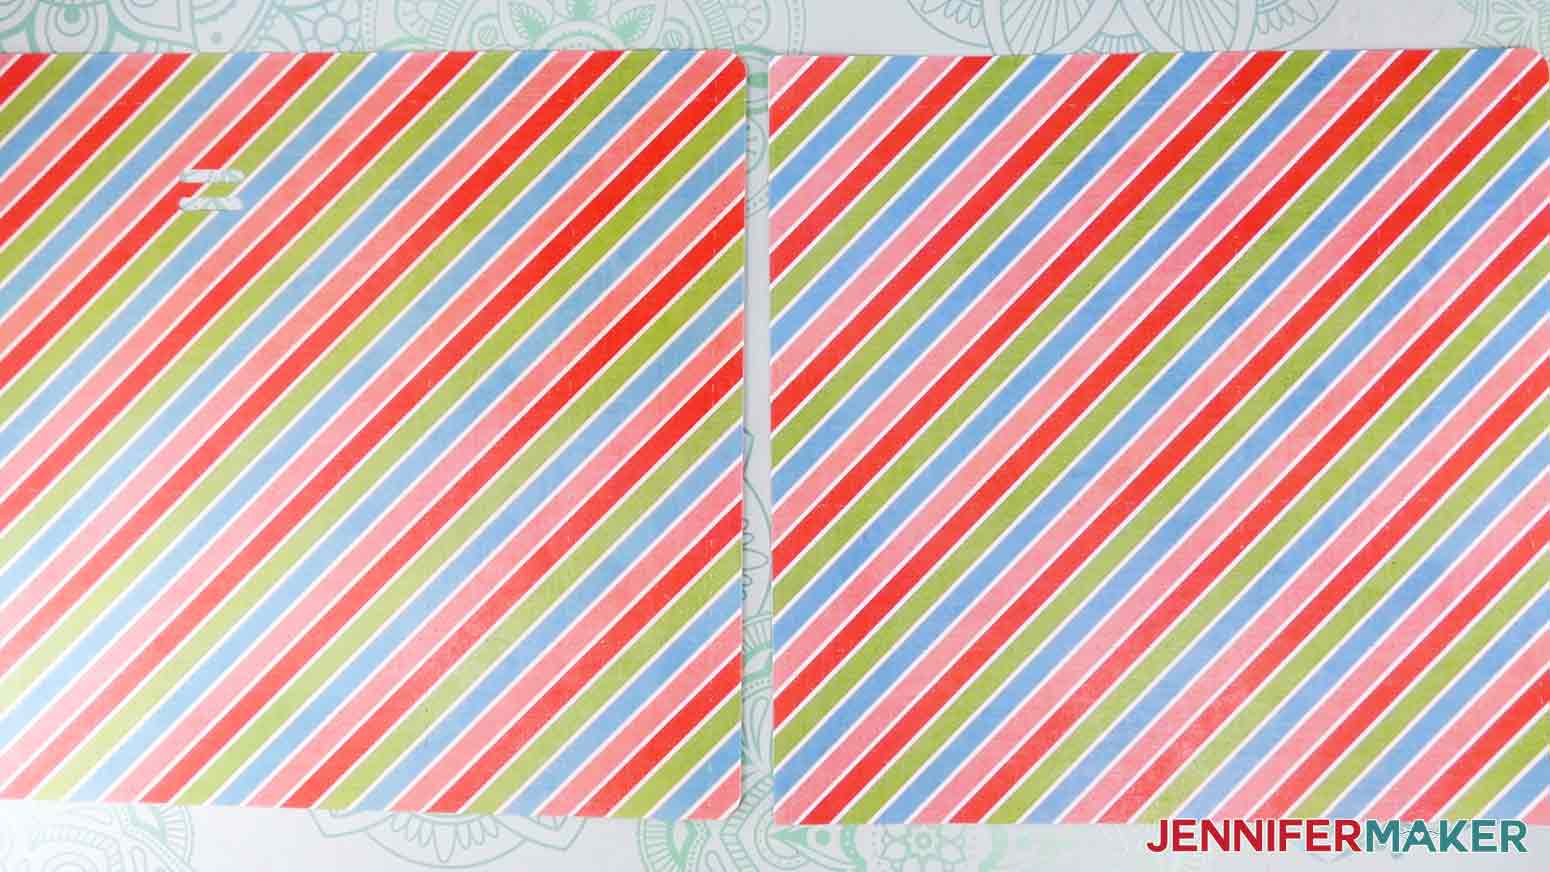
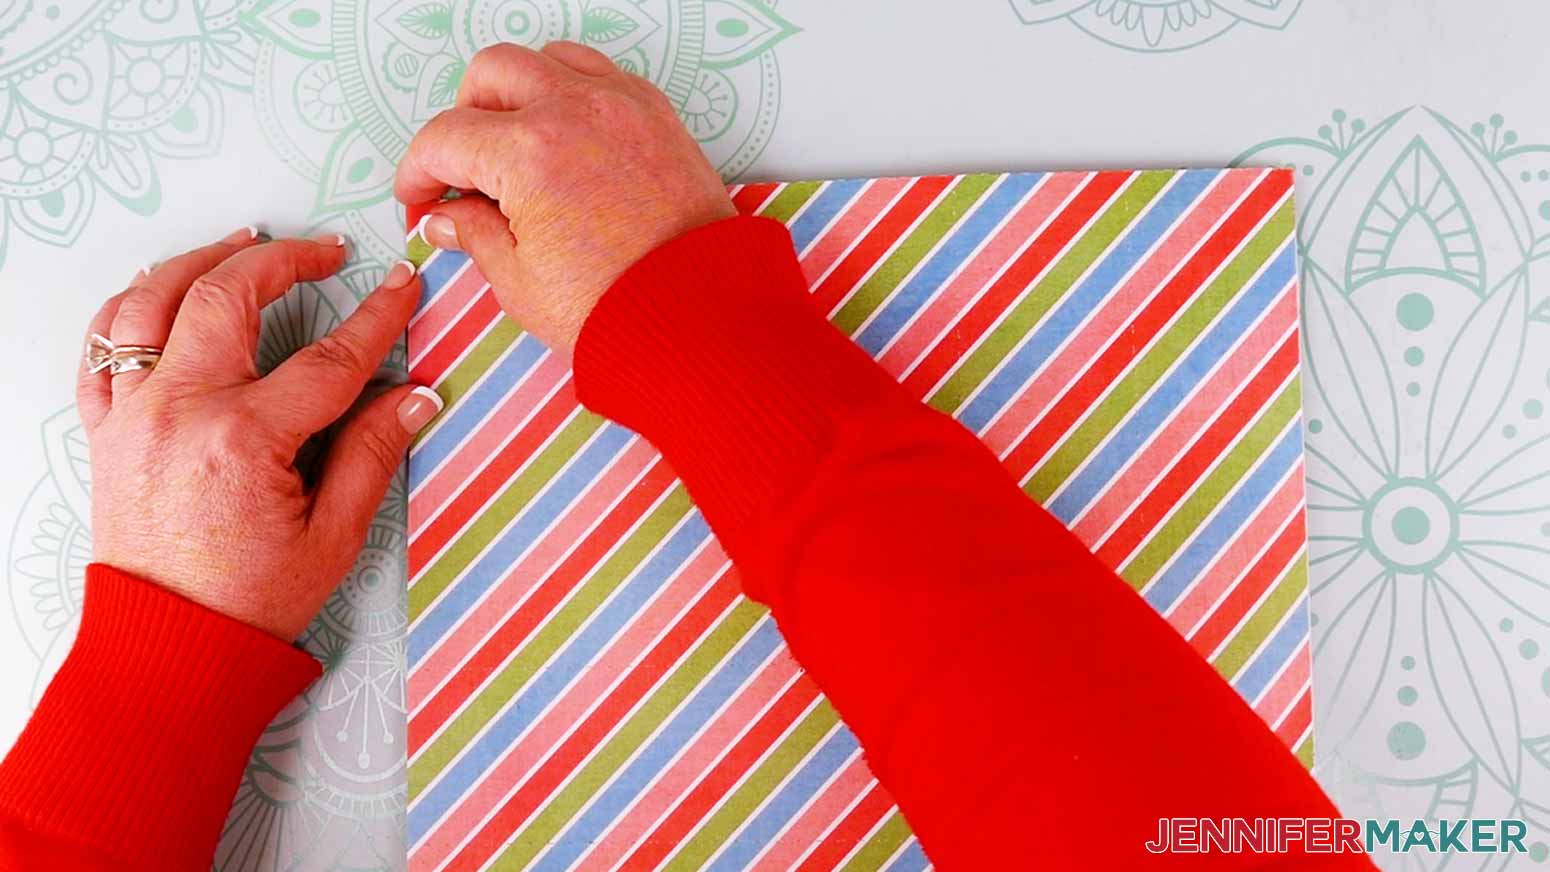
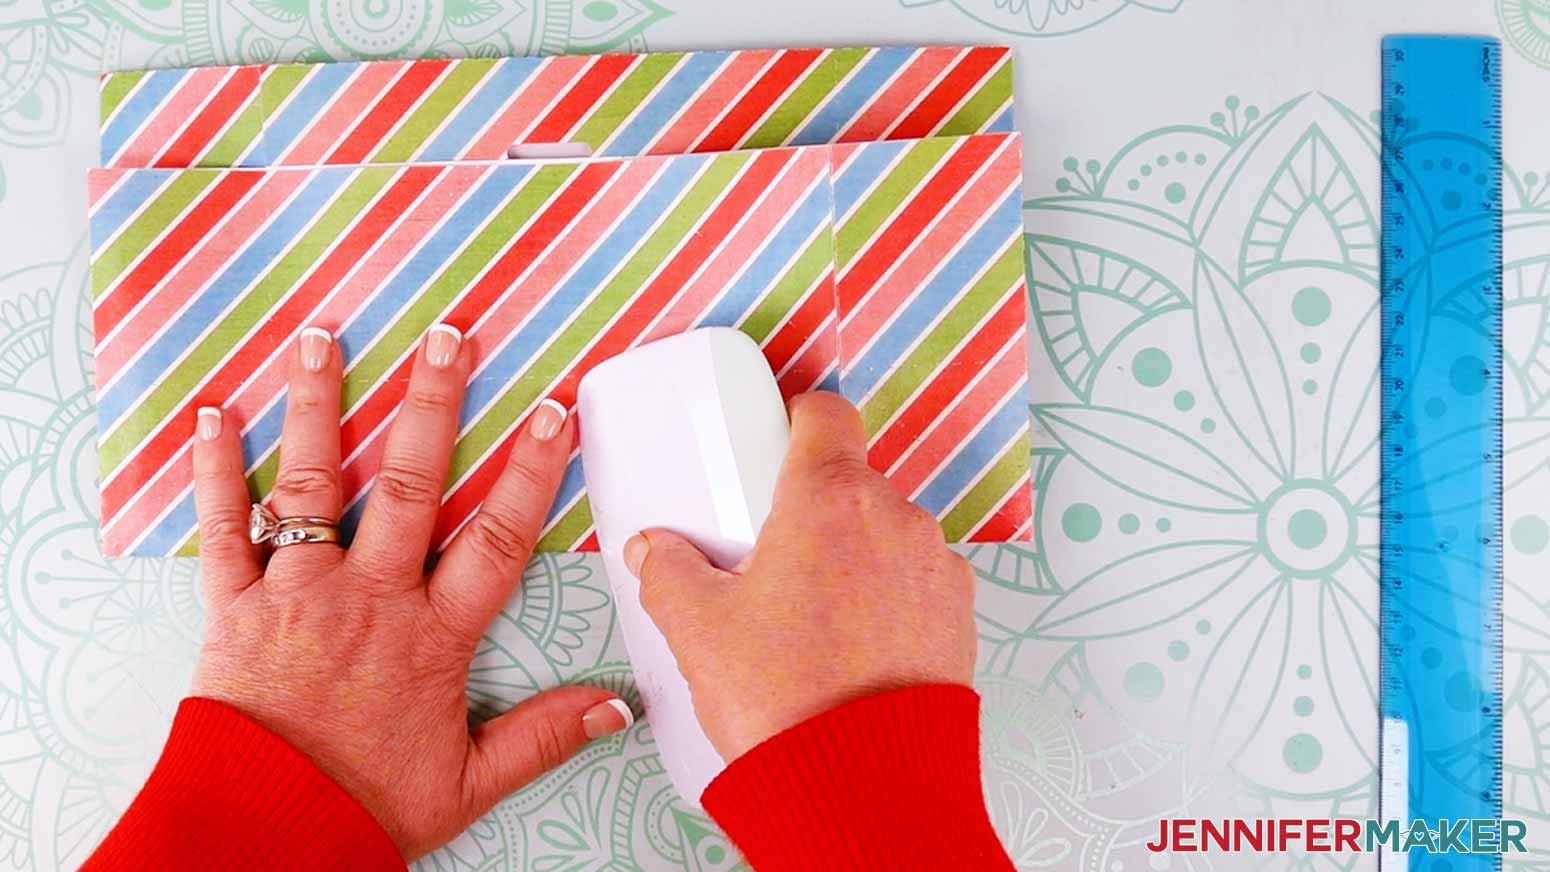
1. Place the two bag exterior pieces face up with the diagonal lines at the bottom
2. Fold the skinny top sections down towards the backside of the paper along the topmost horizontal crease so it is on the interior. A ruler can help.
3. Fold the right side tabs under on both pieces.

4. Flip both over.
5. Add a thin glue line to one of the side tabs showing the paper’s front.
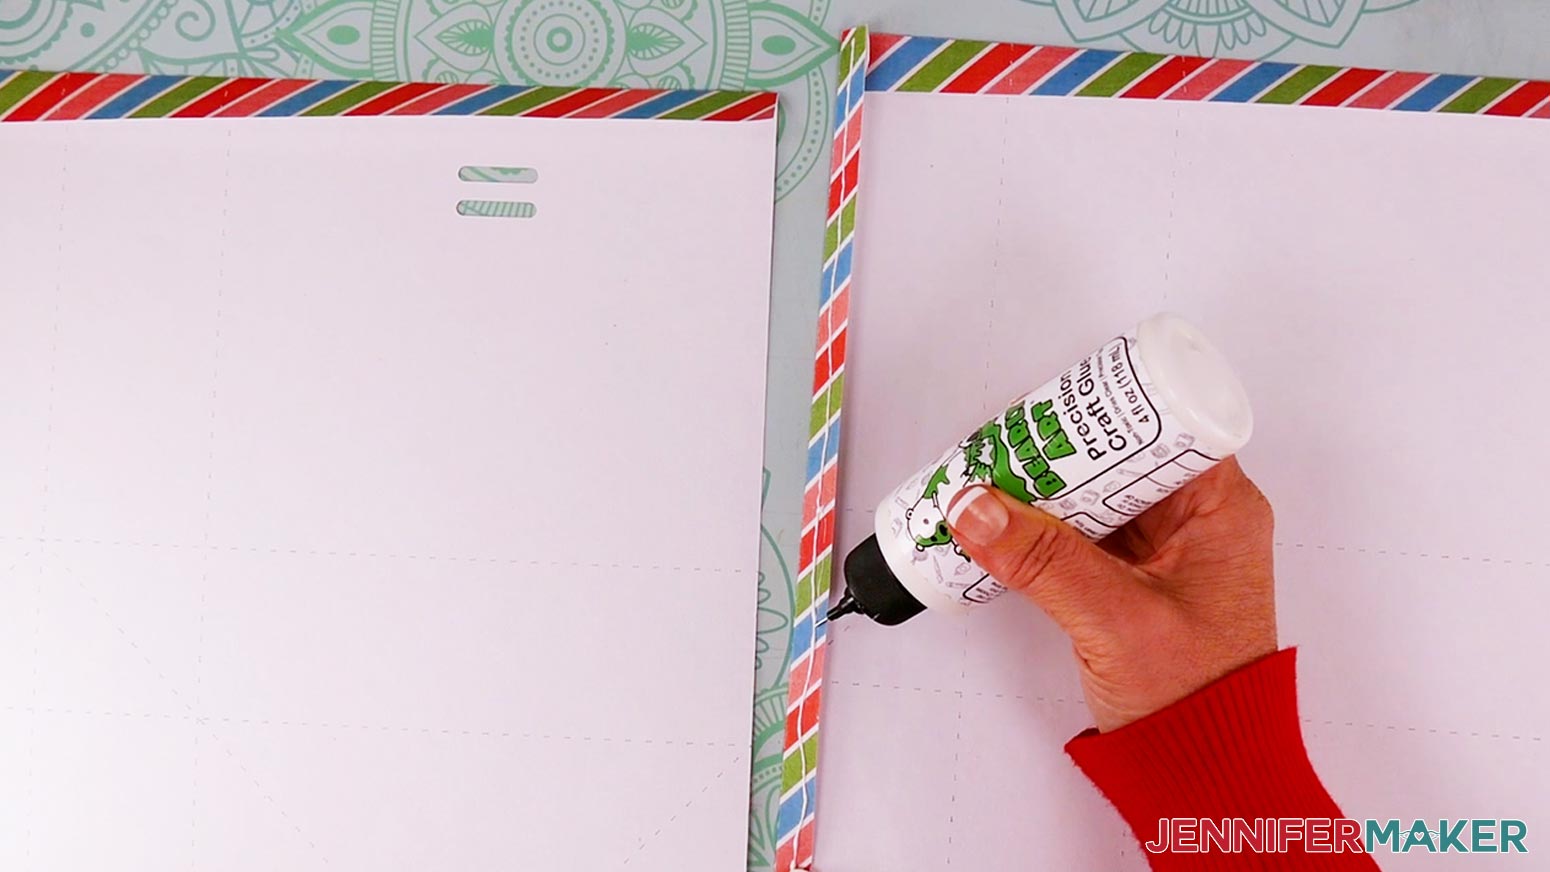
NOTE: If using glitter cardstock, hot glue will work best.
6. Adhere the tab to the unfolded side edge of the opposite piece.
7. Let the glue dry, then add glue to the other side tab on the front pattern.
8. Adhere the tab to the inside edge of the unattached side, to make a closed shape.
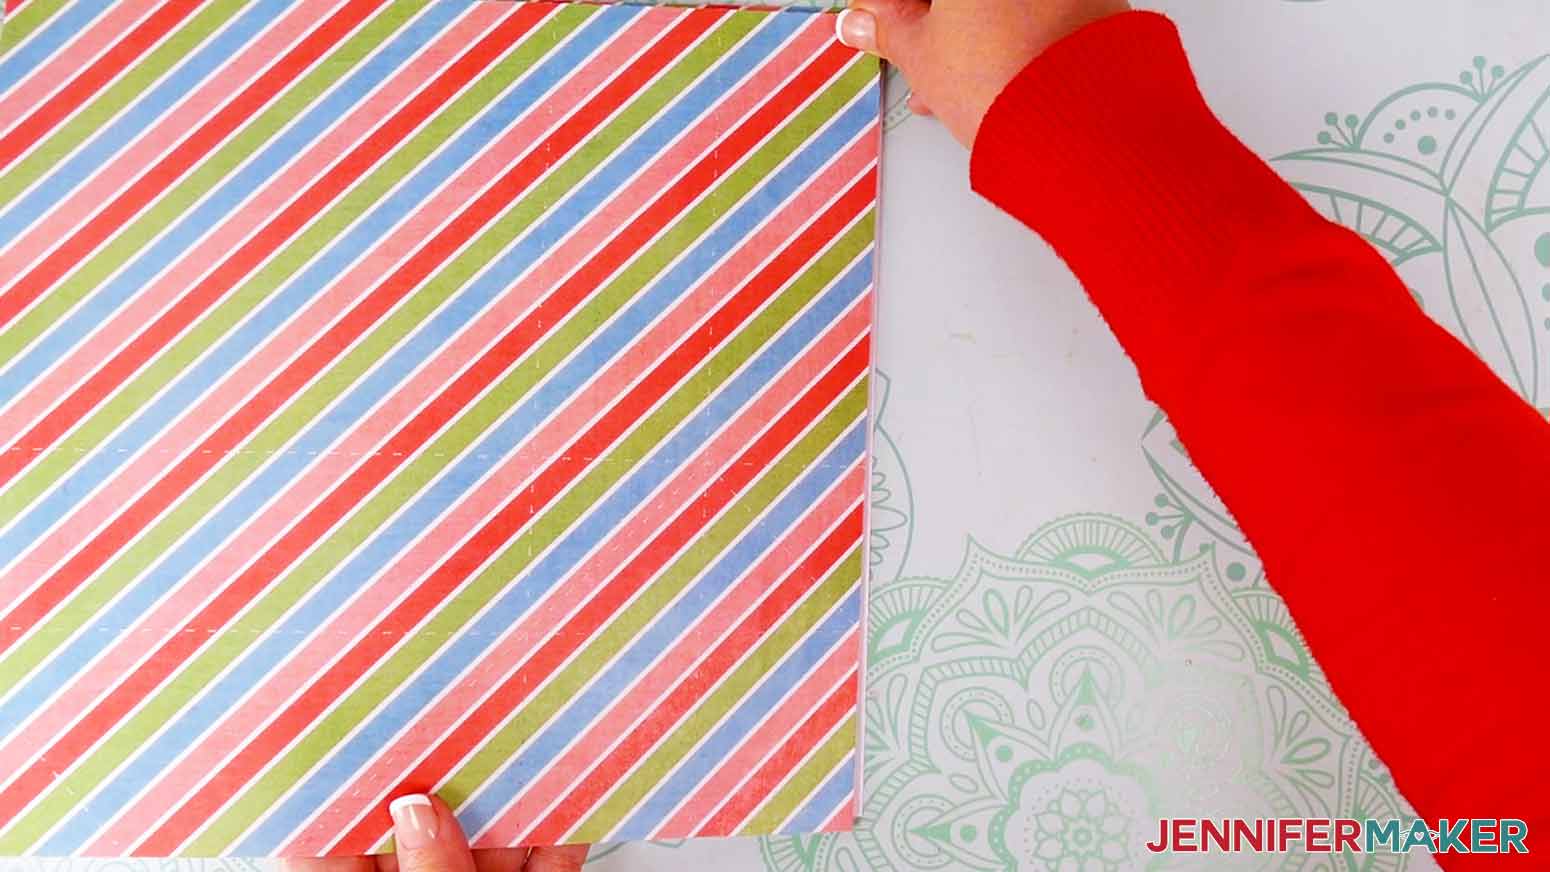
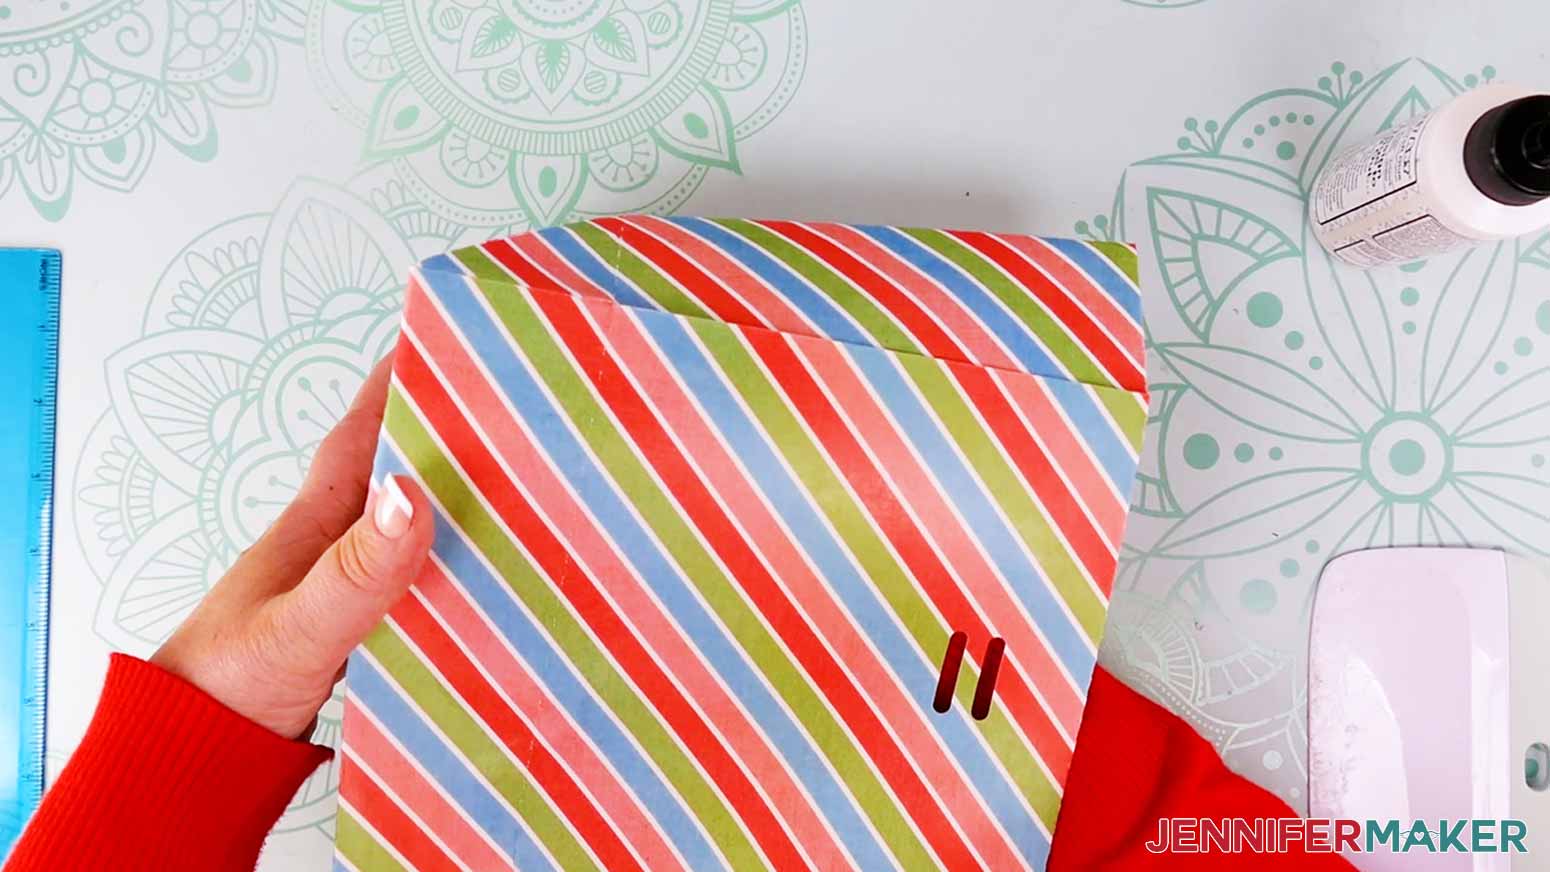
9. Lay the bag flat with the pick slots at the top.
10. Find the vertical fold line directly to the left of the right hand side of your bag.
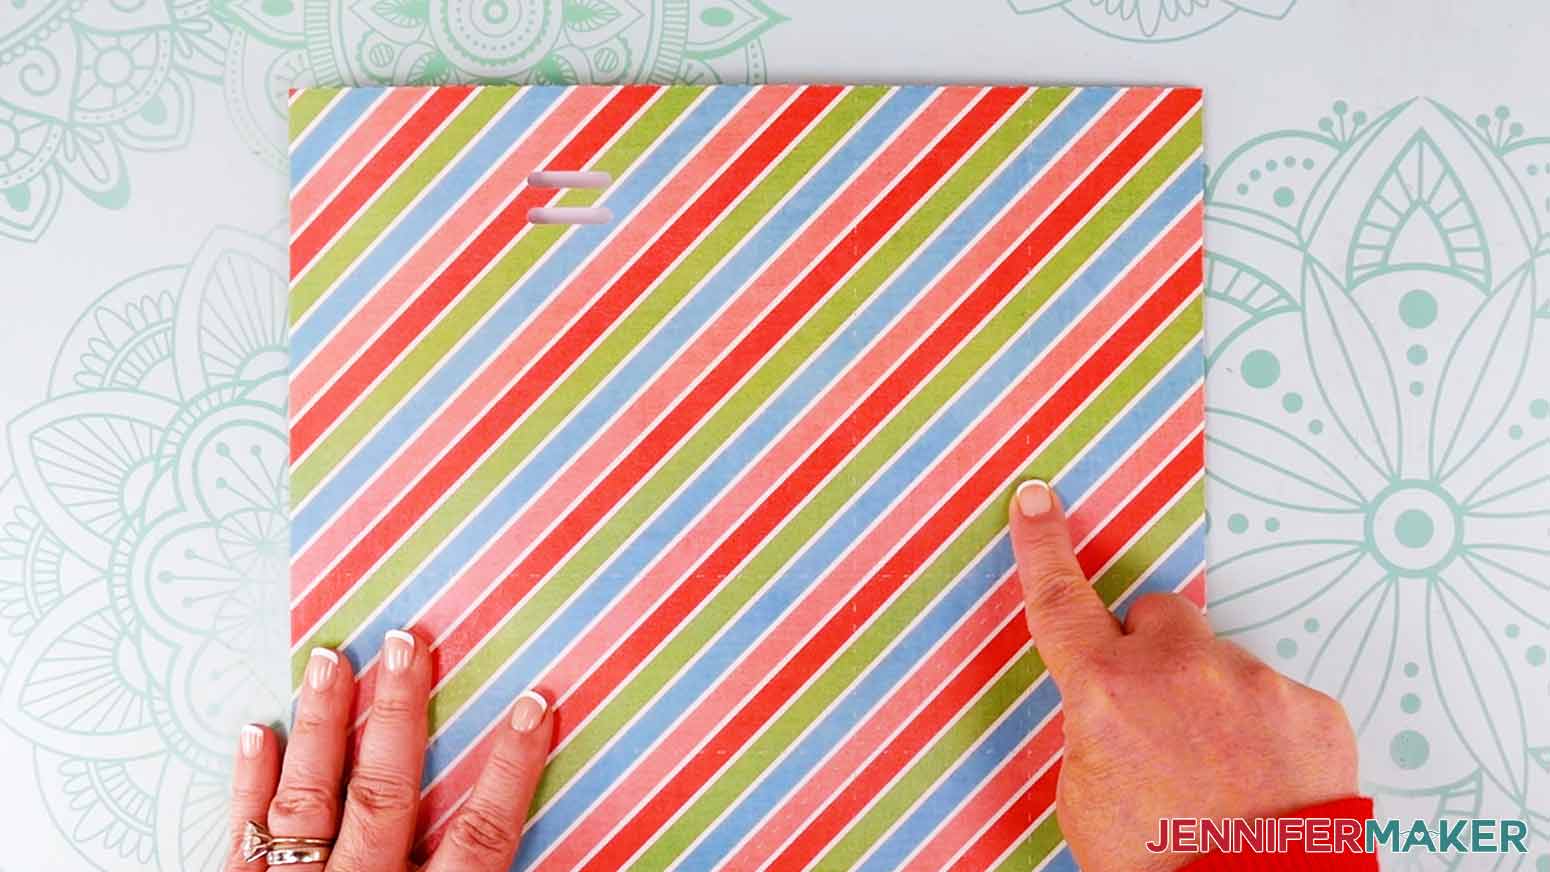
11. Fold outward along this line.

12. Flip your bag over and repeat on the other side.

13. The bag will naturally want to fold along this line and pop up into a 3D rectangle.
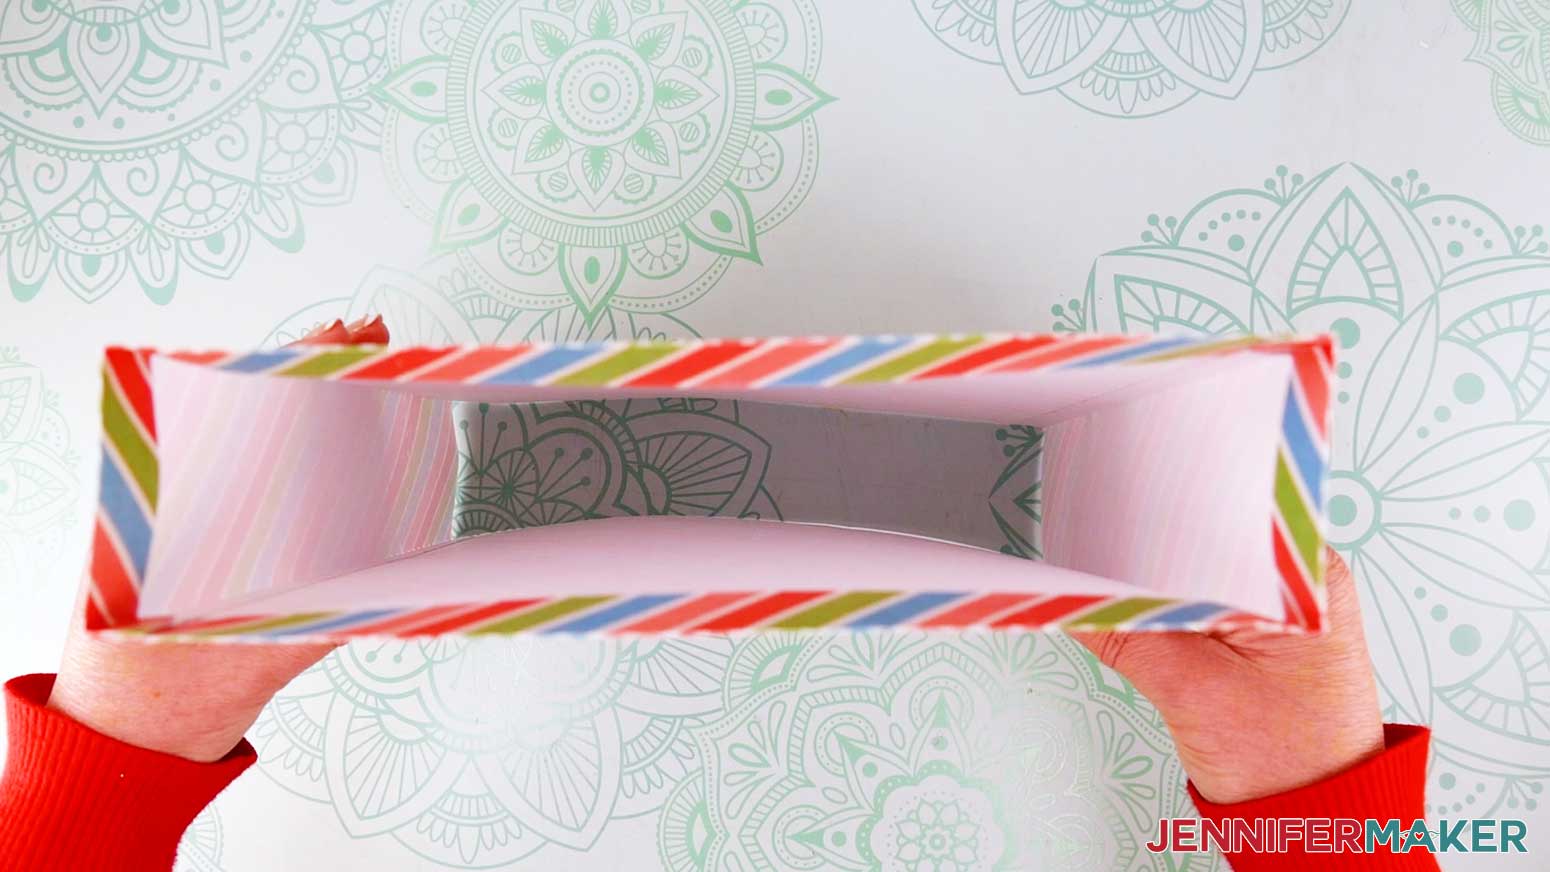
14. Flatten the bag so there are symmetrical vertical creases on the left and right.
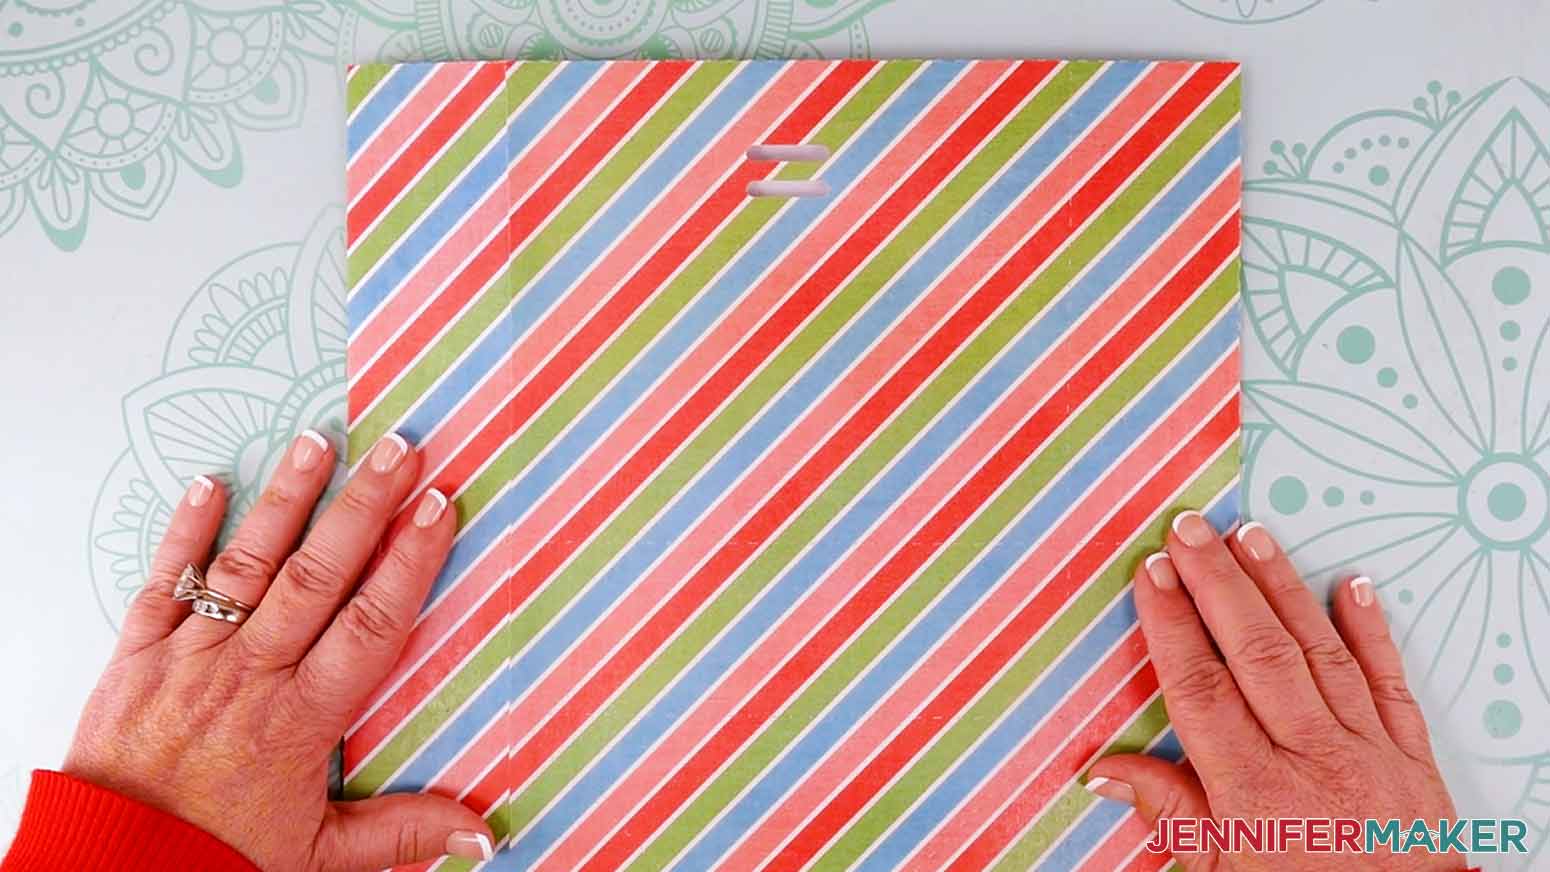
15. Crease the bottom up along the horizontal line closest to the top of the bag, just below the cardstock’s center.
TIP: Using your scraper tool can help to create nice, sharp creases along your folds.
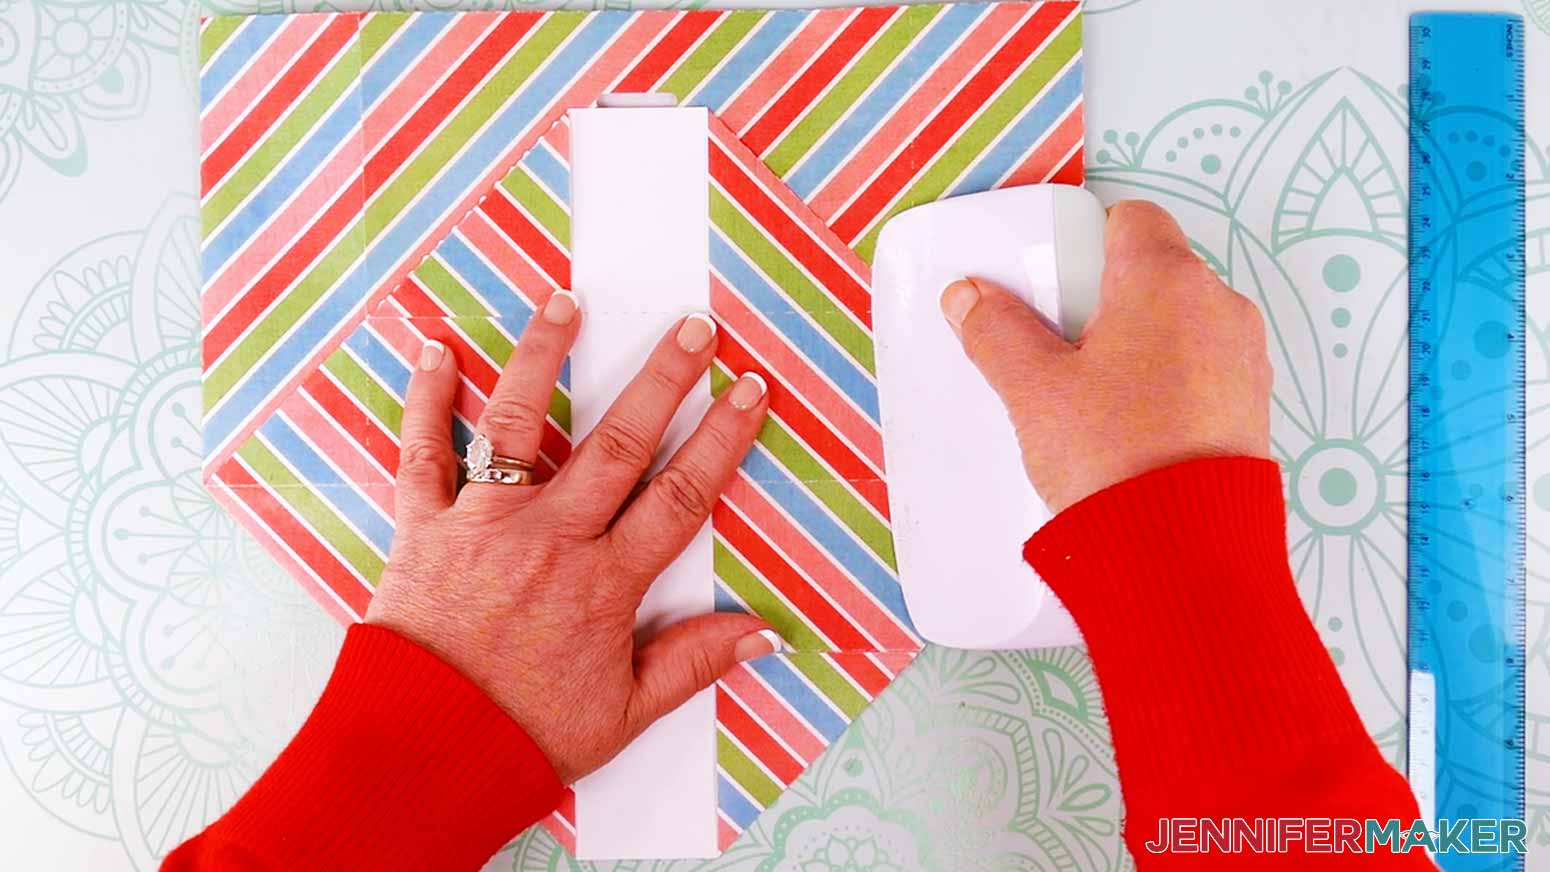
16. Push the two sides of the bottom section in toward each other along the diagonal fold lines.
17. Flatten those sides against your work surface to create a triangle on each side that shows the outer color or pattern.
18. Make sure the triangles’ corners are sharp and crease them with the scraper.
TIP: Go slowly and be patient when folding this part. You may find that you need to gently crease the edges of your cardstock along the diagonal score lines to encourage it to fold where it needs to.
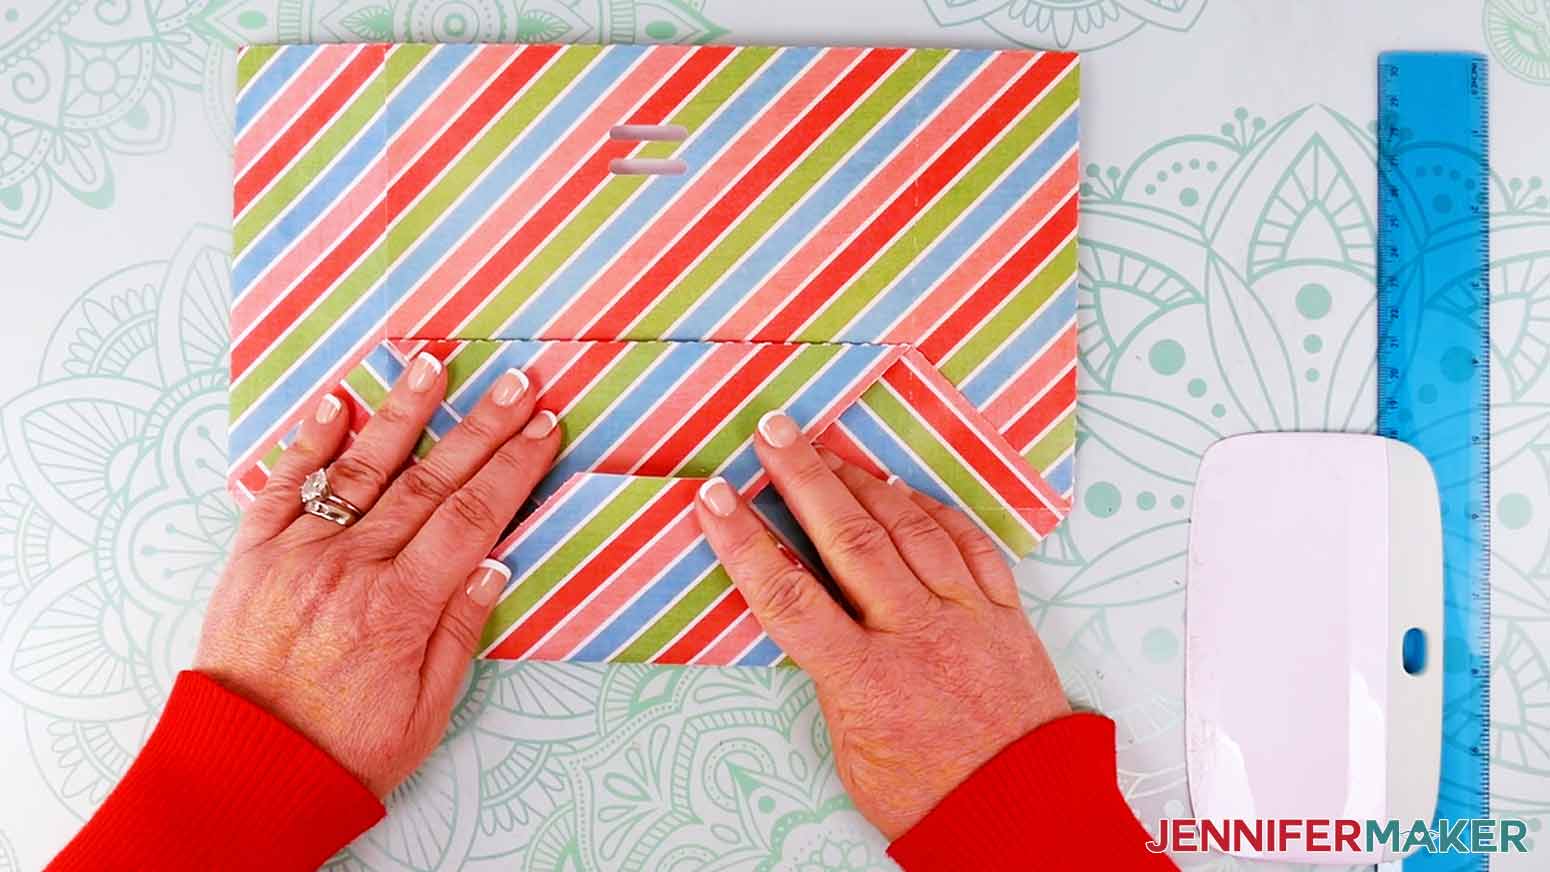
19. Fold the top section down along the topmost horizontal line so the open end overlaps the center just a bit.
20. Fold the bottom section up along the bottom horizontal line so it overlaps the top section’s open end.
21. Unfold these two flaps.
22. Apply glue to the four outer triangles, avoiding the center portion underneath the flaps, as this is actually the inside of your bag, and you don’t want to glue the bottom to the inside!
23. Fold the top section down.
24. Add a thin line of glue where the bottom flap will overlap its edge.
25. Fold up the lower flap and hold it to dry.
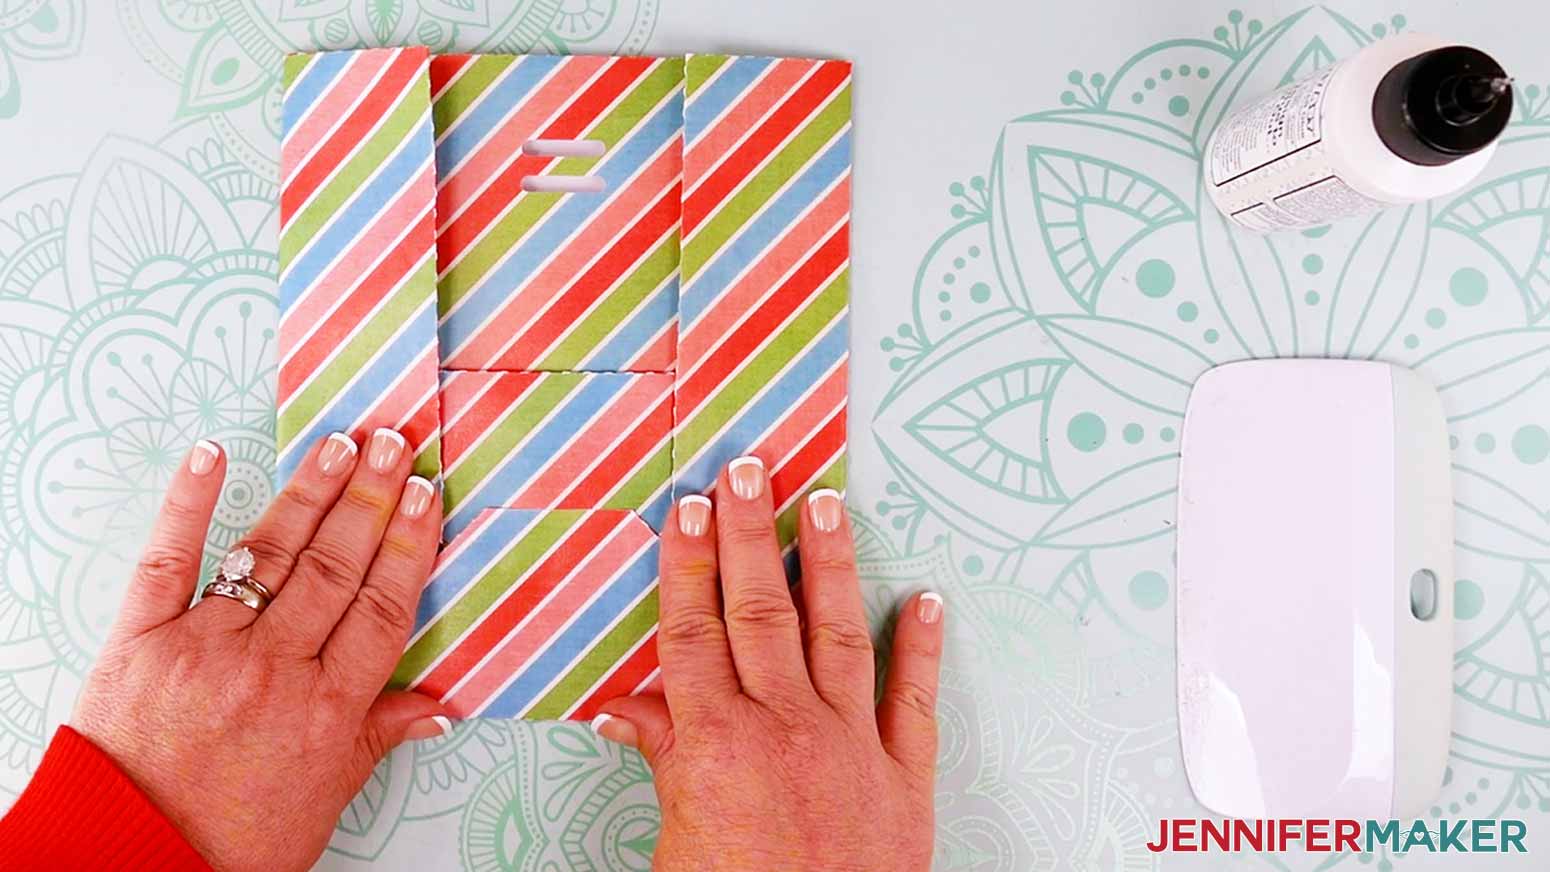
26. Fold the left and right sides inward along the two vertical lines.
NOTE: The angled edges at the bottom of each side flap will just be touching the angled sides on the left and right of your bottom flap. You should have a nice, sharp corner at the bottom left and bottom right of your bag.
27. Crease your folds with your scraper.
28. Put one hand inside the bag from the top and carefully push down on the bottom to open it.
TIP: You may have to push on it from a few different spots to get the bottom completely flat. Go slowly and keep trying until your bottom is flat enough to be set down on your work surface.
29. Fold the bag in the opposite direction along the creases, especially at the bottom to help it open outward rather than inward.
30. Fold the middle crease on both sides inward, and make sure all four edges are neatly creased and folded outward.
31. The bottom and sides should be nice and square and stand on its own.

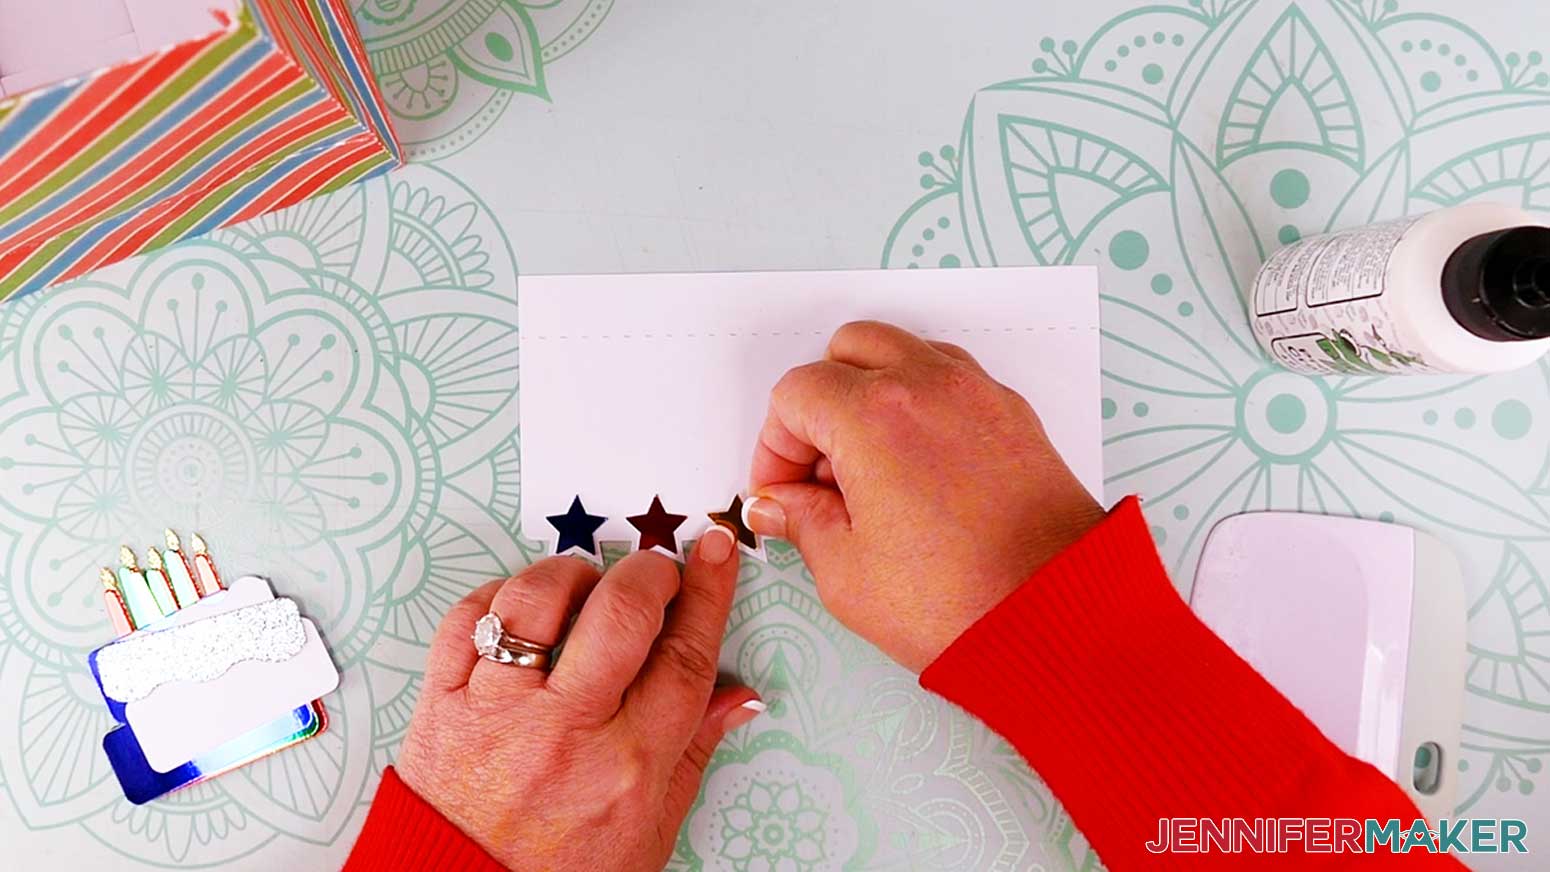
32. Grab the foldable top and the decorative pieces.
33. Place glue on the back of each star and press them on to the shaped edge of the bag top.
34. Once the glue dries, fold the horizontal crease toward the back of the paper.
35. Add a thin line of glue to the top’s tab and press in against the inside of the back of the bag.
NOTE: If the open edges of your flap aren’t lying flat against your bag, you may want to glue them down now.
36. Insert the bag reinforcement inside the bag.
ATTACH THE DETAILS AND PICK
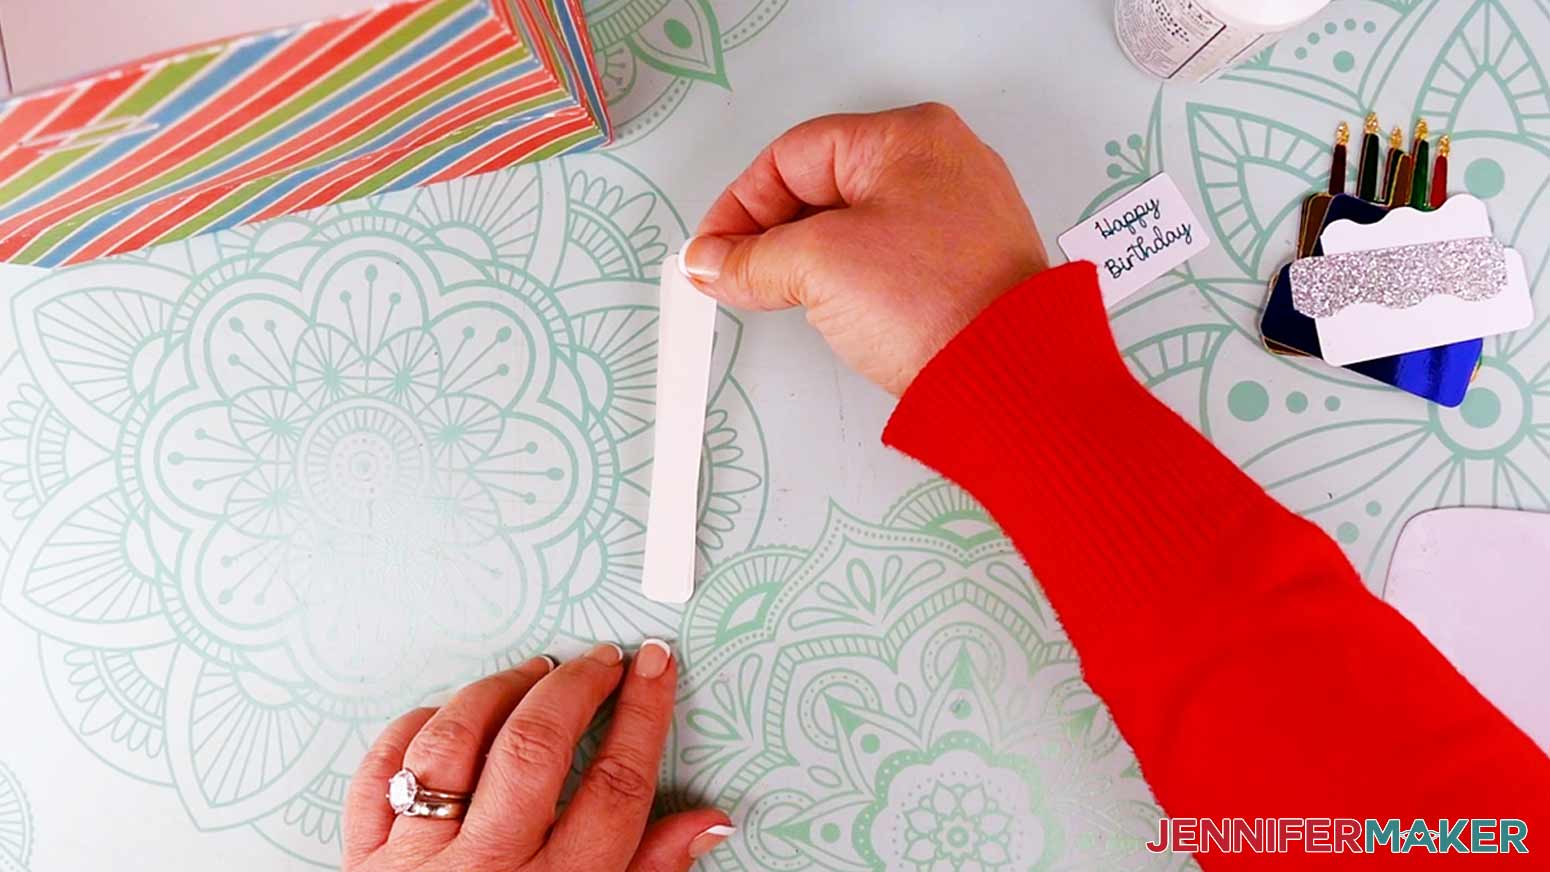
1. Gather your remaining pieces.

2. Glue the three pick layers together perfectly aligned.
3. Align the birthday cake layers face up with gold on the bottom followed by red, green, orange, teal, and white on top. Leave the small yellow layer face-up up by itself for now.
4. Flip the cake stacks face down, then lift the gold layer and place it face up, like opening a book.
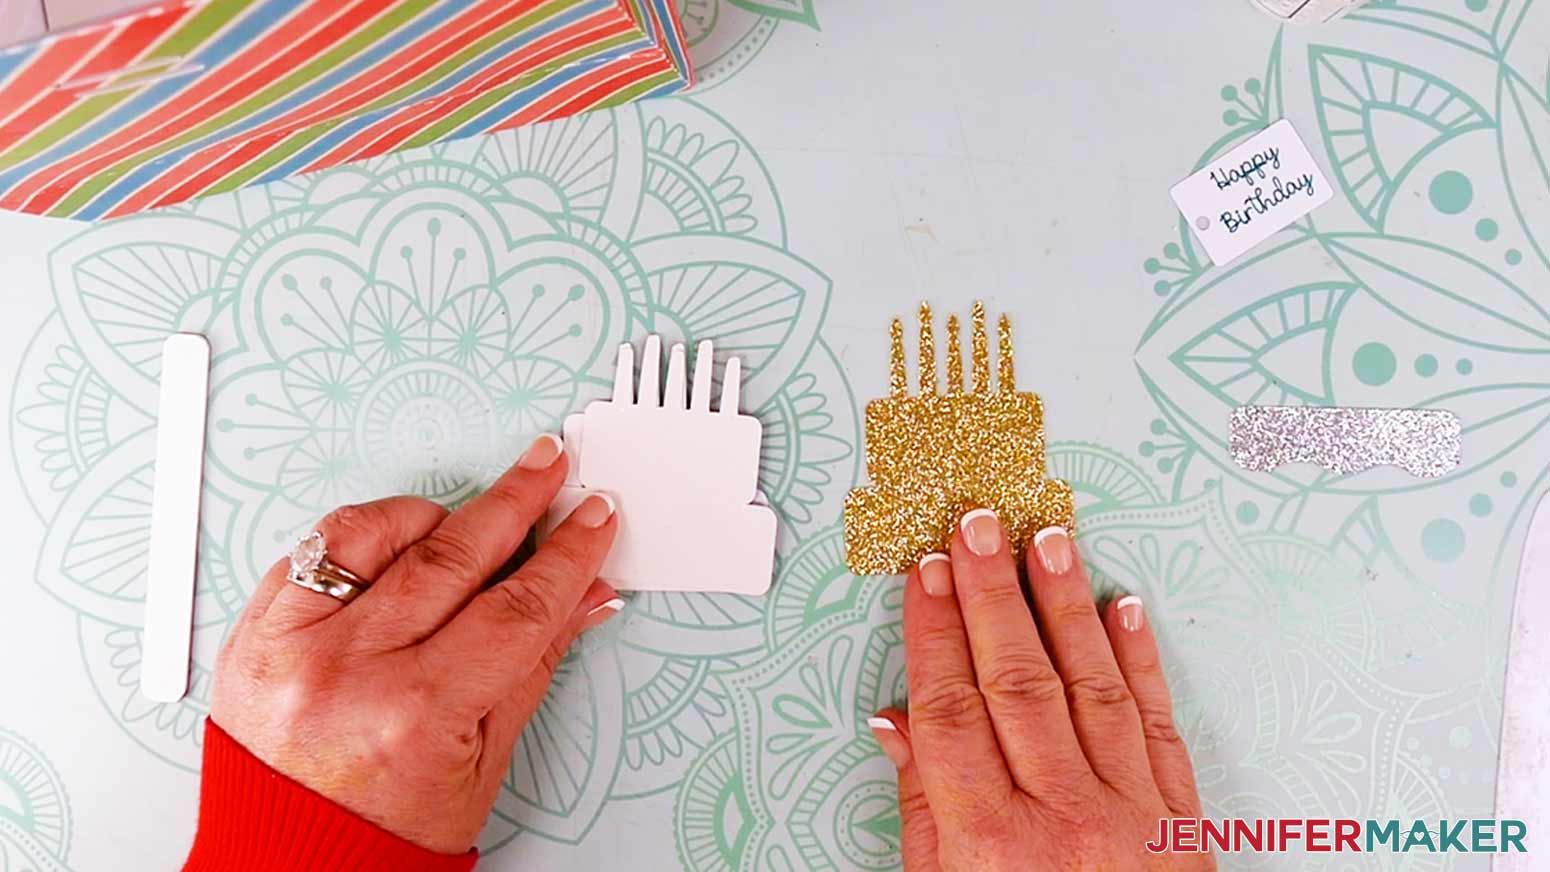
5. Add glue to the back of the next layer where it will touch the one that is face up, then line it up and press it in place.
6. Add the other layers in order the same way.
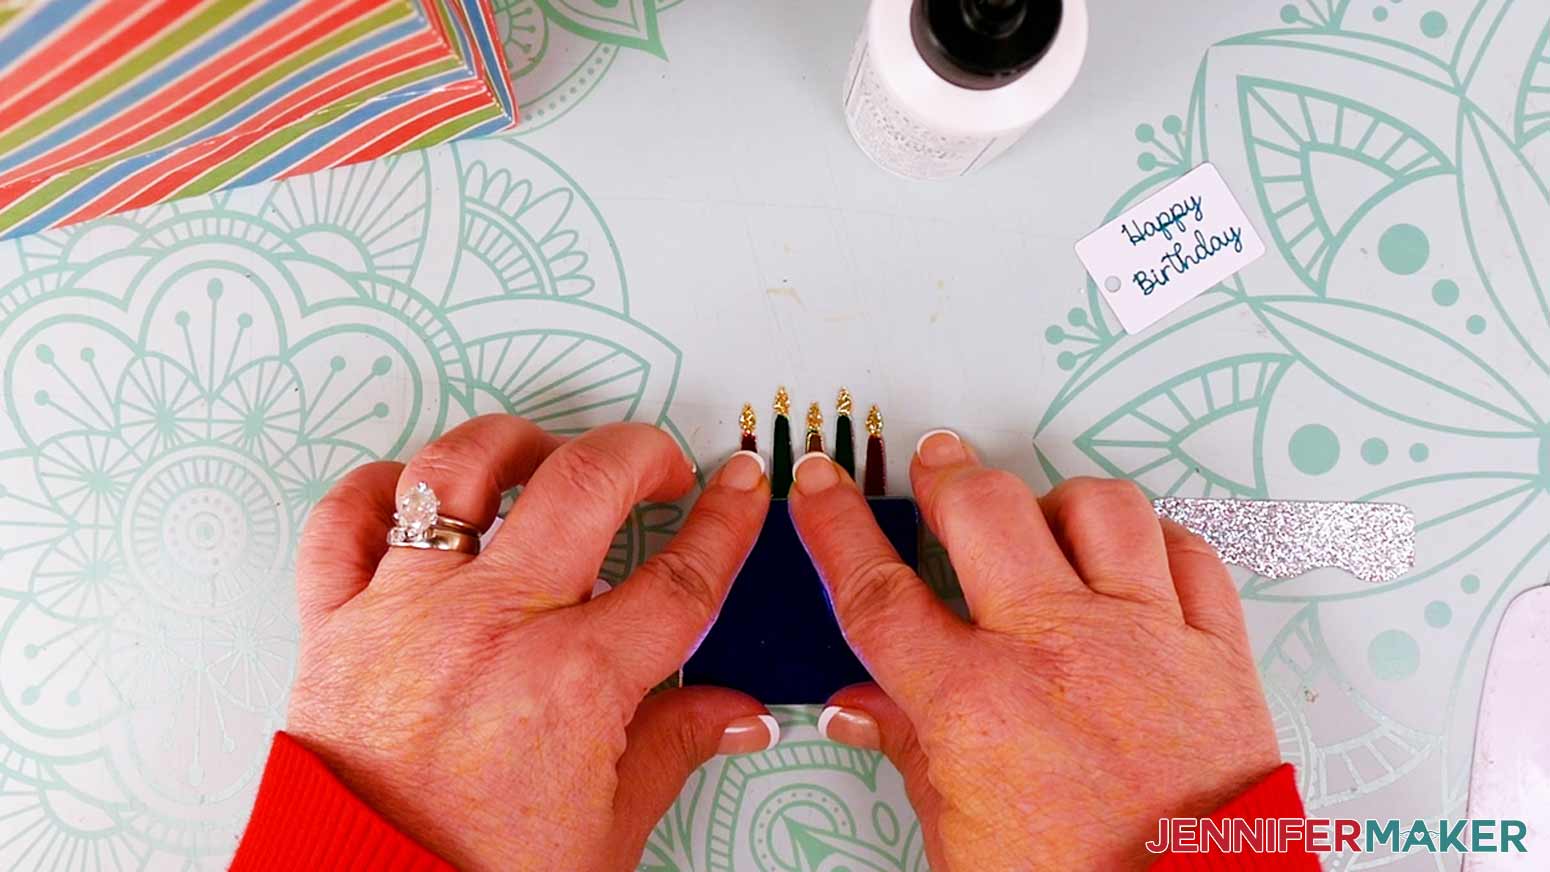
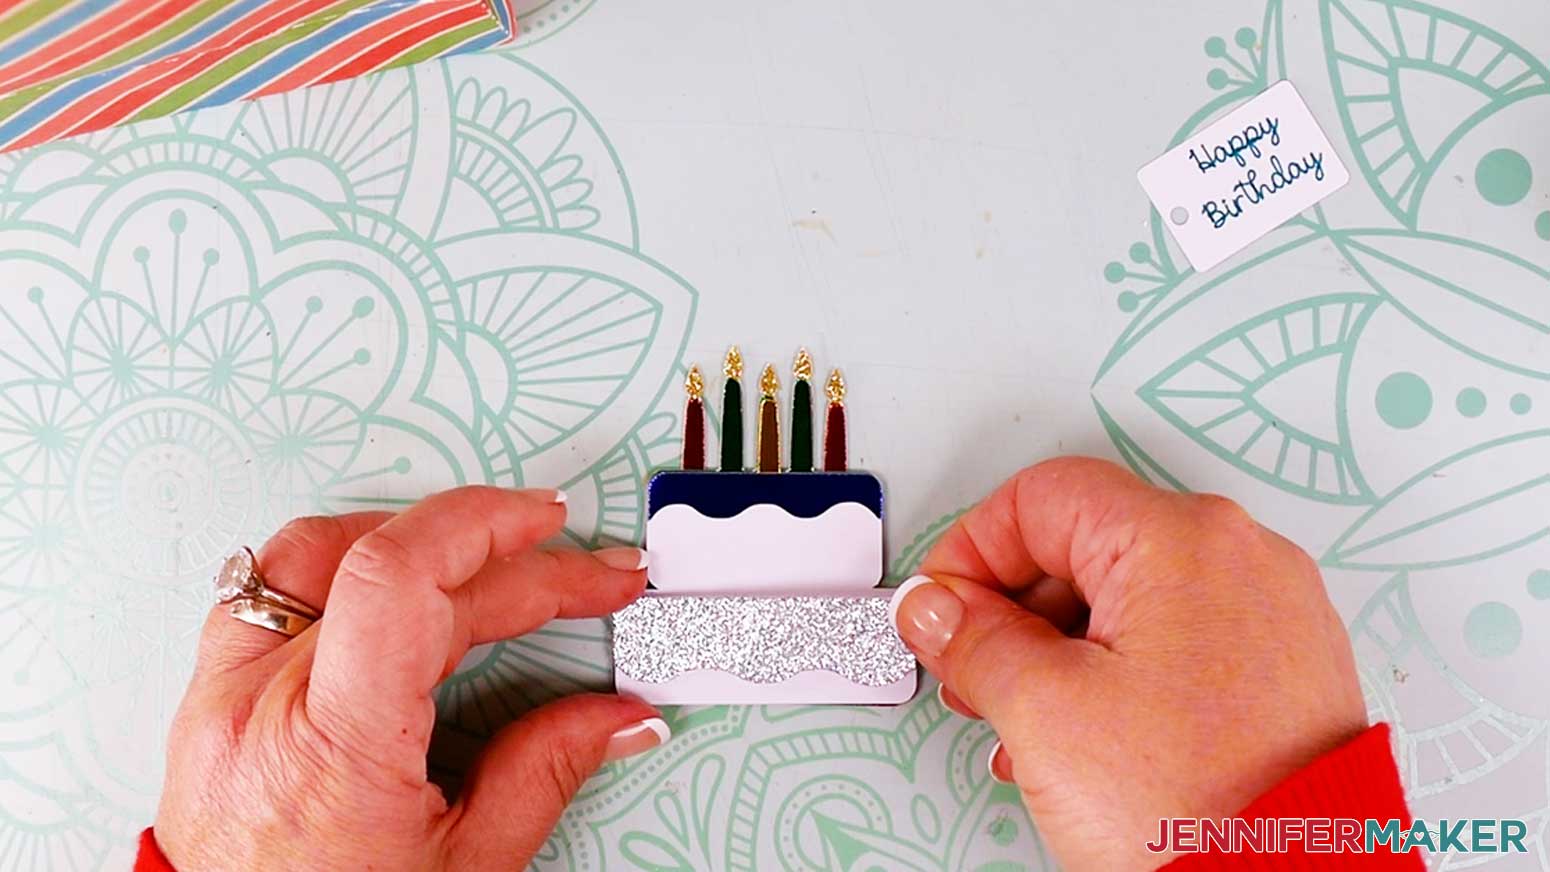
7. Put glue on the back of the small icing piece, then press it in place over the cake’s lower tier.
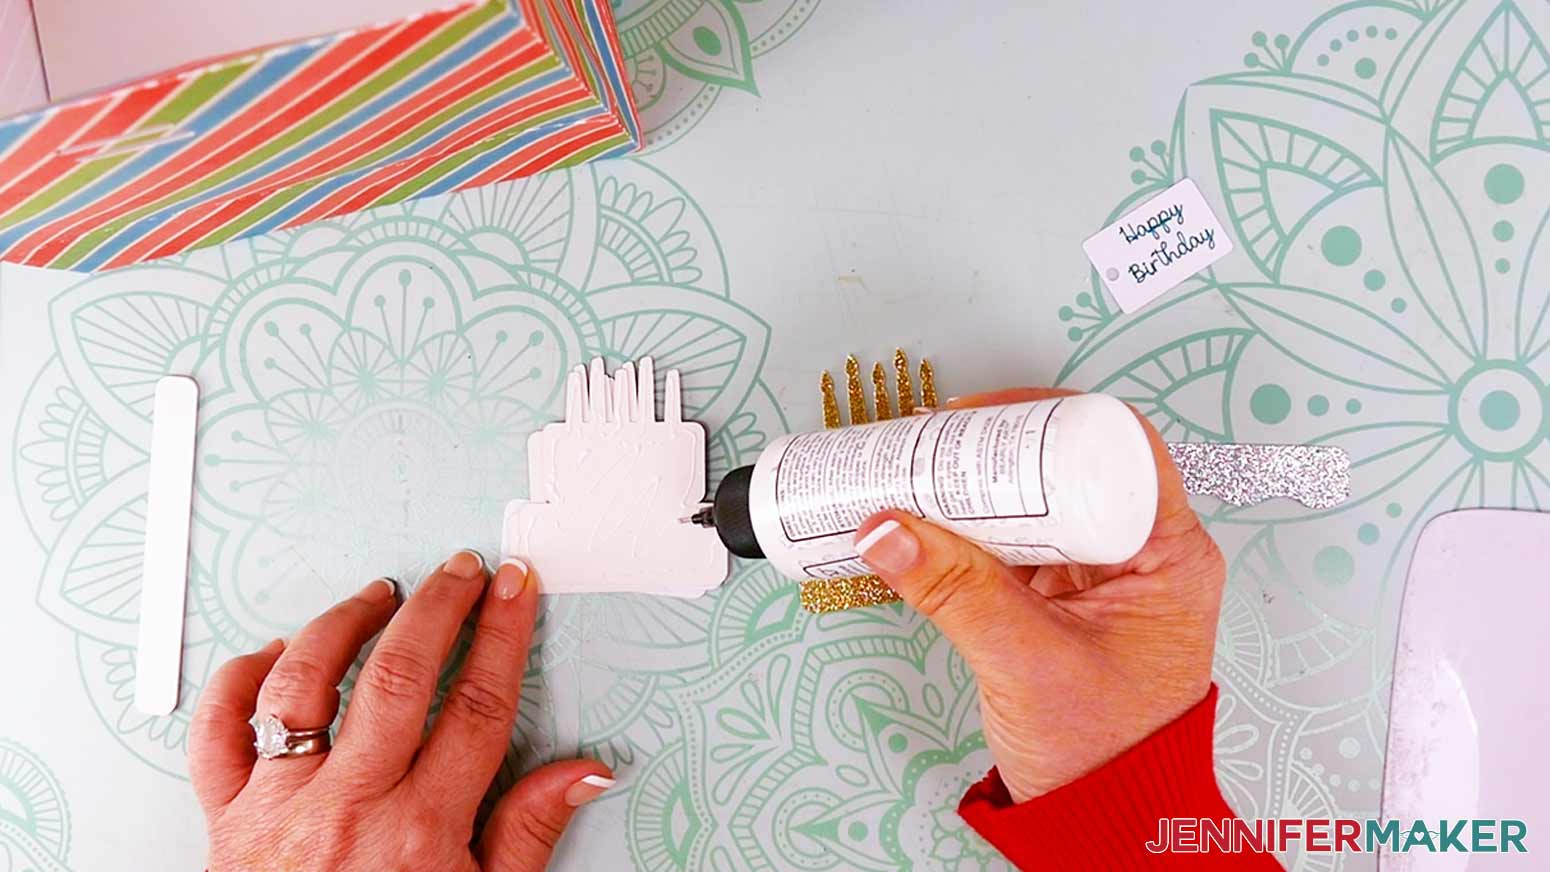
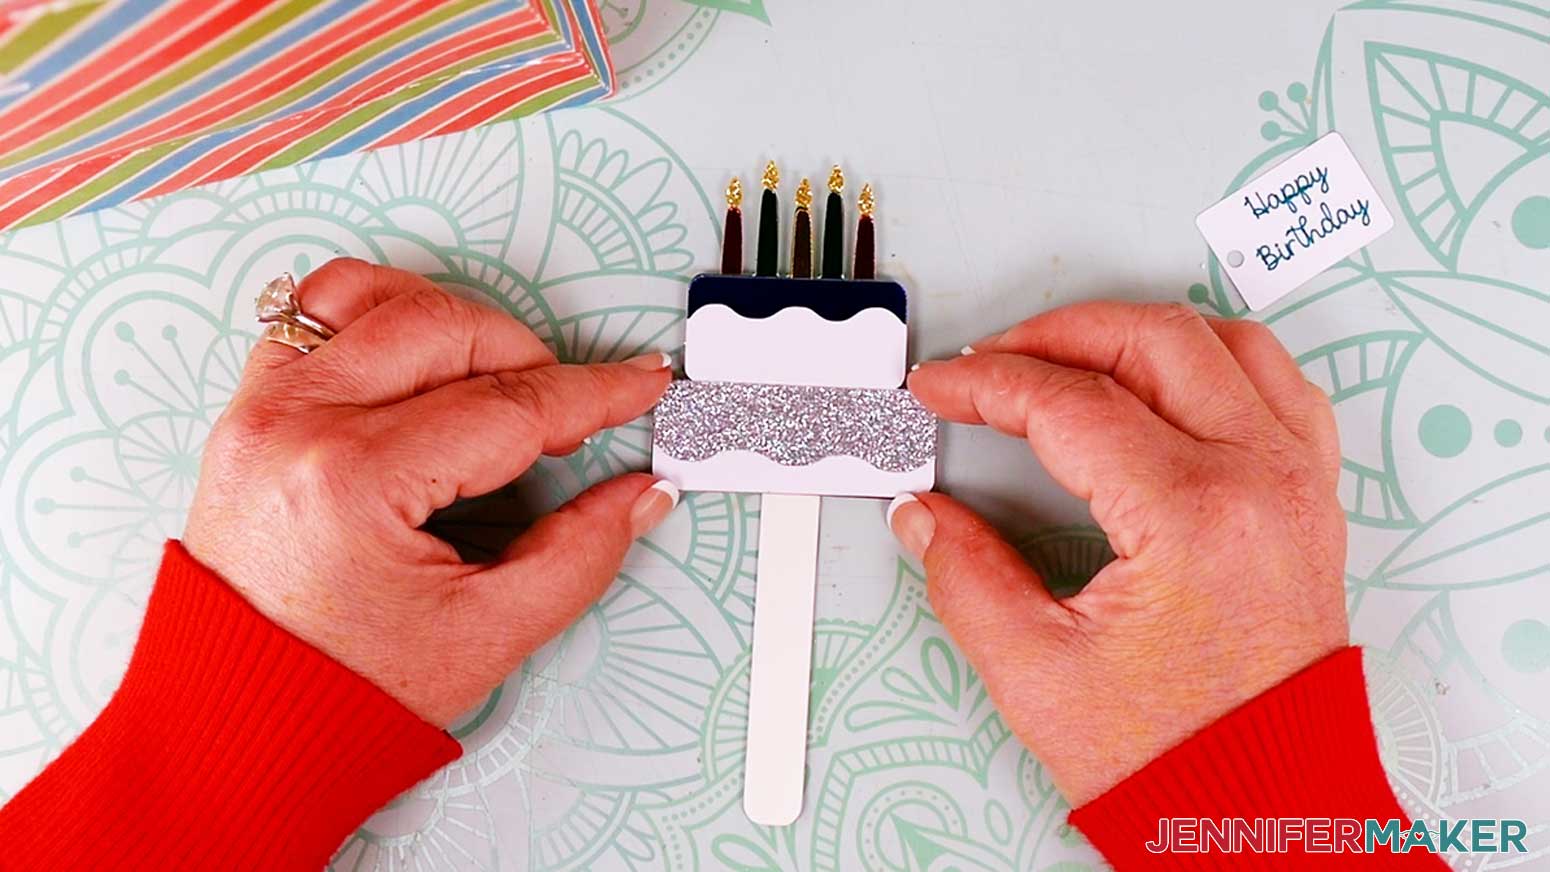
8. Apply glue to the top inch of the pick on one side and press the cake and pick together.
TIP: Inserting the pick can be a little tricky so it is best to place your gift inside the bag before closing it with the pick.
9. Insert your hand inside the bag and press the small area between the slots to push it outward. This helps when inserting the pick.
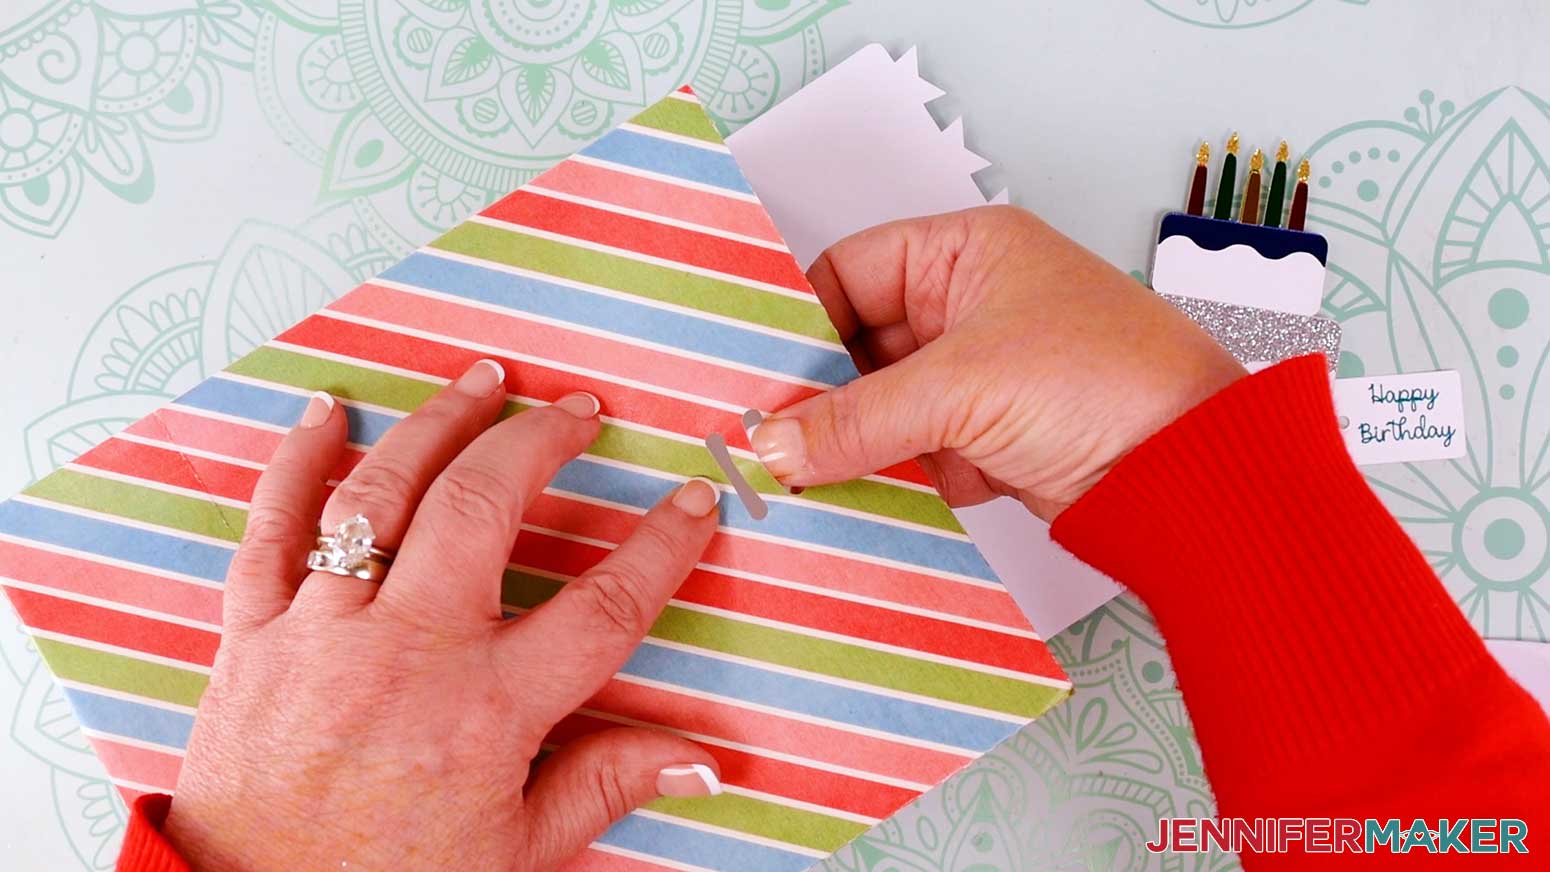
10. Fold over the bag top and insert the pick into the top slot.
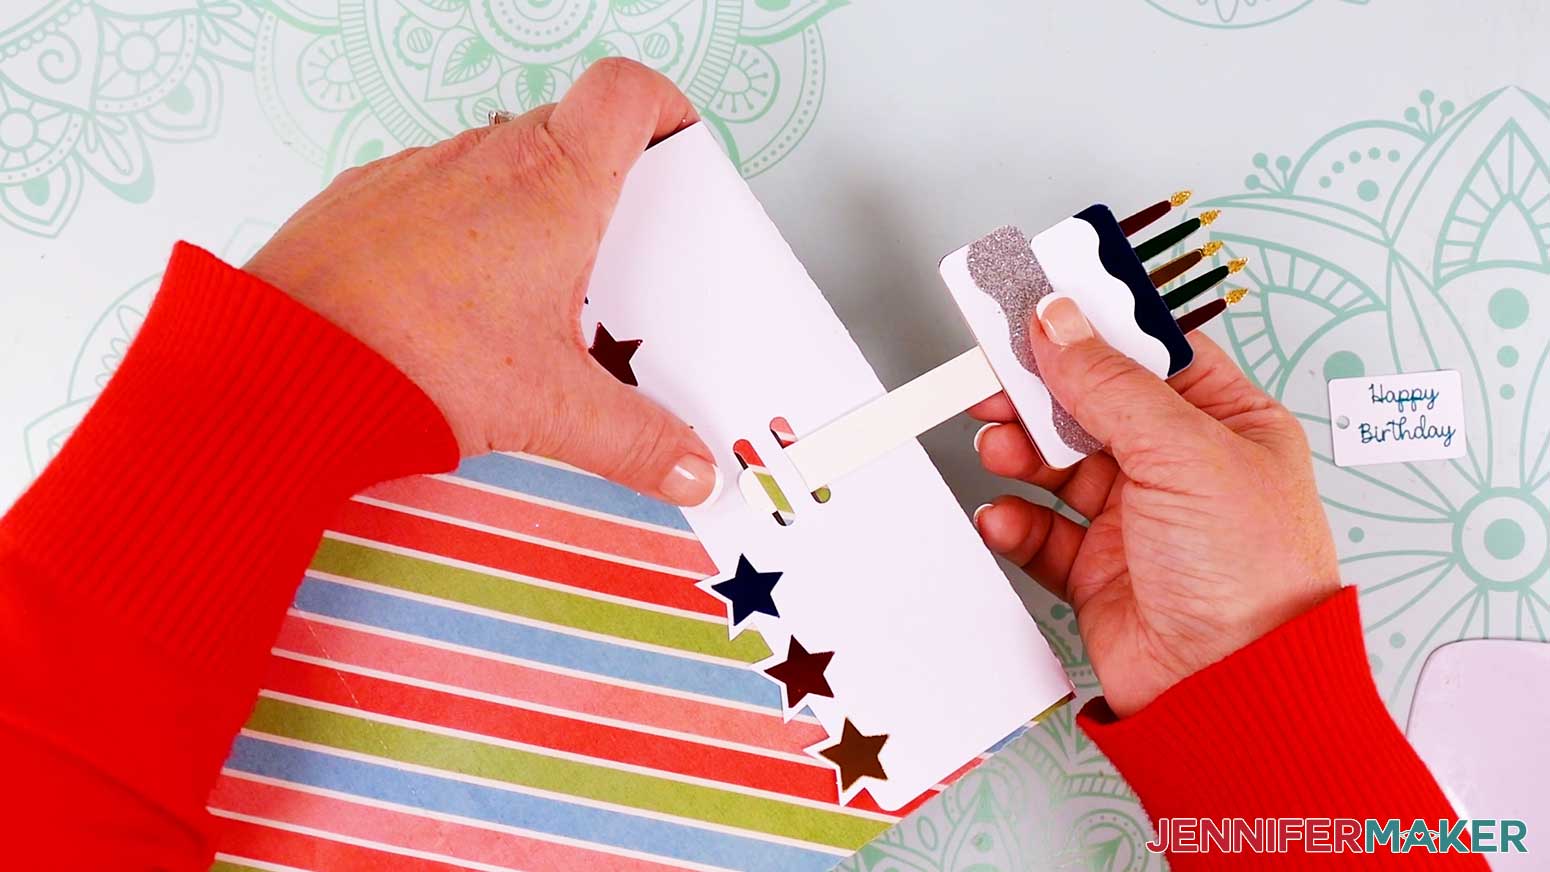
11. Use a weeding tool to help angle the bottom of the pick to come out of the bottom slot. TIP: Go slow and be patient to not ruin the bag or the pick.
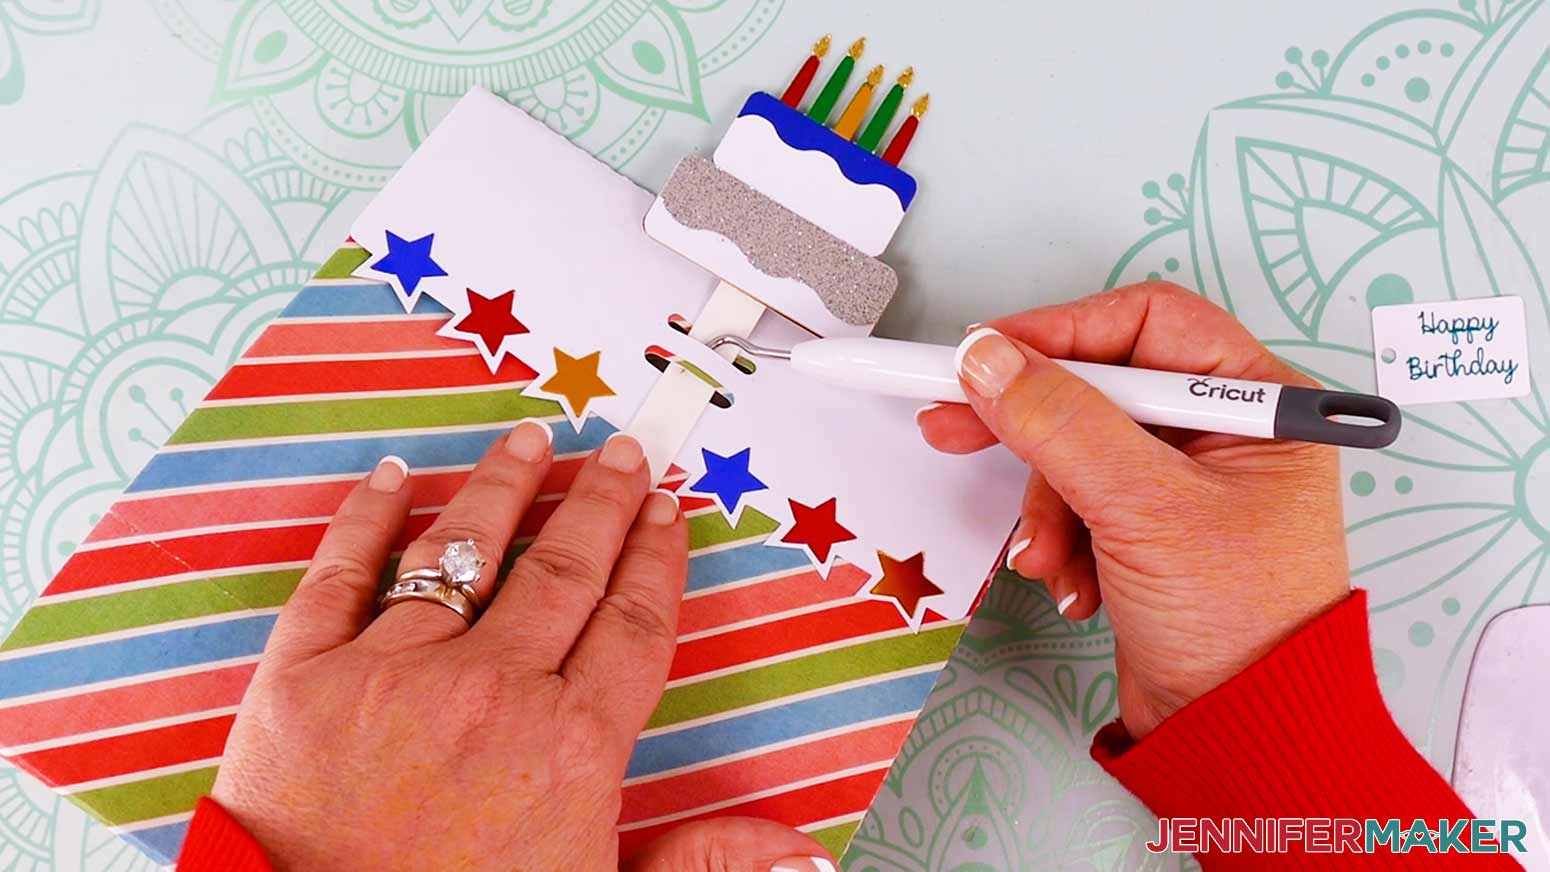
12. When the bottom of the pick is through the bottom slot, push the pick the rest of the way through the slots.
13. Cut a piece of twine about 6” long.
14. Insert the twine through the tag’s hole and wrap the twine around the pick, under the cake decoration.
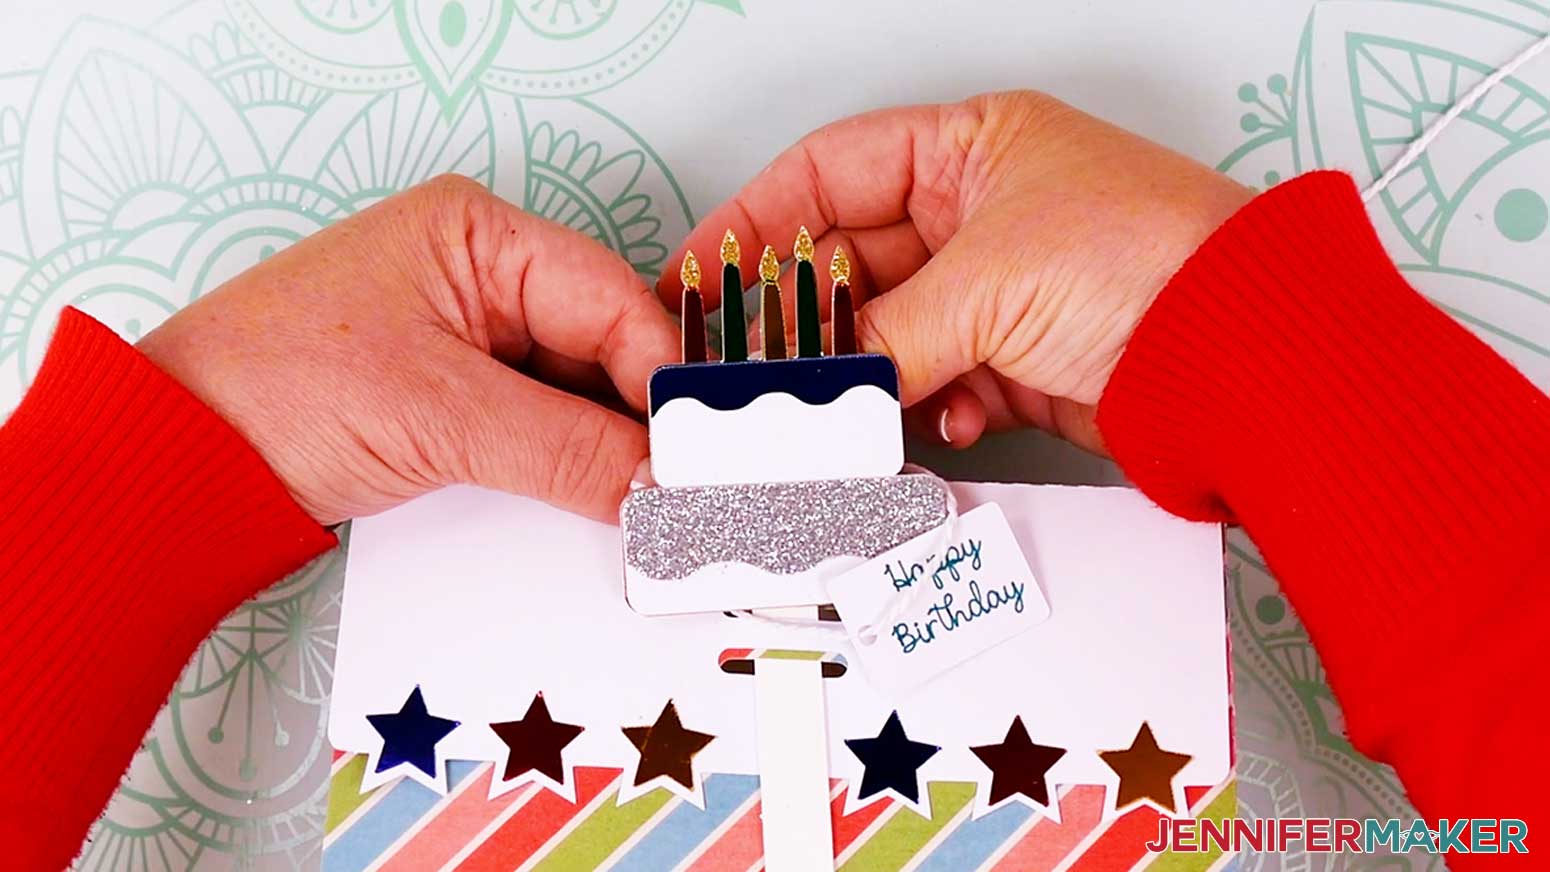
15. Adjust the tag to hang at the desired length and tie the twine behind the pick. Cut off any excess twine.
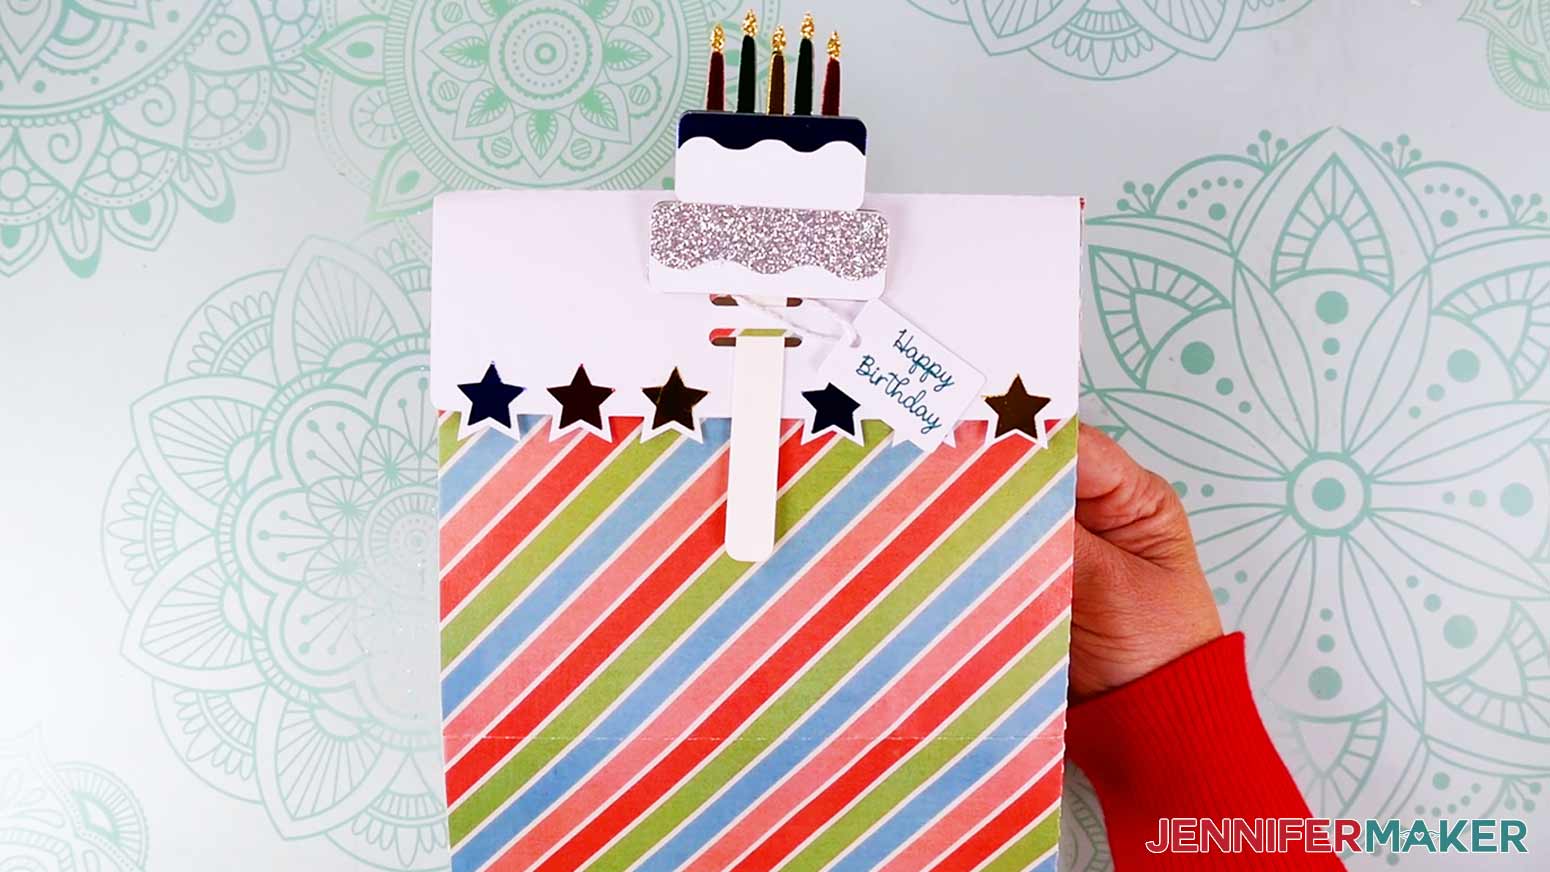
16. Your Folded Gift Bag With A Pick is complete!
NOTE: I found that my finished cardstock gift bag could hold items up to 6.5 lbs. I don’t recommend placing anything heavier than that in your finished bag to avoid ripping it.
VARIATIONS
HEART PICK
For the heart pick design, I used red glitter cardstock for the bottom layer of the heart. I used the “Glitter Cardstock” material setting with “More” pressure. For the other layers, I used 65lb. cardstock and for the material settings, I used “Medium Cardstock - 80 lb” with “More” pressure
Here are the pick pieces for the Heart design.
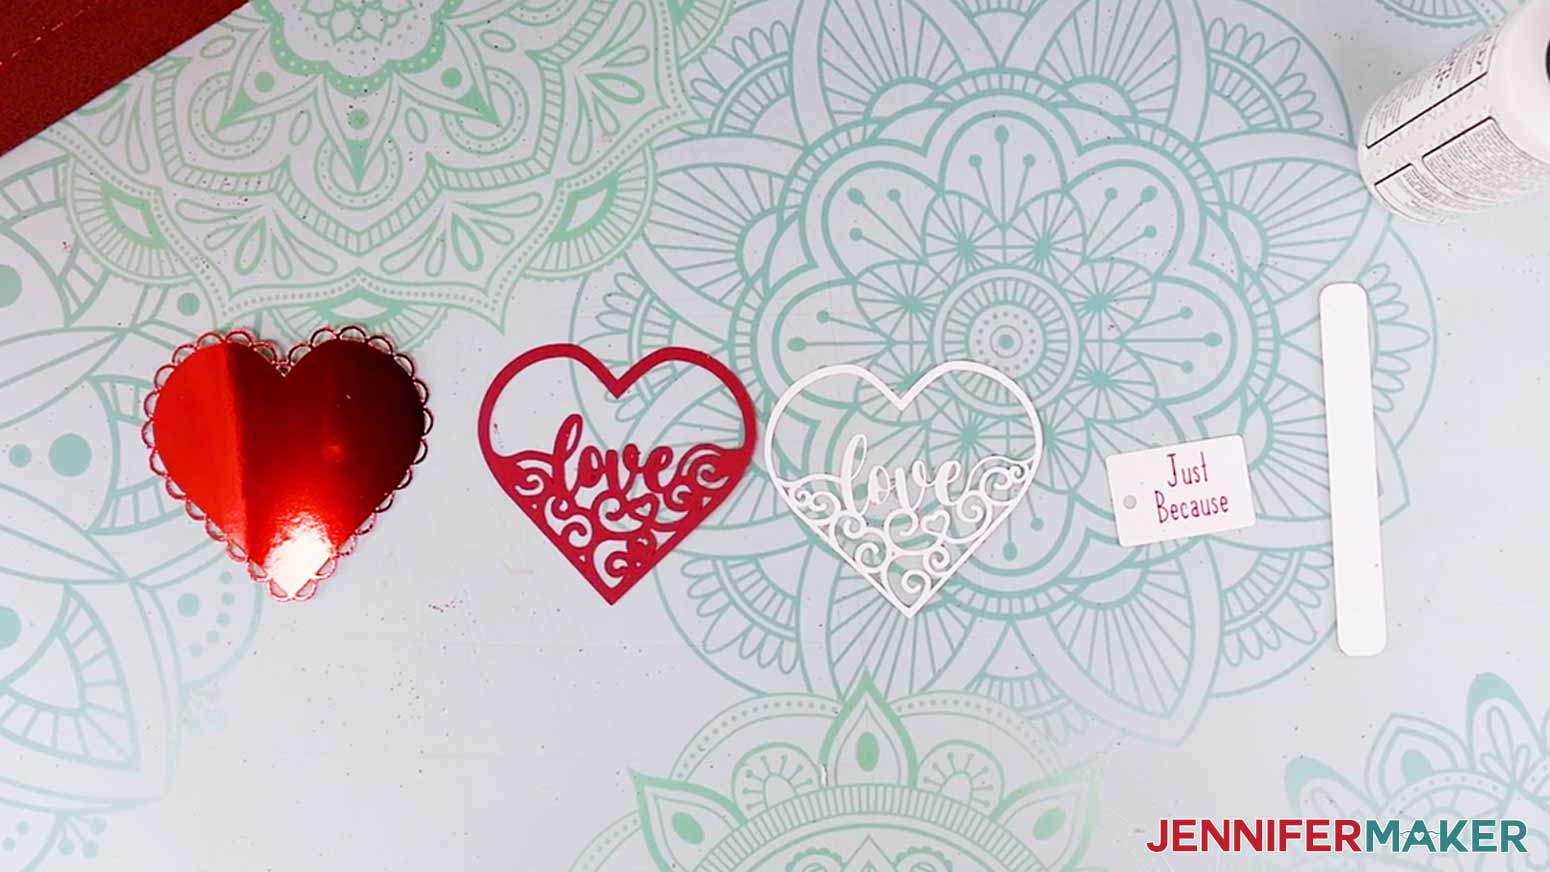
To assemble the heart design, use adhesive foam to attach the dark red detail layer to the heart shape.
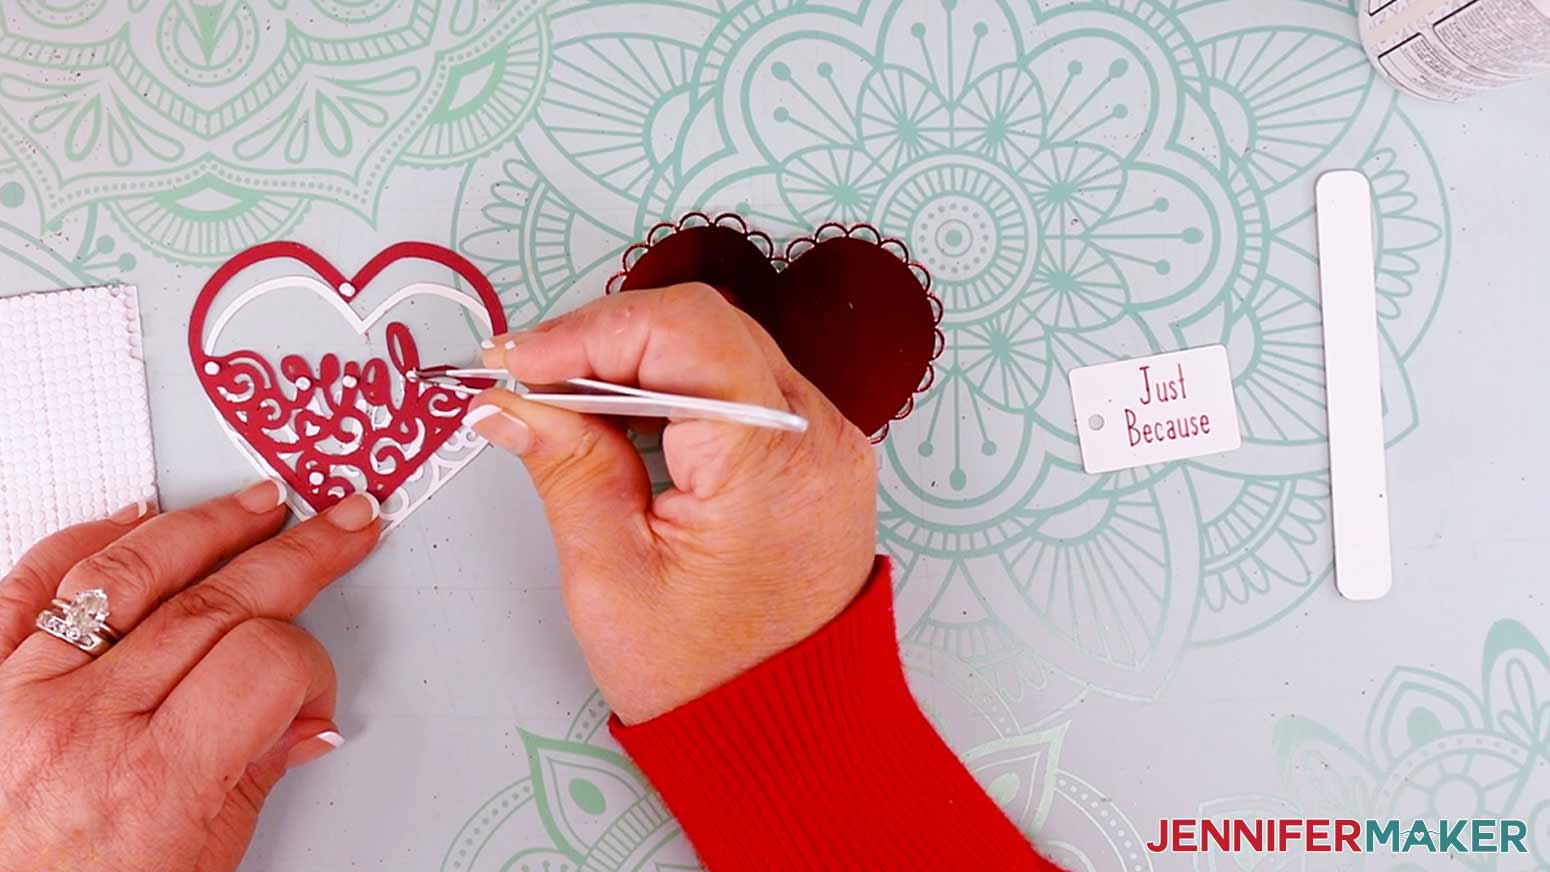
Then, glue the light detail shape on top!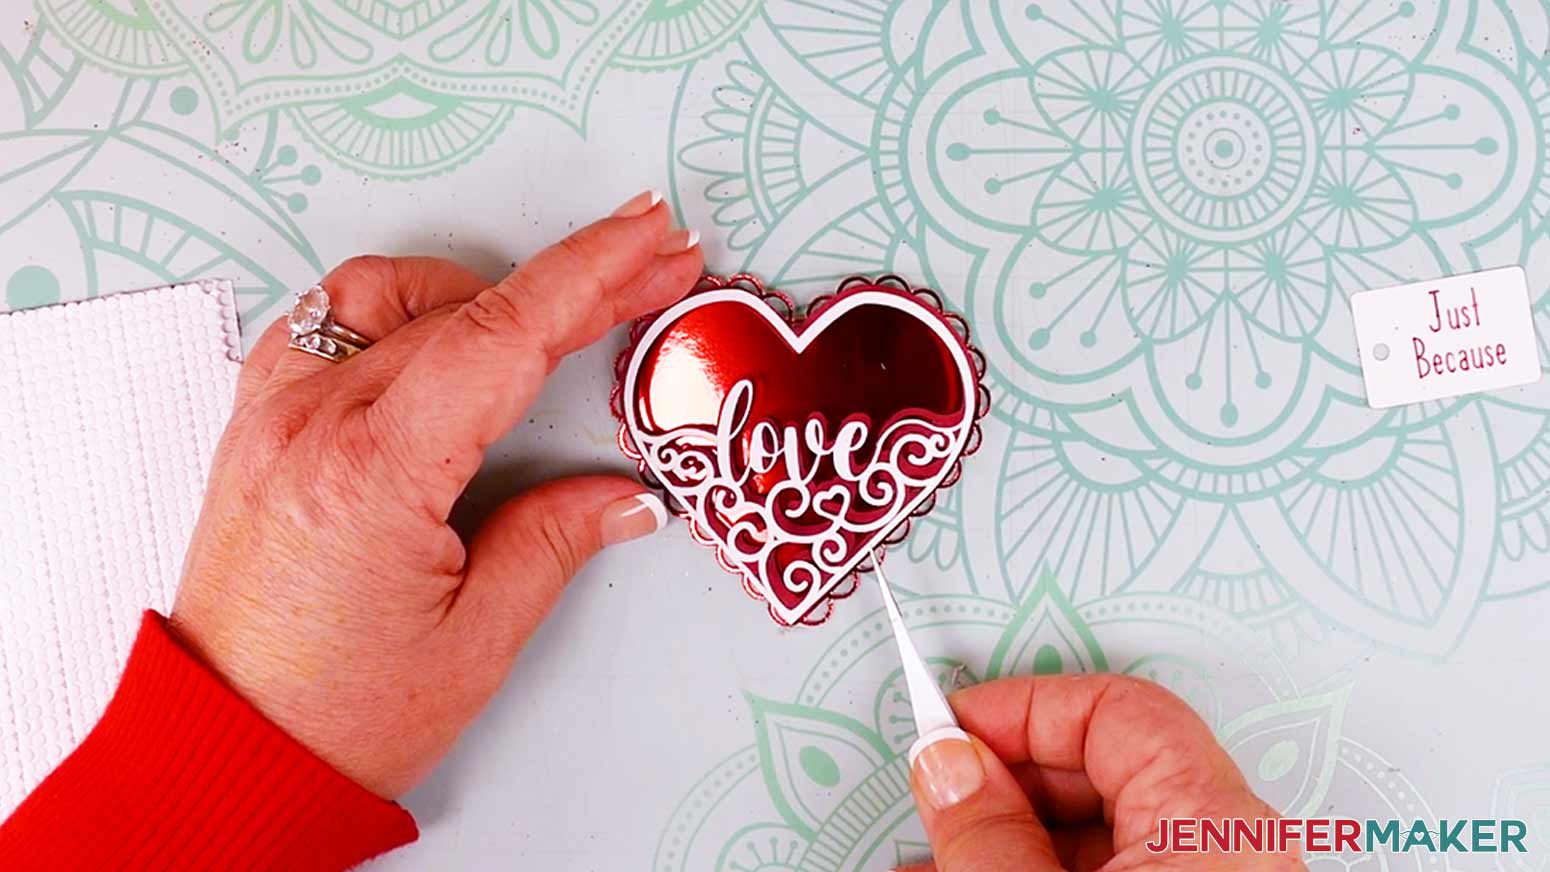
CHRISTMAS TREE PICK
For the Christmas tree pick design, I used XXX. For the other layers, I used 65lb. cardstock and for the material settings, I used “Medium Cardstock - 80 lb” with “More” pressure
Here are the pick pieces for the Christmas tree design.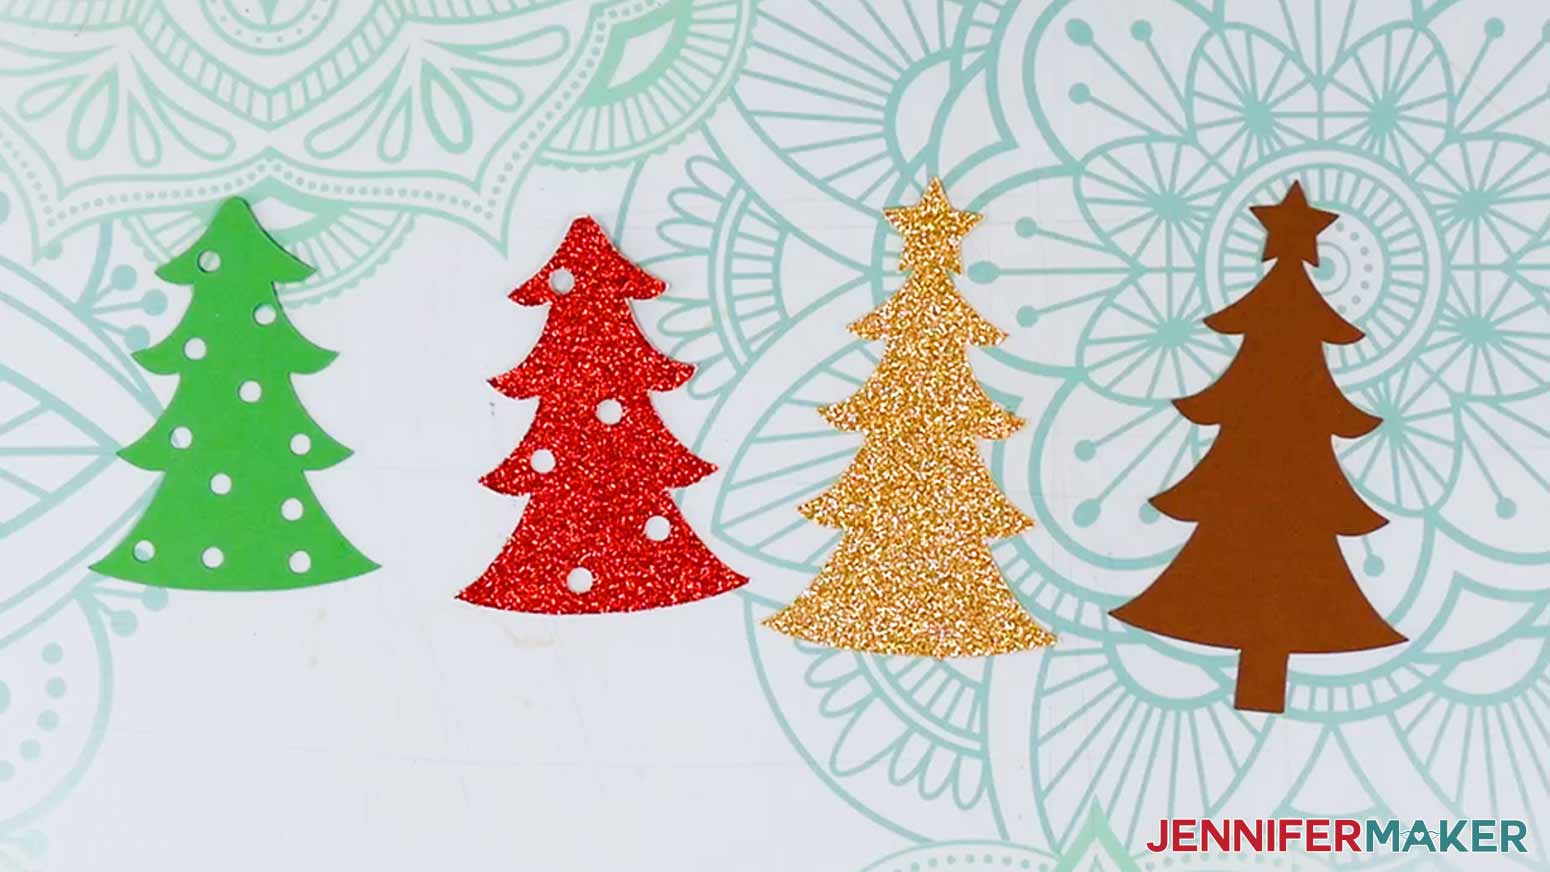
To assemble the Christmas tree design, use adhesive foam to attach the tree layers together. The brown piece with the trunk goes on the bottom with the gold piece next, and then the red piece, and the green layer on top.
TIP: Make sure the holes are aligned so you can see red and gold through the green layer. 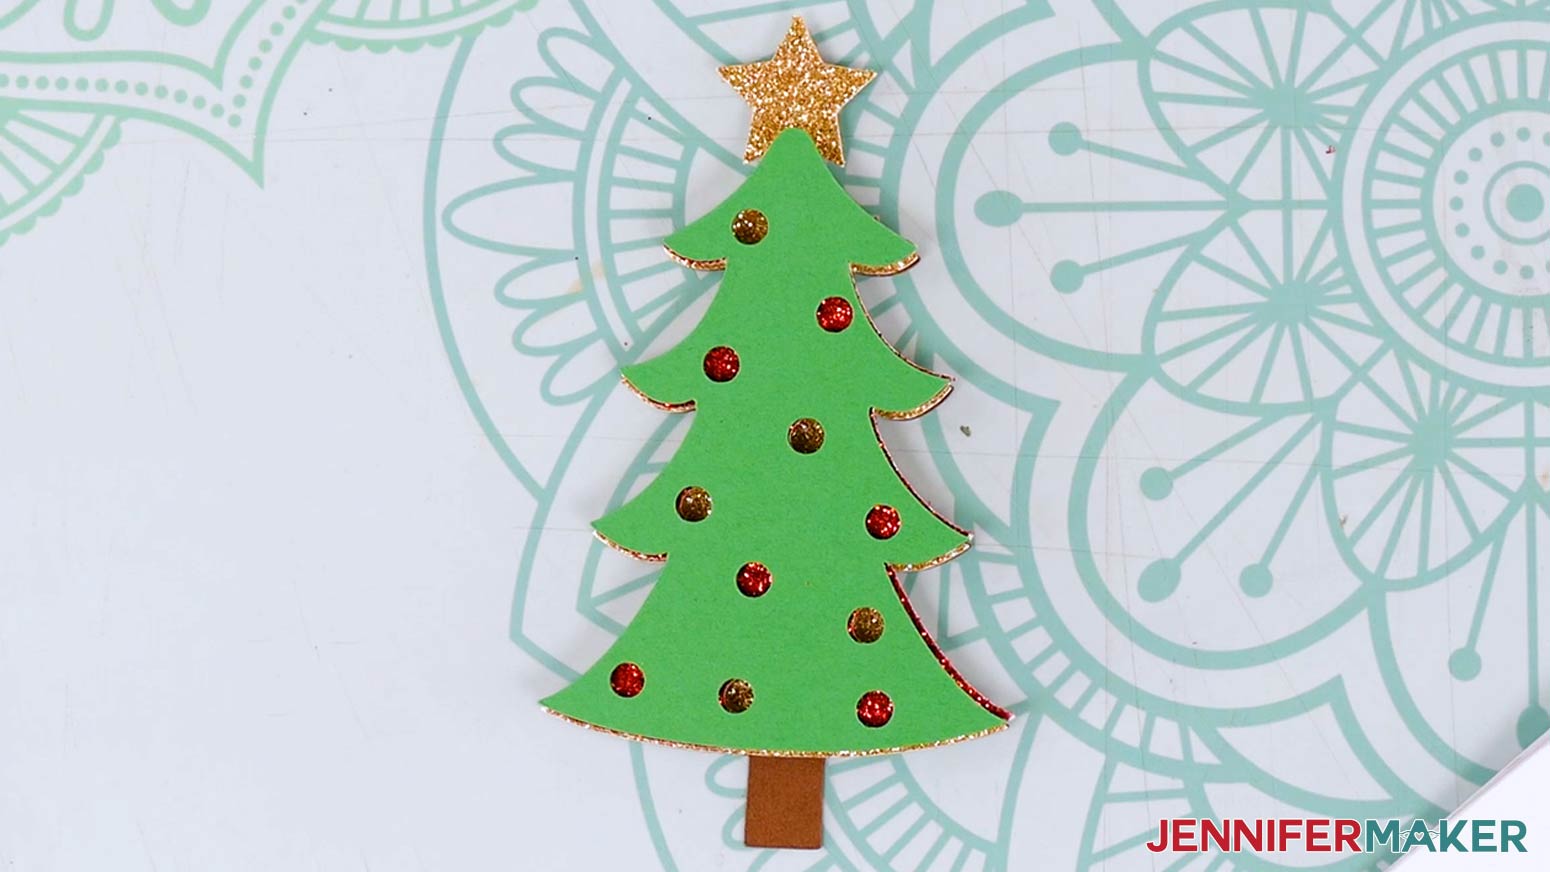
STEP 4: SHOW IT OFF!
Here are my finished gift bags with picks!

Notes
Typeface Used: Dear Agatha, JM Tall, That Girl
Finished Sizes: Bag is 8x7x4" Pick is 5-6"
Answers to Your Questions About Making a Fold-Top Gift Bag With Pick Closure
Q: How do you close the top of a gift bag?
A: To close up my fold-top gift bag with pick closure, you simply (you guessed it) fold the top edge over! Then you slide the pick through the slots at the top of the bag and that’s it! The bag is now closed. To open it, just pull the pick out and unfold the top. Easy peasy!
Q: How do you make a gift bag step by step?
A: Follow this tutorial to make a fold-over paper gift bag with pick closure in just a few simple steps, or check out some of my other gift bag tutorials with great ideas and step-by-step directions!
- DIY Gift Bags (with or without a Cricut)
- Paper Purse Gift Bags
- Sublimation Gift Bags
- Personalized Wine Gift Bags
For more gift-giving, card-making, party ideas — check out my blog!
Q: Can I cut this project on a Cricut Joy?
A: You can make this project different sizes, but the fold-top gift bag with pick designs are pretty big for a Cricut Joy or Joy Xtra, and I don’t recommend reducing the size of your bag because folding the pieces can get tricky.
Q: What kind of paper do I use?
A: You can really use any 65 lb or higher cardstock to make a fold-top gift bag — it’s your choice of which different colors and textures you want to use. If you want to use the exact same materials I used, check the list above. Just remember to use heavier cardstock for the reinforcement and pick layers.
The only thing left is to add a ribbon bow (or paper bow!) for a final finishing touch, and fill your diy gift bag with tissue paper to cushion the gift(s) inside!
Q: My cardstock keeps ripping on the intricate cuts. What can I do?
A: Be sure you’re using a clean and sticky machine mat, good-quality cardstock, and a clean blade. See my Cricut Cutting Problems post for all the easy steps I take to get clean cuts every time.
Q. Do I have to use a Cricut?
A: Using a Cricut or other cutting machine is definitely the easy way, but it’s not required! My capable design staff and I always include several versions of each digital item. If you have a Silhouette Cameo, which uses Silhouette Studio, you can use the DXF cut files in Silhouette Basic Edition. If you have upgraded to Silhouette Designer Edition, Designer Edition Plus, or Business, you can use the SVG cut files. If you don’t have a cutting machine, you can print and then cut out my digital download PDF files, too and then use scissors or a craft knife to cut out your pieces. The ZIP file in my resource library includes these file types and more!
Q. Are your free SVGs just for personal use or also commercial use?
A: Yes, you can sell completed projects using these designs, we only ask that you give credit to JenniferMaker.com and do not sell the digital files. If you use them, please share photos with us! We love supporting small businesses!
Get my free SVG file to create a fold-top gift bag with a pick closure!
I love seeing what you make with my designs and how you use them! Please share a photo of your fold-top gift bag with pick closure in our Facebook group or tag me on social media with #jennifermaker.
Love,

Want to remember this? Save this Fold-Top Gift Bag With Pick Closure Tutorial to your favorite Pinterest Board!