
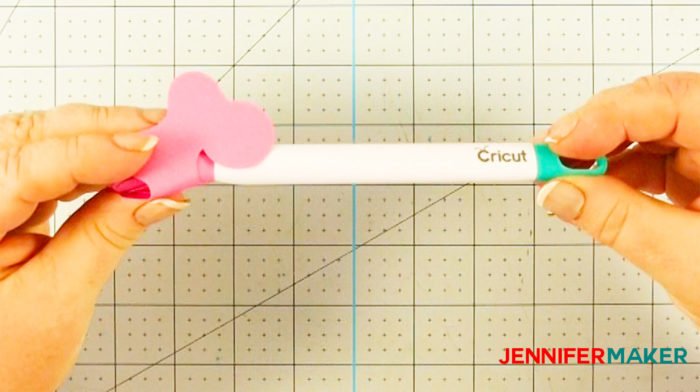
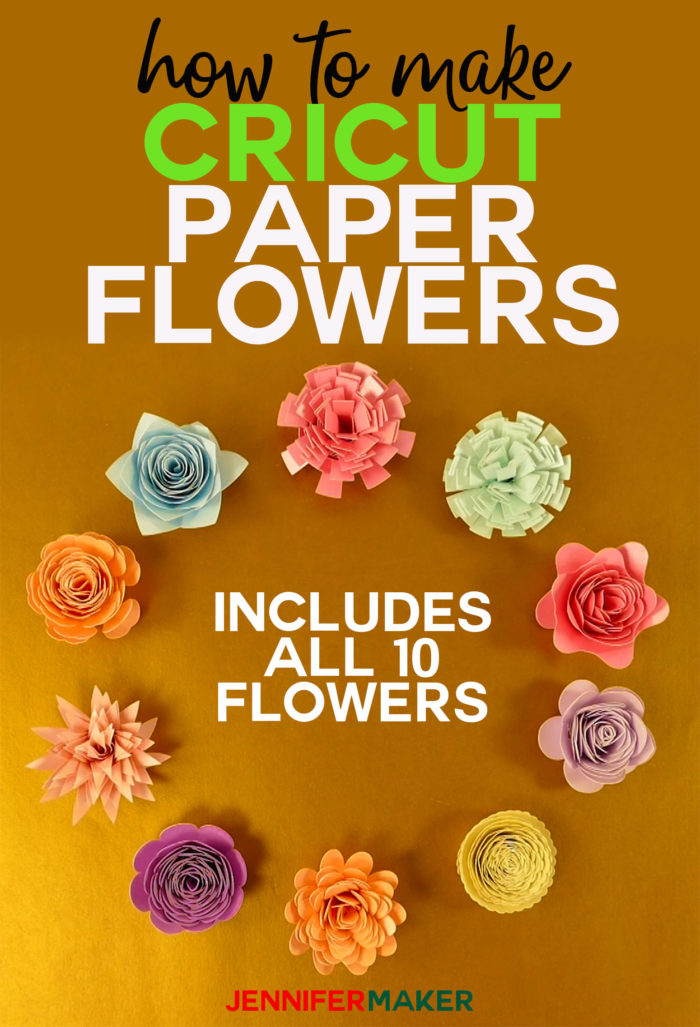
How to make all ten Cricut paper flowers in Cricut Design Space using the Flower Shoppe Cartridge included in Cricut Access — I show you everything from picking the paper, choosing the right tool and glue, and the assembly itself!
I love love love paper flowers. My very first designs for my Cricut machine were paper flowers — first a peony, then a rose, and then a carnation. I’ve designed many more SVG files for paper flowers since then because I just love how we can turn regular cardstock into these beautiful works of art. I believe I’ve designed over 25 paper flowers of different sizes at this point, in fact! But did you know there are 10 paper flower designs right in Cricut Access that you can use any time you want? They are part of the Flower Shoppe cartridge and included in Cricut Access. So today I’m going to show you each of those 10 Cricut paper flowers and exactly how to assemble each rolled flower.
To make paper flowers, you really just need some cardstock (60 lb. to 80 lb.), a way to roll your flowers, and something to keep them together, like glue. I’m going to show you the type of paper that works best for paper flowers because there are some things to watch out for. I’m also going to show you three different tools you can use to make your flowers and how well they work — Cricut’s quilling tool, my own homemade quilling tool, and reverse-action tweezers. And finally, I’m going to show you how to use both tacky glue and hot glue with the flowers so you can decide what works best for you.
You’ll also want a Cricut cutting machine — you can make these gorgeous paper flowers on a Cricut Maker, Cricut Explore Air, or even a Cricut Joy.
So let’s head on over to Cricut Design Space so I can show you exactly where to find these 10 paper flowers and we’ll start cutting them out!
This step-by-step video tutorial shows you how to create all 10 Cricut paper flowers in Cricut Design Space:
I’m excited to show you how to make Cricut flowers! This post contains some affiliate links for your convenience (which means if you make a purchase after clicking a link I will earn a small commission but it won’t cost you a penny more)! Read my full disclosure policy.
Materials for Cricut Paper Flowers
- 65lb – 80 lb. card stock (solid core paper works best — watch the video to see the difference between solid core and white core) — this is my favorite paper for making paper flowers and Cricut Pearl Paper makes a pretty paper flower, too!
- Cricut quilling tool, homemade quilling tool, and or tweezers
- Hot glue gun and glue sticks (or tacky glue if you don’t have a glue gun)
- A way to cut your paper flowers (I used the amazing Cricut)
- Cricut’s paper flower patterns (learn exactly how to find them in step 1 below) — note that you will need to either purchase these flowers OR have a Cricut Access subscription
- (Optional) Free paper flower SVG cut files and DXF files, as well as a variety of paper flower templates (available in my free resource library—get the password at the bottom of this post)
How to Make Cricut Paper Flowers
Step 1: Find the paper flowers in Cricut Design Space
There are THREE ways to find Cricut’s paper flowers:
- Just go to https://jennifermaker.com/cricutflowers (or https://design.cricut.com/#/design/130709934) and all the flowers will come up for you in Cricut Design Space! Super easy!
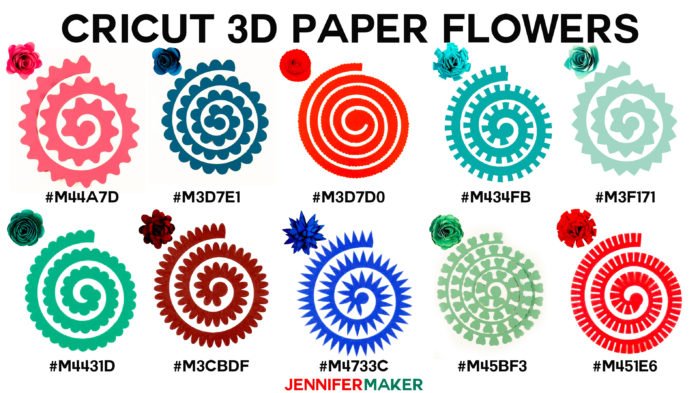
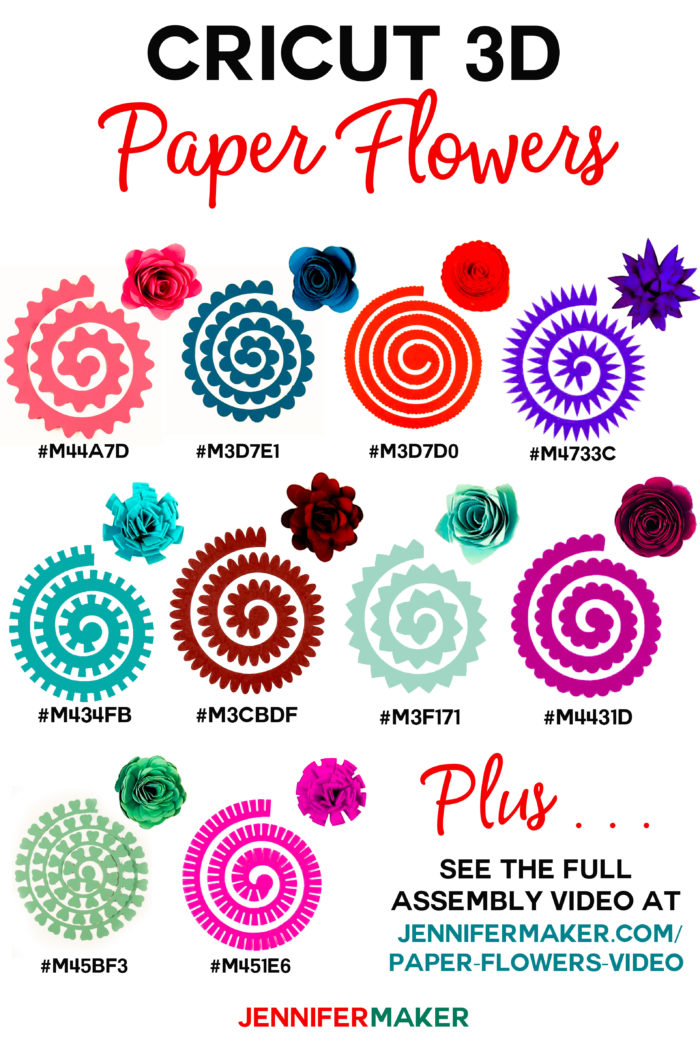
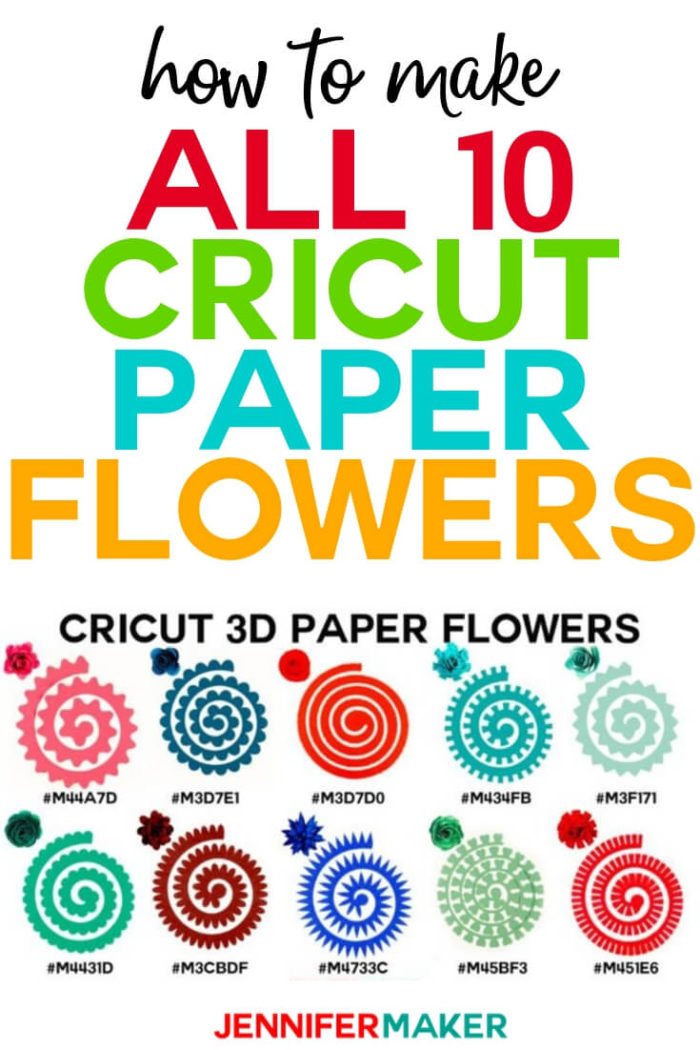
- Go to Cricut Design Space, click on Images and search on each of these 10 ID numbers: #M3F171 #M3D7D0 #M3D7E1 #M45BF3 #M4733C #M44A7D #M4431D #M434FB #M451E6
- Go to Cricut Design Space, click on Images, click on Category: All Images in the top left corner to bring up the Search Page. From the Highlighted Categories column on the left, choose Image Sets. Search for Flower, scroll down until you see Flower Shoppe (50 images) and click on it. All 50 images will show up individually. Select each of the 10 flowers.
Here is a Cricut paper flower reference diagram that shows each paper flower’s cut spiral shape, finished flower, and code in Design Space:
Here’s another version of it that is great for pinning to Pinterest:
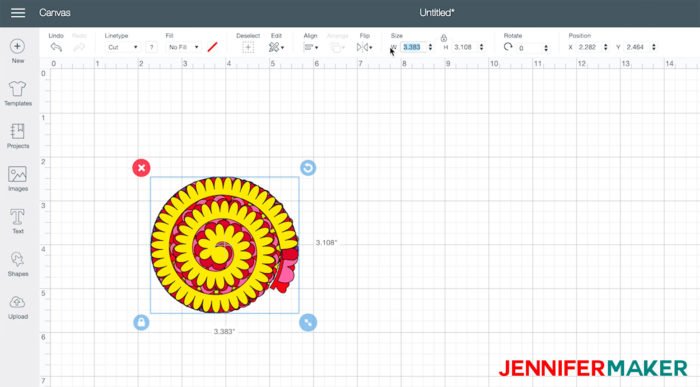
Once you’ve found the Cricut paper flowers, you’ll want to size them for your project. I’m making these flowers for my Vase of Paper Flowers Canvas so I’m opting for 8″ wide, but you may have different needs. To resize a whole bunch of flowers, select them all, click Align, select Center, then type in the size you’d like them all to be.
And here is a handy guide to Cricut paper flower sizing! I used the #M3F171 flower, which are the Cricut roses, but this sizing applies to all of the Cricut paper flowers (more or less).
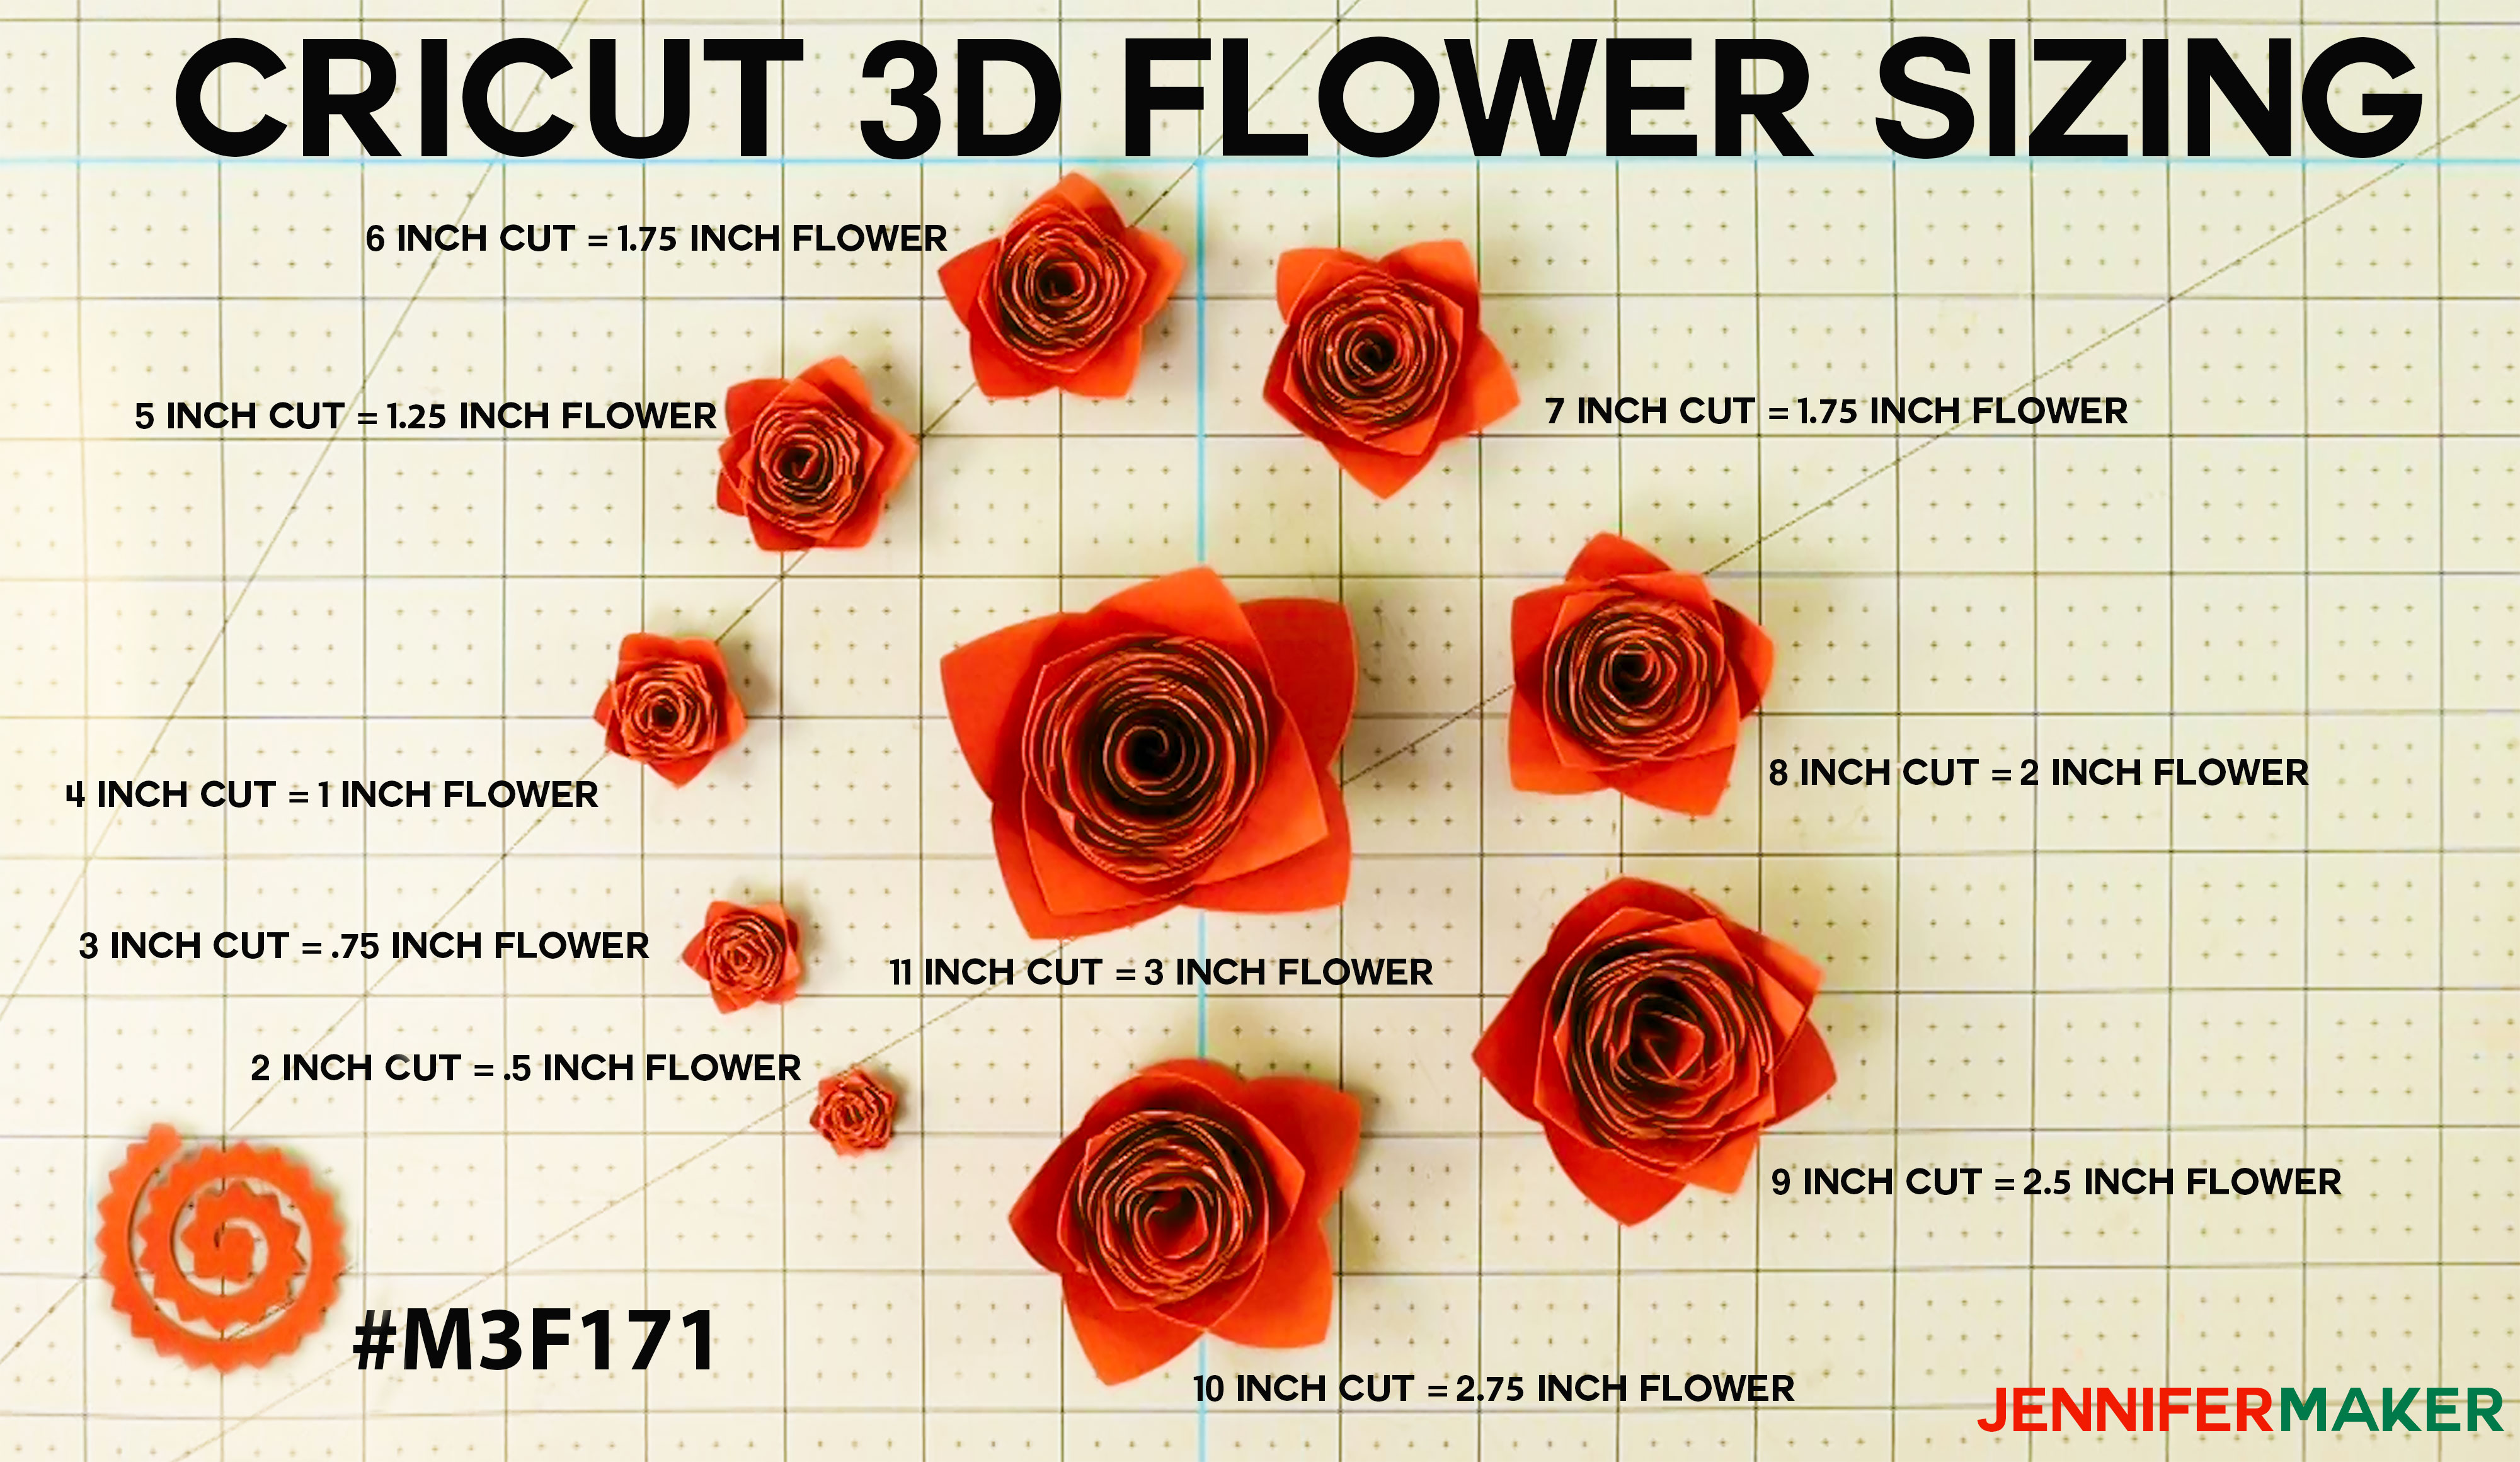
TIP: Click here to see a BIG version of the above photo!
Note: If you have an older Cricut that cannot access Cricut Design Space, you can still make these flowers if you have the Flower Shoppe cartridge!
Watch my step-by-step tutorial video for more directions!
Step 2: Cut out your Cricut paper flowers using the best paper
Watch my step-by-step video for an overview of the best papers (and which ones to avoid). I show you how to identify white core vs. solid core papers just by looking at them.
Step 3: Assemble your paper flowers using the best tool
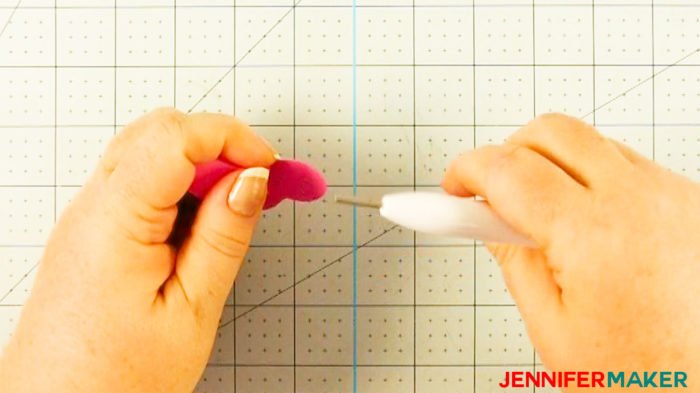
There are at least three tools you can use to roll up your paper flowers. The first is a Cricut quilling tool, which you can get as part of their paper crafting set. The second is a DIY quilling tool, which I have a tutorial on and is simple to make. The third is a pair of tweezers, and reverse-action tweezers work best. I personally prefer to use either the Cricut quilling tools or my homemade quilling tool, depending on the project.
Let’s start with how to use the Cricut quilling tool. It has a metal head with a slot in it. Insert the end of your paper flower cut-out into the slot on the quilling tool, just like this:
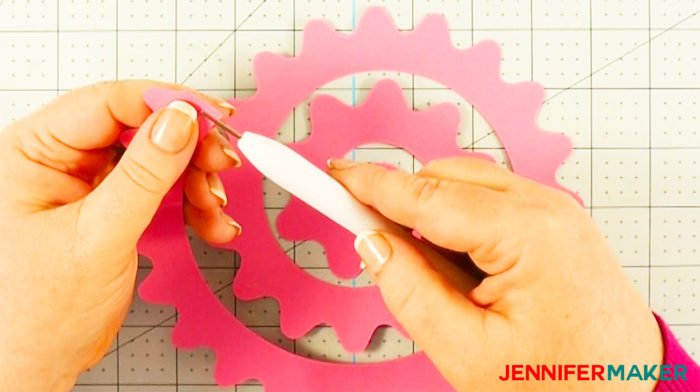
Now roll the quilling tool toward you as you hold the paper steady. Your flower petals will roll up into a bud as you go!
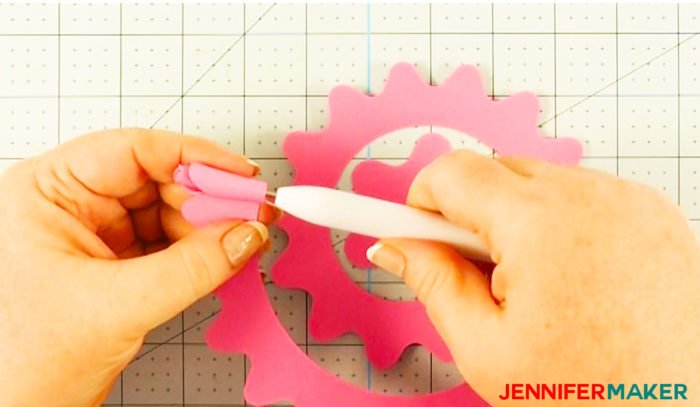
As you continue to roll the paper flower, do your best to keep the bottom aligned with itself. It will want to naturally creep down the tool, but if you hold the paper as you roll it, you can get a little extra control.
When you near the end of the paper flower, it will get a little harder to roll. Just go slow and use your fingers to guide it. Stop when you get to the circle on the end.
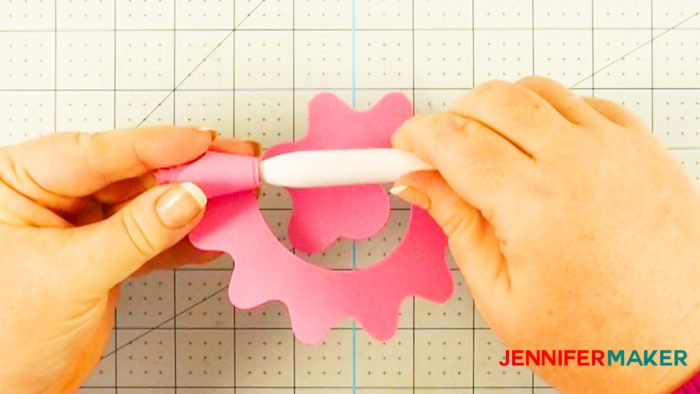
When you reach the circle, hold the rolled paper flower in your fingers firmly and gently pull out the quilling tool. You may need to wiggle the tool out from your flower centers a bit to get it out.
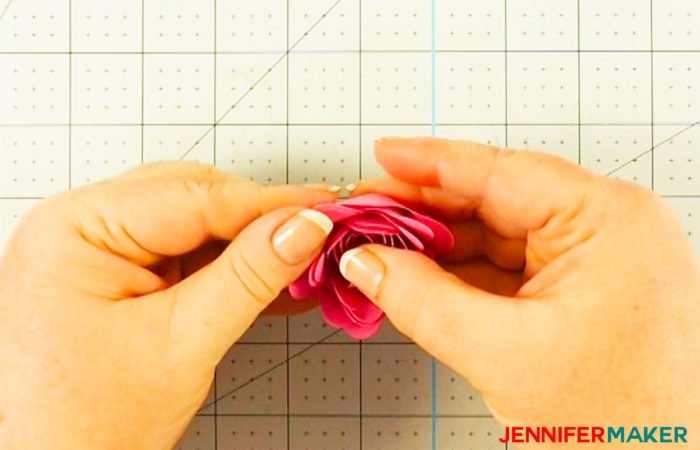
Once your rolled paper flower is free of the quilling tool, hold it between your thumb and forefinger and allow it to relax a little until it looks the way you’d like it too. It’s best if it doesn’t unroll completely, or it will be hard to glue.
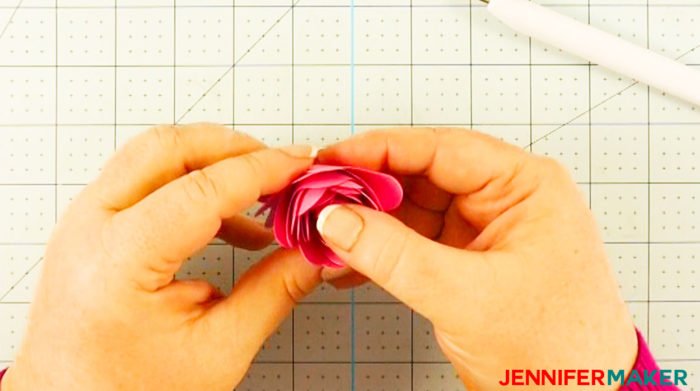
With your paper flower in the position you like it, turn it over, bend back the circle, and glue the rolled ends.
Step 4: Glue your Cricut paper flowers using the best glue
Now you just need a drop of hot glue or craft glue to keep the tab on the bottom of the flower petals. Watch my step-by-step video for more directions!
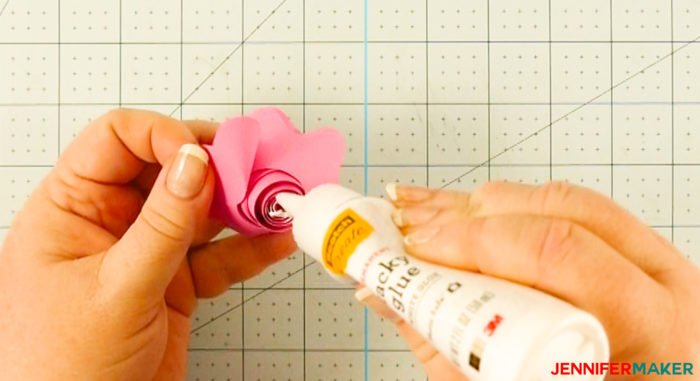
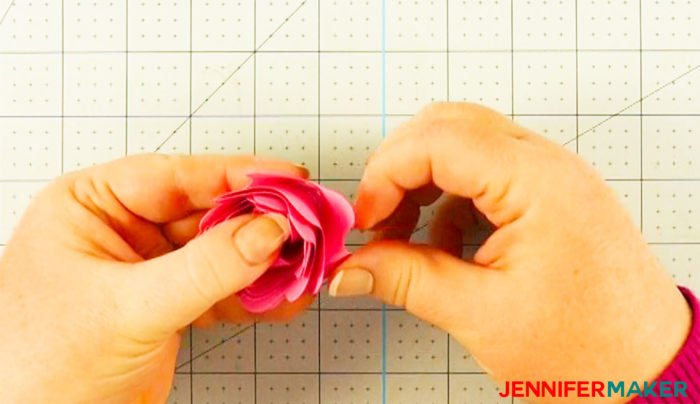
Press the circle on top of the glued ends and hold in place while the glue sets.
While you hold it the paper flower in place at the bottom of the petals, gently roll the petals outward to make your Cricut paper flower look more realistic.
Watch my step-by-step video for more directions on getting your smallest petals and largest petals to look amazing. The biggest struggle is often the center of the flower, as it’s often wound just a little too tight.
Get more paper flower tutorials totally FREE!
Download all of my free paper flower designs by subscribing (free) below to get the password to my resource library.

Love,

Want to remember this? Save the Cricut Paper Flowers Tutorial to Your Favorite DIY Pinterest Board!

I love your videos. They are so easy to understand and you make it look easy. Thank you.
Thank you so much, Shirley!
Thank you for your amazing tutorials and free library!!!
Hi, first I love all you tutorials, I tried to get your flowers, but, asked for payment. Are these not free through your website. I tried going through design space to find them with the codes, but, nothing. Could these have changed since your tutorial? I am a new cricut owner and am anxious to learn, and you make projects easy to follow.
Hi Patricia! Those flowers are a Cricut design and they have chosen to make them a paid design unless you have Cricut Access.
Just discovered your site, awesome! THANK YOU for the wonderful video on rolling paper flowers. I avoided them after struggling with my 1st few trials.
You explained everything so well, the video quality was great, and now I understand more about the process.
Off to check out more of your site and FB page. Thanks!
I just love your videos!! I want to make everything! Wonderful Jennifer!
Thank you so much! You explain things very clearly and your instructions ACTUALLY work! I read many, many tutorials that I just didn’t get before I found your videos. Thank you again!
This video is where I met you! I was hooked and made 25 flowers. Thank you
Nice Flower !!! I love it .
Hi Jennifer,
I just found your site and I am in heaven! Your flower tutorial was exactly what I was looking for. Amazing in every way! I’m so excited to get started on making these flowers and creating.
Hi Karen! So happy you are here crafting with me!
Hi Jennifer, I am a newbie and wondering what blade you use for your flowers? I have 65lb paper but it won’t cut through. I am using the one that came with the machine explorer air 2.
I use the blade that came with the machine too, the fine point blade. Definitely double check to see what the materials setting is on your Cricut!
I have an expression 2 cricut…design space won’t work with this machine…will the files you offer work wih it?
Hi Debbie. Unfortunately, no, not as the machine stands right now. Some have had success using the program Sure Cuts A Lot. That might be something to look into.
how do you make the stems ?
Hi Eva! You can make stems with floral wire and green floral tape.
I’m relatively new to Cricut. And every time I Google how to do something, you are almost always the first site that pops up. Thank you for all of your help.
Welcome to Cricut, Claire! You are very welcome! I love helping others!