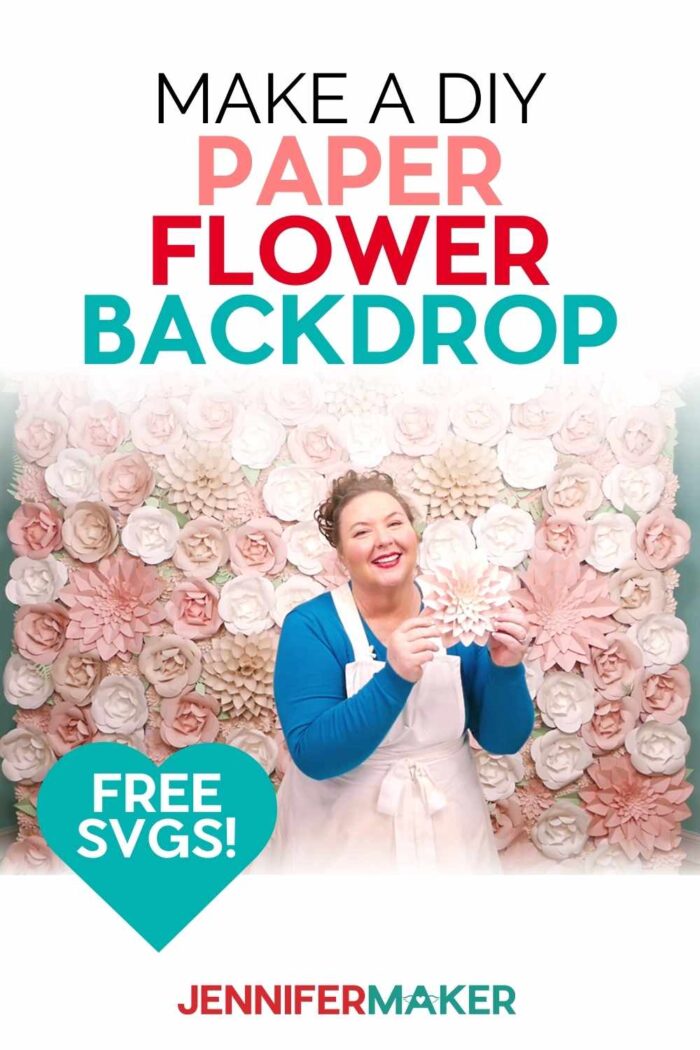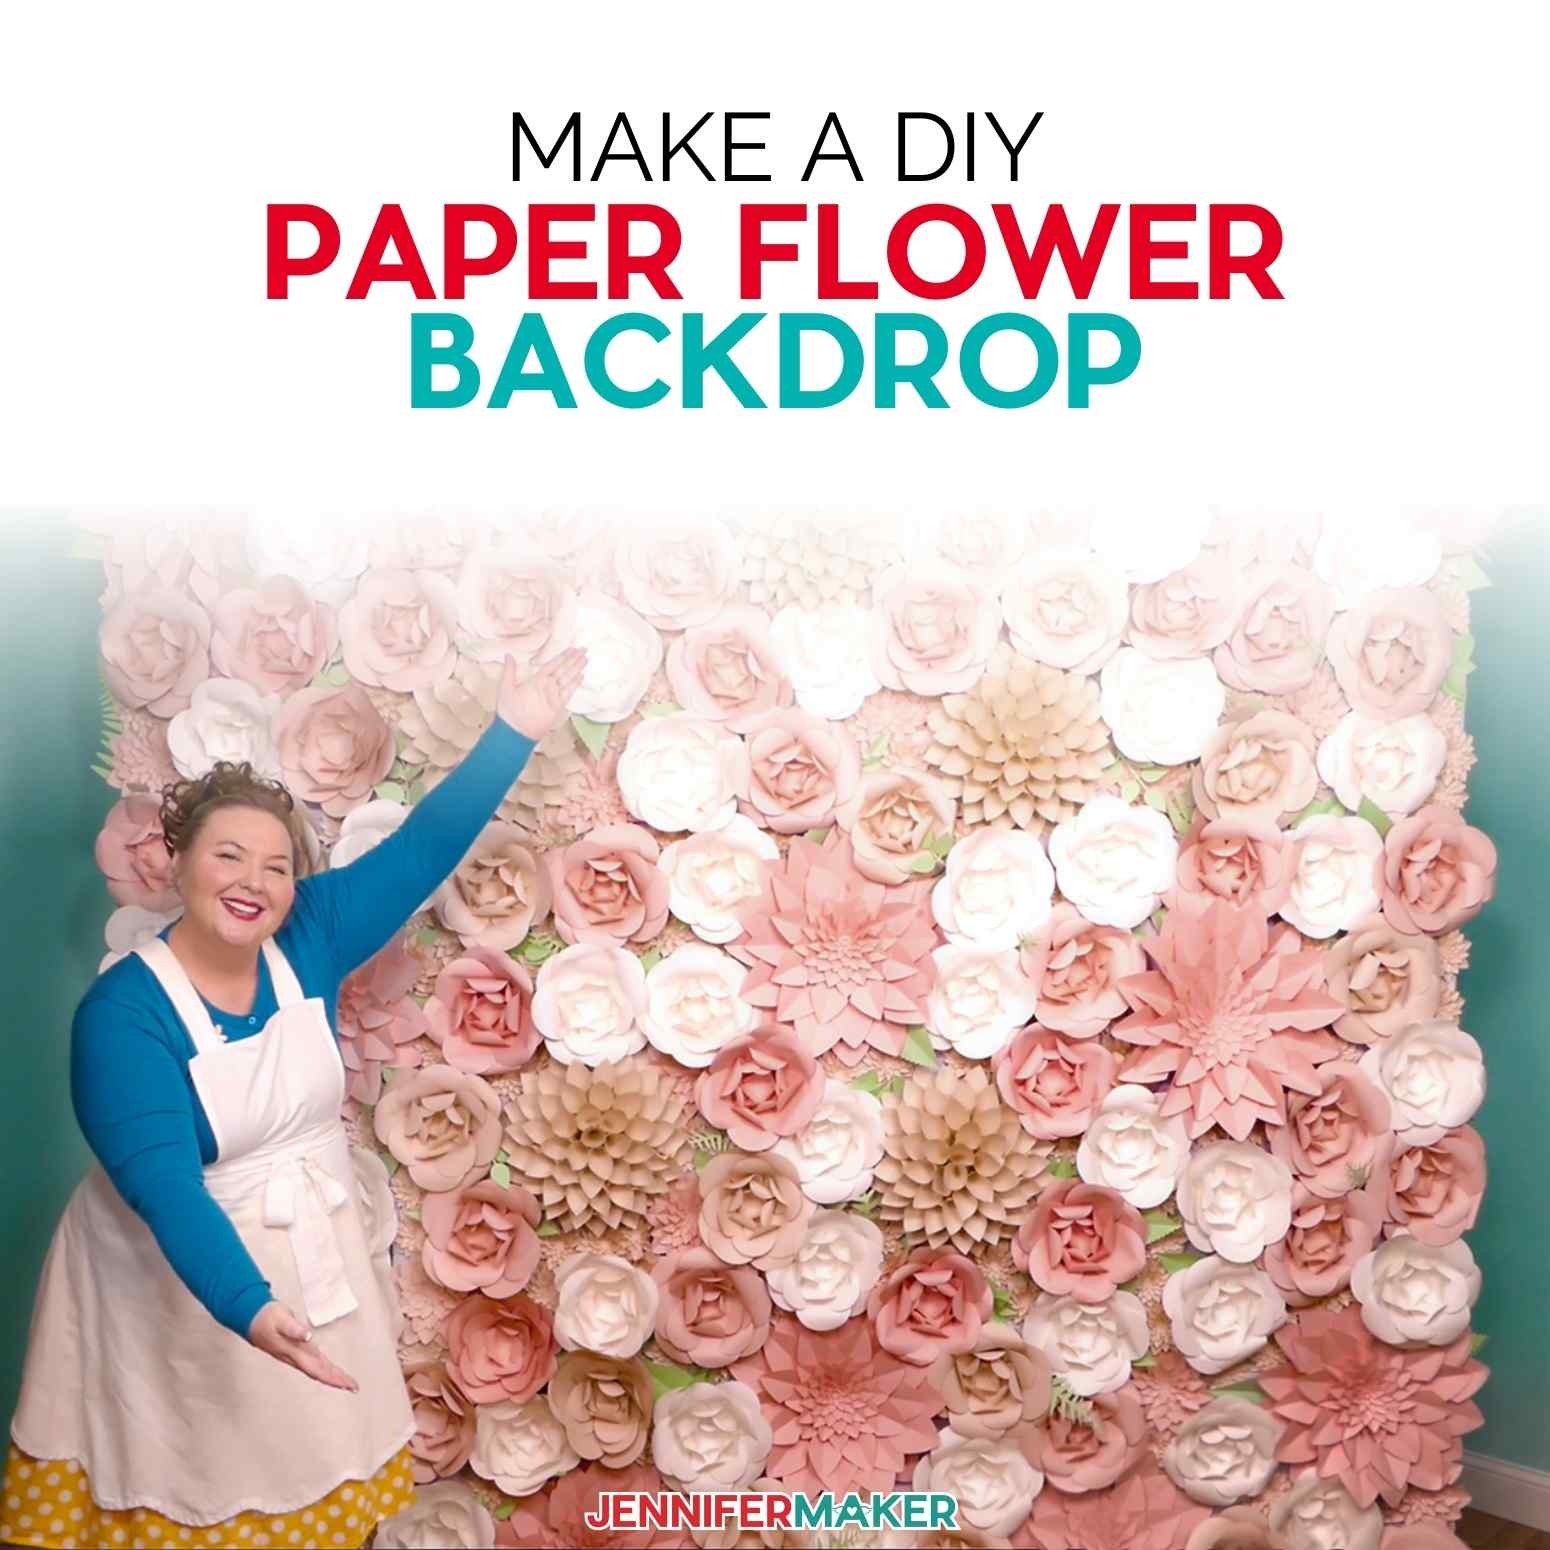
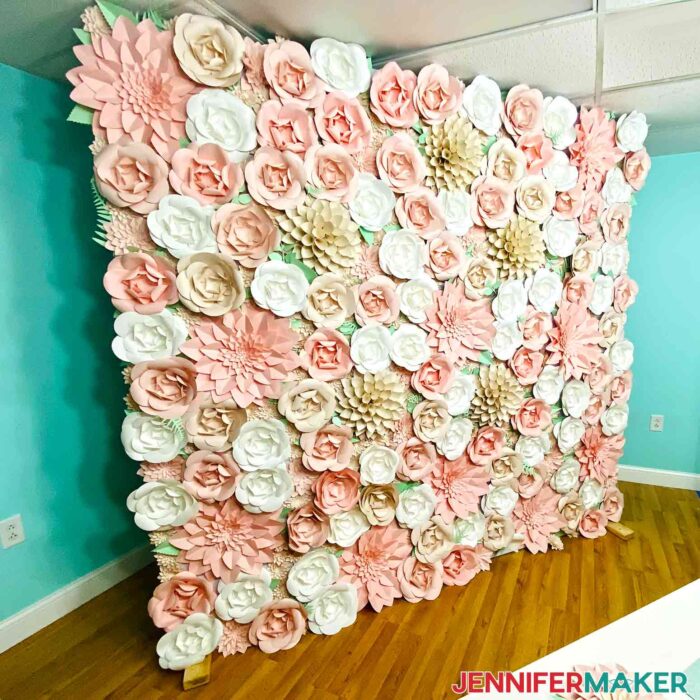
Learn how to make a beautiful paper flower backdrop for photos and parties from start to finish!
Like you, I love all the paper flower walls as party decor lately. Weddings, proms, even events like the Met Gala have had a floral backdrop! But if you don’t have the budget to rent one (they can cost $1,000+!), I’m here to help you. I’ll show you how to make your own paper flower backdrop! We’ll get to practice a lot of paper flower designs and maybe pick up some planning and building skills along the way!
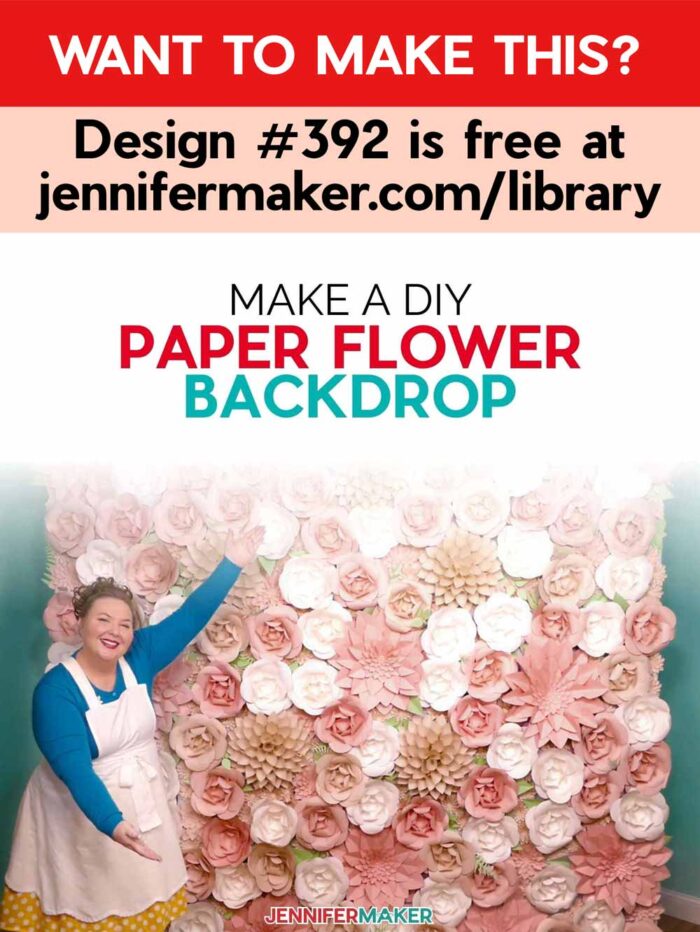
Watch the full step-by-step tutorial video to make a paper flower wall:

And before you say, “Jennifer, I don’t really need a party backdrop!” remember that you can always adjust my projects to fit you and your needs! Even just two of these panels make a real home decor impact. You can use my planning and assembly tips to go as big or as small as you like. But really, if you don’t have a party to plan, if you want to make a DIY paper flower backdrop, do it. Craft it just for fun and then have a fabulous photo shoot with your beautiful backdrop!
Ready to make your own backdrop? Good!
I’ve been dreaming about this project and am so excited to make a paper flower backdrop with you! After A LOT of flowers, and A LOT of experimenting, it really comes down to three things:
- Paper flowers
- A way to hold them together, and
- A way to display them.
Let’s go over the basics of each, but you can find much more detail in the full video tutorial and the written instructions with pictures below.
The Paper Flowers
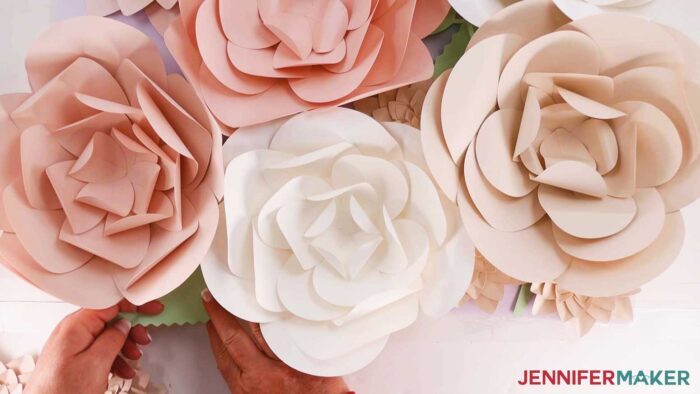
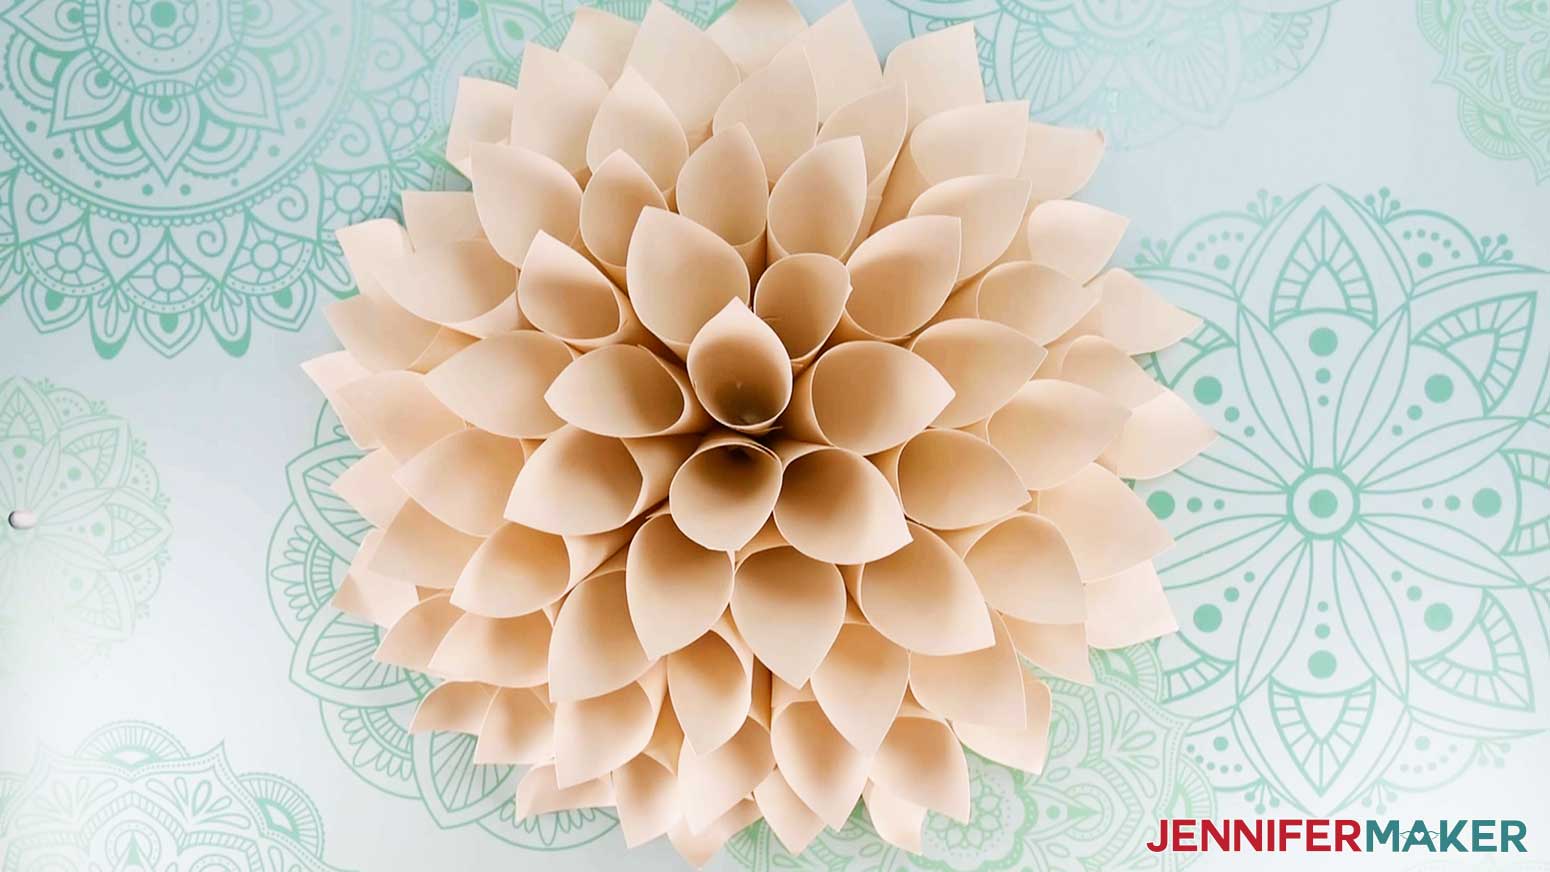
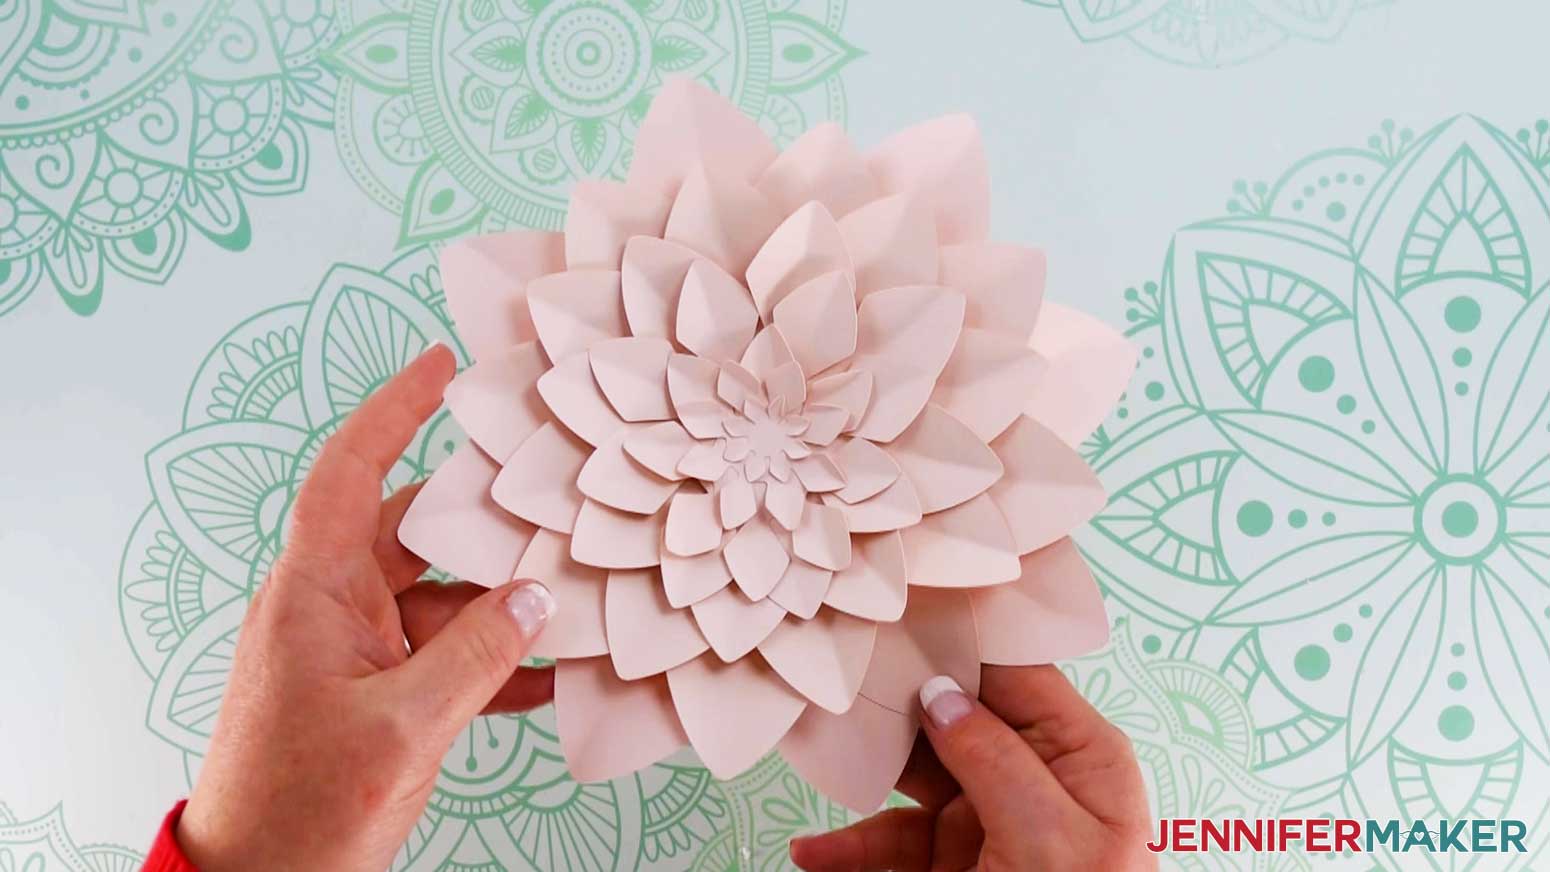
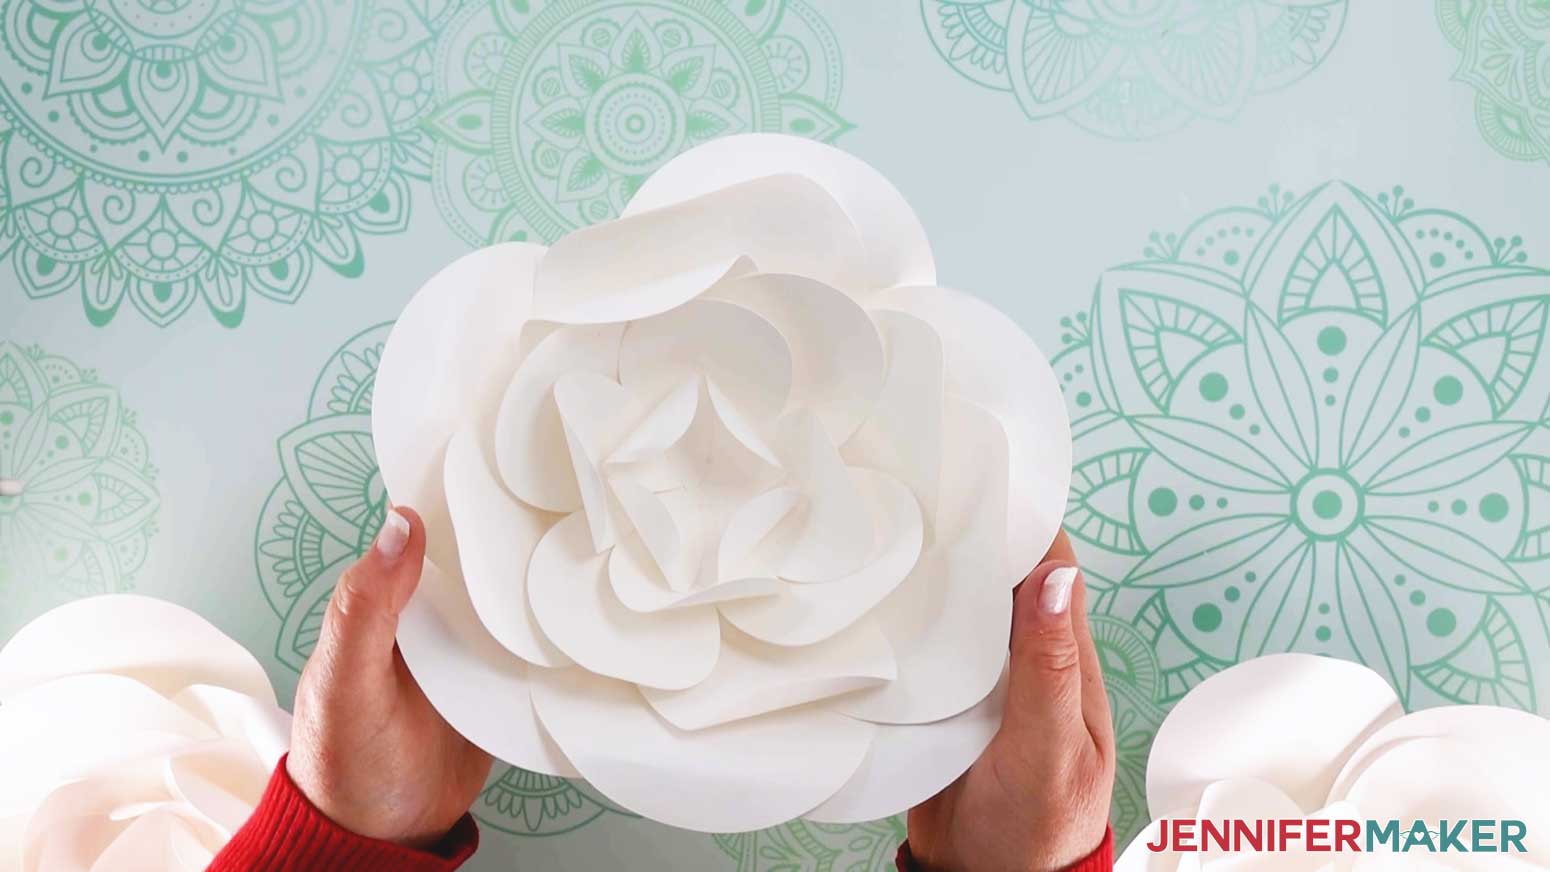
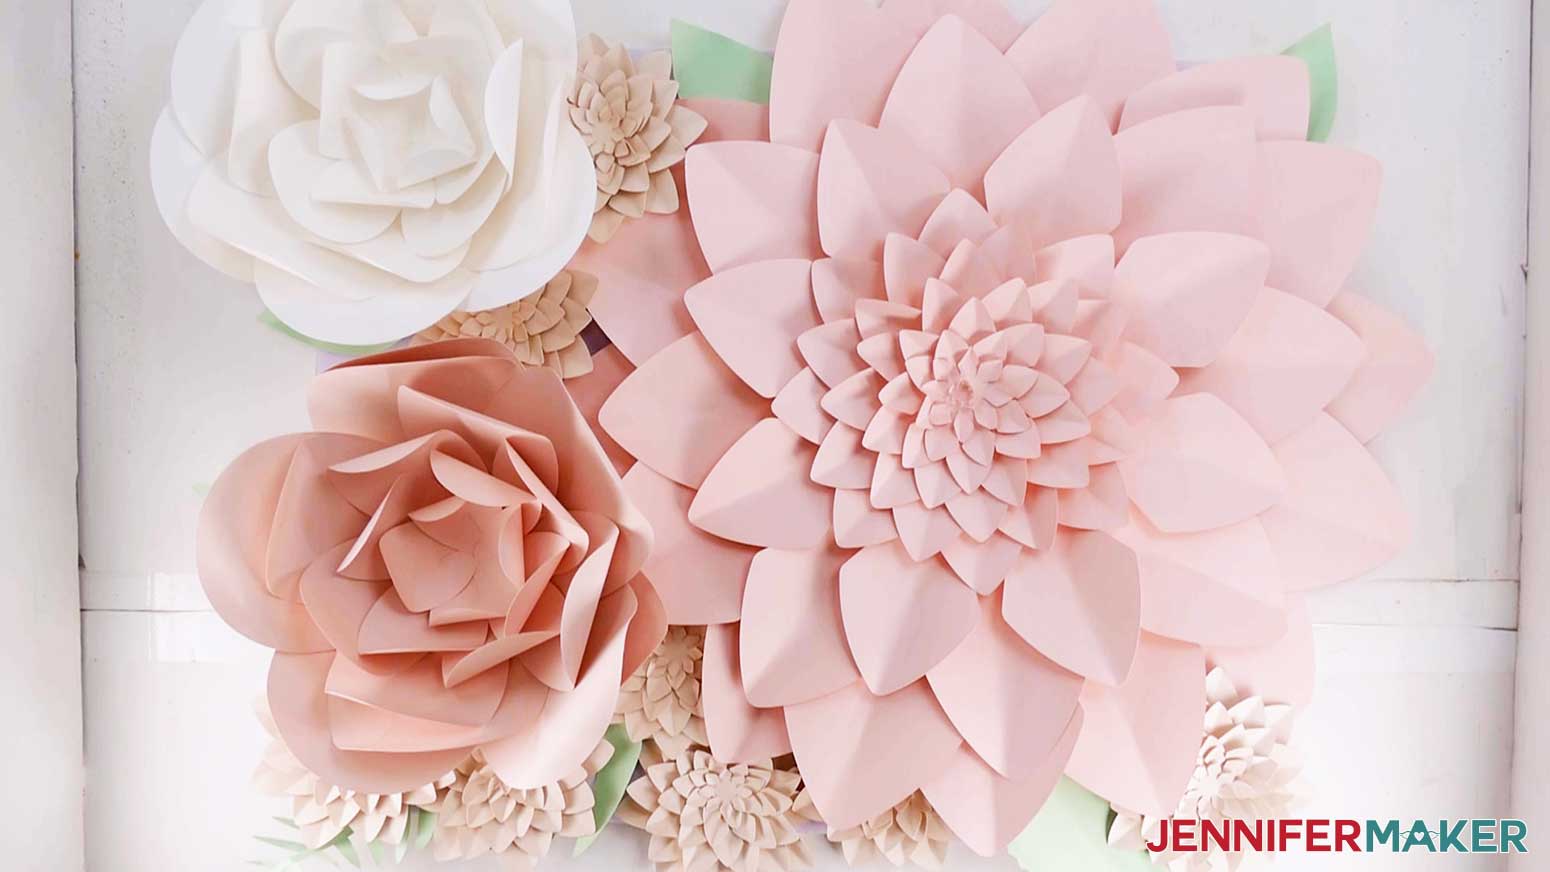
I used several dahlia variations and two sizes of my Easy Flower for my wall to keep it cohesive. The DIY paper flowers I used plus some bonus greenery are available in the project’s free download files. Of course, you can experiment with other flowers or leaves! Assembled, the largest flowers about about 18″ wide and the smallest are just 4.5″ so you have various sizes to work with.
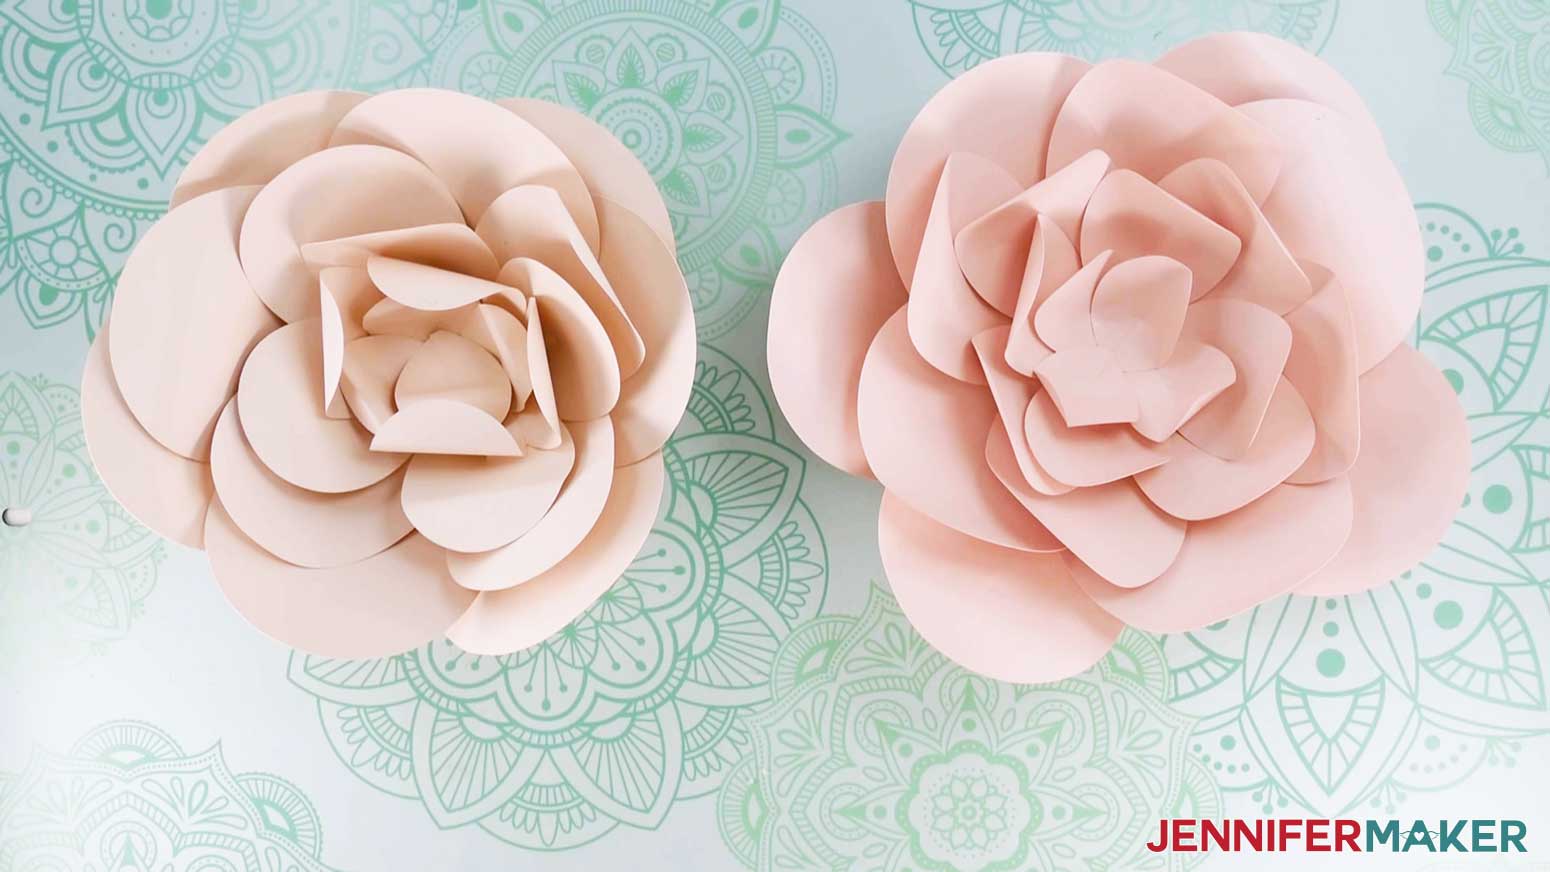
I used good-quality, 65 lb 8.5″ x 11″ cardstock in natural shades of rose, pink, and cream, with light green leaves. You can use adjust the palette to match an event, school colors, or any other theme you like. Good-quality craft glue holds the flowers together perfectly, and a bone folder helps with some shaping techniques.
Your Cricut is definitely the way to go when making a paper flower backdrop. I used a Cricut Maker 3, but you could use an original Cricut Maker or a machine from the Explore series. Some of the flowers and petals can even be cut on a Joy! Depending on how many flowers you cut, your Fine-Point Blade and Cricut StandardGrip Machine Mat will get a workout. This is a good opportunity to check out my tips on getting clean cuts and taking care of your mats.
The Paper Flower Panels
This paper flower backdrop is a lot of work, so I designed it to be manageable for storage and moving once you’re ready to use it again. The assembly uses 20″ x 16″ foam panels like pieces of a puzzle, helping you build one flower into a wall of hundreds. We used 3M Command Strips for hanging posters to stick the flowers to the panels.

Even the heaviest panel is just over 2 lbs, so they’re not too difficult to carry, too. I even found rolling storage containers they fit in!
The Paper Flower Display / Backdrop Stand
I know there are many different settings where these paper flower backdrops will be appreciated, so I also wanted to give you the easiest ways to display your own backdrops. If you’re just making a few or are making a semi-permanent installation, I’ll show you how to stick them directly to a wall. Just watch the paint!
Since paper flower backdrops are often used for event photos, I also have instructions for assembling free-standing frames. Depending on your situation and needs, you can follow my instructions for a fast PVC backdrop frame, or a sturdier wooden version. Click here to view the full DIY Backdrop Stand tutorial.
This paper flower backdrop has been a big project, and I’ve learned a lot about planning and crafting BIG while developing it. Now, I’m so excited to see what you will make and celebrate with the hard-earned results!
Ready to make a paper flower backdrop using my free designs and step-by-step tutorial? You’re going to have so much fun! This post contains some affiliate links for your convenience (which means if you make a purchase after clicking a link I will earn a small commission but it won’t cost you a penny more)! Read my full disclosure policy.
Materials to Make a Paper Flower Backdrop
View my Amazon shopping list with the exact items we used to make this project!
- 65 lb 8.5″ x 11″ Cardstock for flowers – we used 26 packs of the Roses color collection
- 65 lb 8.5″ x 11″ Cardstock for greenery – we used two packs of Spearmint Green
- Craft glue to assemble flowers – we used Bearly Precision Art Glue
- A method to cut your cardstock, I used the amazing Cricut Maker 3 but you can also use the Cricut Maker, Cricut Explore 3, the Cricut Explore, or even the Cricut Joy — you use the standard fine point blade for this project.
- Cricut Green StandardGrip Machine Mat 12” x 12
- Cricut Pen to draw assembly guidelines for the large flowers
- Bone Folder to shape flowers and greenery
- Foam core boards – we used 30 20″ x 16″ foam boards
- 3M Command Strips – Poster Hangers to attach the flowers to the foam panels – we used 6 packs
- 3M Command Strips – 12 lb Picture Hangers if you want to hang the panels on a wall – we used 3 packs
- Hot Glue Gun
- A Wooden Frame or a PVC Pipe Frame —see the tutorial to learn how to make them!
- Stepstool – to reach the top of the frame and backdrop
- (Optional) A way to hang your foam core panels from the frame – we used clothes hangers with metal hooks that turned using pliers
- (Optional) A way to hold your panels together if you hang them from a frame – we used clear packing tape
- (Optional) A way to keep your wall rigid when hanging from a frame – we used 6 foot long bamboo landscape stakes
- Craft knife to cut the packing tape apart to disassemble the backdrop for storage
- (Optional) A way to store your flower panels – we used six 128qt. wheeled storage bins
- Design #392 – My free flower backdrop design files (available in my free resource library – get the password by filling out the form at the bottom of this post)
How to Make a Paper Flower Backdrop
Learn to make a paper flower backdrop for your event and budget! First, download my Paper Flower Backdrop design SVG/DXF/PDF files from my free resource library — it's Design #392. The design file includes several flowers and some greenery. You can print the PDFs and cut them by hand, but I strongly recommend using the SVGs with a Cricut. Since this project is very customizable and takes some planning, think about your goal before starting to cut. What size wall do you want to make? Which flowers do you want to use? Will anyone else help you make the flowers? It's a fun group project! Each crafter's items will be different, but here are the flowers, their average sizes, and some color options: Cone Dahlia (15") Large Easy Flower (9.5") Medium Broad Dahlia (8") Medium Easy Flower (9.25") Mini Broad Dahlia (4.5" and can be cut on a Joy) Next, how many flowers will you need to cover the panels? If you are not sure how to upload an SVG cut file to Cricut Design Space, watch this helpful video training series I made. While you can use the Cricut app to make this project, it will be much easier on a desktop computer. If you are on an iPad or iPhone, here is how to download and upload SVG files to the Cricut Design Space app. Then, add the Large Easy flower SVG to your Canvas. With your flower on the Canvas, zoom out to see the entire design. This is what my Large Easy Flower looks like in Design Space. Then, click "Continue" in the bottom right. For detailed assembly instructions, visit the original paper flower tutorials for each flower. If you plan to hang your panels on a wall, you can prep them in advance all at once or one at a time. If you’re putting your panels on a frame, skip this step. Place one 16" x 20" panel face down on your work surface and have four Command Strips ready. I’m making them on small 20" x 16" panels because they’re much easier to transport and store this way. Whenever you have a layout you like, take a picture and make a few notes on how many of each flower you used. It's a good idea to rearrange your flowers a few times in case you find a combination you like more. Repeat for the second large flower test and then for the layout without a focal flower. Once you've recorded your layout ideas, pick one to assemble as an example. Place the flowers back on the panel, and add a 3-M Command strip for posters with the protective film removed to their backs one at a time, gently pressing them back in place. The larger flowers may take more than one strip. I’ll show you how to attach the panels to each other in a bit. Remember, if you can see the panel around the edges, it’s ok. I recommend cutting and assembling extra of the small flowers and greenery to cover the edges and seams while you hang the finished panels to make your backdrop. After you have created a version of each panel layout you’d like, plan how many of each type you want to have in your wall. I decided to put a big flower on every other panel, and I want more jumbo dahlias than cone versions. So, I knew I needed enough flowers for ten versions of the jumbo panel, five of the cone version, and fifteen panels without a focal flower. Then, I made a list of how many of each flower was on each test panel type and multiplied it by the number I wanted of each layout. Then, we made a lot of flowers. I decided to decorate and assemble the panels all at once, but you can also put them together one at at time, however works best for you. To decorate them in the way I did, lay out your panels face down on a clean floor in the dimensions you want to cover. When you're happy with the placements, flip each panel over in place and attach the flowers to each panel with the 3M Command Strips for posters. Now that we have all of the flowers on panels, it's time to turn these into a wall. As I said before, you can just put these panels right onto a wall or another solid surface using the 3M Command Strips for Picture Hanging, but what if you need a freestanding wall for a special event? I enlisted Greg's help to come up with a design for a stable wood backdrop frame that anyone with some basic tools could make, wouldn't cost too much, would breakdown to fit in a vehicle, and be re-usable over and over. Once you have your backdrop frame up, it's time to hang the foam panels from it. If you're doing a partial flower wall with a curtain, put the curtain up before you begin this next step. You may need clamps to attach your curtain. Isn't this beautiful? And this is really stable -- it won't fall over. If you want, stake it down outside or put sandbags on the legs for extra stability, but I don't think it's necessary unless you have a really uneven surface to work with. If you need to take the wall down, simply cut the tape along the seams in the back. Then place them in storage containers, or tack them in a closet with some paper towels in between them. That will make any dust easier to remove the next time you put it up! Variations Decorating just a few panels makes a showstopper of a wall decoration. You can stick them up with the 3M Command Strips for Picture Hanging, just be careful of your paint. Or if you want to use them in photos but have limited time, place three to five panels together to make a swag in front of a nice curtain. Place more flowers and greenery along the edges to completely cover the foam and make the shape less boxy. Final Size: 8ft x 8ft wall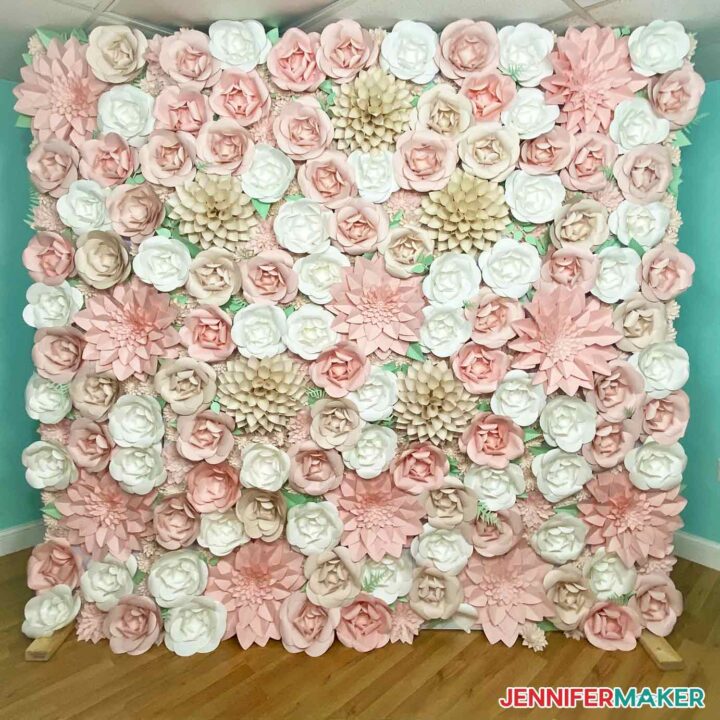
Paper Flower Backdrop
Materials
Tools
Instructions
STEP 1: GET MY FREE PAPER FLOWER SVG FILES
Greenery (varies)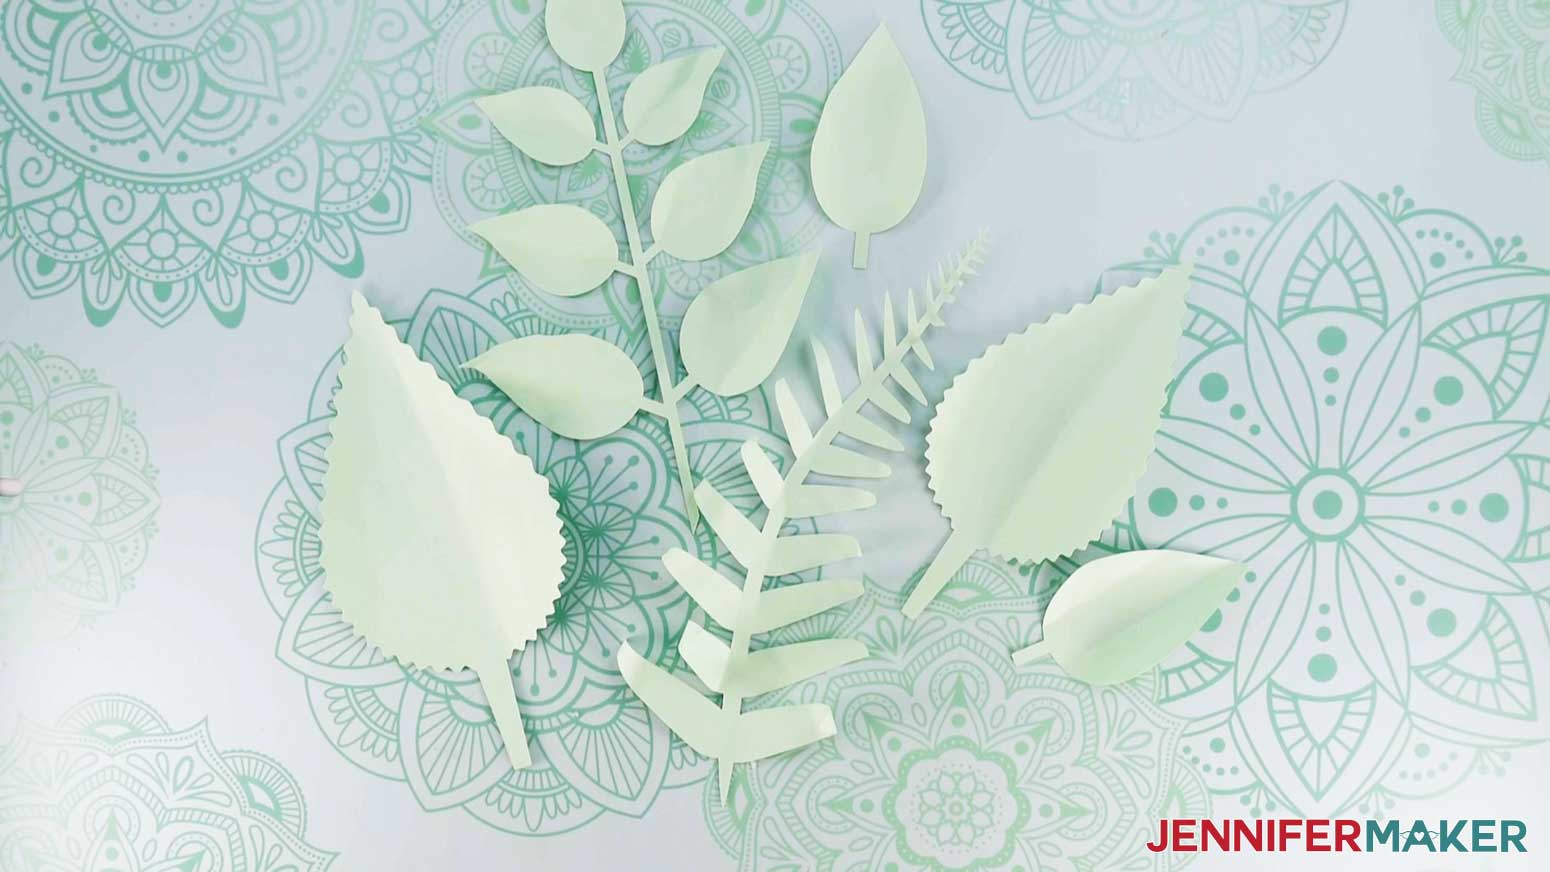
Jumbo Broad Dahlia (18.5")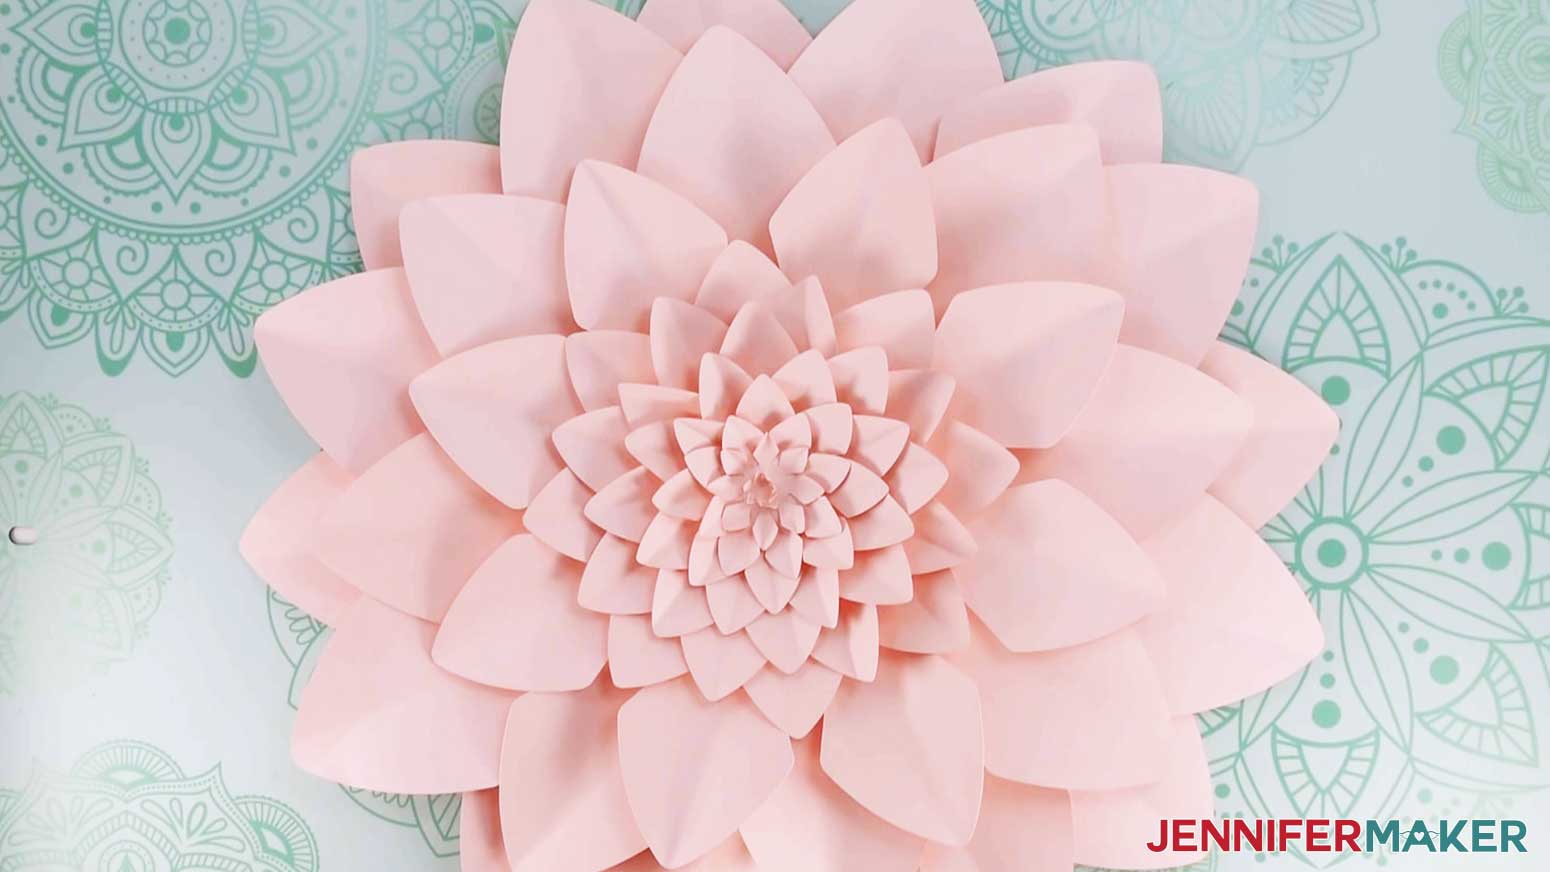

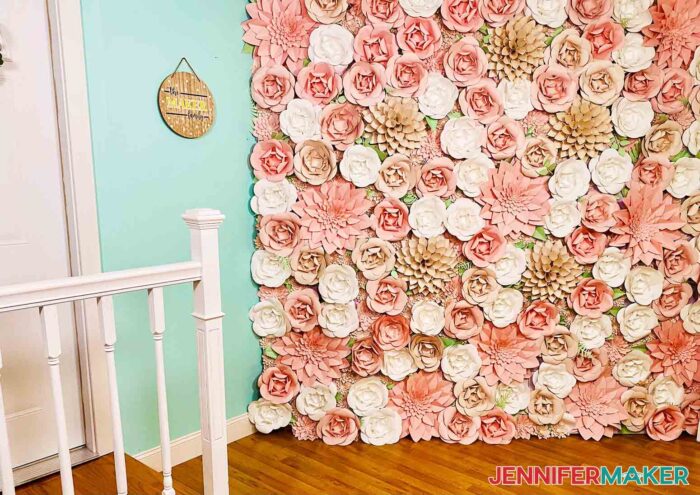
Once you know how large you want your backdrop to be, consider how many panels you’ll need to create it. I’m making a wall 8' x 8' and I’ve decided to use 30 20" x 16" panels.
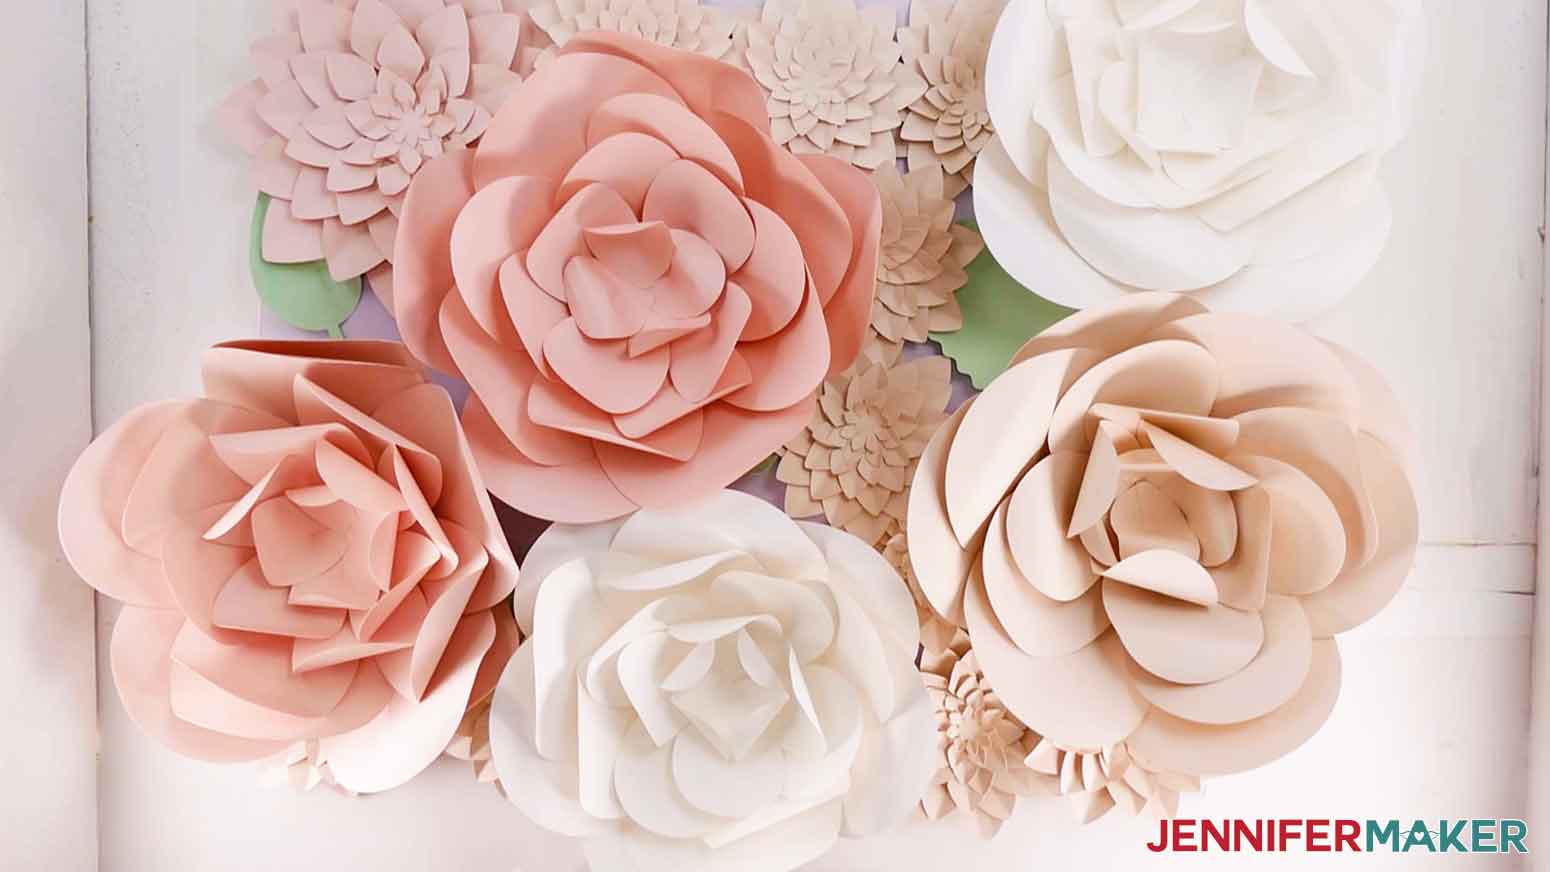
I’ve found that the panels look best with one of the largest flowers as a focal point surrounded by medium and smaller flowers, or with just a mix of medium and small flowers. Greenery looks great on both!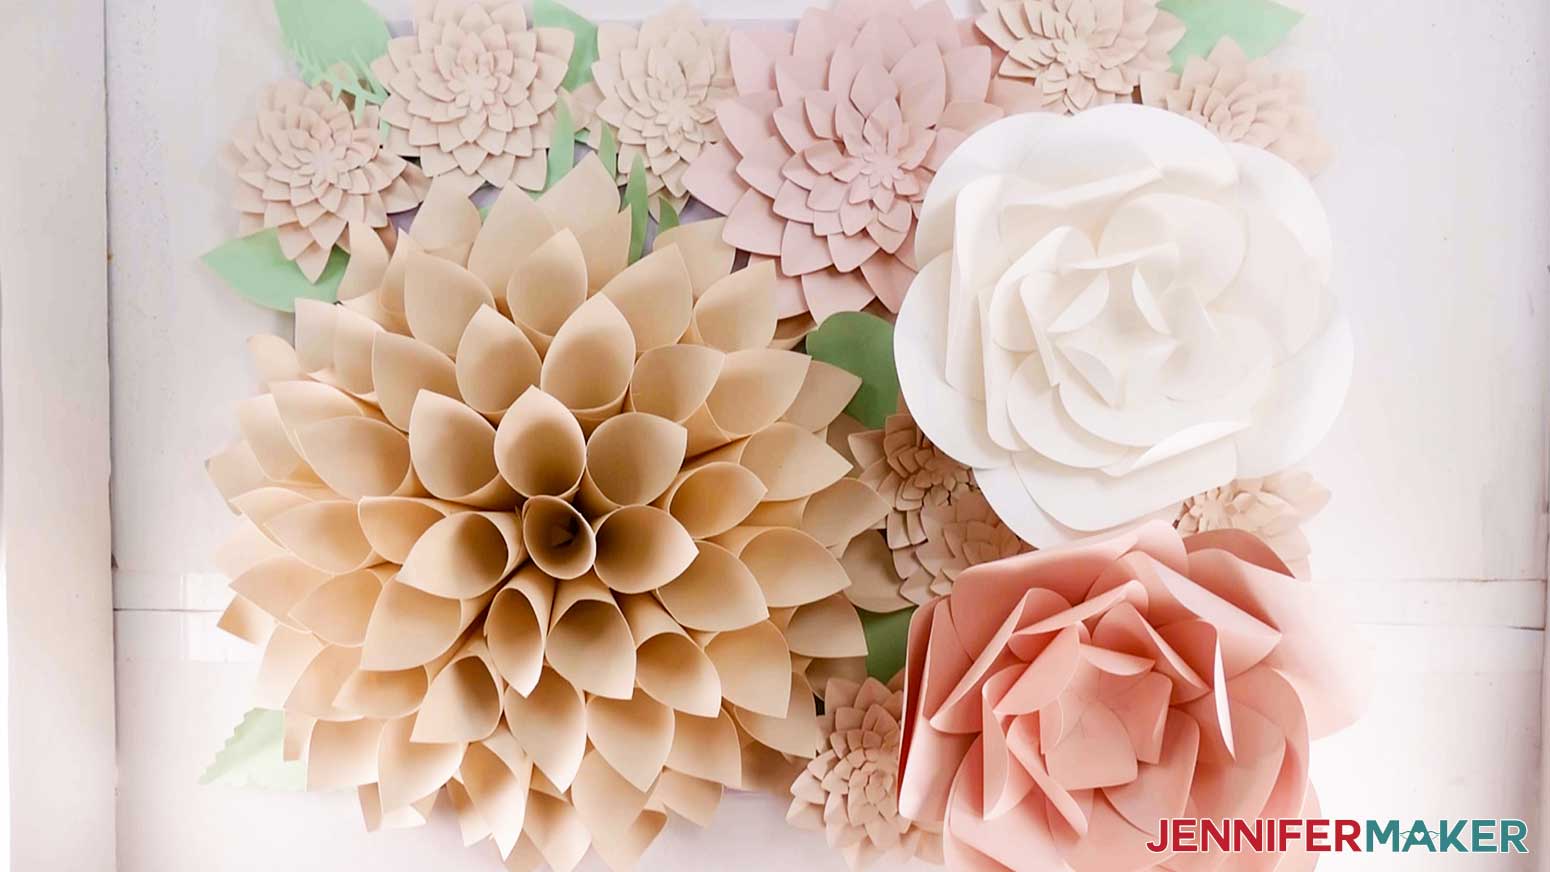
So, I’ll show you how to estimate how many flowers you’ll need for a similar wall using these three layouts. Again, everyone's flowers and layouts will be different, but once you've watched my process, you'll be able to adjust it to fit your own goal!
To test my three layouts and estimate my flower needs, I cut and assembled:
1 Cone Dahlia
4 Greenery sheets
1 Jumbo Broad Dahlia
4 Large Easy Flowers
1 Medium Broad Dahlia
3 Medium Easy Flowers
8 Mini Broad Dahlias
Let's go over how to cut these on a Cricut using the Large Easy Flower as an example. You can find FREE printable instructions and video tutorials for all the other paper flowers on my tutorials page.
First go to Cricut Design Space and upload the SVG files from the file you downloaded.STEP 2: PREPARE YOUR FLOWER DESIGNS
image forthcoming
Cutting more than one flower at once saves time and material, so select the design and click Duplicate to create the quantity of flowers you want. I usually cut a few at a time of each type to keep the pieces straight.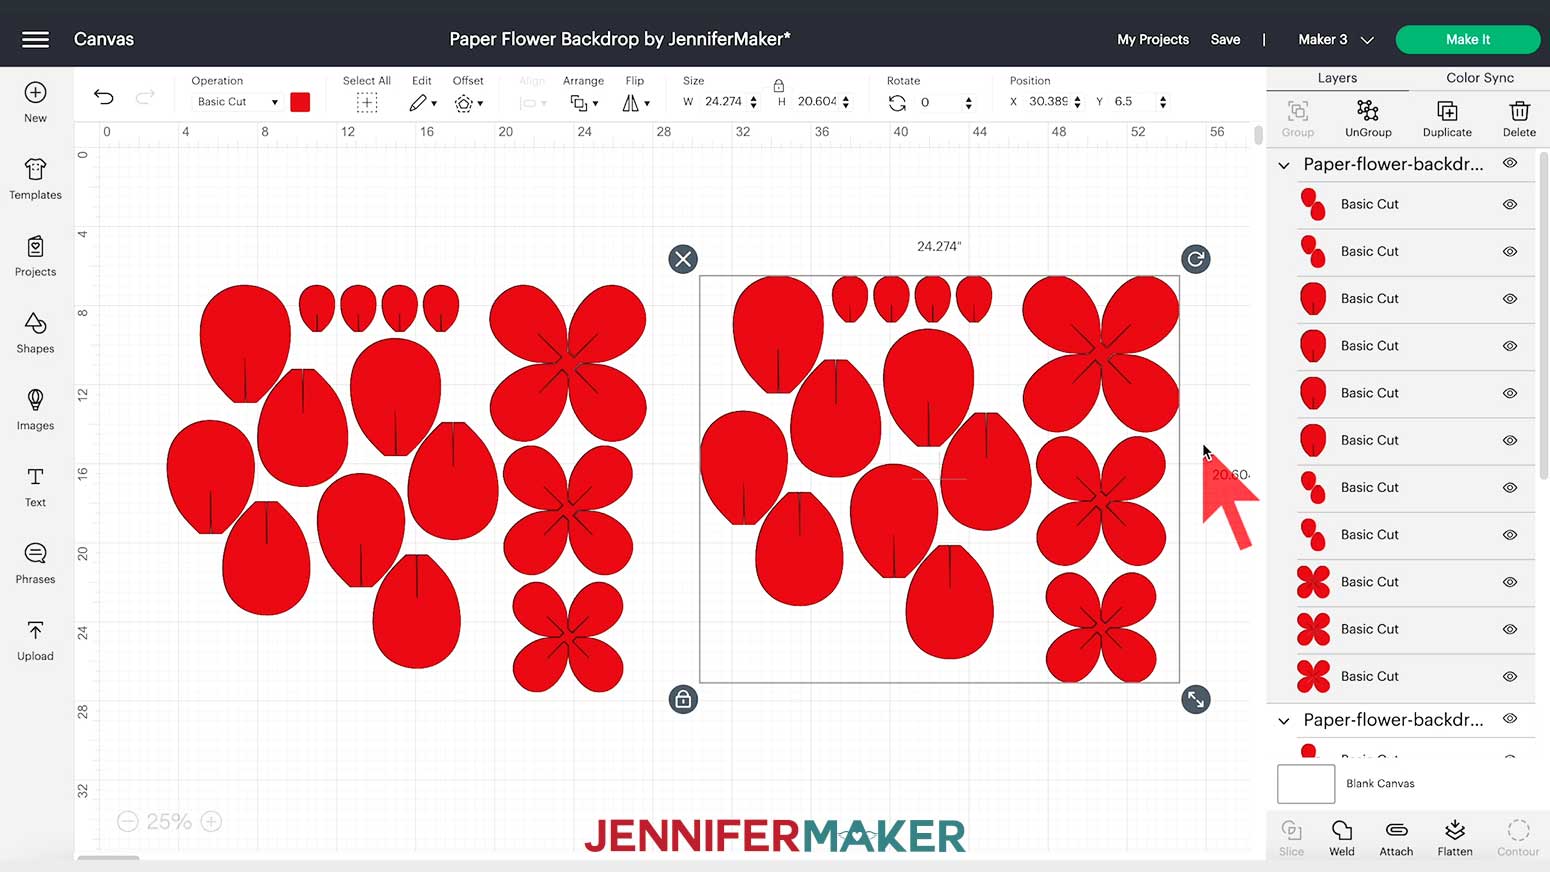
You can also change their colors by selecting a flower and using the color box at the top menu to adjust it.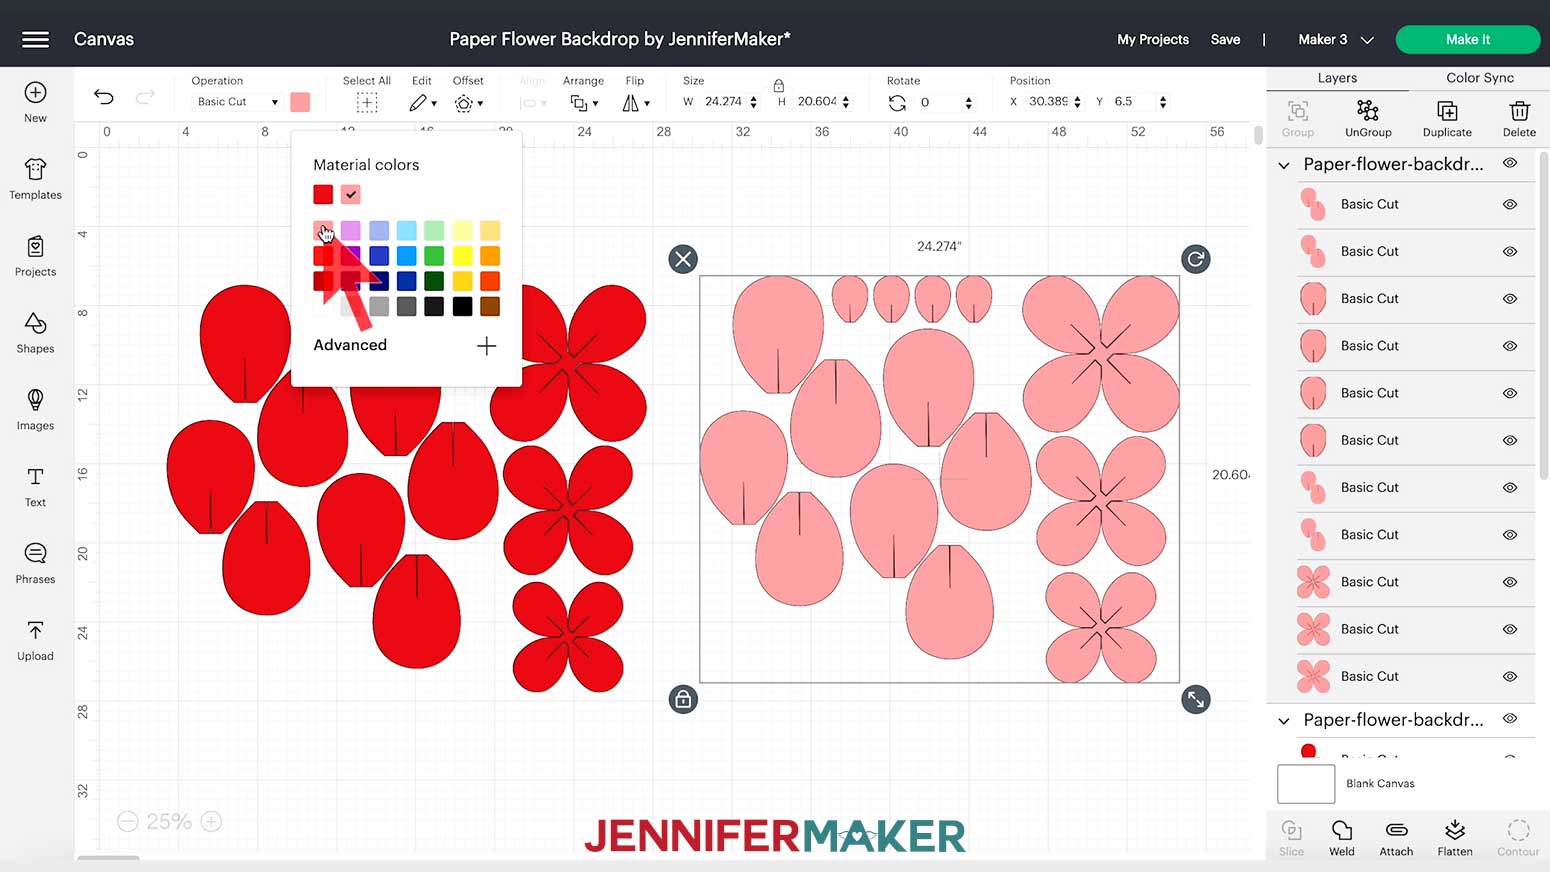
Once you’re happy with the flowers, make sure you have the right machine selected and click "Make It."STEP 3: CUT YOUR PAPER FLOWERS
If prompted, click "On Mat," "twelve inch by twelve inch" and "Continue."
If you're using the same paper as I am, change the Material Size to eight and a half by eleven inches".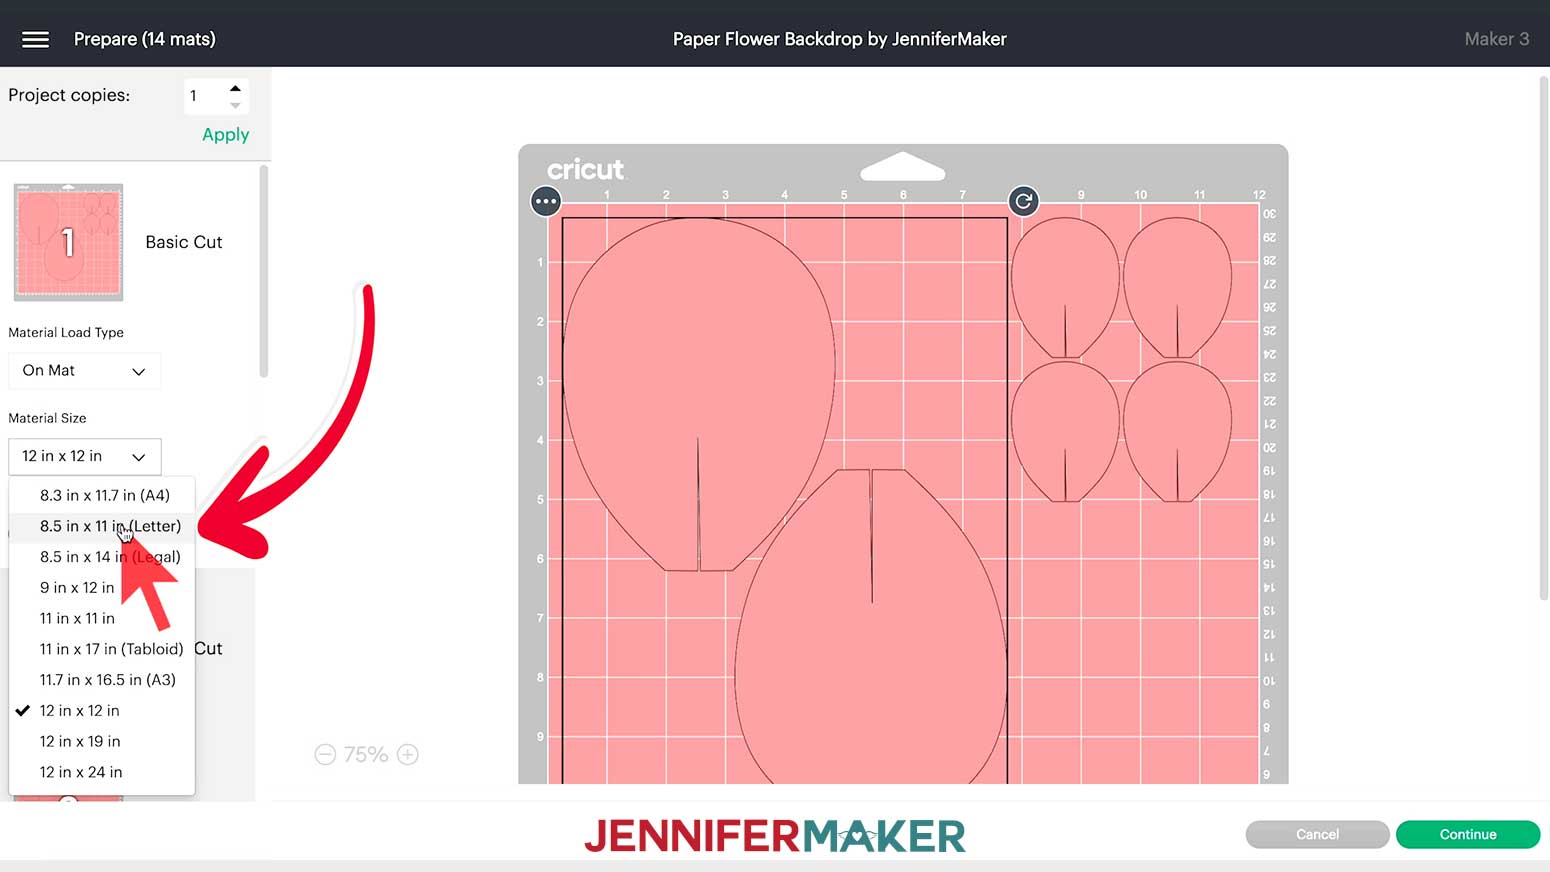
On the next screen, select your material settings. I’ll select “Medium Cardstock - eighty pound” and “More” pressure.
Some machines cut differently, so if you have trouble, try the “Cardstock (for intricate cuts)” material setting.
If you’re using the same materials throughout and the “Remember material settings” box is available, click it to save time. Make sure your Cricut Standard Fine-Point Blade in Clamp B is clean and free of debris.
Place your first mat's cardstock on a green Cricut StandardGrip Machine Mat. Use a brayer to adhere it well. Load the mat and press your machine's Go button.
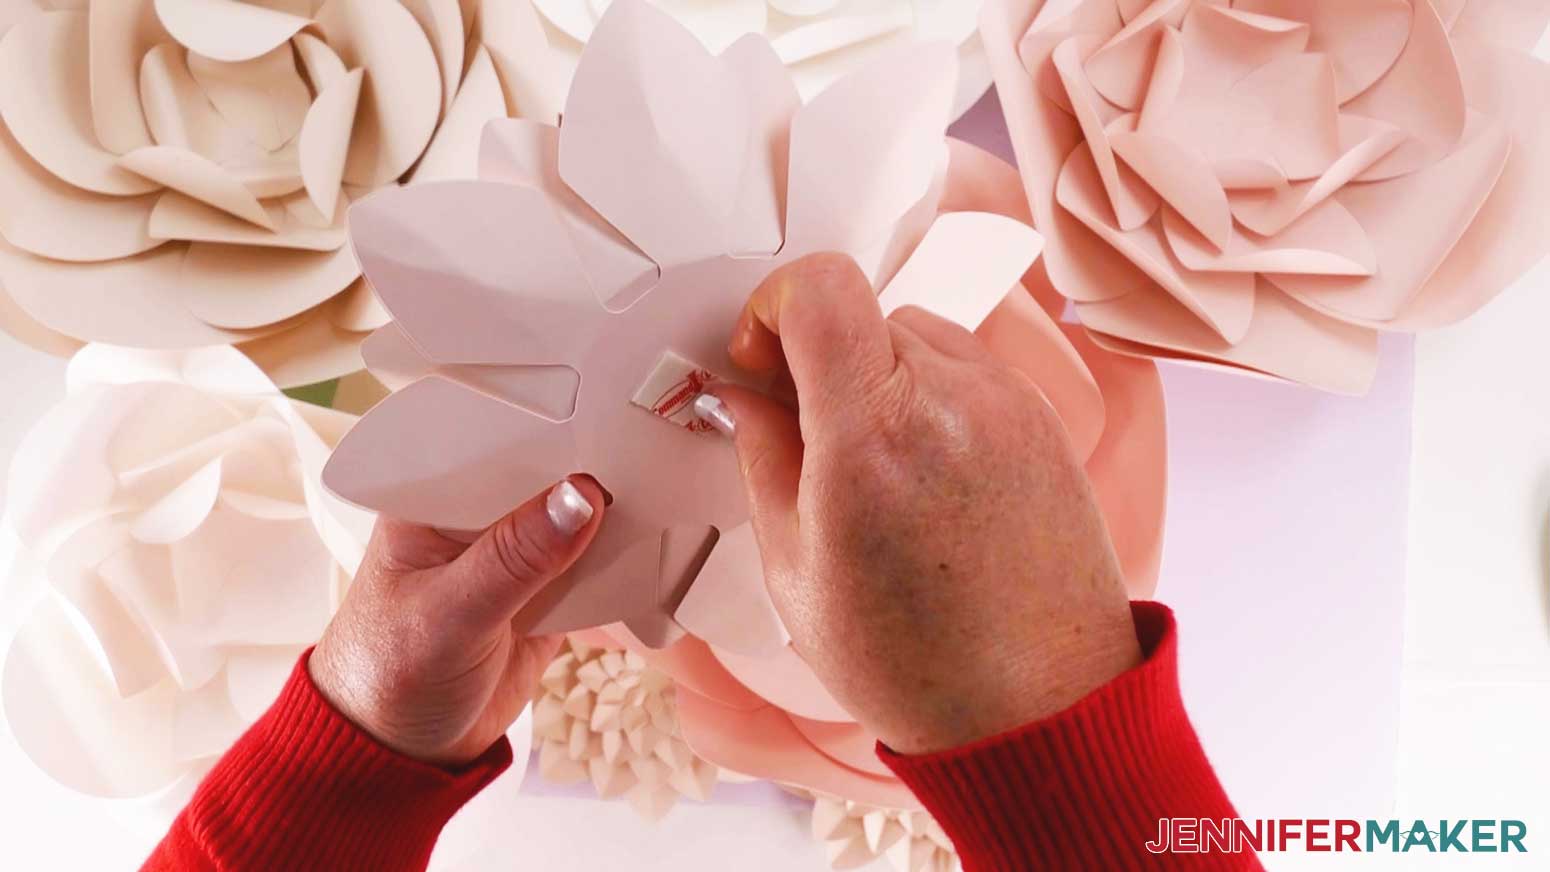
When the cut is finished, unload the mat, flip it over and roll it back to release the cardstock. Cut the rest of the mats using the colors on the screen for reference.STEP 4: ASSEMBLE THE PAPER FLOWERS
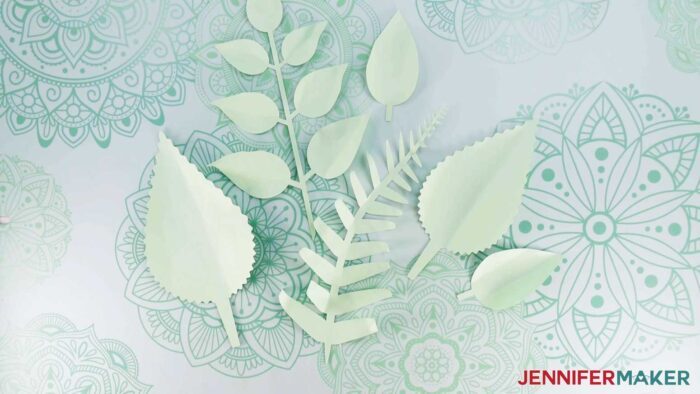
To make the greenery, fold each leaf in half to form a crease along the length. Curl the edges and tips with your fingers or bone folder to make a more realistic leaf shape.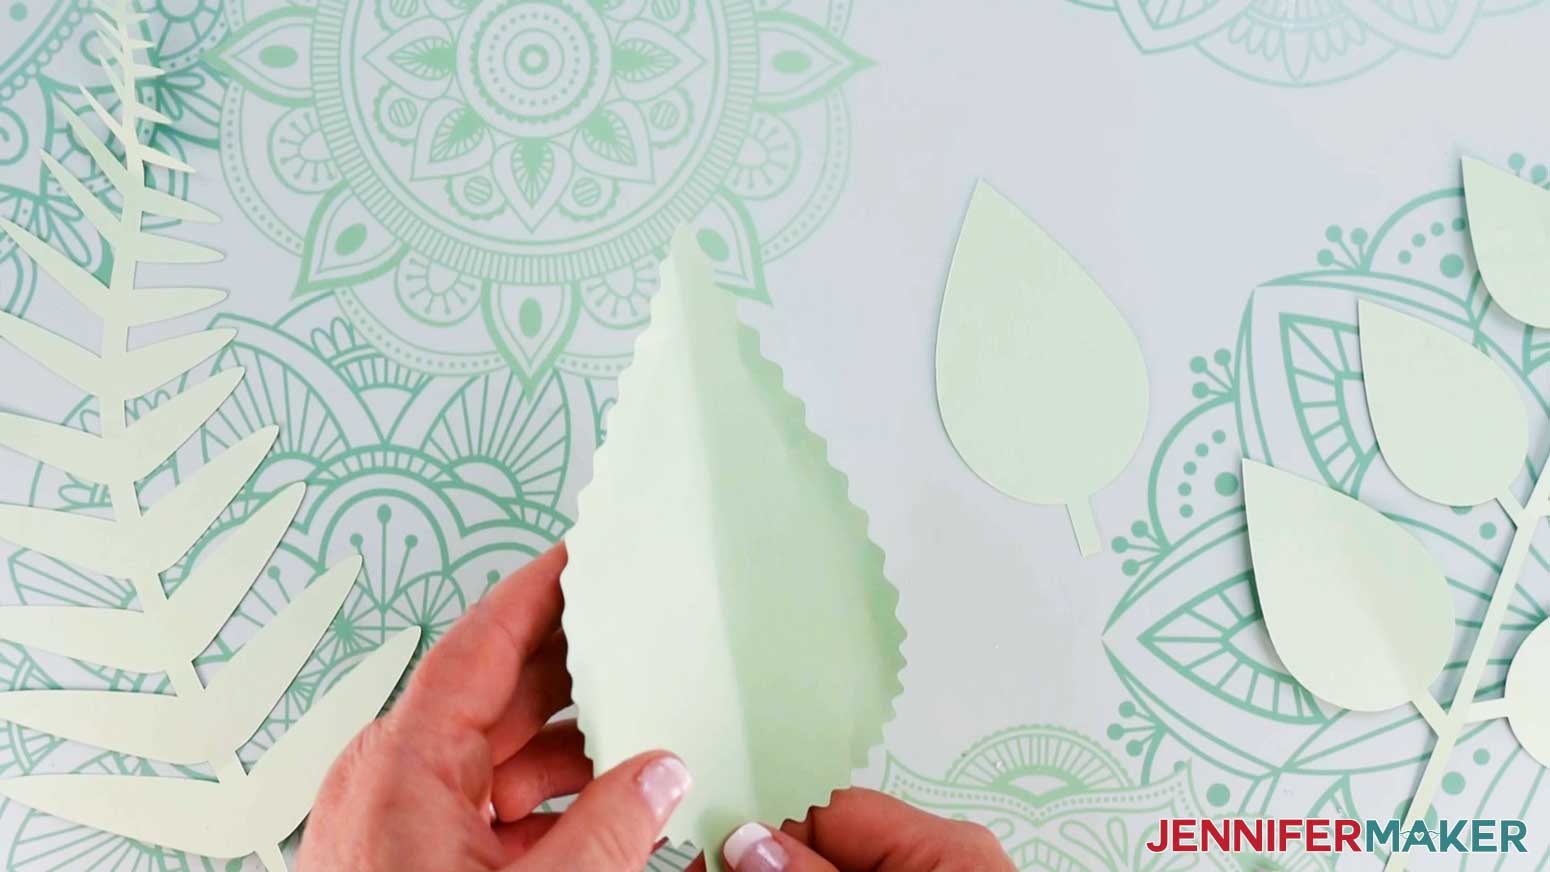
STEP 5: PREPARE THE FOAM PANEL BACKING
Take the protective backing off of a strip and stick it on a corner. Repeat for the other corners.
Leave the exterior backing in place to protect the sticky surface.
STEP 6: TEST YOUR PAPER FLOWER LAYOUTS
Now, the fun part: flower arranging! Since everyone’s flowers and layouts will be different, you might need different quantities then my versions, but this is a good place to start!
To make a test layout, place your foam panel on the work surface and set the large flower so that most of the base touches the panel. Then add some a few large, medium, and small flowers to fill in around the focal point. Remember, the panels will be attached to each other, so you can add small flowers and greenery during the installation to cover the edges.
STEP 7: PLAN OUT AND ASSEMBLE YOUR BACKDROP
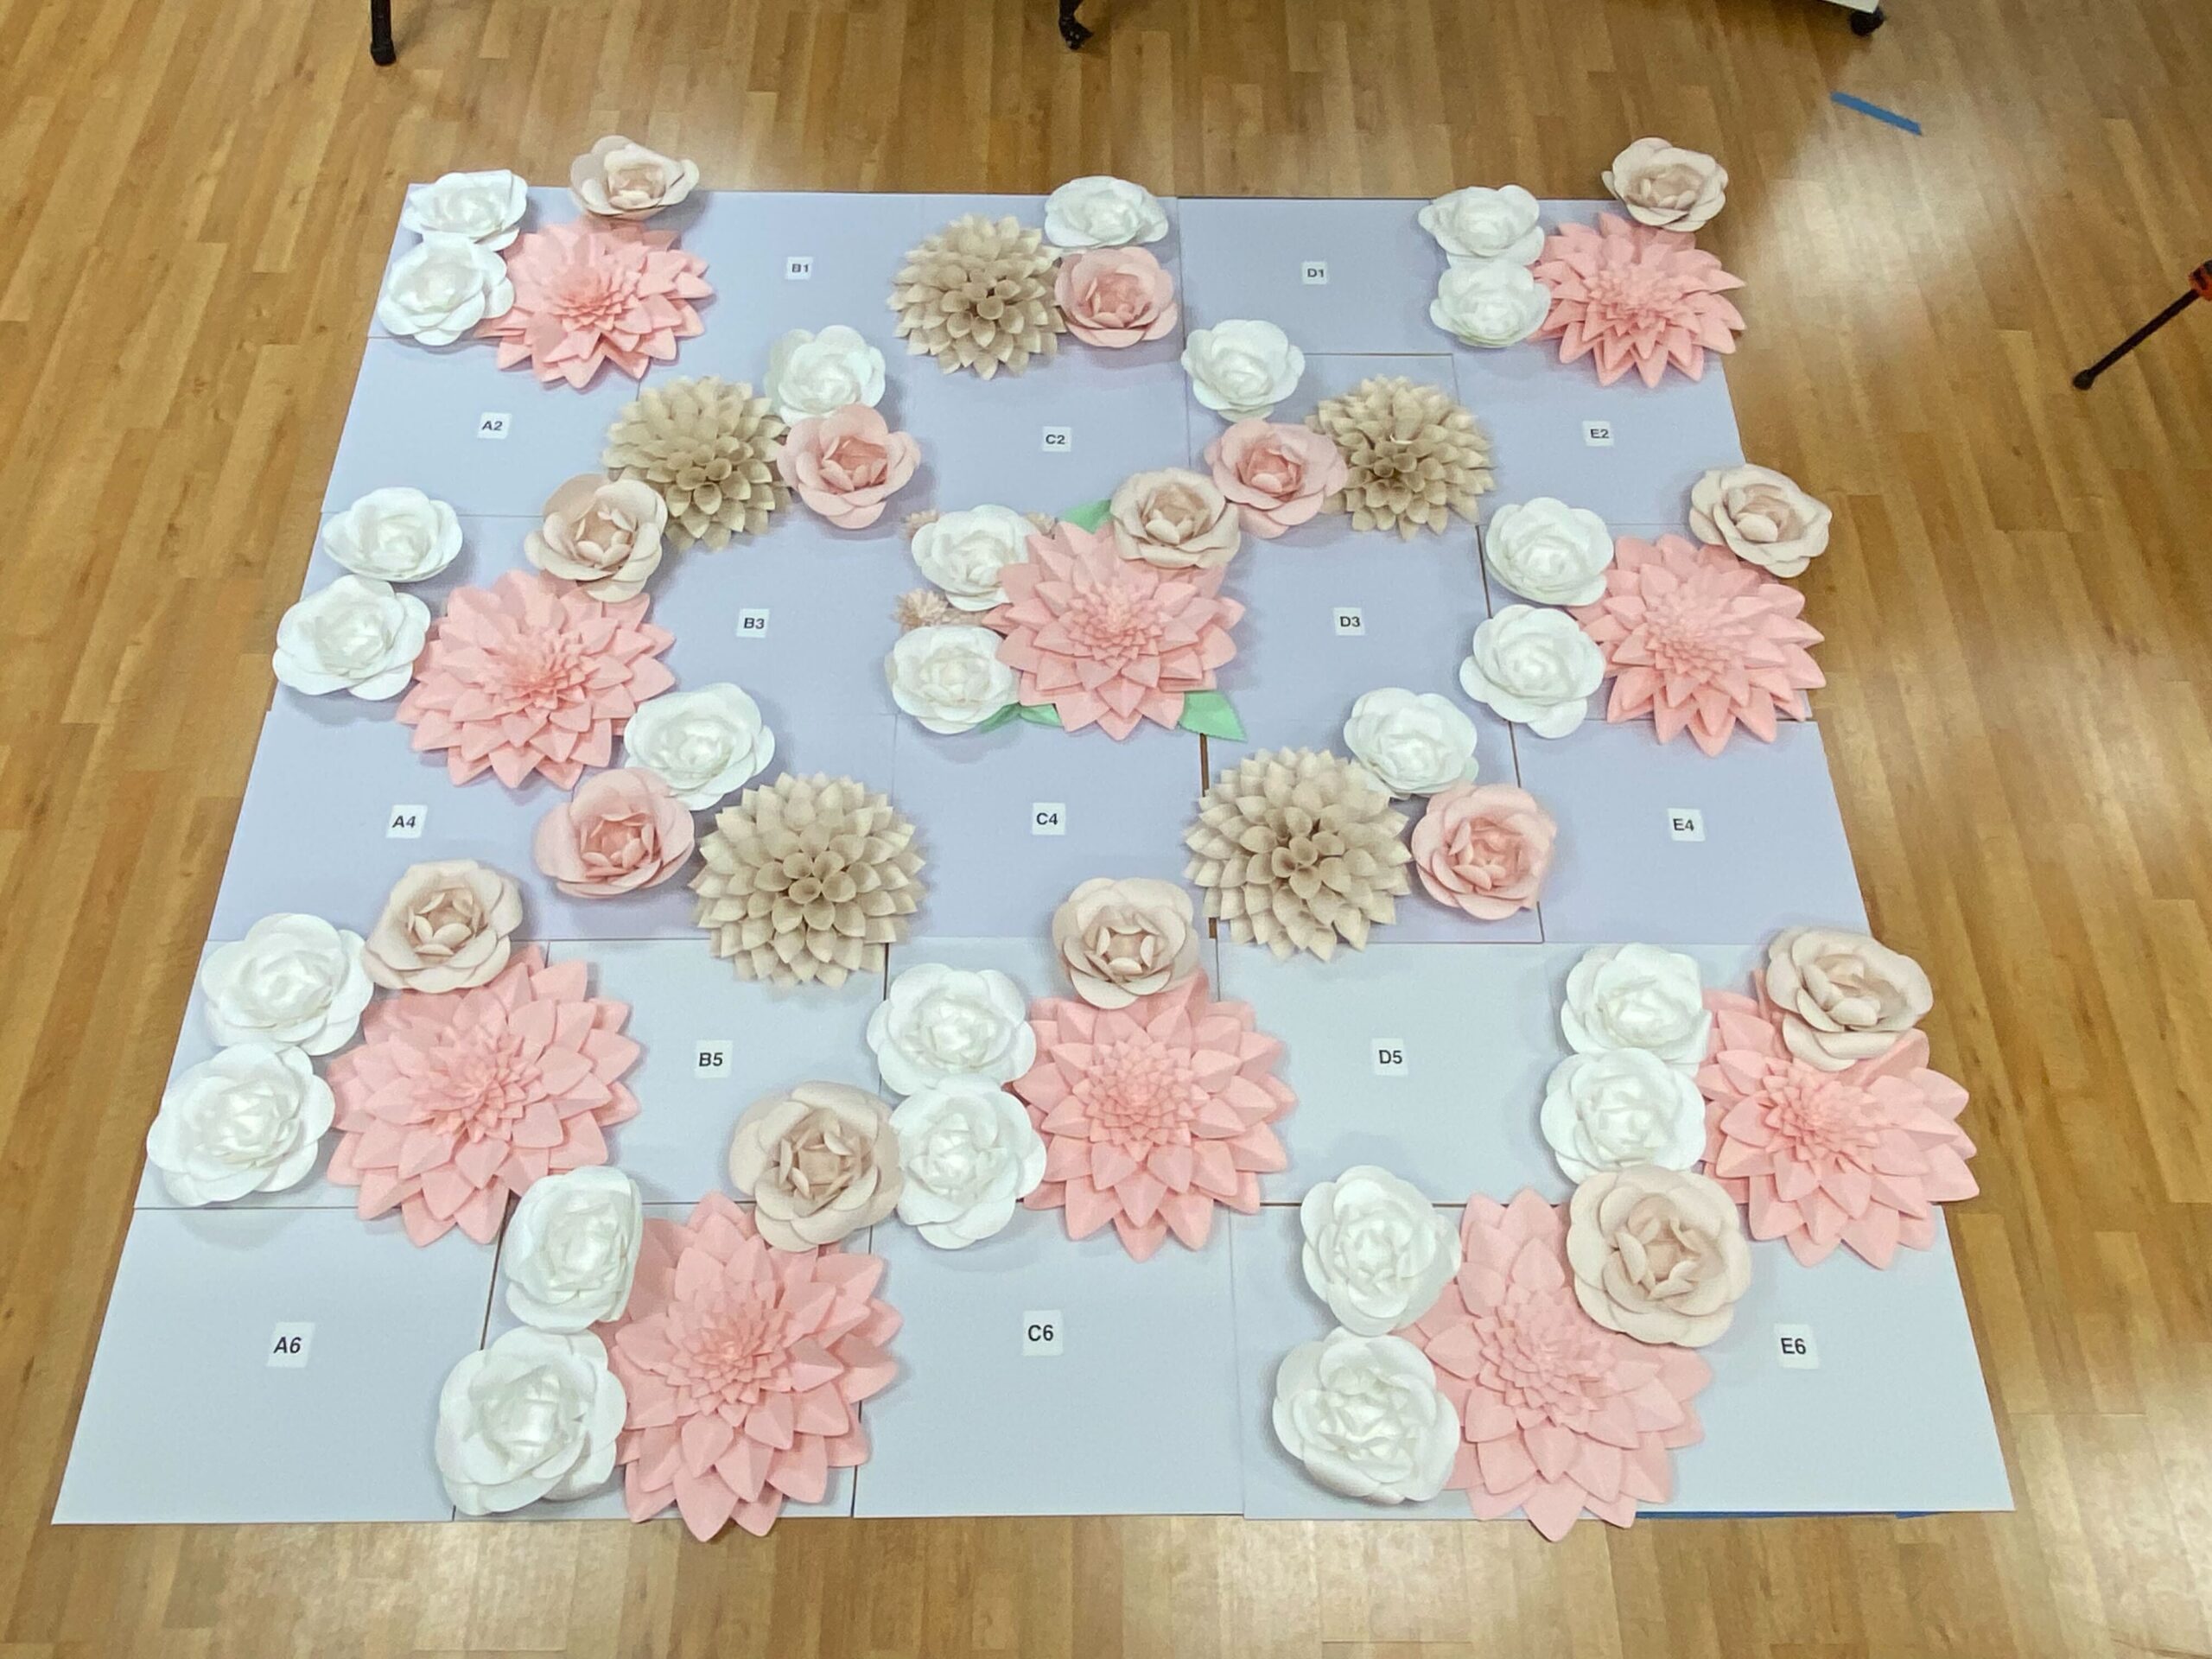
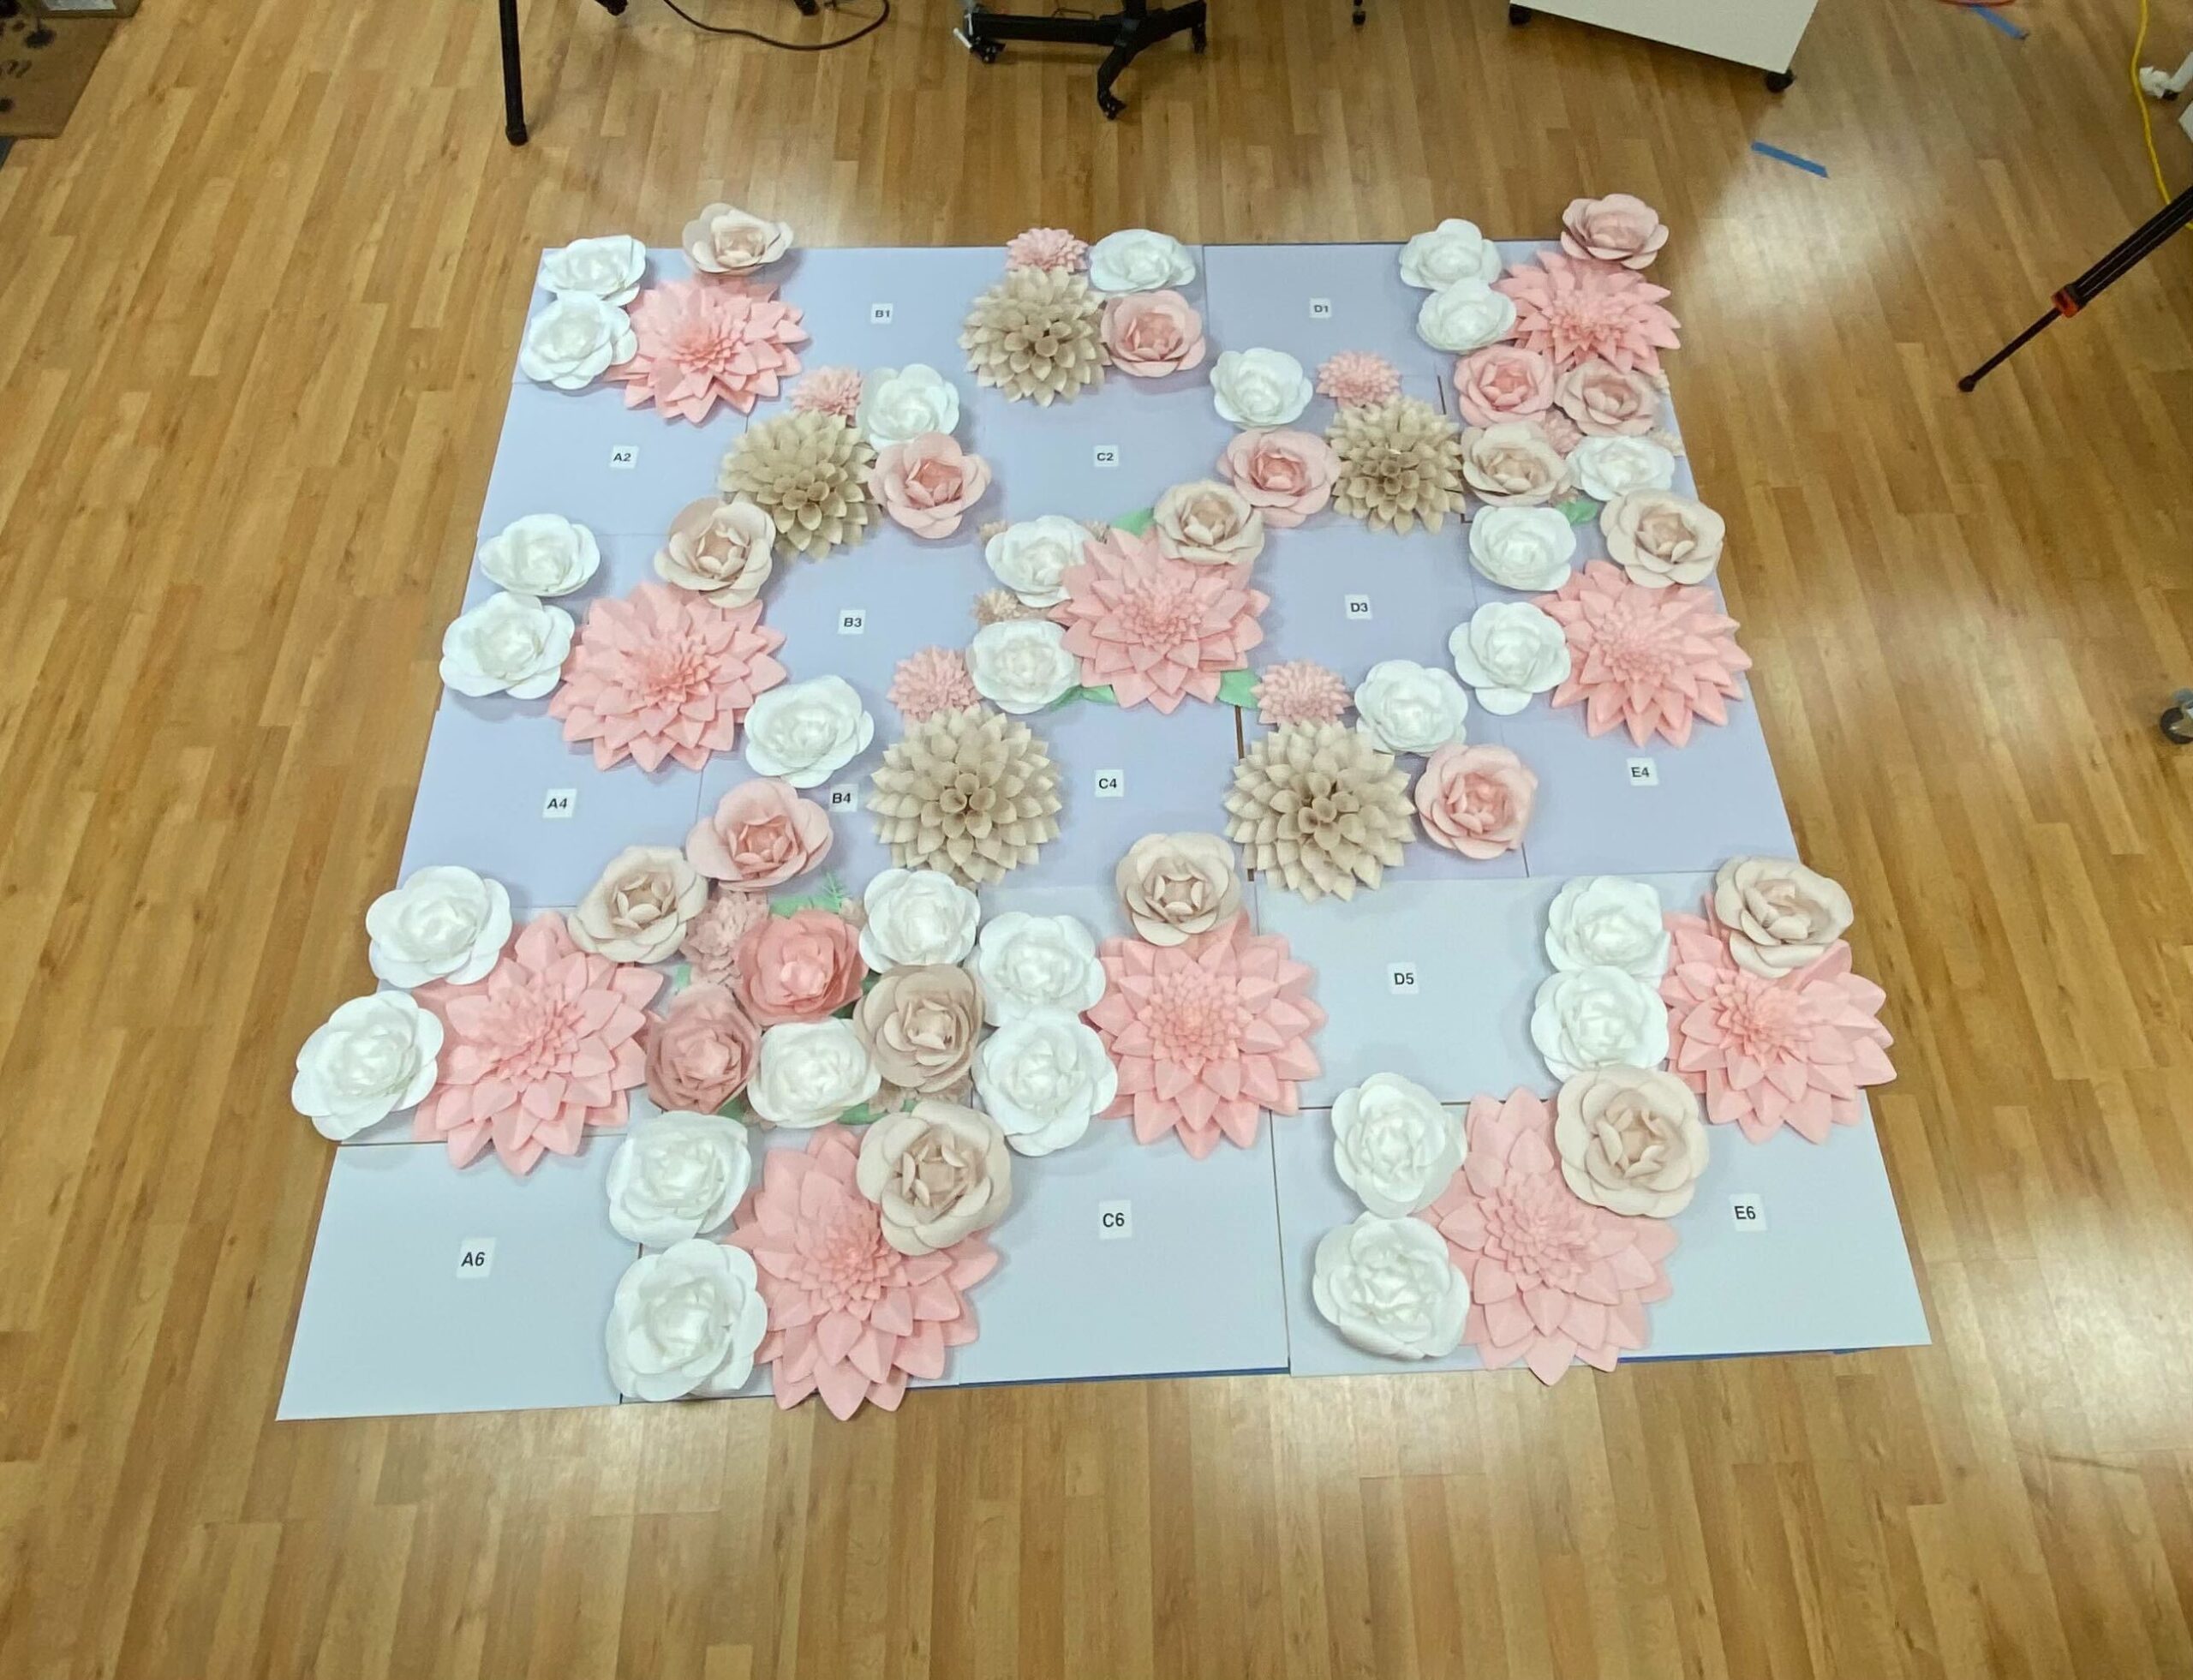
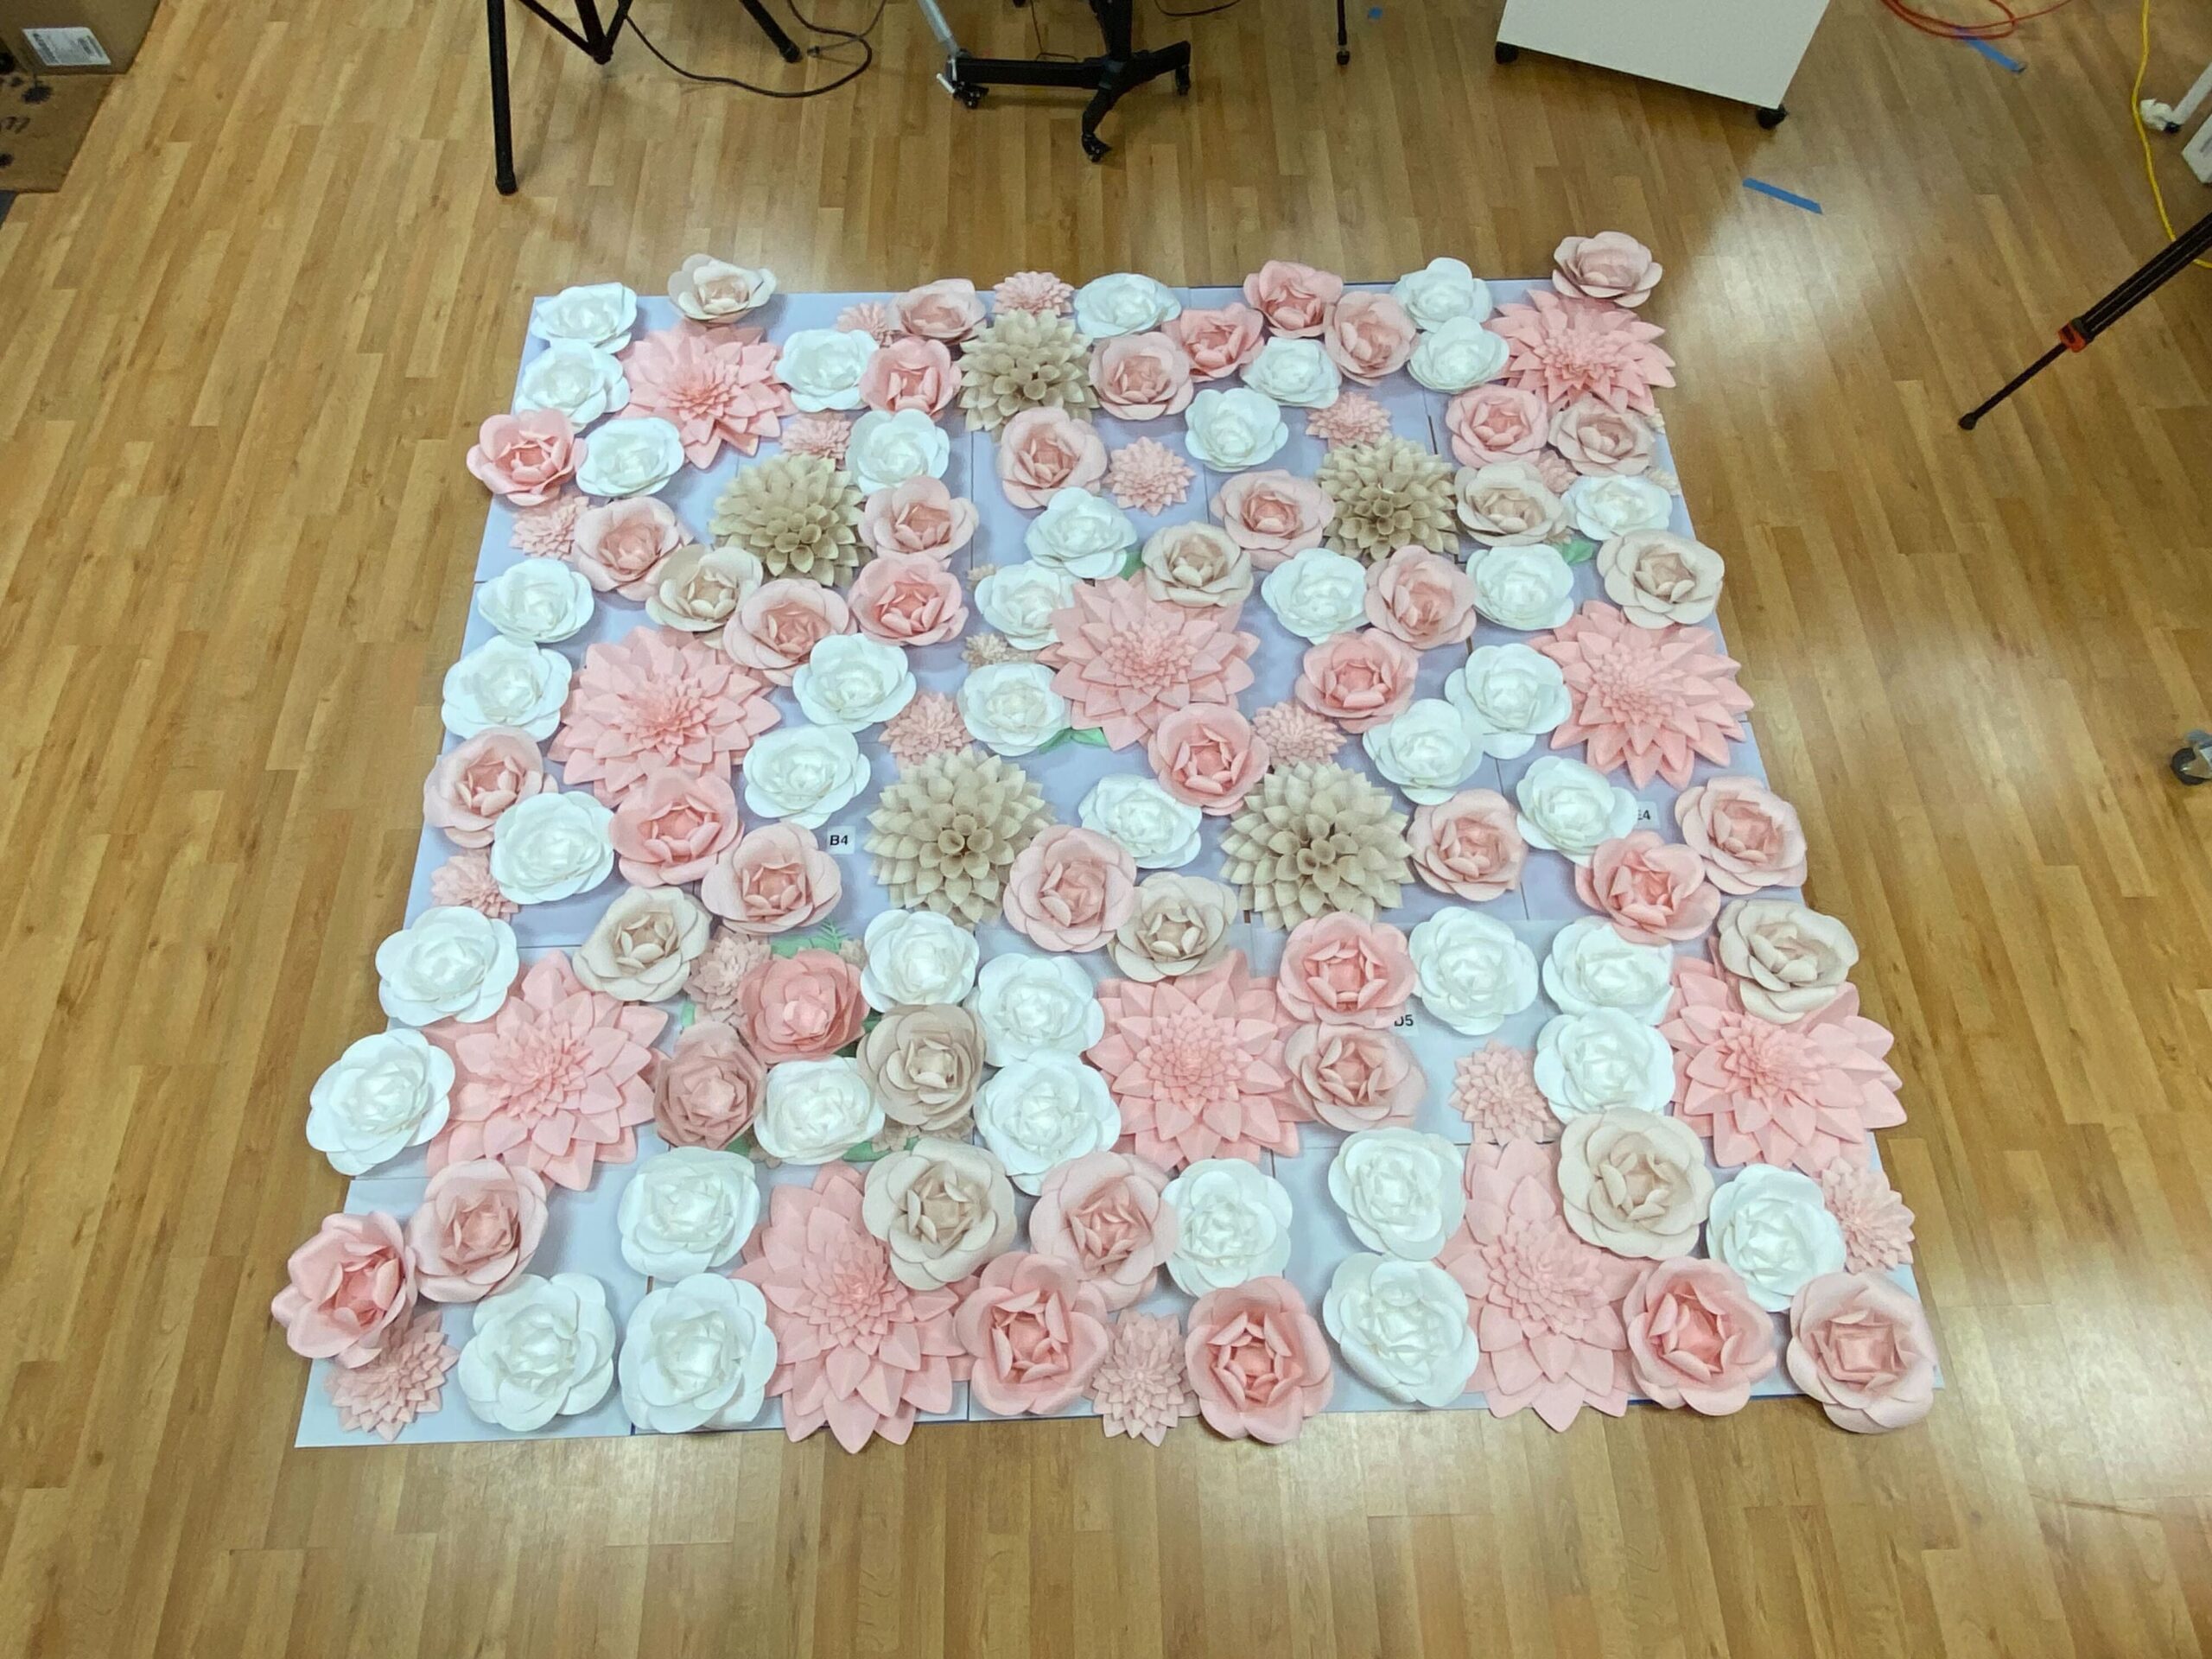
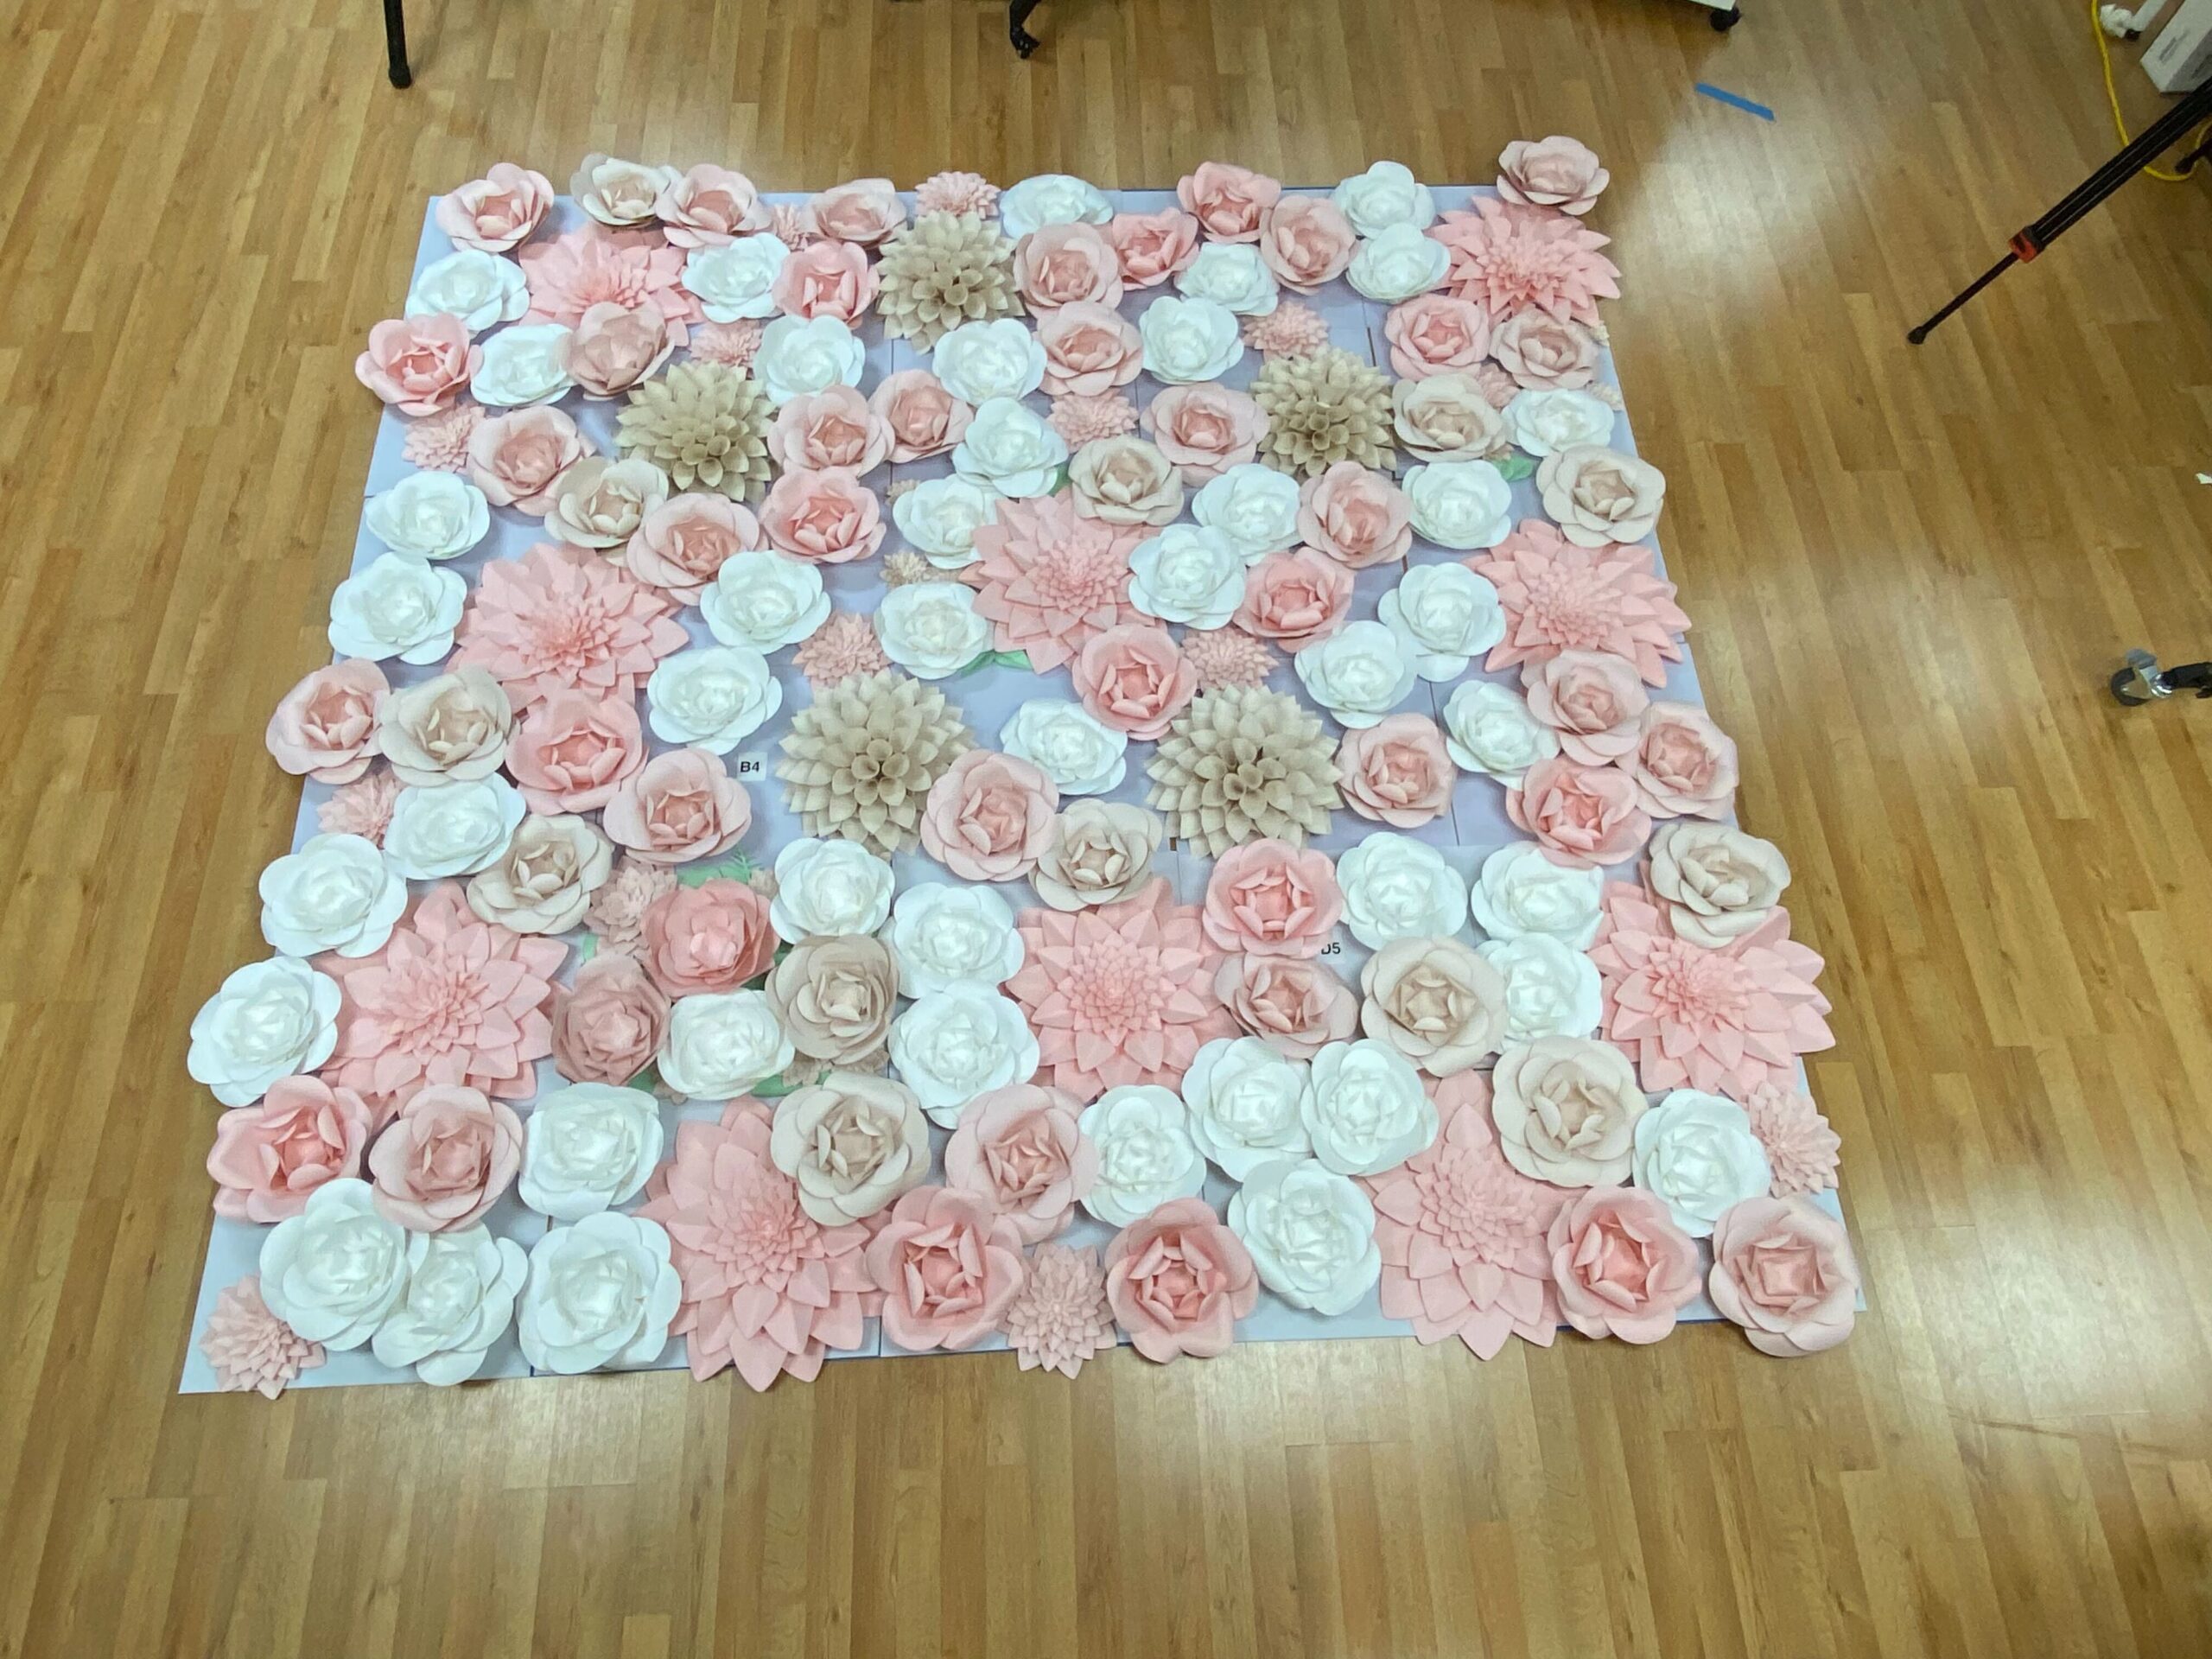
I needed a system to keep everything straight, so I thought of the wall like a spreadsheet. Five columns and six rows of 16" x 20" panels will cover eight square feet. So, A1 will be the top left panel and E6 will be bottom right. I made a simple label for each panel.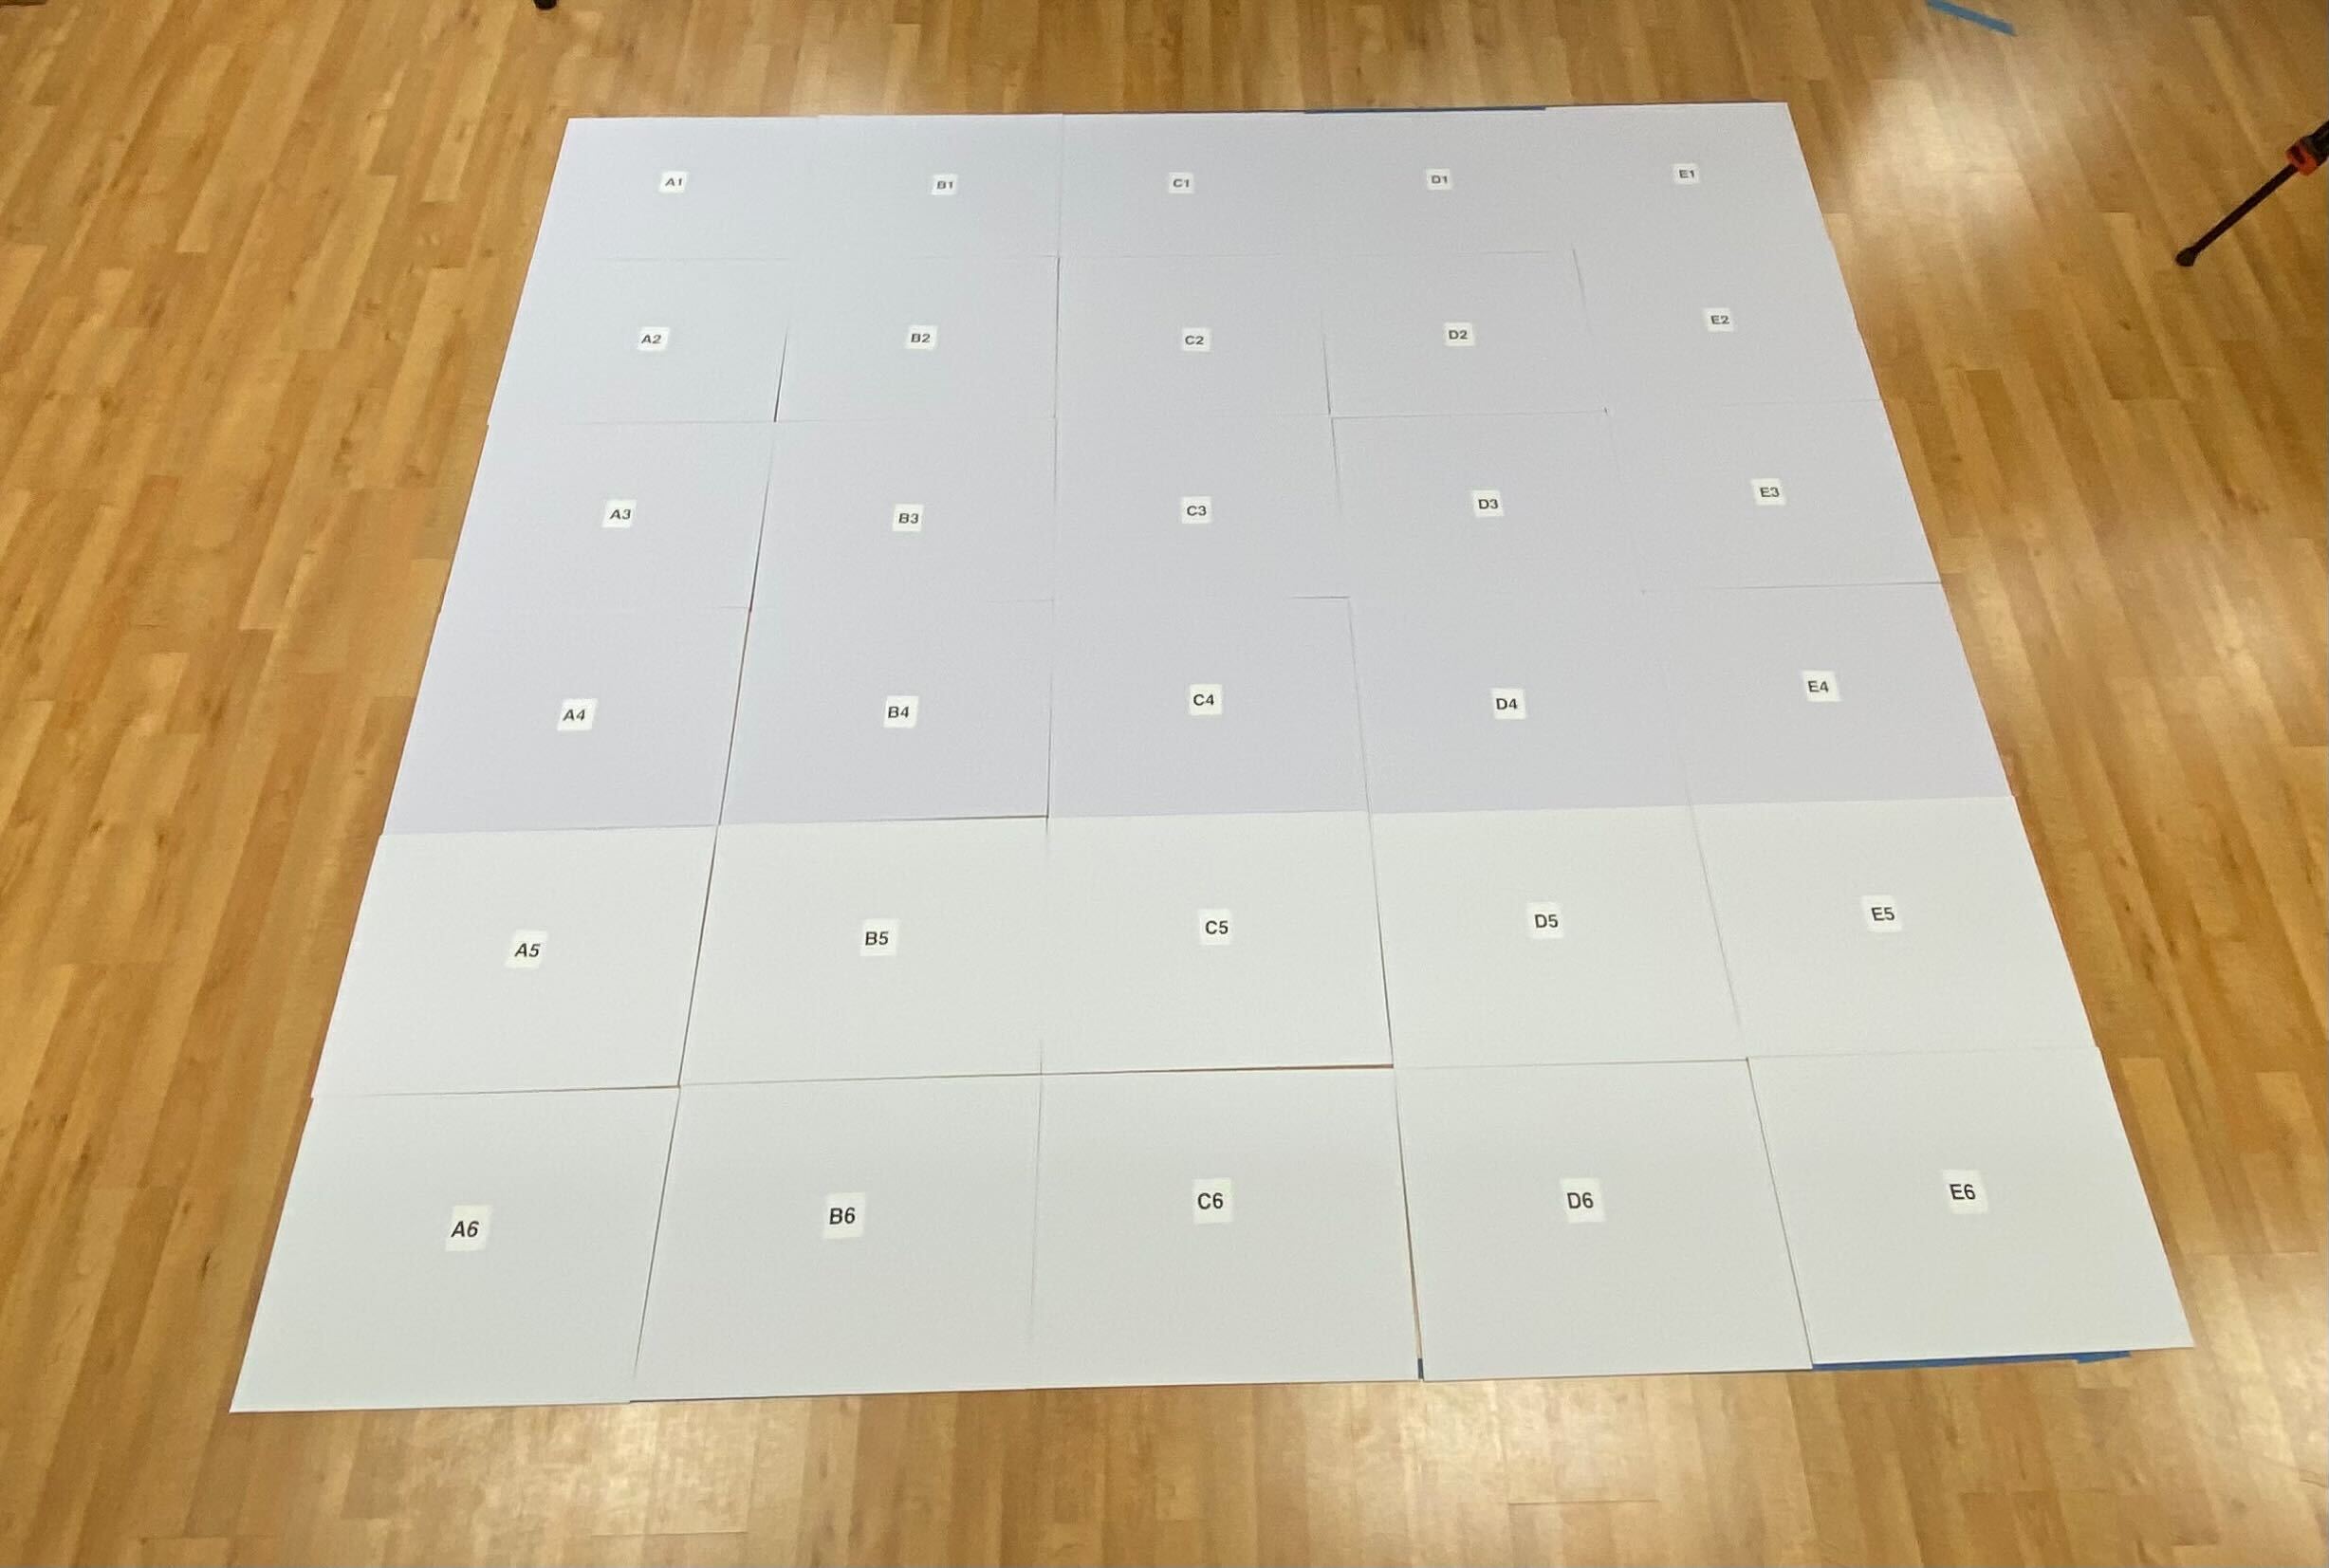
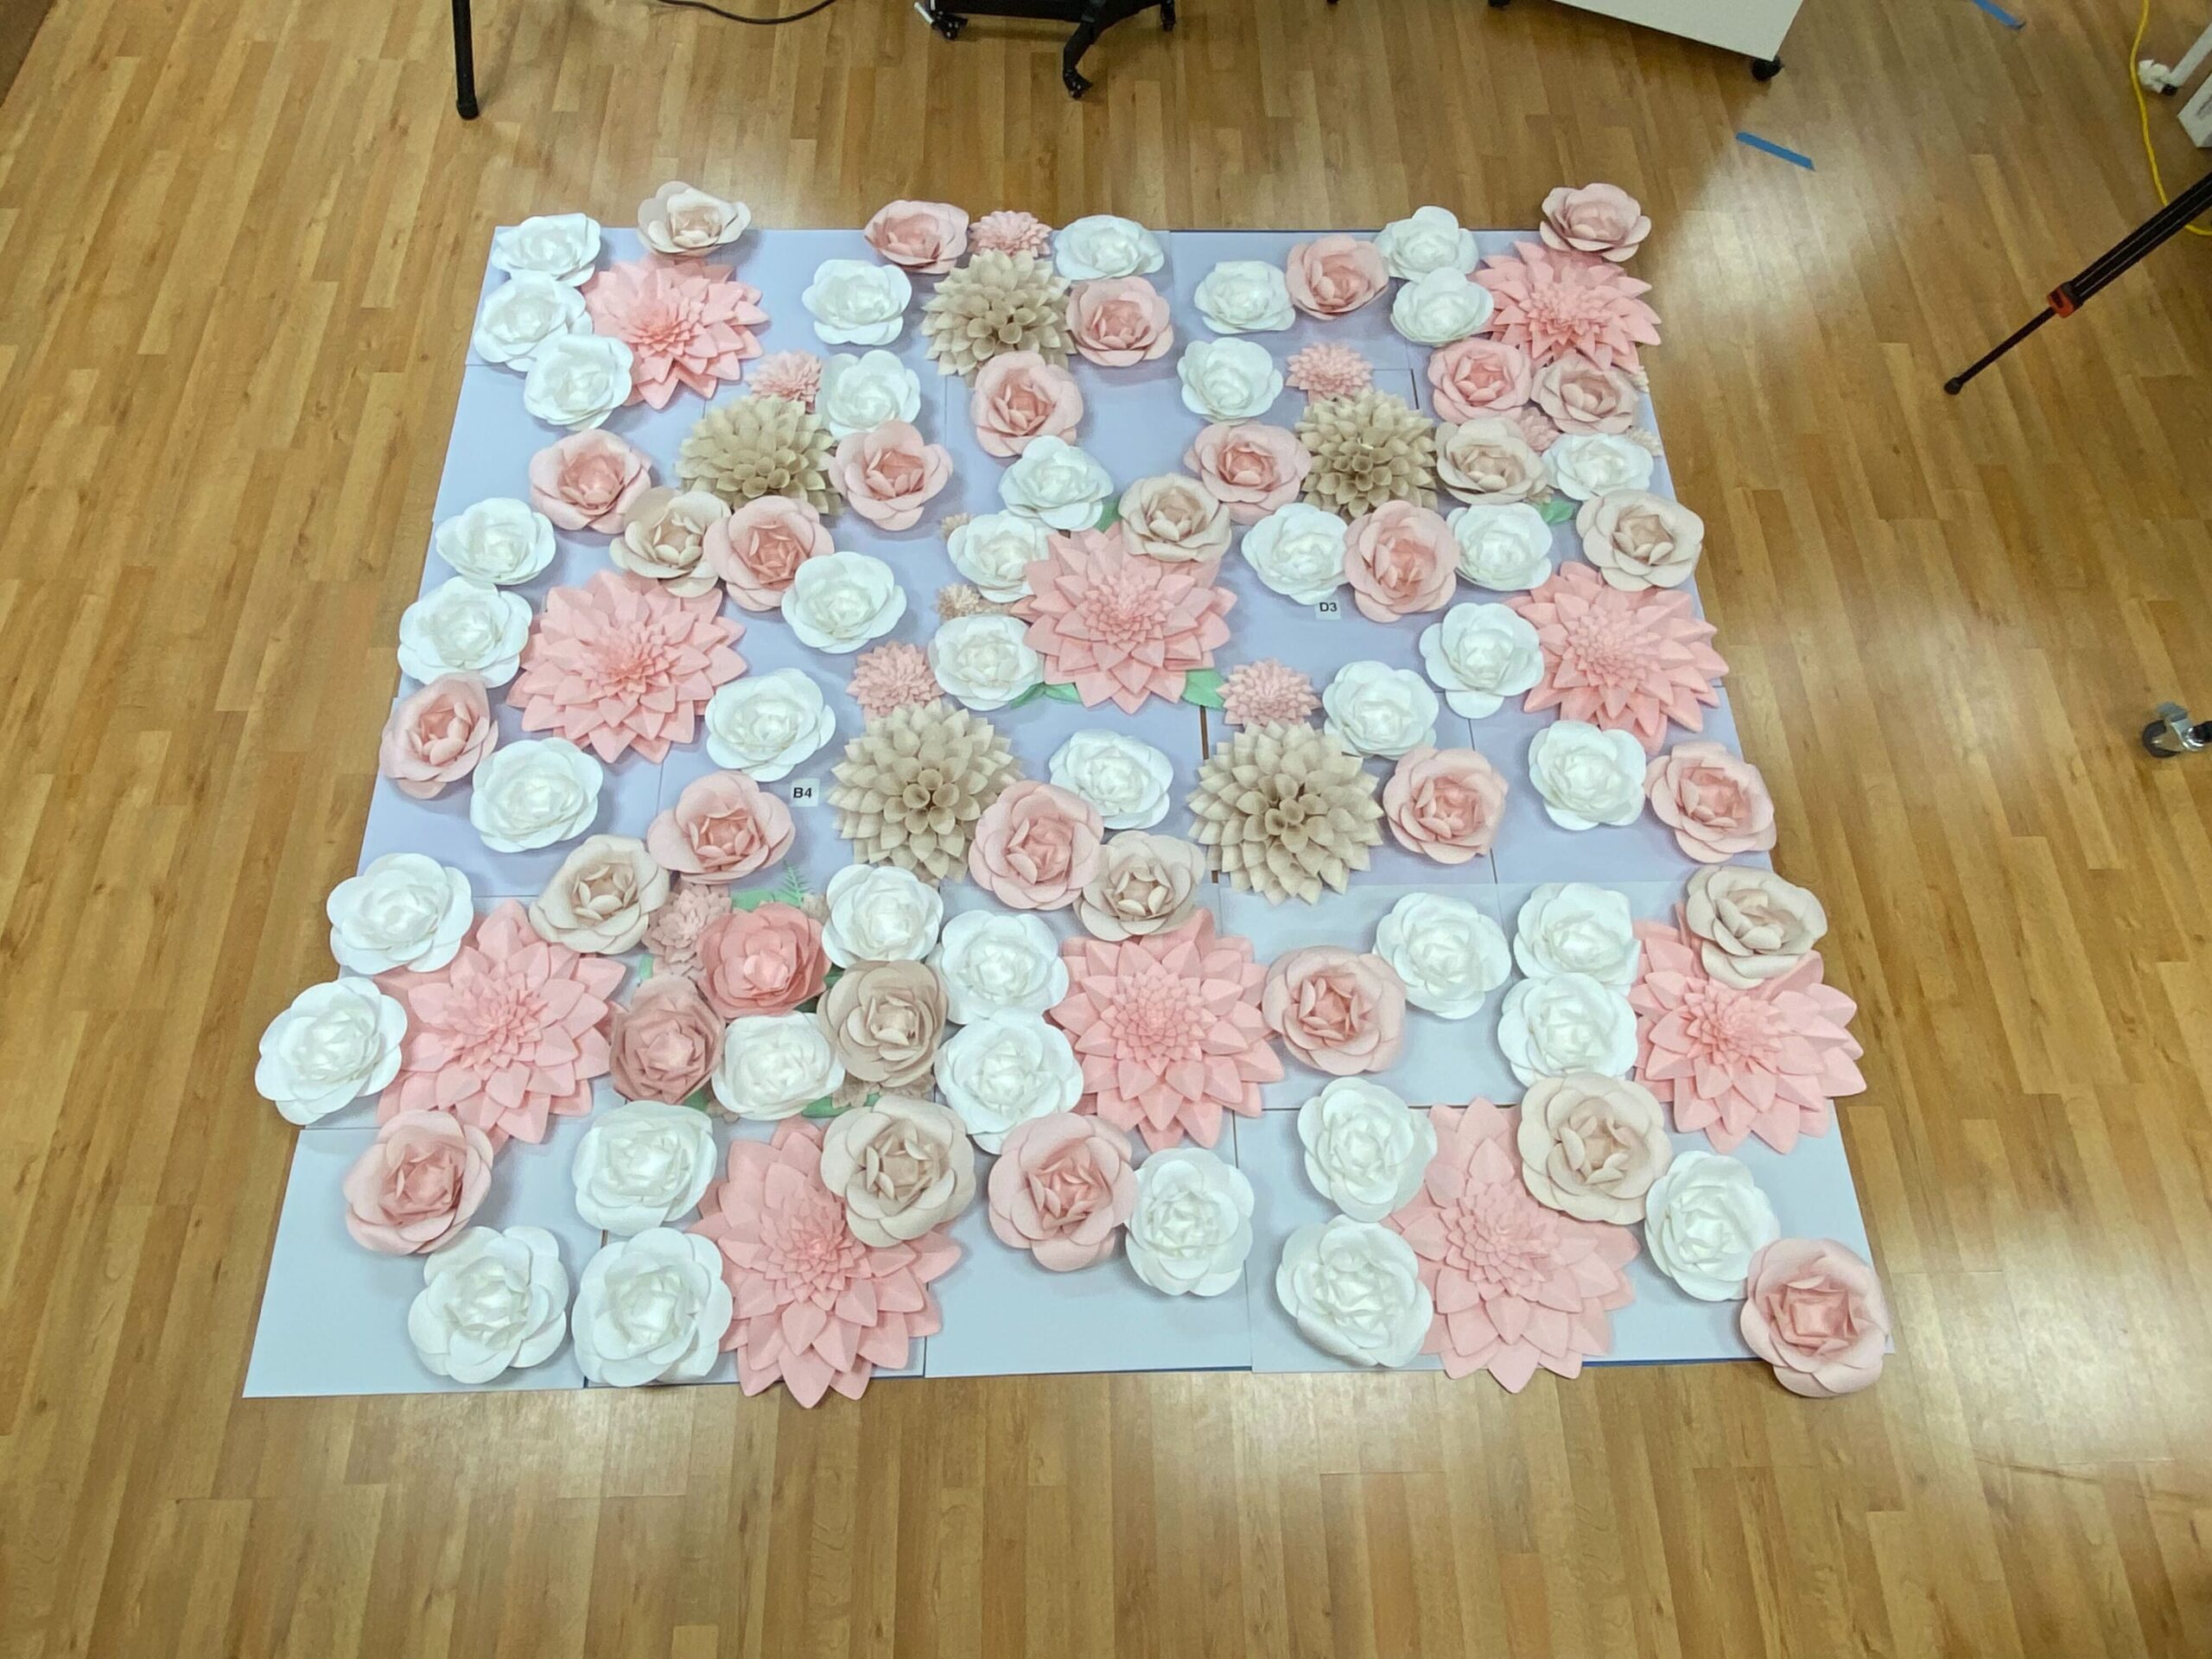
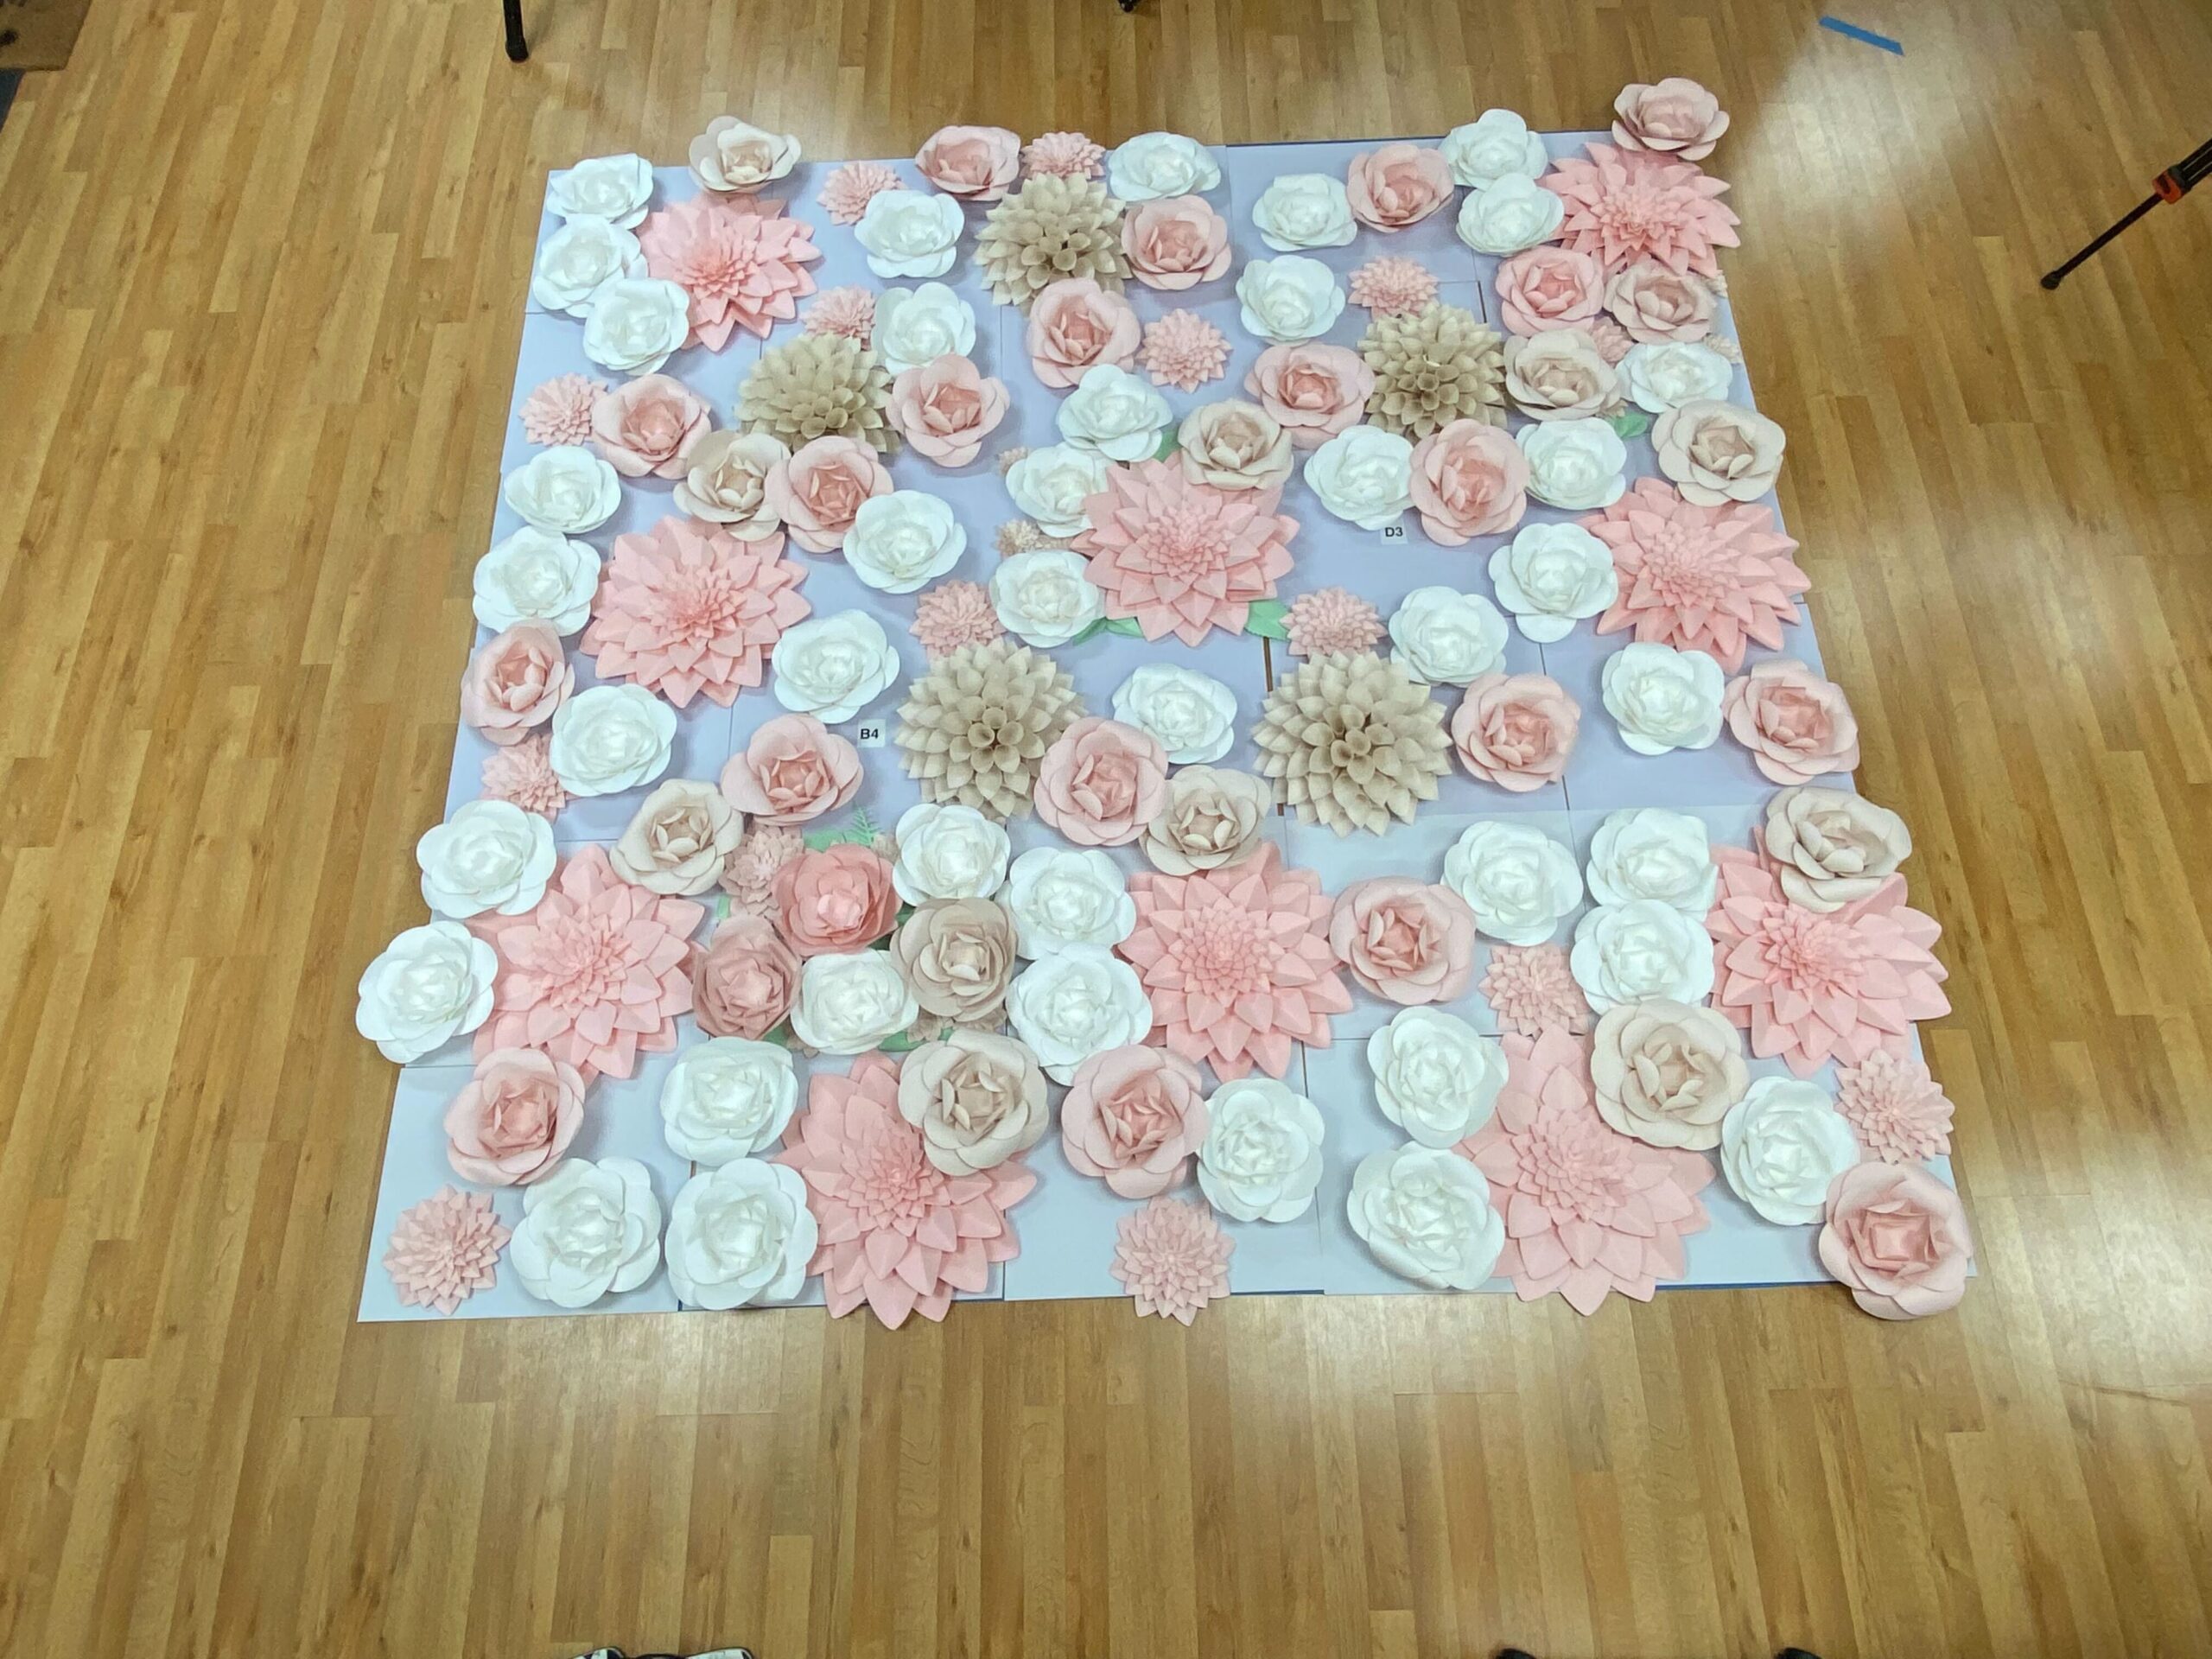
Then, lay the flowers on the panels roughly following your notes. I started with the biggest flowers and then continued down in size. It’s ok if some seams and edges show right now, just hold back some small flowers and greenery to fill them in after the wall is up.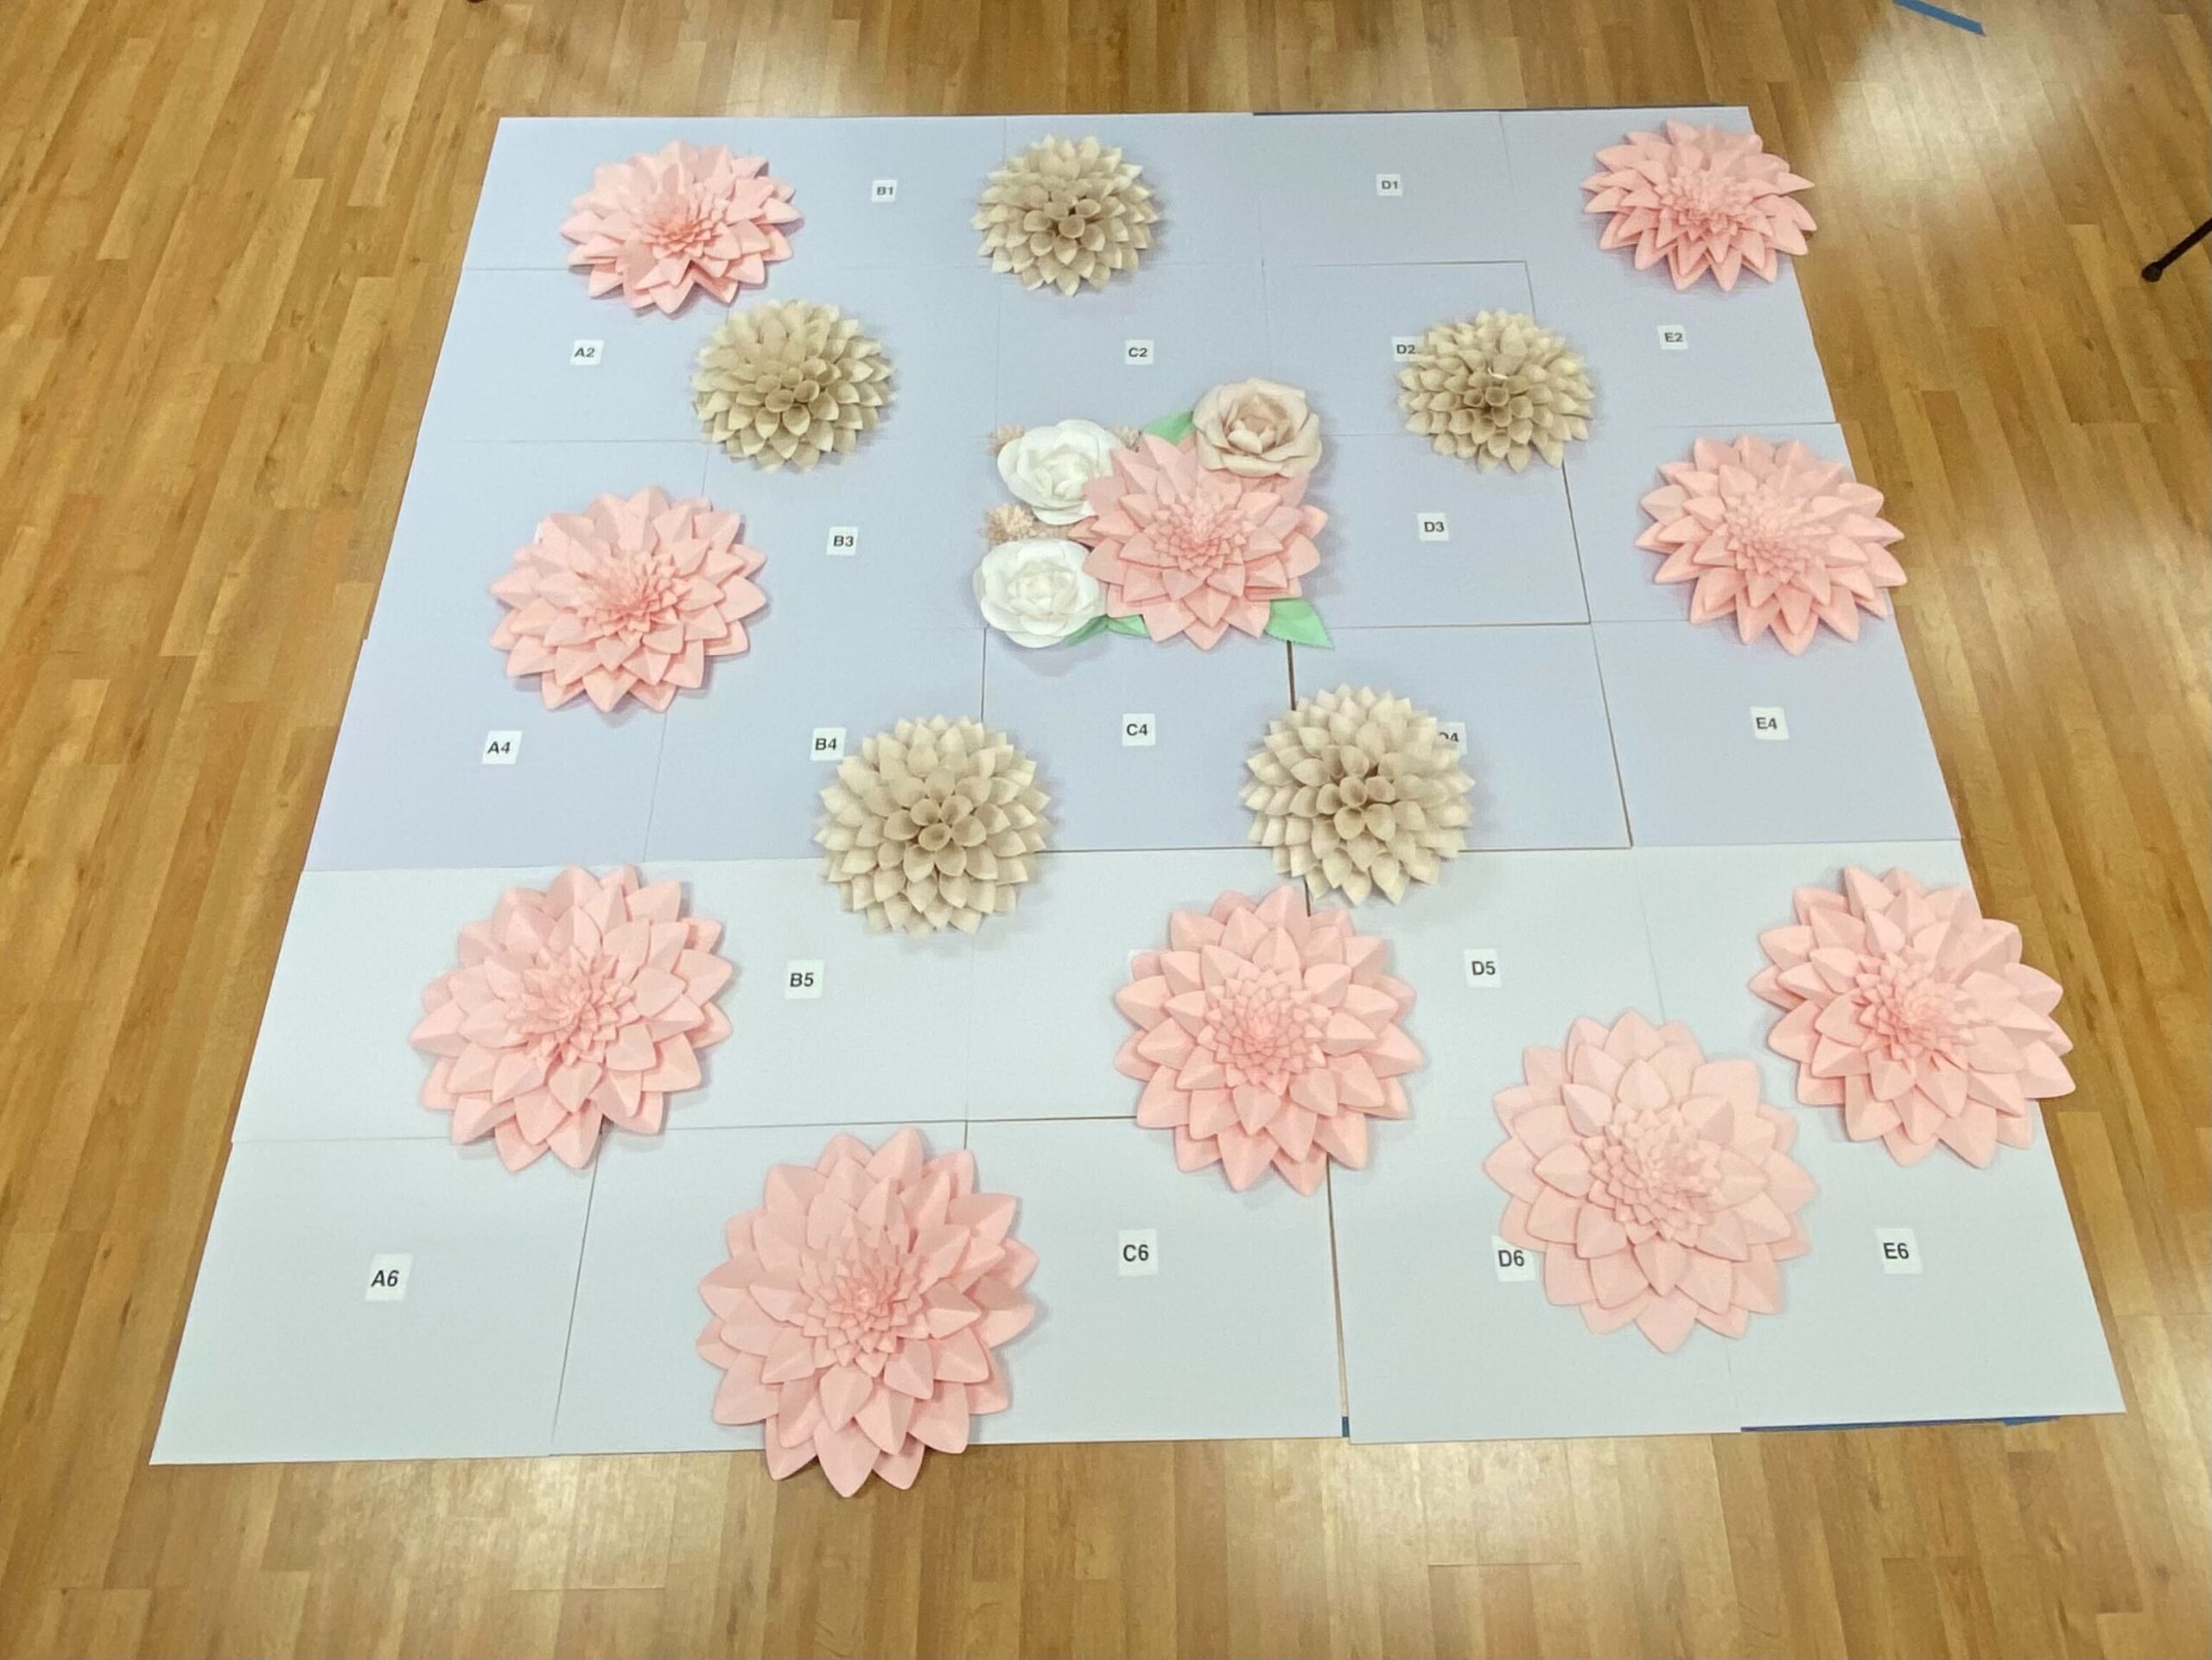

STEP 8: PLAN YOUR WALL FRAME
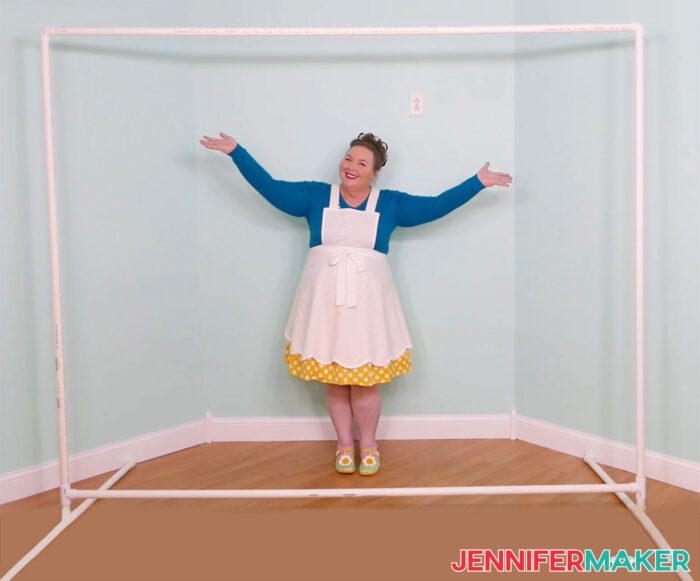
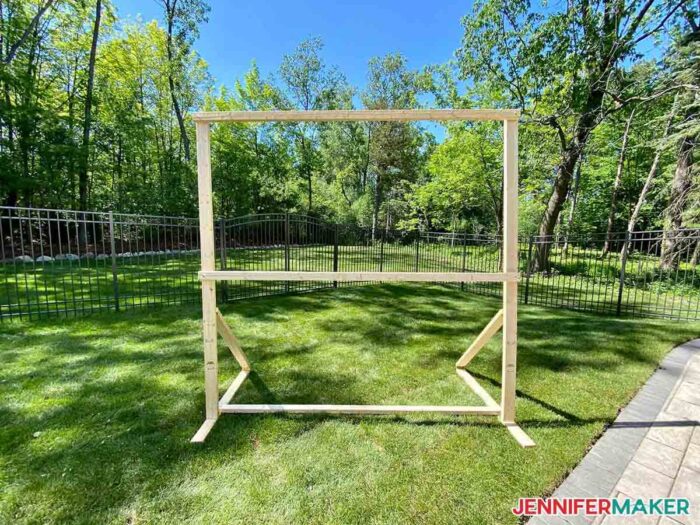
To have your wall be freestanding and stable, you need to create a frame. There are two good ways to make a backdrop frame -- you can build one from PVC pipes or you can build one from wood. The PVC pipe one is okay, but nowhere near as heavy duty as the wood one. If you only need a backdrop frame for a few uses, PVC is fine. But if you plan to re-use this backdrop frame over and over, or maybe let others use it or even rent it out, you'll probably want the more stable wood version.
You can learn exactly how to make either the PVC backdrop frame or the wood backdrop frame in the full tutorial. It's a bit too much to cover all in one project!STEP 9: HANG YOUR PAPER FLOWER BACKDROP
I'm going to put our panels up one by one, starting with the top row. For this, we need some over the door hooks or hangers, pliers, a roll of clear packing tape, about a dozen landscape stakes -- mine are bamboo -- and a stepstool.
To begin, add hooks to the top of your tow row of panels. If you're using a hanger, just break or snap off the arms with pliers. If you're using hooks, straighten the end that doesn't go over the door -- it doesn't have to be perfectly straight, just straight enough that you can tape it onto the back top end of one of your top row panels, like this. I prefer hangers, so I'm putting two hangers on either end of the upper edge of each top panel so that only the hook part extends beyond the end of the panel.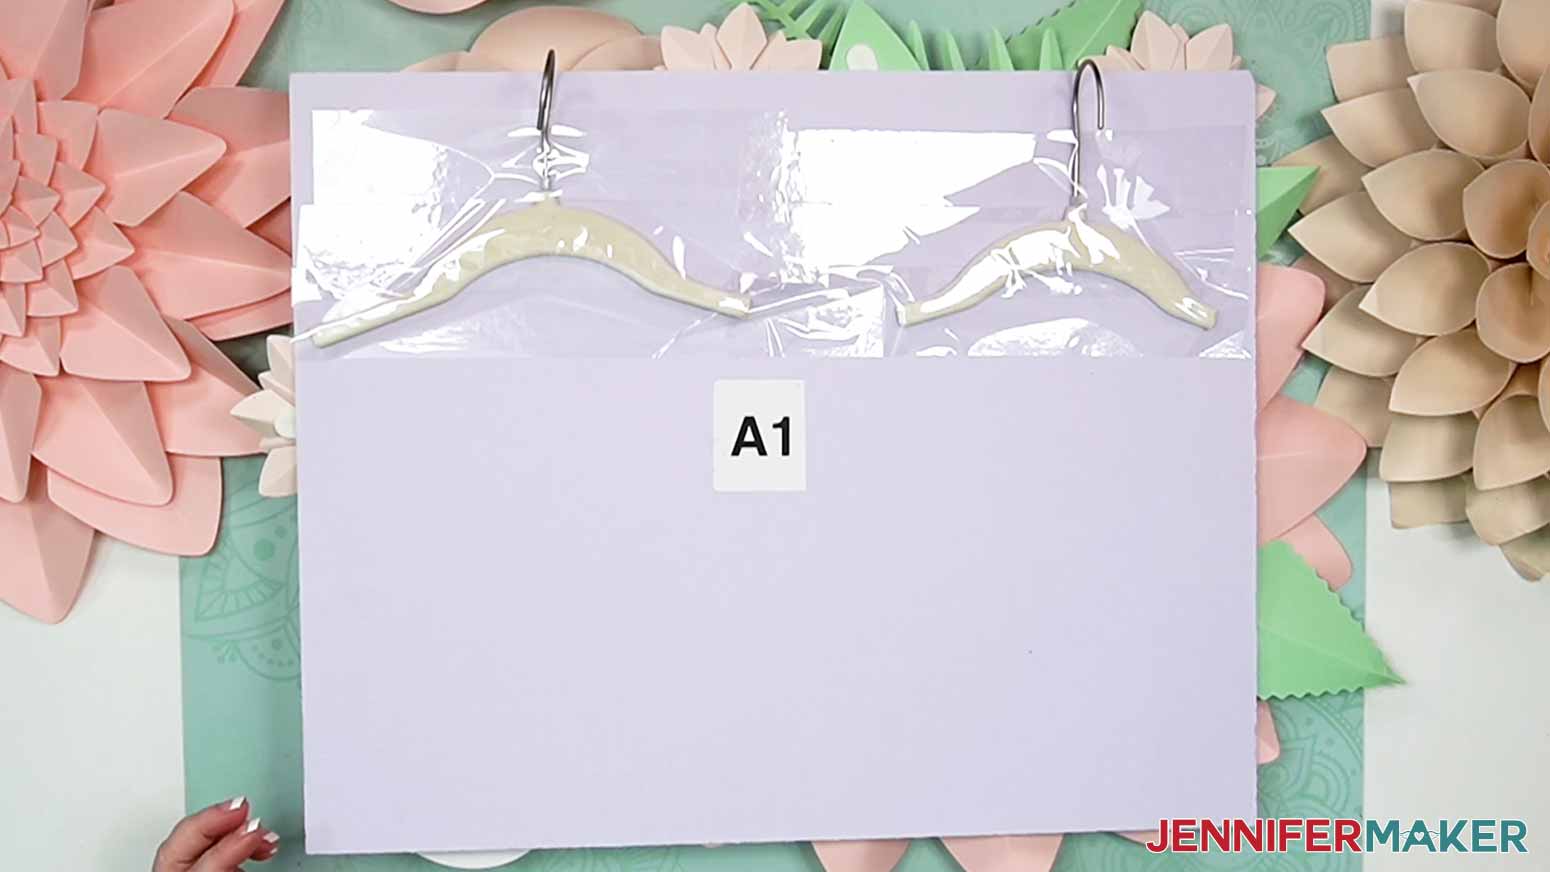
Now my backdrop frame is turned around so we're looking at it from the back -- I recommend you set your frame up where it's going to stay, and then walk around and work from the back to hang all of your panels.
Hang the top row of panels in order from A1 to A5 across the top of the frame. Since I want A1 to be in the top left when people look at the wall from the front, it will be in the top right when viewed from the back.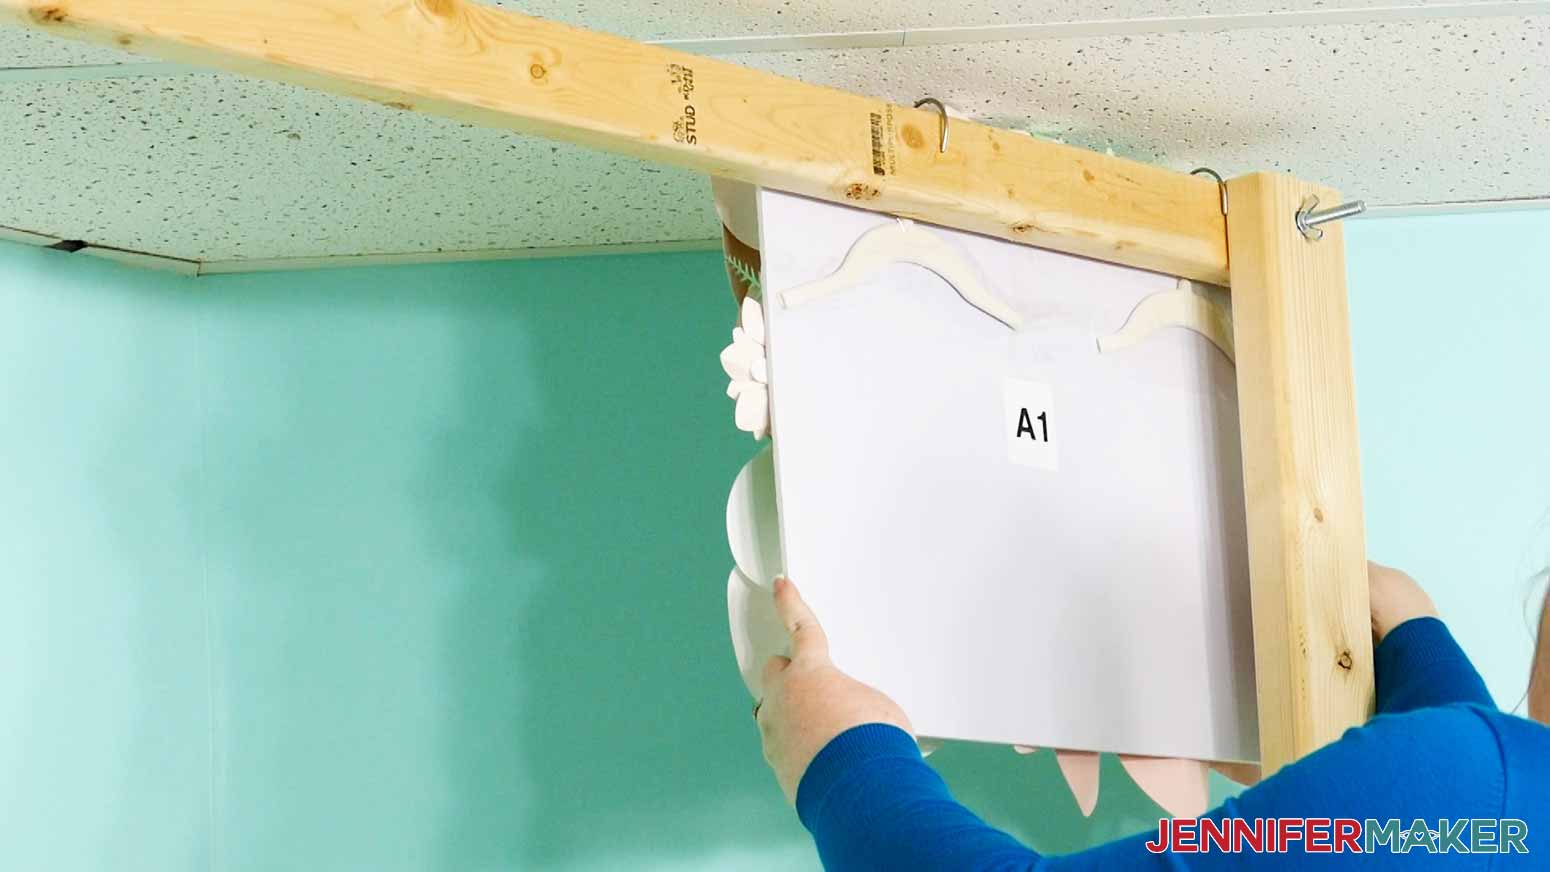
Then we tape each panel together with clear packing tape. I recommend you use clear tape, rather than something like duct tape, because it'll be easier to cut apart later when you take this down. Now be aware that some of your flowers are overlapping the panels in the front, so be sure you shift the panels together properly before taping them as close together as you can.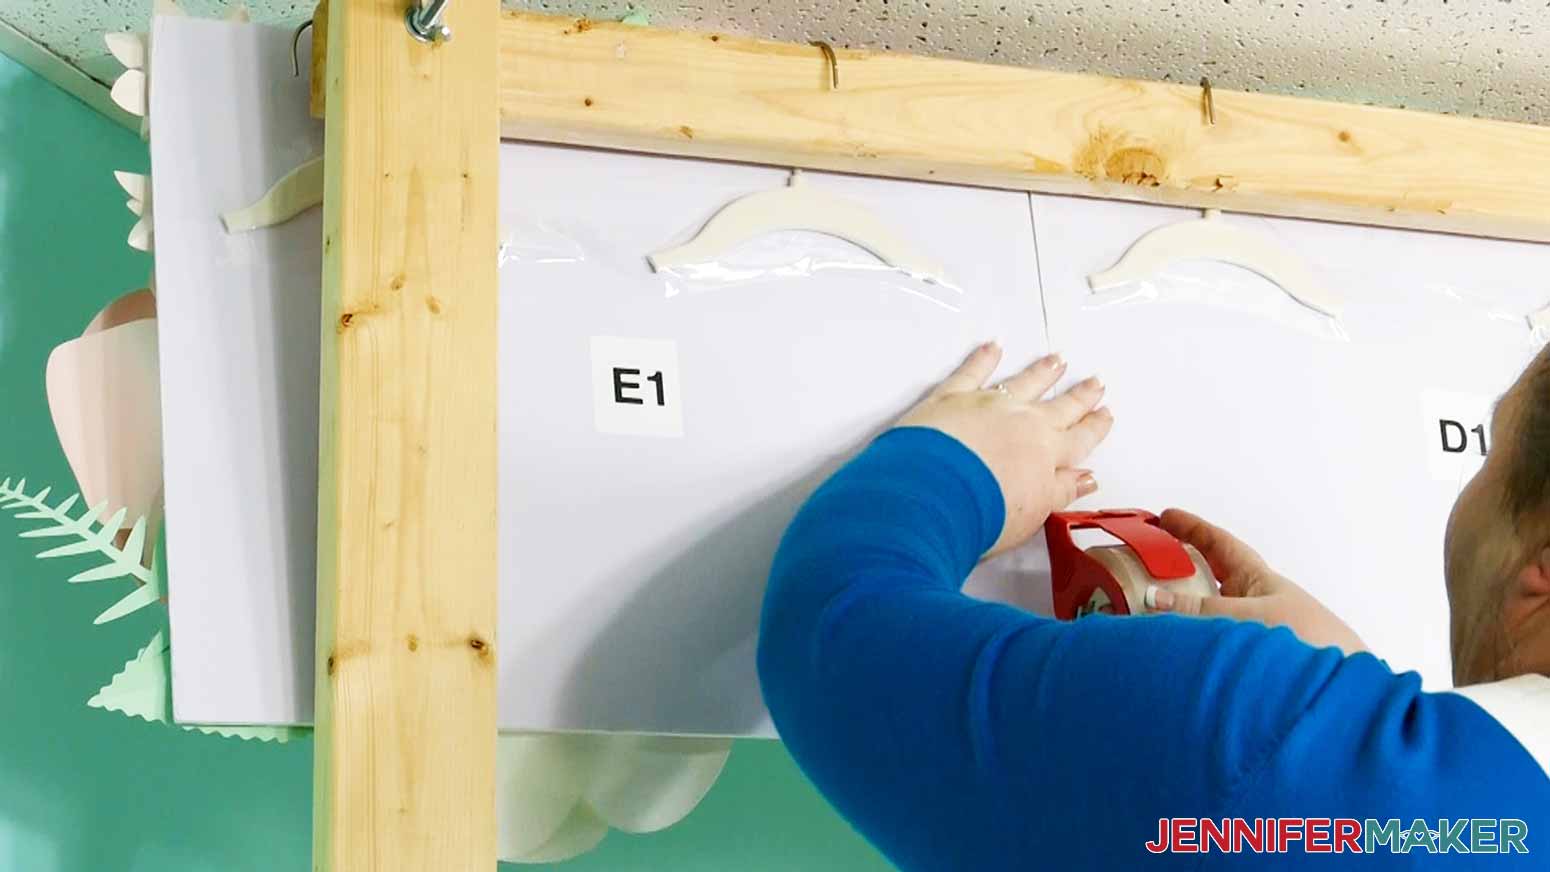
Once you have the top row done, start on the next row, taping each panel to the one above and the one beside it.
Continue taping until all panels are together.
Now tape alone is stable, but not very rigid. If you are setting this up outside or anywhere there's a breeze, your flower wall may move on you. You don't want that. So to keep it rigid and stable, I'm simply taping landscape stakes to the back along each row and column using the same clear packing tape. It's strong, inexpensive, and easy to remove later on.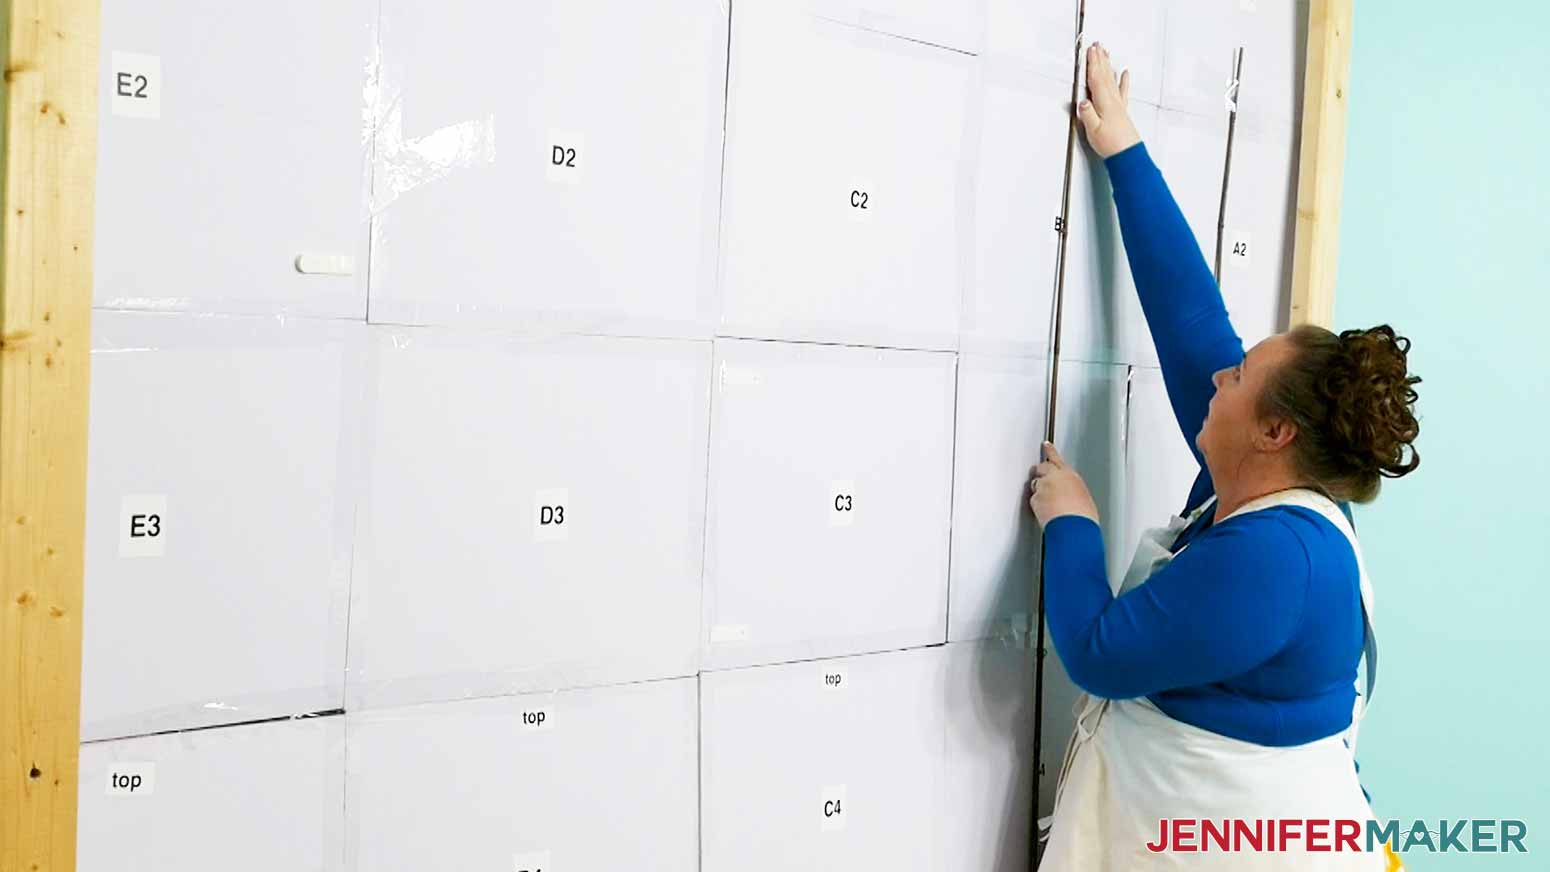
STEP 10: ENJOY YOUR FLOWER BACKDROP
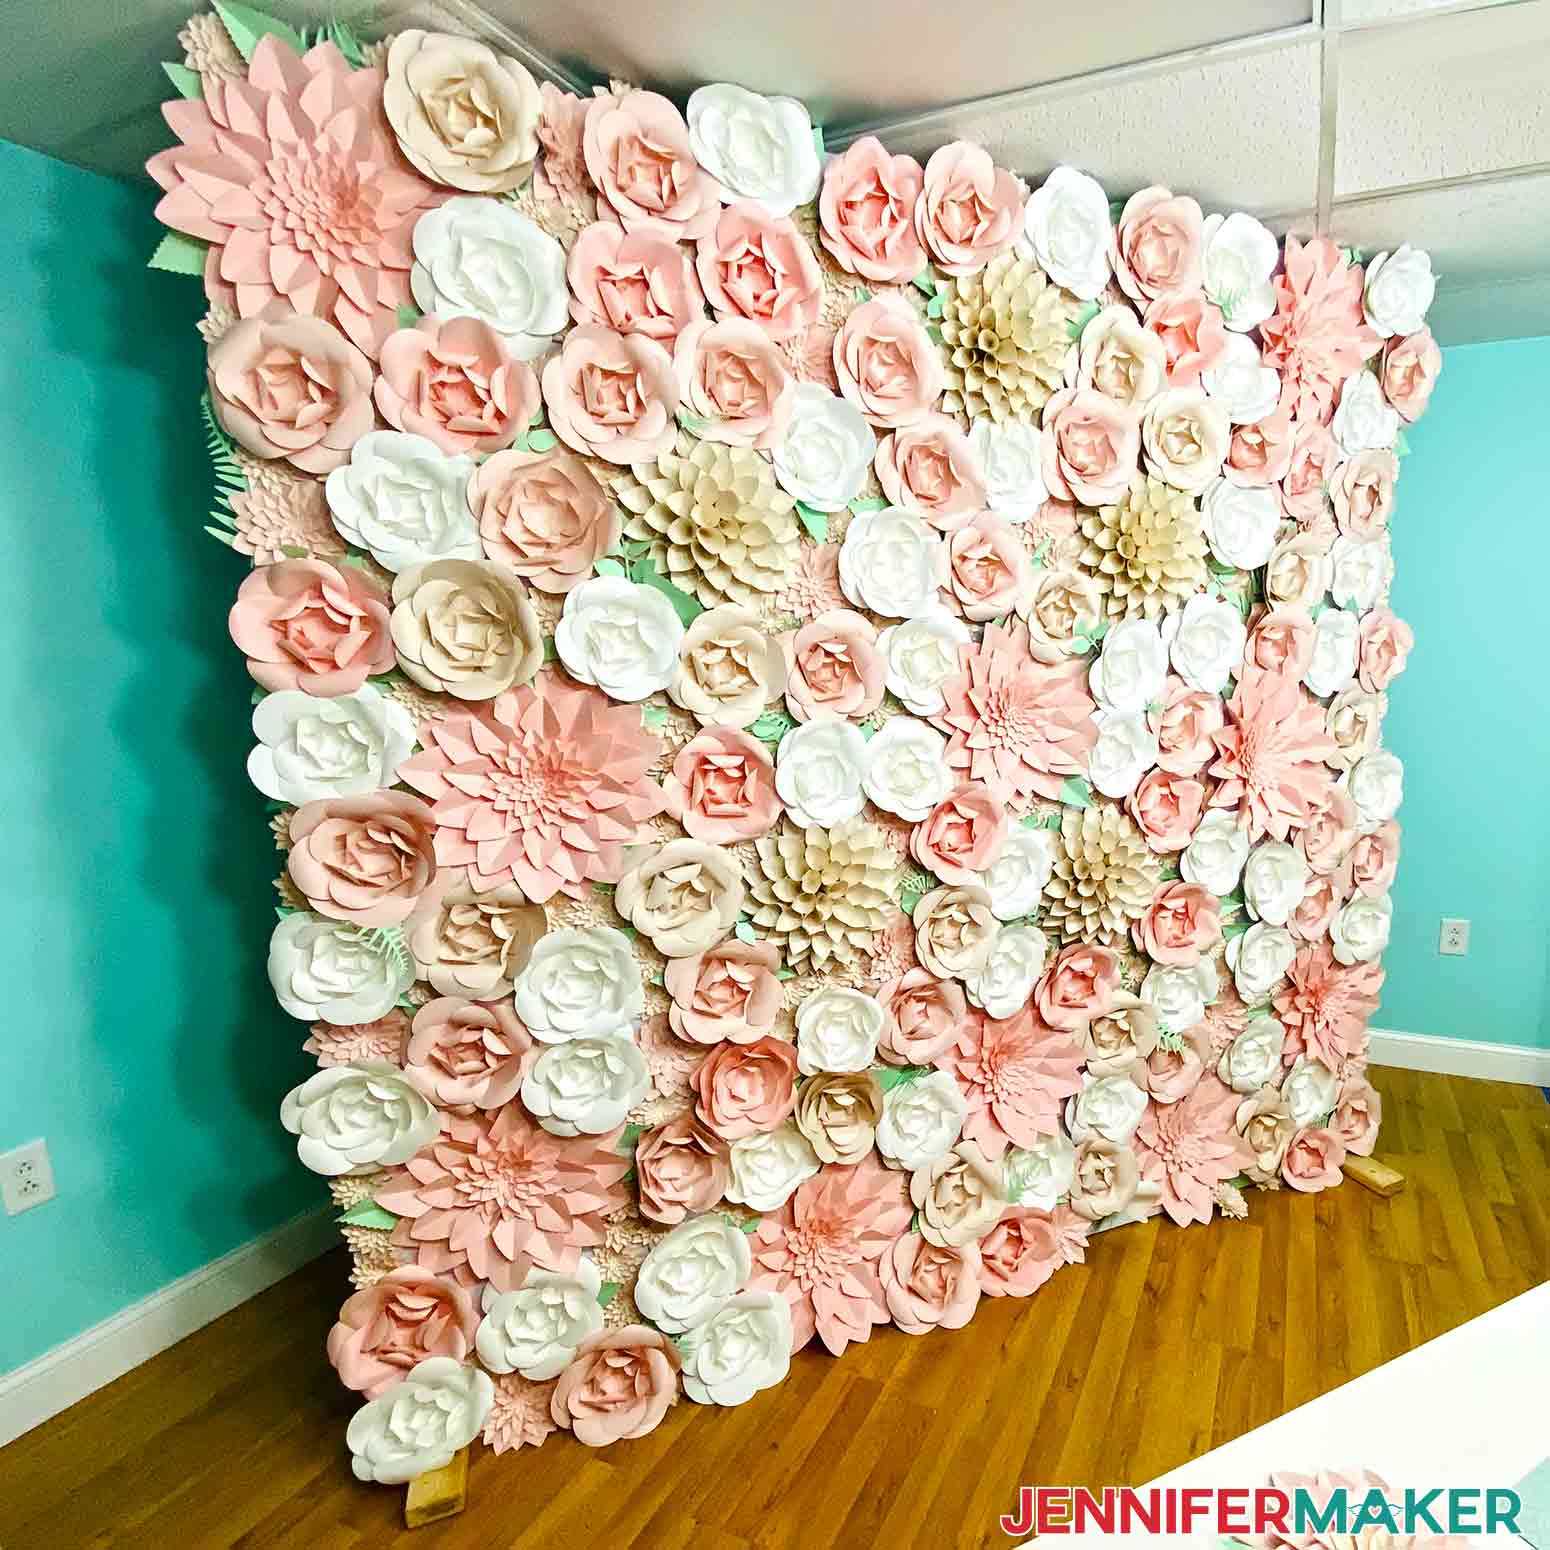
So in the end, our paper flower backdrop took about 285 paper flowers of different sizes and colors, plus a bunch of greenery. We used over 1,100 sheets of cardstock to make all of these flowers! It was a lot of work, but SO worth it. I can’t wait to use this wall as a background for photos! You can expect to see this flower wall show up in future projects, too!Notes
Questions About My Paper Flower Backdrop
How long does it take to make a full paper flower wall backdrop?
We worked together as a team to make the paper flowers, so we estimate it took us 80 hours total. If you want to make a full wall like this, I recommend you enlist the help of family and friends to make flowers in your preferred colors. To speed things up, make only the Easy Giant Paper Flower — the Cone Dahlias took the most time. Another time-saving tip is to use multiple mats for cutting so you can be cleaning and prepping one mat while another one is cutting. This makes the cutting part go much faster, and may also give you time to curl the petals while waiting for the next mat to finish cutting.
How do you make a flower backdrop out of paper?
Just follow my steps and I’ll show you! After some planning, you’ll need to cut and assemble the flowers, pick a way to hold them together, and then decide on your display method. It all really depends on your event and your materials.
What kind of paper do you use for paper flowers?
65-80 lb good-quality cardstock in your choice of colors works well! We used 8.5″ x 11″ paper, but you can also work with 12″ x 12″ paper.
How much does a flower backdrop cost?
I’ve seen companies renting a similar paper flowers backdrop for more than $1,000! We estimate that each panel cost us about $15, so you can make the paper flower wall to fit your budget!
How do you put backdrop on fake flowers?
To attach faux flowers to a solid backdrop, you could use a hot glue gun or strong adhesive strips on the back center of the flower. For a fabric background, I’d stick to a hot glue gun if the cloth is not intended for future use. I don’t really recommend trying to stick fake flowers to nice curtains or cloth you don’t own. That’s when I recommend that you build a simple frame using my tutorial and hang the backdrop accordingly.
How do you make a homemade flower backdrop?
If you want to make a decorated fabric backdrop, many of my tutorial’s steps will still help. If you’re making the cloth backing, choose a neutral color so your flowers will not clash. Then, test some adhesives to make sure they will hold the weight of your heaviest flowers. Finally, attach the flowers to the fabric, but I suggest going for a less dense style to keep the papercraft decorations from rubbing against each other as the curtains sway.
How do you make a flower wall?
There are many ways to make a photo backdrop for baby showers, bridal shower, birthday party, prom, wedding, or other special event, but I believe my tutorial is is easiest, most straight-forward way to go. I’ll show you how to prepare the free SVG files, tips for cutting the flowers fast, and how to hang them all up together no matter your location.
How do you make giant paper flowers?
Just like how you make a small paper flower, just bigger! Cutting large flower pieces out of cardstock by hand is tiring, so I definitely recommend using your Cricut. The Giant Paper Flower is the easiest flower to make — check out the tutorial here.
How do you make a DIY backdrop stand?
Check out my full DIY Backdrop Stand tutorial at jennifermaker.com/diy-backdrop-stand
Get my instant download digital files for my free paper flower backdrop designs!
I’d love to see your paper flower backdrop projects and how you’re celebrating with them! If you make a flower backdrop, please share a photo in our Facebook group, email it to me at [email protected], or tag me on social media with #jennifermaker.
Love,

Want to remember this? Save the Paper Flower Backdrop Full Tutorial to your favorite Pinterest Board