Learn how to make a perpetual calendar out of paper!
In a world buzzing with digital reminders and calendar apps, there’s something timeless about a physical calendar. But this isn’t just a simple calendar, you can make a perpetual calendar out of cardstock using a Cricut cutting machine. If you’ve ever wanted to combine the charm of crafting with the functionality of a perpetual calendar, this DIY project is a must-try.

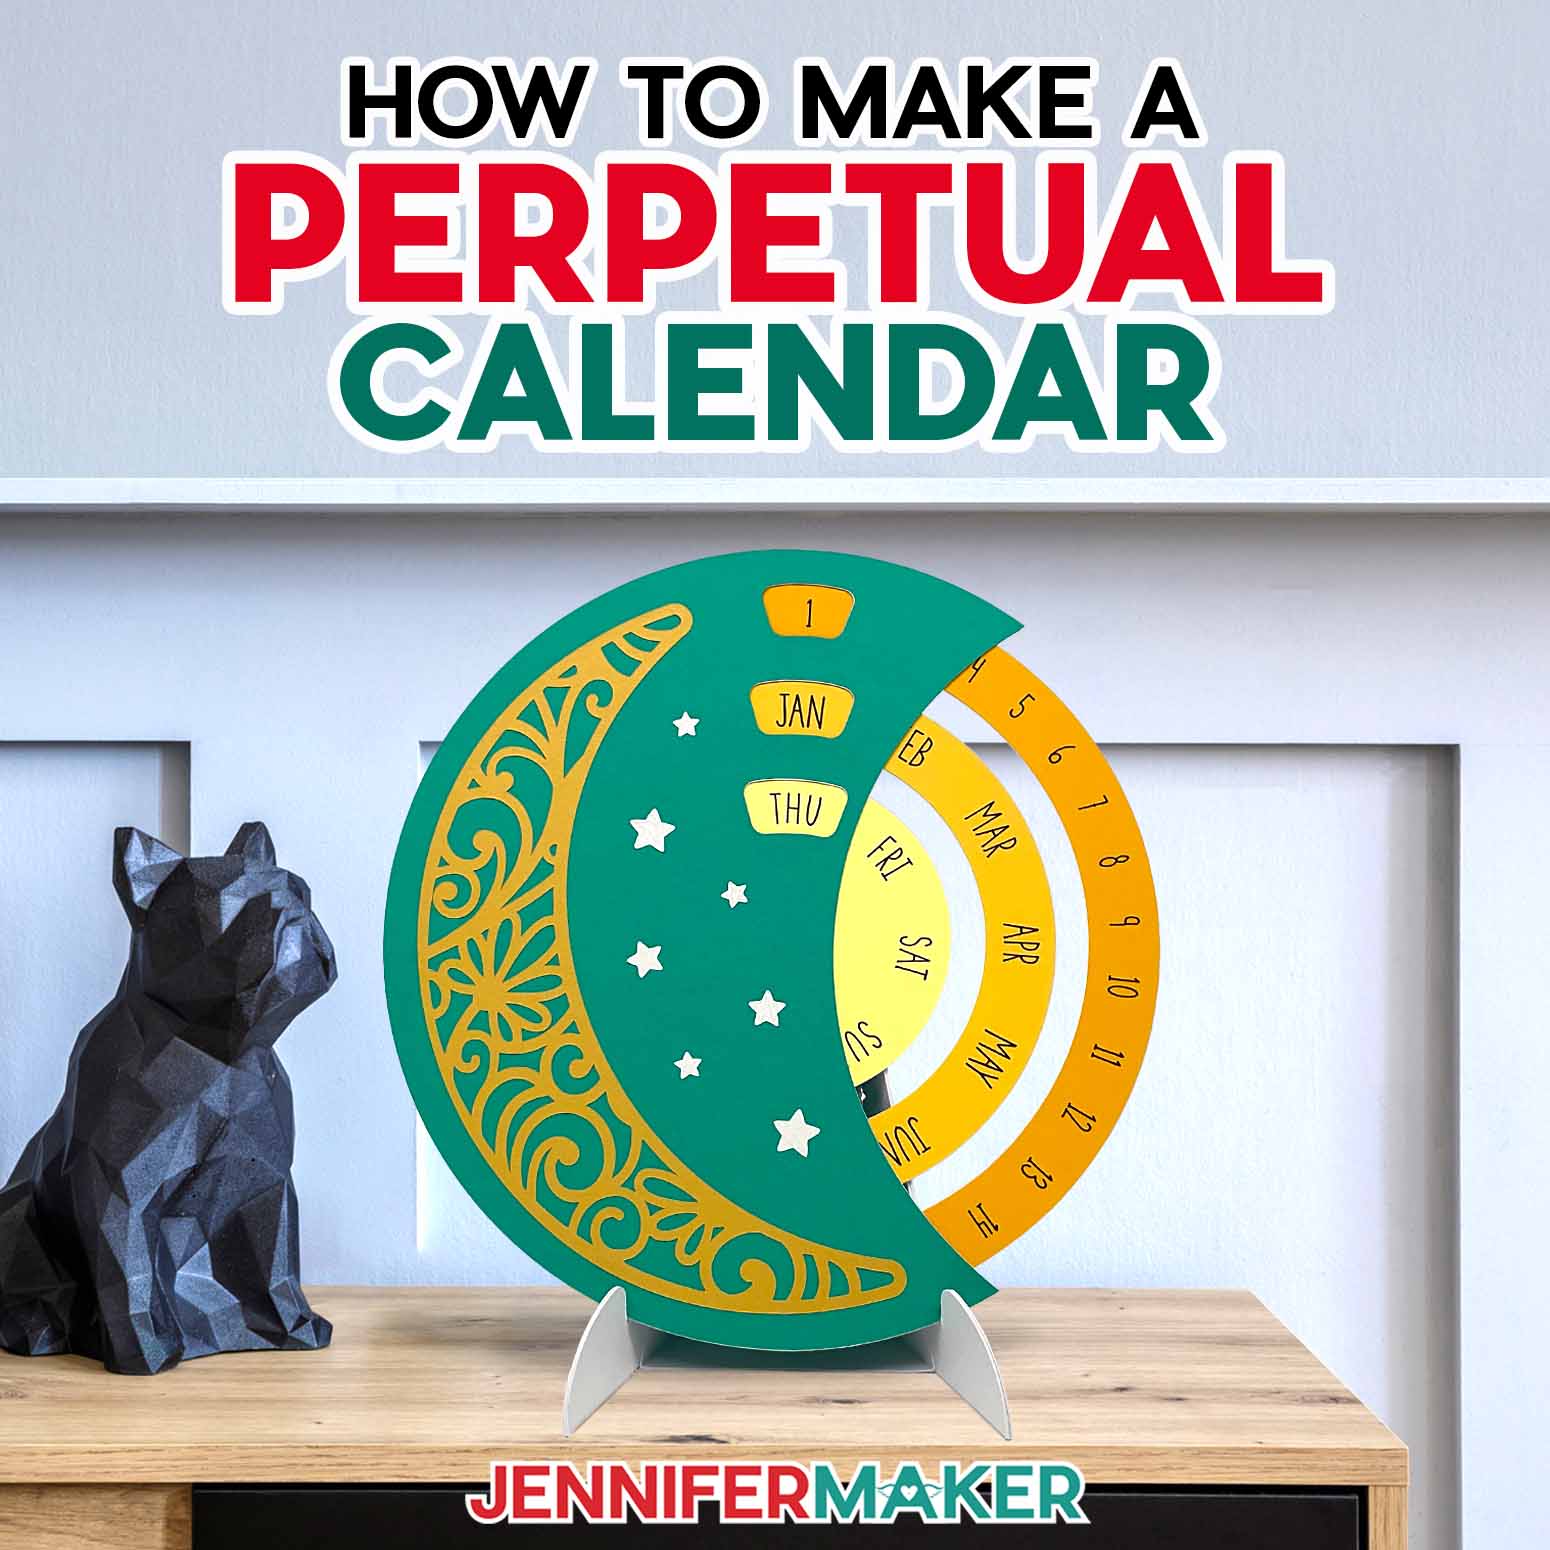
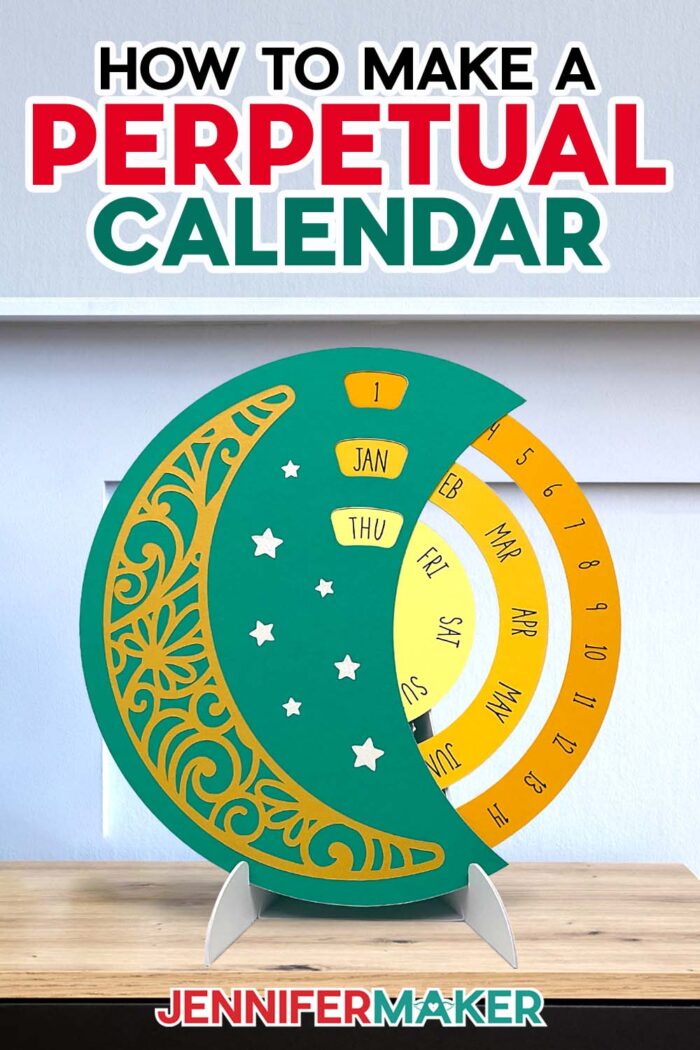
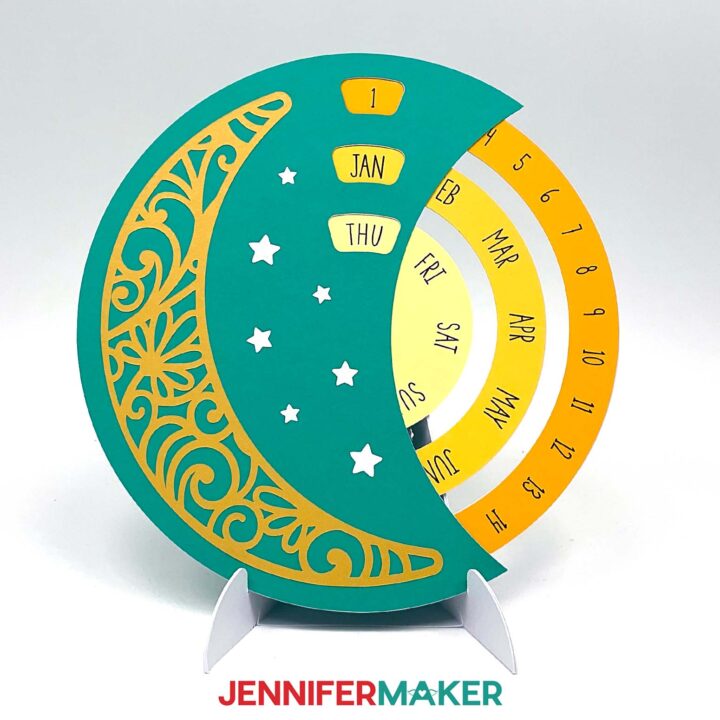
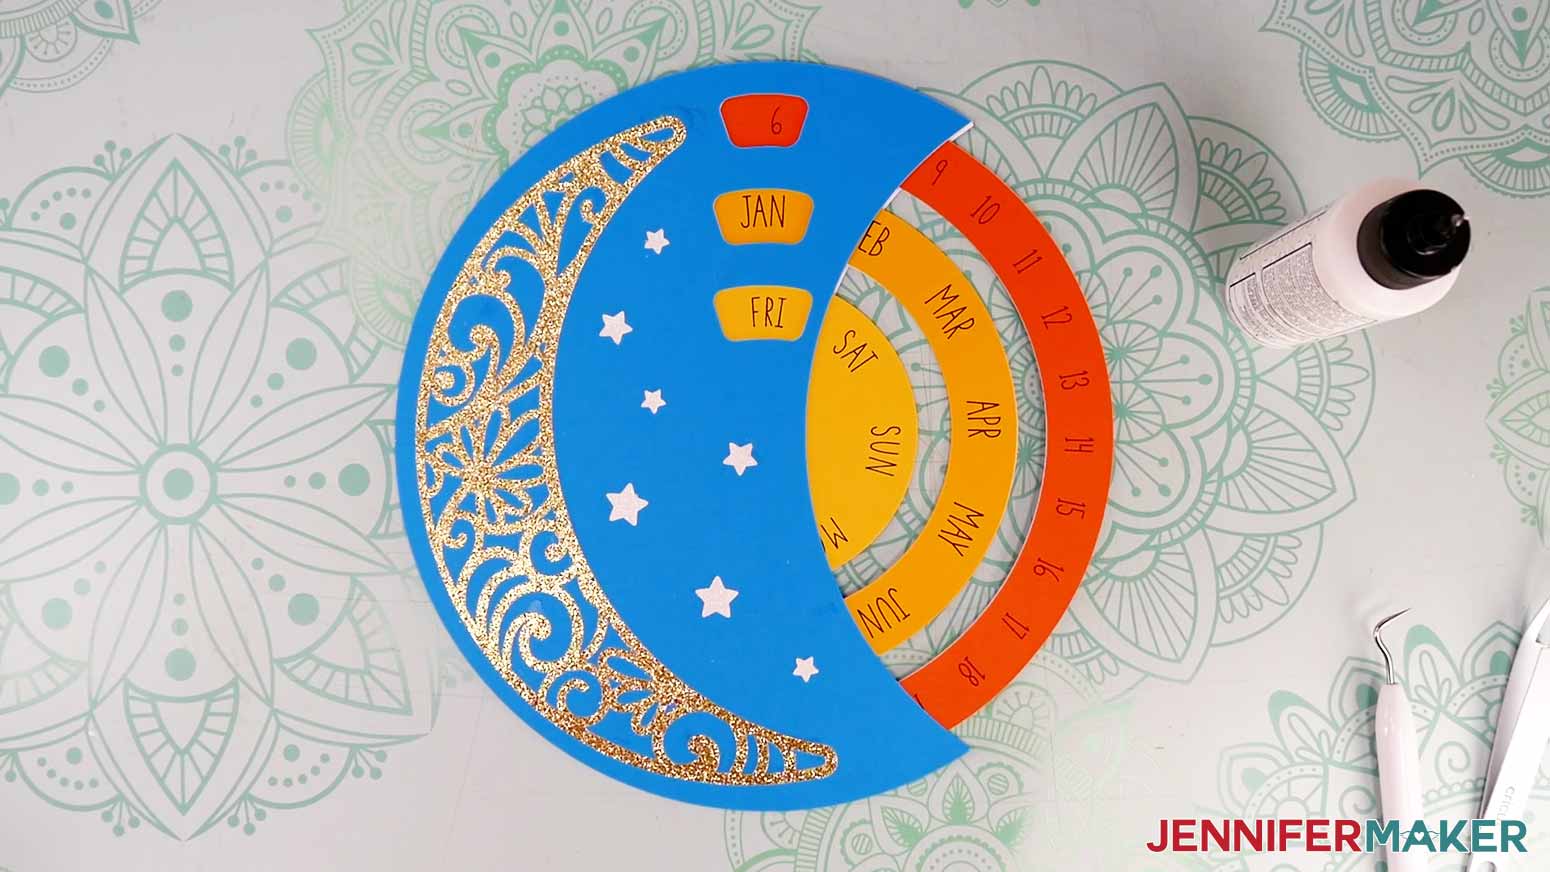
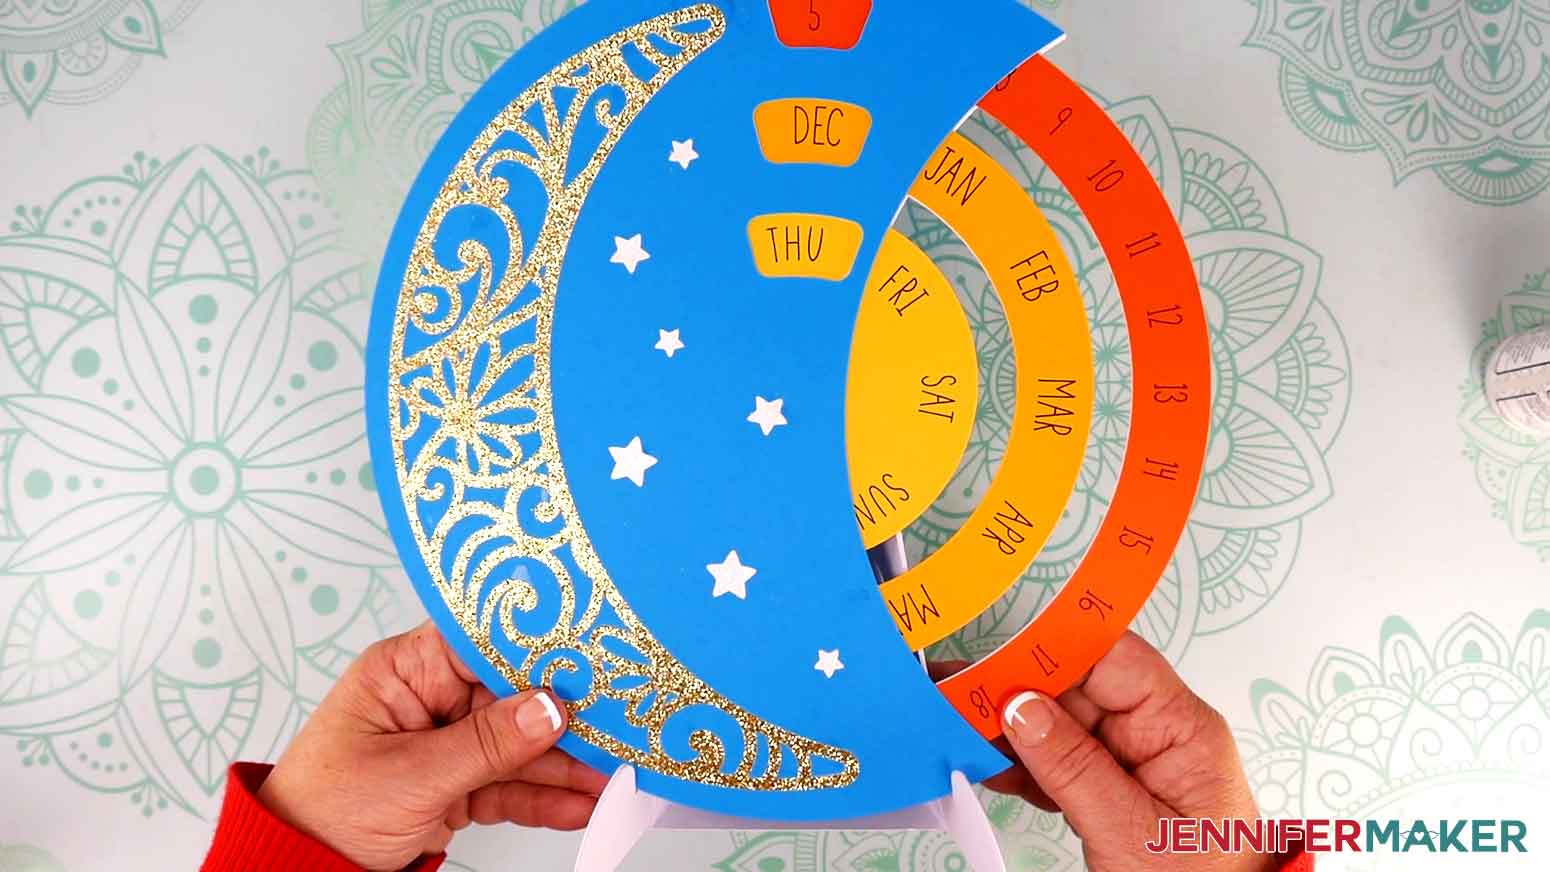
There are many styles of perpetual calendars, but my free SVG is a lovely mix of form and function with three wheels. The day of the week is in the middle, the month display is in the middle, and the date wheel is on out outside since it has the most options to track. It’s easy to set the correct date, just rotate the wheels until the small windows show the correct items.
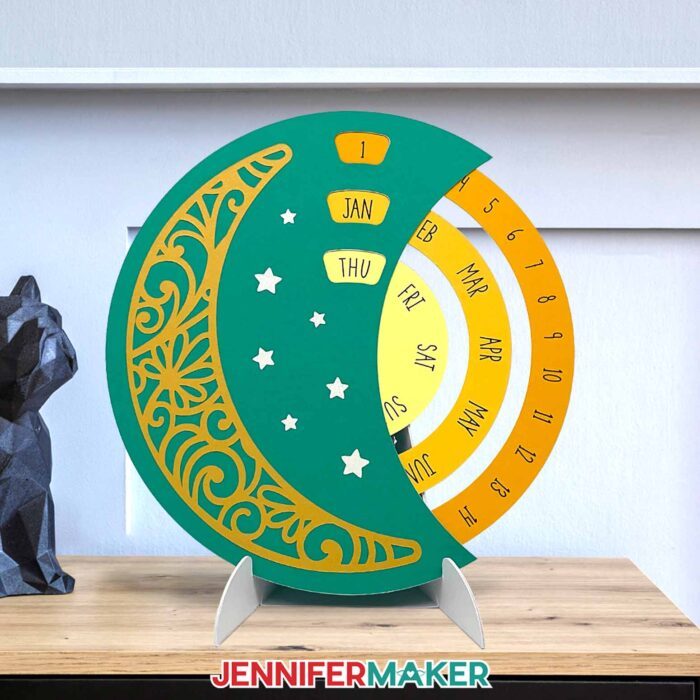
I made the perpetual calendar nice and sturdy by layering kraft board with pretty cardstock on top. There are so many color options available, you can customize the calendar to match your decor. Take your time aligning and adhering everything, because the calendar can last a a long time if you secure your layers well. It’s a little large for a desk calendar, but the included base means you can move the perpetual calendar around as needed.
I used a Cricut Maker 3 to cut my perpetual calendar pieces, but you can use any cutting machine that fits 12″ x 12″ or 8.5″ x 11″ cardstock depending on the paper size you want to use. That includes the original Maker, any of the Explore series machines, or the Cricut Joy Xtra. Plus, I’ll show you how the Cricut can add the writing for you with perfect writing! See the full list of tools and materials below followed by a detailed written tutorial with helpful pictures!
Ready to learn how to make a perpetual calendar? This post contains some affiliate links for your convenience (which means if you make a purchase after clicking a link I will earn a small commission but it won’t cost you a penny more)! Read my full disclosure policy.
Materials And Tools to Make a Perpetual Calendar
- Five (5) Sheets of 12″ x 12″ White Cricut Kraft Board
- Five (5) Sheets of 12″ x 12″ 65 lb. Cardstock – I used 2 sheets of blue, 1 sheet of light yellow, 1 sheet of dark yellow, and 1 sheet of light orange
- One (1) Sheet of 12″ x 12″ or 8.5″ x 11″ Gold Glitter, Foil, or Shimmer Cardstock (for the moon piece)
- One (1) Sheet of 12″ x 12″ or 8.5″ x 11″ White Glitter, Foil, or Shimmer Cardstock (for the stars)
- Two (2) Sheets of 12″ x 12″ White Cricut Kraft Board (optional for stand)
- Cricut Fine Point Pen – I used black
- A way to cut your materials – I’m using the Cricut Maker 3, but you can also use the Cricut Maker, a Cricut Explore Series machine, the Cricut Venture, or even the Cricut Joy Xtra.
- Cricut Green StandardGrip Machine Mat 12″ x 12″
- Scoring Stylus -OR- Single Scoring Wheel (optional for files with score lines)
- Brayer
- Spatula
- Scraper
- Weeding Tool (for popping out small pieces from intricate areas)
- Tweezers (optional for handling delicate areas)
- Bearly Art Precision Craft Glue (optional for the star pieces)
- Design #577 – My free SVG/DXF/PDF design files are available in my free resource library – get the password by filling out the form at the bottom of this page
How to Make a Perpetual Calendar!
Perpetual Calendar
Learn how to make a perpetual calendar with moveable wheels using layered Kraft board.
Materials
- Five (5) Sheets of 12" x 12" White Cricut Kraft Board
- Five (5) Sheets of 12" x 12" 65 lb. Cardstock (I used 2 sheets of blue, 1 sheet of yellow, 1 sheet of light orange, and 1 sheet of dark orange)
- One (1) Sheet of 12" x 12" or 8.5" x 11" Gold Glitter Cardstock (for the moon piece) -OR-
- One (1) Sheet of 12" x 12" or 8.5" x 11" Gold Shimmer Cardstock (for the moon piece)
- One (1) Sheet of 8.5" x 11" or 12" x 12" White Glitter Cardstock (for the stars; you can also use Foil or Shimmer Cardstock)
- Two (2) Sheets of 12" x 12" White Cricut Kraft Board (optional for the stand)
- Design #577 (My free SVG/PDF/DXF design files are available in my free resource library - get the password by filling out the form at the bottom of this page)
Tools
- A way to cut your cardstock - I’m using the Cricut Maker 3, but you can also use the Cricut Maker, a Cricut Explore Series machine, the Cricut Venture, or even the Cricut Joy Xtra.
- Cricut Green StandardGrip Machine Mat 12" x 12"
- Cricut Fine Point Pen (I used black)
- Craft Glue (I used Bearly Art Precision Glue)
- Scoring Stylus (optional for stand with score lines) -OR-
- Single Scoring Wheel (optional for stand with score lines)
- Brayer
- Spatula
- Weeding Tool (for popping out small cutouts from intricate areas)
- Scraper
- Tweezers (optional)
Instructions
STEP 1: GET MY FREE PERPETUAL CALENDAR DESIGN
First, download my Perpetual Calendar design from my free library -- look for Design #577. Alternatively, you can use the Save This Project form near the top of this post and the design link will be emailed to you.
There are three files in the SVG folder: the main perpetual calendar design, the “noscore” stand using dashed cut crease lines, and the “score” stand that will require a scoring wheel or stylus.
In this tutorial, I will show you how to prepare and assemble the calendar with the dashed cuts stand. If you want to make the score line version, see my tutorial on how to adjust and prepare the layers.
TIP: If you’re not sure how to upload, go to jennifermaker.com/svgs to learn how to unzip and upload SVG files.
STEP 2: PREPARE AND CUT YOUR PERPETUAL CALENDAR
CRICUT DESIGN SPACE
1. Open Cricut Design Space and click “New Project.”
2. Click “Upload” and then “Upload Image.”
3. Click “Browse.”
4. Select the perpetual calendar SVG file.
5. On the Prepare to Upload screen, it will say “Cut image” with the design preview.
6. Click “Upload.”
7. Find your design in Recent Uploads and add it to the Canvas.
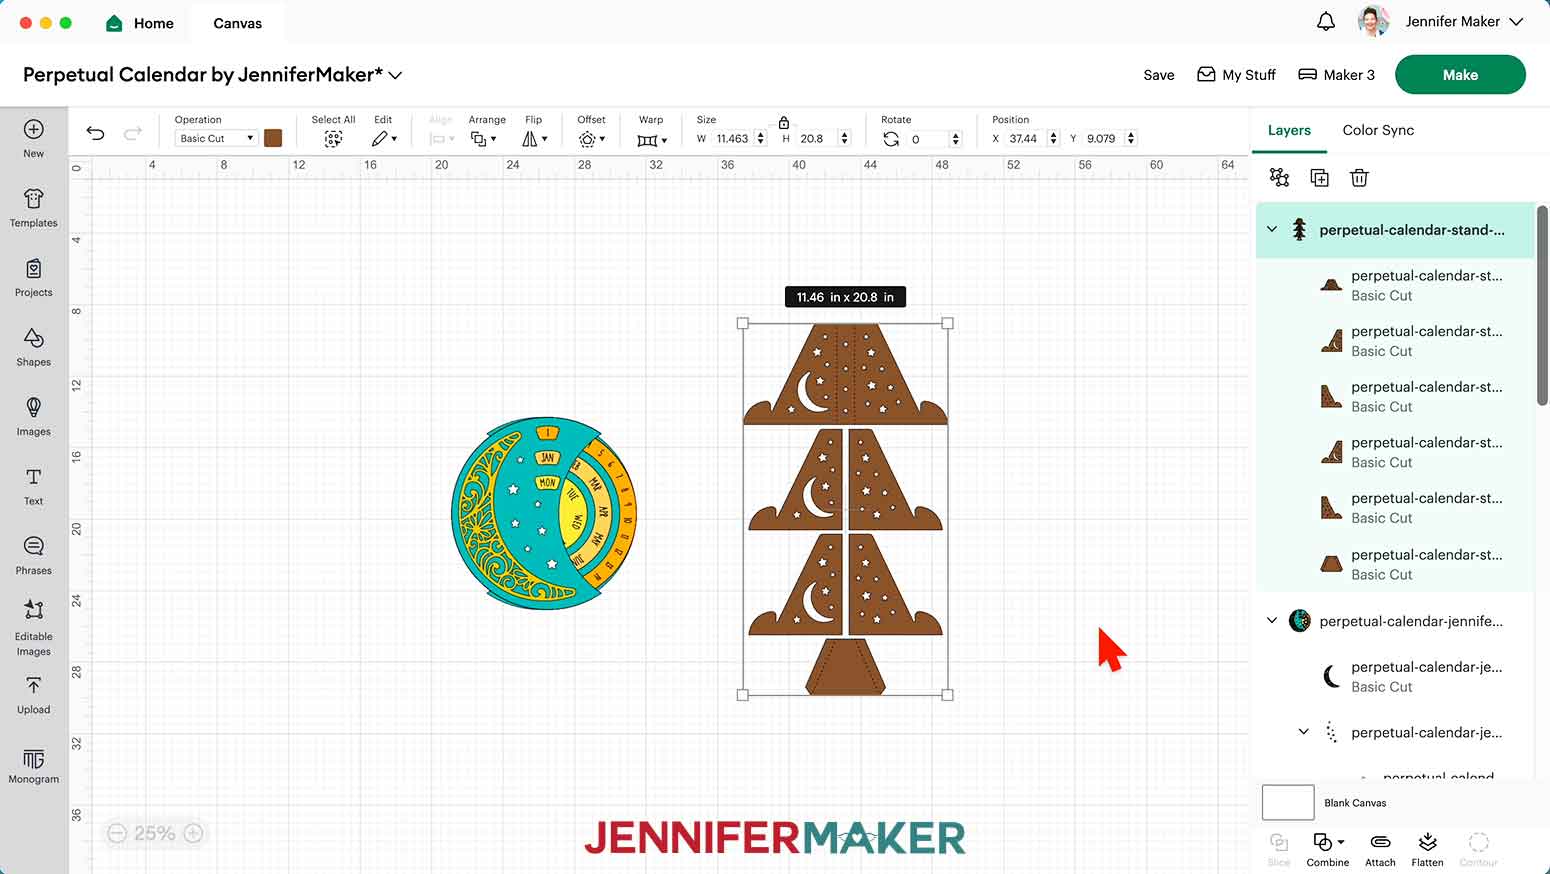
NOTE: The design is sized to be cut on 12” x 12” cardstock and makes a 10.375" wide x 10.75" tall calendar. It can be resized smaller to fit on 8.5” x 11” cardstock, but make sure to do test cuts before cutting your entire calendar, especially if you’re using the optional moon piece. You can also enlarge your design and cut it on larger cardstock with the Cricut Venture.
8. Follow Steps 2-7 to upload and add the stand of your choice, too.
9. Move the stand design to the side so it does not cover the calendar design.
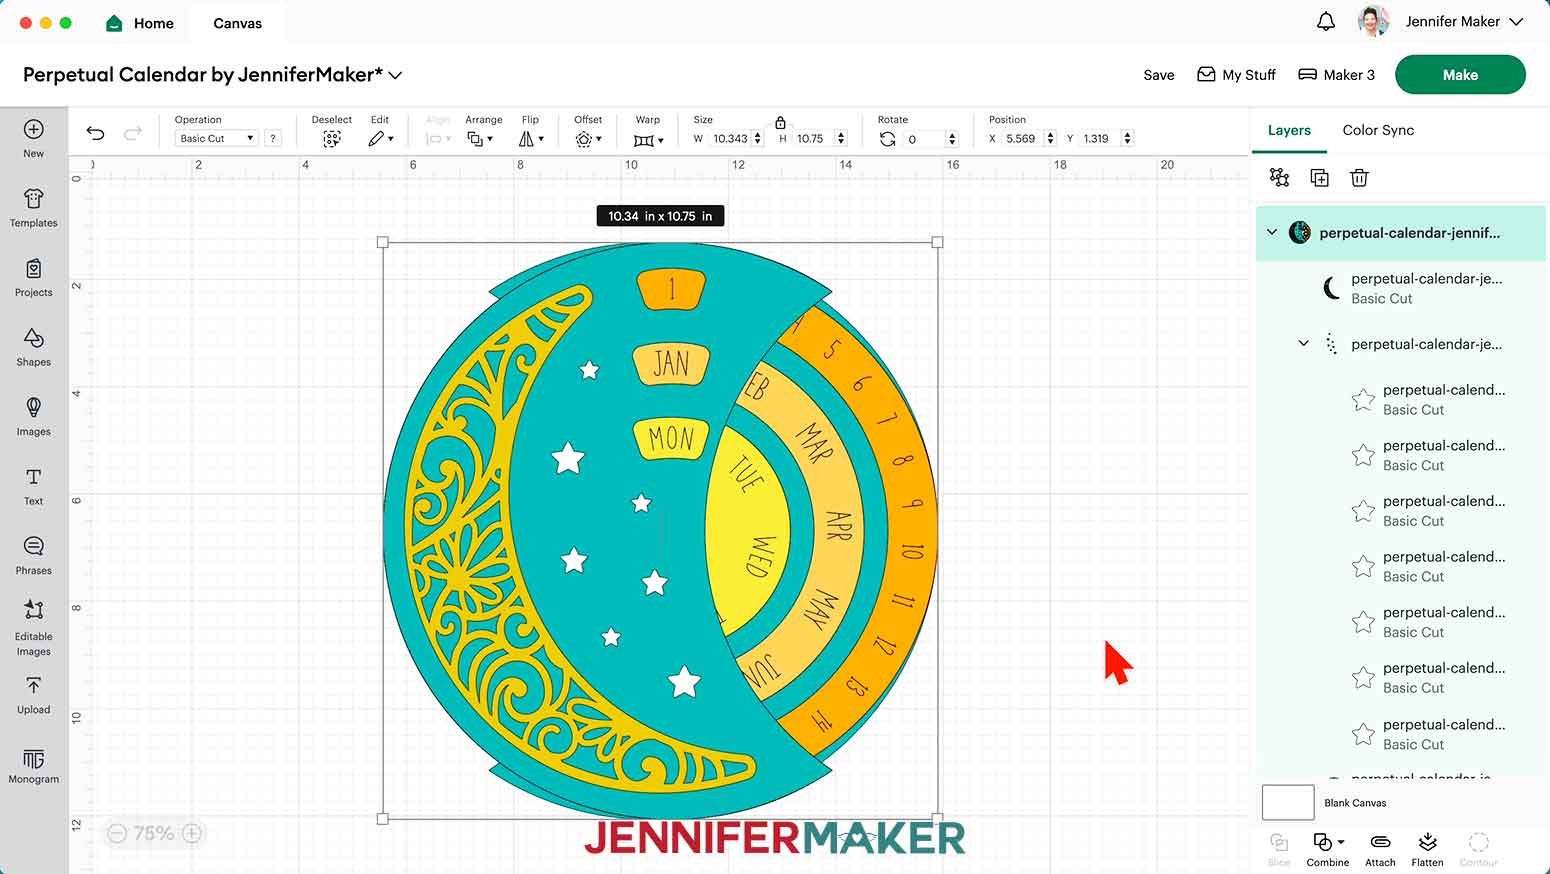
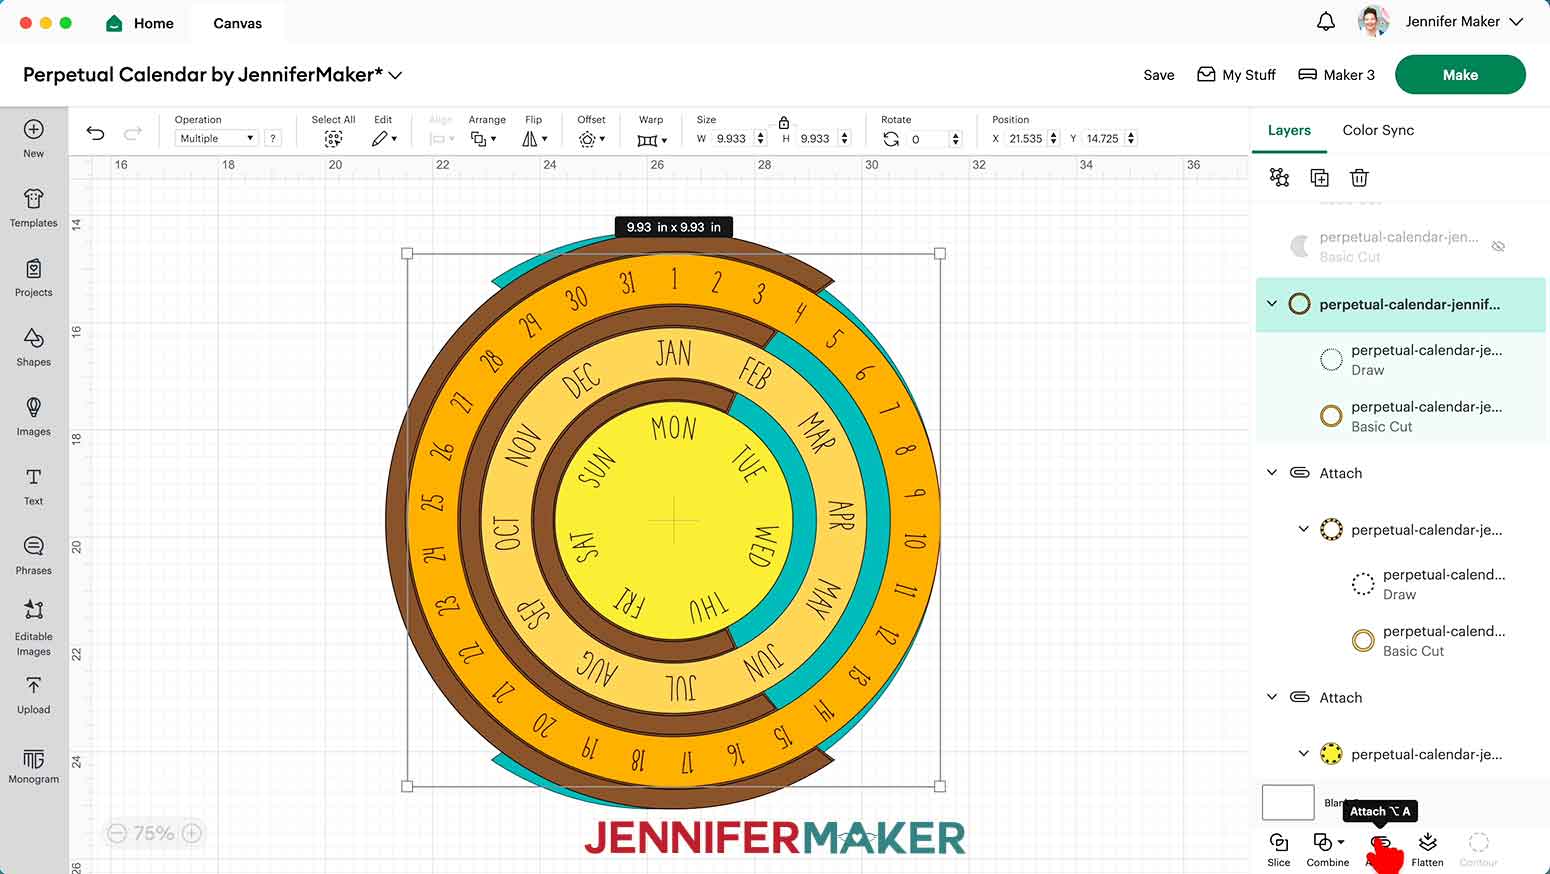
10. Select the calendar and click “Ungroup.”
NOTE: The design includes:
- Three brown layers for each “track” piece and two brown layers for each “wheel” piece that we’ll cut on Cricut Kraft Board and glue together for stability. These pieces are grouped into three layers in the file.

- A separate brown layer for the front and one for the back of the calendar that will also be cut on Cricut Kraft Board.
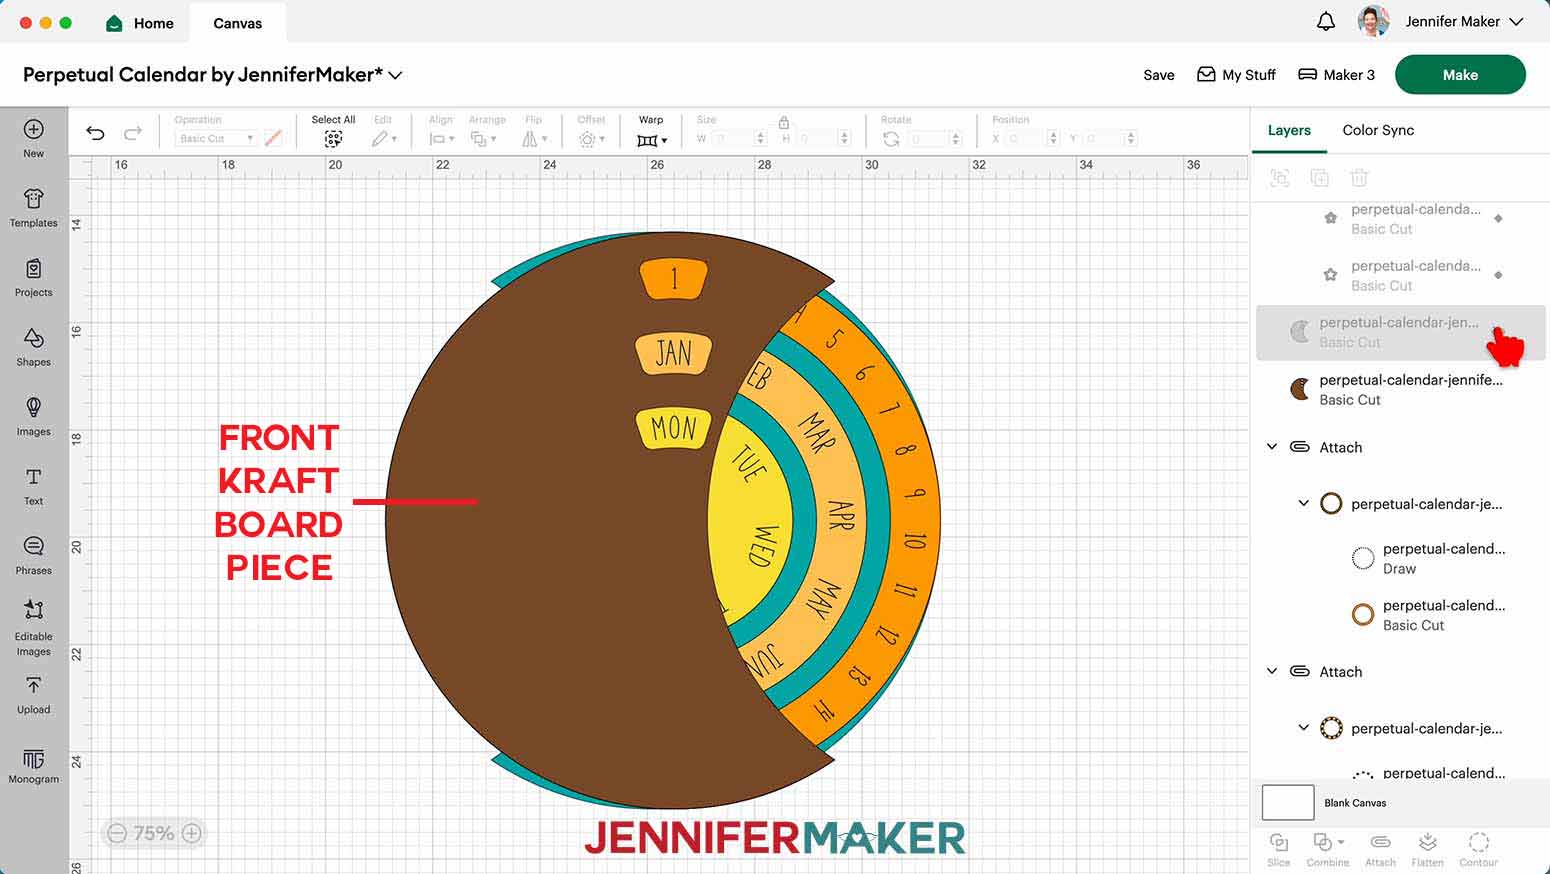
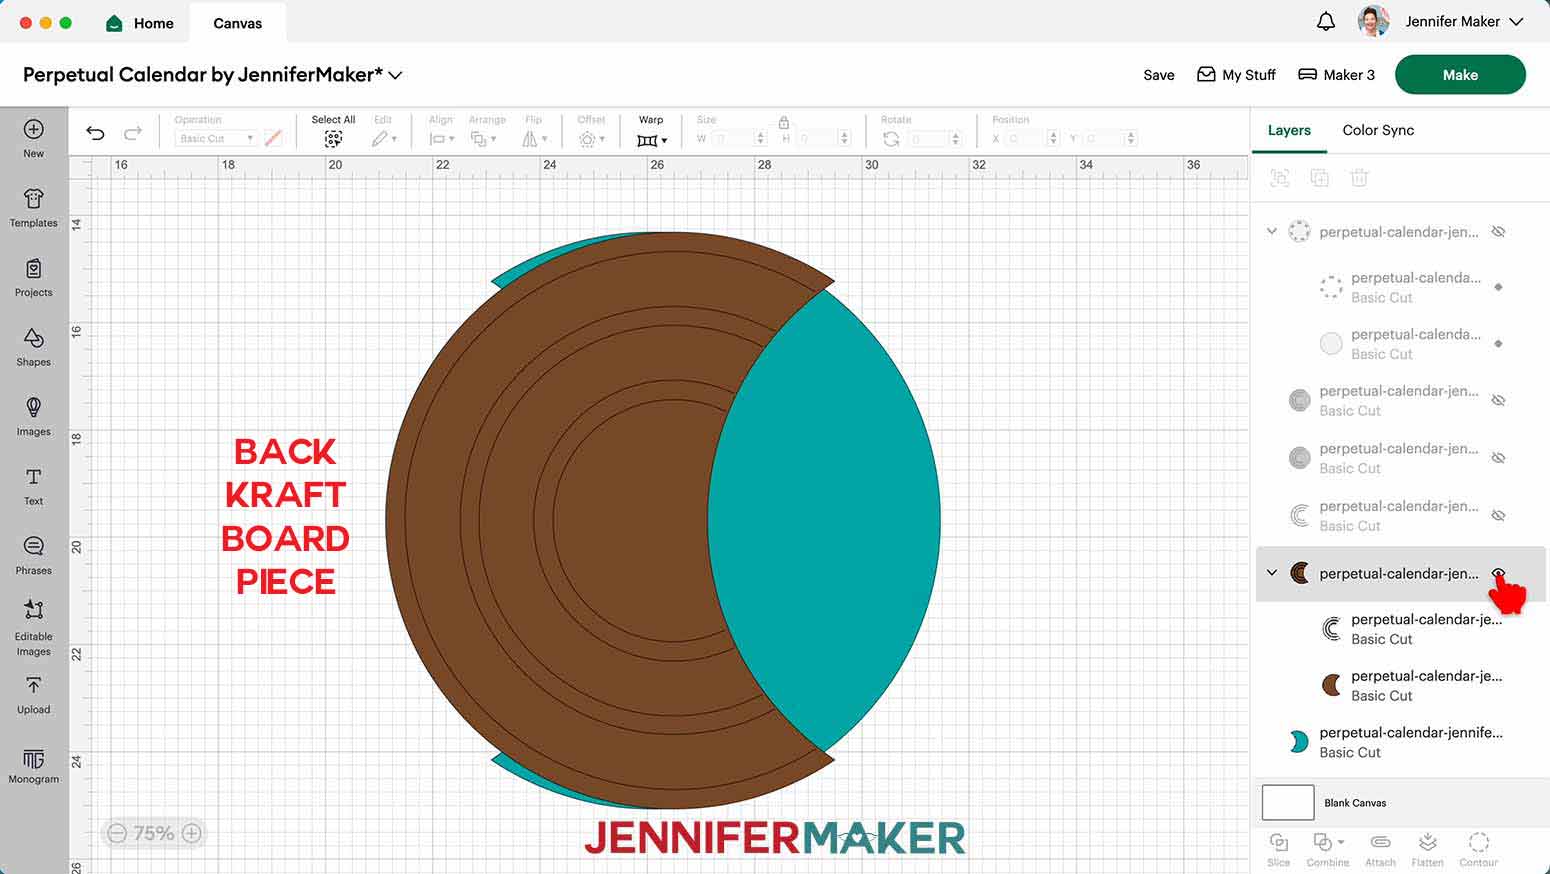
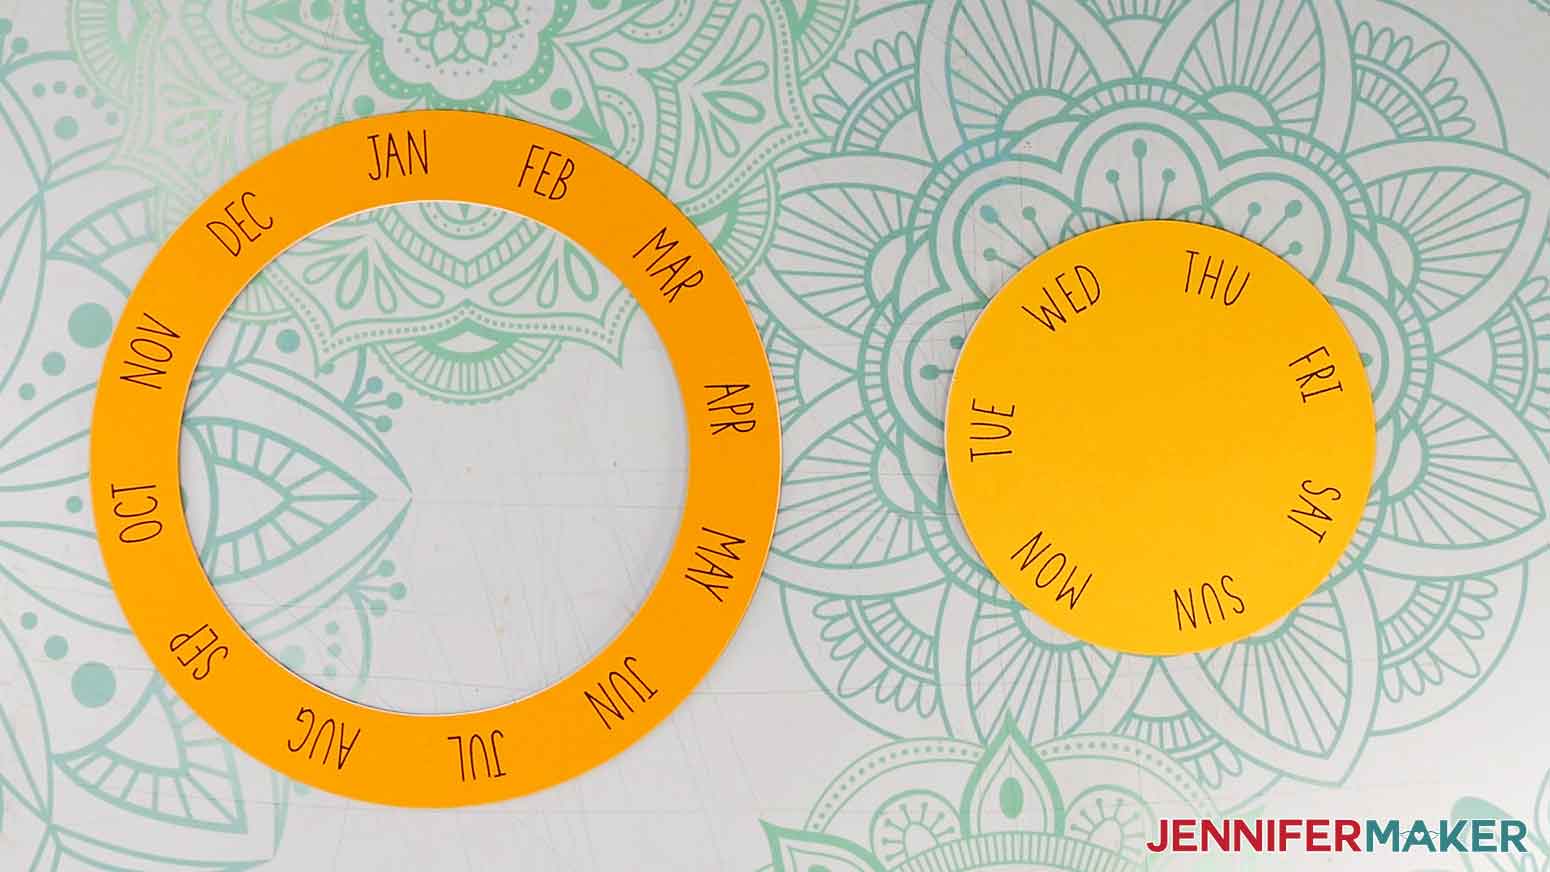
- Seven colored layers that will be cut on cardstock and used as accents (one blue for the front cover, one blue for the back cover, which is mirrored so it will cut on face up cardstock, three different shades of yellow/orange for the wheels, one gold for the moon, and a group of white stars).
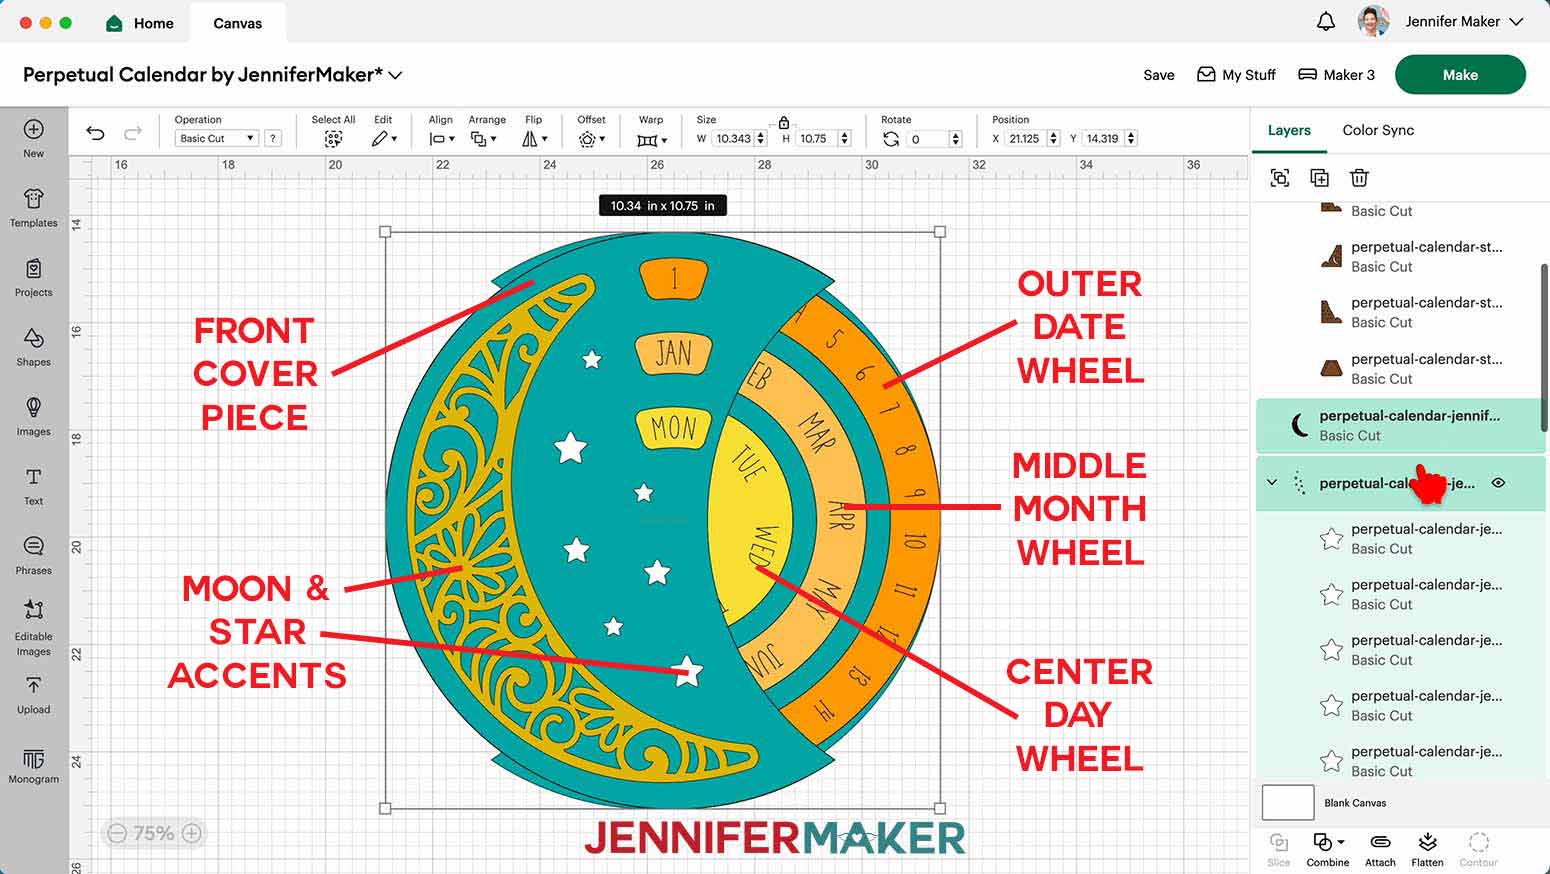
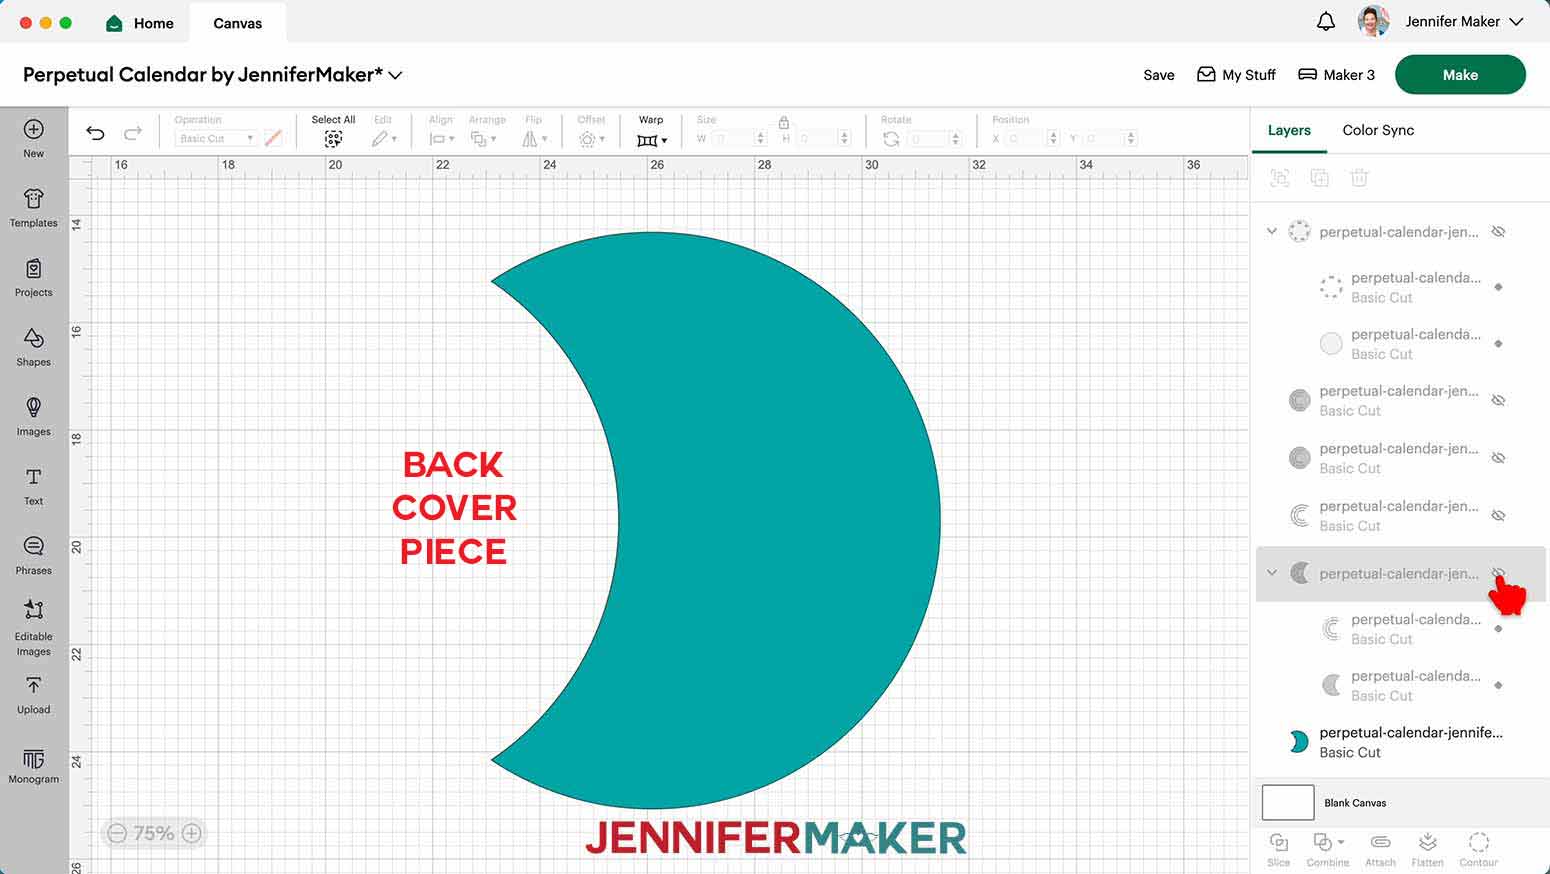
- Each of the three colored Month, Day, and Date wheels has two grouped layers with the Draw layer on top and the cardstock Cut layer below. The back Kraft Board piece also has two grouped Draw and Cut layers.
11. In the Layers Panel, select a black Draw layer from one of those groups.
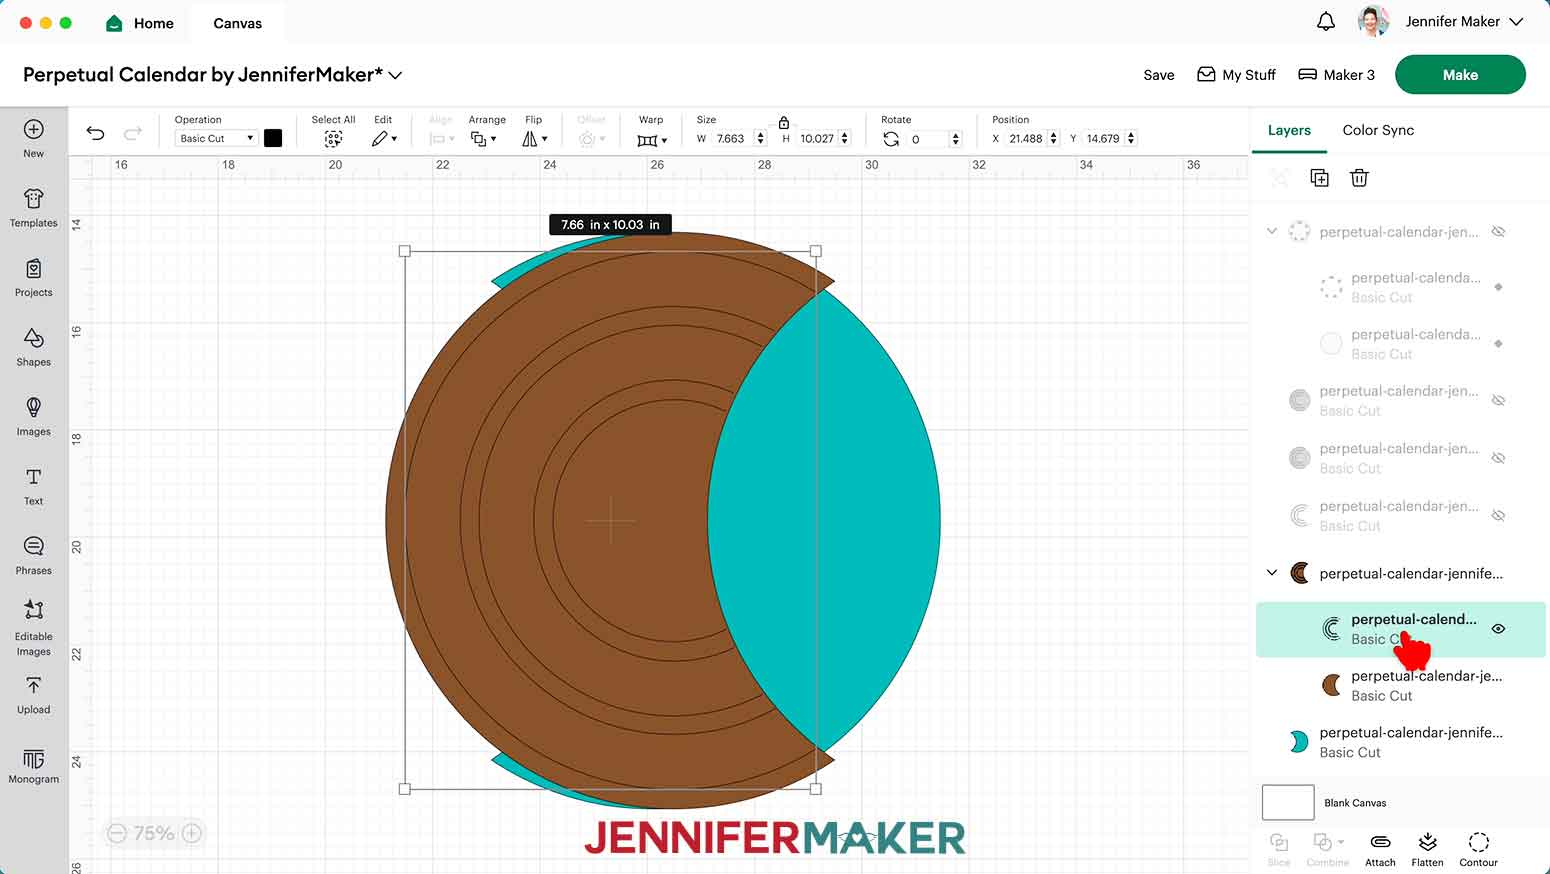
12. Click the “Operation” dropdown and select “Pen.” It will now say "Draw" in the Layers Panel instead of "Basic Cut."
13. Click the Color Box to select your pen type and color, if needed. I’ll stick with the default Black Fine Point Pen.
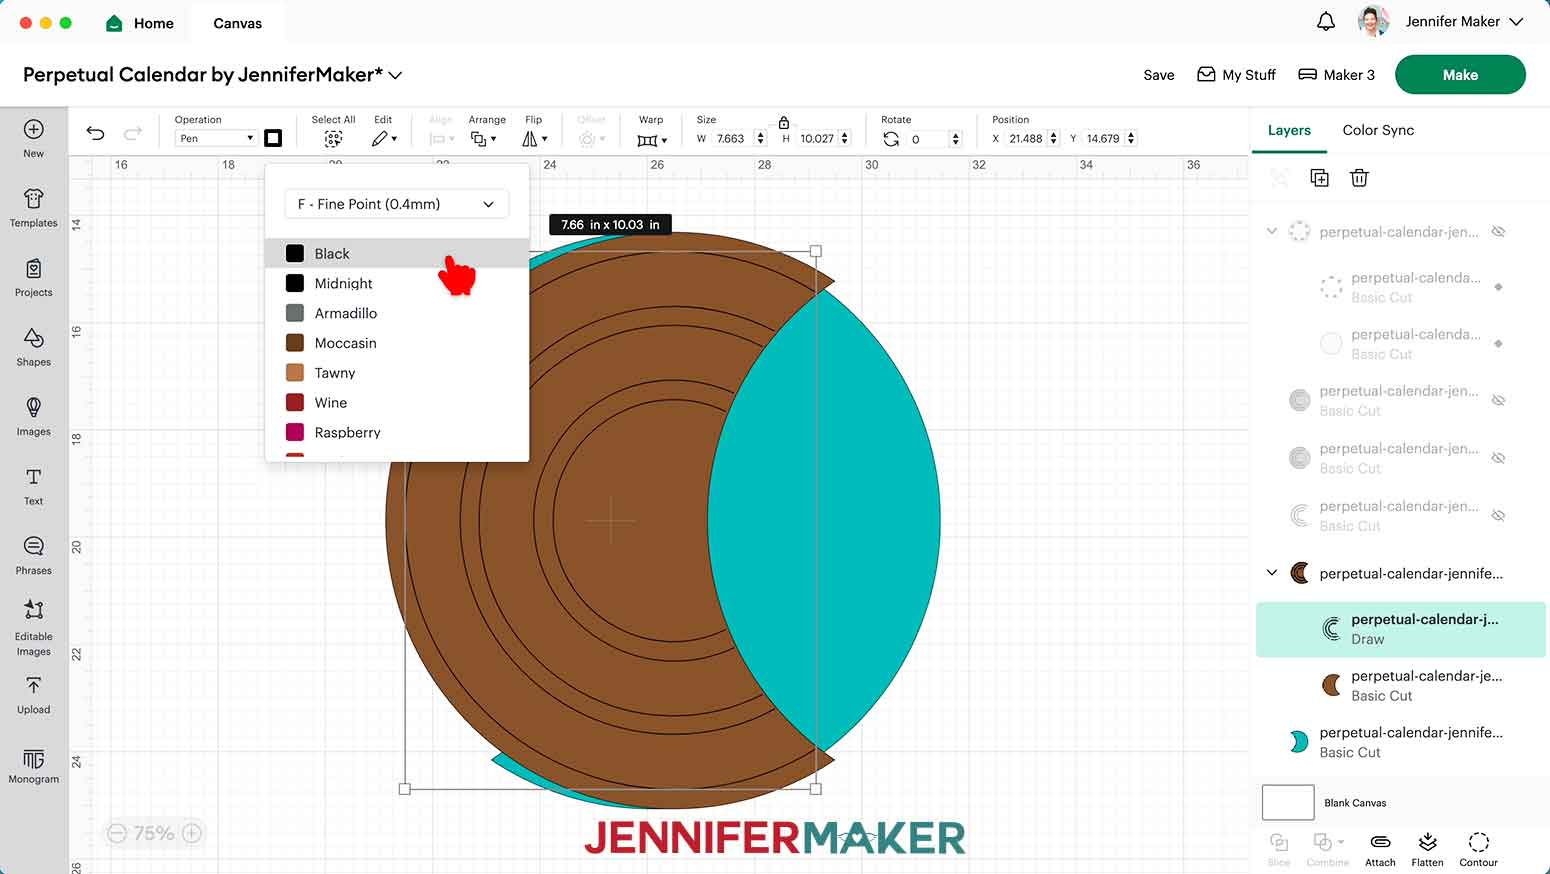
14. Click the top-level layer of that group in the Layers Panel to select both Draw and Cut layers.
15. Click “Attach” to keep the layers together.
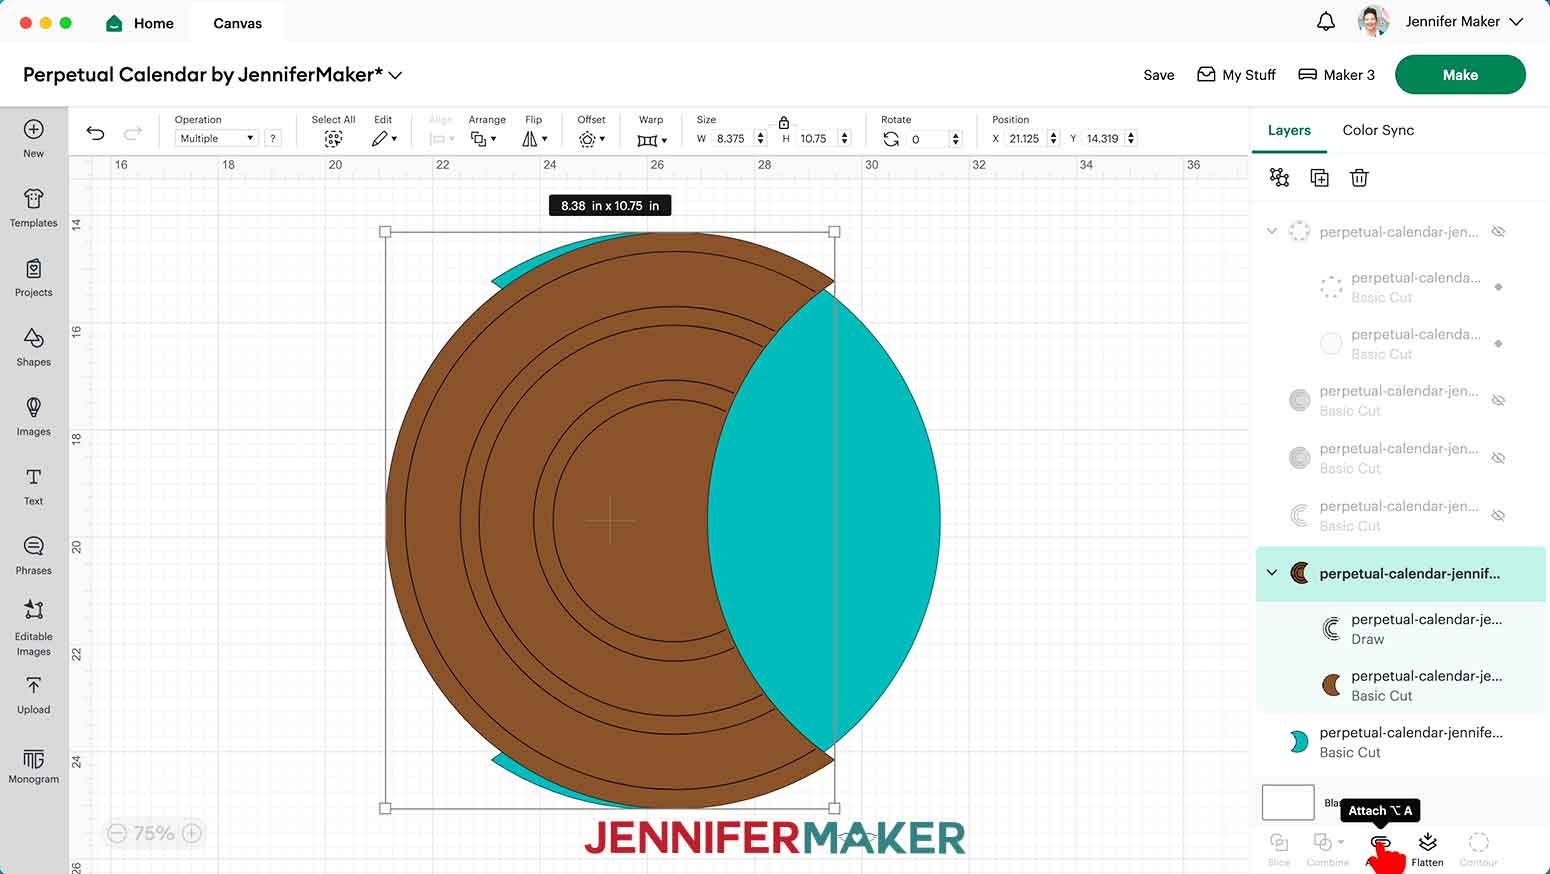
NOTE: The attached layers will jump to the top of the Layers Panel, but you can use the Arrange menu to send them behind the other layers again if you’d like.
16. Repeat Steps 11-15 for the rest of the grouped Draw and Cut layers.
17. The “noscore” stand doesn’t require any additional preparation, so your designs are ready to cut!
18. Make sure the correct machine is selected in the top right.
19. Click “Make.”
20. If prompted, click "On Mat," choose your mat size, and click “Confirm.”
21. On the Prepare Screen, you should have 14 mats:
- 1 white for the optional stars
- 7 brown for the Kraft board
- 1 light orange for the Month wheel
- 1 dark orange for the Date wheel
- 1 gold for the optional moon
- 1 yellow for the Day wheel
- 2 blue for the outer covers
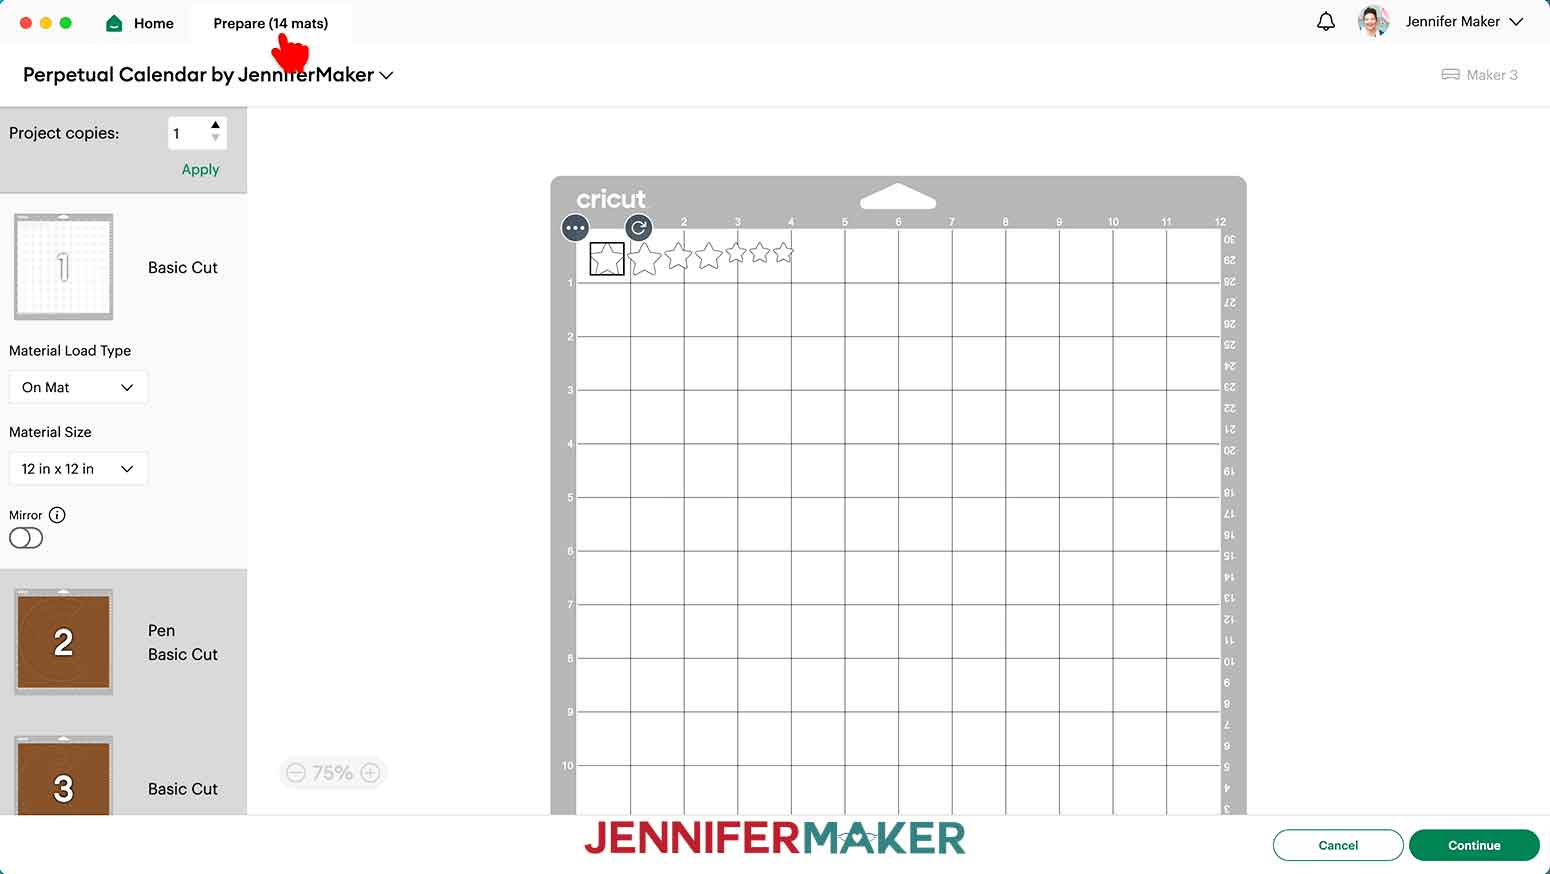
22. If needed, change the Material Size to match each paper you’re using.
23. Select the first mat again and click “Continue.”
CUTTING
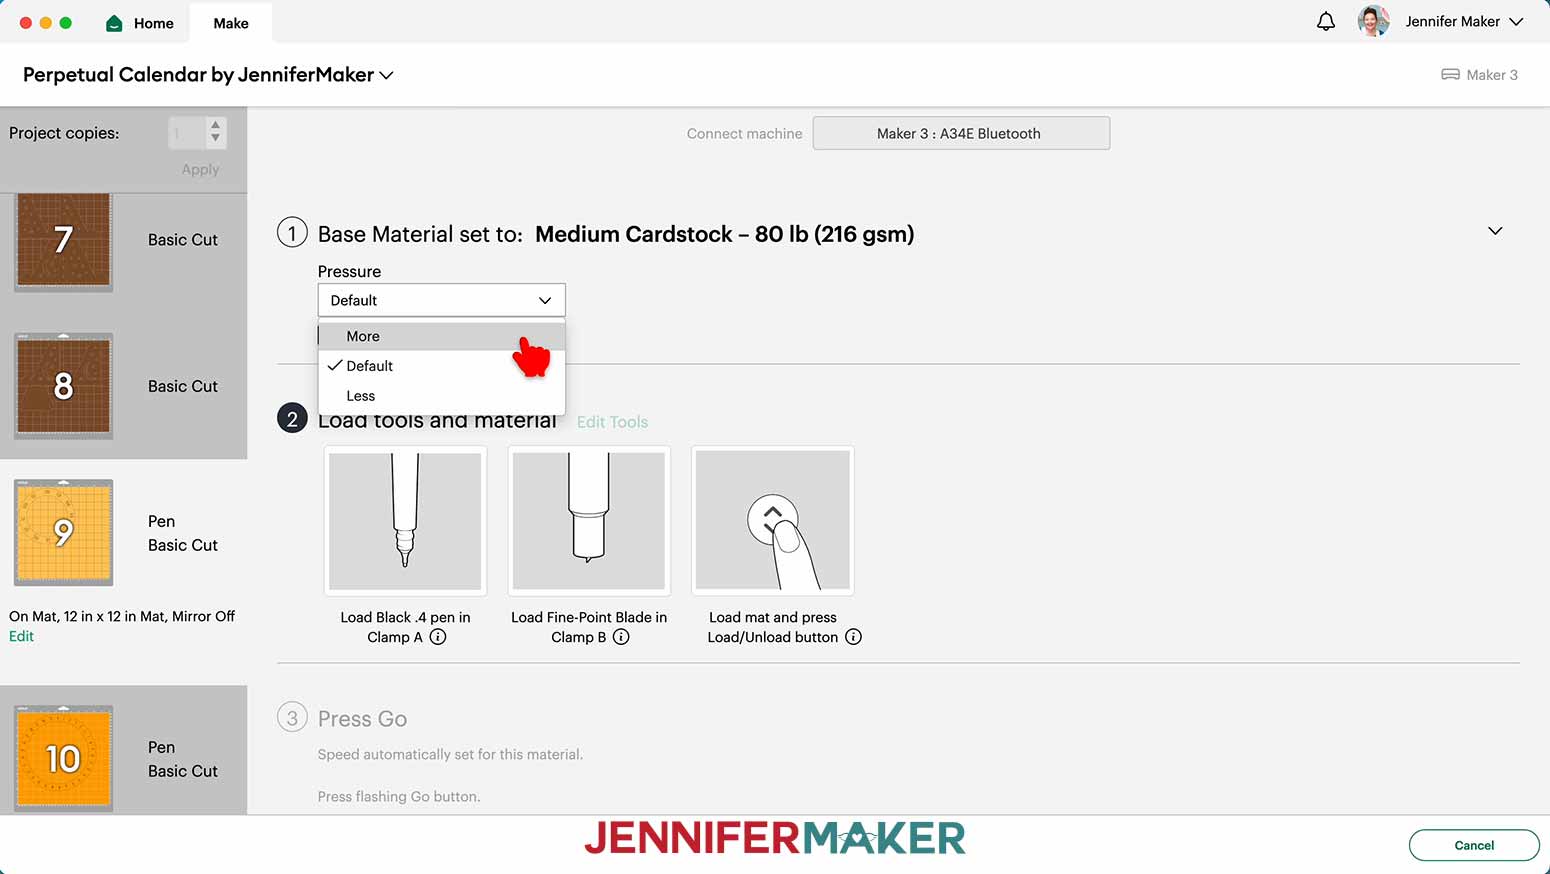
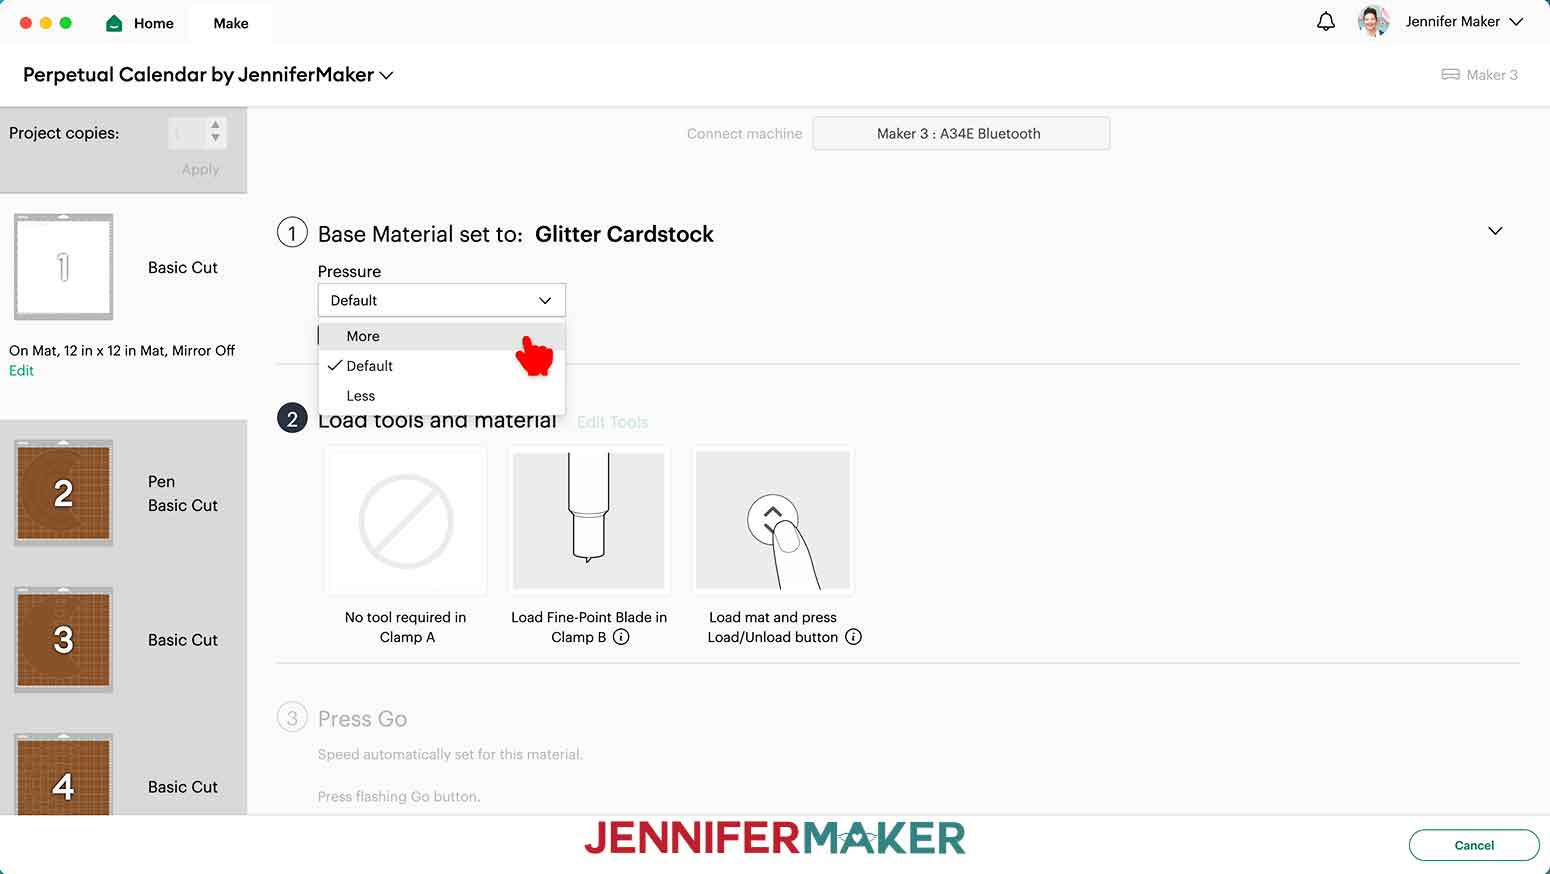
1. On the Make Screen, click “Browse All Materials.”
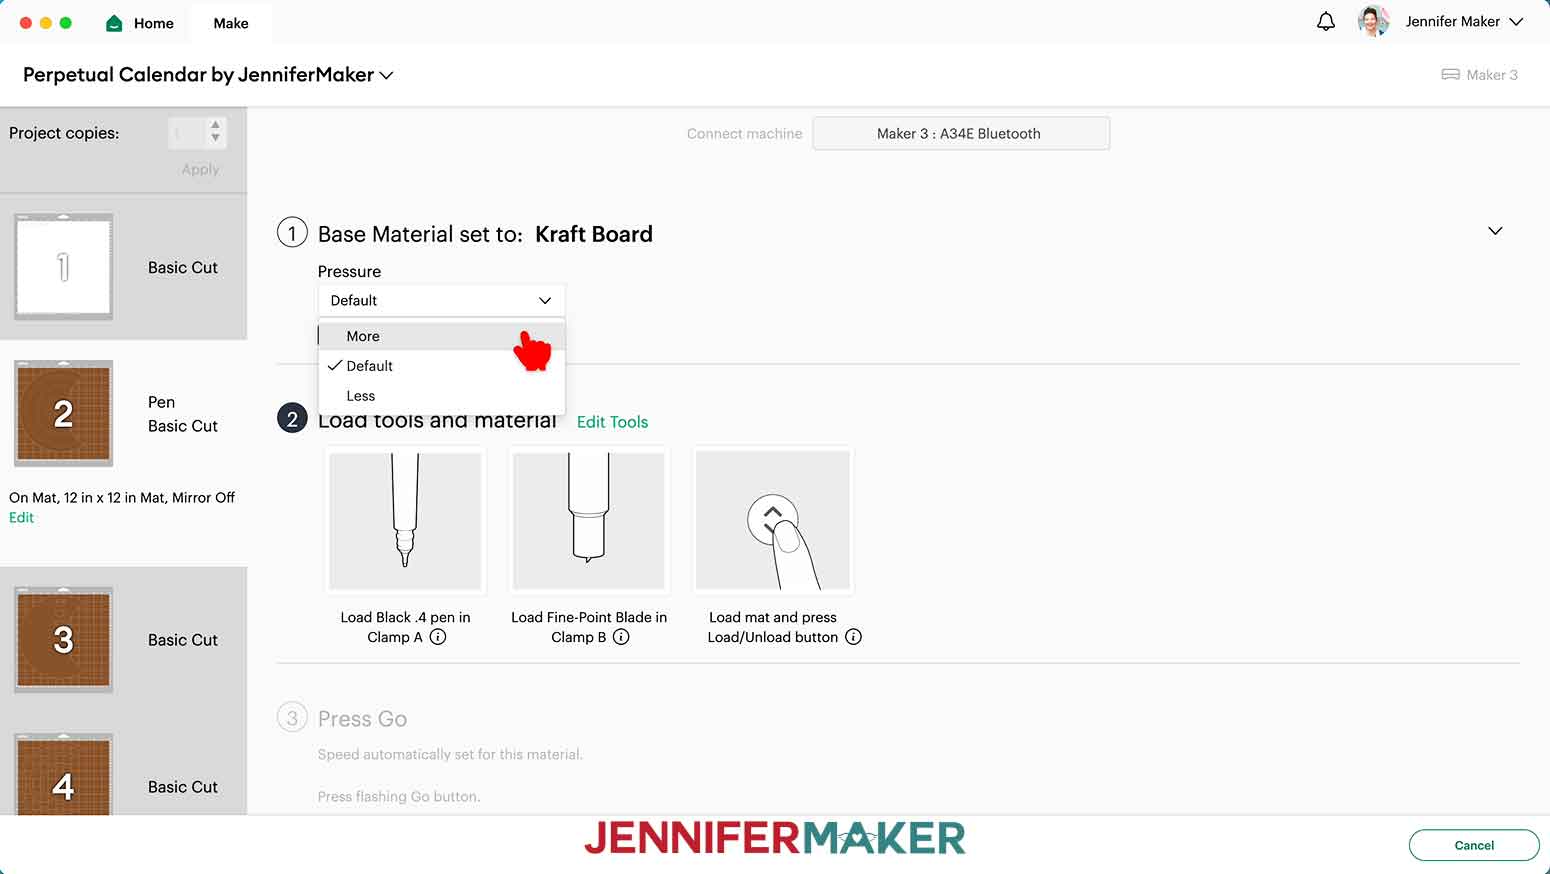
2. Search for and select the settings needed for the materials you’re using. I used 65 lb. cardstock for the light orange, dark orange, yellow, and blue mats, glitter cardstock for the white and gold mats, and white Cricut Kraft Board for the brown mats. These are the settings you can use for each material:
- 65 lb. Cardstock - “Medium Cardstock - 80 lb (216 gsm)” Setting with More Pressure
- Glitter Cardstock - “Glitter Cardstock” Setting with More Pressure
- Cricut Kraft Board - “Kraft Board” Setting with More Pressure
3. Place your cardstock face up on a StandardGrip machine mat and use a brayer to make sure it’s fully adhered.
4. Check that your Fine-Point Blade is clean and in the clamp.
5. When prompted, load your Fine Point Pen in the specified clamp.
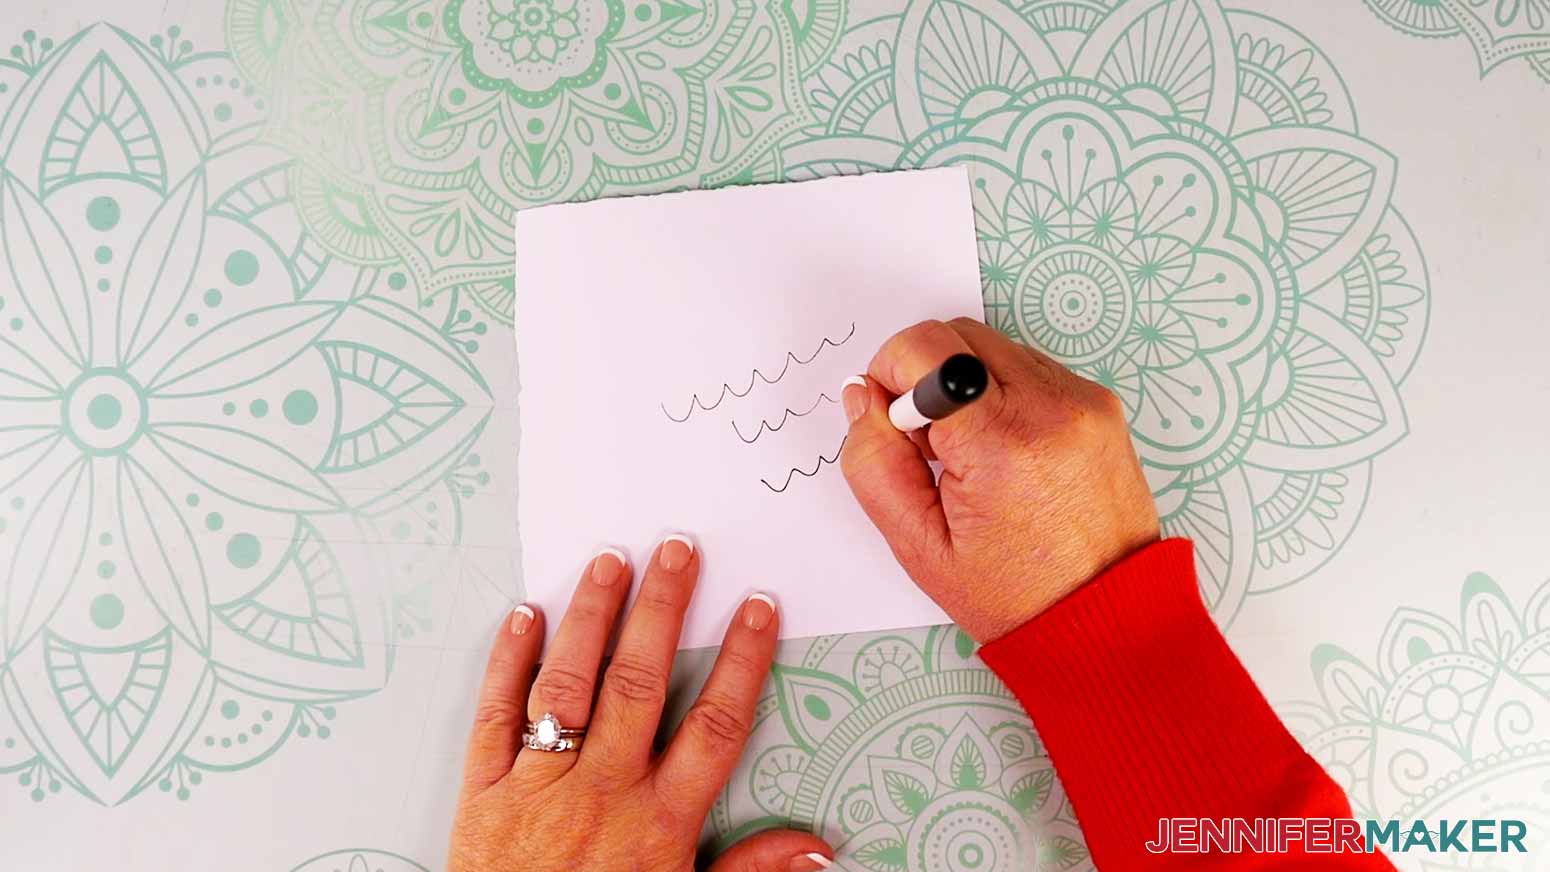
TIP: Test your pen on a scrap piece of paper to make sure it works before loading it, then put the cap on the back so you don’t lose it.
6. Press the flashing “Load/Unload” button to load the prepared mat into your Cricut.
7. Press the flashing “Go” button to begin cutting.
8. Before unloading your mat, carefully peel up a section of the material to make sure the cuts went all the way through. If not, press the “Go” button to run the cuts again in the same locations.
9. When it has finished cutting, unload the mat, flip it over onto your work surface, and roll it back to release the material.
TIP: After cutting glitter cardstock, be sure to clean your blade using a foil ball to remove all glitter debris before cutting your next mat.
10. Follow Steps 2-9 to cut and remove your remaining pieces.
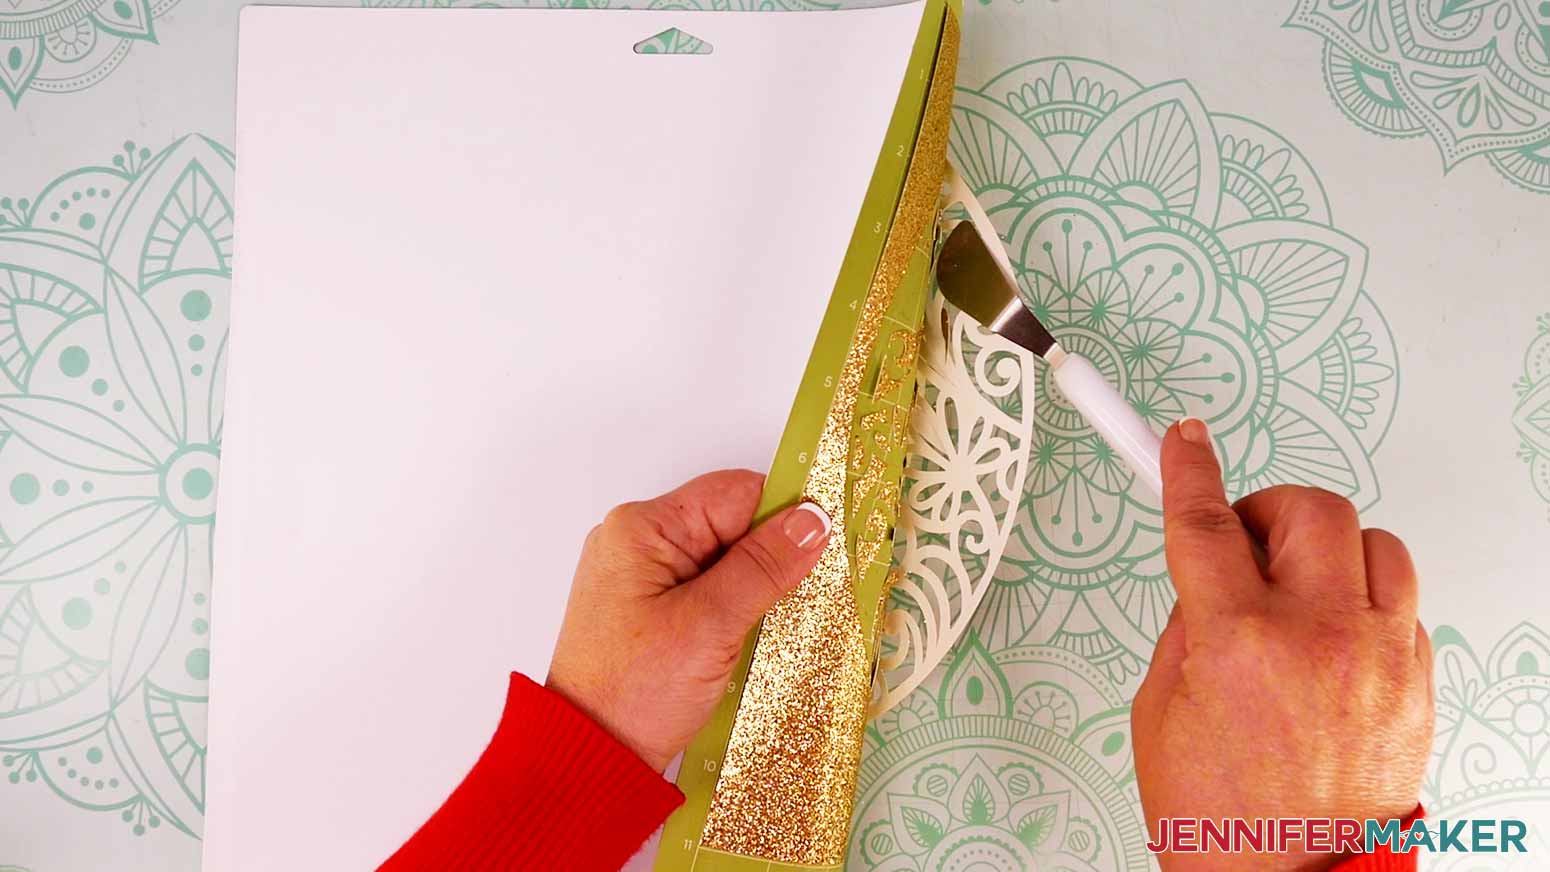
TIP: Be careful when removing intricate pieces like the moon. Use a spatula to carefully remove any intricate parts and a weeding tool to pop out any small pieces. If you have trouble with any of your cuts, check out my Cricut Tips & Tricks for Cleaner Cuts.
11. Here are what my cut pieces for the perpetual calendar look like.

STEP 3: ASSEMBLE YOUR PERPETUAL CALENDAR
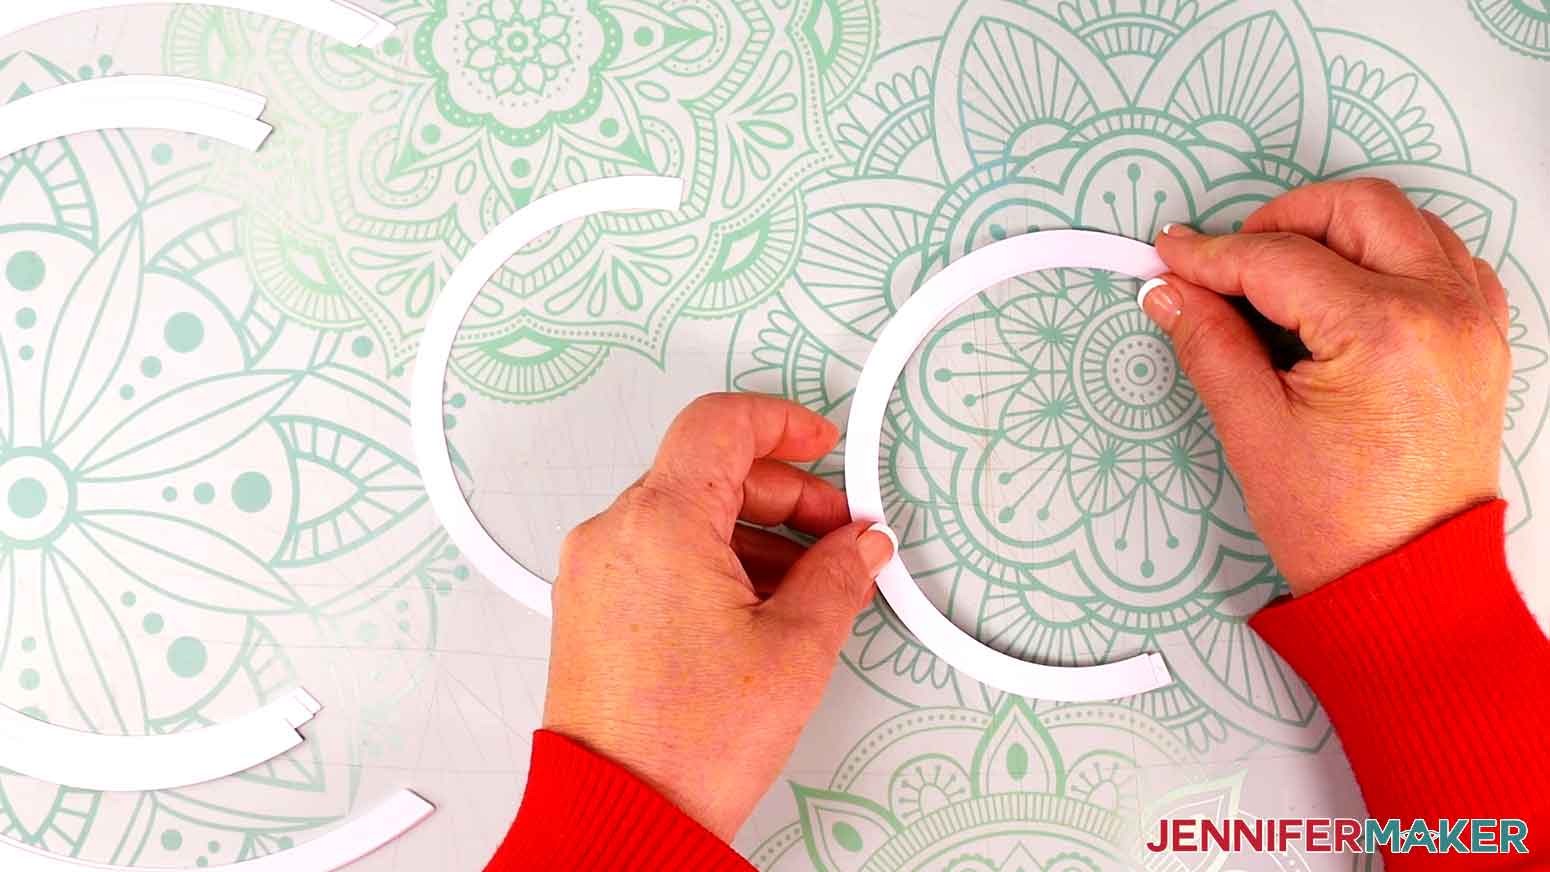
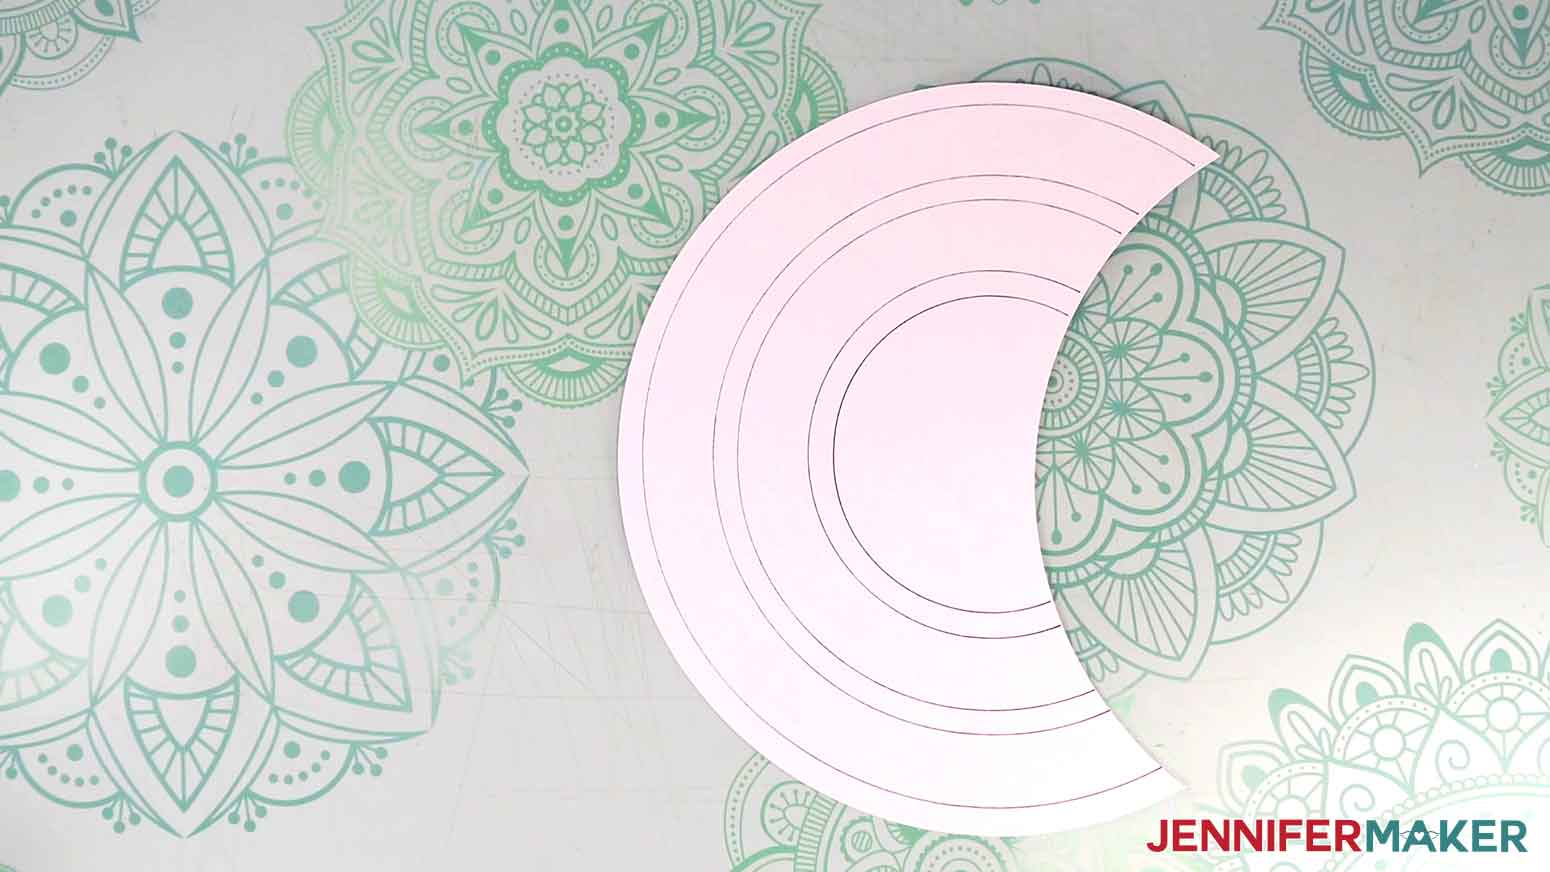
1. Lay out and stack your nine curved track pieces into three piles.
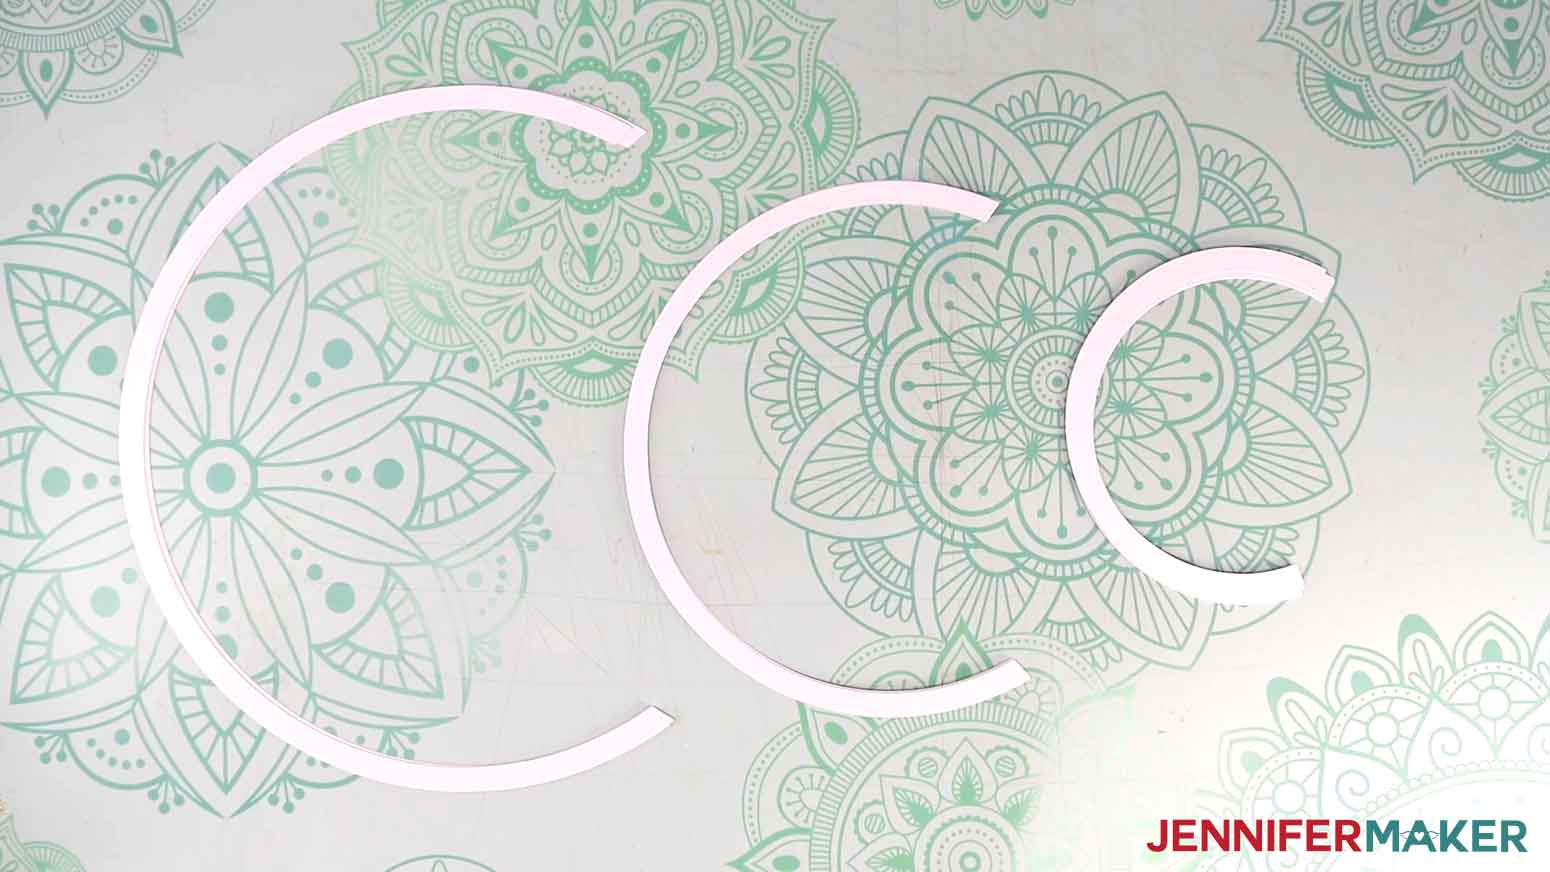
NOTE: They are face up when the curve is on the left and the opening is on the right.
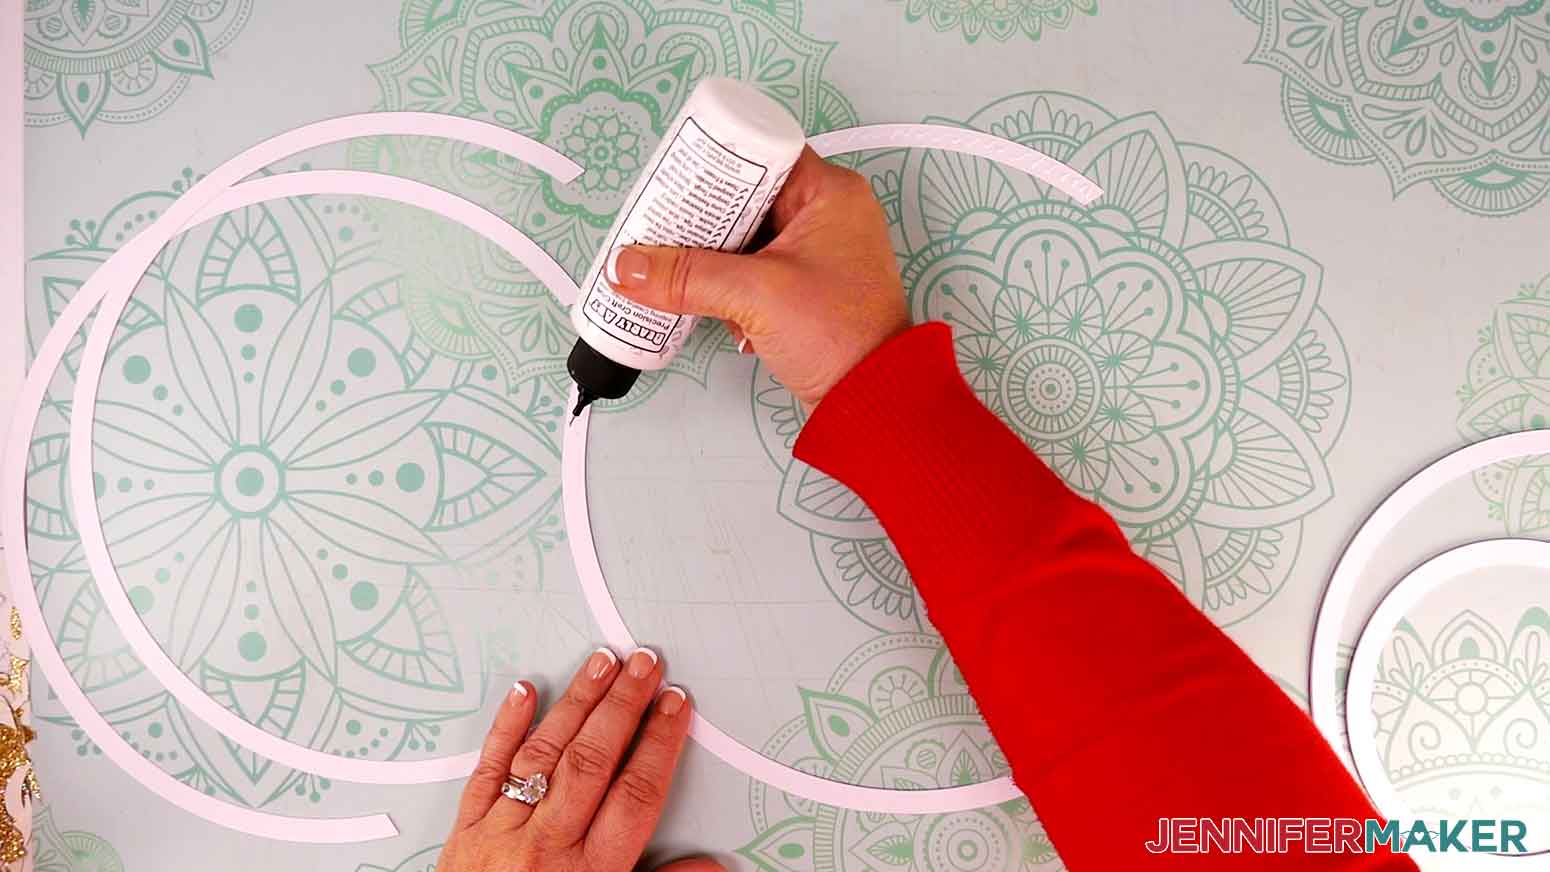
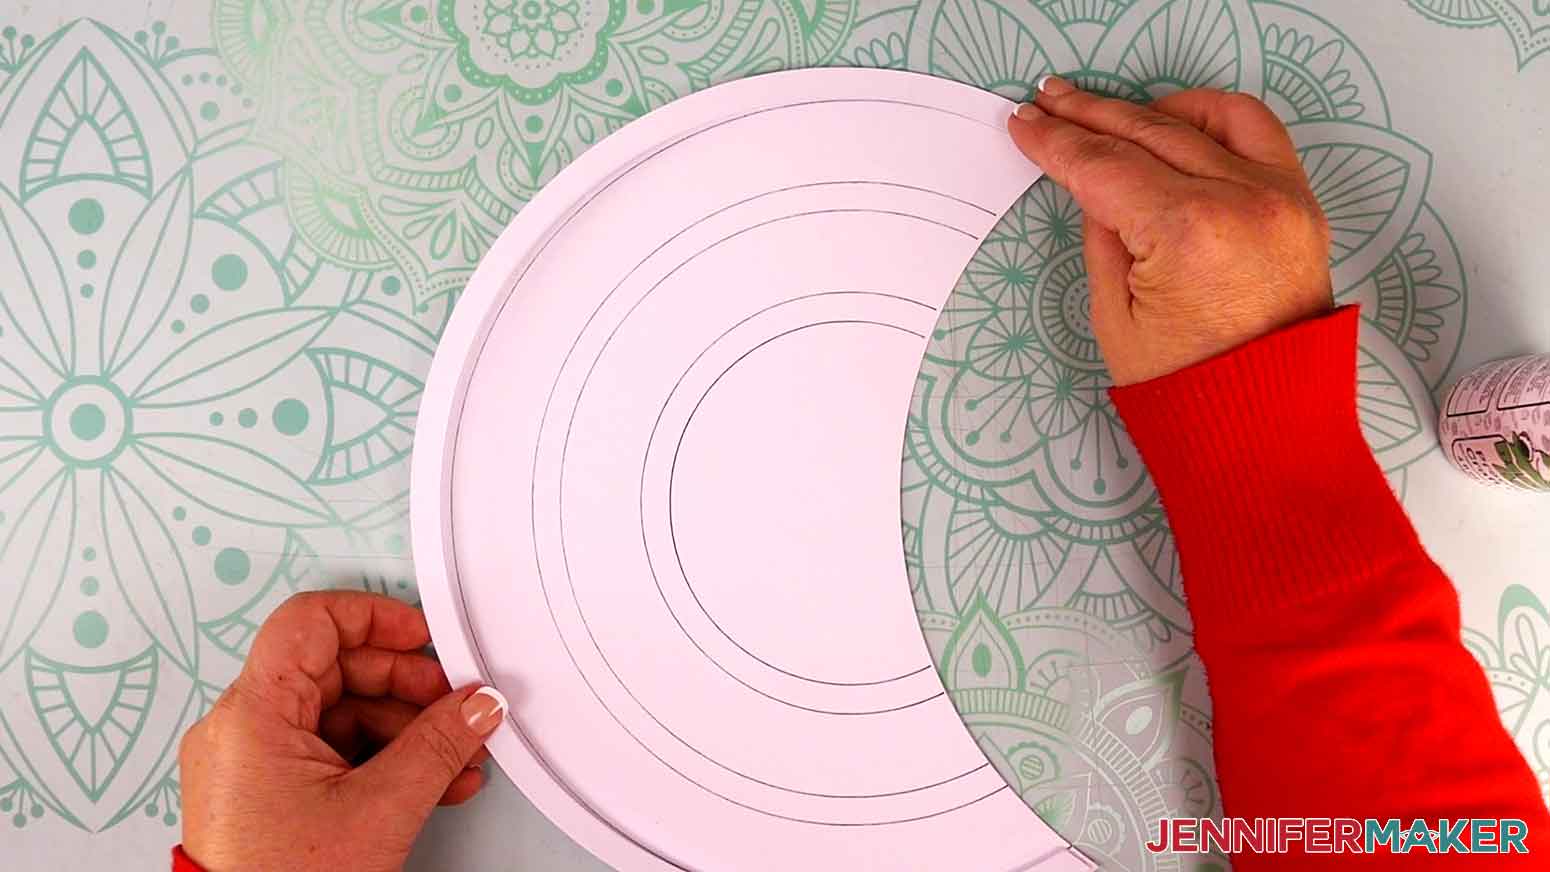
2. Start with the smallest track since it’s easiest to handle, and add glue to the front of one piece.
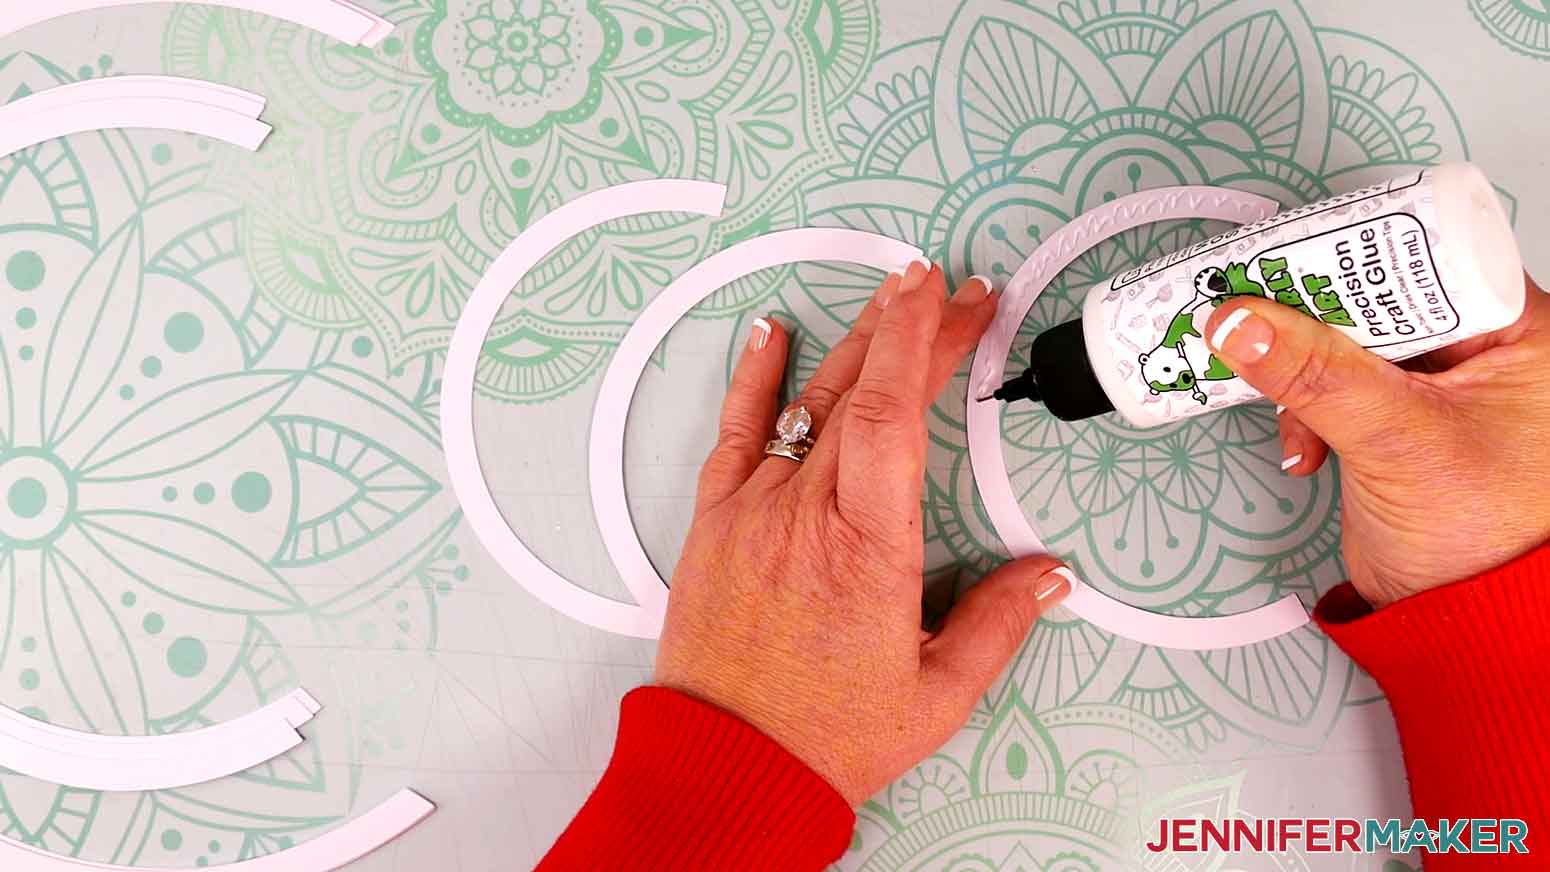
TIP: Work quickly so the glue doesn’t dry.
3. Line up a matching track piece on top but don’t press down until it’s perfectly aligned. This way, the wheels it touches can glide smoothly later.
TIP: Align a short edge perfectly, then the other, then lightly run your fingers along the arc to make sure the long edges are aligned, adjusting them as needed before the glue sets.
4. Press the two pieces together smoothly, wipe away any glue that seeps out, and let them dry.
5. Follow Steps 2-4 to glue the third small track piece on top.
6. Repeat the process with the next three larger arcs to make the middle track piece.
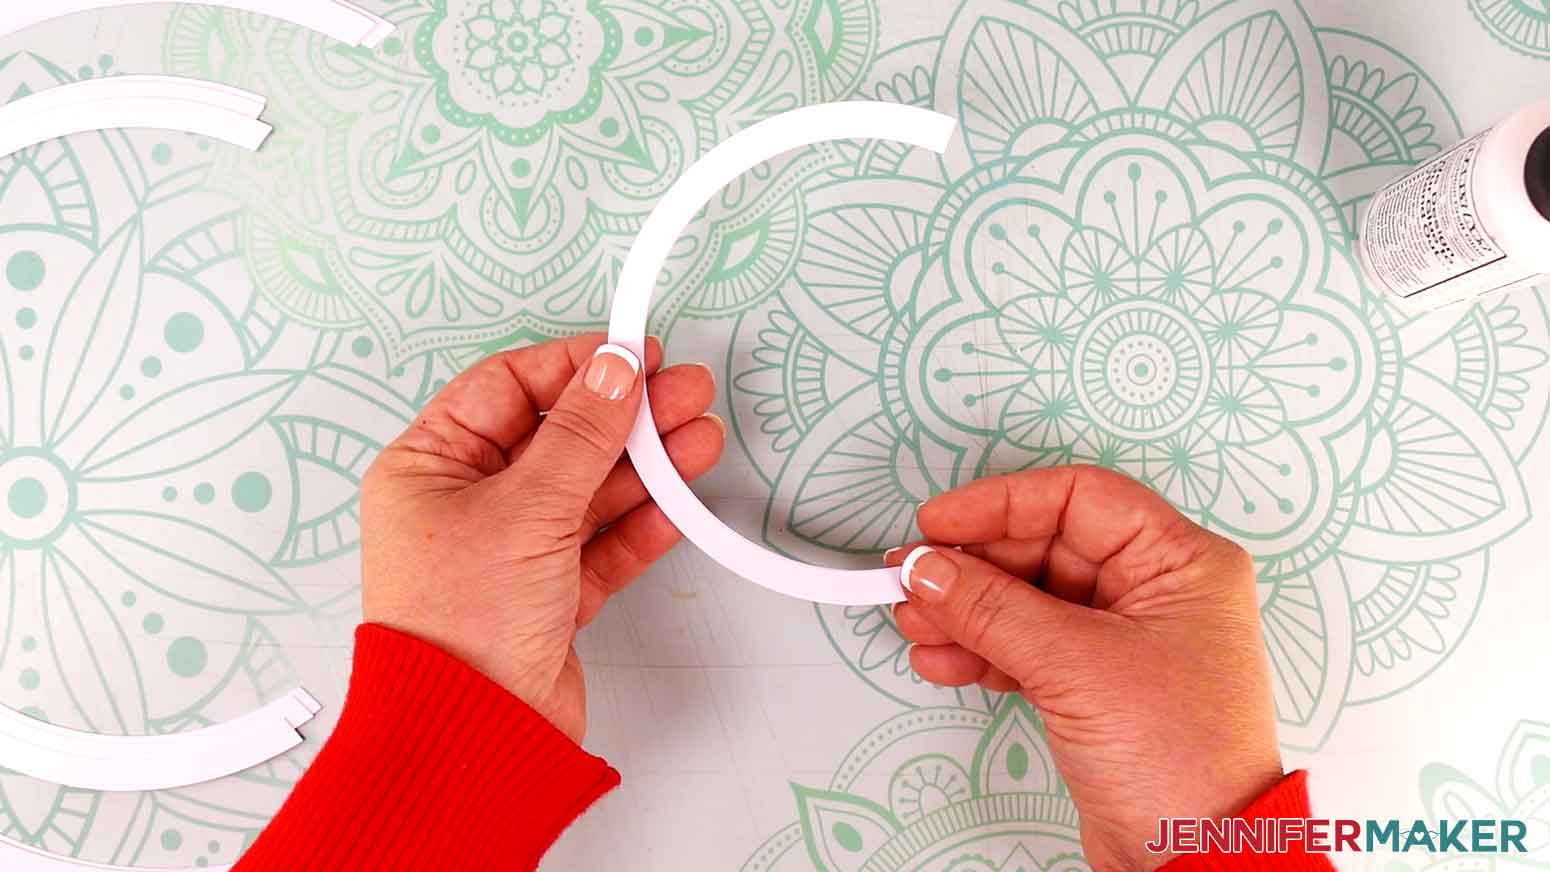
7. The largest track pieces are too large to align before the glue dries, so add glue to half of one arc at a time.
8. Press the first two pieces together, align them, and let the glue dry.
TIP: Make sure the other edges will be aligned, but don’t add glue to the second half yet.
9. Gently lift the unglued half to add glue between the layers, then align the rest of the arc and press it to dry.
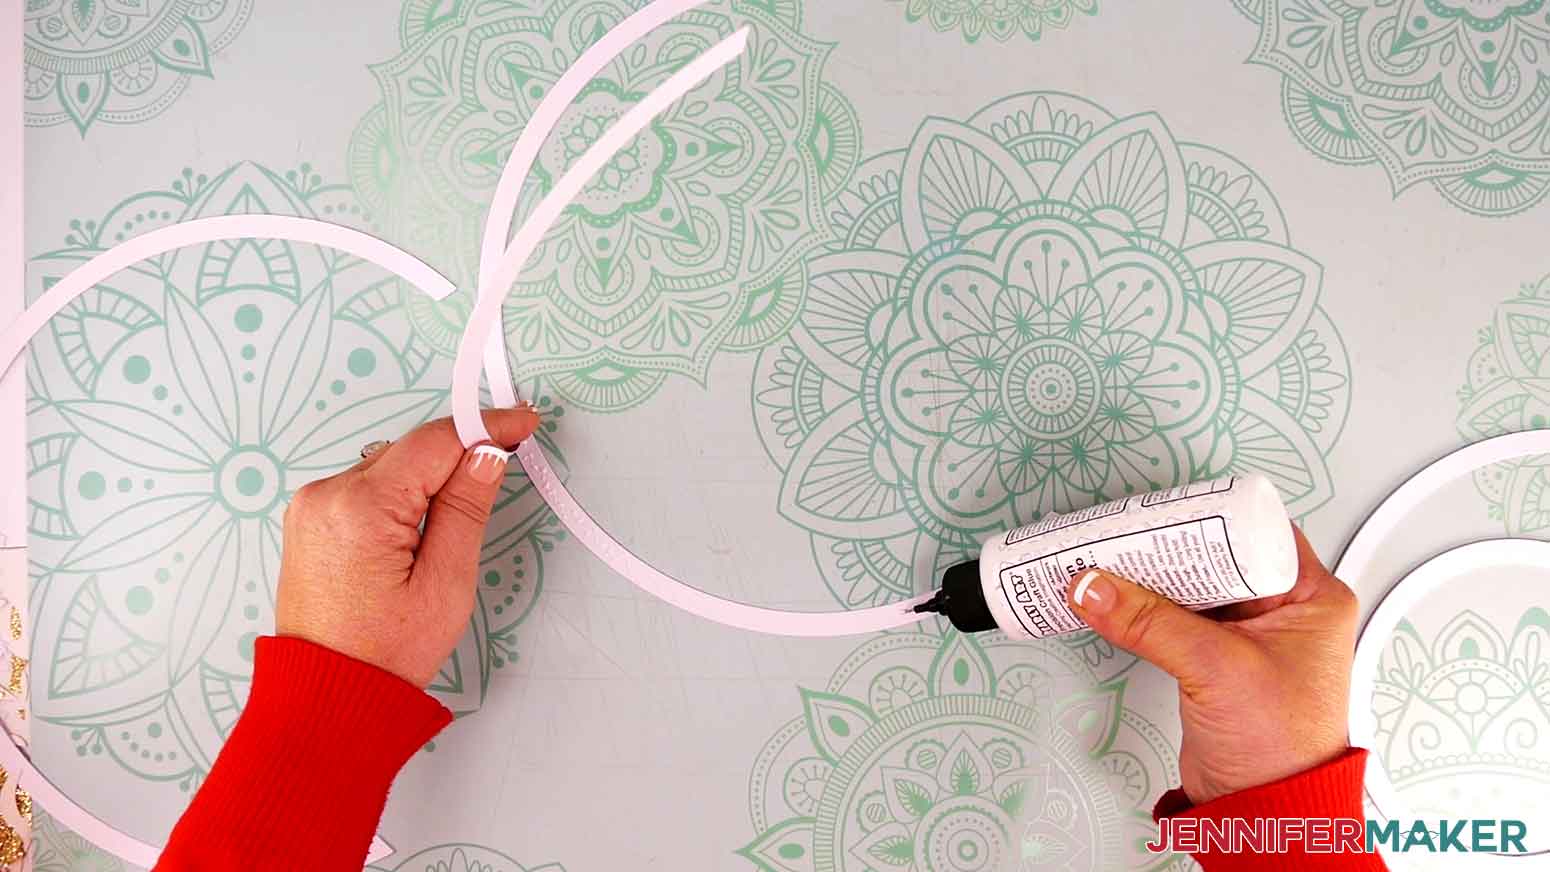
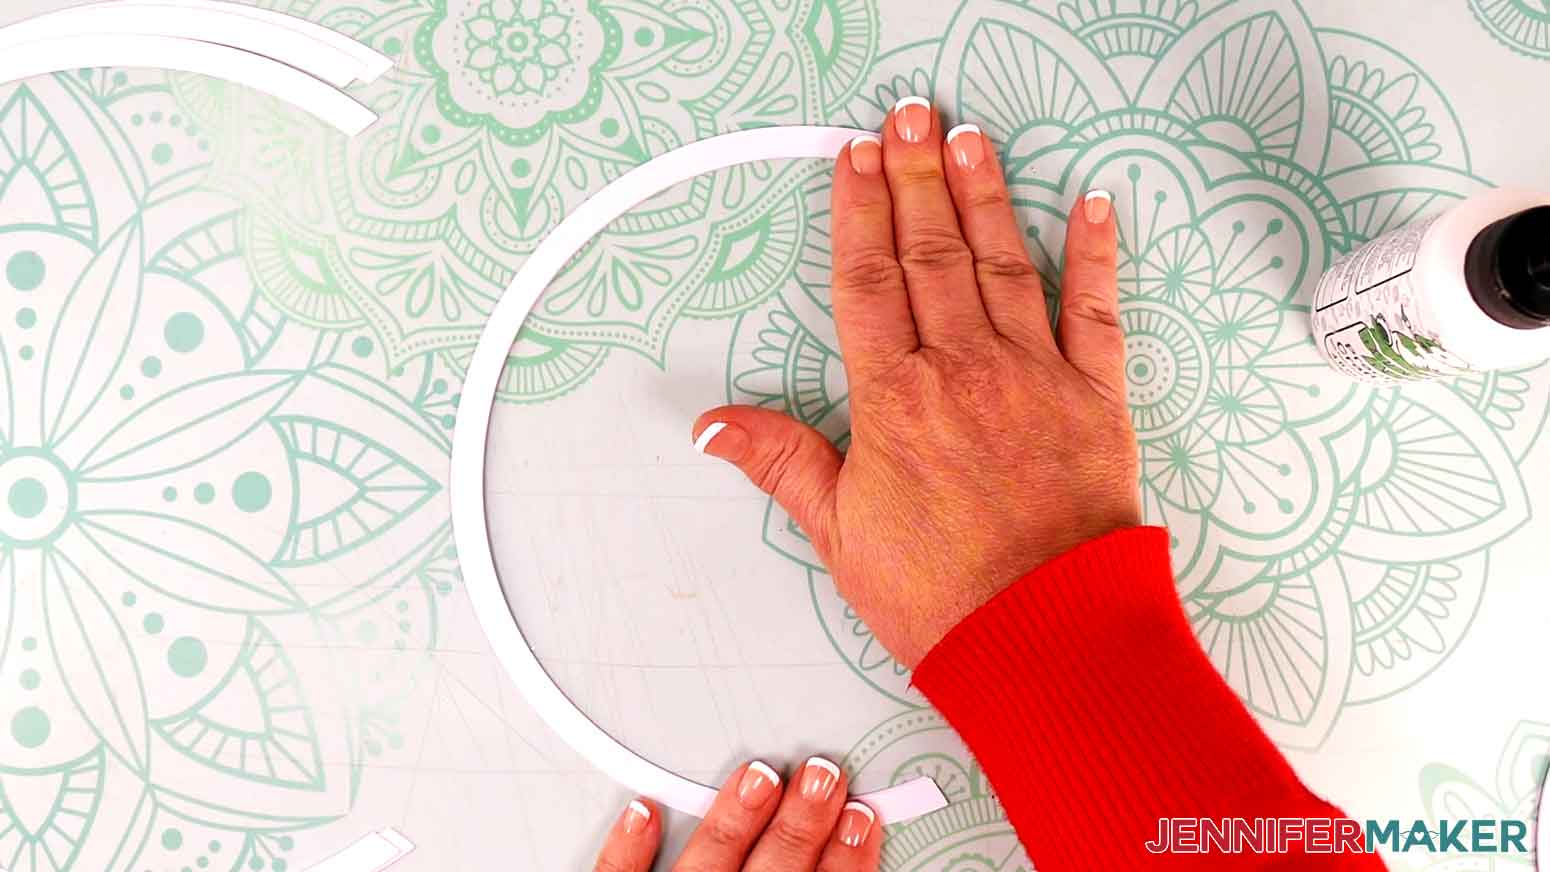
10. Add the third layer to the large track using Steps 7-9.
11. Use Steps 2-4 to align and glue the layers for the smallest center and middle wheels, with two Kraft board layers on the bottom and the cardstock face up on top.
TIP: Unlike the tracks, the wheels will be visible in the end, so try not to get them dirty or let glue dry on the fronts. Also be sure the pen is completely dry on the cardstock wheels before starting to layer them.
12. Use Steps 7-9 to adhere the layers for the largest outer wheel one half at a time so the glue doesn’t dry too fast. You’ll have two Kraft board layers on the bottom and the cardstock face up on top.
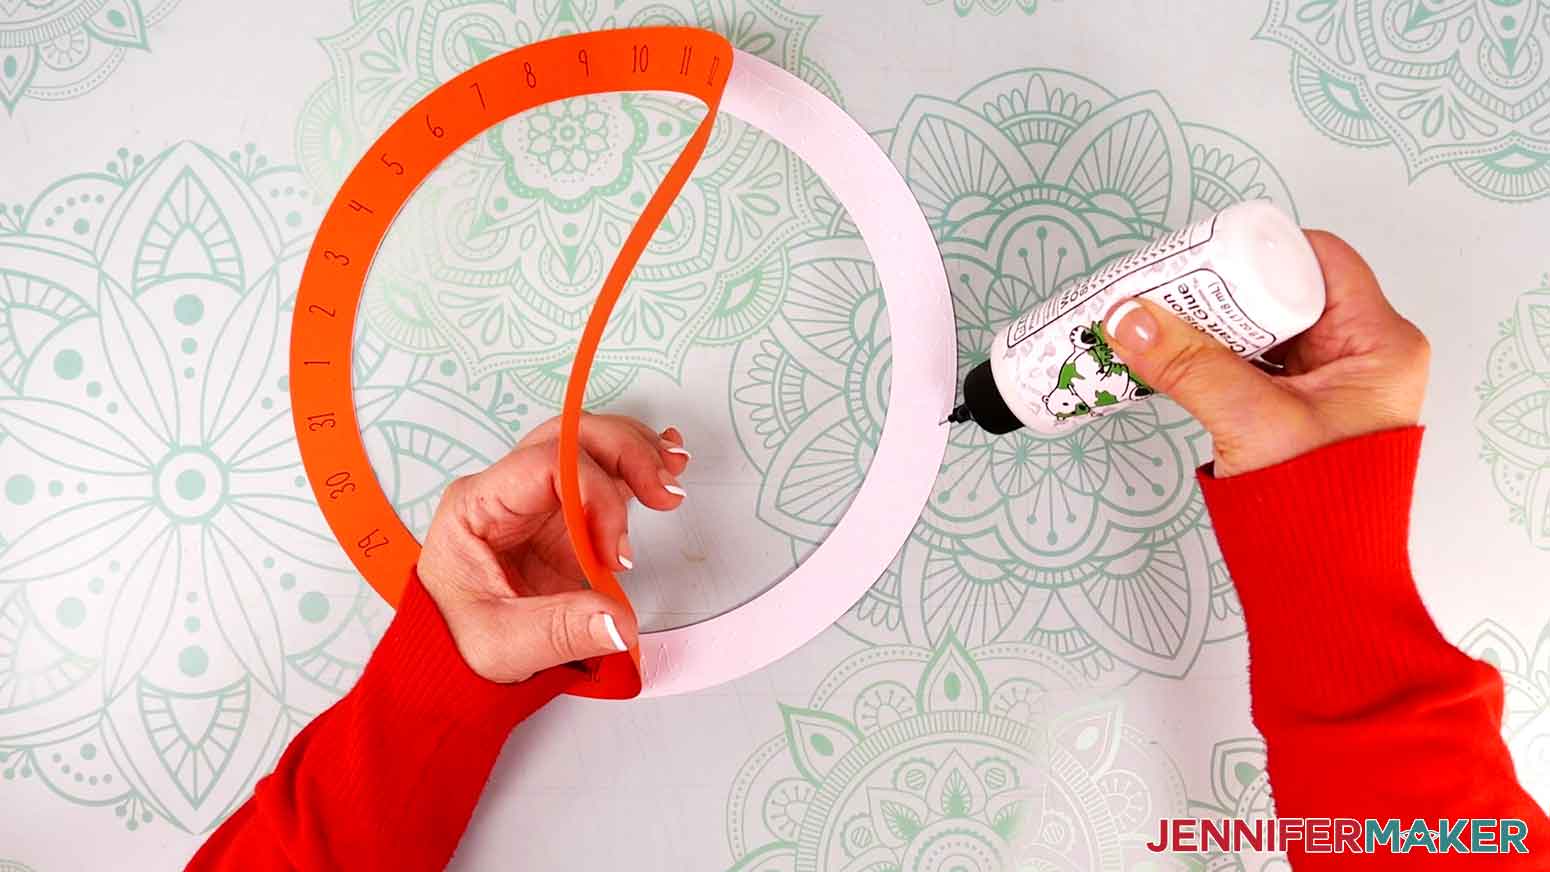
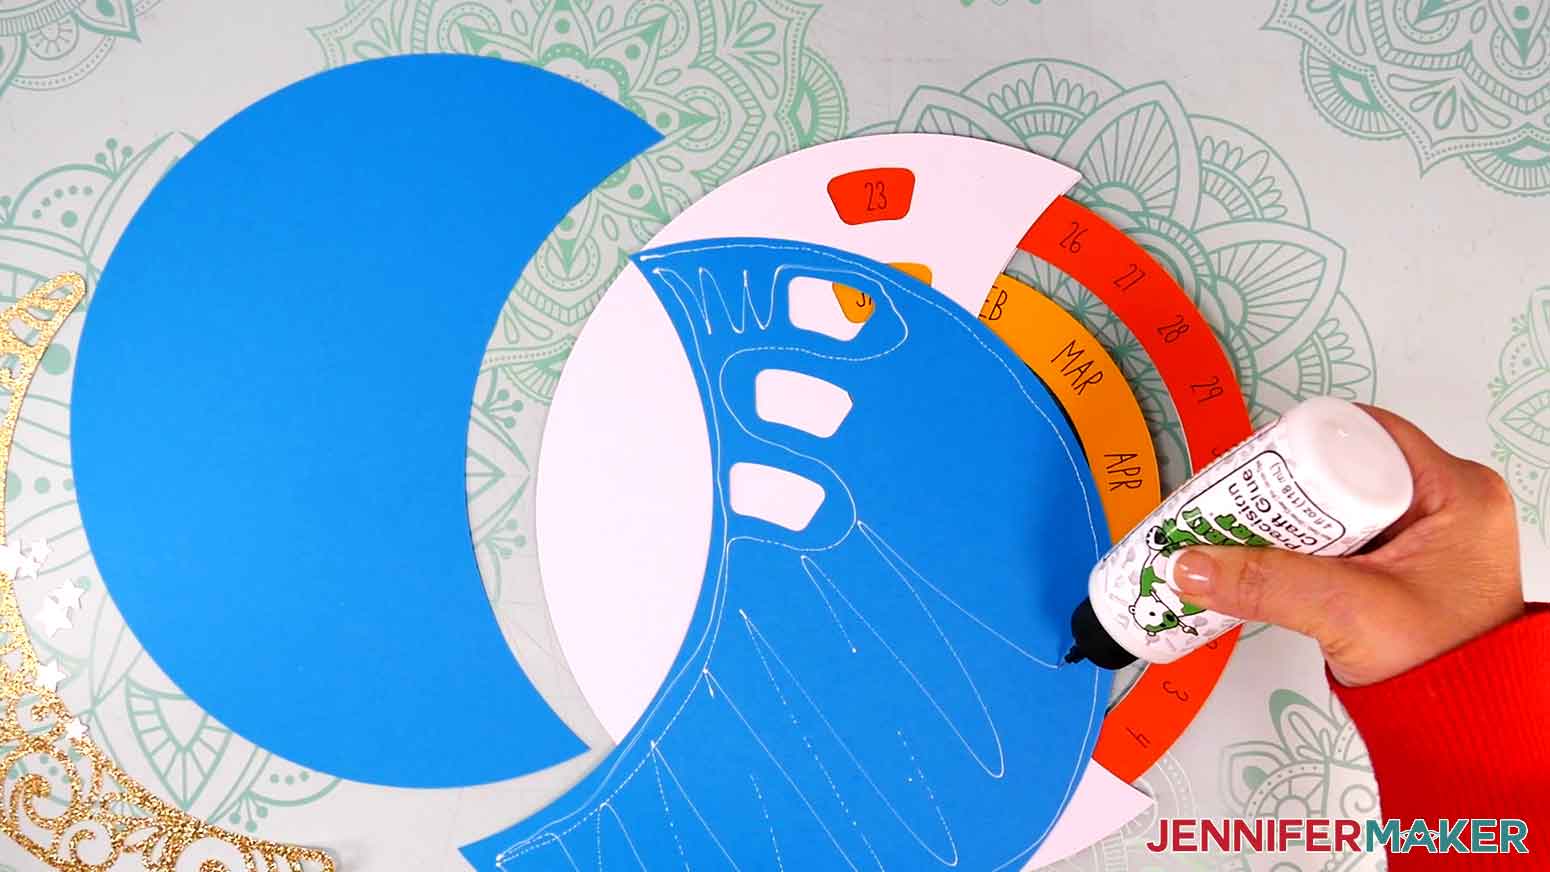
NOTE: The wheel layers should be very secure, so check the edges for any spots where they’re easily separated. If you find some, stick the glue’s precision tip between the layers to add a dot of adhesive, then press the layers together and wipe away any excess.
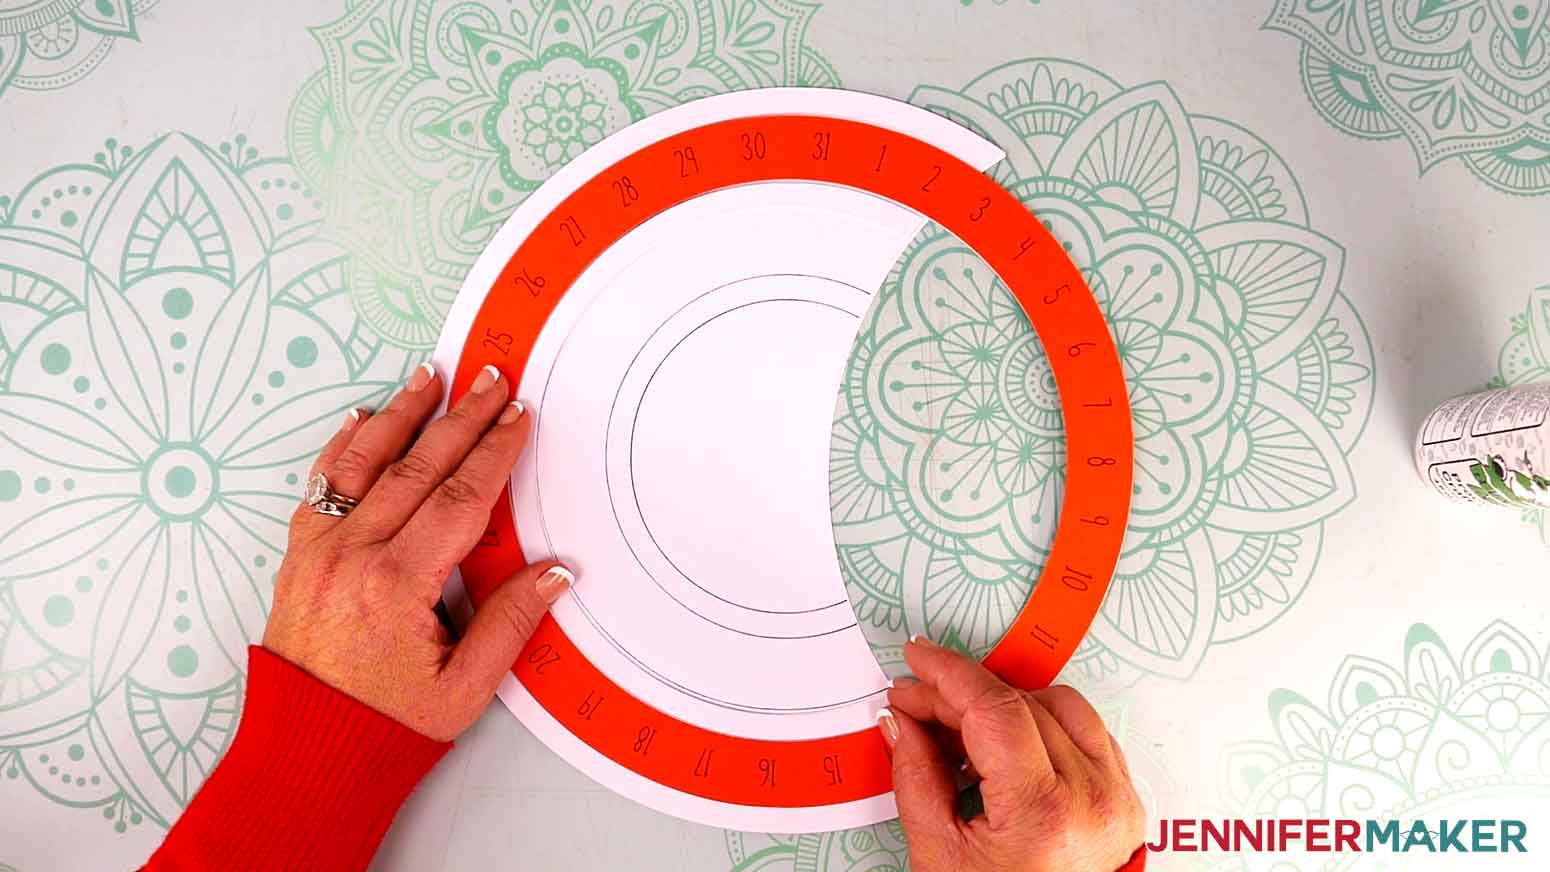
13. Set the back Kraft board piece with the drawn guidelines face up with the rounded edge to the left.
14. Glue and align the large track piece to the back, one half at a time, making sure the outer edges are flush and the track’s inner edge is aligned with the first guideline.
NOTE: When correctly positioned, there should be an even amount, about 1/16”, of the back visible at each short end of the track piece.
15. Make sure the large wheel’s layers are dry, then place it face up on the background, covering the next white section.
16. Position the middle layered track piece face up just inside the wheel, with the same 1/16” of background uncovered at either end.
17. Hold the background and middle track still, then rotate the large wheel to make sure it will glide smoothly once the next track is adhered. Adjust the track placement as needed.
18. Lift the middle track and add glue to the background within its guidelines.
NOTE: Work quickly so the glue doesn’t dry, but avoid getting glue on the large wheel.
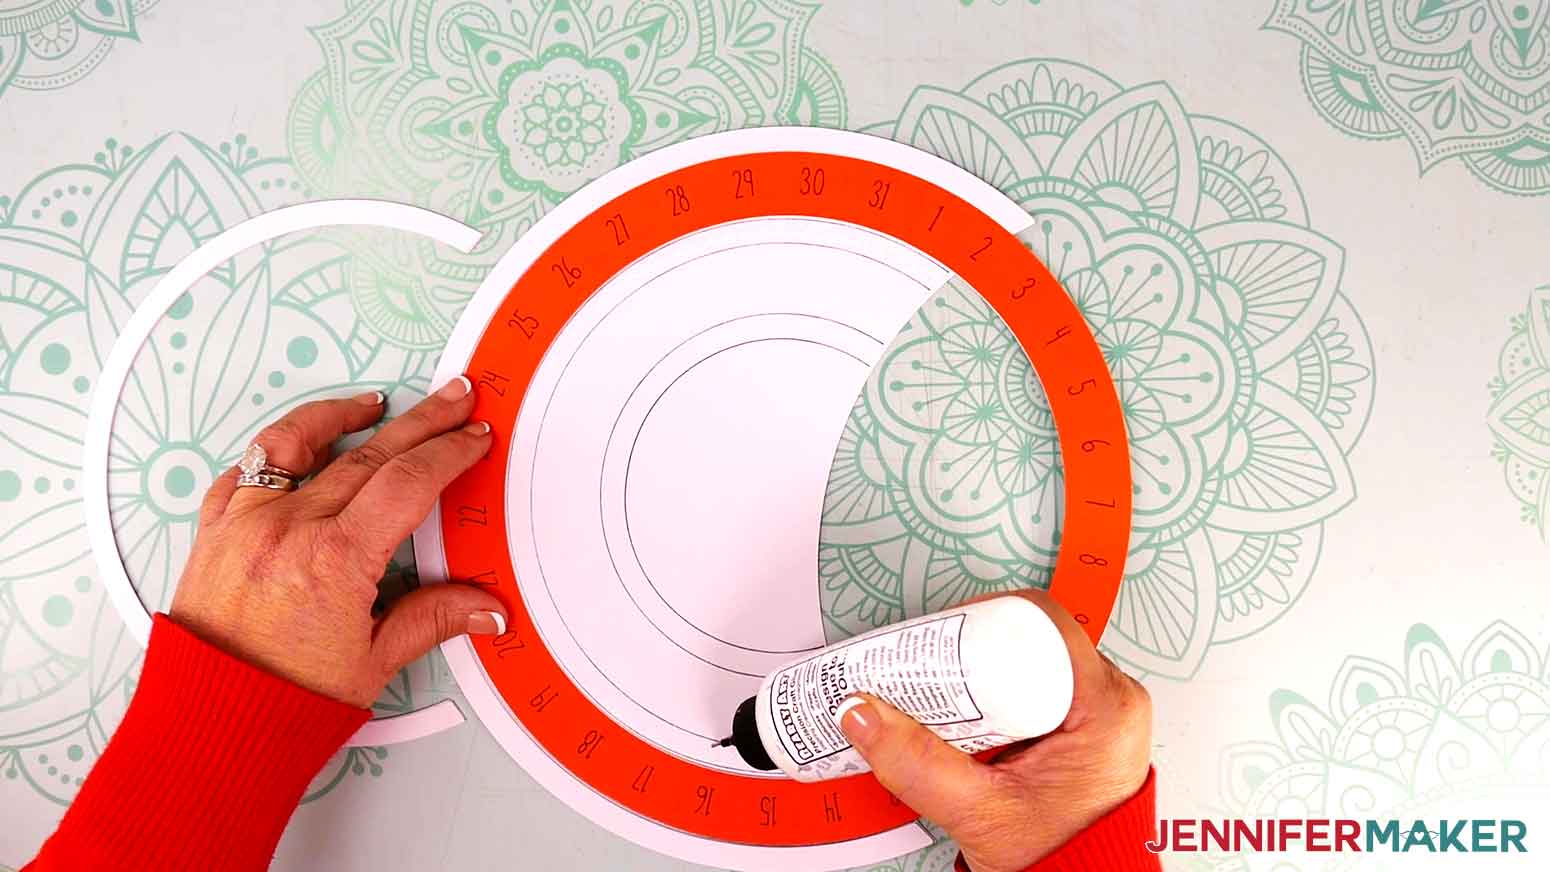
19. Position the middle track on the glue and press it lightly in place within the guidelines. Make sure the large wheel still glides easily and adjust the track if needed.

20. Press down all along the track to secure it to the background.
21. Add the middle wheel, the last smallest track, and the center wheel to the background.
22. Use steps 16-20 to glue the final track to the background.
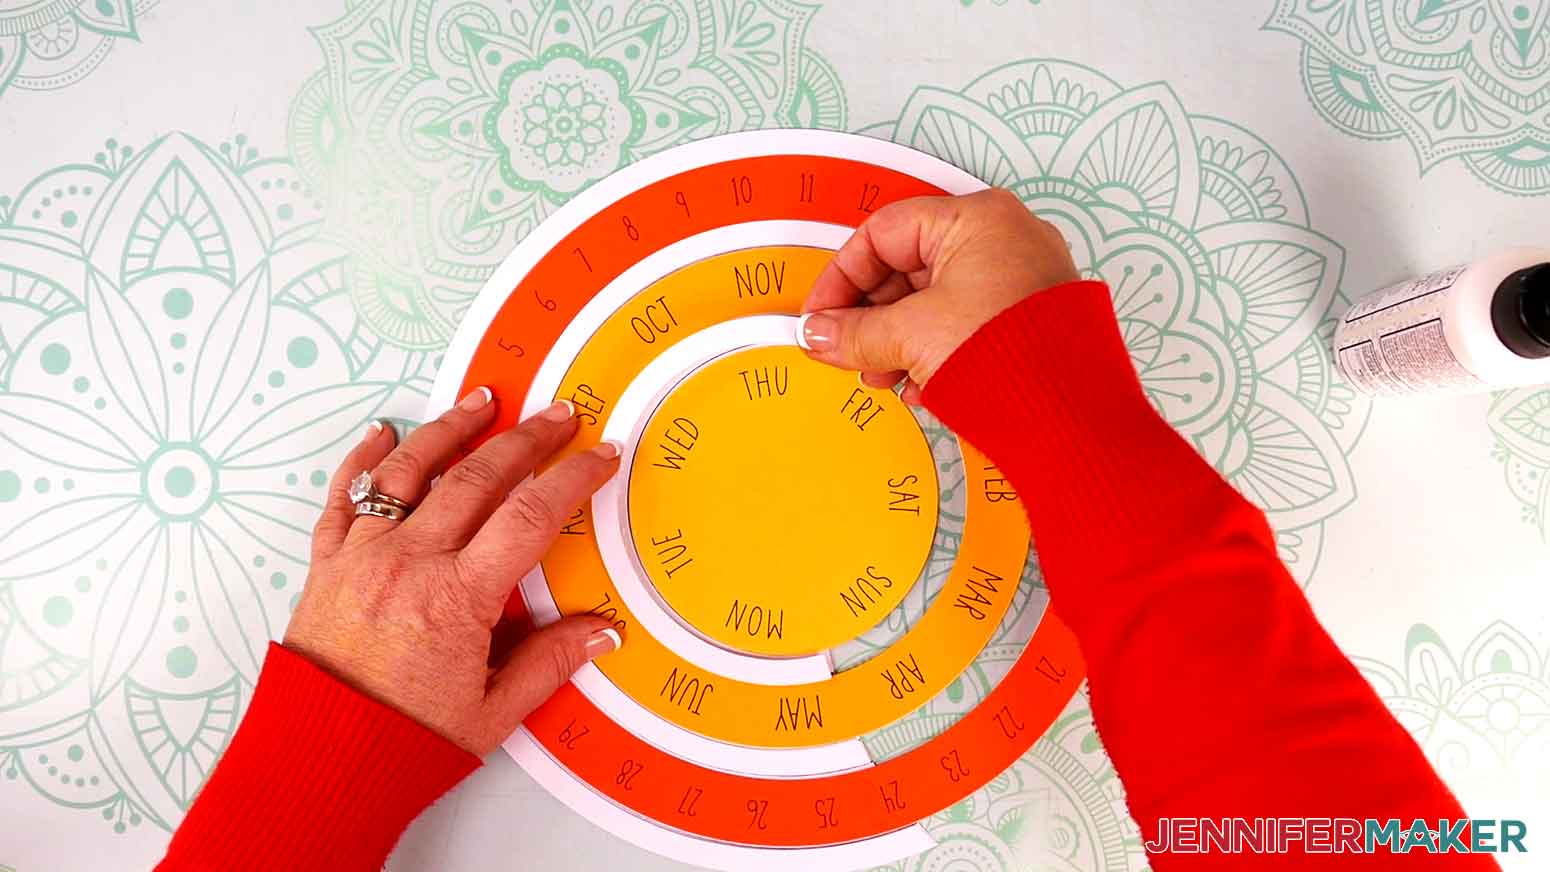
23. Make sure the tracks are secure and all three wheels glide smoothly.
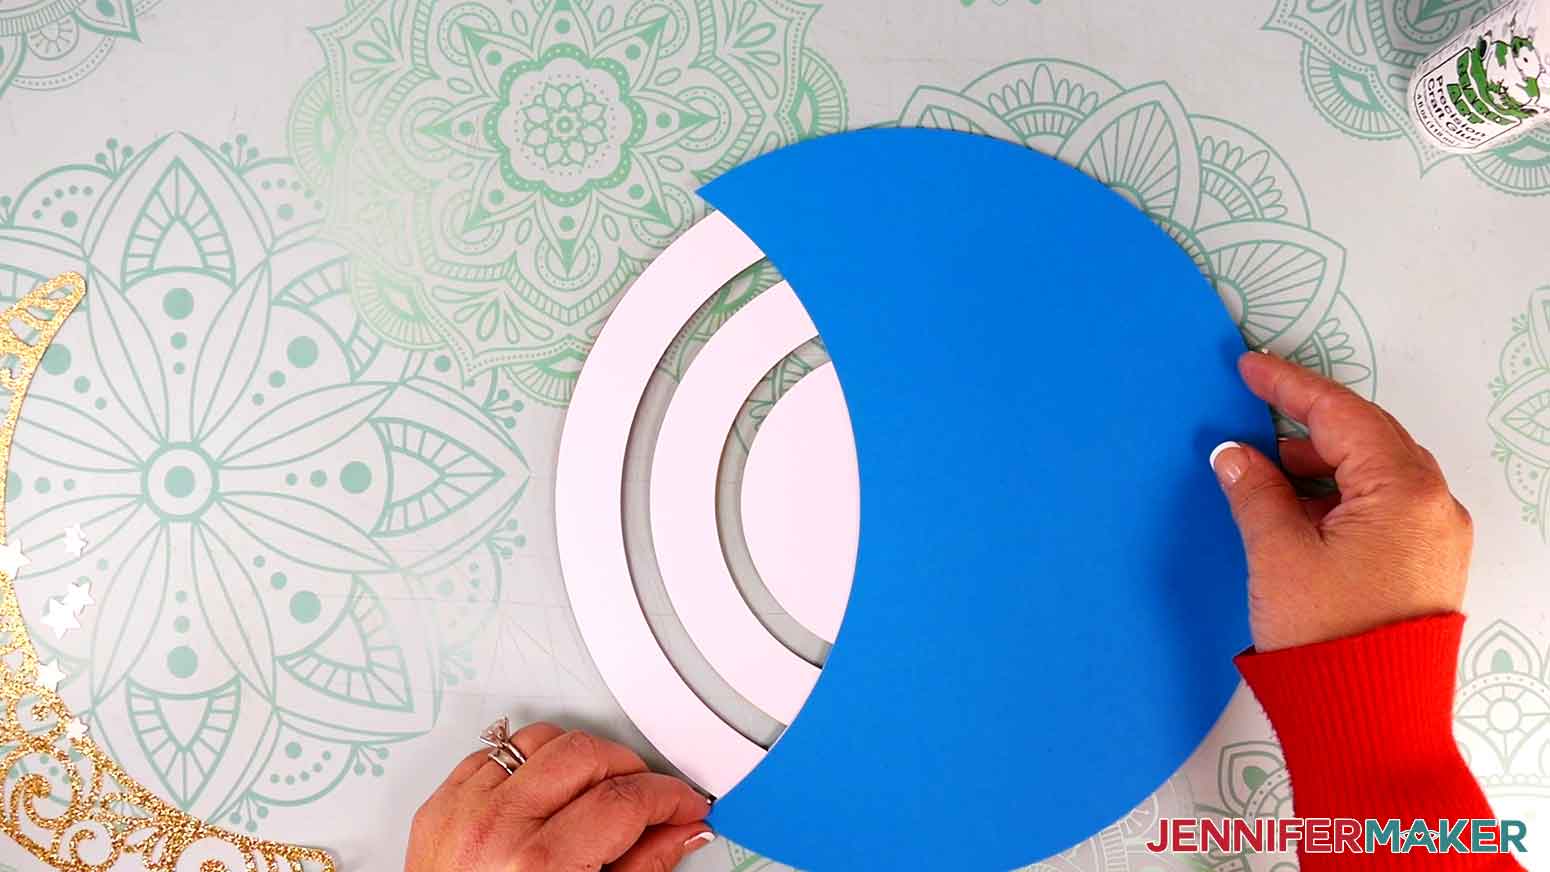
24. Leave them in place and put the Kraft board front piece on top, making sure it aligns with the background shape.
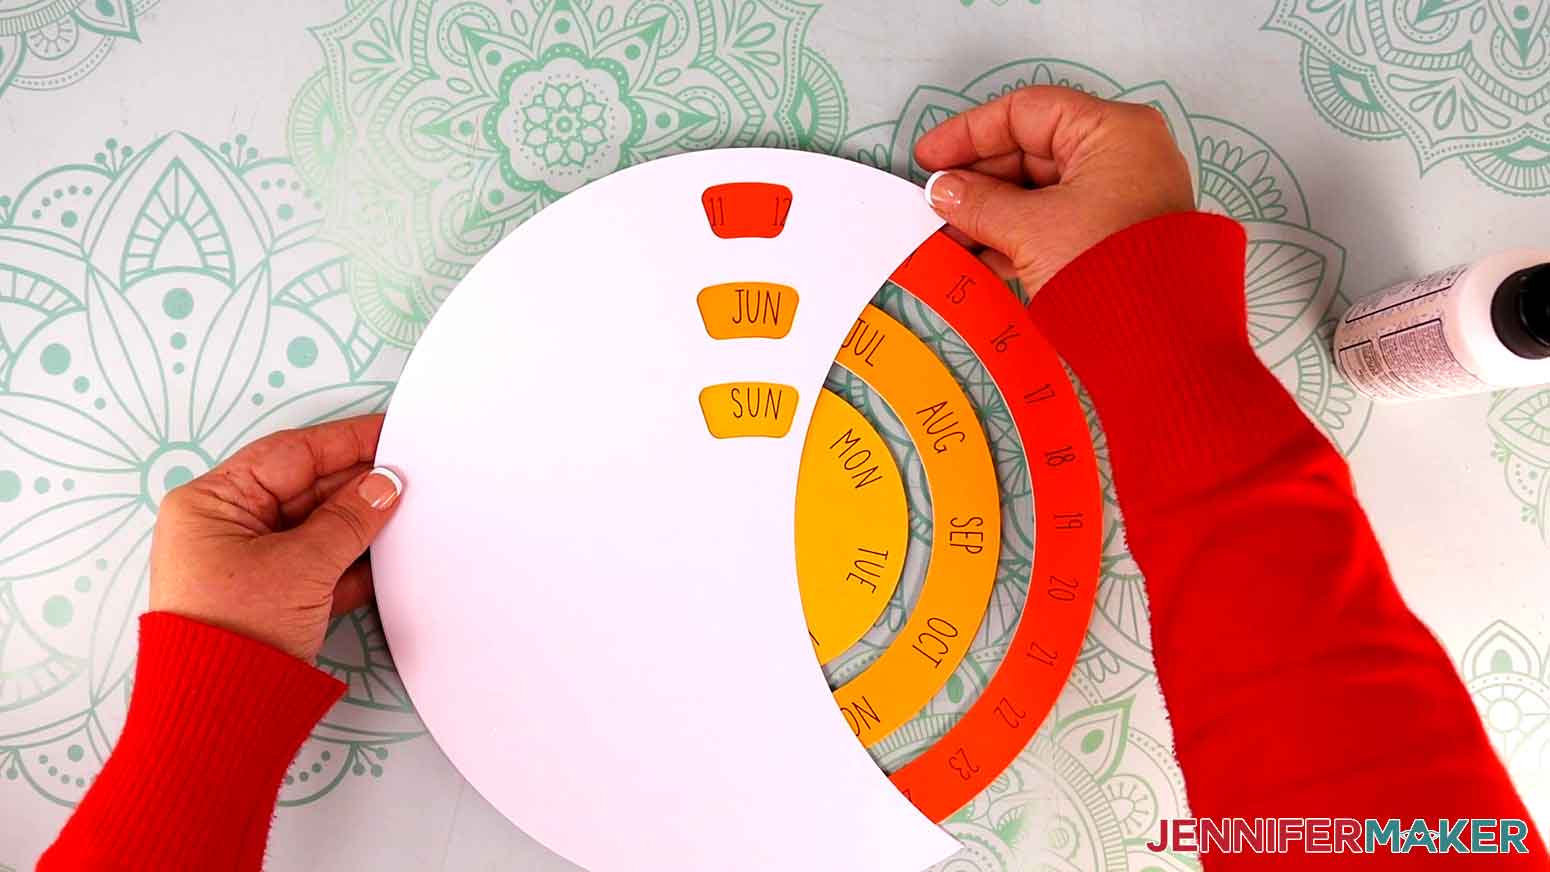
25. Remove the front piece and quickly add glue to the top of all three track pieces.
NOTE: The front Kraft board must adhere to the tracks, but not the wheels, so don’t add so much glue that it will seep out and touch the wheels.
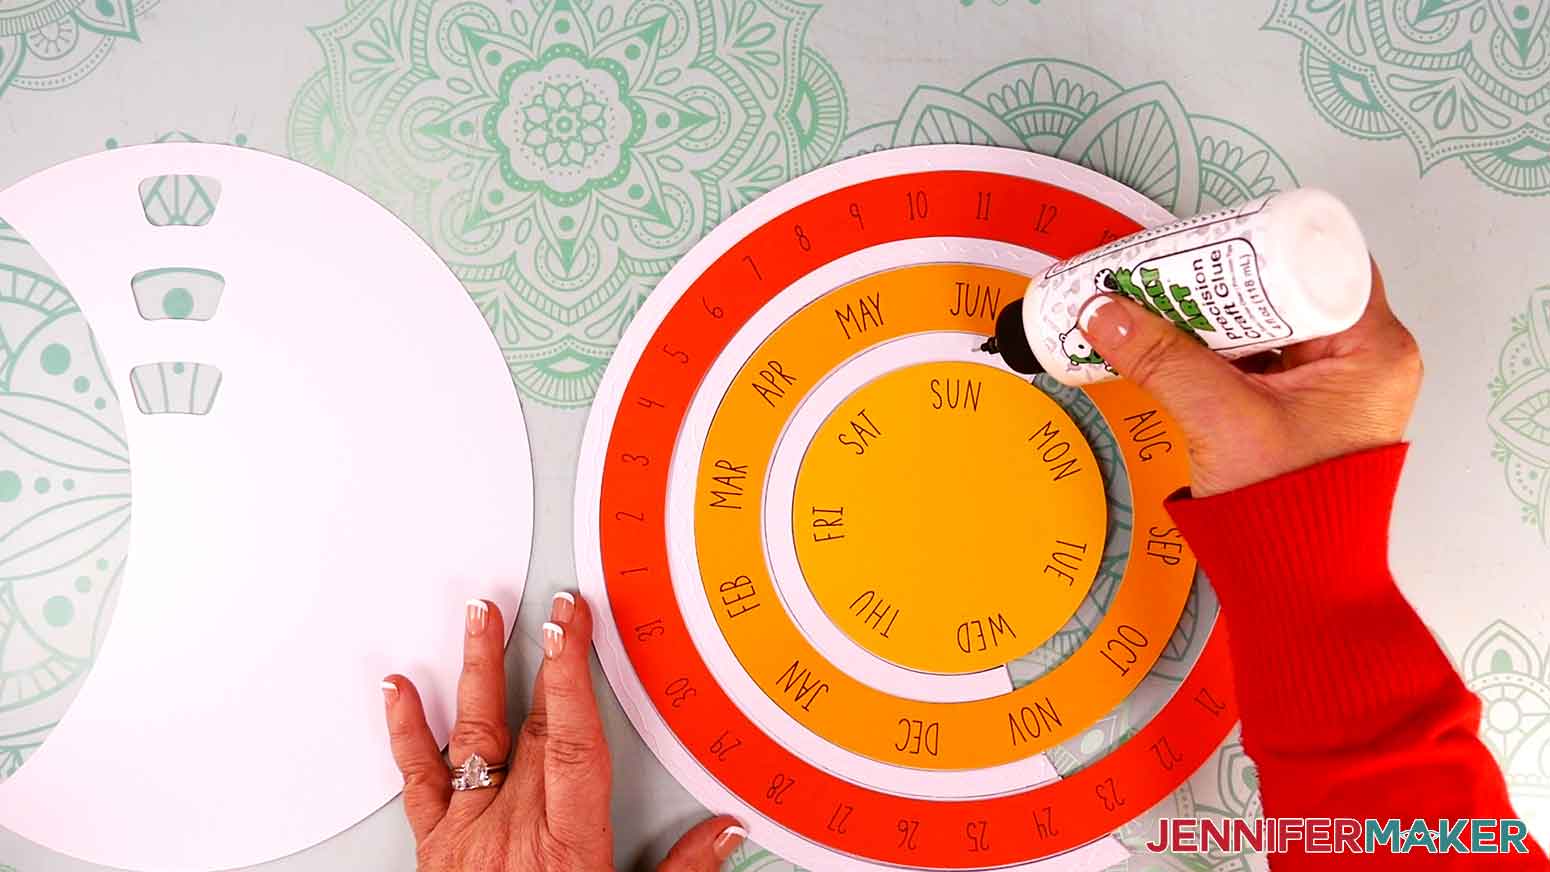
26. Quickly put the front piece back in place, making sure the edges are aligned and the wheels still glide.
27. Press down along the glued areas where the Kraft board touches the three tracks.
TIP: Keep rotating the wheels for a bit to make sure any extra glue doesn’t stick them in place. As their surfaces become visible, wipe any glue away, avoiding the pen lines so they don’t smudge.
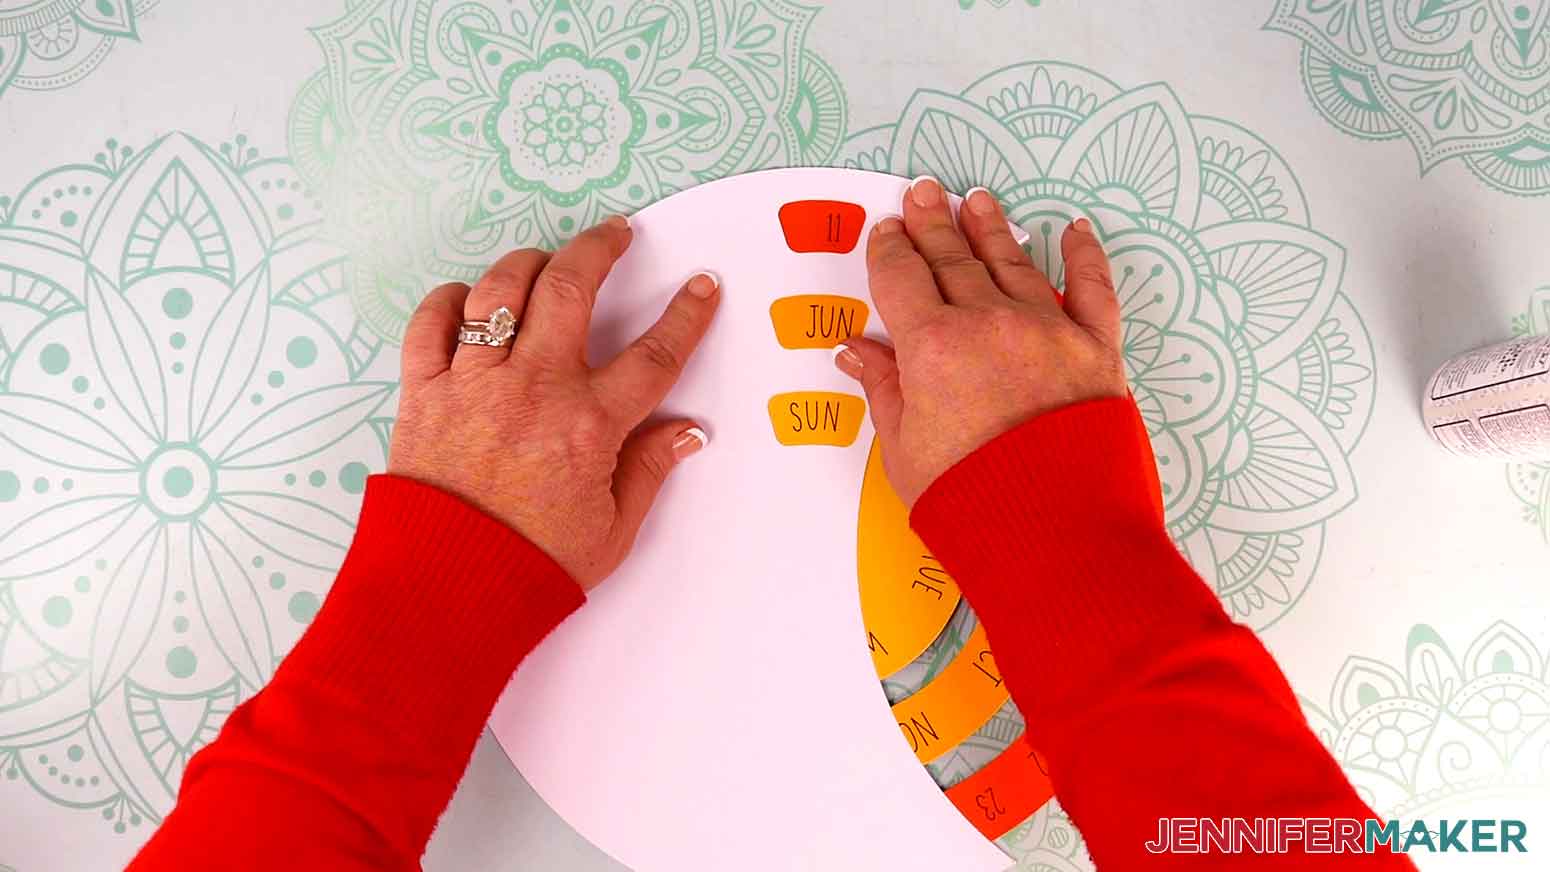
28. Add glue to the back of the front cardstock piece and align it to the front Kraft board piece along the edges and cutouts.
TIP: Make sure to apply glue close to the edges and tips of the piece so they don’t lift with use.
29. Re-check that the wheels all rotate smoothly.
NOTE: Hold the calendar in one hand by the outer edge to spin the outer two wheels without pinching them in place. Reach your thumb through from the back to move the smallest center wheel.
30. Flip the calendar over and glue the back cardstock piece, aligning it to the outer edge of the Kraft board.
31. If you made the optional moon and star decorations, glue them face up on the front wherever you’d like.
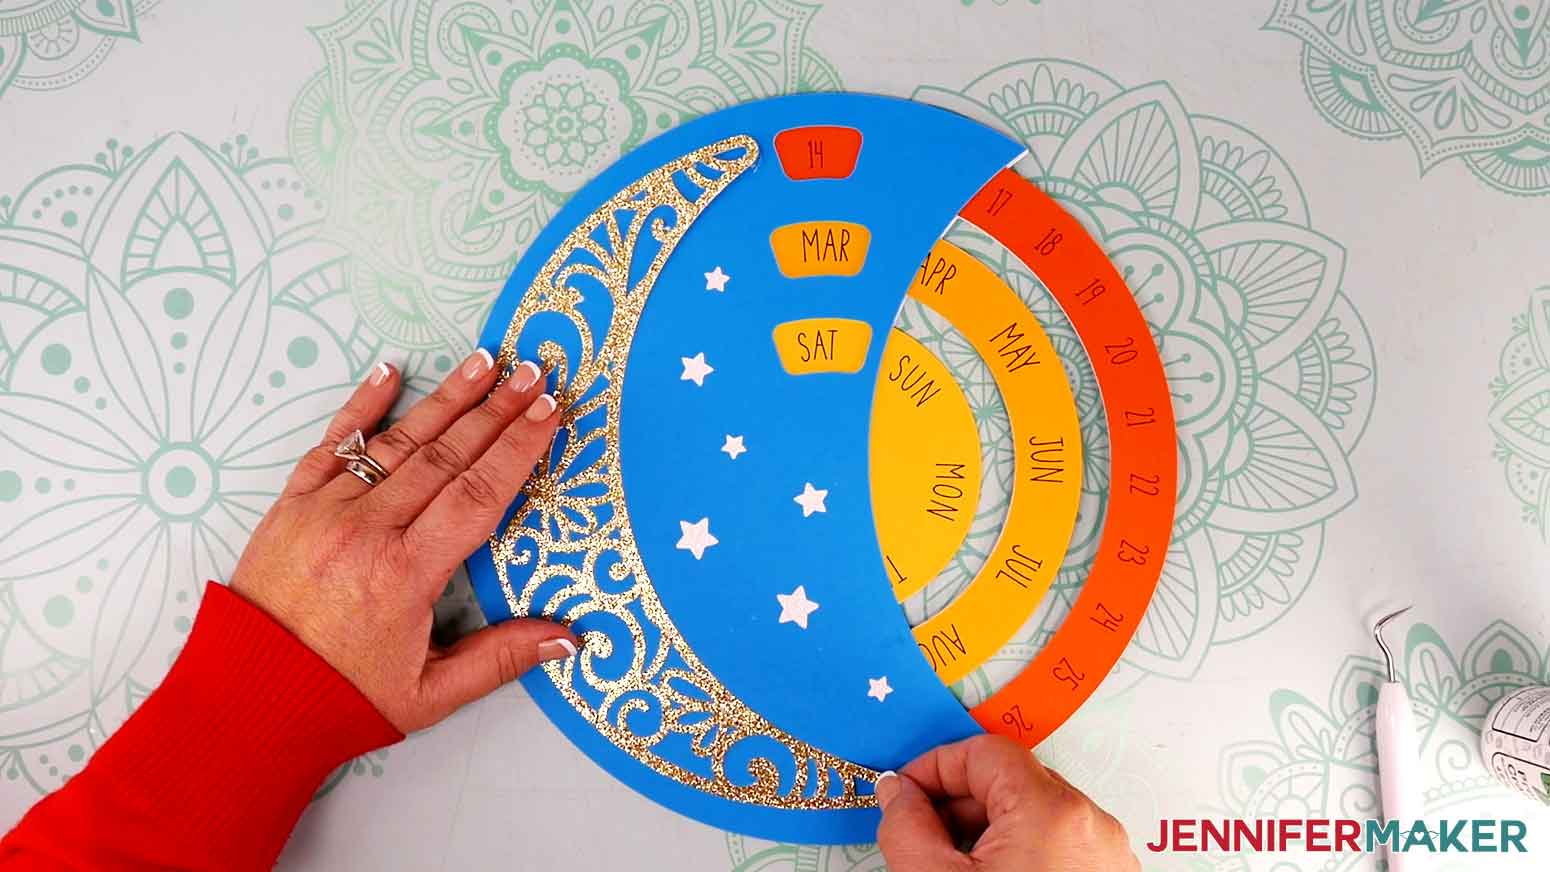
TIP: You can refer back to your Cricut Design Space Canvas for help with positioning.
ASSEMBLE THE OPTIONAL STAND
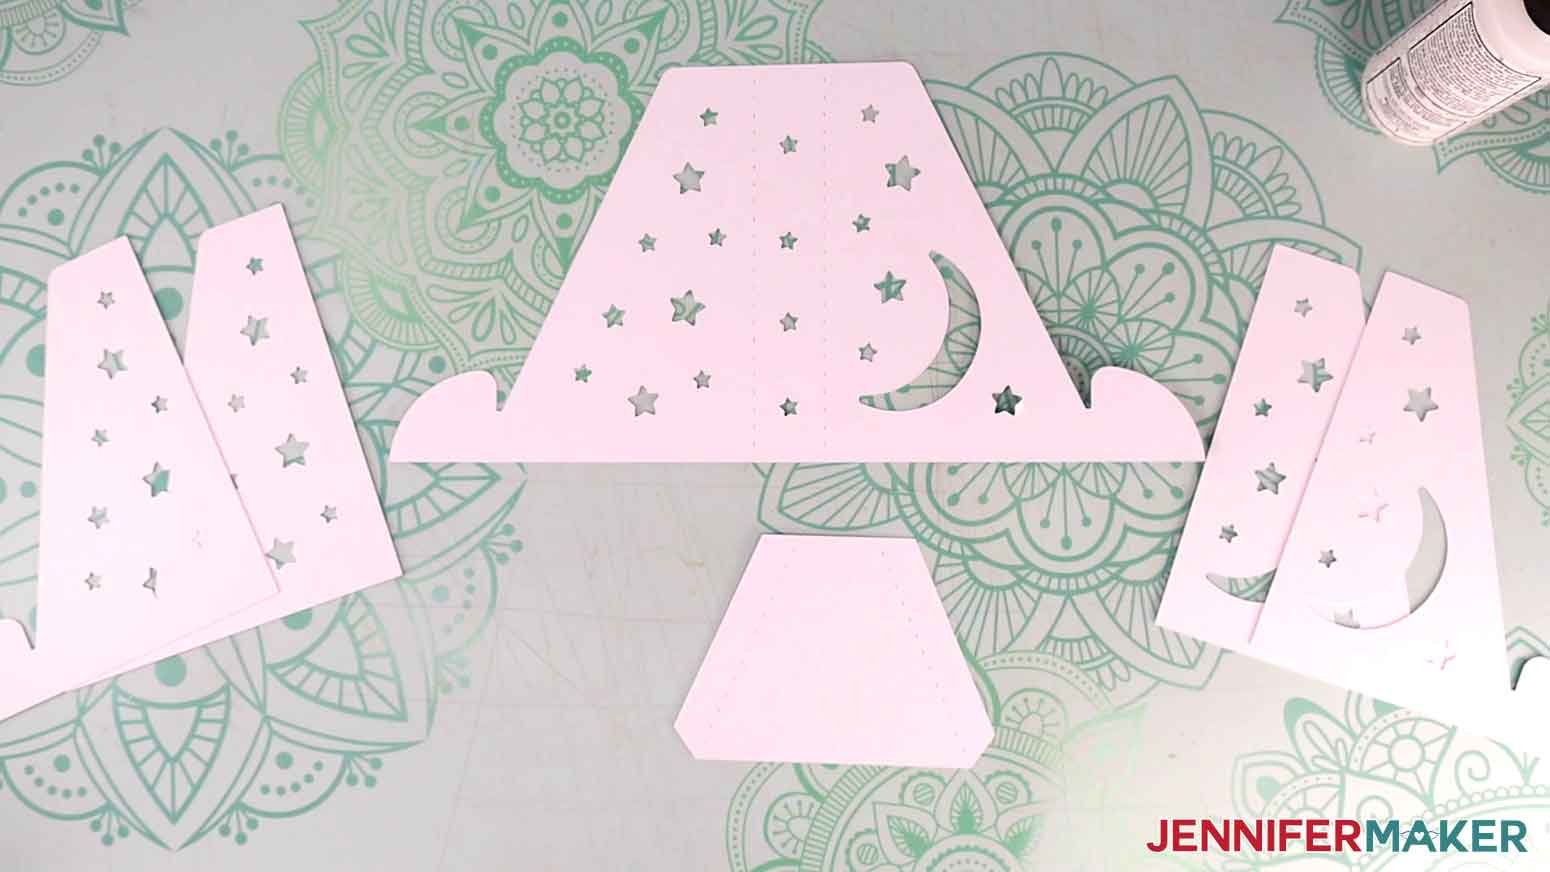
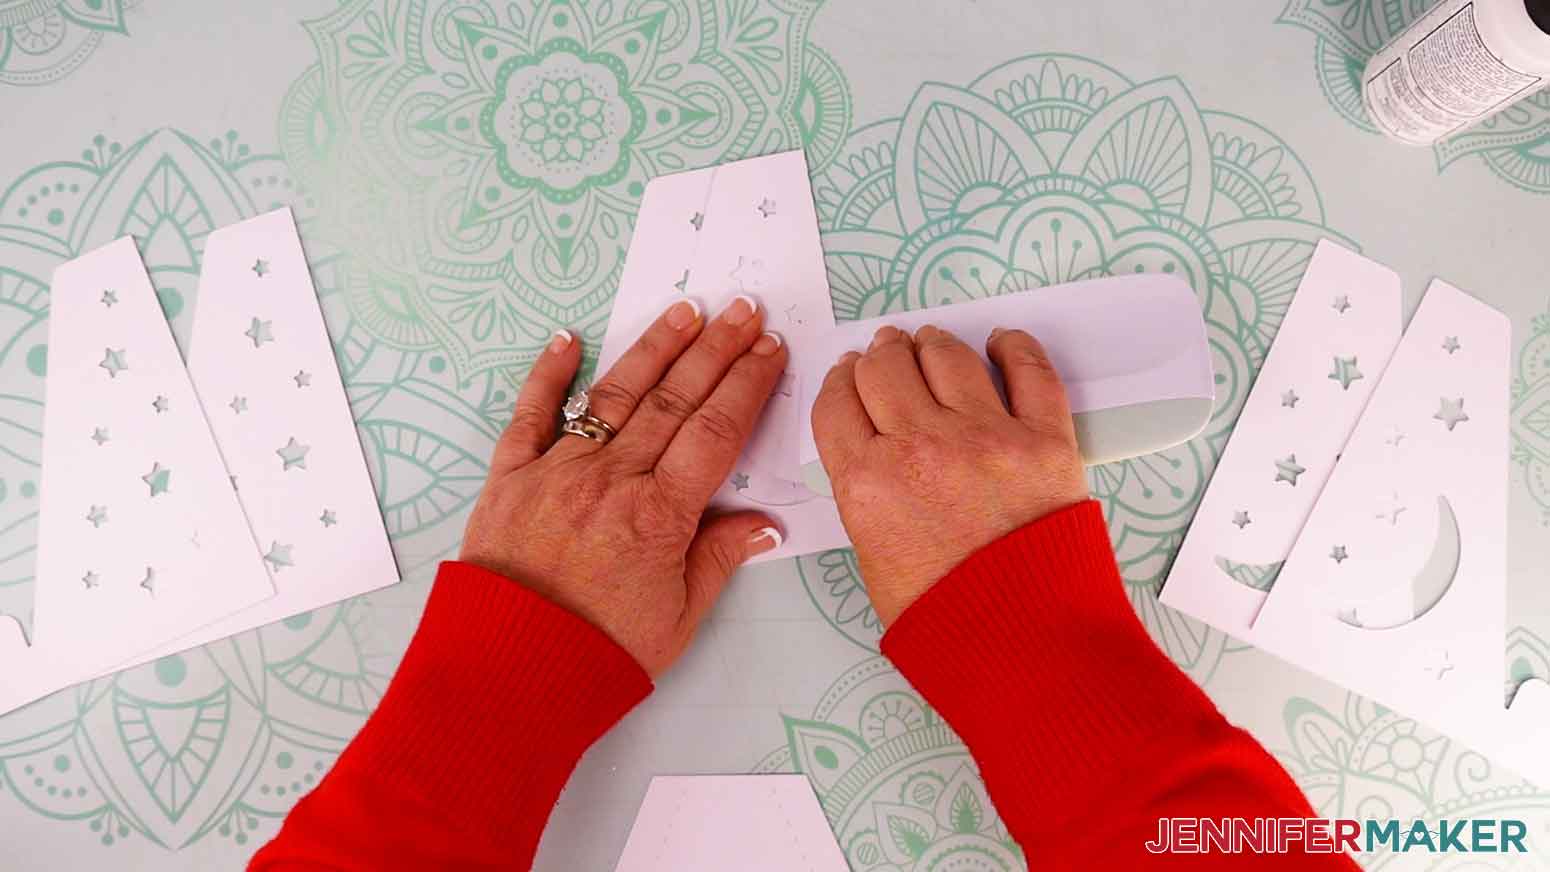
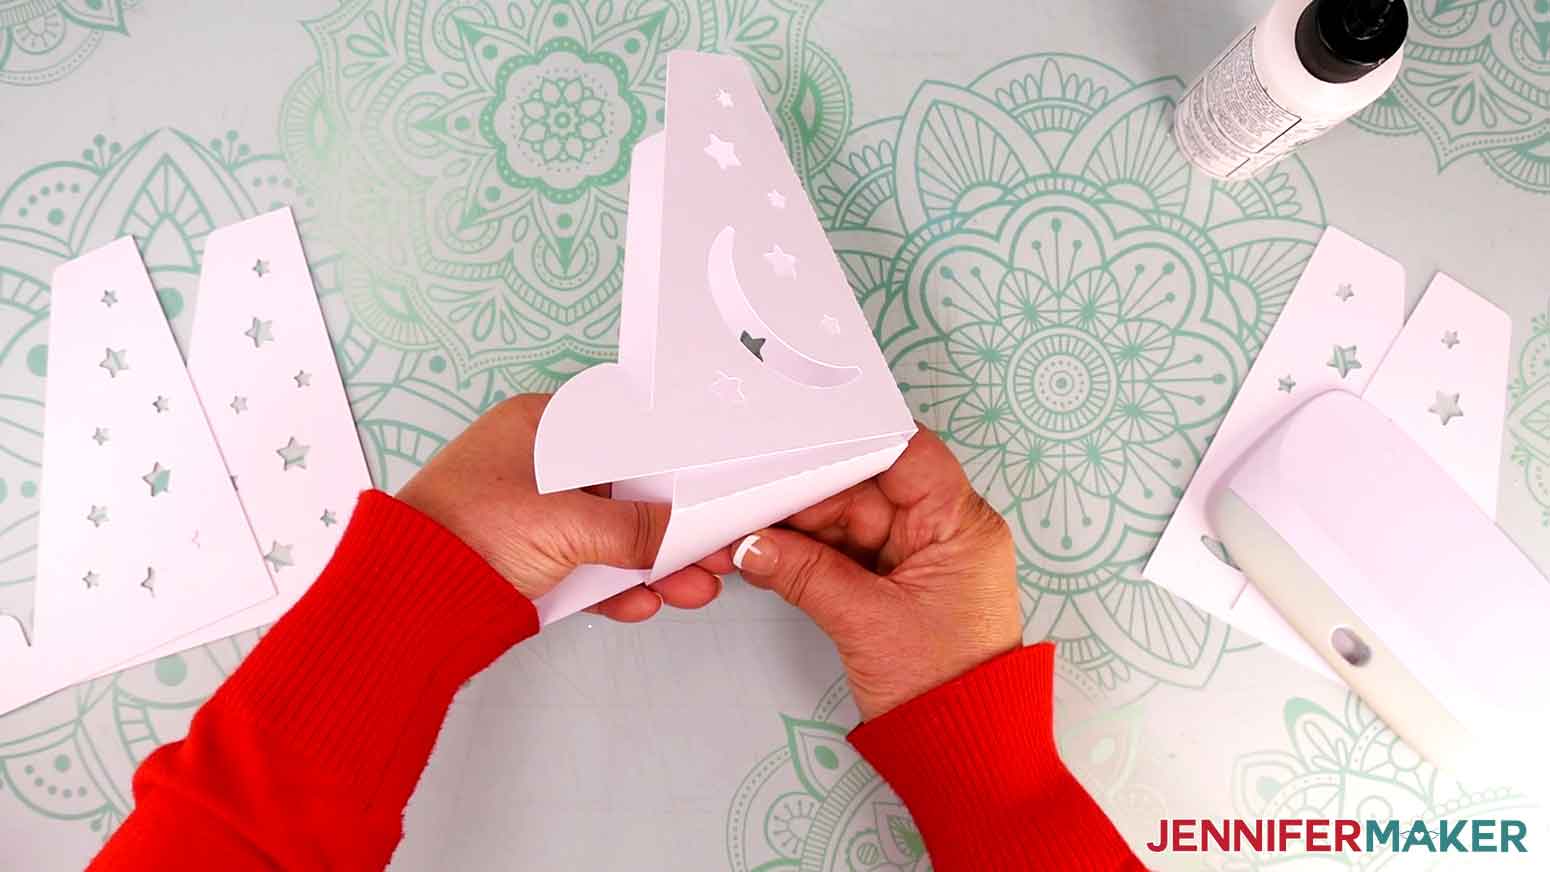
1. Here are the cut pieces for the stand. There’s one large main piece with scored/dashed lines, one small base piece with tabs, and four side pieces (two for each side) that we’ll layer for extra reinforcement.
2. Fold along the scored or dashed lines on the main piece so it stands up. The sides can fold either way - there isn’t a right or wrong side.
TIP: Use your scraper to sharpen the creases.
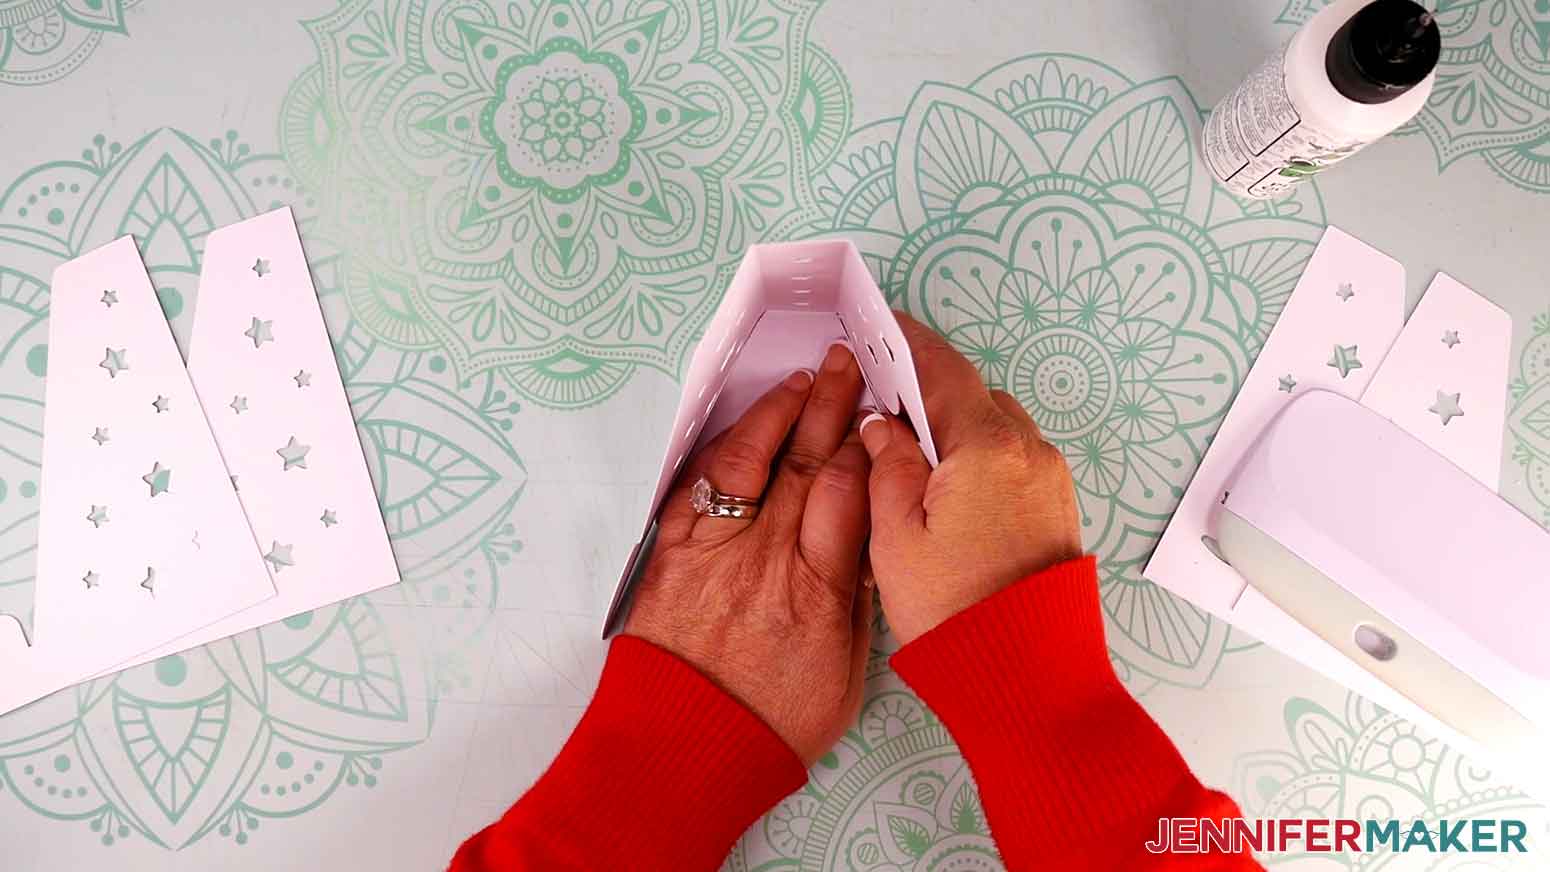
3. Fold along the two tabs on the bottom base piece.
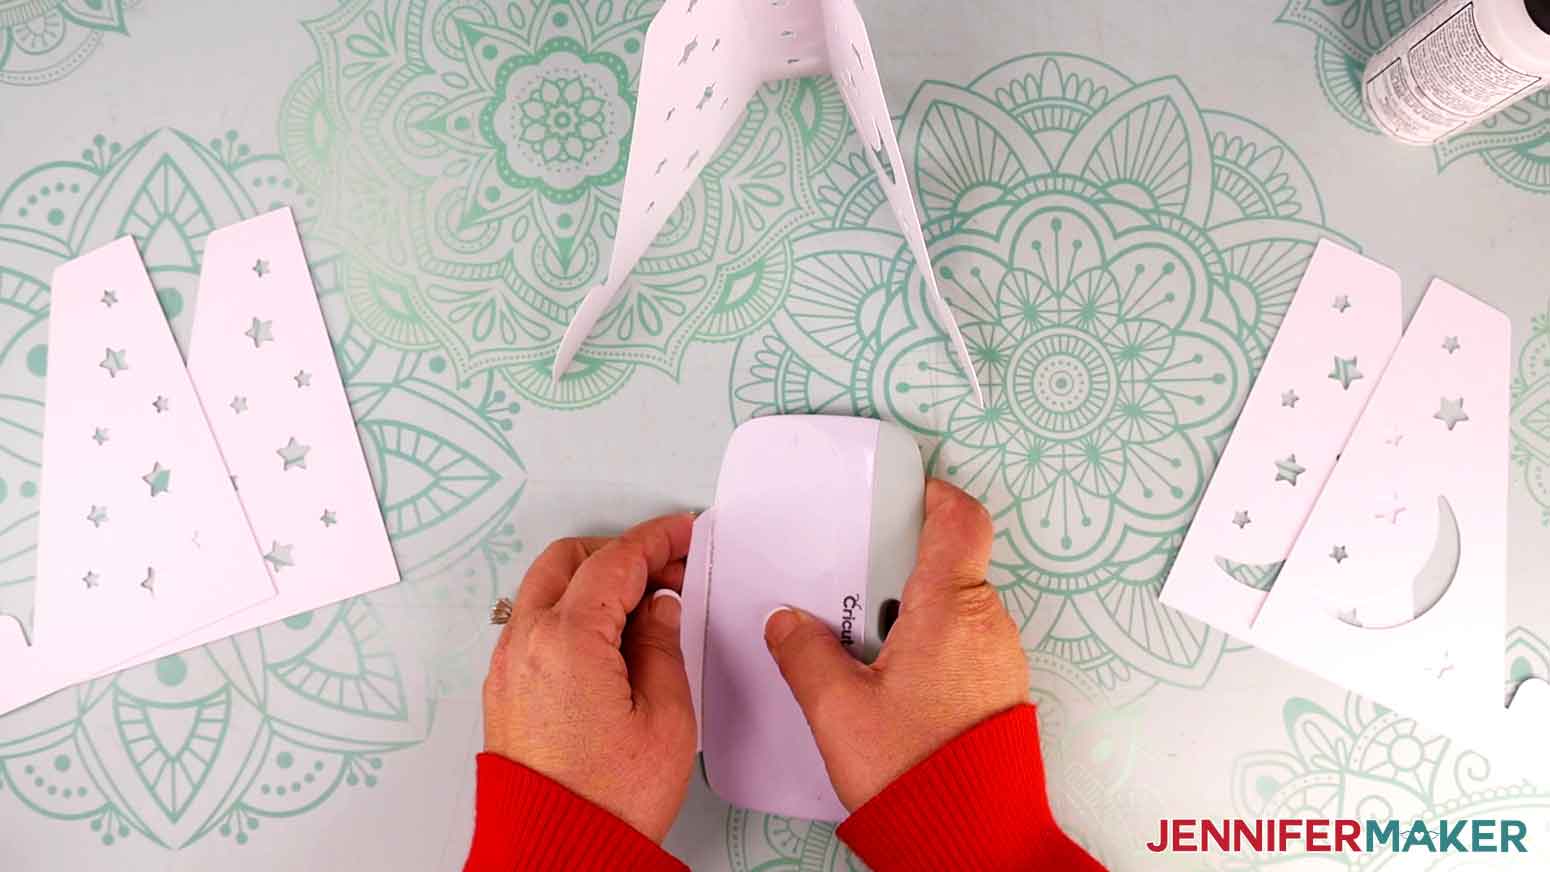
4. Make sure the base piece fits inside the bottom of the main stand and the tabs will evenly align with the sides’ surfaces.
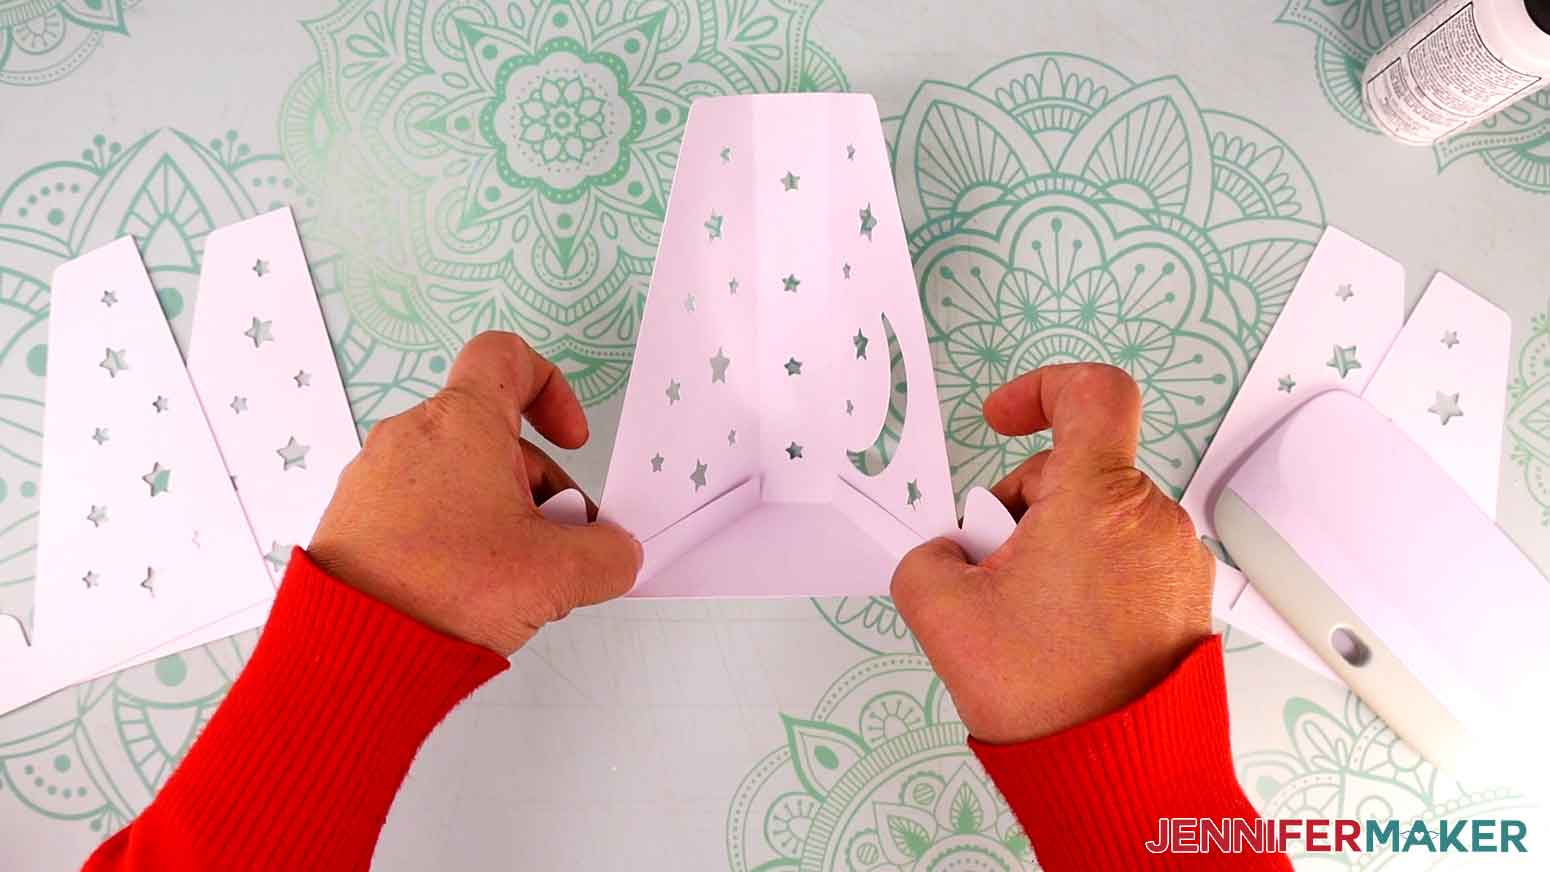
5. Add glue to the back of one tab.
6. Slide the base piece back in place so the glued tab aligns with the nearby side. Make sure the joint is flush on the outside so the stand will be even on a flat surface.
7. Press along the tab and let it dry.
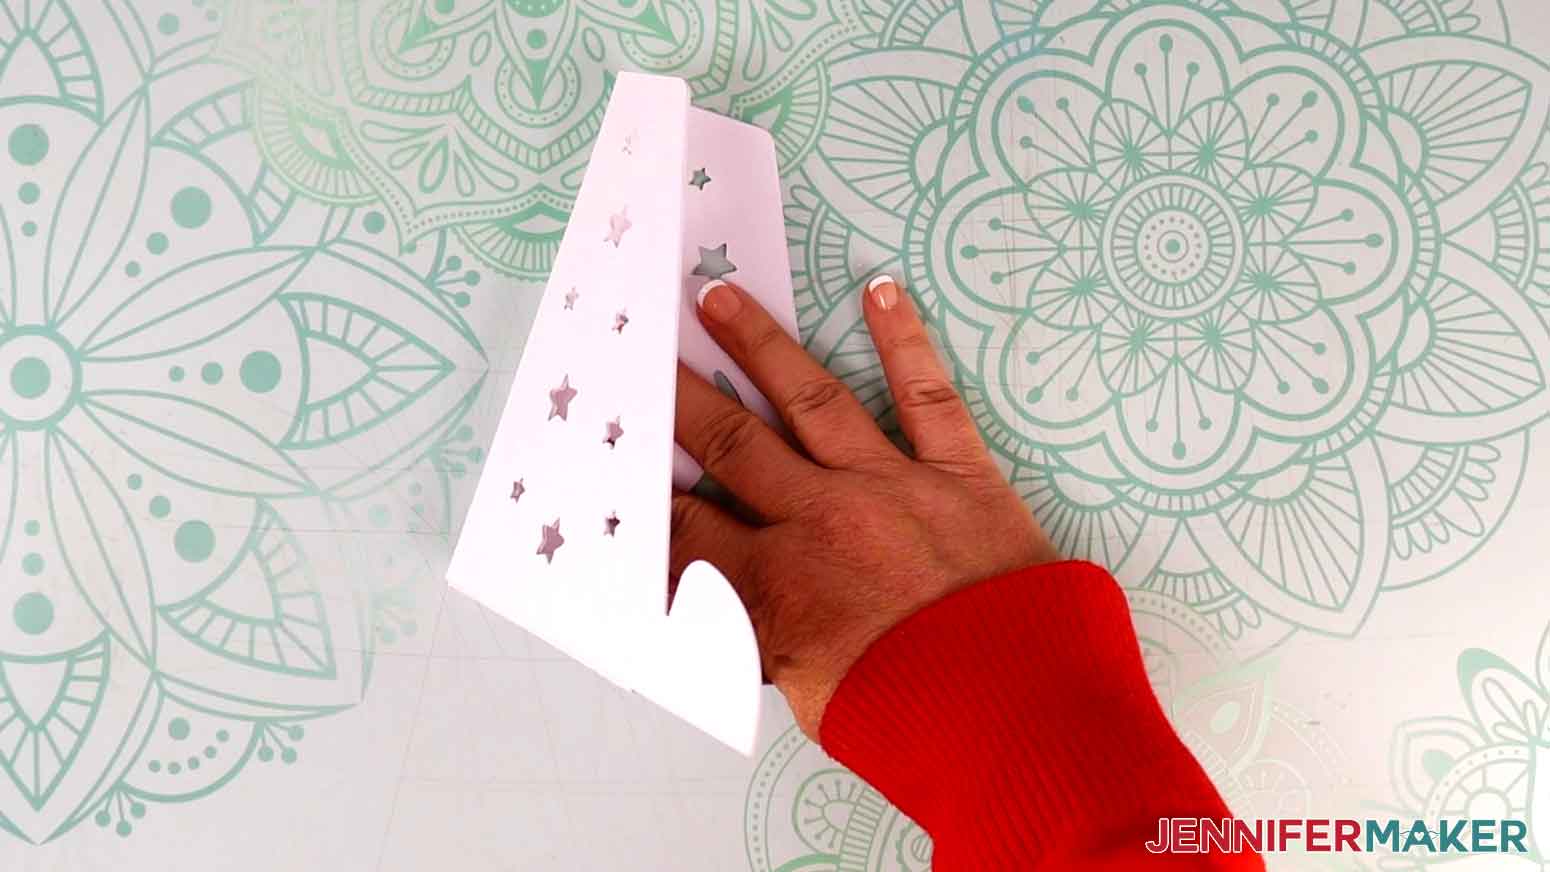
8. Add glue to the back of the other tab.
9. Check its alignment to keep the stand even, then press it in place to dry.
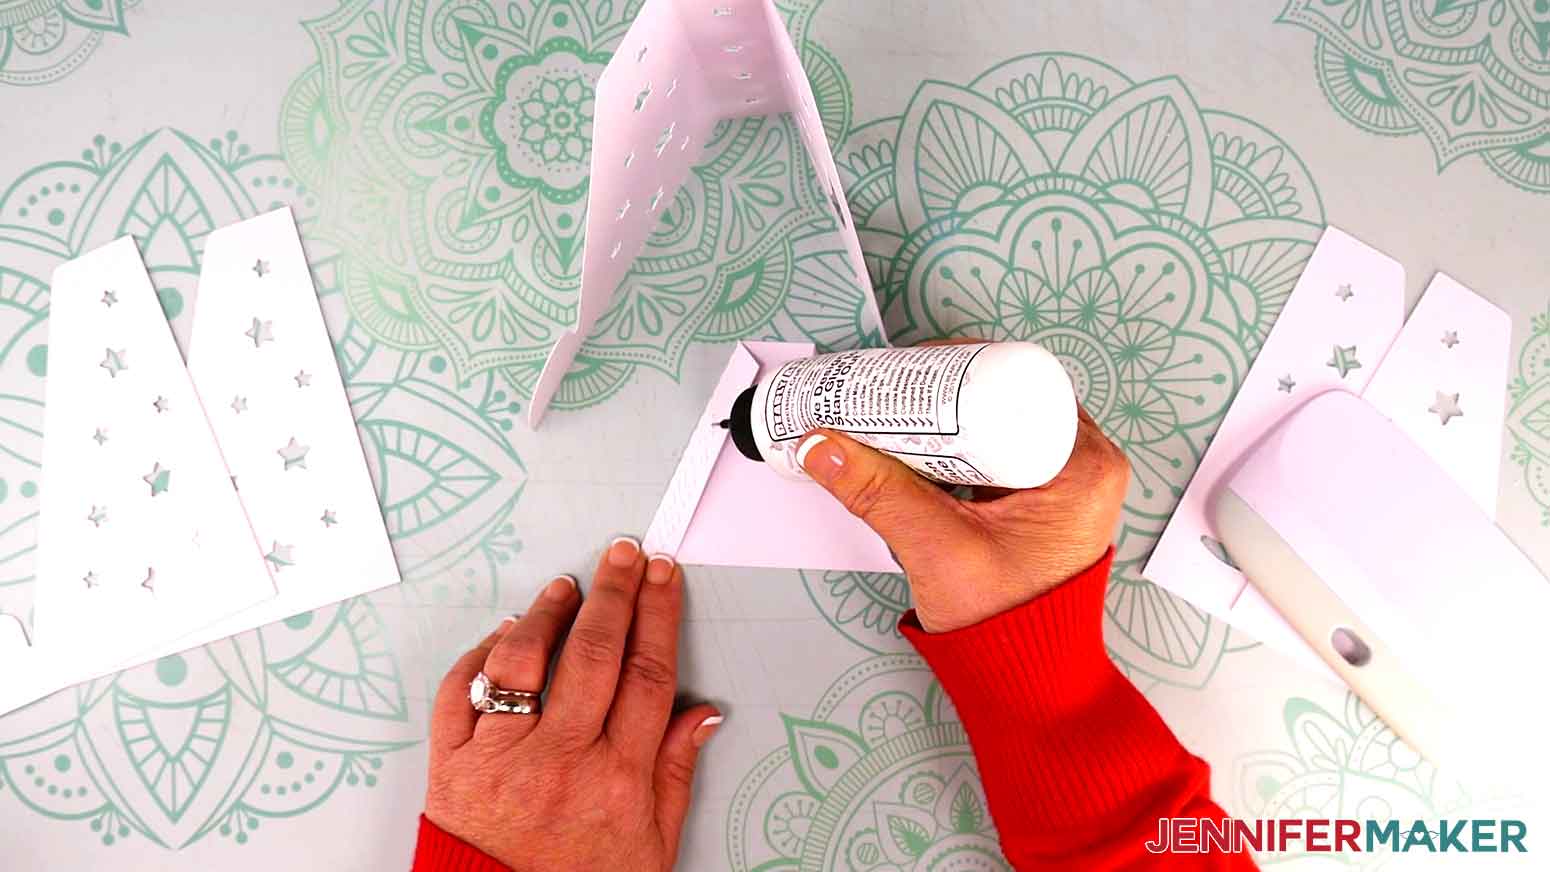
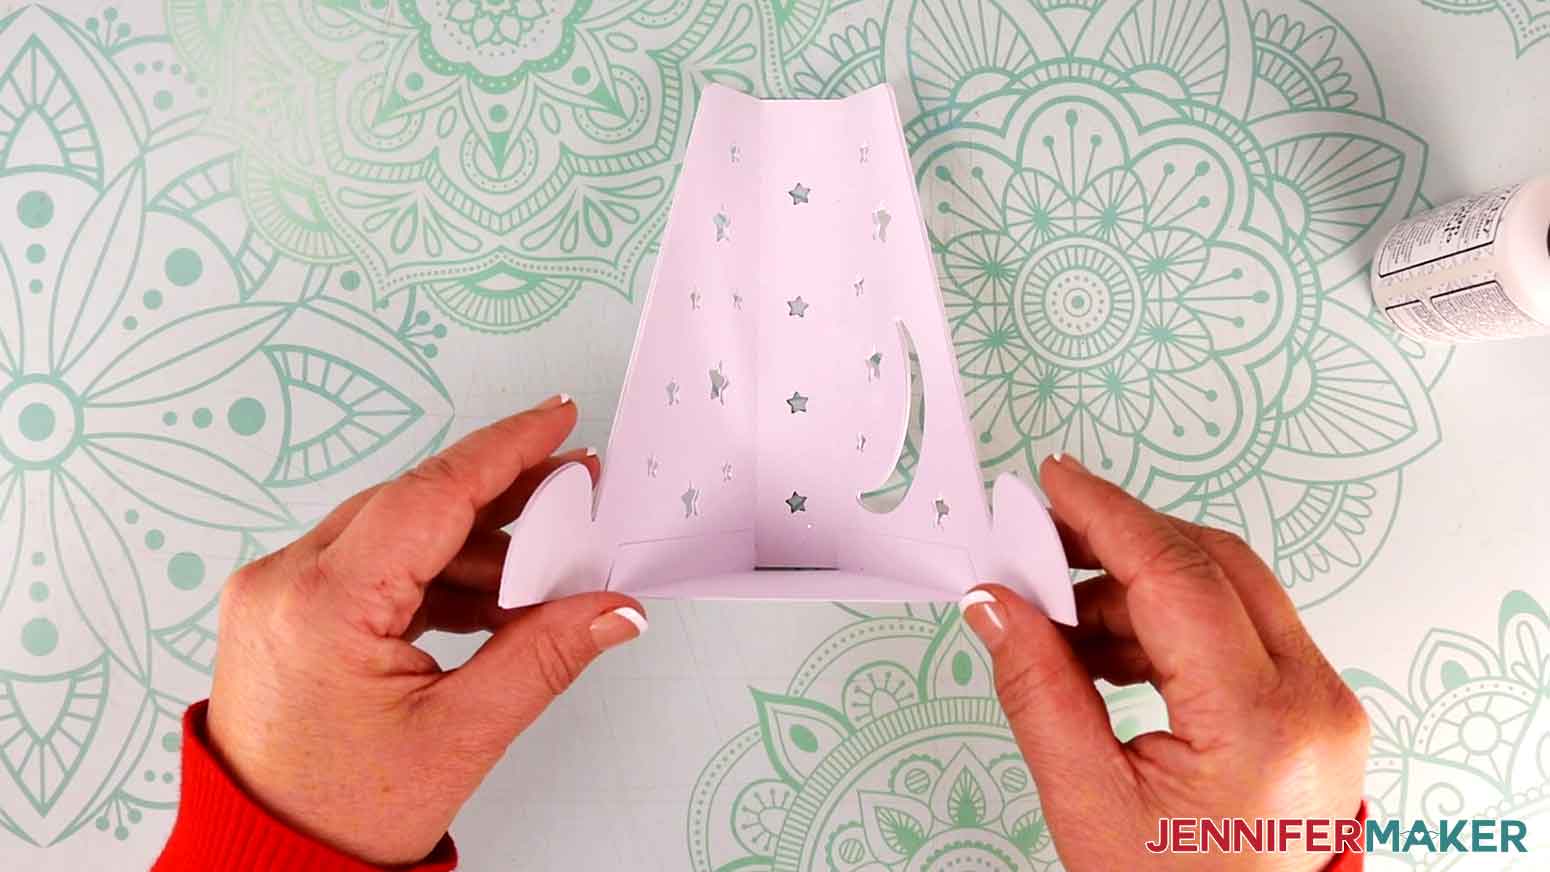
10. Glue the four Kraft board reinforcement pieces to the outside of each side, one at a time, using the star and moon cutouts to align them.
TIP: Place the assembled stand with the glued side down to press each reinforcement piece in place after aligning them.
11. Your stand is complete!
NOTE: To spin the calendar’s wheels when it’s on the stand, hold the stand’s sides steady with one hand and gently move the wheels with the other.
STEP 4: SHOW IT OFF
Your perpetual calendar and stand are complete! Now you can display it on a table, mantel, or accessible shelf and rotate the wheels each day to keep track of the date.
You can keep your calendar secure by placing a glue dot on the bottom of the stand base to hold it in place on your display surface.
Notes
Typeface Used: JM Tall
Finished Sizes:
Calendar: 10.375" W x 10.75" H
Stand: 5.25" W x 5.75"H x 5" D
Answers to Your Questions About How to Make a Perpetual Calendar
Q: What makes a perpetual calendar?
A: A perpetual calendar can be used year after year because it can display the days of the week and dates for any given month and year, accounting for variations in days between short months, long months, and leap years. No need for an annual calendar once you’ve made a perpetual calendar!
Q: What paper is best for a perpetual calendar?
A: I had the best results using medium weight cardstock on top of layered kraft board to get sturdy perpetual calendar pieces that glide well. You can use special goods like solid colored cardstock, textured cardstock, glitter cardstock, or even patterned cardstock to make your calendar your own. Or the perpetual calendar works as a unique gift if you use colors a friend loves! I added a moon phase and stars to mine, but you can adjust the decorations, too!
Q: What glue works best on paper crafts?
A: I’m a big fan of Bearly Art Precision Craft Glue, because it bonds well to many surfaces and the application tips help place the liquid right where you want it!
Get my free SVG files to make a Perpetual Calendar!
I’d love to see YOUR beautiful perpetual calendar! Please share a photo in our Facebook group — we’re a vibrant community of real people, new and experienced crafters, and creative entrepreneurs who love to share our projects and be inspired! Consider it part help center, part gallery for all your amazing creations! Post a photo of your lantern on social media and tag me with #jennifermaker.
Love,

Want to remember this? Save this tutorial on How to Make a Perpetual Calendar to your favorite Pinterest Board!