Learn how to make an adorable light-up Dollar Tree Bunny for Spring!
It’s no secret that I absolutely love finding inexpensive items at Dollar Tree to use in my Cricut Crafts. When I first found these round glass vases in the floral section, I immediately started dreaming up all the different things I could do with them! Last winter, I made a light-up snowman from items I found at Dollar tree, which was so cute. With Springtime rapidly approaching, I decided to hop to it and make a super cute light-up Easter bunny! It turned out so awesome and cost less than $10 to make. Today I’ll share my tutorial with you so you can make one too.
Want to save this project? Enter your email below and we’ll send the project straight to your inbox.
Watch the step-by-step video tutorial showing you how to make this adorable light-up bunny:

This is a Cricut Mystery Box project — it uses the Black Smart Vinyl from the “Red Carpet” Cricut mystery box (affiliate link) that came out in January 6, 2023. Even if the mystery box is not available when you check, you can still purchase the individual vinyls, which are all linked below in my material list. Learn more about Cricut Mystery Boxes and their contents in my Cricut Mystery Box Guide.
Spring means the end of Winter, with warmer and sunnier days ahead. It’s my favorite time of year here in Michigan. The snow melts, flowers start budding, and it makes me want to dig out all of my Spring and Easter decorations to celebrate.
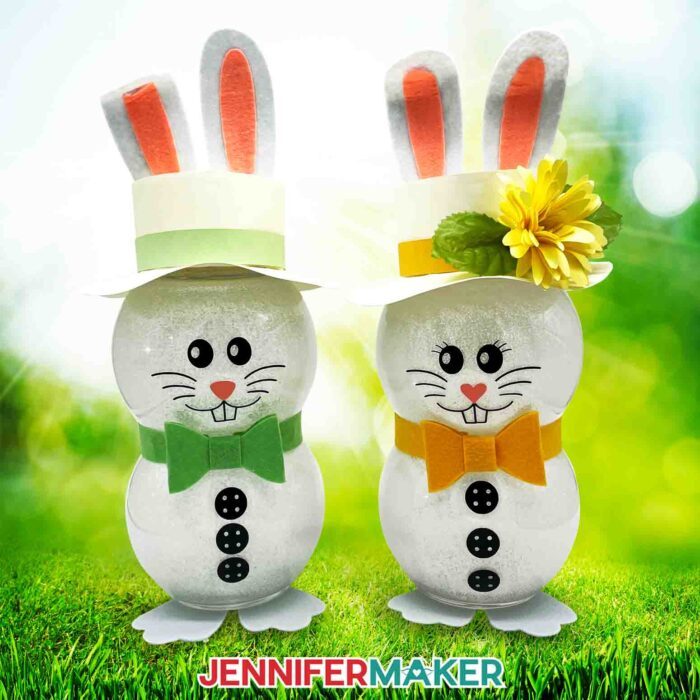
And nothing says Springtime more than bunnies in Easter hats!
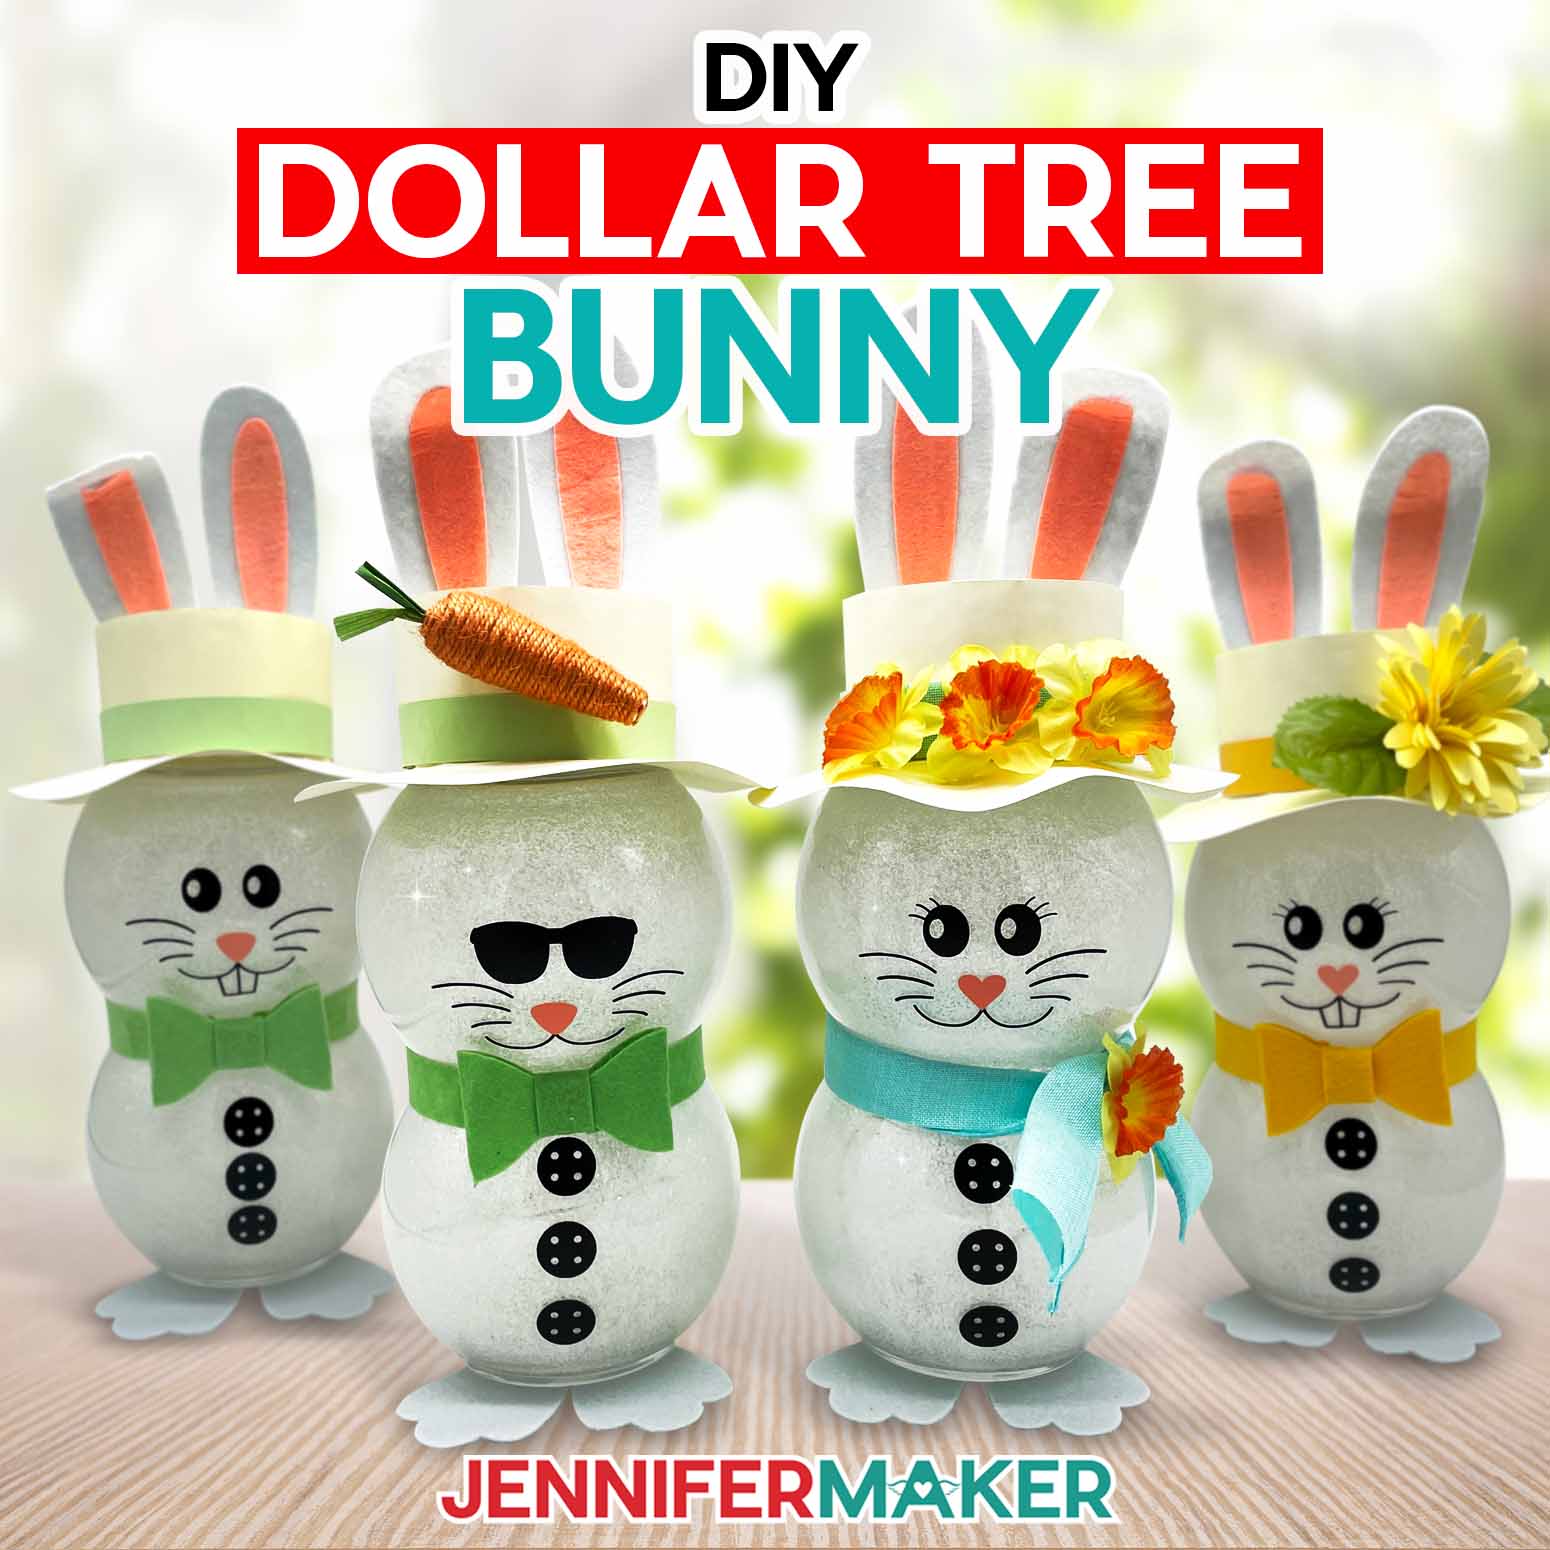
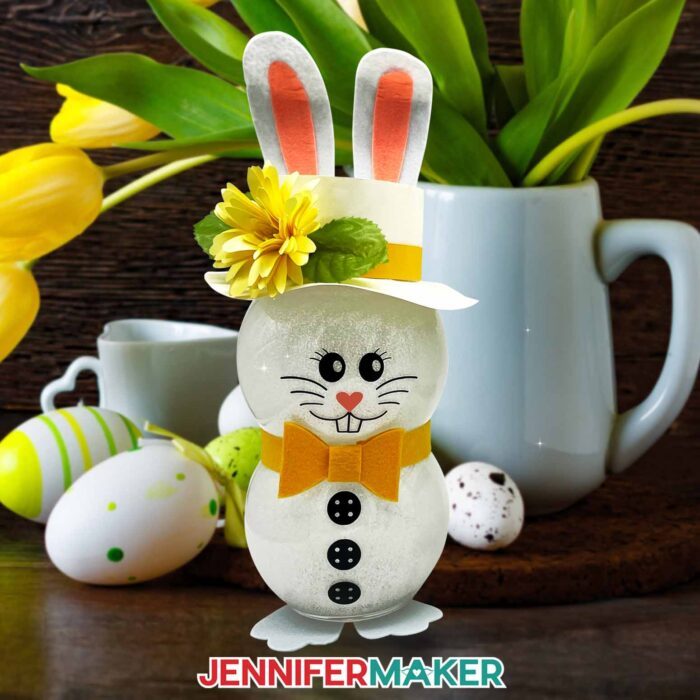
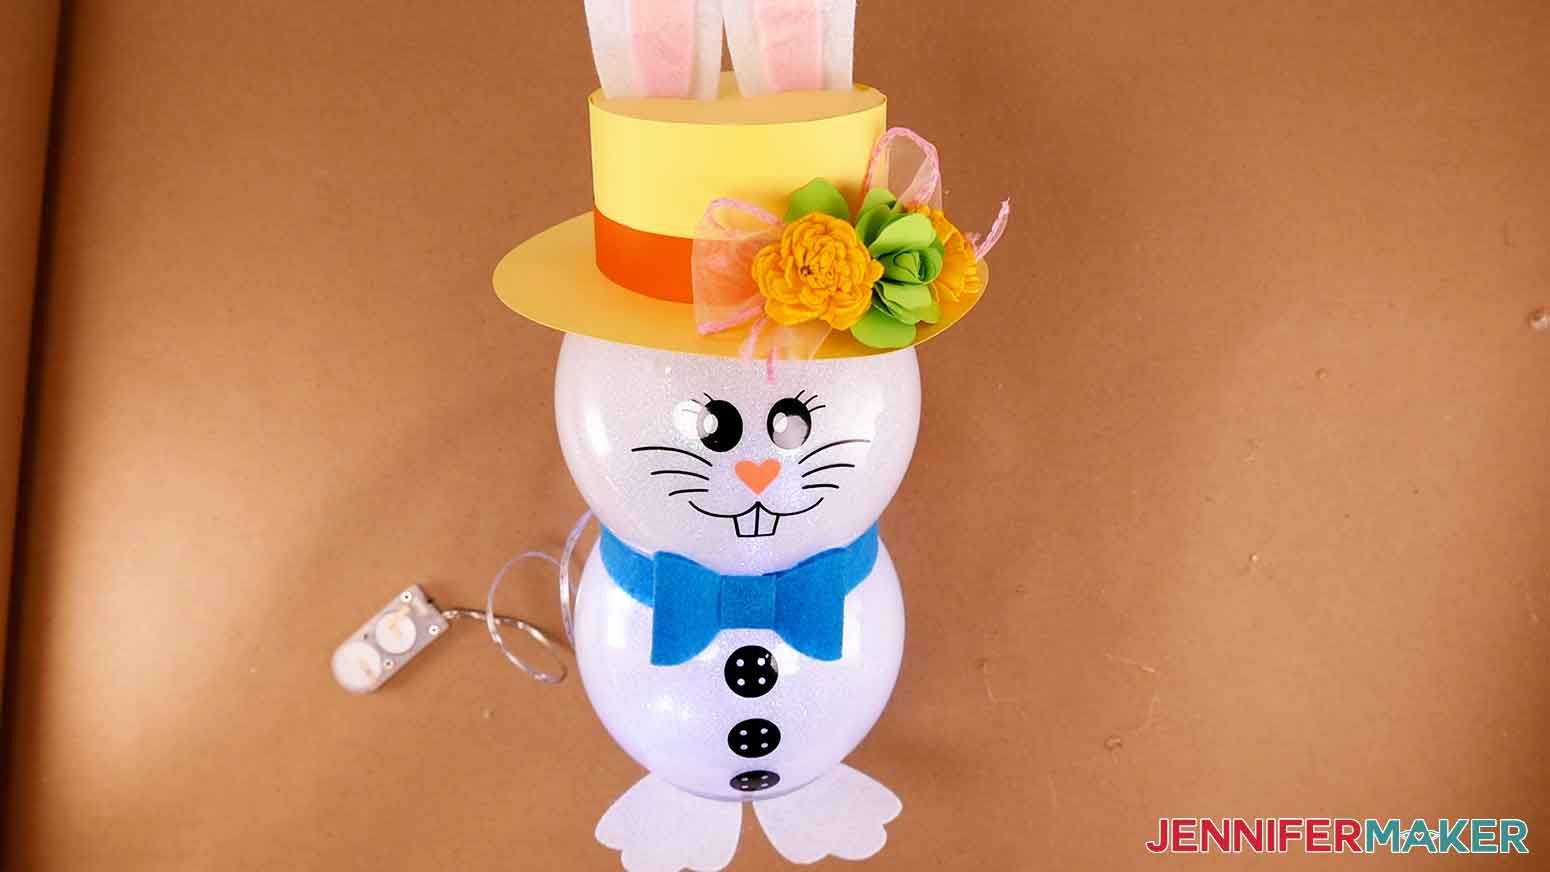
In this tutorial, I’ll show you how to make an easy light-up bunny out of dollar store items, along with a few other materials and tools you may already have on hand! This Dollar Tree bunny has become one of my favorite projects for Spring – I mean, look at their cute little faces!
To make a light-up Easter bunny, you need two round glass vases. I got these 5 inch bowl shaped vases from my local Dollar Tree, but you can usually find them at craft stores, Walmart, and Amazon, too.
When we make the Dollar Tree bunny, I’ll walk you through applying glitter to the inside of the vases, and how to fill them with fairy lights to make the bunny sparkle! Then I’ll show you how to attach them with two kinds of glue so they last season after season.
We’ll give our bunny a cute face and buttons with Cricut Permanent Vinyl, cut on your Cricut cutting machine. I’ll walk you through the steps of applying your bunny’s face on the vase’s curved surface, the easy way!
Did you know you can cut felt on your Cricut? I’ll teach you how to figure out your perfect settings, and then we’ll make our Dollar Tree bunny’s ears stand up and bend using floral wire.
There are so many different ways to add personality to our bunny! I’ll guide you through all the steps to make their festive little Easter hat, and show you lots of different ways to decorate it. You can use ribbon, small rolled paper flowers, Dollar Tree flowers, Dollar Tree carrots, little decorative Easter eggs, or anything else you can think of!
And don’t forget the bow tie – aside from being super cute, it will hide any glue that may be visible from attaching the vases together.
And of course, you’ll need something to cut your Dollar Tree bunny’s features and accessories! I’m using my Cricut Maker 3, but you can use any Maker or Explore series machine. You can even use the Cricut Joy, but you’ll need to cut the brim of the bunny’s hat by hand because it’s a tad too big for the Joy. And you might think we need the rotary blade for the felt, but the fine-point blade works well with the right settings!

My free download includes a printable PDF if you want to cut the pieces by hand, but the DXF and SVG files work with cutting machines.
Who knew you could make such a cute craft out of stuff from Dollar Tree? Well, I guess we’re all in on that secret. At under $10 total, they’re so inexpensive, you could make a bunch of them – all with different colors, faces, and personalities. You can even add a cute bunny tail to help hide disguise the fairy lights’ battery pack.
There’s so many possibilities with this project, you might just find them multiplying around your home like real bunnies!
Ready to make your own light-up Easter bunny? This post contains some affiliate links for your convenience (which means if you make a purchase after clicking a link I will earn a small commission but it won’t cost you a penny more)! Read my full disclosure policy.
Materials & Tools to Make a light-up Dollar Tree Bunny
View my Amazon shopping list with items you can use to make this project!
- Two (2) 5″ Round Glass Vases from Dollar Tree (alternative)
- Hot Glue Gun & Glue Sticks and optional Finger Protectors
- Mod Podge Matte
- White Glitter from Dollar Tree
- Foam Brush to apply the Mod Podge
- 7.2′ String of LED Fairy Lights
- Cricut Premium Permanent Vinyl – I used Black
- Cricut Premium Permanent Vinyl – I used Coral
- Cricut StandardGrip Transfer Tape
- Felt – I used Pink, Green, and Teal
- One sheet of 9″ x 12″ White Felt – slightly heavier type for the bunny’s ears
- White Floral Wire and Floral Wire Cutters to shape the ears
- Several Sheets of 12″ x 12″ 65 lb Cardstock for the Hat and Optional Paper Flowers
- Jute Carrots, Foam Carrots, Faux Flowers, and Wired Ribbon from Dollar Tree to decorate the bunny’s hat (optional)
- Straw Hat (optional) (alternative)
- White Pom Poms from for the bunny’s tail (optional)
- Bearly Art Precision Craft Glue to assemble the bunny’s paper hat
- A method to cut your felt, vinyl, and cardstock, I used the amazing Cricut Maker 3 but you can also use the Cricut Maker, Cricut Explore 3, or the Cricut Explore
- Cricut StandardGrip 12″ x 12″ Green Machine Mat and Cricut StrongGrip 12″ x 12″ Purple Machine Mat
- Butcher Paper to protect your work surface from glitter and glue
- Isopropyl Alcohol and a Lint-Free Cloth or coffee filter to clean your glass vases
- Spatula and Paper Towels to remove labels from the glass vases
- Weeding Tool
- Scraper
- Scissors
- Brayer
- Lint Roller (to help hold your vases in place)
- Fan (for Ventilation)
- Design #480 – My free SVG/DXF/PDF design files (available in my free resource library—get the password at the bottom of this post)

How to Make a Dollar Tree Bunny
Dollar Tree Bunny
Learn how to make an adorable light-up Dollar Tree Bunny!
Materials
- 2 5" Round Glass Vases
- Mod Podge Matte
- White Glitter
- LED Fairy Lights
- Cricut Premium Permanent Vinyl - Black
- Cricut Premium Permanent Vinyl - Coral
- Cricut StandardGrip Transfer Tape
- 1 (One) White Felt Sheet
- Cricut Felt Sampler - Summer Sky (Coral, Green, and Teal Sheets)
- Several Sheets of Cardstock for Hat and Optional Paper Flowers
- White Floral Wire
- Jute Carrots (Optional)
- Foam Carrots (Optional)
- White Pom Poms (Optional)
- Faux Flowers
- Wired Ribbon (Optional)
- Straw Hat (Optional)
- Design #480 – My free designs (available in my free resource library—get the password at the bottom of this post)
Tools
- A method to cut your felt, vinyl, and cardstock, I used the amazing Cricut Maker 3 but you can also use the Cricut Maker, Cricut Explore 3, or the Cricut Explore.
- Cricut StandardGrip 12" x 12" Green Machine Mat
- Cricut StrongGrip 12" x 12" Purple Machine Mat
- Butcher Paper
- Foam Brush
- Isopropyl Alcohol
- Lint-Free Cloth or Coffee Filter
- Weeding Tool
- Scraper
- Scissors
- Brayer
- Hot Glue Gun & Glue Sticks
- Finger Protectors (Optional)
- Bearly Art Precision Craft Glue
- E6000 Craft Adhesive
- Lint Roller (To Help Hold Glass Bowls in Place While Assembling)
- Floral Wire Cutters
- Fan (for Ventilation)
- Spatula
- Paper Towels
Instructions
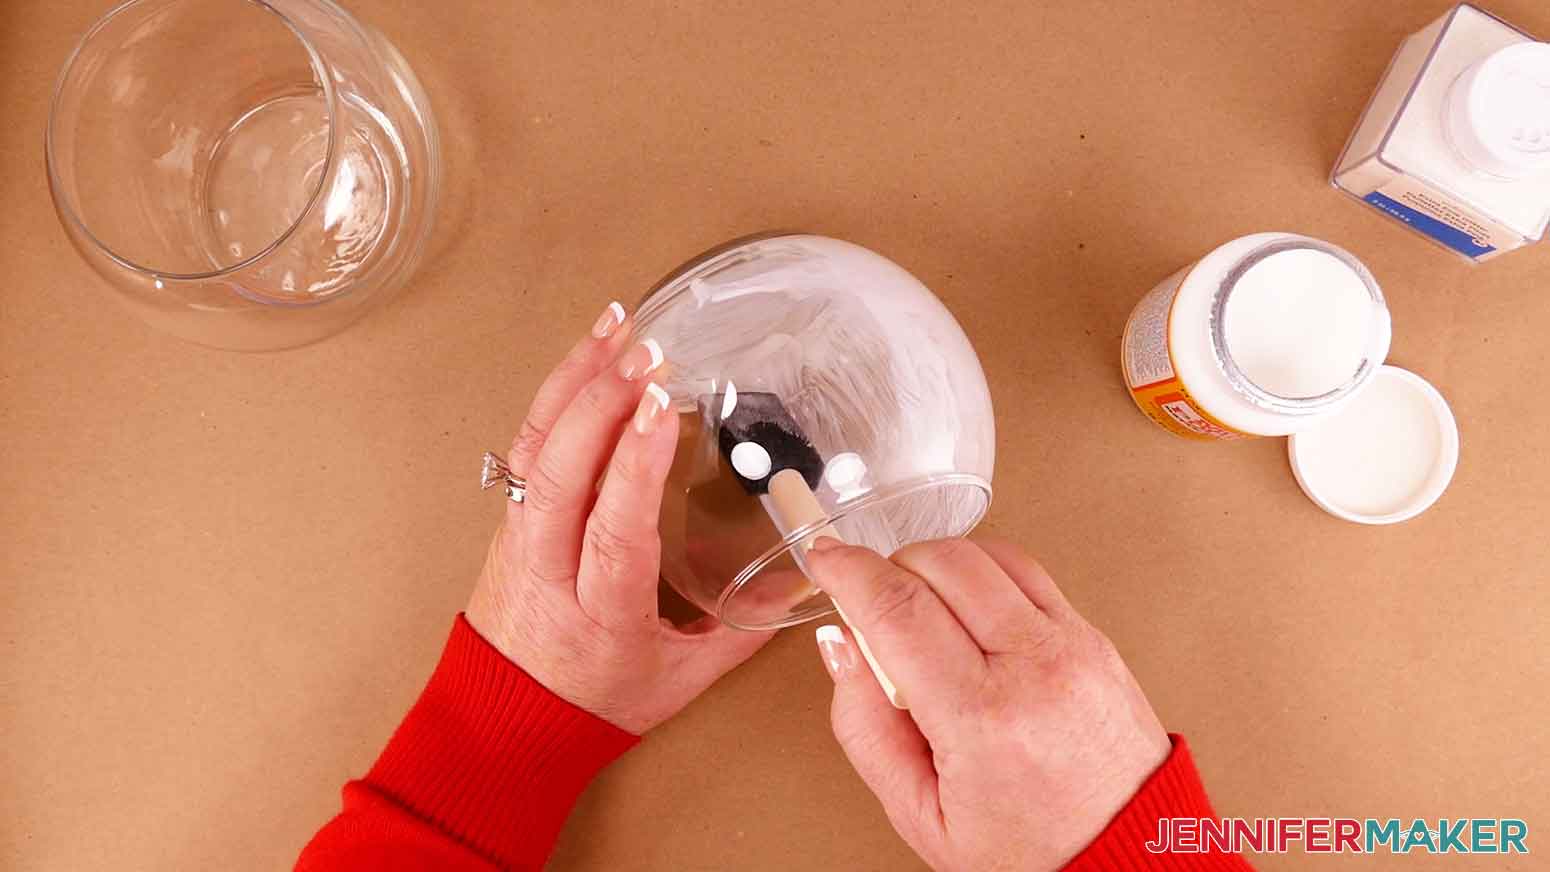
STEP 1: PREPARE YOUR GLASS BOWLS
First up, we need to glitter our glass bowls. Place a piece of butcher paper over your workspace to protect it from the glitter and Mod Podge.
Remove any price tag stickers before you begin. If the sticker is stubborn, a little isopropyl alcohol will help remove any sticky residue.
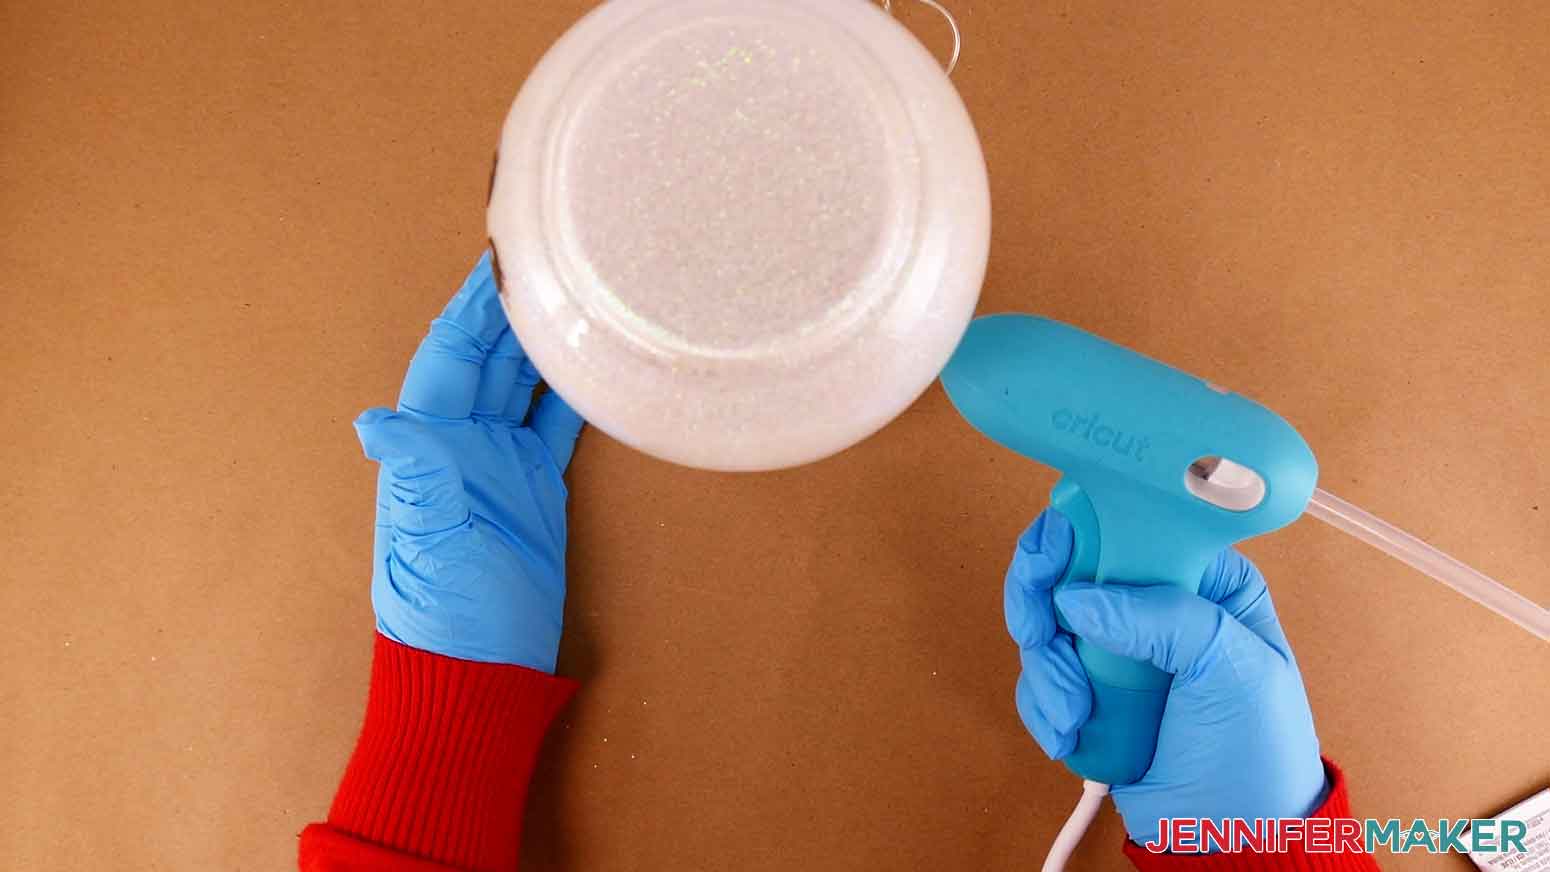
Dip your small foam brush into the Mod Podge and spread it evenly inside the glass vase. Start with spreading it around the bottom and then apply even strokes to the sides, starting at the bottom and working to the rim.
When the glass is evenly coated, lightly sprinkle the glitter inside the bowl. Twirl the bowl to work the glitter to cover all of the inside area with Mod Podge.
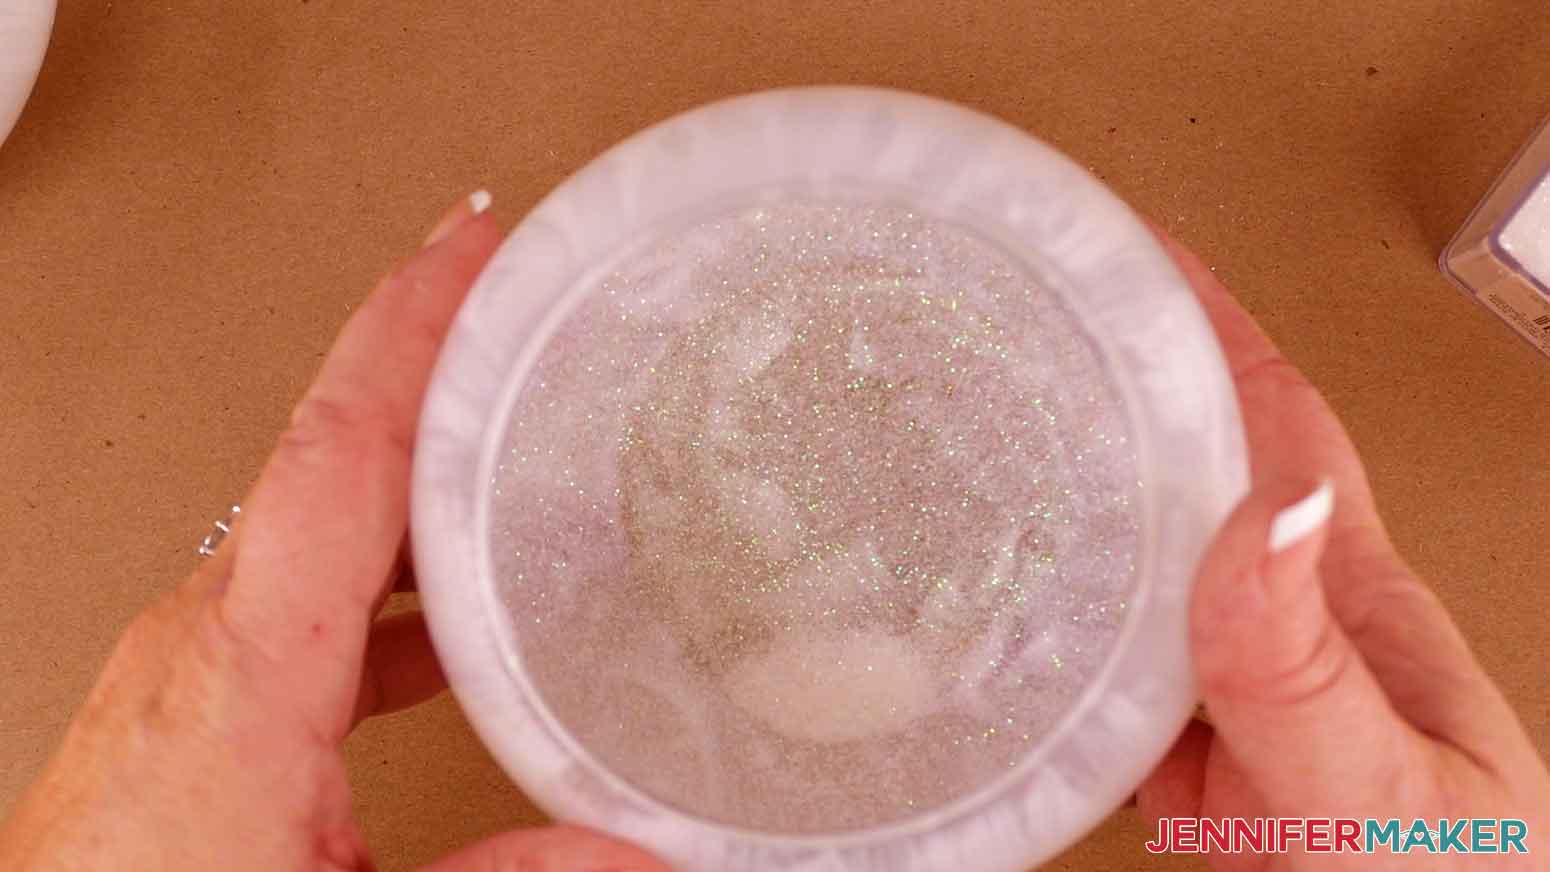
Set the bowls aside to dry and we'll work on the design pieces. I let my dry overnight but a couple hours is enough.
That's all for prepping!
STEP 2: GET YOUR DOLLAR TREE BUNNY SVG
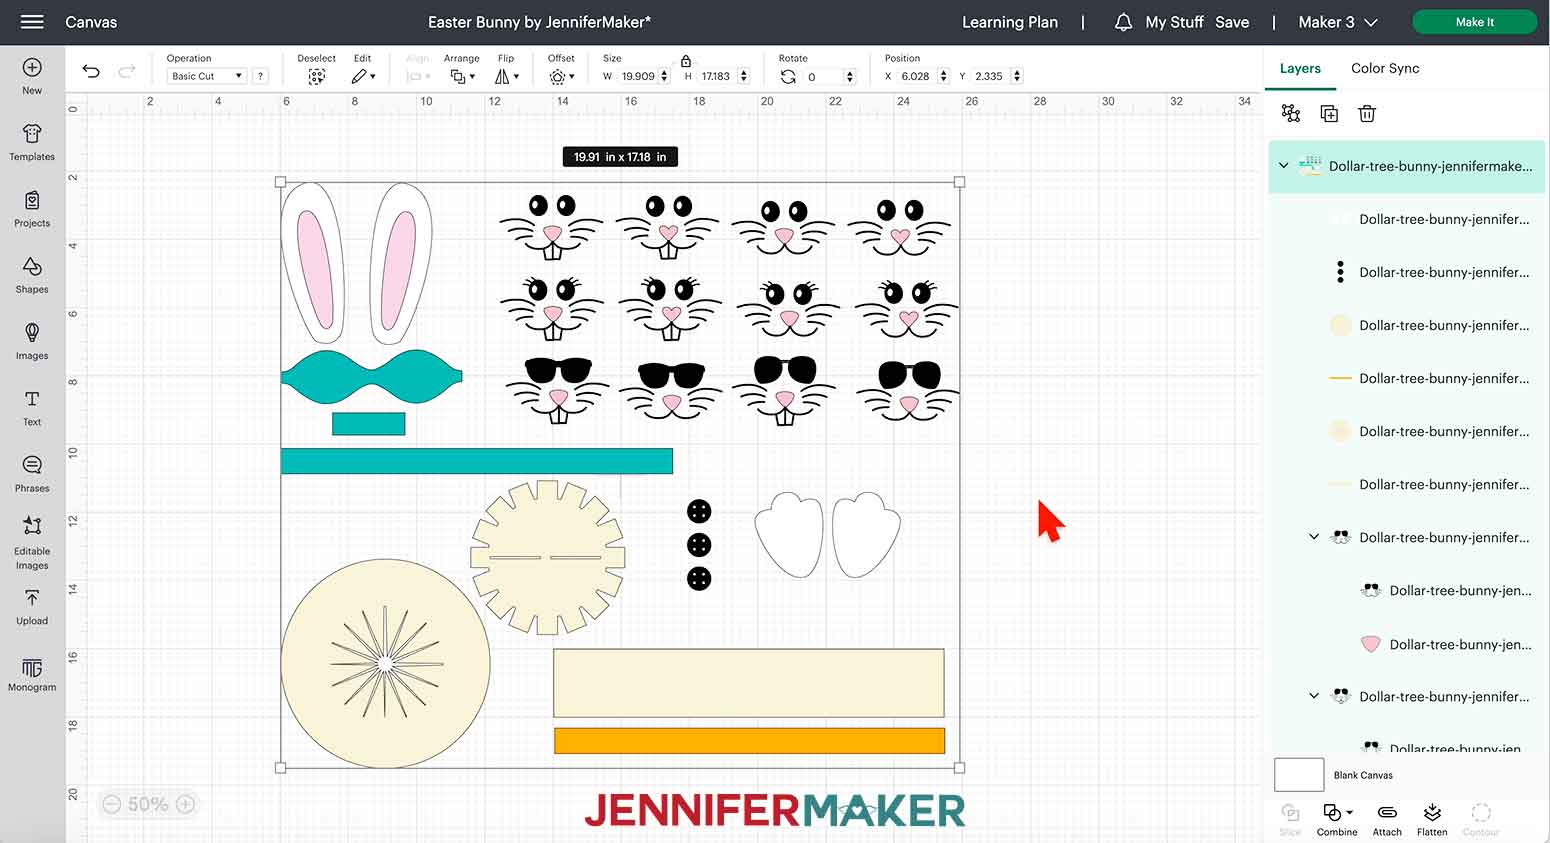
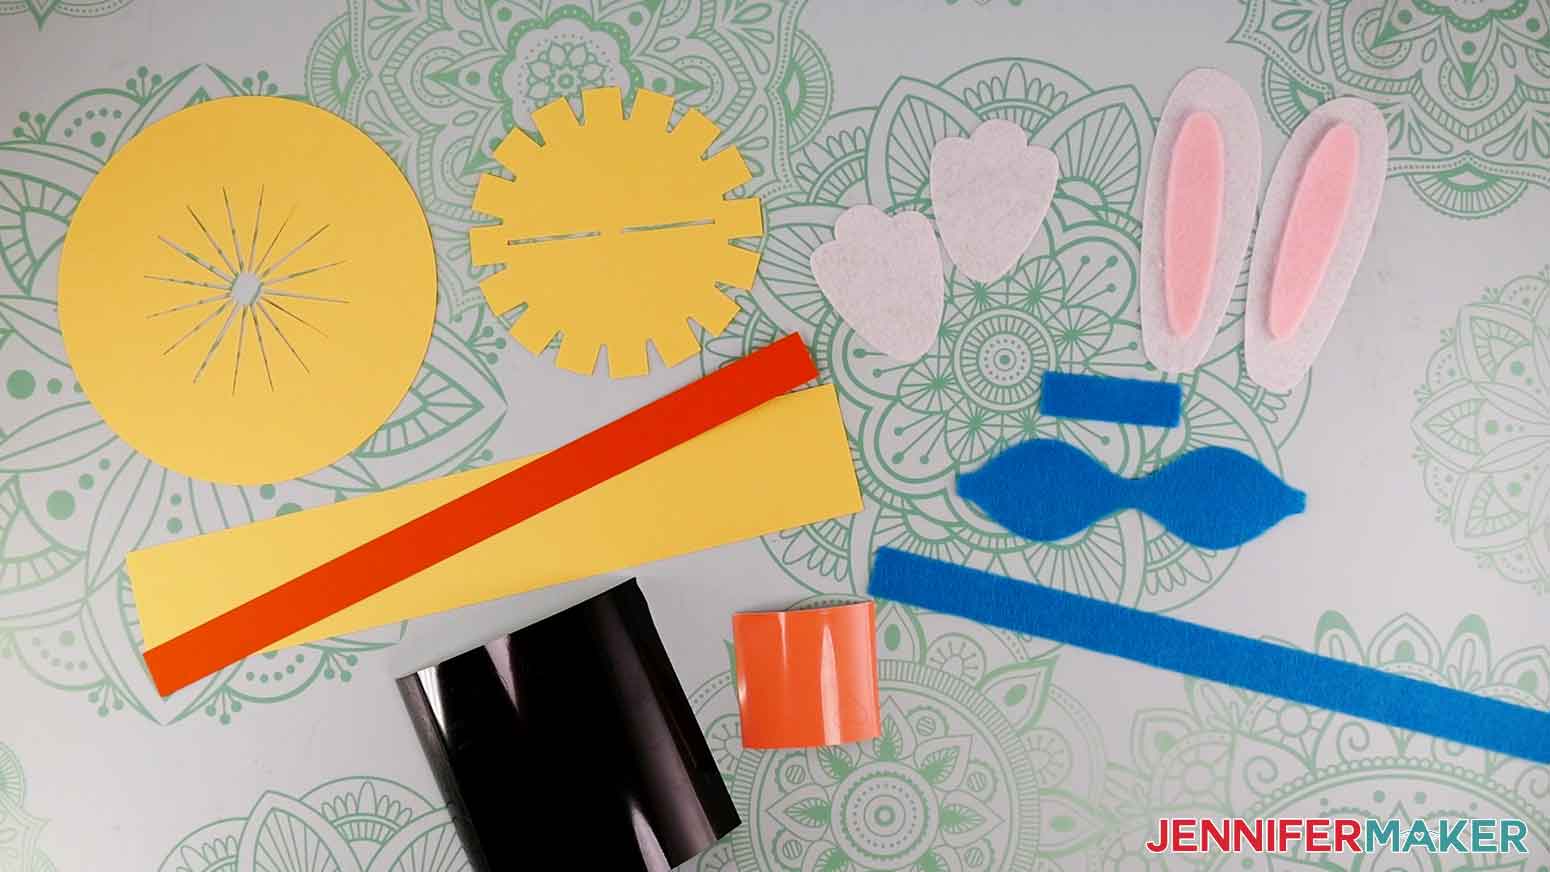
First, download my Dollar Tree Bunny SVG/DXF/PDF files from my free resource library. It's Design #480. I’ve included 12 different bunny faces, the ears, feet, bow tie, buttons, and hat!
Upload your Dollar Tree Bunny SVG file to Cricut Design Space.
TIP: If you're not sure how to upload an SVG cut file to Cricut Design Space, watch this helpful video training series I made. If you're on an iPhone or iPad, here's how to download and upload SVG files to the Cricut Design Space app.
STEP 3: PREPARE AND CUT YOUR DOLLAR TREE BUNNY DESIGN
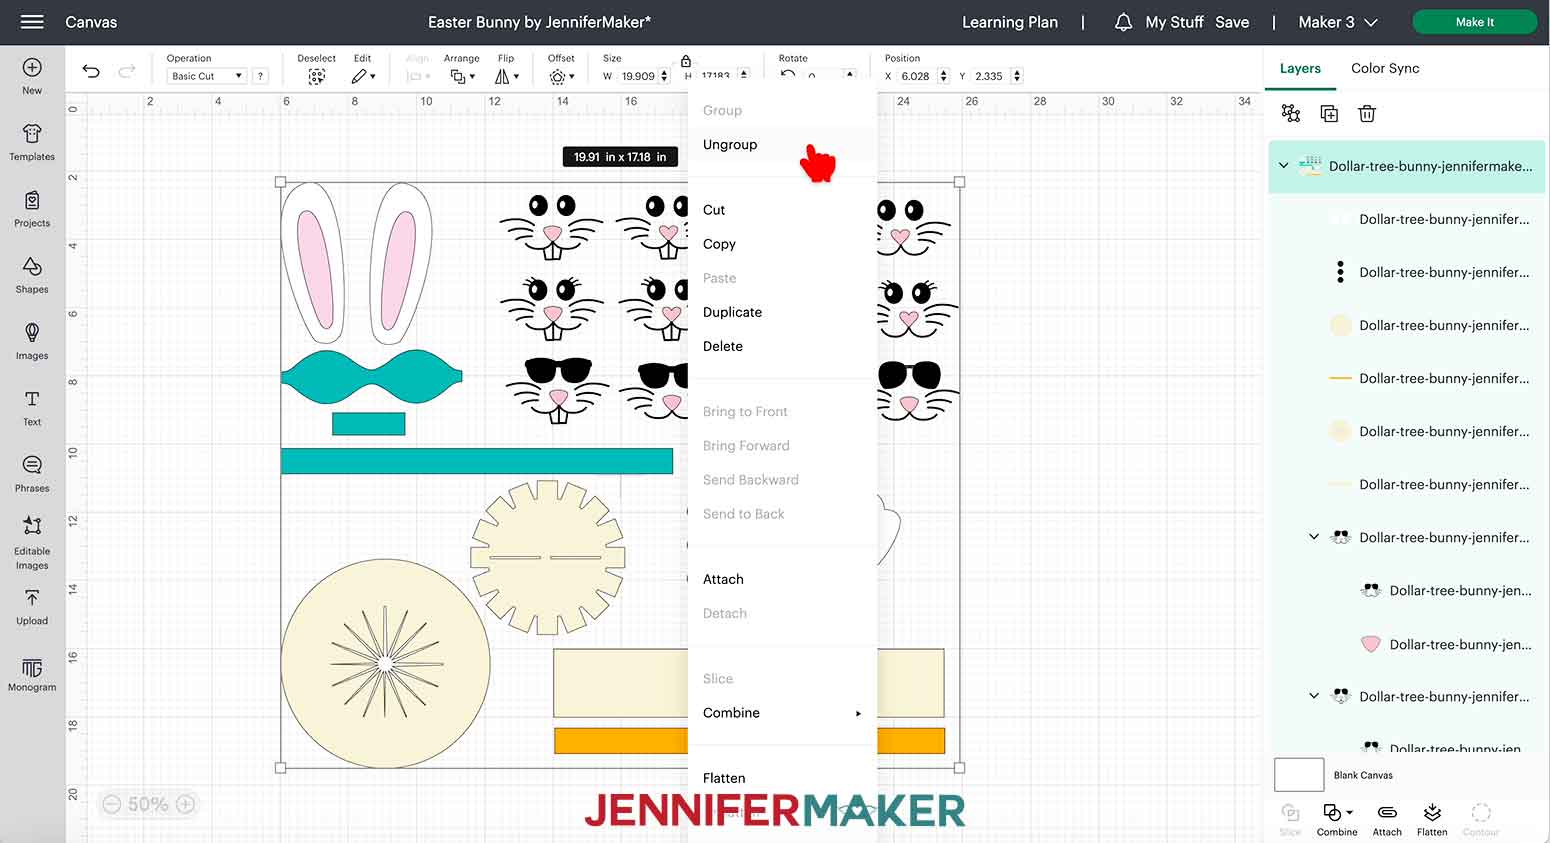
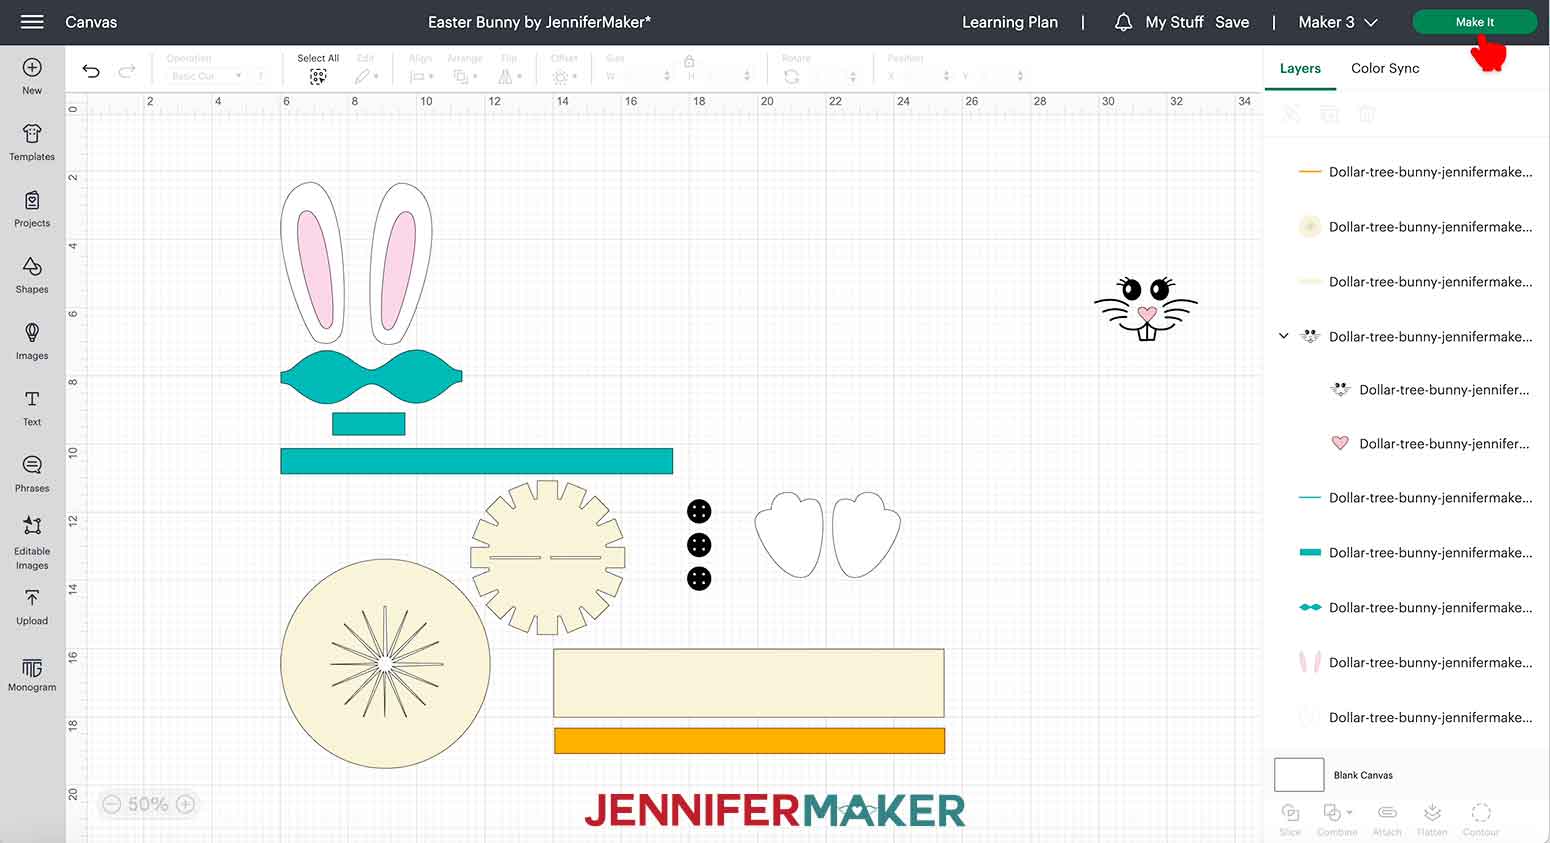
Click the Ungroup icon to separate your design pieces.
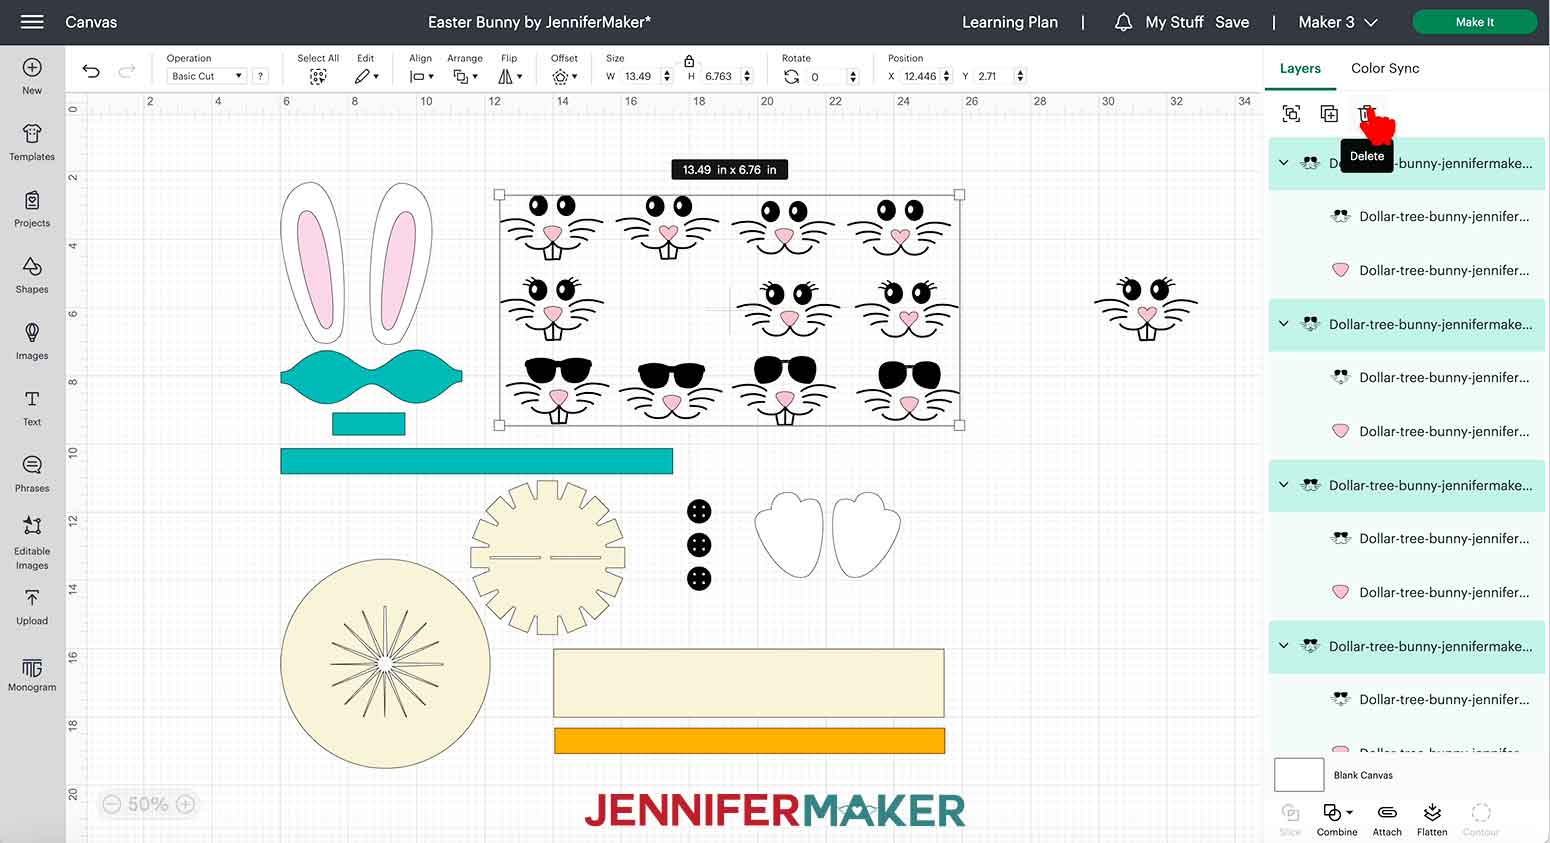
Choose which bunny face you want to use and hide or delete the rest.
Everything else is ready as it is. Make sure your machine is selected and click Make It in the upper right corner.
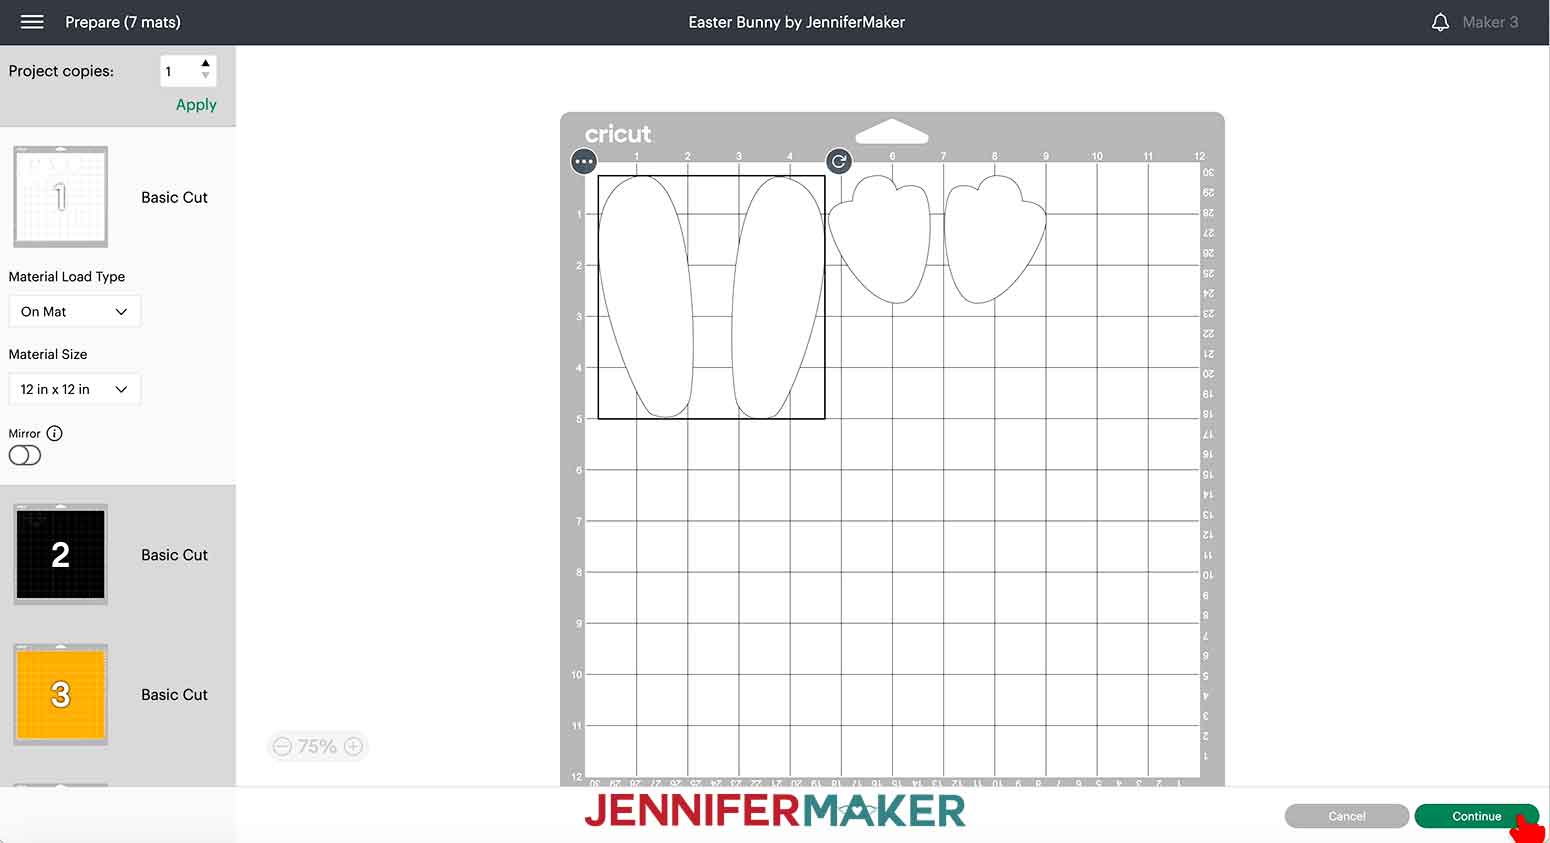
If prompted, select "On Mat" and 12" x 12" for Mat Size and click "Confirm."
The Prepare screen will appear next. No changes are needed on this screen. Click "Continue" in the lower right corner to go to the Make screen.
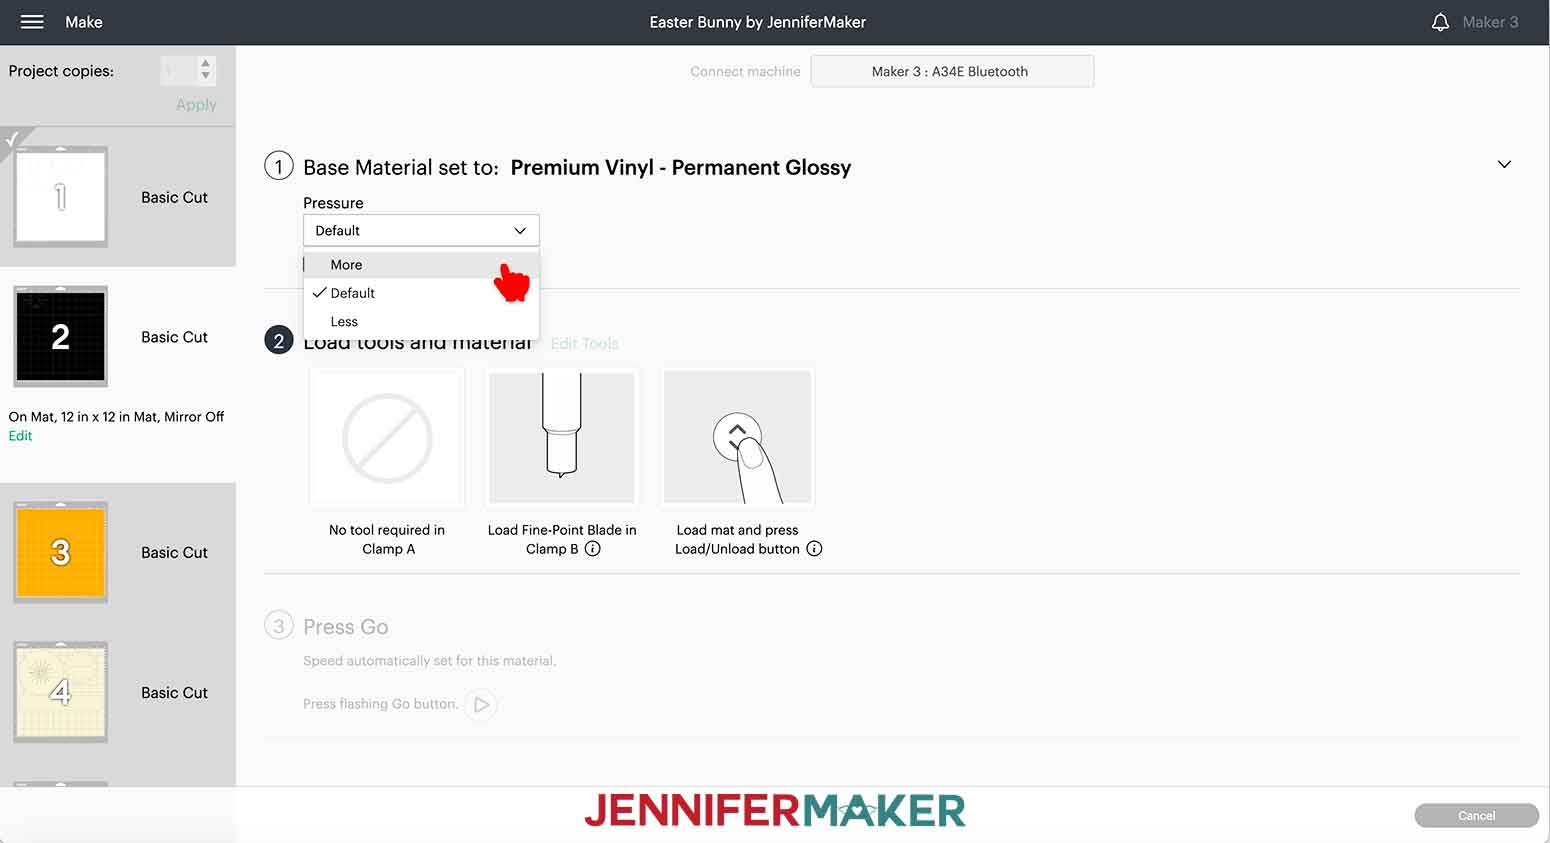
We will be using several different materials for this project so we will need to change the material settings
The white, teal, and first pink (with the inner ear pieces) mats will be cut with the Felt setting. The black and second pink (with the nose design) mats will be Premium Vinyl. The beige and orange mats will be cut with Cardstock.
If the material you need to select is not displayed on your screen, click "Browse All Materials" and search for it.
I recommend selecting "More Pressure" for all materials in this project.

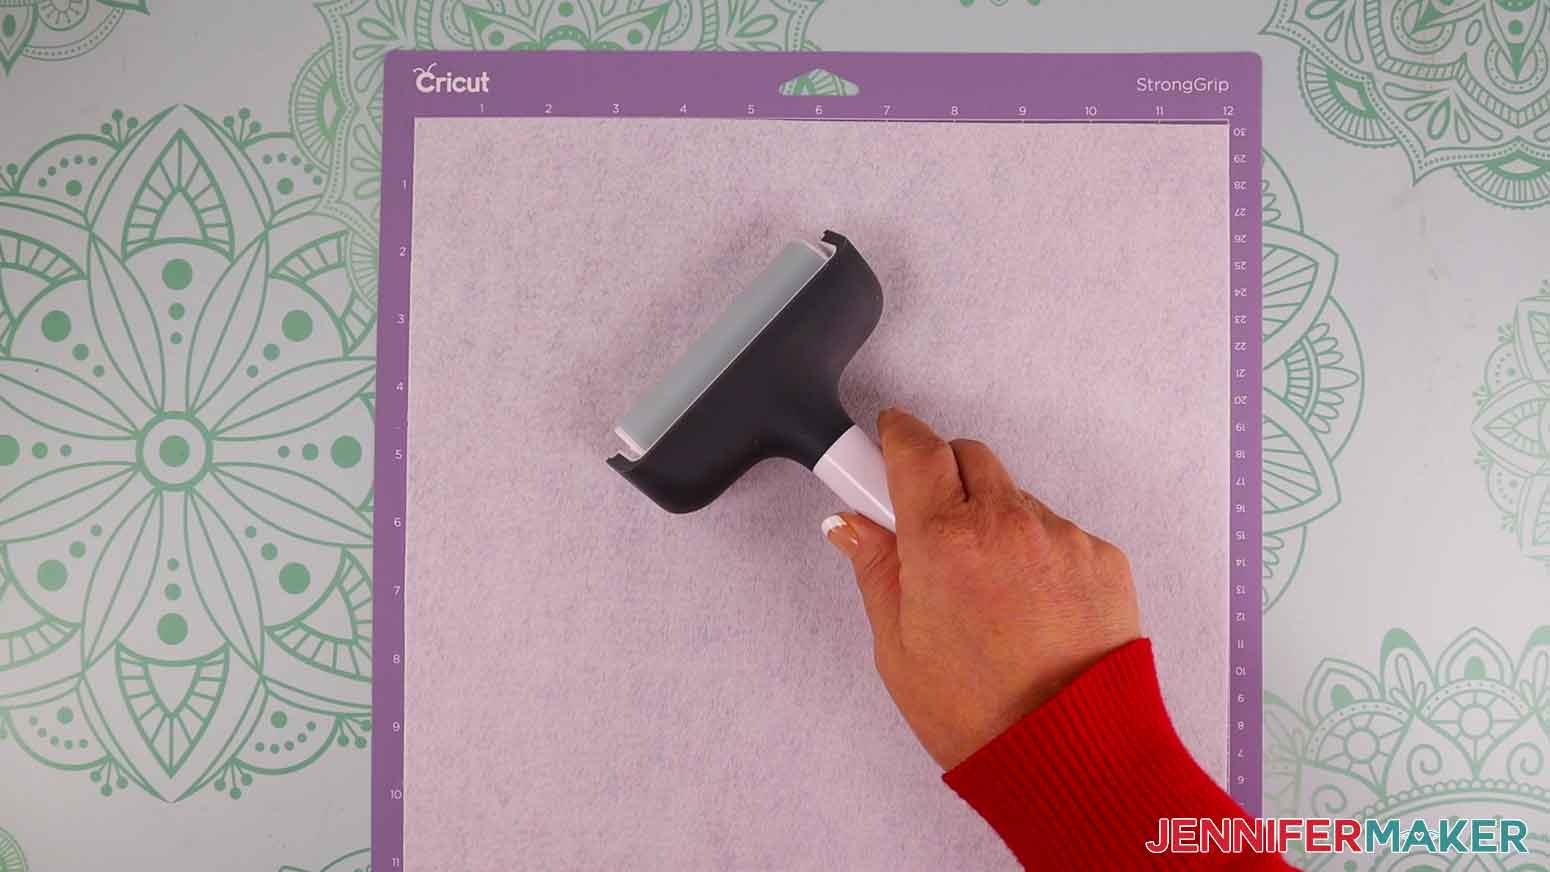
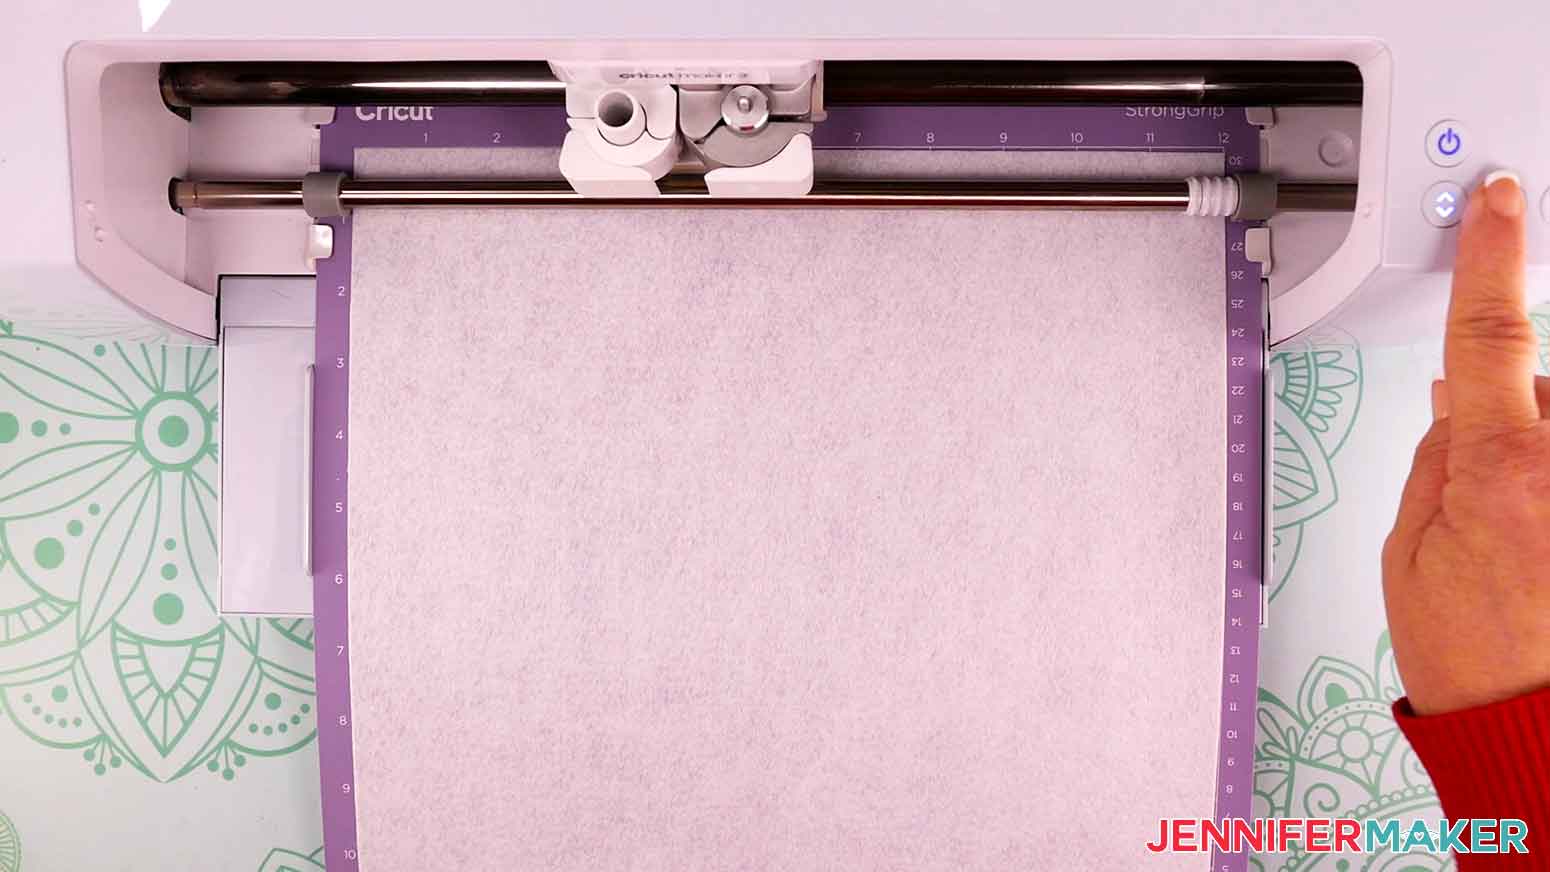
Place your white felt on a StrongGrip purple machine mat.
TIP: You can also use a Pink FabricGrip machine mat or a really sticky (like new) StandardGrip machine mat. All three worked well for me with the felt.
Use a brayer to make sure the felt is evenly adhered to the mat.
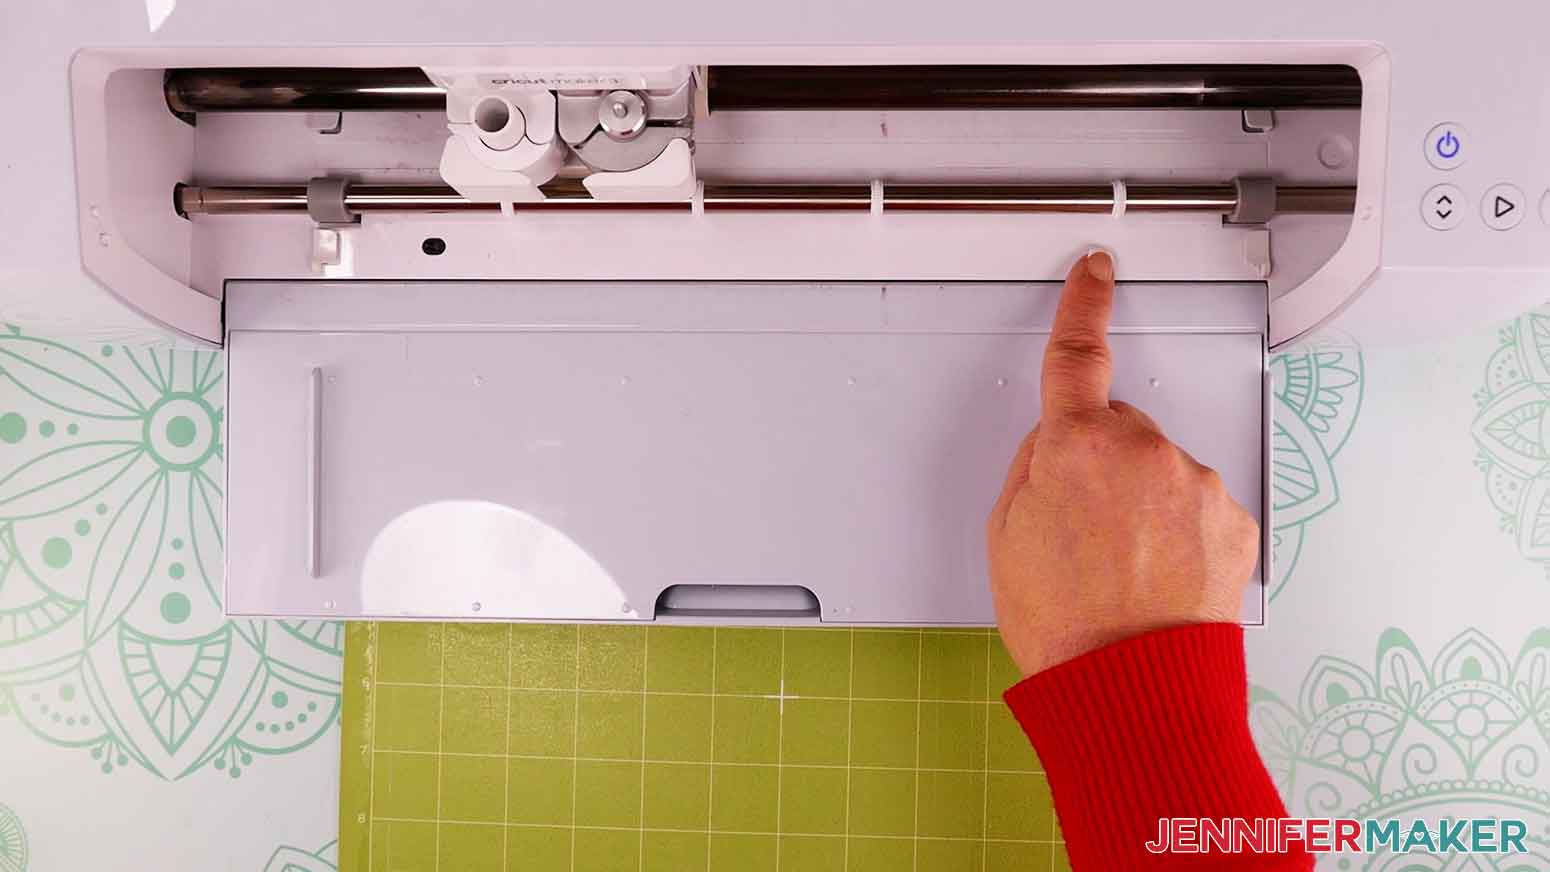
Before loading your mat, move your star wheels all the way to the right of your machine. Some types of felt may be creased by the star wheels so it is best to move them to prevent unwanted marks on your felt.
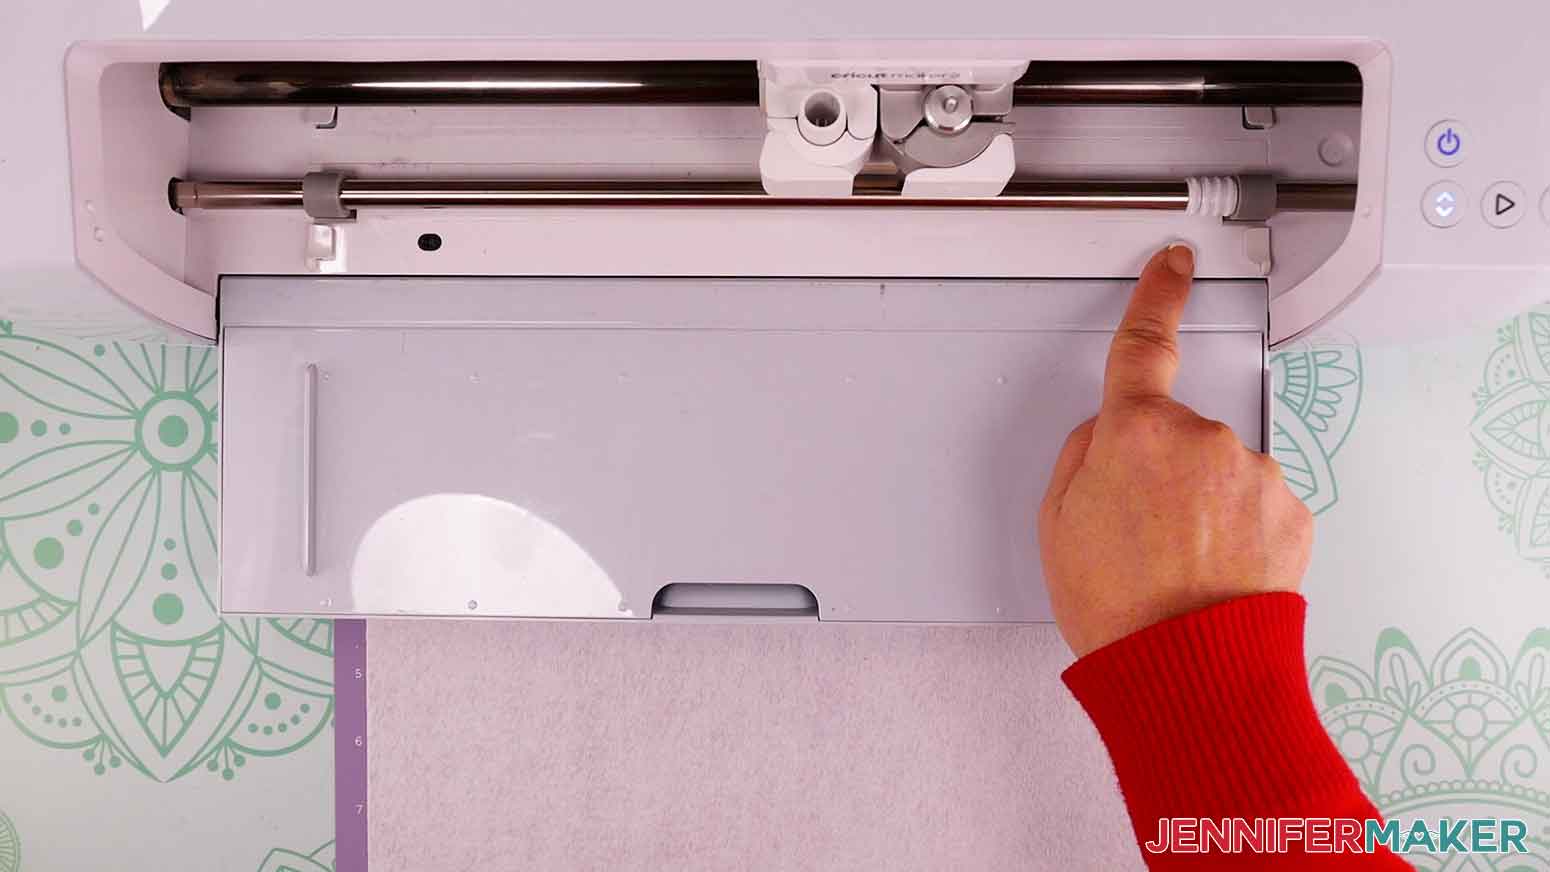
Insert the mat into your Cricut and press the flashing arrows to load it. When the middle button flashes, press it to begin the cut.
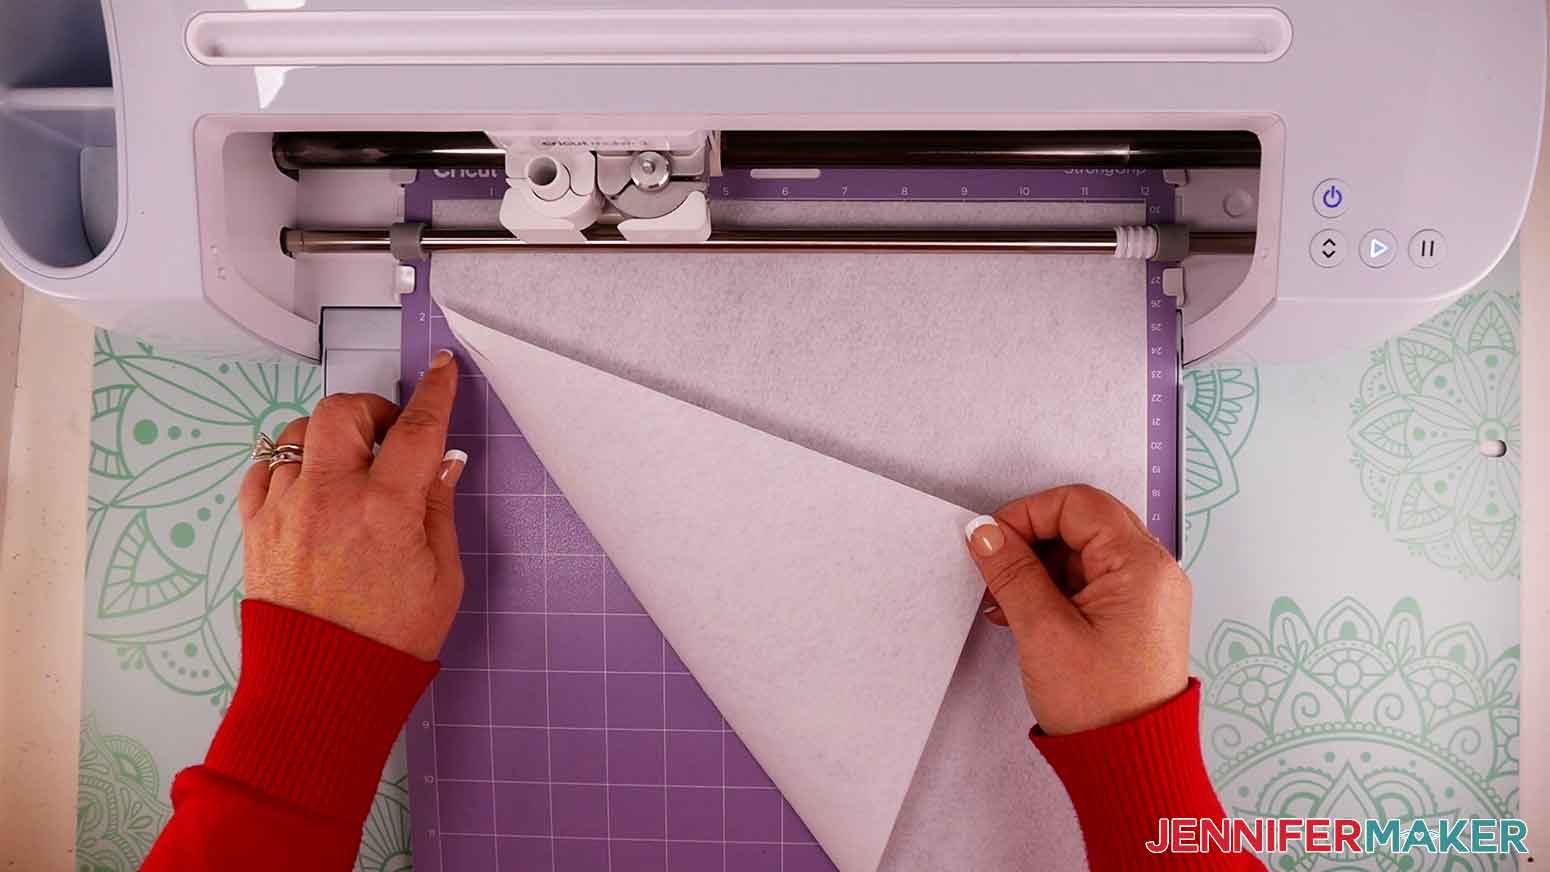
When the cut is done, do NOT unload the mat. Gently lift a corner of the cut felt to make sure it cut all the way through. If it did not, press the middle button again for a second pass of the cut.
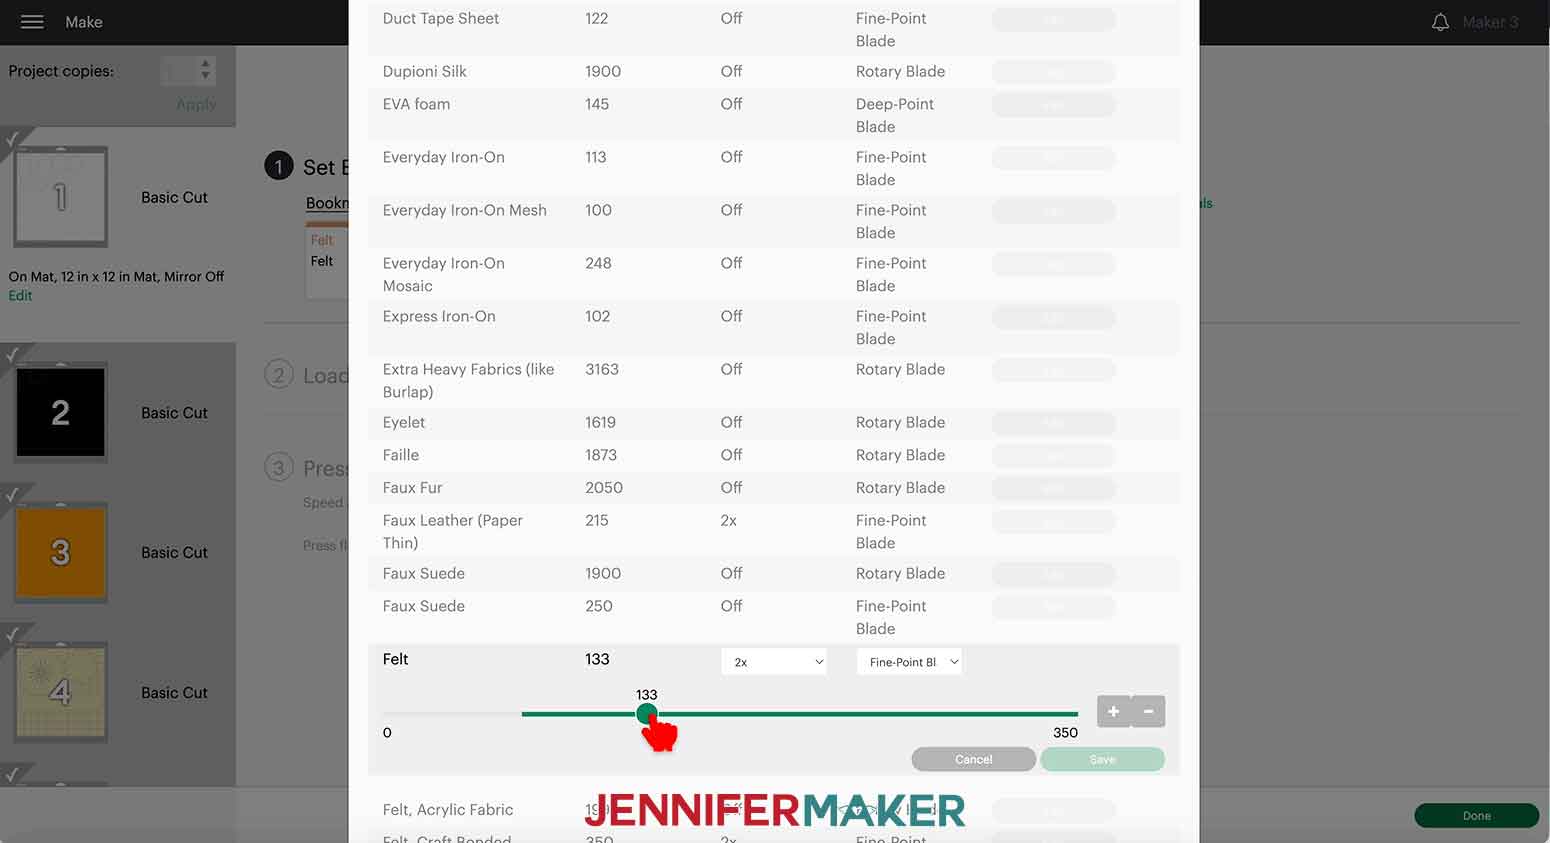
NOTE: Different brands of craft felt will have different cut results. If your felt is not cutting through, you may need to experiment with different pressure settings and multiple passes. If you need to change the pressure, click "Browse All Materials" and then click "Material Settings" in the lower left corner. Scroll to "Felt" and click "Edit." You can move the lever to the right to increase the pressure and you can also click on the drop down to add multiple passes.
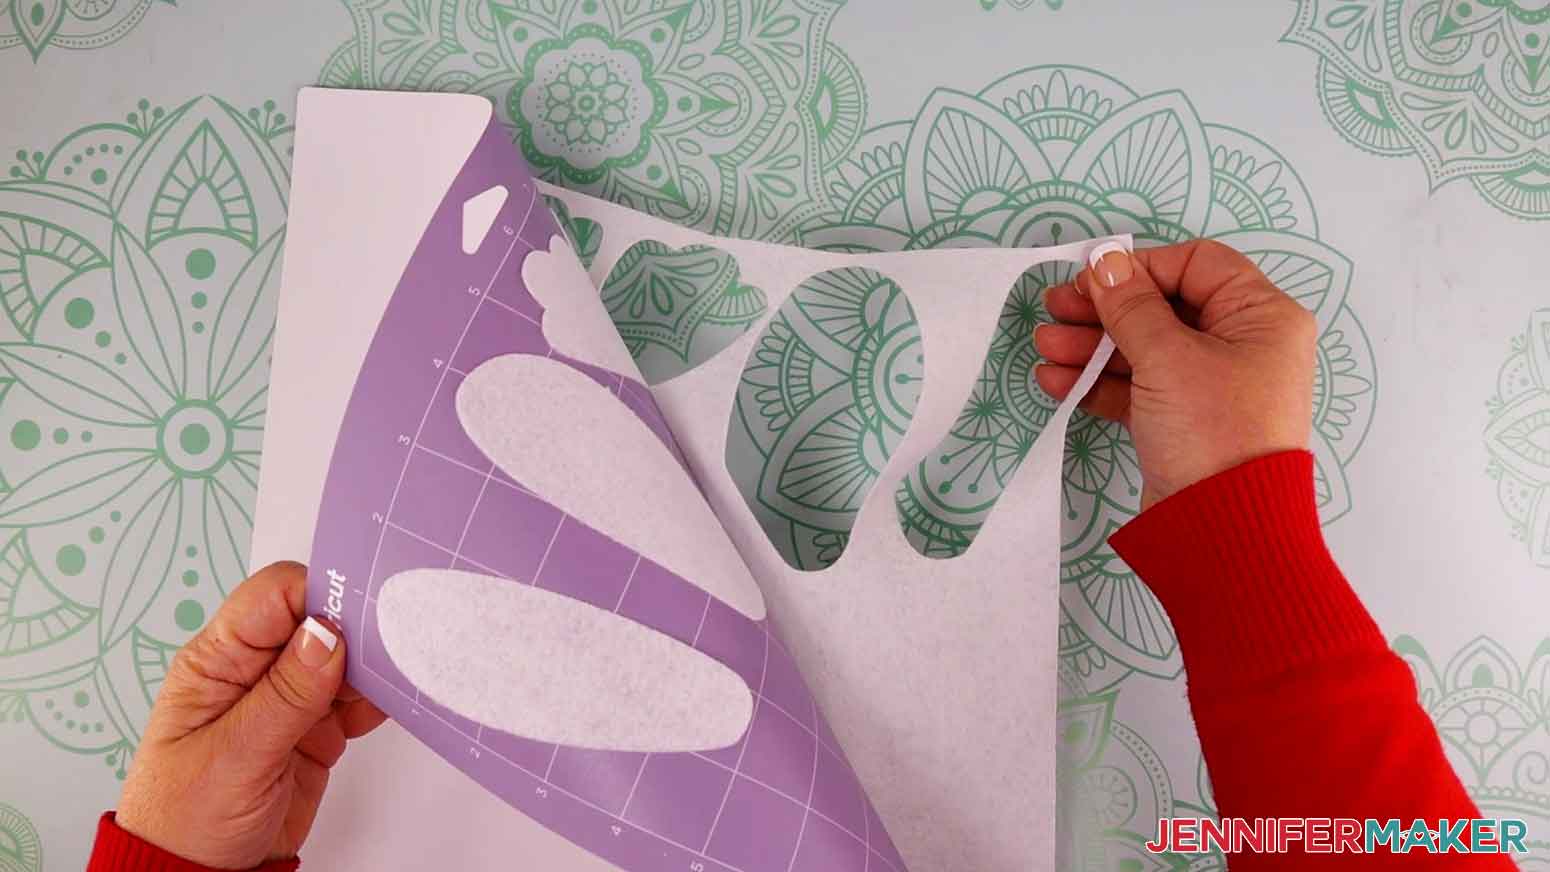
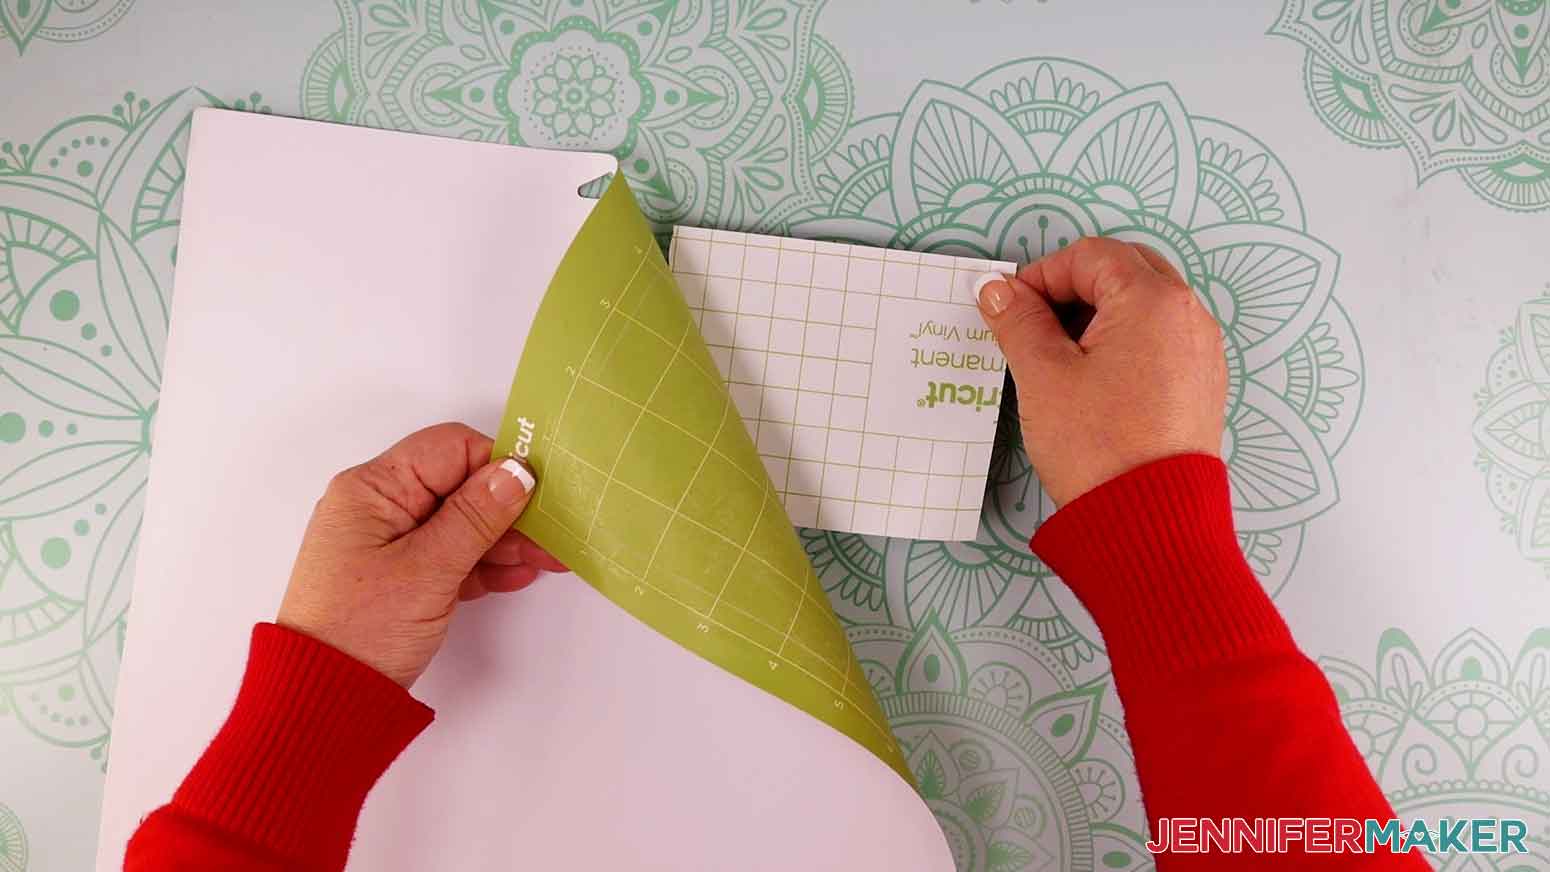
When the felt has cut all the way through, press the flashing arrows to unload the machine mat from your Cricut. Turn the mat over and gently pull the felt away from the mat. Remove the excess felt, too.
Next will be the permanent vinyl. Cut a piece of vinyl slightly larger than the design area. Place the vinyl with the color side facing up on a StandardGrip green machine mat. If needed, use a brayer to adhere the vinyl to the mat.
Click on the Material type in Design Space and select the correct material with "more" pressure.
Move the star wheels back in place for the vinyl and cardstock cuts.
Insert the mat into the Cricut and press the flashing arrows to load it. When the middle button flashes, press it to begin the cut.
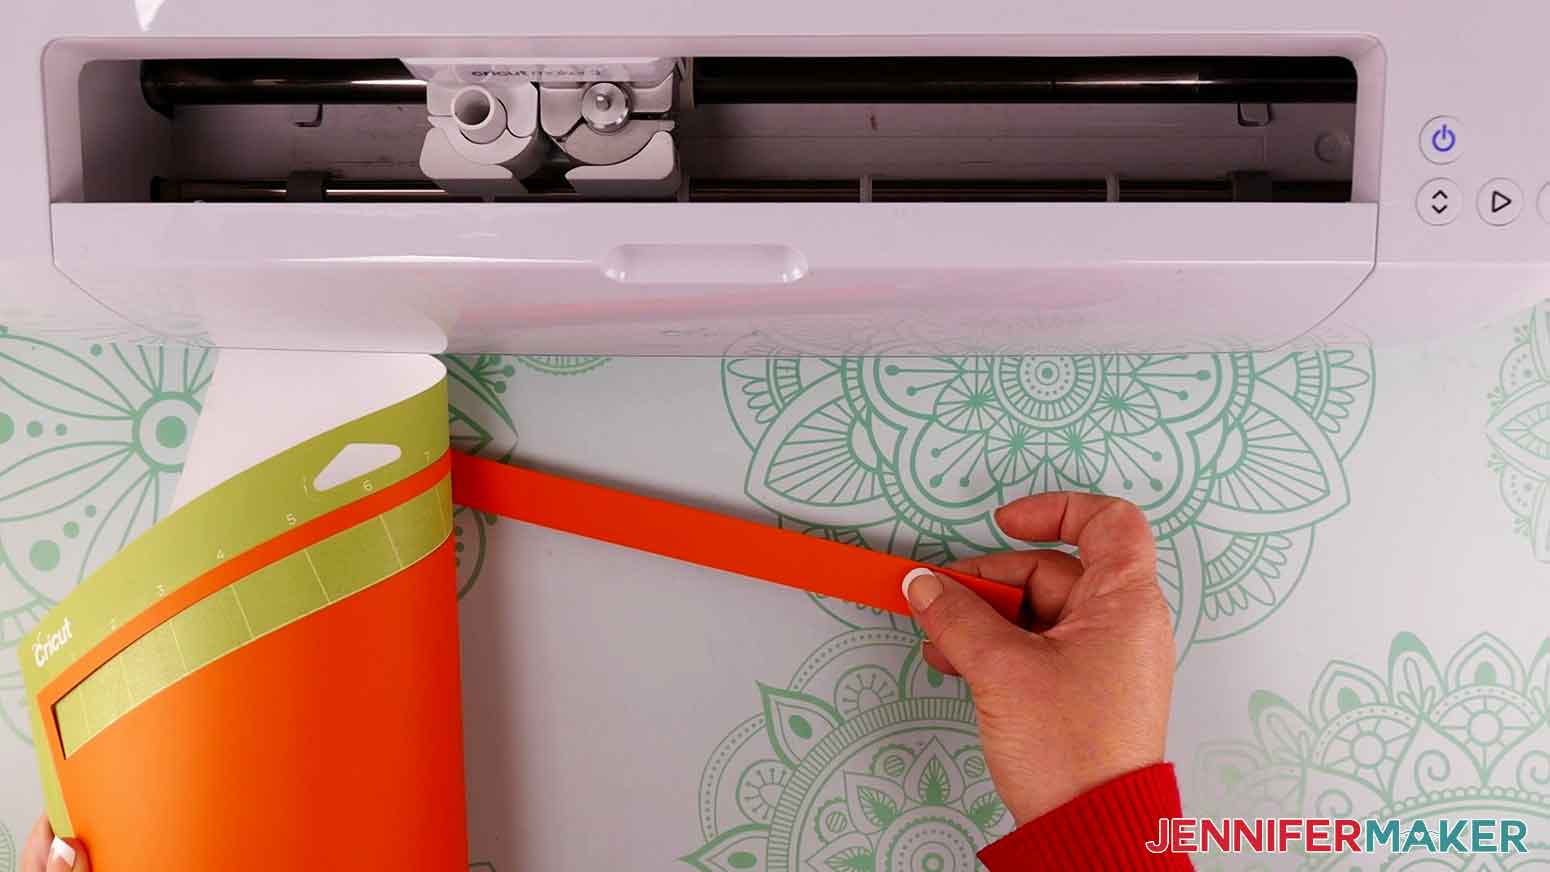
When finished, press the arrows to unload the mat. Flip the mat over and pull the mat away from the vinyl to remove it from the mat.
Next up are two cardstock mats. Return to Design Space and change the material type to Medium Cardstock with "more" pressure.
Place your cardstock on a StandardGrip green cutting mat. Use a brayer, if needed, to help the cardstock stick to the mat.
Insert the mat into the Cricut and press the flashing arrows to load it. When the middle button flashes, press it to begin the cut.
When finished, press the arrows to unload the mat. Flip the mat over and pull the mat away from the vinyl to remove it from the mat.
Repeat these steps for the remaining mats. Remember to change the material type, if necessary, for each mat. For the felt layers, remember to move the star wheels away from the material and check your cuts before unloading your mats.
STEP 4: ASSEMBLE YOUR DOLLAR TREE BUNNY
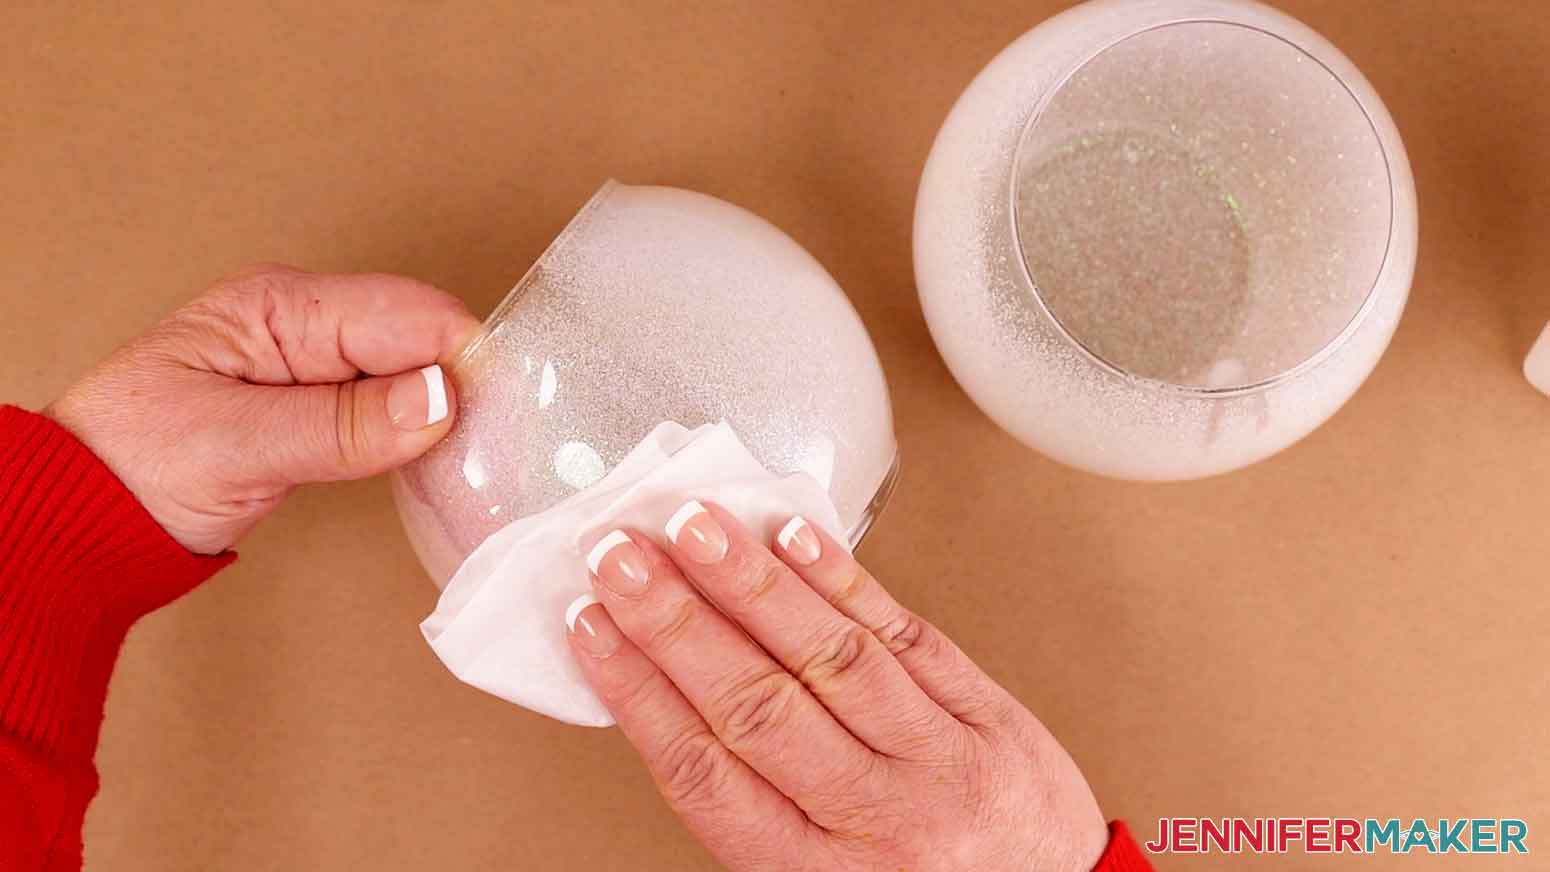
Let's start by placing fresh butcher paper on our work area and cleaning the glass surface of our vases. Use rubbing alcohol and a lint free cloth to remove any dirt, oil, or debris from the glass surface.
Next, it is time to weed the vinyl pieces. With a weeding tool, gently pull away excess vinyl from the face, nose, and button pieces of vinyl.
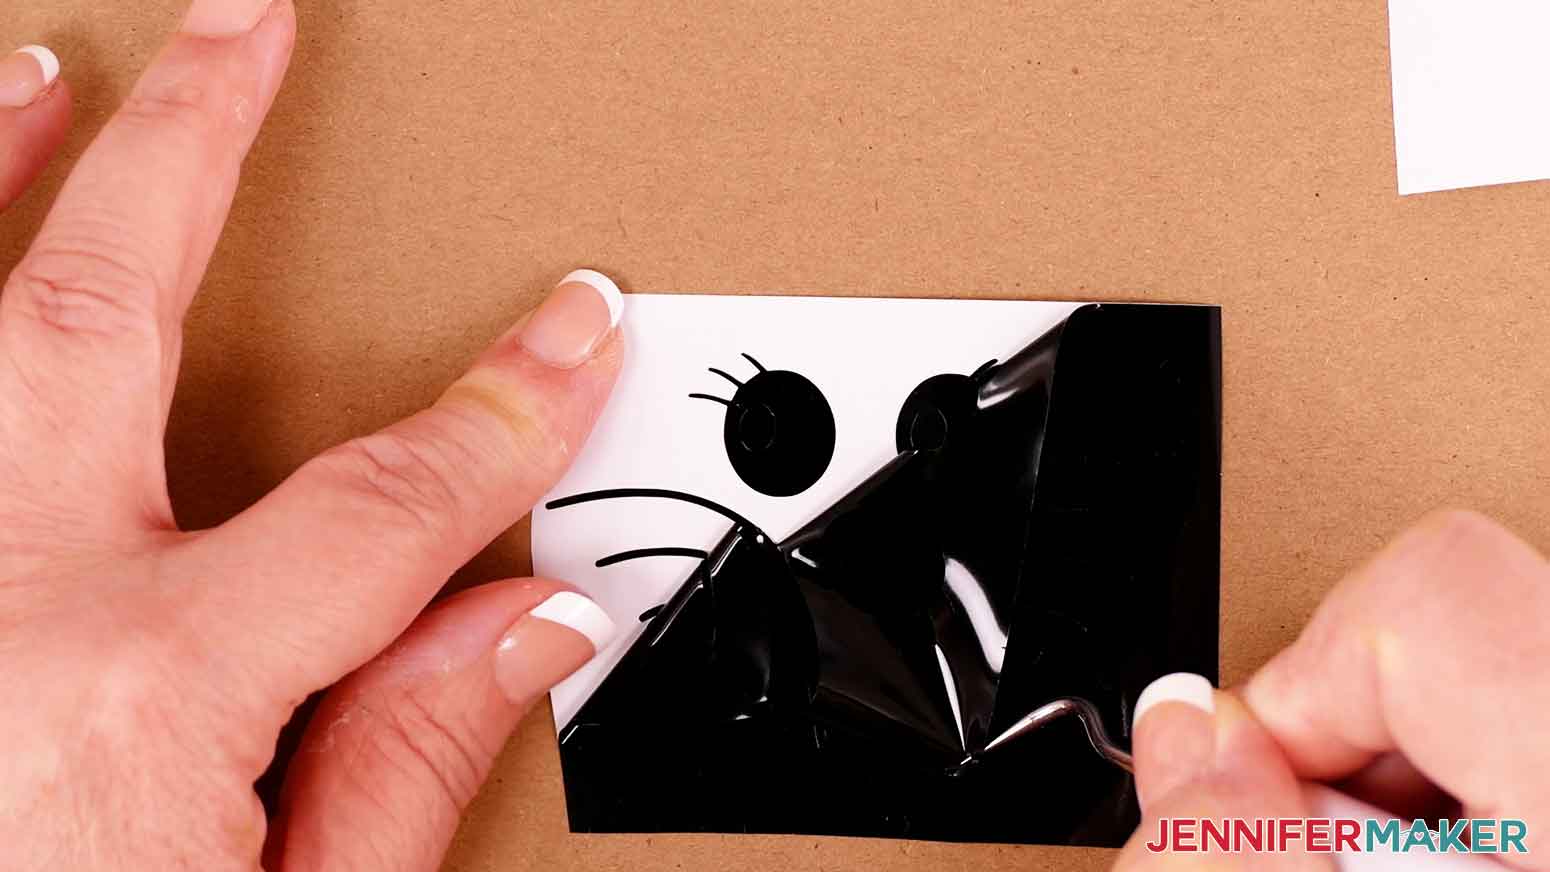
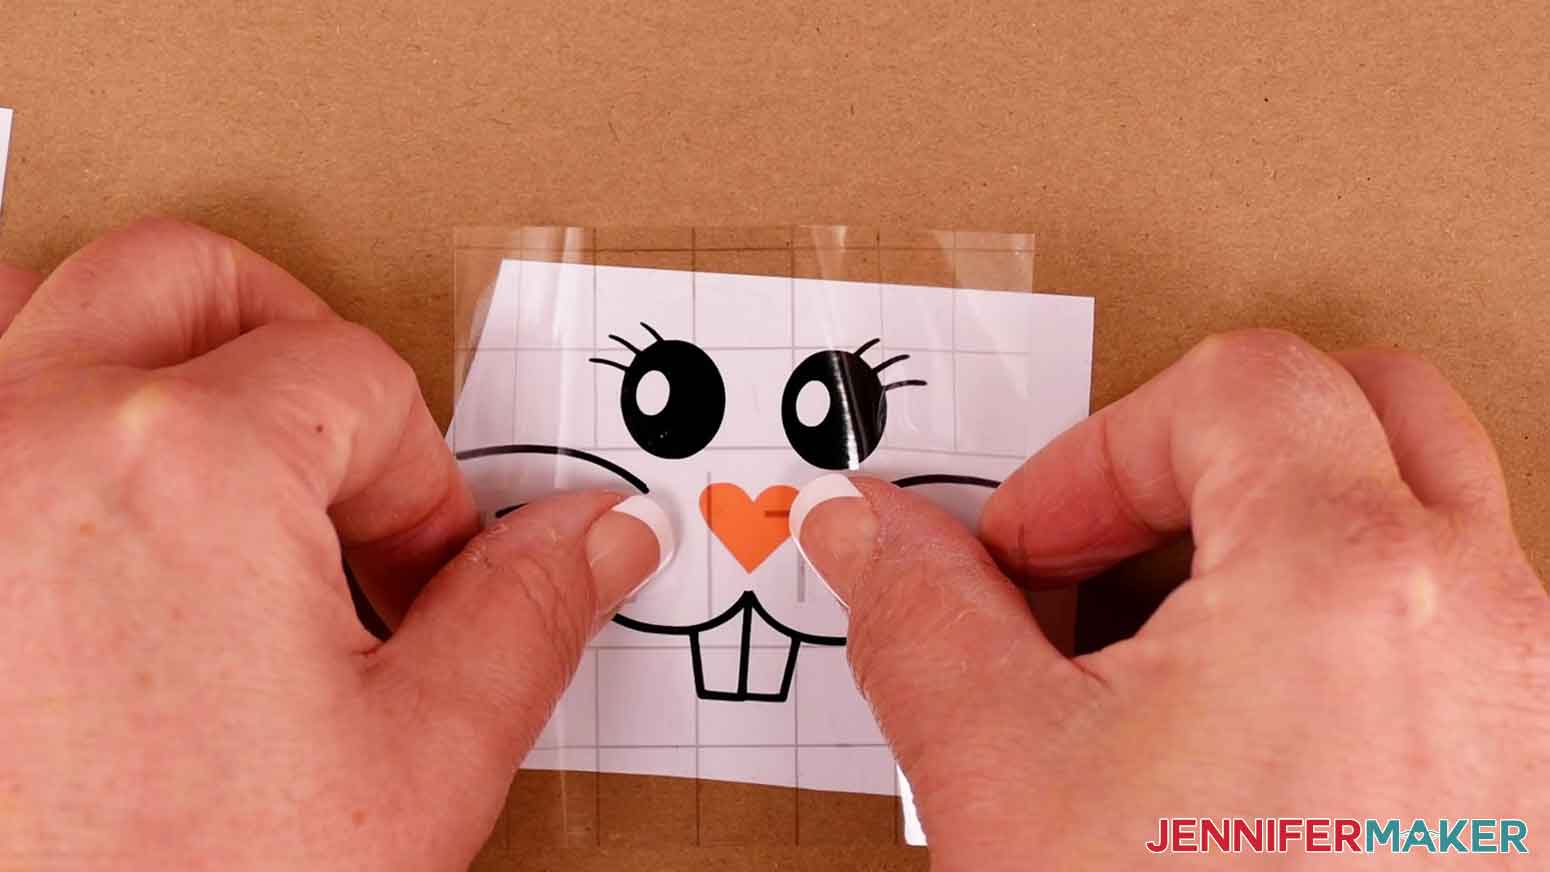
Cut a piece of StandardGrip Transfer Tape slightly larger than the face. First, place the transfer tape over the nose to adhere it to the transfer tape. Once it's adhered, remove the vinyl backing.
Place the transfer tape and nose over the bunny face and press the black vinyl to adhere it to the transfer tape.
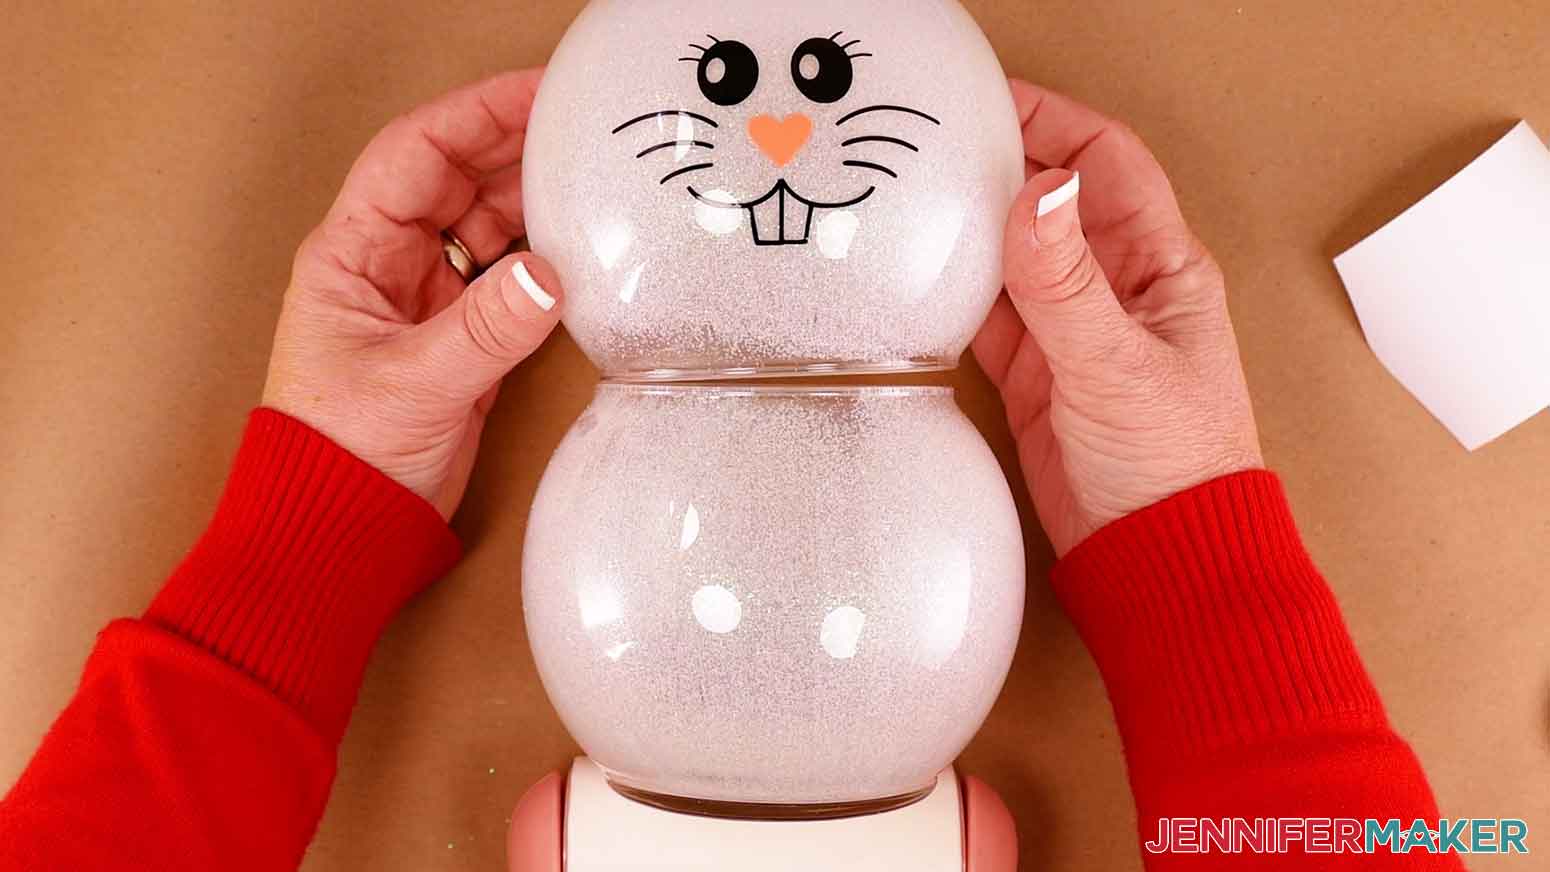
Before removing the vinyl backing, let's set up our first glass vase that will be the top half of the bunny. I'm going to use a lint roller to help hold my vase in place.
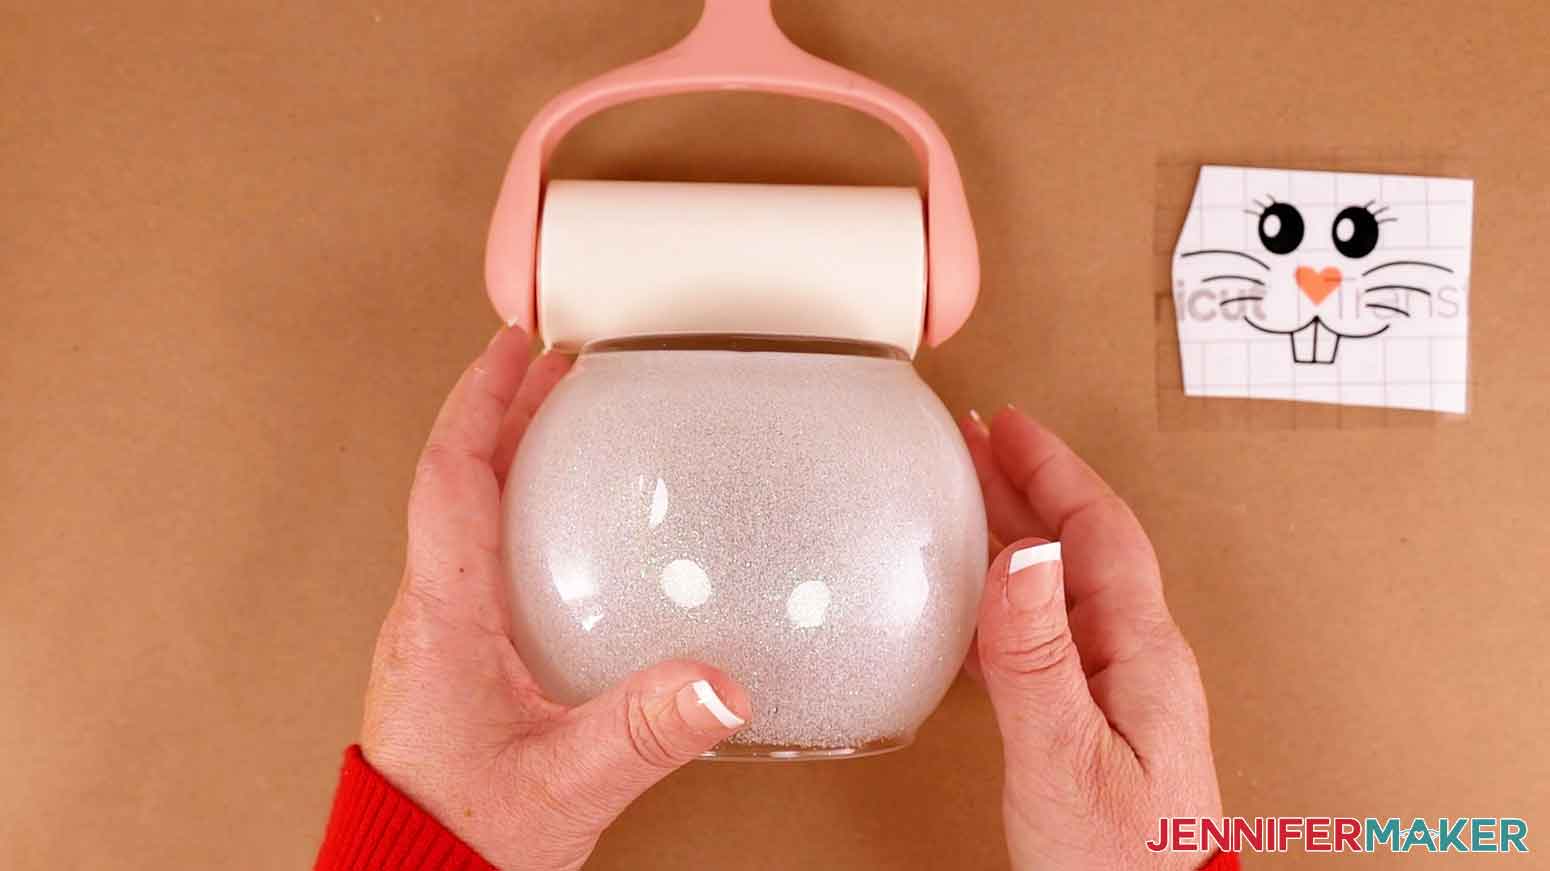
Remove the vinyl backing and make small cuts around the edges of the transfer tape. This will help evenly apply the vinyl to the curve of the vase.
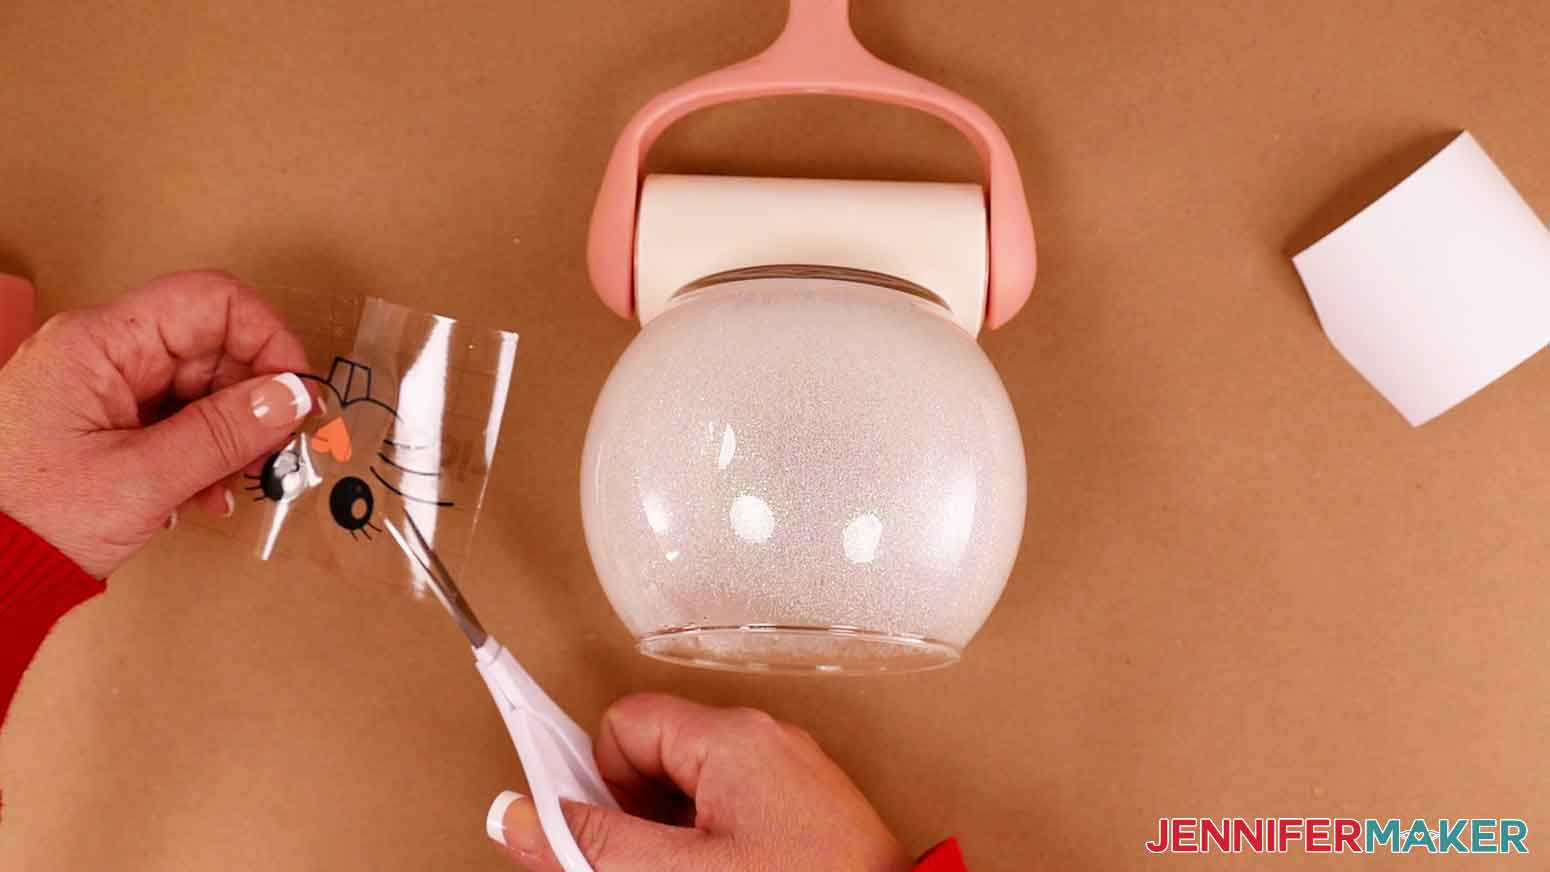
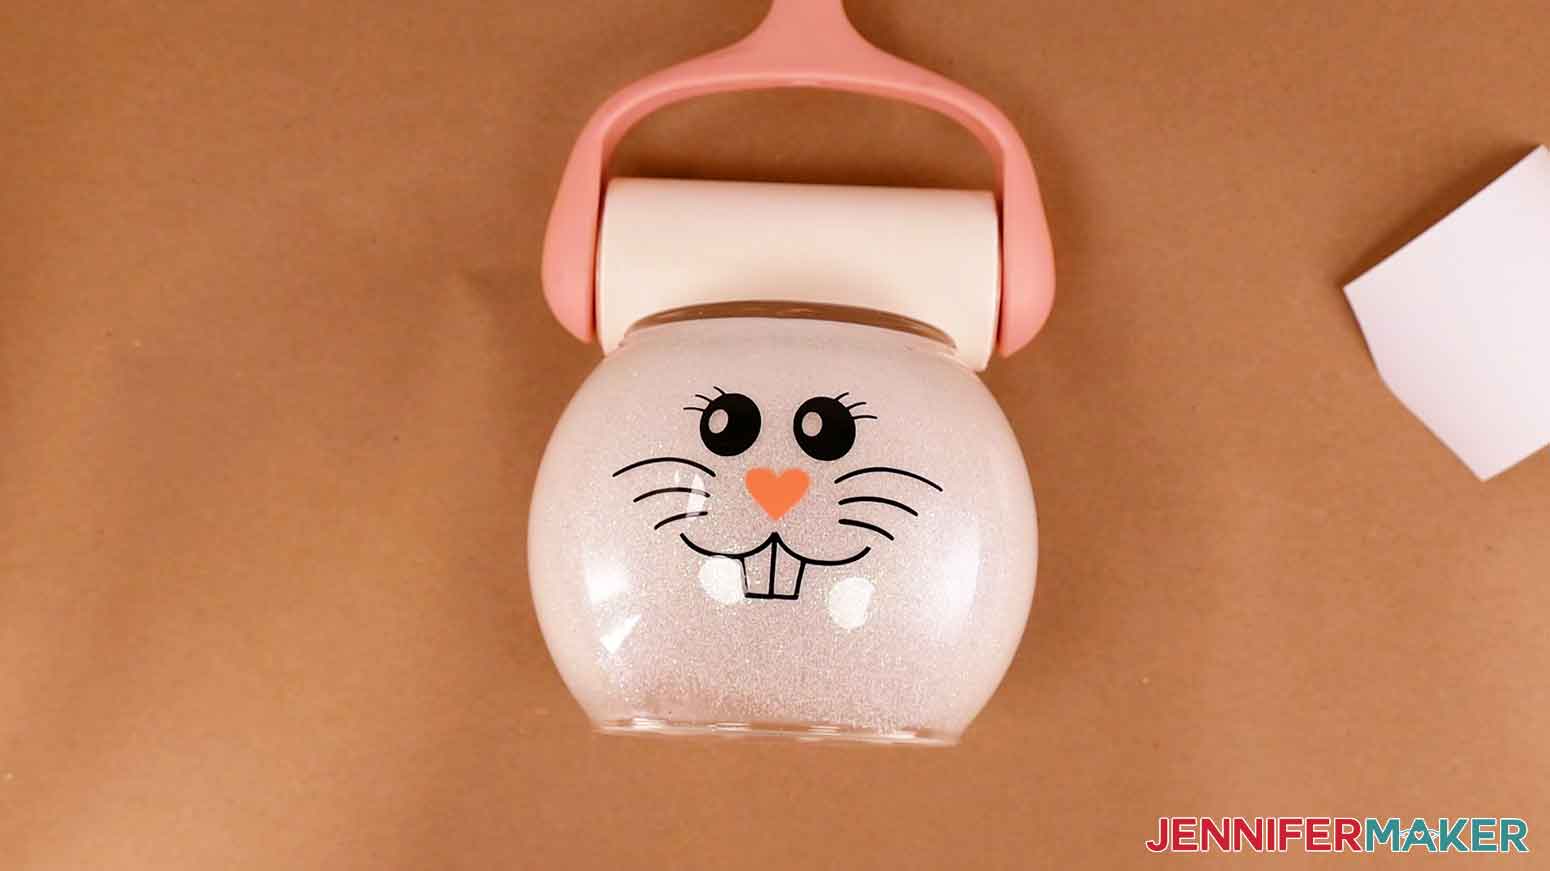
Gently fold up the edges of your transfer tape, like a taco shape, and place your bunny face on to your glass vase. Press the vinyl in to place on the vase. You can use a scraper tool if you need to. Gently pull away the transfer tape.
We need to also apply the buttons. Place the bottom vase in your work area and stabilize it with a lint roller. If necessary, place the top vase above it to envision how the spacing will look.
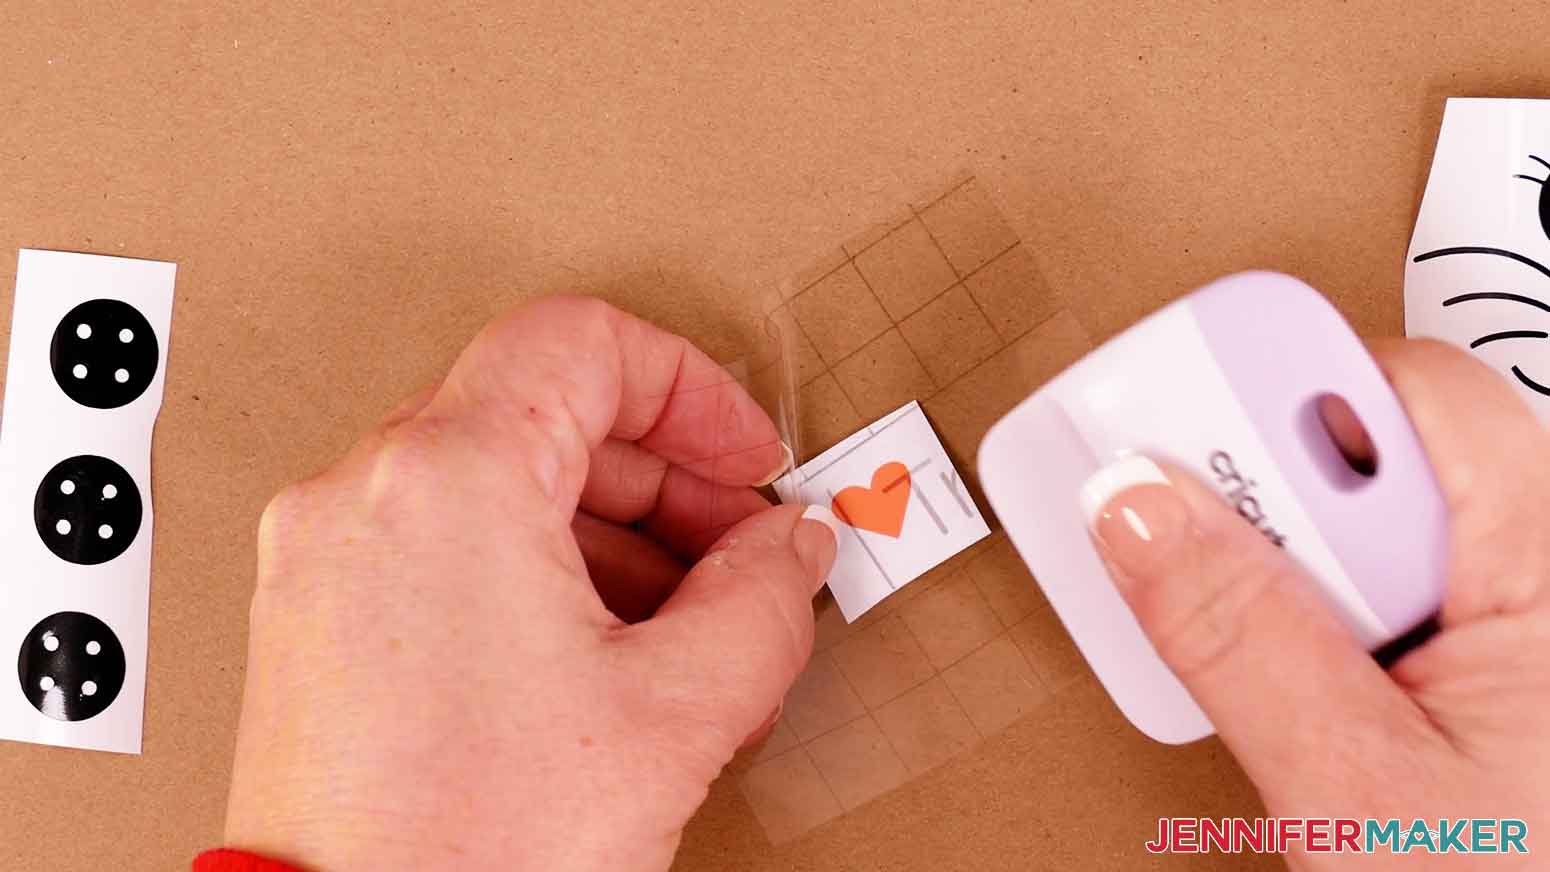
Place your transfer tape over the buttons and remove the vinyl backing. Placing them at the same time will keep them perfectly aligned. Press the vinyl buttons on to the glass and remove the transfer tape.
TIP: If any pieces of vinyl stick to the transfer tape, use a scraper tool to help them adhere to the glass.
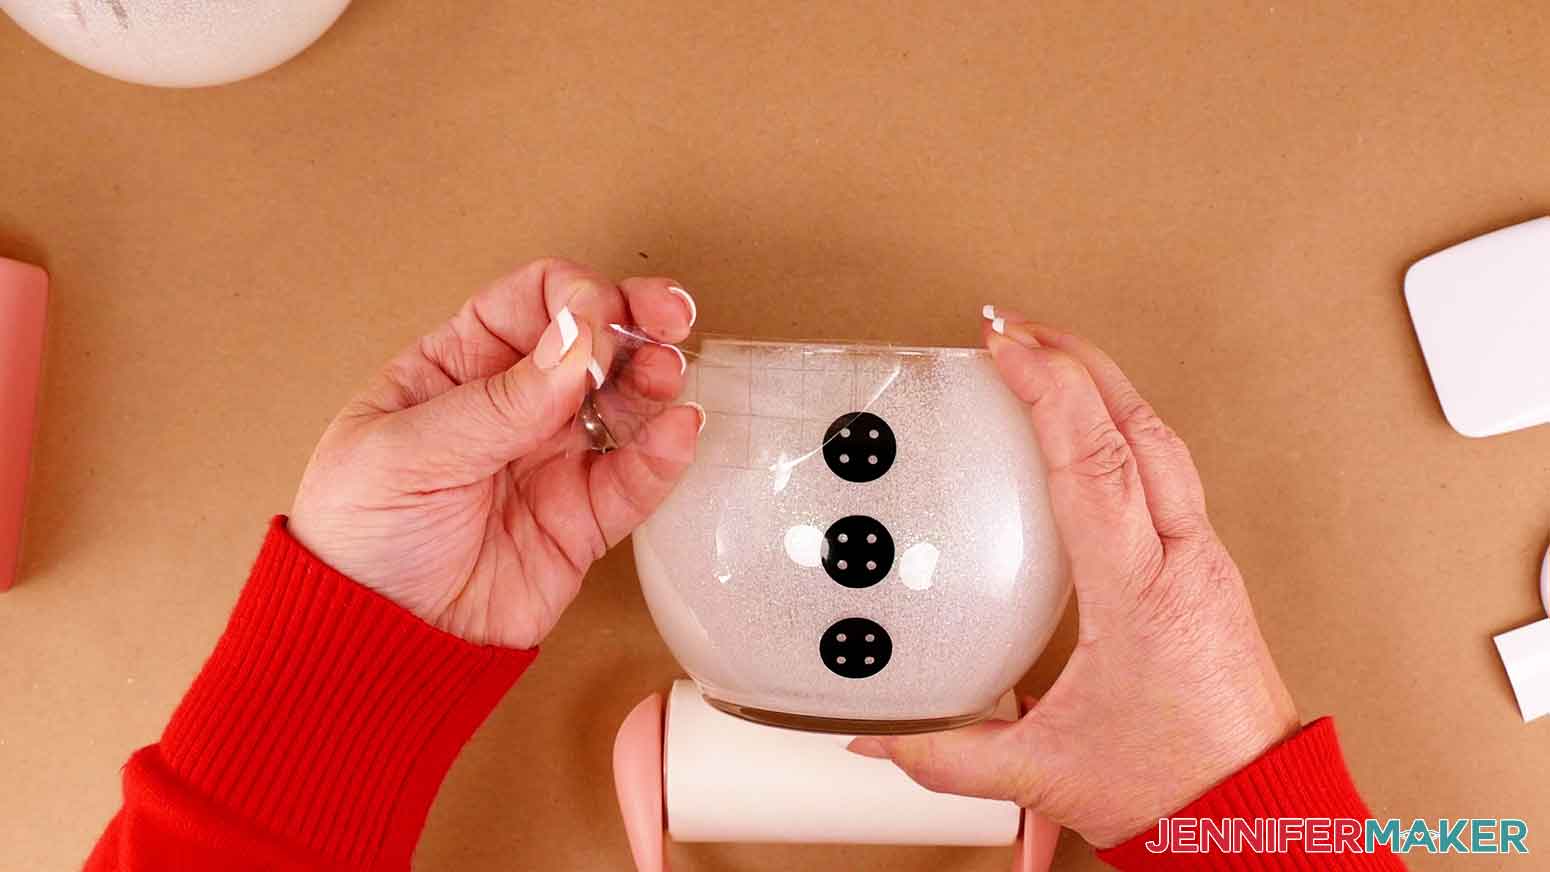
The bunny is coming together and looking so cute!
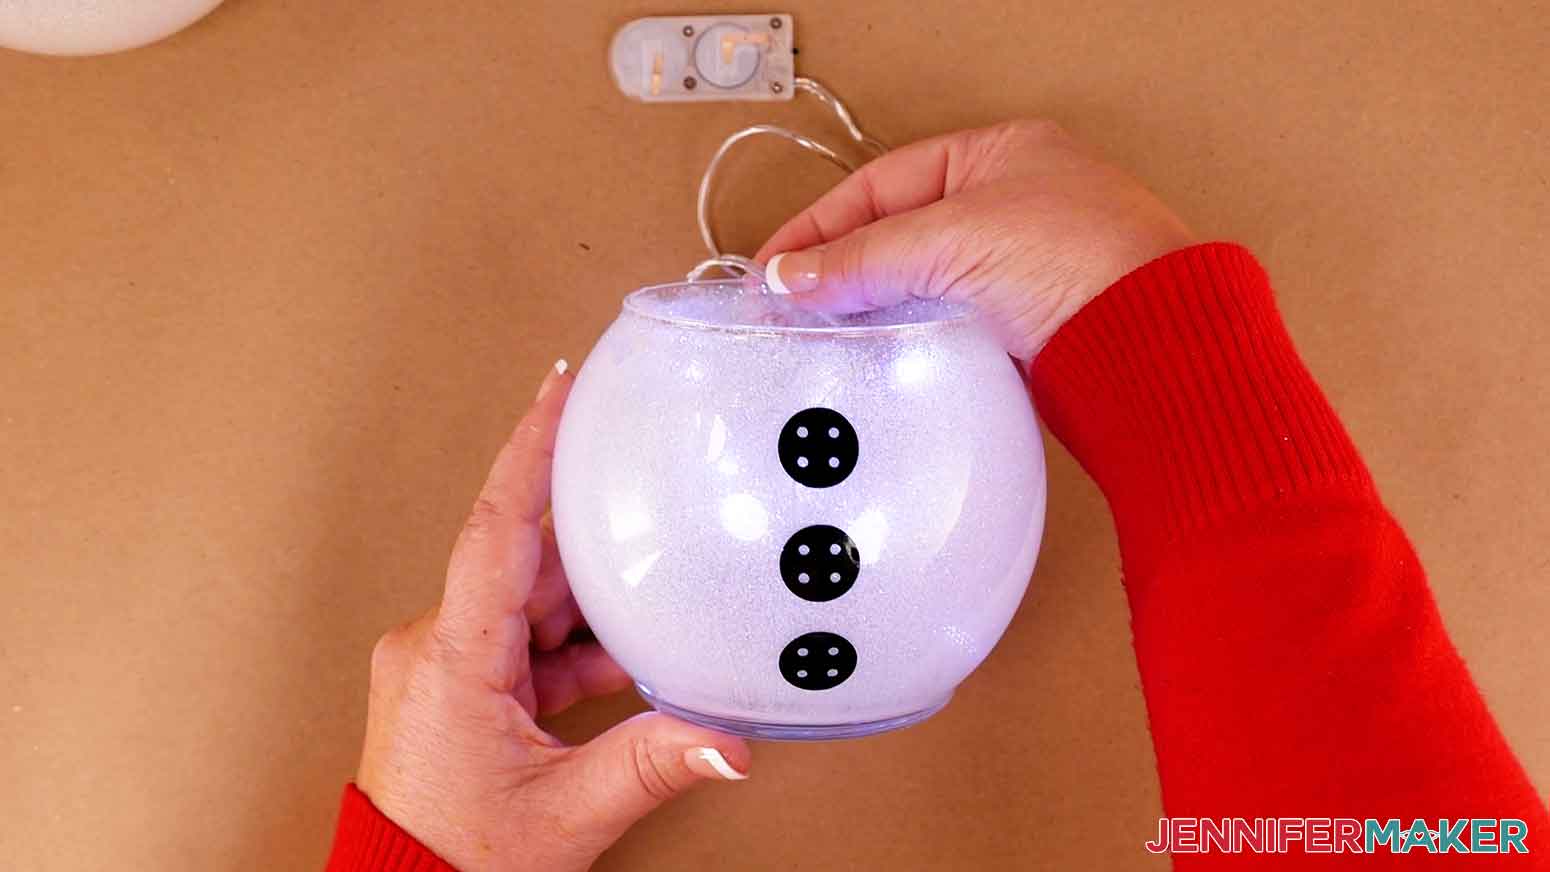
Let's now put this cutie together. Unravel your LED fairy lights and test them to make sure they power on. Place the fairy lights inside the bottom glass bowl and leave the battery pack hanging out the back.
It is time to glue our bunny together.
IMPORTANT: Be sure to use a fan or open a window for proper ventilation when using E6000 glue.
First, we'll use the E6000 glue. Apply it around the rim of the bottom bowl and remember to leave the battery pack hanging out the back.
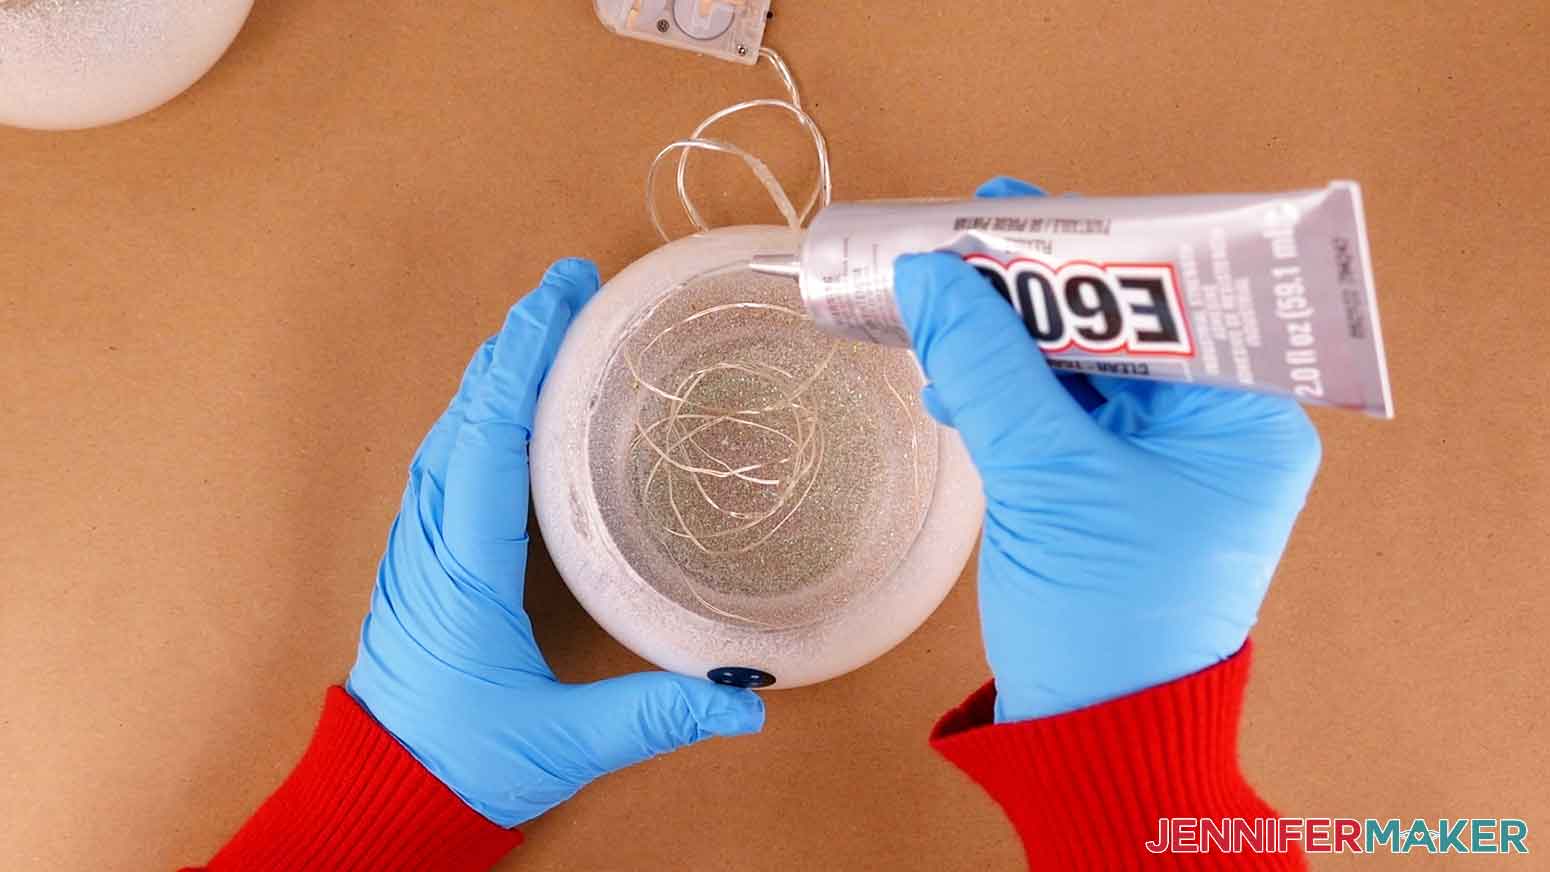
Don't worry too much about perfect glue lines because the seam will be covered with the bow tie wrap.
While the E6000 is setting, let's add some hot glue to help secure the glass together. With the vases together, add hot glue around the seam of the two vases and hold them in place for a minute or two while the hot glue cools a bit.
Set your glass vases aside to dry and let's put together our hat, ears, and decorations.
While the glue gun is hot, let's assemble the ears. Cut a piece of floral wire about 4 inches long and shape it into a long oval, matching the inner shape of the pink part of the bunny ear.
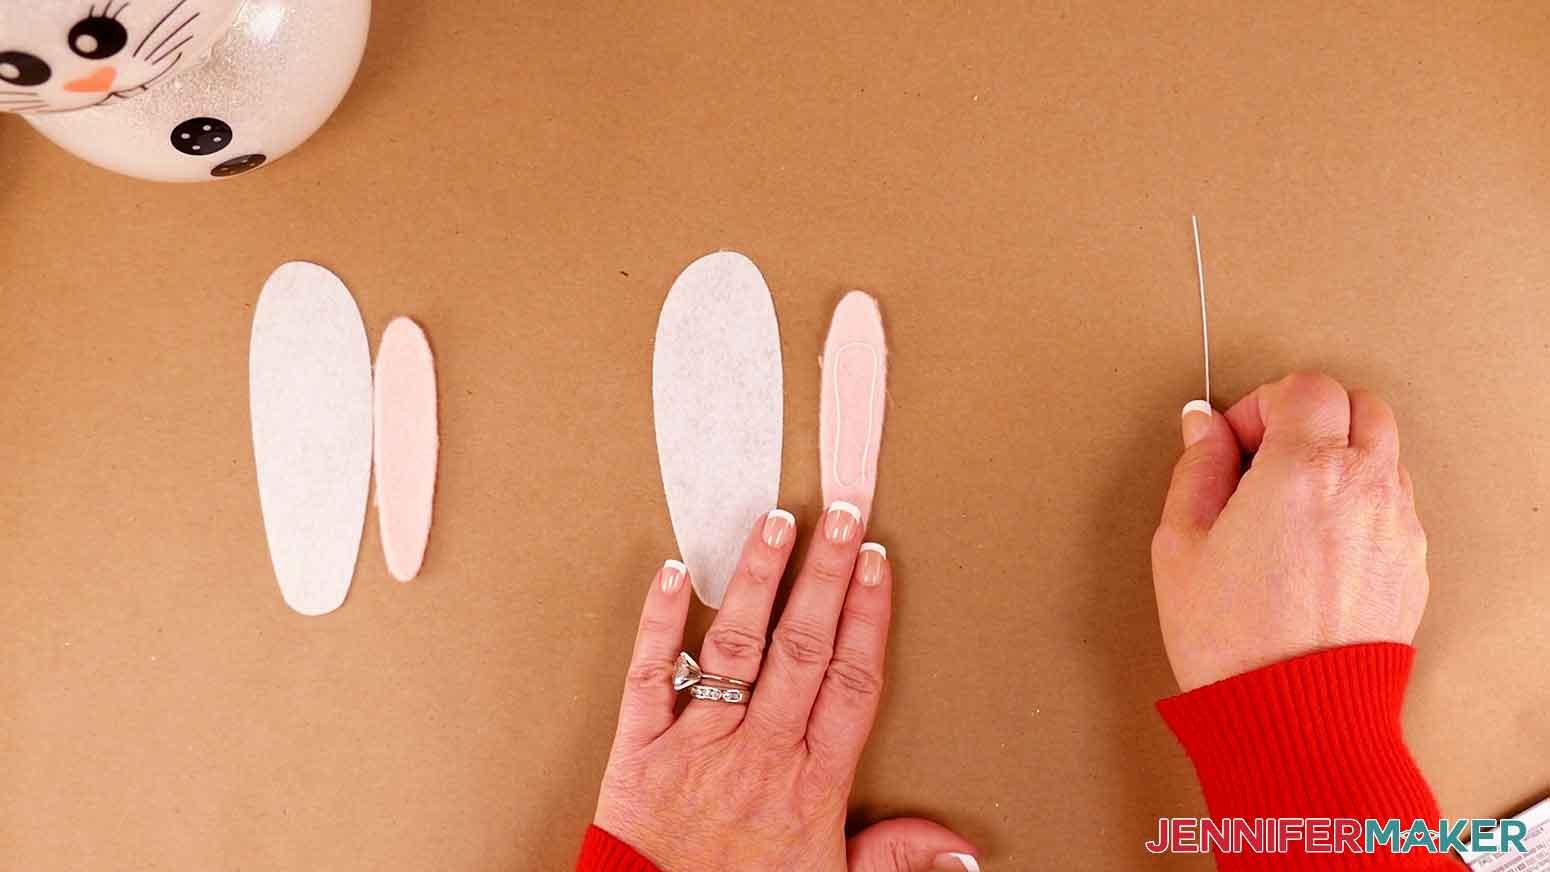
Apply hot glue to the back side of the pink ear piece. Place the floral wire on the pink felt and then turn it over and press on to the white felt ear.
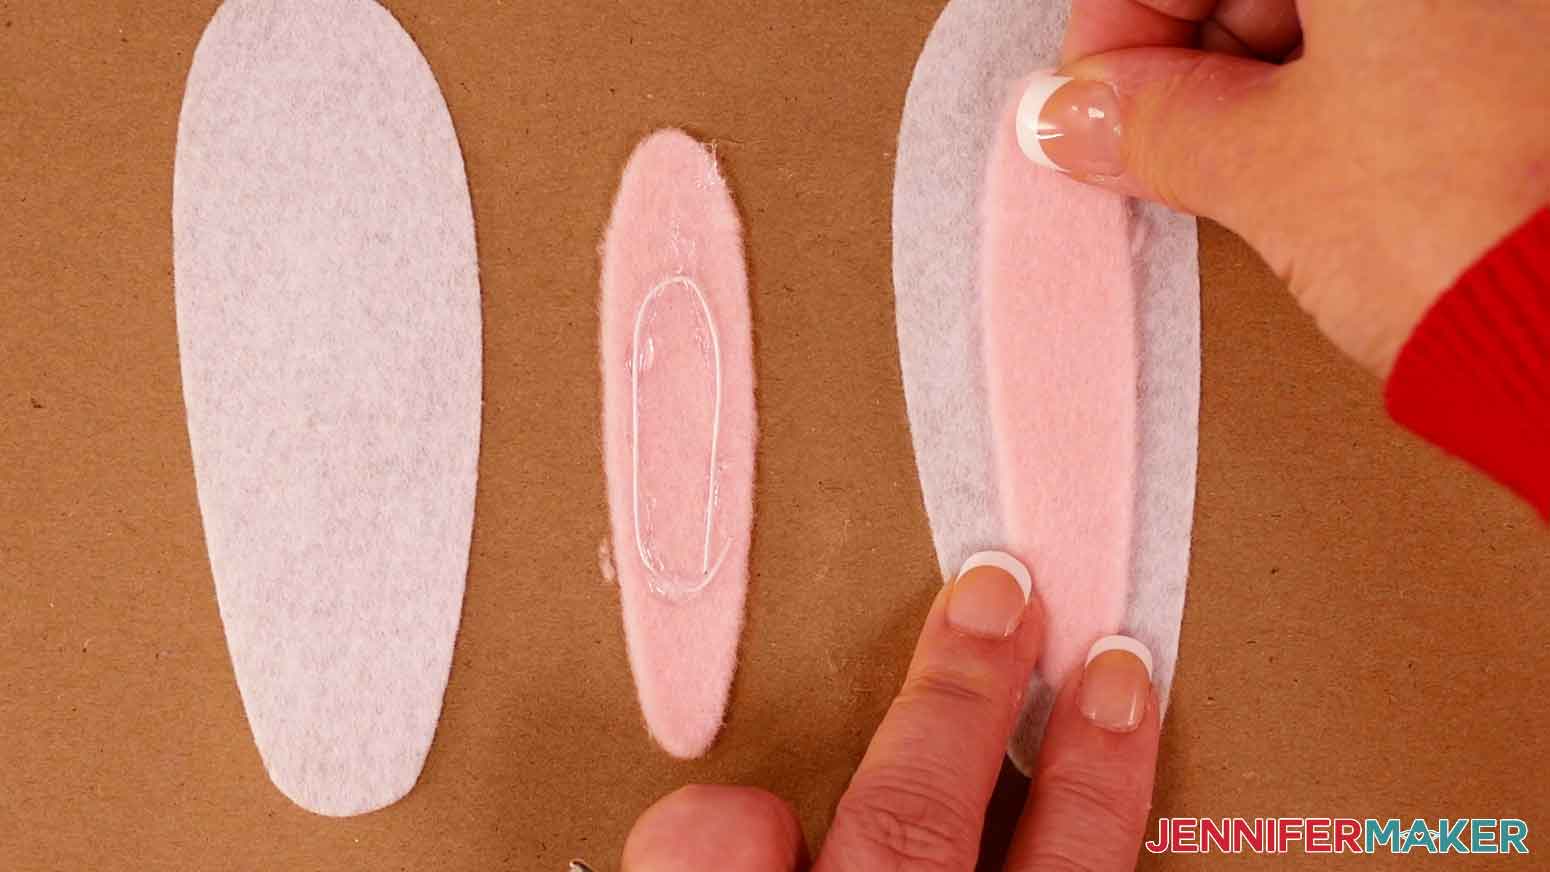
Repeat these steps to make the second ear.
Now, let's make the cardstock Easter bonnet!
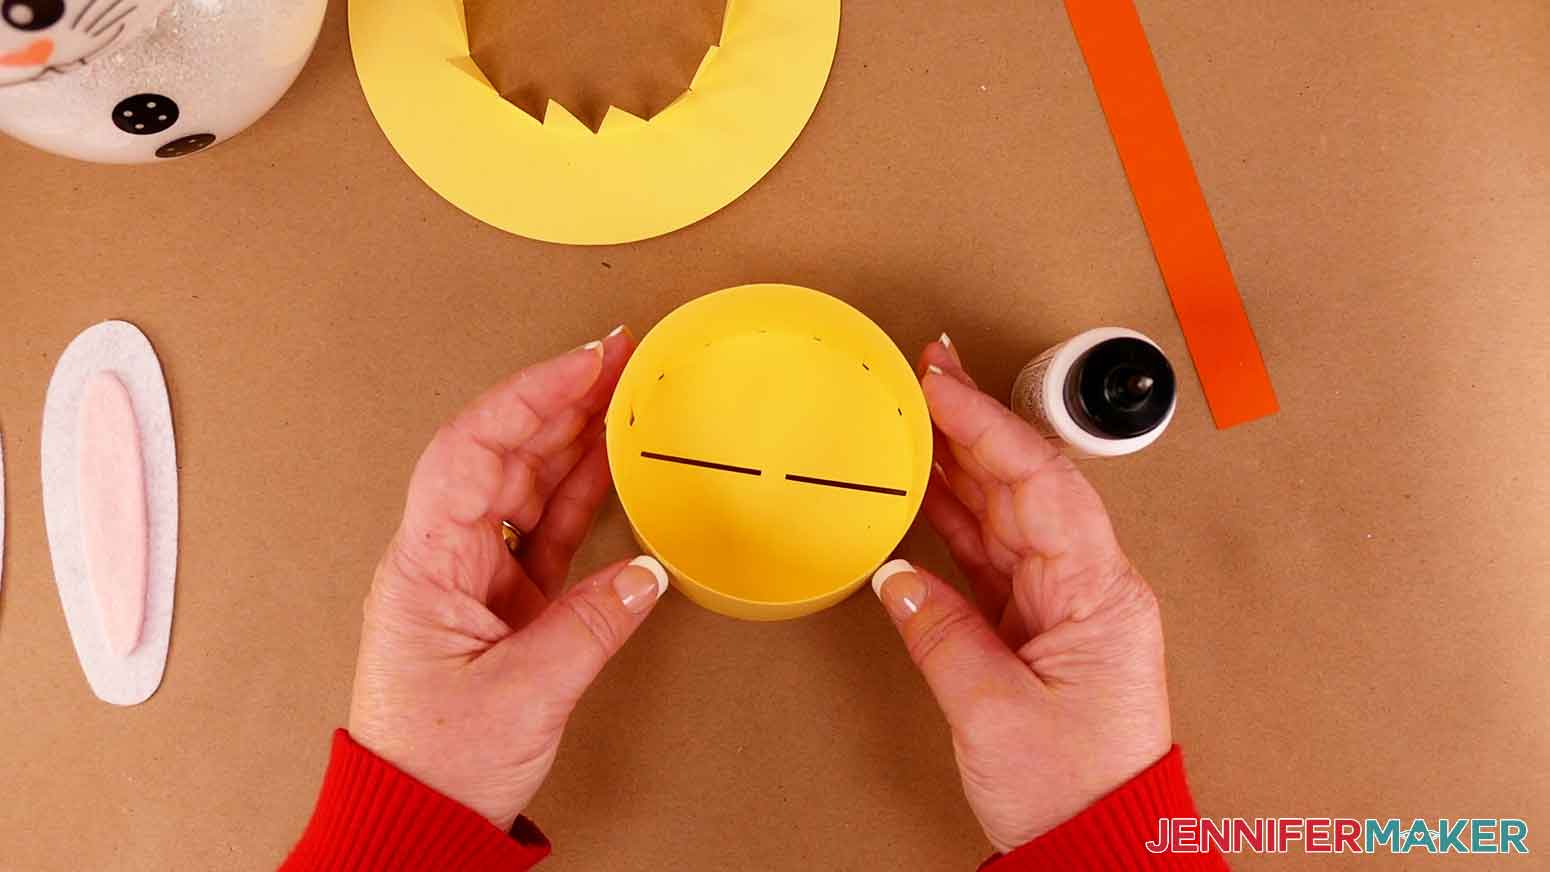
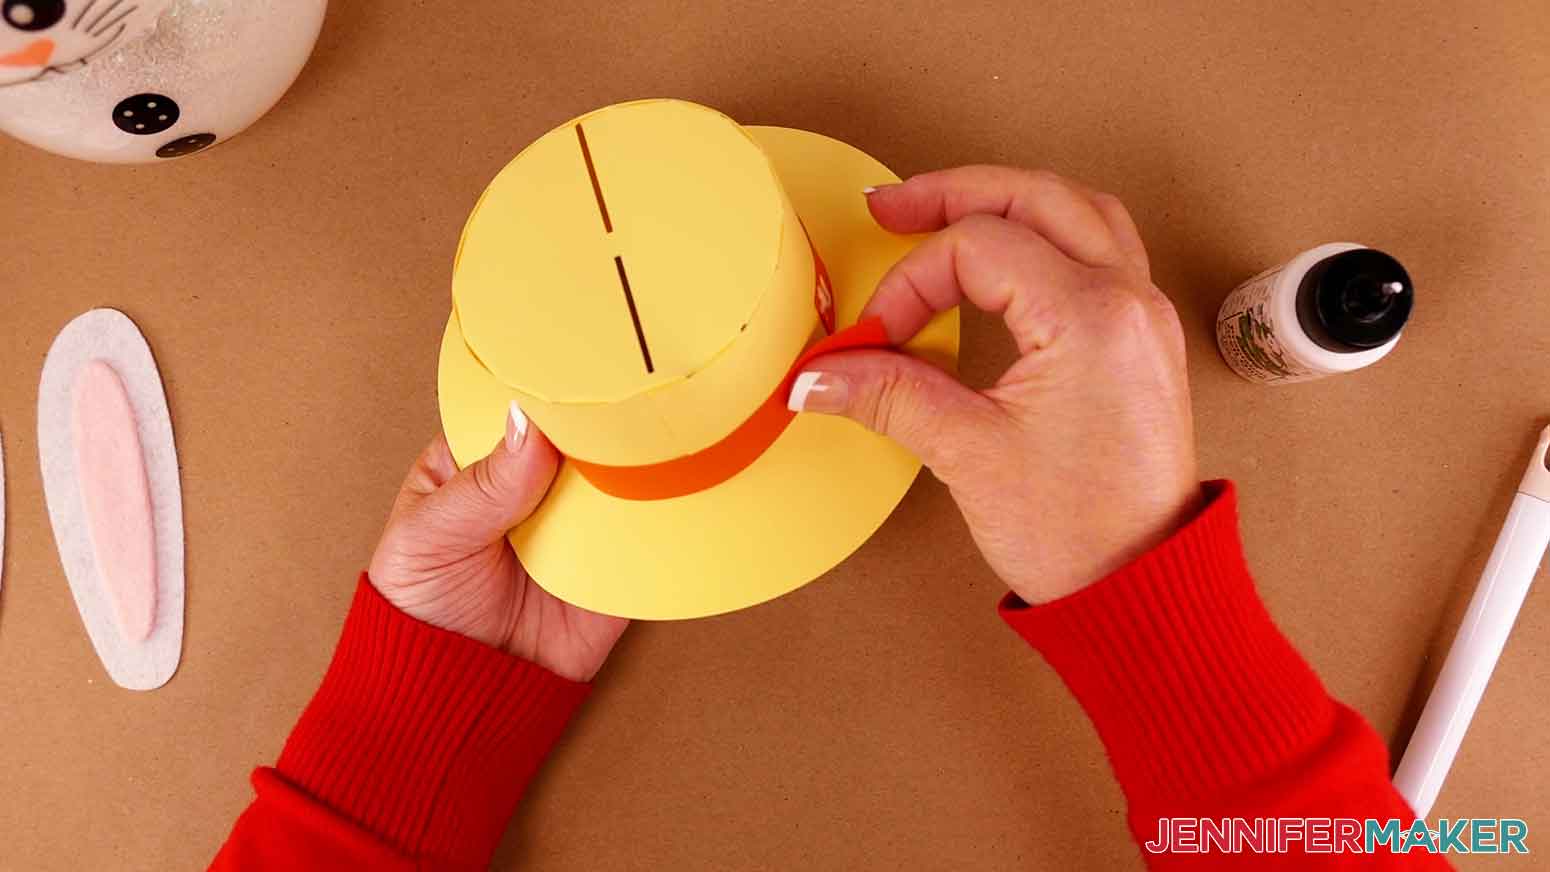
Start with the smaller round piece that has tabs around the outer rim. This will be the top of the hat. Press to fold the tabs inward.
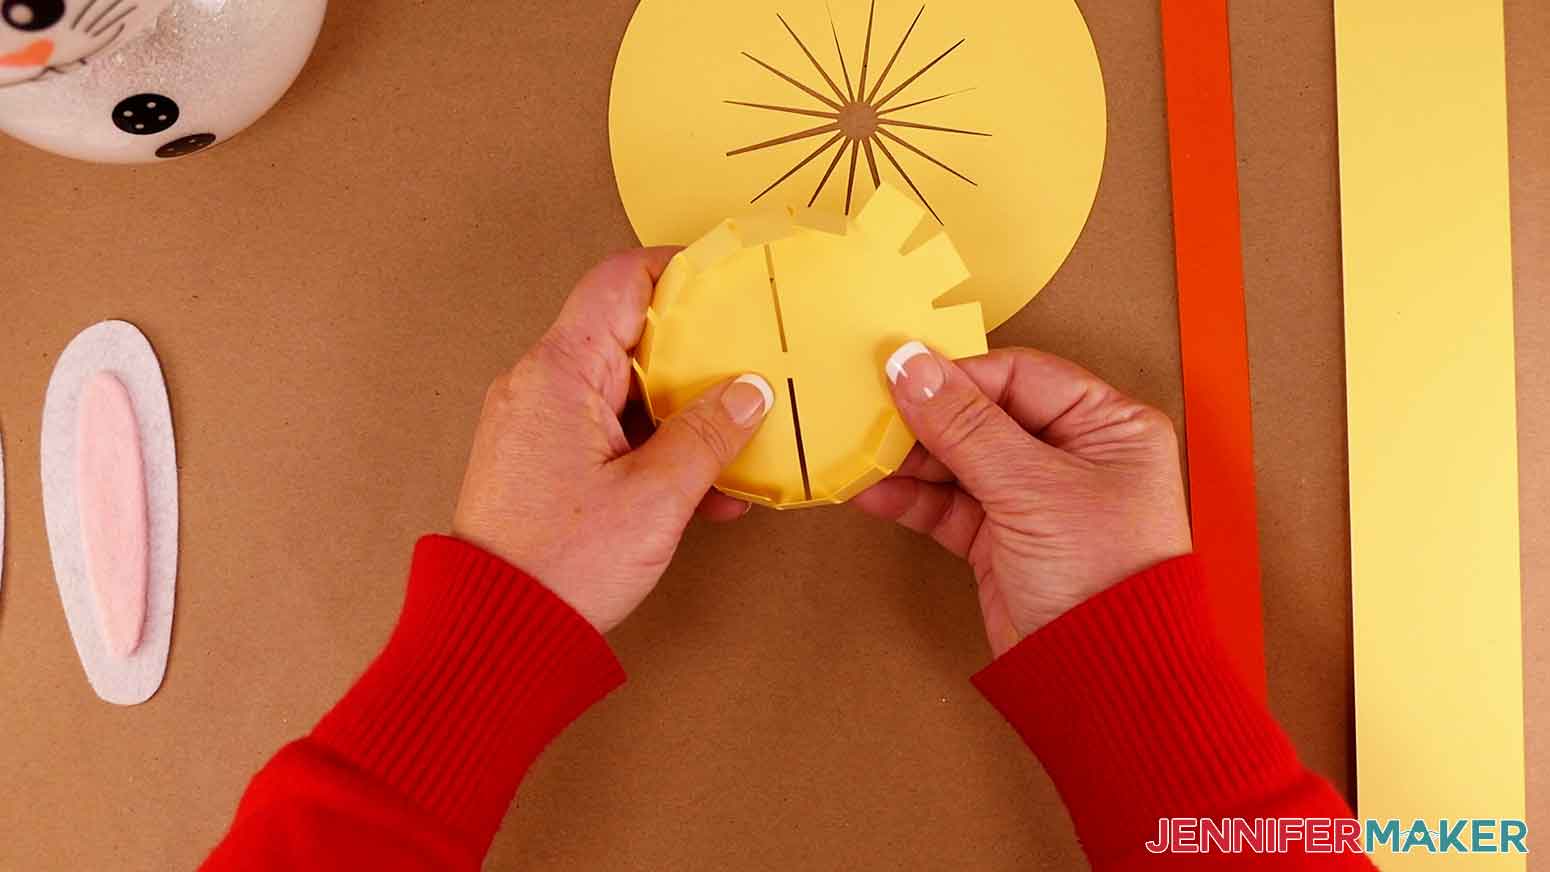
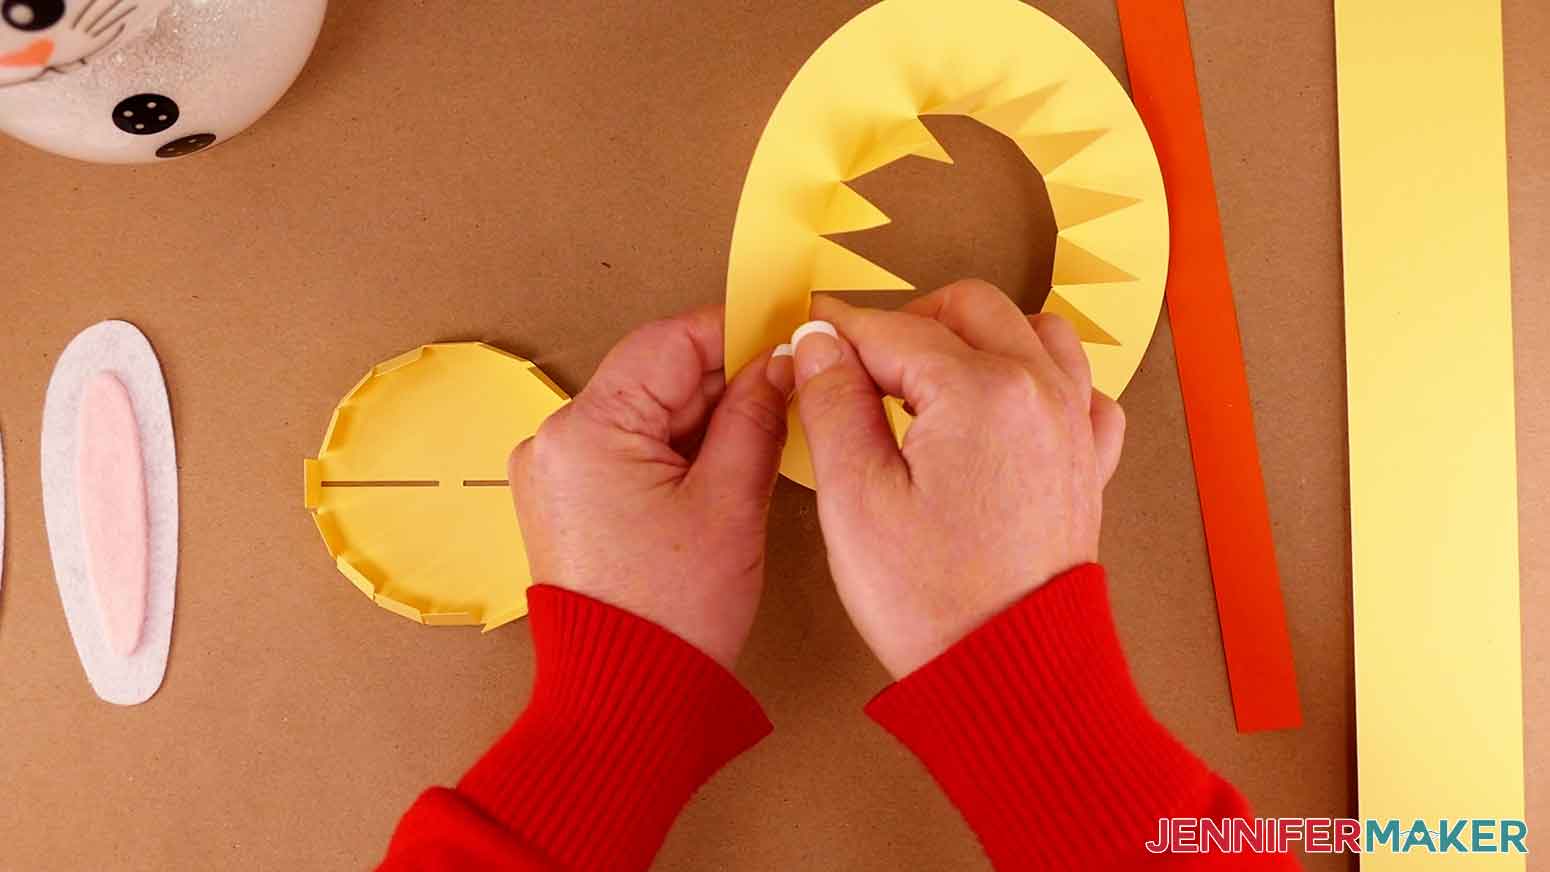
Now, take the circular piece with the starburst in the middle and do the same thing. Fold the inner triangles back towards the brim.
We'll glue the smaller circle with tabs first. I'm using Bearly Art Precision Craft Glue with the ultra fine tip. Apply glue to one tab at a time and press the tab against the long rectangle that will be the side part of the hat. The top of the rectangular piece should align with the top of the top hat piece.
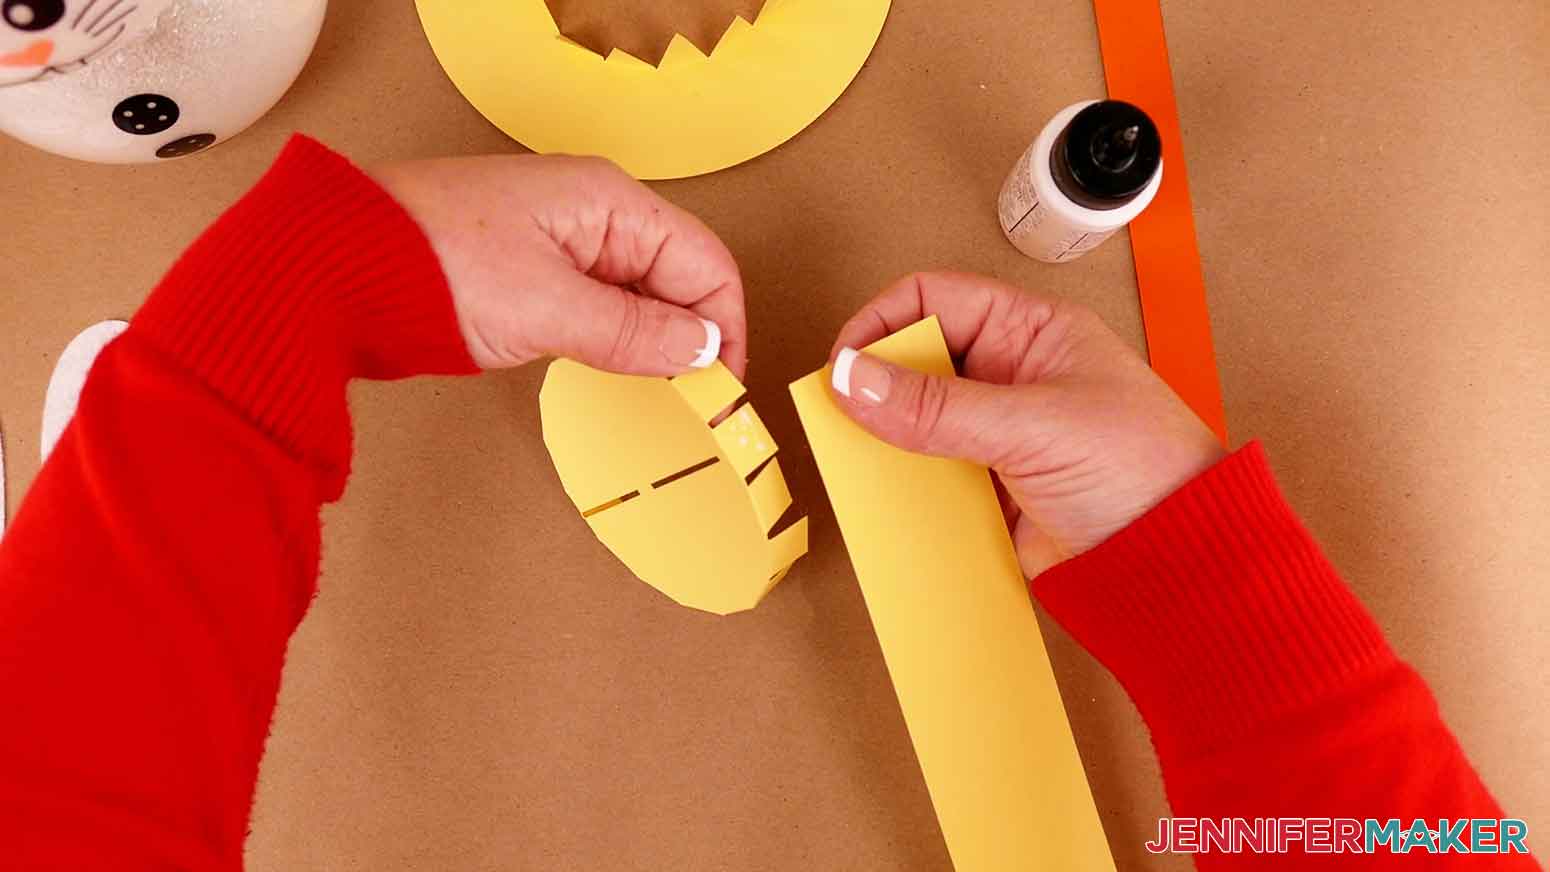
Continue with one tab at a time and attach the tabs to the side rectangle piece. When you get to the last tab, also apply glue to the edge of the side piece to secure it.
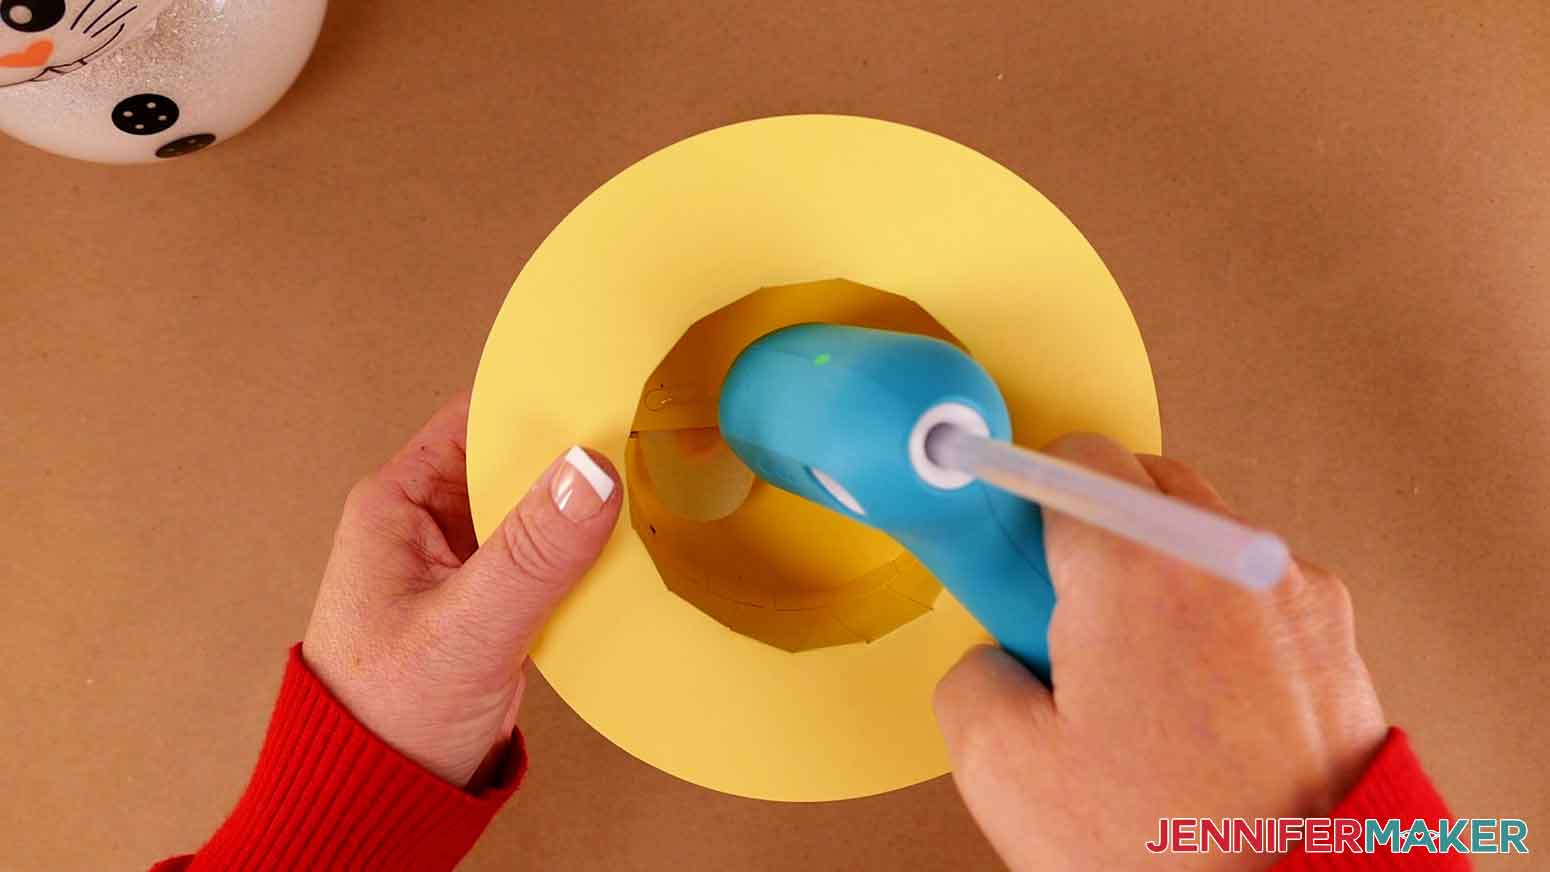
Now we'll add the brim in a similar way. Place the piece you just assembled over the brim piece. The triangles will attach to the inside of the hat.
Identify the back of the hat by finding the seam from the side piece. We're going to start on the opposite side so that the front looks the best. Apply glue to the triangles one at a time and press them in the underside of the hat.
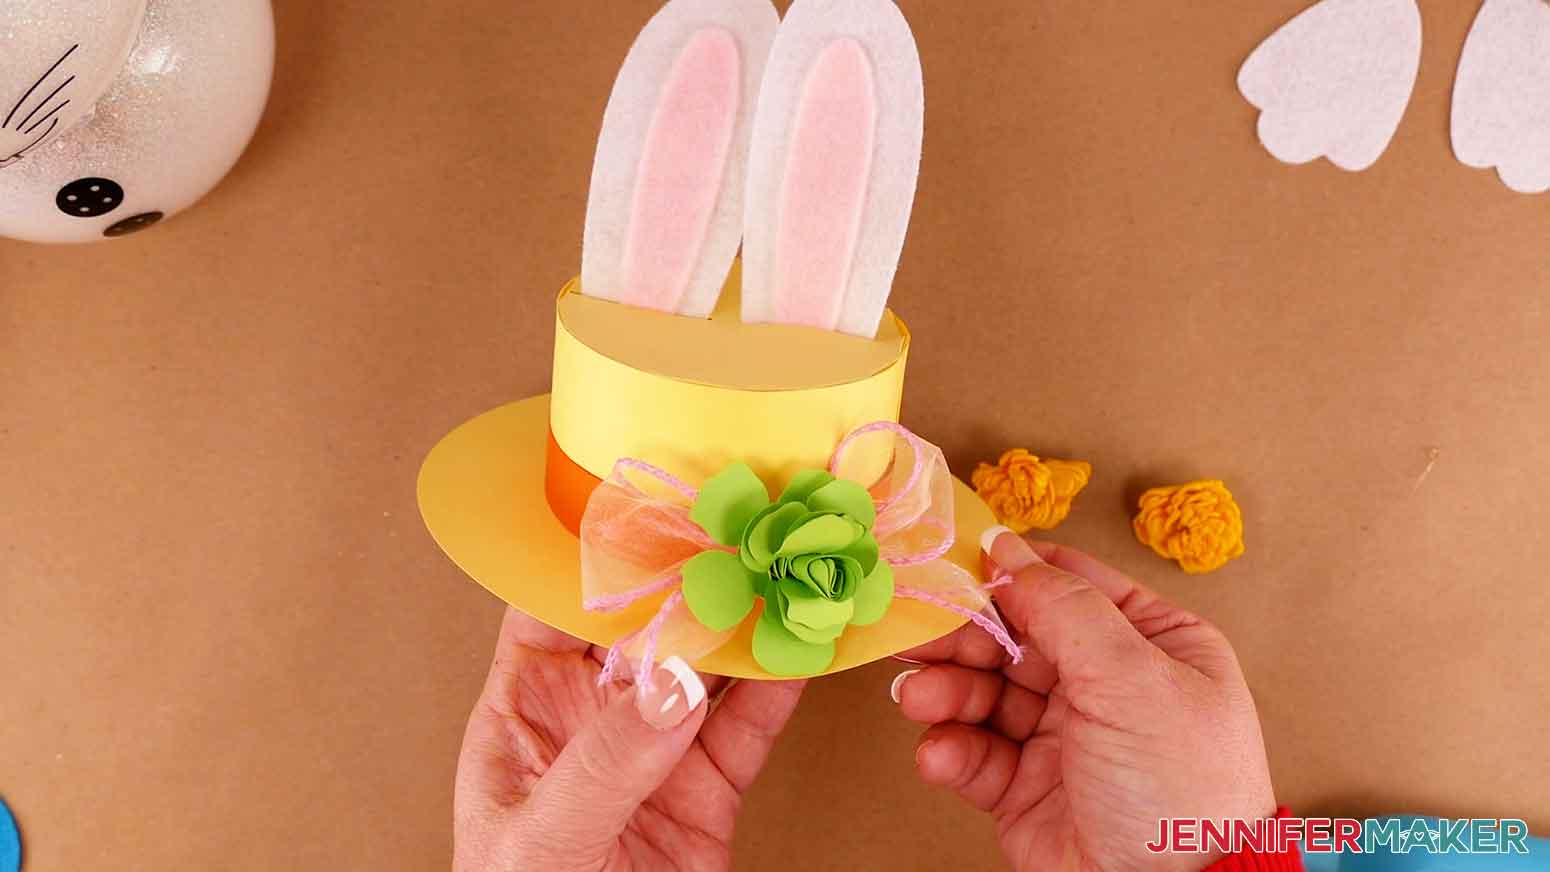
Add the accent piece around the hat. Place a small dab of glue to the end and press it along the seam on the back of the hat. The accent piece should be flush against the brim. Wrap it around and glue down the other end.
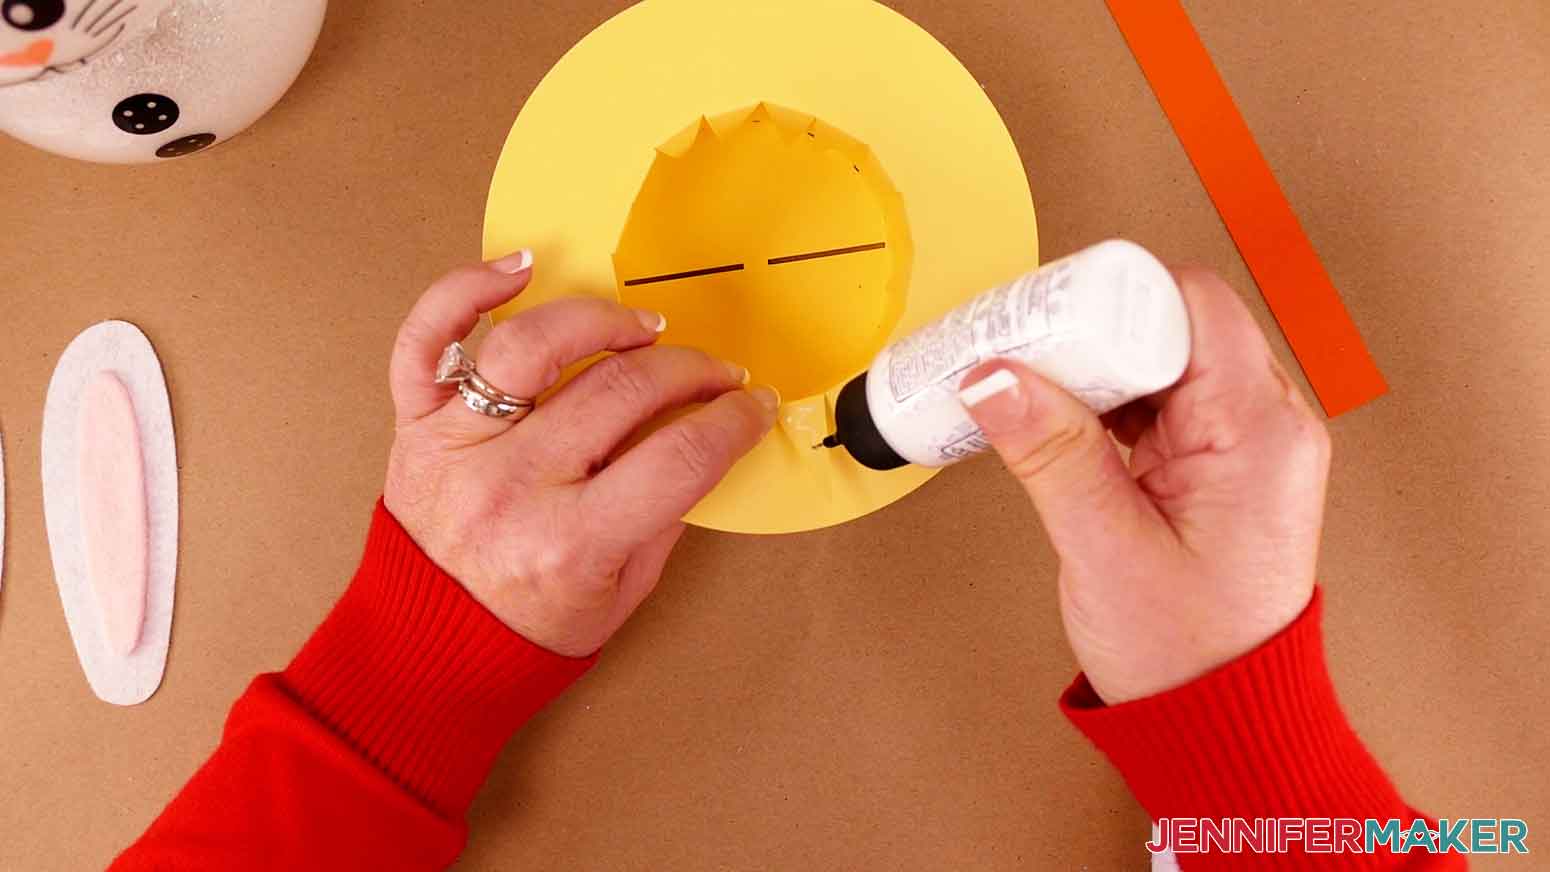
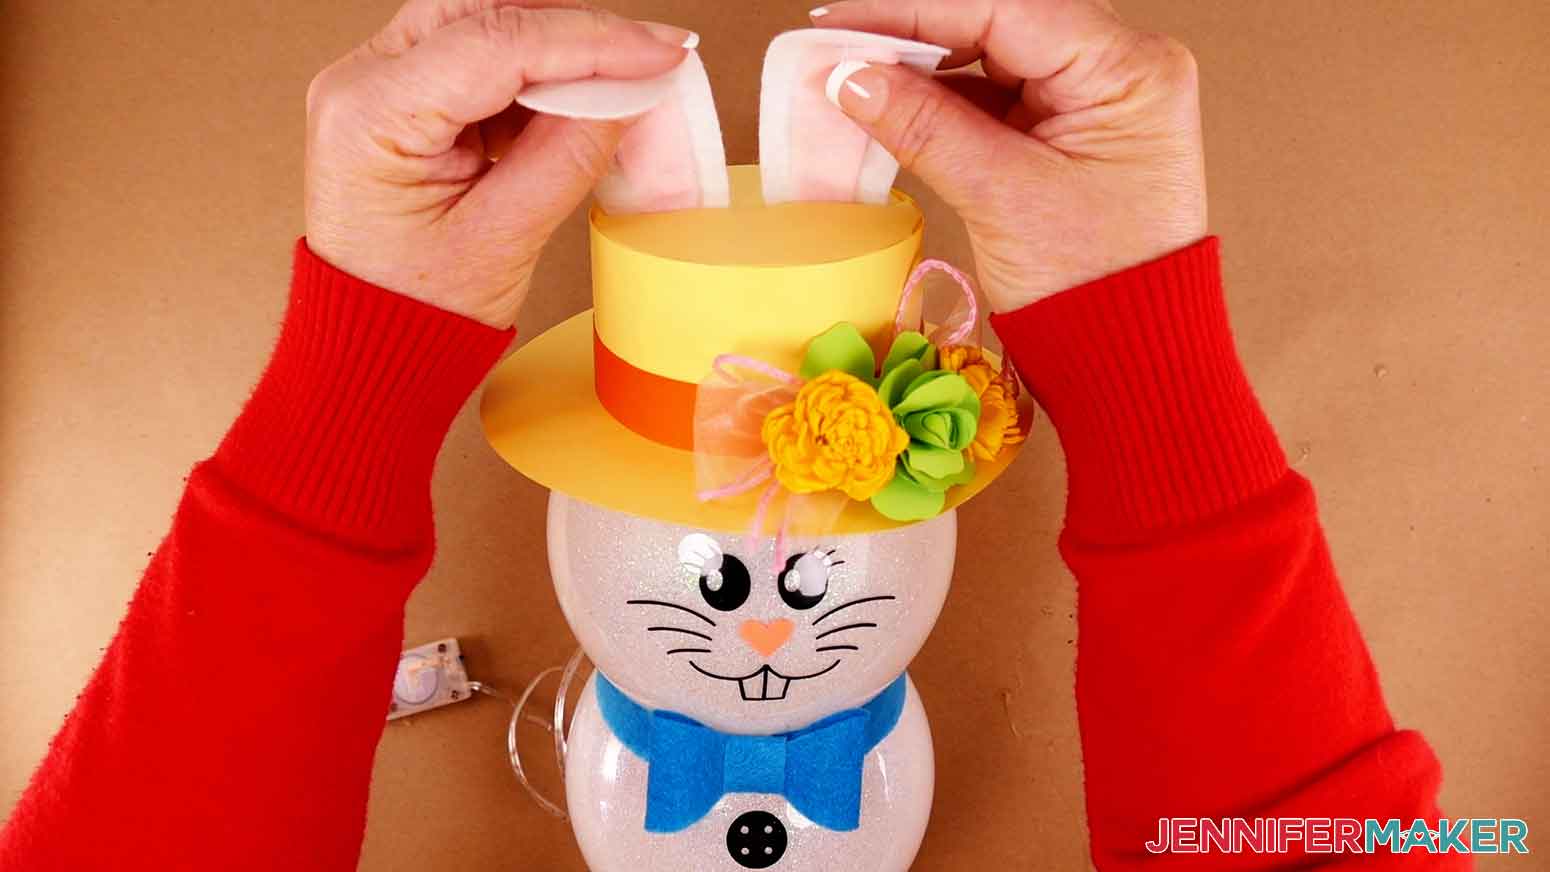
Bend the bottom part of the bunny ears to make an L shape. Insert the ears through the slots in the top of the hat. Use hot glue to glue the edges to the underneath side of the top of the hat.
The hat decorations are up to you! You can use ribbon, paper flowers, Dollar Tree flowers, or anything else you can think of! I'm going to use some of my paper flower designs and ribbon.
Decorate your bunny hat.
Let's glue that festive hat on our bunny. Apply hot glue around the inside of the back of the hat and press it in place. How cute is that?
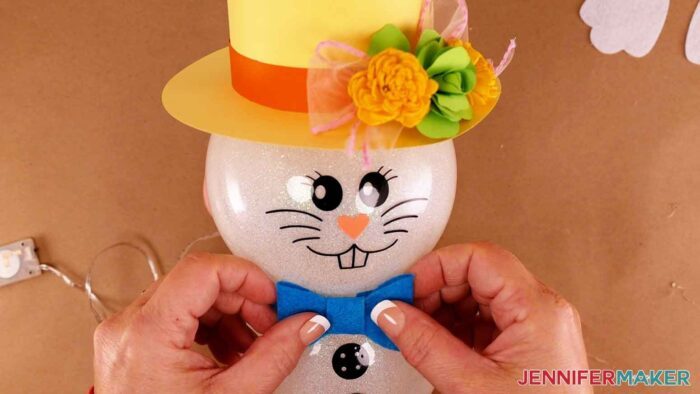
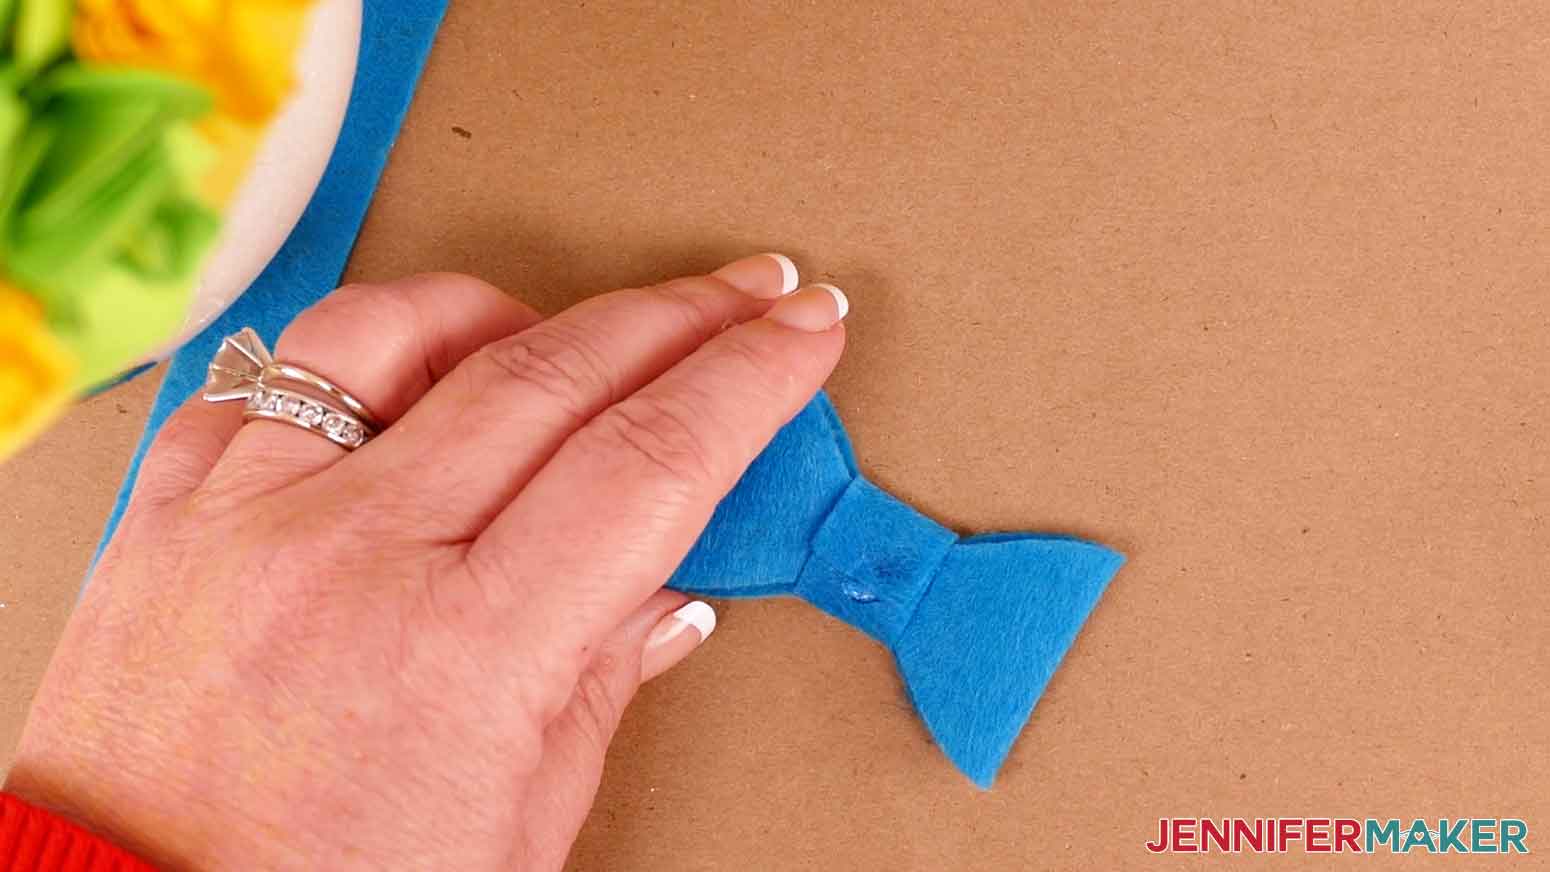
Now, let's attach the bow tie. Fold the outside of the felt bow towards the center and glue it in place.
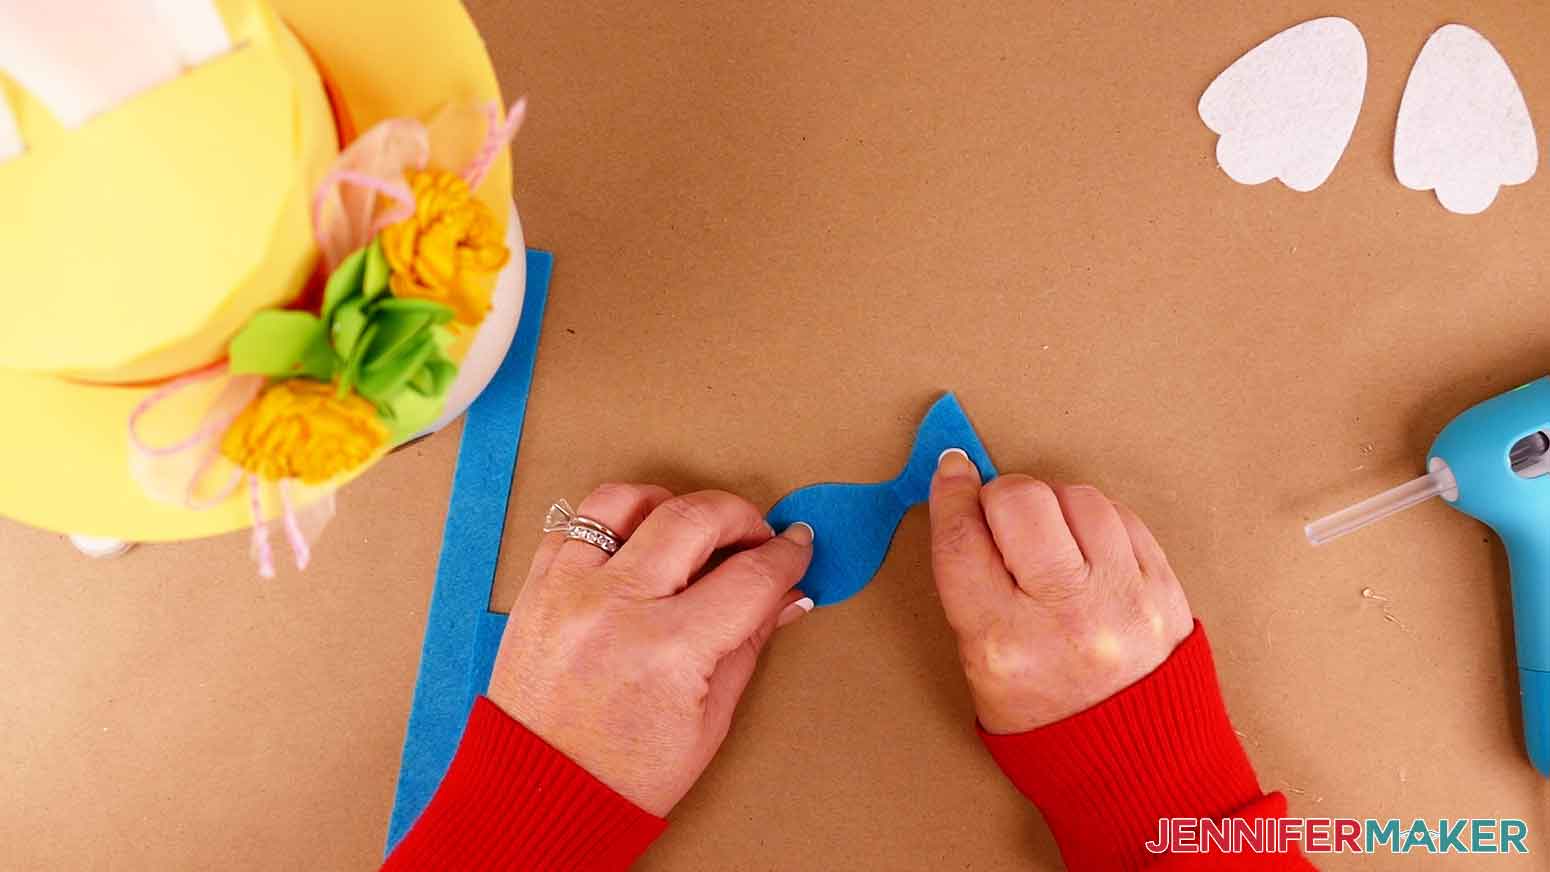
Fold the second side in to the middle and glue it, too.
Wrap the small rectangular piece around the bow and glue it in the back for a finished look on the bow tie.
Now, let's wrap the neck piece around our bunny. It will not wrap all the way around, but that's okay. The bow tie will hide the gap. First wrap it around and center the gap in the front center of the bunny. It will be about an inch gap.
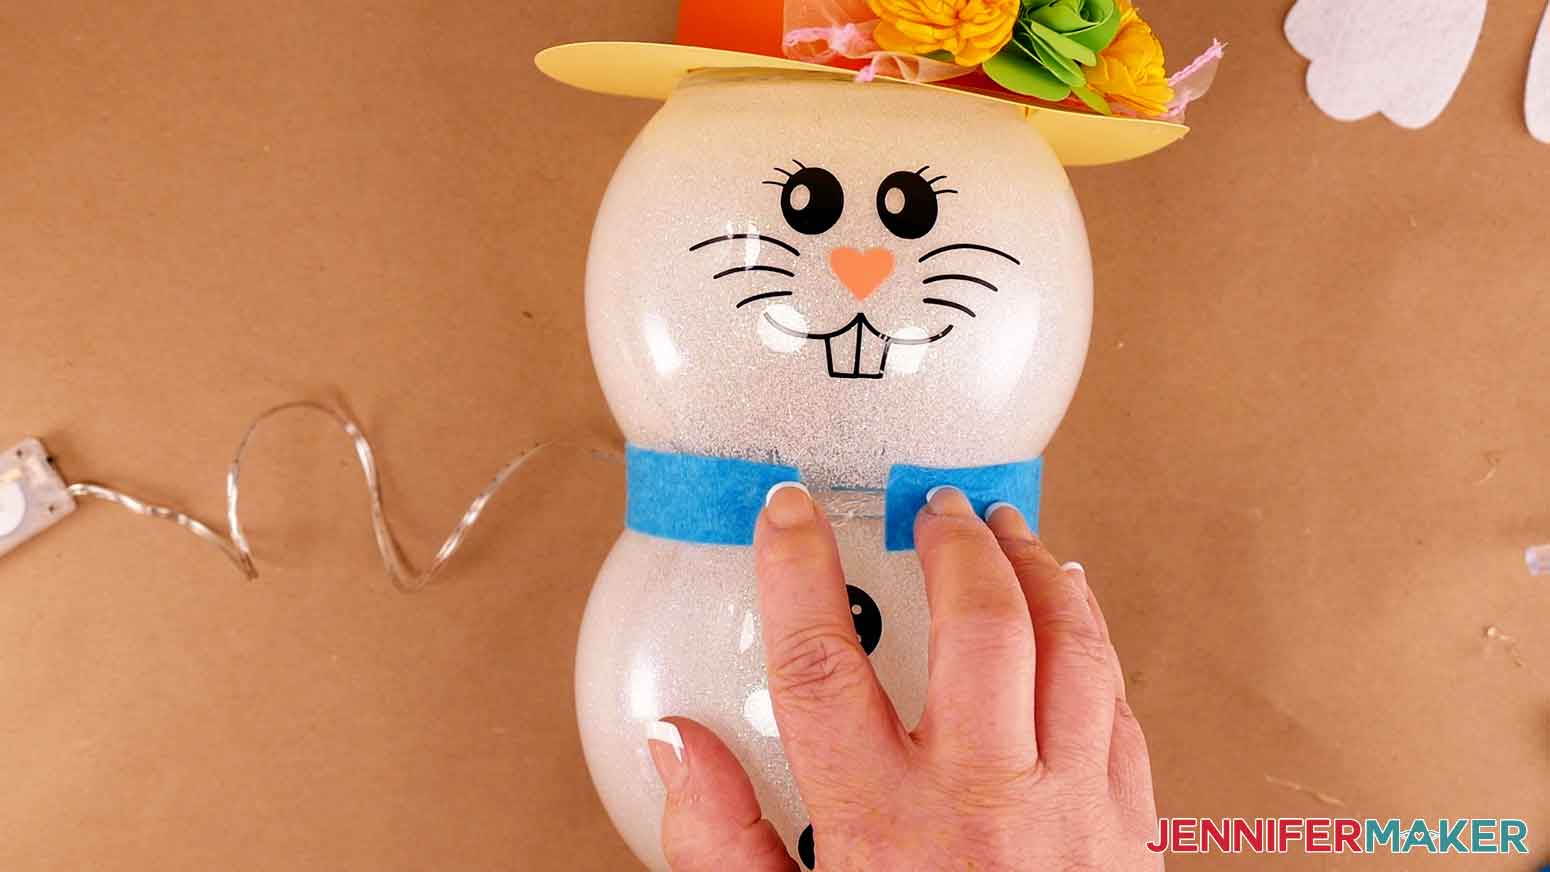
Once in place, glue the ends of the neck wrap to hold it in place.
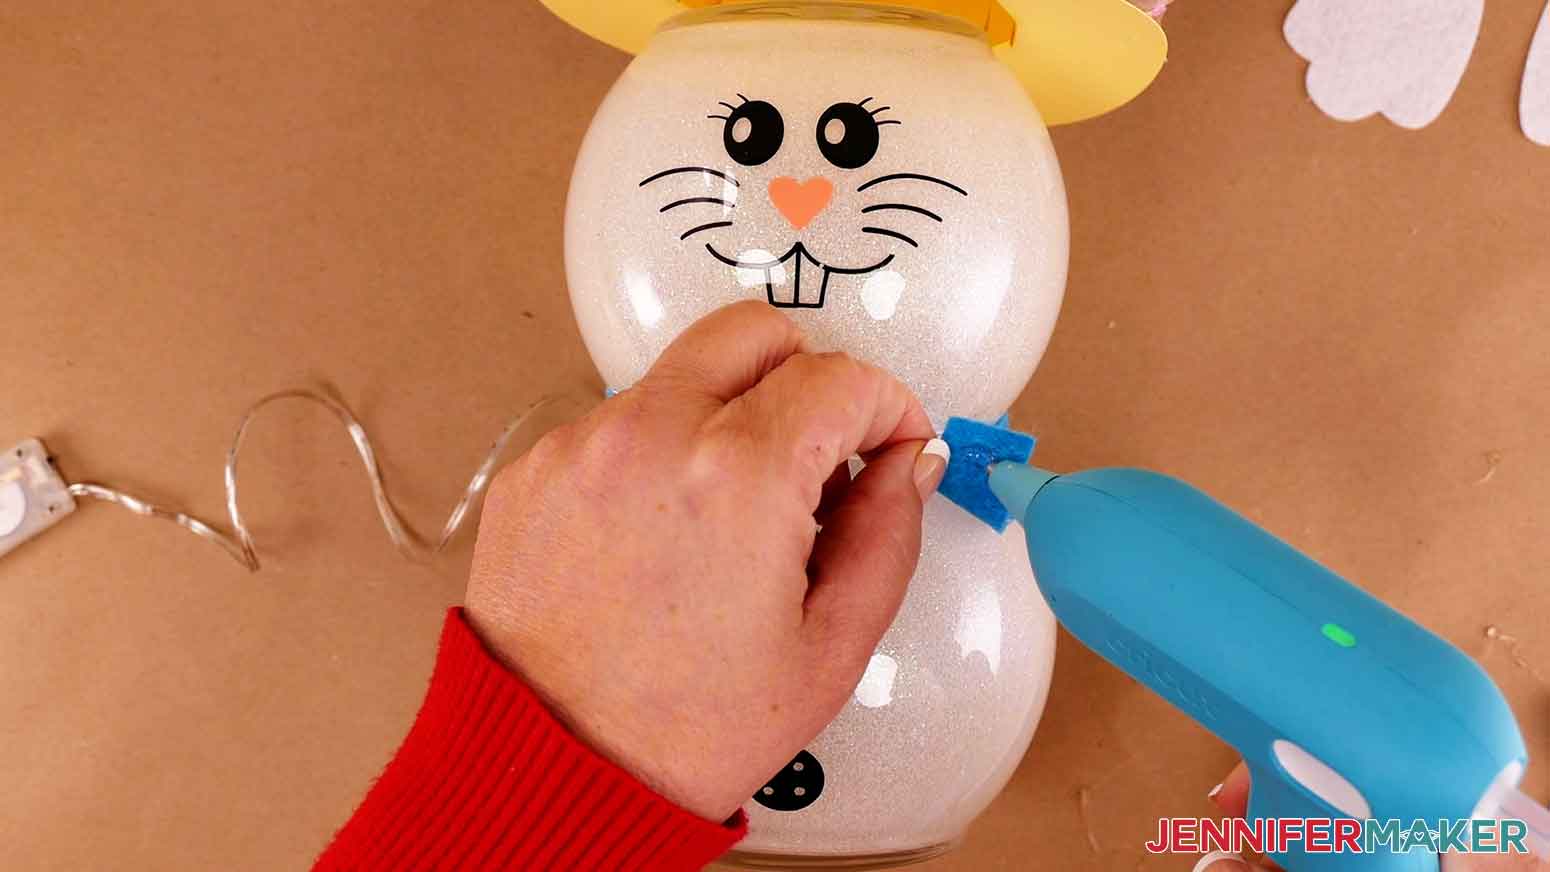
Now place hot glue on the back of the bow tie and press it on to the bunny.

Lastly, we need to glue the feet. Place a dab of hot glue at the heel of the foot and place it under the bunny. Press the bunny down to adhere the felt foot. Repeat for the second foot.
Shape the ears however you want and your bunny is done!
STEP 5: SHOW IT OFF
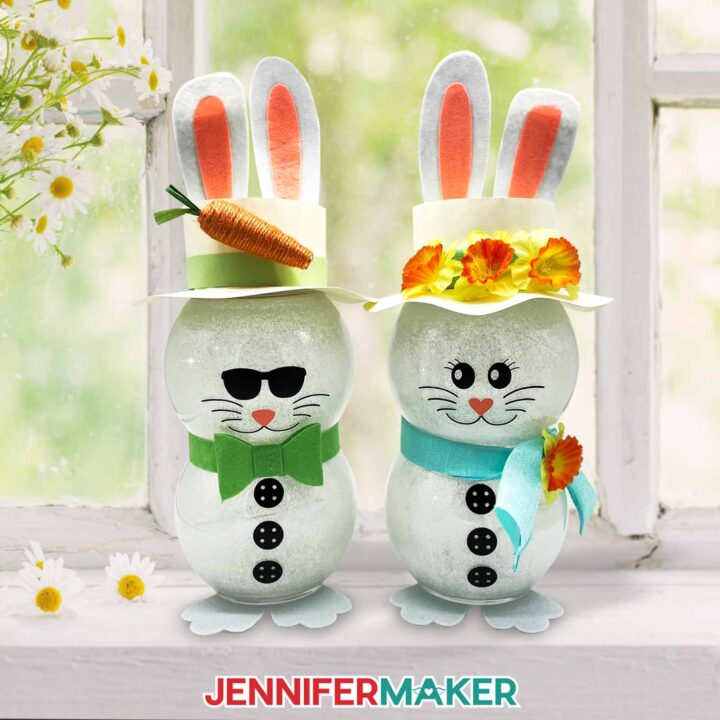
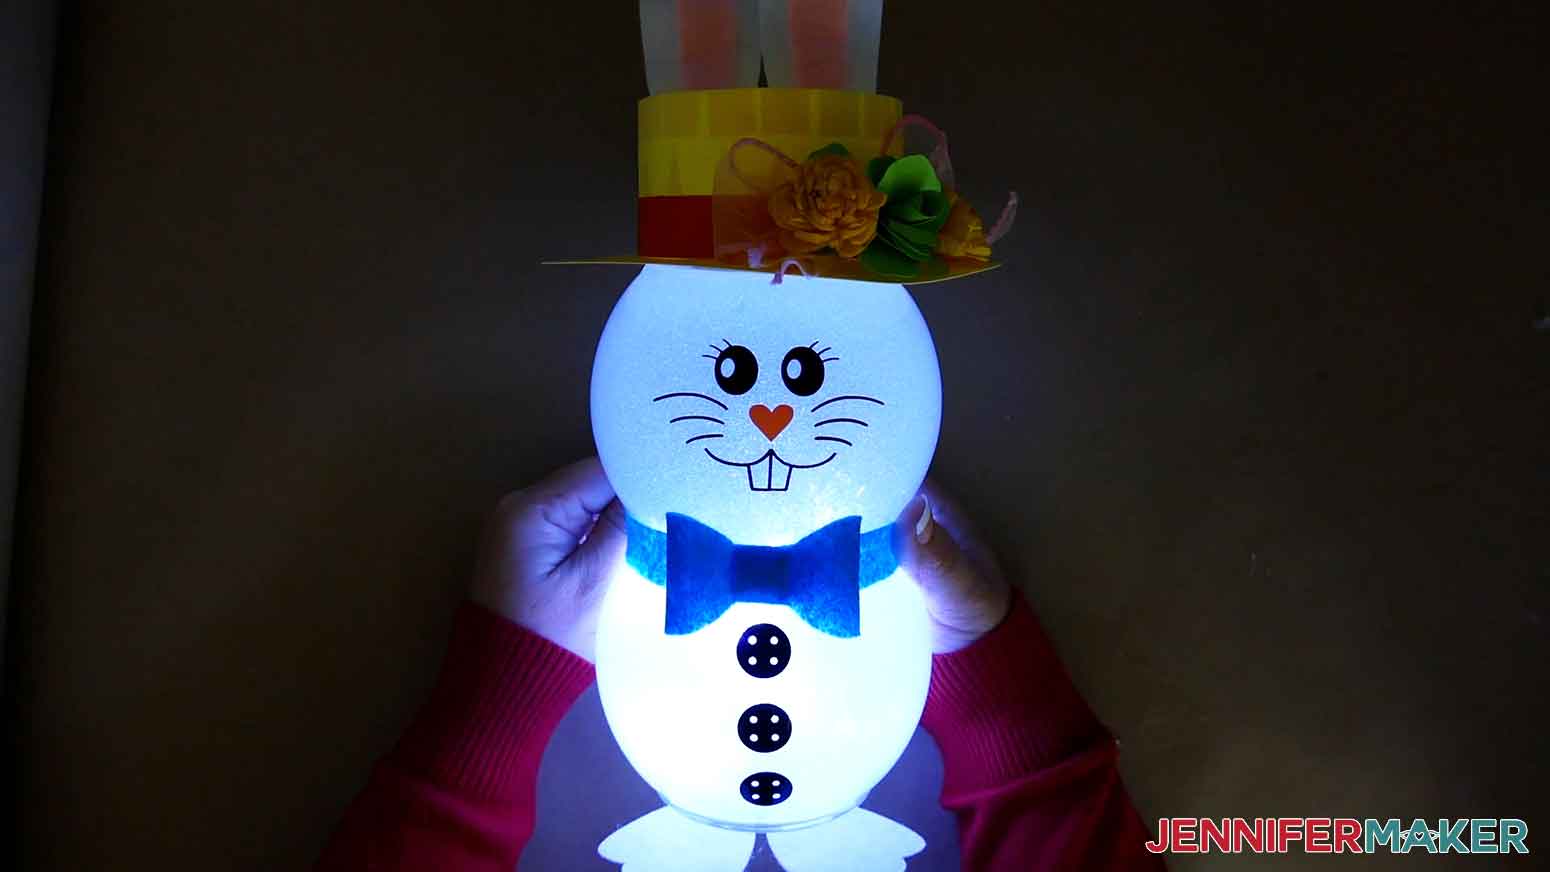
I can't wait to see your light-up Dollar Tree Bunny! Here is what my finished bunnies look like!
Answers to Your Questions About How to Make a Dollar Tree Bunny
Q: What kind of cardstock do I need?
I recommend 65-80 lb. cardstock for this craft. Thicker cardstock will be harder to cut and curve, and thinner cardstock may not hold up well over time in your holiday storage.
Q: Do I have to use those exact round glass vases?
I haven’t found anything better yet! They are ideal because they have a flat bottoms, allowing them to sit on a surface without rolling about. Plus, they stack well on one another!
Q: What kind of lights can I use?
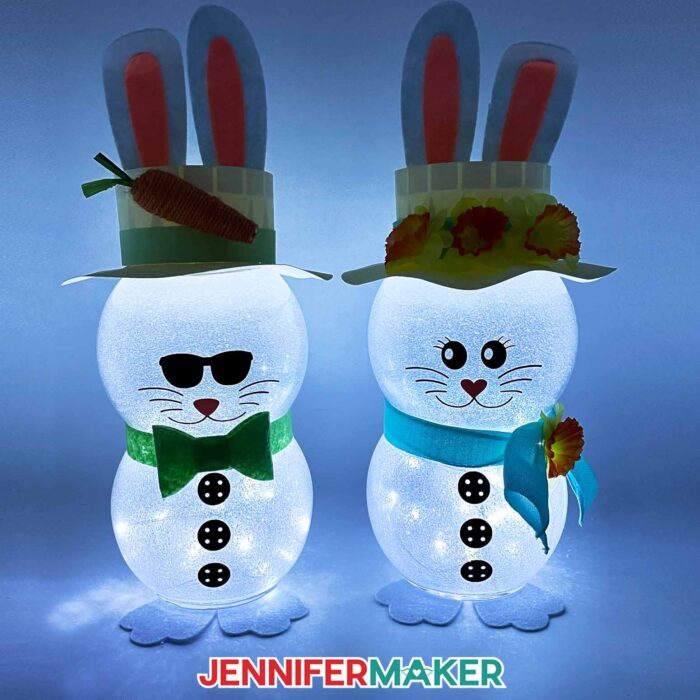
I only recommend mini LED lights because they will be enclosed in small space. Do not use any light that may heat up for these DIY projects. I think cool white lights look best, but the choice is up to you!
Q: Is there an alternative to make the cardstock hat?
Sure! You can glue decorations directly to the glass around the bunny ears, or you can experiment with tiny craft hats, small floral Easter wreaths, and other cute decorations from Dollar Tree or your local dollar store or craft store.
Q: How can I display my light-up Dollar Tree bunny?
I love that the bunny uses fairy lights with a battery pack! This means that you can literally display it anywhere, because it doesn’t need to plug in to light up. Show it off on your Easter table as part of a centerpiece, on a side table, or line up a whole family of cute Easter bunnies on your fireplace mantle. I’m sure you’ll be inspired by all the Dollar Tree supplies available!
Get my free SVG files to make a DIY Light-Up Easter Bunny!
I’d love to see YOUR Dollar Tree Bunny and how you display it in your home! Please share a photo in our Facebook group or tag me on social media with #jennifermaker.
Love,

Want to remember this? Save this tutorial on making a Dollar Tree Bunny to your favorite Pinterest Board!