Learn how to cut metal with Cricut machines and make a stylish metal wreath!
Cutting cardstock and vinyl seems simple with practice, but have you wondered how to cut metal with Cricut machines? Cricut can engrave metal, but you can totally cut it with the right materials and supplies. You can even make a metal wreath with delicate details and a coppery look. I’ll show you how, including the best tools for the job and how to work with metal safely.
Watch the step-by-step full tutorial video on how to cut metal with Cricut:

I’ve seen delicate, copper metal wreaths in stores and knew you’d enjoy making your own! First, I considered what type of metal we could cut on a Cricut?
I tested a few different materials, including true copper sheets. Unfortunately, inconsistent results make the real copper difficult to recommend. But, the thin metal sheets of aluminum with a copper color on one side worked. The cutting machine handles the cuts well, and the leaves have enough structure to make a sturdy metal wreath. I tried thicker materials and also found them difficult to cut.

If the aluminum and faux copper metal isn’t available at your local craft store, my list of materials has an online option.
To create an organic look, I added some veins that you can mold. After trying several tools, I got the best results with the scoring stylus with a design trick to create deeper indents. I used my Cricut Maker 3, but you can also use an original Maker or Cricut Explore series machines. You can use a single-scoring wheel or scoring stylus with a Maker or Maker 3, but Explore machines will require the scoring stylus.
You’ll also need a purple StrongGrip Machine Mat, fine-point blade, scissors, and brayer for perfect cuts! The brayer is especially important, because the metal needs to be really secure on the mat so it doesn’t shift around.

However, all machines can cut differently, so practicing is always a good idea. Especially if you’re using a new machine or adjusting Cricut material settings! I’ll show you how to make a custom material setting that worked for me in the tutorial. You can practice with the single leaf on scrap material and make any adjustments before cutting ten leaves at once. I used about 50 leaves to fill in the 14″ metal wreath frame.
Also, craft safely while learning how to cut metal with Cricut machines! The metal edges are sharp, especially when you’re carefully lifting them from the mat with a spatula. I wore my crafting safety gloves when handling the leaves, which also kept my skin oils from marring the surface. It’s not the thickest material, so go slowly to avoid creases where you don’t want them.
Finally, the right glue makes all the difference for this metal wreath. I tried both hot glue and E6000 adhesive, and they each have pros and cons. The E6000 takes longer and requires craft clamps and parchment paper, but it could be the difference between enjoying the metal wreath for years or finding it’s dropped its leaves on a hot day. Watch the video for the details!

Ready to learn how to cut metal with Cricut machines? I’m super excited to show you how! This post contains some affiliate links for your convenience (which means if you make a purchase after clicking a link I will earn a small commission but it won’t cost you a penny more)! Read my full disclosure policy.
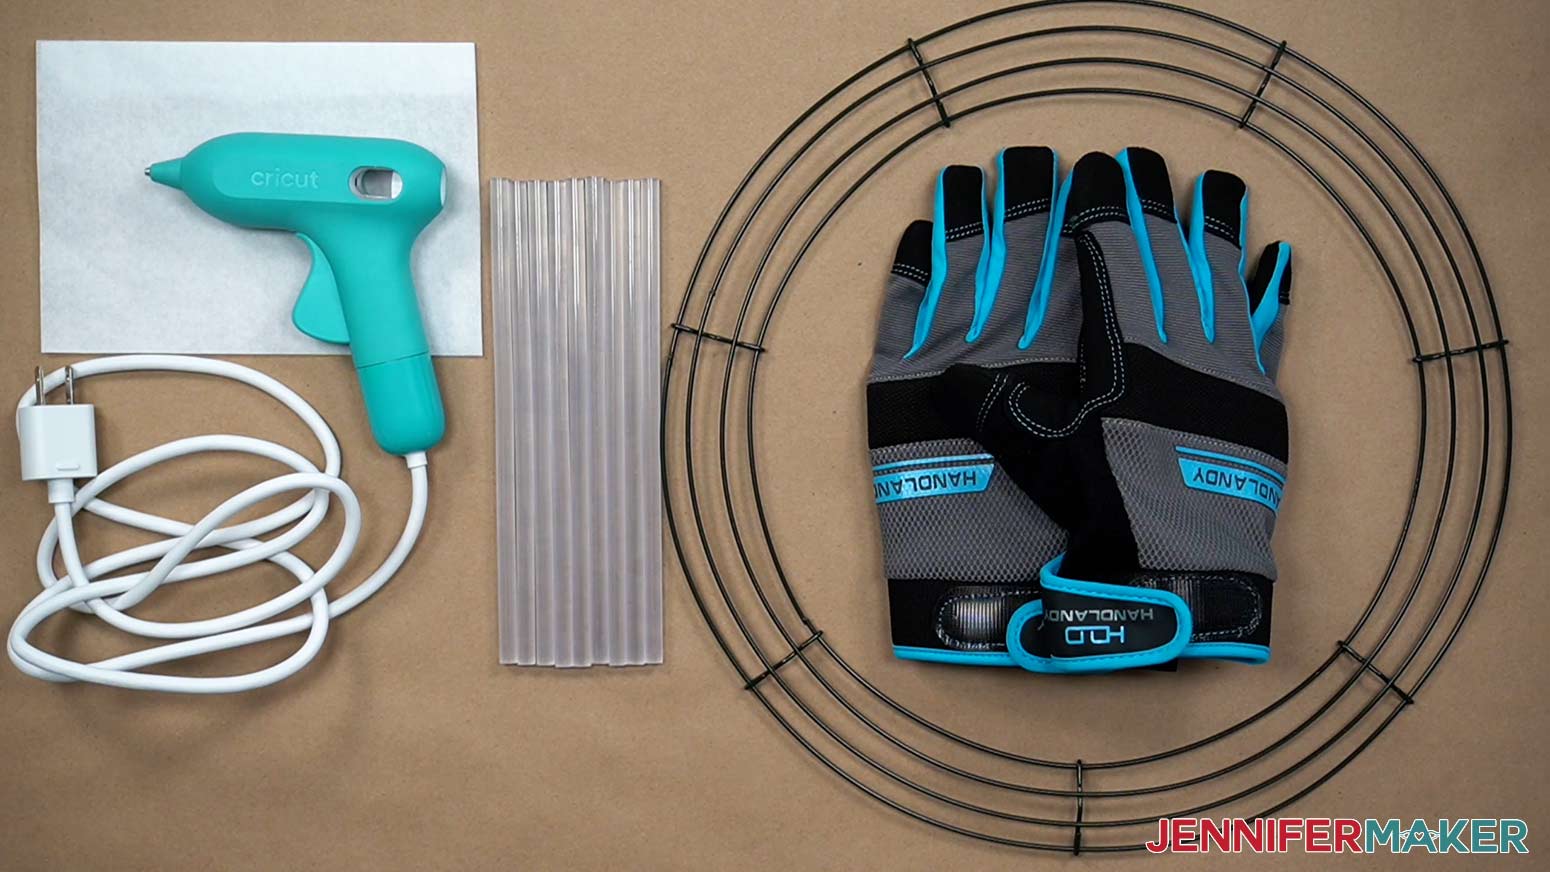
Materials to Make a Metal Wreath Cut on a Cricut Machine
View my Amazon shopping list with the exact items we used to make these projects!
- One (1) Roll 12″ x 25′ Aluminum Copper Foil Sheet 36-40 gauge – I used about 5′ of 38 gauge (alternative #1, alternative #2)
- One (1) 14″ Metal Wreath Form
- Cricut Hot Glue Gun & Glue Sticks Bundle -OR- E6000 Glue with several 2″ Craft Clamps and Parchment Paper
- Thick Safety Gloves
- A method to cut your foil sheet, I used the amazing Cricut Maker 3 but you can also use the Cricut Maker, Cricut Explore 3, the Cricut Explore — you can use the standard fine point blade for this project and the scoring wheel or scoring stylus with a Cricut Purple StrongGrip Cutting Mat 12″x12″
- Tools including a Brayer, Spatula, and Scissors
- Design #431 (My free SVG/PDF/DXF design files available in my free resource library – get the password by filling out the form at the bottom of this page)
How to Cut Metal With Cricut and Make a Metal Wreath

How To Cut Metal With Cricut
Learn how to cut metal with Cricut machines to make a copper tinted aluminum wreath for fall!
Materials
Tools
- A method to cut your foil sheet, I used the amazing Cricut Maker 3 but you can also use the Cricut Maker, Cricut Explore 3, the Cricut Explore — you can use the standard fine point blade for this project and the scoring wheel or scoring stylus.
- Cricut Purple StrongGrip Cutting Mat 12"x12"
- Scoring Tool - Single Scoring Wheel for Makers -OR-
- Scoring Stylus] for Makers or Explores
- Crafting Safety Gloves
- Cricut Hot Glue Gun & Glue Sticks Bundle -OR-
- E6000 Glue and
- Several 2" Craft Clamps
- Brayer
- Spatula
- Parchment Paper
- Scissors
Instructions
STEP 1: GET MY FREE METAL WREATH DESIGN FILES
First, download my Metal Wreath SVG/DXF/PDF files from my free resource library. It's Design #431.
You can cut the printable PDF by hand, but I'll show you how to cut the SVG with a Cricut out of metal sheeting.
The file options include a single leaf if you need just a few and a set of 10 leaves that are prepared for a 12” x 12” sheet. Every machine is different, so I recommend testing your materials, tools, and material settings with a single leaf before trying the whole project. For this tutorial, I will be using the set of 10 leaves.
Upload the SVG you’d like to use and add it to your Canvas.
If you are not sure how to upload an SVG cut file to Cricut Design Space, watch this helpful video training series I made.
If you are on an iPad or iPhone, here is how to download and upload SVG files to the Cricut Design Space app.
STEP 2: PREPARE THE DESIGN FILE
Here is how the set of ten leaves looks on my Canvas.
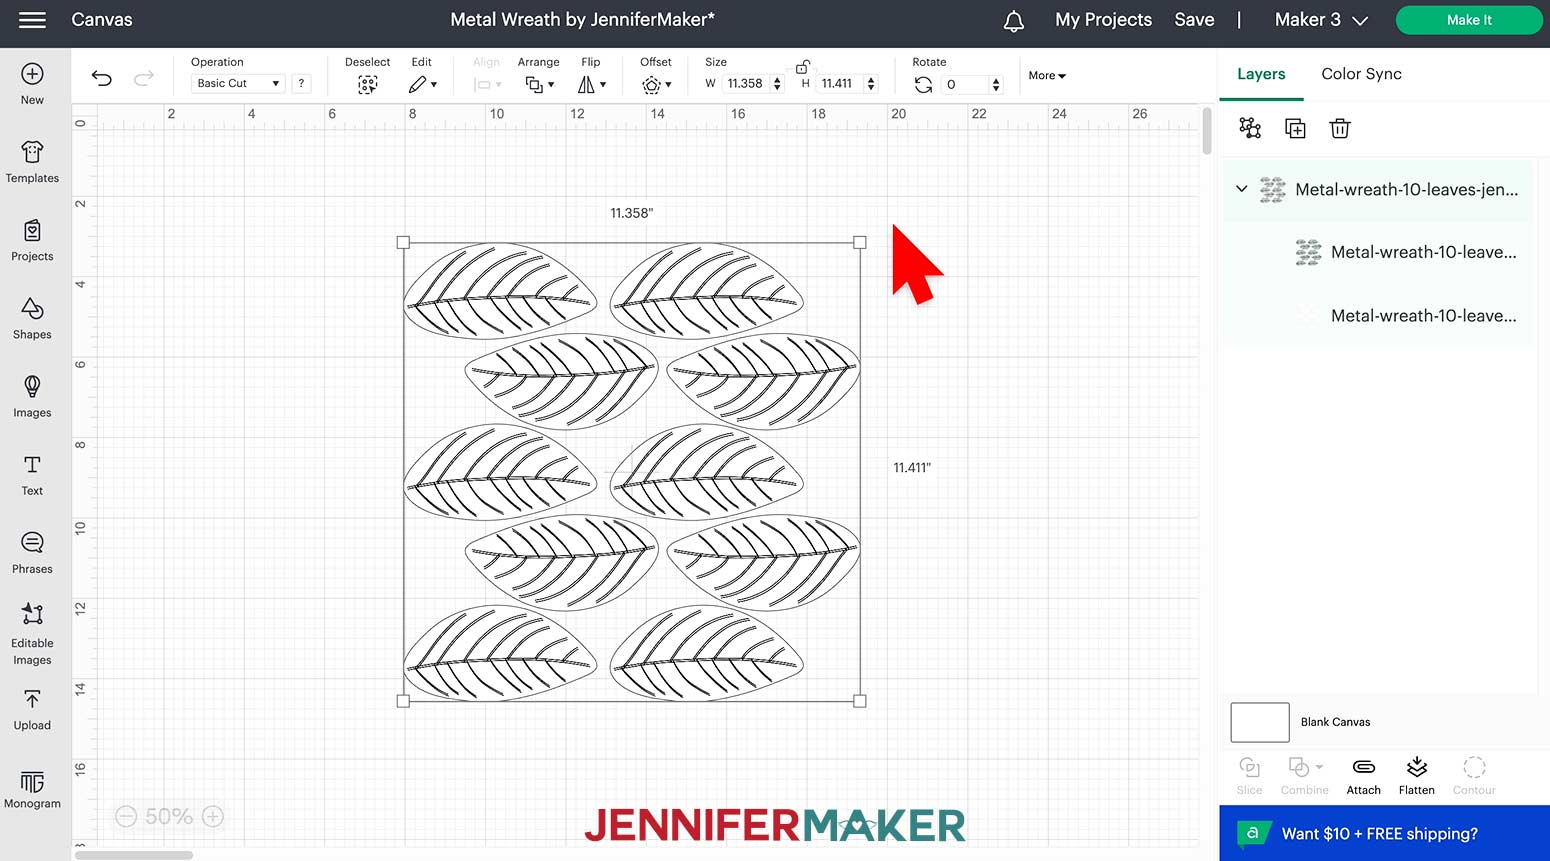
Each leaf consists of “veins” that we'll score and one cut outline to form the leaf itself. The “vein” layers appear on the Canvas as Basic Cut lines, so we need to change those to Score lines.

Select the “vein” layer in the Layers Panel, then select "Score" under the Operation menu.
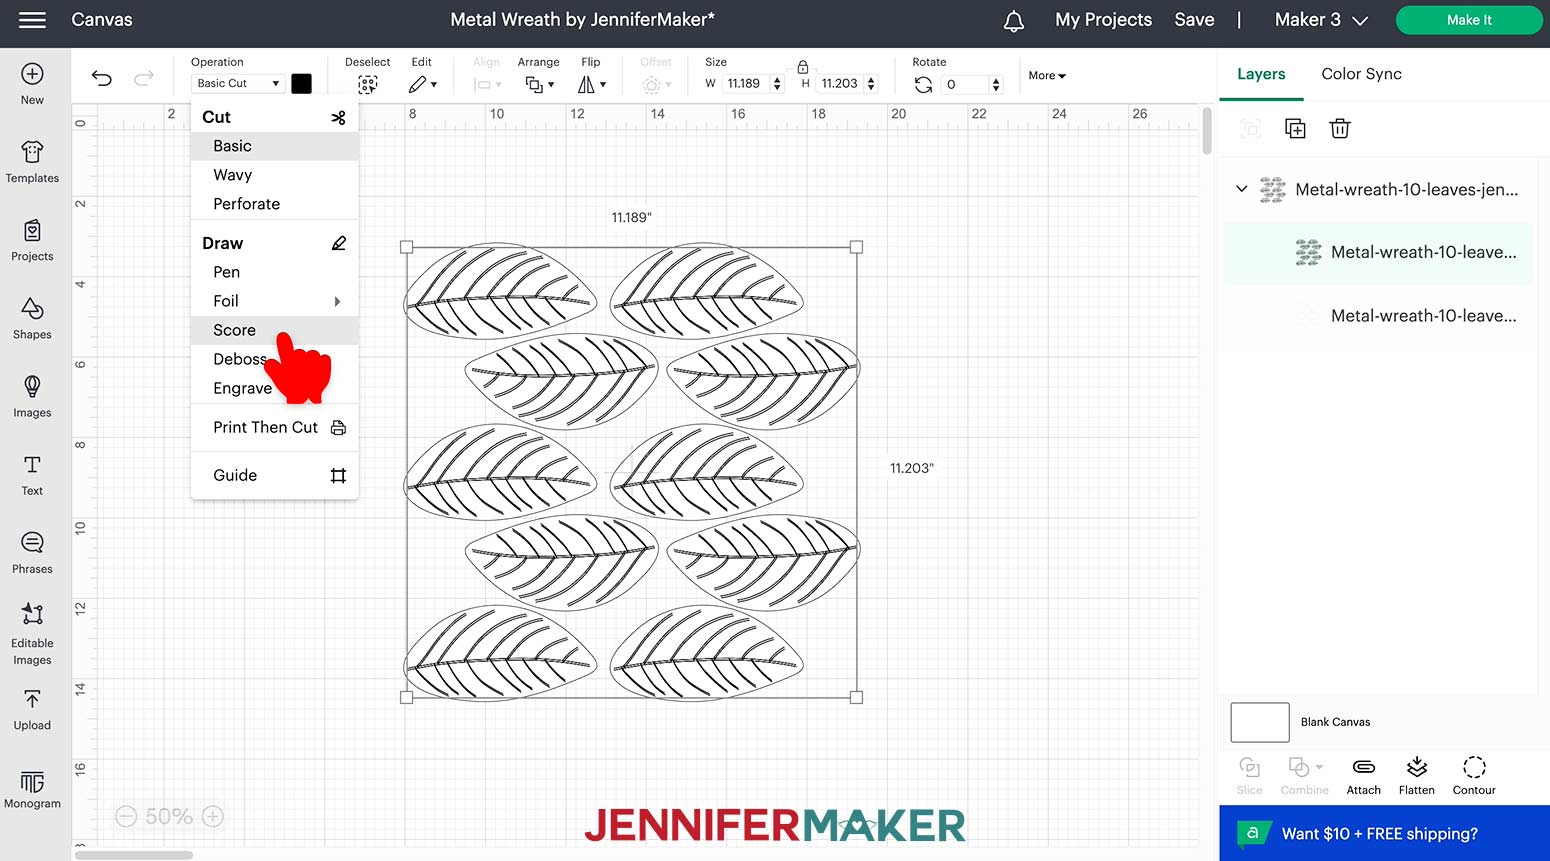
It’s really important you attach your vein layer to your leaf cutout, or else the Cricut won't know where to place the score lines. Click "Select All" and click "Attach".
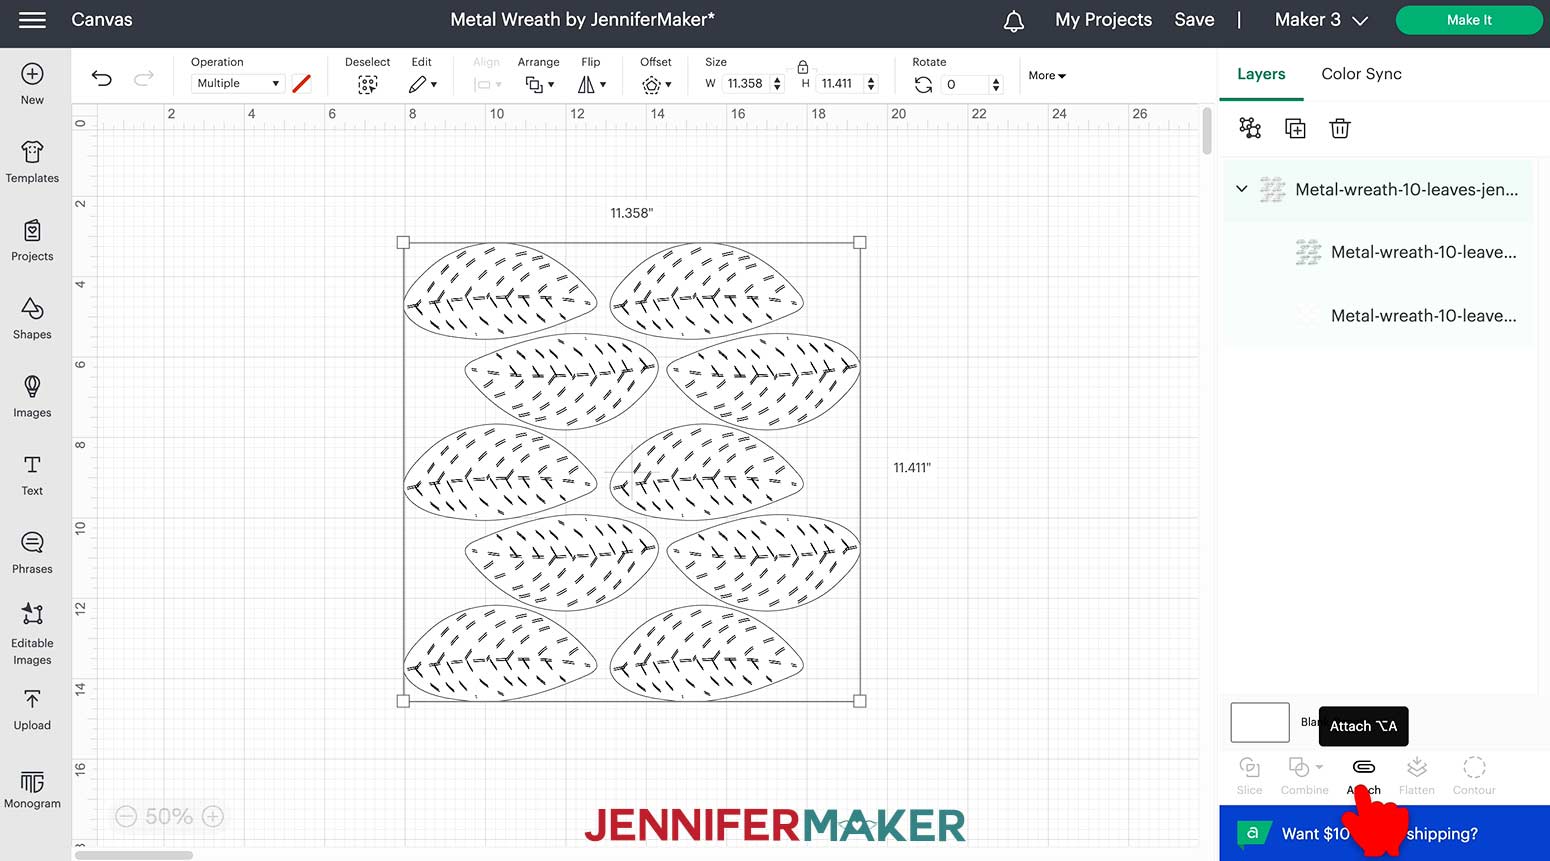
Your leaves are ready!
STEP 3: CUT THE LEAVES
The cutting process takes approximately one hour per sheet of ten leaves. Make sure your computer is set to not go to sleep while the file is scoring and cutting!
Check that the right machine is listed in the top corner, then click "Make It!"
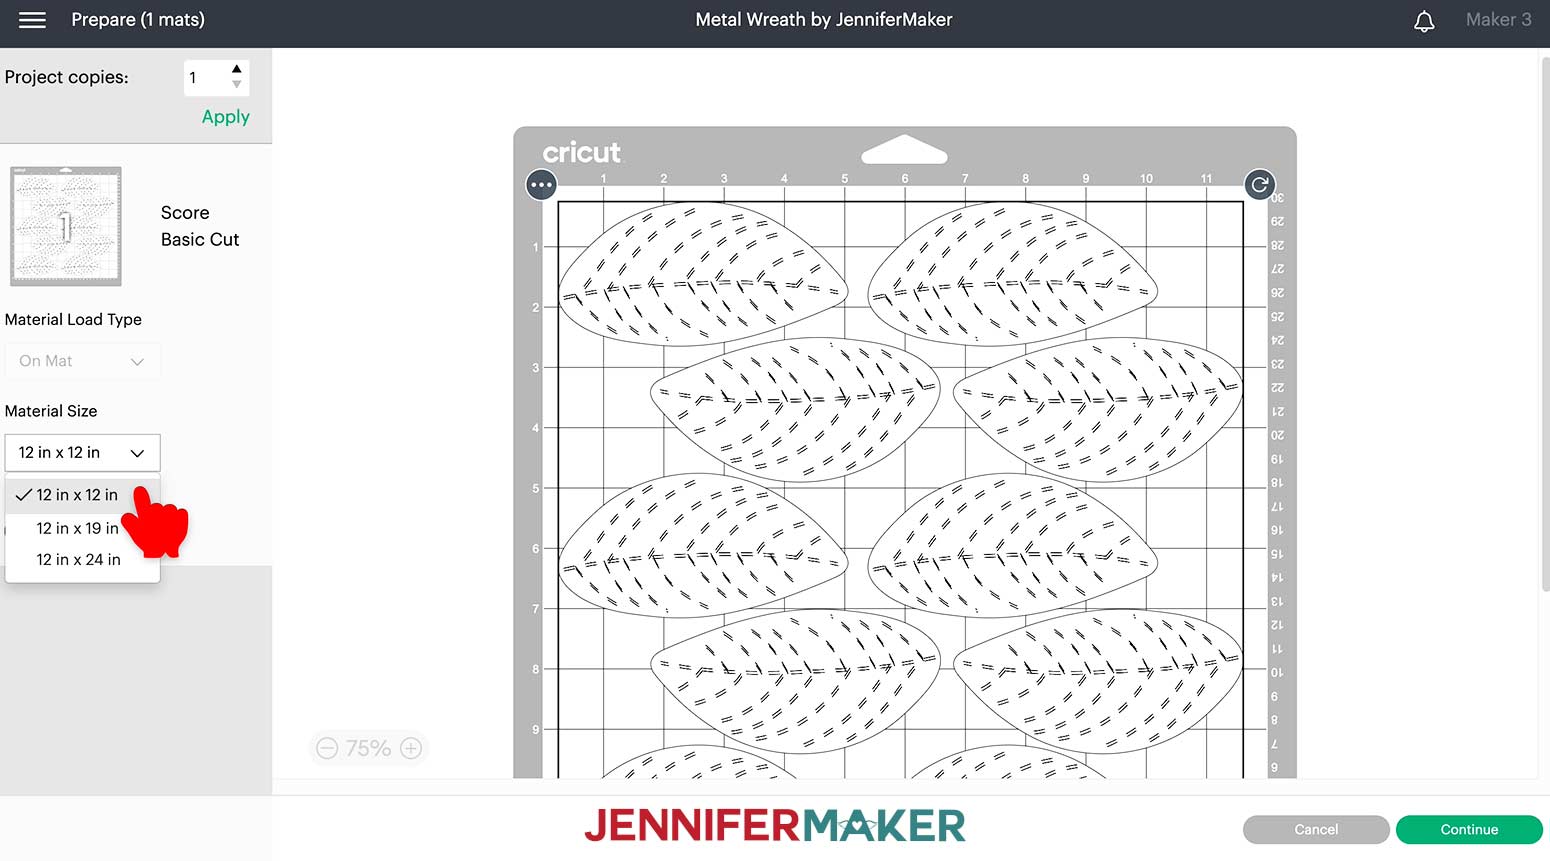
If you are asked if you are cutting your designs without a mat, on a mat, or multiple ways, select "On Mat" and "12 x 12." Then click "Continue."
On the Prepare screen, keep the "Material Size" at 12" x 12”.
I've found that about 50 leaves are needed to cover the wreath in my materials list. You may use more or less depending on how closely you glue the leaves together, and the size of the wreath form you use. I need five copies of the set of 10 leaves, so I'll change the "Project Copies" in the upper left hand side of the screen to "5" by either typing in the number or using the up arrows. Click "Apply."
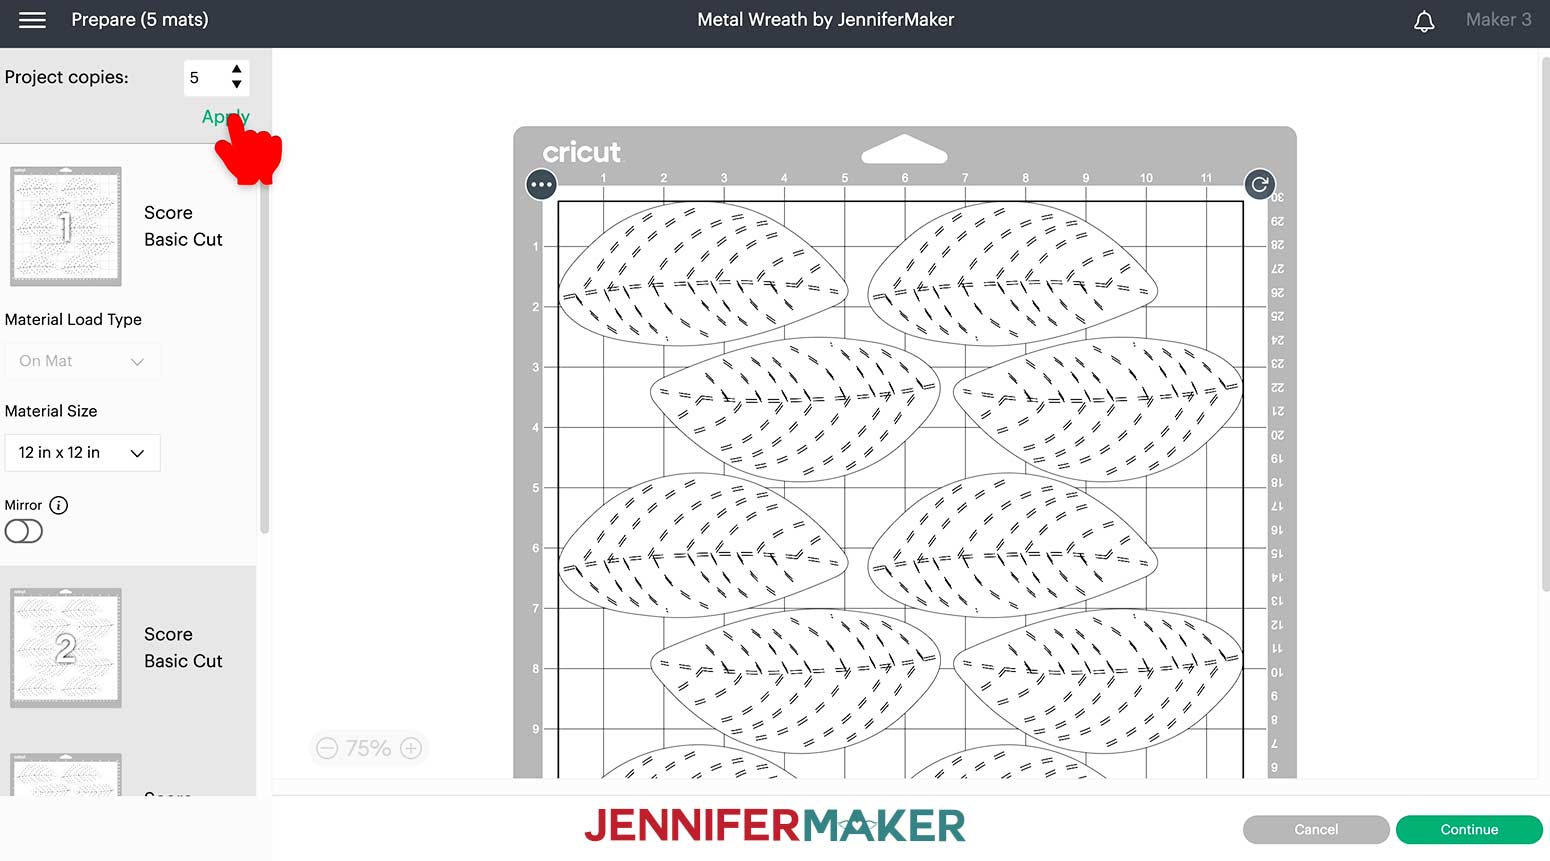
The number of mats has now increased to five and we will have a total of 50 leaves when the project is cut.
Click "Continue."
On the Make screen, we will need to create a custom material cut setting. Don’t worry, I’ll show you how! These settings worked for my machine, but each one is different, so test with a single leaf just in case. If the score lines are too deep, try these settings with the pressure on Default.
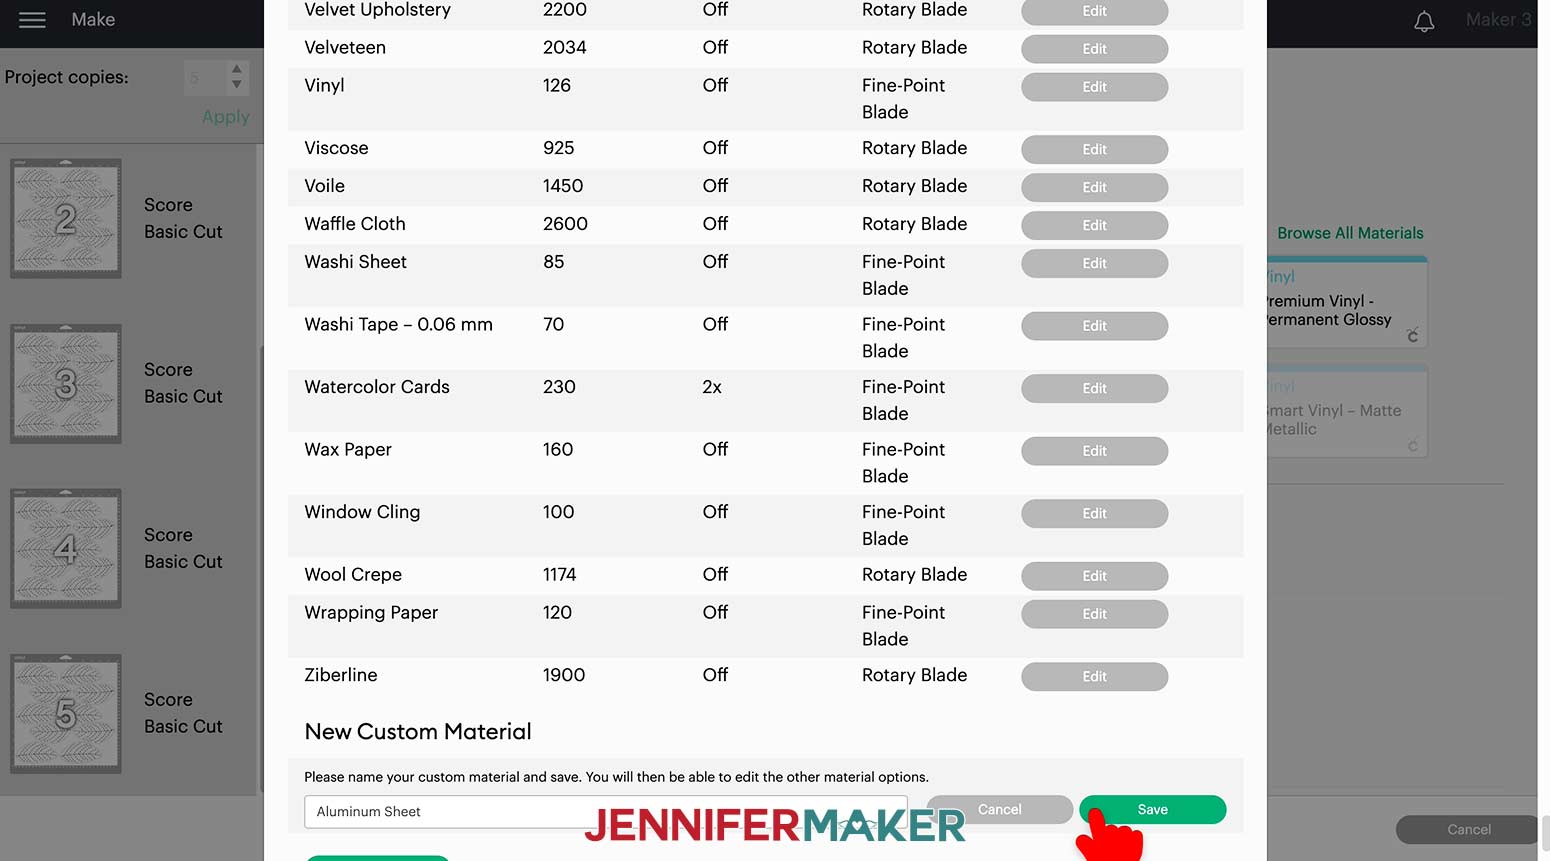
Click "Browse All Materials," then "Material Settings." Scroll all the way to the bottom of the listed materials and click the green button labeled "Add New Material."
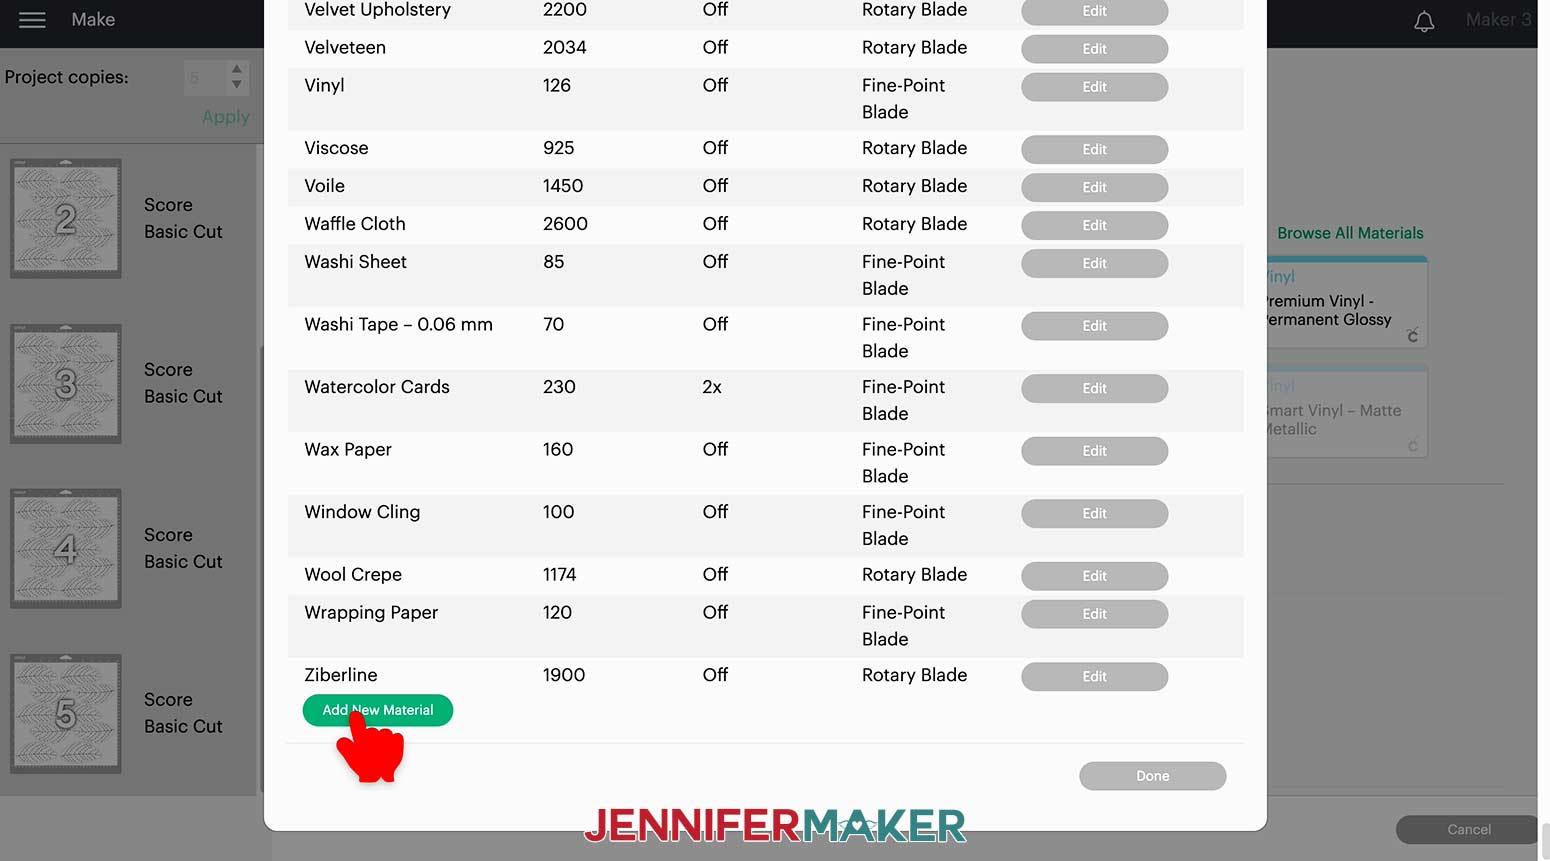
Next, type a label for your new material setting. I used "Aluminum Sheet" as my title. Click "Save."
The list will now scroll back to your new material to allow you to input custom cut settings. I used "300" for the pressure using the slider and "2x" for the cut under Multi-cut. The Fine-Point Blade is already selected so I left that in place. Click "Save."
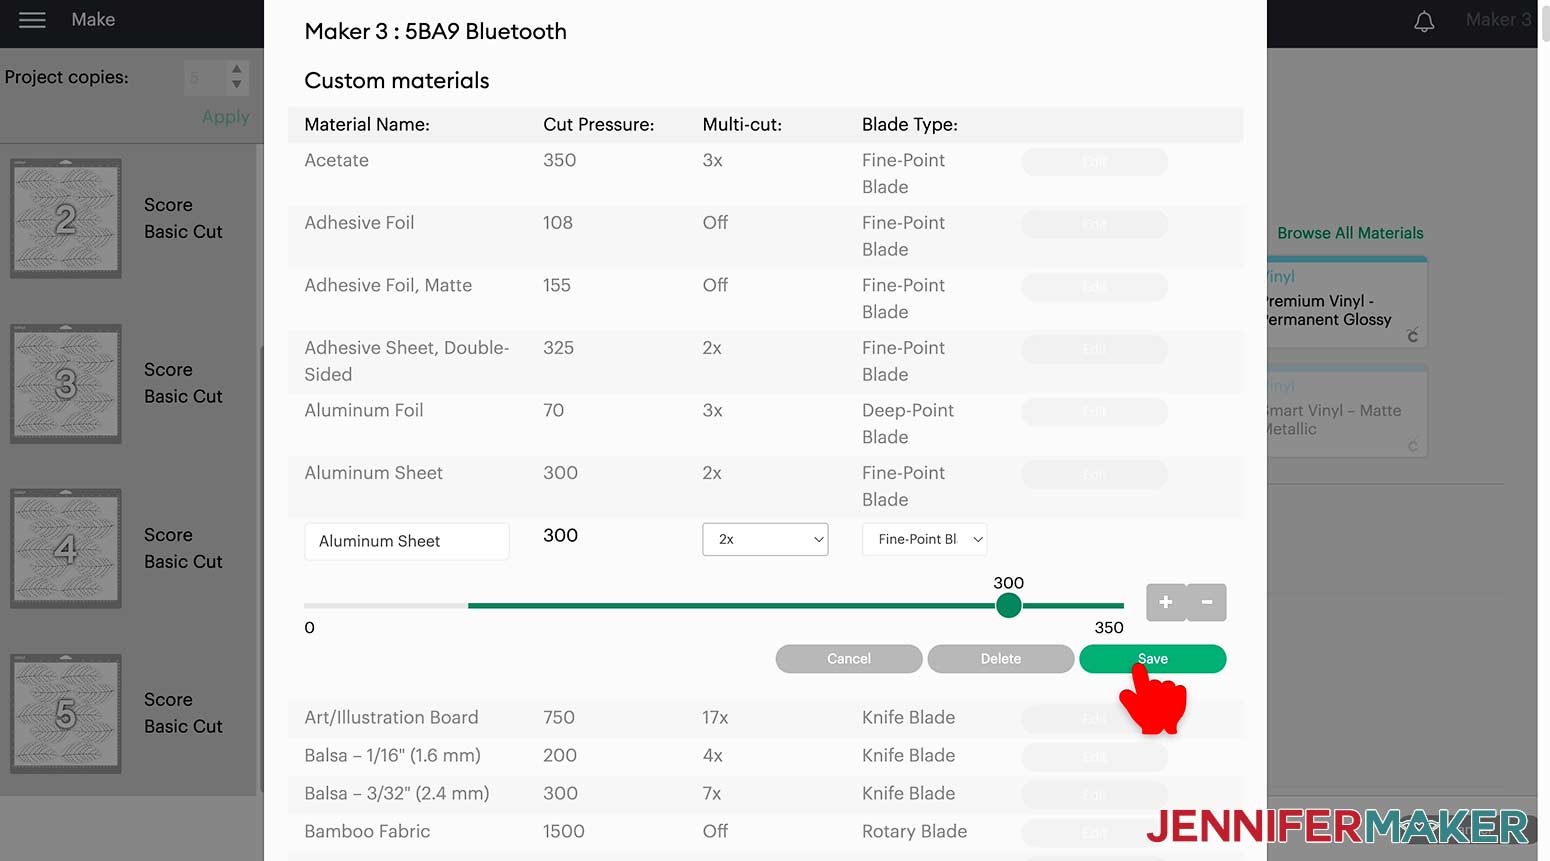
Click the “X” to close the Custom Materials window.
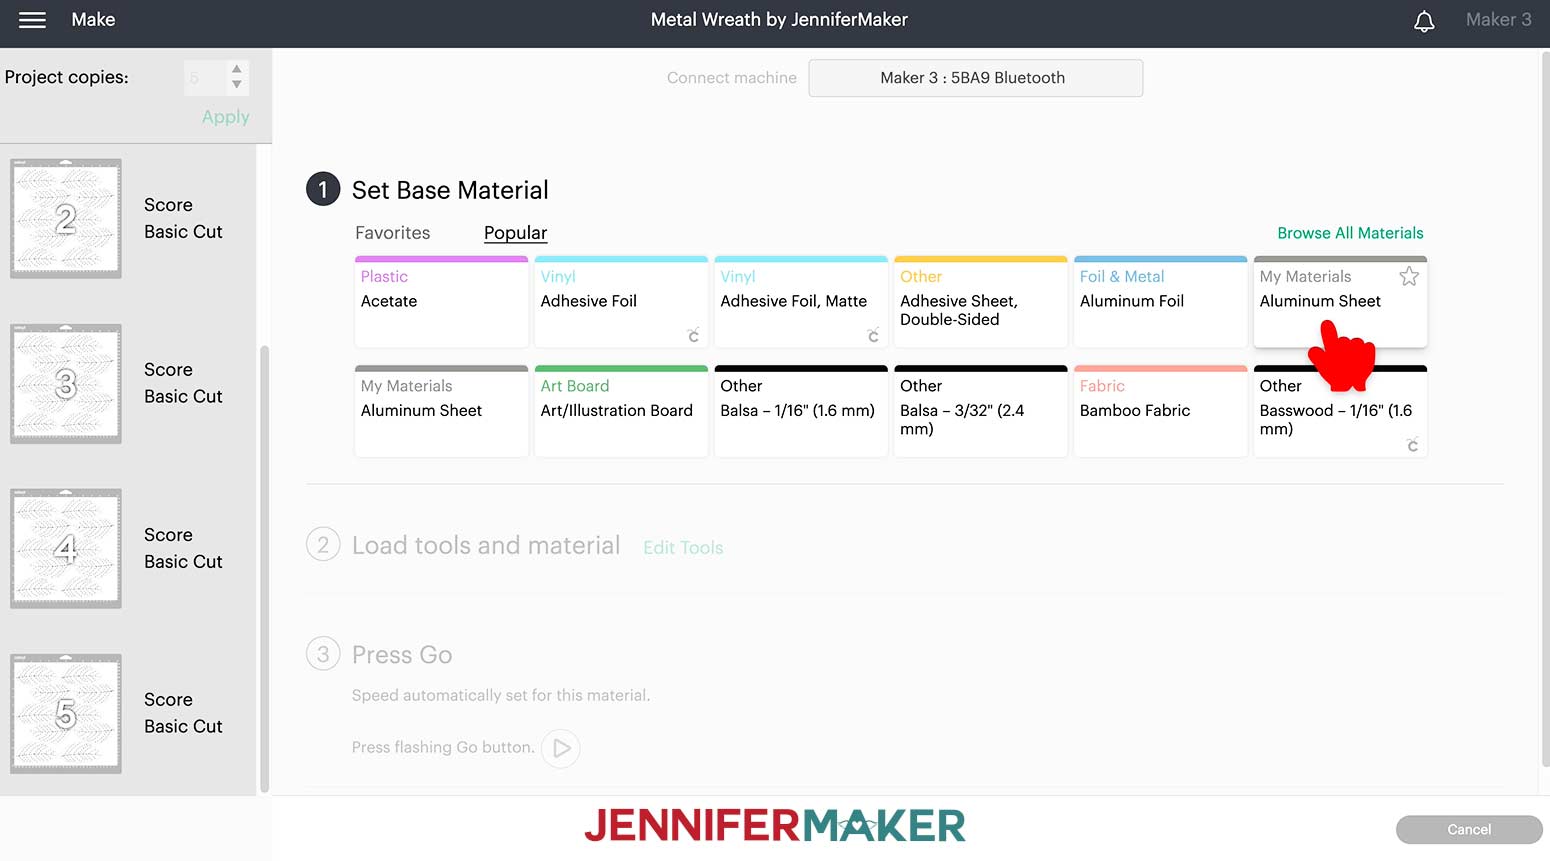
Now, select the new material from the material list by clicking "Browse Materials" and changing the Categories drop-down menu to "My Materials."
Select "Aluminum Sheet" and click "Done."
Select "More" Pressure.
The scoring tool automatically selected for the Maker 3 is the single scoring wheel. This is the tool I used, but if you are using the scoring stylus or the double scoring wheel, select "Edit Tools" to select the proper tool.
Make sure the correct scoring tool is loaded in the machine.
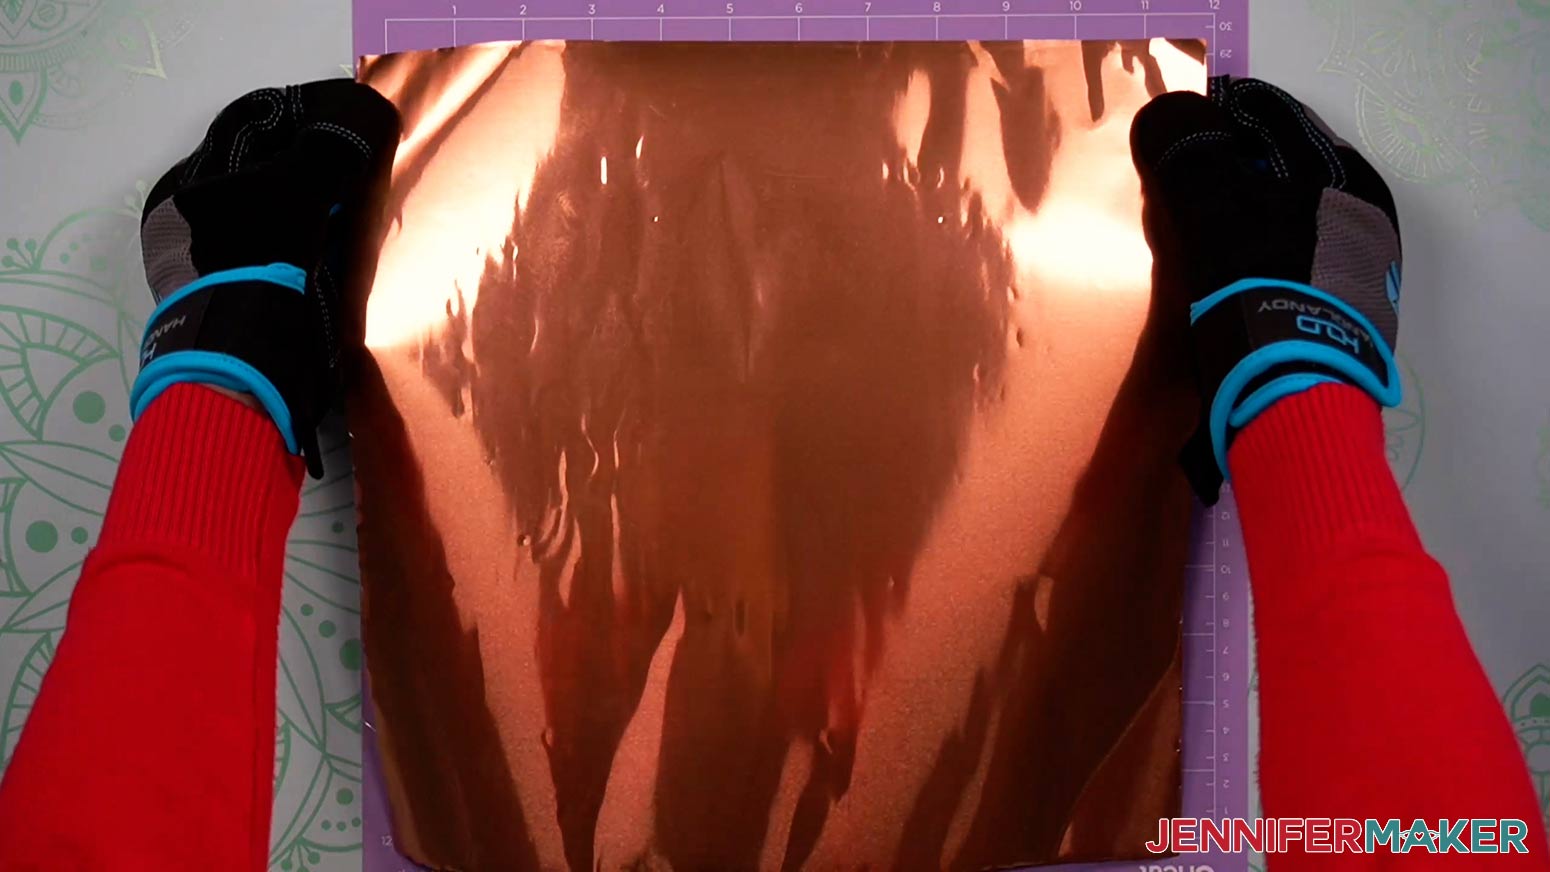
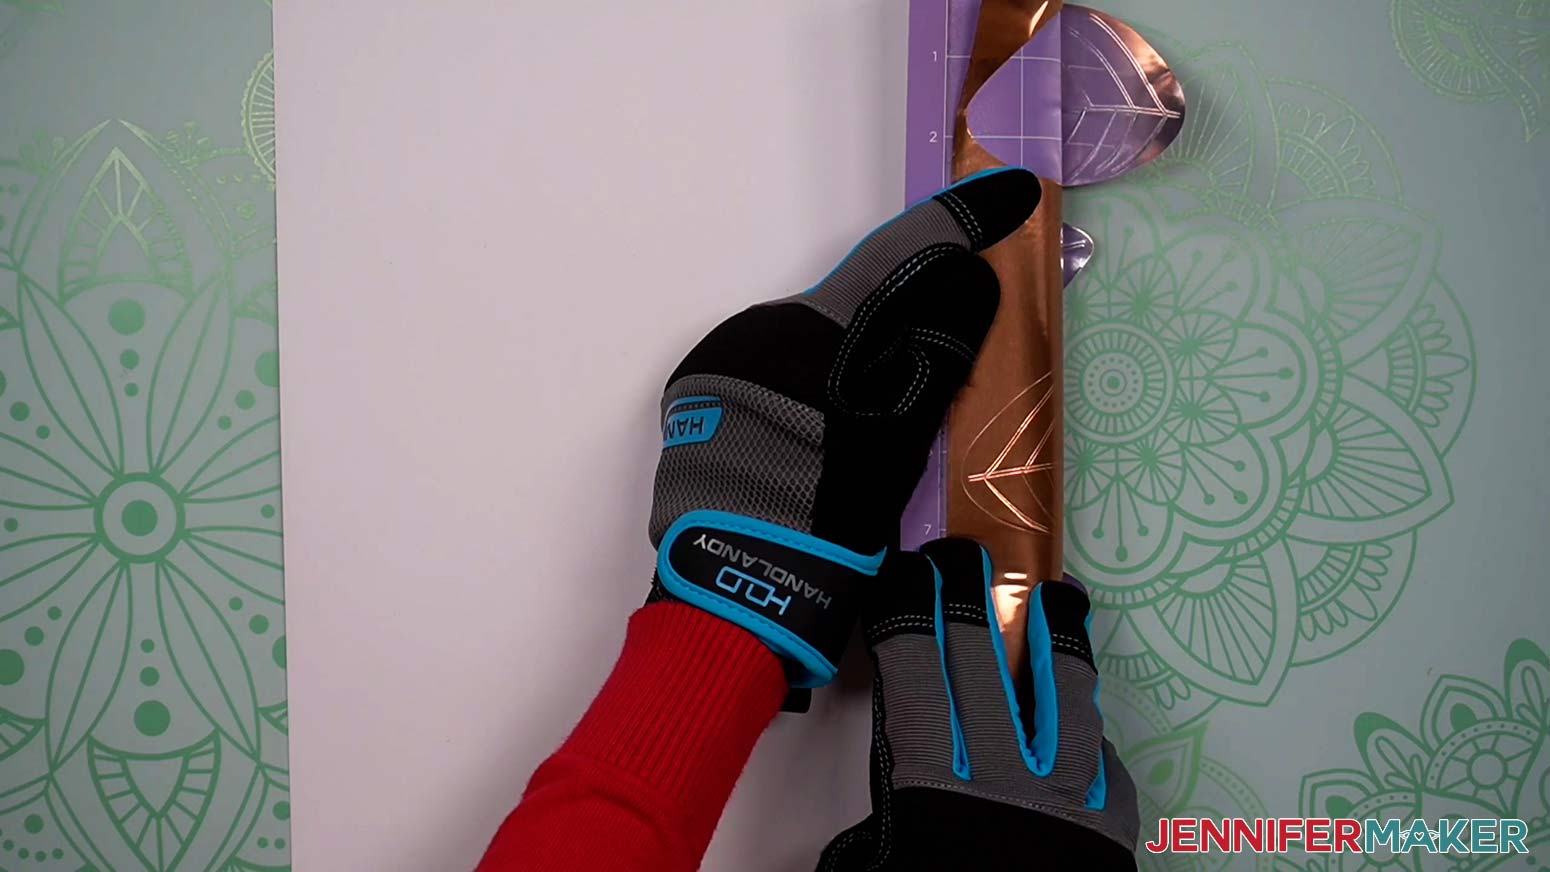
Put on your safety gloves and use the scissors to cut a piece of the metal 12" x 12." Place it copper side up on a purple StrongGrip machine mat. Use the brayer to make sure the metal is fully adhered to the mat.
Load the mat into your Cricut and press the flashing button to begin. When the scoring step is completed, the machine will stop and wait for you to change the scoring wheel to the Fine-Point Blade. Make sure the blade is clean and loaded before continuing.
TIP: If you run into any issues cutting your materials, check out my Cricut Tips & Tricks for Cleaner Cuts.
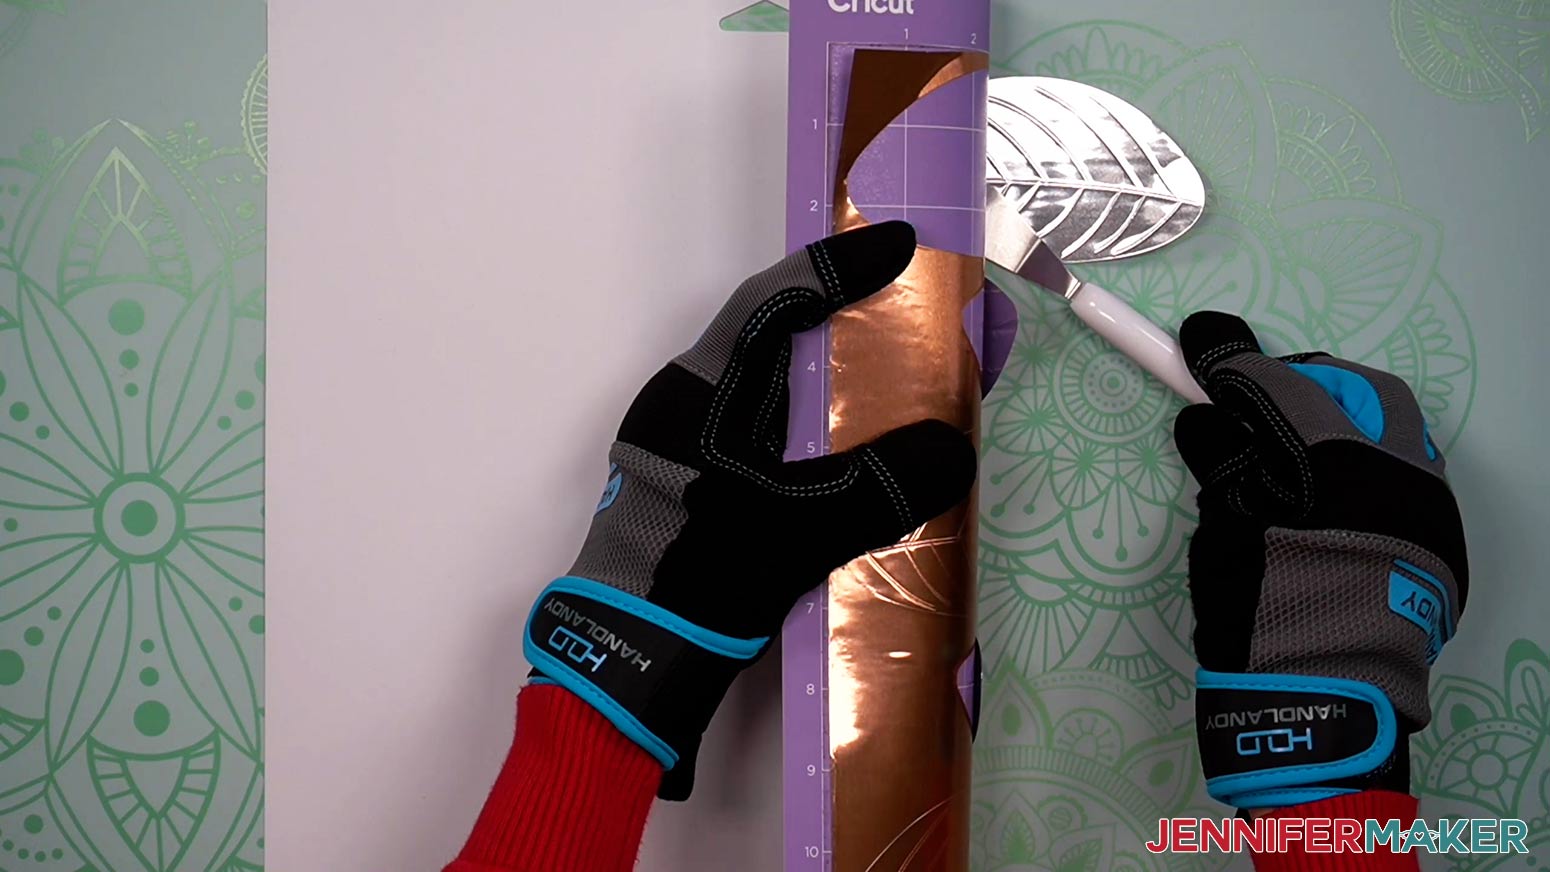
Once the cutting is complete, the leaves are ready to remove from the mat. Make sure to wear protective gloves to prevent accidentally cutting yourself. The edges of the cut metal are sharp!
“Weed” the leaves by flipping the mat over onto your work surface and gently pulling it back to release the excess material.
Use the spatula to carefully remove the leaves from the mat. Do not curl the leaves up or lines will appear across them as they release from the mat.
Now, prepare the mat with the next aluminum sheet, load it in the machine, and press the flashing button to continue.
Once all five sheets of leaves are cut and weeded, we are ready to assemble the wreath.
STEP 4: ASSEMBLE THE METAL WREATH
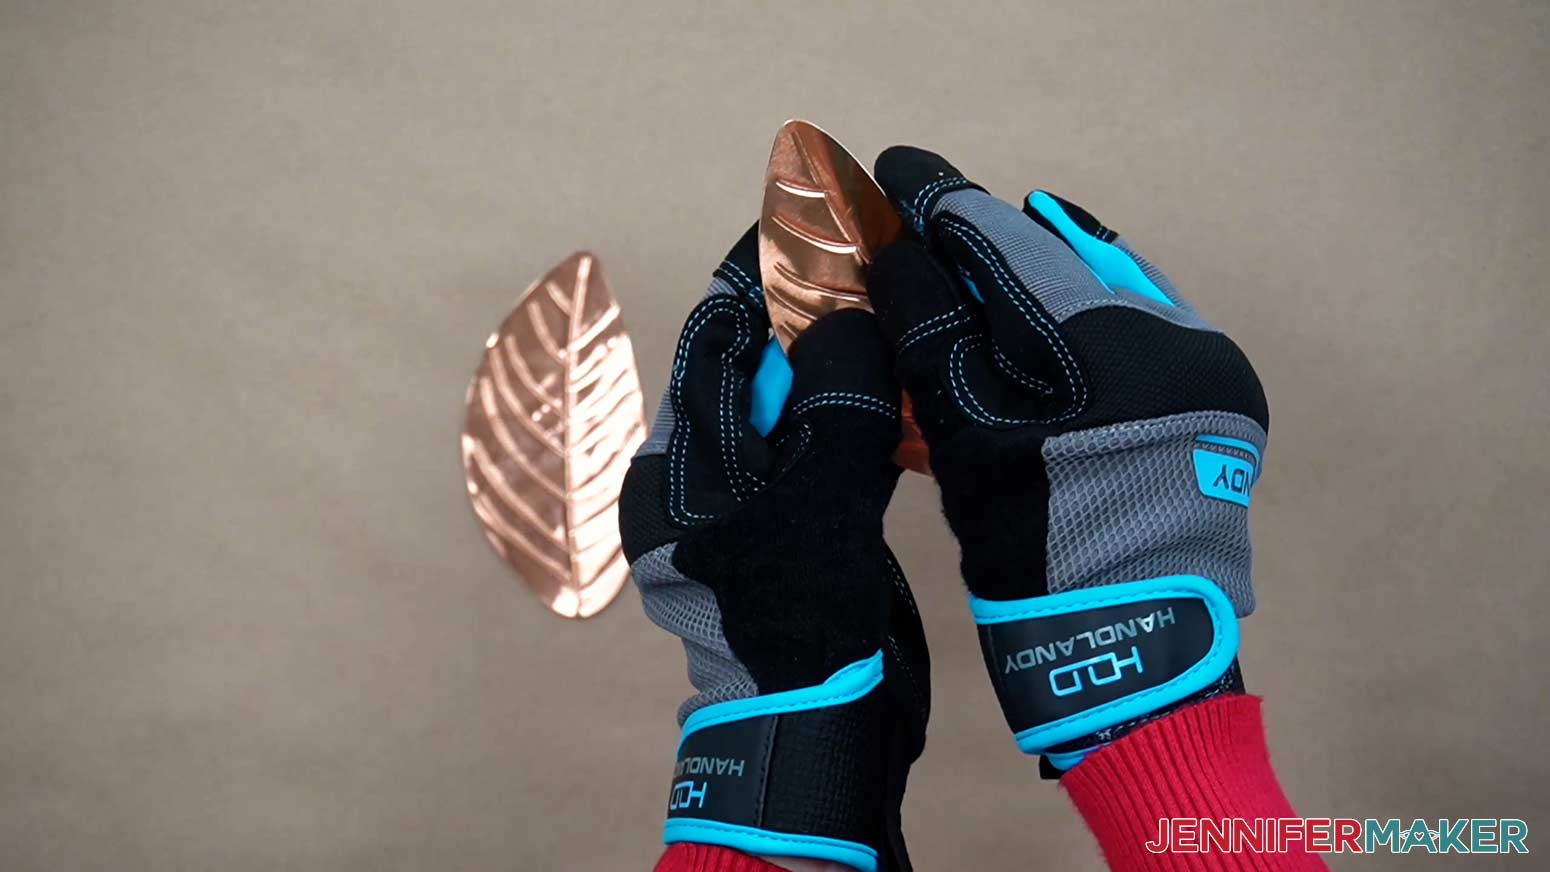
You can choose to keep the leaves flat or bend them for a little more dimensional effect. I chose to crease them along the center vein to fold them slightly.
Once all the leaves are ready to apply to your wreath form, there are two options for gluing the leaves to the form.
Attachment Option 1: Hot Glue
Hot glue is the quickest and easiest way to apply the leaves to the form. If you intend to hang the wreath on an outside door or window where it will receive a lot of sun during the day, however, you may want to use the other option as hot glue can melt from the heat of the sun.
Cover your work area with parchment paper. Place the wreath frame face up.
Plug in and warm up your glue gun.
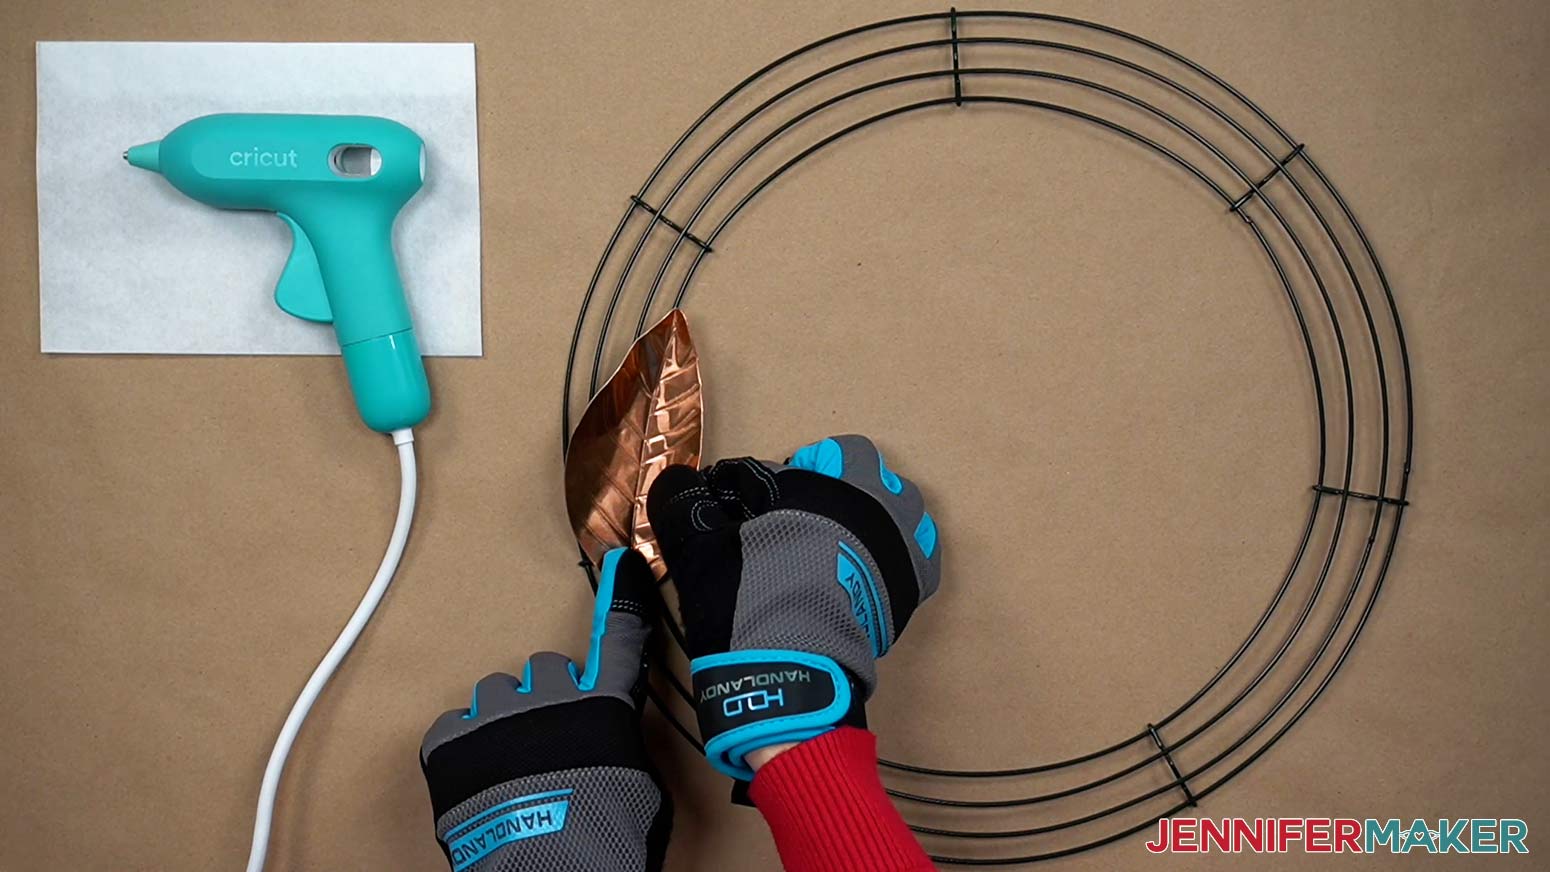
Make sure your hands are protected from the heat of the glue as the heat will transfer up the metal. I wore my crafting gloves!
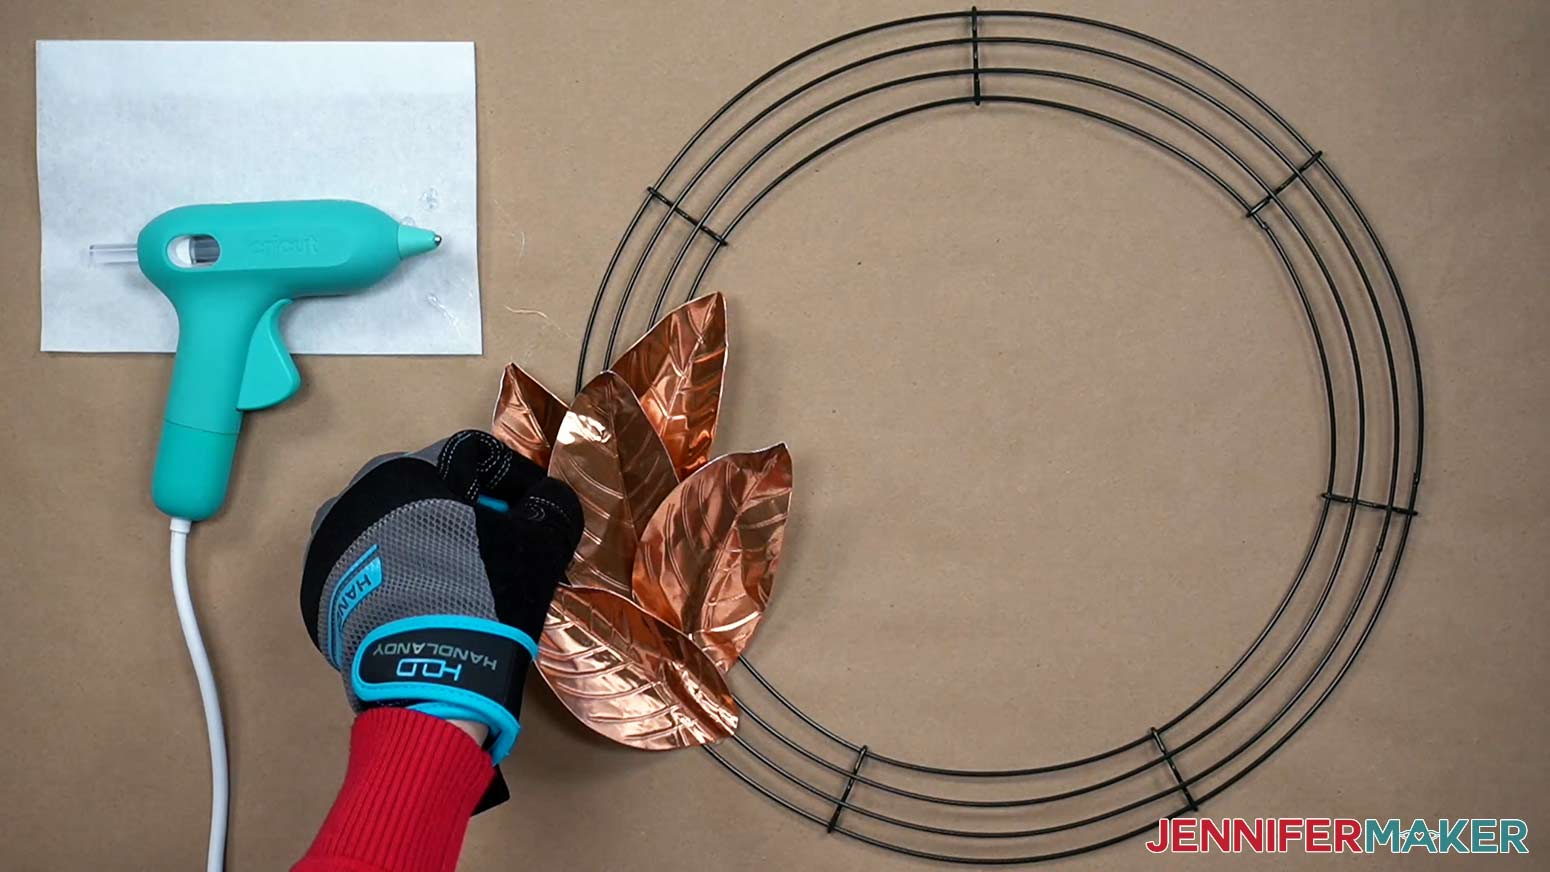
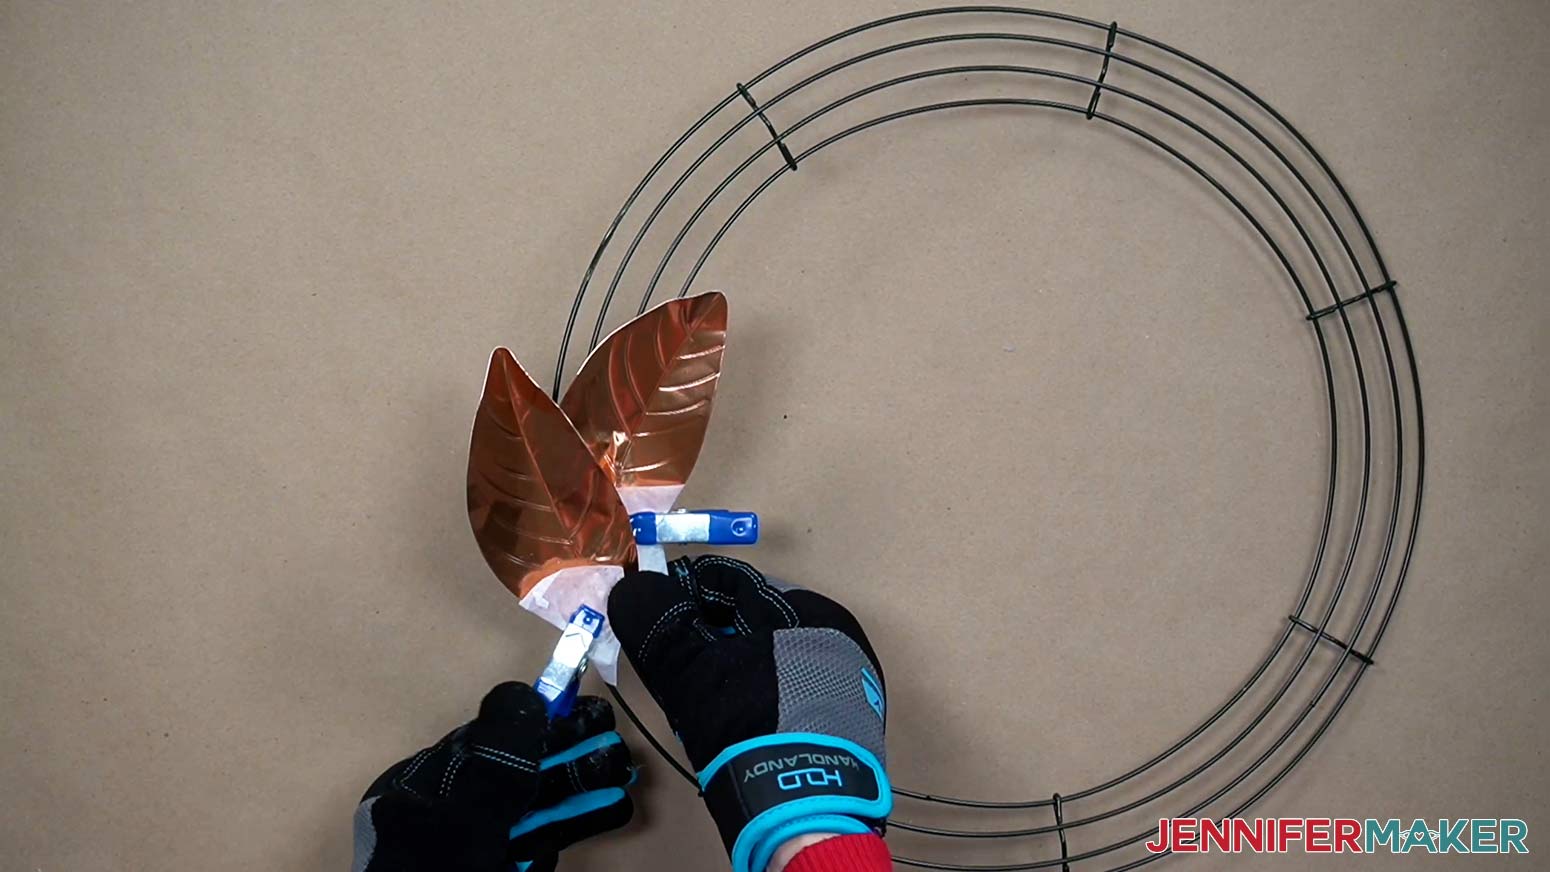
For the easiest placement, I found adding the leaves in an alternating “braid” style worked best:
Decide where you want to place each leaf before adding the glue. I started with a leaf on the middle two wires, slightly angled in to the center of the wreath, with the point facing to the right. Press the bottom part of a leaf into the wires to conform the base to where the glue will hold it in place.
Place hot glue on the back of the leaf at the widest part of the bottom where you just shaped it.
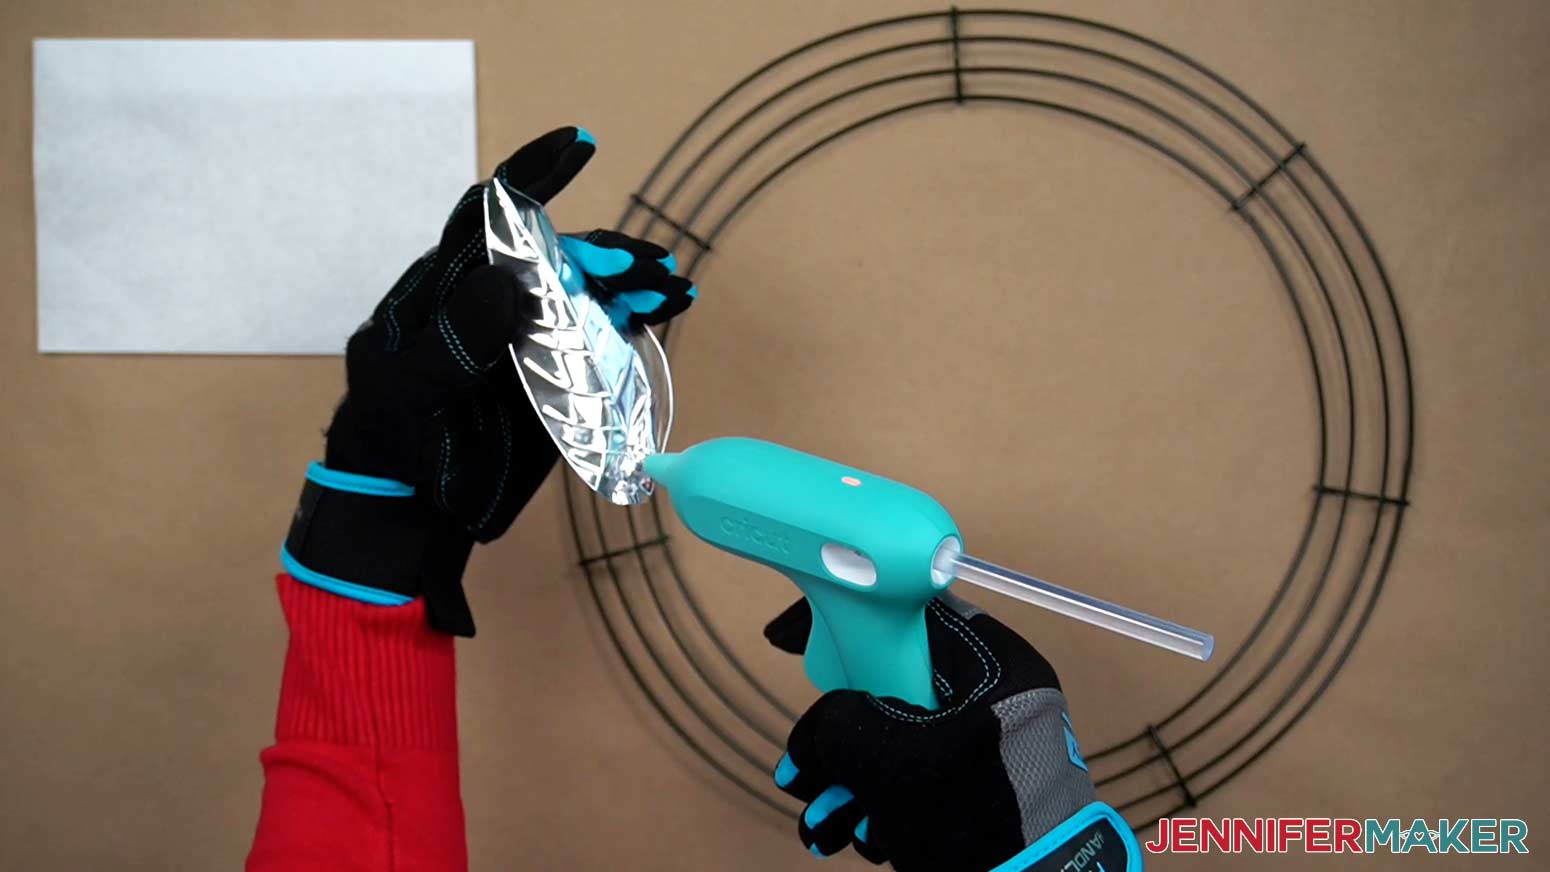
Let the glue cool slightly before turning the leaf over and setting in your pre-determined spot. Hold the leaf in place for a moment while the glue cools enough to be secure.
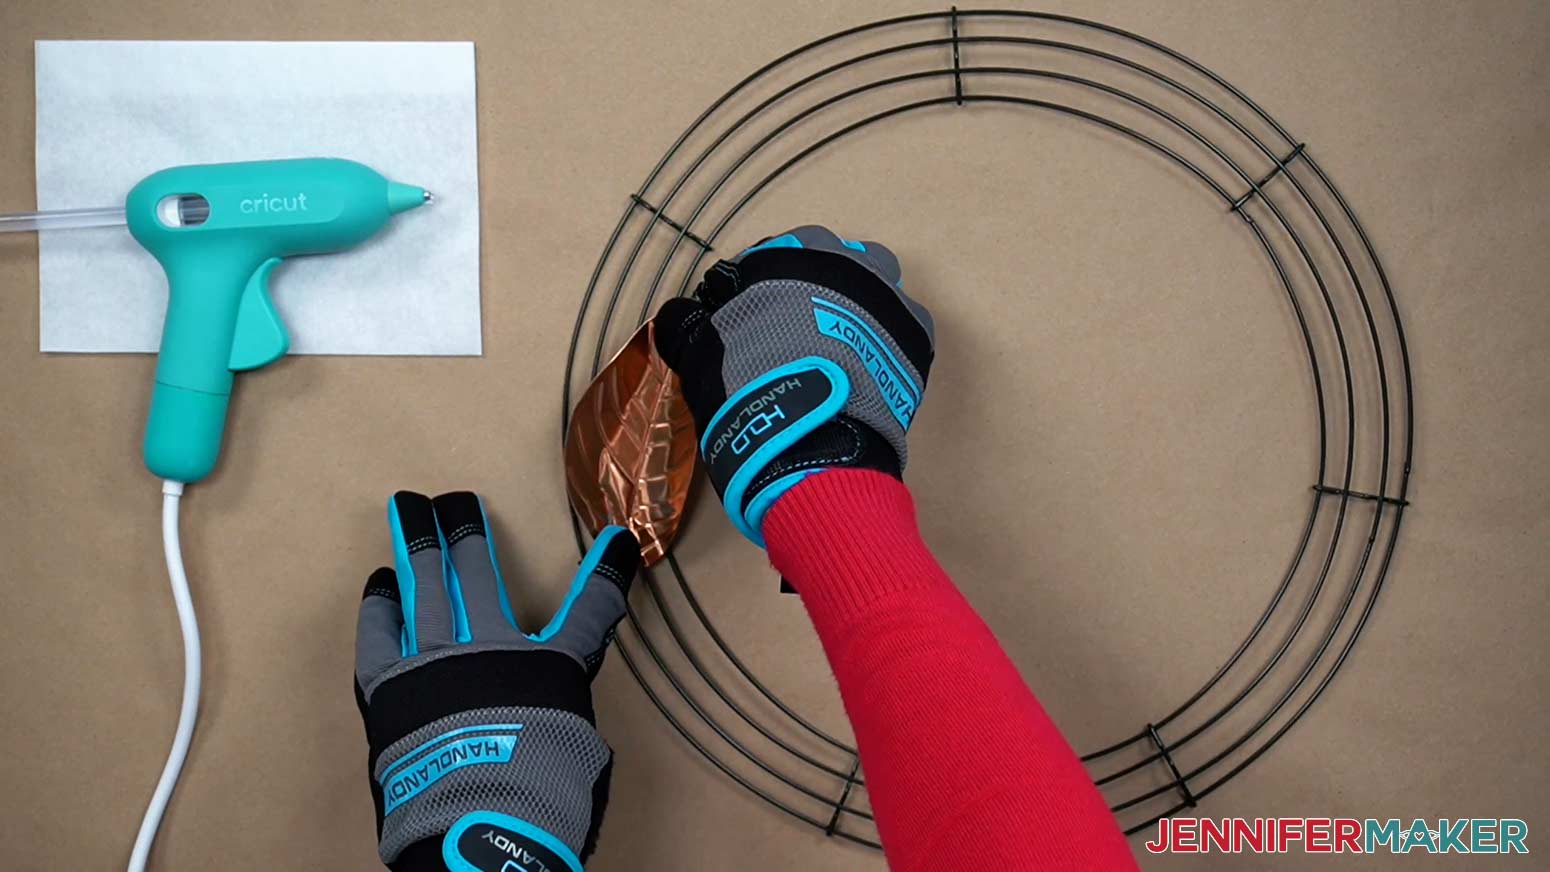
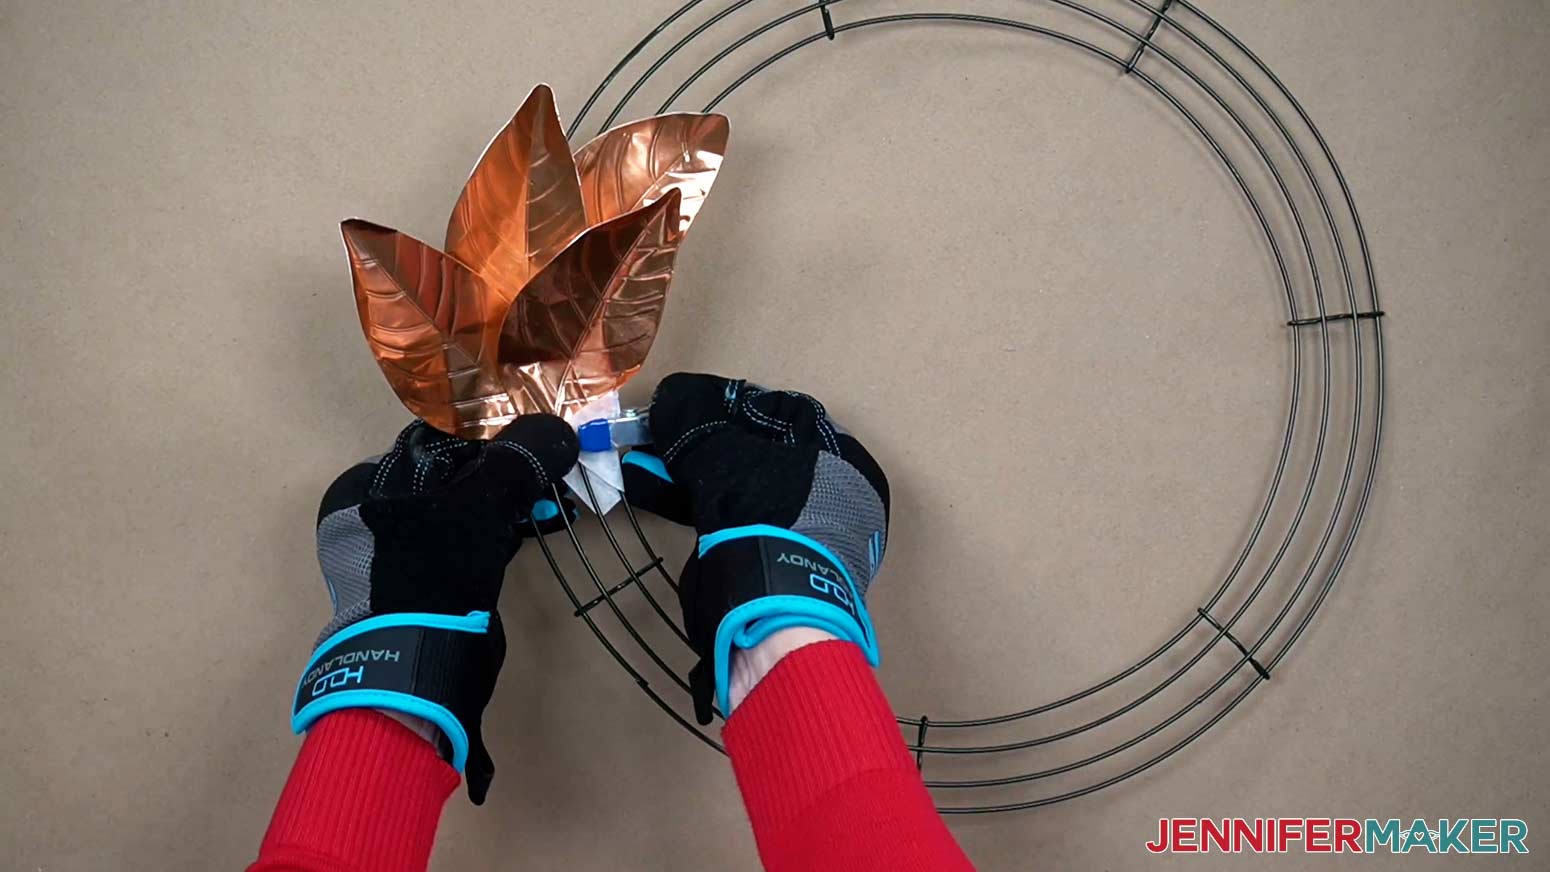
Then, add a second leaf on the same two center wires so that the tip angles out and it slightly overlaps the previous leaf's base.
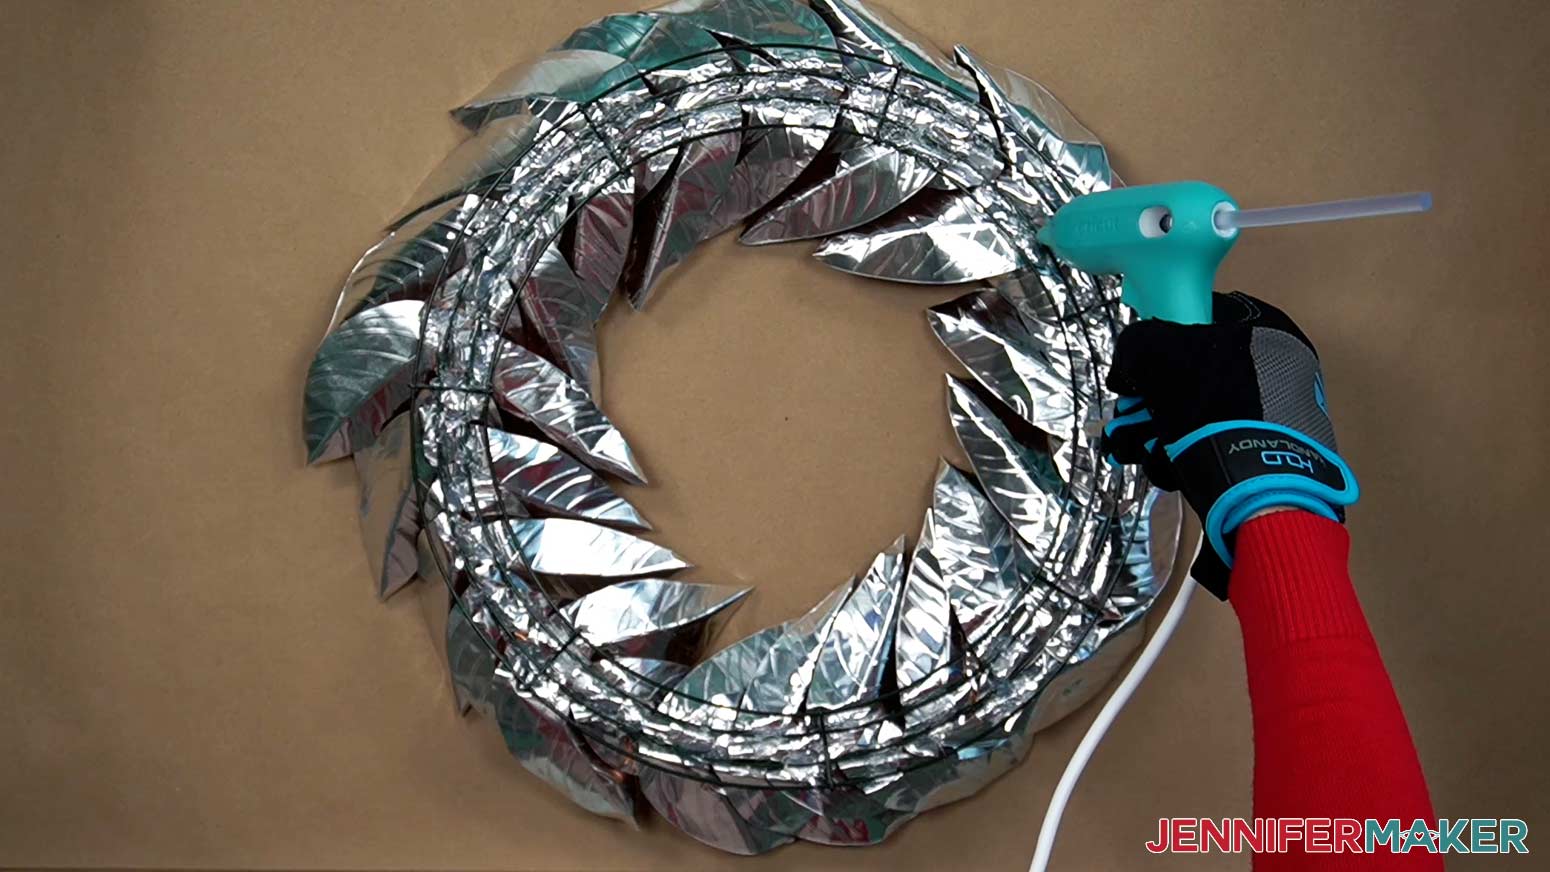
Continue gluing leaves around the form until your wreath is full.
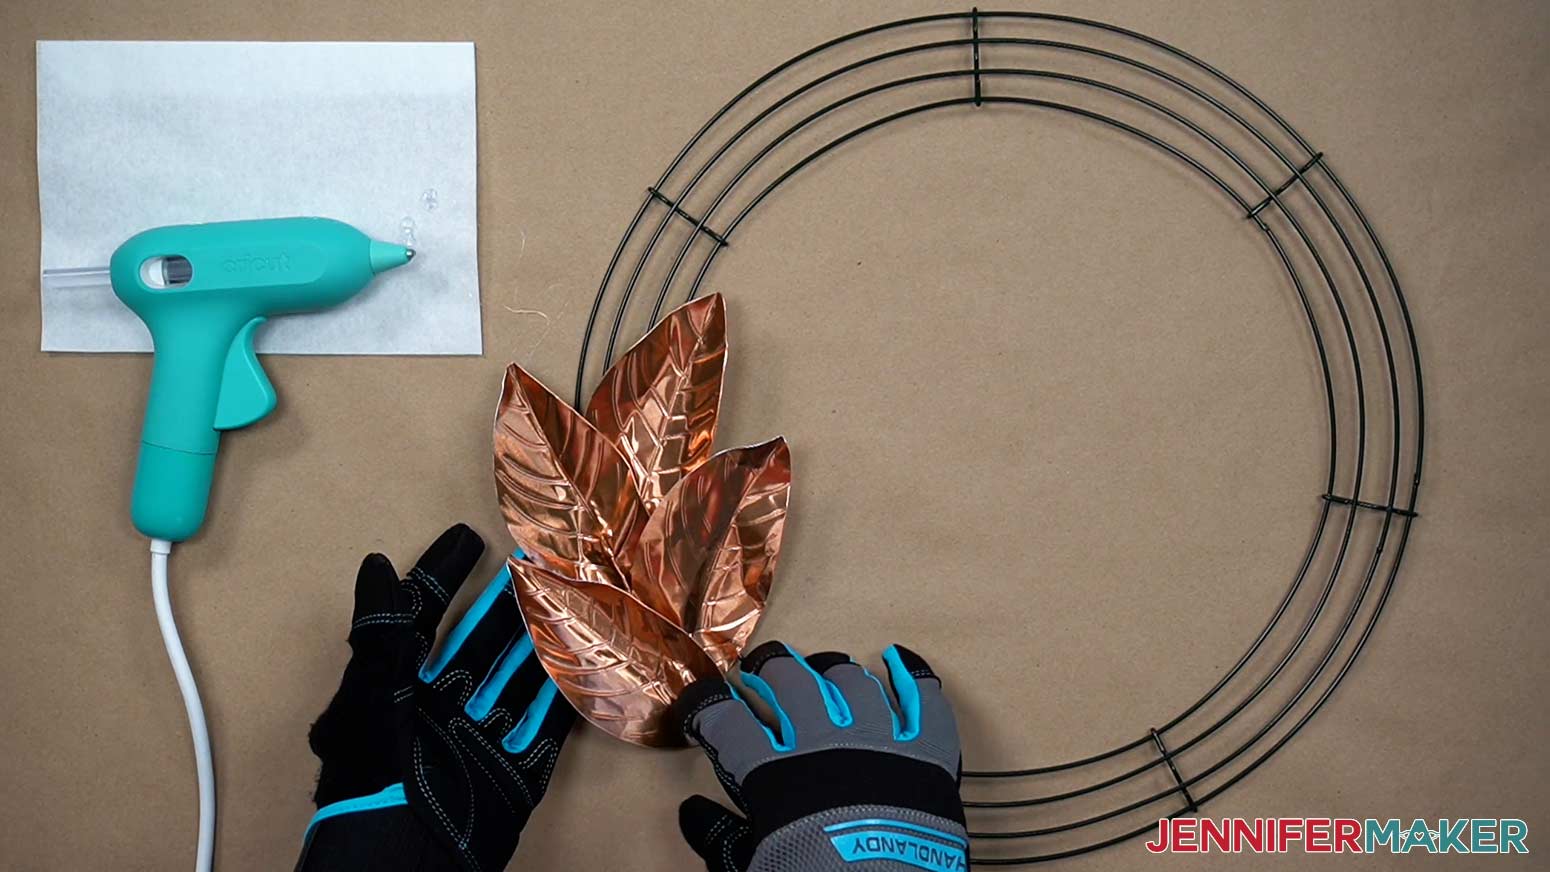
After filling the leaves around the form, add the middle leaves to make groupings of three leaves here and there around the wreath form.
To place the middle leaves, add glue to the widest part of the back of the leaf and slide it in to the center between the inside edges of two overlapping leaves. Hold the leaf in place until the glue cools.
The final step is to turn the wreath over and place a little bit of glue on the back of each leaf to lock them into place. Without this step, the hot glue can work loose and the leaves may fall off!
Attachment Option 2: E6000
E6000 creates a nice strong hold on the metal but takes a long time to dry thoroughly and can be quite messy. It will not melt in the sun like hot glue can, though, so is a better choice if the wreath will be hung in direct sunlight for hours at a time.
Cover your work area with parchment paper. Place the wreath frame face up.
For the easiest placement, I found adding the leaves in an alternating “braid” style worked best:
Decide where you want to place each leaf before adding the glue. I started with a leaf on the middle two wires, slightly angled in to the center of the wreath, with the point facing to the right. Press the bottom part of a leaf into the wires to conform the base to where the glue will hold it in place.
Spread glue on the back of the leaf at the widest part of the bottom where you just shaped it.
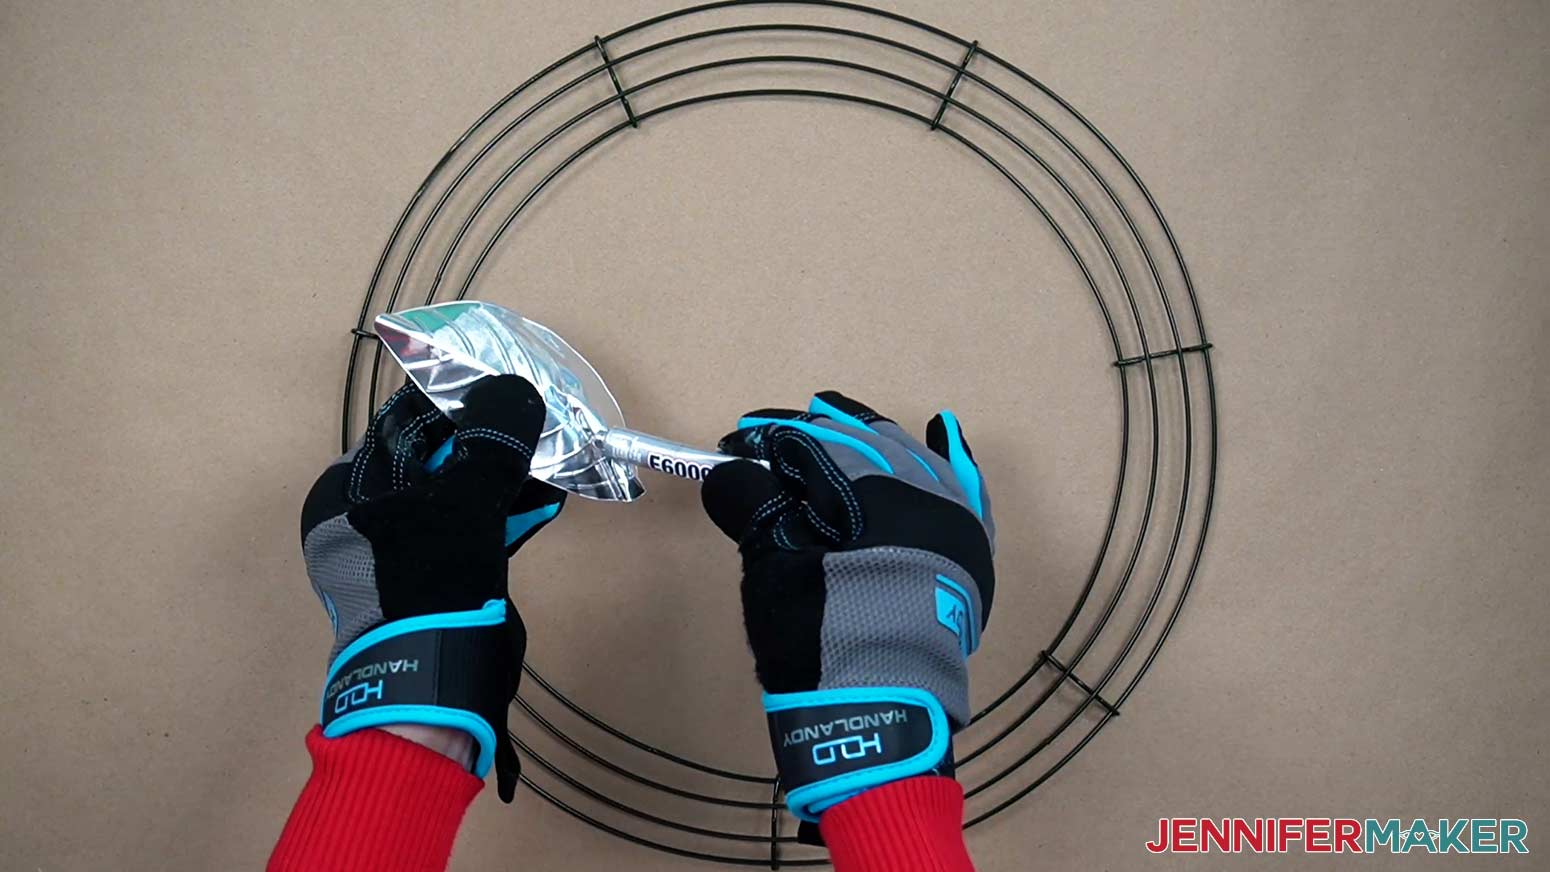
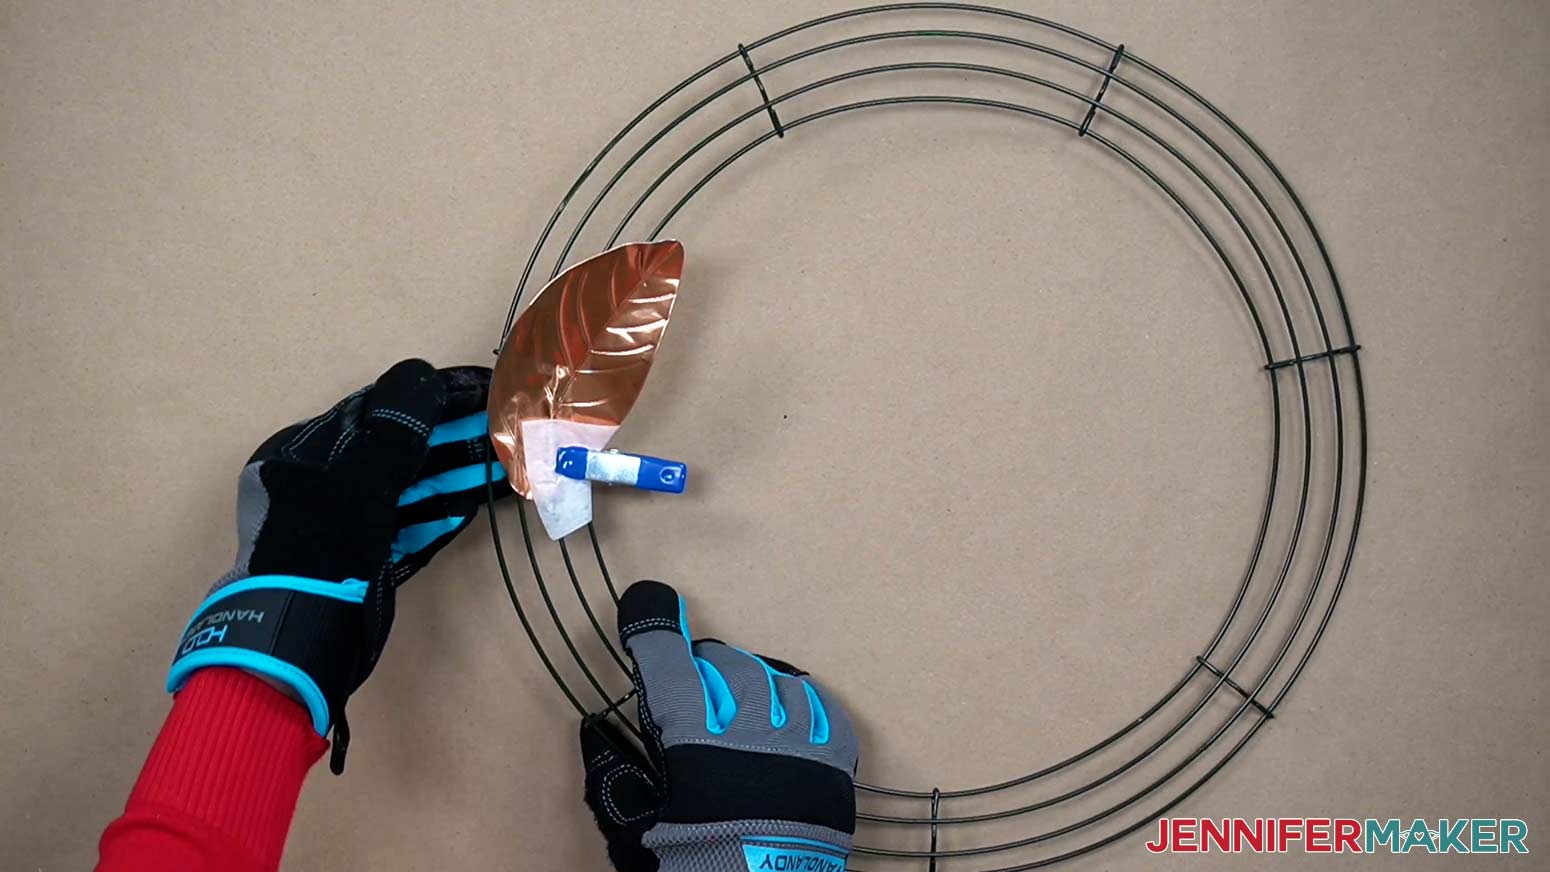
Let the glue sit a moment before turning the leaf over and setting it in your pre-determined spot. Wrap a small piece of parchment around the leaf base. Place a crafting clamp over the parchment paper onto the leaf to hold it in place while the glue forms a bond. This can take quite a few minutes for each leaf.
Then, add a second leaf on the same two center wires so that the tip angles out and it slightly overlaps the previous leaf's base.
Continue alternating the leaves around the form. Be sure to check the bond on the glue before removing the clamp and parchment paper on each one. If the glue hasn't set quite yet, replace the parchment and clamp for a few more minutes.
After filling the leaves around the form, add the middle leaves to make groupings of three leaves here and there around the wreath form.
To place the middle leaves, add glue to the widest part of the back of the leaf and slide it in to the center between the inside edges of two overlapping leaves. Hold the leaf in place for a short while to ensure it will not shift from its spot. Clamps aren't necessary for the middle leaves since they sit on top of other leaves. The glue adheres to the metal leaves much more easily than to the wire form.
Once the form has been filled, allow the wreath to set on a flat surface for at least 24 hours so the E6000 glue has time to thoroughly dry.
STEP 5: SHOW IT OFF!
Hang your wreath to enjoy the coppery fall colors in your home!

Notes
Wreath Form Size: 14" diameter
Finished Wreath Size: Approximately 18.5" diameter
Answers to Your Questions About How to Cut Metal With Cricut Machines
Q: Can Cricut Maker cut metal?
Yes! A Cricut Maker machine can cut metal, but it needs to fit on the mat, under the rollers, and under the tool you choose.
Q: How thick of metal can Cricut cut?
While aluminum foil and “Metal – 40 gauge thin copper” are both on the official list of metals a Cricut can cut, this craft foil I used feels about twice the other foil’s thickness. I used 38 gauge, which is about 0.0060″ or 0.15 mm. It cut and scored well with a fine-point blade on my Maker 3.
It’s not always clear how thick some materials are. While metal is pretty consistent, other types of materials like faux leather, genuine leather, or even magnetic sheets can be hard to tell. The best way to avoid using material that will hurt your machine is measuring it with calipers.
Q: Can a Cricut cut aluminum sheet?
Yes, the metal I used is an aluminum sheet with a thin copper color on one side. If copper isn’t your favorite metal, there’s also silver, gold, and a red tone.
Q: Which machine mat is best for cutting metal?
The metal sometimes shifted on the standard grip machine mat, but the strong grip mat held it still.
Q: What Cricut blade cuts metal?
I had the best results with the fine-point blade — especially with custom material settings — but the deep point blade is often recommended for learning how to cut metal on Cricut machines. I tried the Cricut knife blade but the results were inconsistent.
The Cricut engraving tool, single and double scoring wheels, and scoring stylus allowed me to mark the metal’s surface but not cut reliably. I have not tried the rotary blade on metal.
Q: Can Cricut engrave metal?
Yes, I’ve suceessfully engraved anodized aluminum, plain aluminum, brass, and stainless steel with a Cricut Maker. In my engraving tests, the thickest metal I could reliably engrave was 14 gauge, which is 5/64th or .078 of an inch. That’s LESS than 1/8″. Remember, use only metal that will safely fit in the machine!
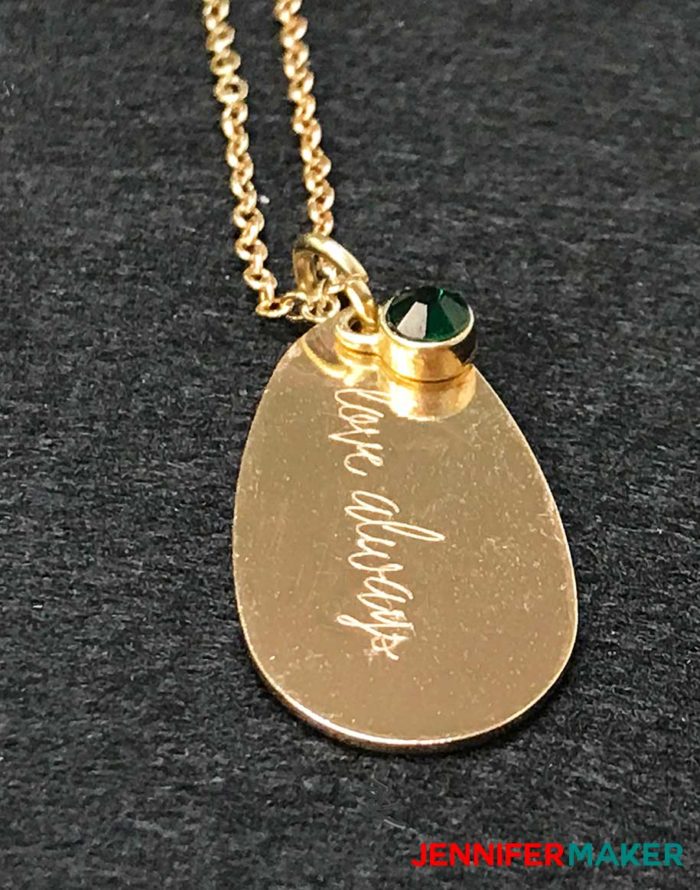
Looking for more metal projects? Try my Metal Jewelry Engraving Projects!
Want a wreath but prefer paper? I have a simply stunning wreath project perfect for you!

Get my free SVG files to learn How to Cut Metal With Cricut!
Now, I’d love to see your projects while you learn how to cut metal with Cricut machines. If you make anything with these designs, please share a photo in our Facebook group, email it to me at [email protected], or tag me on social media with #jennifermaker.
Love,

Want to remember this? Save the How to Cut Metal With Cricut Tutorial to your favorite Pinterest Board!