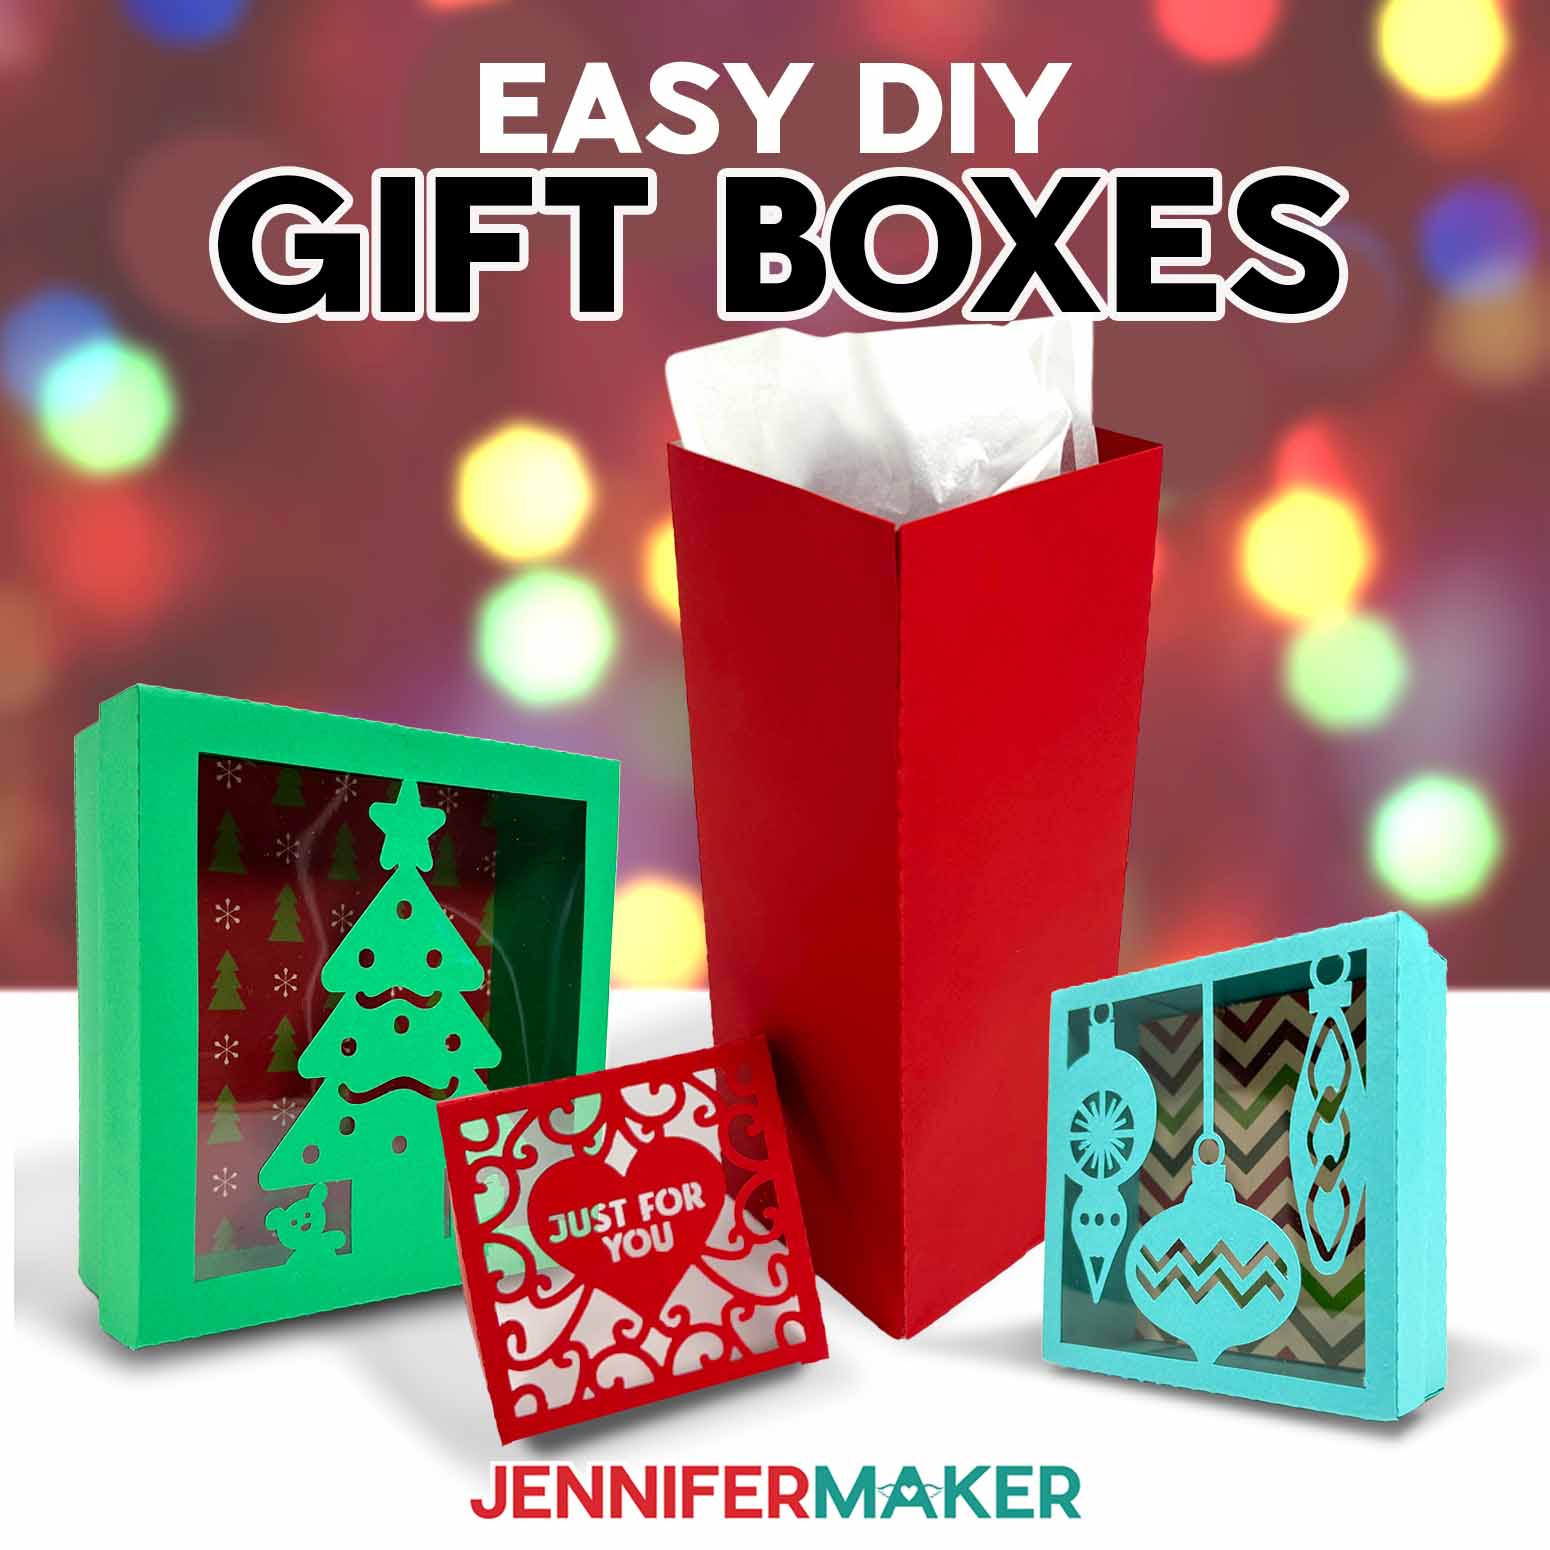
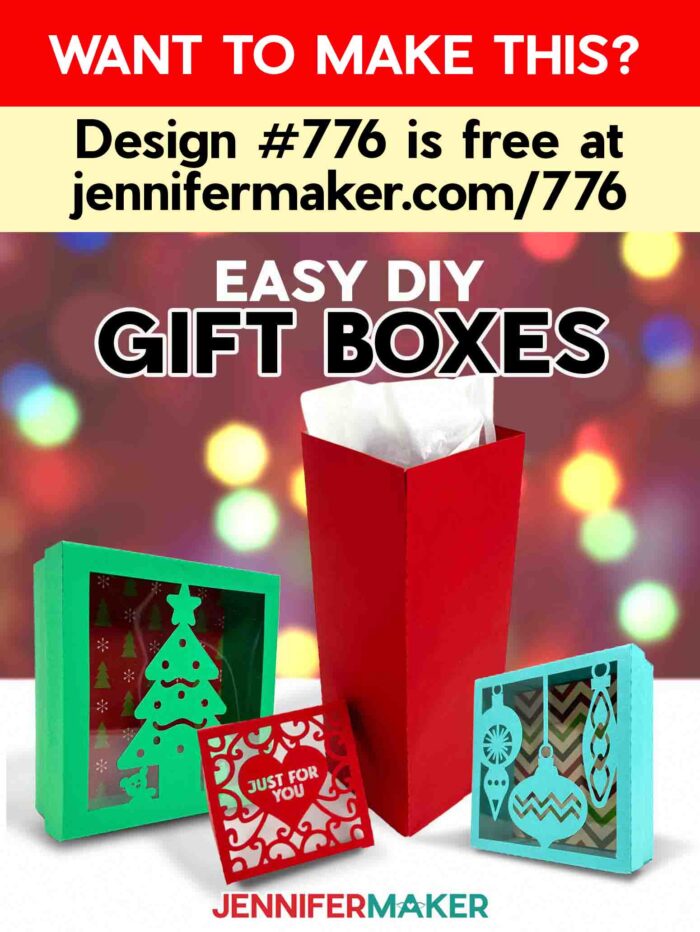
Learn how to make easy DIY gift boxes with colorful cardstock and acetate!
When I was little, I always heard that half the joy of giving a present was in the packaging. I found that a bit funny since I just tore through wrapping paper, treat boxes, and gift bags without a second thought, as most kids do. But as I’ve grown into my own crafting journey, I finally understand what that means. A beautiful presentation is part of the gift itself, and nothing says “thoughtful” quite like a handmade box! That’s why I love making these easy DIY gift boxes with window lids during the holidays. They hold not just the treasure inside, but also all the time and care you’ve poured into putting together something special for your loved one.
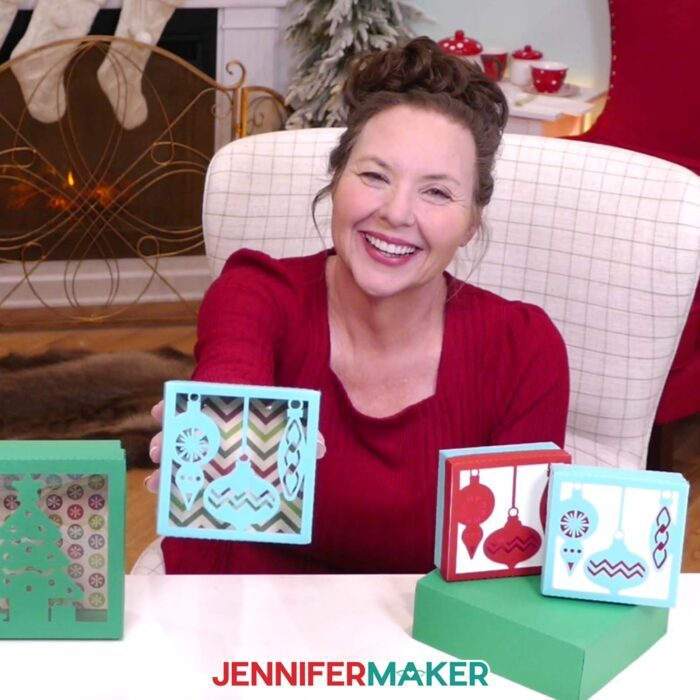
See the full step-by-step video tutorial on how to make easy DIY gift boxes:

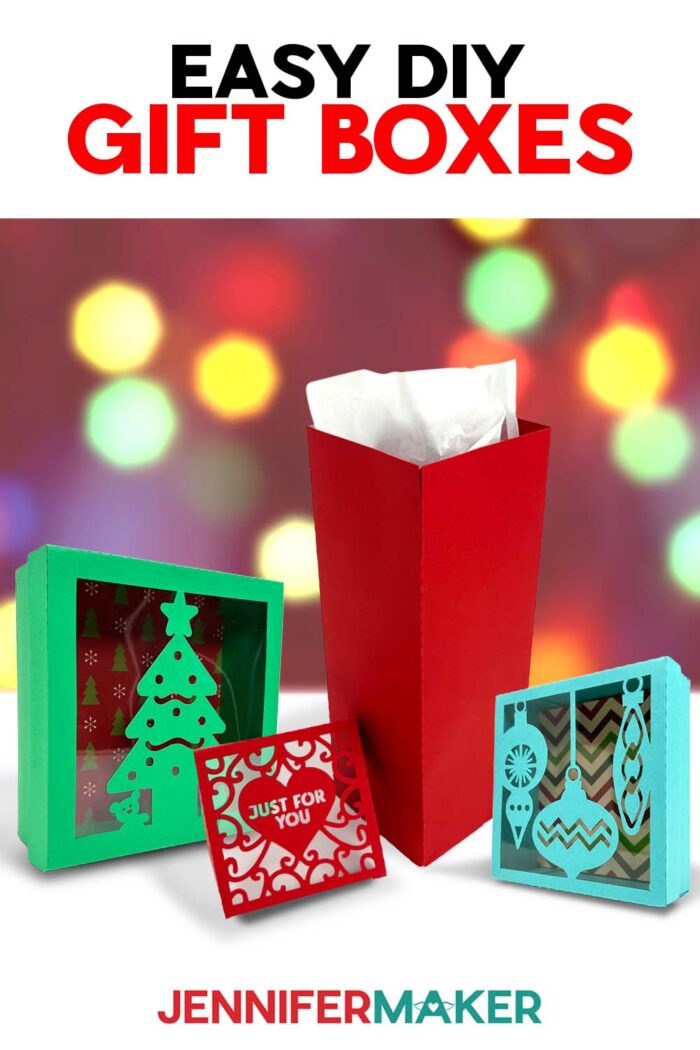
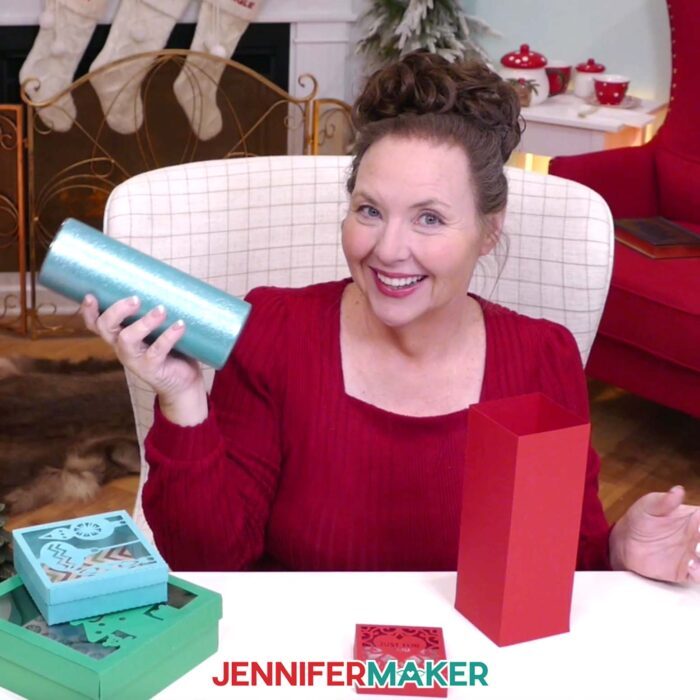
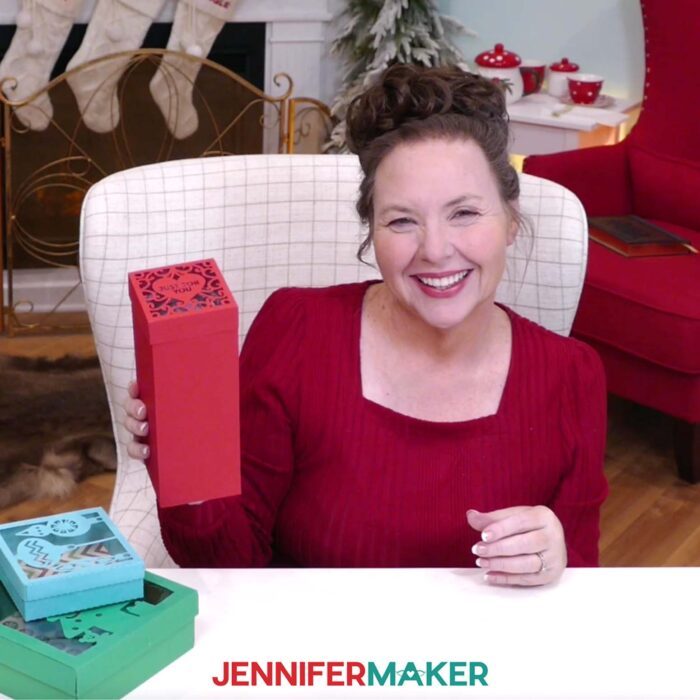
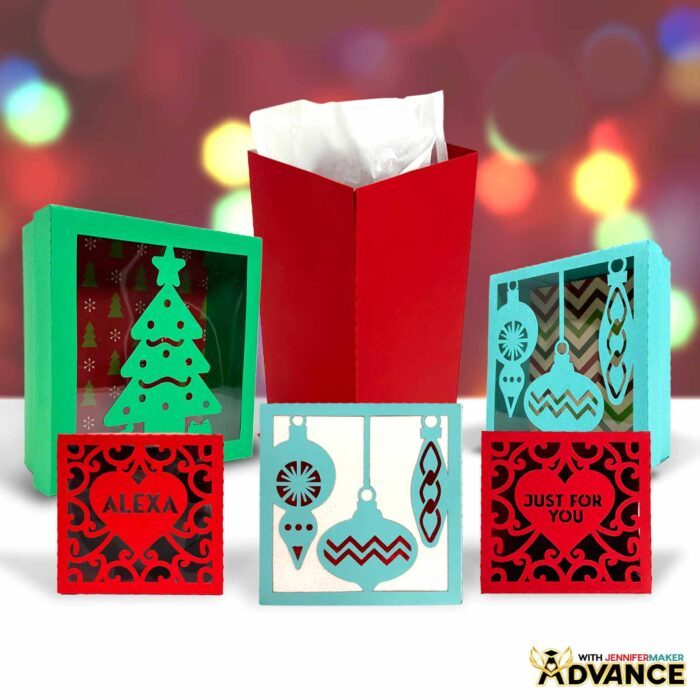
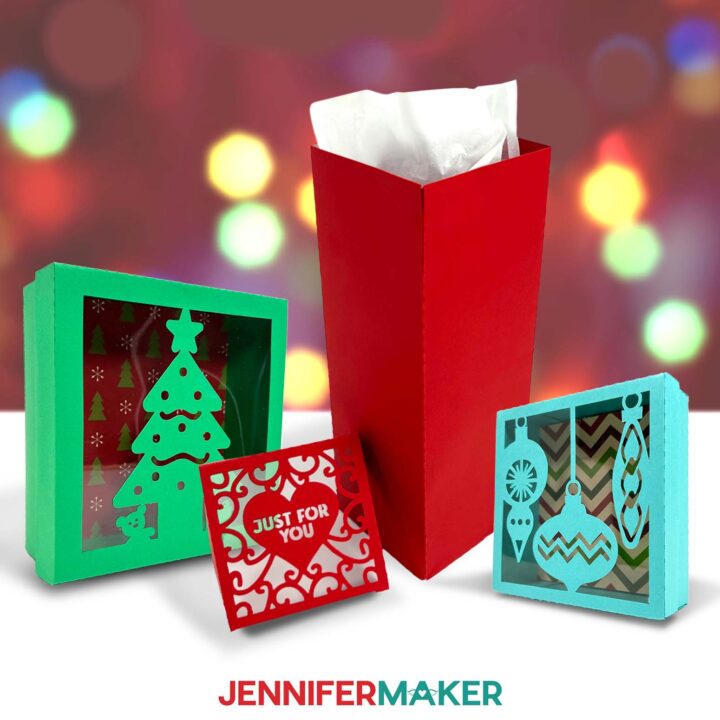
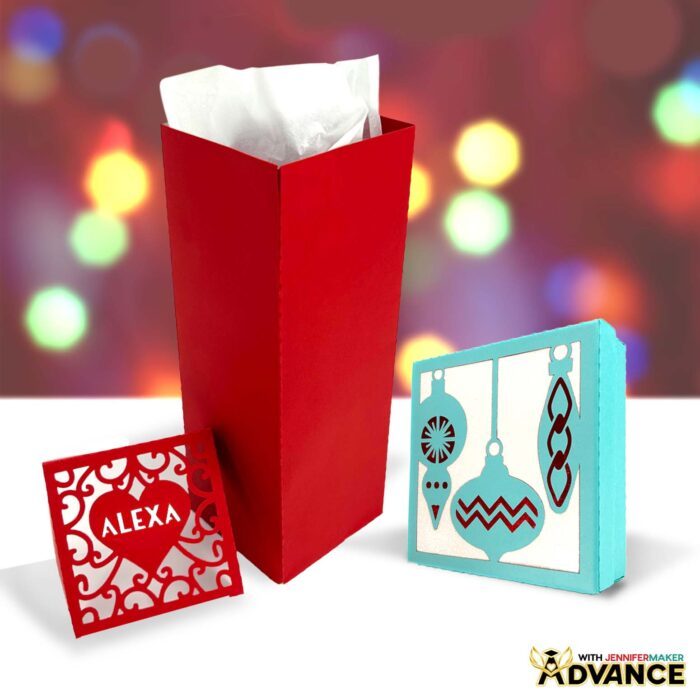
The holiday season is the perfect excuse to bring out the cardstock, fire up your Cricut, and make something that’s as special as the goodies you tuck inside. These aren’t just any boxes — they’re sturdy, beautifully designed creations that you can customize to fit your style. Picture this: a classic square paper box with a festive cutout on the lid, or a taller version designed to fit a tumbler perfectly. Both feature a clear acetate window so the lucky recipient can peek at the gift inside, plus a chipboard reinforcement panel and a decorative liner that make the whole project feel polished and professional. The result is a homemade gift box that looks like it came straight from a boutique, yet it was crafted right at your own table.

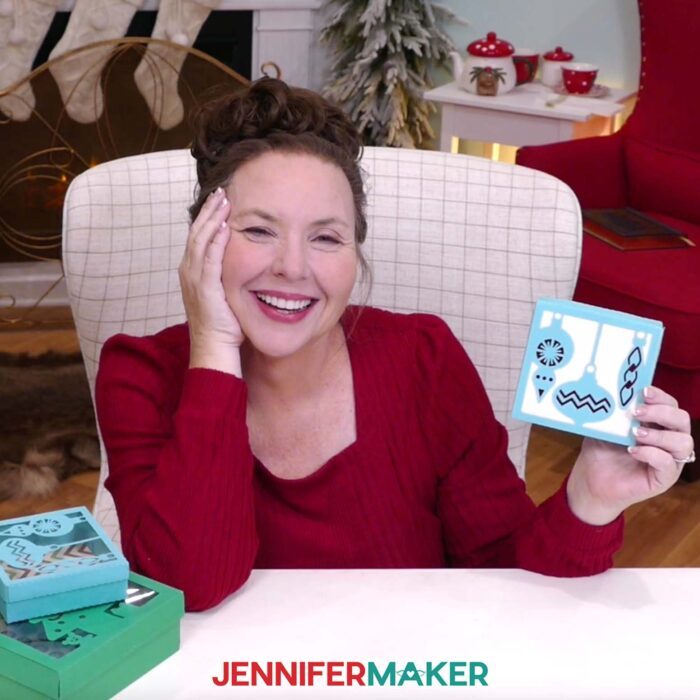
One of my favorite things about this project is how versatile it is. If you’re giving a Christmas gift like homemade cookies, the square design with the Christmas tree scene is ideal. Have something smaller? The square box with ornaments on the lid is perfect for tiny treasures. And if you’ve made someone a personalized tumbler or bottle, the tall box is just the right fit. Whatever the gift, you can choose the size of the box to suit what you’re giving. And no matter which one you pick, it’s a fun way to elevate even the simplest presents. That little bit of extra effort transforms something ordinary into something extra special.
And while the ornament and tree designs are perfect for Christmas, the tumbler box is versatile enough to use year-round, making it easy to adapt for many different events. It’s a wonderful choice for birthdays, weddings, anniversaries, or any celebration where you want to add a personal touch. No matter the occasion, you’ll find yourself reaching for these easy DIY gift boxes whenever you need a quick but beautiful way to present a thoughtful gift.
You don’t need a lot of time to get started, either. The materials list is simple: cardstock, acetate, chipboard, and some craft glue. The acetate gives that beautiful peek-through effect on the lid, the chipboard keeps the box sturdy enough to hold your gift, and the cardstock brings the festive color and design. You can cut everything on your Cricut Maker or Explore, and if you have the deep-point blade handy, it makes slicing through the chipboard a breeze. Even if you’re working mostly with your fine-point blade, this DIY box project comes together beautifully.
The assembly process is as satisfying as it is creative. Each crease, fold, and dab of glue slowly brings the flat pieces to life as a three-dimensional box. Adding the acetate window is a great way to give your project that professional finish, while the decorative liner inside hides the chipboard and makes the whole piece feel extra polished. It’s amazing how a simple paper box can look like something you’d pay a premium for at a store, yet you can make it yourself in under an hour. That’s the beauty of this time of year for homemade gifts. It reminds us that effort and creativity are worth more than price tags.
And for me, the magic really comes from experimenting with different styles of cardstock, especially for the box’s inner lining! Metallics shimmer under the tree lights, patterned paper can match a theme, and glitter cardstock adds sparkle to the holiday season. You can keep things elegant and understated or go bold with bright, joyful colors. It’s a great way to stretch your crafting skills and make gifts that feel completely one-of-a-kind.
If you’ve ever worried that making a homemade gift box would be too complicated, I promise this project will change your mind. With the included box templates, clear instructions, and a step-by-step video tutorial, you’ll feel guided every step of the way. In fact, watching the process unfold in the video is a fun way to learn while crafting alongside me. You’ll see how to cut, fold, and assemble the boxes, and by the time we’re done, you’ll have a creation that’s sturdy, beautiful, and ready to fill with love.
These easy DIY gift boxes are more than just containers; they’re keepsakes. They turn a simple cookie, ornament, or tumbler into a heartfelt presentation, making your Christmas gift stand out in the best possible way. And the best part? Each one is reusable, so your loved ones may keep them long after the special occasion has passed. That’s a little bit of holiday magic that keeps giving.
So gather your cardstock, grab your glue, and let your Cricut do the cutting. In no time, you’ll be making gift boxes that are as memorable as the treasures they hold. Don’t forget to follow along with the full video tutorial to see each step come to life. Crafting these boxes is such a joyful experience, and I know you’ll be just as excited as I am to share them with friends and family. After all, this is the time of year for homemade gifts, and what better way to celebrate than with something you’ve crafted with your own two hands?
Would you like to design your own custom gift box lid or add a name for personalization? I have a workshop just for you in my ADVANCE program. Learn more about ADVANCE with JenniferMaker here!
Let me show you how to make easy DIY gift boxes! This post contains some affiliate links for your convenience (which means if you make a purchase after clicking a link I will earn a small commission but it won’t cost you a penny more, there is no additional cost)! Read my full disclosure policy.
Materials to Make Gift Boxes With Window Lids
View my Amazon shopping list with the exact items I used.
- Three (3) Sheets of 12″ x 12″ Teal 65 lb. Cardstock -OR-
- Three (3) Sheets of 12″ x 18″ Green 65 lb. Cardstock (for the large tree box) -OR-
- Three (3) Sheets of 12″ x 12″ Red 65 lb. Cardstock
- One (1) Sheet of 12″ x 12″ Clear Plastic Acetate
- One (1) Sheet of 12″ x 12″ Brown 30 pt Chipboard
- One (1) Sheet of 11″ x 11″ Christmas Patterned Paper -OR-
- One (1) Sheet of 12″ x 12″ Red Metallic Foil Cardstock -OR-
- One (1) Sheet of 12″ x 12″ White Glitter Cardstock
- A way to cut your materials – I’m using the Cricut Maker 4, but you can use any Maker series machine, any Cricut Explore Series machine, the Cricut Venture, or the Cricut Joy Xtra
- Cricut Green Standard Grip Machine Mat 12” x 12”
- Cricut Purple StrongGrip Machine Mat 12” x 12” (for the chipboard)
- Cricut Green StandardGrip Machine Mat 12” x 24” (if making the large tree box)
- Cricut Deep-Point Blade & Housing (for the chipboard)
- Brayer
- Spatula
- Scraper
- Weeding Tool
- Tweezers (optional)
- Craft Glue (I used Bearly Art Precision Glue)
- Scoring Stylus (optional for files with score lines) -OR-
- Single Scoring Wheel (optional for files with score lines)
- Bone Folder (optional)
How to Make Easy DIY Gift Boxes!
Easy DIY Gift Boxes
Learn how to make easy DIY gift boxes with acetate windows!
Materials
- Three (3) Sheets of 12" x 12" Teal 65 lb. Cardstock -OR-
- Three (3) Sheets of 12" x 18" Green 65 lb. Cardstock (for the large tree box) -OR-
- Three (3) Sheets of 12" x 12" Red 65 lb. Cardstock
- One (1) Sheet of 12" x 12" Clear Plastic Acetate
- One (1) Sheet of 12" x 12" Brown 30 pt Chipboard
- One (1) Sheet of 11" x 11" Christmas Patterned Paper -OR-
- One (1) Sheet of 12" x 12" Red Metallic Foil Cardstock -OR-
- One (1) Sheet of 12" x 12" White Glitter Cardstock
- Design #776 (My free SVG/PDF/DXF design files are available in my free resource library - get the password by filling out the form at the bottom of this page)
Tools
- A way to cut your materials - I’m using the Cricut Maker 4, but you can use any Cricut Maker Series machine, any Cricut Explore Series machine, the Cricut Venture, or the Cricut Joy Xtra
- Cricut Green StandardGrip Machine Mat 12” x 12”
- Cricut Purple StrongGrip Machine Mat 12” x 12” (for the chipboard)
- Cricut Green StandardGrip Machine Mat 12” x 24” (if making the large tree box)
- Cricut Deep-Point Blade & Housing (for the chipboard)
- Brayer
- Spatula
- Scraper
- Weeding Tool
- Tweezers (optional)
- Craft Glue (I used Bearly Art Precision Glue)
- Scoring Stylus (optional for files with score lines) -OR-
- Single Scoring Wheel (optional for files with score lines)
- Bone Folder (optional)
Instructions
STEP 1: GET MY FREE EASY DIY GIFT BOX DESIGNS
First, download my Easy DIY Gift Box files from my free library – look for Design #776. Alternatively, you can use the Save This Project form near the top of this post and the design link will be emailed to you.
In the SVG folder, you’ll find “score” and “no-score” versions of my “tree,” “ornaments,” and “heart-swirl” designs. The “score” versions require a Scoring Stylus or Single Scoring Wheel to create smooth lines for folding and alignment. If you don’t have a scoring tool, or if you prefer dashed cut lines, you can use the “no-score” versions instead.
There is also a DXF folder with cut files, and a PDF folder with versions you can print and cut by hand.
TIP: If you’re not sure how to upload, go to jennifermaker.com/svgs to learn how to unzip and upload SVG files.
STEP 2: PREPARE AND CUT YOUR GIFT BOX DESIGN
CRICUT DESIGN SPACE
- In Cricut Design Space, open a blank Canvas.
NOTE: If you’re new to using Cricut Design Space, go to cricutkickoff.com for my introductory tutorial on Design Space basics. - Click “Upload” and then “Upload Image.”
- Click “Browse.”
- Select the SVG file of your choice.
NOTE: I’ll choose the “ornaments-no-score” file, but you can use these instructions to make the “no-score” version of the “tree” and “heart-swirl” designs as well. - Click “Open,” and then “Continue.”
- Click “Upload” to add the design to your Canvas, then close the side panel.

- Click “Save” and give your project a name.
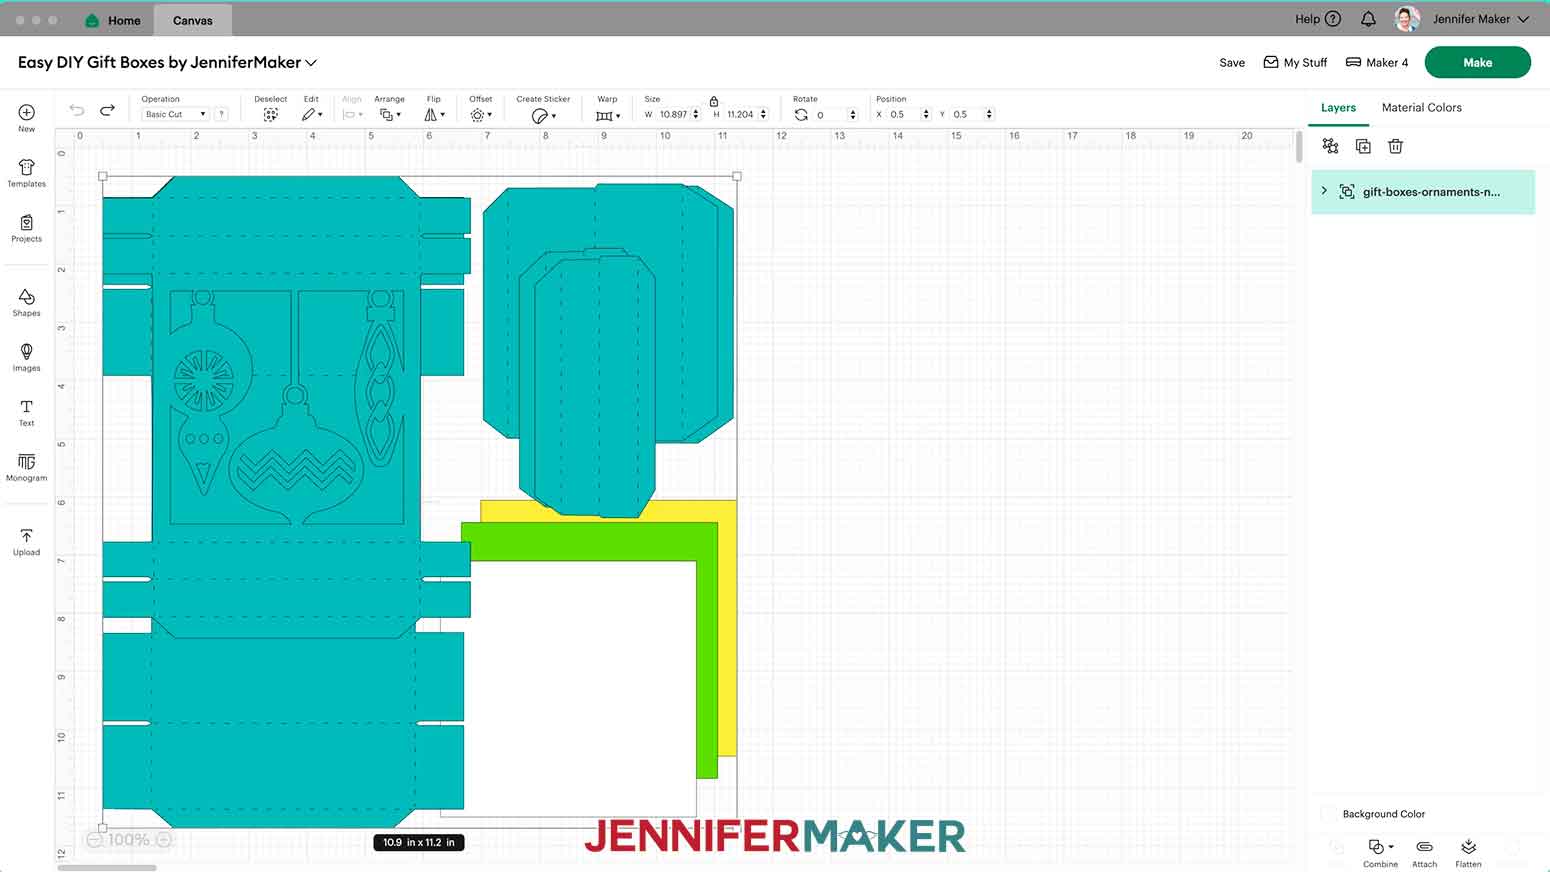
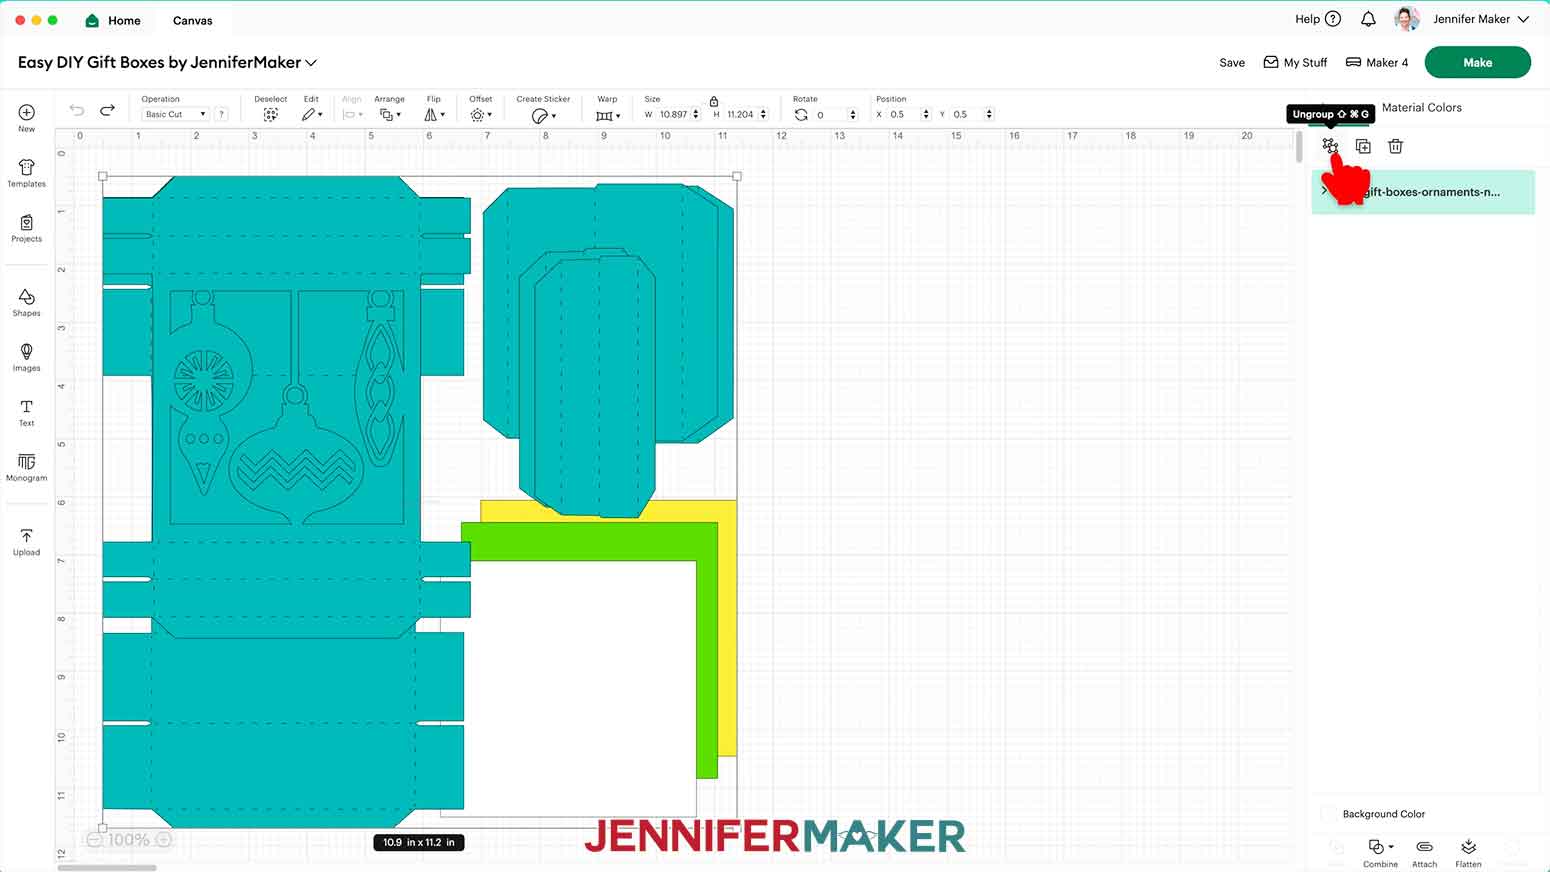
- “Ungroup” the design and spread out the pieces.
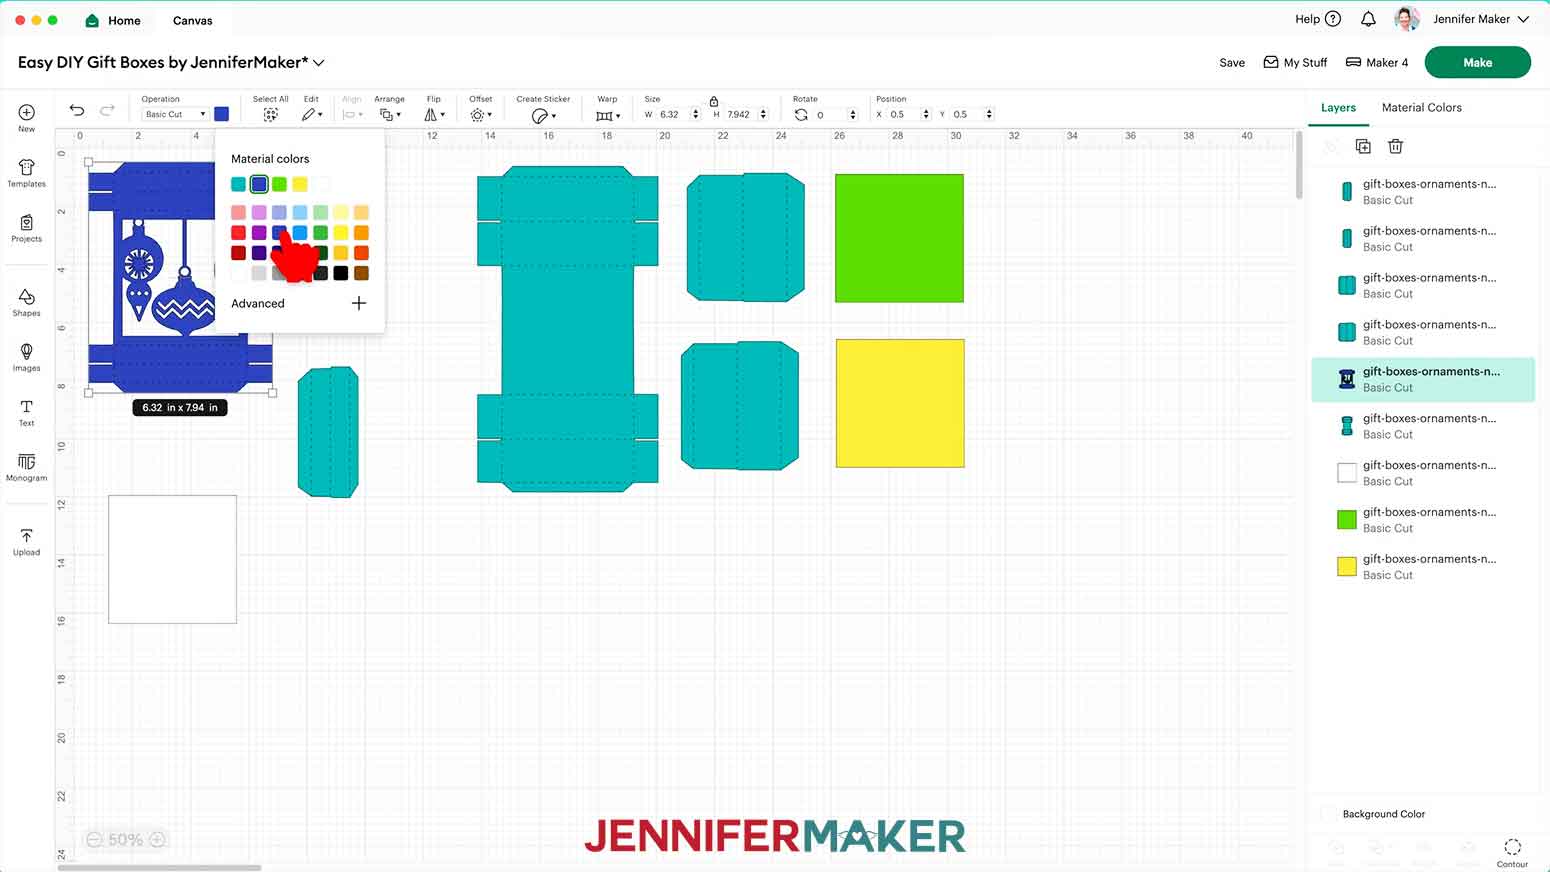
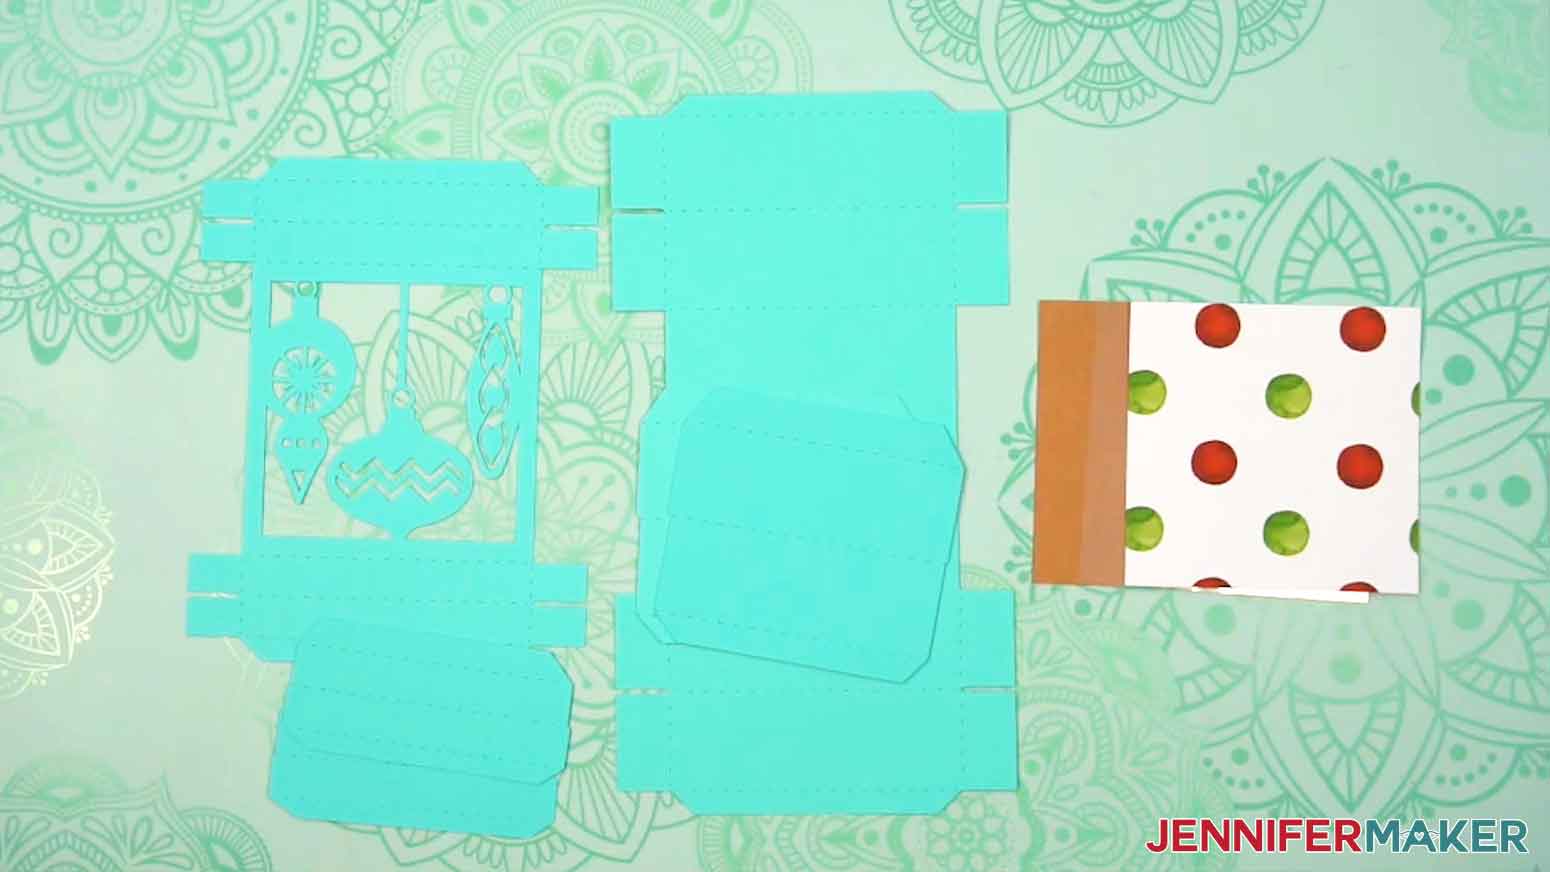
NOTE: On your Canvas, you’ll have a teal main lid piece, two teal lid side pieces, and a white square for the lid’s acetate window. You’ll also have a teal main box piece, two teal box side pieces, a green square for the box’s decorative liner, and a yellow square for the box’s chipboard reinforcement panel. - To change the color of a piece to match the cardstock you’ll use, select the shape on the Canvas and use the Color Box next to “Operation” to pick a new color.
NOTE: I’ll leave my colors as is, but you can design your box any way that you like. - If you’re cutting the “no-score” version of the gift box, your project is ready to cut! If you’re cutting the “score” version, follow the steps from my scoring tool tutorial to adjust your file.
CUTTING
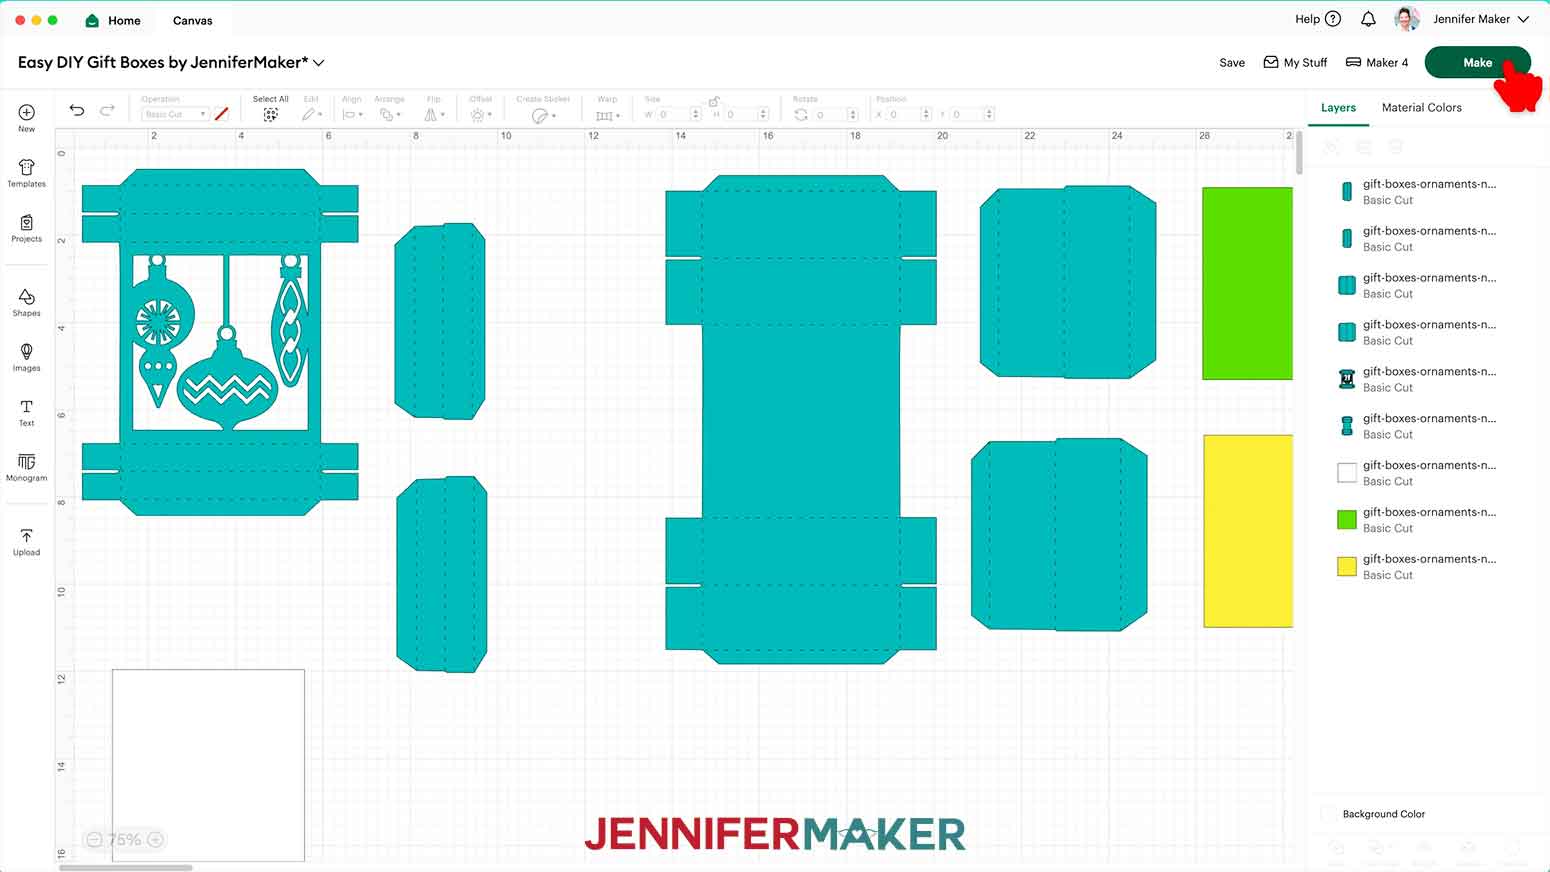
- Make sure the correct machine is selected in the top right.
- Click “Make.”
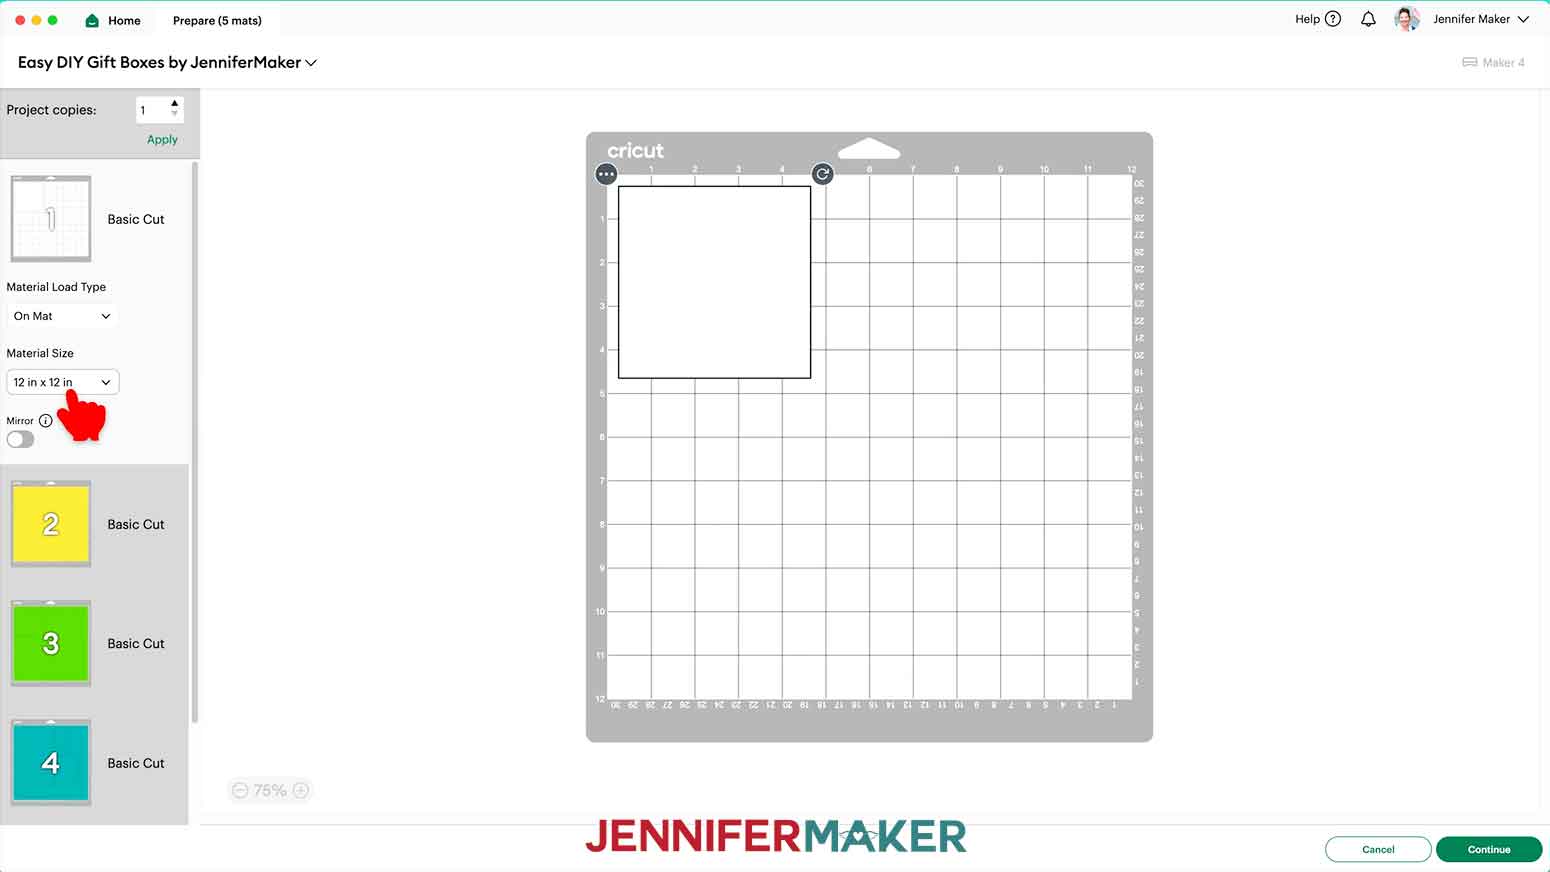
- If prompted, select “On Mat” to load all your materials onto mats, then click “Confirm.”
NOTE: If you’re cutting the “tree” box, the “12 in x 24 in” Mat Size will automatically be selected to accommodate its large pieces. - On the Prepare screen, make sure the correct Material Size is selected for your mats.
NOTE: I’ll choose “12 in x 12 in” for all of my mats.
NOTE: If you’re cutting the “tree” box, choose “12 in x 19 in” for your regular cardstock mats to use the 12” x 18” cardstock listed in my materials list. - Once you are satisfied with your mat layouts, select the lid liner mat (mine is white) so it loads first on the next page and click “Continue.”
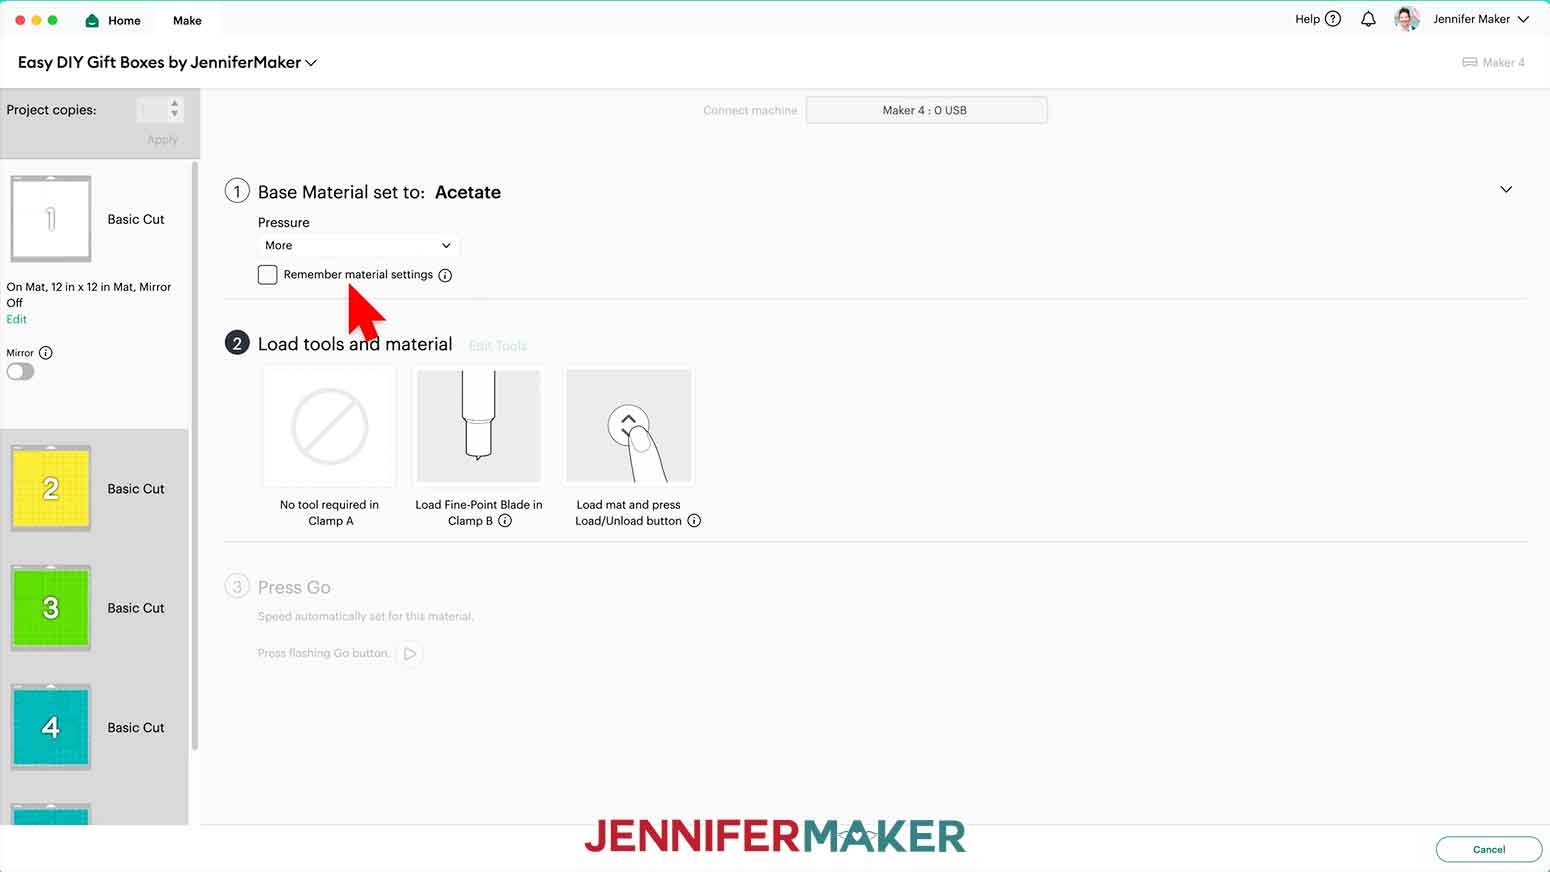
- On the Make screen, set the Base Material for your lid liner. I used the “Acetate” material setting with “More” pressure for cleaner cuts.
- Take the protective film off one side of the acetate only.
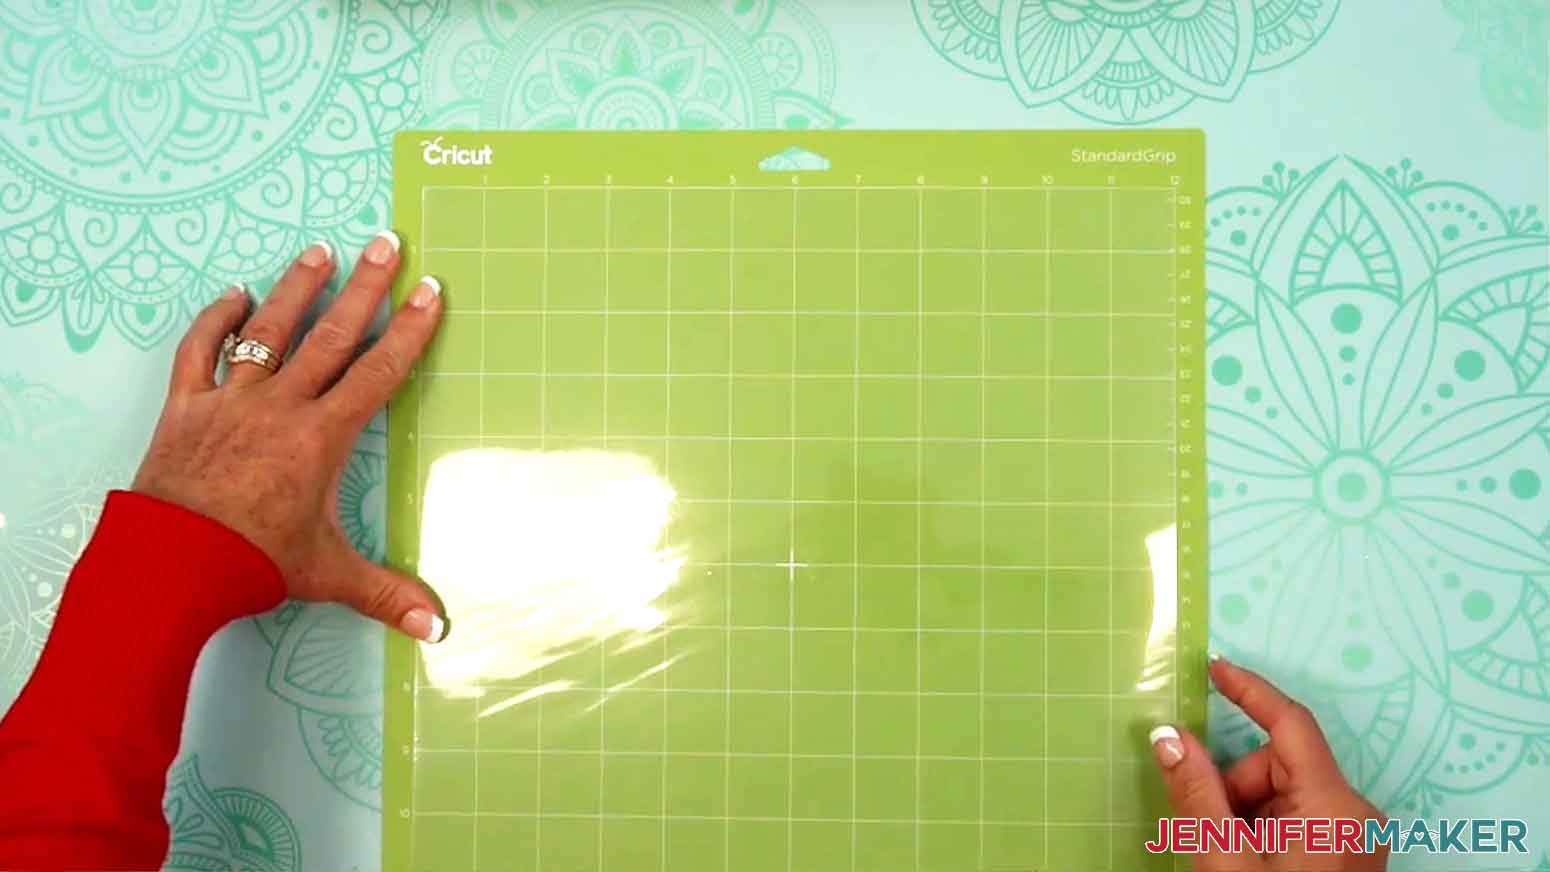
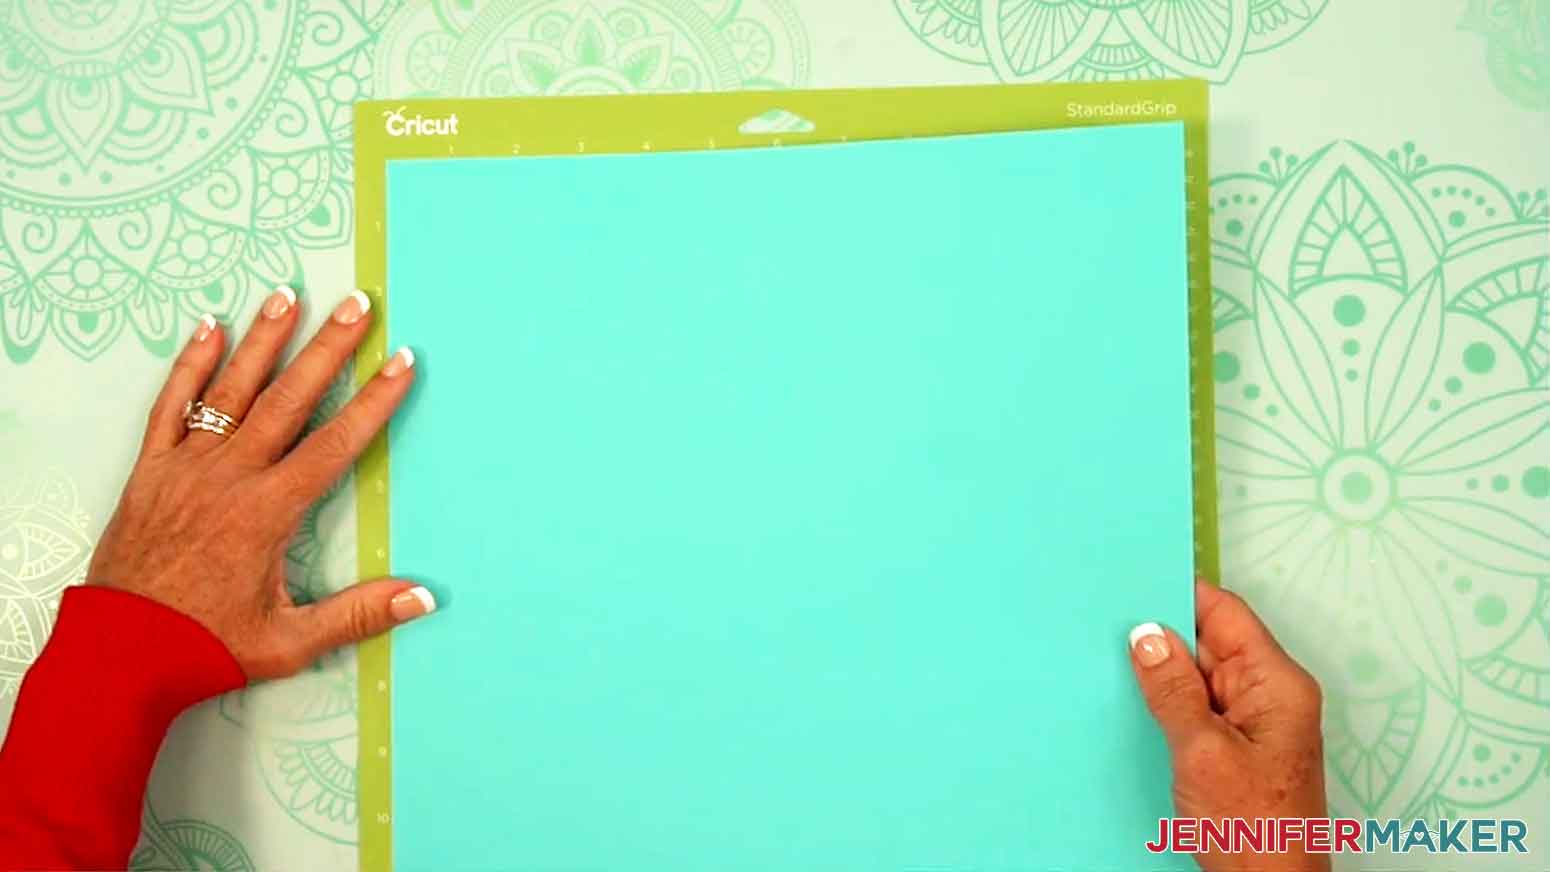
- Place the acetate film-side-down on a green StandardGrip machine mat to keep adhesive and scratches from damaging the material.
- Use a clean brayer to make sure it’s fully adhered.
- Check that your Premium Fine-Point Blade is clean and in the clamp.
- Press the flashing “Load/Unload” button to load the prepared mat into your Cricut.
- Press the flashing middle button to begin cutting.
- When it has finished cutting, don’t unload the mat right away. Gently lift a corner of the material to make sure the cuts went all the way through. If not, press the middle button again to make a second pass of cuts in the same spots.
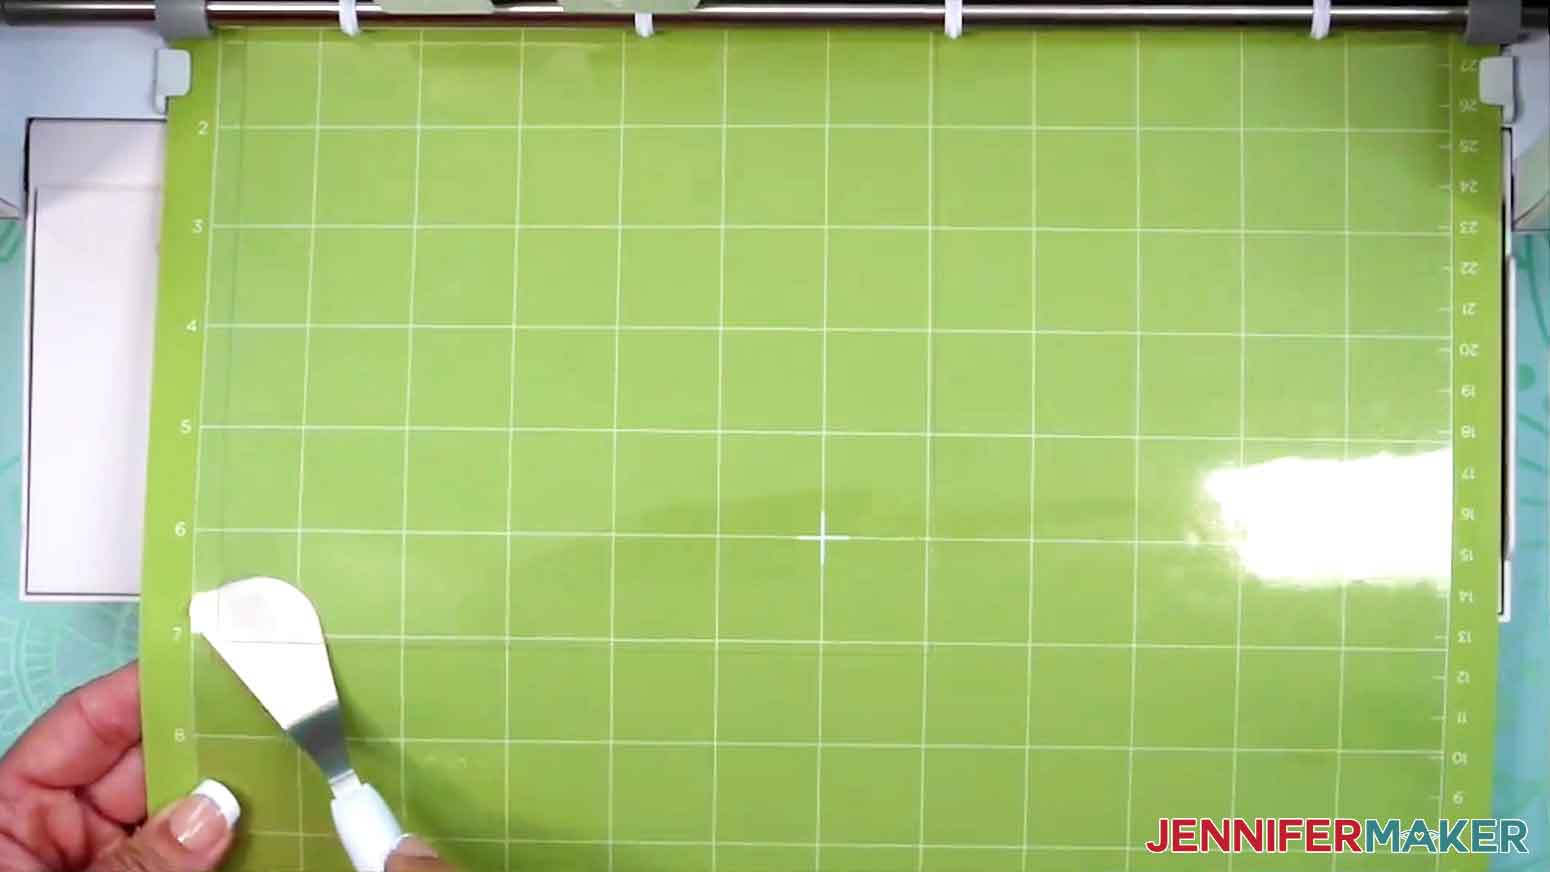
- When the cuts are complete, unload the mat, flip it over onto your work surface, and roll it back to release the material.
- Use your spatula to help lift the pieces, and your weeding tool to poke out any small bits of material that may have been left behind.
TIP: If you have any issues with your cuts, go to jennifermaker.com/cleaner-cuts. - Use a scraper tool to remove any small bits left on your mat after you remove the cut pieces.
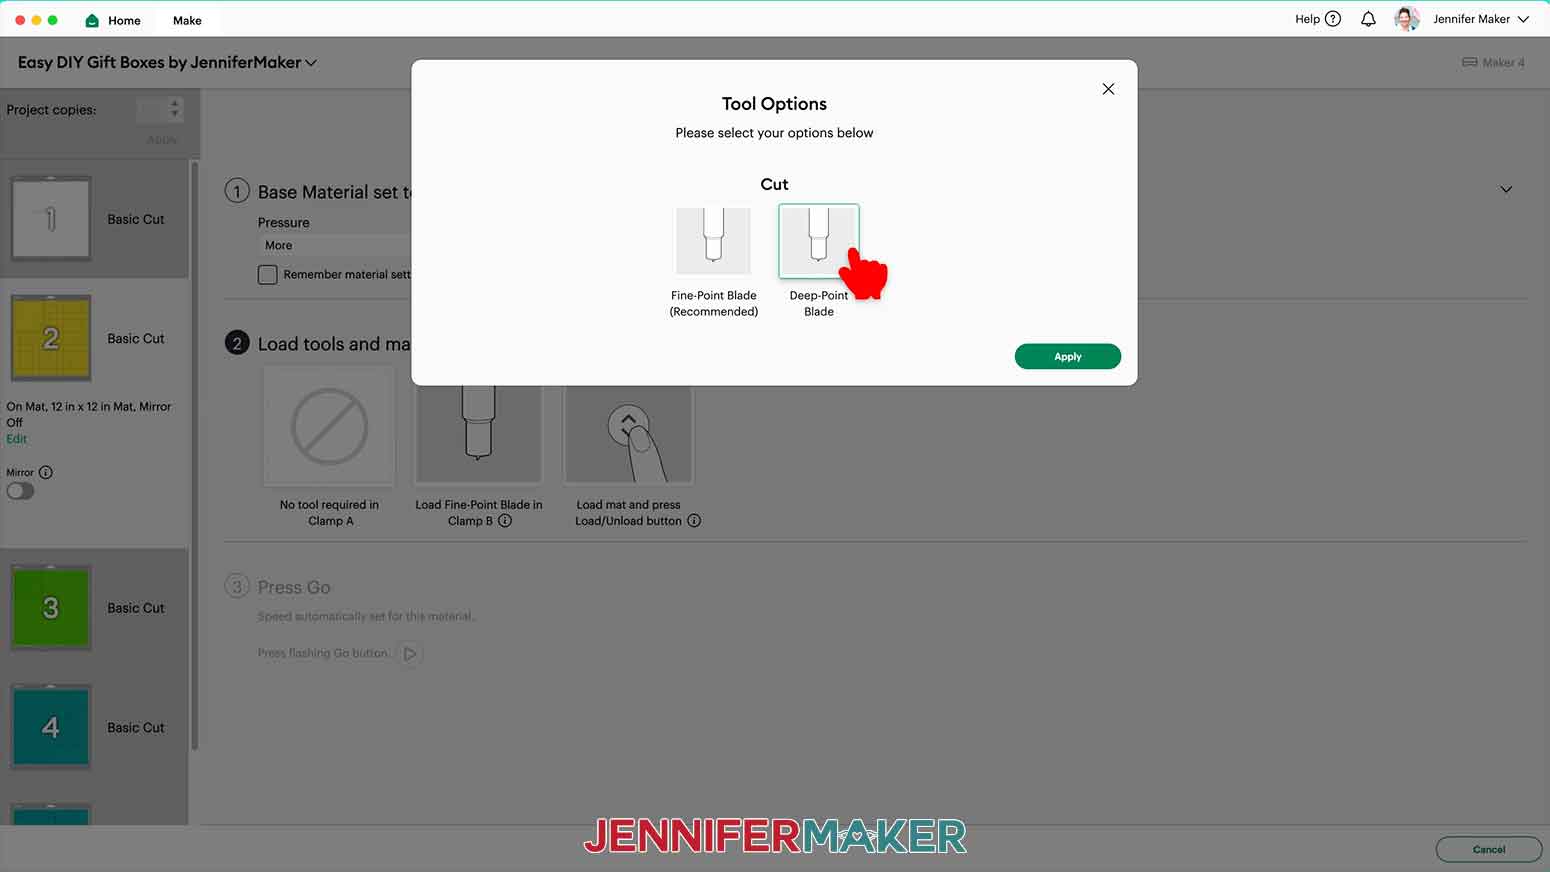
- When you get to your reinforcement panel mat (mine is yellow), set your base material to “Kraft Board” with “More” pressure.
- Click “Edit Tools” and select “Deep-Point Blade,” then click “Apply.”
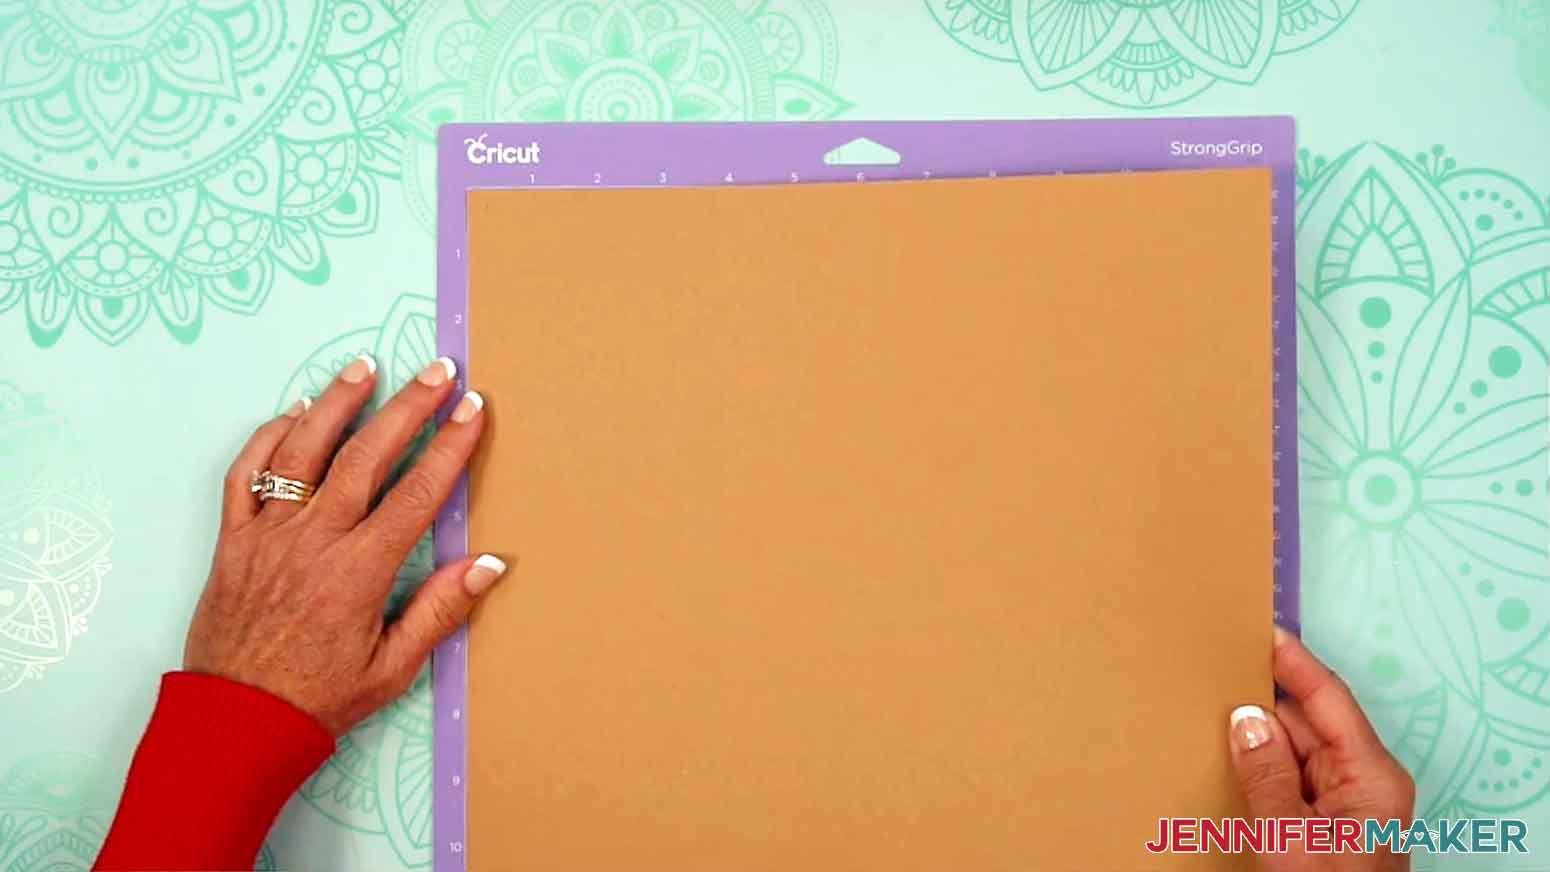
- Place the chipboard on a purple StrongGrip machine mat, and use a brayer to secure it in place.
- Load the Deep-Point Blade and Housing in the clamp indicated on screen.
- Repeat Steps 11-16 to cut your chipboard mat.
- When you get to your decorative liner mat:
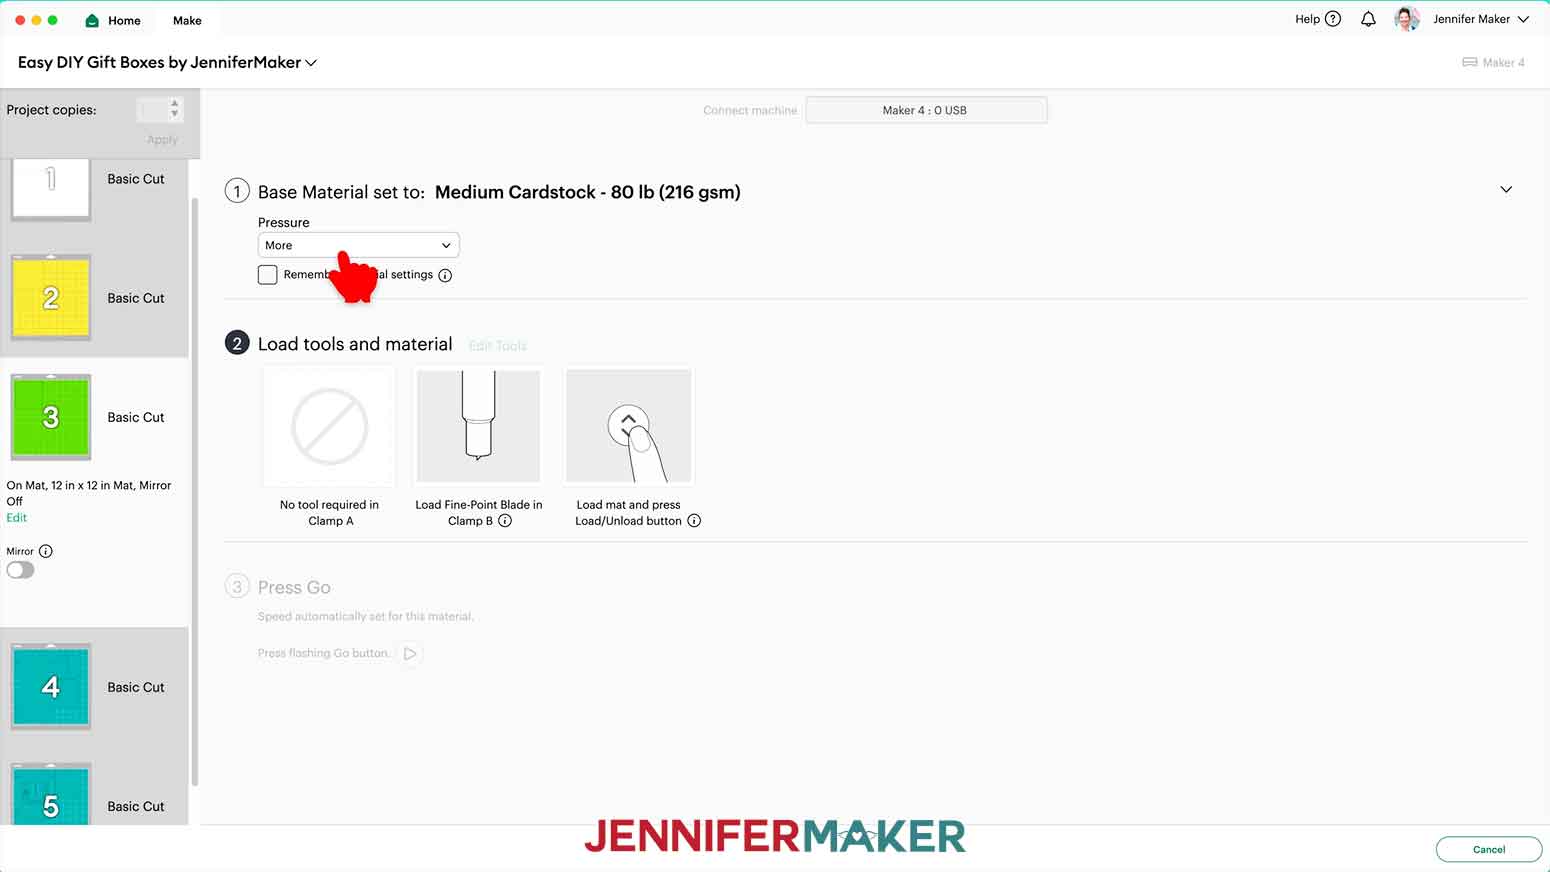
- If you’re using patterned paper or metallic cardstock, set your base material to “Medium Cardstock - 80 lb (216 gsm)” and the pressure to “More.”
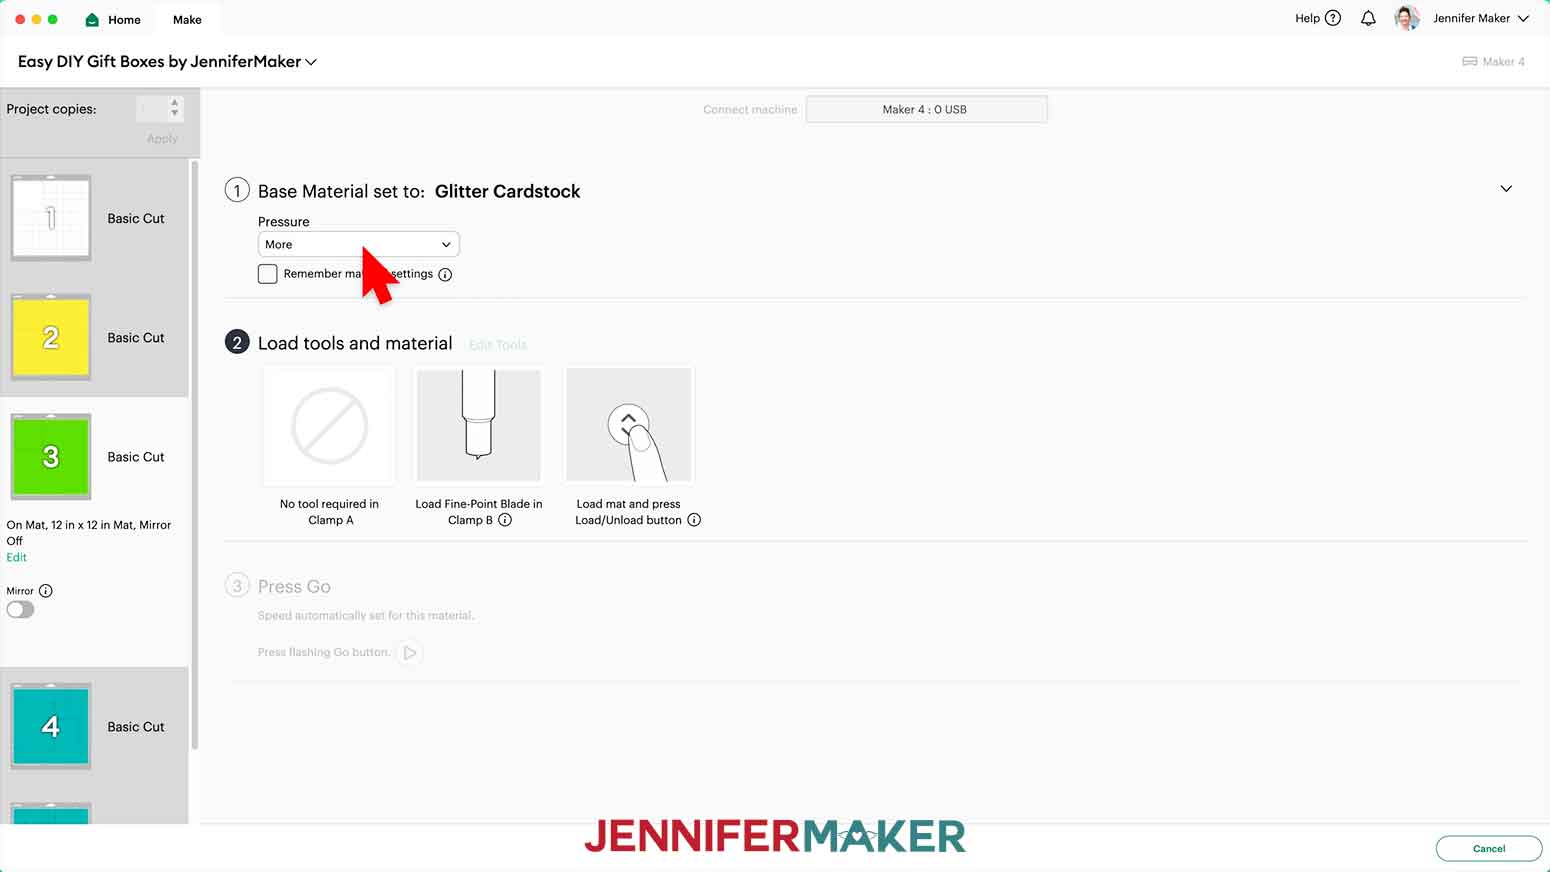
- If you’re using glitter cardstock, set your base material to “Glitter Cardstock” and the pressure to “More.” - Place your material face up on a green StandardGrip machine mat.
TIP: If you’re using patterned paper with words or an obvious “up” direction, make sure it’s oriented correctly on the mat. - Repeat Steps 9-16 to cut your material.
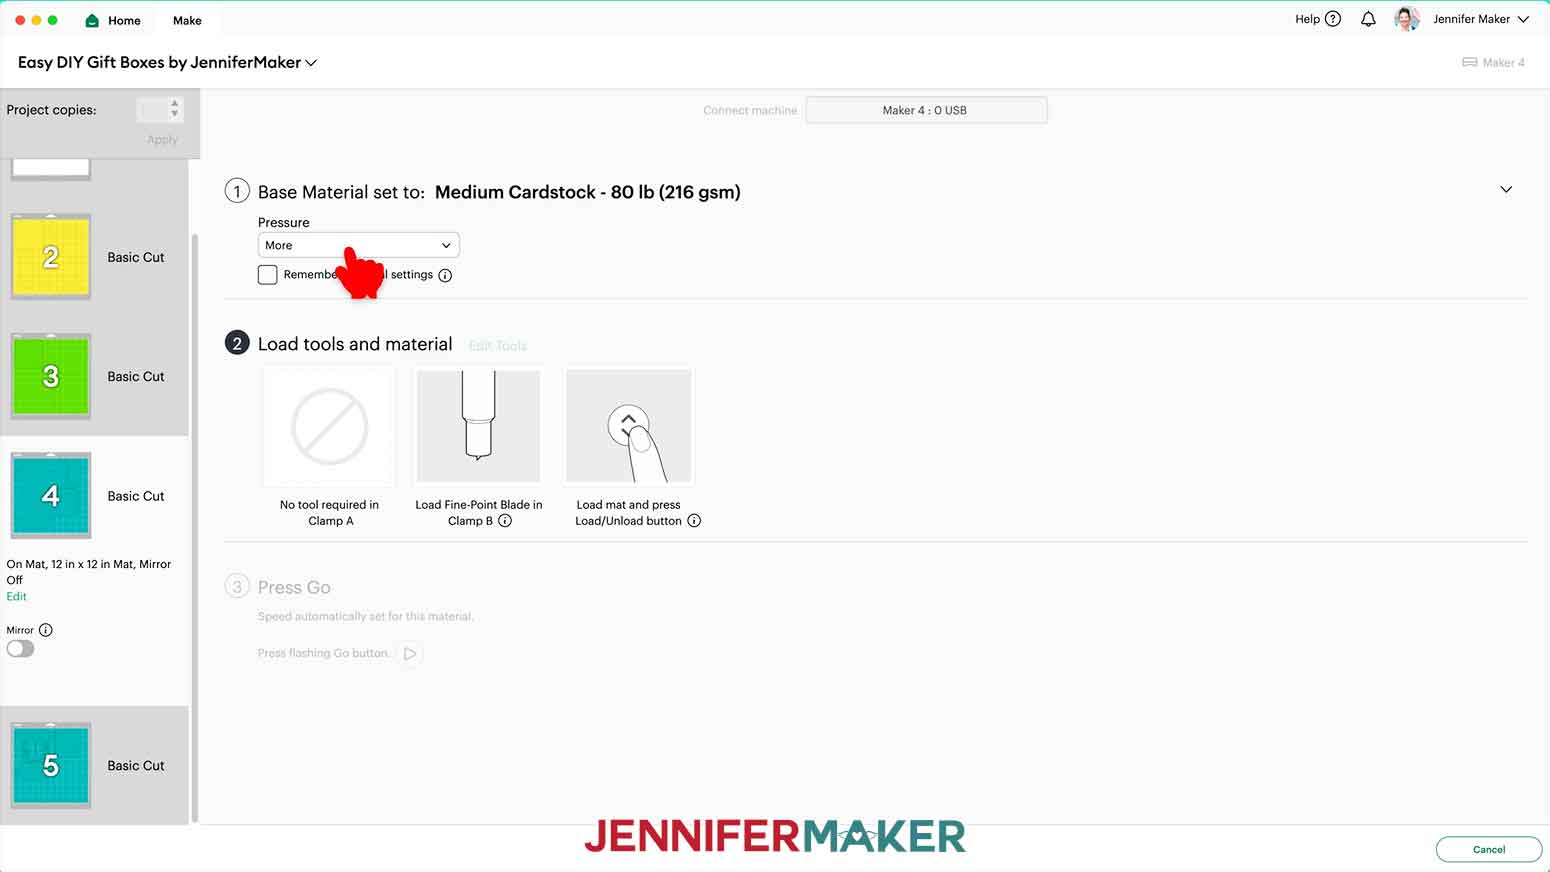
TIP: Glitter can stick to the blade and cause trouble on your future cuts, so I recommend cleaning it after cutting any glitter cardstock. You can take the housing and blade out of the clamp, press down on the plunger, and carefully poke the blade into a ball of aluminum foil several times, or clean it with an alcohol wipe. Be careful, it's sharp! - When you get to your regular cardstock mats, set your base material to “Medium Cardstock - 80 lb (216 gsm)” and the pressure to “More.”
- Place your regular cardstock face up on a green StandardGrip machine mat.
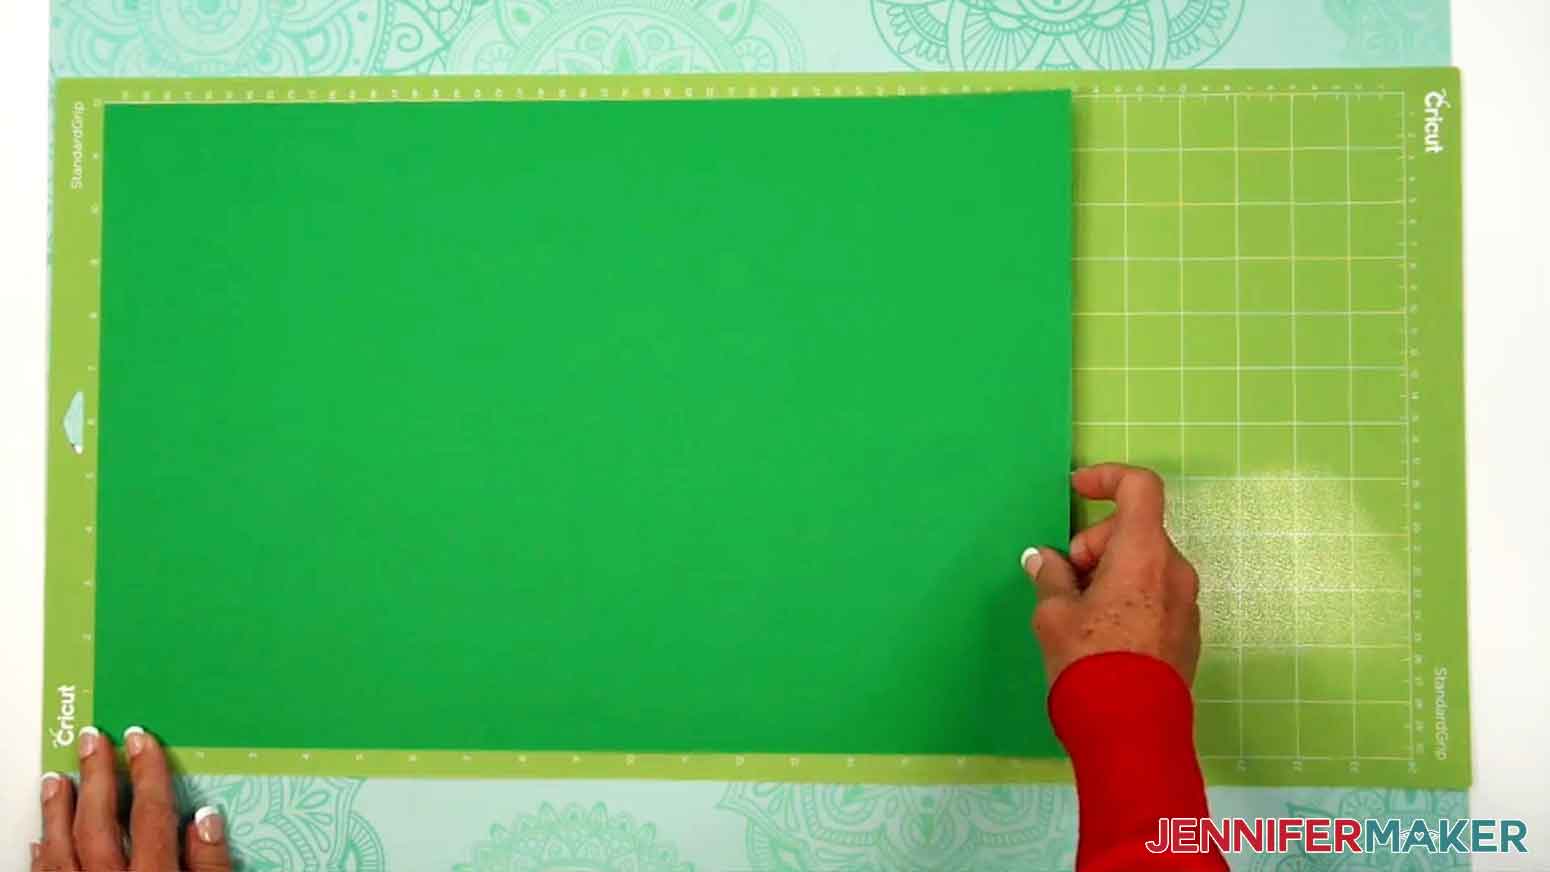
NOTE: If you’re cutting the “tree” box, place your regular 12” x 18” cardstock face up on a 12” x 24” Cricut green StandardGrip machine mat. - Repeat Steps 9-16 to cut your regular cardstock mats.
- Lay out all of the pieces face up in organized piles.
TIP: Refer to the Design Space screen if you’re not sure about some pieces’ orientation. - To assemble your box, follow the instructions from the “STEP 3: ASSEMBLE YOUR GIFT BOX” Variation that matches your box style below.

STEP 3: ASSEMBLE YOUR GIFT BOX
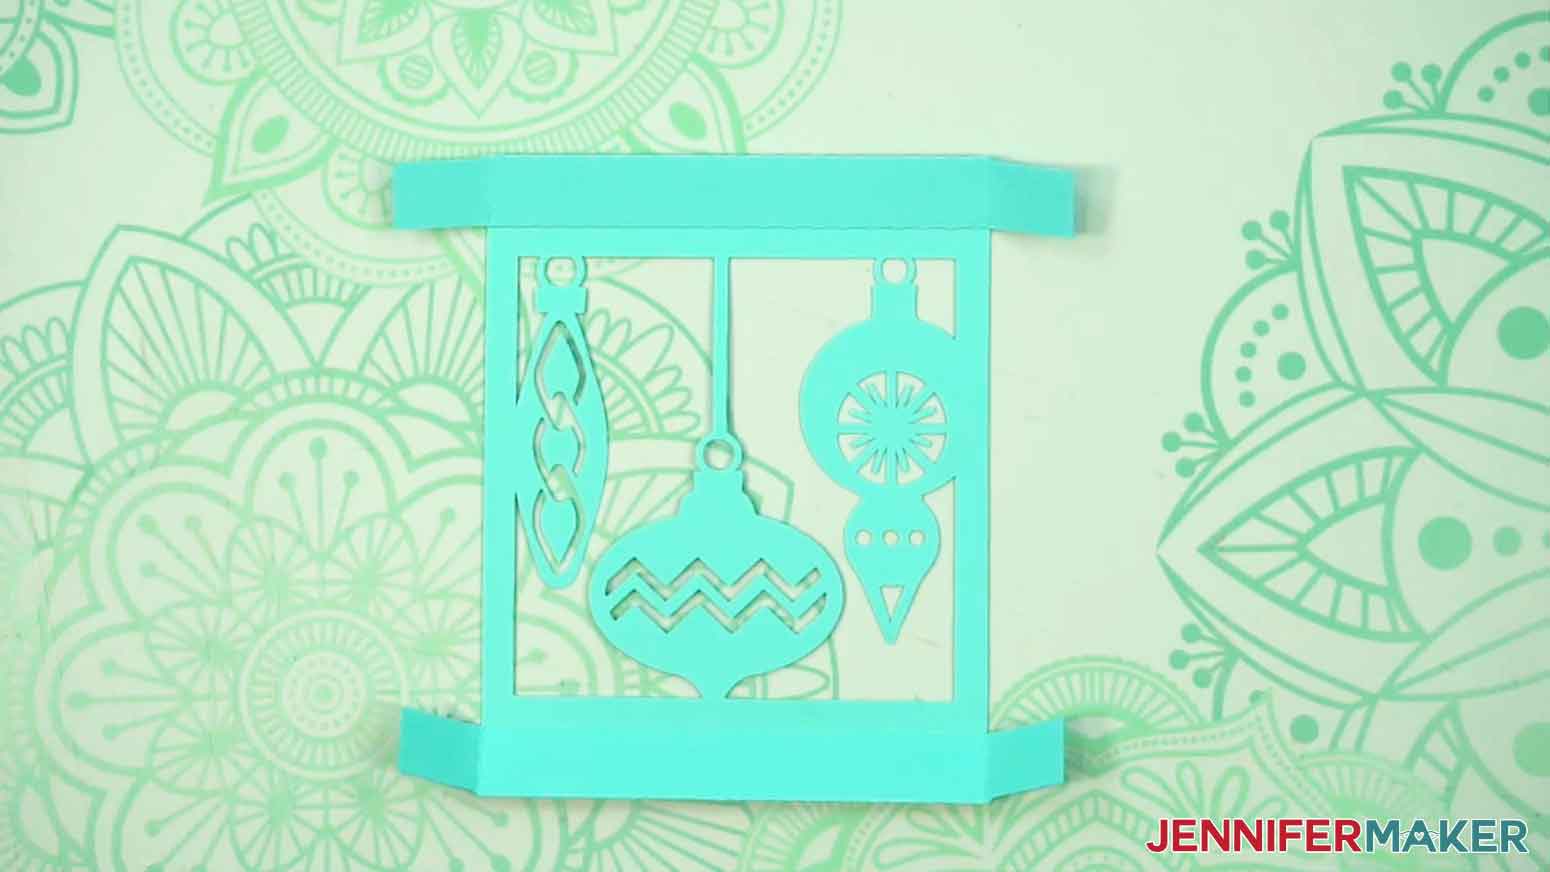
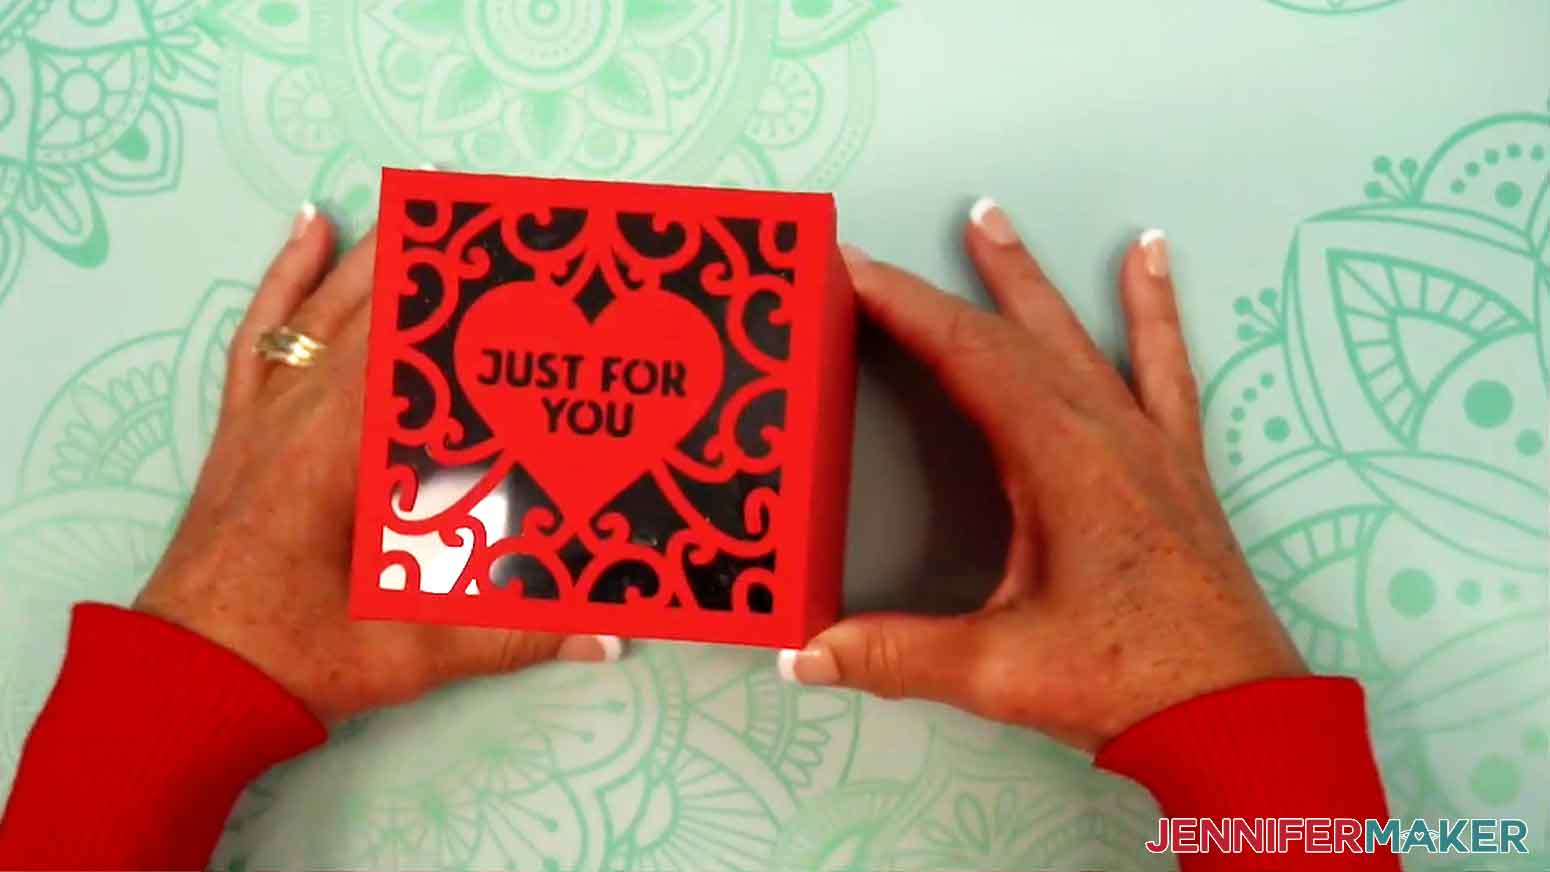
VARIATION 1: SQUARE “ORNAMENTS” OR “TREE” GIFT BOX
- Place your main lid piece face down on your work surface with the long crease lines running horizontally.
- Fold downward along the top horizontal crease line, sharpen the fold with your scraper tool, then unfold along the crease line.
- Repeat for the middle and bottom horizontal crease lines.
- Then fold inward, sharpen, and fold out the lid piece’s four side tabs along their vertical crease lines.
- Next, add a line of glue to the top horizontal section, then fold it down along the crease line. Press and hold to adhere.
- Then, add thin lines of glue to the section you just folded, avoiding the corner tabs.
- Fold this section down to overlap the next one, and press it in place.
- Fold back the left corner’s top tab, add a small amount of glue to the bottom tab, then fold the top tab back down. Press and hold to adhere.
- Glue the right corner tabs together the same way.
- Rotate the lid piece 180 degrees so the unfolded crease lines are on the top, then repeat Steps 2-9 to fold and glue the bottom creases.
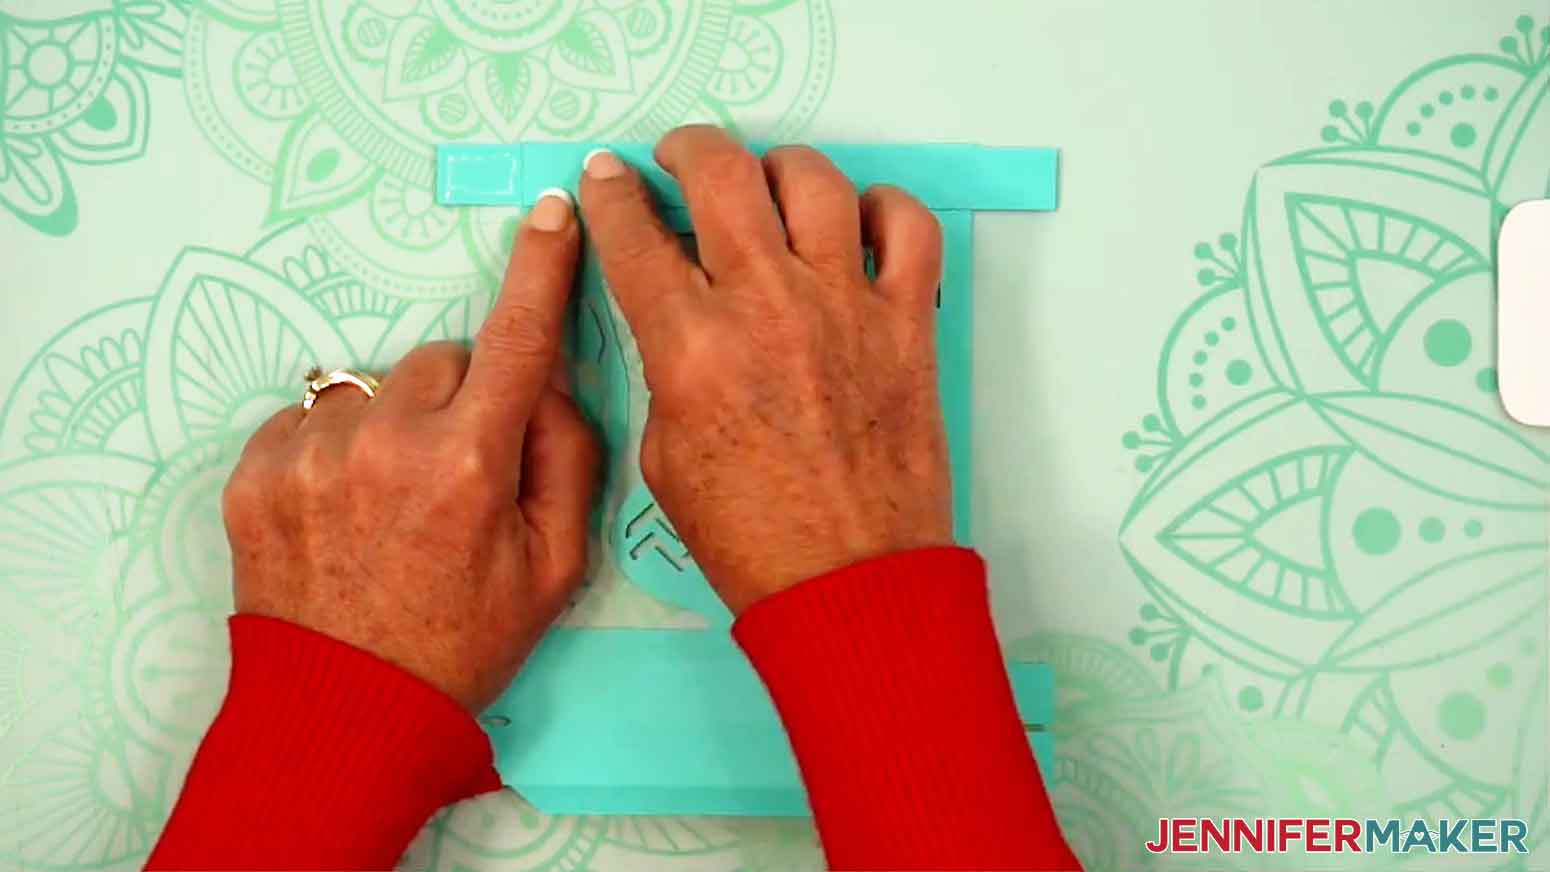
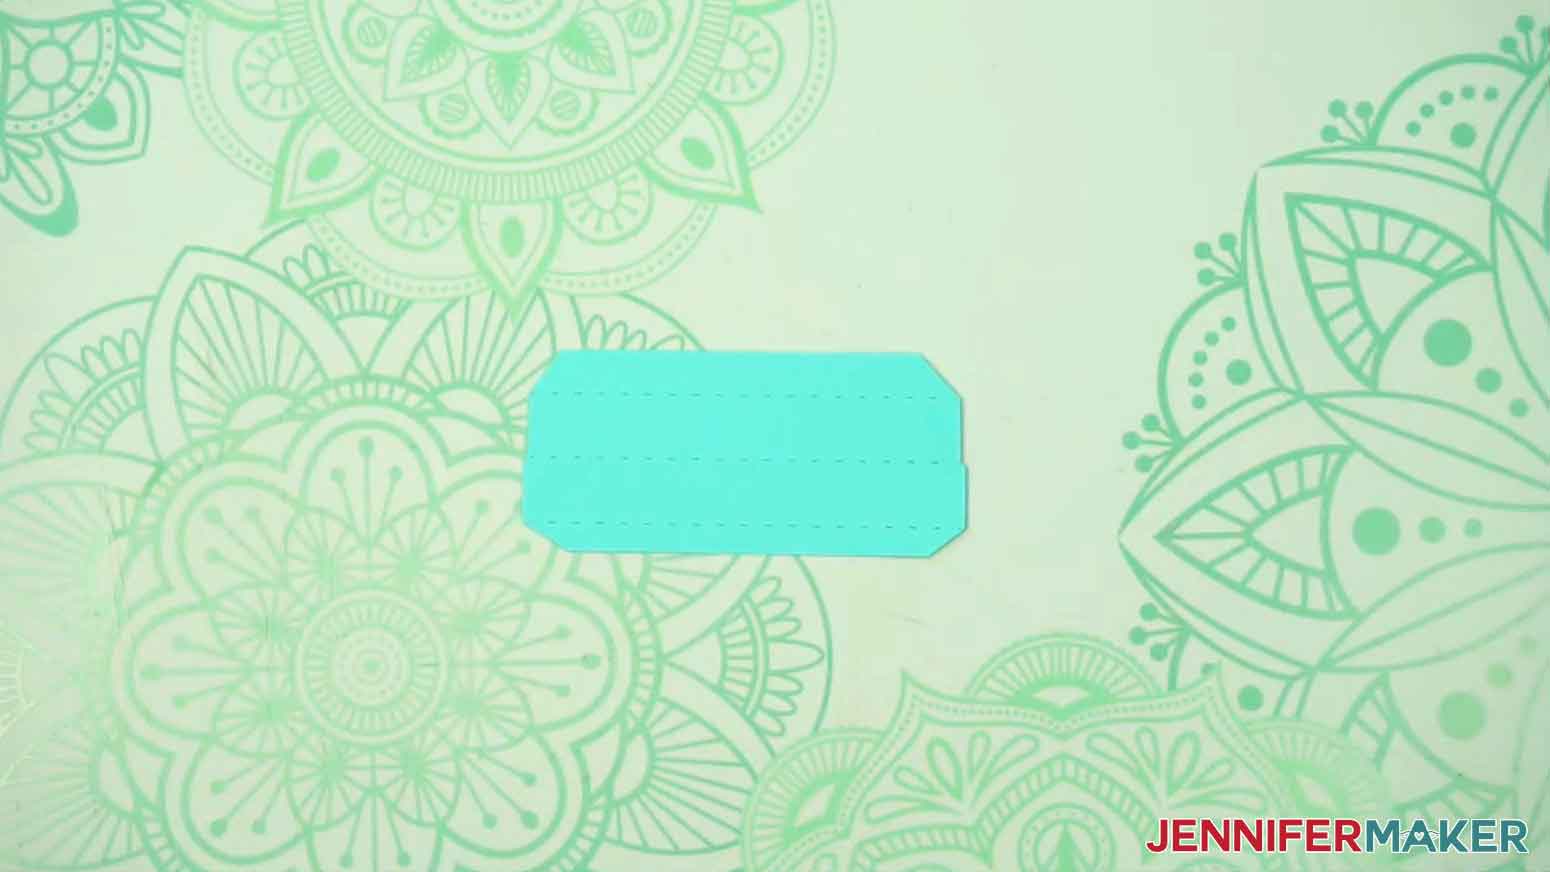
- Next, take one of the lid side pieces and place it on your work surface with the larger tab at the top.
NOTE: The lid side pieces are the thinner ones, while the thicker side pieces are for the box. - Fold downward along the top horizontal crease line, sharpen the fold with your scraper tool, then unfold along the crease line.
- Repeat for the middle and bottom horizontal crease lines on the lid side piece.
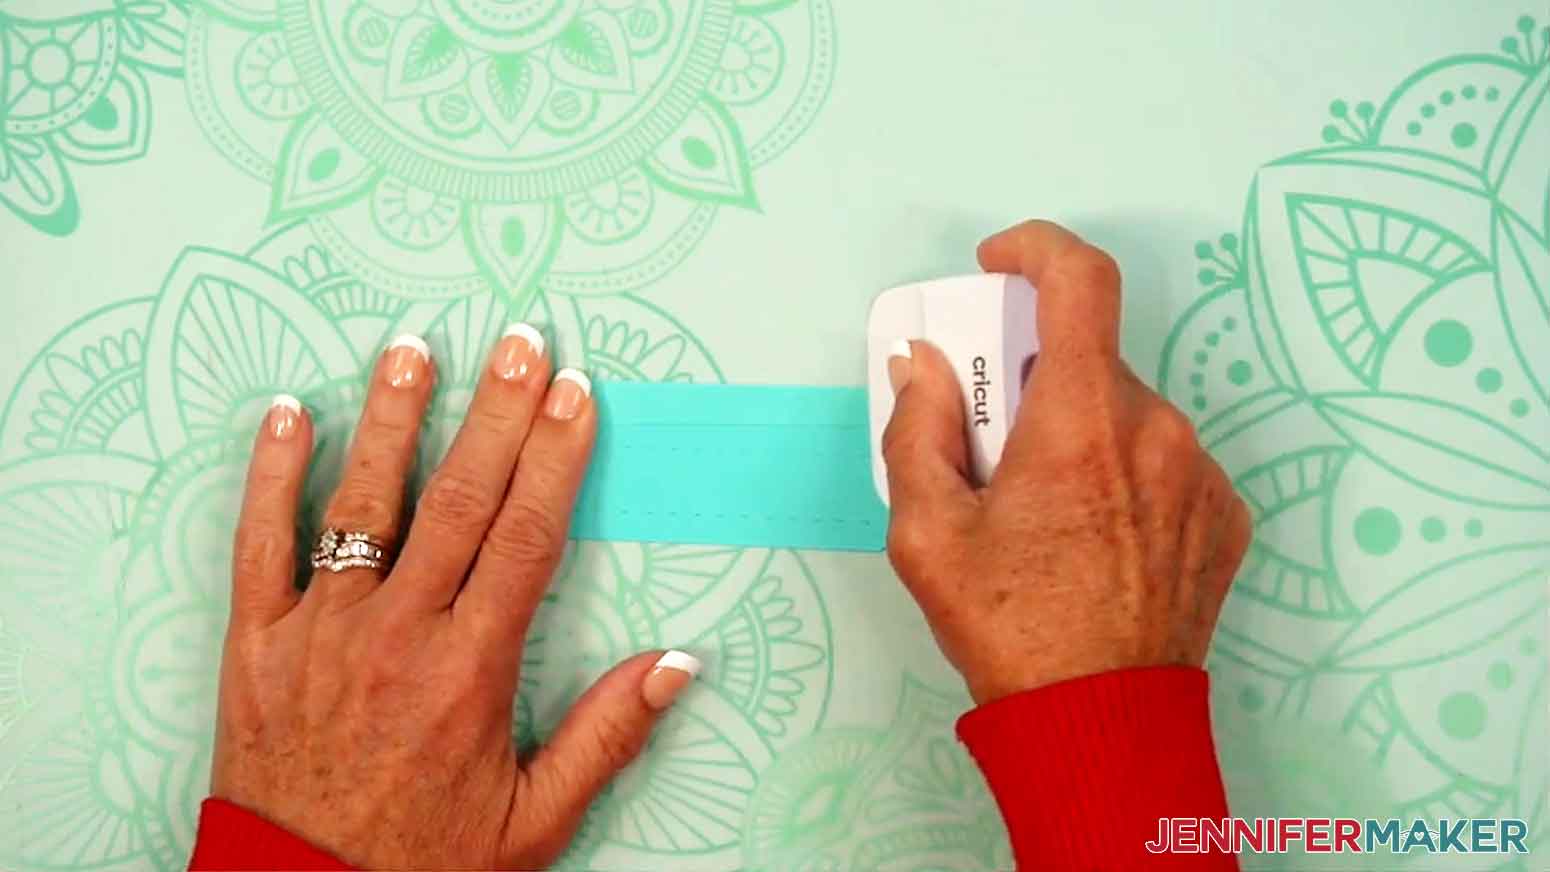
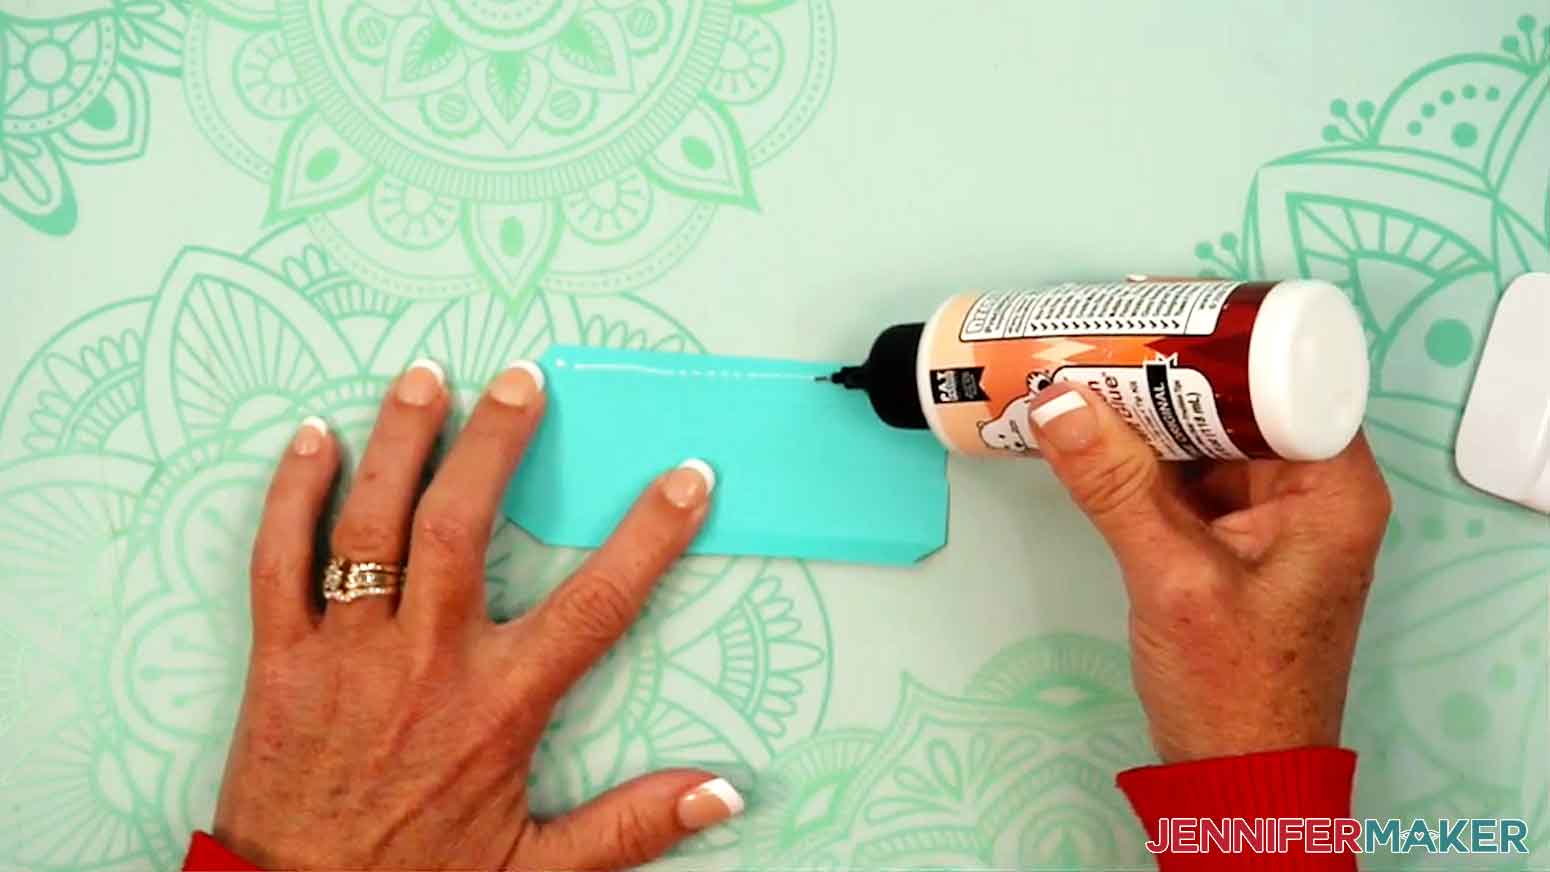
- Add a small amount of glue along the edges of the top section, then fold the section down along the crease line. Press and hold to adhere.
- Do the same to adhere the second section.
- Repeat Steps 11-15 for the second lid side piece.
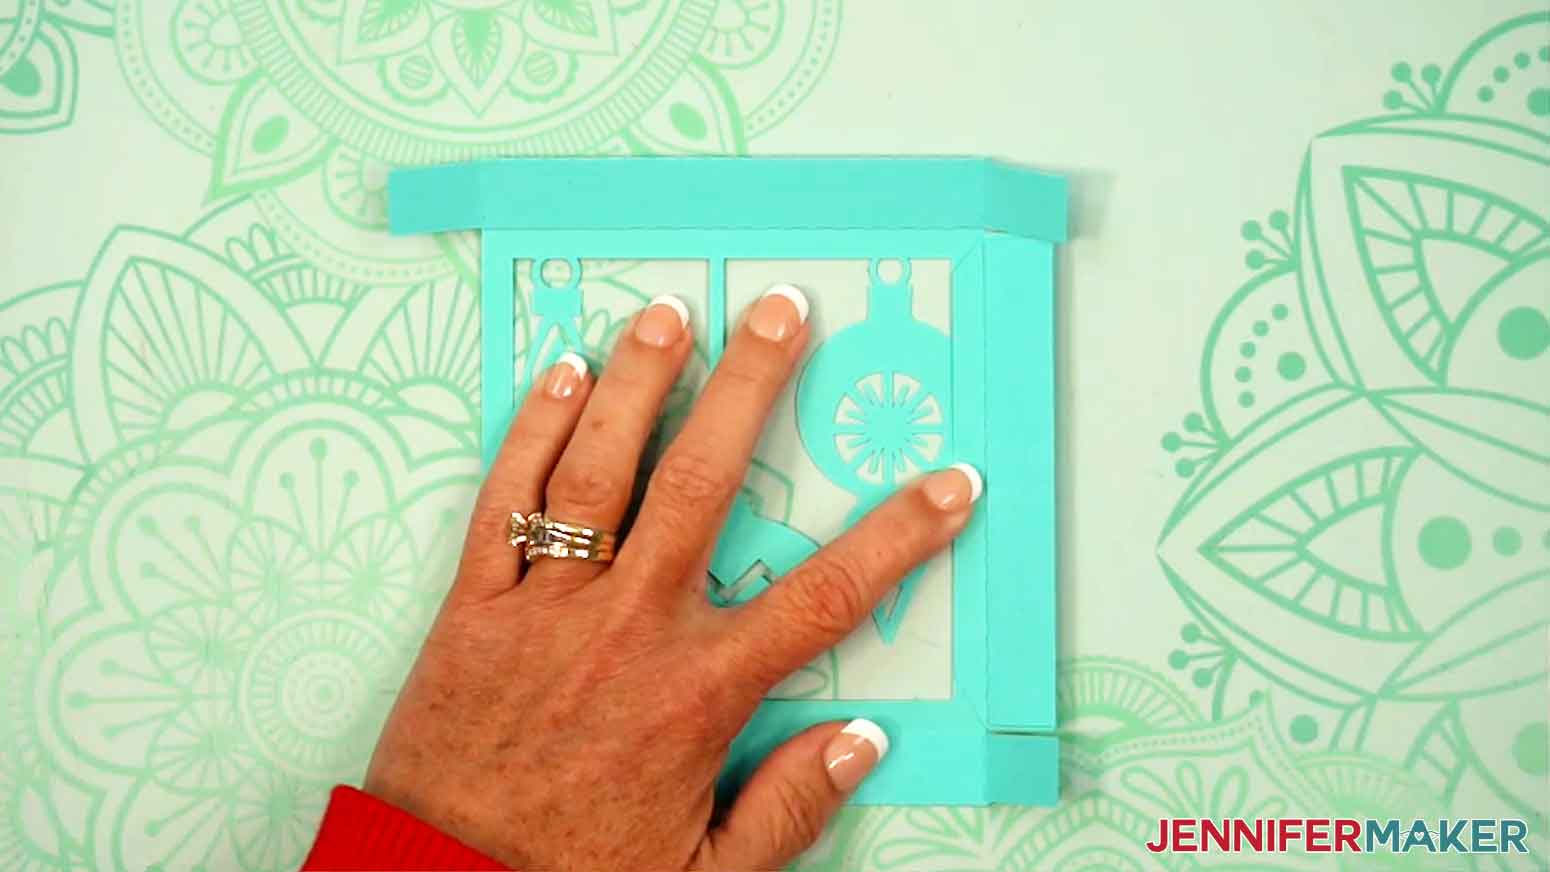
- Place your main lid piece face down with the folded sections on the top and bottom.
- Take a lid side piece and position it on the main lid piece’s right side with the unglued tab on the left and the glued side face up.
- Align the crease line of the unglued tab with the straight edge of the main lid piece’s right side, between the main piece’s top and bottom tabs.
- Apply a small amount of craft glue to the underside of the side piece’s tab.
- Fold the glued tab down onto the main lid piece.
- Press and hold the tab in place to adhere the side piece to the main lid piece.
- Rotate the main lid piece 180 degrees, then repeat Steps 18-22 to adhere the other side piece to the main lid piece.
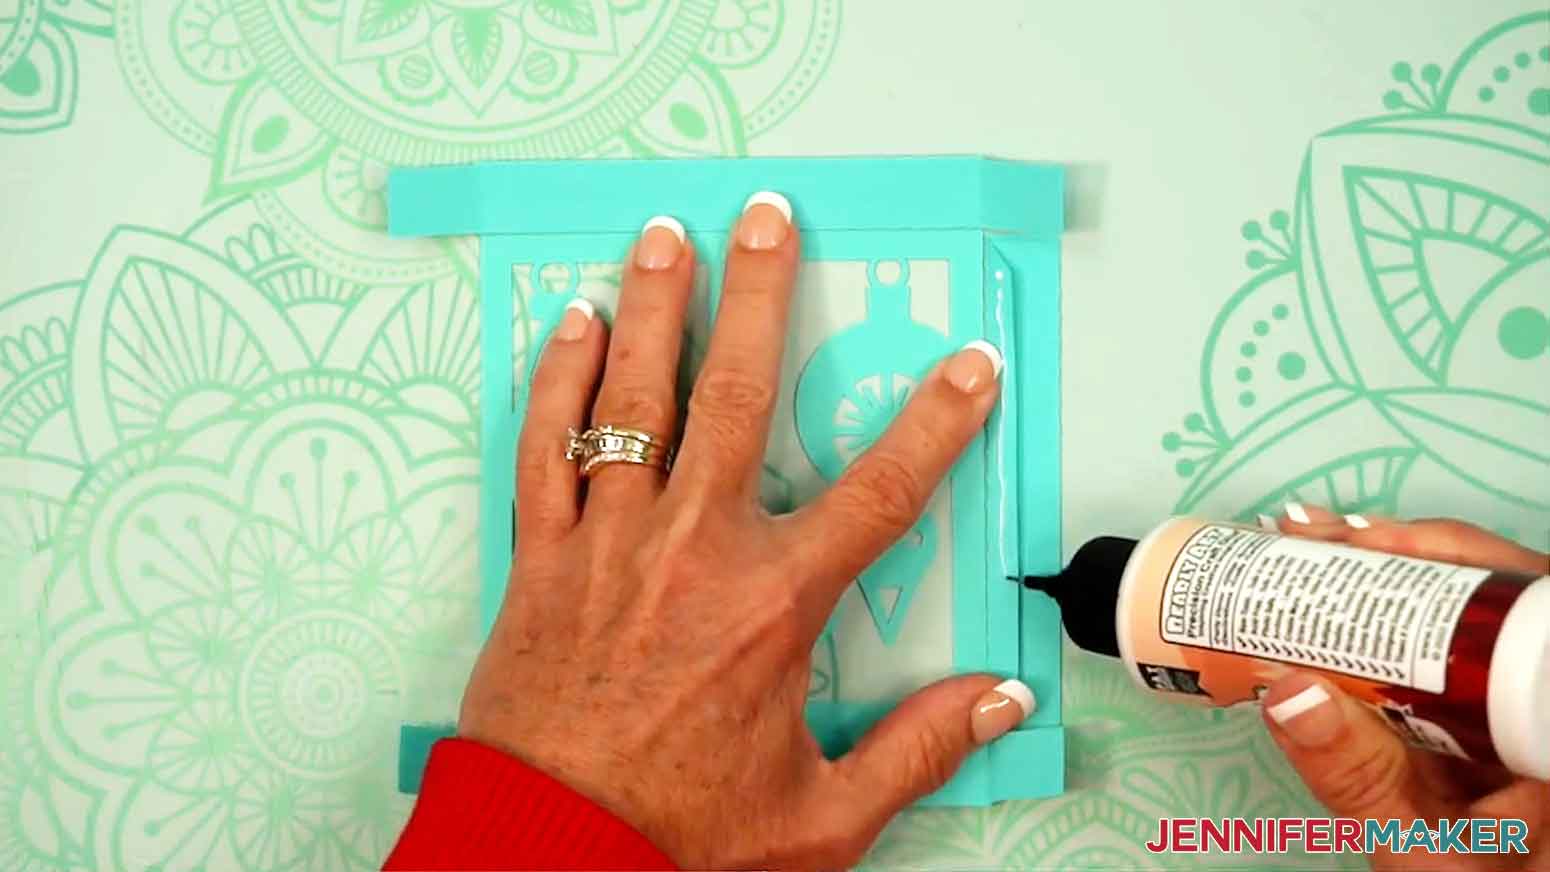
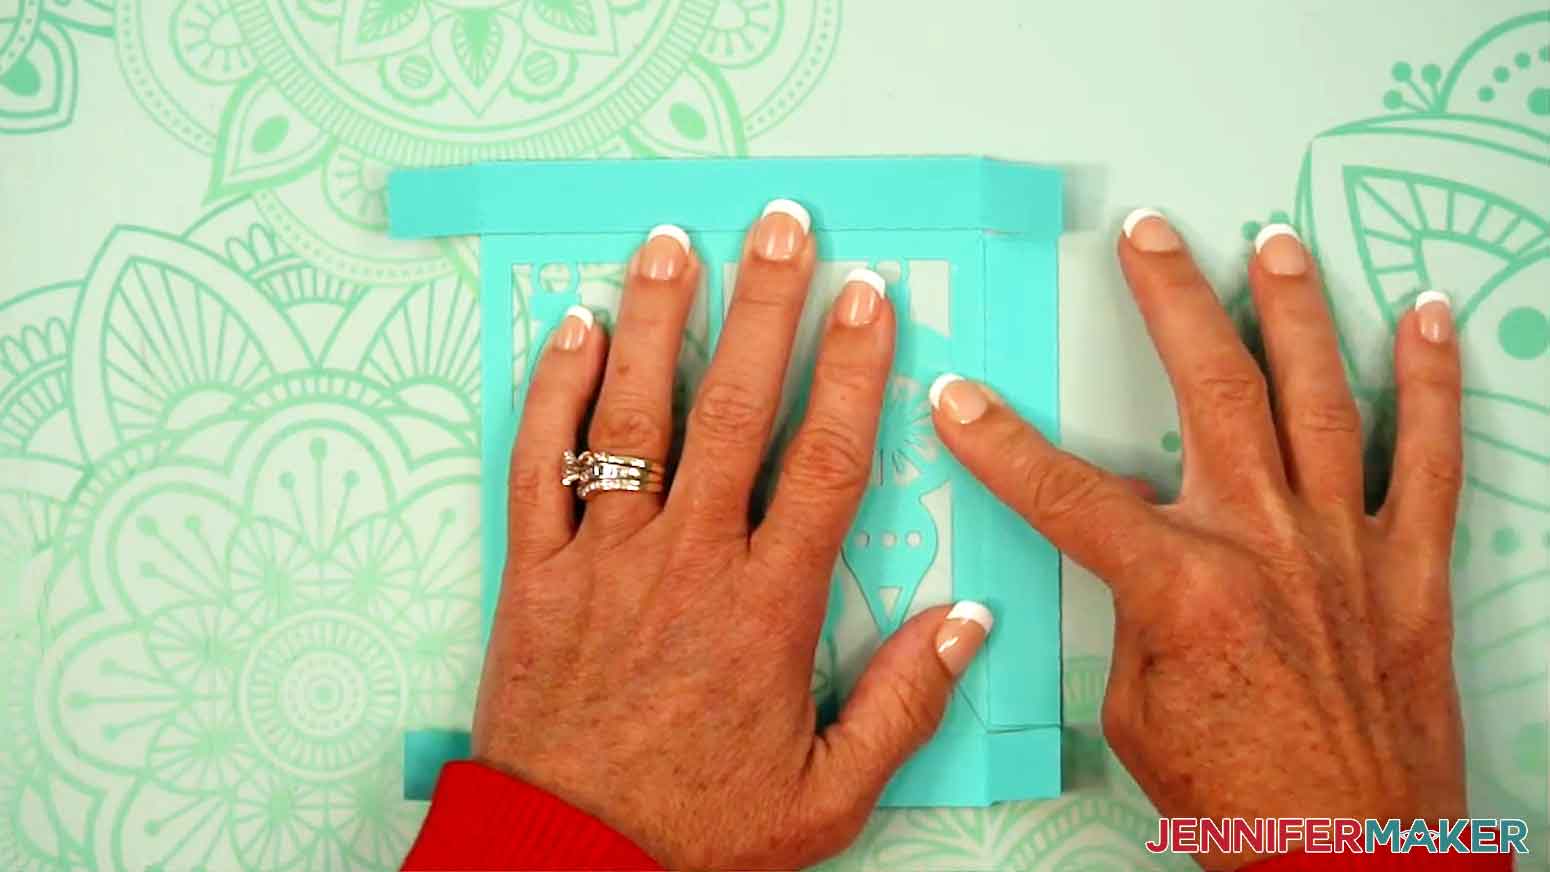
- Next, fold in one of the small corner tabs and add small lines of glue along the tab’s edges.
- Bring in the corner and attach the small tab to the matching side piece, aligning the side’s edge along the tab’s crease.
- Press firmly and hold to secure the corner.
- Repeat Steps 24-26 for the remaining three corners.
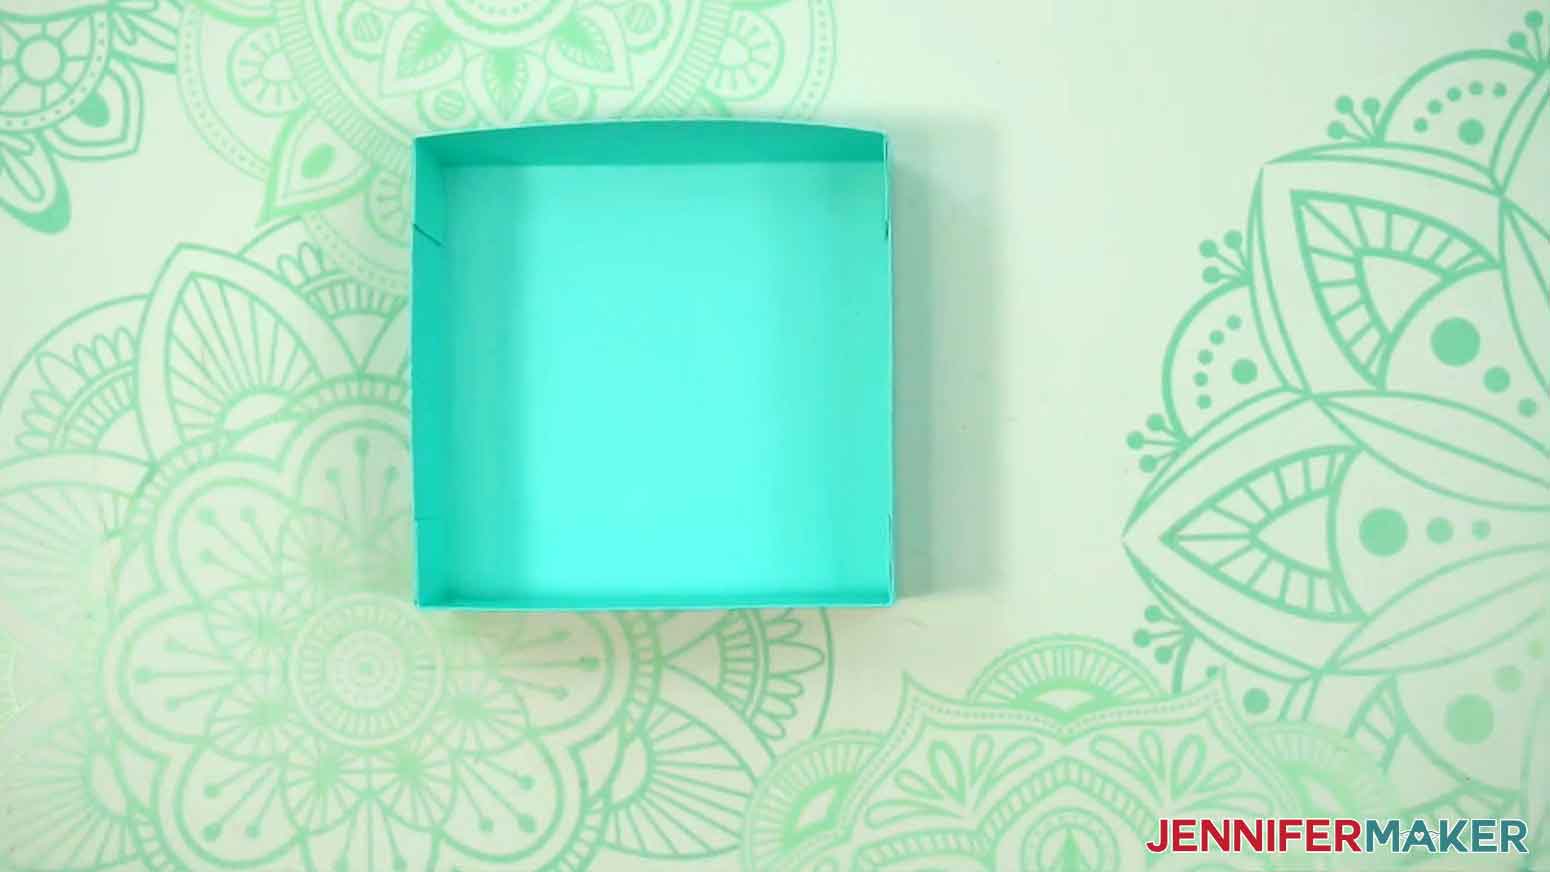
- To assemble your box base, repeat Steps 1-27 with the main box piece and two box side pieces.
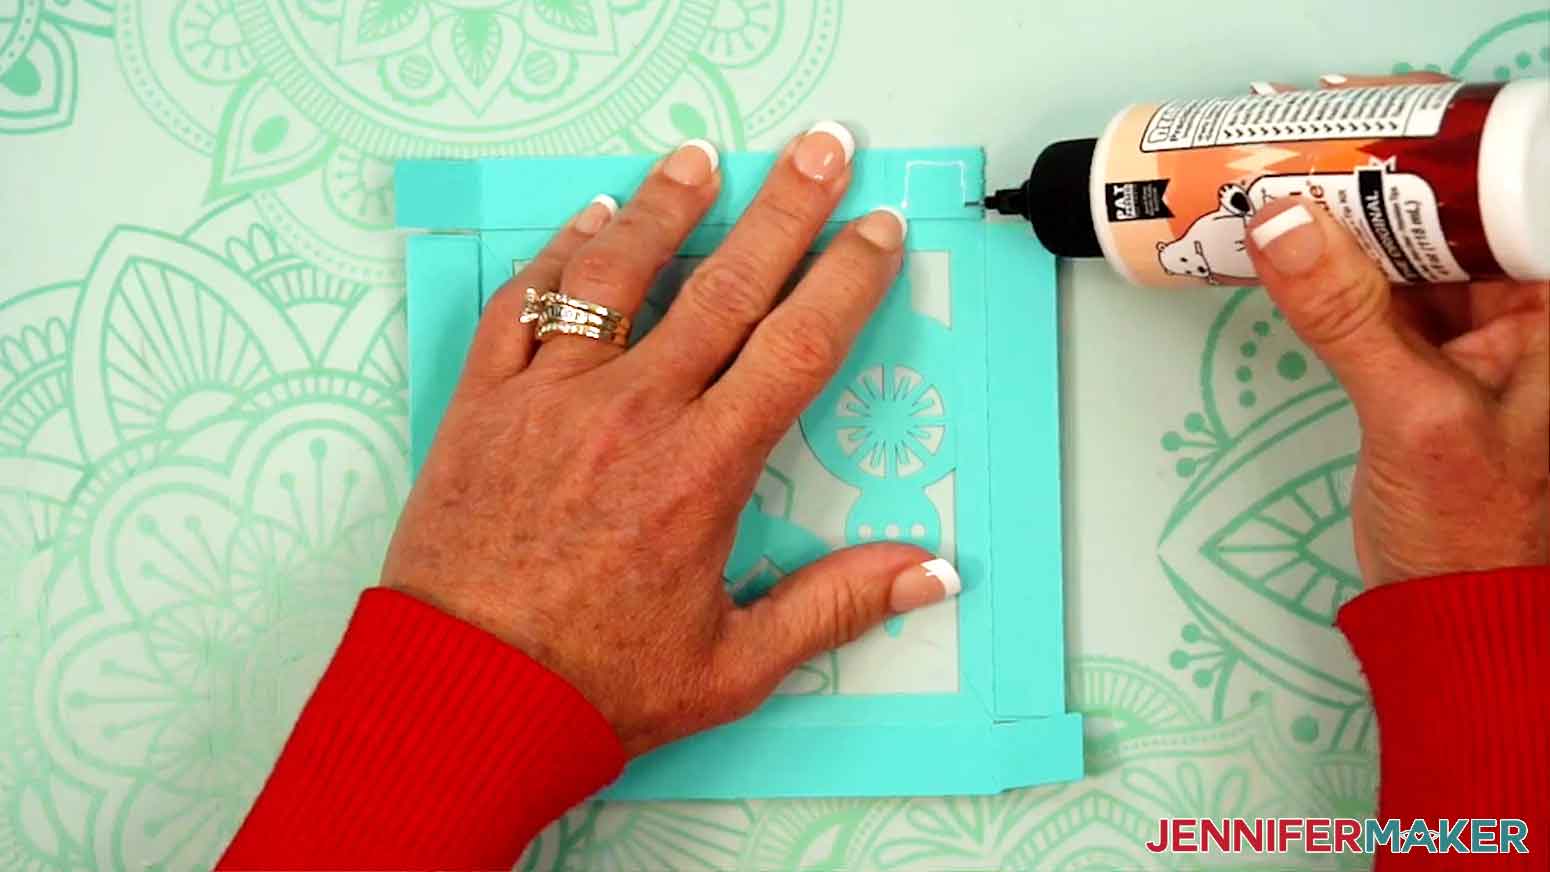
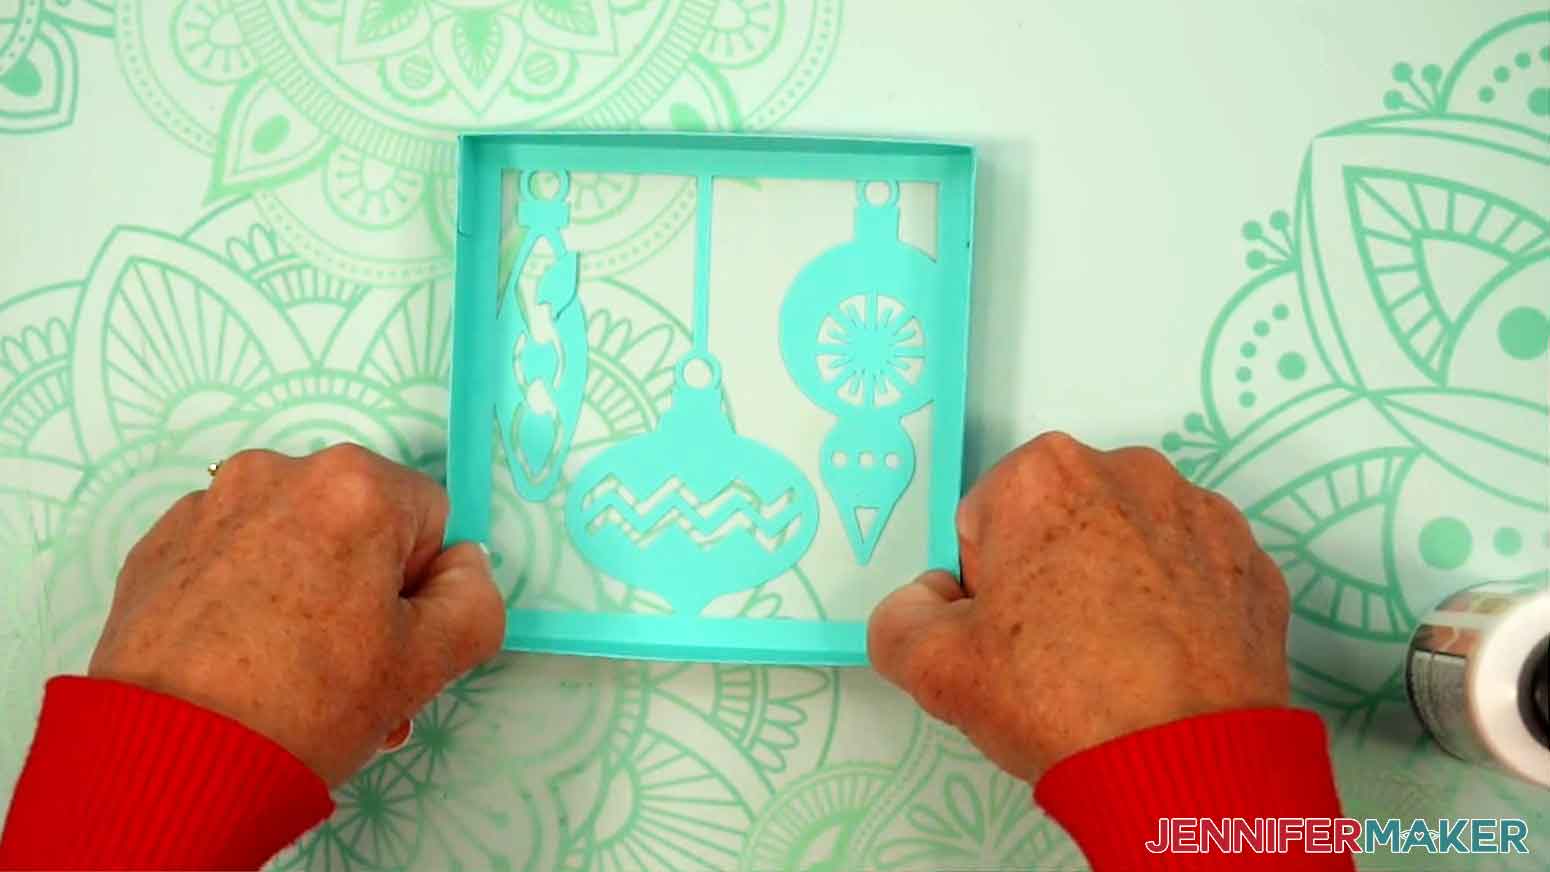
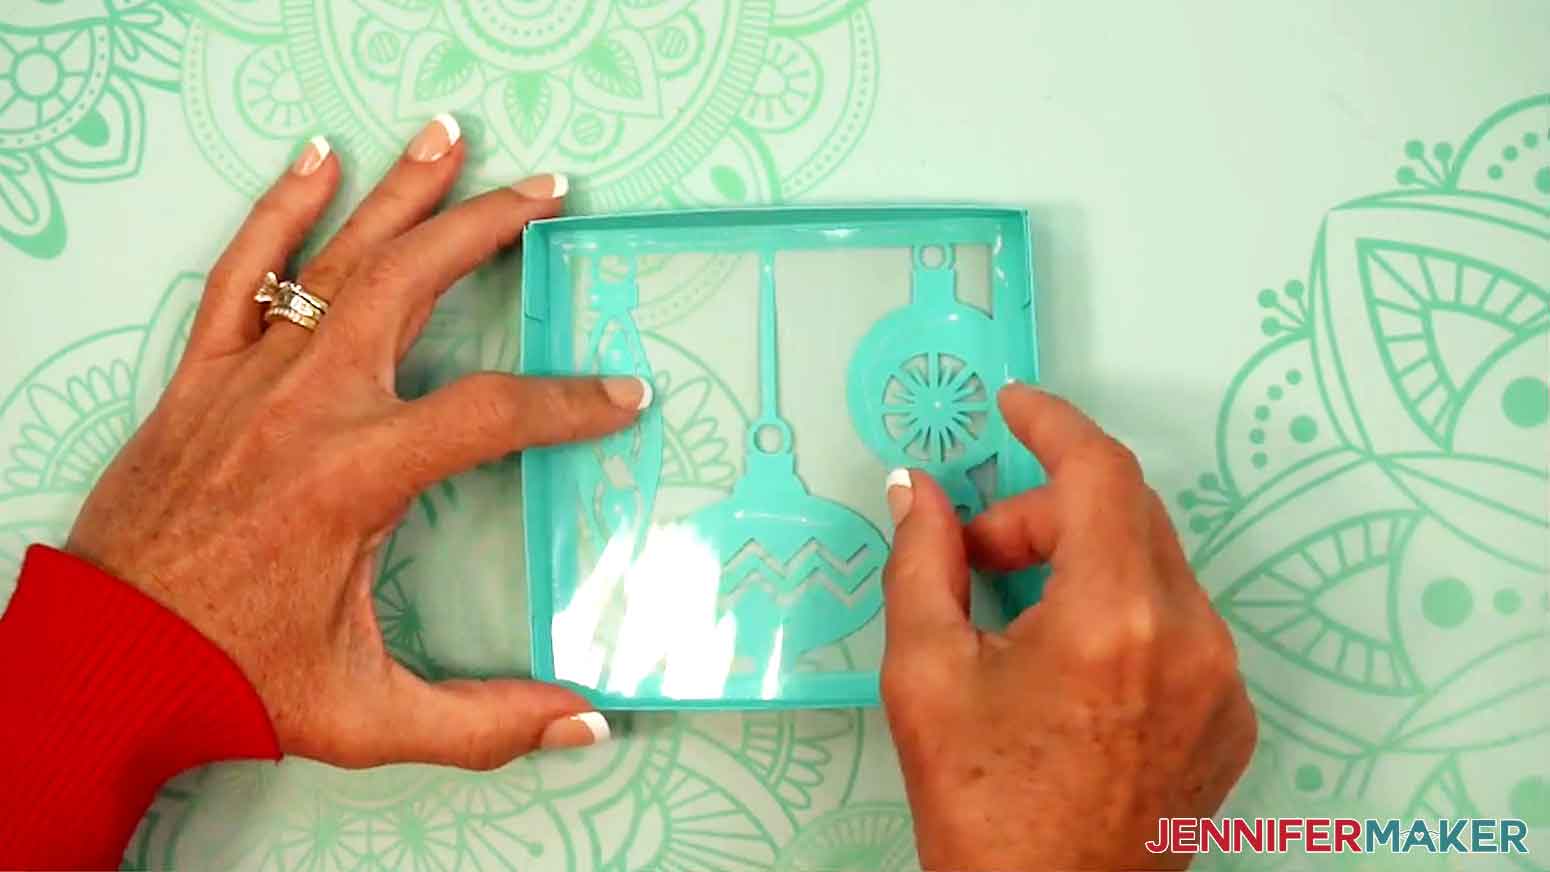
- To add the acetate piece to your assembled lid, peel the protective film from the acetate’s top side.
TIP: Use a weeding tool to help remove the film if needed, but be careful not to scratch the acetate. - Flip the lid so the flat top is against your work surface.
- Working quickly, add small lines of glue to the lid’s flat inside, making sure to cover the edges and around the design cutouts.
- Insert the acetate piece into the lid, then press down to adhere it.
- Flip the lid face up and wipe away any excess glue using your finger or a paper towel, then allow the glue to set.
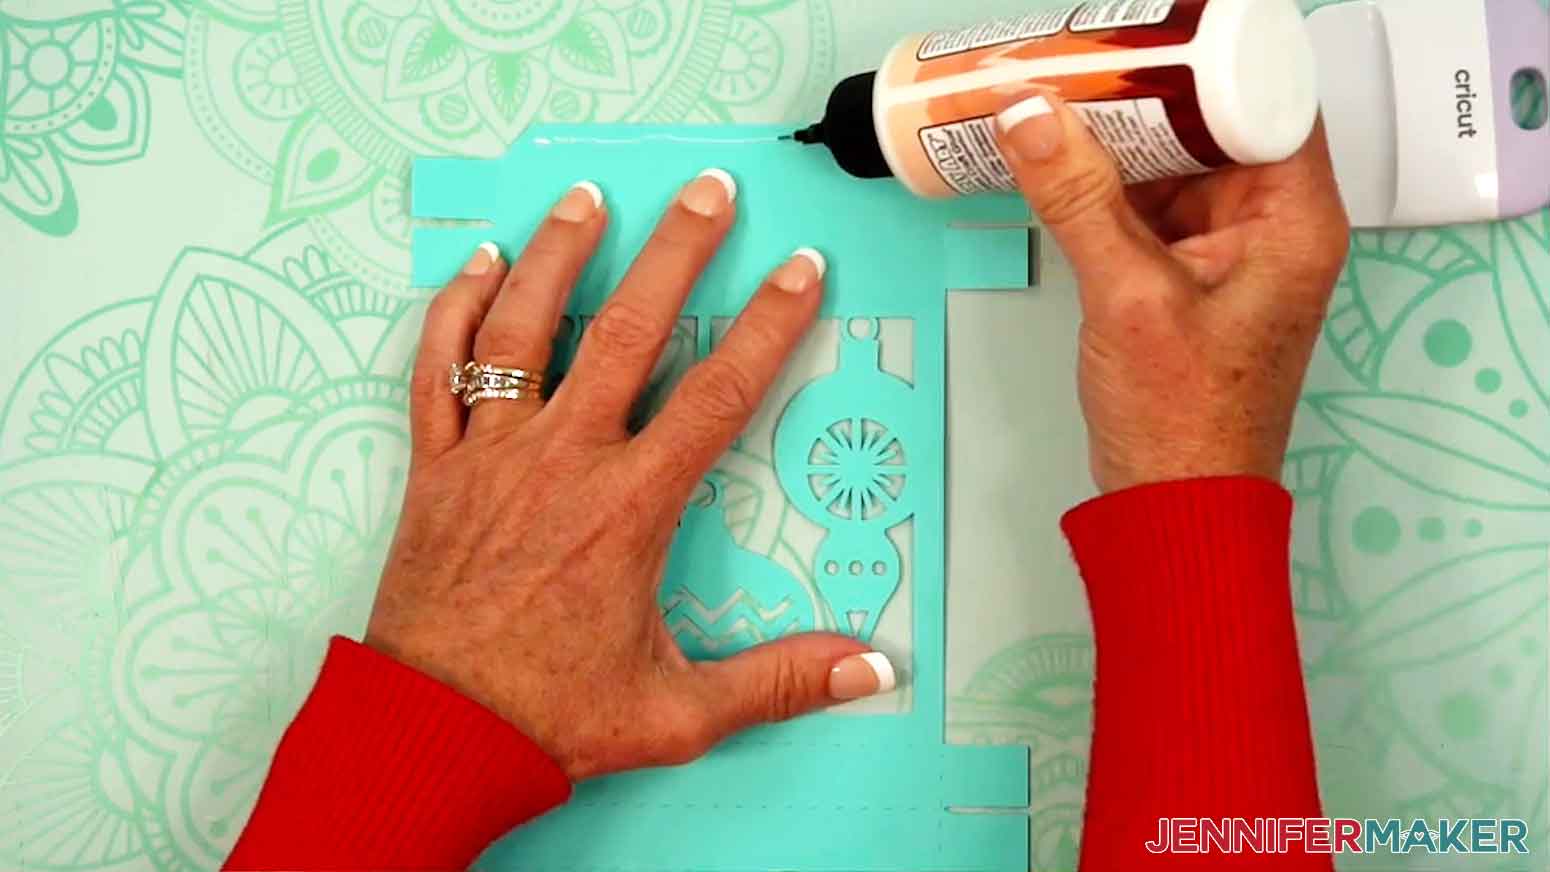
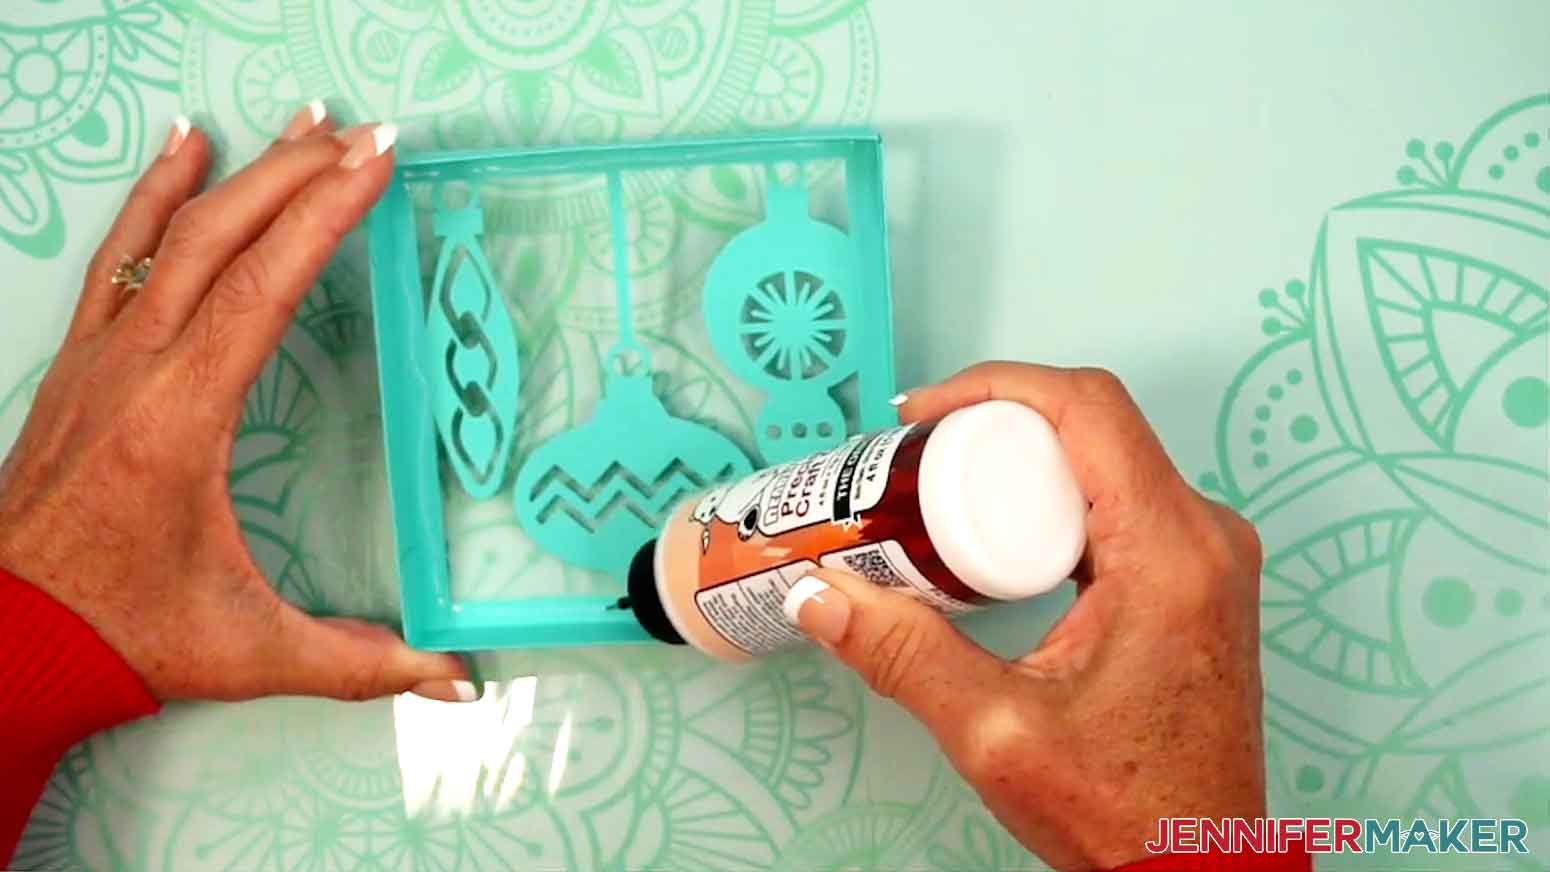
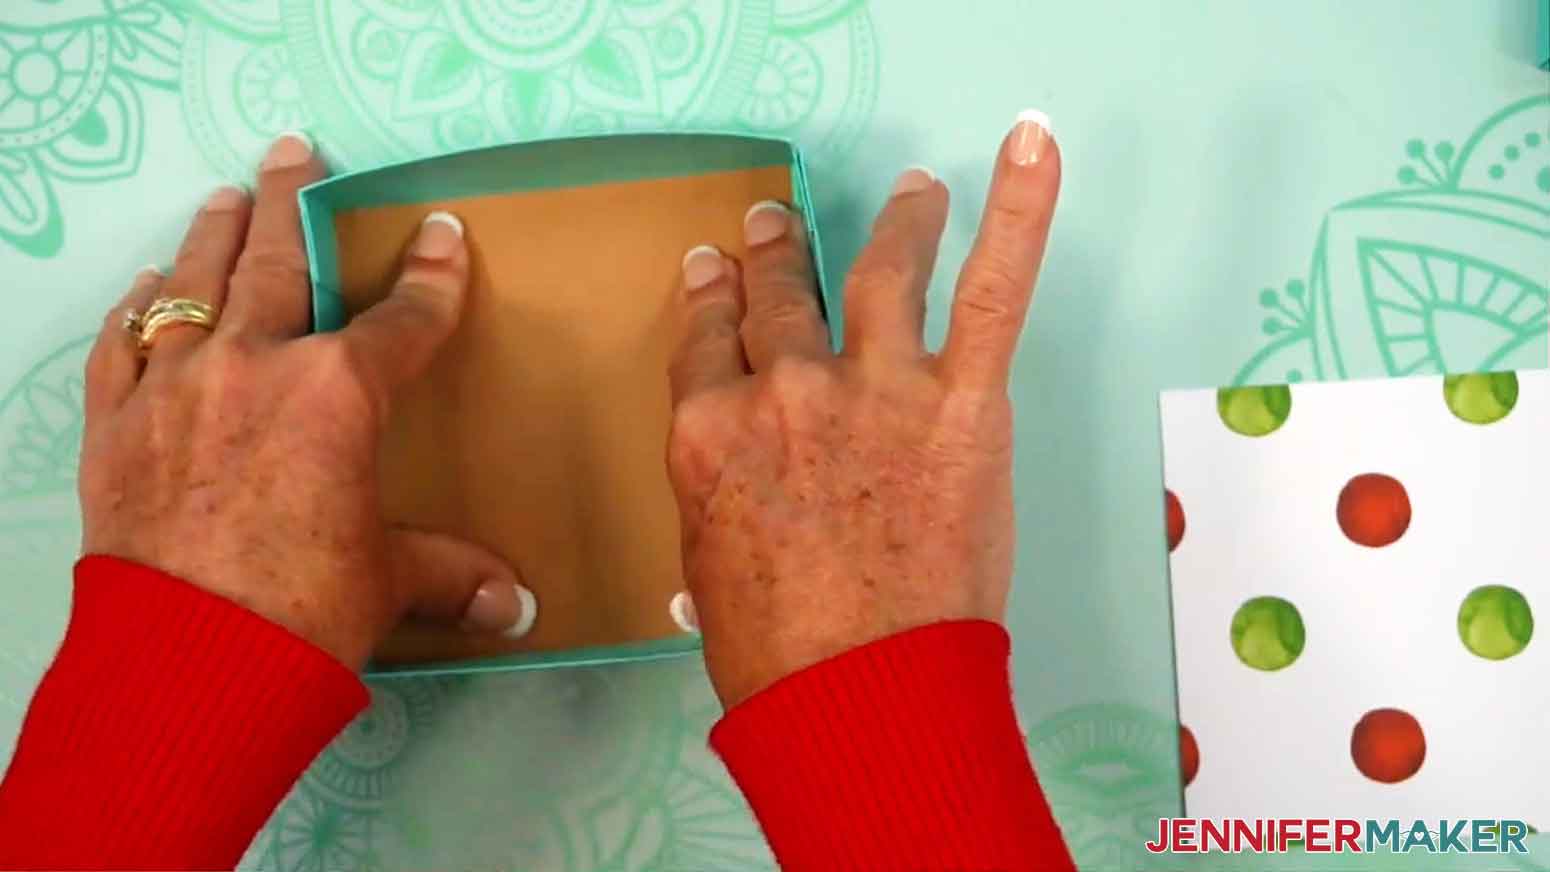
- Next, add glue to one side of the chipboard reinforcement panel.
- Flip the reinforcement panel over and place it into the bottom of your box. Press and hold to adhere it.
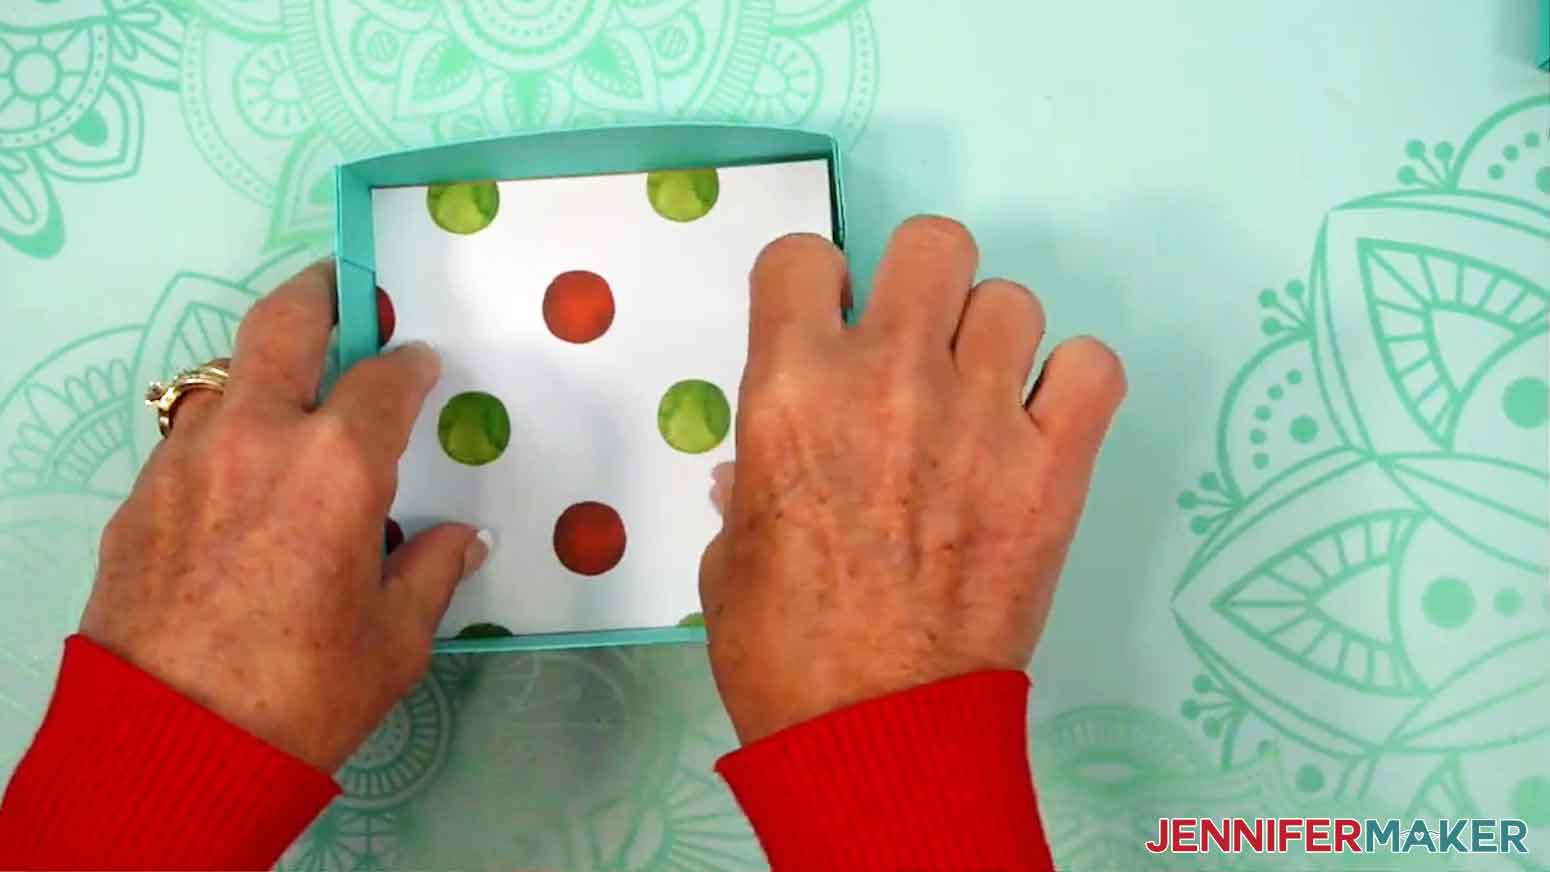
- Then place your decorative liner face down on your work surface.
- Add glue to the back side of the decorative liner.
- Then flip the decorative liner over and place it on top of the reinforcement panel inside your box. Press and hold to adhere it.
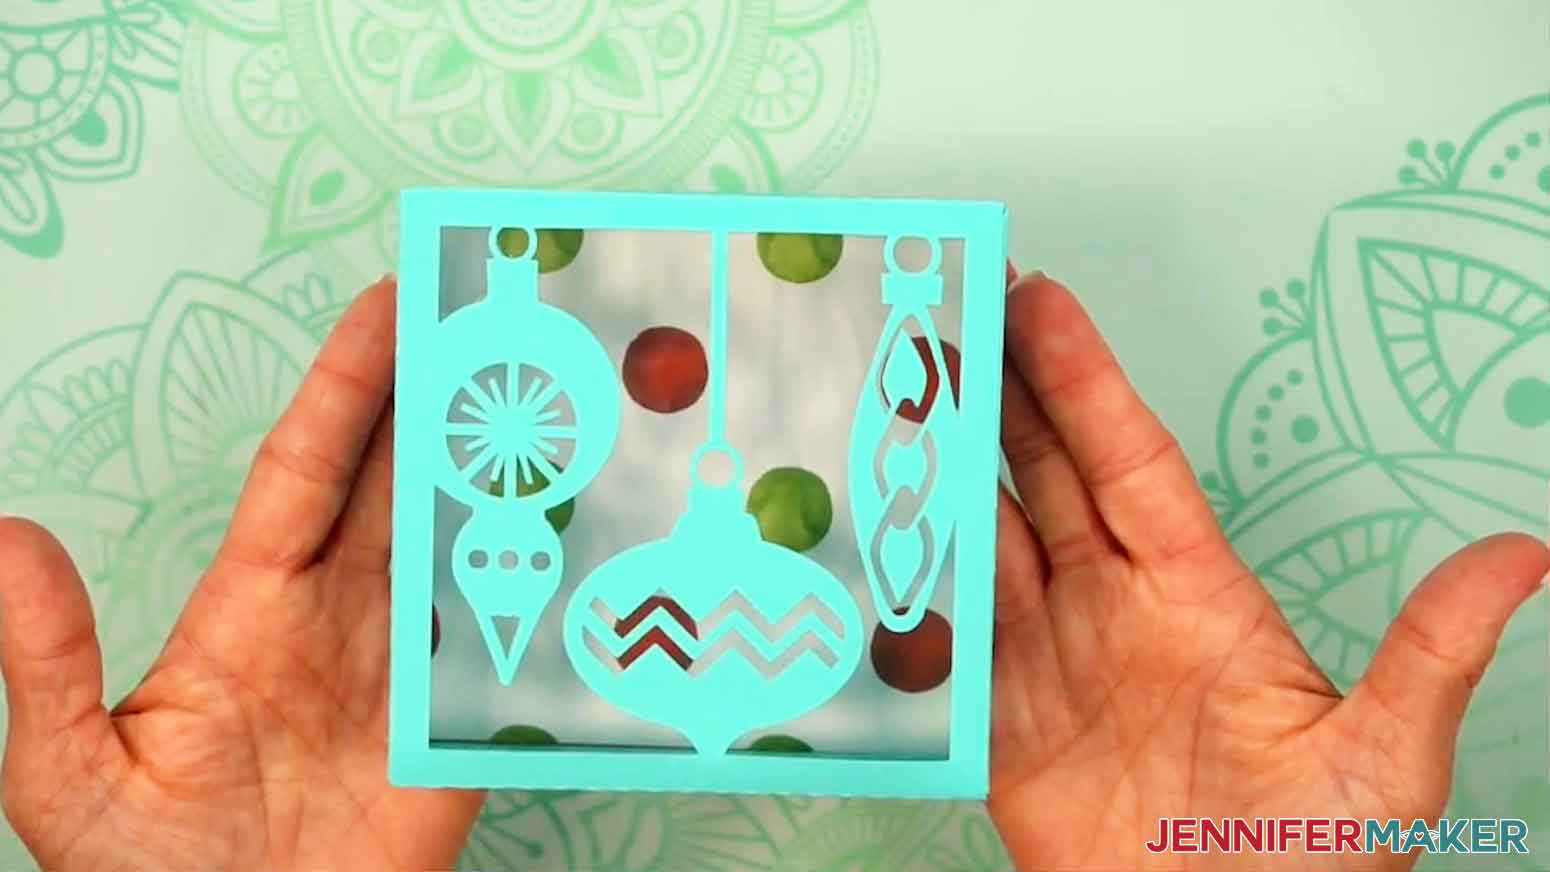
- Now place the lid on top, and your square box is ready!


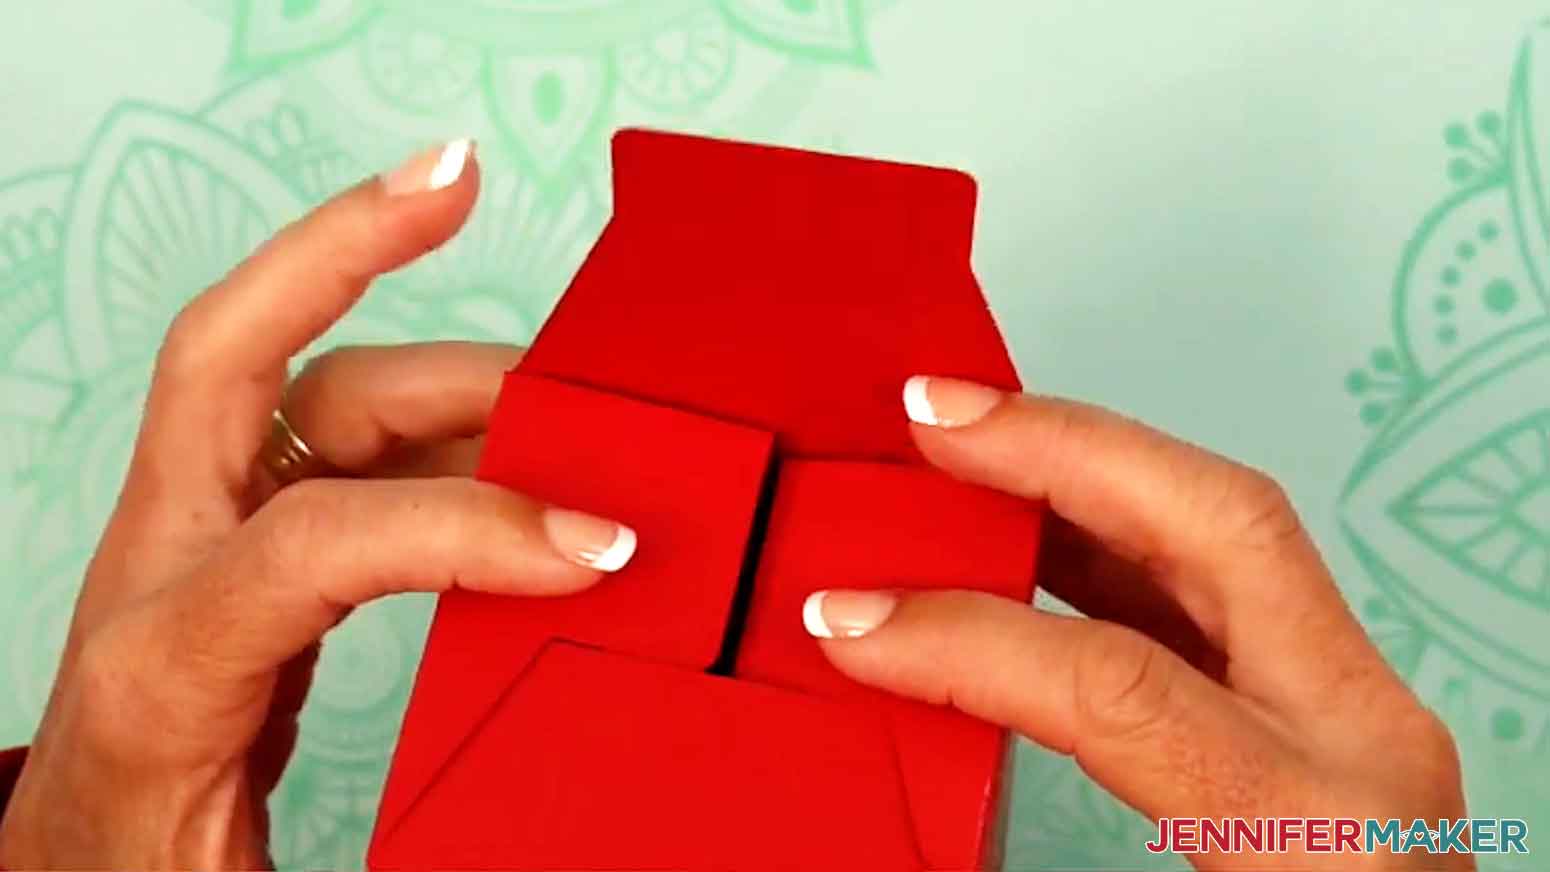
VARIATION 2: “HEART SWIRL” TUMBLER BOX
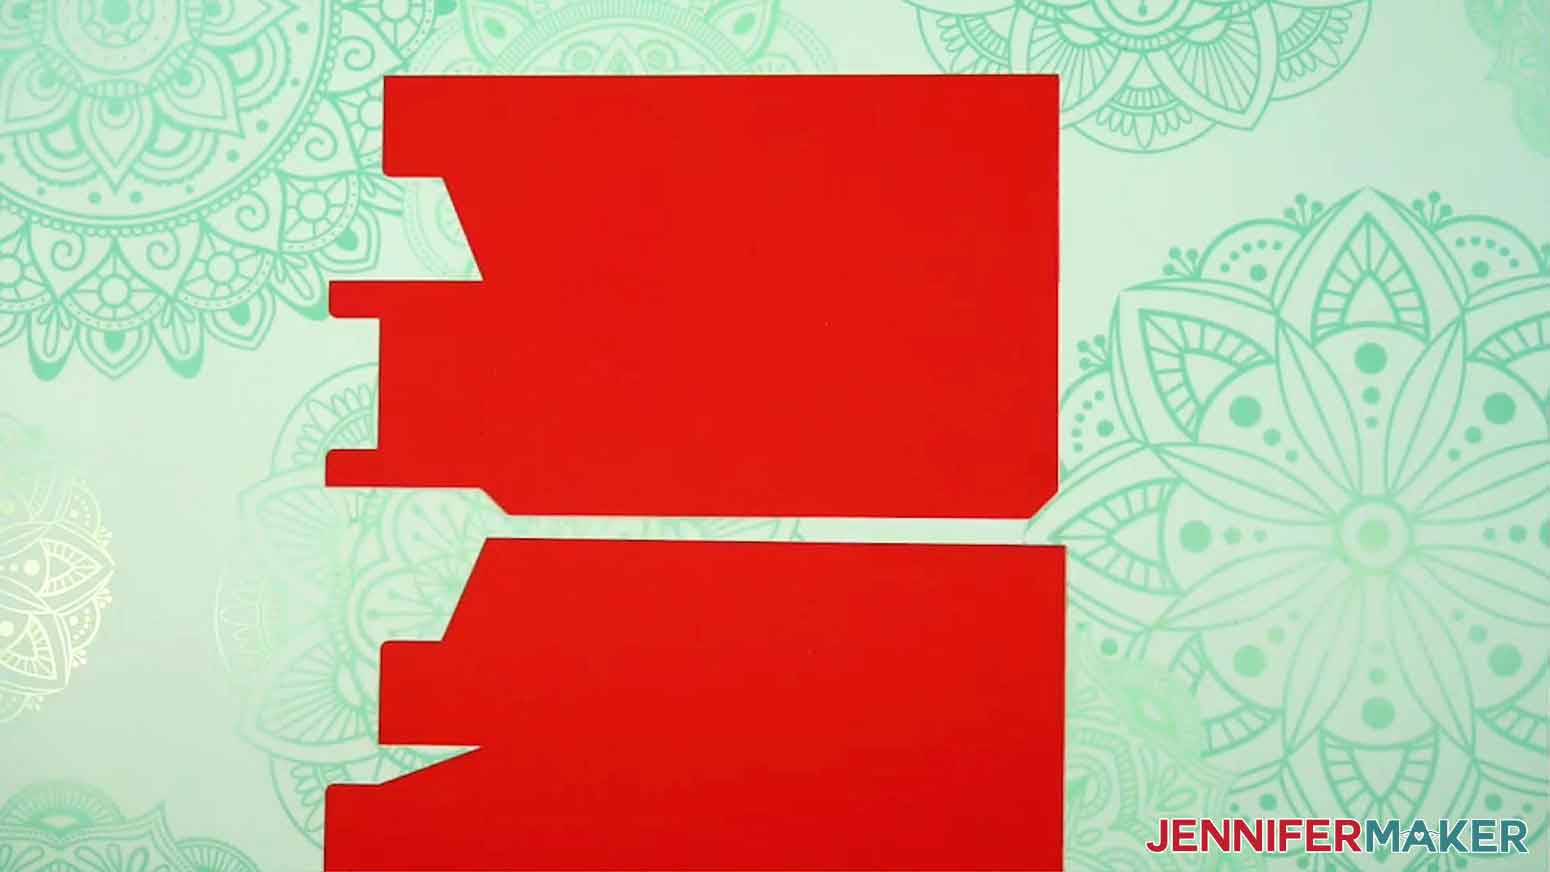
- Place the two box sides face down on your work surface so their straight edges are at the top, the thin tabs are at the bottom, and the side tabs (for the box’s bottom) are on the left.
- Fold up the bottom tab along the horizontal crease line, use your scraper tool to sharpen the fold, then unfold the tab.
TIP: Use your scraper tool to help lift long tabs along their crease lines before folding them. - Repeat for the remaining crease lines on both pieces, including the side tabs.
- Flip both pieces face up, keeping the straight edges at the top and the side tabs on the right.
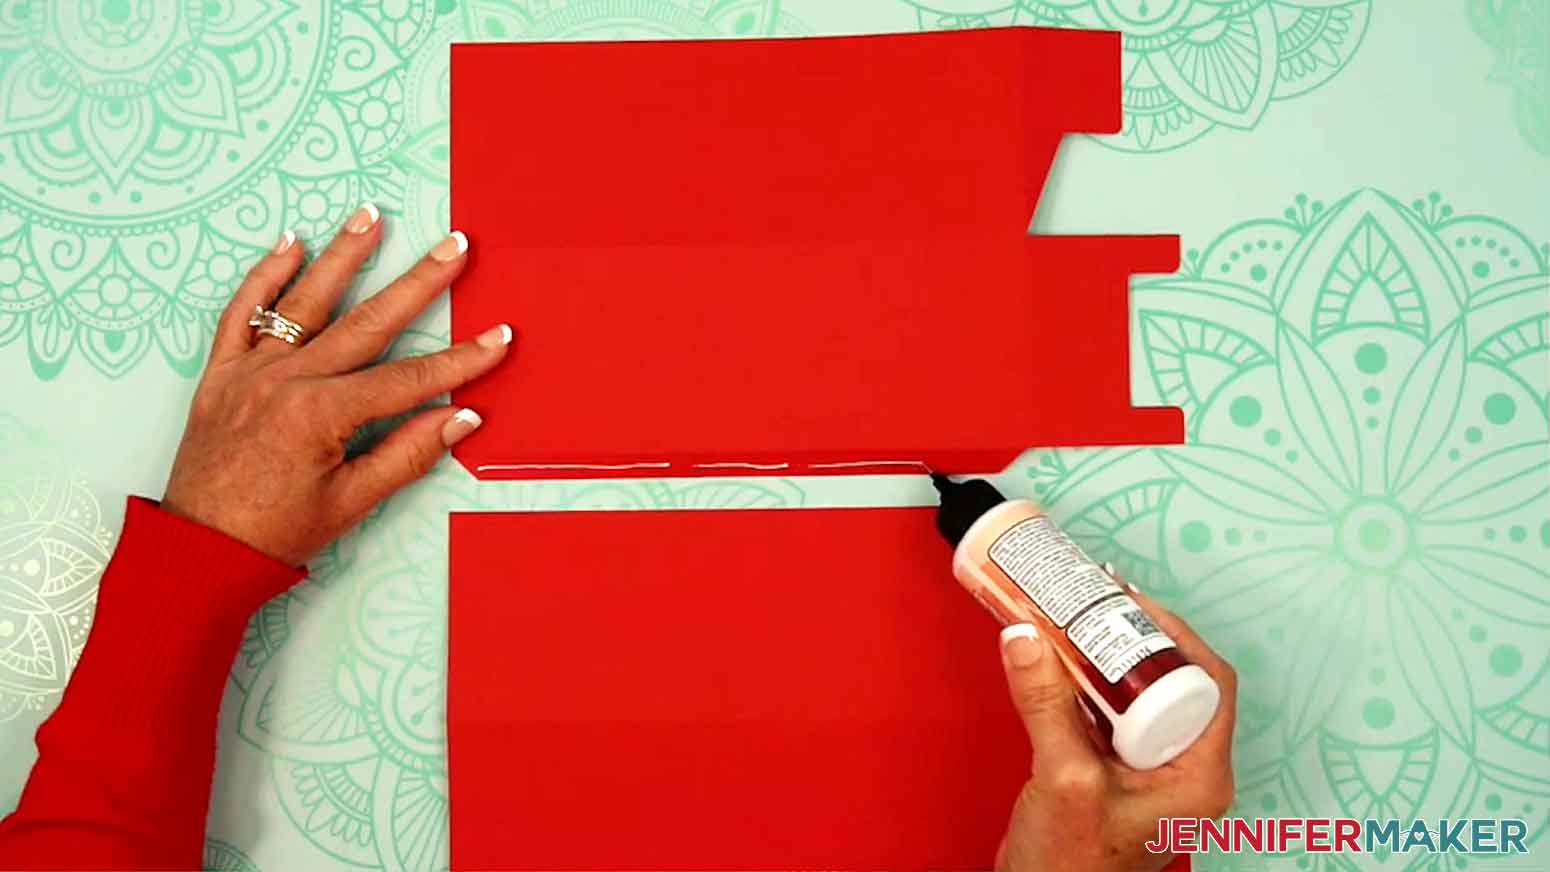
- Add a small amount of craft glue along the entire length of the thin bottom tab on one of the box sides.
- Lay the other box piece onto the tab with glue, keeping the top edge of the piece flush with the tab’s crease line, and the left edges of both pieces aligned vertically.
- Press firmly and smooth down to adhere the seam.
- Flip your attached box pieces face down.
- Fold up the bottom panel along the crease line and hold it in place.
- Add a small amount of craft glue along the bottom section’s thin tab.
- Then fold down the top section along the crease line so its straight edge overlaps the glued tab and is flush with the glued tab’s crease line.
- Press firmly and smooth down the tab to adhere the seam, connecting the box’s four sides.
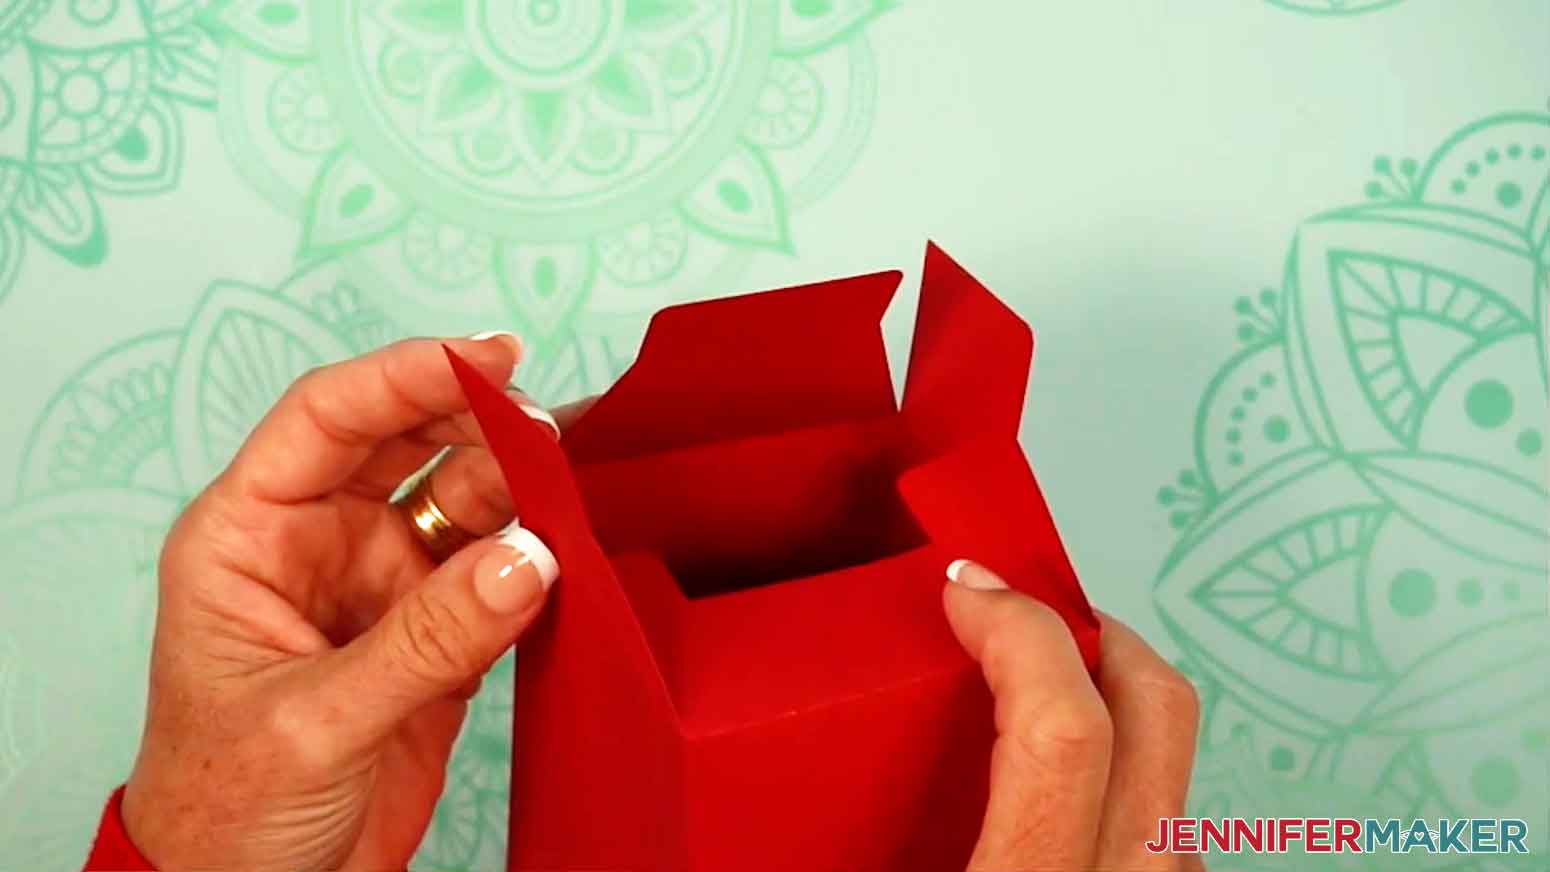
- Turn the box so the straight edges are against your work surface and the bottom tabs are on top.
- Fold down the slot insert side first.
- Then fold down the two short sides.
- Press the tabbed side down so it catches under the slot side.
- Turn the box over and press down from the inside of the box until the tabs lay flat.
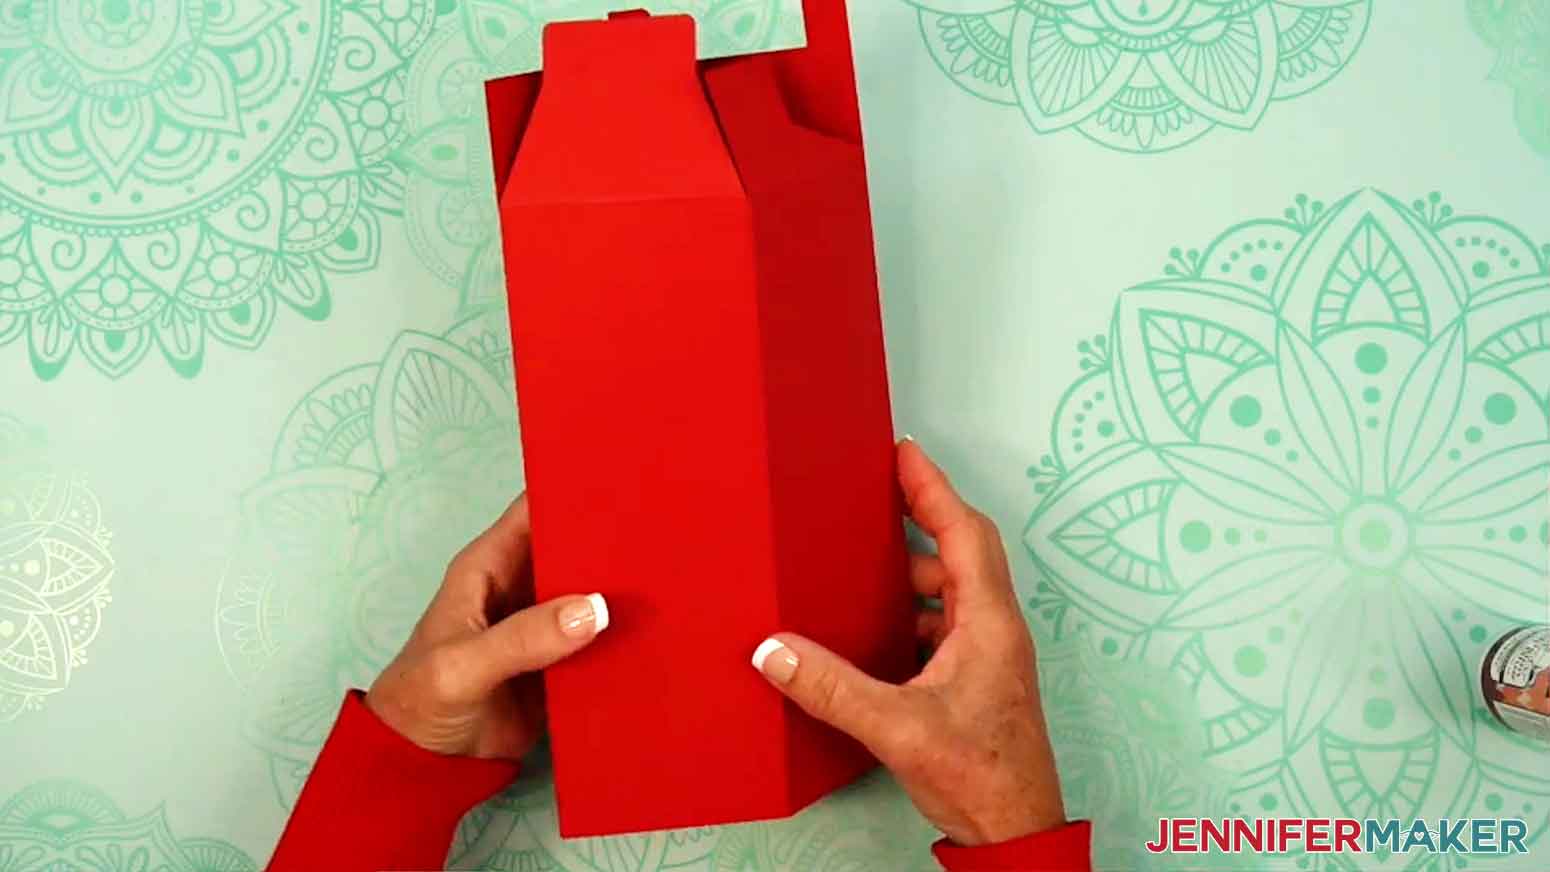
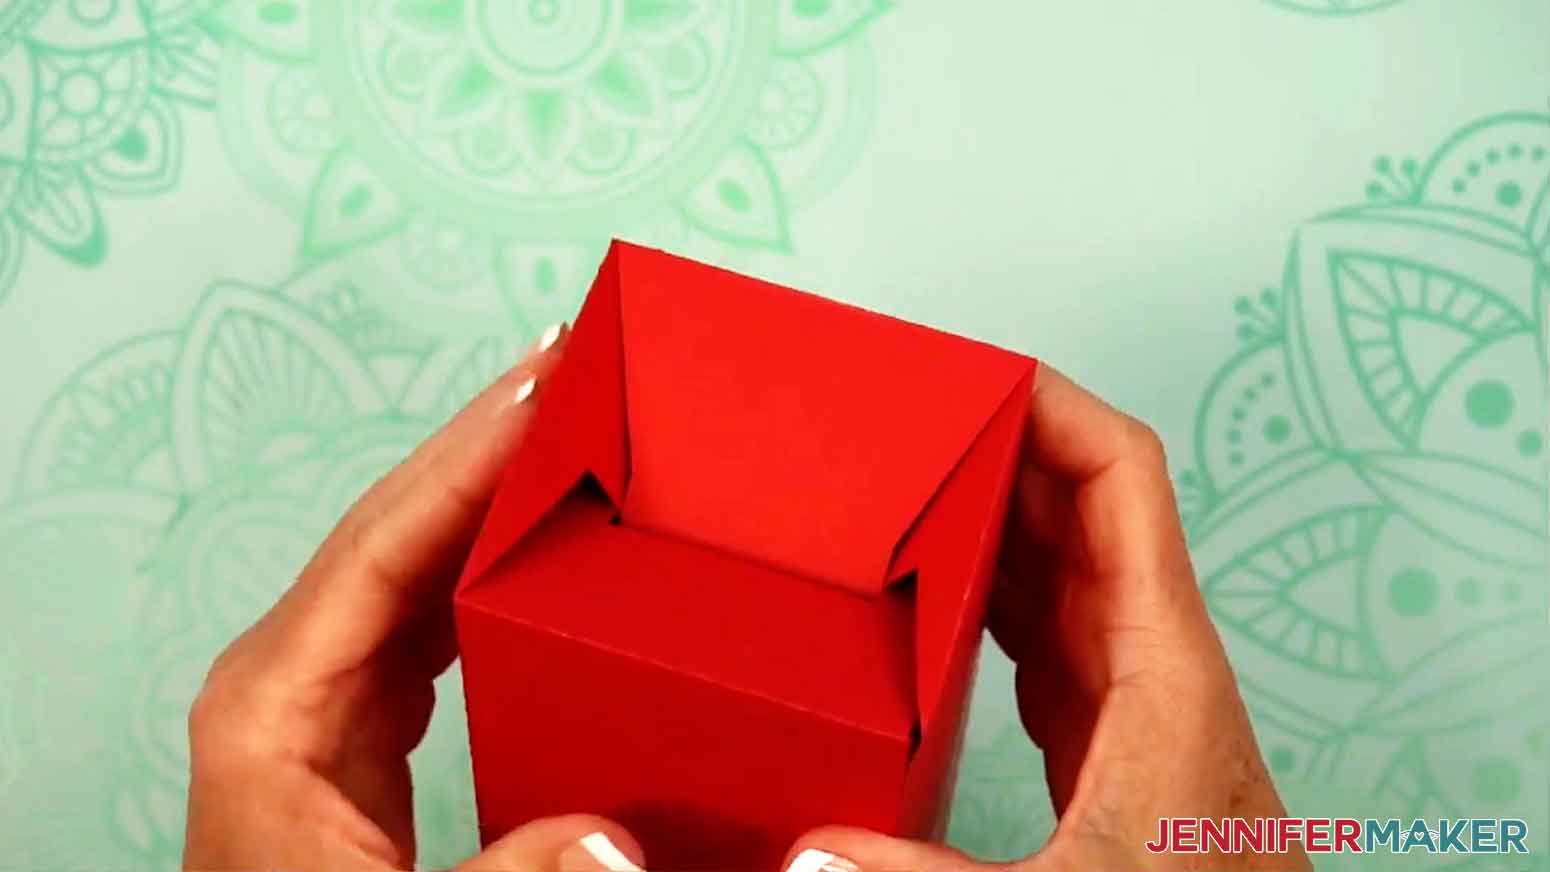
- To make the box top, lay your tumbler box lid face down.
- Fold up the short corner tabs and sharpen the creases with your scraper.
- Then do the same for the long side tabs.
- Add craft glue to one of the small corner tabs.
- Bring in a corner and attach the small tab to the matching side piece, aligning the side’s edge along the tab’s crease.
- Press firmly and hold to secure the corner.
- Repeat Steps 21-23 for the remaining three corners.
- Repeat Steps 29-38 from the “VARIATION 1: SQUARE ORNAMENTS OR TREE GIFT BOX” section to add the acetate, reinforcement panel, and liner to your tumbler box.
- Now place the lid on top, and your tumbler box is ready!


STEP 4: SHOW IT OFF
You now have an easy DIY gift box for packaging a small gift or tumbler!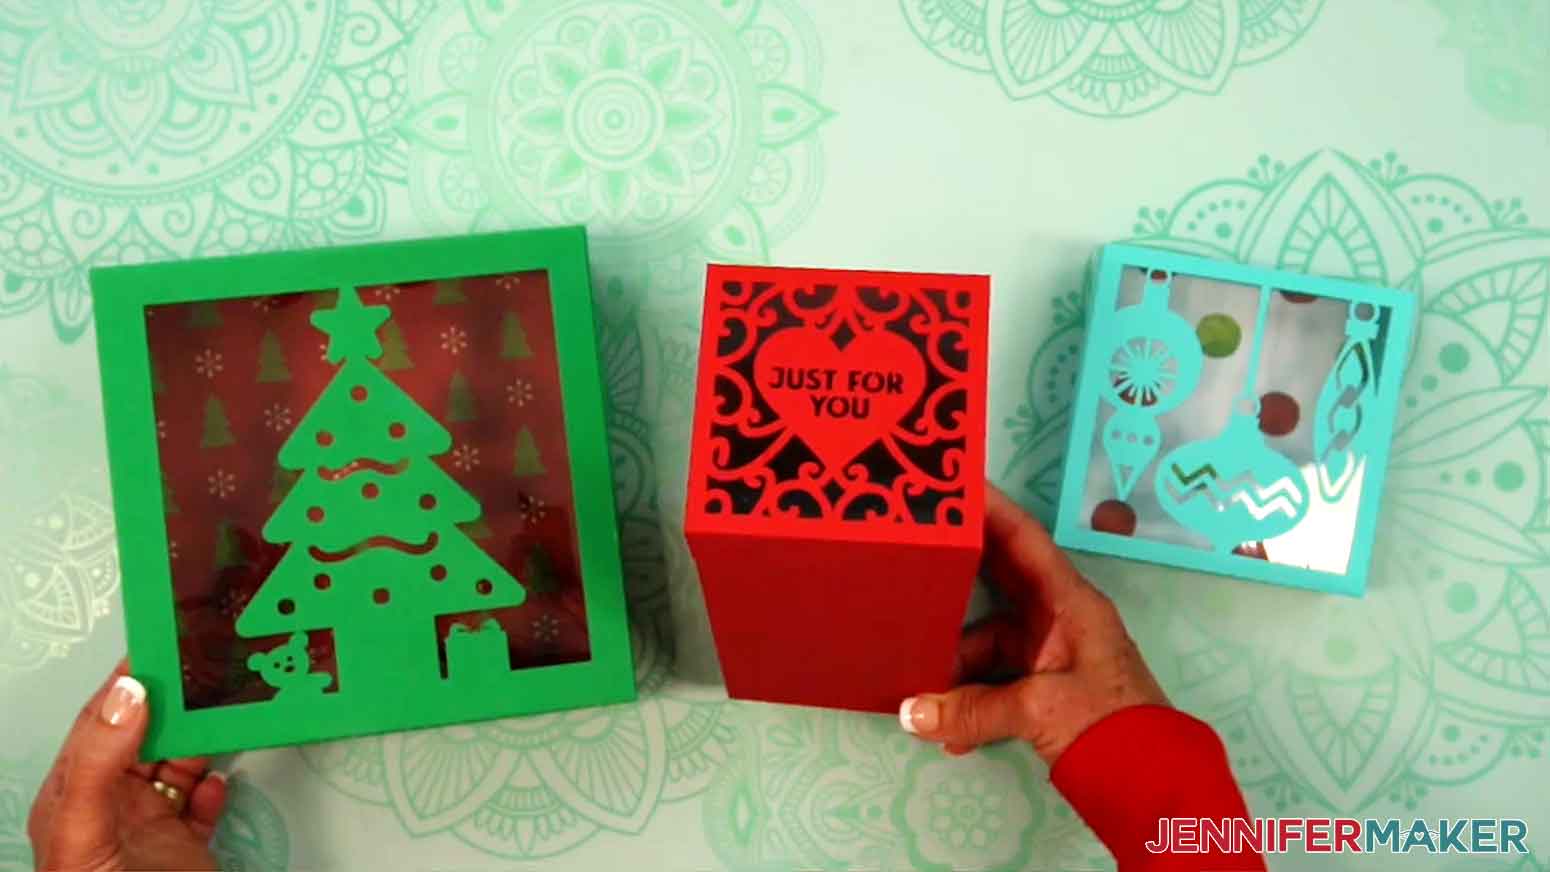
Answers to Your Questions About DIY Gift Boxes
Q: I want to customize my gift box’s lid design. How do I do that?
A: You can learn how to design your own box lid in my ADVANCE program. Learn more about ADVANCE here!
Q: What can I use to make a gift box?
A: I like to use high quality 65 lb. solid-core cardstock for my DIY gift boxes. It’s lightweight but sturdy, and it folds well along either score lines or dashed cut lines. It also holds together well with craft glue–no need to bust out the hot glue gun, glue stick, or any other adhesives to keep it together!
Q: Why does this project have so many liners?
A: This project has three different liners, and each serves a different purpose! The acetate liner goes on the lid to give the cut-out areas a window effect. It also helps protect the cardstock design in case something falls on top of it. The chipboard liner goes in the bottom of the box for support. And finally, the decorative liner goes on top of the chipboard so the bottom of your box looks as pretty as the outside!
Q: What kind of cardstock can I use for my box liner?
A: Any kind you like! In my tutorial, I show you how to cut your decorative box liner from patterned cardstock, metallic foil cardstock, and glitter cardstock. All the cut settings I use are included, too.
Q: What’s a scoring tool? Do I have to have one to make my DIY boxes?
A: A scoring tool is a tool that makes grooves in your material, often for folding. It can be a wheel or a stylus with Cricut machines. If you don’t have one, I’ve included “no score” versions of all my gift box designs in the download. These use your Cricut’s default Fine-Point Blade to create dashed lines for folding.
Q: What size are these gift boxes?
A: The ornament box is 4.5″ x 4.5″ x 1.5″, making it the perfect gift box for small gifts or little treasures. The tree box is 7″ x 7″ x 2.25″ for larger items that need their own gift box. The heart swirl box is 3.25″ x 8.875″ x 3.25″ and can fit a 20 oz. tumbler inside.
Q: Do you have any other easy gift boxes I can make?
A: Yes! Here are some of my favorites:
- DIY Gnome Gift Boxes
- Easy Mug Gift Boxes
- Tower Gift Box
- Silver & Gold Foiled Gift Boxes
- Baseball Cap Gift Box
- Easy Treat Gift Boxes
Get my free SVG/DXF/PDF design files!
(If you do not see the signup form above, click here.)
I love seeing what you make with my tutorials and how you customize them! Please share a photo of your easy DIY gift boxes in our Facebook group or tag me on social media with #jennifermaker.
Love,

Want to remember this? Save this Easy DIY Gift Boxes tutorial to your favorite Pinterest Board!