
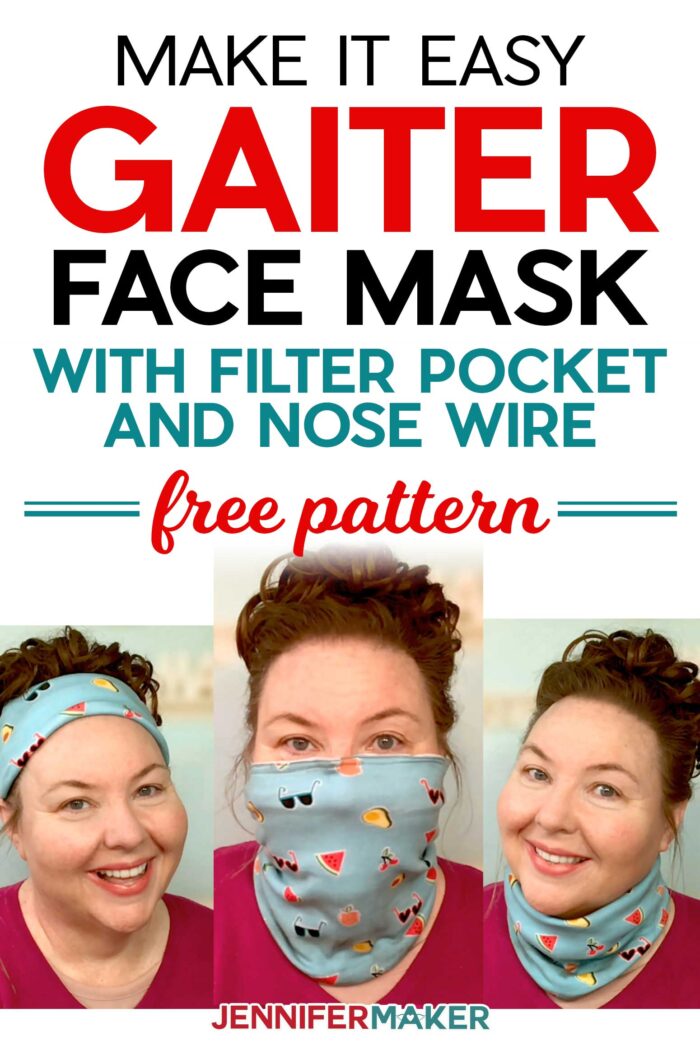
Learn how to make a super easy neck gaiter face mask, with or without a filter pocket and nose wire. No elastic needed!
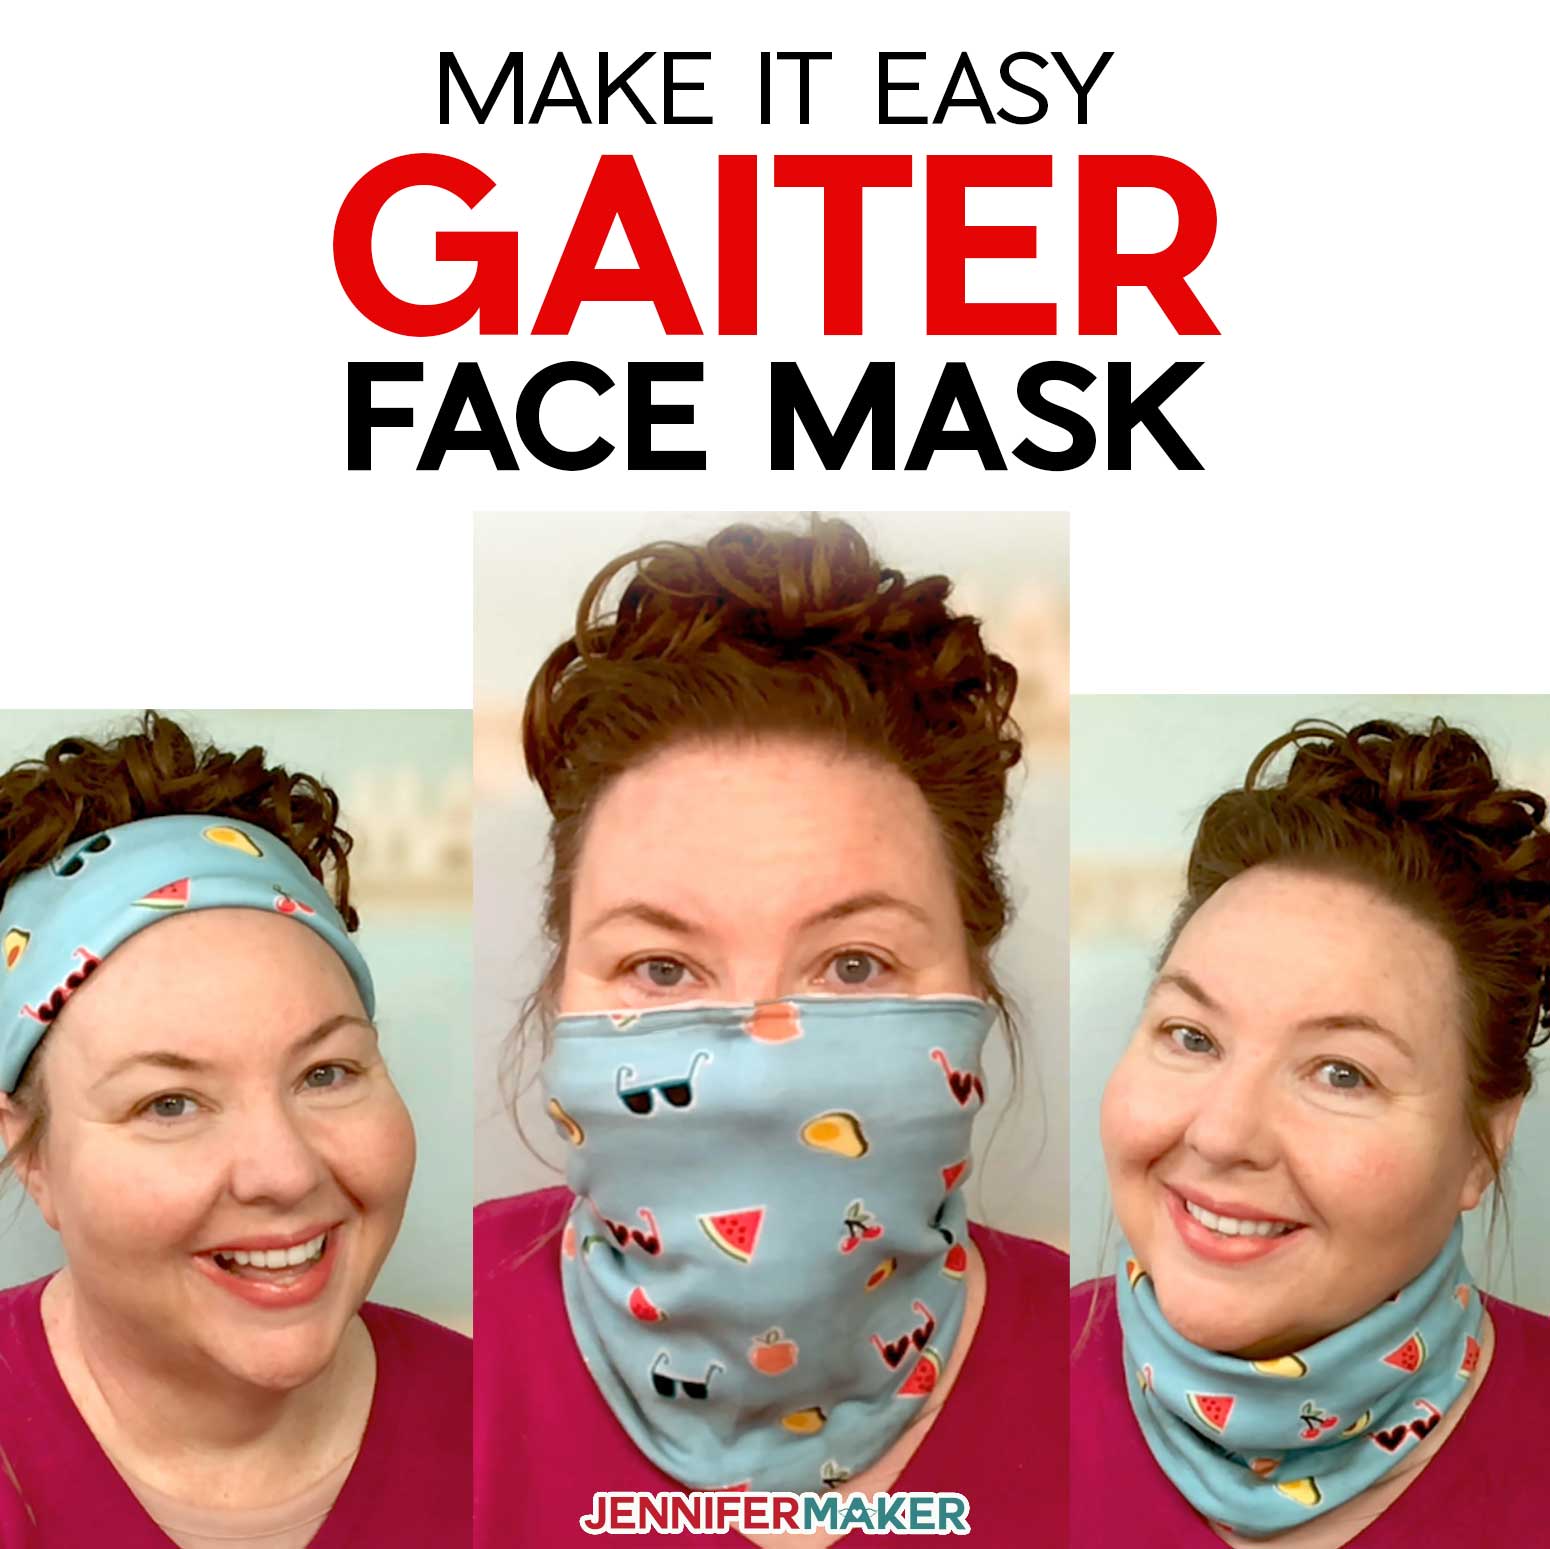
Looking for a simple face mask that needs no elastic and can double as a scarf or headband? Look no further than the easy gaiter-style face mask. This stretchy tube fits right over your face and doesn’t cover your ears, so it’s very comfortable. And, bonus, it provides a little sun protection on your neck, too! So let me show you how to sew this very easy gaiter face mask in less than 15 minutes!

Watch me cut and assemble this face mask in this step-by-step video:
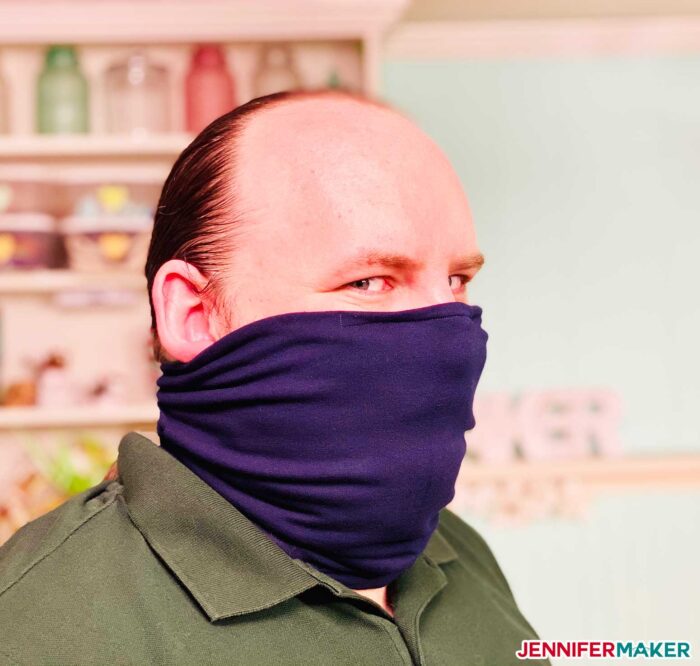
I think these gaiter face masks make great options for guys! Here’s Greg wearing a dark blue gaiter face mask from our pattern (size extra large):
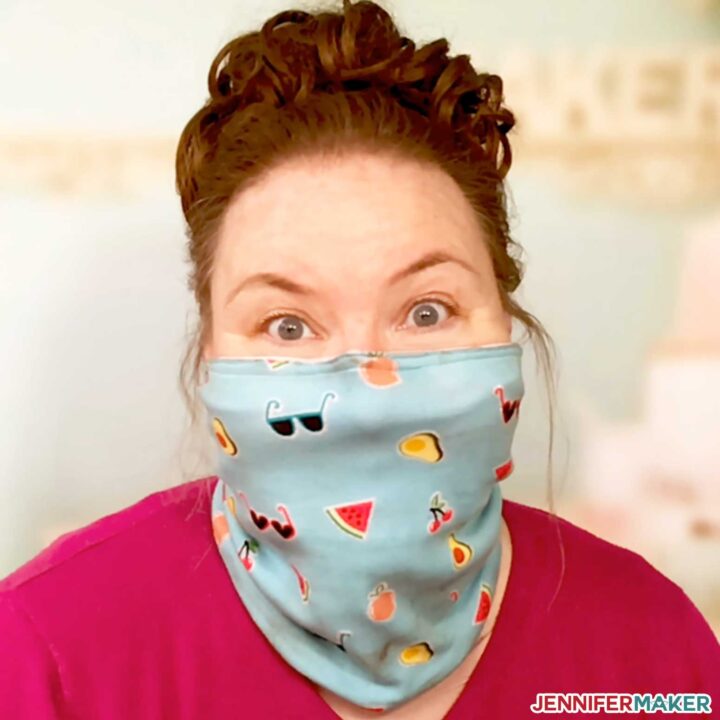
But they’re also really functional for women, as you can wear them like a headband or scarf, too! Here’s a photo of me (below) with a light blue/light pink gaiter face mask (size medium):
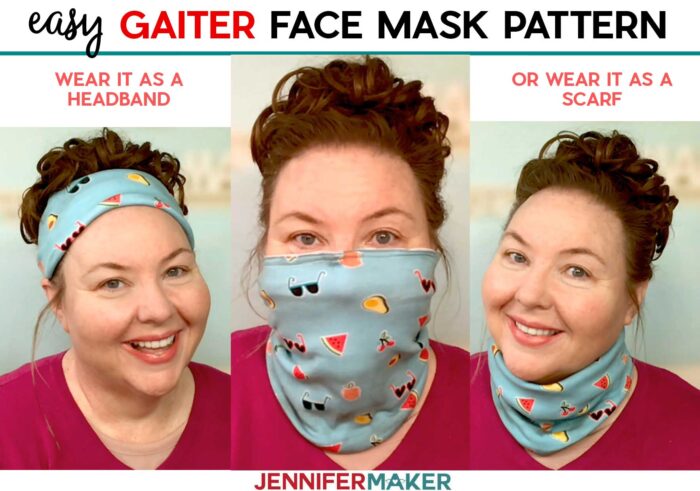
The best thing about the gaiter face mask is how easy and fast it is to make! The version without the filter pocket and nose wire is probably hands-down the fastest face mask you can make, in fact. Oh, and it’s crazy comfortable, too! It’ll even give you a little sun protection!
WHICH SIZE GAITER FACE MASK SHOULD I MAKE?
It is very important that your face mask fits you well. The CDC recommends that your face mask fit snugly on your face which this design does. My gaiter face mask pattern comes in six sizes — Youth Small, Medium and Large and Adult Small, Medium, and Large. To find the right fit, measure your head circumference with a flexible measuring tape. You can also wrap your fabric around your face to give you an idea of how the fabric stretches, how it feels, and what feels comfortable before you cut the fabric. Here is a general idea that might give you a good starting point based on your head circumference:
- 19″-19.5″ – Youth Small
- 19.75″ – 20.25″ – Youth Medium
- 20.75″-21.25″ – Youth Large
- 21.5″-22″ – Adult Small
- 22.5″-23″ – Adult Medium
- 23.5″-24″ – Adult Large
Learn more about face masks and get more answers to your questions in my DIY Face Mask Guide:

Ready to make your own DIY gaiter face masks? This step-by-step tutorial shows you how to do it. This post contains some affiliate links for your convenience (which means if you make a purchase after clicking a link I will earn a small commission but it won’t cost you a penny more)! Read my full disclosure policy.
Materials to Make a Gaiter Face Mask with an Optional Filter Pocket and Nose Guard
View my Amazon shopping list with the exact items we used to make this project!
- Two pieces of stretchy cotton interlock knit fabric, a max of 12″ x 21″ each — I used this blue knit and this pink knit — click here to see research studies that show why cotton is the best household item to use for a DIY face mask
- Thread
- Pins (for keeping fabric attached while sewing)
- (Optional) 20-22-gauge wire or floral wire, 4″ long (to make a fitted top to go over the bridge of your nose)
- (Optional) Something you can use as a filter — see my Face Mask Materials List for notes, effectiveness, and breathability so you can make an informed decision
- (Optional) Fabric marker (good if you want to mark the seam allowance)
- Scissors
- Ruler
- Sewing machine as shown in the video, this sewing machine as another option, a serger, or needle and thread for hand sewing
- A way to cut your material, such as a rotary blade, scissors, or a Cricut cutting machine
- Pink FabricGrip mat (if you’re cutting this on your Cricut Maker; you can use the green StandardGrip mat if you’re cutting on your Cricut Explore)
- Design #223 – My free gaiter face mask pattern which comes as an SVG cut file or printable PDF pattern ( available here and in my free resource library—get the password by filling out the form at the bottom of this page)
How to Cut and Sew the DIY Neck Gaiter Face Mask
Easy Gaiter Face Mask
Create your own easy gaiter face mask using this simple pattern, with or without a filter pocket and nose wire!
Materials
- Knit Fabric, 4-way stretch is best (12" x 36" or a third of a yard)
- Thread
- (Optional) Fabric Marker
- Freezer paper (if you're cutting this on a Cricut Explore)
- Design #223 - My free gaiter face mask SVG/DXF/PDF cut files (available in my free resource library—get the password at the bottom of this post)
Tools
- A way to cut your fabric (I use the amazing Cricut cutting machine -- you can do this on both a Maker and an Explore)
- Pink FabricGrip Mat, 12" x 24" (for Maker) or Green StandardGrip Mat, 12" x 24" (for Explore)
- Sewing Machine and/or a hand needle & thread
- (Optional) Serger
- Scissors (for cutting fabric)
- Ruler (for measuring fabric)
- Pins (for keeping pieces of fabric together)
Instructions
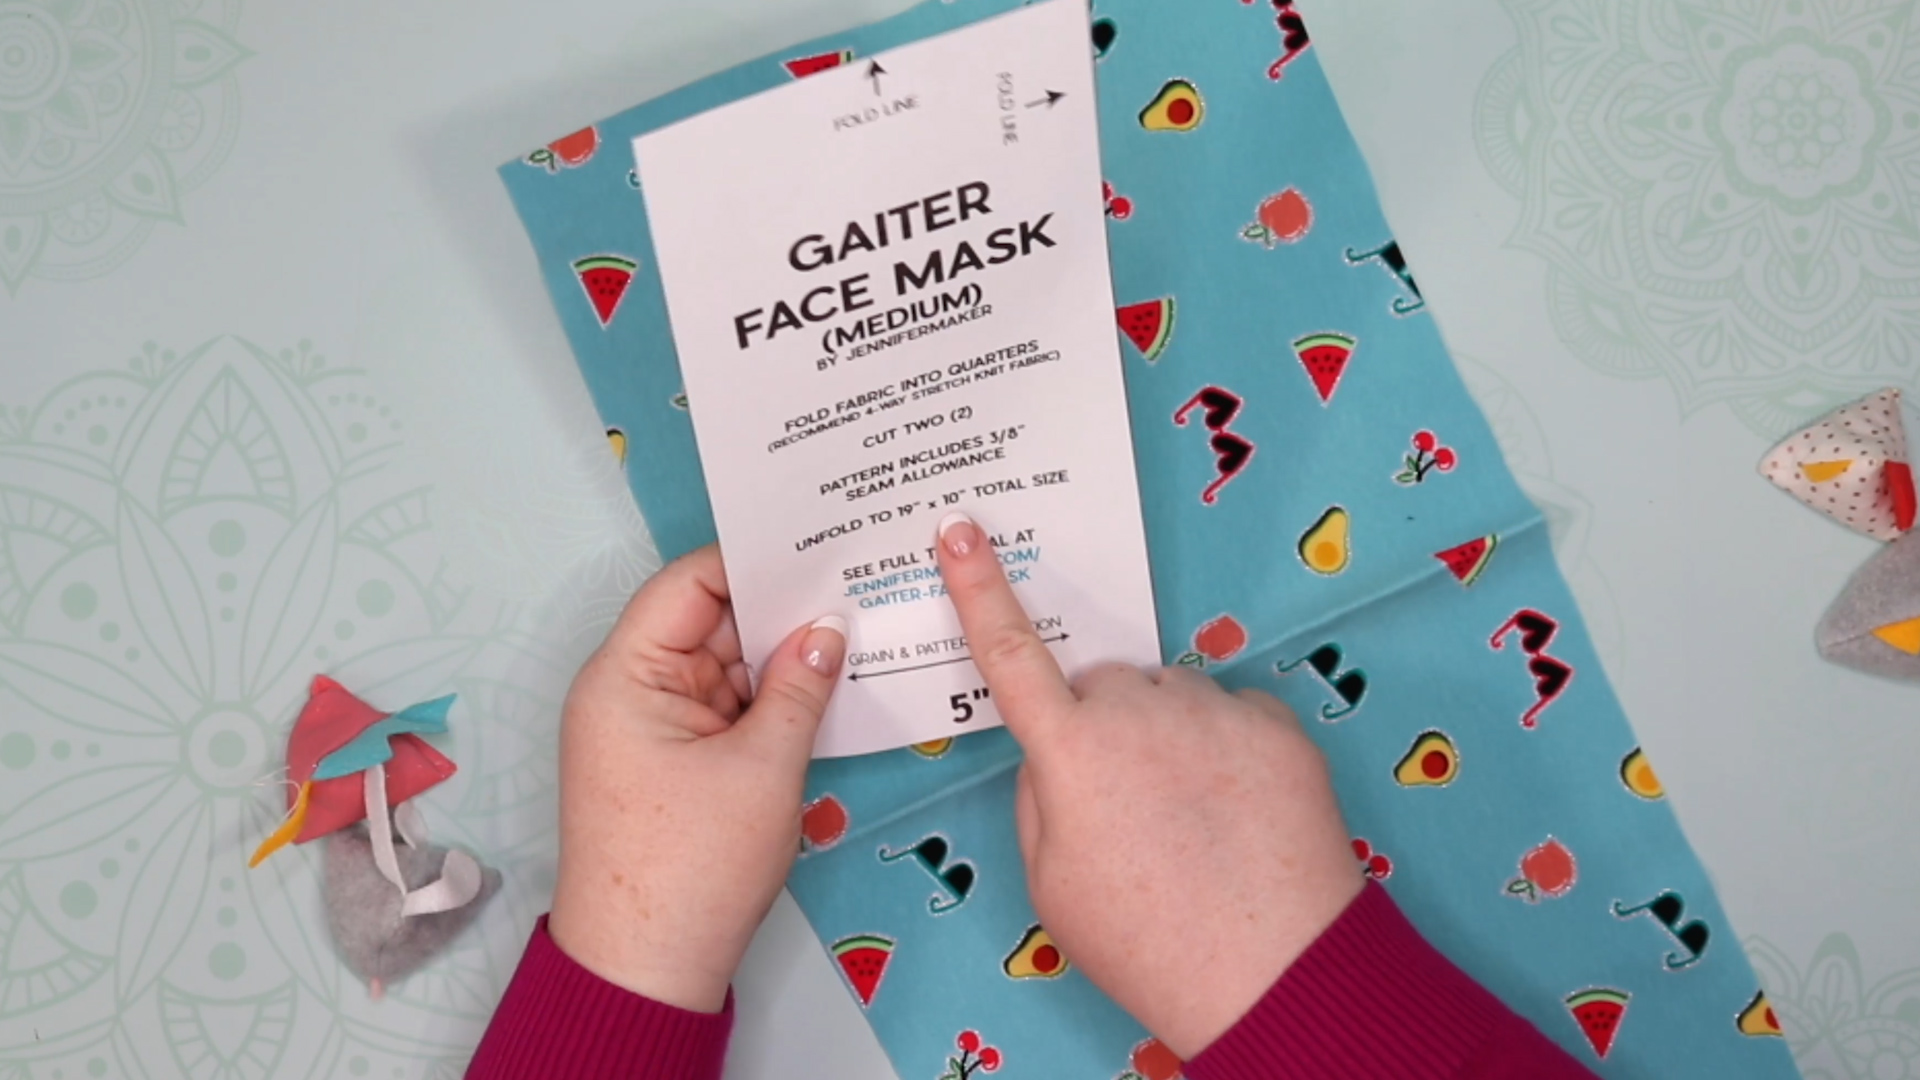
Step 1: Get my free easy Gaiter face mask pattern
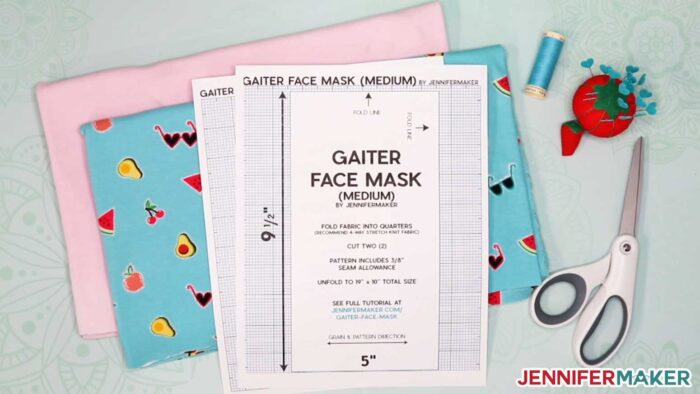
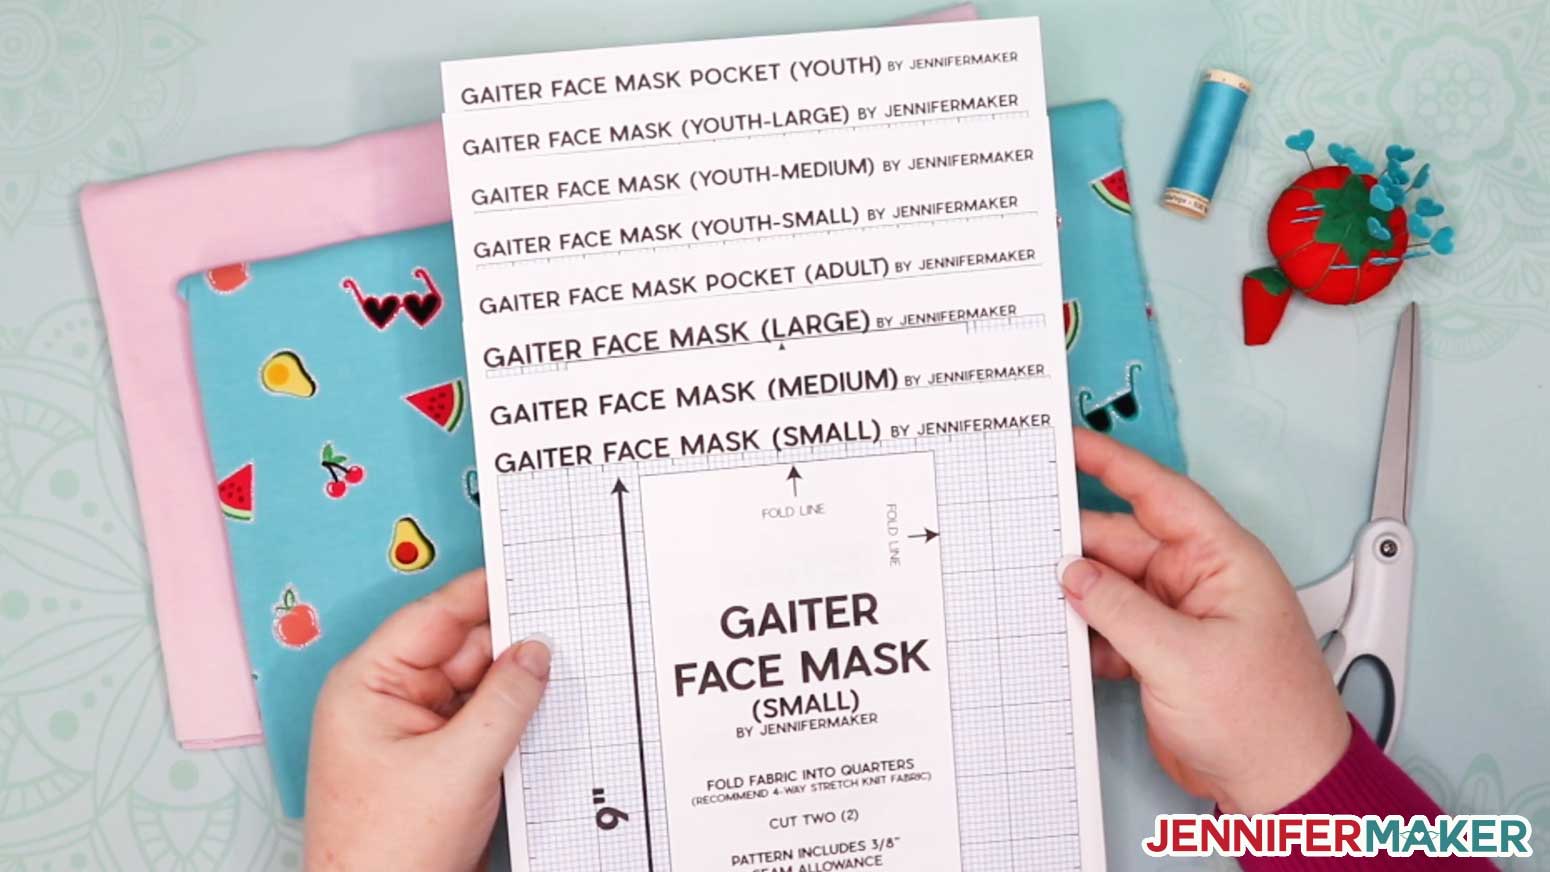
My free DIY gaiter face mask pattern comes in several formats. You can get a printable PDF for cutting by hand, or an SVG cut file for cutting with a Cricut or another cutting machine. Download Design #223 which is the DIY gaiter face mask pattern, from my free resource library (get the password to the library in the form at the bottom of this post), or click here!
Here's what the Gaiter Face Mask PDF pattern looks like printed out:
Here’s what the gaiter face mask SVG cut file will look like once uploaded to Cricut Design Space (the top three are for youth, the bottom four are for adults, and the two gray rectangles are filter pockets in two sizes):
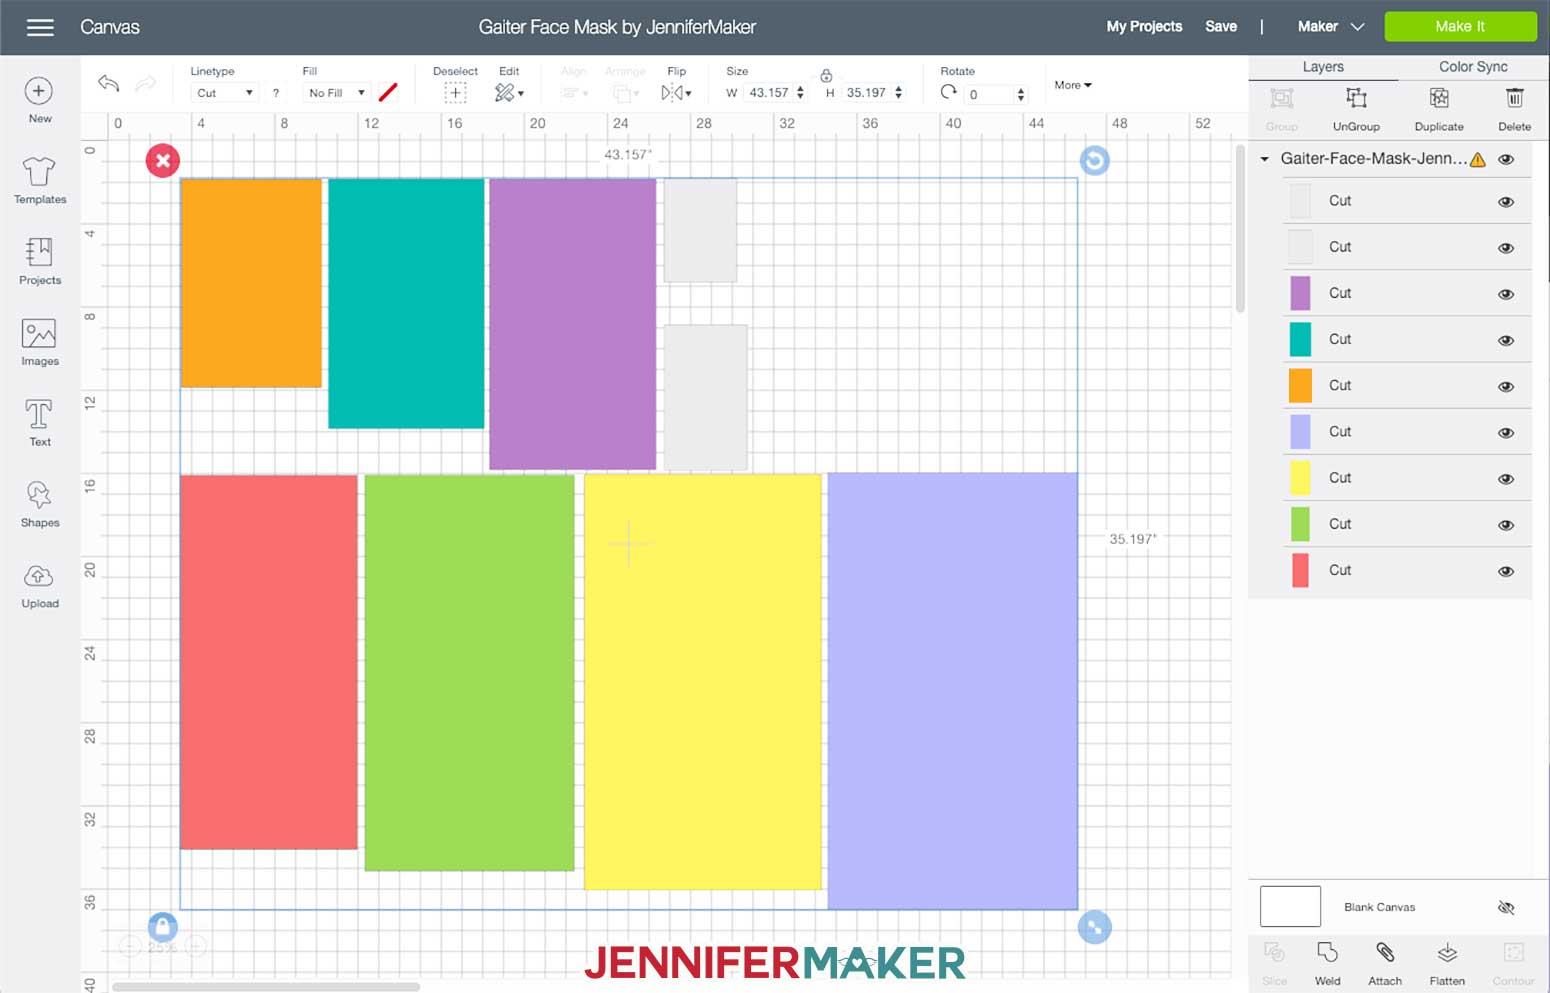
Tip: If you’re not sure how to upload an SVG cut file to Cricut Design Space, watch this helpful video training series I made. If you’re on an iPhone or iPad, here’s how to download and upload SVG files to the Cricut Design Space app.
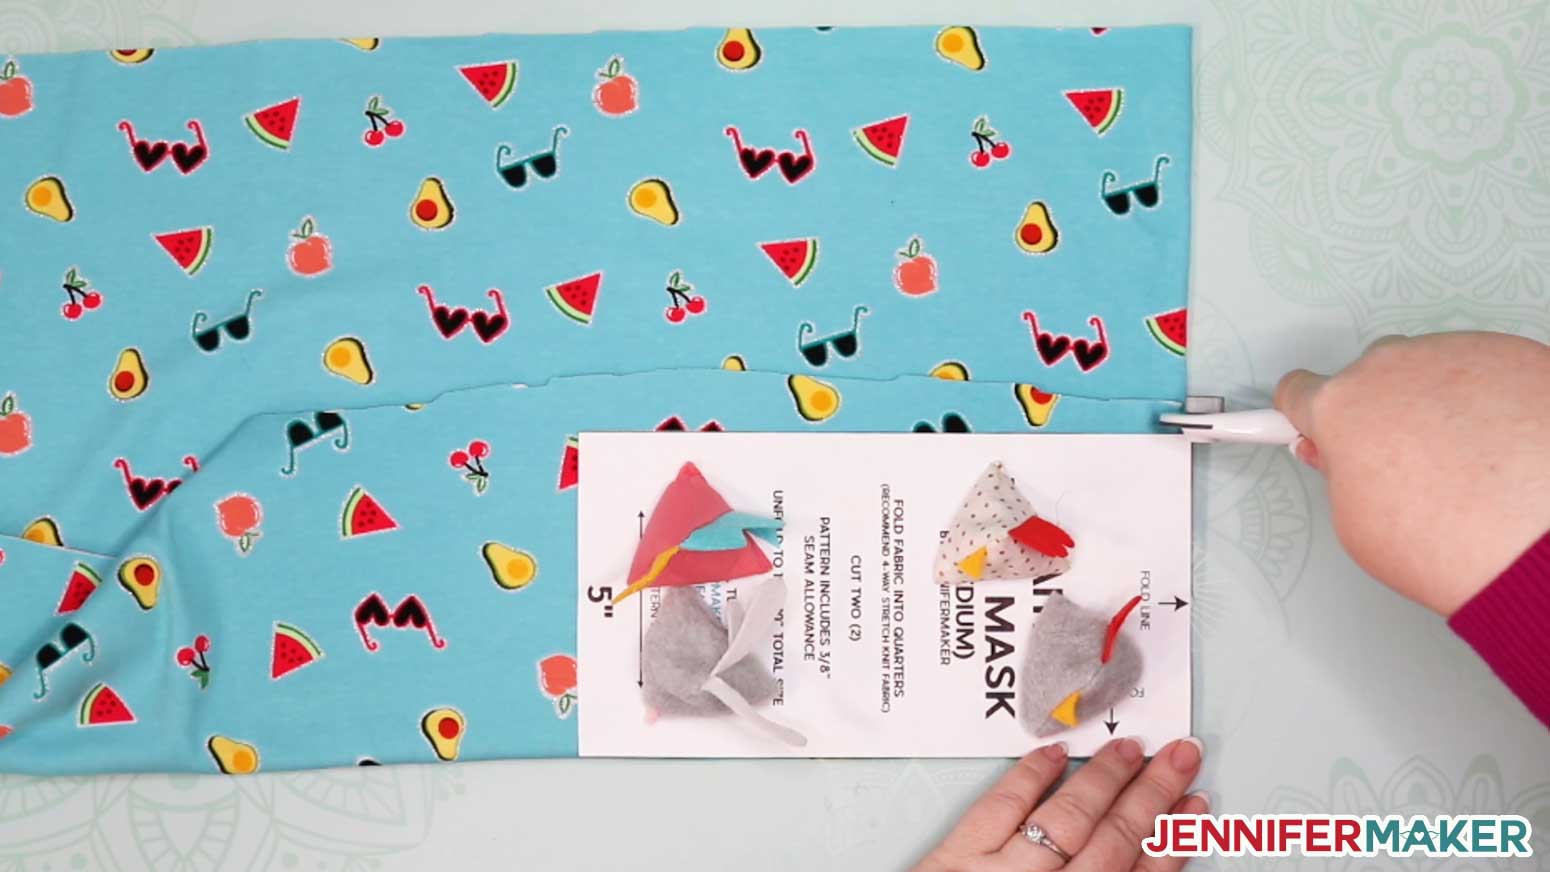
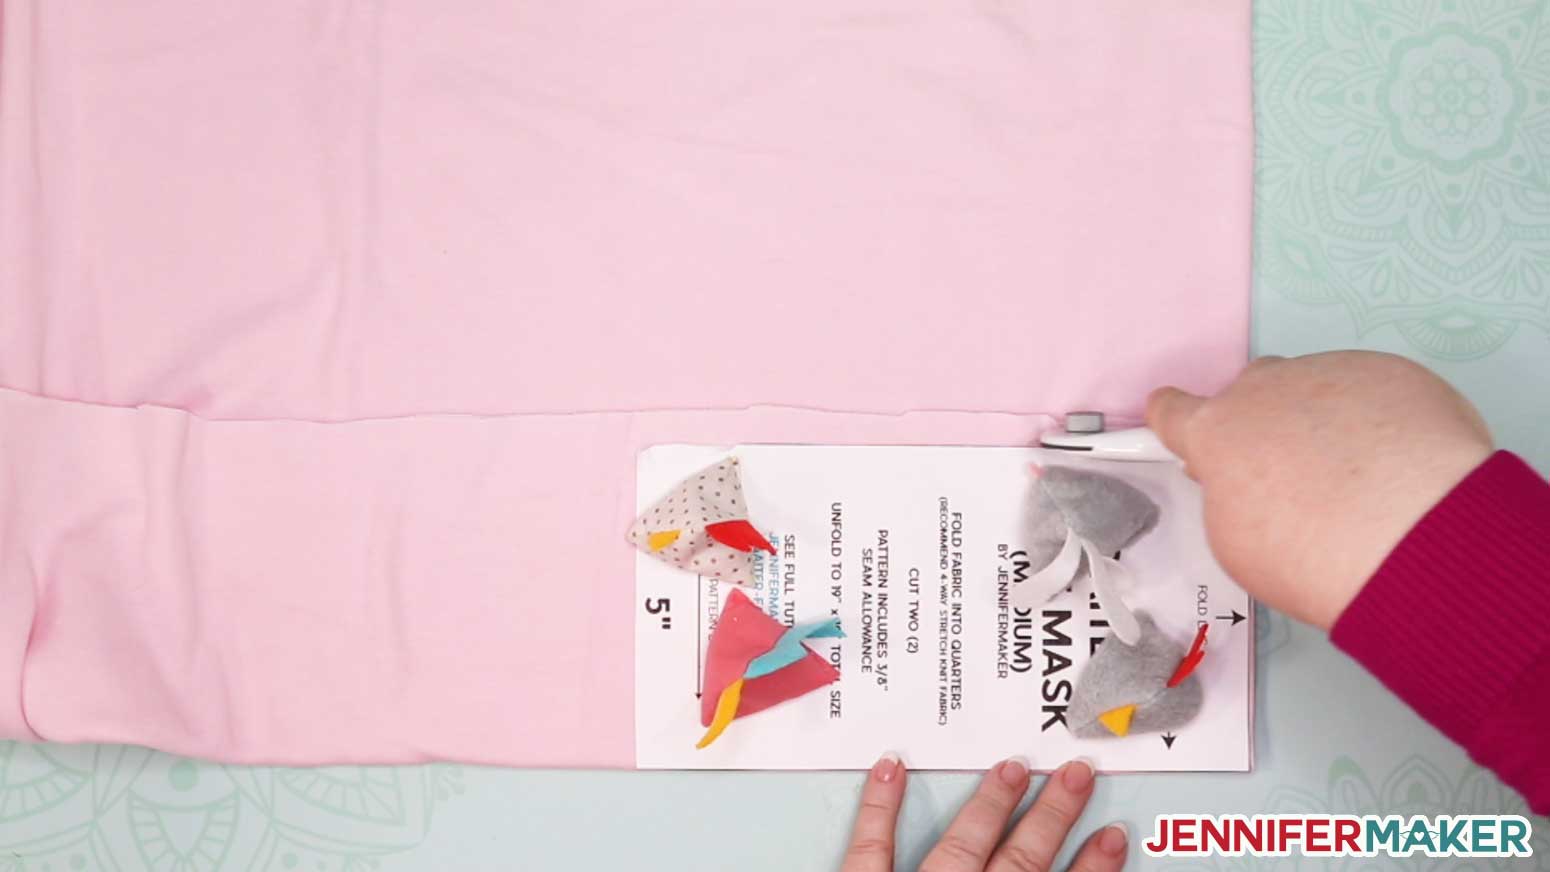
Step 2: Cut out your DIY Gaiter Face mask pattern pieces from fabric
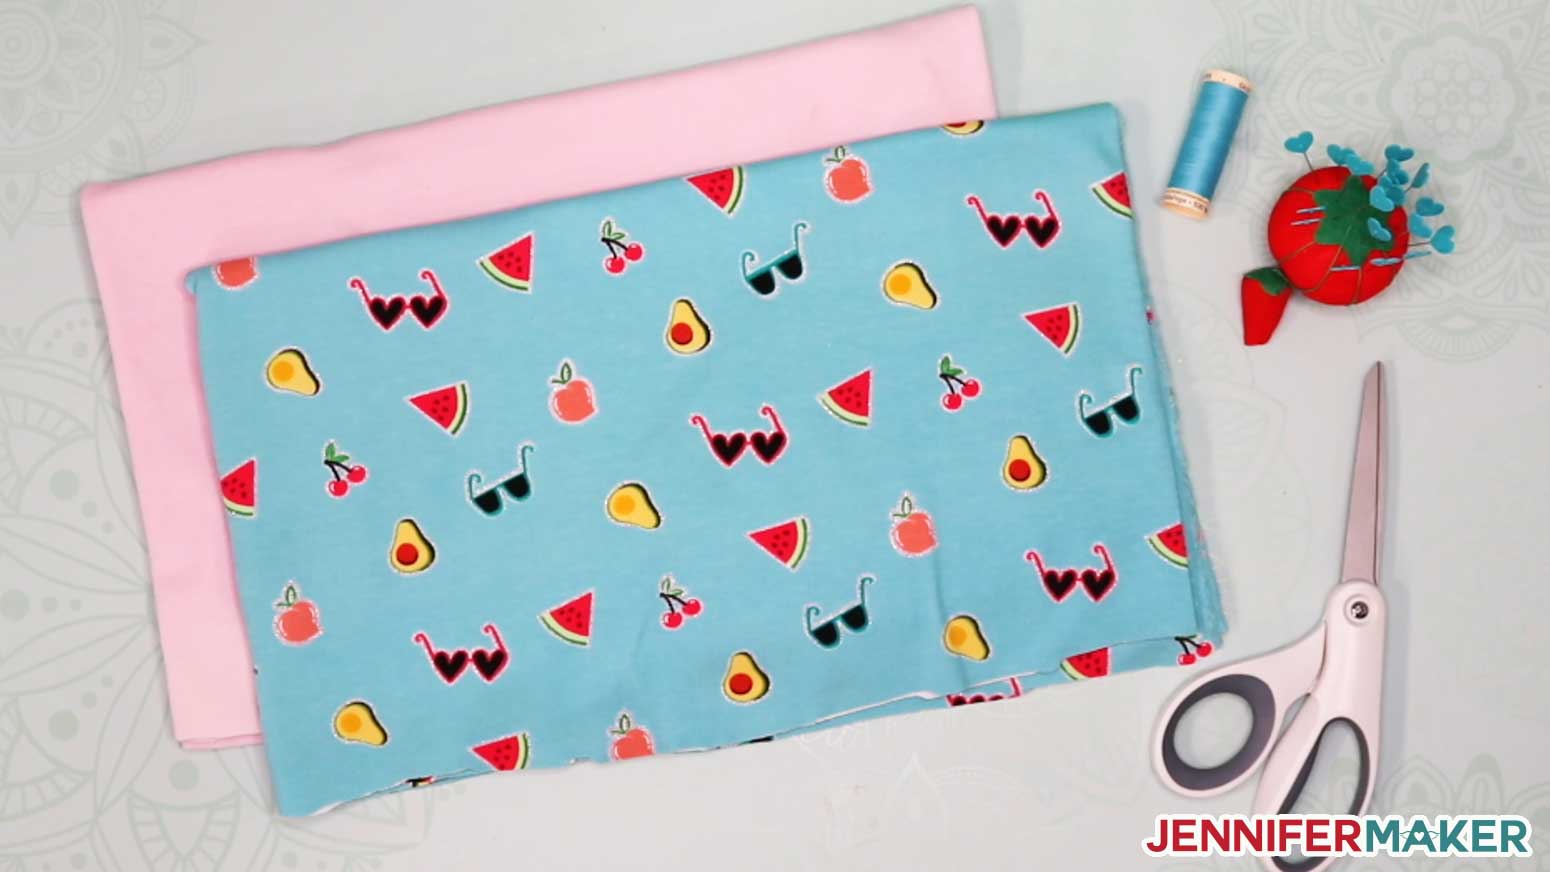
I recommend you use two different colors and/or patterns of knit fabric to make your gaiter face mask, that way you always know which side is the outside and which is the inside. You don't want to accidentally put the outside layer against your mouth. For this tutorial, I'm using a blue patterned knit as the outside layer and a pink solid knit as the inner layer.
Tip: Pay attention to the fabric grain and pattern direction noted on the printed pattern.
If you're cutting the gaiter mask by hand, just print out the printable PDF, cut out each pattern piece as directed, and use it to cut your fabric. Note that your fabric is folded in quarters before cutting each layer.
Note: I'm using DIY pattern weights to hold my pattern in place while I cut my fabric in the above photo.
Tip: If you plan to make a LOT of these gaiter face masks, print out your patterns on cardstock for tracing!
Be sure to cut two layers of fabric!
If you're cutting this gaiter face mask on a Cricut Maker: Place your fabric right side down on a pink FabricGrip cutting mat. Load your rotary blade and fabric marker into your Cricut machine, load your mat, and press the flashing button to begin your cut.
If you're cutting this gaiter face mask on a Cricut Explore, it's probably more trouble than it is worth because these are really just rectangles. But if you want to do it, see this tutorial on how to cut fabric on a Cricut Explore.
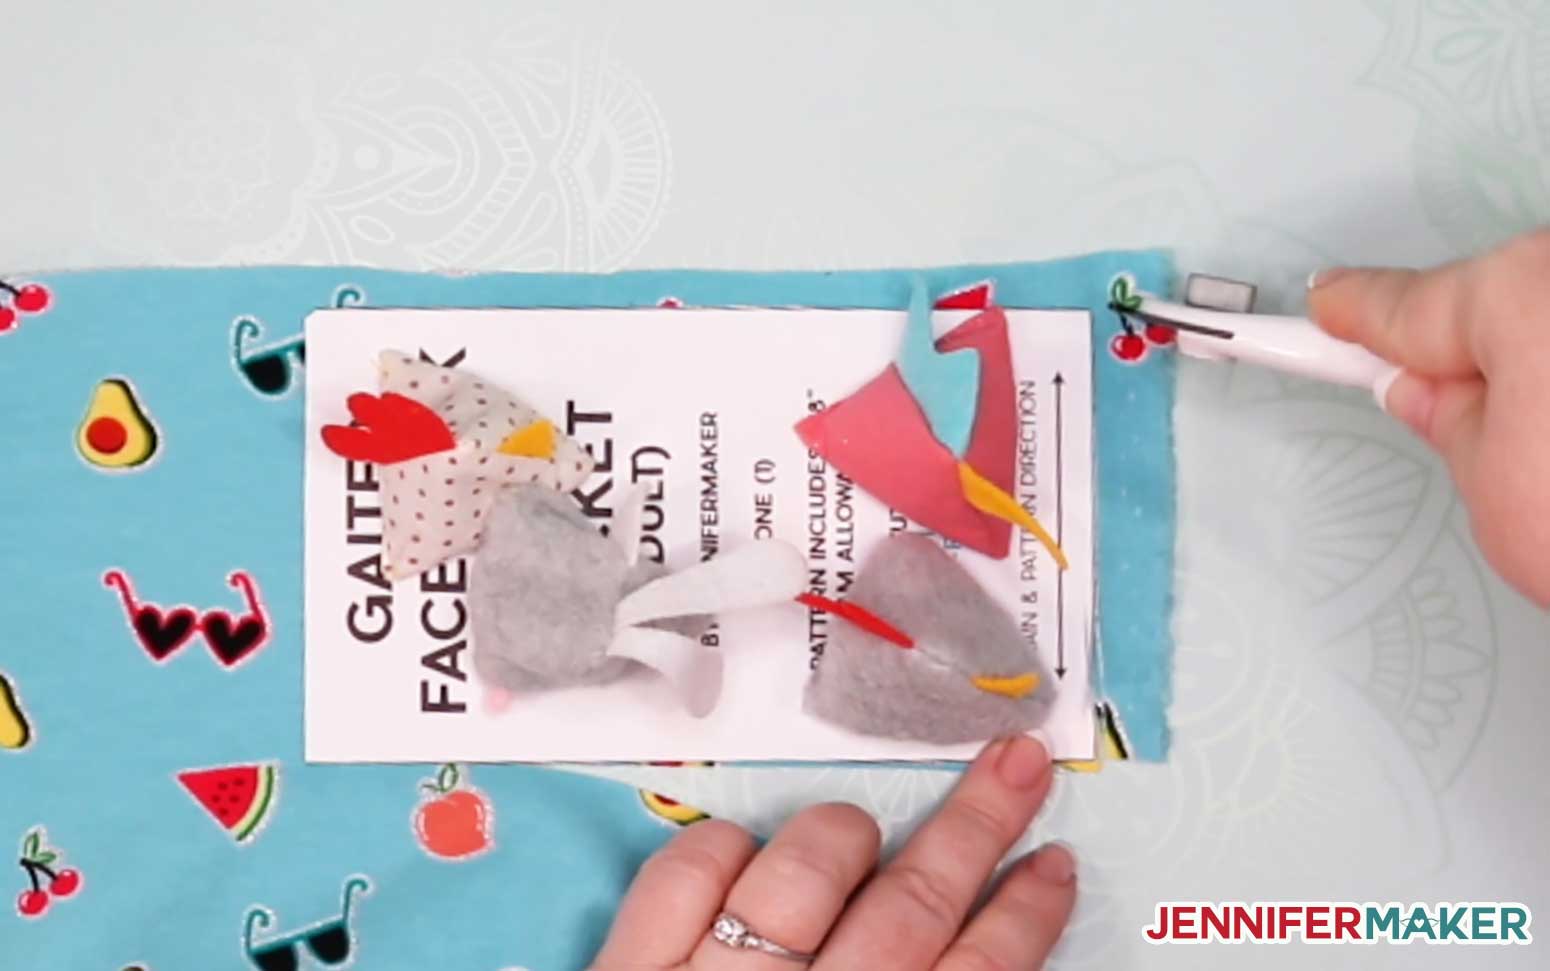
Step 3: (Optional) Make the Filter Pocket
If you want to add the filter pocket, cut out a piece of fabric with the filter pocket pattern.
Take the layer of fabric that will be your inside layer and fold it in half the long way. Mark that center point with a pin.
Now fold your filter pocket in half the long way and mark its center point with a pin.
Line up the inside layer and the filter pocket along their center points, one inch from the edge. Make sure the wrong side of your pocket is against the right side of your inner layer. Pin in place.
Sew the filter pocket to the inside layer of the gaiter face mask along the two edges and bottom at 1/4" seam allowance with a straight stitch, leaving the top opening (the side closest to the edge) open. Be sure to do a backstitch at the start and end of your line of sewing to keep your pocket secure.
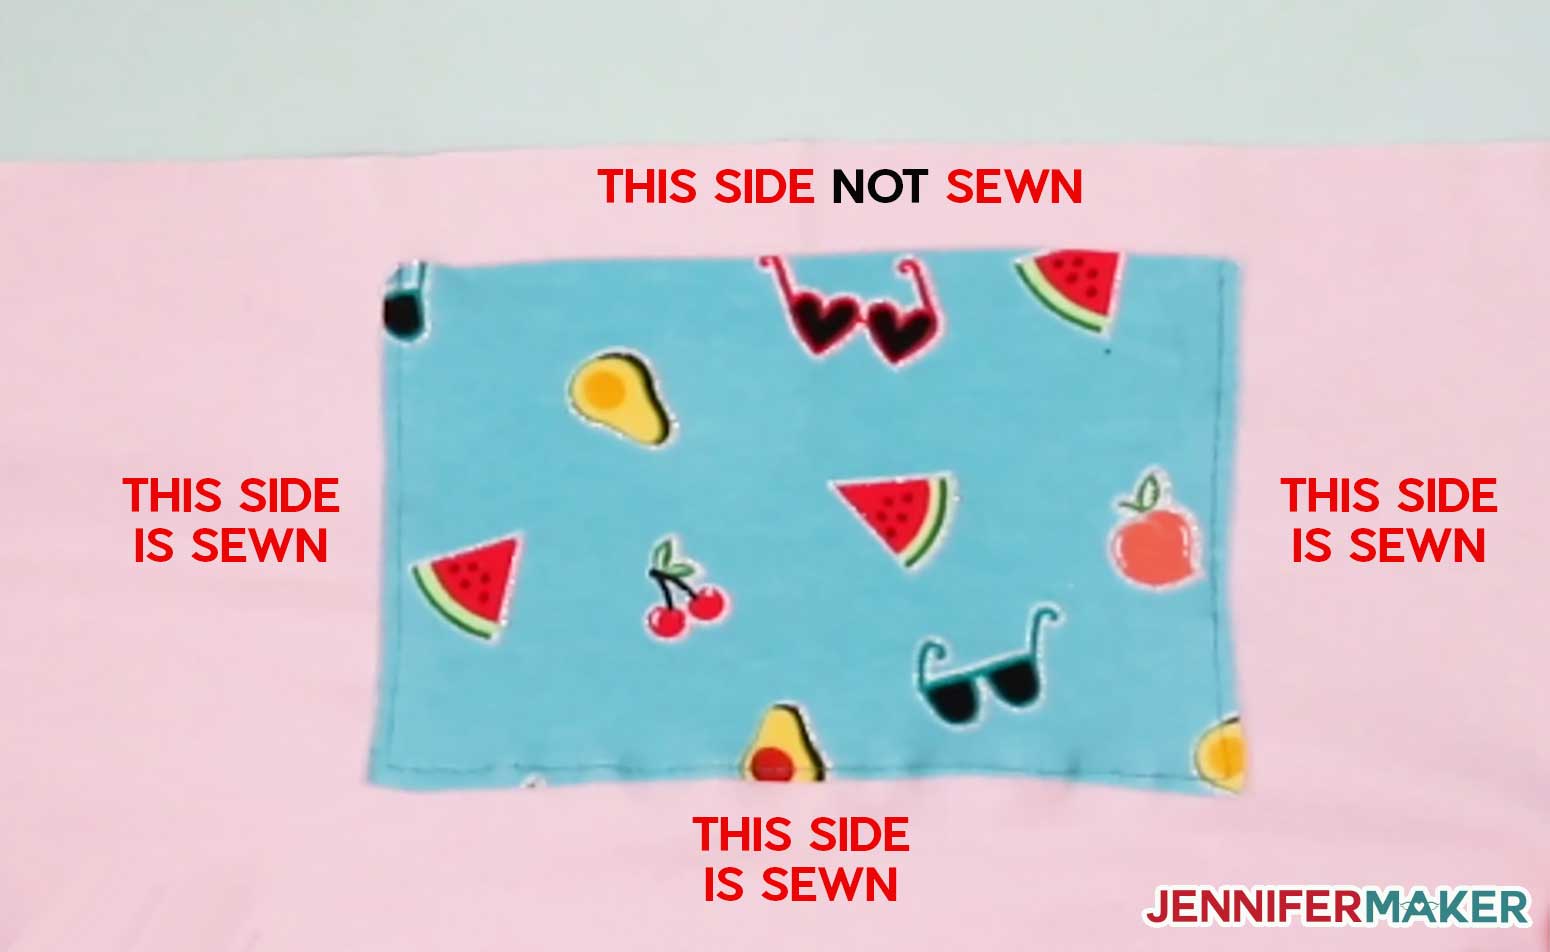
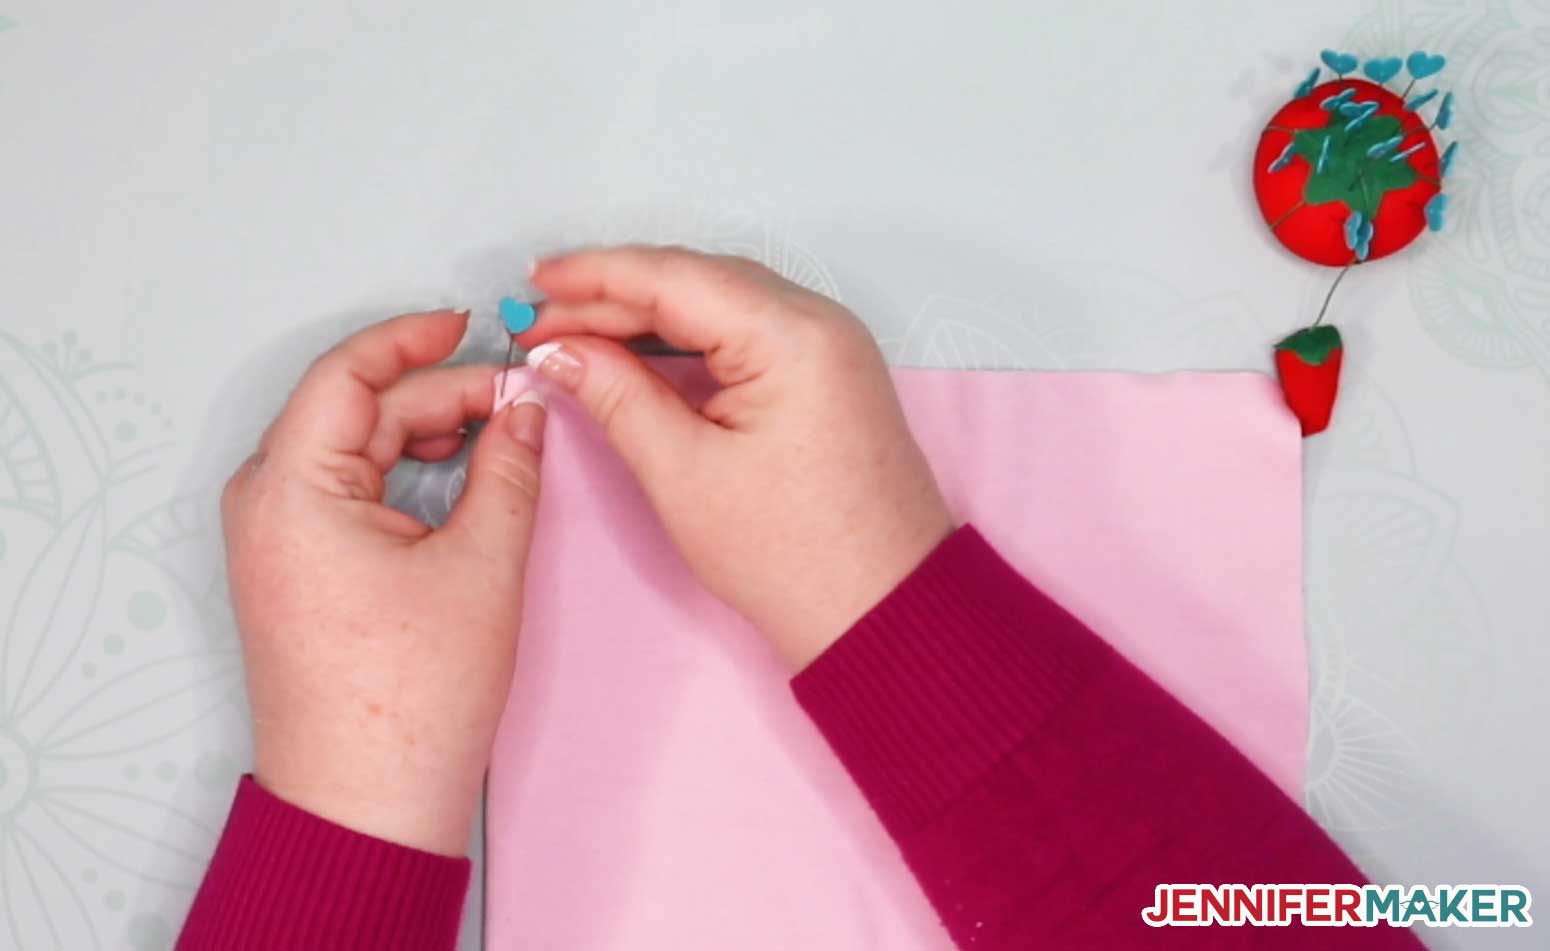
Step 4: Pin and sew the long sides together
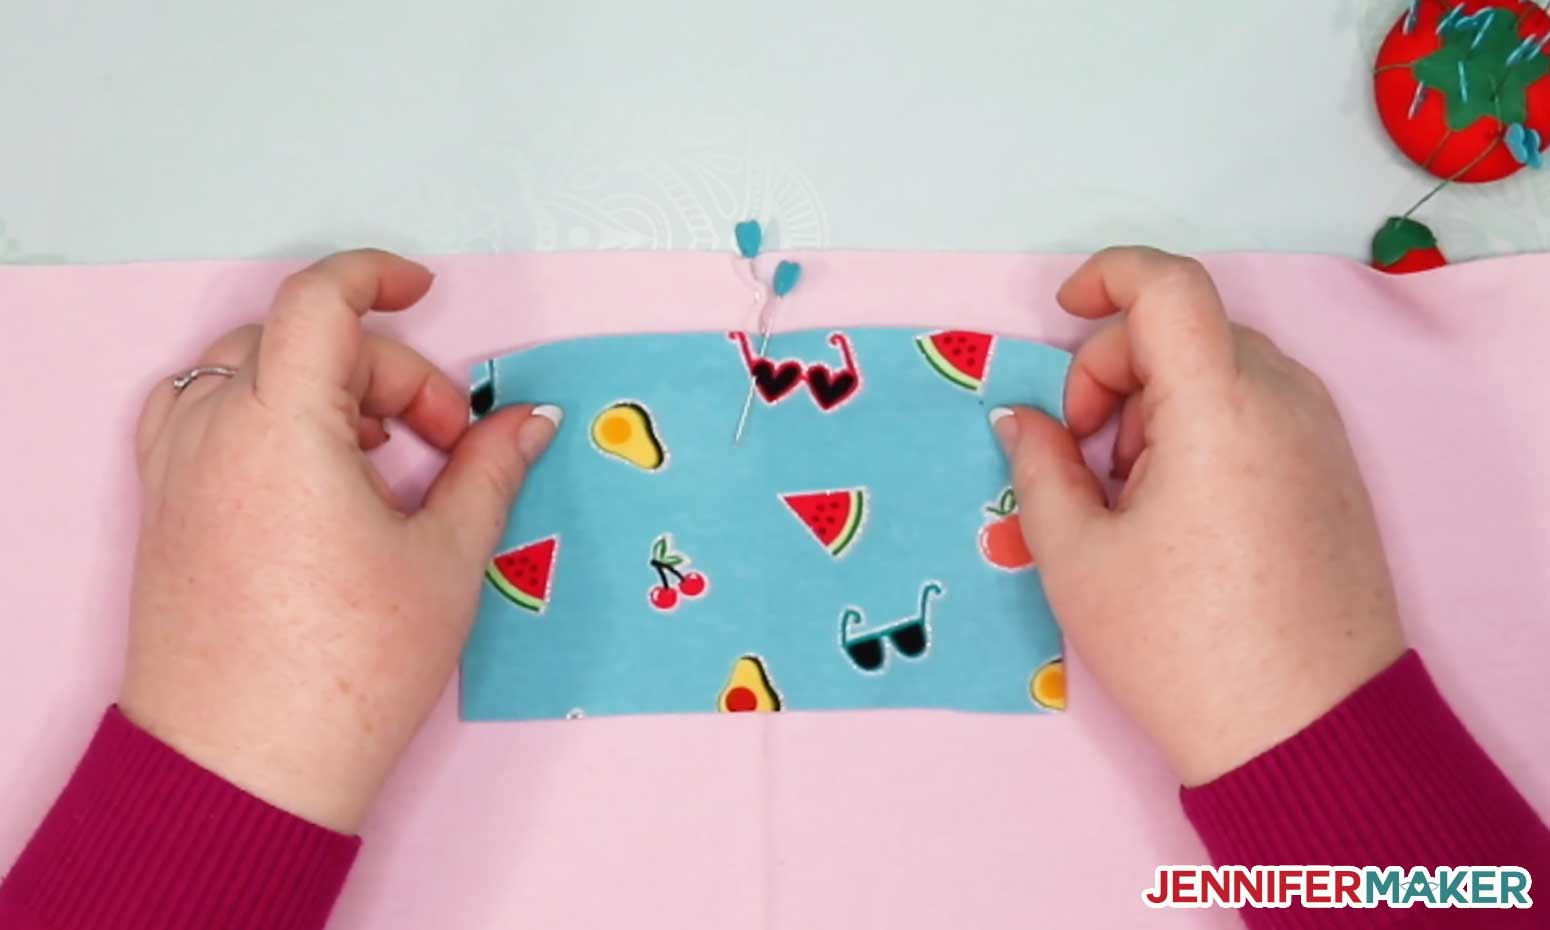
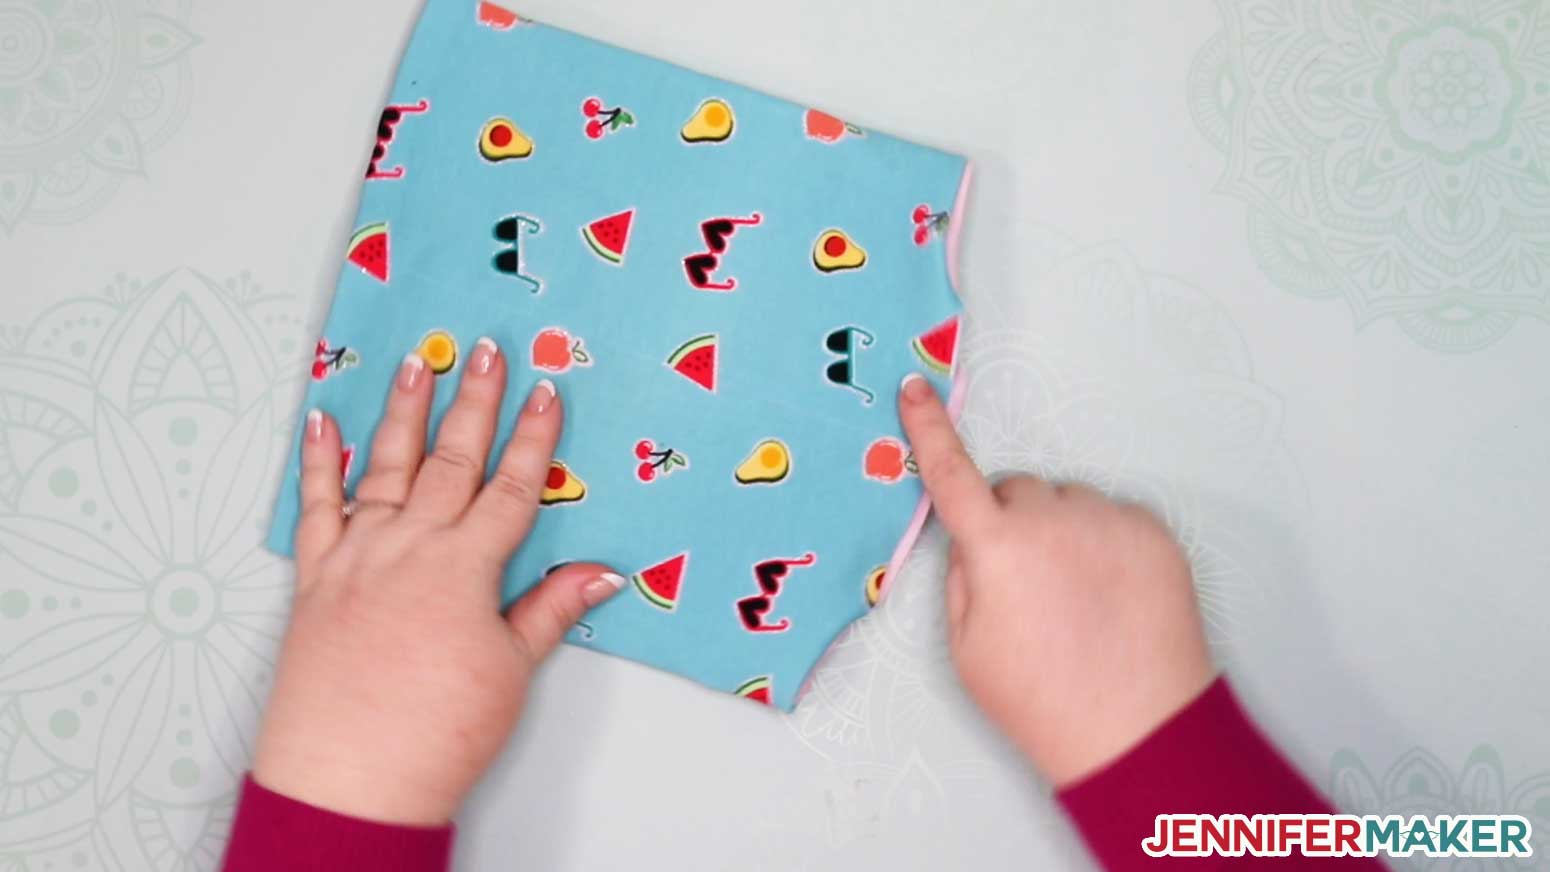
Place your inner layer on top of the outer layer for your gaiter face mask. Make sure the right sides (the side with a design on it if you have any) are facing each other. If you added a pocket in step 3, your pocket side should be facing your outer layer. Pin in place.
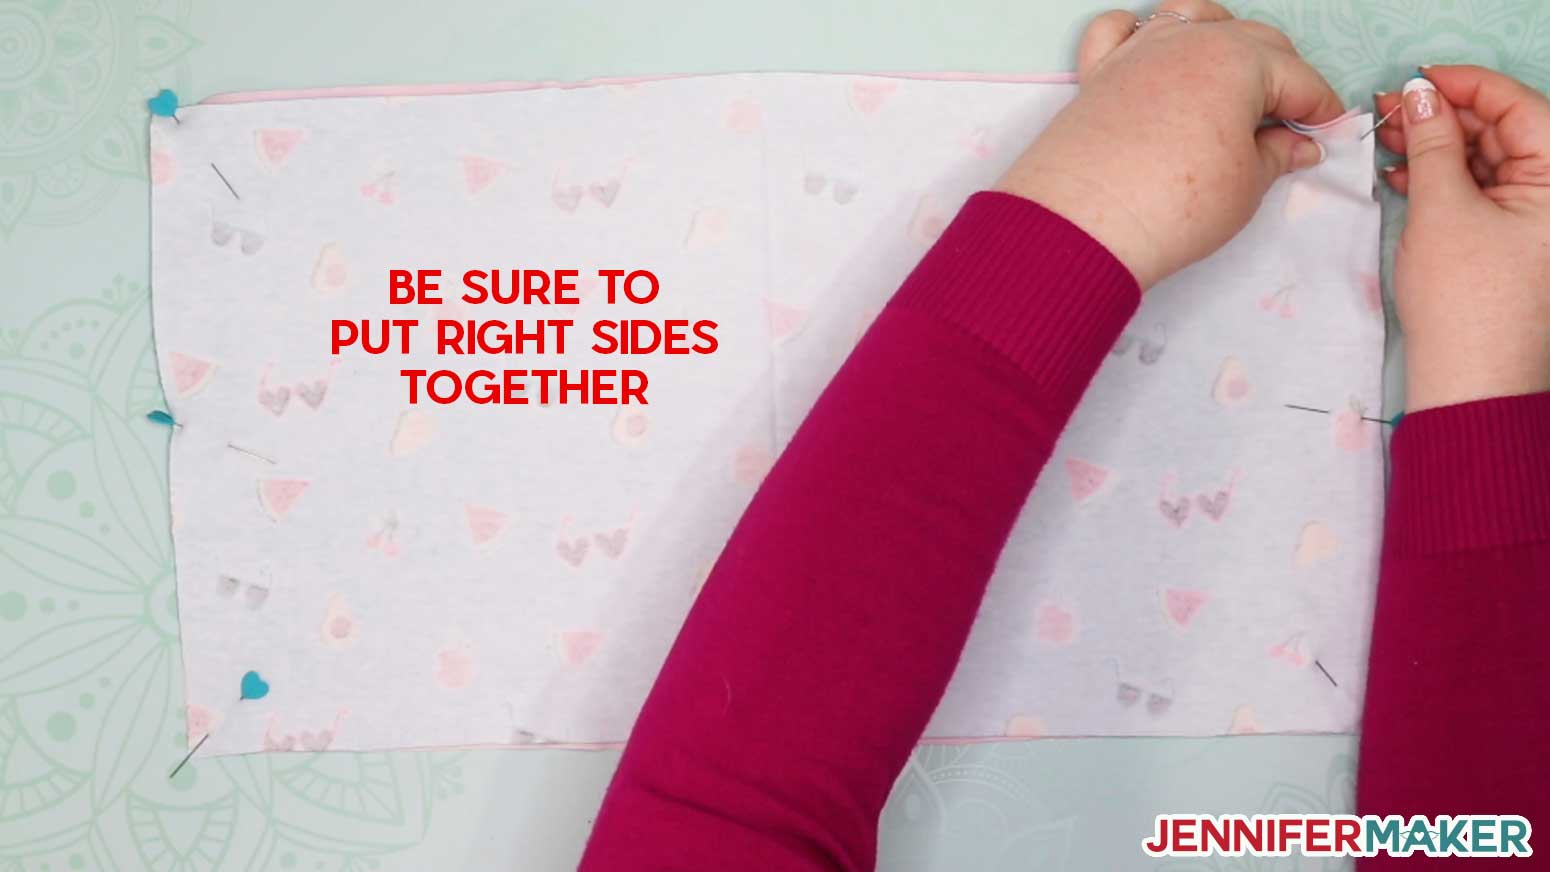
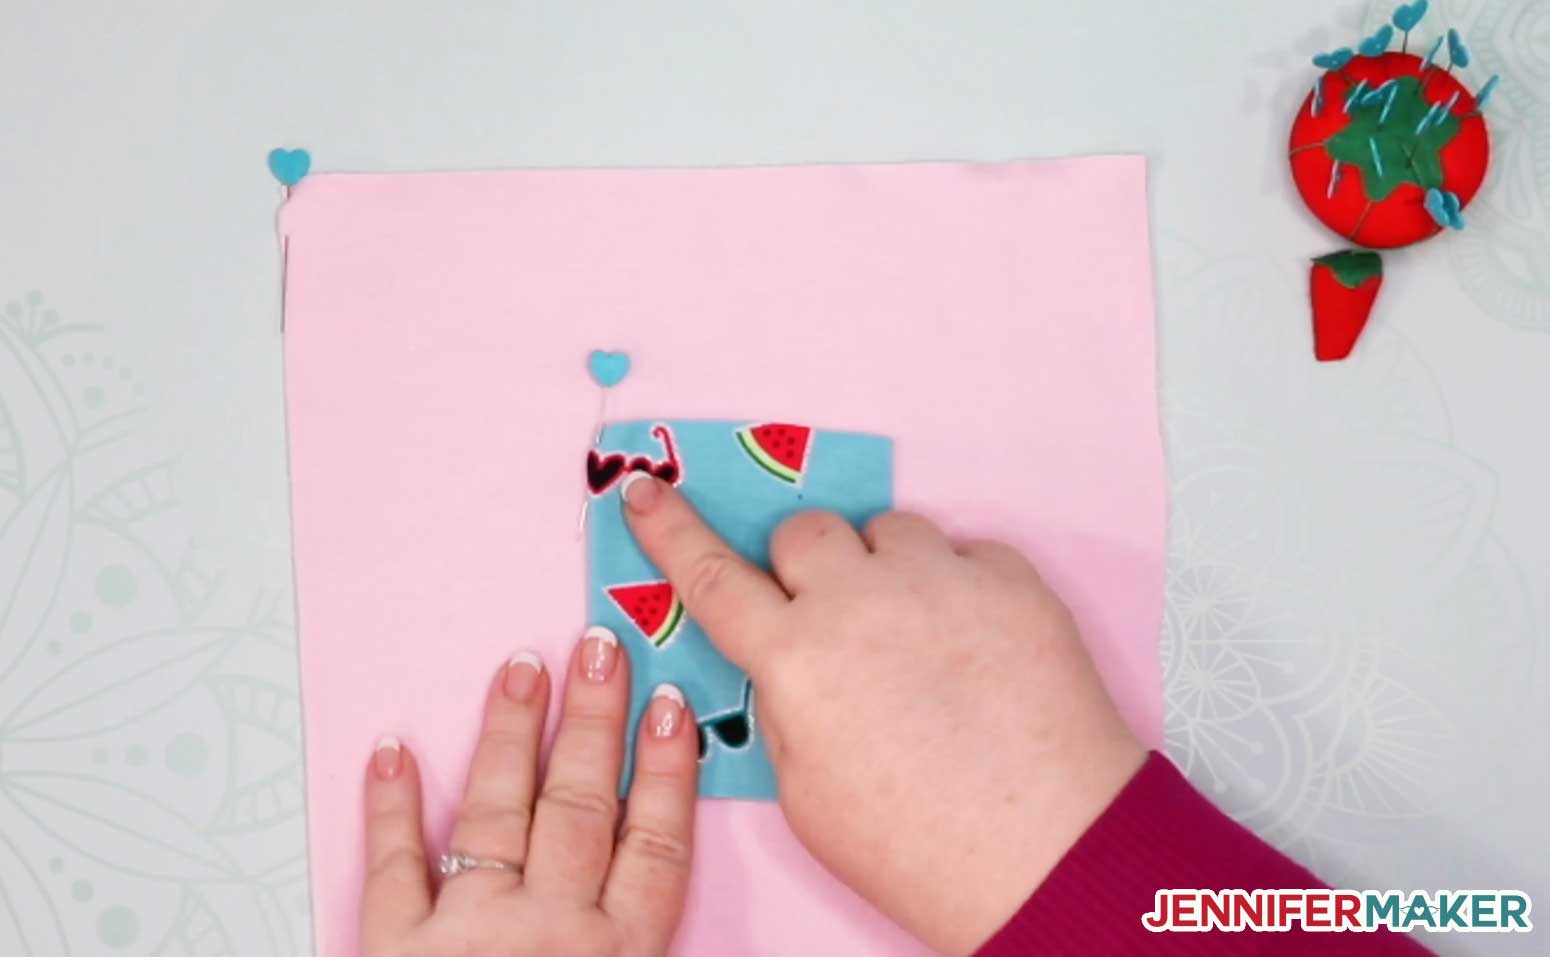
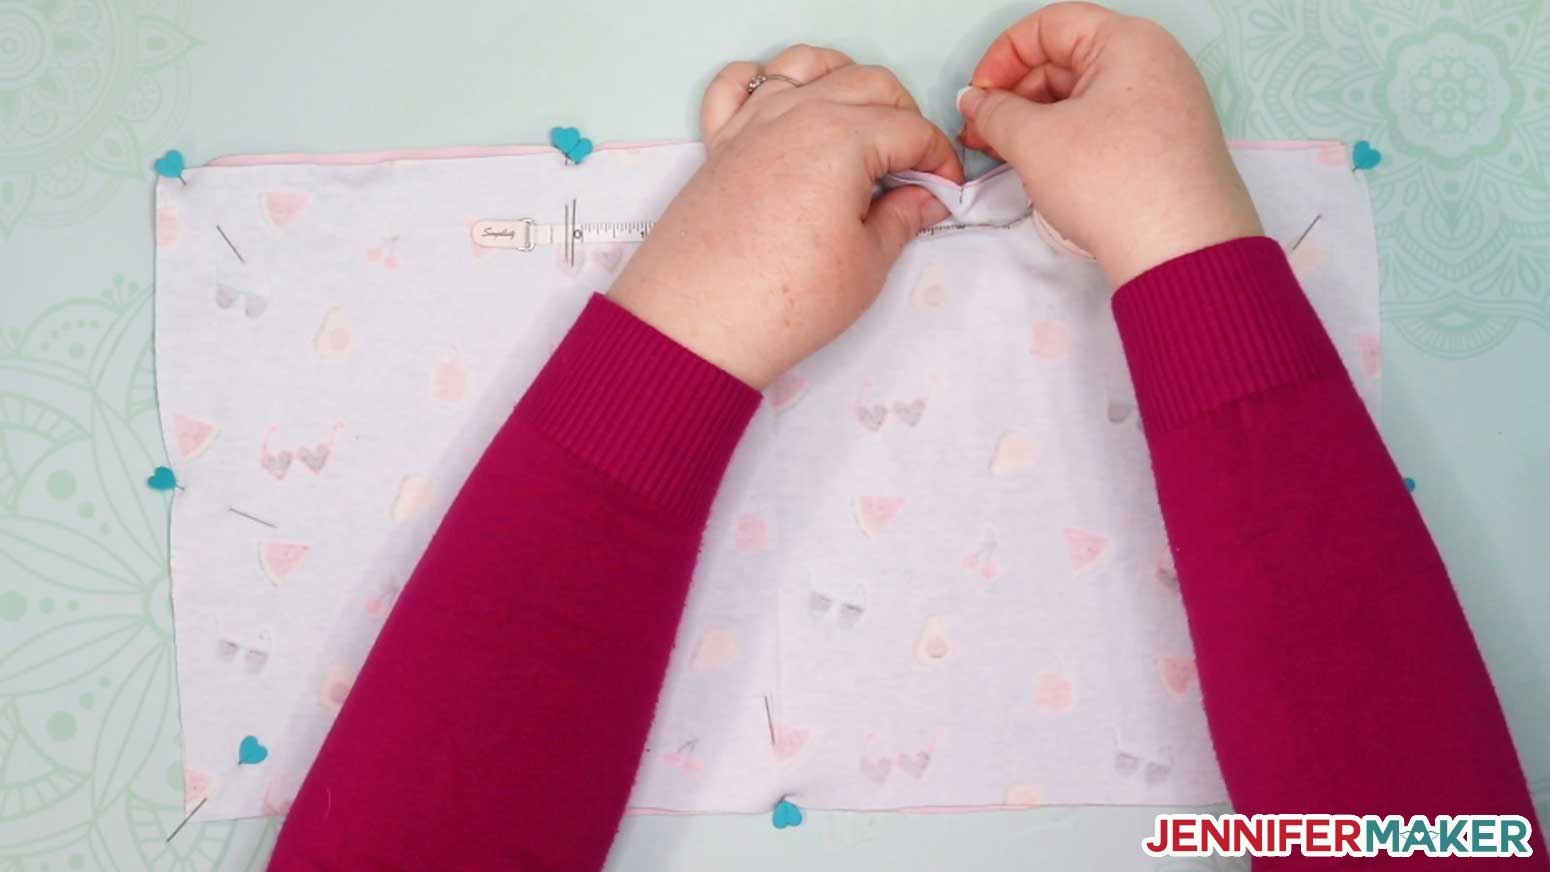
Fold your two layers in half the long way (with the pocket at the top, if you have one) and mark the top center point of your gaiter face mask, then measure out about 3" on either side of this center point and pin again. Put two more pins immediately next to those last two pins, then remove the center pin entirely.
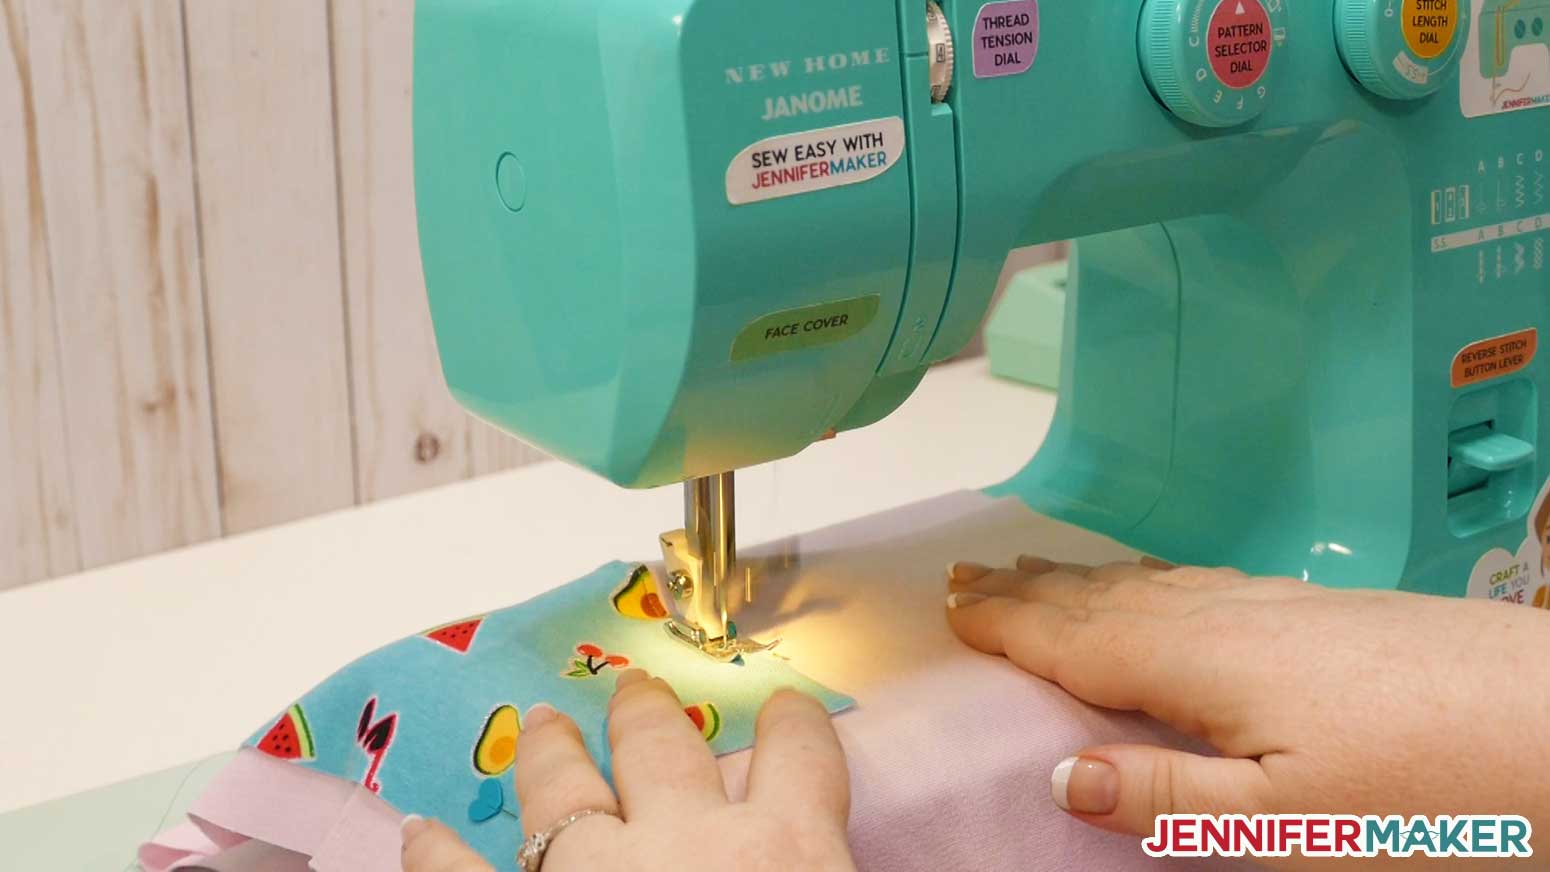
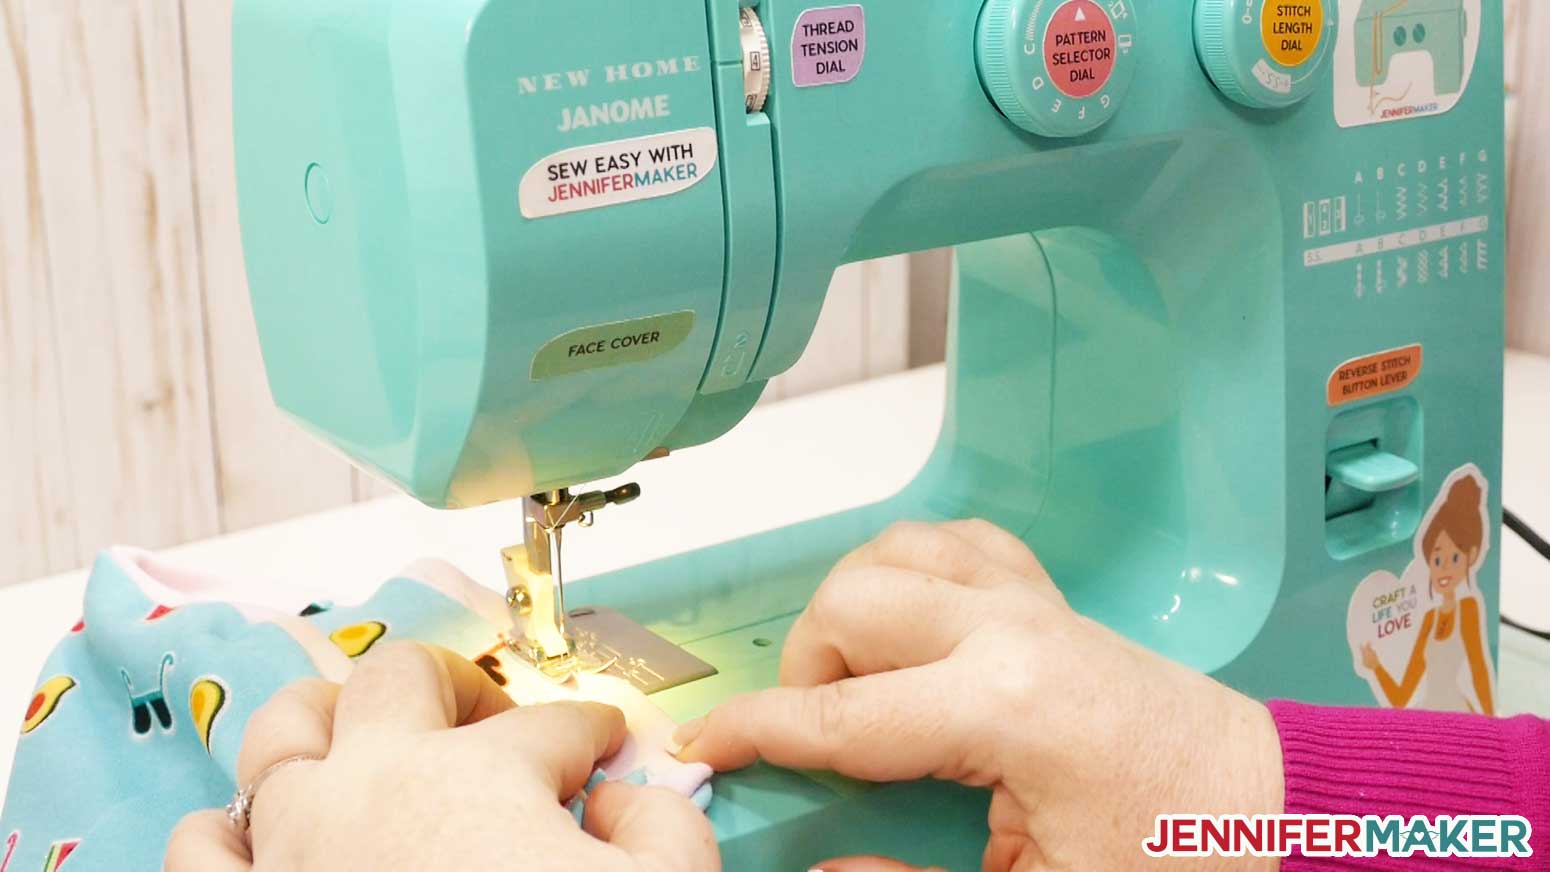
Starting at one long end along the side with your double pins, sew with a zig zag stitch (or serge with your serger) from the corner until you get to where your double pins are and stop. Move your fabric up and resume sewing from the second set of double pins to the bottom edge of your fabric.
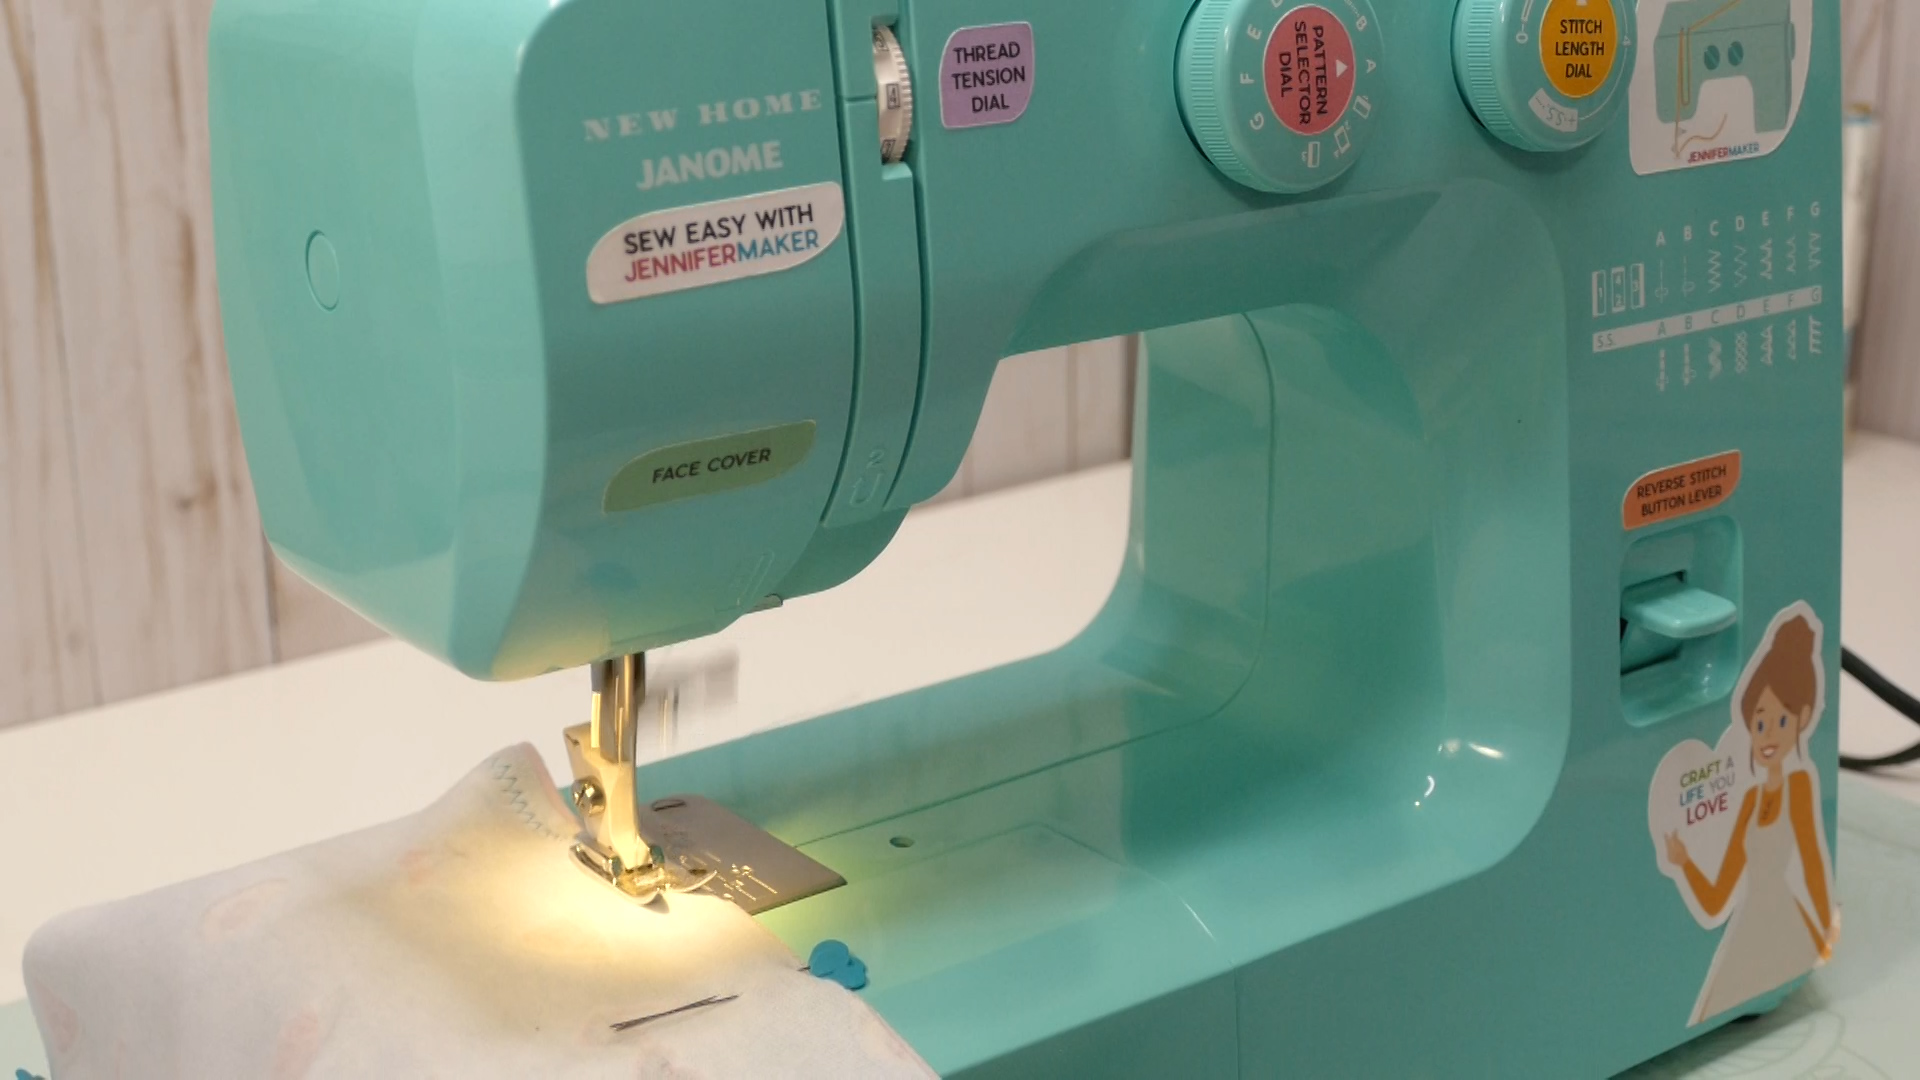
Important: You MUST use a zig-zag stitch (or serger) when sewing fabric with stretch. A single straight stitch doesn't allow flexibility for the fabric to stretch and the seams will break when stretched.
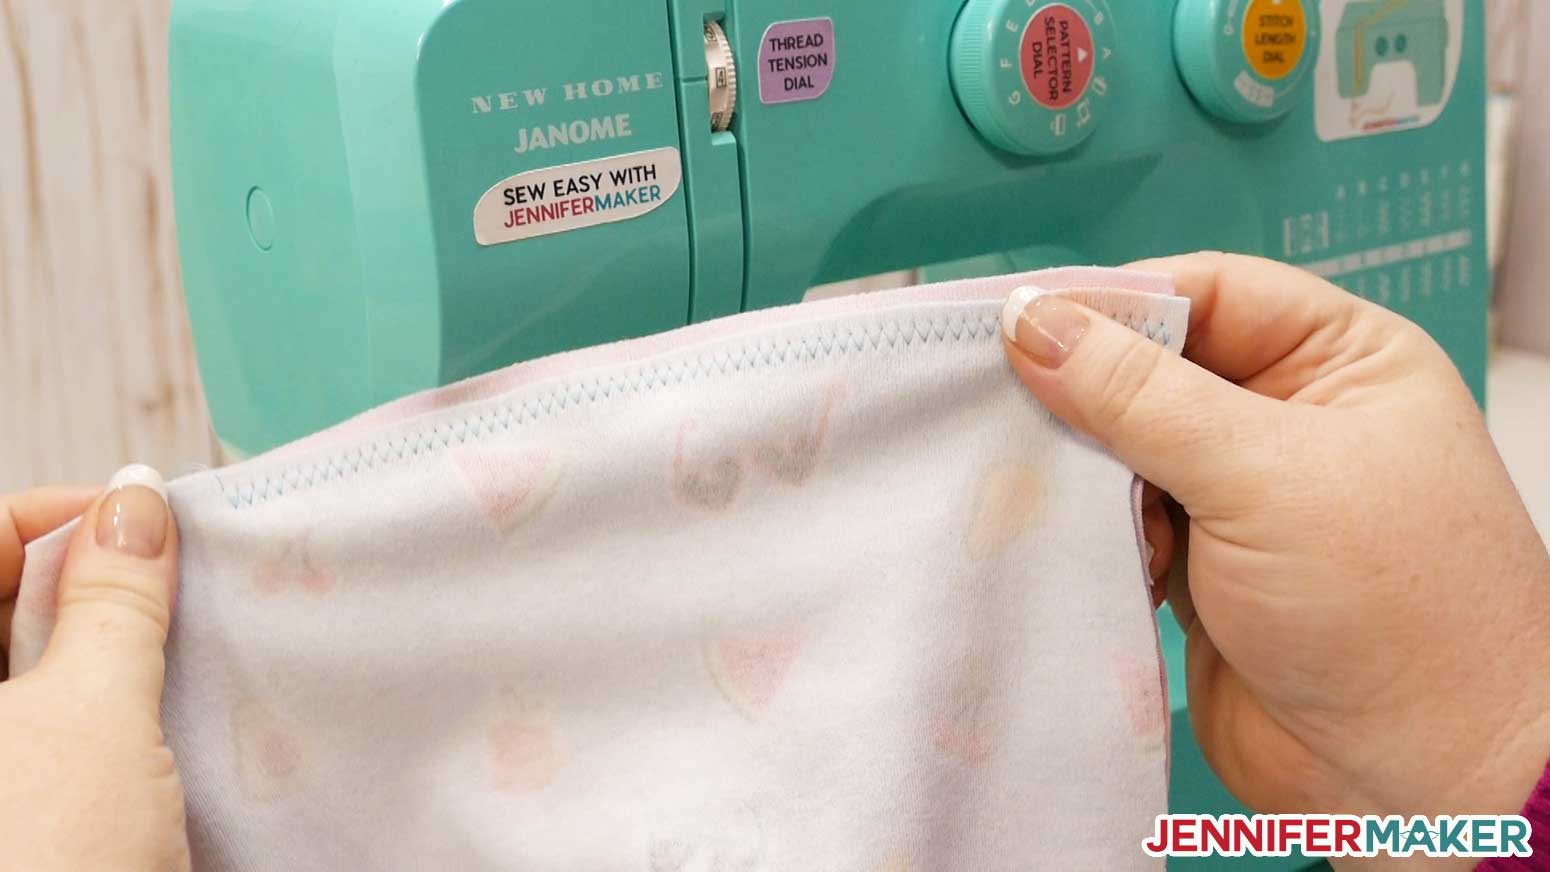
Note: I am using a using a basic sewing machine for this project, so my stitches may appear slightly different than yours if you are using a serger. The directions and results are the same, though.
Sew the other long side all the way from beginning to end with a zig zag stitch or serger. You should be left with a long tube with both short ends still open. Remove the pins.
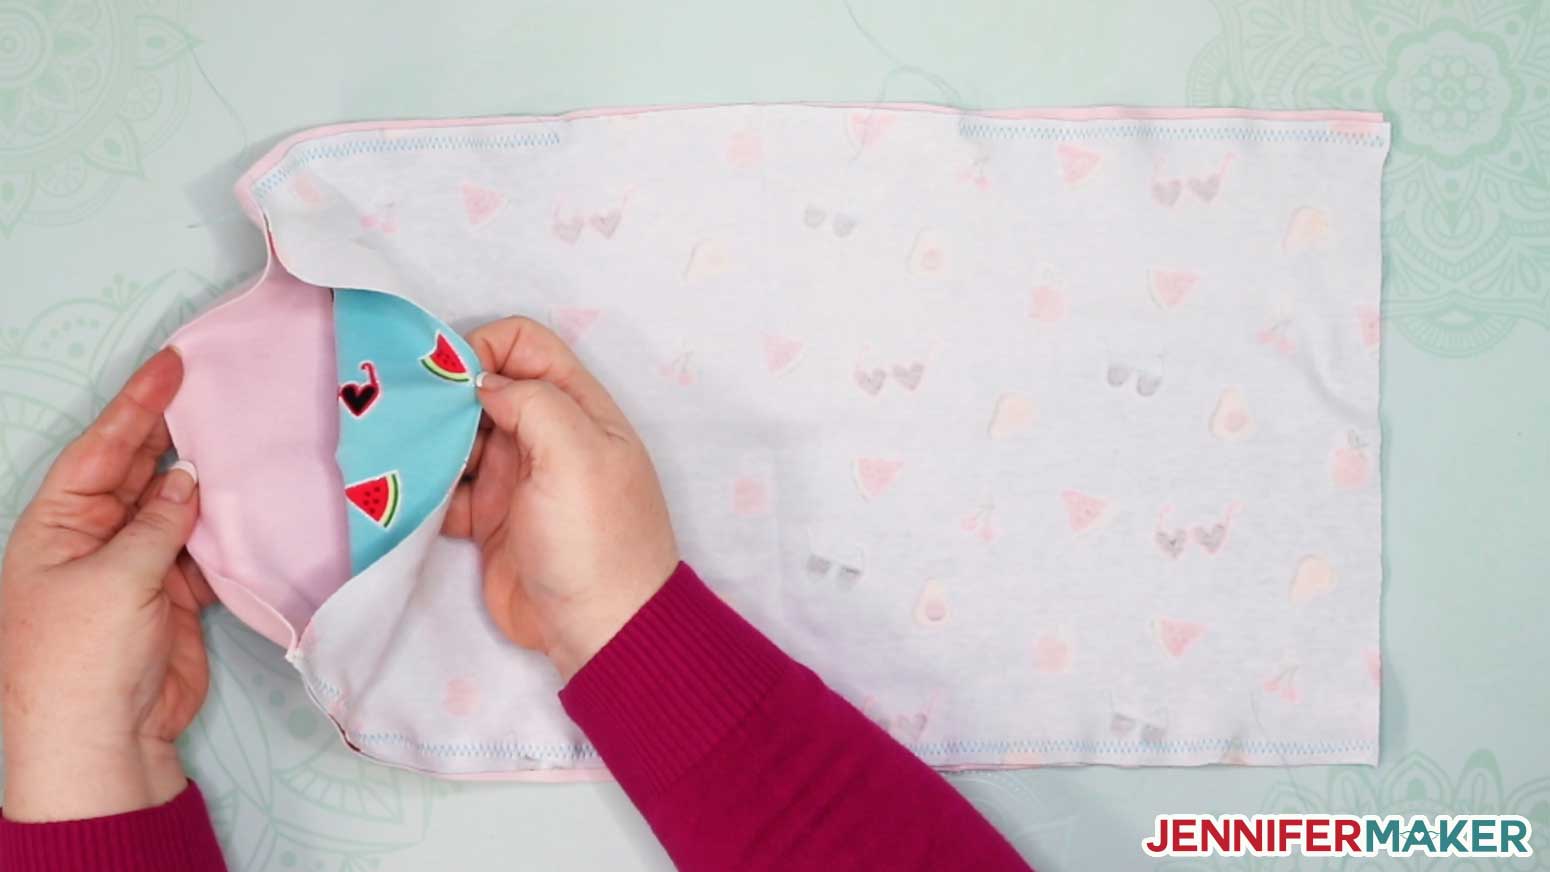
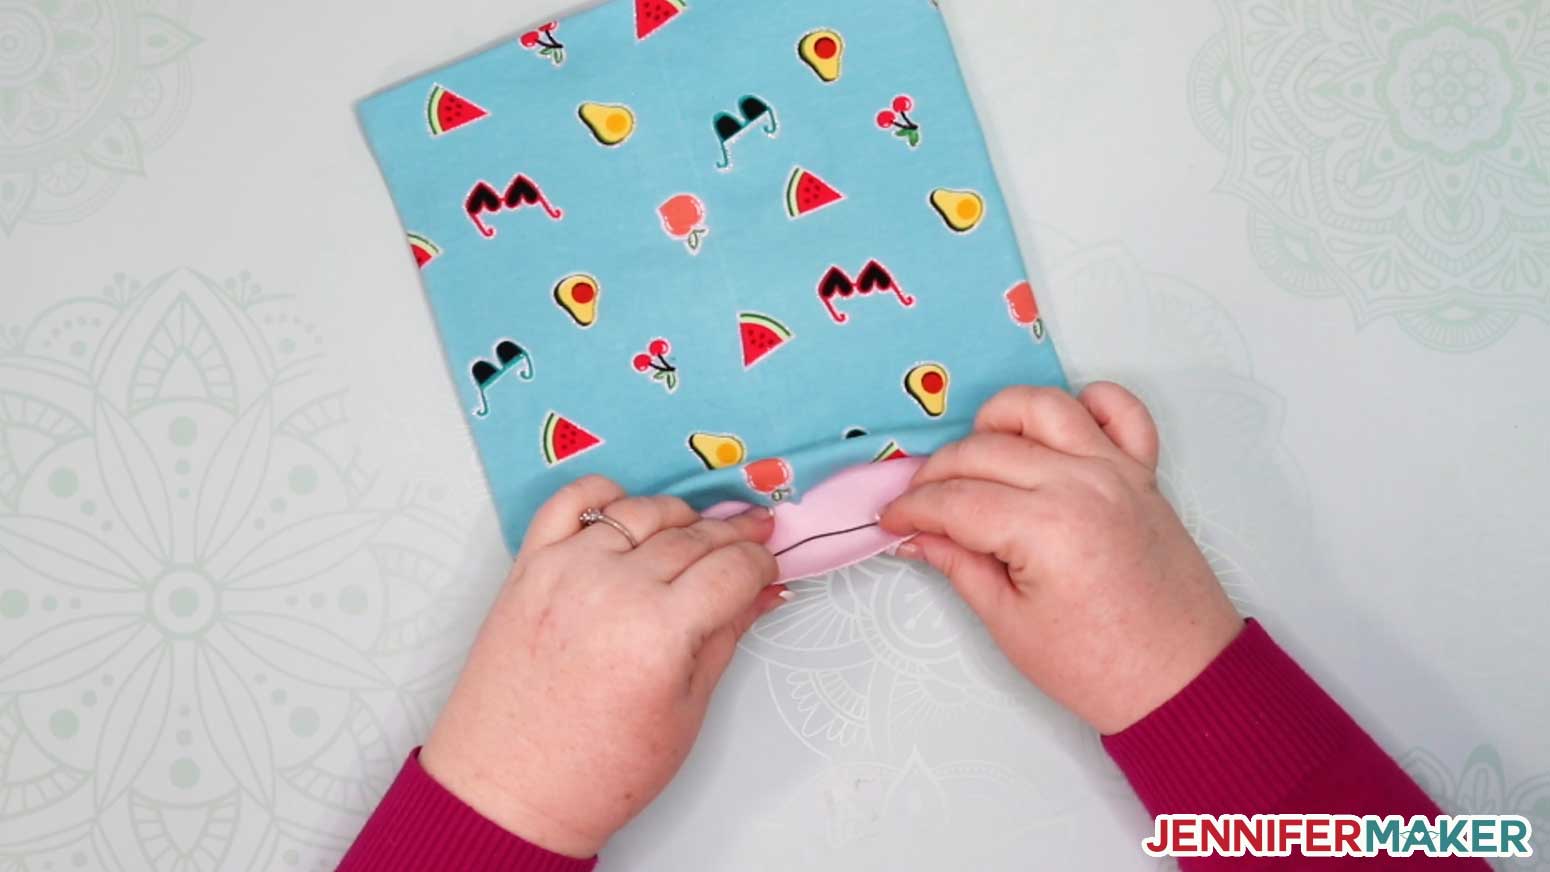
Step 5: Sew your gaiter face mask tube together
Once both sides are sewn, stick your arm through the long tube and pull the farthest short side with raw edges INSIDE the tube to meet the other short side raw edge.
Your ends should meet up, creating a fold with the right sides of your fabric still facing the insides. You should still have a tube, just a shorter one.
Match the seams together, and pin along the outside edge.
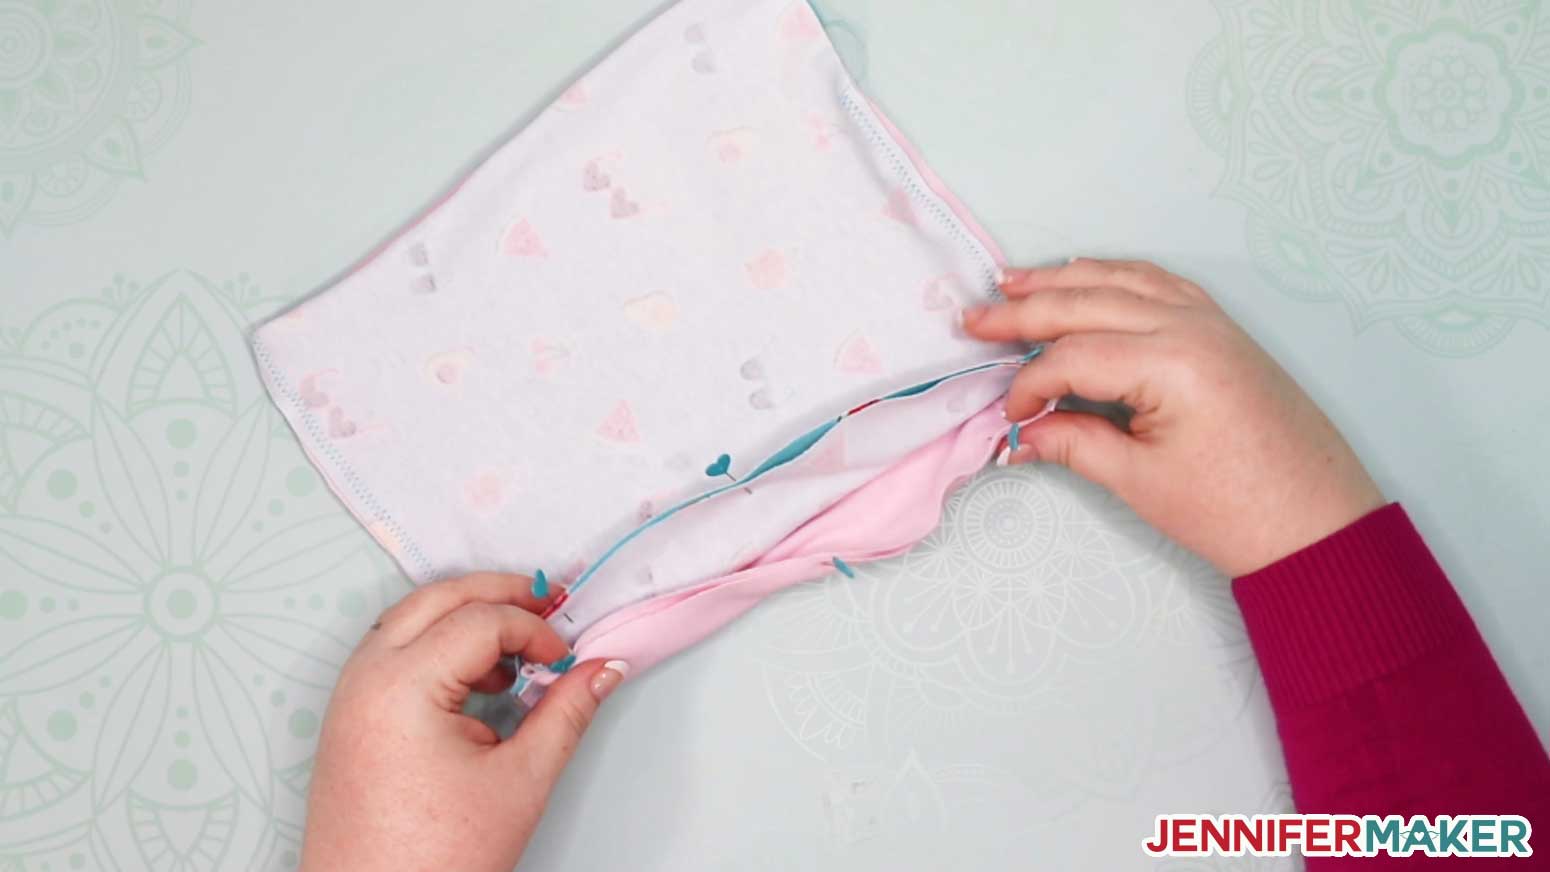
Still using the zig-zag stitch, sew all around the ends until you get to your beginning stitch, making sure not to sew all four layers together. You're only sewing two layers together. You should still have a tube you can put your arm through when you're done.
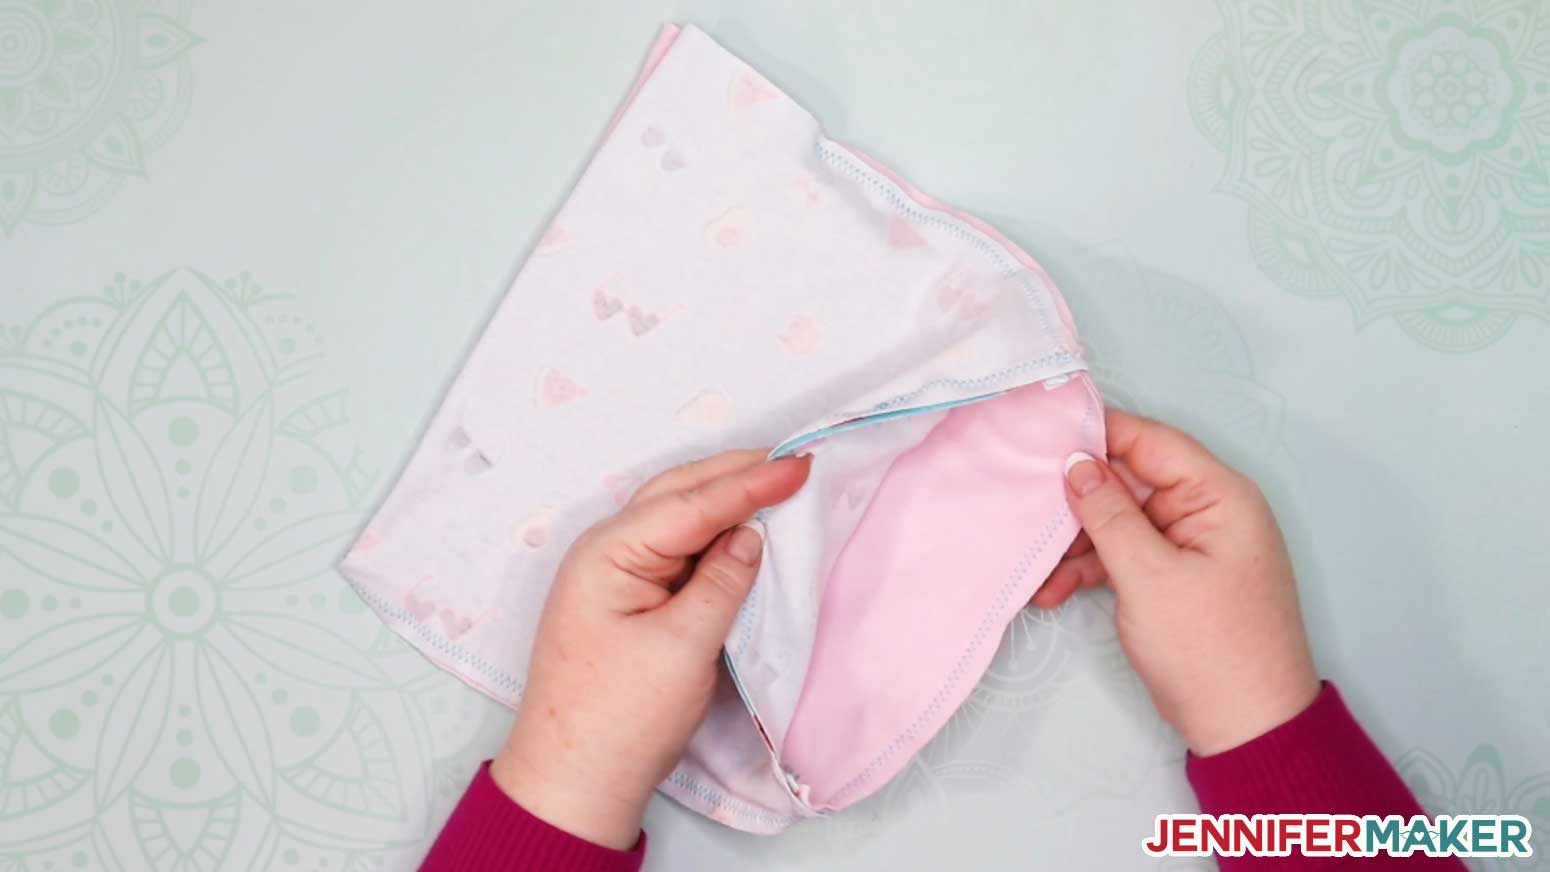
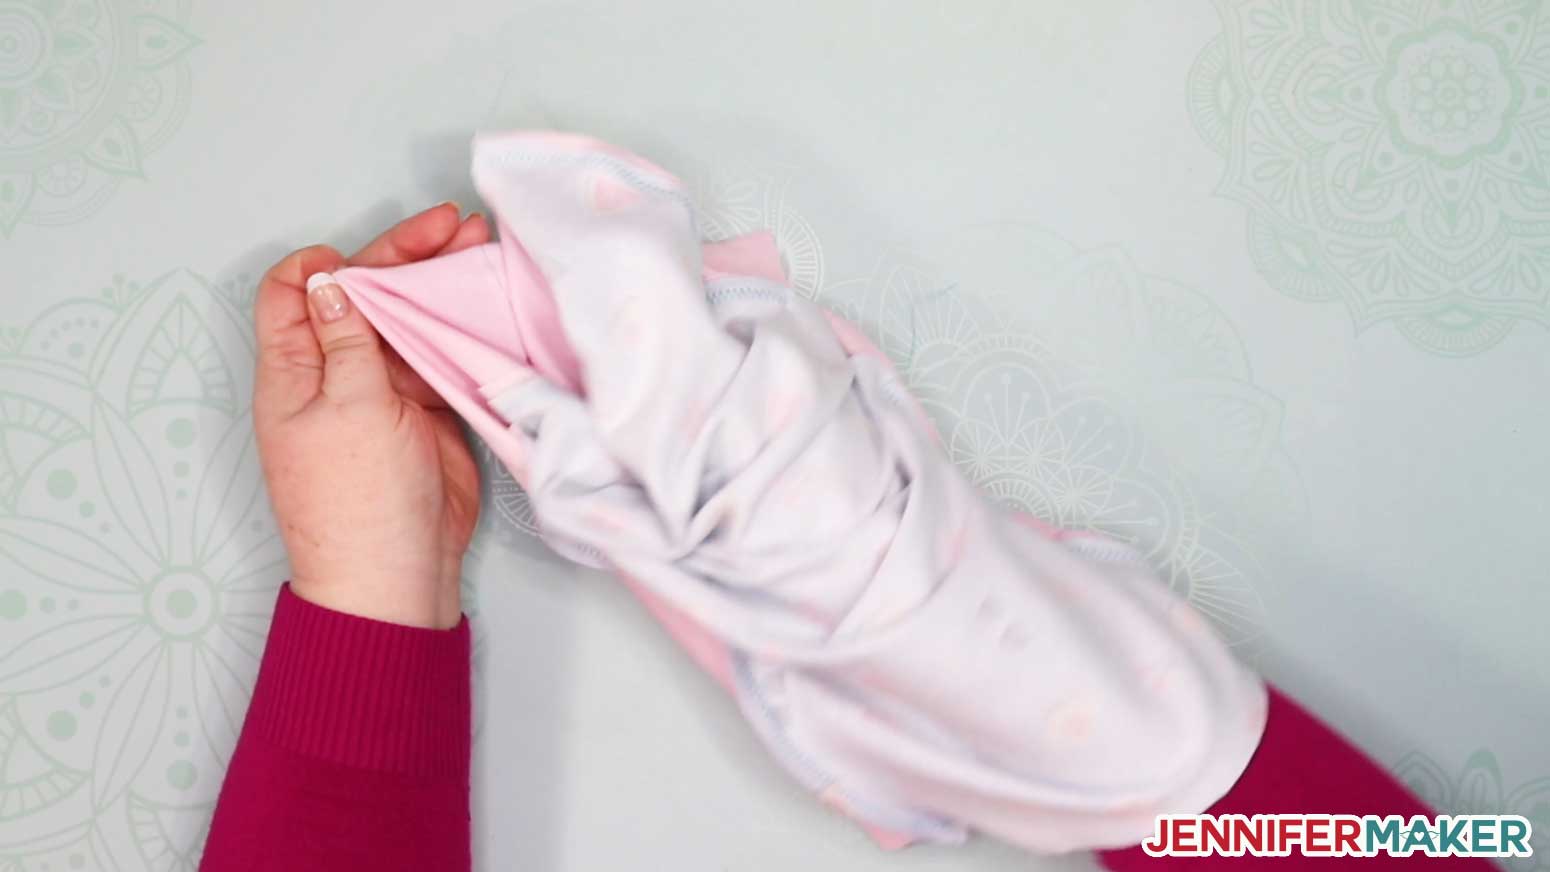
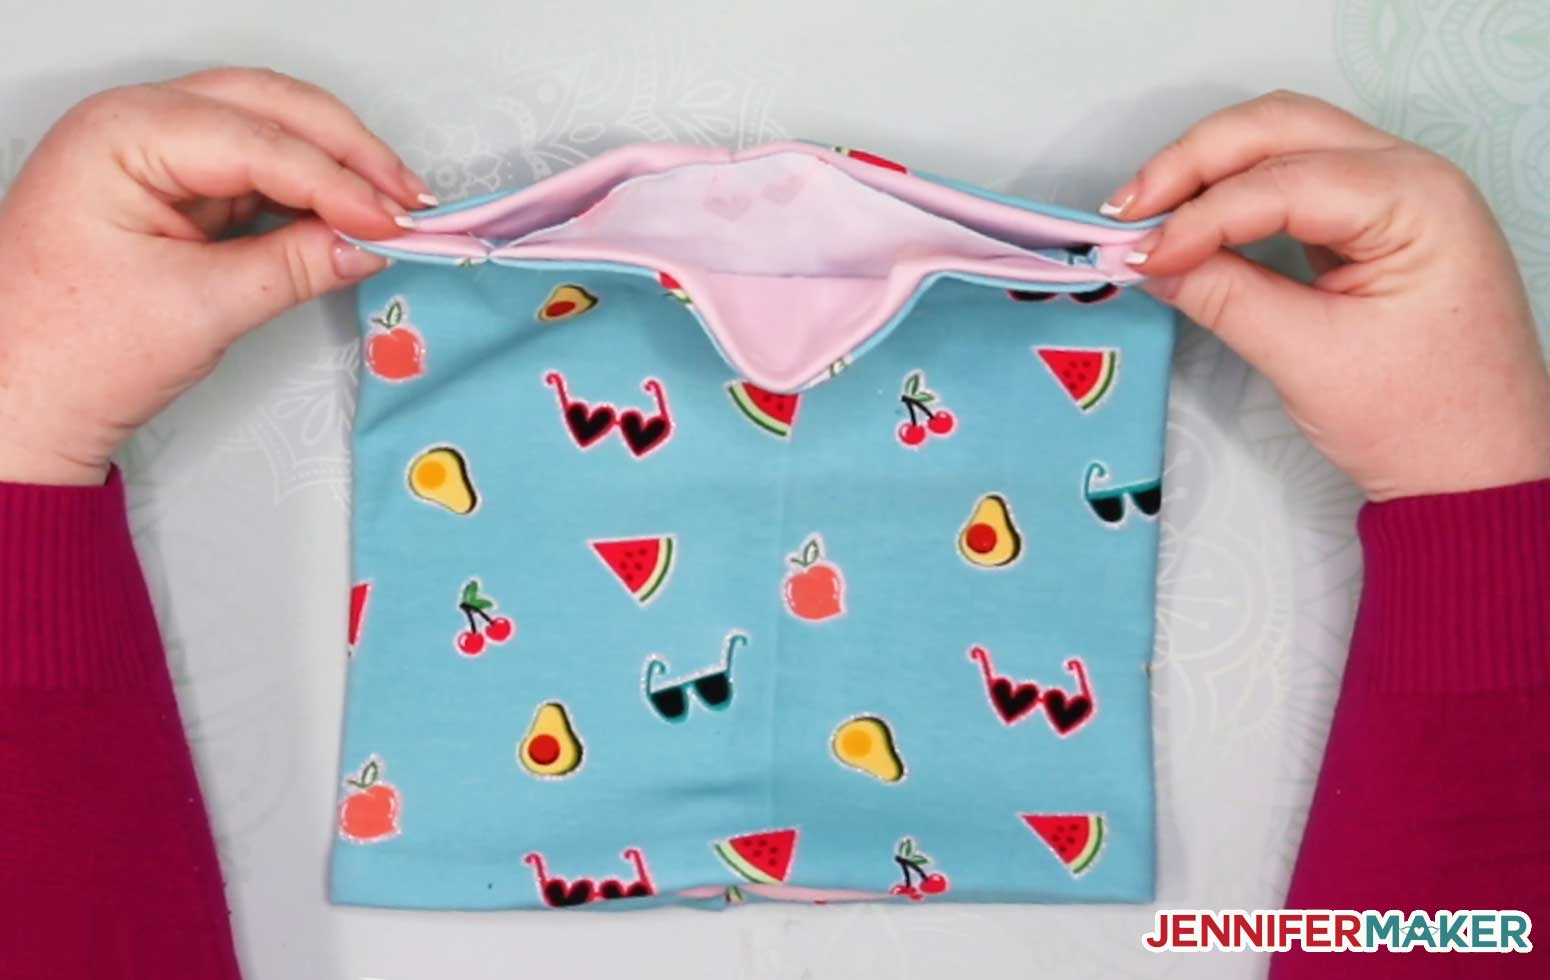
Step 6: Turn your gaiter face mask right side out
After you've sewn all your edges together, find the holes you left in the top edge in step 5 in making your gaiter face mask. It may look a little like rabbit ears.
Start pulling your fabric through one of these holes (it doesn't matter which one) to turn your fabric layers right side out.
Make sure the layer you intended to be on the outside of your DIY gaiter face mask is the layer that is facing outward when you're done.
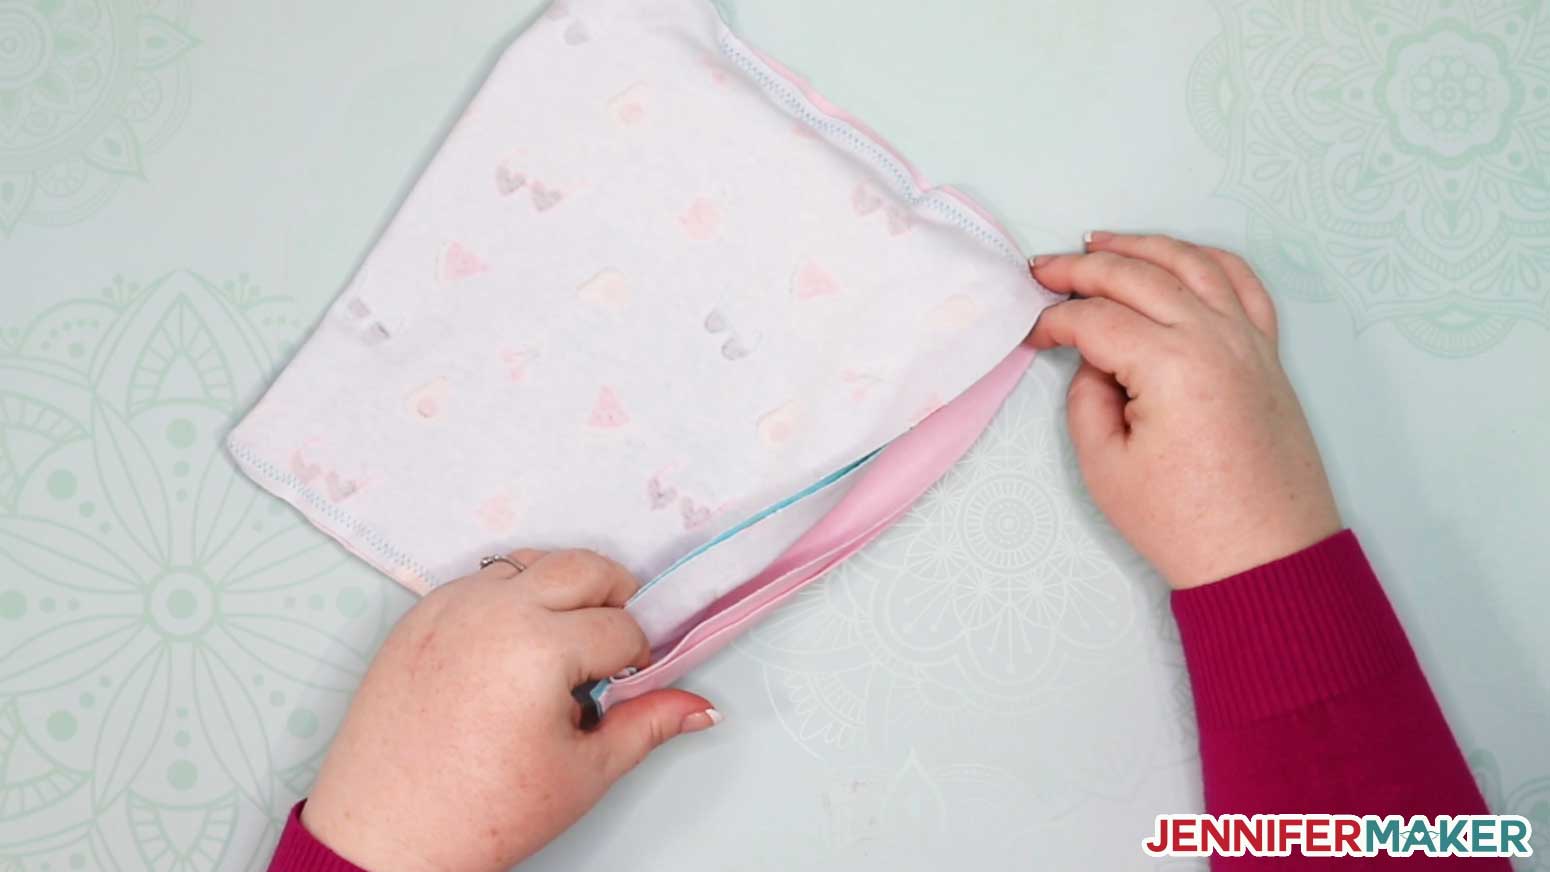
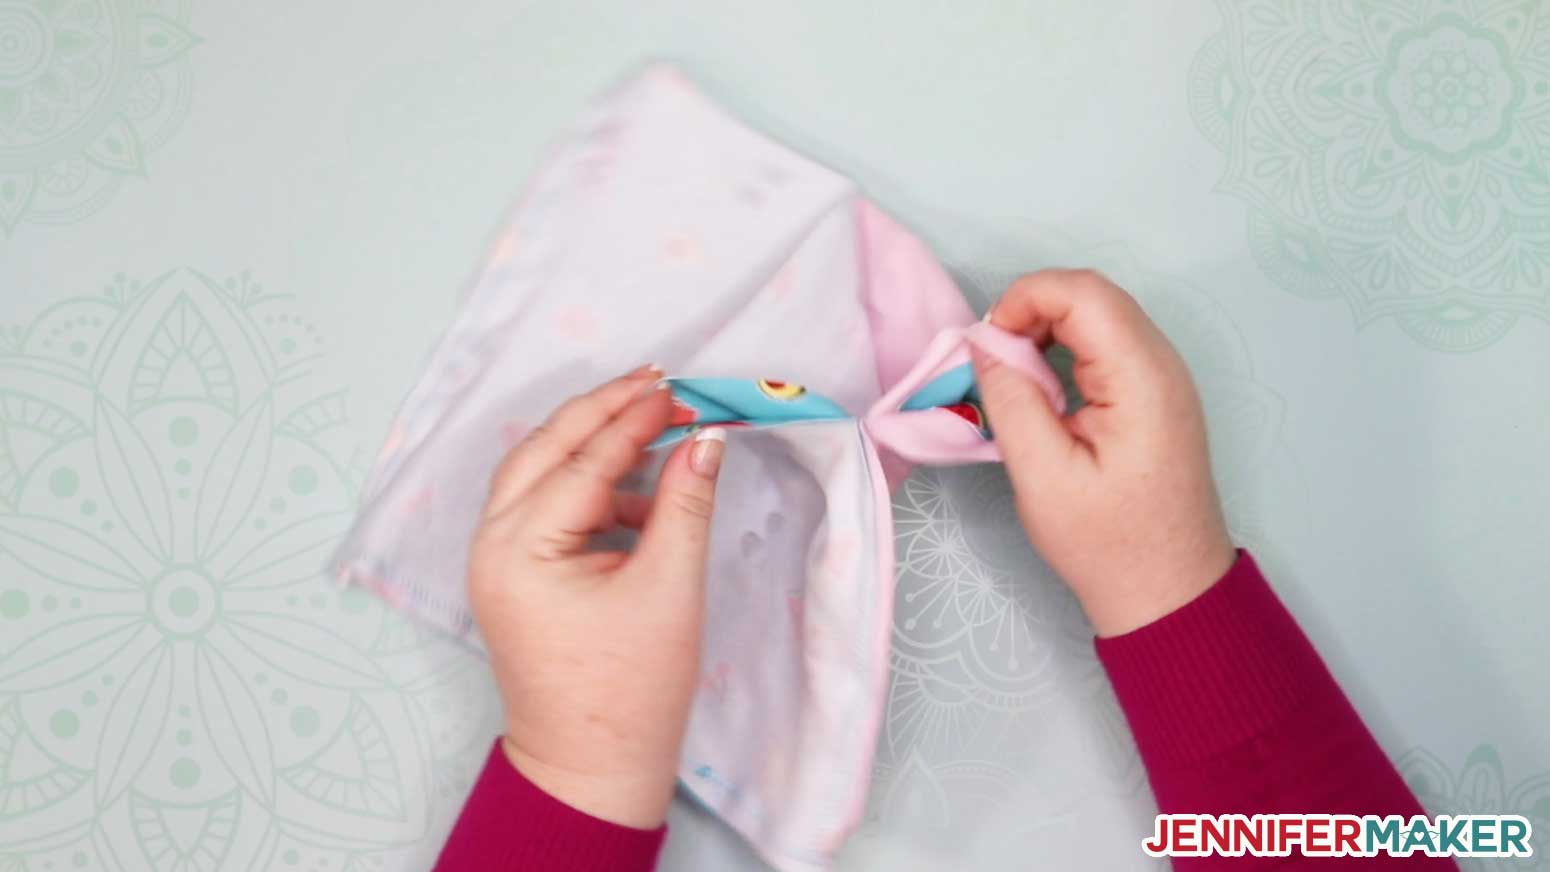
Once your fabric is right side out, it's time to close up the hole you used to turn this right side out. If you want to include a nose guard wire, now is the time -- just cut 4" of wire, fold in the ends so the wire doesn't poke through the fabric, and tuck the wire under the edge of one of the seams in the hole of your gaiter face mask.
Either way, I recommend you pin it in place.
Now sew the hole closed with either a zig zag stitch or a straight stitch.
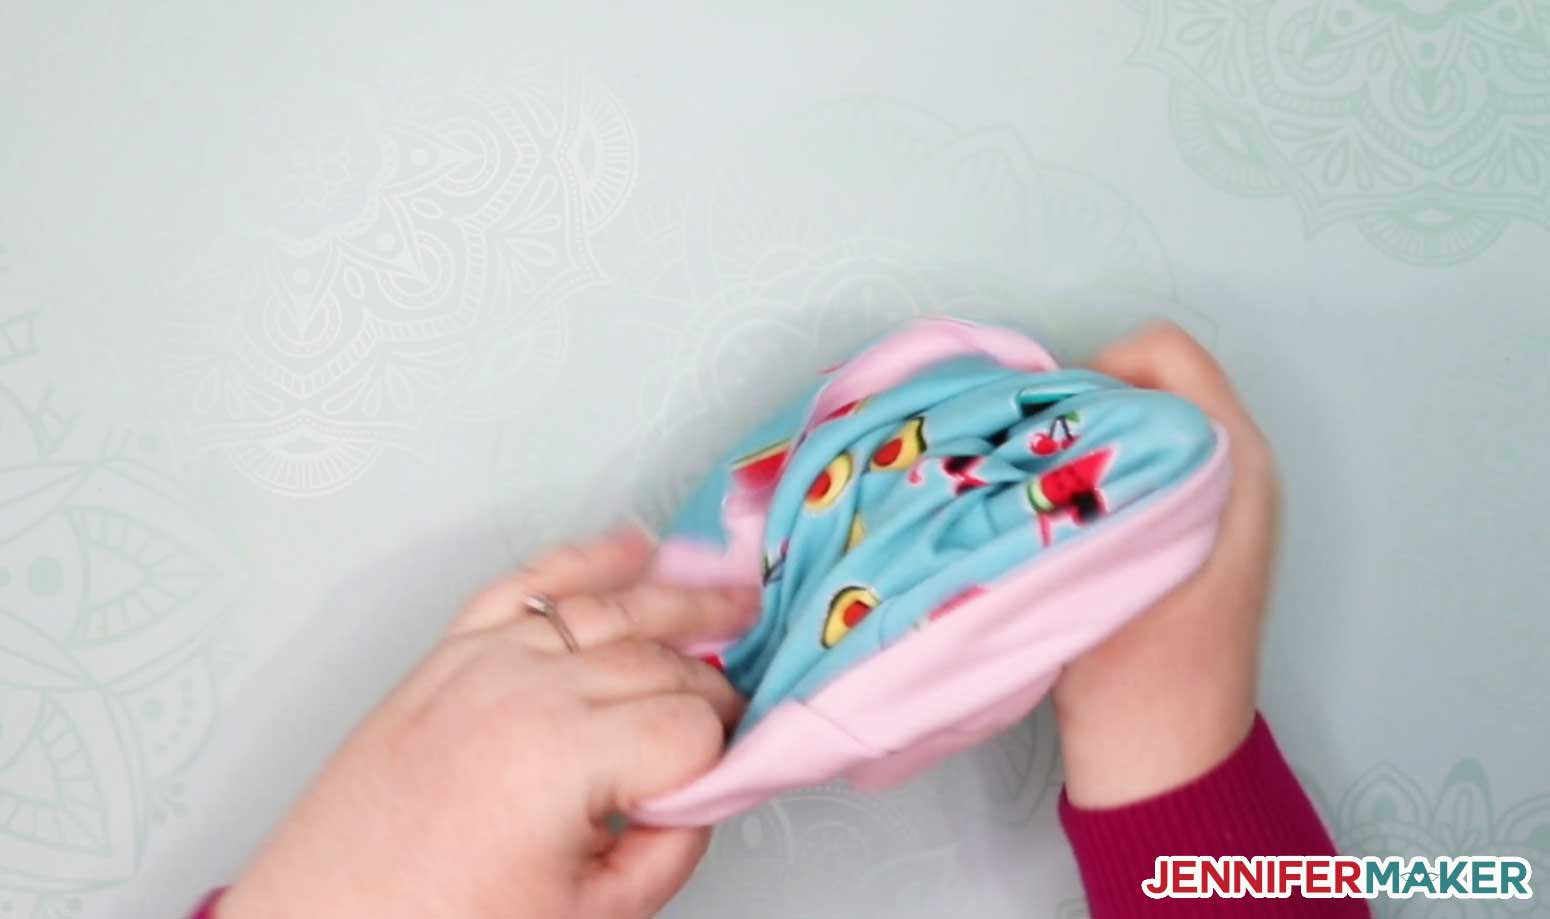
Congratulations! You made an easy DIY gaiter face mask!!
Notes
ACKNOWLEDGMENTS
Special thanks to the JenniferMaker Design Fairy team for helping me design and assemble this awesome Easy Gaiter Face Mask.
Answers to Your Questions About Making DIY Face Masks
Q: Do both sides of the face mask need to be different fabrics, or can I use the same fabric?
A: I recommend they be different colors or patterns so the wearer can tell which is outside and which is inside. We don’t want them to accidentally put the side they’d be wearing on the outside against their face.
Q: I don’t have cute cotton fabric. Can I use a T-shirt?
A: Yes, so long as it’s a stretch T-shirt! See my list of Best Fabrics for Face Masks. Your goal is to find and use closely knit and STRETCHY cotton. You can tell how close it is by holding it up to bright light — if not too much light is visible between the threads, it’s probably good.
Q: What kind of sewing machine do you recommend? I am new to sewing and want to make these headbands!
A: I am a big fan of Janome sewing machines, and that is the brand I am using in this tutorial. I think they are simple to use, affordable, and long-lasting. This is a good beginner sewing machine and the same one I use in this tutorial.
Q: I need to make a gaiter mask for my child. Do you have a pattern that small?
A: We have gaiter face mask patterns for youth small, medium, and large, but for more information on face masks for children, see my post that will answer all of your questions!
Q: I don’t have 20-22 gauge wire. Can I use a more flexible wire (like 24 or 26)? Or can I use pipe cleaners?
A: Yes. Many of our readers have reported success with this.
Q: Do I have to cut these gaiter face masks on my Cricut?
A: Nope! If you’re only cutting out one face mask, you’ll probably like using a Cricut (if you have one). If you are making more than one face mask, you’ll find it faster to print out the printable PDF pattern from cardstock and cut out multiple layers of fabric using a rotary blade cutter.
Q: How do I wash my gaiter face mask?
A: The CDC advised routinely washing your mask in a washing machine. The frequency of washing depends on your frequency of use. We wash our gaiter face masks daily after we’ve worn them.
Q: I can’t sew. Do you have a no-sew pattern?
A: Yes, we have a super easy no-sew face mask pattern here!
Get my free printable PDF and SVG files to make your own easy gaiter face mask!
Have questions? Come on over and ask in our Facebook group — everyone is welcome! We’d love to see your DIY gaiter face masks, too! Please share them in the group or email us at [email protected].
Love,

Take a Look at My Other Face Mask Patterns and Learn More About Face Masks


Want to remember this? Save this DIY Gaiter Face Mask tutorial to your favorite Pinterest Board


Why do your directions call for two 10″ by 12″ pieces of fabric, when that doesn’t match any of your patterns? It’s not even close! Even your smallest pattern has a larger total area.
The 10″ x 21″ fabric pieces you are referring to are materials for a different style of Face Mask that you can find over at https://jennifermaker.com/face-mask-patterns-cricut/. For this gaiter mask tutorial, the size of fabric will depend on the size of the mask you’re making and would range from 8.5″ x 18″ up to 12″ x 21″.
When I uploaded the svg file into Design space, it says my machine is incompatible when I choose make it. When I ungroup, it’s the purple layer is the problem. I am a total newbie, so what am I doing wrong? Love your site! Love your library and your instructions are so clear, I rarely have any problems. TIA
Welcome, Jill! You can hide or delete any of the sizes that you don’t want to cut. If you do want to cut that X-Large Adult size, you can resize the 12″ size down to 11.5″ and it will cut for you. (You will need the larger 12″ x 24″ mat to cut the X-large size since the length will be 20.125″ when resized.)
Do you sell these?
I don’t sell any finished products, I provide the design and tutorials for free so people can create their own! If you need any help with the project, you can always ask me or ask in my private Facebook group (https://www.facebook.com/groups/seweasy/), I’m always happy to help!
Gaiter mask: The finished product looks too short to go around the neck…and how do you put on? I think i am missing something here.
You could definitely make it longer if you’d prefer it longer!
Good morning,
Do you have a video of you making your gaiter face mask? I’ve looked through this post several times and don’t see a link.
Thank you, Leah
I am currently working on a video and will post it and link to it when I get it up. If you want to get notified when I upload the video, please subscribe to my YouTube channel and turn on notifications https://www.youtube.com/c/jennifermaker.
Hi! I just want to tell you how much I appreciate you, your talents and your time. I just opened my email a short while ago and was so pleased to see this mask as well as the scarf type masks. I have seen these on Youtube but not in english, and I was like…I sure do wish Jennifer would do a tutorial on this. And voila! You did!!! 🙂 So excited. Thank you very much
Will you be making a video for the neck gaiter. Please
I’ve added the gaiter video above!
Hello!! Thanks so much for this, it’s super helpful! I’ve made a few of these and they are wonderful, however they do tend to slip down after a bit. I’m wondering how/ if attaching ear loops might be helpful? And the best way to do that? My son has been wearing them for school, but can’t make it too long without it slipping. I’d love to modify it if it’s possible, as this one is much preferred over the normal style mask :).
Thanks again!!
I’m happy to hear you’re liking the design. I haven’t had that issue with the gaiter falling, but I also haven’t had to wear it a full day like your son has to. I think ear loops might work or maybe even just cutting slits on the side of the gaiter where his ears are?
I just came across this post and am going to make one ASAP for outdoor group activities. I was VERY confused when reading how to turn the tube right-side out though when you reference the gap left in Step 5. It all came clear when I watched the video though.
I am so glad the video helped! Thank you!