Learn how to make a 3D paper baseball cap box with stitched details!
Intrigued by 3D paper projects but nervous to start? My baseball cap box is a great project to start! With just a few clicks, cuts, and folds, you’ll transform ordinary cardstock into a miniature masterpiece that’s as functional as it is fun. I’ll show you how to put it all together!
Watch the full step-by-step tutorial on how to make a baseball cap box!

Imagine the delight on your loved ones’ faces when they receive a gift tucked inside this adorable, unique packaging.
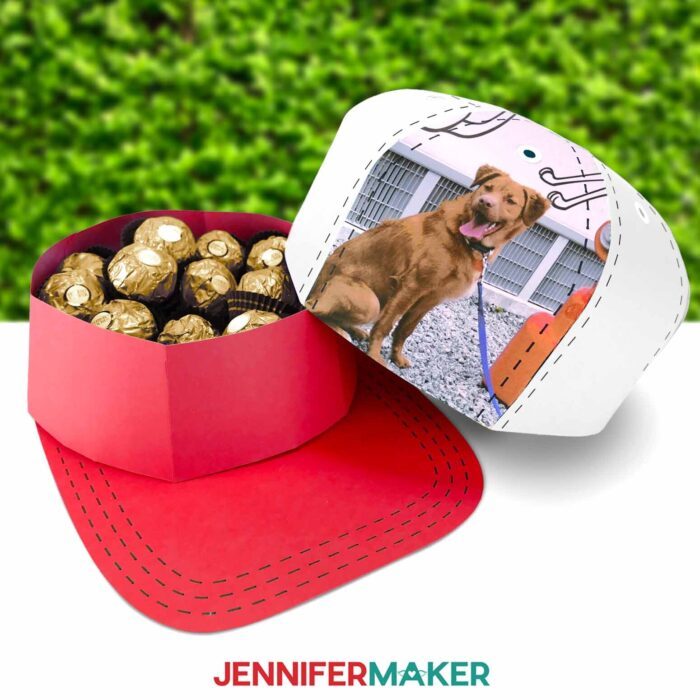
Whether it’s for a sports-themed birthday party, a baseball fan’s special occasion, or just a fun surprise for someone who adores hats, this baseball cap-inspired box is sure to steal the show.
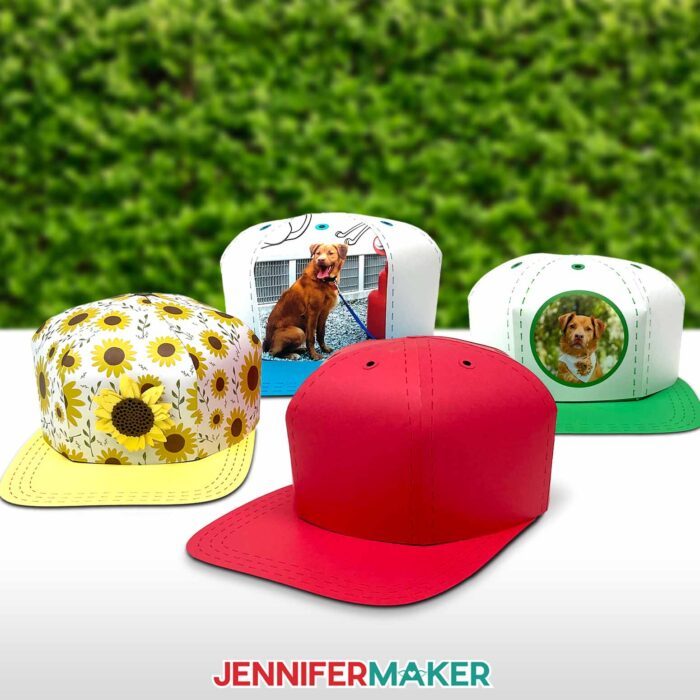
Not only does this design add a delightful touch to your gift-giving, but it also offers endless opportunities for customization. Get creative with colors, patterns, and embellishments to tailor each box to suit your loved one’s style and preferences. They’d be a hit for Father’s day, too!
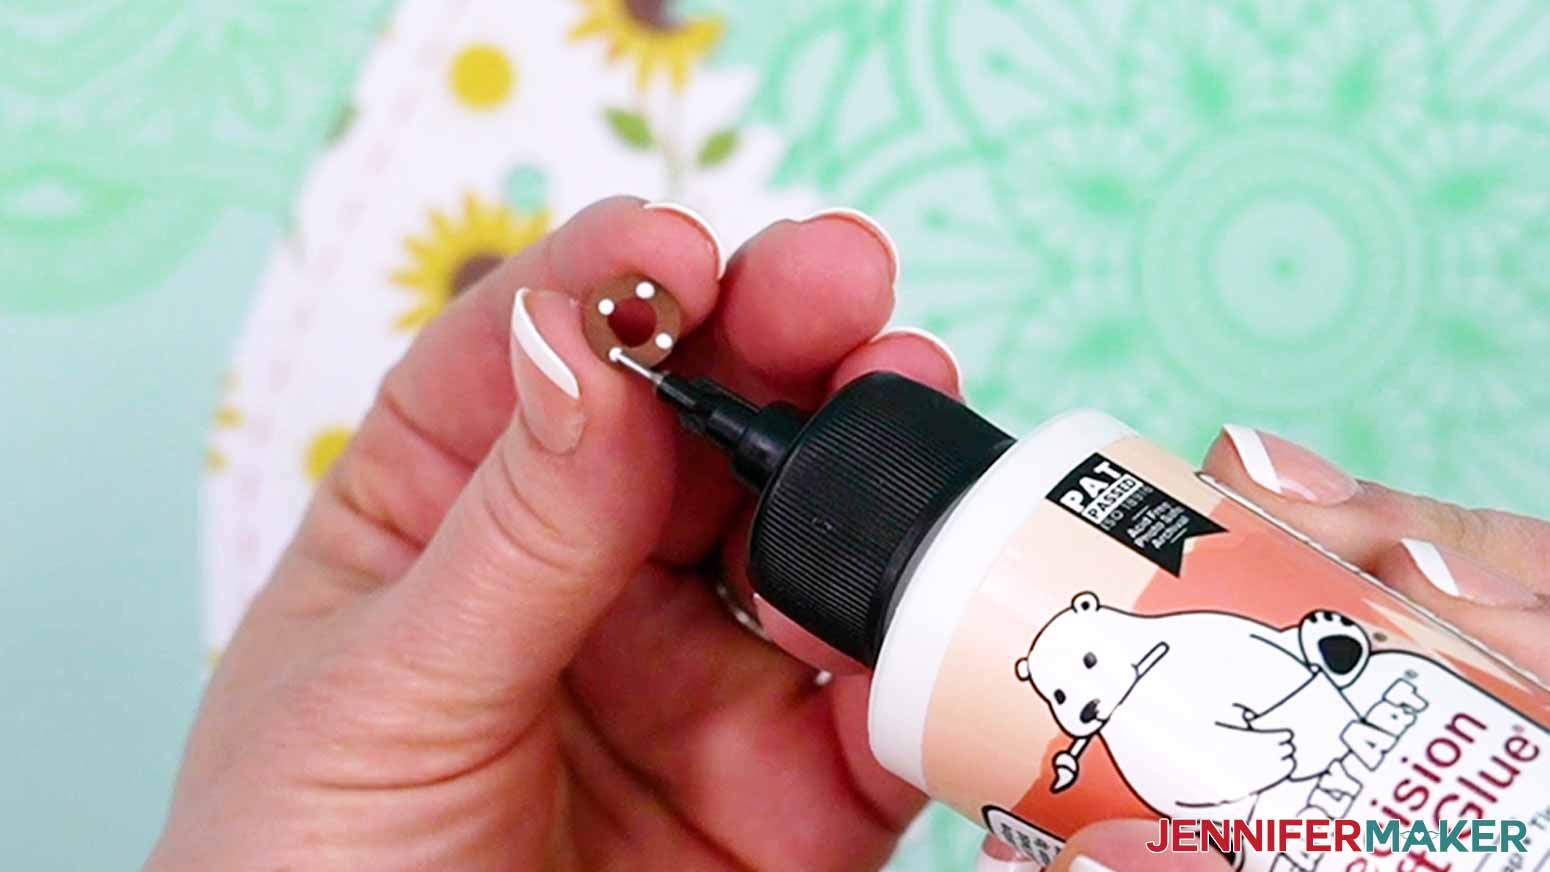
My step-by-step assembly instructions make it a breeze, whether you’re a seasoned Cricut pro or a new to the craft. There are a lot of tabs to crease, glue, and shape, but you can do it! Just take your time, and I recommend using glue with a precision tip to keep your project clean. I’ve linked my favorite glue below!
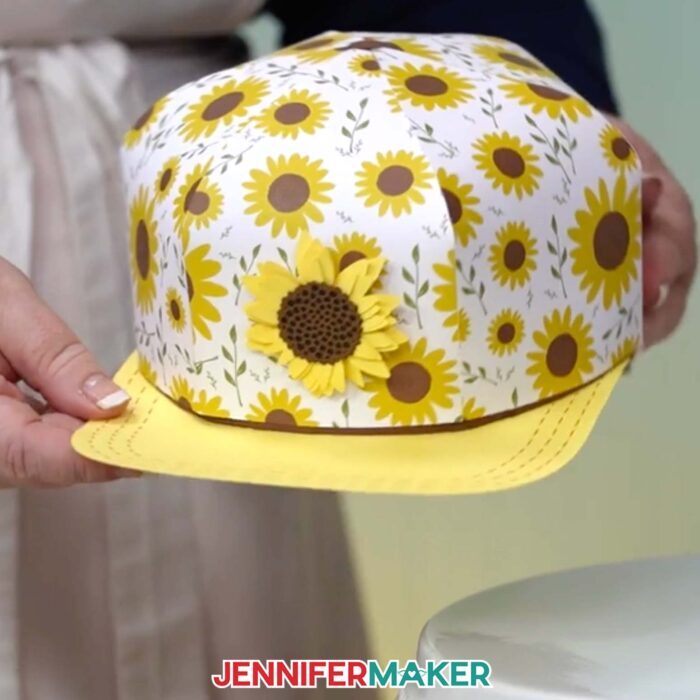
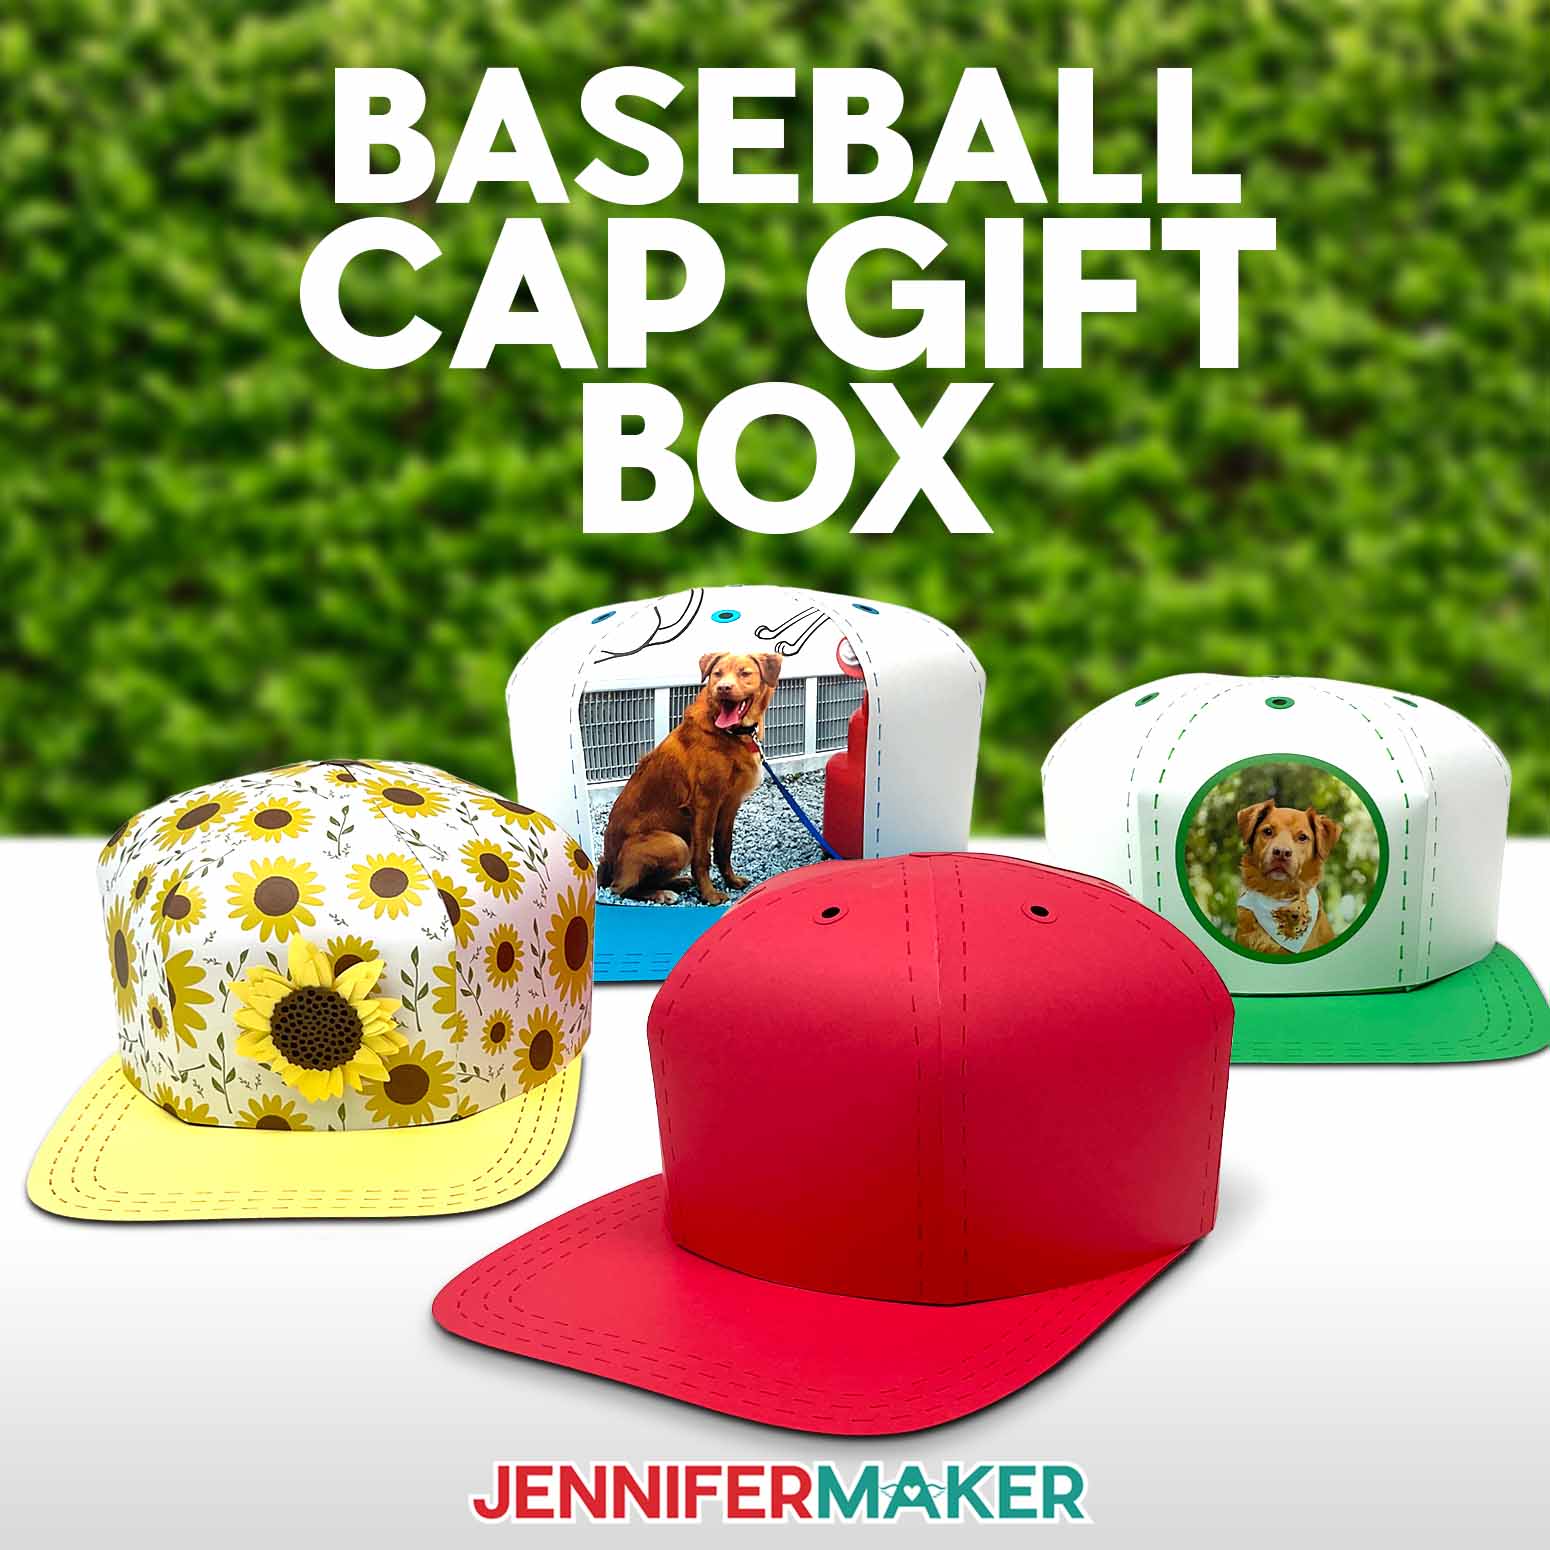
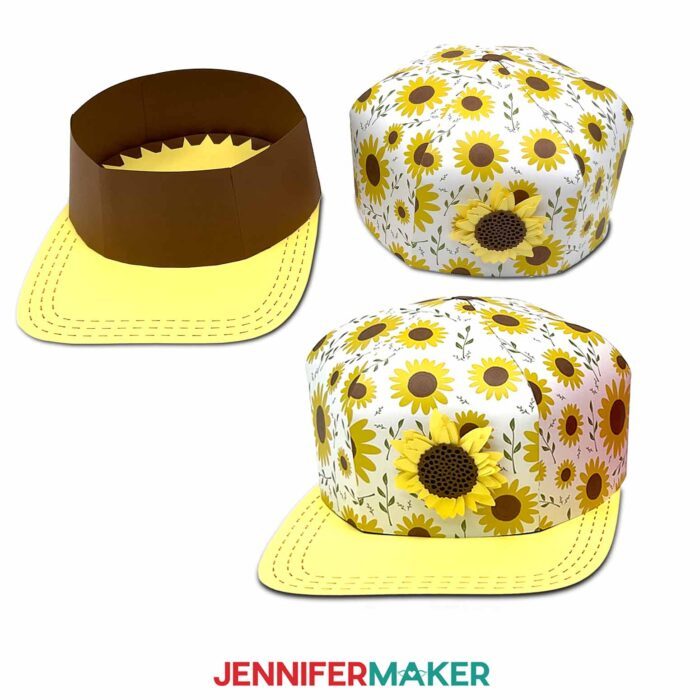
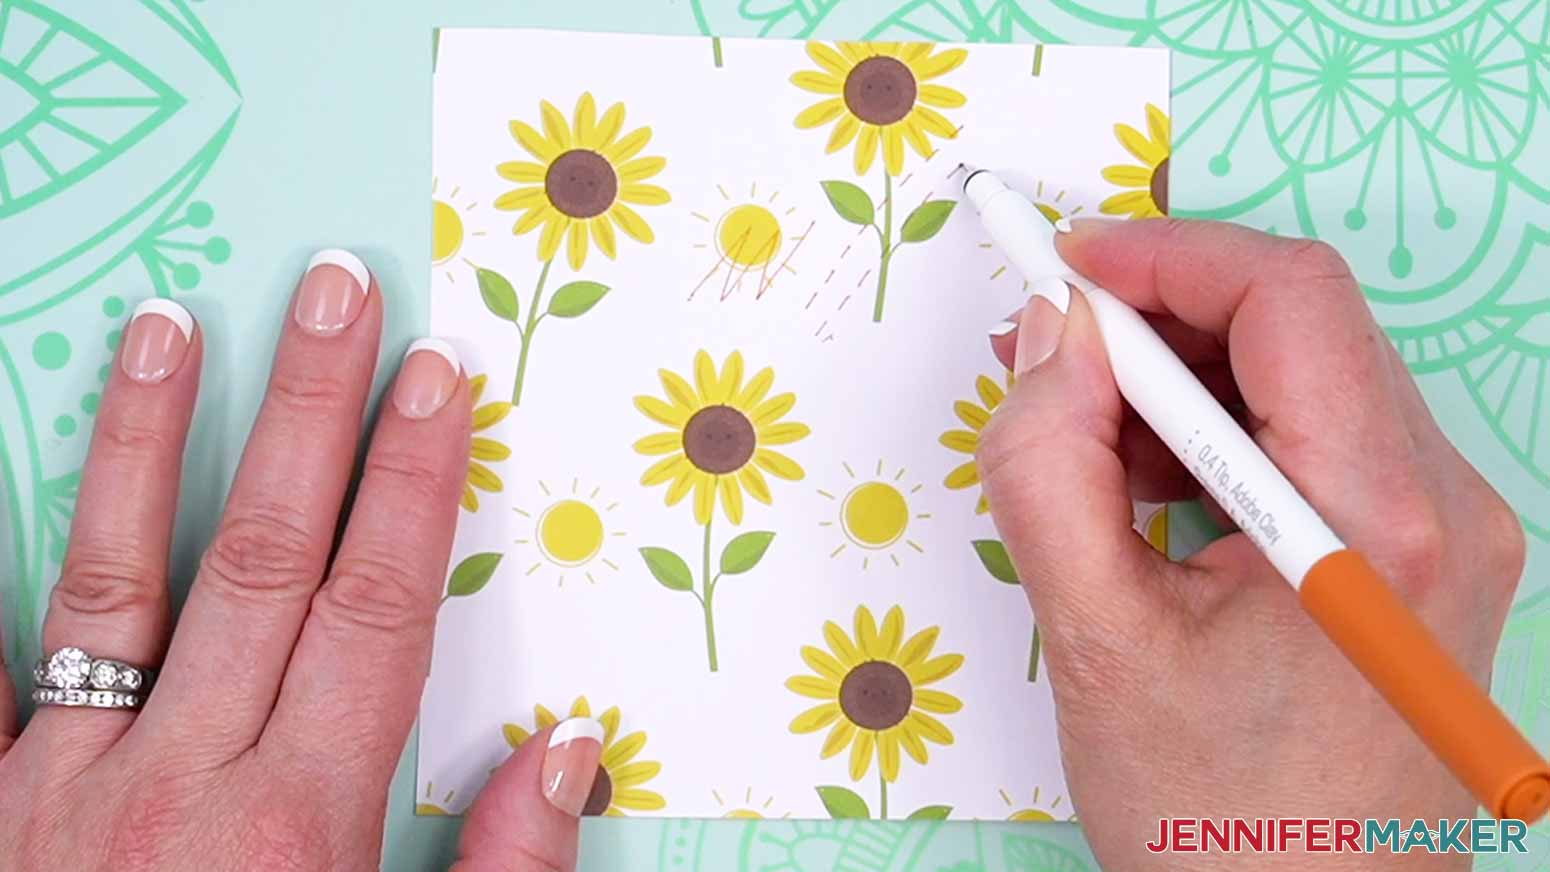
And these caps aren’t just for sports fans! I don’t love baseball, but love cute accessories, so I used floral patterned paper and added a rolled paper sunflower to my hat box!

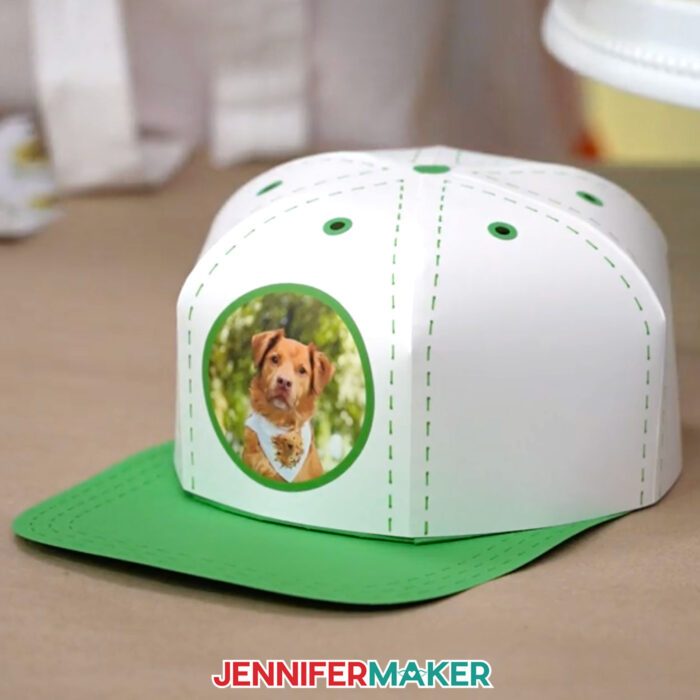
The customized hats with photos are examples of projects you can design yourself in my ADVANCE program.

The hats with Hunter’s image were completed right in Cricut Design Space and I cannot share the Design Space project link as it contains uploaded elements. But this is something you can easily make in my ADVANCE program! Learn more about ADVANCE here!
Turn on your cutting machine, grab your favorite cardstock, and let’s get crafting! Whether you’re planning a special gift or simply want to add a dash of fun to your crafting repertoire, this 3D paper baseball cap box is sure to be a home run.
Let me show you how to make a paper baseball cap box! This post contains some affiliate links for your convenience (which means if you make a purchase after clicking a link I will earn a small commission but it won’t cost you a penny more, there is no additional cost)! Read my full disclosure policy.
Materials to Make a 3D Baseball Cap Box
View my Amazon shopping list for the exact items I used!
- Three to Six (3-6) Sheets of 12″ x 12″ or 8.5” x 11” 65 lb. Solid Core Cardstock (any color) -OR-
- Three to Six (3-6) Sheets of 12″ x 12″ or 8.5” x 11” 65 lb. Patterned Cardstock
- A way to cut your materials – I’m using the Cricut Maker 3, but you can also use the Maker, Cricut Explore series machines, Venture, or Joy Xtra
- Cricut Green StandardGrip Machine Mat 12″ x 12″
- Cricut 0.4mm Fine-Point Pen (Optional for Stitching Lines)
- Scoring Stylus (optional for files with score lines) -OR-
- Single Scoring Wheel (optional for files with score lines)
- Brayer
- Spatula
- Scraper
- Weeding Tool (optional for popping out small pieces from intricate areas)
- Tweezers (optional)
- Bearly Art Craft Glue
- Clear Tape
- Hot Glue Gun & Glue Sticks
- Soft Measuring Tape
- Flowtool, or a quilling tool, optional for Sunflower detail
- Design #601 (My free SVG/PDF/DXF design files are available in my free resource library – get the password by filling out the form at the bottom of this page)

How to Make a Baseball Cap Box

Baseball Cap Box
Learn how to make a 3D baseball cap box.
Materials
- Three to Six (3-6) Sheets of 12" x 12" or 8.5” x 11” 65 lb. Solid Core Cardstock (any color) -OR-
- Three to Six (3-6) Sheets of 12" x 12" or 8.5” x 11” 65 lb. Patterned Cardstock
- Design #601 (My free SVG/PDF/DXF design files are available in my free resource library - get the password by filling out the form at the bottom of this page)
Tools
- A way to cut your materials - I’m using the Cricut Maker 3, but you can also use the Maker, Explore series machines, Venture, or Joy Xtra
- Cricut Green StandardGrip Machine Mat 12" x 12"
- Cricut 0.4mm Fine-Point Pen (Optional for Stitching Lines)
- Scoring Stylus (optional for files with score lines) -OR-
- Single Scoring Wheel (optional for files with score lines)
- Brayer
- Spatula
- Scraper
- Weeding Tool (optional for popping out small pieces from intricate areas)
- Tweezers (optional)
- Bearly Art Craft Glue
- Clear Tape
- Hot Glue Gun & Glue Sticks
- Soft Measuring Tape
- Flowtool (for Sunflower)
Instructions
STEP 1: GET MY FREE BASEBALL CAP BOX DESIGNS
First, download my Baseball Cap Box designs from my free library – look for Design #601. Alternatively, you can use the Save This Project form near the top of this post and the design link will be emailed to you.
In the SVG folder, you’ll find “score” and “no-score” versions of my design to cut on a cutting machine. There is also a DXF folder with cut files, and a PDF folder with versions you can print and cut by hand.
Upload the SVG file you need to Design Space to get started. I’ll demonstrate with the “score” design because it creates a smoother result.
TIP: If you’re not sure how to upload, go to jennifermaker.com/svgs to learn how to unzip and upload SVG files.
STEP 2: PREPARE AND CUT YOUR BASEBALL CAP BOX DESIGN
CRICUT DESIGN SPACE
- Open Cricut Design Space and click “New Project.”
- Click “Upload” and then “Upload Image.”
- Click “Browse.”
- Select the SVG file of your choice.
- On the Prepare to Upload screen, it will say “Cut Image” with the design preview.
- Click “Upload.”
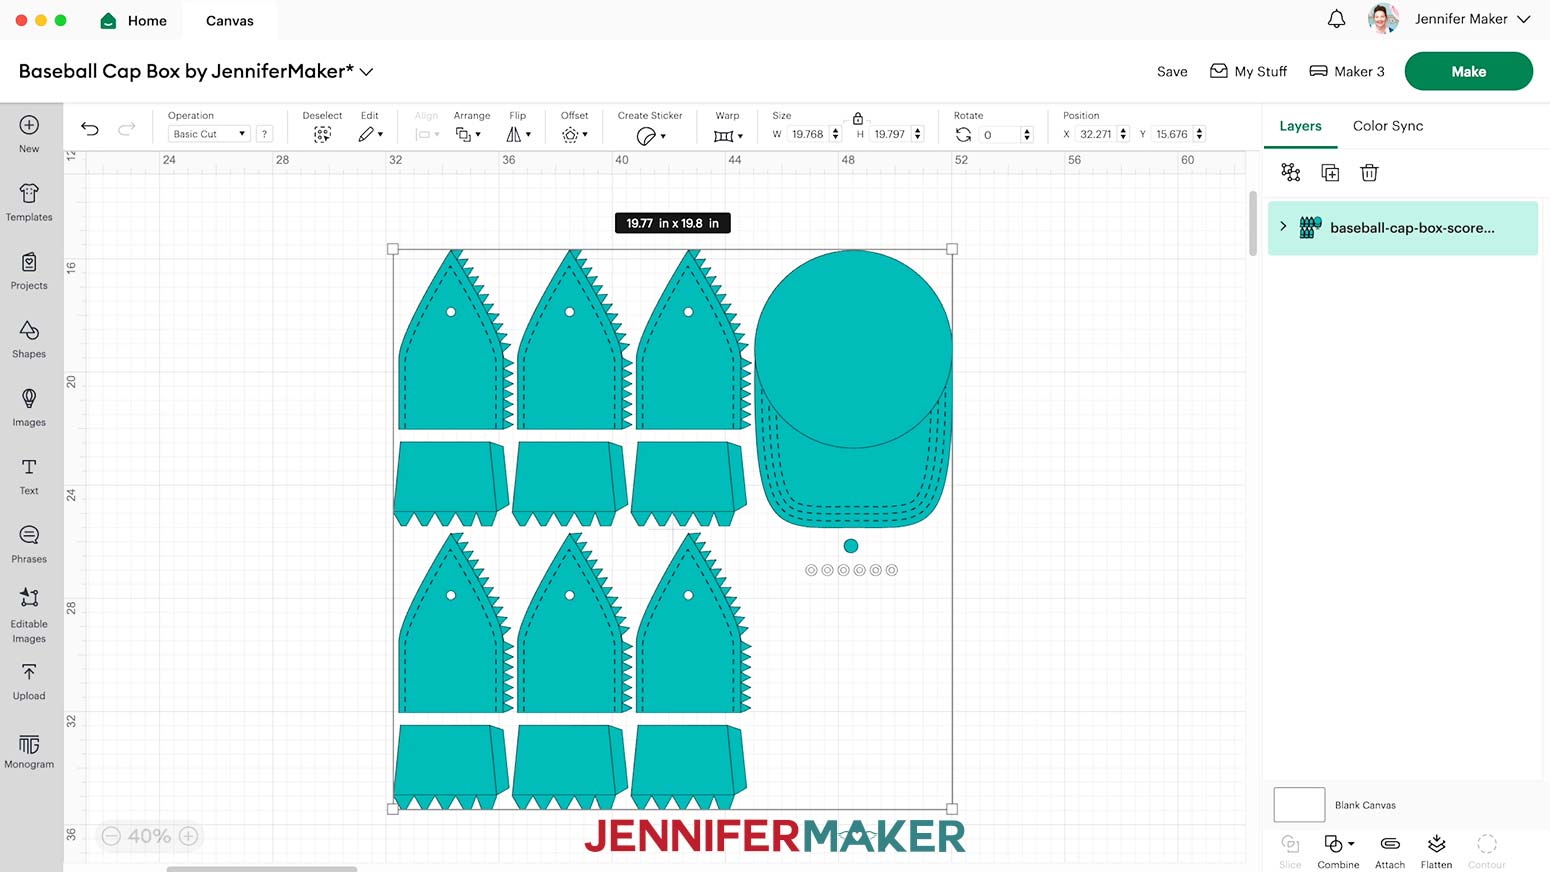
- Find your design in Recent Uploads and add it to the Canvas.
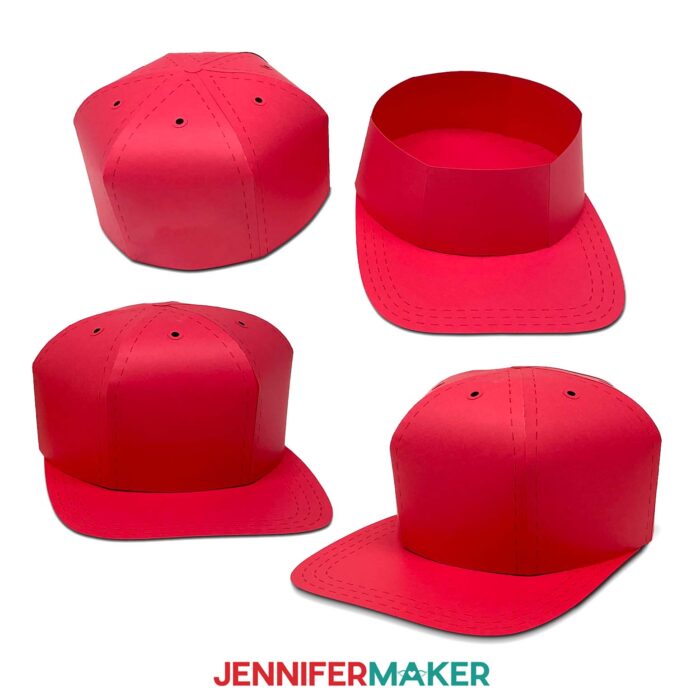
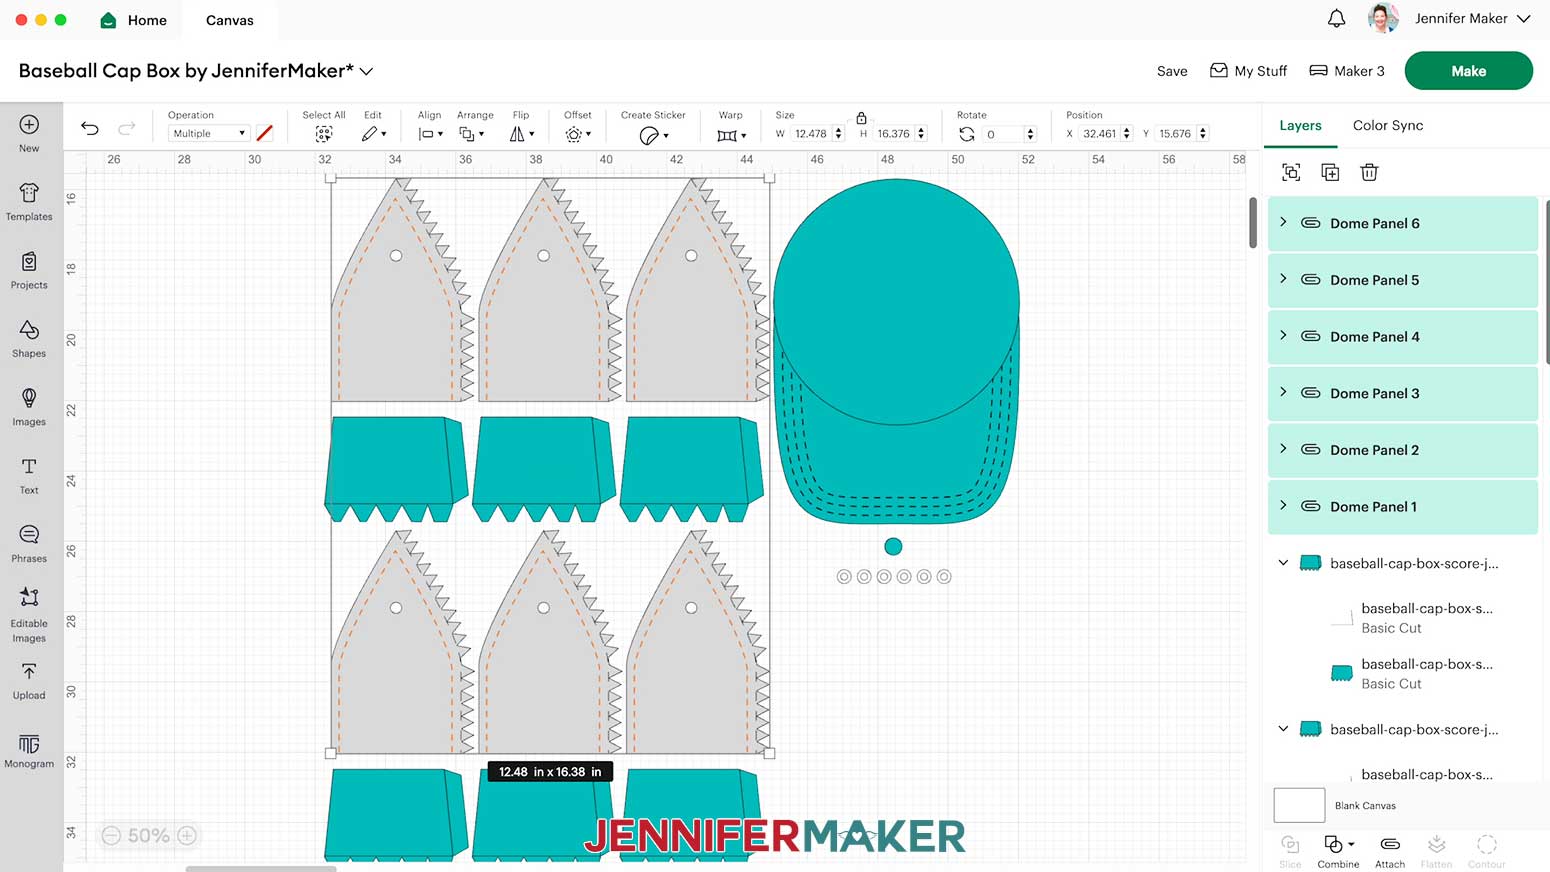
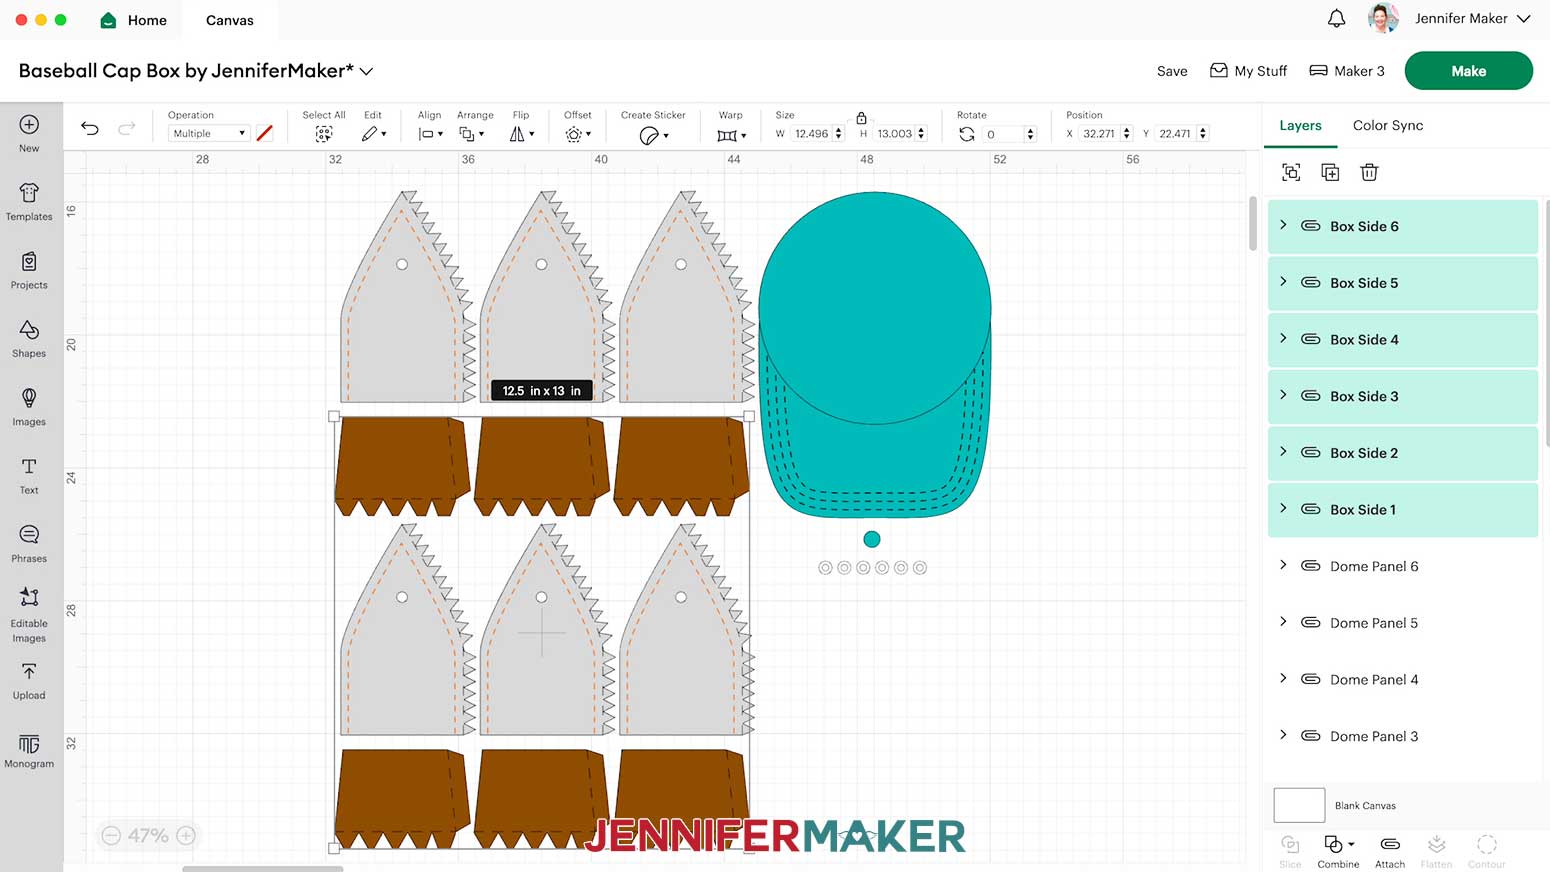
NOTE: The pointed pieces will be the hat’s dome, the rectangles with tabs will be the box sides, the large piece is the brim base, the small circle is the topper, and the six rings are vent hole covers. The dome pieces and brim have optional stitching to draw on with pen using the machine.
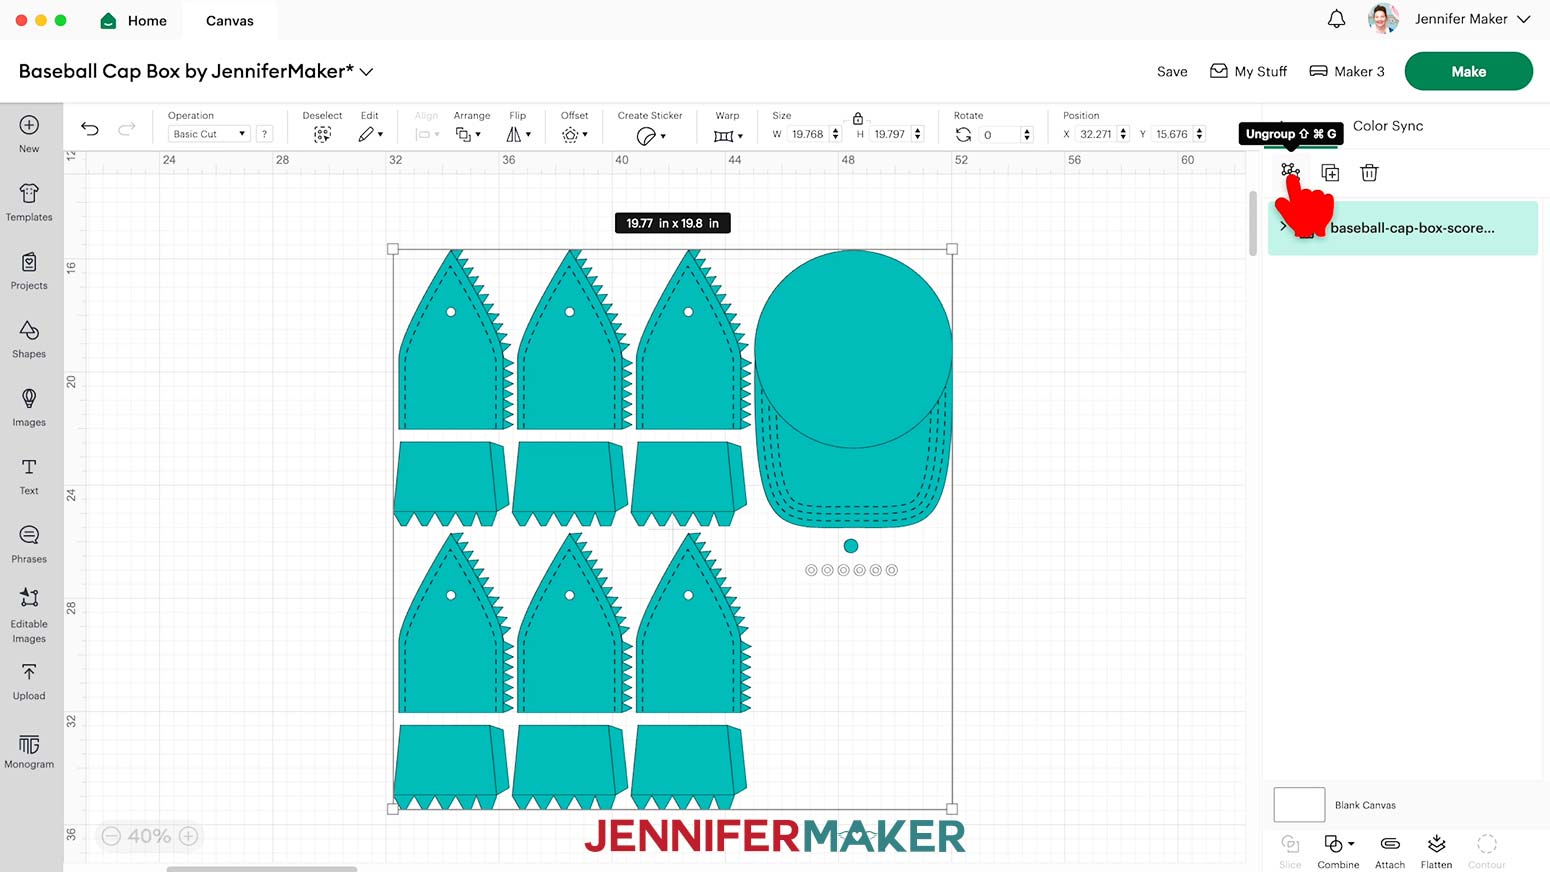
- Ungroup the design.
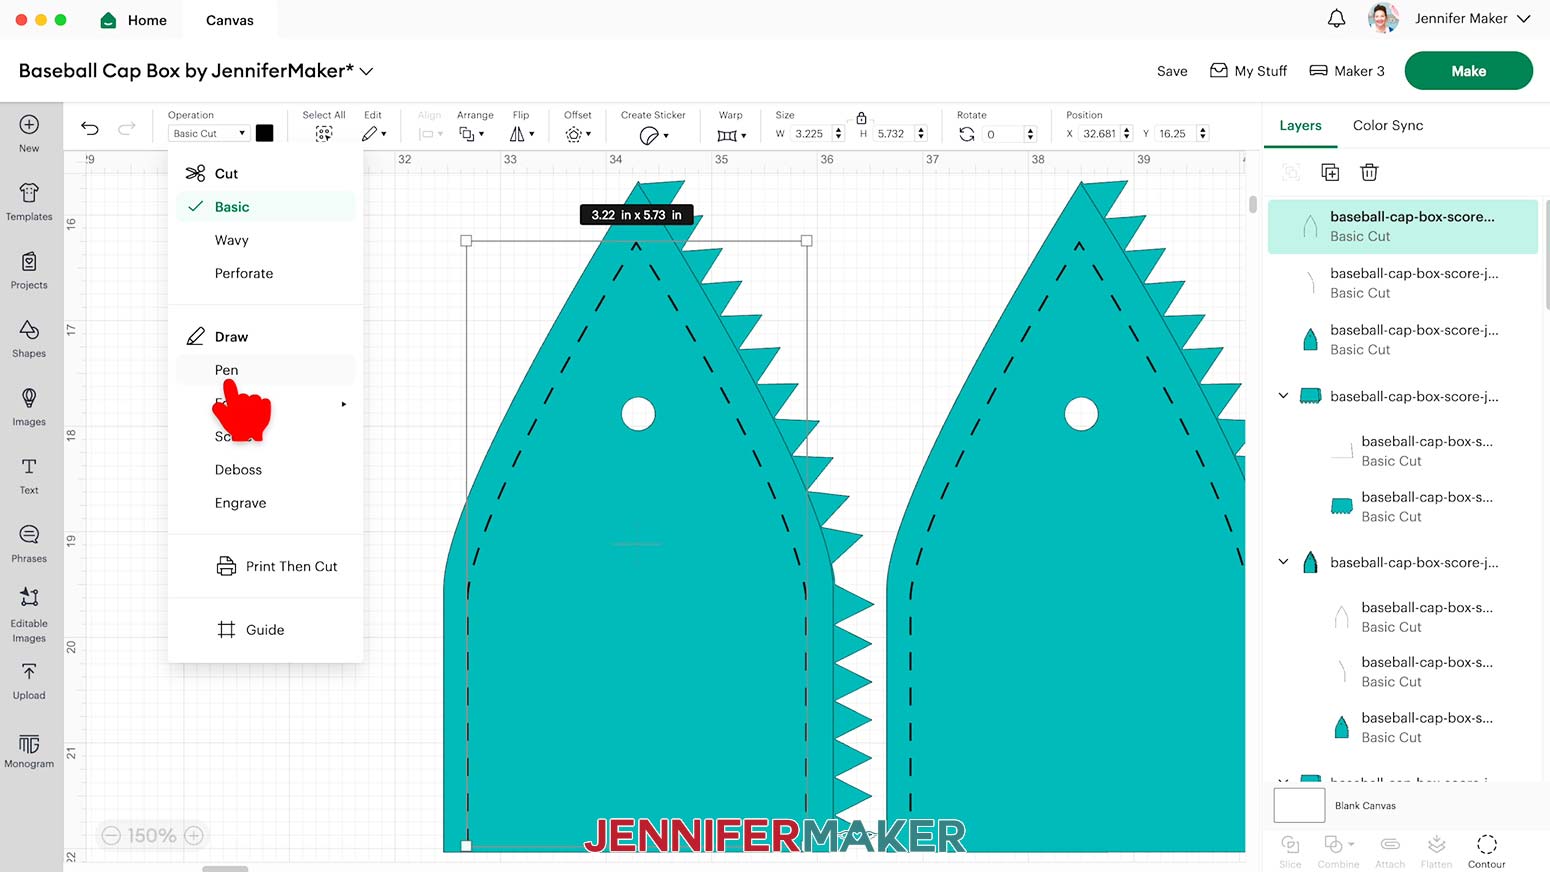
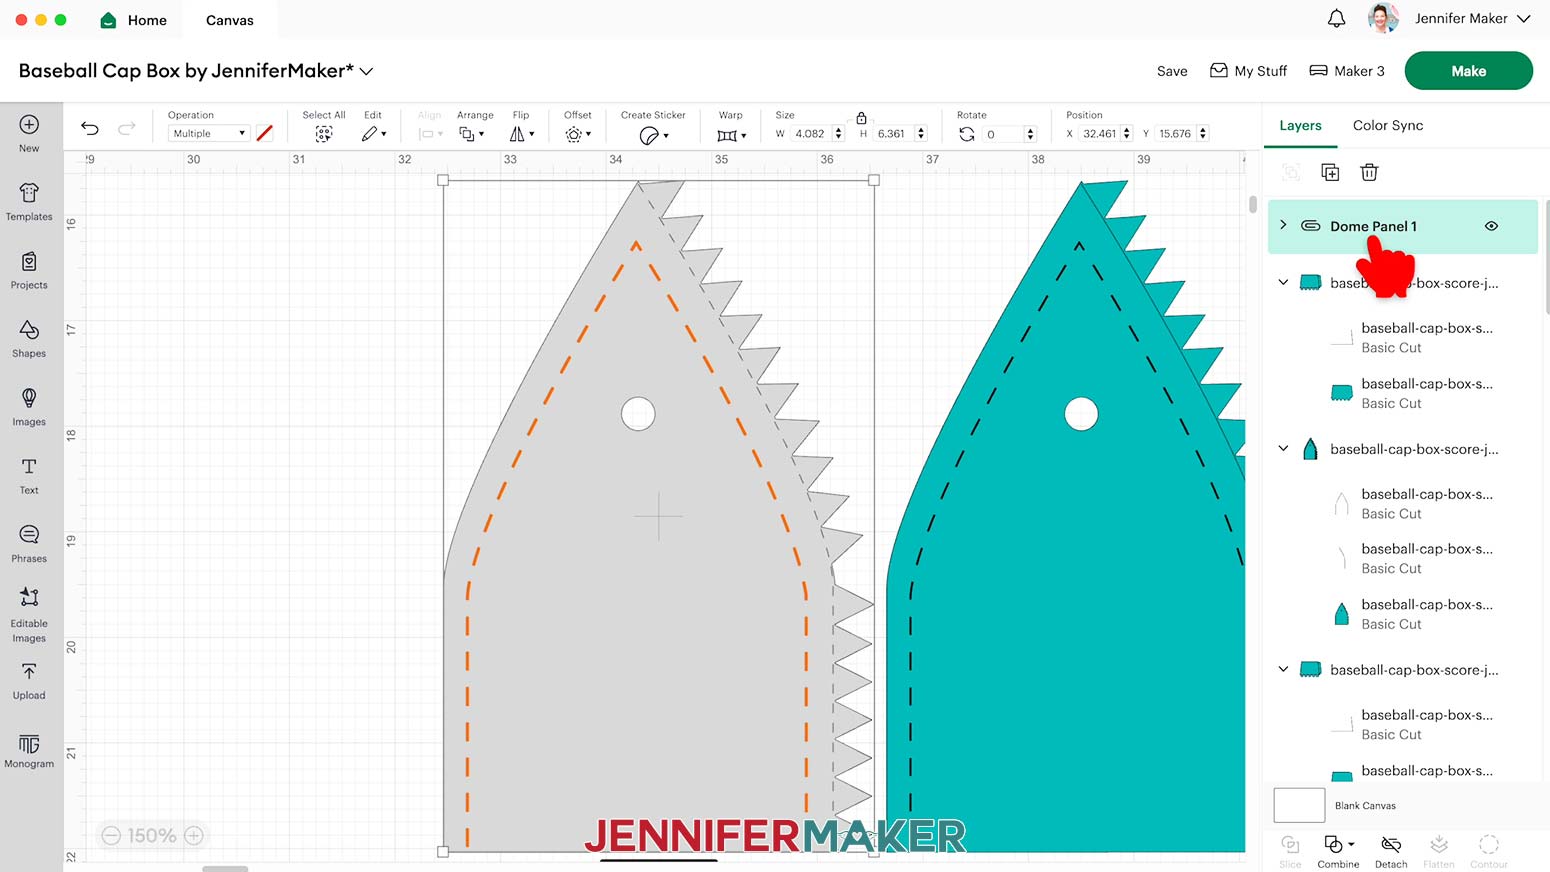
- Select and Ungroup the top left dome piece. It has three layers: the stitches, a crease line layer, and the cardstock shape.
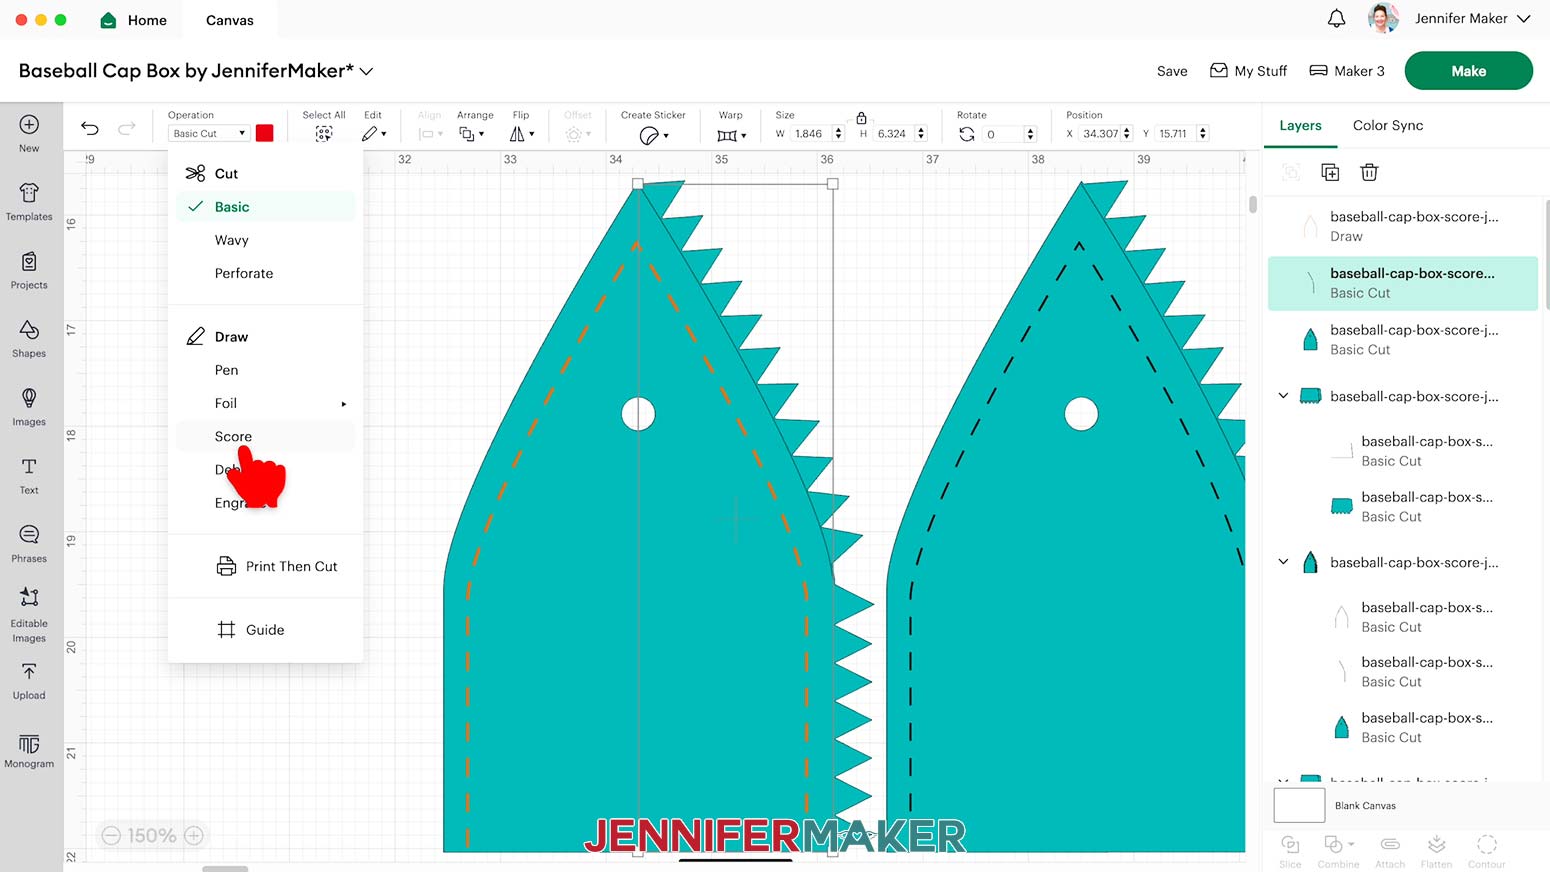
NOTE: If you’re using the dashed cut line version, you will only have the stitch and cardstock layers. - Select the top layer (the stitches) and click the “Operation” drop-down menu to change it to “Pen.”
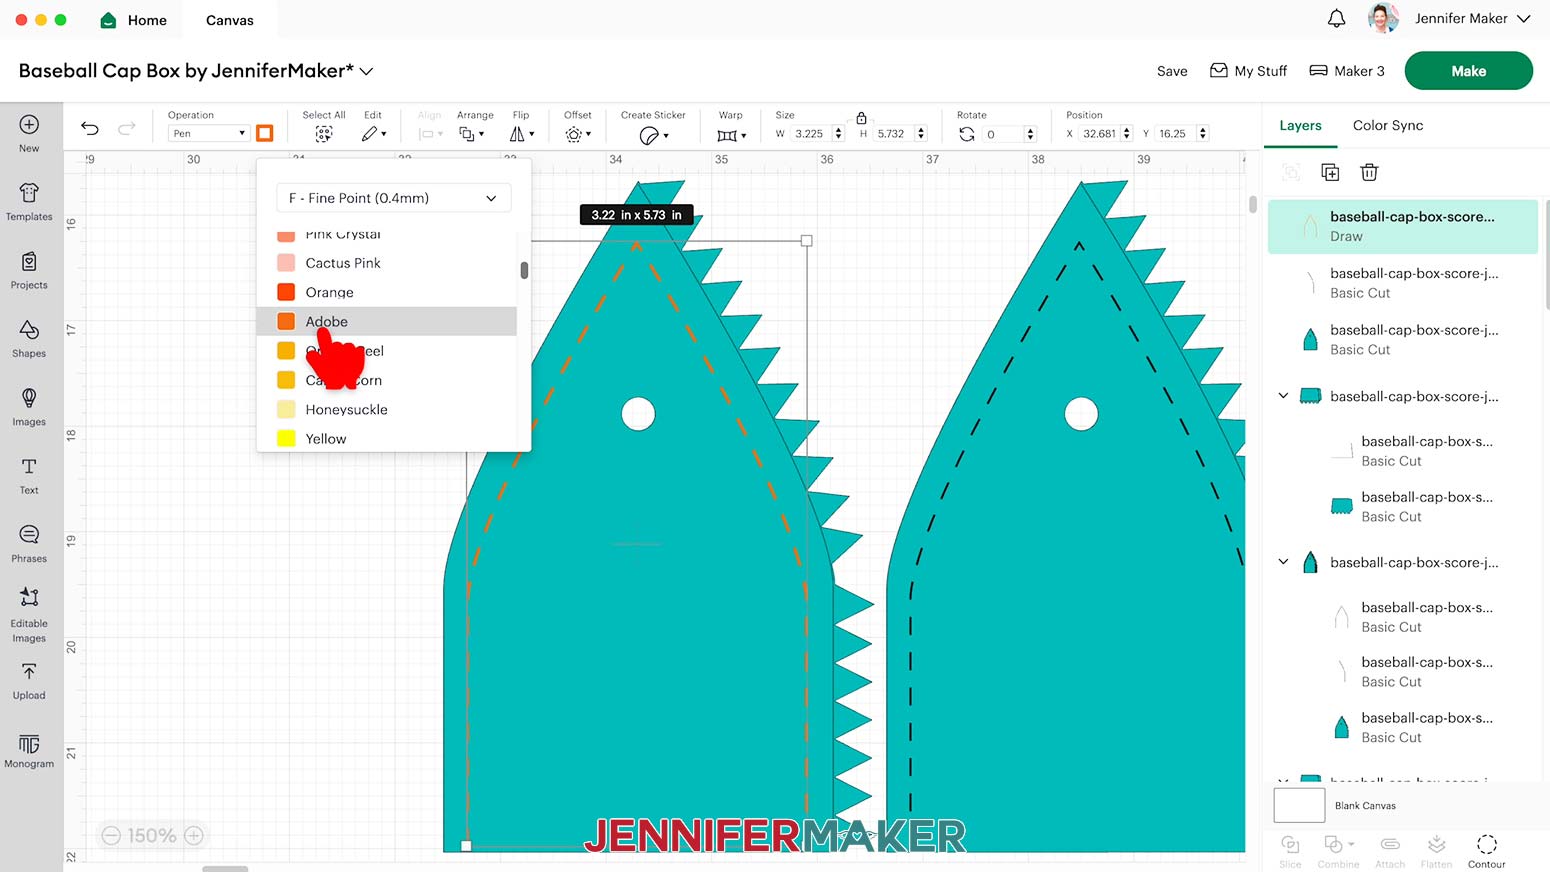
- Use the Color Box to select the pen type and color you want to use. I’m using a “F - Fine Point (0.4mm)” Adobe red Cricut Pen.
TIP: Test the pen and cardstock combination you plan to use on scrap paper to see how the colors interact. - In the Layers Panel, select the next layer for this dome piece, which shows as a “Basic Cut” layer with a red Color Box.
- Use the “Operation” drop-down menu to change the layer to “Score” to make the crease lines.
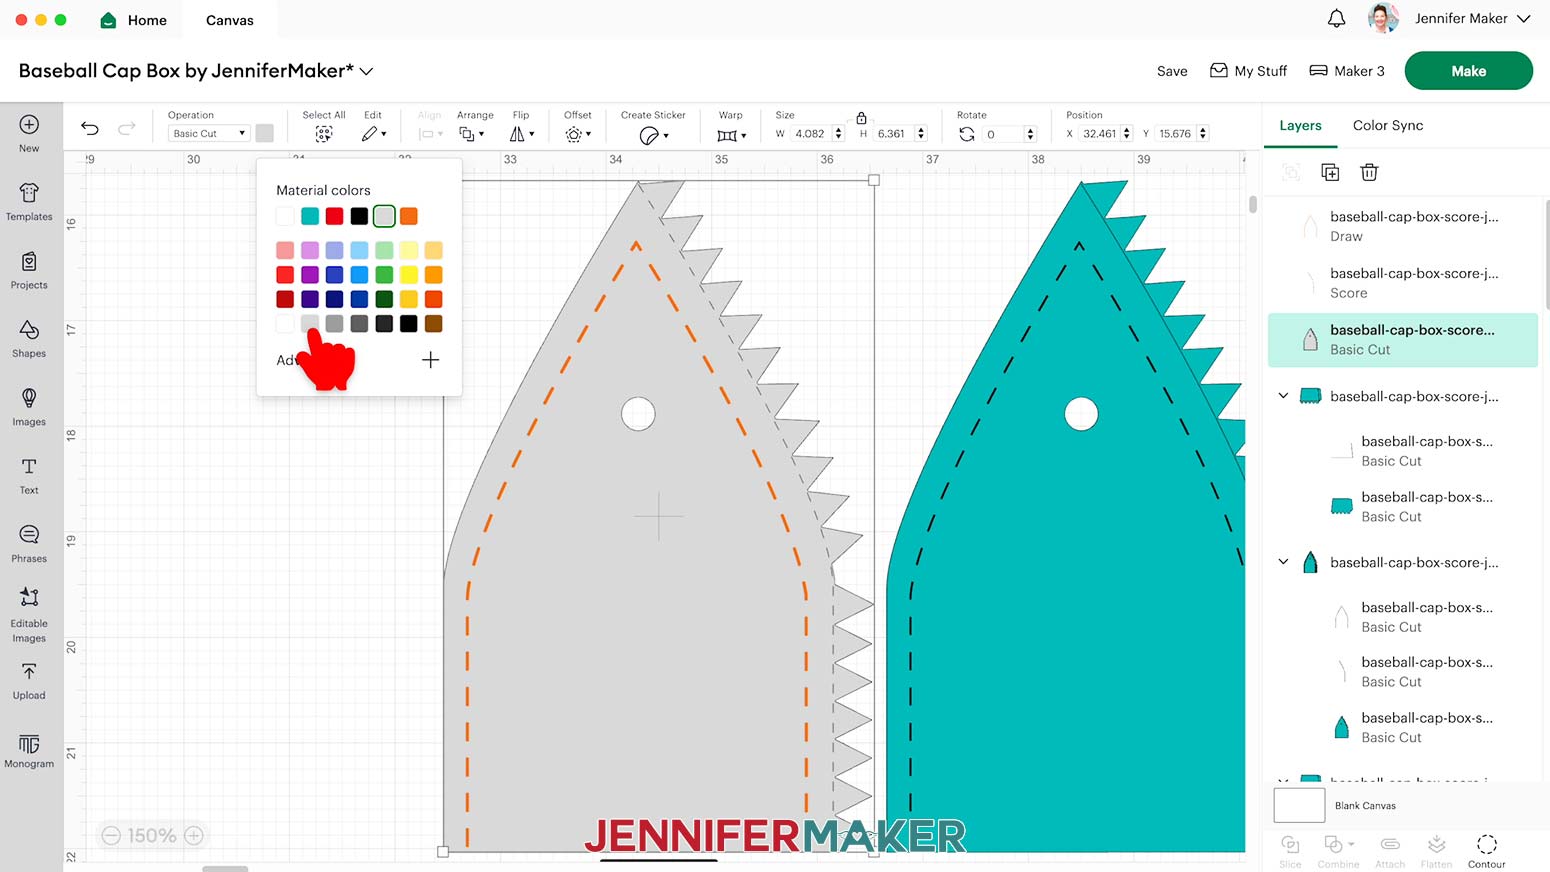
- If you want to change the cardstock color for the dome panel, select the next “Basic Cut” layer and use the Color Box to do so.
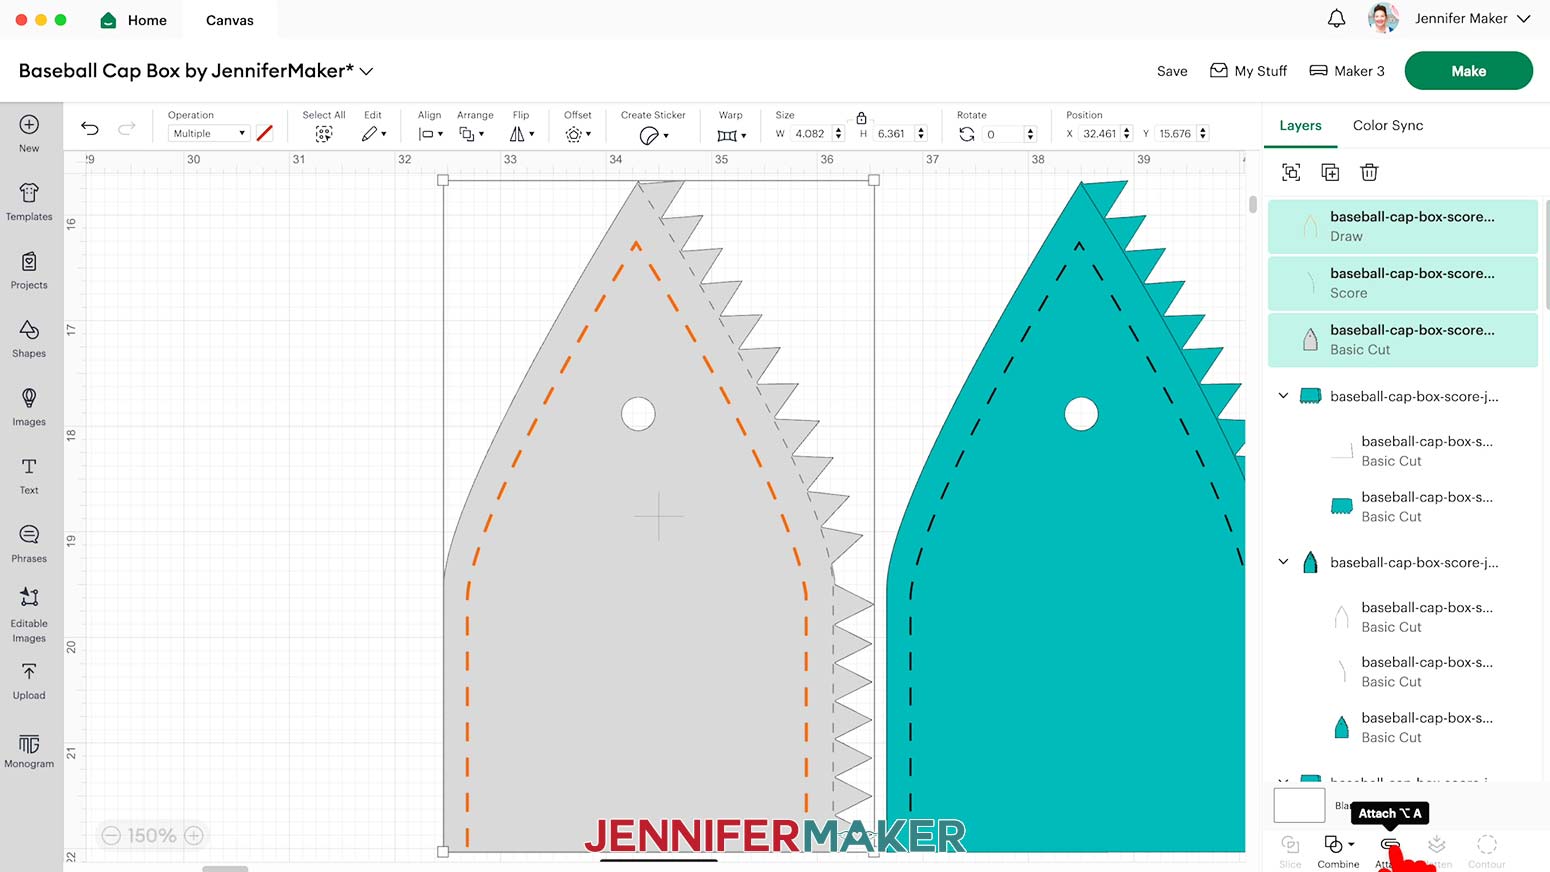
NOTE: If you want to use a different color or pattern of paper for one front panel, use the Color Box to change one panel to a new color so it cuts on its own mat. - Hold your Shift key and click the three layers for the dome piece in the Layers Panel.
- Click “Attach” to keep these operations together.
- To keep the pieces straight, double-click the Attached layer in the Layers Panel and rename it “Dome Panel 1.”
- Use Steps 9-17 to adjust and name the other five Dome Panel pieces.
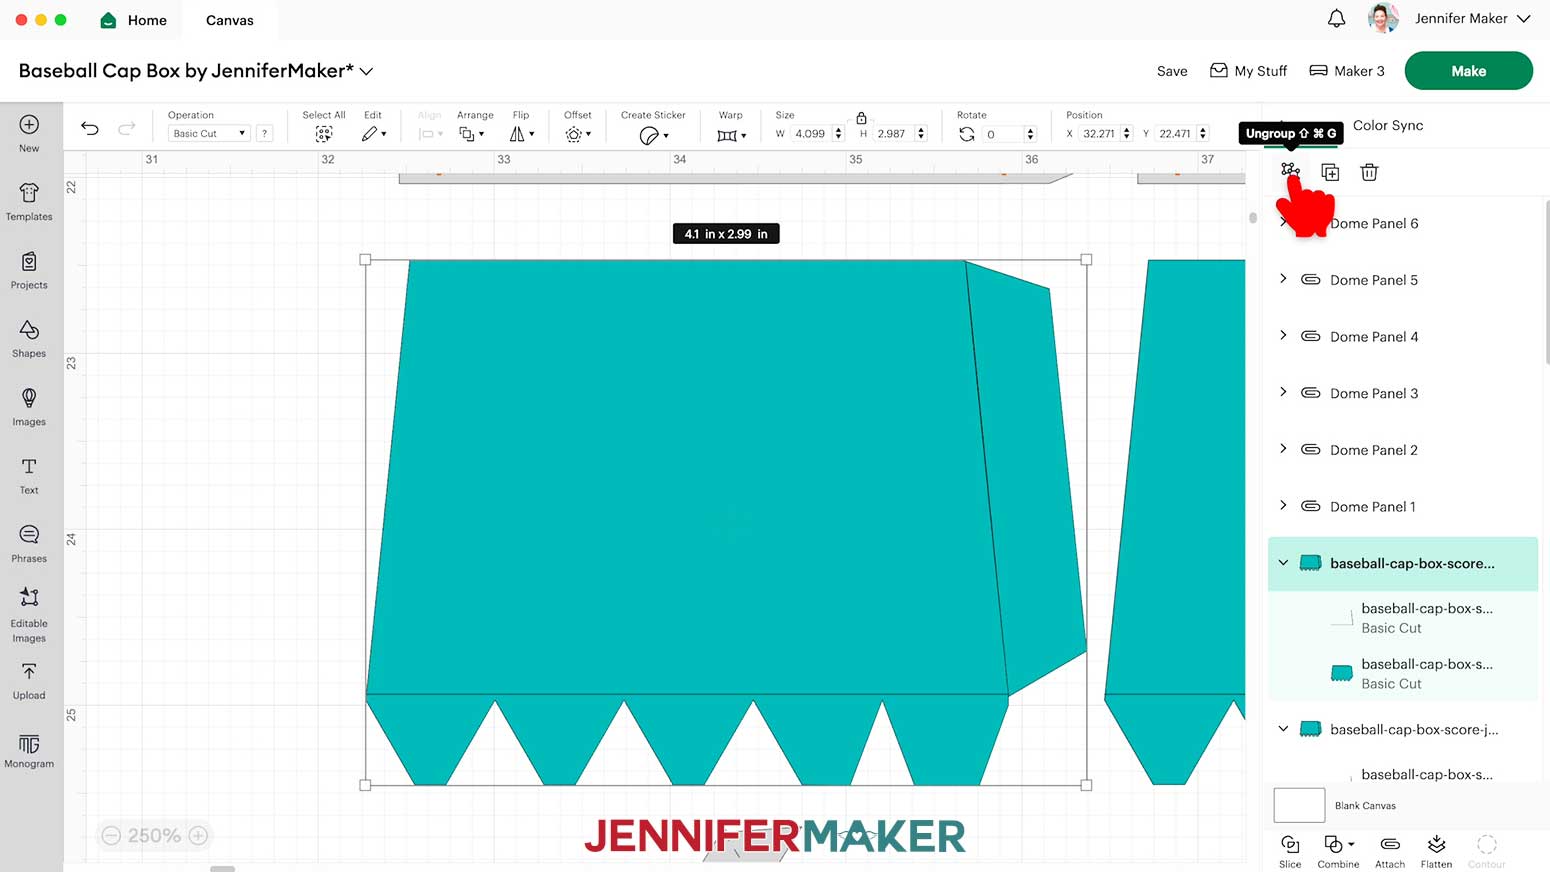
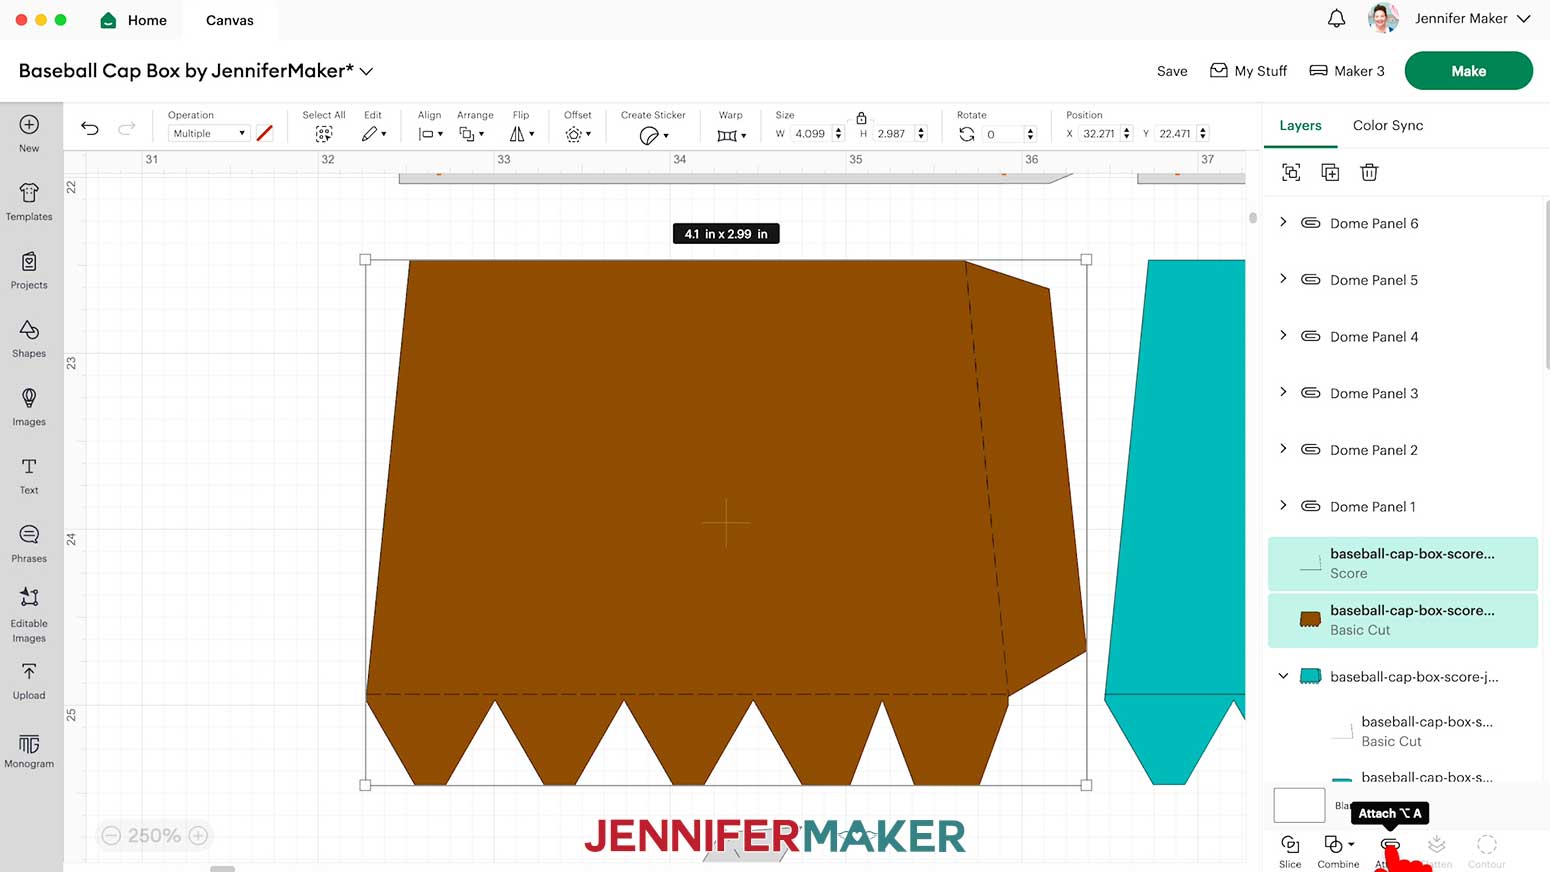
- Select and Ungroup the top left Box Side piece. It has two layers: a crease line layer, and the cardstock shape.
NOTE: If you’re using the dashed cut line version, you will only have the cardstock layer. - In the Layers Panel, select the top layer for this Box Side piece, which shows as a “Basic Cut” layer with a red Color Box.
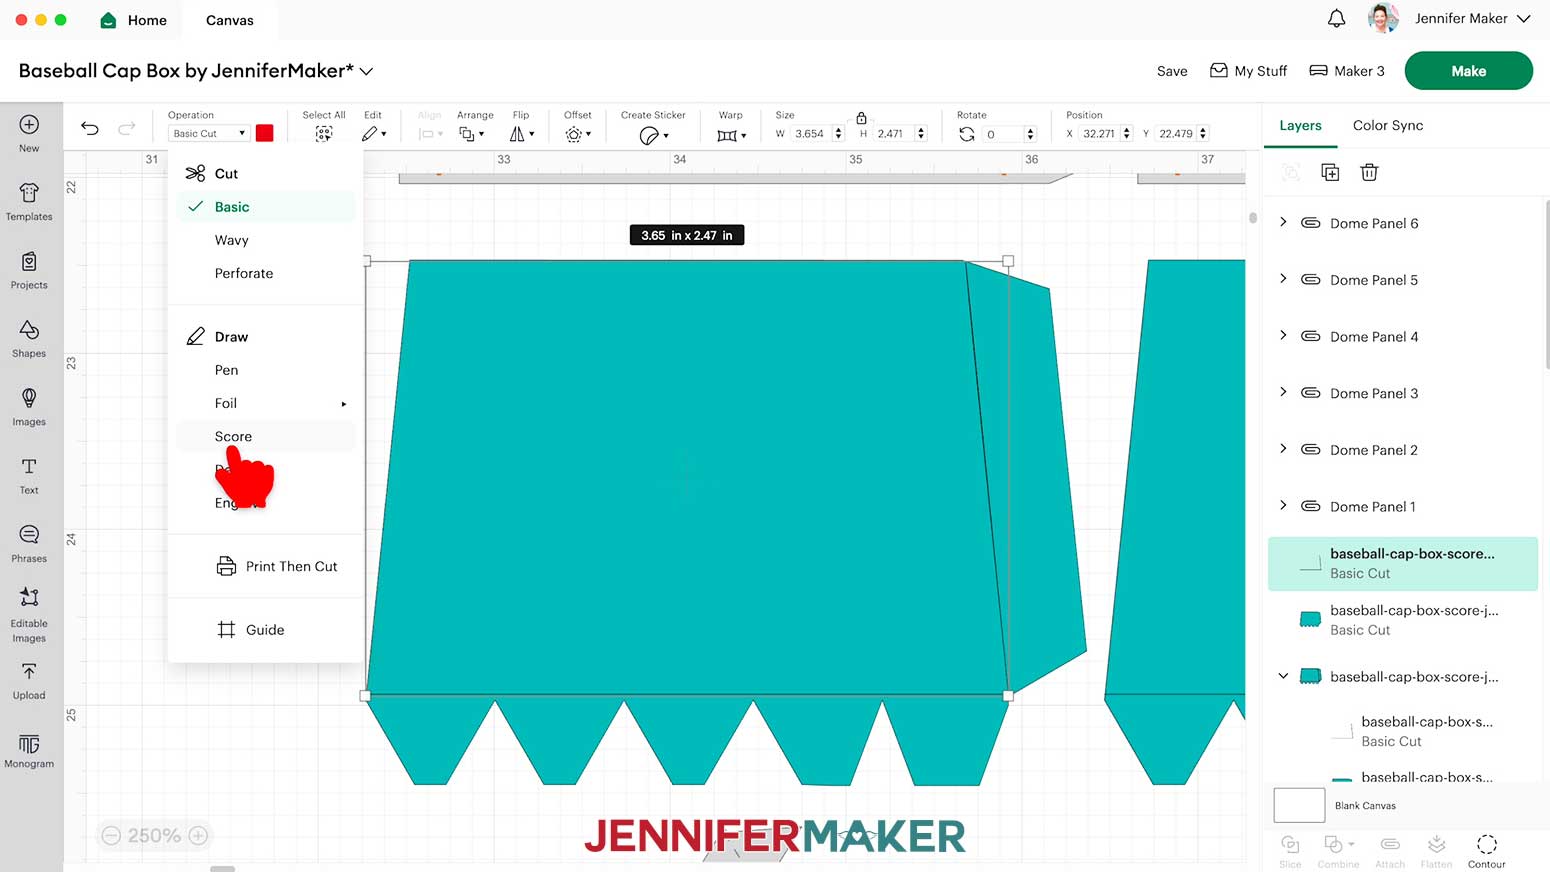
- Use the “Operation” drop-down menu to change the layer to “Score” to make the crease lines.
- If you want to change the cardstock color for the box side, select the next “Basic Cut” layer and use the Color Box to do so.
- Hold your Shift key and click the two layers for the box side piece in the Layers Panel.
- Click “Attach” to keep these operations together.
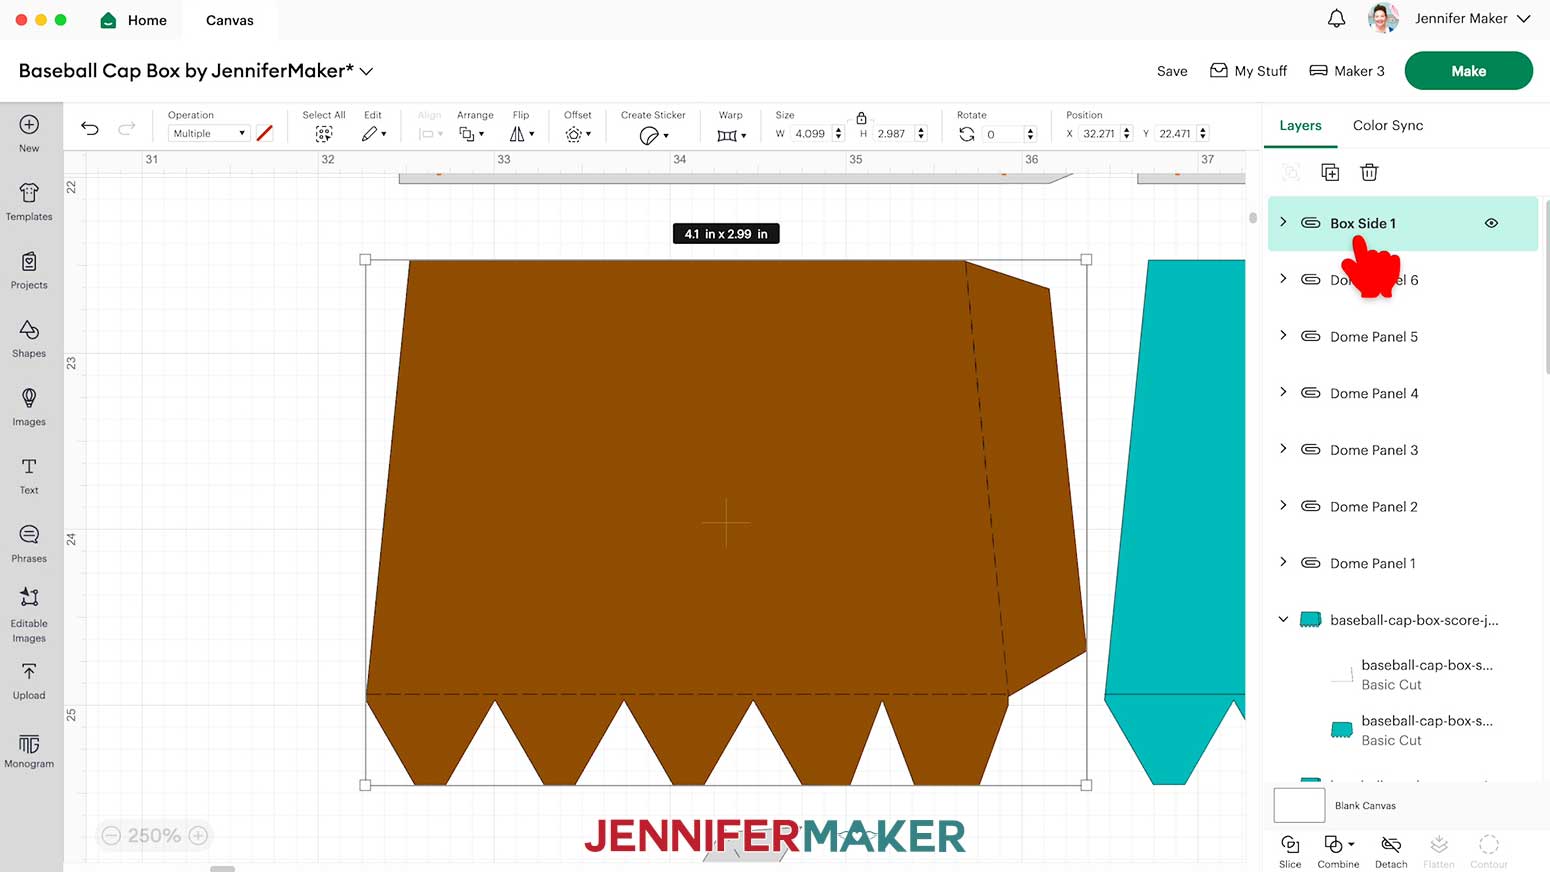
- To keep the pieces straight, double-click the Attached layer in the Layers Panel and rename it “Box Side 1.”
- Use Steps 19-25 to adjust and name the other five Box Side pieces.
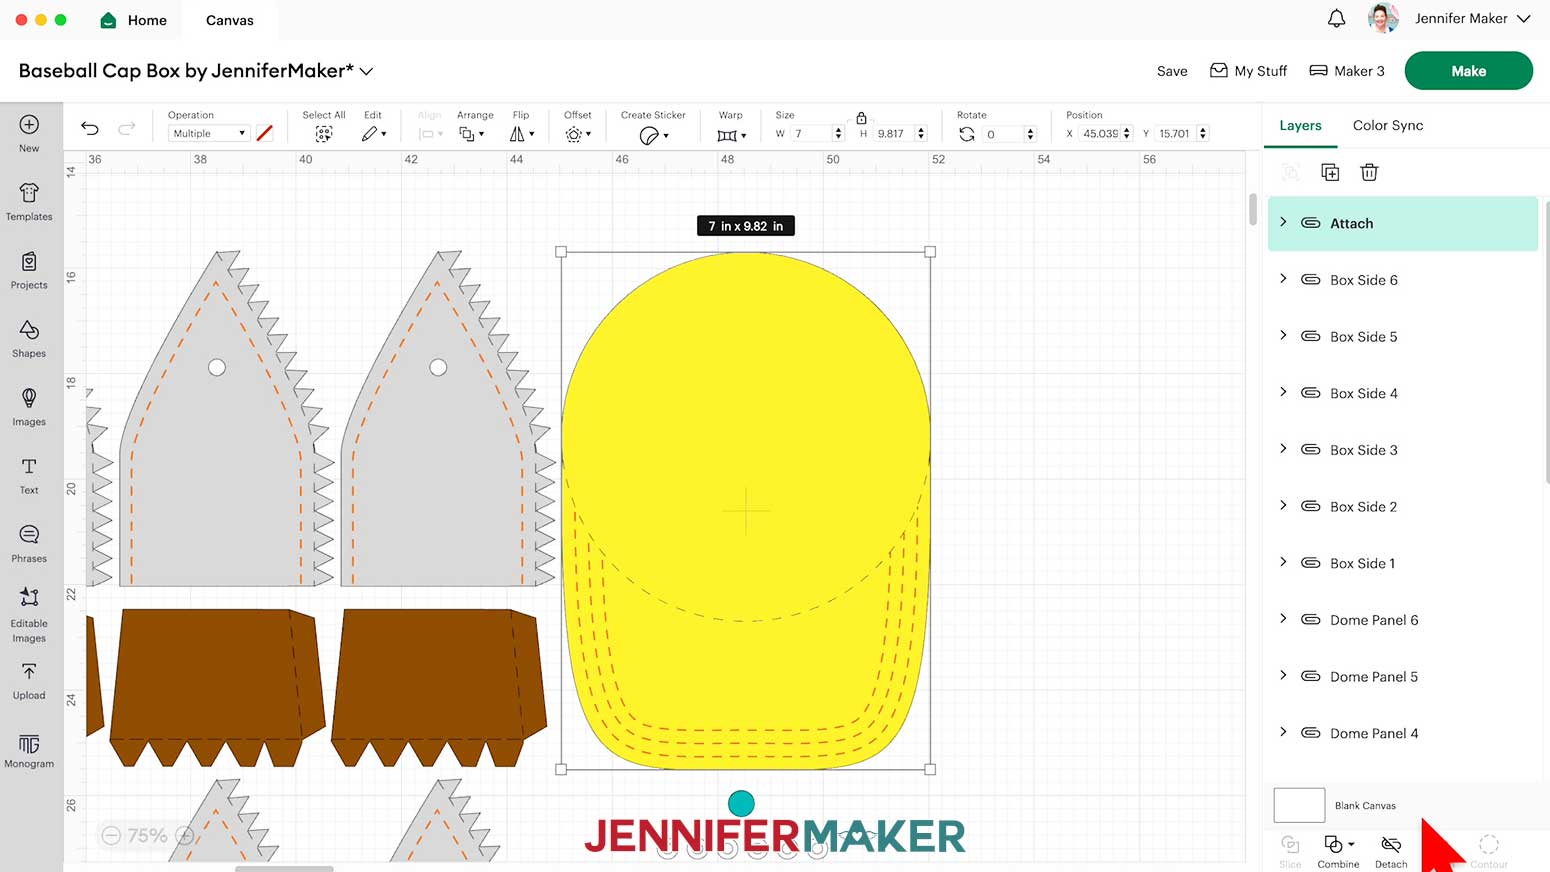
- Use Steps 9-16 to adjust and Attach the brim piece.
- If you want to change the color for the vent hole rings or topper, do so now using the Color Box.

CUTTING
- Make sure the correct machine is selected in the top right.
- Click “Make.”
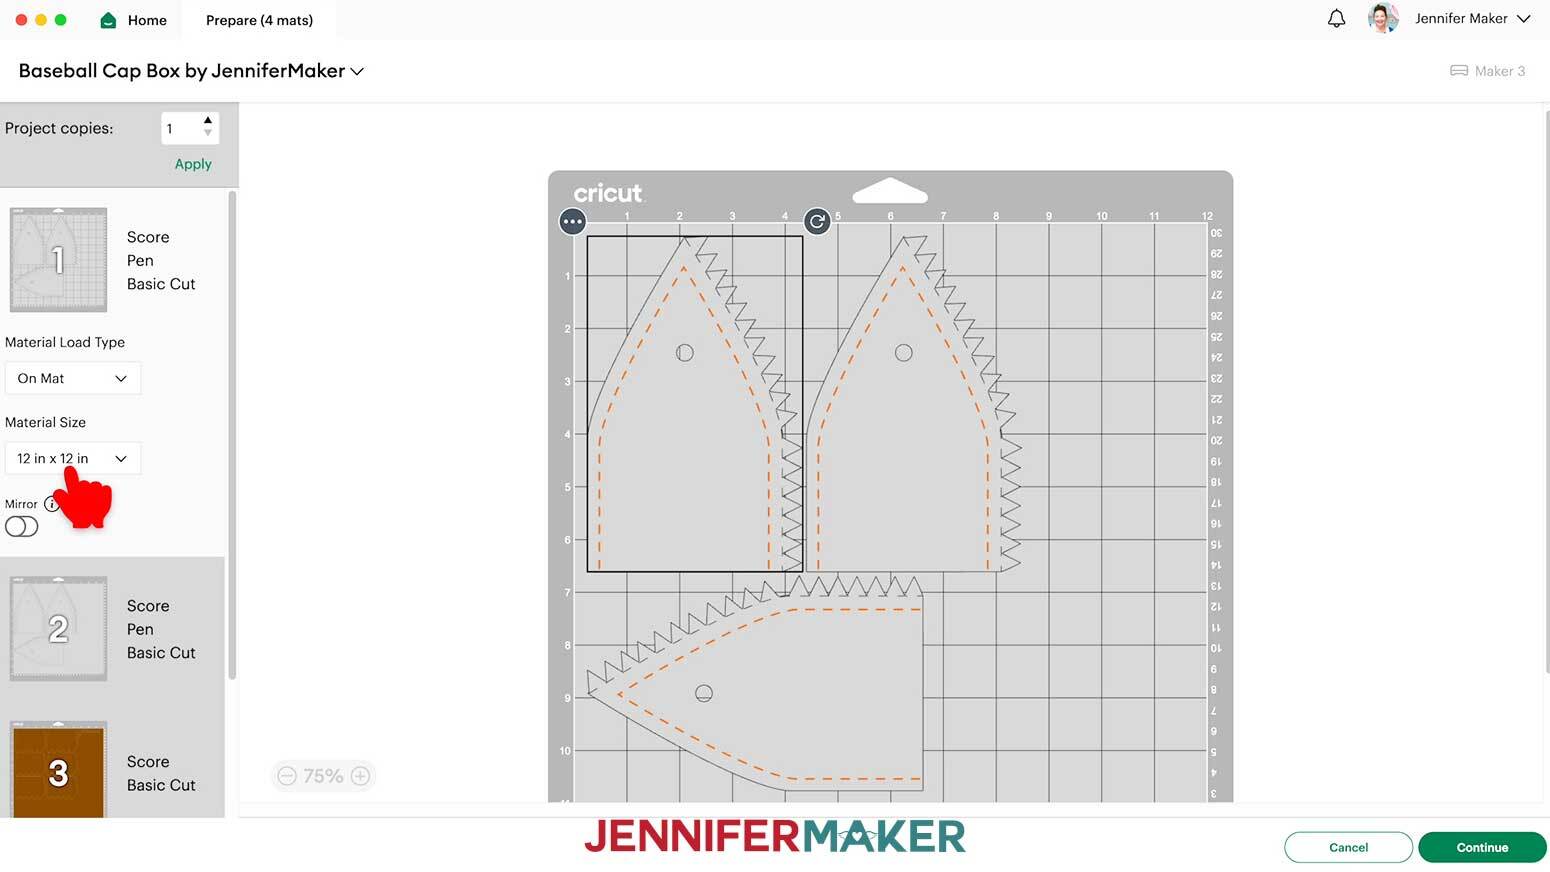
- If prompted, click “On Mat,” choose your mat size, and click “Confirm.”
- On the Prepare screen, make sure the correct Material Size is selected for your materials.
- Select the first mat again and click “Continue.”
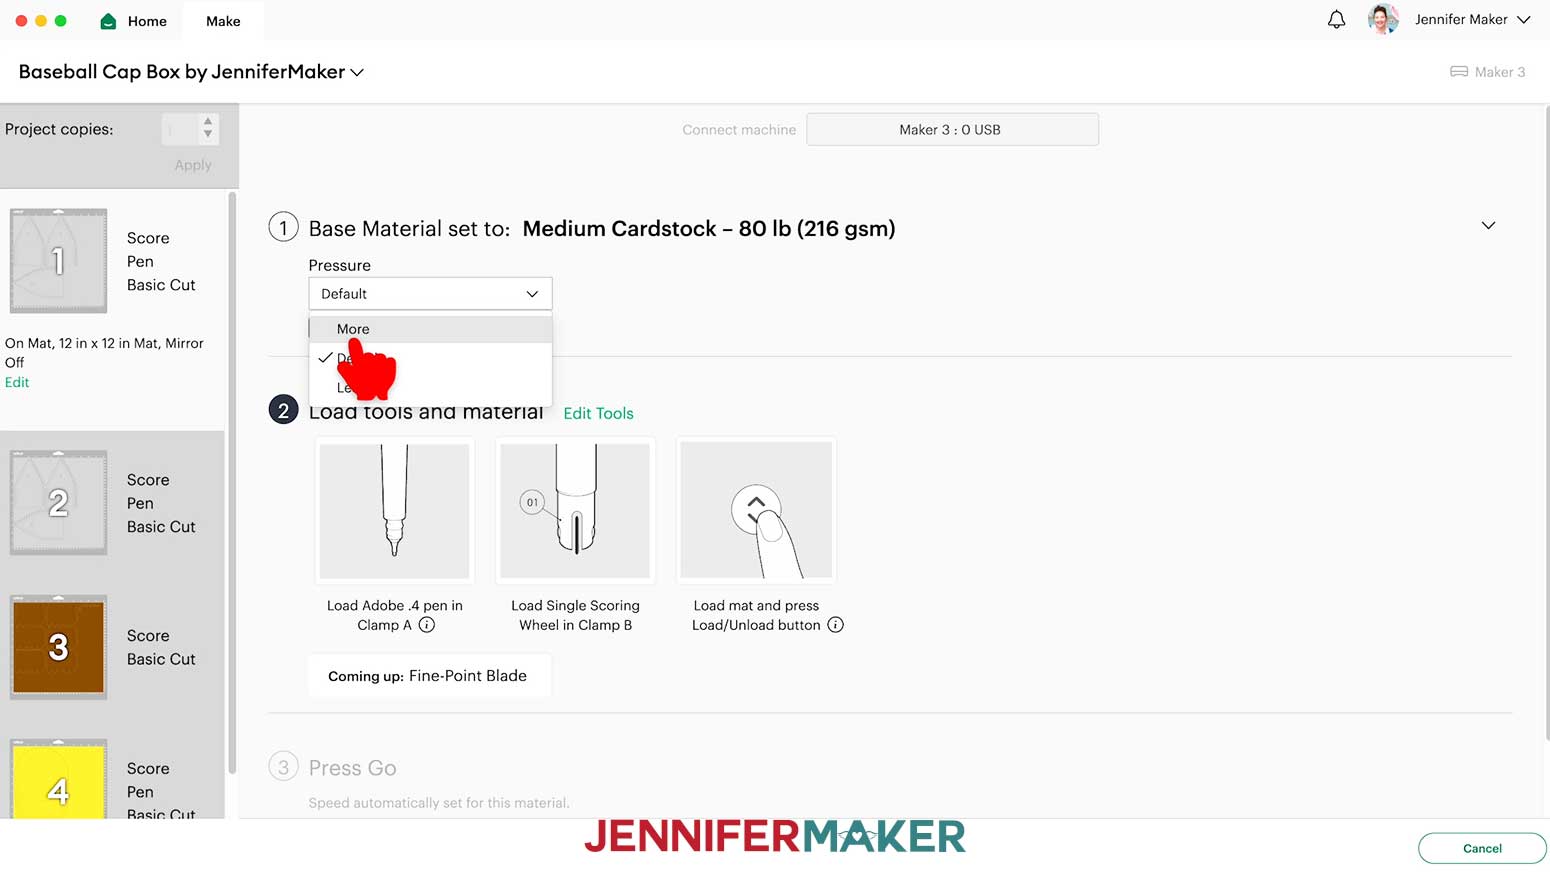
- On the Make screen, set the Base Material for your mats. I used the “Medium Cardstock - 80 lb (216 gsm)” setting with “More” Pressure for all my tests with good results.
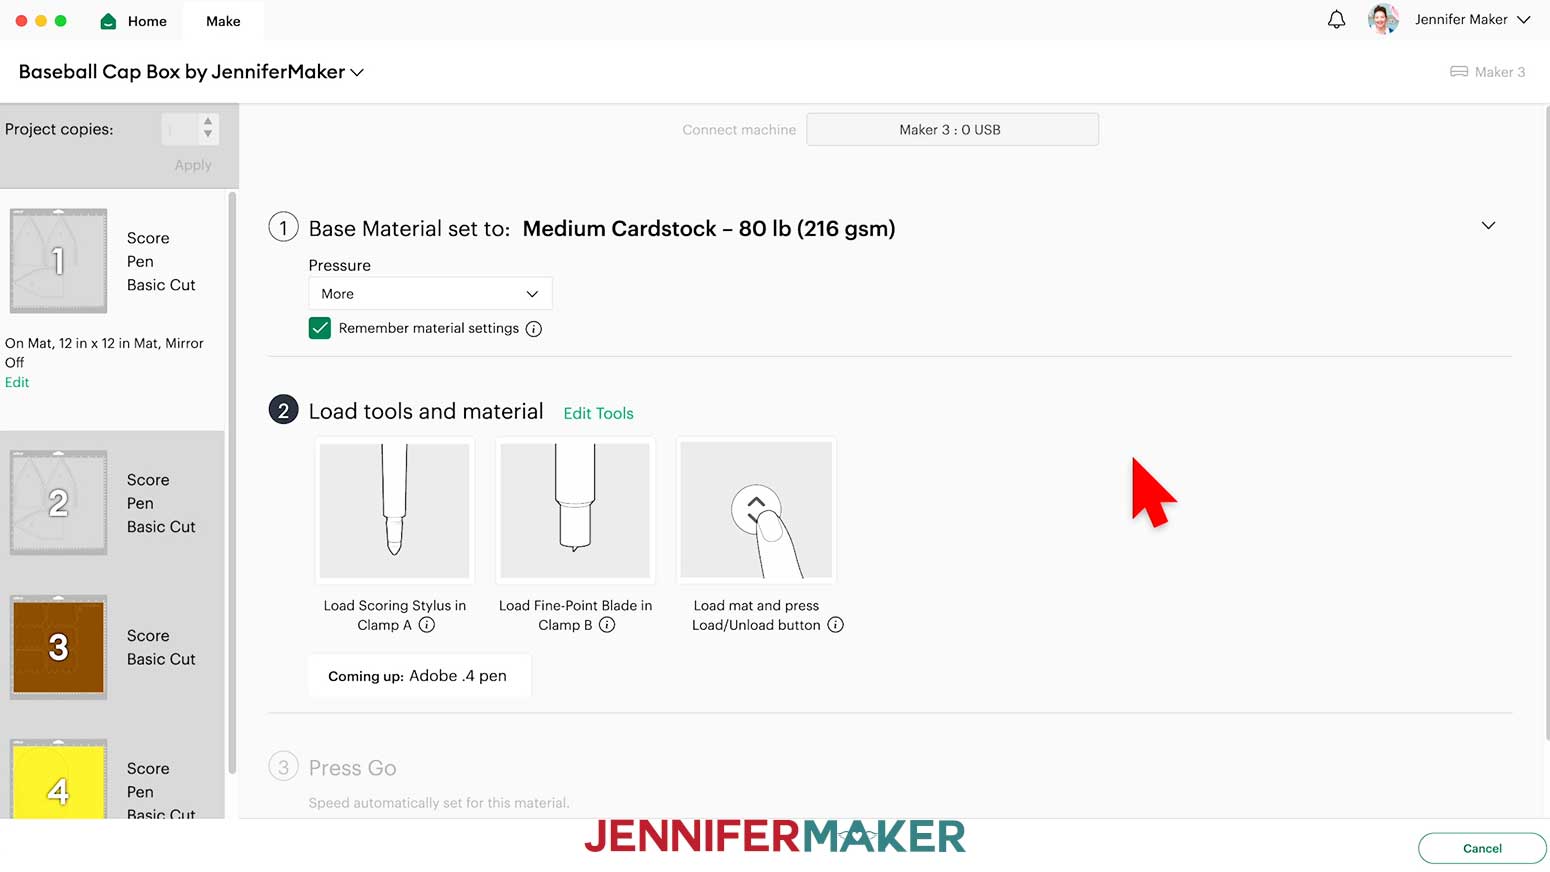
NOTE: You can check the box next to “Remember Material Settings” to save time.
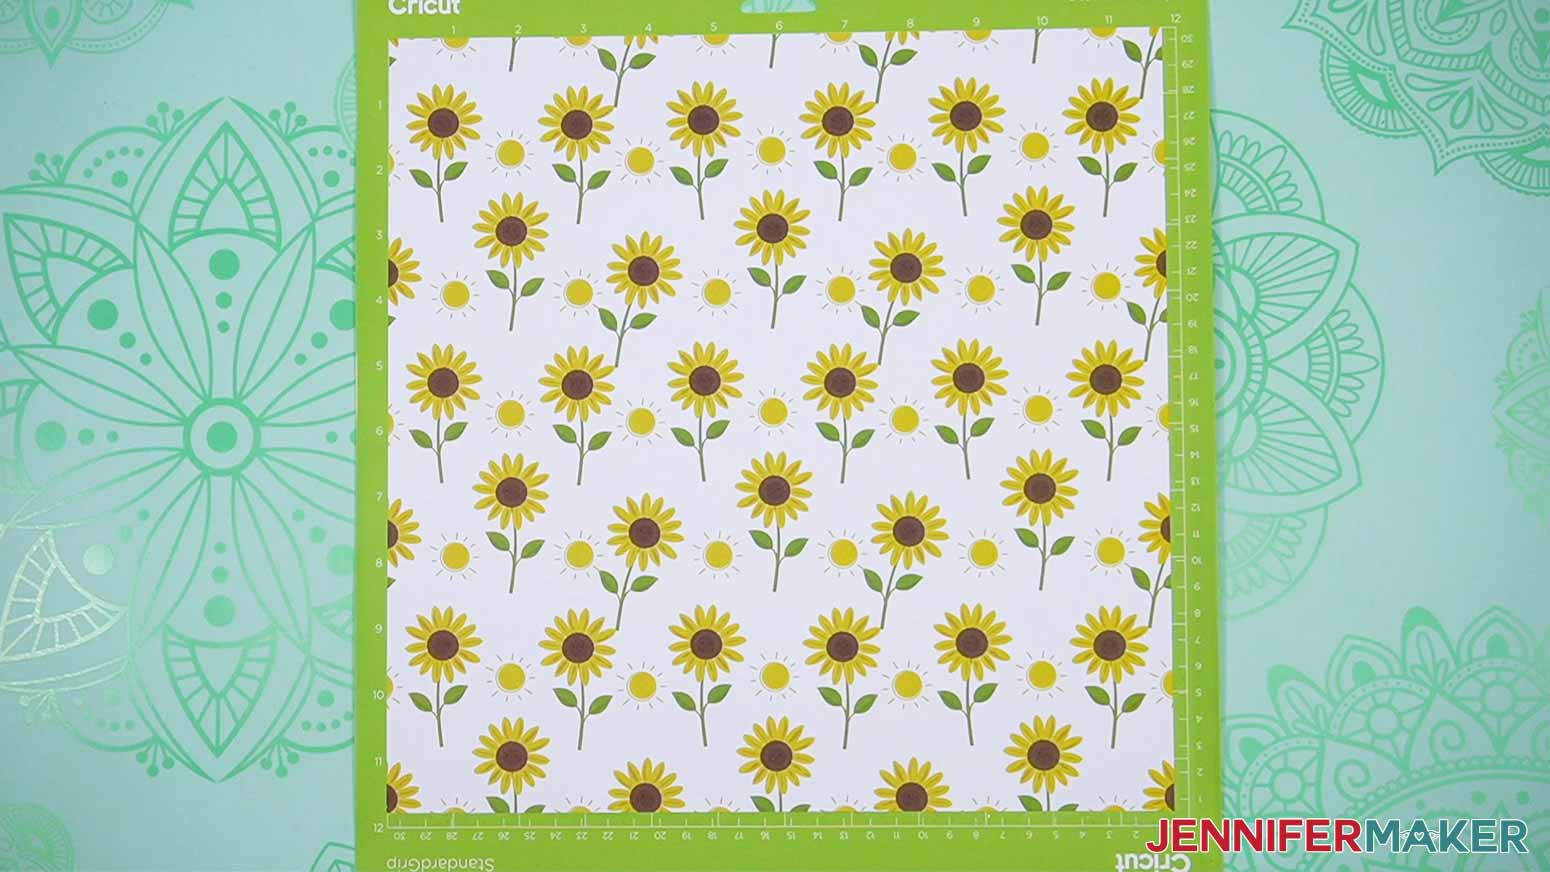
TIP: Changing the Pressure to “More” results in a cleaner cut. - Place your first mat’s cardstock face up on a green StandardGrip machine mat.
- Use a brayer to make sure it’s fully adhered.
- Check that your Premium Fine-Point Blade is clean and in the clamp.
- When you get to a mat with score and pen lines, follow the screen prompts to select and add the tool and pen you chose as needed.
TIP: Design Space might not remember your tool choices between mats, so always check that they’re correct.
NOTE: If you’re using the dashed cut line version, you won’t see the scoring tool prompts. - Press the flashing “Load/Unload” button to load the prepared mat into your Cricut.
- Press the flashing “Go” button to begin cutting.
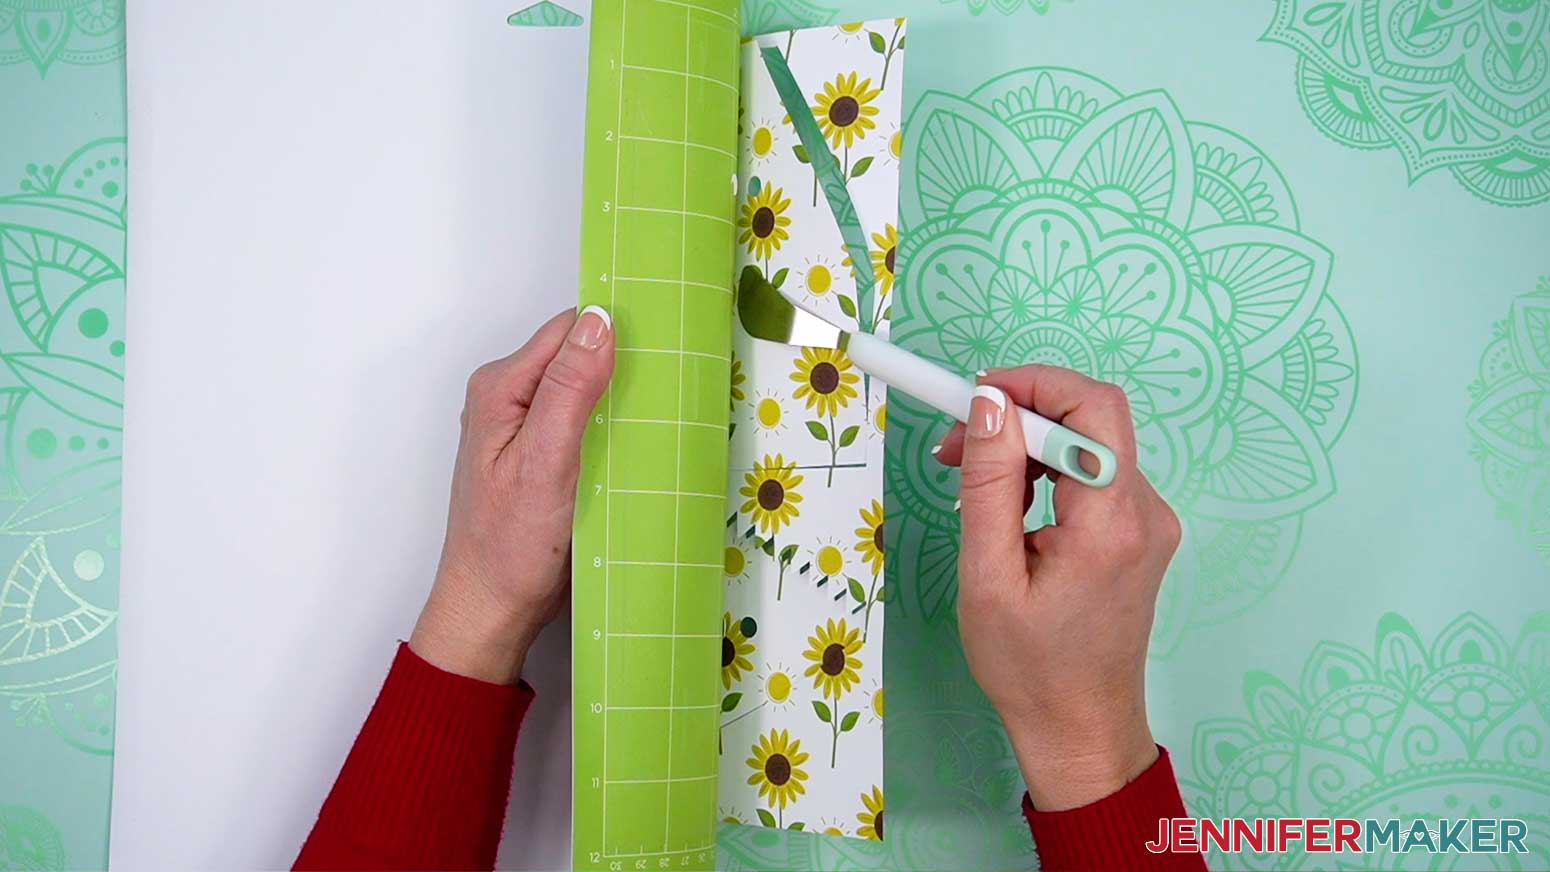
- When it has finished cutting, unload the mat, flip it over onto your work surface, and roll it back to release the paper.
TIP: Use the spatula to help lift delicate parts, and your weeding tool to poke out small bits of cardstock that may have been left behind. If you have any issues with your cuts, go to jennifermaker.com/cleaner-cuts. - Use a scraper tool to remove the small bits left on your mat after you remove the cut pieces.
- Follow Steps 6-14 to continue cutting the rest of your mats.
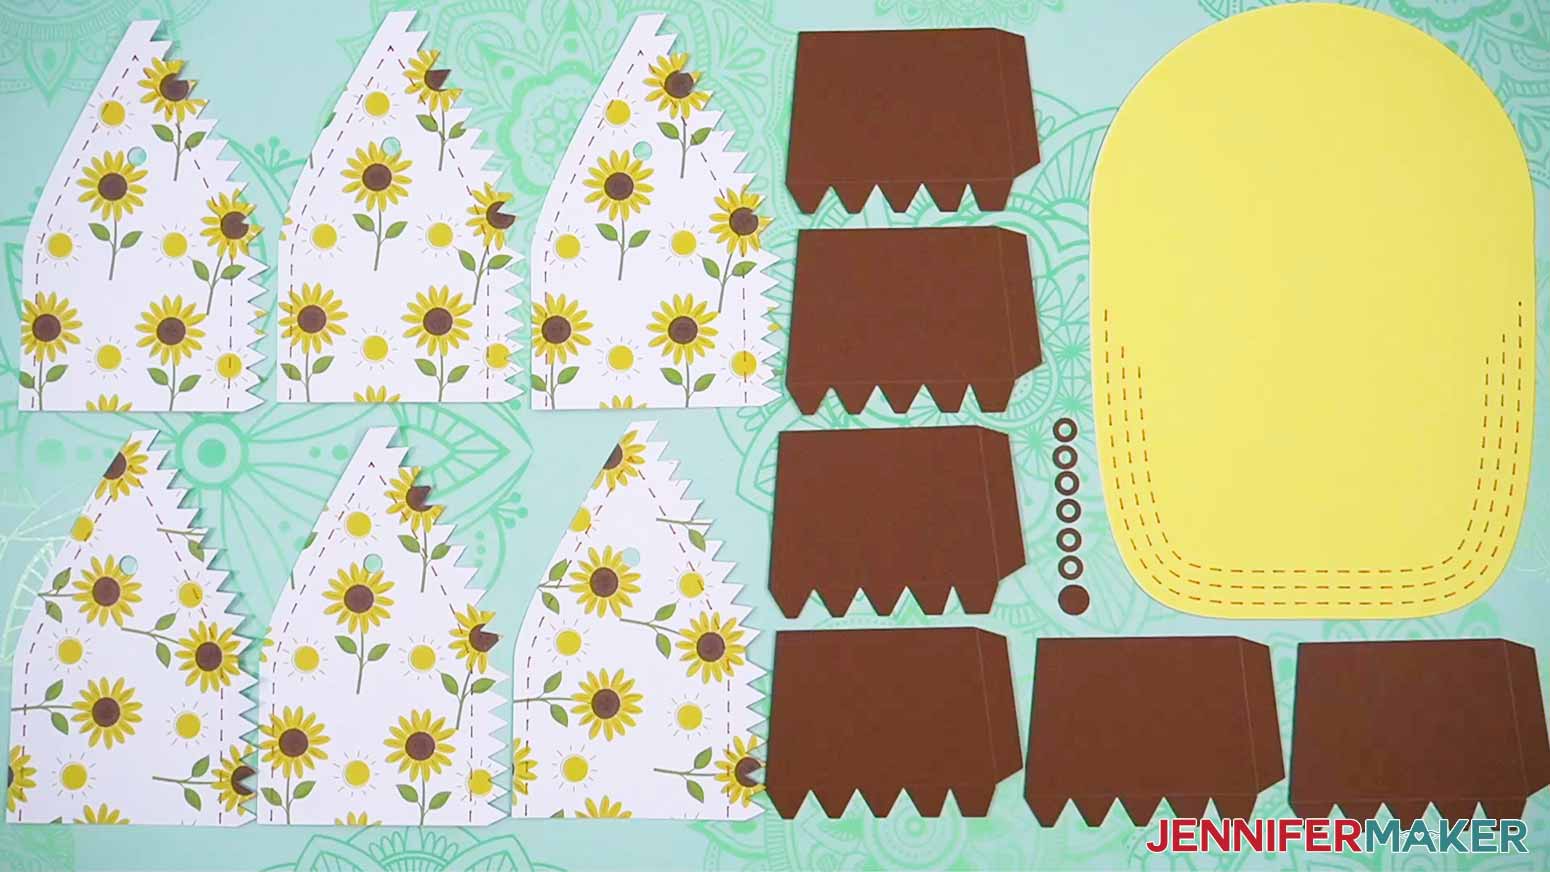
- Lay out all of the pieces face up. You should have six dome panels, six box sides, the brim, the topper, and six vent hole rings. Refer to the Design Space screen if you’re not sure on some pieces’ orientation.
STEP 3: ASSEMBLE YOUR BASEBALL CAP BOX
NOTE: It’s important to let your pieces dry well before moving on to some assembly steps, so you can either assemble one section at a time, or work on the dome and box sides simultaneously, moving back and forth between the elements. That way, you can keep working while other pieces dry!
BOX SIDE AND BASE ASSEMBLY
- Set the topper circle safely aside so you don’t lose it.
- Gather the six Box Side pieces. Each Box Side has a plain tab on one short side and a series of smaller tabs on a long side, which is how we’ll adhere the sides to the brim.
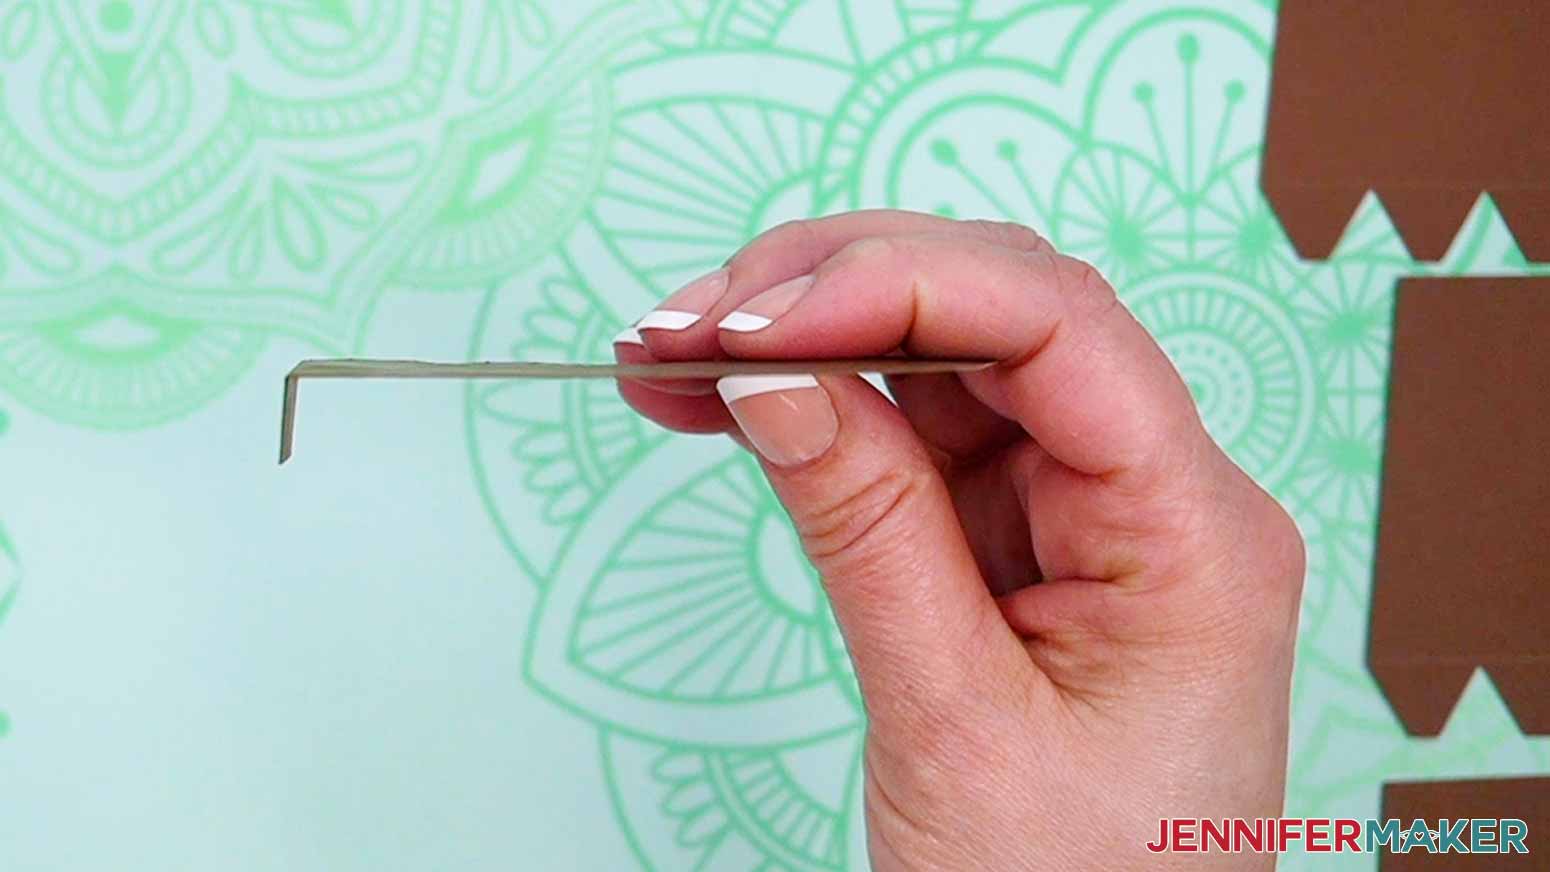
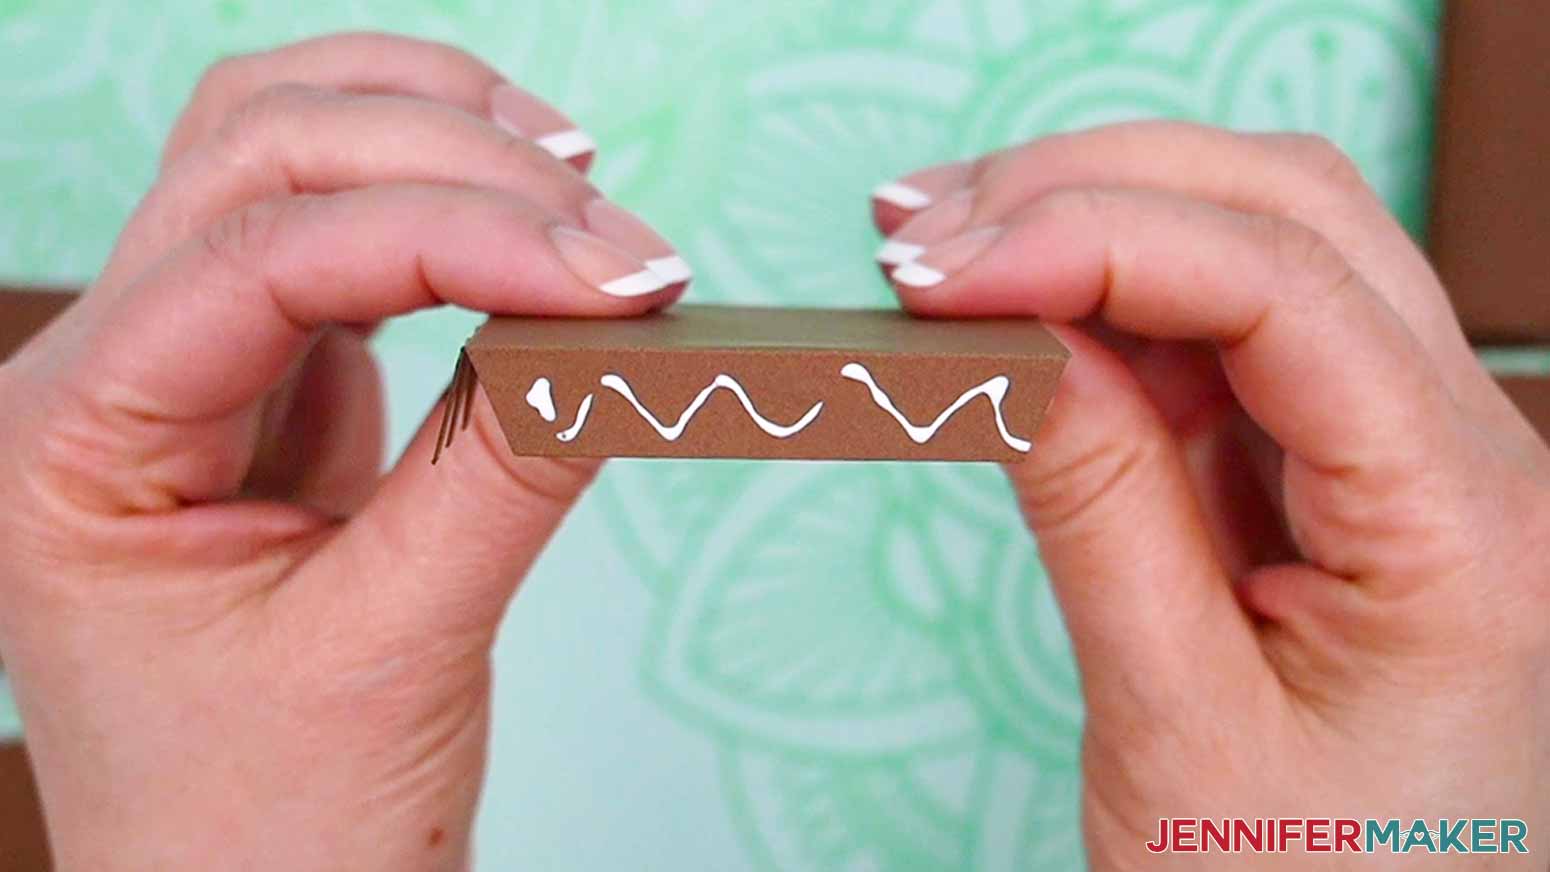
- With a Box Side face down, fold the long crease line to bring the long side tab up so it’s perpendicular to the main section.
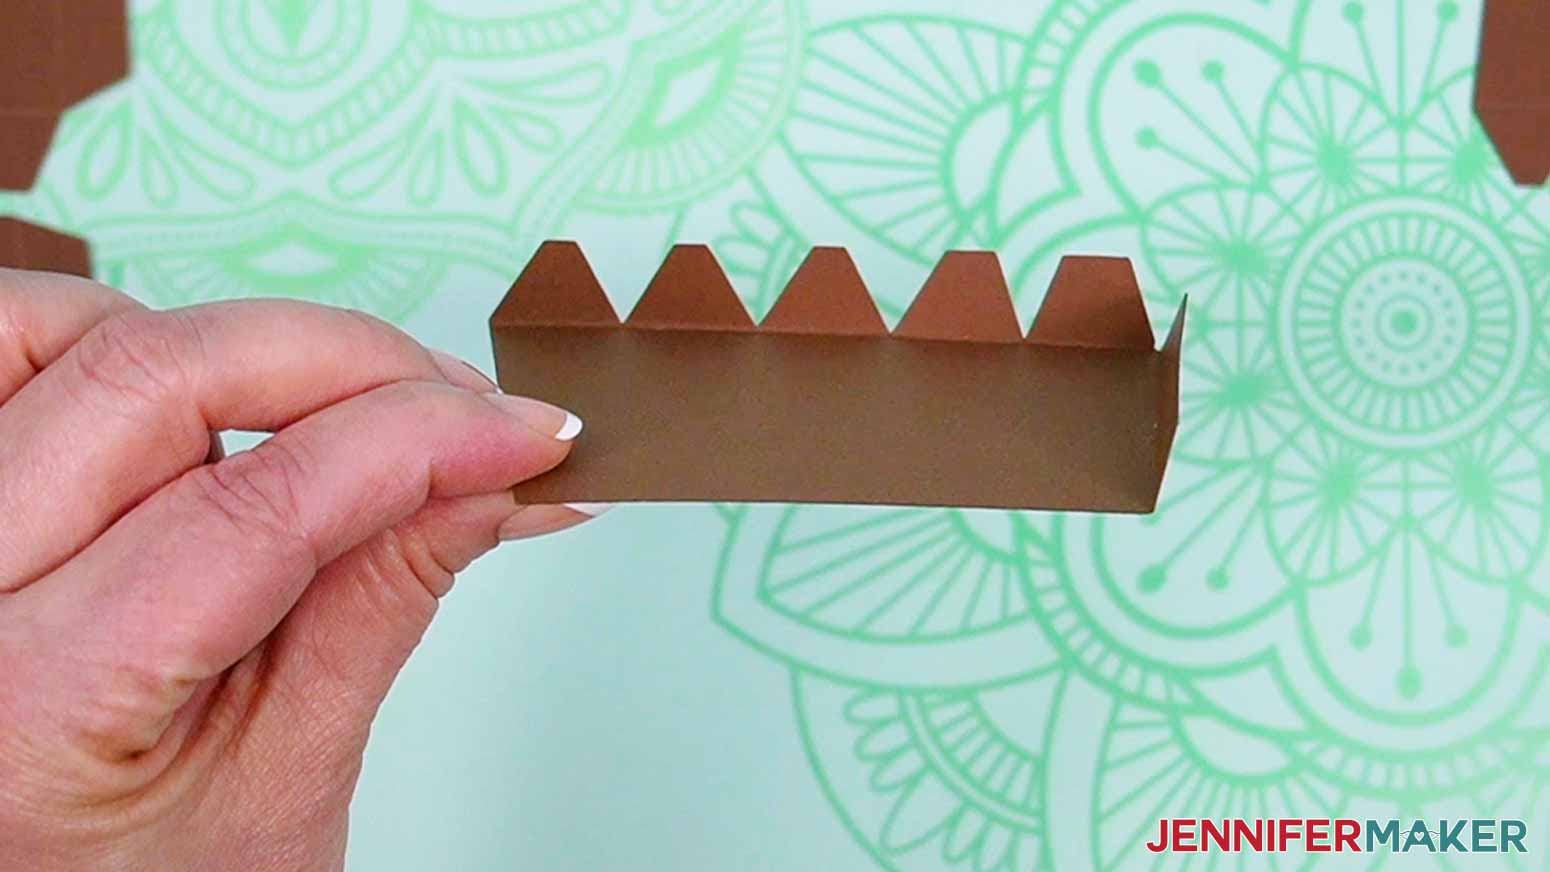
TIP: If you have trouble making straight creases, place your scraper tool along the line, then fold the tab up against it. - One at a time, fold the small tabs up.
- Use Steps 3 and 4 to prepare the other five Box Side pieces.
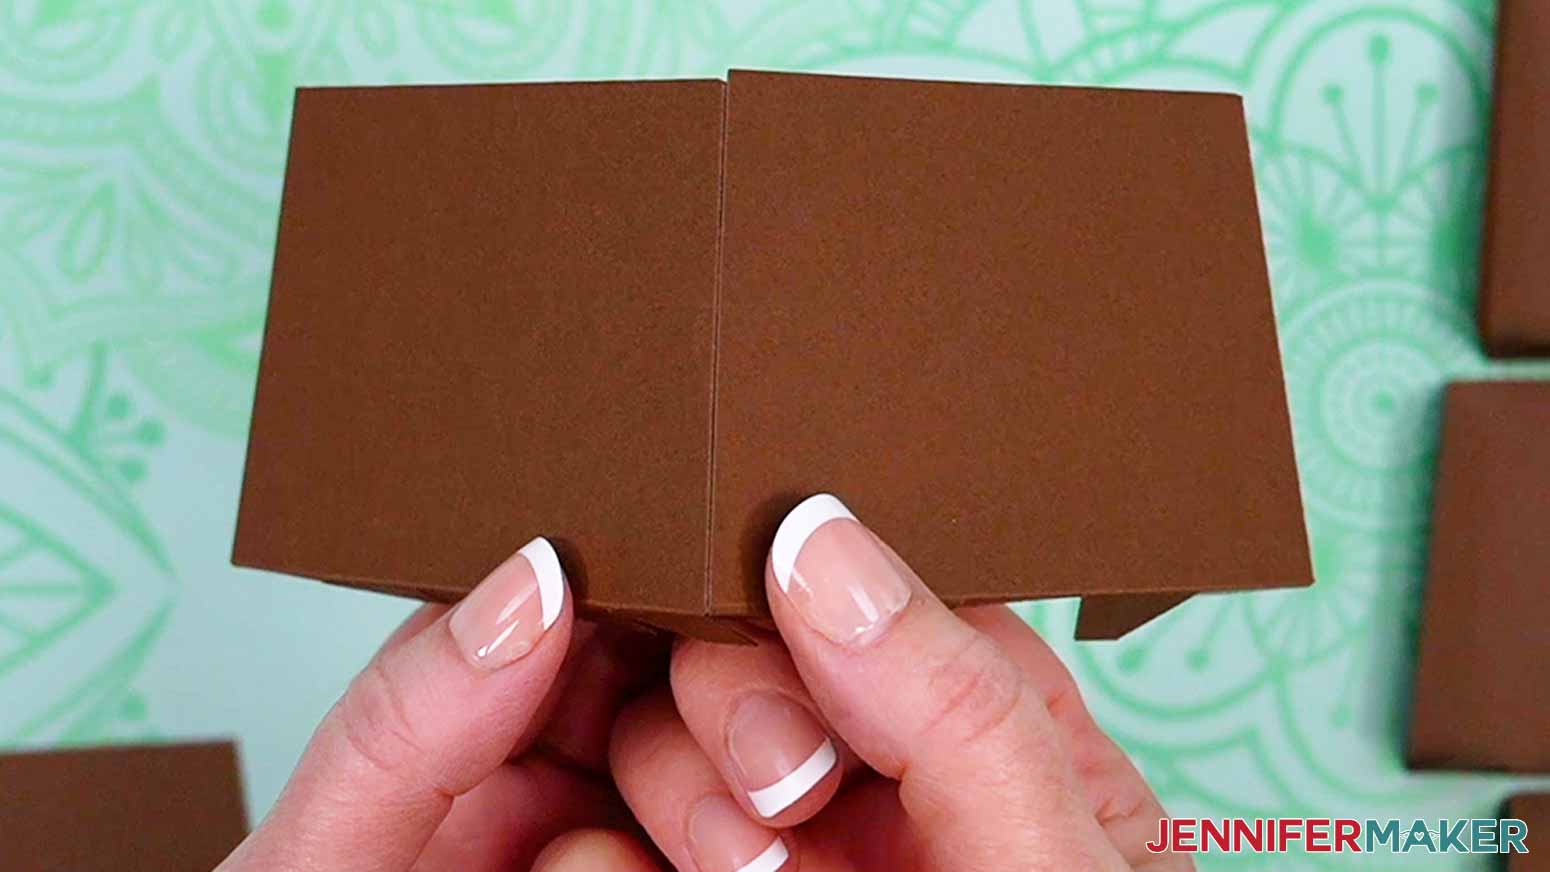
- Hold a Box Side piece face up so you can see the long tab’s surface.
- Add thin lines of craft glue along the long tab.
- Take another Box Side piece and hold it the same way so its plain short edge overlaps the first glued tab.
- Make sure the joint is flush from the outside and at the smooth upper edge, and can bend easily.
- Then press the pieces together so they begin to set.
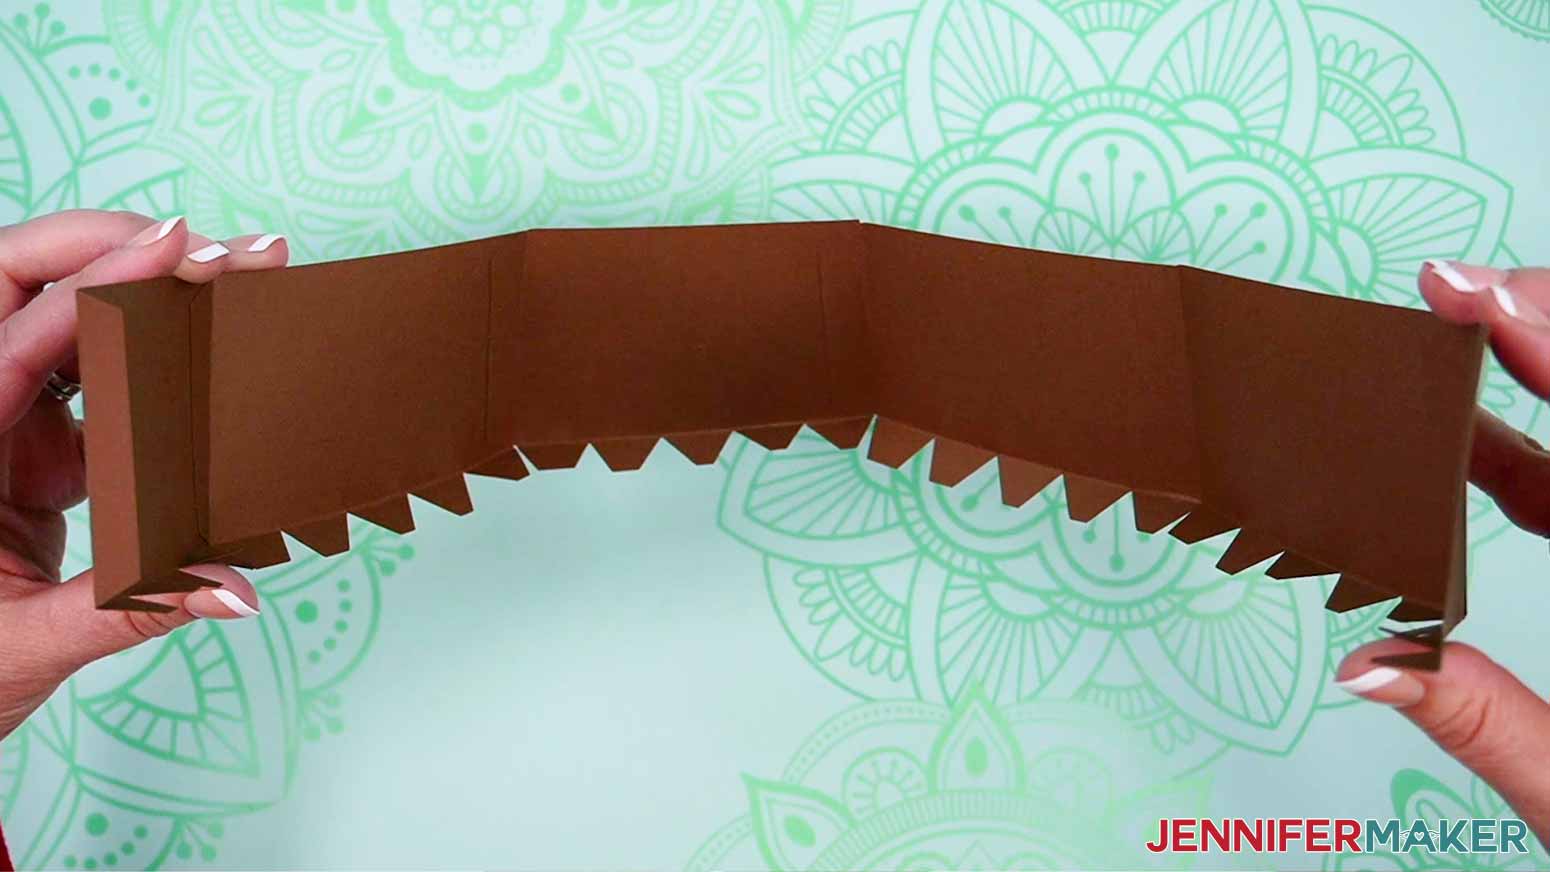
TIP: Since we used a good amount of glue and these joints won’t be under pressure to pop away from each other right away, they don’t have to dry completely before you add the next Box Side piece. - Use Steps 7-10 to add the other four Box Side pieces in a line.
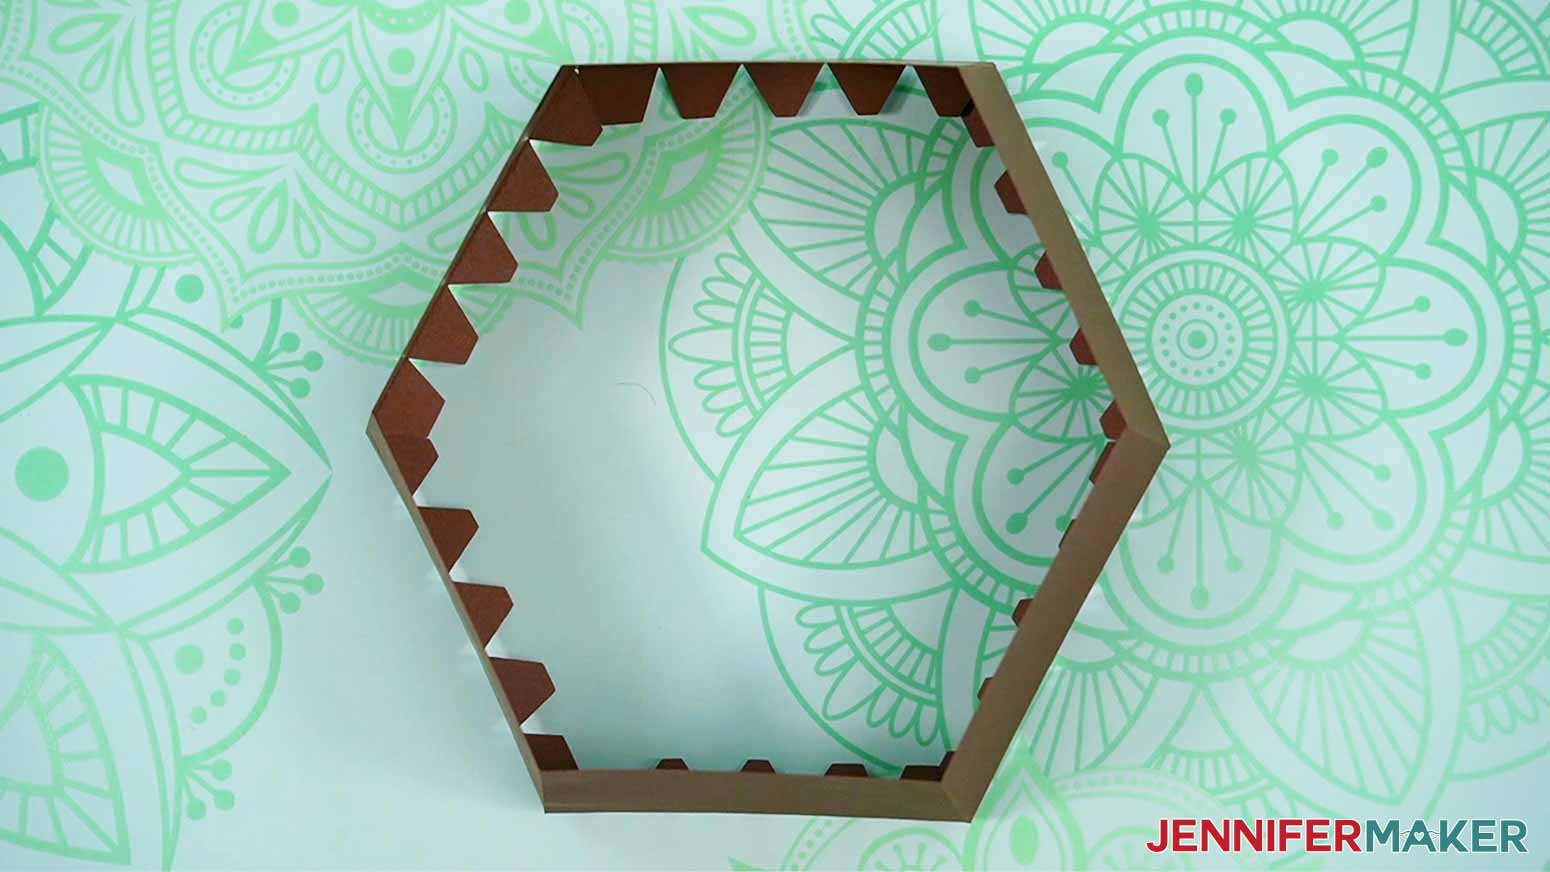
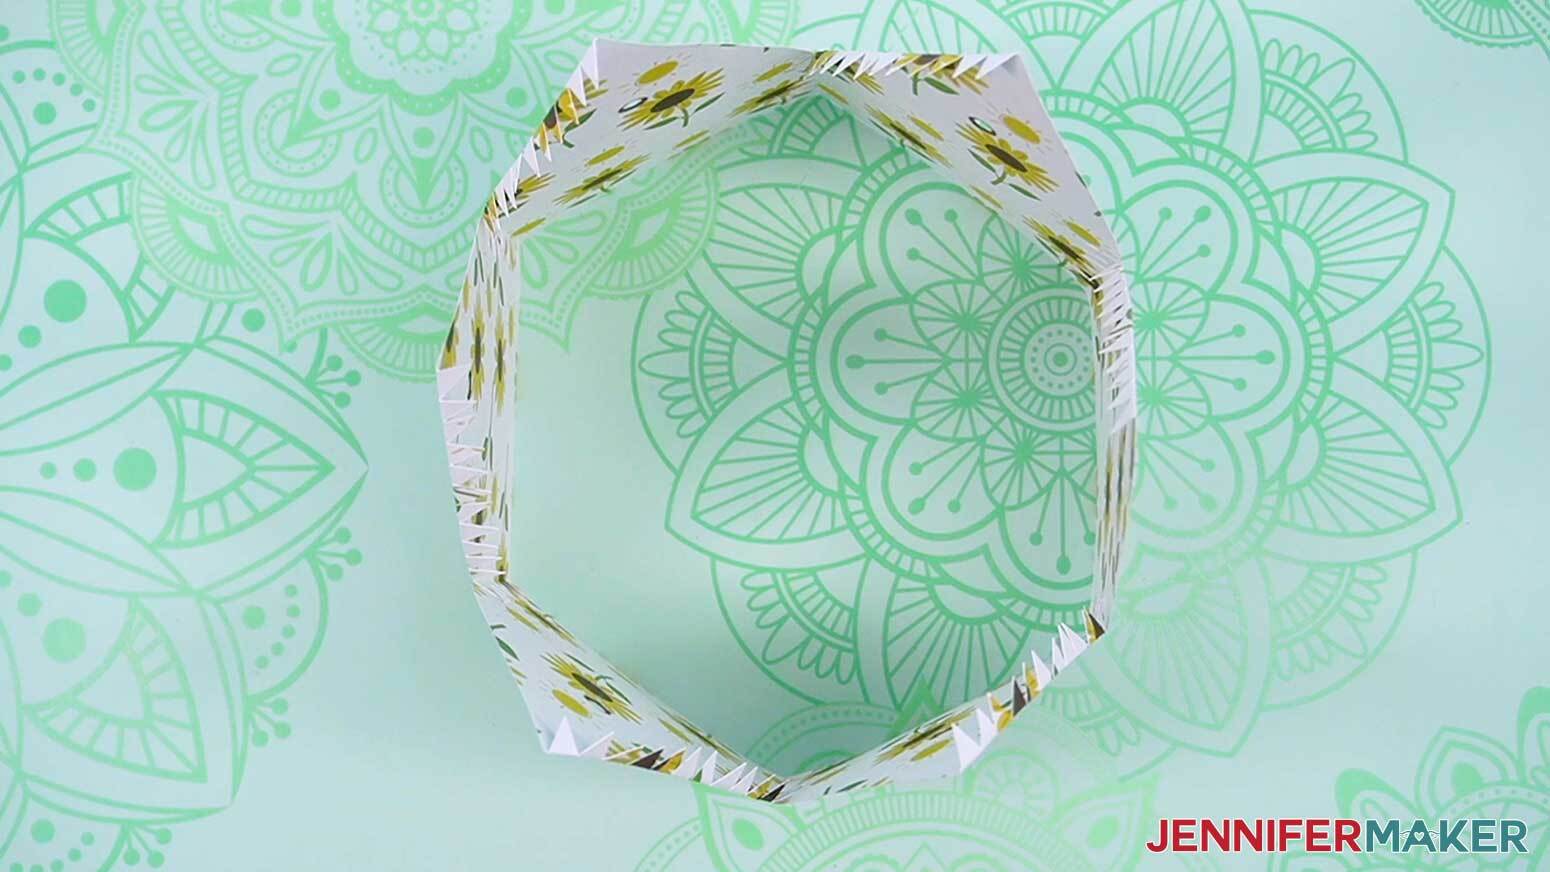
NOTE: One long edge should have all the small tabs, and the other should be smooth. One short edge will be smooth and the other will have one unglued long tab. - With the long tabs on the inside, bring the remaining long tab to meet the plain short edge, making sure nothing is twisted and the small tabs are all on one side.
TIP: It’s ok if the small tabs have shifted and point in and out of the box circle, we can fix it. - Add glue to the remaining long tab and adhere it to the back of the short edge, completing the hexagon.
- Let it dry completely.
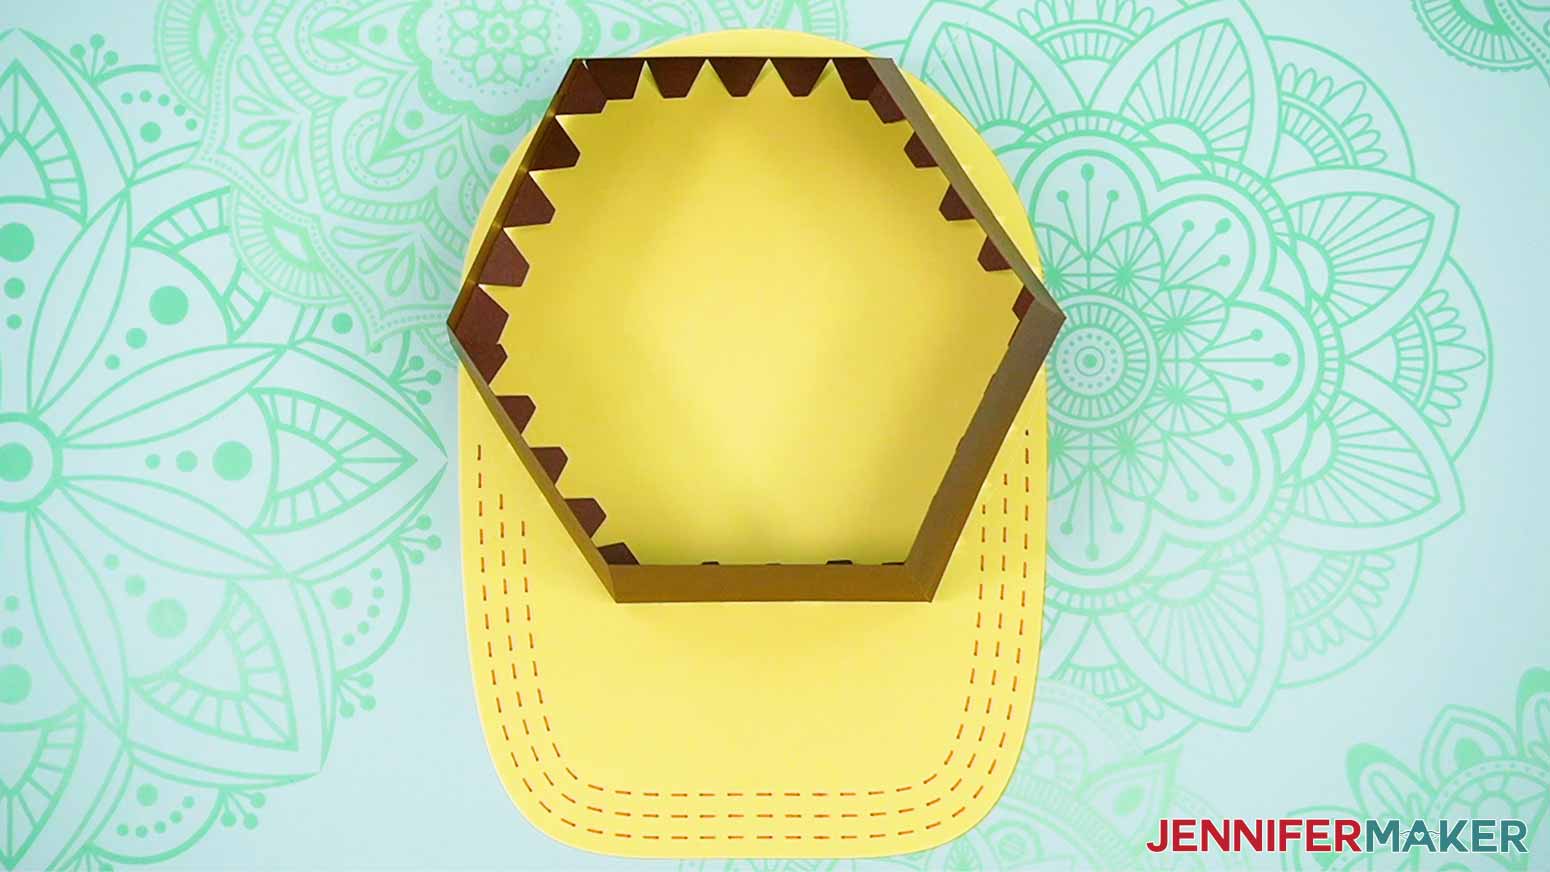
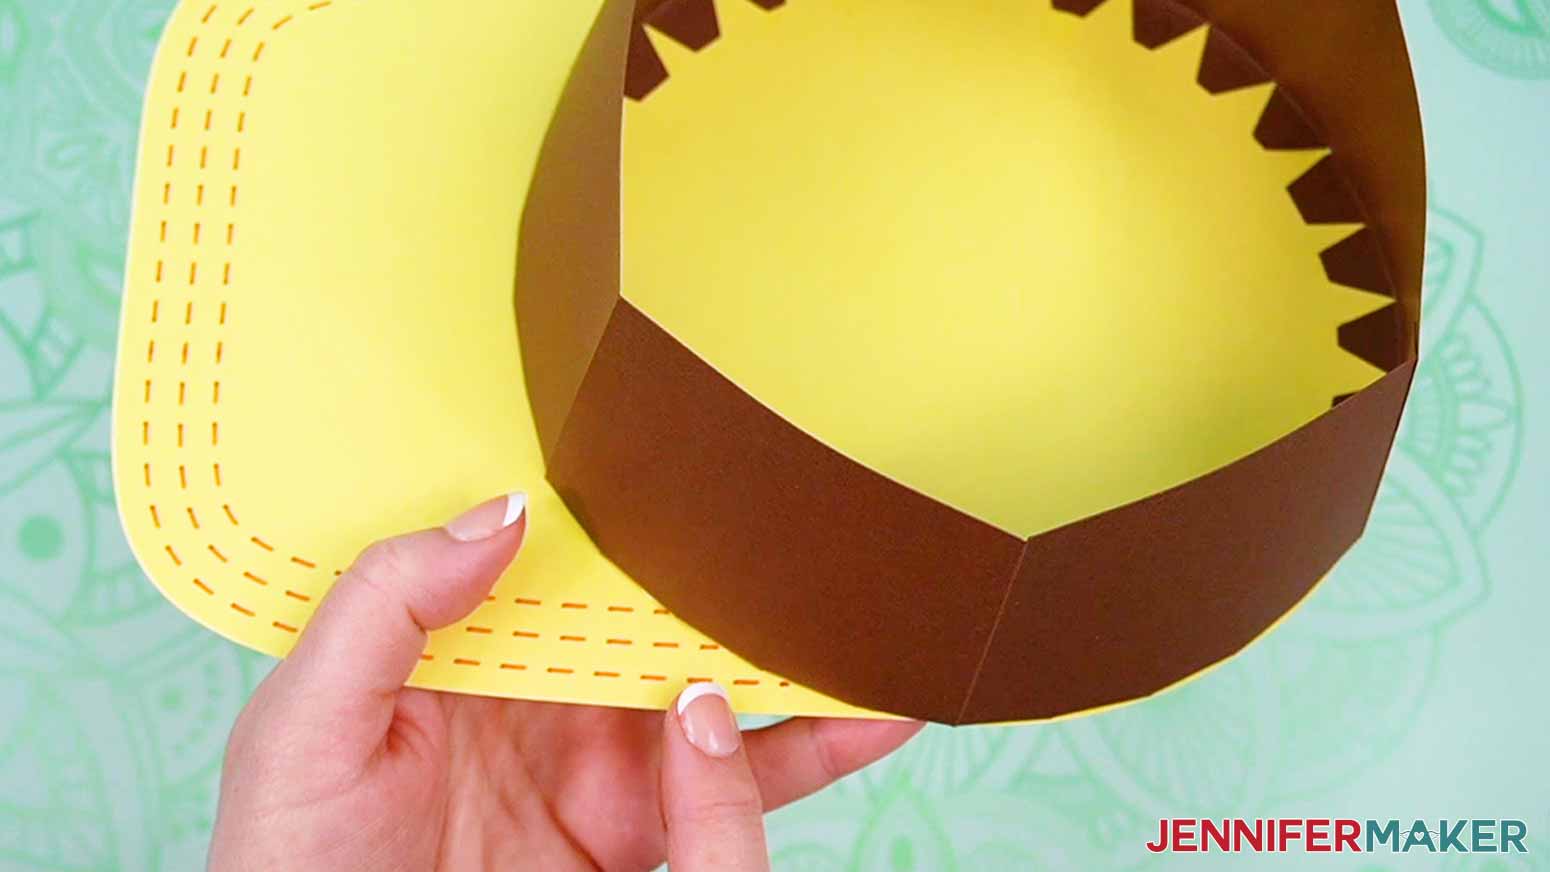
- Put your hat brim face up and position the assembled box sides so one flat panel is centered on the front.
- Pick the Box Side piece for the back section. It will curve around the brim’s back edge.
- Add craft glue to the bottoms of the back piece’s tabs.
- Position the glued edge along the center back of the hat base, gently curving the box side to match it.
- Press the tabs in place well.
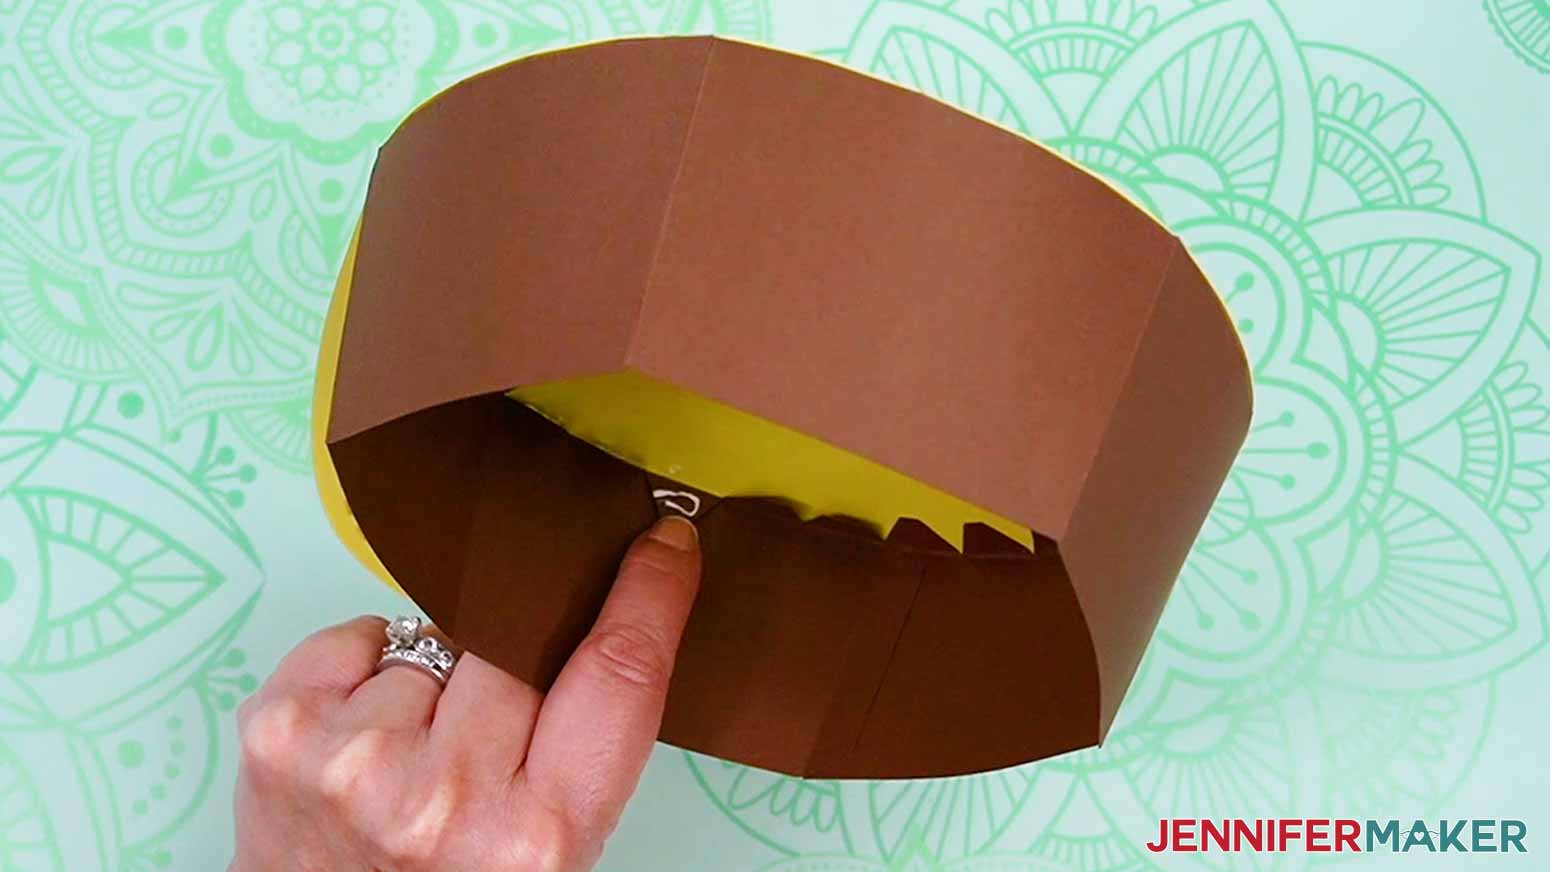
NOTE: The first set of tabs must be completely dry before you work on the next ones. - Make sure the box’s back tabs are completely dry and secure on the brim.
- Gently lift a side piece next to the secured section so you can access the bottoms of the tabs.
NOTE: Don’t lift the box so much that it pulls away from the brim. - Make sure the next section’s tabs are all facing inside the box.
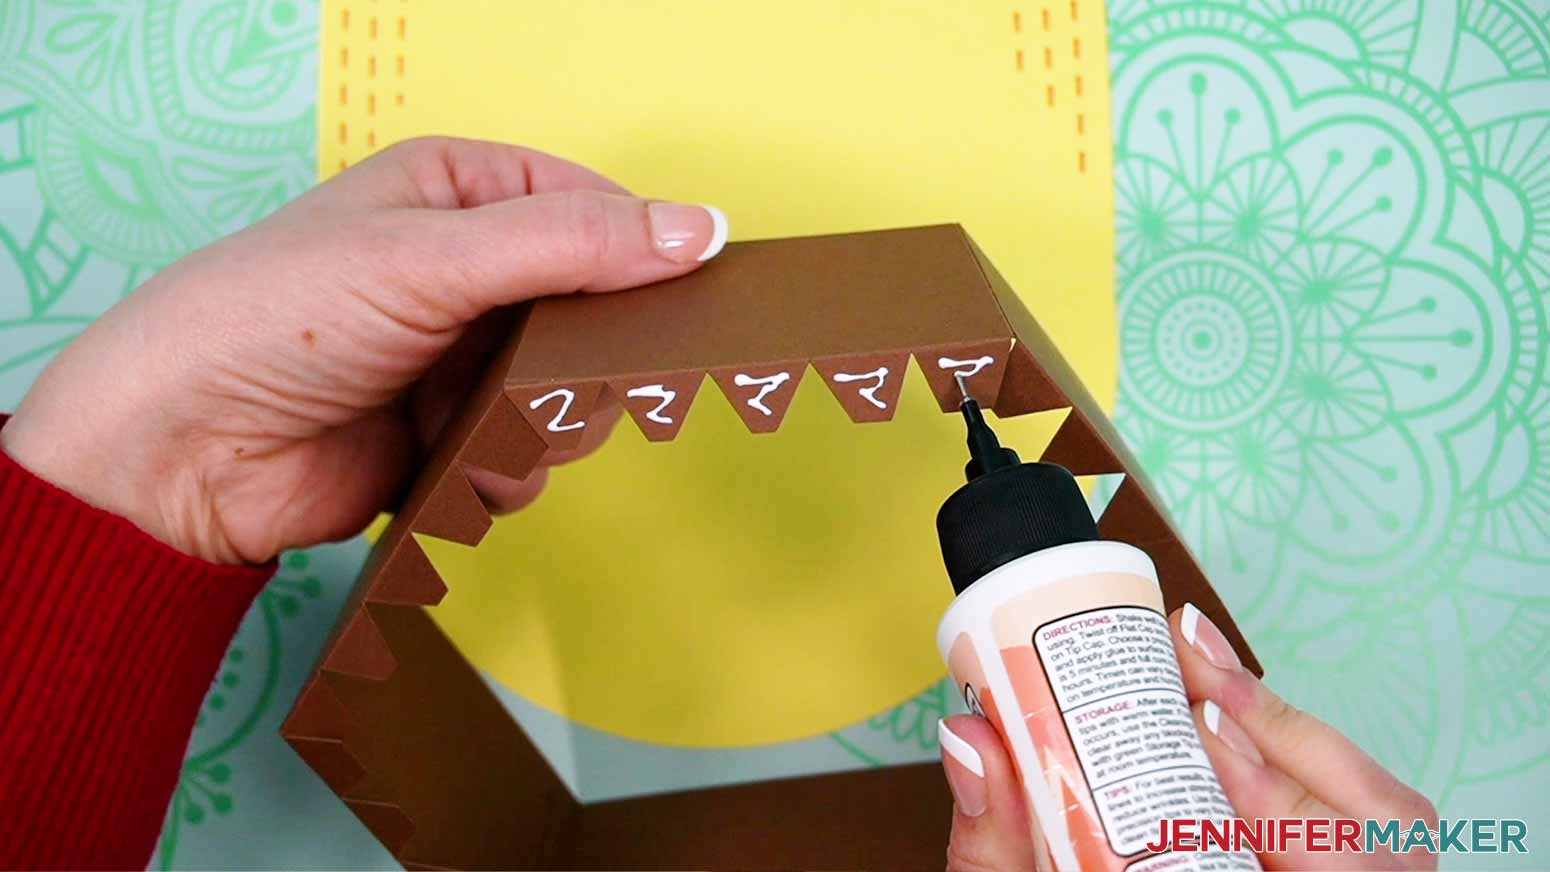
- Use the glue’s precision tip to add glue to each tab where it will touch the base.
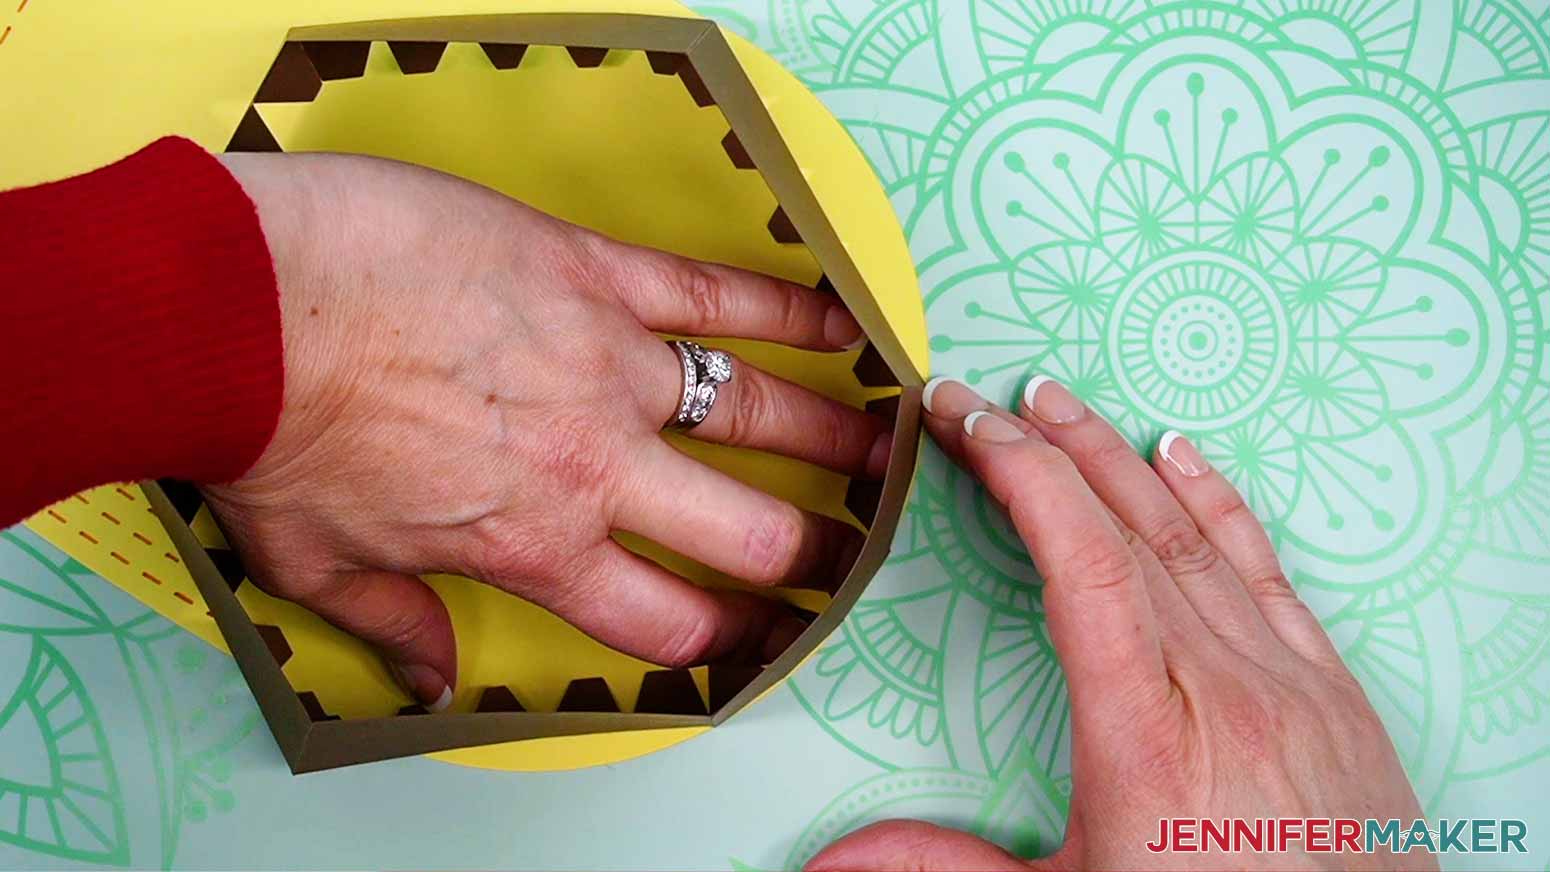
- Starting near the secured side, press one tab in place at a time so the side aligns with the base’s curved edge.
TIP: When you adhere a tabbed piece along a concave curve, the tabs will move closer together and may overlap. When the curve is convex, the tabs will be further apart. - Let it dry completely.
- Adhere the other side edge adjacent to the back piece on the brim and set it aside to dry
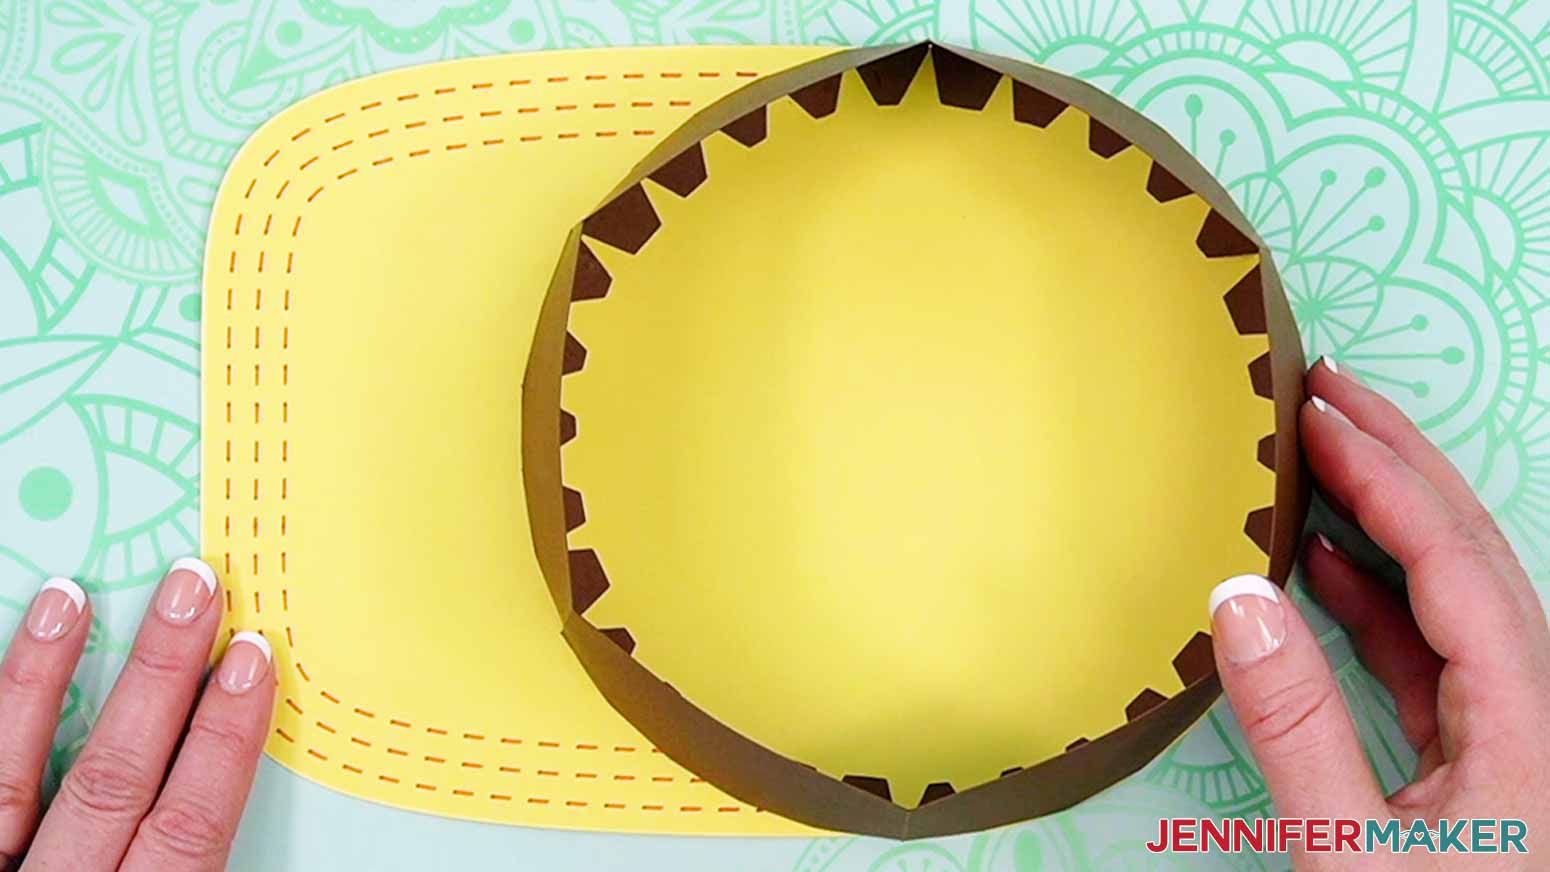
- Adhere the next side edge on the base, aligning the wall with the ends of the drawn stitches on the brim. This way, the middle panel will be centered.
- Set it aside to dry.
- Adhere the opposite side edge on the base, aligning the wall with the ends of the drawn stitches on the brim.
- Set it aside to dry.
- It won’t be as easy to lift the gift box wall now that all of the other pieces are secure, so instead, carefully lift the front panel’s tabs to add a bit of glue to the bottoms from the inside.
- Then slightly curve the wall out along the brim and secure the tabs in place.
- Let it dry.
DOME ASSEMBLY
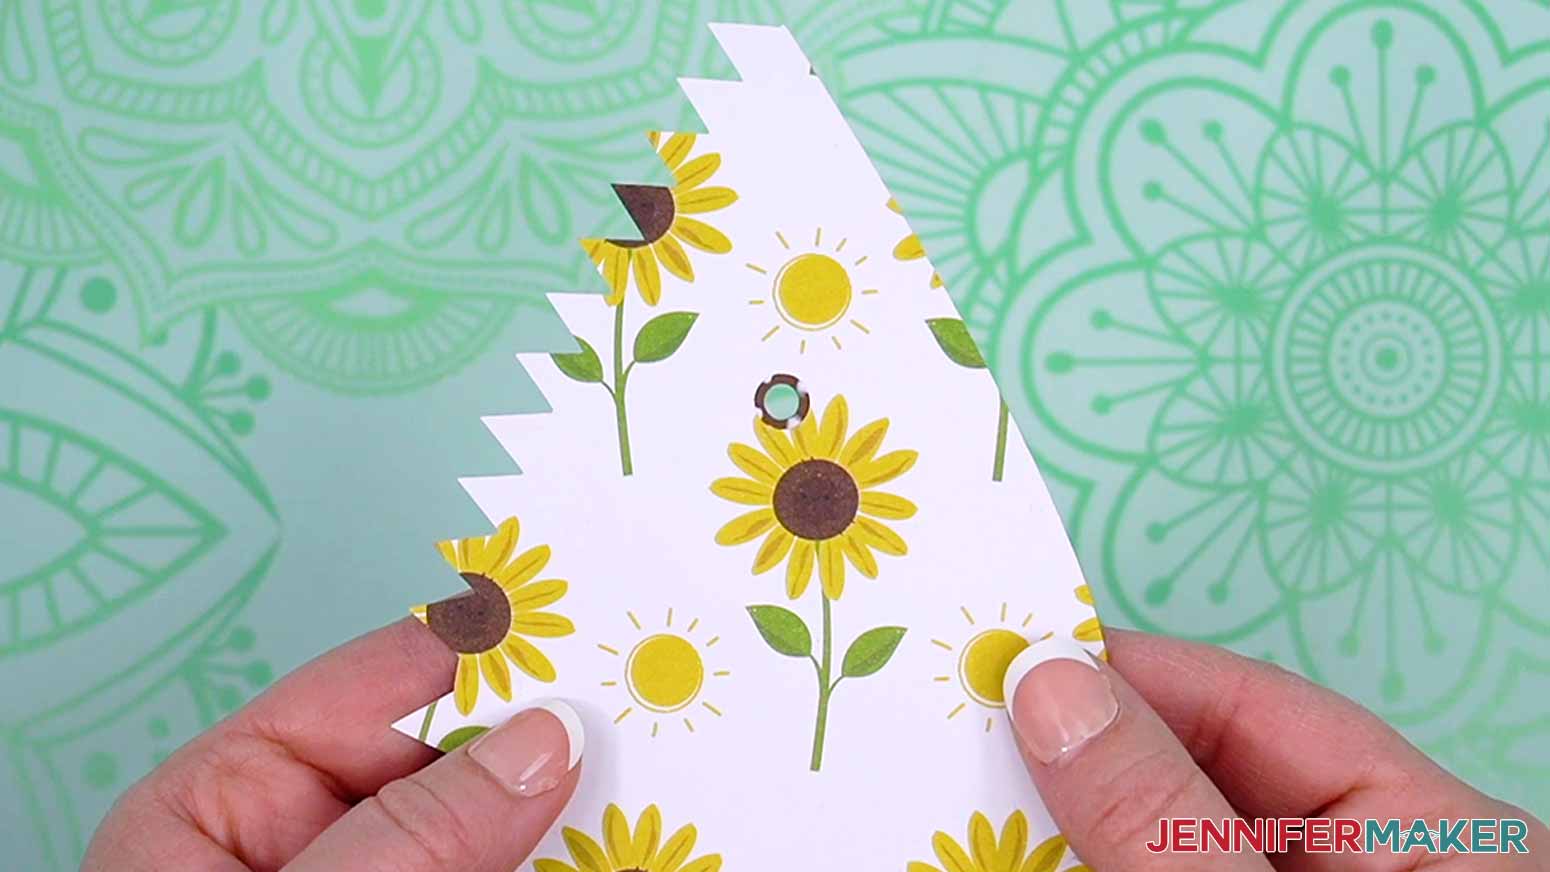
- Grab one vent hole ring and a dome panel. Make sure the panel is face up so the stitches are visible and the tabs are to the right.
TIP: When you’re planning to shape a piece of paper, it’s often easier to adhere small pieces while they’re still flat. - Add a few small dots of craft glue to the back of the ring.
- Flip the ring and align it over the vent hole.
- While the glue is still wet, turn the panel over so you can see the ring through the hole. Adjust the ring so the color is evenly visible in the hole.
TIP: If you might need to reposition a piece, do so while the glue is still wet to avoid damaging the papers. - Look at the panel’s front and gently wipe away any excess glue with a paper towel or clean finger.
TIP: Uncovered glue can pick up lint or dirt, discoloring your project. - Set the panel aside face down to dry.
TIP: If there is glue visible on one side of a project piece, let it dry with that side up so it doesn’t stick to your work surface. - Use Steps 1-6 to adhere a ring to each of the other five dome panels.
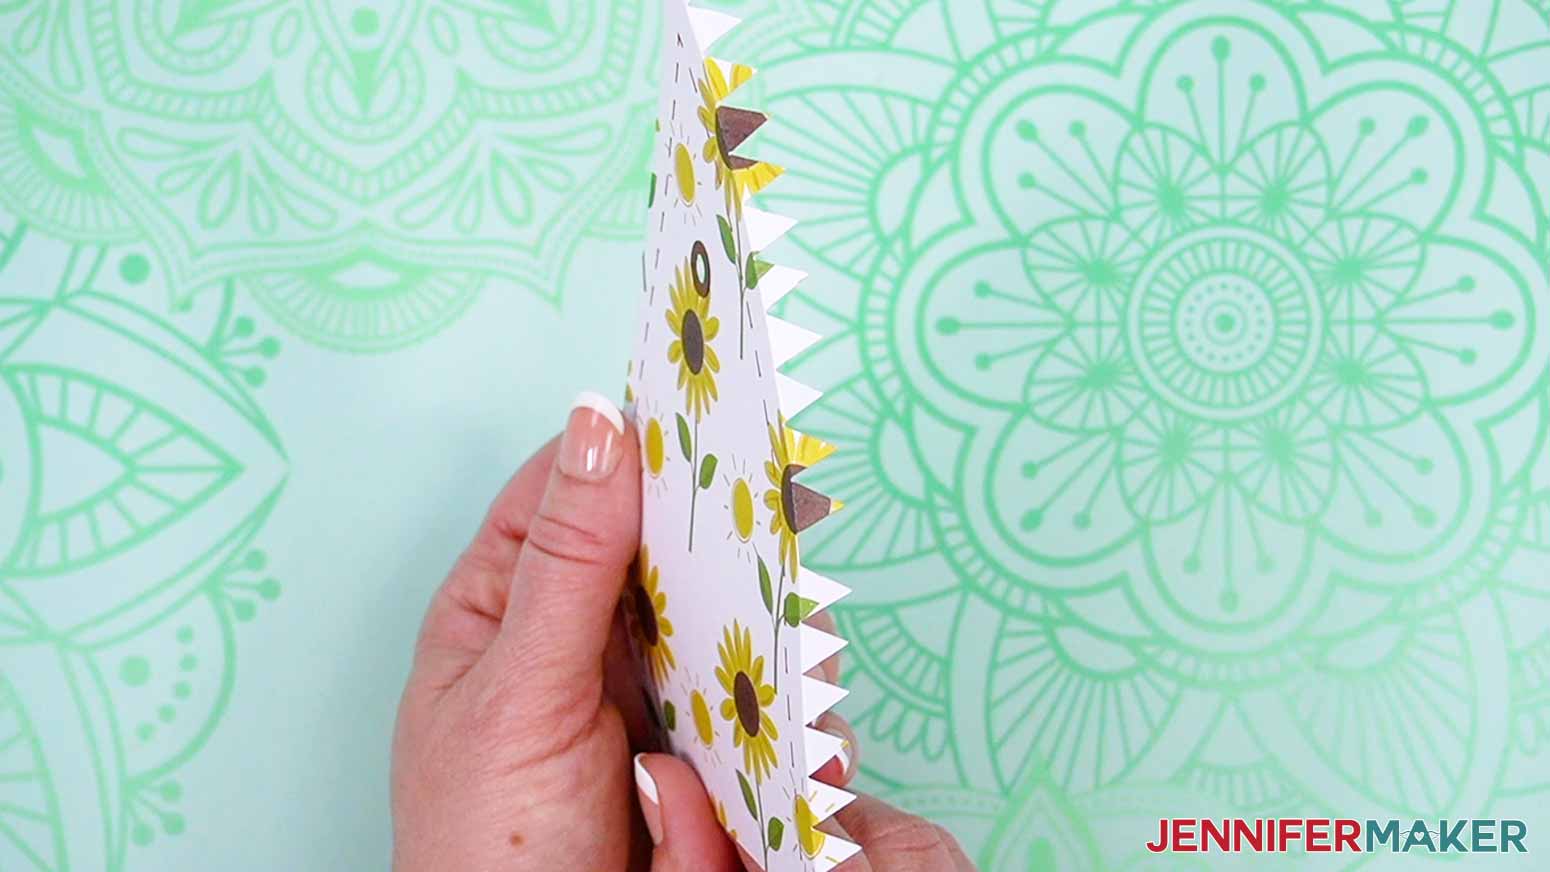
- Once the vent rings dry, take a dome panel face up and fold the tabs back.
- Fold the tabs for a second dome panel the same way.
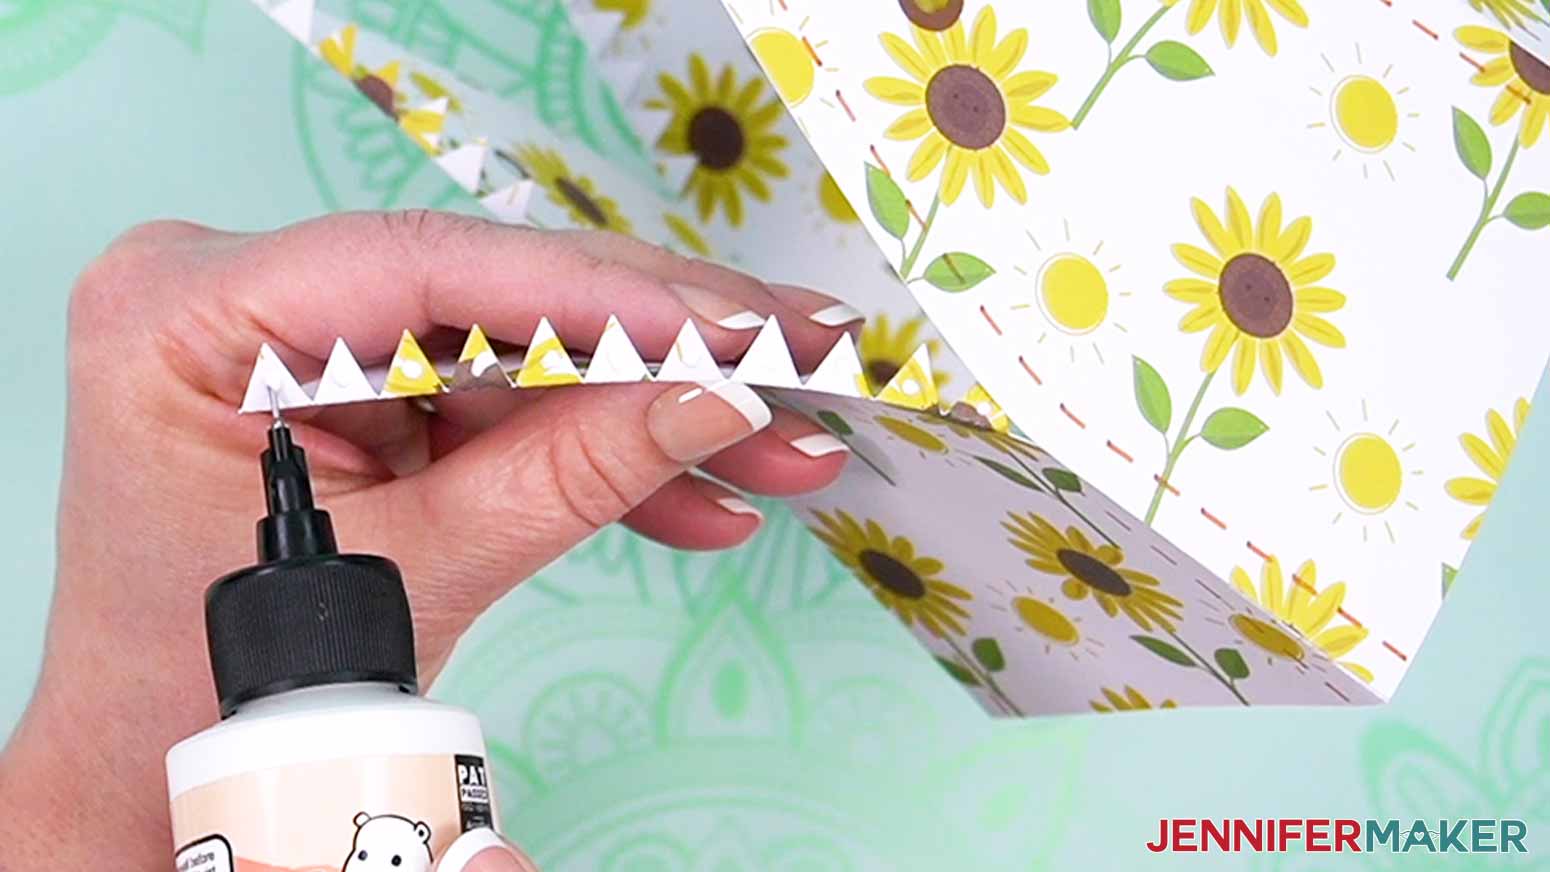
- Add glue to the front of the folded bottom seven tabs on one dome panel.
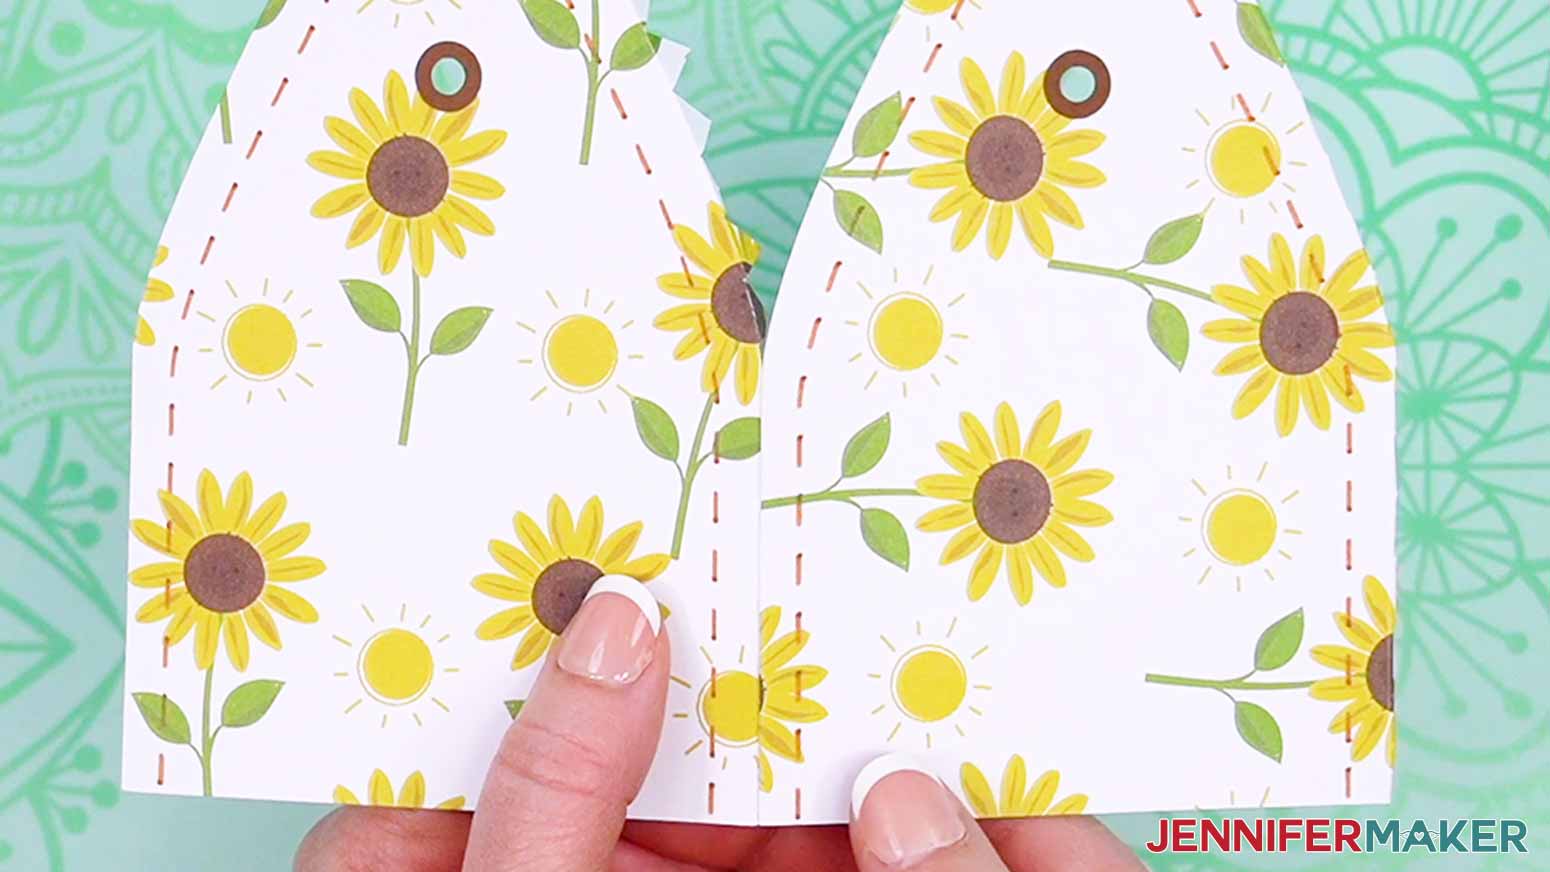
NOTE: These tabs are on the straight section of the dome panel, so we’ll work on them first before moving to the curved section, which takes more preparation. - Align the plain edge of the next dome panel on the glued tabs. Make sure the bottom edges are flush.
NOTE: The untabbed dome panel edge should very slightly overlap the other to completely cover any gaps between the tabs. - Hold the tabs to set, then gently put the panels face down to dry completely.
NOTE: These need to be really secure before continuing. Press each tab from both sides and adjust them as needed while the glue is still pliable. - Use Steps 8-12 to prepare and glue the other four dome panels in pairs, then glue them together to create a chain similar to the Box Sides.
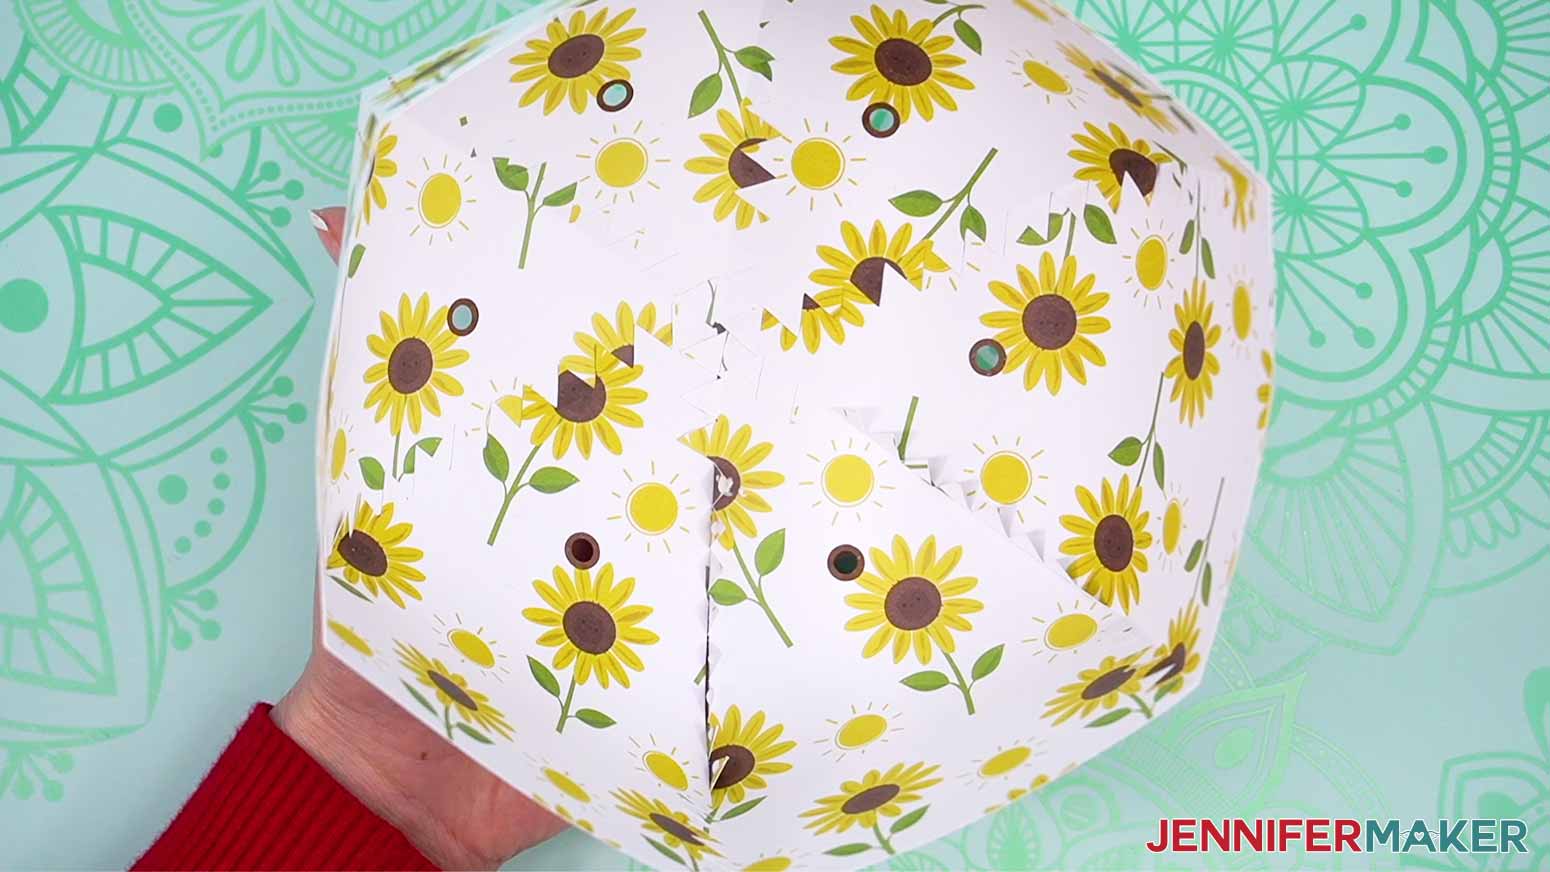
- Once all the initial tabs are dry, secure the last tabs to the remaining plain edge to make a hexagon.
- Let the dome dry completely.
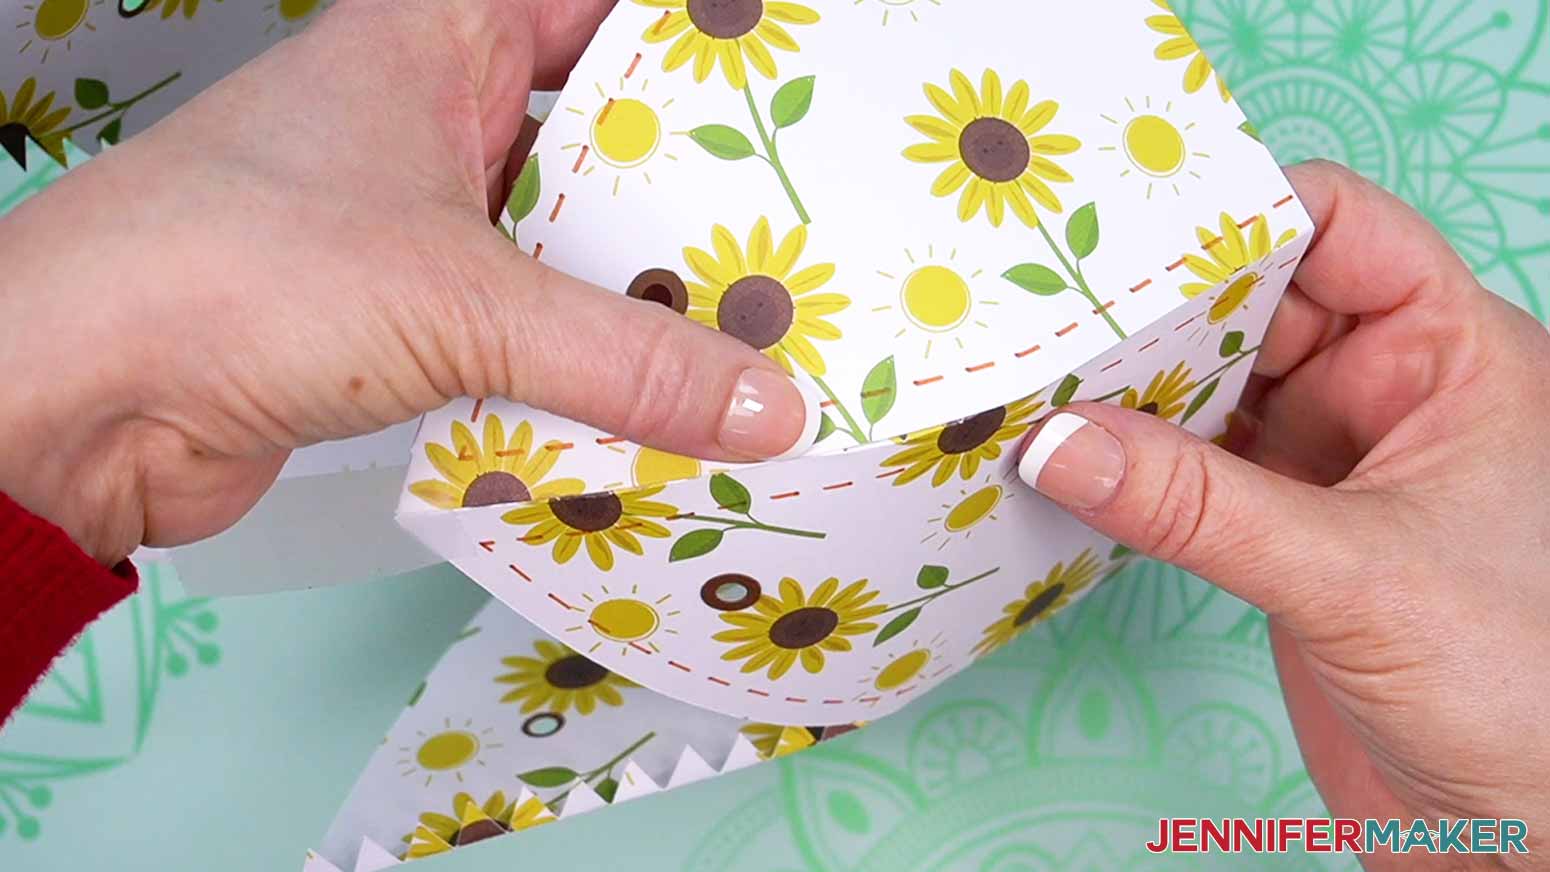
NOTE: Make sure all of the previously-glued dome panel tabs are completely dry, because it’s easy to pop them open while shaping the cap dome if they’re not secure. - Add dots of glue to the rest of the folded tabs on the first panel.
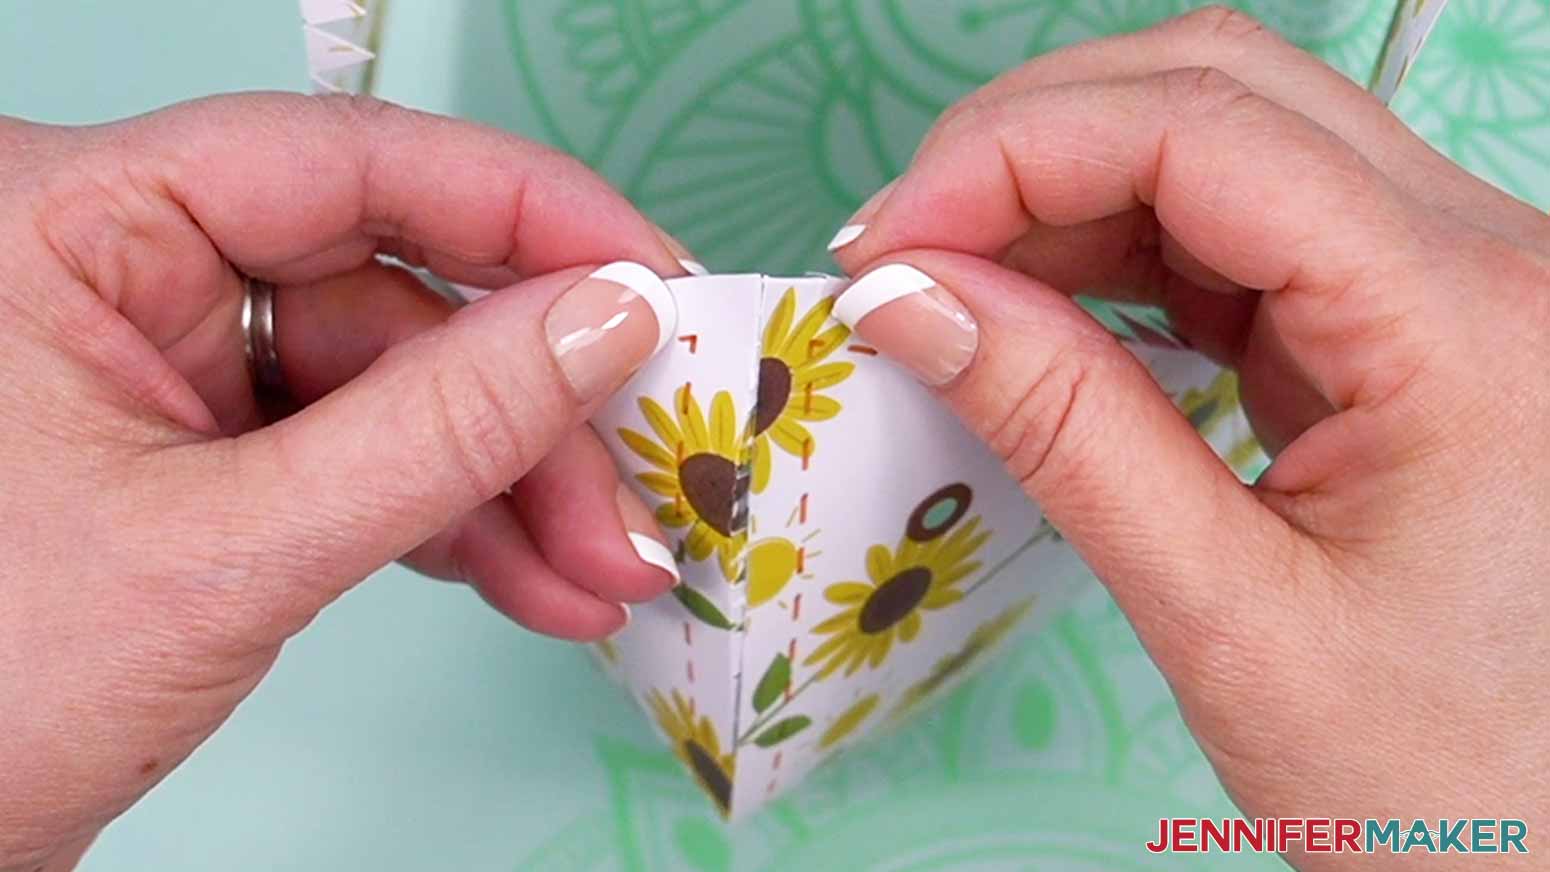
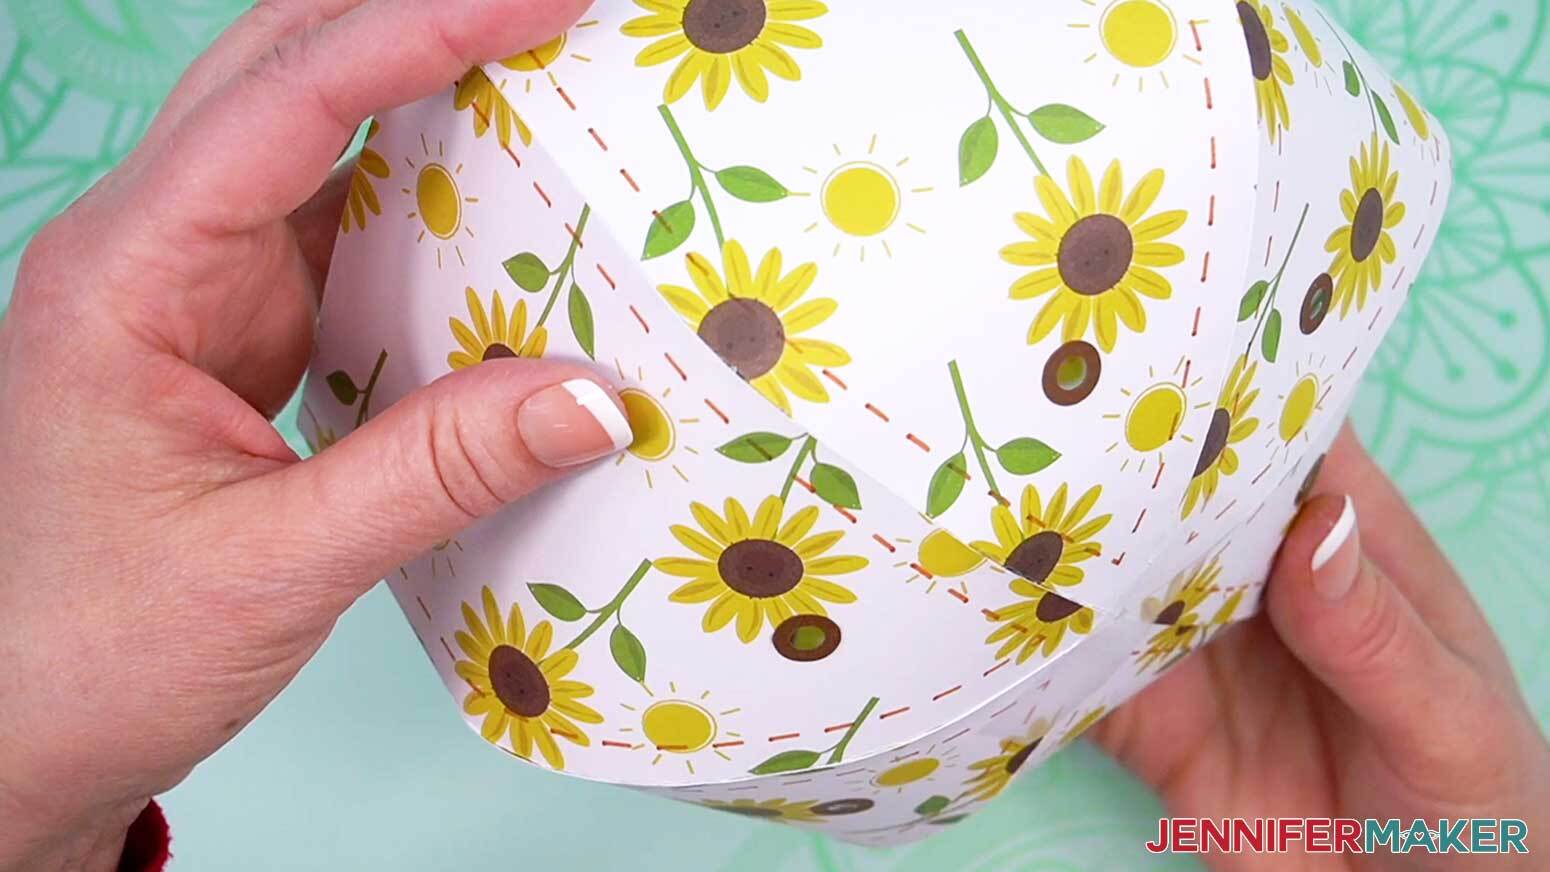
NOTE: If you have a panel that you want to be in the front, begin with that panel. - Bring the plain edge of the next panel over to meet the glued tabs.
NOTE: Make sure the tips of the panels match up perfectly, which will help you get the correct curve for the rest of the seam. - While holding the points in place, gently press down on the seam to help the panels curve.
TIP: Take a piece of clear tape and stick it to your hand a few times to make it less sticky. Then gently secure it to the cap’s top so the points will remain in place. - Don’t press down too hard or the tape could damage the paper when you remove it, or the curve could flatten out.
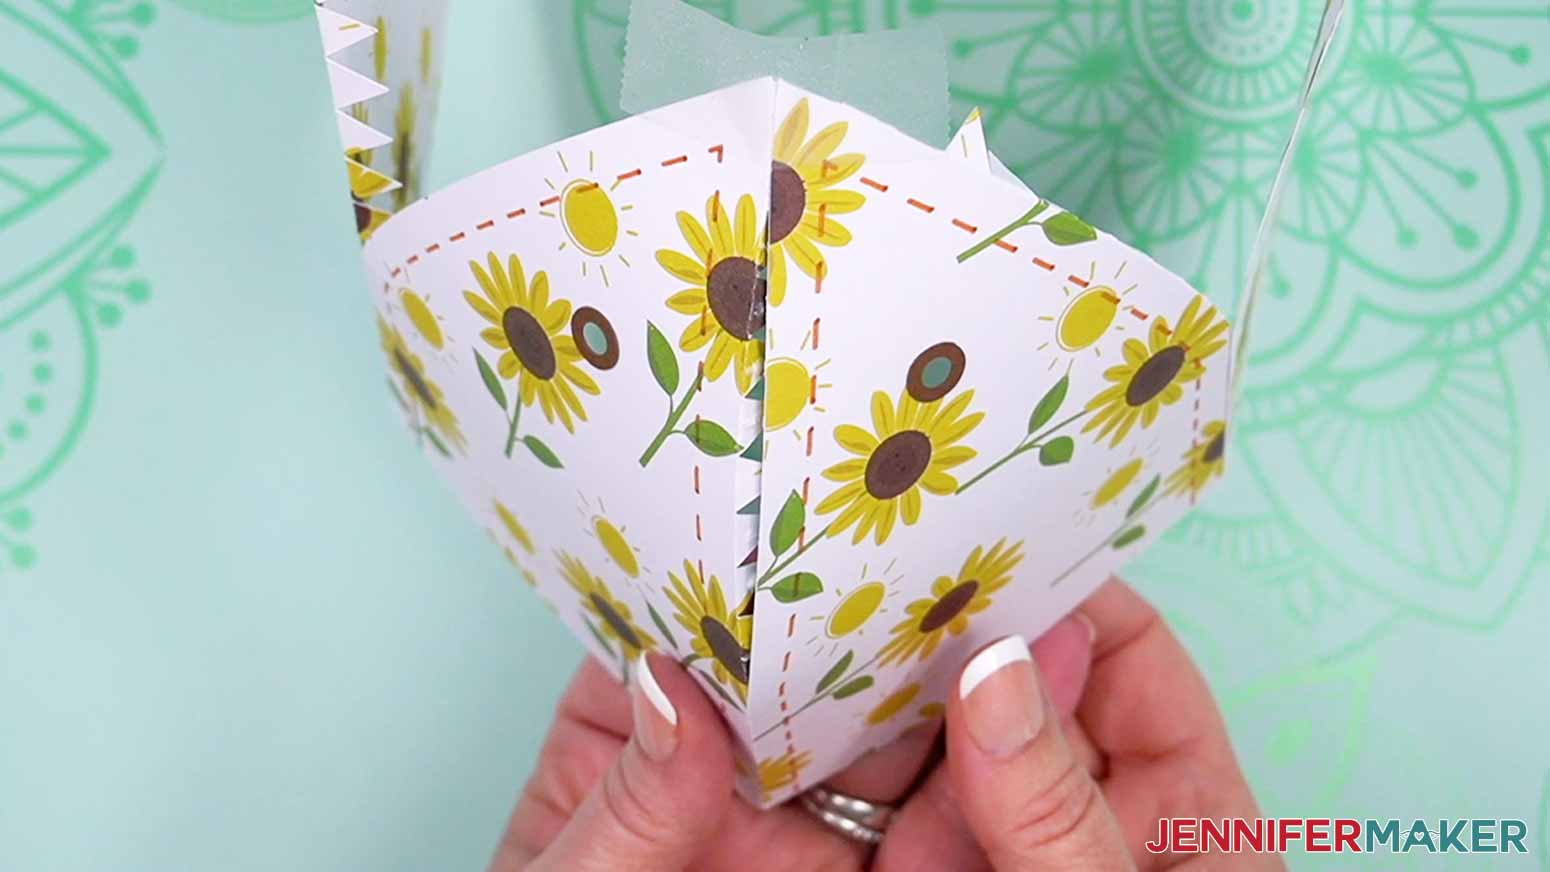
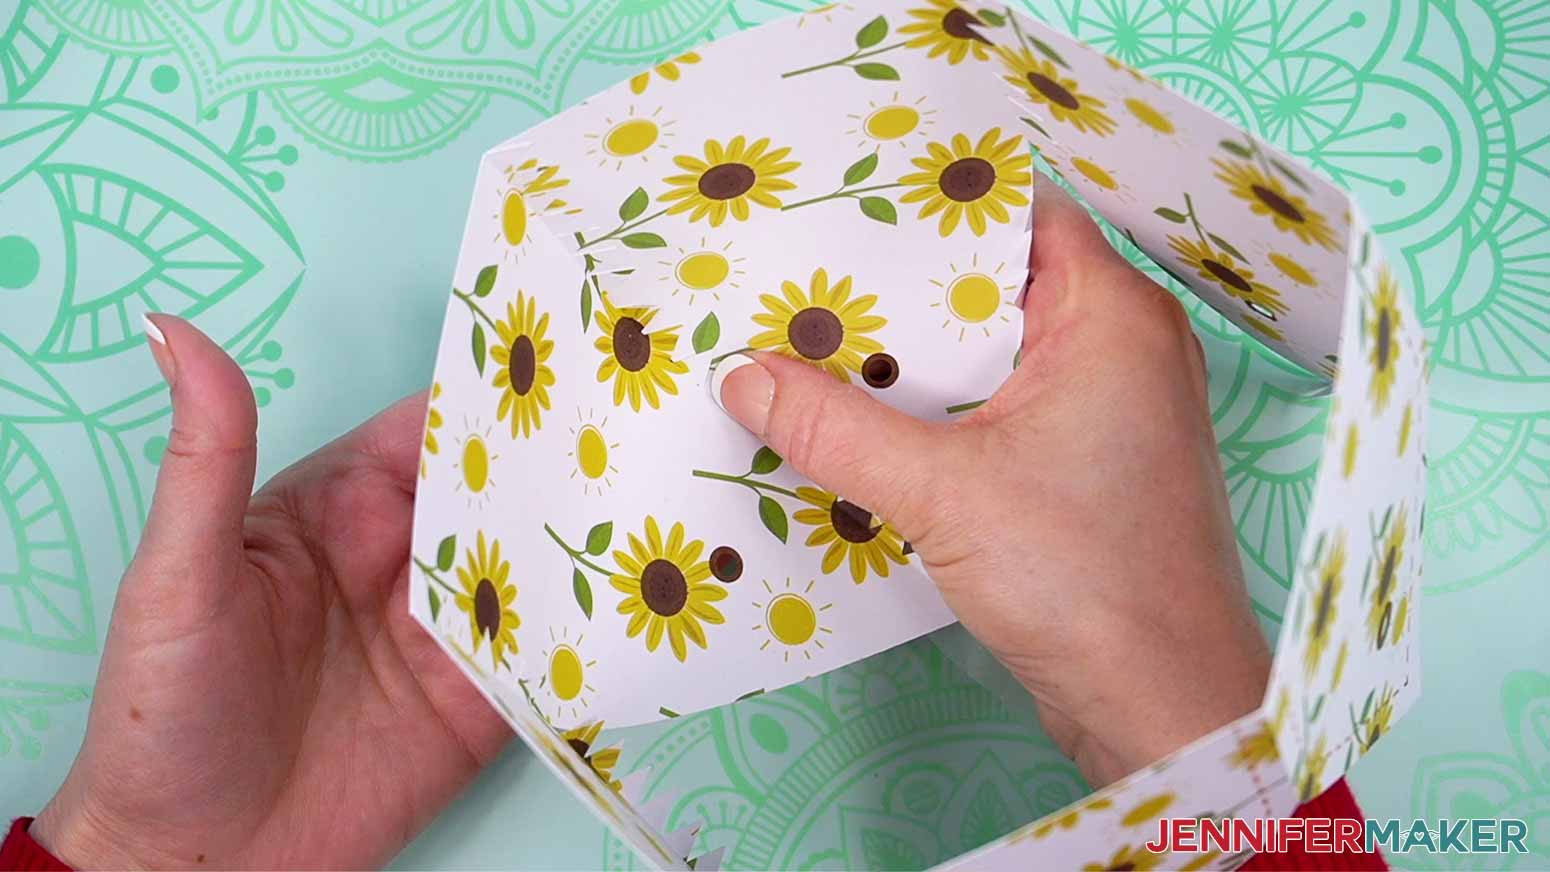
- Carefully move down the seam to align and adhere the tabs.
TIP: The most important part is to get the top completely aligned and secure, we can come back and secure the lower tabs if they’re difficult to adhere right now. - Flipping the project over to press from the back onto your work surface can help you see where light is peeking through.
- Use Steps 16-21 to work around the dome, shaping and gluing the next four panel seams, letting each dry completely before starting the next.
- Set it aside to dry with the last panel unattached.
- The last seam on the dome is the trickiest, and if any of the other points were misaligned, this is when it will get difficult because positioning the last panel might not completely match the other pieces.
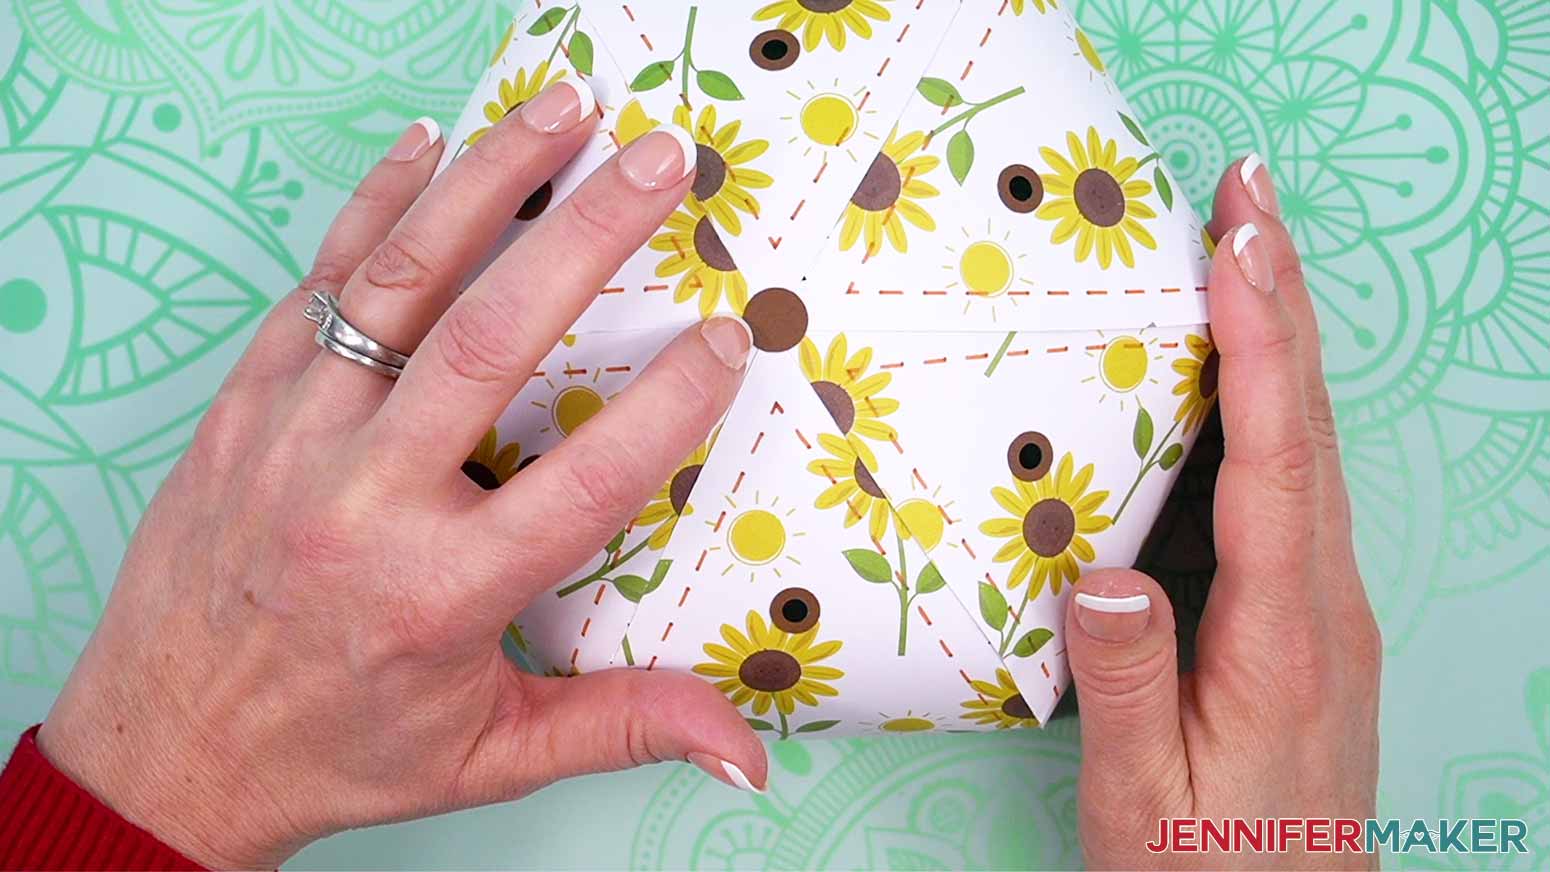
- To check, tuck the remaining tabs under the nearby panel’s plain edge and see how well the point matches the others.
- Instead of working on all of the tabs at once, add glue to the top three on either side of the last panel.
- Carefully put the last panel into position, making sure the tabs are all underneath the adjacent panels and covered.
NOTE: If any tabs are sticking out, the dome won’t end up the correct shape. - Once the tabs and points are in the correct spot, use some less sticky clear tape to hold the last panel in place from the top.
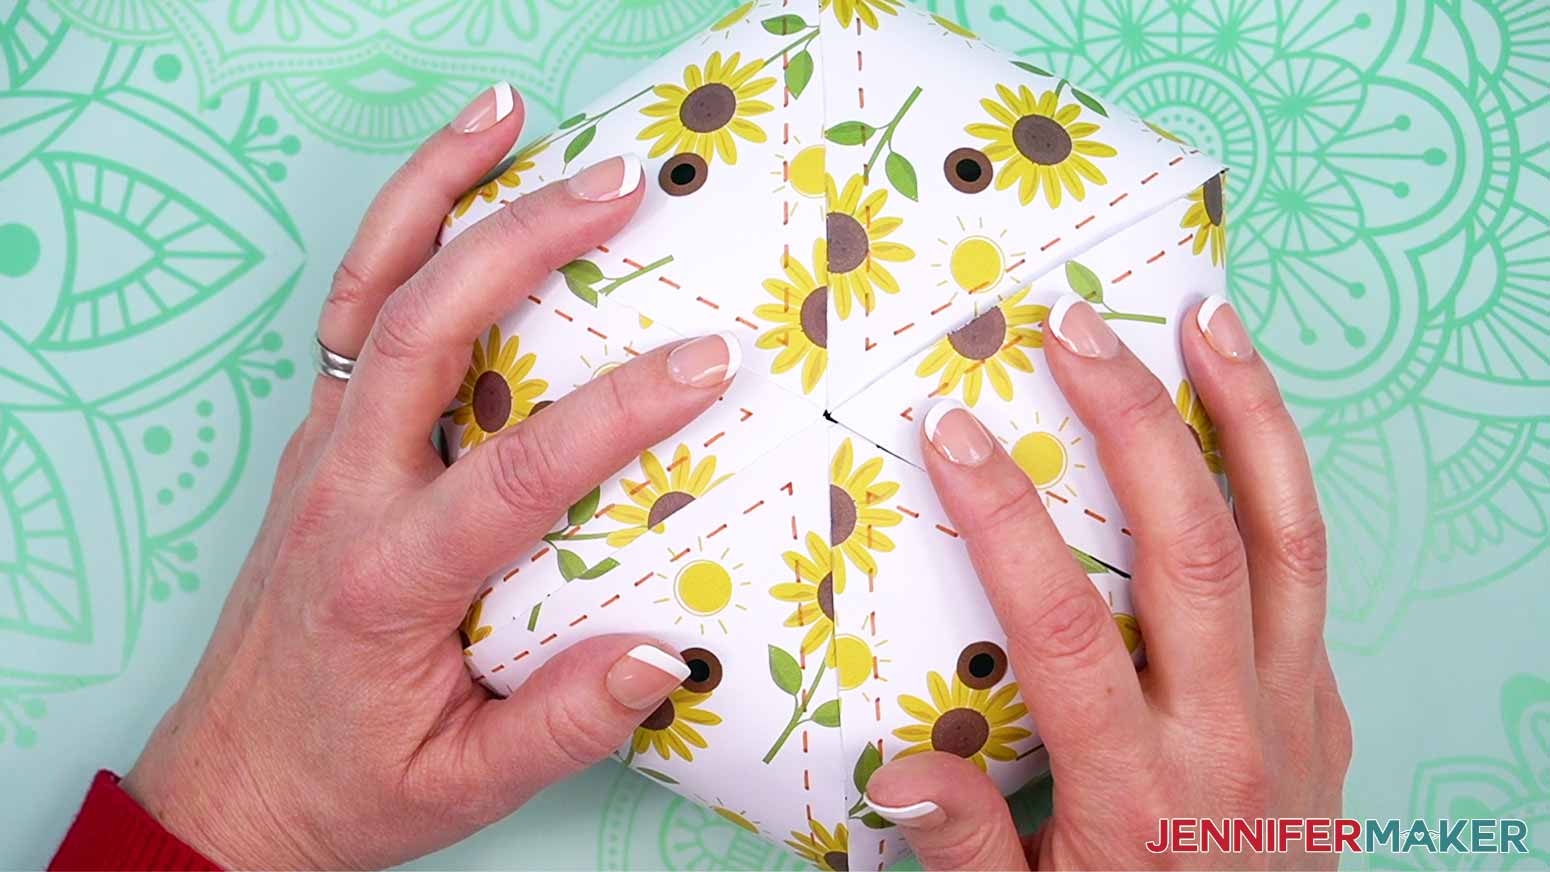
- Flip the cap over and gently press on the upper tabs to make sure they’re secure.
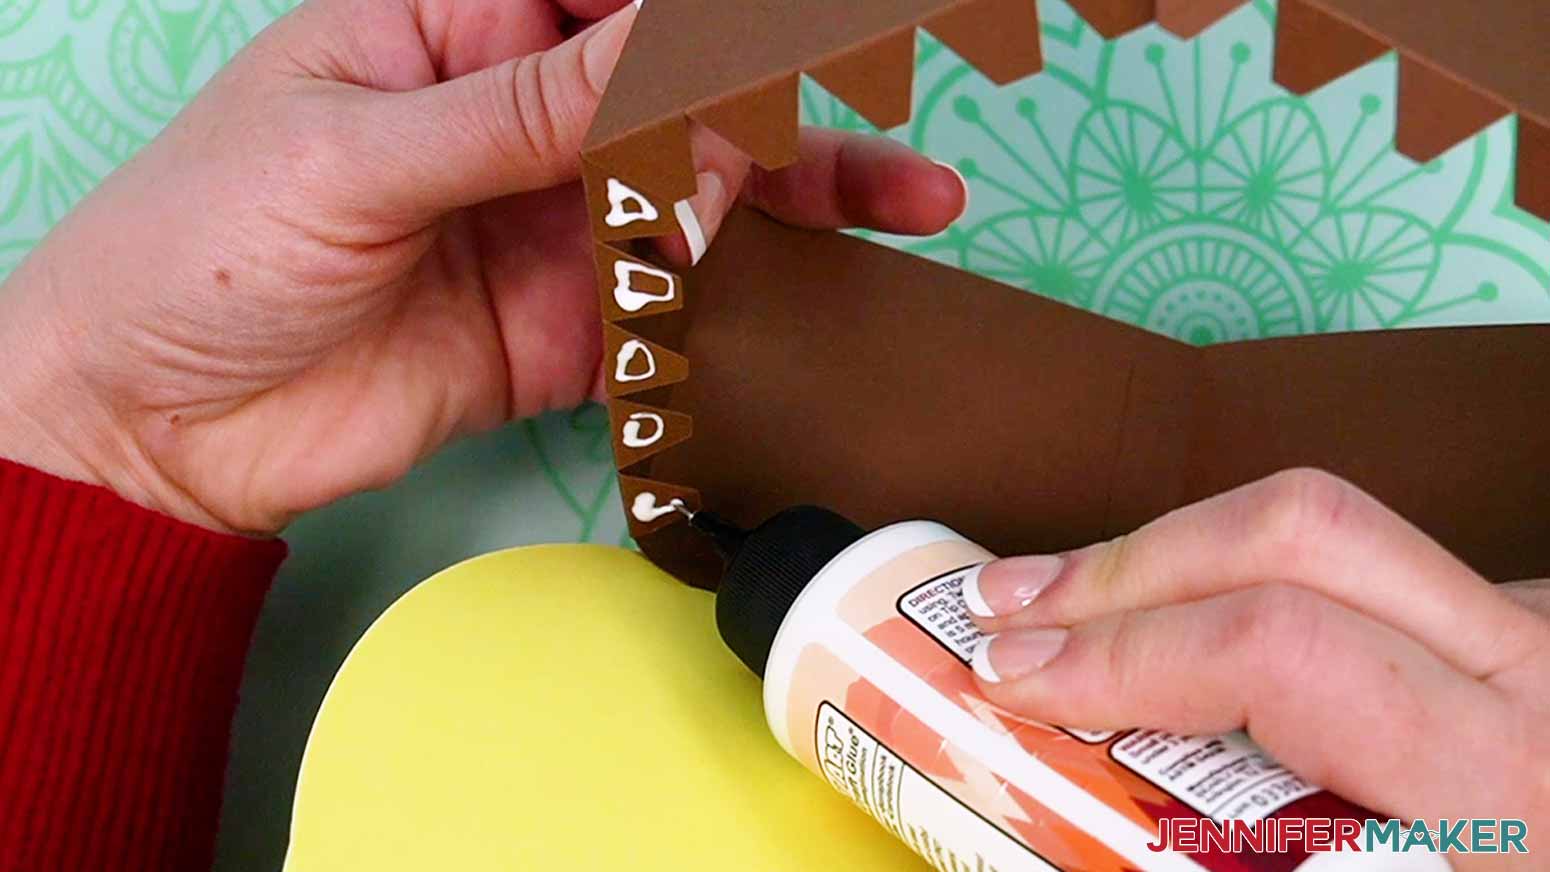
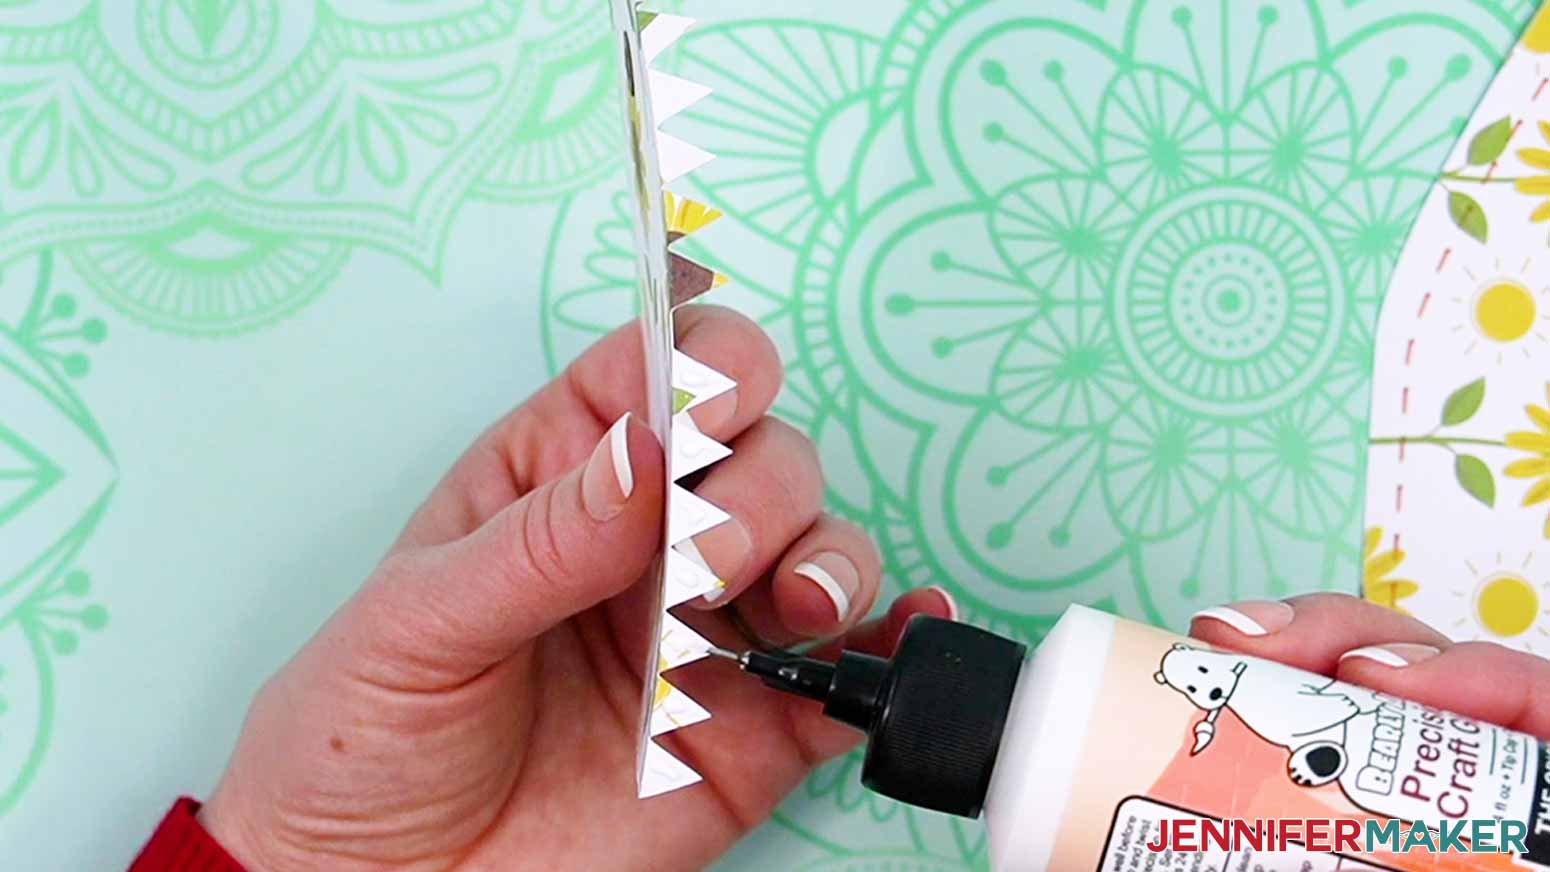
- Then, gently lift up the unglued tabs on one seam so you can reach the undersides with your glue’s precision tip.
- Add small dots of glue to each tab.
- Gently press the tabs back into place and secure them.
- Before the seam dries, look at it from both sides and gently adjust any sections where the tabs are showing.
- Glue and adhere the last tabs on the other seam the same way.
- Set it aside to dry.
- Gently remove the clear tape from the dome.
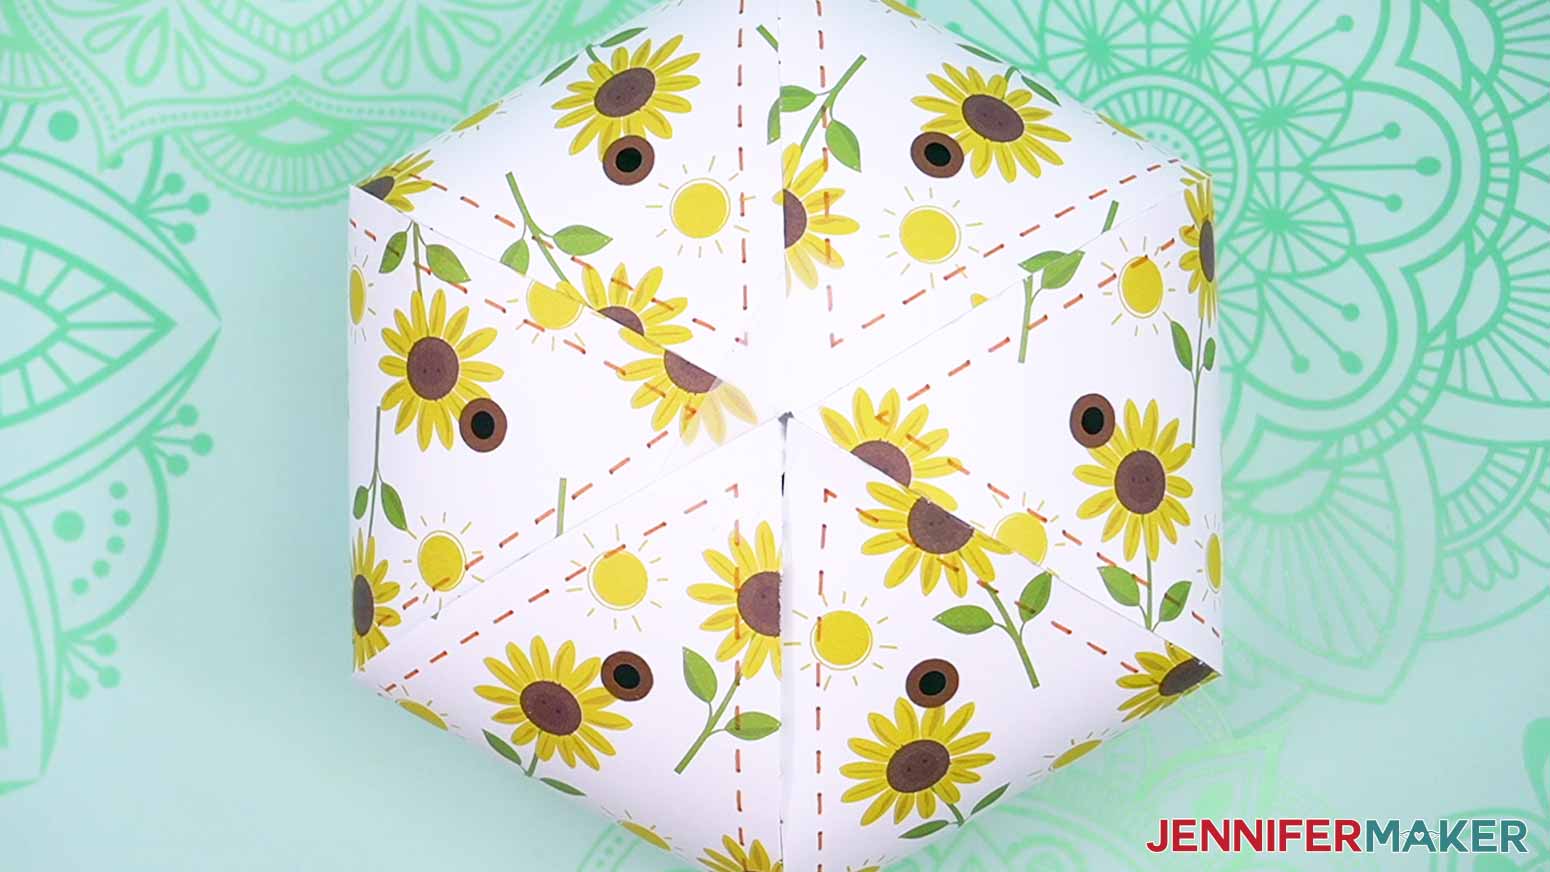
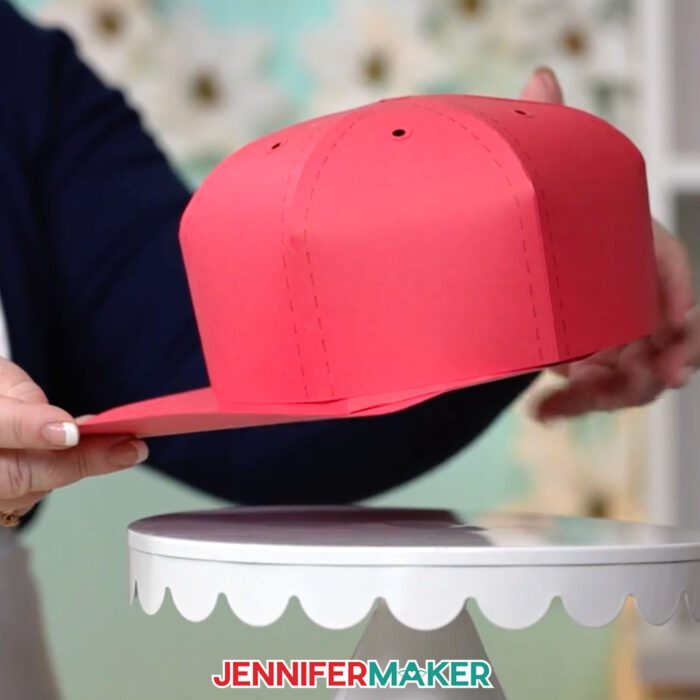
- Use craft glue to adhere the top button right over where the panels’ points come together and press it from both sides to dry.
- Place the domed cap top on the box with the brim and you’re done!


VARIATION: ADD A DETAIL
If you want to add a detail to your finished hat, it’s easy to do. It’s easier to adhere a detail to the finished hat, so use the main tutorial to assemble your gift box, then follow these steps to add a detail, like a rolled flower.
STEP 2: PREPARE AND CUT A ROLLED FLOWER DETAIL
CRICUT DESIGN SPACE
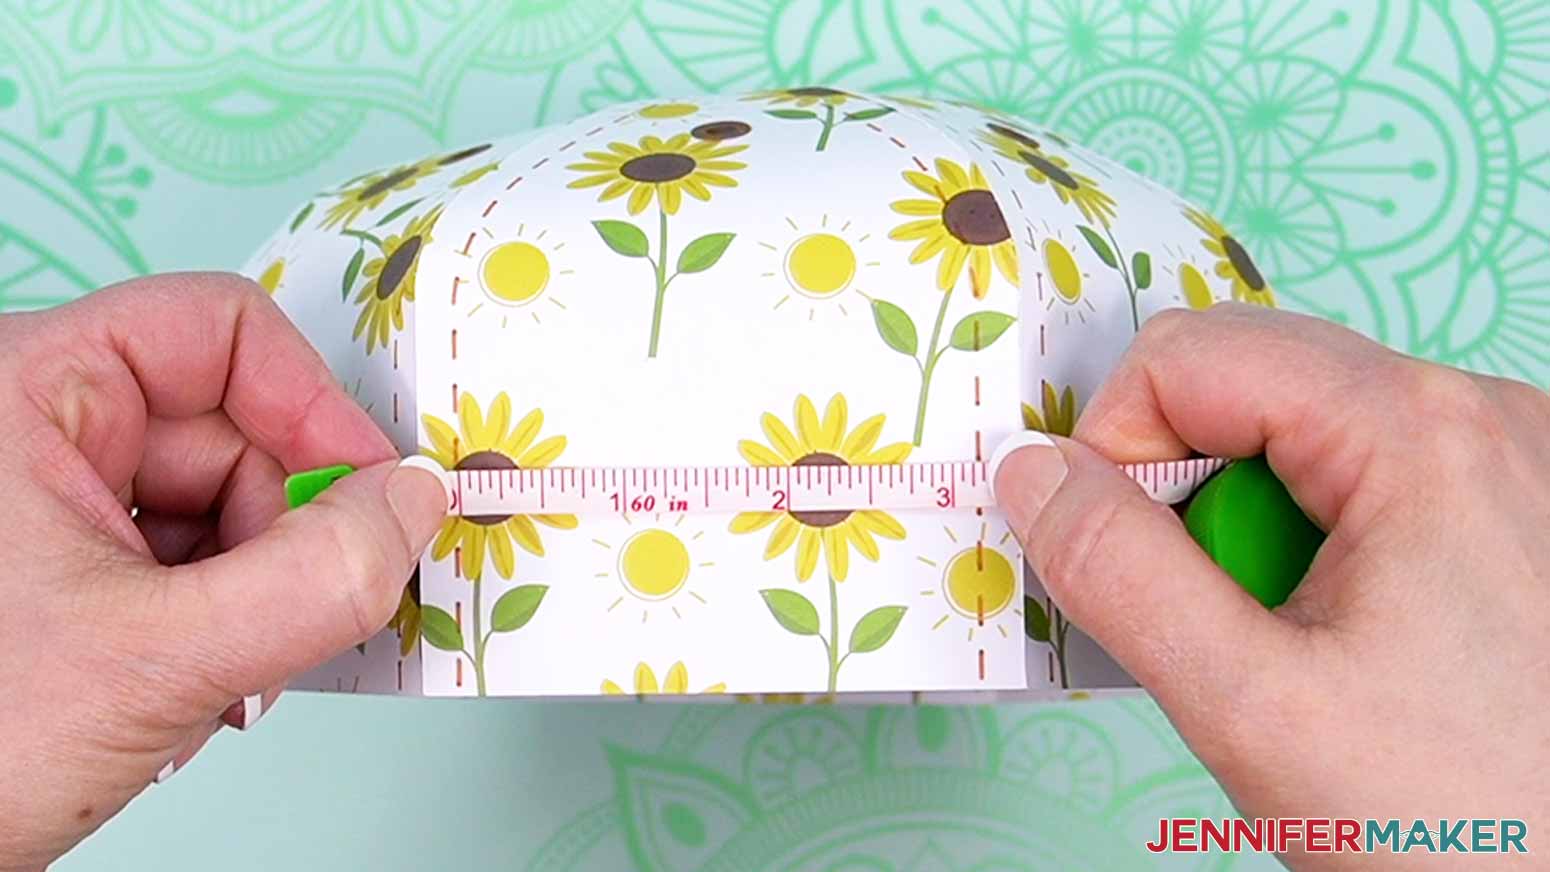
- When you’re picking a detail design, see how large the item will be assembled. I have the dimensions listed at the bottom of most tutorials. If you’re making a hat with stitch lines, measure the area between them on the front panel and make your detail just a little smaller. If you’re not using the stitch lines, use the panel seams instead.
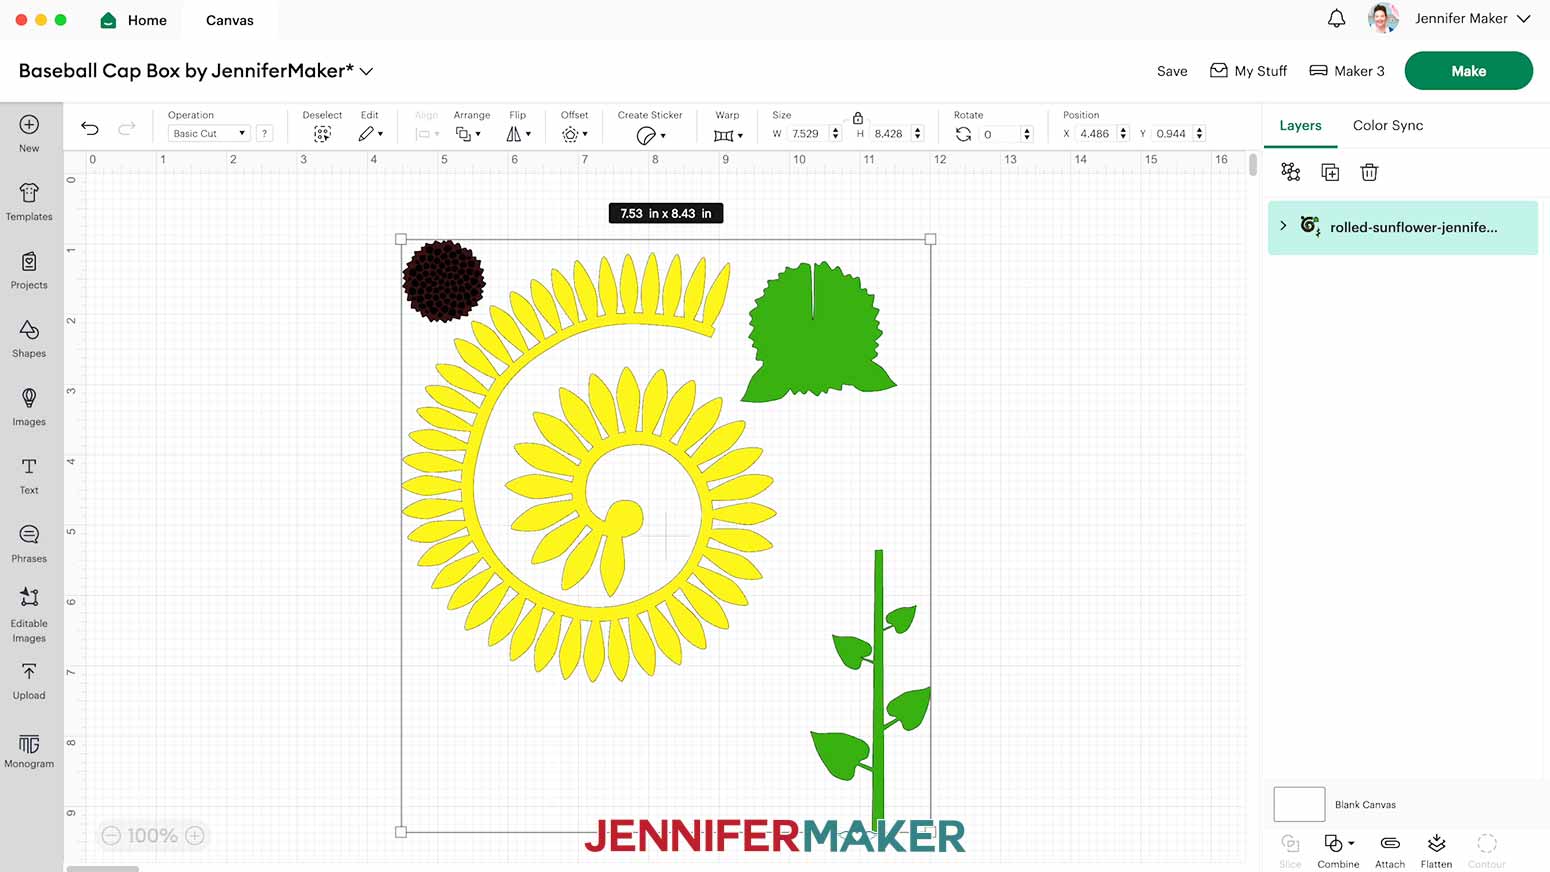
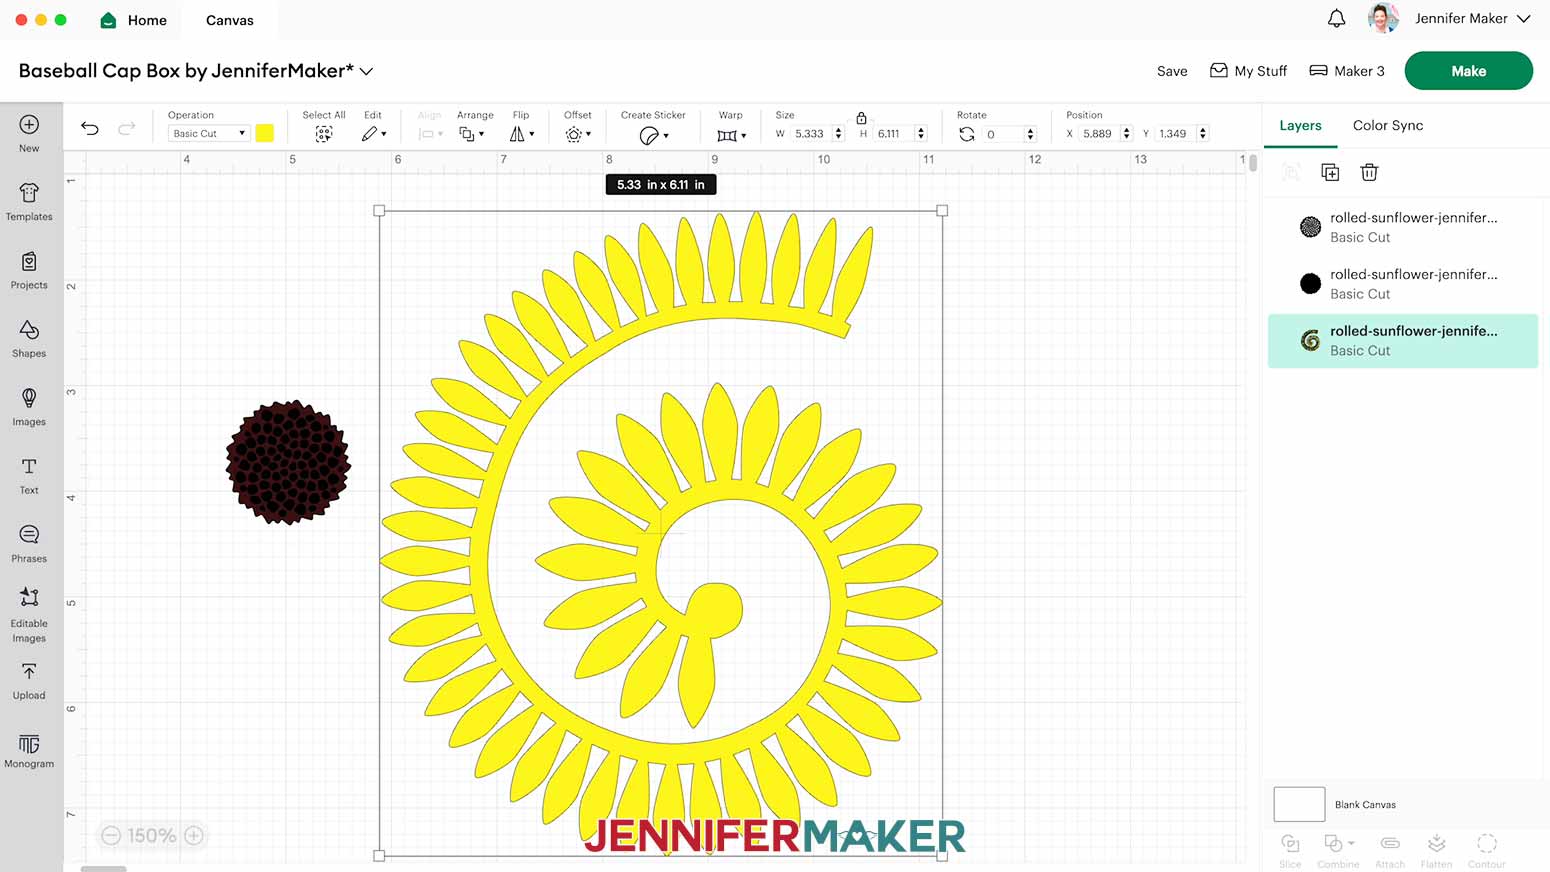
- Use Steps 1-7 from this tutorial to find, upload, and add the rolled flower SVG of your choice to the Canvas. I’m using the small rolled sunflower, Design #37 in my free library.
- Select and Ungroup the detail design.
- If there are parts of the detail design you don’t want to use, delete the layers. I’ll delete the stem and back leaf pieces.
NOTE: My finished flower fit the hat perfectly at the original dimensions. I don’t recommend making the sunflower smaller because the details will not cut as cleanly. - Follow the tutorial to cut your flower pieces using the same process and settings.
STEP 3: ASSEMBLE YOUR ROLLED FLOWER DETAIL
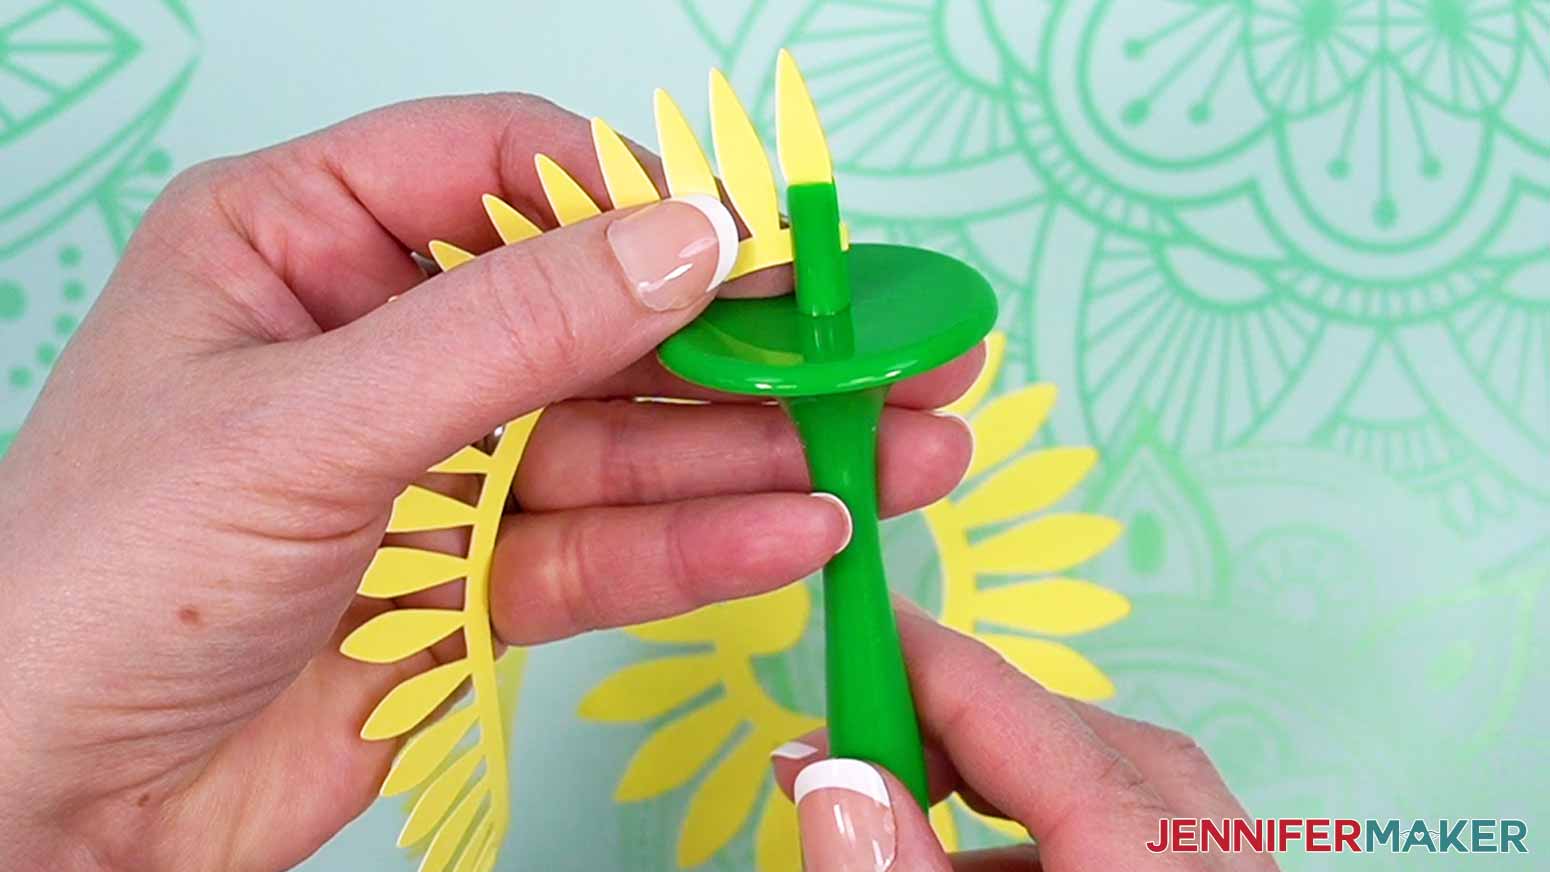
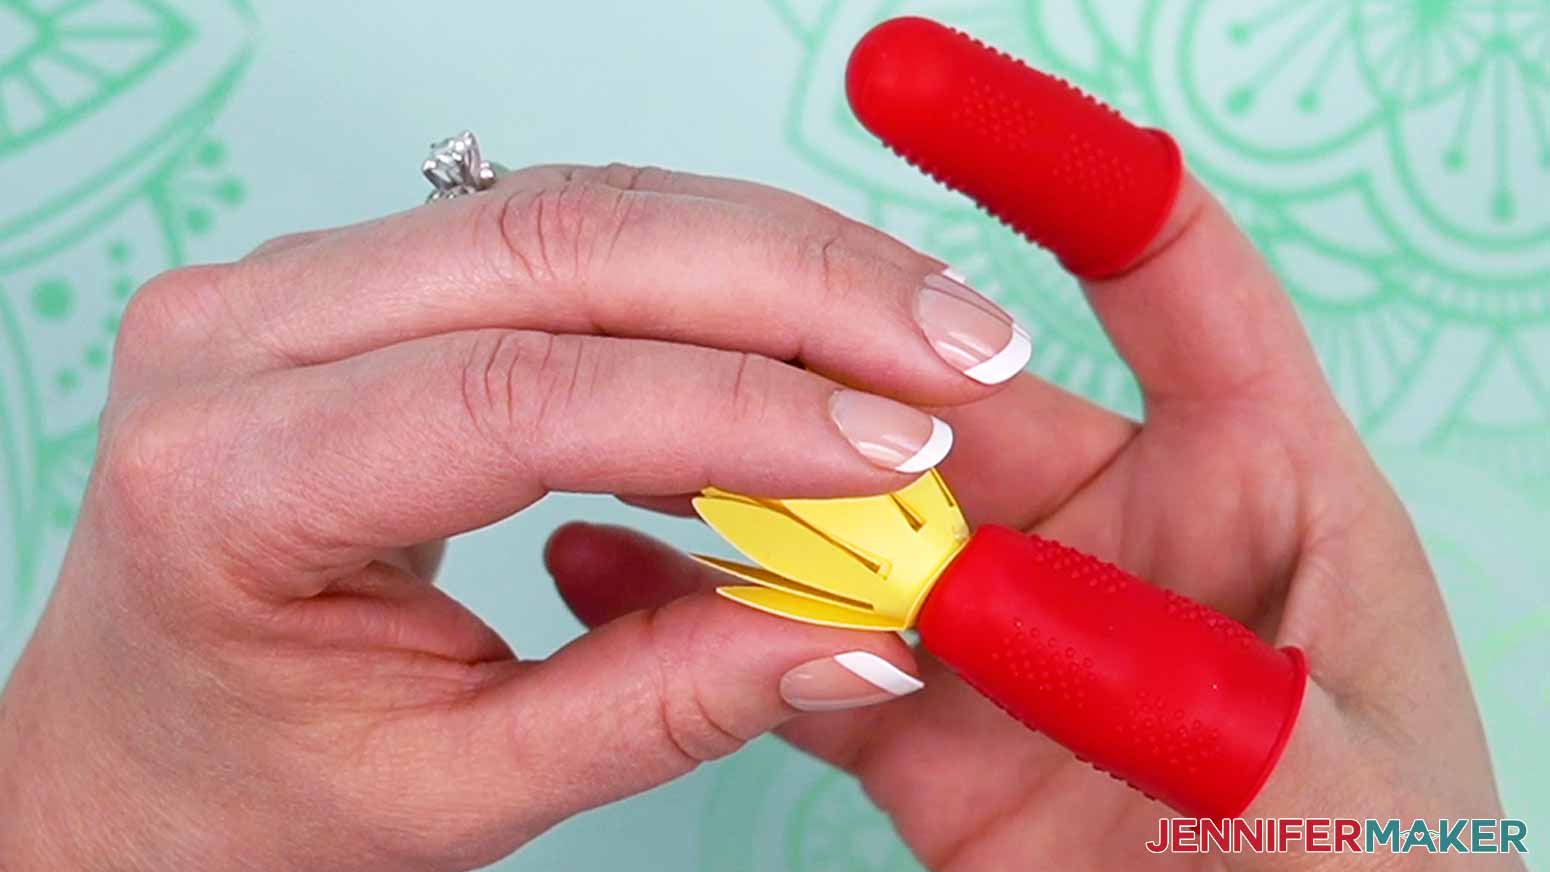
- Insert the loose end of your sunflower petal spiral into the end of your quilling tool.
- Begin rolling the tool toward you.
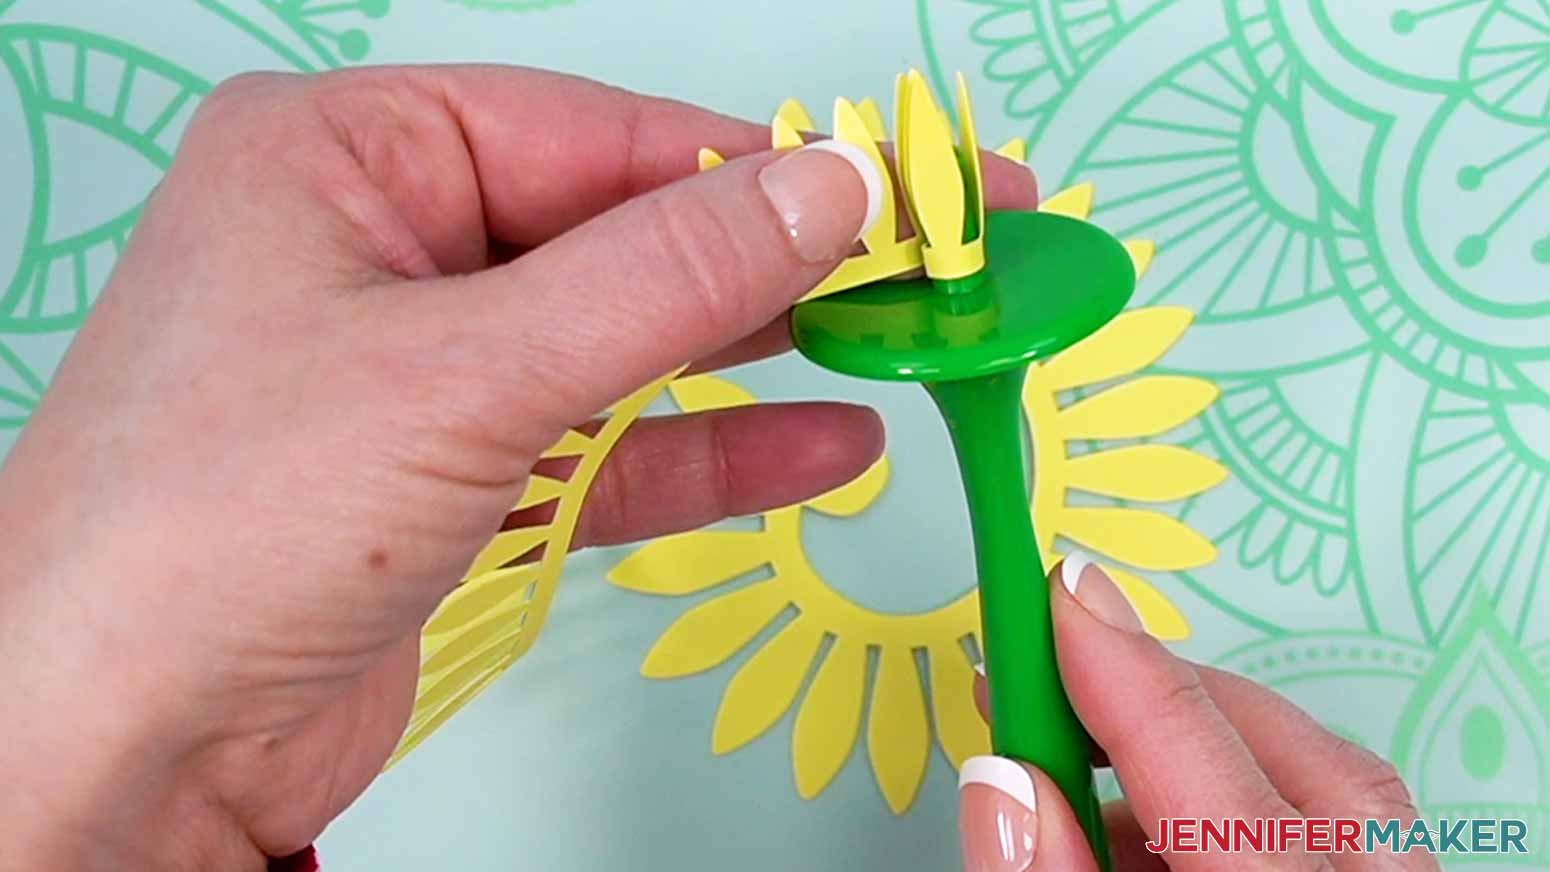
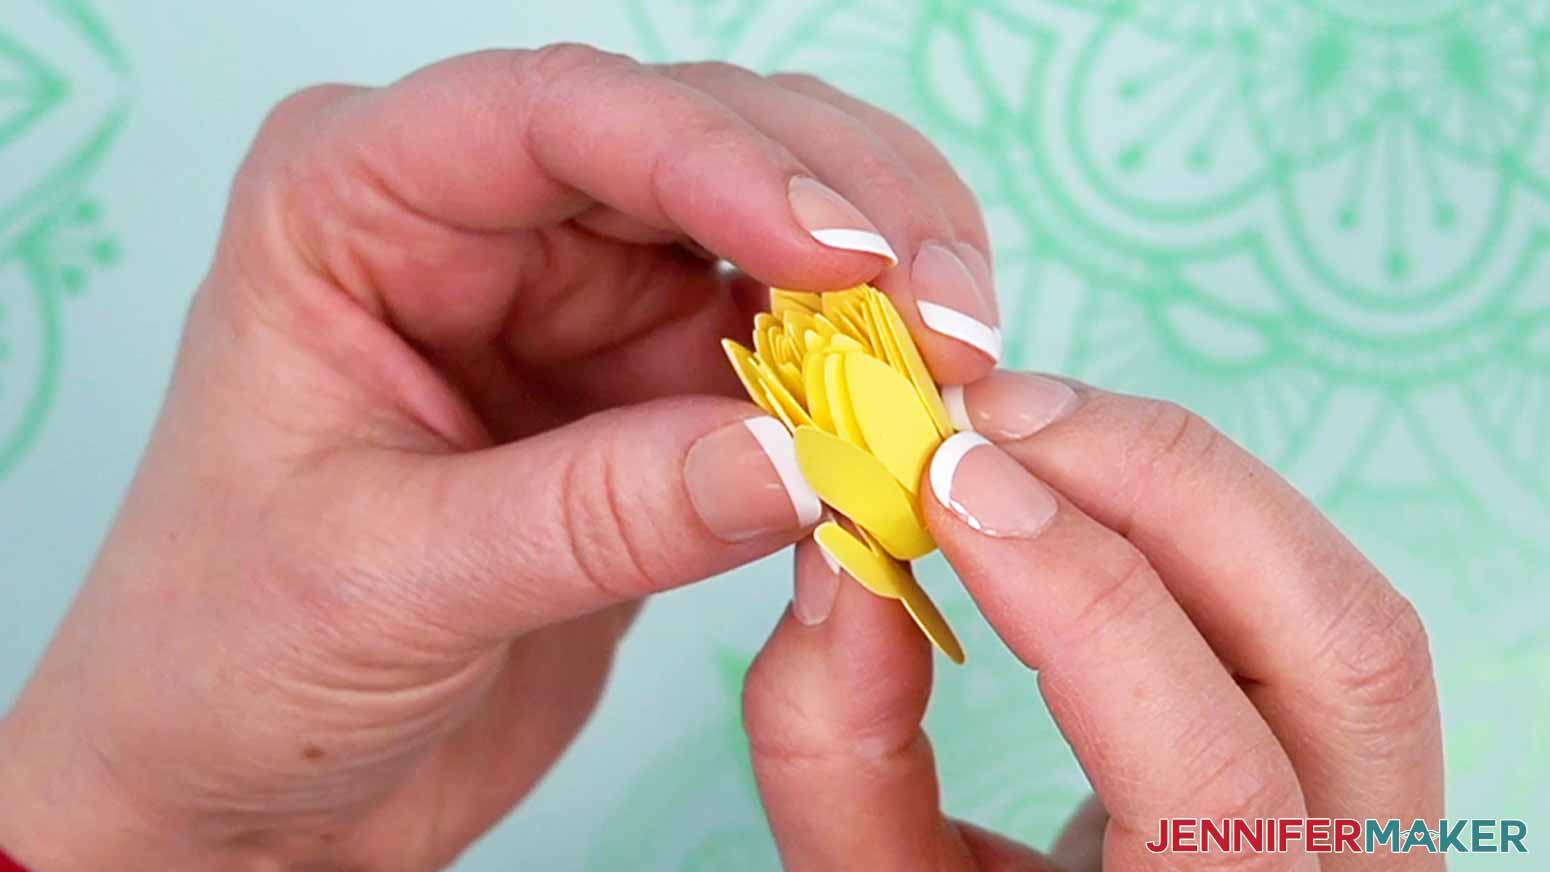
- Keep rolling the petals until they are all rolled up, leaving the middle circle sticking out.
NOTE: Do your best to keep the bottom edge of the petals aligned with one another. - Gently pull the quilling tool out of the rolled petals, but keep them in place with your fingers.
- Put on your finger protectors.
- Apply hot glue to the bottom of the roll, then fold the bottom circle over and press it in place to keep the roll together.
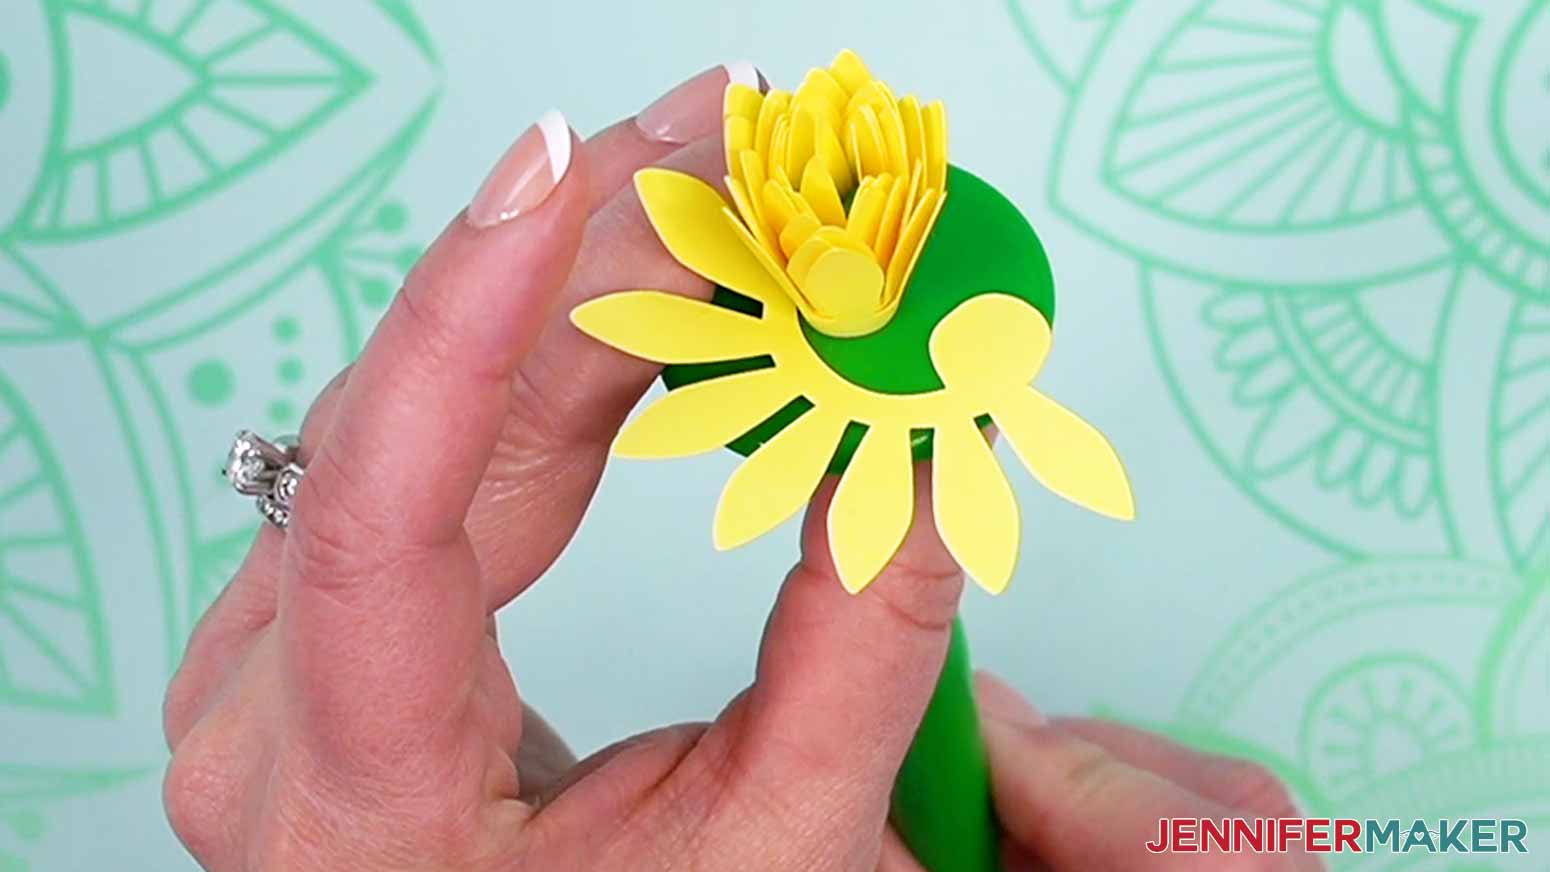
- Turn your sunflower right side up and open up all the petals.
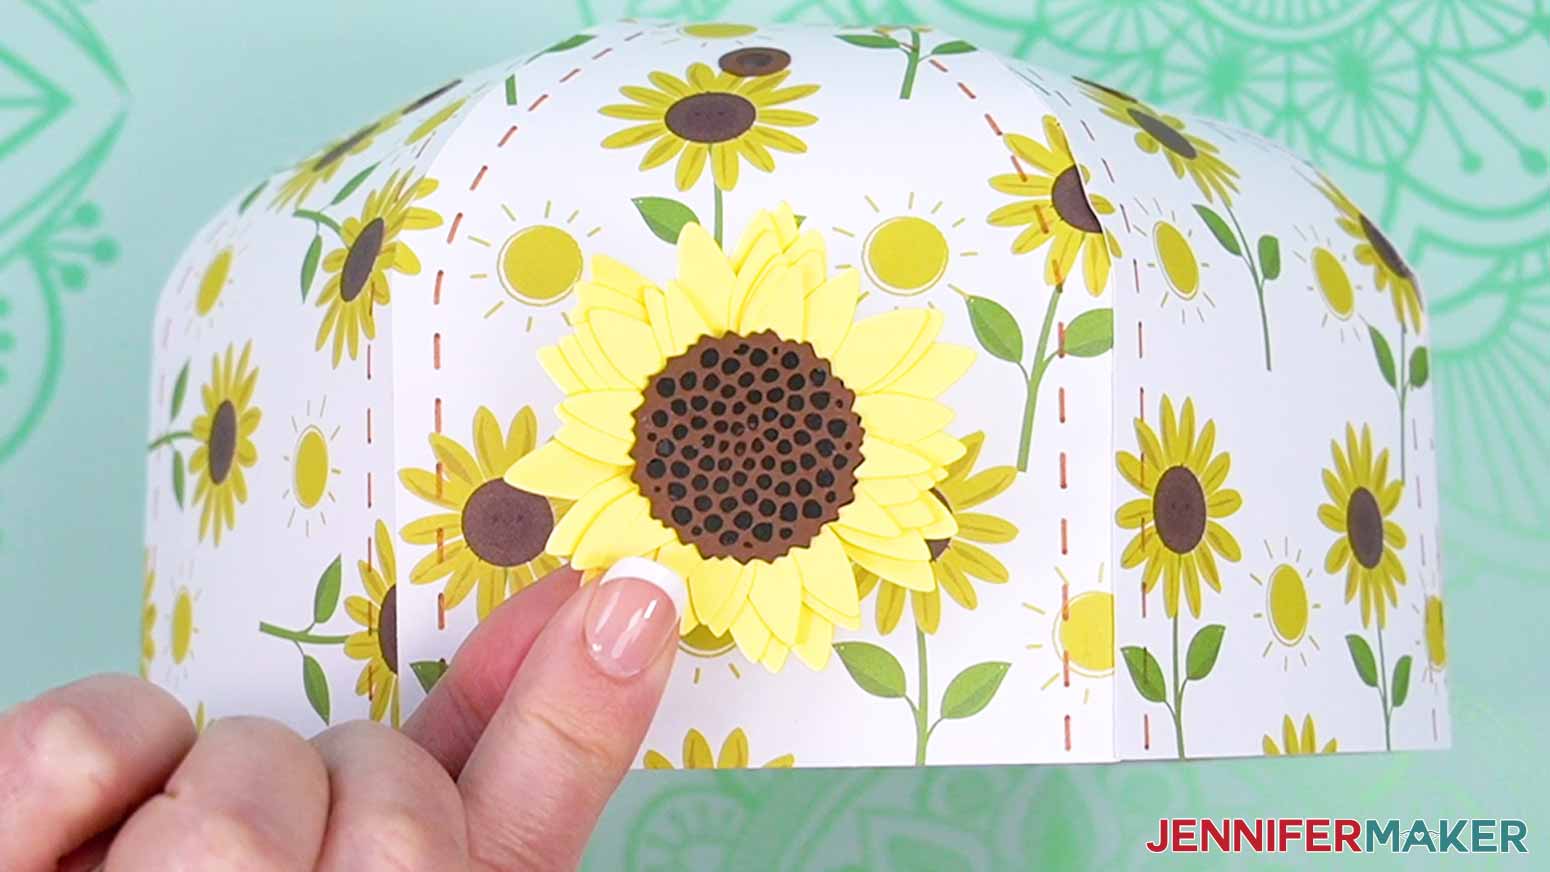
TIP: Rearrange the petals as you like now, while the glue is still a little wet. - Add several tiny dots of craft glue to the back of the solid seed head.
- Press the solid seed head into the middle of the flower’s front.
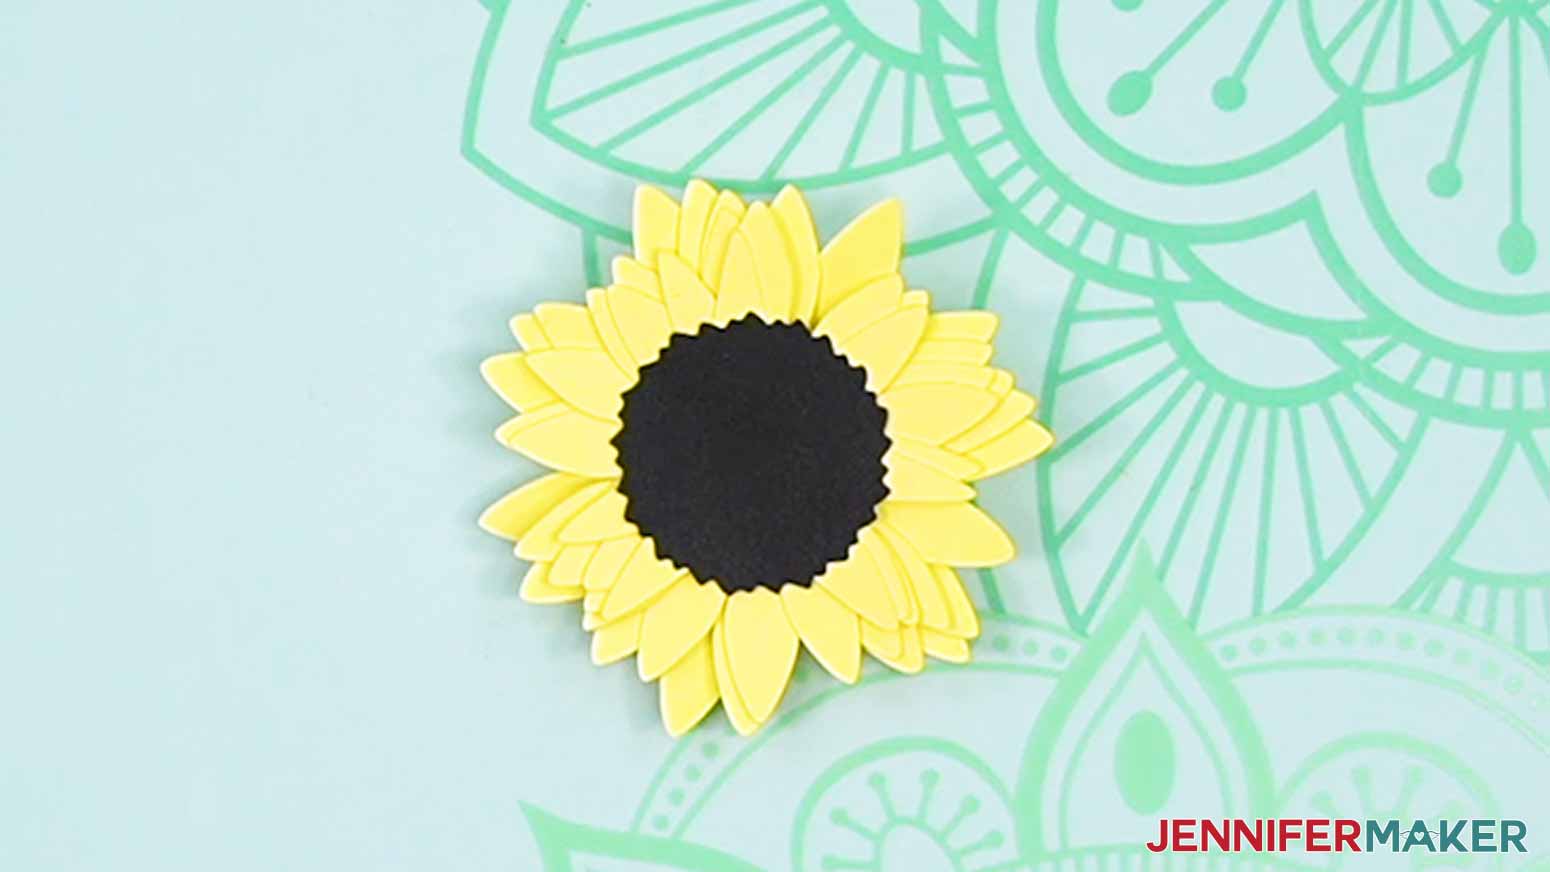
- Use tiny dots of craft glue to adhere the detailed seed head on the solid piece.
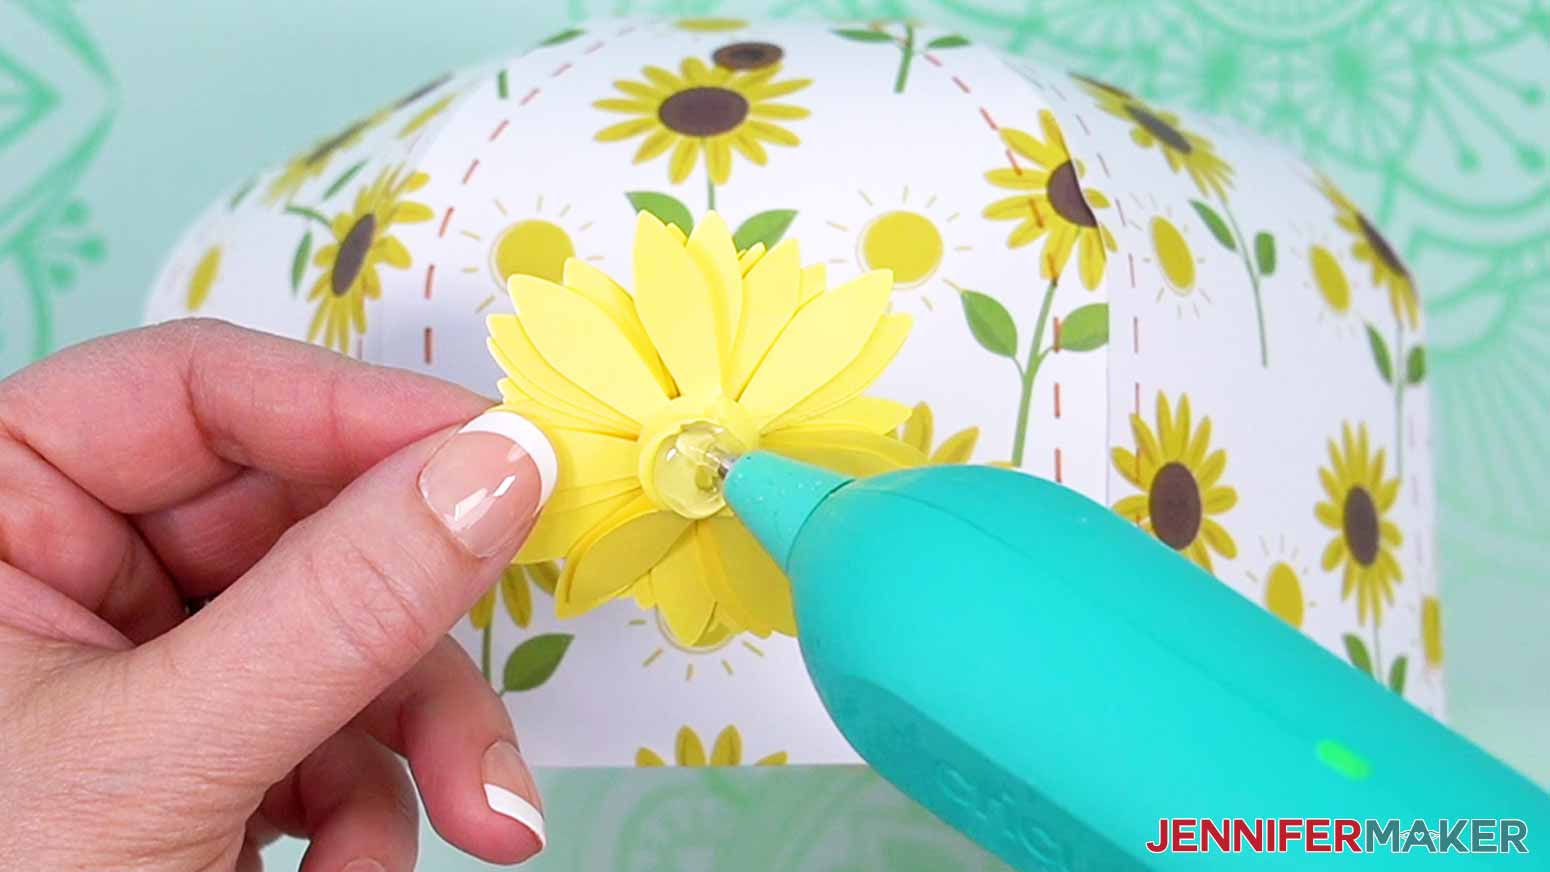
- Use some more hot glue to adhere the sunflower to the center of the front panel on the hat.

STEP 4: SHOW IT OFF
Your 3D baseball cap gift box is finished! 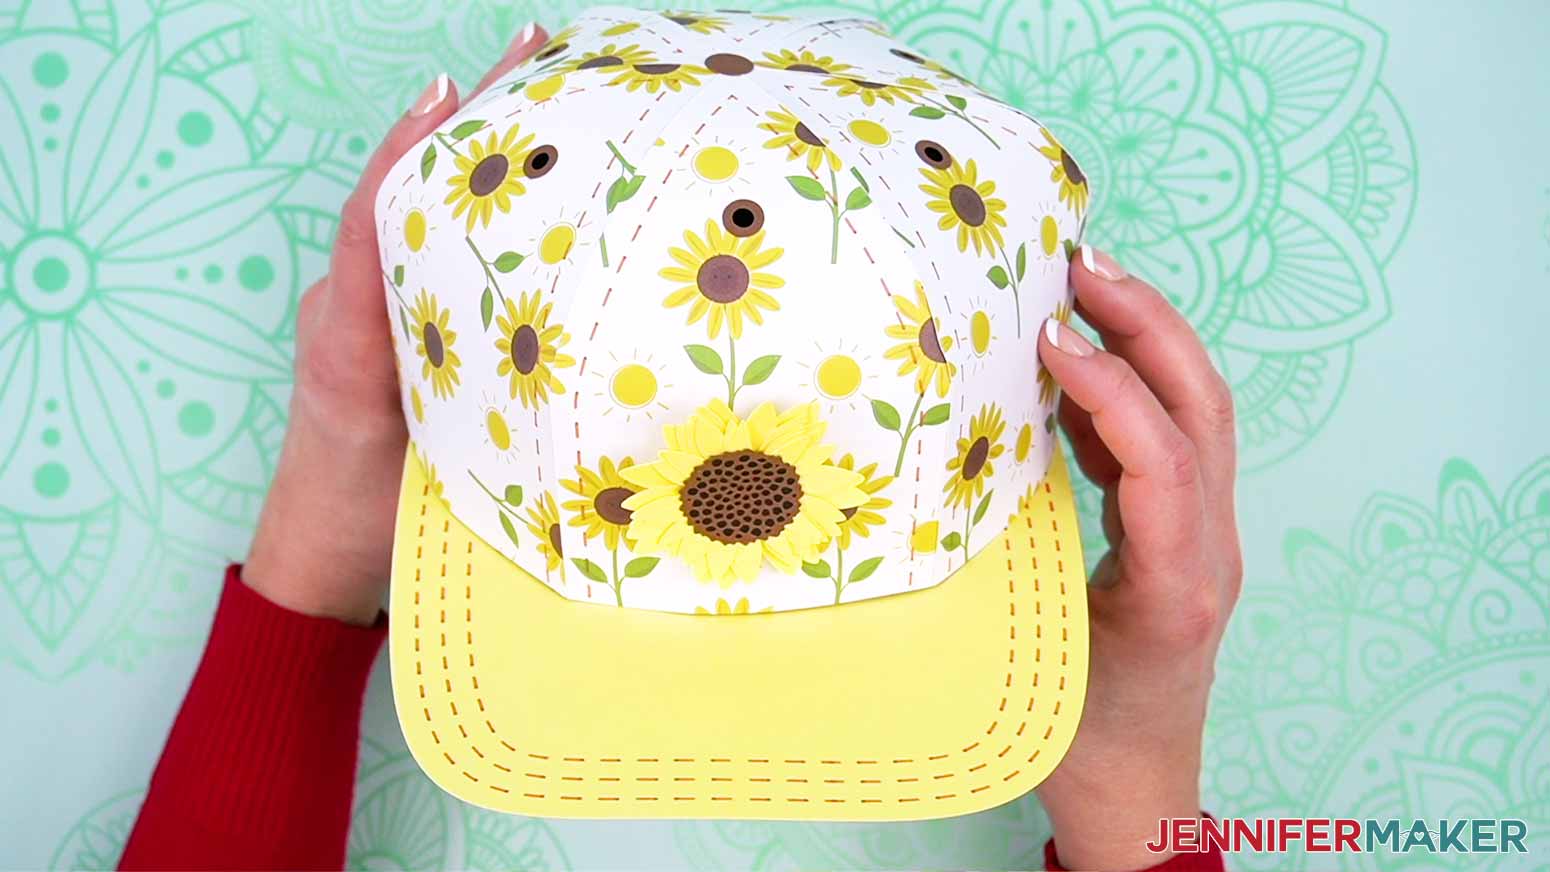
Notes
Assembled hat 10" x 7" x 4"
Assembled sunflower 2.25” x 2.25”
Answers to Your Questions About How to Make a Paper Baseball Cap Box
Q: Where is the baseball cap box with a photo patch?
A: The baseball favor box SVG with a photo is not a done-for-you design — it’s an example of the custom products you can design yourself in my ADVANCE program. The hats with my dog Hunter’s image were created right in Cricut Design Space using my baseball cap box SVG template. But this is something you can easily make in my ADVANCE program! Learn more about ADVANCE here!
Q: What’s the button on top of a baseball cap called?
A: A squatchee is the fabric-covered button that tops a baseball cap.
Q: What kind of paper do I use for the SVG cut file?
A: You can really use any 65 lb or higher cardstock to make a gift using this baseball cap SVG — it’s your choice which different colors and textures you want to use. If you use white cardstock, the glue might be a little hard to see so work in a well-lit area.
Q. Do I have to use a Cricut?
A: No! I use a cutting machine to be sure cuts are in the right spots, but I know not everyone has one. My capable design staff and I always include several versions of each digital item. If you have a Silhouette Cameo, which uses Silhouette Studio, you can use the DXF cut files in Silhouette Basic Edition. If you have upgraded to Silhouette Designer Edition, Designer Edition Plus, or Business, you can use the SVG file. A Brother ScanNCut works, too, If you don’t have a cutting machine, you can print and then cut out my digital download PDF file, too, and then use scissors or a craft knife to cut out your pieces. The ZIP file in my resource library includes these file types and more! And good news, you can also use Cricut cut files and Design Space on a mobile device. Just make sure you have the latest version of the app.
Q: My cardstock keeps ripping on the intricate cuts. What can I do?
A: Be sure you’re using a clean and sticky machine mat, good-quality cardstock sheets, and a clean blade. See my Cricut Cutting Problems post for all the tips I use to get clean cuts every time.
Q: Can I cut this project on a Cricut Joy?
A: This baseball hat box SVG is pretty big for a Joy, but the Joy Xtra can cut these SVG shadow box designs! I don’t recommend using manual sizing to make it fit with a Joy. A smaller size won’t make for easy assembly.
Q: How do you add drawn details to a papercraft project?
A: I added optional stitching details to my design file. My tutorial shows you how to set the dashed cut lines layers to the “pen” operation in Cricut Design Space and how to have the machine draw them with compatible markers!
Q: What’s the easiest way to make a rolled paper flower?
A: I always use a quilling tool to make paper flowers. I really like the Flowtool, because it keeps the bottom edge aligned, which can be tough with handmade pieces!
Get my free SVG files to make a baseball cap box!
I love seeing what you make with my designs and how you use them! Please share a photo of your 3D paper baseball cap box in our Facebook group or tag me on social media with #jennifermaker.
Love,

Want to remember this? Save this Tutorial on How to Make a Paper Baseball Cap Box to your favorite Pinterest Board!