
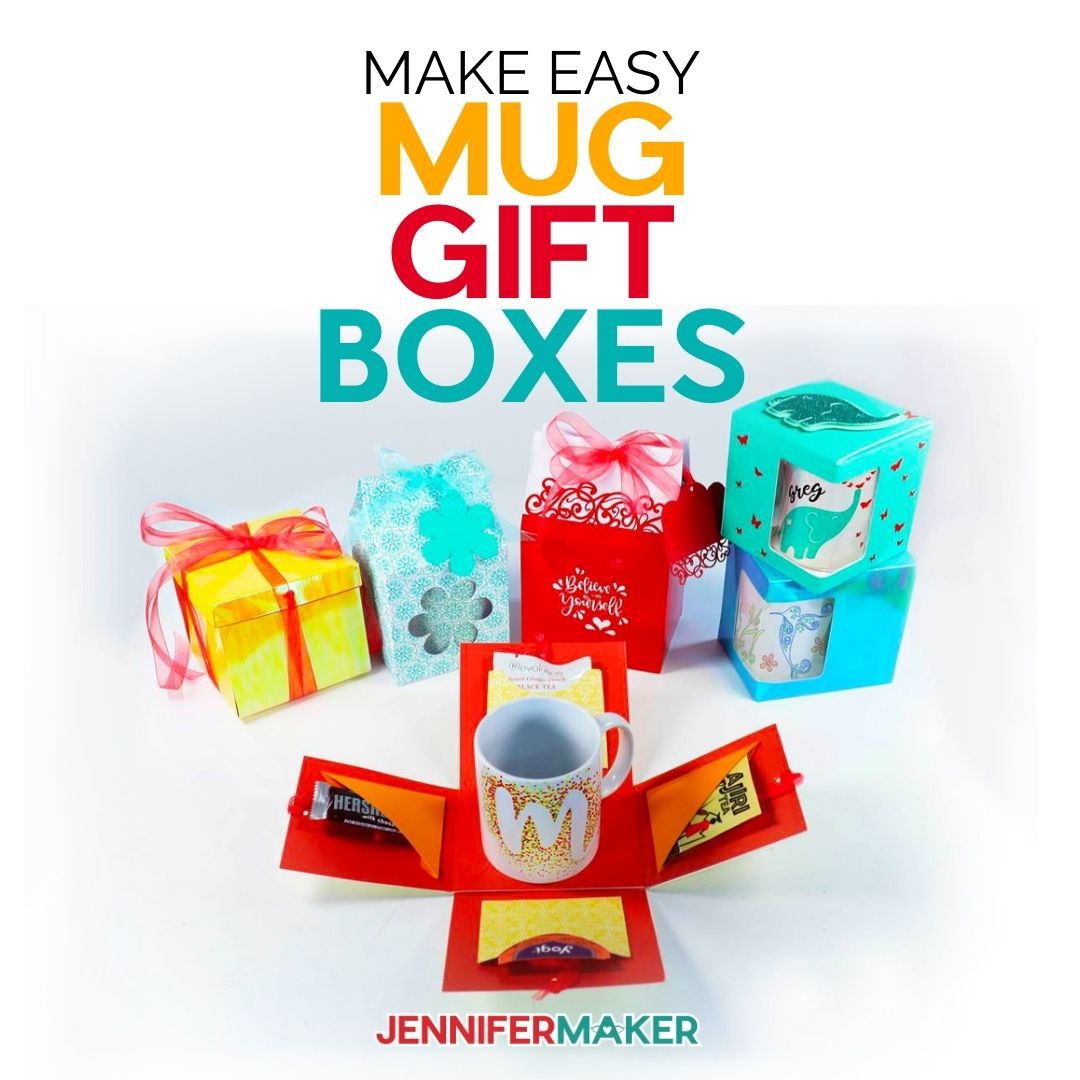
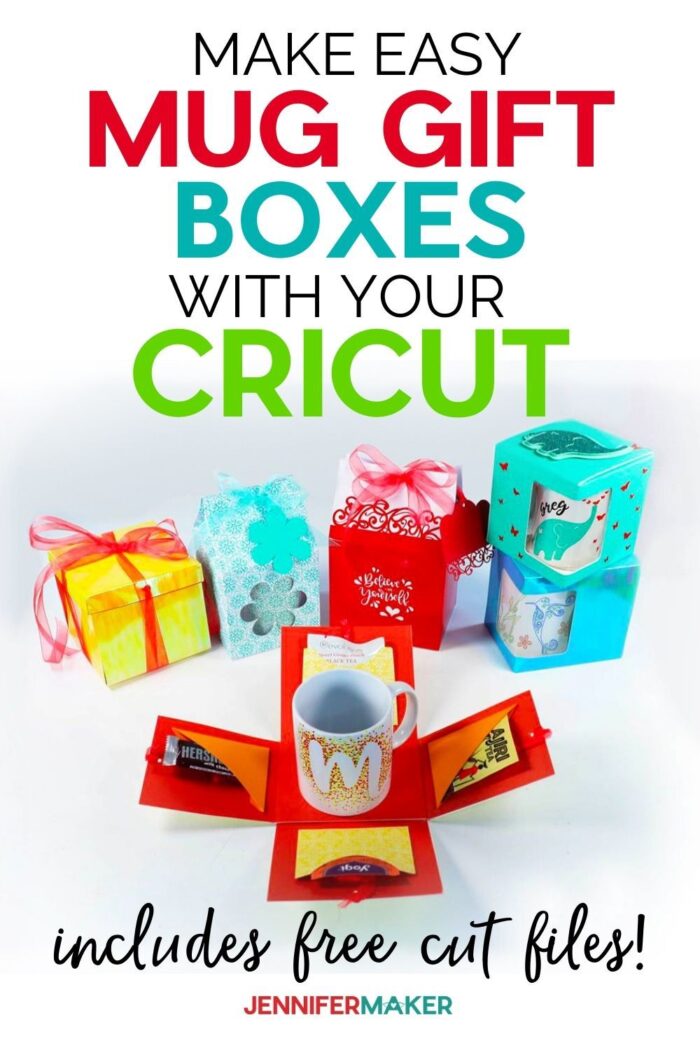
Learn how to make these beautiful Cricut Mug Gift Boxes for those fun and unique mugs you’ve been making! Mugs are a great gift to give year round and now, in this tutorial, I show you how to make three different Cricut Mug Gift Box designs!
I had so much fun last month making all of the mugs and creating tutorials for all of them, too! Now it’s time to create the perfect accessory for your mugs: Cricut Mug Gift Boxes! I have received many requests for mug boxes and ways to wrap up these memorable creations, and today I want to give you not one box but THREE different boxes to choose from!
I know not everyone has kids back in school but some do, and many are still distance learning. And, from what you have told me in your feedback, you are looking for gift ideas to give teachers, or other people in your life who need a quick pick me up! I face the same struggles you do, what to give and how to present it in a cute and unique way! This year, I plan to make a mug, wrap a gift card in this cute coffee cup gift card holder, and wrap them all up in one of my Cricut Mug Gift Boxes! I can personalize them for each person and they will hopefully bring a smile to their face!
Watch the Cricut Mug Gift Box assembly video here:

I love adding a special touch to the gifts I give, whether it be gift cards or physical gifts. Cricut Mug Gift Boxes are the perfect way to jazz up your present!
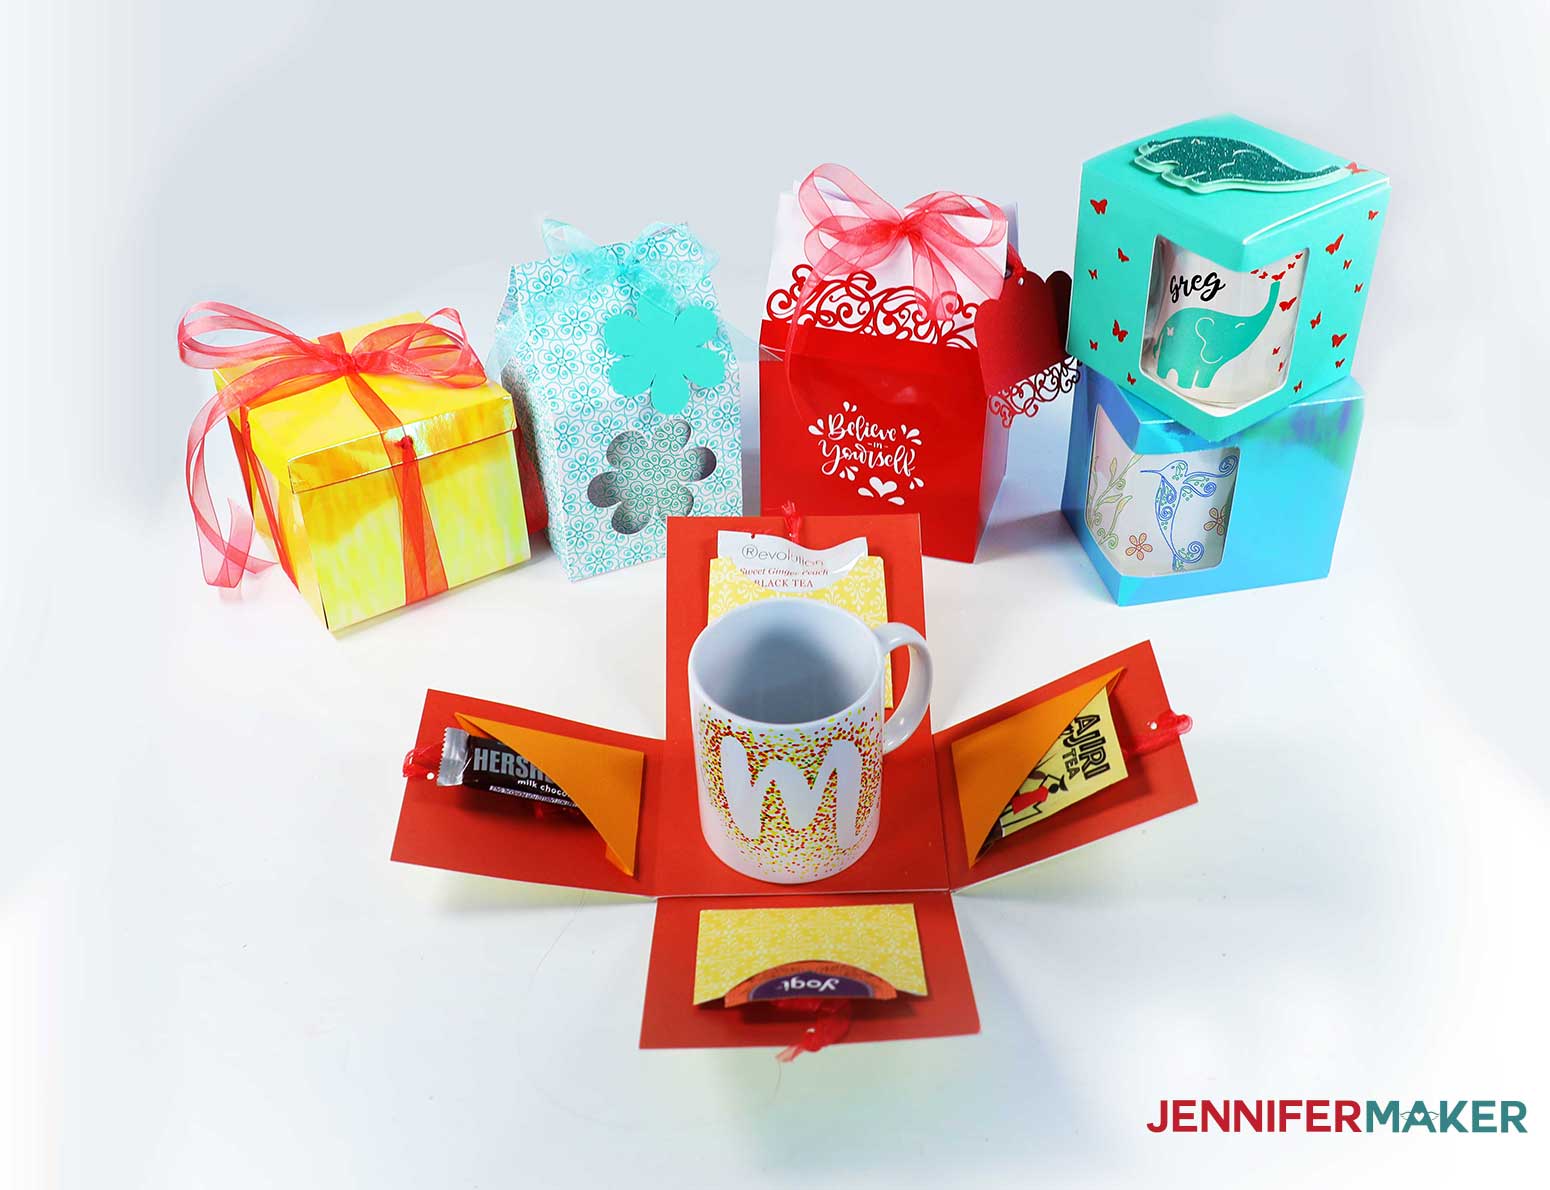
I had so many ideas for gift boxes, but narrowed it down to three separate designs, which can then each be decorated and modified to your personal tastes. These three designs are all so fun to make, I can’t decide yet which one is my favorite! Here are the three designs you can choose from:
Here’s are some of the Basic Mug Boxes with a Corner Window:

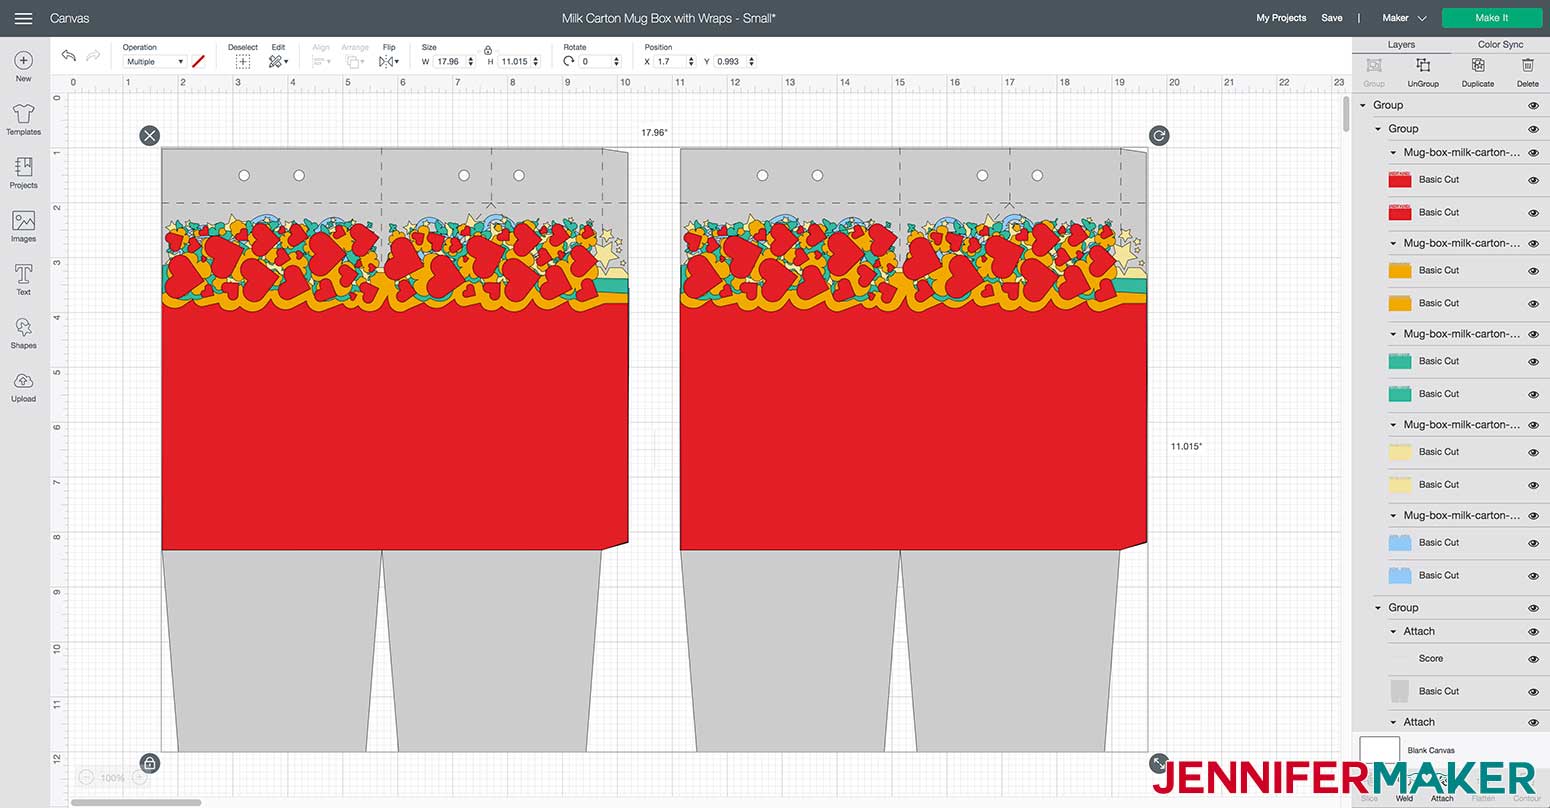
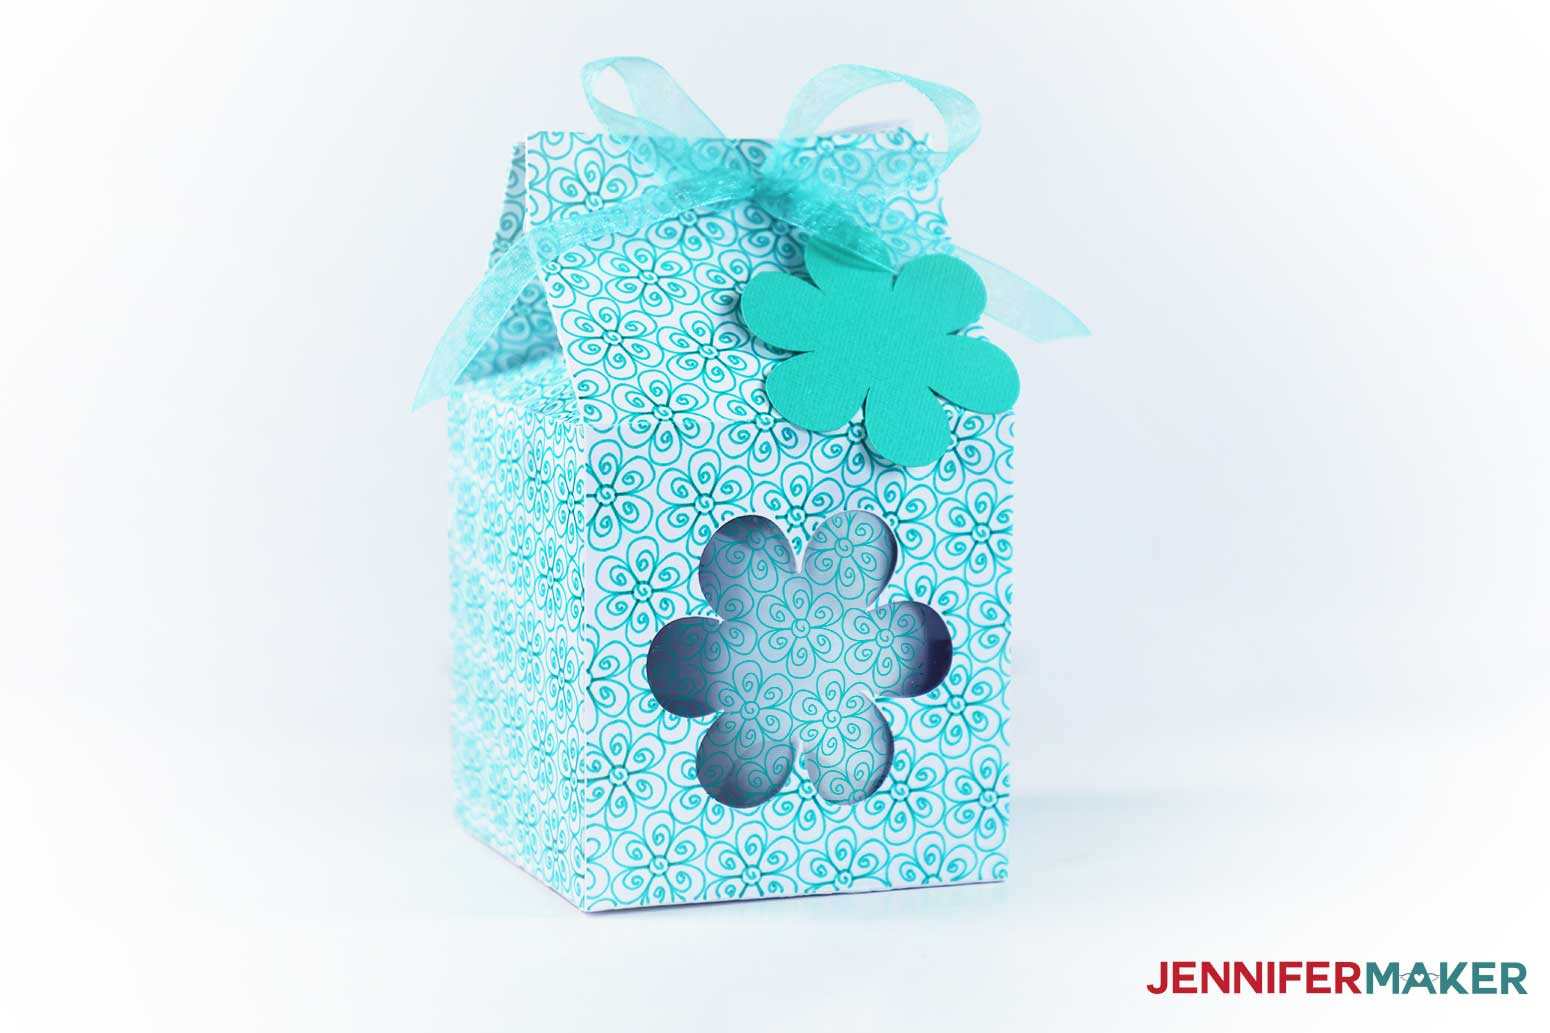
Here are the fun Milk Carton Style Mug Gift Box with fun shapes and designs:

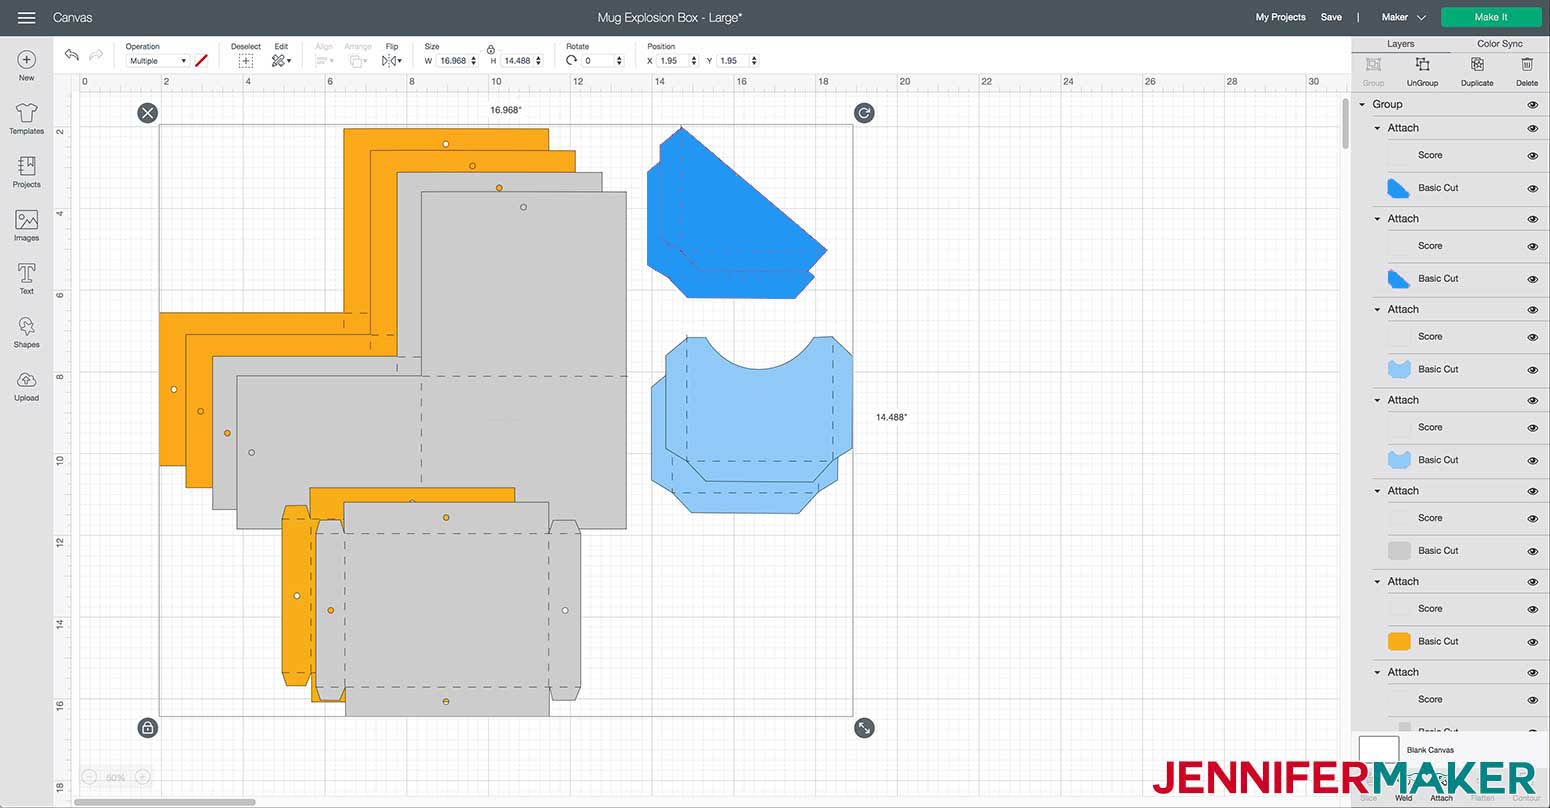
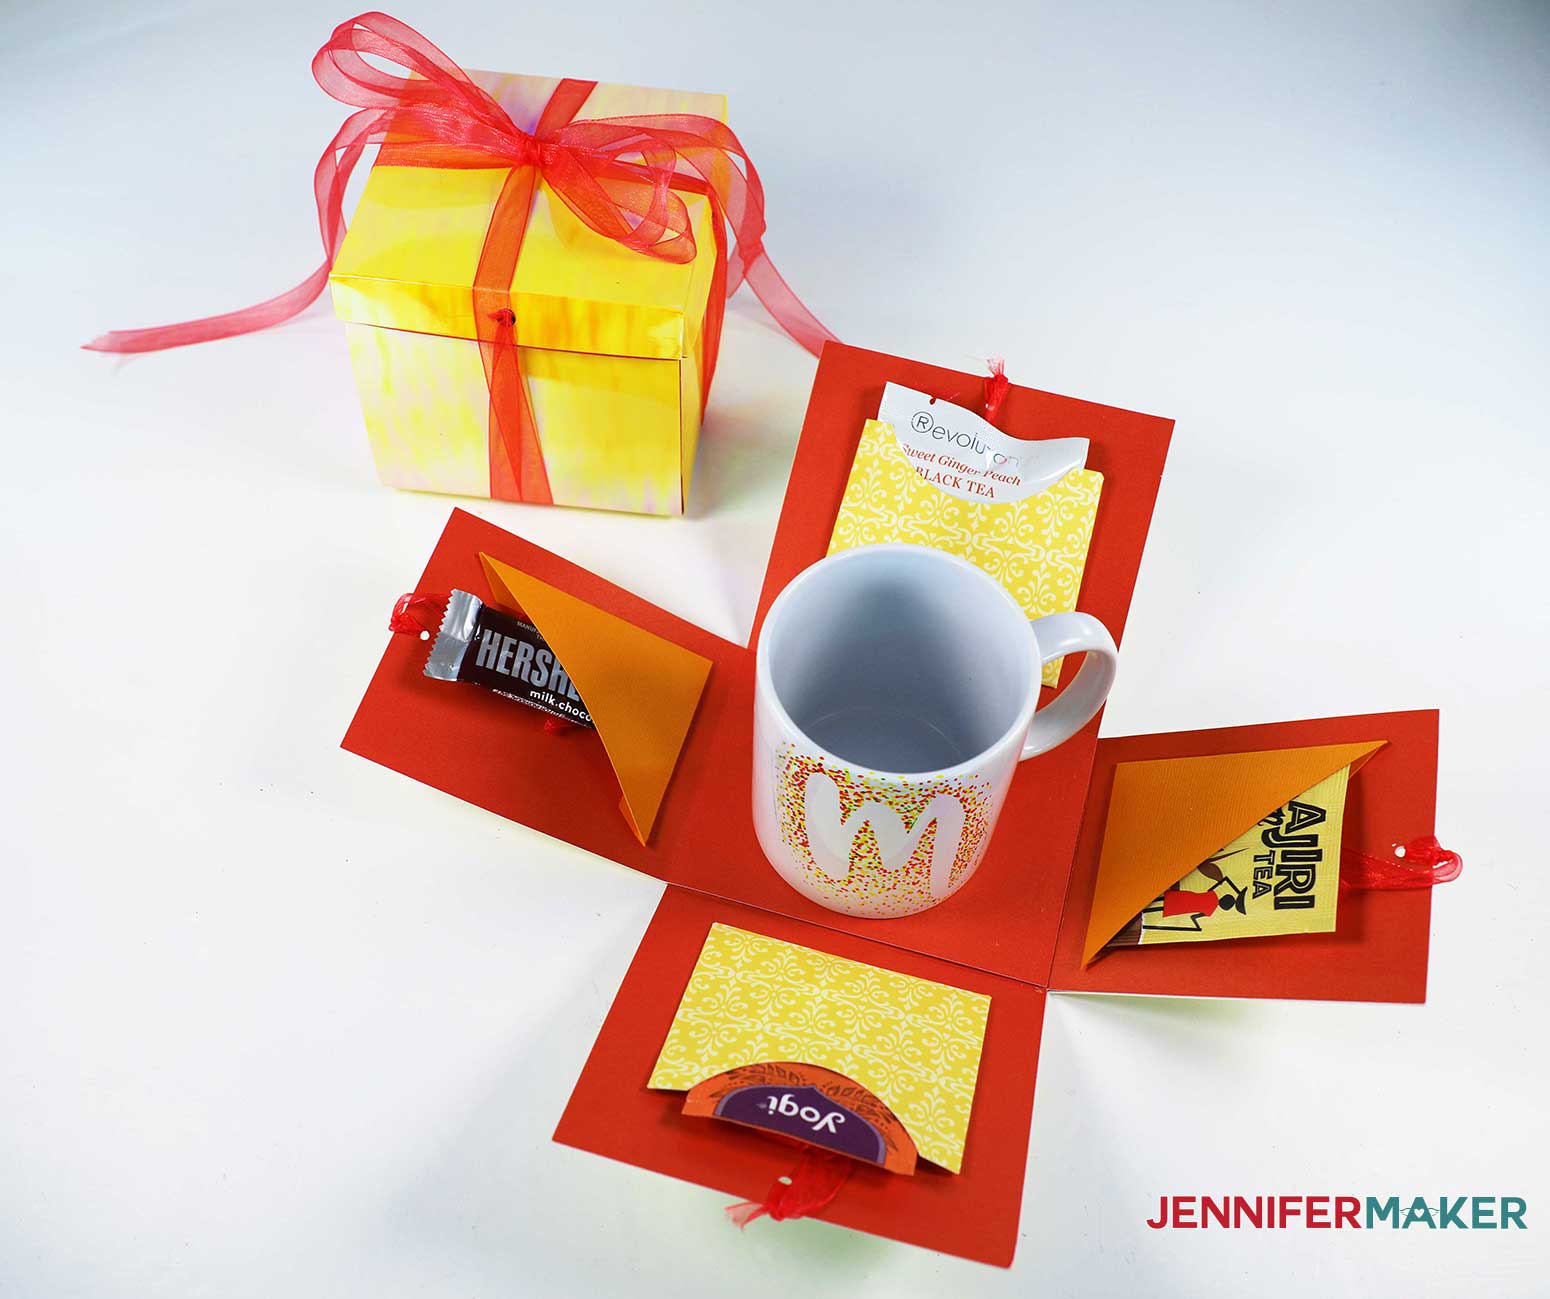
And here is the “Explosion Box” style Mug Gift Box with pockets for treats and notes:

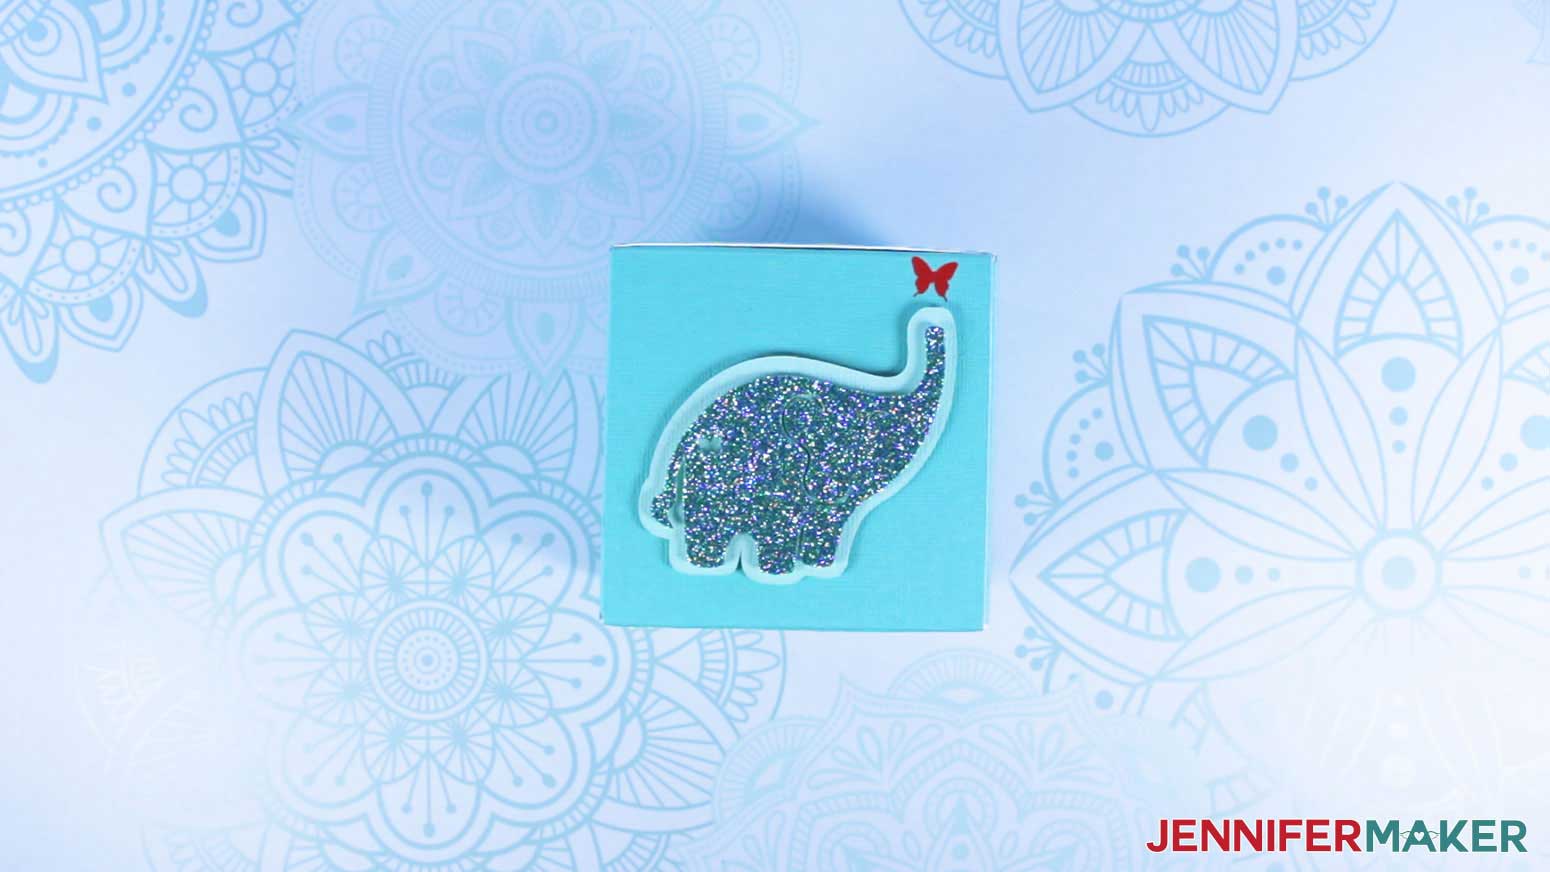
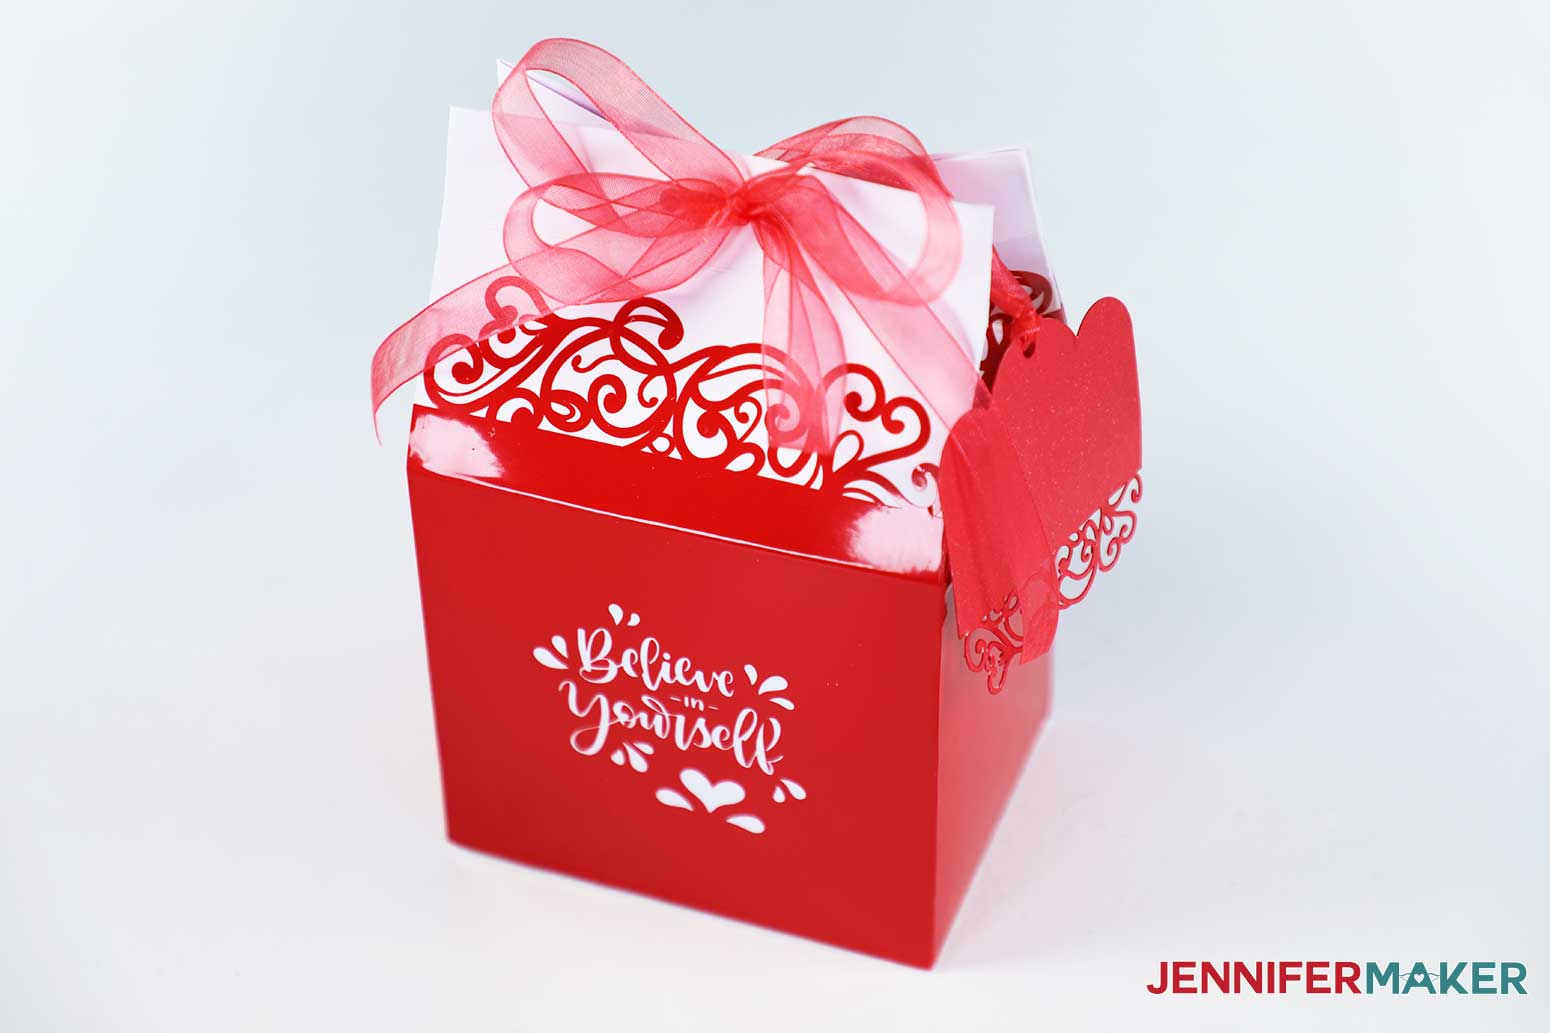
But perhaps the favorite thing is how many of these box designs match my other coffee mug designs I shared last month. You’ll find matching mug boxes for my Fancy Edge Wrap designs that have things like butterflies, hearts, and stars along the edges, matching mug boxes for my cute animal mugs (elephant, bear, deer, etc.), matching mug boxes for my handlettered decal designs with coffee quotes and motivational sayings (like “Believe in Yourself”), and matching mug boxes for my mandala coffee mugs!
And these are EASY to make! Each box requires minimal supplies, making it a wonderful project using mostly items you should have on hand!
I highly suggest you use Kraft Board to make your Mug Gift Boxes as your mugs are on the heavier side and could use the extra support, and you can use your Cricut Explore or your Maker to cut Kraft Board! If you don’t have Kraft Board, you can use 100 lb. cardstock, but I would still handle with a little more care when presenting your gift!
For assembling the Cricut Mug Gift Boxes, I used a combination of tacky glue and dual adhesive foam tape, things I already had on hand!
I did use permanent vinyl for one of my coffee mug boxes, but this is completely optional. I love adding fun touches to these gift boxes, so how could I not add some fun vinyl elements? And, if you want to make the Mug Gift Box that has the window, you will also need a sheet of acetate.
Other useful things for creating these Cricut Mug Gift Boxes include ribbon for decoration, and a weeding tool and a scraper tool, both of which can make your assembly process a bit easier!
Let me show you how easy it is to make these Mug Gift Boxes! This post contains some affiliate links for your convenience (which means if you make a purchase after clicking a link I will earn a small commission but it won’t cost you a penny more)! Read my full disclosure policy.
Materials to Make DIY Mug Gift Boxes on a Cricut
See my Amazon shopping list for this project here!
- Twelve (12) Sheets of White Kraft Board
- -OR- Twelve (12) Sheets of Holographic Kraft Board
- Optional: Two (2) Sheets of 12″ x 12″ 65-80 lb Cardstock Per Decorated Mug Box
- -OR- Optional: Two (2) Pieces of 12″ x 12″ Permanent Vinyl Per Decorated Box
- Optional: Two (2) Pieces of Cricut Standard Grip Transfer Tape, 12”x12”
- Optional: Acetate sheets
- Tacky Glue
- 3D Pop Dots Dual-Adhesive Foam Tape
- Ribbon
- A way to cut your Kraft board (I used the Cricut Maker, but you can also use a Cricut Explore, another cutting machine, or scissors)
- Green Cricut StandardGrip or Purple StrongGrip Cutting Mat 12” x 12”
- Scoring Stylus or Scoring Wheel
- Scraper Tool
- Weeding Tool
- Design #298 (My free SVG/PDF/DXF design files are available in my free resource library – get the password by filling out the form at the bottom of this page)

How to Make Coffee Mug Gift Boxes
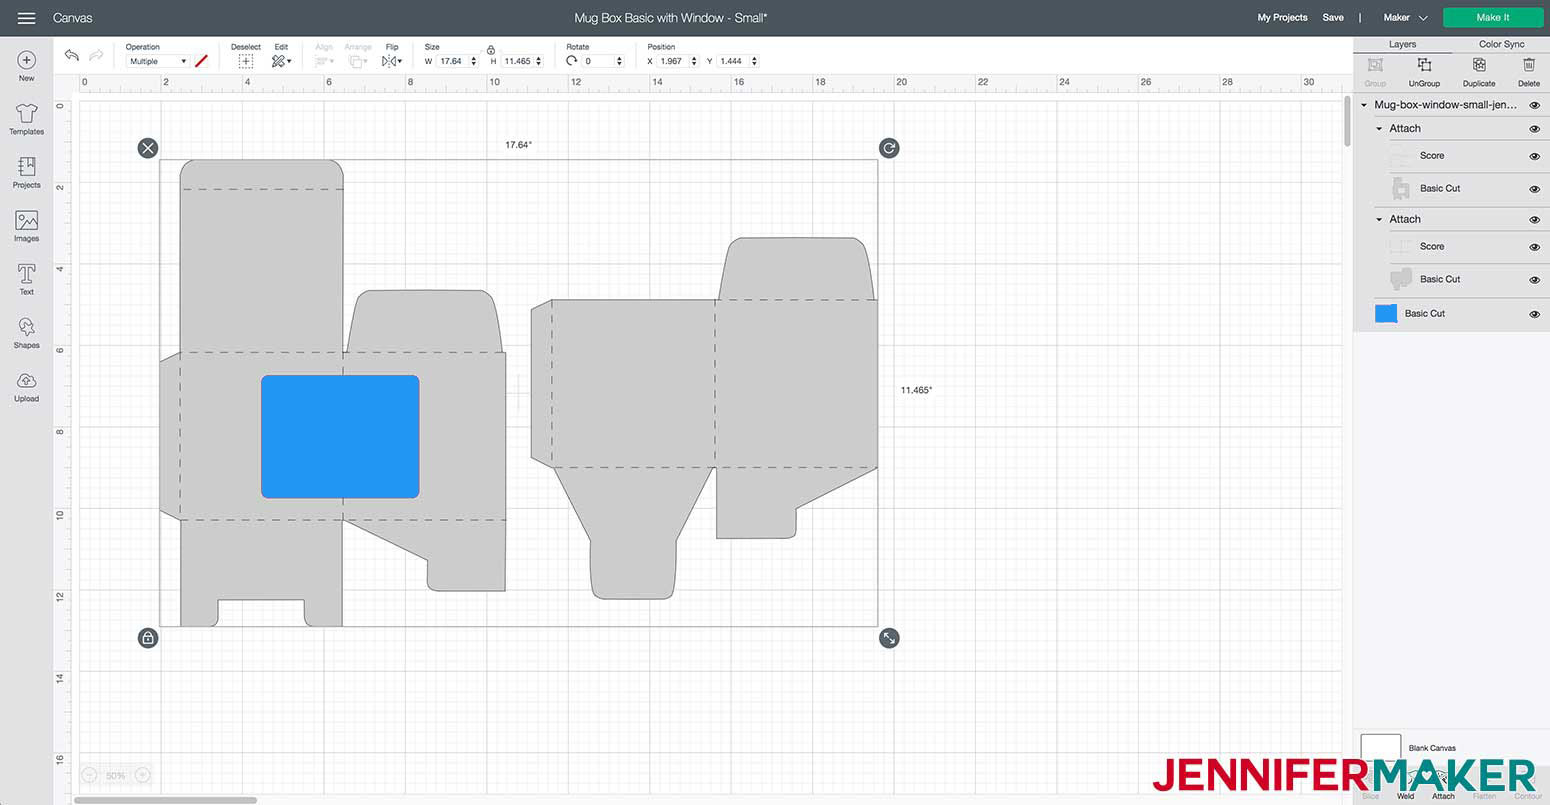
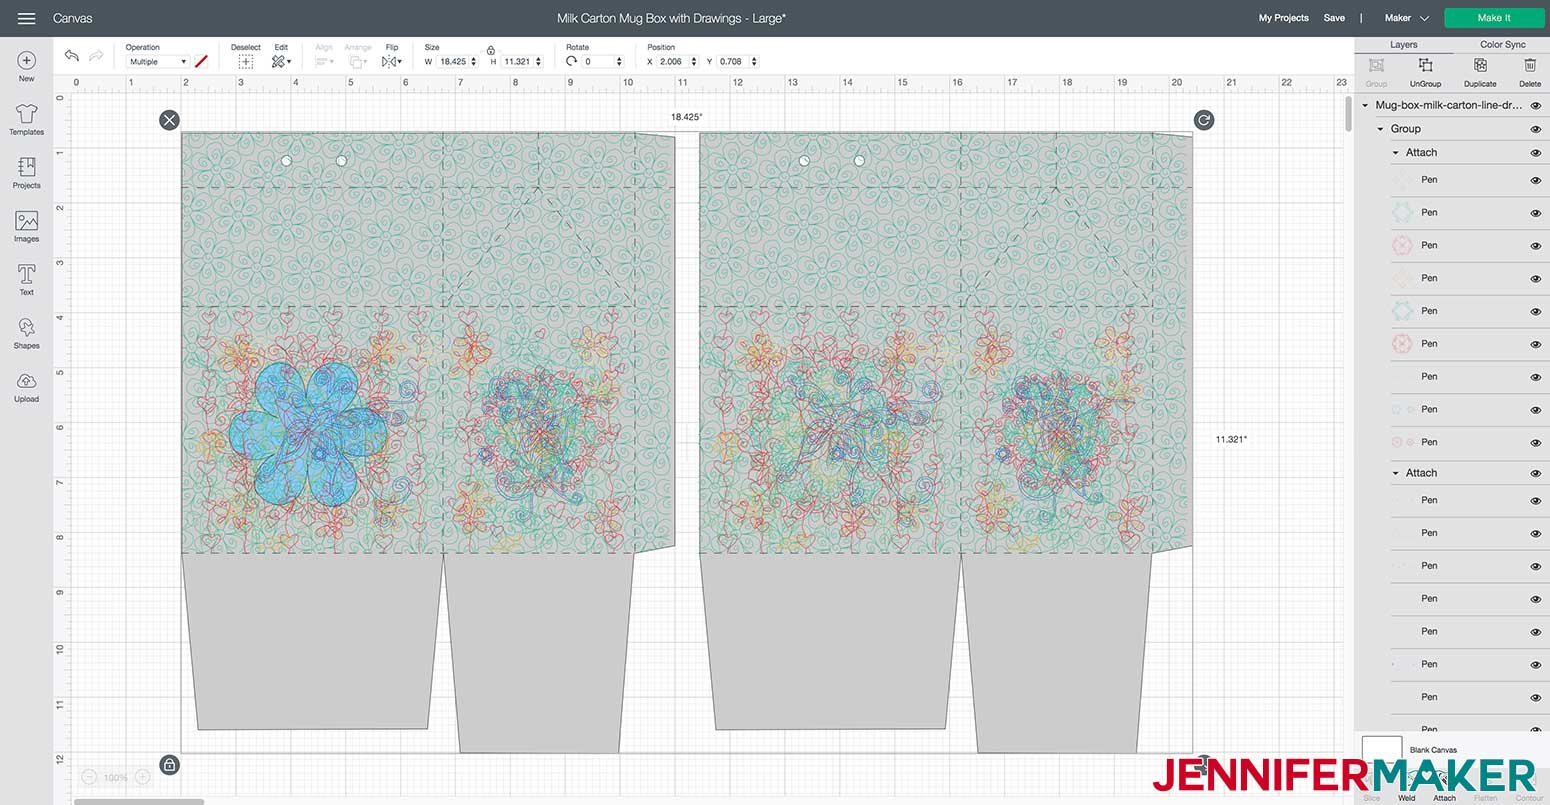
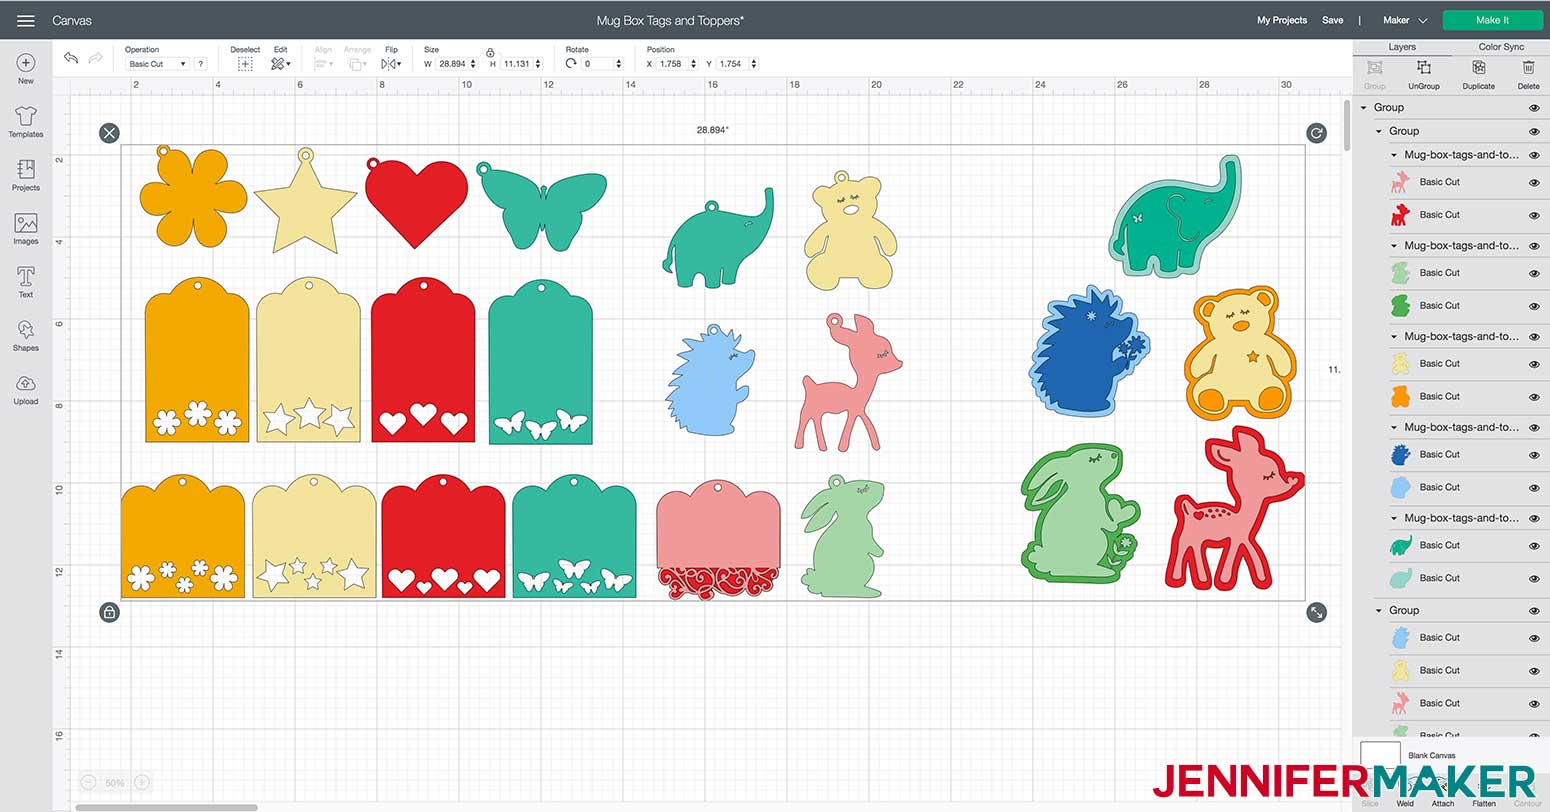
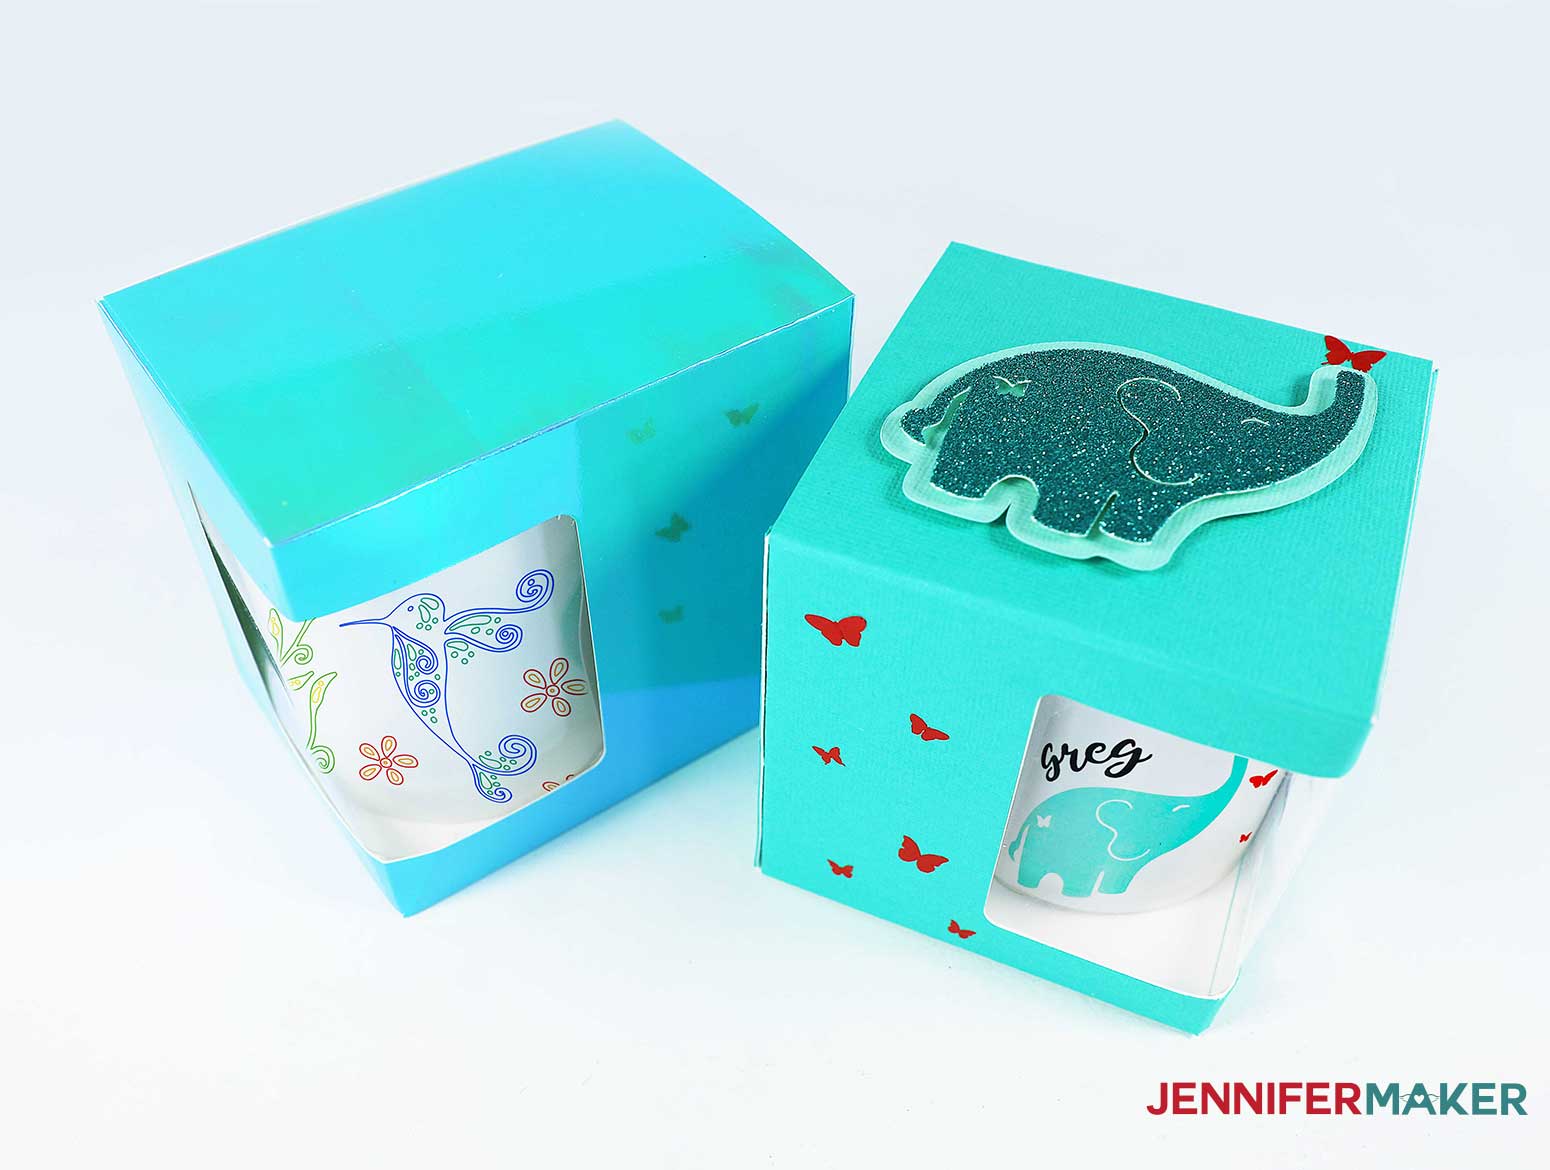
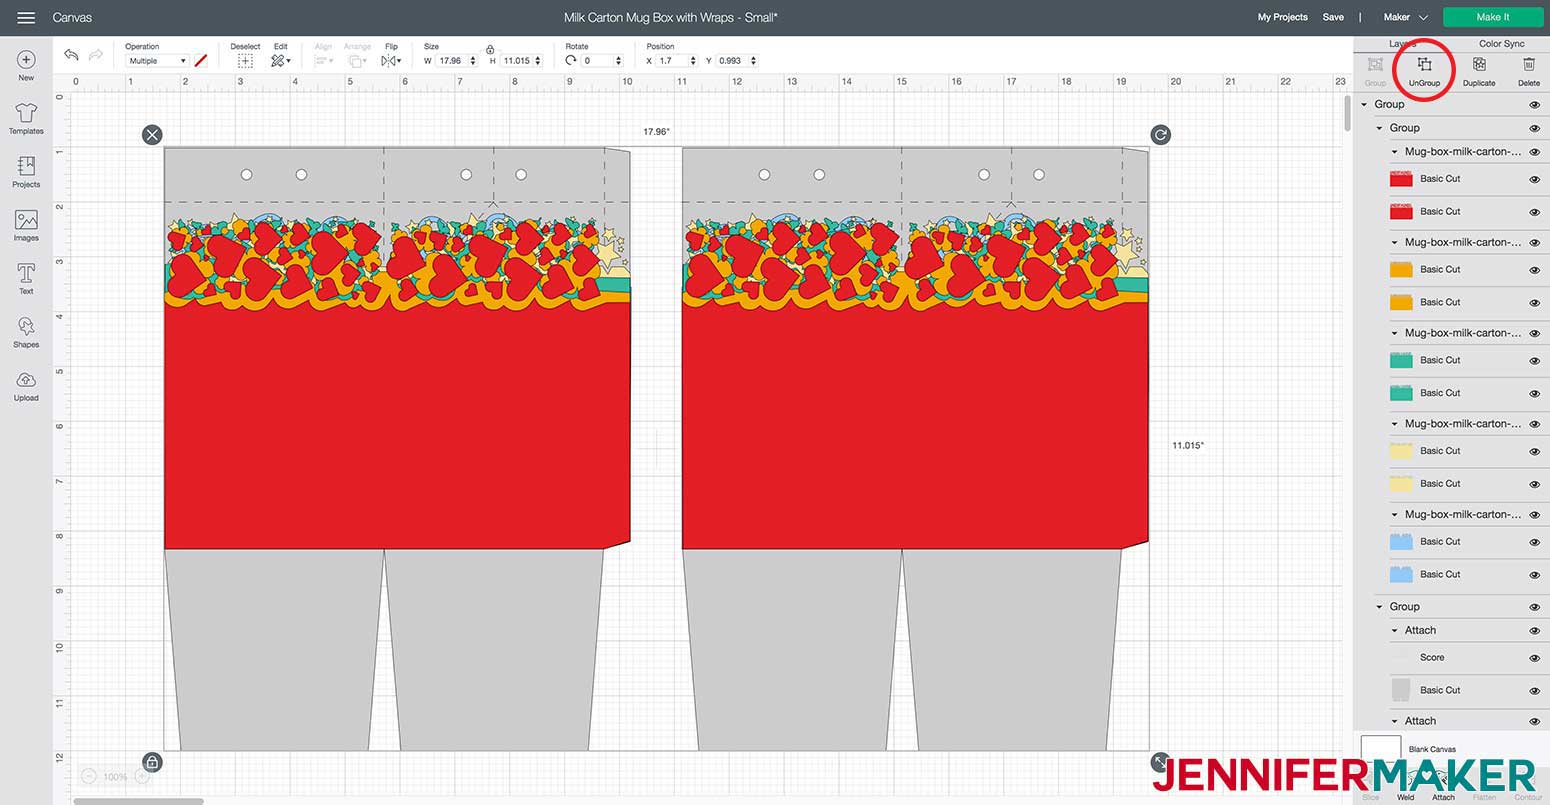
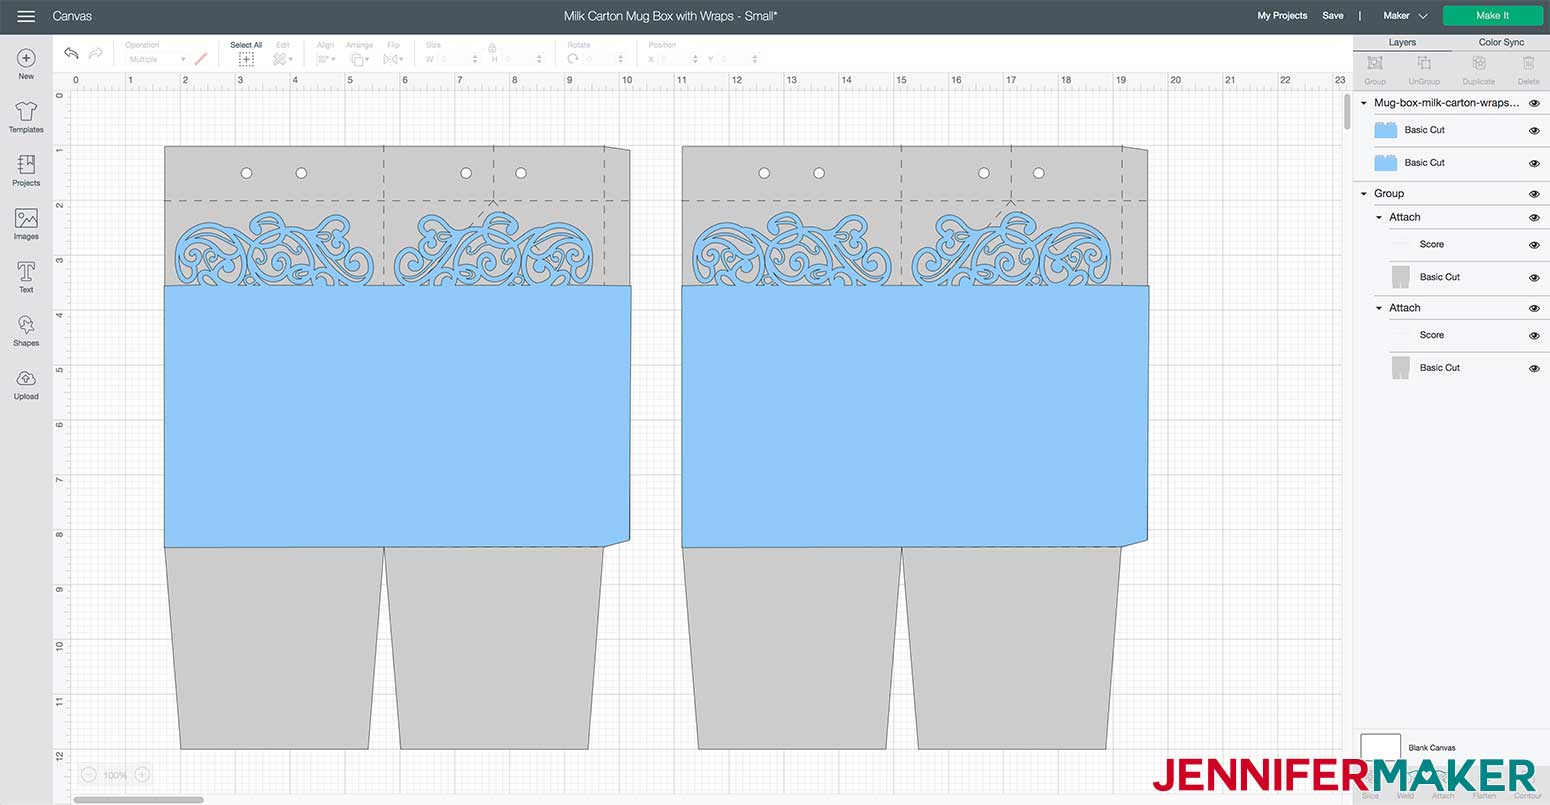
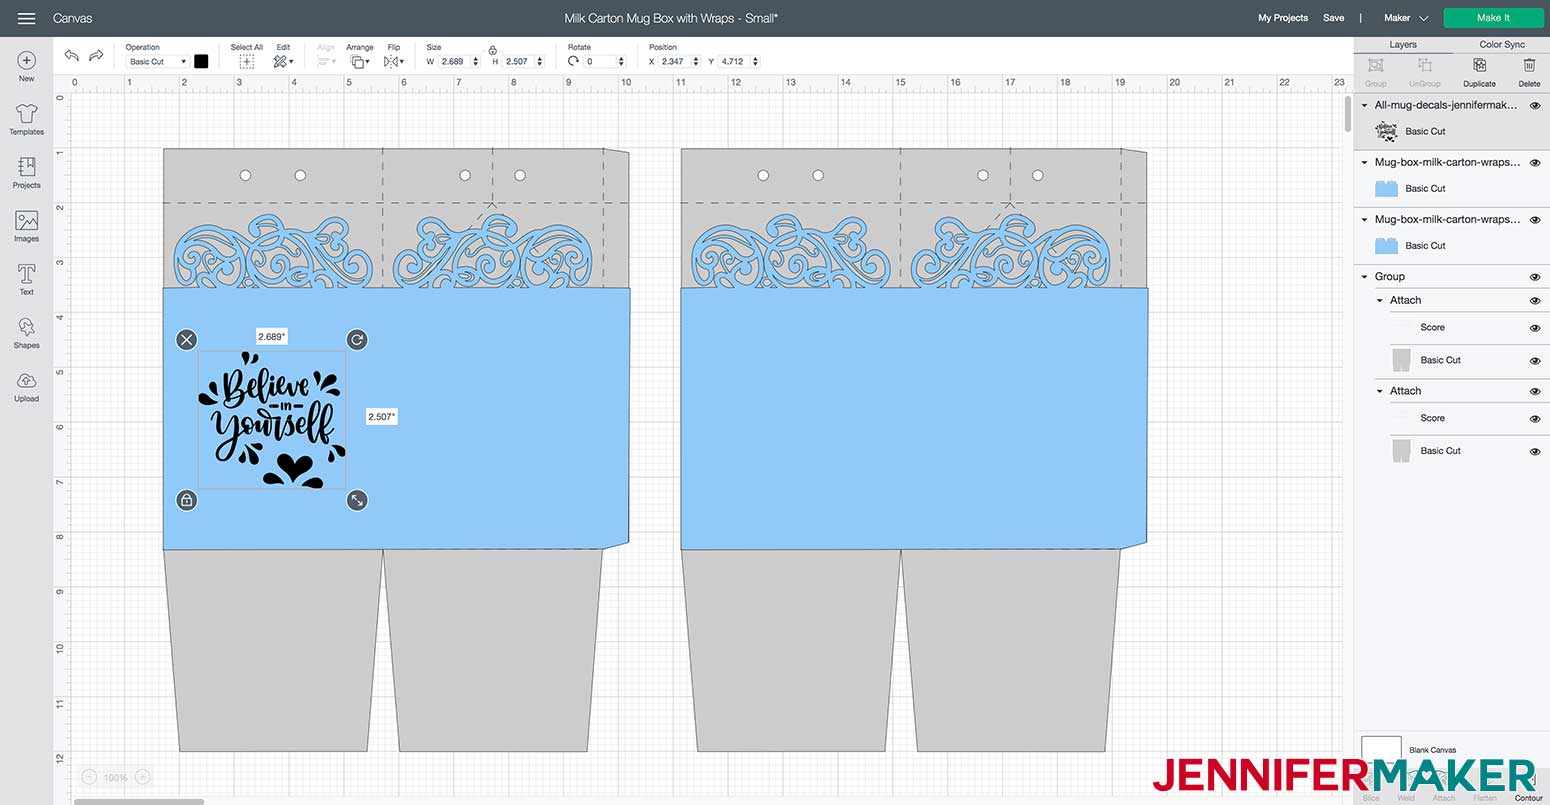
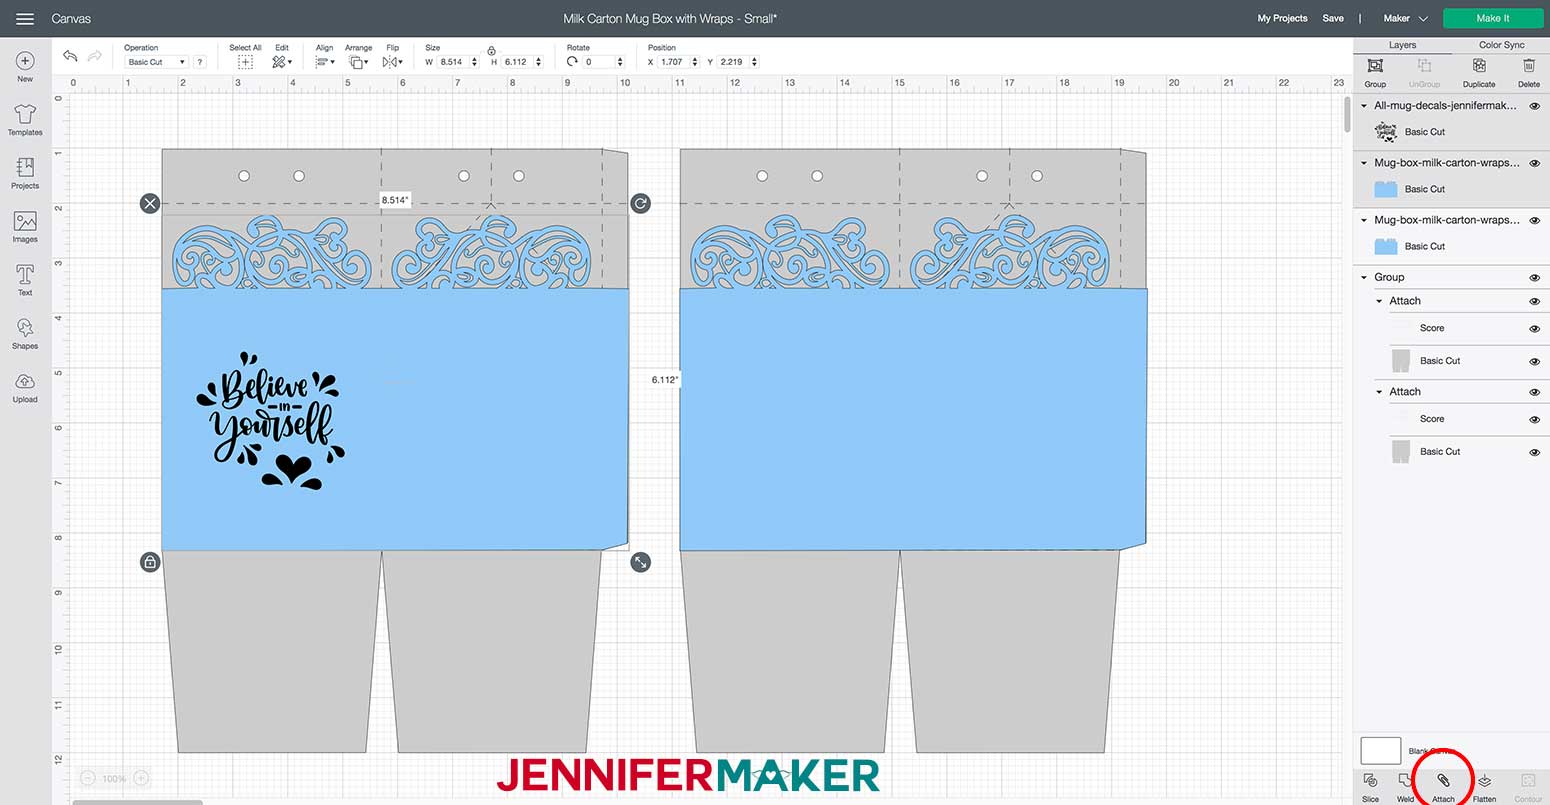
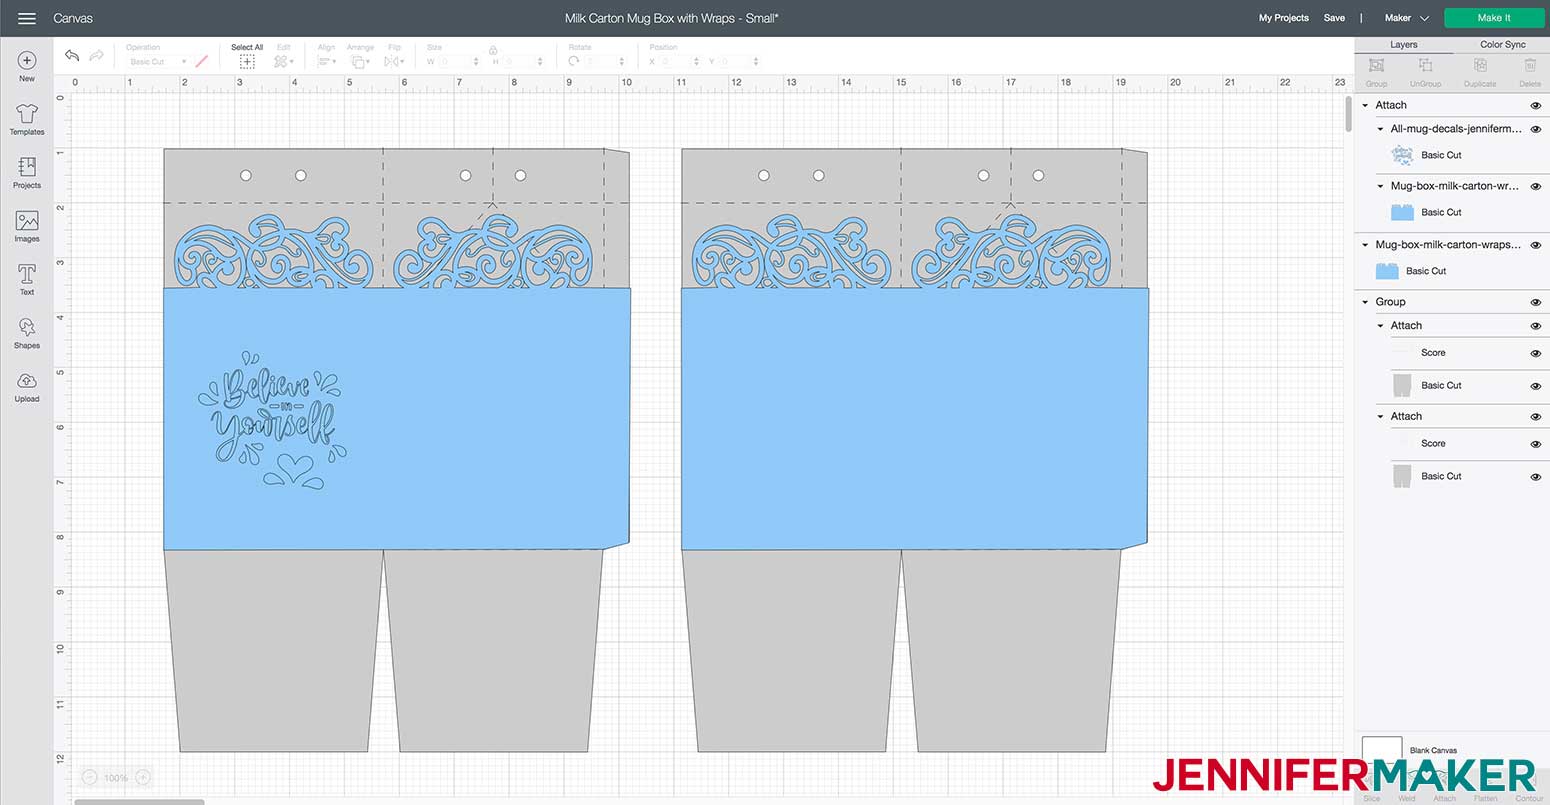
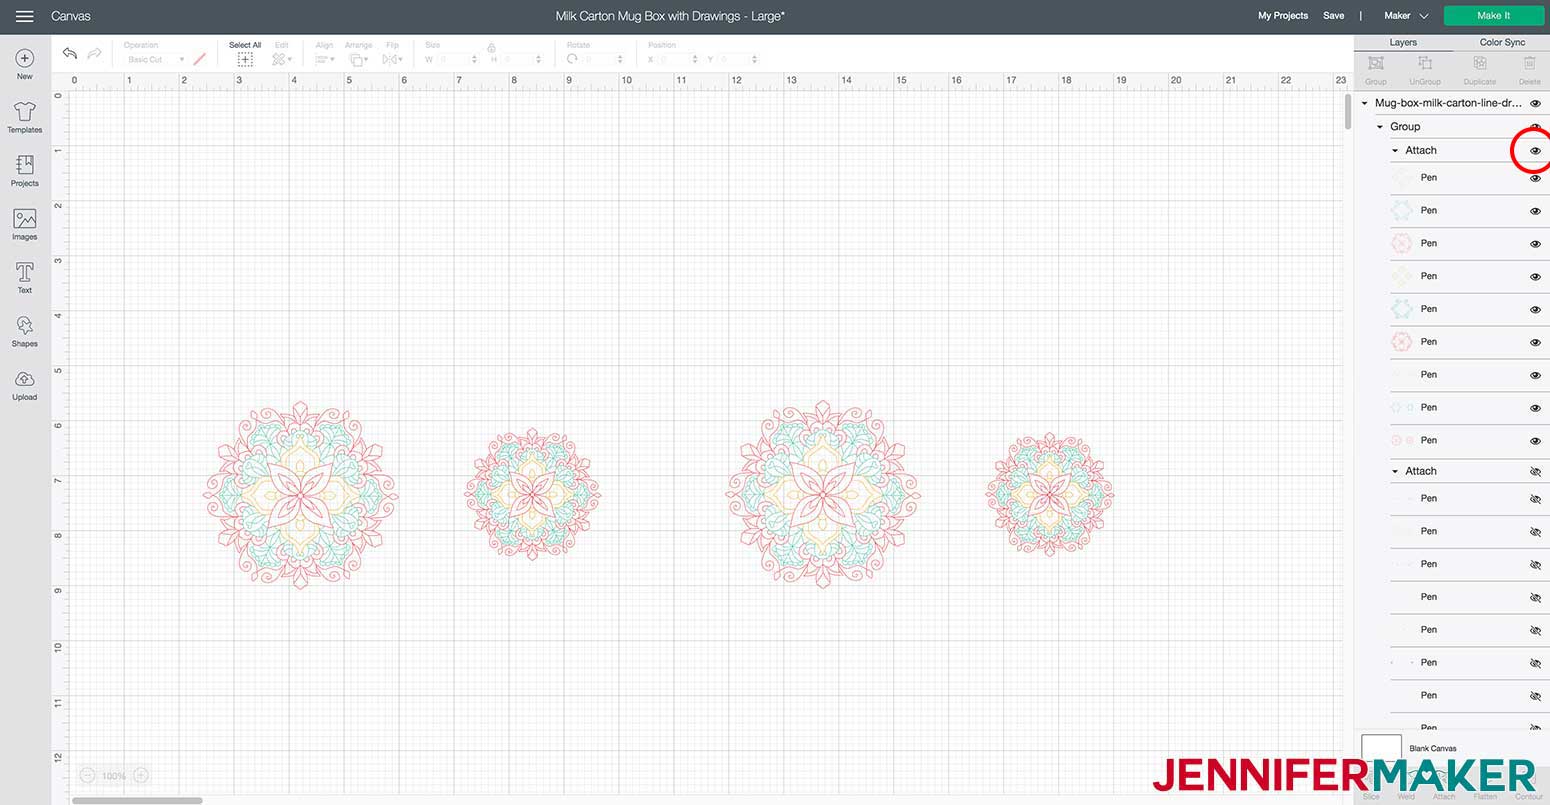
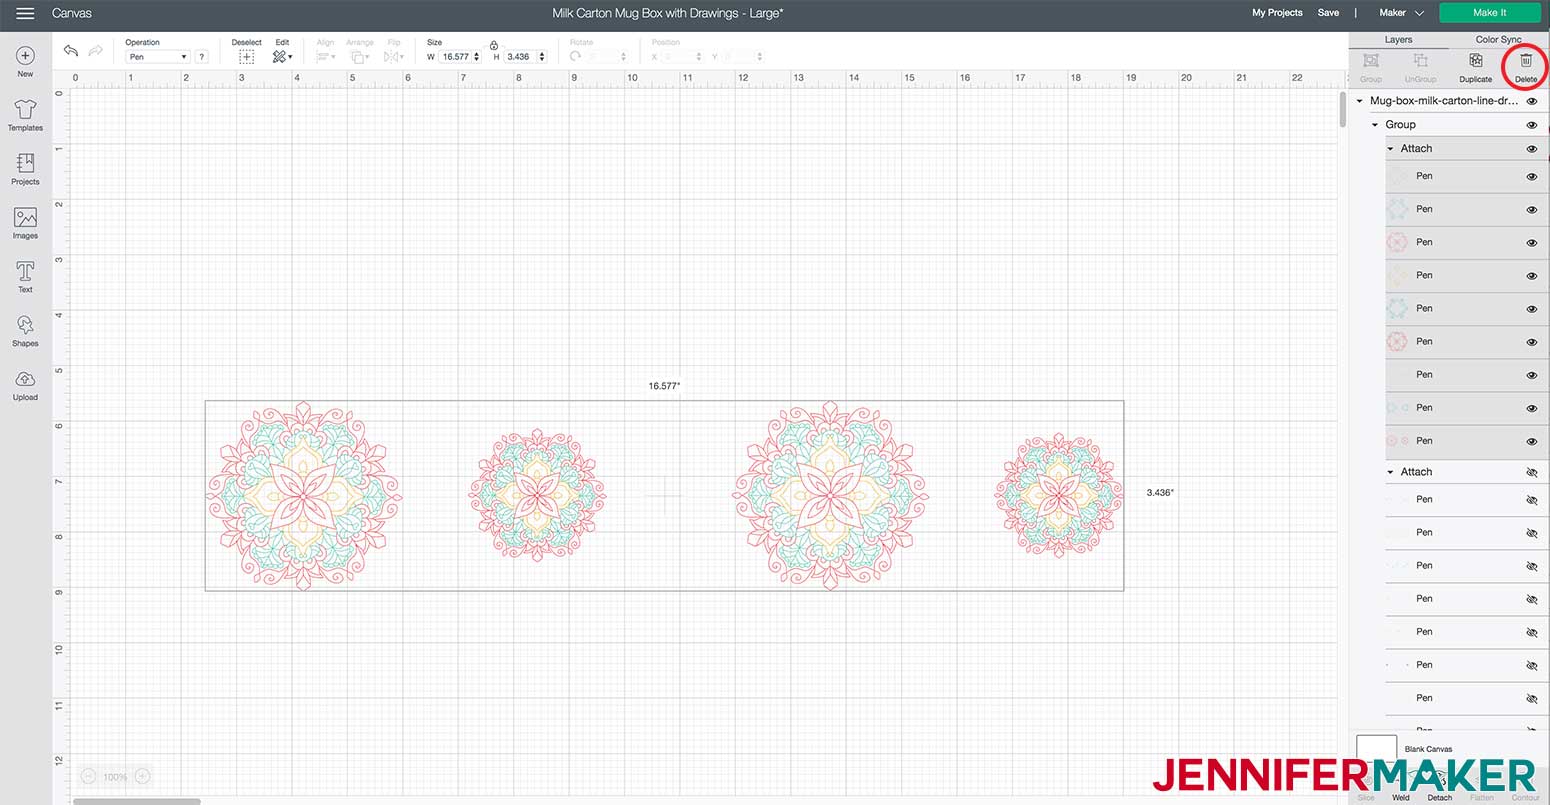
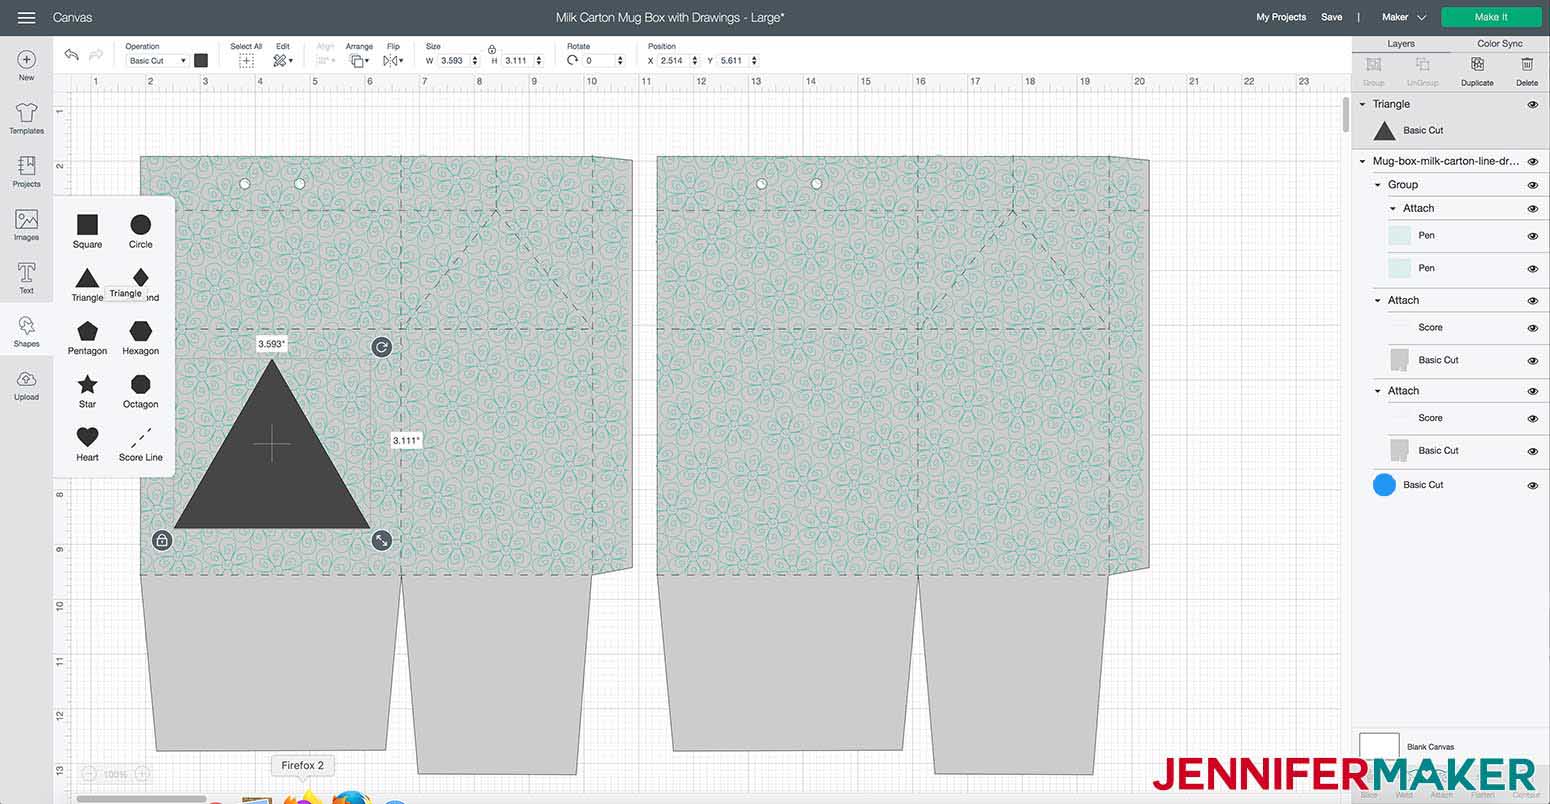
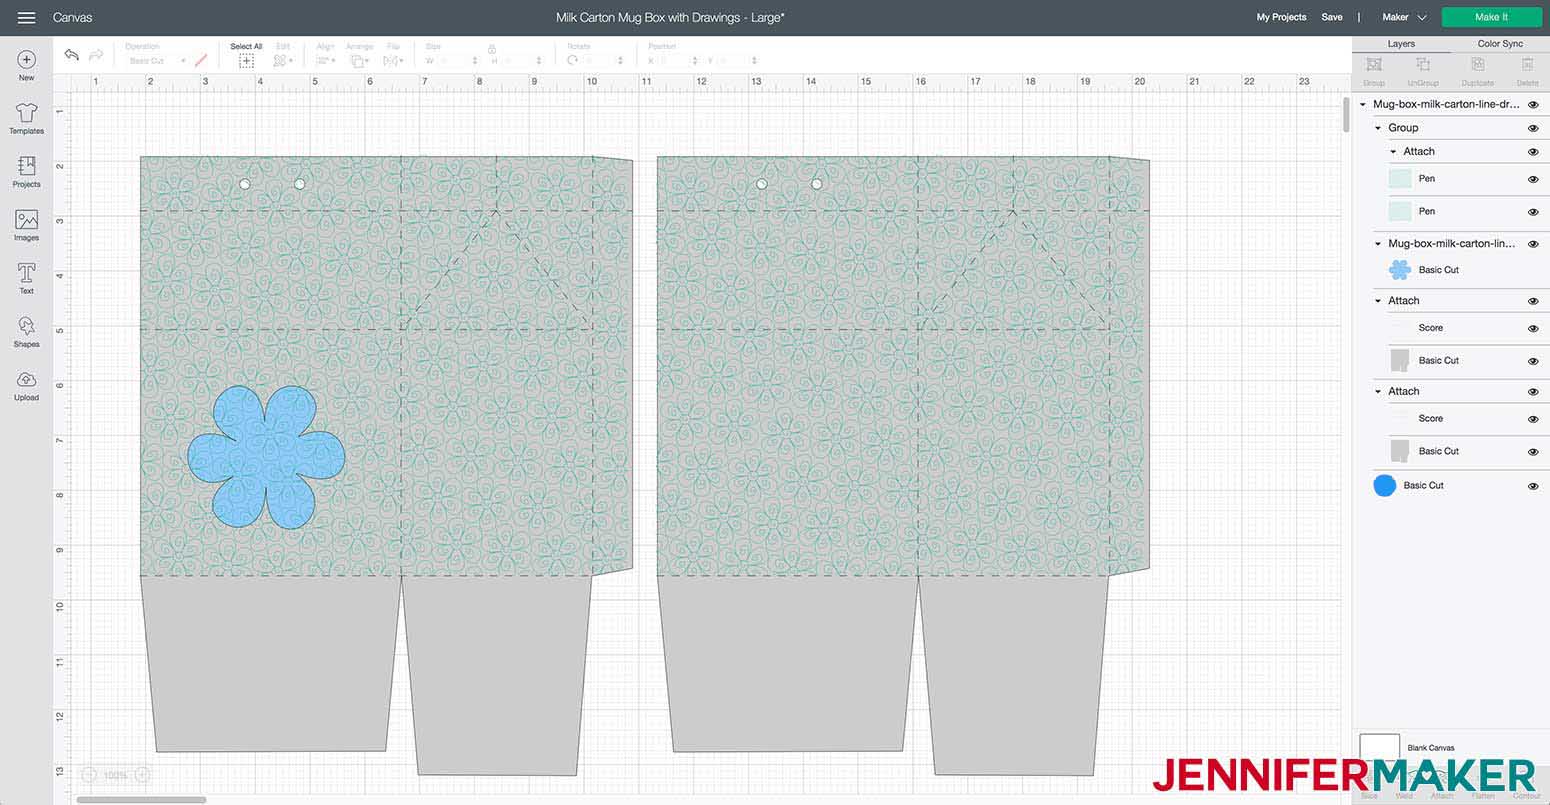
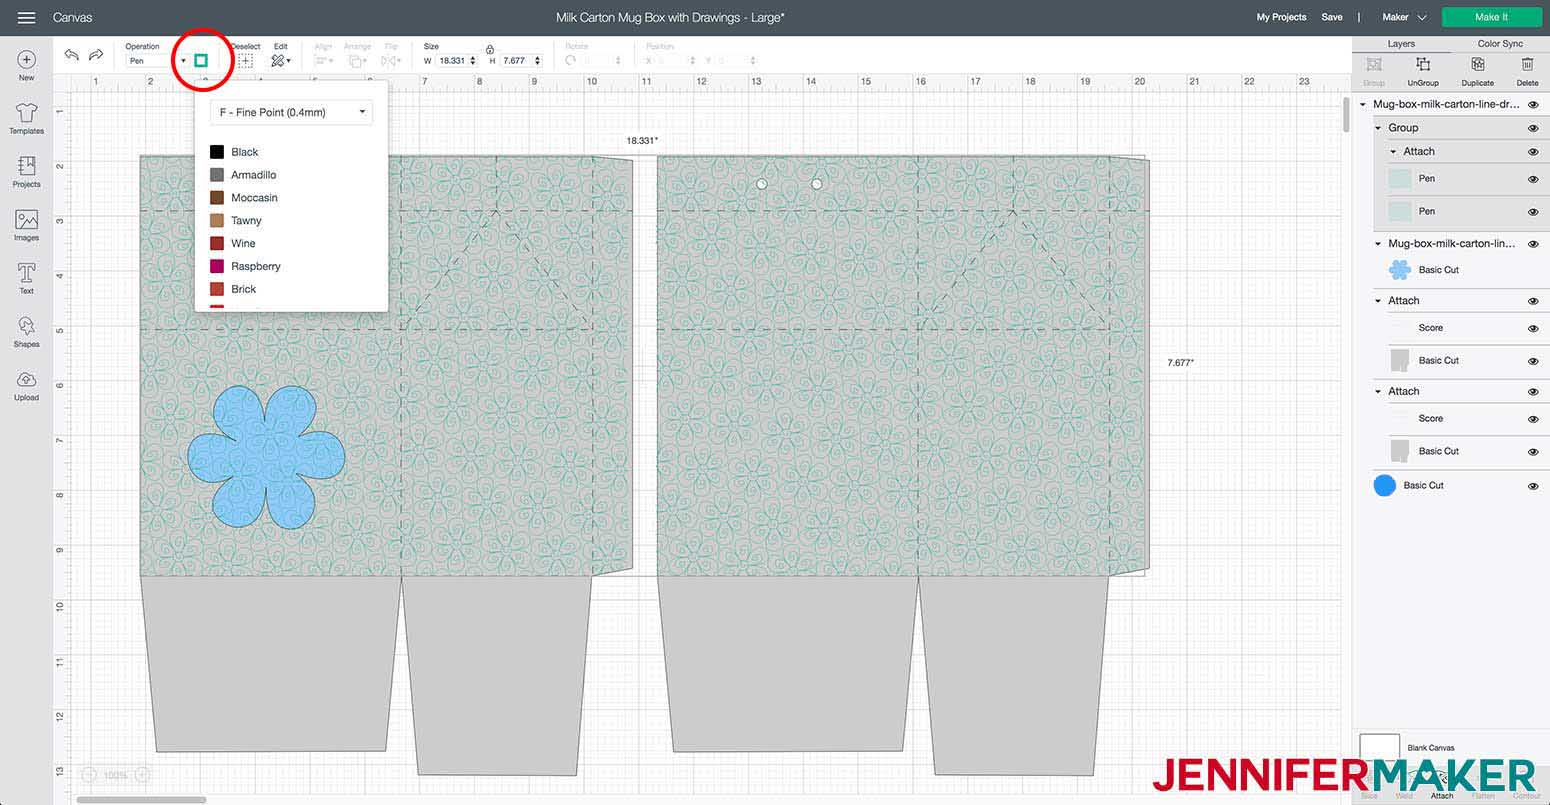
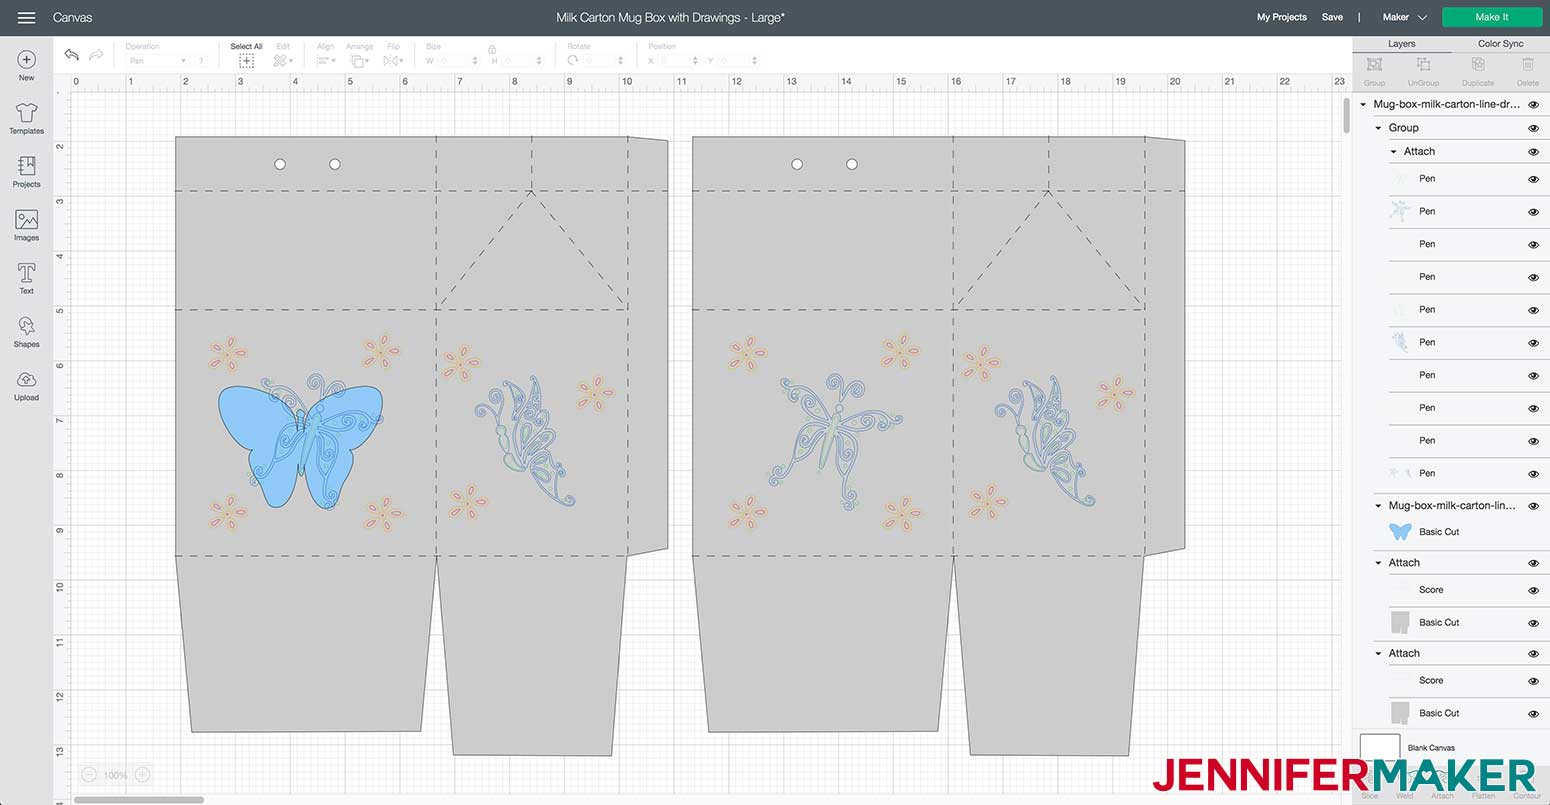
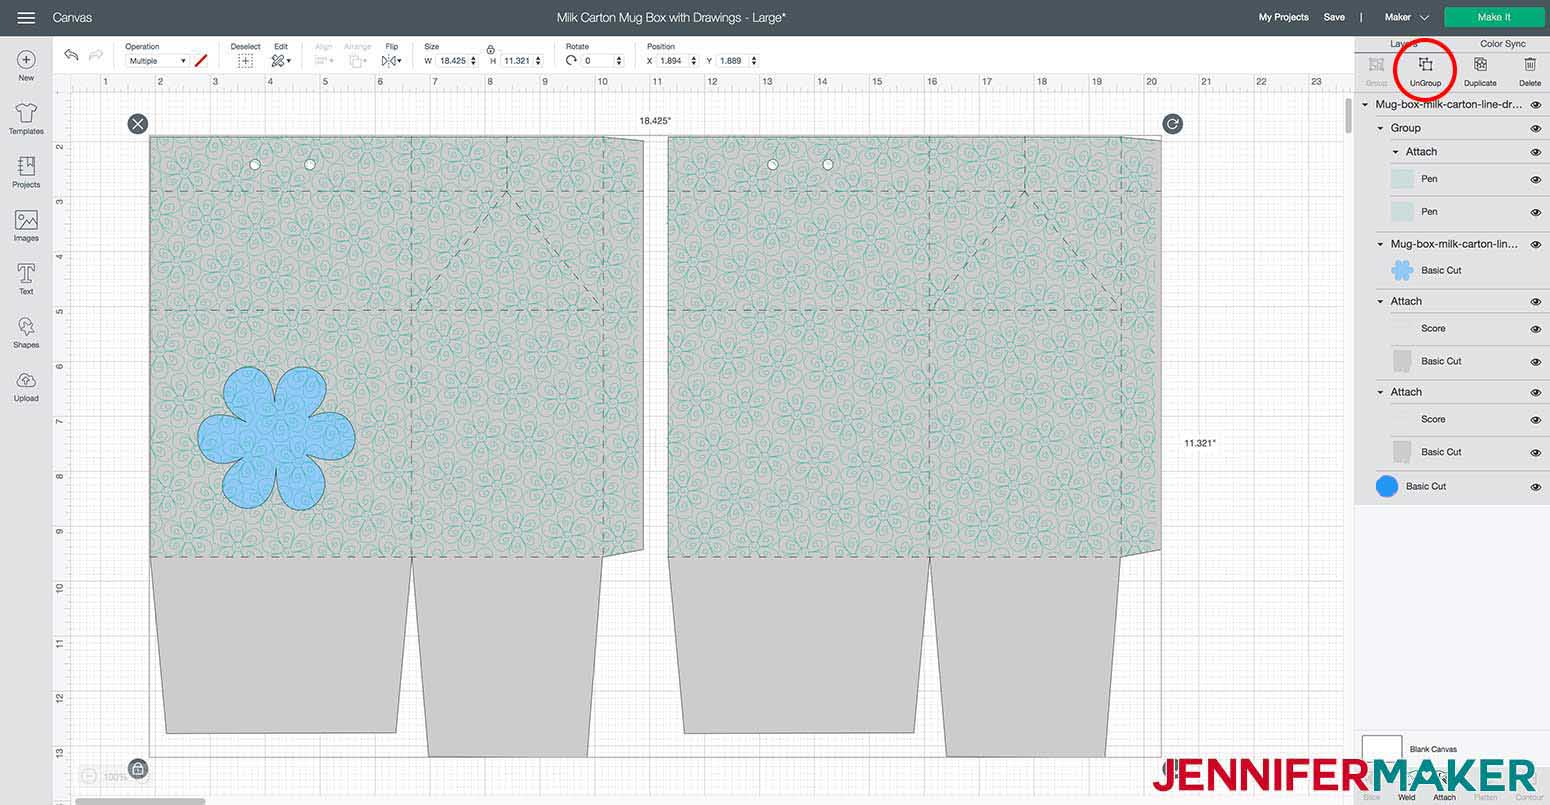
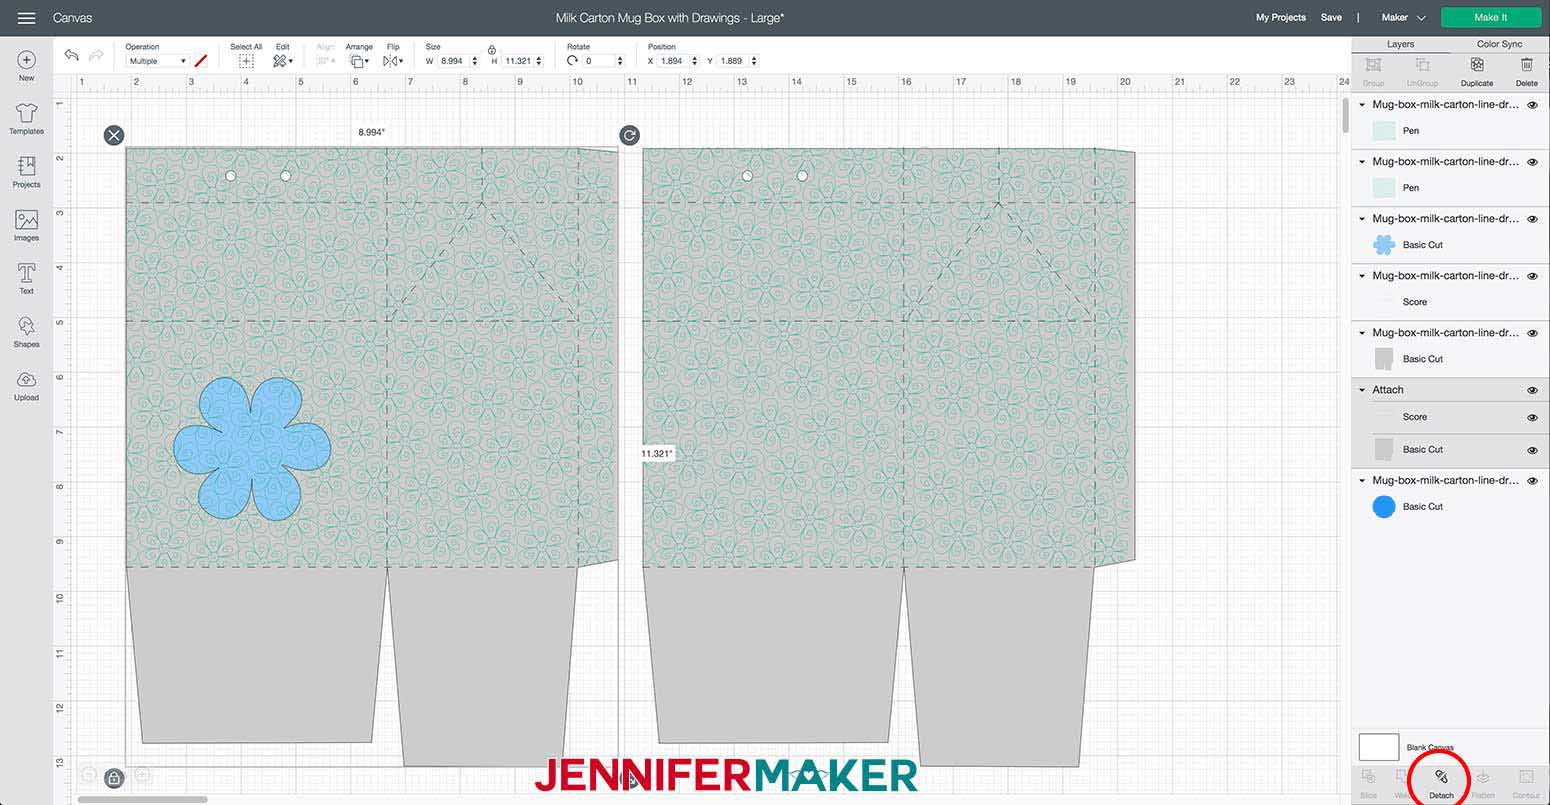
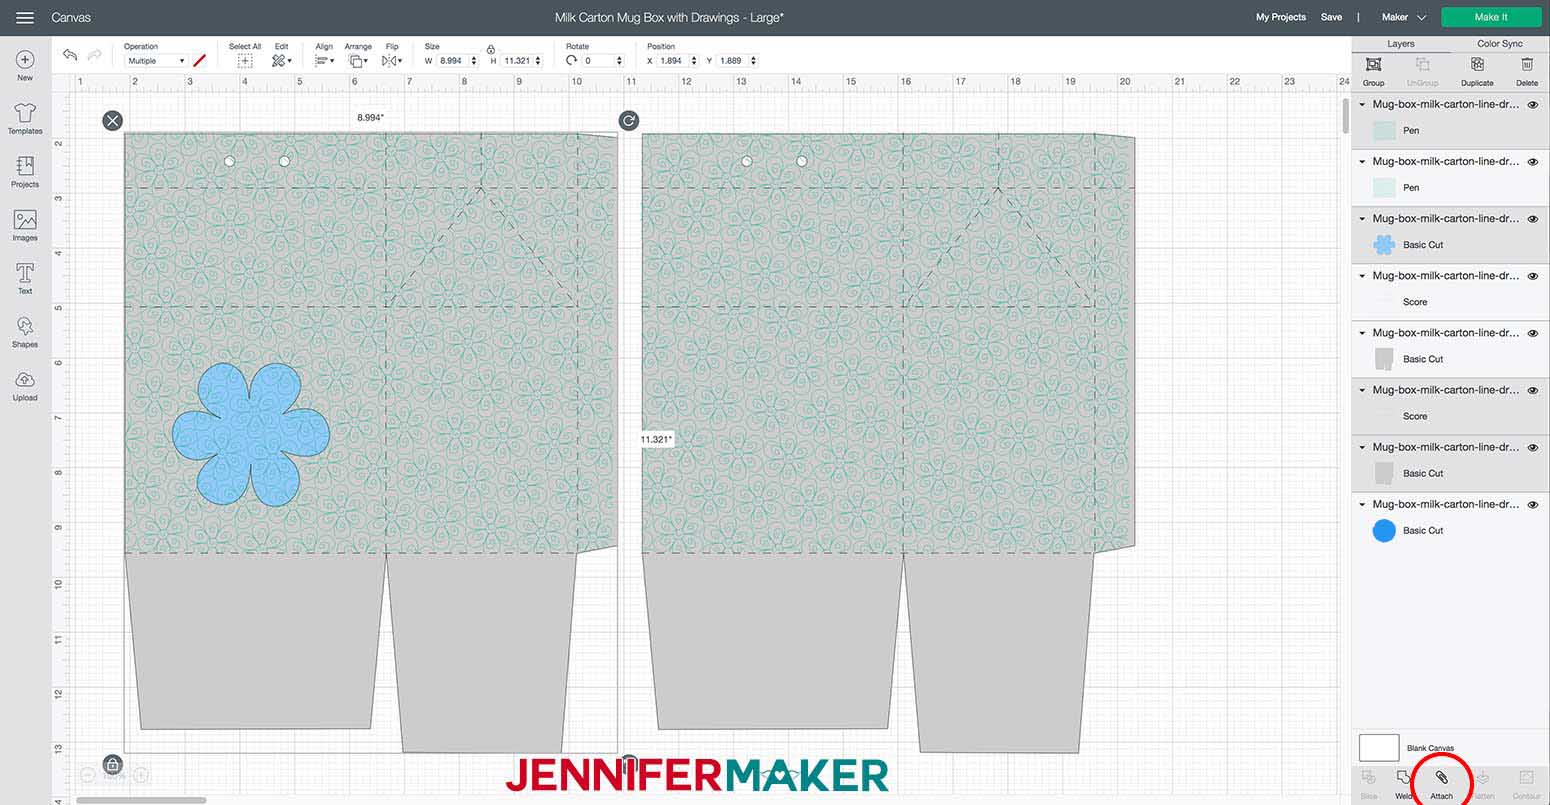
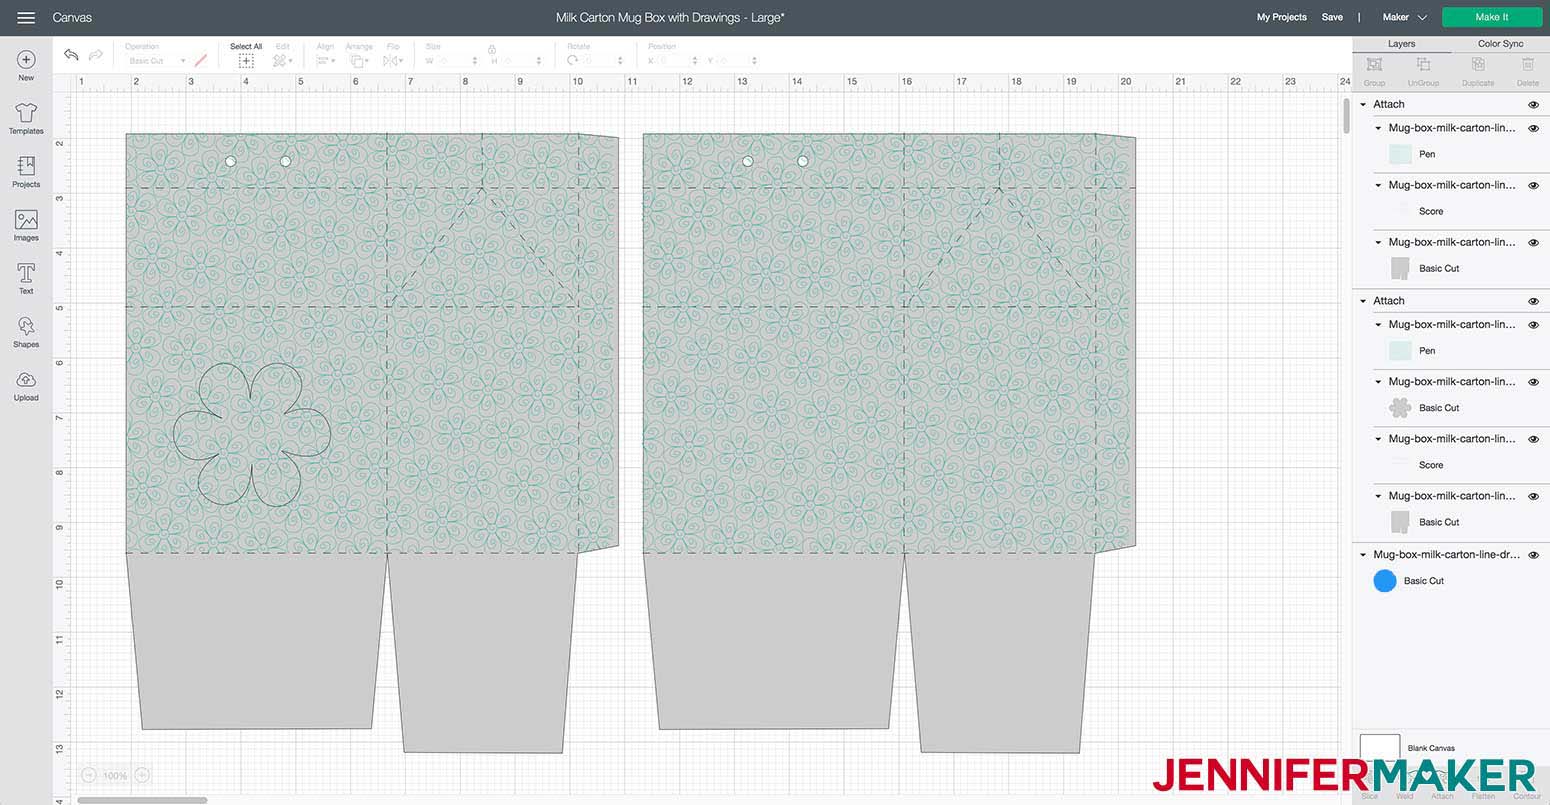
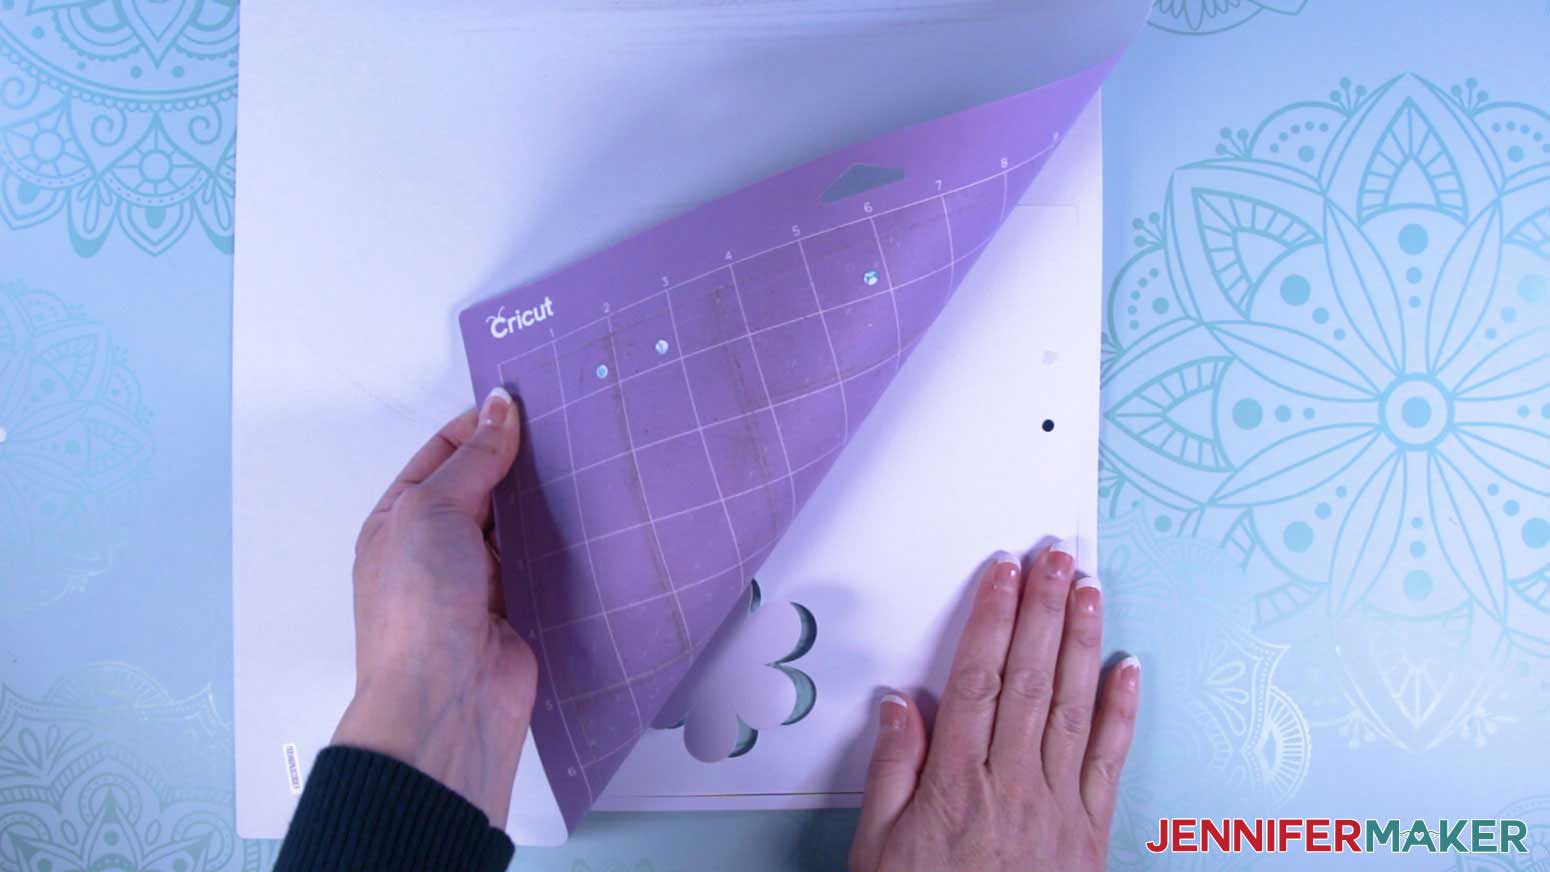
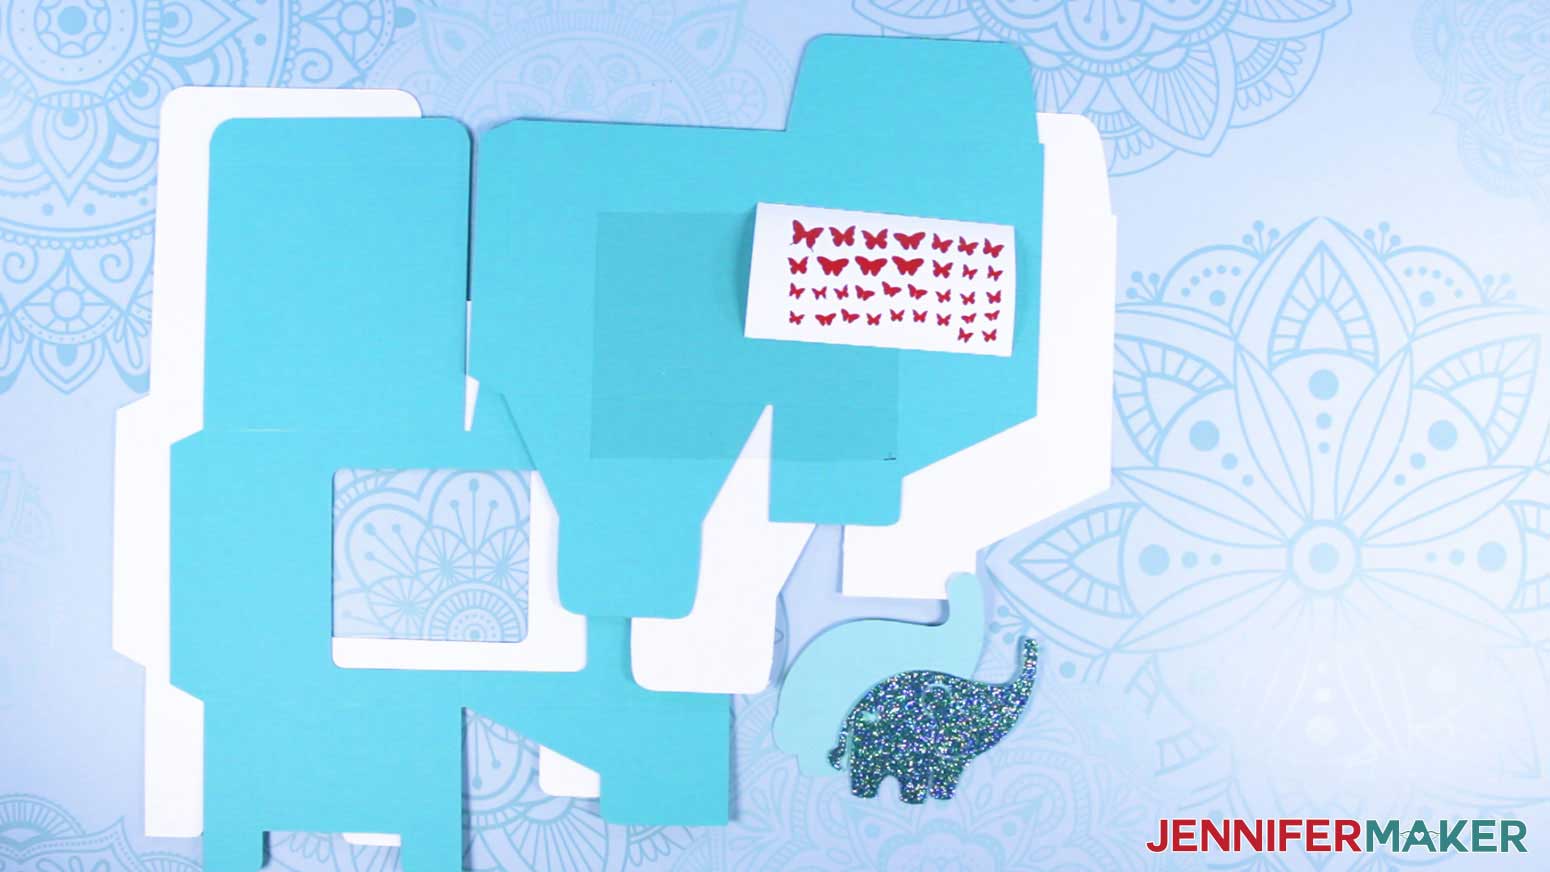
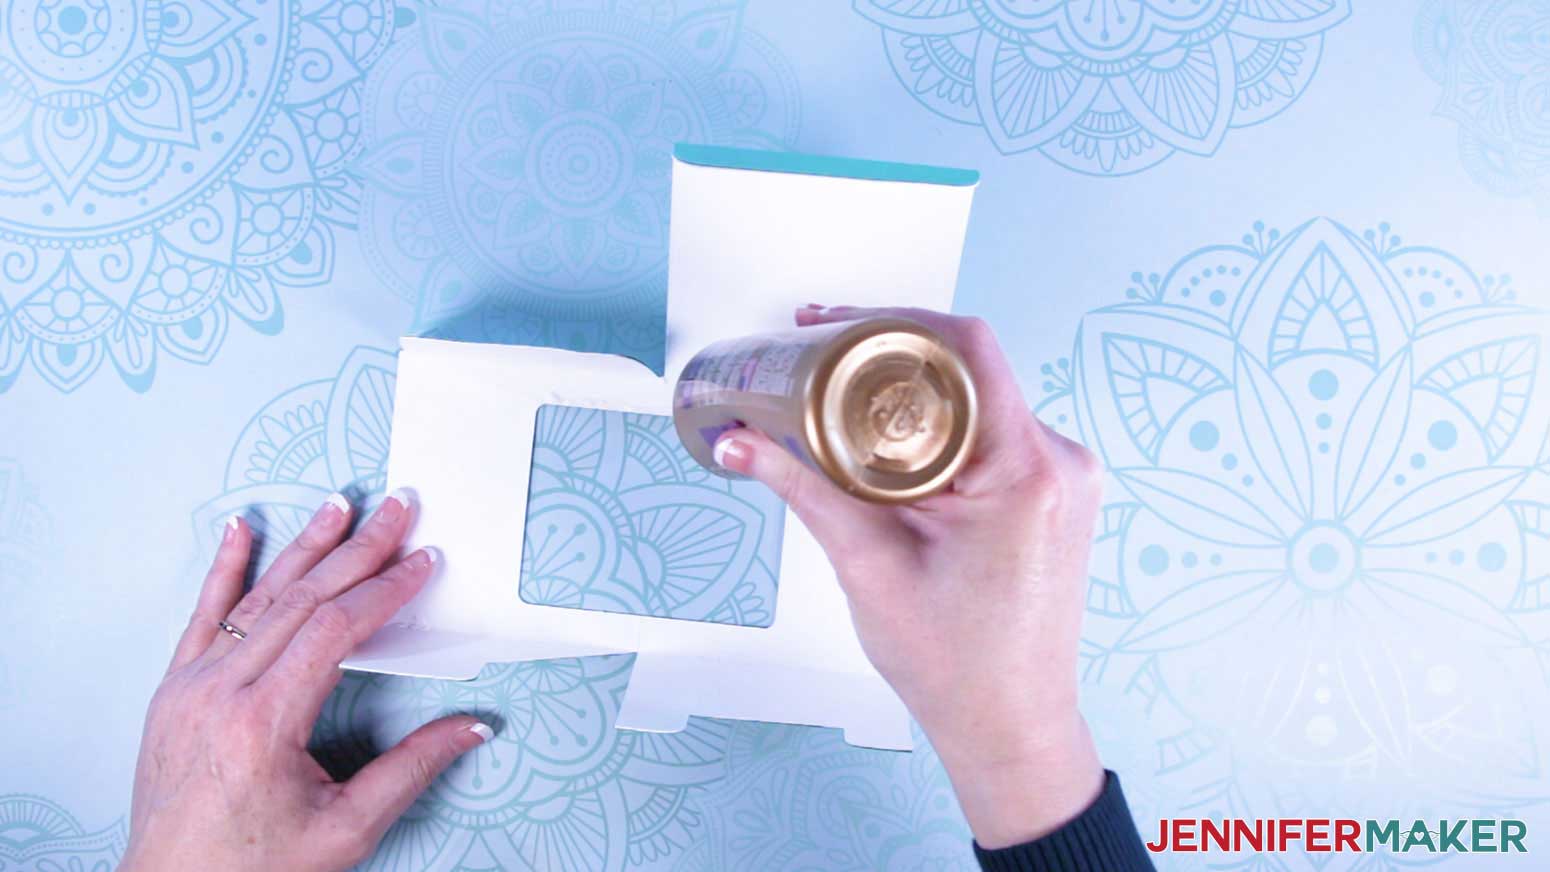
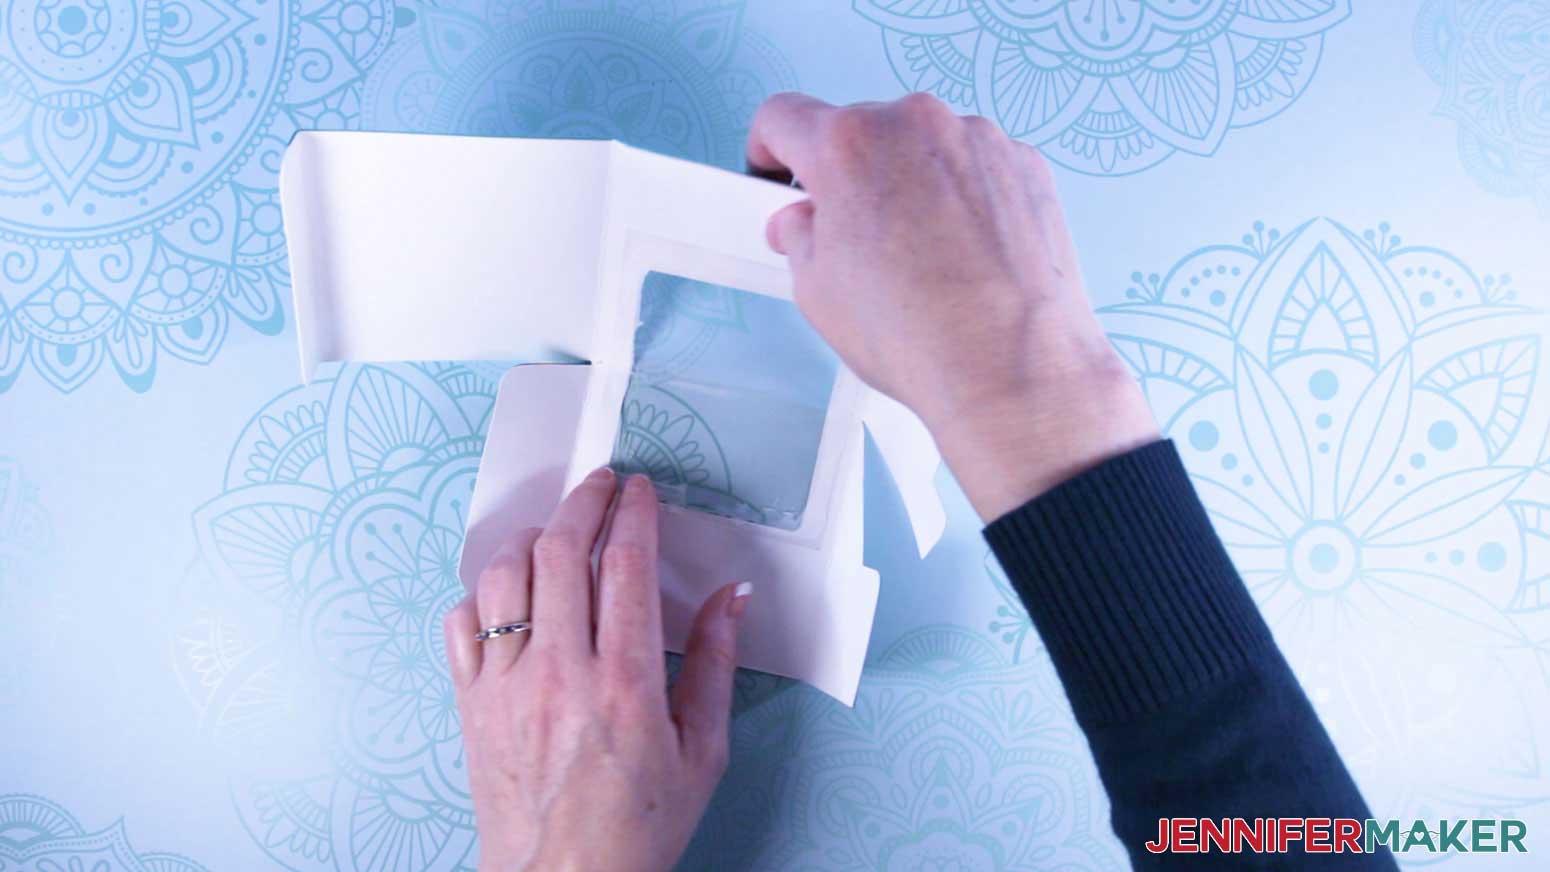
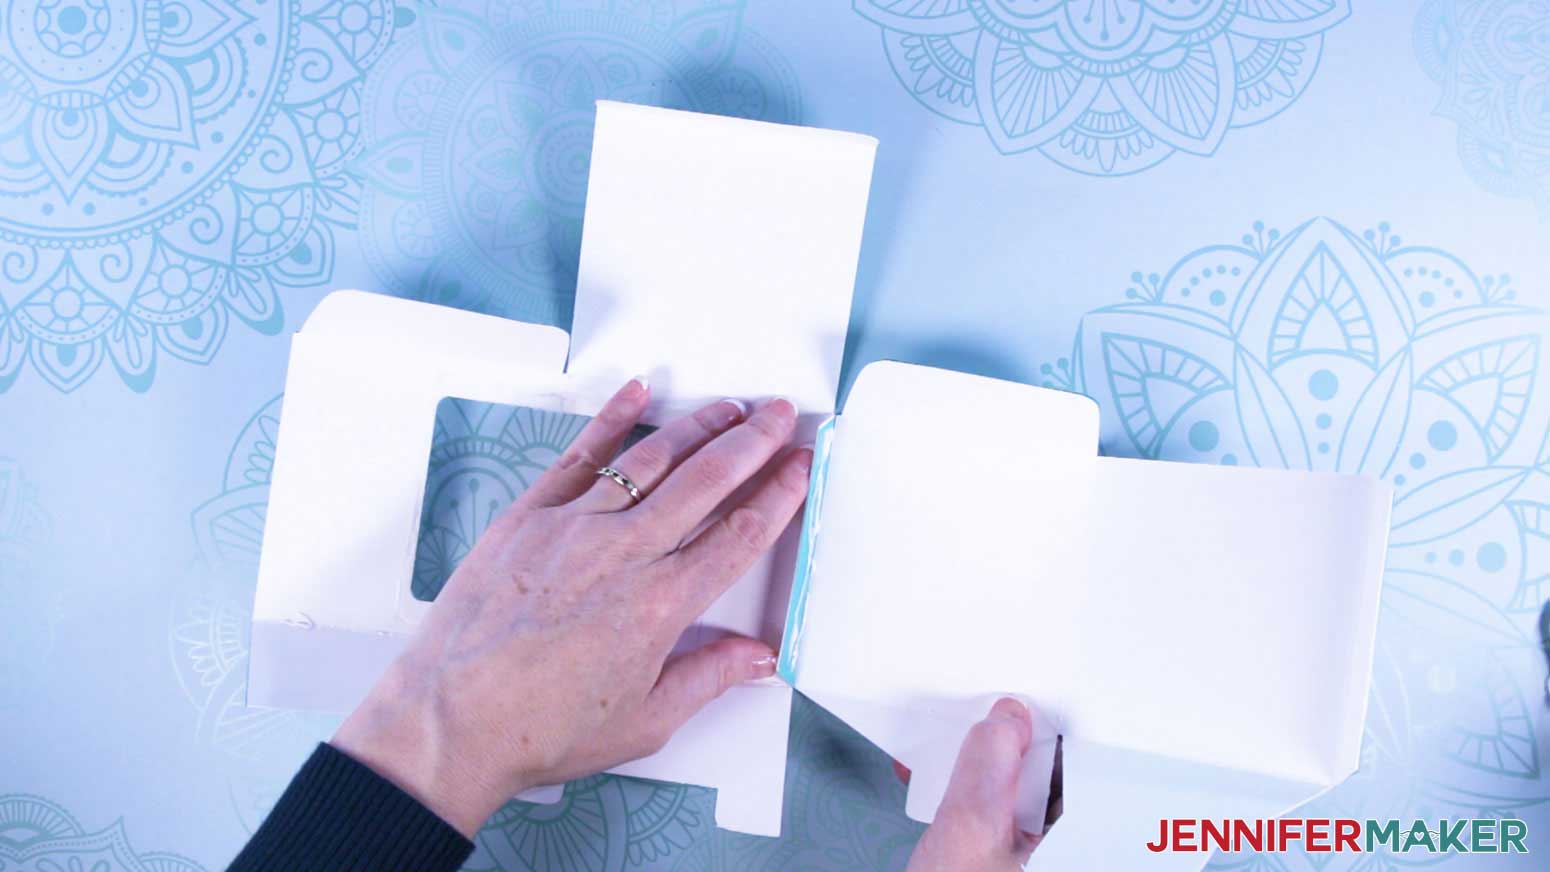
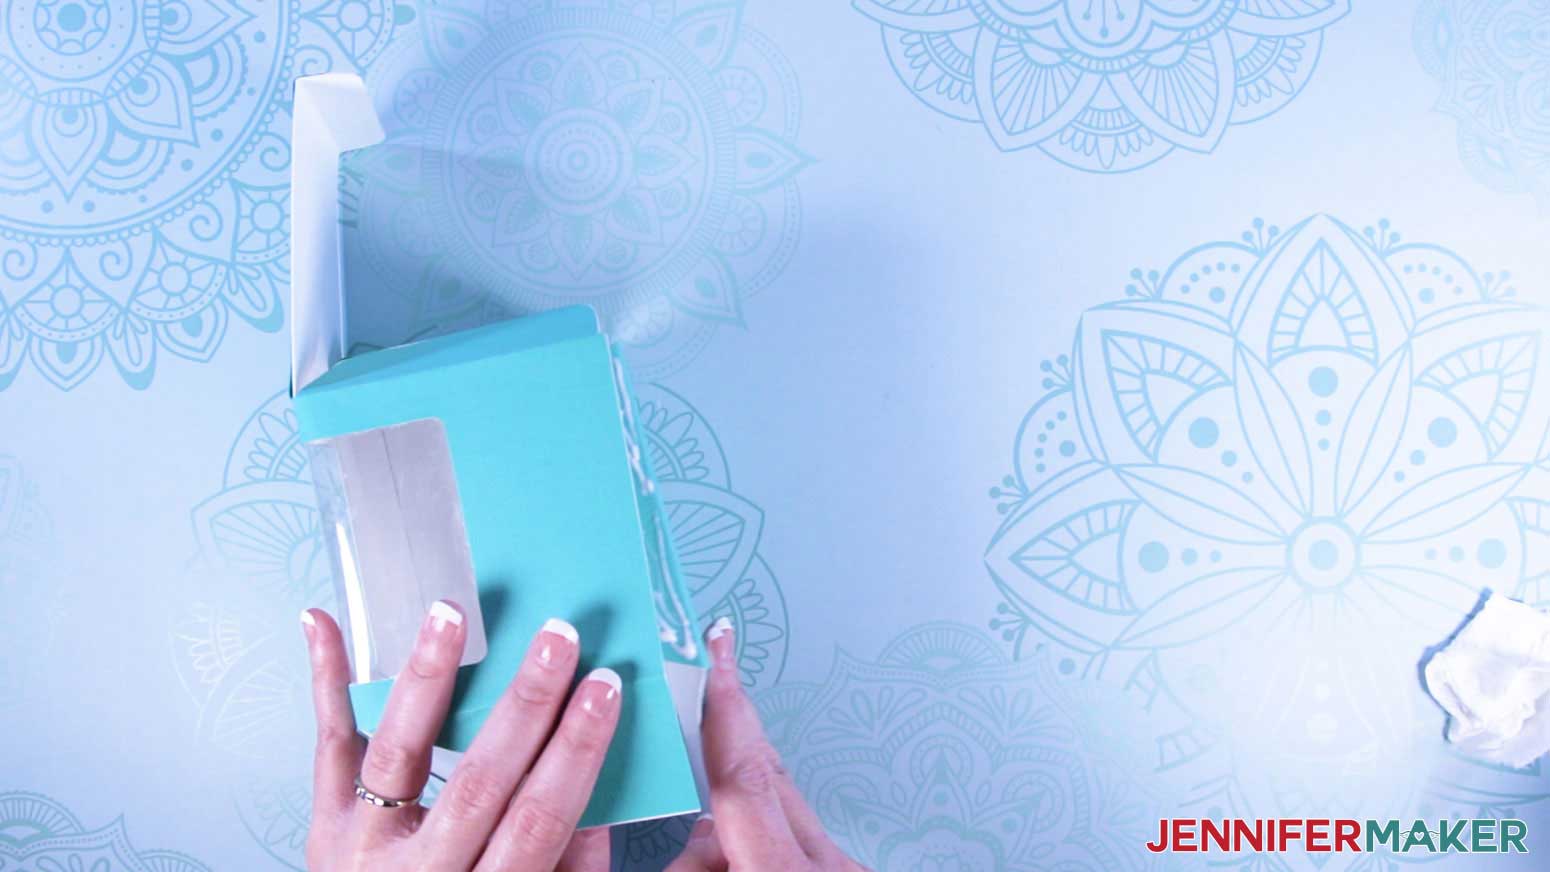
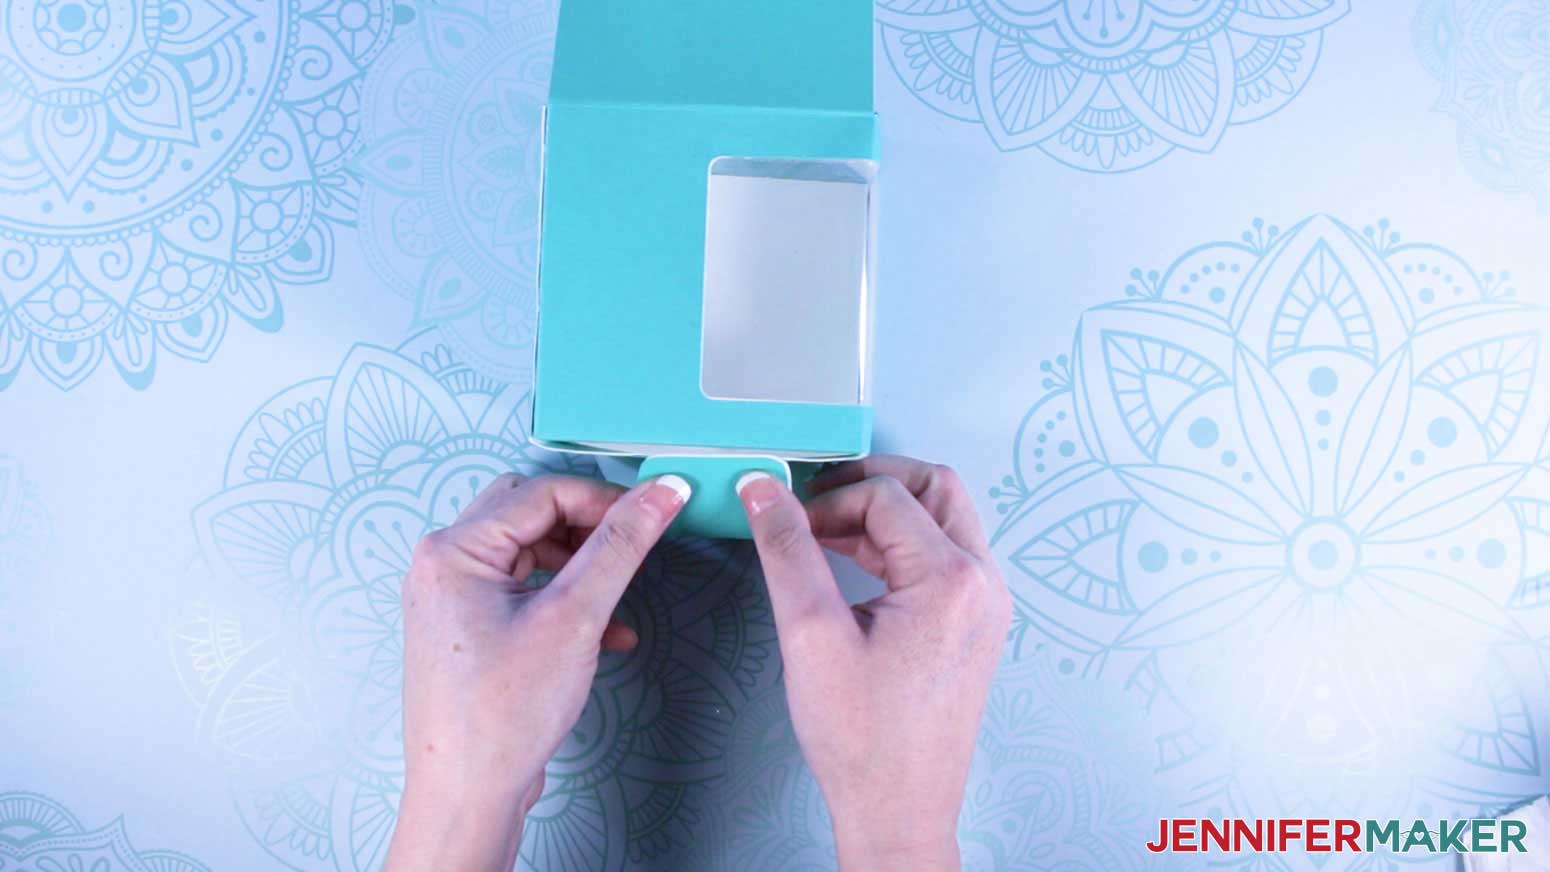
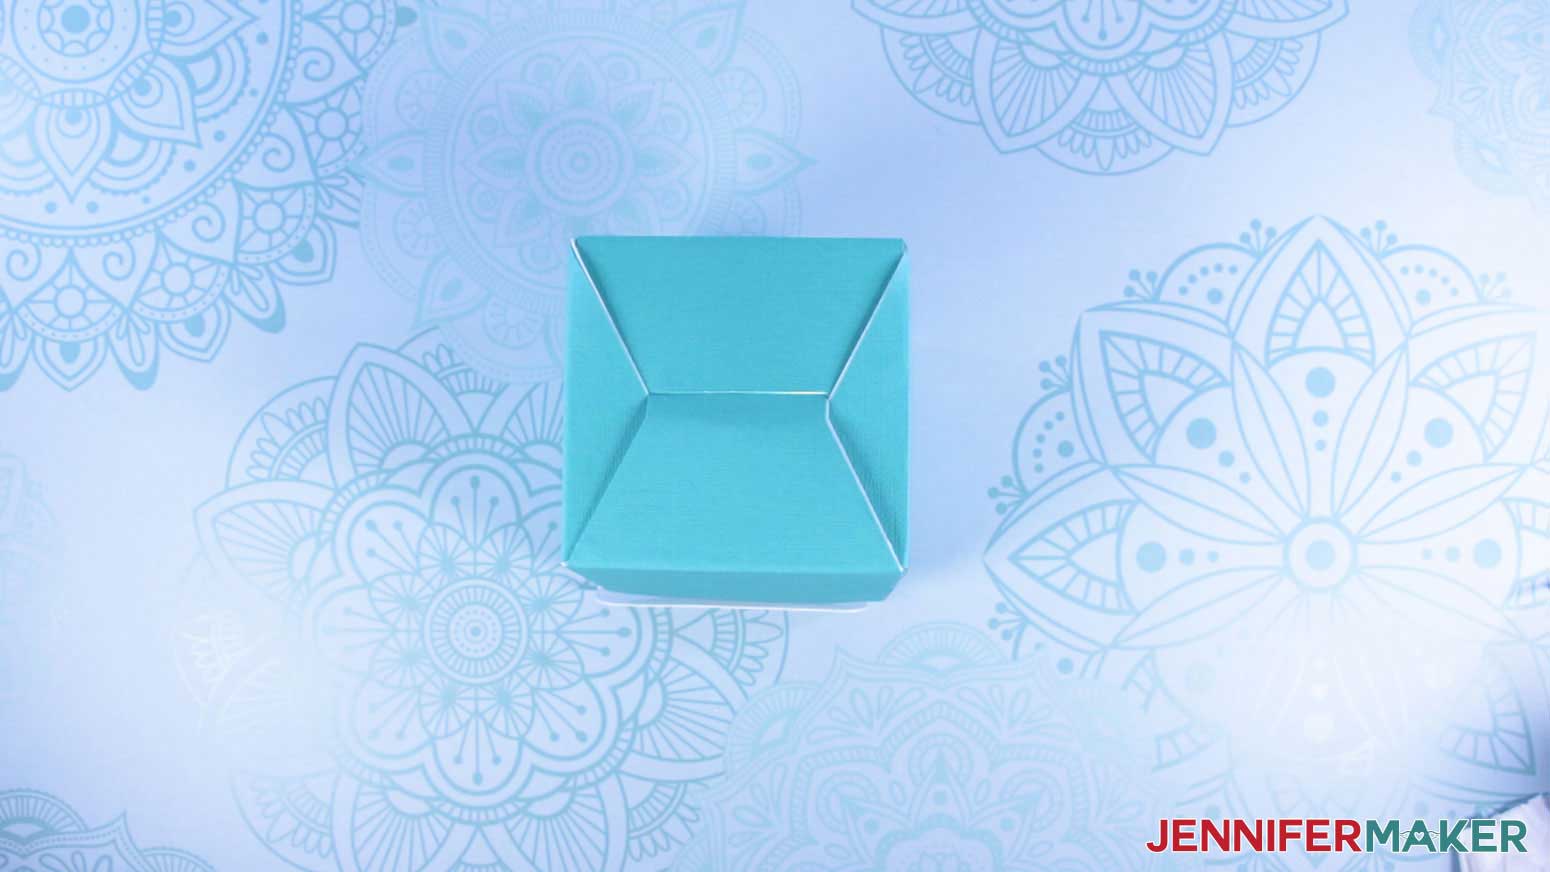
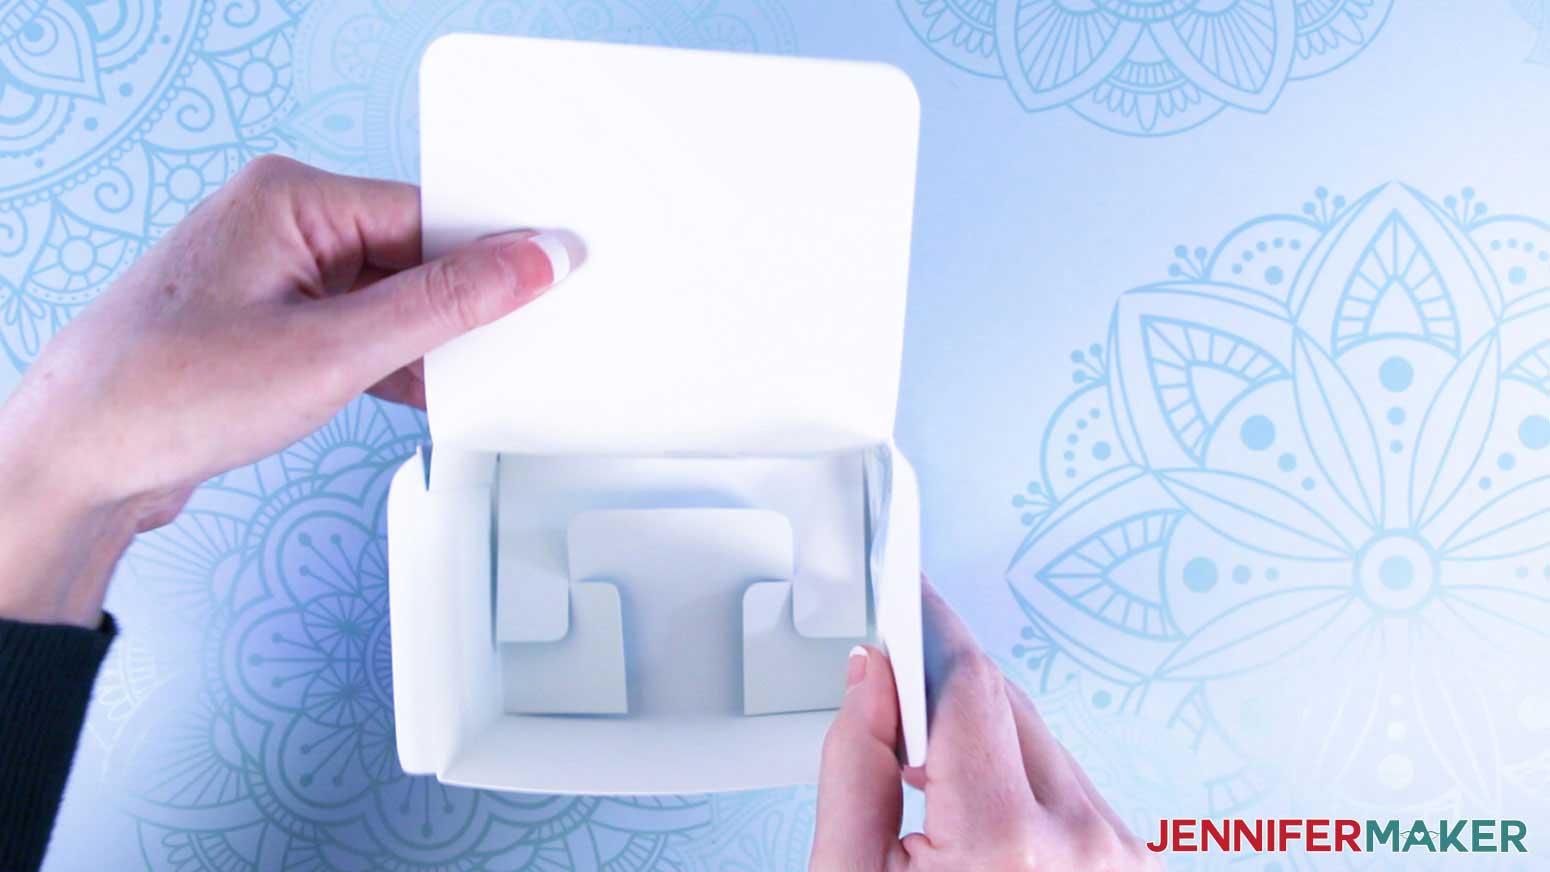
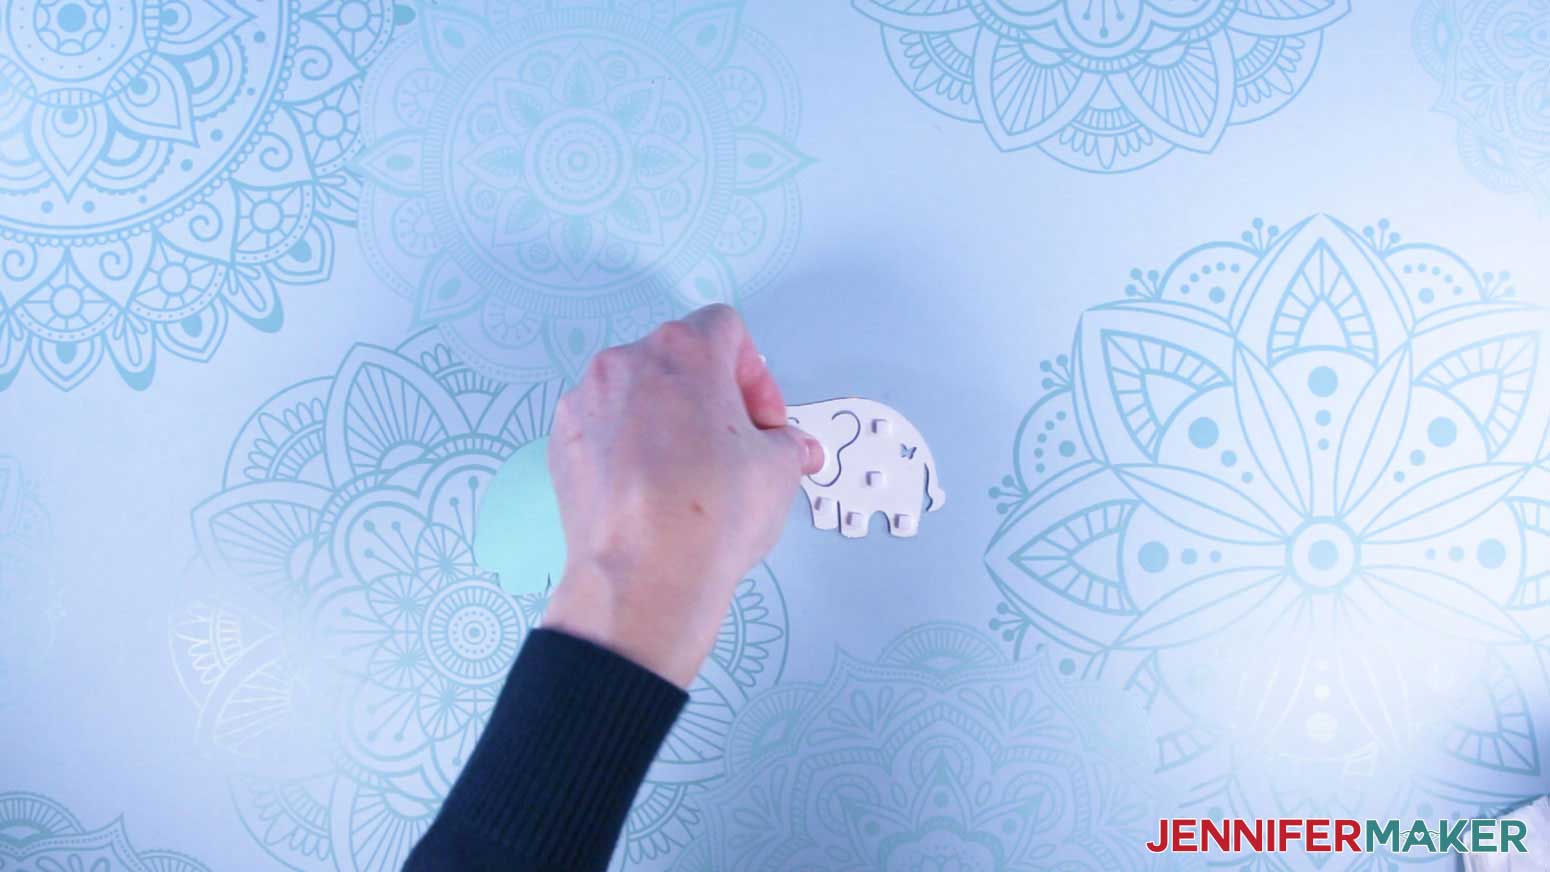
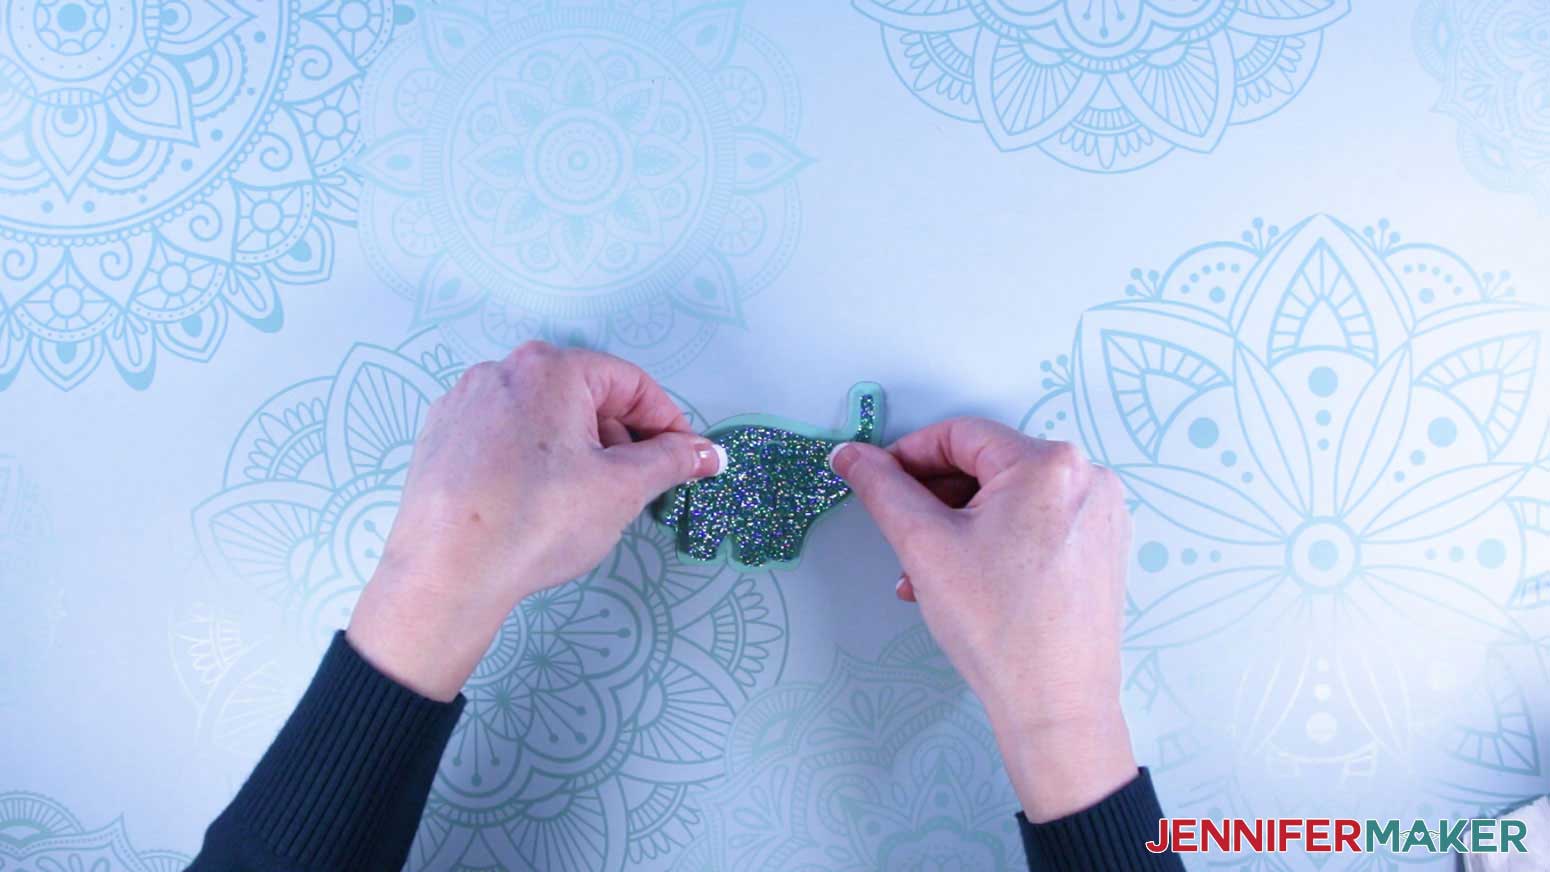
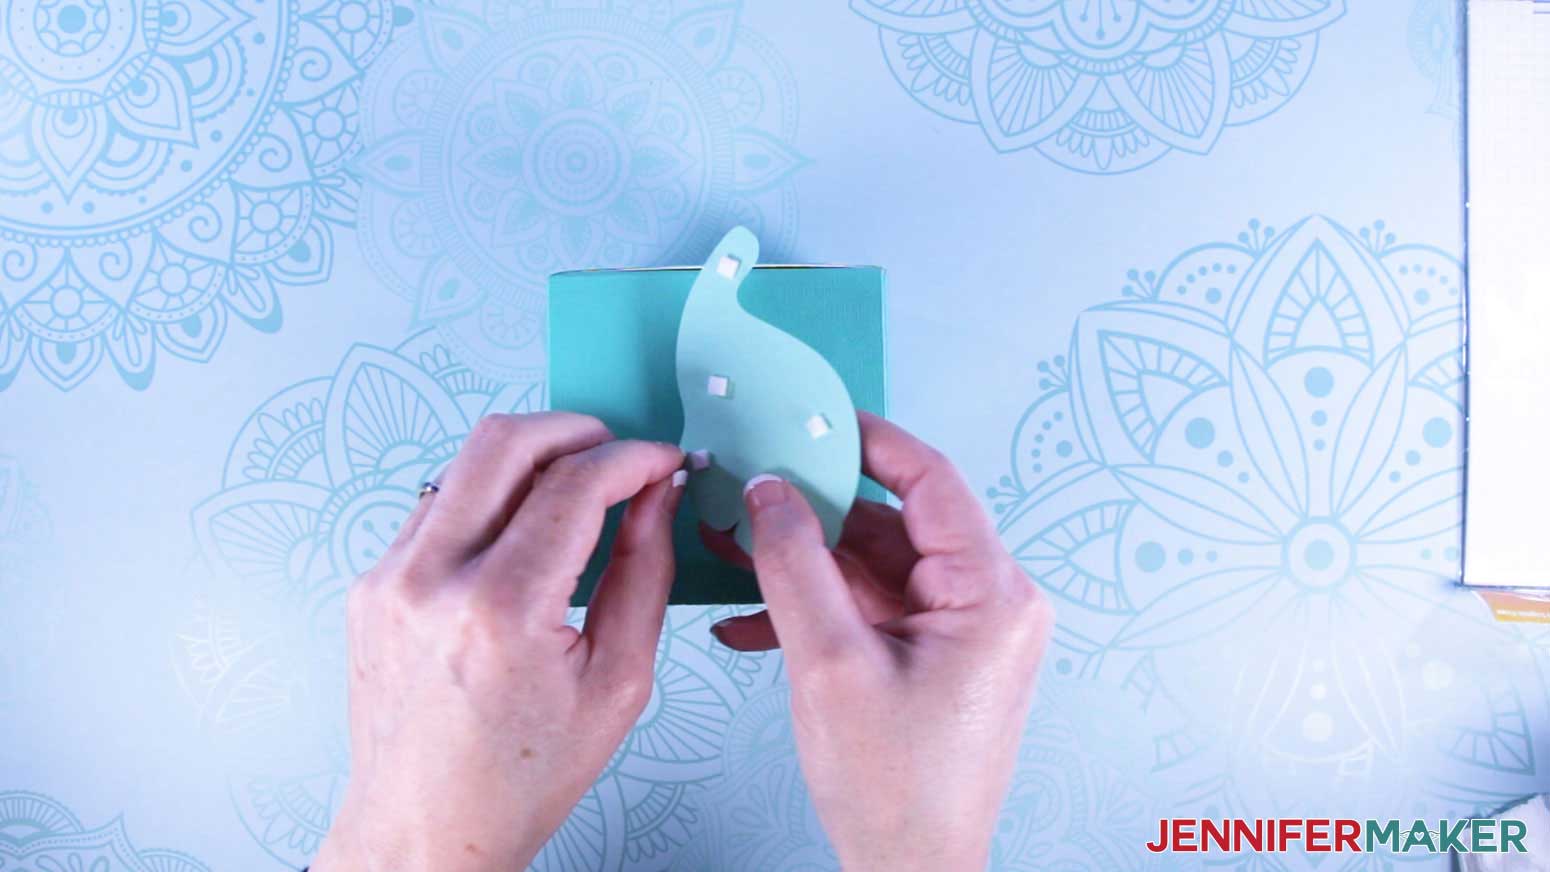
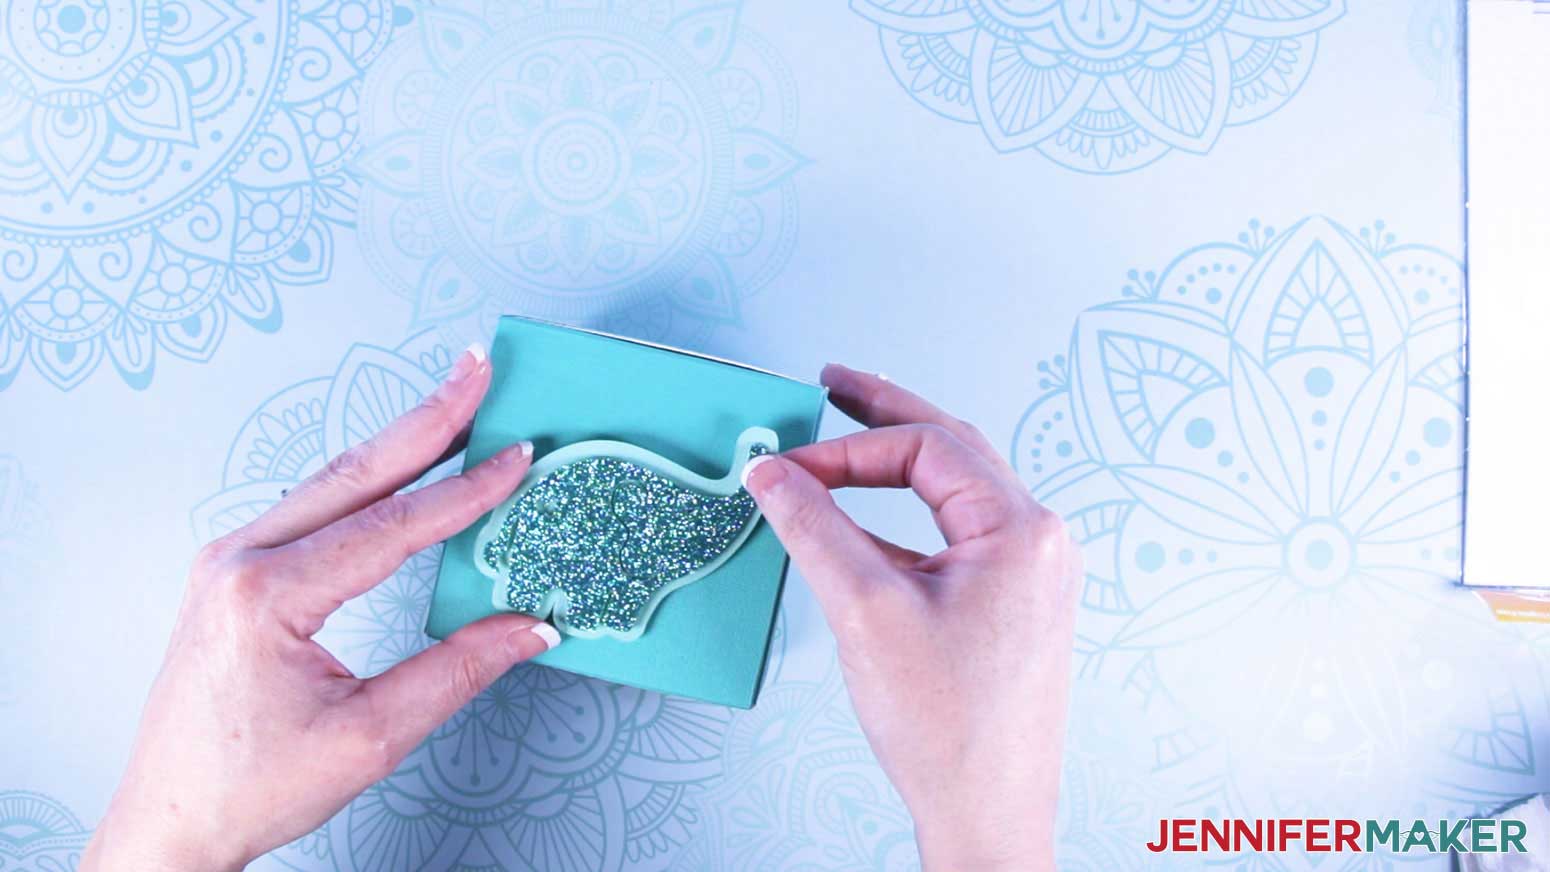
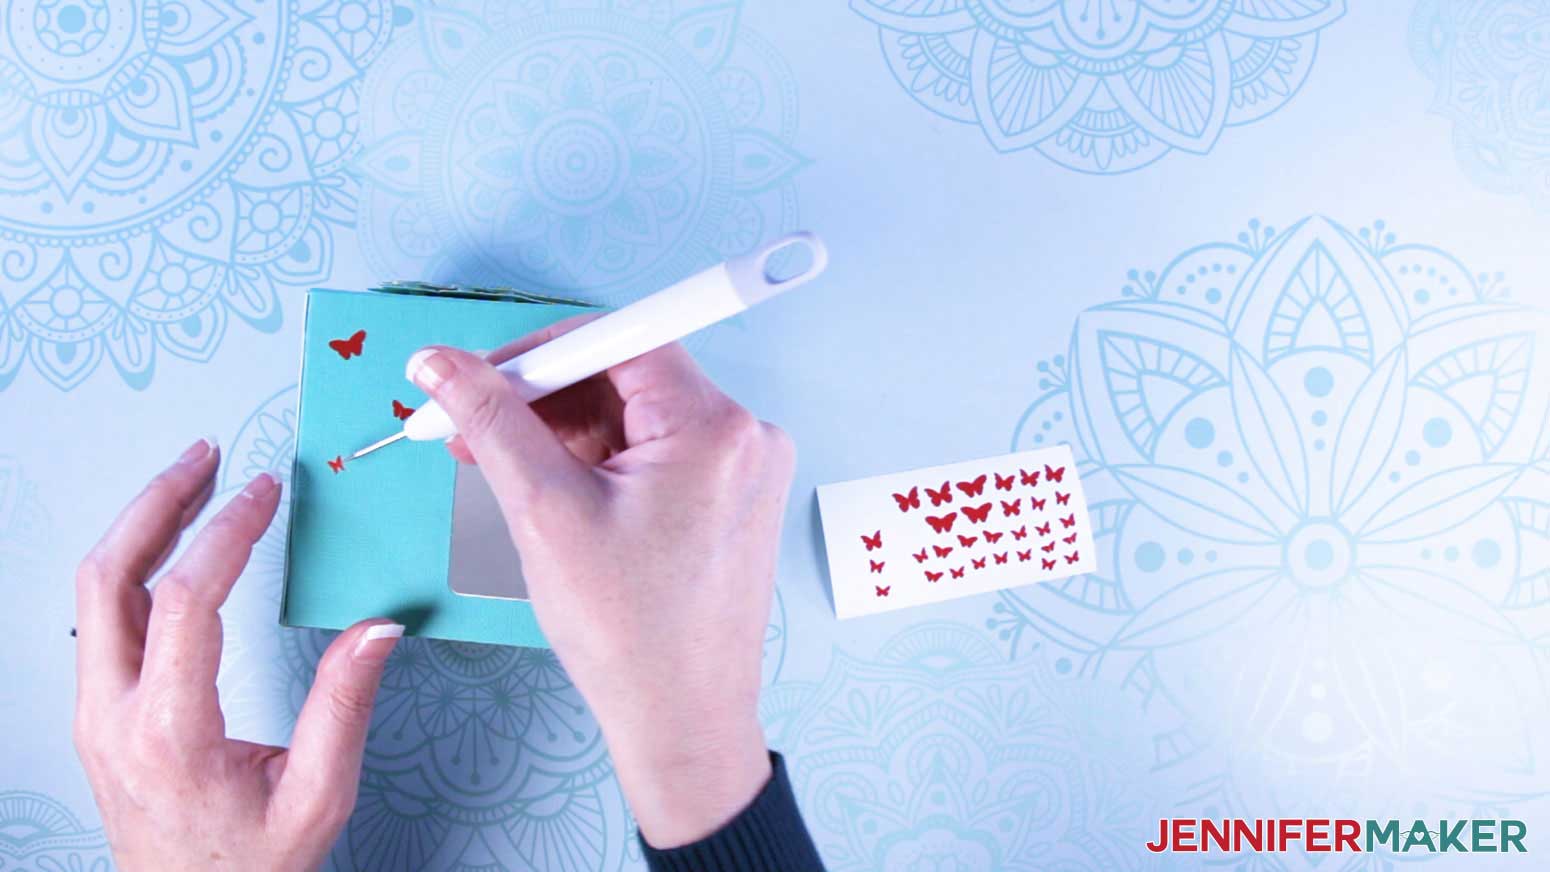
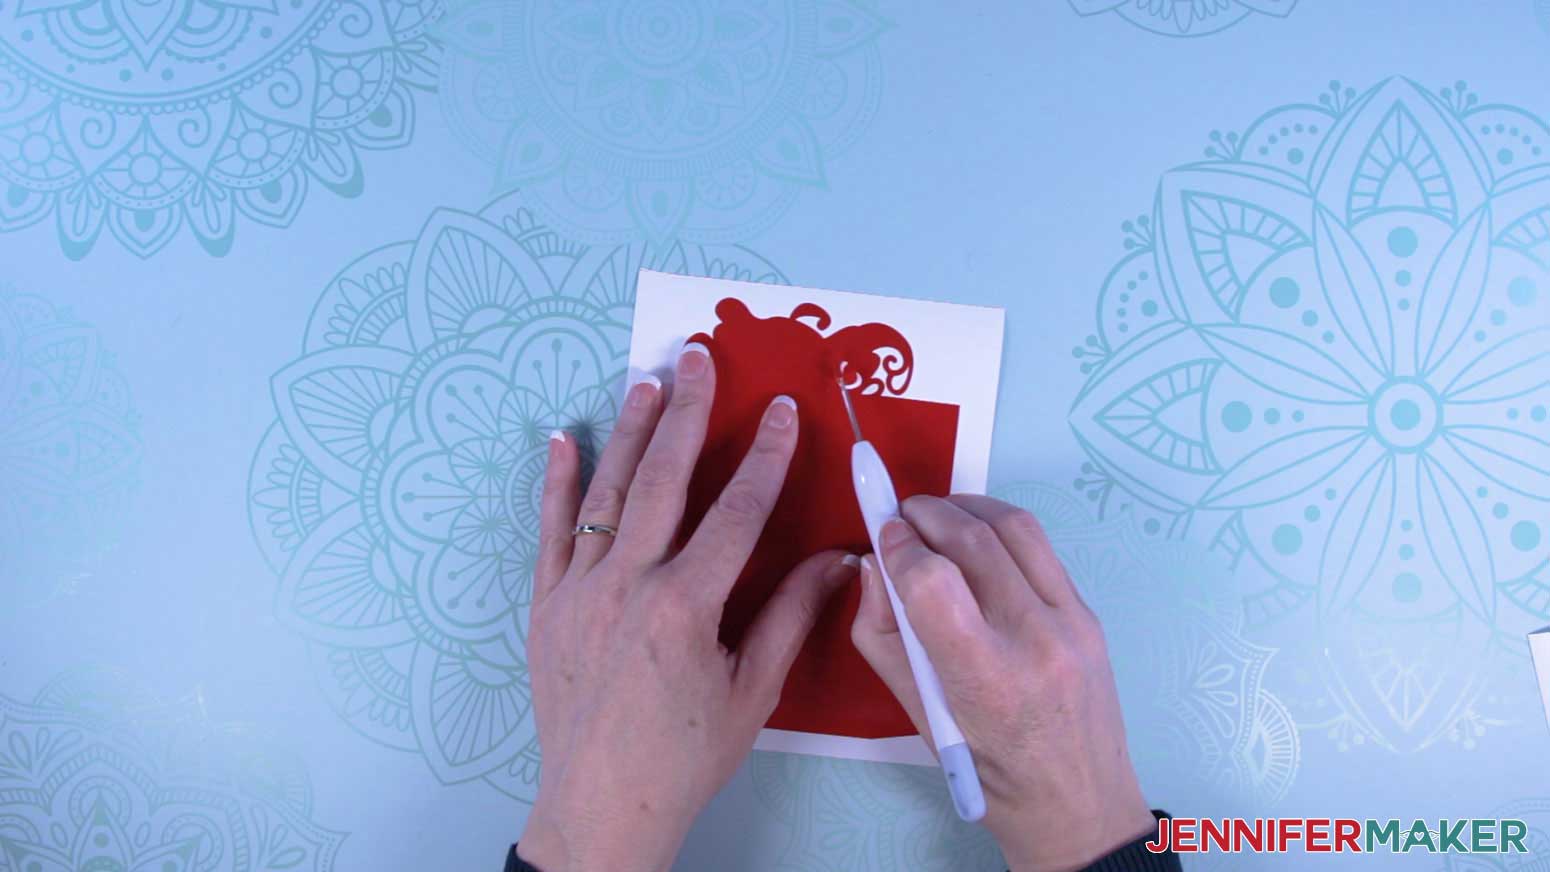
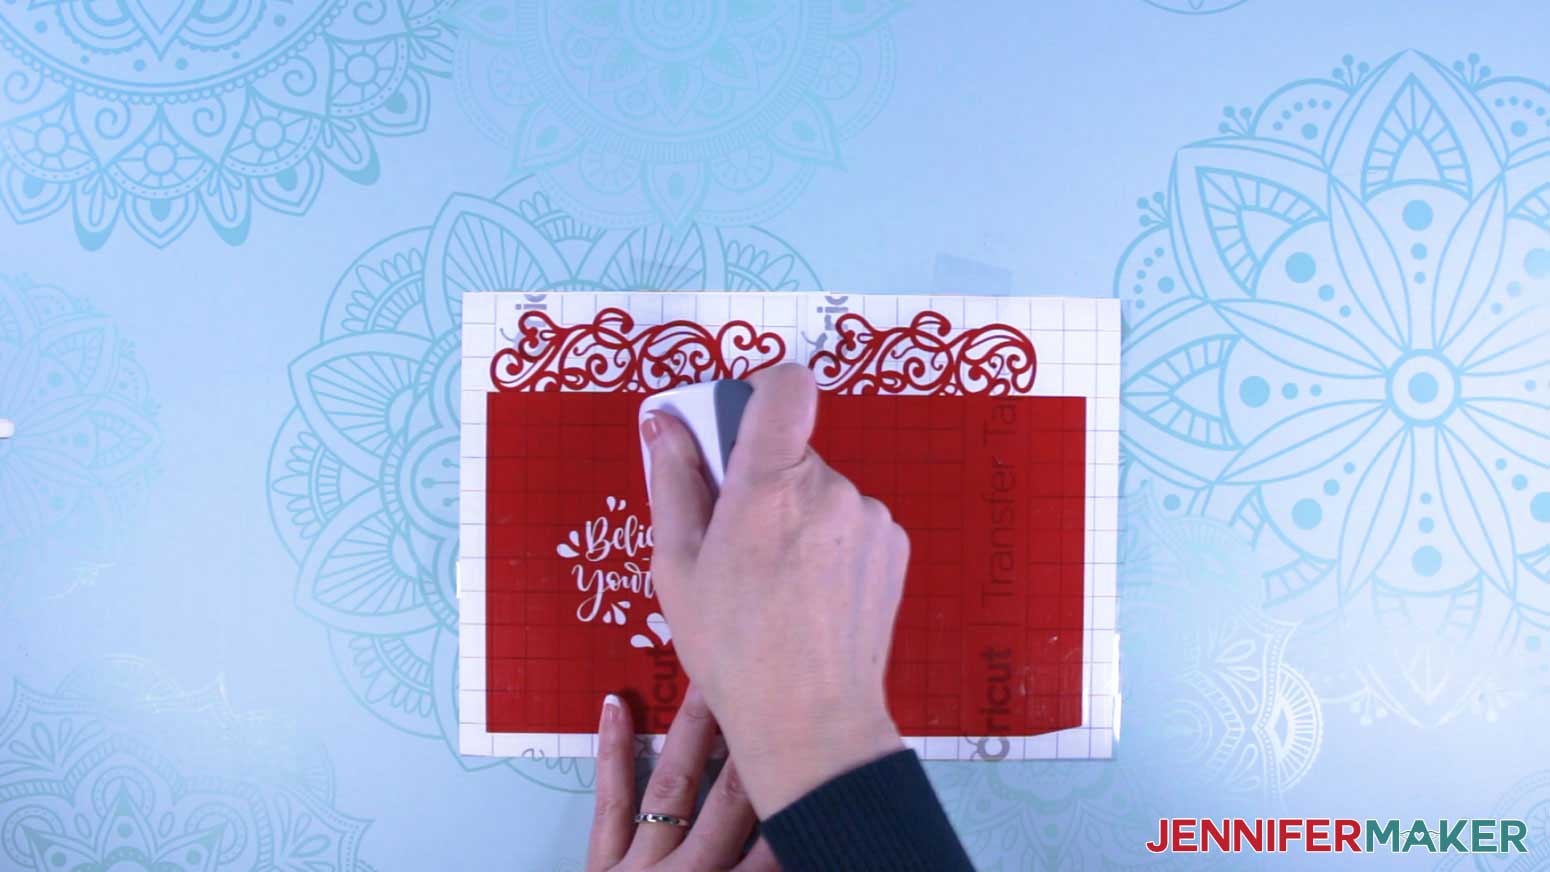
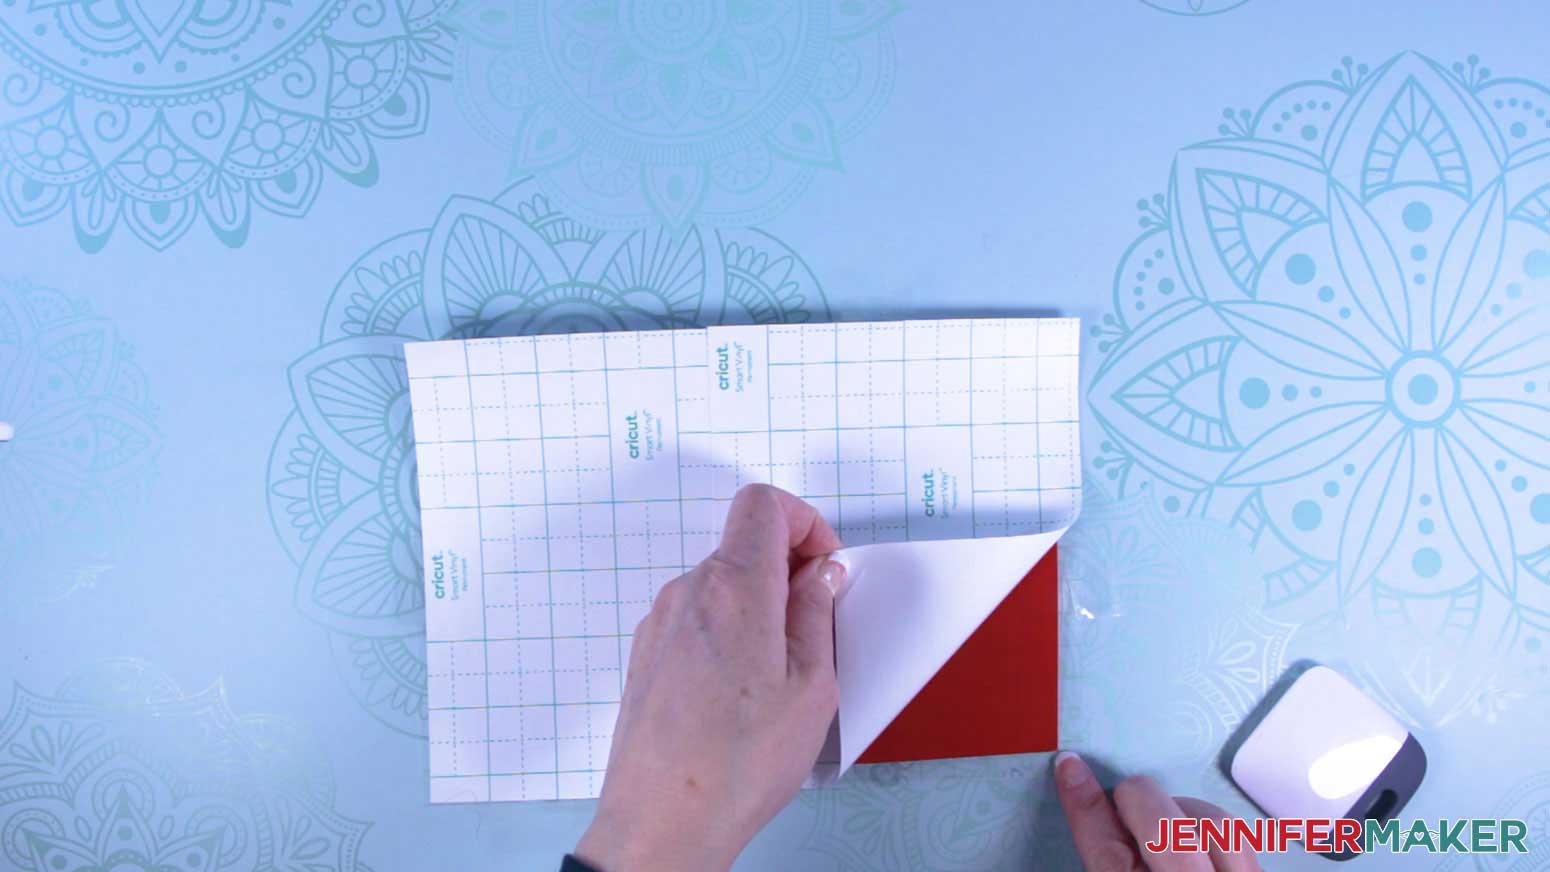
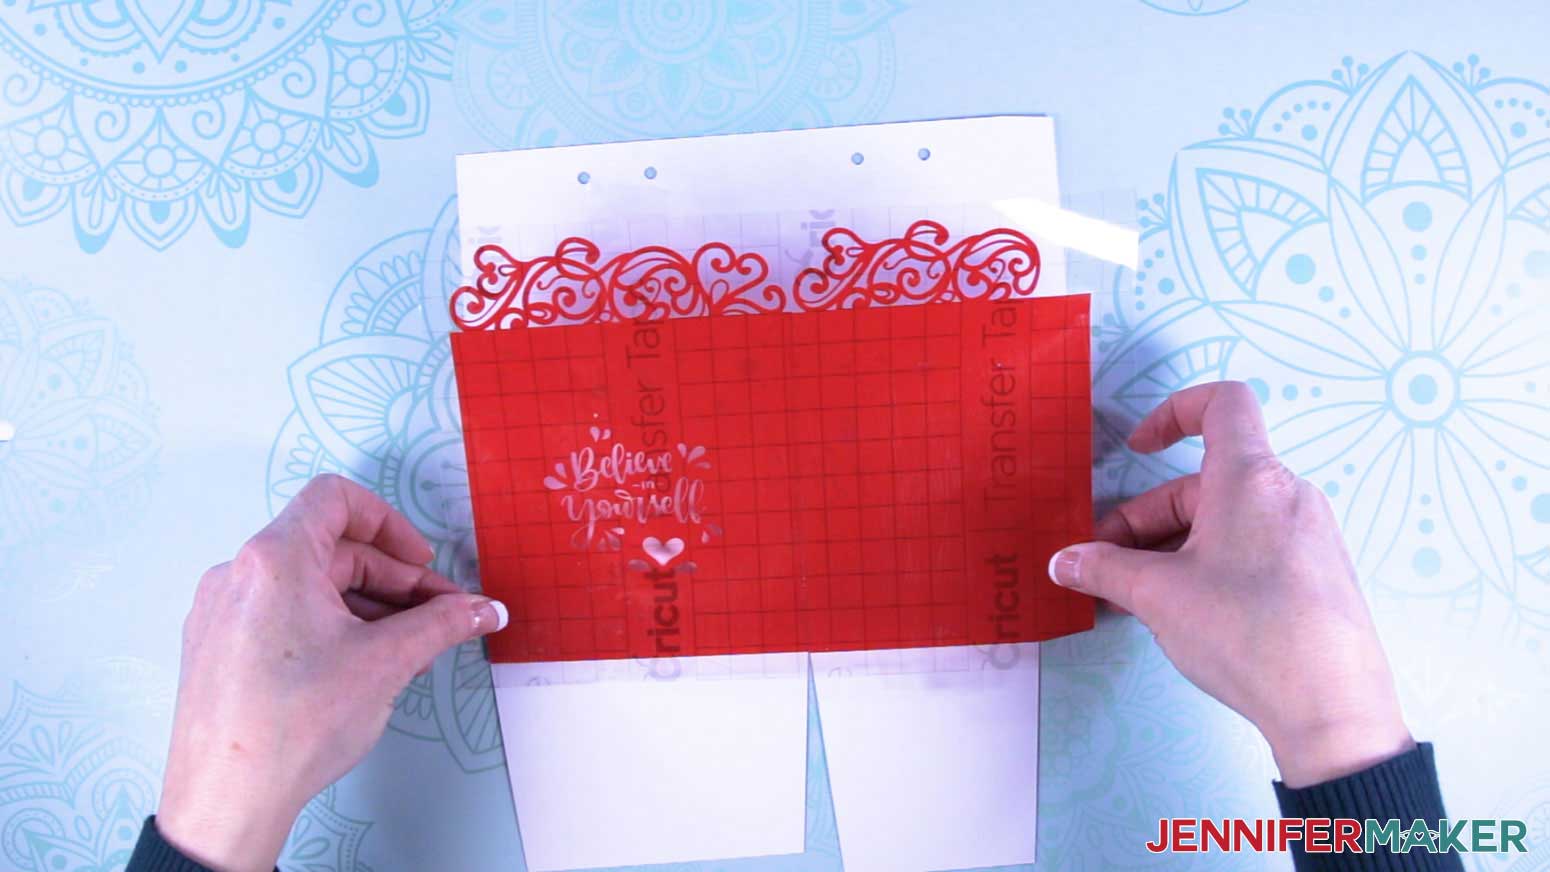
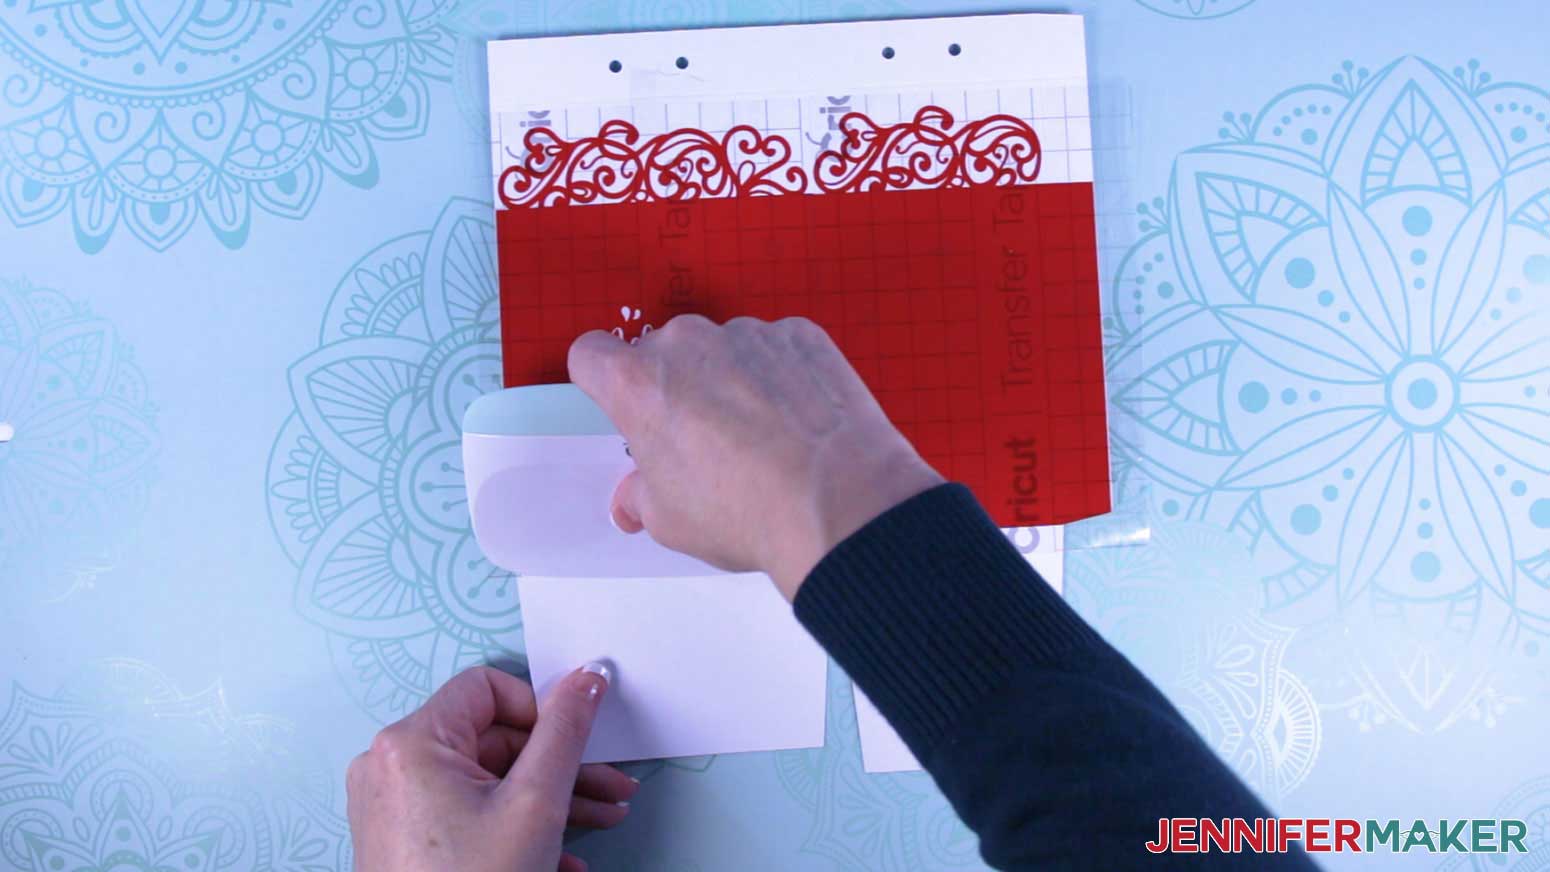
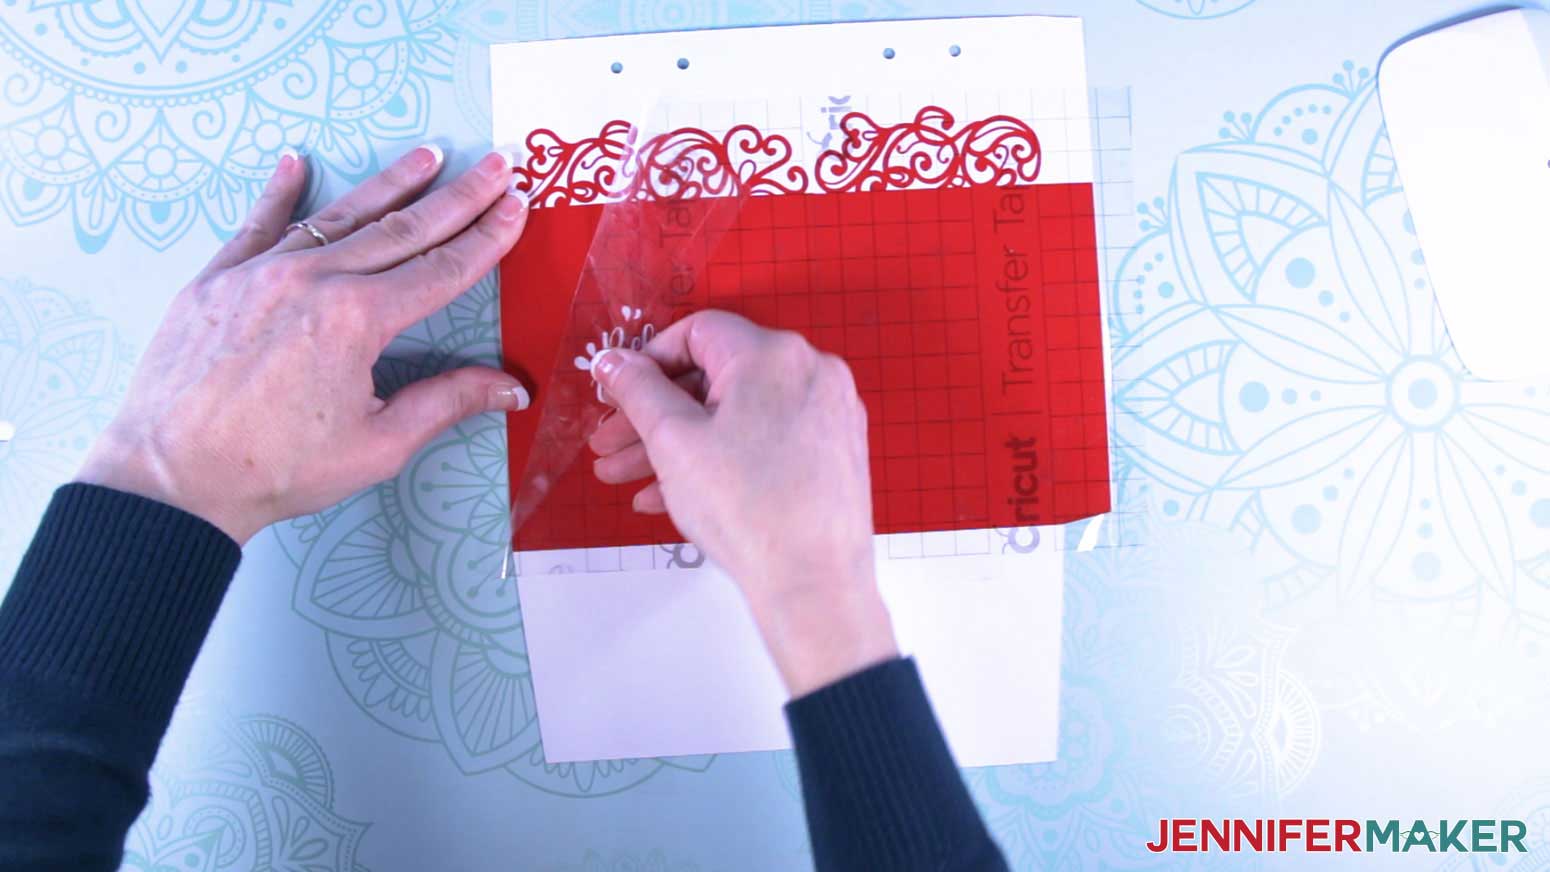
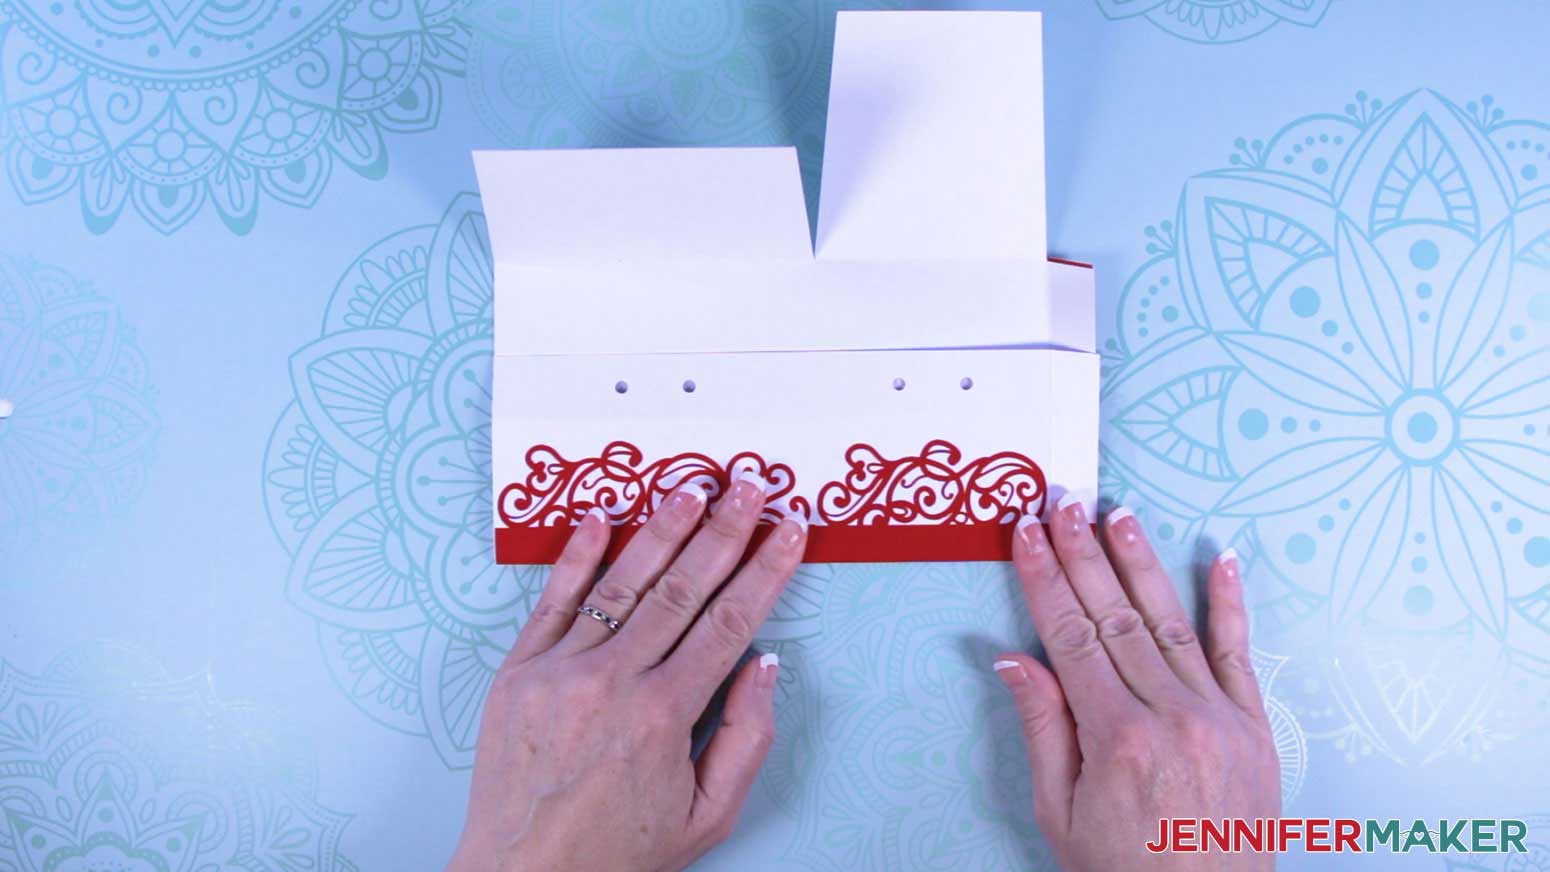
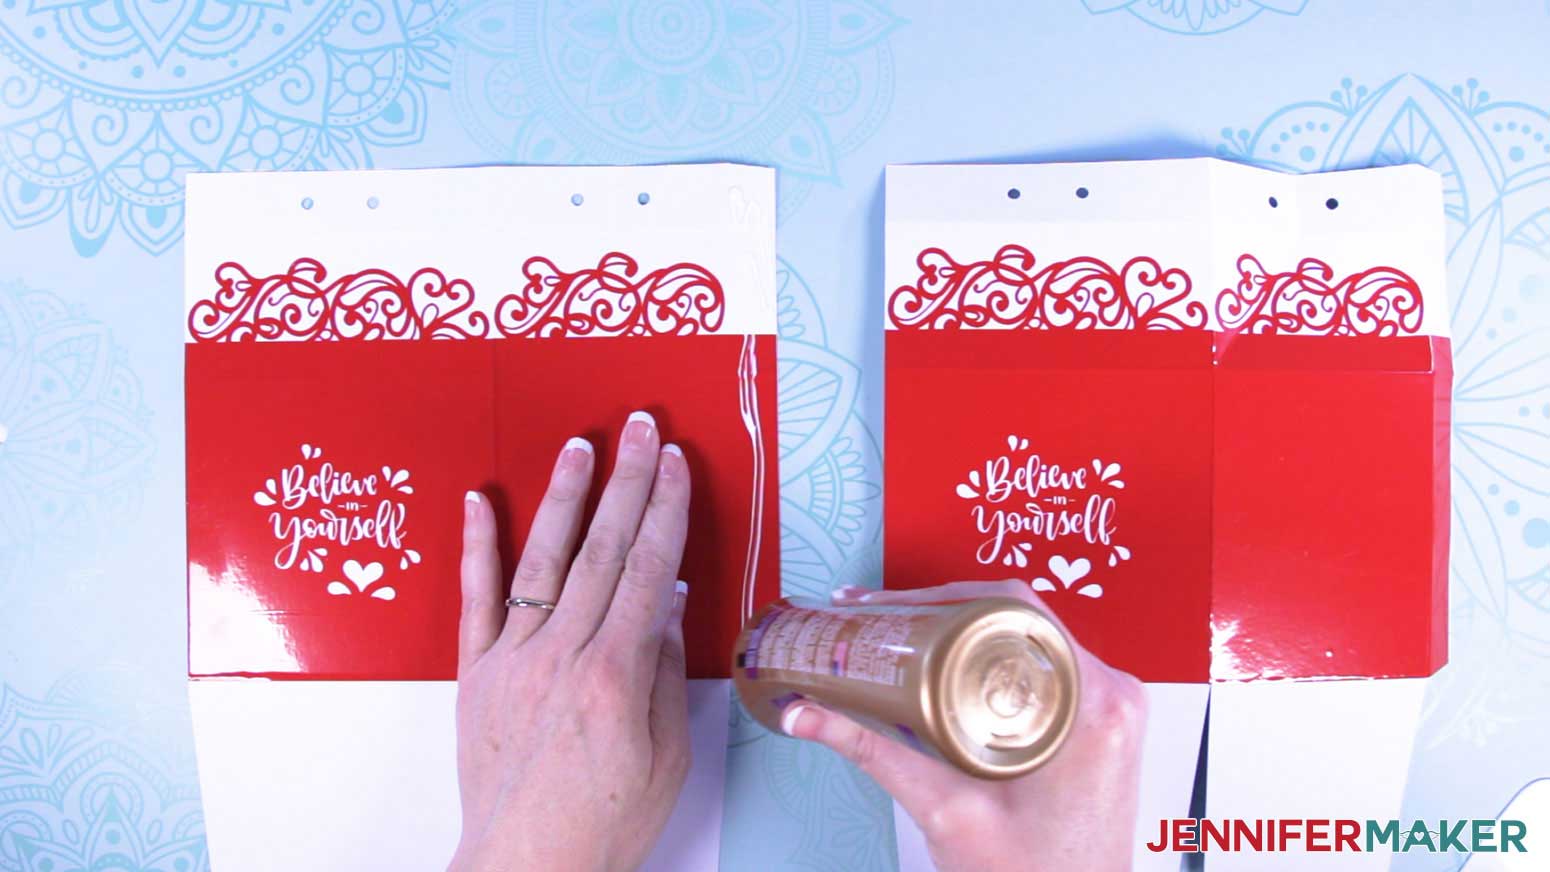
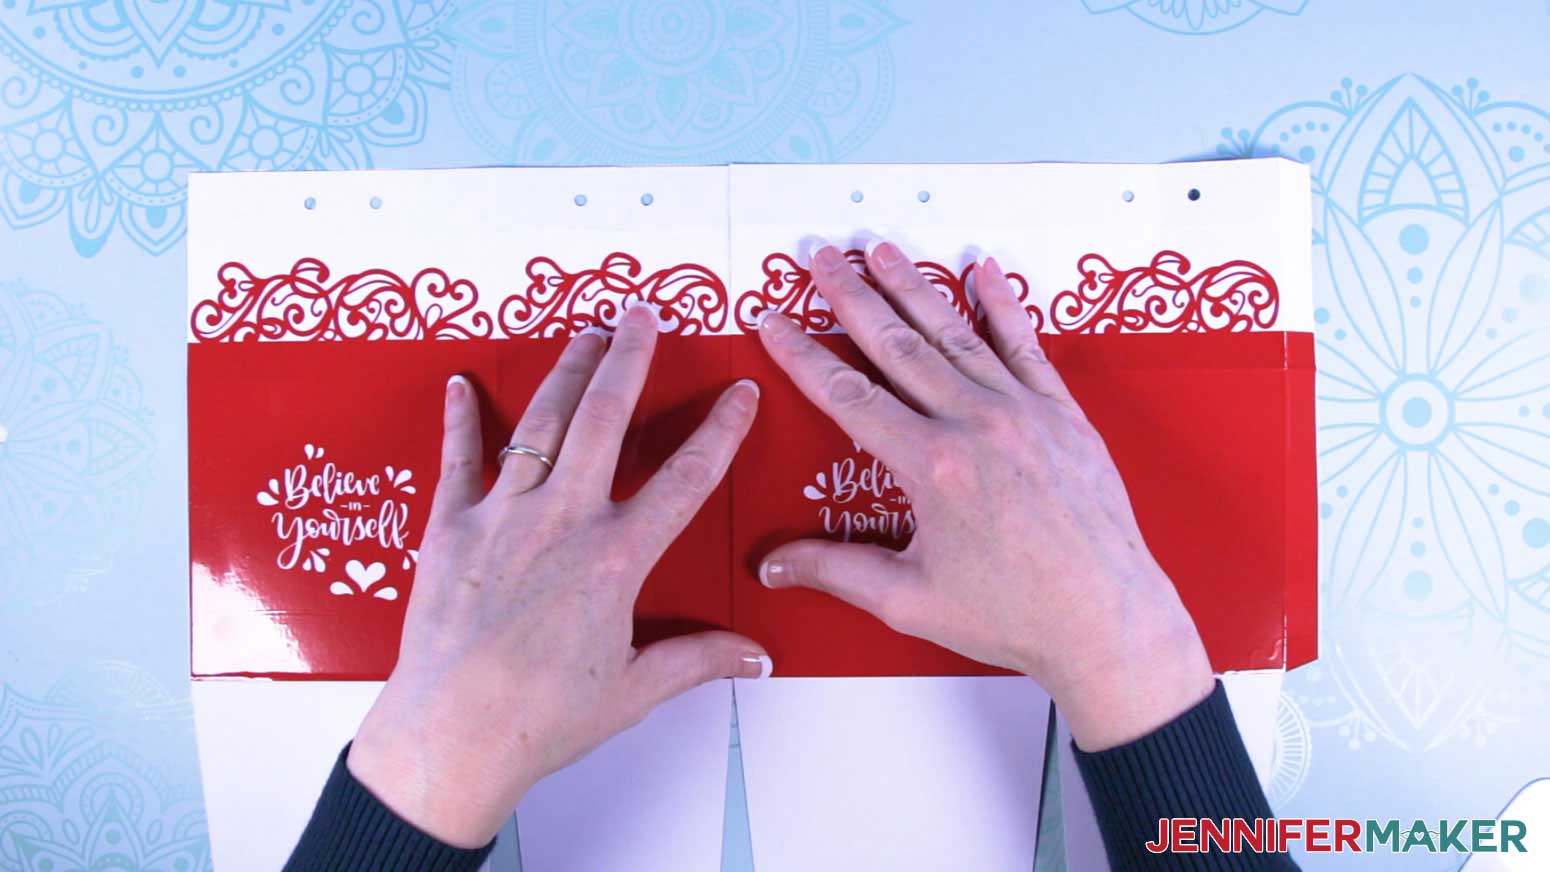
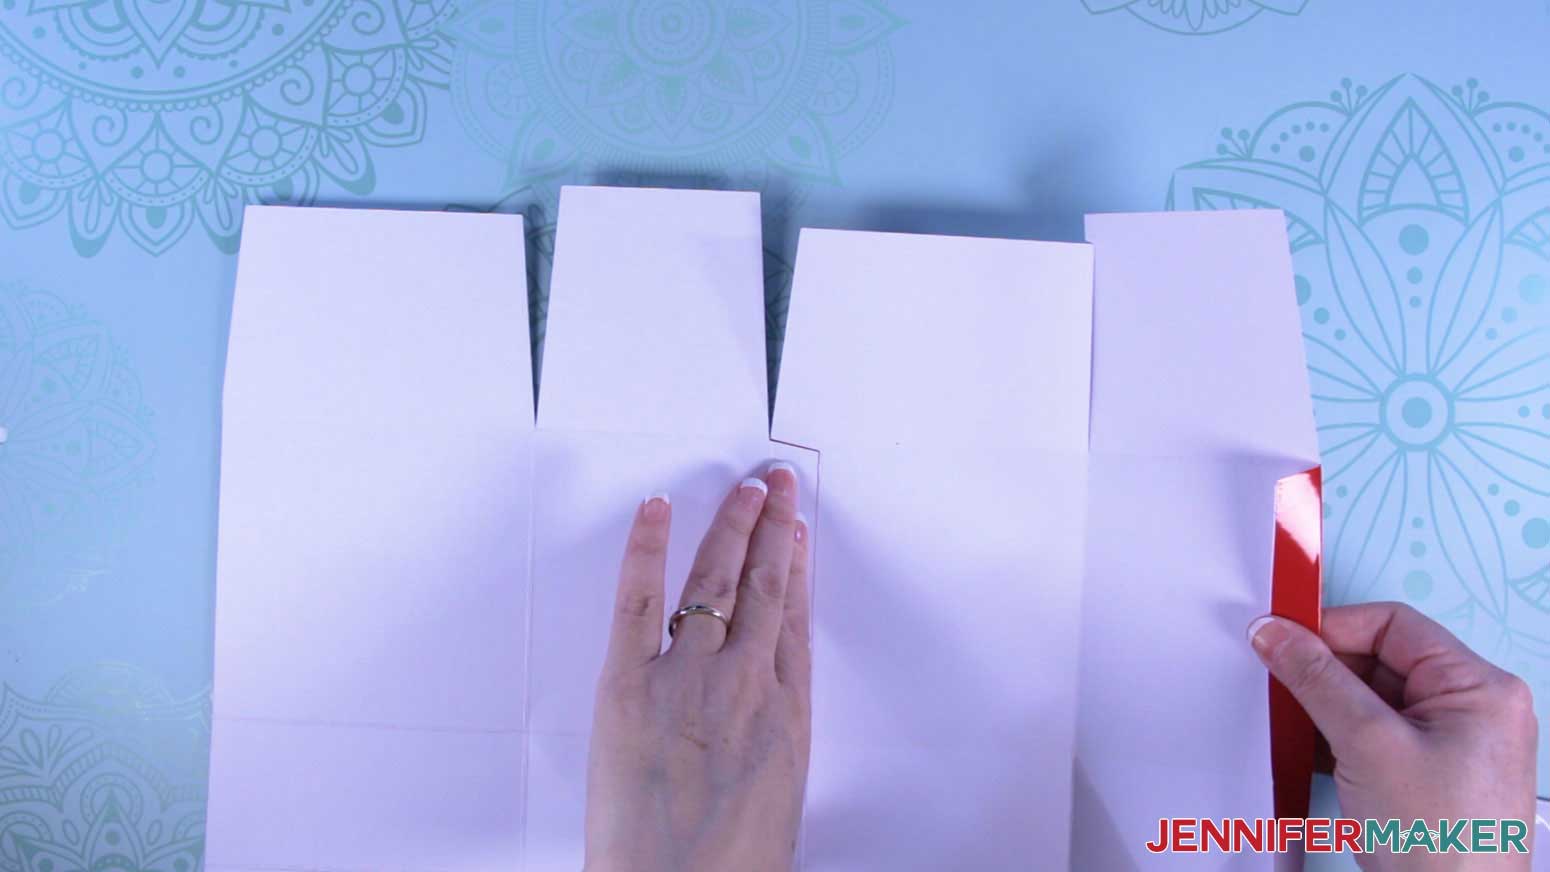
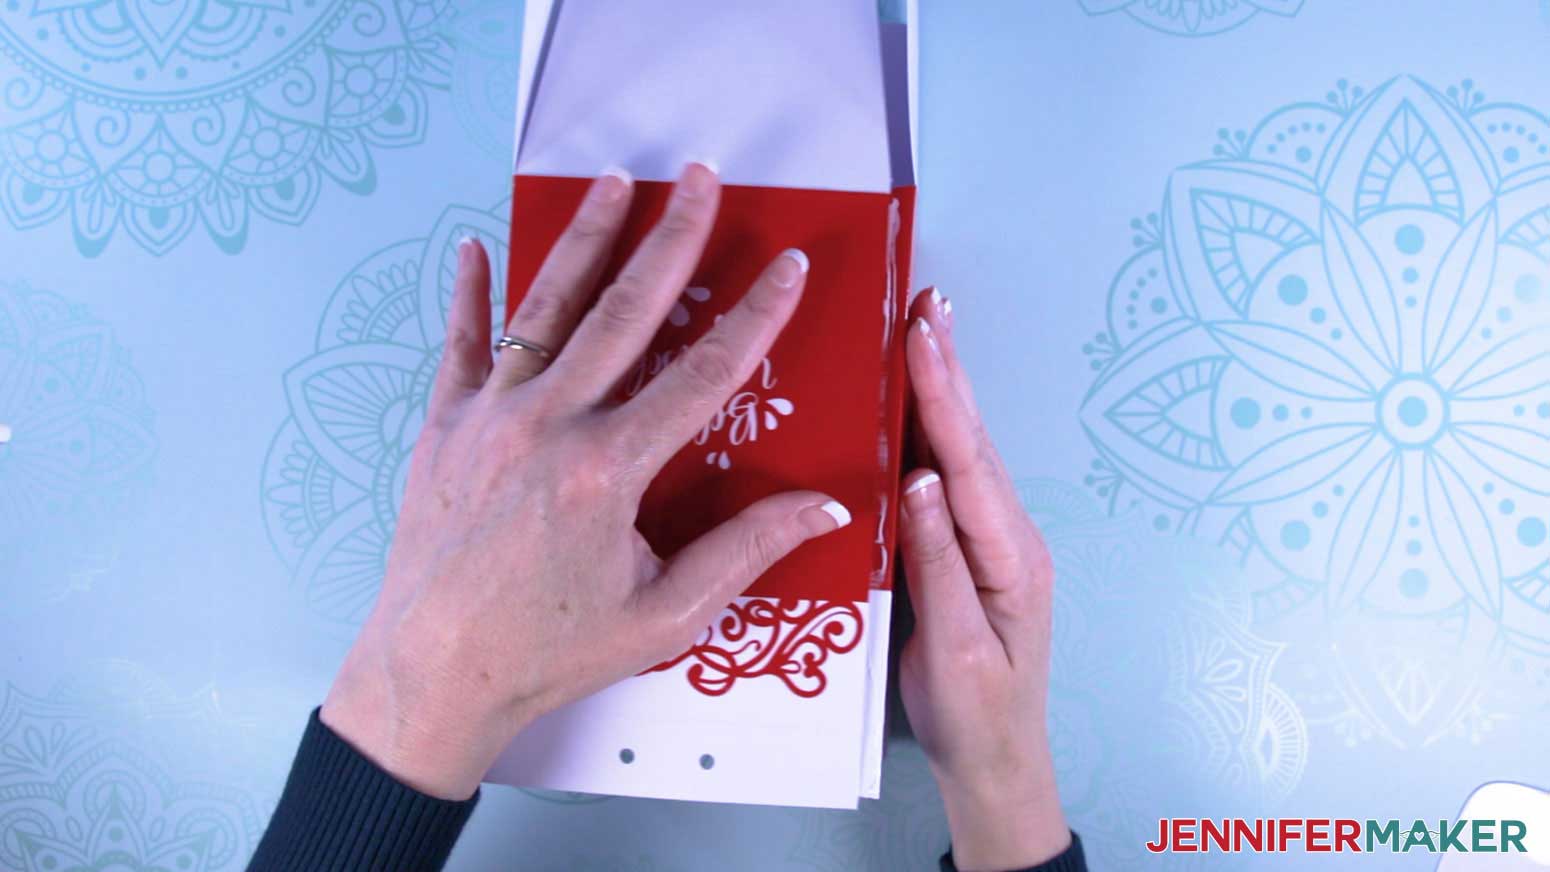
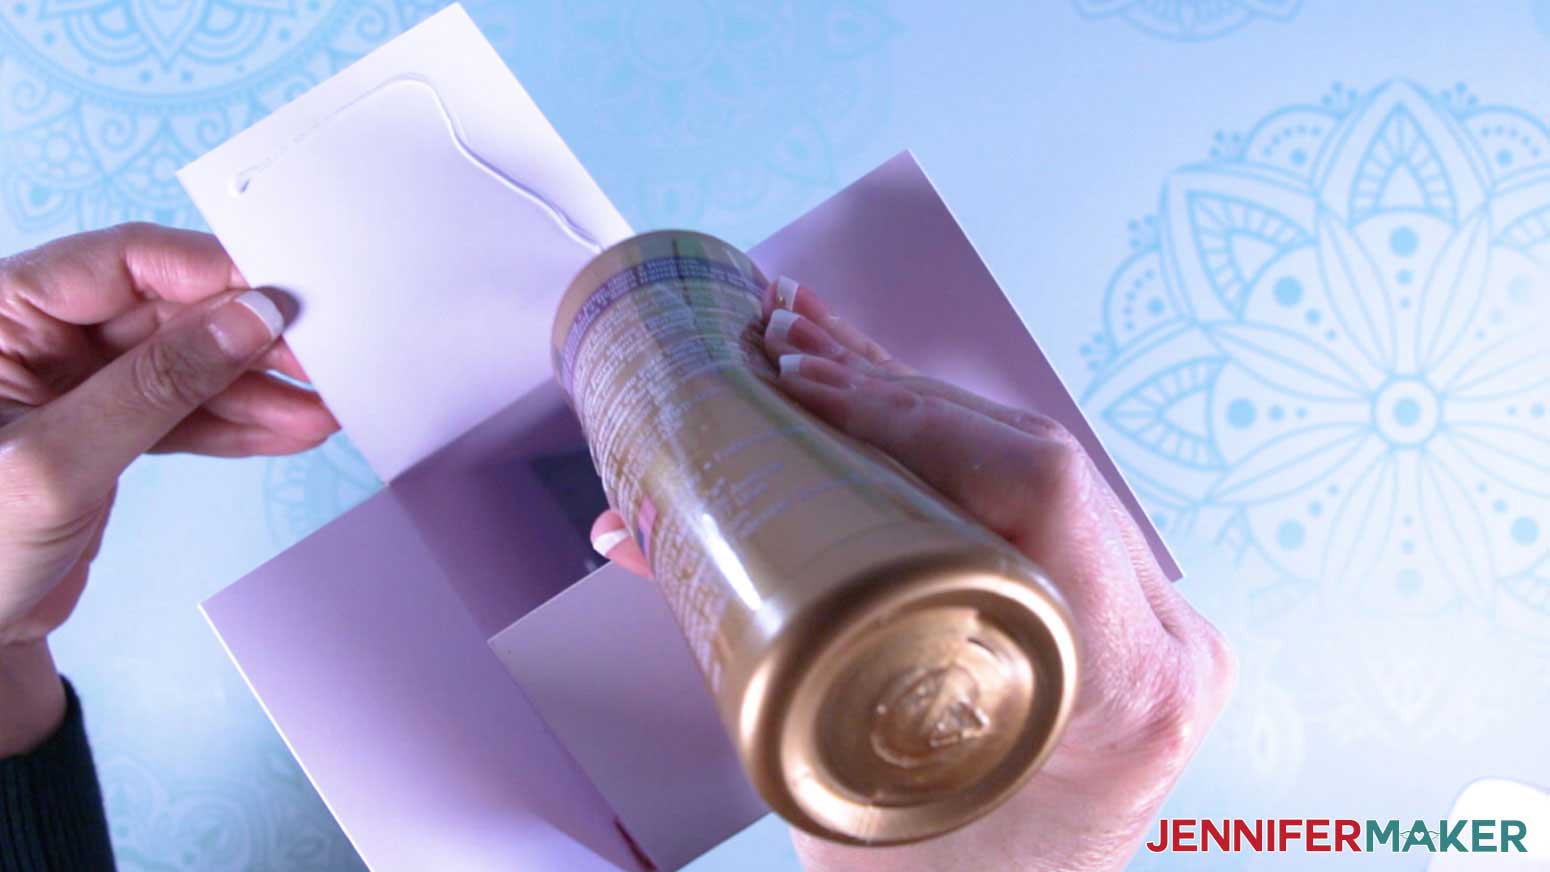
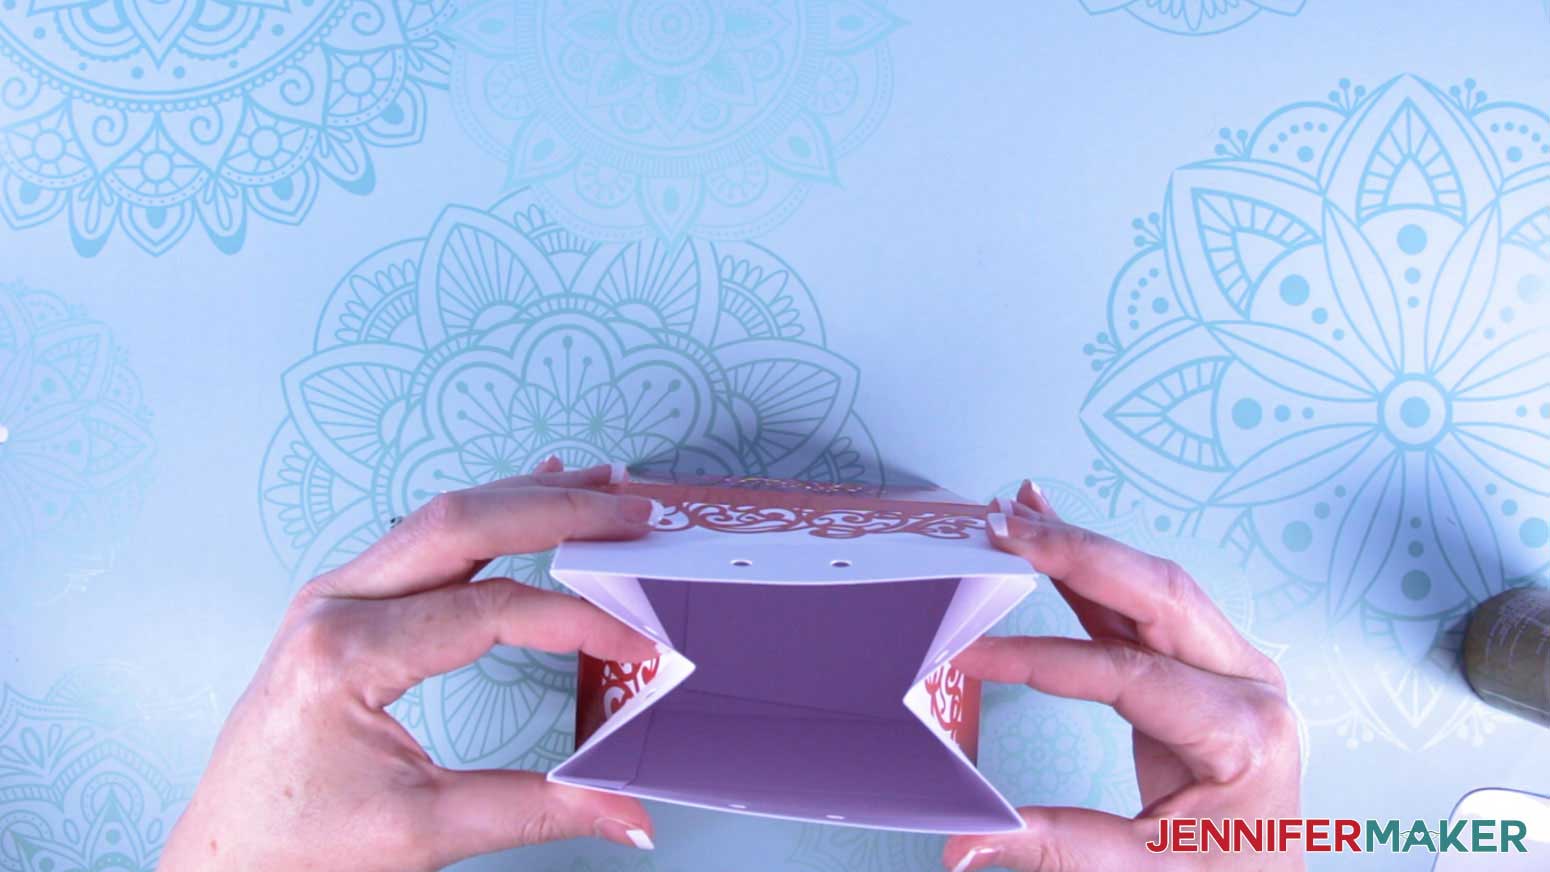
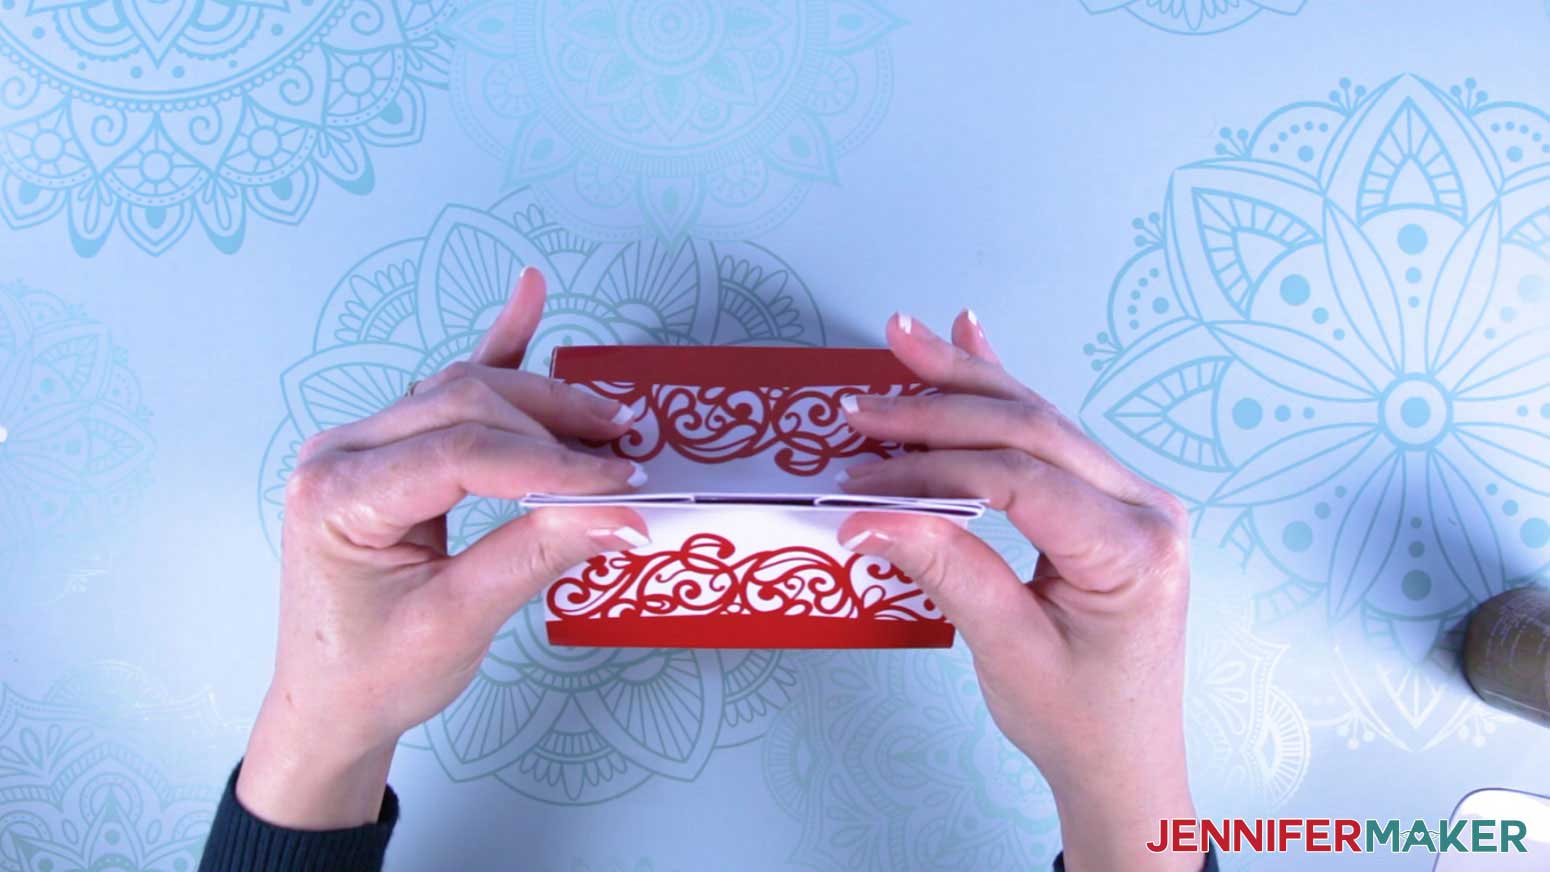
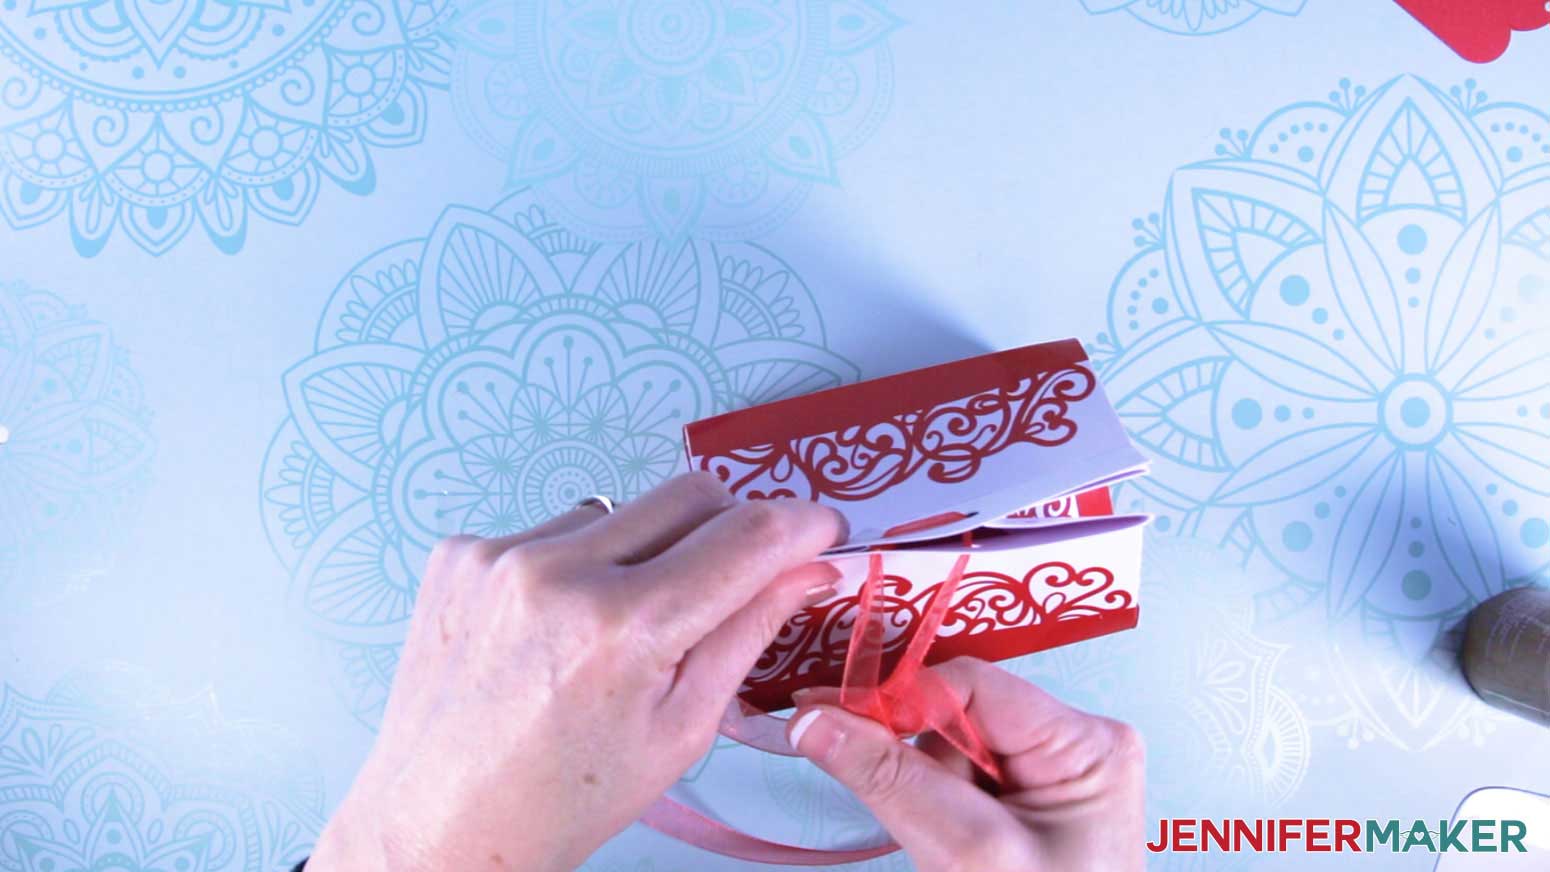
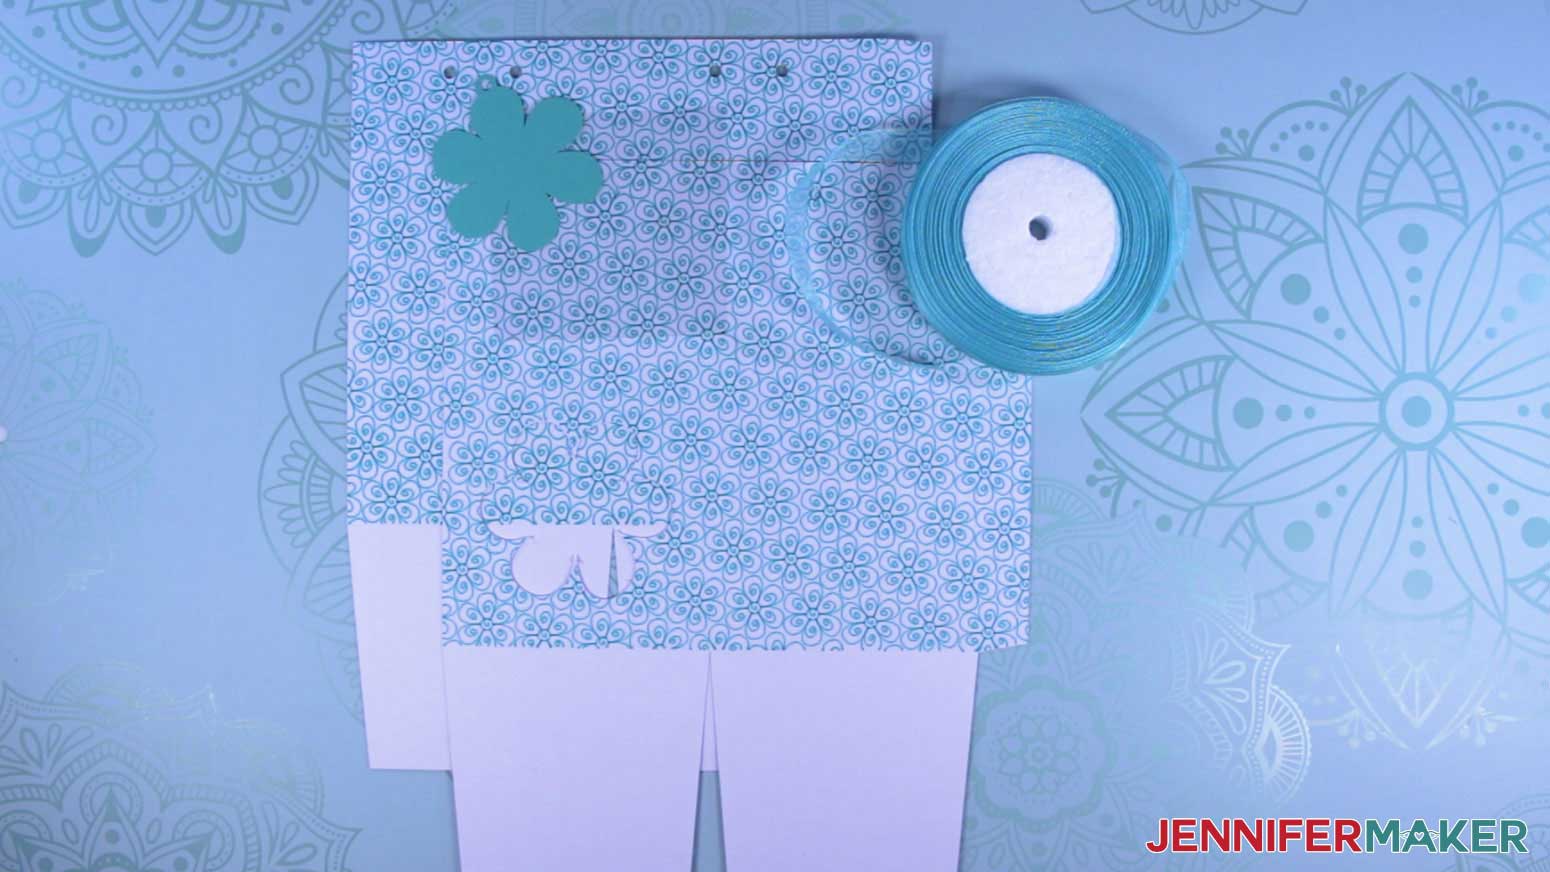
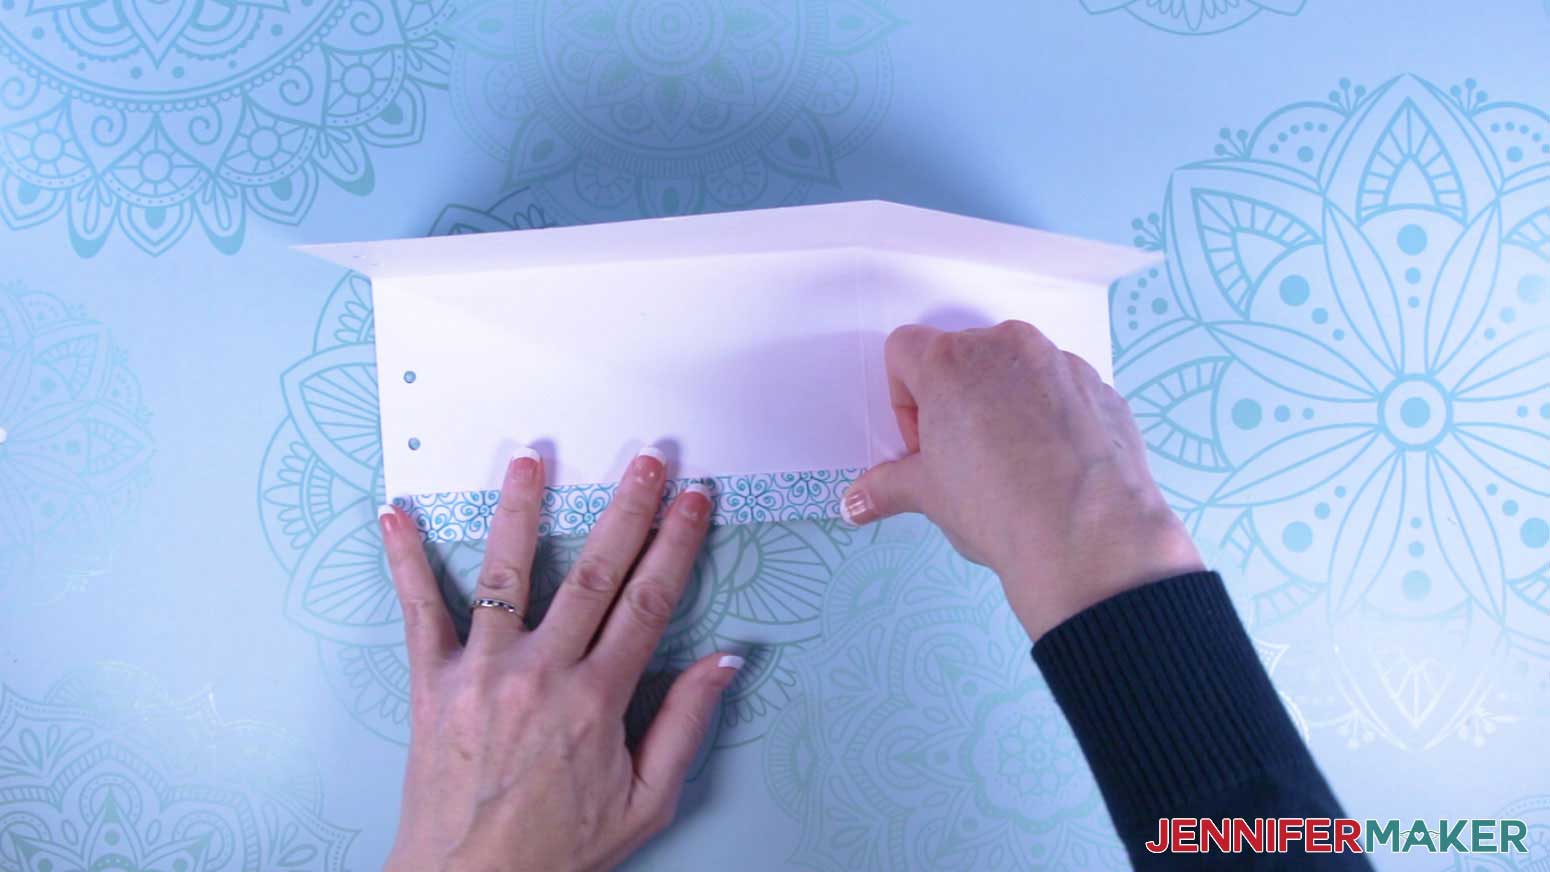
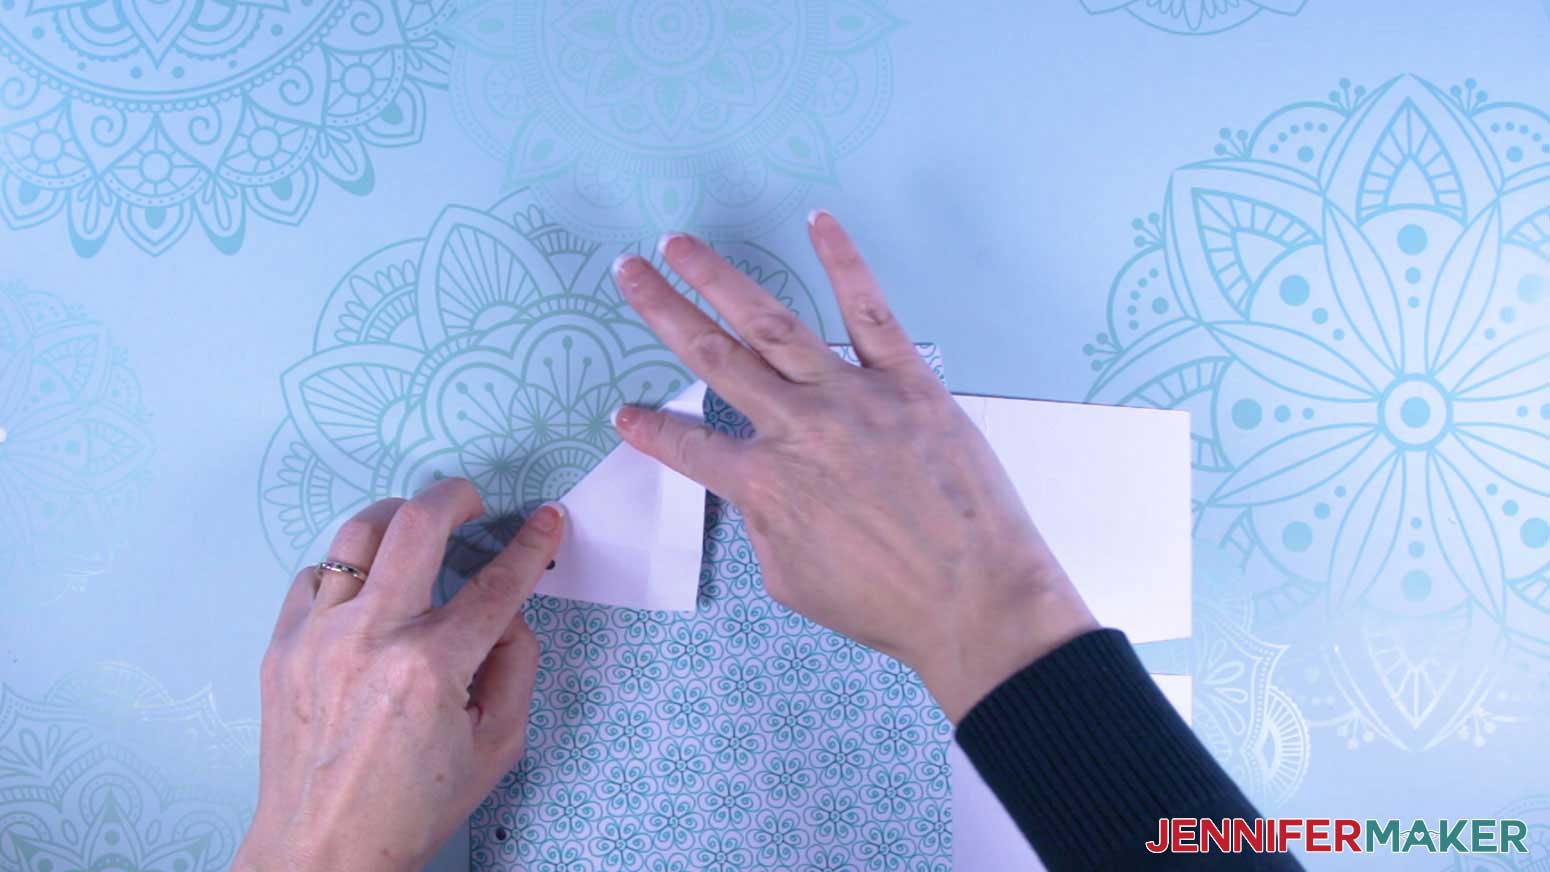
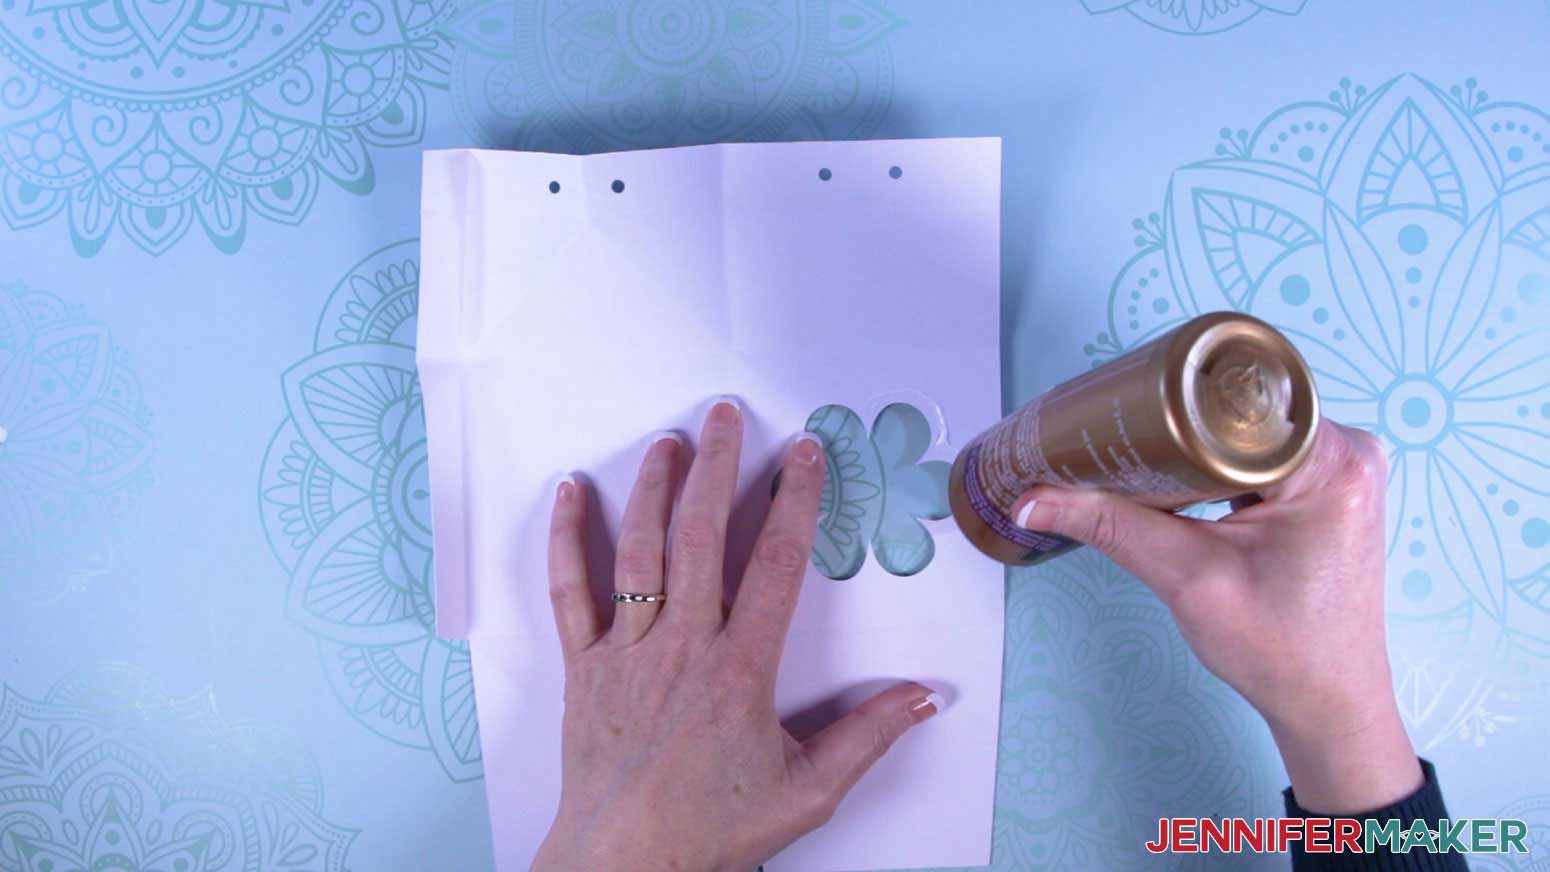
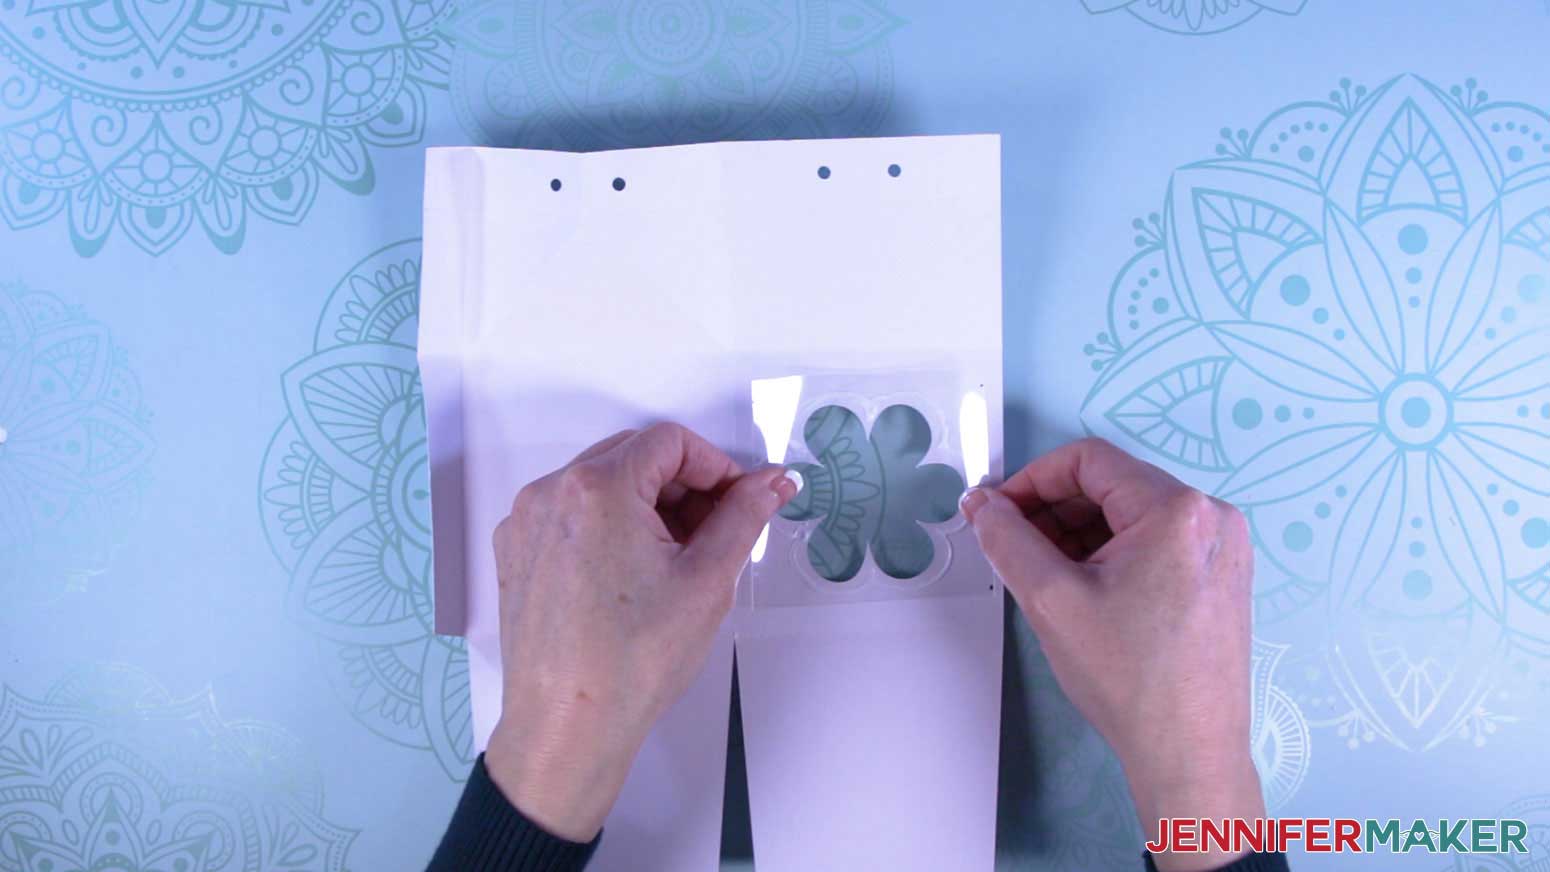
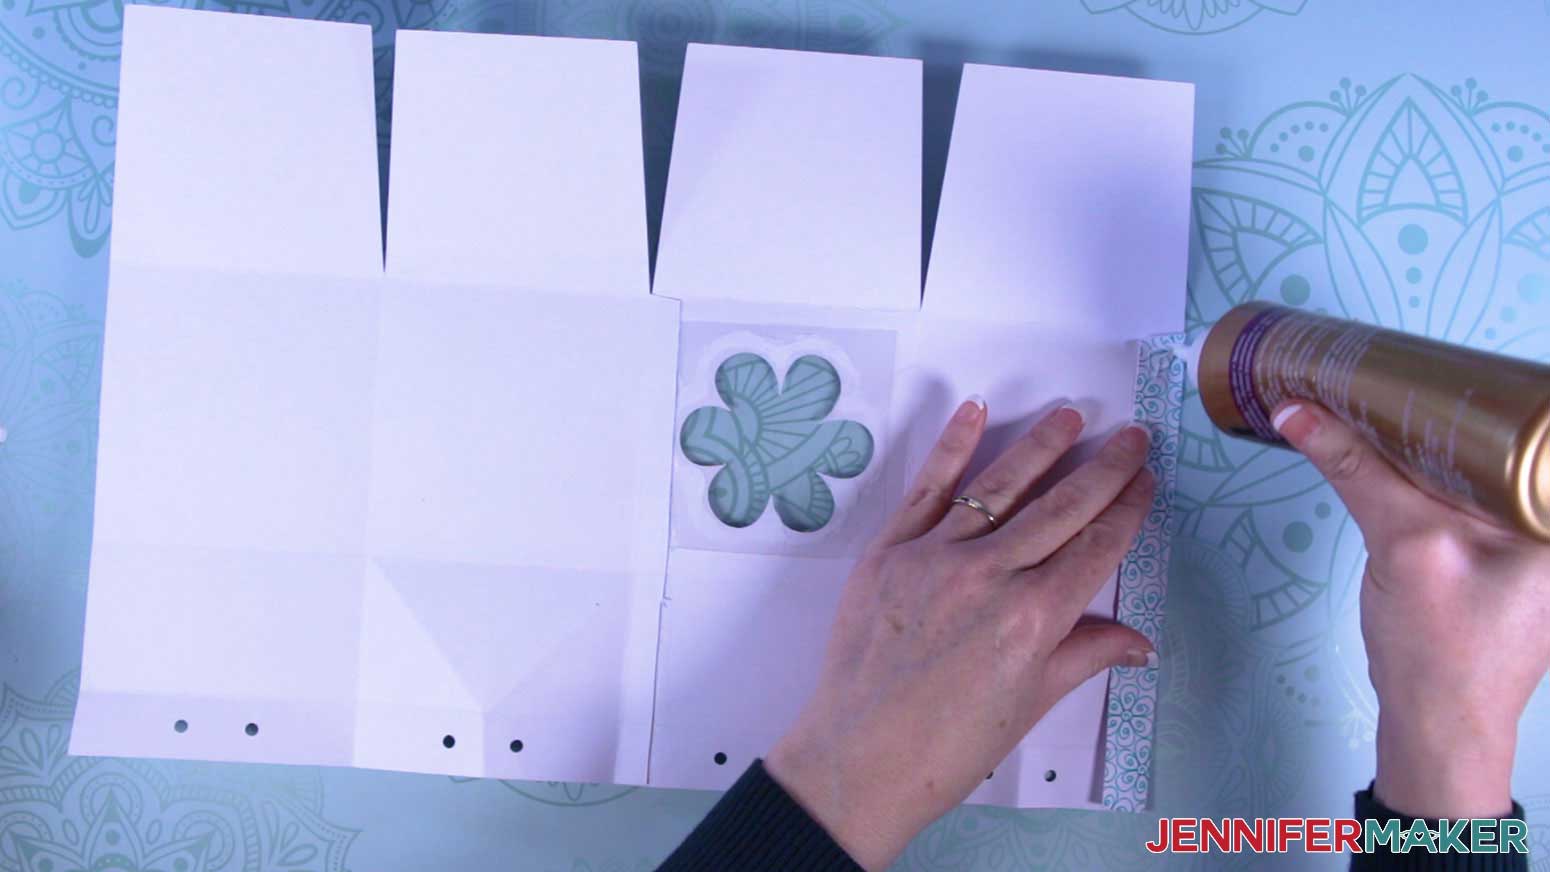
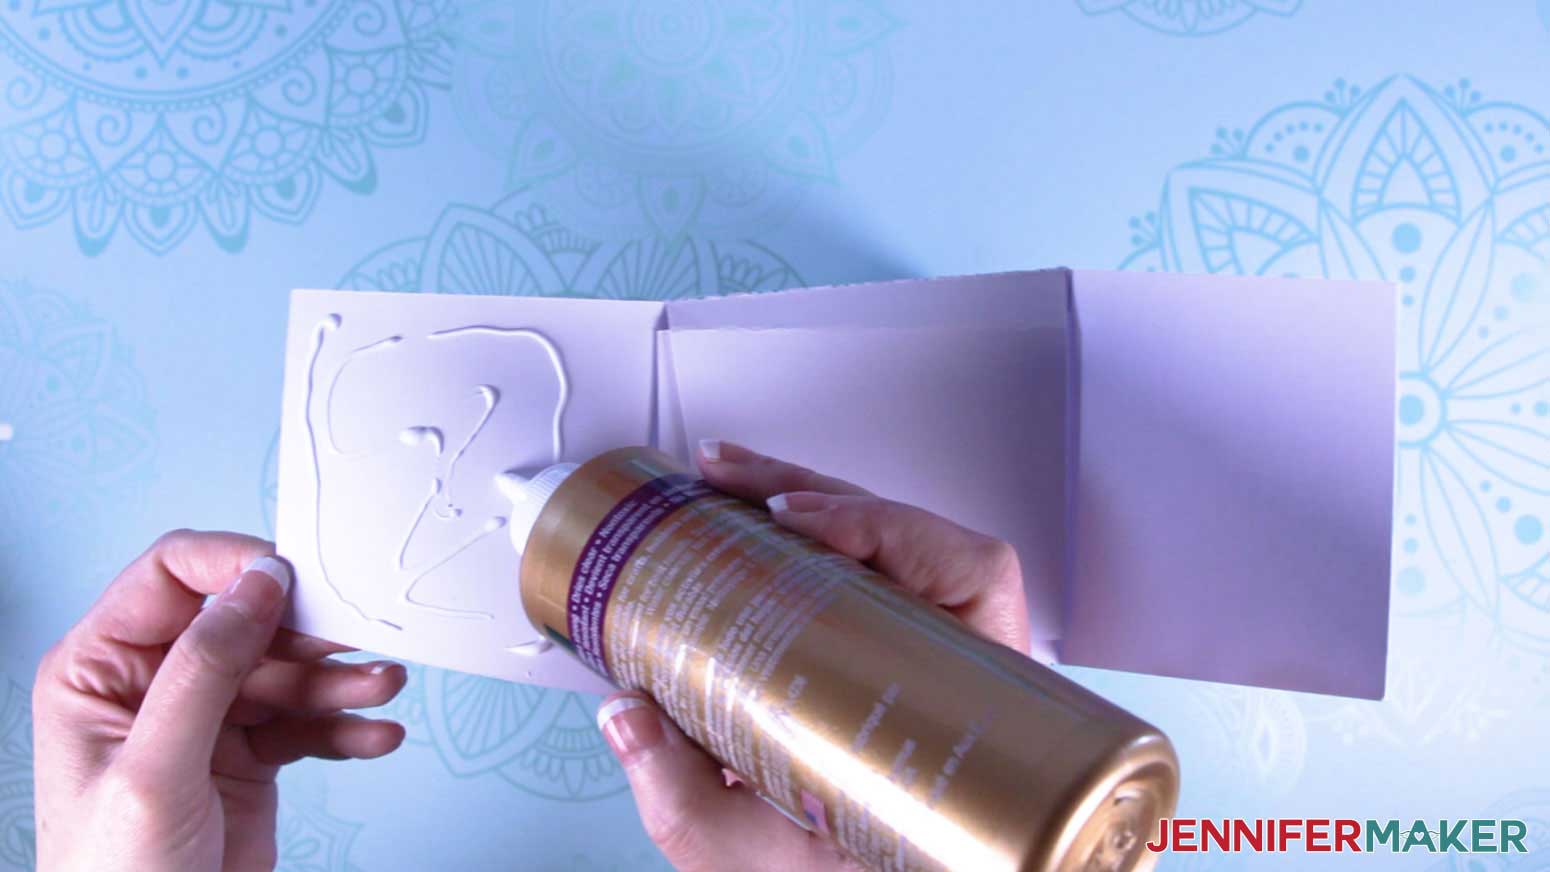
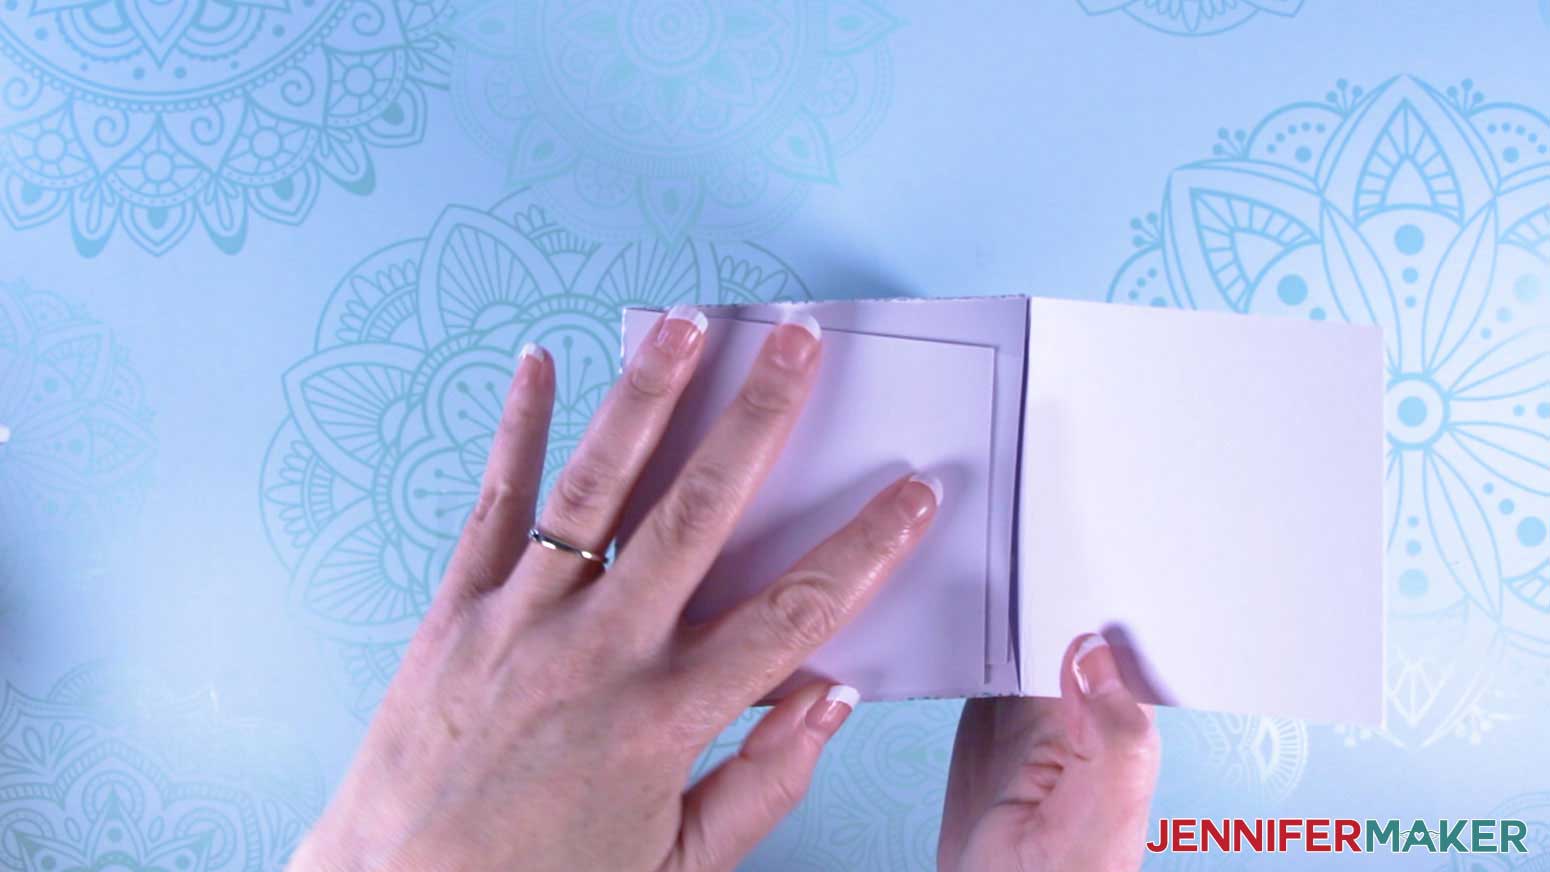
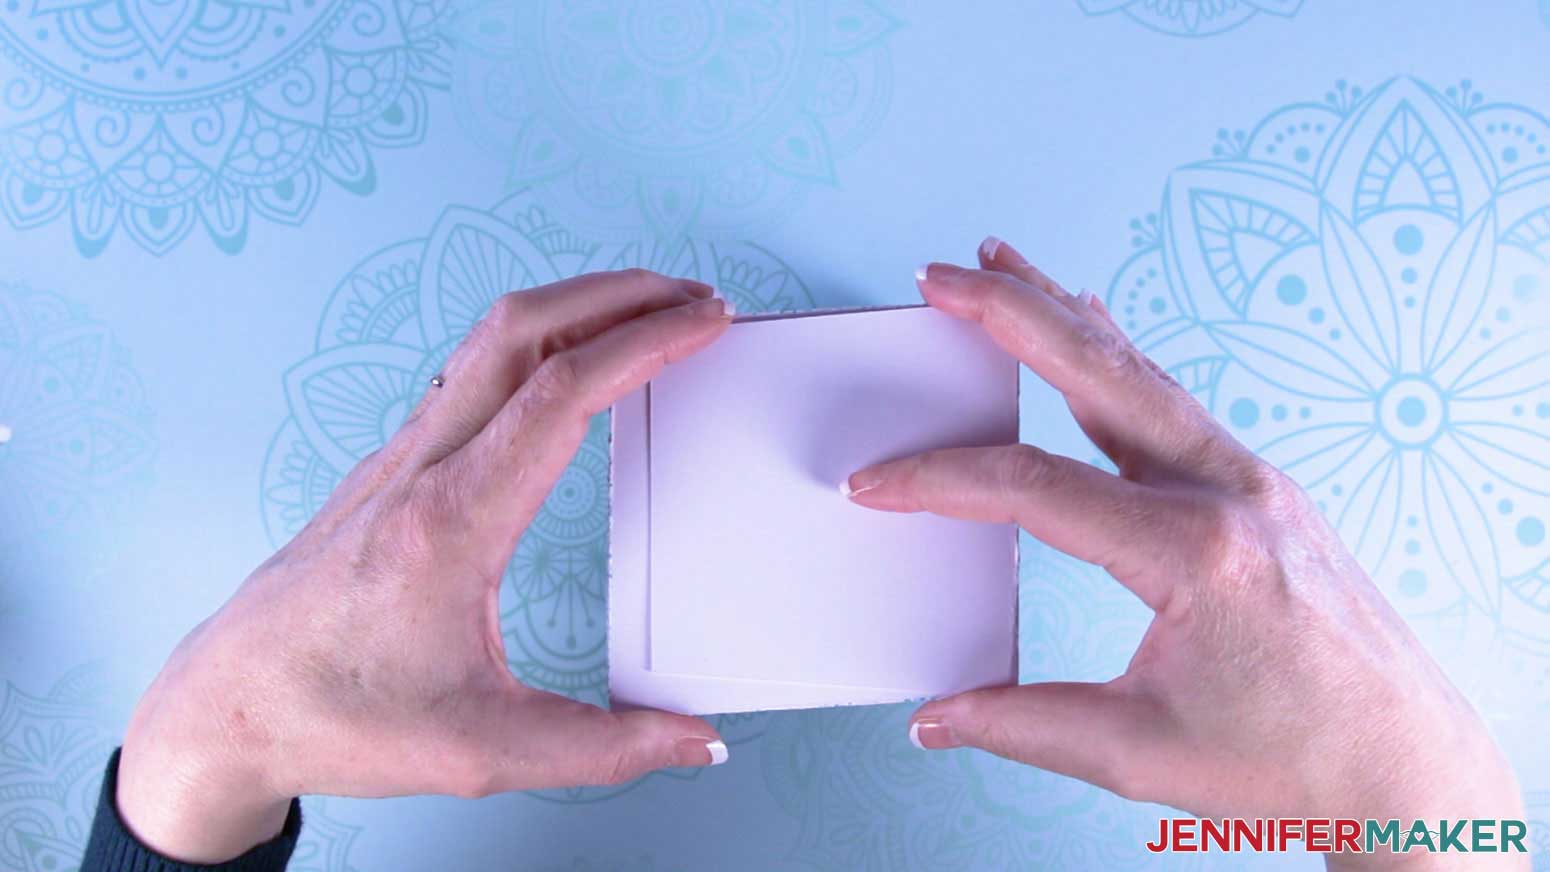
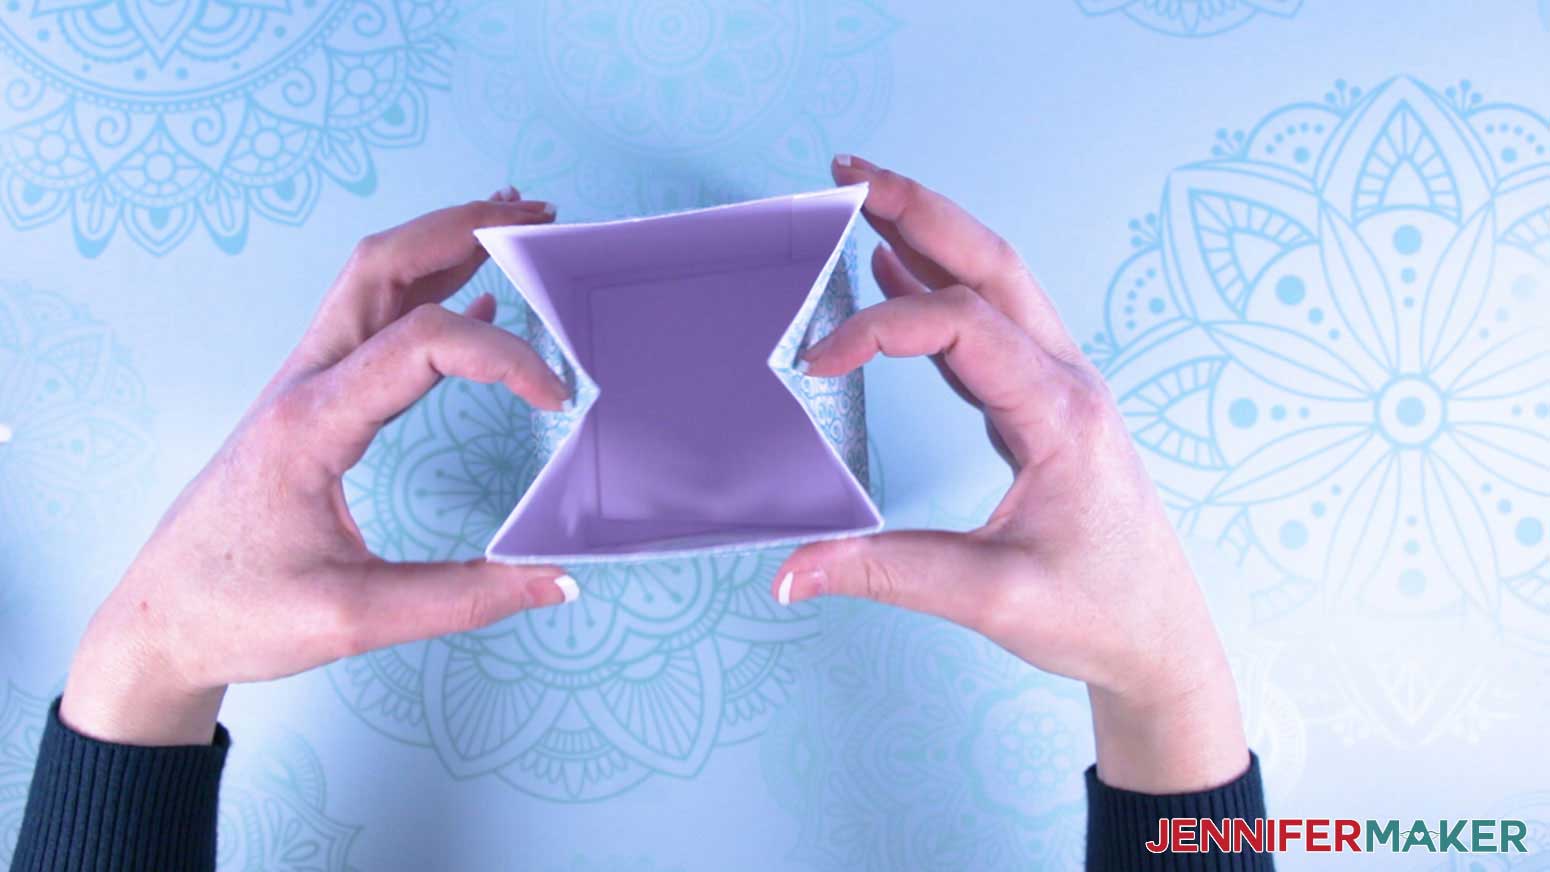
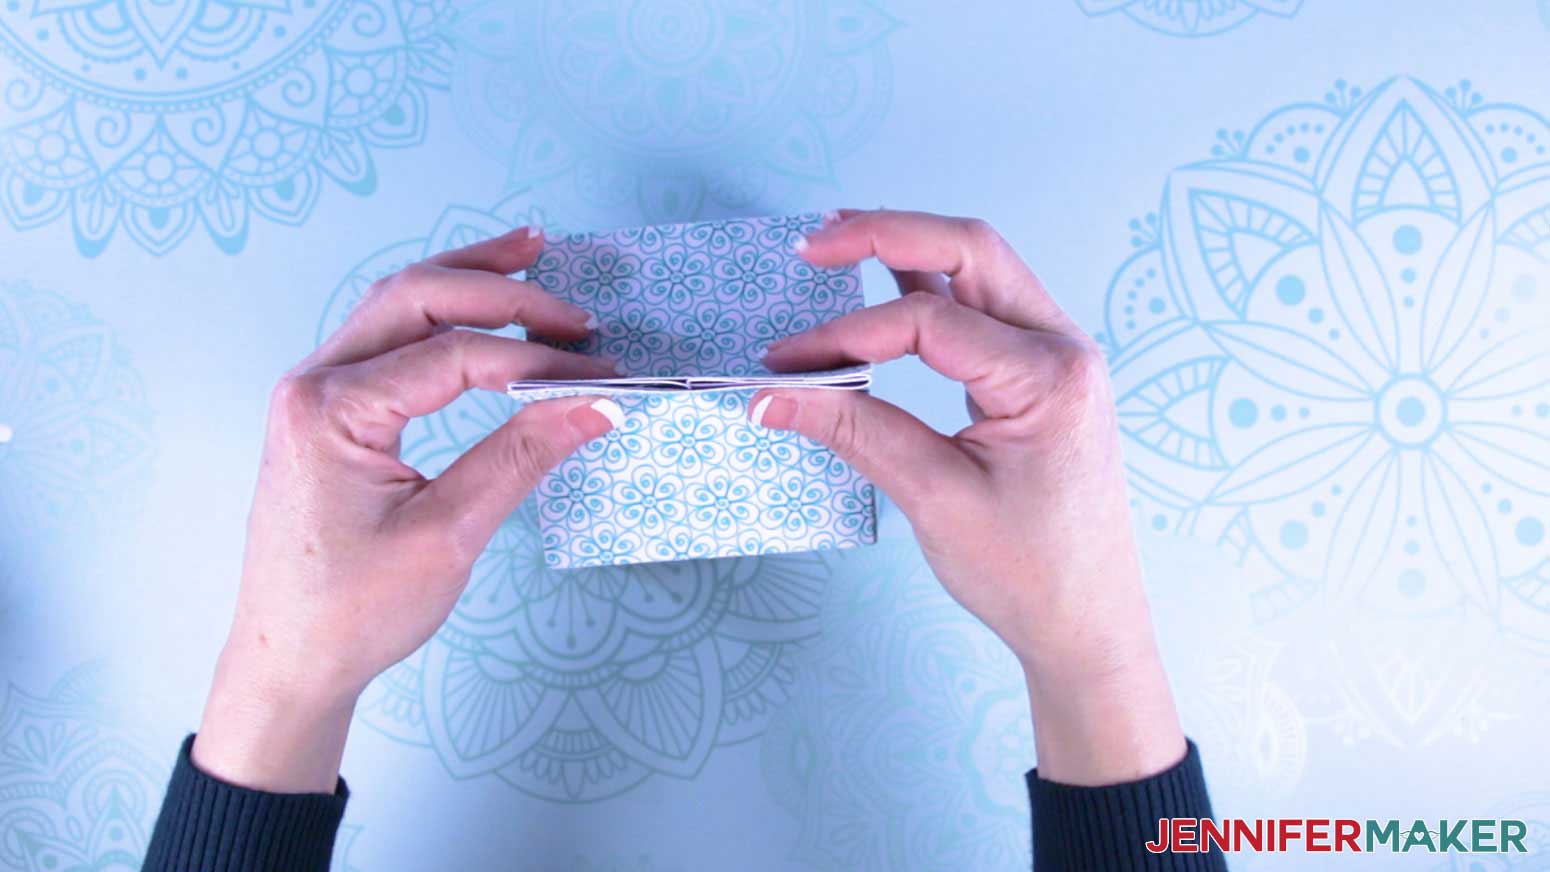
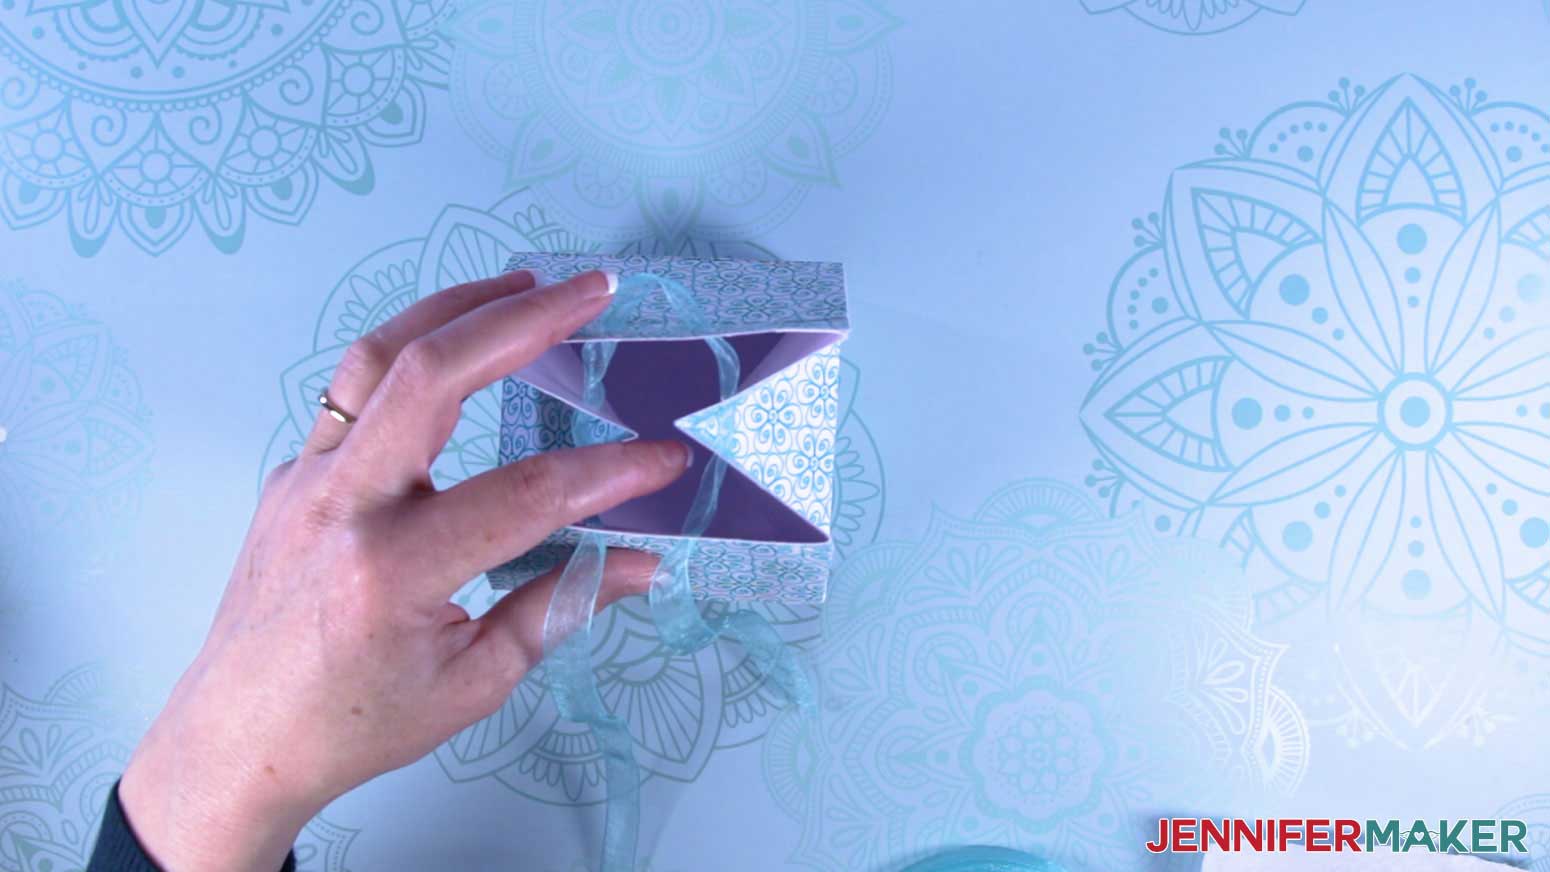
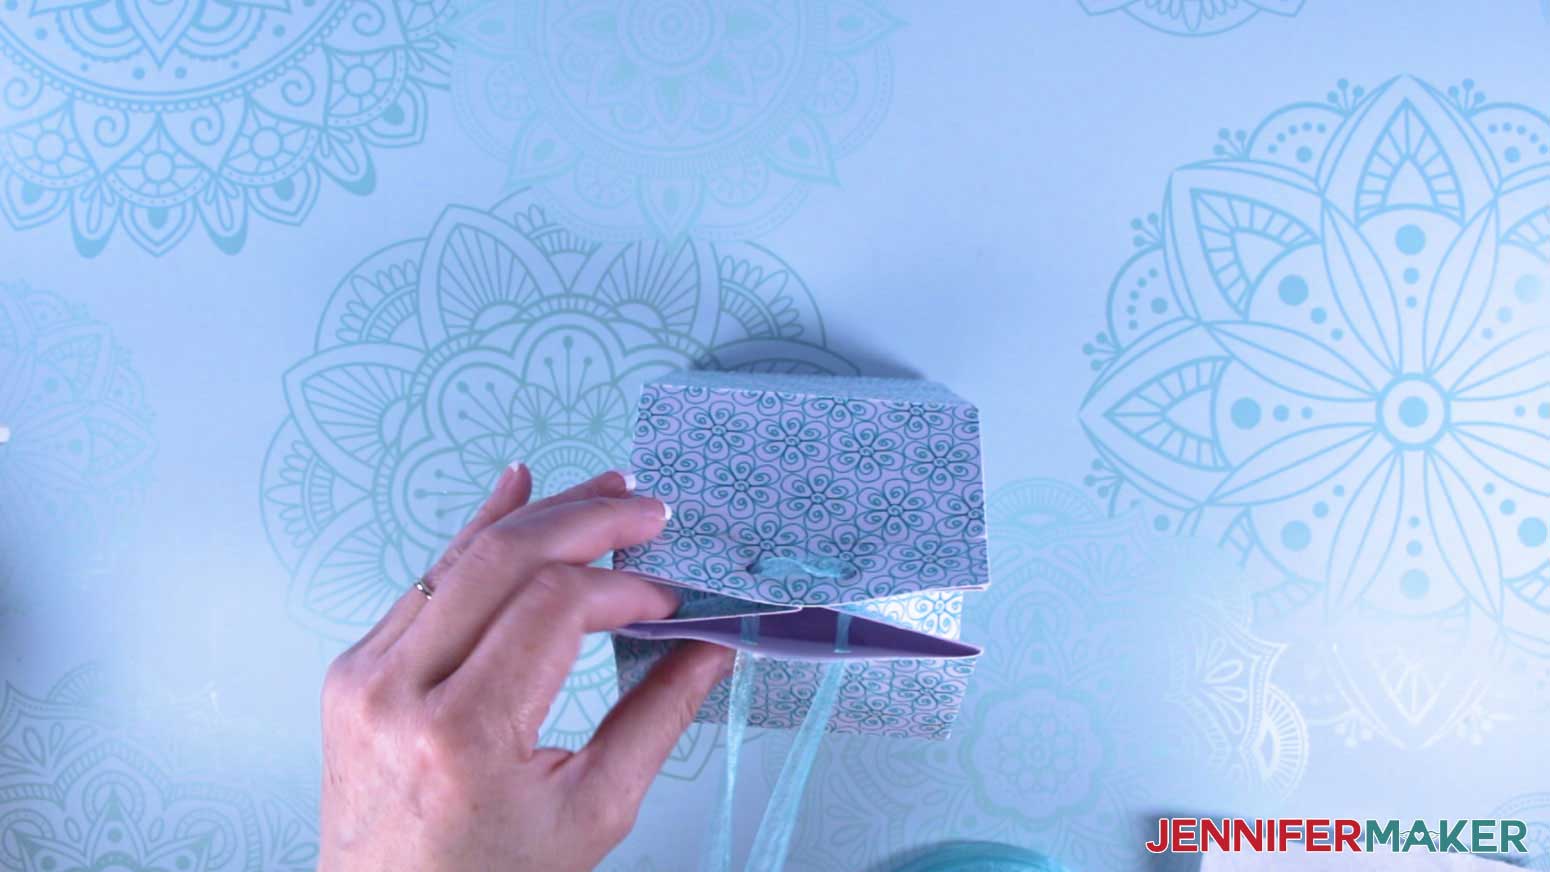
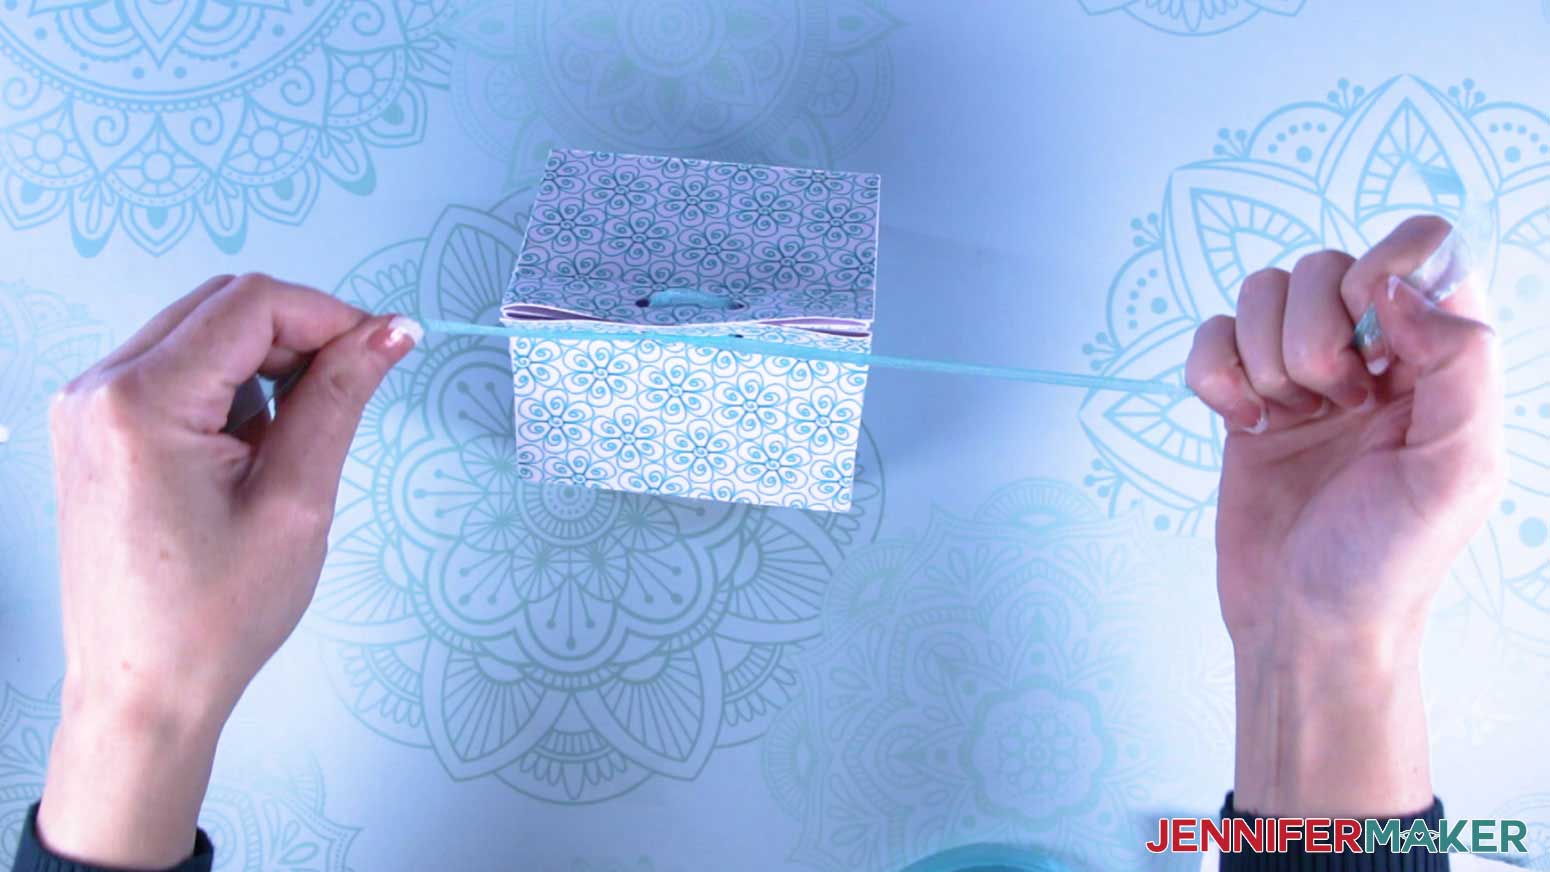
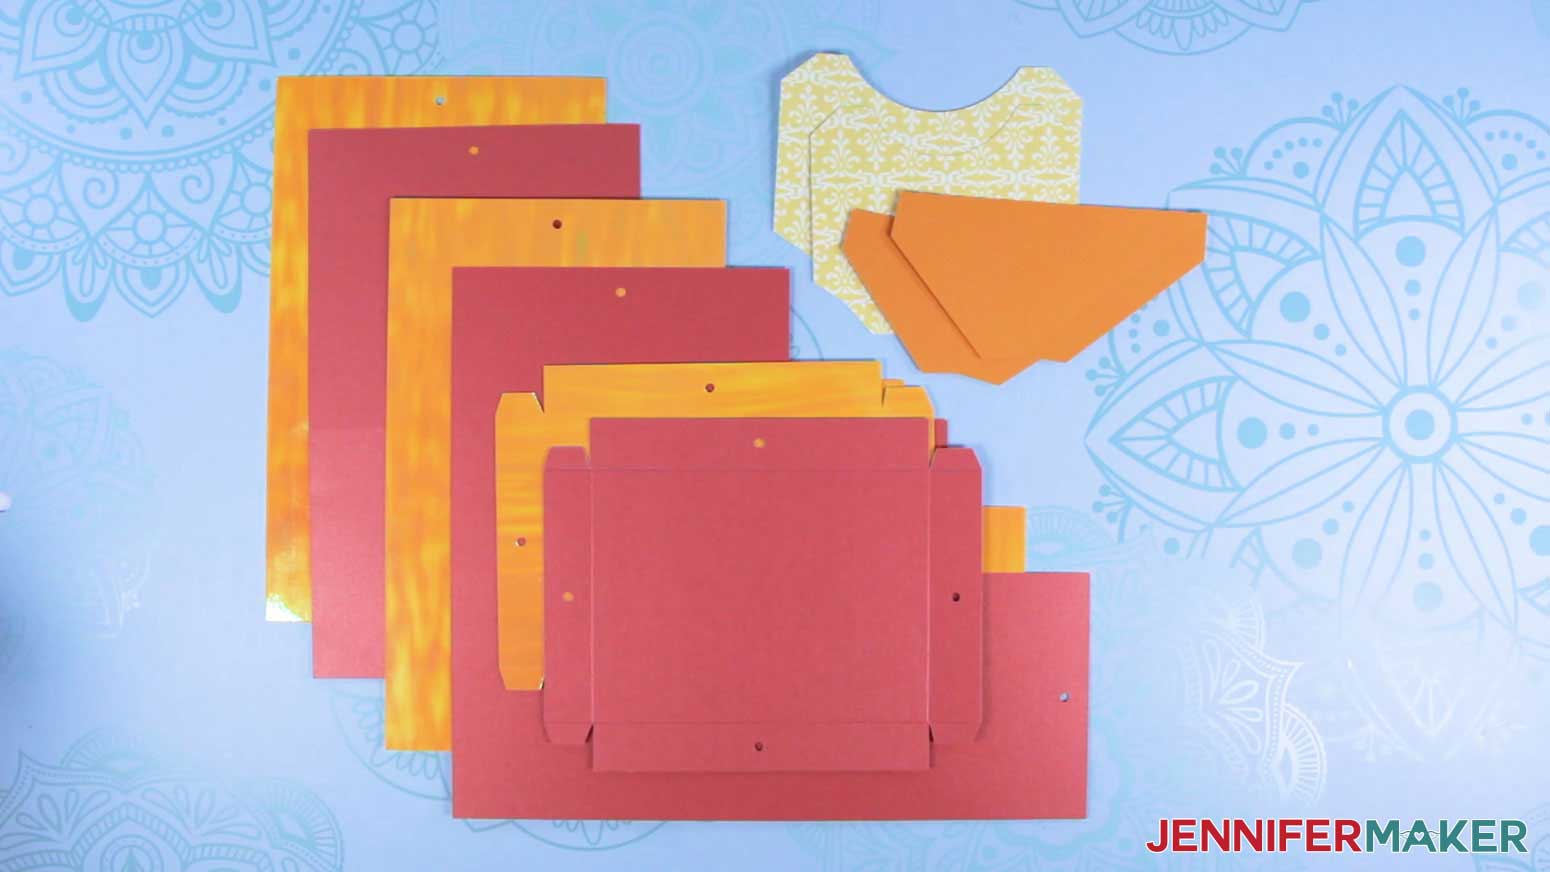
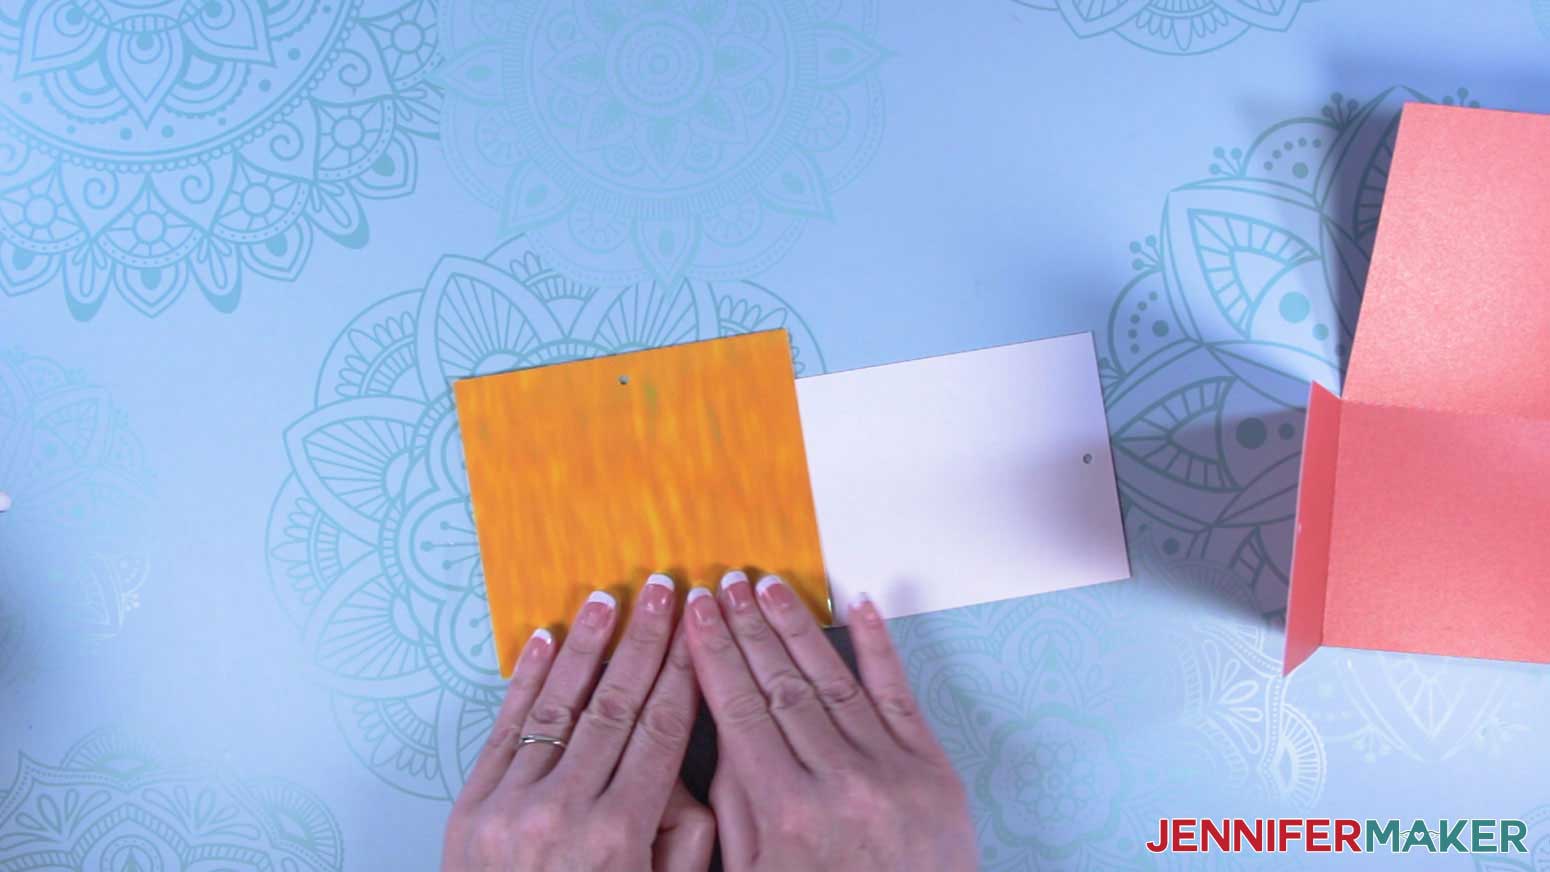
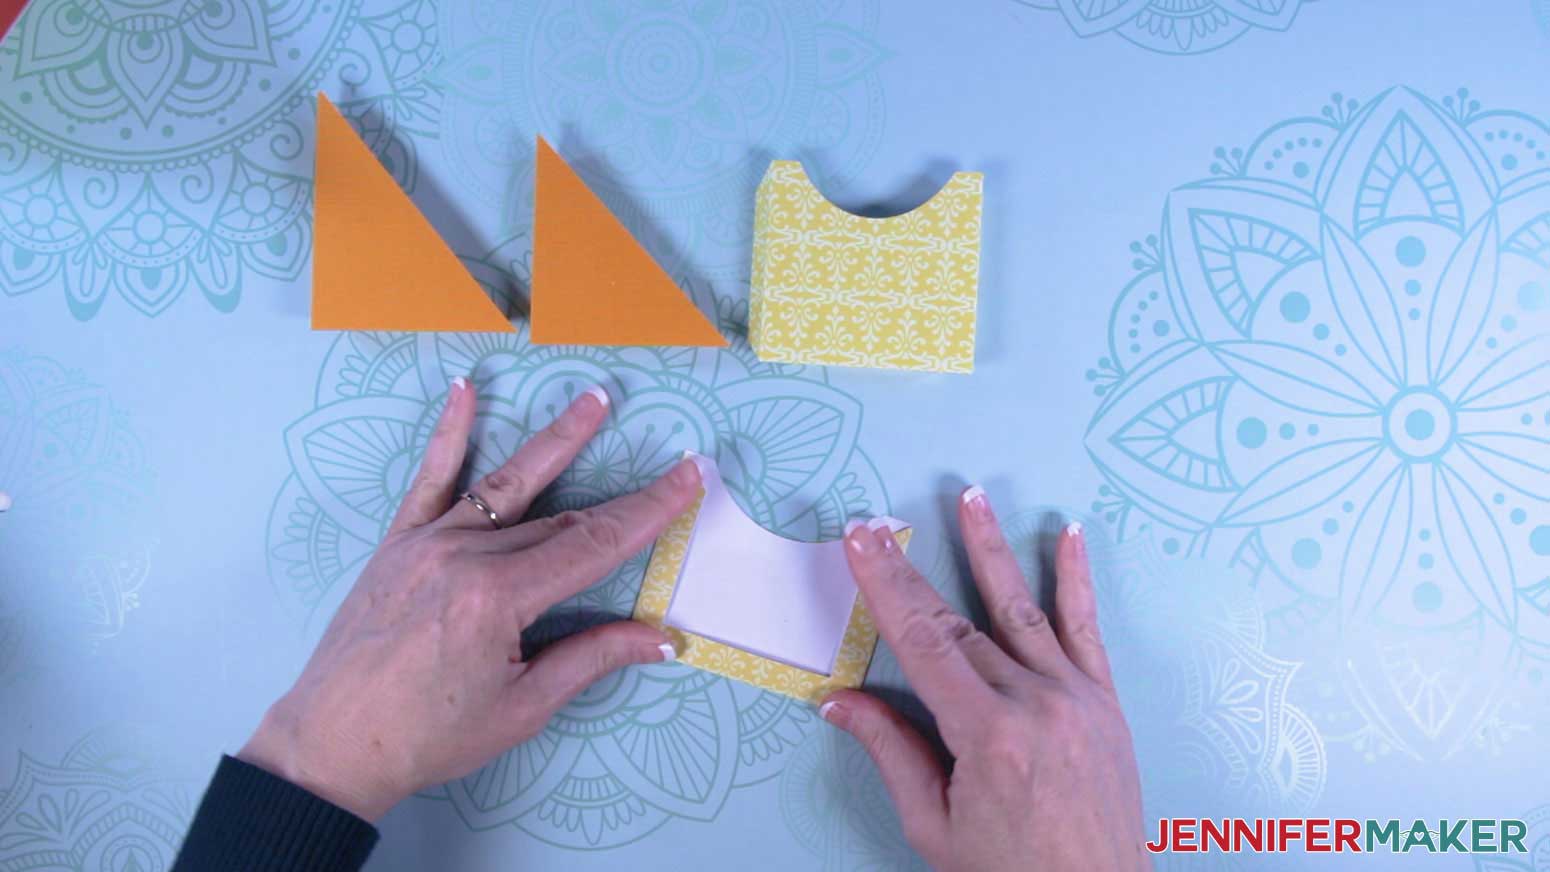
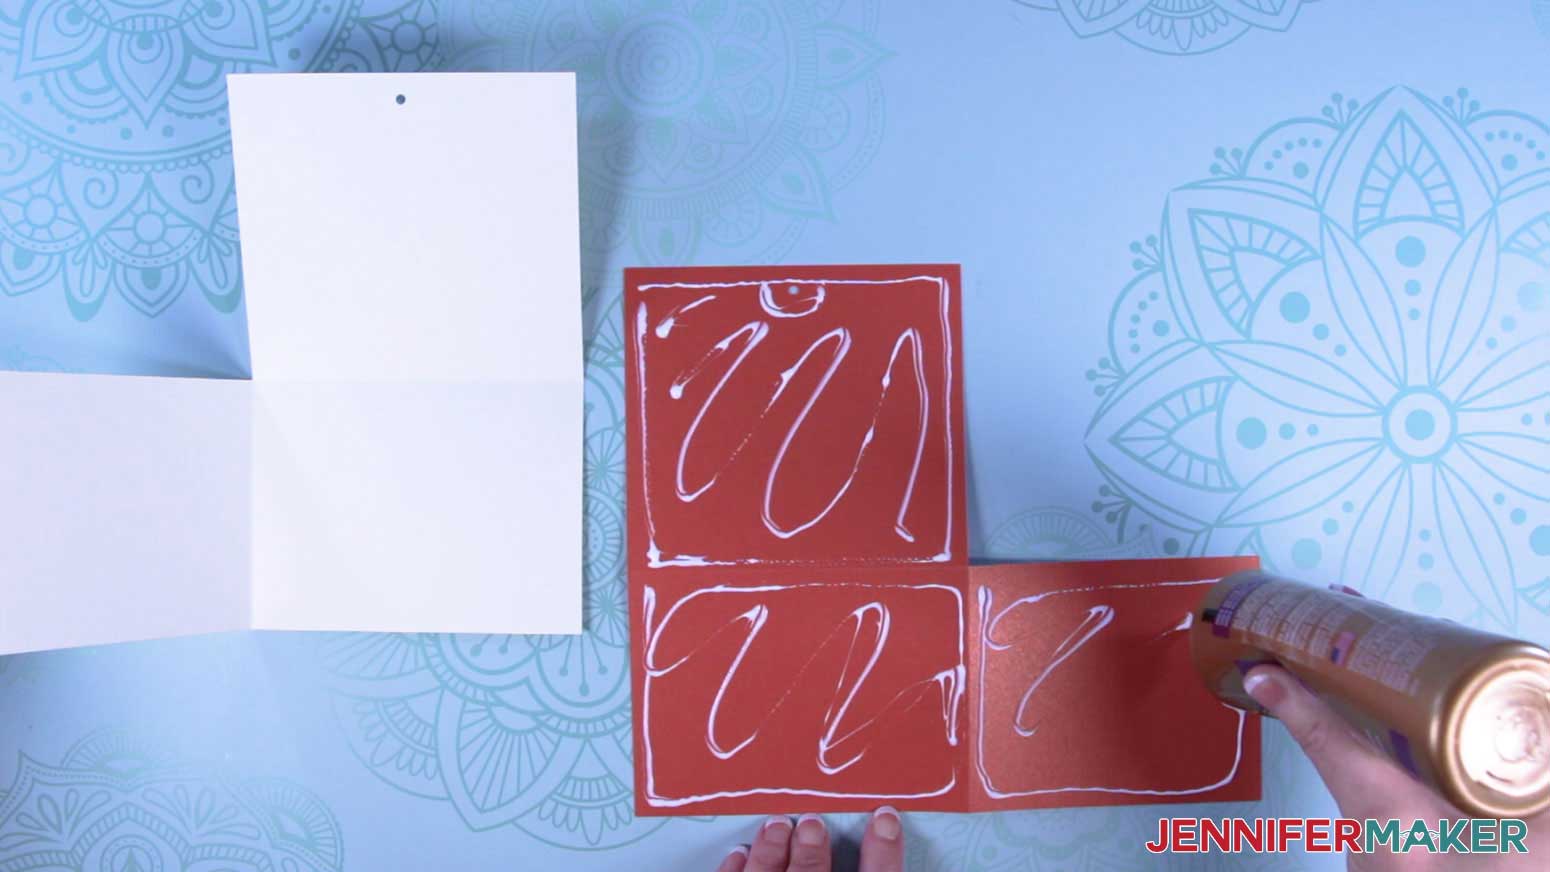
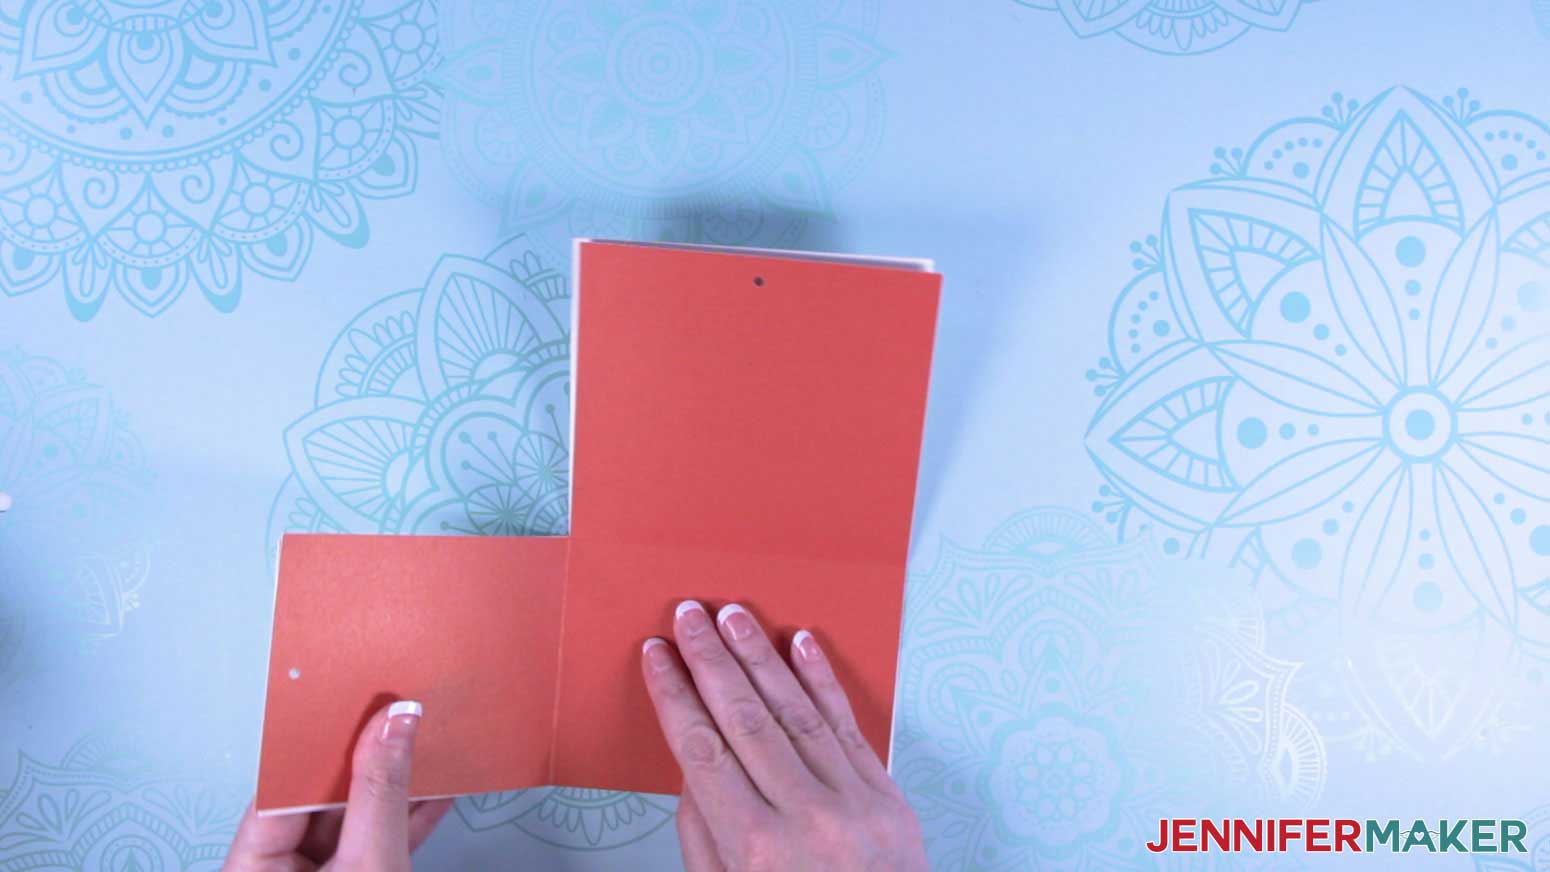
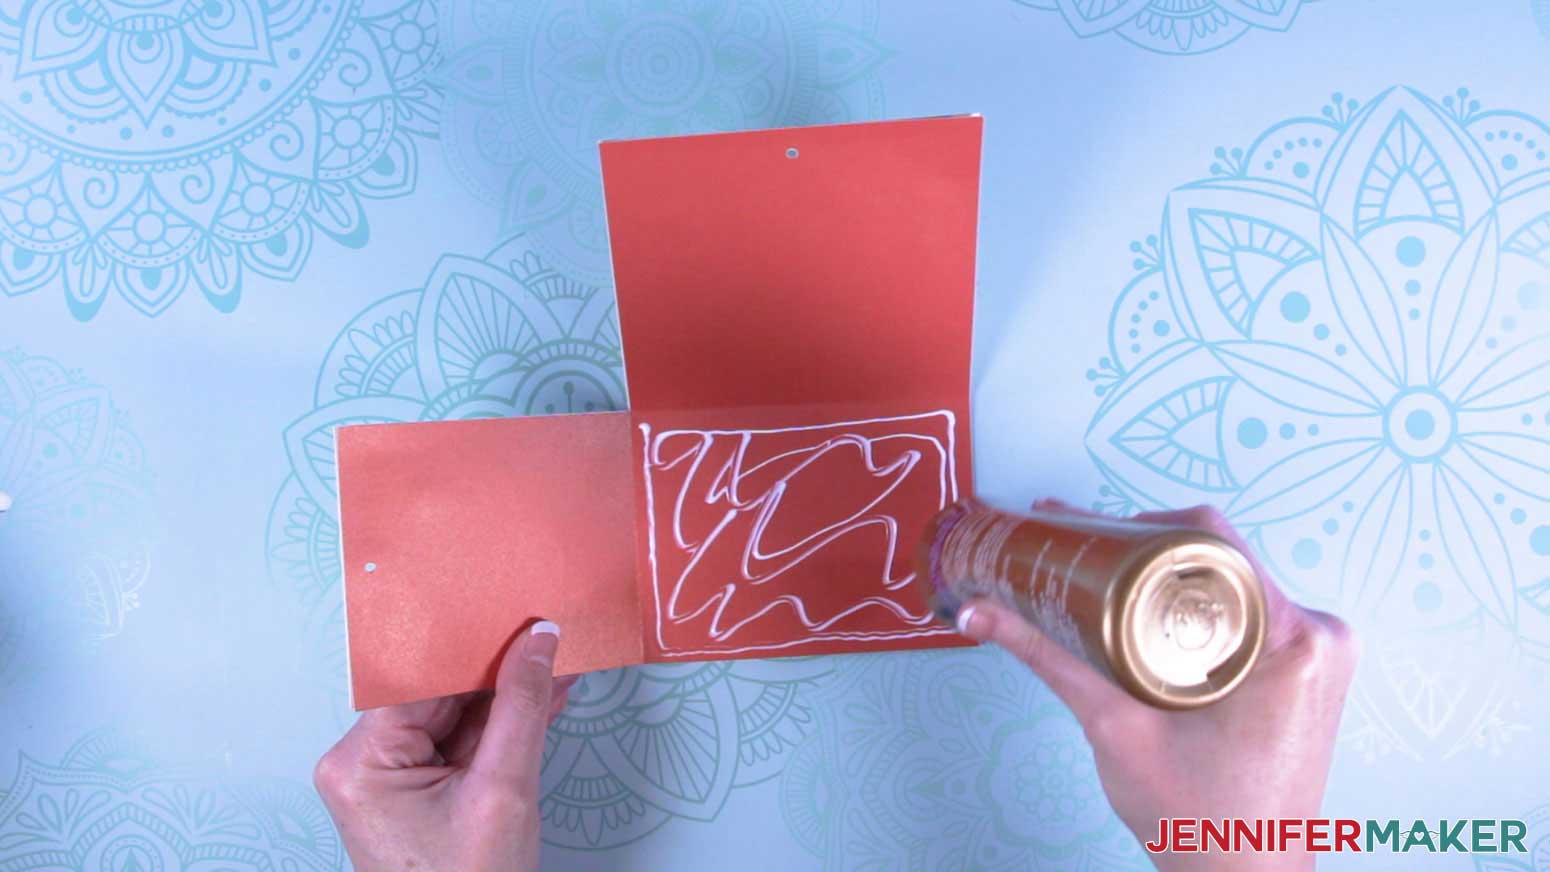
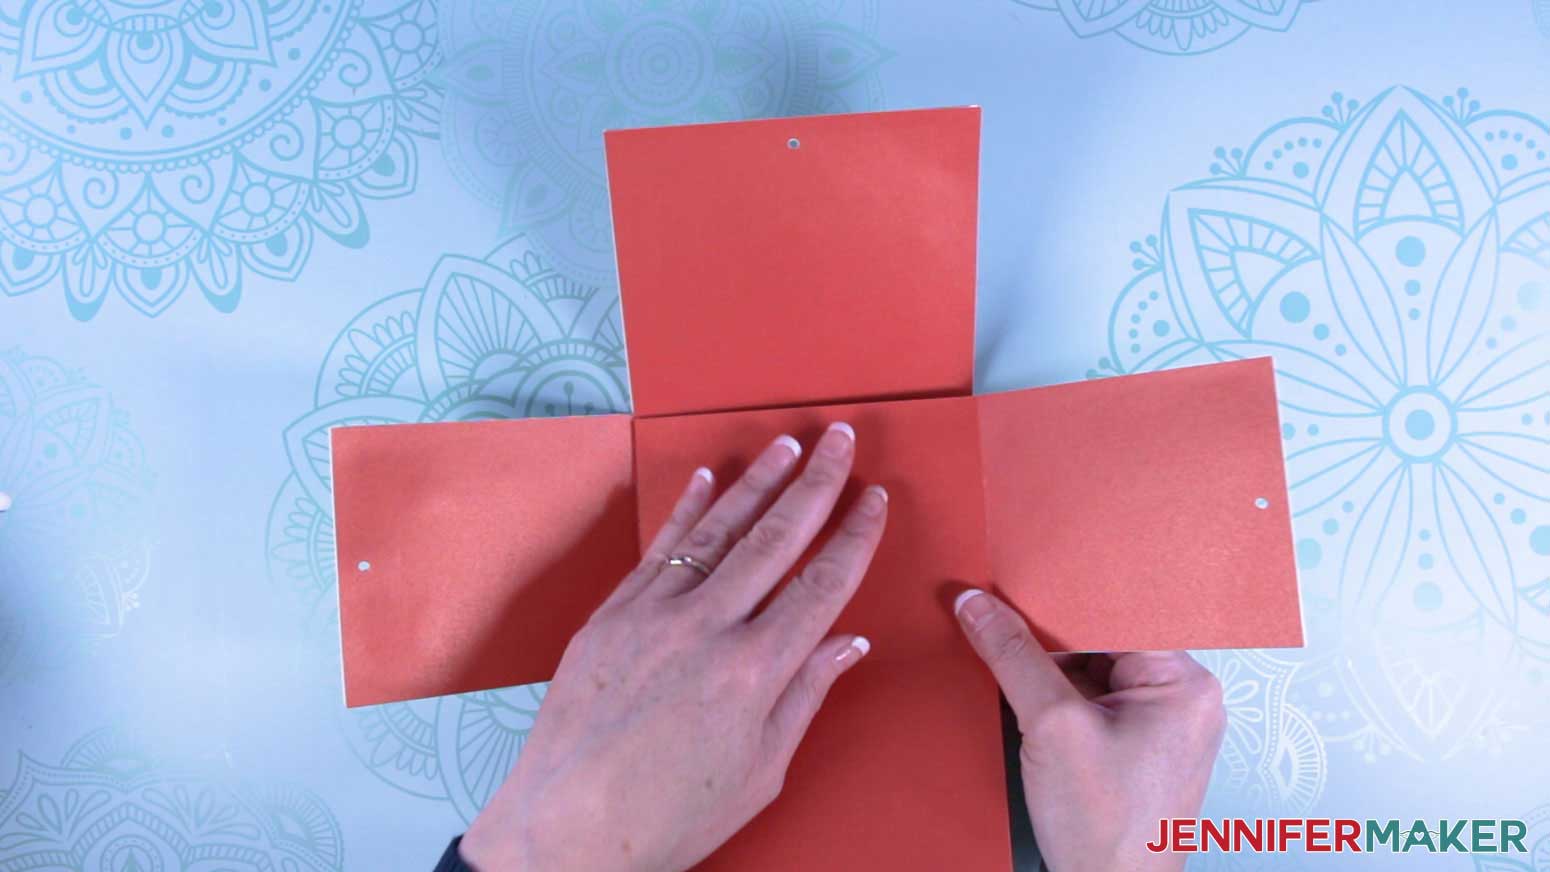
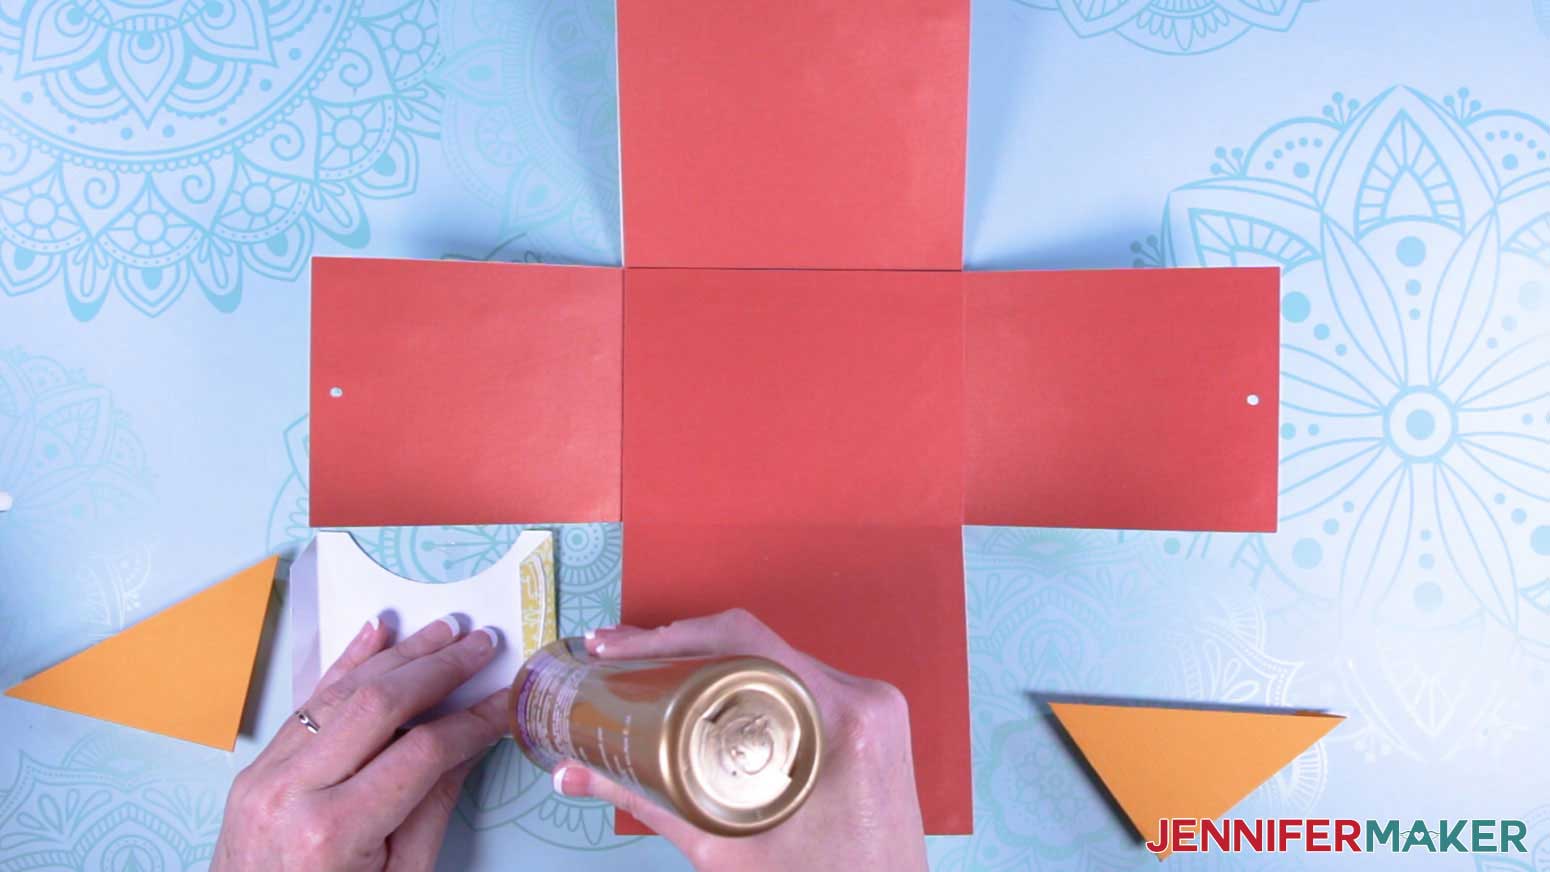
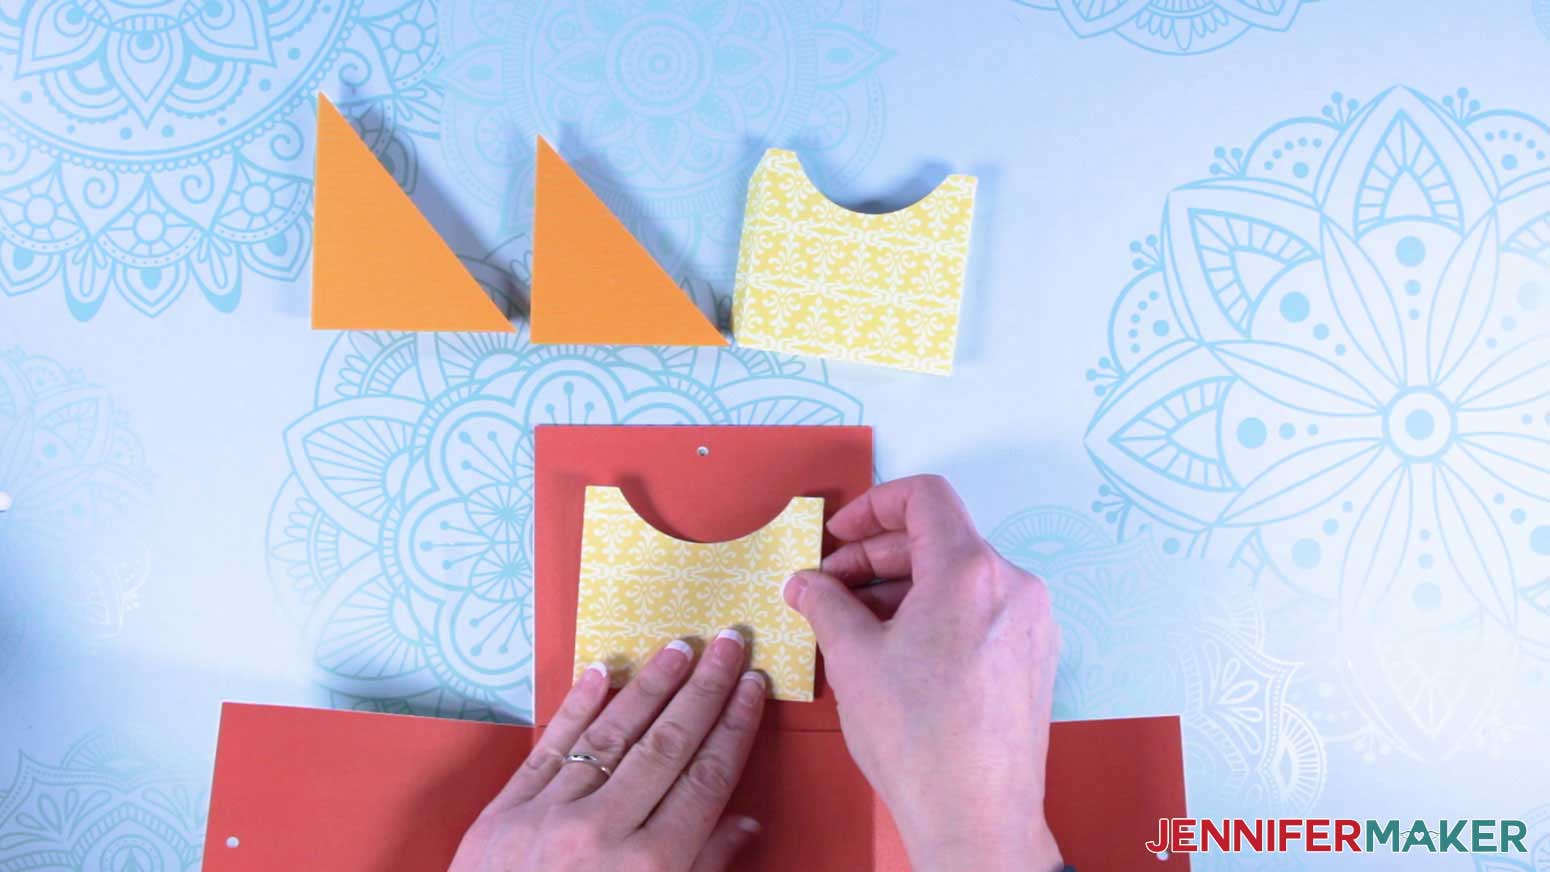
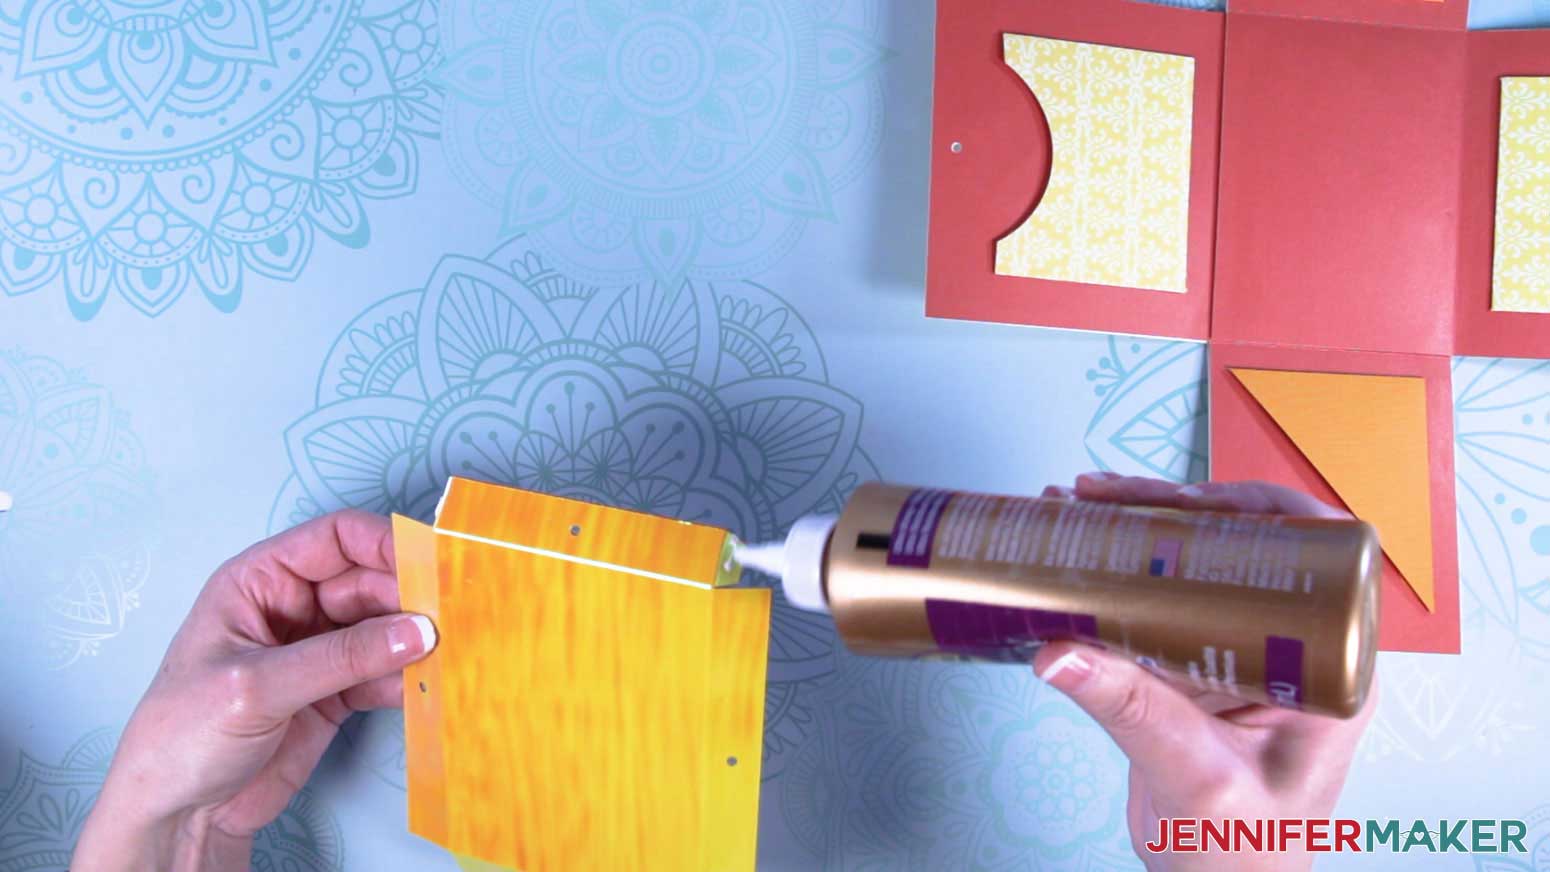
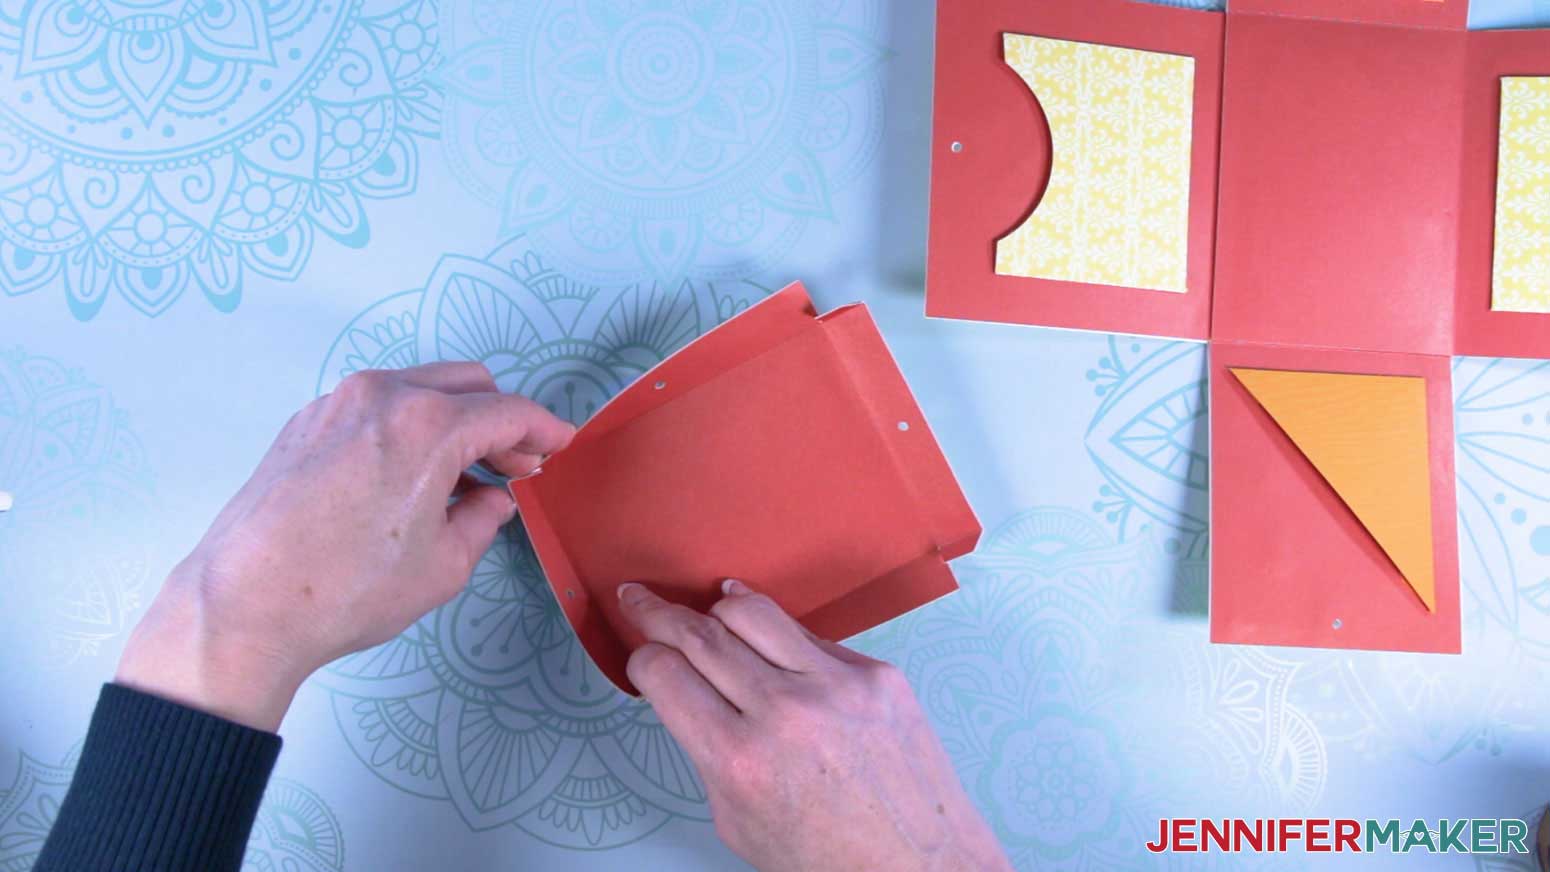
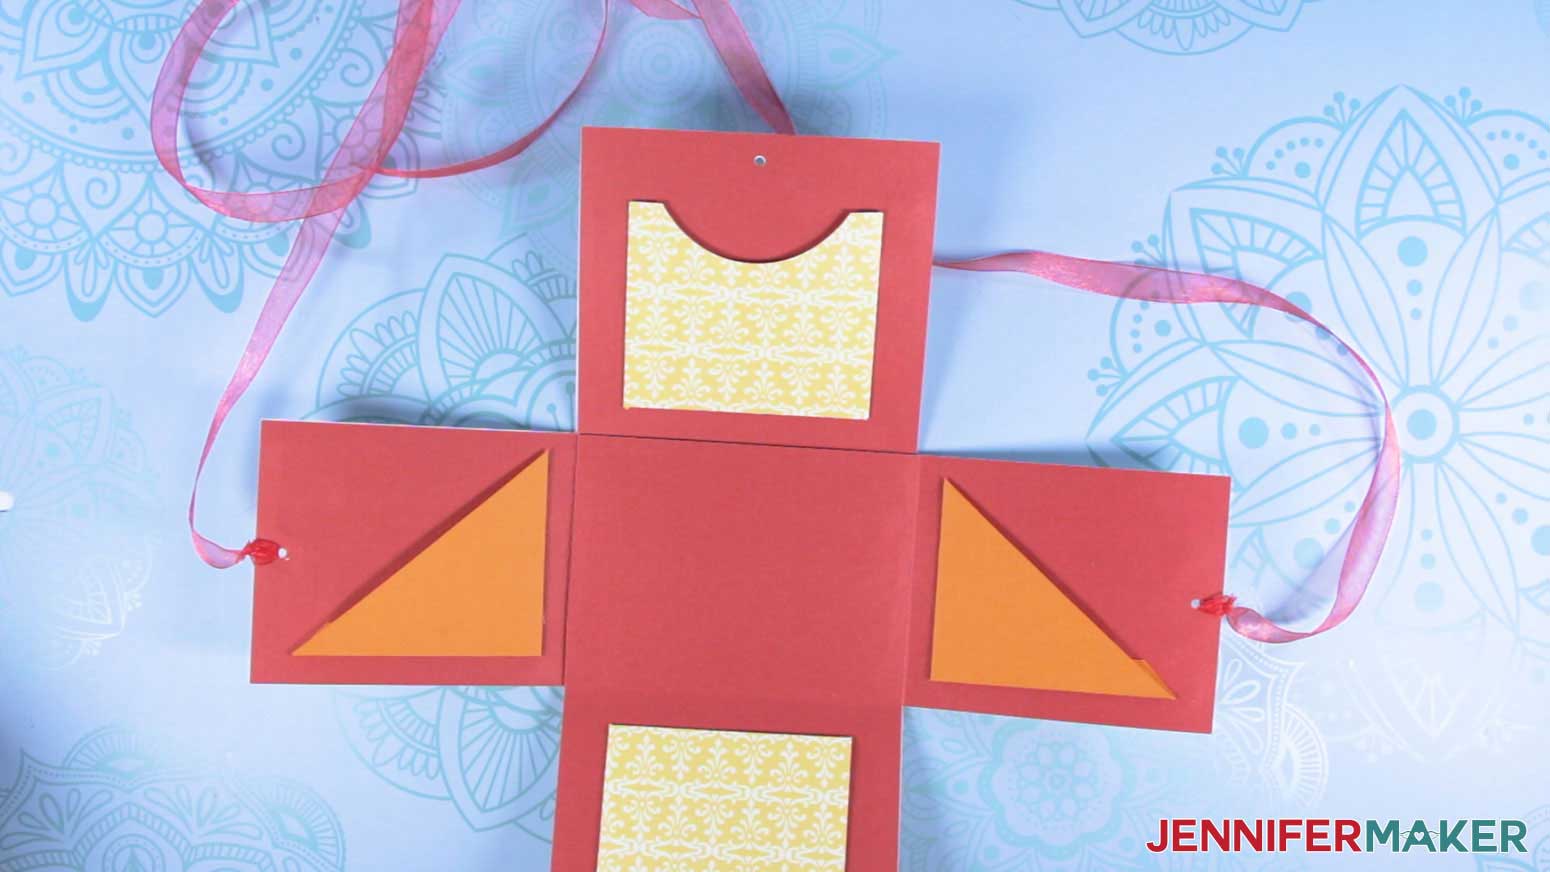
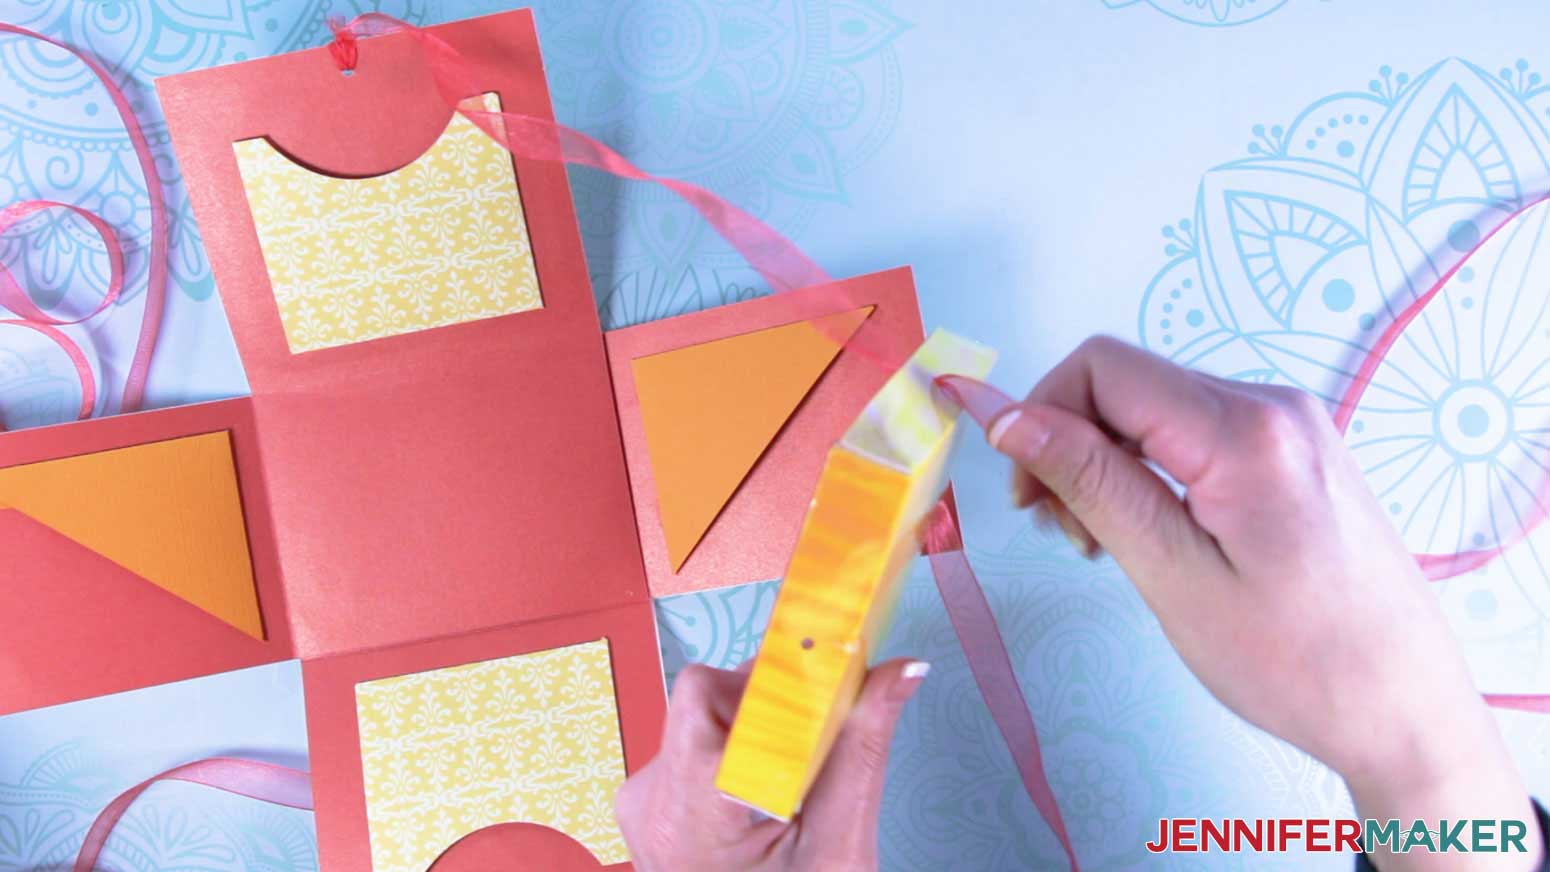
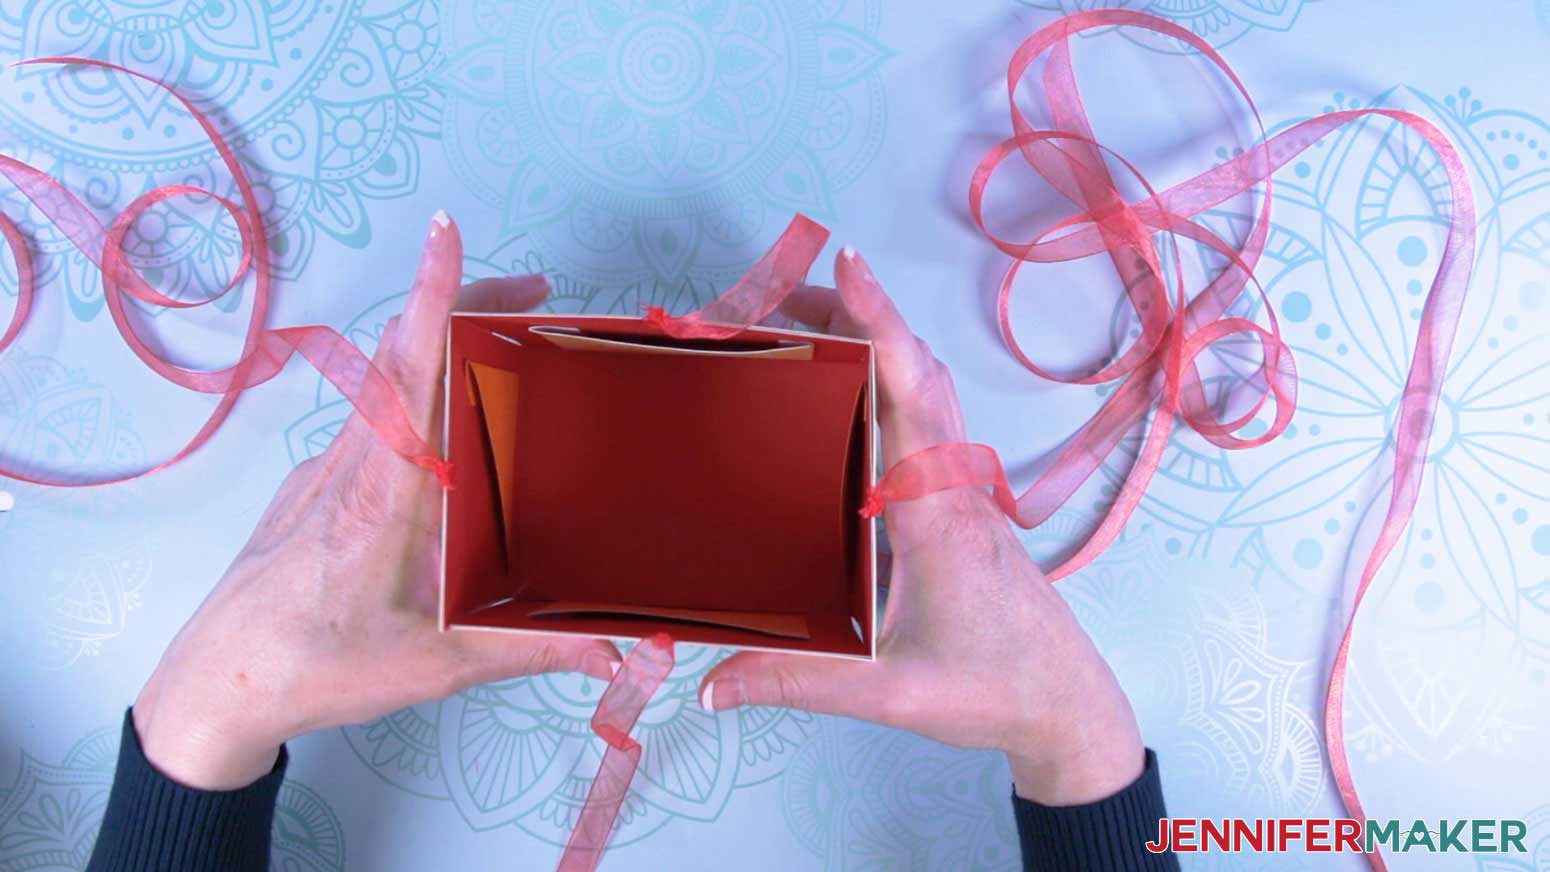
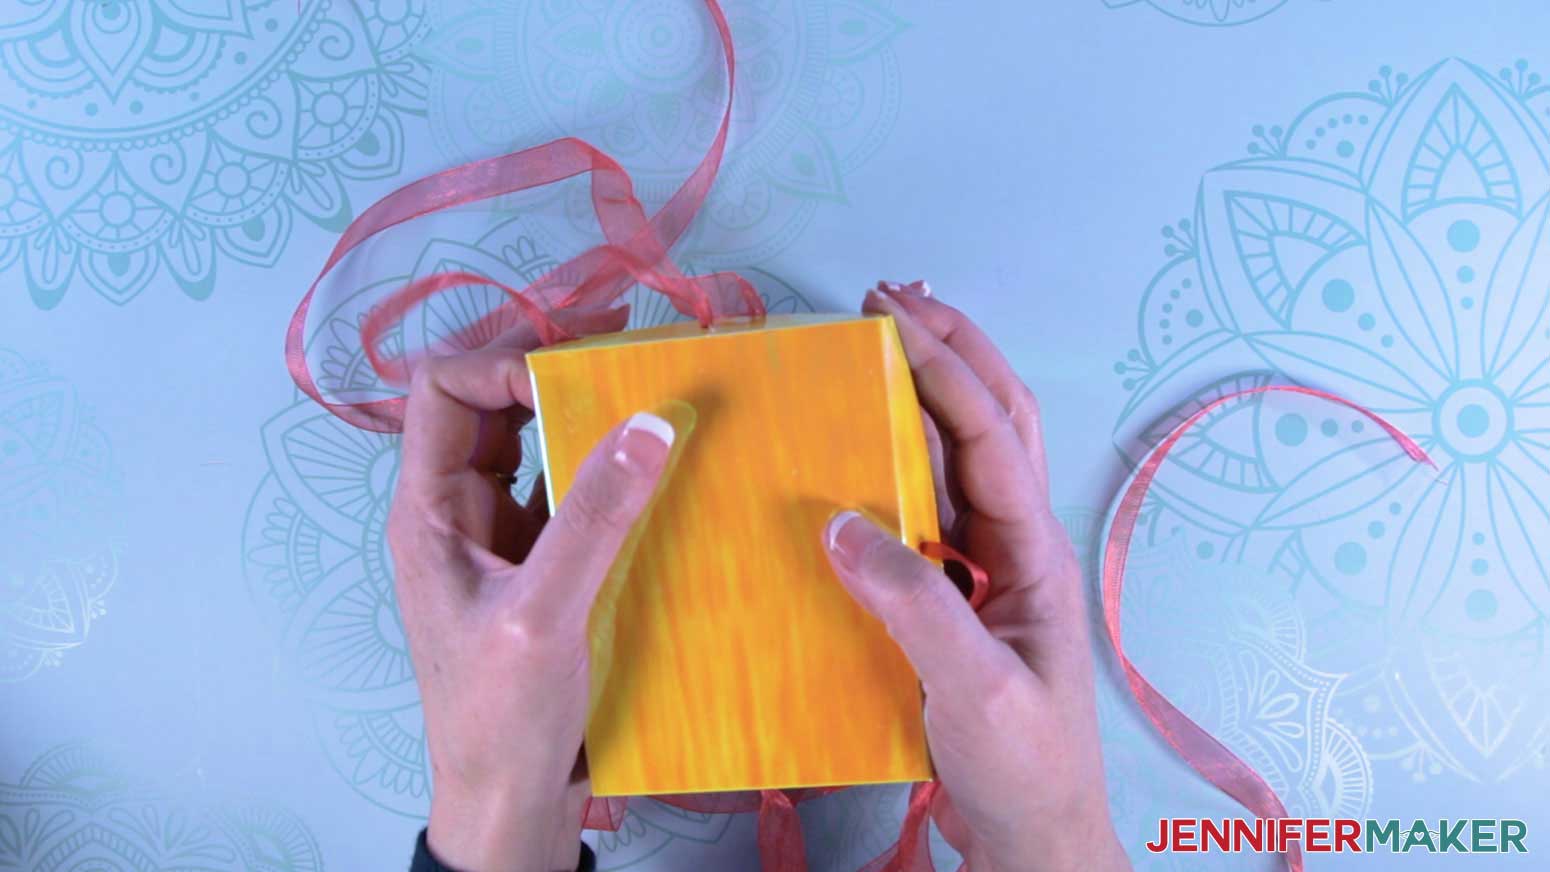
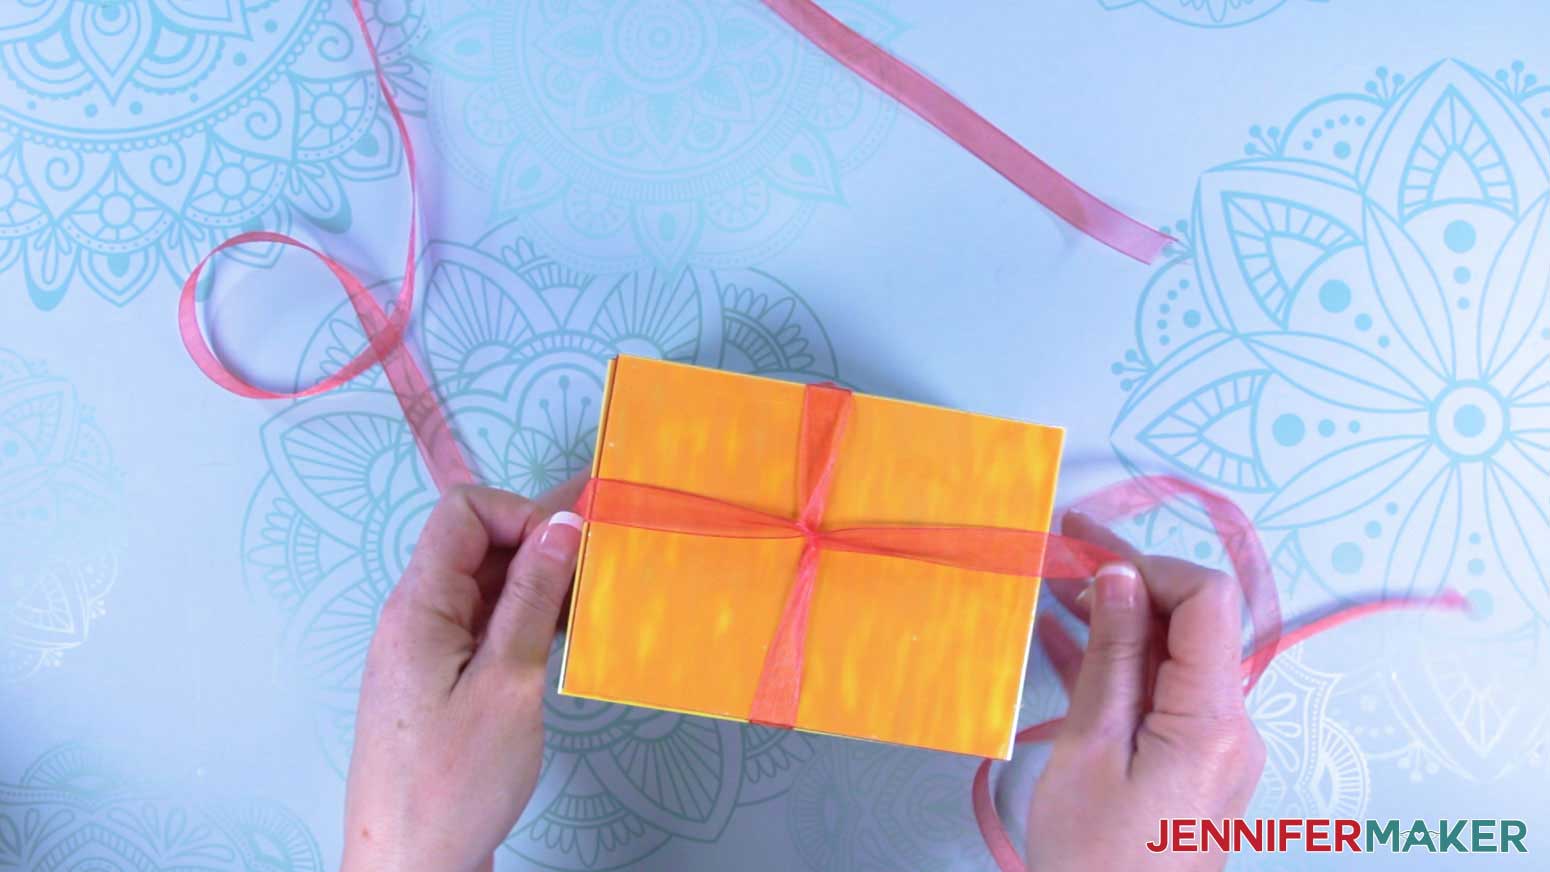
Surprise someone special with a personalized mug in a handmade gift box! First, download my free Mug Gift Boxes templates (Design #298) available in SVG/DXF/PDF formats from my free resource library. There are three different designs—a basic box with or without a window, a milk carton style box also with or without a window, and a mug explosion box. The Zip folder also includes gift tags and toppers to match some of my infusible ink mug designs (Design #288, #289 and #291), which are also all available in my free resource library. Each Mug Gift Box design comes in two sizes (one fits an 11" oz mug and is 4" W x 4" L x 4.125" H and the other fits a 15 oz mug and is 3.5" W x 4.75" L x 4.5" H). The designs can be scaled up or down to fit your particular mug. Just choose the size closest to your mug size as a starting point. Each box and its related components are in its own SVG. There are also separate files for the toppers and gift tags. If you're going to cut components on your cutting machine, upload the appropriate file to your design software. This is what the basic mug gift box, with a corner window, looks like once you upload it to Cricut Design Space: Here's how the milk carton style box, with windows and line drawings, imports: And here's the milk carton style box, with decorative wraps: The mug explosion boxes look like this: And the mug gift box tags and toppers import like this: Tip: If you're not sure how to upload an SVG cut file to Cricut Design Space, watch this helpful video training series I made. If you're on an iPhone or iPad, here's how to download and upload SVG files to the Cricut Design Space app. Each Mug Gift Box design is split into two sections that will cut out on a 12" x 12" piece of Kraft board. These designs include many score lines, which makes the box easier to fold. I've pre-set and attached these score lines for for you, so there's nothing you need to do. Scoring your box is very helpful, but not necessary. If you don't have a scoring stylus or scoring wheel, the easiest thing to do is just set your Cricut to use a scoring stylus and then go ahead and cut it without the stylus in place—it will take a little longer, but it means you don't have to go through and hide all of your score layers. To make this super easy for you, I colored the layers. I did this so you can click Make It right away and know that the pieces will cut out in order from the Kraft board layer first, then the vinyl or cardstock decorative layers, and finally the acetate layer (if you choose to cut out a window). If you are making these boxes to give mugs as gifts, I recommend you make your boxes out of Kraft board for strength since the mugs are quite heavy. You may then decorate them with vinyl or cardstock, like I did. However, if you choose to use only cardstock, I suggest you use the heaviest cardstock you can (100lb works best). I made the bottom flaps extra big so you can glue them together using tacky glue or your favorite glue. Gluing the flaps will add the necessary strength and peace of mind that the box will hold the mug without accidentally falling open at the base. The Basic Mug Gift Box comes in either a small square size (to fit an 11 oz mug) or large rectangle size (15 oz mug), and you can select a version that includes a corner acetate window or a version without. You can choose from the four SVG files in the Basic Mug Box SVG folder. This is an example of what the basic boxes with a window look like: All of these basic boxes can be decorated with vinyl or cardstock. To do this, you will need to create extra Cut layers by shift-clicking on the two Attached groups to select them and then clicking on Duplicate on the right side at the top of the Layers panel. You can change the colors of these two new layers to match your vinyl or cardstock if you want, so you have a reminder that those are the decorative layers when you start to cut. Note: I also made decorative toppers to match my cute animal mugs (Design #291), which work perfectly with these basic boxes. The toppers are in the Tags & Toppers folder. Each topper has two layers: a larger bottom layer and a smaller top layer. I used two different cardstock colors (glitter cardstock is the top layer) to make this adorable elephant. The Milk Carton Mug Gift Boxes also come in a small 11 oz or large 15 oz version, and can be cut either with or without a window. There are six templates in the Milk Carton Box SVG folder. There are two plain templates that can be decorated any way you choose. Again, you can decorate these with vinyl or cardstock by duplicating the two Attached groups and cutting them using your favorite vinyl or cardstock. There are four additional files in this folder that are my two special decorative versions that match my infusible ink mug designs (each version comes in a small 11 oz or large 15 oz size): These SVGs include a selection of decorative designs to match my Infusible Ink mugs with Fancy Wrap Mug Designs (Design #288). I will show you how you can add any of my inspirational quotes on them like I did to match my Handlettered Quote Decals for Mugs (Design #289). I used vinyl on my box, but you can also cut these wraps using cardstock if you prefer. The decorative wraps are already sized and included in this file so you can mix and match to your heart's content. You can get the handlettered quote designs in my free resource library (Design #289). Choose which size box you want to make and import it into Design Space. Begin by ungrouping everything, including all the wraps and the gray box segments. To do this, make sure everything is selected and select Ungroup on the right at the top of the Layers panel. Choose the wrap you want and delete all the others (you may choose to simply hide them, but I find it’s less confusing to get rid of the ones I’m not going to use). Now Ungroup the wraps you’ve chosen so the back and front layers are separate. You may need to Ungroup them a few times until you see they are separated layers. This is what my file looks like when I've ungrouped the wrap I've chosen. If you want to add a quote, upload the SVG file containing the quote you want to use and insert it into your Mug Gift Box project. In the case of my hand lettered quotes, you will see several within one file. Delete any extra quotes you don't want to use. Once you’ve selected and isolated a quote decal, make sure the decal layer is ABOVE the vinyl wrap layer. Use the arrows on the bounding box to resize or rotate it, and click and drag it into place over the front wrap on the side of the box WITHOUT the tent folds (the triangular score lines), like this. Carefully hold down your Shift key while clicking on the quote decal Basic Cut layer and the vinyl wrap Basic Cut layer that will appear on the front of your box. Select Attach at the bottom. Now the quote decal will cut out of the vinyl so you will see the box layer below when the box is assembled. This is an example of what your file will look like when it's ready to cut. Now we’re ready to start cutting! The other decorative Milk Carton Mug Gift Box files include line drawings to match my Infusible Ink Pen Mugs (Design #292). These designs are intended to be drawn with Cricut pens or markers directly on your Kraft board (or cardstock) as you cut them. You can also upload other pen art such as my Mandala Monogram Pen Art for Mugs designs (Design #293). Choose which size box you want to make and import it into Design Space. Begin by hiding everything by clicking on the eye icon next to the very top layer labeled with the file name. Everything will disappear from your canvas. Now, go through the layers showing and hiding the line drawings until you find the one you want to use. There are several individual Pen layers per line drawing (one layer for each color). So you'll want to click on the eye icons on the layers that say Attach so the entire group of all drawings (all colors) are shown together. Once you find the drawing you'd like to use, select all the other Attached groups and delete them by clicking on Delete at the top of the Layer panel. If you choose to cut out a window shape, repeat the process to select one of the pre-made shapes to match the pen drawing you chose. Delete all the other window shapes you're not going to use. TIP: You can also make your own window shape! To do this select a Shape in the Shapes menu on the left side of the canvas. Click on the shape to insert it onto your canvas. Use the arrow and rotate icons to move and change the shape, or click and drag it to move it. Now show all layers that are left. This is what my canvas looks like: The pen colors on the drawing are already designated, but you can change those to customize your design. Select a Pen layer (or Group of layers if you want them all to be the same color) and then click on the color square at the top Operation menu next to where it says Pen. Select the pen style and color you like. Your image color will change to reflect the change. Now is the time to make any final adjustments to your design. Nudge the window shape layer if you need to, and hide any extra Pen layers that you don't want. Be particularly aware of how the Pen layers interact with the window. Any part of the drawing that is WITHIN the window shape will be cut out and removed, so you may want to delete any layers that will be partially cut off by the window. This is an example of when you might want to remove an extra pen layer—in this case I would remove the butterfly Pen layers that are being cut off by the window: Next, you need to attach the Pen layers along with the window Basic Cut layer to the FRONT of the box. You also need to Attach the Pen layers to the BACK of the box. To do this, first Ungroup everything by clicking on the top layer to select all the layers and then clicking on Ungroup at the top of the Layers panel. Repeat the ungrouping process for the Pen layers, too, until everything is ungrouped. Now we need to Unattach the pen layers. Click on the layer that says Attach to select all the pen layers. Click on the Detach button at the bottom of the Layers panel. You also need to Detach each of the Gray box layers. Note: Both the front AND the back segments need to be Detached before you can proceed. This is what your canvas will look like when everything is Ungrouped and Detached: Carefully hold down your Shift key while clicking on all the Pen layers, the window Basic Cut layer and also the Score and Basic Cut (Gray) layers that will appear on the FRONT of the box (all the parts on the left side of the canvas). Select Attach at the bottom. Now select all the remaining Pen layers and the Score and Basic Cut (Gray) layers associated with the BACK of the box (all the parts on the right side of the canvas). Click on Attach at the bottom. The only layer that remains unattached is the acetate Basic Cut layer (shown in Dark Blue). This is an example of what your file will look like when it's ready to cut. You will have two Attached groups (one for the front of the box and one for the back) and a single acetate cut layer: Now when you click Make It, your Pen layers and the window Cut layer should stay aligned on the Gray box segments just like you had arranged them. The Explosion Mug Gift Boxes also come in two sizes, but they are slightly larger to make space for the pockets, and treats or tea bags. The smaller 11 oz box measures 4.5” W x 4.5” L x 4.125” H, while the larger 15 oz box is 3.75” W x 5” L x 4.5” H. Each file is set up and ready to cut. It has an exterior layer (colored in Gray), which I cut using Holographic Kraft board. The interior liner layer (colored in Orange) was cut using Shimmer paper or cardstock. There are also four pockets set up to cut using two different colors of cardstock. This is what the file will look like when imported into Design Space: Idea: If you want to write special labels such as "coffee," "tea," "sweets," or "treats" on the envelopes in this project, you can have your Cricut do the work for you! Read my Cricut Writing and Pen Tutorial for tips, tricks, and font ideas. Once you've selected the box you'd like to make and have finished customizing it, click Make It, then Continue, and choose your material—I am cutting my Kraft board using the Kraft board (or Holographic Kraft board) setting with the Scoring Wheel selected (you may use the Scoring Stylus if you prefer, but I find the wheel gets a deeper score on thicker materials like Kraft board, which is helpful for getting cleaner folds). Then just place the material you want for your first cut onto your cutting mat that correlates to your layer color (Gray=Kraft board, Other Colors=vinyl or cardstock), load it into your machine, and press the flashing "C" button to begin cutting. TIP: For those of you using textured cardstock, double-sided patterned cardstock, or holographic Kraft board: put the side you want to appear on the outside of your box face down on your mat. That way your score lines will be on the side of the cardstock that is inside the box, which is where you want it to be. When the cut is finished, unload your mat, flip your mat over onto your surface, and peel your mat away from the paper to avoid ripping or curling your material. Now just continue cutting until all sections and parts are cut out. NOTE: if you are drawing any designs, you will be prompted to load pens at the appropriate time. The flower design is quite intensive so allow for 30 minutes to draw each mat (for a total of one hour). The other line drawings will take less time, but may require more pen colors to swap out. Design Space will prompt you to load the corresponding pen color that you selected per layer, which is very helpful at this stage, but you may use any pen color you wish. Repeat the cutting process for any gift tags or toppers. Let's assemble our boxes! These are all the materials I cut for the basic Mug Gift Box with a window. This is for the version I made with the cute elephant topper. Fold along the score lines on all your pieces. Remember, if you used decorative Kraft board or cardstock, the score lines will be on the INSIDE of your box. You may want to use a scraper tool to get a sharp fold. Once everything is folded, glue the decorative exterior cardstock pieces to the Kraft board. They should fit together perfectly if your cardstock isn't too thick (I use 65lb paper). If you cut out the optional window and acetate, attach the acetate to the INSIDE of the box to fully cover the window. Be careful not to crease the acetate while folding it around the corner. Align the front and back sections of the basic Mug Gift Box. Now, put glue along the outer part of the tabs and attach the two sections. Repeat until your box is enclosed. Fold in the base tabs of the box and assemble them with the long straight side first, then the two shorter sides, and tucking in the long flap so it's on the inside and holds everything together snuggly. TIP: If you are using cardstock for your entire Mug Gift Box instead of Kraft board, I recommend you glue your bottom tabs together to add strength so the box holds the weight of the mug. Now add a mug and fold the top down. If you cut decorative toppers or vinyl decorations, add those at the end. For the elephant topper, I used 3D dot tape to add dimension between each of the layers. I added vinyl butterfly stickers around the box. I got the butterflies from the cute elephant mug design (Design #291). This is what my finished, decorated window boxes look like! The one on the left is the large 15 oz version made with Holographic Kraft board. The mug gift box on the right is the smaller 11 oz version made with white Kraft board covered in cardstock and decorated with a topper and vinyl butterflies. Milk Carton Mug Gift Boxes #1: Wraps with handlettered quotes Here are all the materials I cut and used to make the mug milk carton box with a vinyl wrap: First, we attach the vinyl wraps or glue any decorative cardstock pieces to the Kraft board. If you are using vinyl, you will first need to weed it by removing all the parts you don't want. Depending on how complicated your design is, you may need to use transfer tape to transfer your design to the Kraft board. To do this, cut a piece of transfer tape the same size as your vinyl design. Remove the backing from the transfer tape. Apply the transfer tape to your vinyl decal. Smooth the tape over the decal from the center outward to remove any bubbles. Use a scraper tool or other hard and flat-edged item (like a store loyalty card) to transfer the vinyl decal design to the transfer tape. It’s important to scrape it well to transfer the vinyl decal. Carefully peel the carrier sheet off the decal. If little bits don’t want to transfer to your tape, scrape it again and pay careful attention to those problem areas. Now place your design on your surface, being mindful that it is straight and centered. You’ll want to align the bottom of the vinyl with the bottom of the milk carton, along the score lines just above the bottom flaps. Using a scraper tool, scrape the surface of the transfer tape down to transfer the design to the Kraft board. Now just pick up a corner of the transfer tape and slowly remove it from your decal. Repeat for the second piece of Kraft board. You should end up with two sections wrapped in vinyl. Fold along the score lines of your two Kraft board pieces. You may want to use a scraper tool to get a sharp fold. TIP: Remember, if you used decorative Kraft board or cardstock, the score lines will be on the INSIDE of your box. Now, put glue along the outer part of the tabs and attach the other section. Repeat until your box is enclosed, like this. Fold in the base flaps of the box gluing them to each other as you fold them in. Place your mug gift box on a flat surface and apply pressure from the inside, making sure your box is straight and not crooked, until the glue sets. Fold in the sides of the box like this. Notice the direction of the tent folds. Now put a mug inside the box and pinch the top pieces together. I threaded ribbon front-to-back through the holes on one side, and back-to-front on the other side. Tie a pretty bow and now your box is held together! I also cut gift tags and attached them using matching spare ribbon. This is what my finished, decorated milk carton mug box with a vinyl wrap and handmade quote looks like! Milk Carton Mug Gift Boxes #2: Line drawings with a window Here are all the materials I cut and used to make the Milk Carton Mug Gift Boxes with lineart drawings: Fold along all the score lines on both the front and back sections. Notice the direction of the tent folds. If you cut out the optional window and acetate like I did on the pen-drawn version, attach the acetate to the INSIDE of the box to fully cover the window. Fold in the base flaps of the box gluing them to each other as you fold them in. Place your box on a flat surface and apply pressure from the inside, making sure your box is straight and not crooked, until the glue sets. Fold in the sides of the box like this. Notice the direction of the tent folds. Now put a mug inside the box and pinch the top pieces together. I threaded ribbon front-to-back through the holes on one side, and back-to-front on the other side. Tie a pretty bow and now your box is held together! I also cut gift tags and attached them using matching spare ribbon. This is what my finished, decorated milk carton mug box with line art drawings looks like! And this is what both my decorated Milk Carton Mug Gift Boxes look like. The one on the left is the smaller 11 oz version with line art drawn directly on white Kraft board. The one on the right is the larger 15 oz version made of white Kraft board covered in a pretty vinyl wrap. These are all the materials I cut for the Explosion Mug Gift Boxes. Fold along the score lines on all your pieces. Remember, if you used decorative Kraft board or cardstock, the score lines will be on the INSIDE of your box, except for your cardstock liner if you cut one. You may want to use a scraper tool to get a sharp fold. Once everything is folded, attach the interior liner to the exterior Kraft board with glue. You will end up with two box segments. Now add plenty of glue to the base square and press them together. Add glue to the pocket tabs and attach them to the interior sides. Assemble the lid by first attaching the liner to the Kraft board with glue, and then gluing the tabs closed. TIP: If using tacky glue, it helps to use binder clips or gator clips to hold the tabs closed while the glue sets. This step isn't necessary, but it keeps you from having to hold them closed while the glue sets! Cut long pieces of ribbon for each side (I measured each piece at 48" but had extra that I trimmed off). Attach each ribbon to the inside box, and then thread from the inside of the lid to the outside. Repeat this for all sides. Fill the pockets with tea bags, instant coffee packets, or other treats. Add a mug to the middle, and align the lid over the four sides as you squeeze them closed. Pull the ribbons tight and tug them down under the box. Flip the box upside down and twist the ribbons of each opposing side together and thread them back up the sides to the top. Bring them all together and tie a pretty bow snuggly on top. Your fun explosion box is ready! This is what my finished Explosion Mug Gift Boxes look like. The one on the left is the closed smaller 11 oz version. The one on the right is the open larger 15 oz version. Both are made of Holographic Kraft board. This is what all my fancy decorated mug gift boxes look like! Special thanks to the Design Fairy Team, specifically Kelly for helping me design and assemble these coordinated mug boxes.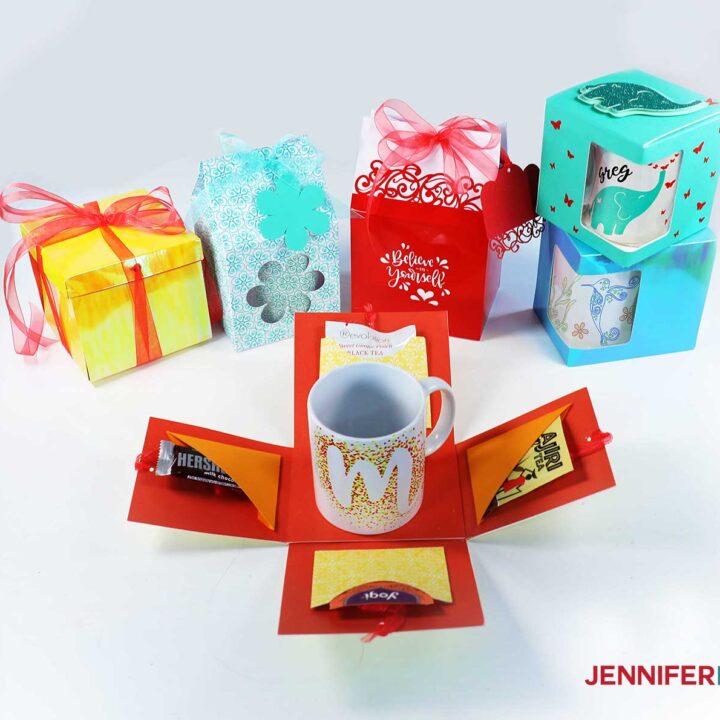
Mug Gift Boxes
Materials
Tools
Instructions
STEP 1: GET MY FREE MUG GIFT BOXES TEMPLATES
STEP 2: SET UP THE MUG GIFT BOXES FILES IN DESIGN SPACE
Basic Mug Gift Boxes With Optional Window

Milk Carton Style Mug Gift Boxes
Milk Carton Mug Gift Boxes #1: Wraps with hand lettered quotes
Milk Carton Mug Gift Boxes #2: Line drawings with a window

Explosion Mug Gift Boxes
STEP 3: CUT THE MUG GIFT BOXES
STEP 4: ASSEMBLE THE MUG GIFT BOXES
Basic Mug Gift Boxes With Optional Window
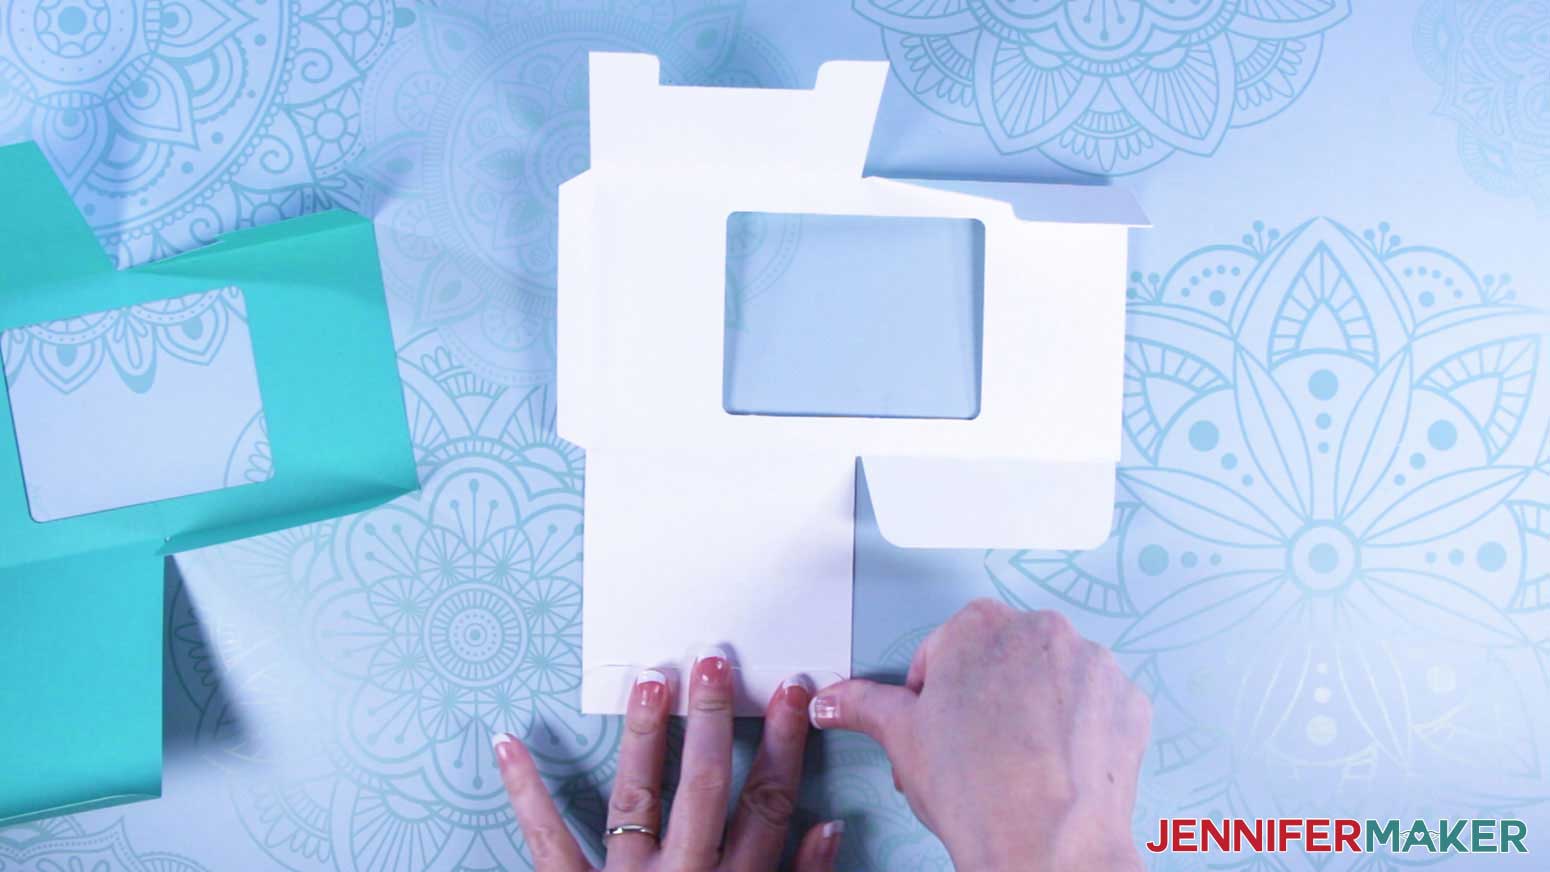
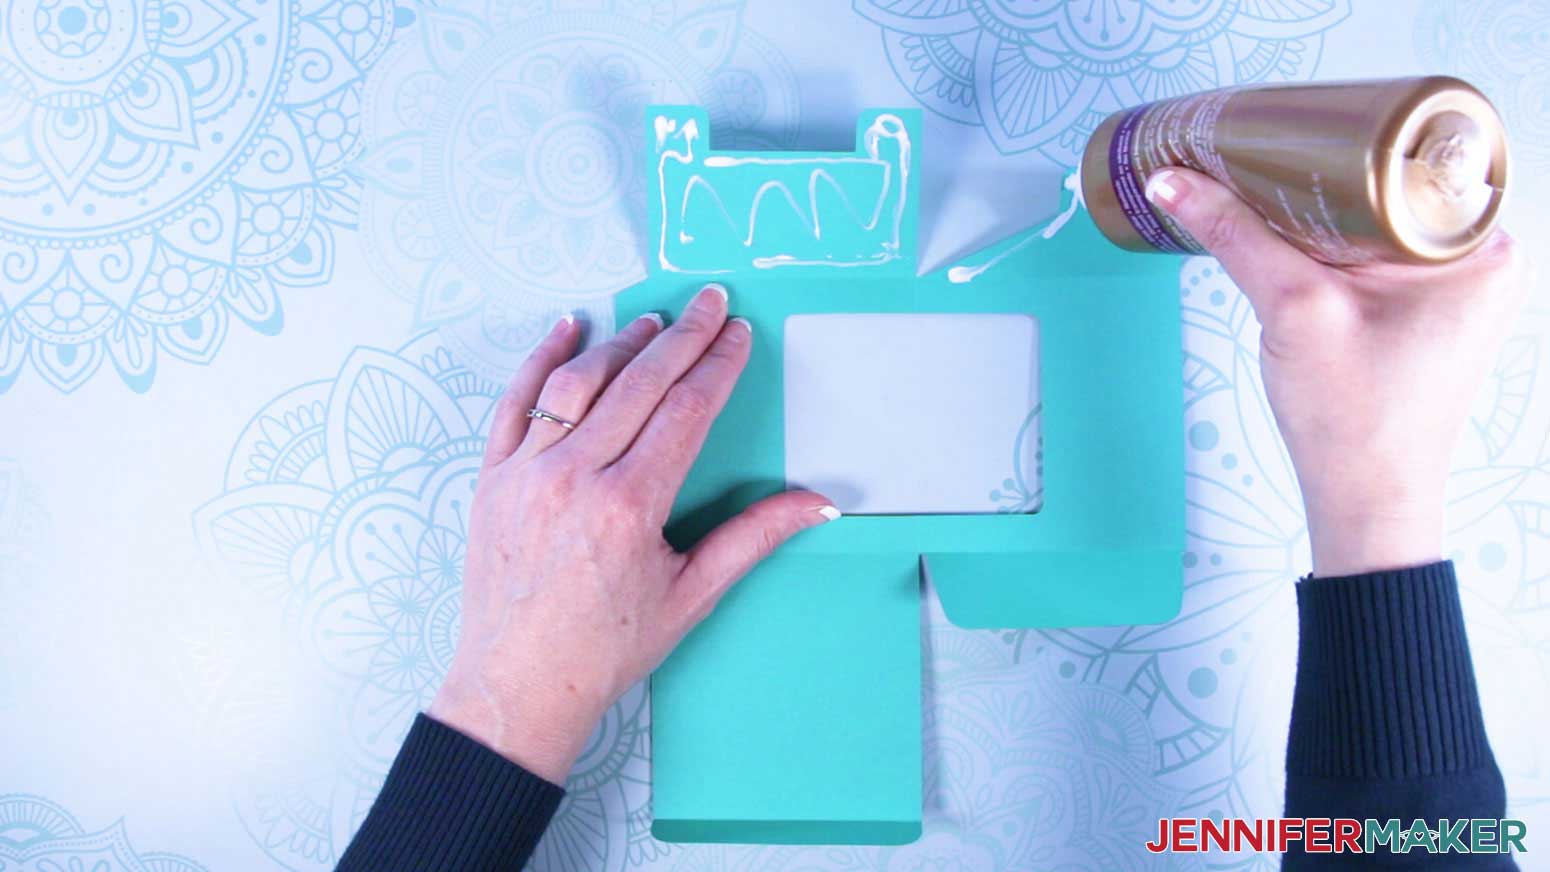
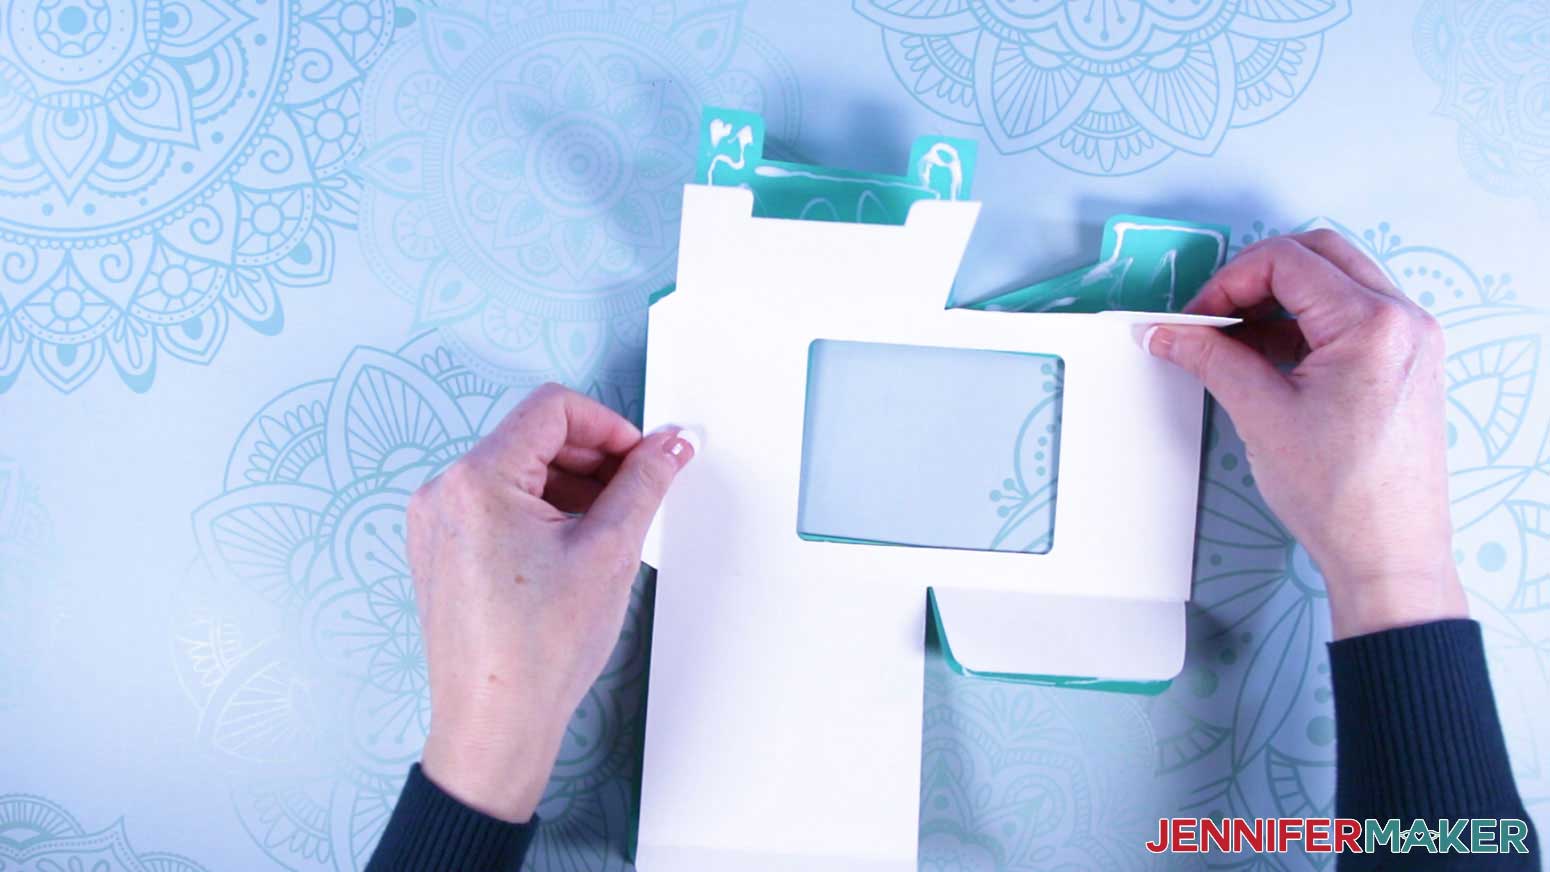

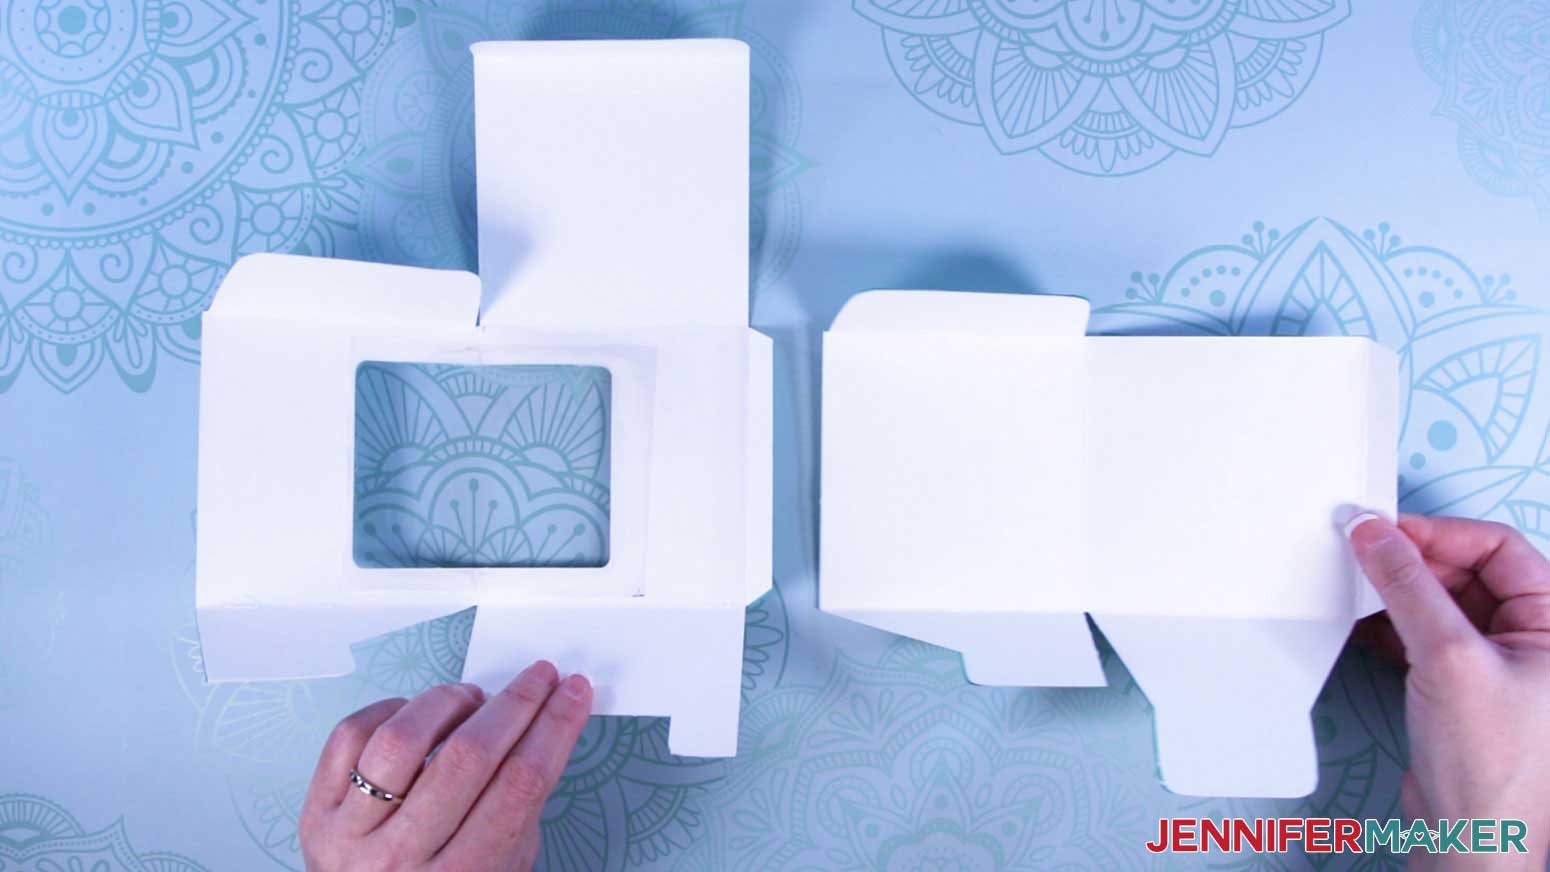
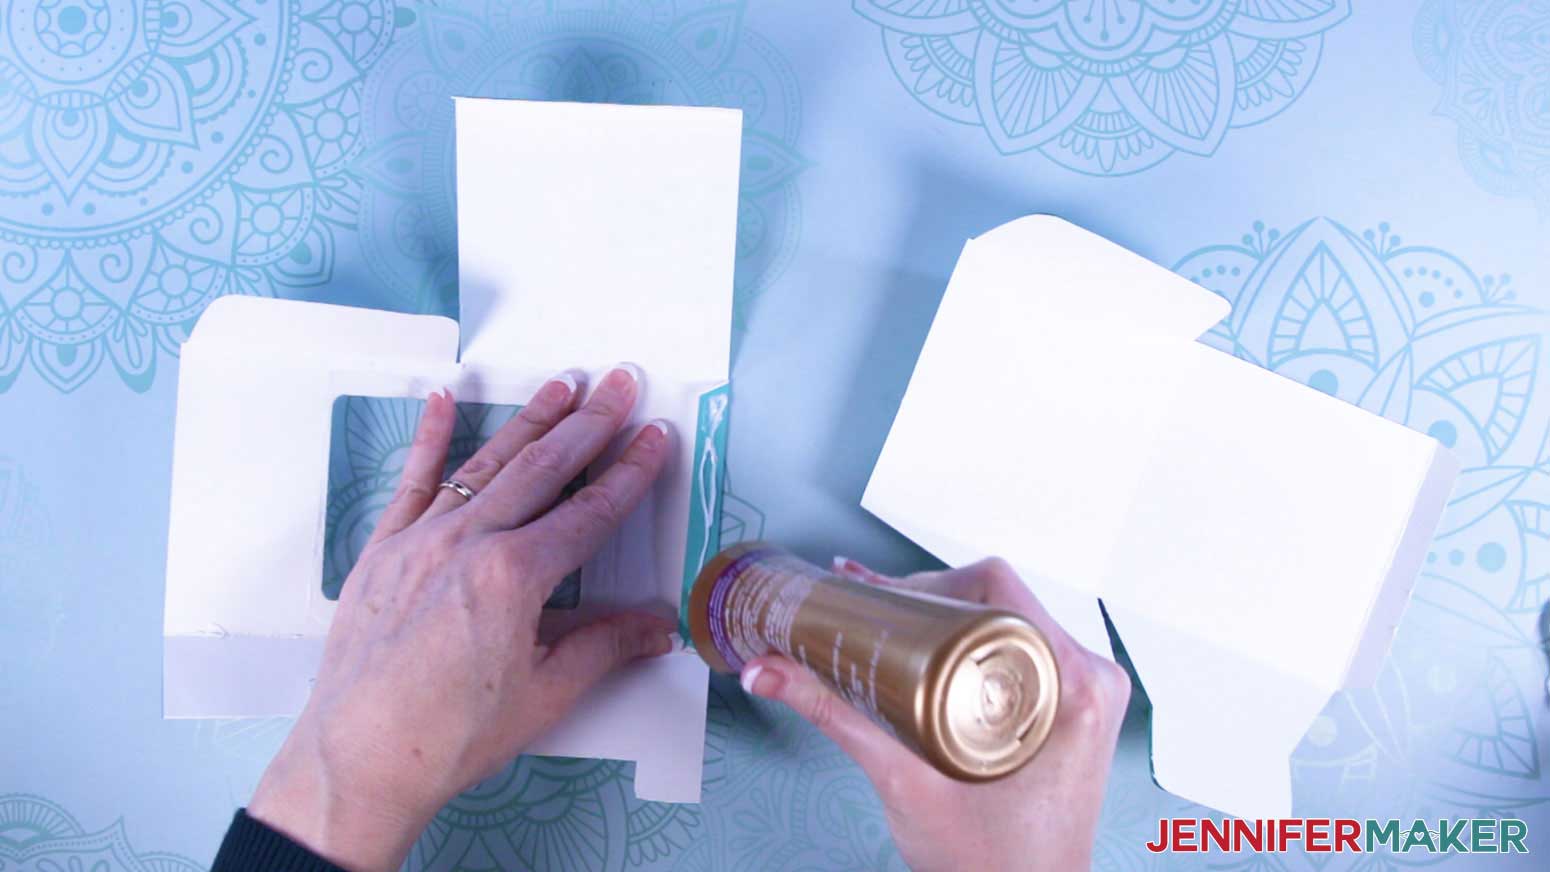
Now, put glue along the outer part of the tabs and attach the sections. Repeat until both sections of your box are attached to each other.


Explosion Mug Gift Boxes

STEP 5: SHOW IT OFF
Notes
Answers to Your Questions About Coffee Mug Gift Boxes
Q: What can I use instead of acetate for my window in my mug gift boxes if I want to cover it?
You don’t need to cover the window at all if you don’t want! But if you chose to, you would want something transparent so the artwork on your mug can be seen through it. If you have any of the clear cover sheets that come on our Cricut mats available, they make a nice substitute. You could also use the acetate from any packaging you may have on hand!
Q: I am trying to cut the Kraft Board with my Cricut Explore Air but cannot find the setting on the dial.
Turn the Smart Set Dial to Custom and select Kraft Board from the list of custom materials that appear on your computer screen!
Q: Do I need a special blade to cut Kraft Board on my Cricut Explore Air?
No, you can cut the Kraft Board on your Cricut Explore machine with the normal Premium Fine-Point blade that you use to cut most everything else.
Q: Could I use double sided tape or tape runners in place of glue?
Yes! I used Tacky Glue but you most certainly can use an adhesive of your choice.
Q: What size mugs will fit in these mug gift boxes?
Each of my Mug Gift Box designs come in two sizes (one fits an 11″ oz mug and is 4″ W x 4″ L x 4.125″ H and the other fits a 15 oz mug and is 3.5″ W x 4.75″ L x 4.5″ H).
Q: The Mug Gift Boxes are so pretty! But, I’m having trouble with the boxes I’ve made with the Holographic Kraft Board. They seem to come apart after a few weeks. Did I do something wrong?
No, you didn’t do anything wrong! We’ve noticed the same thing happening! Either hot glue, or E6000 (you will need to hold the box together with clamps until it dries), should take care of it!
Q: Can I use my Infusible Ink pens to create those great designs on the Milk Carton Mug Gift Boxes with the line art drawings?
You will need to use non-Infusible Ink pens with either the Kraft Board or cardstock for this project! You can tell on the package which pens they are – Infusible Ink pens have those words printed right on the front. If it’s not there, then you have a regular pen and are ready to go!
Q: I made some mugs using the Infusible Ink pens and Cricut Mug Press, and used what I thought were the same colors of regular Cricut pens to make a matching Milk Carton Mug Gift Box with Line Drawings. The colors don’t match!
We aren’t affiliated with Cricut, so can’t speak to why this might be, but also noticed that discrepancy! It seems to be more pronounced with certain colors. Unless you point it out, your recipient will probably be too thrilled to receive it to notice!
Q:Are you sure the SVG for the Milk Carton Mug Gift Boxes with Line Drawings is correct? I can’t get it to download.
This is a very big file!! Even if you have a newer computer with a lot of memory, it will take a while. It also helps to close down all the open applications you aren’t using and clear your computer cache, then re-boot your computer, before trying!
Get my free SVG files to make your Coffee Mug Gift Boxes
I’d love to see your mug gift boxes filled with all of your wonderfully creative mugs!! Please share a photo in our Facebook group or tag me on social media with #jennifermaker.
Love,

Want to remember this? Save this Mug Gift Boxes Tutorial to your favorite Pinterest Board!

So excited about mug gift boxes. The three different options are incredible!
Love to see your excitement!
Once you make the investment in these boxes, you can be sure that they’ll hold up well for the long run. Littleton Tree Company
Hi Ashley! The file is free from us so it just depends on the type of material you are using. Under normal wear, they should hold up fine.