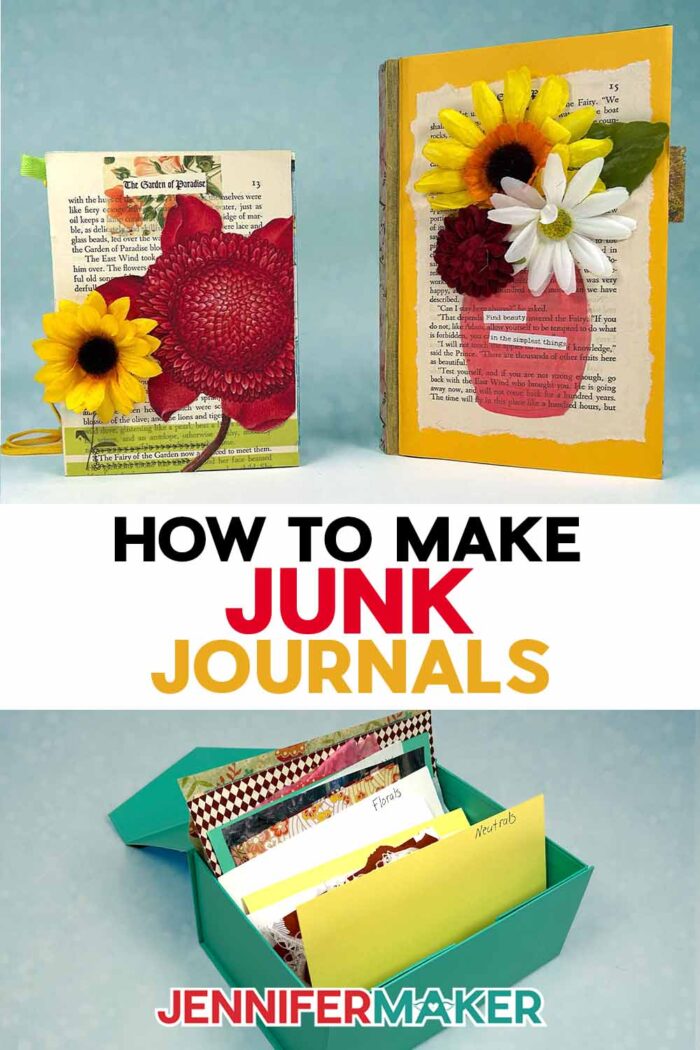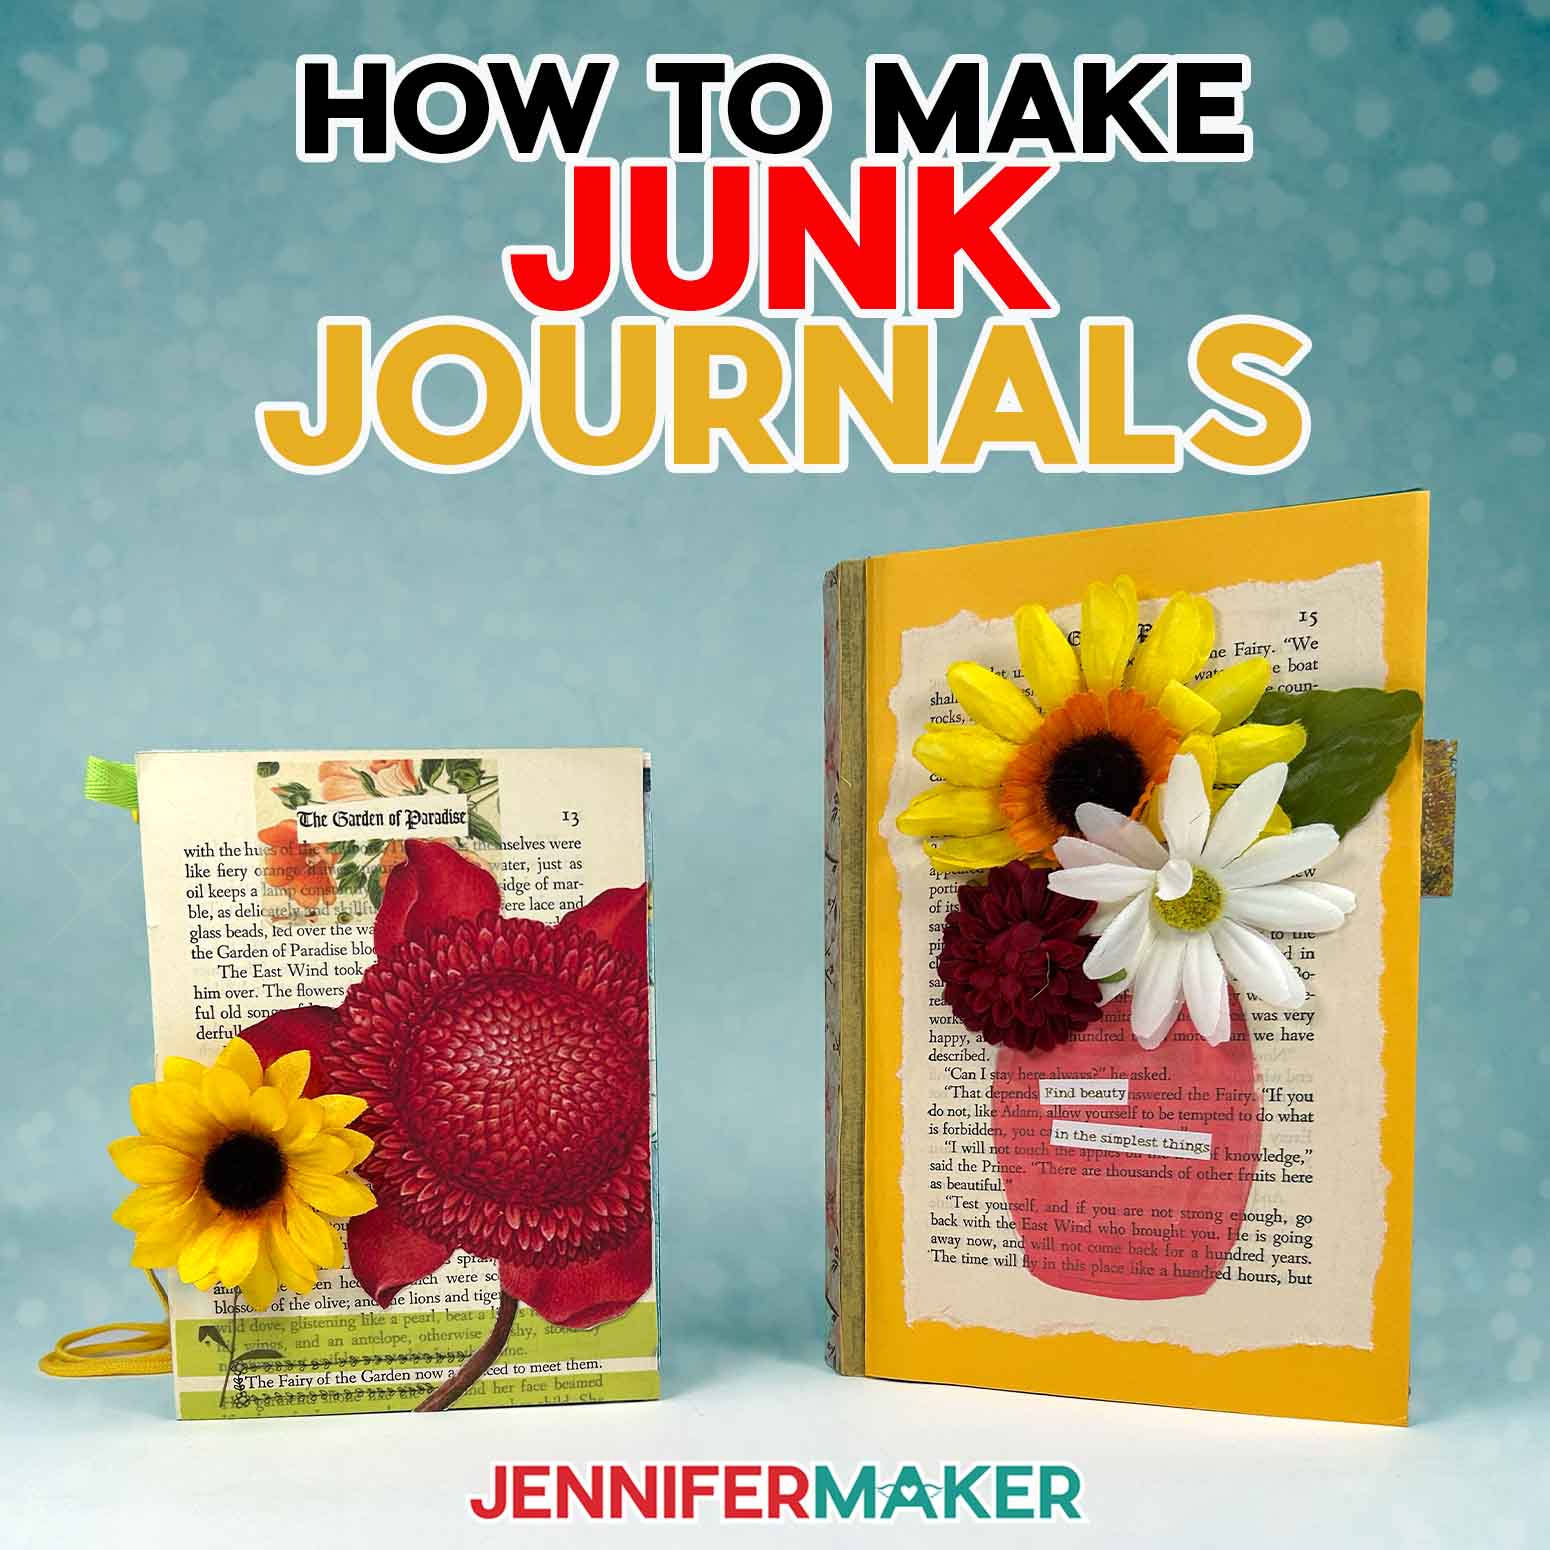
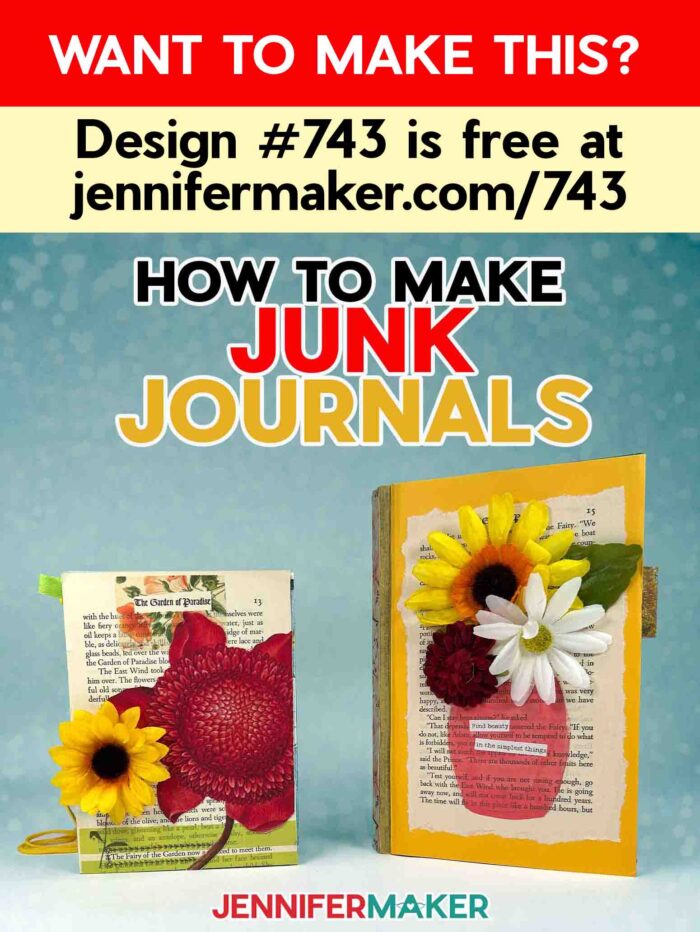
Learn how to make junk journals with unique & personal flair using repurposed materials!
Do you ever find yourself saving little bits of paper like a postcard, a handmade gift tag, or a note from a friend because it feels too special to toss away? I know that feeling all too well. Before I knew it, I had a whole pile of pretty scraps, waiting for the “perfect” project that never seemed to come. That’s when I discovered the joy of junk journaling! It’s a creative, relaxing way to turn life’s little leftovers into something meaningful and beautiful. Once you learn how to make junk journals, you’ll see that every torn page, every ribbon, every doodle has a place and a story to tell. It’s such a wonderful reminder that even the smallest pieces of everyday life can become something worth hanging on to.
Watch the full step-by-step tutorial on how to make junk journals:

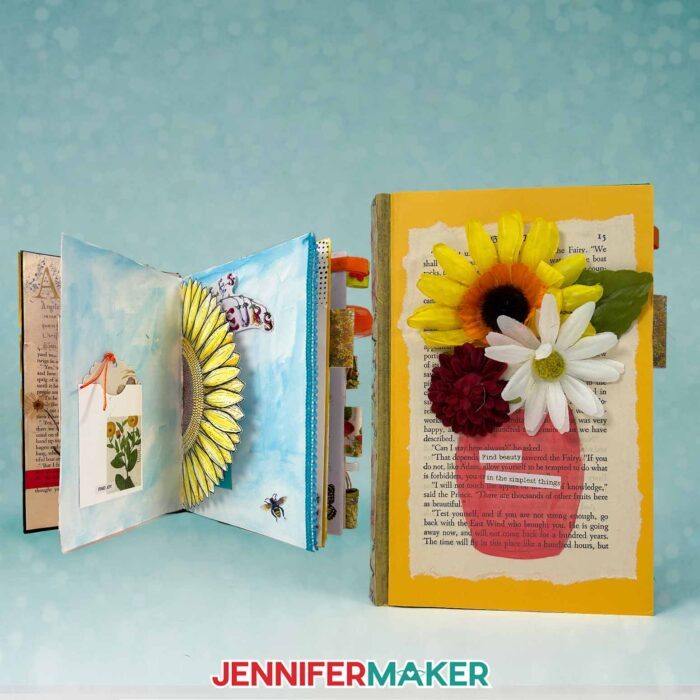
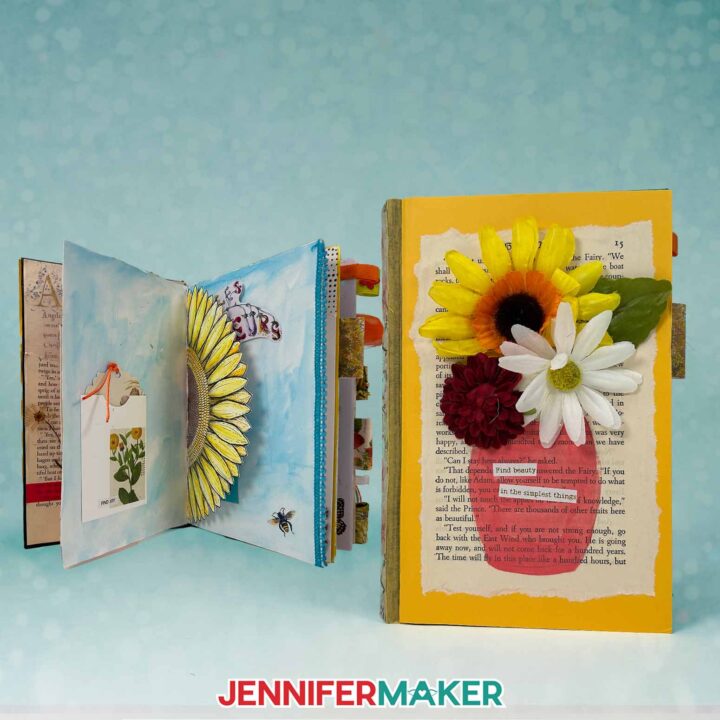
In its simplest form, a junk journal is a handmade book filled with pages you decorate using whatever you already have, like paper scraps from projects, old book pages, fabric scraps, or even old mail and magazines. It’s a great way to recycle, create, and remember all at once. Every piece of paper, every cut-out embellishment, and every handwritten note becomes part of your story.
If you’re making a junk journal for the first time, there’s only one rule: don’t worry about perfection. The beauty of junk journals lies in their freedom. There’s no wrong way to do it! Some pages might be messy, colorful, or layered with lots of ideas, and that’s exactly what makes them special. You can mix different elements, experiment with different sizes, or follow a particular theme like a travel journal, an art journal, or even a gratitude journal. You’ll be amazed at how a single piece of scrapbook paper, a little washi tape, or a few old books can come together in a creative way to tell a story.
There are so many different types of junk journals to explore. You can create a basic junk journal with just a few pages and some glue, or build a larger one full of various papers and textures. You might decorate your junk journal cover with acrylic paint or fabric scraps, or use old envelopes or a brown paper bag to make pocket pages.
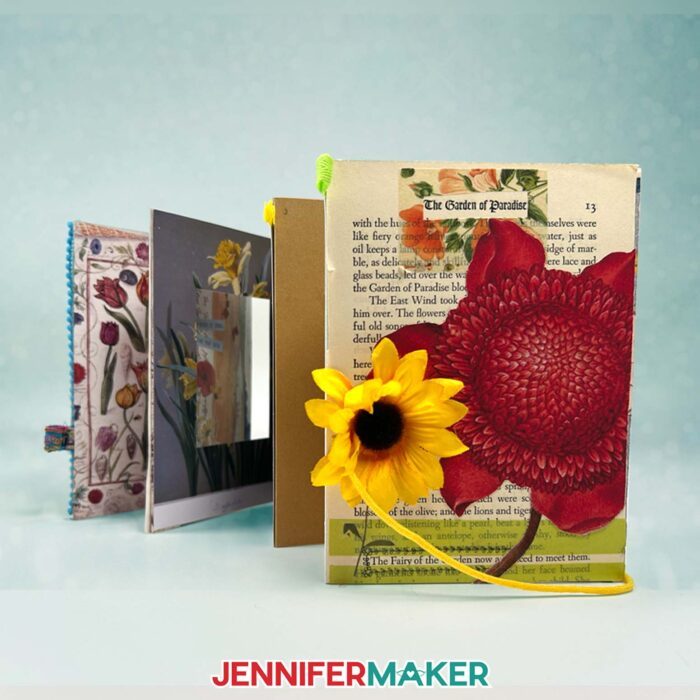
In the tutorial, I’ll show you how to make a basic junk journal using my free SVG and PDF design files, available in my resource library. The accordion-style version is flexible, fun, and perfect for beginners. It’s a great way to get started if you’ve been collecting various items like postcards, wrapping paper, or bits of ribbon you want to reuse.
I’ll also walk you through how to print your own pretty papers using public domain artwork for endless customization ideas … all copyright-free and easy to use. Then you’ll see how to fold, glue, and layer the pages together into a simple handmade book that you can keep adding to as your ideas grow.
The first things you’ll need are basic supplies: glue, scissors, cardstock, and a few of your favorite papers. The cool thing about this craft is that your junk journal supplies can come from anywhere!
Soon you’ll see a grocery bag, a magazine, or a leftover piece of scrapbook paper from another project in a whole new light. And you’ll quickly learn how different types of papers and textures bring your journal to life! It’s such a meaningful way to combine all the pieces of everyday life into one creative outlet.
You’ll also find that your junk journal crafting can grow and change over time. Maybe your first time you fill one with personal notes and photos, and next time you’ll create something new, like a travel journal full of tickets and sketches, or a book honoring your favorite quotes.
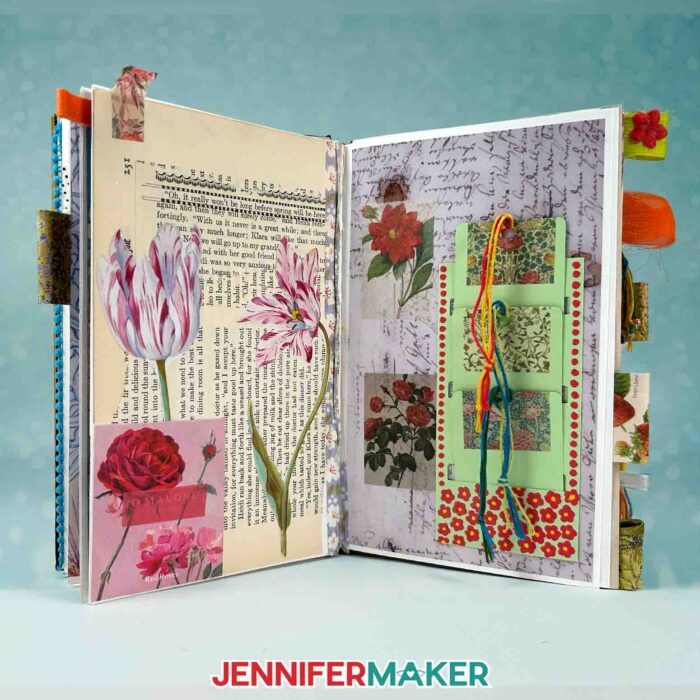
Each spread can take on a specific theme or color palette, depending on what inspires you that day. You can decorate pocket pages with photos or tuck in handwritten notes between layers of old book pages. The creative process is never the same twice, and that’s the beauty of junk journals: each one becomes a reflection of you. Maybe you’ll experiment with a different kind of journal next time, like one for recipes, dreams, or daily reflections. There are lots of ideas to explore and plenty of creative ways to make it your own.
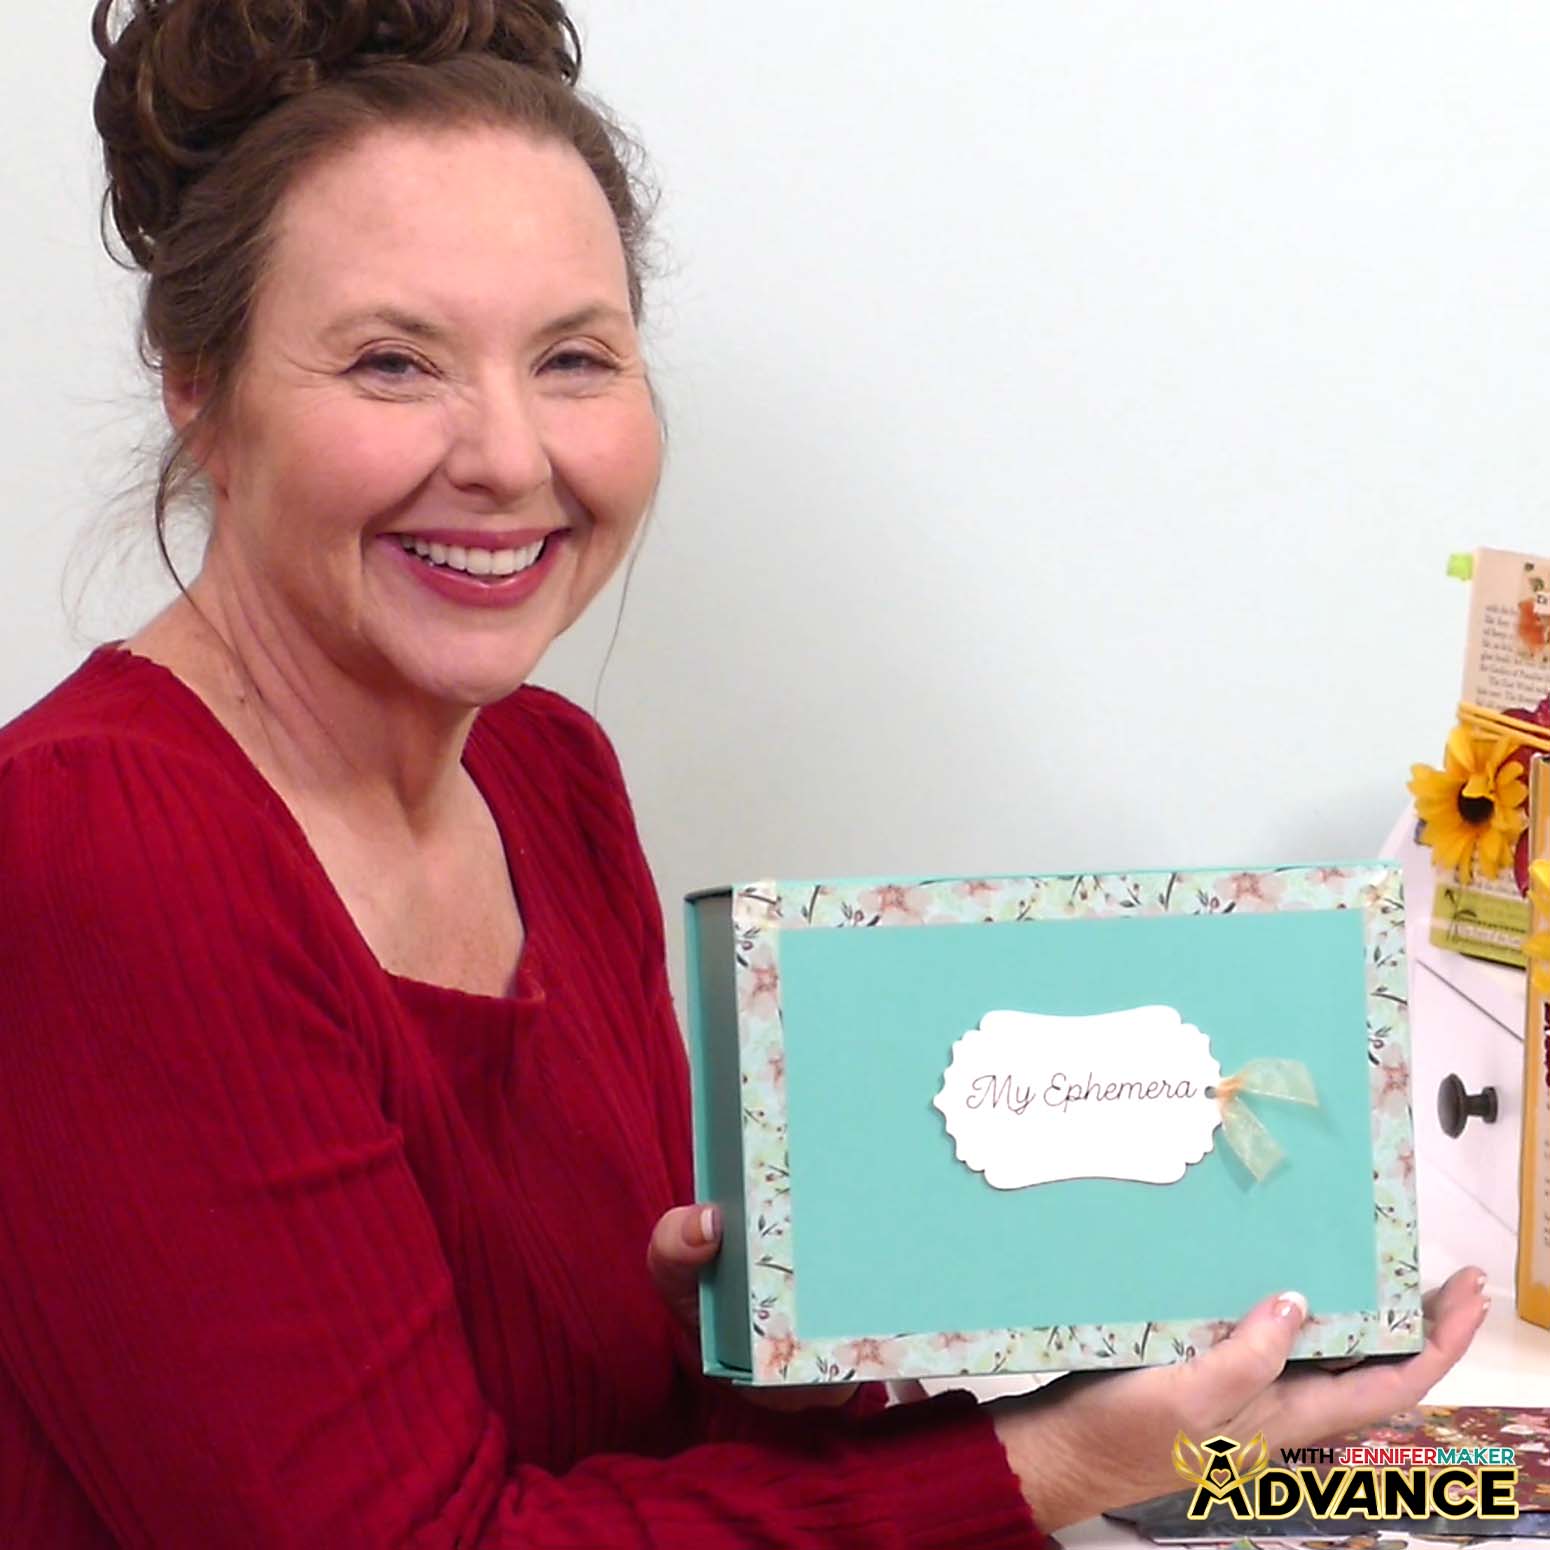
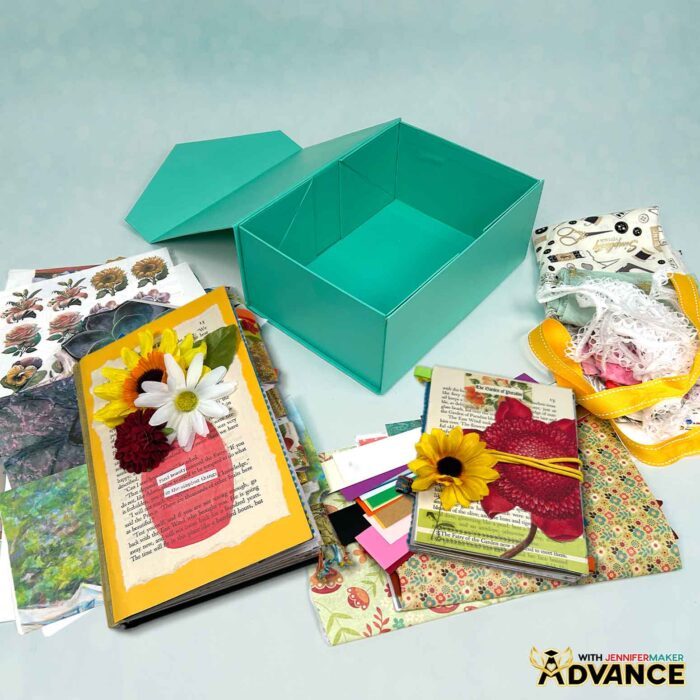
And if you want to take your creativity even further, I’d love to invite you to join my ADVANCE with JenniferMaker program. In our exclusive tutorial for this project, you’ll learn how to make your own Junk Journal Ephemera Box, which is the perfect companion for your new journal!
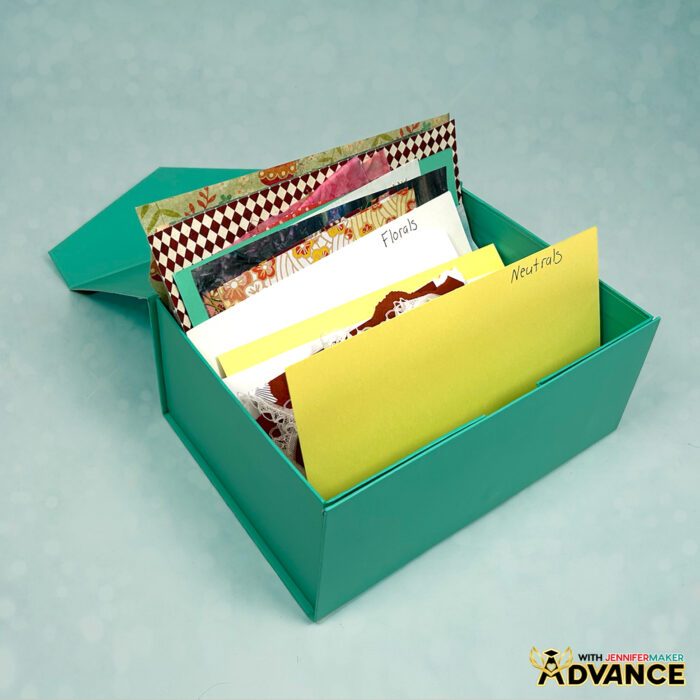
It’s a beautiful, organized space to hold all your special papers, tags, and embellishments until you’re ready to use them. As an ADVANCE member, you’ll also get access to extra tutorials, personalized guidance, and a supportive community of makers who share your passion for crafting and creativity. Click here to learn more about the Advance program!
I hope you’ll give it a try and learn to make junk journals of your very own! Fill them with personal touches, creative layers, and stories that only you can tell. However you decide to begin, I hope your journal reminds you that there’s no wrong way to create!
So, want to learn how to make junk journals of your very own? Let me show you how fun and easy it is with my junk journal designs! This post contains some affiliate links for your convenience (which means if you make a purchase after clicking a link I will earn a small commission but it won’t cost you a penny more)! Read my full disclosure policy.
Materials to Make a DIY Junk Journal
View my Amazon shopping list with the exact items I used.
- Three to Six (3-6) Sheets of 8.5” x 11” or 12″ x 12″ 65 lb. Solid Core White Cardstock
- Canon Double Sided Matte Photo Paper -OR-
- 5.5” x 8.5” Sketch Book with heavy duty pages
- Scotch Wrinkle Free Glue Sticks
- Scrap cardstock, old magazines or books
- Floral Washi Tape
- Washi Stickers
- 15 mm Washi Tape
- Acrylic Markers
- Black Fineliner Drawing Pens
- Ribbon
- Pressed Flower Stickers
- Word Stickers
- A way to cut your materials – I’m using the Cricut Maker 4, but you can also use any Cricut Maker series machine, a Cricut Explore Series machine, the Cricut Venture, Cricut Joy, or Cricut Joy Xtra
- Cricut Green StandardGrip Machine Mat 12″ x 12”
- Cricut Blue LightGrip Machine Mat 12″ x 12″ (optional for delicate pieces)
- Scoring Stylus (optional for files with score lines) -OR-
- Single Scoring Wheel (optional for files with score lines)
- A Color Inkjet Printer (I used my Epson EcoTank ET-2800 Inkjet Printer)
- Brayer
- Spatula
- Weeding Tool
- Tweezers
- Scissors
- Paper Trimmer
- Design #743 (My free SVG/PDF/DXF design files are available in my free resource library – get the password by filling out the form at the bottom of this page)
How to Make Junk Journals
Make Junk Journals
Learn how to make junk journals in two ways!
Materials
- Three to Six (3-6) Sheets of 8.5” x 11” or 12" x 12" 65 lb. Solid Core White Cardstock
- Canon Double Sided Matte Photo Paper -OR-
- 5.5” x 8.5” Sketch Book with heavy duty pages
- Scotch Wrinkle-Free Glue Sticks
- Scrap Cardstock, Old Magazines, or Books
- Floral Washi Tape
- Washi Stickers
- Pressed Flower Stickers
- Word Stickers
- Washi Tape
- Acrylic Markers
- Black Fineliner Drawing Pens
- Ribbon
- Design #743 (My free SVG/PDF/DXF design files are available in my free resource library - get the password by filling out the form at the bottom of this page)
Tools
- Color Printer - I used my Epson EcoTank ET-4700 Inkjet Printer
- A way to cut your material - I’m using the Cricut Maker 4, but you can also use a Maker, Explore, Venture, Joy, or Joy Xtra.
- Cricut Green StandardGrip Machine Mat 12" x 12"
- Cricut Blue LightGrip Machine Mat 12" x 12" (optional for delicate pieces)
- Scoring Stylus -OR-
- Single Scoring Wheel (optional for files with score lines)
- Brayer
- Scissors
- Scraper
Instructions
STEP 1: GET MY FREE JUNK JOURNAL DESIGNS
If you’d prefer to make a journal instead of starting with a sketch book, download my Junk Journal files from my free library – look for Design #743. Alternatively, you can use the Save This Project form near the top of this post and the design link will be emailed to you.
In the SVG folder, you’ll find “score” and “no-score” versions of my bases and pockets with tags.
The “score” versions require a Scoring Stylus or Single Scoring Wheel to create smooth lines for folding and alignment. If you don’t have a scoring tool, or if you prefer dashed cut lines, you can use the “no-score” versions instead.
There is also a DXF folder with cut files, and a PDF folder with versions you can print and cut by hand.
TIP: If you’re not sure how to upload, go to https://jennifermaker.com/svgs to learn how to unzip and upload SVG files.
STEP 2: GATHER YOUR JUNK JOURNAL MATERIALS
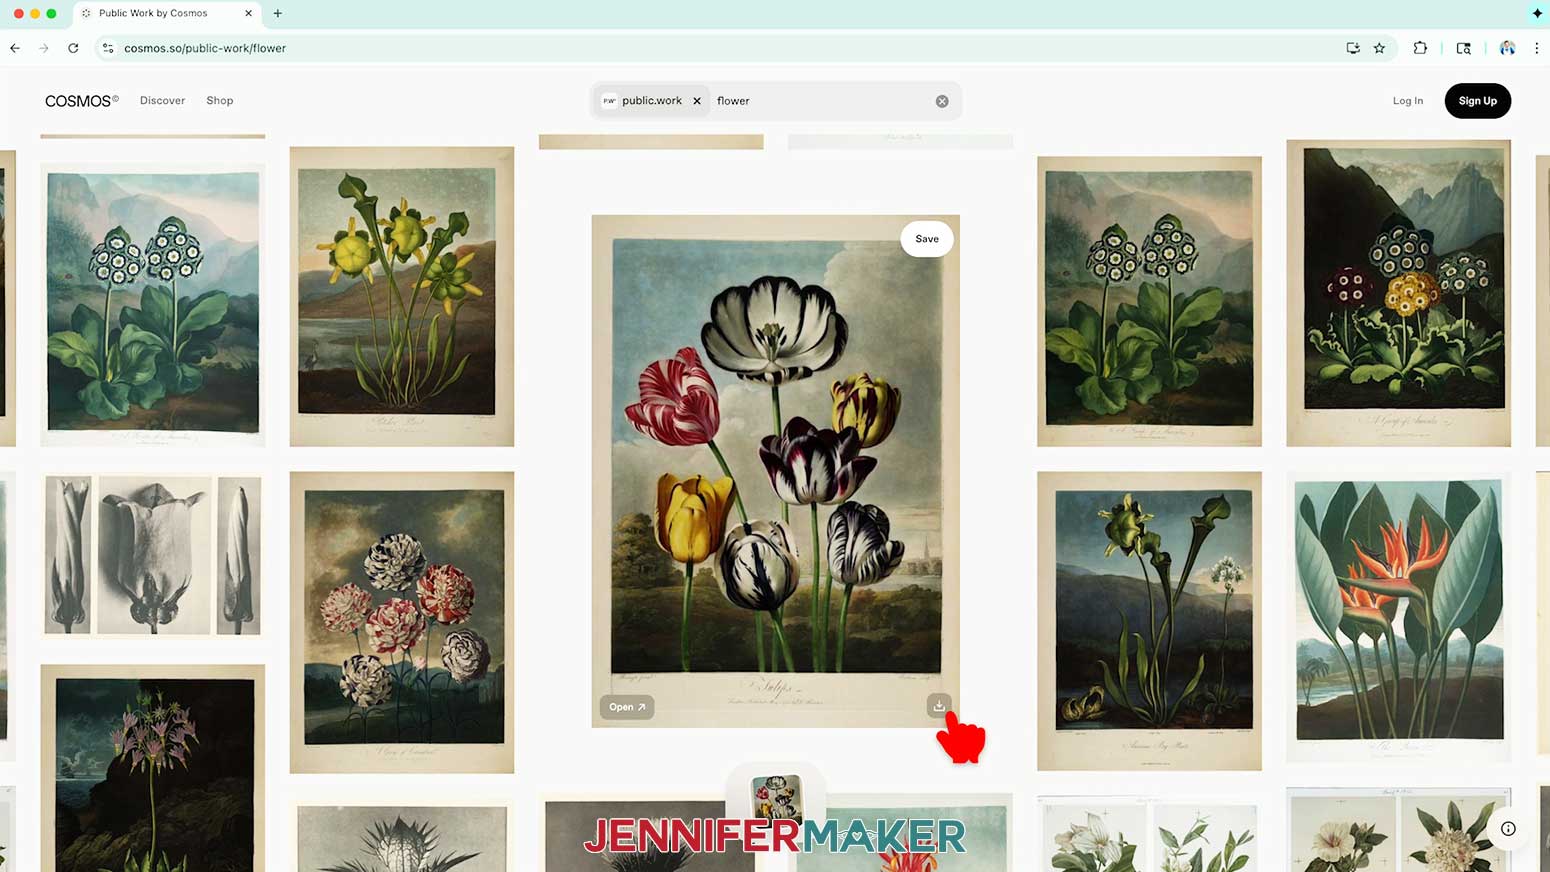
1. Open https://jennifermaker.com/cosmos in the Google Chrome web browser on your computer to go to the Cosmos collection of public domain images.
NOTE: These images are in the public domain, meaning you can download and use them in artwork. For more information, see Cornell University’s notes on copyright and the public domain.
2. Search for the topic you want, then click the download icon to save the ones you like.
NOTE: I’ll look for images of written letters to add visual texture to my designs without needing to worry about detail orientation.
3. Open https://jennifermaker.com/google-docs in the Google Chrome web browser on your computer.
NOTE: You will need a free Google account to use the free Google Docs software.
TIP: You can also download and open the Google Docs app, but you’ll have limited access to features.
4. Click “Blank document” at the top left to open a new document.
5. Go to the File menu and select “Page setup.”
6. Make sure the box next to “Portrait” is checked.
7. Change your margins to “0” to use more of the page.
8. Make sure your Paper Size matches your photo paper.
NOTE: I’ll set mine to 8.5” x 11” or letter-size.
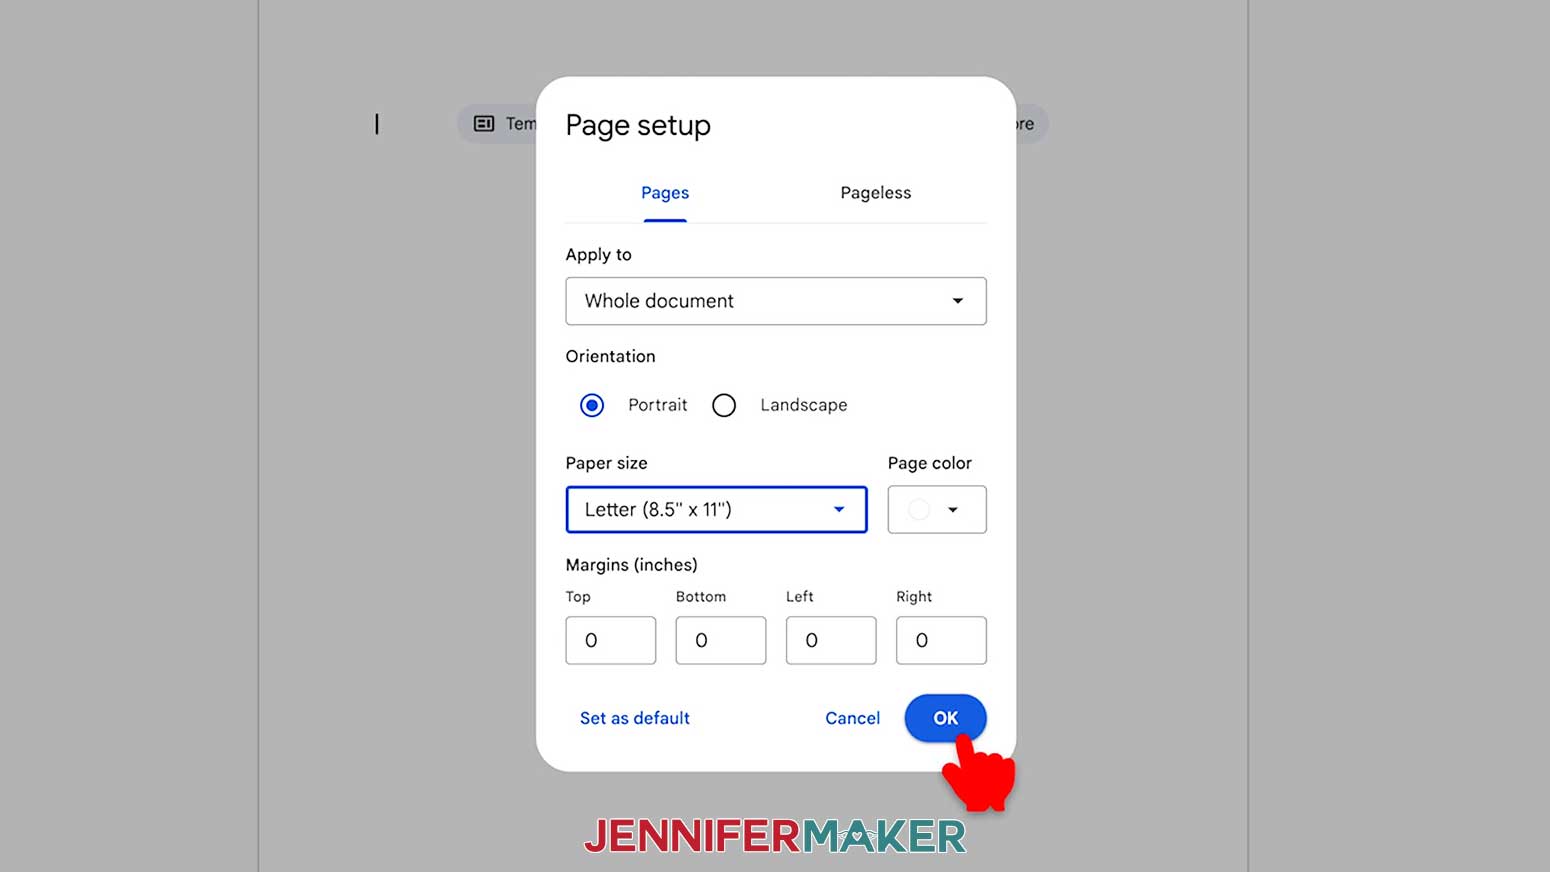
9. Click “OK” to apply the settings.
10. Click the area that says “Untitled document” at the top and type a name for the file.
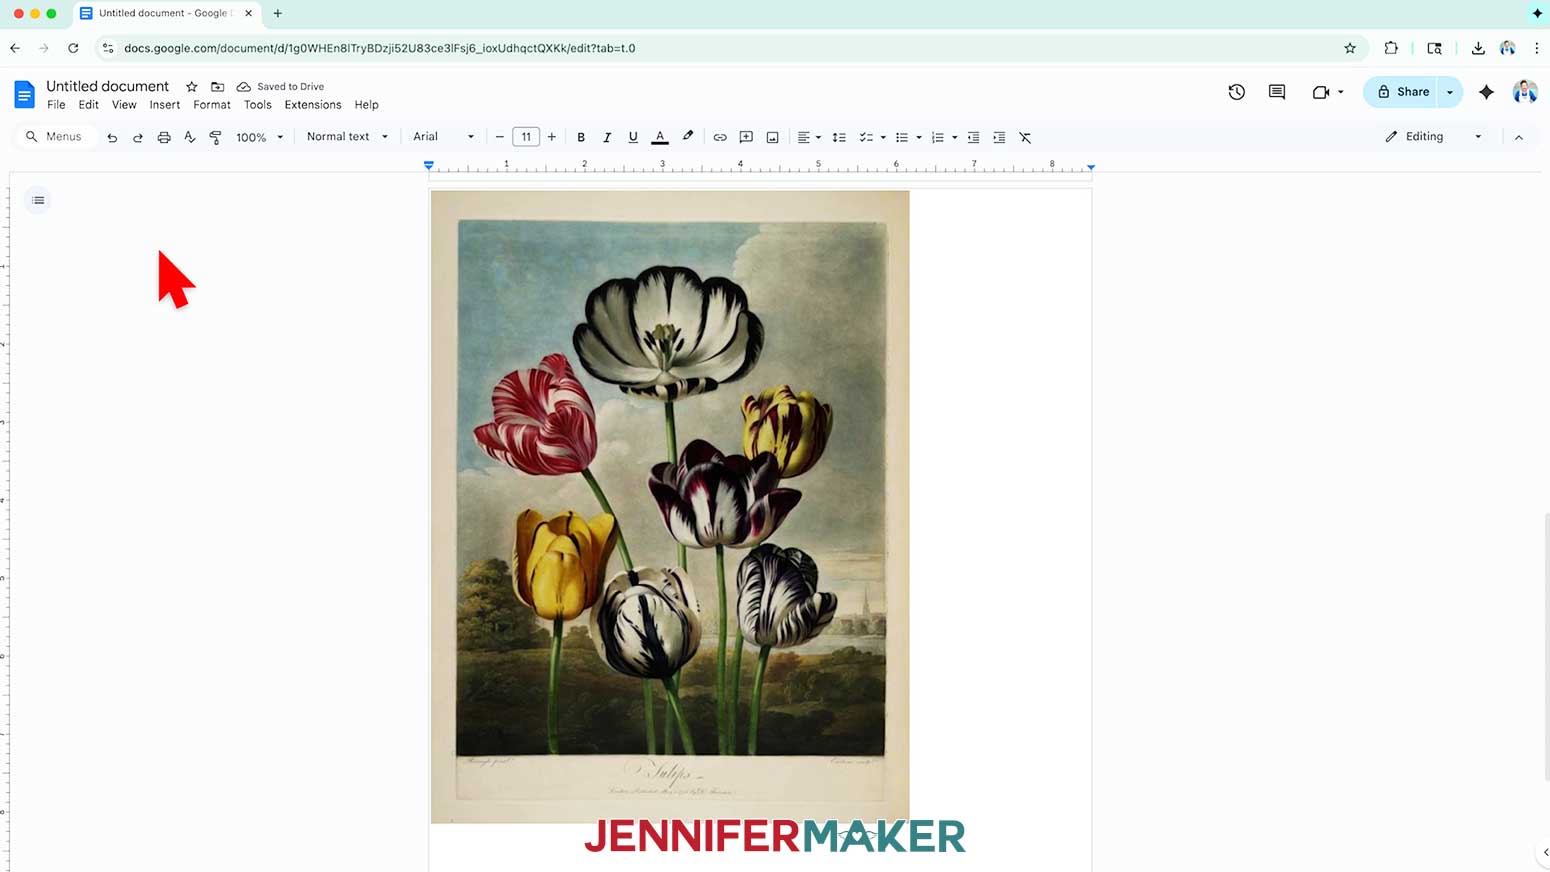
11. Go to the “Insert” menu, then select “Image” and “Upload from computer.”
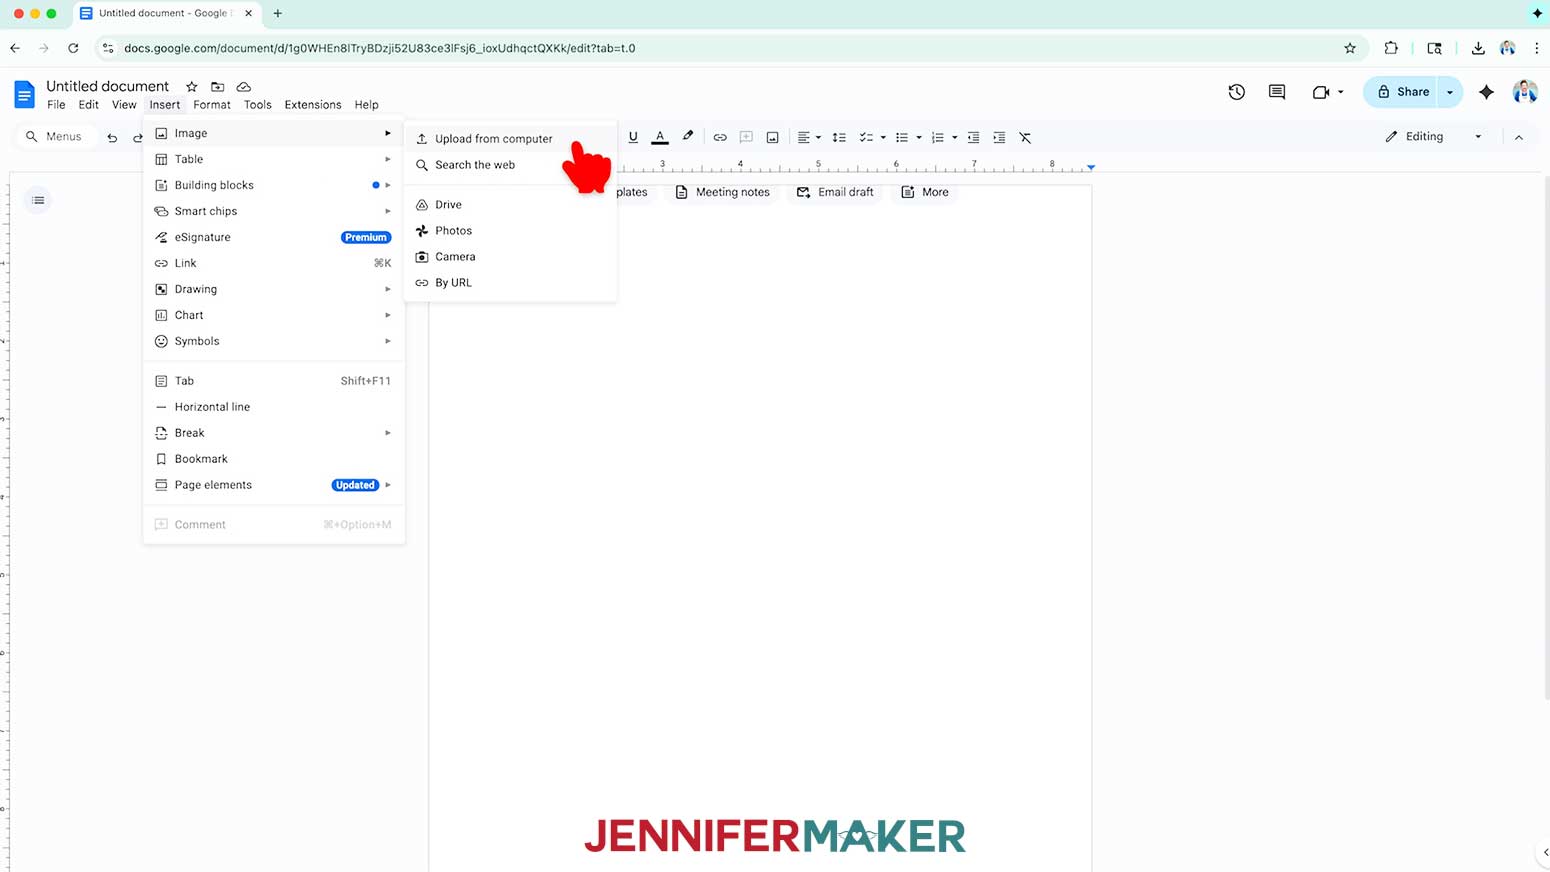
12. Click “Browse” and select your chosen image.
13. On the document page, click and drag a corner of the image until it fills the page.
14. With the image selected, click “Edit” and “Copy.”

15. Click your keyboard’s right arrow key to move next to the first image, then use “Edit” and “Paste” to add the image again, which should go on to a new page.
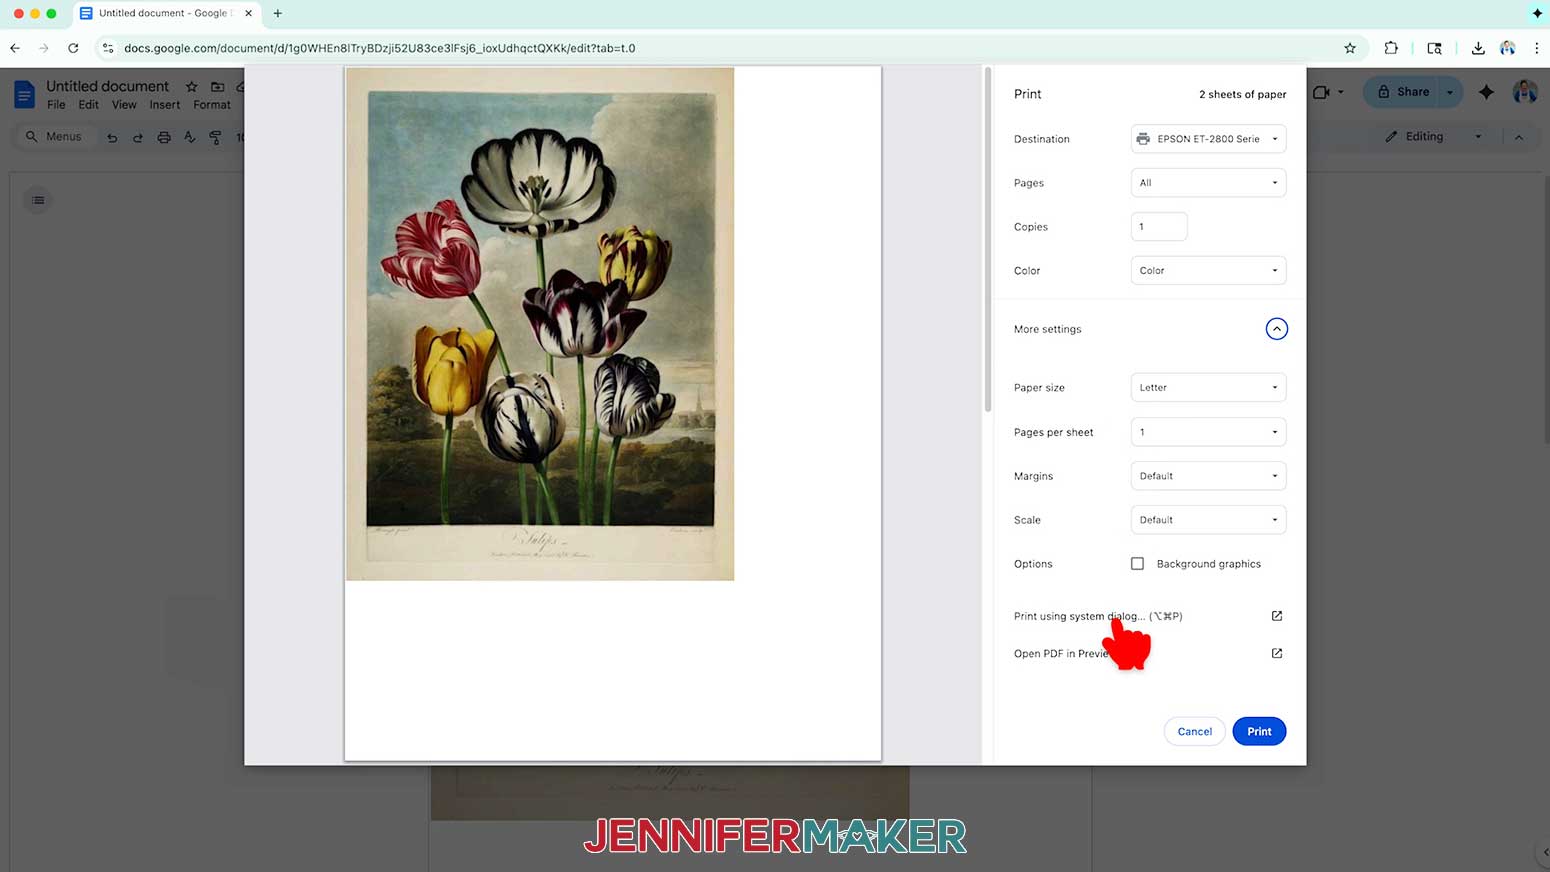
16. Go to the File menu and choose “Print.”
17. Select your printer under “Destination.”
18. Click the arrow beside “More Settings,” and then click “Print Using System Dialog.”
19. Your print menu may look different - just make sure the correct printer is selected, increase the copies if you want, activate double-sided printing, and select the highest quality matte paper and print settings.
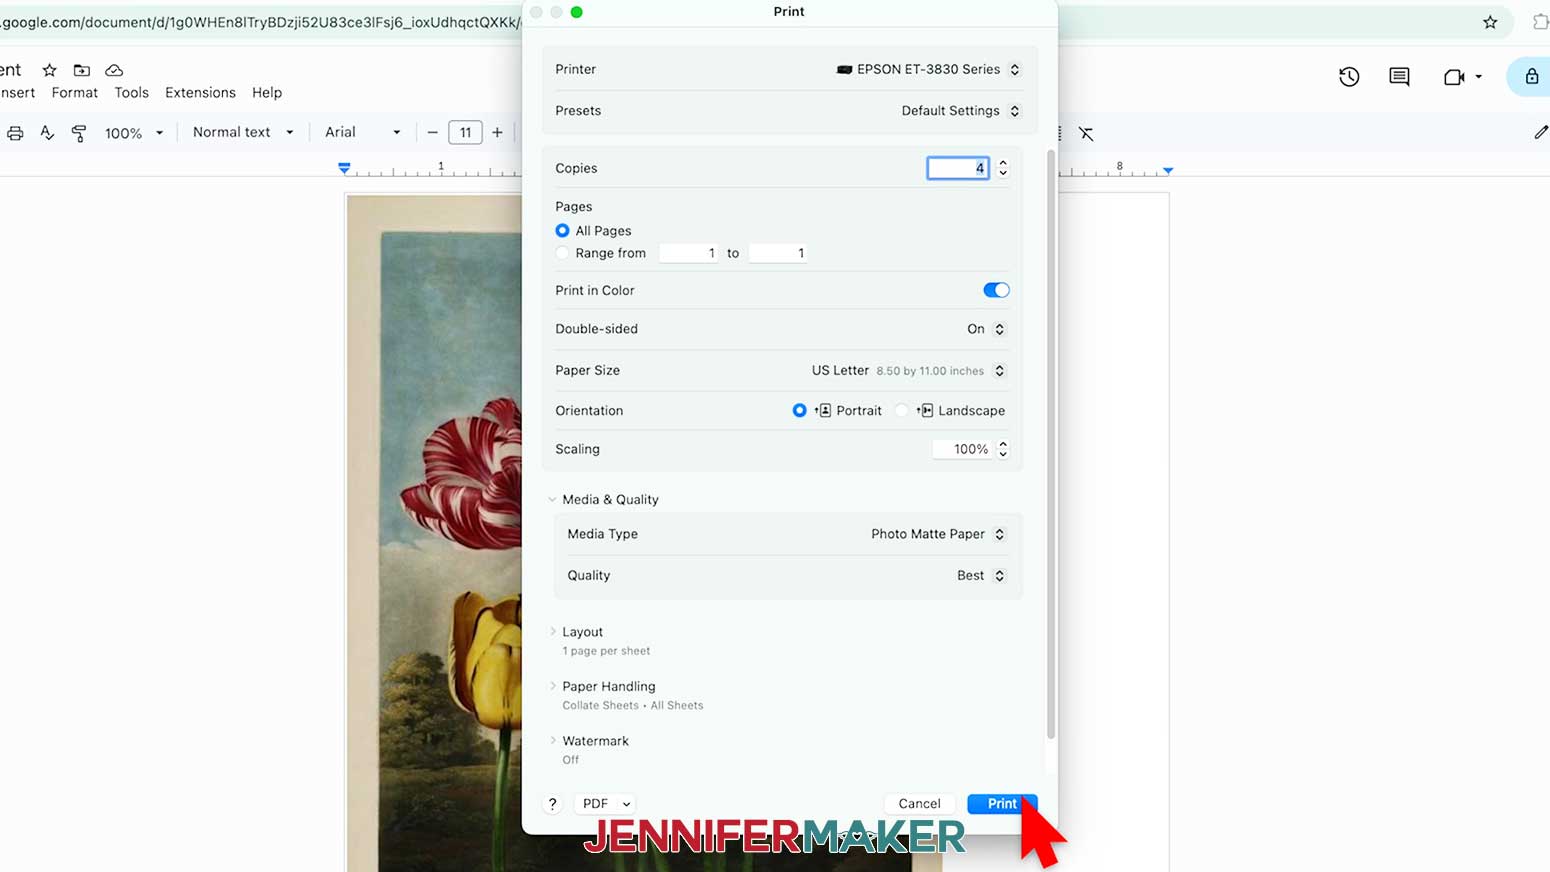
20. Load the matte photo paper correctly into your printer.
NOTE: Make sure your paper is the same on both sides.
21. Click “Print.”
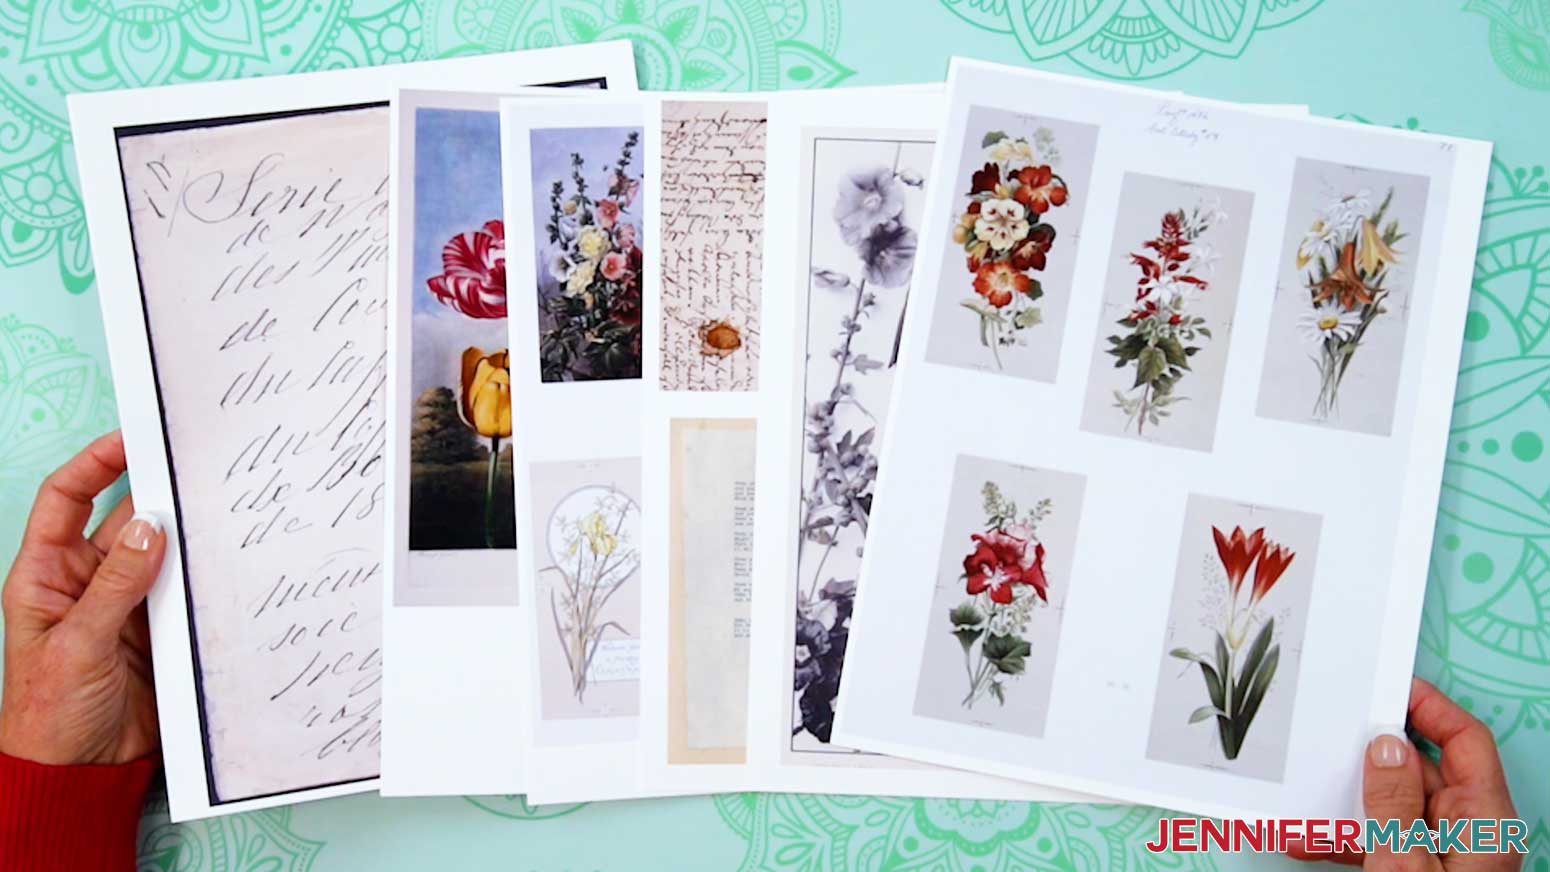
22. Your print is ready to use as double-sided decorative paper!
STEP 3: PREPARE AND CUT YOUR JUNK JOURNAL DESIGN
CRICUT DESIGN SPACE
1. In Cricut Design Space, open a blank Canvas.
NOTE: If you’re new to using Cricut Design Space, go to cricutkickoff.com for my introductory tutorial on Design Space basics.
2. Click “Upload” and then “Upload Image.”
3. Click “Browse” and select the base SVG file you want to use.
NOTE: I’ll demonstrate with the “score” base.
4. Click “Open,” and then “Continue.”
5. Click “Upload” to add the design to your Canvas.
TIP: You can click the minus (-) icon in the lower left corner to zoom out and see everything on your canvas.
6. Click “Save” and give your project a name so you can find it easily.
7. If you want to add my pocket designs, use Steps 2-5 to add the “tags” SVG to your Canvas, too.
NOTE: I’ll add the “score” file.
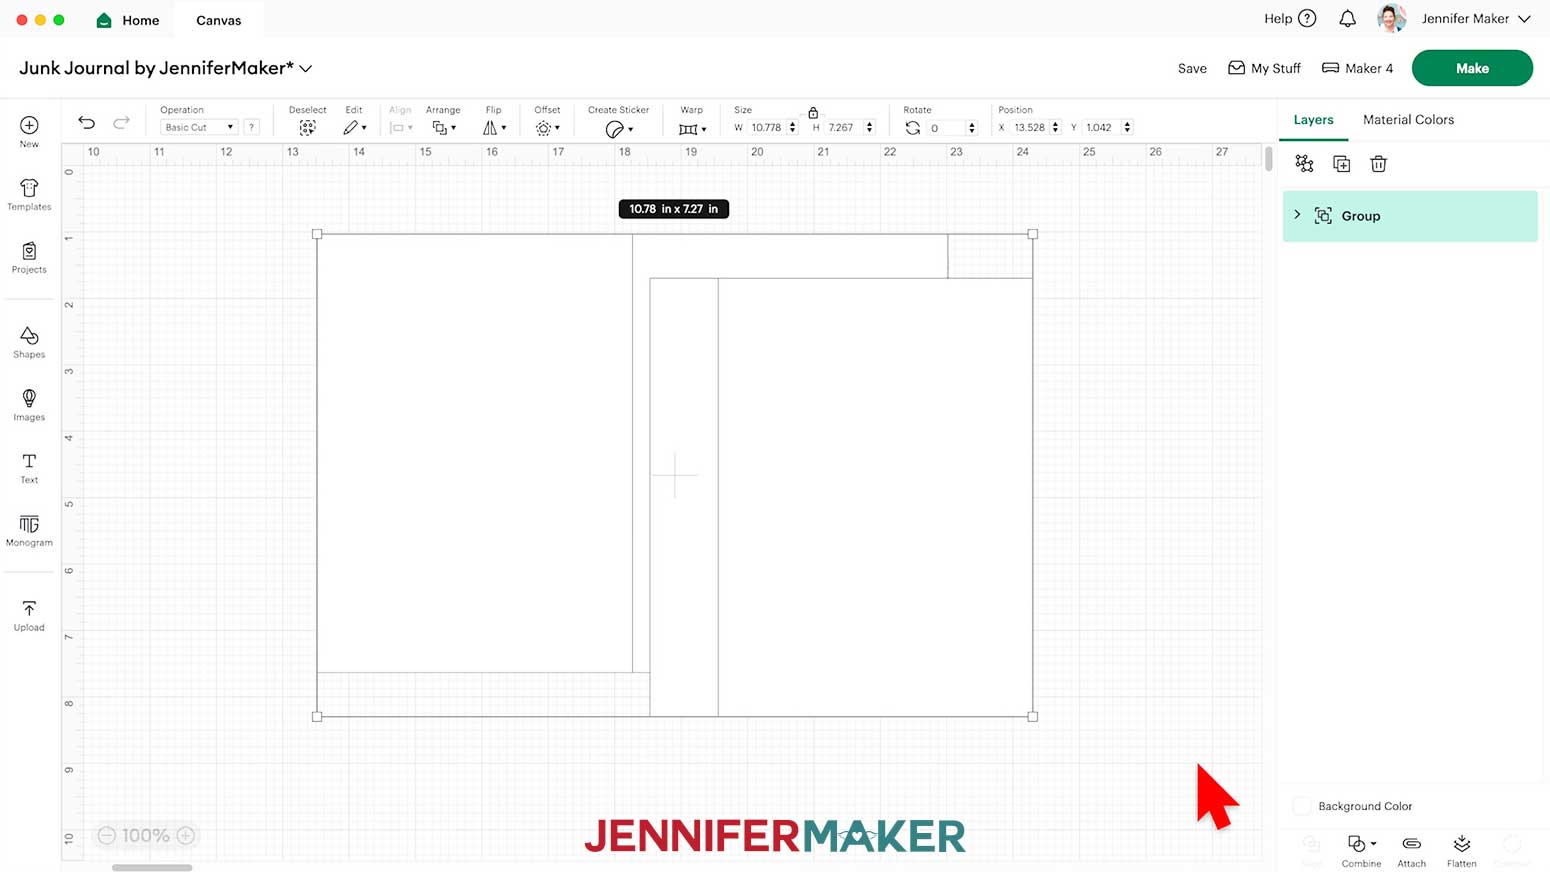
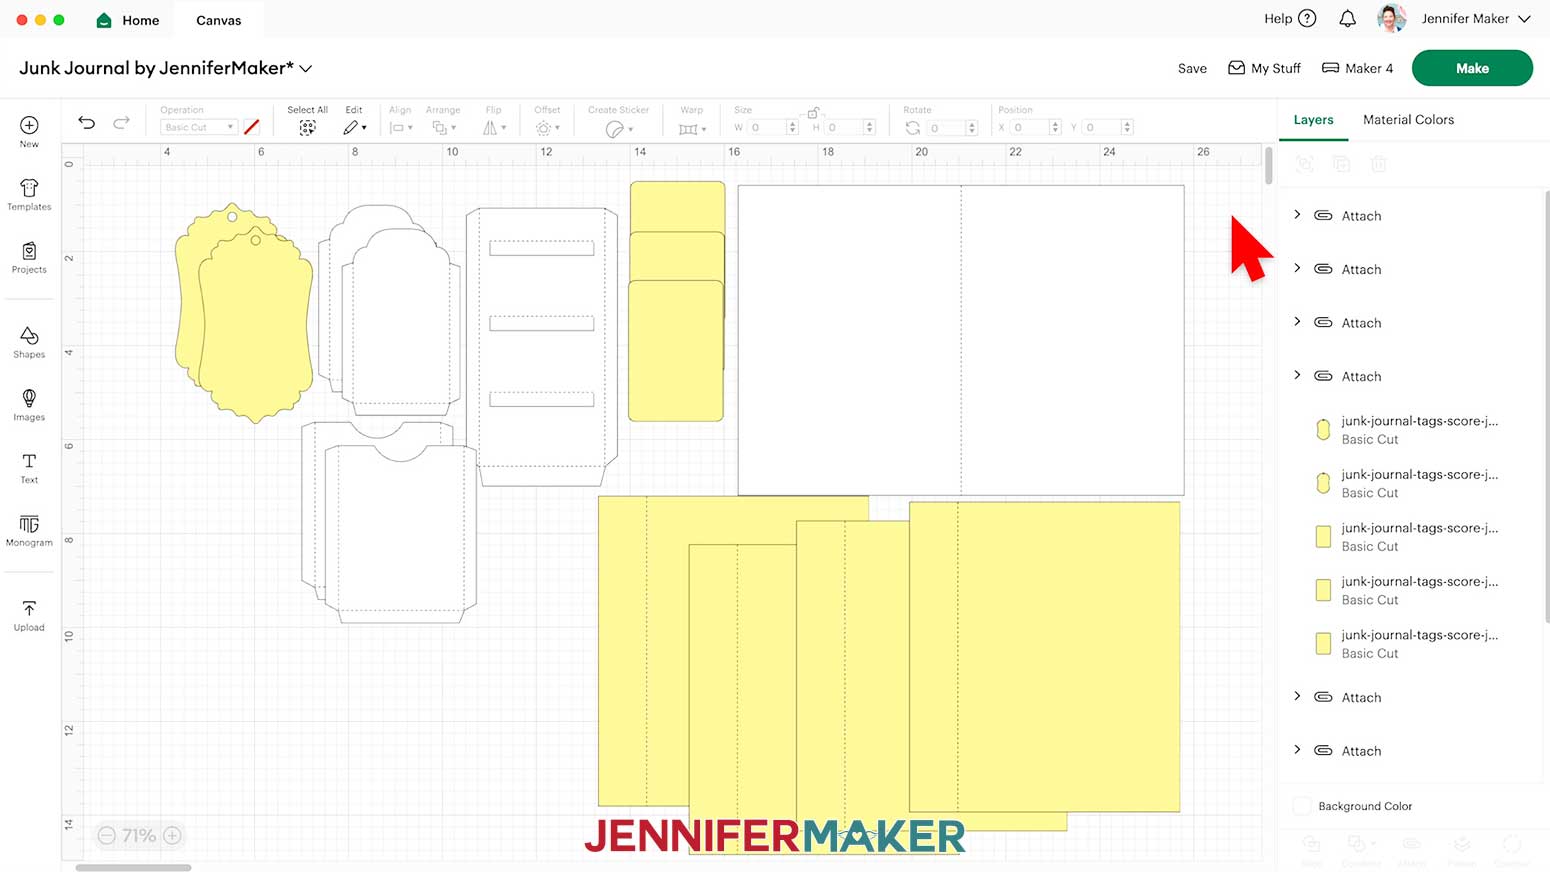
8. “Ungroup” the main design to work with the pieces separately. You can drag them apart to see everything as needed.
NOTE: On your Canvas you have one large rectangle with a line down the middle for the journal’s base, and a smaller rectangle with a line on one side for the additional pages.
9. In the Layers panel, click the arrow to expand the page Group.
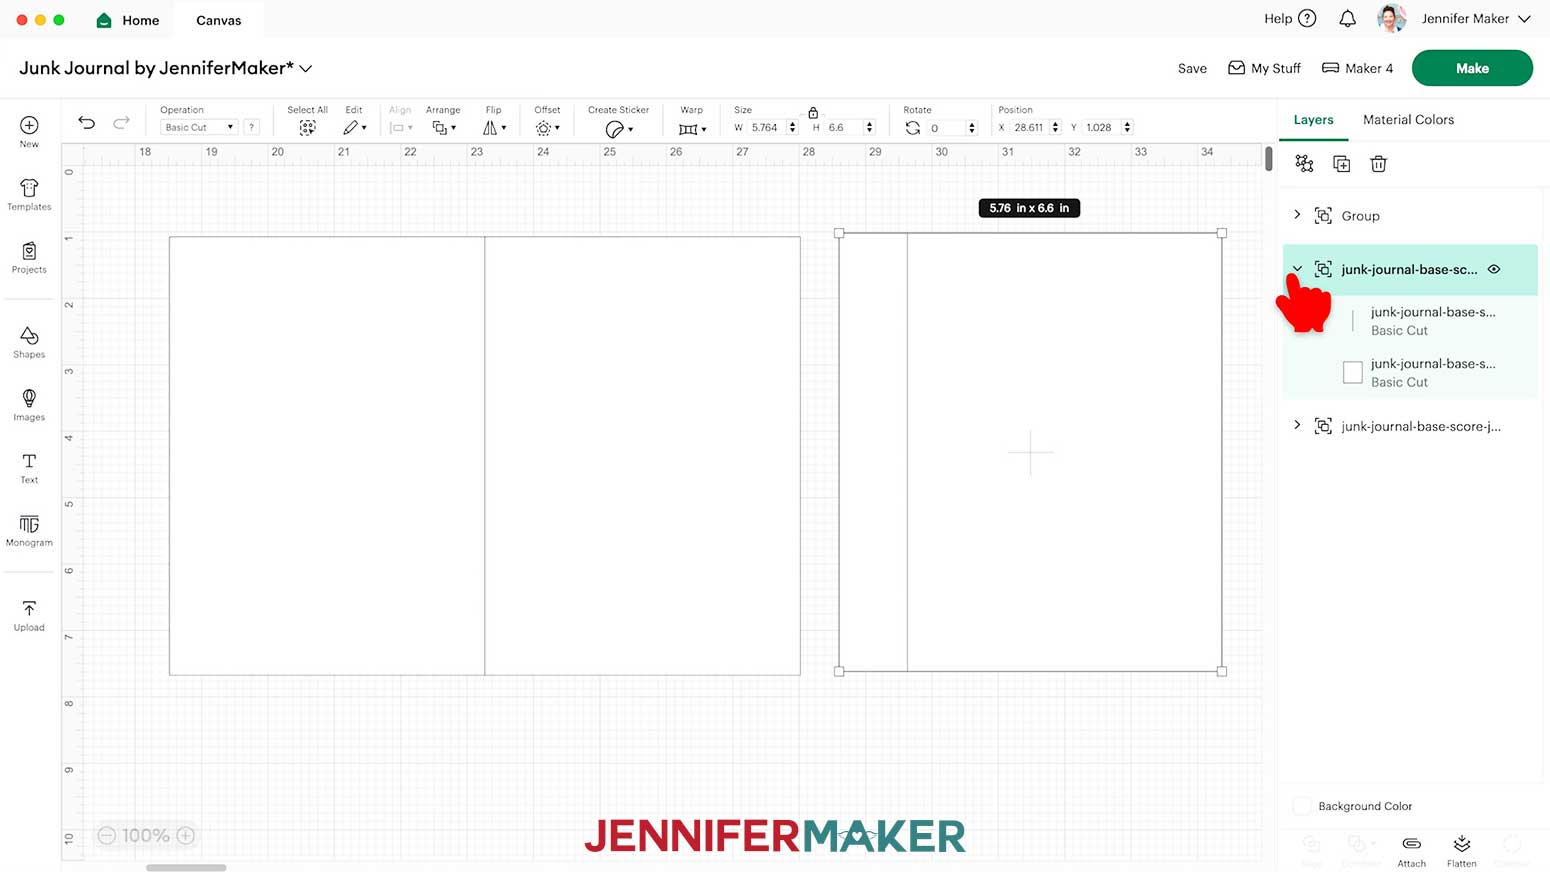
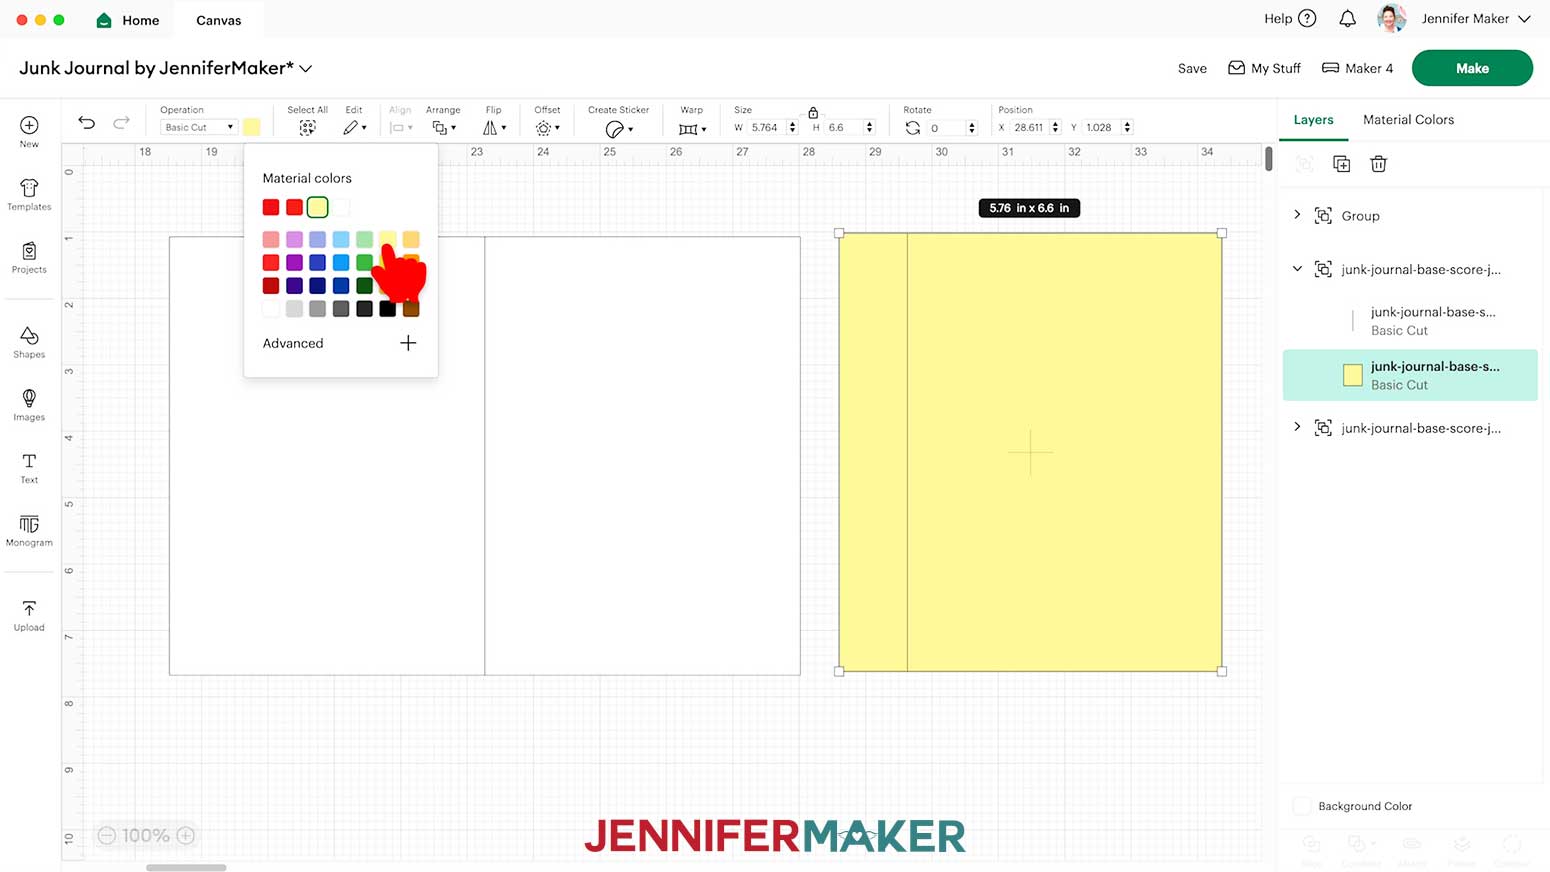
10. If you want to cut your pages on a different material than the base, click the lower “Basic Cut” layer, then change the color using the Color Box.
NOTE: I’m cutting my pages from printed paper, so I’ll make them yellow.
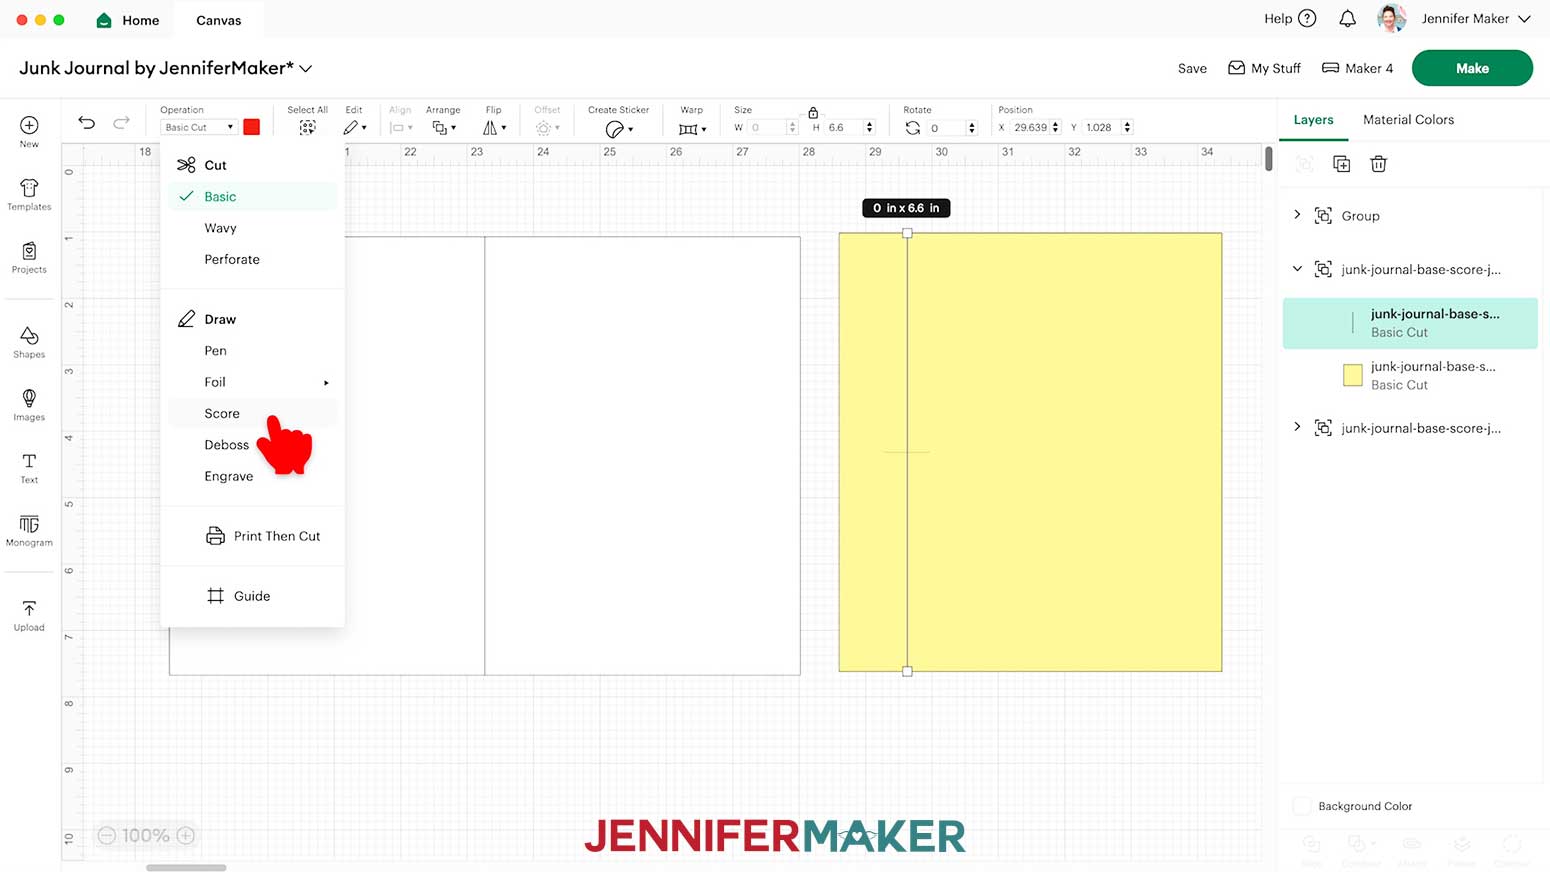
11. If you’re using the “score” file, select the top layer with the solid lines and change it to “Score” so the Cricut knows to make the score line where your page tab will be folded.
NOTE: The score lines for this project are all red, which is reflected in the Color Box when selecting a line layer.
TIP: If you’re making the “no-score” version, your lines are already dashed line cuts and don’t need to be changed to “Score,” so you can skip this step.
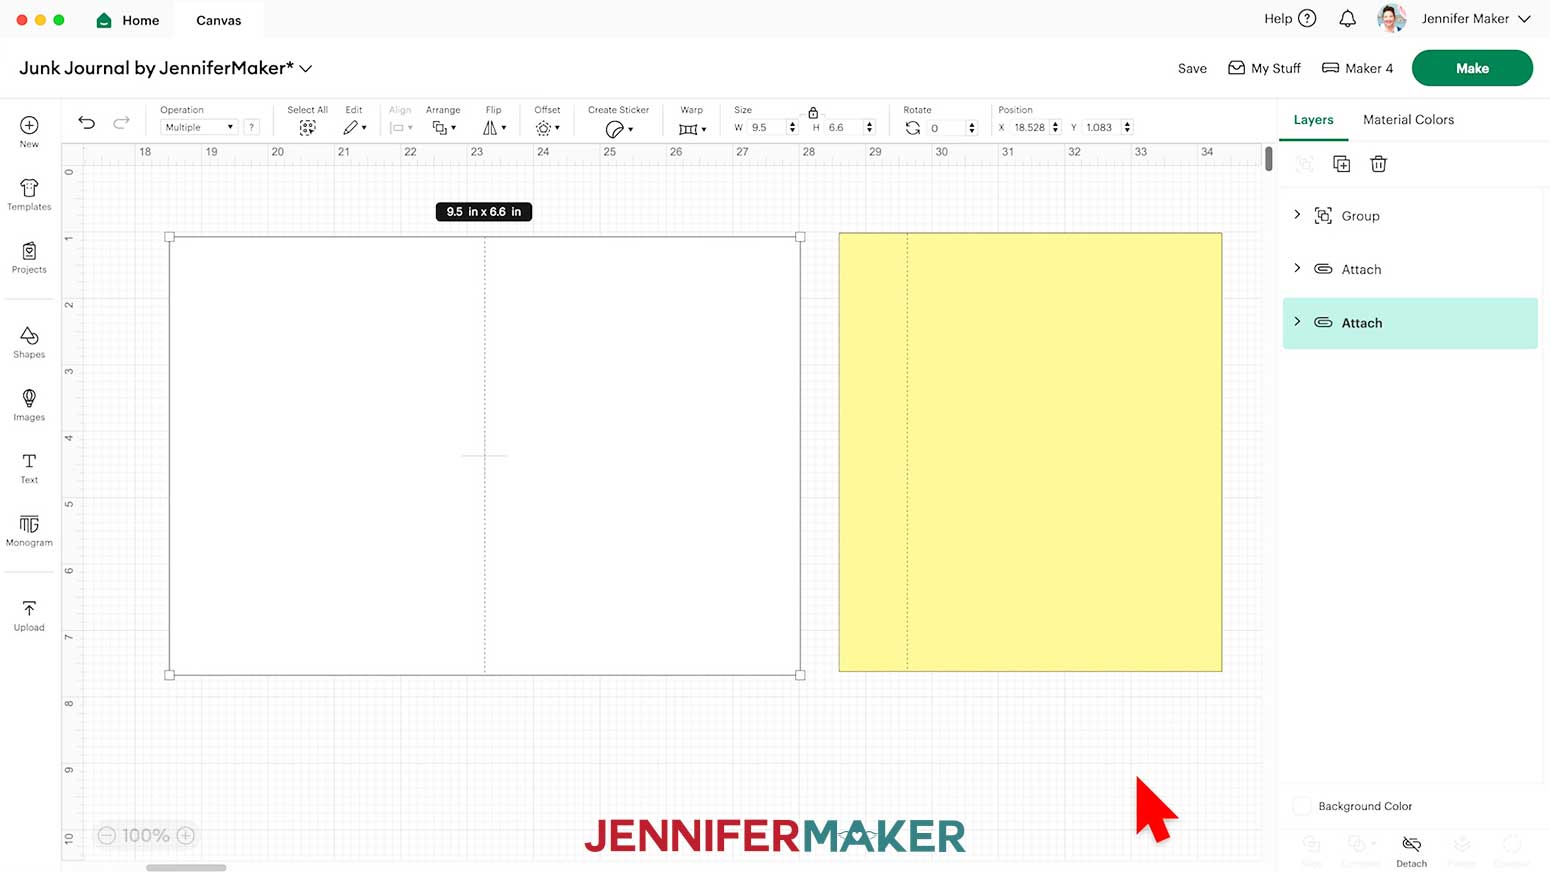
12. Click the Group layer with the arrow to select both layers in this group, then click “Attach” to keep your score line with your cut shape.
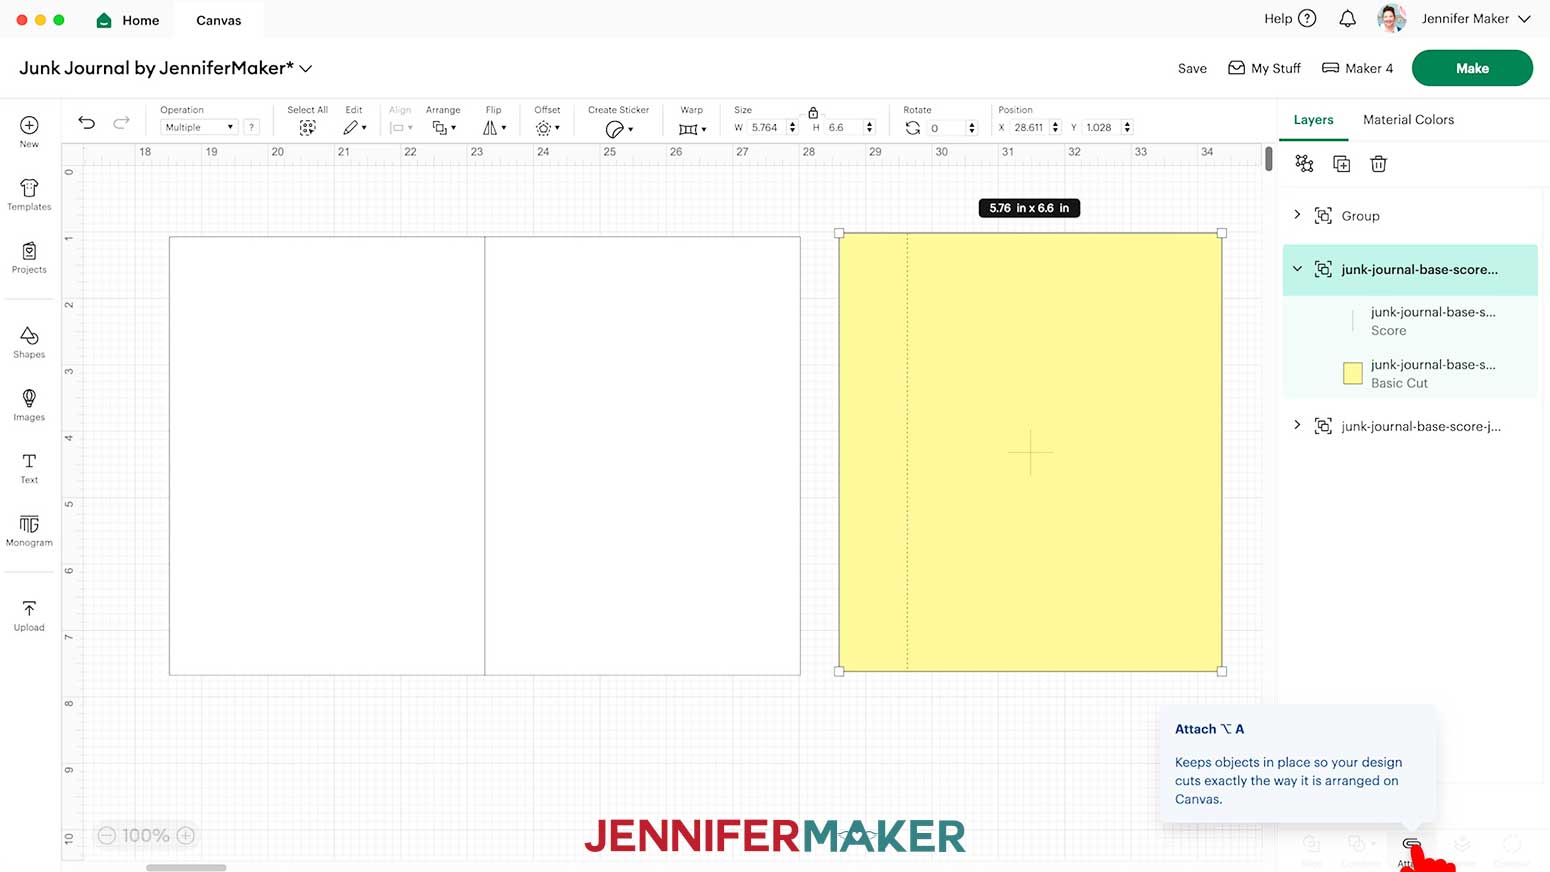
13. Repeat Steps 9-12 for the base, changing the line to “Score” and Attaching it to the cut shape.
NOTE: I’ll keep the base white and cut it from white cardstock so I can decorate the front and back of my journal.
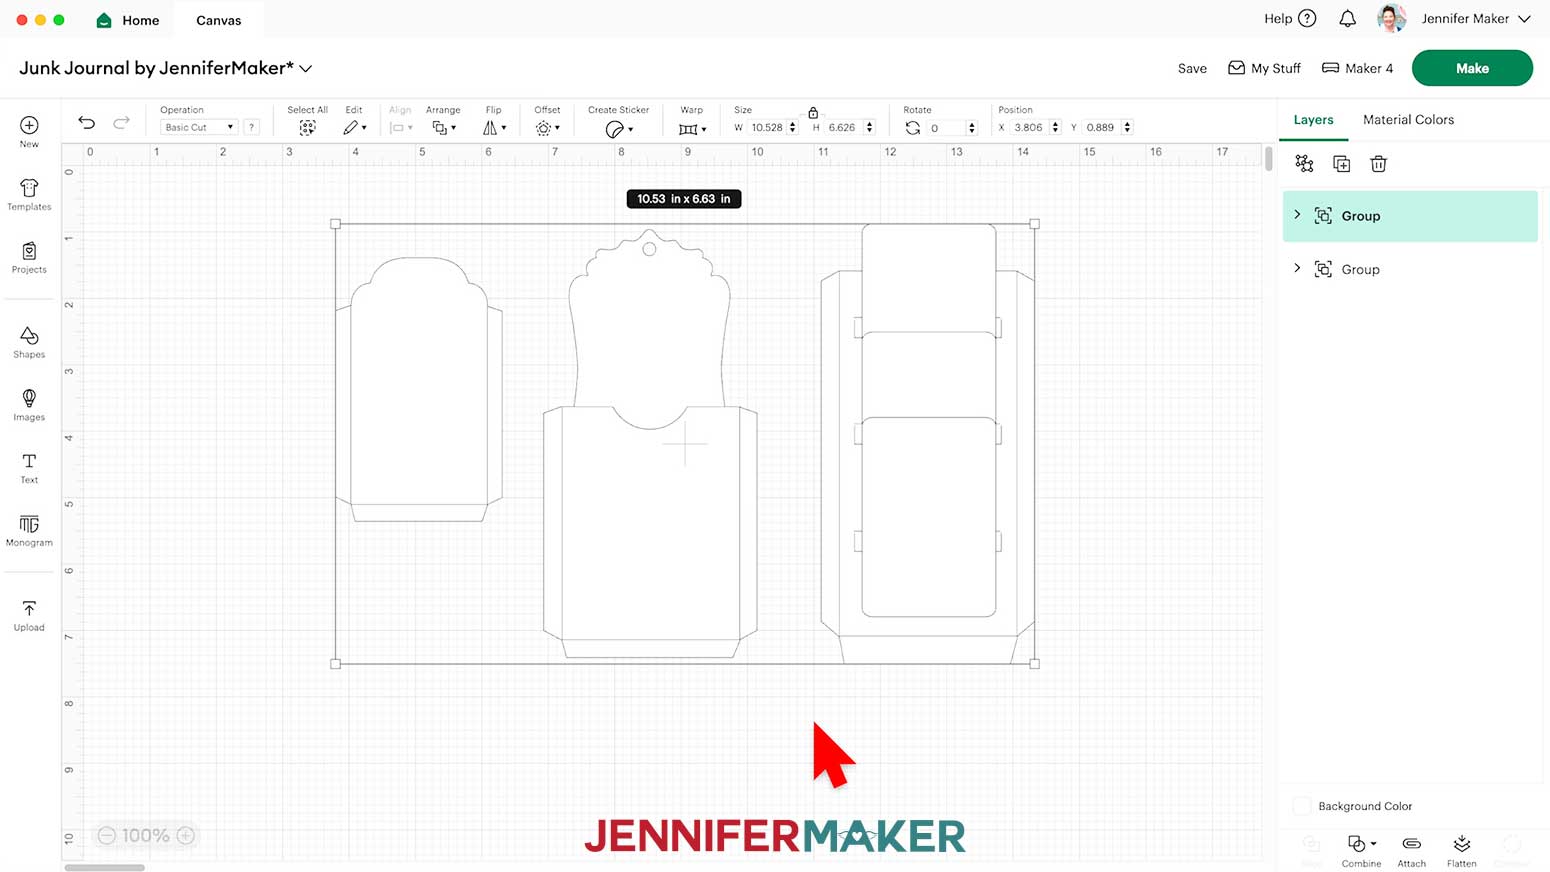
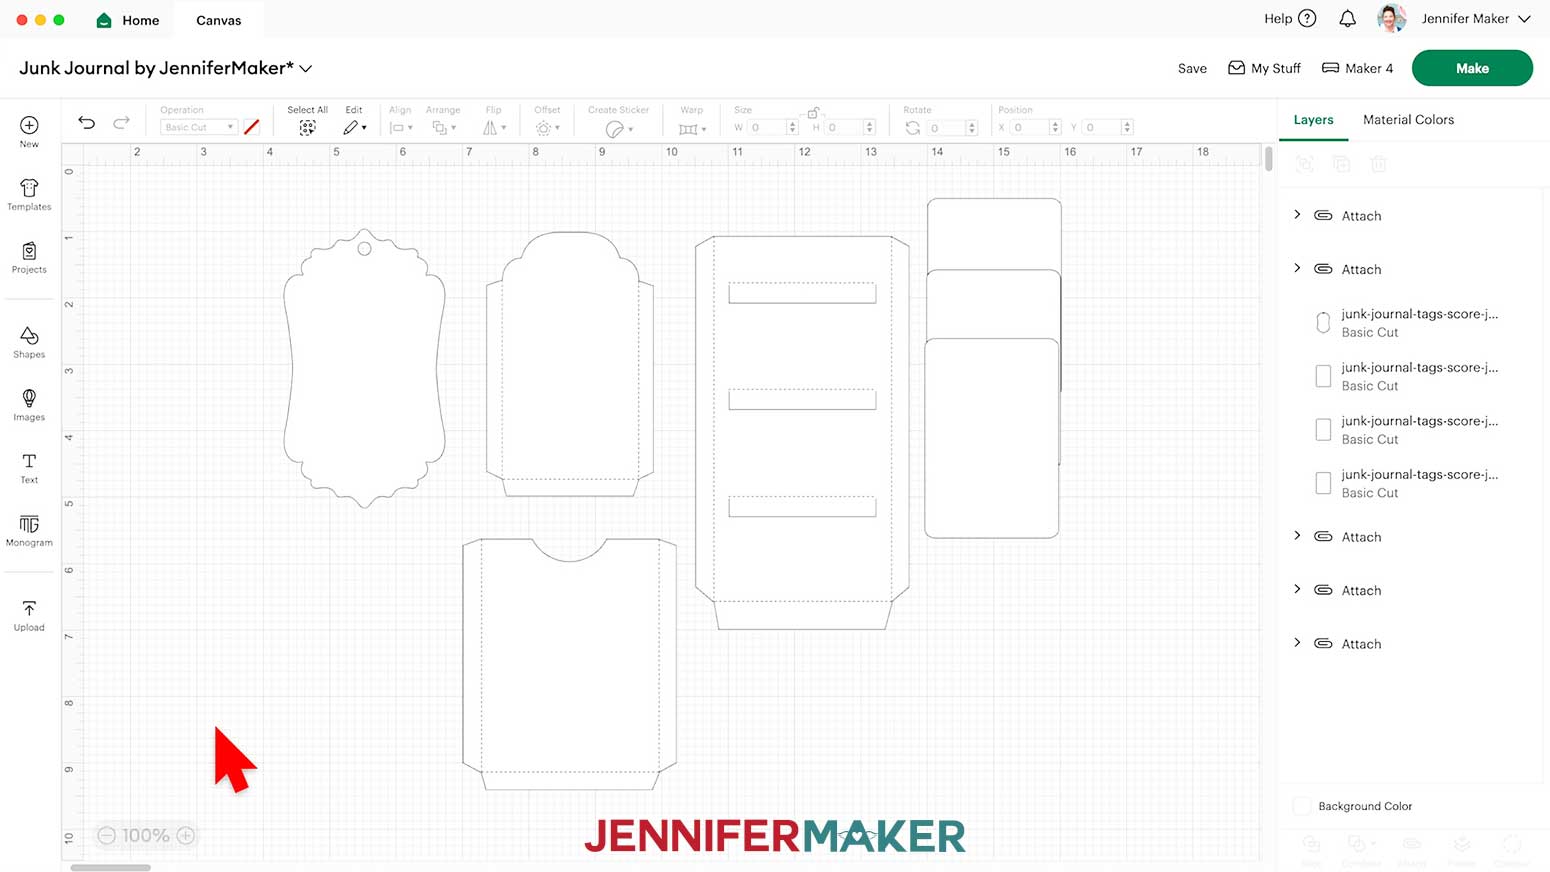
14. “Ungroup” the tags design and delete any you don’t want to use. I’ll use all three.
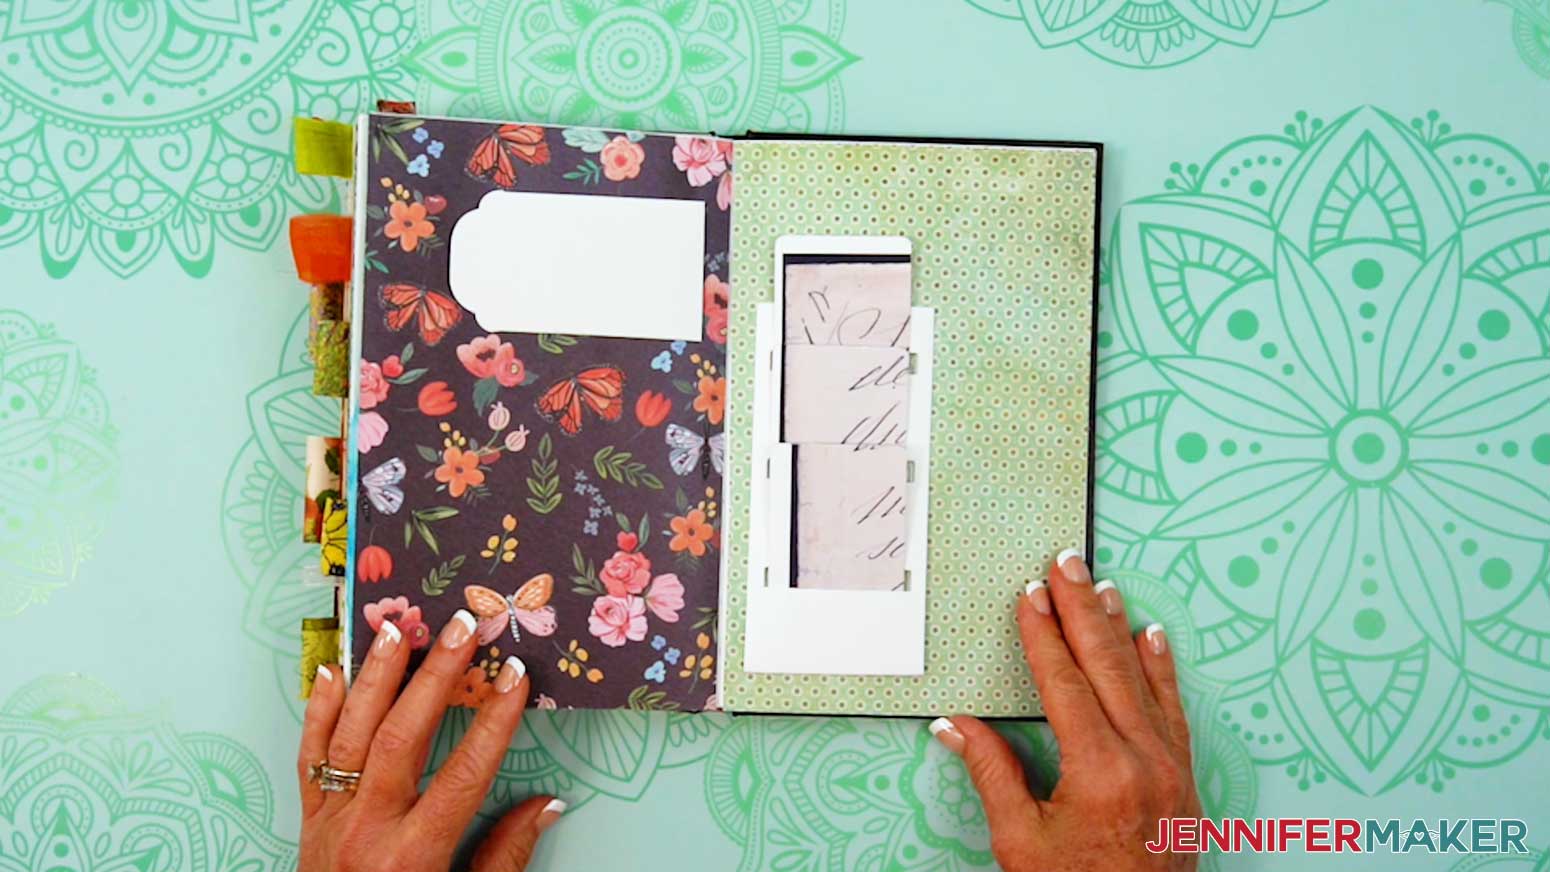
NOTE: The options include a simple pocket, a pocket with a tag you can add a ribbon to, and a complex pocket with three slot-in cards.
15. Repeat Steps 9-12 for the pocket options you want to keep, changing the line to “Score” and Attaching it to the cut shape.
16. Select just the page, then click “Duplicate” to make copies until you have enough to make the junk journal you want.
NOTE: I’ll make 3 more pages.
17. “Duplicate” and adjust any of the pockets, tags, or cards you want.
NOTE: I’ll make the tag and cards yellow to cut them from the decorated paper, and make copies of some to have more options.
18. Your project is ready to cut!
CUTTING
1. Make sure the correct machine is selected in the top right.
2. Click “Make.”
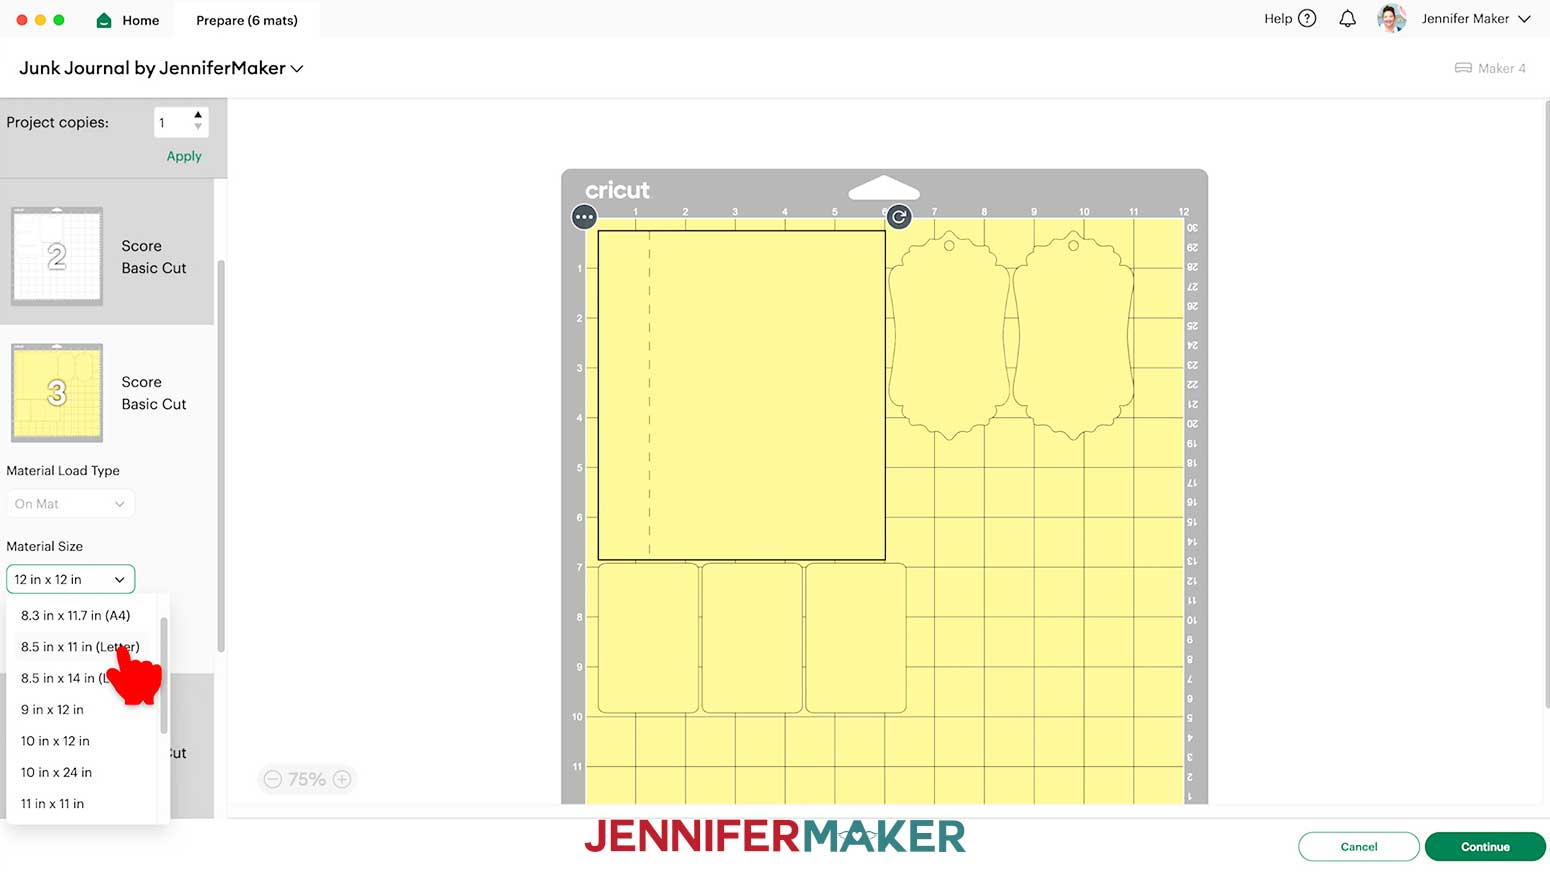
3. On the Prepare screen, make sure the correct Material Size is selected for your materials.
NOTE: I’m using “12 in x 12 in” white cardstock for the base and some of the accessories, and printed 8.5” x 11” for the pieces on yellow mats.
NOTE: If you see a mat with just lines, one or more of your score layers may not have attached correctly, so click on “Cancel” to return to the Canvas to check and adjust as needed.
TIP: If you have a lot of extra space on your mats, you can go back to the Canvas and “Duplicate” the pockets and/or cards to cut extras.
4. Once you are satisfied with your mat layouts, select the first mat again and click “Continue.”
NOTE: My first mat is the white base, but yours may be different.
5. On the Make screen, set the Base Material for your first mat. For both the regular cardstock mats and the printed matte photo paper, I used the “Medium Cardstock - 80 lb (216 gsm)” material setting with “More” pressure for cleaner cuts.
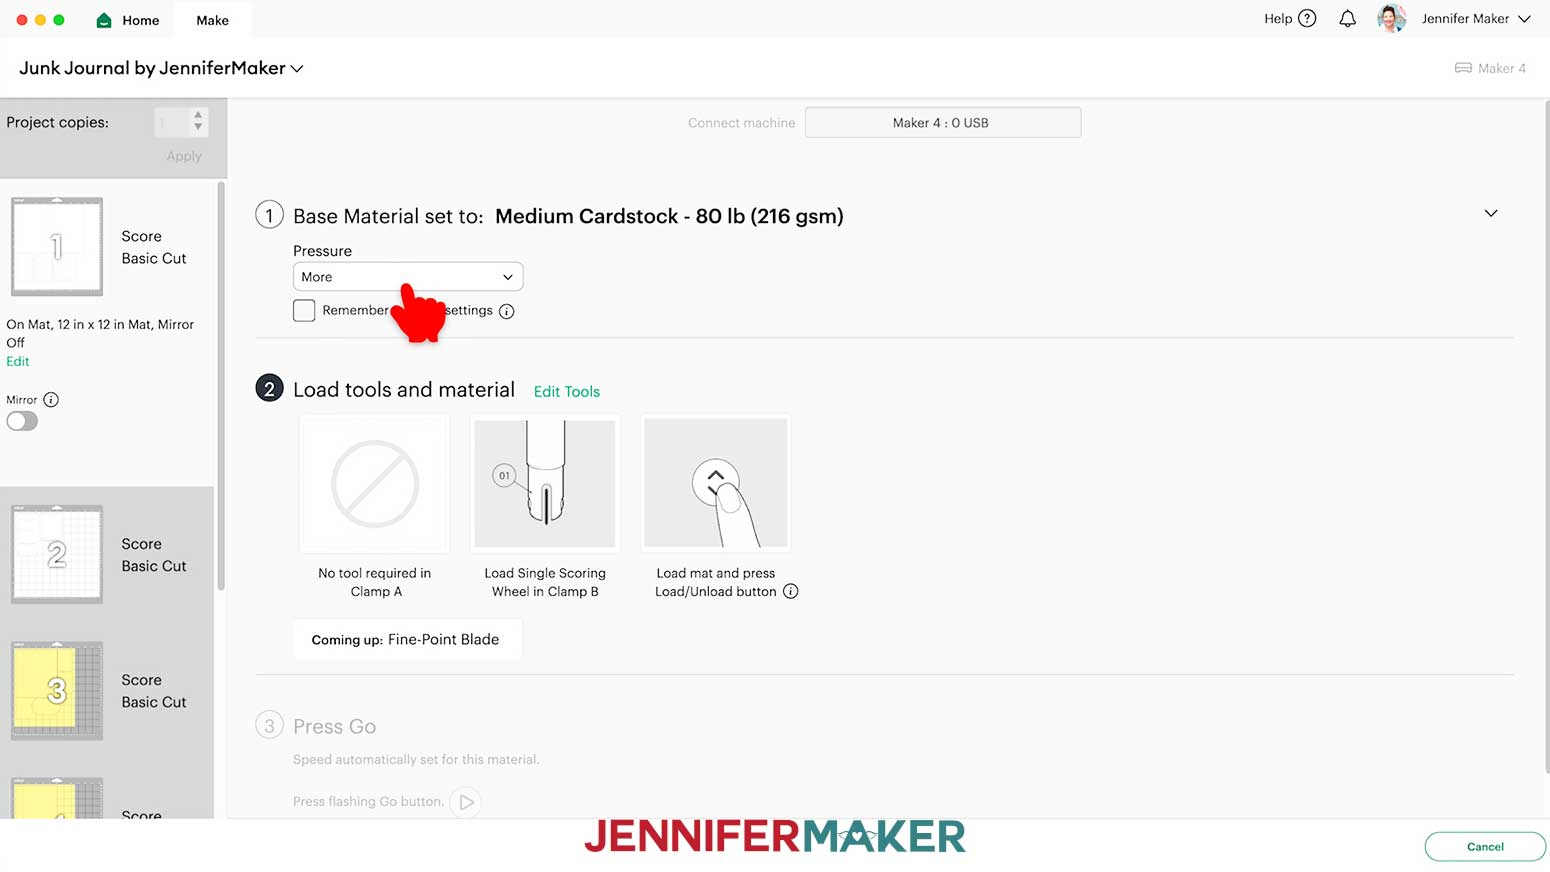
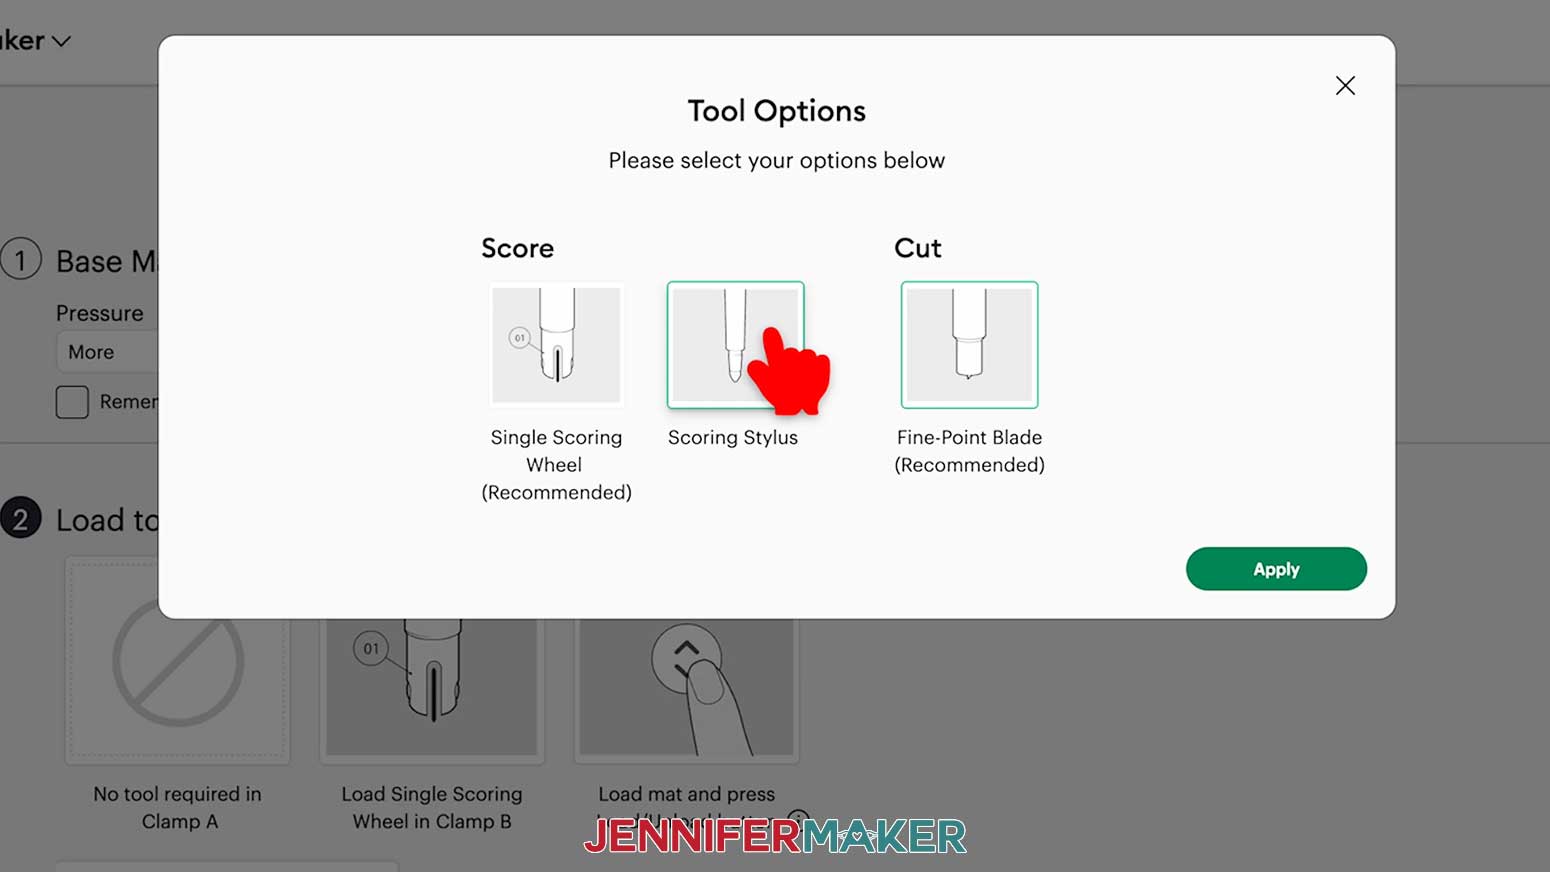
6. If your mat has scoring lines, follow the screen prompts to select and add your scoring tool. Depending on your machine, click “Edit Tools” and select the Scoring Stylus to load both the scoring tool and the blade at the same time. Or you can select the Scoring Wheel and switch tools when prompted. Click “Apply” to close the “Edit Tools” window.
NOTE: If you’re using the “no-score” version, you won’t see the Scoring Tool prompts since all of your fold lines are dashed cuts.
7. Check that your Premium Fine-Point Blade is clean and in the correct clamp.
8. Place the cardstock face up on a green StandardGrip machine mat to cover the design area on the screen.
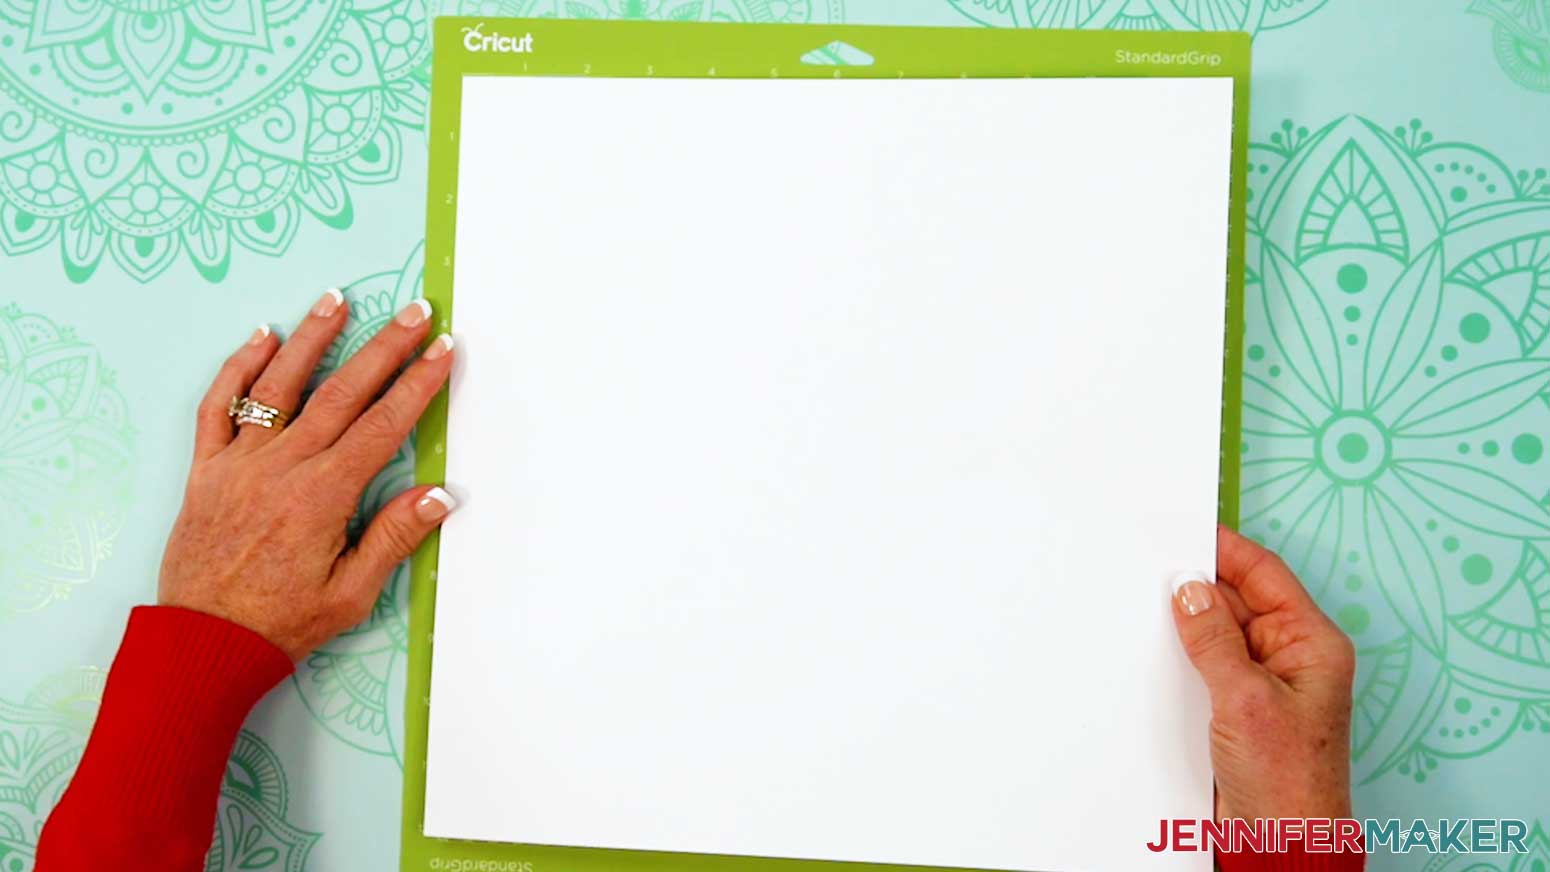
9. Use a brayer to make sure it’s fully adhered.
10. Press the flashing “Load/Unload” button to load the prepared mat into your Cricut.
11. Press the flashing middle button to begin cutting.
12. When it has finished cutting, don’t unload the mat right away. Gently lift a corner of the material to make sure the cuts went all the way through. If not, press the middle button again to make a second pass of cuts in the same spots.
13. When the cuts are complete, unload the mat, flip it over onto your work surface, and roll it back to release the cardstock.
14. Cut the rest of your plain cardstock mats the same way.
15. When you’re ready to cut a mat using decorated paper, place it on a green StandardGrip machine mat to cover the design area on the screen. Since there are non-directional decorations on both sides, you don’t have to worry about design placement.
16. Prepare, load, cut, and unload the mat the same way as you did the plain cardstock.
17. Save the extra printed paper to cut into decorations.
18. Cut the rest of your mats the same way.
STEP 3: ASSEMBLE YOUR ACCORDION-STYLE JUNK JOURNAL
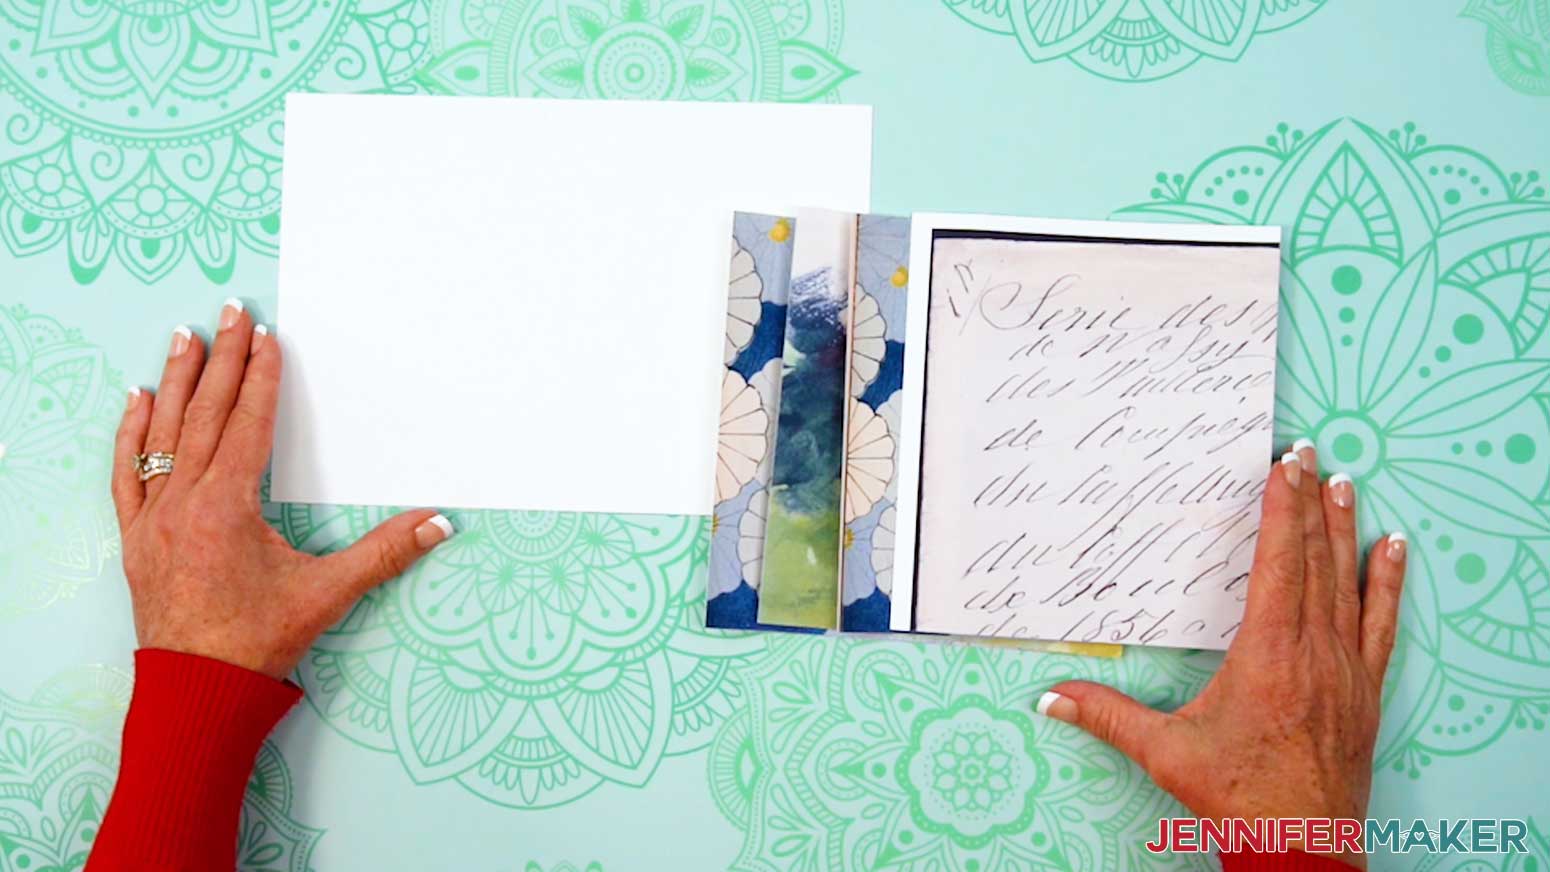
1. Lay out your junk journal pieces grouped by type.
TIP: If you have double-sided pieces, pick your favorite side and consider that “face up.”
2. Fold and unfold the base along its center line.
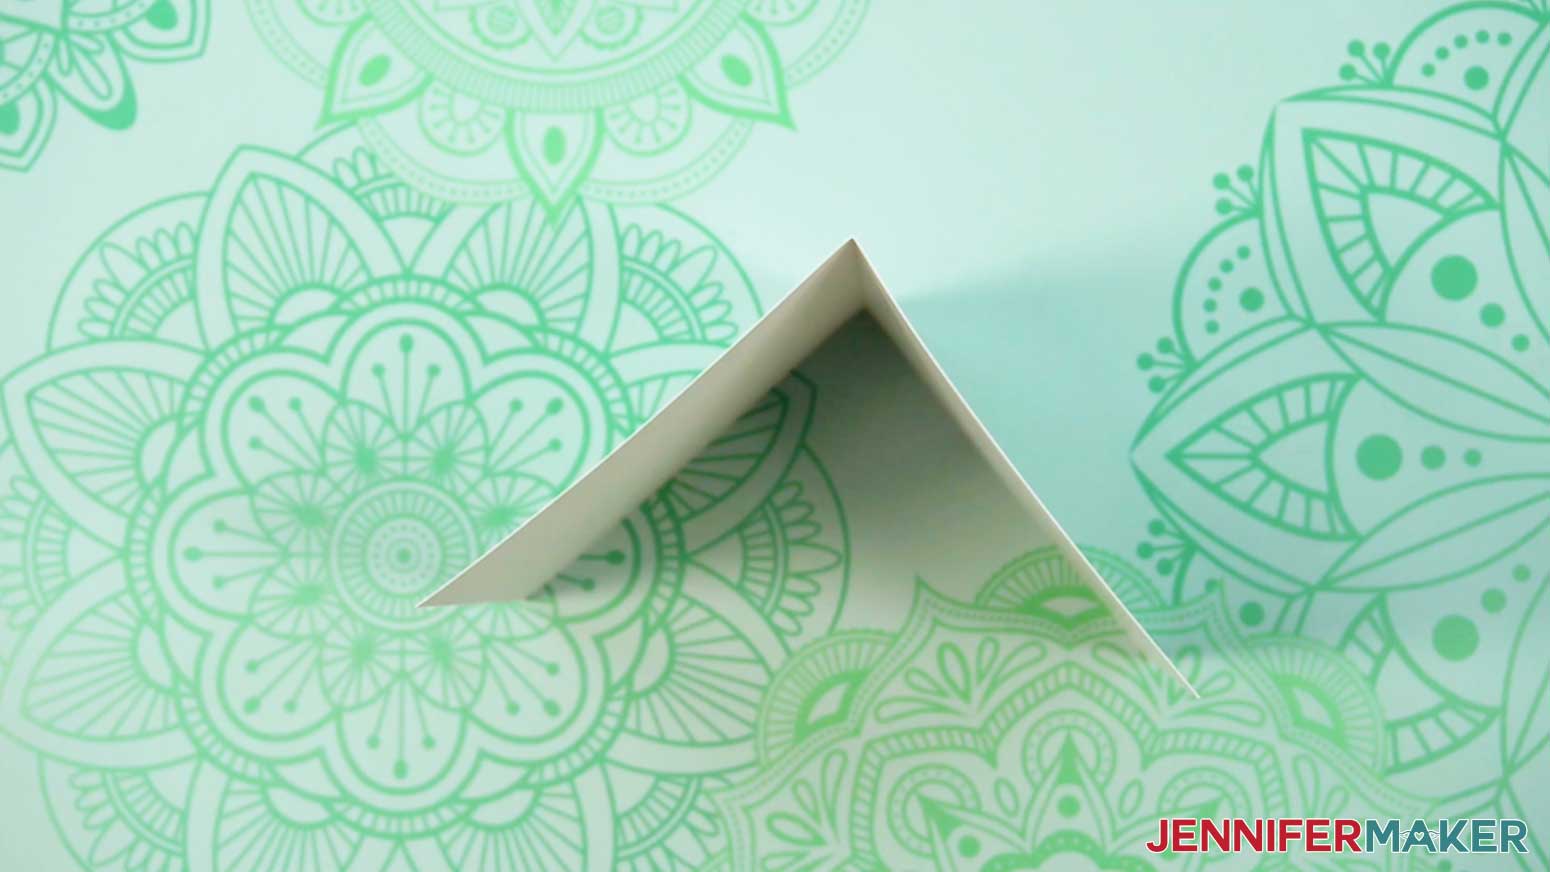
3. Flip your first page over and fold its side tab up to see where the crease will be.
4. Run a wrinkle-free glue stick along the tab’s back, but don’t get too close to the crease.
TIP: Keep some scrap paper under the page to catch any extra glue.
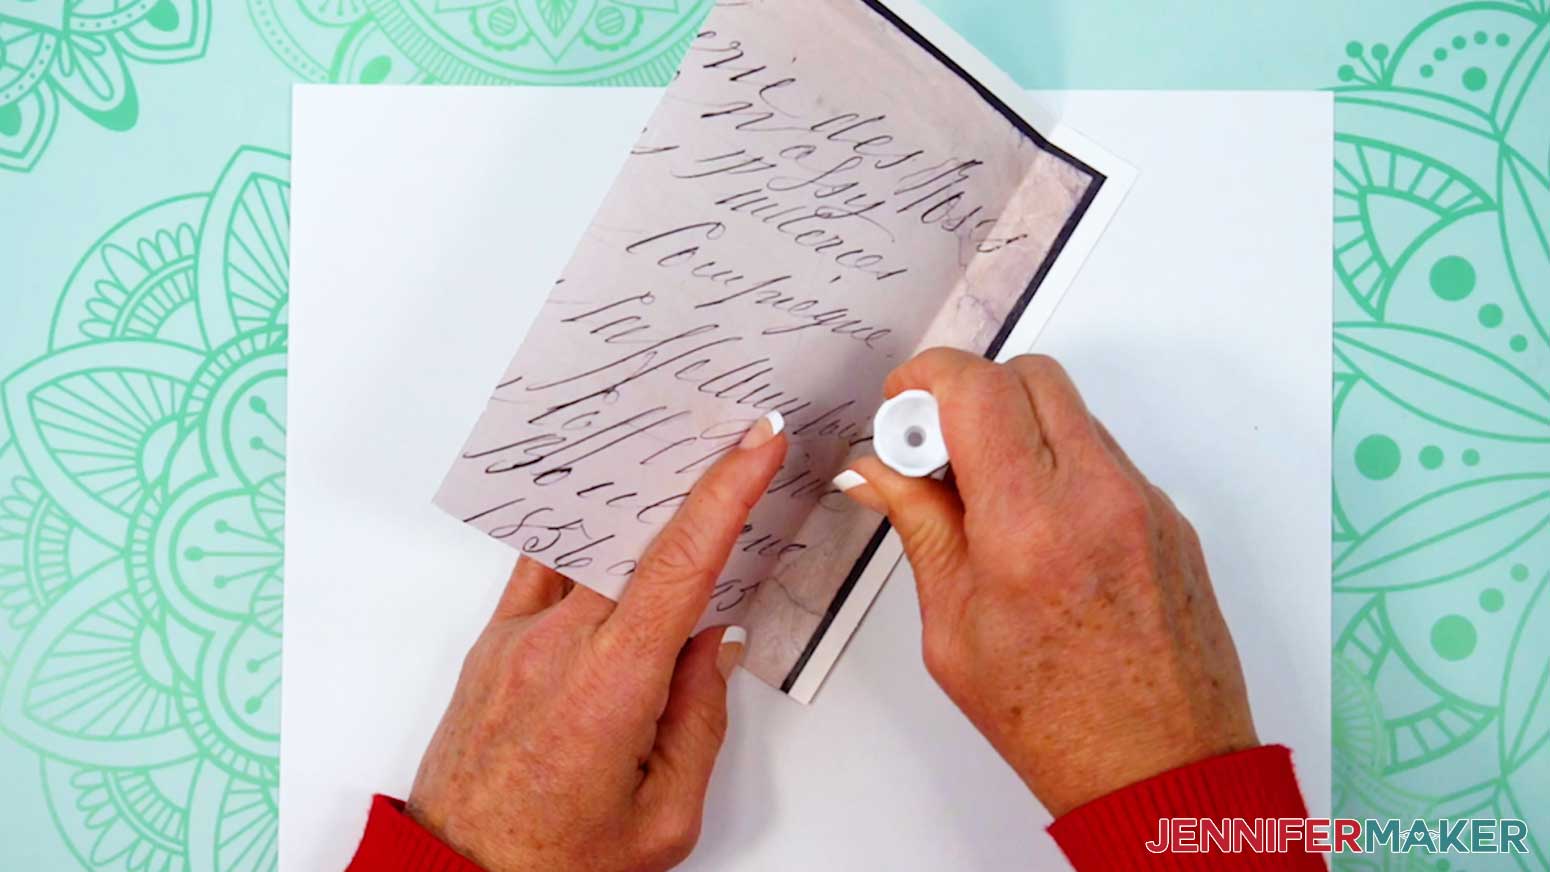
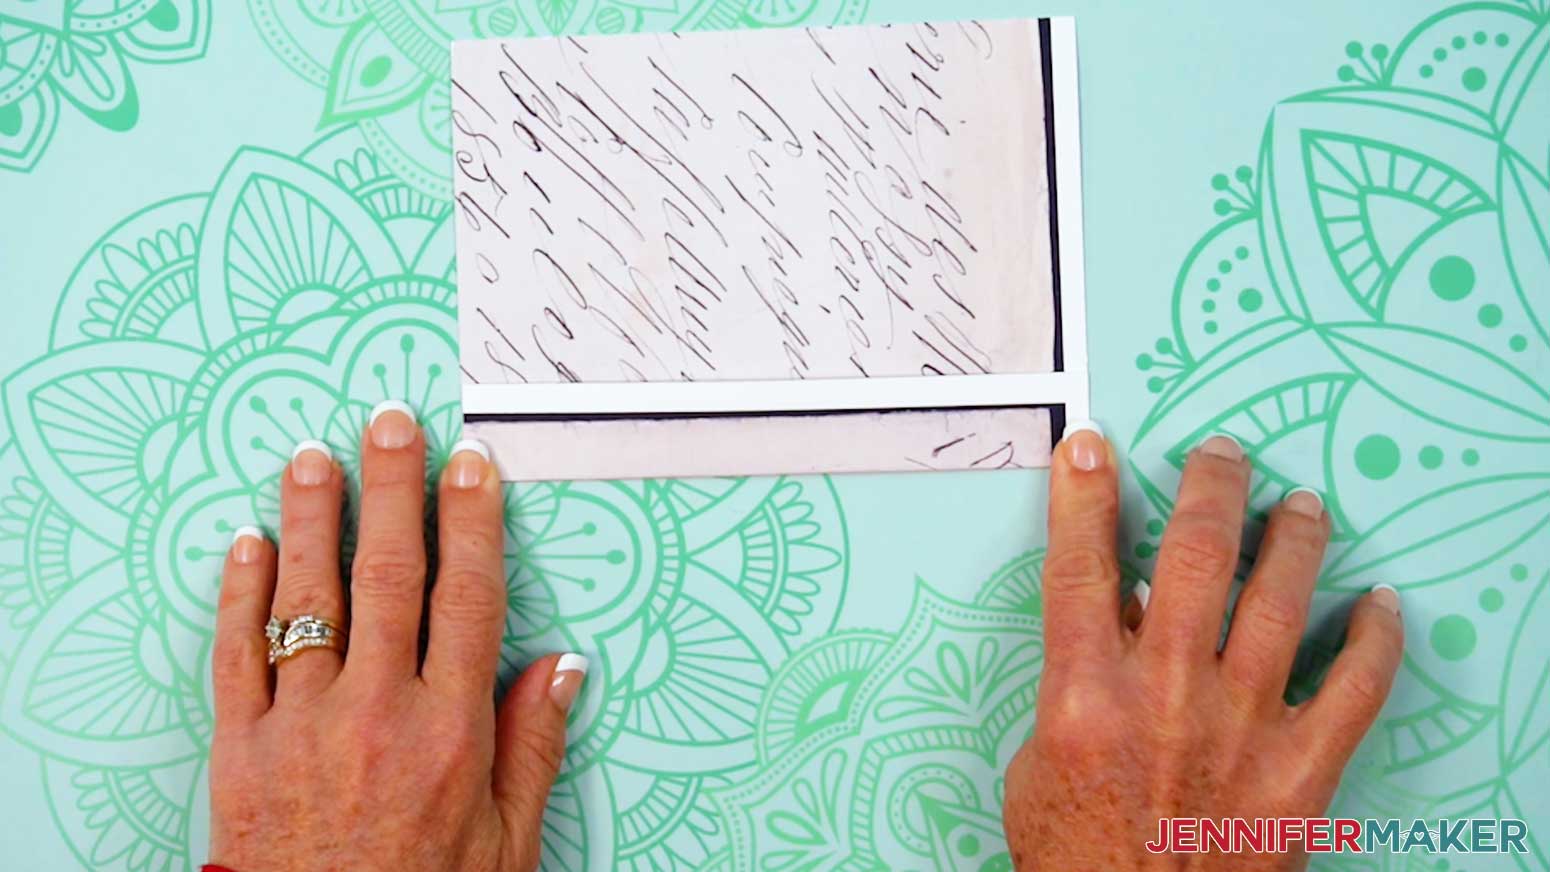
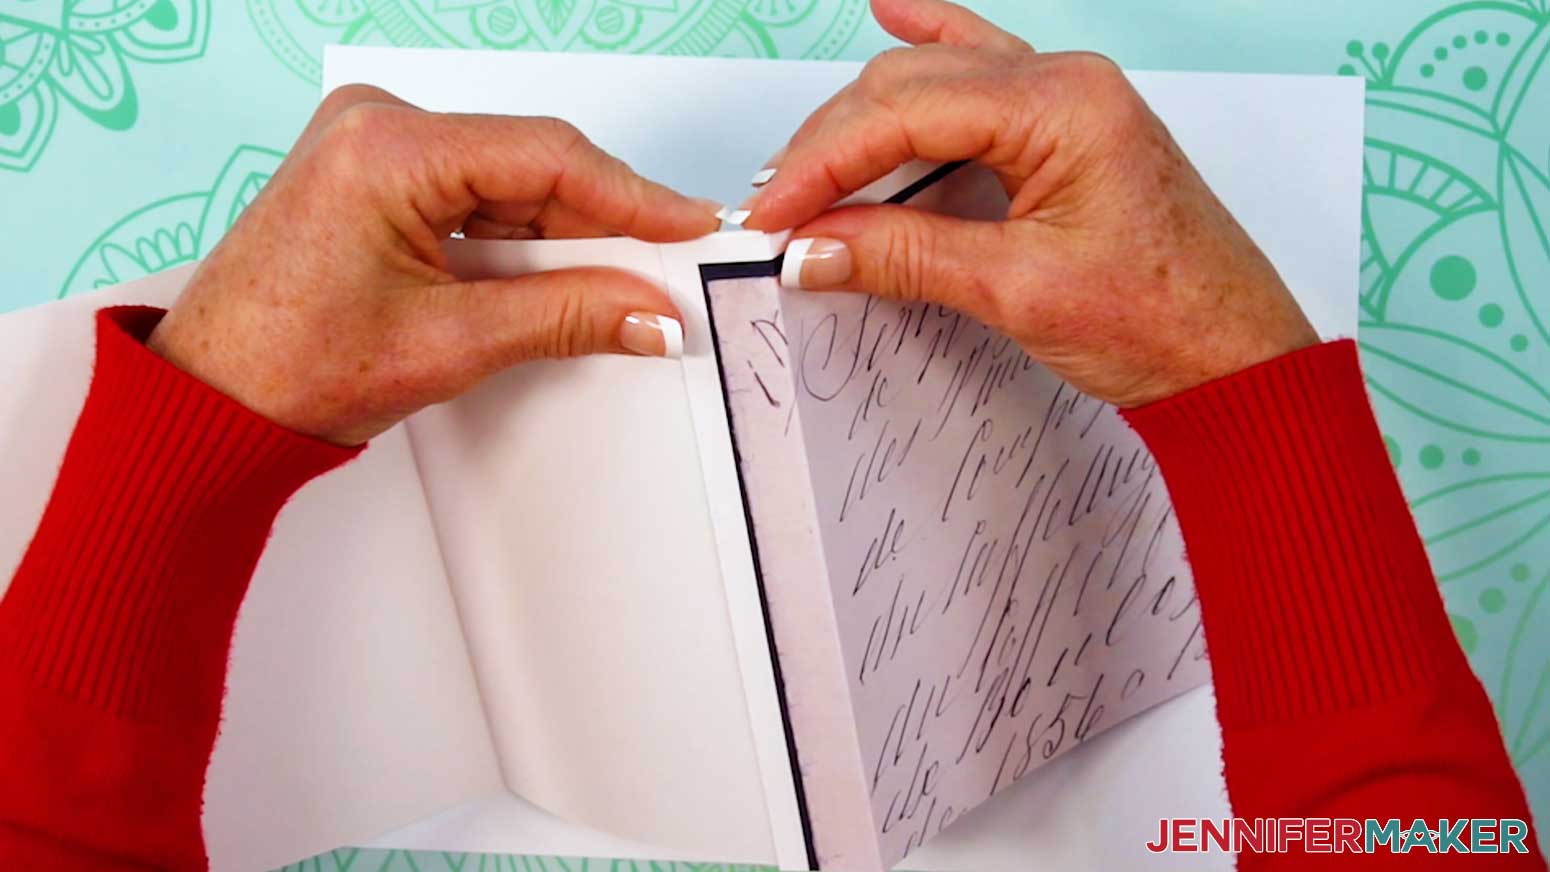
5. Flip the page face up and align the score line with the base’s right edge so the tops and bottoms are flush.
6. Press the tab in place and let it dry to create the third inner page, connected to the base with a mountain fold.
7. To create the accordion style folding, add glue to the front of the next page’s tab and glue it to the back of the third page to create a valley fold
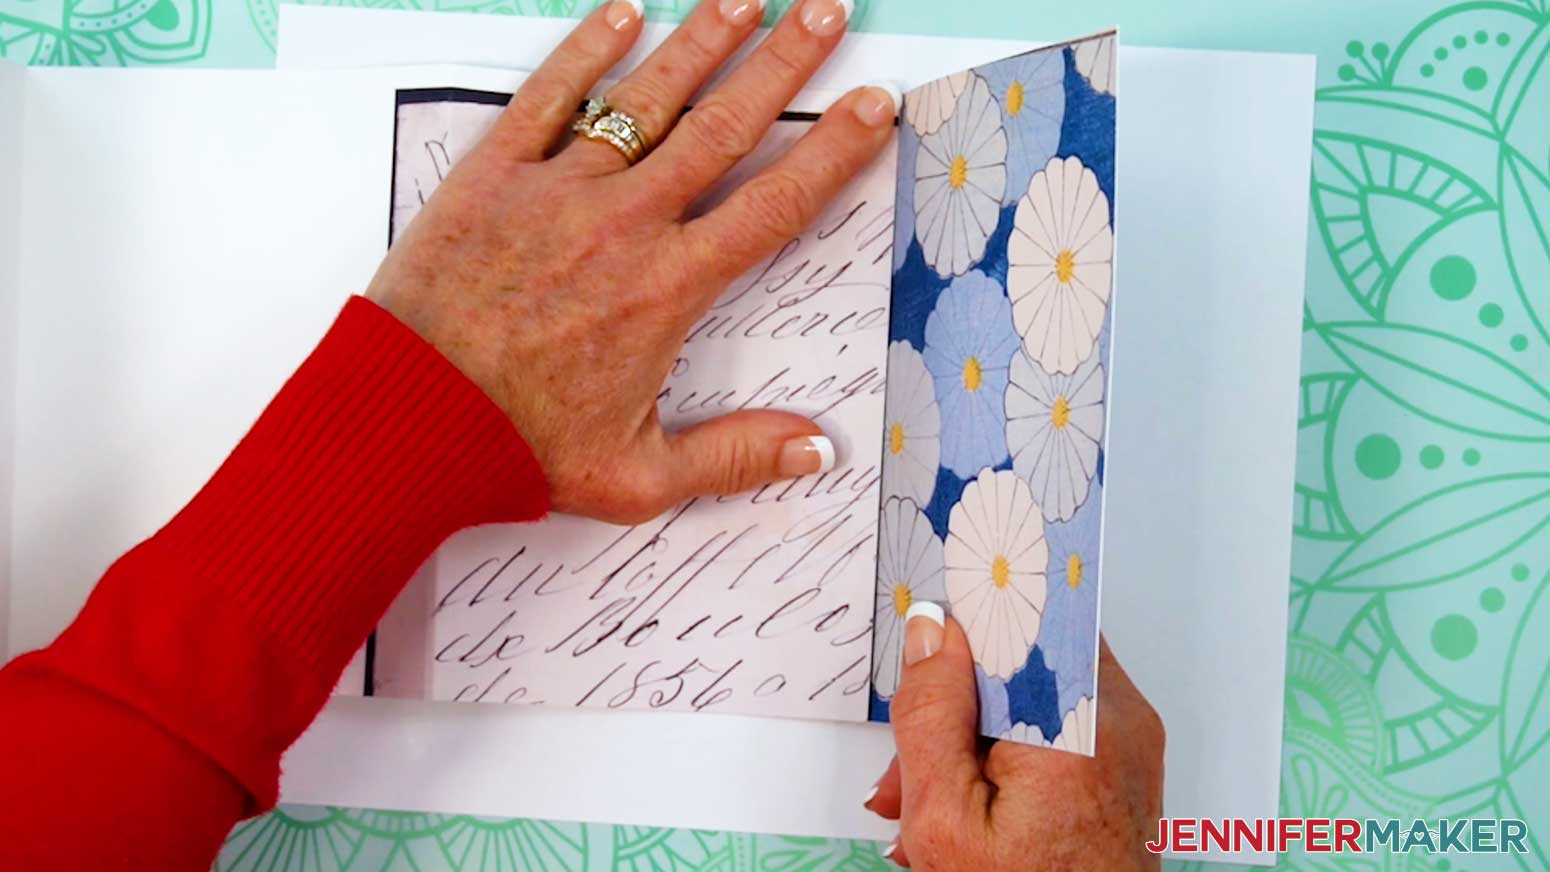
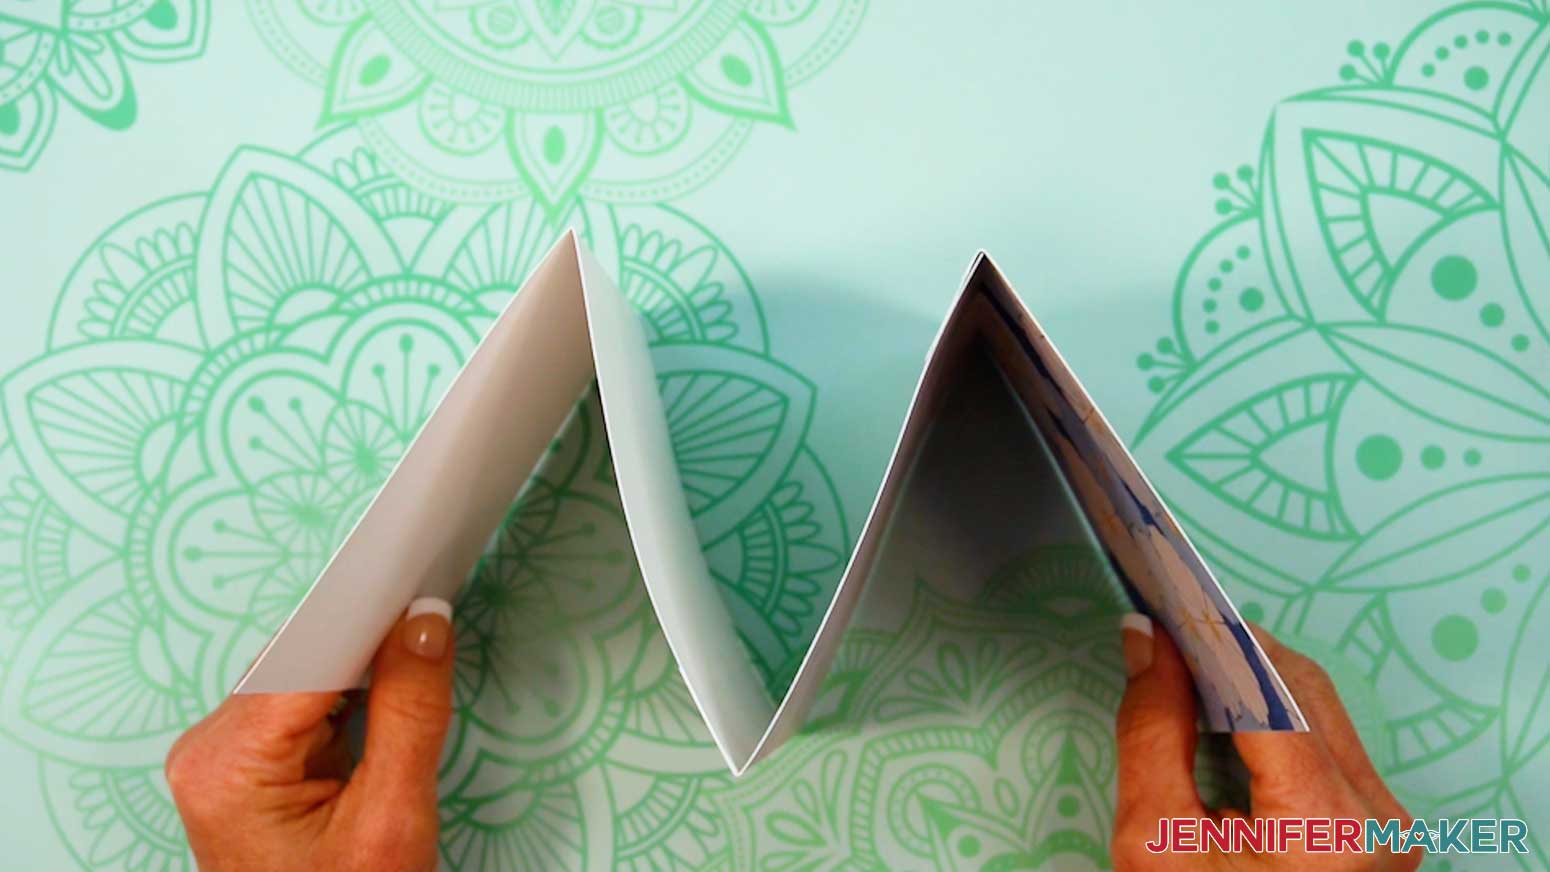
8. Alternate adding your pages as mountain and valley folds until they are all connected.
9. If you want to add any of the included pockets, use a scraper to carefully fold back along the score or dashed cut lines.
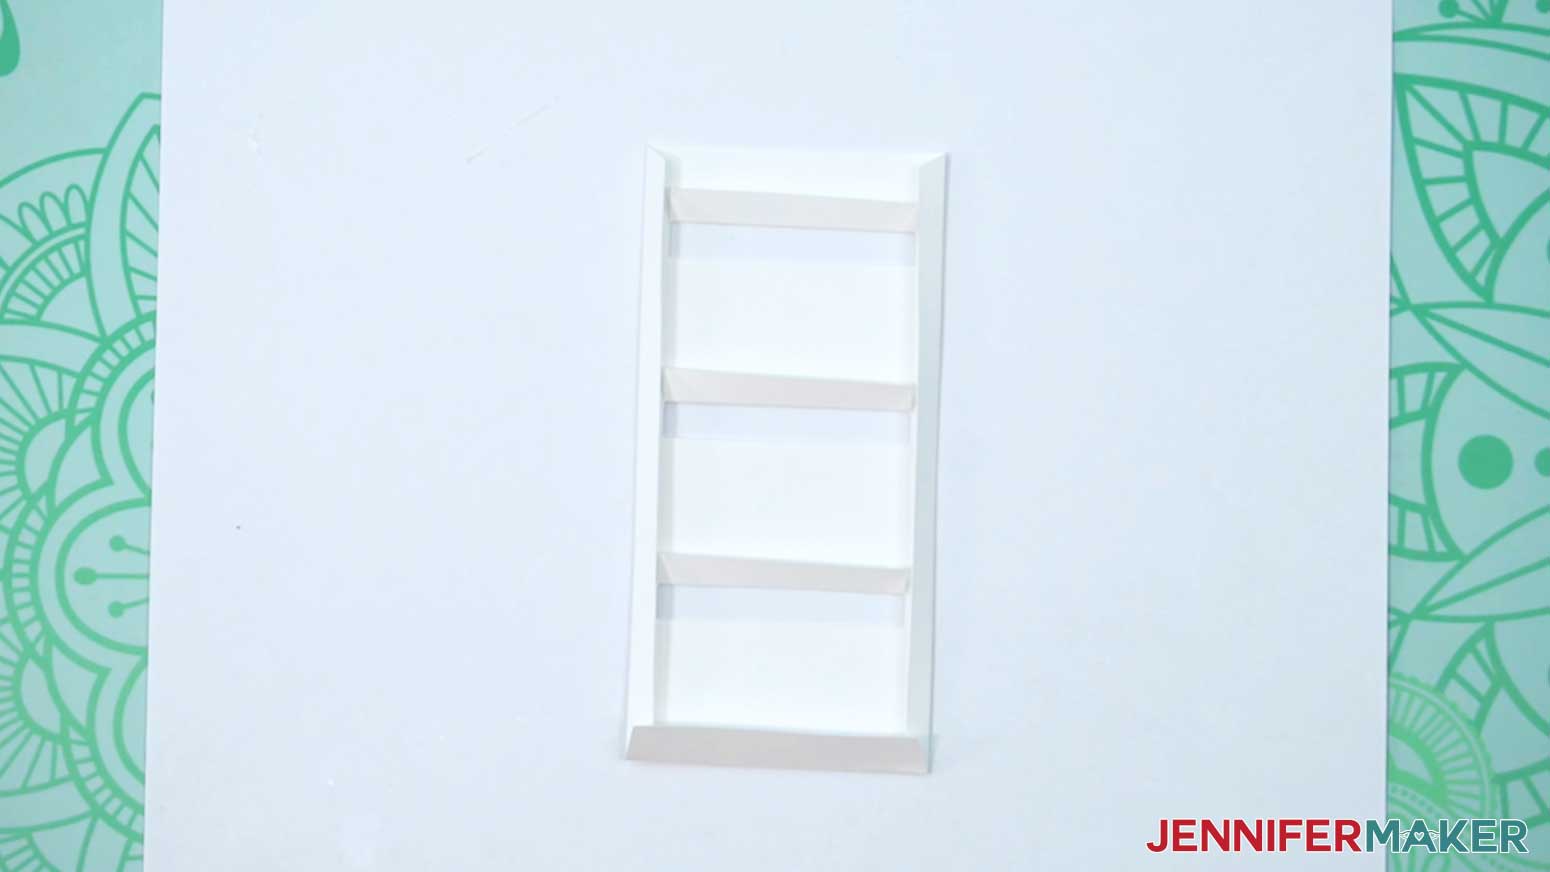
10. Add glue to the pocket’s outer tabs but not the middles.

11. Press the pockets glue-side down onto the page and hold them to dry in place.
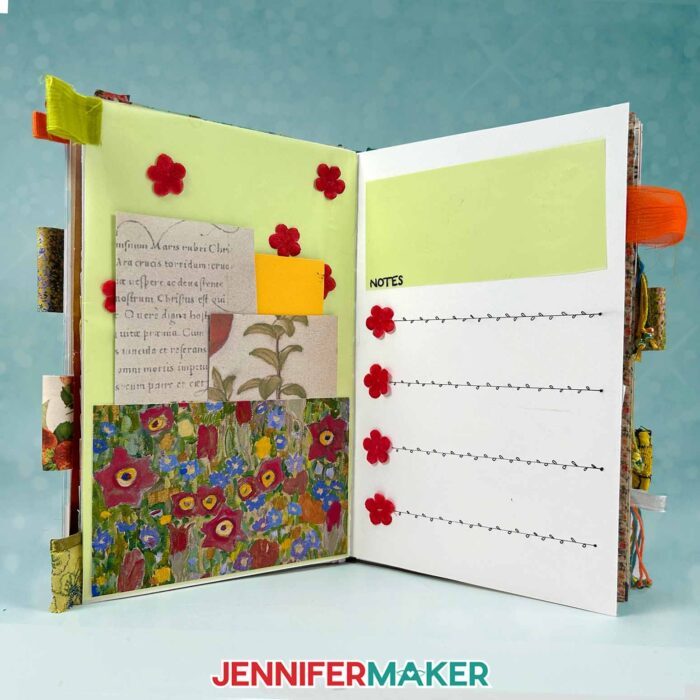
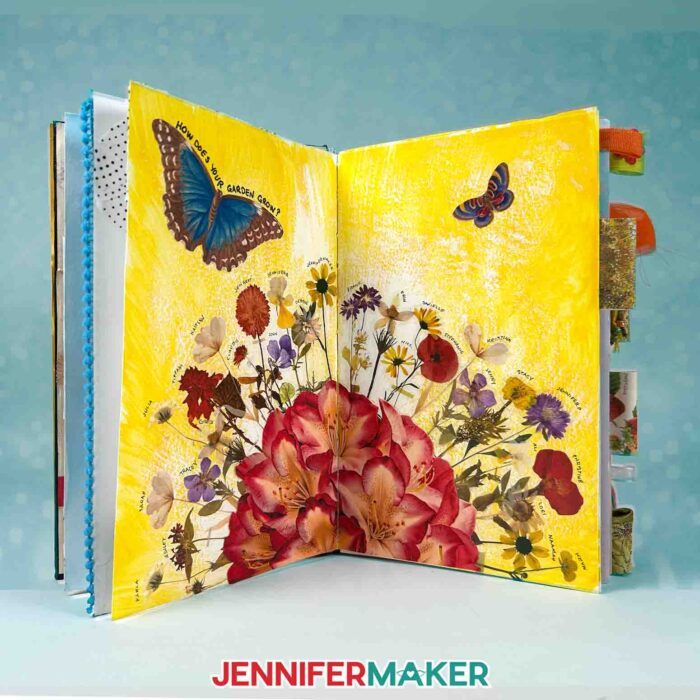
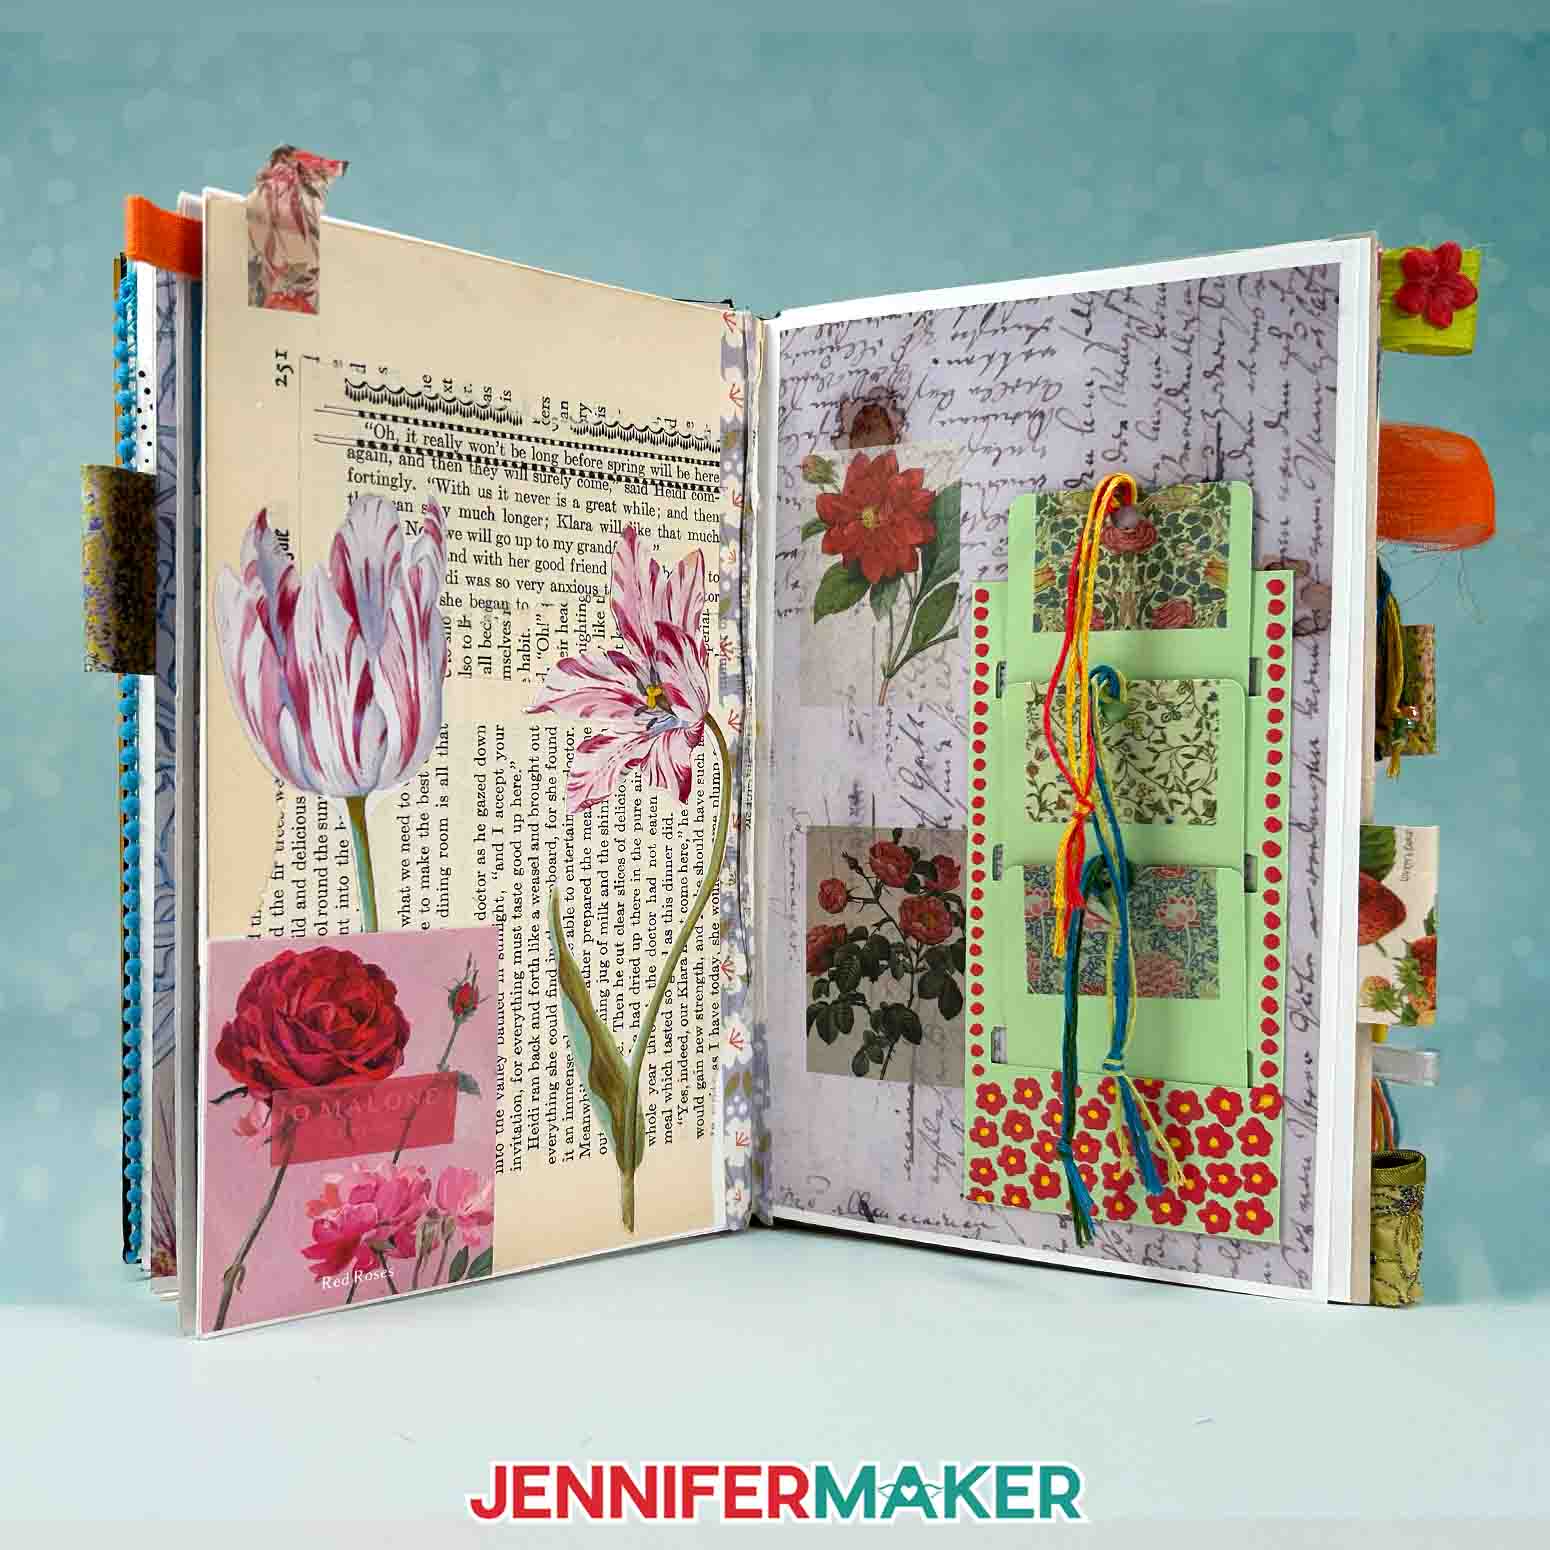
STEP 4: DECORATE YOUR JUNK JOURNAL
Let your creativity take over and play with layering paper, adding found bits. placing stickers, adding handwritten quotes -- whatever your materials inspire you to do!
Answers to Your Questions About How to Make Junk Journals
Q: I want to create a box to keep all of my junk journal supplies in. Can you teach me how?
A: You can learn how to create your own junk journal ephemera box in my ADVANCE program. Learn more about ADVANCE here!
Q: What exactly is a junk journal?
A: A junk journal is a handmade book filled with pages you decorate using everyday materials like cardstock, scrapbook paper, paper scraps, fabric scraps, old book pages, and more. It’s a creative outlet and a meaningful way to capture memories, thoughts, and bits of everyday life in a form that’s uniquely yours.
Q: What kind of papers can I use in my junk journal?
A: You can use almost anything! Try cardstock scraps, old book pages, wrapping paper, scrapbook paper, or even a recycled cereal box for your junk journal cover. Mixing various papers and textures is what gives each journal its personality and charm!
Q: What supplies do I need to start?
A: You only need a few basic junk journal supplies: glue, scissors, some pretty papers, and a bit of imagination. You can also add washi tape, stickers, or ribbon for extra color and texture. I’ll show you exactly what to use in the video tutorial and the step-by-step written guide above.
Q: What are the rules for junk journaling?
A: The one rule of junk journaling is that it does NOT have to be perfect. Other than that, there are no rules! The beauty of junk journals is that there’s no wrong way to create one. And when it comes to junk journal ideas, there’s no such thing as a bad one. Whether you prefer neat layouts or messy, layered pages, every junk journal tells a story in its own creative way.
Q: What if I don’t have a lot of junk to use yet?
A: It’s okay to start small. Even a single piece of scrapbook paper or an old envelope can spark an idea. As you go, you’ll collect more little treasures like tags, tickets, and postcards, that you can tuck into your next creation.
Q: What are the different types of junk journals?
A: There are so many. You can make a travel journal, an art journal, a gratitude journal, or one based on a specific theme, like nature, recipes, or your favorite quotes. You can even mix themes throughout the same book. There are no rules!
Q: Can I make a junk journal without a cutting machine?
A: Oh, absolutely! You can cut all your pieces by hand using scissors or a craft knife. But if you have a Cricut, the free SVG files make it easy to cut your pages, pockets, and tabs with perfect precision.
Q: Where can I find pretty papers for my junk journal?
A: I like to print my own using copyright-free images from public domain collections. In the tutorial, I’ll show you how to use a resource I found to print gorgeous vintage artwork on double-sided matte photo paper for a professional look.
Q: How do I decorate the pages inside my junk journal?
A: This is the fun part! You can layer paper scraps, add washi tape, glue down cut-out embellishments, paint with acrylic paint, or include handwritten notes and photos. Try experimenting with different elements and a consistent color palette for a cohesive look.
Q: What’s the accordion-style junk journal, and why is it good for beginners?
A: The accordion-style junk journal is a flexible, expandable design made of folded cardstock. It’s perfect for beginners because it’s easy to assemble, doesn’t require a binding machine, and gives you the freedom to grow and add more junk journal pages later.
Q: Can I use my junk journal for writing, too?
A: Definitely! Many people use their junk journals as daily diaries, gratitude logs, or creative notebooks. Feel free to add your own personal notes, sketches, inspiration, or favorite quotes. It’s all part of your creative process.
Q: How can I make my junk journal last longer?
A: Using sturdy materials for your base and gluing layers carefully will help your junk journal pages hold up over time. If you’re using paint or heavier embellishments, let each layer dry before closing your journal.
Get my free SVG/DXF/PDF files to make junk journals of your very own!
(If you do not see the signup form above, click here.)
I absolutely love seeing your junk journal projects! Once you’ve learned how to make your own unique junk journal, inspire others and share a photo of your junk journal project in our Facebook group or tag me on social media with #jennifermaker.
Love,

Want to remember this? Save this How to Make Junk Journals Tutorial to your favorite Pinterest Board!