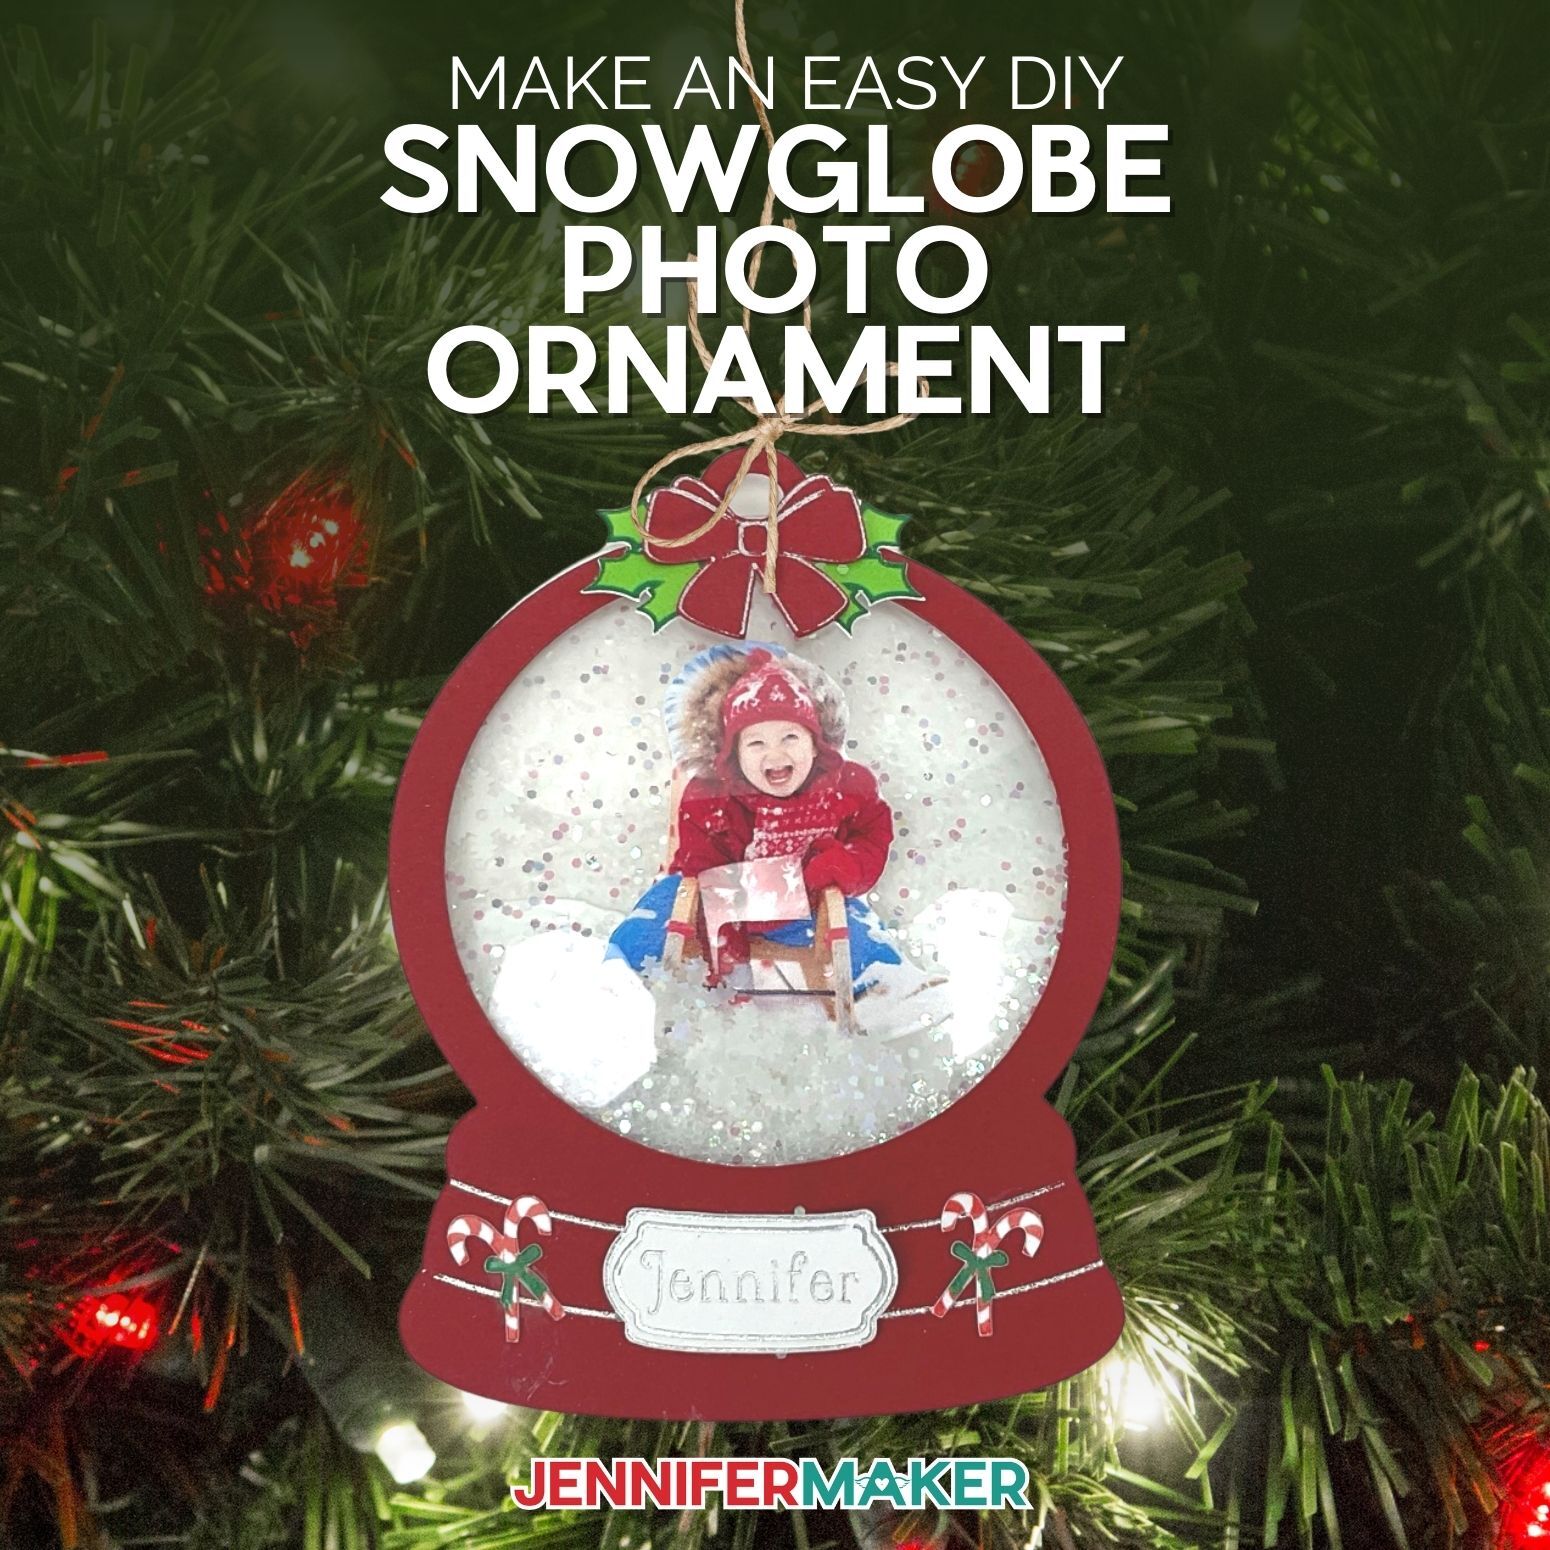
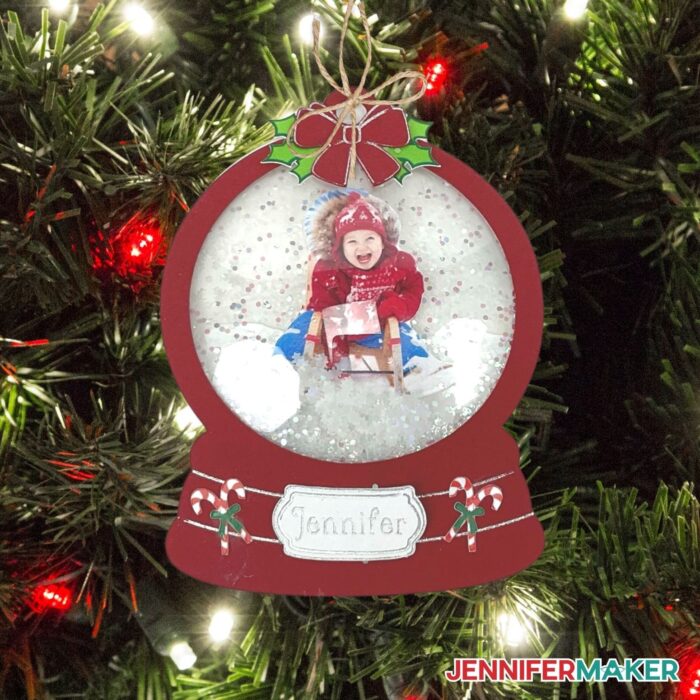
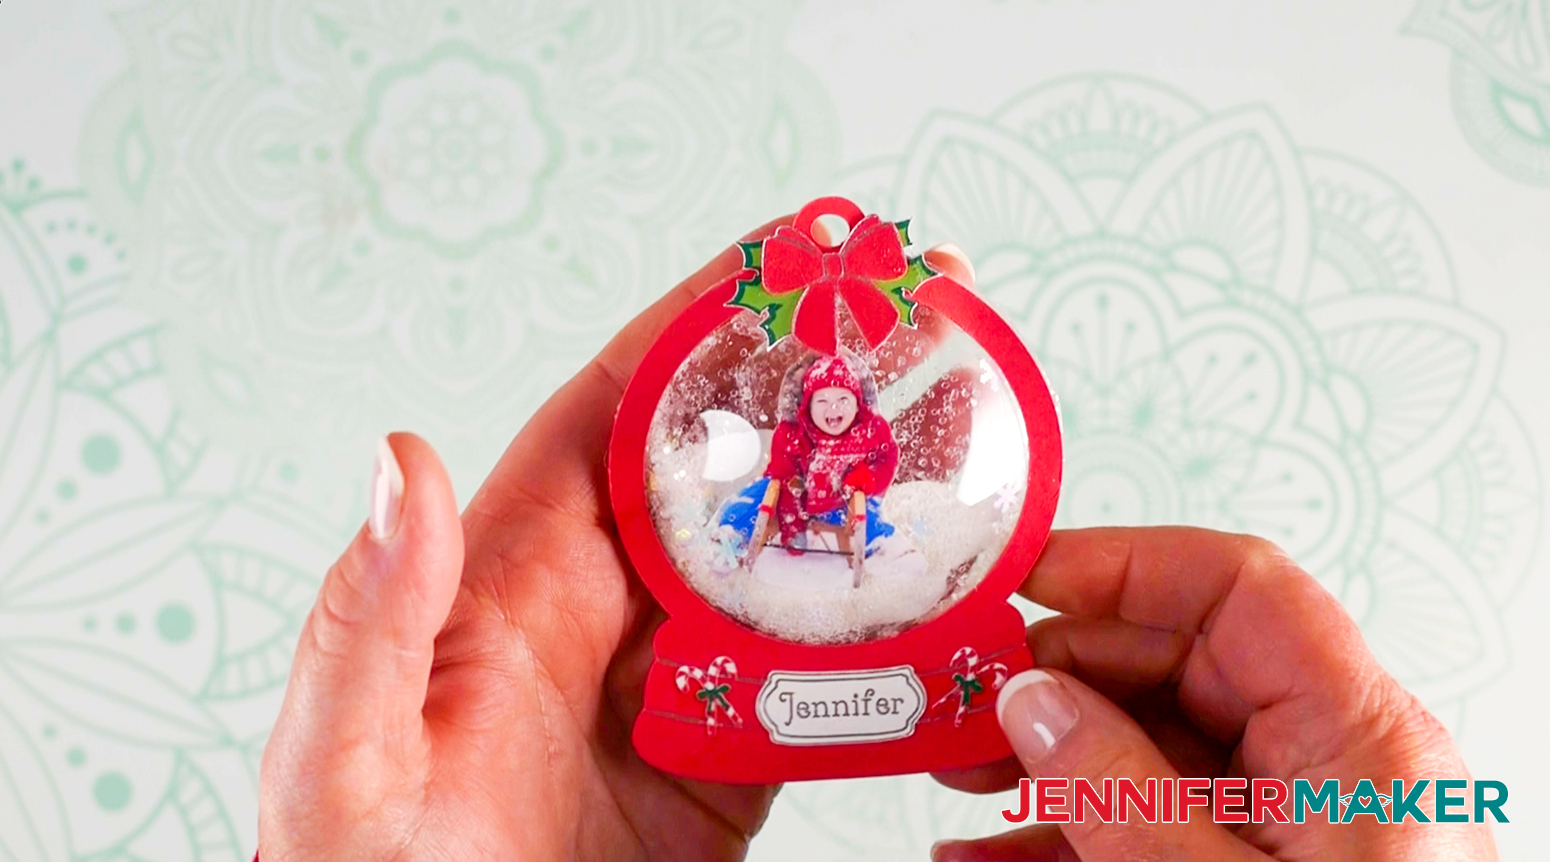
Learn how to make these festive Snowglobe Ornaments with your own photos!
I just love Christmas ornaments! And I especially like making them as gifts or keepsakes for friends and family. I’ve made A LOT of different ornaments over the years. From glitter ornaments, layered ornaments, and wood slice ornaments to arabesque ornaments, Infusible Ink ornaments, and engraved ornaments — you name it, I’ve made it. But if you know me, I’m always up for trying something new! This year I thought it would be a lot of fun to make photo snowglobe ornaments!
Watch the step-by-step video that shows how this snowglobe ornament is made from start to finish!

And not just ordinary snowglobe ornaments, but ones you can shake to watch the snow fall! Also, these are not just your run of the mill flat ornaments, these are 3D dome ornaments, so they look like real snowglobes! How cool is that?
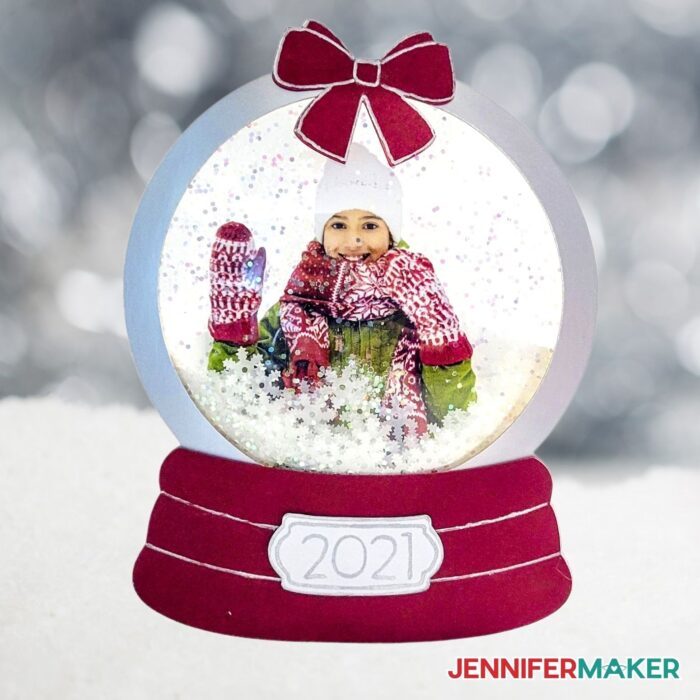
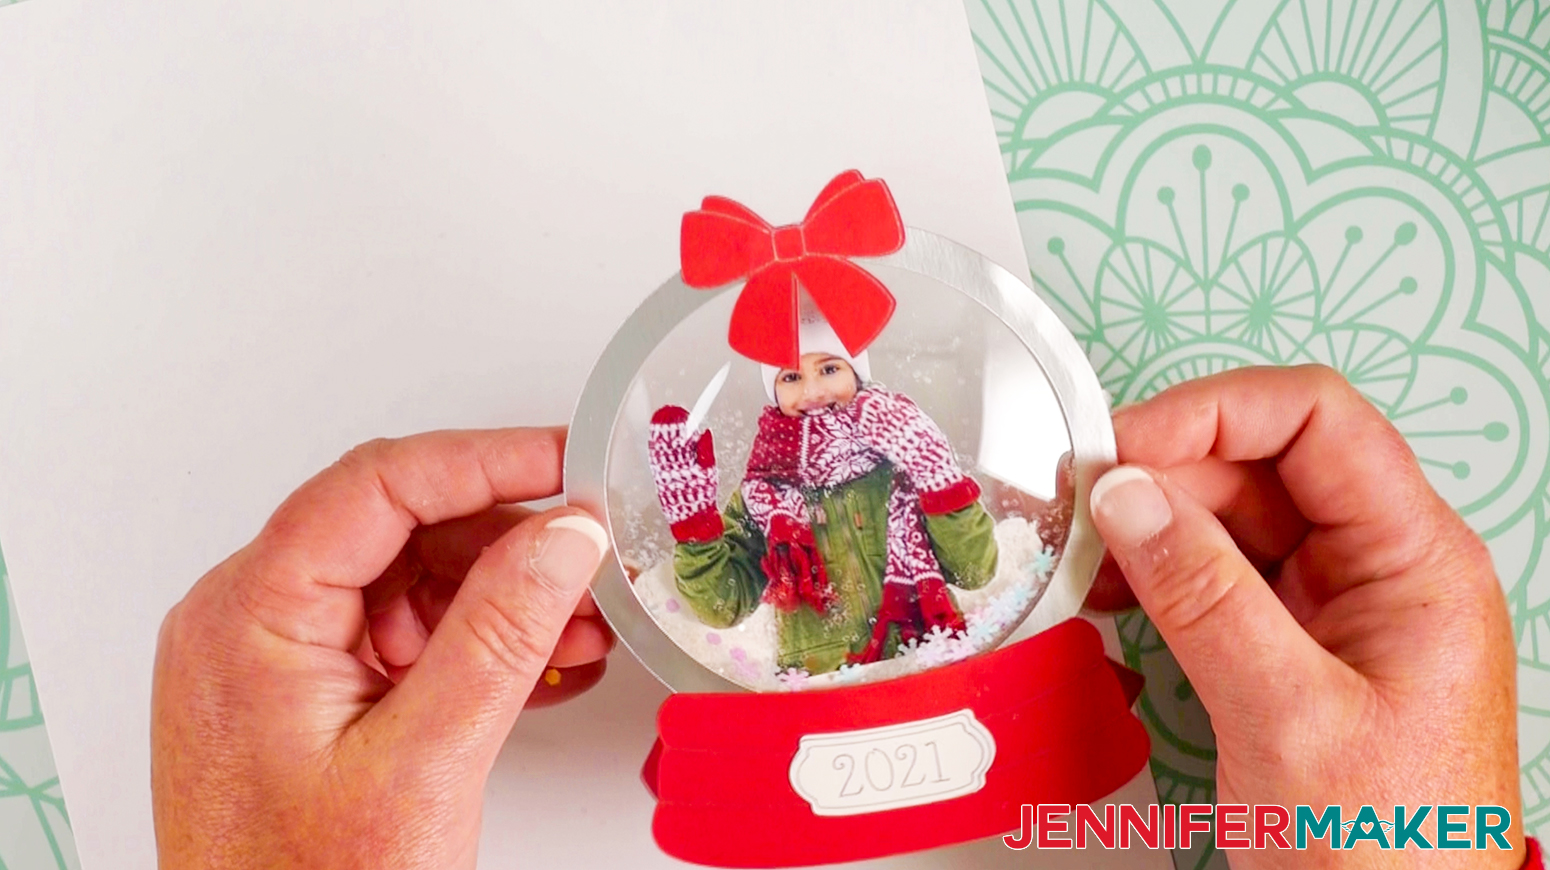
I wanted these ornaments to look more realistic, so I’m using these cool plastic shaker domes to give them a real snowglobe feel. I’m using two sizes: a smallish one for a hanging ornament, and another one that’s just a little bigger to make an ornament you can put on display on a mantle or side table or even give as a gift. You can of course change it up and use both as ornaments or both as displays or gifts. Be as creative as you’d like!
I’m also using some card stock, photo paper and lots of glitter of course because, you know, glitter makes everything more fun and festive! Although my family might say otherwise when it’s time to clean up!
We will also need glue to put this lovely ornament together. I’m using both tacky glue and hot glue as well as some double-sided tape. I’m also using some white acrylic paint and Mod Podge along with some Cricut Foil and Pens to add some fun and personalized touches.
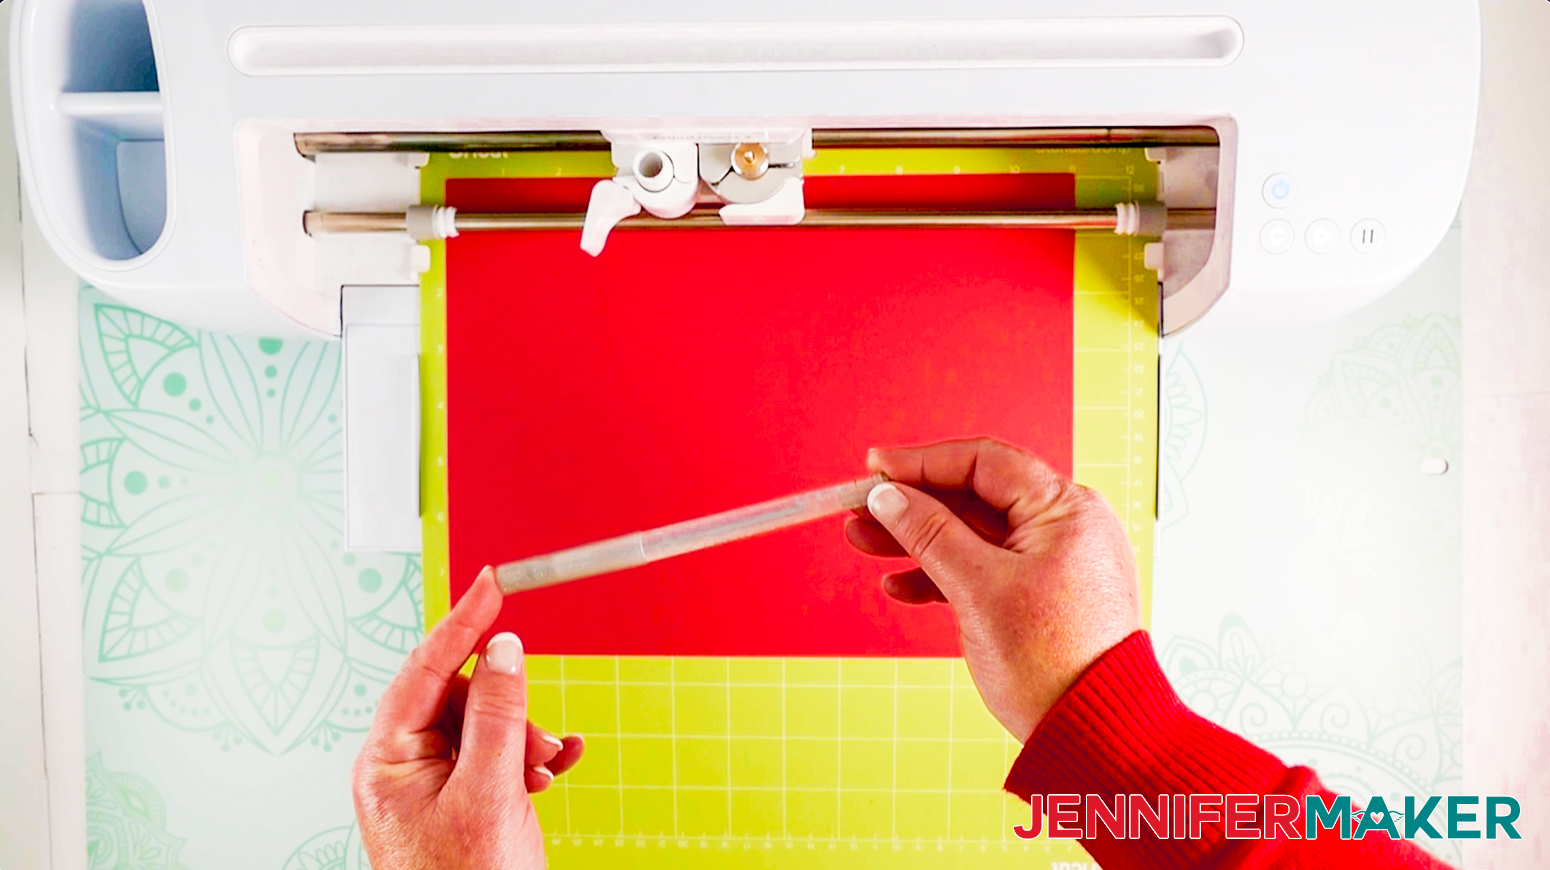
To cut out the paper, I’m using my Cricut Cutting machine, along with a green machine mat, a scoring stylus (or scoring tool), and a brayer.
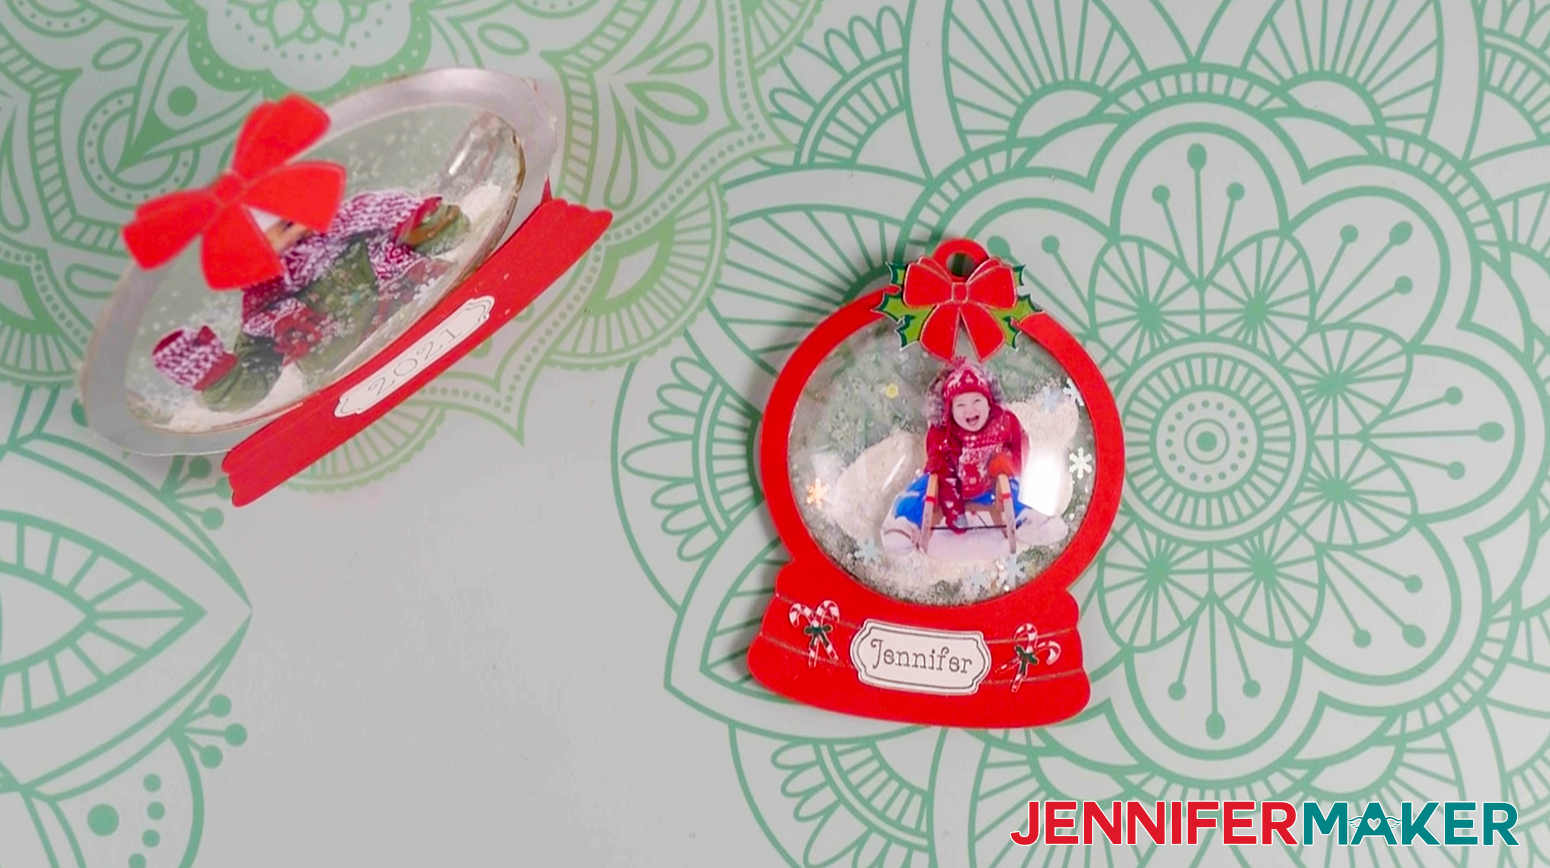
How pretty are these? And they both make beautiful keepsakes that you can enjoy for years to come! They also make beautiful gifts you can give out to friends and family.

I’m a big believer in that personalized gifts are truly the best when it comes to gift-giving. And what better way than to add a special little touch to your loved ones holidays than to give them their very own personalized ornament that came straight from the heart?
This tutorial teaches many different Cricut techniques, including:
- Background Removal
- Print Then Cut
- Foil Transfer
- Cricut Pens
Let me show you how easy it is to make these personalized photo snowglobe ornaments with my free SVGs! This post contains some affiliate links for your convenience (which means if you make a purchase after clicking a link I will earn a small commission but it won’t cost you a penny more)! Read my full disclosure policy.
Materials to Make Photo Snowglobe Ornaments
View my Amazon shopping list with the exact items we used to make this project
- Shaker Domes – (2.5″ or 3.5″) (If you can’t find the domes in stock, see our tutorial below for a way to use just acetate)
- Acetate Sheets
- Cardstock – Silver Foil and Red (65 lb, 8.5″ x 11″)
- Glitter Sparkling Crystals
- Snowflake Glitter
- Cricut Foil Transfer Kit
- Cricut Glitter Gel Pens – Silver
- Double sided tape
- Mod Podge – Matte
- Acrylic Paint (white)
- Tacky Glue
- A way to print your photos – I used my Inkjet Printer
- Photo Paper
- A method to cut your cardstock – I used the amazing Cricut Maker 3, but you can also use the Cricut Maker or Cricut Explore Series
- Cricut Green Standard Grip Mat
- Brayer Tool
- Hot Glue Gun
- Scoring Tool
- Design #348 – My free paper snowglobe SVG/DXF/PDF design files are available in my free resource library – get the password by filling out the form at the bottom of this page
How to Make Your Own Photo Snowglobe Ornament
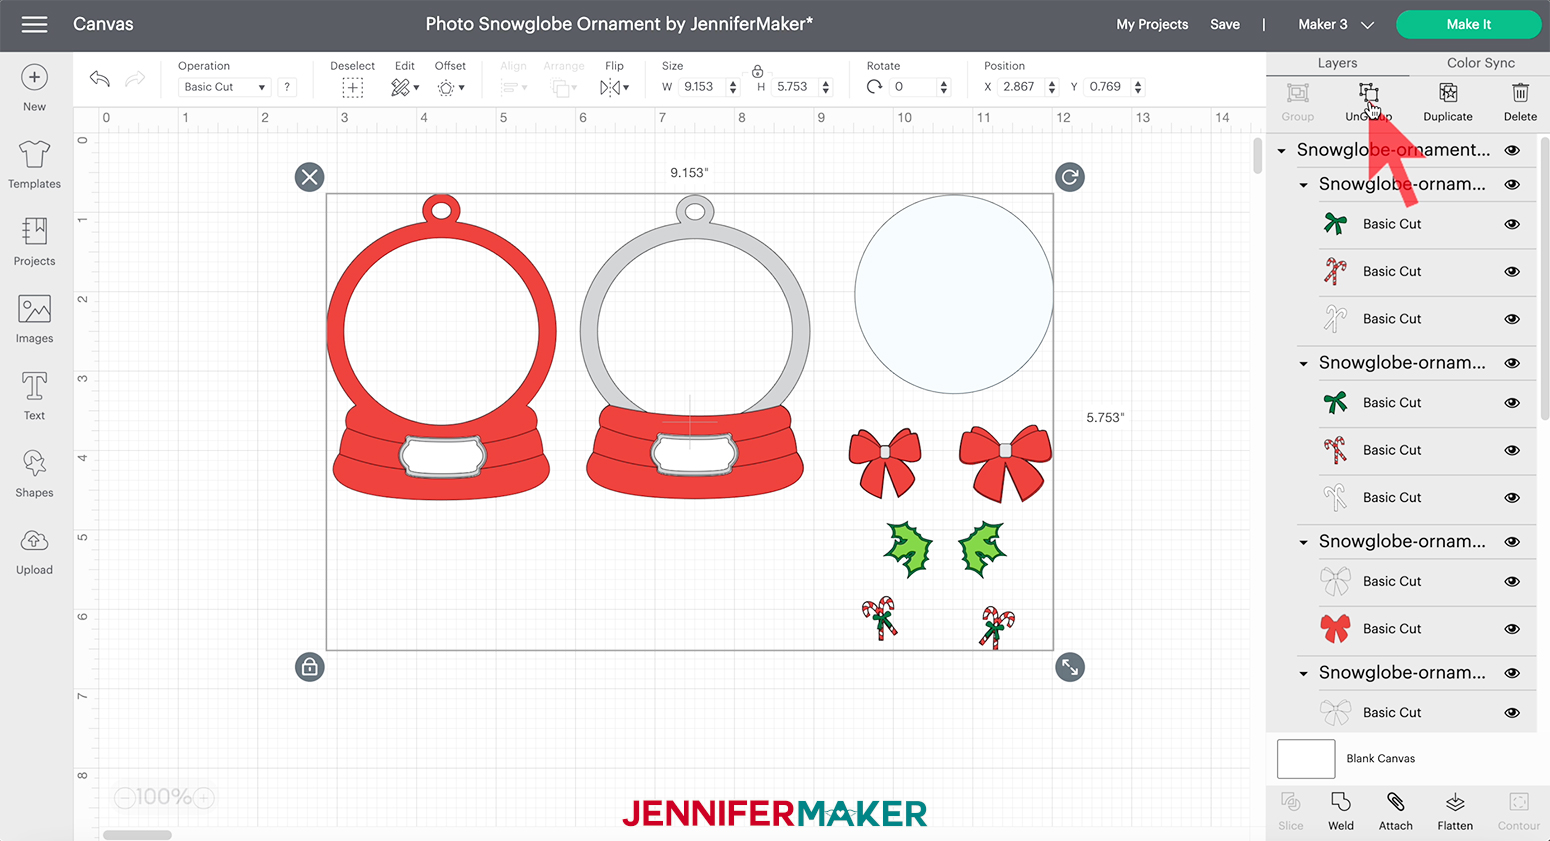
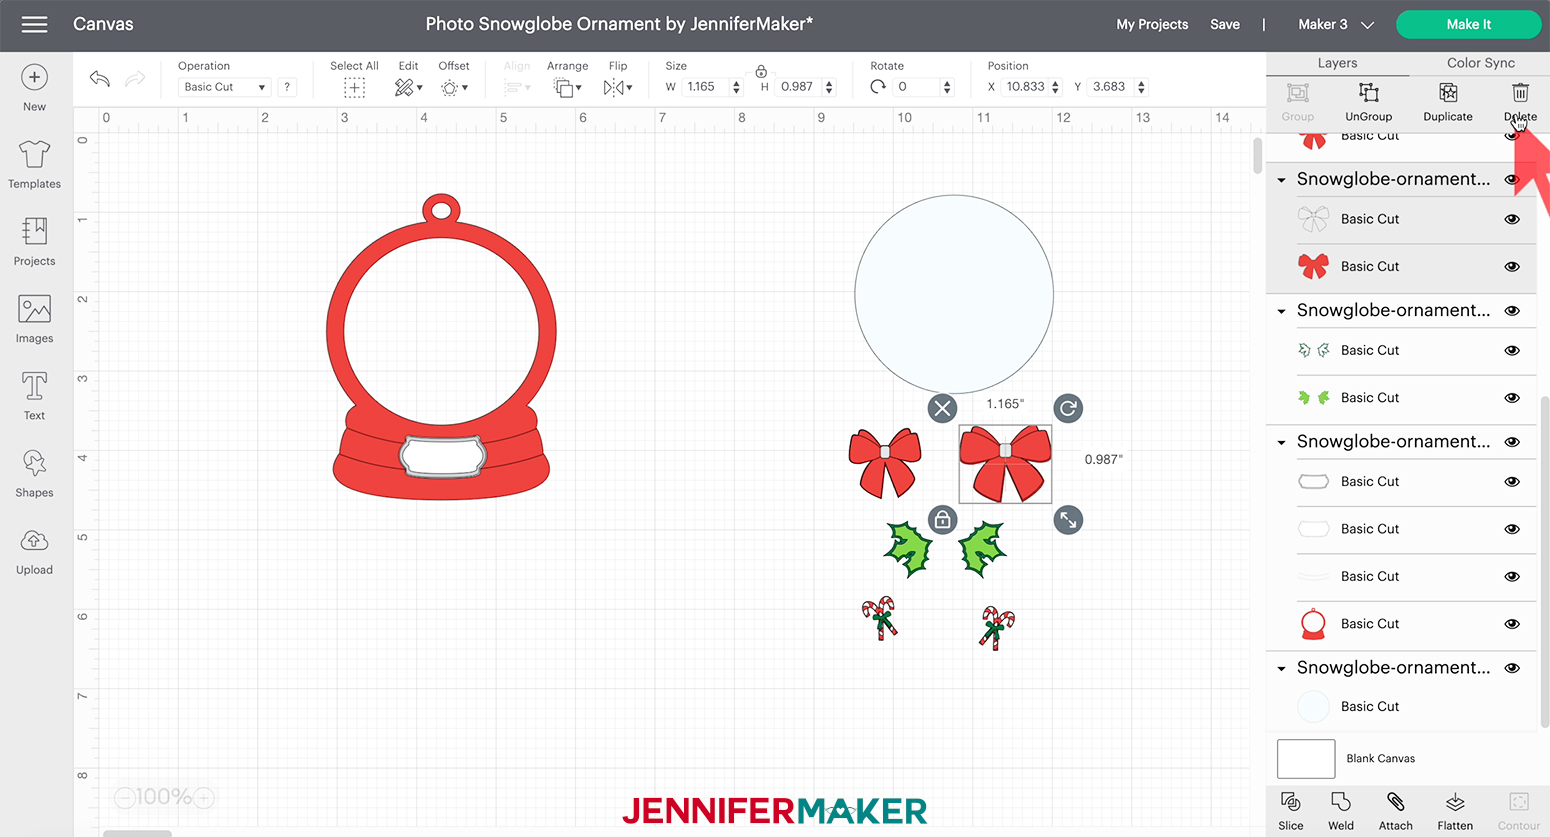
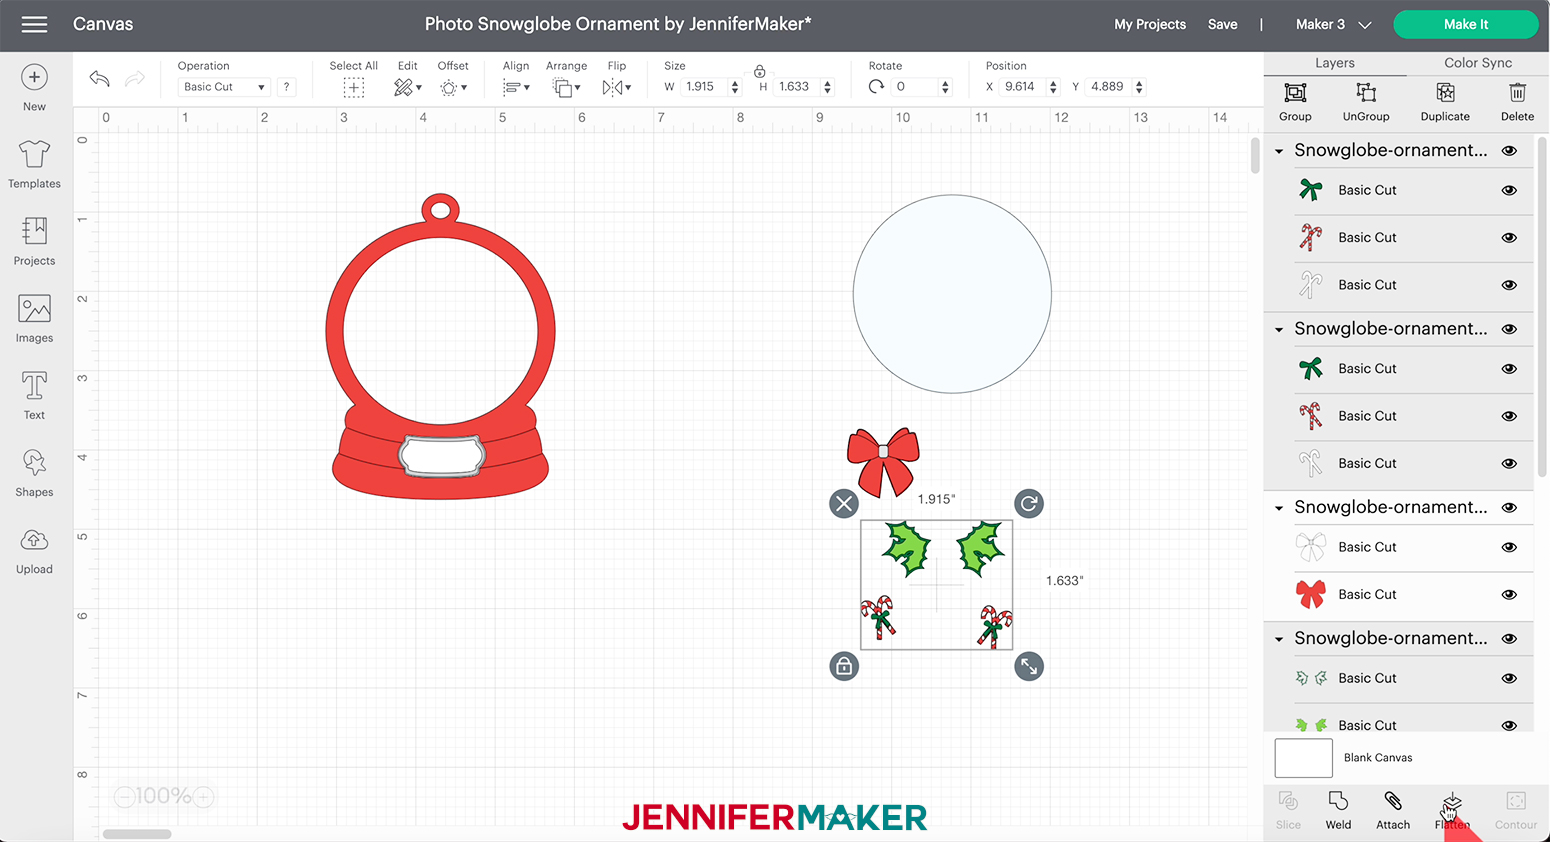
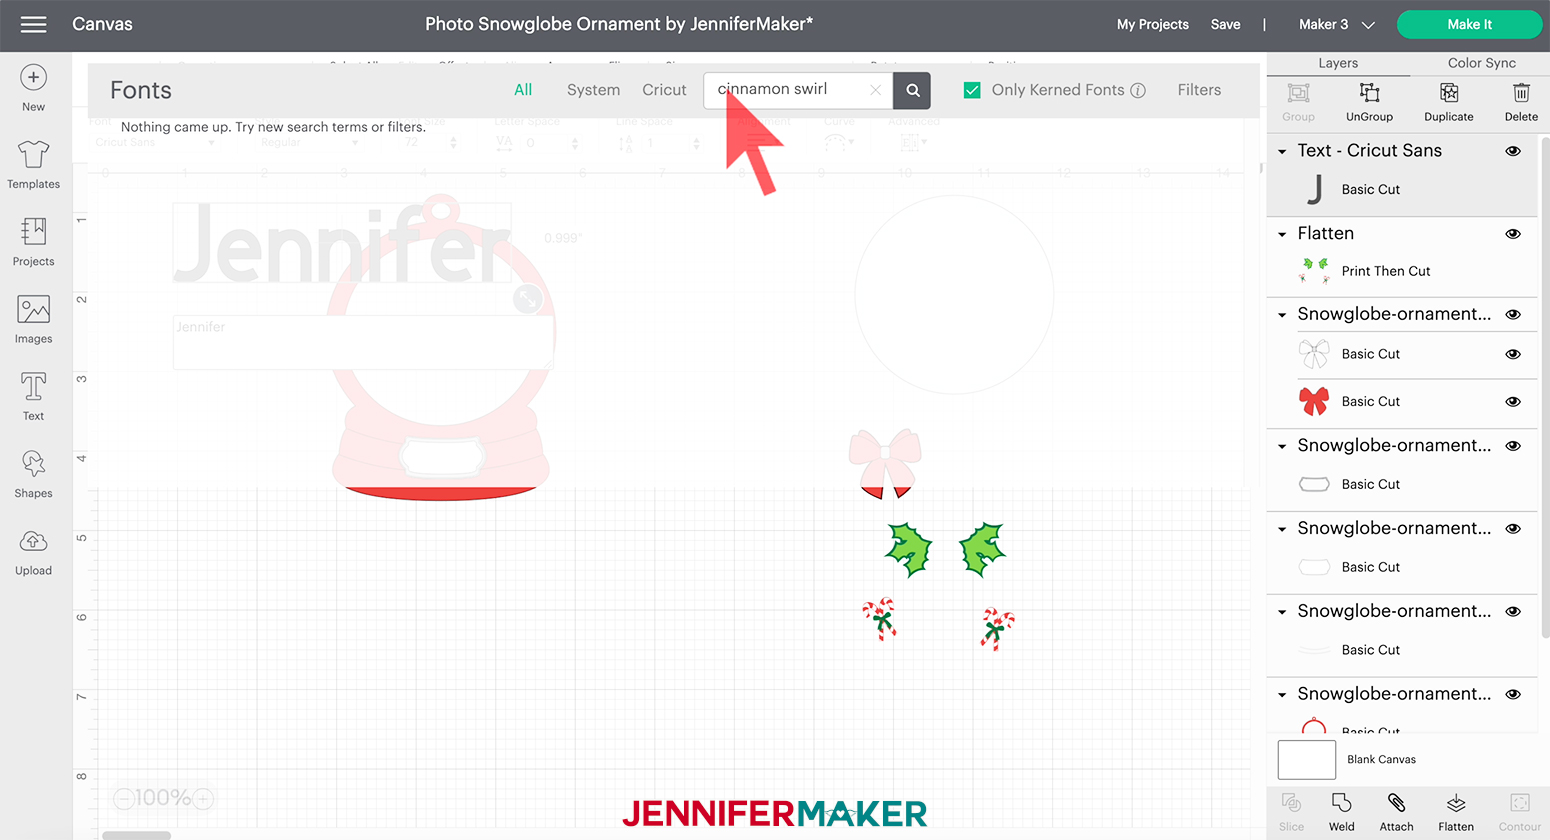
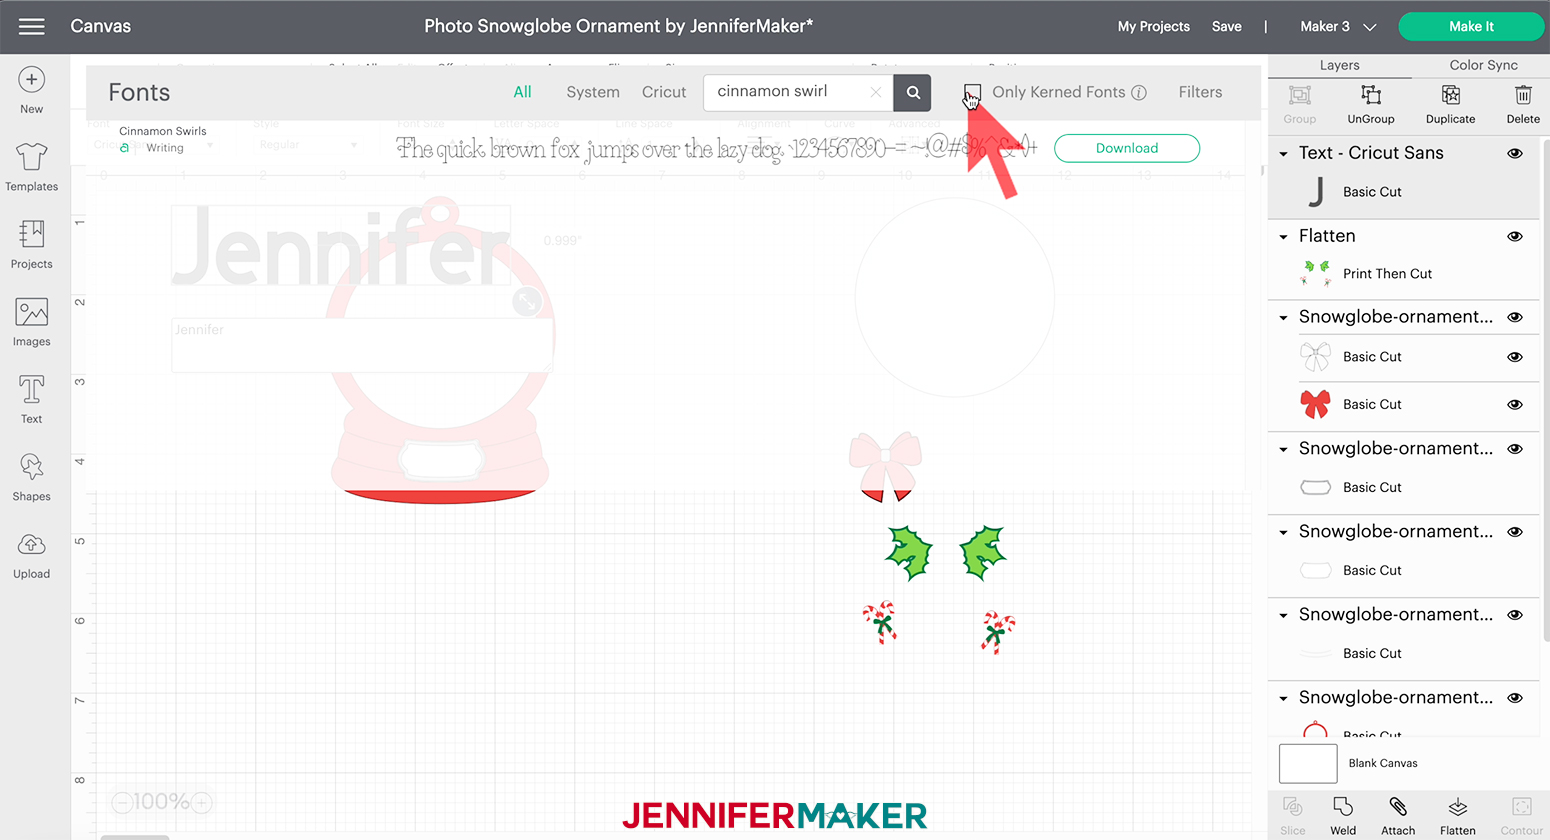
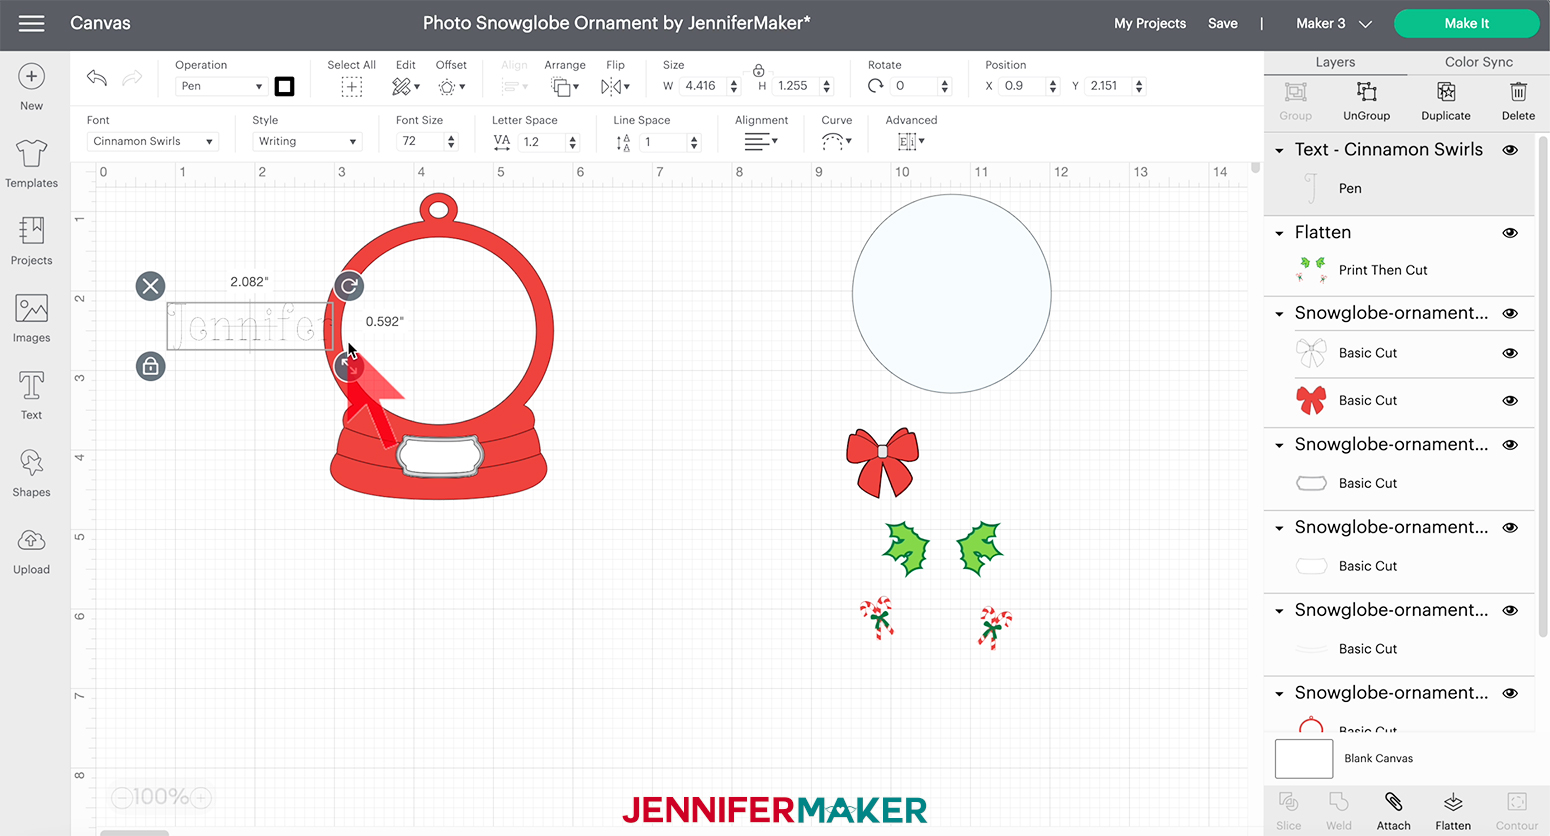
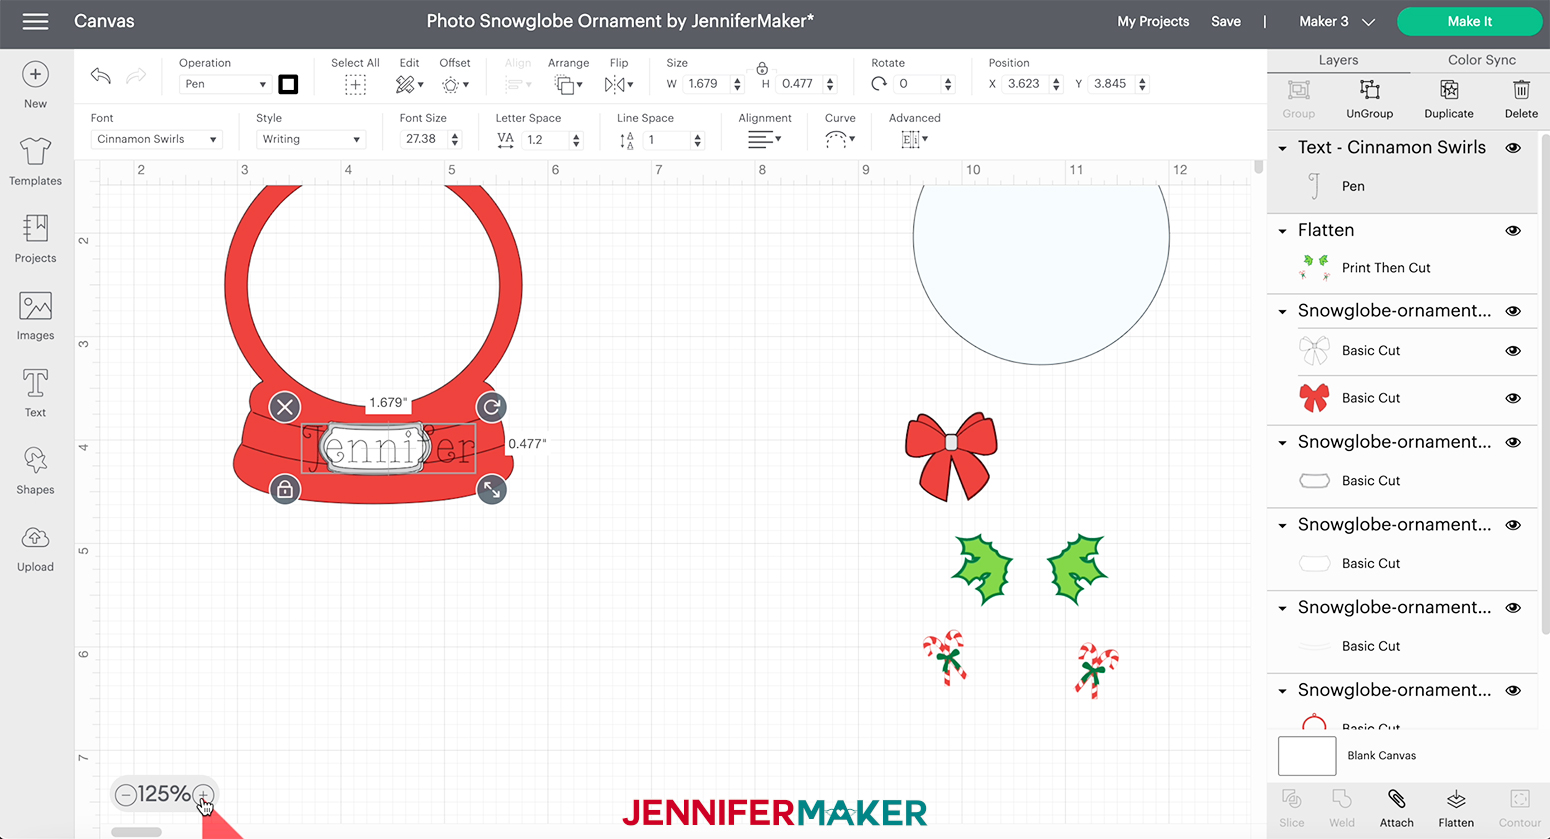
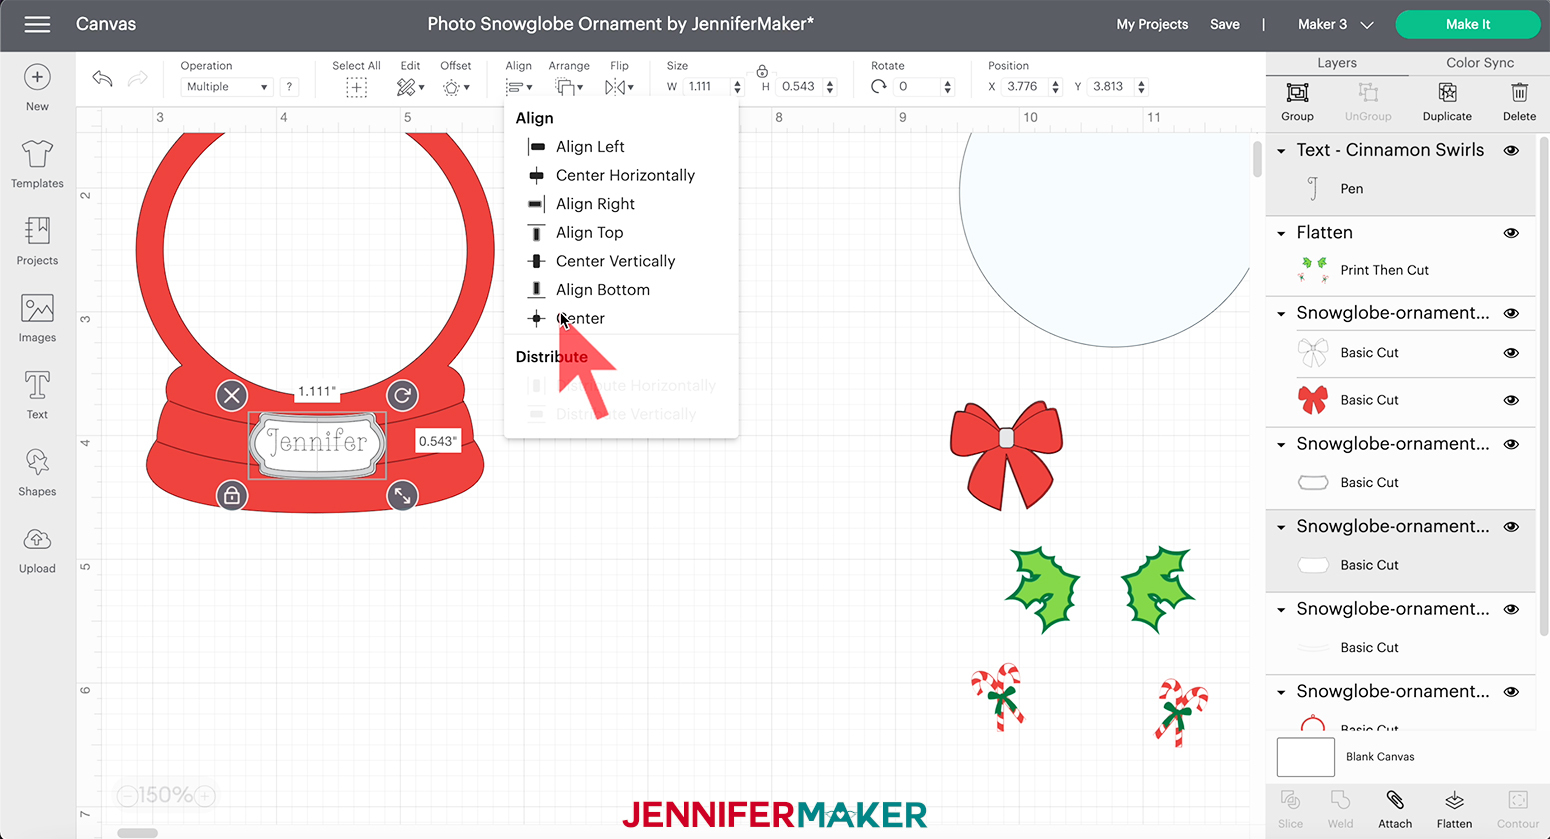
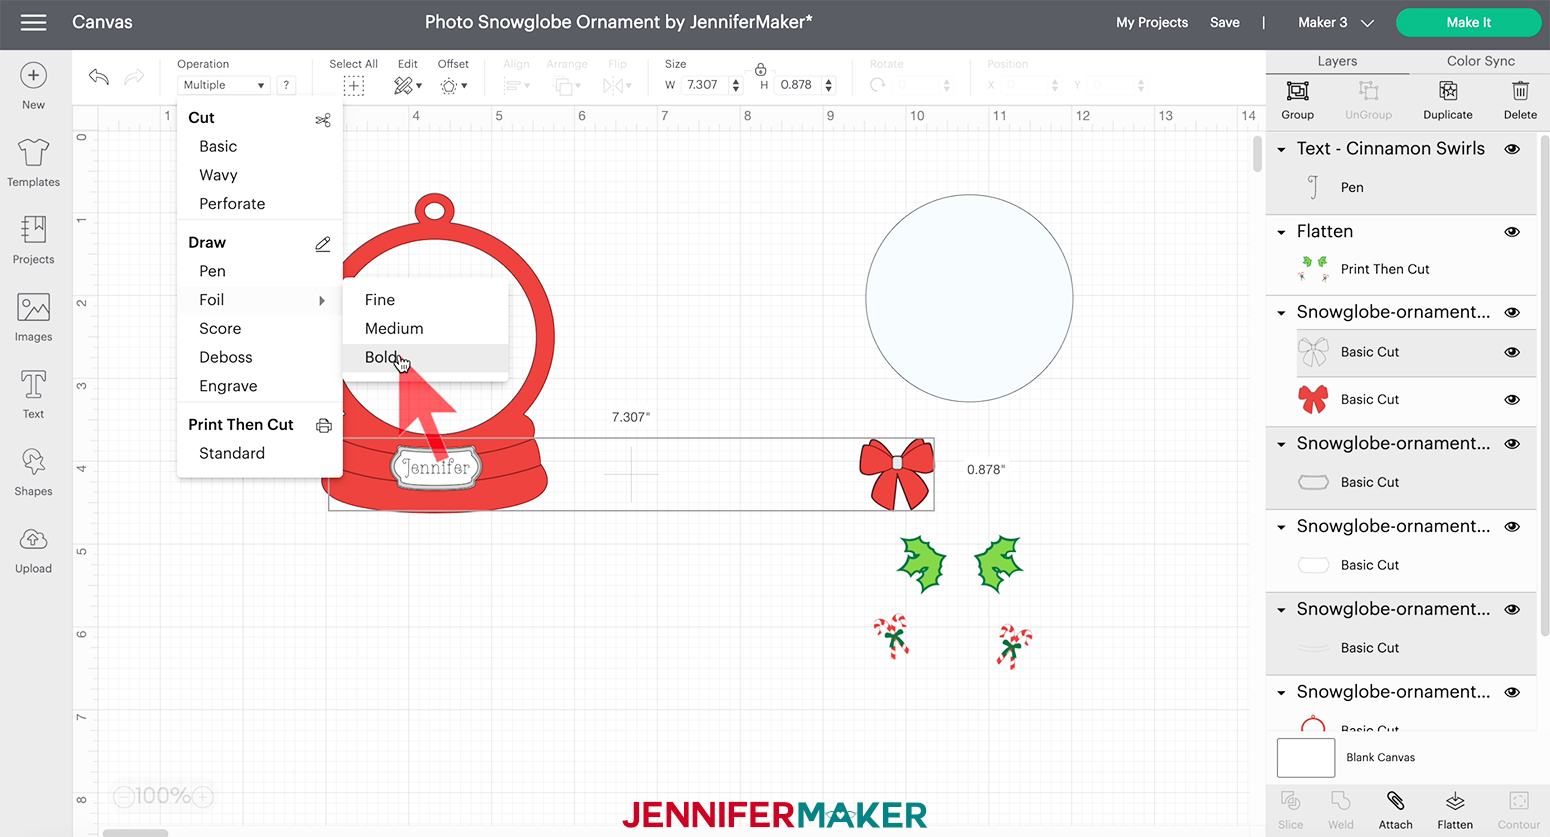
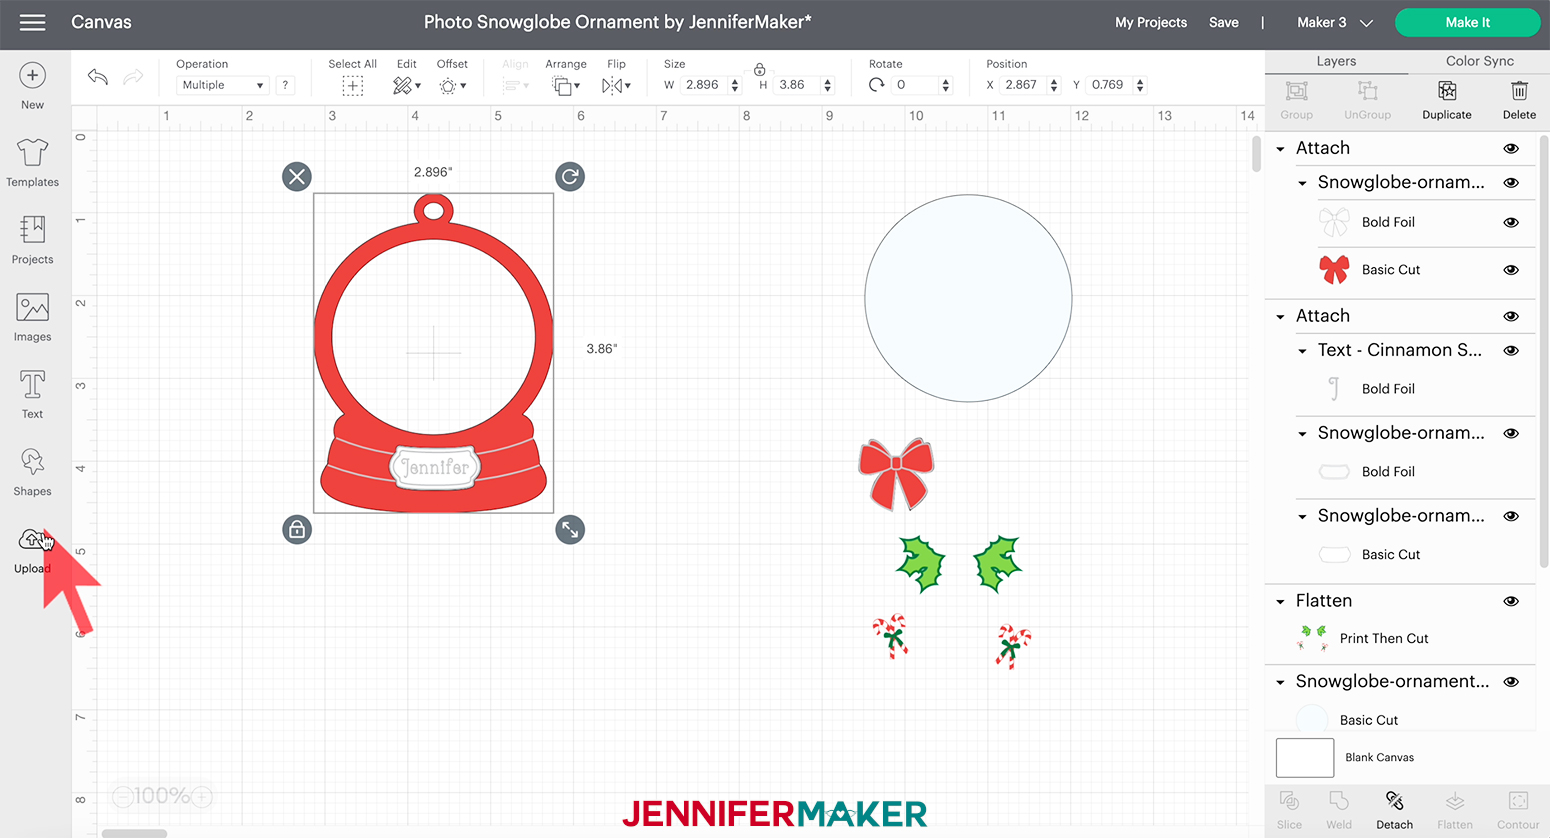
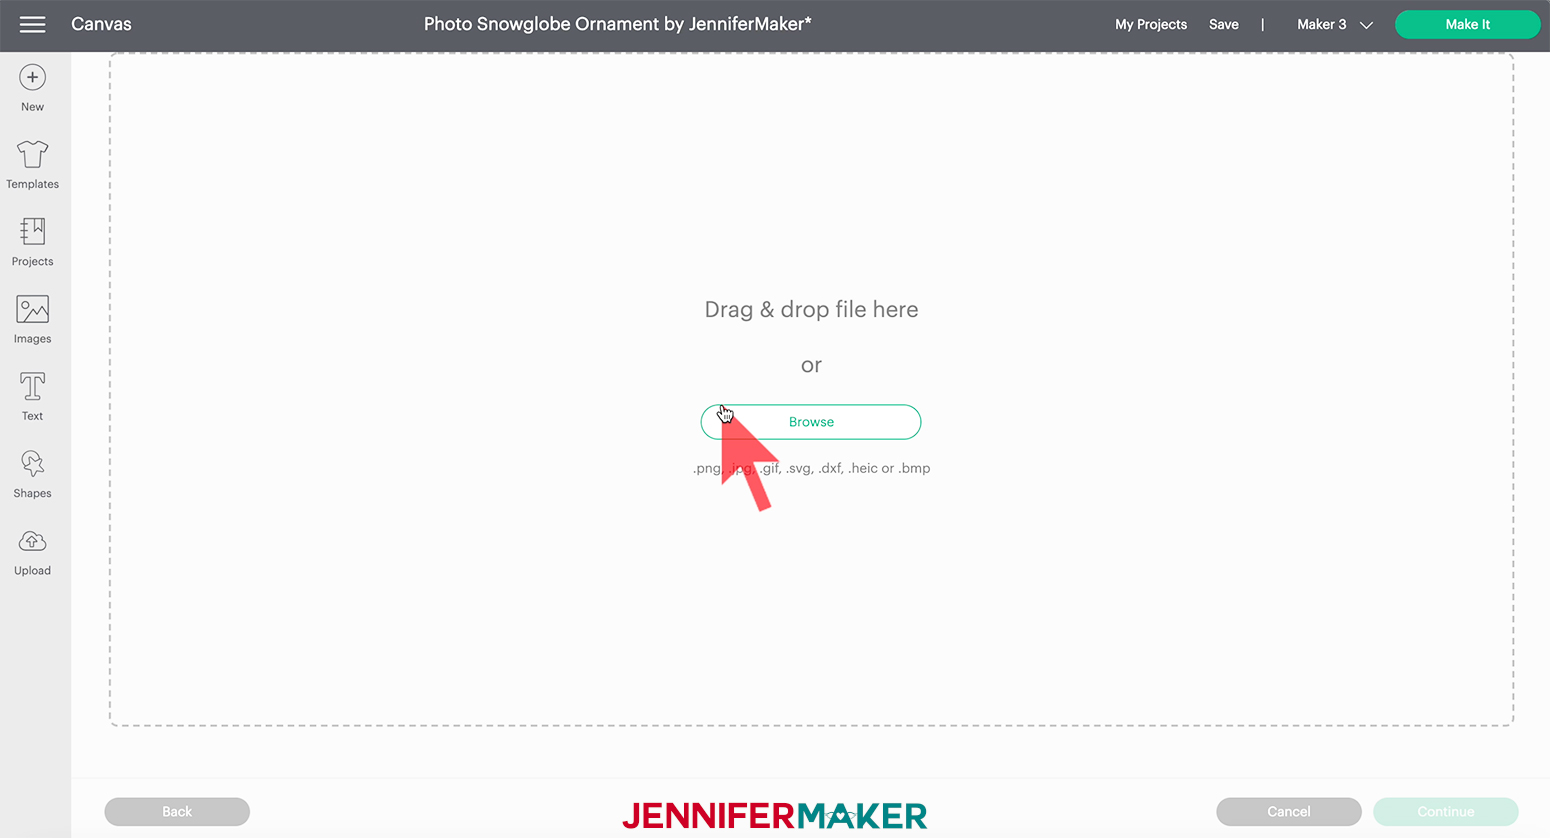
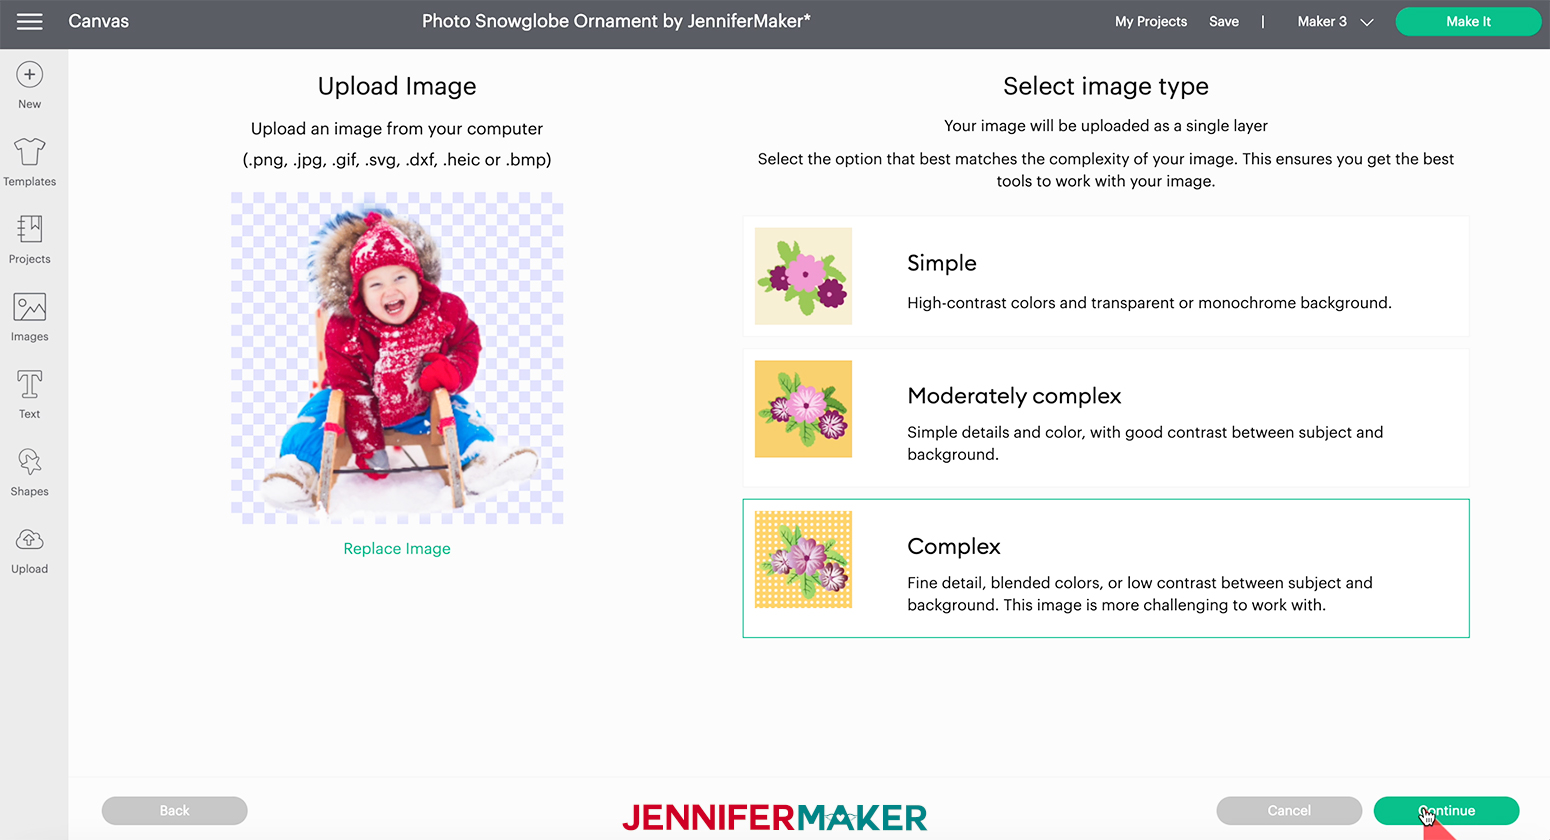
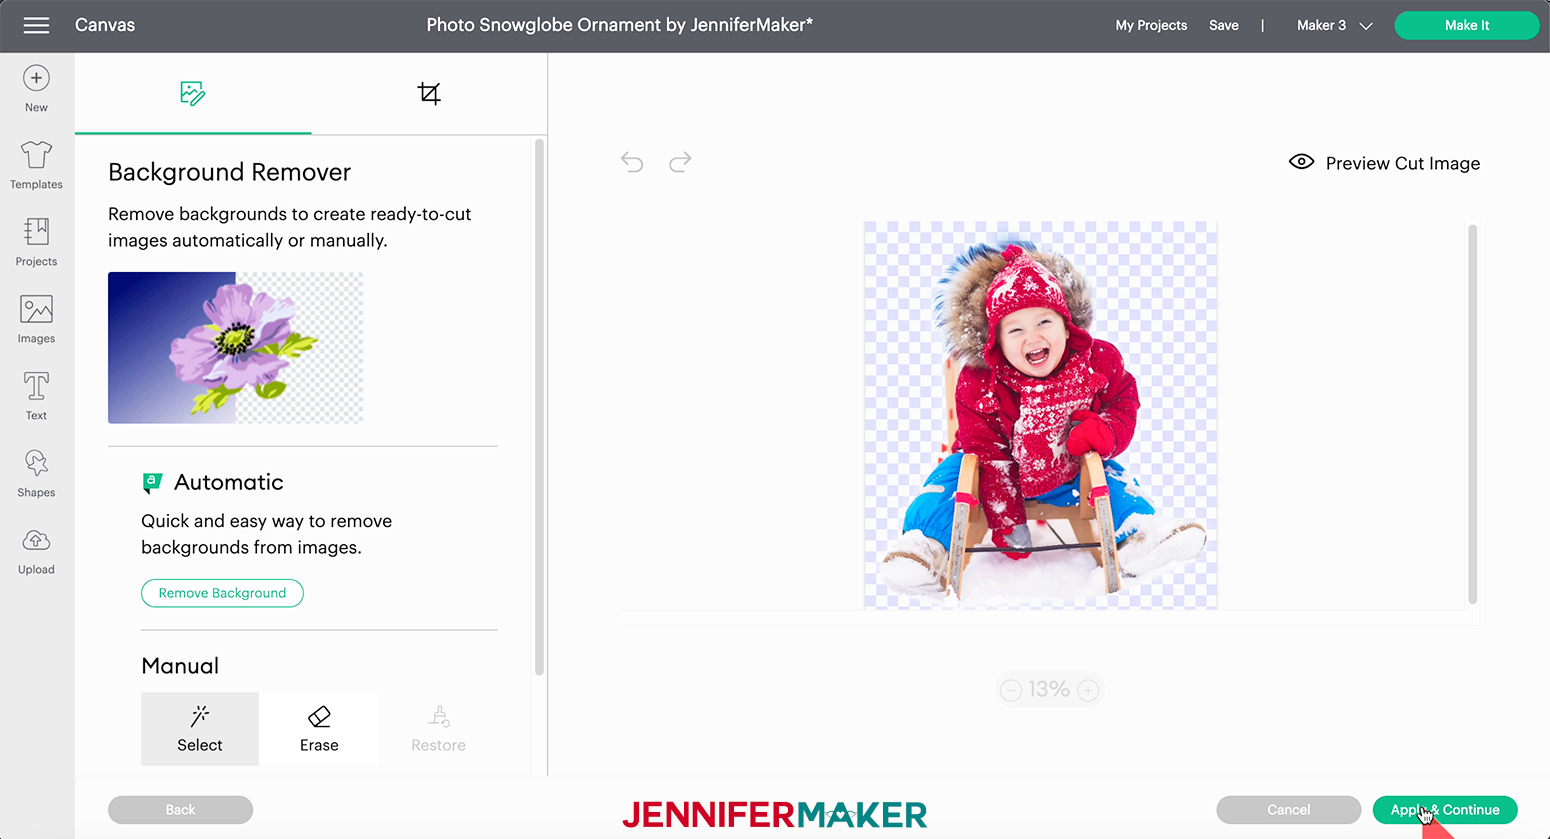
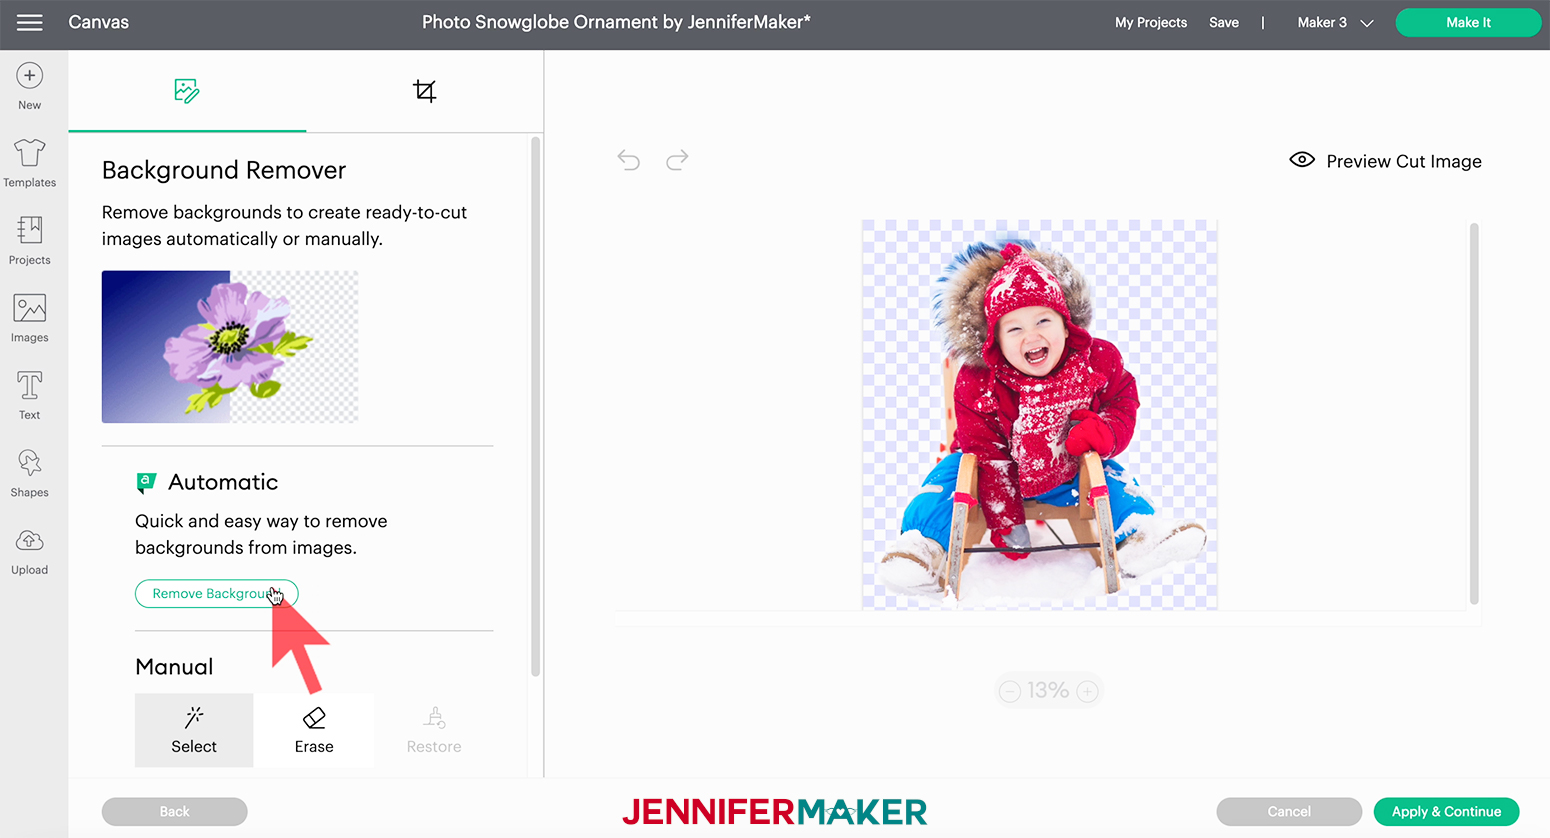
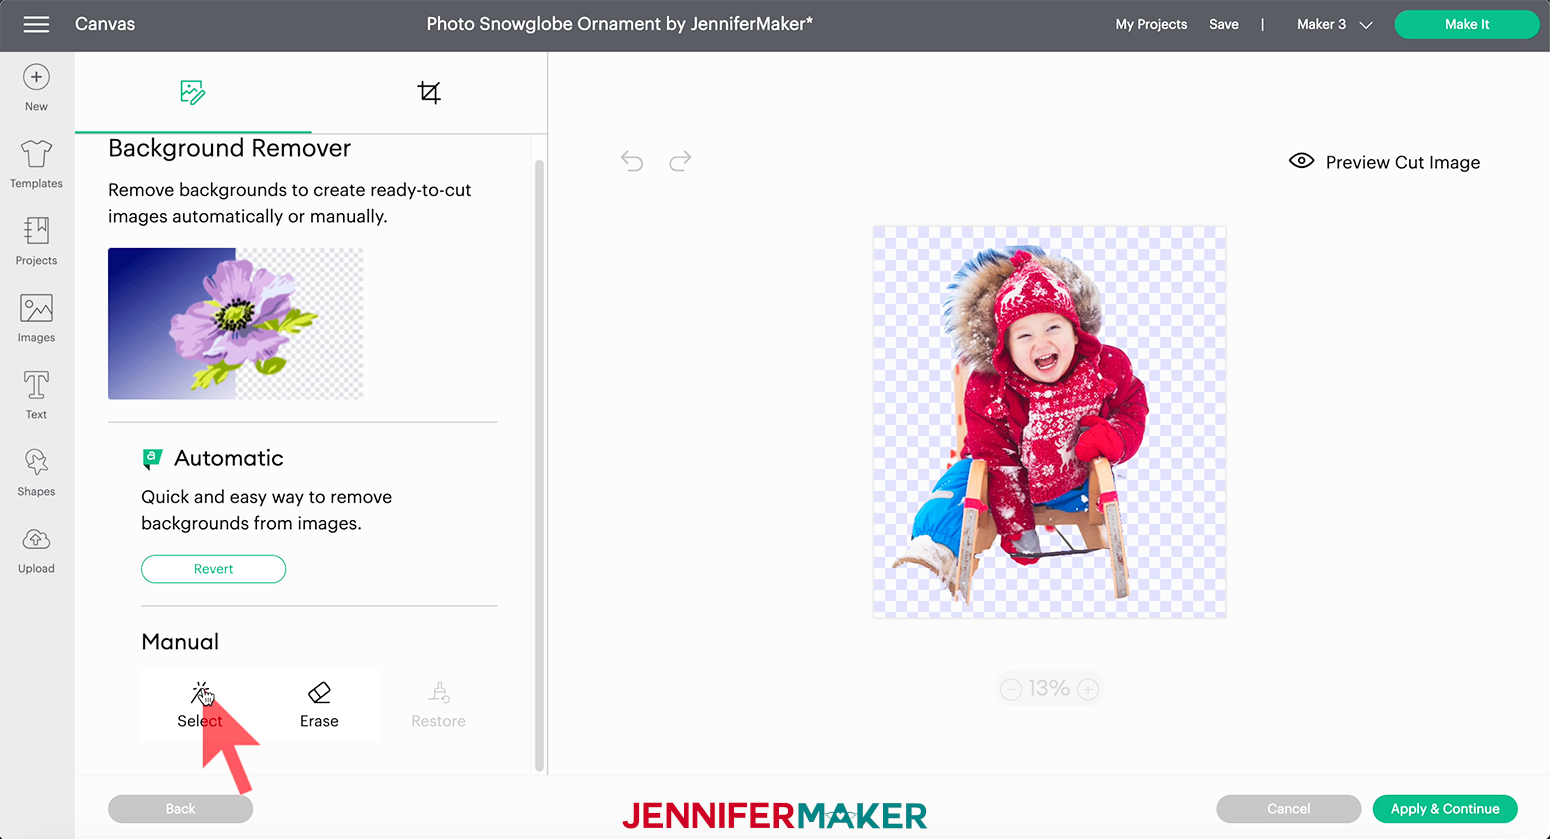
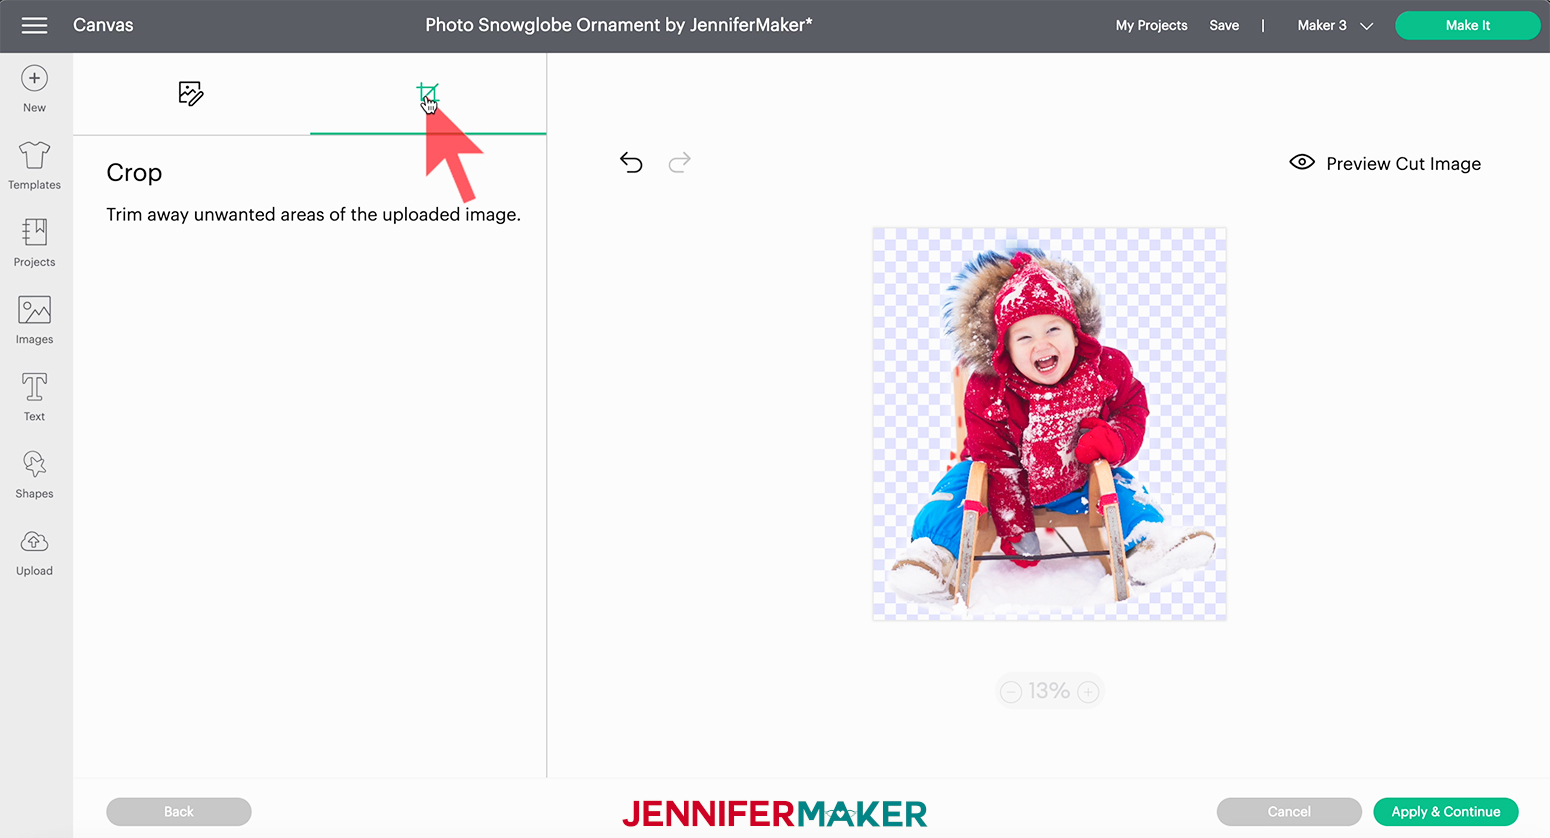
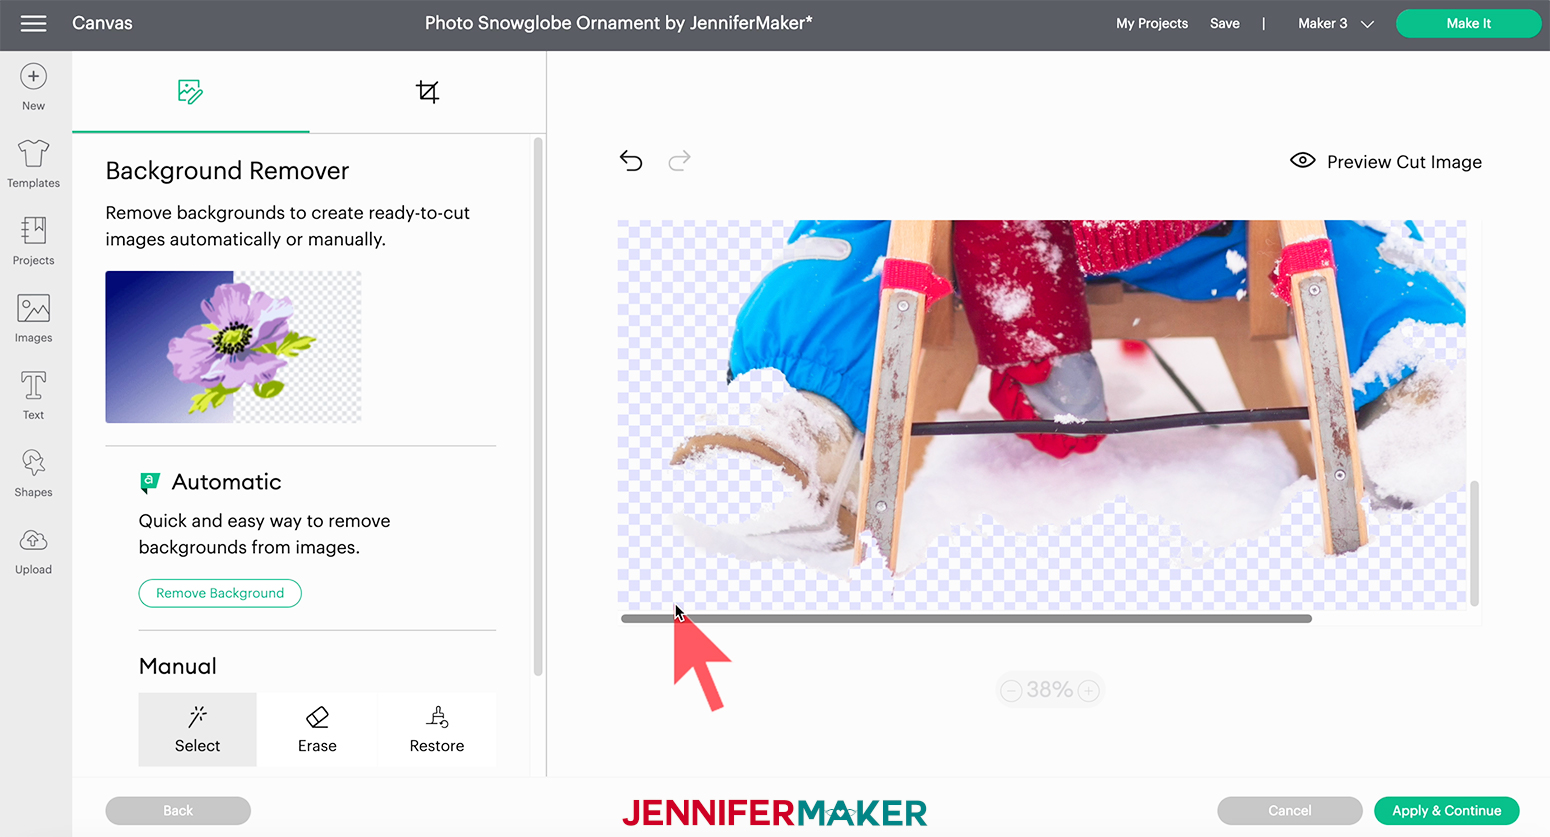
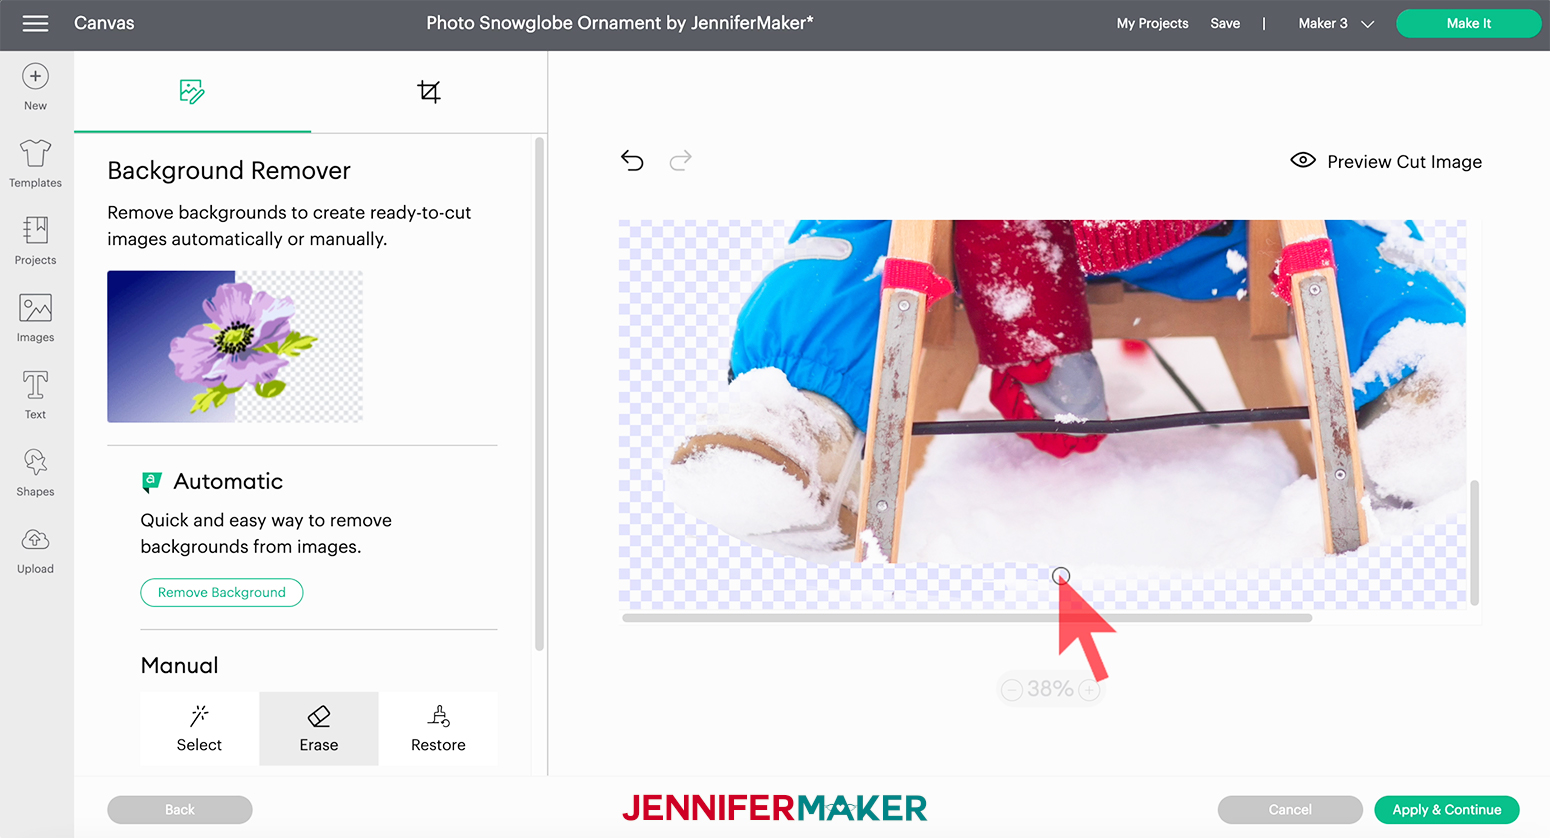
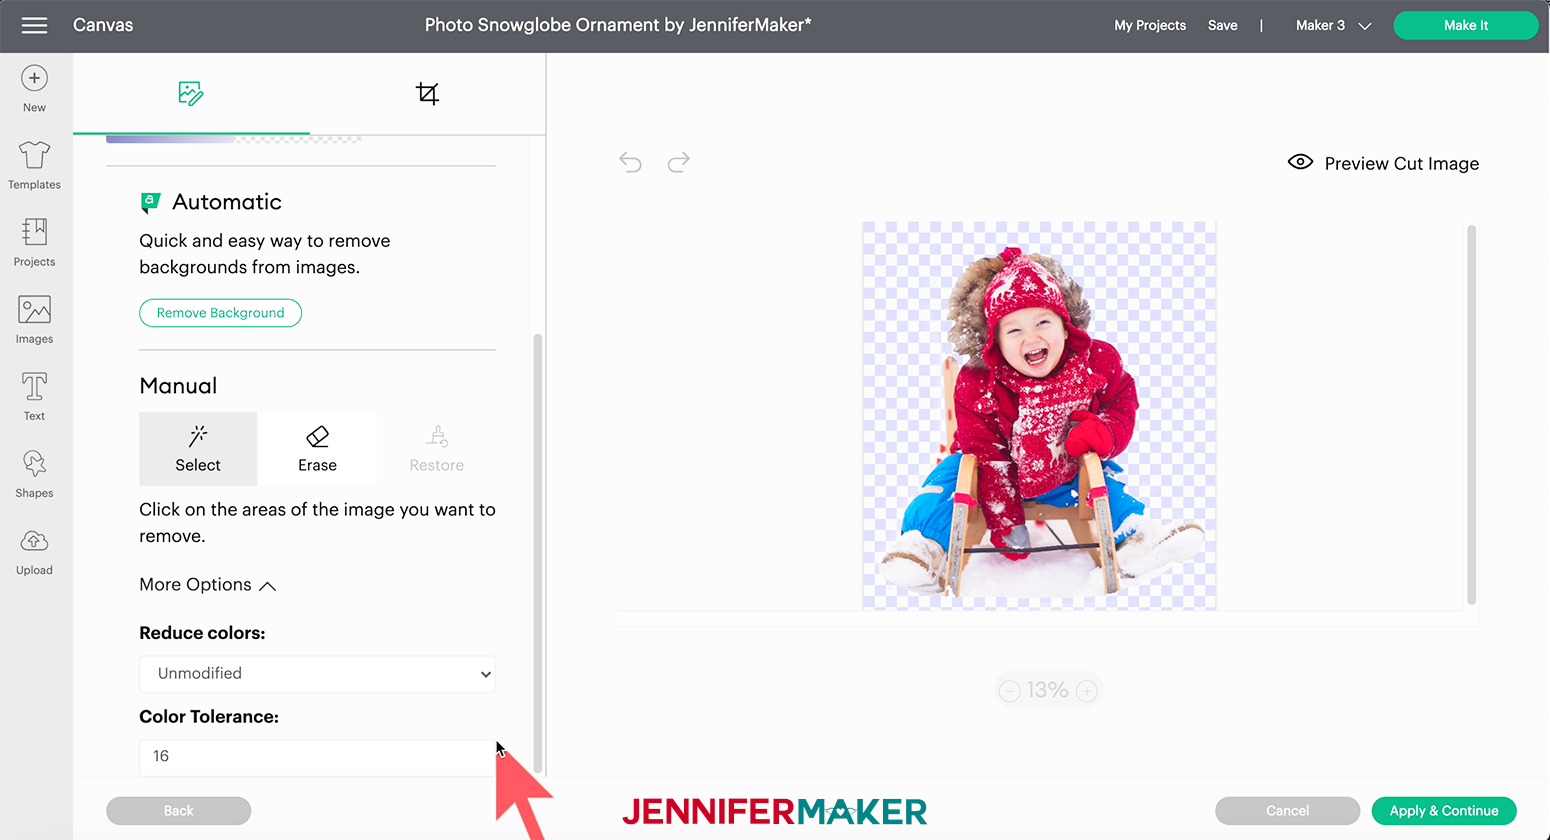
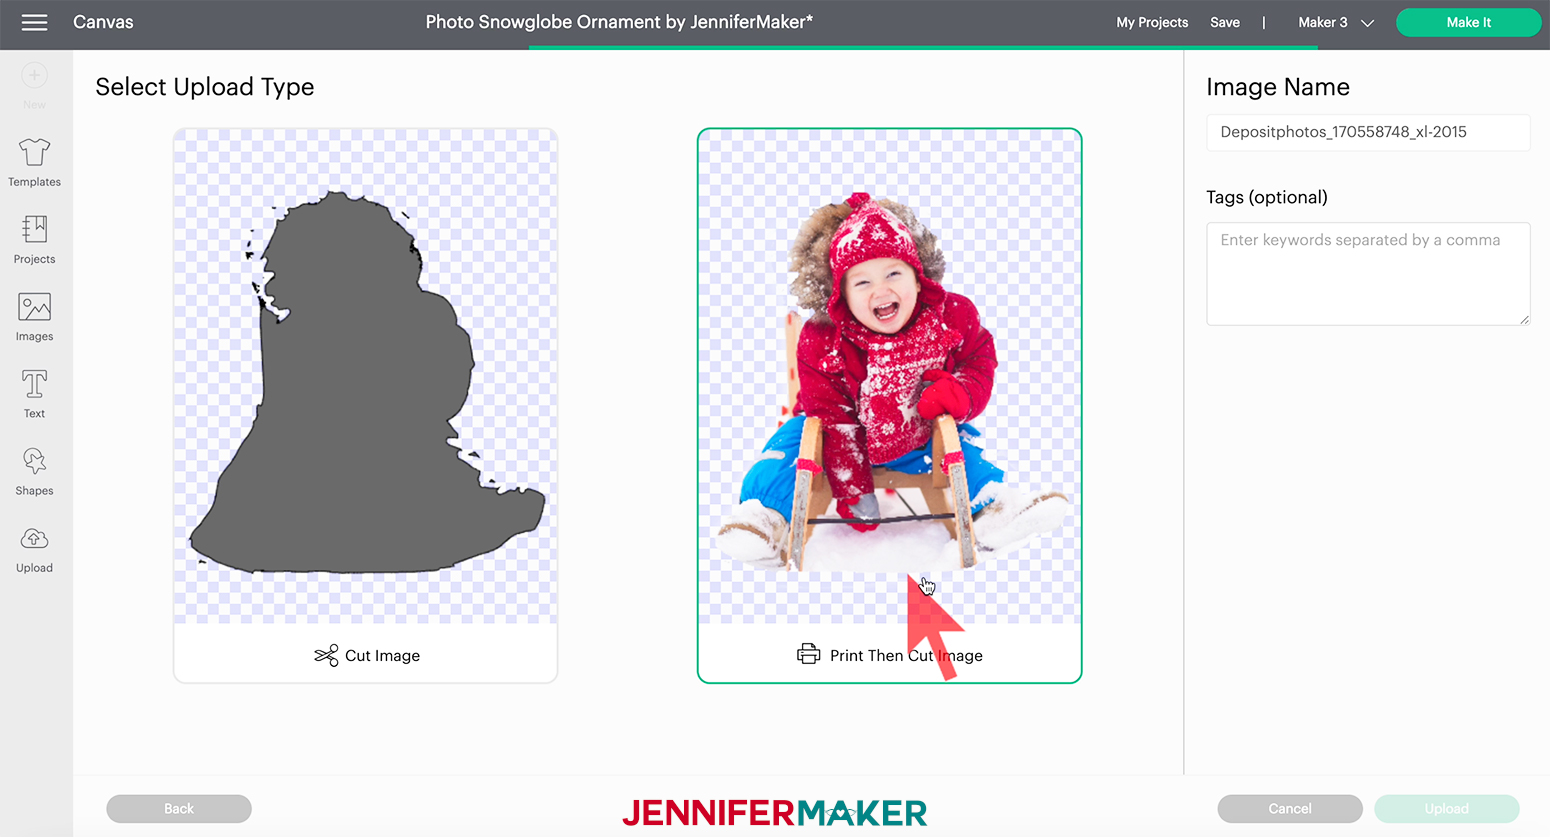
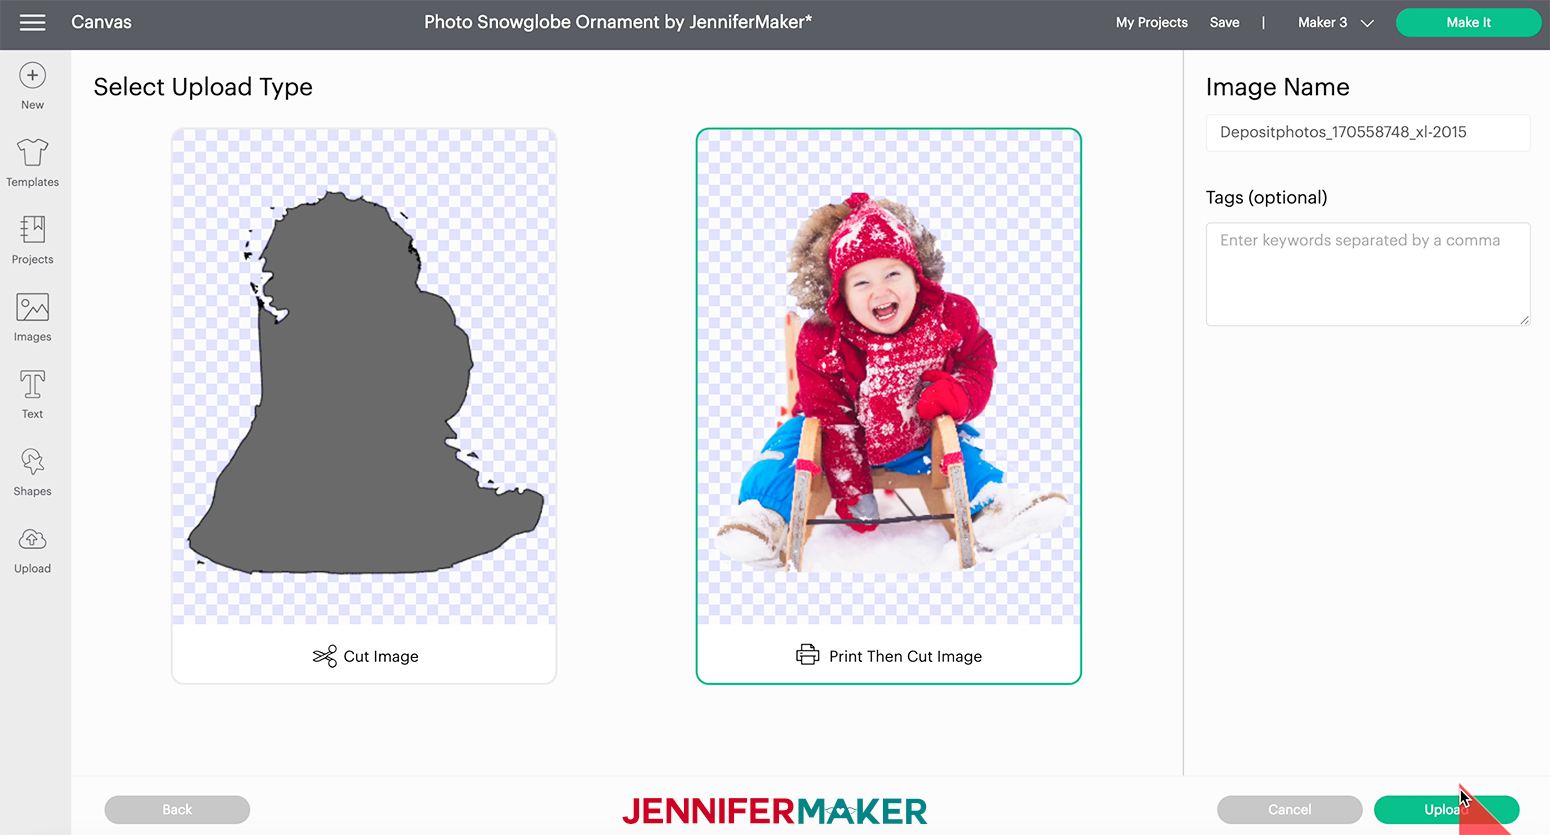
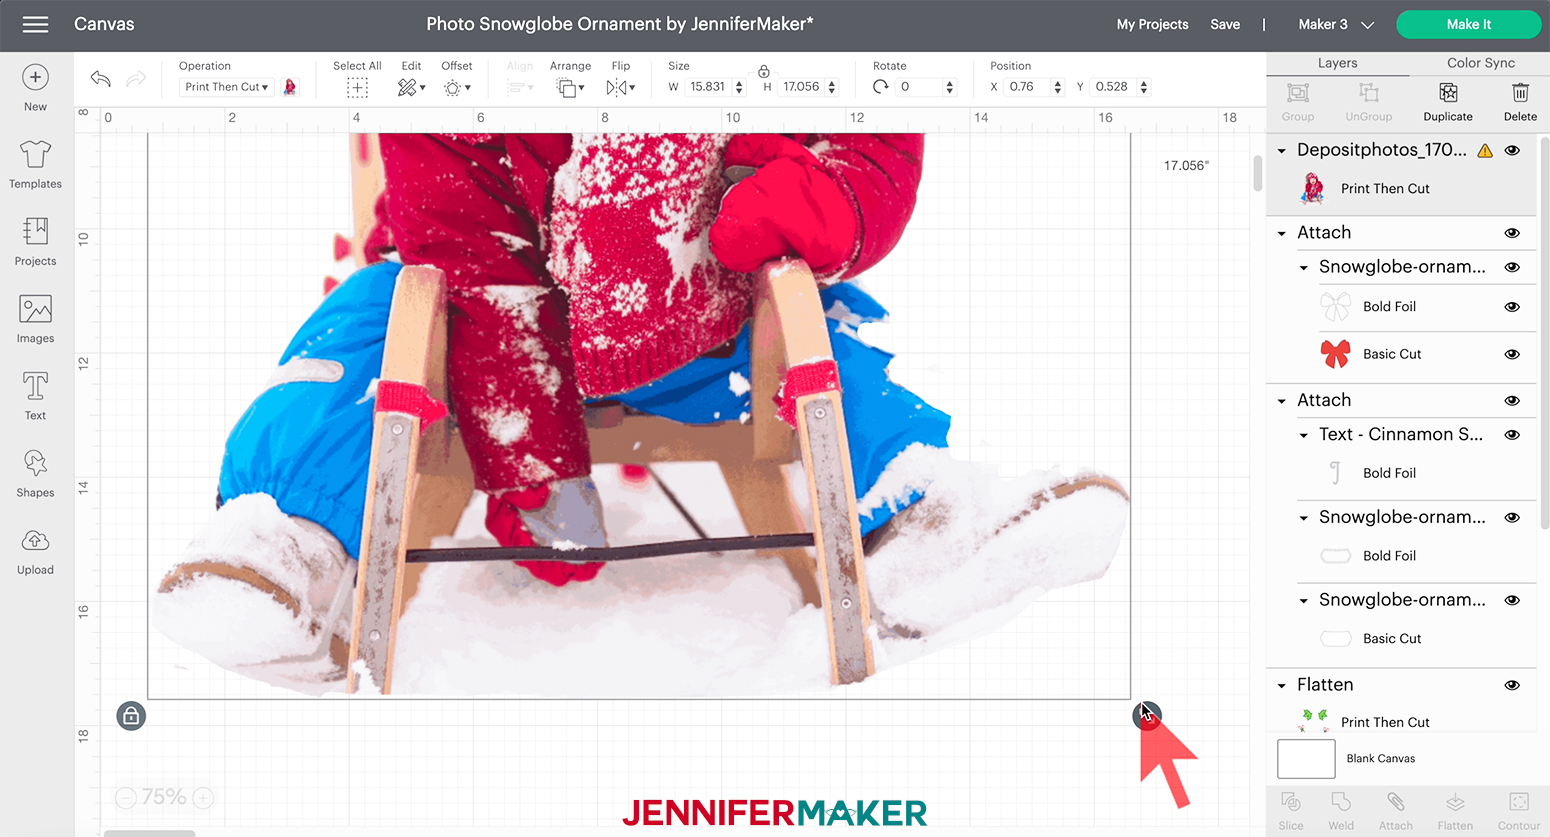
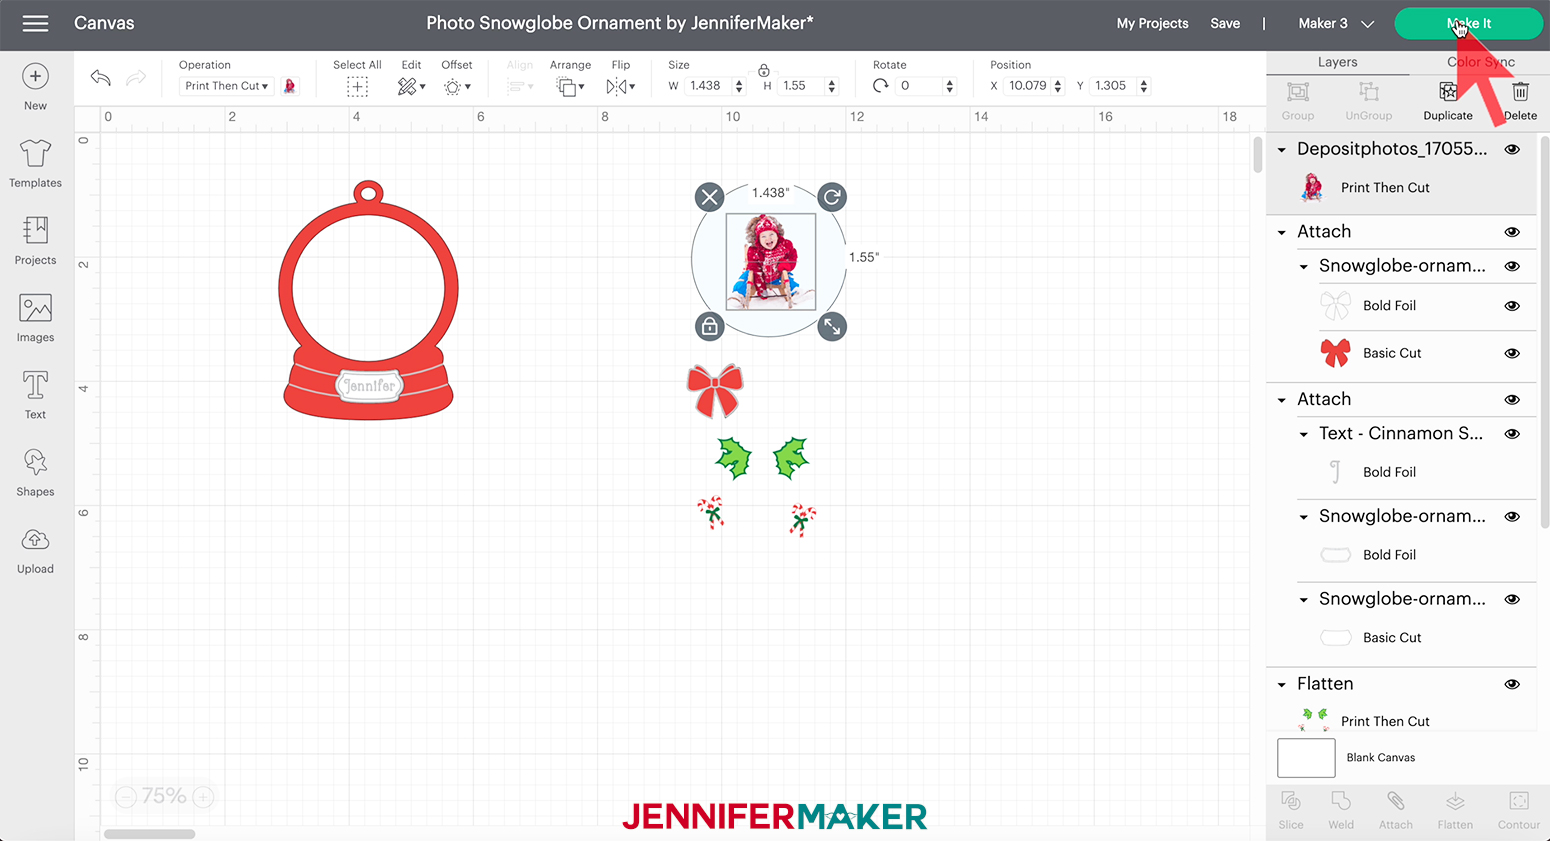
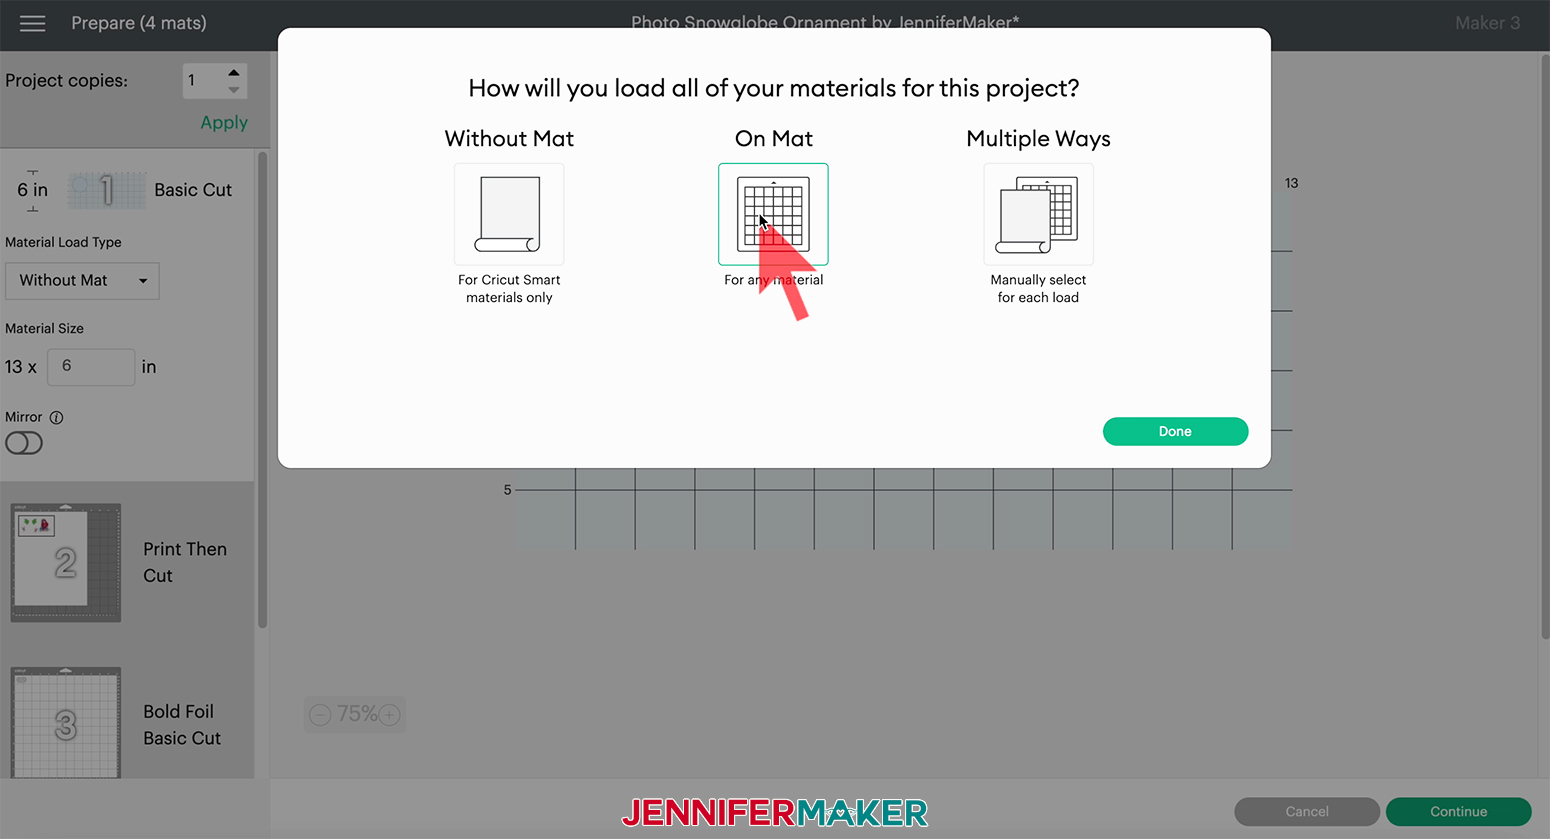
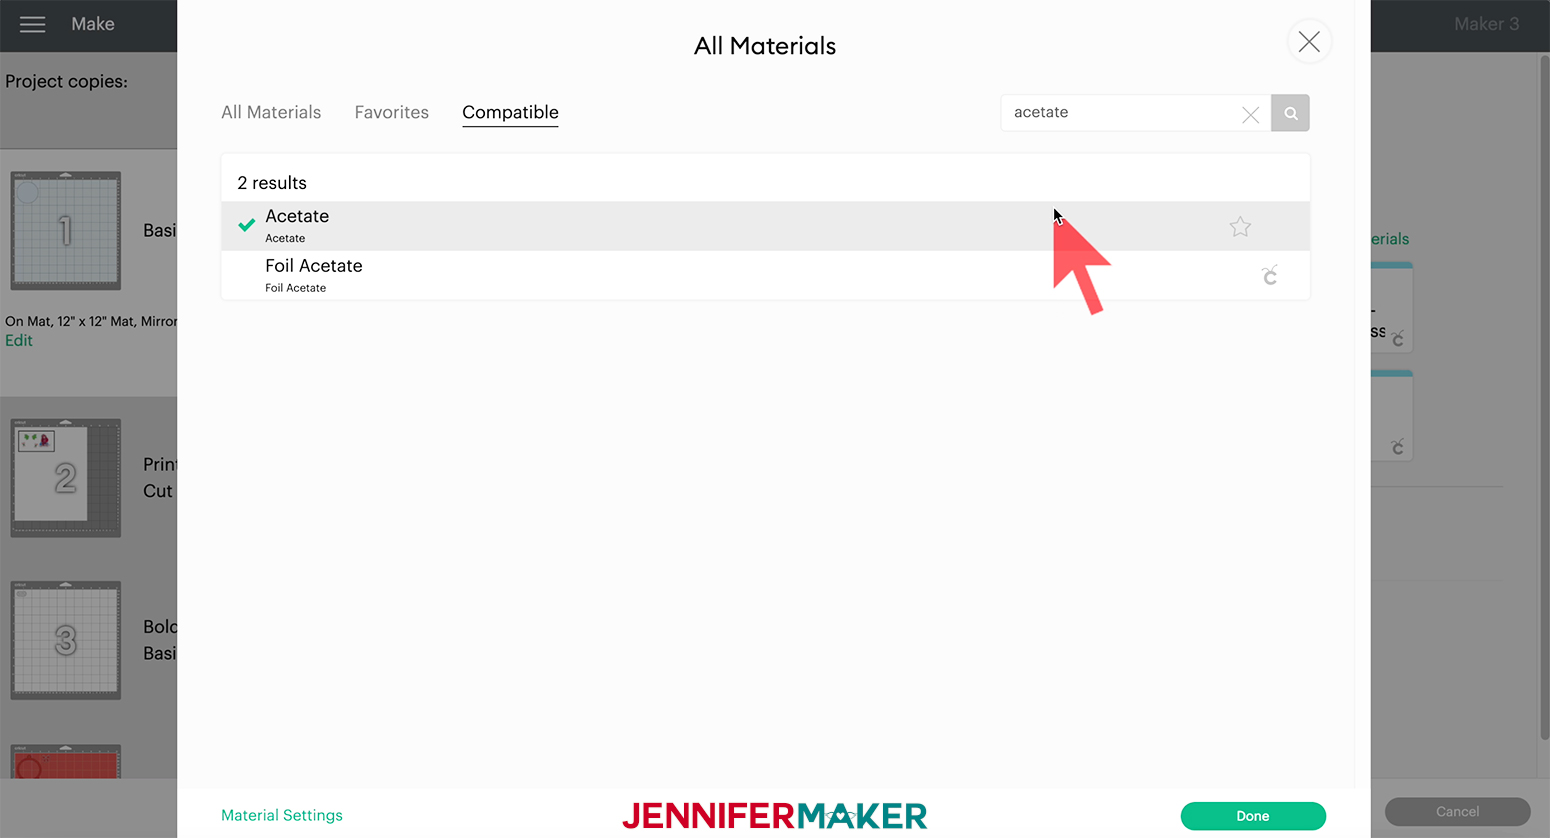
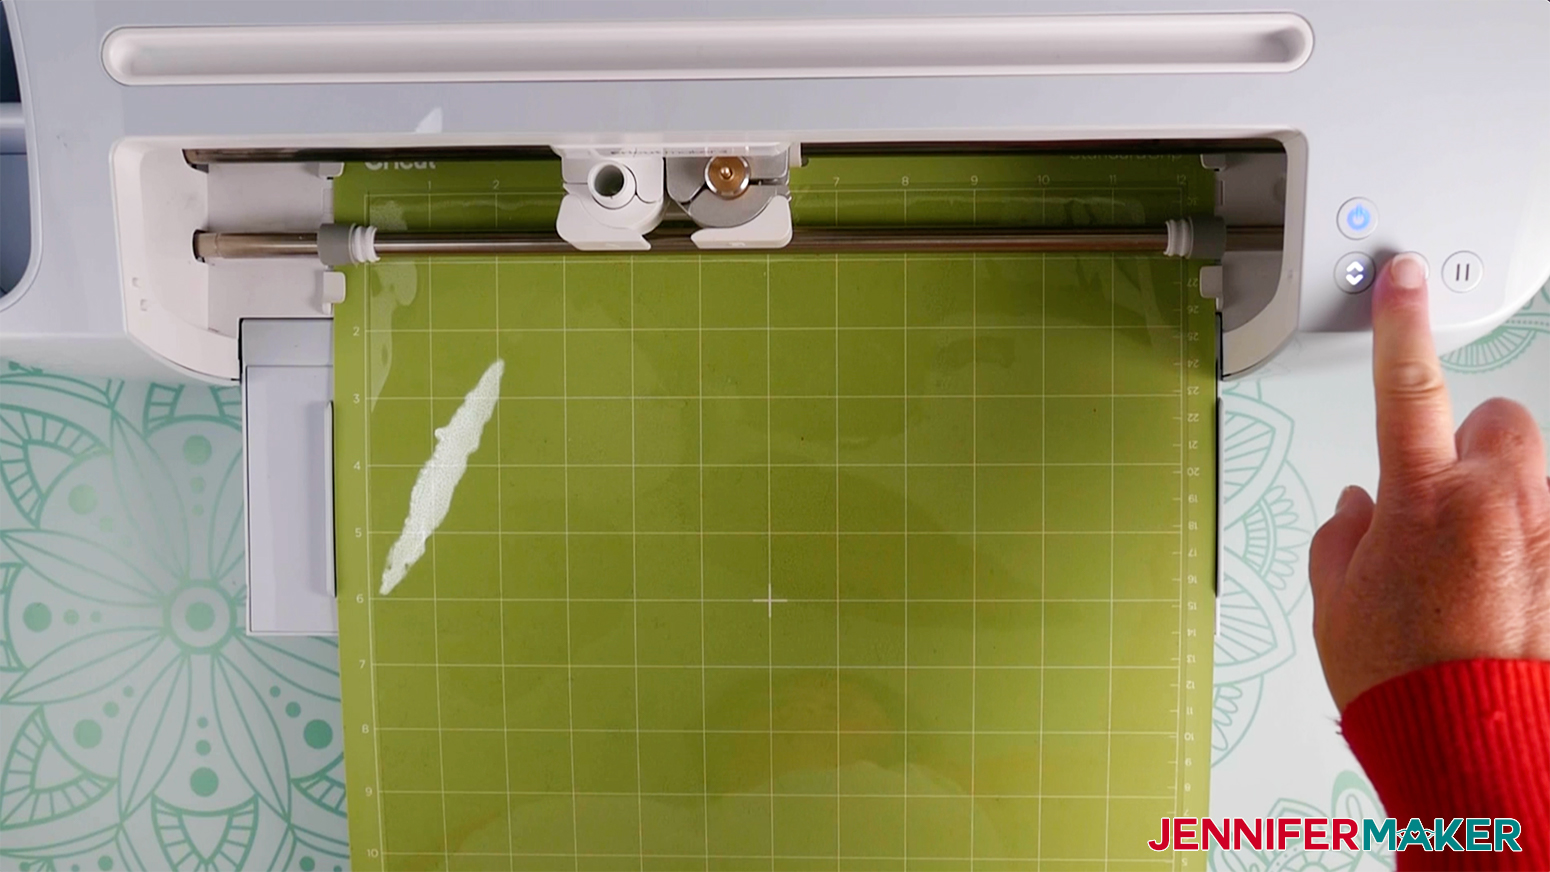
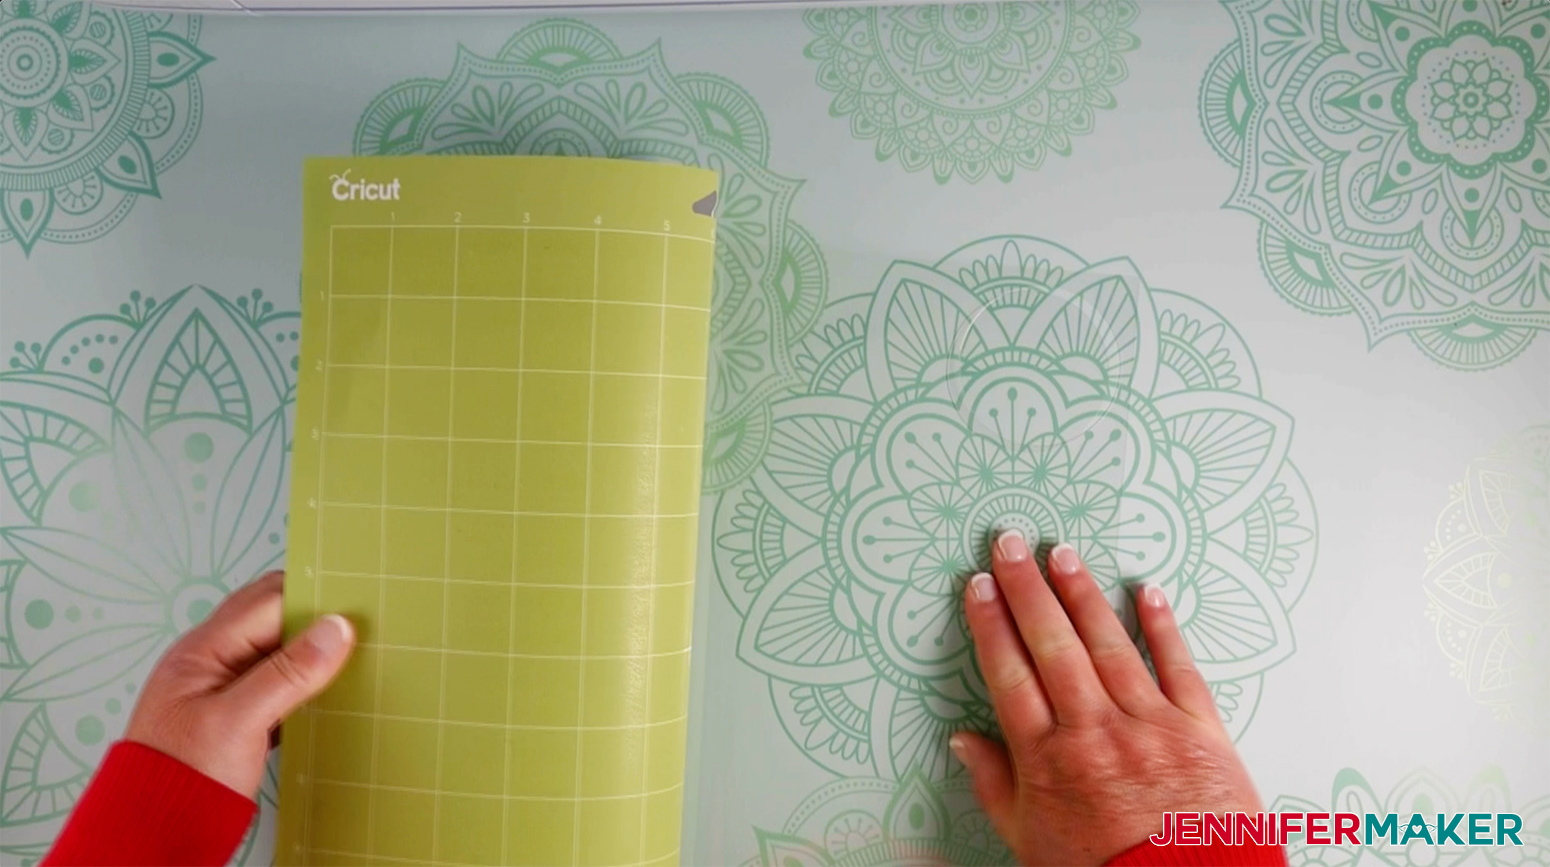
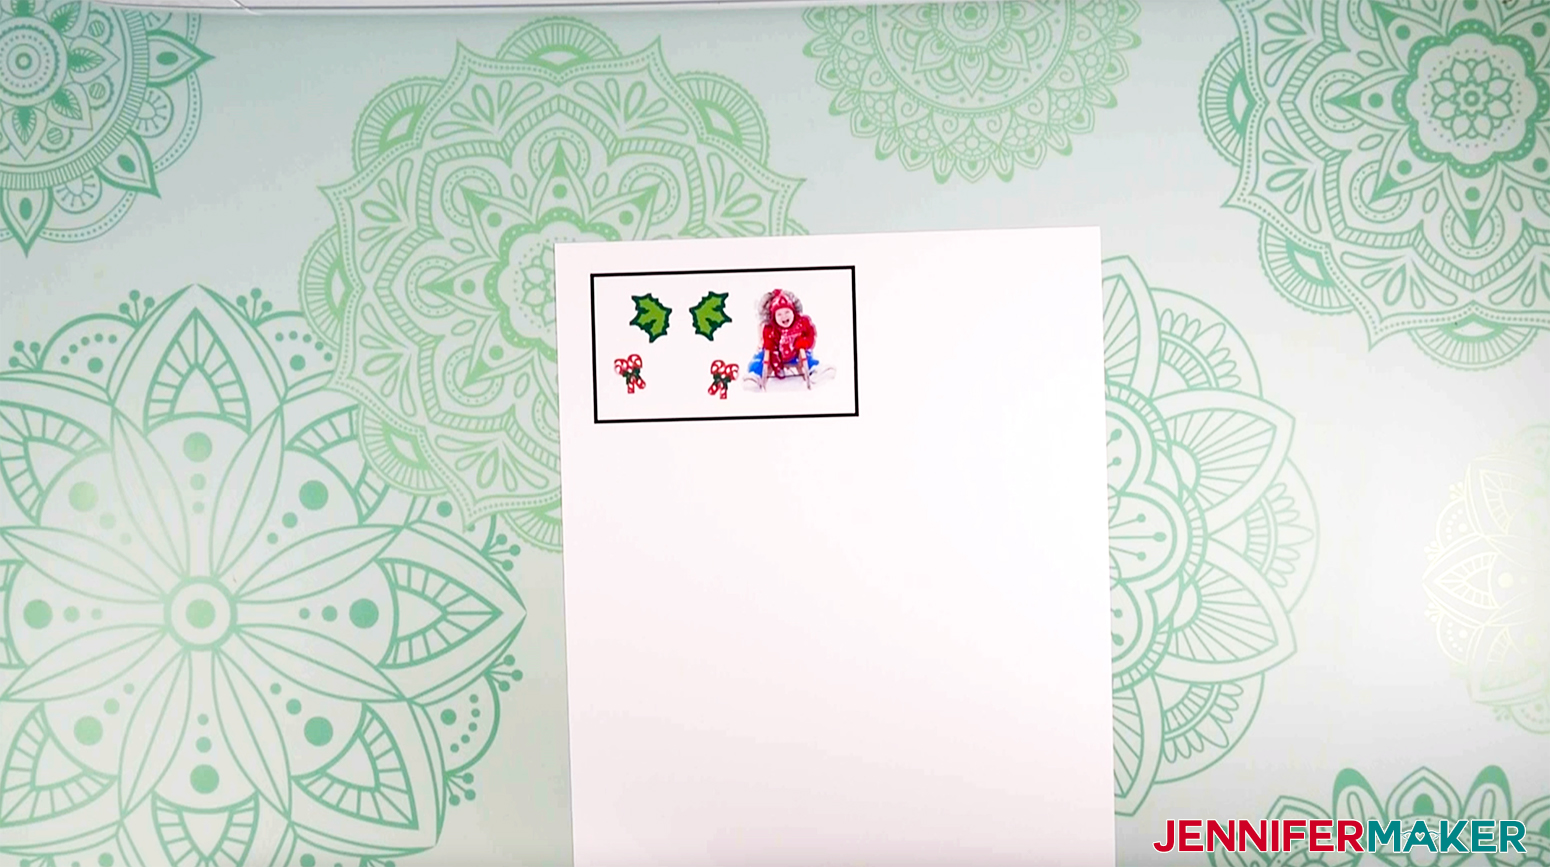
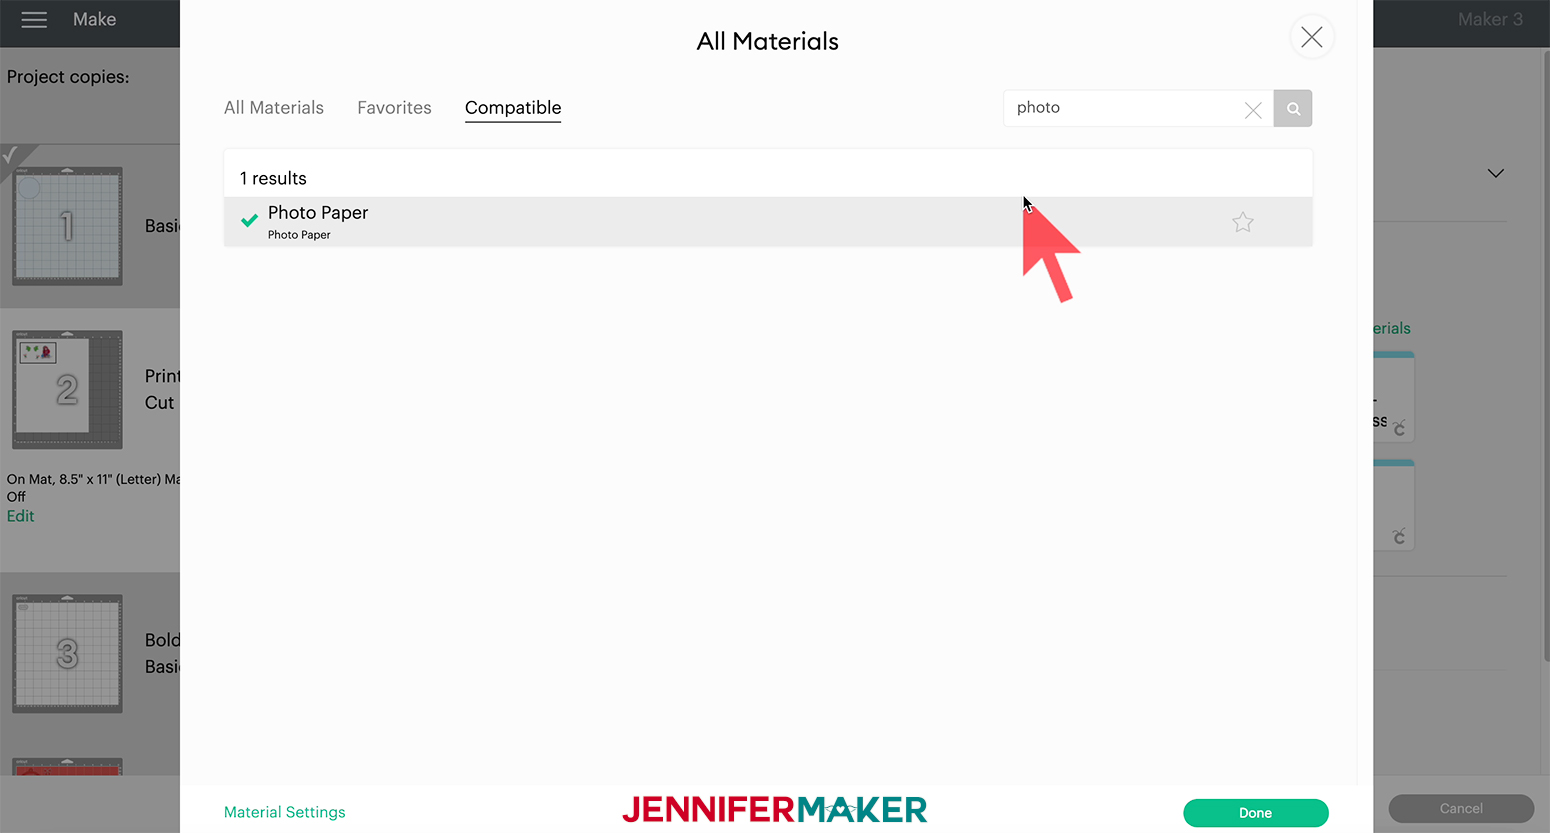
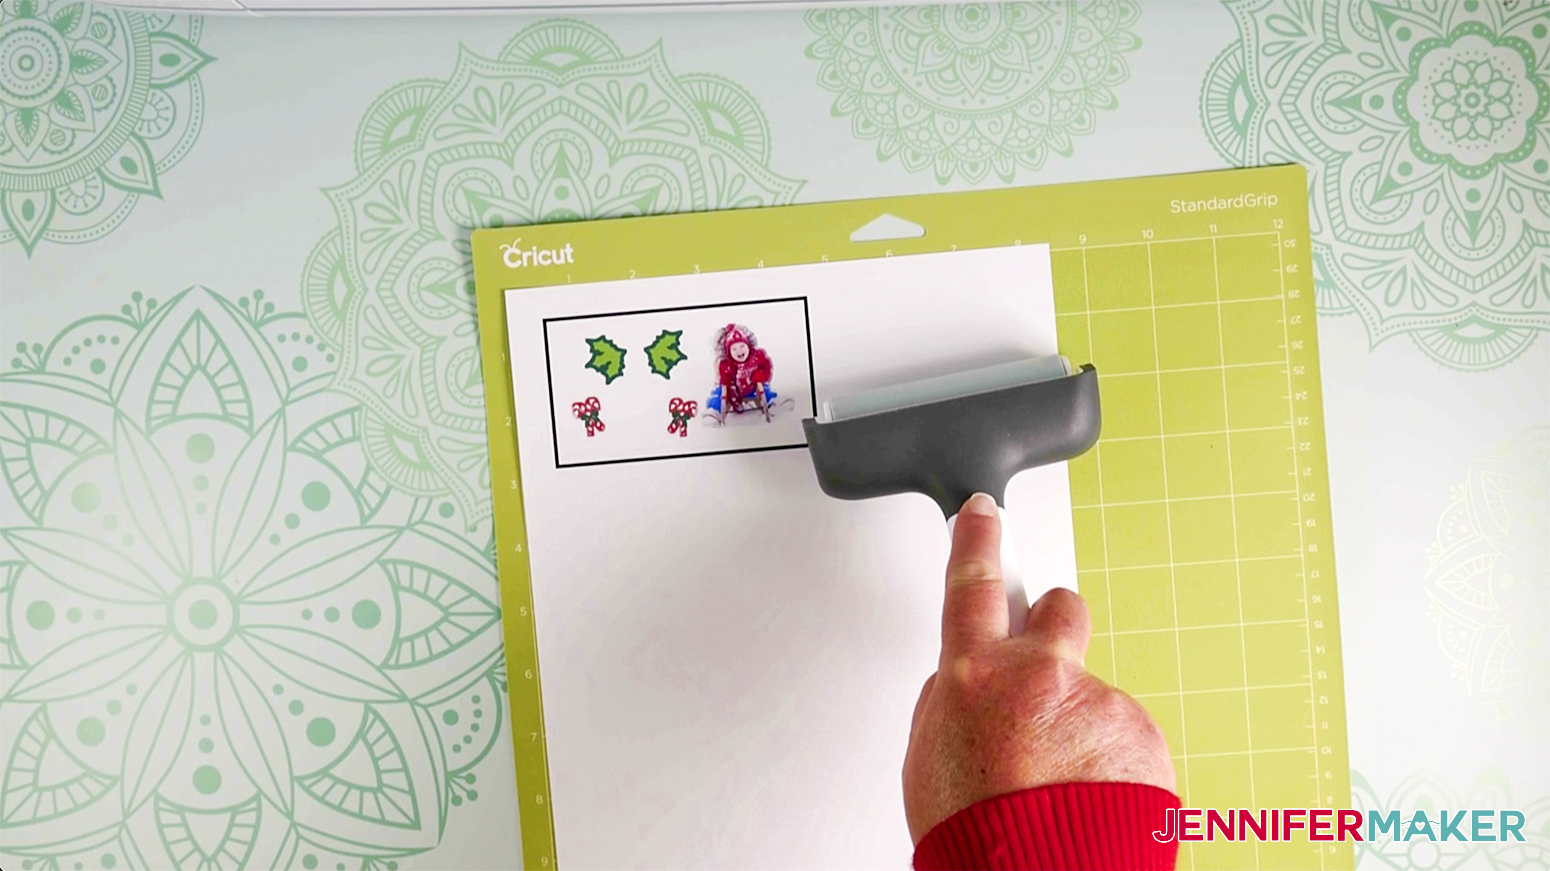
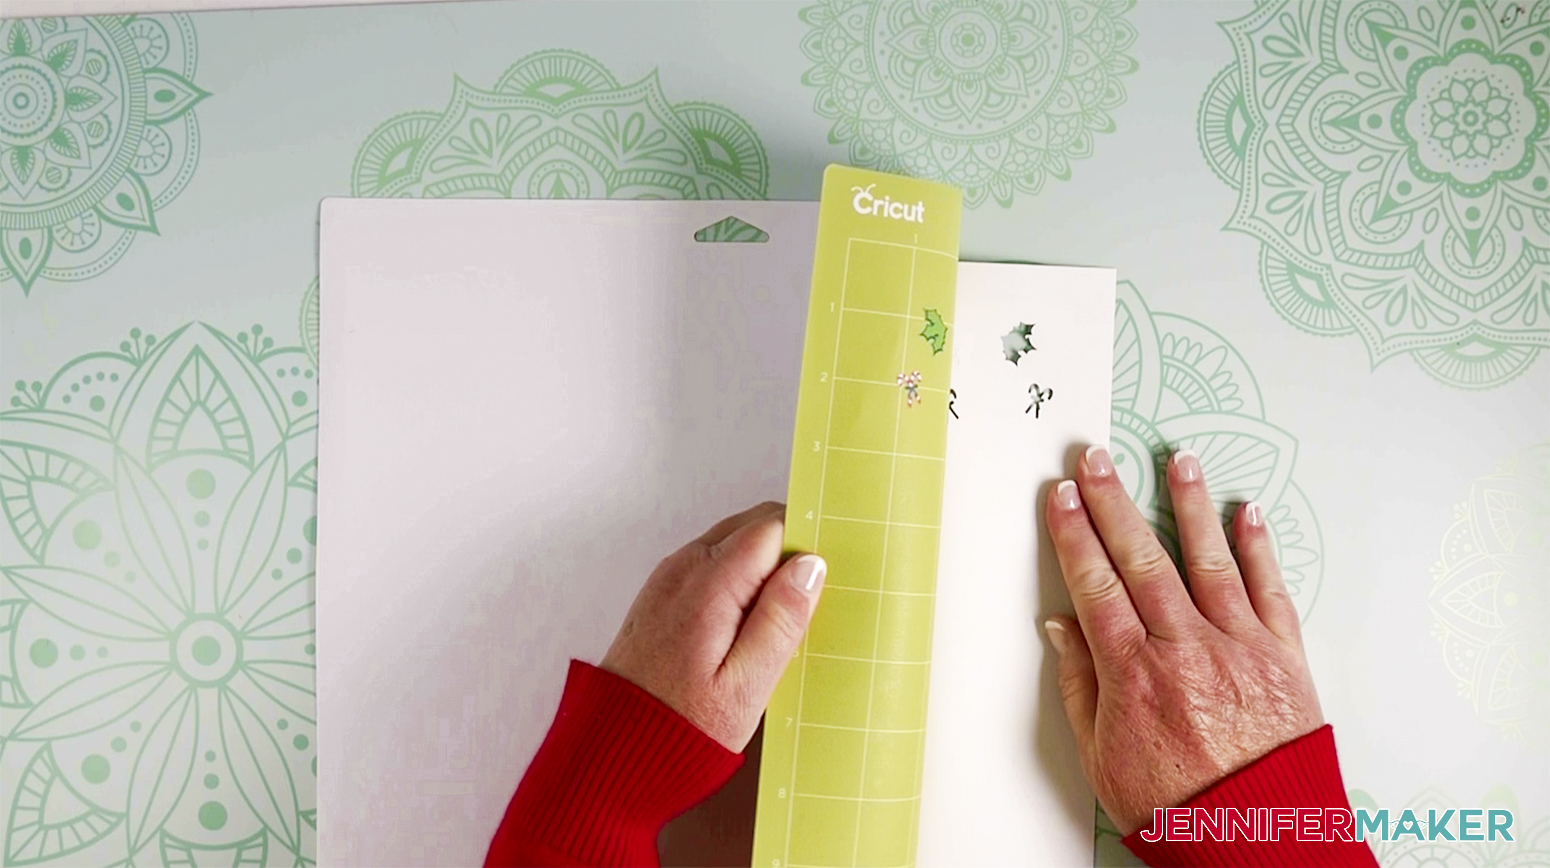
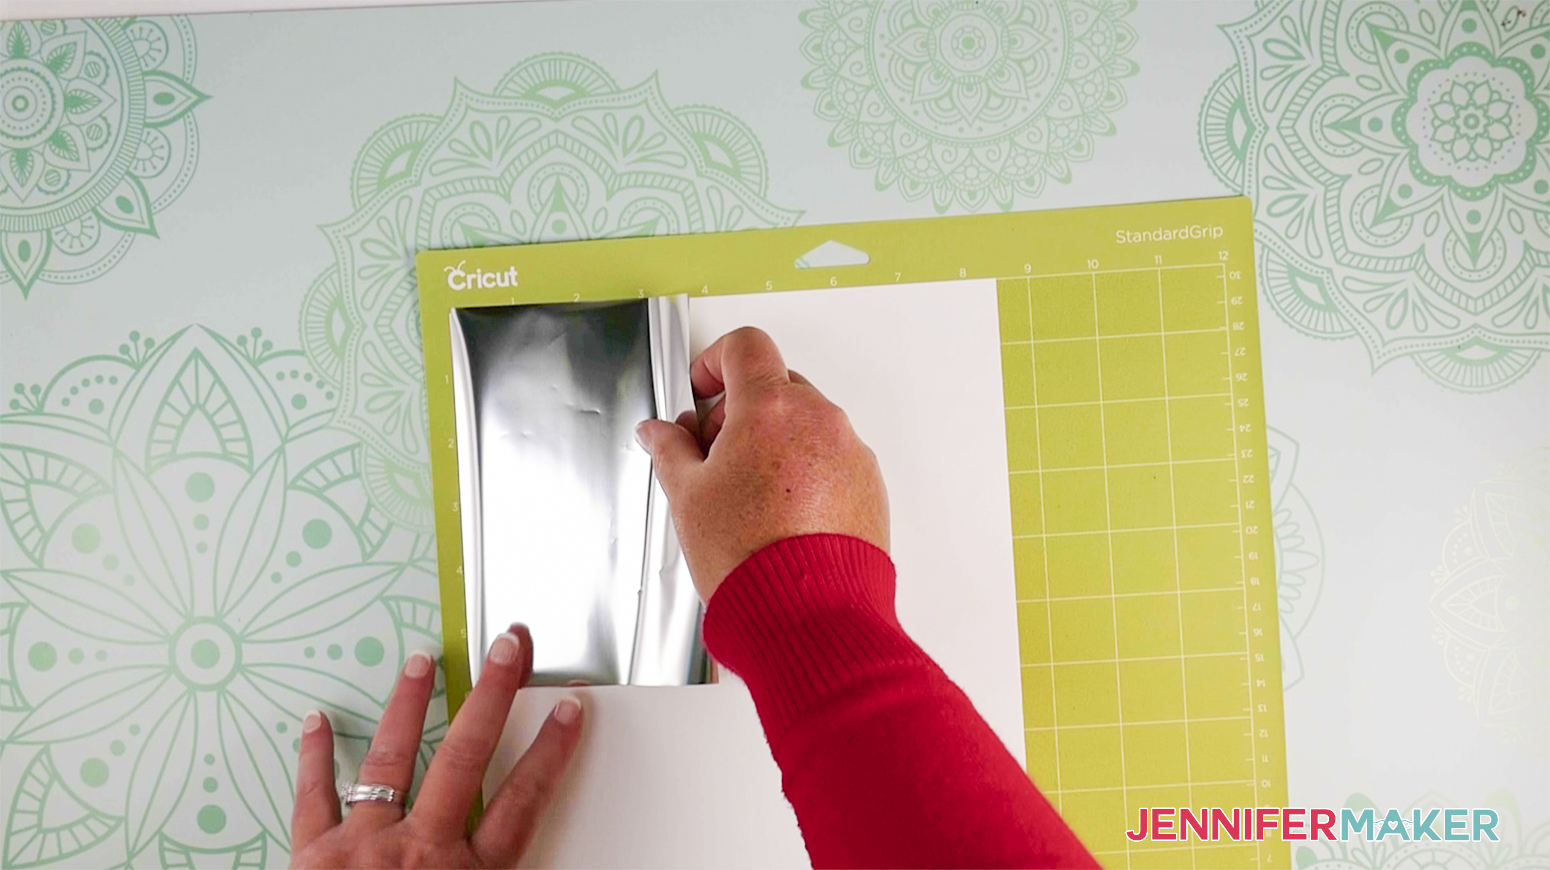
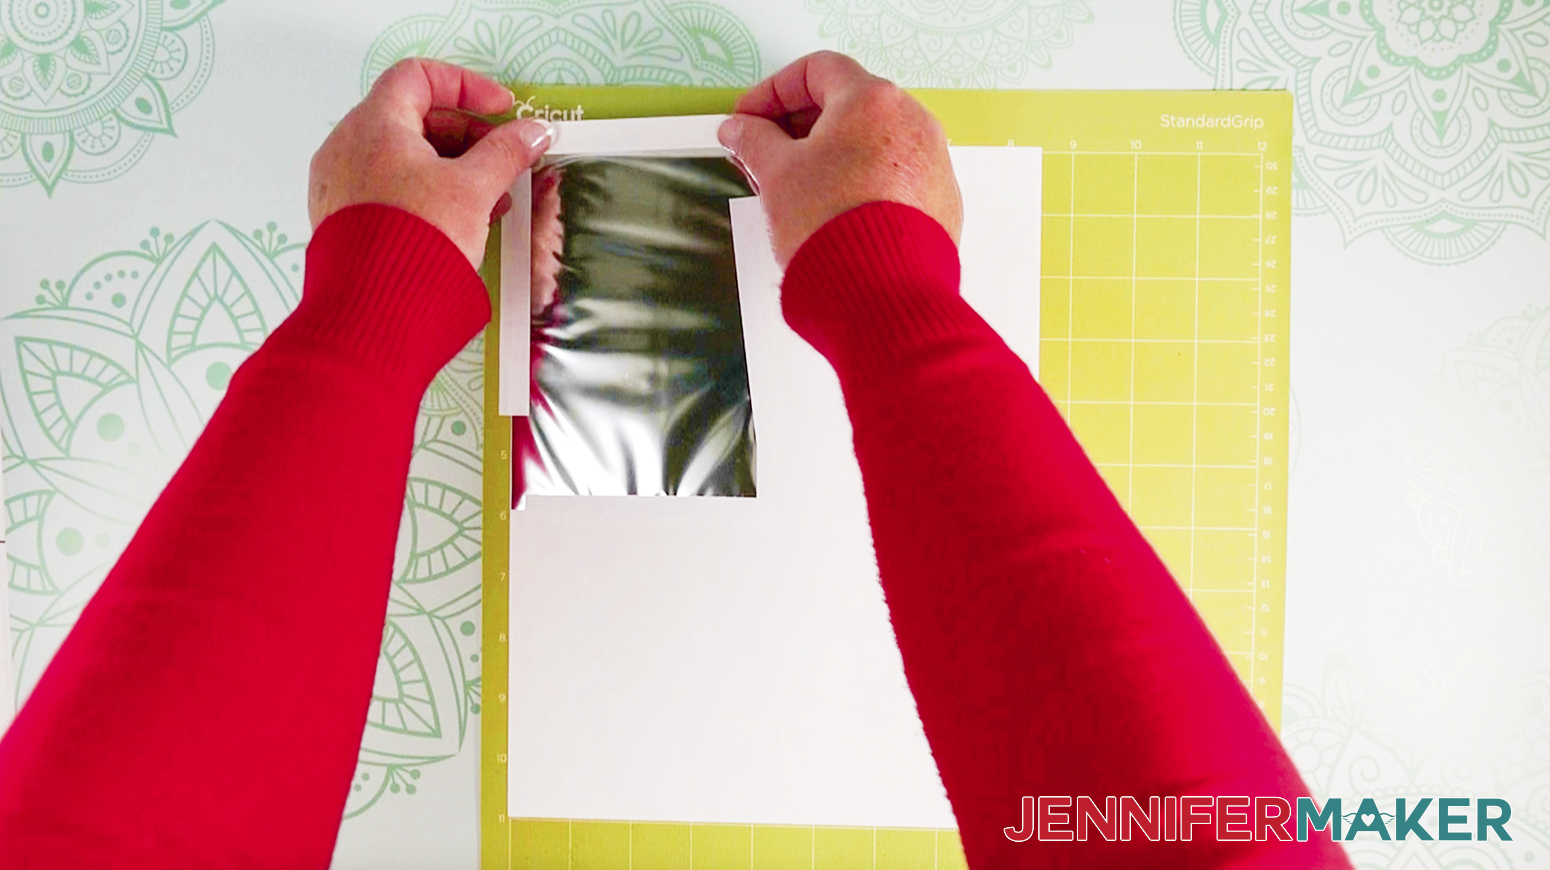
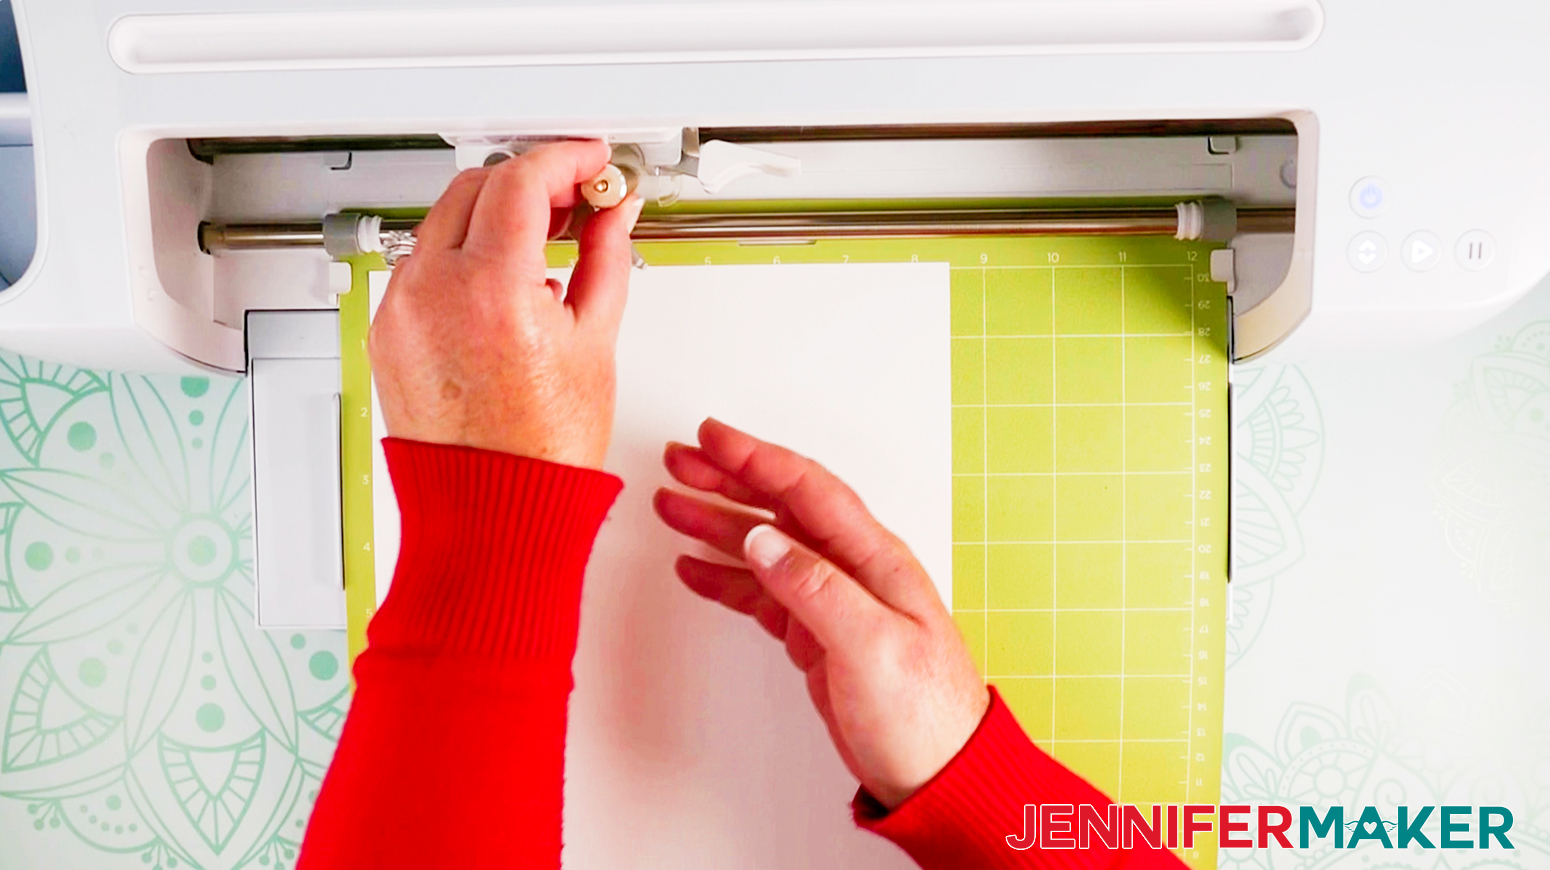
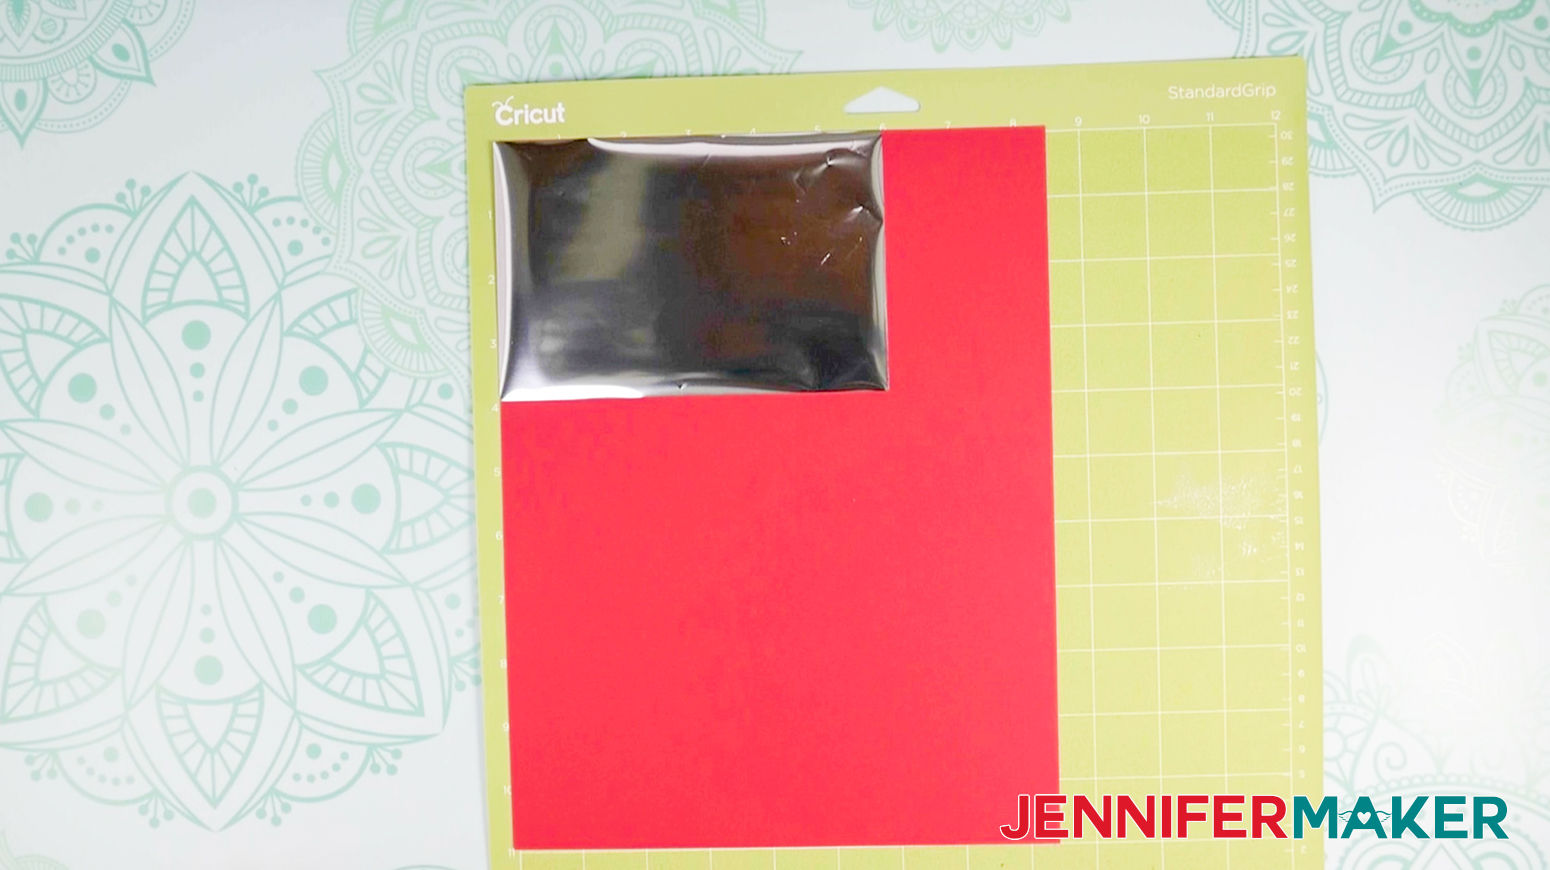
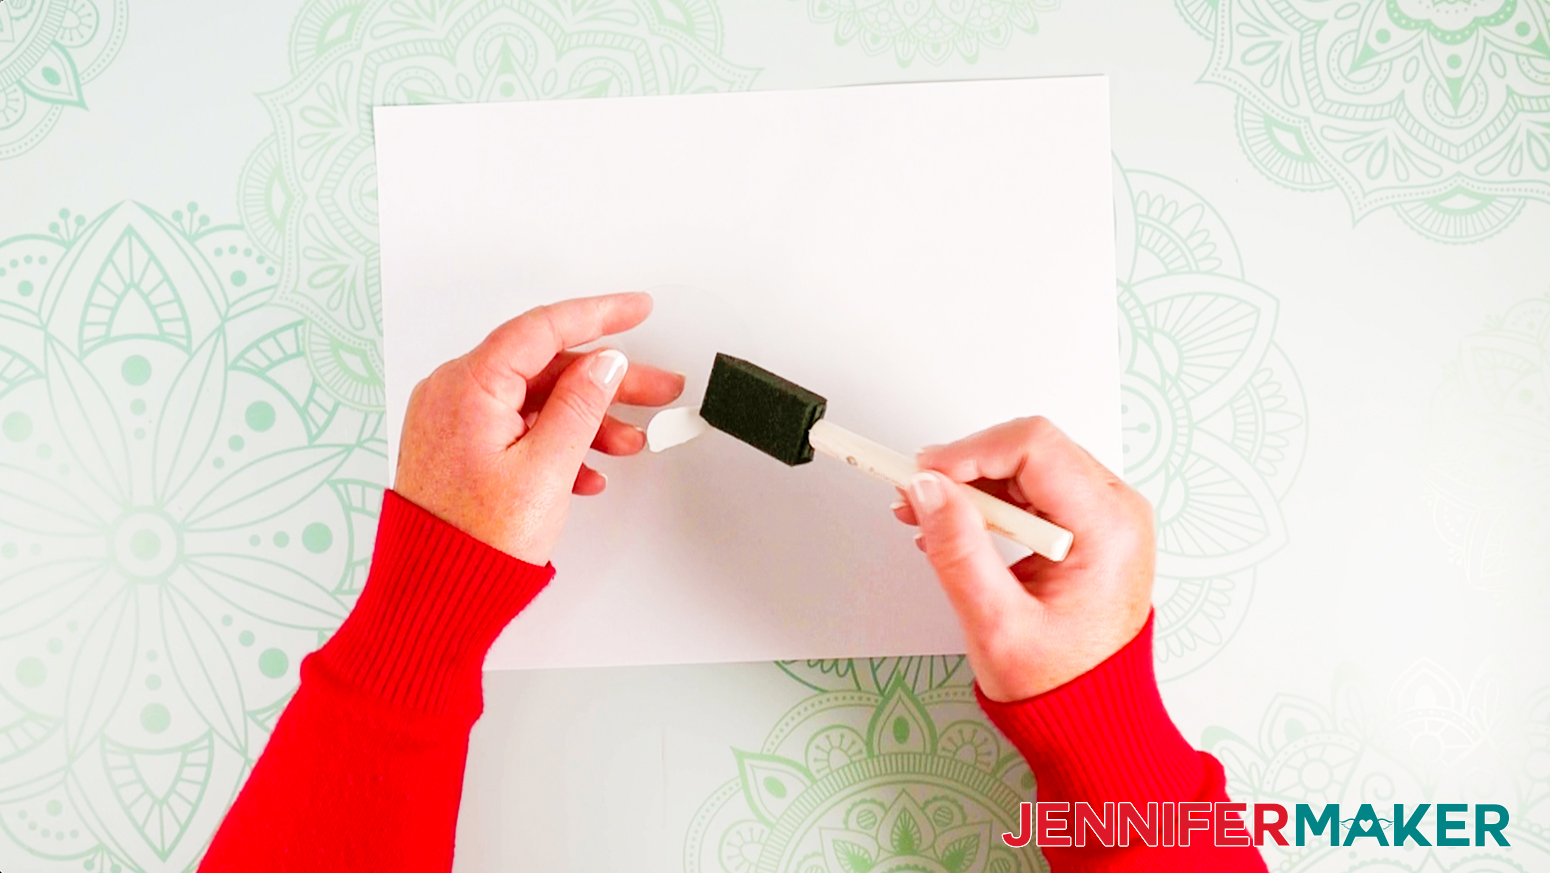
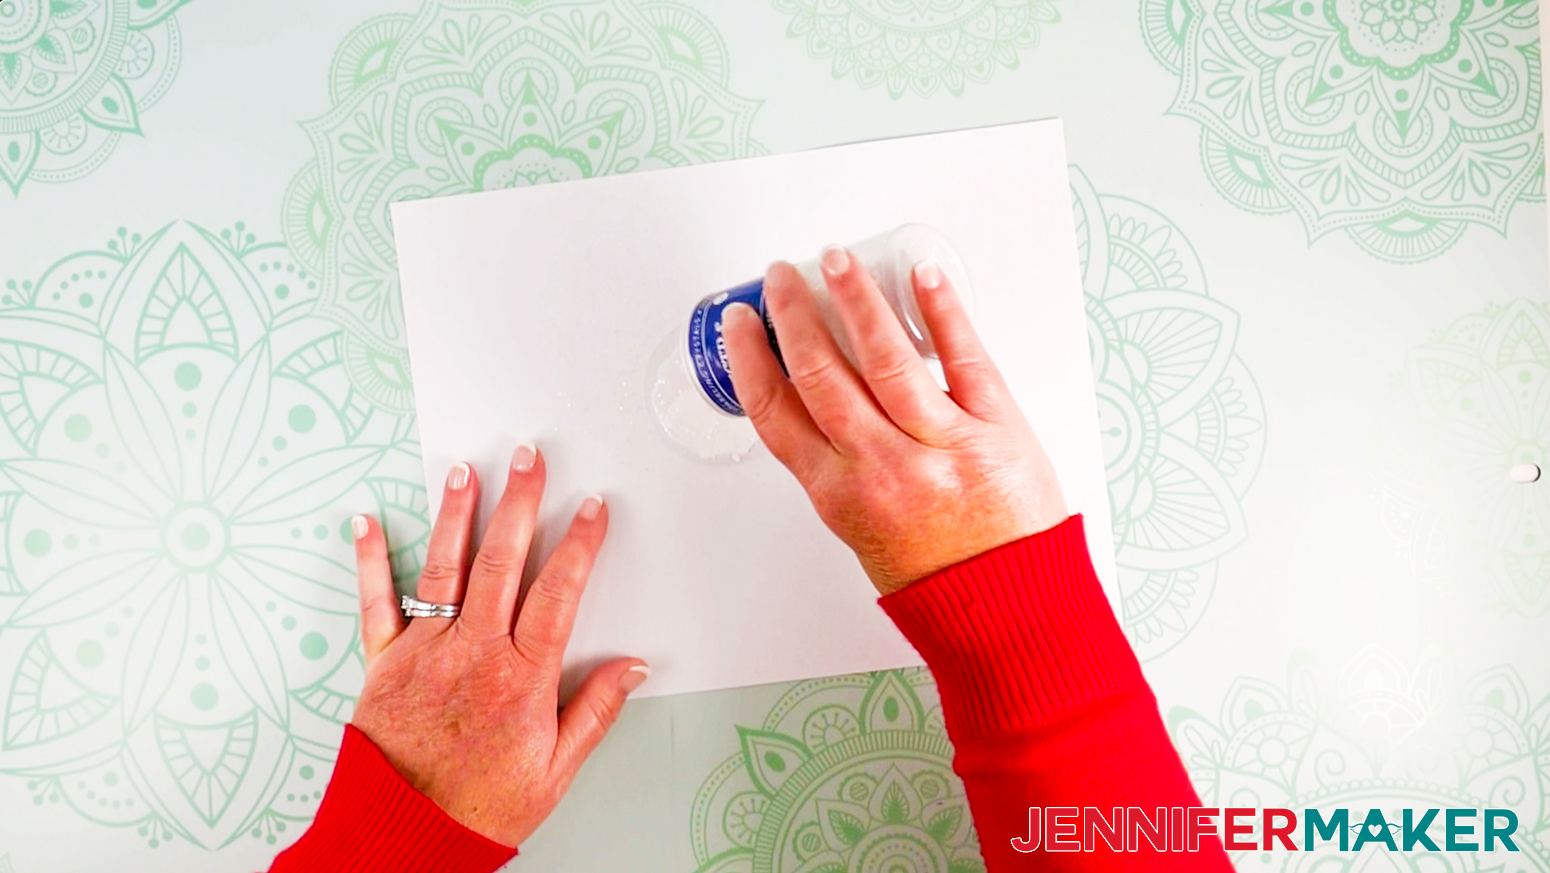
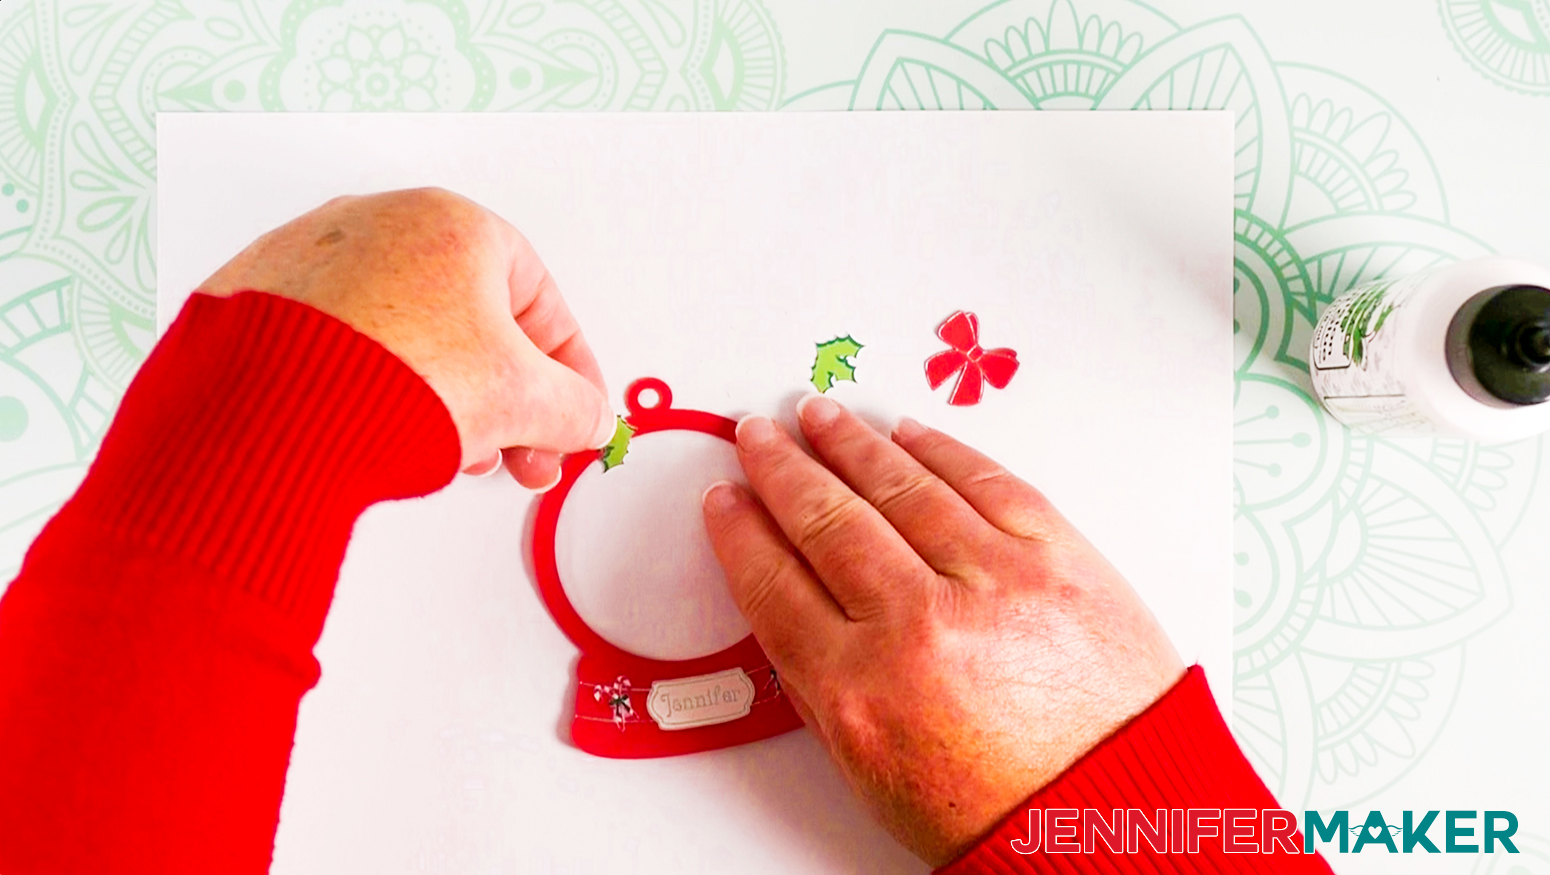
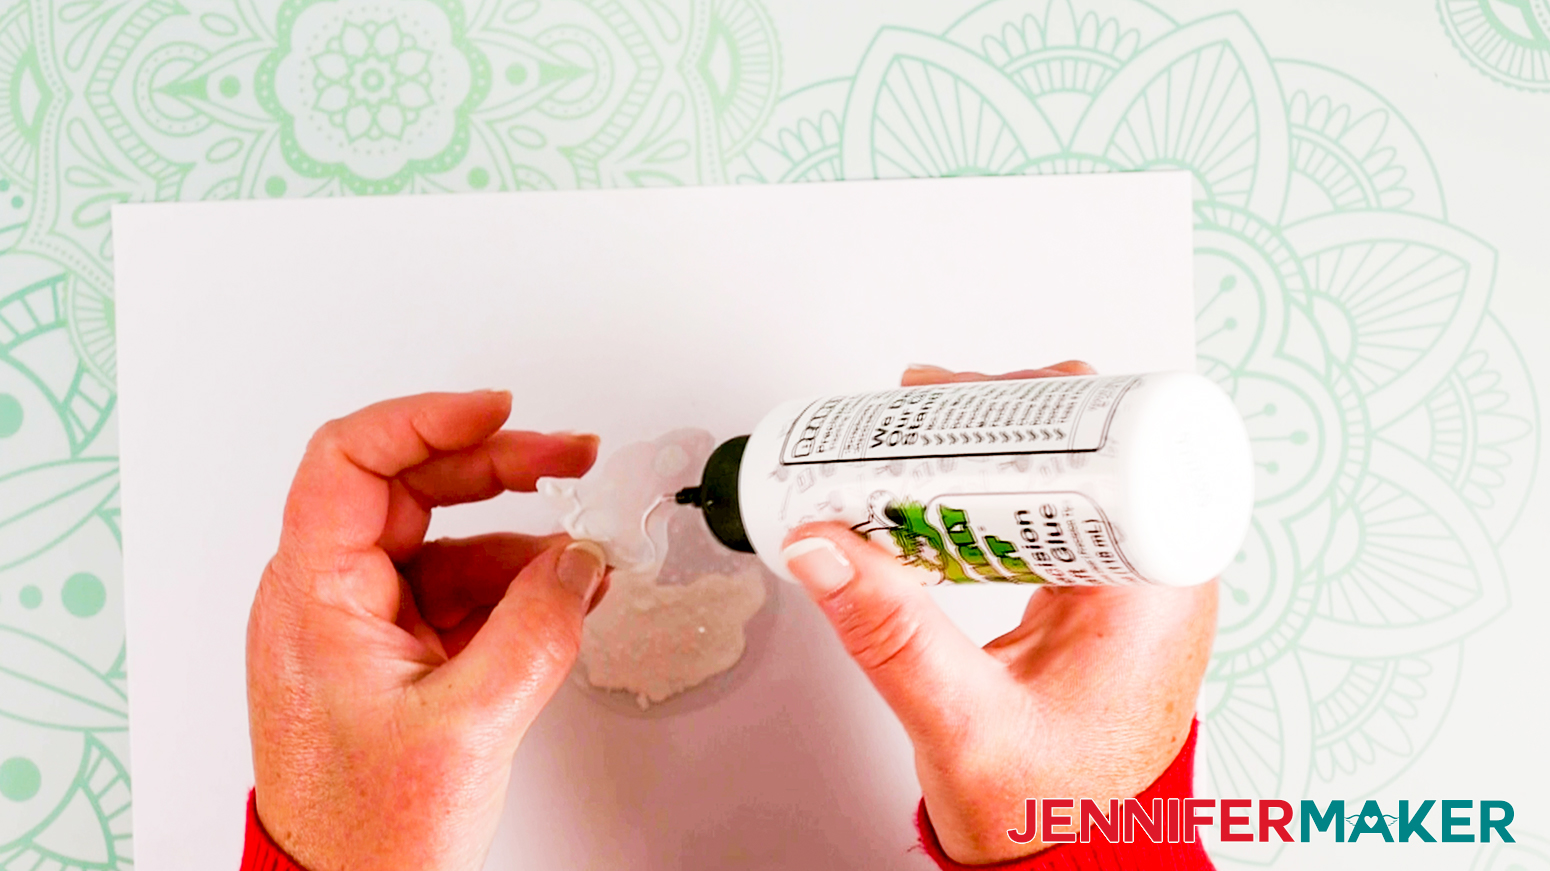
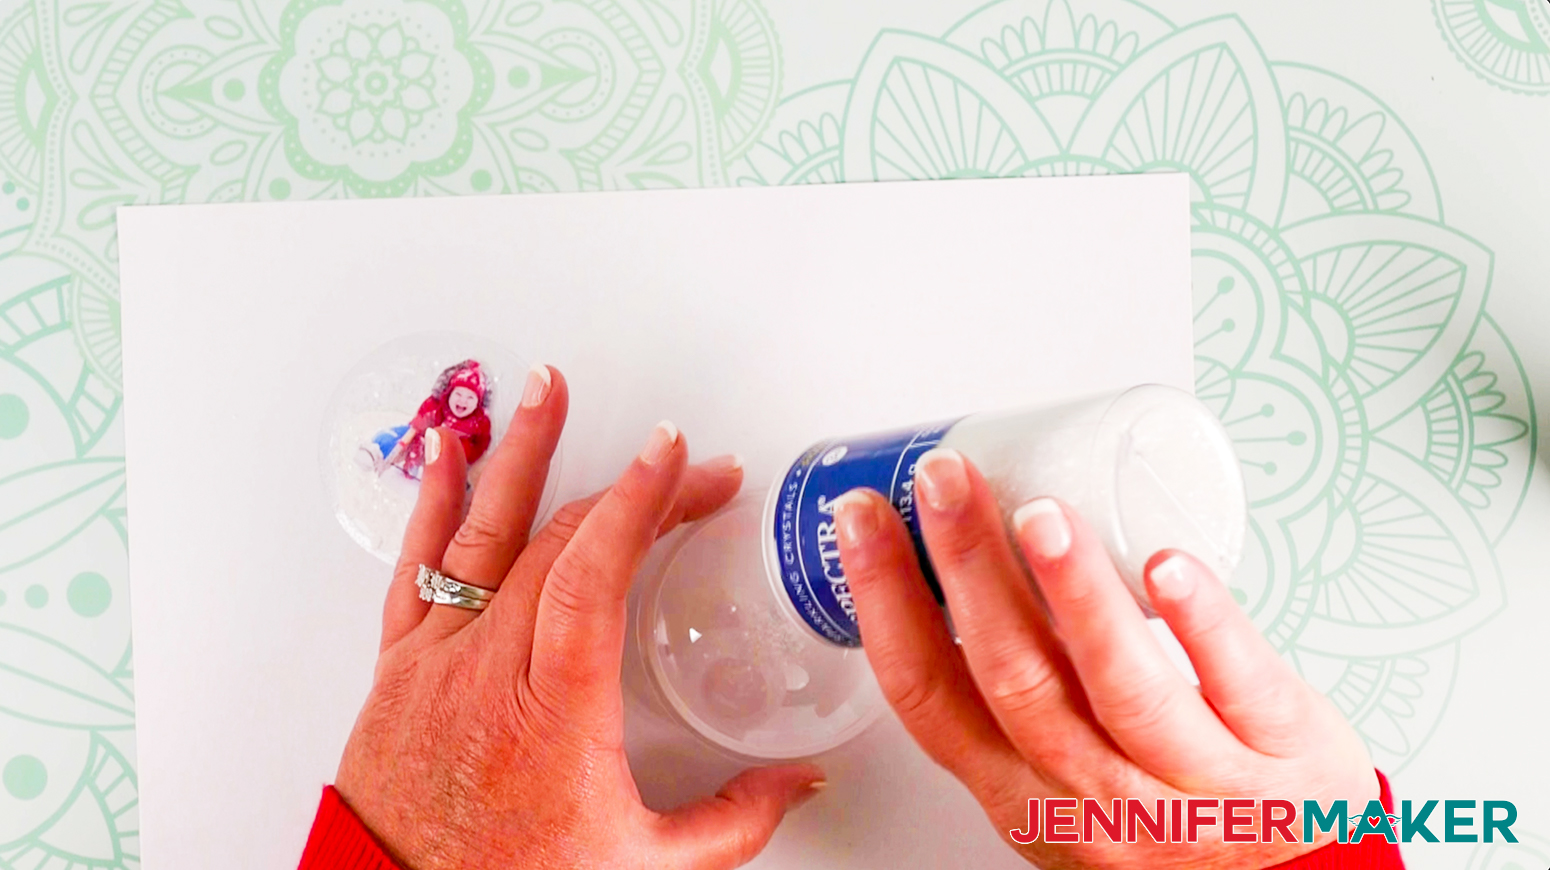
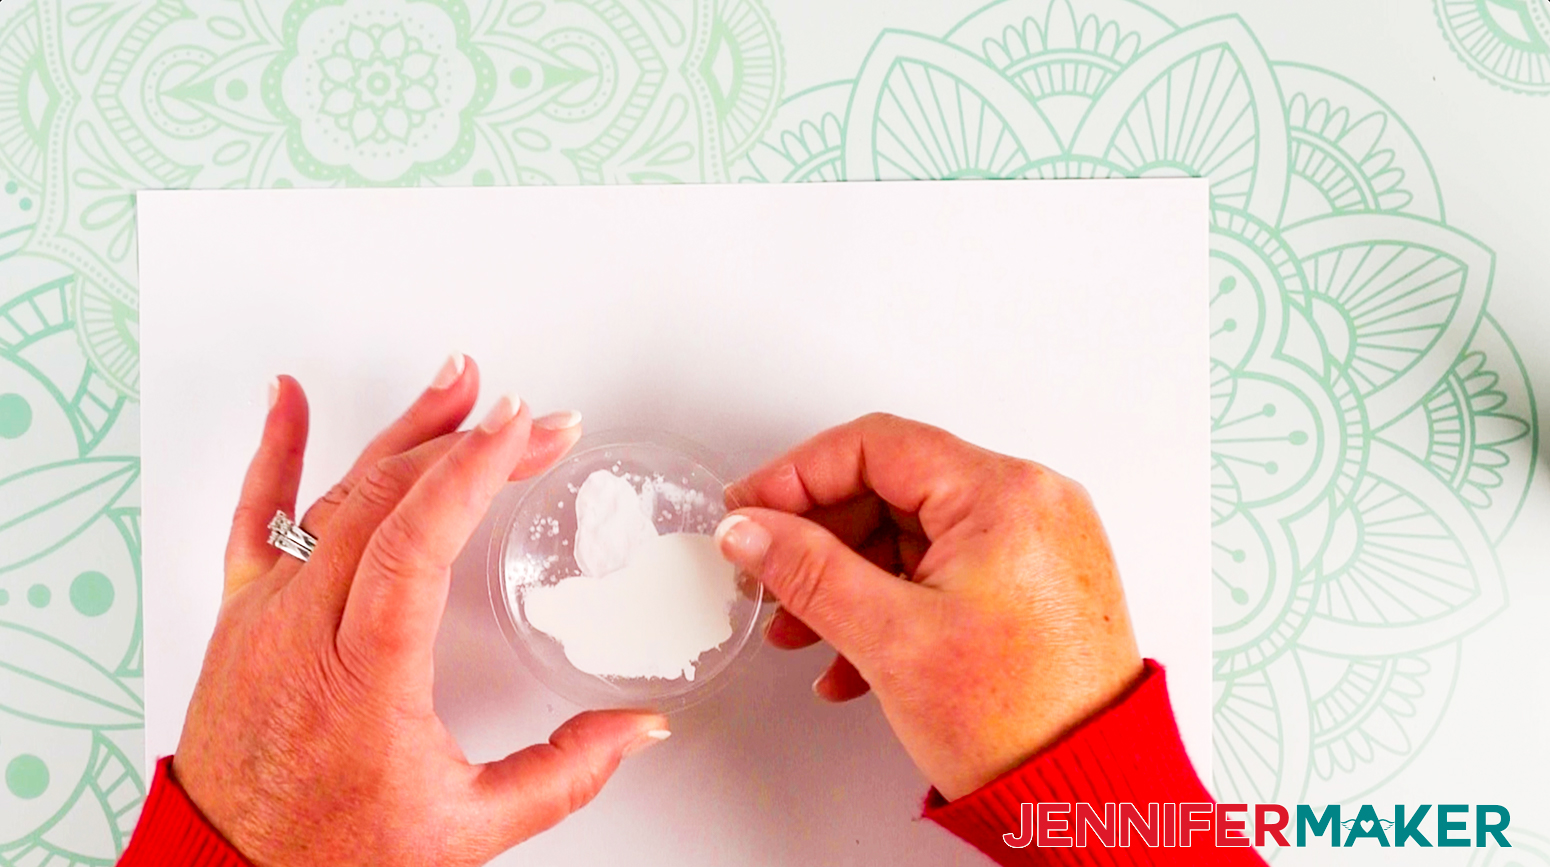
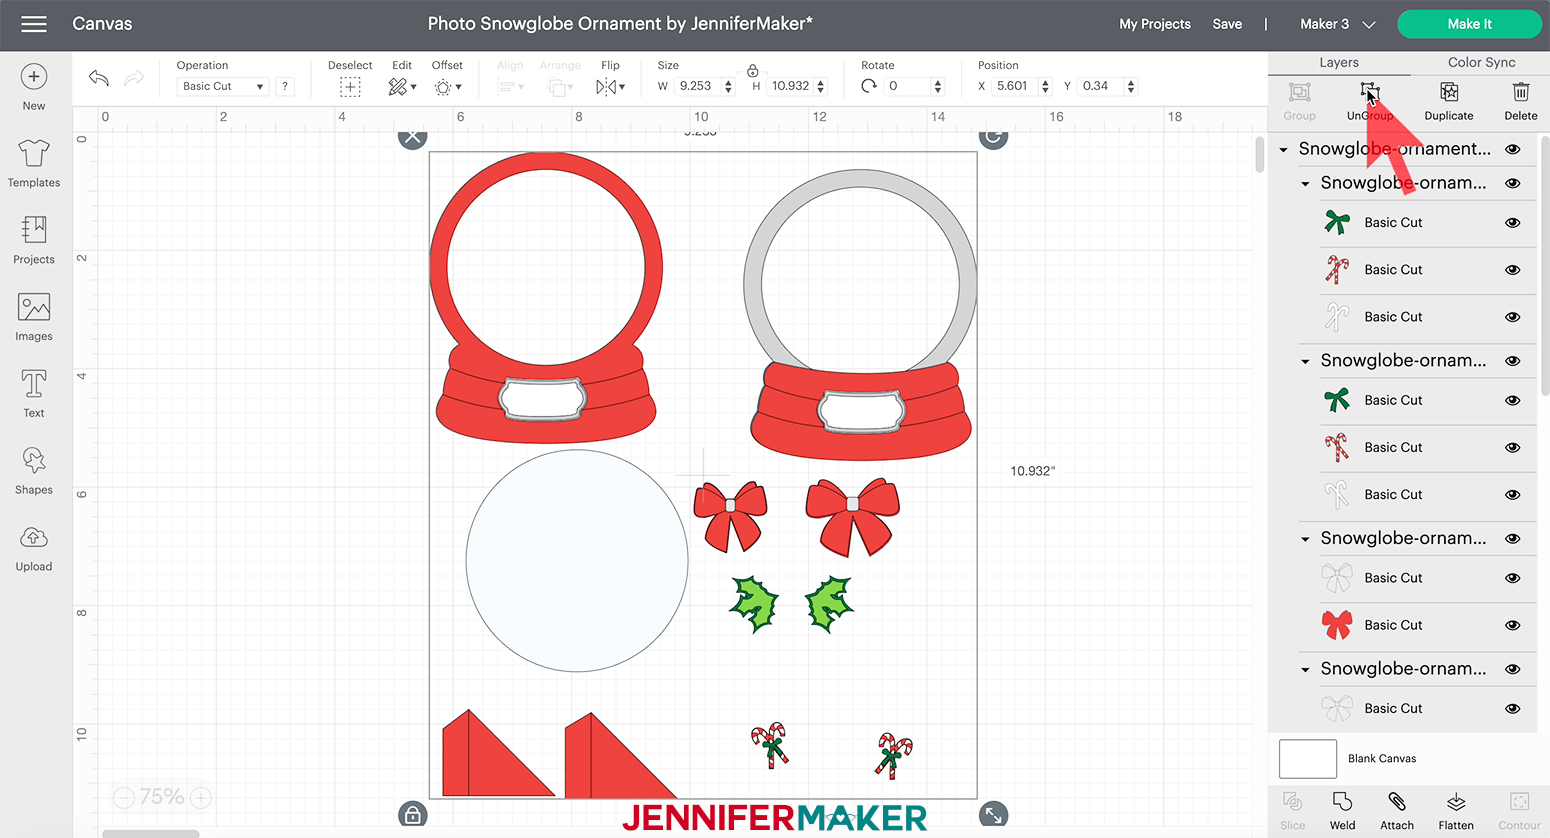
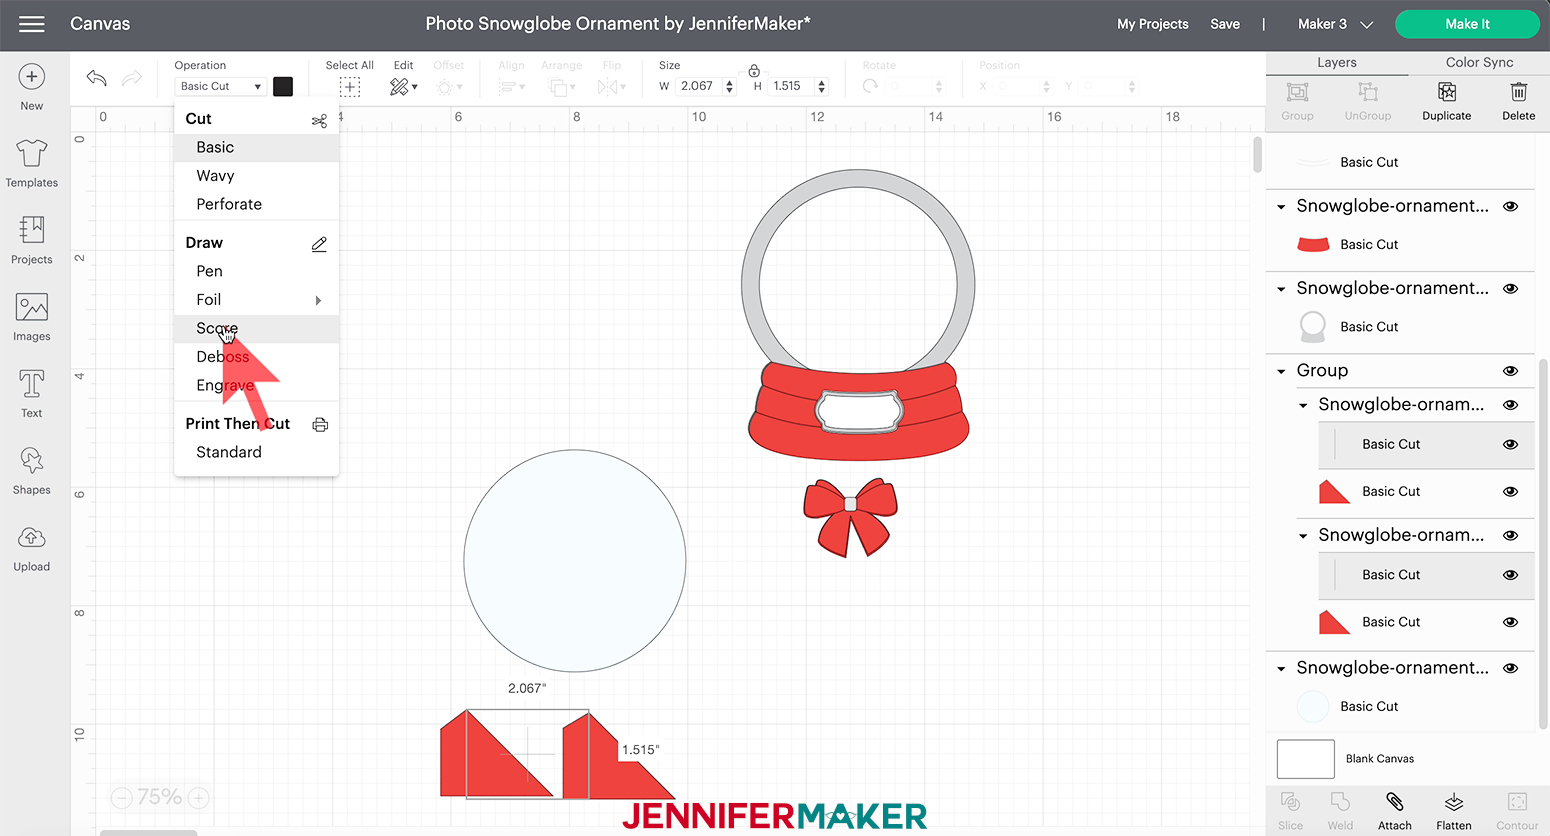
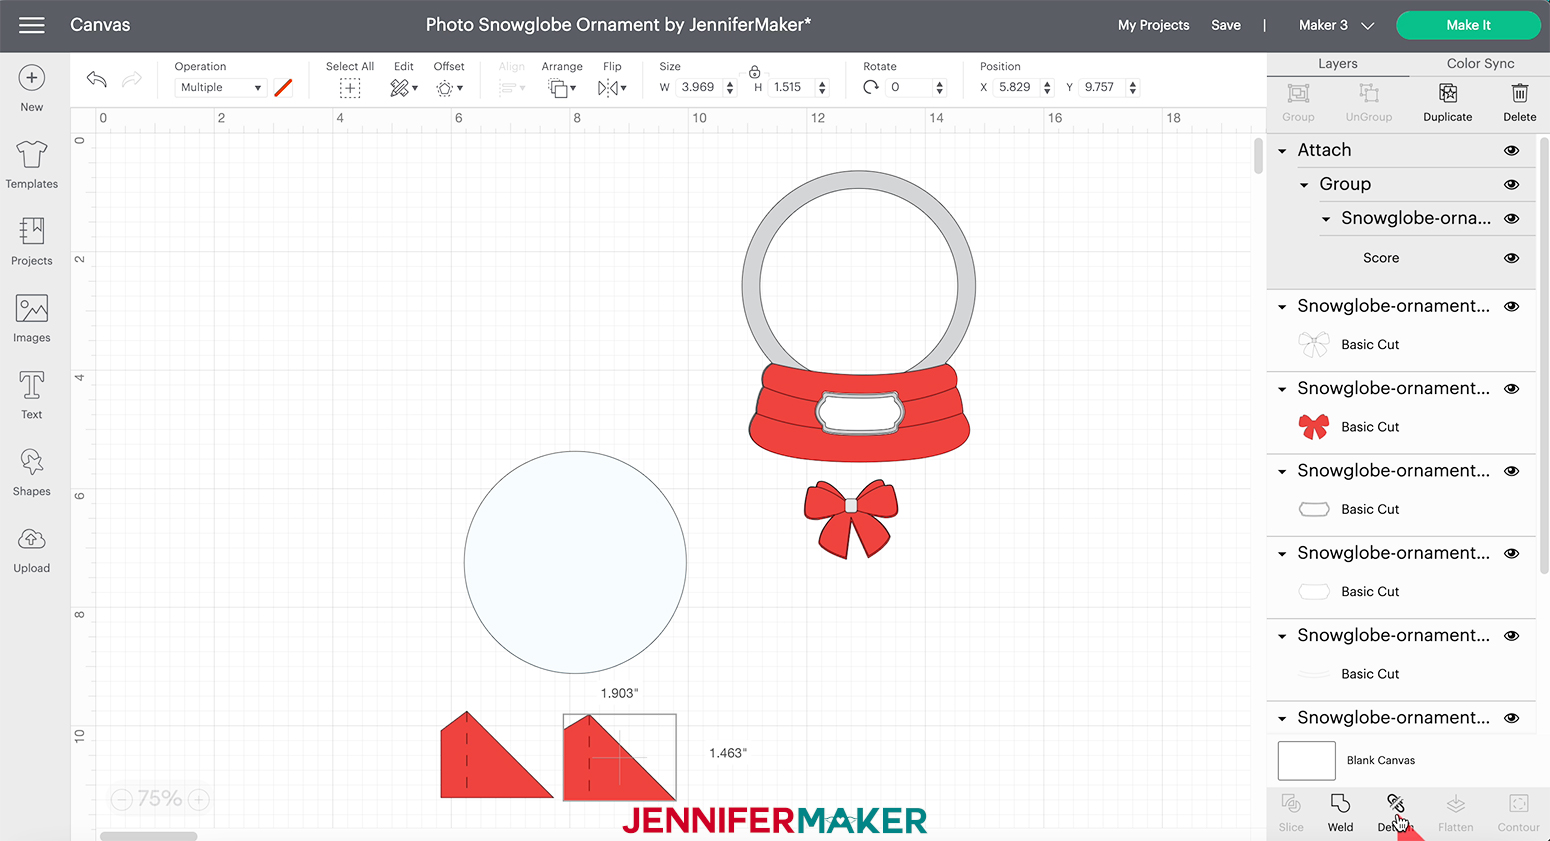
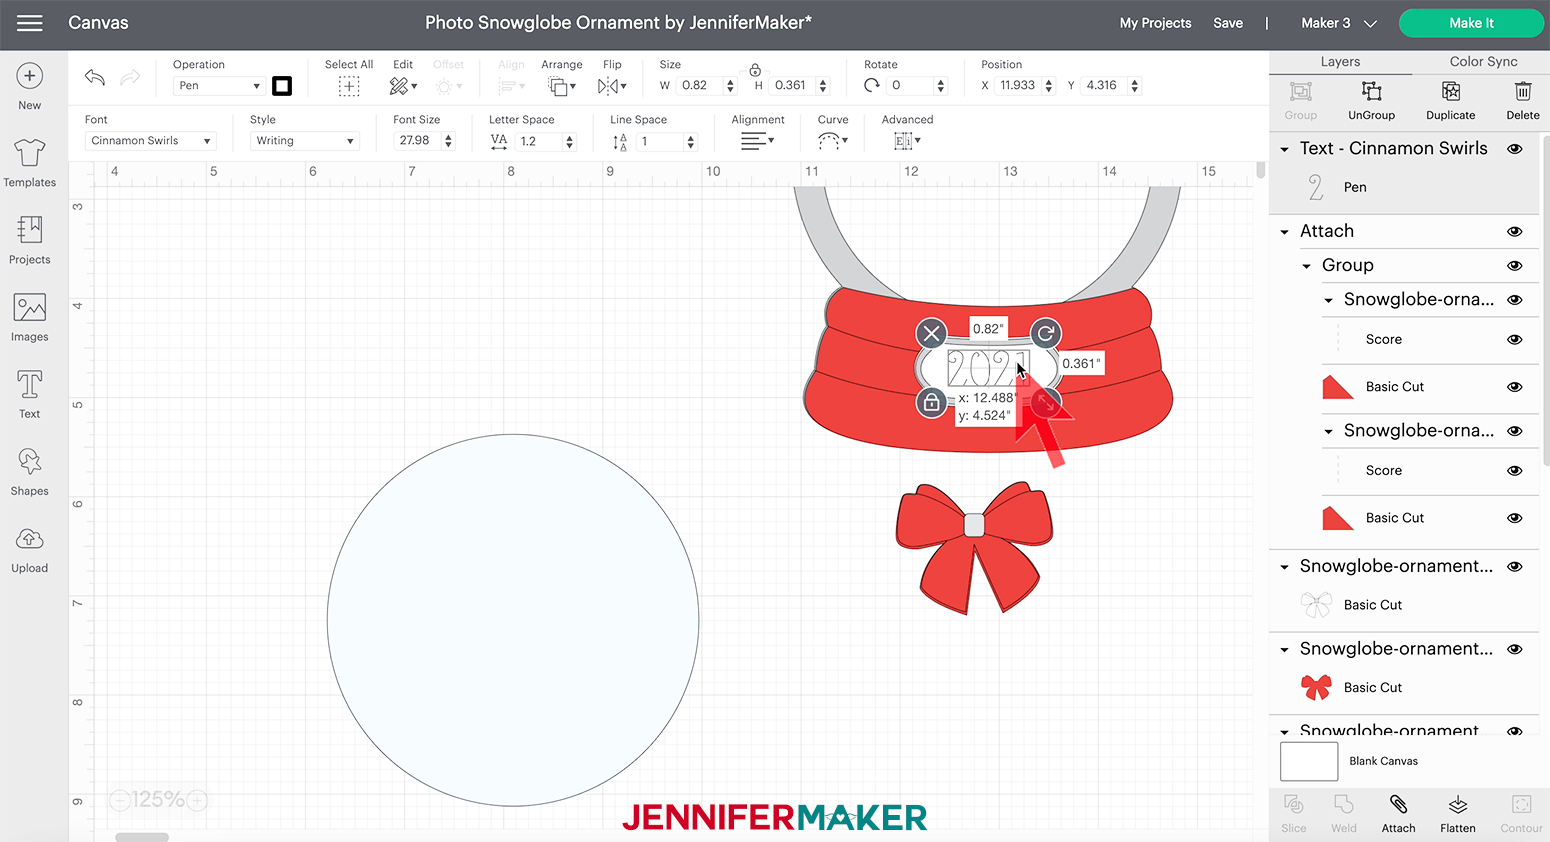
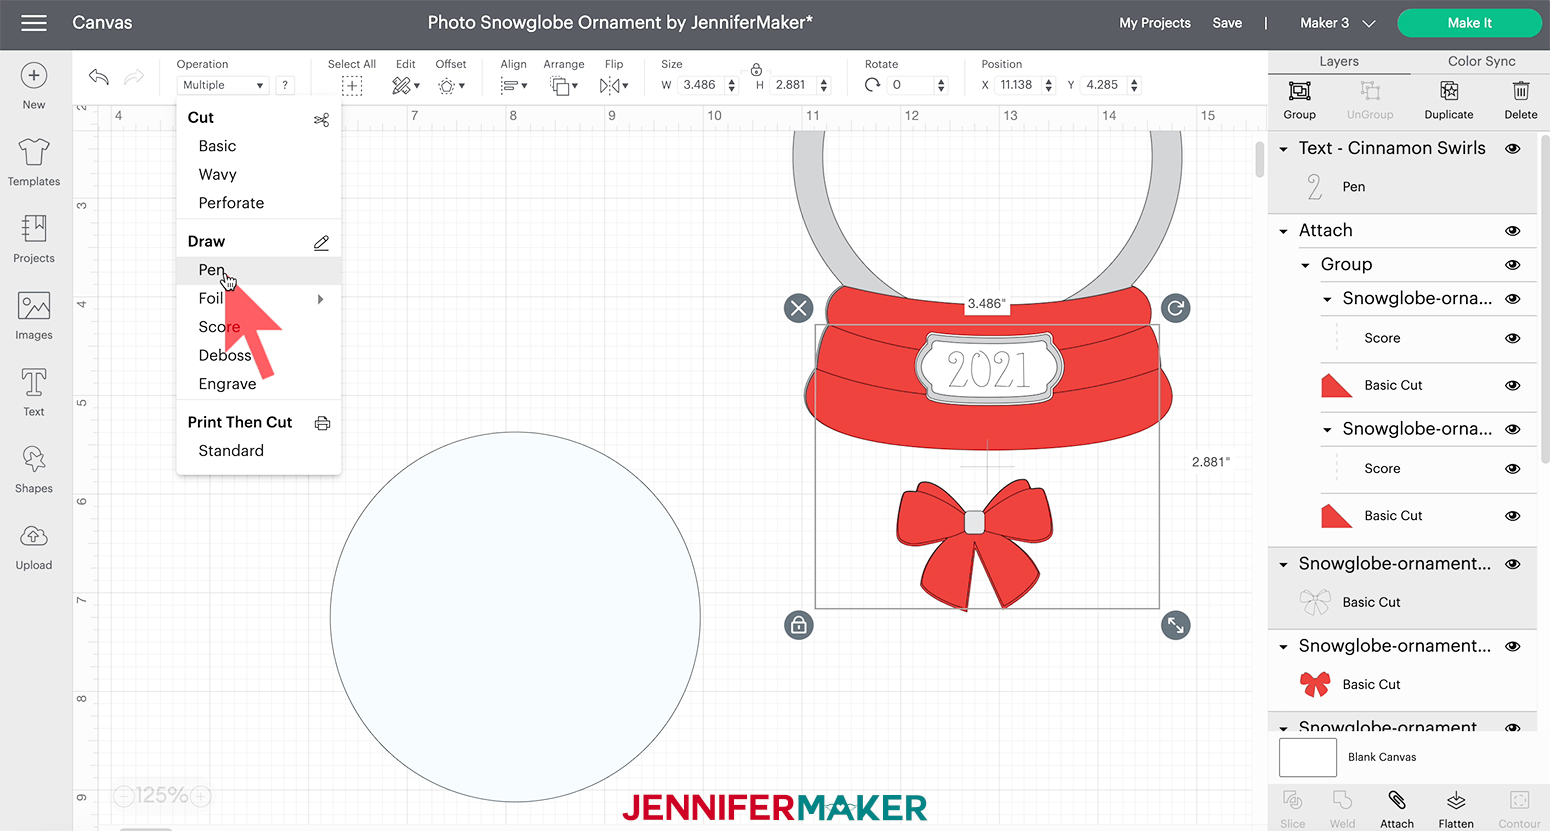
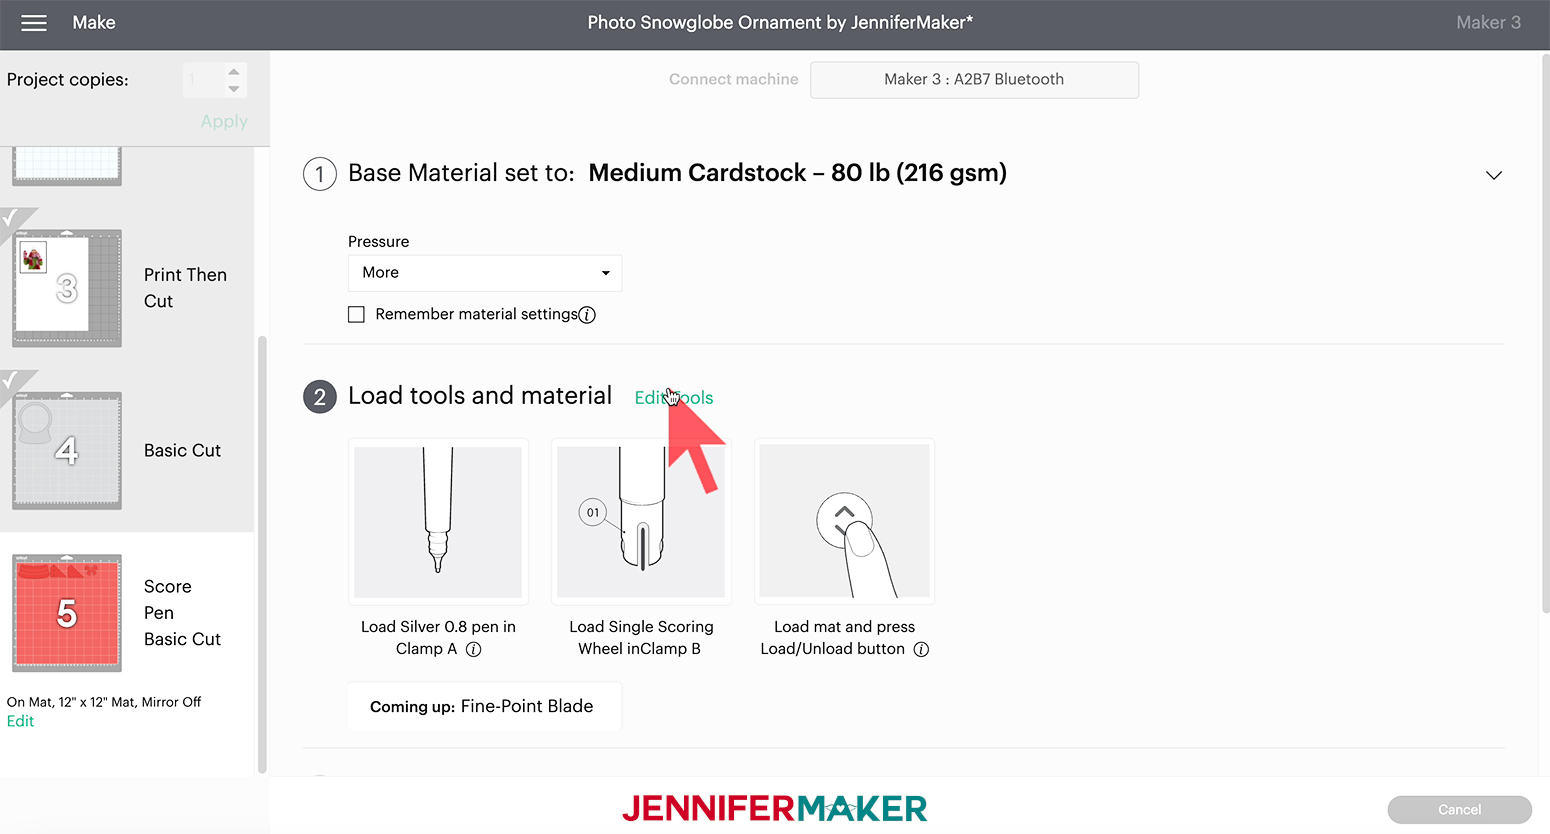
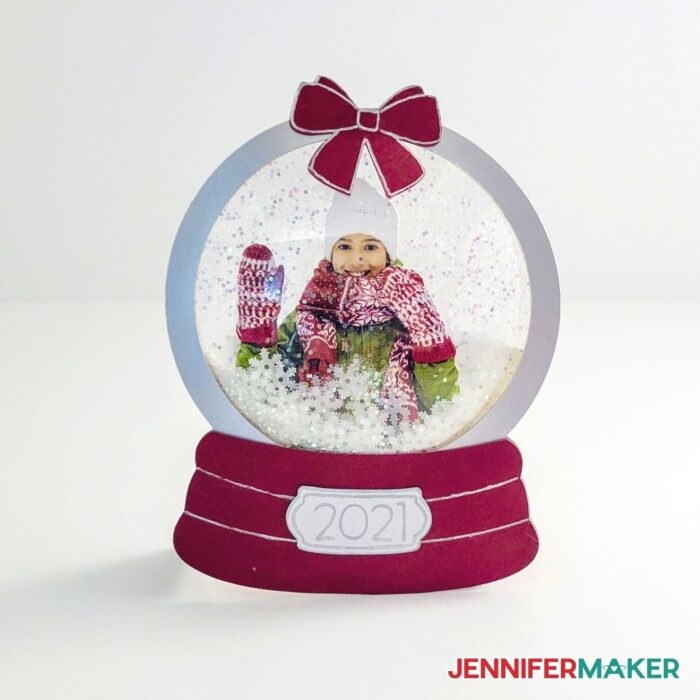
Learn how to make these festive photo Snowglobe Ornaments! First, download my free Snow Globe Ornament Design File, design #348, from my free resource library. TIP: If you are not sure how to upload an SVG cut file to Cricut Design Space, watch this helpful video training series I made. If you are on an iPad or iPhone, here is how to download and upload SVG files to the Cricut Design Space app. Upload the file named: "Snowglobe-ornament-jennifermaker-SVG" to Cricut Design Space. Here's what my Snow Globe SVG looks like in Cricut Design Space. There is a solid color snow globe (red) and a two-tone snow globe (silver and red) if you want to use two different colors. We will start by making a fully decorated hanging ornament. First, you want to ungroup the design by clicking "Ungroup" at the top of the layers panel. Next, we are going to delete the parts we don't want. Select the two-tone photo snowglobe ornament and the larger size bow in the layers panel and click delete. Now click on the red ornament and "Ungroup." Next, we are going to turn the candy canes and holly leaves into Print then Cut designs. These are super small pieces we are going to use to decorate our ornament and they would be tough to cut by hand, so if we transform them to Print then Cut, they will first print on a printer with all the adorable details and then they can be cut on our Cricut. To change them to Print then Cut, select both candy canes and the holly leaves by clicking and dragging over them on the canvas and click on "Flatten" at the bottom of the layers panel. You will now see them together in one layer on the right that says “Print Then Cut.” Now let's add a name to the name plate. Click on "Text" on the left and then type your name. To change the font click on the down arrow next to font on the top tab. I'm using "Cinnamon Swirl" which is a Cricut Access font, but you can use whatever like. TIP: Need help installing a font in Cricut Design Space? Check out this video and tutorial I made that explains everything step by step. If you don't see Cinnamon Swirls come up in the search, you may have the "Only Kerned Fonts" box checked. Make sure to uncheck that box and then you will see it. Now, I am going to resize my name by using the “Resize Handle” at the bottom right of my name. I am going to make it small enough to go inside my snowglobe ornament nameplate. NOTE: If you want to zoom in so you can get a better look at the snowglobe's nameplate and text as you are resizing it you can use the plus and minus icons on the lower left side of the screen to zoom in and out. Once the size is right, select the text and the nameplate (the white layer only) in the layers panel then click "Align" in the top tab and scroll down and select "Center." Now I'm going to explain how to add some pretty foil detail to the ornament. In the layers panel select the text layer, the bow outline, the name plate outline and the lines on the ornament. With all four layers selected, click where it says "Multiple" under "Operation" on the top left and scroll down to select "Foil" and then "Bold." NOTE: You can choose “Fine” “Medium” or “Bold” for the foil pen. Fine is a very small line. Medium is only slightly thicker and Bold is a very thick line. I like Bold because it shows up nicely. For intricate designs, the Fine and medium work better. Then change the color by clicking on the color box next to the “Operations” menu, and select silver. Once you have selected the color click off the menu to close it. Now we will attach our foil details to their corresponding layers. Select the name layer along with the nameplate and the nameplate outline and click attach at the bottom. Next, select the bow and the bow outline in the layers panel and click “Attach.” Do the same with the ornament. Select the ornament and the foil lines and click “Attach.” If your nameplate "disappears" don't worry, it's just hidden behind the ornament. With the ornament still selected, click "Arrange" at the top and click "Send to Back” and it will reappear. Now that we have our snowglobe ornament all ready to go, we are going to upload the image we want to put inside our Snow Globe. You will want to have your image uploaded to your device so you can import it to Design Space. Click “Upload” in the lower-left corner. Then, click the "Upload Image" button. Click "Browse", and select the photo you want to use from your device, and click "Open." This will bring your photo into Design Space. On the next page, choose "Complex" and click "Continue." Then, you will then get a screen that looks like this: Now let’s remove the background of the photo. There are a few ways to do this. The first and easiest way, which is the Automatic feature, is only available to Cricut Access members. Cricut Access is an optional subscription plan that gives you access to images, fonts, projects and other discounts. NOTE: If you don’t have Cricut Access you will still see this feature and be able to use it, however a watermark will appear over your image. To use this feature simply click on the “Remove Background” button under “Automatic.” This might take a few moments, but when it’s done you will see the background is gone. You should only see the part of the image you want to use, your subject, over what looks like a blue and white checkerboard, which means it’s transparent. If there are parts that didn’t get removed you can use the magic wand or eraser tool to clean up those areas. If not, then your image is ready to go. Magic Wand & Erase: Click on the magic wand and then click on the areas of the image you want to remove. Or click on the eraser and drag that over unwanted areas to clean up the image. You can also adjust the size of the eraser by dragging your mouse up or down the slider. If you don’t have Cricut Access and need to remove the background of your photo you can also remove the background “manually.” There are a few options to choose from: the magic wand, the eraser or some more advanced options. We also have the ability to crop the image with the "Crop" tool. Once we are done cropping our image, go back to the remove background page and click on the “Magic Wand” and then click on the areas you want to remove. You can click the “Preview” button to see how your image will be cut out. You can keep clicking until you remove everything you want, but sometimes this doesn't do the trick. The "Eraser Tool" can be resized to get all the little bits left behind or you can use it to erase larger portions. Just click and hold your mouse while erasing the parts you want. The “Advanced Options" tool is a little more complicated. It allows you to select a certain number of colors in your image which can help you remove larger areas all at one time. Once your image looks good, click “Apply and Continue.” Next, select "Print then Cut" on the right-hand side. Select "Upload." Click on the image and select "Add to Canvas." Now that you have your picture in Design Space, we need to resize the picture to fit inside of the ornament. You can use the “Resize Tool” on the lower right to adjust the size. You want the image to fit inside the dome without touching the top. Now that we have our design prepped, we are going to click “Make It” at the top right corner of the screen. I'm cutting my ornament on the Maker 3, so I will select "On Mat" on the next screen and then click "Done." This prompt will not appear if you are using an earlier model Maker or Explore. You should see four mats on the left side of the “Prepare” screen. Click “Continue.” Now, we are going to select our materials. First, we will select “Acetate” for the light blue mat. This will be the backing to the snow globe dome. In the search window type “Acetate” and select it. I recommend selecting "More" pressure for a nice, clean cut. Now, remove the protective film from both sides of the acetate and place the acetate down on your Cricut Green StandardGrip Mat. Gently burnish the acetate to the mat using the Brayer Tool to make sure it’s stuck to the mat. Next, load the mat and start your cut. Next, unload your mat and remove the acetate from the mat by flipping the mat over and peeling the mat away from the acetate. Next, we are going to print and cut the photo and decorations. I am using photo paper for this tutorial but you can use regular card stock too. I chose photo paper because it gives the cutouts a nice shine. I recommend using any photo paper that is compatible with your printer. Insert the photo paper into your printer so that it prints on the shiny side. Then, click "Send to Printer" in Cricut Design Space. On the pop-up page make sure “Add Bleed” is turned on and I also recommend you click Advanced Options and make sure your paper type is set appropriately and make sure your quality is set to "best" for the most vibrant image. NOTE: If you chose to use the system dialog box, be aware that it will appear behind your Design Space window -- so you’ll want to move your window to the side to find it. Then select "Print". This will send your image to your printer, and it will start printing it. How cool is that! You will see a black rectangle on the finished print, this is your Cricut's registration mark which needs to be there so it knows where to cut. Once the Cricut is finished printing, select the "Browse All Materials" button on the right side of the screen. Select “Photo Paper” under the “Paper” tab. NOTE: If you are using Card stock select "Medium Card stock – 80 lb (216 gsm)" from the “Materials” menu. Place the newly printed design on your Cricut Green StandardGrip Mat print side up. Make sure it's dry, then gently burnish the design using the Brayer Tool to make sure it's securely adhered to the mat. Next, load your mat and start the cut. The machine will first use its sensors to read the registration mark on the print so it makes a precise cut. When it is finished cutting, unload your mat. Remove the photo paper from the mat, by flipping the mat over and peeling the mat away from the paper. This helps prevent the paper from curling. For the next mat, we are going to select "Medium Cardstock" and "More" pressure. We will also use the foil transfer tape and tool. Place your card stock on the green mat and burnish it with the Brayer Tool. Now, take a foil sheet and place it on the card stock on the top left side with the shiny side up. Then, use the adhesive strips that come with the foil to tape down all four sides of the foil. Make sure not tape it too tight, that can cause tearing or too loose which can cause loss of transfer, NOTE: Foil doesn't always work the first time you use it. The result may not turn out perfect every time. If you have more questions about using foil check out my "Ultimate Guide to Foiling." Now, we are going to take our Foil Transfer Tool and insert the Bold tip (3 lines). Then, we are going to take our cutting blade out of our machine and replace it with the Foil Transfer Tool (Clamp B). Now load your mat and press the Go button. When it has finished transferring, DO NOT unload the mat. Gently remove the tape and foil sheet from the cardstock and replace the Foil Transfer Tool with the Fine Point Blade. Now, press the blinking "Arrow/Go" button. Once the Cricut has finished cutting, unload your mat and remove the cardstock from the mat by flipping the mat over and peeling the mat away from the paper. We'll use the same setting again for our last mat: Medium Cardstock and More Pressure. Place the red cardstock on the mat and add your silver foil transfer shiny side up. Tape all four sides. Load your mat and press Go. Remember, when it has finished transferring, DO NOT unload the mat. Gently remove the foil sheet from the cardstock and replace the Foil Transfer Tool with the Fine Point Blade. Then press Go. Once the cut is done, unload the mat and remove your cardstock by flipping the mat over and peeling the mat away from the paper. Now that we have all the pieces of our Snow Globe cut out, it's time to assemble it! First, we are going to take the acetate circle and paint the bottom quarter with white paint. Leave a small edge so that the dome can stick to the acetate better. It doesn’t have to be perfect, we want it to look like snow on the ground. Once the white paint is dry (40 minutes depending on how thick the paint is), take Mod Podge and evenly coat the remaining area leaving a slight edge. NOTE: I used Matte Mod Podge. I found that the Glossy Mod Podge left streaks. While the Mod Podge is still wet, sprinkle glitter on it and let it dry, It should take about 20 minutes. While our circle is drying, let’s decorate our snowglobe. First, using double-sided tape or glue add the nameplate to the center of the Snow Globe base. Next, glue the candy canes, holly and bow to the ornament. Now, we are going to finish the dome. Start by gluing the photo to the acetate circle. Next, take the dome and flip it over and pour a little glitter and some of the snowflakes in it. Now, take the protective cover off of the adhesive on the dome and place the circle on top and press them together. Next, flip the dome over and add some glue to the lip of the dome then place the red decorated Snow Globe on top. Finish gluing the dome to the Snow Globe. Now add a hook or some pretty ribbon and you have a festive keepsake ornament! The steps are basically the same to make the display-size Snow Globe. Here’s what it looks like in Design Space. This version doesn’t have a loop at the top, instead it has two stands that you attach to the back of the snow globe base. Again, you can choose to cut the solid ornament or the two-tone ornament. First “Ungroup” everything. This time I’m going to make the two-tone version with the larger size bow and delete everything else besides the “stand” pieces and the light blue circle. I’m also going to “Ungroup” the ornament pieces and the bow layers. Next, I’m going to add my score lines to both stands. Select the vertical lines above each stand layer in the layers panel. Under “Operation” at the top scroll down and select “Score.” Now select the new score lines and stand pieces in the layers panel while holding the shift key and attach them to the stands by clicking on “Attach” at the bottom. Now we’ll add our text to the nameplate. Click on Text and select your font. Instead of a name I’m going to add the year “2021” in the Cinnamon Swirls font again. Then resize it to fit the nameplate. Select the name plate and the text in the layers panel and select “Align” at the top and “Center.” Next select all the outline pieces again, the text, the bow outline, the nameplate outline and the lines on the ornament. This time we will use a Glitter Pen to add the detail instead of the foil. With all of those layers highlighted in the layers panel click on “Operation” at the top and scroll down and select “Pen.” Now click on the color picker and select “Glitter Gel” and change the color to sliver. Then select the text, nameplate, and the name plate outline in the layers panel and click “Attach” at the bottom. We need to do the same for the bow and the ornament. Select the bow and the new pen lines and click attach and do the same with the ornament. Again, the nameplate may seem to disappear, but it’s behind the snow globe. Add your image just like we did for the ornament and click “Make It” and “Continue.” We will use the same material settings that we used for the ornament, but instead of the foil tool we will use the Glitter Pen. This goes in “Clamp A.” And we will also use the scoring tool for the “stand” pieces. After you select the medium cardstock with more pressure for the mat that includes the bottom part of the snow globe, the stand pieces and the bow, click where it says: “Edit Tools.” I’m going to use my scoring stylus so I will click on that, but you can use the scoring wheel if you prefer. And click “Apply.” Once the stands are scored I will replace the scoring stylus with my Glitter Pen. Both go in Clamp “A.” Once all the pieces are cut, assemble it just like the ornament. The only different is we will glue the stand pieces to the back of the snow globe. Fold the stands at the score lines. Then, flip the Snow Globe over and use glue to attach them to the back of the base of the snowglobe. Make sure to space them out about two inches so they help hold the snowglobe upright. STEP 5: SHOW IT OFF And that's it! How pretty are these? You can add a ribbon to the ornament and hang it from the tree and display the other one along with holiday decorations around the house! They both make beautiful keepsakes that you can enjoy for years to come! Fonts Used: Cinnamon Swirls and Everyday Fonts - Announcement from Cricut Access Finished Product: 3" x 4" Hanging ornament, and 4" x 5" display piece. As an Amazon Associate and member of other affiliate programs, I earn from qualifying purchases.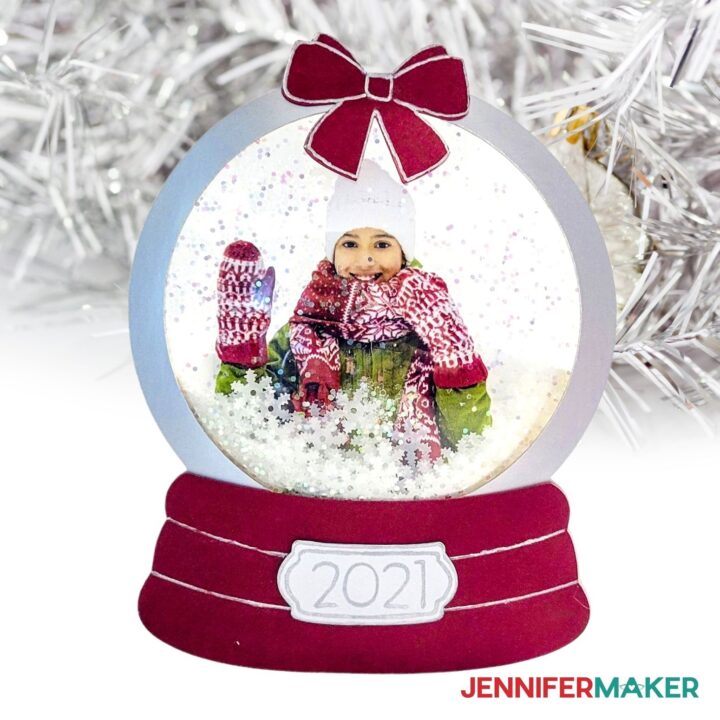
Photo Snowglobe Ornament
Materials
Tools
Instructions
STEP 1: GET MY FREE SNOW GLOBE ORNAMENT DESIGN FILE
STEP 2: PREPARE YOUR SVG DESIGNS
STEP 3: CUT YOUR SNOWGLOBE ORNAMENT
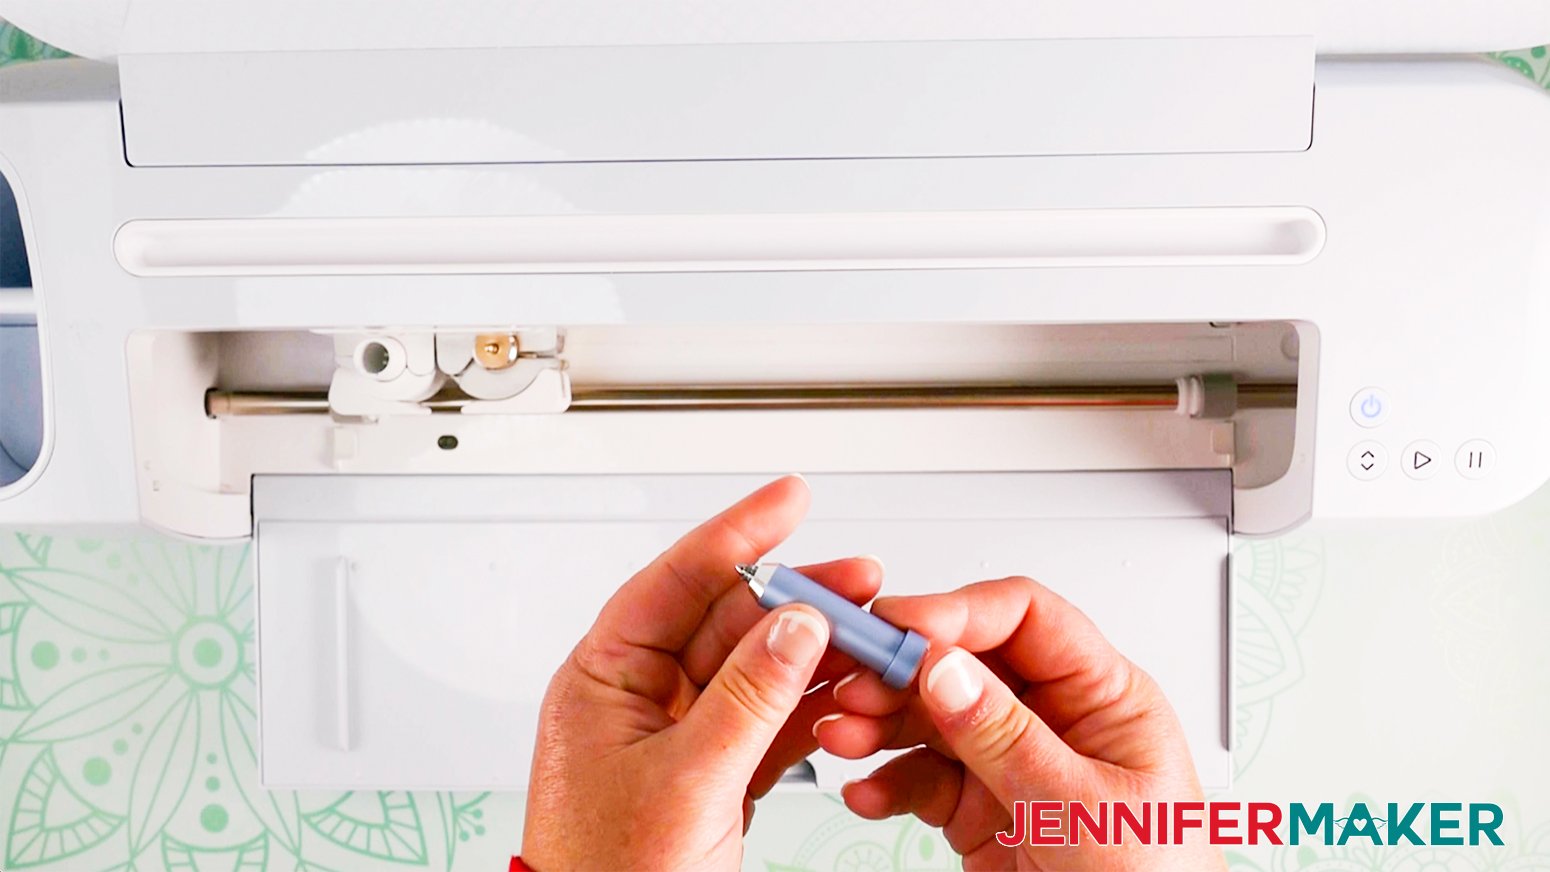

 Replace the Cutting Blade with your Foil Transfer Tool (Bold Tip).
STEP 3: ASSEMBLE YOUR PHOTO SNOWGLOBE ORNAMENT


Notes
Recommended Products

Answers to Your Questions About How to Make Photo Snowglobe Ornaments
Q: Can I change the font of the name or numbers on the snowglobe ornament nameplate?
Yes! Put whatever you want there. I’m using “Cinnamon Swirls” (a Cricut Access writing font), but you are welcome to use another font if you like.
Q: How can I upload my own font for this project?
If you want to upload your favorite font to Cricut Design Space go to my Cricut Font Guide for a tutorial and video that walks you through the process step by step.
Q: Do I have to use those plastic domes? I can’t find them!
No, you can just cut a piece of flat acetate plastic to fit over the snowglobe window instead. Just be aware that the snow won’t shake and fall as well.
To do this, just cut out two circles of acetate instead of just one, paint the “snow” on the bottom half of one piece, glue on a picture, sprinkle with glitter and use some tacky glue around the edges to attach a top piece. Then add it to the ornament.
Q: Can I use the same piece of foil to cut both the nameplate and the ornament/bow?
Yes, you can! Just be sure to place the foil sheet in the right orientation the second time so there is unused foil over the parts that need it.
Get my free patterns to create beautiful photo snowglobe ornaments
I love seeing what you make with my designs and how you use them! Please share a photo of your Photo Snowglobe Ornaments in our Facebook group or tag me on social media with #jennifermaker.
Love,

Want to remember this? Save this DIY Photo Snowgloble Ornament Tutorial to your favorite Pinterest Board!