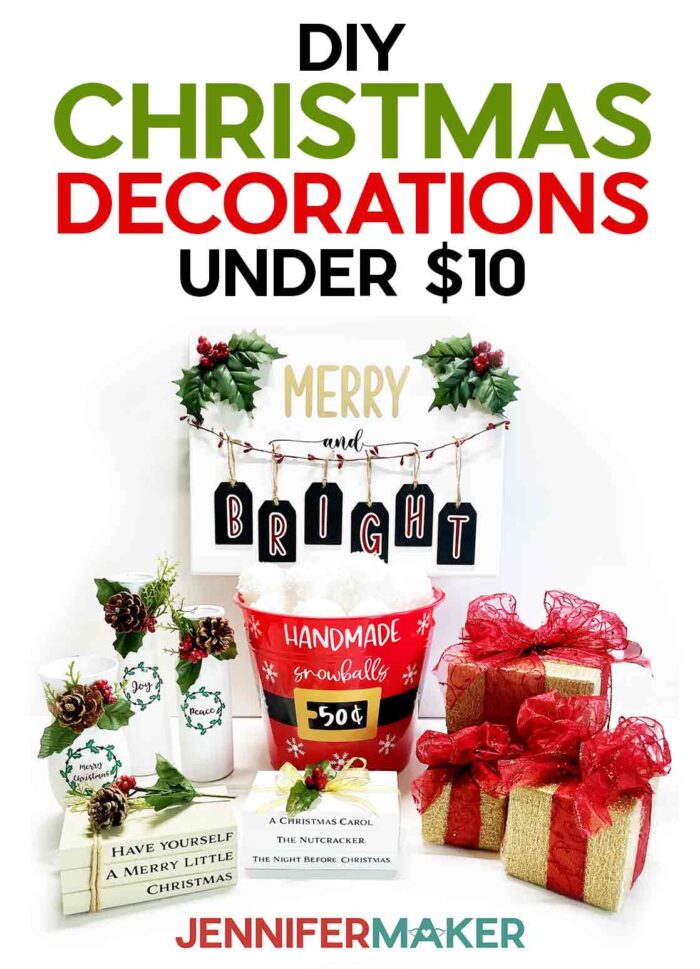
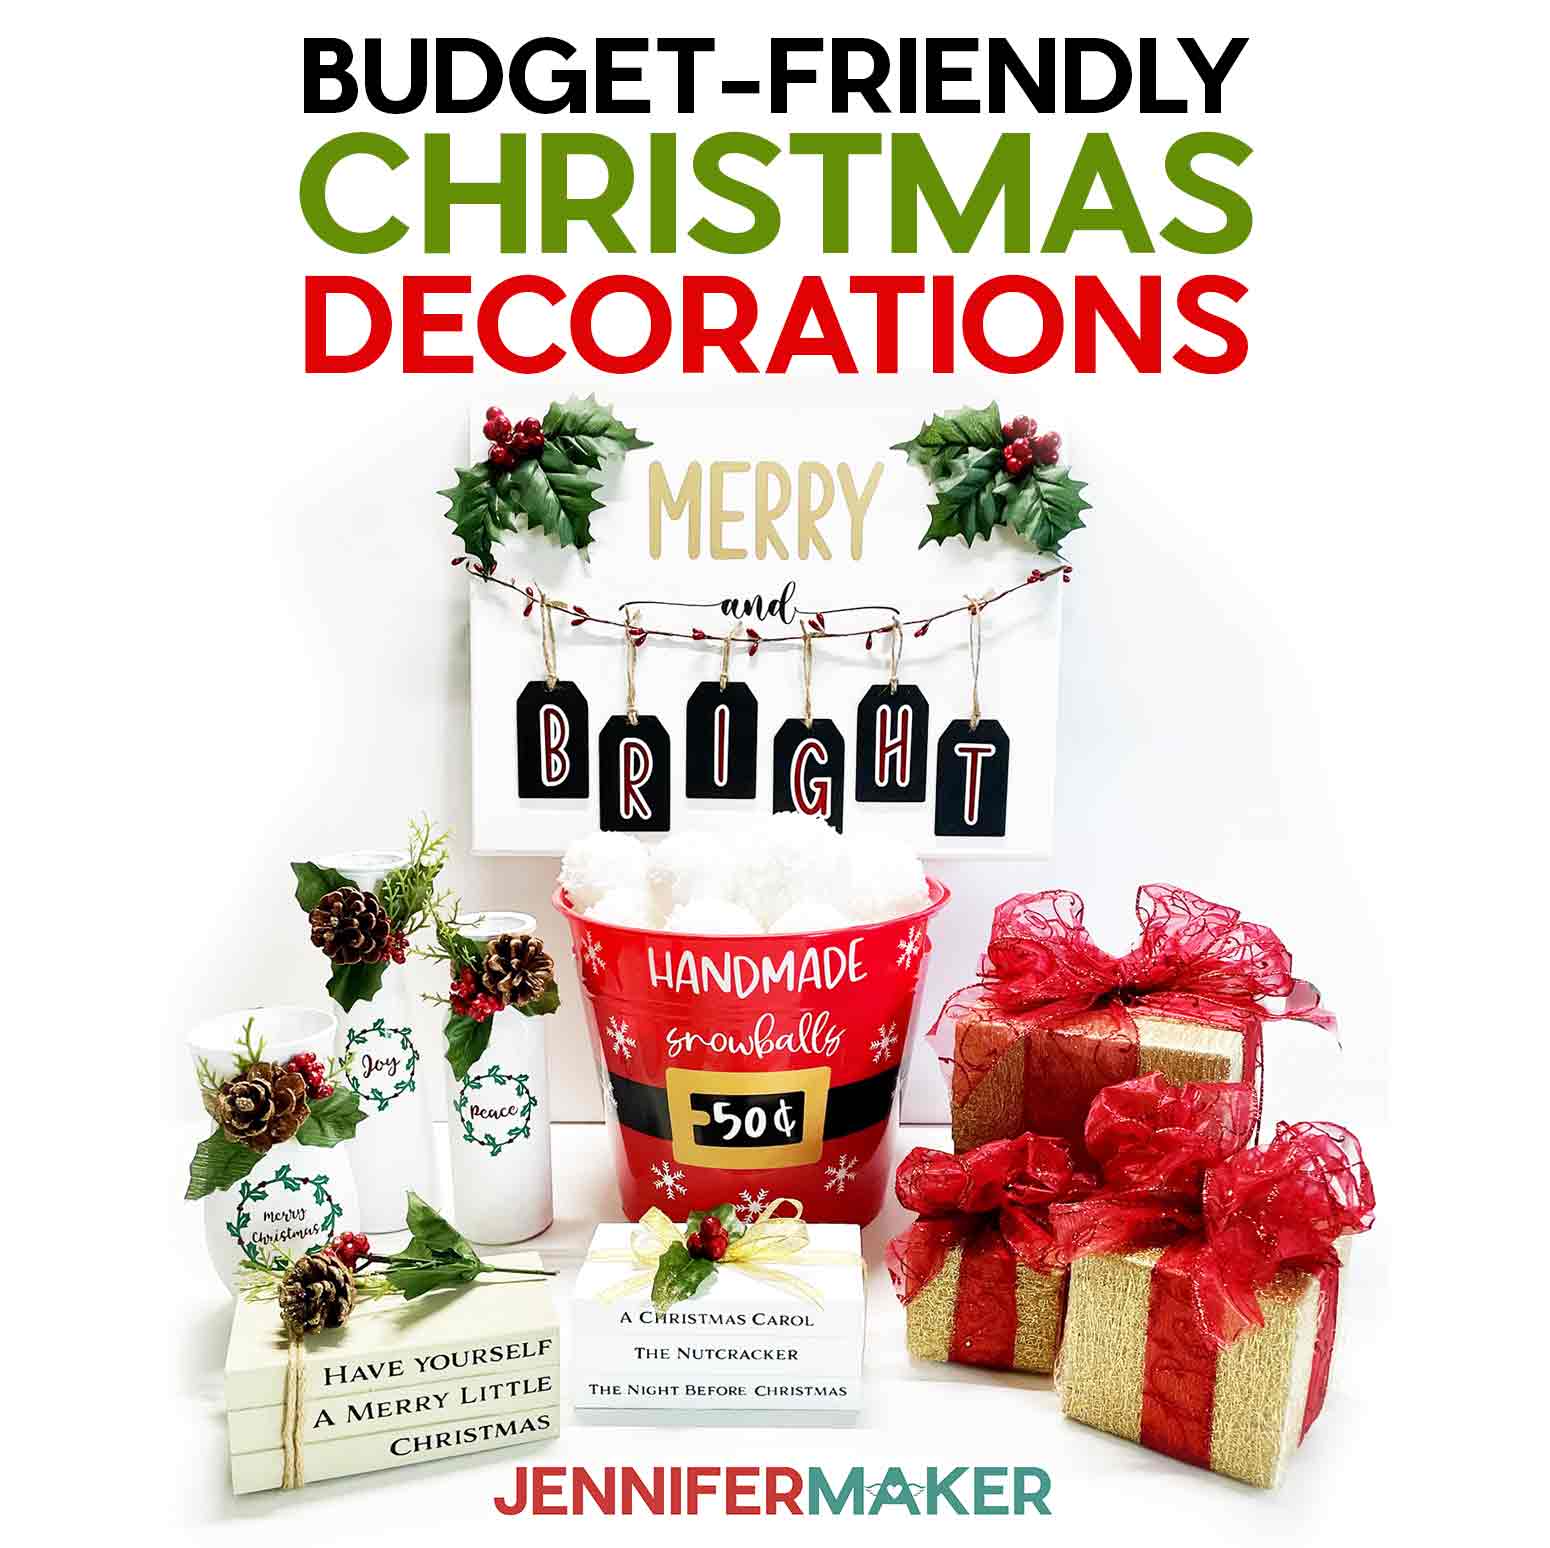
Learn how to make impressive, inexpensive DIY Christmas decorations!
Stretching a dollar gets even more important in the holiday season. But making DIY Christmas decorations is so much fun! Luckily, Dollar Tree has lots of inexpensive materials to help you stay on track! I’m sharing several of my favorite projects for stylish decor and free designs for you to use! Pair these ideas with my Christmas Wreath and Mini Tree, Reverse Canvases, and other ideas below for beautiful, budget-friendly holiday decor!
Watch the full step-by-step DIY Christmas decorations tutorial:

So how can you create DIY Christmas decorations that are budget-friendly with a unique look? Each project in this collection ties into a tip to elevate your homemade Christmas decorations!
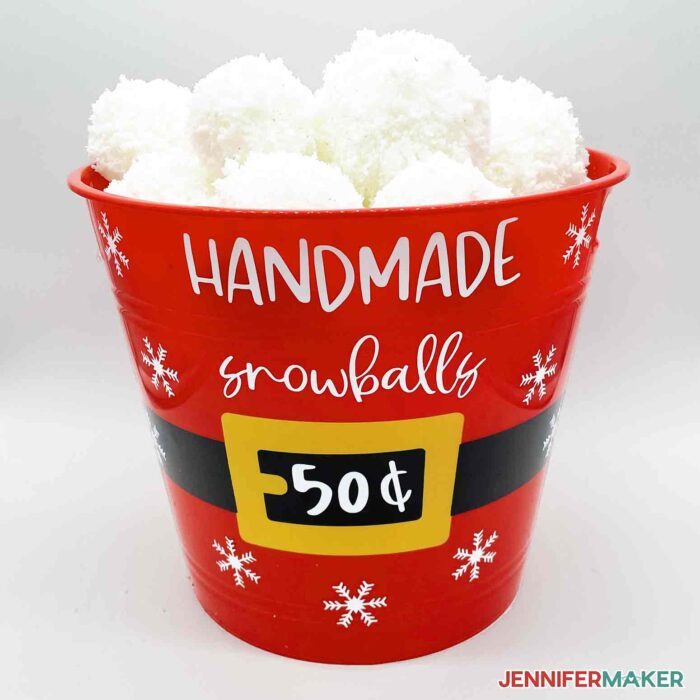
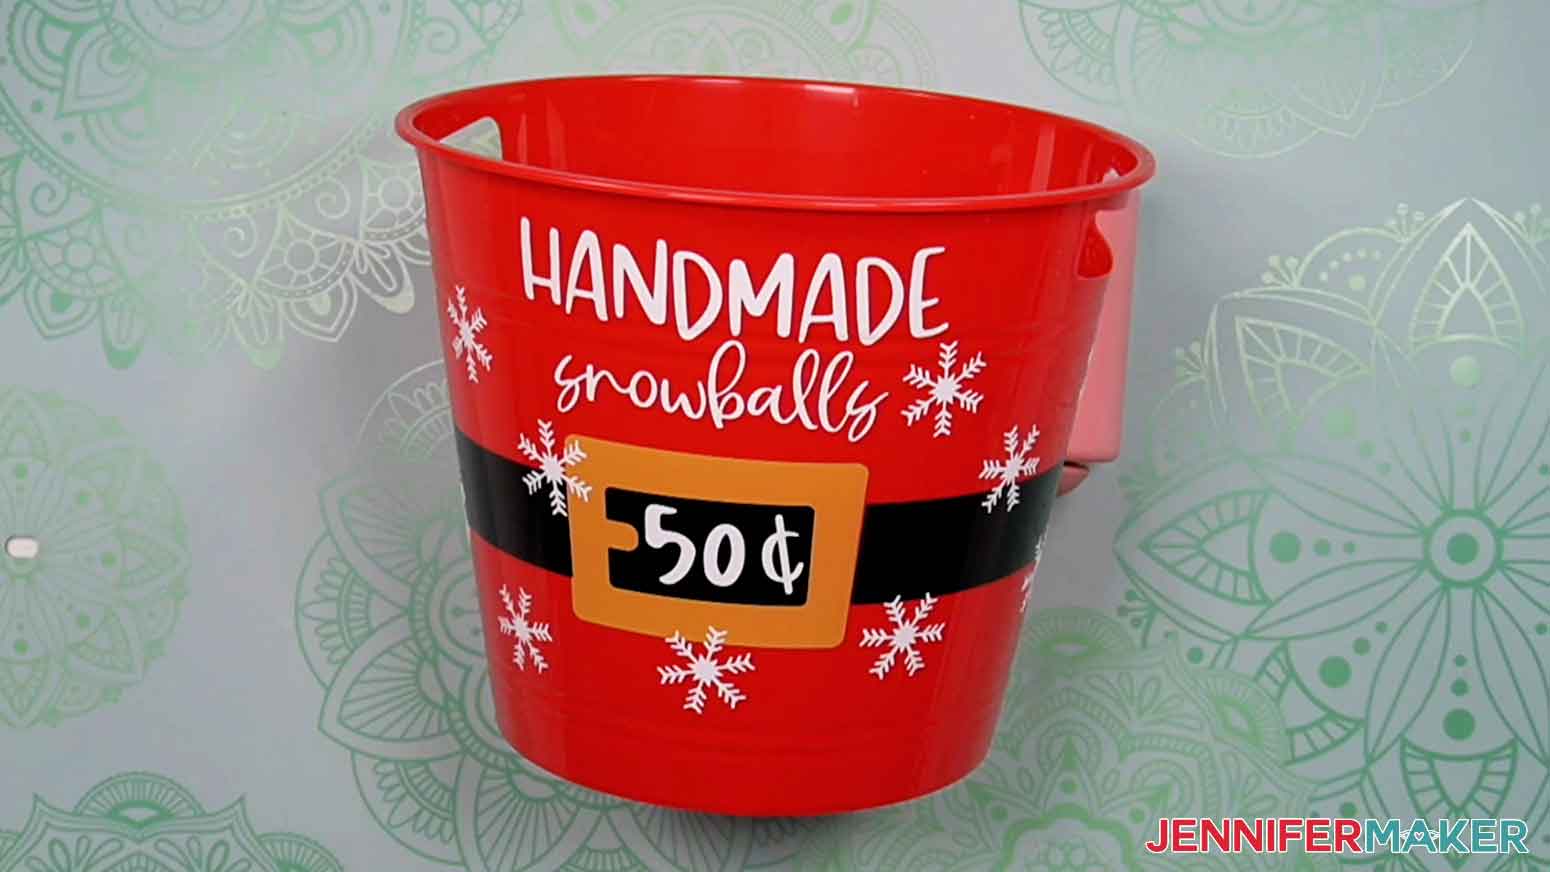
The Dollar Tree Santa belt bucket is cute on its own, but adding some vinyl decals and homemade snowballs makes it a special, simple project. And the snowballs won’t melt, so you can use them again next year!
Tip 1: Consider your space when picking DIY Christmas decorations to make. If you have a big space to decorate, you might need more, or larger items to make an impact. The Santa snowball bucket fills areas really well!
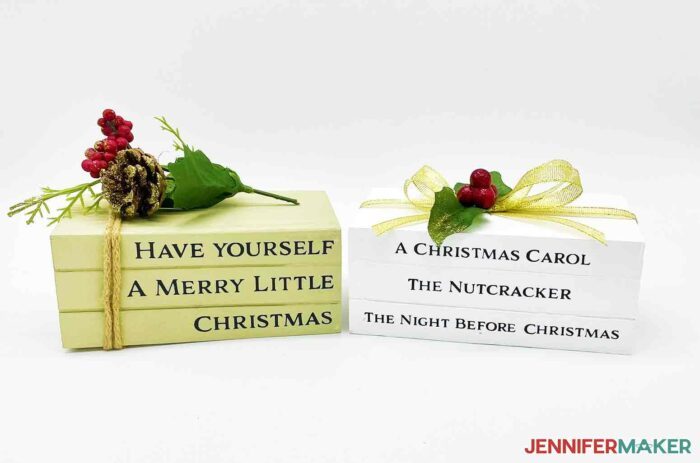
Wooden Crates turn into decorative stacked books with a bit of paint, vinyl, and Dollar Tree items from the floral section. I’ll show you how to size any line of text for the spines in Cricut Design Space. Wrap twine around the stack and add evergreen branches for a touch of natural materials.
Tip 2: If you have a small area, don’t overwhelm it. You have to be able to see the decor to enjoy everything, so don’t squish too many projects together. Leave space so your eye can rest between the pretty things. These books fit nicely near taller items like the vases for this reason.
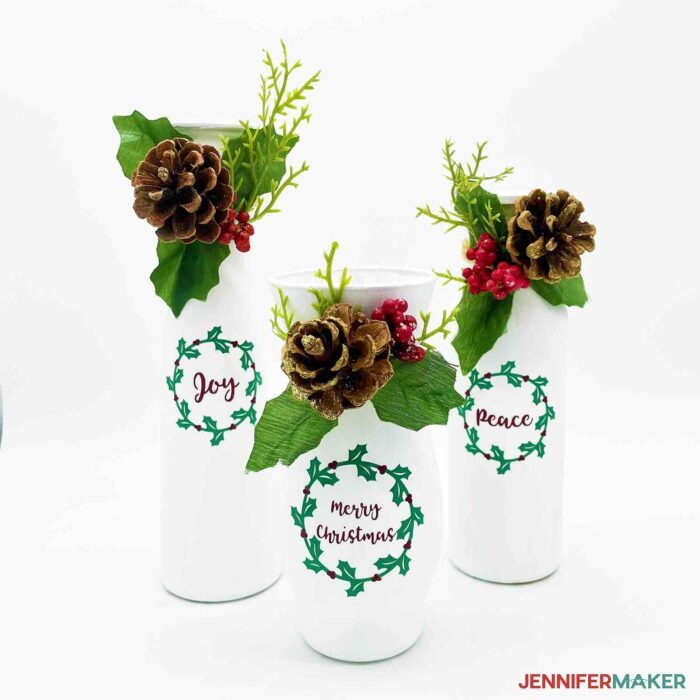
You can turn any of the cute glass vases into vintage-inspired milk glass with some paint, layered vinyl, and more seasonal items like pine cones and faux Holly. I painted mine with chalkpaint for a rustic look, but acrylic white paint will work, too. Since they’re your own Christmas decorations, you can adjust the decals, of course!
Tip 3: When you find a favorite material, get enough to use it in several projects to tie them together. These holly branches are some of my favorite things, so I bought enough to feature them in a few DIY Christmas decor ideas. They’re small, but seeing them throughout the easy decorations really elevates the style!
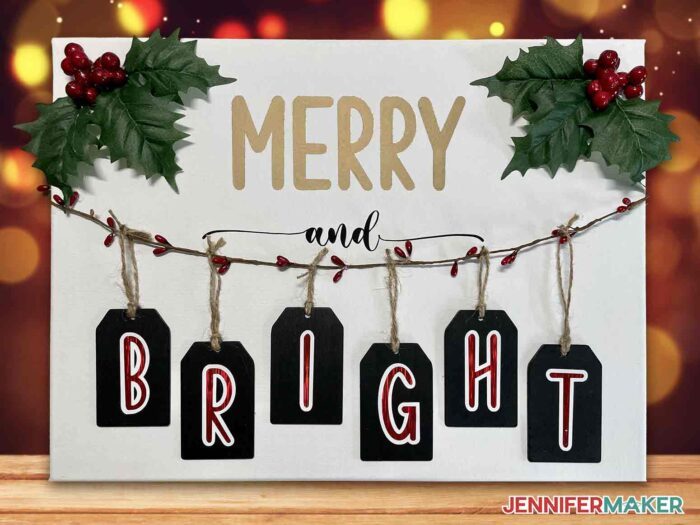
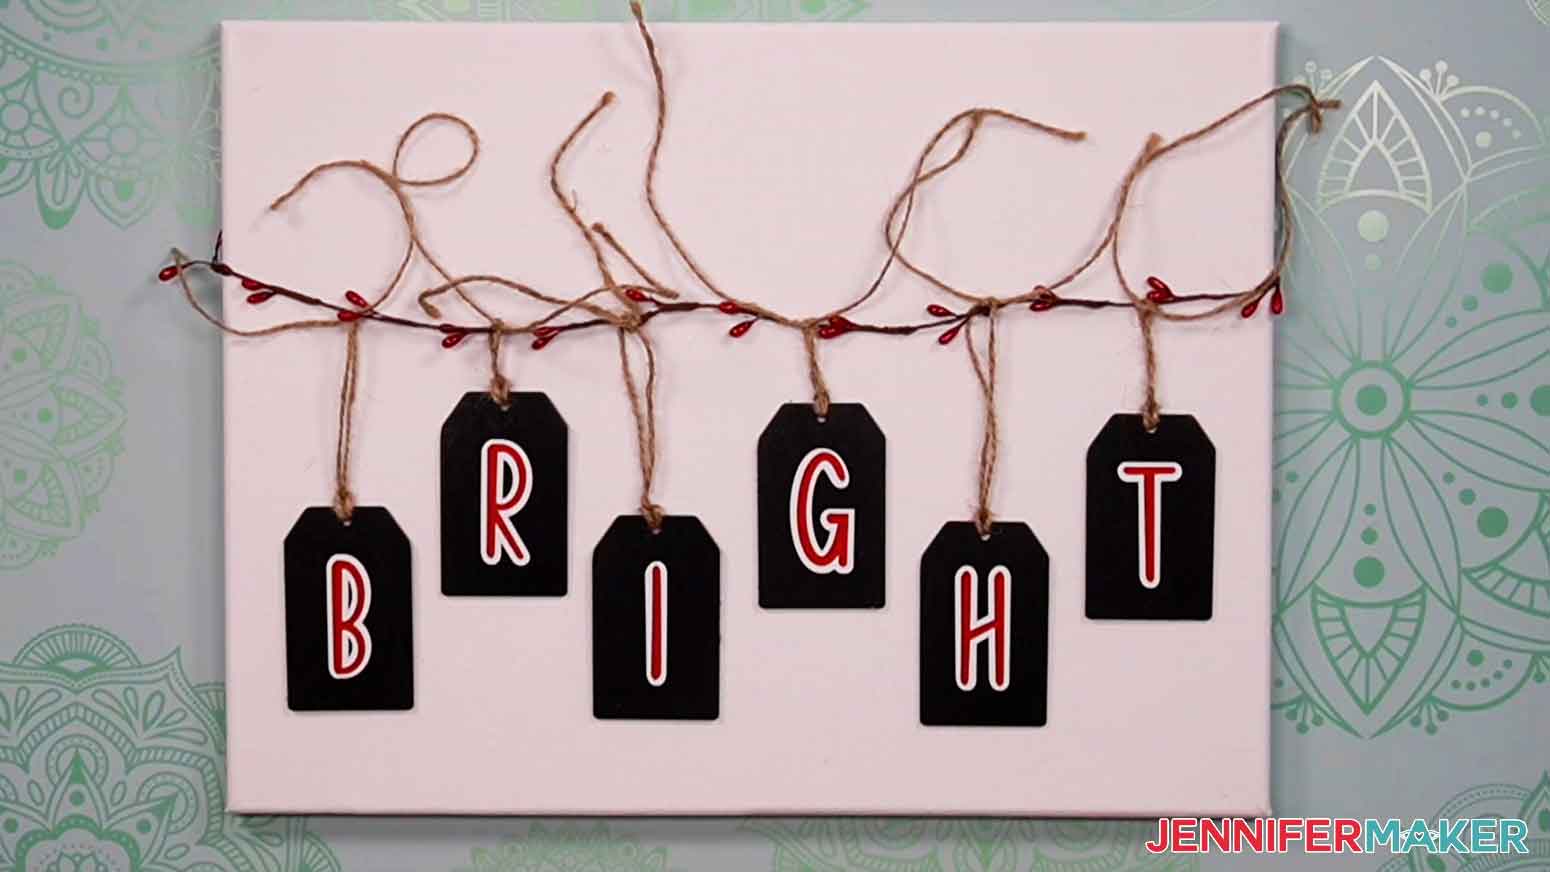
Turn any canvas into a stylish, festive Christmas sign. It would look perfect on your Christmas mantel in your living room!
Tip 4: When you make your own DIY Christmas decorations, remember that nothing handmade will be perfect. If you make a mistake, don’t worry! There are plenty of creative ways to work around them. If you find a smudge on your canvas, it’s the perfect time to add some more holly to cover it up!
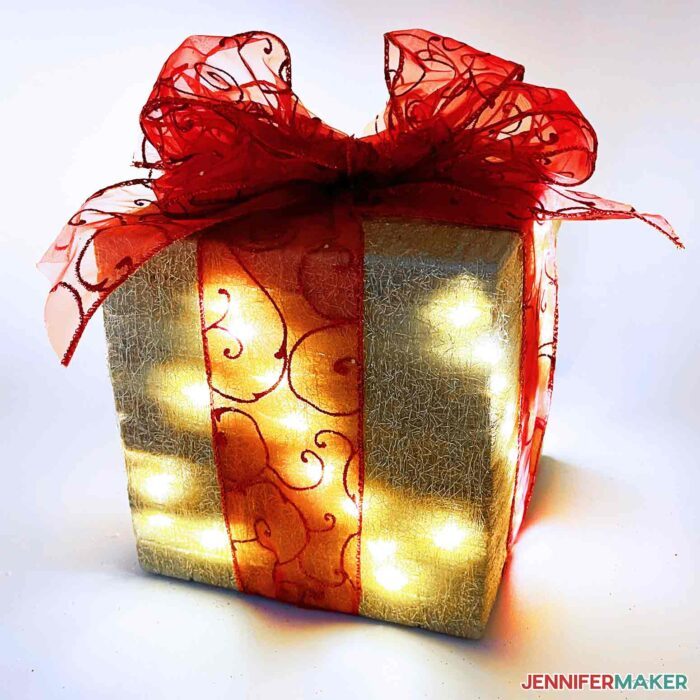
These faux gift boxes are perfect to fill in space around the Christmas tree or in the background of family photos. Wait until you see what I made them out of! I added fairy lights, but Christmas lights could also work.
Tip 5: Remember, you don’t need everything in the store. Picking a color palette or theme will help you stay on budget and create DIY Christmas decorations that complement each other rather than clash. Or if you find a ribbon or other accent you just love, use that to guide your choices. I really love this red and gold ribbon, so you’ll notice I used red and gold in other projects, too. It helped narrow my choices so I was less overwhelmed while shopping!
Want more Dollar Tree DIY Christmas decorations? I have you covered!
Have you seen the mini Christmas trees and wreath forms at your store? I’ll show you my secrets for making the tree from wimpy to wonderful in the full tutorial coming soon!
Reverse canvases are also really fun and combine iron-on vinyl with adorable metal words from the craft aisle!
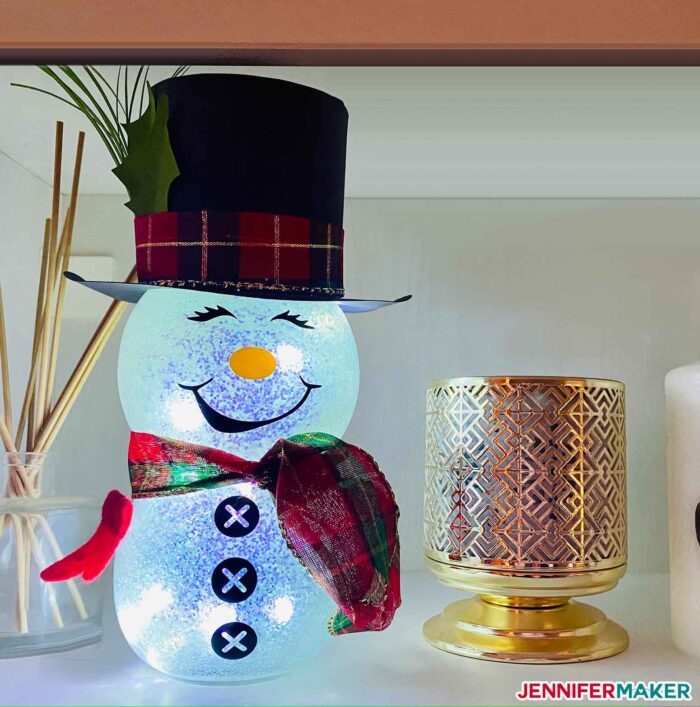
My Light Up Snowman spreads the holiday spirit! He’s my favorite Christmas decoration!
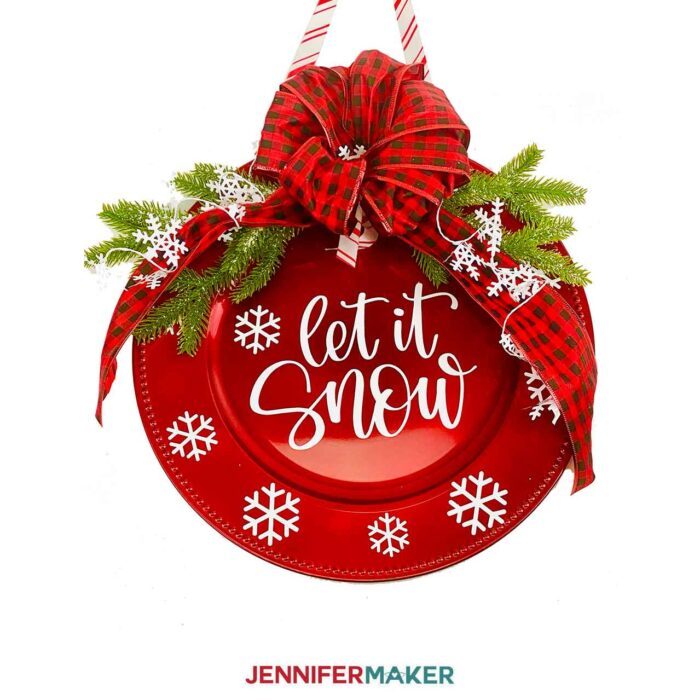
A super easy Front Door Hanger that uses a plate as the base.
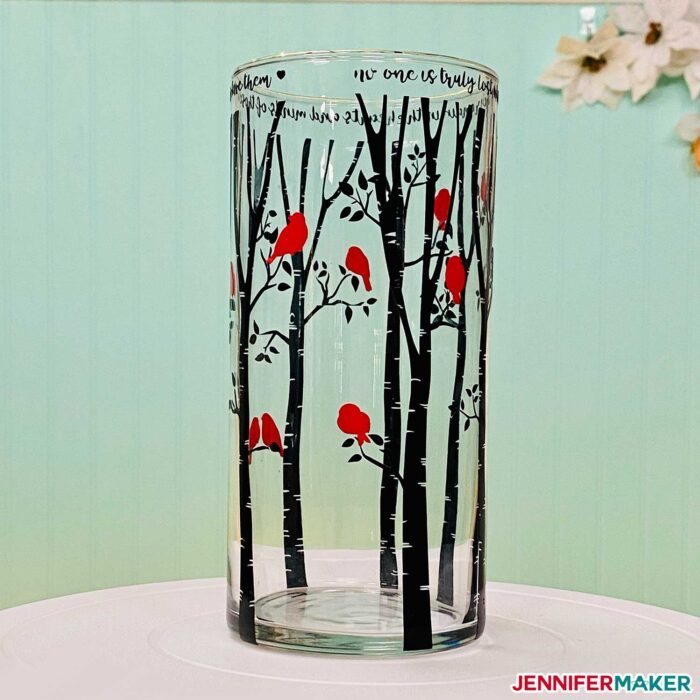
My Cardinal Remembrance Vase with a new tutorial coming soon!
And cute Personalized Elves you can create with iron-on vinyl to give any loved one a Merry Christmas.
Let me show you how to make DIY Christmas decorations on a Dollar Tree budget! This post contains some affiliate links for your convenience (which means if you make a purchase after clicking a link I will earn a small commission but it won’t cost you a penny more)! Read my full disclosure policy.
Materials to Make DIY Christmas Decorations
View my Amazon shopping list with the exact items we used to make this project
Santa Bucket:
- One (1) Santa Belt Bucket
- Two (2) White Foam Floral Blocks
- Twelve (12) or More Assorted Sizes Craft Foam Balls
- One (1) Glittered Drape
- Mod Podge Glitter
- Instant Snow
- Glitter Spray (Optional)
- Cricut Premium Permanent Vinyl – White
Stacked Books
- Wooden Crate
- FolkArt Chalk Paint – Adirondack White – Acrylic paint will work, too!
- Cricut Premium Permanent Vinyl – Black
- Ribbon – Gold
- Wired Jute Twine
Vases
- Clear Tapered Vase
- Clear Hurricane Vase
- Glass Milk Bottle Vase
- FolkArt Chalk Paint – Adirondack White – Acrylic paint will work, too!
- Cricut Premium Permanent Vinyl – Dark Red
- Cricut Premium Permanent Vinyl – Kelly Green
Canvas
- 12″ x 16″ Stretched Canvas or 11″ x 14″ from Dollar Tree
- Chalkboard Tags
- Cricut Everyday Iron-on Vinyl – Gold
- Cricut Everyday Iron-on – Black
- Cricut Holographic Permanent Vinyl – Red or Red Shimmer
- Berry Garland
Large Gift Boxes
- Three (3) Tumbling Tower Wooden Blocks Sets – you could also use cardboard boxes
- Wood Glue
- Red & Gold Wired Ribbon
- FolkArt Chalk Paint – Oatmeal – Acrylic paint will work, too!
- Battery Powered Fairy Lights (Optional)
General:
- A method to cut your vinyl, I used the amazing Cricut Maker 3 but you can also use the Cricut Maker, Cricut Explore 3, the Cricut Explore, or the Cricut Joy for small designs
- Cricut Green StandardGrip Machine Mat 12” x 12
- Cricut StandardGrip Transfer Tape
- Artificial Holly Bushes
- Holly Bushes with Pine Cones
- Brayer
- Weeding Tool
- Foam Paint Brush
- Butcher Paper
- Disposable Gloves
- Paper Plate
- Scissors
- Wire Cutters
- Hot Glue Gun & Glue Sticks
- A heat source – I used my Cricut EasyPress Mini with an EasyPress Heat Resistant Mat
- Isopropyl Alcohol
- Lint-Free Cloth or Coffee Filter
- Lint Roller
- Scraper
- Ruler or Tape Measure
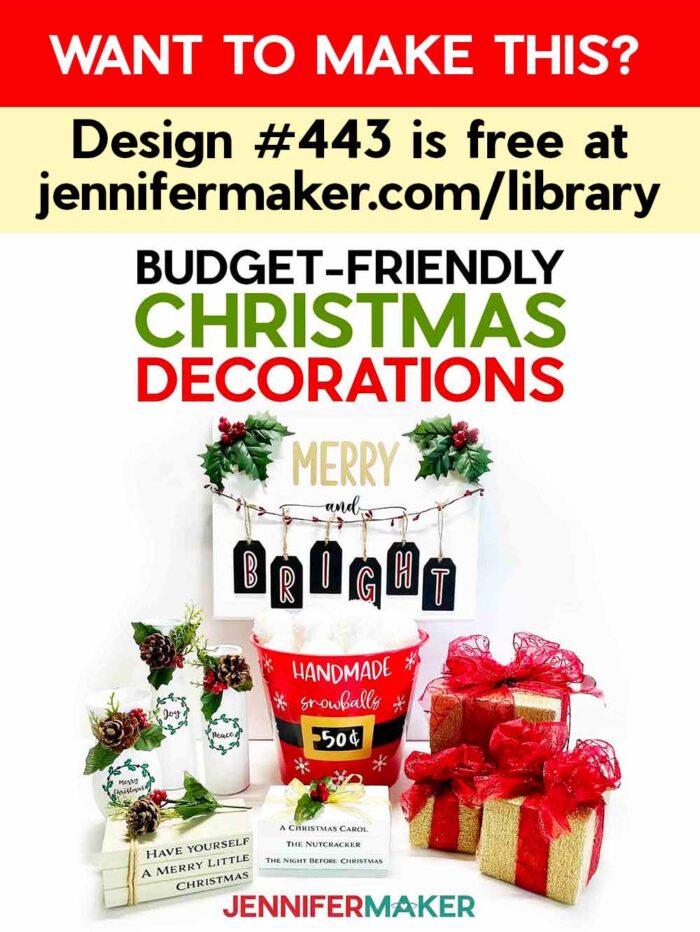
- Design #443 (My free SVG/PDF/DXF design files available in my free resource library – get the password by filling out the form at the bottom of this page)
How to Make DIY Christmas Decorations on a Dollar Tree Budget
DIY Christmas Decorations
Learn how to make high-end DIY Christmas decorations for under $10!
Materials
- One (1) Santa Belt Bucket
- Two (2) White Foam Floral Blocks
- Twelve (12) or More Assorted Sizes Craft Foam Balls
- One (1) Glittered Drape
- Mod Podge Glitter
- Instant Snow
- Glitter Spray (Optional)
- Cricut Premium Permanent Vinyl - White
- Cricut StandardGrip Transfer Tape
- Wooden Crate
- FolkArt Chalk Paint - Adirondack White
- FolkArt Chalk Paint - Oatmeal
- Cricut Premium Permanent Vinyl - Black
- Ribbon - Gold
- Wired Jute Twine
- Artificial Holly Bushes
- Holly Bushes with Pine Cones
- Clear Tapered Vase
- Clear Hurricane Vase
- Glass Milk Bottle Vase
- Cricut Premium Permanent Vinyl - Dark Red
- Cricut Permanent Viny - Kelly Green
- 12" x 16" Stretched Canvas
- Chalkboard Tags
- Cricut Shimmer Permanent Vinyl - Red
- Cricut Everyday Iron-on Vinyl - Gold
- Cricut Everyday Iron-on - Black
- Berry Garland
- Three (3) Tumbling Tower Wooden Blocks
- Red & Gold Wired Ribbon
- Battery Powered Fairy Lights (Optional)
- Design #443 (My free SVG/PDF/DXF design files available in my free resource library - get the password by filling out the form at the bottom of this page)
Tools
- A method to cut your iron-on vinyl, I used the amazing Cricut Maker 3 but you can also use the Cricut Maker, Cricut Explore 3, the Cricut Explore, or the Cricut Joy.
- Cricut Green StandardGrip Machine Mat 12” x 12
- Brayer
- Weeding Tool
- Foam Paint Brush
- Butcher Paper
- Disposable Gloves
- Paper Plate (to Roll Snowballs)
- Scissors
- Wire Cutters
- Hot Glue Gun & Glue Sticks
- Cricut EasyPress Mini
- EasyPress Heat Resistant Mat
- Wood Glue
- Isopropyl Alcohol
- Lint-Free Cloth or Coffee Filter
- Lint Roller
- Scraper
- Ruler or Tape Measure
Instructions
STEP 1: GET MY DIY CHRISTMAS DECORATION DESIGNS
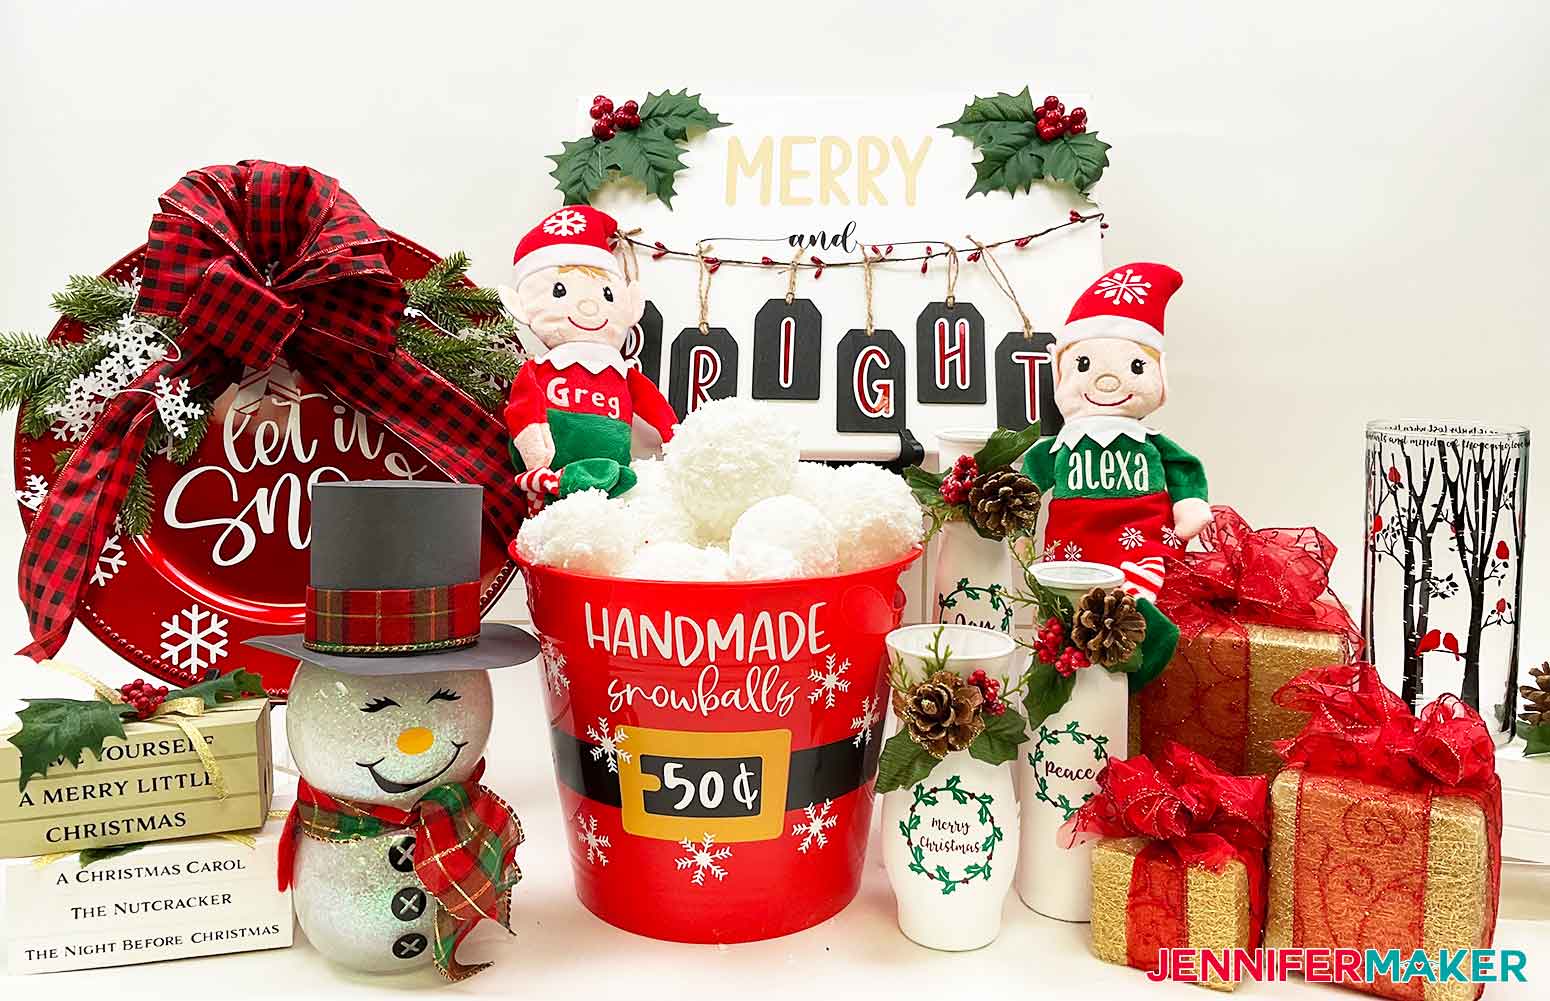
Today, I will show you twelve easy, high-end looking DIY Christmas Decorations that you can make on a budget! Here is a list of the fun projects! Over half of these projects have their own tutorial and I will show you how to do the first five in this tutorial.
- Snowball Bucket
- Vase Set
- Mini Stacked Books
- Gift Boxes for Decor
- Canvas with Chalkboard Tags
- Mini Christmas Tree with Personalized Tree Skirt link (new project tutorial coming soon)
- Christmas Wreath (new project tutorial coming soon)
- Reverse Canvas (new project tutorial coming soon)
- Light-Up Snowman
- Door Hanger
- Cardinal Remembrance Vase
- Personalized Elves
First, download my DIY Christmas Decorations designs from my free resource library -- it's design #443. You can cut the PDF by hand, or use the DXF with another cutting machine, but I'll show you how to prepare the SVG to cut on a Cricut.
The collection includes several options. Upload it and add it to your Canvas. Or, you can use these steps to prepare a different design.
TIP: If you are not sure how to upload an SVG cut file to Cricut Design Space, watch this helpful video training series I made. If you are on an iPad or iPhone, here is how to download and upload SVG files to the Cricut Design Space app.
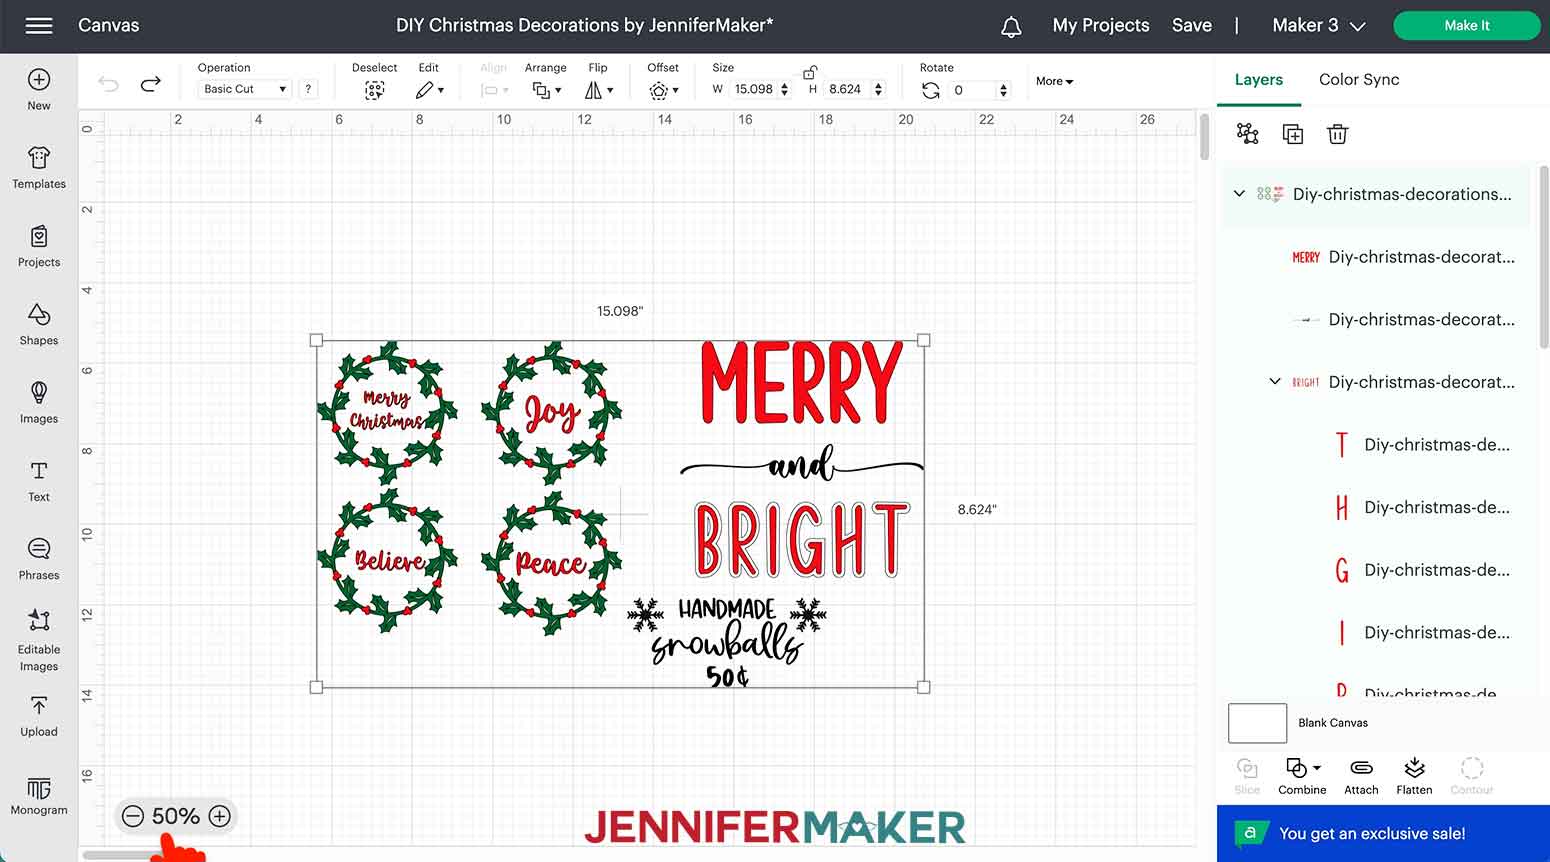
This is what my DIY Christmas Decorations SVG file looks like when uploaded in Cricut Design Space.
STEP 2: PREPARE/PAINT BLANK ITEMS
Some of the items need prep and time to dry so let's work on those first. Place butcher paper down to protect your work area and get your gloves ready.
SNOWBALL BUCKET
The snowballs are a little messy but so beautiful when they're done! First, place the instant snow in a bowl and mix in a little water. I splashed in a little at a time and only used enough to get the "fluff" effect. Follow the directions on the packaging, but add slowly to not over saturate your snow.
Unwrap the foam balls. I chose various sizes and used about twelve but you can use as many as you'd like.
Pour Mod Podge Extreme Glitter on a plate and lightly roll the foam ball through the Mod Podge. Use a small foam brush to distribute the Mod Podge evenly around the foam ball.
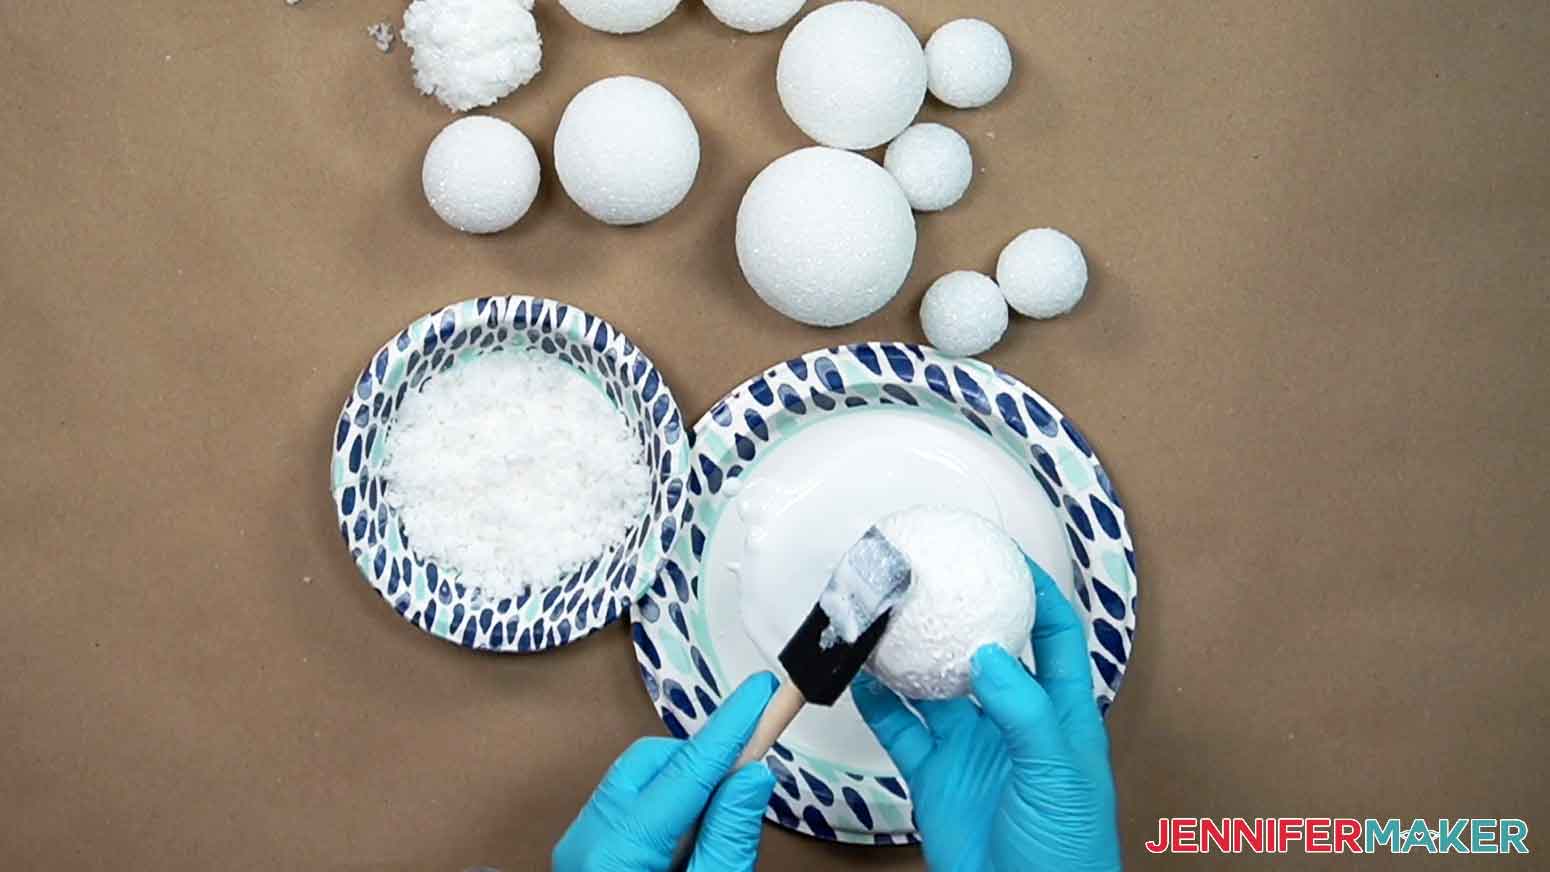
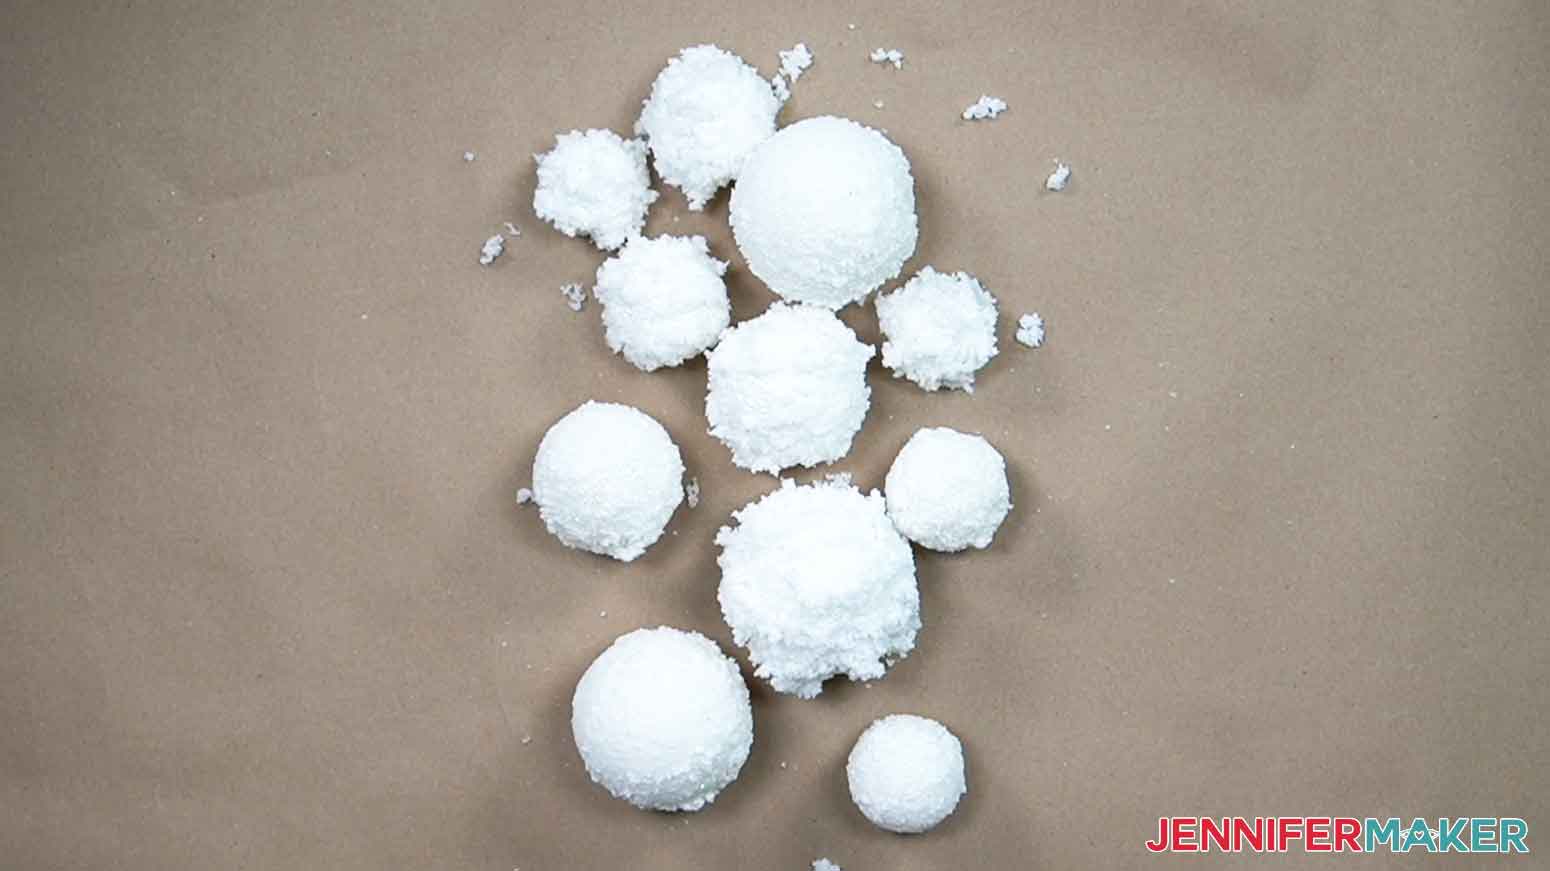
Place the ball in the bowl with the snow and roll it around until the ball is covered. Place it aside on butcher paper to dry.
Repeat the process by rolling all of the foam balls in Mod Podge and rolling them in the snow. Due to moisture and glue, I recommend allowing the snowballs to dry overnight before placing them in your bucket.
SET OF VASES
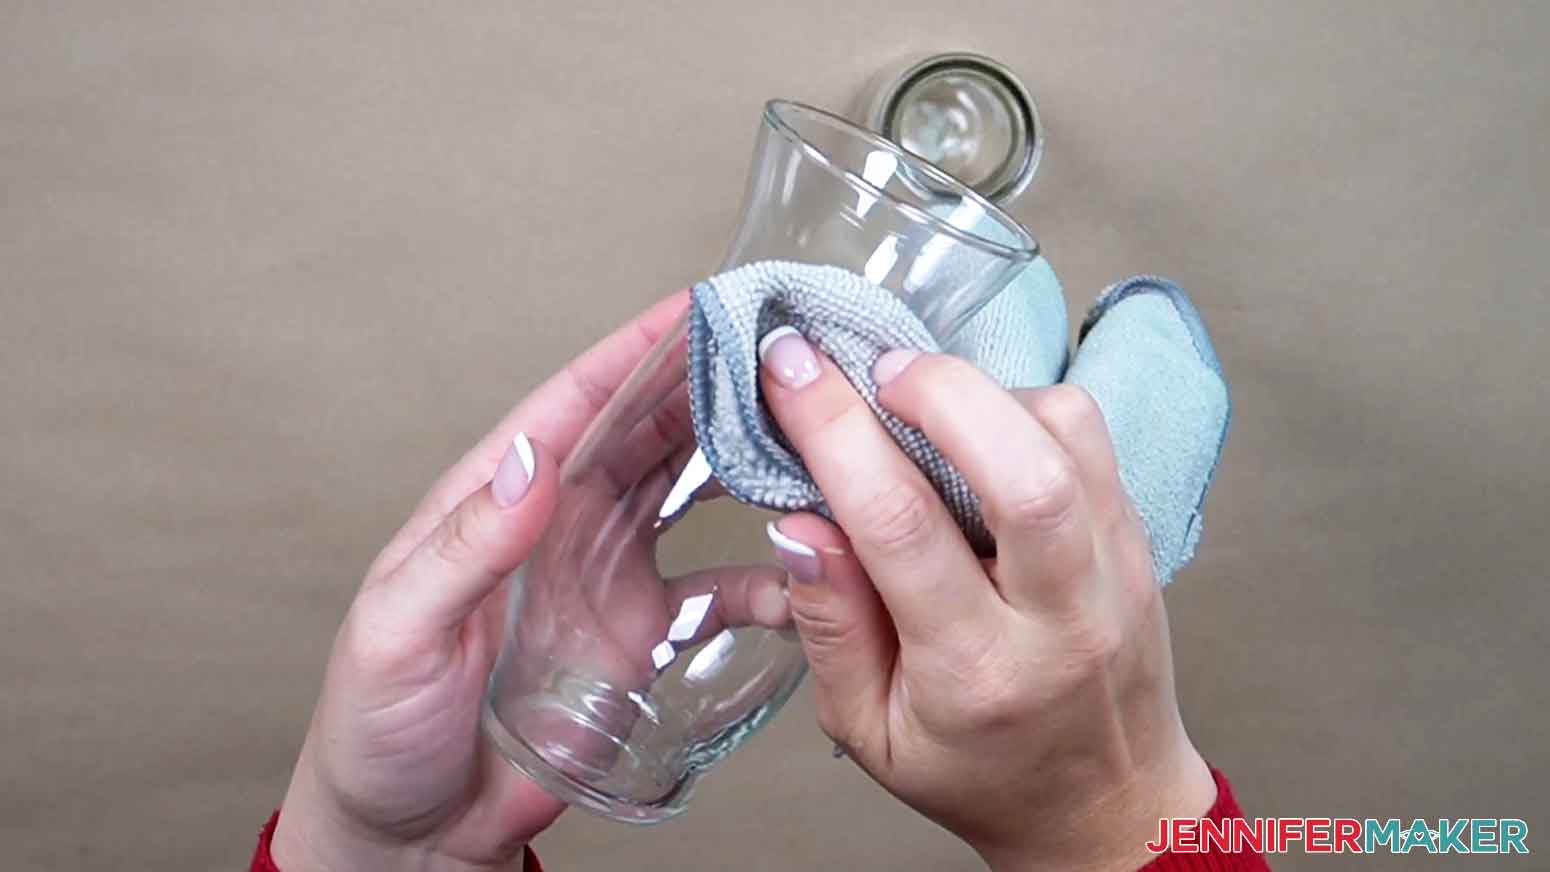
Use a lint-free cloth and isopropyl alcohol to wipe down the glass vases. The will remove any oil or residue and help the paint brush more evenly on to the glass.
Use a foam paint brush to paint the vases with a vertical stroke. I painted mine with white chalk paint but you can use any color you'd like! I used the opening of the vase to help hold the vase as I rotated it.
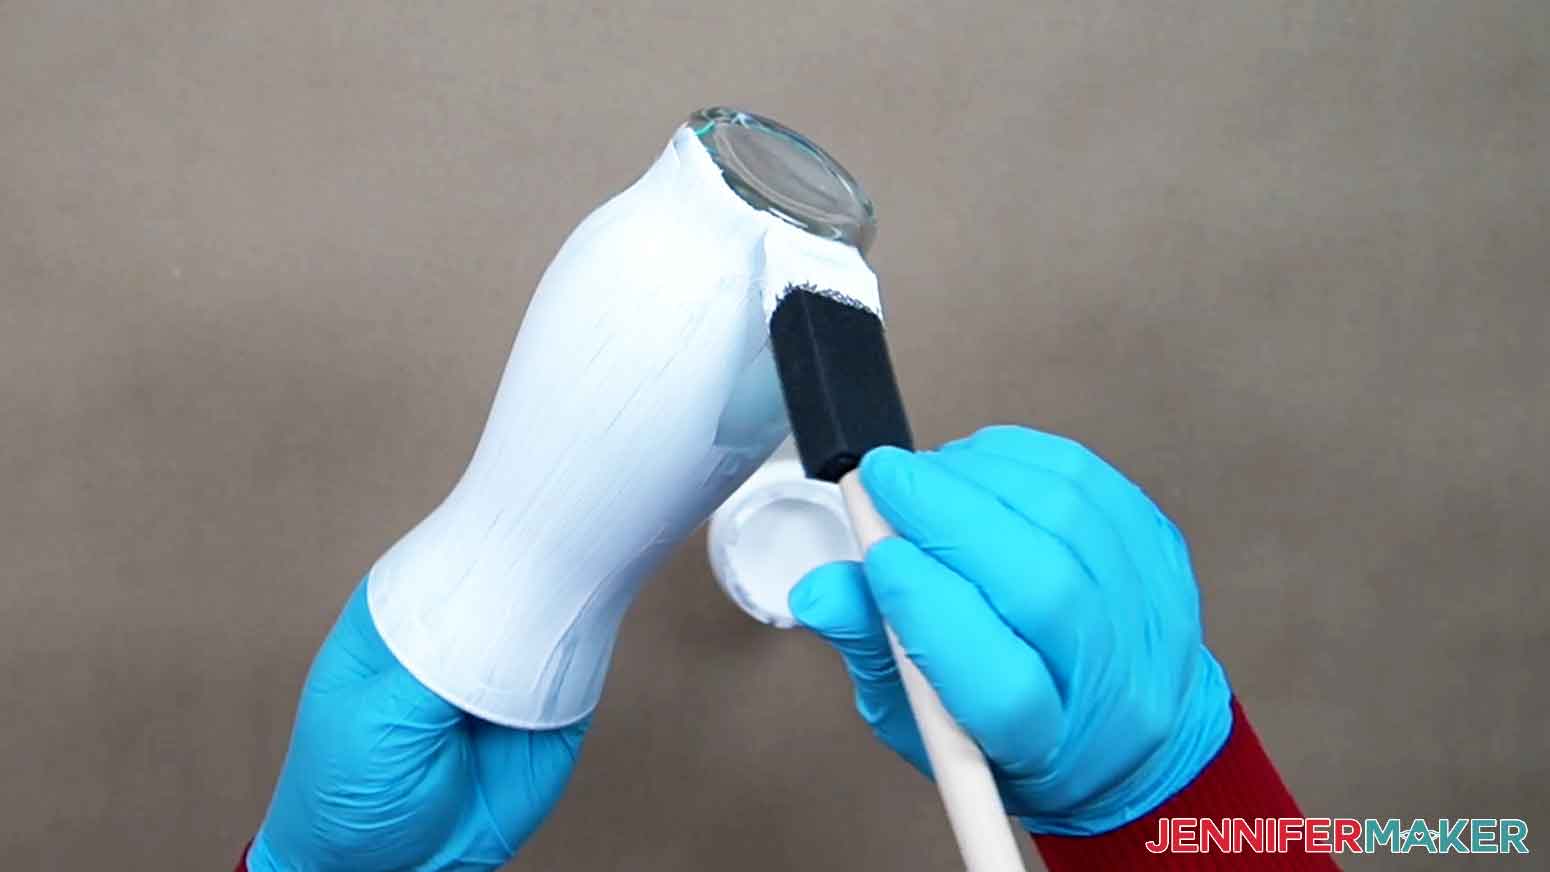
Allow the vases to dry about an hour and apply a second coat for a more even color.
MINI STACKED BOOKS
These cute little wooden boxes take on a different look with a little paint. Turn them upside down so the opening faces down. Use a foam paint brush to paint the wood. I used chalk paint for both and used the colors Adirondack (white) and Oatmeal.
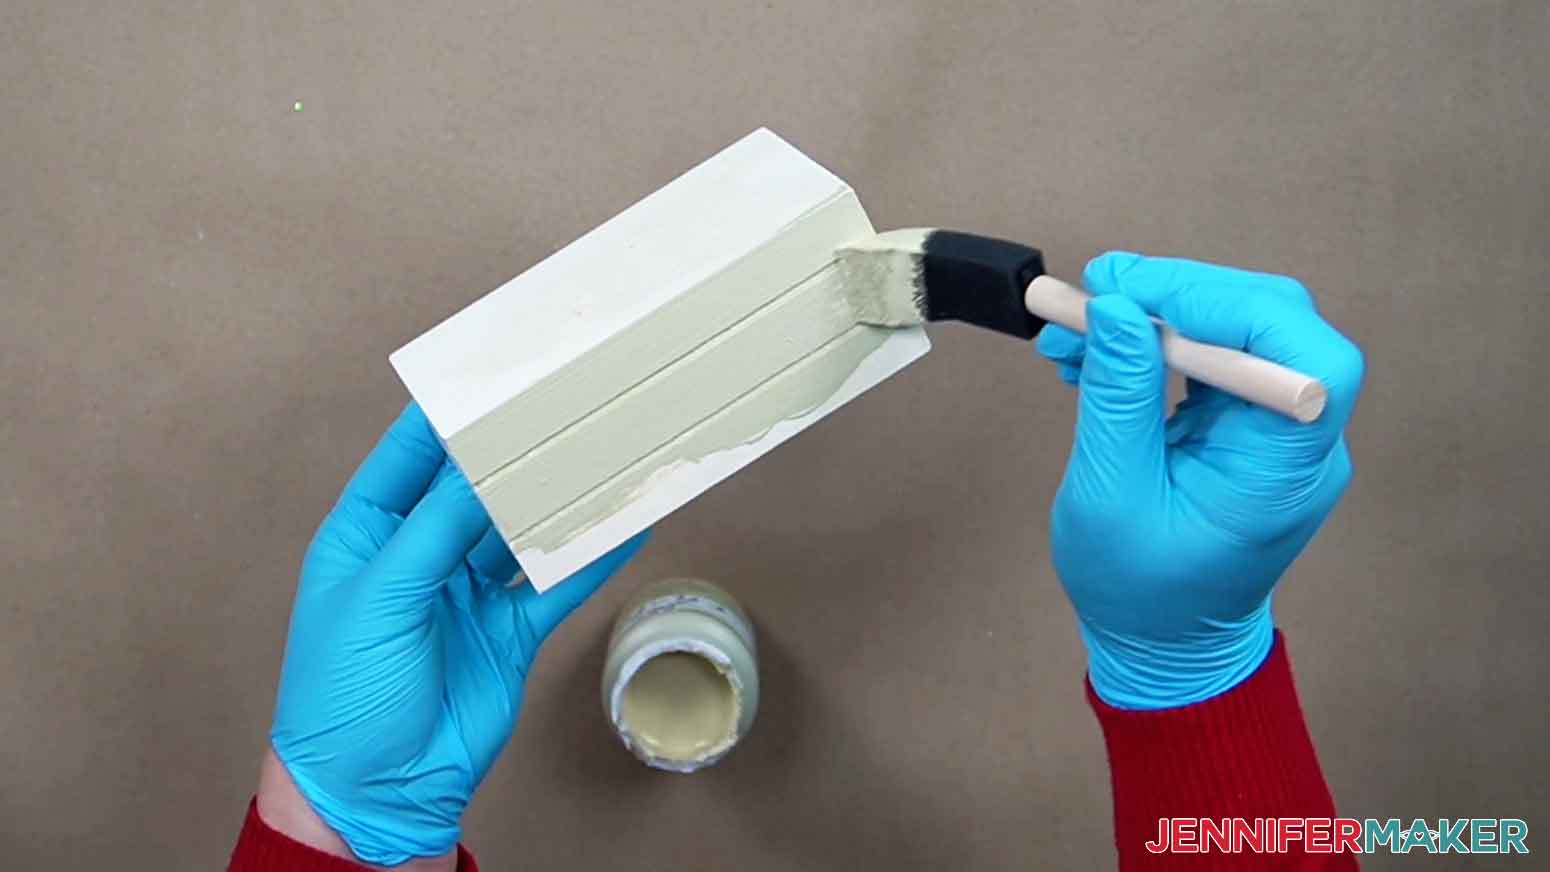
Allow about an hour and apply a second coat of paint for a more even finish.
GIFT BOXES
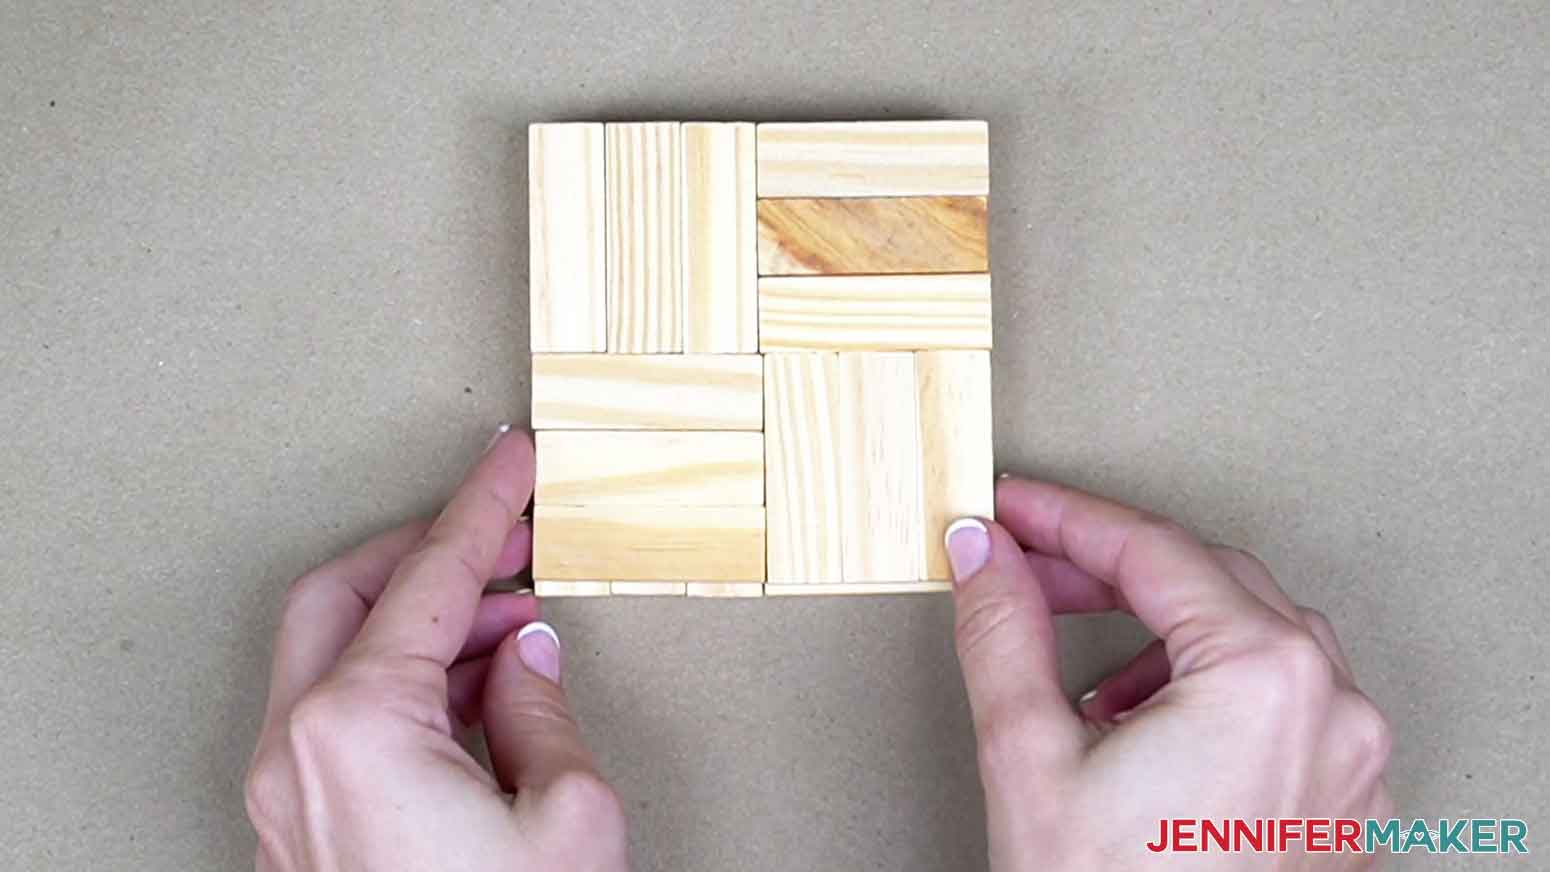
The gift boxes are made with wooden blocks from a tumbling game. To make three different sizes, i used almost three complete block sets. Lay the blocks out to experiement with the layout of each cube before gluing.
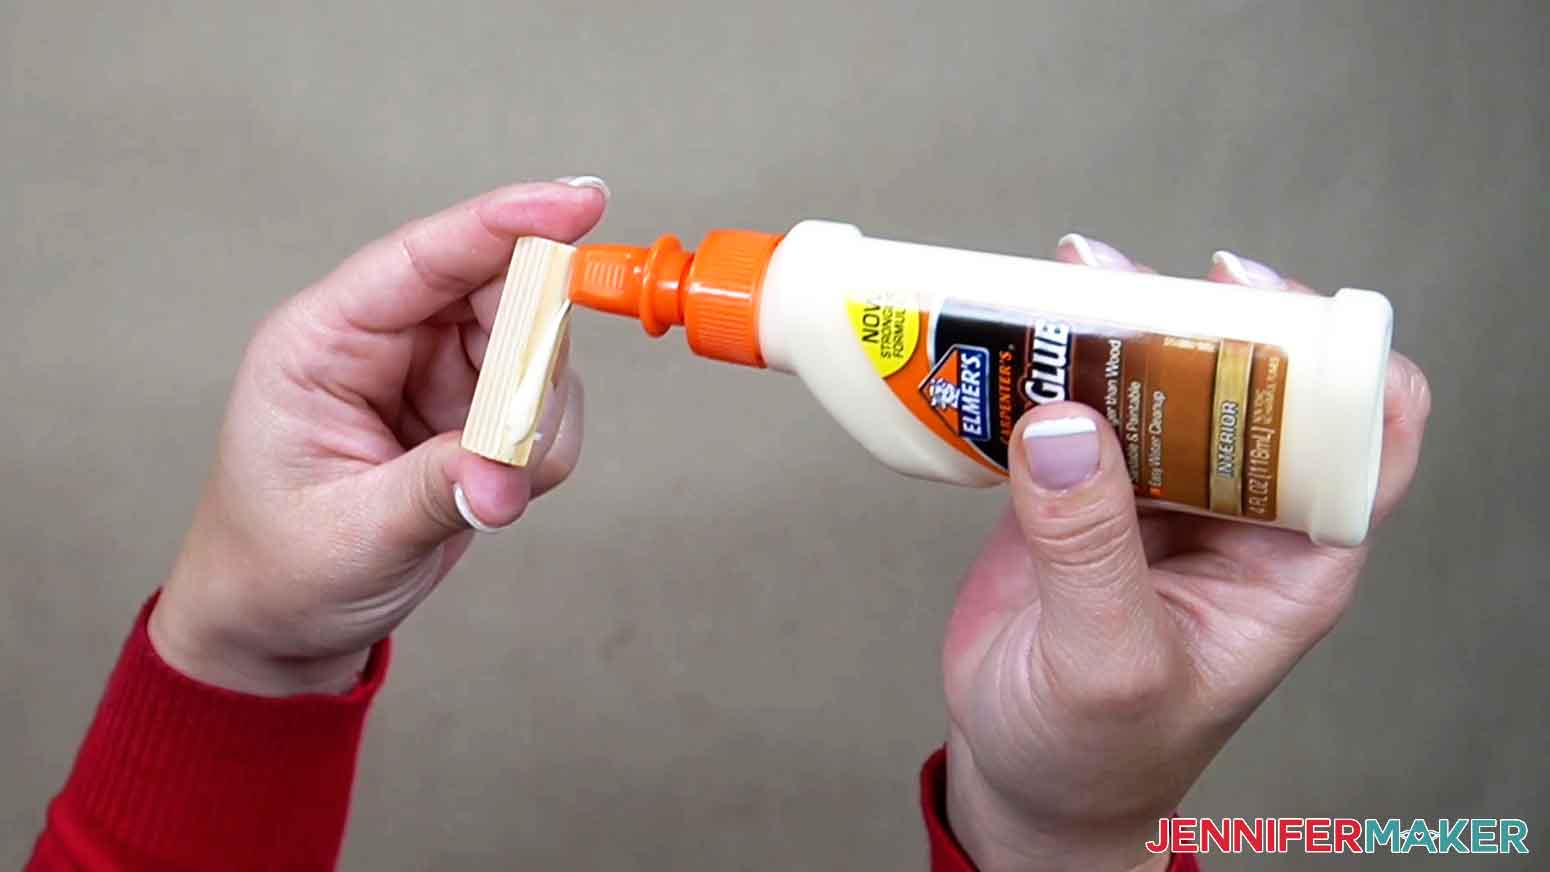
Use wood glue to stick the blocks together and allow them to fully dry before the next step. I left mine overnight to not risk anything falling apart.
For a more subtle underneath look, I chose to paint my gift boxes with chalk paint in Oatmeal.
STEP 3: PREPARE AND CUT DIY CHRISTMAS DECORATION VINYL DESIGNS
There are vinyl designs for each of the projects except the gift boxes. I will show you how to measure and size the decals correctly to look great on your decorations. Click "Ungroup" to separate the designs.
SNOWBALL BUCKET
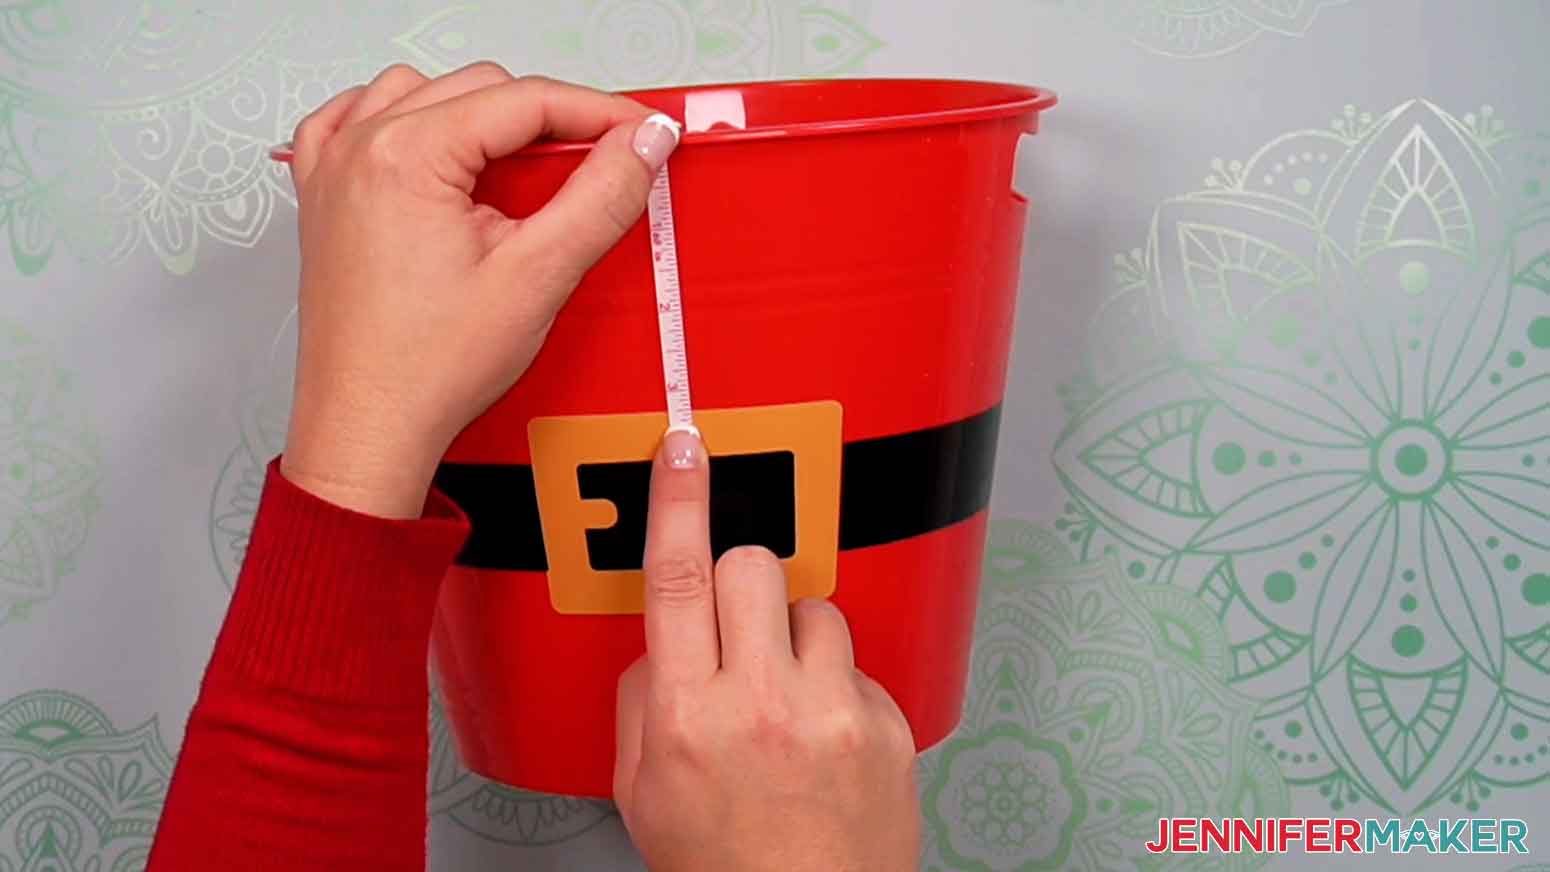
The SVG design is sized to fit on the Santa Buckets in the supply list. If you are using a different bucket, Ruler the height and width to make sure the decal fits.
TIP: For my bucket, I measured the height of each bucket section to make sure the words were not taller than the bucket section.
If you need to adjust the side of the wording, select the words, click "Ungroup" and then click and drag the corner of the bounding box to resize it.
The SVG include two snowflake designs around the bucket but I thought it would be fun to include more. Click to select one of the snowflakes and click the "Duplicate" icon above the layer panel. I made eight additional snowflakes for a total of ten.
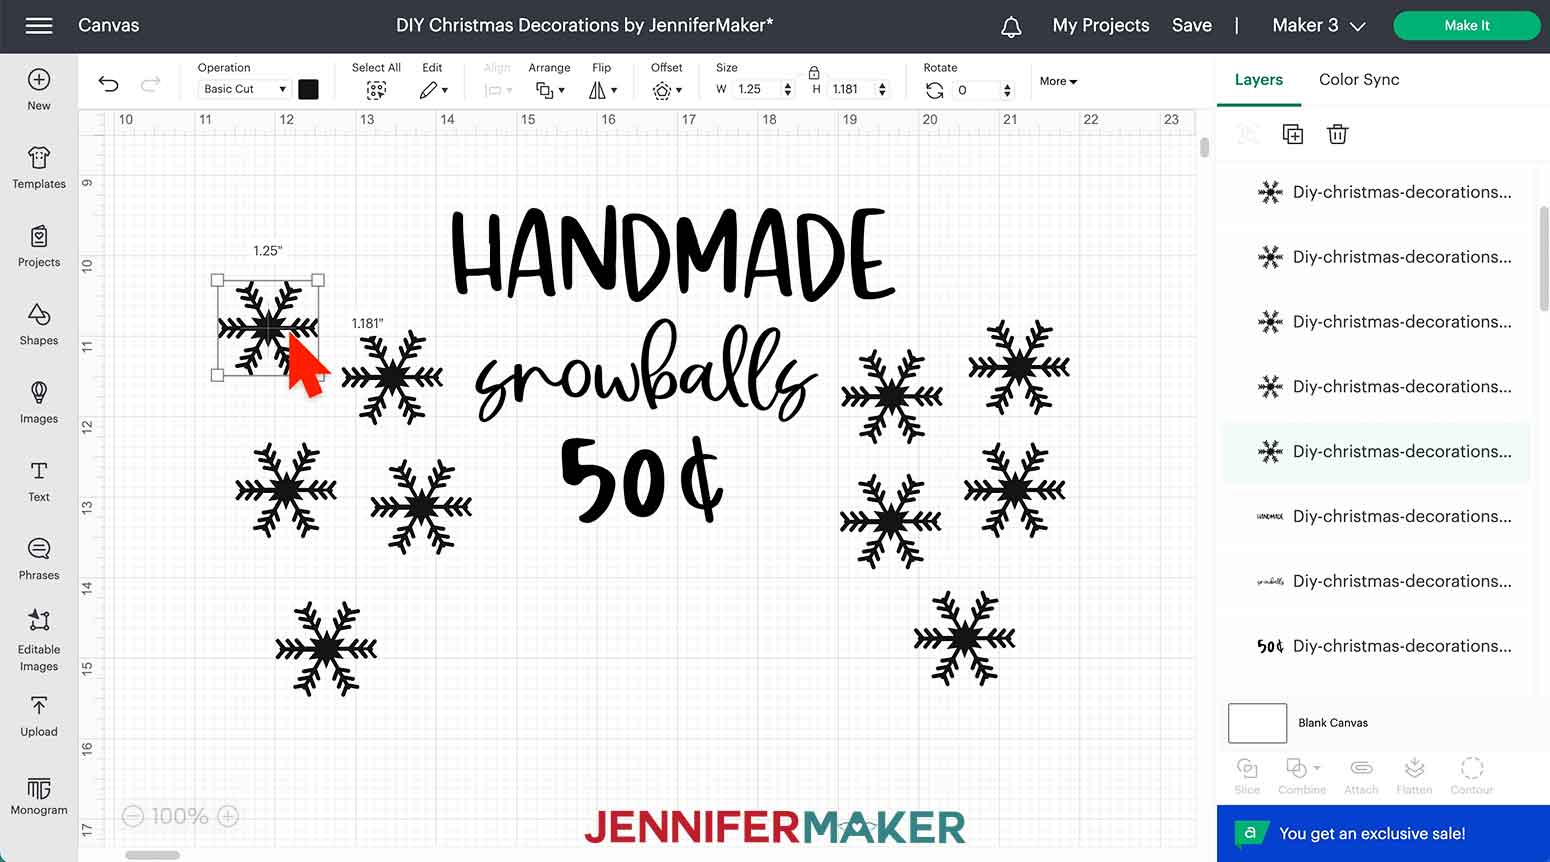
Once the design is sized correctly and the desired number of snowflakes are made, make sure the appropriate machine is selected in the upper right corner and click "Make It."
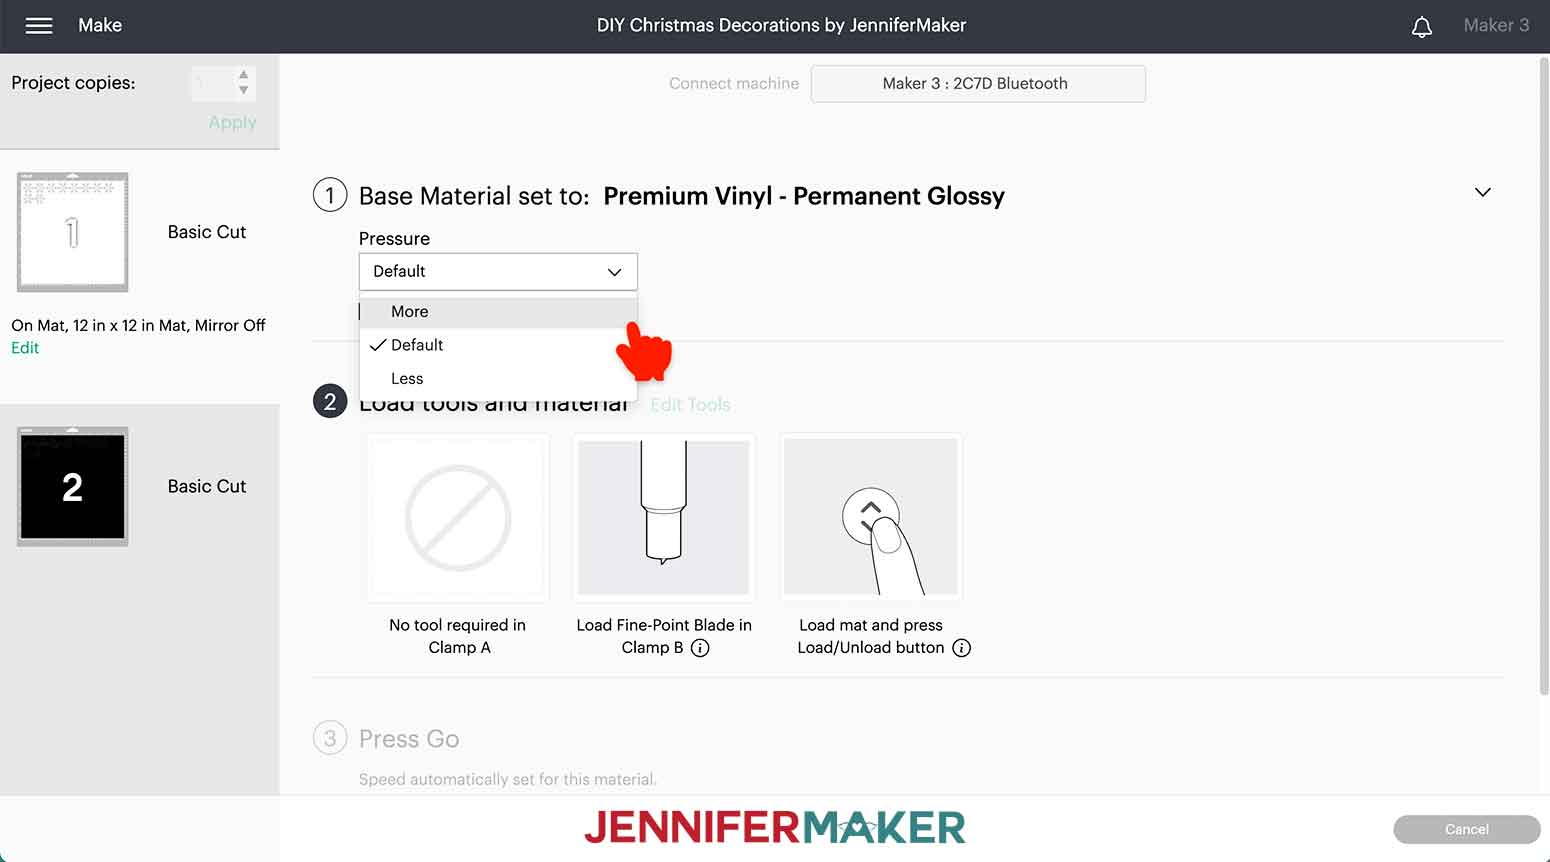
If prompted, select "On Mat" and "12" x 12" for mat size.
We don't need to make any adjustments on the Prepare screen. For Material settings, I chose "Premium Vinyl - Permanent Glossy." If you don't see that material on your screen, click "Browse All Materials" and search for it. I recommend adjusting the Pressure to "More"
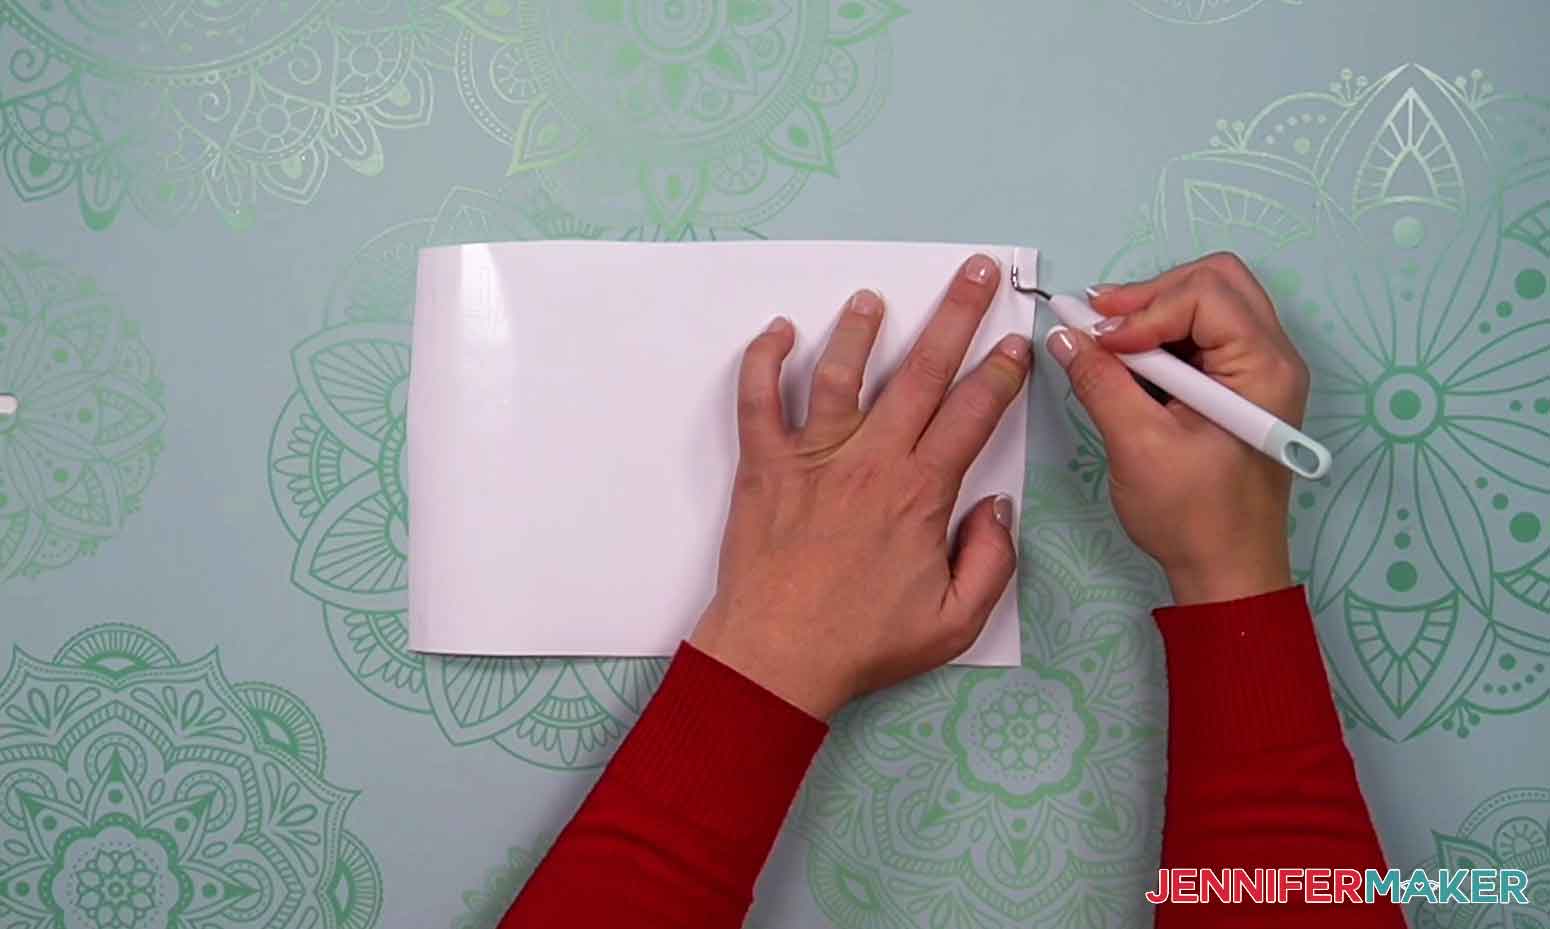
Cut your vinyl to size and place it on the cutting mat with the backing side down and color side up. Press the flashing arrows to load your mat into your machine and press the flashing middle button to begin the cut. When it is done, press the arrows again to unload the mat.
Flip your mat over and peel the mat away from the vinyl. This helps prevent the vinyl from curling.
Use a weeding tool to remove the excess vinyl around the design.
Once the design is weeded, set it aside and move on to step 4 or prepare addtional decorations below.
SET OF VASES
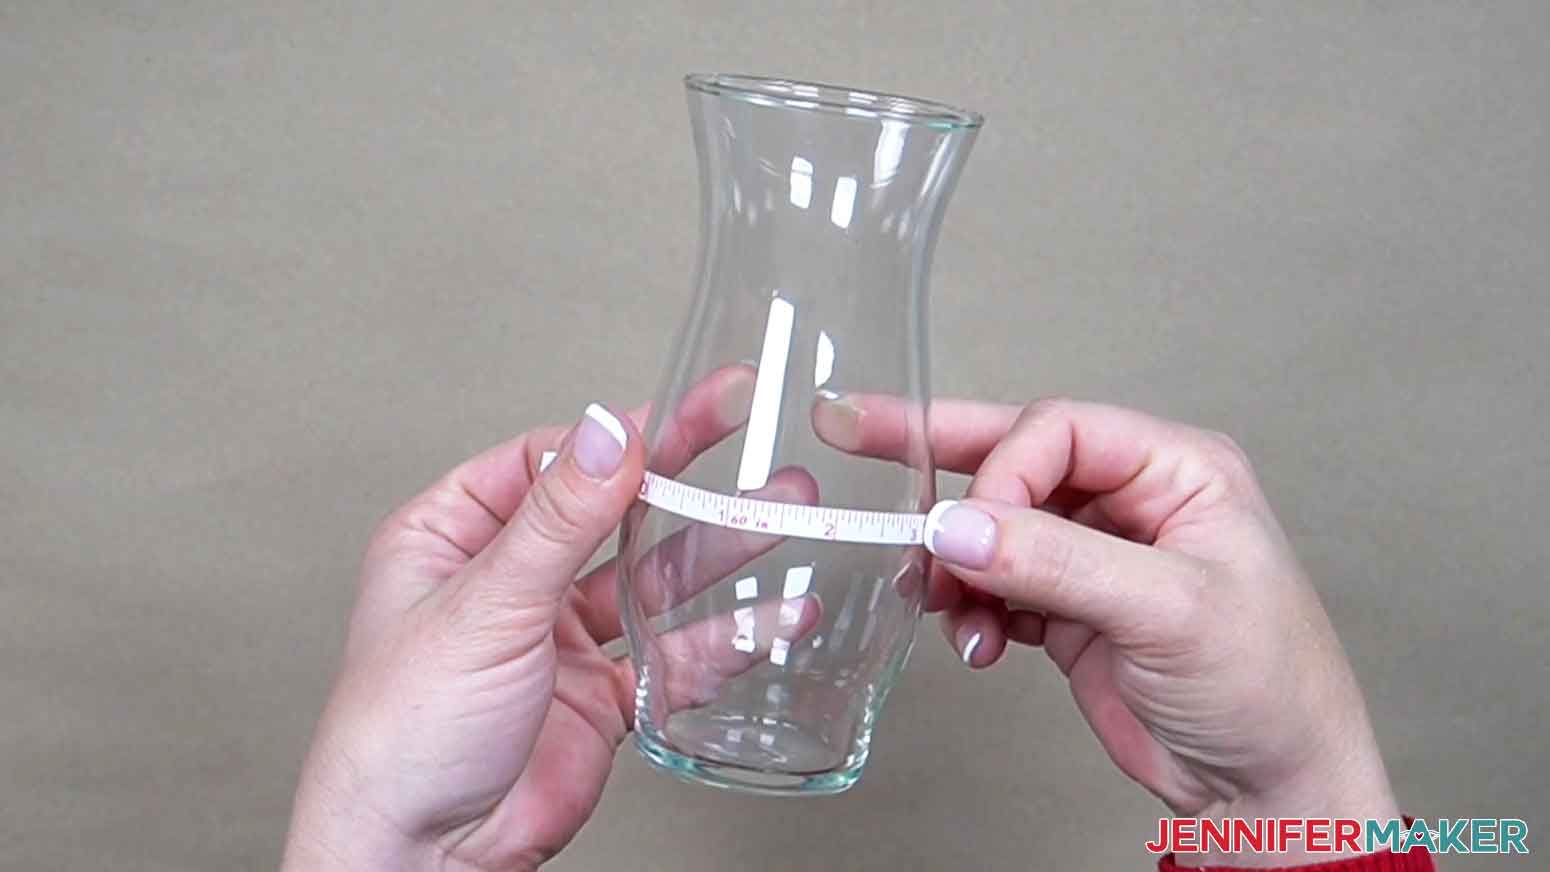
Vases come in all different sizes. If you are using different sized vases, measure the front visible width on the vase. The hurricane vase is a little wider than the other two.
If you haven't already, click Ungroup in Design Space to separate the deisgns. I'm going to click the eye icon to hide the "Believe" wreath design.
The "Merry Christmas" design has the most detail so I will put that on the wider vase. Click the wreath to select it and enter 3" in the width box above the canvas. I'm going to make the other two wreaths 2.5" wide.
NOTE: If you'd like a different sentiment inside the wreath design, you can click on the red layer with the word and berries in the Layers panel. Click on "Contour" and click on the word to remove it from your design. Click the "Text" icon to add add your own wording and select the your font choice. Lastly, make sure to select the new sentiment and berries layers and click "Attach" so that they cut together.
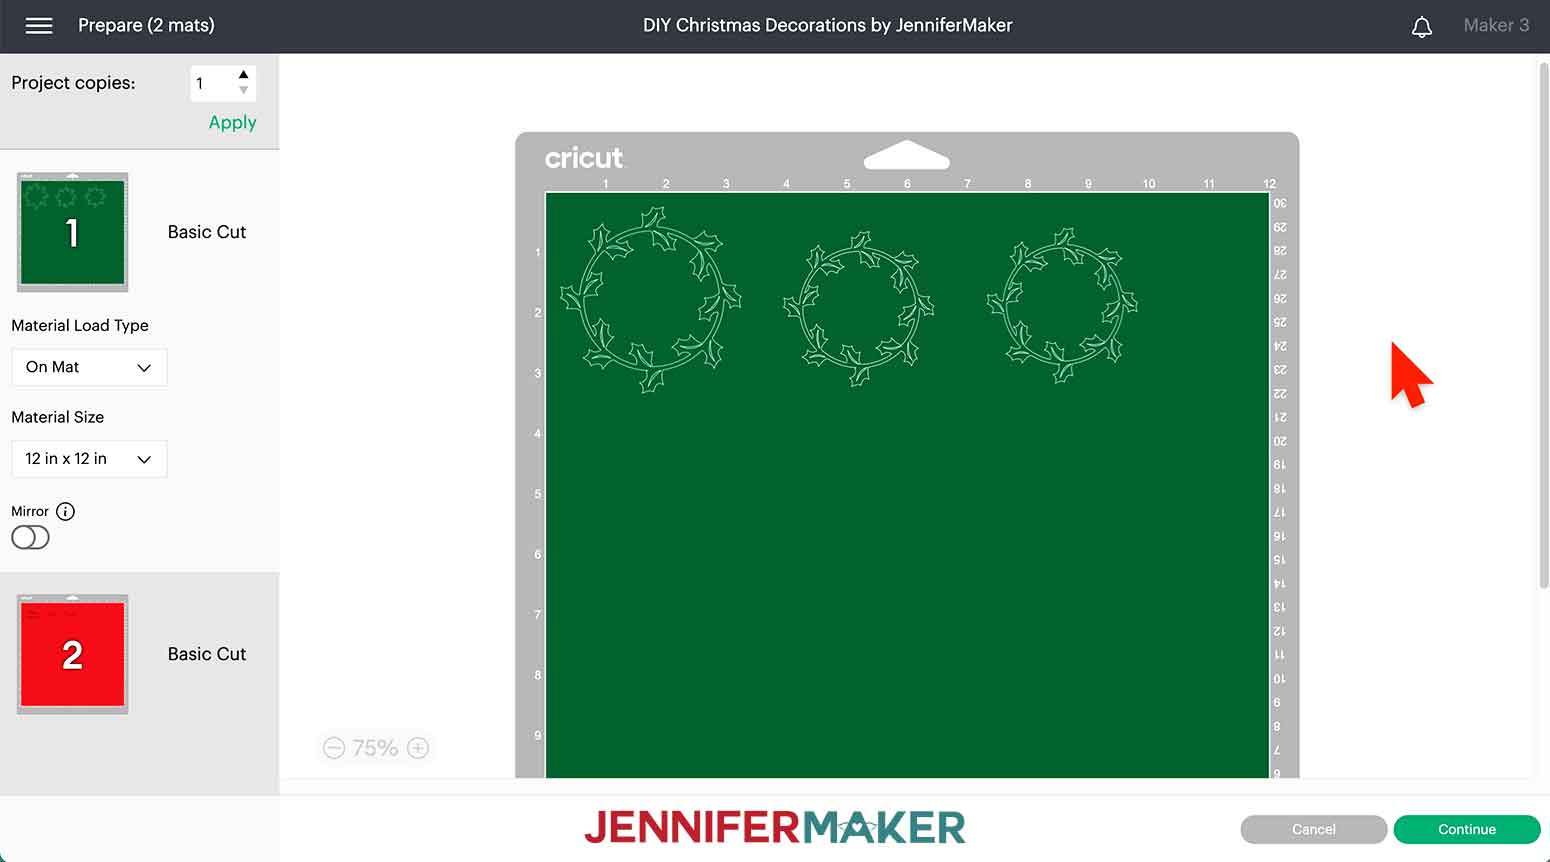
Make sure the appropriate machine is selected in the upper right corner and click "Make It."
If prompted, select "On Mat" and "12" x 12" for mat size.
We don't need to make any adjustments on the Prepare screen but it may be helpful to click and drag the designs a little father apart for ease in weeding. This is optional, of course.
For Material settings, I chose "Premium Vinyl - Permanent Glossy." If you don't see that material on your screen, click "Browse All Materials" and search for it. I recommend adjusting the Pressure to "More"
Cut your vinyl to size and place it on the cutting mat with the backing side down and color side up. Press the flashing arrows to load your mat into your machine and press the flashing middle button to begin the cut. When it is done, press the arrows again to unload the mat.
Flip your mat over and peel the mat away from the vinyl. This helps prevent the vinyl from curling. Repeat the steps for the next color of vinyl.
When your designs are cut, use a weeding tool to remove the excess vinyl around the design.
MINI STACKED BOOKS
I made the mini stacked book titles all in Design Space! If you're using a different wooden crate than me, be sure to measure the height and width of each "book" layer to size your text appropriately.
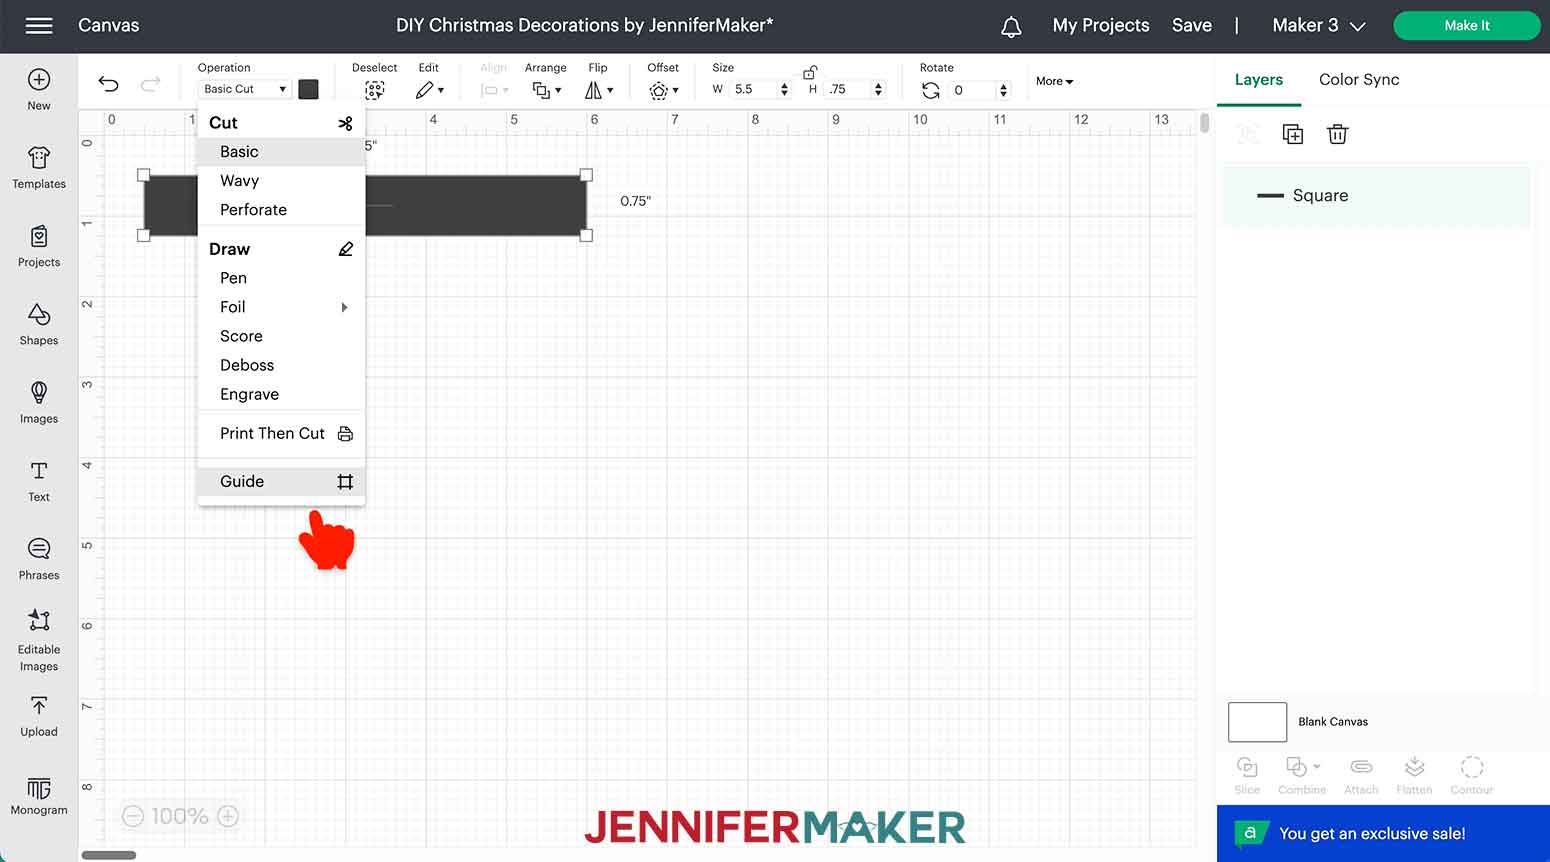
My stack measures about 5.5" wide and about 0.75" tall. Over in Design Space, click on "Shapes" and select a Square. Click the Unlock icon above the size fields and enter the measurements for your stacked books. Lastly, click on the Operation dropdown and select "Guide."
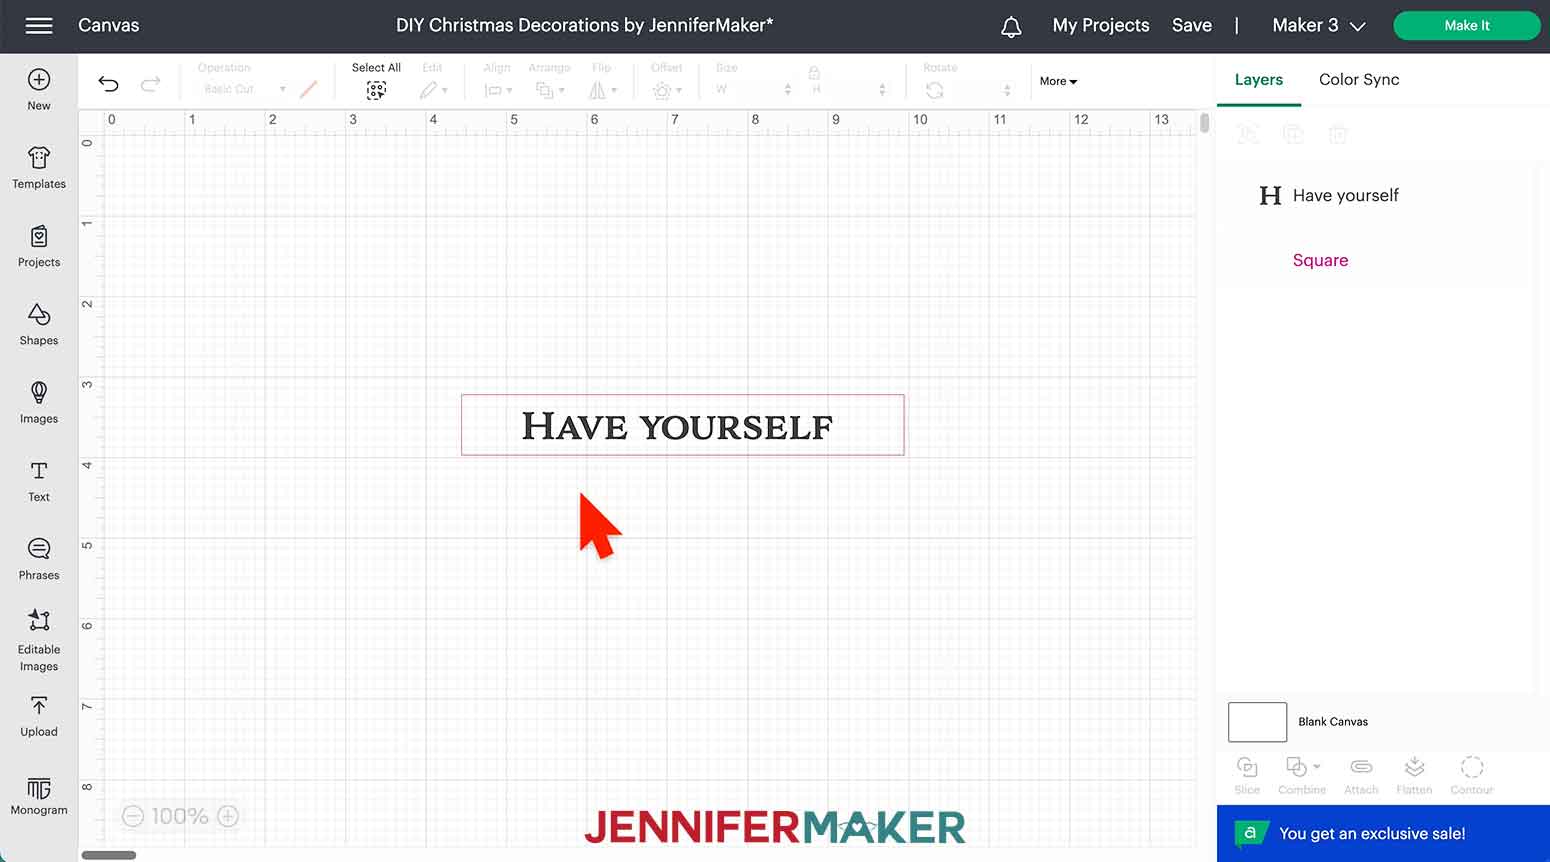
Now, click Text and type the book name or sentiment that you want to use. I'm going to type "Have youself" in the text box. Click the font menu to select your font. I used Adorn Serif but you can use any font you'd like. A free alternative for personal use only is Waldorf Astoria from dafont.com.
NOTE: If you aren't sure how to upload a font to Cricut Design Space, check out this blog post for more help.
Click on a blank area of the canvas to get out of text editing mode. Click the text once so you can click and drag the corner to resize the text. My words are at font size 25.
With the text still selected, click the Duplicate icon. Double click on the text to edit the words. I'll type "a merry little" for this one. Repeat the duplication once more to make one more text box and type "Christmas" in that one.
We will apply each vinyl layer separately so there is no need to attach the words.
Make sure the appropriate machine is selected in the upper right corner and click "Make It."
If prompted, select "On Mat" and "12" x 12" for mat size.
We don't need to make any adjustments on the Prepare screen. For Material settings, I chose "Premium Vinyl - Permanent Glossy." If you don't see that material on your screen, click "Browse All Materials" and search for it. I recommend adjusting the Pressure to "More"
Cut your vinyl to size and place it on the cutting mat with the backing side down and color side up.
Press the flashing arrows to load your mat into your machine and press the flashing middle button to begin the cut. When it is done, press the arrows again to unload the mat.
Flip your mat over and peel the mat away from the vinyl. This helps prevent the vinyl from curling.
Use a weeding tool to remove the excess vinyl around the design. Once the design is weeded, set it aside and move on to step 4 or prepare additional decorations below.
CANVAS SIGN WITH CHALKBOARD TAGS
I made the sign with chalkboard tags on a 12" x 16" canvas. I will show you how to resize the iron-on part of the design and also how to resize the "Bright" letters if you are using different chalkboard tags than I am.
I am going to leave my canvas wrapped so I know the measurements are 12" x 16". If you are using the reverse canvas method, be sure to measure the blank space for the design.
Click the "Shapes" icon and click on Square. Click the Unlock icon and enter the measurements of your canvas. Click on Operation and Guide to use your rectangle as a design guide.
Next, repeat the same steps to make a rectangular guide for the chalkboard tags. I measured the width of my tags to just under the hole at the top. Mine are 2" wide and about 2.75" from the bottom to the hole. Once your first chalkboard tag guide template is made, select it and click Duplicate for the number of letters you are putting on your canvas. I'll make six tag templates for "Bright." The most important thing to note with these chalkboard tag templates is that all of your tags will fit on your canvas when assembled.
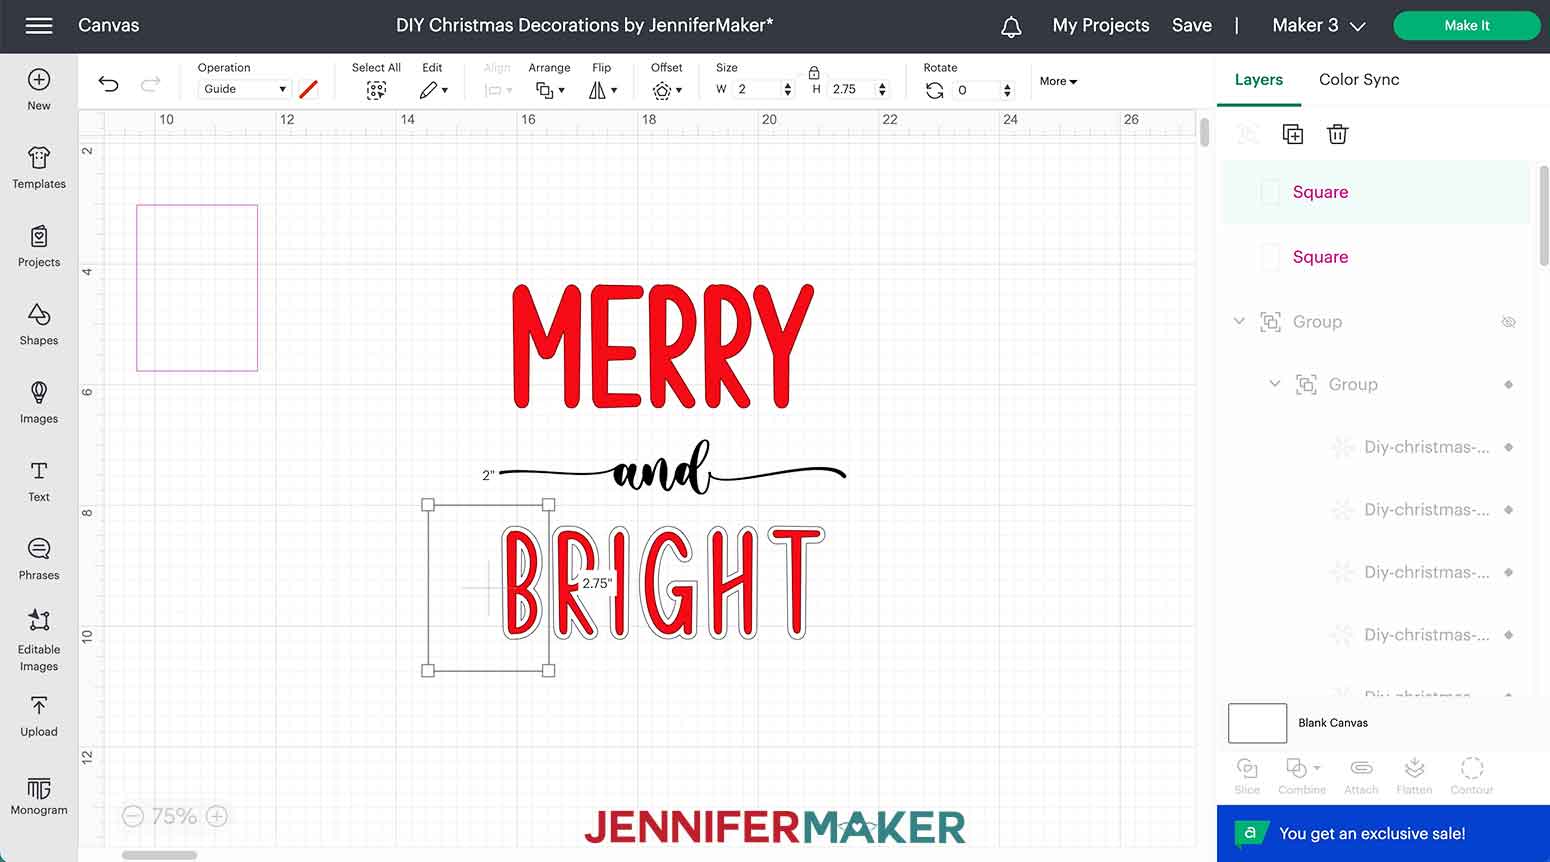
Press and hold the Shift key to select the red letters of "Believe" and the white offset layer. Click and drag the corner to resize all of the letters proportionately. It is okay if they don't all align on the template. Most important it to keep them all the same size in this step. When you're happy with the size. Click on the canvas to unselect the letters. You can now click and drag one of the tag templates behind each letter to make sure the new sizing of each letter will fit on your tags.
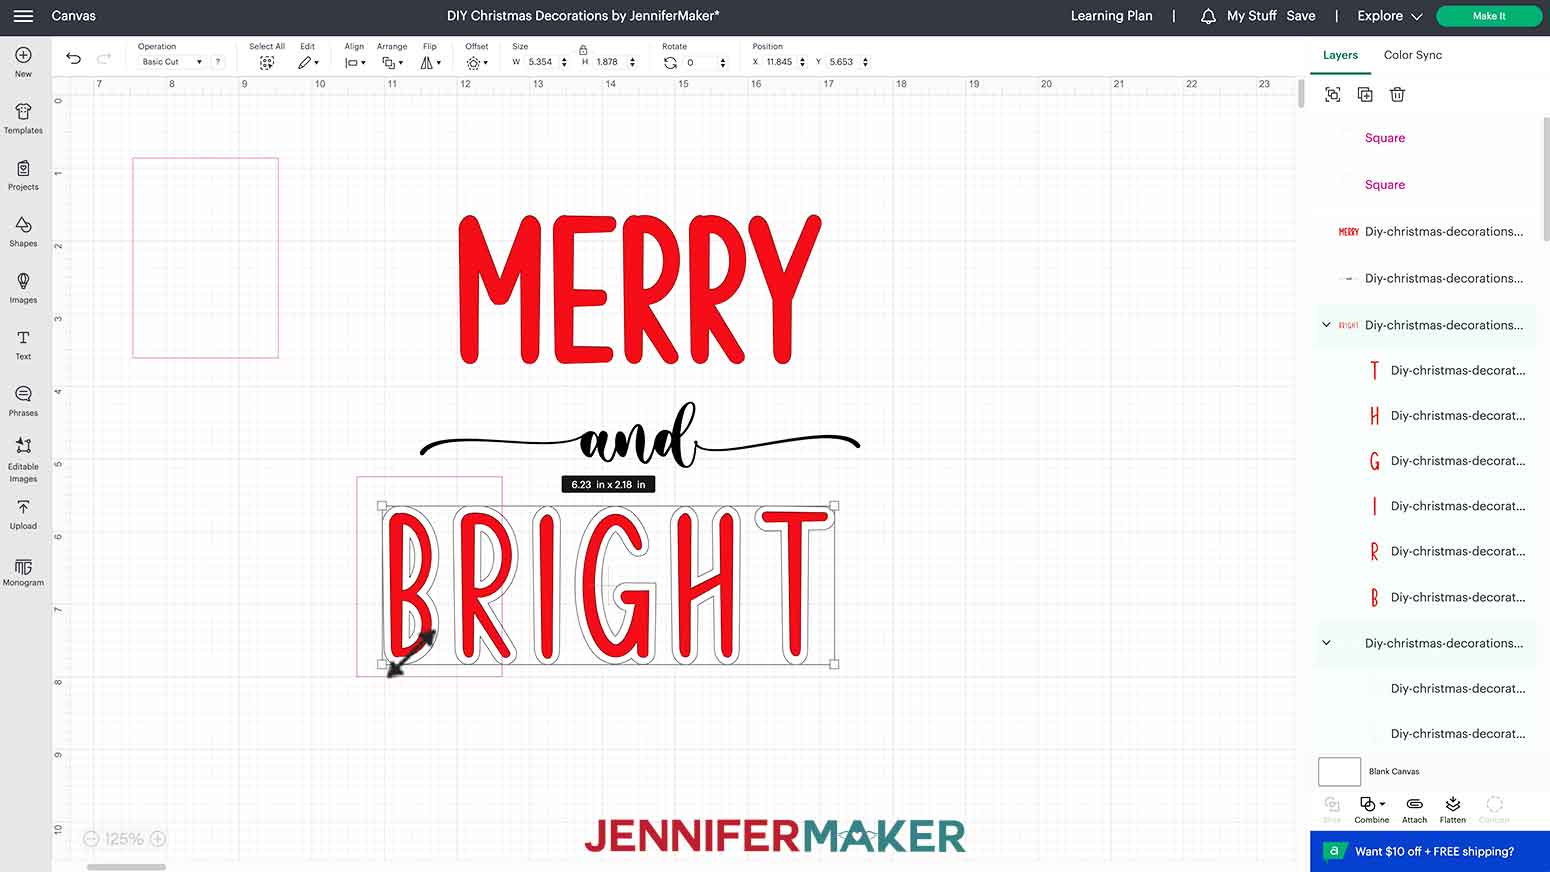
Lastly, you can resize the "Merry" and "and," if needed. Remember to leave enough space so that you'll have room to hang your chalkboard letters under the vinyl words.
Make sure the appropriate machine is selected in the upper right corner and click "Make It."
If prompted, select "On Mat" and "12" x 12" for mat size.
We will be using iron-on vinyl for "Merry" and "and" so on the Prepare screen, we need to toggle Mirror On for those two mats.
For Material settings, I chose "Premium Vinyl - Permanent Glossy" for the white and red mats. These are the letters adhering to your tags. I chose ""Everyday Iron-On" for the black and gold mats.
If you don't see that material on your screen, click "Browse All Materials" and search for it. I recommend adjusting the Pressure to "More"
Cut your vinyl to size and place it on the cutting mat. For Permanent vinyl (red and white) the backing side will be down and color side up. For the iron-on vinyl (gold and black), the shiny side will face down against the mat.
Press the flashing arrows to load your mat into your machine and press the flashing middle button to begin the cut. When it is done, press the arrows again to unload the mat.
Flip your mat over and peel the mat away from the vinyl. This helps prevent the vinyl from curling.
Use a weeding tool to remove the excess vinyl around the design. Once the design is weeded, set it aside and move on to step 4 below.
STEP 4: ASSEMBLE DIY CHRISTMAS DECORATIONS
SNOWBALL BUCKET
it’s time to assemble your snowball bucket! First, we'll apply the vinyl. I recommend placing one word/snowflake at a time.
Cut a piece of StandardGrip transfer tape slight larger than your vinyl design. Peel away the backing and press it firmly over the first section of vinyl that you are going to transfer. Turn over the vinyl and peel away the backing.
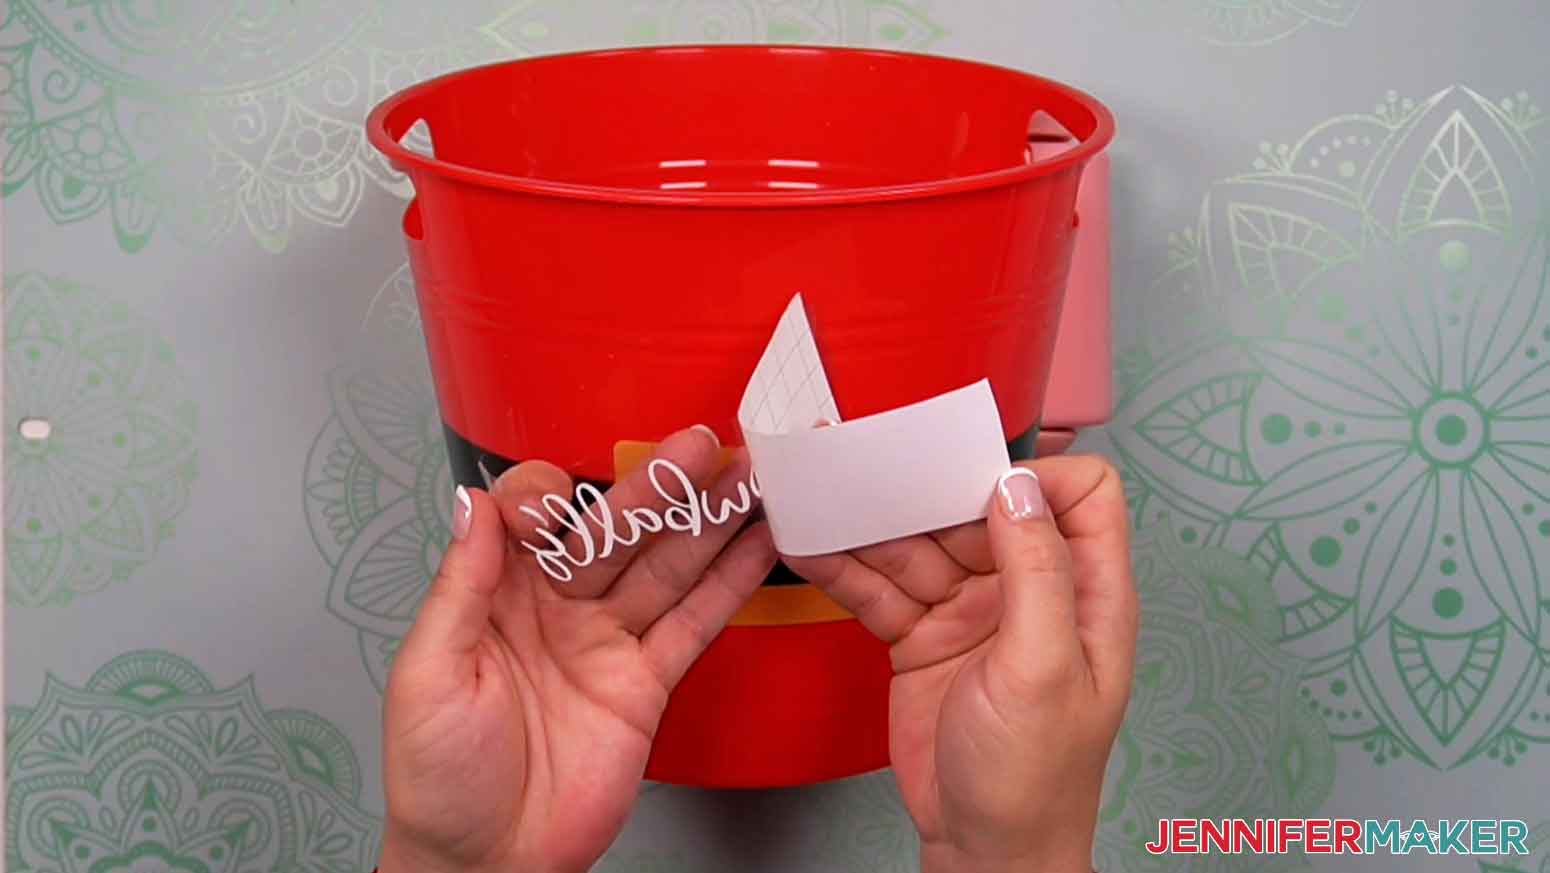
You can use a lint roller to keep the bucket from rolling when applying the vinyl.
TIP: If any areas of vinyl do not transfer easily, use a scraper tool to help with better adhesion.
Place the vinyl decal on the bucket. Use the scraper tool for the best adhesion.
Repeat these steps for the remaining pieces of the design. I randomly applied the snowflakes around the bucket.
When all the vinyl is applied, your bucket is ready for snowballs. Place two foam block in the bucket. These are fillers. Open and place the glittered drape over the blocks. Fluff it to cover the blocks and provide a base for your snowballs.
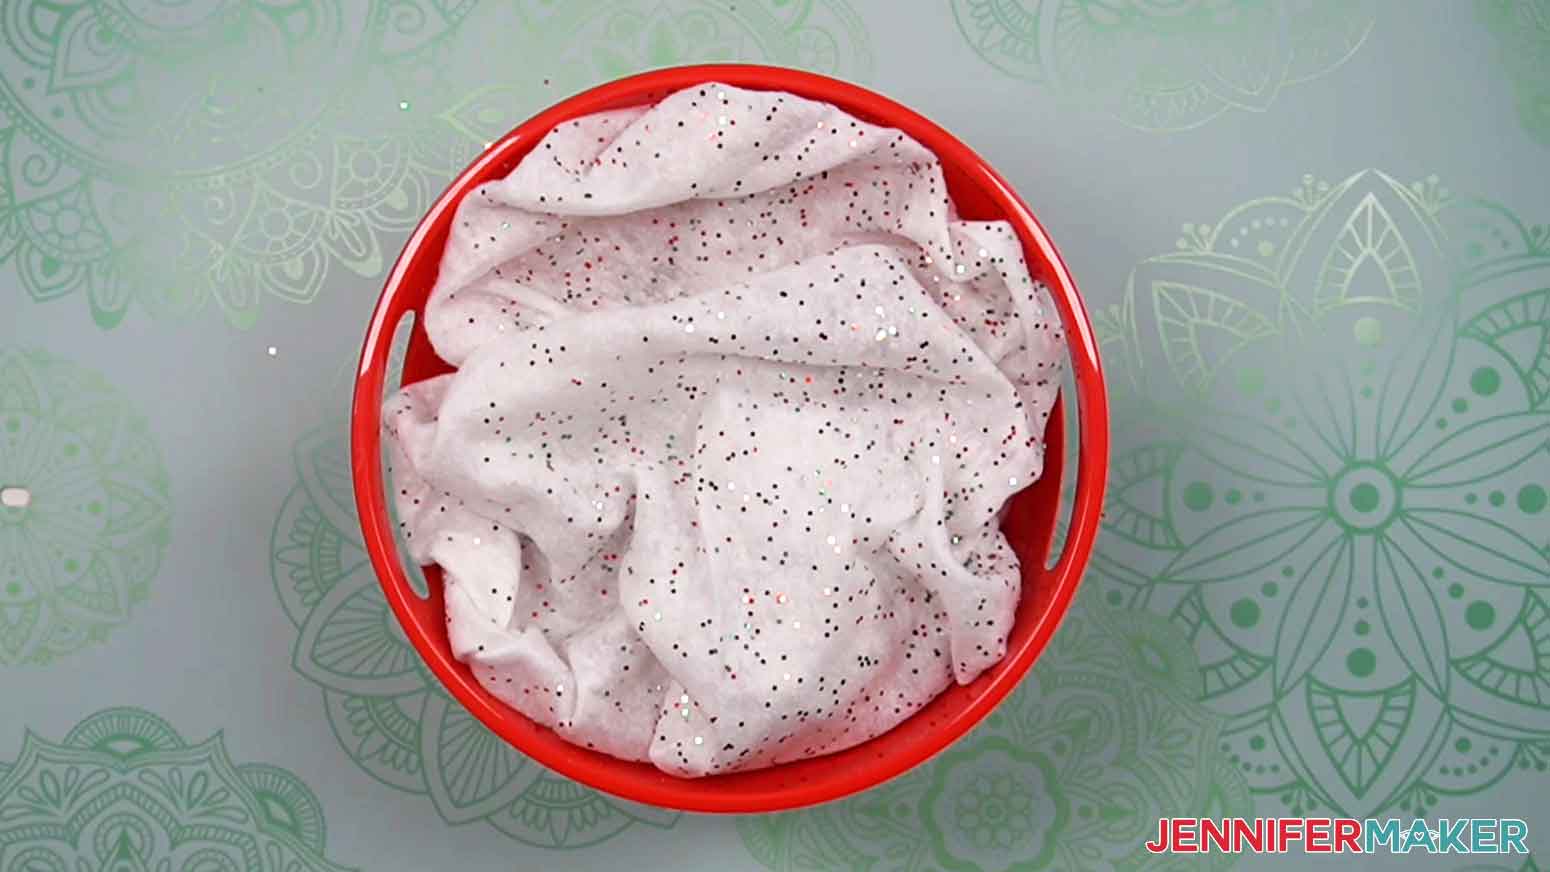
Place your snowballs randomly in the bucket. If your bucket won't be disturbed, the snowballs can sit loosely in the bucket. If you need a sturdier decoration, you can use hot glue to hold them together.
SET OF VASES
For the easiest application, we'll layer our vinyl before applying it to the vases. Cut a piece of StandardGrip transfer tape slight larger than your vinyl design. Peel away the backing and press it firmly over the red vinyl. Turn over the vinyl and peel away the backing. Now, align and place the red vinyl over the green vinyl.
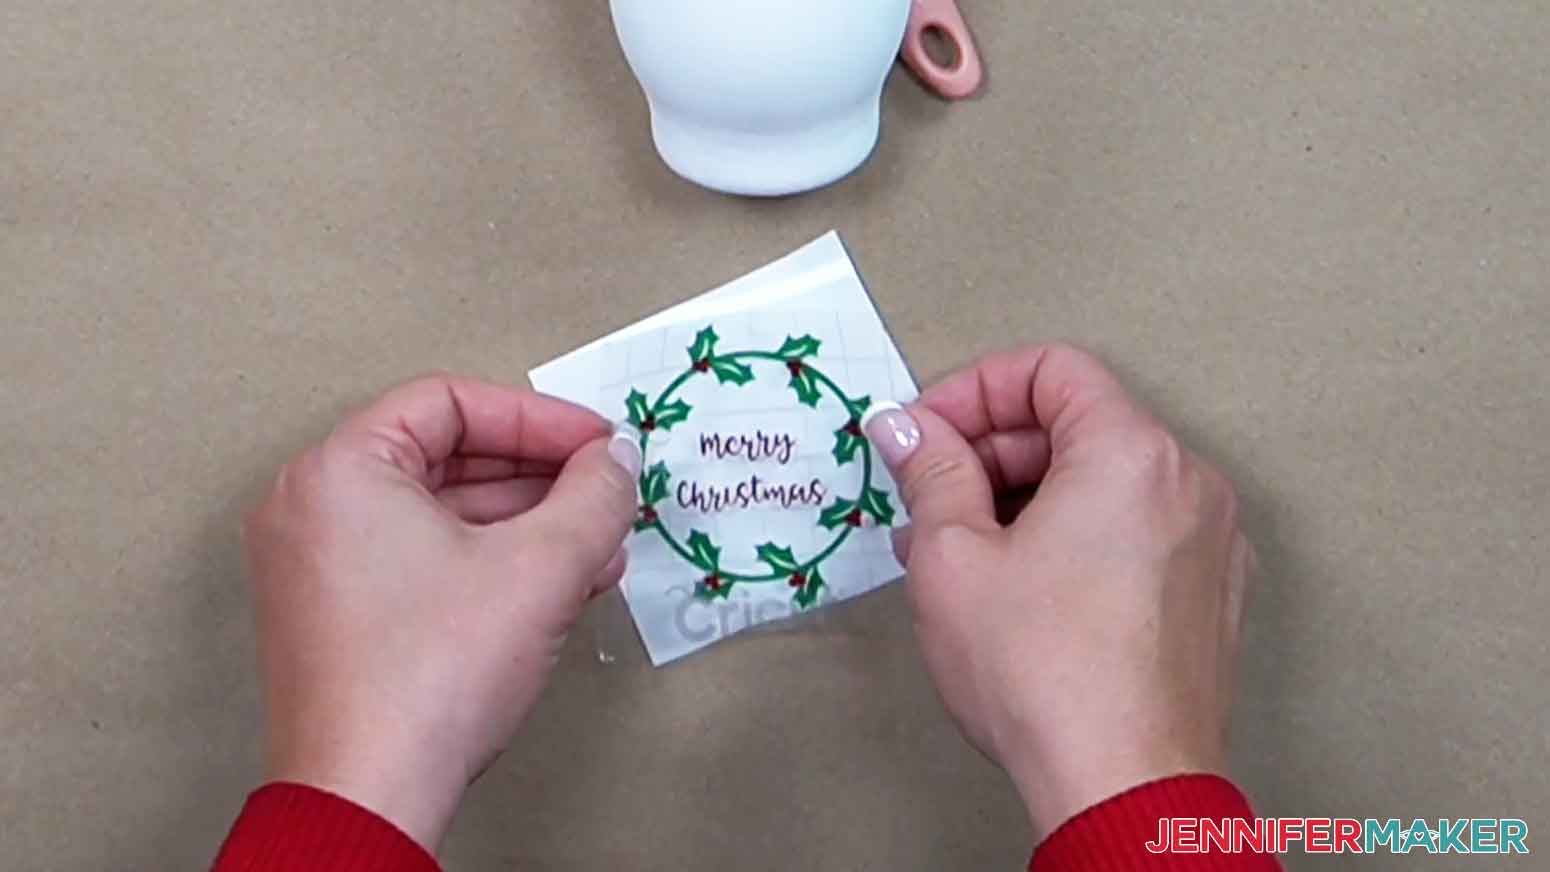
Turn over the layered vinyl and peel away the backing from the green vinyl. Now, lay your first vase down. A lint roller may be helpful to hold it in place!
Fold up the edges of the vinyl in to a taco shape and place the center of the vinyl on to the vase. Press the vinyl to help it adhere to the vase. Gently peel away the transfer tape.
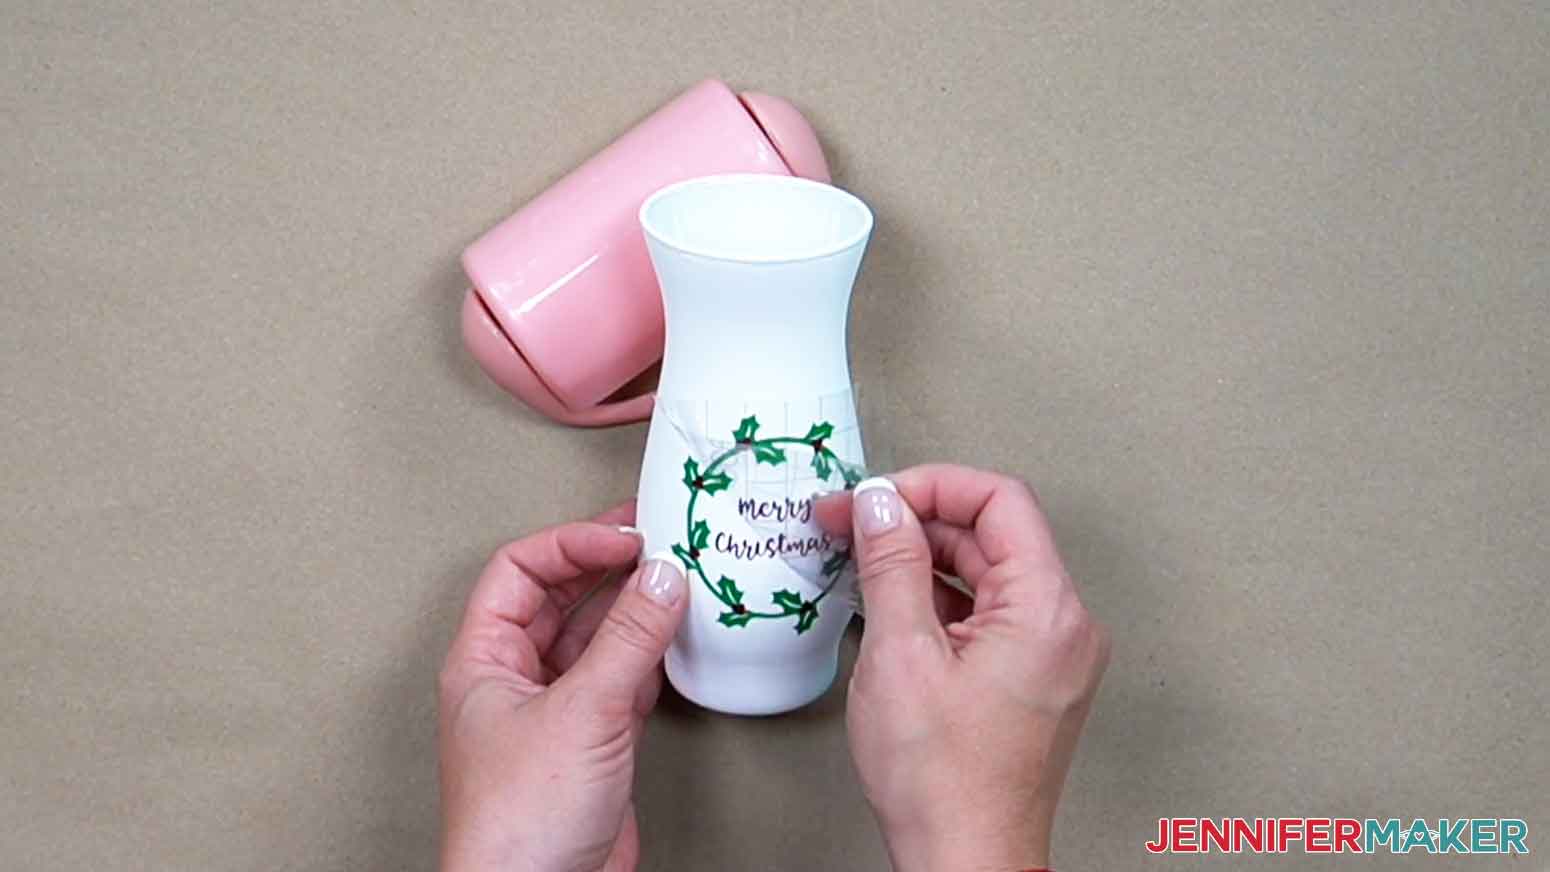
If any areas of vinyl have trouble sticking, use your scraper tool to rub over the vinyl and help it adhere.
Repeat the vinyl application for all vases. Time to decorate! I wrapped a piece of jute twine around the neck of the vases and tied a knot in the front of the vase. Add leaves, pine cones, holly, or whatever you'd like to decorate your vases! I used hot glue to secure all the decorations in to place.
MINI STACKED BOOKS
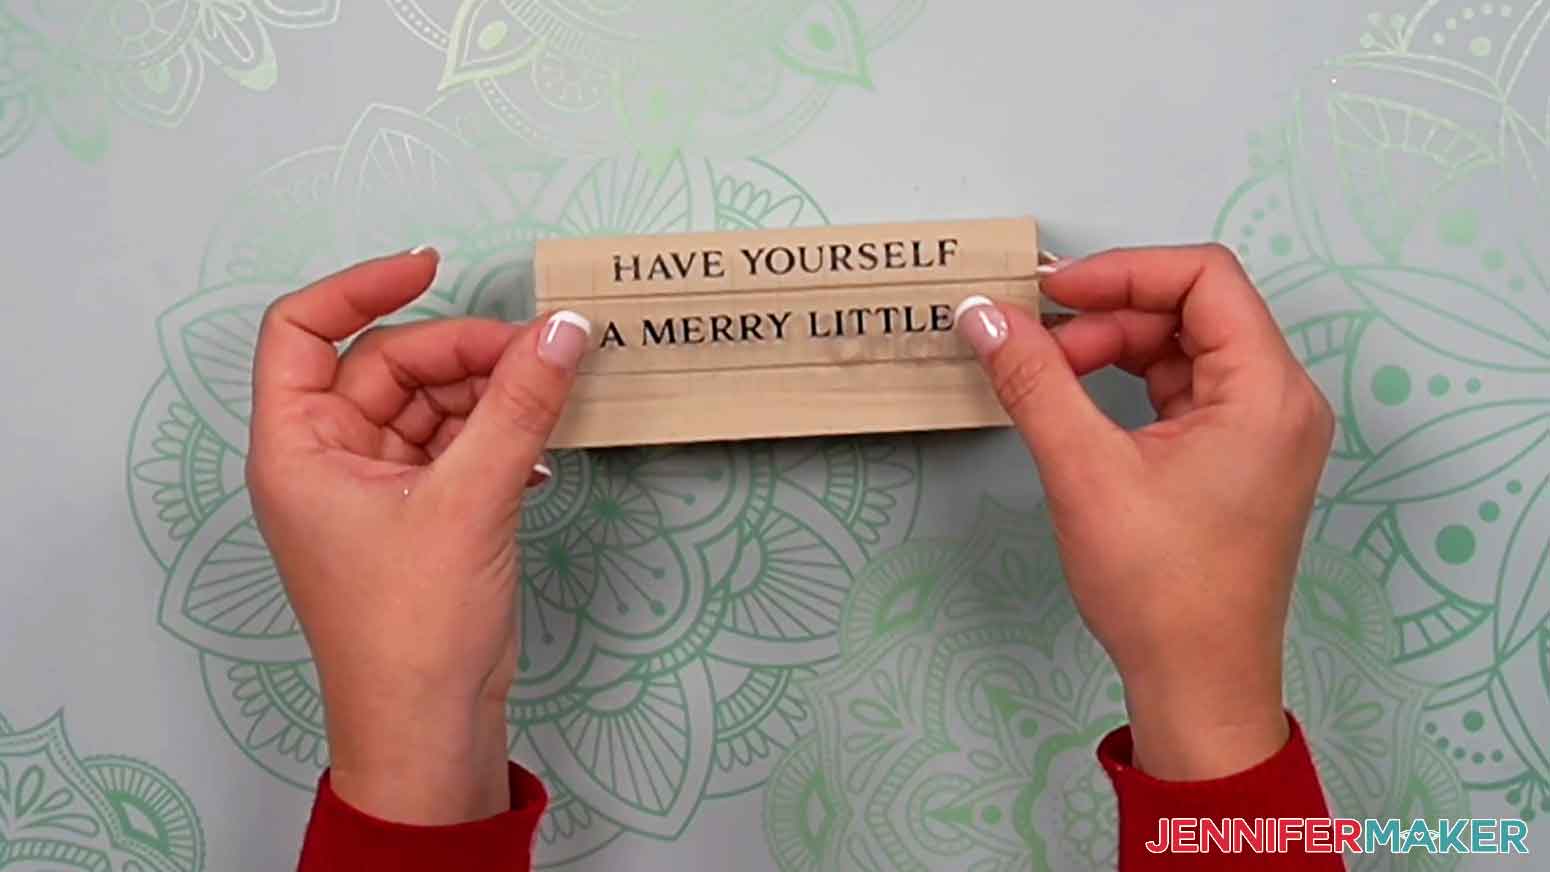
These are also so quick and easy to put together! Cut a piece of StandardGrip transfer tape slightly larger than one line of text. Peel away the backing and press it firmly over the vinyl. Turn over the vinyl and peel away the backing.
I recommend placing the book stack on its back so the "spine" is facing up to you. Fold up the edges of the vinyl in to a taco shape and place the center of the vinyl on to the wood. Use a scraper tool to help the vinyl adhere to the painted wood. Gently peel away the transfer tape.
Repeat this step for each book title or sentiment that you are transfering to your project.
Once the vinyl is in place, time to get creative with your decorations!
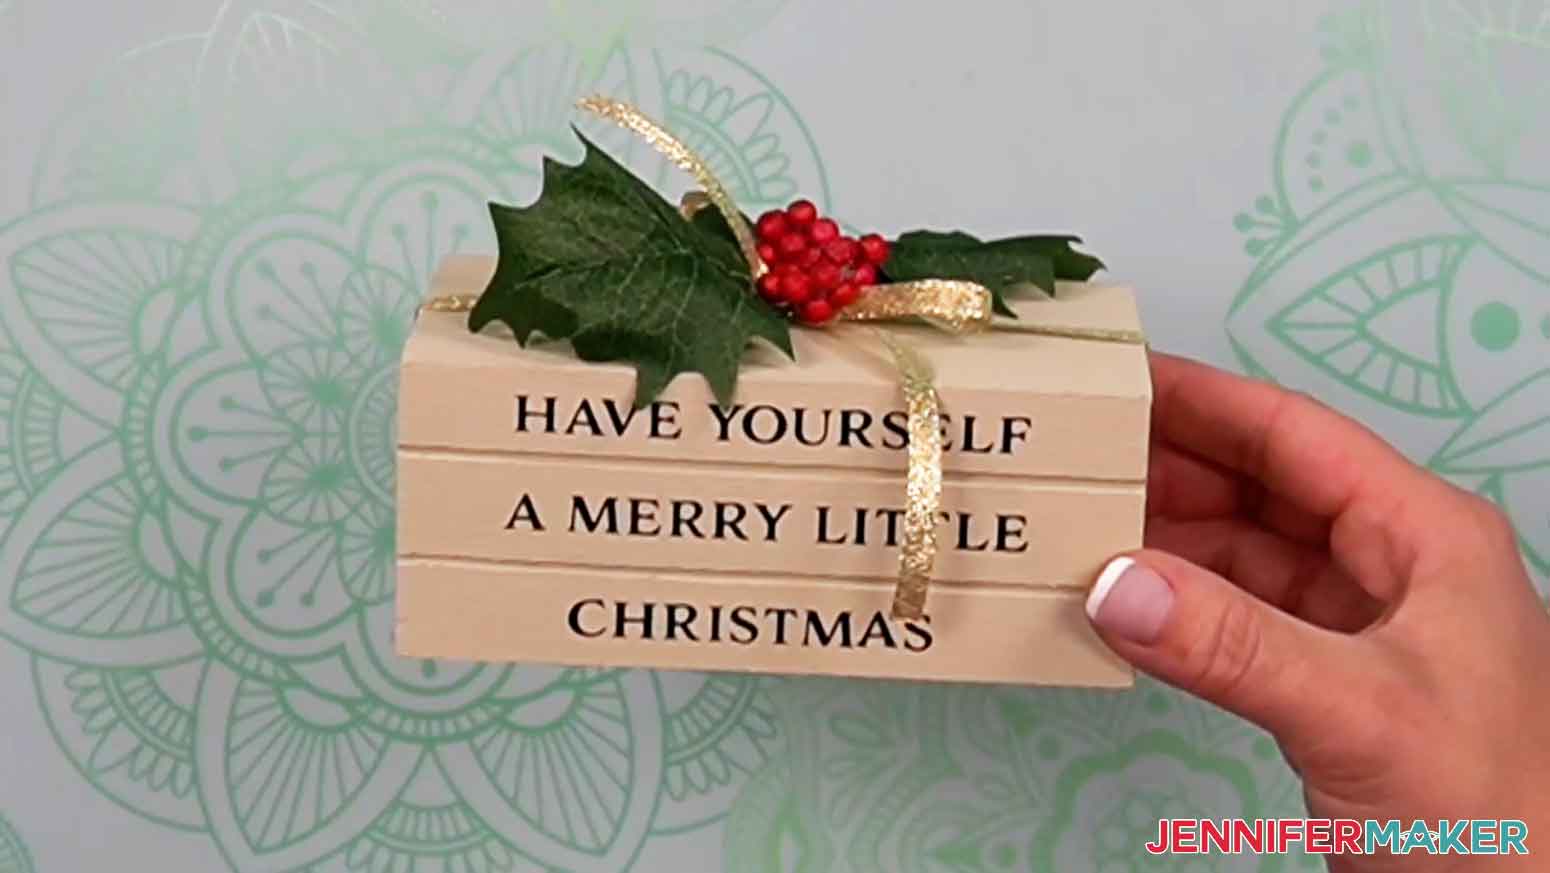
For one book stack, I wrapped wired twine around the wood crate. For the other, I used gold ribbon. Whatever look you'd like, unspool and wrap the twine or ribbon around your wooden crate.
I tied the twine in a knot at the top of the stack and trimmed away the excess twine. I tied the ribbon in a simple bow and trimmed the edges.
Lastly, apply the embellishments of your choice, like holly, a pine cone, and/or leaves!
CANVAS SIGN WITH CHALKBOARD TAGS
The canvas with chalkboard tags incorporates several techniques to create a festive holiday decoration!
First, let's apply the vinyl to the chalkboard tags. The white vinyl can be hard to see on the white backing. For this project, I recommend not layering the vinyl before transferring it to the tags.
Cut a piece of transfer tape slightly larger than your largest white offset letter. Press it to the vinyl and peel away the vinyl backing. Place the white vinyl on the chalkboard tag.
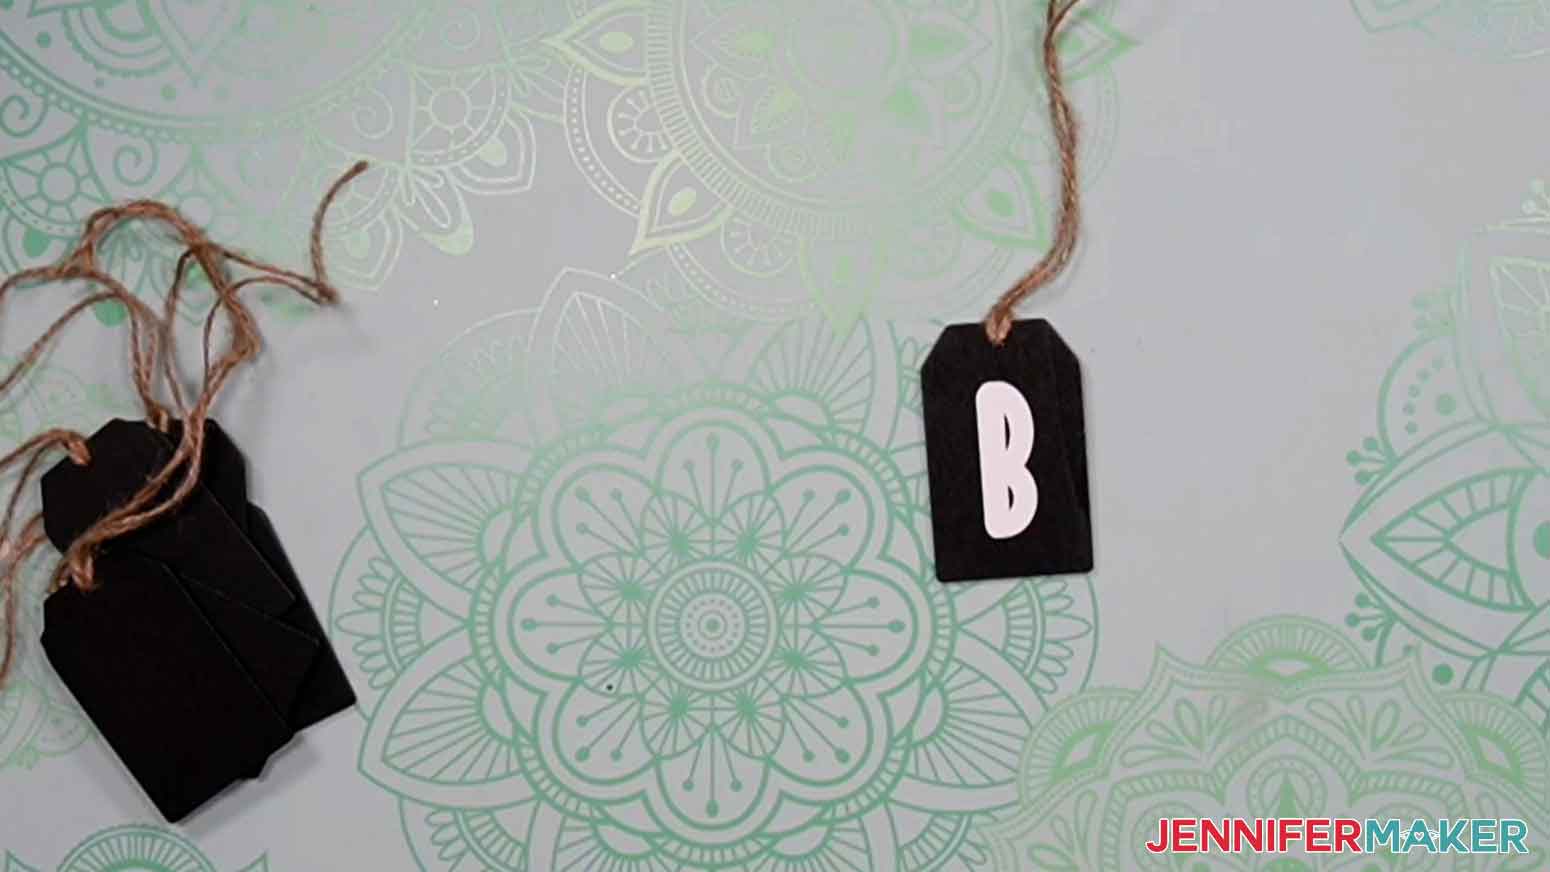
Now that the offset is on the black tag, the outer lines are much easier to see. Place the transfer tape over the corresponding red letter and peel away the vinyl backing. Place the red letter over the white offset. If needed, use a scraper tool to help adhere the vinyl on to the chalkboard tag.
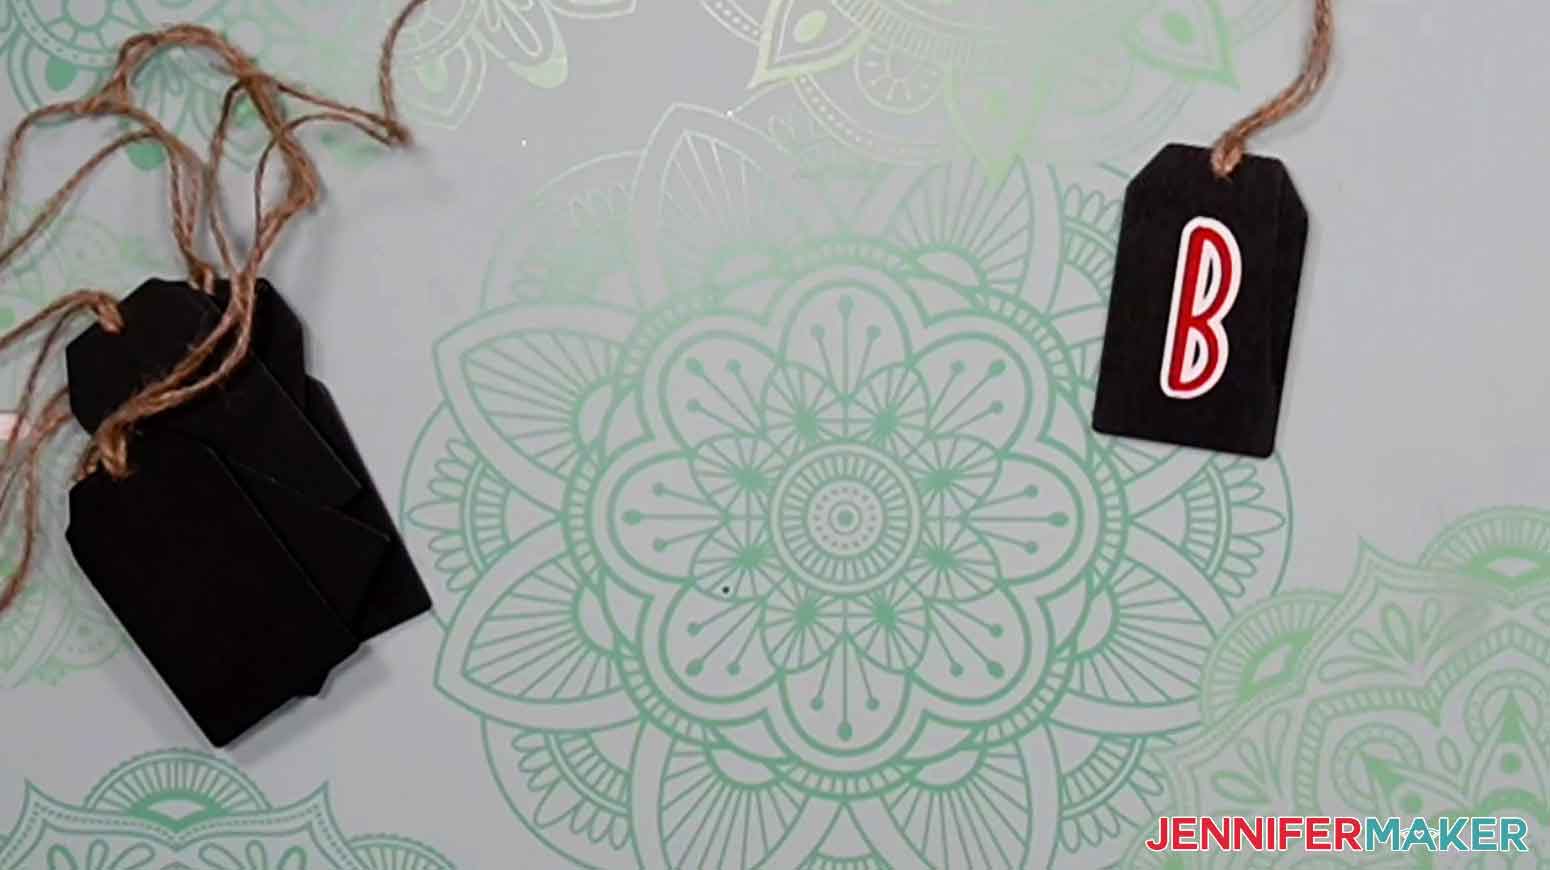
Repeat the application of the white and red vinyl layers to all of the remaining chalkboard tags.
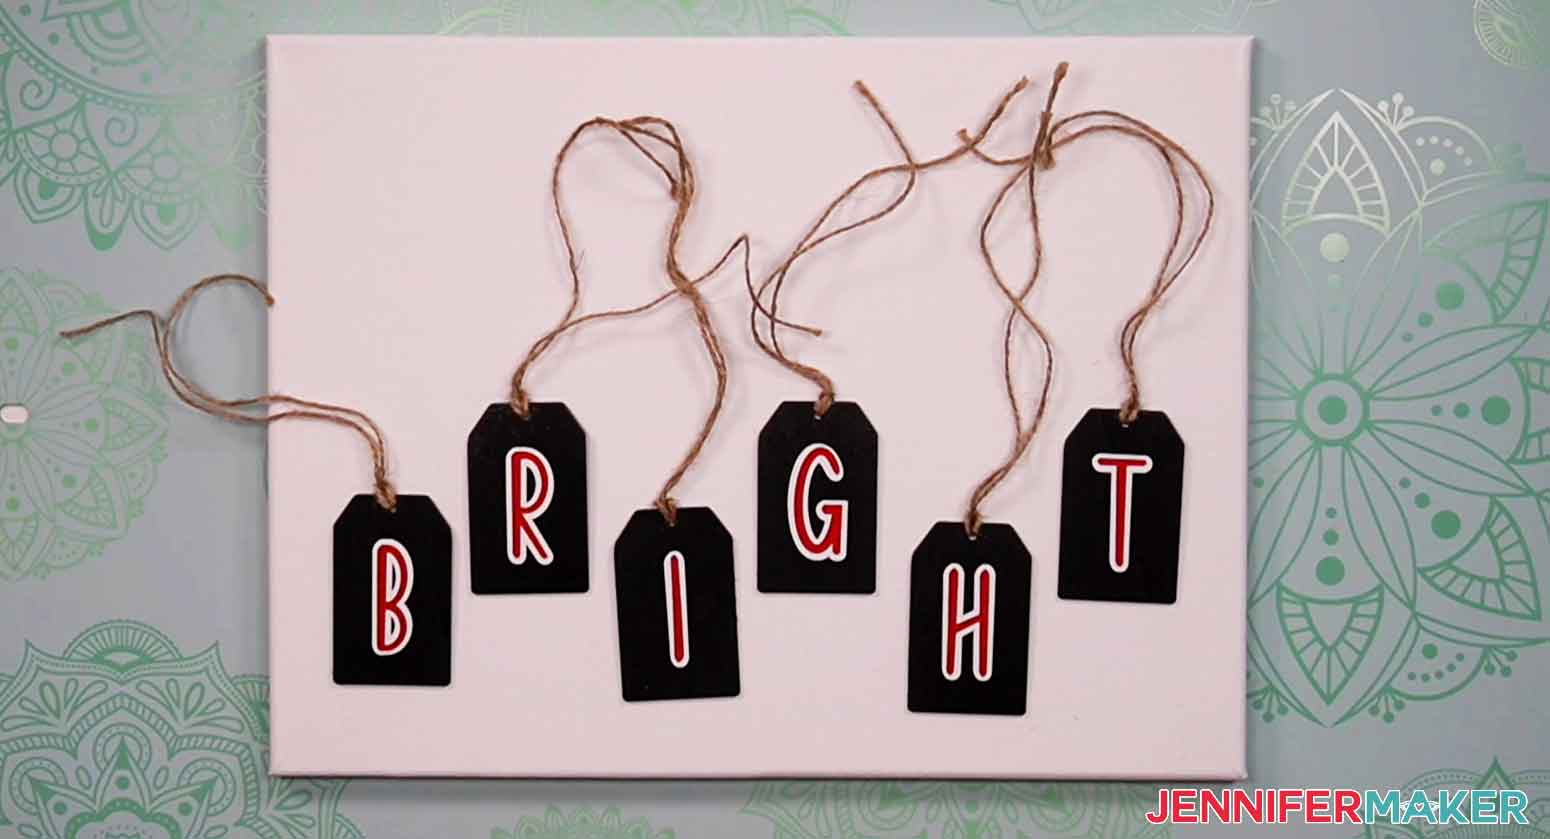
The spacing for this sign can be tricky so let's get our tags on the canvas before the iron-on vinyl. Choose how you want to arrange your chalkboard tags. I'm going to stagger mine up and down, about a 1/4" apart.
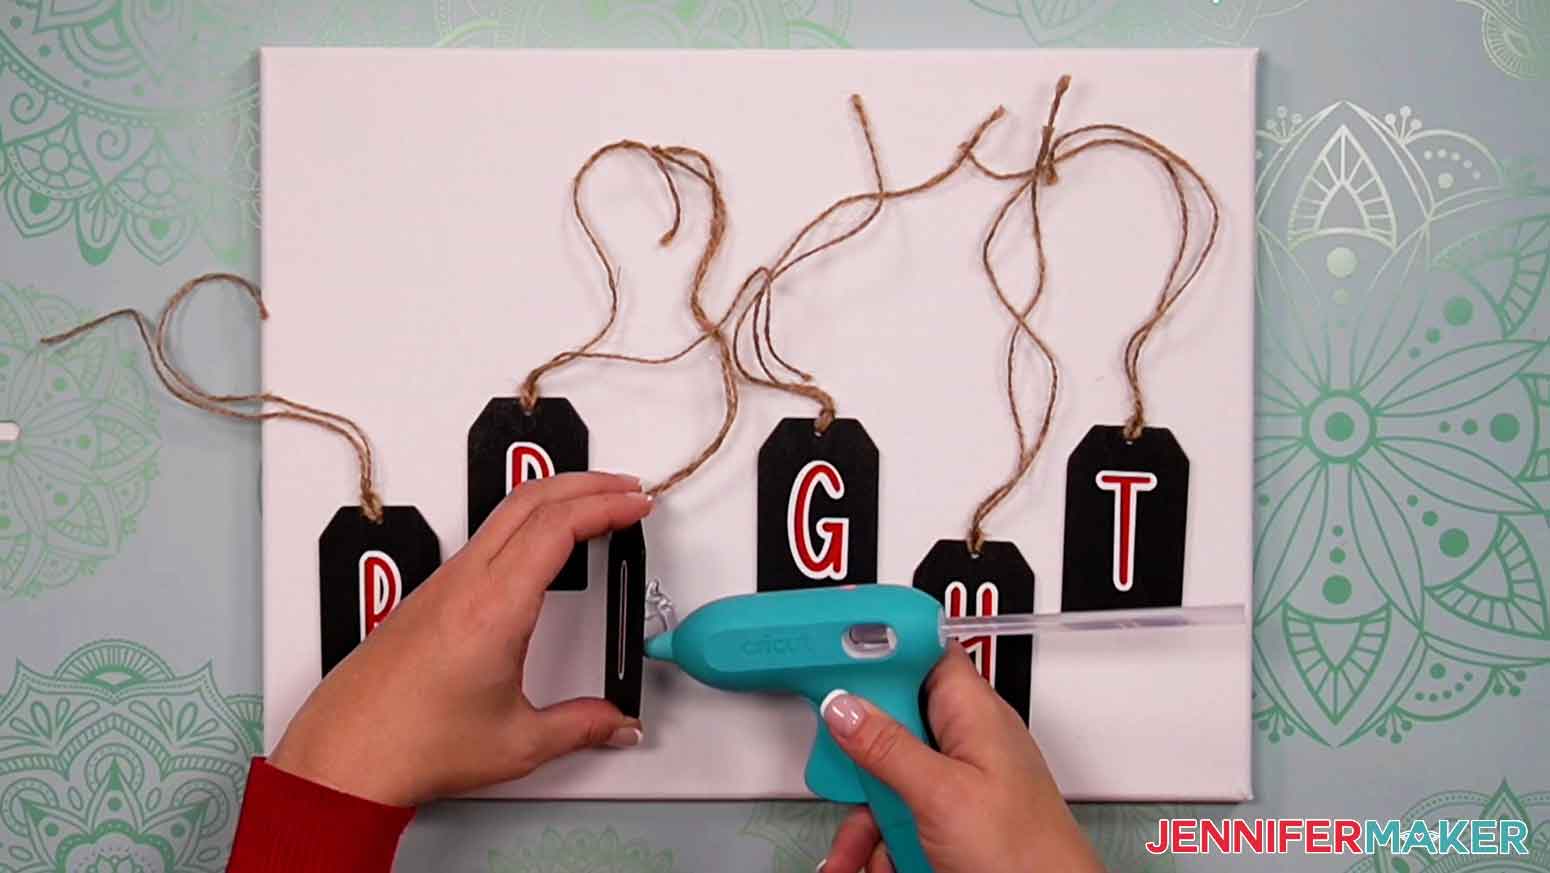
Warm up your hot glue gun and apply a small dab behind each chalkboard tag to secure it on the canvas. Don't worry about the ties for now.
Once the tags are glued in to place, they need something to "hang" from. I chose a cute berry garland but you can use jute twine, ribbon, etc!
The berry garland is wired so I formed it to the shape I wanted. I curved it downward tucked it around the back of the canvas.
Some areas might lift from the canvas so a small dab of hot glue can easily hold it where you want it to lay. I also applied some hot glue to the edges I tied around the back side of the canvas.
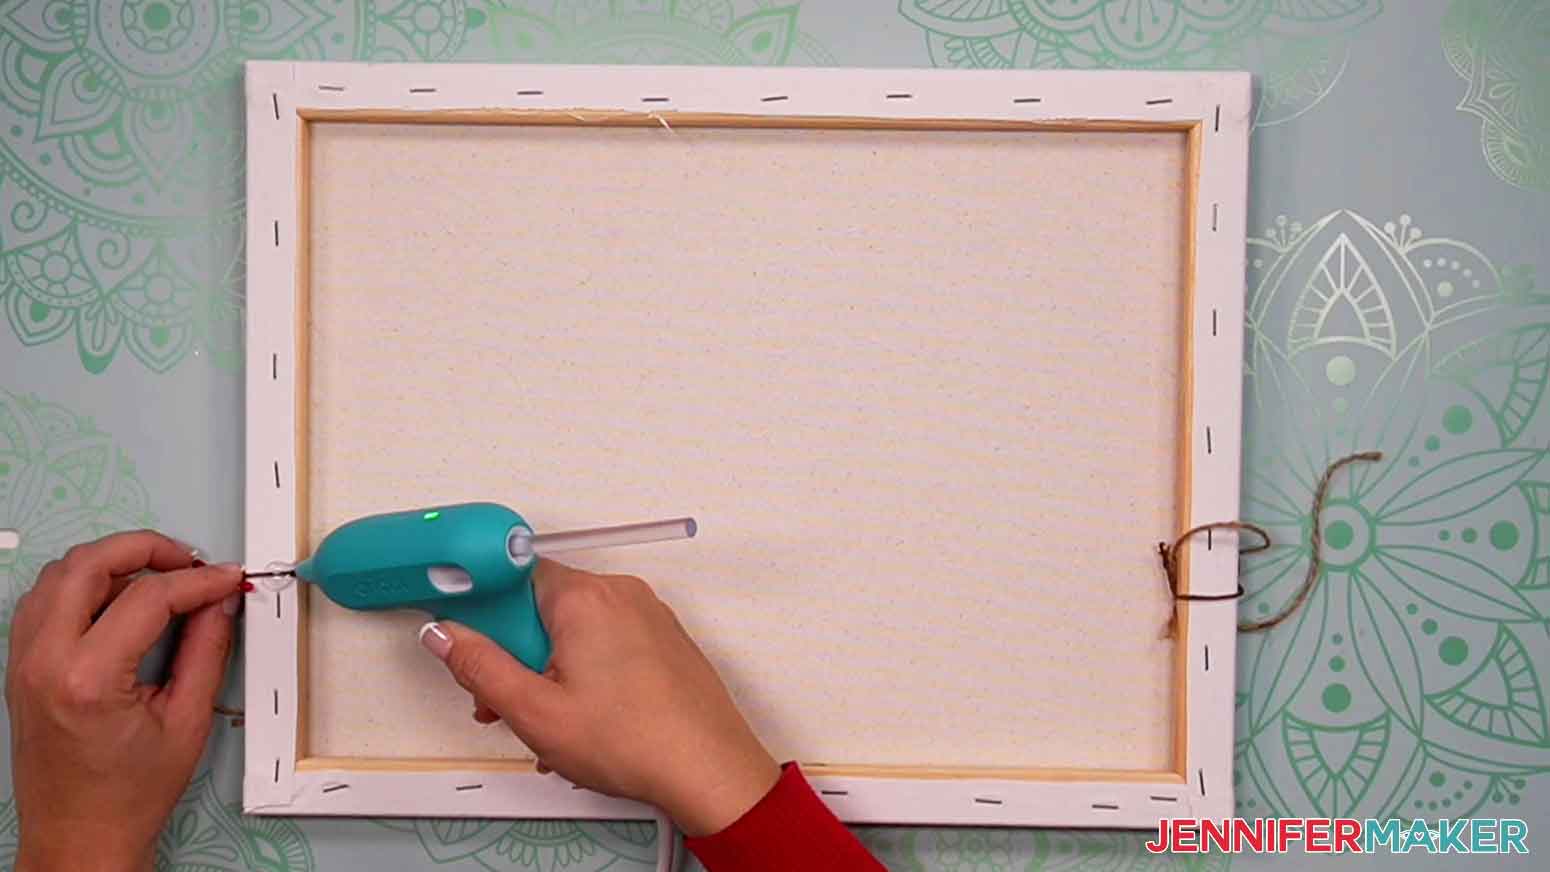
Gently pull the twine from each tag and tie it in a knot around the garland. You want it just tight enough to have a hanging look but not too tight that it puts tension on the garland.
Use scissors to trim excess twine from the tag ties.
Now, let's apply the iron-on vinyl. I used an EasyPress Mini to apply pressure directly to the vinyl and not impact the rest of the canvas design. Place the canvas over an EasyPress Heat Resistant Mat. Preheat the canvas for 5 seconds on medium heat.
Place the "Merry" and "and" iron-on vinyl layers on the canvas. Center them over the chalkboard tags.
Once at a time, press the the iron-on word for 30 seconds with constant movement and firm pressure. Be careful to not make an imprint with the heat press in to the canvas. Flip the canvas sign over and press the design area from the back for 15 seconds.
Remove the liner when cool to touch.
Lastly, I added some leaves and berries in the upper corners for decoration. You can spruce up your canvas however you'd like!
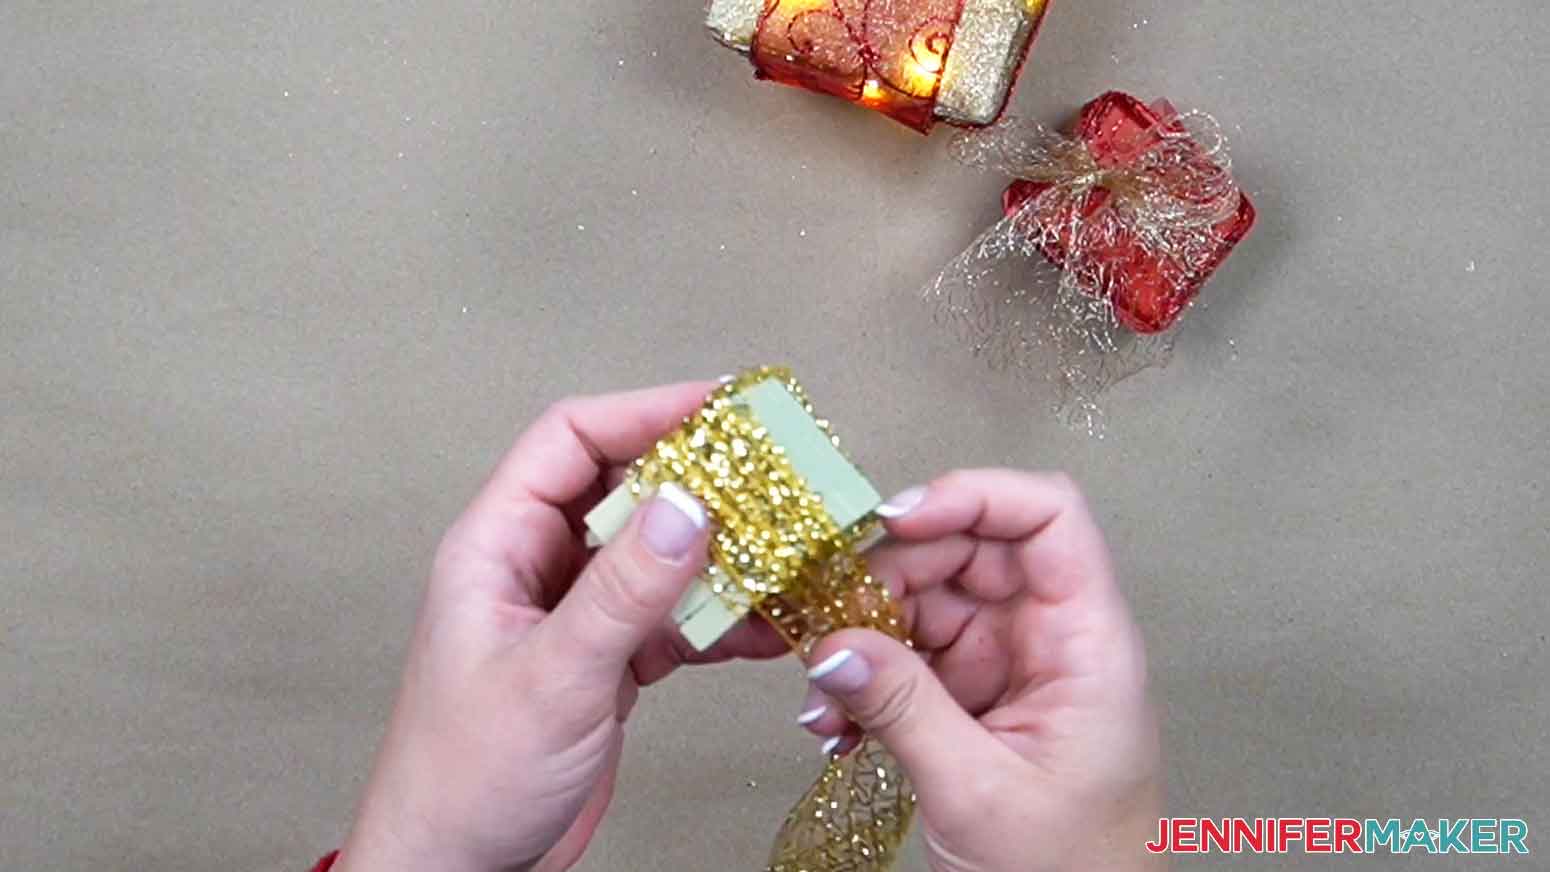
GIFT BOXES
The gift boxes are so easy to decorate!
NOTE: I tried wrapping battery-powered fairy lights around my large box. If you want to do this too, wrap them around your gift box before you begin wrapping the box with ribbon. Leave the battery box on the outside of the ribbon when you wrap the gift box.
Use your ribbon of choice and wrap it around the body of your gift box. You can layer it as many times as you'd like depending on how you want the finished effect to look.
Once you're happy with the ribbon, apply a thin line of hot glue to secure the end. I recommend gluing the ends on the back sides of the gift box.

For the finishing touch, add the accent ribbon and make a bow on the top of the gift box. If you need help on making a beautiful bow, I recommend checking out this tutorial!
Lastly, if you have a battery box, apply a small dab of hot glue to the back of the box and secure it to the back of the gift box.
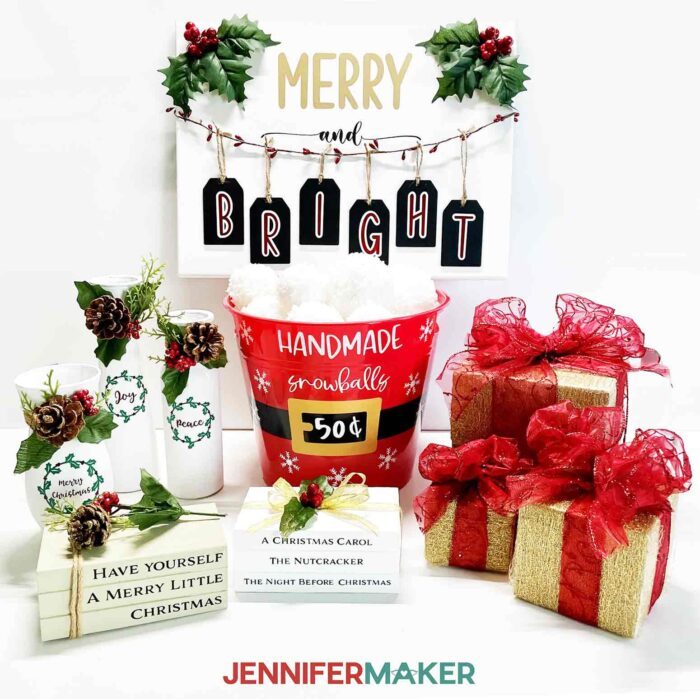
STEP 5: SHOW IT OFF
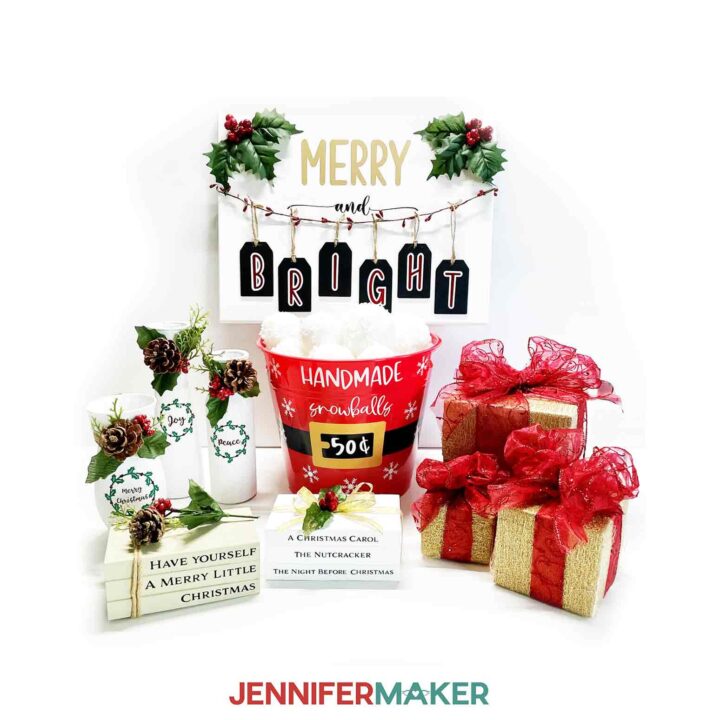
Look at all of these beautiful decorations! I can't wait to see all of your DIY Christmas Decor!
Notes
FONTS
Snowball Bucket: Farmland Acres / Free Alternative: Delight Winter
Wreath: Tingler Script / Free Alternative: Timberly
Stacked Books: Adorn Serif / Free Alternative: Waldorf Astoria
Recommended Products
As an Amazon Associate and member of other affiliate programs, I earn from qualifying purchases.

Answers to Your Questions About DIY Christmas Decorations
Q: How can I make cheap Christmas decorations?
A: Visiting the dollar store (instead of the craft store) is a great way to get inspiration for inexpensive Christmas crafts! Even better, think of ways to use your favorite decorative items in different ways so you can save by buying in bulk. I’m sure you’ll make great projects like these!
Q: What can I make for Christmas decorations?
A: I have lots of holiday DIY ideas! You can make projects with mason jars, snow globe homemade ornaments, and etched or clear glass ornaments!
Q: Can I cut this project on a Cricut Joy?
A: Yes, several designs are small enough to cut with a Joy. See our Resizing Guide for more details.
Q: What is Merry Maker Mingle?
A: Each day in December leading to Christmas, I present you with a brand new “gift” — a project to craft, make, or do from our DIY advent calendar. You can make these projects on a Cricut cutting machine or by hand if you don’t have one. Most of our Merry Maker Mingle projects will come with a fun video with yours truly, a step-by-step printable photo tutorial, and a free pattern/SVG cut file. Sign up to get daily updates and prizes! I’ll share each project by opening a gingerbread house from our Christmas village every day!
Get my free SVG files to create DIY Christmas decorations!
I love seeing what you make with my designs and how you use them! Please share a photo of your DIY Christmas decorations in our Facebook group or tag me on social media with #jennifermaker.
Love,

Want to remember this? Save this DIY Christmas Decorations Tutorial to your favorite Pinterest Board!