
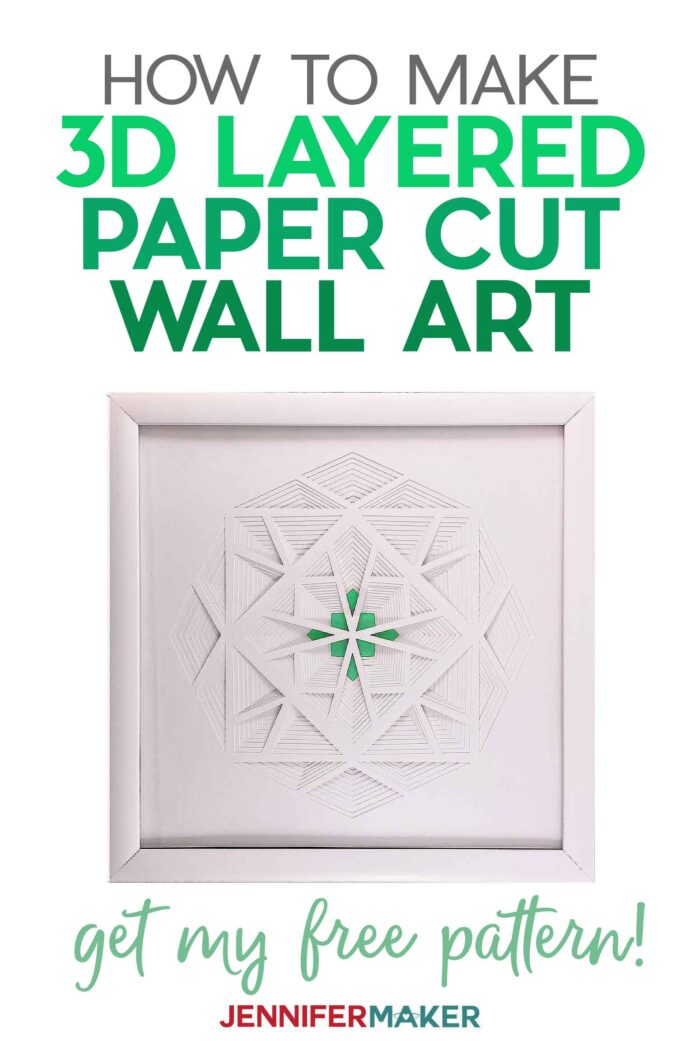
Learn how to make breathtaking 3D layered cut art that looks difficult but is really SO easy to do!
Last weekend we shared the first of four 3D layered paper cut designs and so MANY of you made it … your photos really made my heart happy! As promised, we’re sharing the second one this weekend so you can continue your collection (there are four designs in total). These 3D layered paper cut art designs look complicated, but they are really so much easier than you’d think — you really just load your cutting mat with paper, cut, and stack each layer together. Seriously … it’s that easy! Come turn a short stack of paper into some pretty 3D layered cut art with us!

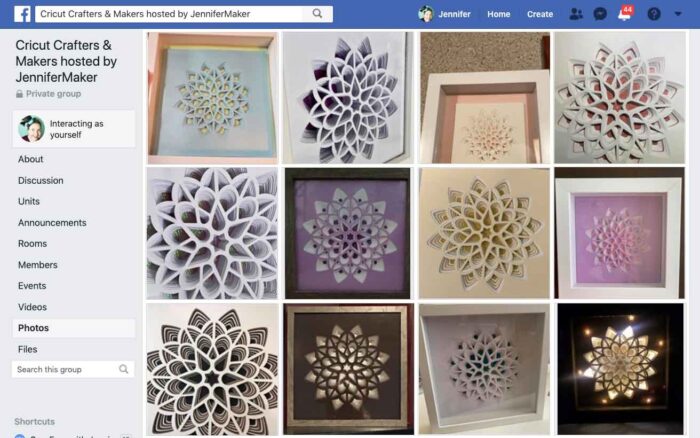
To inspire you to try this lovely layered design, here are just a few of the photos of the paper art you all made from last week’s design and posted in our Cricut Crafters & Makers Facebook Group (there are many more if you’d like to check our photos and get inspired!)
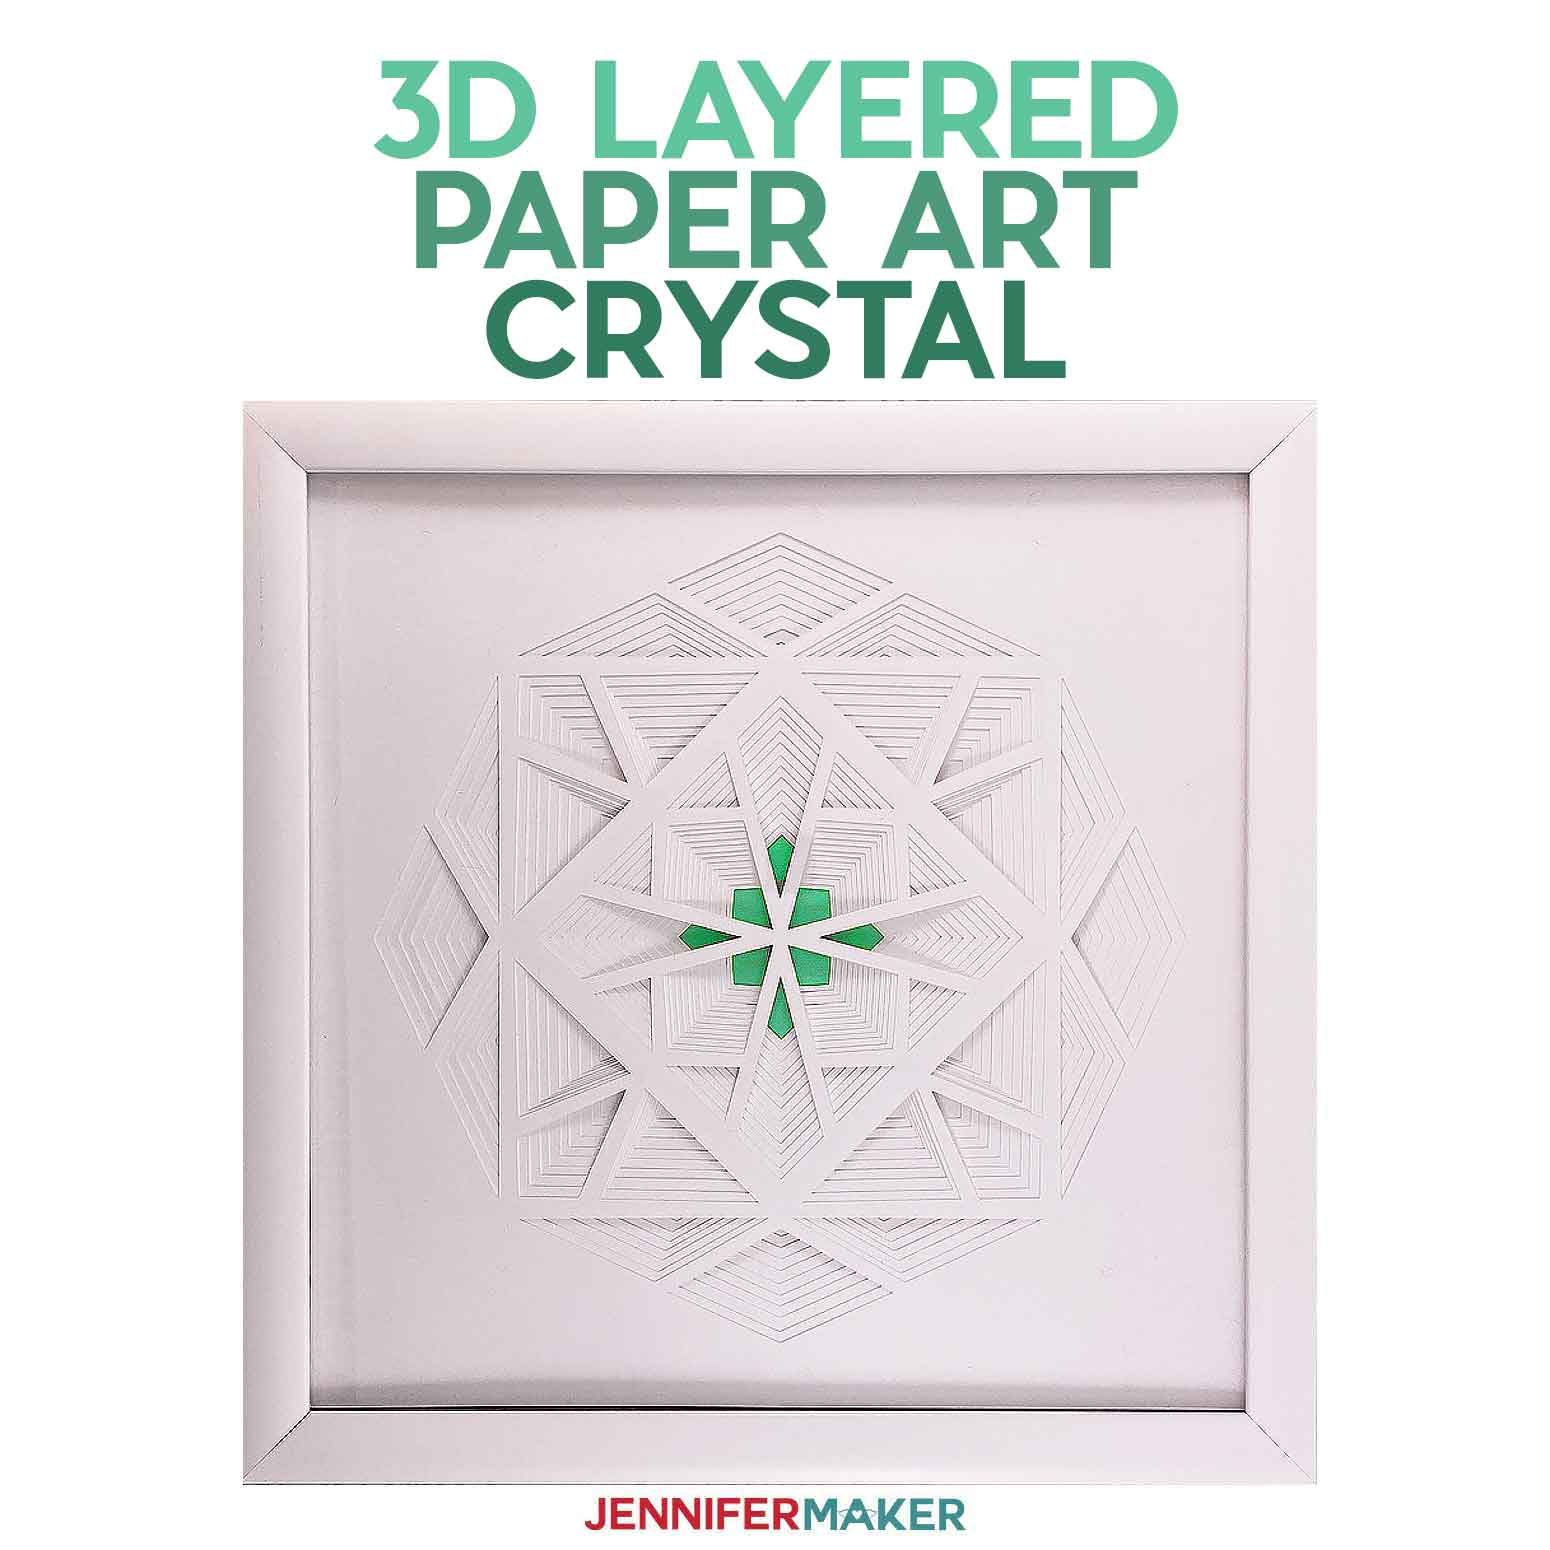
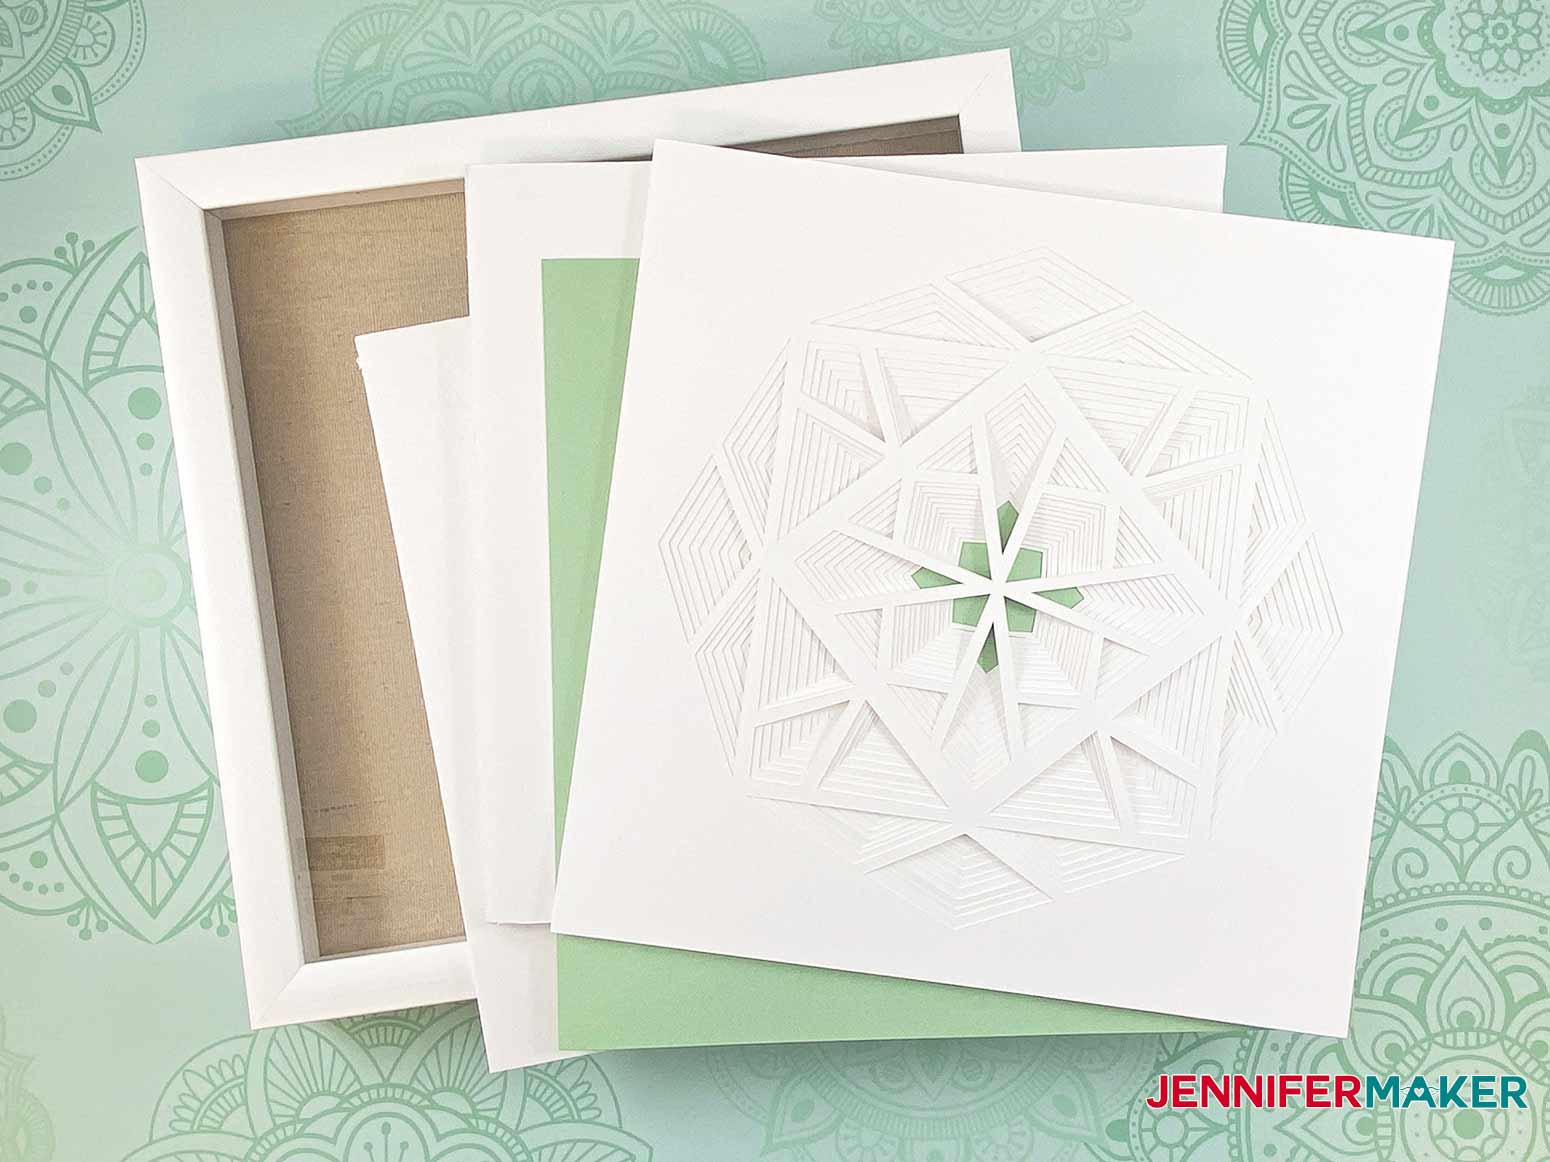
To make a 3D layered paper art crystal, all you need is at least 13 sheets of basic 12″ x 12″ white cardstock, one more sheet of 12″ x 12″ cardstock in a contrasting color, and a way to keep your layers together, like a frame. Of course, you don’t HAVE to use white cardstock — many people choose to use other colors, which looks really cool! The look of this design changes a lot based on what colors you used.
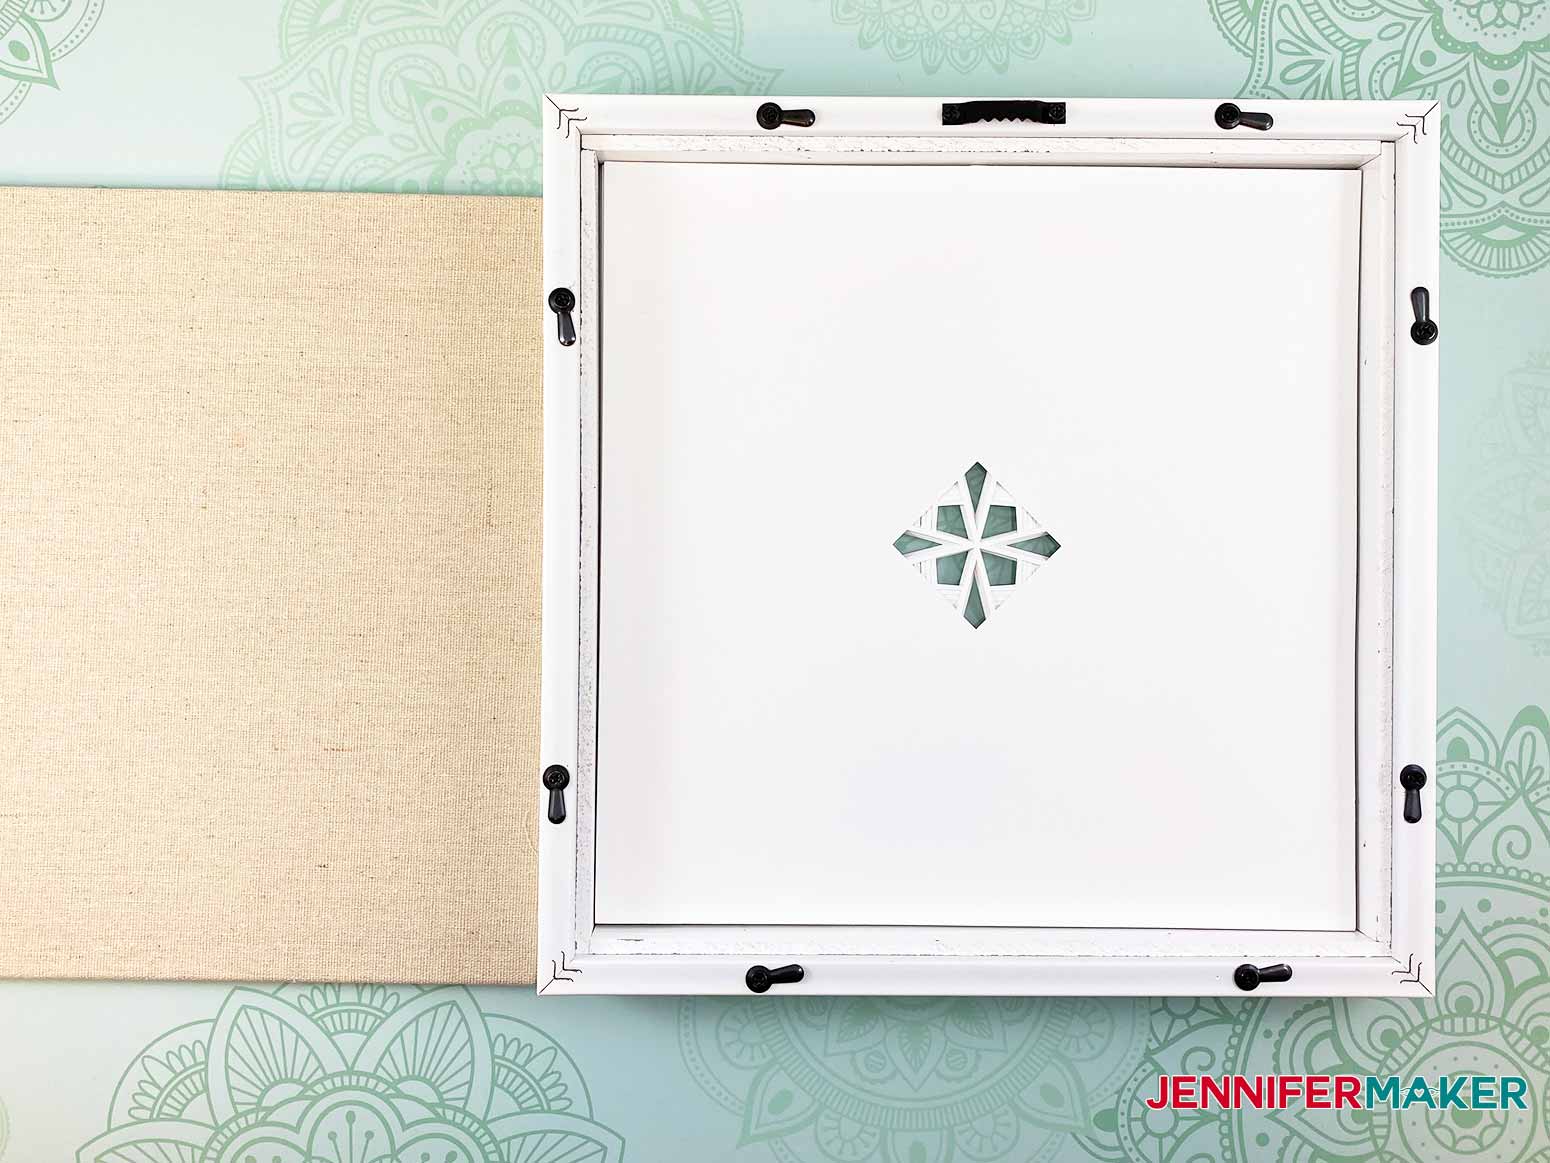
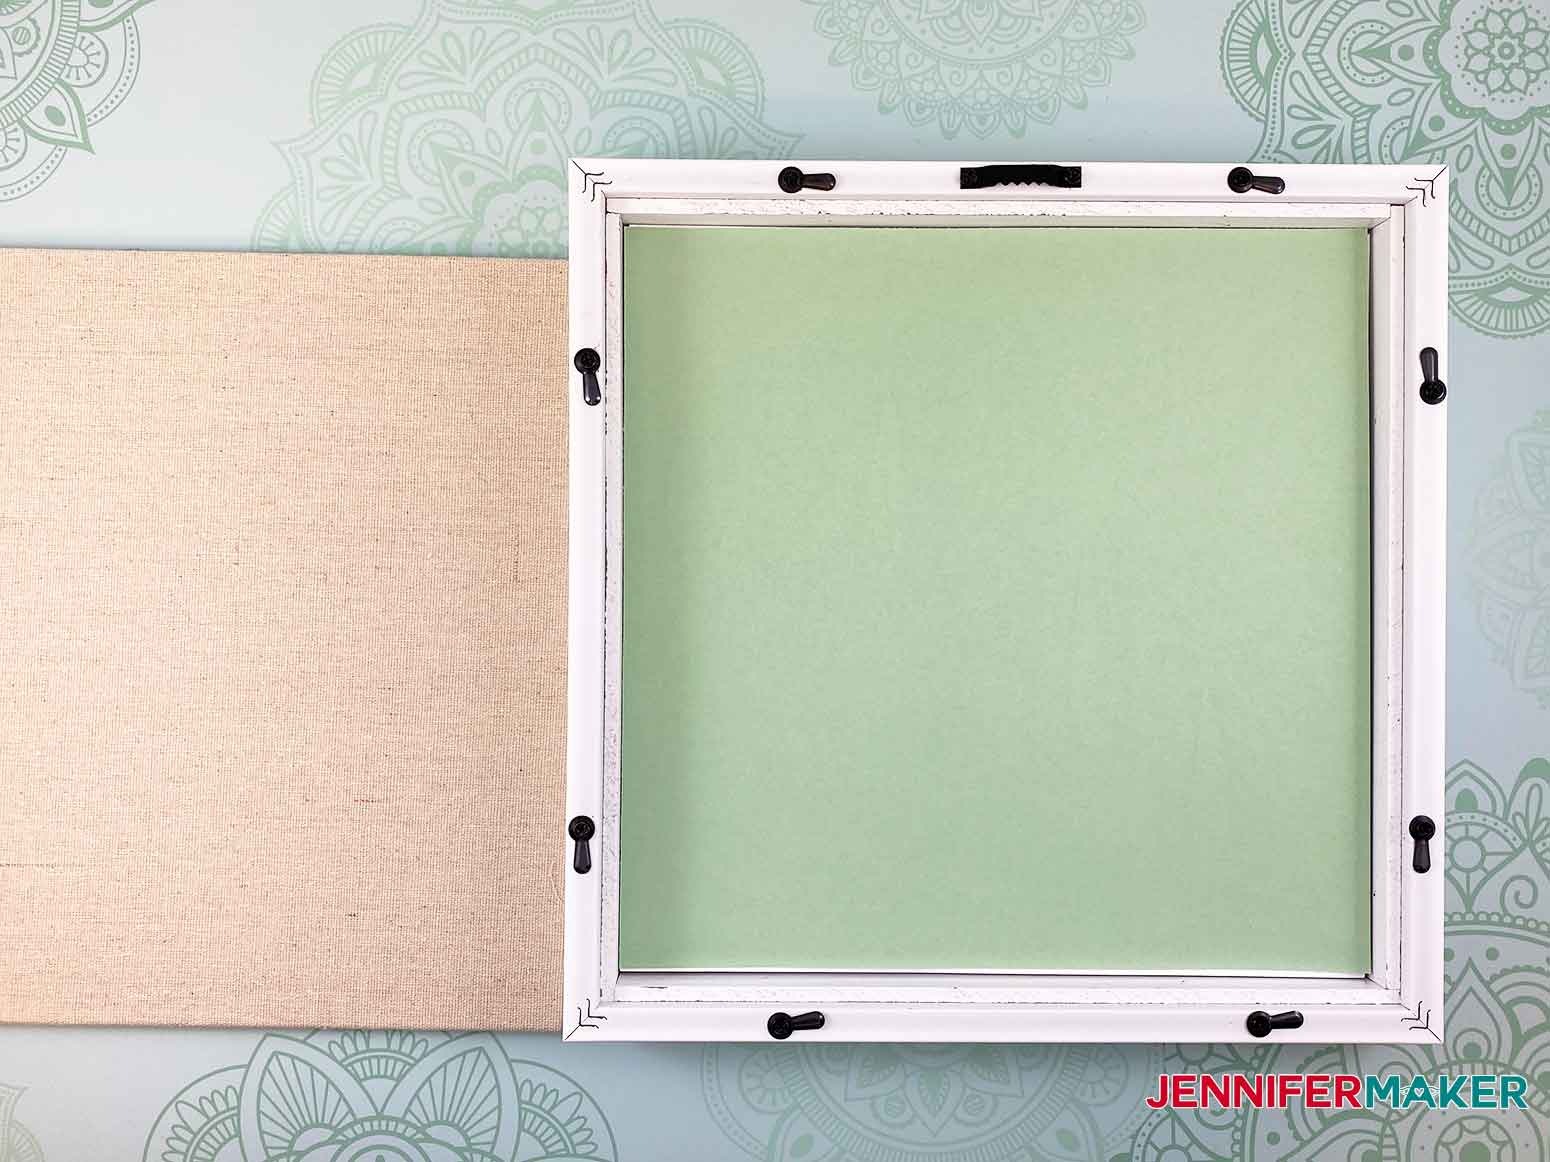
You don’t need to use any spacers between the layers — there are so many that the paper itself creates its own 3D look. But I do recommend you use foam core underneath the last layer to keep the paper in place inside your frame. If you don’t have a frame for your paper art, you could use spray adhesive on the back of each layer to keep it all attached instead.
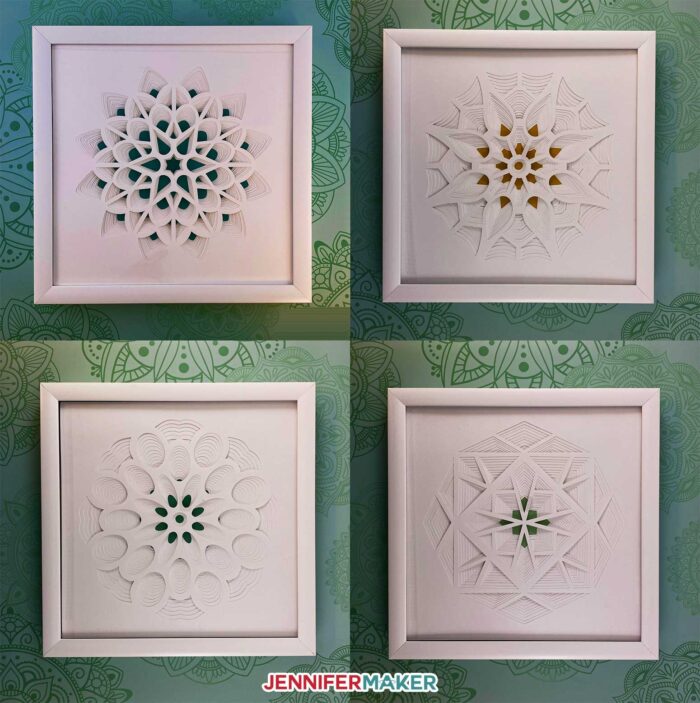
We’ve designed four different FREE 3D layered paper cut patterns for you to try, and they’re all very easy! We’ve already released the flower, which you can find here. The other two will be released over the month of July. Here are all four of them together:
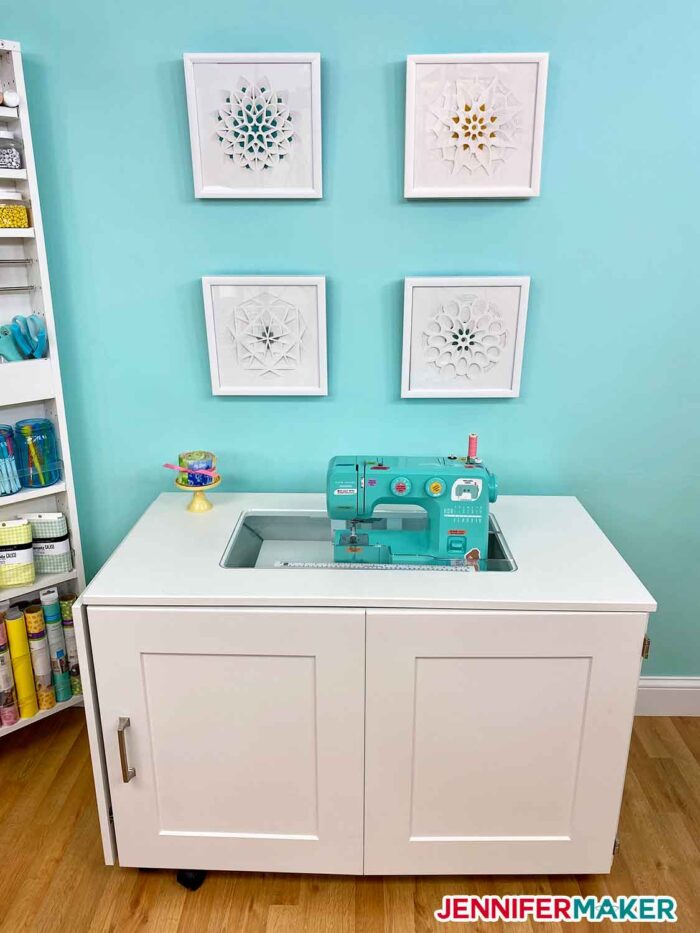
And here’s a closer look at all four of these framed beauties:
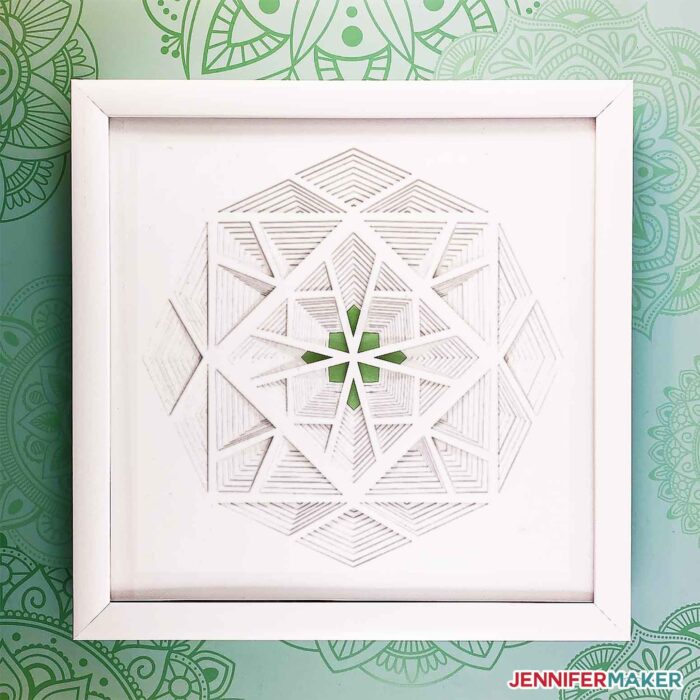
Today we’re releasing the beautiful crystal 3D layered paper cut art design — which I think looks a lot like a diamond! This pretty design has 14 layers.
Let me show you how easy it is to make this 3D layered paper art crystal diamond design! This post contains some affiliate links for your convenience (which means if you make a purchase after clicking a link I will earn a small commission but it won’t cost you a penny more)! Read my full disclosure policy.
Materials to Make a 3D Layered Paper Art Crystal Diamond
View my Amazon shopping list with the exact items we used to make this project!
- 80 lb. 12″ x 12″ cardstock, 14 sheets (I used 13 white and 1 green, but you can use any colors you wish!)
- Foam core (2 pieces of 10″ x 10″)
- 12″x12″ Shadowbox Frame
- XL Scraper (or a plastic store loyalty card)
- A cutting mat for your Cricut (green or blue works, just make sure it’s sticky!)
- Scissors to cut your foam core or foam mounting tape
- A ruler (helpful for lining things up)
- A way to cut your layers (I used the Cricut Maker cutting machine but they can also be cut on a Cricut Explore — you can even do a Cricut Joy if you resize things down)
- Design #229 (My free SVG design file available in my free resource library—get the password by filling out the form at the bottom of this page)
How to Make a 3D Layered Paper Cut Art Crystal or Diamond
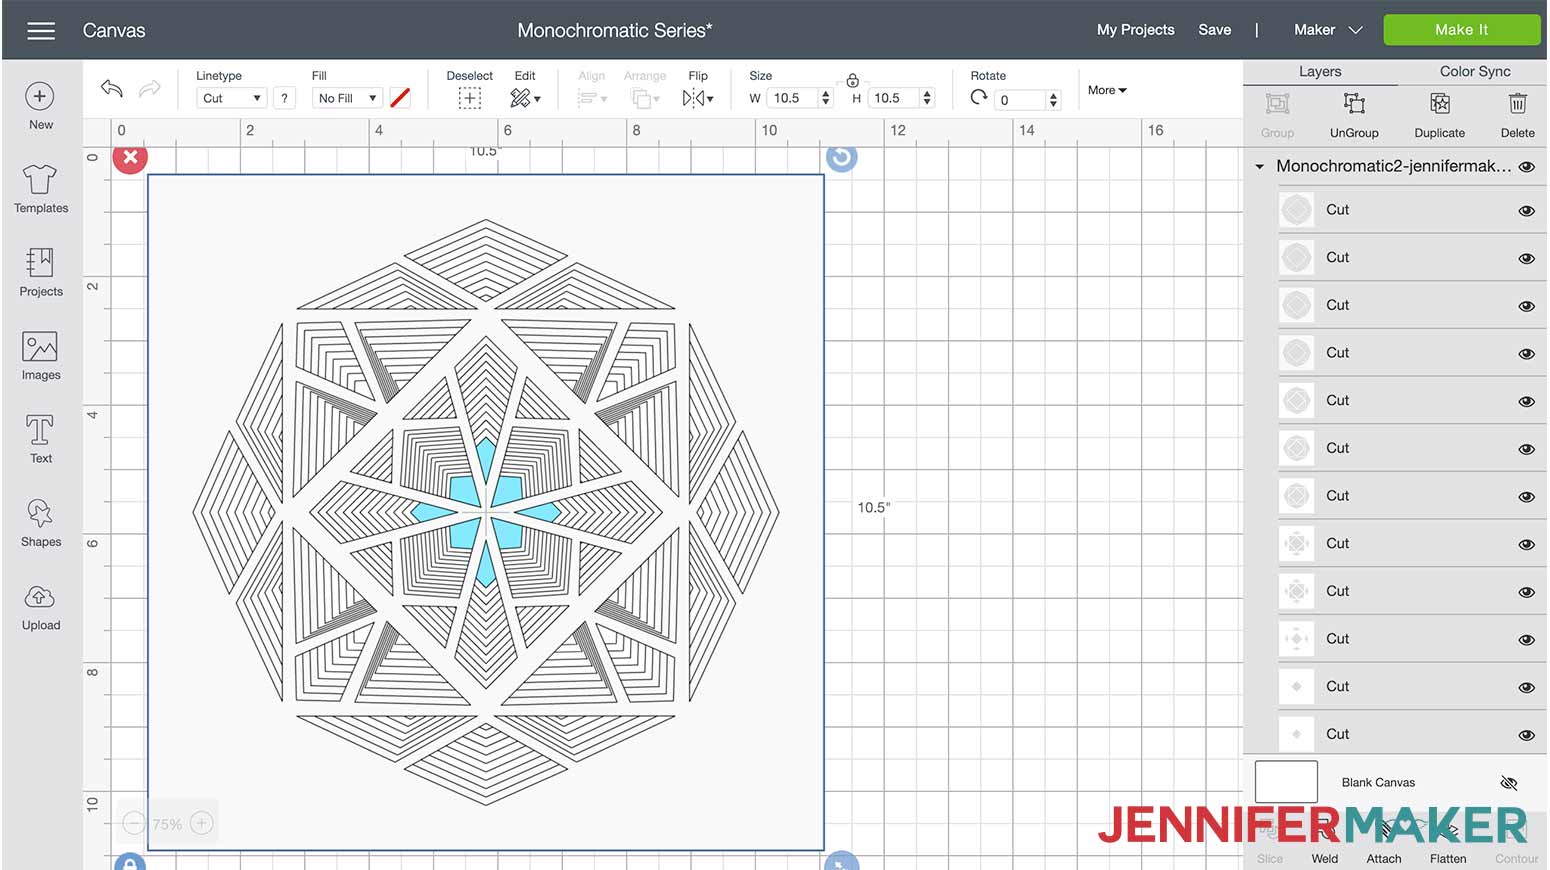
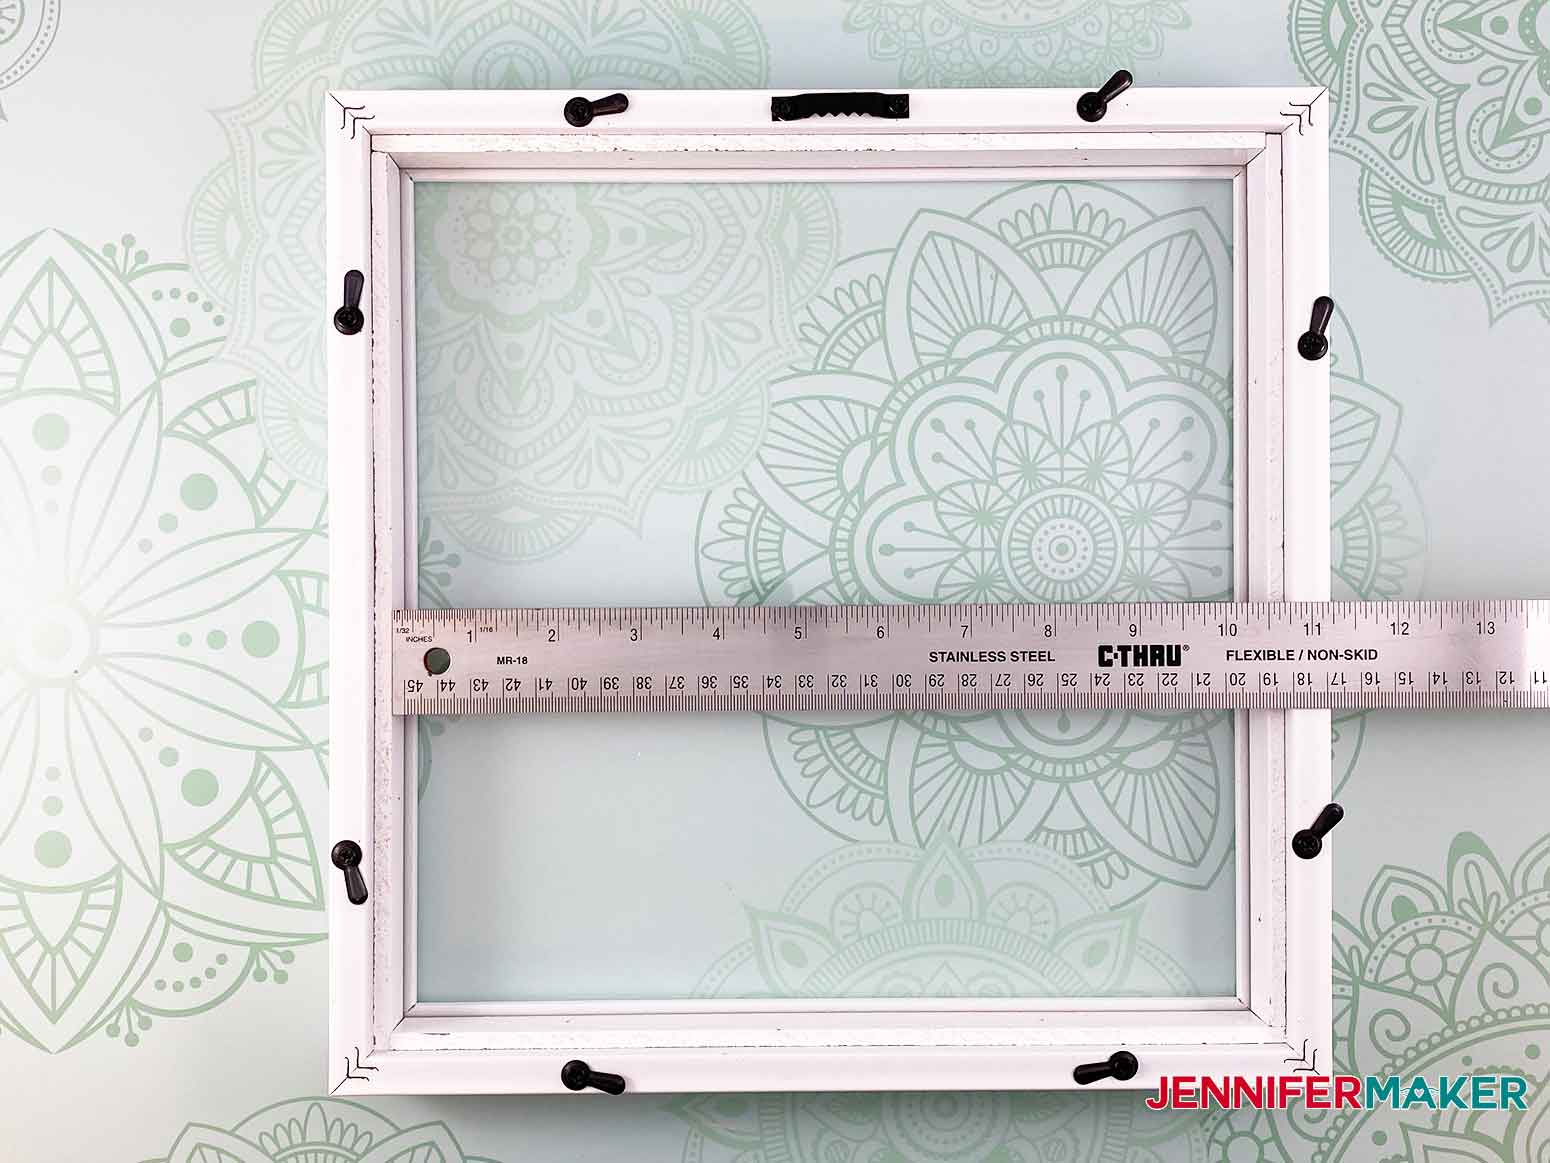
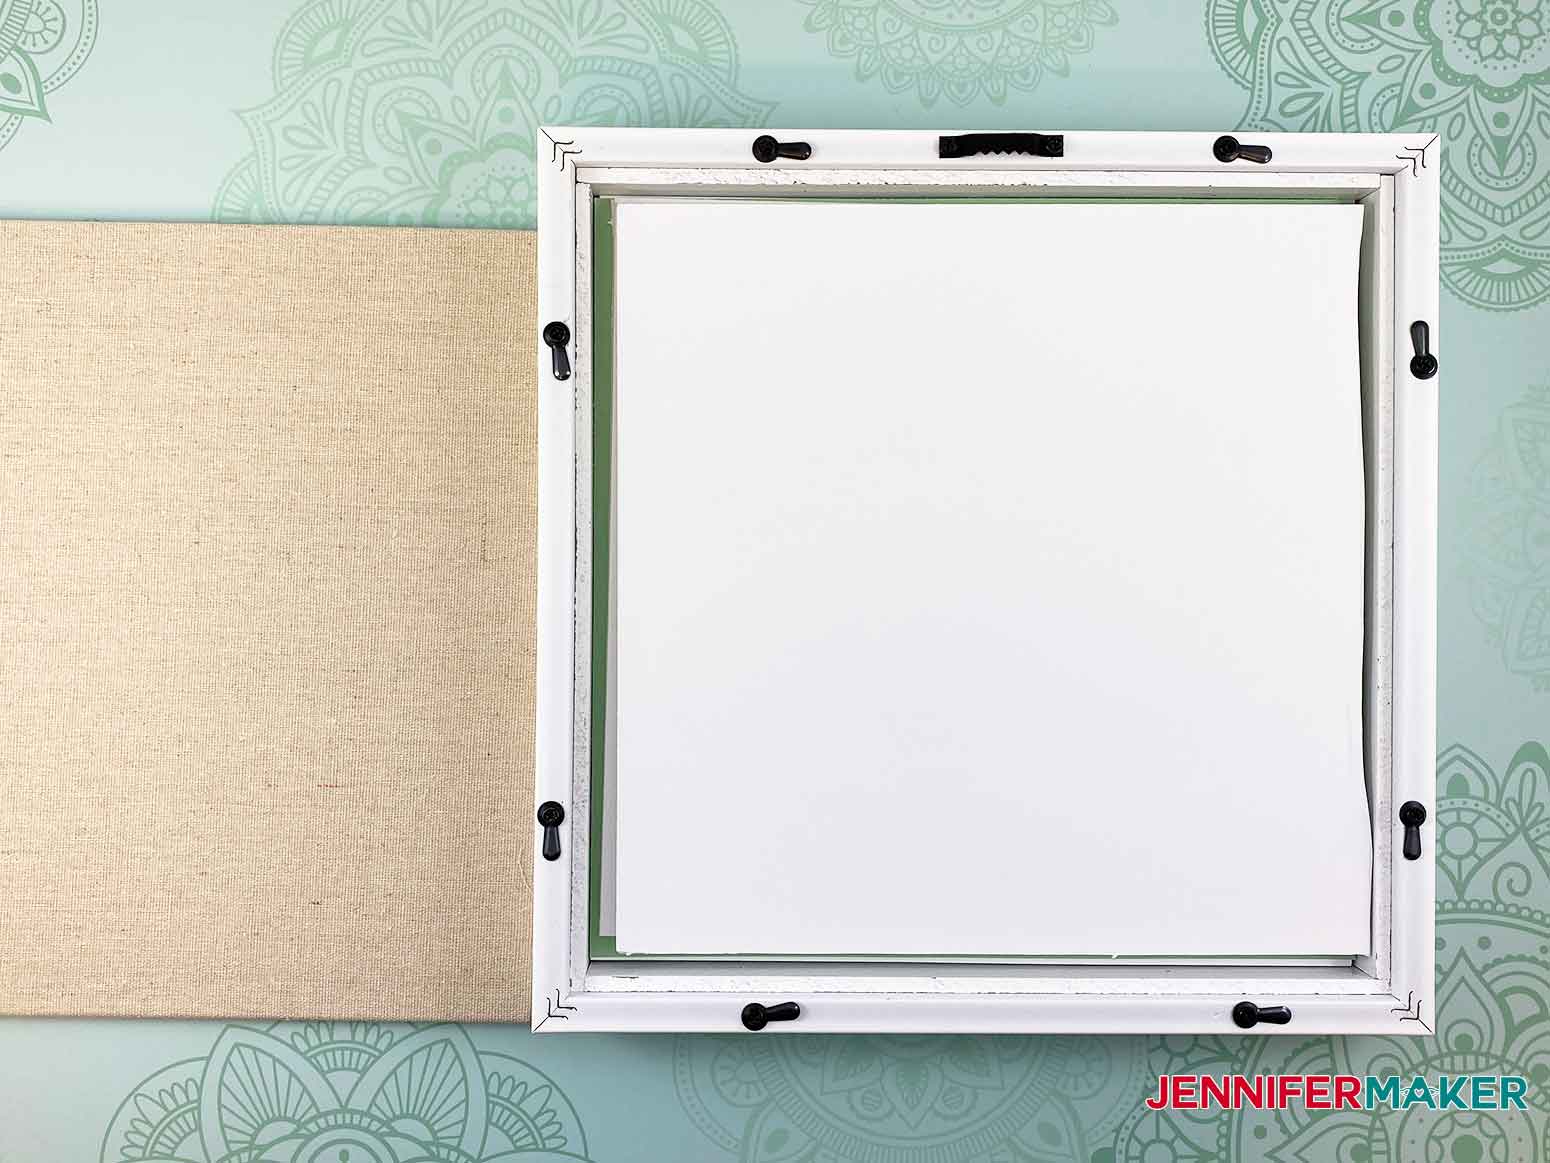
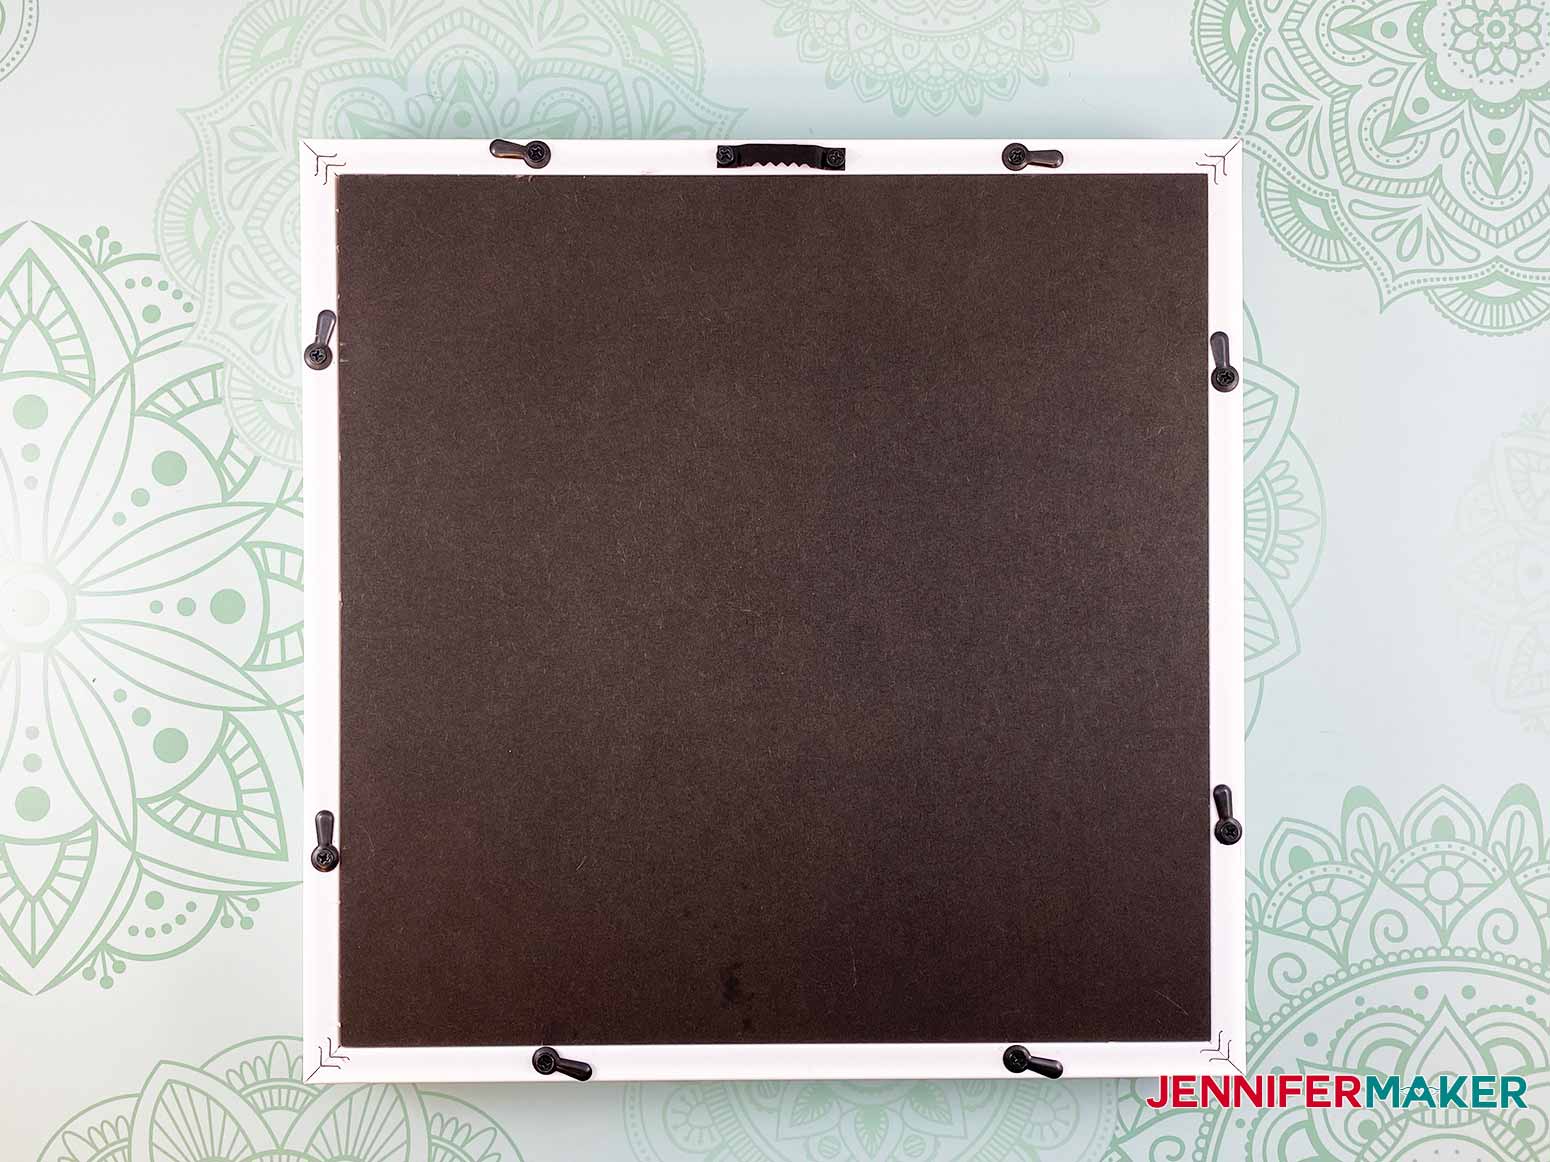
This tutorial shows you how to make my 3D layered paper cut CRYSTAL framed art project. First, download Design #229 which is my free paper art SVG/DXF/PDF. It is available from my free resource library. If you're going to cut it on your cutting machine, upload the file to your design software. This is what my the "crystal" file looks like in Cricut Design Space. Tip: If you're not sure how to upload an SVG cut file to Cricut Design Space, watch this helpful video training series I made. If you're on an iPhone or iPad, here's how to download and upload SVG files to the Cricut Design Space app. Note: If you're going to cut this on a Cricut Joy, resize the entire design to about 4". This design contains 13 layers for the design plus one contrasting cardstock layer for the back. Each of the 13 layers takes approximately 5 minutes to cut. Measure the inside space of your frame and adjust the measurements of the design file to fit. The file is sized 10.5" x 10.5" which fits my shadowbox frame perfectly. Cut each layer of the design. I found it is helpful to put the finished layers in order as they are cut. I used my extra large scraper to remove paper pieces left on my mat from cutting the design. Once all paper layers are cut, gather your supplies for assembly. Make sure the cut cardstock layers are placed in the correct orientation. This is what your cut layers should look like with proper orientation. I found it helpful to put the layers in order as they are cut. Open the back of your frame. Insert the cardstock layers into the frame. Add the one contrast layer of cardstock. Add two layers of foam core cut slightly smaller than the inside of your frame to fill up the empty space so the cardstock does not slide around. If you are using a different frame than mine, add enough foam core so that the cut layers have no room to slide around. Place the back on the frame of your 3D layered paper art. Special thanks to the JenniferMaker Design Fairy Team, specifically Design Fairy Caitlin, for helping me design and assemble this beautiful framed art.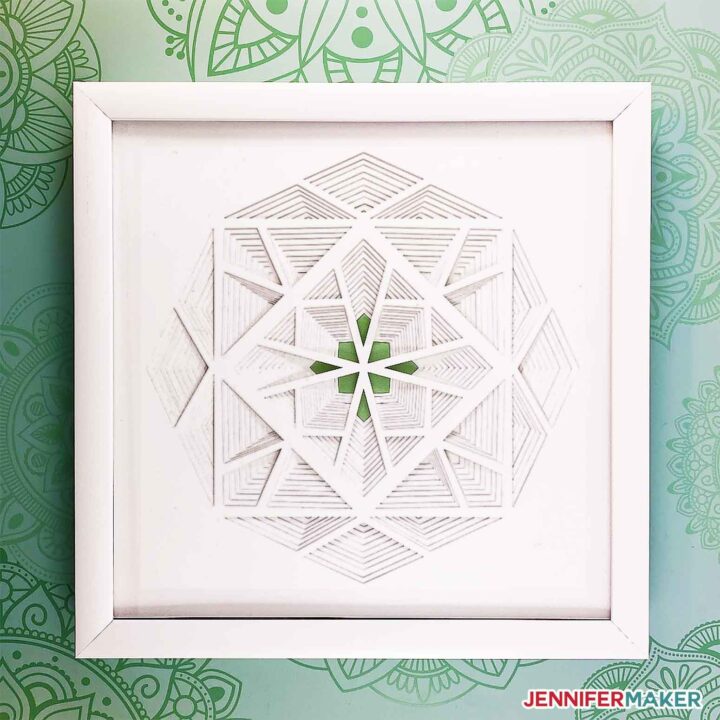
3D Layered Paper Cut Art Crystal (Series 2 of 4)
Materials
Tools
Instructions
STEP 1: Get my Layered Crystal Design
STEP 2: Cut the 3D Layered Paper Crystal Design
STEP 3: Assemble the 3D Layered Paper Art Design

STEP 4: Show it Off
 You are now ready to hang your beautiful piece of artwork. This is what the monochromatic framed art looks like completely assembled.
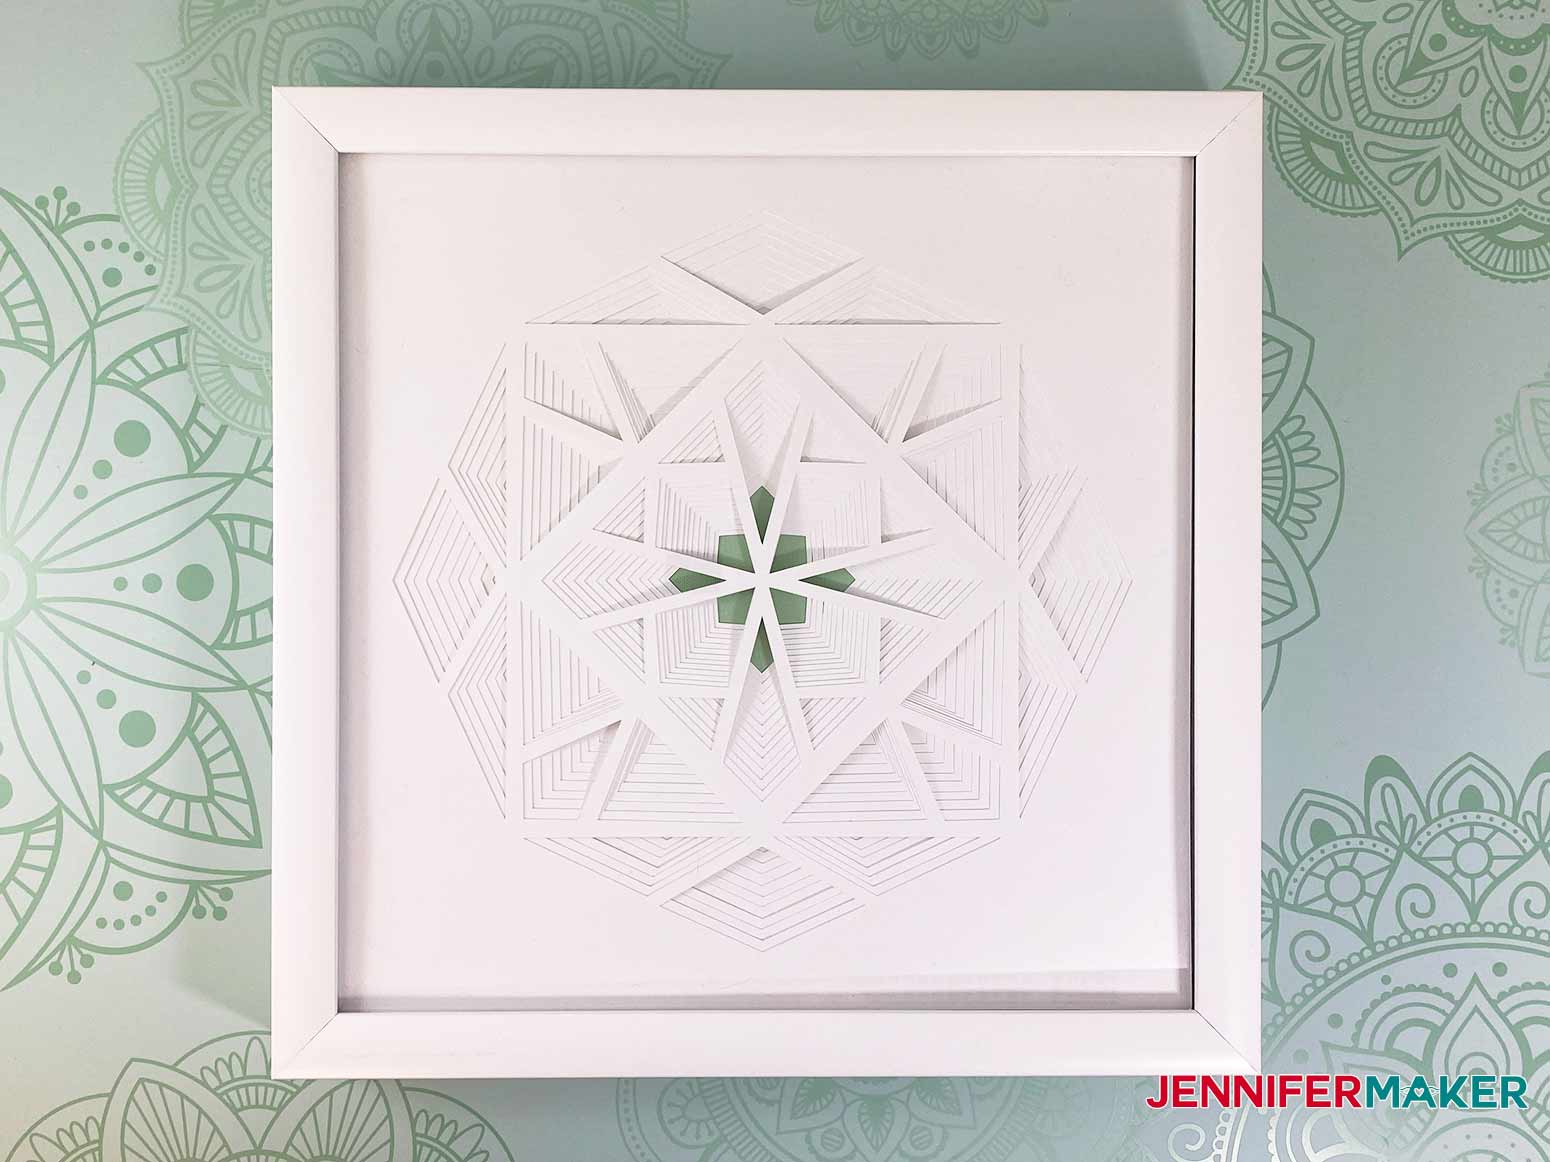
Notes
ACKNOWLEDGMENTS
Answers to Your Questions About Making 3D Layered Paper Cut Designs
Q: Can I cut this design on my Cricut Joy?
A: Yes, it should be able to make it if you reduce it down in size once you upload it to Design Space. Just make sure it is under 4.25″ wide. If you’re unclear on how resize SVG designs, please see my resizing tutorial.
Q: How do I resize this in Design Space to fit my frame?
A: I have a blog post that explains How to Resize SVG Files in Cricut Design Space.
Q: Can you use 65 lb cardstock? Or a different weight of cardstock?
A: Yes, you can. Just make sure you choose the appropriate setting for your material.
Q: My blade gets dull while I’m cutting, is there anything I can do?
A: Your blade might not be getting dull, it might need to be cleaned. Take a look at my Cricut Blade Cutting Tips post for troubleshooting help. Here’s a video that shows how I clean my blade to keep it cutting nicely:
Get my free SVG files to make your own 3D Layered Paper Cut Crystal!
I cannot wait to see YOUR 3D layered paper cut design! Please share a photo in our Facebook group or tag me on social media with #jennifermaker.
Love,

Want to remember this? Save this 3D Layered Paper Art Crystal tutorial to your favorite Pinterest Board


I love the geometric architecture patterns. The depth show you the construction of the design,also the strength of the design by each layers. It is a beautiful creation
I do not have a Cricut machine or other, but for me the creation of any project is fantastique.
Merci Jennifer Maker
Thank you, Yolande!
will you save as separated file as you did the flower? I have silhouette cameo and it does best with that type of file. Thank you so much for these designs!
You can ungroup and separate the layers in Silhouette Studio bu selecting the object, go to the Object menu and choose Ungroup. I also did add the ungrouped layers to the zip file.
THANK YOU!
Jennifer….thank you soooo sooooo muches for all you do for us in the crafting world. Your videos are just fantastic and the way you explain things so simply, makes using the Cricut fun. I started using the cricut 3 years ago and I’m still learning, all thanks to you!😎 I want to say thank you for your hard work. THANK YOU!!👍👏👏👏👏 Can’t wait to see what happens next 💖💖💖
I would love to learn how to create other 3D layered projects. Do you have any tutorials on how to make them?
I don’t currently have a tutorial, but I have started creating in-depth workshops in my Maker Academy and I’m always coming up with new workshop ideas!
I have cut out all four of these 3D layered projects and like Annette Goldberg, I’m also interested in a tutorial on how to create other designs like yours. Please let us know when it becomes available in your Maker Academy! Thank you for sharing your talents with us!
So glad you cut them out, Audrey! I do have a course that teaches you how to create your own SVG’s, it is called Cut Above. You can check it out here and get on the waitlist: https://jennifermaker.com/cut-above-svg-design-course-about
Thank you Jennifer. I do not have a techie brain. I am going to invest in a Cricut Air-2 or Maker because I believe I can actually use it with your help. This project is stunning and I don’t want to purchase 10-12 dies to make this beautiful flower. I’m looking forward to having some fun with this machine. I just need to decide which one to get. I don’t want to have old technology and regret not getting the latest available. Know what I mean?? Thanks so much for your giving heart Diana
Where do you get your frames? I can’t find anything bigger than 9×9.
Hi Laura, I purchased my frames from Amazon. You can find them linked in the Materials list above.
I found 2 packs of white frames at Michaels. Picked them up on sale as a BOGO. Got all 4 for under 30 bucks! They look identical to those that Jennifer purchased from Amazon except I had to resize the design to 11.5. So I have same size frame with bigger design.
Have you tried making this crystal design with colors instead of white? Like maybe starting with red in the center and going to pink as you work out? I like the white, just wondering what color would look like. Also, keep up the GREAT work and ideas!! I love finding new things to make off of your site
I have not done a gradient of colors as you described, but it does sound wonderful. If you make one, I hope you’ll share photos! I’d love to see it!
I did an ombre version of the flower and it turned out beautifully. I used teal blues and moved from the lightest at the top to the darkest at the bottom, with a sparkly silver as the base color. I found that you need at least 2 layers per color, but you could do more. I’d love to see a picture if you make one. I shared mine on the Facebook group.
I am using the 12 x 12 frames from Amazon and need the design to be 12 x 12 instead of 10-l/2″. Can I cut it using the 12 x 12 mat?
I used the 12″ x 12″ frames and just added foam squares so that the layers stayed in place in the frame. The largest you can cut on a 12×12 Cricut mat is 11.5″.
Omg, I love the 3 D layered paper cut wall art. I really want to do this. Soooo here is my question. I have a silhouette Cameo. How would I get this file? Is there a way to do this.
Thank you for helping everyone.
You can ungroup and separate the layers in Silhouette Studio bu selecting the object, go to the Object menu and choose Ungroup. I also did add the ungrouped layers to the zip file.
I am having trouble finding the correct frame that you are using. Where are you getting your frames? I have checked Amazon, Michaels, Hobby Lobby and Joanns. I love these and want to do all four, but haven’s even started the first one until I can get the frame. Help!!
I purchased my frames from Amazon and I have them linked in the materials box.
Just wondering, as so many are, when will we see the 3rd 3D picture?!
The third design will be released this week and the fourth in the series will be released next week!
I’ve done 2 of the 3D Layered cut art, love them, when will #3 & # 4 be out. Excited to do those also. Love the set.
That’s great to hear, Valerie! #3 will be released this week and #4 will be released the following week!
Thanks, I excited to do the next 2. Love your files and work