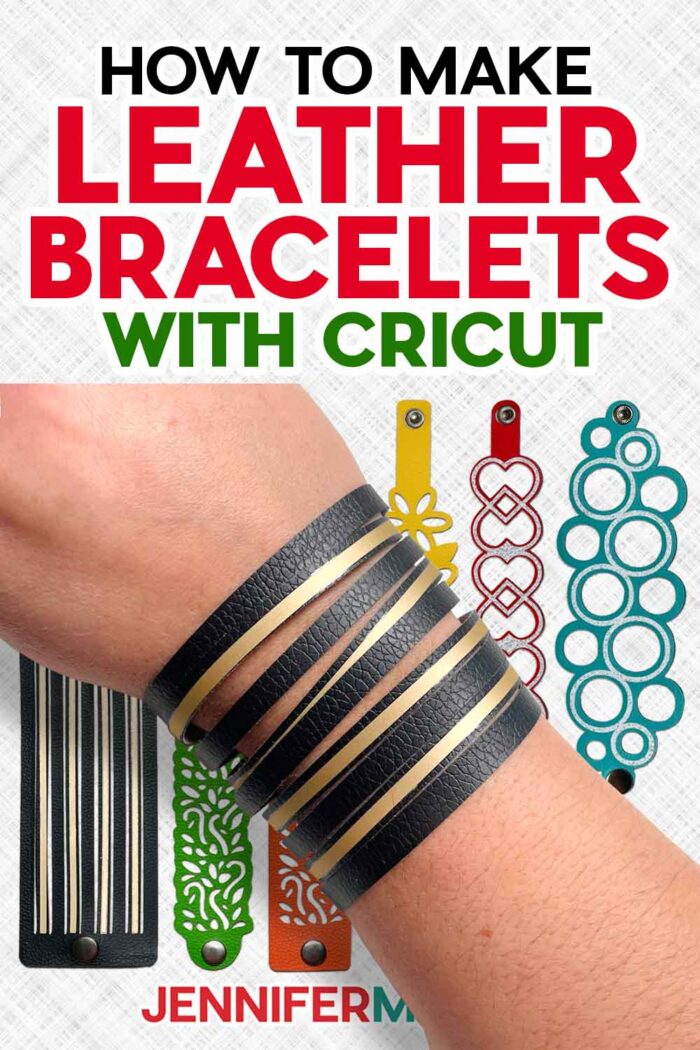
Learn how to make leather bracelets and add snaps!
Want to make a faux leather bracelet in your favorite colors that will fit your wrist perfectly? I can show you how to make leather bracelets with your cutting machine and a few fun new tools from the craft store to get the perfect fit. This way, your leather wrap bracelet will fit well and last for quite a while!
Watch the full step-by-step video tutorial on how to make leather bracelets on my Youtube channel!

If you’re ready to branch out in cutting materials, faux leather is a great item to try! It comes in so many colors and patterns, and it’s quite easy to cut with the right process! Faux leather is really quite thin, so you can cut it on any Cricut machine with a regular fine-point blade. You can even cut a faux leather strip with scissors. And since you don’t need a lot of material for a bracelet size project, you can often use a little bit of leather scraps from a larger project.
Before you start, I’ll show you how to take your your bracelet measurement, because getting the correct wrist size is important for a good fit.
My DIY leather bracelet designs have two layers — one is intended for the faux leather and one is intended for an iron-on vinyl layer. If you don’t want to do the iron-on layer, they’ll look good with just the faux leather layer. A simple leather bracelet is really impressive when you can say you made it!

After we’ve cut everything out and applied the vinyl, I’ll show you how to add a snap closure using a simple kit (it’s in my list of materials!) to place the snap holes perfectly. No dealing with tiny jump rings or a finicky chain for this leather jewelry project!

I prepared my files in Cricut Design Space and used a Cricut Maker 3 to cut all my materials, but you could use an original Cricut Maker, a machine from the Cricut Explore series, a Cricut Venture, a Joy, or a Joy Xtra. A purple StrongGrip machine mat works for the leather, and a green StandardGrip machine mat works well for the iron-on vinyl. Check my full tool list below to see what you’ll need while learning how to make leather bracelets.
Let me show you how to make leather bracelets with Cricut! This post contains some affiliate links for your convenience (which means if you make a purchase after clicking a link I will earn a small commission but it won’t cost you a penny more, there is no additional cost)! Read my full disclosure policy.
Materials to Make Leather Bracelets With Cricut
View my Amazon shopping list with the exact items we used to make this project.
- One (1) Sheet of Colored Faux Leather
- Cricut Everyday Iron-On – I used Gold, White Glitter, and Yellow
- Snap Fastener Kit
- A way to cut your faux leather and vinyl – I’m using the Cricut Maker 3 but you can also use the original Maker, an Explore series machine, the Venture, Joy, or Joy Xtra.
- Cricut Deep-Point Blade (Optional, if the fine-point blade doesn’t work well for you)
- Cricut Purple StrongGrip Machine Mat, 12″ x 12″ (for the leather strip)
- Cricut Green StandardGrip Machine Mat 12″ x 12″ (for the vinyl)
- Brayer
- Heat Press – I used my EasyPress, but you can also use an Autopress or a traditional heat press
- EasyPress Mat
- Soft Measuring Tape
- Painter’s Tape
- Ruler
- Hammer or Mallet (make sure you protect the flat surface you’re working on!)
- Butcher Paper
- Paper Trimmer
- Weeding Tool – optional, helps to pop out tiny cutouts
- Pair of Scissors
- Self-healing mat
- Design #571 (My free SVG/DXF/PDF design files are available in my free resource library – get the password by filling out the form at the bottom of this page
How to Make A Leather Bracelet

How To Make Leather Bracelets
Learn how to make leather bracelets with your Cricut!
Materials
- One (1) Sheet of Colored Faux Leather
- Cricut Everyday Iron-On - Gold
- Cricut Iron-On Vinyl - White Glitter
- Cricut Everyday Iron-On - Yellow
- Snap Fastener Kit
- [Design #571 (My free SVG/DXF/PDF design files are available in my free resource library – get the password by filling out the form at the bottom of this page)
Tools
- A way to cut your faux leather and vinyl - I’m using the Cricut Maker 3 but you can also use the original Maker, an Explore series machine, the Venture, Joy, or Joy Xtra.
- Cricut Deep-Point Blade (Optional)
- Cricut Purple StrongGrip Machine Mat, 12" x 12"
- Cricut Green StandardGrip Machine Mat, 12" x 12"
- Brayer
- Weeding Tool
- Heat Press - I used my EasyPress, but you can also use an Autopress or a traditional heat press
- EasyPress Mat
- Soft Measuring Tape
- Scissors
- Painter's Tape
- Ruler
- Hammer or Mallet
- Butcher Paper
- Cricut Trimmer
- Self-Healing Mat
Instructions
STEP 1: GET MY FREE LEATHER BRACELETS DESIGN FILE
First, download my How to Make Leather Bracelets designs from my free library -- look for design number 571. Alternatively, you can use the Save This Project form near the top of this post and the design link will be emailed to you.
TIP: If you’re not sure how to upload, go to jennifermaker.com/svgs to learn how to unzip and upload SVG files.
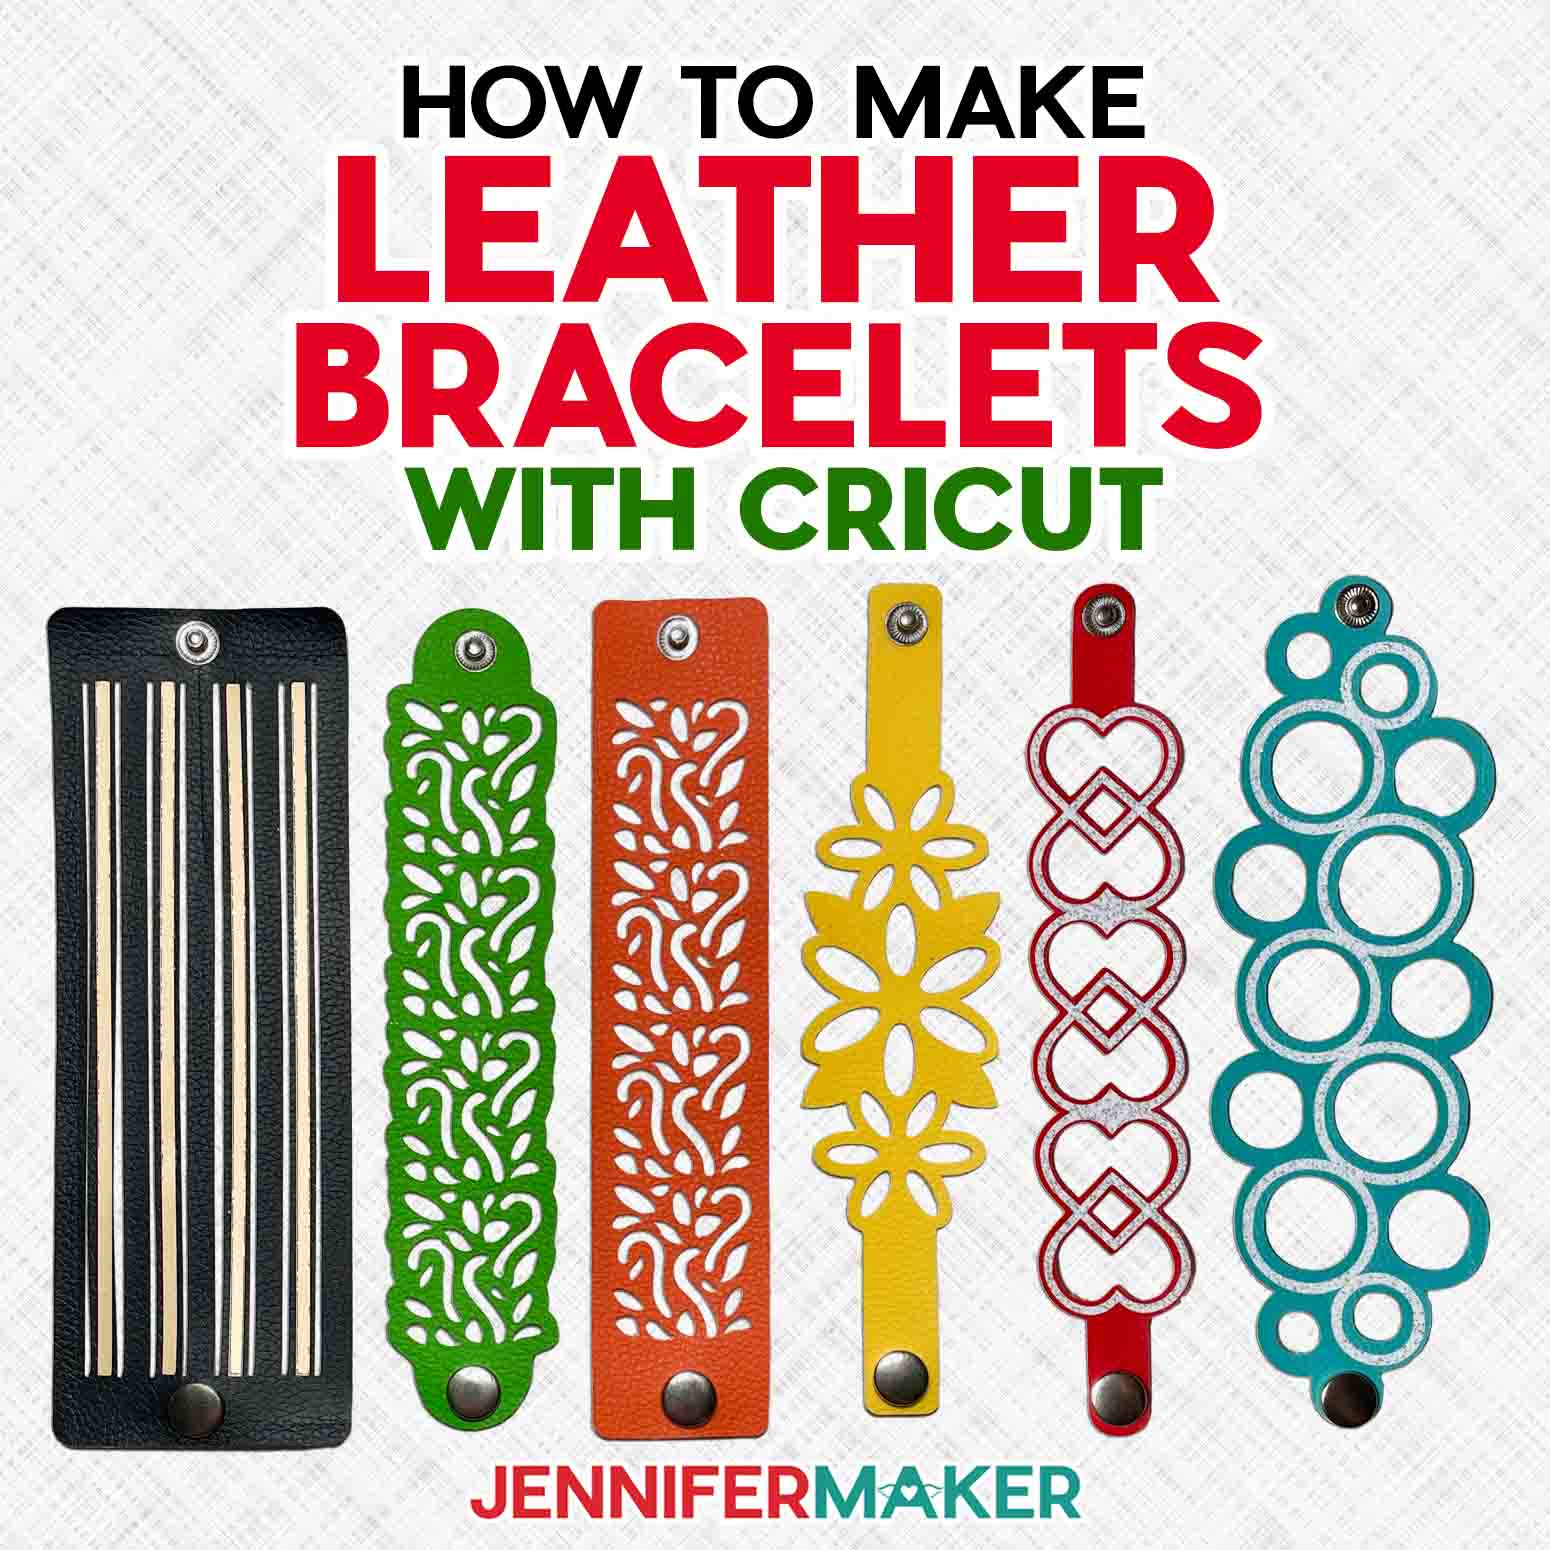
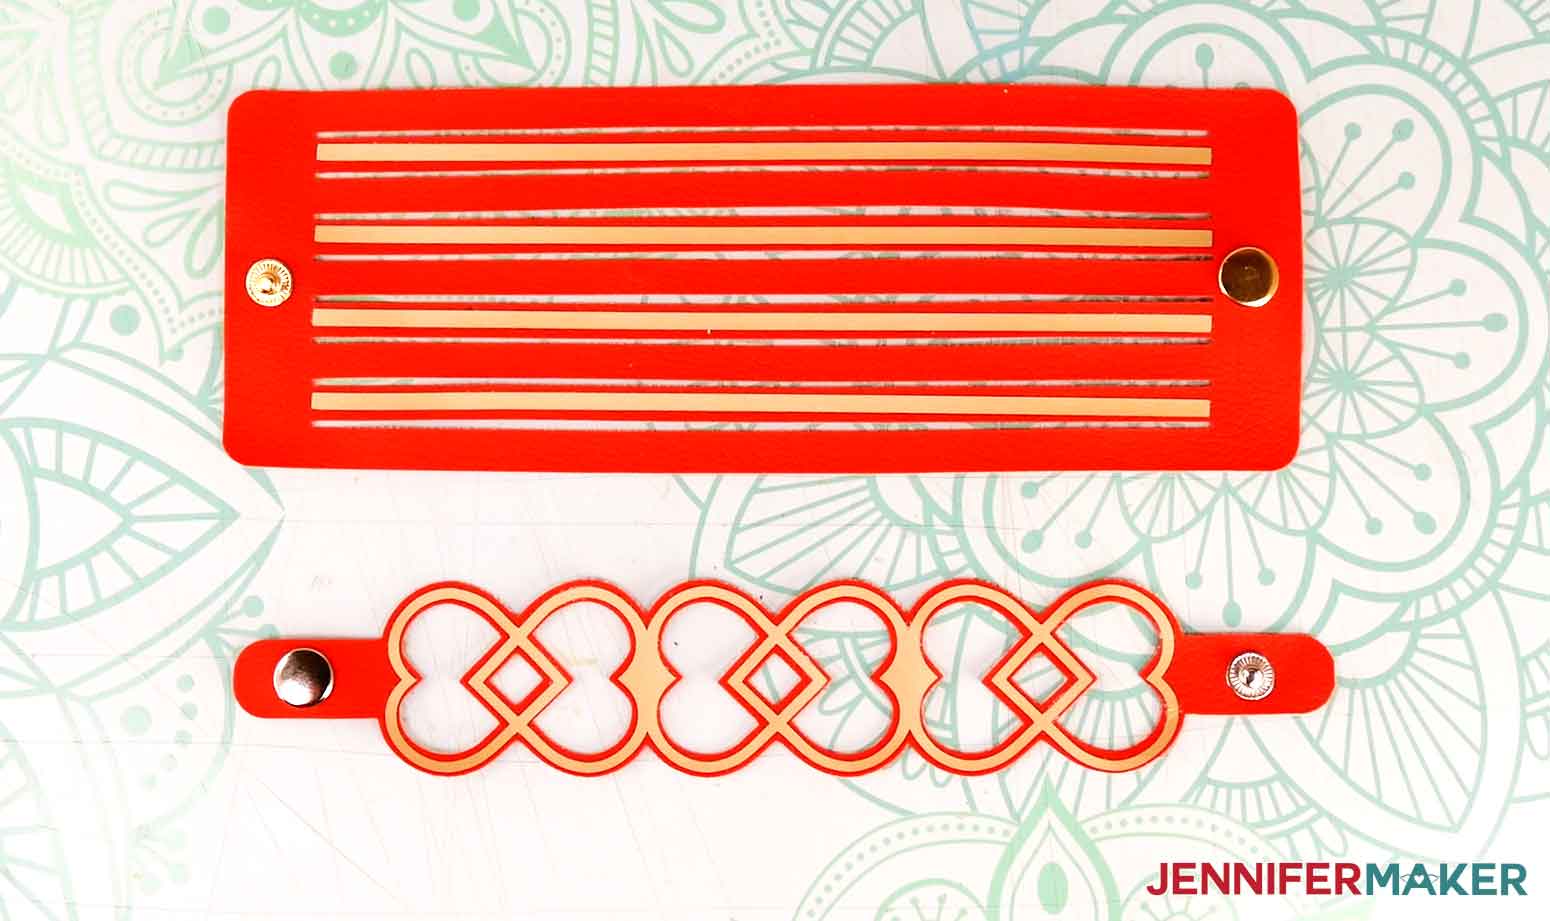
The SVG has 7 designs. A filigree design without tabbed ends, a similar design with tabs, a heart chain, cute bubbles, flowers with or without vinyl accents, and a cuff. I’ll demonstrate the hearts and cuff designs.
STEP 2: MEASURE YOUR WRIST
1. Use a soft measuring tape to measure around your wrist.
2. Make it as tight or as loose as you want the bracelet to be.
3. Add 1” to account for the section on each end used by the snaps. Add another 1/4” if you want it looser fitting.

STEP 3: PREPARE AND CUT YOUR BRACELET DESIGN
1. Open Cricut Design Space and click “New Project.”
2. Click “Upload” and then “Upload Image.”
3. Click “Browse.”
4. Select the design SVG file.
5. On the Prepare to Upload screen, it will say “Cut image” with the design preview.
6. Click “Upload.”
7. Find your design in Recent Uploads and add it to the Canvas.

8. With the collection selected, click “Ungroup.”
9. Delete everything other than the design(s) you want to make.
10. Some designs have an additional layer for optional iron-on vinyl. Delete those layers if you don’t want to use them.
11. One by one and with the lock icon closed, change the design’s height to match your wrist measurement.
NOTE: Remember to add the extra length to account for the snaps and how loose you want it to fit.
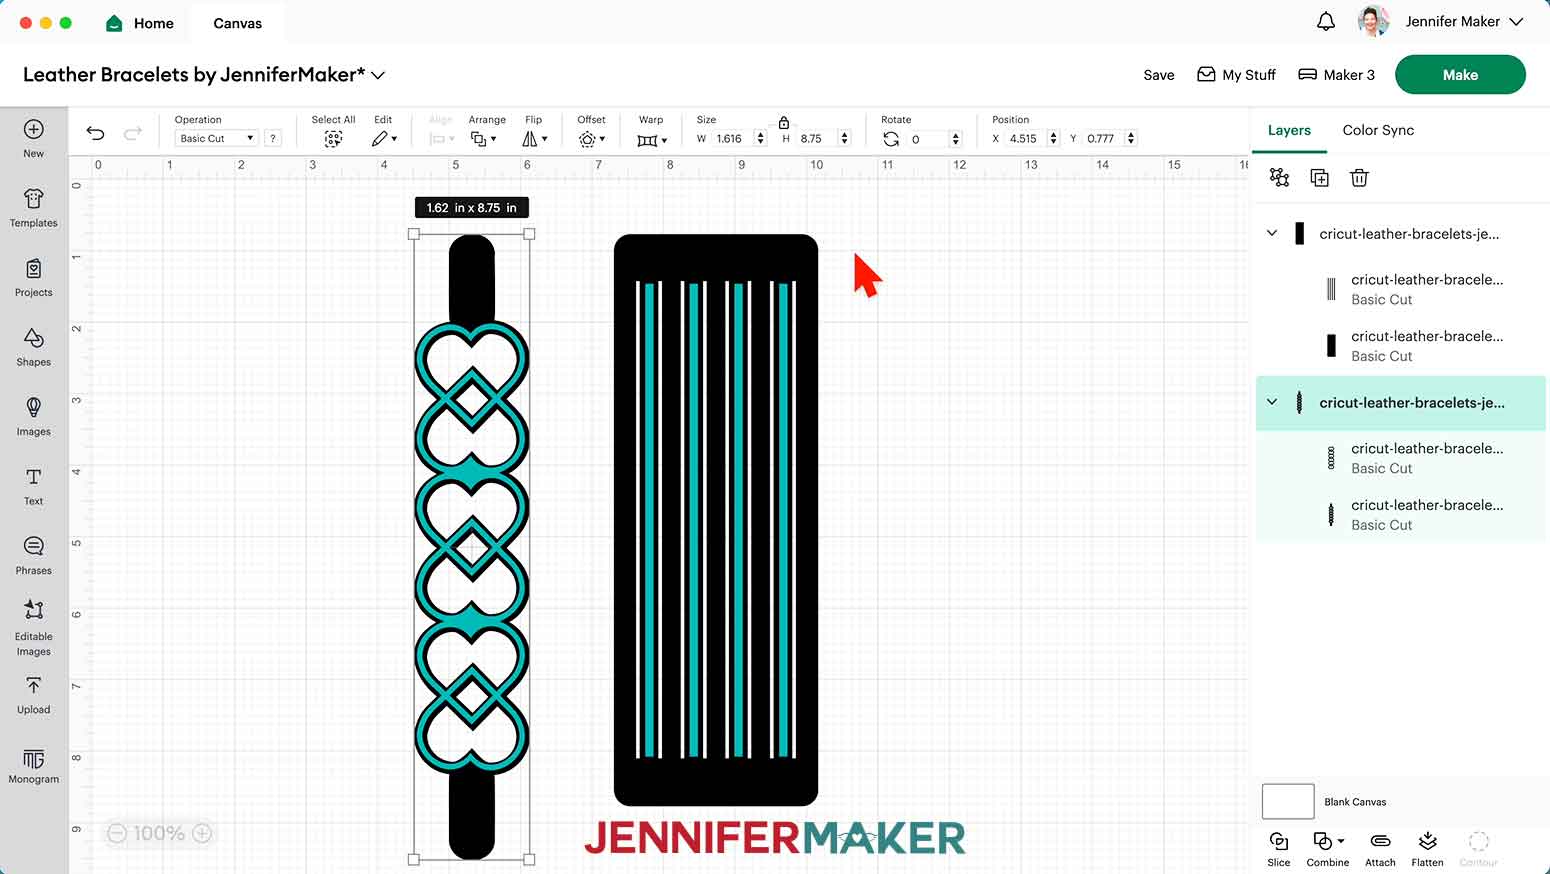
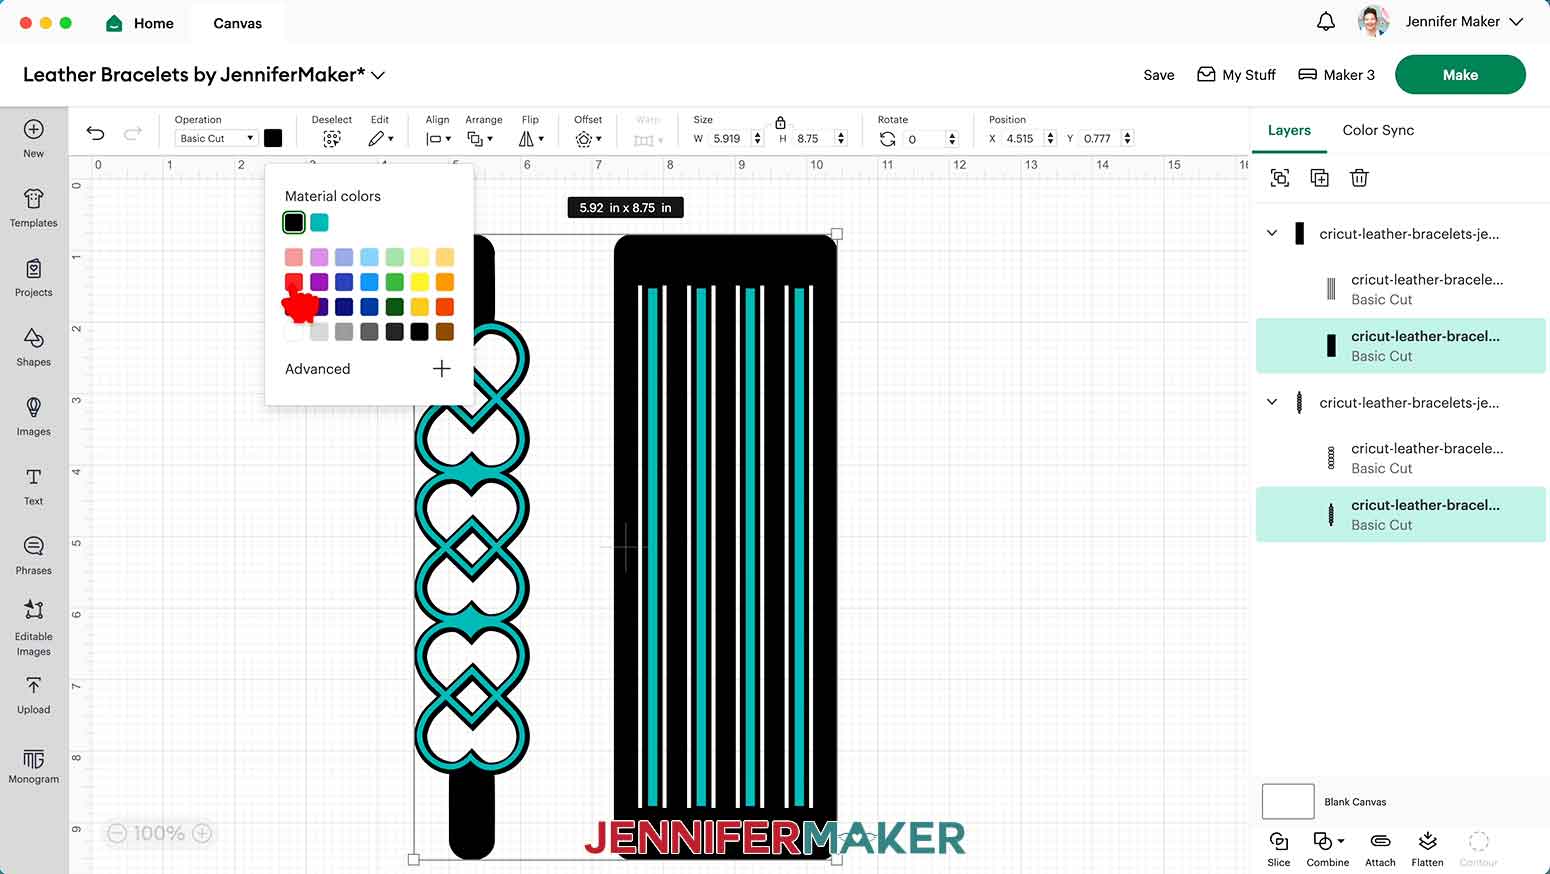
12. If you want to cut any pieces on the same material, use the color box to make their colors match.
13. Make sure the correct machine is selected and click “Make.”
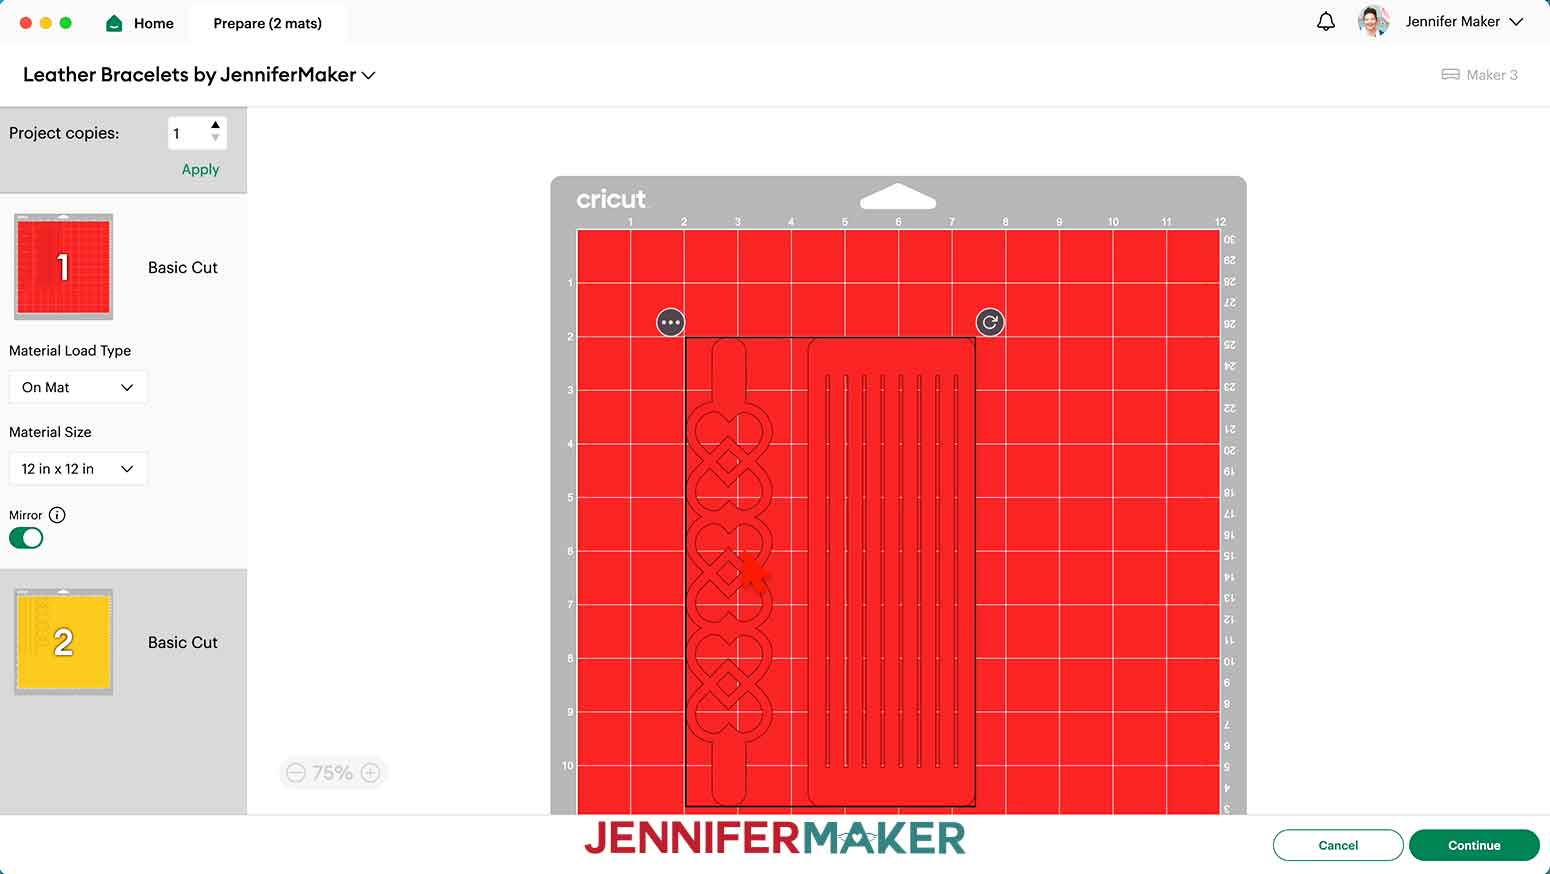
14. On the Prepare screen mat for the leather, check the dimensions to determine what size your piece of leather needs to be.
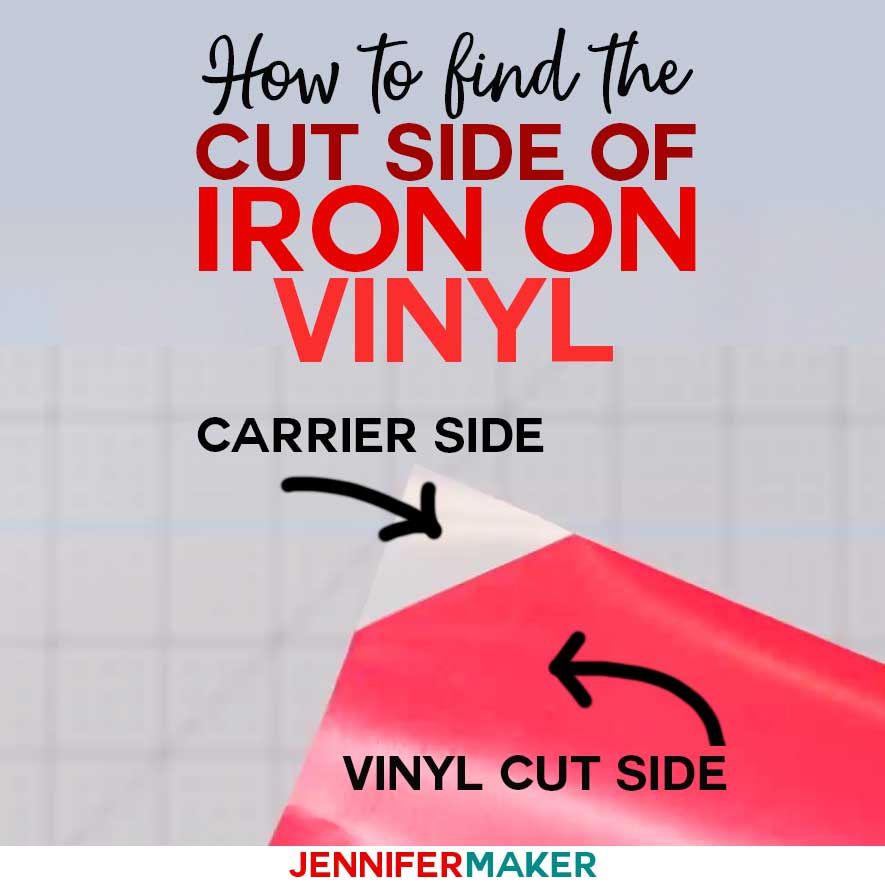
15. Turn “Mirror” on for your leather mat because they cut better from the back.
NOTE: If you're using glitter leather, leave “Mirror” switched OFF and put your leather on the mat with the glitter side up.

16. Use scissors or a trimmer to cut your leather a little taller and wider than the dimensions you need.
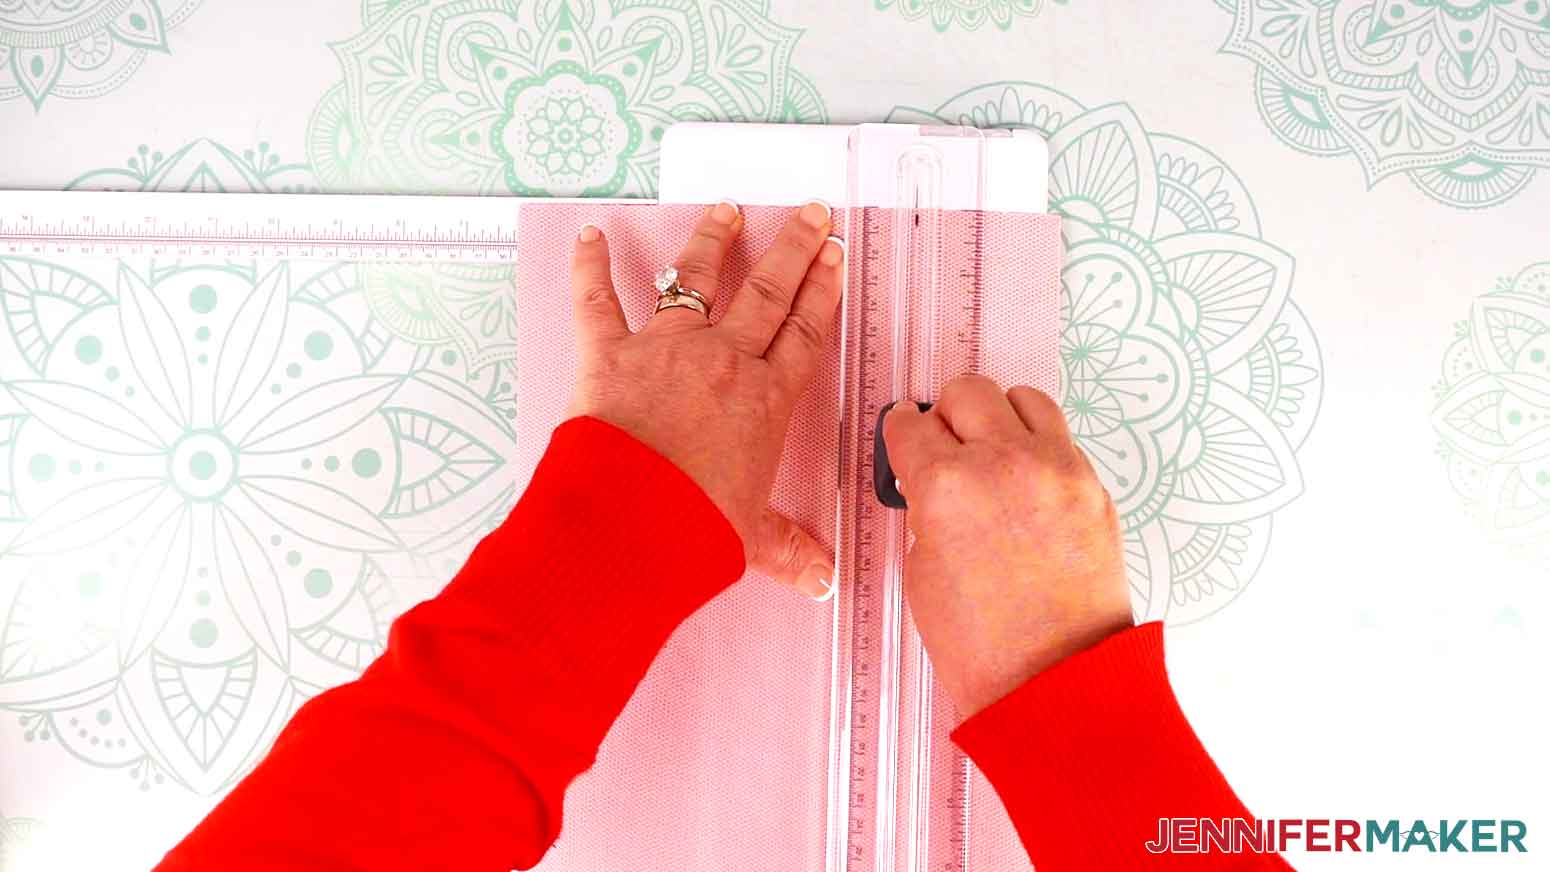
17. Since the leather is thicker than most materials, we won't place the material right in the corner.
18. If there is enough space, place the leather with its top left corner 2" in from the left and down from the top on a purple StrongGrip machine mat.
19. Make sure the leather lines up with the straight lines.
20. If your mat isn’t very sticky, use painter's tape to secure all four sides of the faux leather.
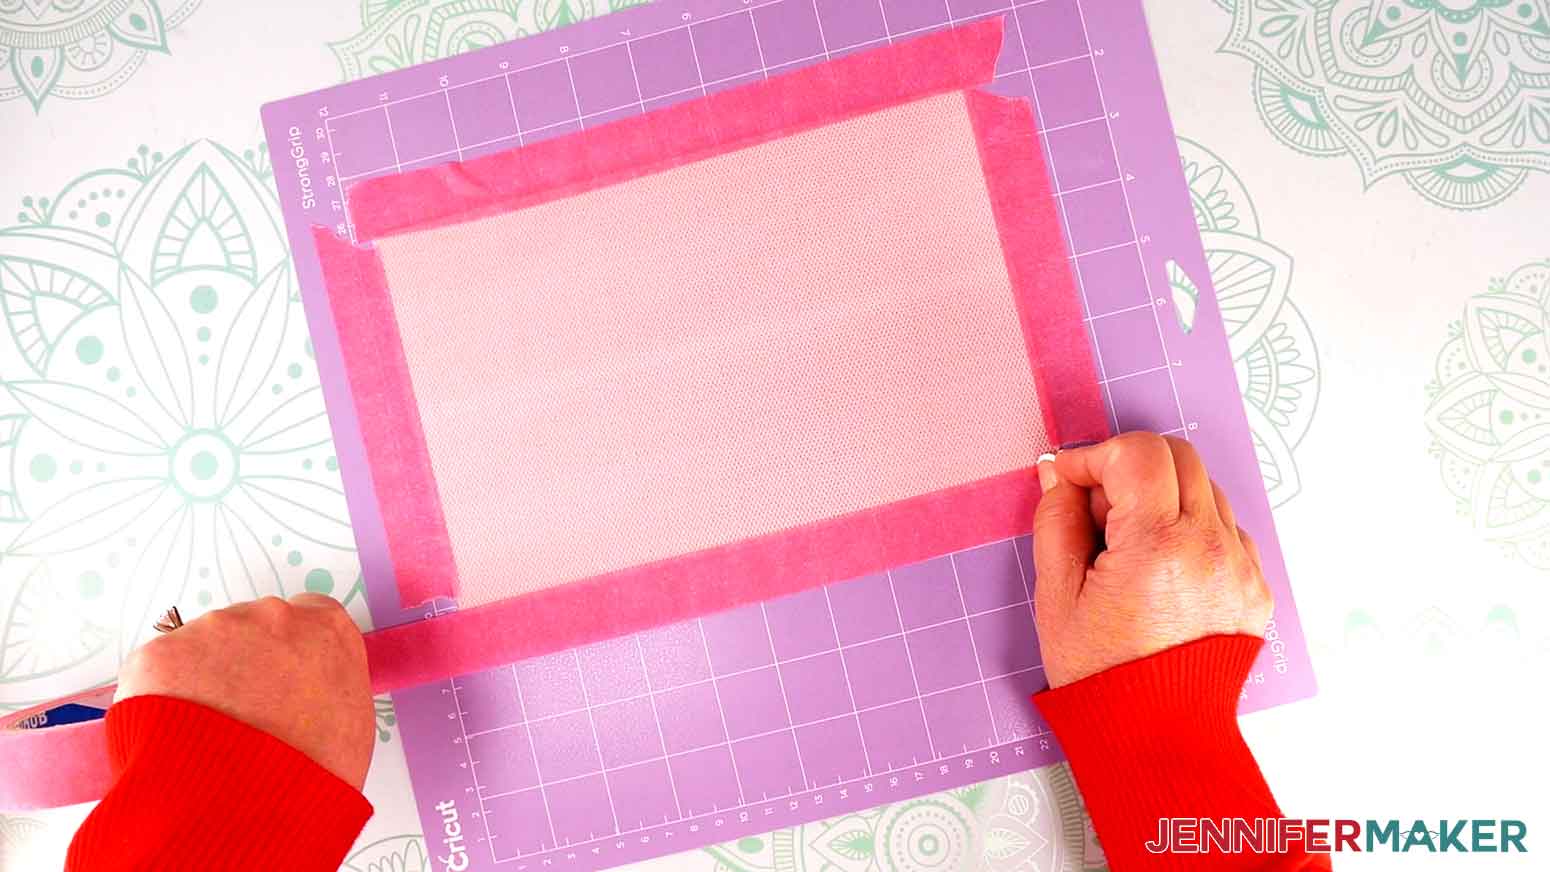
21. Back on the Prepare screen, move the design(s) to match the placement of the leather on your mat.
TIP: If you’re cutting more than one design on a mat, make sure the dimensions still match.
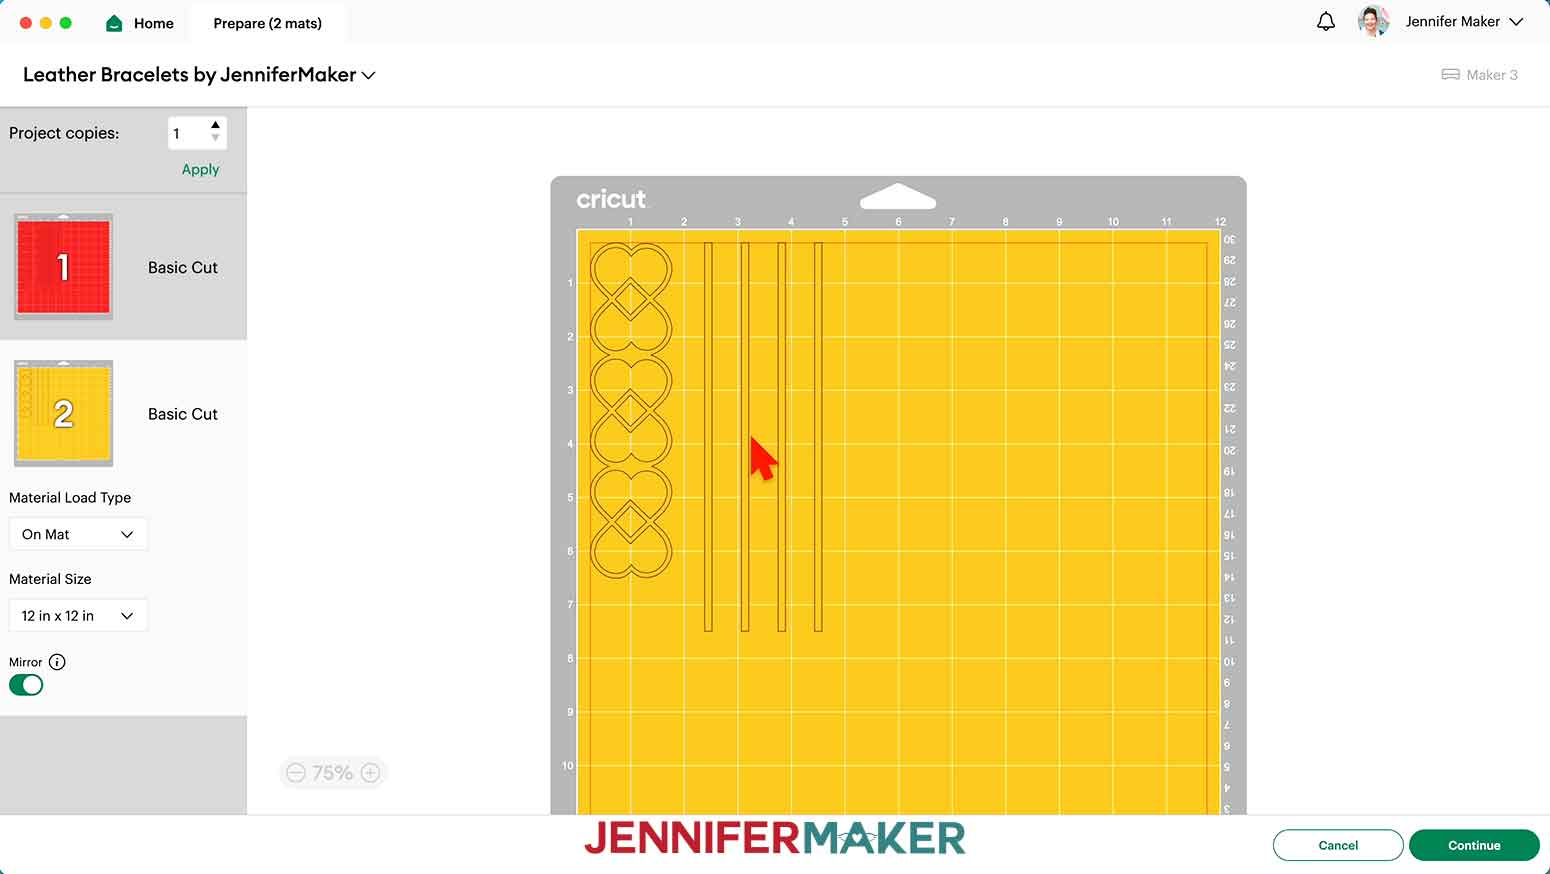
22. Turn on “Mirror” for the iron-on vinyl mat.
TIP: If you’re cutting more than one design, space them out a little so you can trim them apart later.
23. Select the first leather mat and click "Continue."
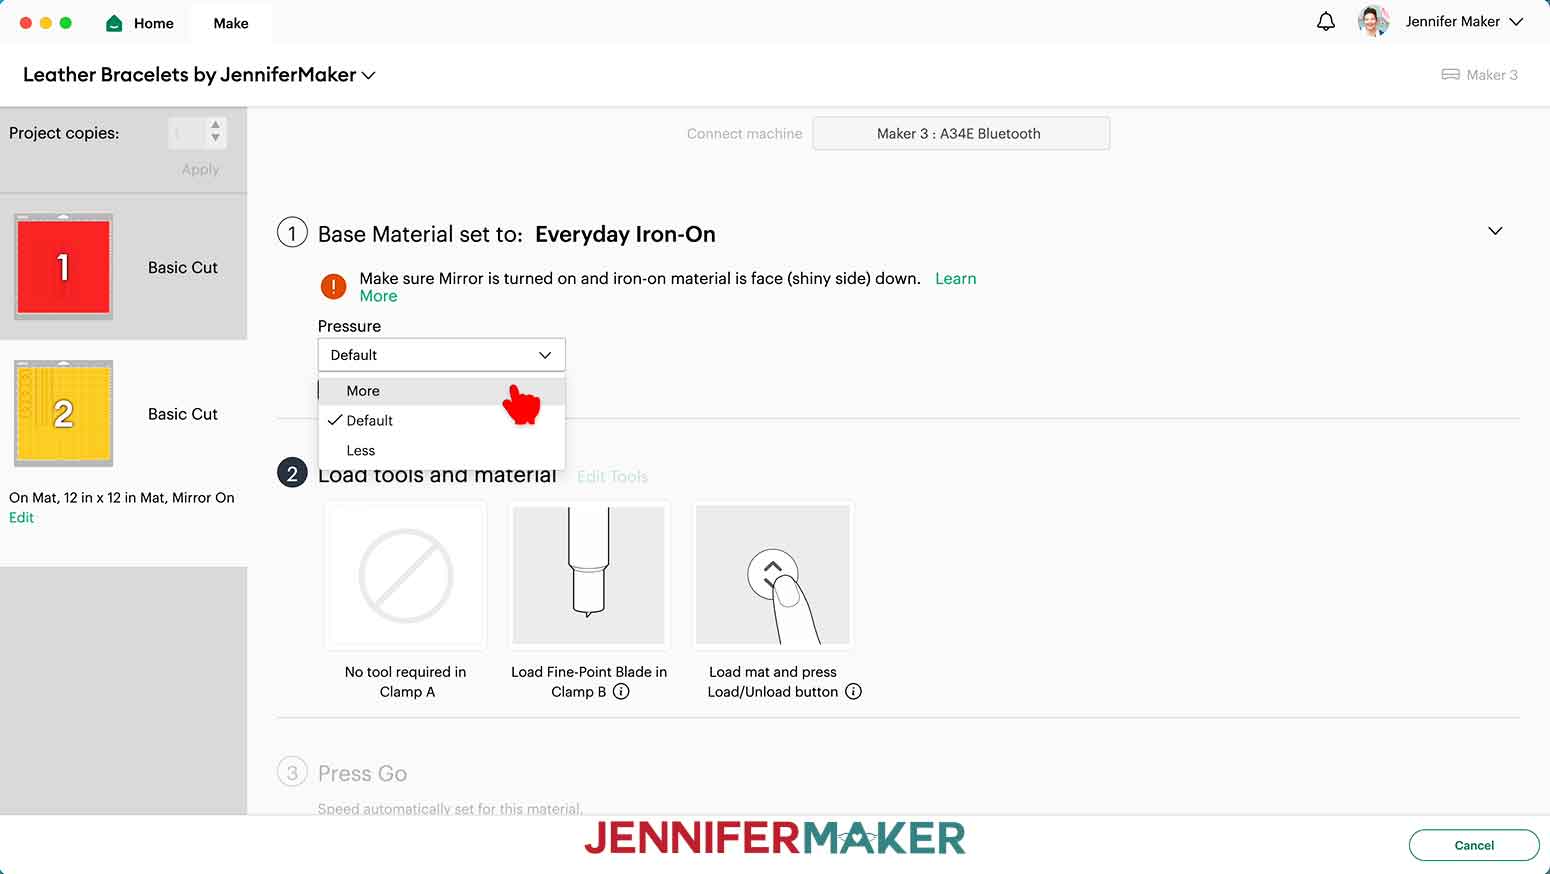
24. On the Make screen, select "Browse All Materials."
25. Type "leather" in the search bar and select “Faux Leather (Paper Thin)” and click "Done." Change the cutting pressure to "More."
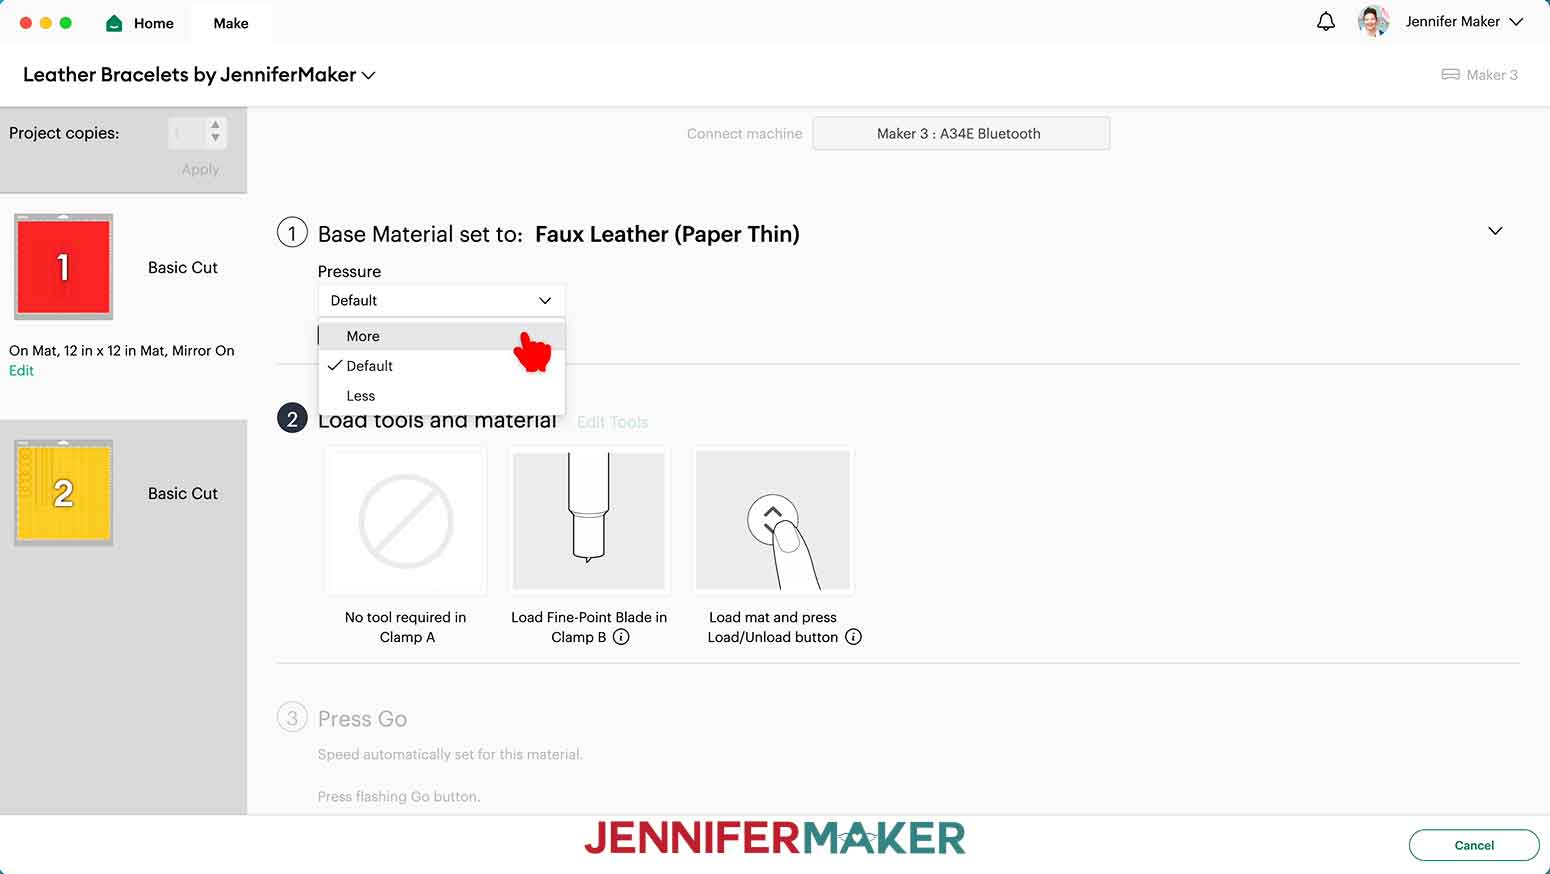
26. Your machine will indicate that you use the Fine-Point Blade.
NOTE: This worked in my testing, but if you have trouble, try using the Deep-Cut Blade.
27. Move the white star wheels all the way to the right so they don’t mar the leather.
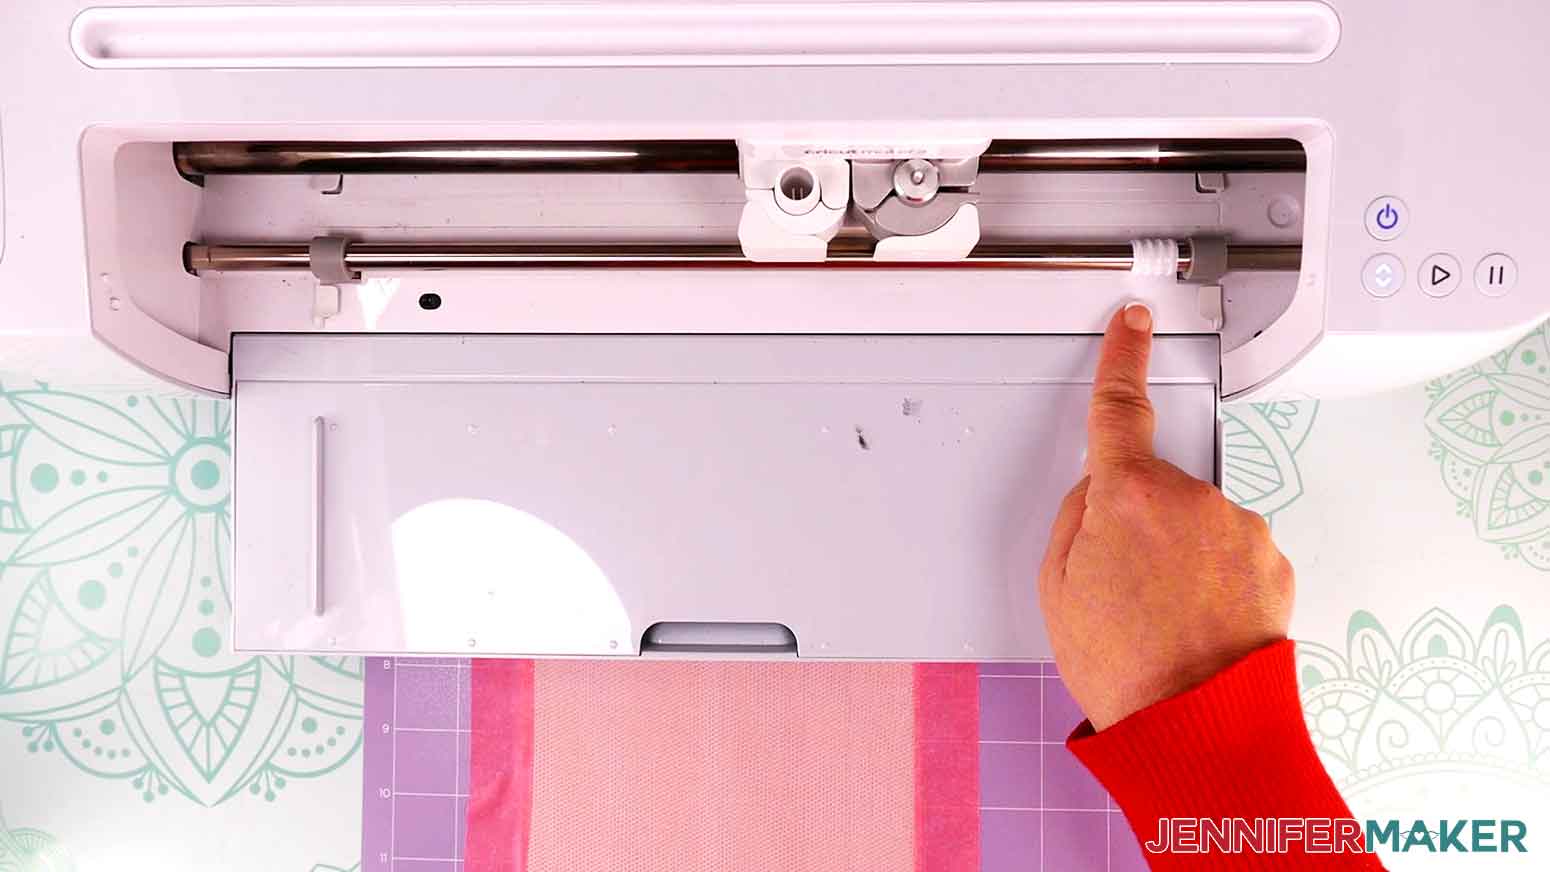
28. Load your mat into the machine and then press the “Go” button.
29. When the cuts finish, don’t unload the mat right away. Carefully peel up a section of material to make sure the cuts went all the way through the faux leather. If not, press the “Go” button to run the cuts again in the same locations.

30. After your bracelets are cut, unload the mat.
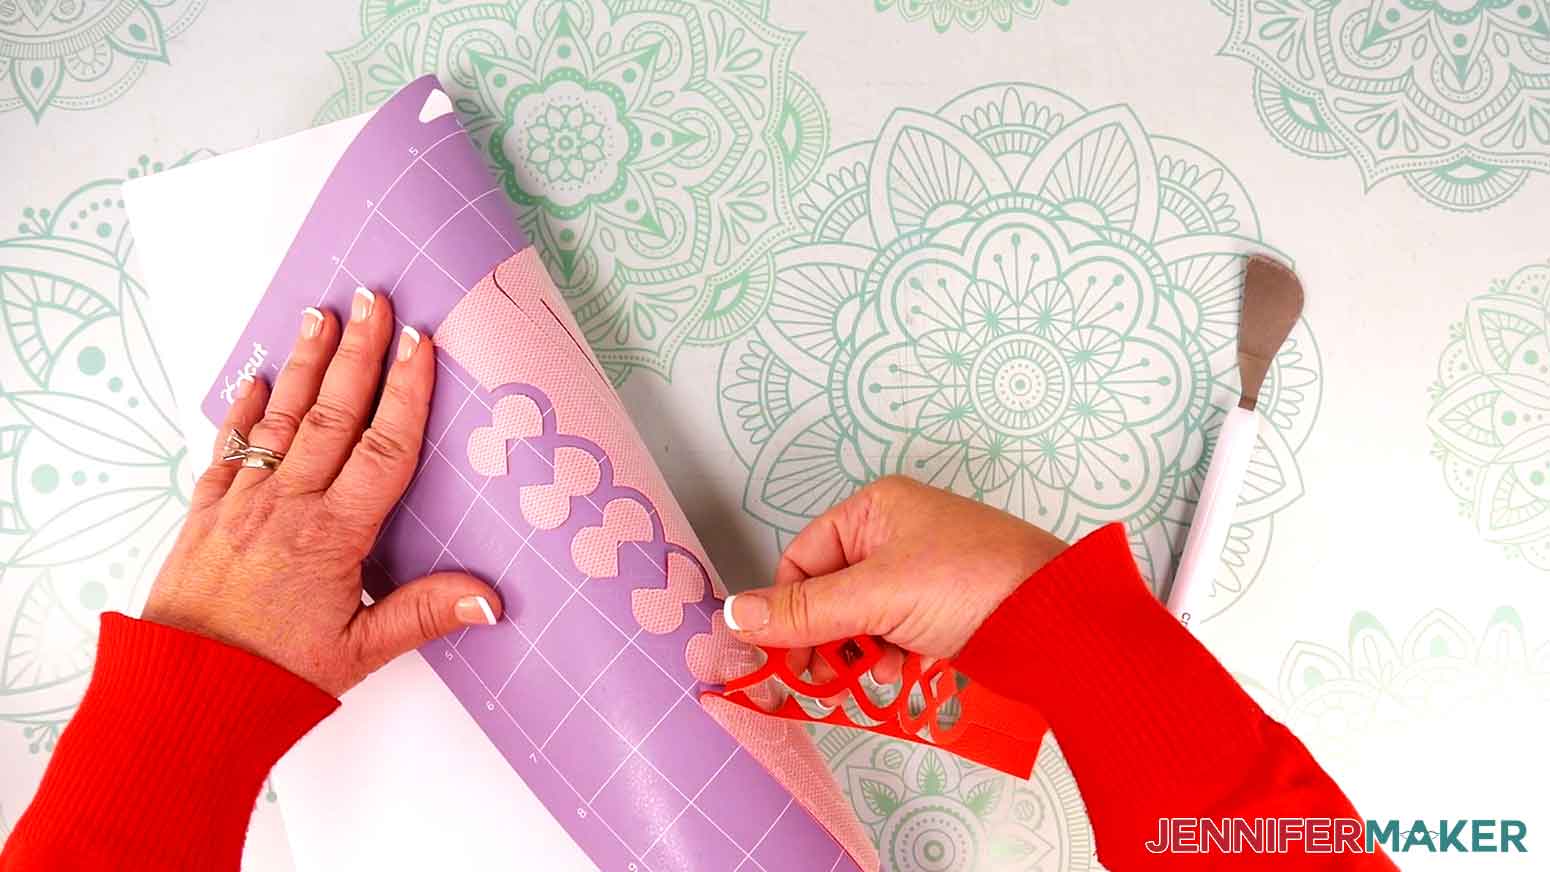
31. Remove the tape (if you used it) from all four sides of the material, then turn the mat over and carefully bend the mat slightly to remove the faux leather pieces.
32. If you’re adding the iron-on vinyl details, place the vinyl shiny side down on a green StandardGrip machine mat.
33. In Design Space, use the “Everyday Iron-on” or “Glitter Iron-on” setting (depending on your vinyl) and set the Pressure to “More.”
34. Load, cut, and unload the vinyl mats.
35. Flip over the mat and roll it back to release the vinyl.
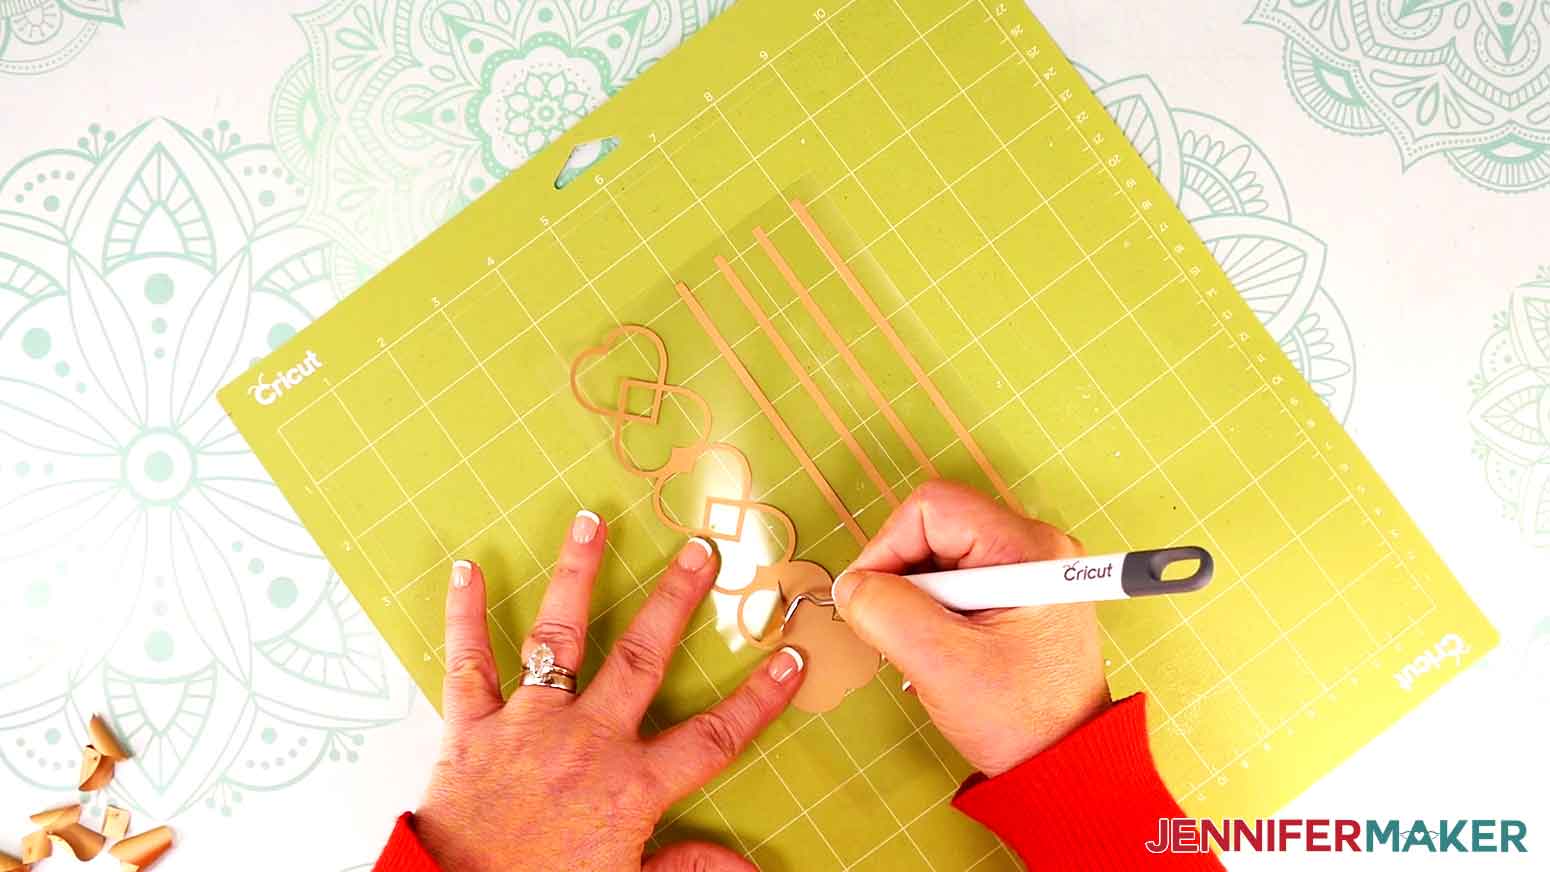
36. Trim away excess vinyl, then cut the designs apart if you have more than one.
37. Weed the excess vinyl from your designs.
TIP: Place the vinyl carrier sheet side down on the machine mat to hold it steady.
STEP 4: ASSEMBLE YOUR LEATHER BRACELETS
OPTIONAL: ADD IRON-ON VINYL TO YOUR LEATHER
Check our HTV Cookbook to find the correct settings for your combination.
1. Preheat your heat press to 280° F (138° C) if you’re using Everyday Iron-On Vinyl, or 270° F (132° C) for Glitter Iron-On Vinyl.
2. Put the cut leather face up on the pressing mat.
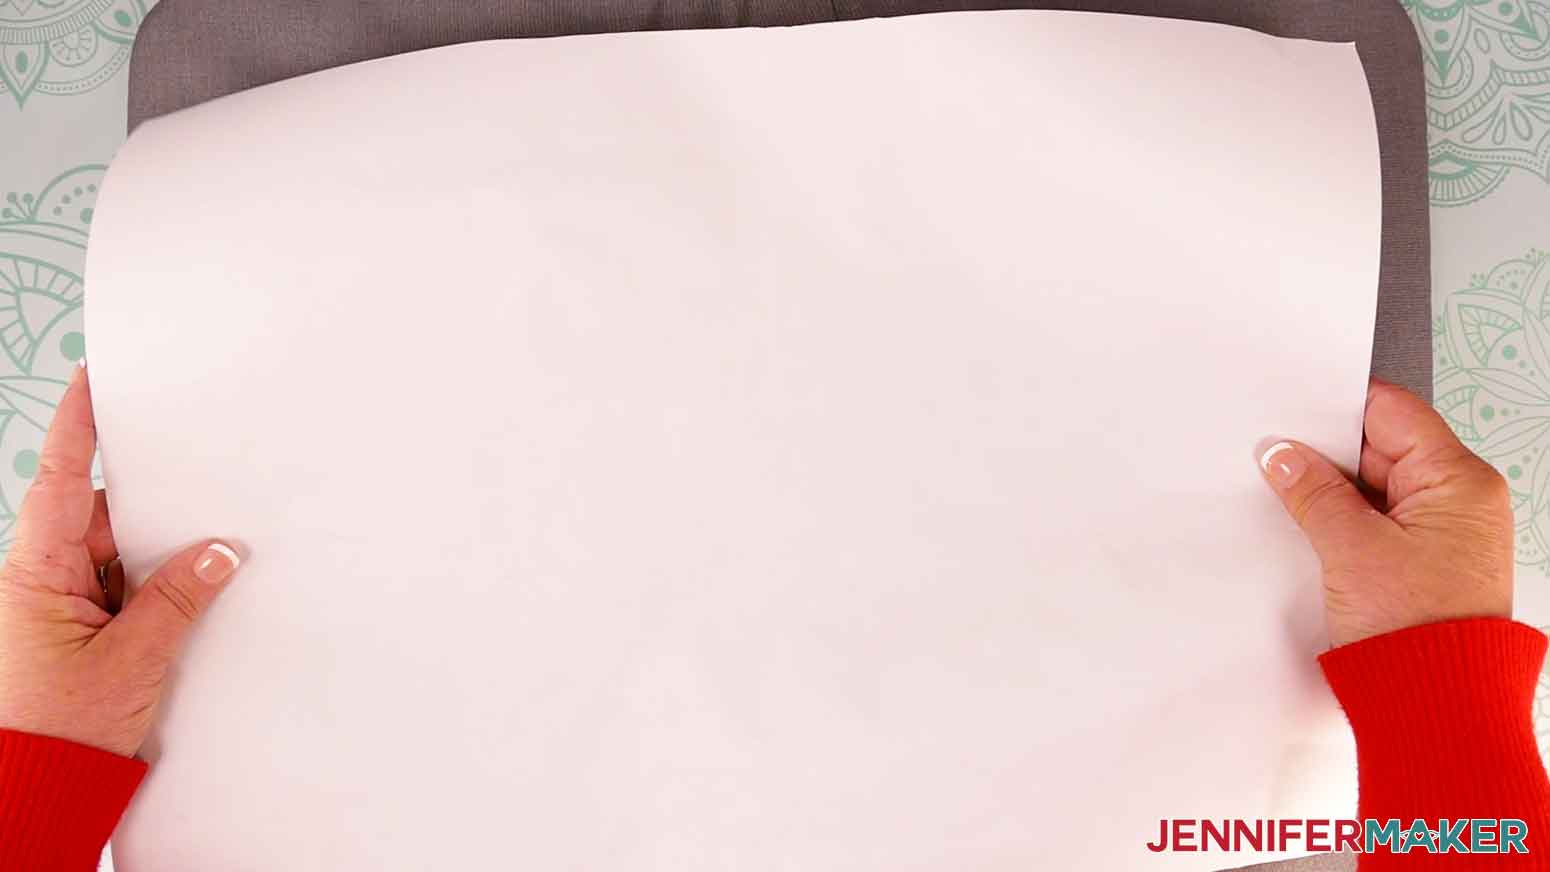
3. Place butcher paper on top.
4. Preheat the leather for 5 seconds without pressure.
5. Place the matching HTV face down, aligning the designs.
6. Cover the project with butcher paper to protect the leather from direct heat.
7. Press with firm pressure for 30 seconds for Everyday Iron-On Vinyl and 20 seconds for Glitter Iron-On Vinyl.
8. Allow the project and carrier sheet to cool for both types of vinyl.
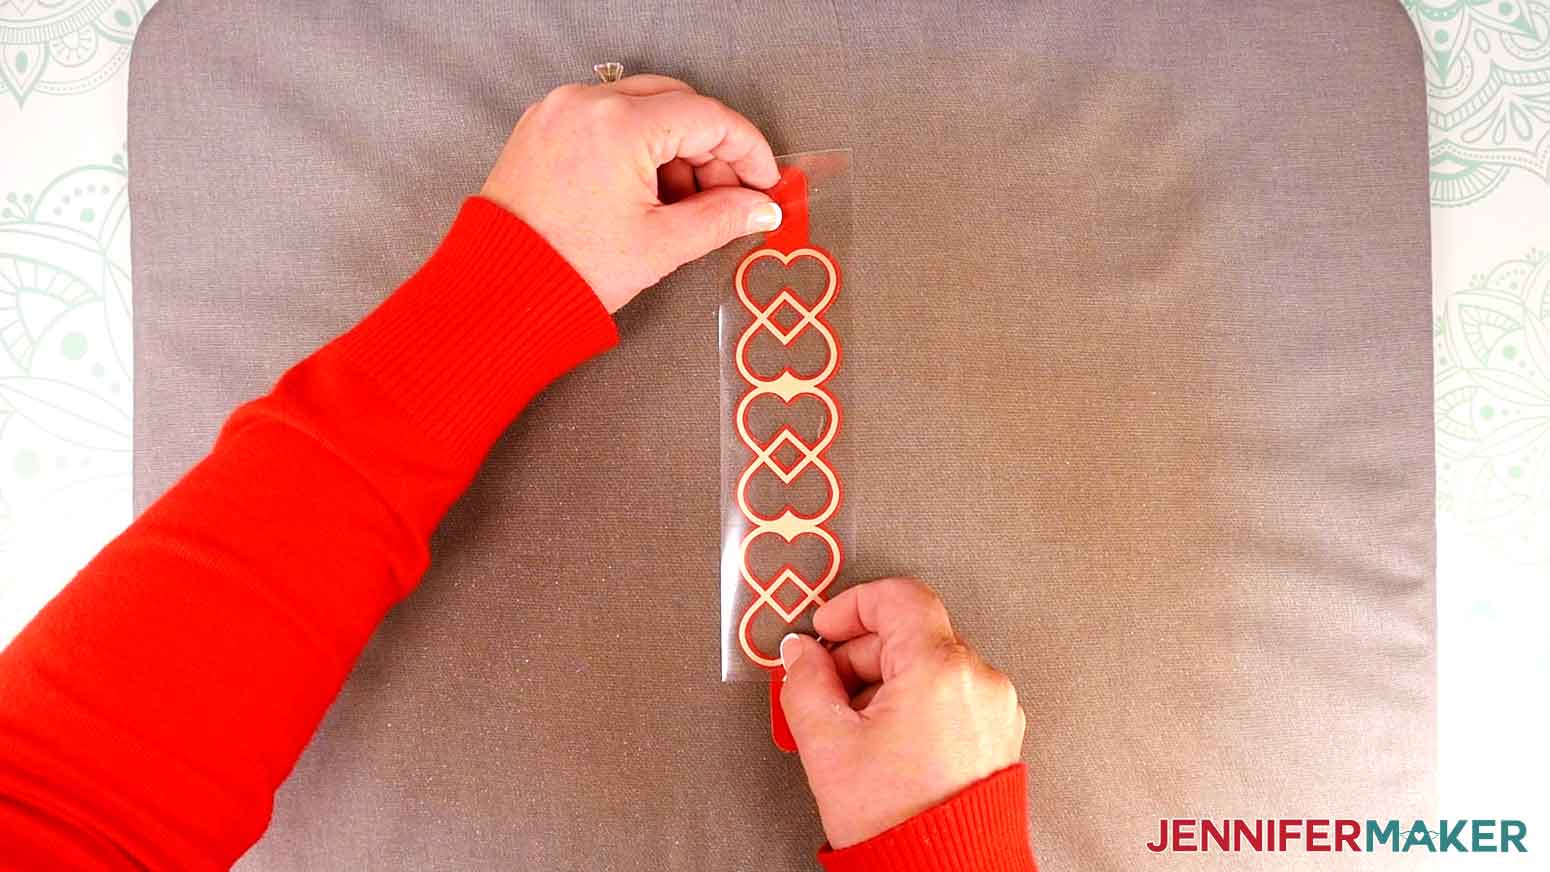
9. Remove the vinyl carrier sheet.
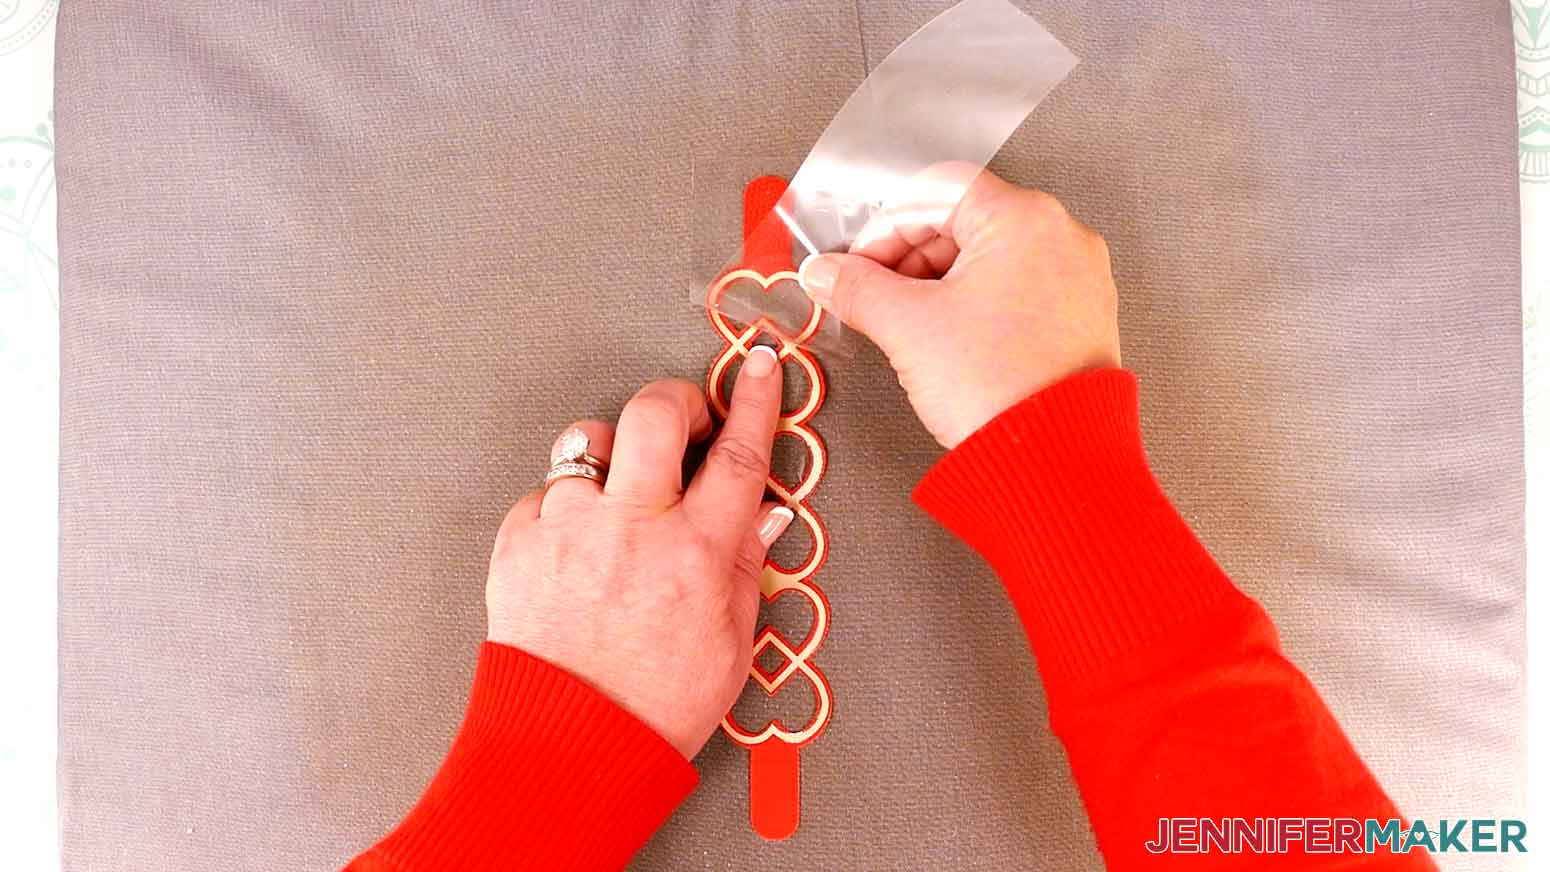
BRACELET ASSEMNLY
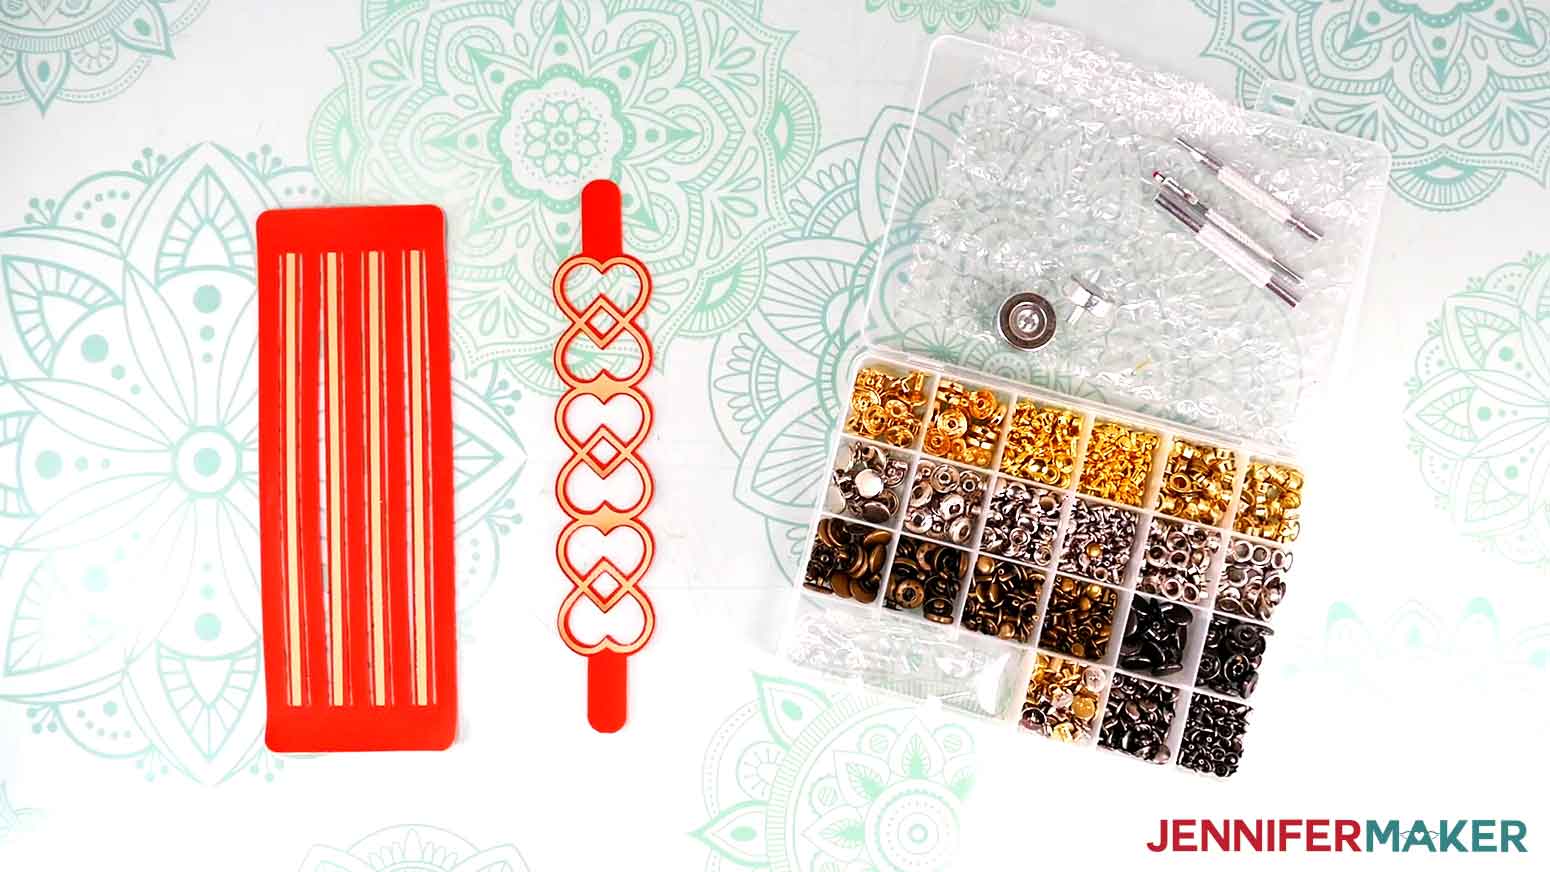
Here are the tools that we'll be using to insert the snaps.
NOTE: It’s a good idea to practice adding closures on scrap leather before working on your finished bracelets.
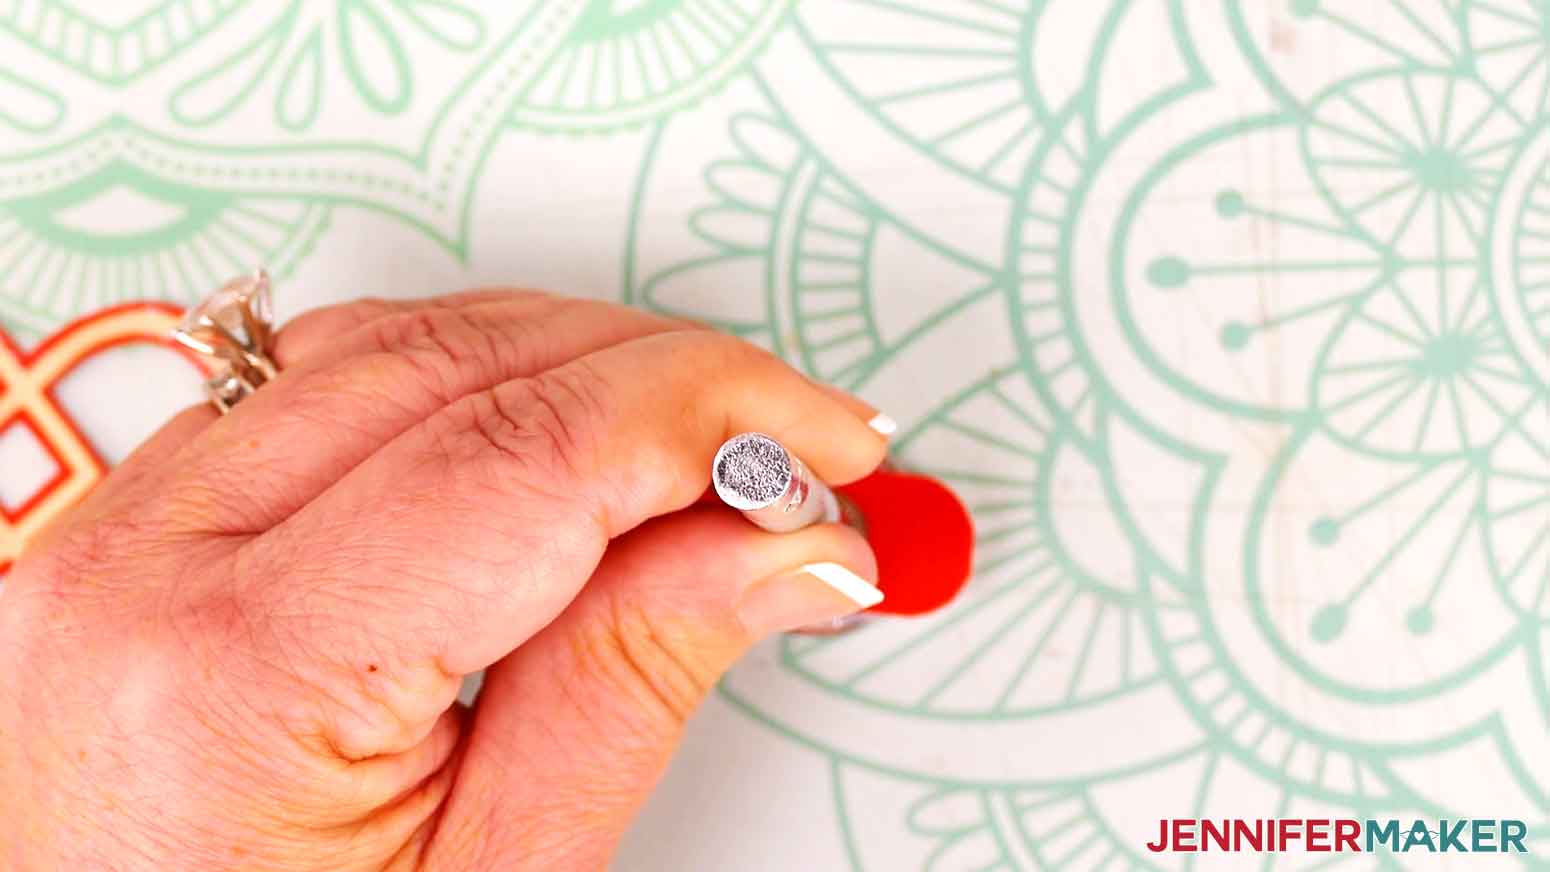
1. Place your bracelet and tools on a self-healing mat to protect the work surface. We’re using the three smallest tools in the kit.
- Punch tool: has a small bladed opening on one end.
- Pointed tool: a narrow rod at the end of the tool to press recessed pieces in place.
- Concave tool: slightly cupped end to fit over pieces to keep them positioned during pressing.

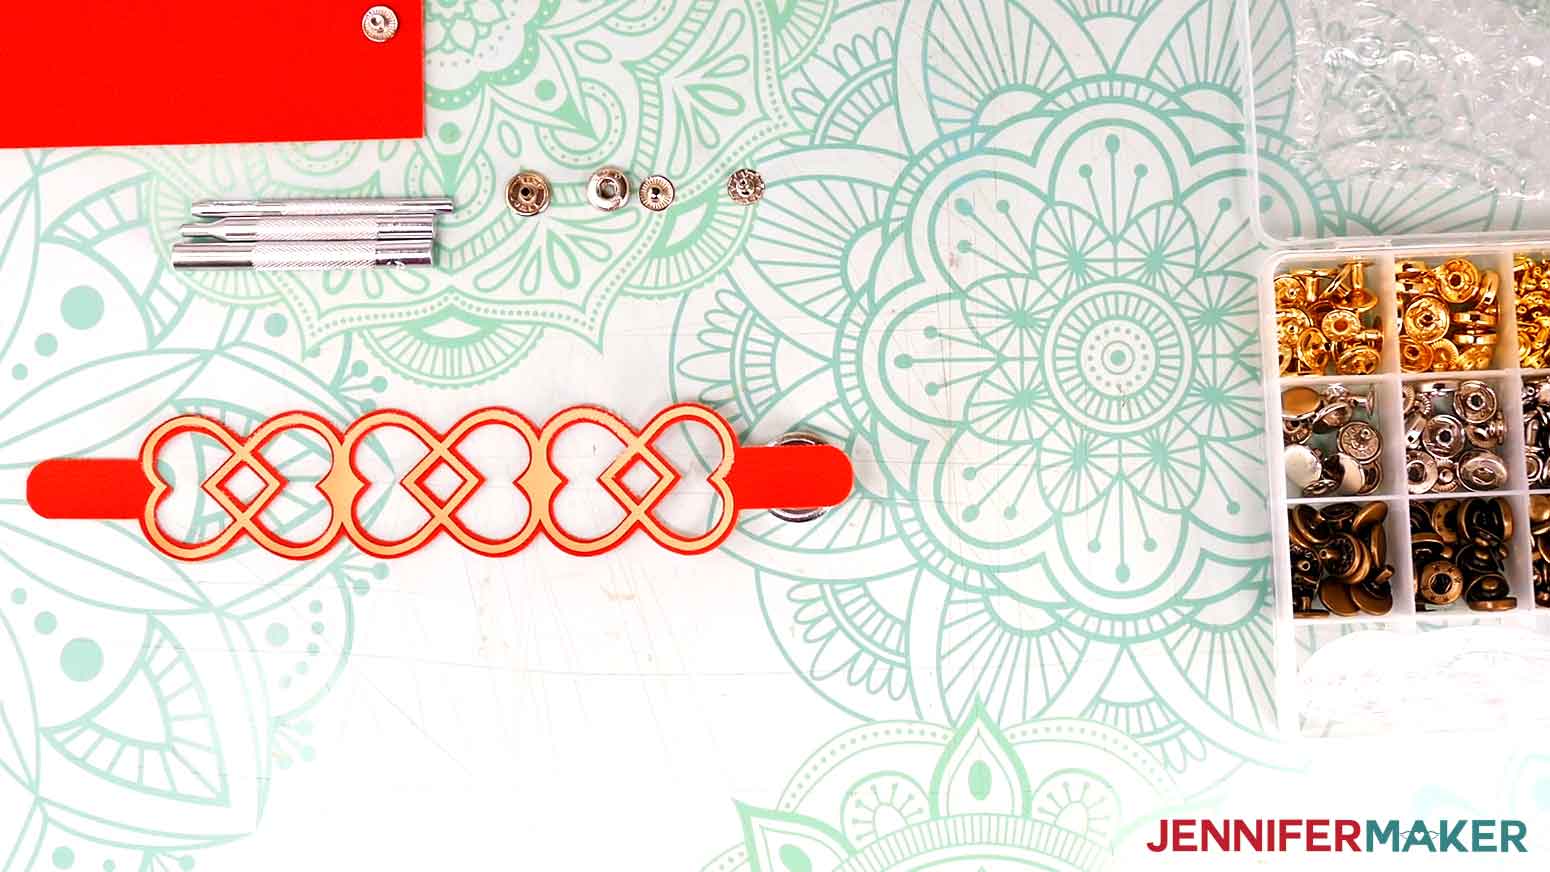
2. If your set has different sizes, find a cap that fits on the bracelet’s tab.
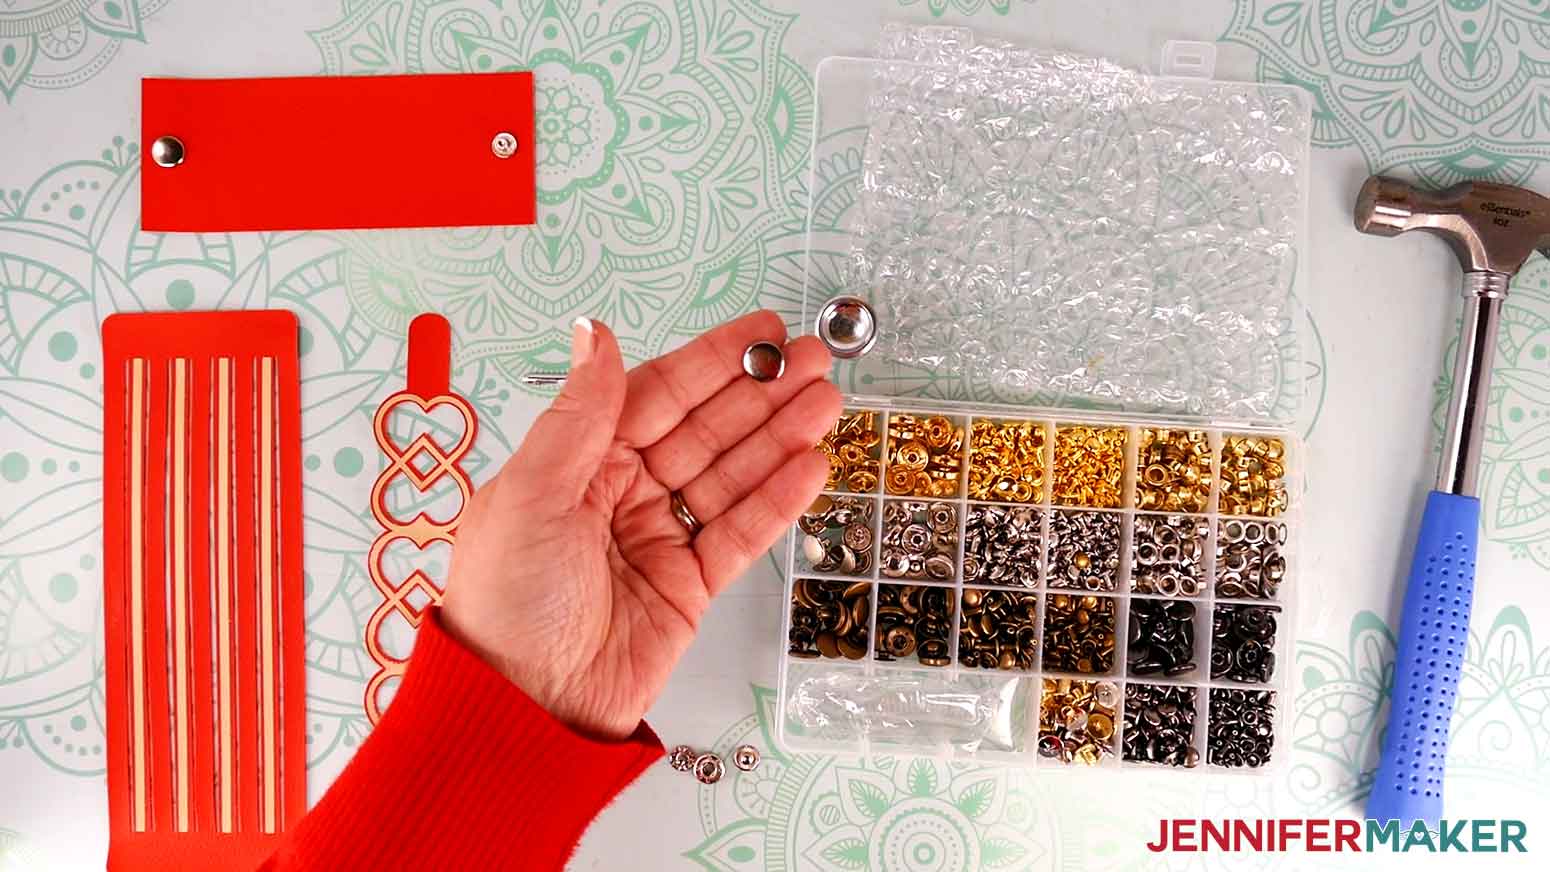
3. Find the cap’s matching socket, stud, and post.
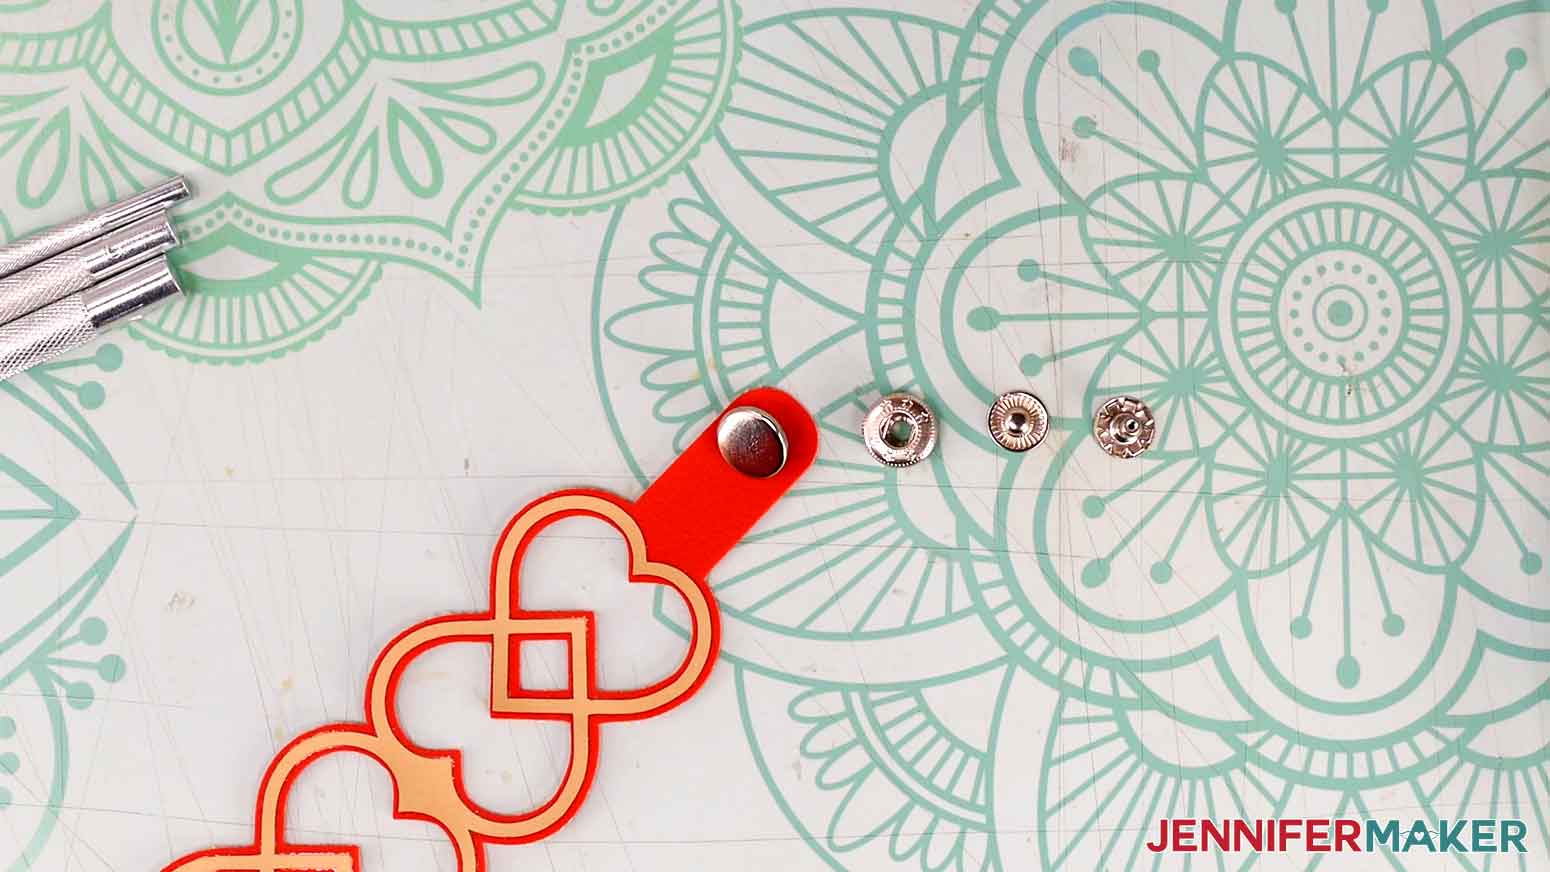
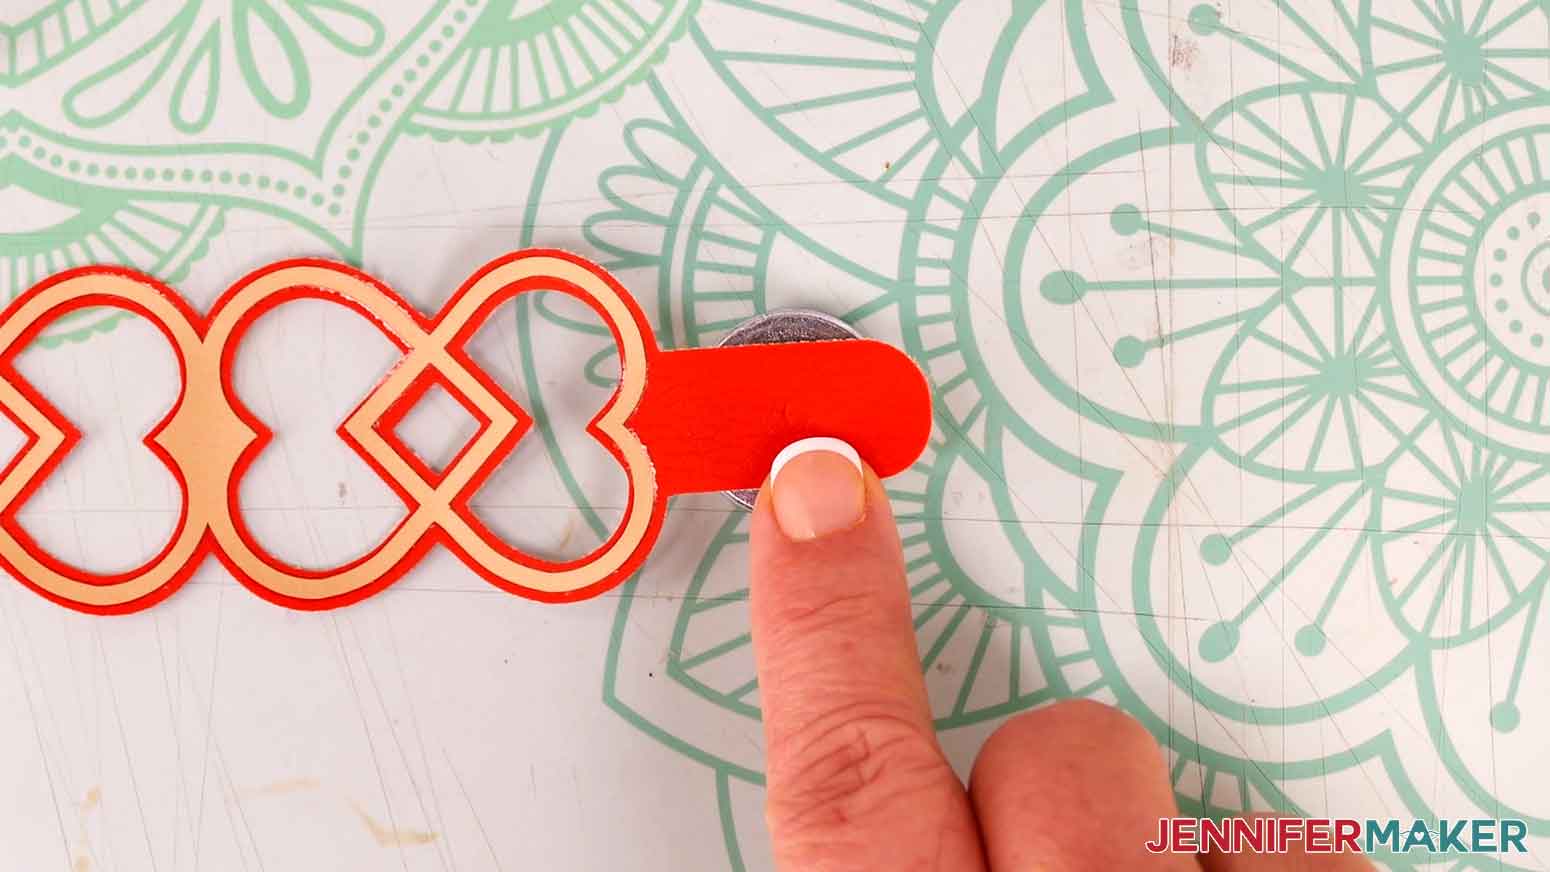
4. Pick the leather tab you want to have on the outside when wearing the bracelet.
5. Place the leather tab face up on the flat anvil with the self-healing mat underneath.
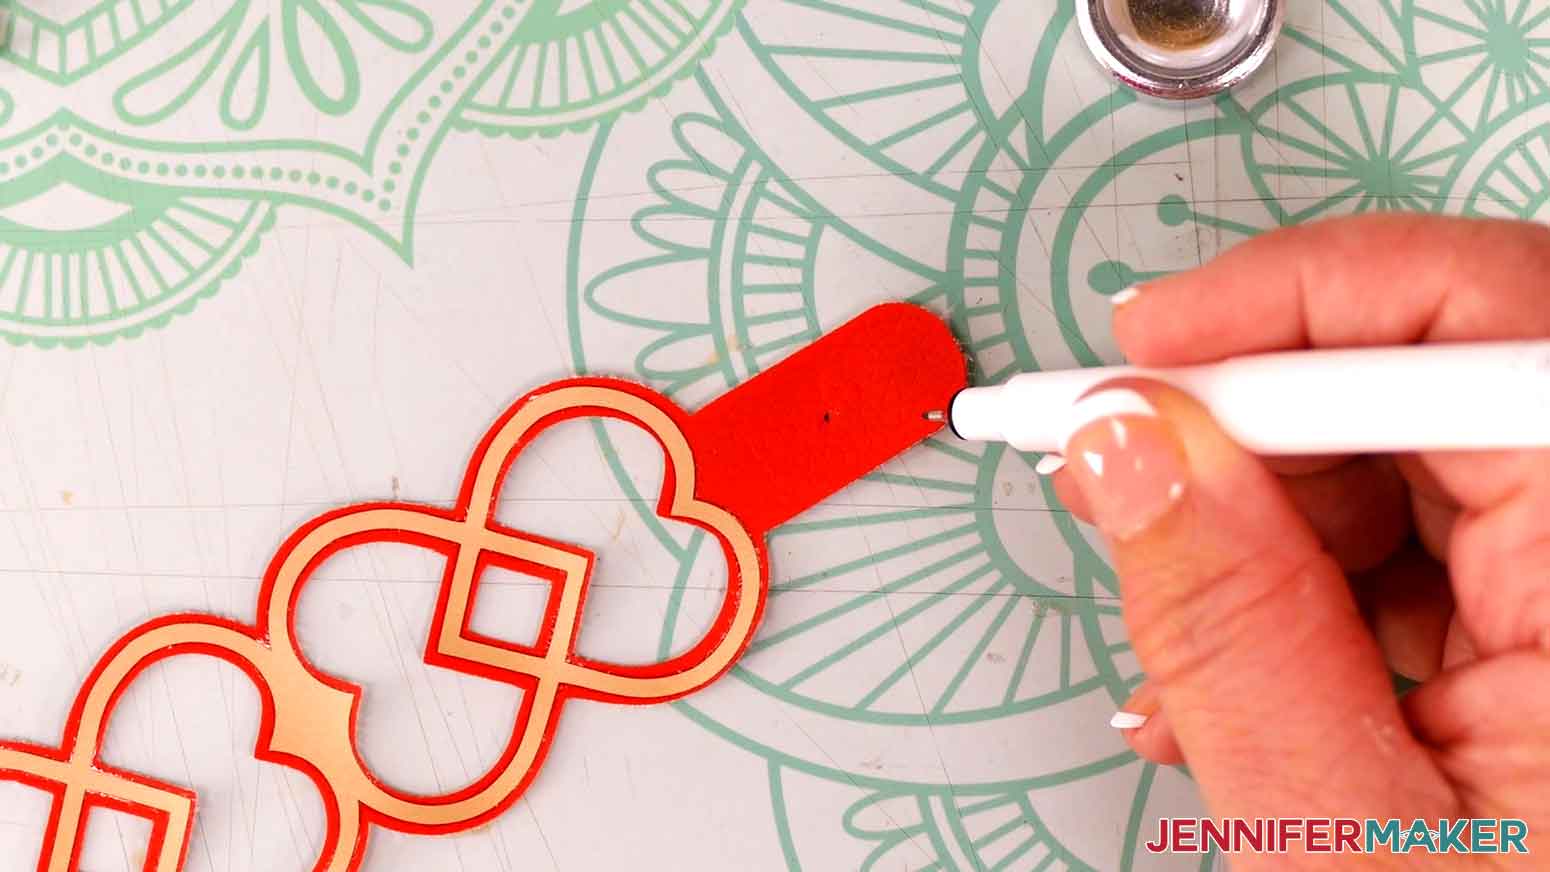
6. Position the punch tool in the middle of the tab with the open end down. (Be careful, the edge is sharp!) Hold it straight up and down.
7. Use a mallet or hammer to tap the tool a few times to make an indent but not cut.
8. Remove the tool to check the location, then adjust if needed.
9. Replace the tool in the intended spot, then hit the top straight down to make the cut.
10. When you think the tool is through the leather, push it down and twist to help cut any remaining threads.
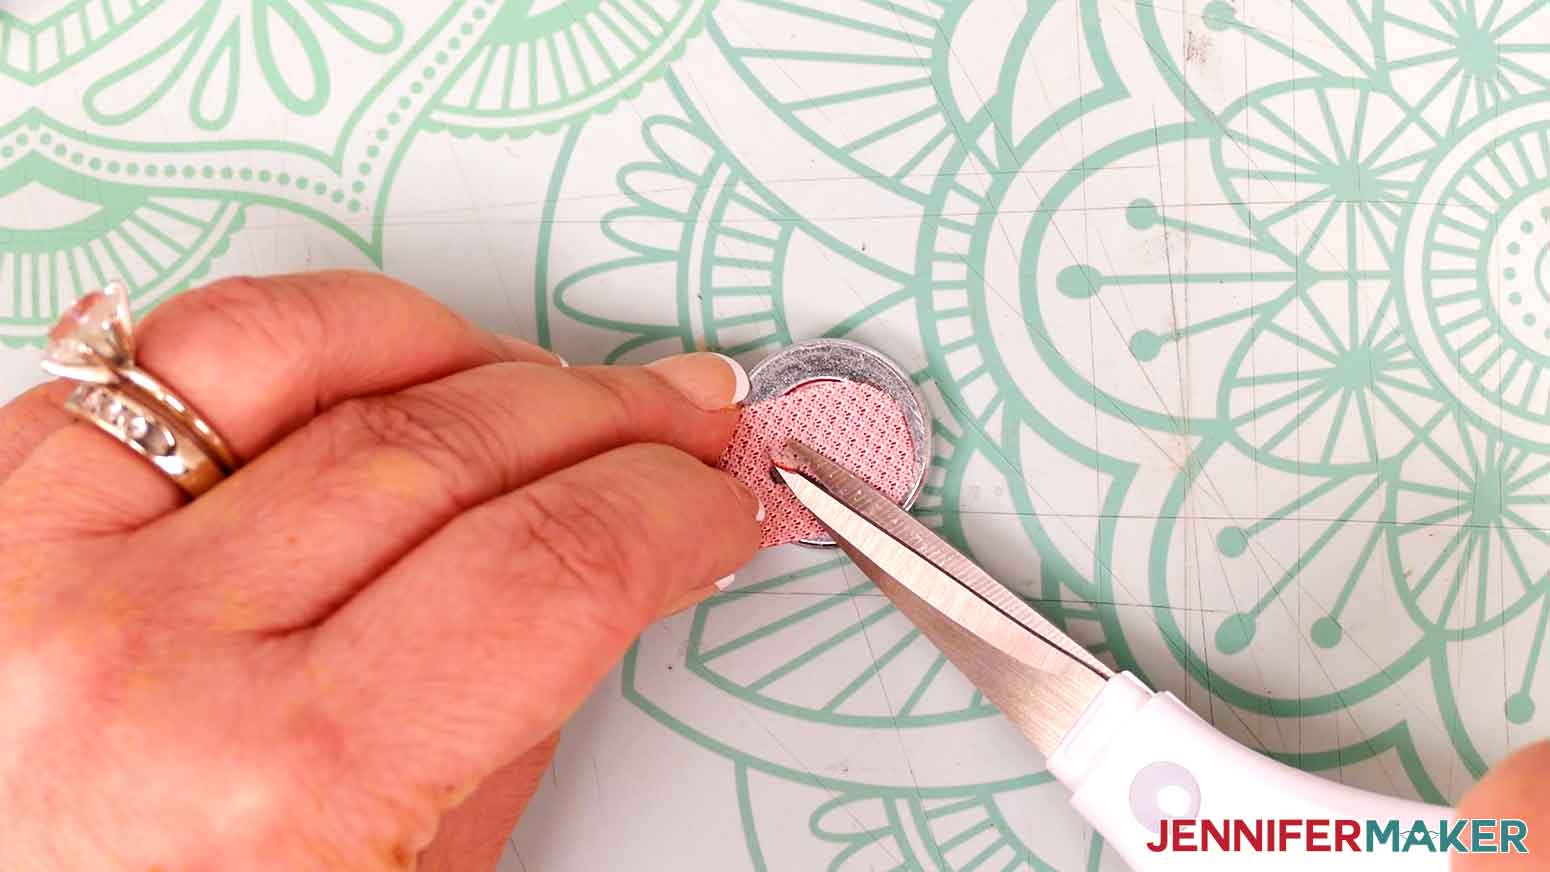
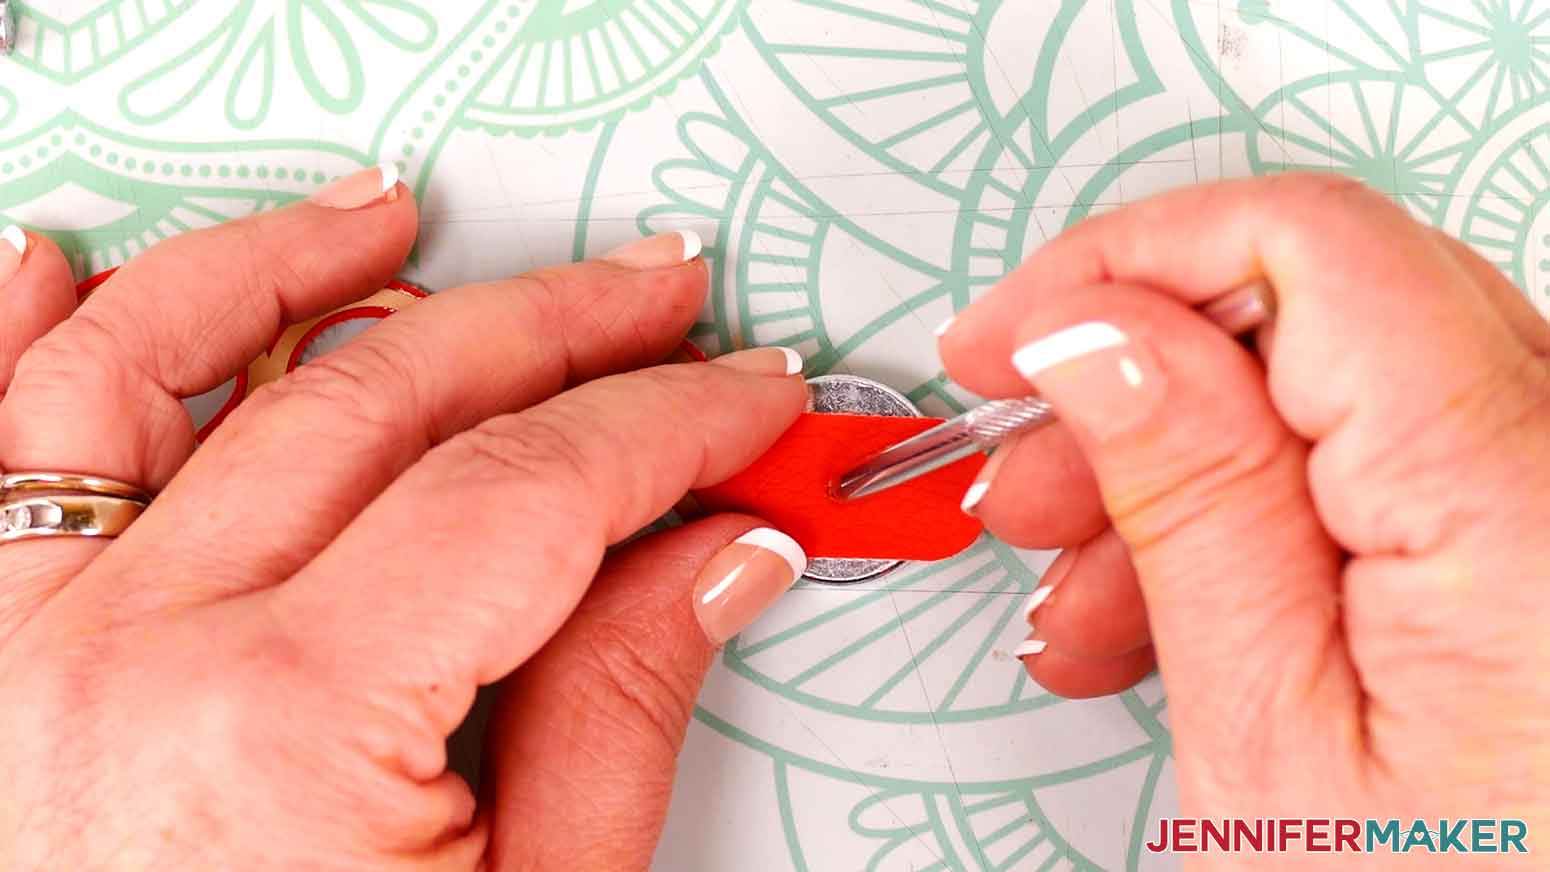
11. Remove the tool to check your progress. If a few threads are holding the cut leather in, use your scissors to carefully snip them and push the punched leather out.
12. Put the cap through the leather so the post is visible on the back side.
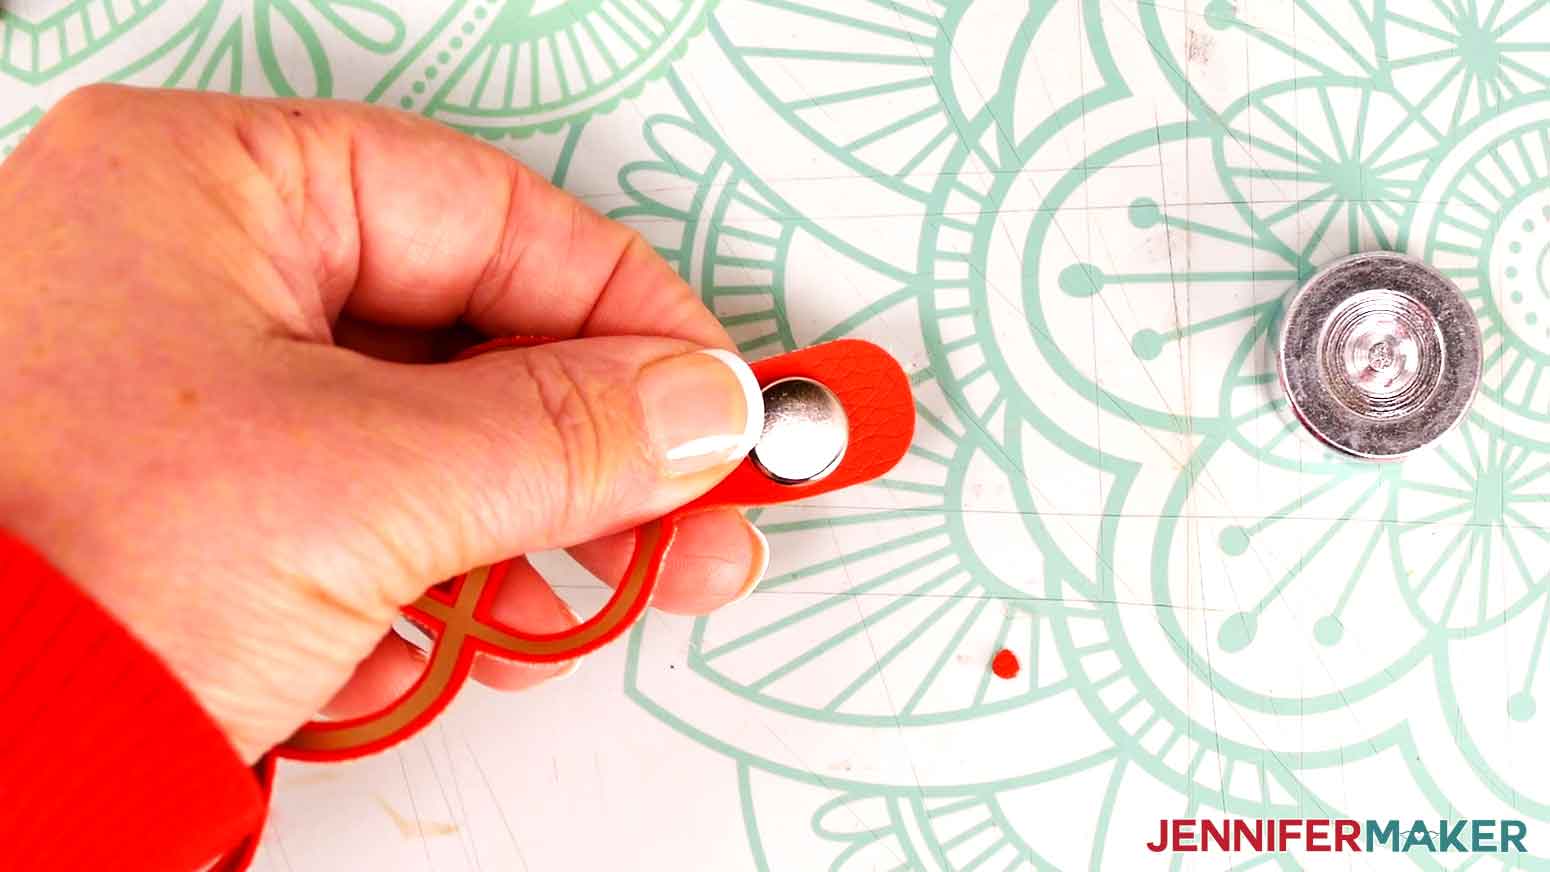
13. Hold the cap in place and flip the bracelet so the cap is centered on the anvil.

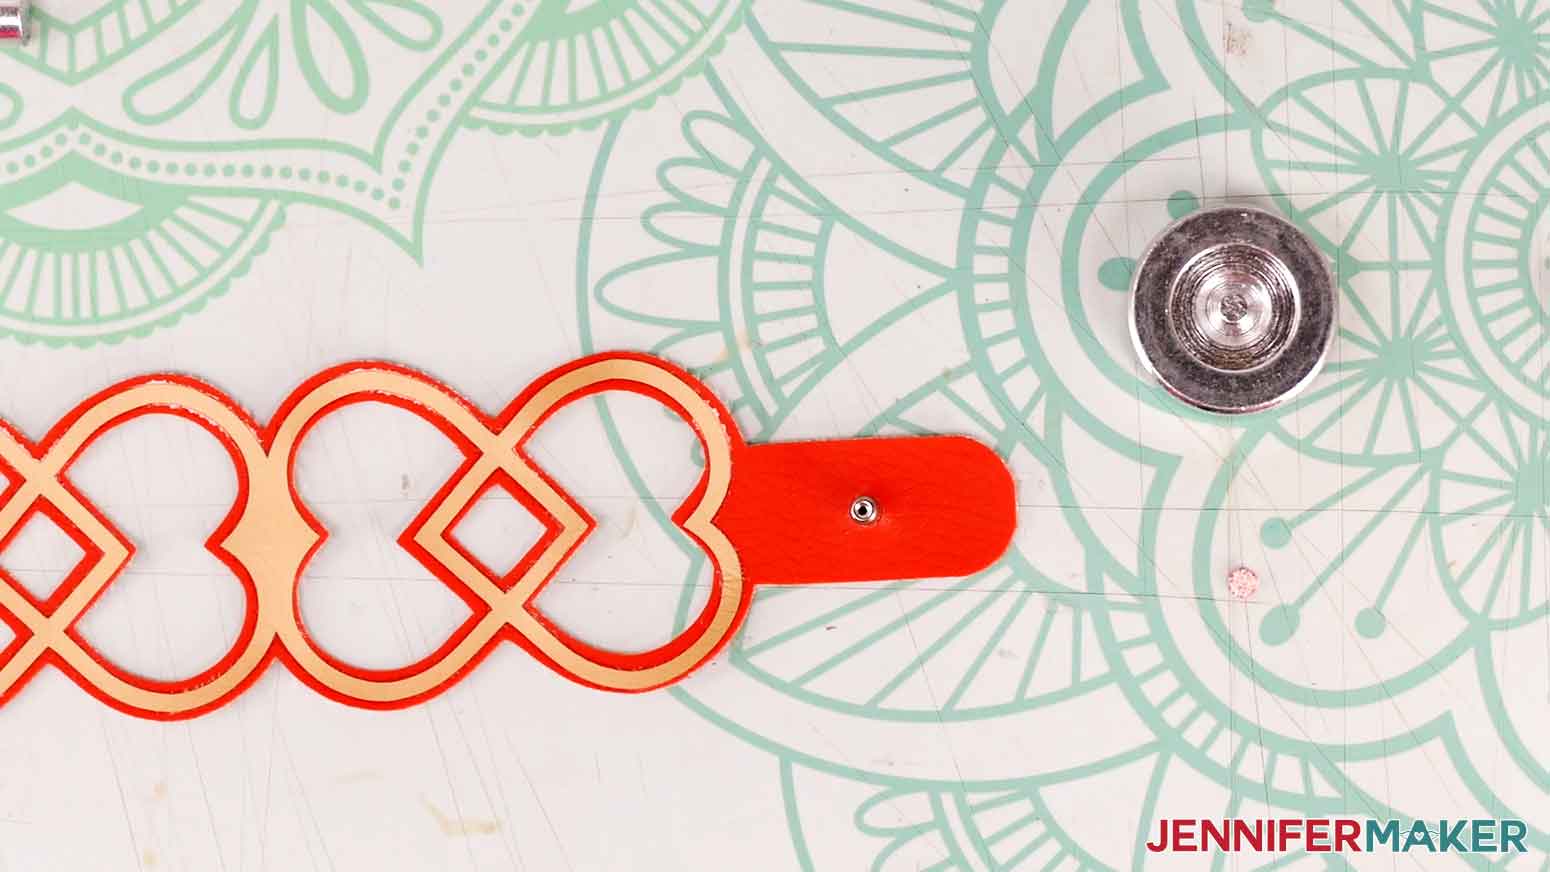
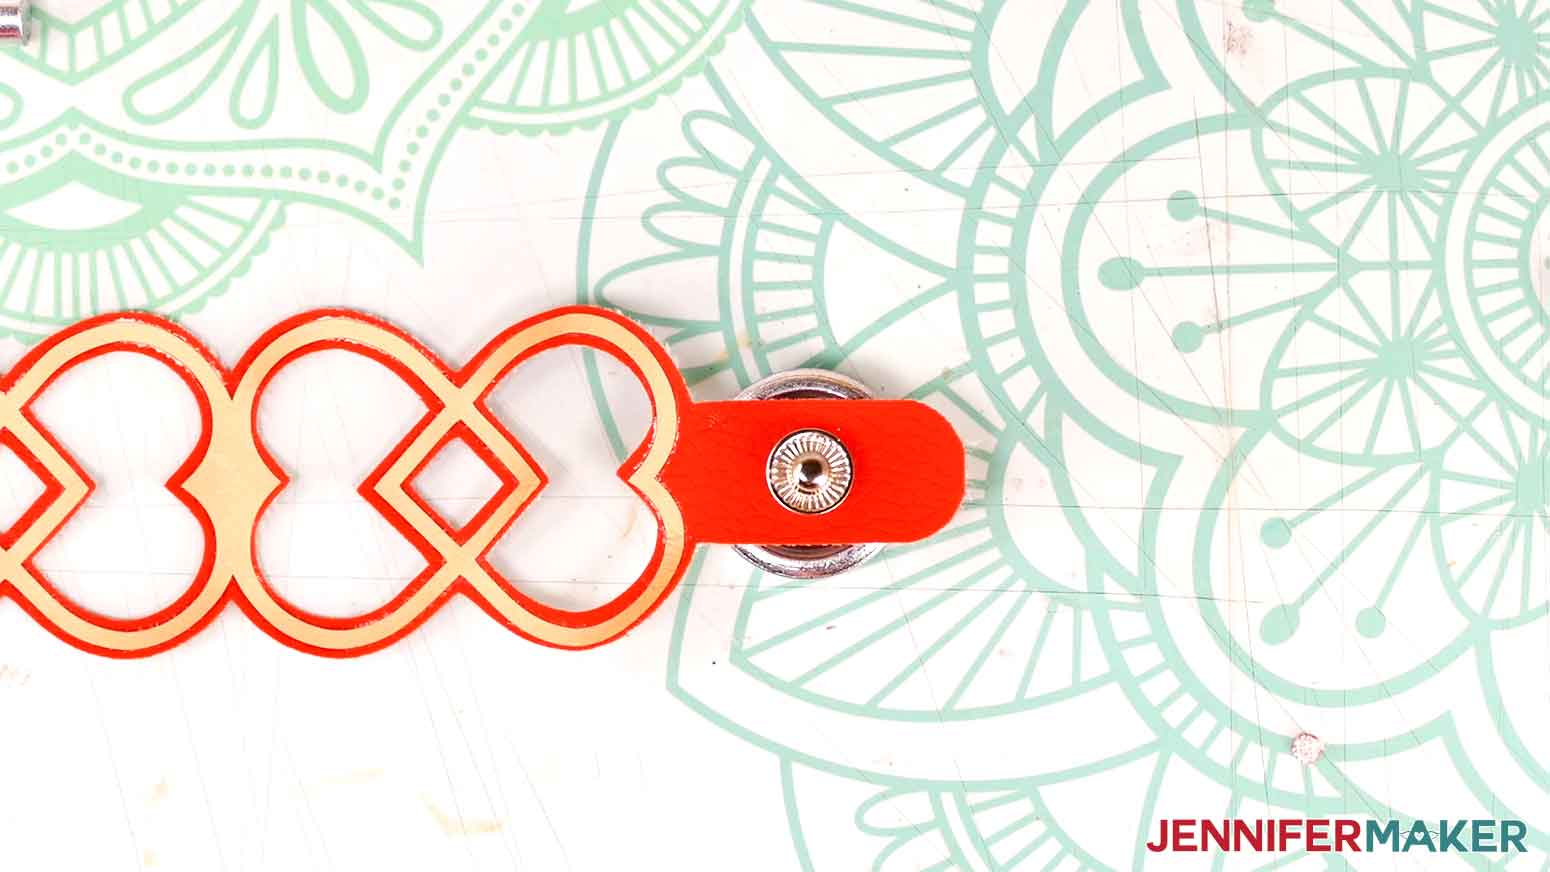
14. Place the socket on the post, with the finished side facing out.

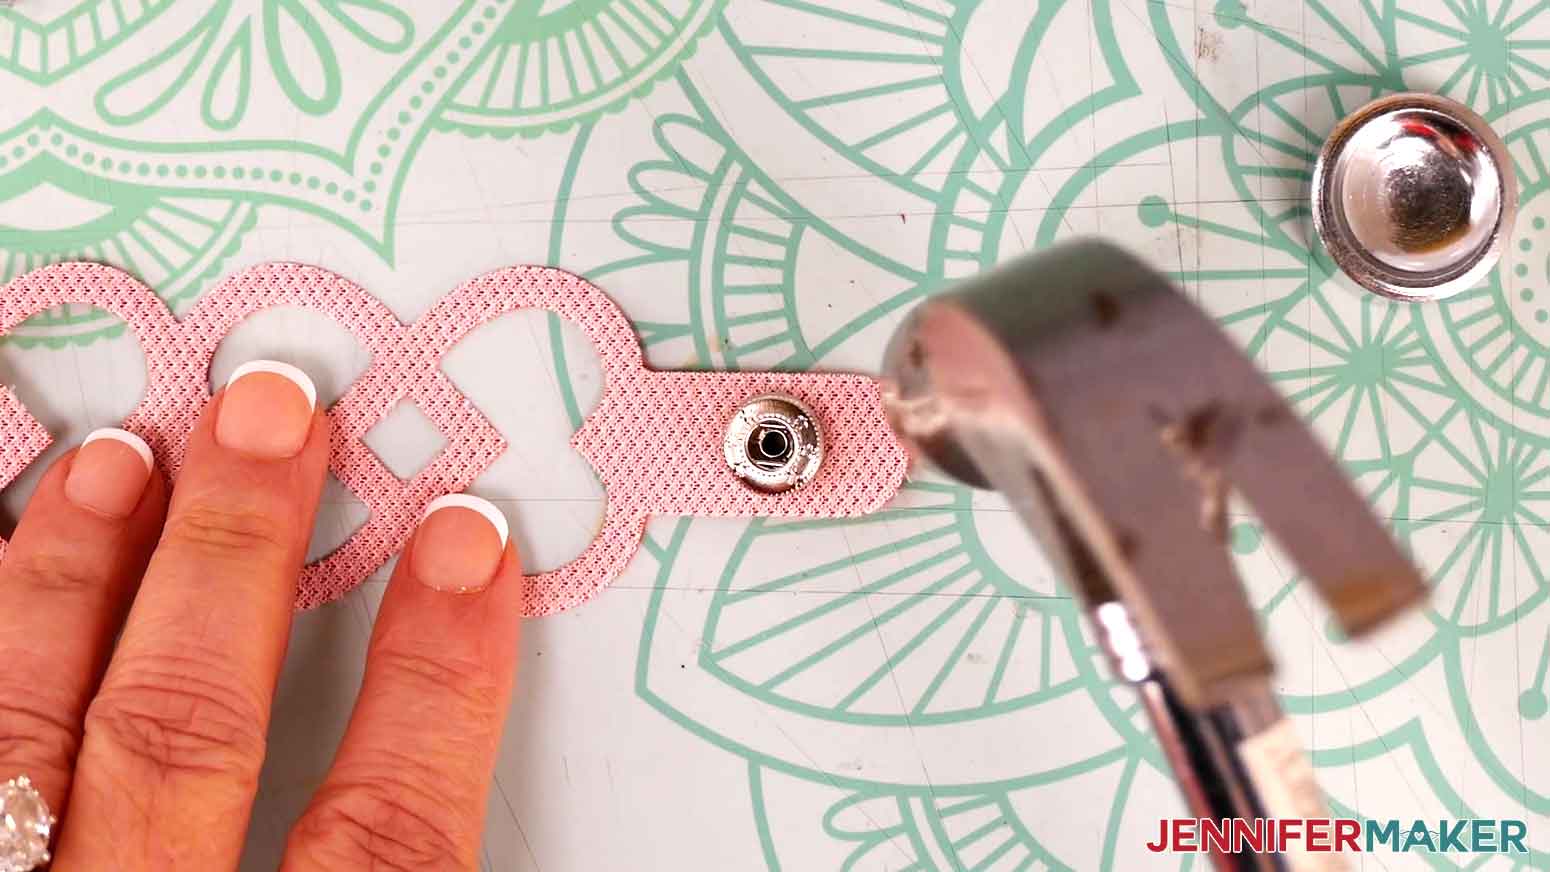
15. Make sure the socket is centered, then place the pointed tool in the middle.
16. Tap the end of the tool straight down until the socket and cap are secure on the leather. If there’s any wiggle, place it cap side down on the self-healing mat and tap it a few times to secure the pieces better.
17. Try the bracelet on to see where you want the clasp’s other side to be, and make a small mark on the leather.
18. Follow Steps 5-11 to punch a hole in the second tab the same way.
19. Push the post through the leather from the back.
20. Place the tab and finding on the anvil with the post facing up.
21. Put the stud on the post, making sure it’s a good fit and centered.
22. Place the concave tool over the stud, making sure it’s straight up and down.
23. Hit the back of the tool straight down until the post compresses in the stud.
24. Make sure the clasp is secure on both sides of the leather.
25. Test out the clasp!
VARIATIONS
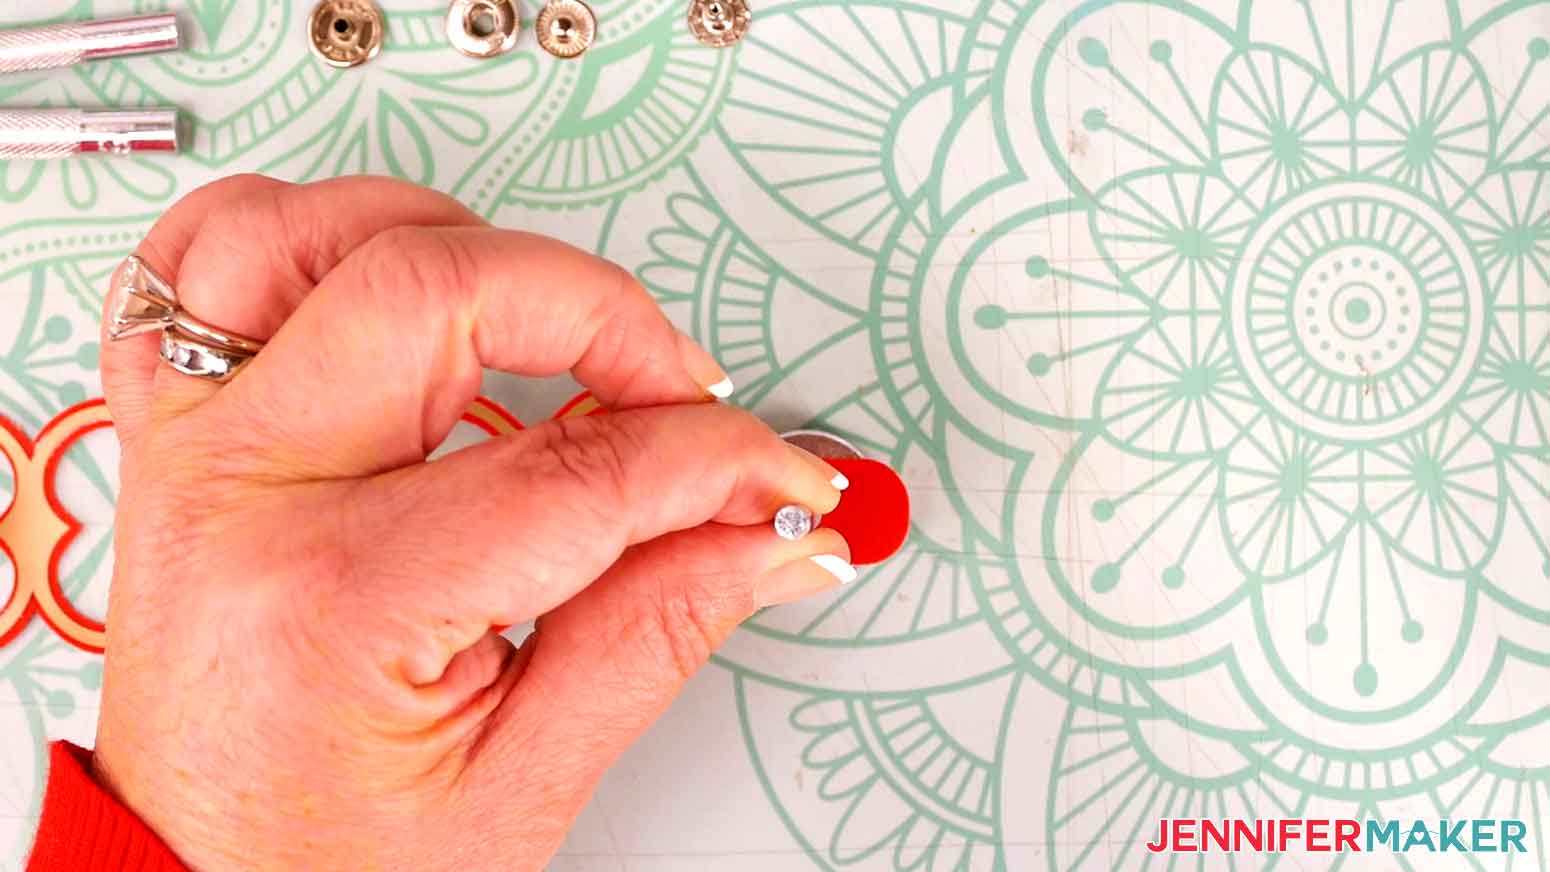
For a design without a tab, select the correct cap and place it near the edge. Make sure it’s centered and a little leather shows beyond it.

Press the post straight down to make an indent and punch the hole in the same spot.
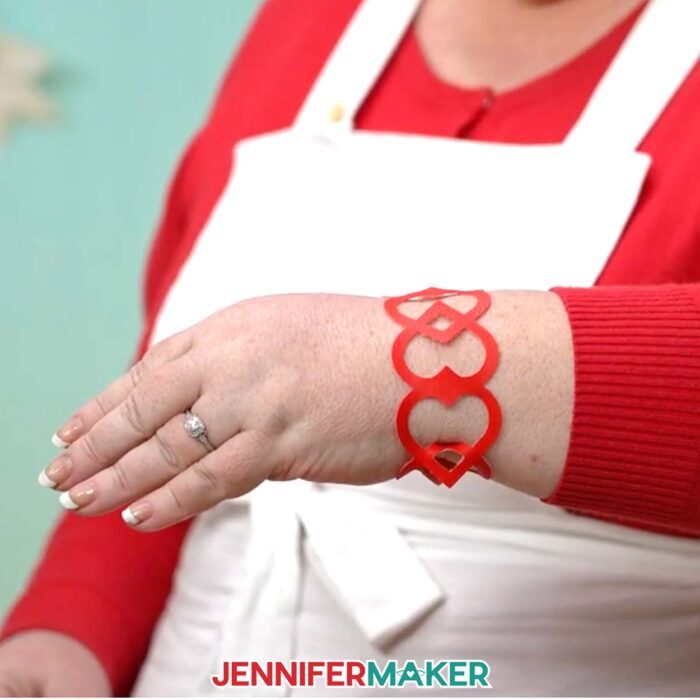
STEP 5: SHOW IT OFF
And there are your bracelets!
Notes
Finished Sizes:
Intricate bracelet (rectangular): 8” x 1.7”.
Intricate bracelet (rounded): 8” x 1.6”
Heart bracelet: 8” x 1.5”
Circle bracelet: 8” x 2.6”
Flower bracelet with leaves: 8” x 1.9”
Flower bracelet with iron-on: 8” x 1.8”
Rectangular bracelet: 8” x 2.8”
Answers to Your Questions About Making a Custom Family Name Ornament
Q: What do you need to make leather bracelets?
A: You’ll need some thin faux leather, the correct machine mat, your cutting machine, a snap closure kit with a hole punch and the correct tools mentioned in my tutorial. And some free designs from my library, of course, to make pretty bracelets! There are many different ways to secure wrap bracelets, or leather cord bracelets, but I prefer using snap fasteners instead of a lobster clasp or magnetic clasps on my handmade bracelets.
Q: What blade cuts leather on Cricut?
A: Depending on the types of leather, the knife blade, perforation blade, wavy blade, Cricut Maker engraving tool, rotary blade, deep point blade, and fine point blade can cut leather. The debossing tool, scoring wheels and stylus, and Cricut pens can also be used on leather. Some tools will require the Strong Grip mat. Always do a test run when using new tools! You may have to experiment with the material settings to get the result you want.
Q: What kinds of leather can Cricut engrave or cut?
A: Depending on the machine and tools available, Cricuts can use real leather, Cricut faux leather, unfinished leather, metallic leather, Cricut leather, tooling leather, and many other leather products.
Q. Do I have to use a Cricut?
A: No! My capable design staff and I always include several versions of each digital item. If you have a Silhouette Cameo, which uses Silhouette Studio, you can use the DXF cut files in Silhouette Basic Edition. If you have upgraded to Silhouette Designer Edition, Designer Edition Plus, or Business, you can use the SVG files. If you don’t have a cutting machine, you can print and then cut out my digital download PDF files, too and then use scissors or a craft knife to cut out your pieces. The ZIP file in my resource library includes these file types and more!
Q. Are your free SVGs just for personal use or also commercial use?
A: Yes, you can sell completed projects using these designs, we only ask that you give credit to JenniferMaker.com and do not sell the digital files. If you use them, please share photos with us! We love supporting small businesses!
Get my free SVG file collection to create your own custom leather bracelet!
I love seeing what you make with my designs and how you use them! Please share a photo of your own leather bracelets in our Facebook group or tag me on social media with #jennifermaker.
Love,

Want to remember this? Save this Tutorial on How To Make Leather Bracelets to your favorite Pinterest Board!