
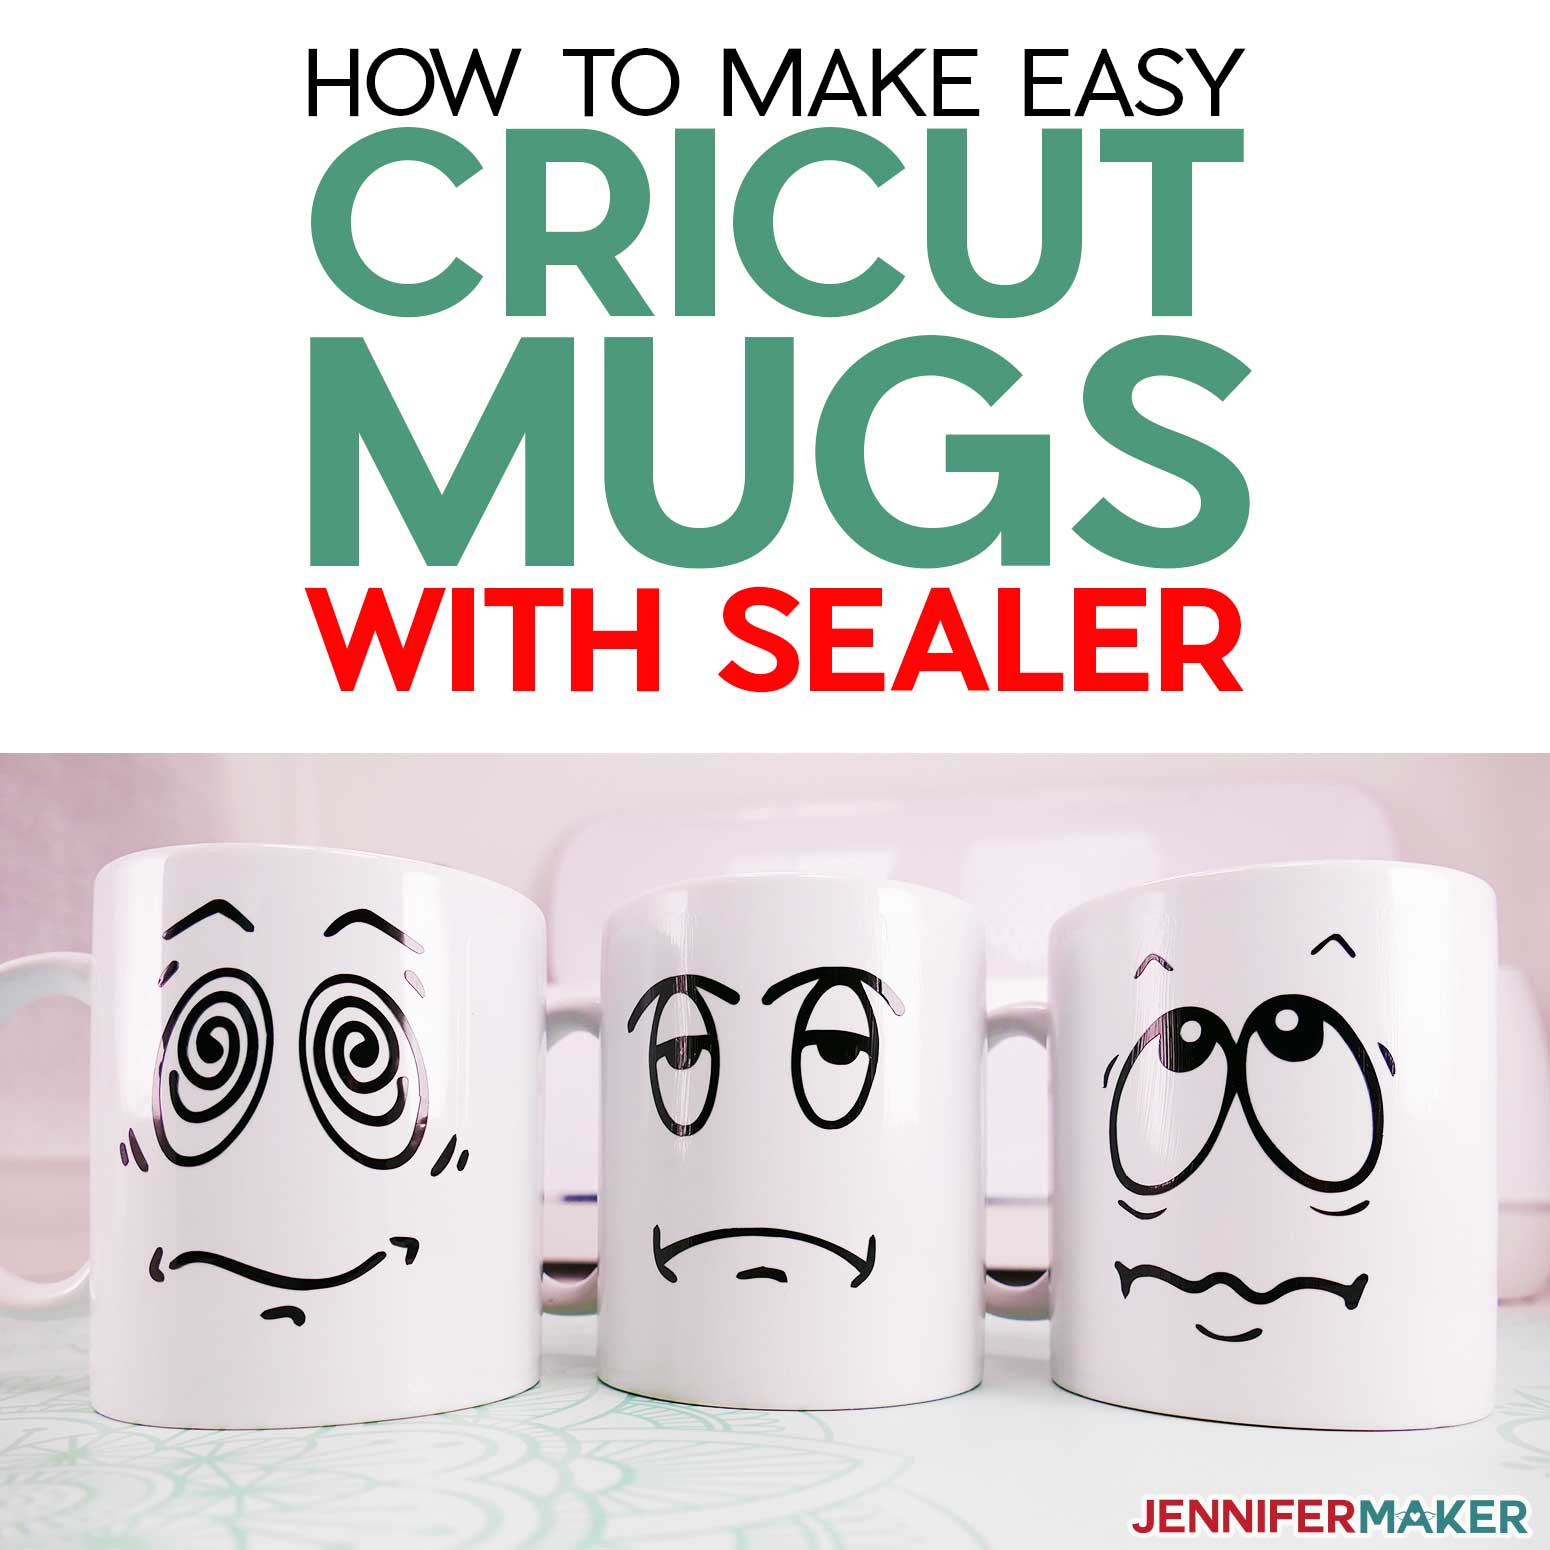
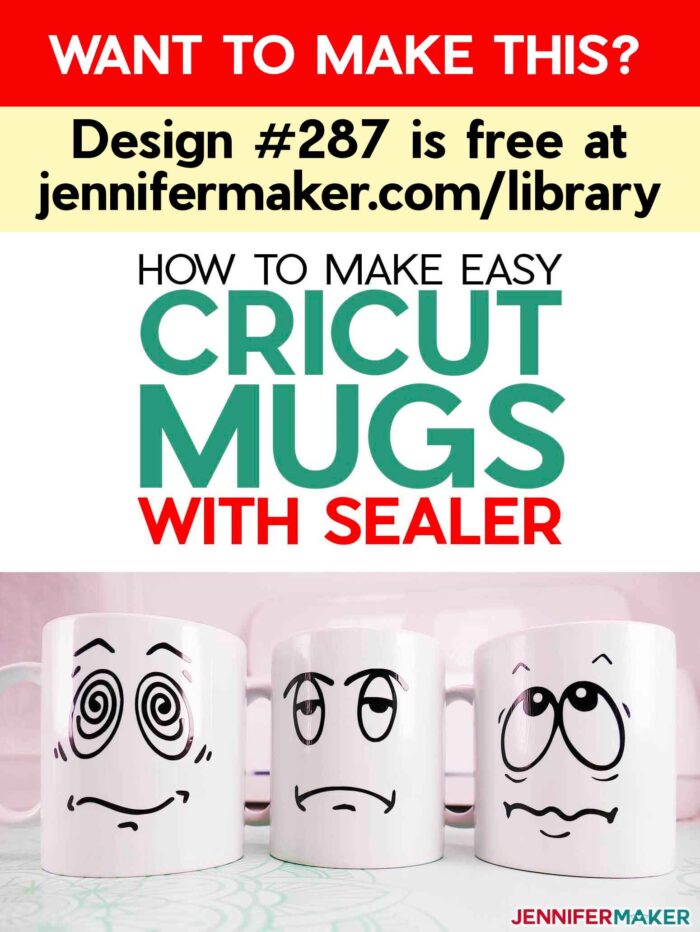
Learn how to make a Cricut mug by applying vinyl and sealing it with Mod Podge for a washable, long-lasting mug!
Cricut mugs are SO popular — my tutorial on how to put vinyl on mugs has nearly a million views! But one question I keep getting over and over is how to seal the mugs after you apply the vinyl. Most people don’t bother to seal their mugs as permanent vinyl usually does well enough on its own, but it’s not really and truly dishwasher safe. So can you do it? You can, and in this tutorial I’m going to show you how to make a vinyl Cricut mug and seal it for a washable mug! I have put together this really easy, absolutely adorable Cricut mug tutorial to simplify the entire process for you! Don’t forget to check out my mug gift box tutorial too, for the perfect way to gift your brand new mug!

These Cricut mugs are so cute and perfect for any level of crafter! Even if you have never worked with vinyl, don’t worry, you can do this project! Mugs are great for teachers, neighbors, really anyone — they are bound to bring a smile to someone’s face. Fill these mugs with candy and a gift card, wrap it in colorful cellophane, and you have a wonderful and thoughtful gift! These mugs are a simple, but personalized gift to give! How easy is that?
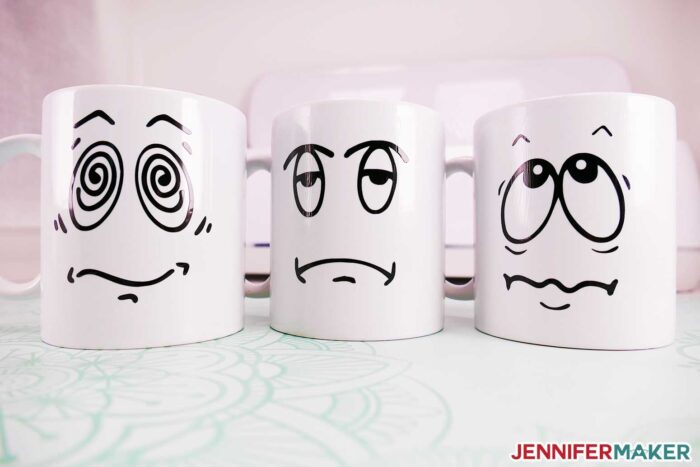
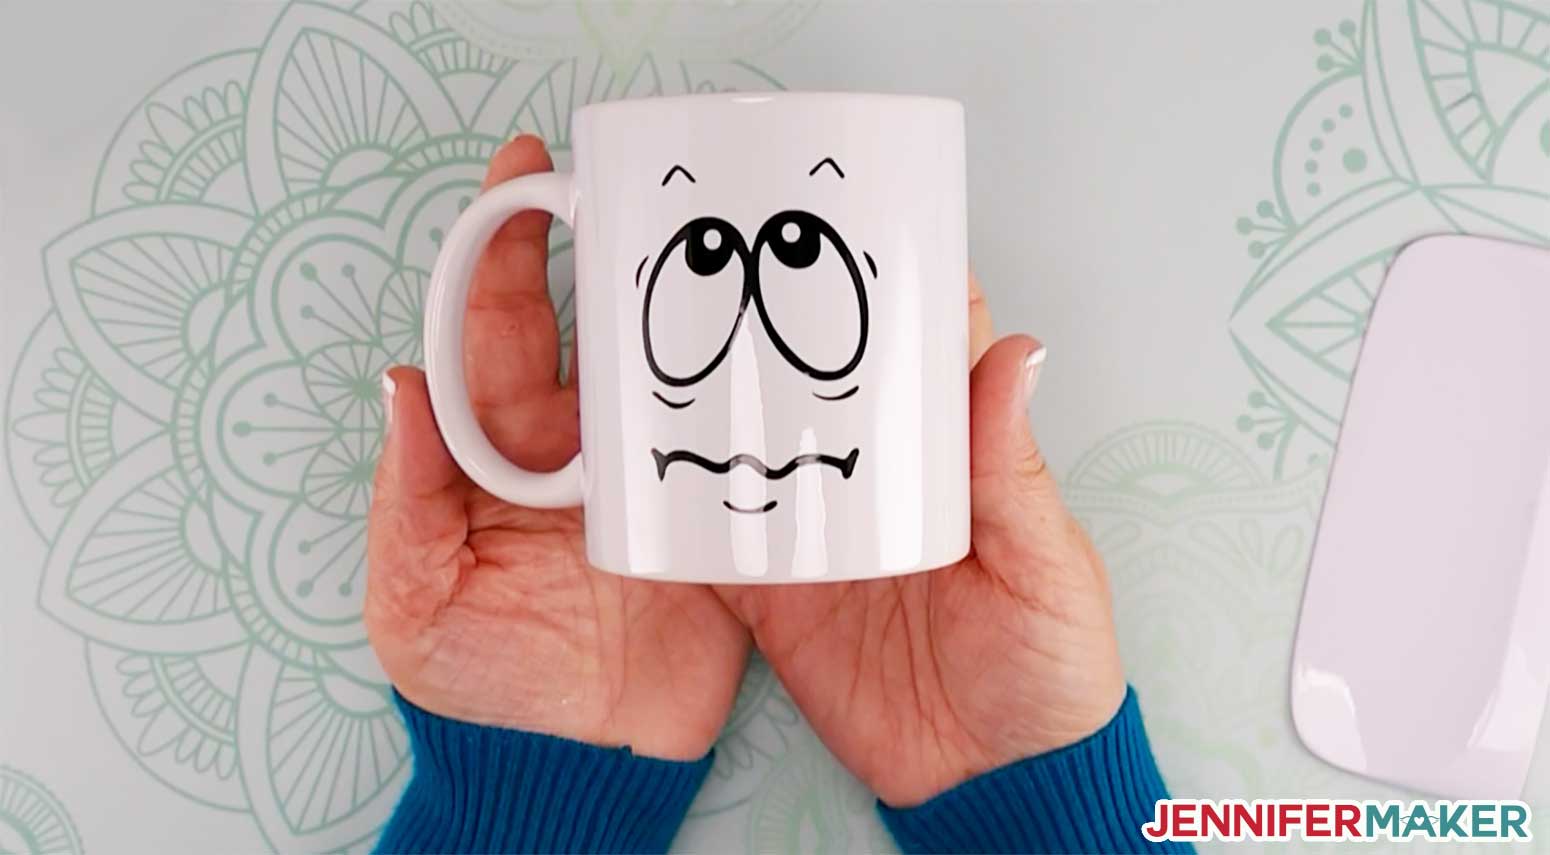
When I say that these are easy, I am not exaggerating! I encourage you to try this project, especially if you’ve never worked with vinyl before! One of the things I love about these adorable faces is that they are quick and simple to make! I wanted to create a design on a mug that is universal, one that will appeal to men, women, young, and old. We have all experienced these facial expressions at some point (especially BEFORE coffee) and now you can put them on a mug!
There are only a couple of items you must have to make this project. You need permanent adhesive vinyl in a color to go on your mug. You’ll also want standard grip transfer tape to get the vinyl onto your mug’s surface.
To clean the mugs, rubbing alcohol is all you need — cleaning them helps your vinyl stick better.
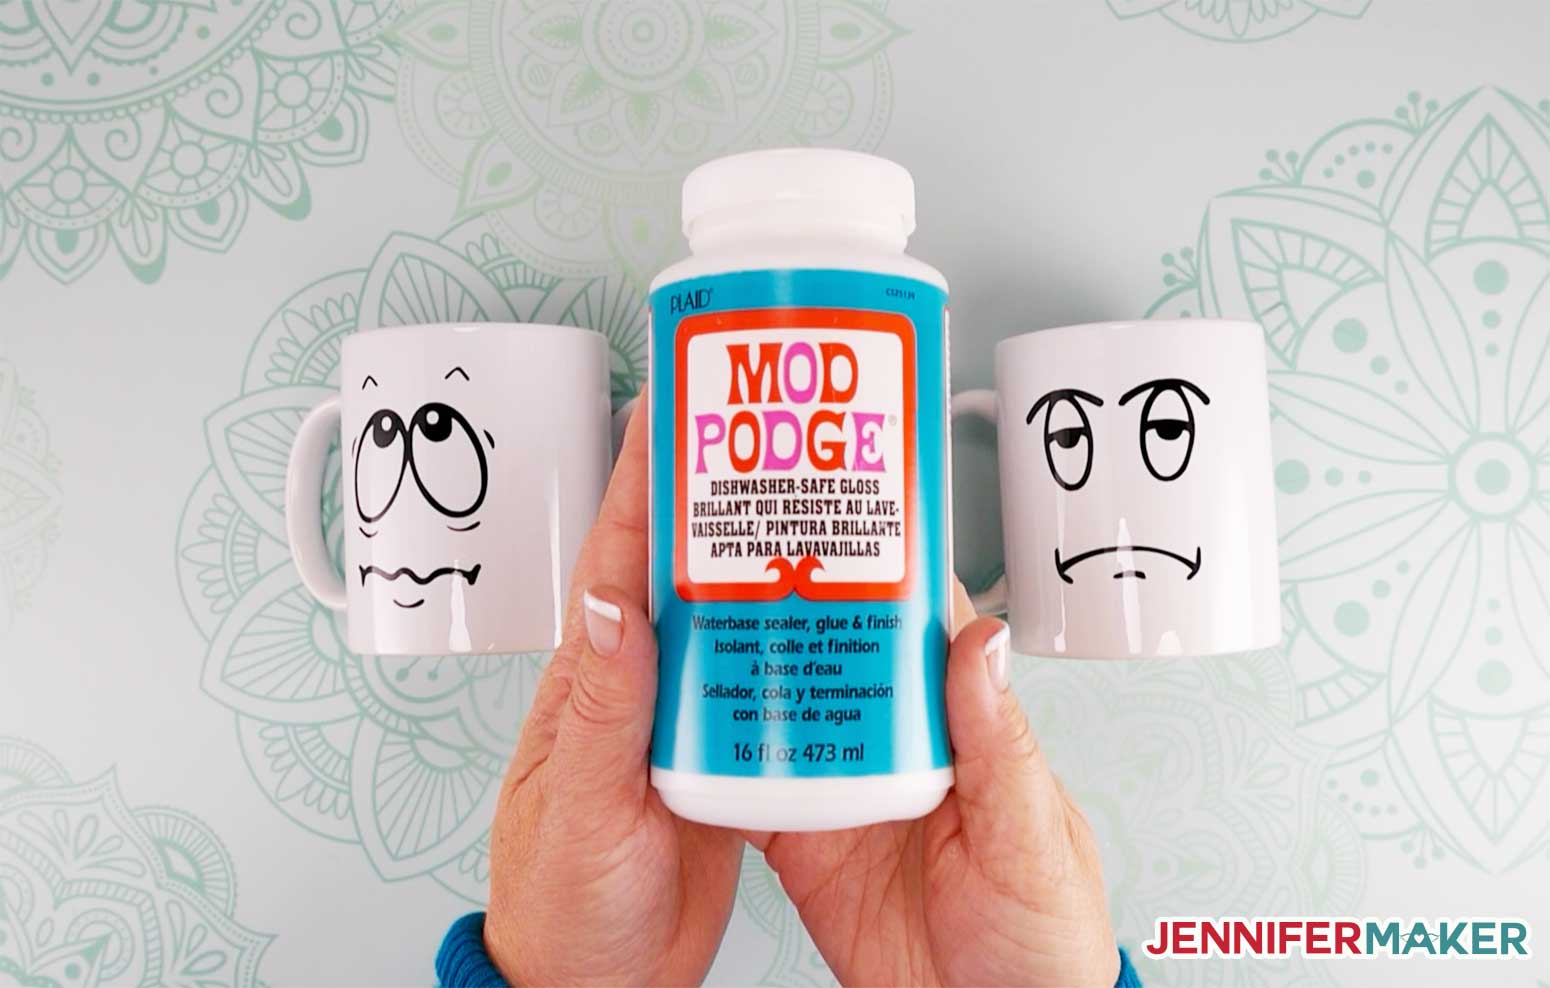
And then, to make your Cricut mug dishwasher safe, I recommend Mod Podge Dishwasher Safe Sealer! A foam or soft bristle brush will help spread the Mod Podge smoothly on your mug.
I used my Cricut cutting machine to cut out these adorable faces, along with the fine point blade along, a green Standard Grip cutting mat, and some basic weeding tools and a scraper.
Let me show you how to create a washable vinyl design on a Cricut mug! This post contains some affiliate links for your convenience (which means if you make a purchase after clicking a link I will earn a small commission but it won’t cost you a penny more)! Read my full disclosure policy.
Materials to Create a Vinyl Design on a Cricut Mug
View my Amazon shopping list with the exact items we used to make this project!
- Ceramic mugs (avoid anything powder coated or textured)
- Outdoor permanent adhesive vinyl
- Mod Podge Dishwasher Safe Sealer
- Foam or Soft bristle brush
- Cricut Standard Grip Transfer Tape (do not use Strong Grip)
- Rubbing alcohol
- Cricut Standard Grip Mat (green)
- Weeding Tool
- Scraper tool
- A way to cut your vinyl for the mug (I used the amazing Cricut cutting machine!)
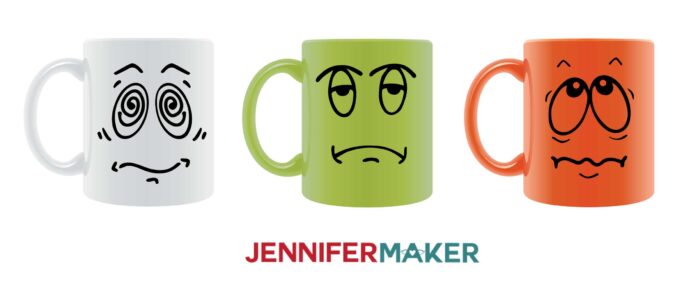
- Design #287 – My free Cricut mug face decals (available in my free resource library—get the password at the bottom of this post
How to Create a Cricut Mug with Sealed Vinyl
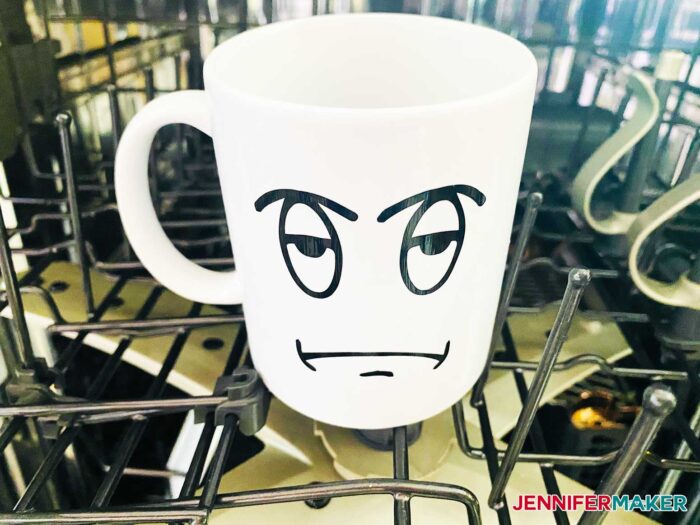
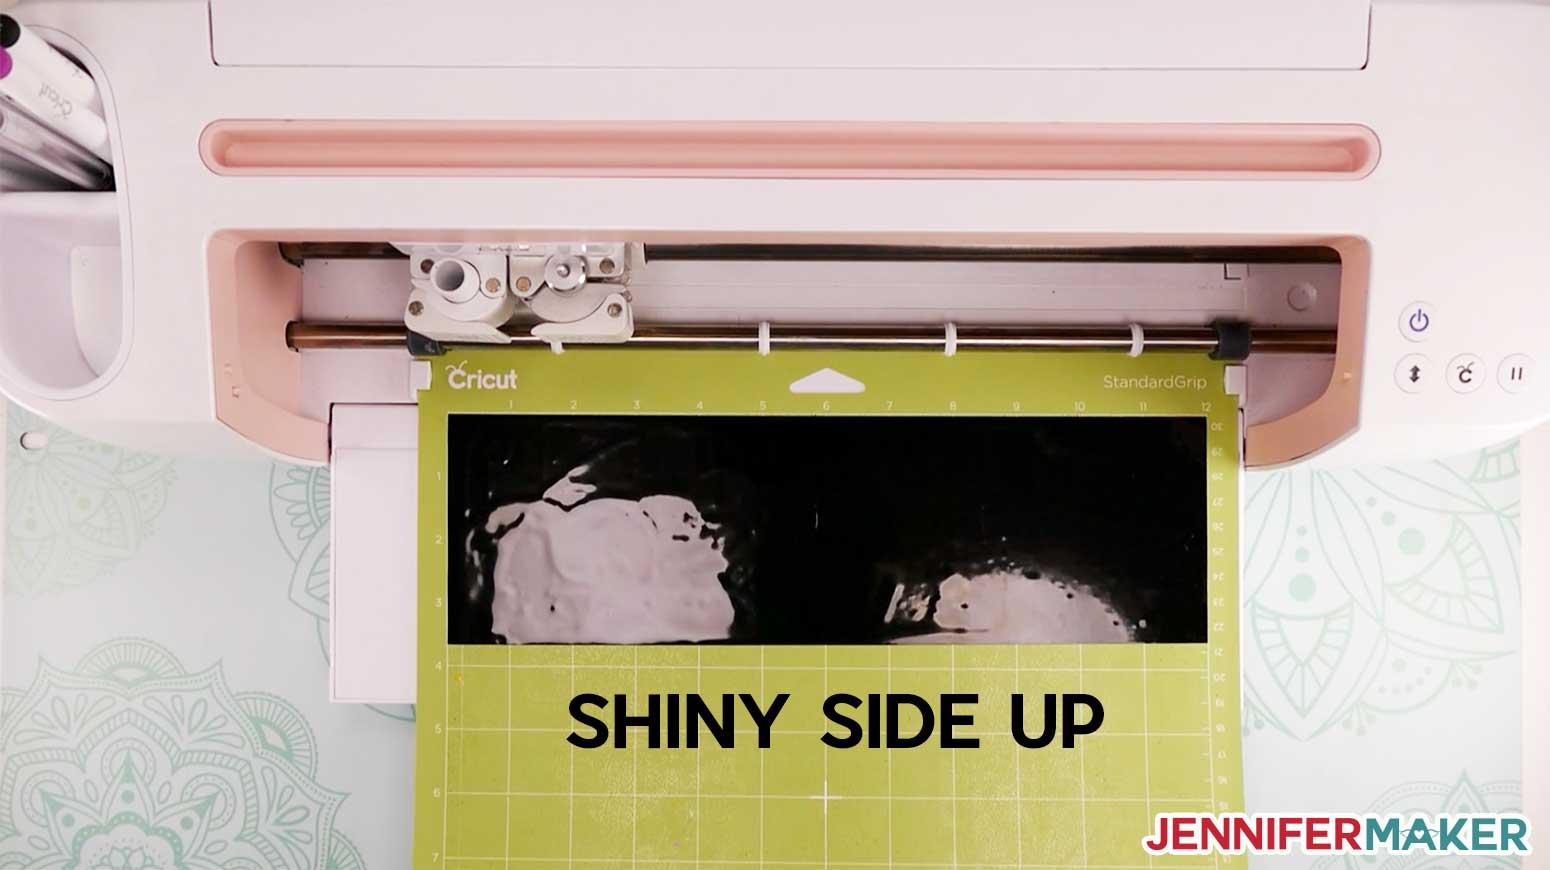
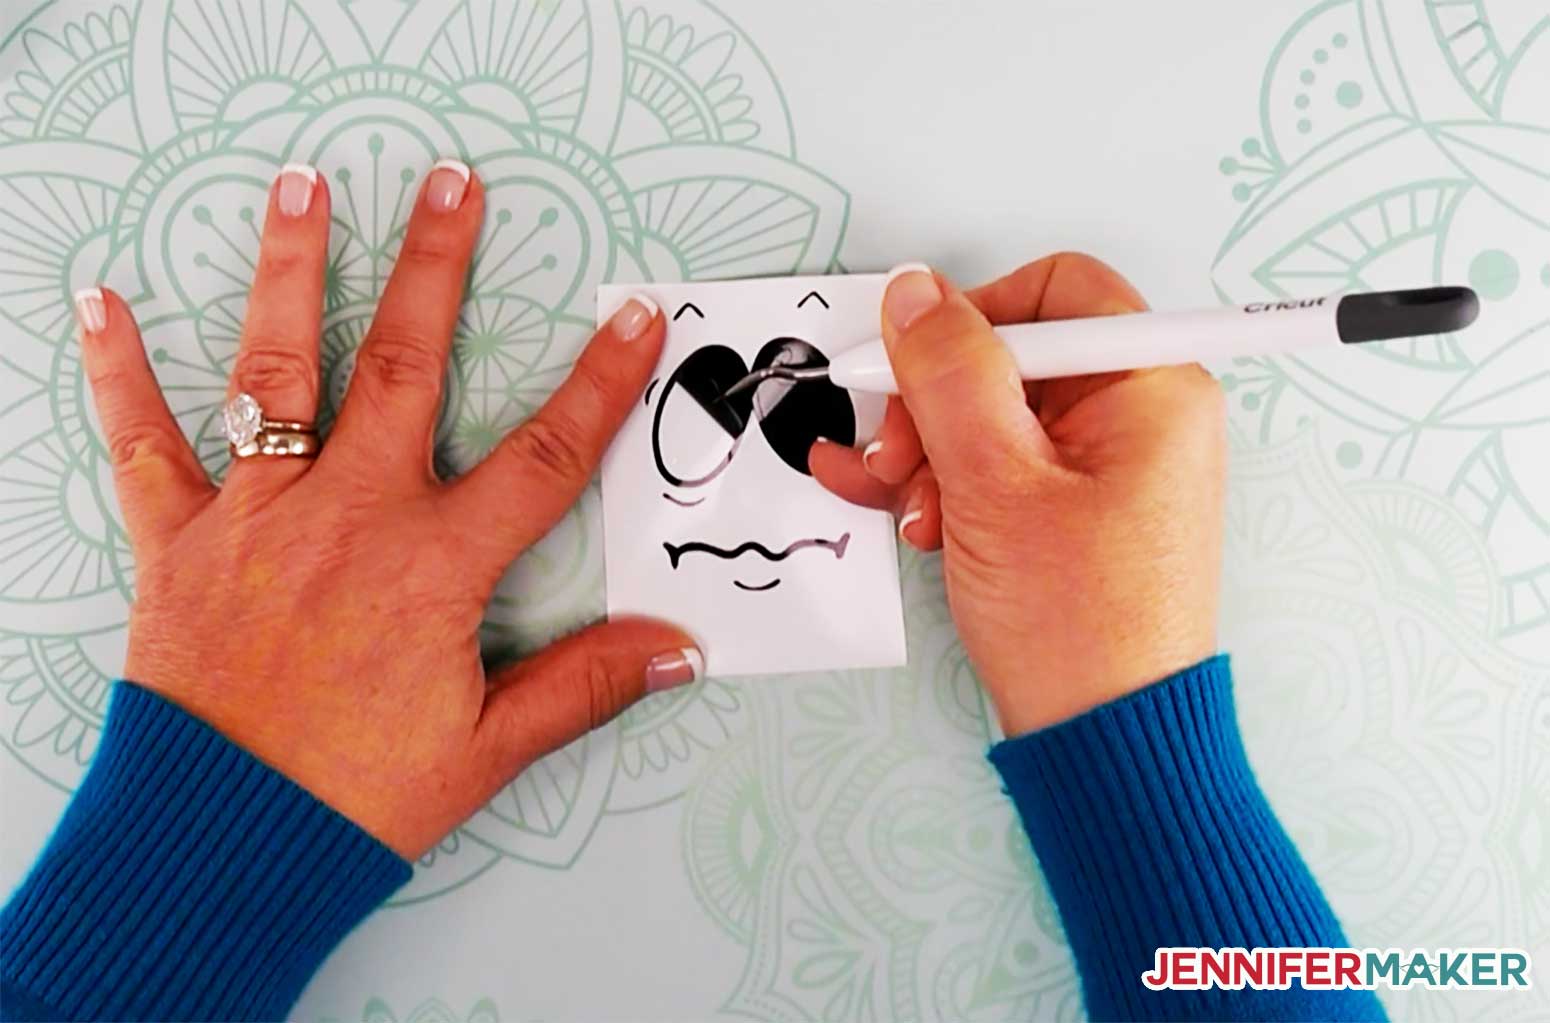
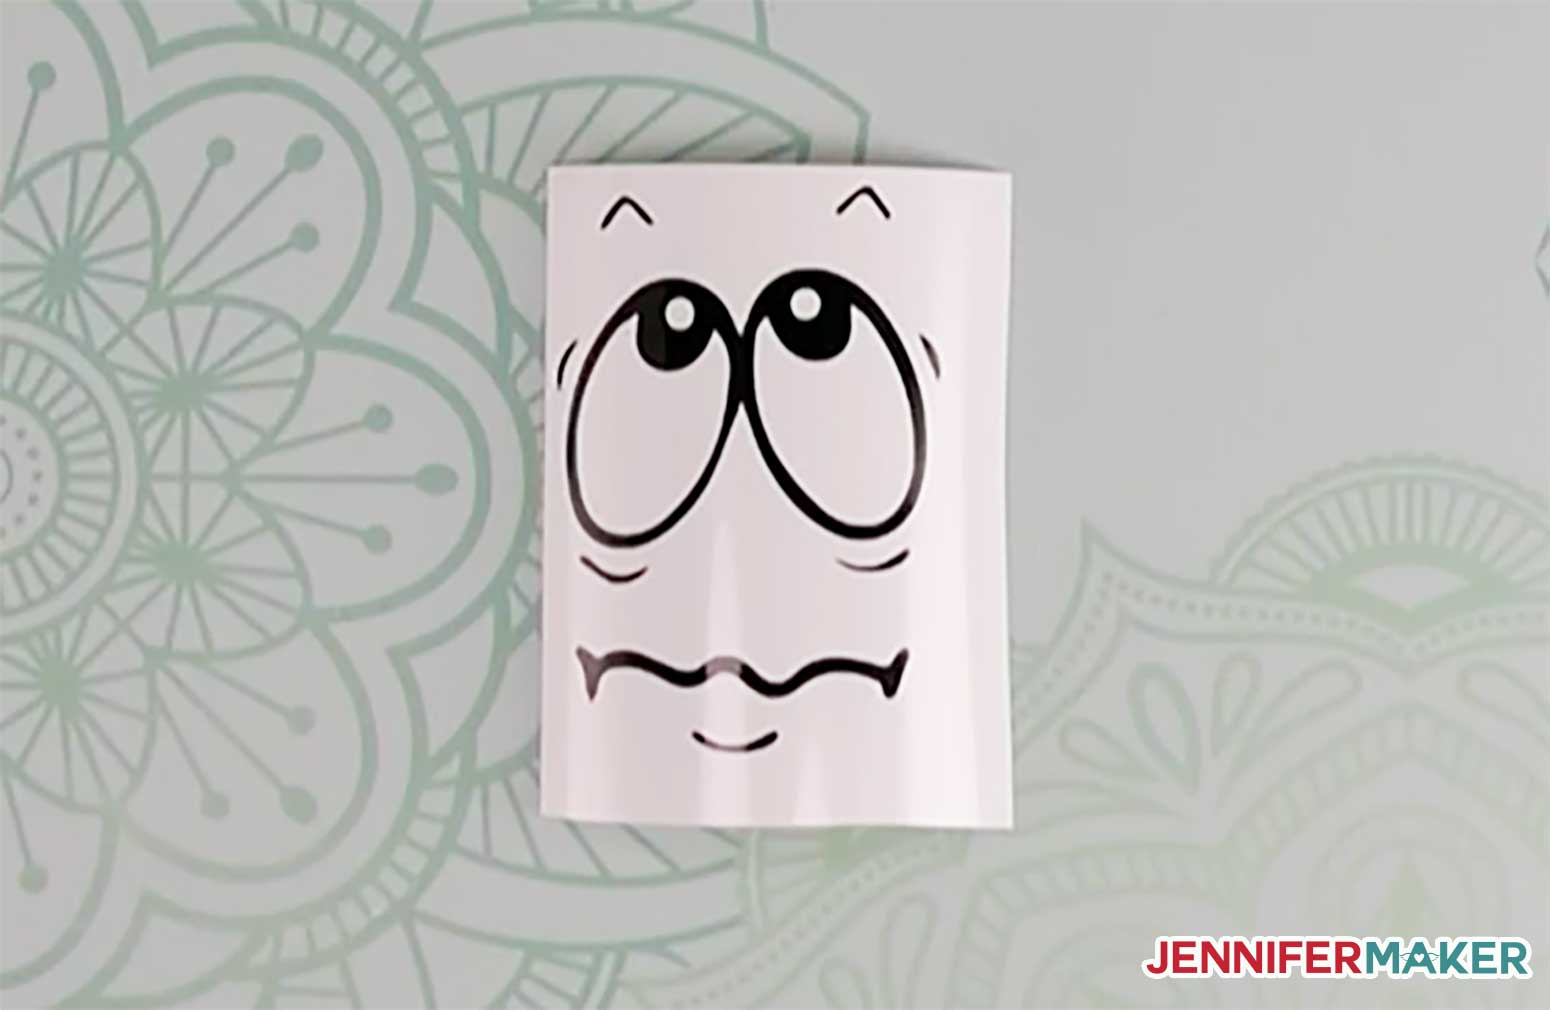
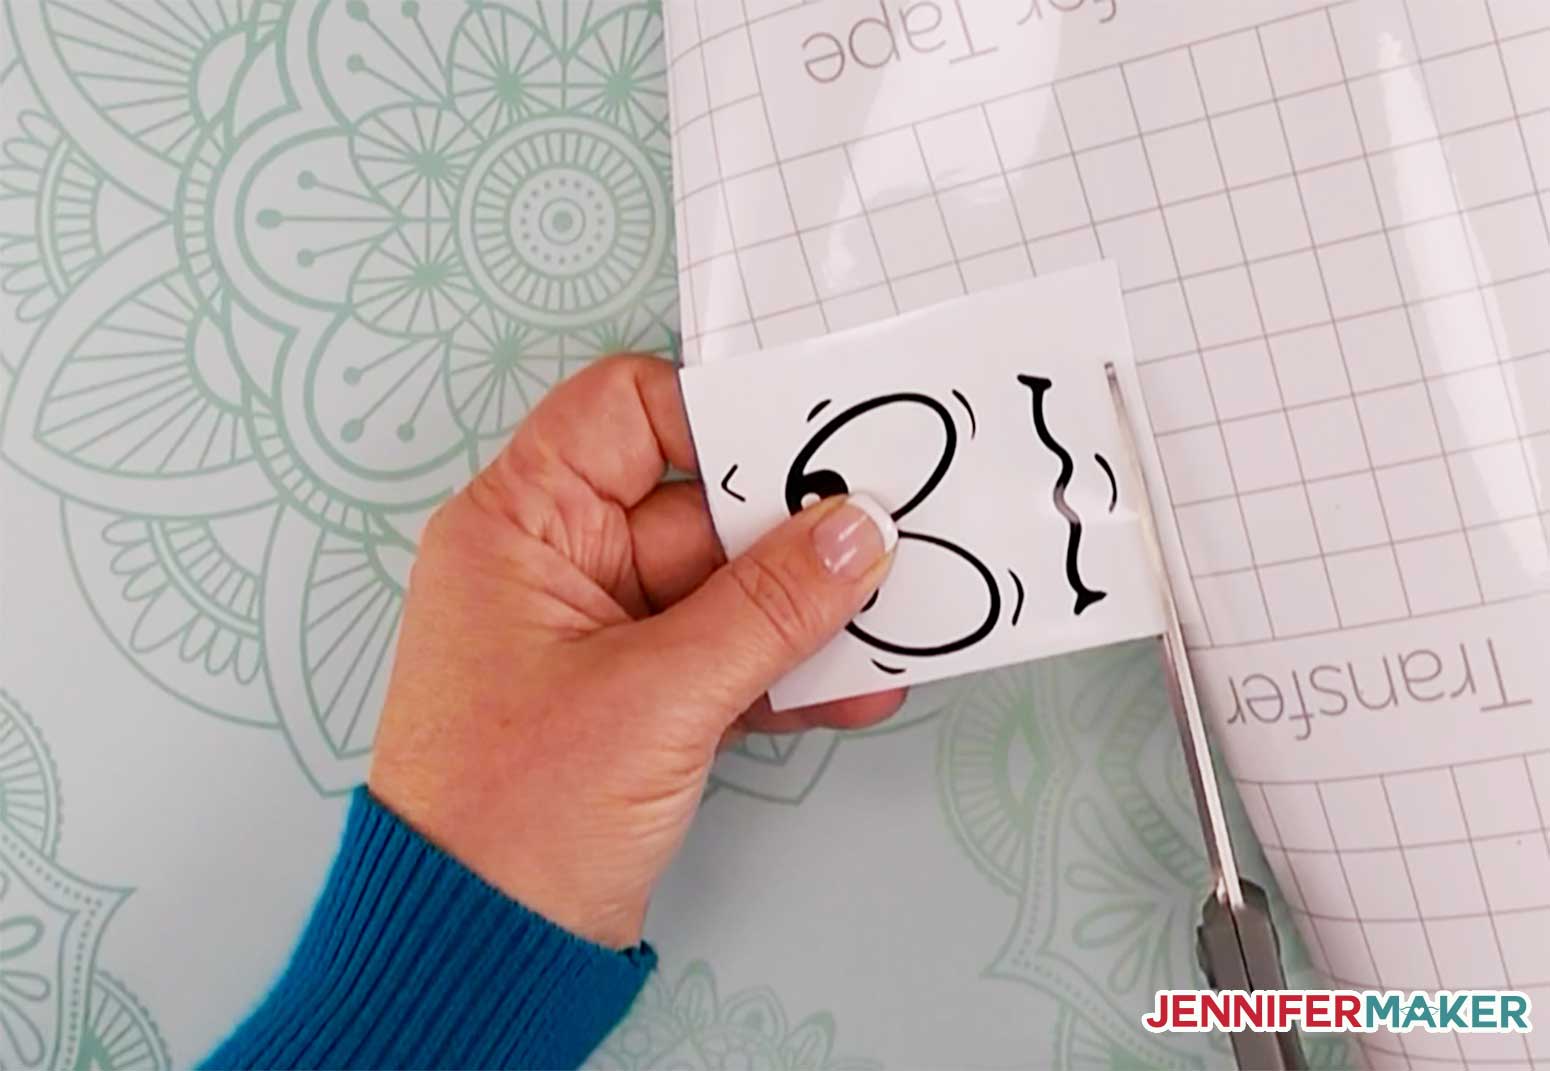
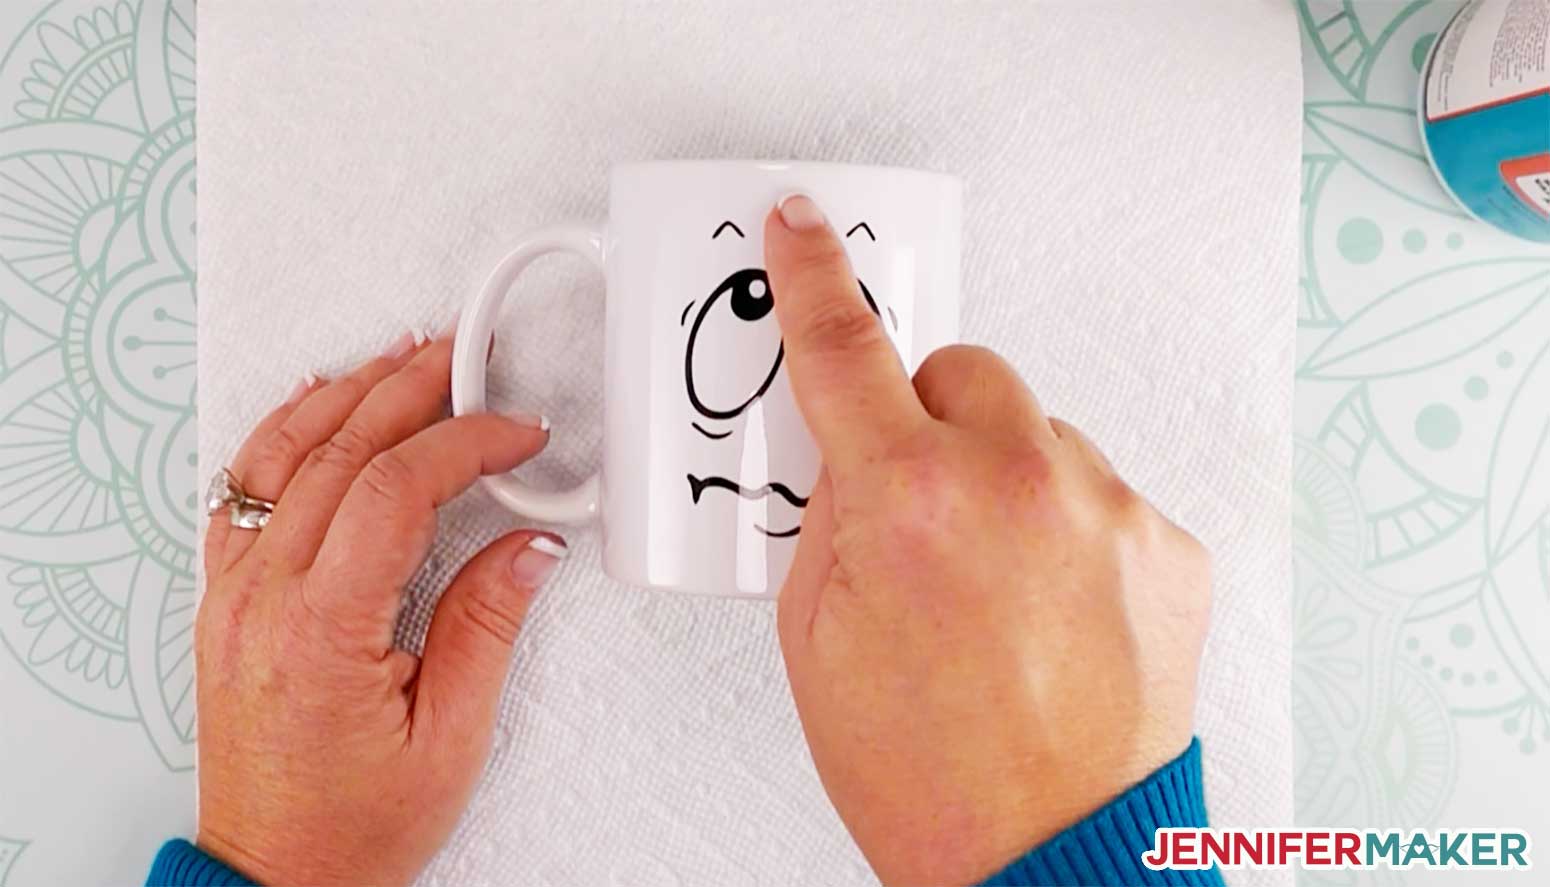
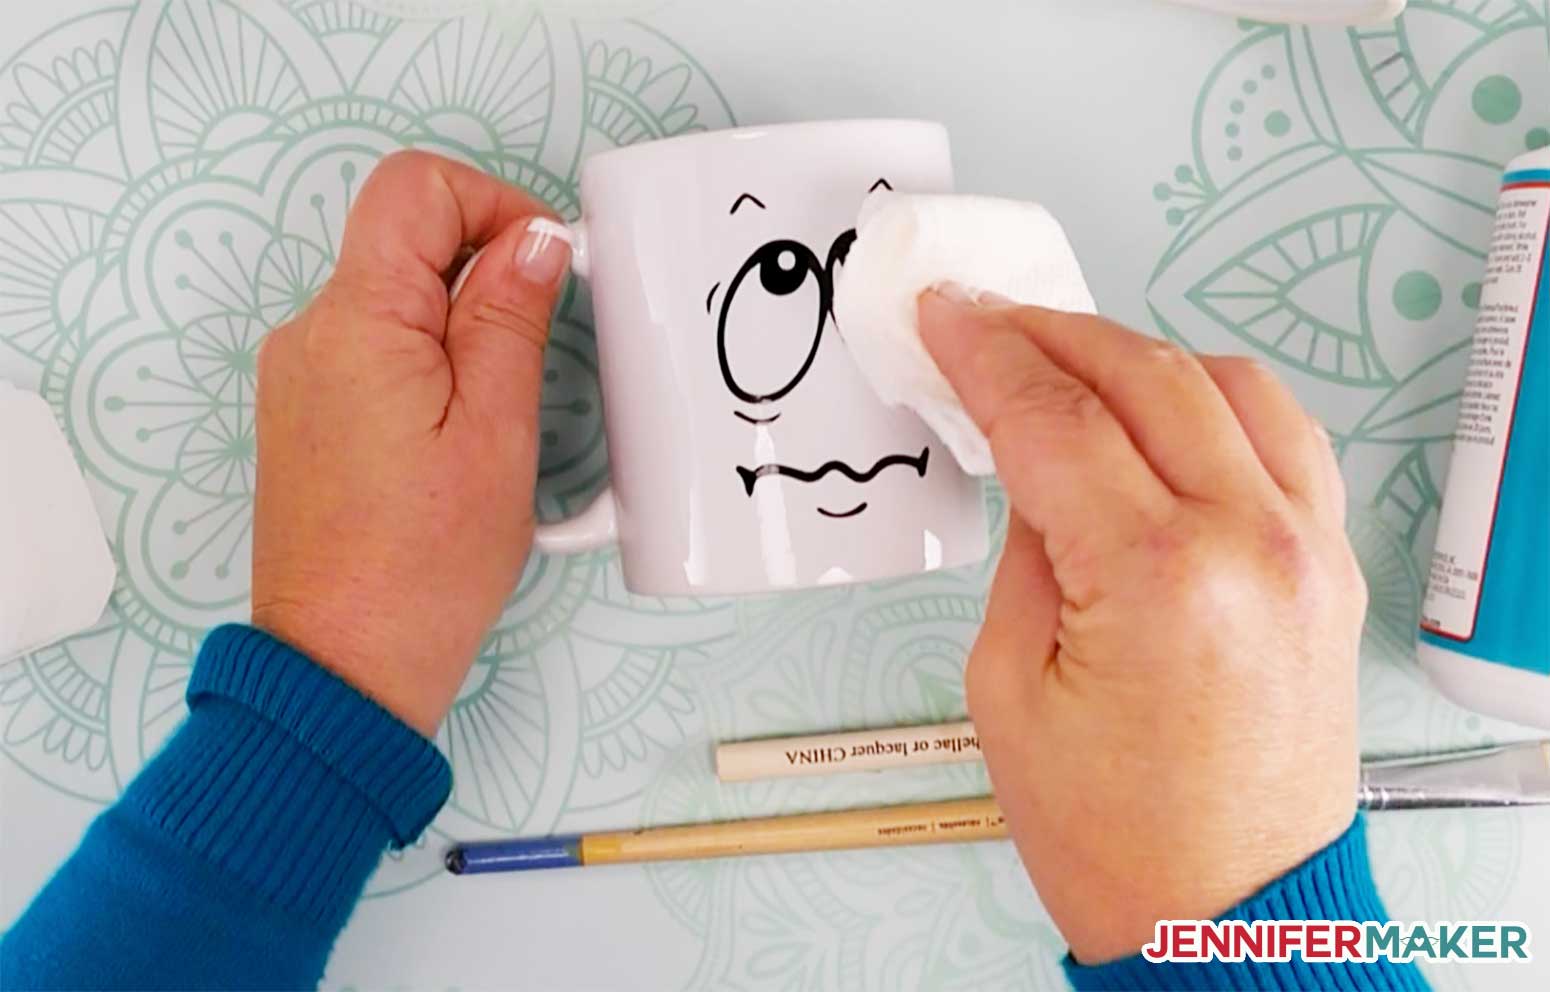
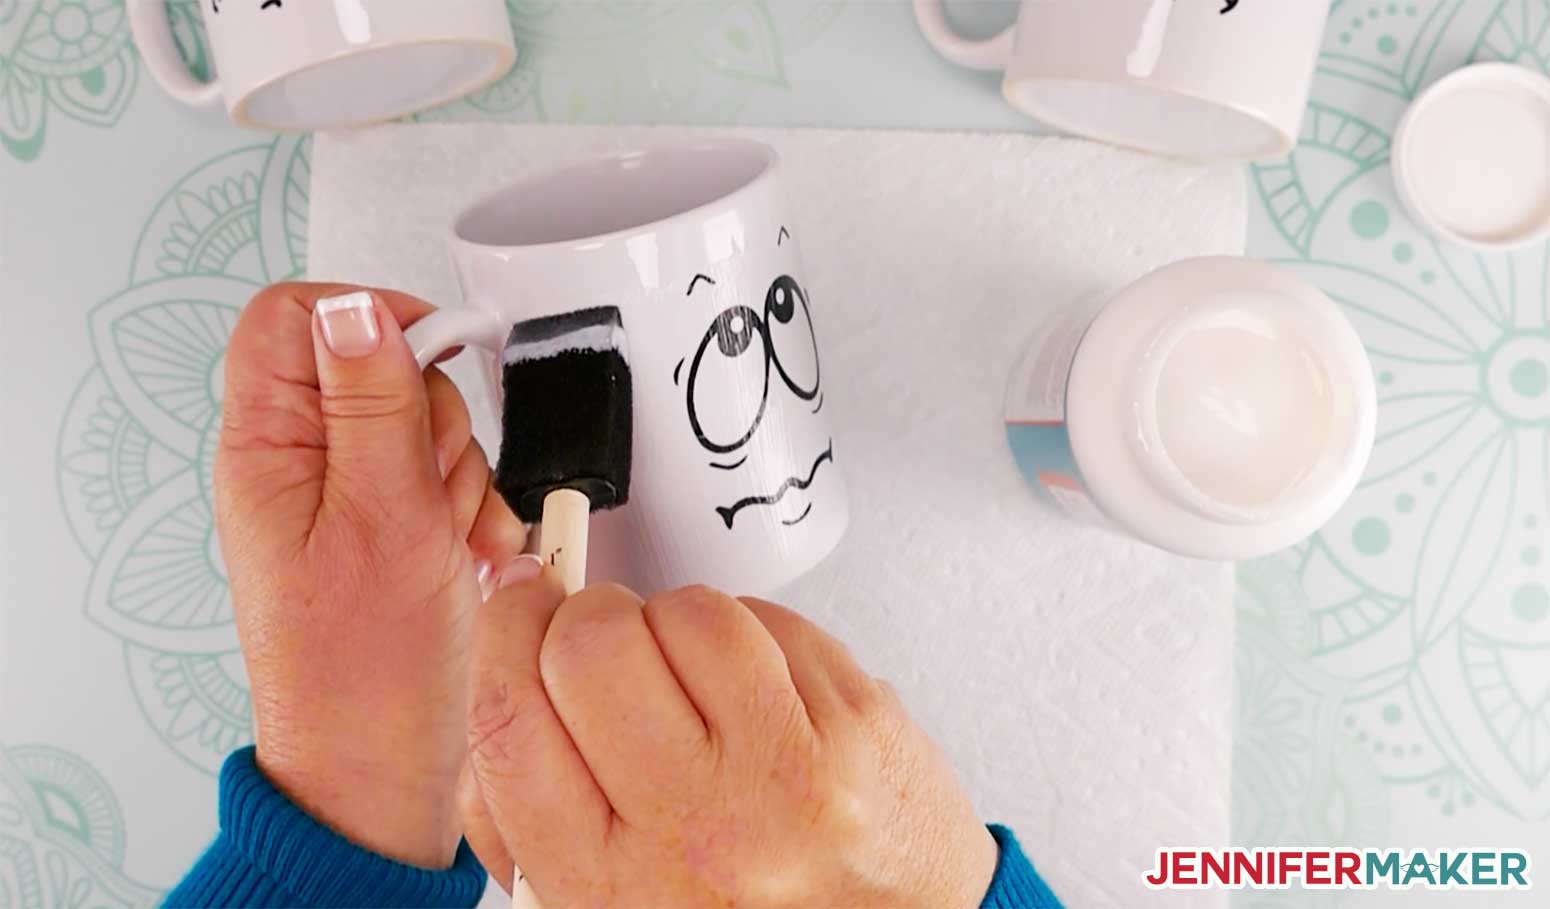
Here are my step-by-step directions for applying vinyl to your Cricut mugs and sealing them so they are dishwasher safe. First, you need some cute designs for your mugs! I made some funny faces for you that you can download from my free resource library. The “I Need Coffee” faces I used in this project are design #287 or check out my cute animal faces in design #125. You can find the patterns by searching the page for the design number and then click it to download the SVG cut files. If you’re going to cut the vinyl decals out on your cutting machine, upload the file to your design software. I'm going to show you how to do this in Cricut Design Space. If you’re not sure how to upload an SVG cut file to Cricut Design Space, watch this helpful video training series I made. If you’re on an iPhone or iPad, here’s how to download and upload SVG files to the Cricut Design Space app. This is what the “I Need Coffee” funny faces SVG vinyl decal looks like in Cricut Design Space after uploading: Now all we need to do is cut our vinyl! Click the green Make It button in the upper right corner. NOTE: You should NOT mirror adhesive vinyl the way you would iron-on vinyl, so keep this Mirror toggle OFF. Click on the green CONTINUE button. Now set your material. Click on Browse Material Settings and search for Permanent Vinyl. Place your permanent adhesive vinyl shiny color side UP (right side up) on your cutting mat. Make sure the fine-point blade is loaded into your Cricut cutting machine, then load the mat in. Press the flashing button to GO! It will only take a minute or so to cut the faces. When you are done cutting, flip the mat over onto your work surface and peel it away from the vinyl carefully. Once you cut out your vinyl, you want to weed it, which means to remove all the extra bits that you don’t want to transfer to your mug. You might be able to do this with your fingernail, but you might want to use a weeding tool (I do). This is what your weeded vinyl will look like: After the vinyl is weeded, you need a piece of transfer tape to transfer your design to your mug. So you just want to cut out a piece of transfer tape that is roughly the same size, or at least the same size as your design. Take the backing off of the transfer tape and put it onto the front of your vinyl decal. Start at the corner and move outwards so that you don’t get creases and bubbles in your transfer tape. NOTE: Don’t put the vinyl sticky side down on your work surface because that will just mess with your vinyl’s ability to adhere to a mug. Clean the surface of your mug with 91% isopropyl alcohol. This will remove any oil or dirt and get the surface as clean as possible. This will make sure the vinyl decal sticks and stays stuck permanently. If your coffee mug surface is straight, you're good to continue on. If your coffee mug surface is curved, take small snips around the edges of the transfer tape on your vinyl decal. These snips allow your transfer tape to bend with the curve of the mug and allow you to apply it on that curve without any creases. Apply the vinyl to the mug, and allow the vinyl to move where it wants to go naturally. Don’t force it into a position. Just smooth it all down, and because you cut snips in the transfer tape, it will smooth and move into place. Here's what your Cricut mug looks like with the vinyl on it: Permanent adhesive vinyl will hold up when hand-washed and can be run through the dishwasher... usually. It depends on your dishwasher and how rough it is with your dishes honestly. Even when you CAN dishwash your vinyl mugs, over time and after repeated washings, your vinyl may start to peel. So if you plan on cleaning your mugs regularly in a dishwasher, you can do that by sealing them with Mod Podge Dishwasher Safe Sealer. This sealer can hold up in heat and be run through a dishwasher. It is non-toxic, but since it is not FDA approved as food safe you may choose not to seal the area along the rim where your lips will touch the mug. I like to keep about a 1/2” area just under the rim unsealed. To seal your mug, first re-clean it all over since you’ve been handling it and don’t want any lint or oils remaining. Follow the same process as before using 91% isopropyl alcohol. Now, you will coat the entire mug (except the handle) because you'll want the mug to have the same texture all over. You may choose to seal only the vinyl, but just be aware that the texture may be noticeably different in the places you apply the sealer versus the areas where you don’t. Brush a VERY THIN coat all over the mug using short strokes in the SAME direction using a soft and clean foam brush, leaving the area under the rim unsealed. For the smoothest finish, use as few brush strokes as possible, as it begins to set quickly. If you can brush it on with only one or two strokes, that is best. Let the mug dry an hour before adding a second coat. Repeat for a third layer. Note: The Mod Podge sealer will look streakier when it is wet, and will be less noticeable after it cures. TIP: The Mod Podge Dishwasher Safe Sealer is best used on light colored mugs because the brush strokes will be less visible than when using it on dark colored mugs. If you don't like the textured look of the Mod Podge sealer, or really wish you could microwave your Cricut mugs, here's a better solution for you! After the last coat of sealer, set your mug in a clean, dry location to cure for 28 days before using. It will dry hard in a couple of days, but do NOT use the mug or expose it to water until the 28 days are up! (Yeah, I know, that's a long time. If you don't want to wait that long, use Infusible Ink and the new Cricut Mug Press) Now your mug is ready! Be sure to place it on the top rack of your dishwasher and it should last a very long time over repeated washings! Special thanks to the Design Fairy Team, specifically Kelly and Debbie for helping me design and assemble these cute mugs! As an Amazon Associate and member of other affiliate programs, I earn from qualifying purchases.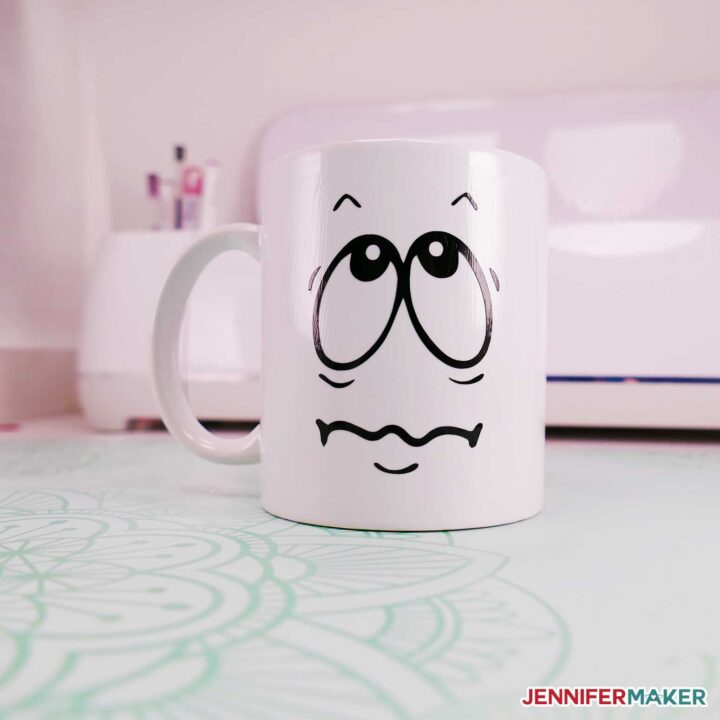
Cricut Mugs with Vinyl and Mod Podge Sealer
Materials
Tools
Instructions
Step 1: Find a Design For Your Cricut Mug
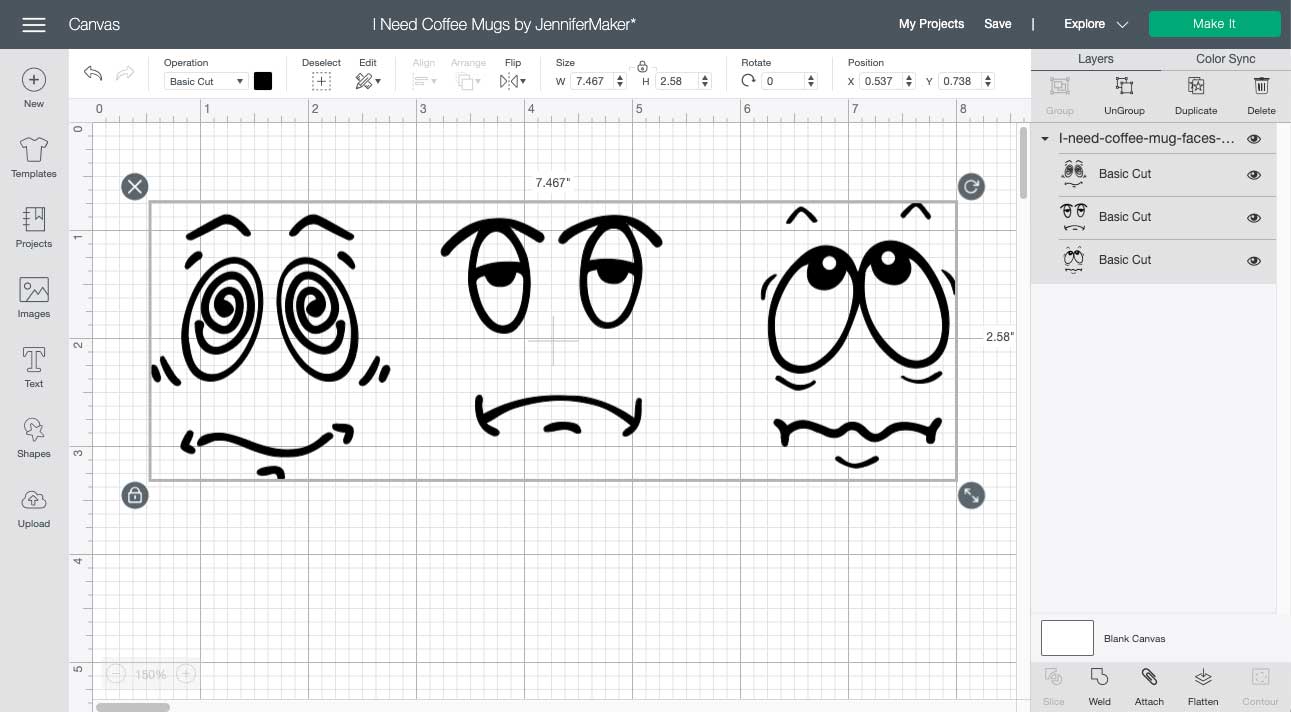
There are three faces to choose from. If you only want to cut one, hide the others by clicking on the eye icon on the layers you do not want to cut.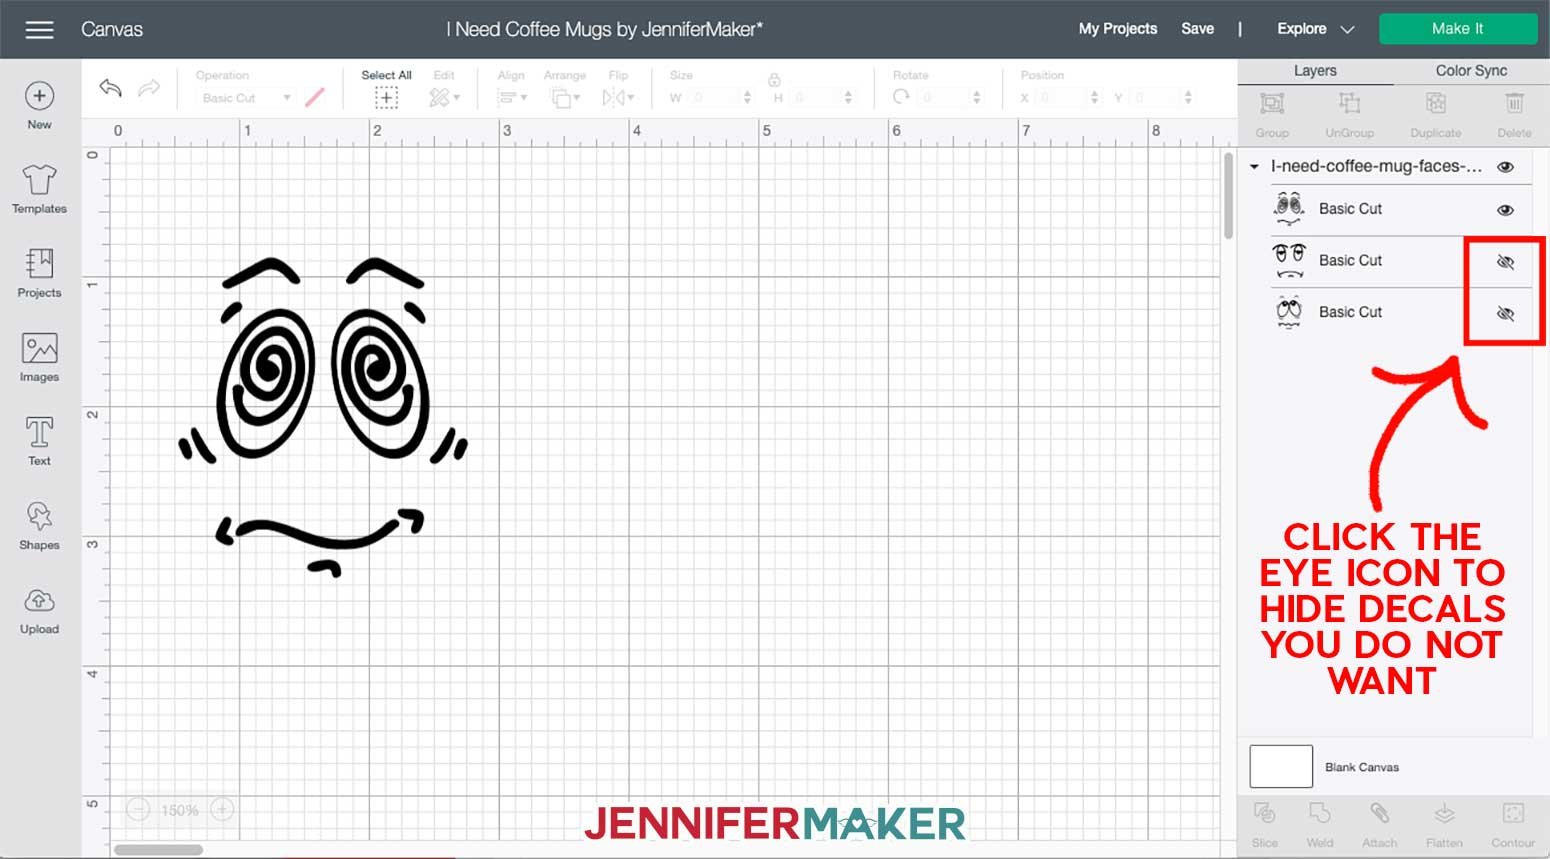
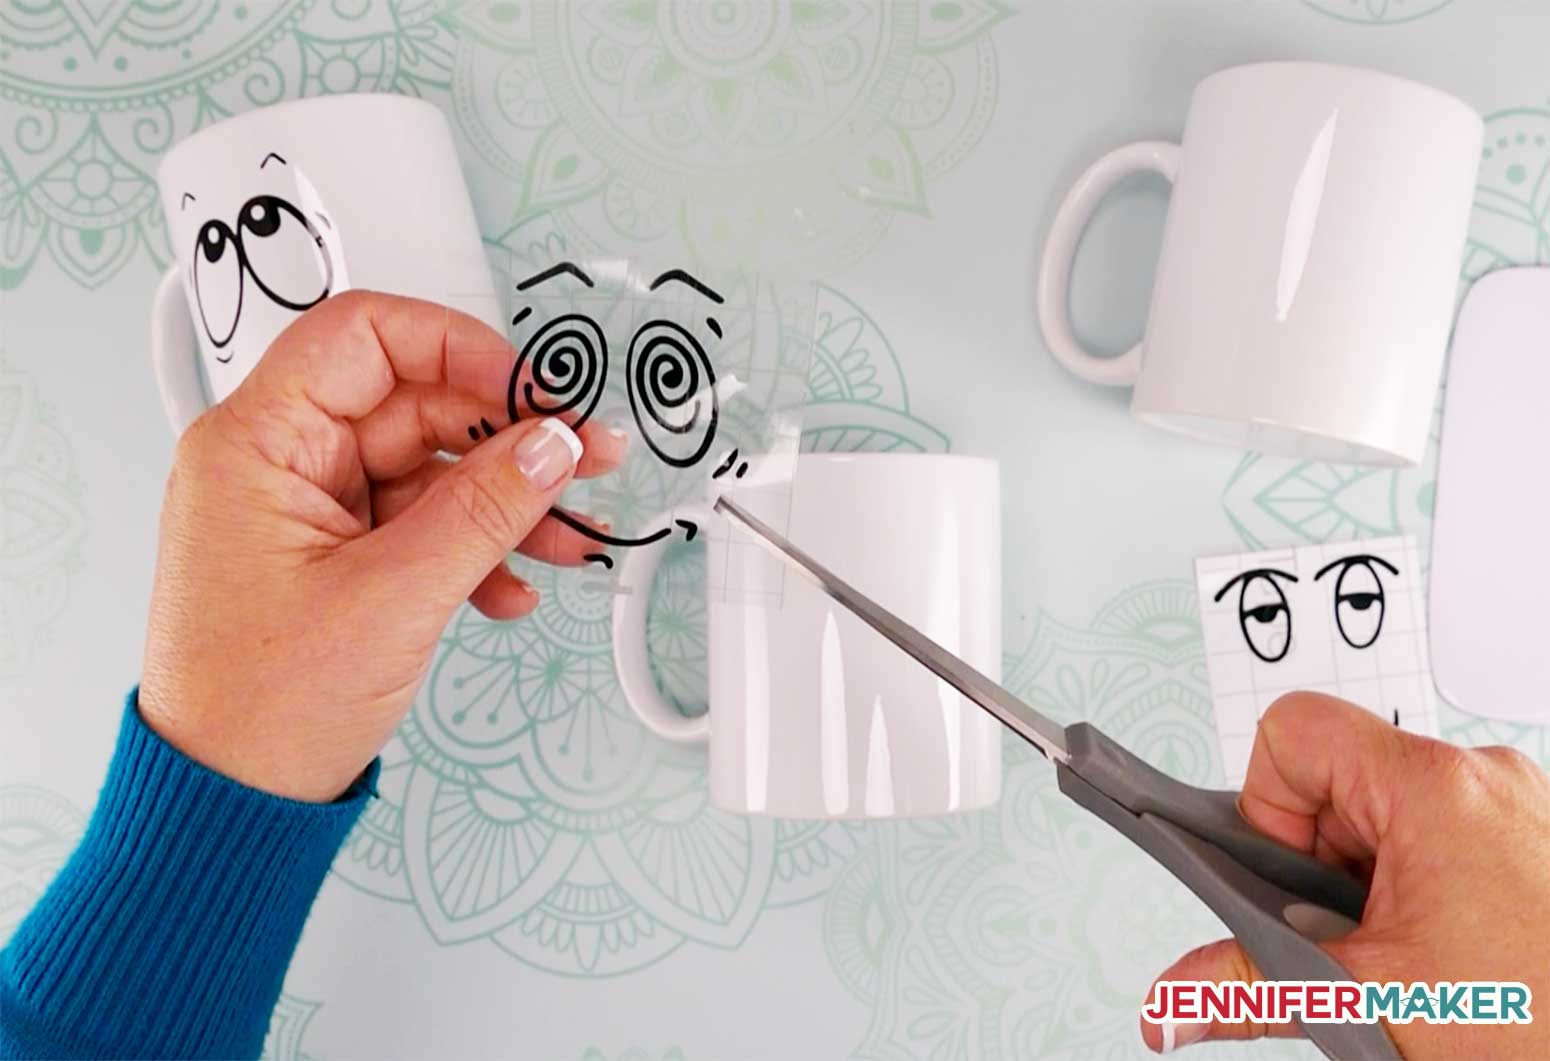
Step 2: Cut Out Your Vinyl
Step 3: Weed Your Vinyl
![]()
Step 4: Apply the Vinyl to the Cricut Mug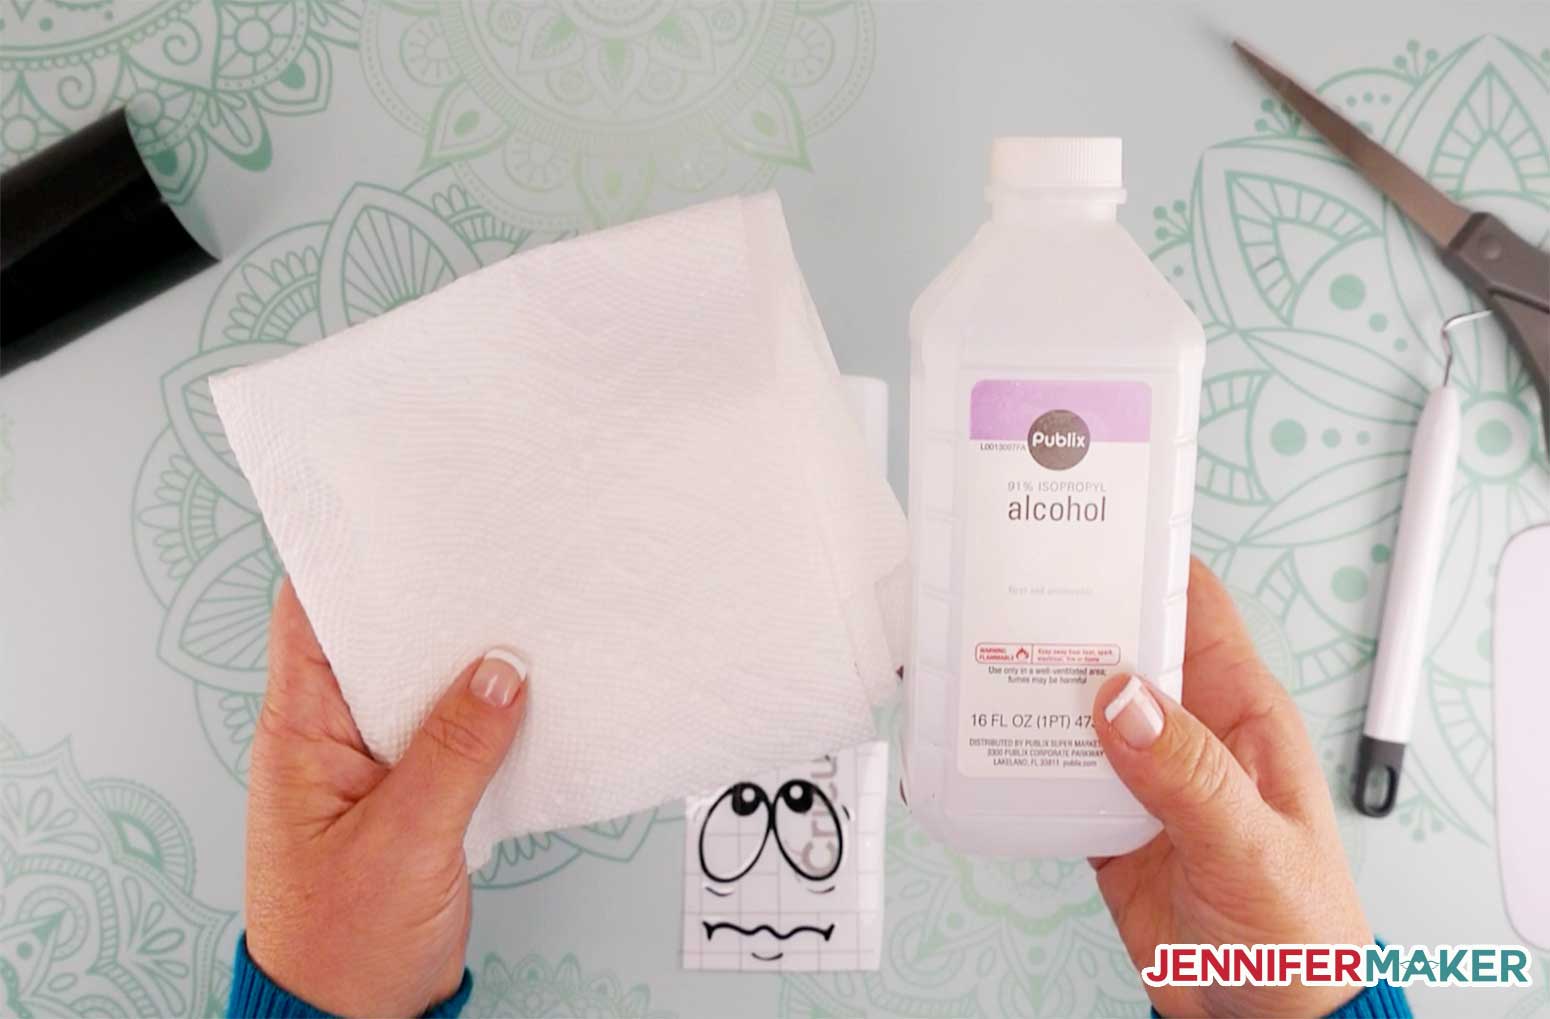
So even though you may have creases in your transfer tape, you won’t have creases in the vinyl. This is the secret to putting vinyl around a curved surface like this. And if you don't have a curved surface, this is even easier.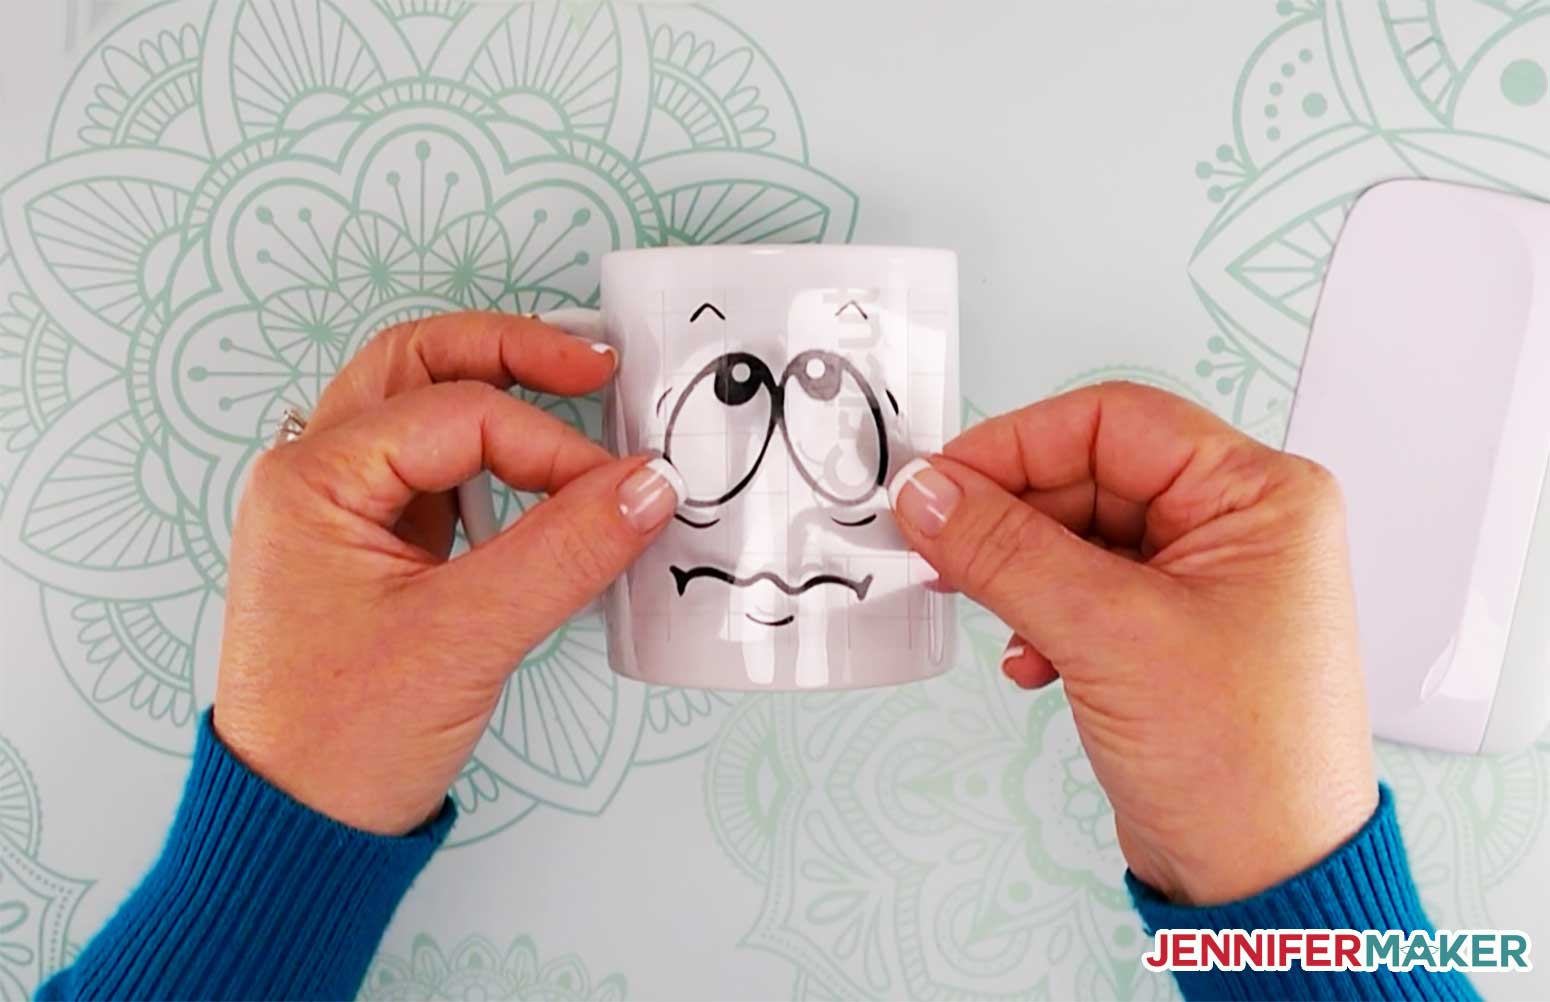
Take off all the transfer tape. Your goal is to see perfectly smooth vinyl on your mug with no creases.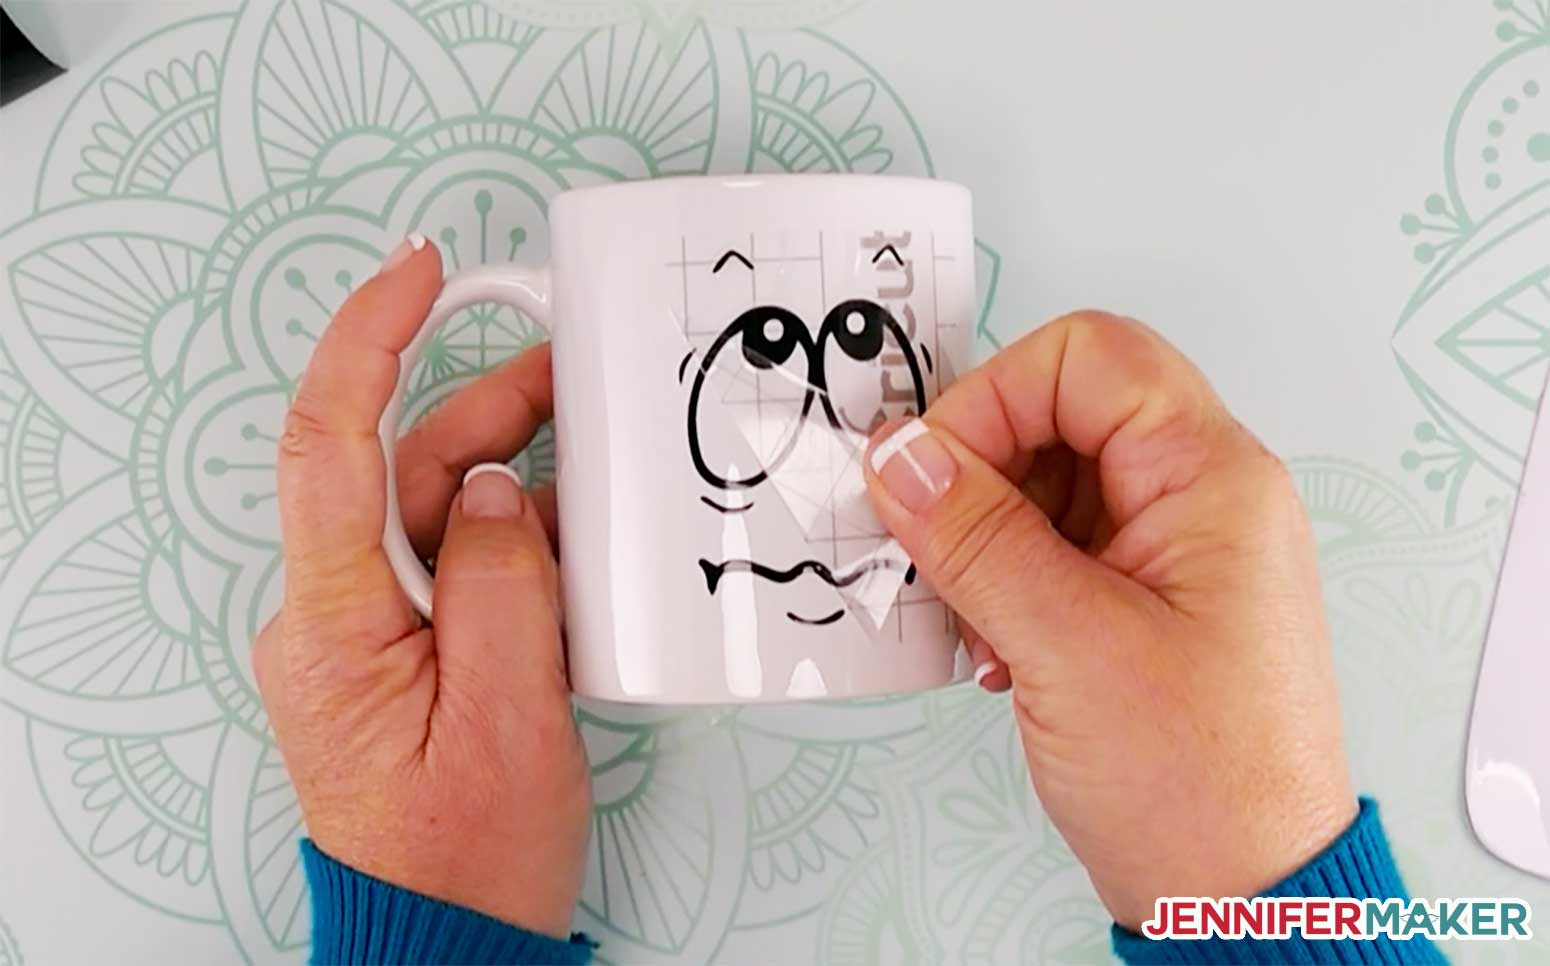
Step 5: Apply Sealer to the Cricut Mug

Step 6: Cure Your Cricut Mug
Notes
Recommended Products

Answers to Your Questions About Making Washable Cricut Mugs Sealed with Mod Podge
Q: What kind of vinyl can I use?
I used permanent adhesive vinyl for my Cricut mugs. Avoid removable and glitter vinyls, as they are less likely to stay stuck. See my tests with other vinyls in this video here.
Q: Can I use the Cricut Joy?
Sure! Mugs are a great project for the Cricut Joy!
Q: Can I use a different sealer?
I’ve only ever tried dishwasher Mod Podge, so I cannot offer other suggestions. I have heard people try using Crystalac Brite-Tone sealer, but I have no had an opportunity to test it yet.
Q: Where do I get Mod Podge Dishwasher Safe Sealer?
You can buy it on Amazon, as well as craft stores like Michaels and Joanns.
Q: I don’t have dishwasher safe Mod Podge. Can I use a different Mod Podge?
No, as other Mod Podge sealers are water soluble and will come off as soon as you wash your Cricut mug.
Q: Can I microwave my Cricut mug?
Mod Podge Dishwasher Safe Sealer can hold up in heat such as the dishwasher. Some people have reported using it in the microwave for short amounts of time, but it is NOT recommended as vinyl can create fumes when heated. If you want a microwave-safe mug, use Infusible Ink with the Cricut Mug Press.
Q: Can I wash mugs with Cricut vinyl?
Yes, and you can do it with and without the sealer. Hand washing is best, dishwasher (top rack only) is riskier but often quite possible. Sealer makes your vinyl mug much more likely to tolerate the dishwasher. But your mileage may vary.
Q: Is Mod Podge food safe?
Mod Podge Dishwasher Safe Sealer is water based and non-toxic, but it is not a FDA approved food-safe product. This is why we recommend avoiding the areas around the rim of the mug where your lips will touch the surface.
Q: My sealer leaves marks and has a weird texture. How can I minimize the streaks and texture?
Very thin coats are the key to the smoothest possible finish, but keep in mind that you’ll never be able to get a completely smooth surface with Mod Podge Dishwasher Safe sealer. I also recommend using the sealer on light-colored mugs because the brush strokes will be more visible on dark colored mugs.
Get my free SVG files to Create a Cricut Mug with Funny Faces
I’d love to see YOUR vinyl design on a Cricut mug! Please share a photo in our Facebook group or tag me on social media with #jennifermaker.
Love,

Want to remember this? Save this Cricut Mug tutorial to your favorite Pinterest Board!


How will we know if a mug is powder coated?
Hi Denise! You can feel the mug and tell. It will be a little course feeling.
Can you get a similar seal with polycrylic?
I have not tried, polycrylic, Kei.
I would love to know a better option to seal my water slide mugs that and won’t streak and would be dishwasher safe. Please email me when you have figured it out.
Hi Linda! Aside from the new Cricut Mug Press, there isn’t another option that I have found.
When using the sealer for being able to wash in the dish washer how about using a scotch bright pad between coats might have to let cup dry a day or two between coats but that could help help make a smooth look what do you think?
I haven’t tried, Jim but that could be a great experiment you can try.
Thank you for this tutorial! Do you know if anything works on powder-coated mugs? I hand-wash all of mine, but feel that some small detailed pieces of vinyl might loosen, and I’d love to seal the transfer to avoid this from happening.
Hi Kathy! I haven’t worked with powder-coated mugs so I can’t say for sure. It is tough to get anything to stick to them.
Obviously I meant Vinyl 🤣
I always enjoy your projects! Thanks for the heads up on the dishwasher safe mod podge. I have made mugs using glossy acrylic craft paint that have gone through the dishwasher for YEARS and still look like new, so I think this should stand up to use! You can use glossy acrylic and a cricut (or in my case Silhouette) cut stencil and make dishwasher safe mugs too 🙂 Again, thanks for the info, and I just ordered a bottle of it (and a few other things) through your link 🙂
Liz
So glad you are enjoying the projects, Liz!
Do we apply it to only the design or the entire mug?
Hi Stephanie! Just apply it over the image.
I luv the faces. lol I was hoping this would be microwave safe. You mention working on a solution. Is simulation the only safe way so far?
Hi Sue Marie! Yes, sublimation or working with the Cricut Mug Press and Infusible Ink is the only option right now.
Do you need to seal the entire mug or can I just go beyond the decal???
Just go a little bit outside your decal, Sheila!
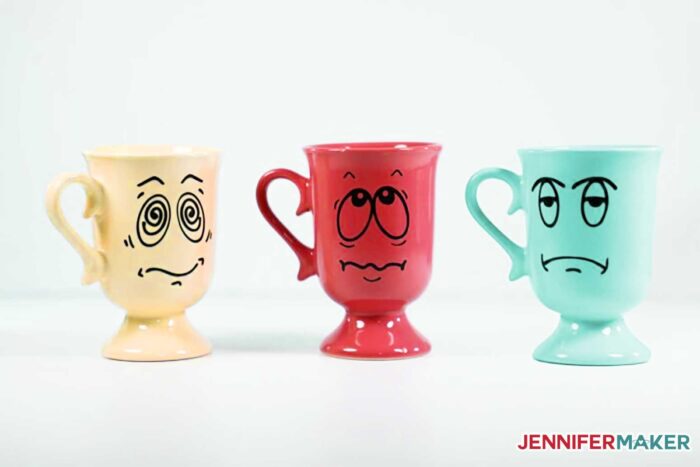
Where did you get those awesome fancy schmancy color mugs at? Love those!
Aren’t they neat? Unfortunately I have had them for years and just can’t remember where I picked them up from. I wish I could find more!
Would this work to seal stainless steel mugs too?
Hi Nancy! I haven’t tried so I can’t say for sure.
Thank you Jennifer. You ALWAYS have new and helpful tips and ideas that you so graciously share. I have a different brand cutting machine yeti still learn so much from you.
I am so glad you are getting tips and tricks from me even though you have a different machine!
Looking forward to the microwave version. I always end up reheating my coffee when I’m crafting!
Oh, me too Stacy!
Could I use a glass clear mug.
I haven’t tried that, Silvia. I would imagine you could see some strong streak marks from the mod podge sealer.
Where did you get the red, yellow, and teal mugs that have the faces?
Unfortunately I have had them for so long I can’t remember where I picked them up but I sure do wish I could find more!
Does this work with wine glasses? Do I need to put the modge podge over the entire cup or just the area where the vinyl is?
Extend the mod podge to a slightly larger area then the vinyl and avoid applying to the lip area.
do you find it is noticeable where you have applied the modpodge? Would it take away from the beauty of a project?
Hi Jen! You can see that there is a layer of film over the decal but I don’t think it takes away from it vibrancy.
Can you use this same technique on water bottles and tumblers?
You can seal water bottles and tumblers!
Can you cut designs using the cricut joy machine?
Hi Grace, Absolutely! Most will just have to be resized to fit the machines cutting capabilities which is no greater than 4.5″ wide.
I didn’t use rubbing alcohol before placing the vinyl… was this important?
It’s important, Michelle because vinyl adheres the best to a clean surface and the alcohol gets it nice and clean! If you didn’t use it, not to worry, and don’t throw out the mug. You may be just fine, but if the vinyl starts lifting off in a few month’s time, you will know the reason why!
Would this be a good way to seal plastic cups? I accidentally bought matte printable vinyl and it looks so dull.
We do get this question once in a while, Victoria! But haven’t yet had time to try it out for ourselves to see if it would work or not. You can do what we would, though – experiment and see if you like the results! 🙂
Hi Jennifer! My birthday is Sunday and I’m thinking of asking for this as a gift. But I’m wondering- how hard is it to find the correct mugs? I pick up things at Goodwill all the time and I’m thinking I could find cheap mugs there-I’m just worried we have to always buy the mugs on Amazon?
Also- those “fancy schmancy” mugs you showed- are they even able to fit in the mug maker?
Thanks for all your help! You’re amazing!!
If you are going to put vinyl on your mugs, Christine, then Goodwill will do just fine! We recommend dollar store mugs, especially when you are a beginner! But if you’re going to be using the Cricut Mug Press, you will have to buy your mugs either from Cricut or “sublimation mugs” off Amazon. We have all kinds of answers about the Mug Press you can read about! And Happy Birthday!! 🎈