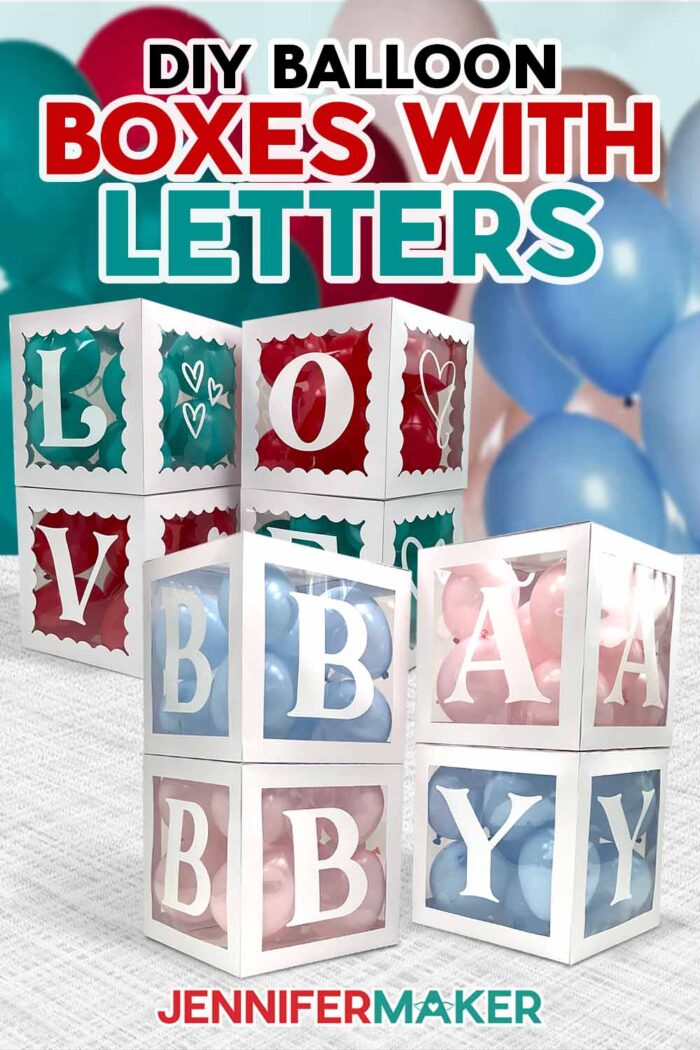
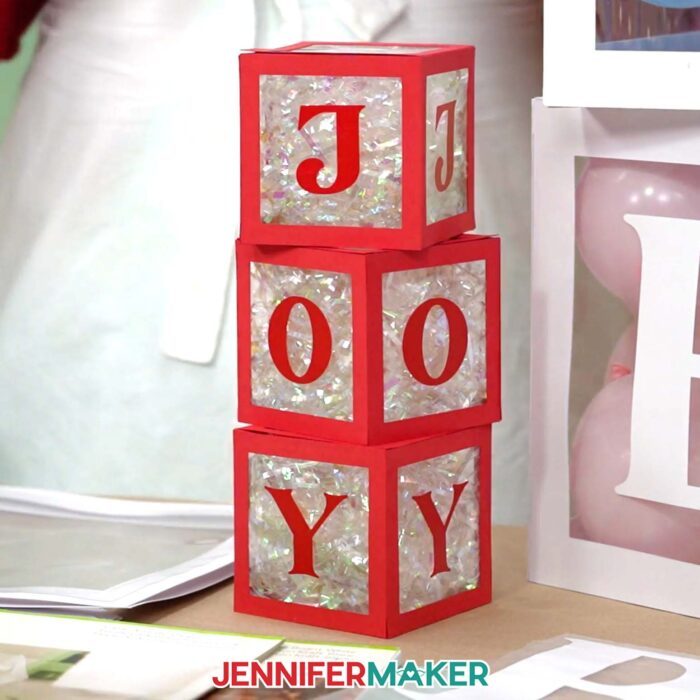
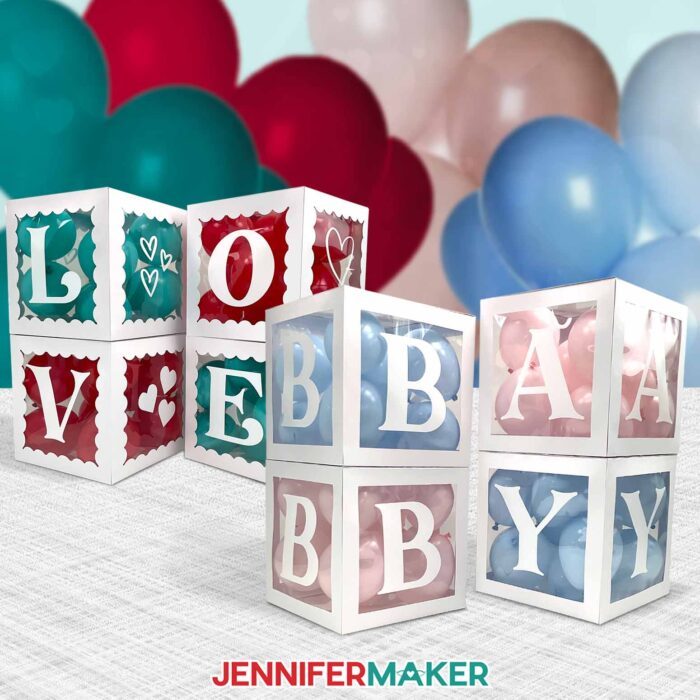
Learn how to make DIY Balloon Boxes With Letters for fun party decor!
When it comes to celebrating, I like to go BIG! I love creating larger than life party decor for birthday parties, holidays, and other special occasions. When I saw these fun and popular party decorations, I set out to design my own DIY Balloon Boxes with Letters! Through the design process, I learned that making these festive, balloon-filled boxes is easier than you might think — as long as you have the right tools and materials for the job.

Let’s talk about the versatility of these letter boxes! Birthday? Spell out the name of the guest of honor. Baby shower? They’re adorably huge building blocks! Game day? Show off your decorating game with a stack boasting your favorite sports team’s name and colors. No matter the event, you’re sure to create a memorable experience with these fun decorations that make a BIG statement.
Use them to decorate gift tables, as DIY props for memorable photos, or to capture your guests attention at outdoor events. I’ll show you how to make them easily with just a few materials, tools, and a cutting machine.

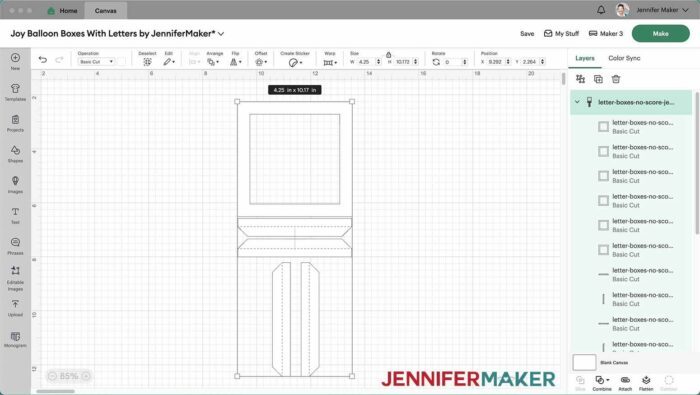
While I’ve got PDF files for you to designs by hand, but I’ll use a Cricut cutting machine to make the cuts really precise. I’ll use a Maker 3, but any Cricut or cutting machine that uses SVG files will work! Yes, even the Joy and Joy Xtra. But how?
To cut letter boxes on the Joy or Joy Xtra, use Cricut Design Space to upload the no-score template file from the folder named “Phone and Tablet Users.” Add the template to your Canvas, then (with the lock icon closed to maintain proportions) resize the template to as small as 4.25″ wide! Then you can follow the rest of the directions to create small letter boxes to fill with confetti, small treats, pom pons, or candy.
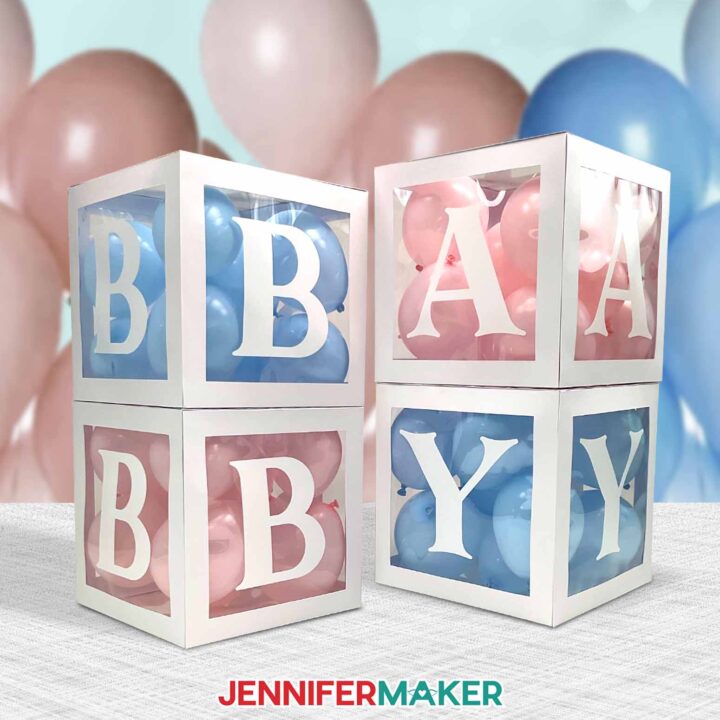
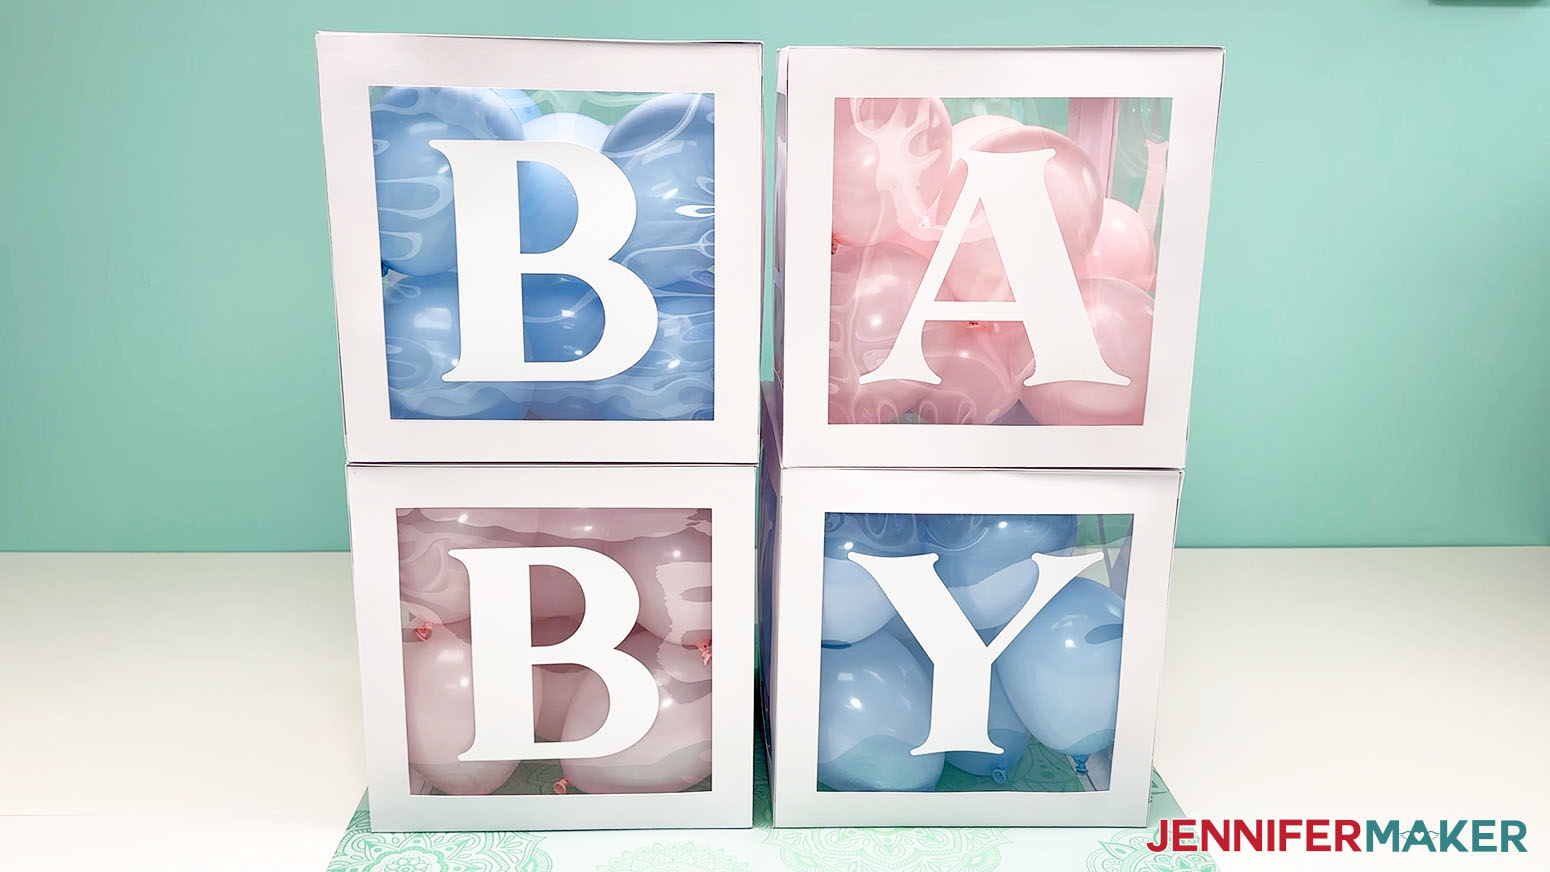
I’ll demonstrate how to prepare, cut, and assemble one box, but you can make as many as you like. My letter boxes look great in stacks of multiples! I’ll show you the whole process of making the letter “B” box from this “BABY” stack I made. You can use the same steps to decorate more blocks with whichever letters and colors you’d like.

I’ve got one important note: I don’t recommend trying to cut more than one box at once. Cricut Design Space tends to have trouble with that many layers on the Canvas at the same time, so keep it simple and just make one box at a time. If you want to make a whole stack of boxes, don’t worry — you’ll see how easy it is to go back in and change the letter for each additional one.
To see the colorful balloons inside, I’ll show you how to cut and add an acetate “window” to your boxes – and then we’ll decorate them with letters cut from adhesive vinyl for a personal touch. You don’t need to cut those with your cutting machine, though; because it’s just a simple square cut, you can actually cut 2-3 pieces of acetate with a paper trimmer in as much time as the Cricut cuts one!

So, what are the boxes made of? What’s the best material to use? I found that making them out of kraft board (which is a bit thicker than heavy cardstock) produces durable boxes you can even reuse over and over.

You might be wondering: “But Jennifer, how do you reuse them if they have a specific letter or word on them?” You’re right, a set of boxes spelling out “BABY” or “LOVE” isn’t going to work for every occasion. The secret? Removable vinyl! It works the same as permanent vinyl, except you can peel it off and replace it with new letters every time you have a new reason to celebrate.
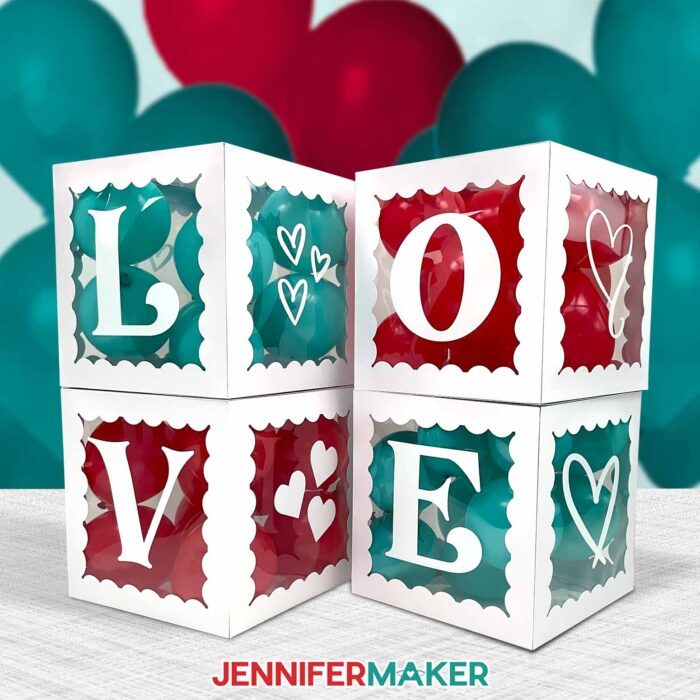
Want to customize them further? Mix it up with different colored kraft board and vinyl, and experiment with different typefaces. Fill them with different balloons, or even other items, too! They’re a really fun decoration for lots of occasions, and will last for several uses if you store them carefully.
My DIY Balloon Boxes with Letters are sure to capture the attention of your guests, and create a fun, inviting atmosphere for your special celebration!
Ready to learn how to make DIY balloon boxes with letters for your special event? This post contains some affiliate links for your convenience (which means if you make a purchase after clicking a link I will earn a small commission but it won’t cost you a penny more)! Read my full disclosure policy.
Materials And Tools to Make DIY Balloon Boxes with Letters
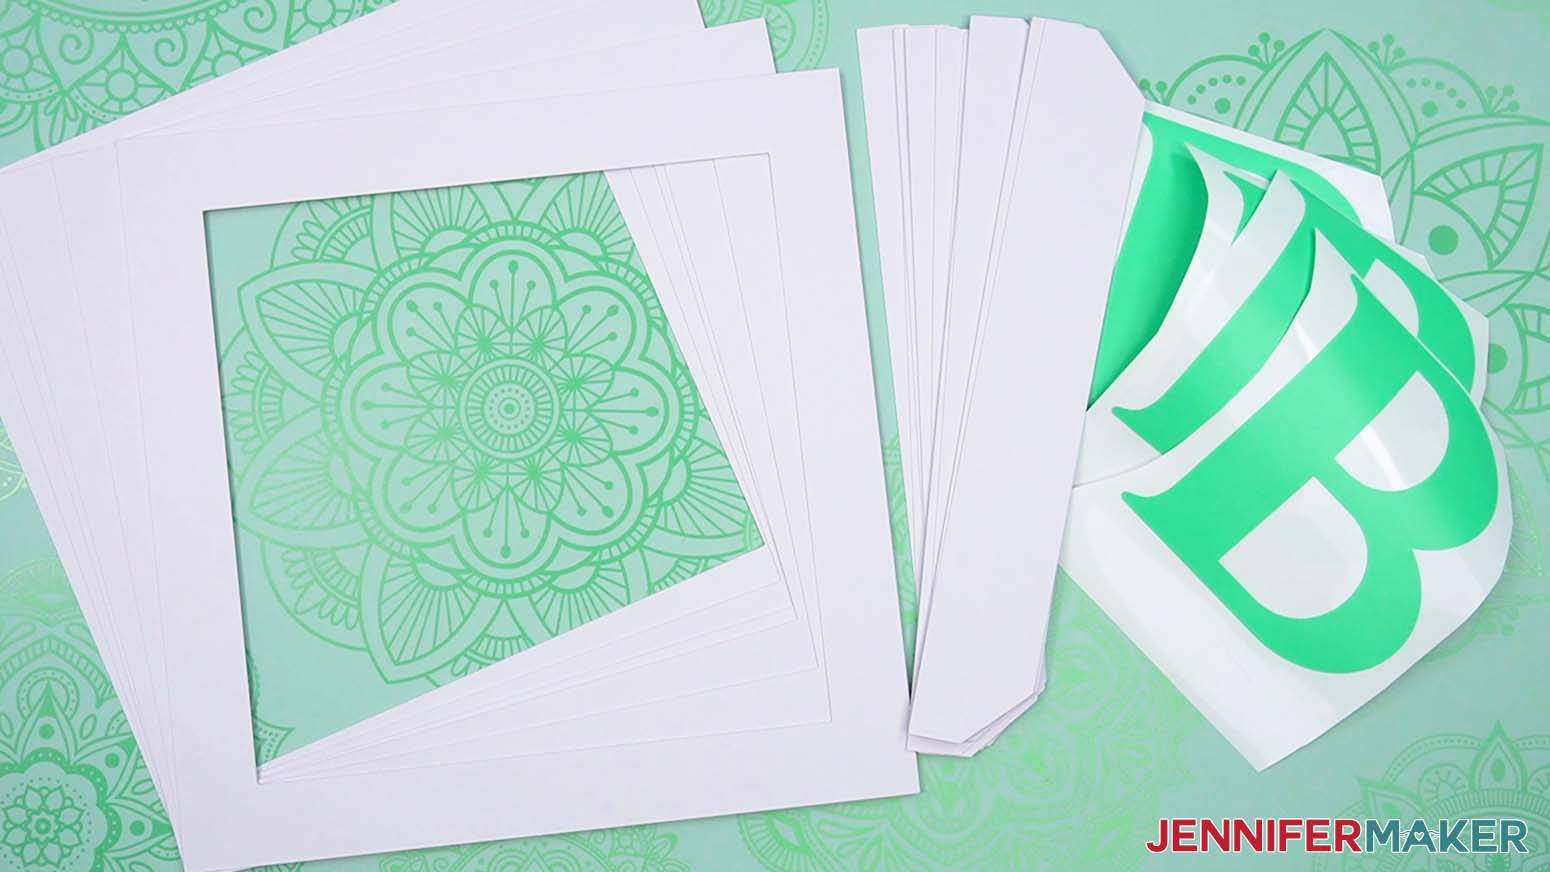
- Twenty-Four (24) Sheets of White Cricut Kraftboard
- Twenty-Four (24) Sheets of Cricut Acetate
- White Removable Vinyl
- StandardGrip Transfer Tape
- 8-10 (per box) 5” Balloons in Assorted Colors
- A way to cut your materials – I’m using the Cricut Maker 3, but you can also use the Cricut Maker, Cricut Explore Series machine, a Venture, Joy Xtra, or Joy.
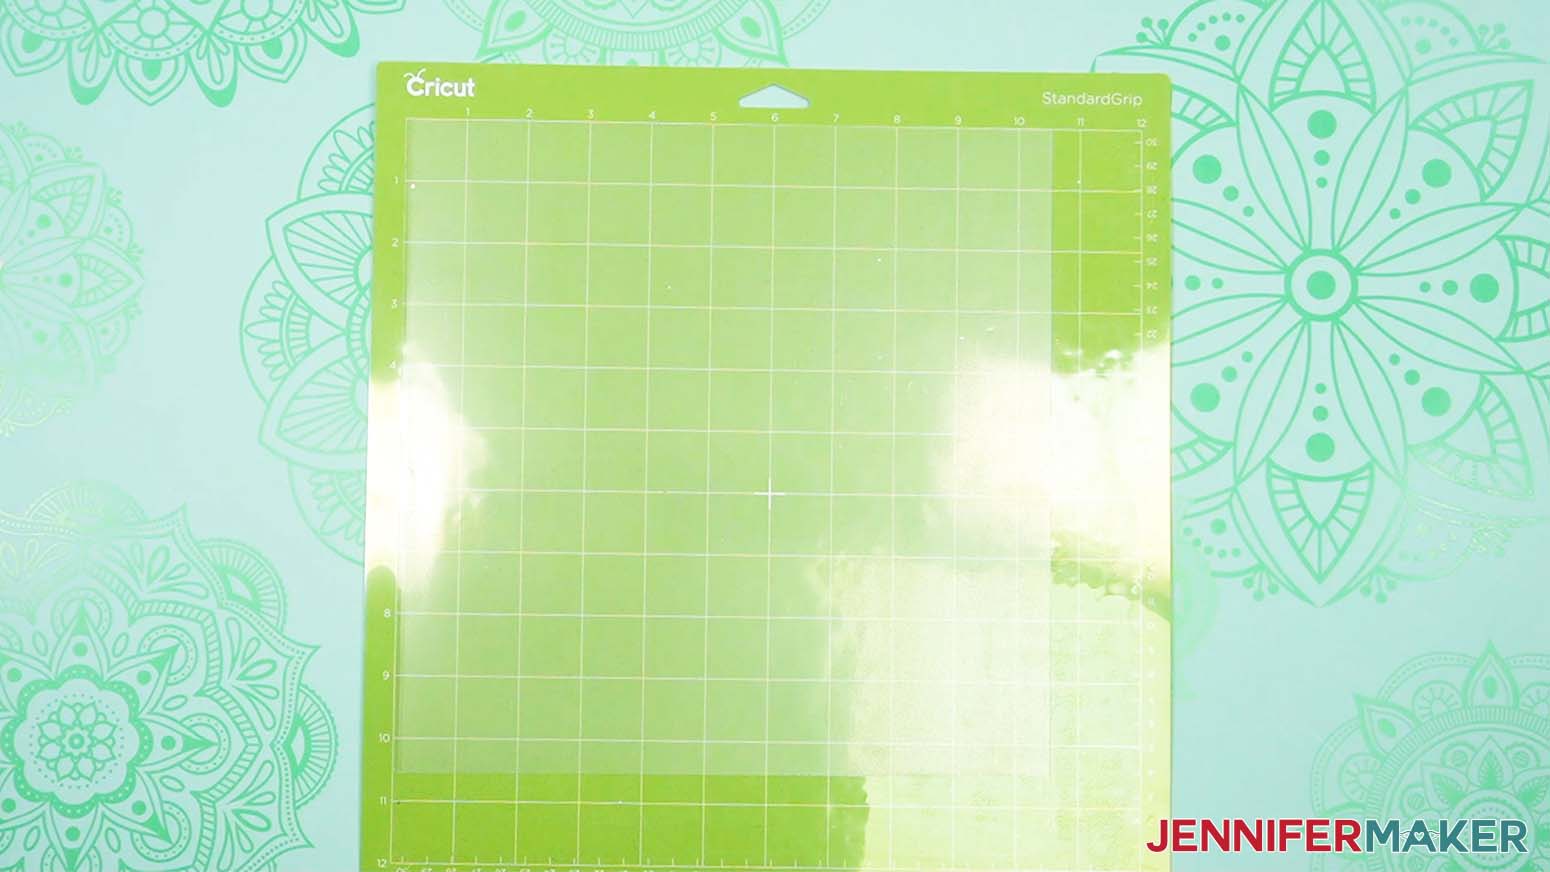
- Cricut Green StandardGrip Machine Mat 12″ x 12″
- Scoring Stylus -OR- Single Scoring Wheel (optional for files with score lines)
- Brayer
- Spatula
- Scraper
- Weeding Tool
- Cricut Trimmer
- Bearly Art Precision Craft Glue
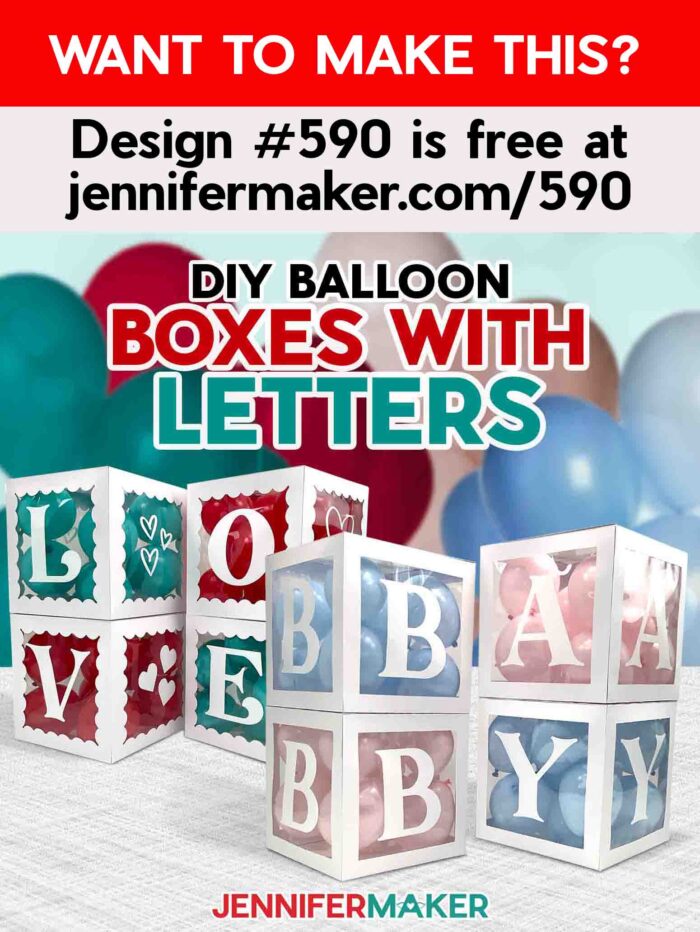
- Design #590– My free SVG/DXF/PDF design files are available in my free resource library – get the password by filling out the form at the bottom of this page
How to Create DIY Letter Boxes!
DIY Balloon Boxes With Letters
Learn how to make DIY balloon boxes with letters!
Materials
- Twenty-Four (24) Sheets of 12” x 12” White Cricut Kraft Board
- Twenty-Four (24) Sheets of 12” x 12” Cricut Acetate
- White Removable Vinyl
- StandardGrip Transfer Tape
- 36-40 5” Balloons in Assorted Colors
- Design #590 (My free SVG/DXF/PDF design files available in my free resource library - get the password by filling out the form at the bottom of this page
Tools
- A way to cut your kraft board - I’m using the Cricut Maker 3, but you could also use the Cricut Maker, a Cricut Explore Series machine, a Cricut Venture, a Cricut Joy Xtra, or a Cricut Joy.
- Cricut Green StandardGrip Machine Mat 12” x 12”
- Scoring Stylus (optional for files with score lines) -OR-
- Single Scoring Wheel (optional for files with score lines)
- Brayer
- Spatula
- Scraper
- Weeding Tool
- Craft Glue (I used Bearly Art Precision Craft Glue)
- Cricut Trimmer
- Handheld Balloon Pump
- Self-Healing Cutting Mat (optional)
Instructions
STEP 1: GET MY FREE DIY BALLOON BOXES WITH LETTERS DESIGNS
First, download my DIY Balloon Boxes With Letters designs from my free library – look for Design #590. Alternatively, you can use the Save This Project form near the top of this post and the design link will be emailed to you.
In the SVG folder, you’ll find score and no-score versions of the box.
There is also a DXF folder with cut files, and a PDF folder with versions you can print and cut by hand.
Upload the files you need to Design Space to get started.
TIP: If you’re not sure how to upload, go to jennifermaker.com/svgs to learn how to unzip and upload SVG files.
STEP 2: PREPARE YOUR BALLOON BOX WITH LETTERS DESIGN
CRICUT DESIGN SPACE
1. Open Cricut Design Space and click “New Project.”
2. Click “Upload” and then “Upload Image.”
3. Click “Browse.”
4. Select the SVG file. I’ll demonstrate with the file with “no-score” in the name.
5. On the Prepare to Upload screen, it will say “Cut Image” with the design preview.
6. Click “Upload.”
7. Find the box file in Recent Uploads and add it to the Canvas.
8. This is what the box looks like on the Canvas.
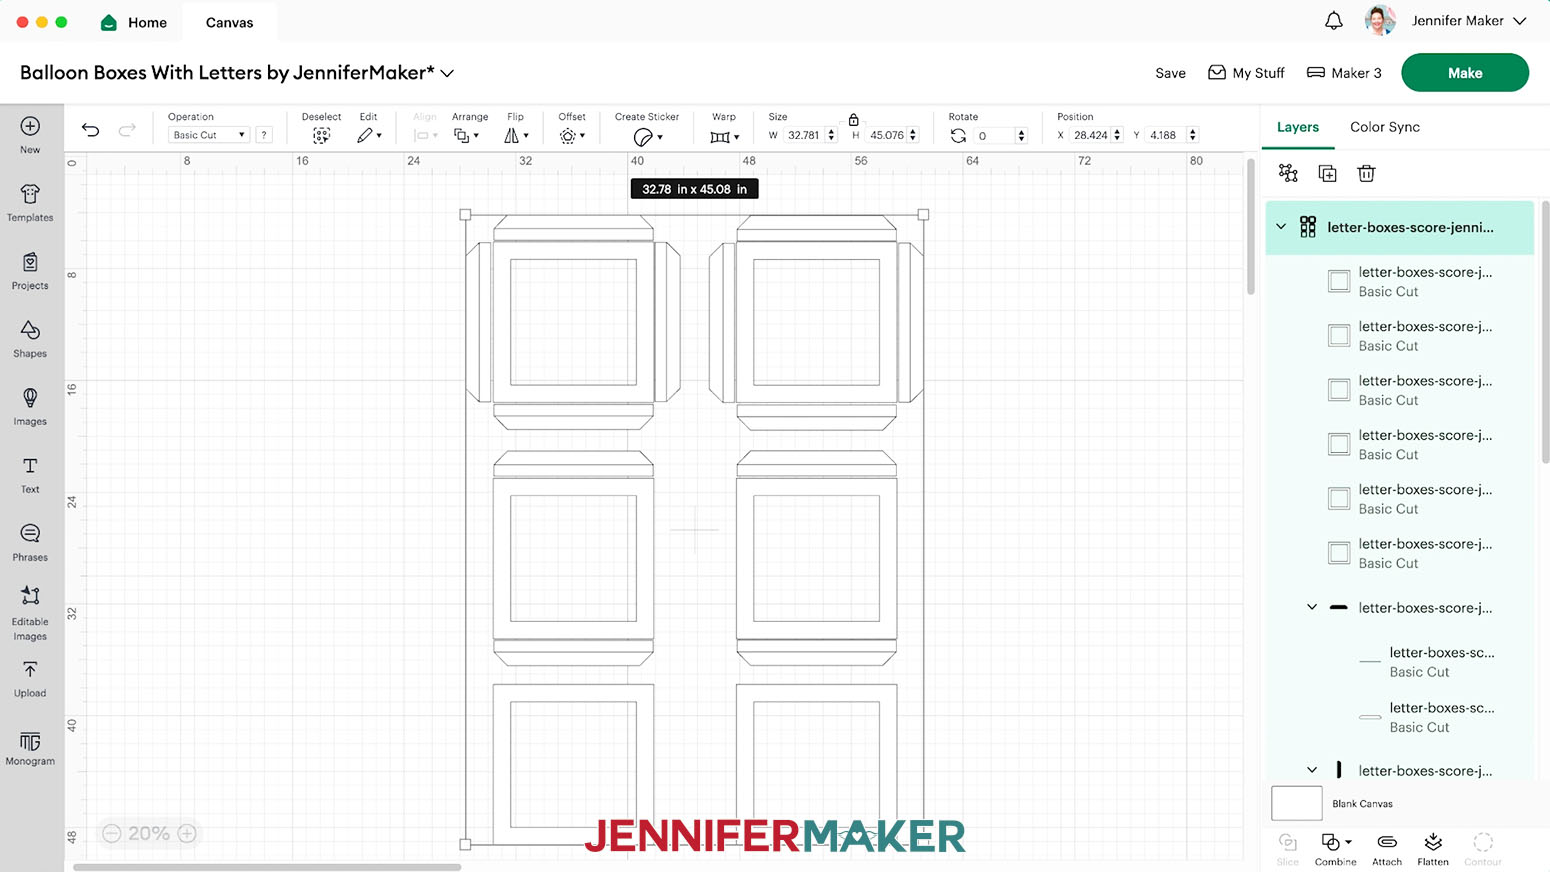
9. Ungroup the design.
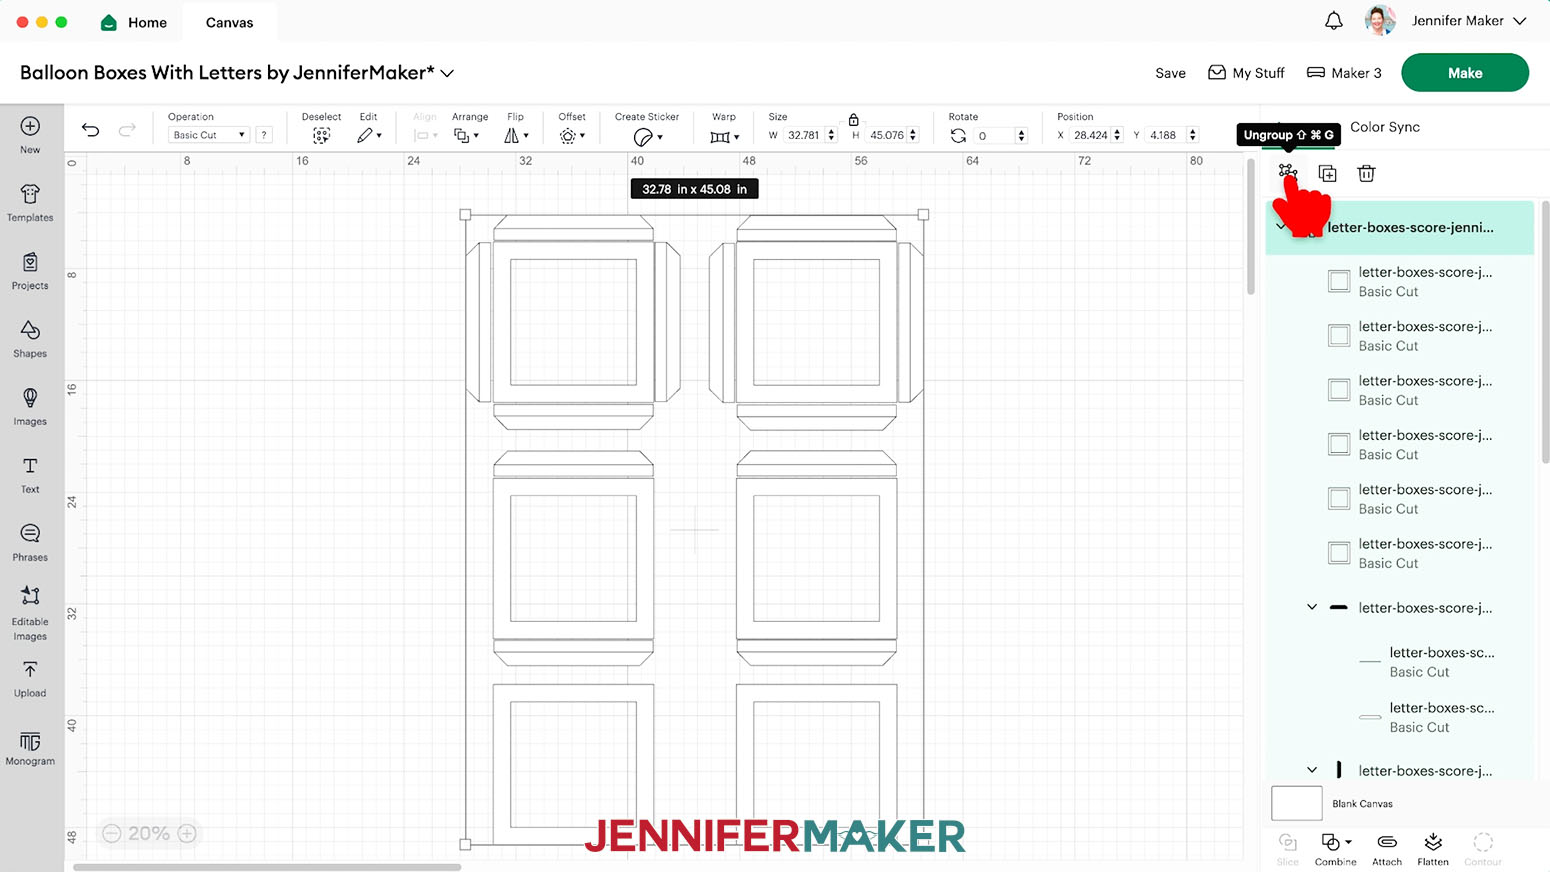
10. If you’re using the file WITHOUT score lines, the box is ready to cut. Skip ahead to step 15.
11. If you’re using the file WITH score lines, find the first group of two layers, and select the layer containing just a line in the Layers Panel.
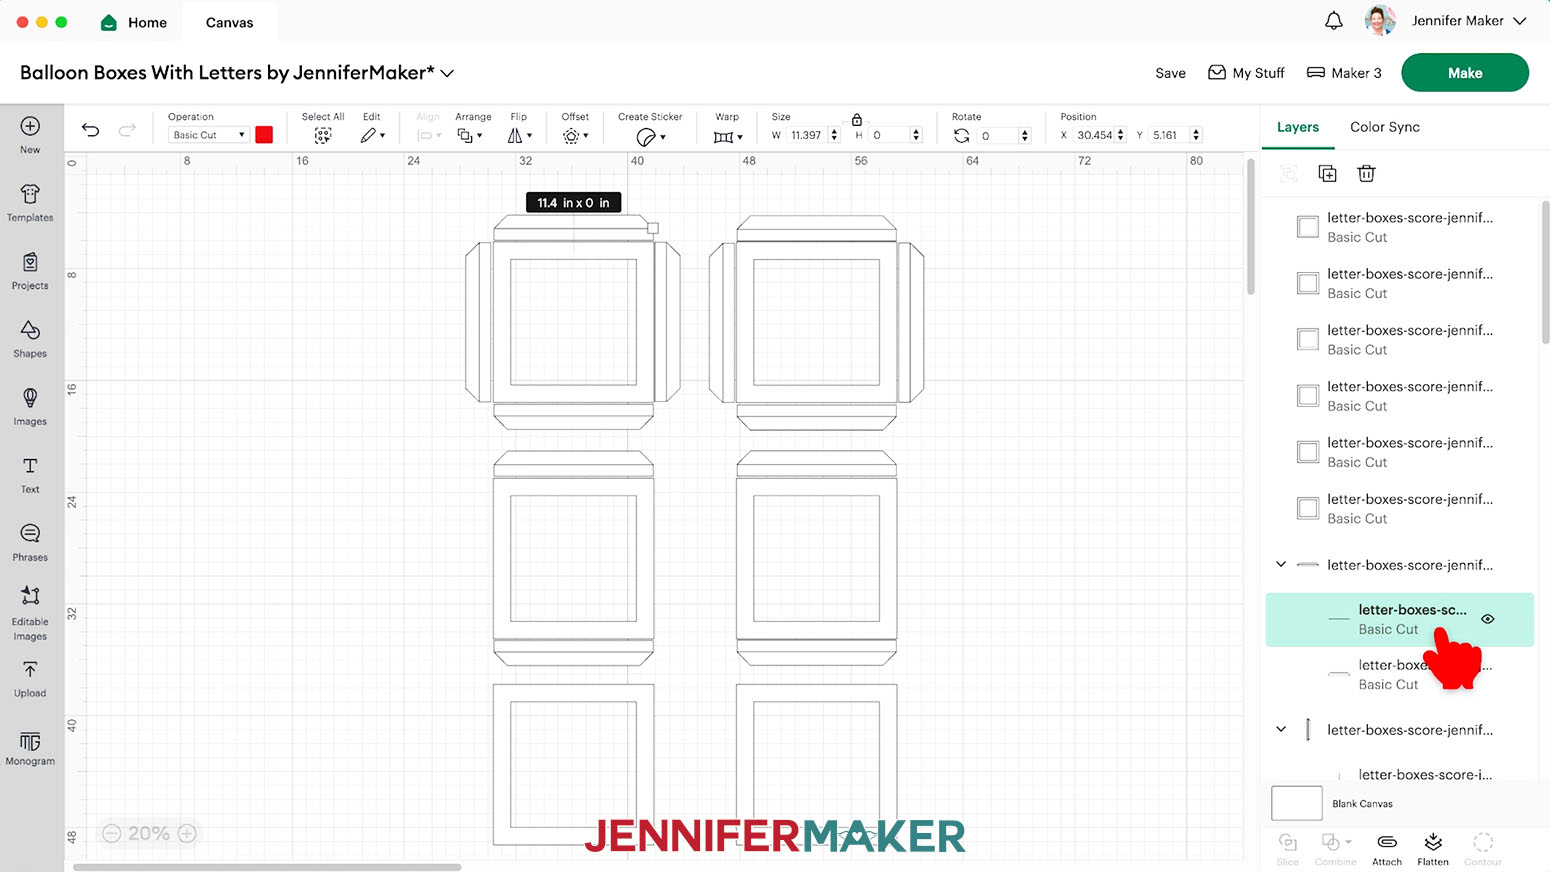
12. Change it to “Score” in the Operation menu.
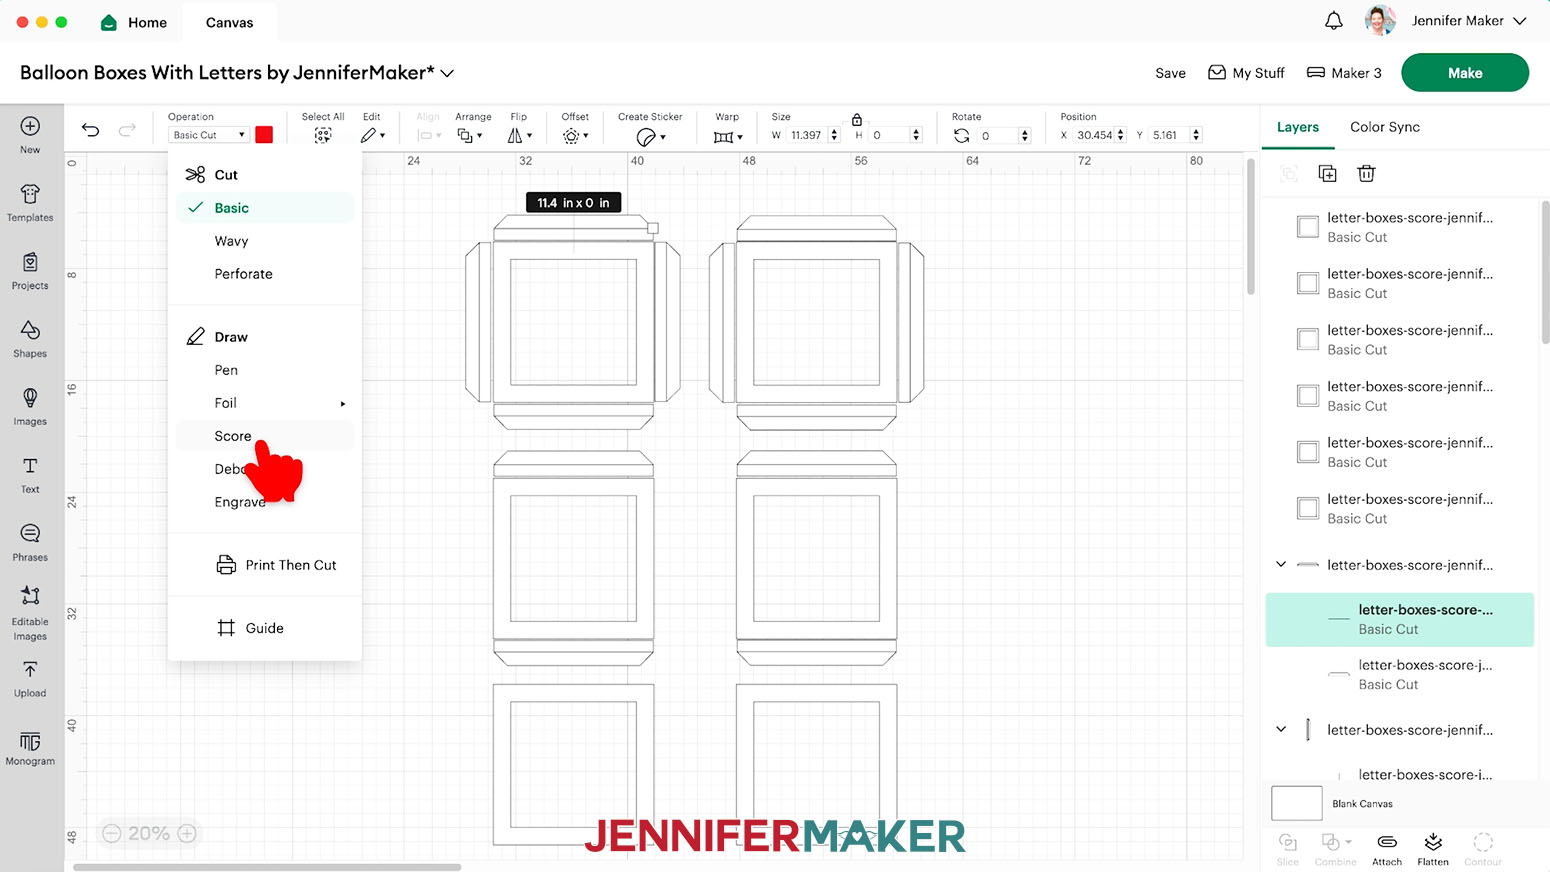
13. Select the box cut layer and its score lines layer and click “Attach.”
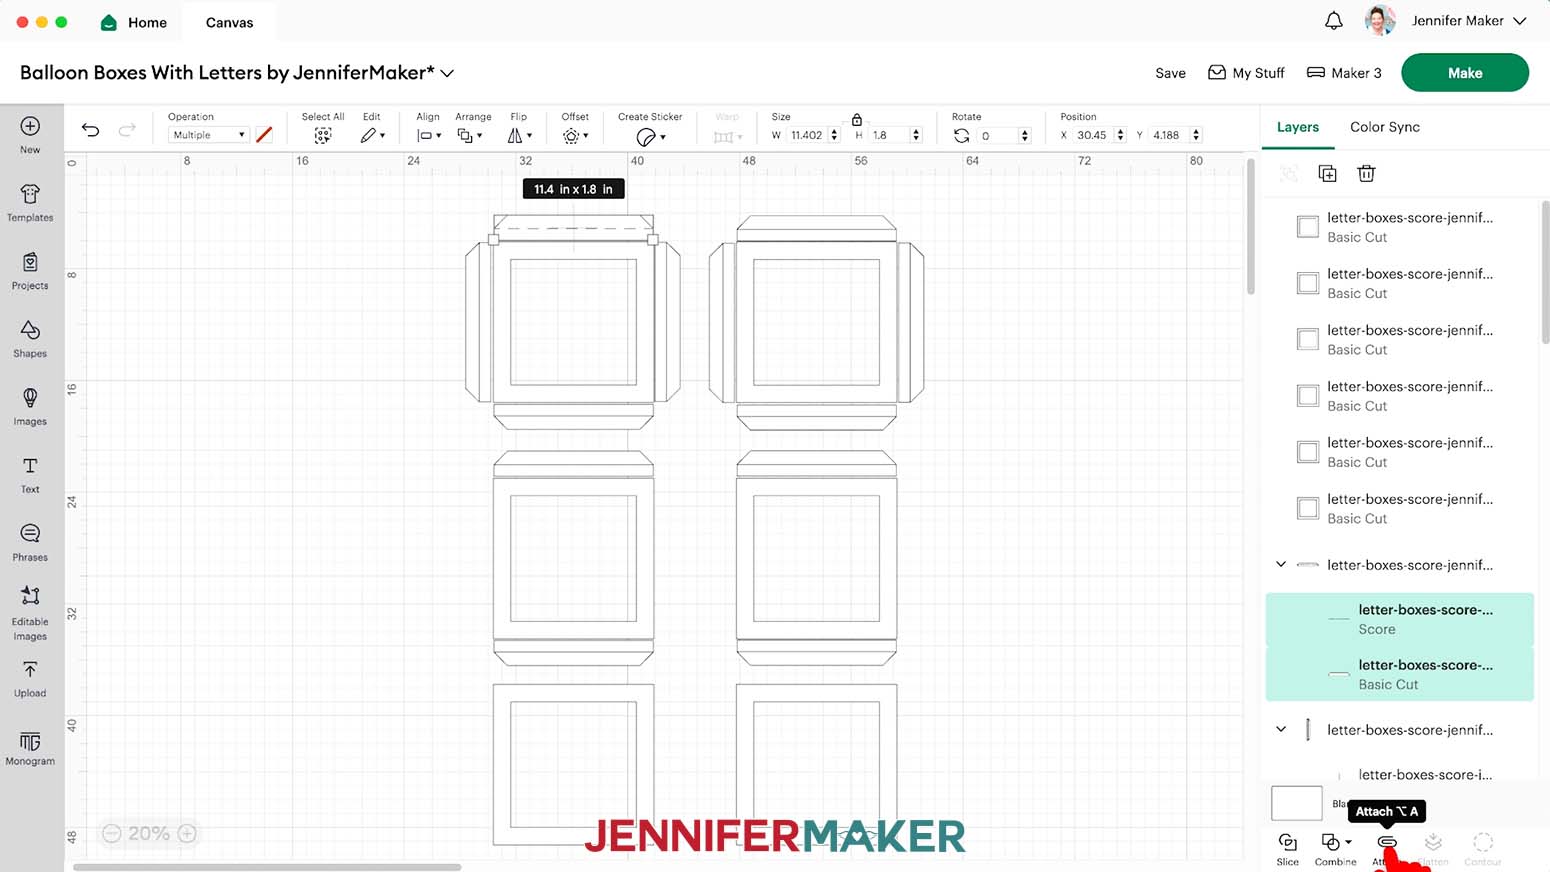
14. Repeat steps 11-13 with the other eleven two-layer groups.
15. If you’d like to change the color of the box pieces to match your kraft board, do that now.
16. Click the Text icon to add a text box.
17. Type your desired letter.
18. Resize the letter to fit inside one of the square openings.
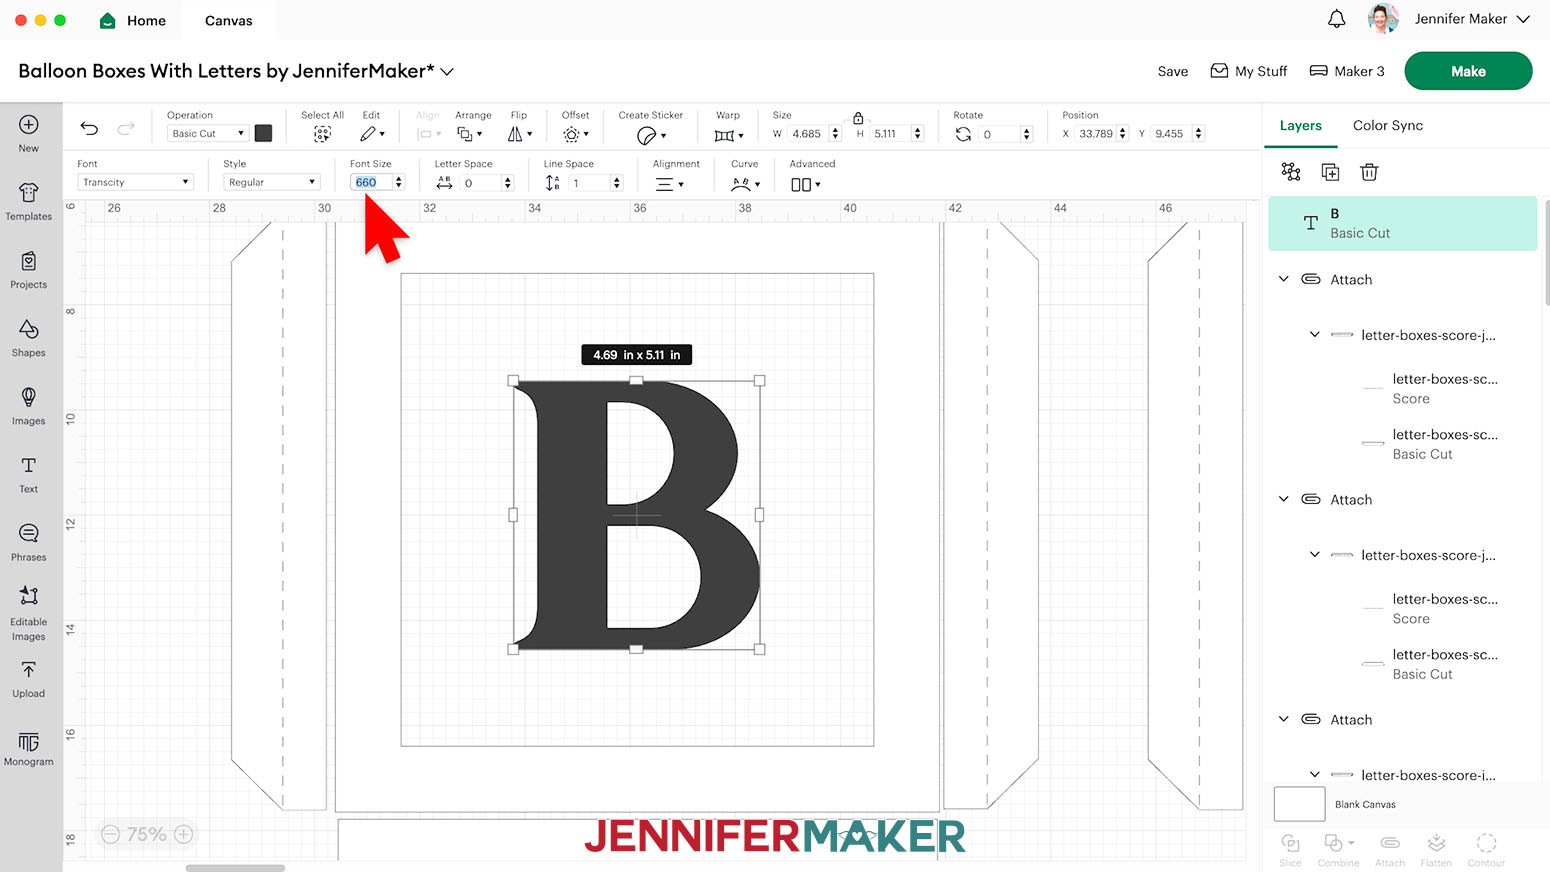
NOTE: If you change the color of your letter in Design Space, be sure to change it to a different color than your kraft board mats so Cricut Design Space knows to cut it on a separate mat.
19. Click the Font dropdown to open the menu.
20. Click “System” to find your uploaded font, and select it.
21. Click the X to exit the Font menu.
22. To save time choosing the font and size, duplicate the letter for each face of the box you’d like to decorate. I didn’t want to decorate the top or bottom with a letter, so I duplicated my letter three times.
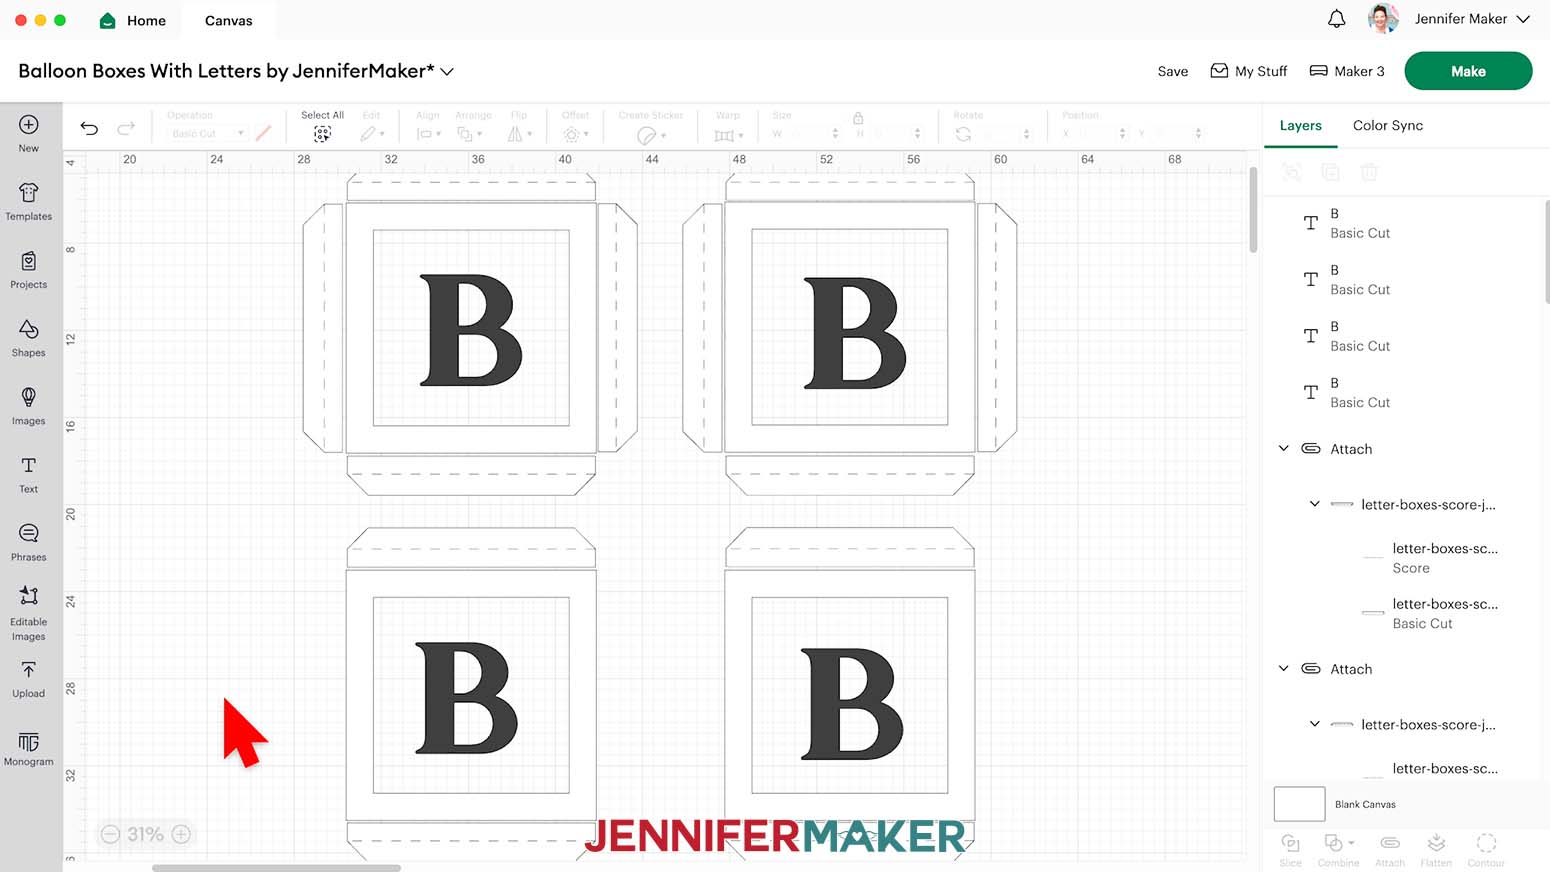
23. If you’d like the same letter on each side of the box, skip to step 25.
24. If you’d like different letters on each side of the box, double-click the text box to edit each letter now.
25. Make sure the correct machine is selected at the top right and click “Make.”
26. If prompted, click “On Mat,” choose your mat size, and click “Confirm.”
27. On the Prepare screen, make sure the correct Material Size is selected for your materials.
28. Select the first mat and click “Continue.”
CUTTING KRAFT BOARD AND VINYL
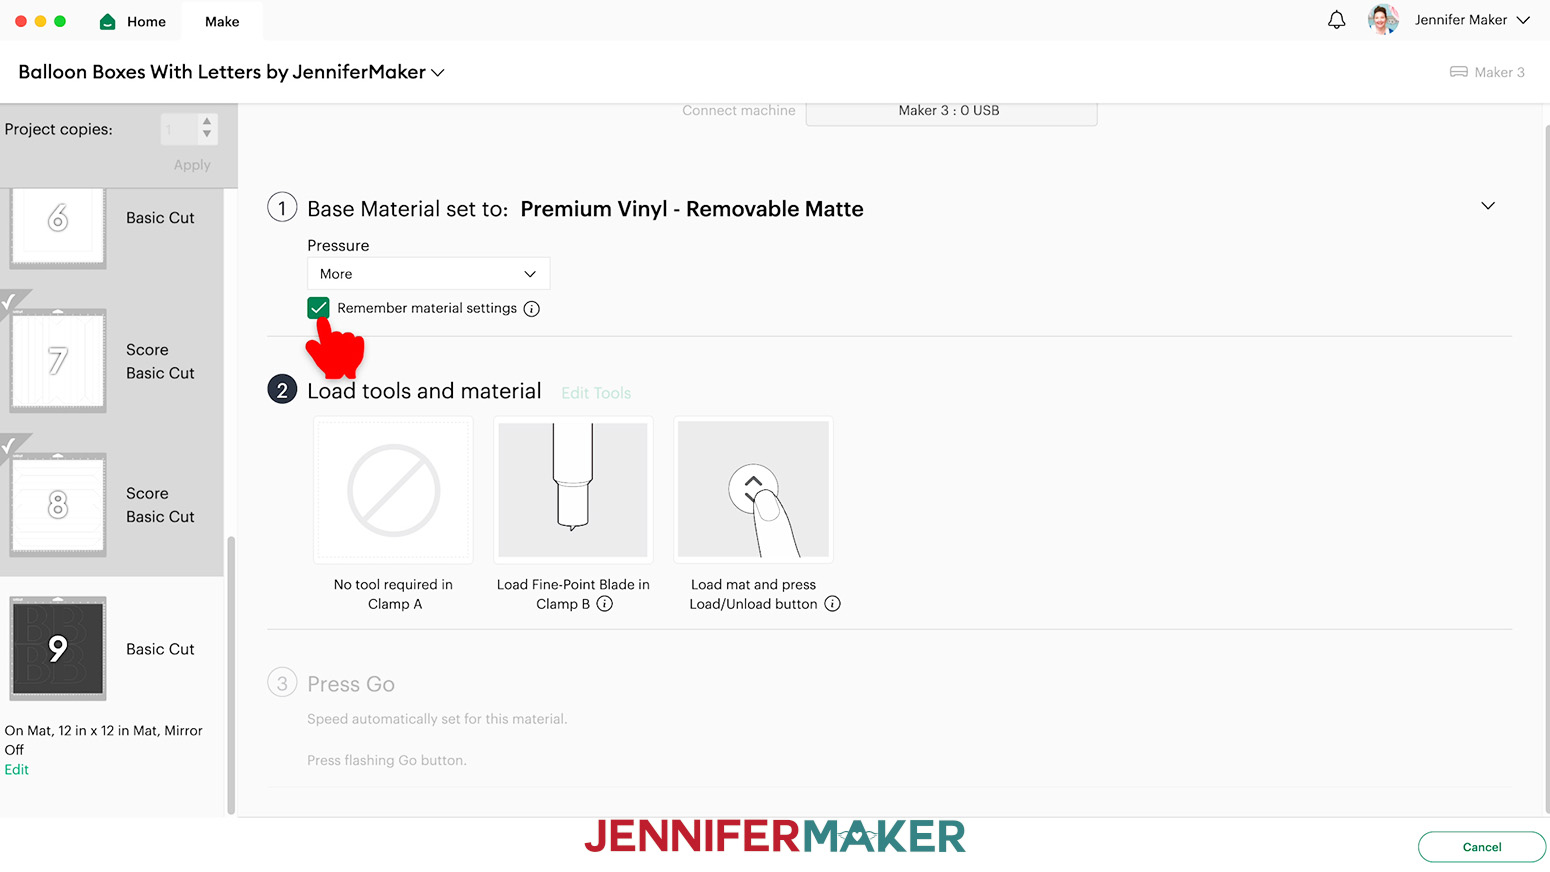
1. On the Make screen, I used these Base Material Settings:
- Box frame and tab mats: “Kraft Board” setting with “More” Pressure
- Letter mats: “Premium Vinyl - Removable Matte” with “More” Pressure
TIP: Since there are a lot of mats, checking the box next to “Remember Material Settings” will apply these settings to all of your mats and save time. When it comes time to cut your vinyl mats, change your material settings to “Premium Vinyl - Removable Matte” with “More” Pressure and check the “Remember Material Settings” box to apply it to the rest of the mats.
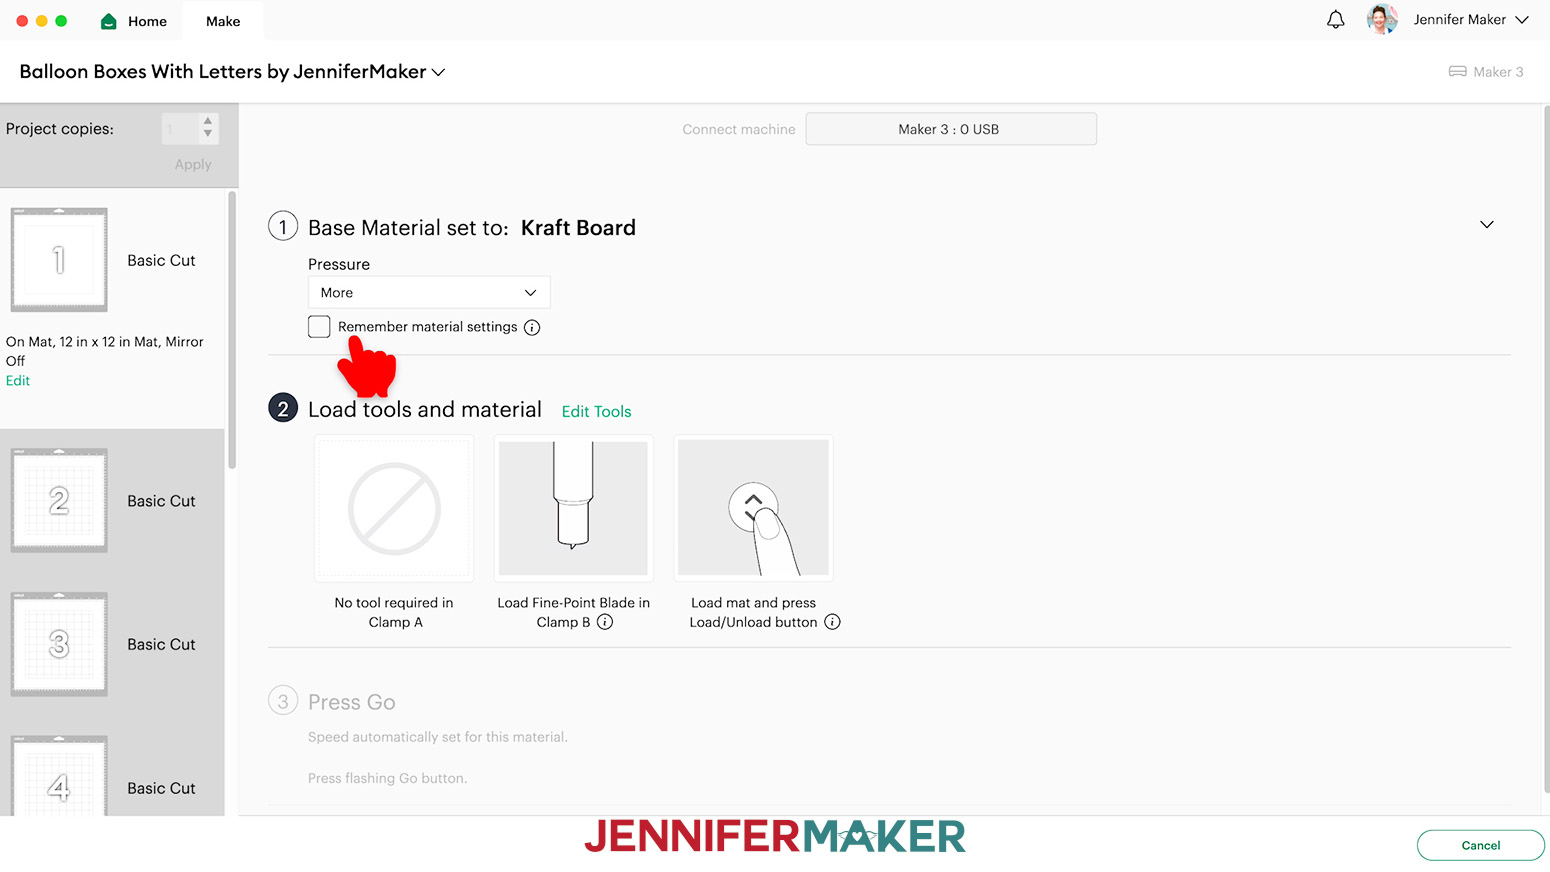
2. If you’re using the “no score” version, skip ahead to step 3. If you’re using the Scoring Stylus, insert it into the clamp now. If you’re using the Single Scoring Wheel, insert it into the clamp when prompted.
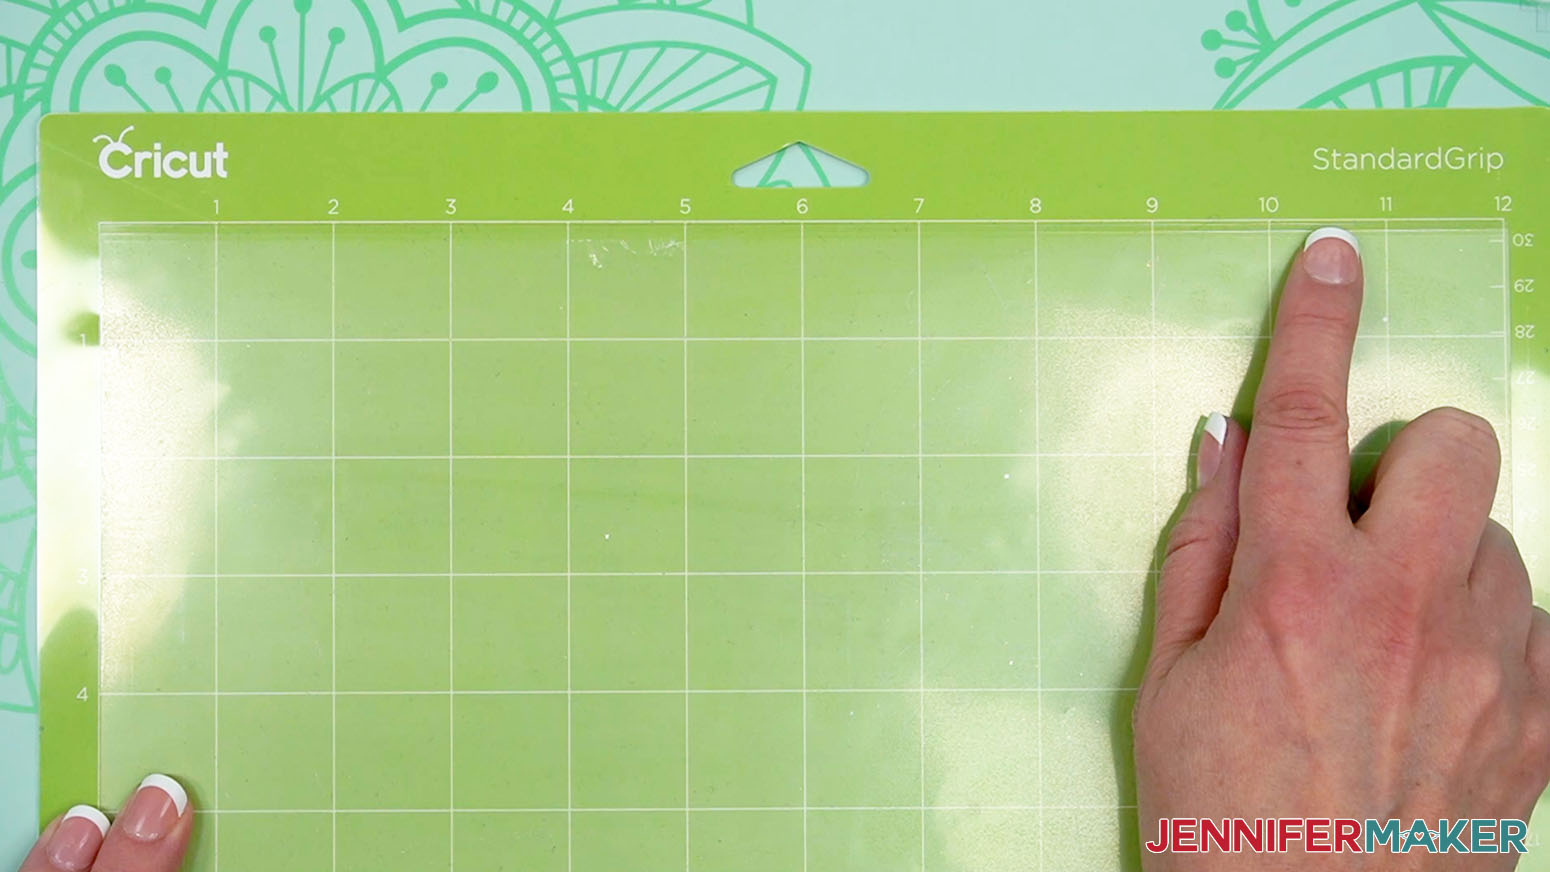
3. Place your first mat’s material face up on a green StandardGrip machine mat.
4. Use a brayer to make sure it’s fully adhered.
5. Check that your Premium Fine-Point Blade is clean and in the clamp.
6. Press the flashing “Load/Unload” button to load the prepared mat into your Cricut.
7. Press the flashing “Go” button to begin cutting.
8. When it has finished cutting, unload the mat, flip it over onto your work surface, and roll it back to release the material.
TIP: If you have any issues with your cuts, check out my Tips for Cleaner Cuts tutorial.
9. Follow steps 3-8 to continue cutting the rest of your kraft board and vinyl mats.
NOTE: Remember to select the “Premium Vinyl - Removable Matte” base material setting with “More Pressure when you get to those mats.
10. Use a weeding tool to carefully peel away the extra background vinyl. I like to work from larger to smaller sections during weeding.
TIP: It can be easier to weed vinyl, especially small, detailed designs, while it is adhered to the machine mat.
11. Poke your weeding tool into each section you want to remove. Gently lift it away from the design. Make sure you do not pull up any pieces you want to keep! If they come up, gently pat them back in place and try again. Don't forget to remove the middle parts of letters.
12. Cut the carrier sheets apart so each letter is separated.
13. Here are what my cut and weeded pieces look like. For each complete box, there are six square kraft board frame pieces, twelve kraft board tab pieces, and four cut vinyl letters.
CUTTING ACETATE
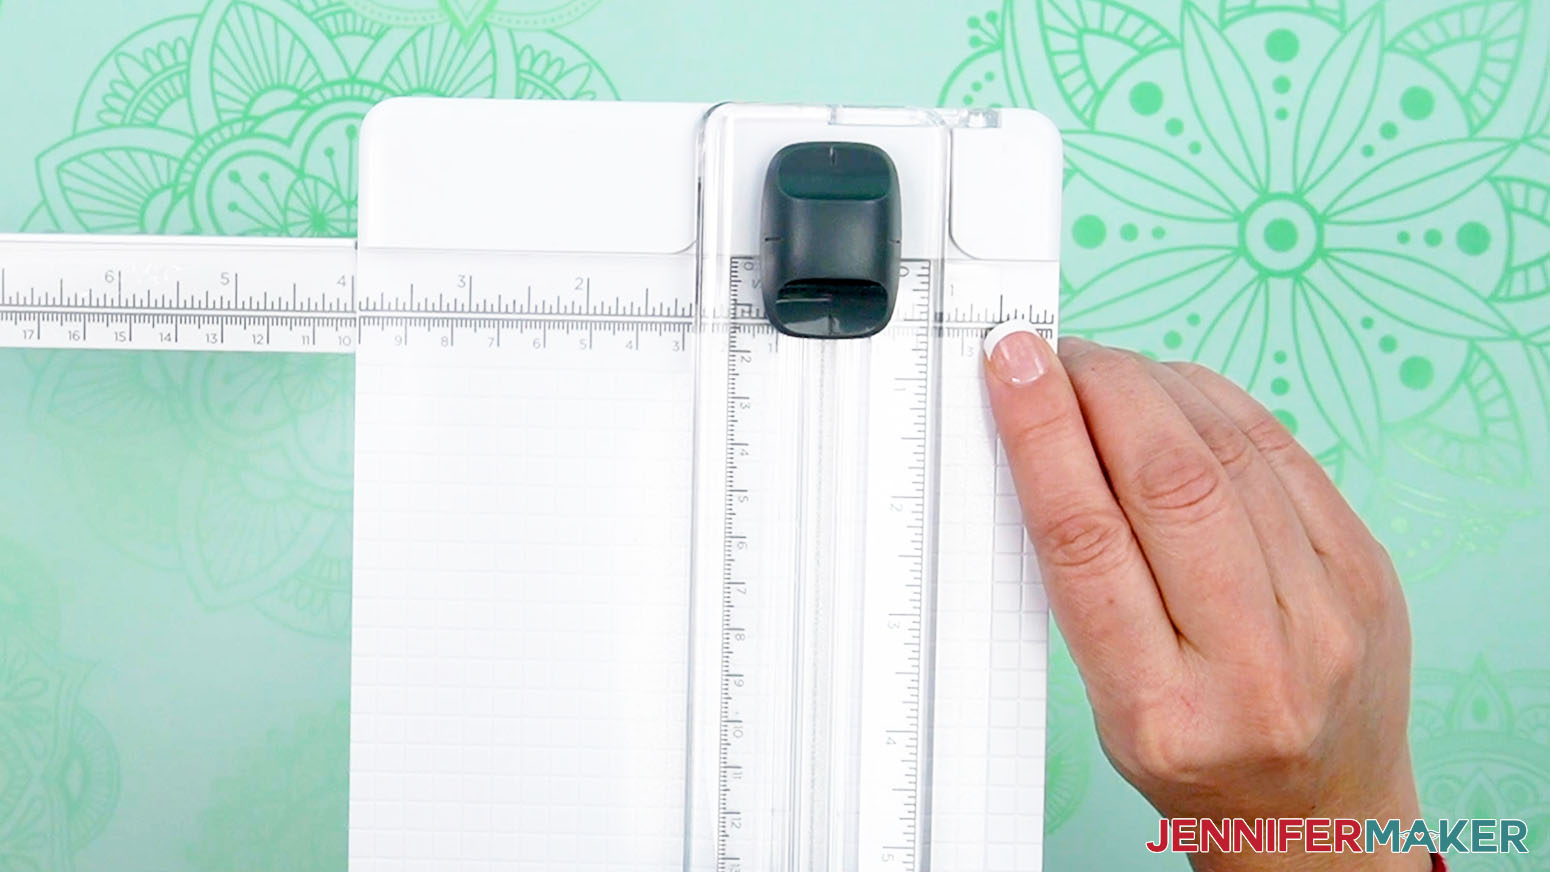
NOTE: You can use your Cricut to cut your acetate pieces, but I found it quicker and easier to cut them with a portable trimmer.
1. Measure your acetate and determine how much you need to remove to make a 10.5" square. Mine is 12" square, so I’ll cut off a 1.5" strip from the right and bottom edges.
2. Leaving the clear protective film on, place your acetate in the trimmer’s cutting area so the top edge is flush with the tool’s horizontal lip.
3. Feed the material under the ruler until the right edge aligns with the 1.5" mark to the right. Check that it hits that mark on the top and bottom rulers to make sure the cut will be straight.
4. Hold the acetate in place and lower the cutting ruler with the blade at the top above the material. You can press down on the ruler to keep the material in position, just don’t get close to the blade.
5. Use your other hand to press down on the blade and draw it down the straight line in a smooth motion. A perfect cut!
6. Lift the ruler to rotate the acetate 90 degrees so the longer section is ready to cut. Line it up the same way, it will just be shorter at the bottom ruler.
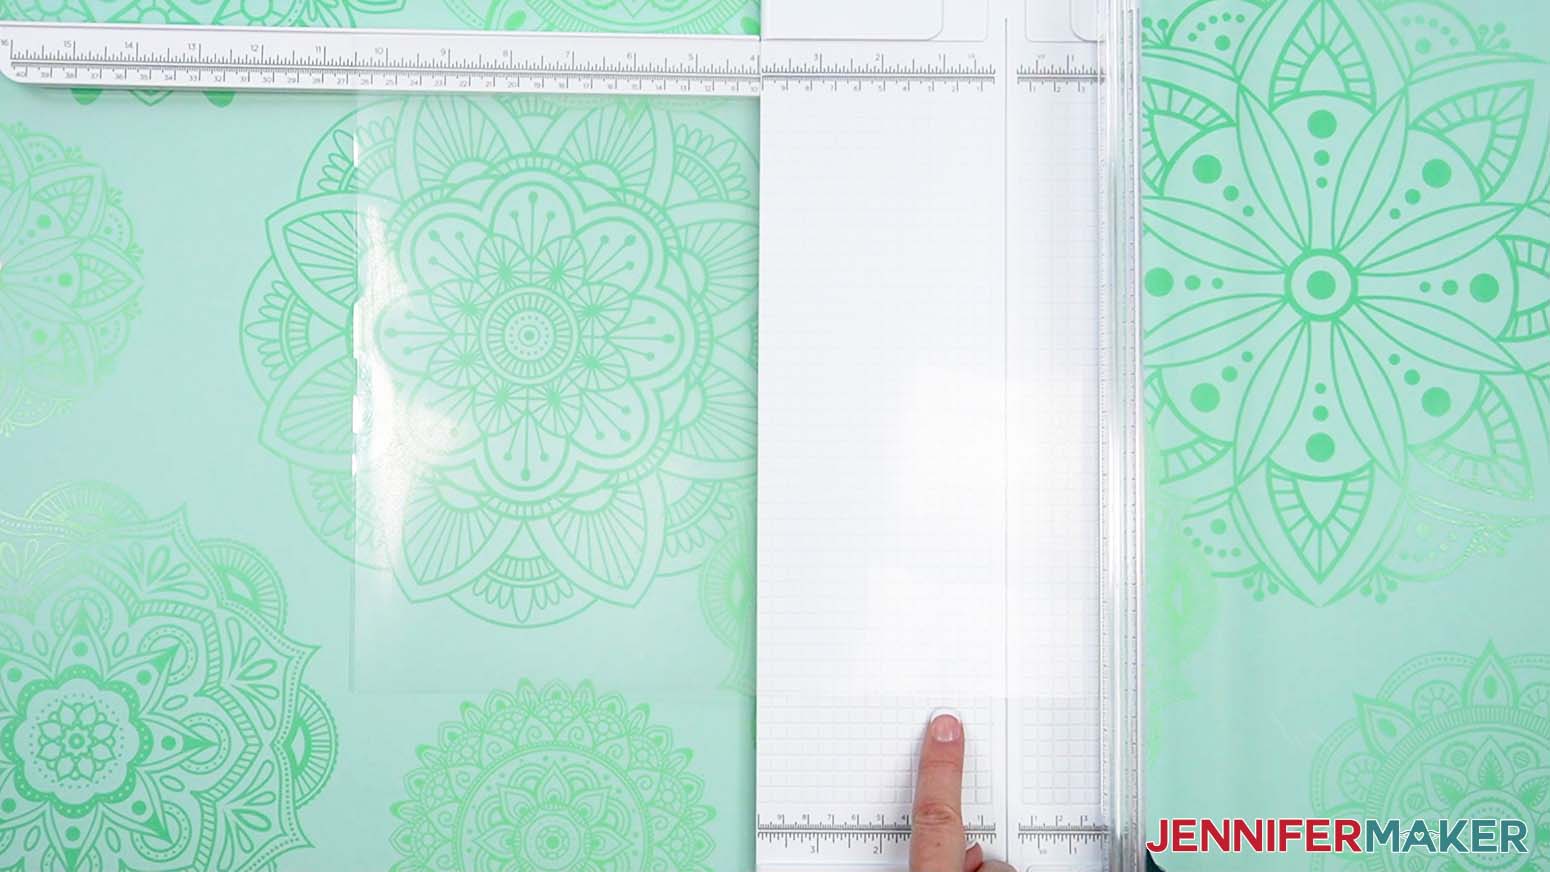
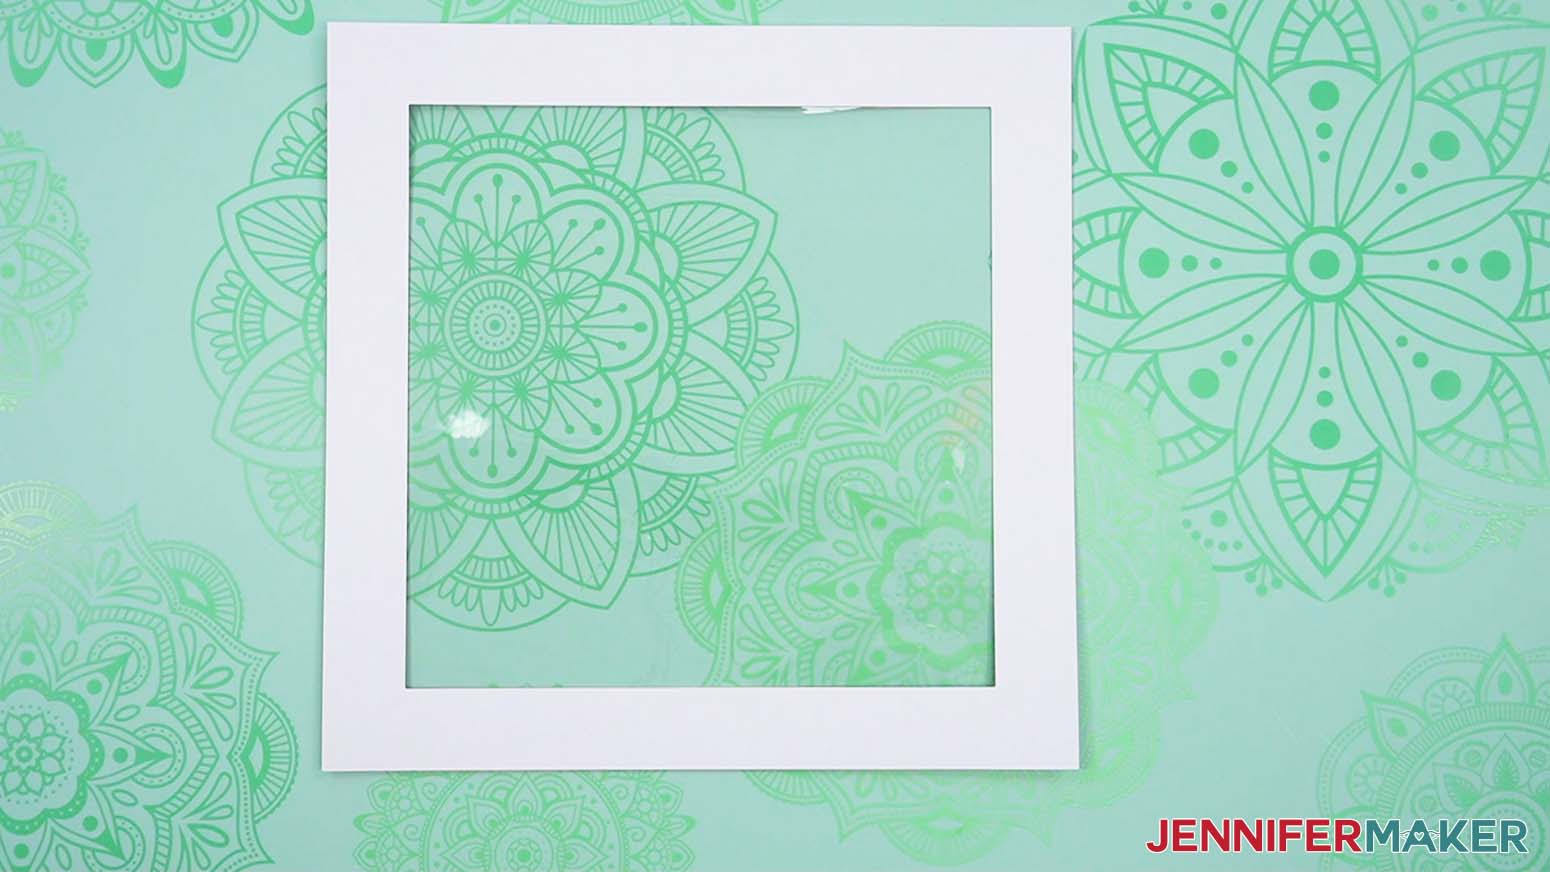
7. Repeat the cut and you have a perfect 10.5" square. This leaves a 0.75” overlap for attaching the acetate to the kraft board frame later.
8. Repeat steps 1-7 with five more sheets of acetate per box (one piece for each side of each box).
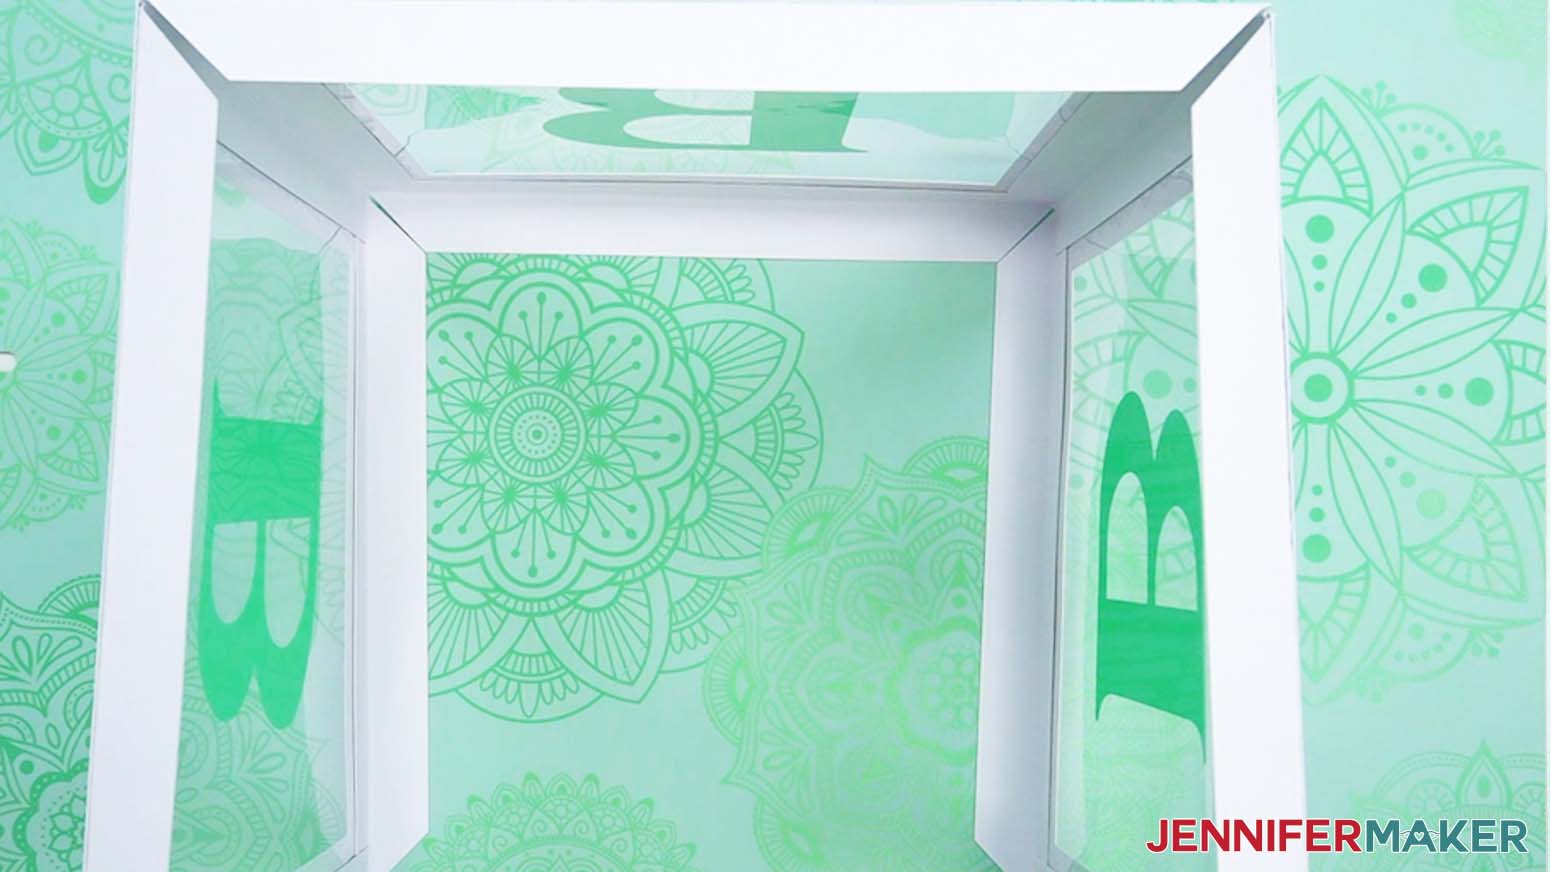
STEP 3: ASSEMBLE YOUR BALLOON BOX WITH LETTERS
NOTE: If you plan to fill your box with inflatable balloons, I recommend leaving the top panel off or only connected on one side to allow you to fill the box the day of your event. This will ensure that they stay inflated and looking their best.
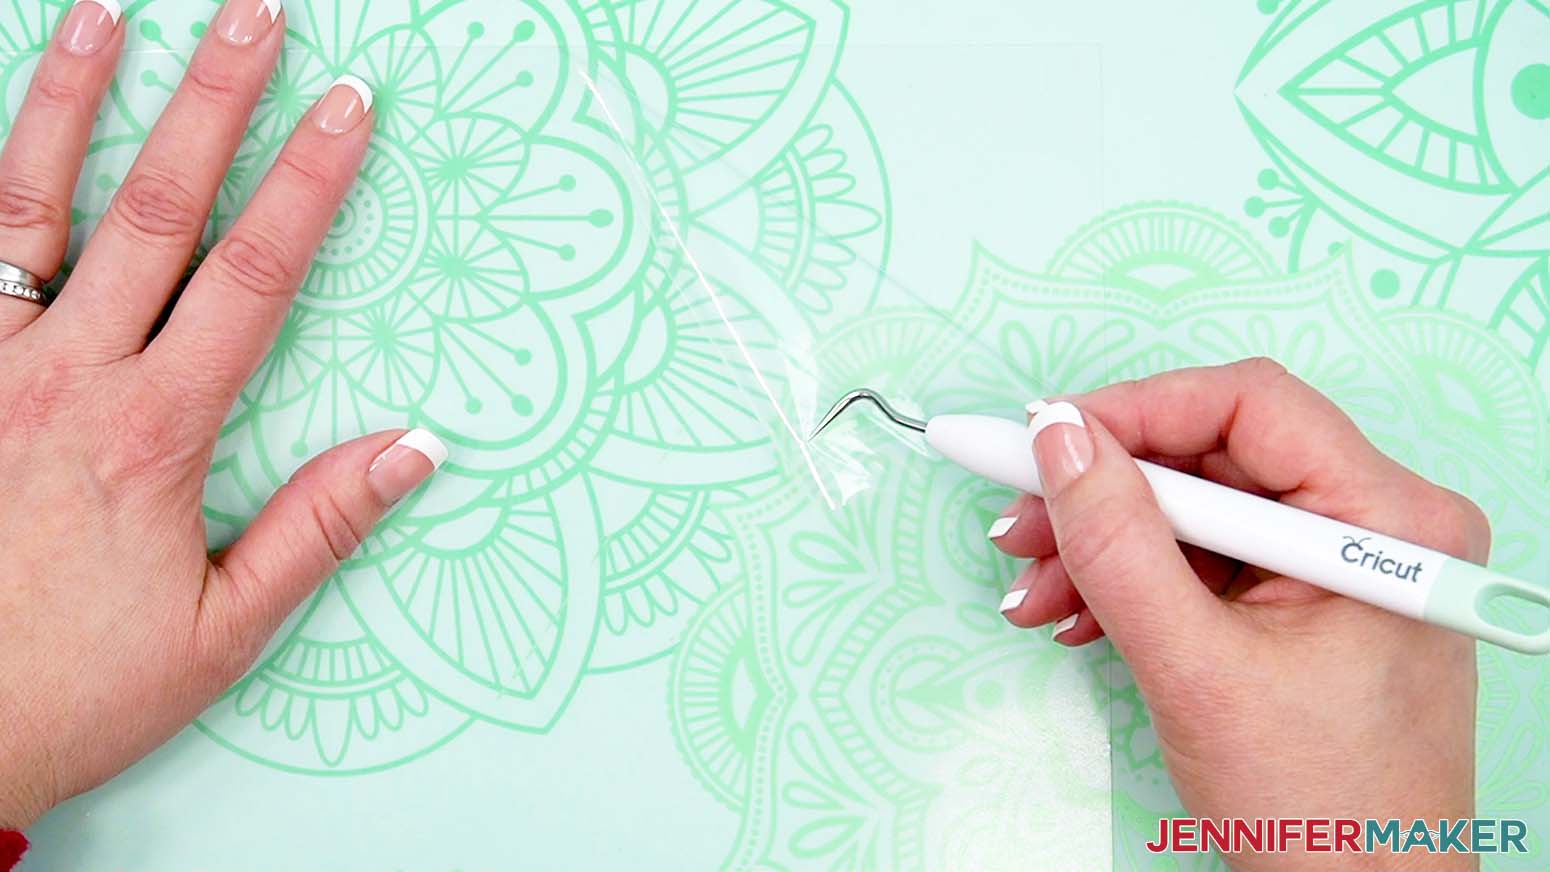
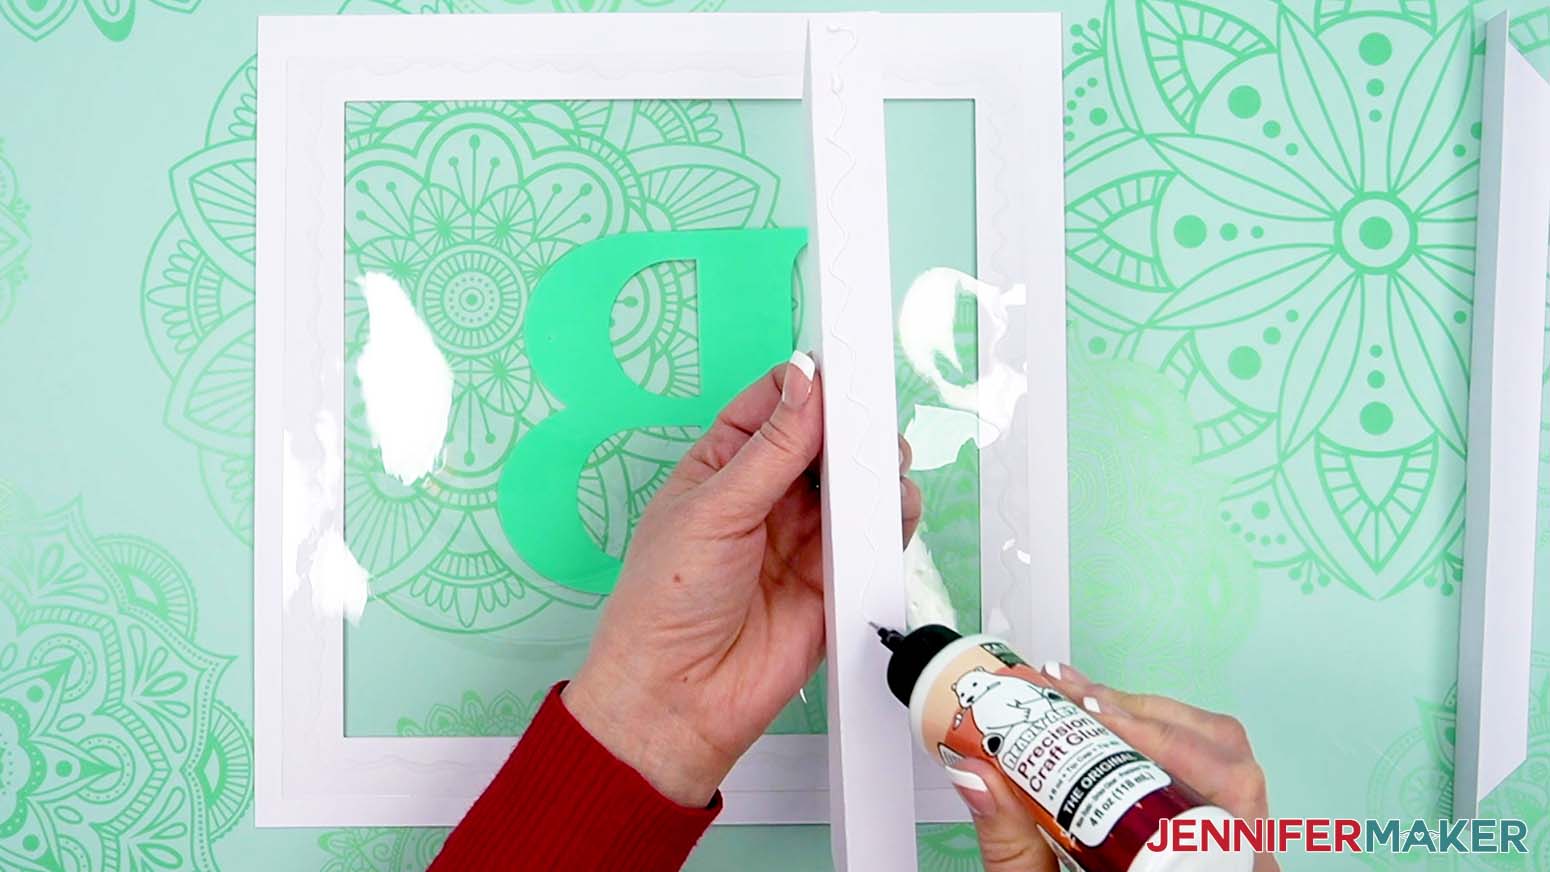
1. Remove the clear protective film from both sides of one sheet of acetate. Use a weeding tool if needed to help lift the corner.
2. Take a square kraft board piece and flip it face down on your work surface.
3. Apply a thin line of craft glue around the inside square opening, about 1/4” from the edge.
4. Lower the piece of acetate onto the glue, smoothing it down with your fingers to adhere.
5. Repeat steps 1-4 for the remaining five kraft board squares and acetate pieces.
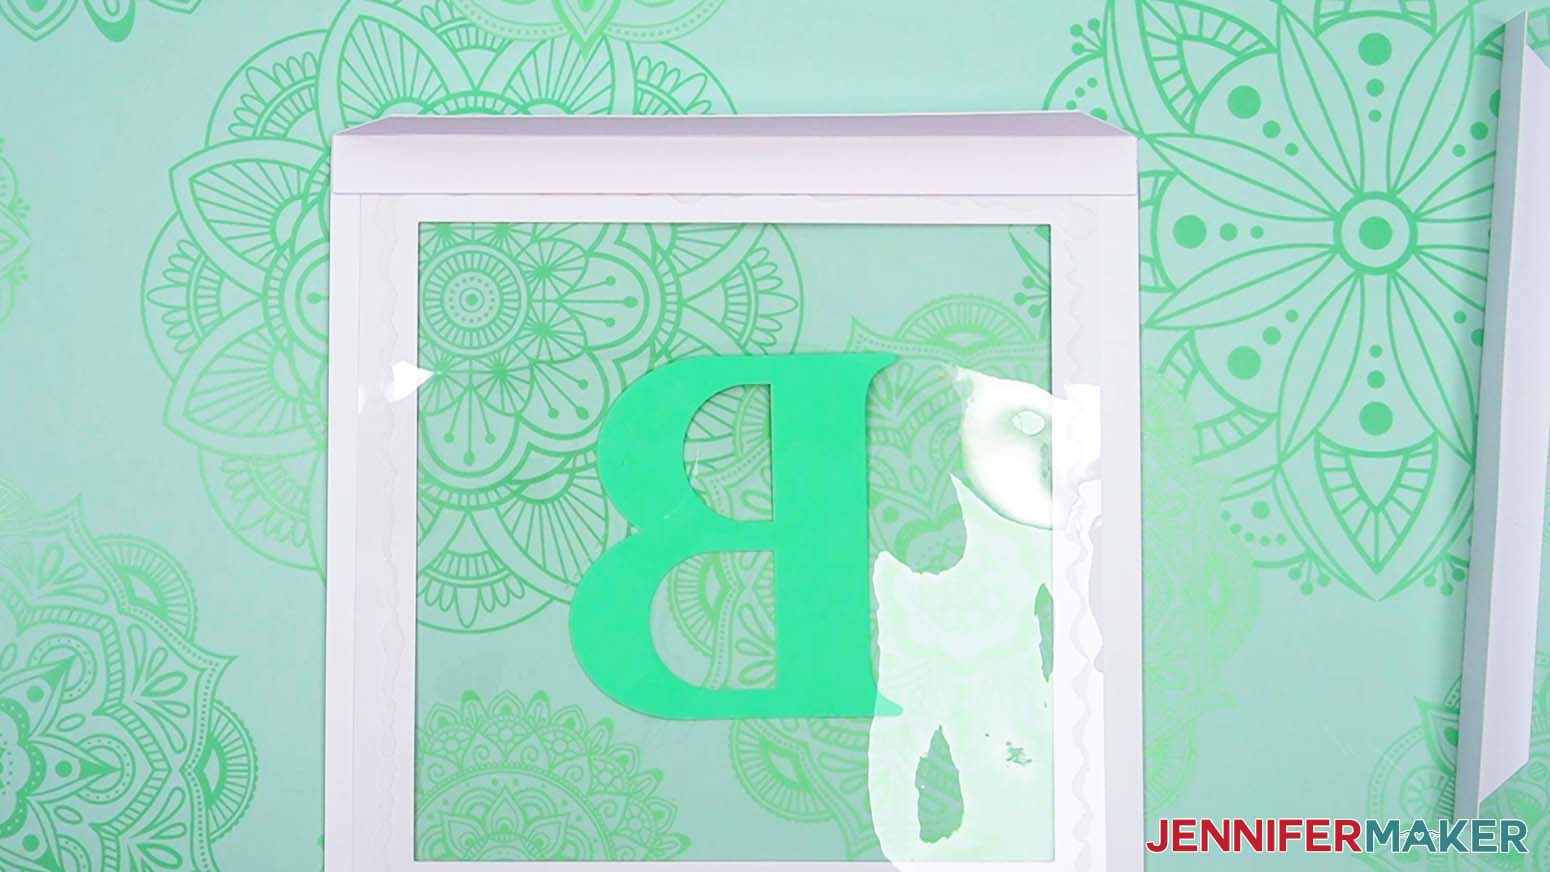
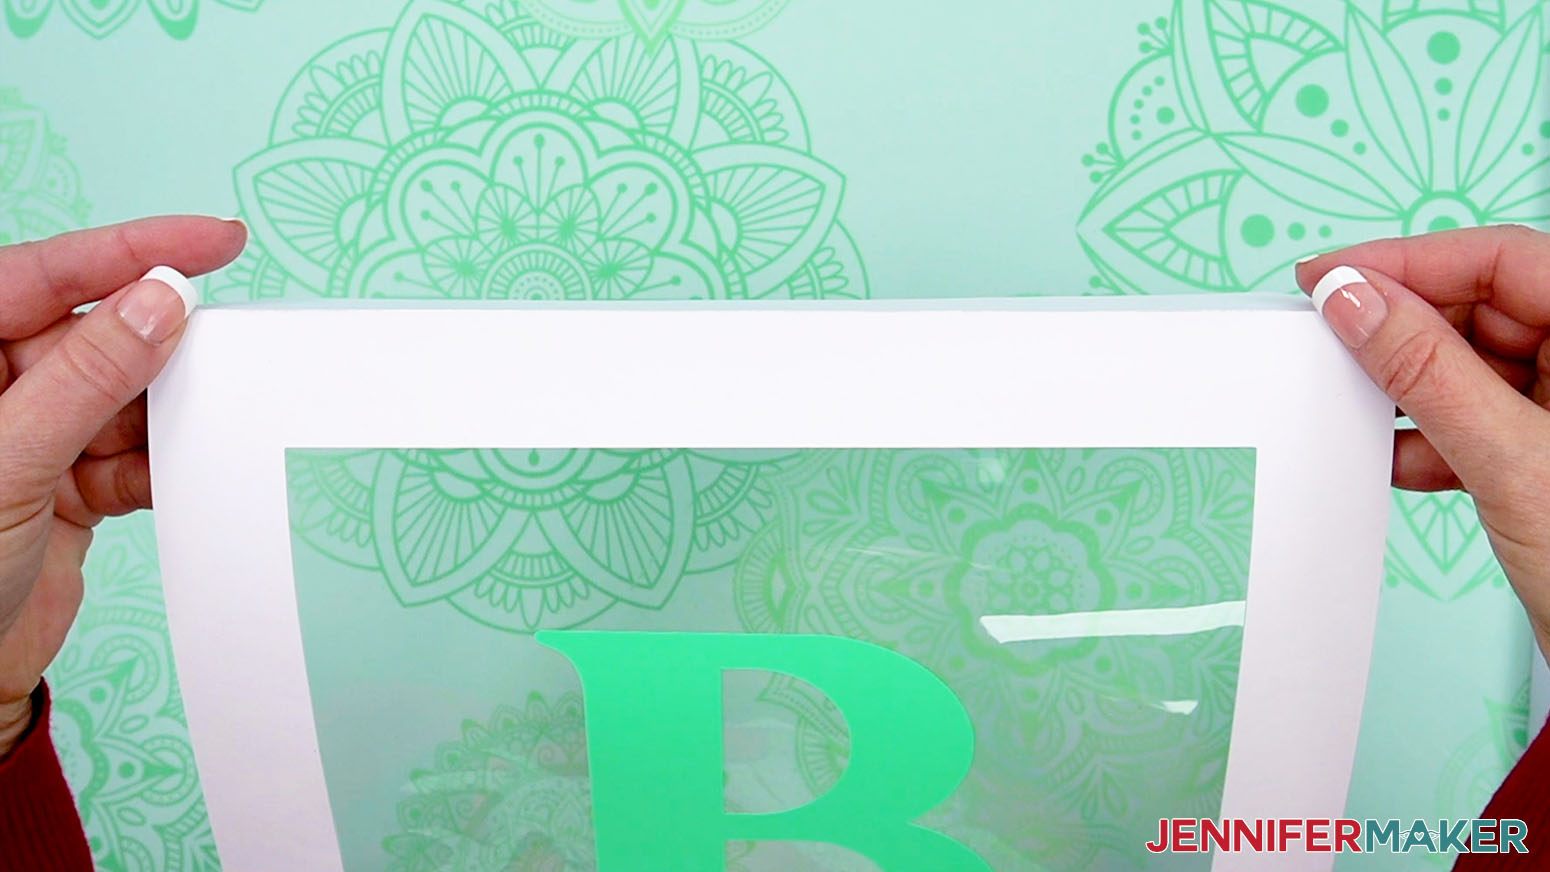
6. Flip one assembled acetate and kraft board square over so it’s glue-side down.
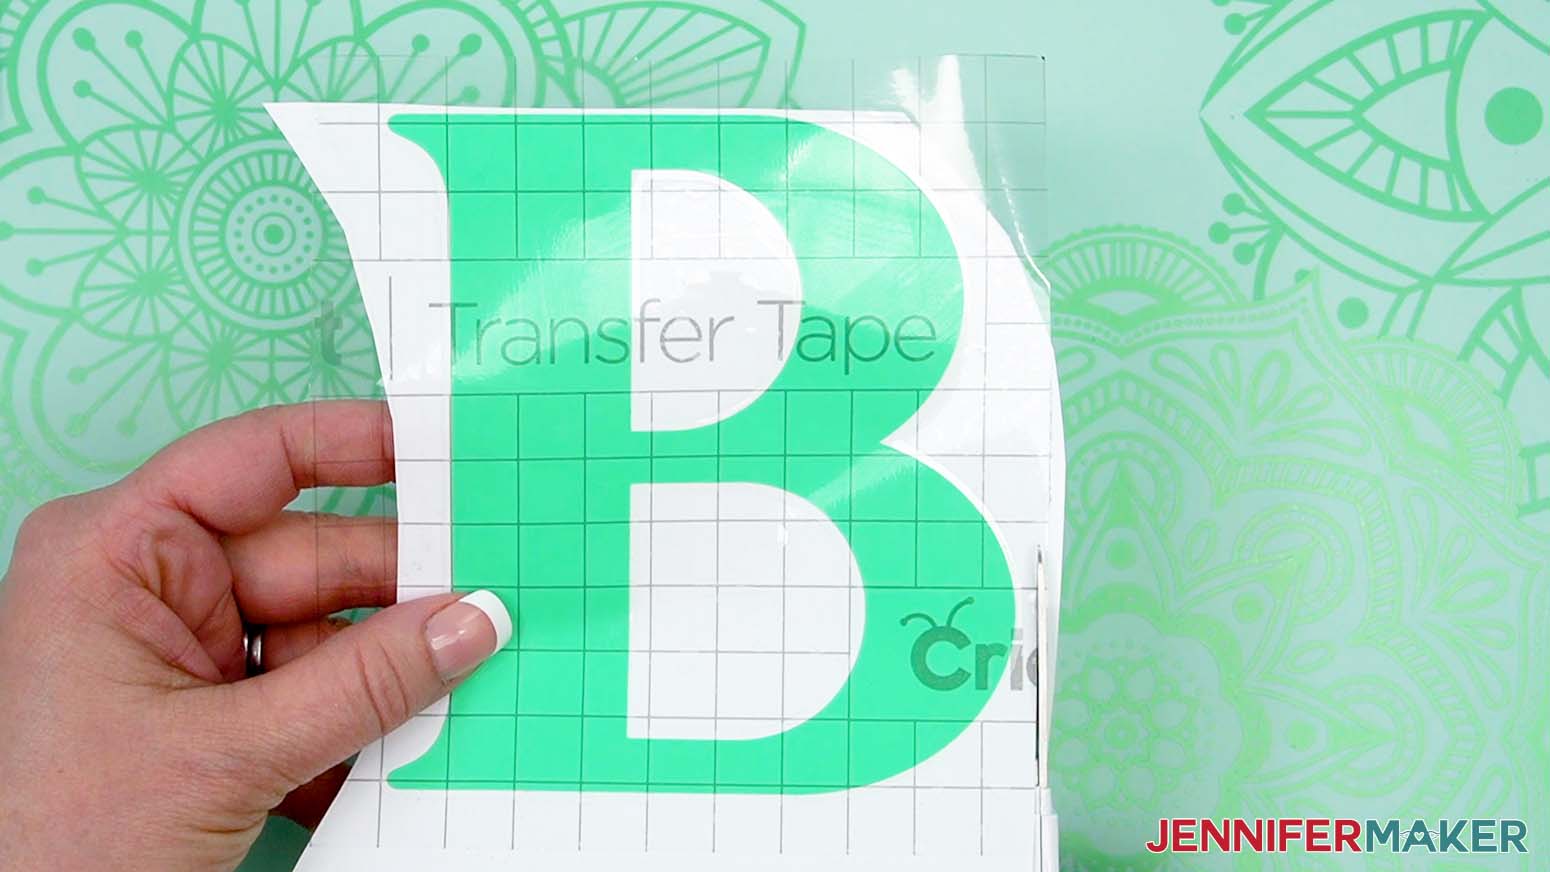
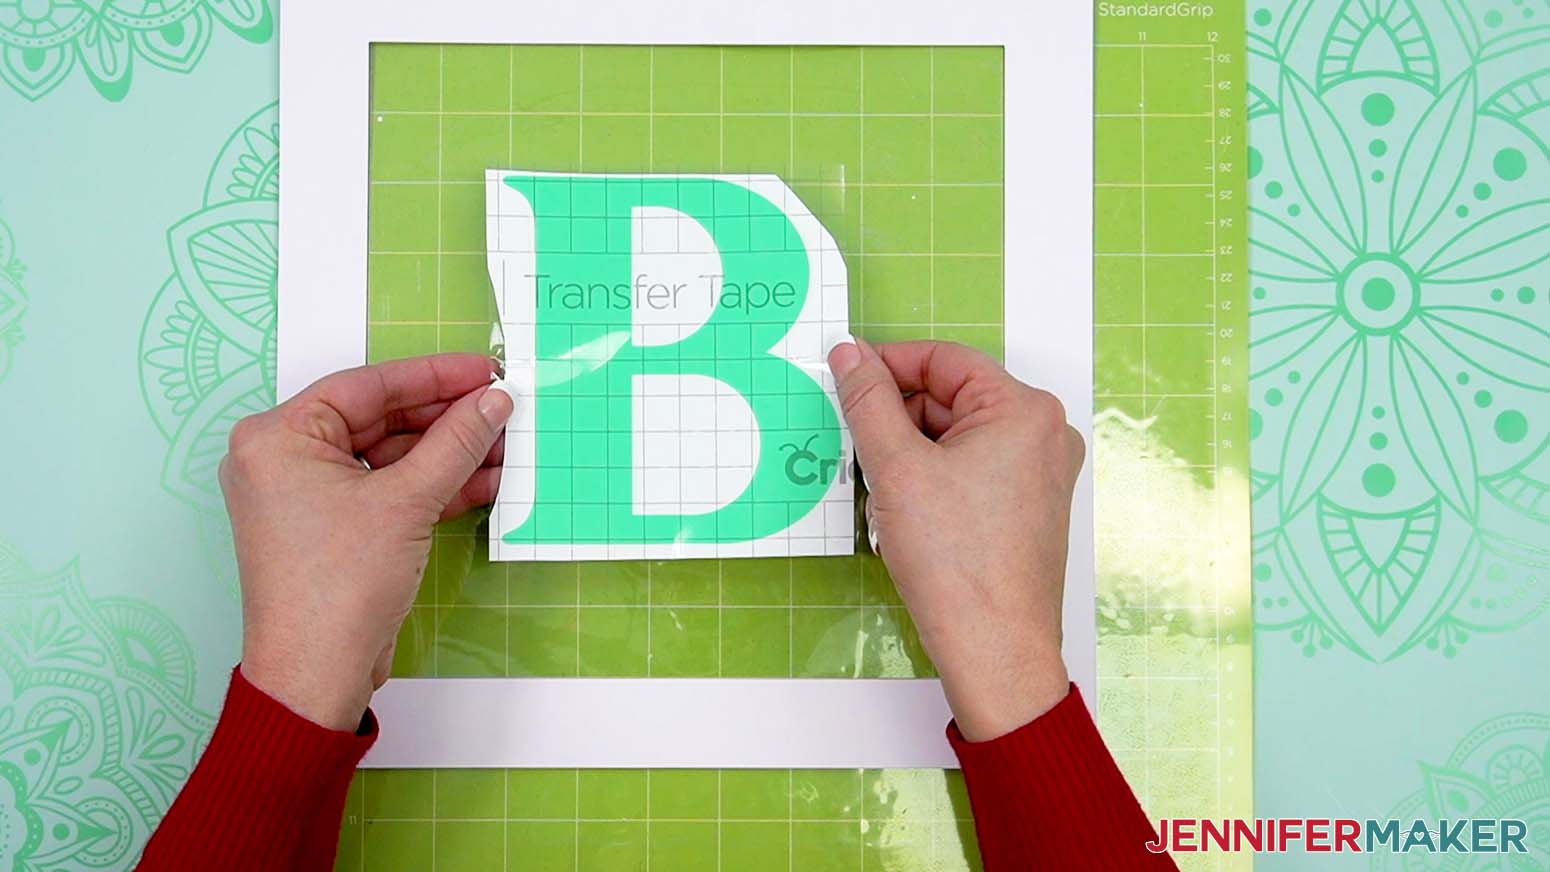
7. Cut a piece of StandardGrip transfer tape that is slightly larger than the letter you’ll apply to that side.
8. Remove the backer from the transfer tape and place it face down on the decal using my "taco method." Hold your transfer tape in the shape of a “taco,” then put the bottom of the “taco” onto the middle of your design.
9. Smooth the transfer tape over the decal from the center outward and burnish it down using the Scraper Tool.
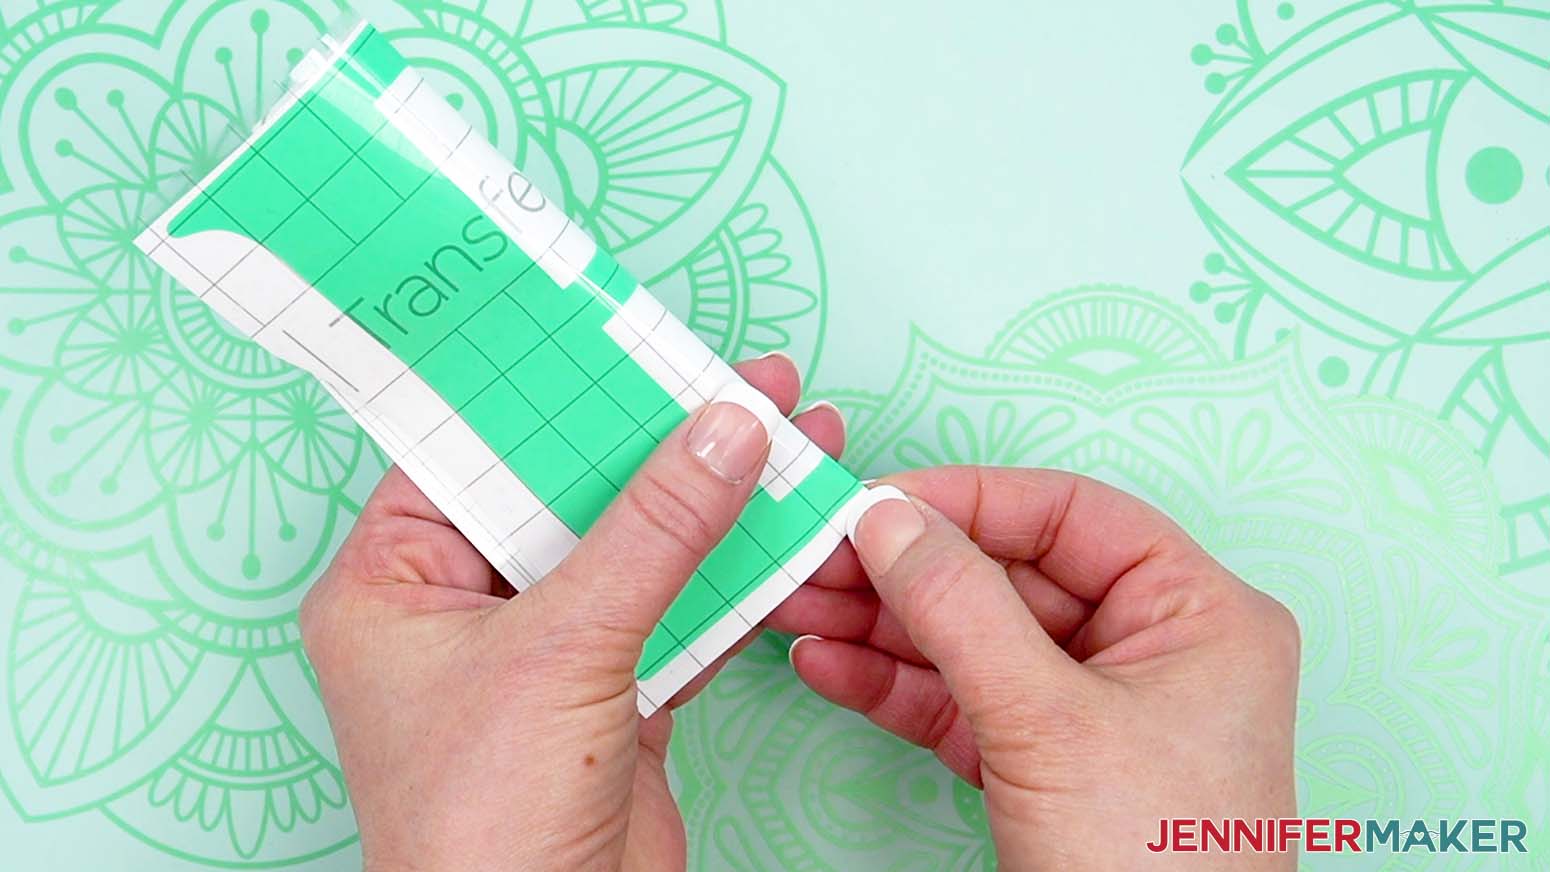
10. Trim the transfer tape so it has an even border all the way around the letter.
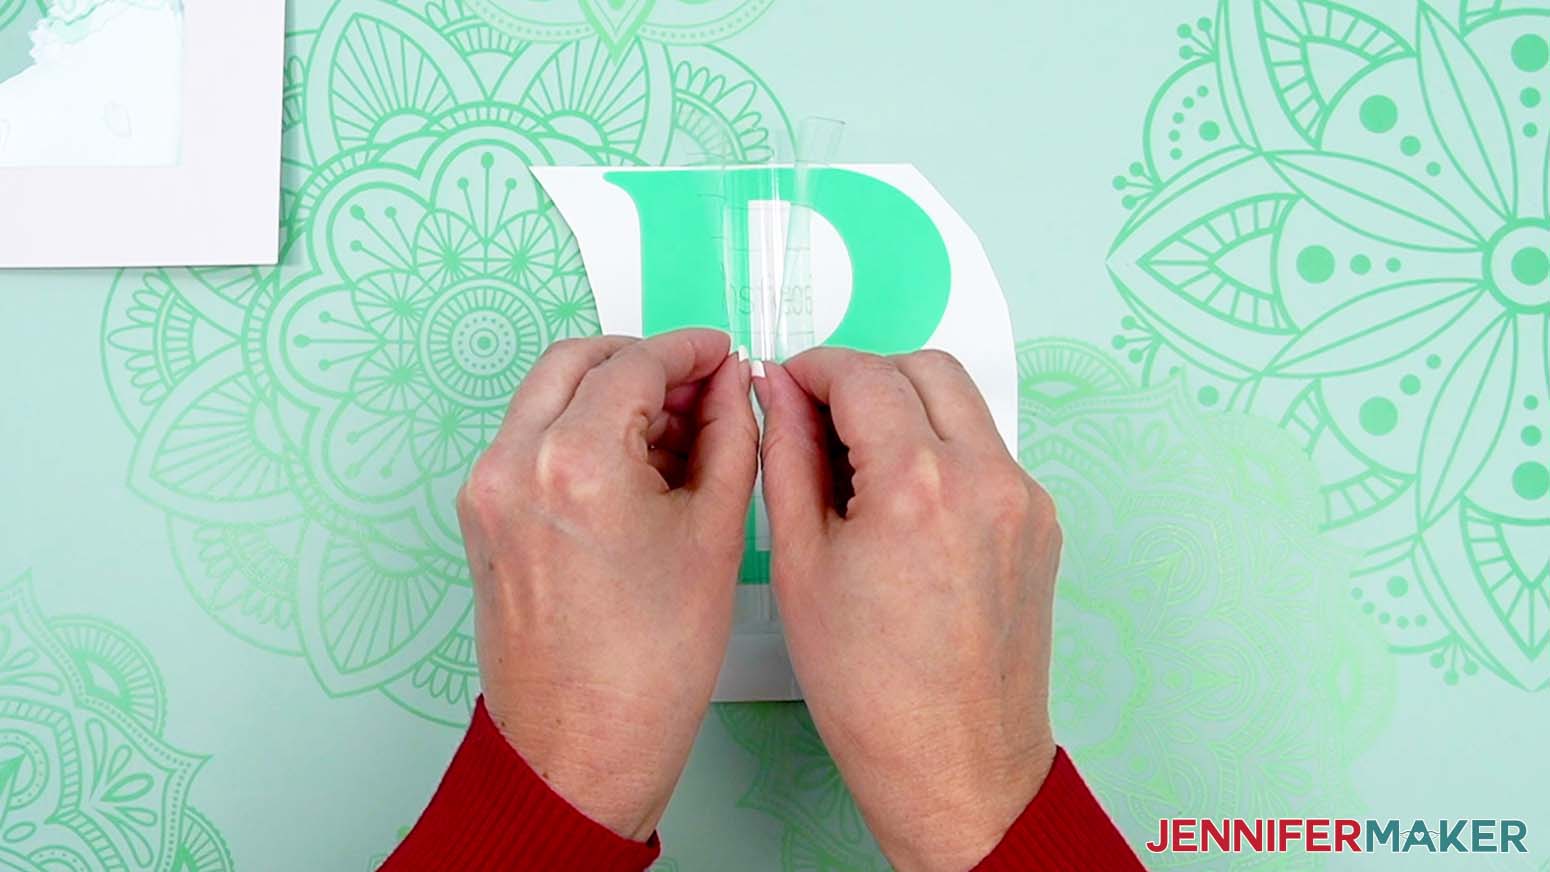
11. Gently bend the vinyl letter in half in one direction, then make a small crease in the center edges on the top and bottom of the transfer tape (do not crease the vinyl itself).
12. Gently bend the vinyl letter in half in the other direction, then make small creases in both center edges of the transfer tape (do not crease the vinyl itself).
13. Place the kraft board and acetate square on a machine mat or a self-healing cutting mat with ruler measurements.
14. Line up the rulers so 9” x 9” is visible through the opening.
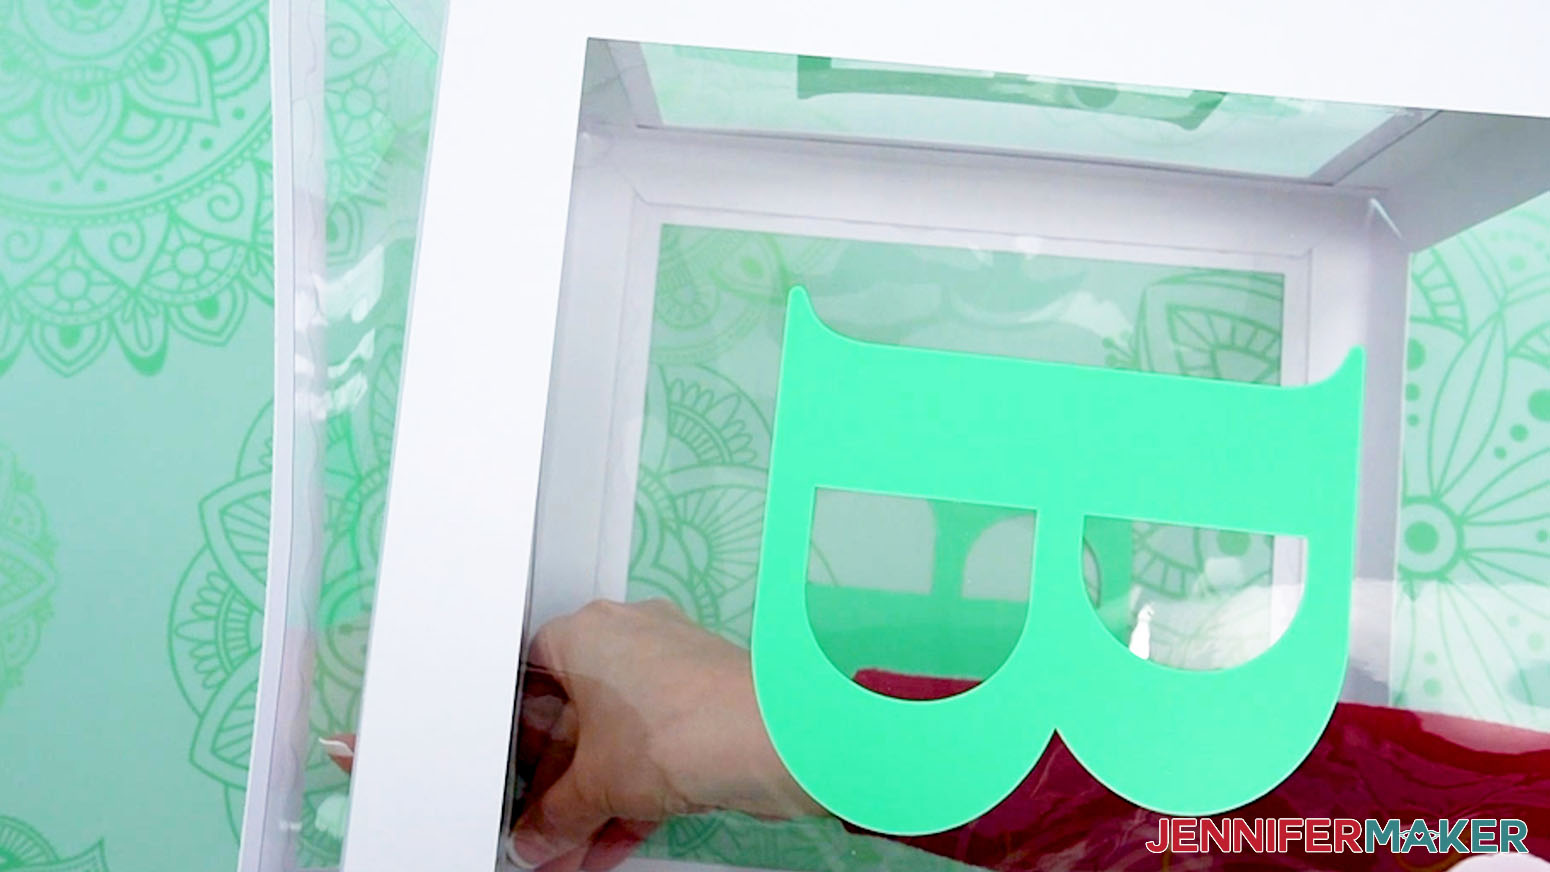
15. Place the letter (still on the transfer tape) onto the acetate in the opening of the square and use the rulers and creases (or small cuts) to position the letter in the center of the square, at the 4.5” mark.
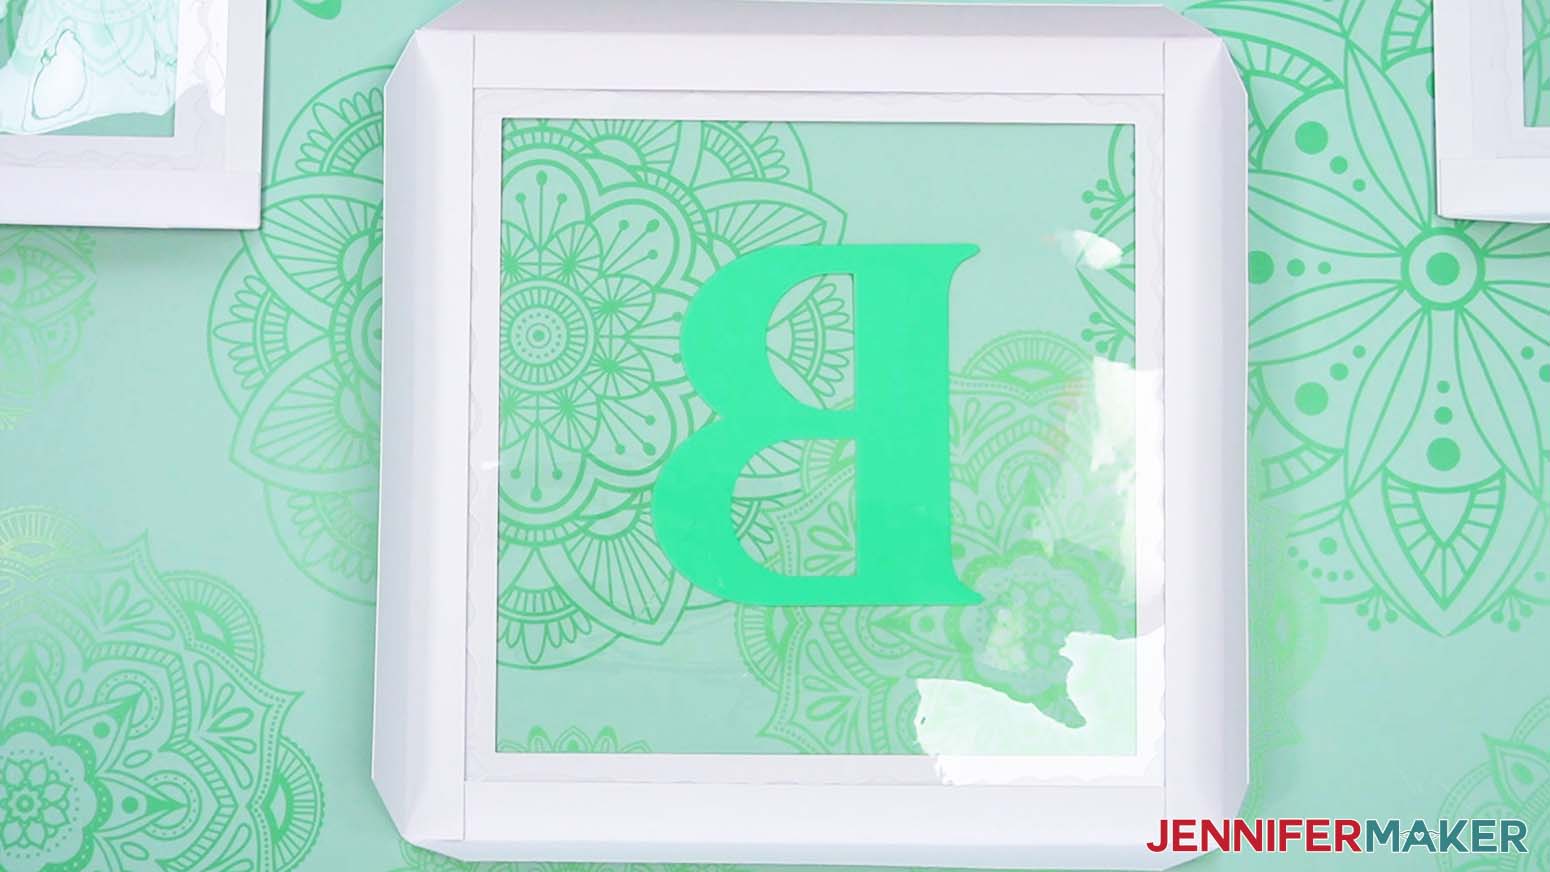
16. Set the letter aside and clean the acetate with some isopropyl alcohol and a lint-free cloth or coffee filter. Let it dry.
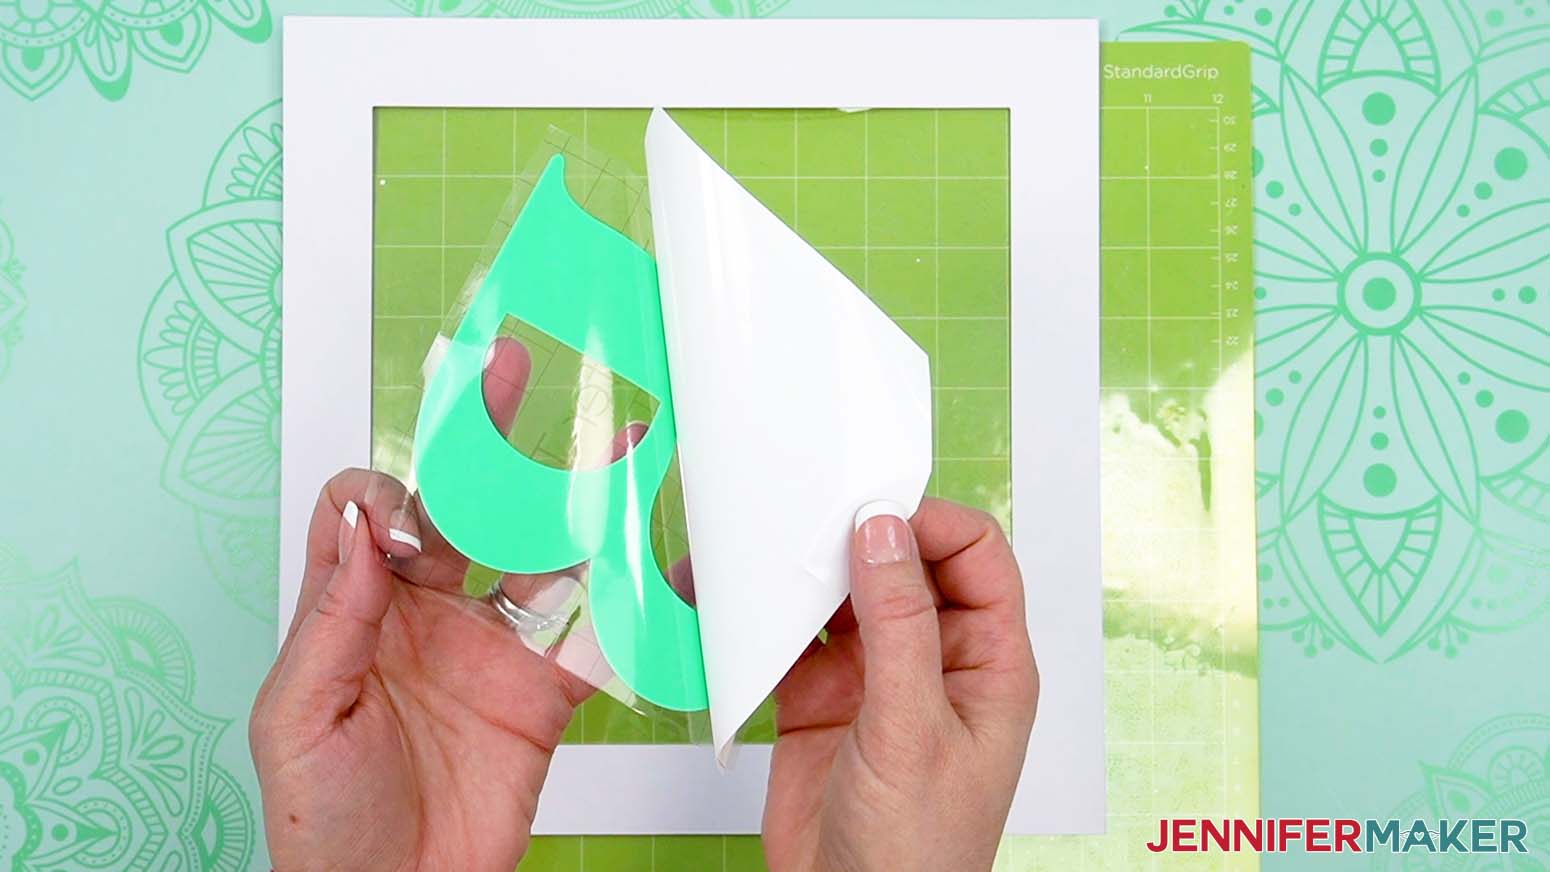
17. To apply the letter to the acetate, remove the backer from the vinyl letter decal. If the vinyl does not stick to the transfer tape, lay it back down and burnish it again.
18. Use the taco method to place the center of your decal onto the acetate in the center of the square opening.
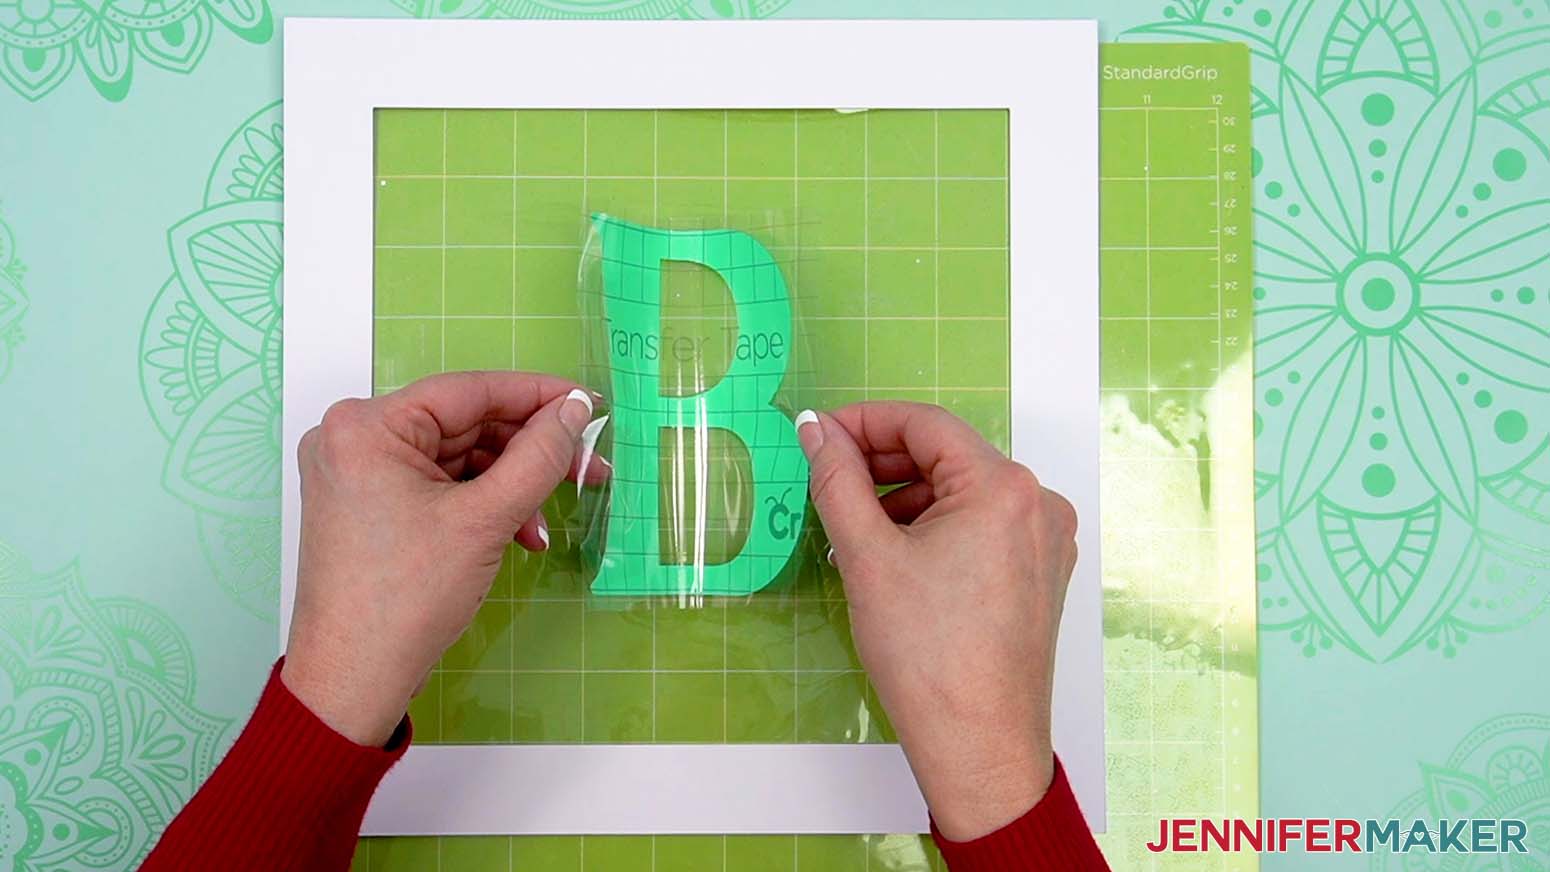
19. Using your finger, rub from the center of the vinyl outward, tacking the vinyl into place. Take your time and use a scraper to press out as many bubbles as possible.
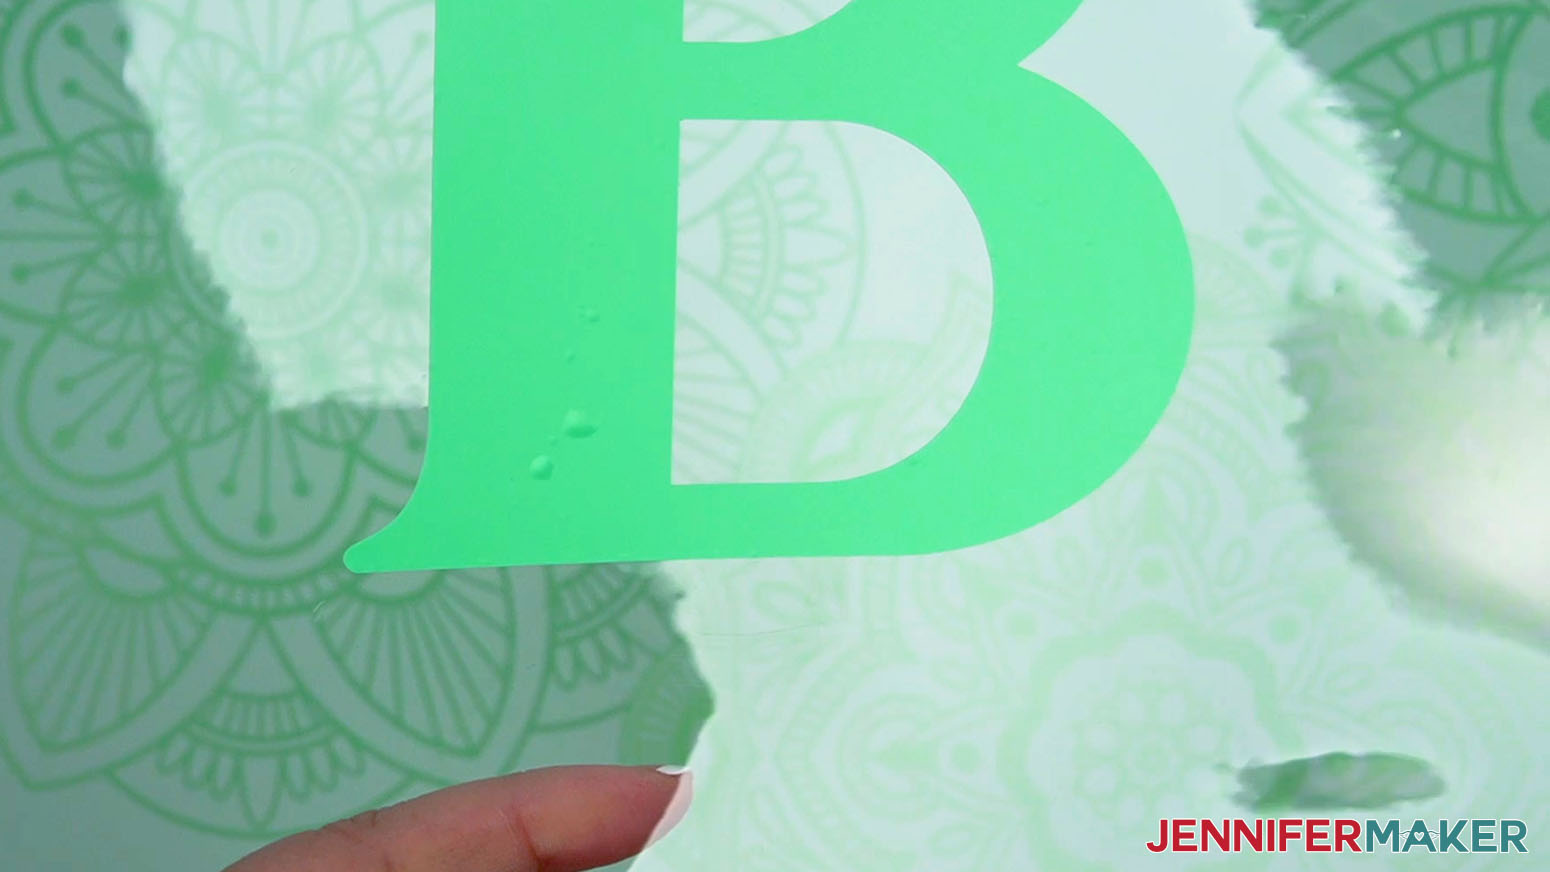
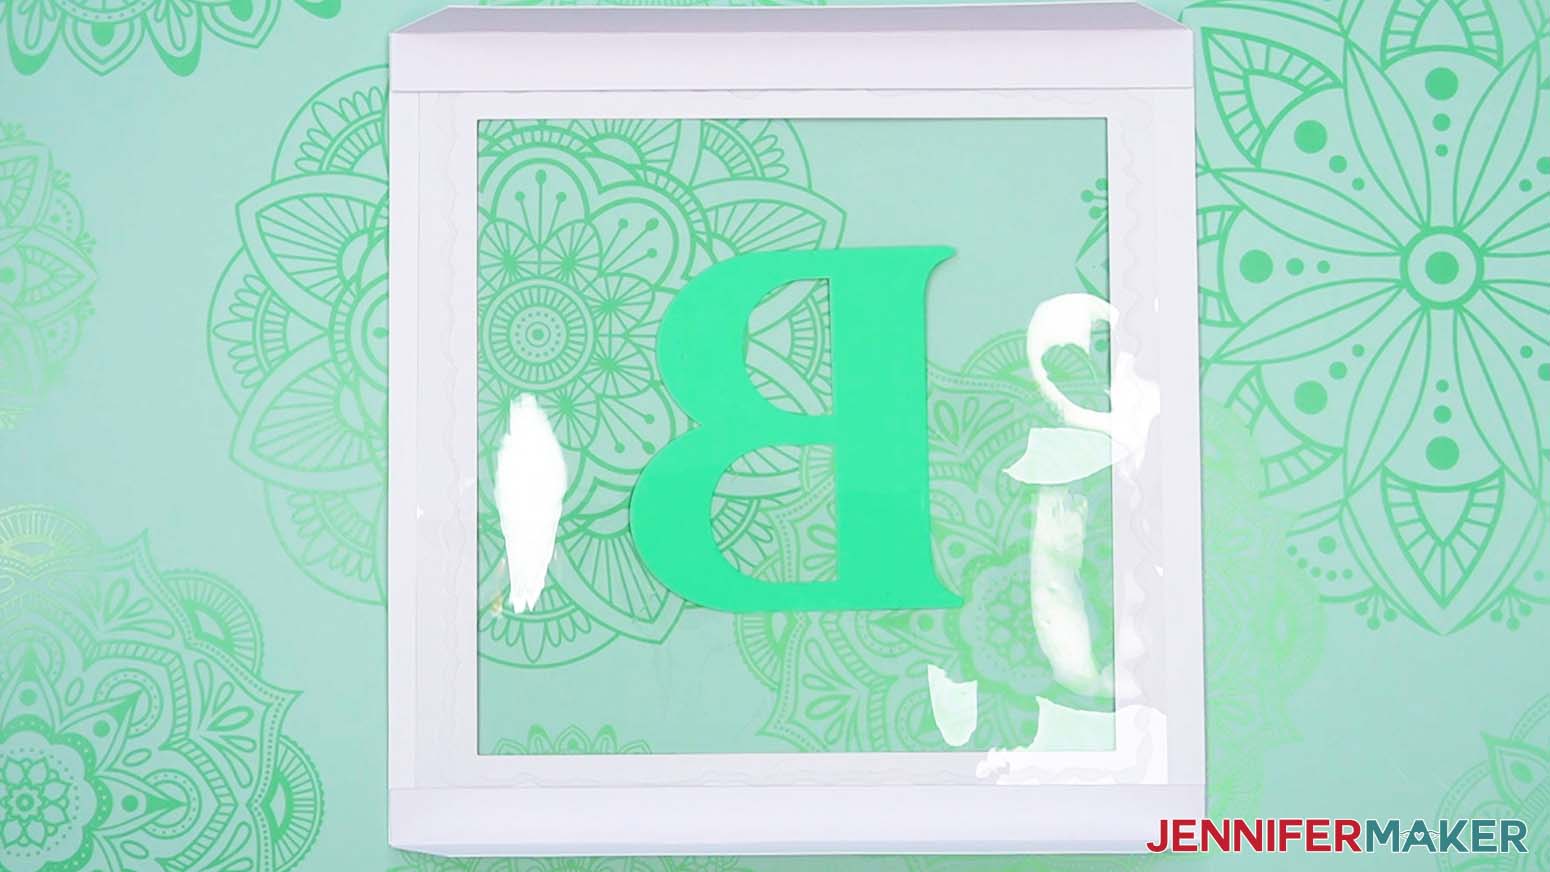
20. Gently remove the transfer tape, leaving the vinyl on the acetate.
TIP: Use your scraper tool to gently smooth out any bubbles that were missed, working from the center outward. If there are stubborn bubbles that you can’t push out, poke a tiny hole with your weeding tool to let the air out, then smooth it down with your scraper.
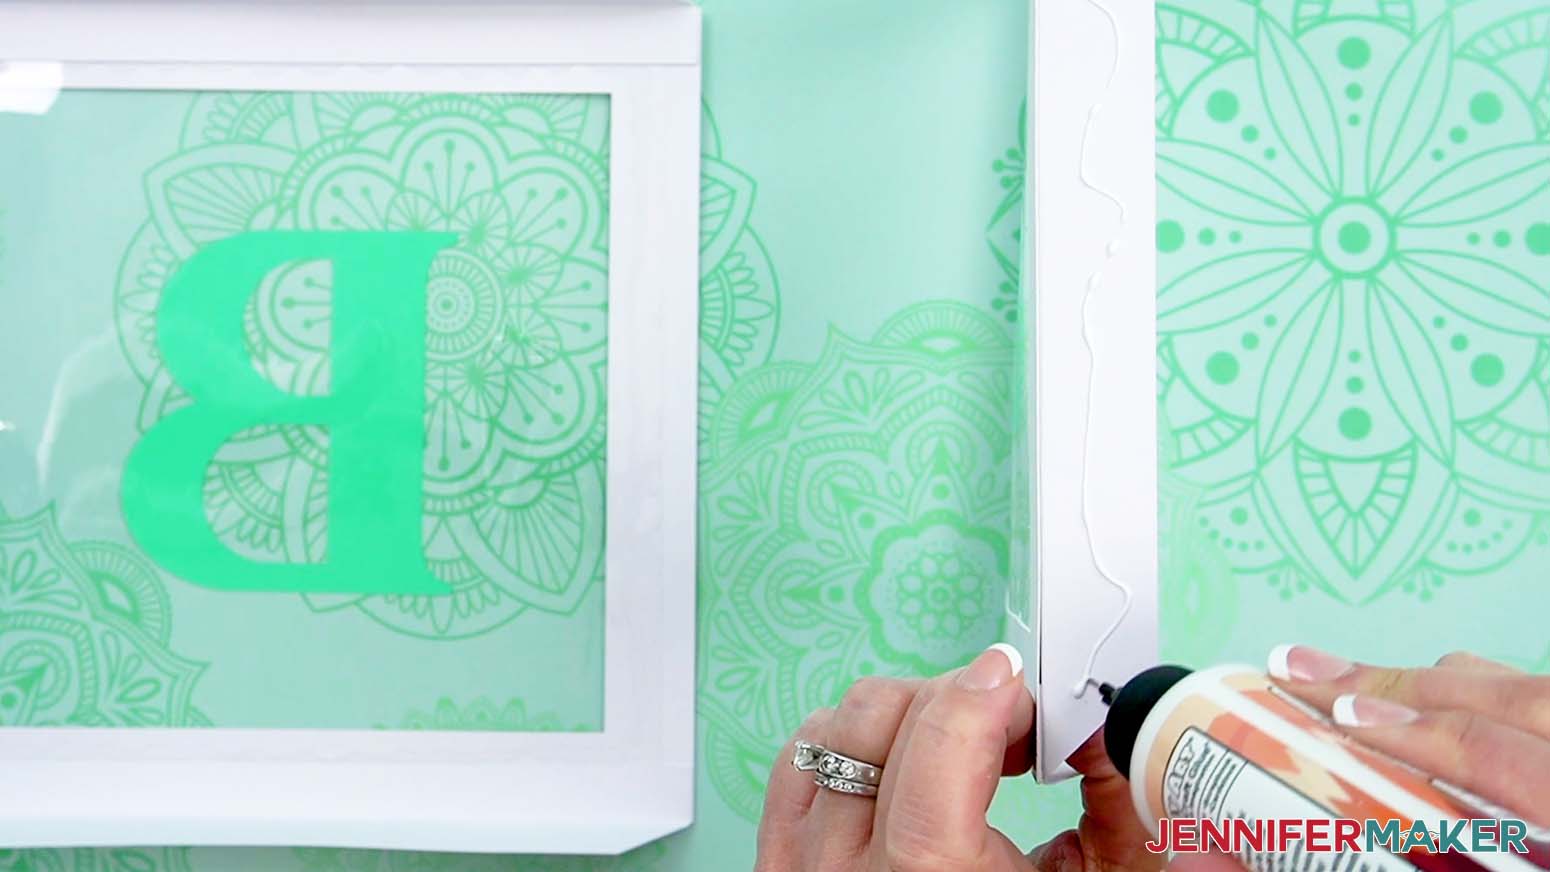
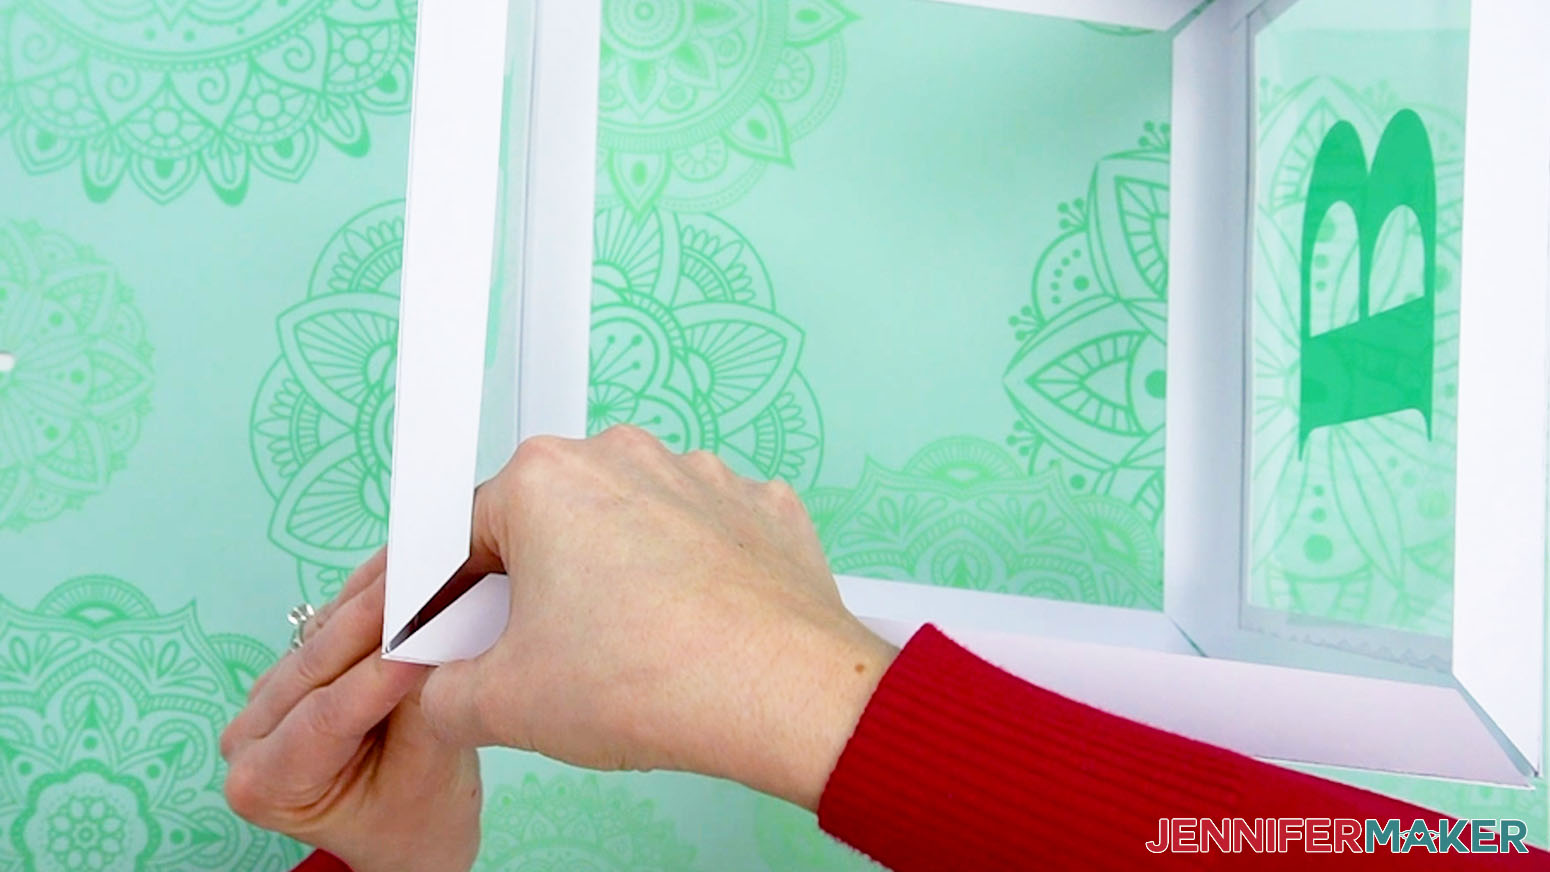
21. Gather the tab pieces.
22. Use your scraper tool to help fold each tab at a 90 degree angle on its scored or dashed cut line.
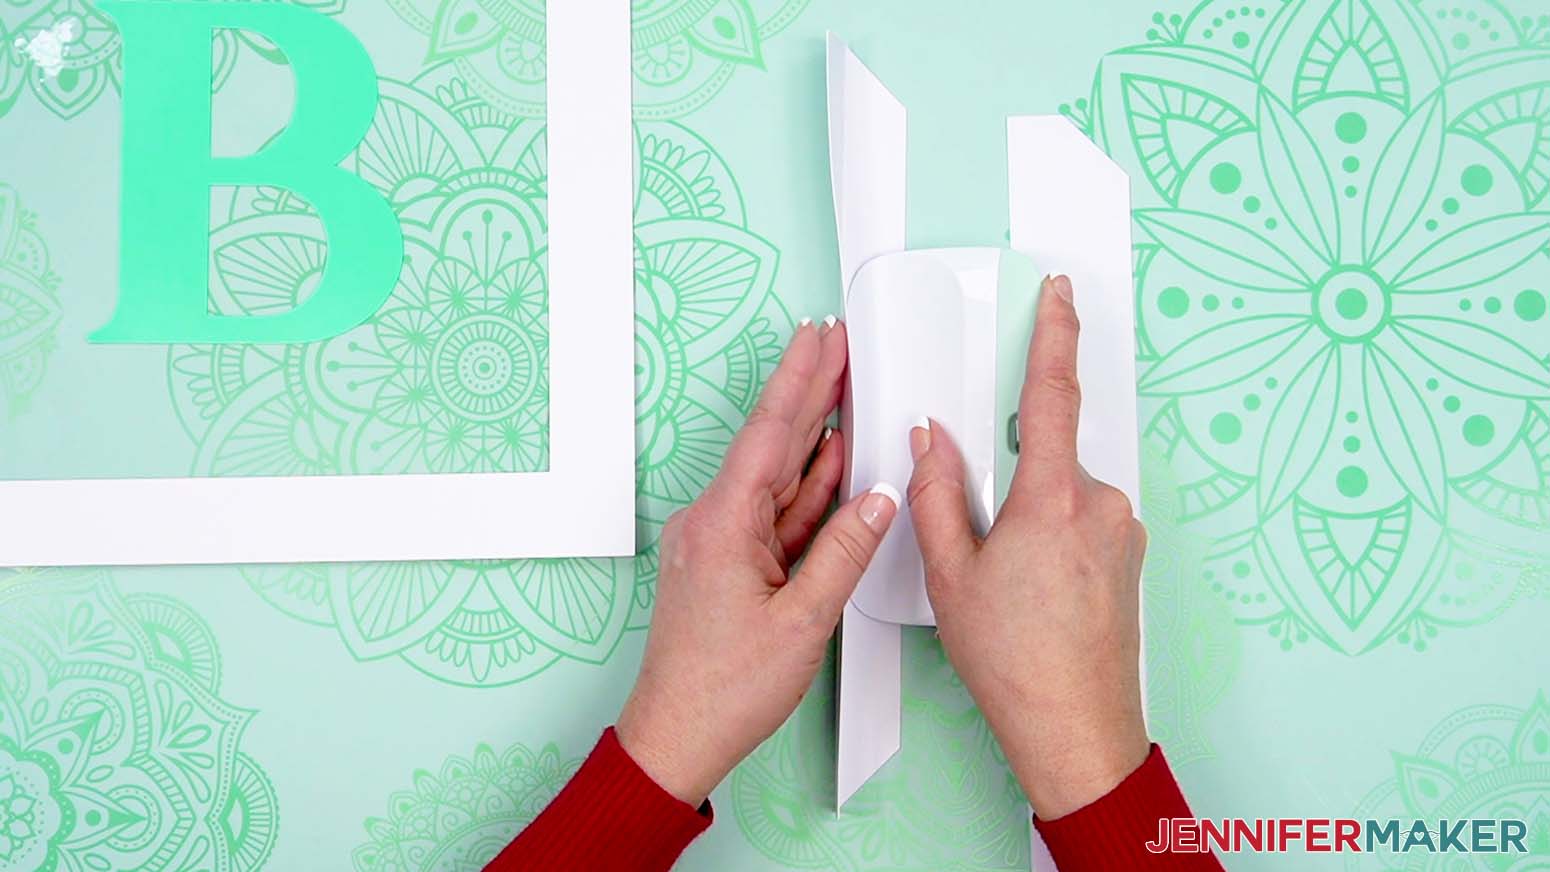
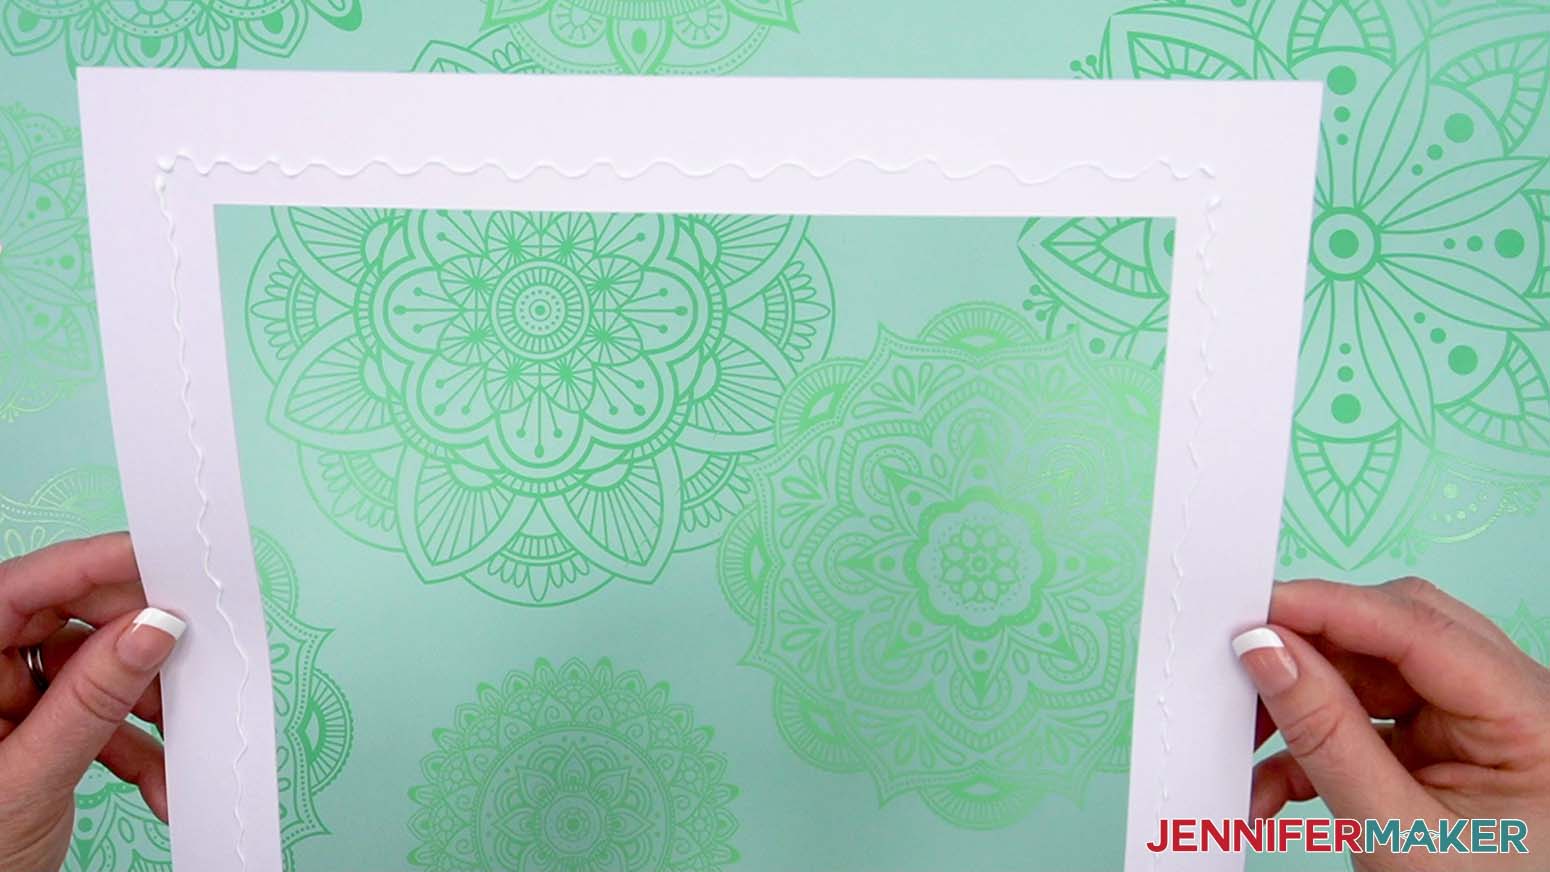
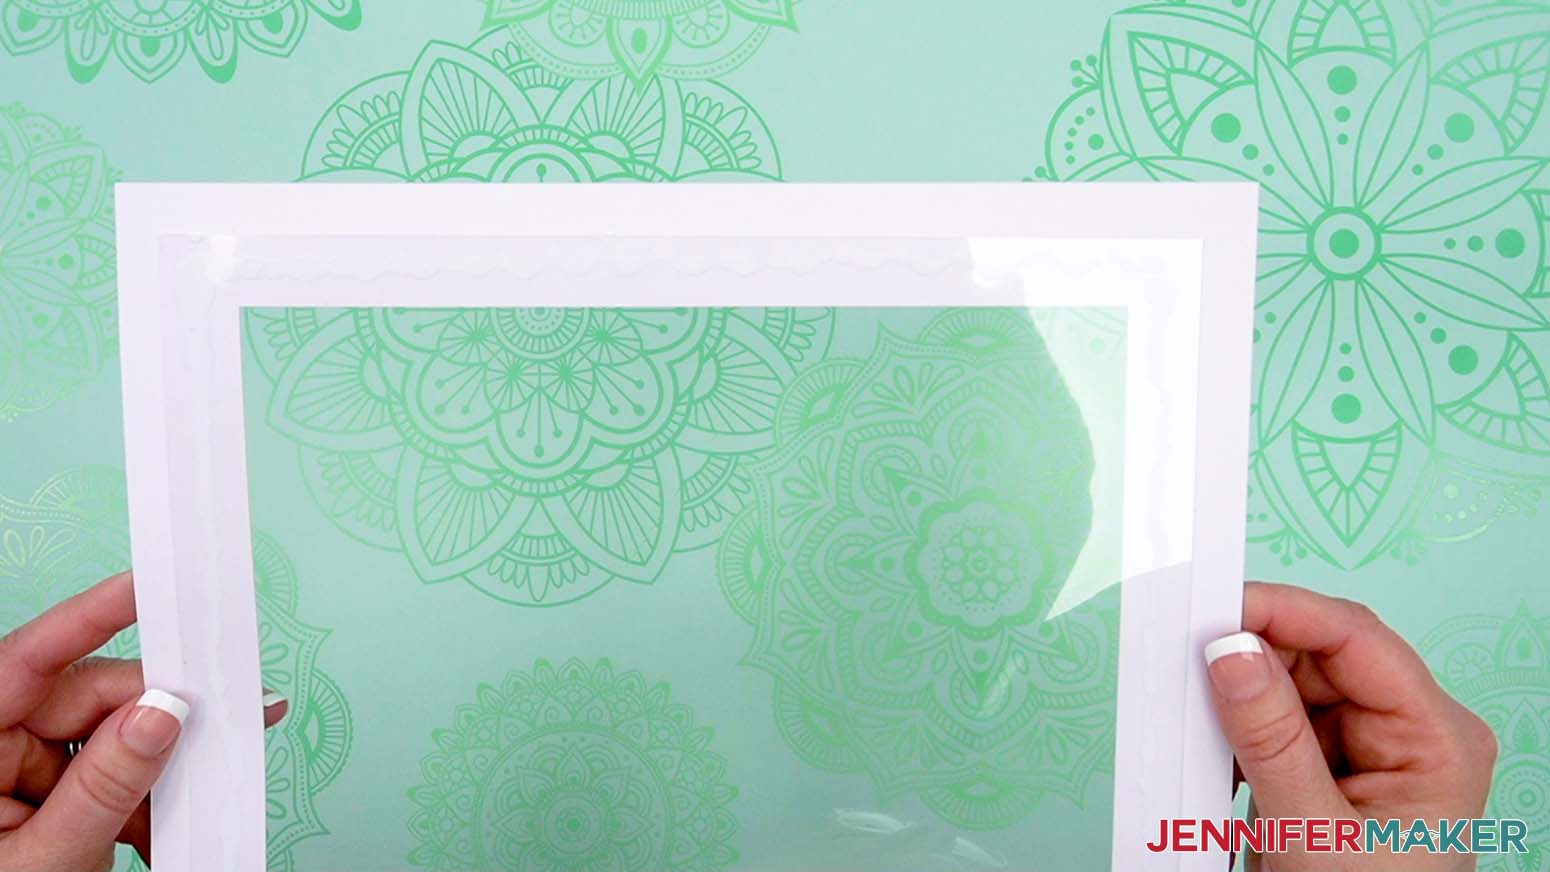
23. Gather the four box panels that will make up the sides (not top and bottom) of the box and turn them face down. Two of them will have four tabs attached to each of the four edges, and two of them will have two tabs attached to the top and bottom edges only.
NOTE: The panels with four tabs will be opposite one another, and the panels with two tabs will be opposite one another.
24. To apply a tab to a box panel, with one folded tab pointing up like an arrow, apply craft glue along the entire length of the long rectangular shaped side.
25. Adhere the tab along one edge of a panel, making sure it’s as flush as possible along the long edge and not hanging off either of the short ends.
NOTE: The tabs are slightly shorter than the panel to help make sure no part of the tabs hangs off either end.
26. Repeat steps 24-25 to attach tabs to the three remaining edges.
27. Repeat steps 24-26 to attach four tabs to one of the other box panels.
28. Follow steps 24-25 to attach two tabs to the top and bottom of the remaining two side panels.
29. Grab one panel with four tabs and one panel with two tabs.
30. Place the panel with four tabs face down on your work surface.
TIP: Make sure your letters are pointing in the same direction as one another throughout the assembly.
31. Apply craft glue to the outside of the angled tab on the left.
32. Take the panel with two tabs and adhere the glued tab on the first panel to the inside right of the two-tab panel. Be sure the edges are as flush as possible. Hold in place until the glue fully sets.
33. Take the next panel (which should have four tabs) and apply craft glue to the outside of the angled tab on the left.
34. Adhere the glued tab to the inside of the second panel on the other side, making sure the edges are flush. Hold in place until the glue fully sets.
35. Apply craft glue to the outside of the angled tab on the other side of the four-tab panel.
36. Adhere the glued tab to the inside of the two-tab panel and make sure the edges are flush. Hold in place until the glue fully sets.
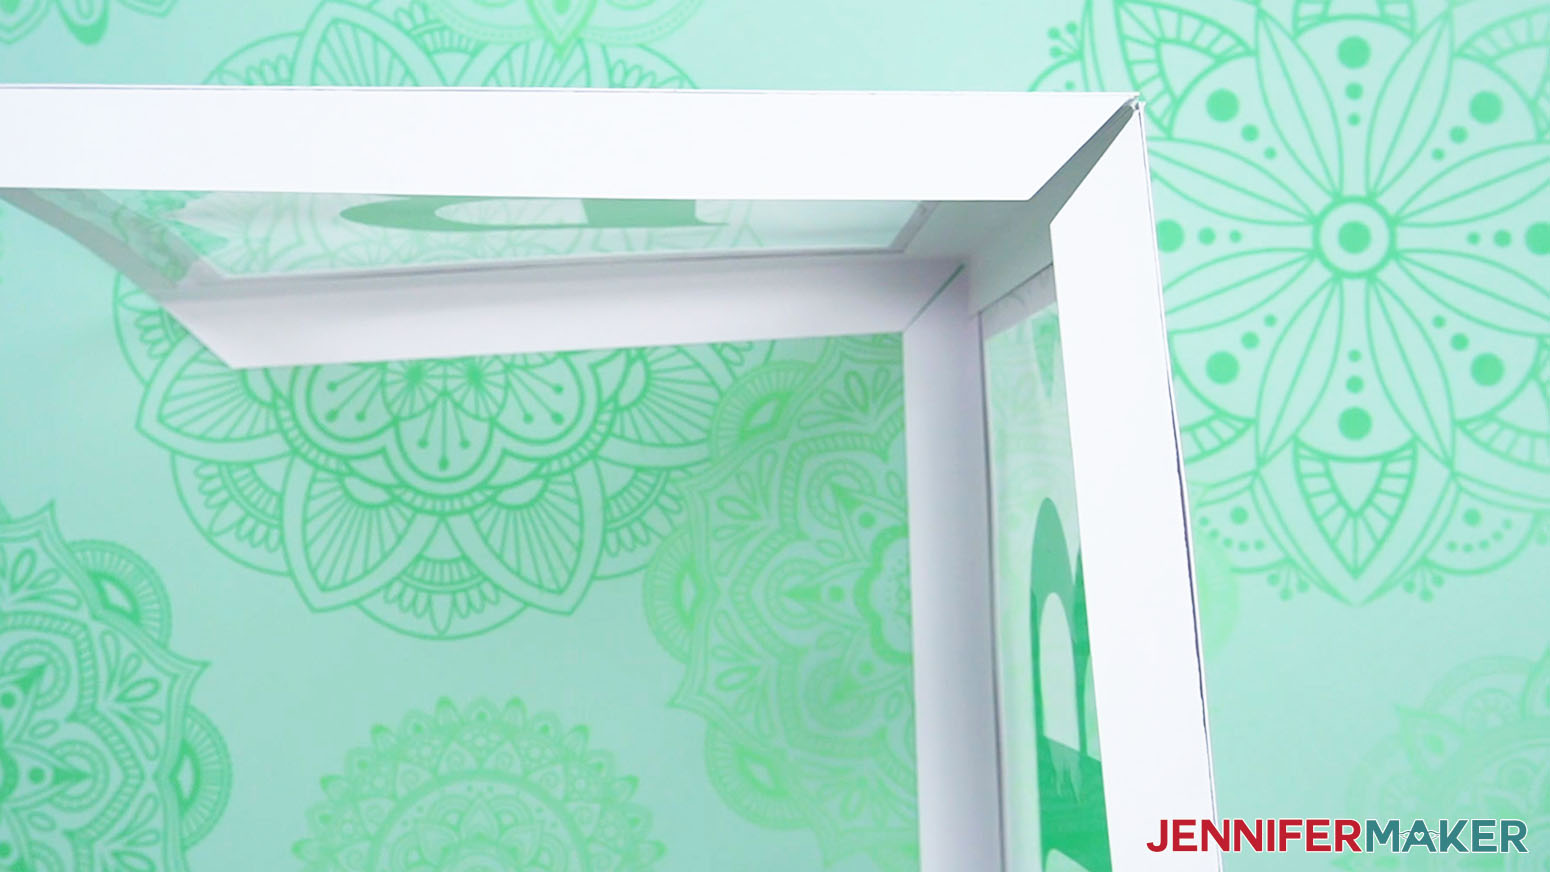
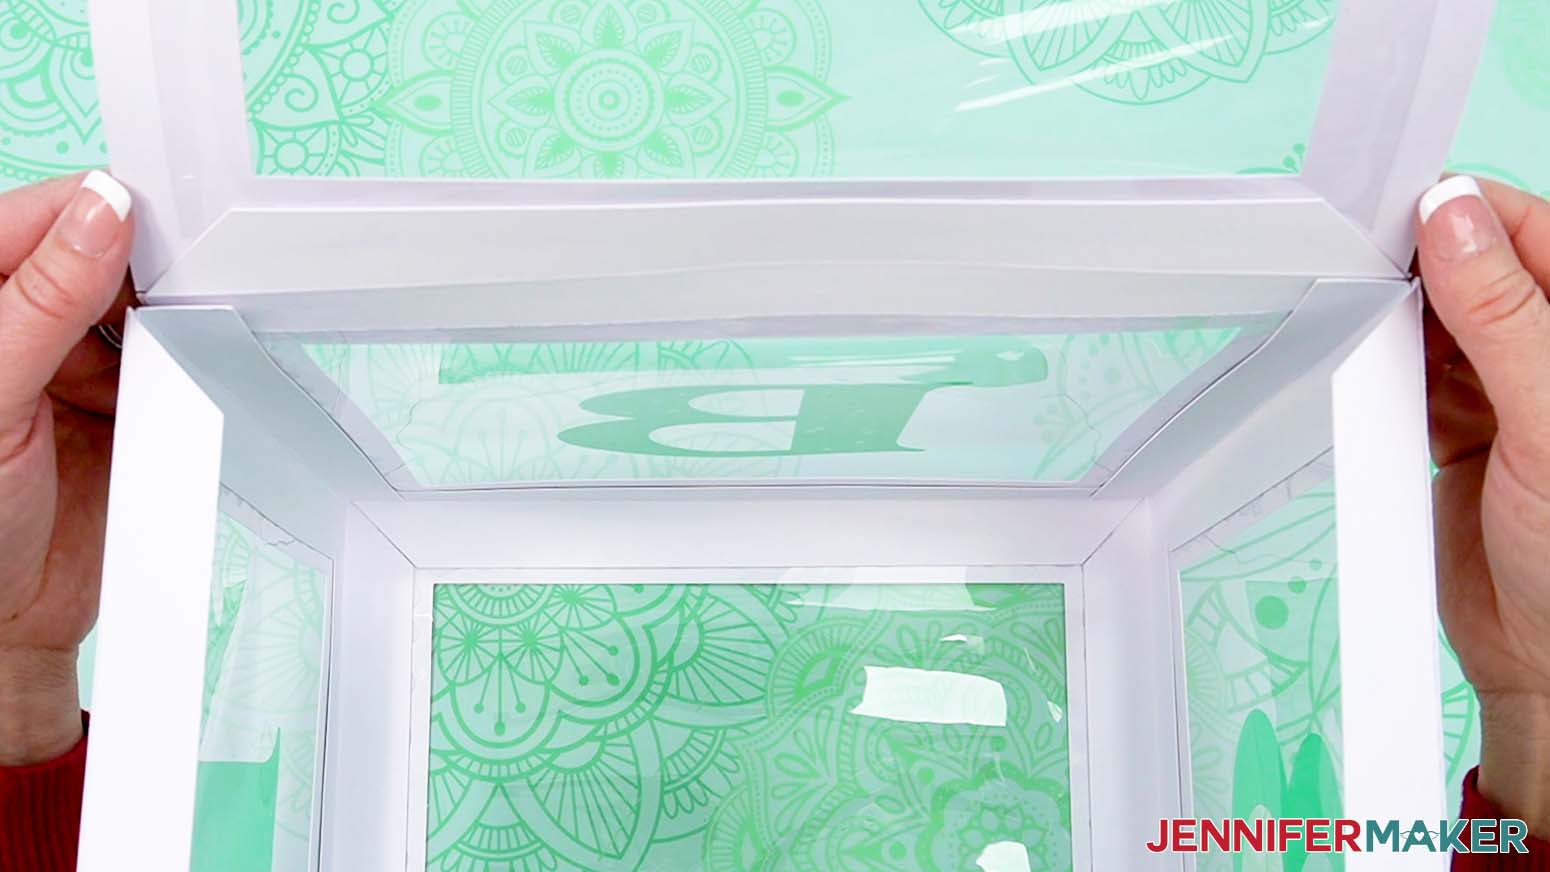
37. Your four connected panels should form a box shape with no top or bottom yet.
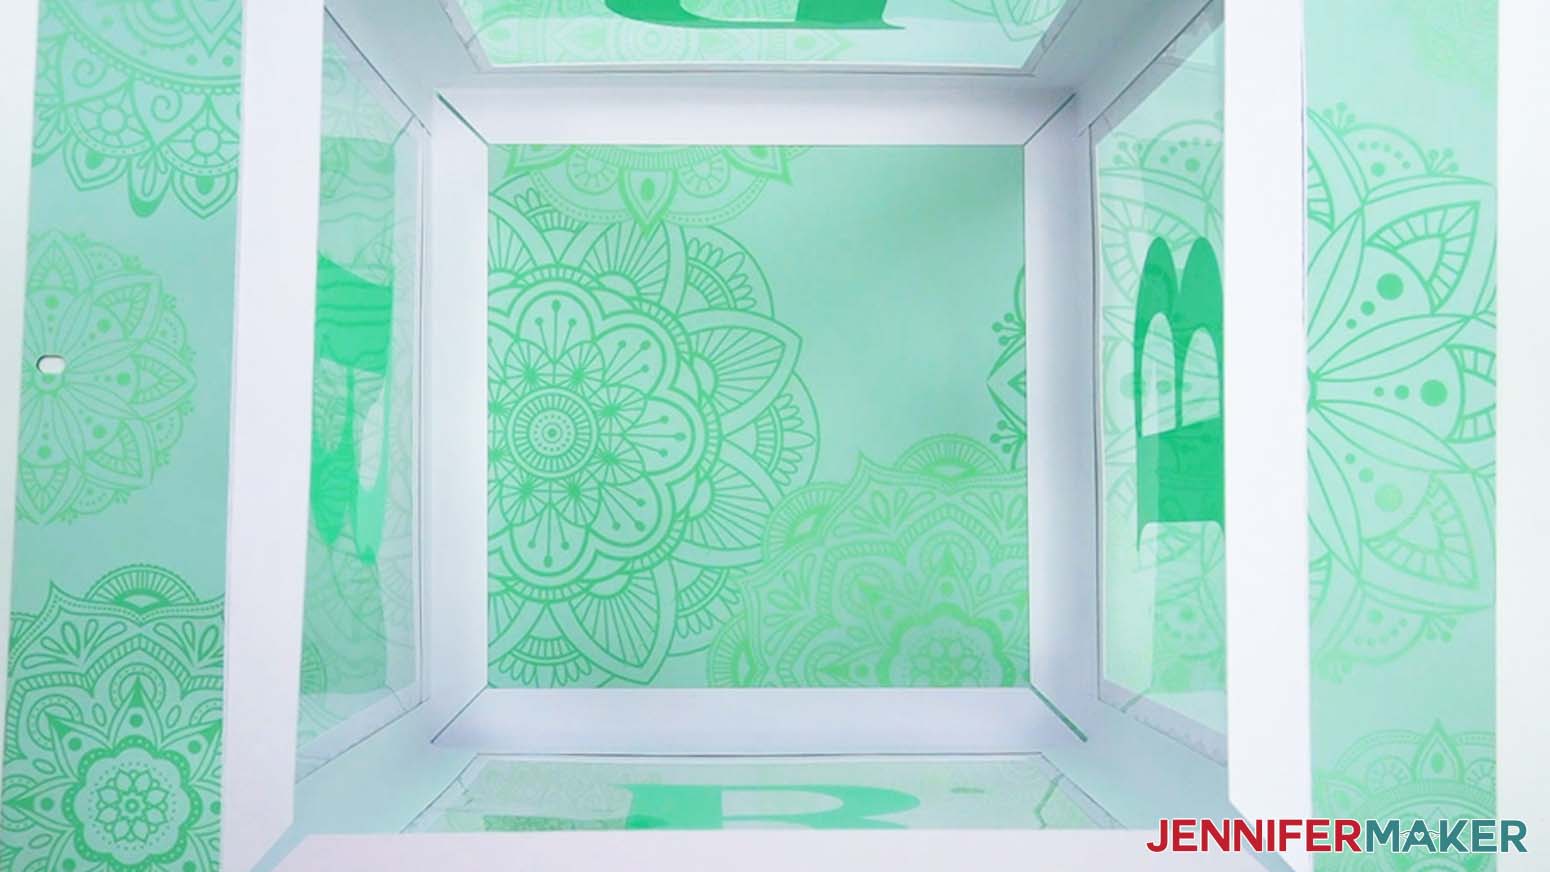
38. Turn the assembled box on its side.
39. Find the blank panel that will be the bottom of the box.
40. Apply craft glue to one of the four outer angled tabs on the bottom part of the assembled box.
41. Push the blank panel onto the glued tab, making sure the edges are flush. Reach inside the box to press the glued layers together until they dry.
TIP: If any edges come undone from the pressure of attaching the bottom, use your glue’s precision-tip applicator to add more glue to those areas before pressing them back together.
42. Repeat steps 40-41 for the remaining three bottom tabs, fully attaching the bottom panel to the box.

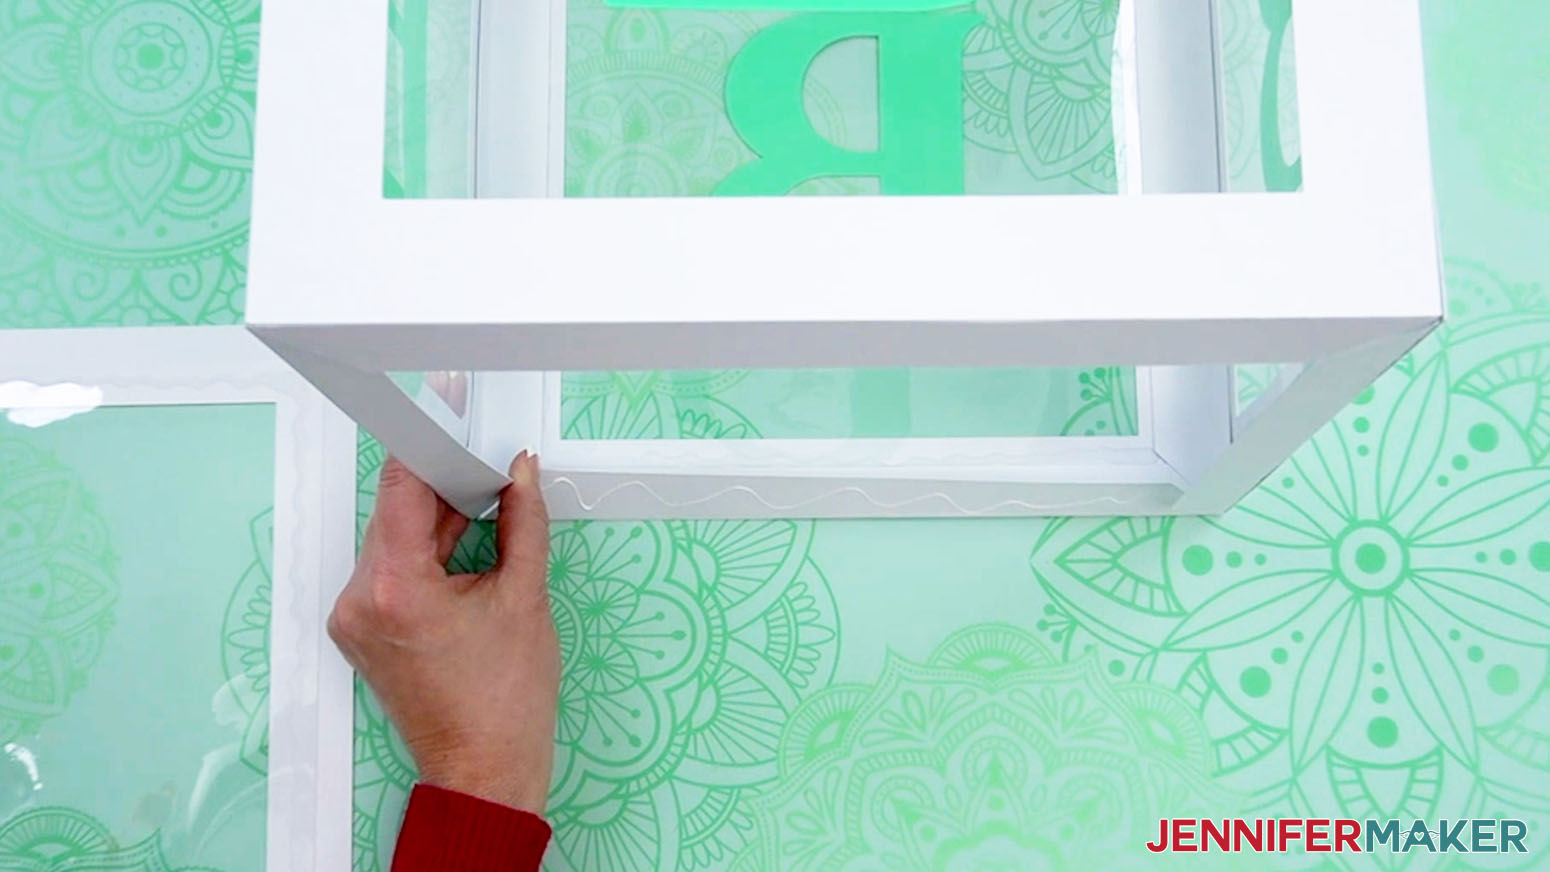
43. Find the panel that will be the top of the box.
44. Apply craft glue to one of the four outer angled tabs on the top part of the assembled box.
45. Push the top panel onto the glued tab, making sure the edges are flush. Reach inside the box to press the glued layers together until they dry. When attached, you’ll have a hinged “lid” to your box.
46. If you want to keep your box empty, skip to step 48.
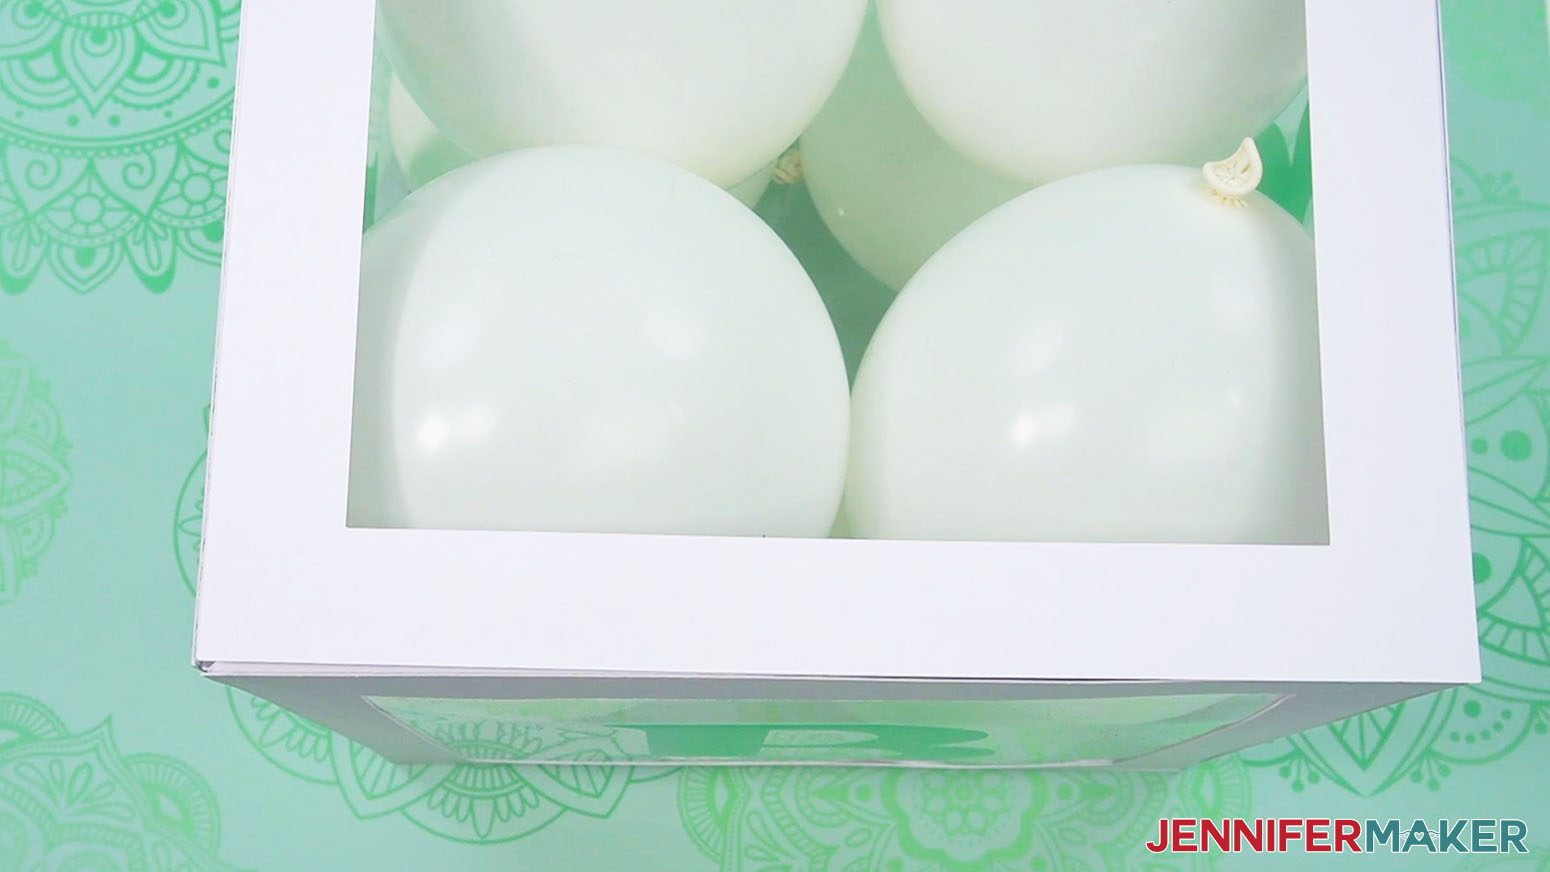
47. If you want to fill your box with balloons, pom poms, or other items, prepare them and insert them now. If you’re using 5” balloons, you’ll be able to fit about eight to ten inside the box.
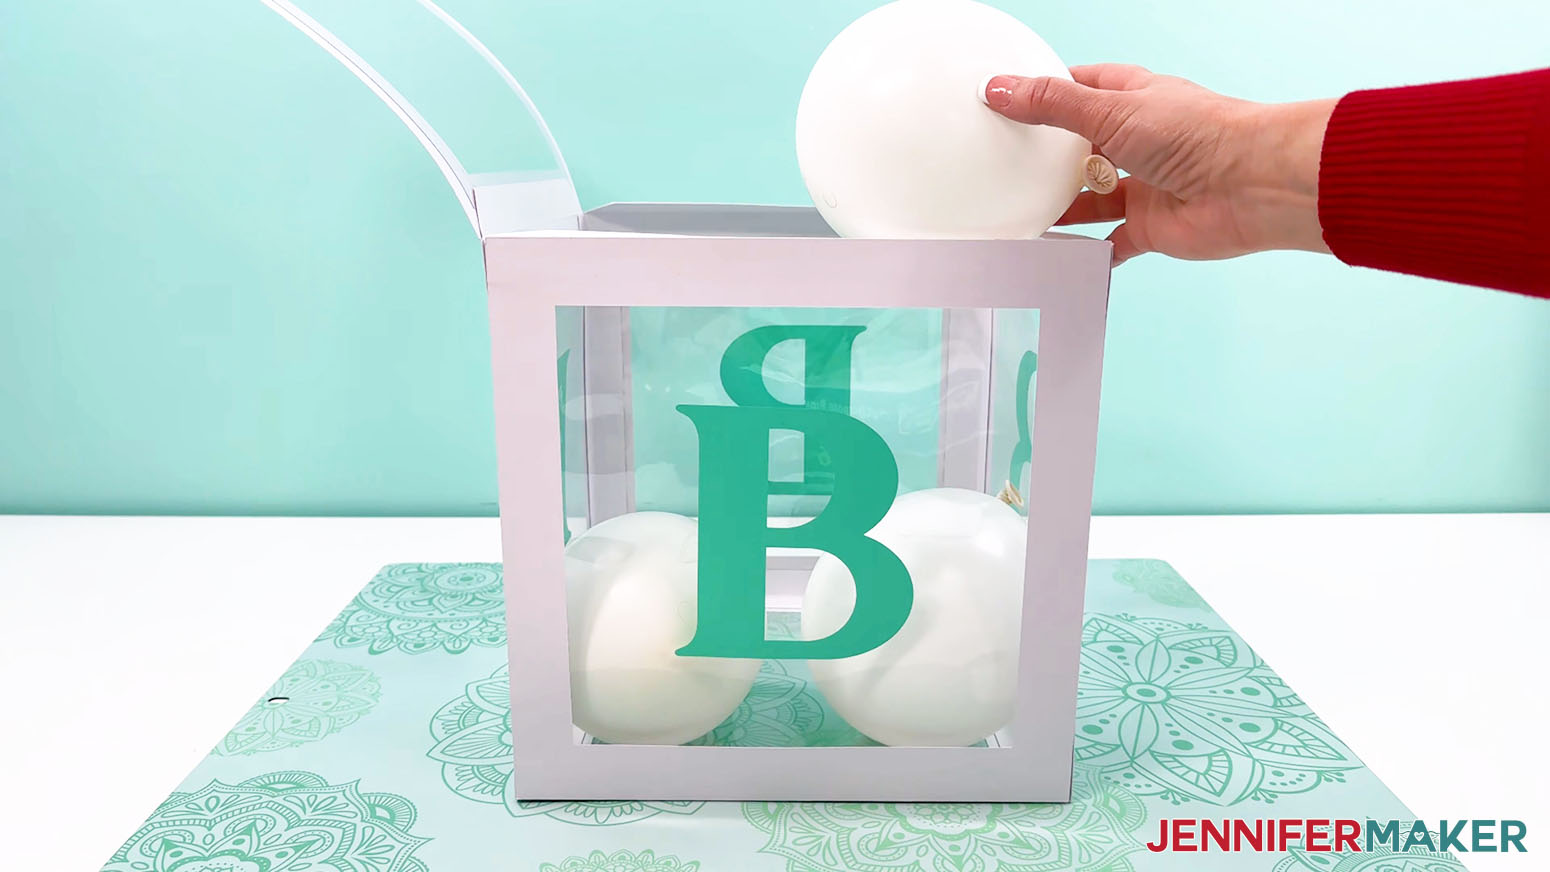
48. Apply craft glue to one of the other three outer angled tabs on the top part of the assembled box.
49. Push the top panel onto the glued tab, making sure the edges are flush. Press the glued layers together until they dry.
50. Repeat steps 48-49 for the remaining two tabs, fully attaching the top panel to the box. Or, to make the box refillable and reusable - after filling the box with balloons, apply a piece of double-sided tape or a glue dot to the remaining three tabs before fully attaching the top panel of the box.
51. Repeat the assembly process for each additional box.
STEP 4: SHOW IT OFF
Here is what my finished Balloon Boxes with Letters look like.
Answers to Your Questions About How to Make Your Own DIY Balloon Boxes with Letters
Q: How do you make a Cricut balloon box?
A: Making a balloon box for a special celebration with your Cricut is easy! Just check my materials list in this post to learn what supplies and tools you need, and use my tutorial to learn how to prepare, cut, decorate, and put your box together. You’re sure to have a memorable event with these larger-than-life decorations!
Q: Can you show me how to make boxes with letters for baby shower?
A: These make amazing baby shower decorations, and can be customized with the baby’s name, sex, or keep your guests guessing by just using the word “BABY” like I did. Just check out my materials list and watch the tutorial to learn how to make your own.
Q: What is the best paper for baby block boxes
A: Choosing the right material is important to make your DIY Balloon Boxes with Letters look their best! I personally love using kraft board for this project. Lightweight cardstock isn’t enough to create rigid sides the boxes need to hold up through your event, or for events to come. Even high-quality cardstock material that’s a bit heavier is usually too thin to hold up over time. However, kraft board is the perfect choice of material for these because it’s durable but can still be cut with a cutting machine like a Cricut.
Q: What size balloons for balloon boxes? How big should you make the balloons?
A: I used 5″ latex balloons for my boxes, and used an air compressor to blow them up to their recommended level of inflation.
Q: How long can balloons stay inflated in a box?
A: Balloons will only stay inflated in the box for about a day, so I highly recommend waiting to fill the box with balloons until just before your birthday party, holiday, shower, or other event.
Q: Should I use Helium or plain air in my balloons for my balloon box?
A: I recommend using plain air in your balloons for your transparent balloon box. It’ll make for MUCH easier filling if the balloons aren’t flying away on you, and once the box is shut you won’t be able to tell if the balloons are floating anyway.
Q: What if I don’t want to use balloons?
A: Good news: You get to fill these with whatever you want! There are various ways to use them, filling them with hollow Christmas ornaments, plush toys, pom pons, tissue paper balls, and other objects. If you’re moving the boxes around after their filled or making a box tower, be sure to opt for very lightweight objects. Otherwise, your boxes could become smooshed, or the bottoms may even fall out. If you size the boxes down, you can even use a Cricut Joy to make them tiny enough to hold small treats and candy!
Get my free SVG files to make a DIY Balloon Boxes with Letters!
I’d love to see YOUR DIY balloon boxes with letters! Please share a photo in our Facebook group or on social media and tag me with #jennifermaker.
Love,

Want to remember this? Save this tutorial on How to Make DIY Letter Boxes to your favorite Pinterest Board!