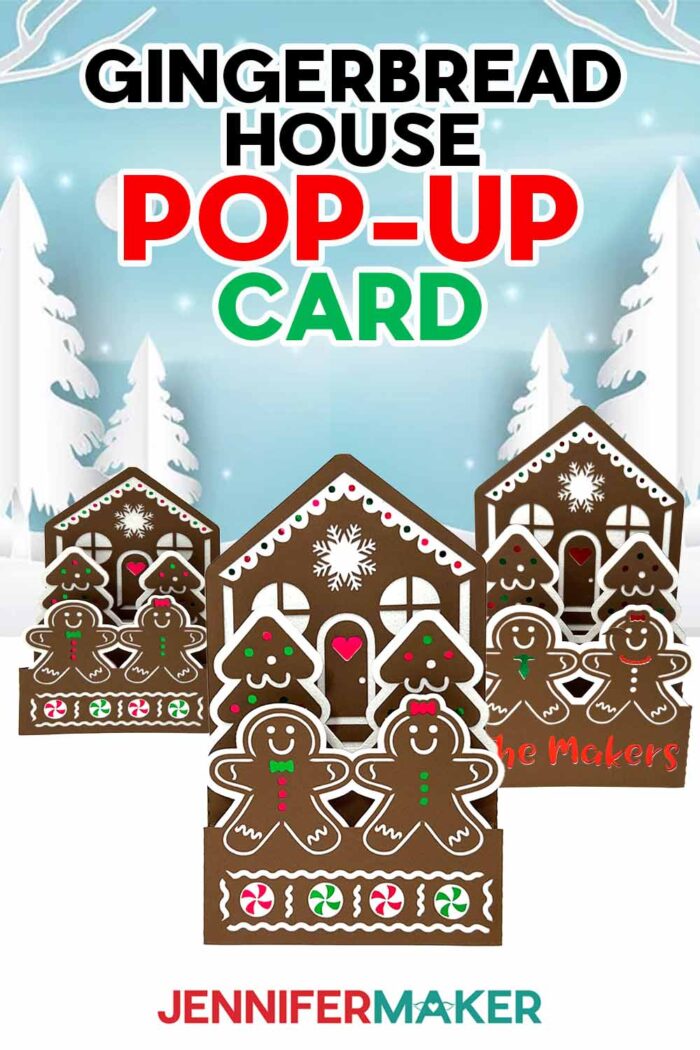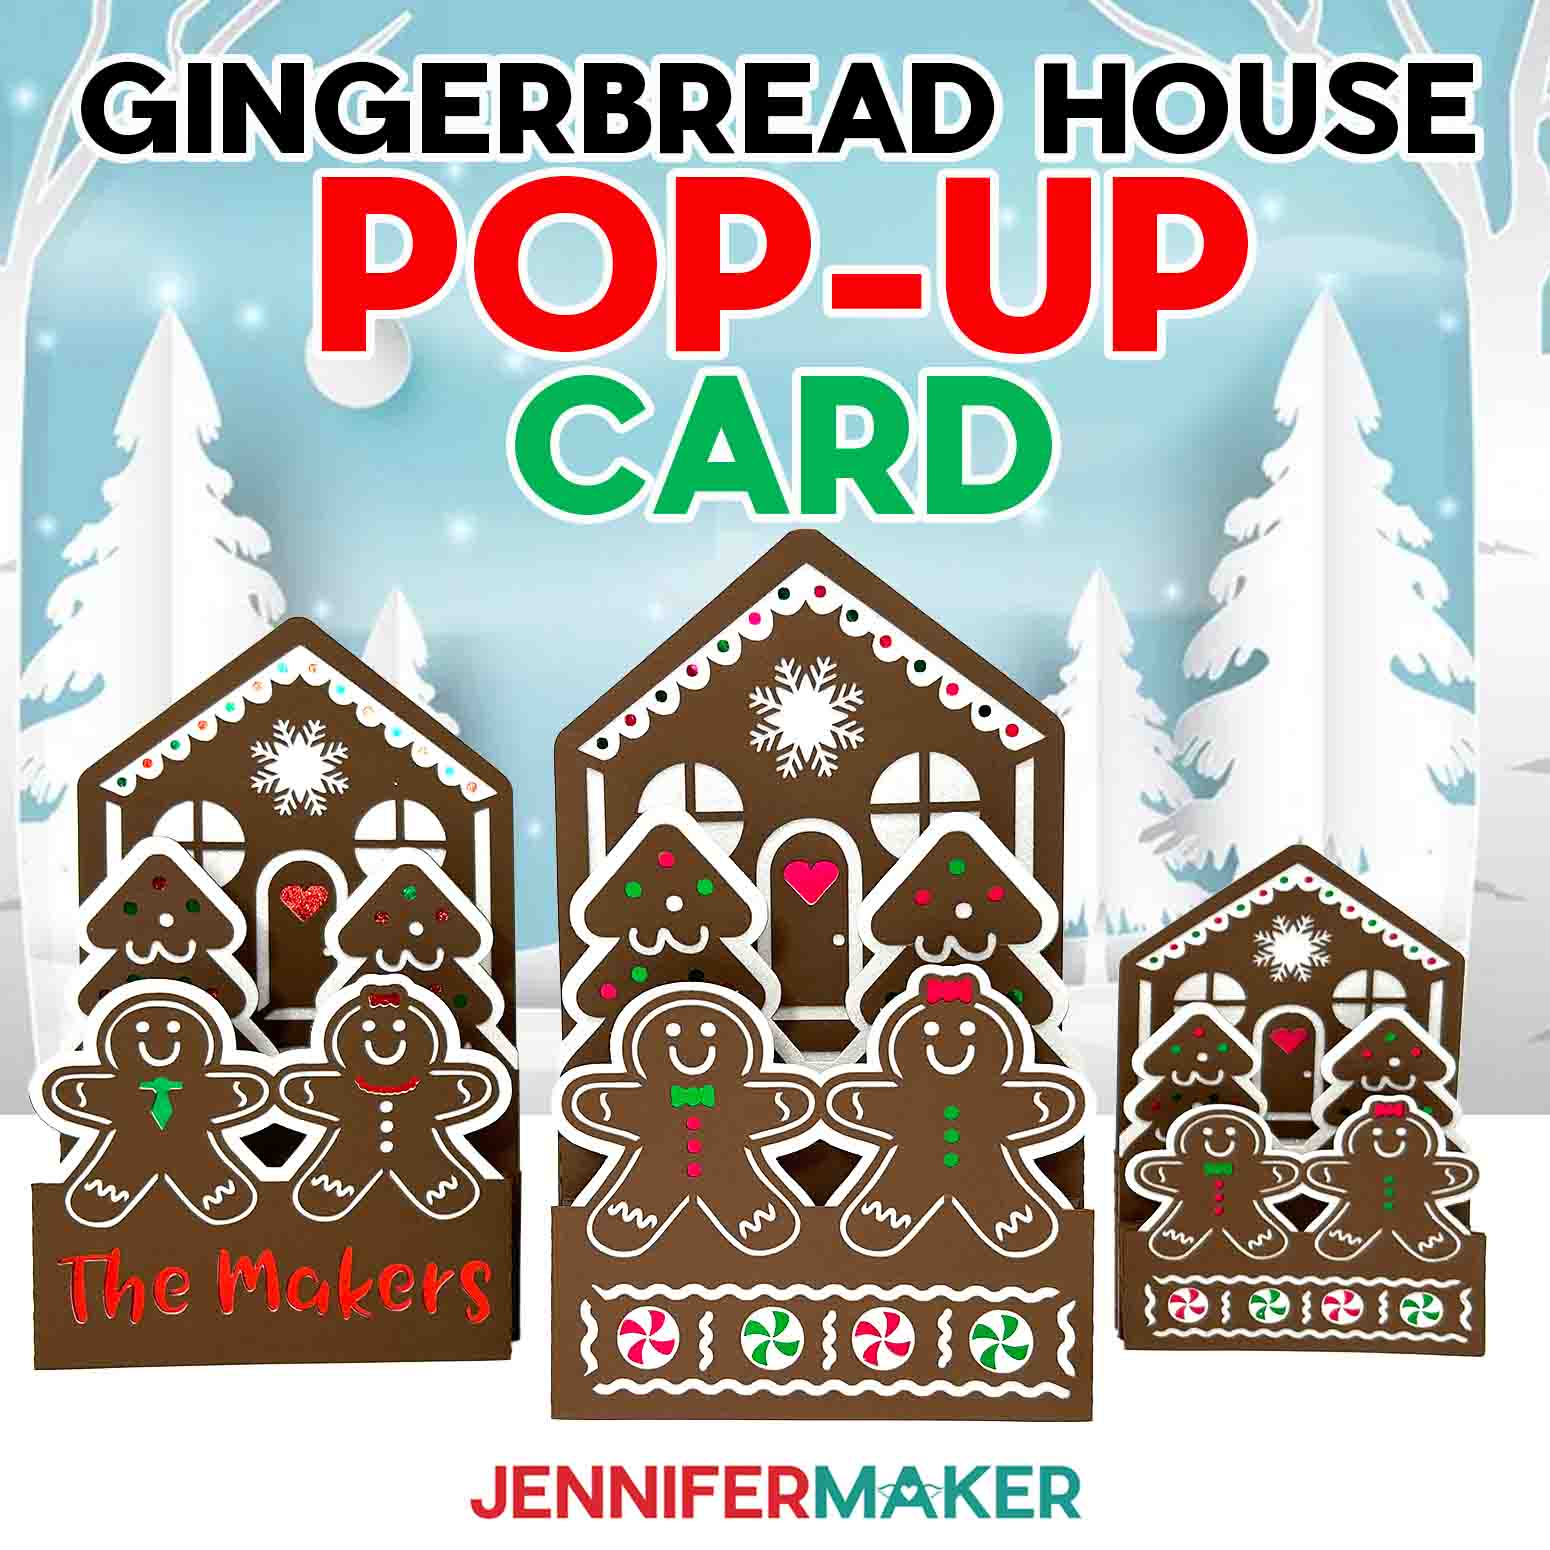
Learn how to make a festive gingerbread house pop-up card with colorful cardstock!
The first time I tried to build a real gingerbread house, it ended in a sugar-covered disaster. I had grand plans of peppermint shingles and gumdrop-lined paths, but the frosting wouldn’t stick, the roof kept collapsing, and someone (Greg!) kept sneaking candy off the walls. It was fun, festive, and (let’s be honest) a little bit chaotic. That memory makes me smile every holiday season, but it also inspired me to make a version of a gingerbread house that’s just as charming … and infinitely more stable: a gingerbread house pop-up card that delights, without the mess!
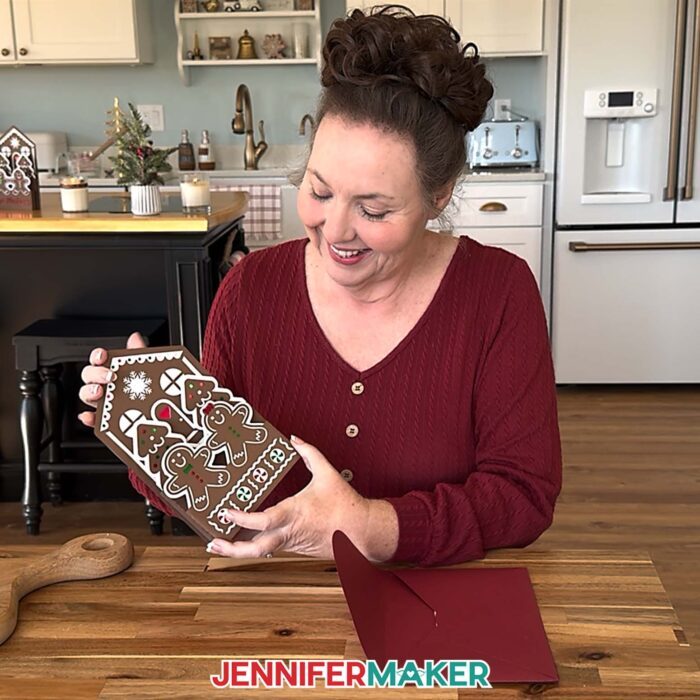
See the full step-by-step video tutorial on how to make a gingerbread house pop-up card:

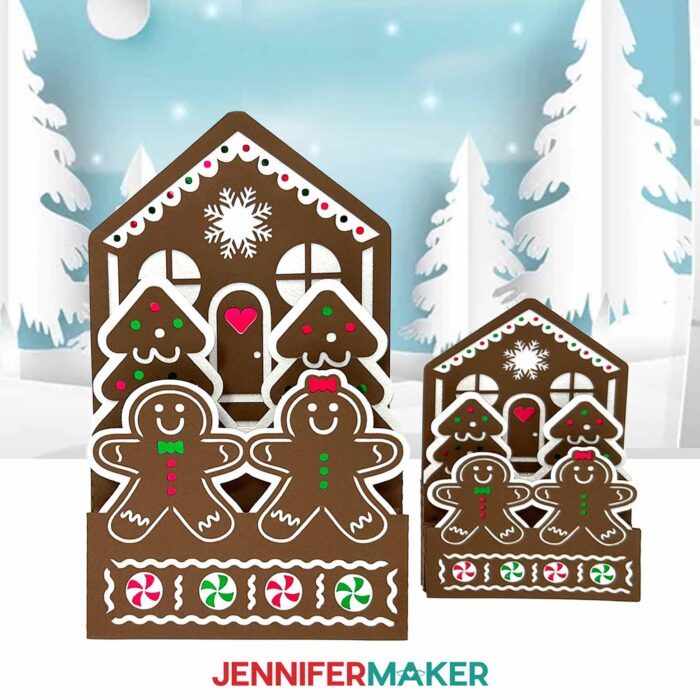
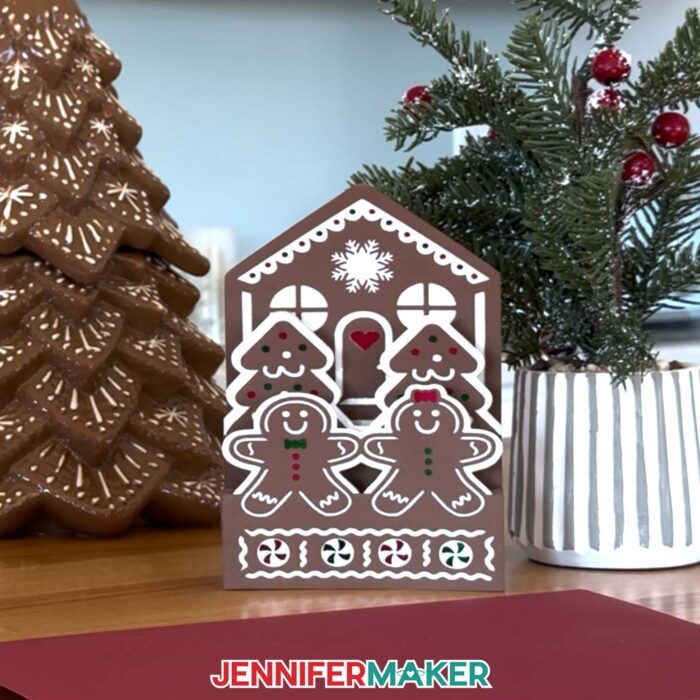
This project has all the cozy, colorful charm of a gingerbread house, but without the falling candy canes, sticky frosting, and ill-timed sugar crashes. Instead, this gingerbread house pop-up card folds flat for easy mailing and opens with delightful bounce thanks to a clever spring-style fold.
I designed it to be both festive and functional, and it’s perfect for giving a handmade Christmas card that stands out from traditional flat designs.

To make this project, all you need is cardstock in your favorite holiday colors, craft glue, and a cutting machine, though you can also cut it by hand with the PDF version if you prefer. I used a combination of brown, white, green, and red cardstock for a traditional Christmas palette, but you can easily make it your own. Try a frosty blue and silver combination for a wintry theme, or use a favorite color combo for a personal touch.

You’ll want a green StandardGrip machine mat, a brayer to help your materials stick, and craft glue with a precision tip. You can use a Cricut scoring tool if you’re using the “score” versions of the design files, or keep it simple and use the no-score versions with your standard Fine-Point blade. A scraper tool helps crease those accordion folds crisply!
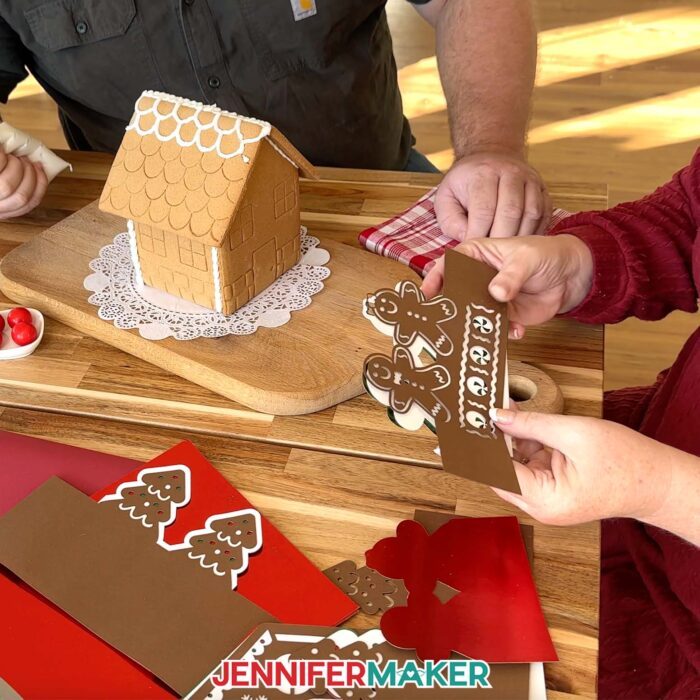
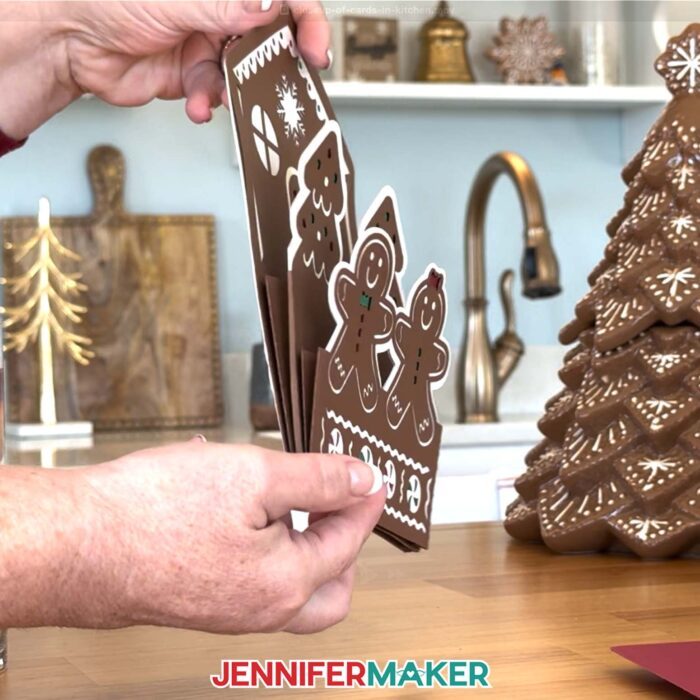
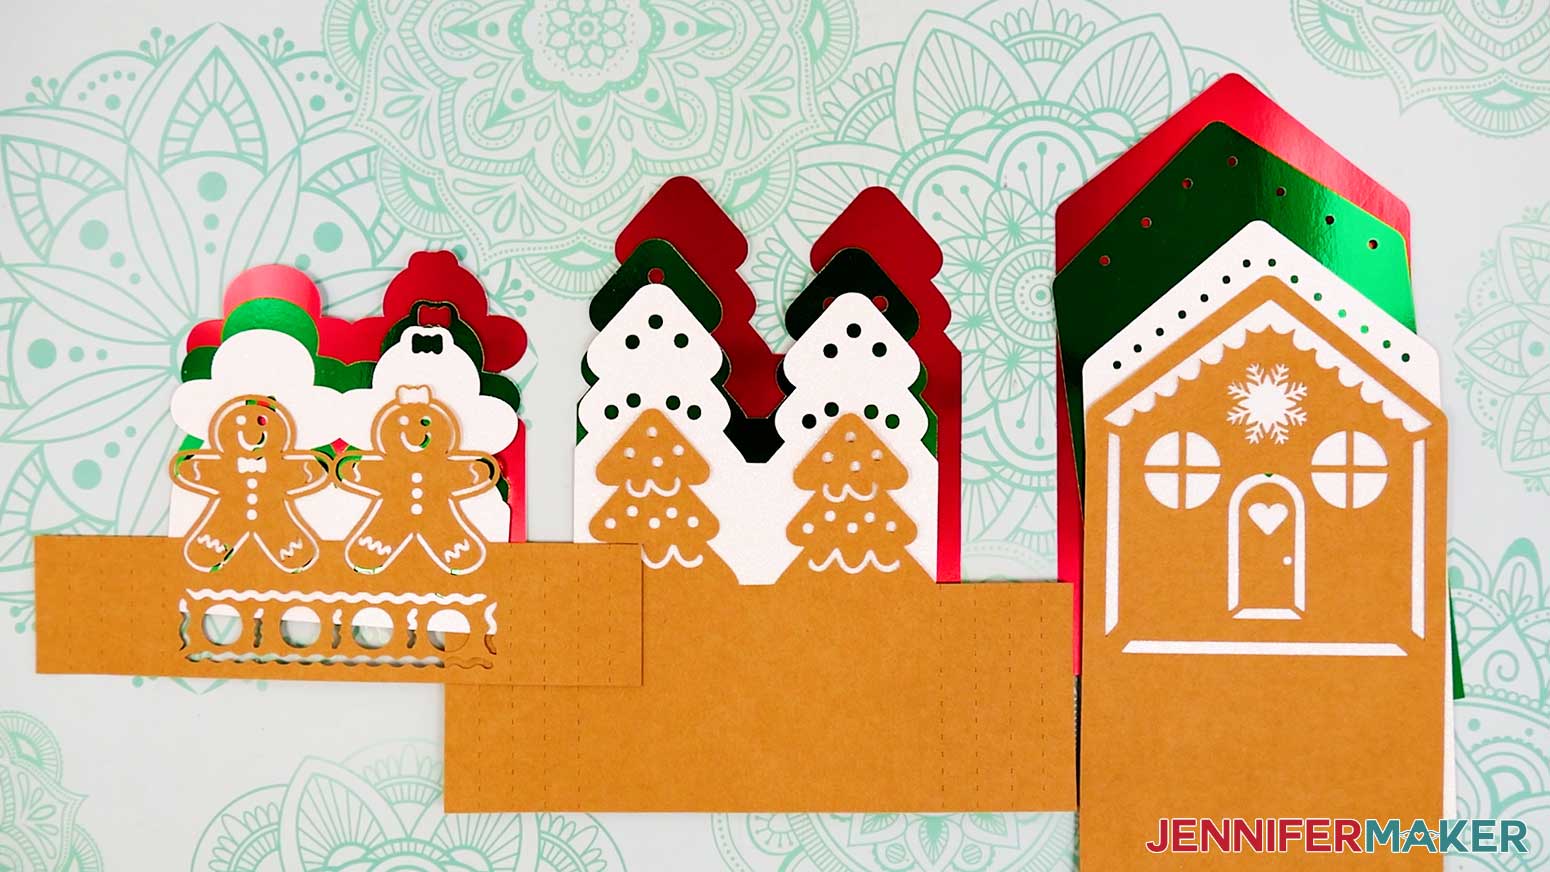
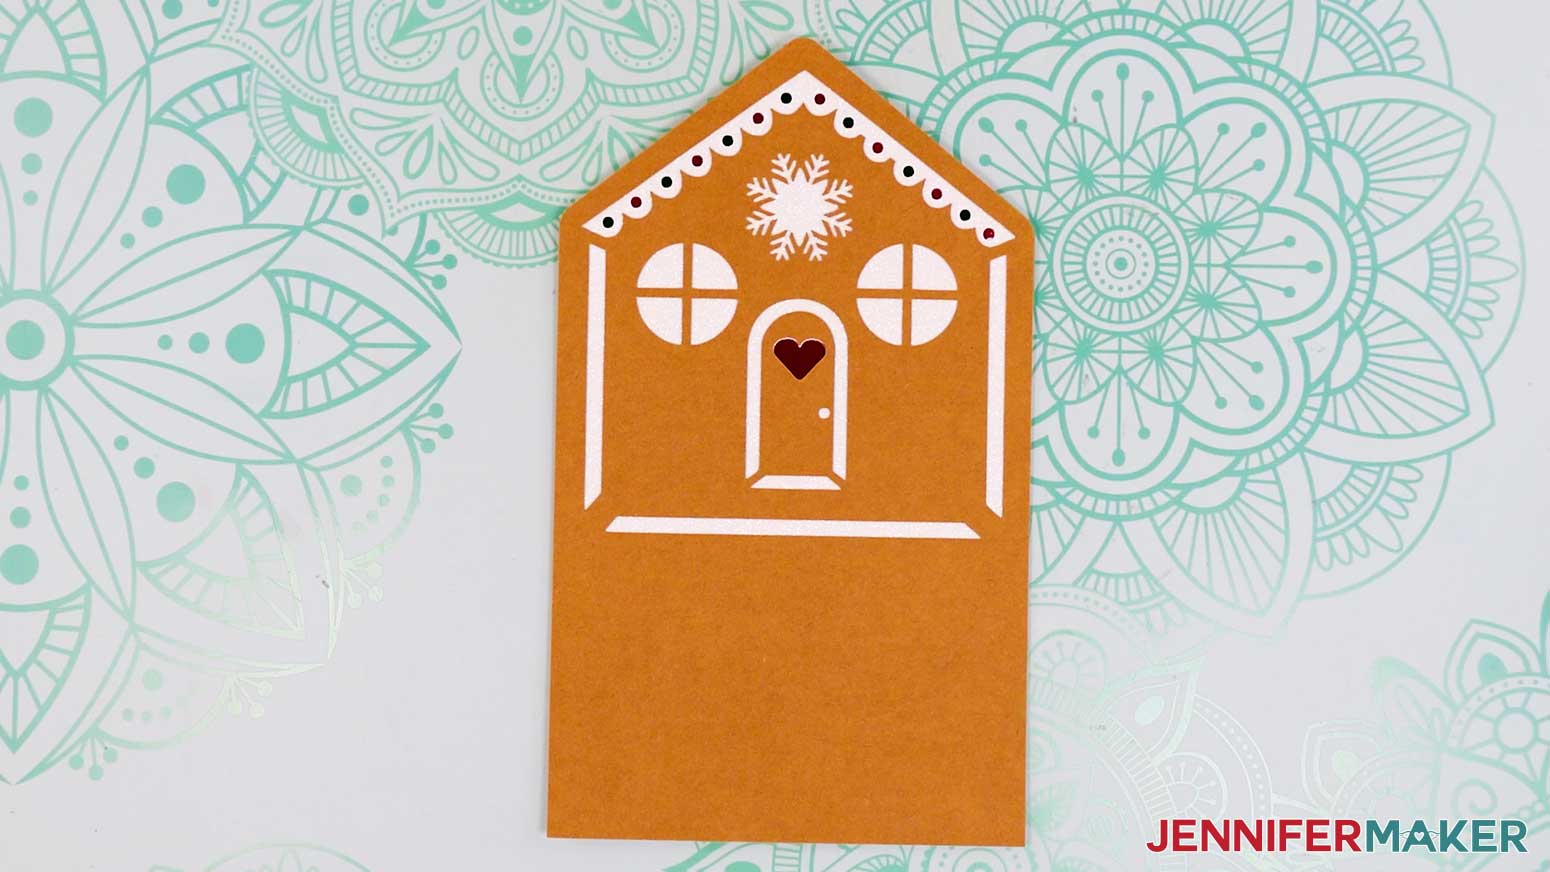
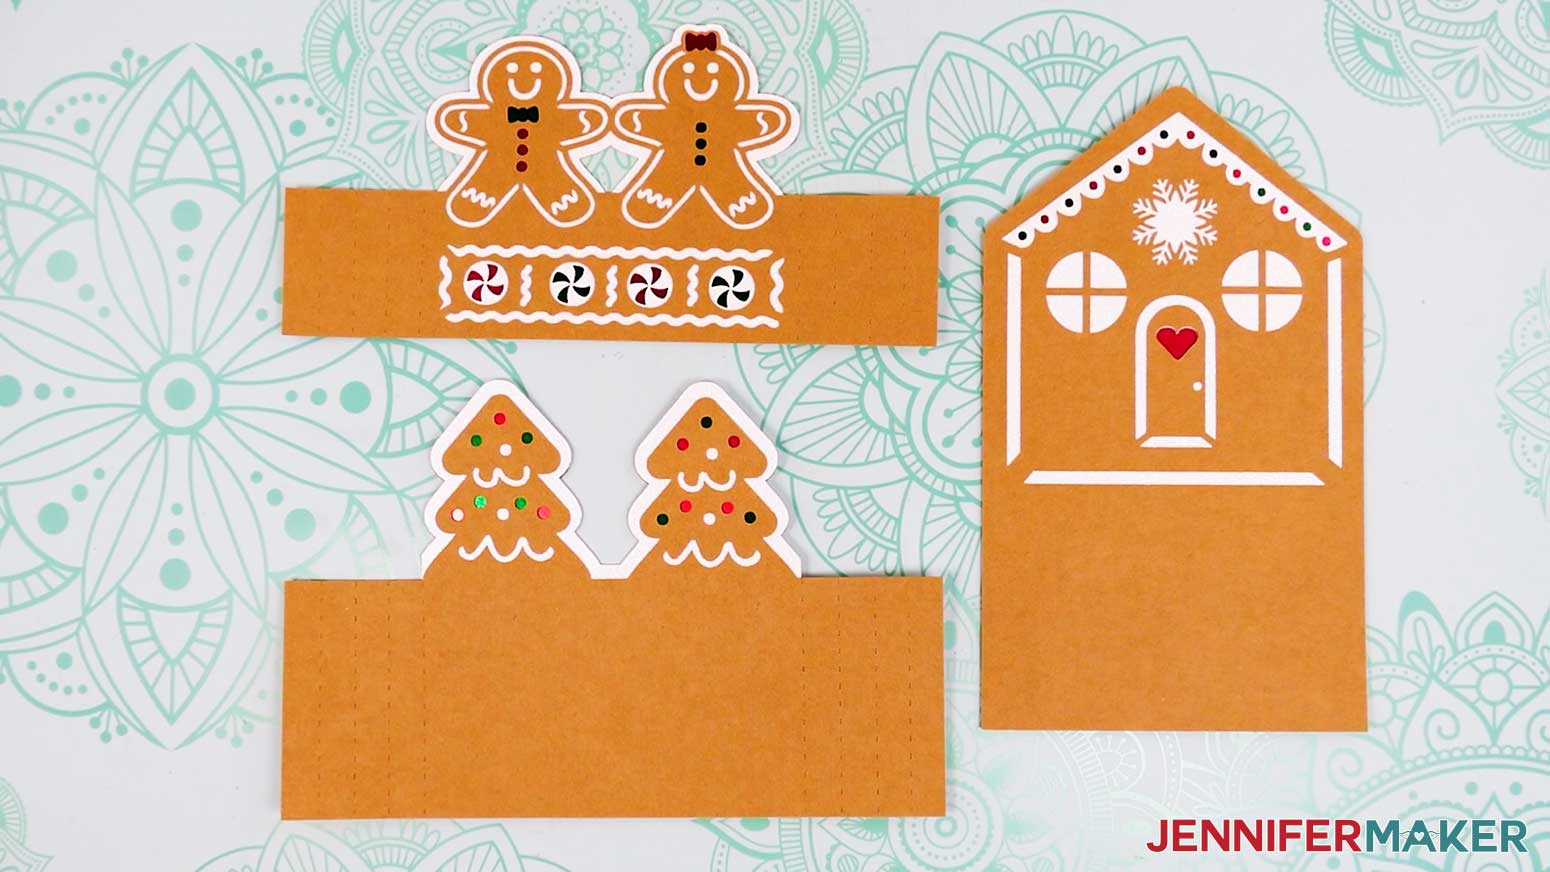
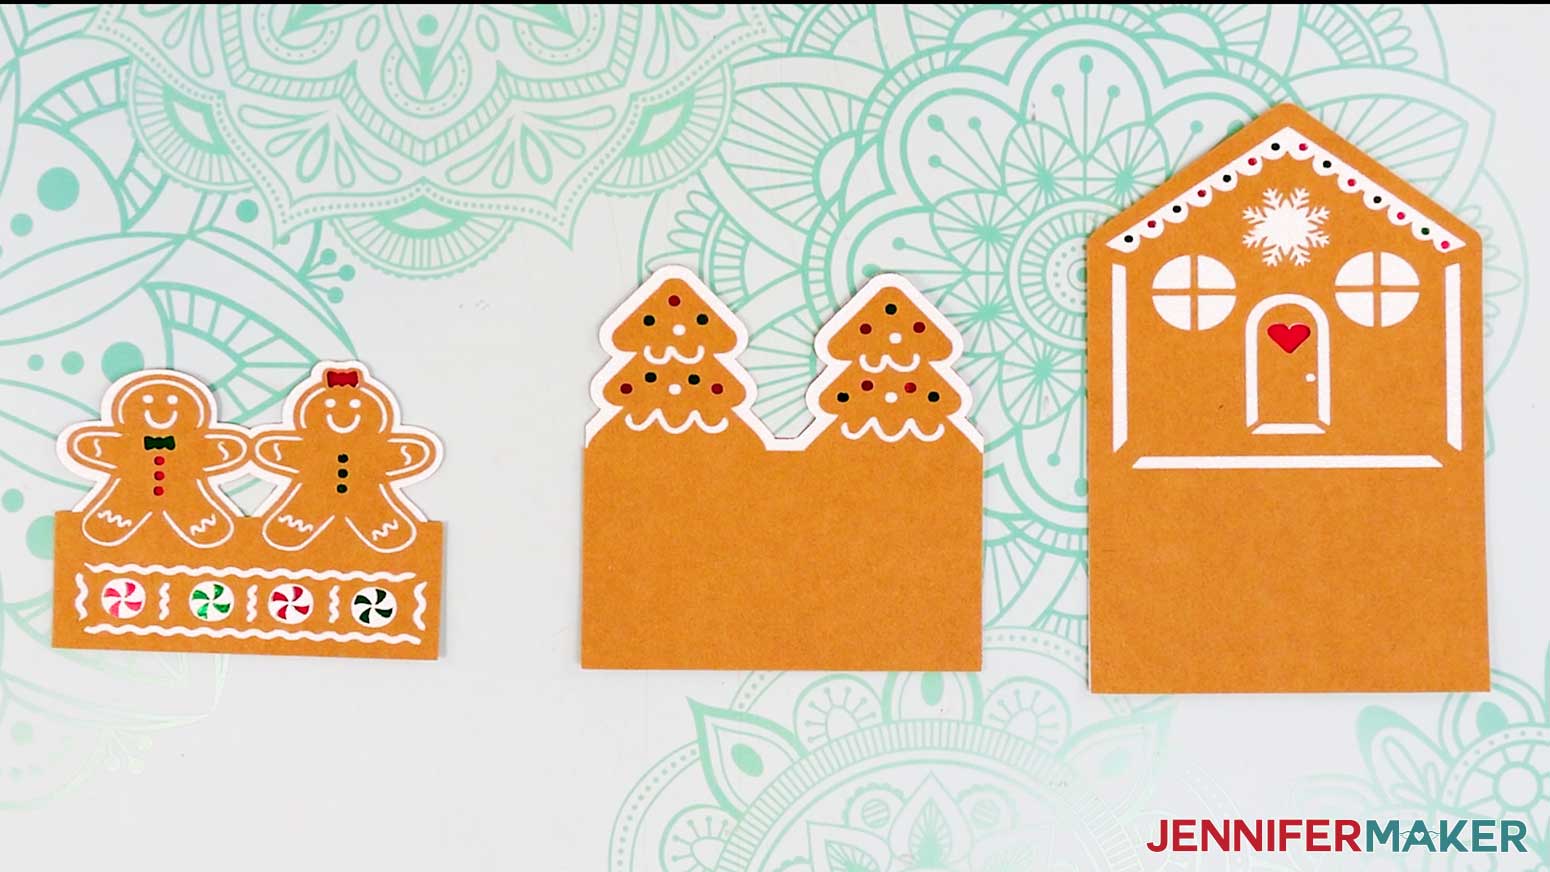
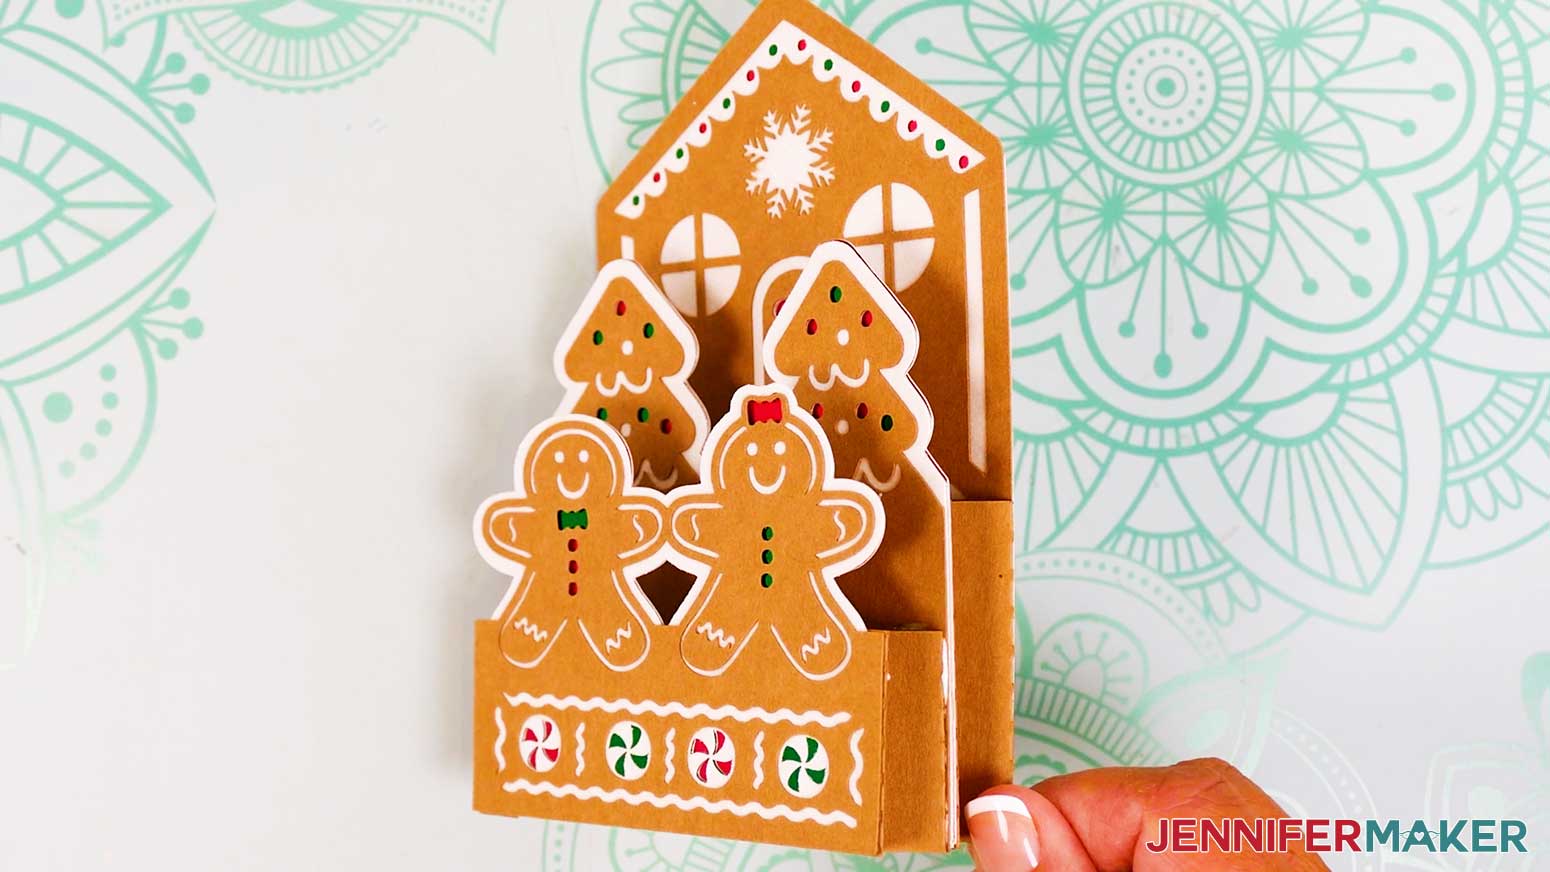
The card is built from three main tiers: the gingerbread house, the trees, and the gingerbread people. Each tier is made up of layered cardstock pieces that you glue together to create depth and detail.
Then, you use an accordion fold (our special “springy” secret) to attach each tier and give the card its dimensional bounce. The folds collapse flat when the card is closed and pop back up when it’s opened, making the whole scene rise and come to life. The assembly process is super easy, and I guide you through every step in the video tutorial.
If you’re using a smaller machine like the Cricut Joy, don’t worry! I’ve created a Cricut Joy-sized version of the card with slightly different folds and pieces that fit perfectly on your smaller mats. It still has all the same charm and bounce, just in a smaller, more adorable package.
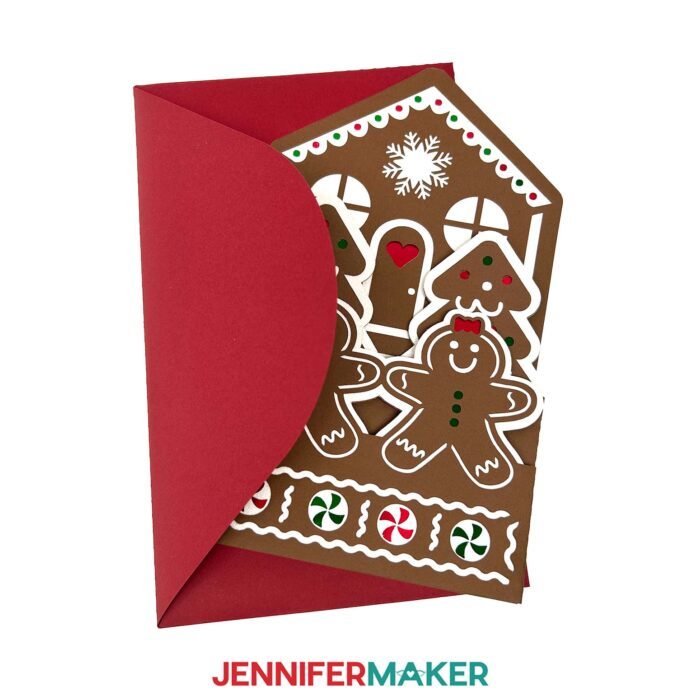
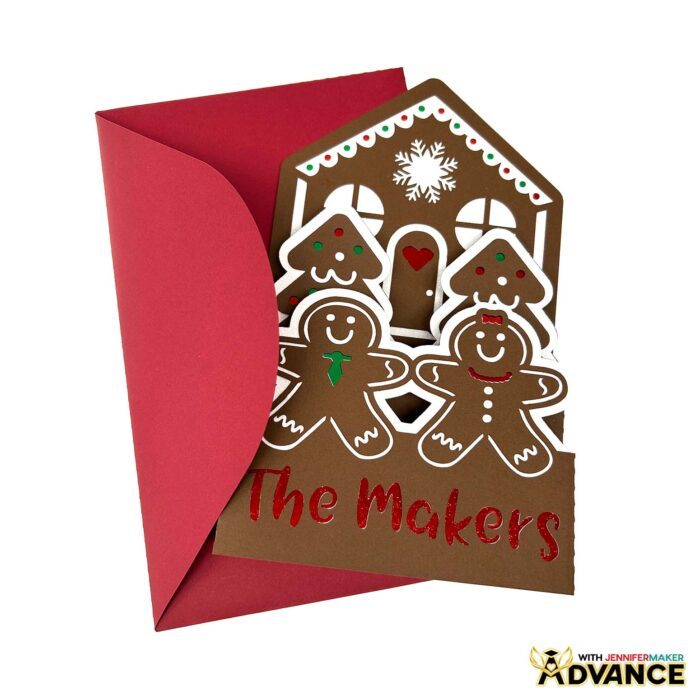
I’ve even included a matching envelope design to help you send your masterpiece in style! Just remember to allow for extra postage, especially if you’re using heavier cardstock or adding embellishments.
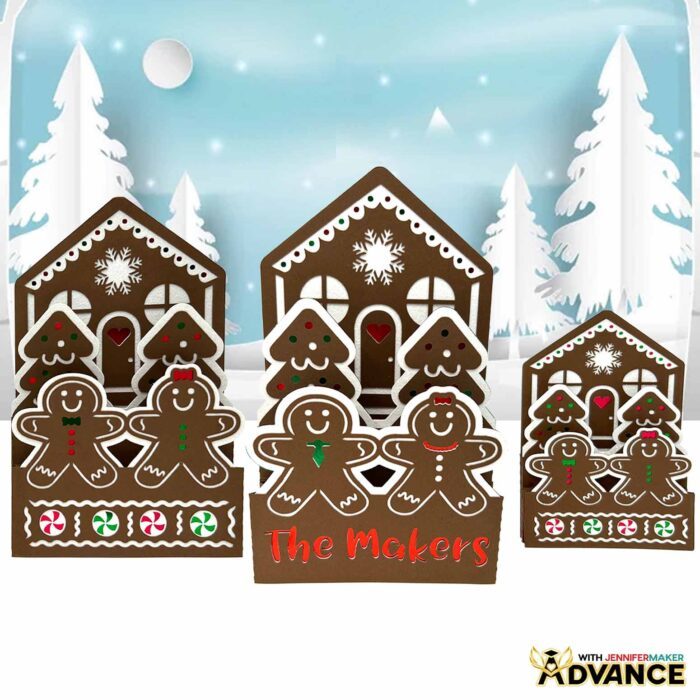
If you want to go beyond the basic design, you can learn how to personalize the gingerbread house, trees, and people with festive extras in my ADVANCE with JenniferMaker program. In a special step-by-step workshop, I teach you how to use Cricut Design Space tools to recolor elements, add decorations, and truly make the card your own.

Whether you’re adding names or other customizations to your gingerbread house pop-up card, the possibilities are endless. Plus, as an ADVANCE member, you get access to my searchable resource library full of design files, templates, and bonus projects, as well as a friendly community of crafters and monthly challenges to keep you inspired. Learn more about ADVANCE with JenniferMaker here!
This project is such a joyful way to spread holiday cheer, and I truly hope you’ll give it a try. Whether you make one card or a dozen, a gingerbread house pop-up card is sure to delight anyone lucky enough to receive one.
Watch the video tutorial to follow along with me and learn all my tips and tricks for creating a Christmas card that’s as sweet as the season itself, without the frosting disasters!
Let me show you how to make a gingerbread house pop-up card! This post contains some affiliate links for your convenience (which means if you make a purchase after clicking a link I will earn a small commission but it won’t cost you a penny more, there is no additional cost)! Read my full disclosure policy.
Materials to Make a Gingerbread House Pop-Up Card
View my Amazon shopping list with the exact items I used.
- Two (2) Sheets of 12″ x 12″ White Glitter Cardstock
- Two (2) Sheets of 12″ x 12″ 65 lb. Brown Cardstock
- Two (2) Sheets of 12″ x 12″ Red Foil Cardstock
- Two (2) Sheets of 12″ x 12″ Green Foil Cardstock
- A way to cut your cardstock – I’m using the Cricut Maker 4, but you can use any Cricut Maker series machine, any Cricut Explore series machine, the Cricut Venture, the Cricut Joy, or the Cricut Joy Xtra
- Green StandardGrip Machine Mat 12″ x 12″
- Brayer
- Spatula
- Scraper
- Weeding Tool
- Tweezers (optional)
- Scoring Stylus (optional for files with score lines) -OR-
- Single Scoring Wheel (optional for files with score lines)
- Craft Glue (I used Bearly Art Precision Craft Glue)

How to Make a Gingerbread House Pop-Up Card!

Gingerbread House Pop-Up Card
Learn how to make a festive gingerbread house pop-up card with colorful cardstock!
Materials
- Two (2) Sheets of 12" x 12" White Glitter Cardstock
- Two (2) Sheets of 12" x 12" 65 lb. Brown Cardstock
- Two (2) Sheets of 12" x 12" Red Foil Cardstock
- Two (2) Sheets of 12" x 12" Green Foil Cardstock
- Design #772 (My free SVG/PDF/DXF design files are available in my free resource library - get the password by filling out the form at the bottom of this page)
Tools
- A way to cut your cardstock (I’m using the Cricut Maker 4, but you can use any Maker series machine, a Cricut Explore Series machine, the Cricut Venture, the Cricut Joy, or the Cricut Joy Xtra)
- Cricut Green StandardGrip Machine Mat 12” x 12”
- Craft Glue (I used Bearly Art Precision Glue)
- Brayer
- Spatula
- Scraper
- Weeding Tool
- Tweezers (optional)
- Scoring Stylus (optional for files with score lines) -OR-
- Single Scoring Wheel (optional for files with score lines)
Instructions
STEP 1: GET MY FREE GINGERBREAD HOUSE POP-UP CARD DESIGNS
First, download my Gingerbread House Pop-Up Card files from my free library – look for Design #772. Alternatively, you can use the Save This Project form near the top of this post and the design link will be emailed to you.
In the SVG folder, you’ll find “score” and “no-score” versions of my card to cut on a cutting machine. The “score” versions require a Scoring Stylus or Single Scoring Wheel to create smooth lines for folding. If you don’t have a scoring tool, or if you prefer dashed cut lines, you can use the “no-score” versions instead.
I have included “score” and “no-score” versions of my matching envelope design, as well. If you’d like to make the envelope, follow along with my How to Make an Envelope Tutorial to assemble it.
You’ll also find an SVG folder with a card to cut on the Cricut Joy. It follows a slightly different assembly process, which I’ve also provided in this tutorial.
There is a DXF folder with cut files, and a PDF folder with versions you can print and cut by hand, too.
TIP: If you’re not sure how to upload, go to jennifermaker.com/svgs to learn how to unzip and upload SVG files.
STEP 2: PREPARE AND CUT YOUR GINGERBREAD HOUSE POP-UP CARD DESIGN
CRICUT DESIGN SPACE
- In Cricut Design Space, open a blank Canvas.
NOTE: If you’re new to using Cricut Design Space, go to cricutkickoff.com for my introductory tutorial on Design Space basics. - Click “Upload” and then “Upload Image.”
- Click “Browse.”
- Select the “card” SVG file of your choice.
NOTE: I’ll pick the “no-score” version. - Click “Open” and then “Continue.”
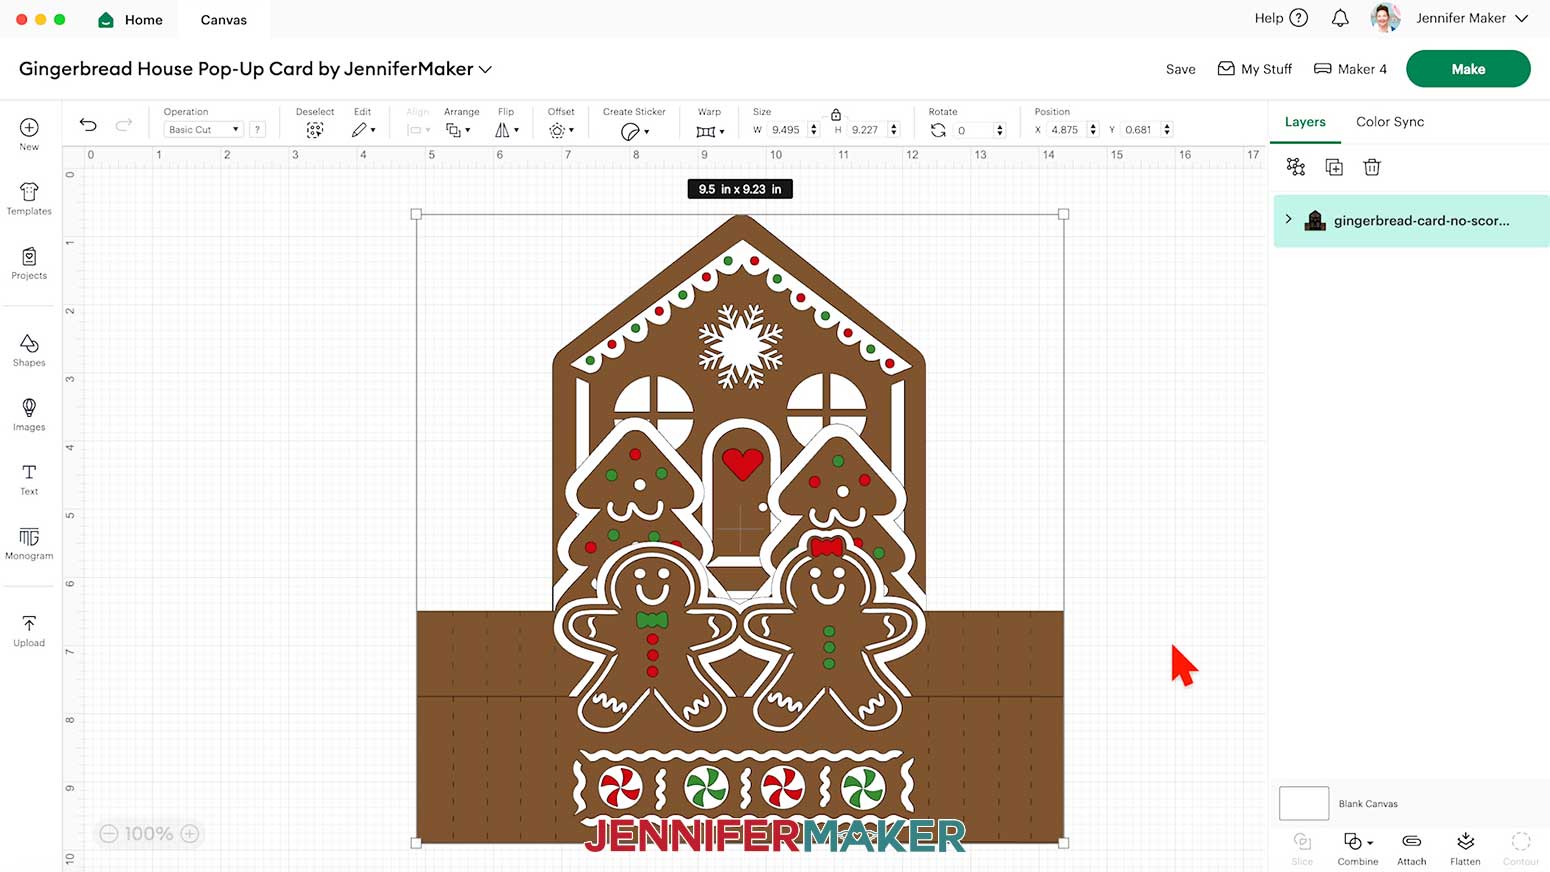
- Click “Upload” to add the design to your Canvas.

- In the Layers Panel, click the arrow beside the design’s group to reveal all the layers.
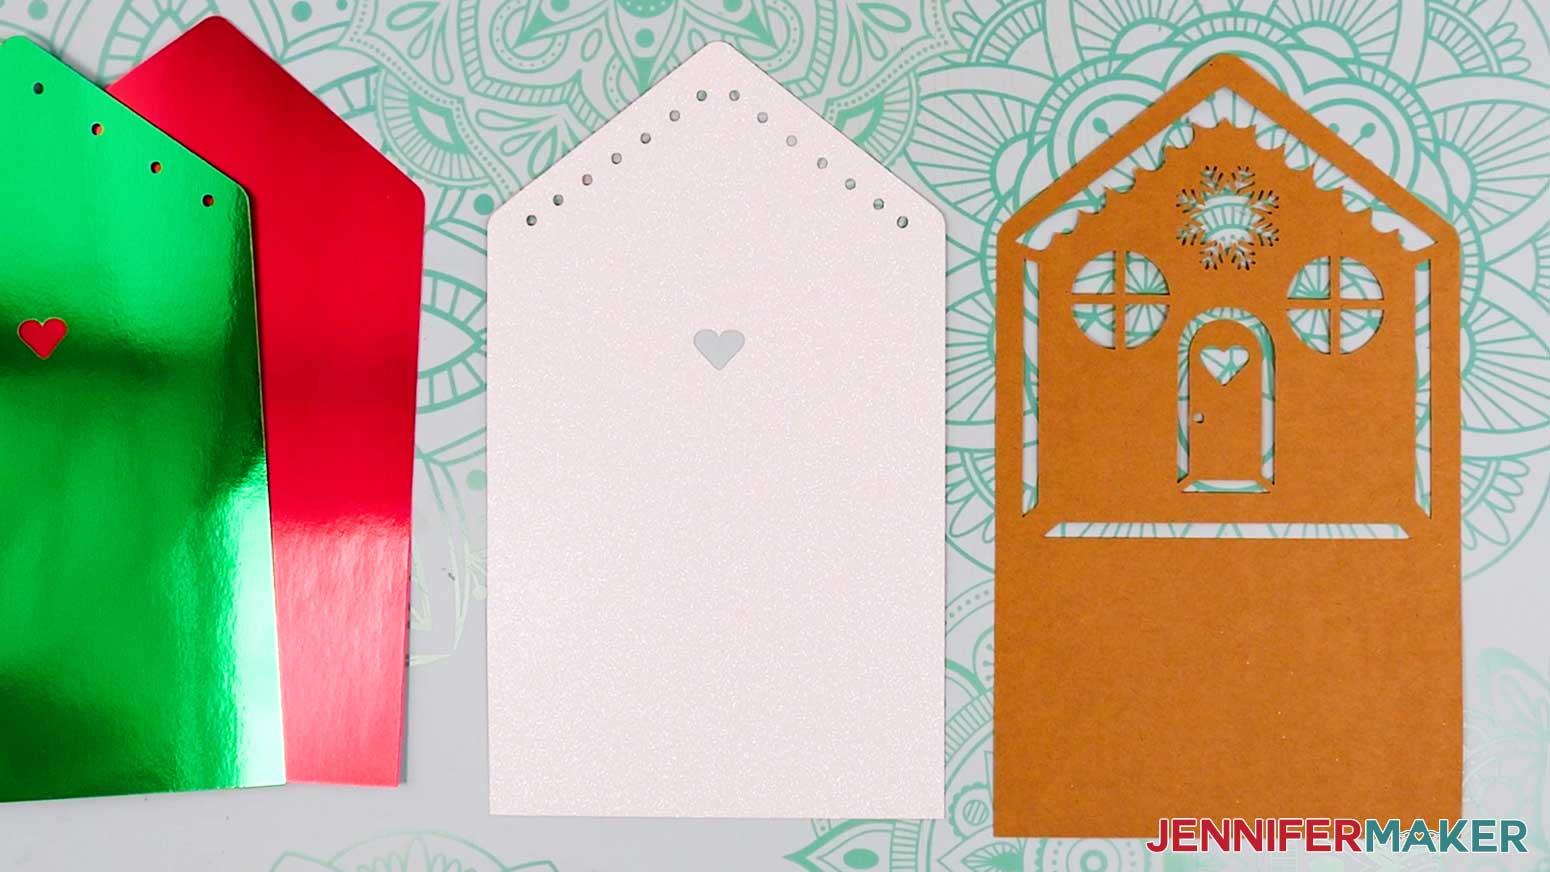
NOTE: On your Canvas there are three tiers for your pop-up card: the house tier, the tree tier, and the gingerbread people tier. Each tier has four layers with different areas cut out to create colorful designs. - Click “Save” and give your project a name so you can find it easily.
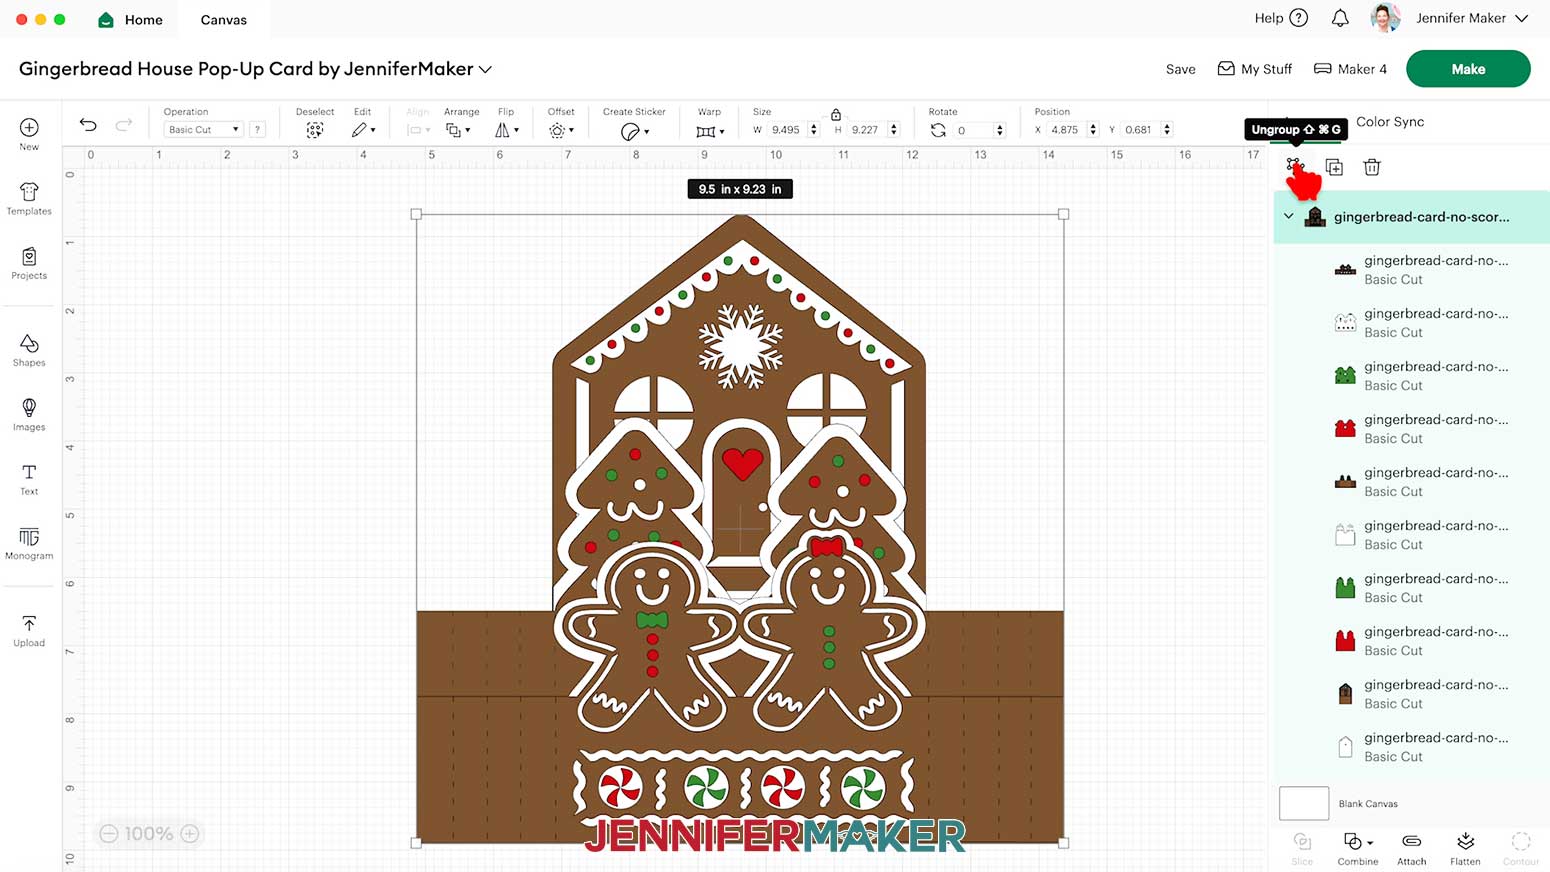
- “Ungroup” the design to work with the elements separately.
- If you’re cutting the “score” version of the pop-up card, follow the steps from my scoring tool tutorial to adjust your file.
- To change the color of a piece to match the cardstock you’ll cut it from, select the piece in the Layers Panel, click the Color Box next to “Operation,” and choose a new option.
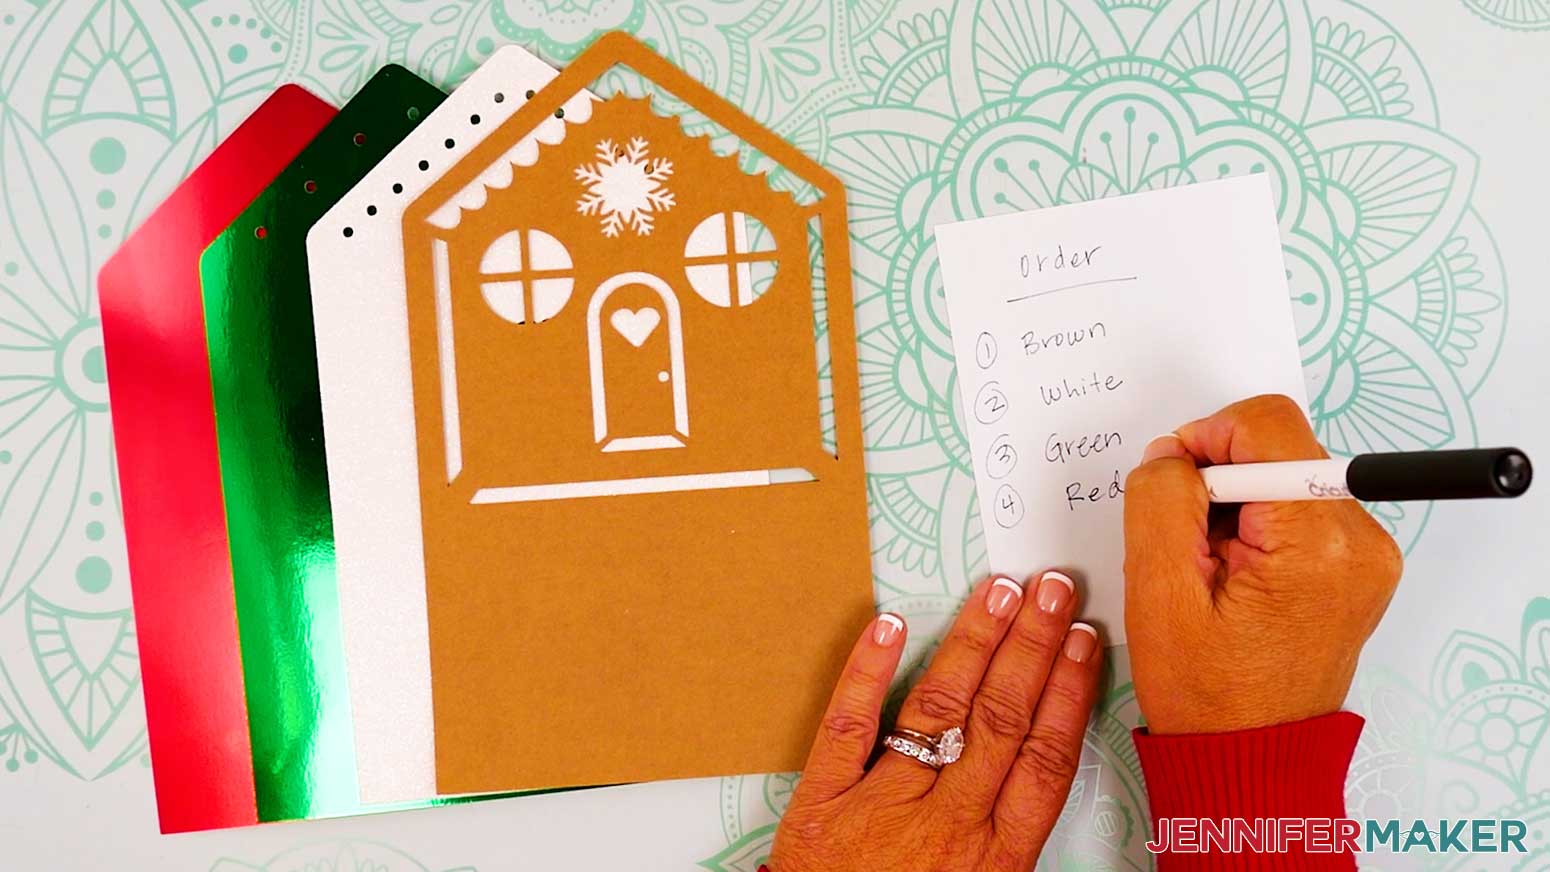
- Layer order matters for this project! Write down your layer colors from top to bottom so you have them later, even if you use the same colors I do (brown, then white, then green, then red).
- Your project is ready to cut!
CUTTING
- Make sure the correct machine is selected in the top right.
- Click “Make.”
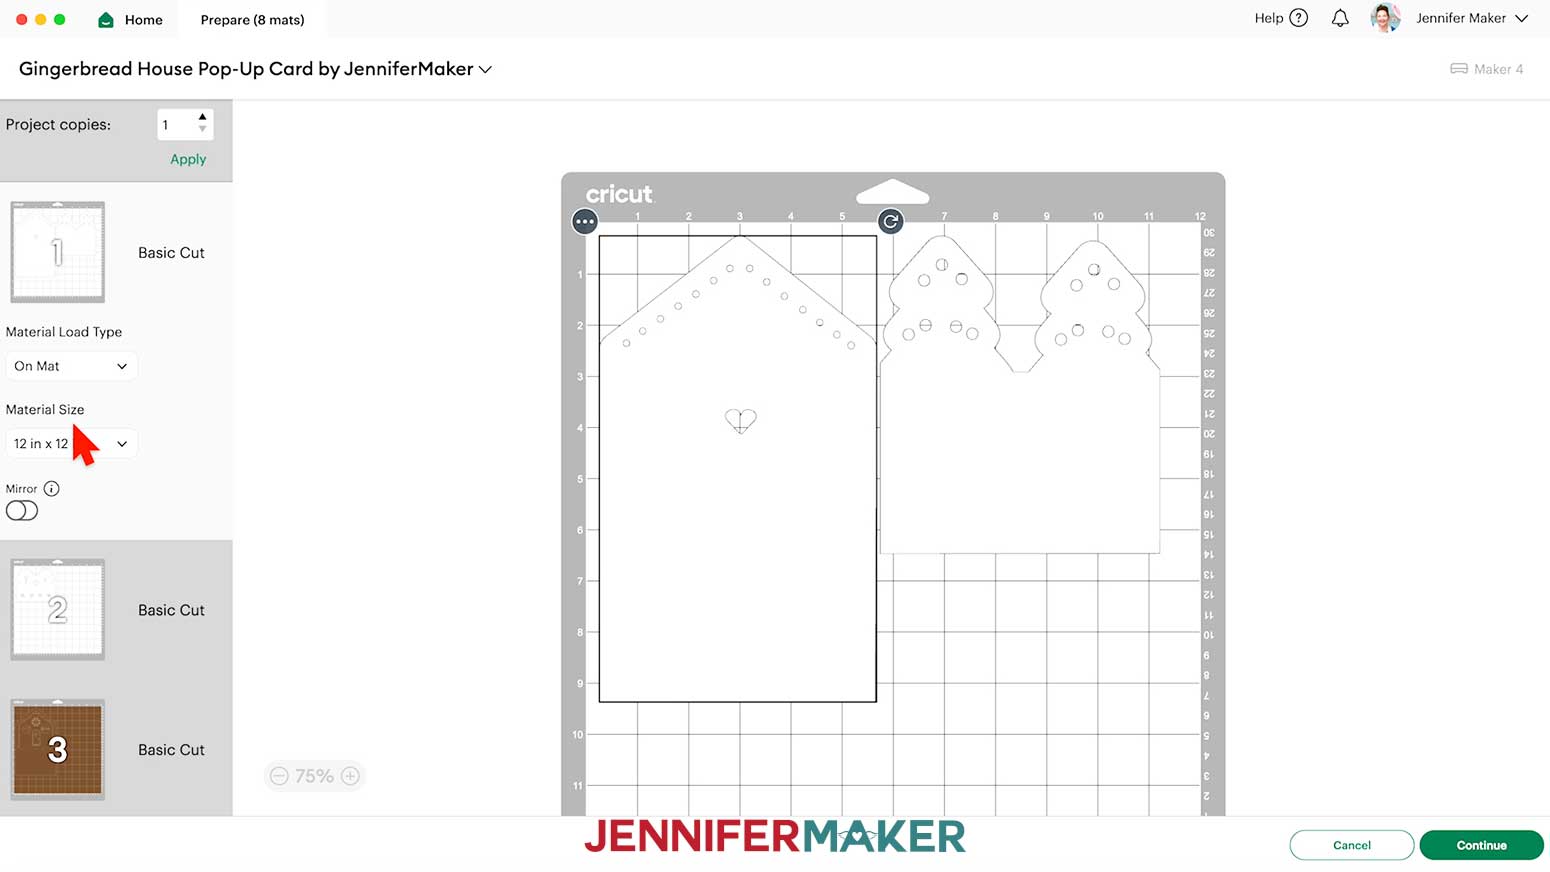
- On the Prepare screen, make sure the Material Size matches the material you’re using.
NOTE: I’m using 12” x 12” material for everything.
TIP: You can combine your mats of the same color to save time and materials. Visit my DIY Lollipop Holders tutorial to learn how. - Select the first mat so it loads first on the next screen and click “Continue.”
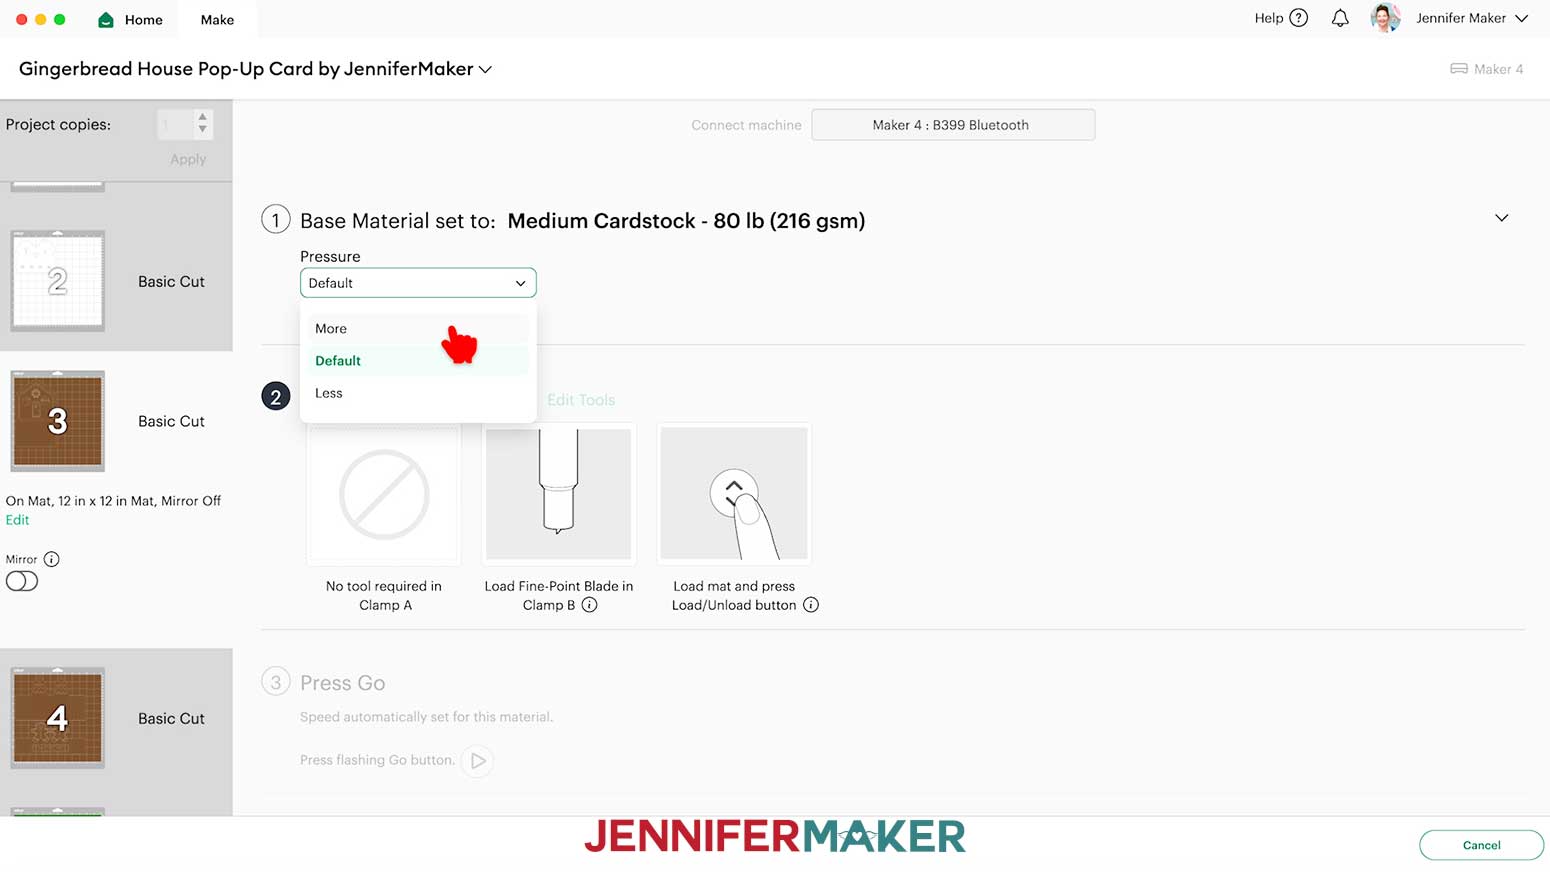
- On the Make Screen, set the Base Material for your first mat. I’m using:
“Medium Cardstock - 80 lb (216 gsm)” setting with “More” pressure for my brown regular cardstock mats and my red and green foil mats
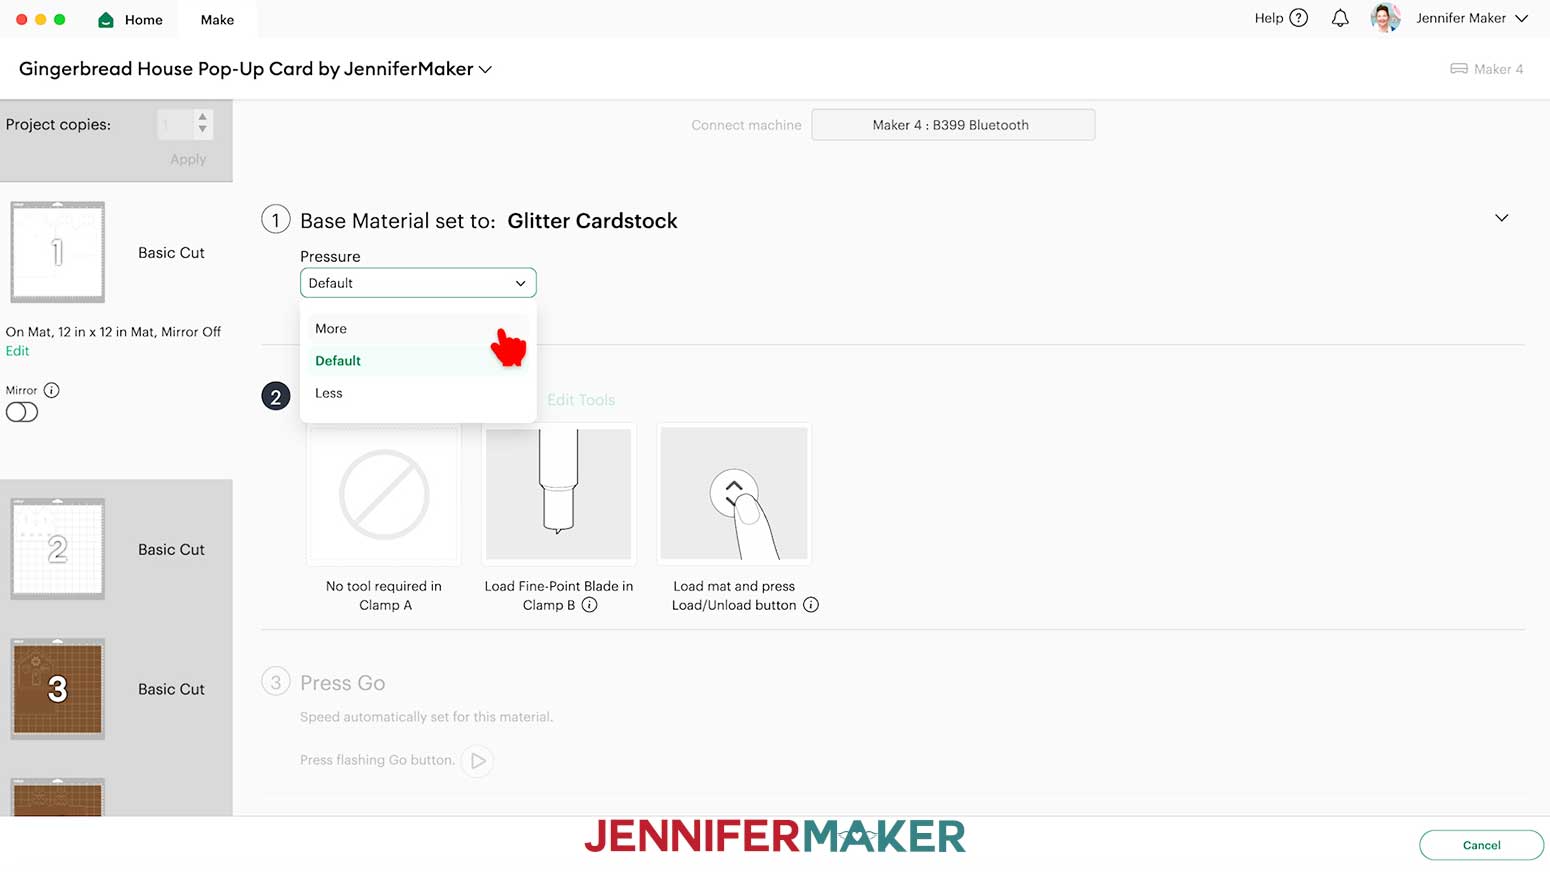
“Glitter Cardstock” with “More” pressure for my white glitter cardstock mats
NOTE: If you don’t see a certain material in your materials list, click on “Browse All Materials.” Enter the material’s name in the search box, select the correct option from the results list, and click “Done.”
TIP: Changing the Pressure to “More” results in a cleaner cut.
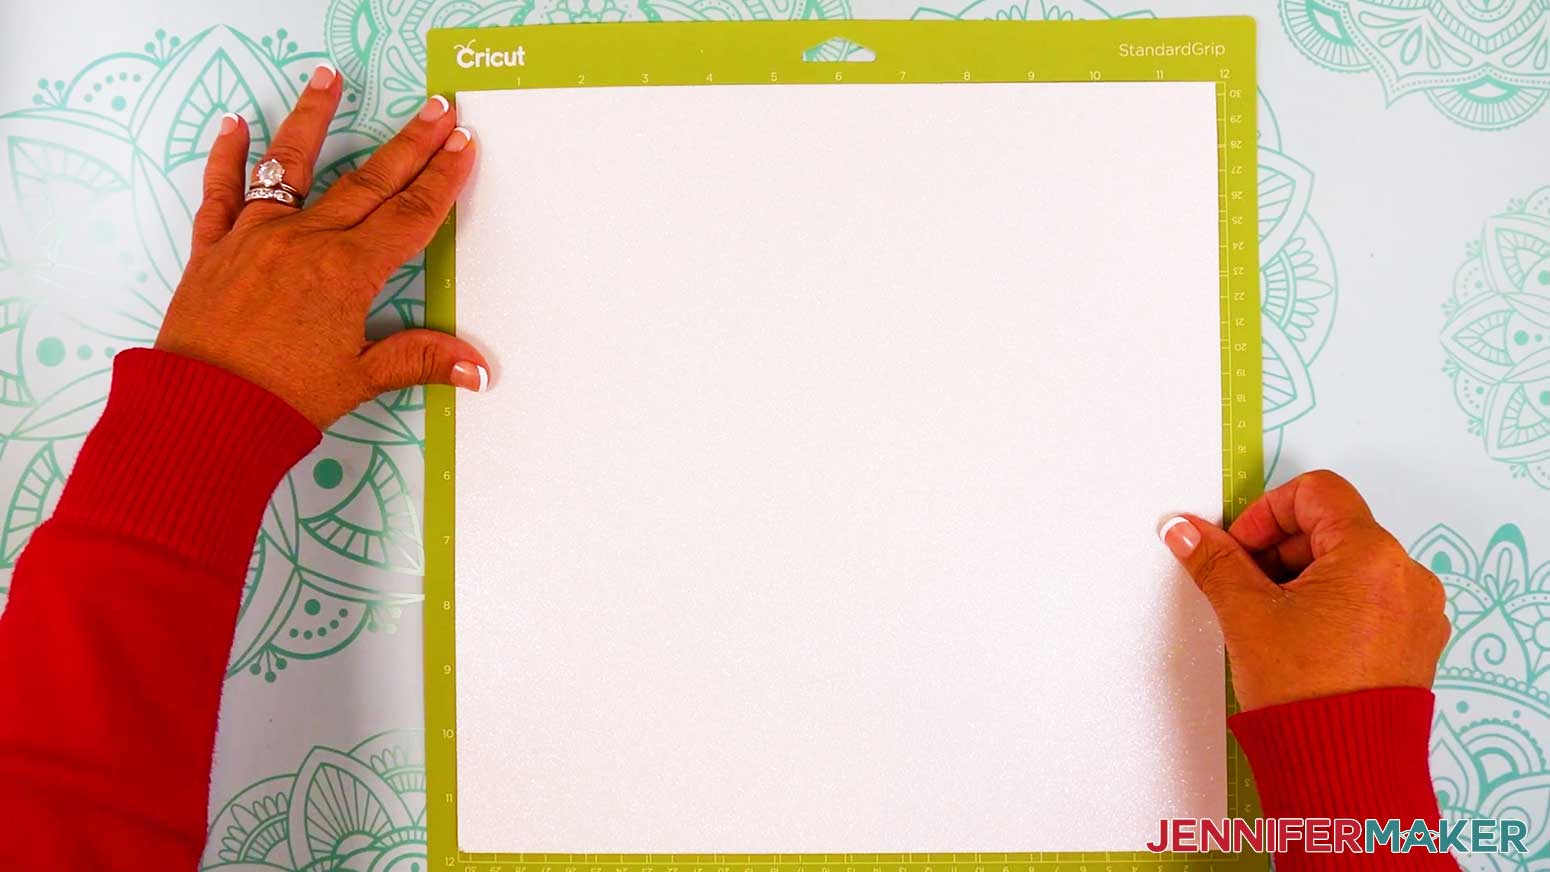
TIP: To save time between cuts of the same material, check the box next to “Remember material settings.” - Place your first mat’s cardstock face up on a green StandardGrip machine mat.
- Use a brayer to make sure it’s fully adhered.
- Check that your Fine-Point Blade is clean and in the clamp.
- Press the flashing “Load/Unload” button to load the prepared mat into your Cricut.
- Press the flashing middle button to begin cutting.
- When it has finished cutting, don’t unload the mat right away. Gently lift a corner of the material to make sure the cuts went all the way through. If not, press the middle button again to make a second pass of cuts in the same spots.
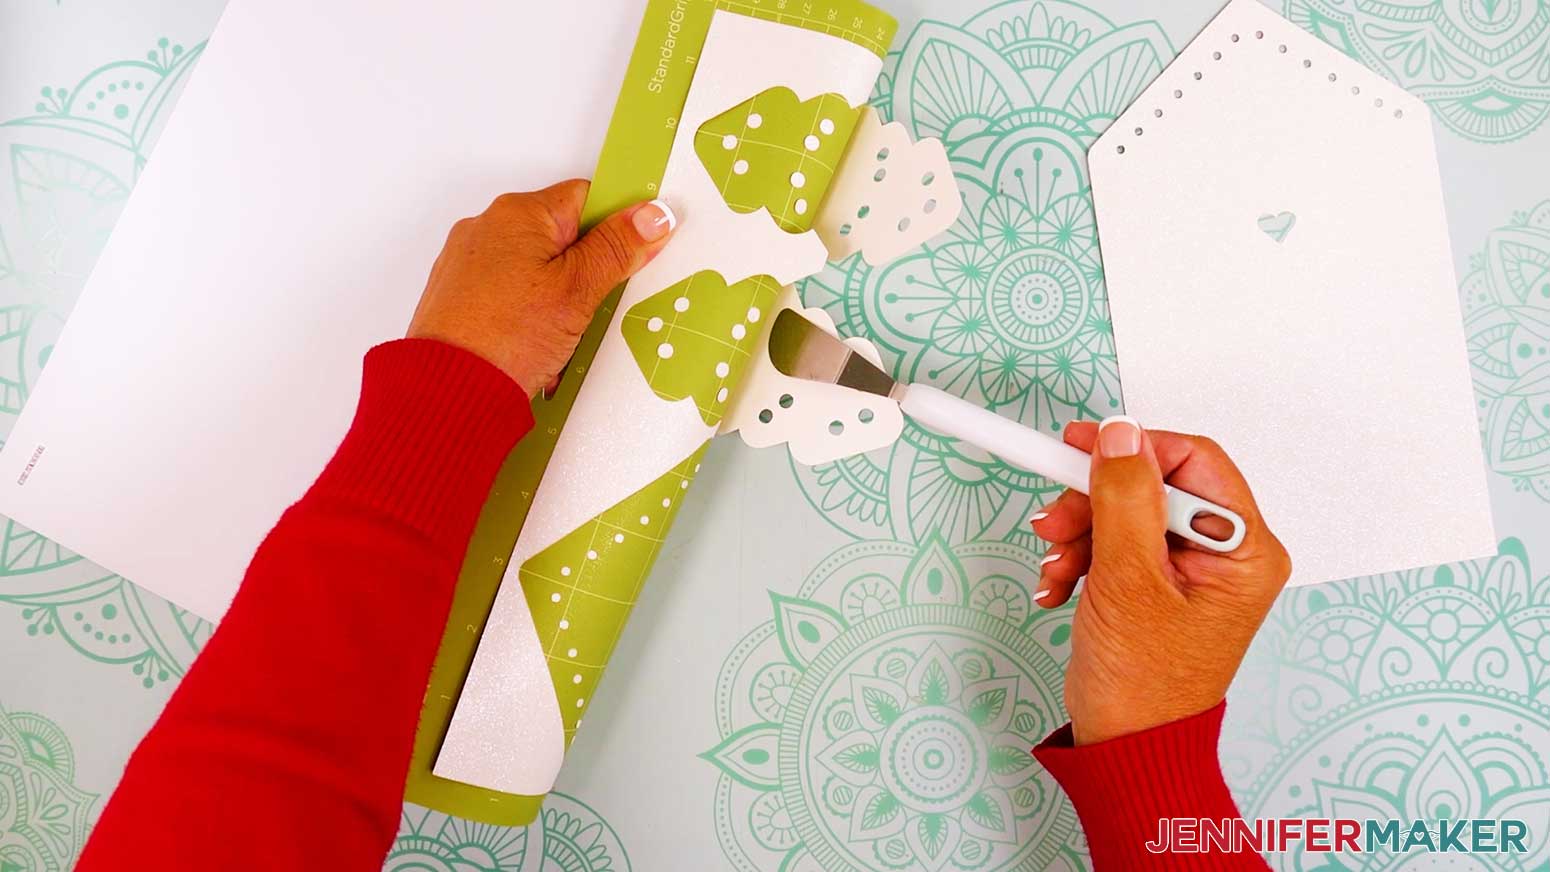
- When the cuts are complete, unload the mat, flip it over onto your work surface, and roll it back to release the cardstock.
TIP: Be careful when removing intricate pieces. Use a spatula to carefully remove any intricate parts and a weeding tool to pop out any small stuck pieces. If you have trouble with any of your cuts, check out my Cricut Tips & Tricks for Cleaner Cuts.
NOTE: Glitter can stick to the blade and cause trouble on your future cuts, so I recommend cleaning it after each sheet of glitter cardstock. You can take the housing and blade out of the clamp, press down on the plunger, and carefully poke the blade into a ball of aluminum foil several times, or clean it with an alcohol wipe. Be careful, it's sharp! - Repeat Steps 6-12 to cut the rest of your mats.
- Lay your pieces face up in organized piles by tier and layer order.
STEP 3: ASSEMBLE YOUR GINGERBREAD HOUSE POP-UP CARD
- Line up the house tier’s first and second layers face up.
- Flip the first house layer face down.
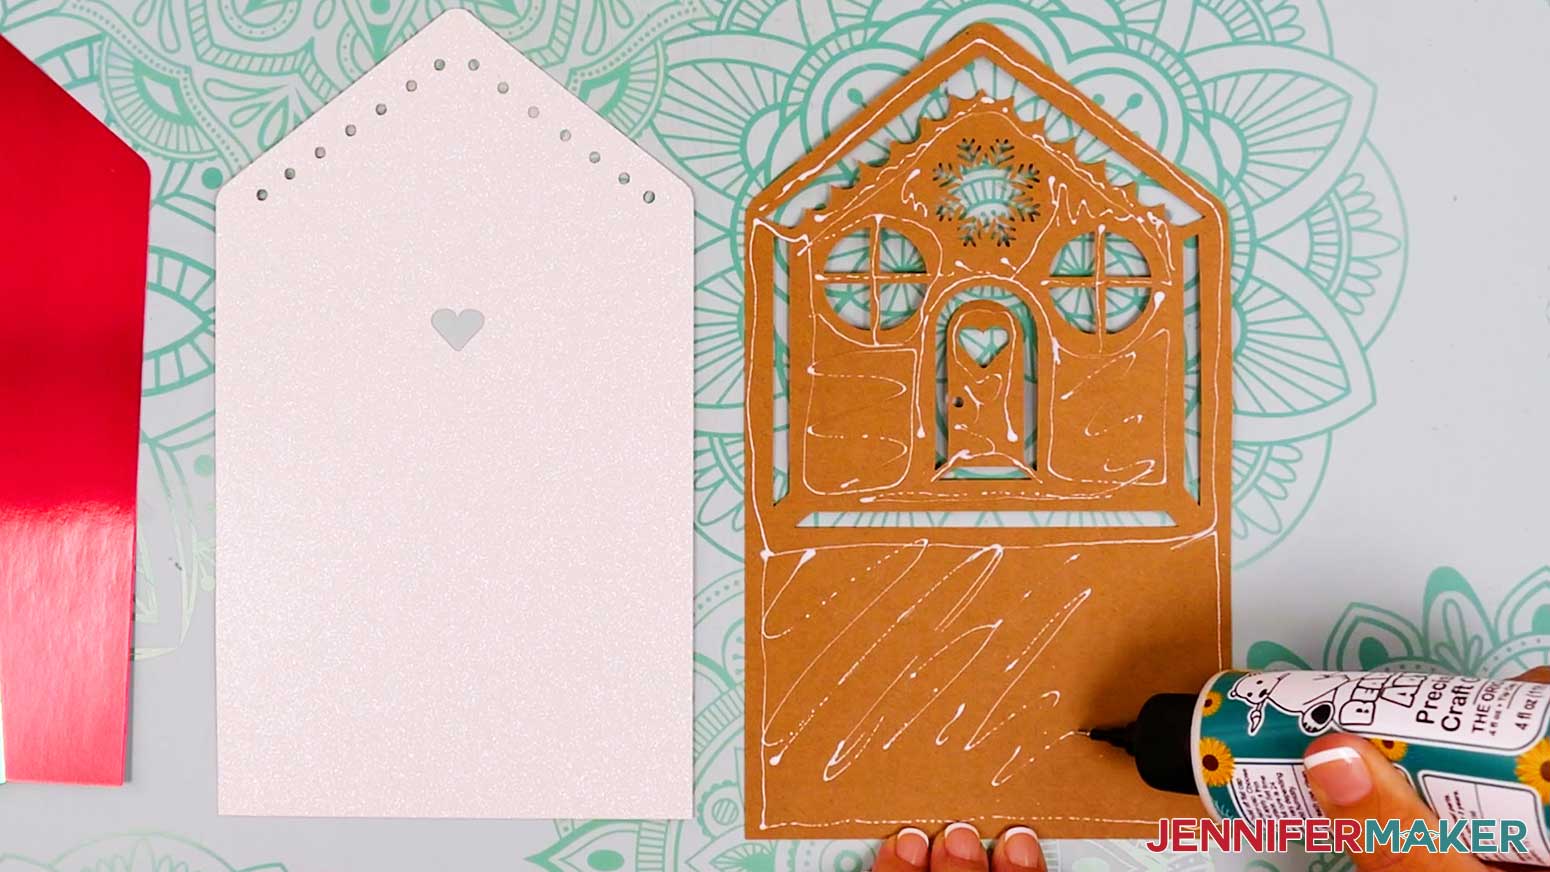
- Working quickly, add craft glue all over the back of the first layer, close to the edges, and around the cutouts (the precision tip on the Bearly Art glue works great for this!).
TIP: If the glue is drying too quickly, glue the top section first, then the bottom section.
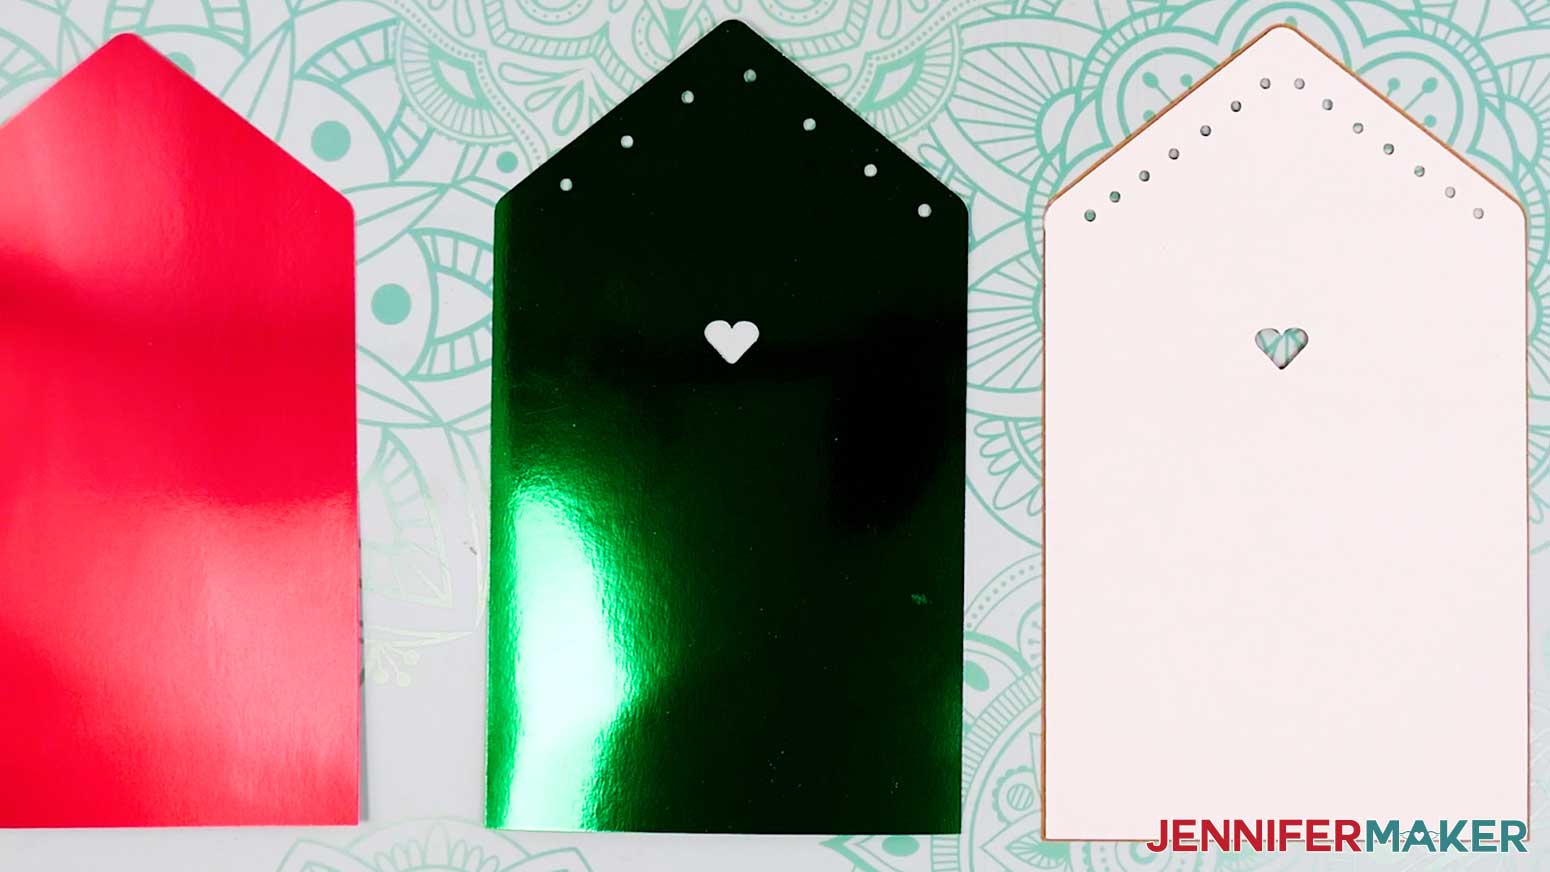
NOTE: Adding glue to the back of each layer keeps glue away from cutout areas. - Flip the second layer face down onto the back of the first layer and align the edges and cutout areas.
- Press down and smooth to adhere.
TIP: Use a brayer to make sure the pieces are flat and secure. - Flip both layers over and use your finger or a paper towel to wipe away any excess bits of glue.
- Allow the house tier’s first two layers to dry.
TIP: If any edges aren’t sealed well, add craft glue and press to adhere them. - Lay the house tier’s first two assembled layers face down, and the third layer face up.
- Working quickly, add glue all over the back of the second layer, close to the edges and around the cutout areas.
- Flip the third layer face down onto the back of the second layer and align the edges and cutout areas.
- Press down and smooth to adhere.
- Flip the attached layers over and wipe away any excess glue, then allow the layers to dry.
- Lay the house tier’s three assembled layers face down, and the fourth layer face up.
- Working quickly, add glue all over the back of the third layer, close to the edges and around the cutout areas.
- Flip the fourth layer face down onto the back of the third layer and align the edges and cutout areas.
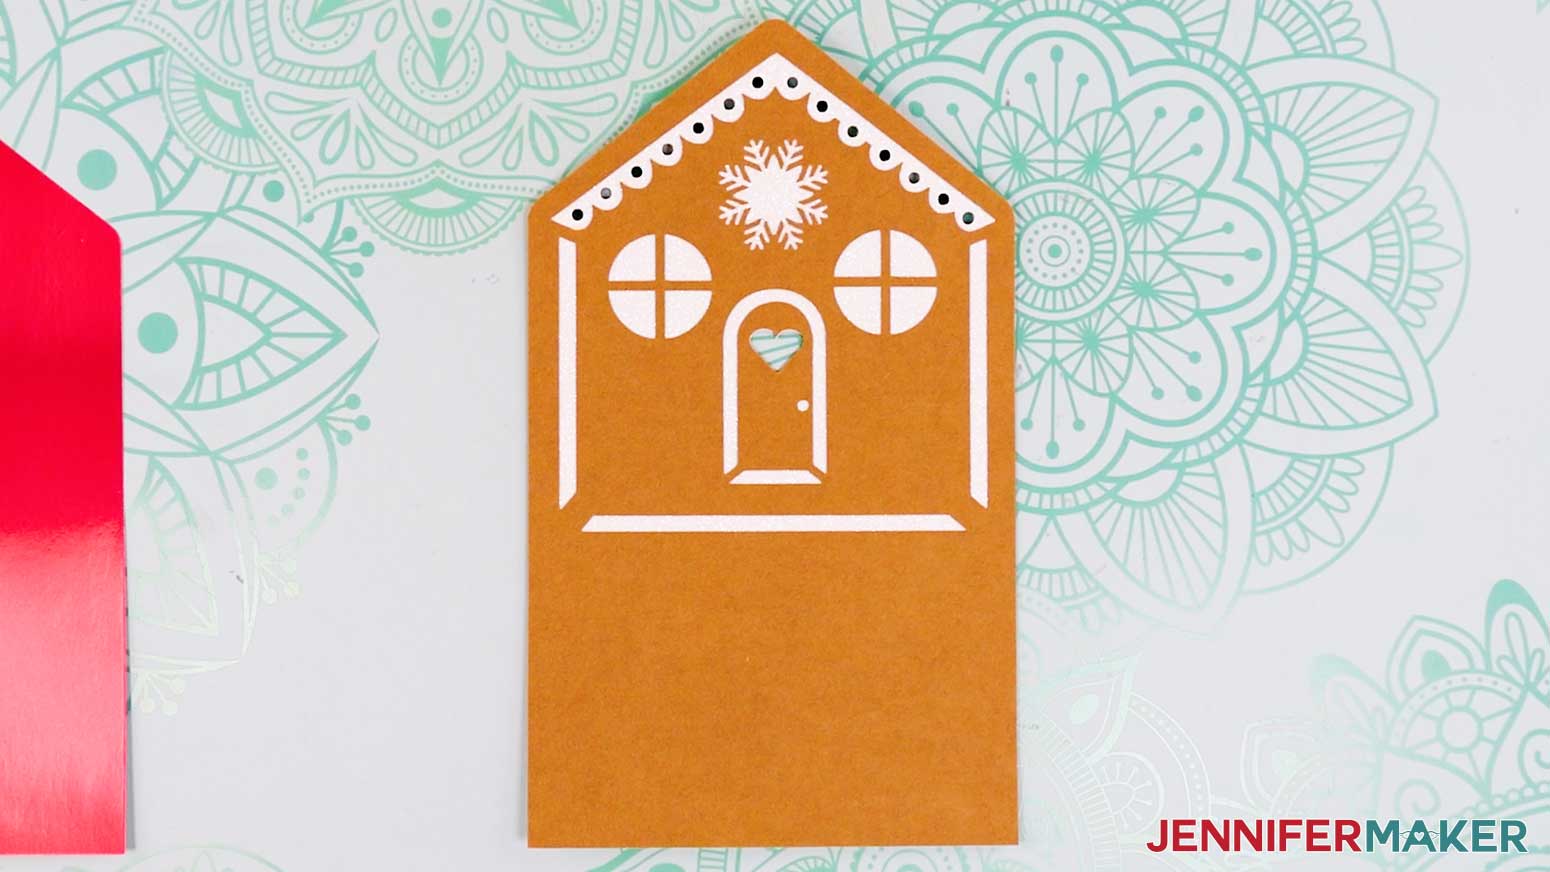
- Press down and smooth to adhere.
- Flip the attached layers over and wipe away any excess glue, then allow the layers to dry.
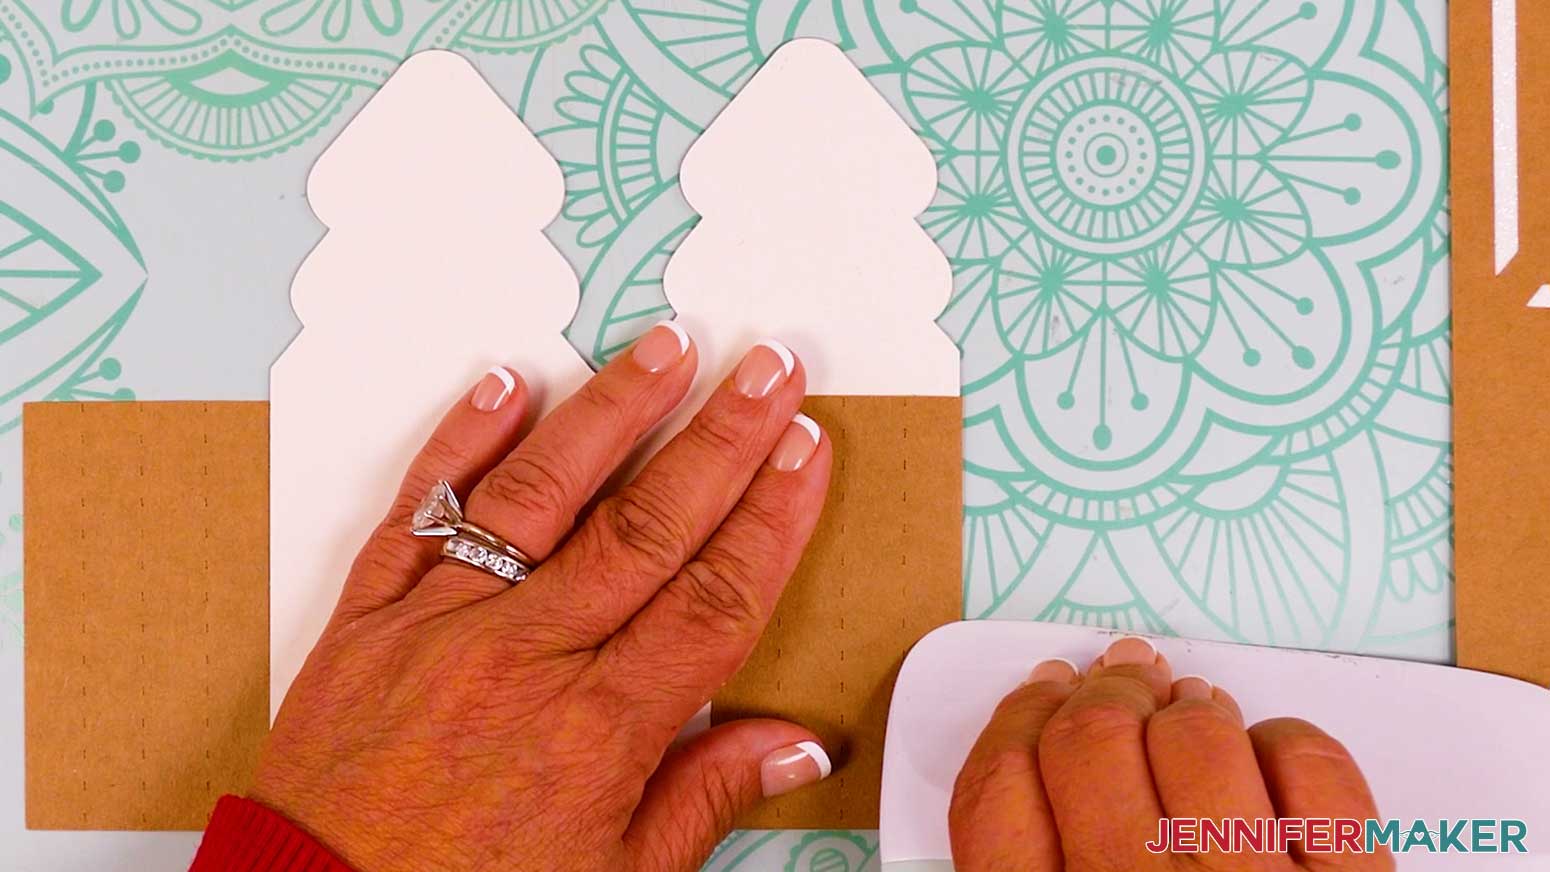
- Follow Steps 1-17 to assemble the four layers for the tree tier, and again to assemble the four layers for the gingerbread people tier.
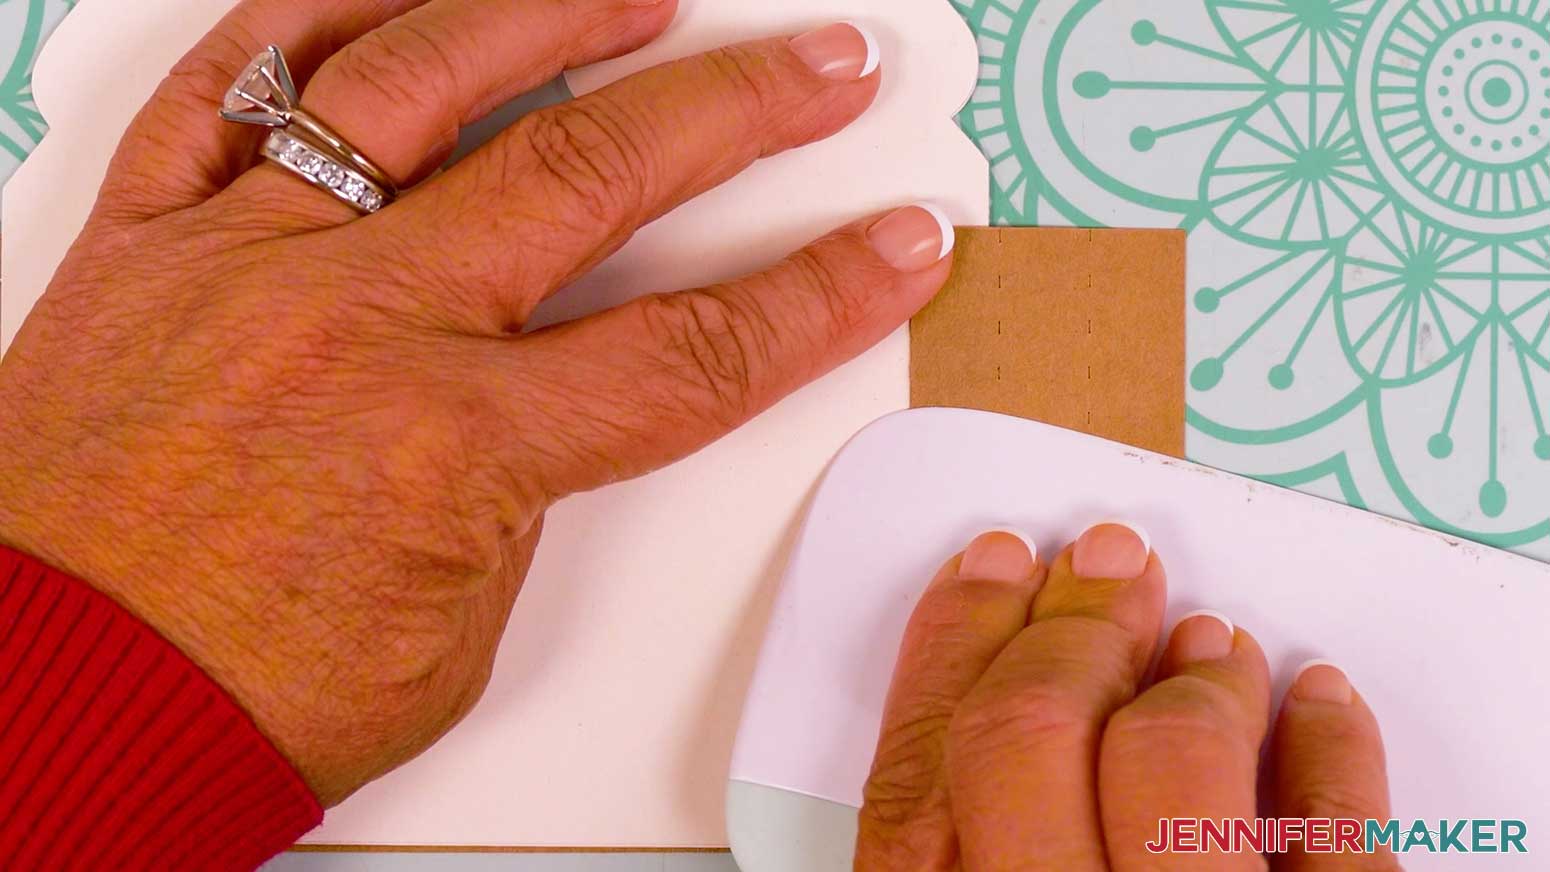
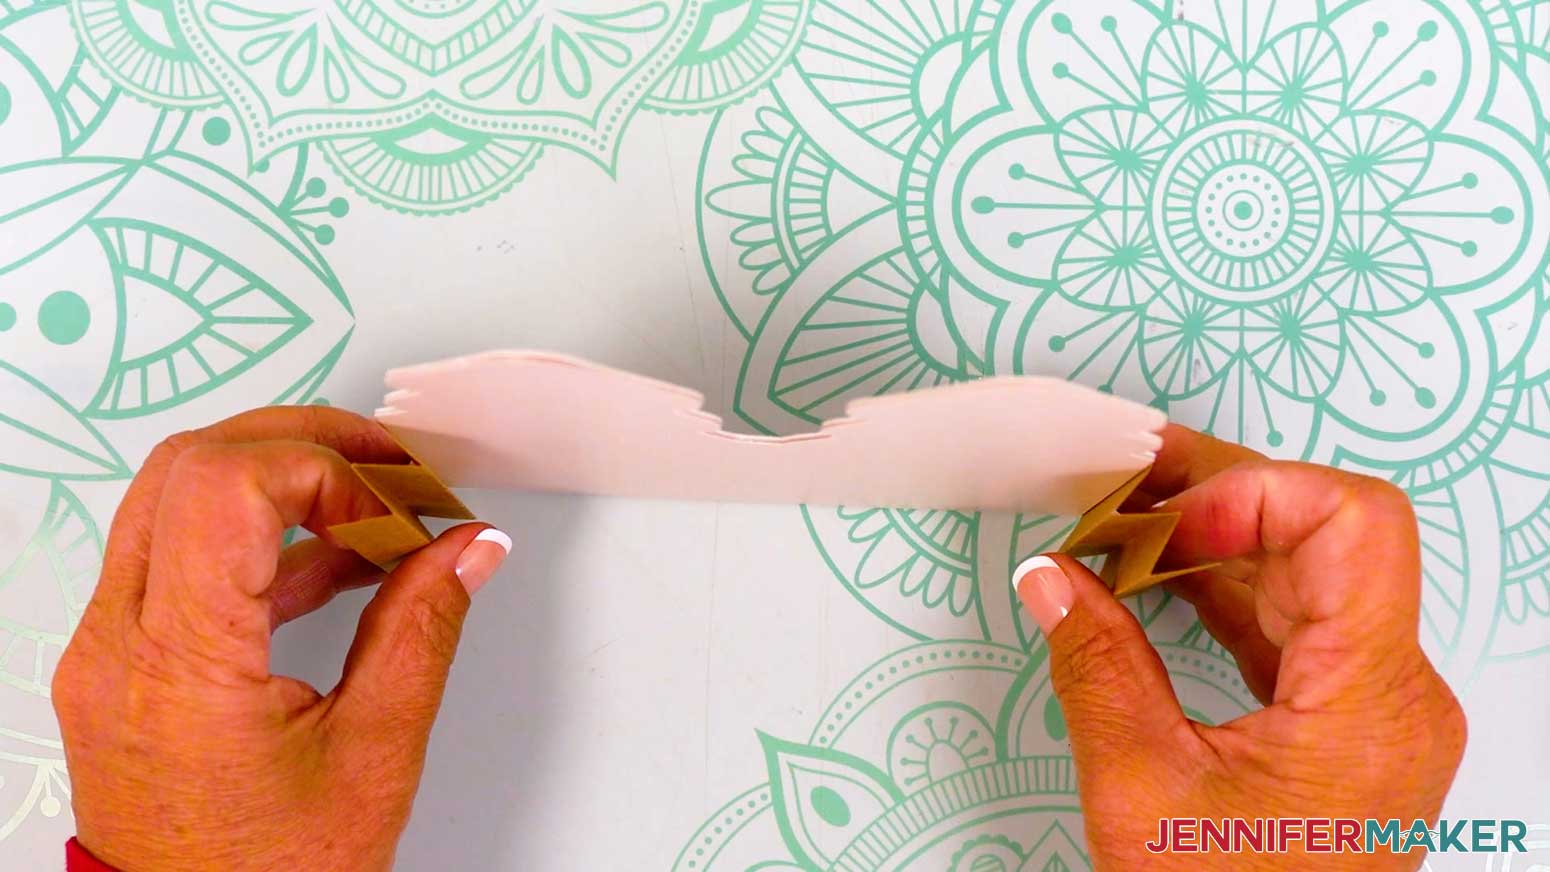
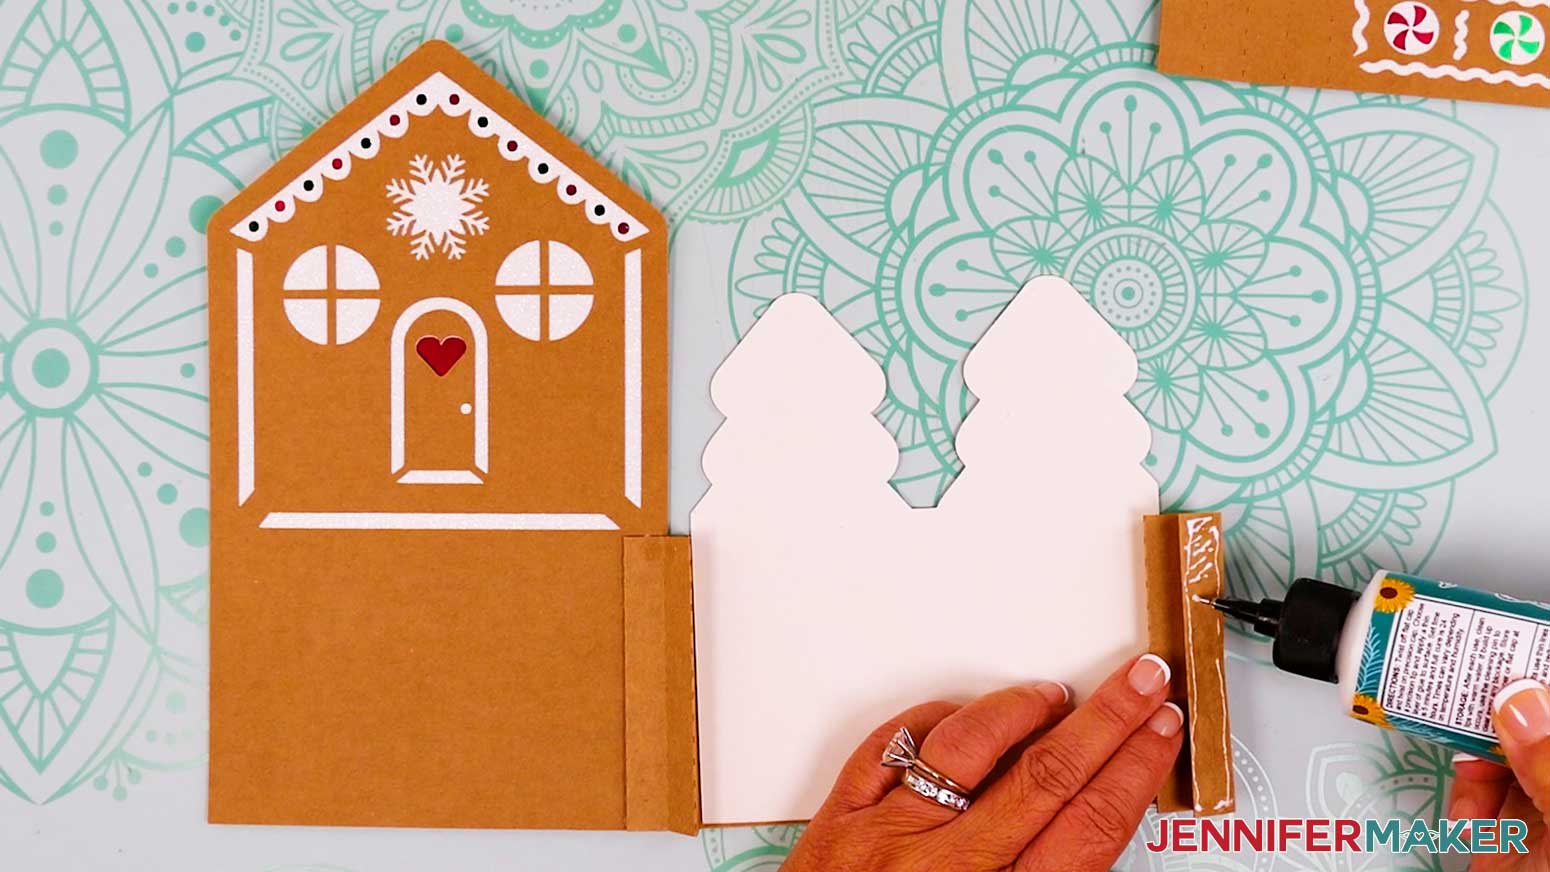
- Next, lay the assembled tree tier face down.
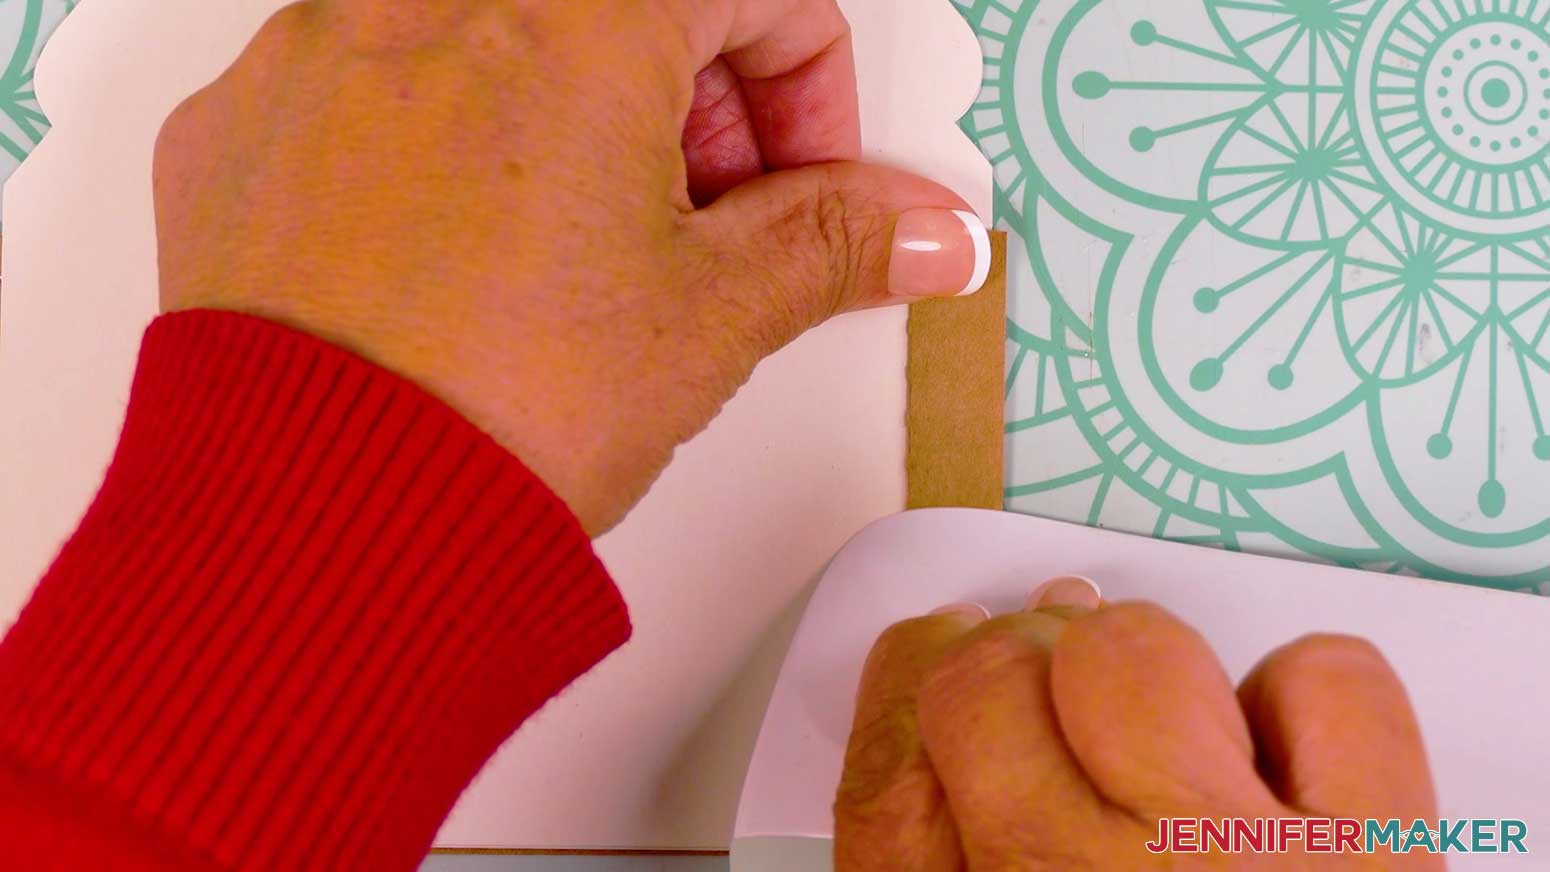
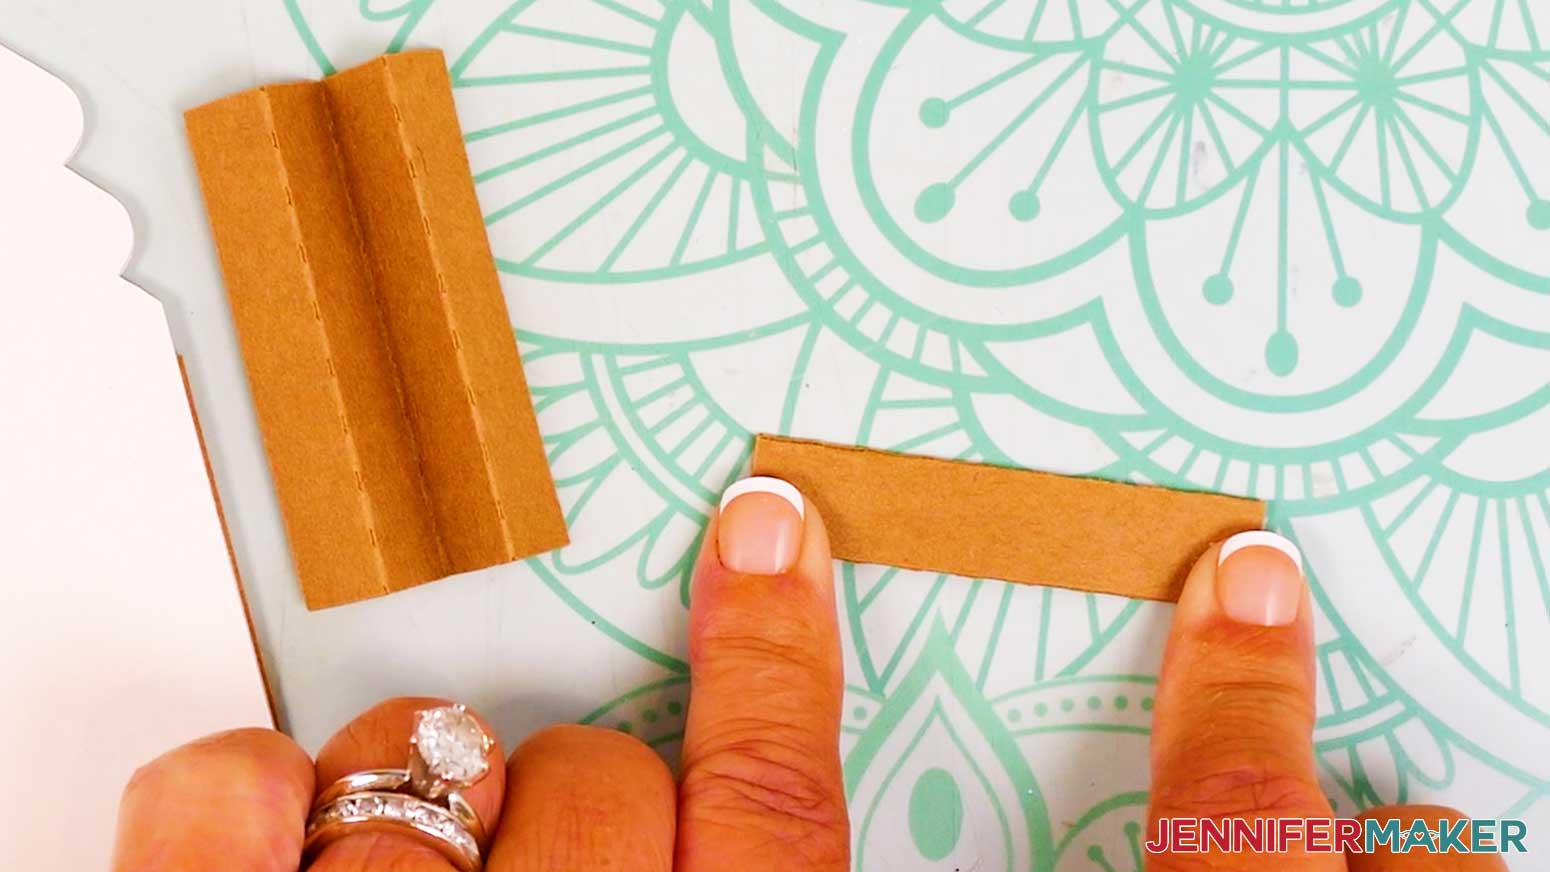
- To create an accordion fold so your card pops up between tiers, start by folding the right side inward along the innermost crease line.
TIP: Use a scraper tool to sharpen the folds. - Then fold the right side outward along the crease line adjacent to the last fold.
- Fold the right side inward again along the next crease line.
- Then fold the right side outward along the final crease line.
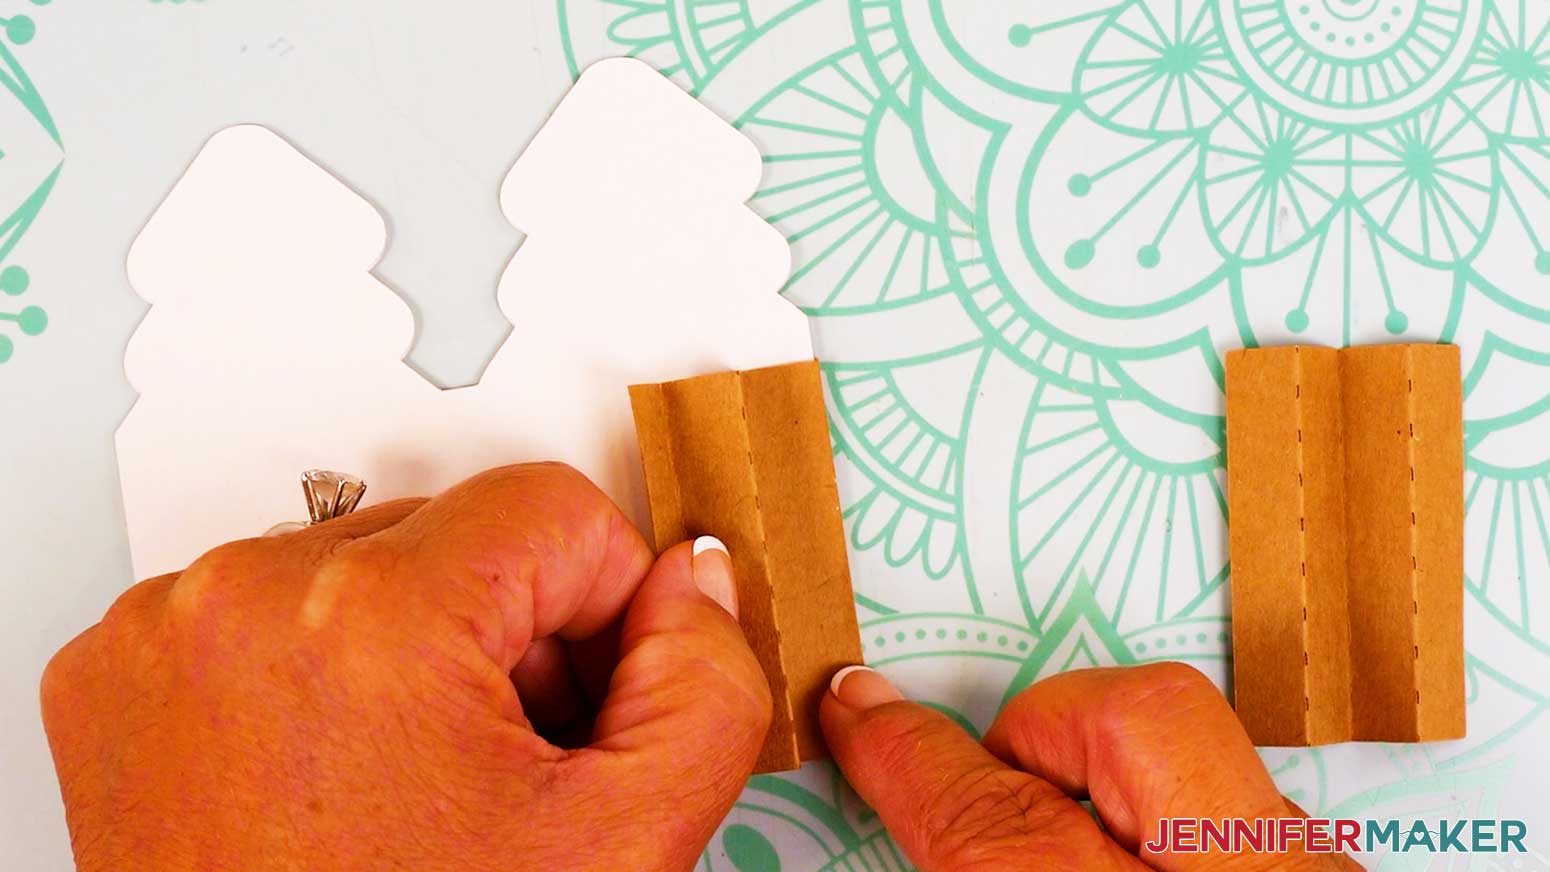
- Repeat Steps 20-23 to make an accordion fold on the left side of the tree tier.
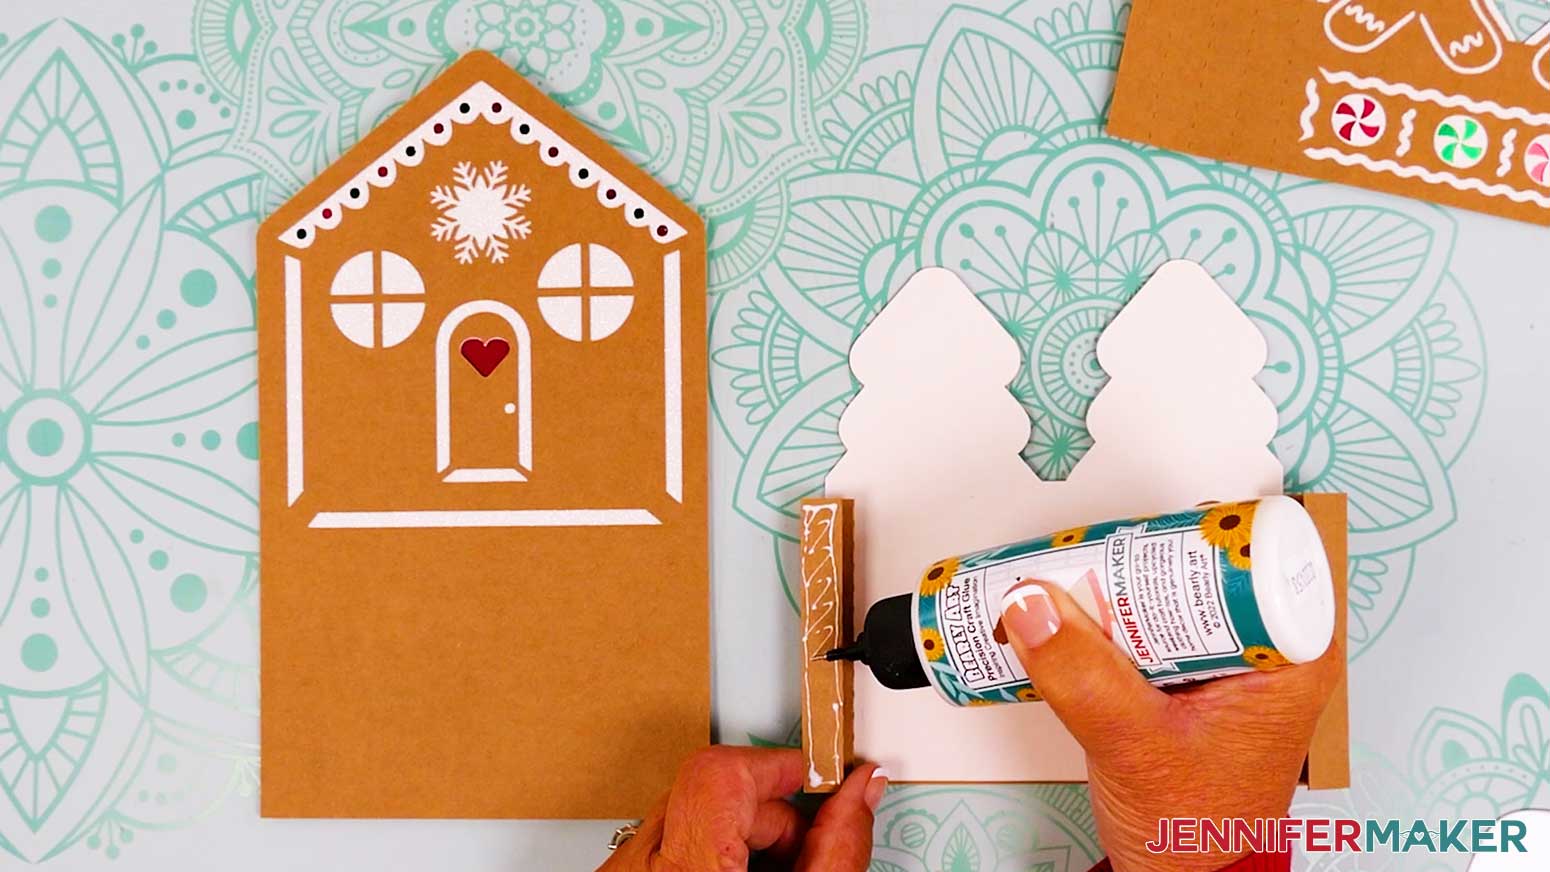
- Lay the house tier face up.
- Press the tree tier’s left accordion fold down, and add glue to the top flap.
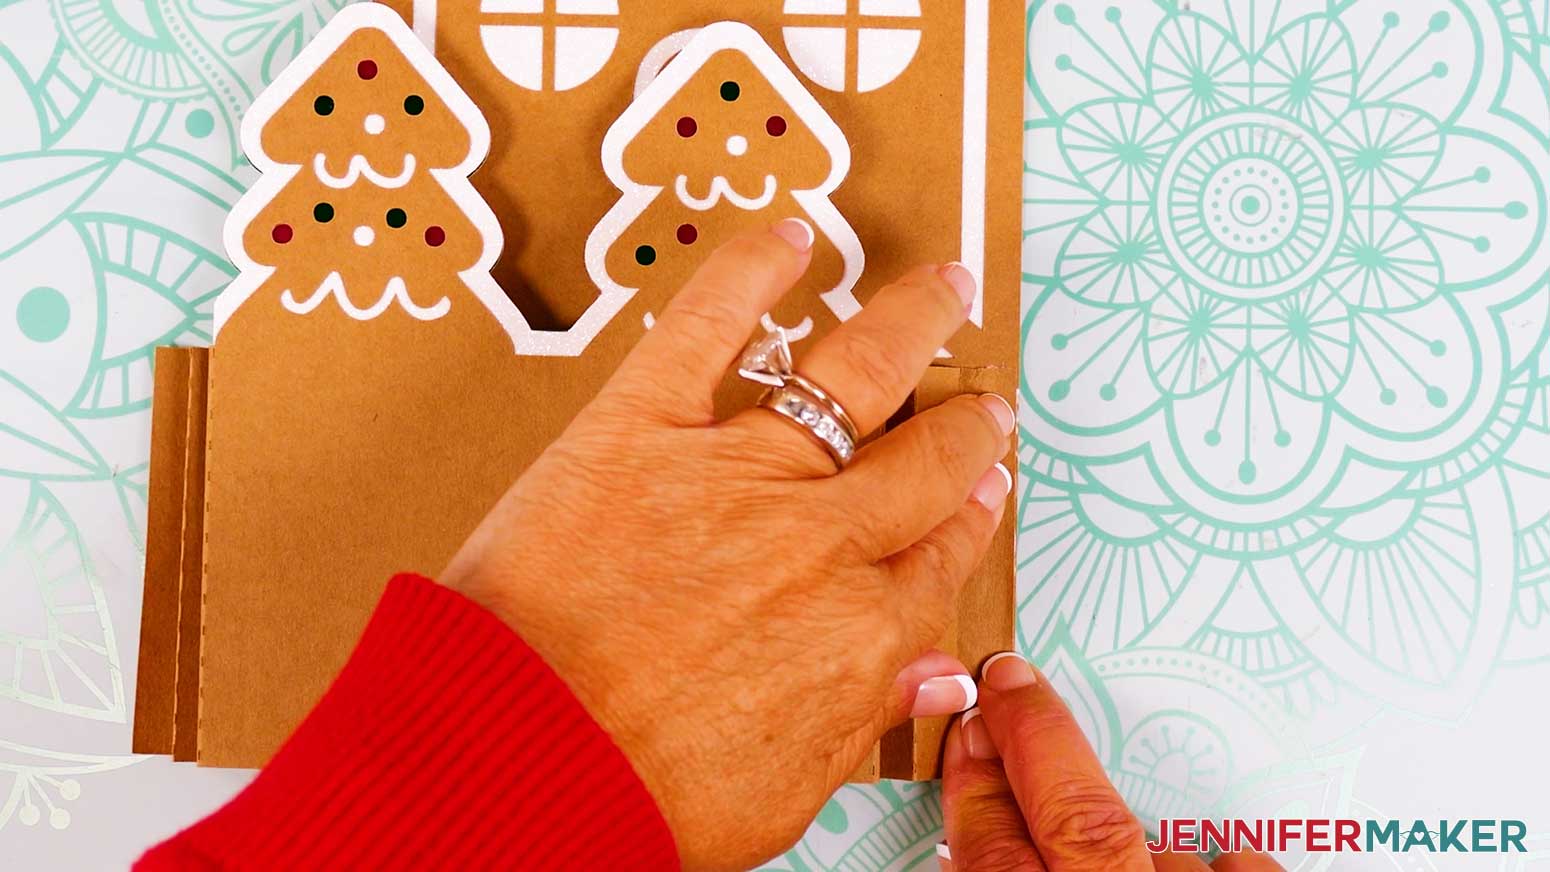
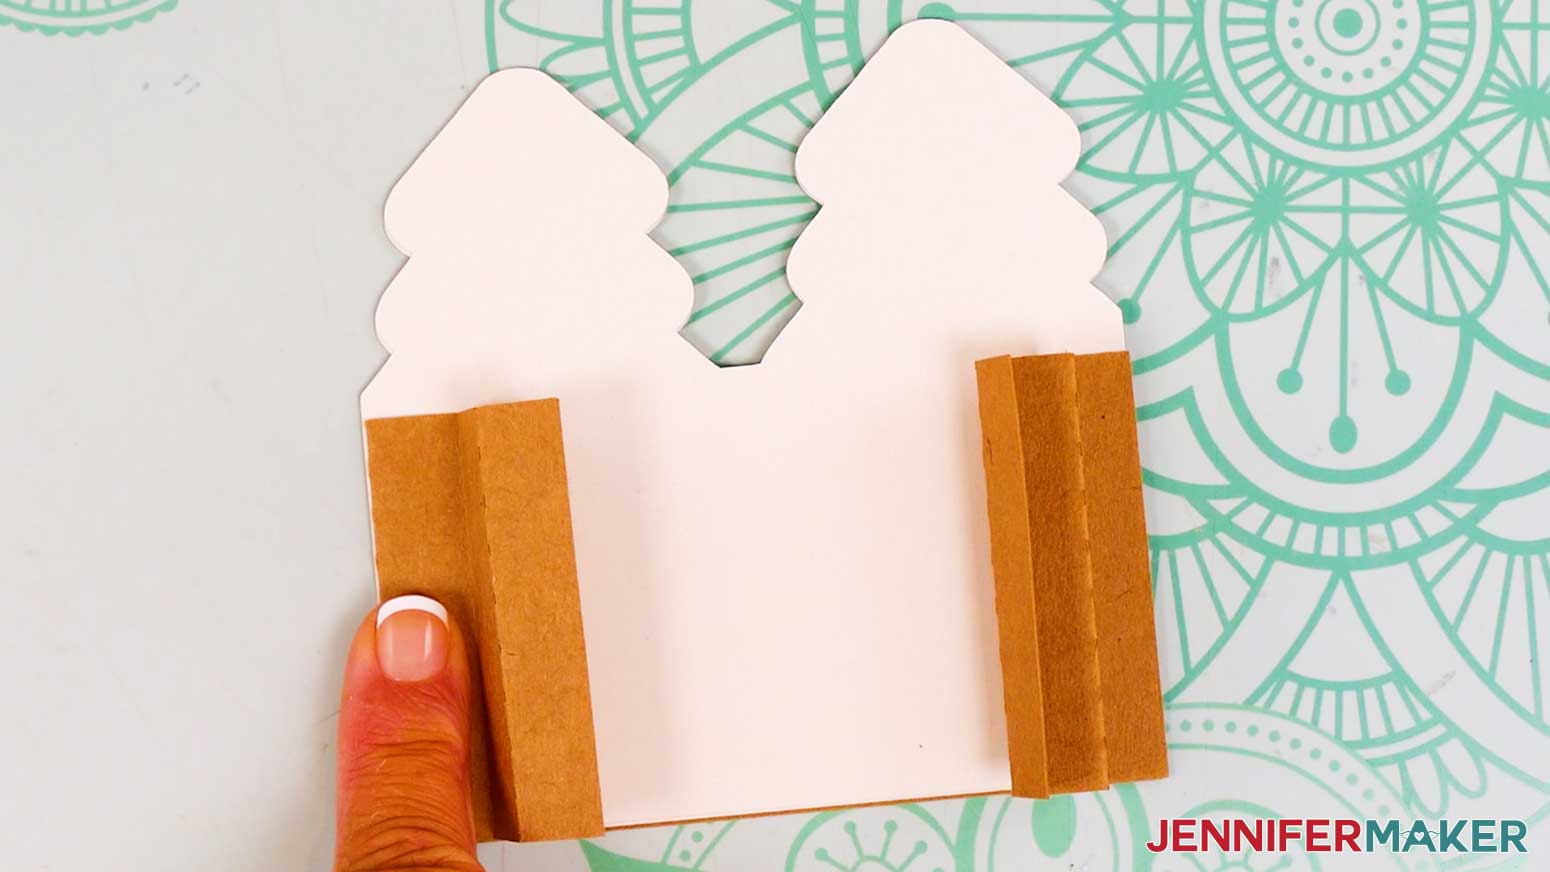
- Flip the tree tier over, and align the glued fold with the house tier’s bottom right corner, flush along the bottom and side edges.
- Press and hold to adhere.
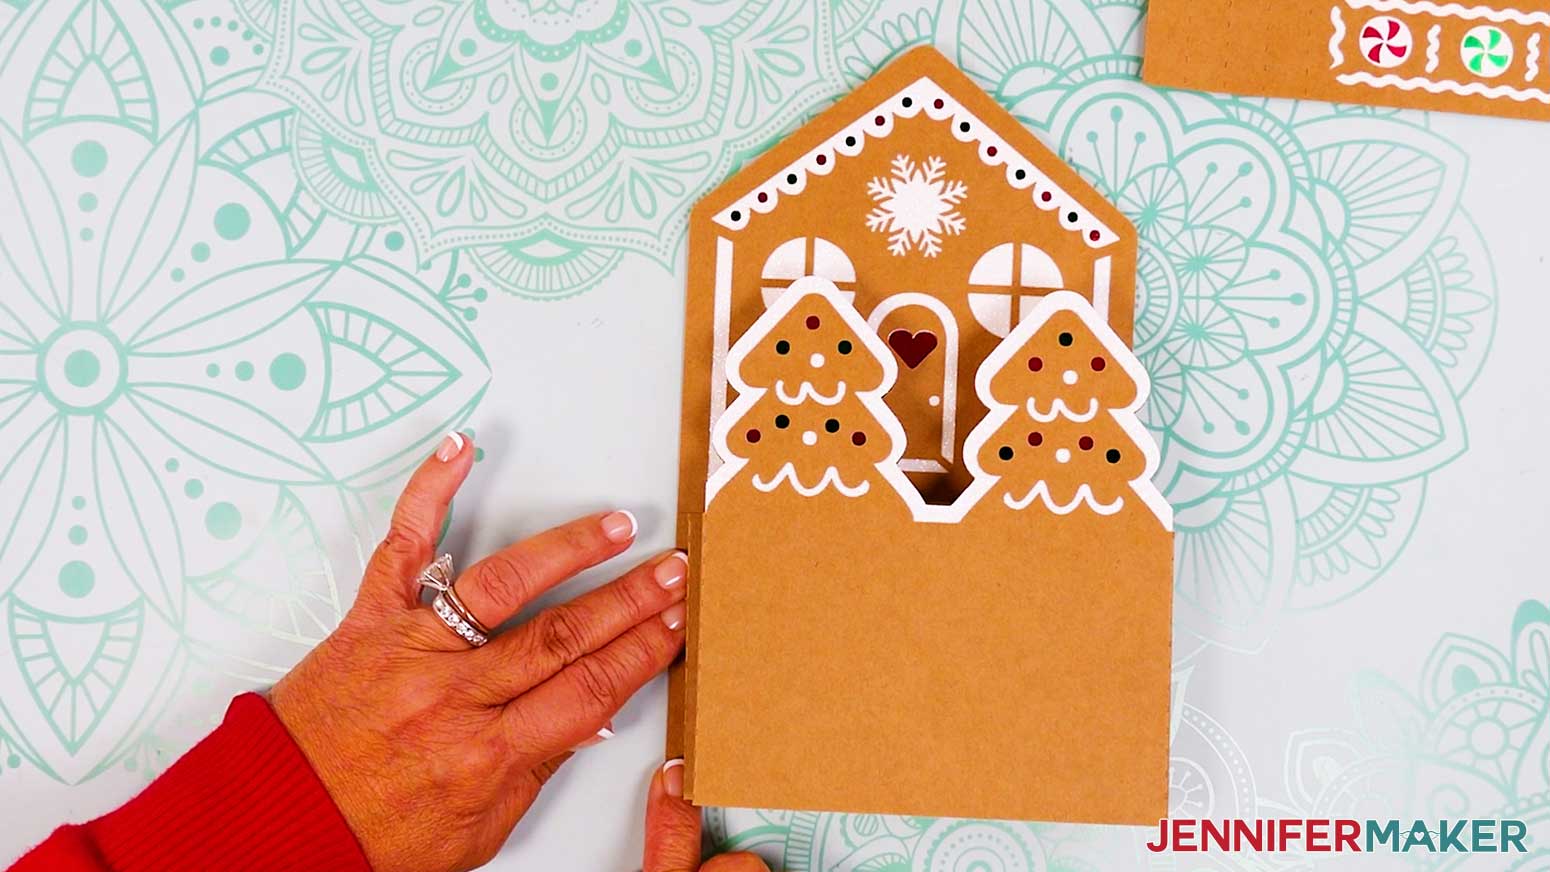
- Flip the tiers open so the tree tier is face down, then add glue to the right accordion fold’s top flap.
- Flip the tree tier over, and adhere the glued flap to the house layer’s bottom left corner.
- Next, lay the gingerbread people tier face down.
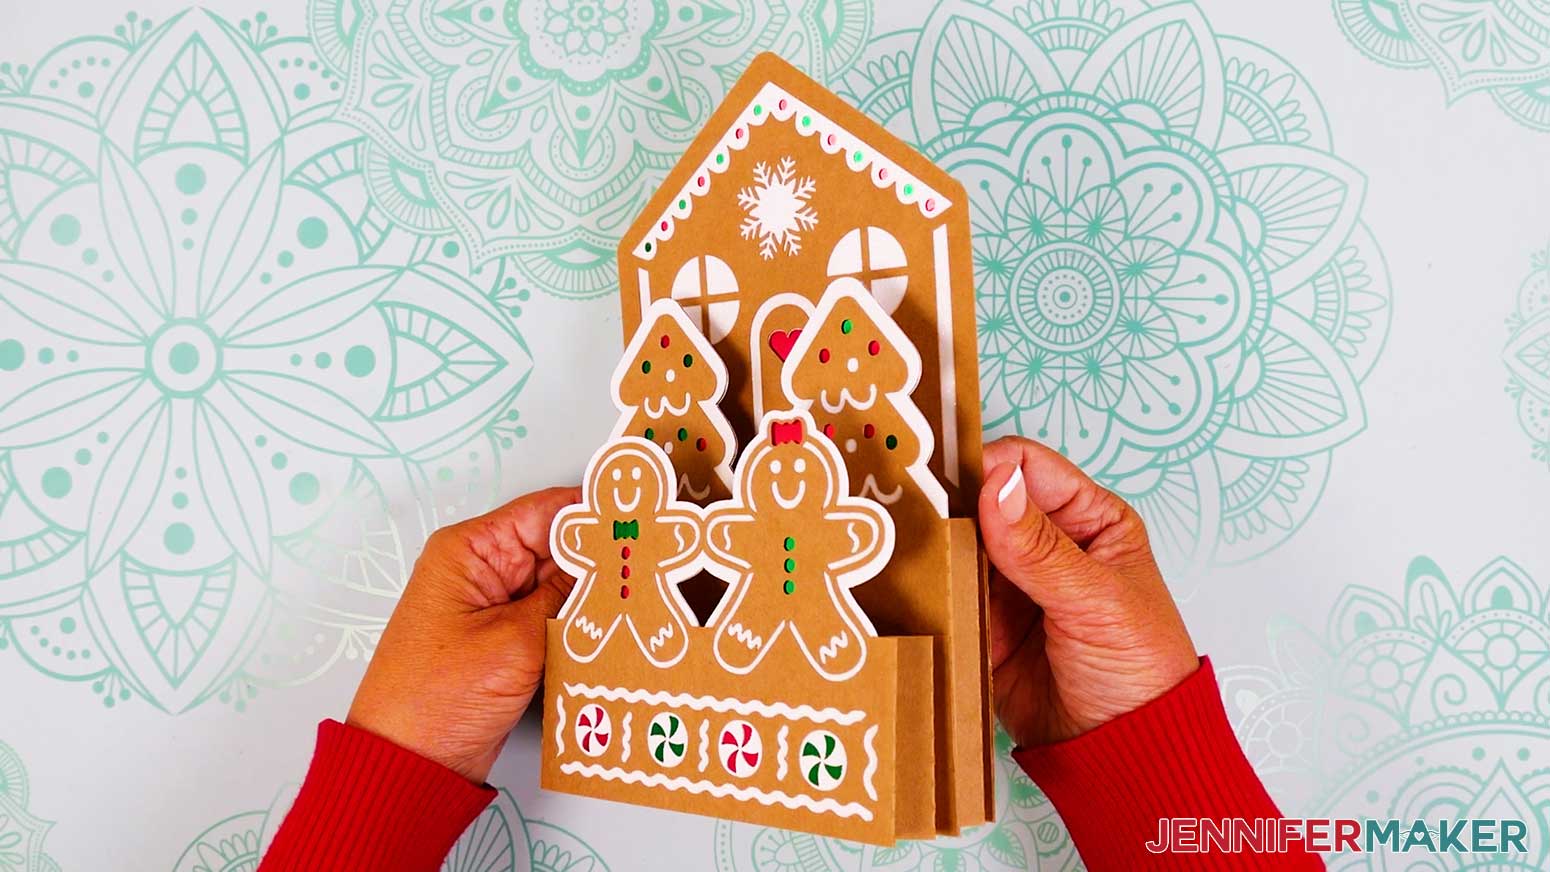
- Follow Steps 20-30 to make accordion folds on the left and right sides of the people tier, and then attach the people tier on top of the tree tier.
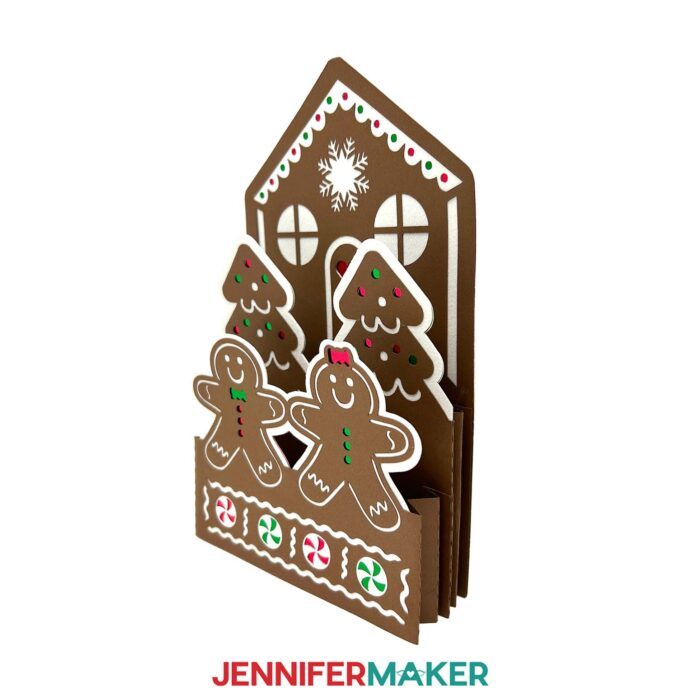
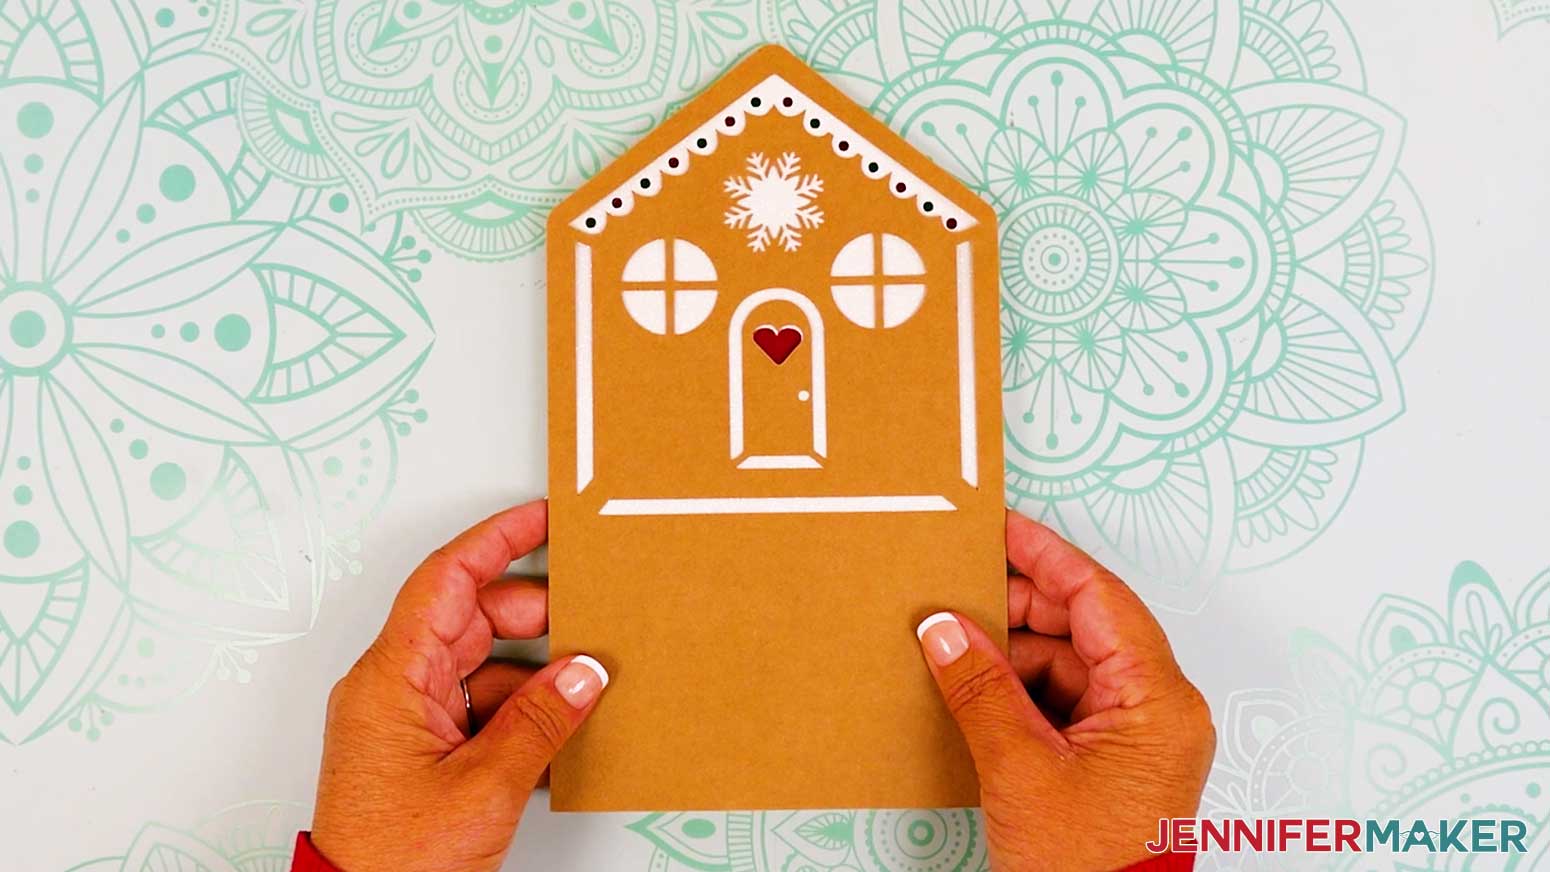
- Your gingerbread house pop-up card is ready!

VARIATION: JOY-SIZE POP-UP CARD ASSEMBLY
- Follow Steps 1-18 from the full-size pop-up card assembly instructions above to assemble the three card tiers.
- Lay the assembled tree tier face down.
- Fold each of the tree tier’s two side pieces along the crease lines in opposite directions to create an accordion fold (see Steps 20-24 in the full-size card assembly above).
NOTE: The tree tier’s side pieces are the longer ones. - Add glue to the top of one of the folded side pieces.
- Flip the glued piece over and align it with the tree tier’s bottom right corner, with the long, folded edge flush on the right side.
- Repeat Steps 4-5 to adhere the other folded side piece in the tree tier’s bottom left corner.
- Glue the tree tier’s attached sides to the house layer (see Steps 25-30 in the full-size card assembly above).
- Lay the assembled gingerbread people tier face down.
- Repeat Steps 3-7 to fold the gingerbread people tier’s side pieces and adhere them to the people tier and then the tree tier.
NOTE: The gingerbread people tier’s side pieces are the shorter ones. - The Joy version of your gingerbread house pop-up card is ready!
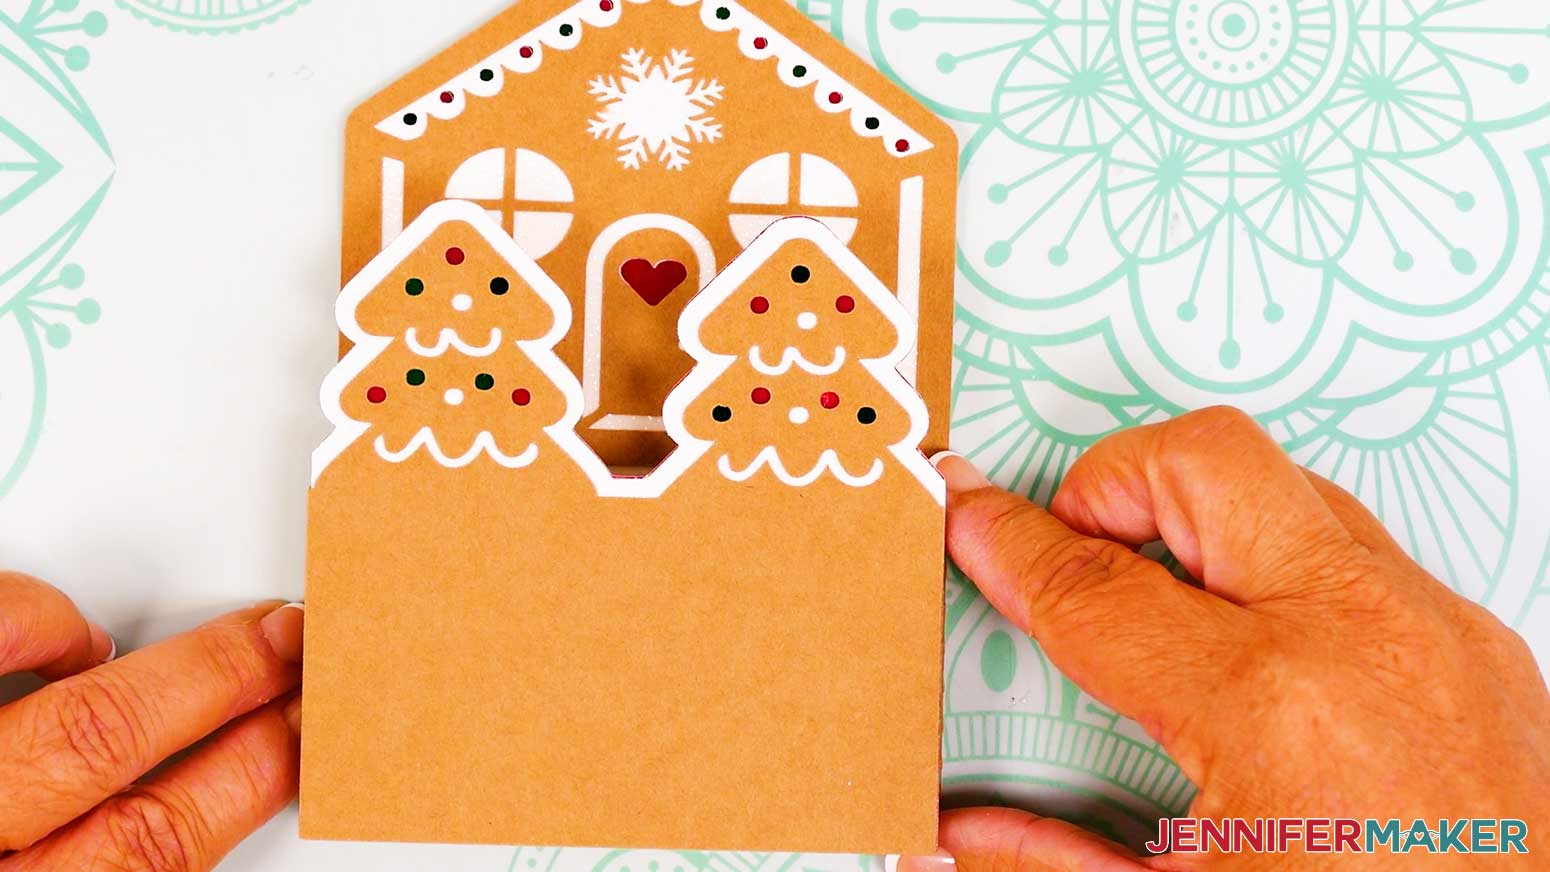
STEP 4: SHOW IT OFF
You now have an amazing gingerbread house pop-up card for spreading some holiday cheer! Just slip the card in an envelope and mail it to a friend or loved one–but plan for extra postage since your pop-up card is a bit heavy. You can even hand deliver the Joy version for a special surprise!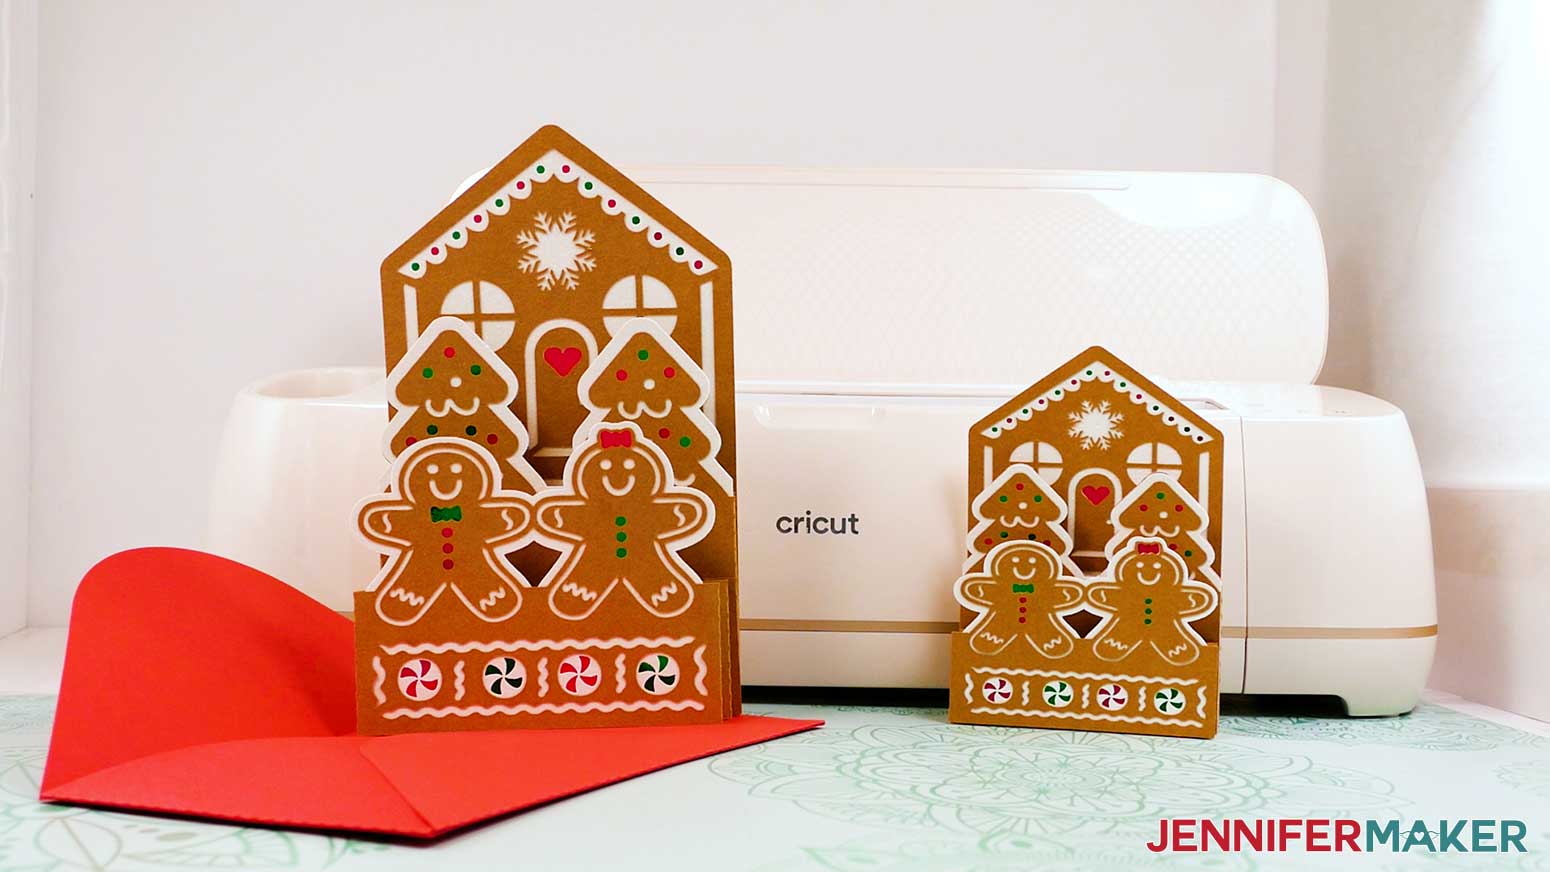
Notes
Finished Sizes
Large Card: 5.5" W x 9.2" H x .25" D
Joy Card: 4.2" W x 6.2" H x .25" D
Envelope: 9.75" W x 6.125" H
Font Used: Tingler Print, Free Alternative: Brannboll Stencil
Answers to Your Questions About Making a Gingerbread House Pop-Up Card
Q: I want to customize a gingerbread house pop-up card. How do I do that?
A: You can learn how to design a custom gingerbread house pop-up card in Canva in my ADVANCE program. Learn more about ADVANCE here!

Q: Can you show me how to make an easy pop-up card for Christmas?
A: Yes! My free video tutorial that shows you exactly how to make a festive gingerbread house pop-up card using cardstock and a Cricut is in this post.. It’s beginner-friendly, folds flat, and springs to life with layered, bouncy tiers!
Q: What is the best material for pop-up cards?
A: I recommend using medium-weight cardstock (65–80 lb) for pop-up cards. It’s sturdy enough to hold its shape but flexible enough to fold and layer easily. For added dimension, use different colors and textures to highlight each layer of your design.
Q: Do you have any other pop-up cards I can make?
A: I sure do! Check out my pop-up holiday manor card, hot air balloon pop-up card, grill pop-up card, apple tree pop-up card, light-up pop-up winter card, pop-up birdcage card, easy butterfly pop-up card, rainbow heart pop-up card, pop-up birthday cake card, impossible card, gamer pop-up card, and fairy house pop-up card.
Q: Can I make and sell these gingerbread house pop-up card designs?
A: I love supporting creative entrepreneurs! If you want to use my designs and projects for commercial use, please familiarize yourself with my important licensing information before selling your crafts.
I do not permit sale of my digital items, but you can sell the creative goods you make with them — as long as you follow my licensing requirements. That means you cannot sell the gingerbread house pop-up card SVG files, but you can sell cards that you made with the files within the guidelines linked above.
Get my free SVG files to make a gingerbread house pop-up card!
(If you do not see the signup form above, click here.)
I love seeing what you make with my tutorials and how you customize them! Please share a photo of your gingerbread house pop-up card in our Facebook group or tag me on social media with #jennifermaker.
Love,

Want to remember this? Save this Gingerbread House Pop-Up Card tutorial to your favorite Pinterest Board!