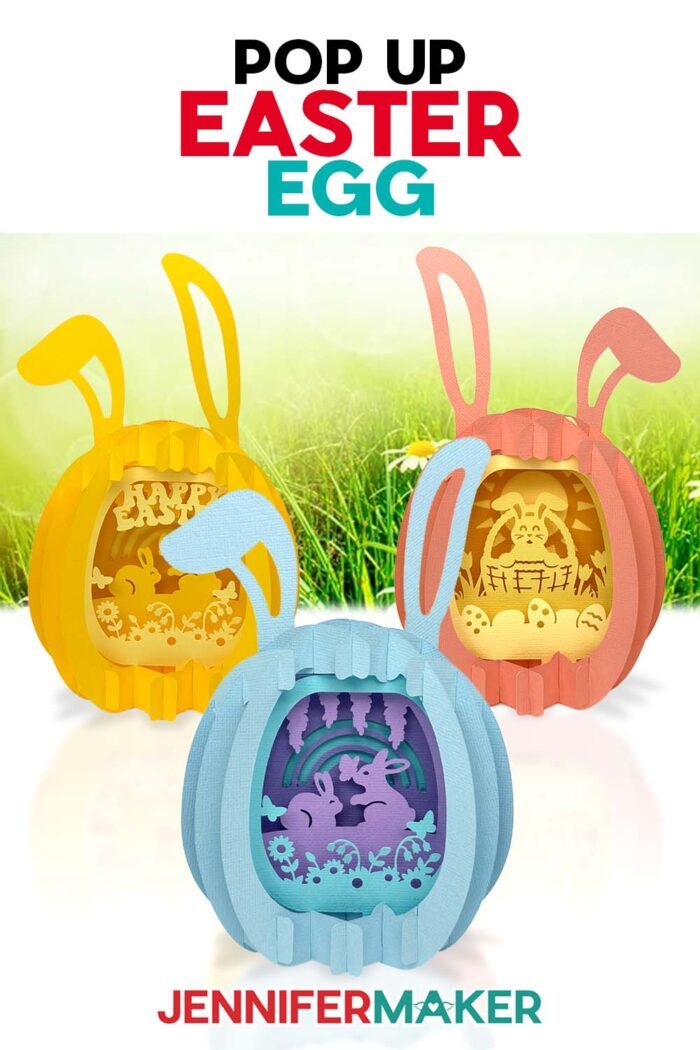
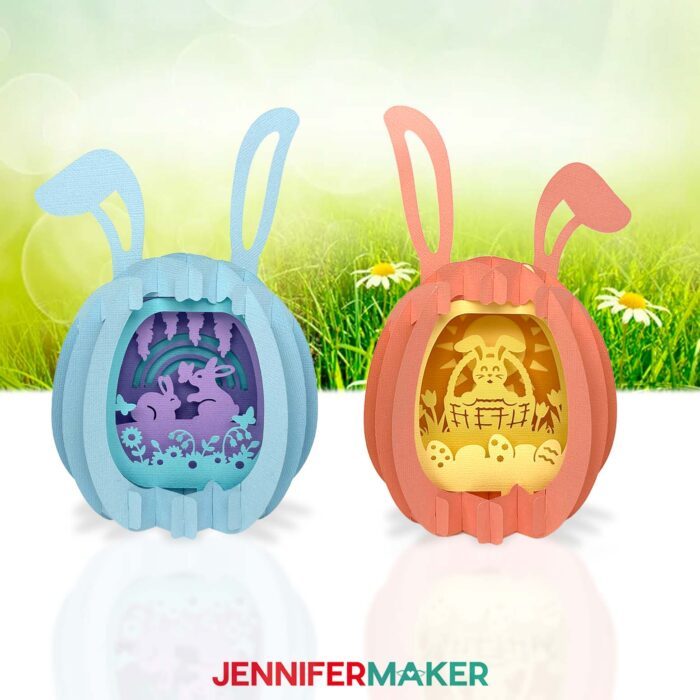
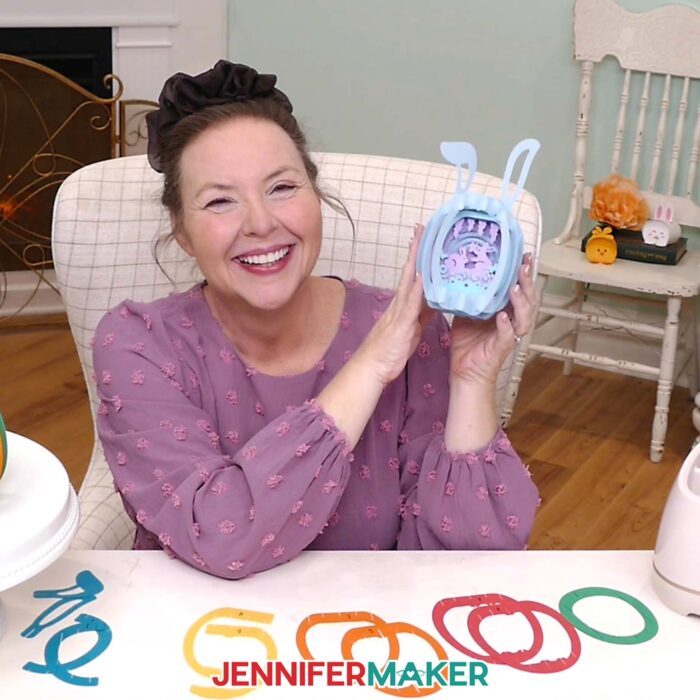
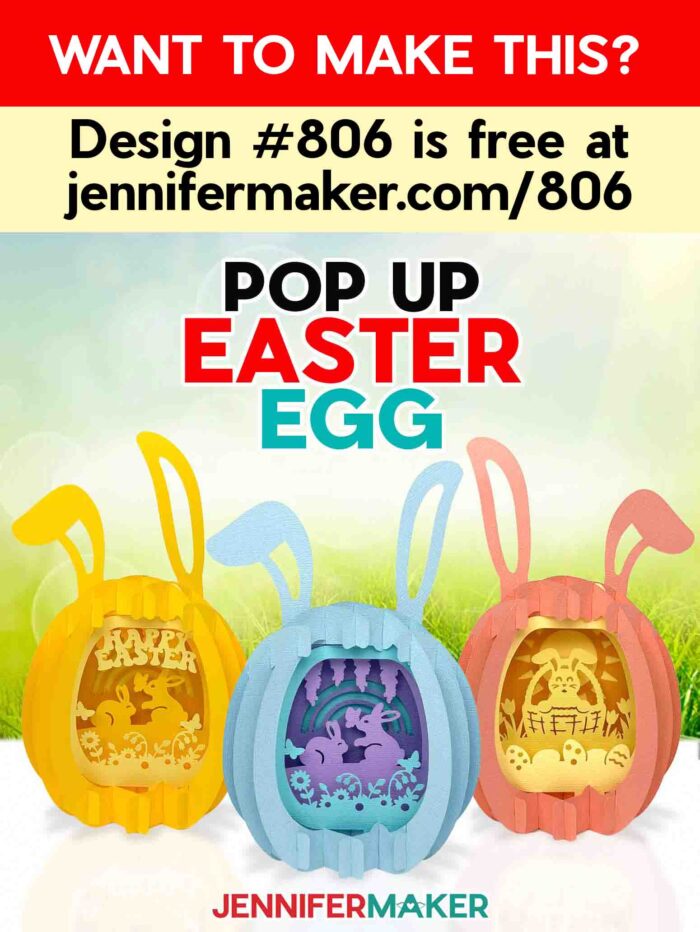
Learn how to make a paper pop up Easter egg that folds flat, then opens to reveal a surprise springtime scene!
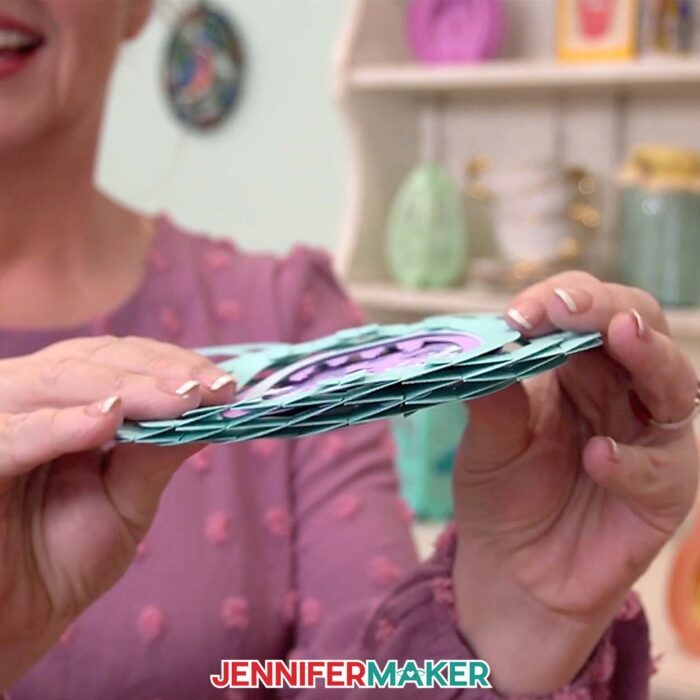
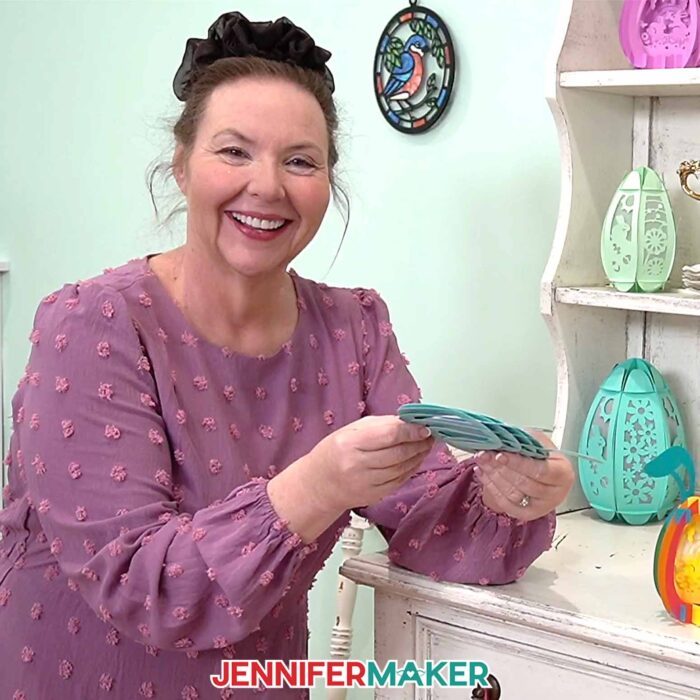
You know that moment when simple sheets of paper turn into something that feels almost impossible? That’s what it’s like to make a Paper Pop Up Easter Egg. It’s a clever 3D design that folds completely flat, then opens into a layered surprise! It’s the kind of project that looks super intricate and impressive, but is actually built in a way that makes it totally doable, even if you’re newer to paper crafting.
Need help with Cricut Design Space?
This video walks you through how to set up the design. If you’re already comfortable with Design Space, you can skip this and go straight to the assembly tutorial video.

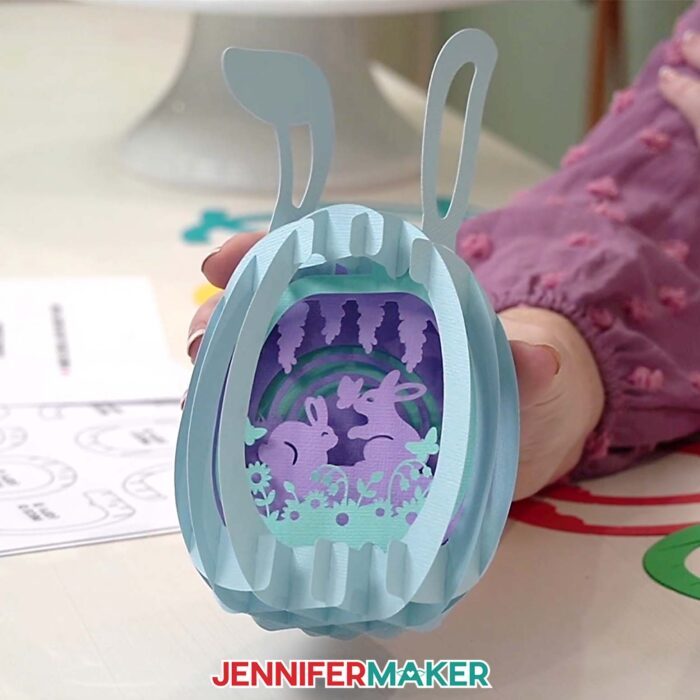
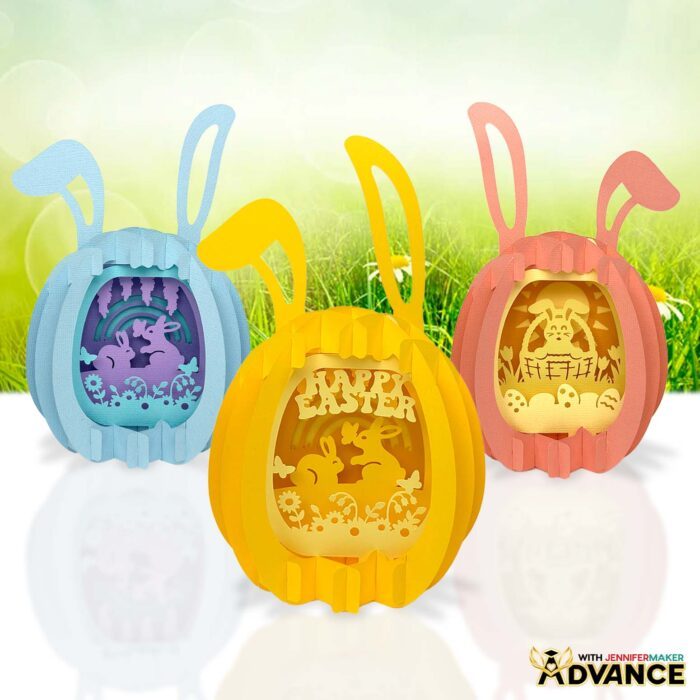
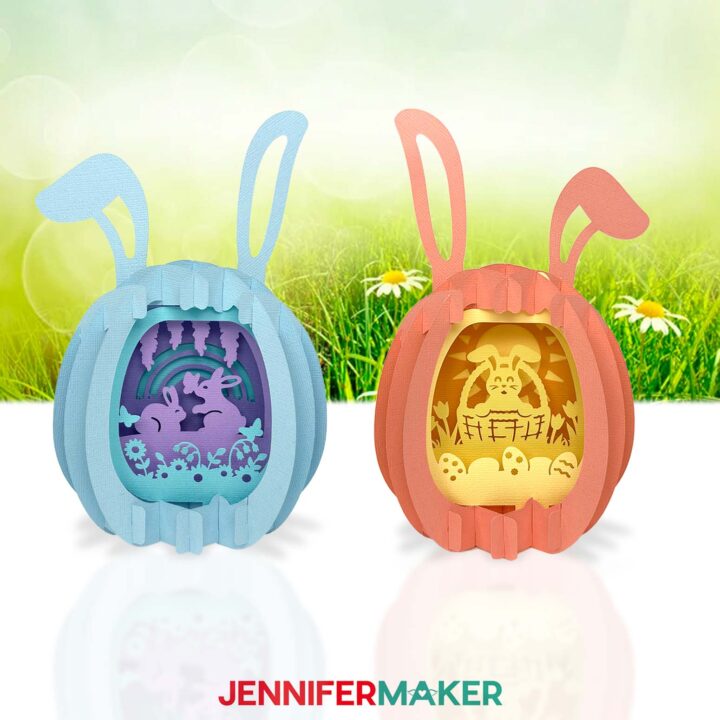
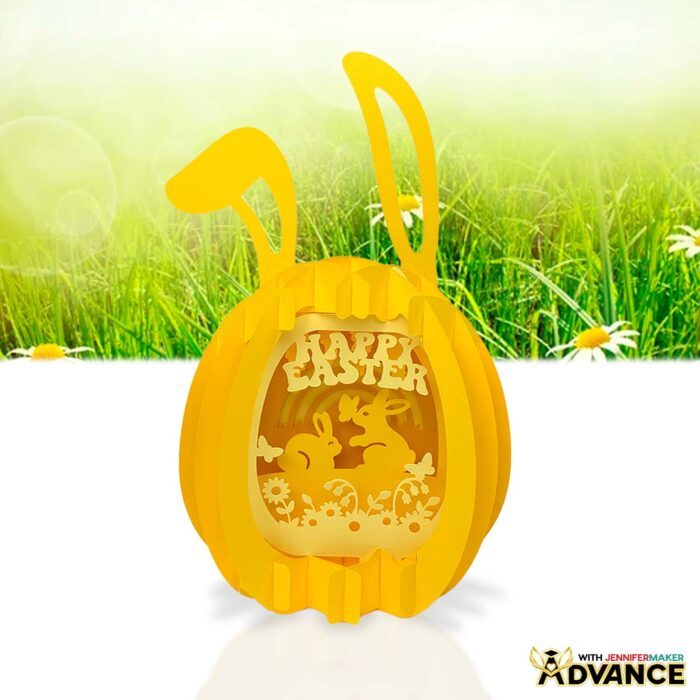
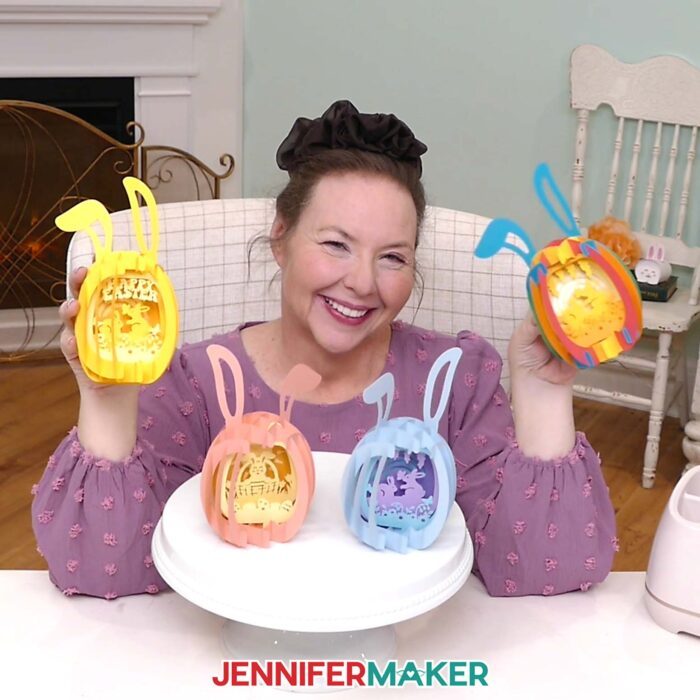
This project turns simple cardstock into something that feels intricate and impressive without glue, stress, or guesswork. In my free tutorial, I teach you how to assemble cut paper shapes into a three-dimensional egg shape that pops up to reveal the sweetest little scenes inside. I created two designs for you to try: one with a pair of cute bunnies in a field of flowers and butterflies, and another with an Easter basket filled with a hoppy surprise. There’s even optional bunny ears you can add to the top!
It’s one of those Easter crafts that looks complicated… but there’s a better way to build it than you might expect.
Here’s what we’ll be working with:
- Cardstock (65–80 lb works beautifully)
- Cricut machine (or hand-cut option using my PDF)
- Fine Point Blade and Cricut pen (for labeling)
- StandardGrip mat
- Basic Cricut papercrafting tools
- My printable Assembly Diagram
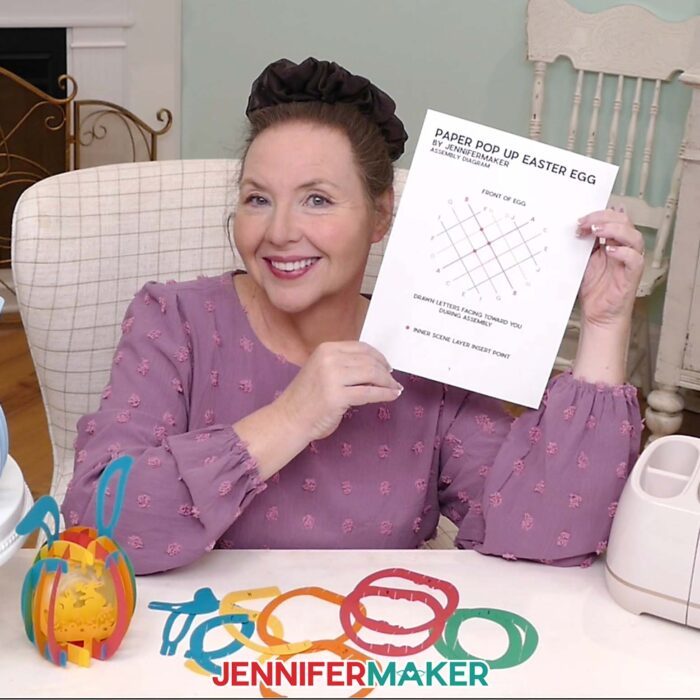
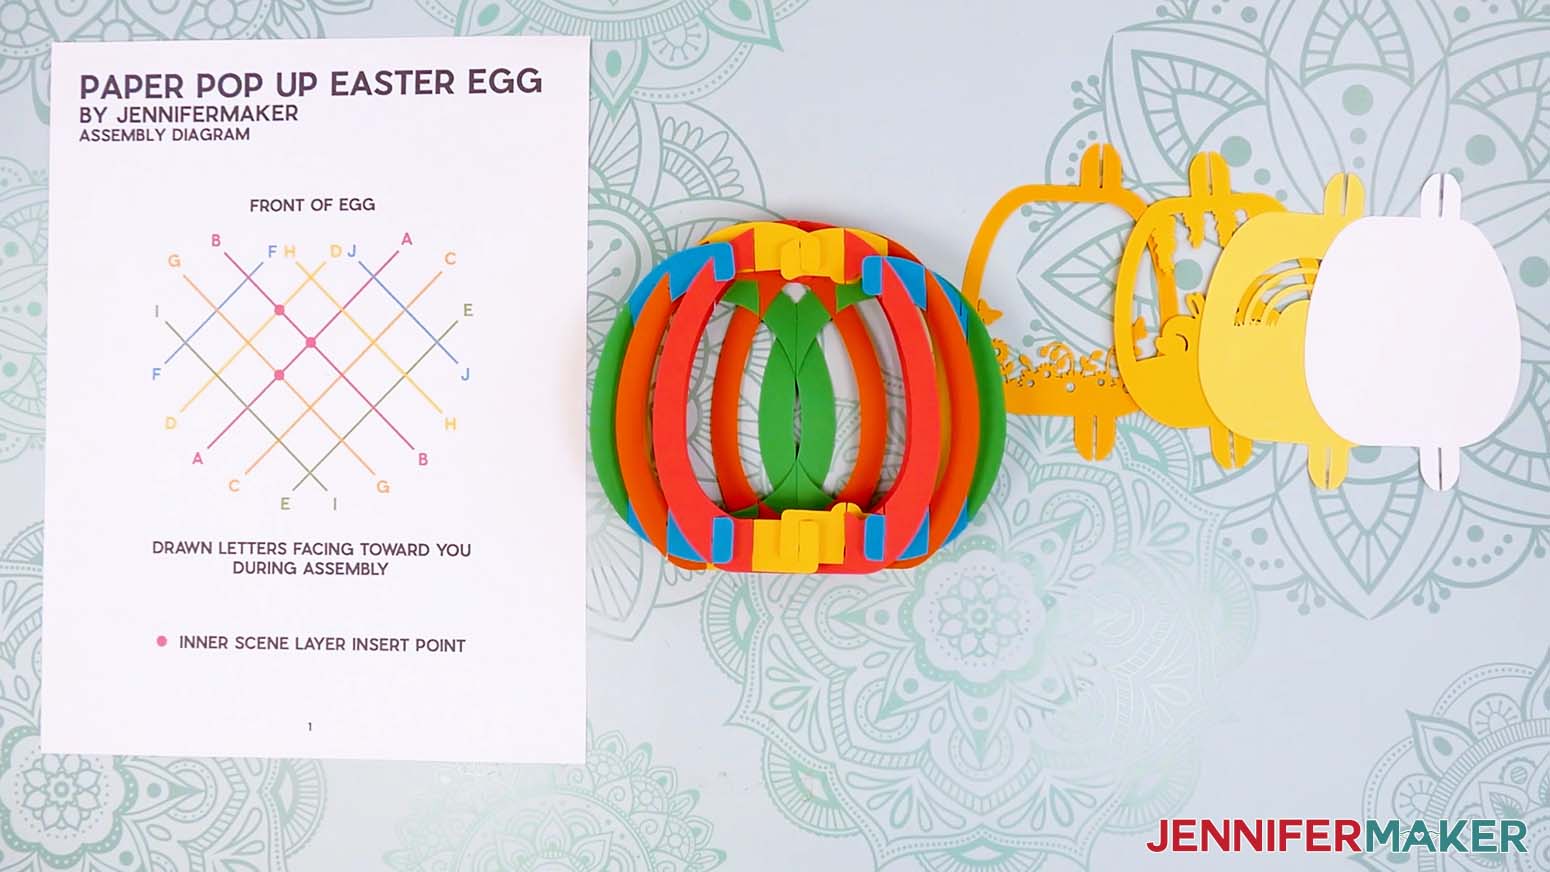
To make assembly as easy as possible, I demonstrate how to build a practice version using rainbow colors that match the printed Assembly Diagram. Each piece is lettered and color-coded so you can clearly see how everything connects, especially that all-important center X, which holds the whole structure together.
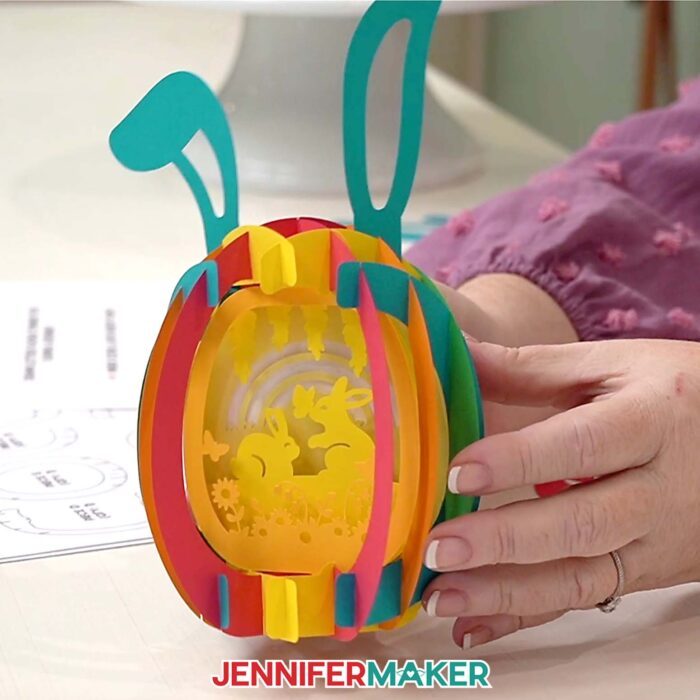
The first step is to build the center X structure. That’s your foundation. From there, it’s just matching letters and sliding pieces into place, watching your paper egg transform into one of the most lovely Easter cards or display pieces you can make by hand. Once the outer shell is complete, I’ll show you how to add the layered scene inside to bring your paper pop up Easter egg to life.
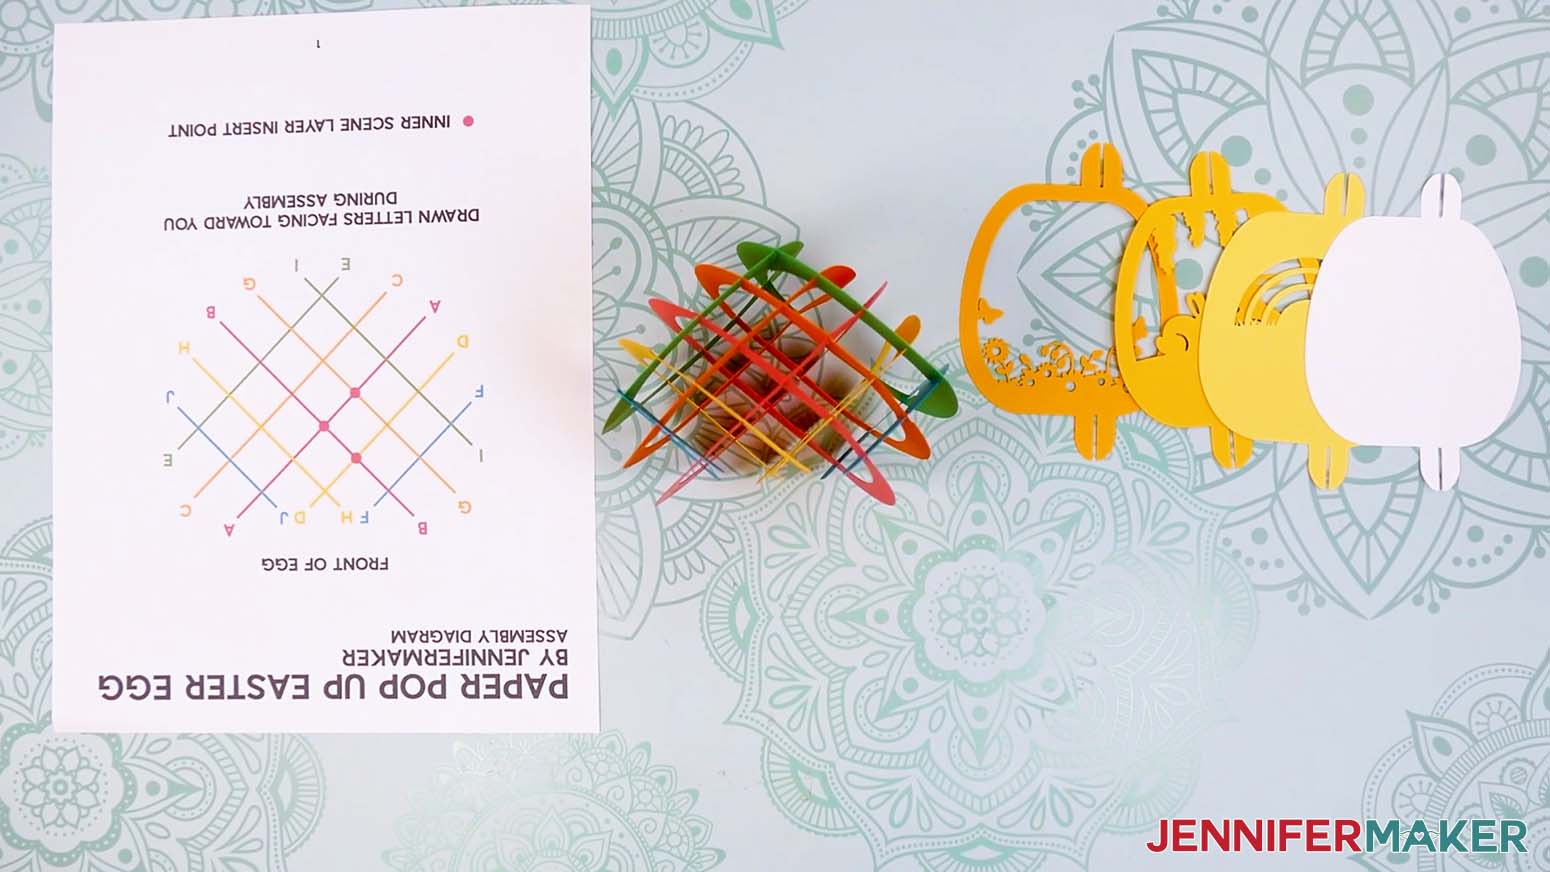
Want to know one of the coolest parts? It folds flat for mailing and storage!
After you get the hang of making your first paper pop up Easter egg, you can recreate another in your favorite colors (like soft, springy pastels) with total confidence, whether you display it as decor or gift it to someone special.
If you’re ready to take this project a step further, there’s an ADVANCE tutorial that shows you exactly how to customize the inner layers with text, so you can turn this into a personalized keepsake. It’s perfect if you want to add that extra wow factor or create something truly one-of-a-kind for a loved one.
Be sure to follow along with my free video tutorial and Assembly Diagram. I recommend watching once to see how the paper pop up Easter egg pieces come together, then crafting along the second time. Check out my FAQ section below for more info on how to make them, too. It makes the whole process of this fun seasonal activity feel totally doable!
Do you want to learn how to make paper pop up Easter egg crafts? Let me show you how fun and easy it is to make your own Easter eggs with my free tutorial and cut files! This post contains some affiliate links for your convenience (which means if you make a purchase after clicking a link I will earn a small commission but it won’t cost you a penny more)! Read my full disclosure policy.
Materials to Make Paper Pop Up Easter Eggs
View my Amazon shopping list with the exact items I used.
- Two to Five (2-5) Sheets of 8.5″ x 11″ or 12″ x 12″ 65 lb. Solid Core Cardstock (any colors) -OR-
- Two to Five (2-5) Sheets of 8.5″ x 11″ or 12″ x 12″ 80 lb. Solid Core Cardstock (any colors) -OR-
- Fifteen (15) Sheets of 4.5″ x 6.5″ 65 lb. Solid Core Cardstock (any colors, for cutting on the Cricut Joy) -OR-
- Fifteen (15) Sheets of 4.5″ x 8.6″ 80 lb. Solid Core Cardstock (any colors, for cutting on the Cricut Joy)
- Cricut Fine Point (0.4mm) Pen or Cricut Joy Fine Point (0.4mm) Pen (for piece labels)
- A way to cut your cardstock – I’m using the Cricut Maker 4, but you can also use any Cricut Maker series machine, a Cricut Explore Series machine, the Cricut Venture, the Cricut Joy, Cricut Joy 2, or the Cricut Joy Xtra
- Cricut StandardGrip Machine Mat 12″ x 12″ or Cricut Joy StandardGrip Machine Mat
- Brayer
- Spatula
- Scraper
- Tweezers (optional for assembly)
- Weeding Tool (optional for poking out small cut details)
- Paper Trimmer (optional for cutting down cardstock to fit a Joy or Joy 2 machine mat)
- Design #806 (My free SVG/DXF/PDF design files are available in my free library – get the password by filling out the form at the bottom of this page)
How to Make a Paper Pop Up Easter Egg
Paper Pop Up Easter Egg
Learn how to make a paper pop up Easter egg with a sliceform design.
Materials
- Two to Five (2-5) Sheets of 8.5" x 11" or 12" x 12" 65 lb. Solid Core Cardstock (any colors) -OR-
- Two to Five (2-5) Sheets of 8.5" x 11" or 12" x 12" 80 lb. Solid Core Cardstock (any colors) -OR-
- Fifteen (15) Sheets of 4.5" x 6.5" 65 lb. Solid Core Cardstock (any colors, for cutting on the Cricut Joy) -OR-
- Fifteen (15) Sheets of 4.5" x 6.5" 80 lb. Solid Core Cardstock (any colors, for cutting on the Cricut Joy)
- Design #806 (My free SVG/DXF/PDF design files are available in my free resource library - get the password by filling out the form at the bottom of this page)
Tools
- A way to cut your cardstock - I’m using the Cricut Maker 4, but you can use any Cricut Maker Series machine, a Cricut Explore Series machine, the Cricut Venture, the Cricut Joy Xtra, or the Cricut Joy
- Cricut Green StandardGrip Machine Mat 12" x 12” -OR-
- Cricut Joy StandardGrip Machine Mat
- Brayer
- Spatula
- Scraper
- Weeding Tool (optional for poking out small cutouts)
- Tweezers (optional)
- Paper Trimmer (optional for cutting down cardstock to fit a Joy mat)
- Cricut Fine Point (0.4mm) Pen (for piece labels) -OR-
- Cricut Joy Fine Point (0.4mm) Pen (for piece labels)
Instructions
STEP 1: GET MY FREE PAPER POP UP EASTER EGG DESIGNS
First, download my Paper Pop Up Easter Egg files from my free library – look for Design #806. Alternatively, you can use the Save This Project form near the top of this post and the design link will be emailed to you.
In the SVG folder, you’ll find one version with a “basket” and another with “bunnies” to cut on a Cricut. There’s also a DXF folder with versions for use with other cutting machines.
In the PDF folder, there is a reference assembly guide to help you put the pieces together correctly. I suggest printing it in color and taking notes to reflect your design using the Adobe Acrobat steps from STEP 2 of my Pipe Cleaner Flowers tutorial.
There is also a PDF version of my designs that you can print and cut by hand.
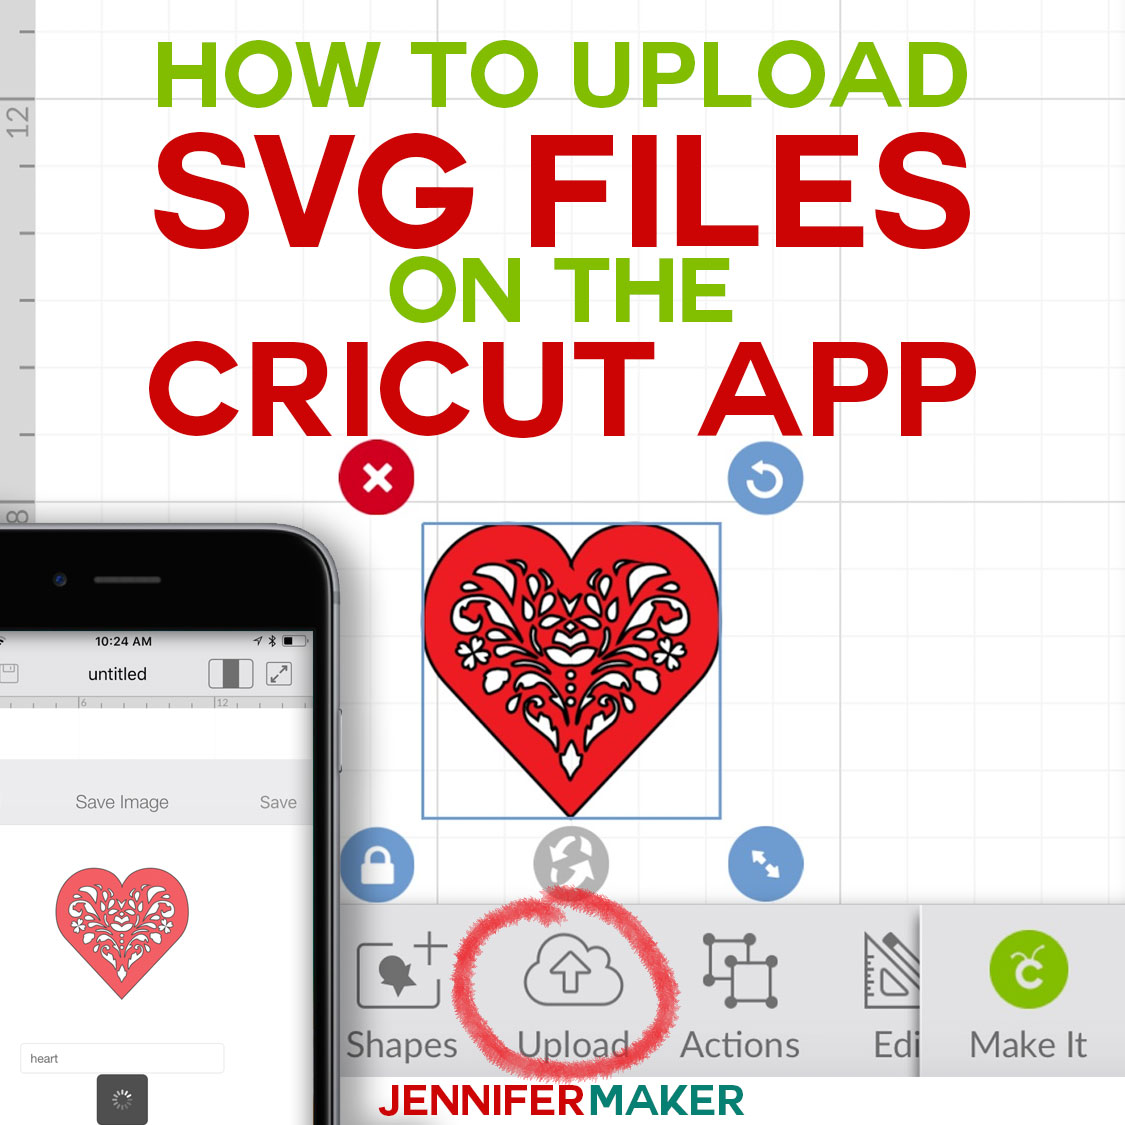
TIP: If you’re not sure how to upload, go to jennifermaker.com/svgs to learn how to unzip and upload SVG files.
STEP 2: PREPARE AND CUT YOUR POP UP EASTER EGG DESIGN
CRICUT DESIGN SPACE
- In Cricut Design Space, open a blank Canvas.
NOTE: If you’re new to using Cricut Design Space, go to cricutkickoff.com for my introductory tutorial on Design Space basics. - Click “Upload” and then “Upload Image.”
- Click “Browse.”
- Select the SVG file from the design folder.
NOTE: I’ll demonstrate with the “bunnies” design, but these directions work for the “basket” design, too. - Click “Open,” and then “Continue.”
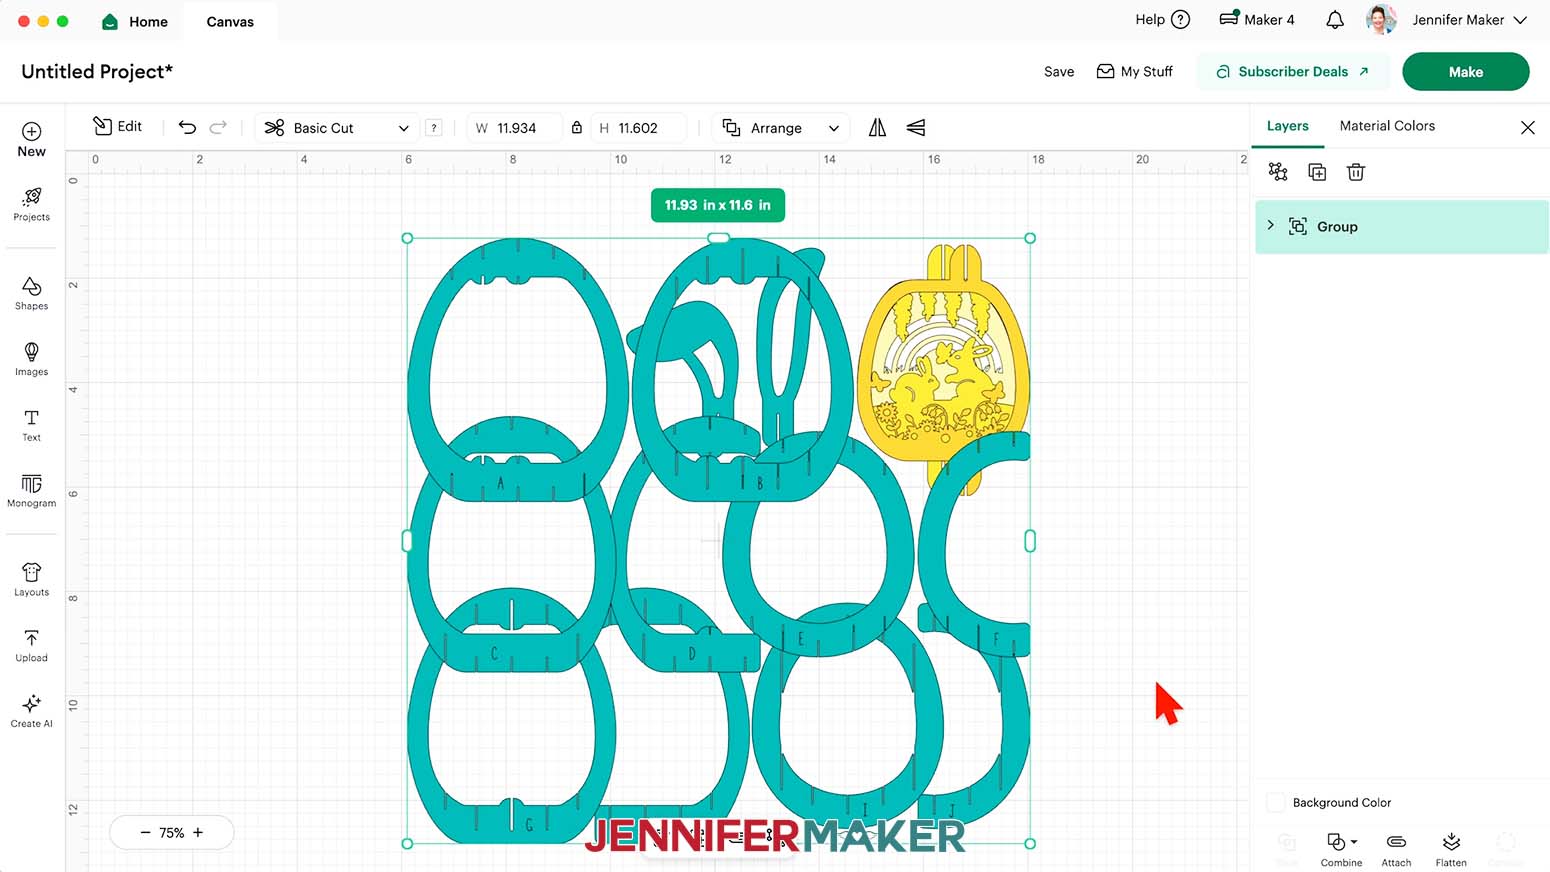
- Click “Upload” to add the design to your Canvas.
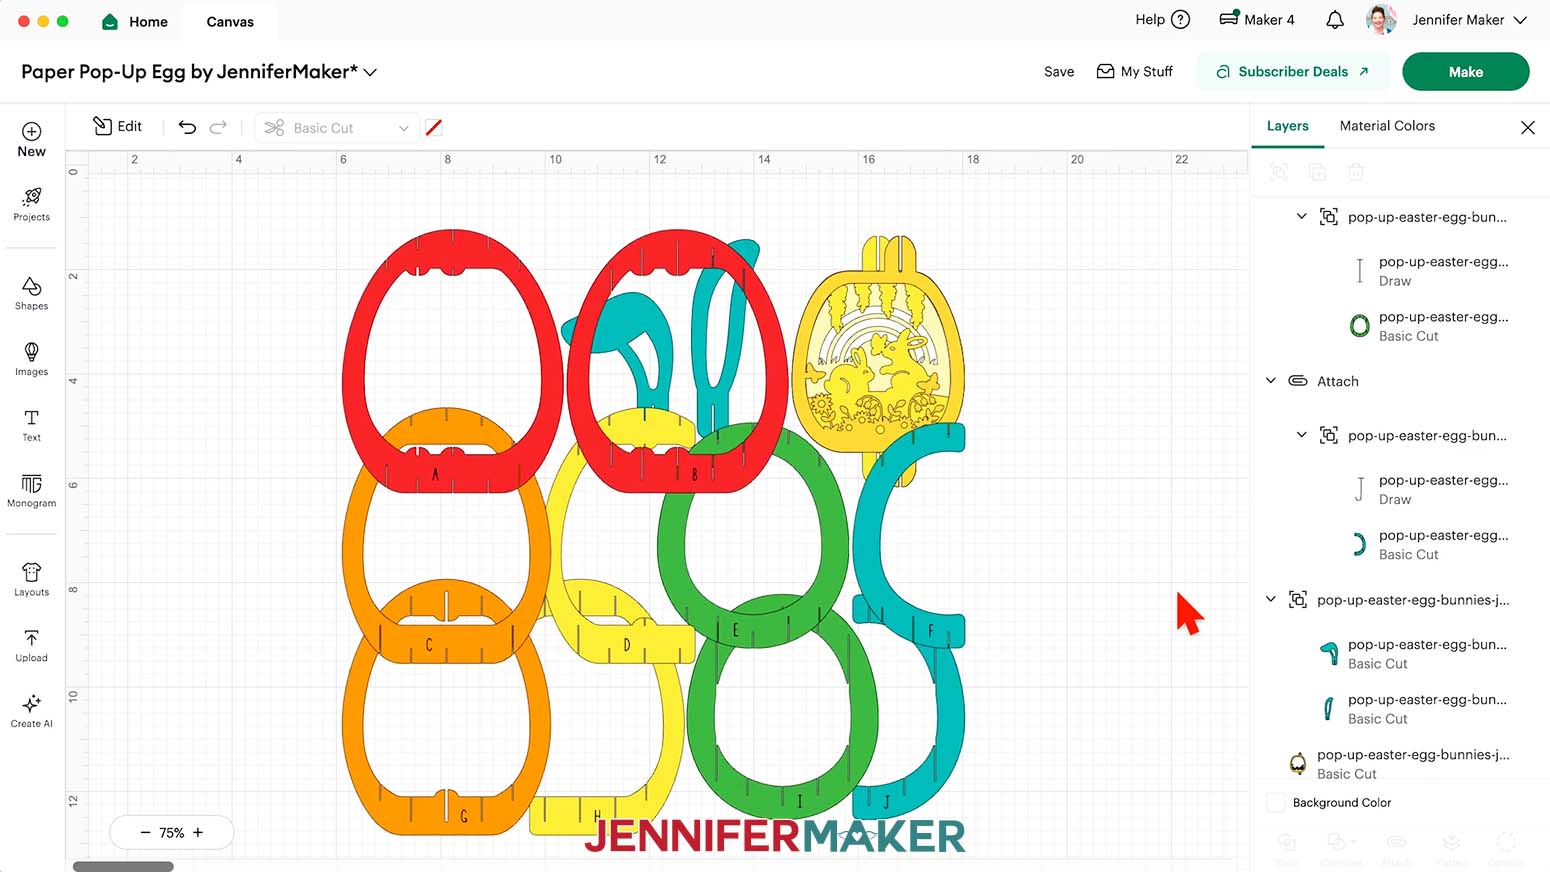
NOTE: On your Canvas, you’ll find 10 teal egg layers, two blue ears, and four scene layers in white and shades of yellow and orange.
- Click “Save” and give your project a name.
- “Ungroup” the design.
- In the Layers Panel, click the small arrows next to the top 10 grouped layers to see the letter and shape pairs, ending with a pair for "J."
TIP: These letters will help with assembly and will not be visible once the pieces are all put together.
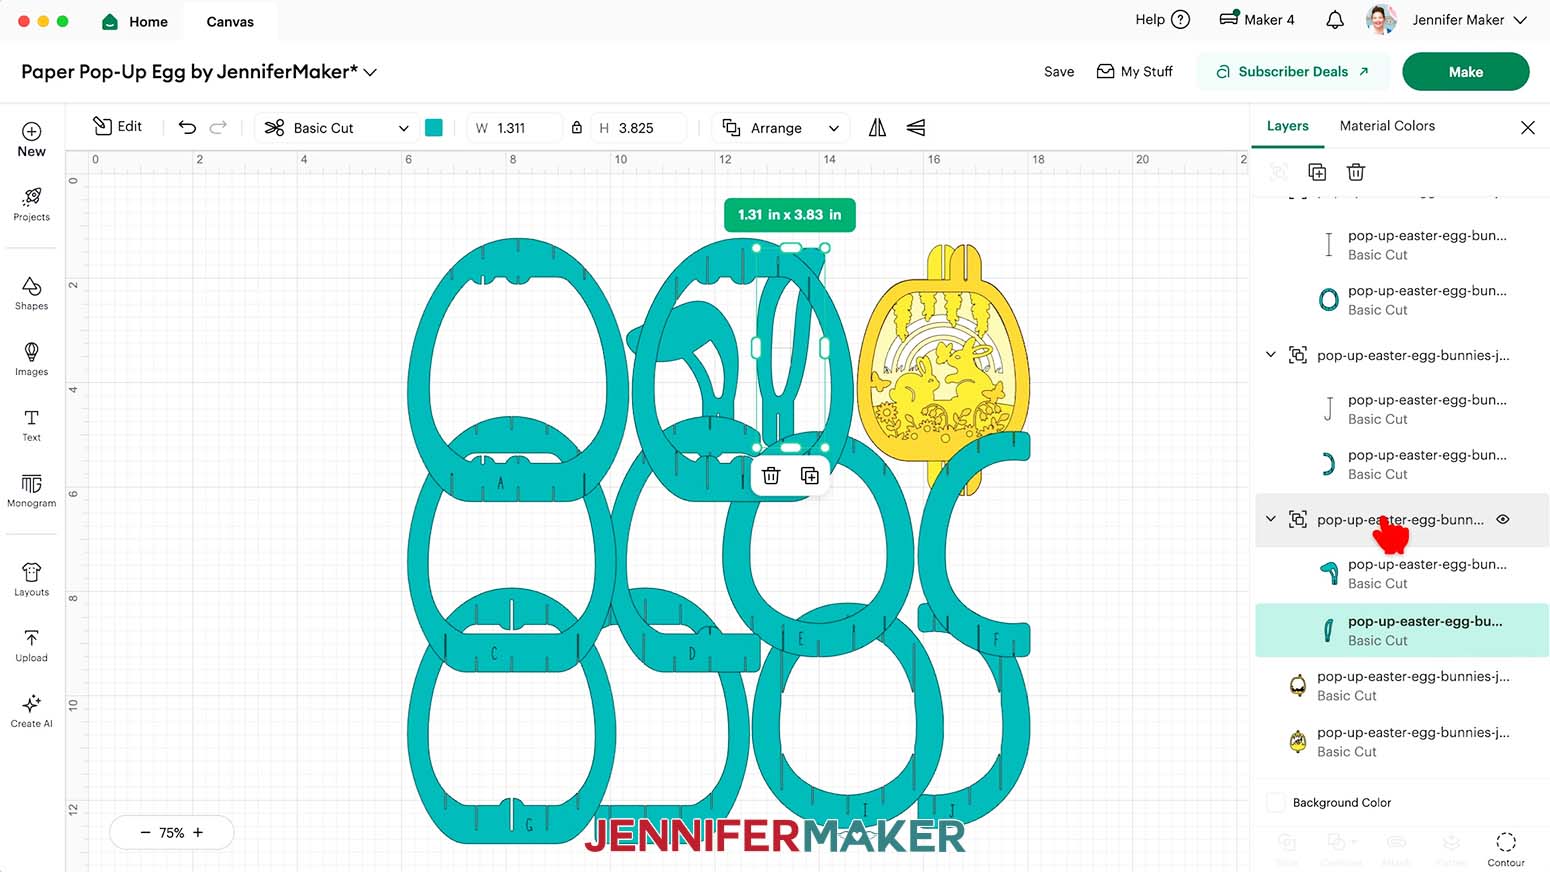
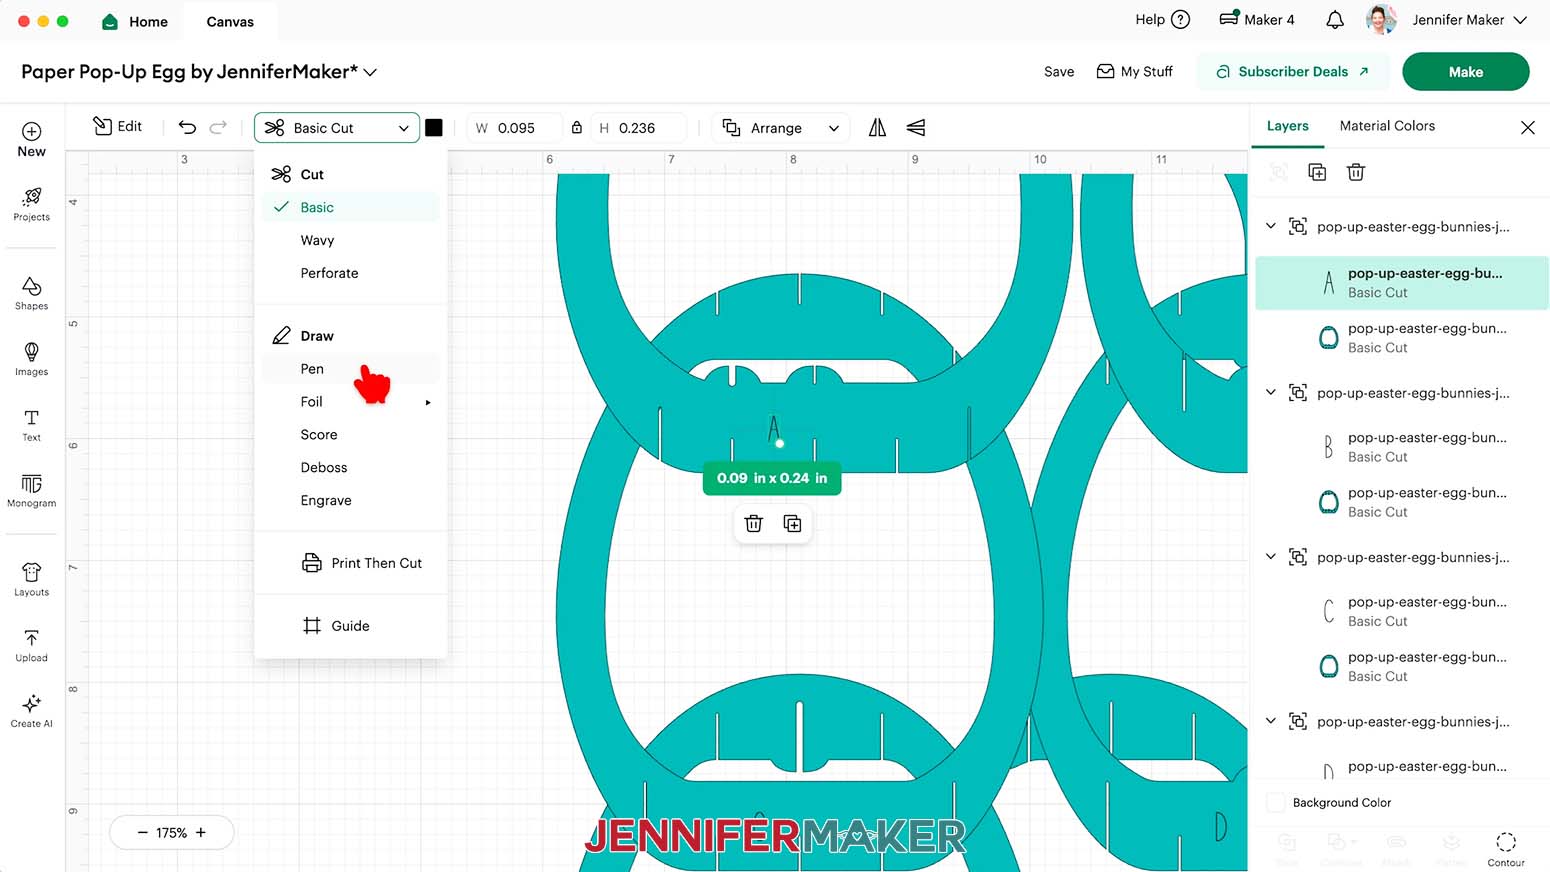
NOTE: The last group in the Layers Panel is for the optional ears, which you can delete or hide if you don’t want to use them. - Back at the top of the Layers Panel, select the first layer with just a letter (“A”) in it.
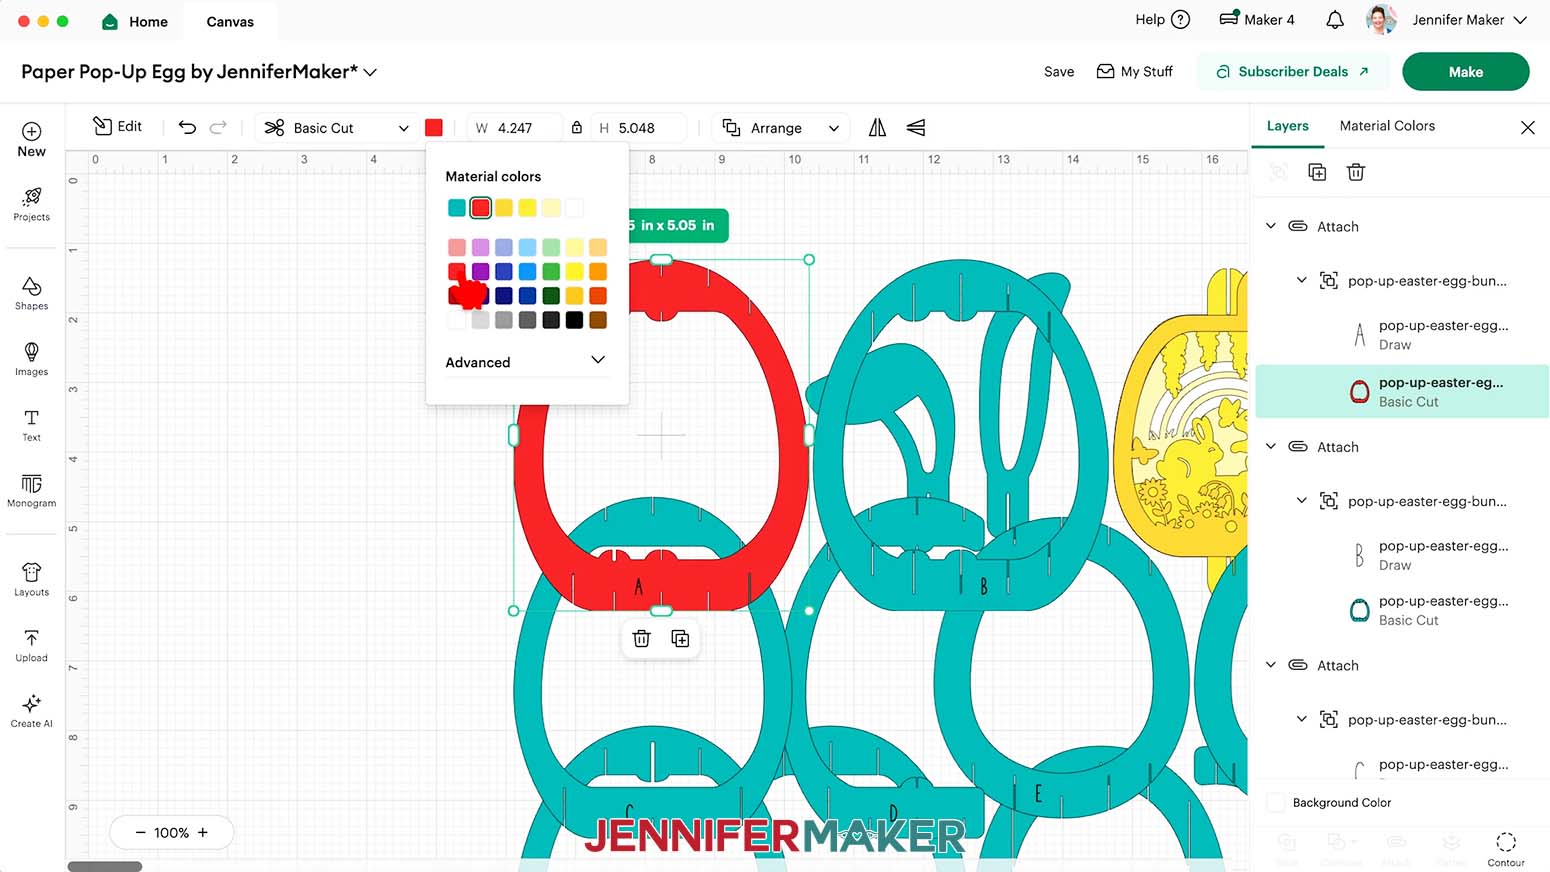
- In the top menu, change the operation from “Basic Cut” to “Pen.”
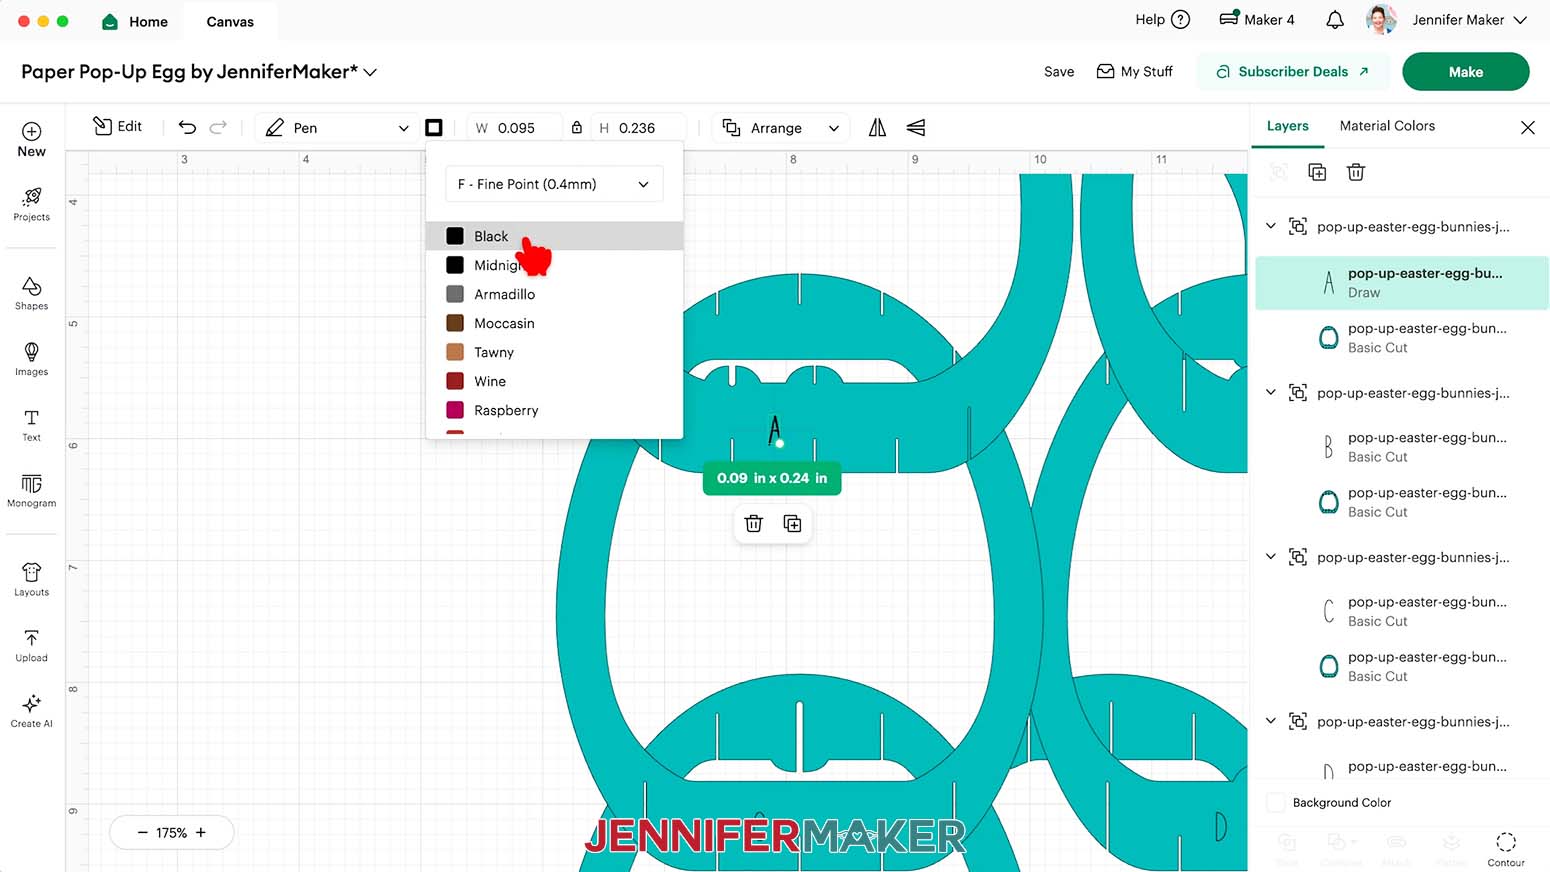
- You can use the color swatch to set the pen or marker type and color.
NOTE: I will use a Fine Point (0.4mm) Black pen, which is the default setting.
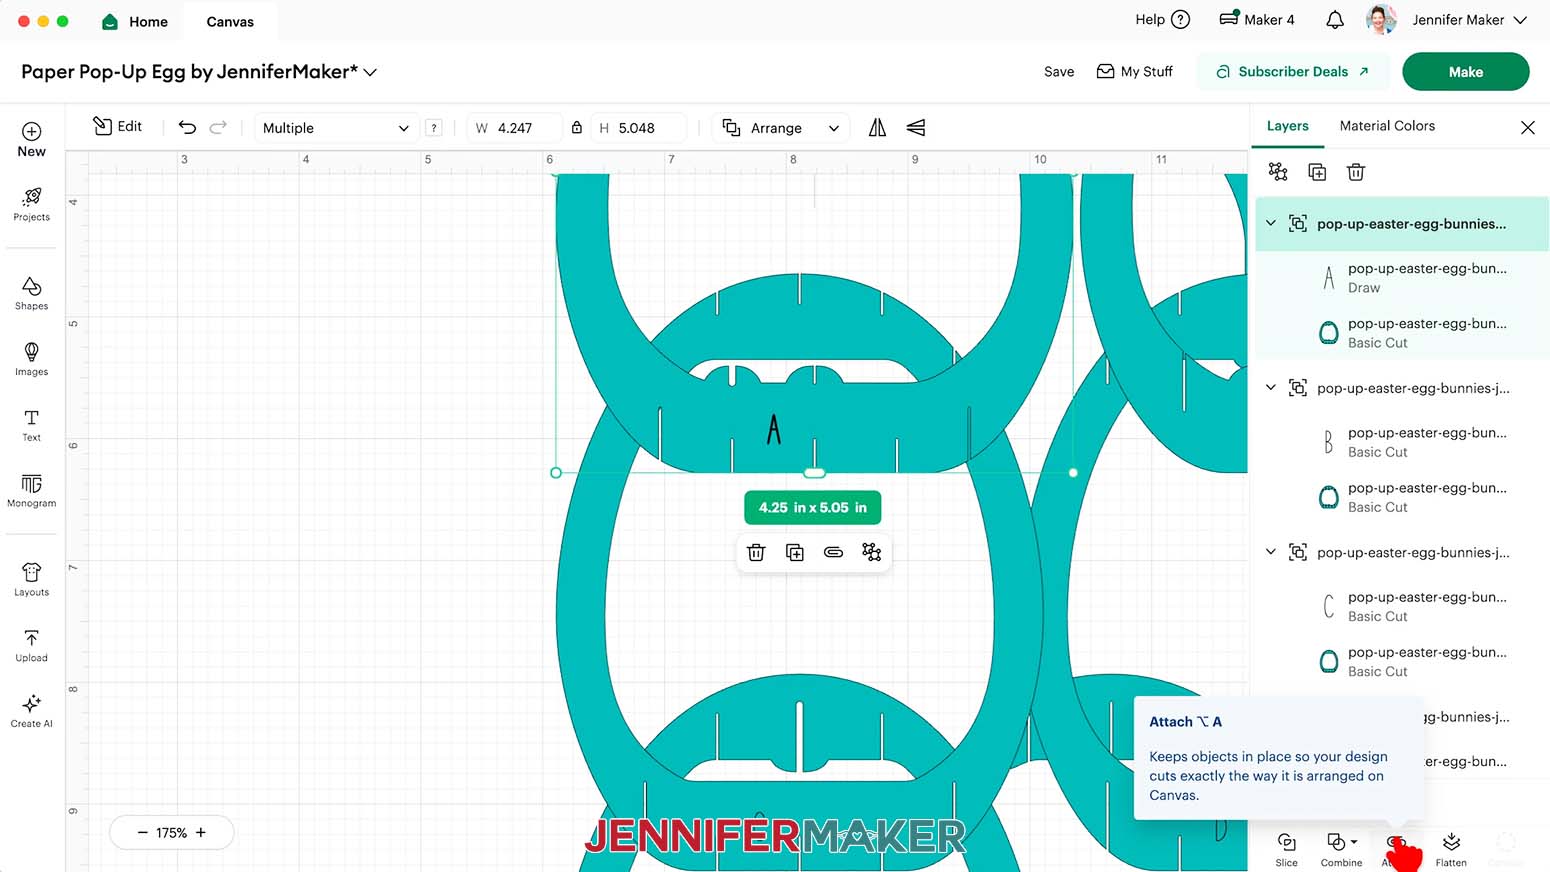
TIP: If you want the written labels to be less visible on the cut pieces, use a pen similar in color to the cardstock you’re using for the egg structure. - Click the grouped layer with an arrow next to it to select the letter and cut shape together.
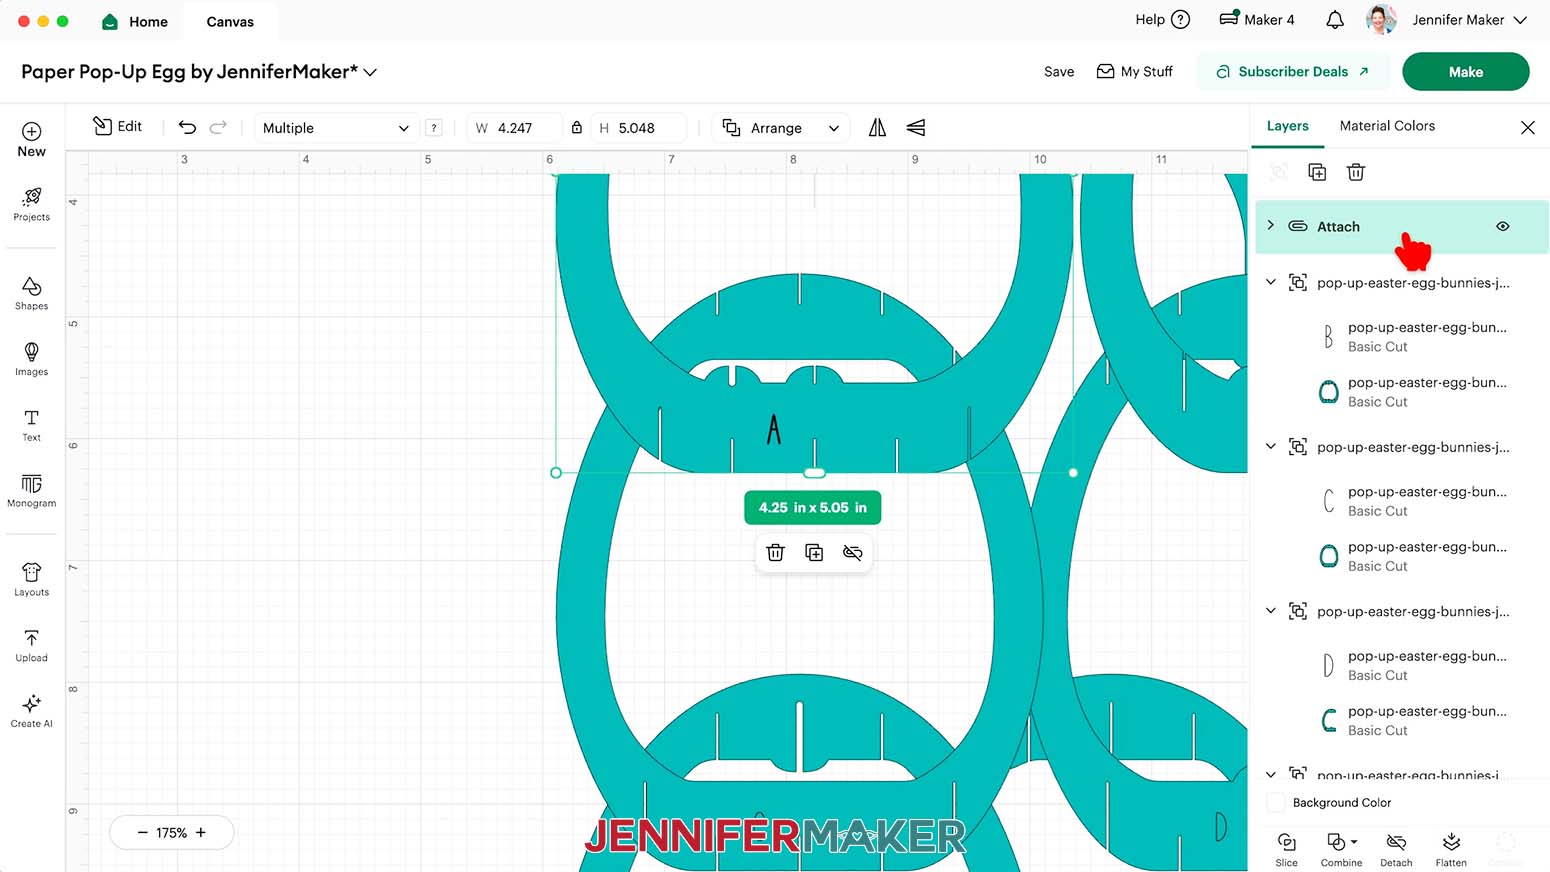
- Click “Attach” to keep the letter and cut shape together.
- Repeat Steps 10-14 to adjust and “Attach” the remaining groups for pieces B - J.
- If you’re making an egg using different colors, recolor the BOTTOM layer inside each attached letter group by first expanding each group using the small arrow. Then, use the Color Box in the top menu to change the color for the “Basic Cut” layer, not the "Pen/Draw" layer.
NOTE: I’ll use rainbow colors to match my Assembly Diagram so the steps are easier to follow. For each layer, make sure what you see on your Canvas matches the color for the letter’s line on the Assembly Diagram. I’ll make A & B red, C & G orange, D & H yellow, E & I green, then leave F & J blue. I’ll leave the ears and scene layer colors as is. - Your project is ready to cut!

CUTTING
- Make sure the correct machine is selected in the top right.
- Click “Make.”
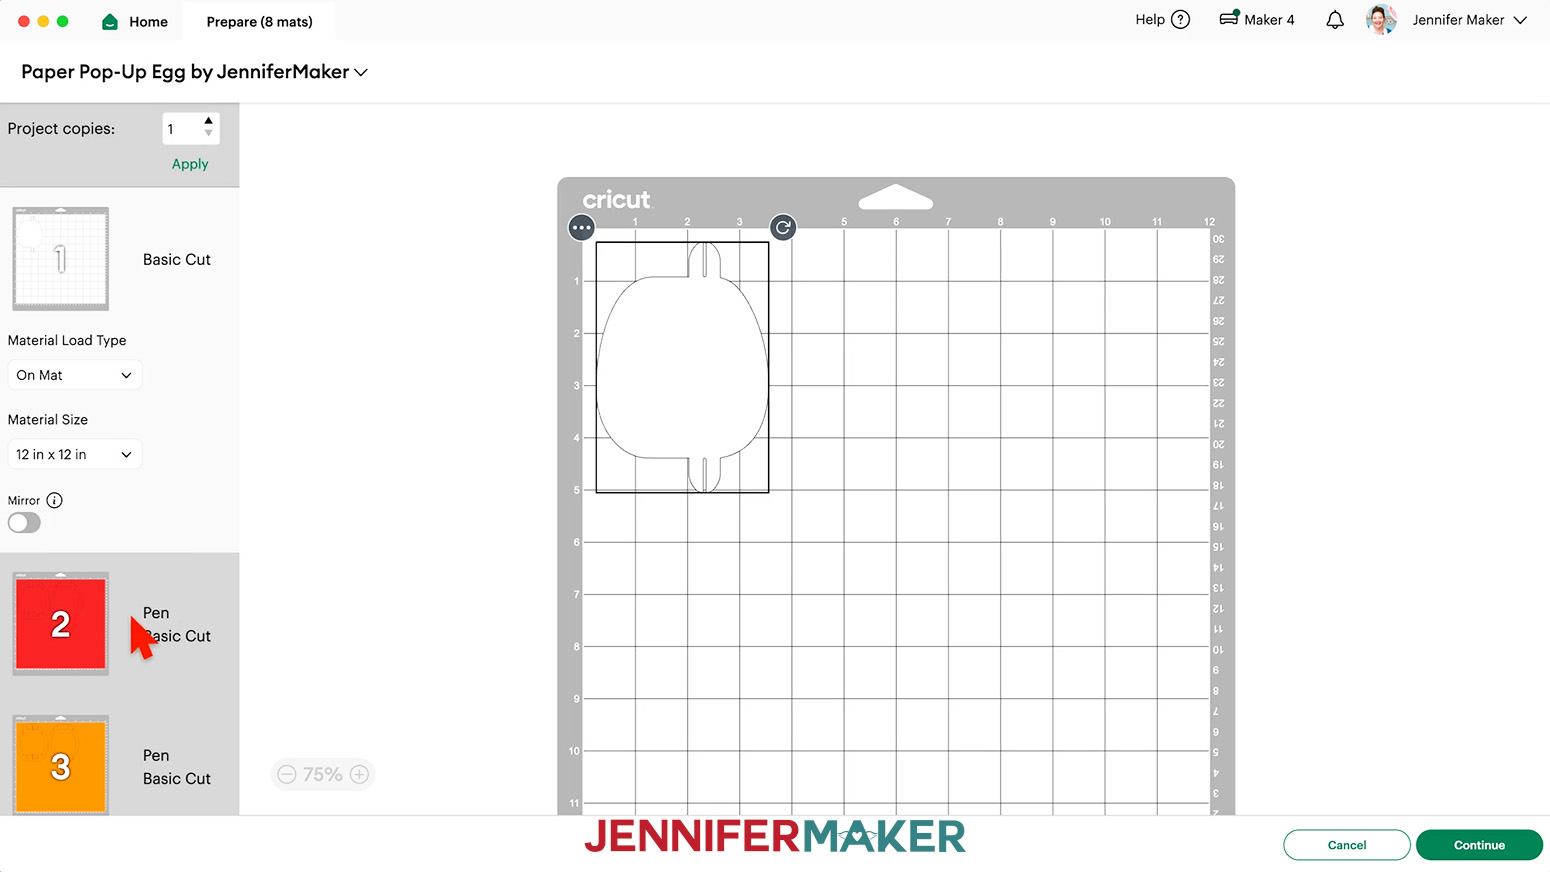
- On the “Prepare” screen, make sure the correct “Material Size” is selected for your materials.
NOTE: I’ll choose “12 in x 12 in” for all of my mats. - Make sure Mat 1 is selected so it loads first on the next screen, and click “Continue.”
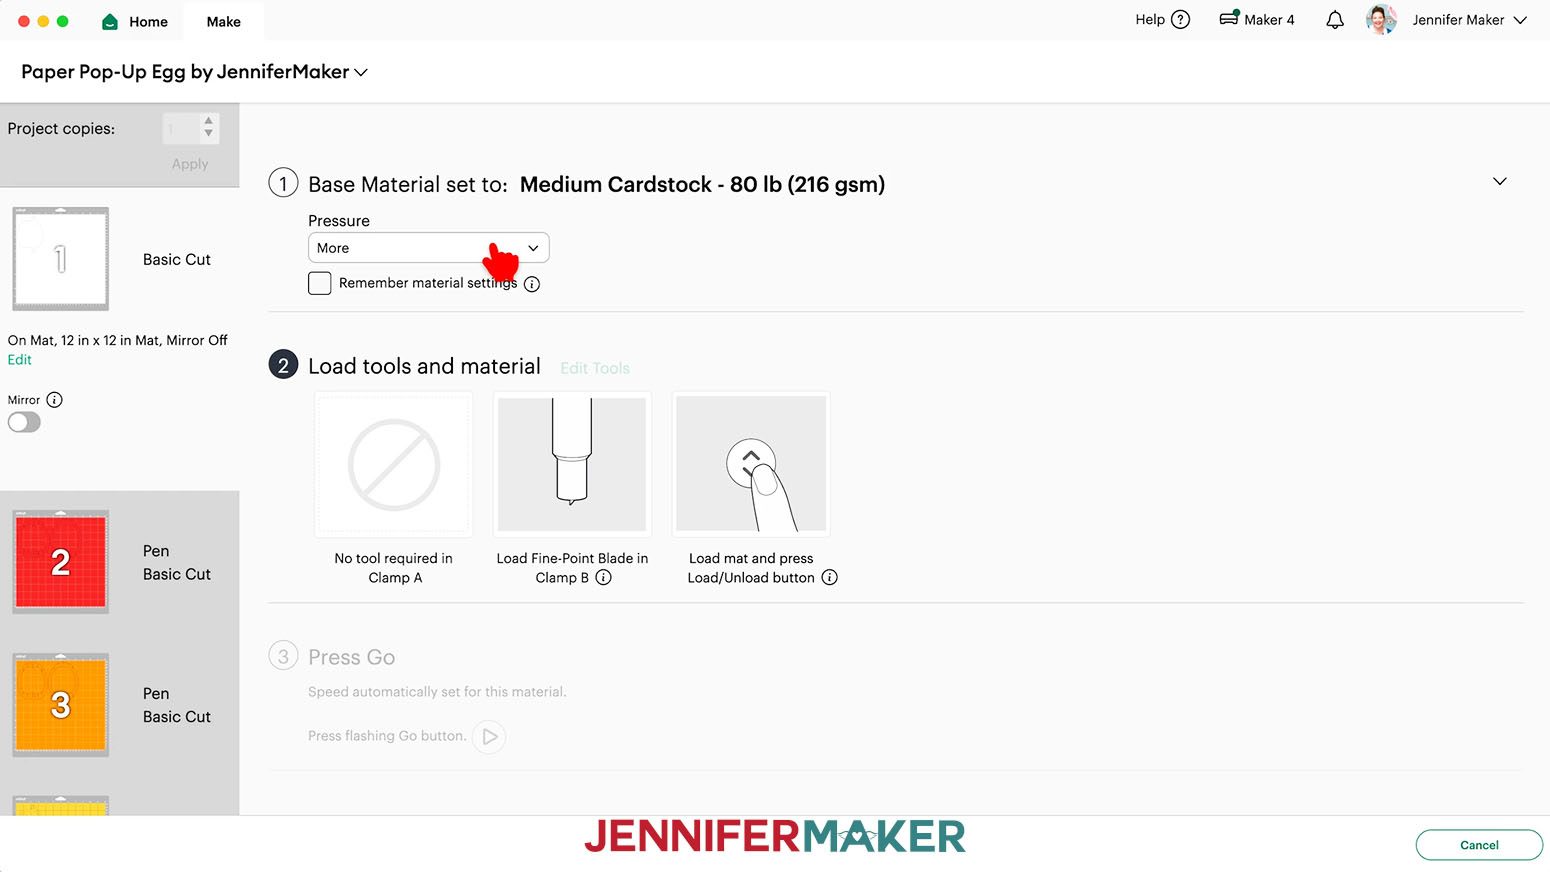
- On the “Make” screen, set the “Base Material” for your first mat.
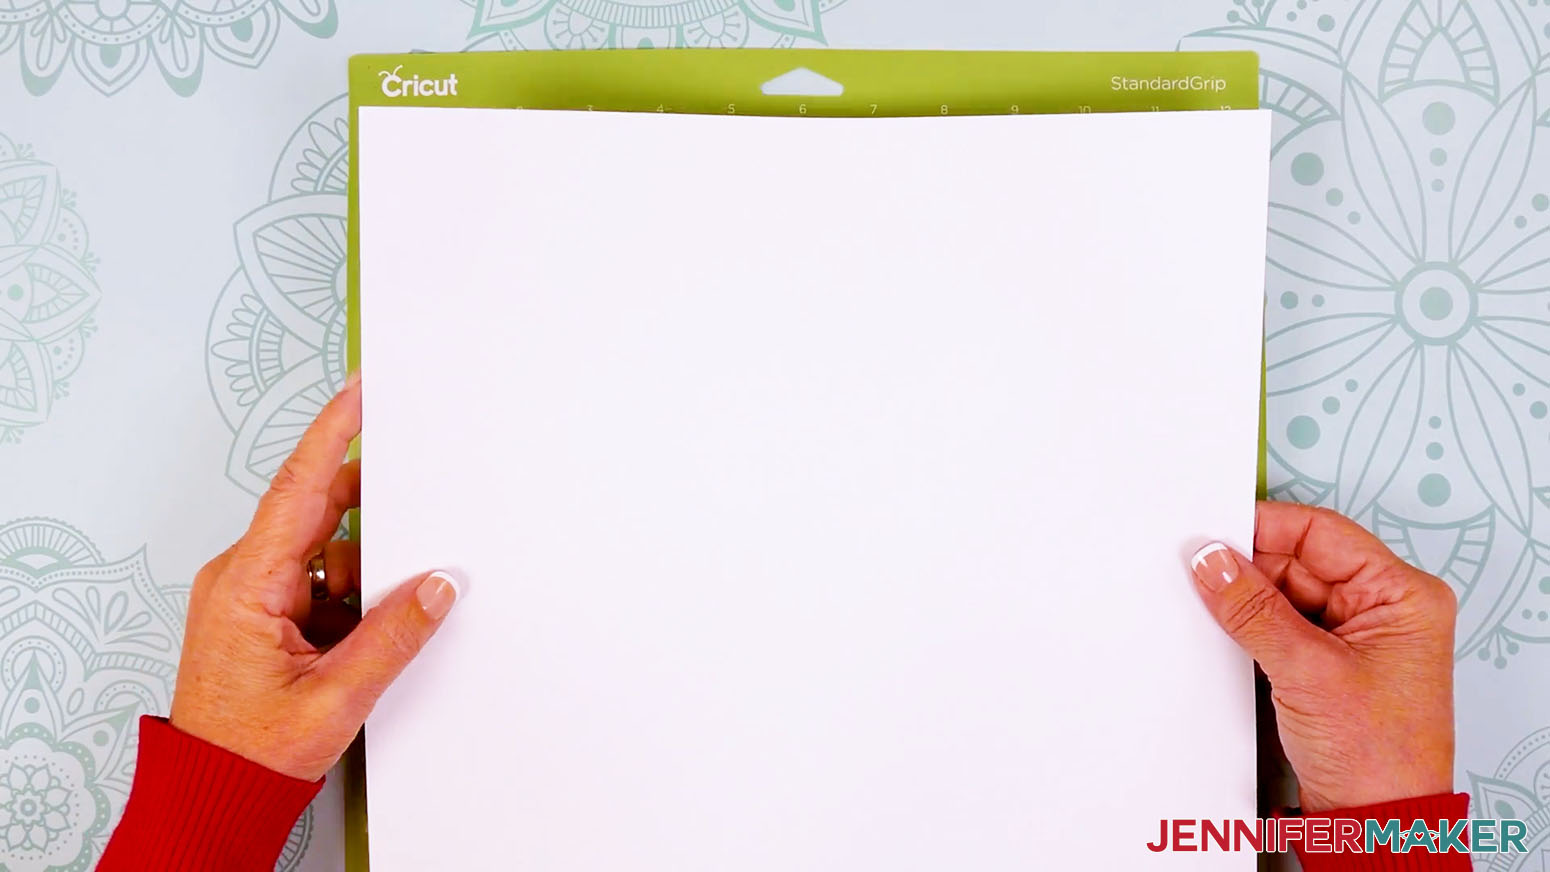
NOTE: Mine has solid white cardstock. I used the “Medium Cardstock - 80 lb (216 gsm)” material setting with “More” pressure (for a cleaner cut) for my 65 lb. and 80 lb. cardstock pieces. - Place your cardstock face up on a green StandardGrip machine mat.
TIP: If you want the textured side of the 80 lb. cardstock from my materials list facing the front of the assembled egg, place the cardstock face down on the mat when cutting. - Use a brayer to make sure it’s fully adhered.
- Check that your Premium Fine-Point Blade is clean and in the clamp.
- When you get to a mat that includes Pen lines, follow the screen prompts to select and add your pen in the clamp indicated.
TIP: Remove the pen’s cap (put it on the back so you don’t lose it) and test it on scrap paper to make sure it flows well first. - Press the flashing “Load/Unload” button to load the prepared mat into your Cricut.
- Press the flashing middle button to begin cutting.
- When it has finished cutting, don’t unload the mat right away. Gently lift a corner of the material to make sure the cuts went all the way through. If not, press the middle button again to make a second pass of cuts in the same spots.
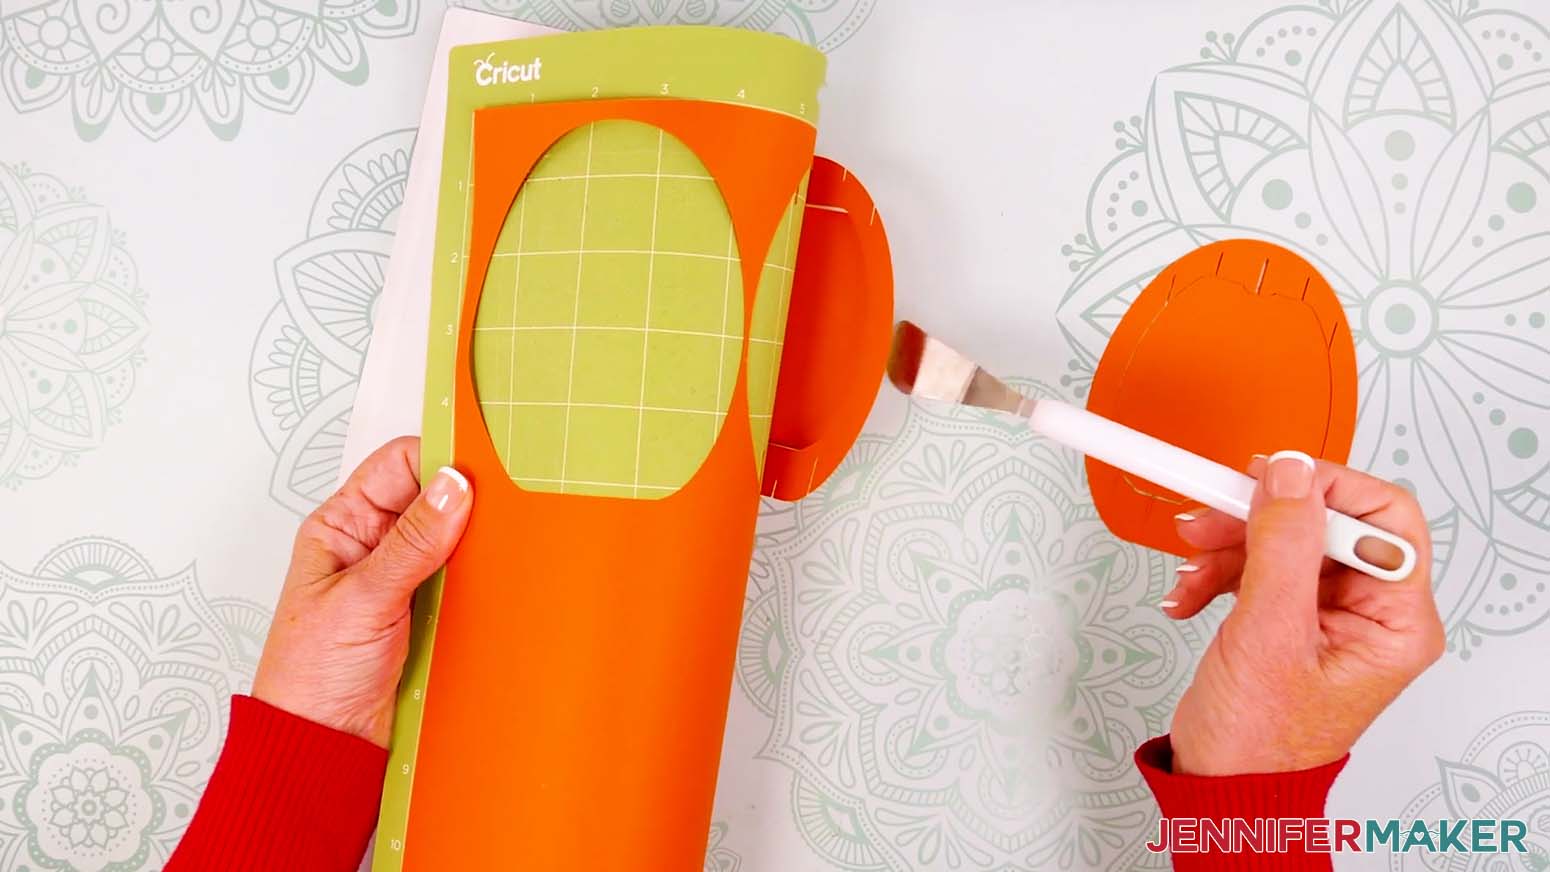
- When the cuts are complete, unload the mat, flip it over onto your work surface, and roll it back to release the cardstock.
TIP: If you have any issues with your cuts, go to jennifermaker.com/cleaner-cuts. - Small design elements can stick to the mat, so use the spatula to help lift delicate parts, and use your weeding tool to poke out small bits of cardstock that may have been left behind.
- Use a scraper tool to clean off the small bits left on your mat after you remove the cut pieces.
- Cut the rest of your mats using the correct settings and materials following Steps 5-15.
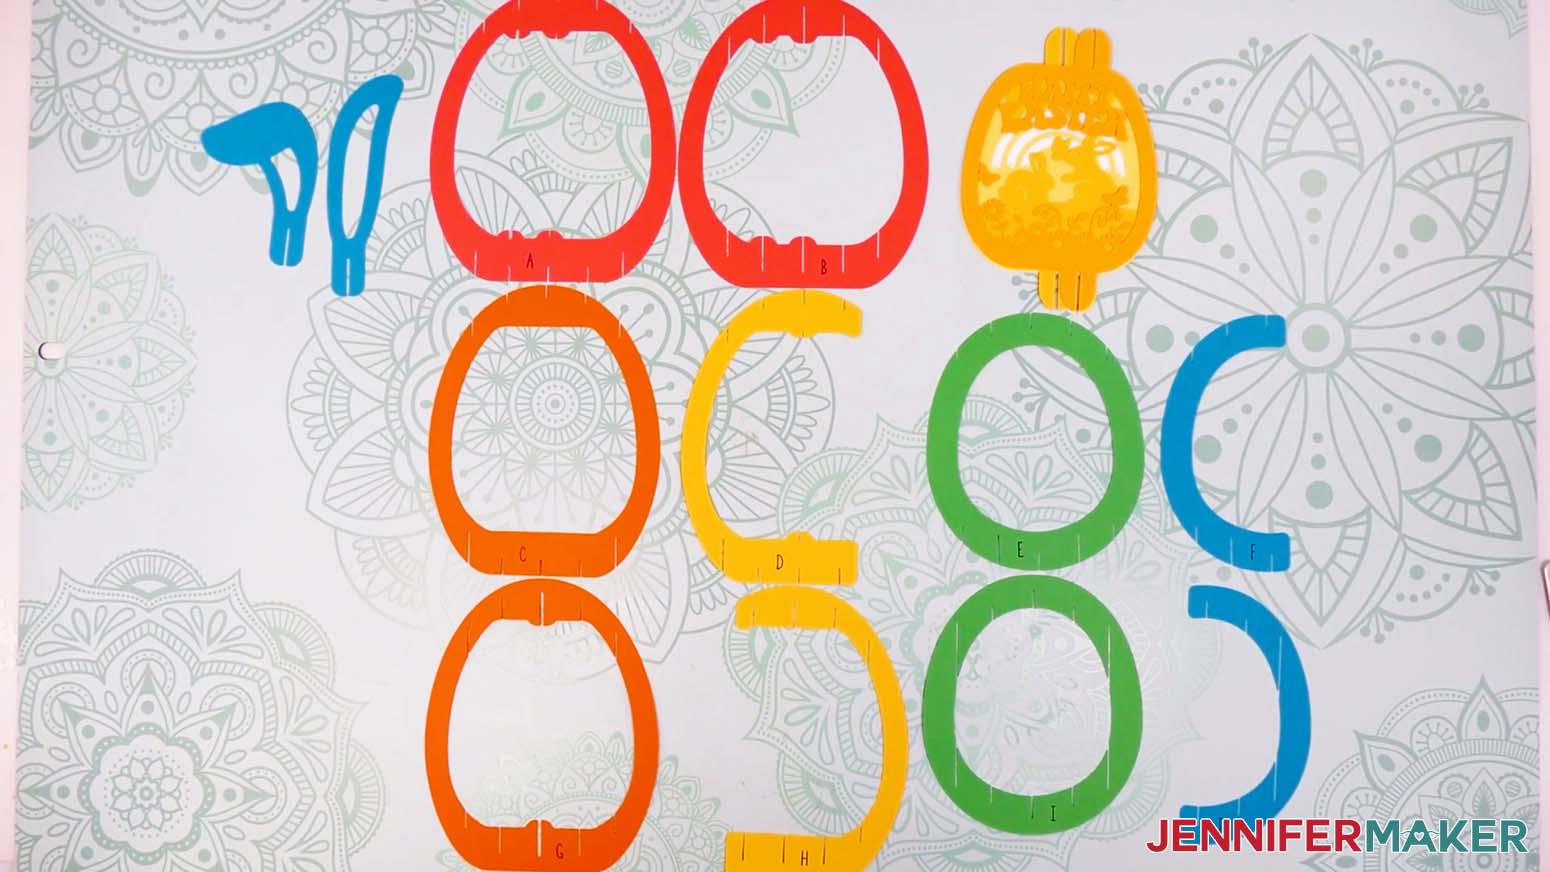
- Lay out all of the pieces face up to make sure you have them all, using your Canvas and Assembly Diagram for reference.
STEP 3: ASSEMBLE YOUR PAPER POP UP EASTER EGG’S SHELL
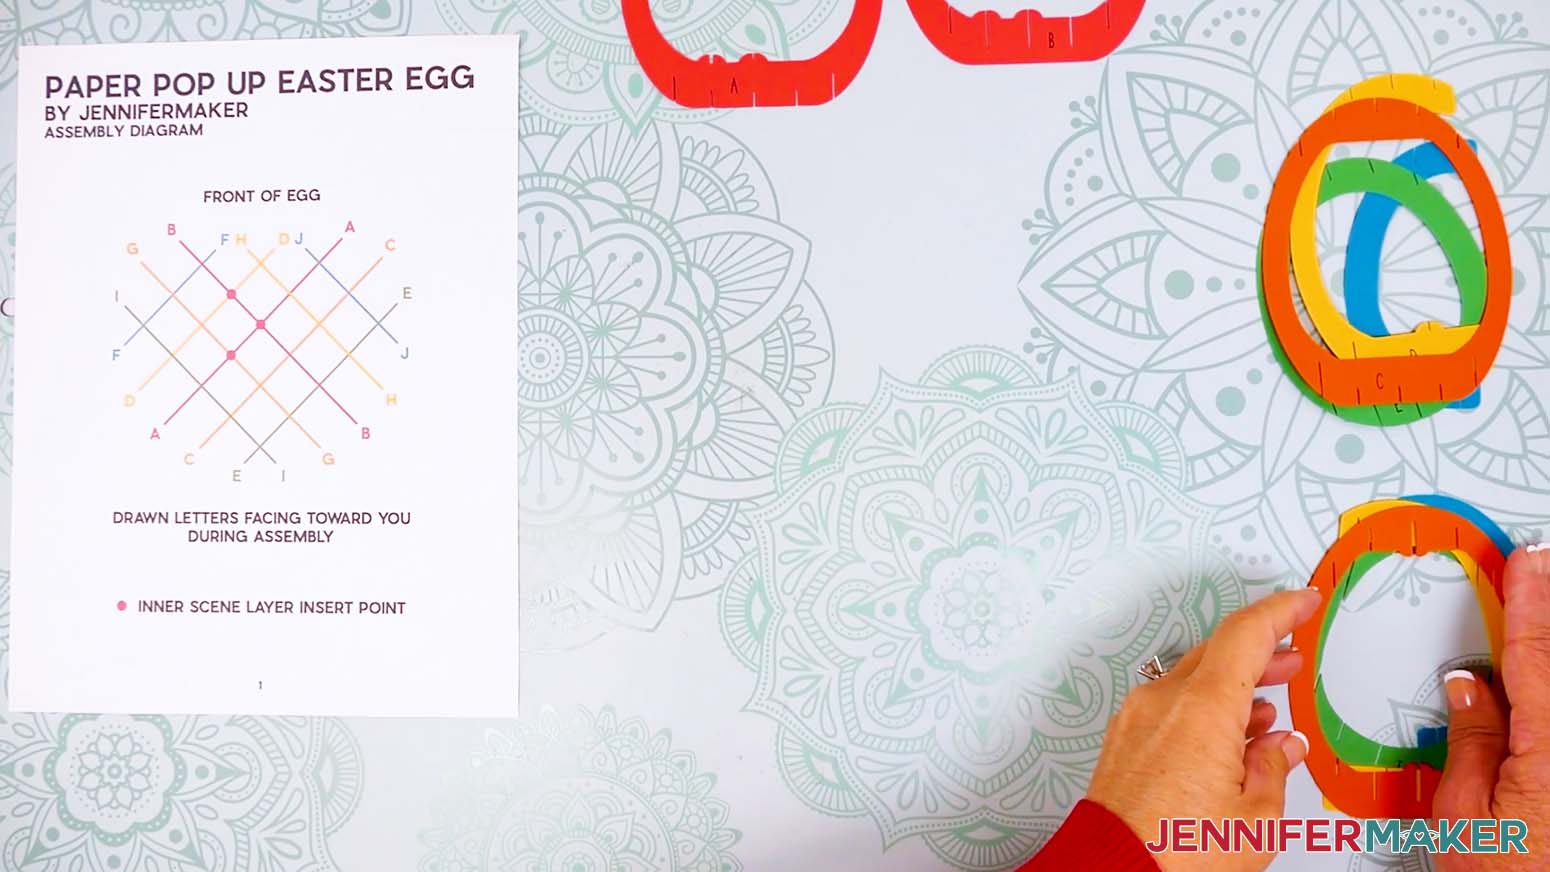
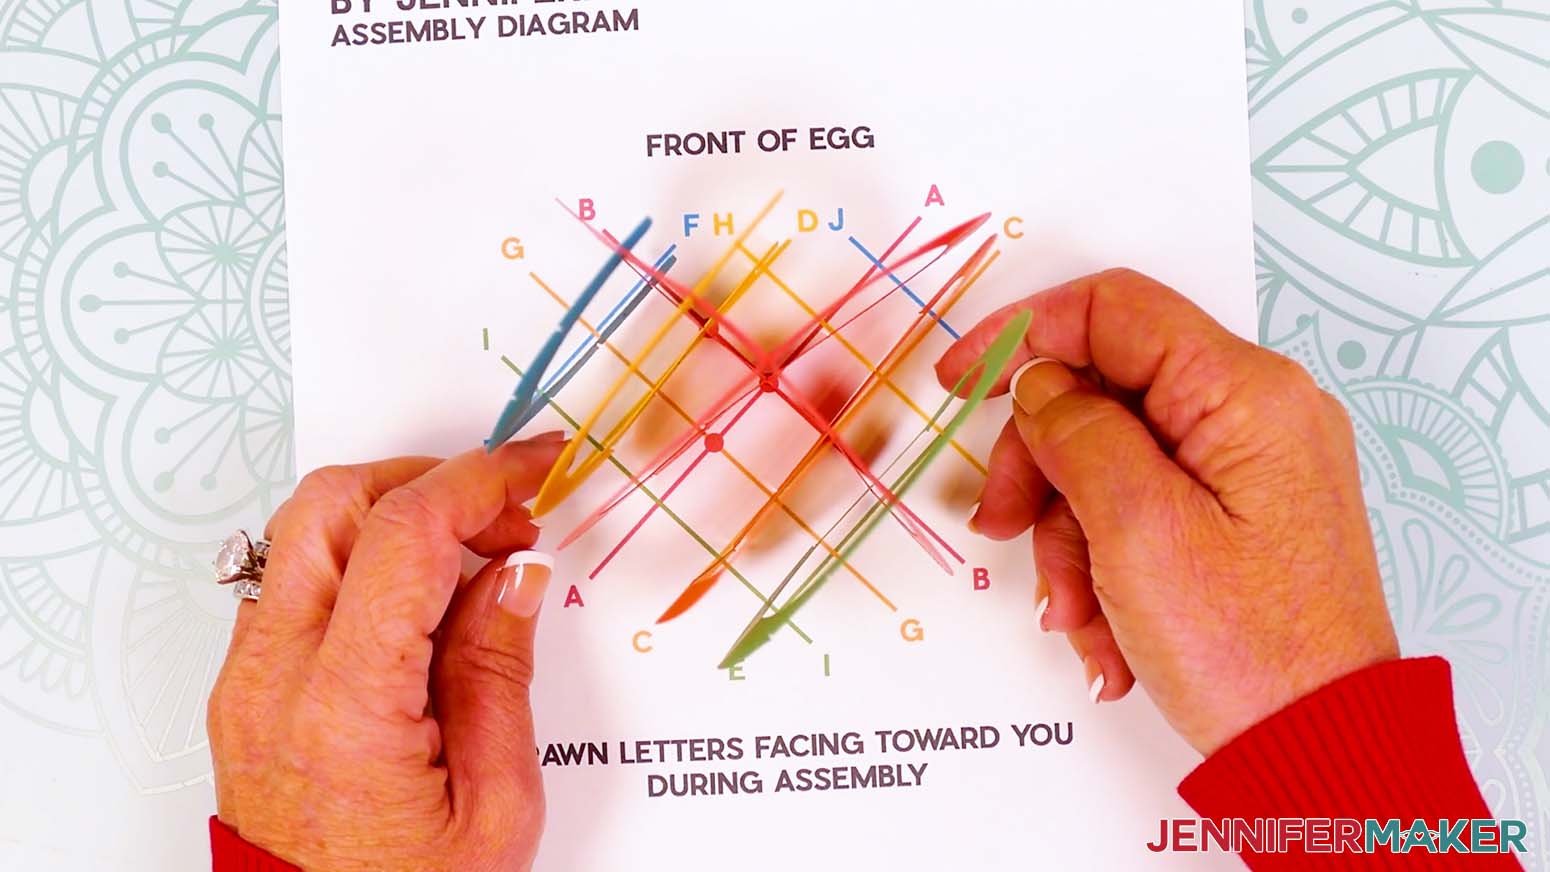
- Before you begin, look at your printed Assembly Diagram and cut pieces to make sure you’re ready:
a. Your pieces should be lettered to match your printed Assembly Diagram.
NOTE: The rainbow colors are used to match the Assembly Diagram for visual reference in the tutorial, but the letters on the pieces can be used to track assembly even if you choose different colors for the outer layers.
b. The front of the egg is the side where the “cut-off” portions of D, F, H, and J will face. The front will face away from you for most of the assembly.
c. The shapes are all different. Some pieces have slits on the inside, while others have slits on the outside. Some slits are wider because more than one piece will intersect at that point.
d. The "bumps" on the cut pieces will help us place the inner scene layers once the outside shell is assembled.
e. As you assemble, keep the letters facing you. - Place Pieces C, D, E, and F in a face-up stack so you can pick them up in the correct order for the back left half of your egg.
NOTE: These pieces all have slits on the outside. - Place Pieces G, H, I, and J in a face-up stack so you can pick them up in the correct order for the back right half of your egg.
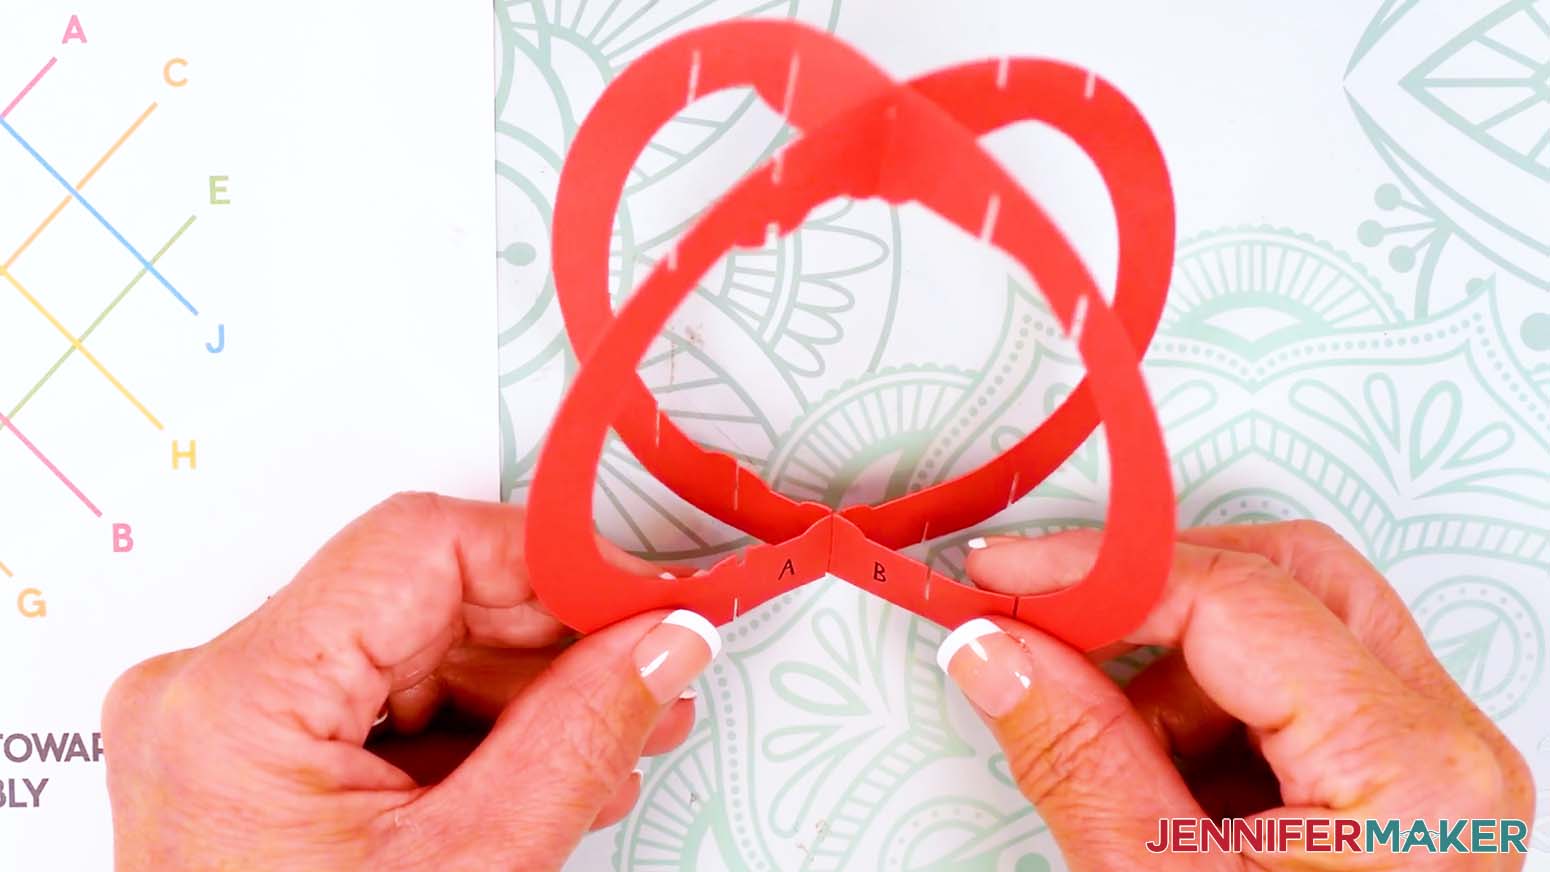
NOTE: These pieces all have slits on the inside. - Keep Pieces A and B face up on their own because we’ll start the assembly with them.
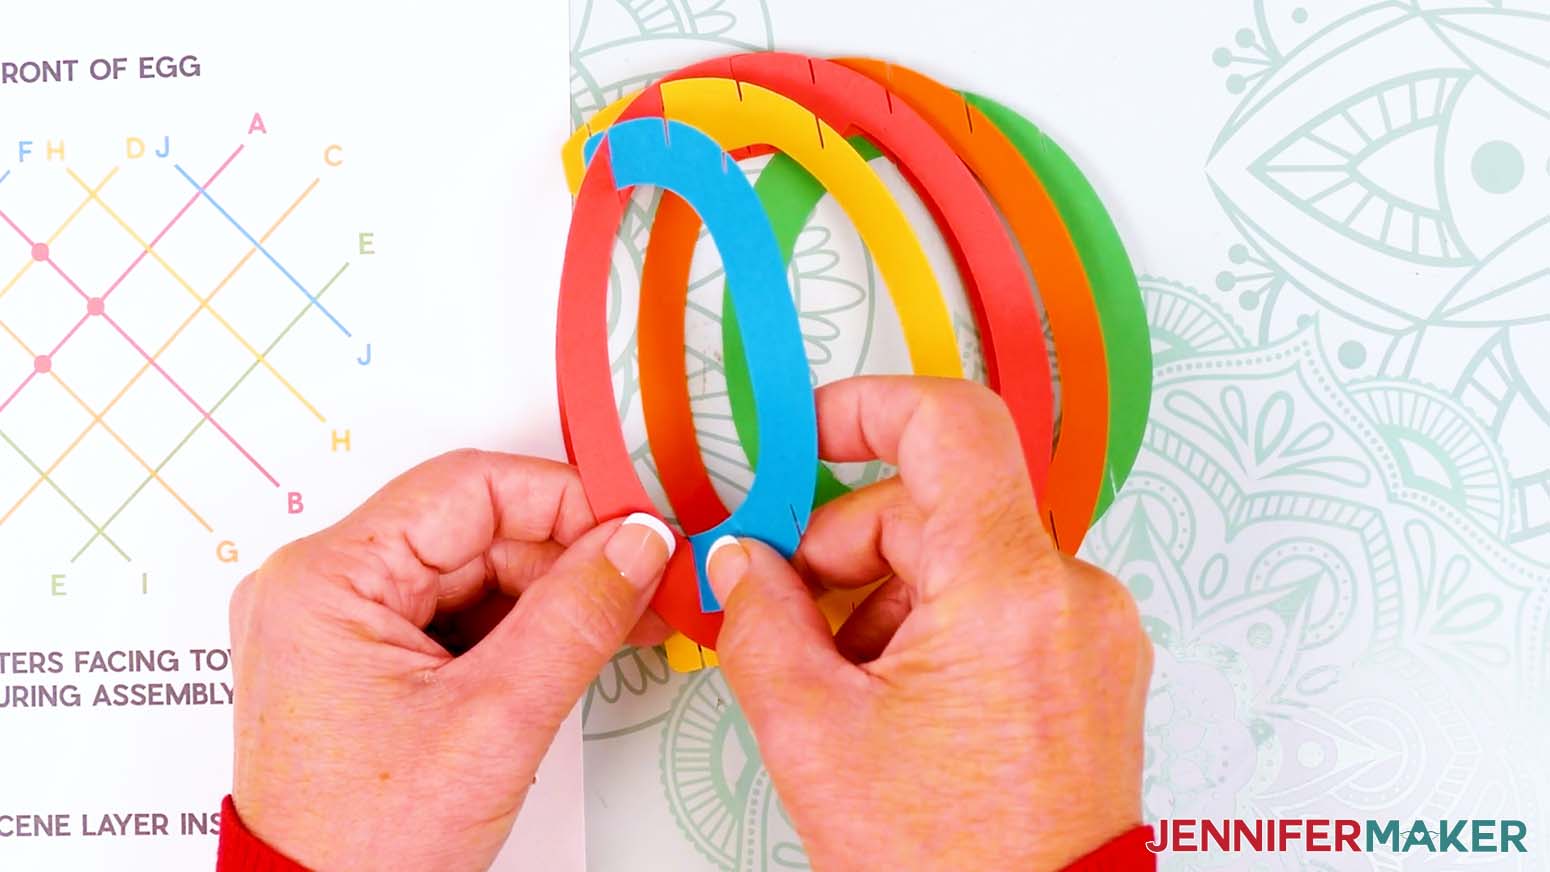
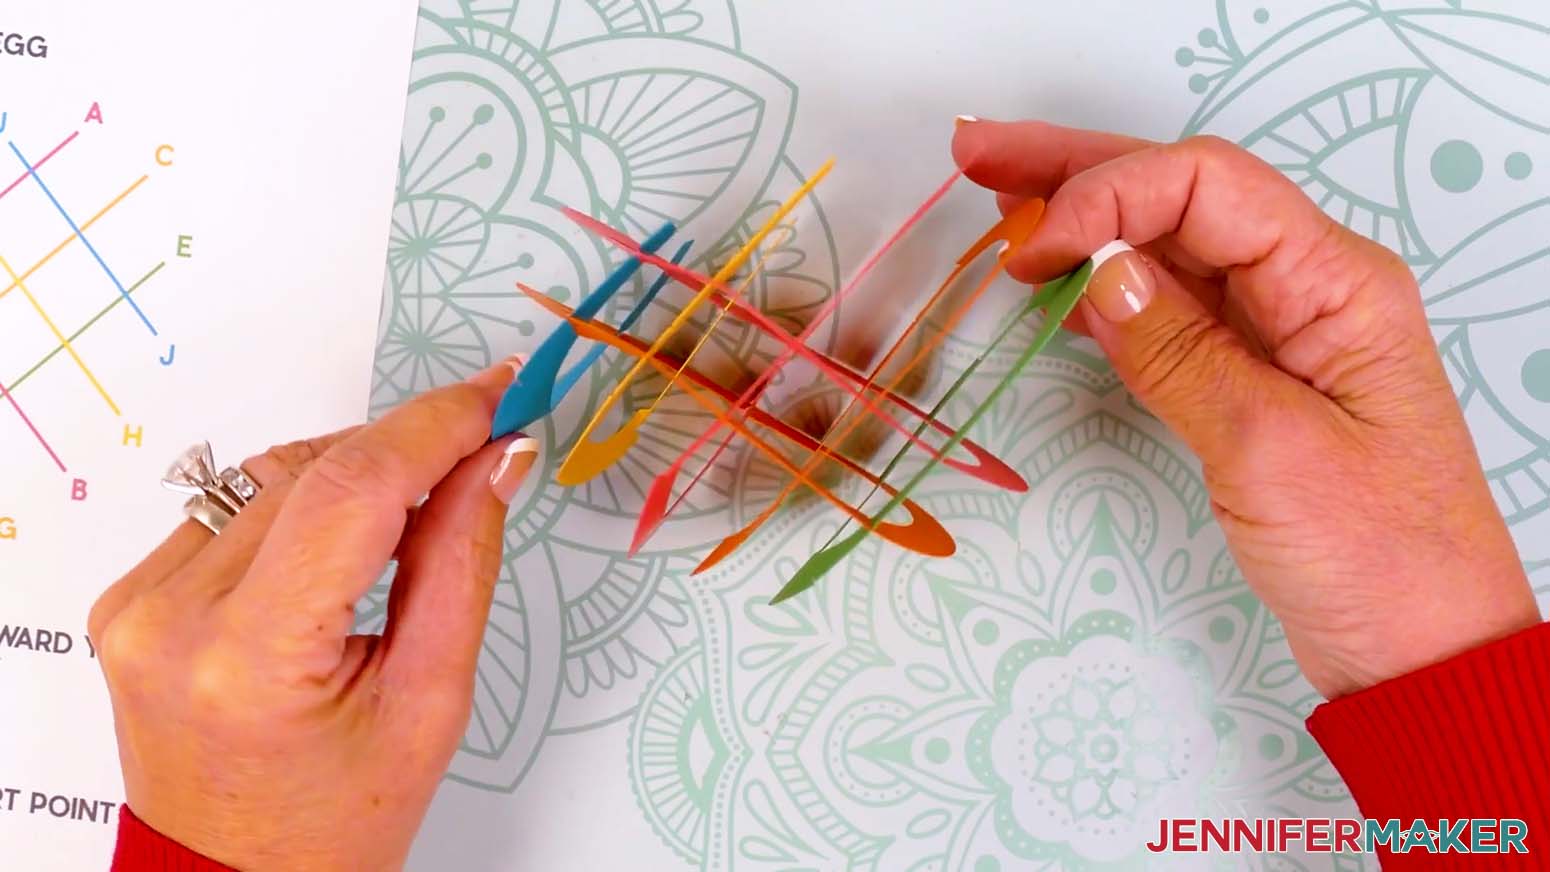
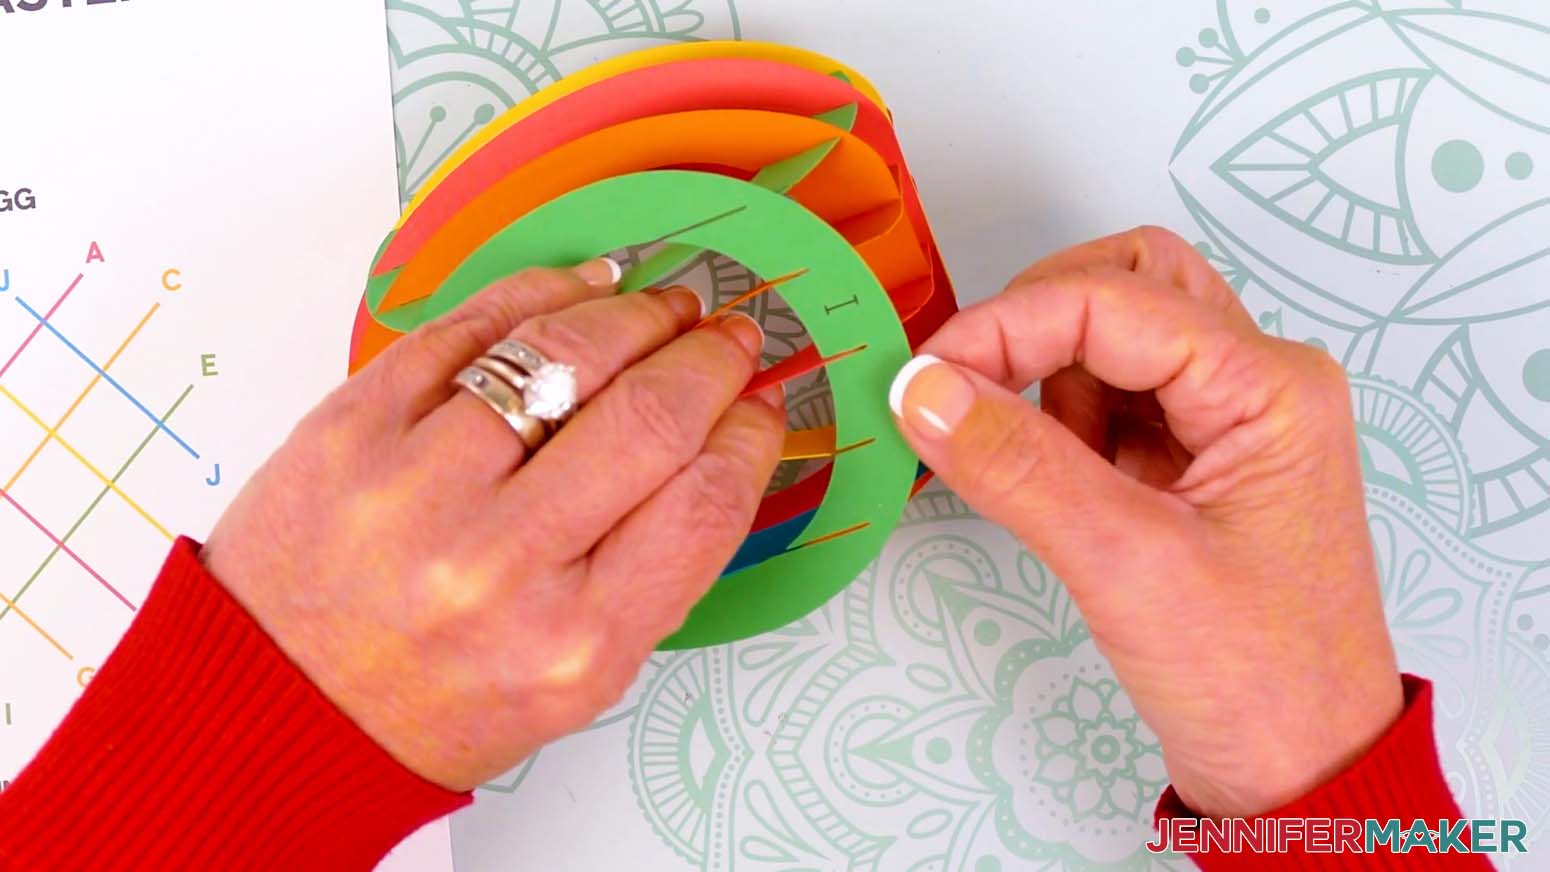
- Slot A (red) and B (red) together using their middle slits, joining them at the top and bottom to form an "X."
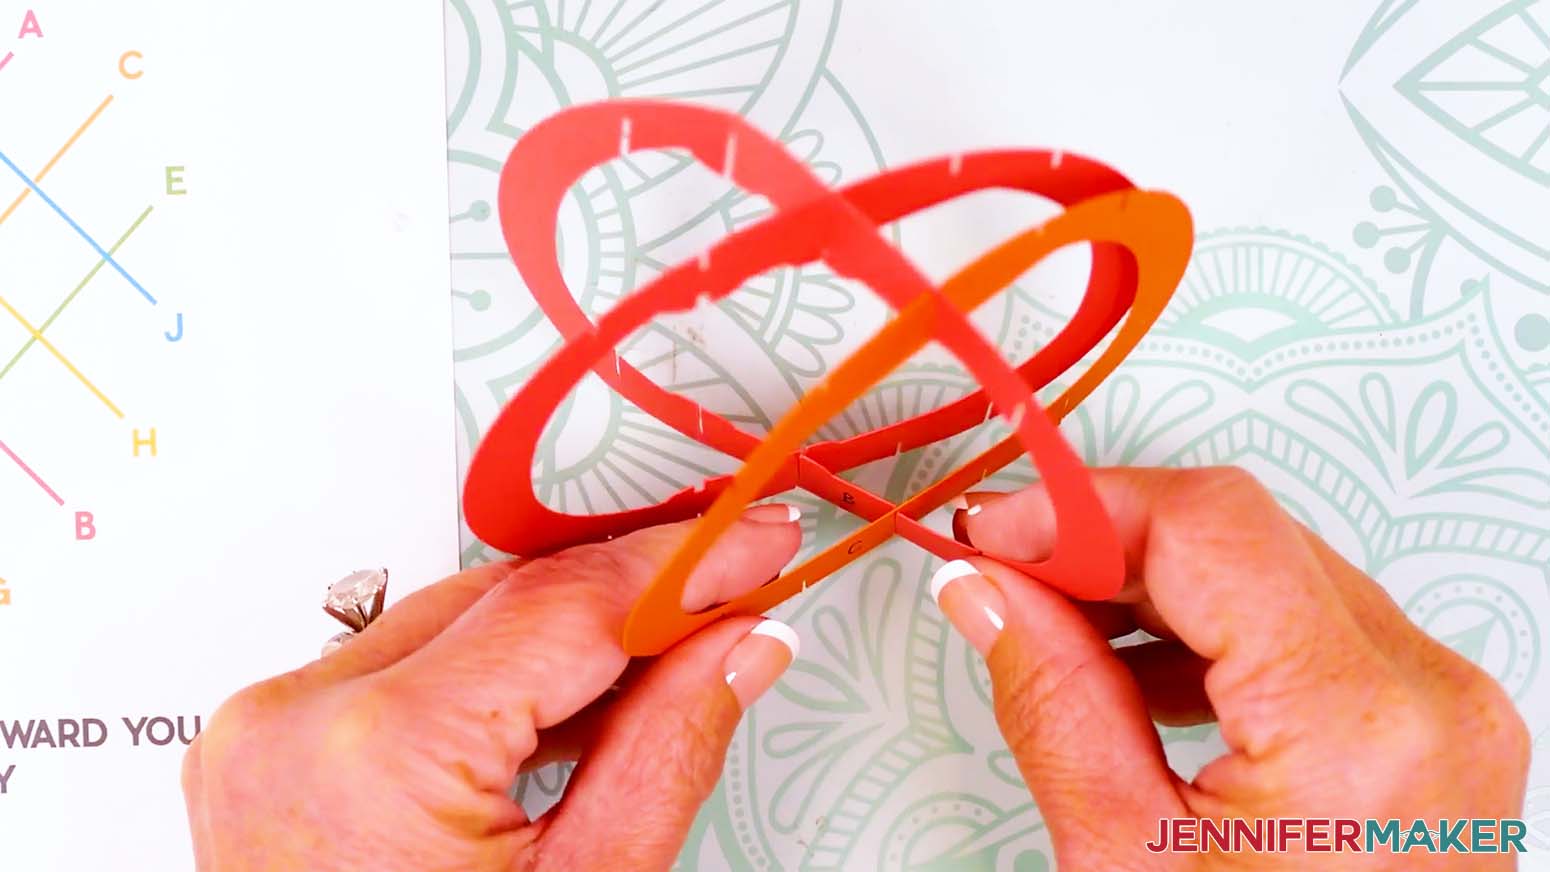
TIP: Confirm the two “bumps” align at the top and bottom where A and B intersect. - Take C (orange) and insert its center slit into B’s second slit from the middle on the right side. Insert the top slit first, then the bottom.
- Take D (yellow) and, with the cut-off end facing the front of the egg, match its slit with a bump with the matching bump on B at the top, then the bottom.
- Take E (green) and use its middle slit to join it to B using the last available slit on that side. Insert the top slit first, and then the bottom.
- Take F (blue) and slot its slit closest to the front of the egg into the last remaining slit on B. Insert the top slit first, and then the bottom.
- Check that your pieces are seated well and align with the Assembly Guide to this point.
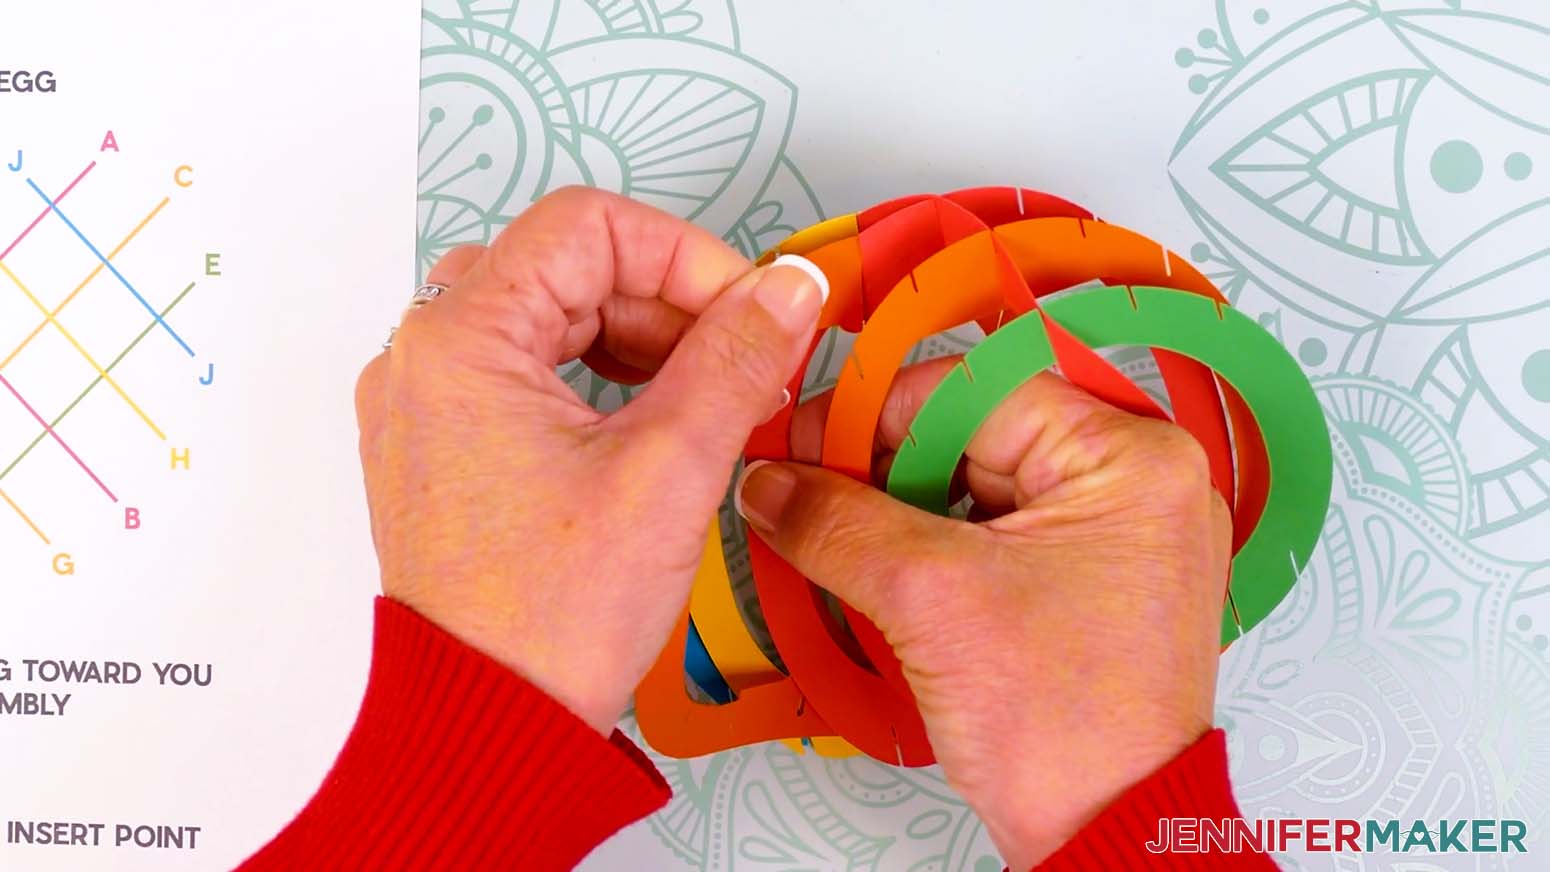
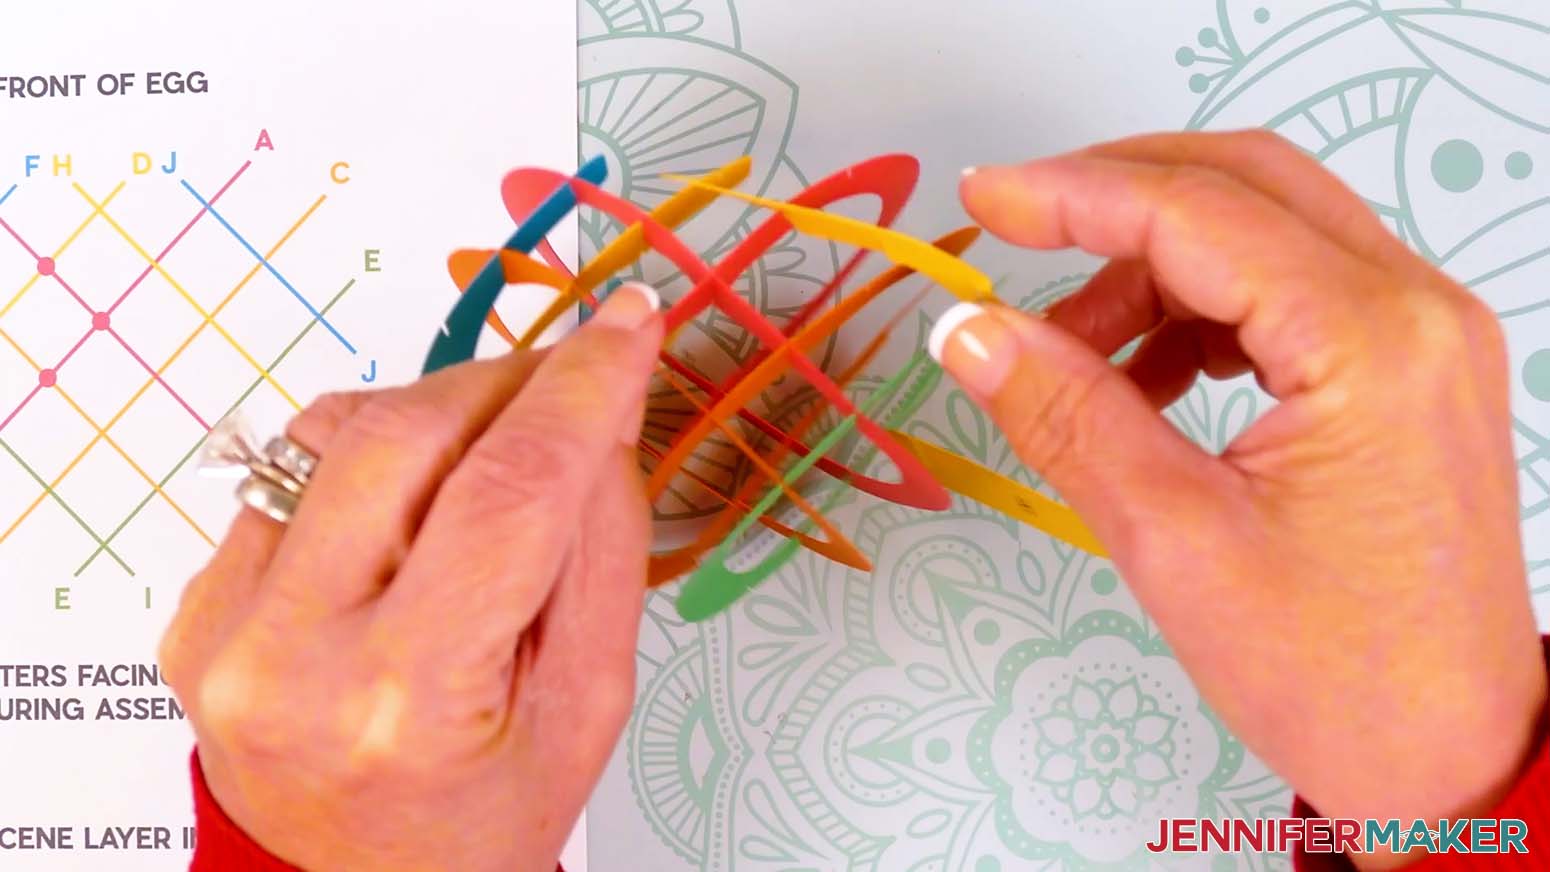
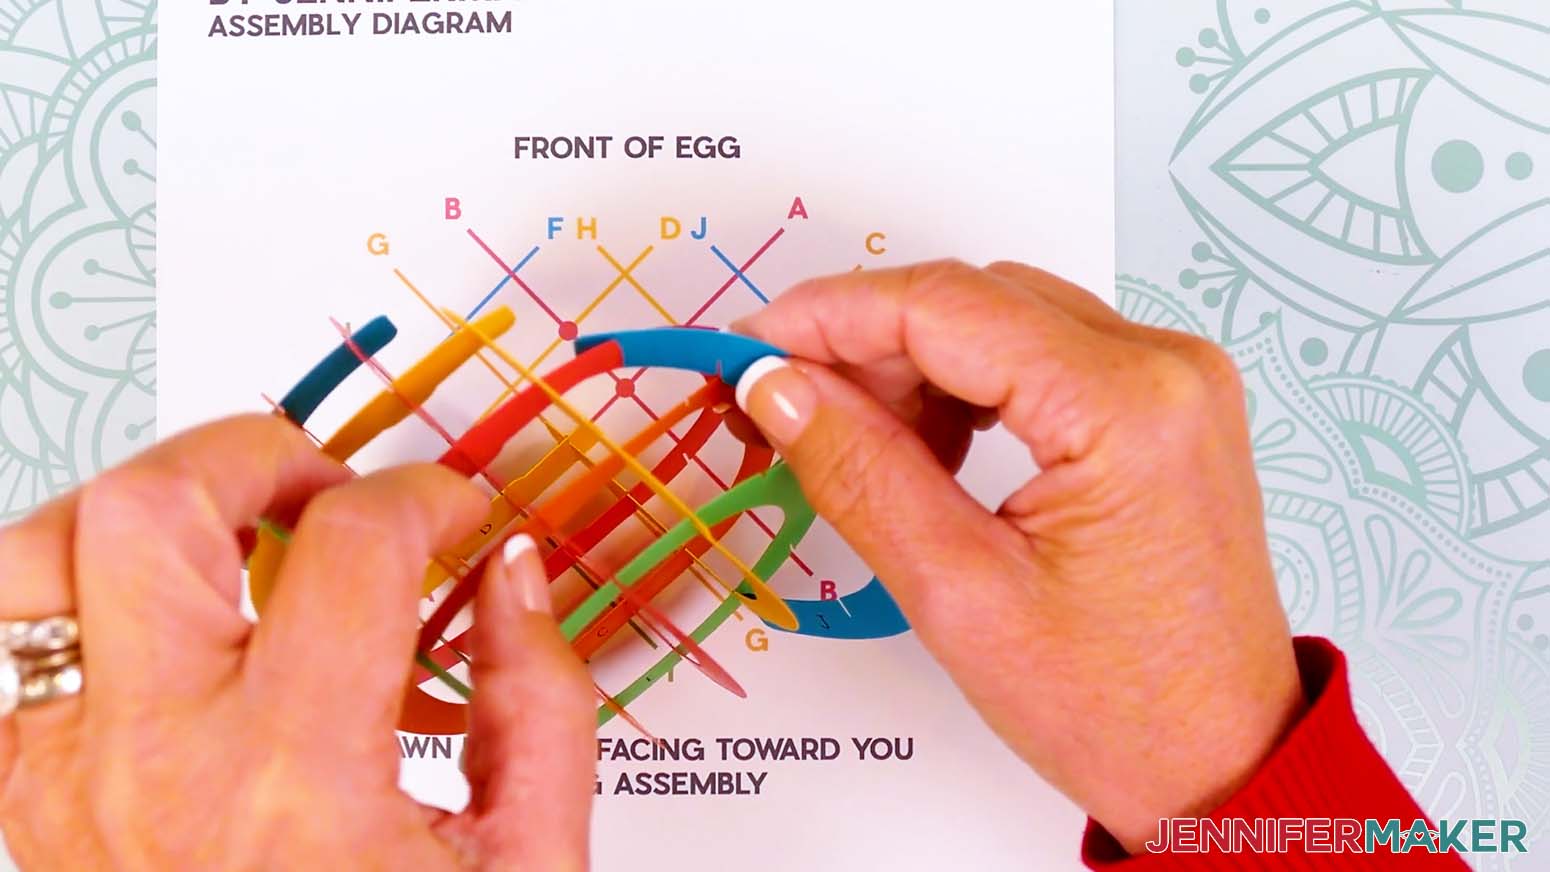
TIP: It’s easier to fix mistakes or issues now instead of trying later once more layers are in place. - Take G (orange) and insert its center slit into the bumped slit on A (top first and then bottom).
TIP: Remember to make sure the letter labels are all facing you as you assemble. - Continue slotting G into the next closest pieces (C and D) one slit at a time, filling every slit as you go.
TIP: This layer can be challenging, so take your time and be patient. If anything pops out, fix it immediately before moving on. - Continue slotting G into the next pieces (E and F) one slit at a time, filling every slit as you go.
TIP: Working from the middle outward makes this easier. - Before adding more pieces, check that your assembled pieces look like a clean grid from the top and bottom. Also, test that you can gently flatten it in both directions. If you can’t flatten it, that means a slit is probably not fully inserted.
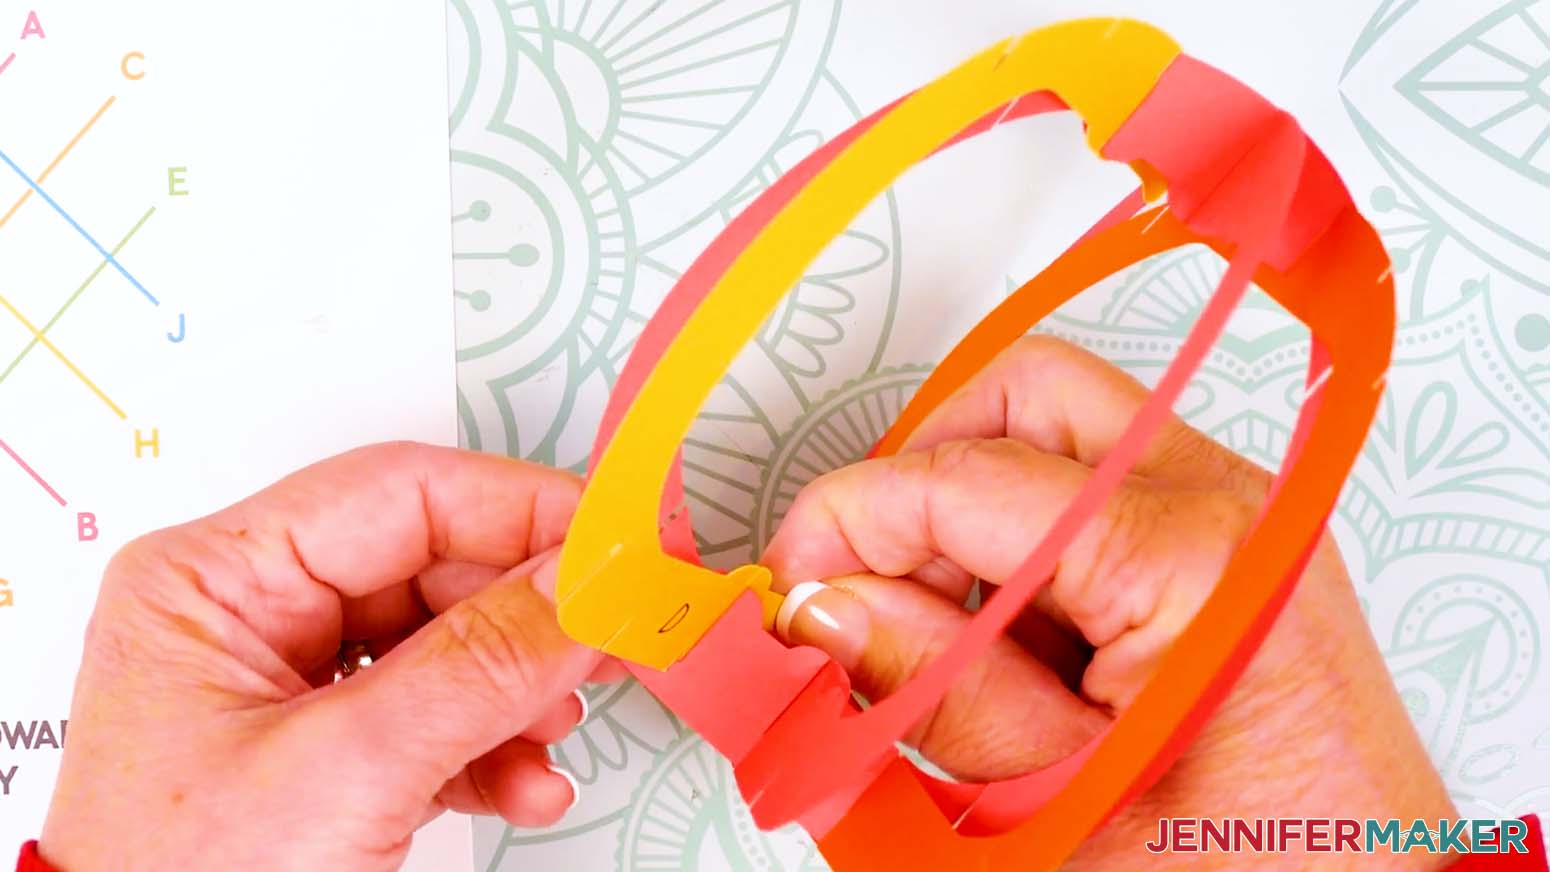
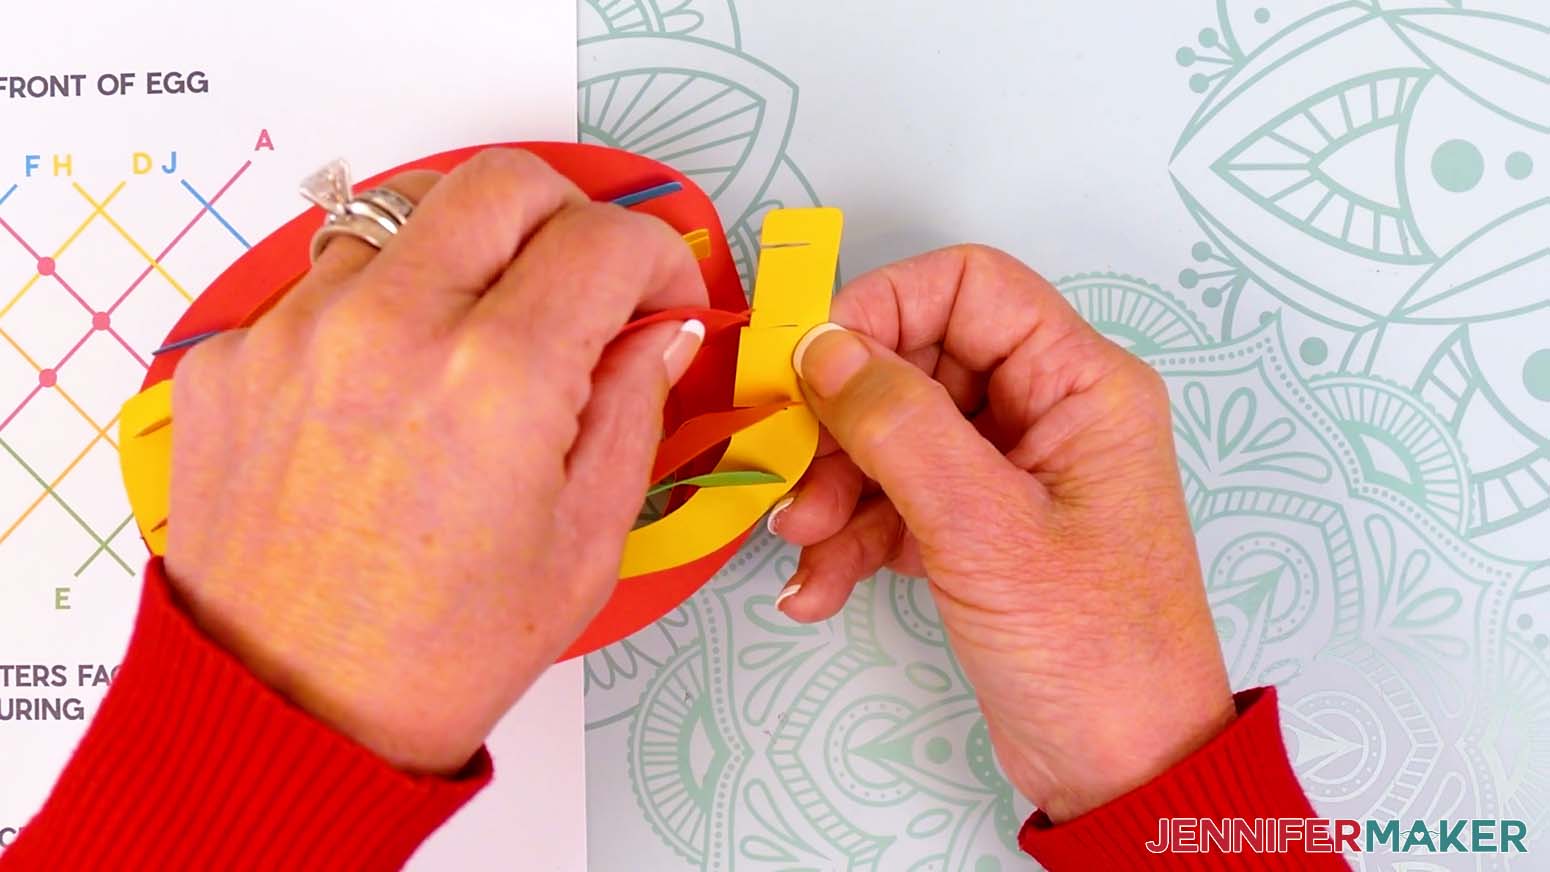
- With the layers back open in their grid shape, slot H (yellow) across its matching row, starting with A’s top slits, then D, C, and E’s top slits.
- Flip the assembly upside down so you can more easily see the bottom slits, then secure H into all of its corresponding bottom slits on A, D, C, and E.
- Flip the assembly back up so the letters are at the bottom and facing you, then check that you can still flatten everything in both directions.
- Take I (green) and slot its top middle slit into A, then the other top slits into C, D, E, and F.
NOTE: This layer might look like it’s incorrect until everything is perfectly positioned, so just take your time and fix anything that pops out before moving on to the next step. - Flip the assembly upside down and finish slotting I into the bottom intersecting slits on A, C, D, E, and F.
- Flip the assembly back up so the letters are at the bottom and facing you, then check that you can still flatten everything in both directions.
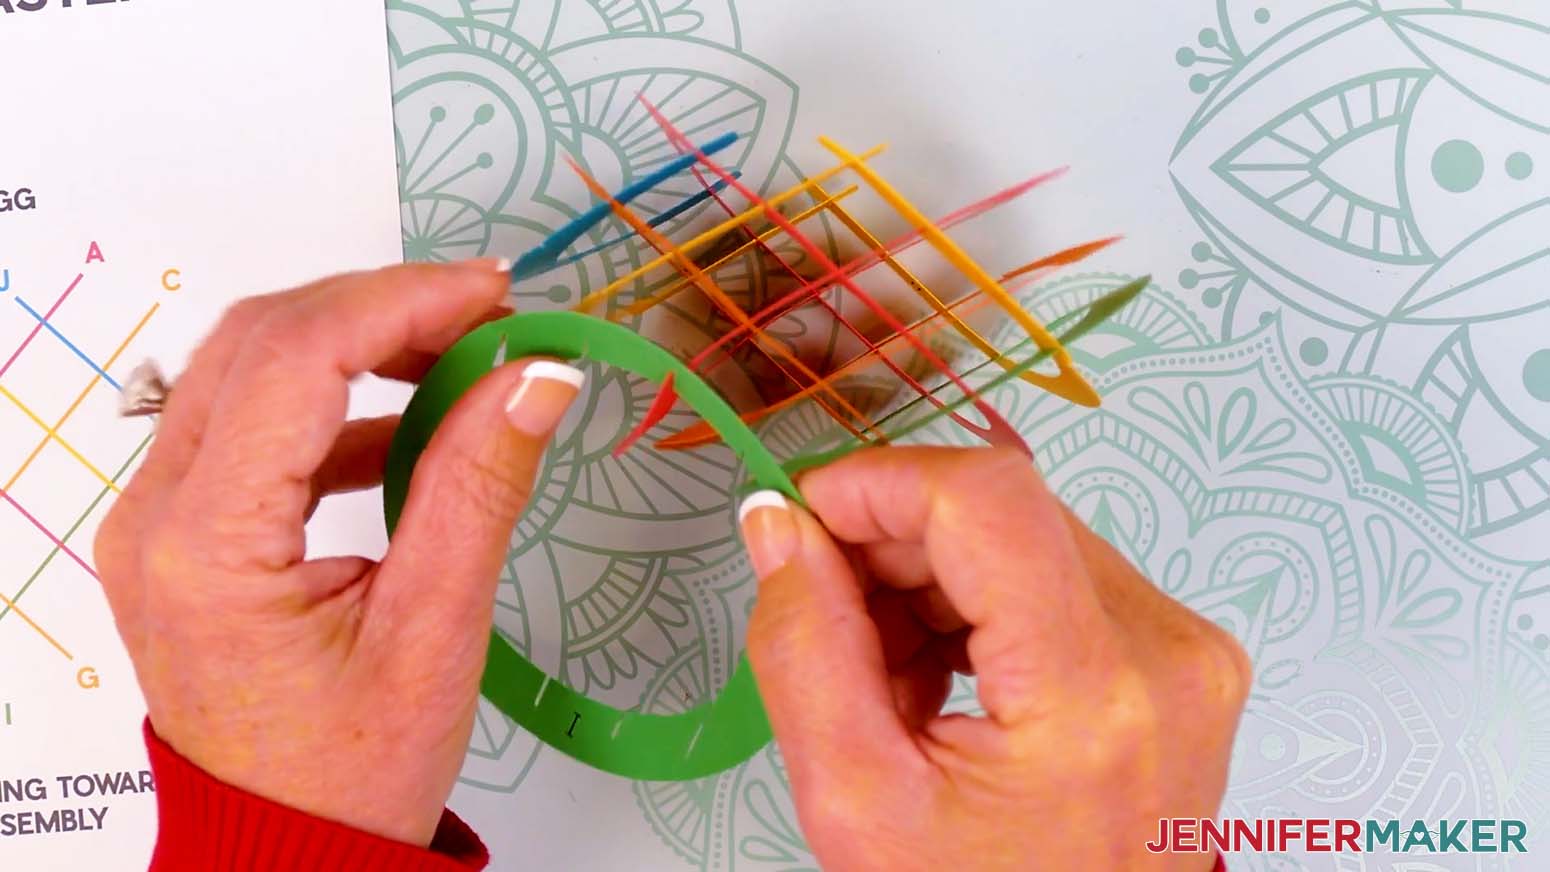
- Take J (blue) and slot its top middle slit into C, then the other top slits into the remaining open slits on A and E.
NOTE: Bend J gently (especially around tighter areas) to avoid tearing. - Slot J into the last remaining intersections at the bottom.
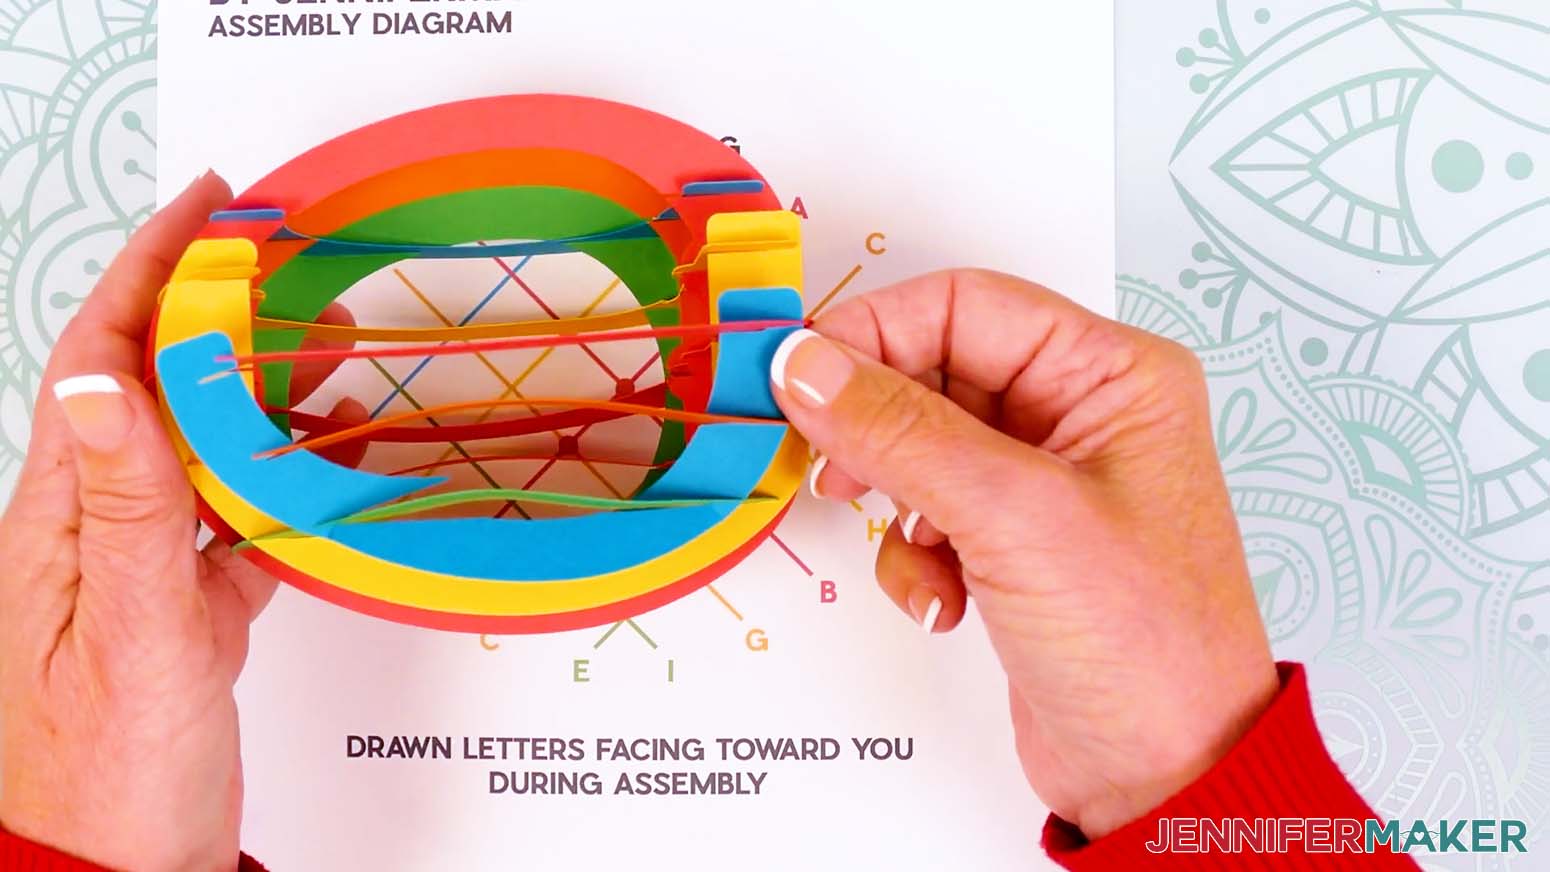
- Re-check your finished egg shell by flattening it in both directions and making sure it has a clean grid shape when viewing it from the top and bottom.
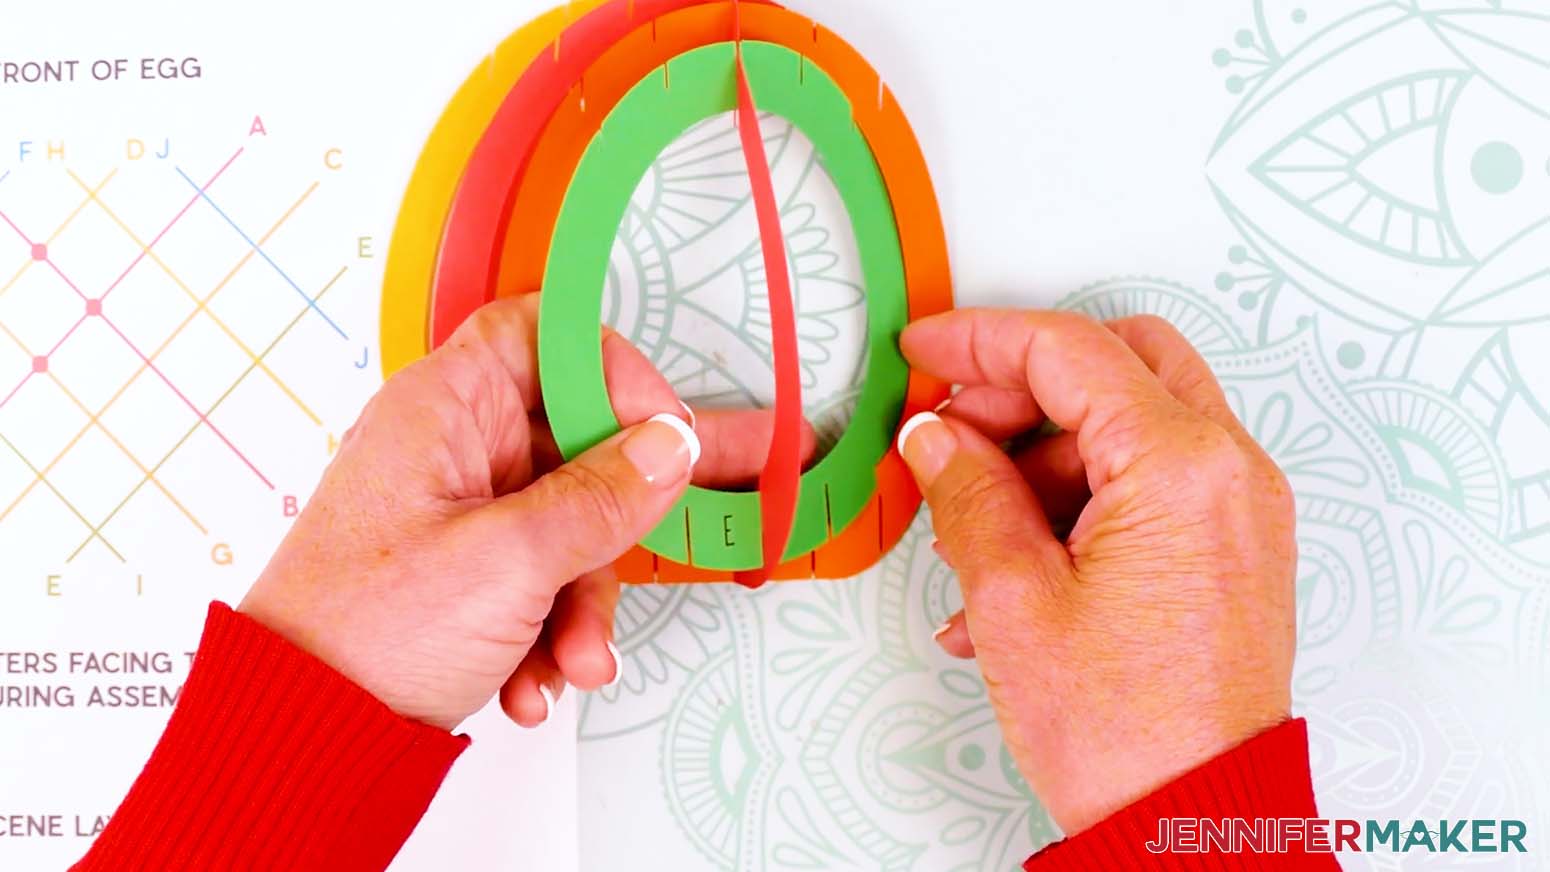
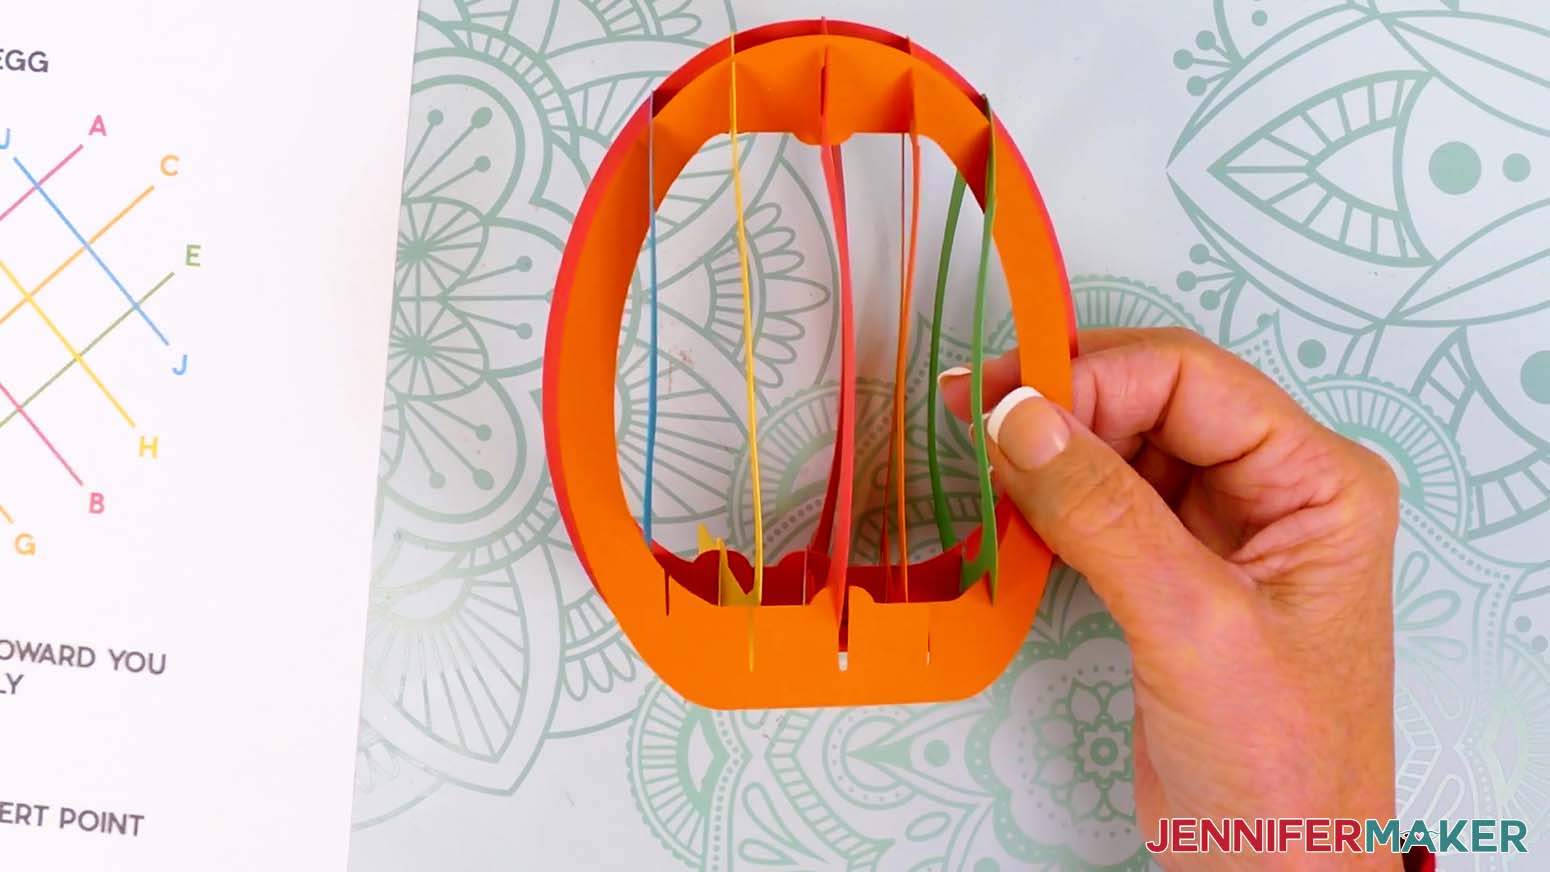
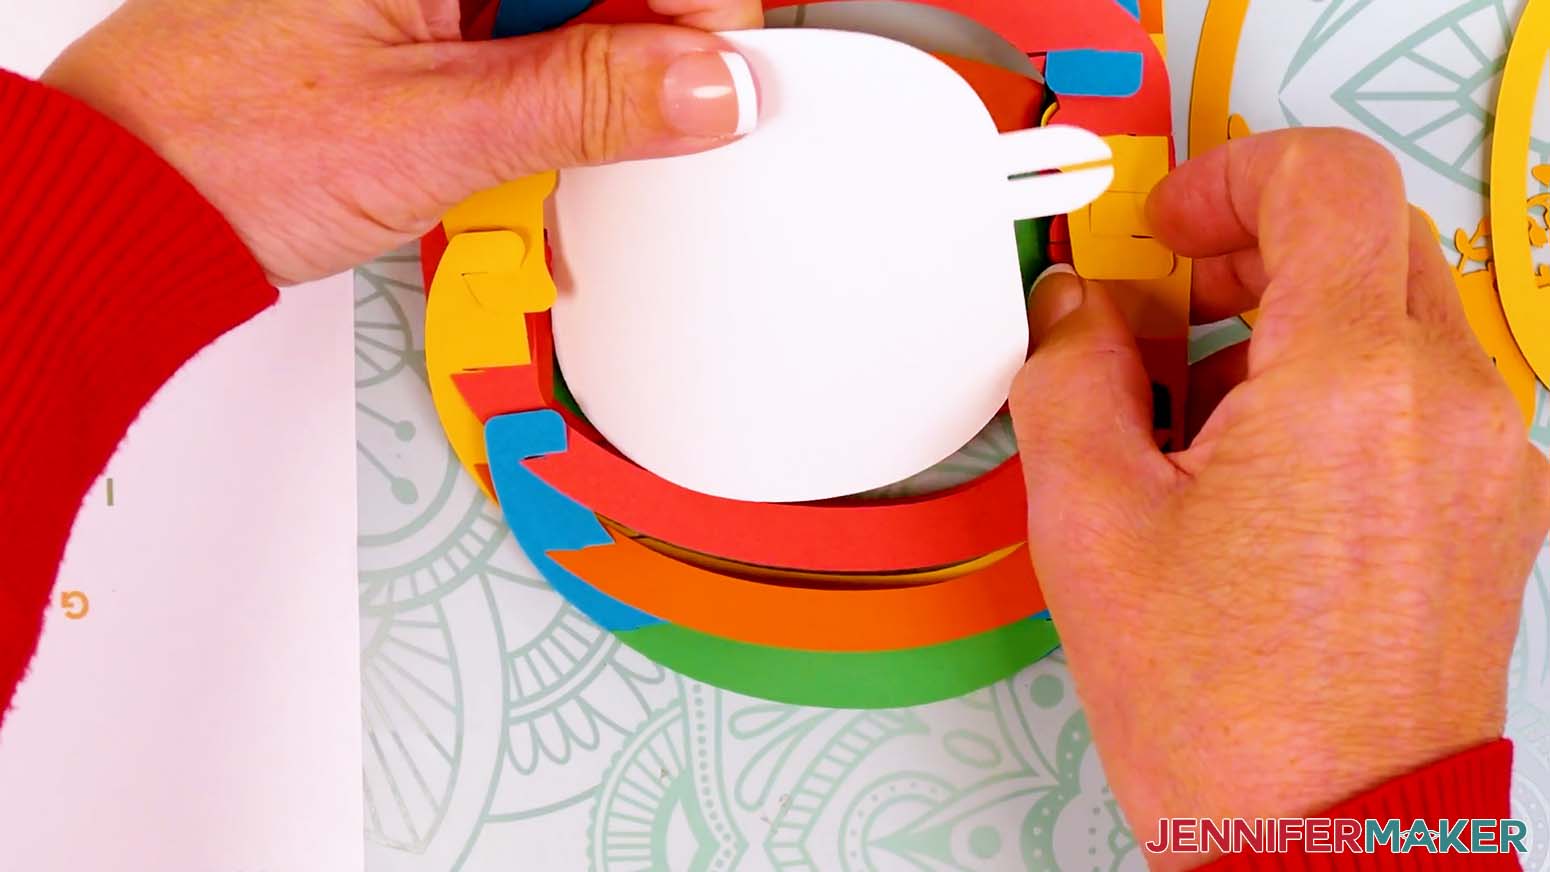
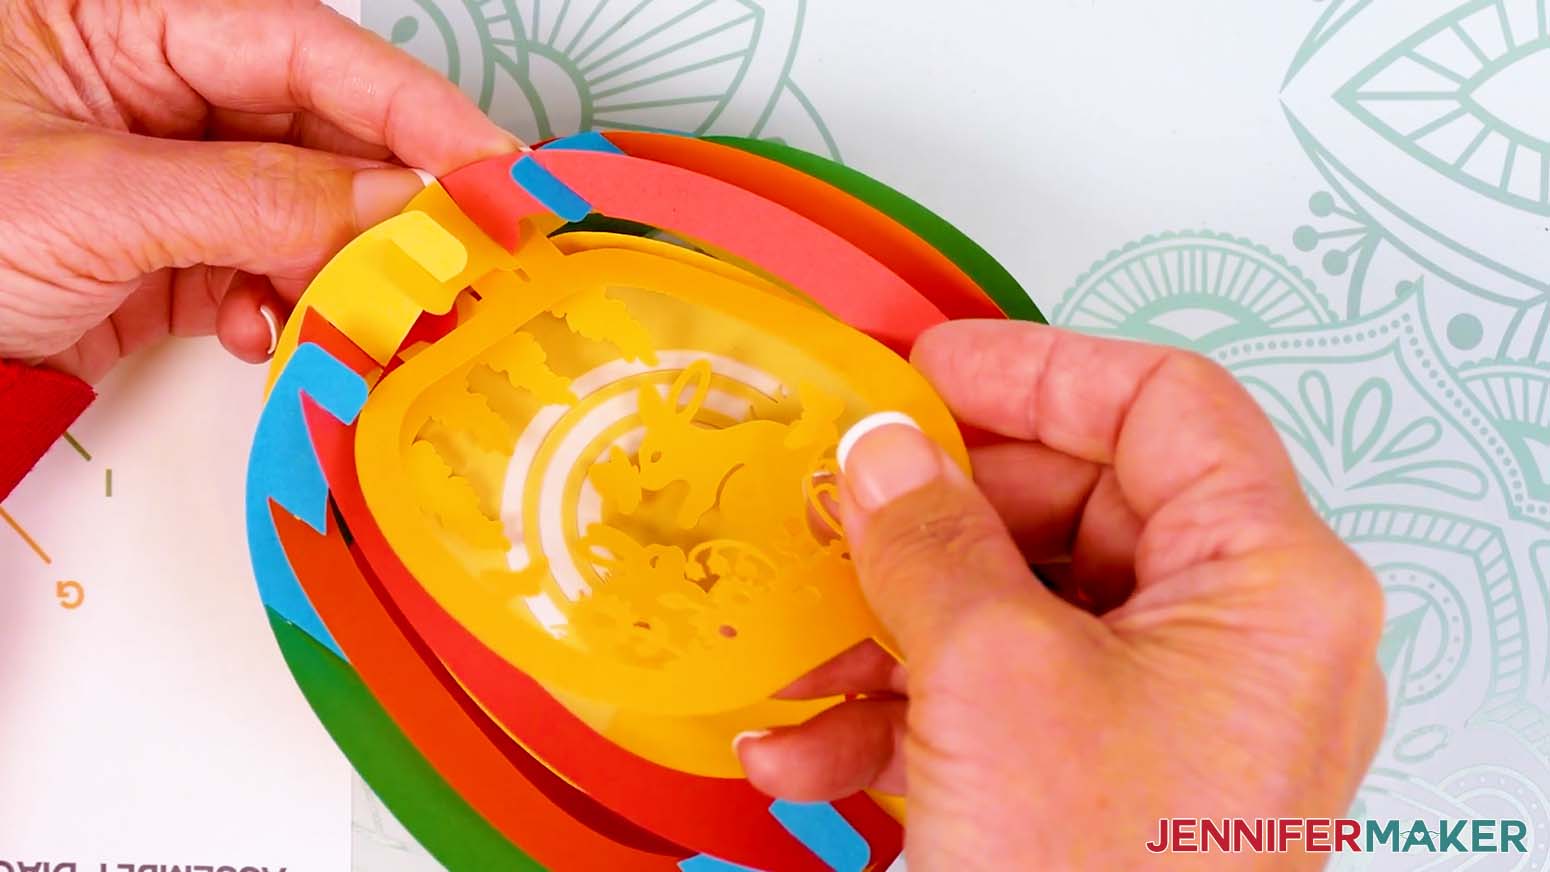
STEP 4: INSERT THE SCENE LAYERS
- Place the scene layers face up in order from left to right, with the solid piece on the very right.
- Turn the assembled egg so the front faces you and make sure you can reach the three sets of "bumps" inside.
TIP: You can rotate your printed Assembly Diagram upside down so the grid’s circles match the bumps’ locations.
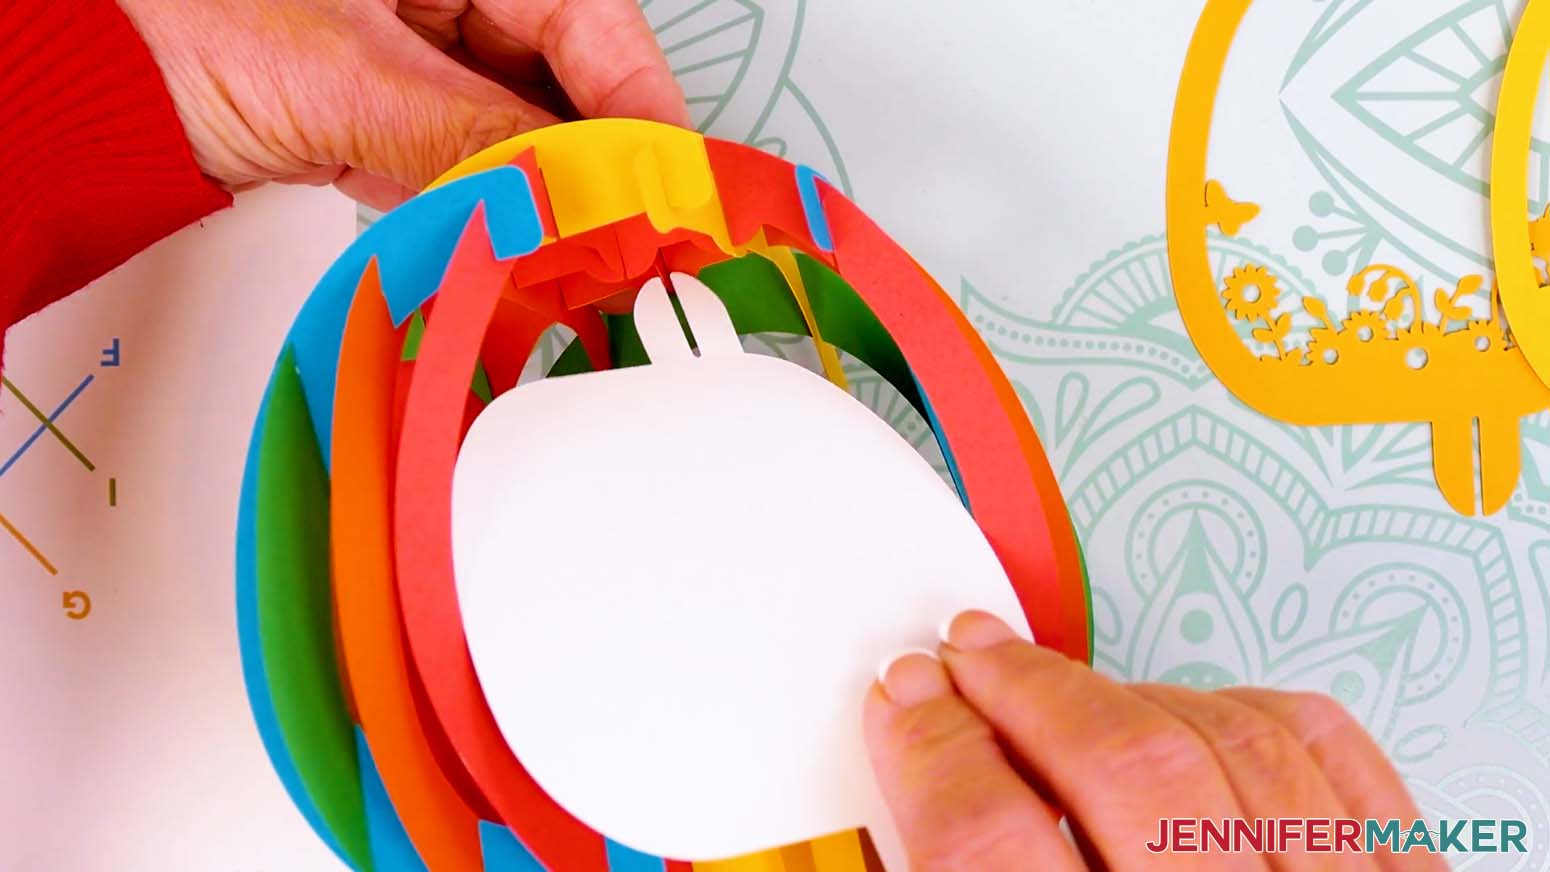
NOTE: Take off any jewelry before working inside the egg, as it can catch on the paper and tear delicate sections. - Hold the solid back scene layer in one hand so the tabs are at the top and bottom and to the right of center.
- From the outside of the egg, pinch on either side of the furthest back bump at the top with your other hand.
TIP: If you’re using color-coded layers like me, you’ll pinch A (red) and G (orange). - Slide the back layer’s top tab in so the slit crosses the "X" horizontally and seats fully.
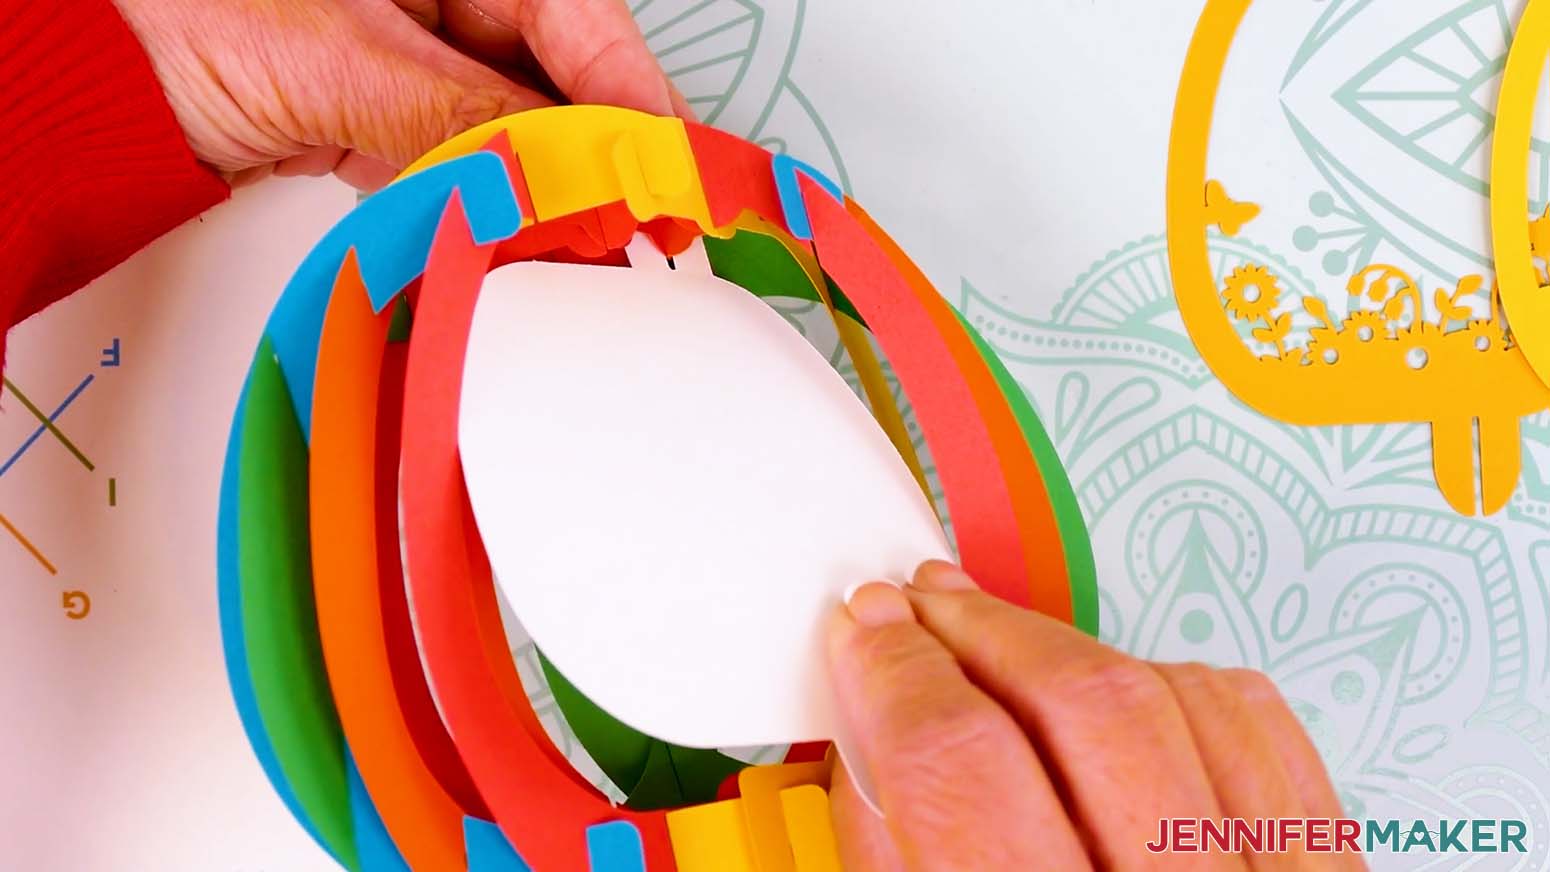
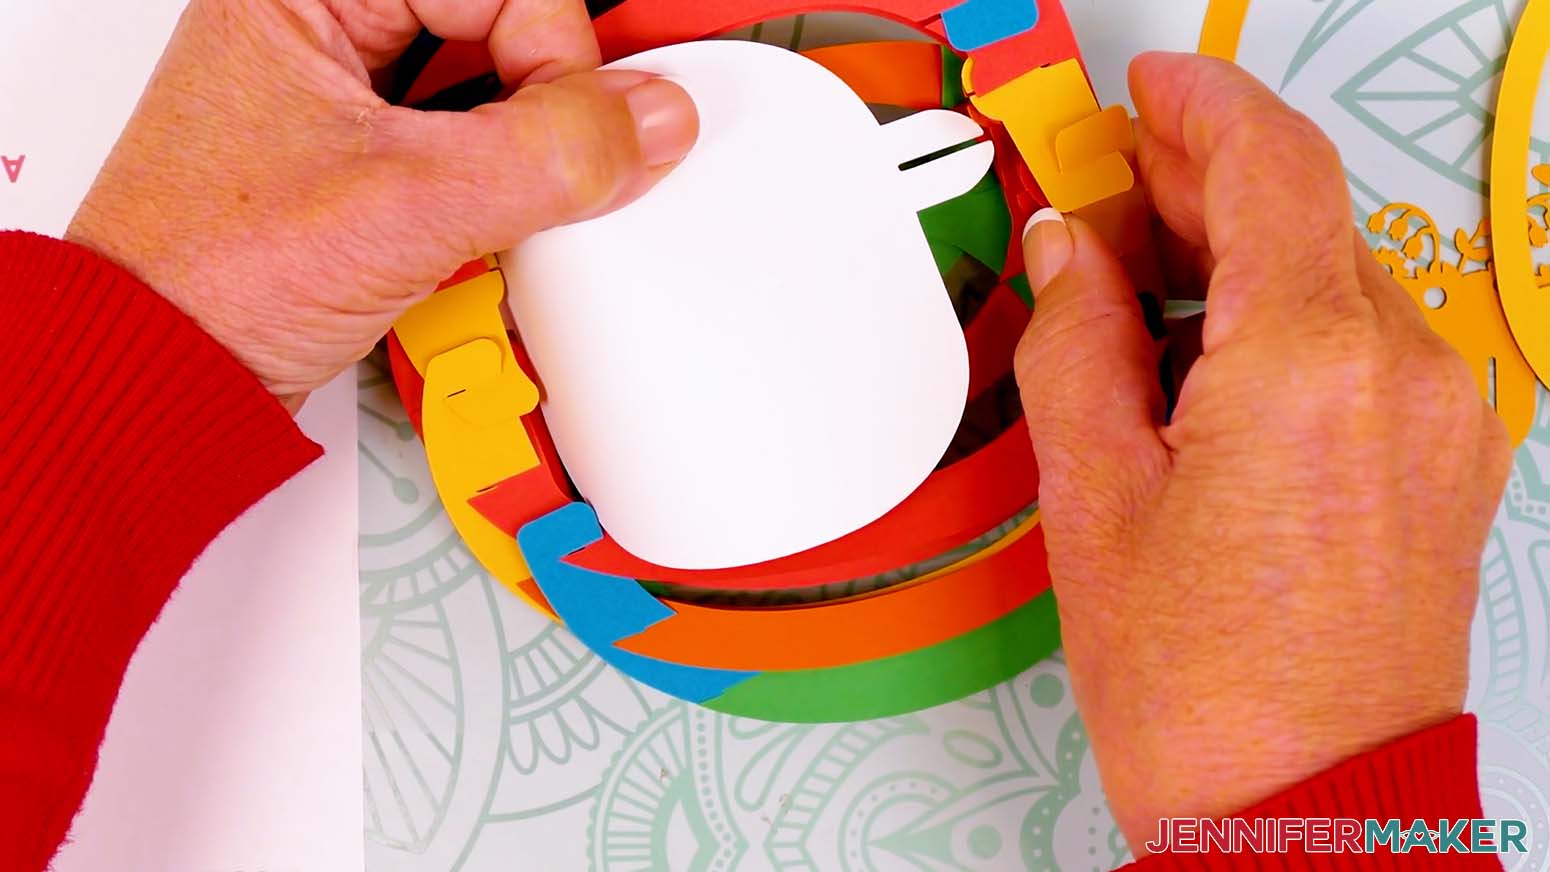
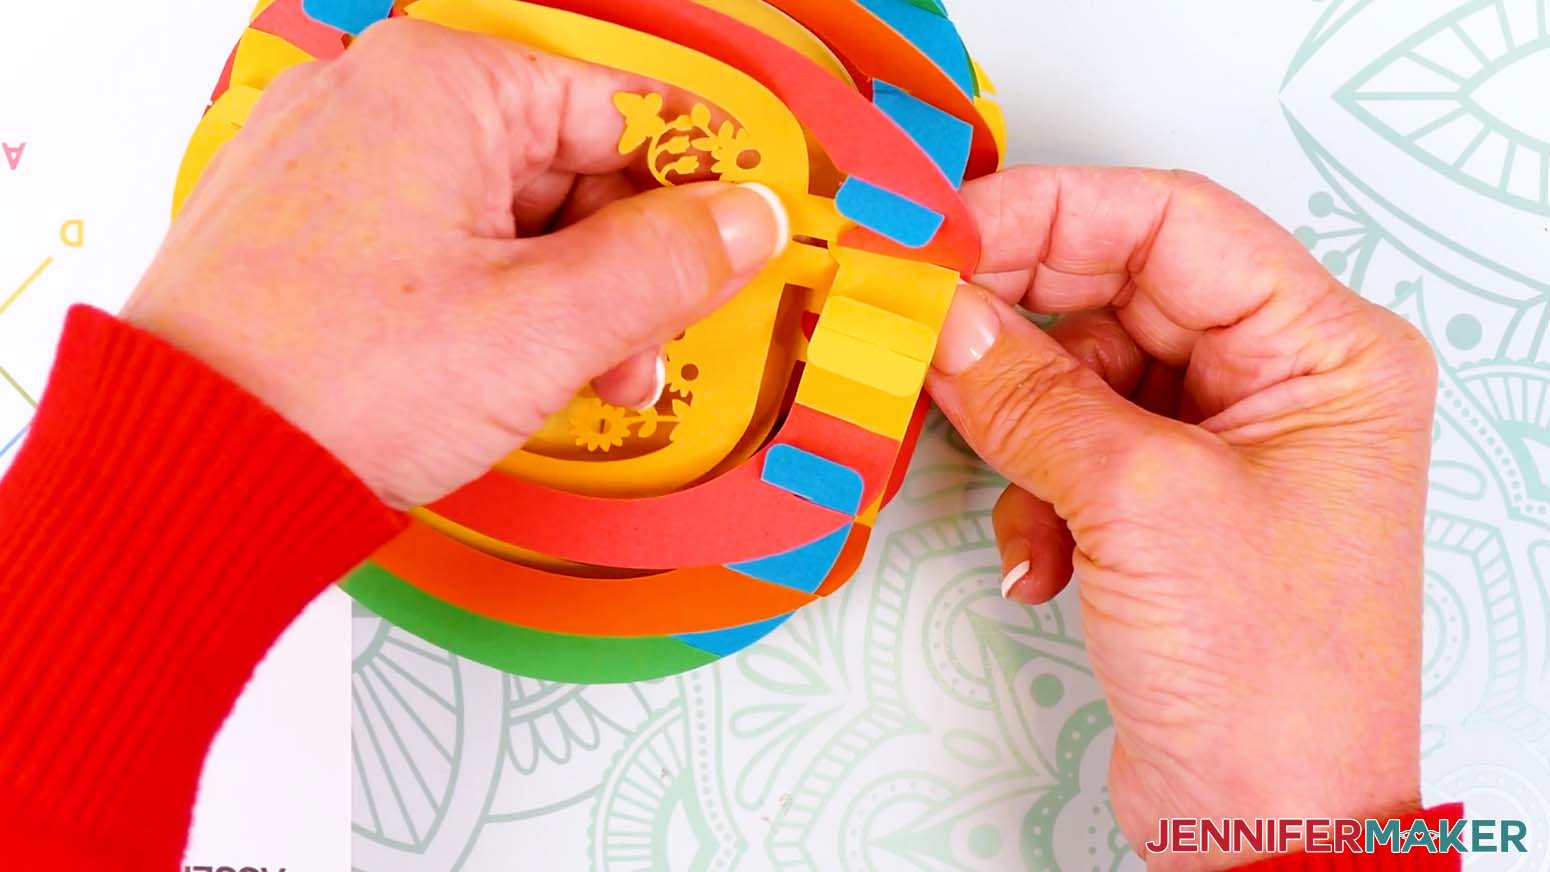
- Carefully flip the project and gently curve the middle of the back scene layer toward yourself so the loose tab can go inside the grid.
- Find the matching bump (it will be furthest to the left in this view) and pinch it on either side from the outside of the egg.
- Slide the back layer’s bottom tab in so the slit crosses the "X" horizontally and seats fully.
- Flatten and open the assembly so far to confirm the layer is seated correctly.
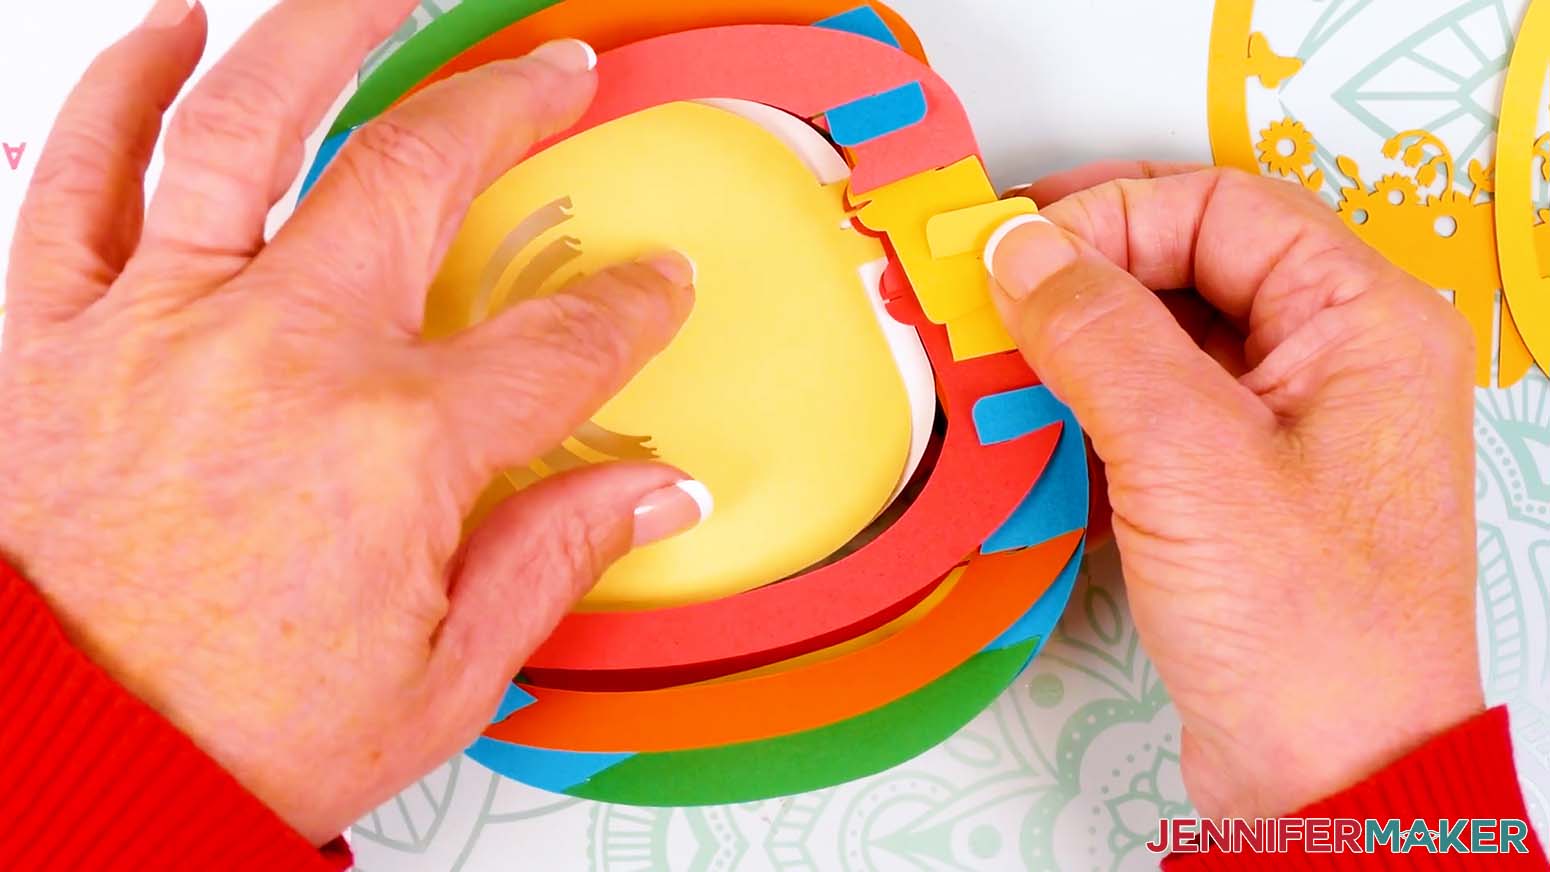
- With the assembled egg right side up, repeat Steps 3-9 to insert the second layer (mine has rainbow cutouts) into the same spot inside the egg. Its tabs are in the same spots, so it stacks with the back layer.
NOTE: The second layer goes in the same spots as the first without a gap between them. - Hold the next scene layer in one hand so the tabs are at the top and bottom in the center.
- From the outside of the egg, pinch on either side of the middle bump at the top with your other hand.
TIP: If you’re using color-coded layers like me, you’ll pinch A (red) and B (red). - Slide the layer’s top tab in so the slit crosses the "X" horizontally and seats fully.
- Carefully flip the project and gently curve the middle of the scene layer toward yourself so the loose tab can go inside the grid.
- Find the matching center bump on the egg and pinch it from the outside.
- Slide the layer’s bottom tab in so the slit crosses the "X" horizontally and seats fully.
- Flatten and open the assembly so far to confirm the layer is seated correctly.
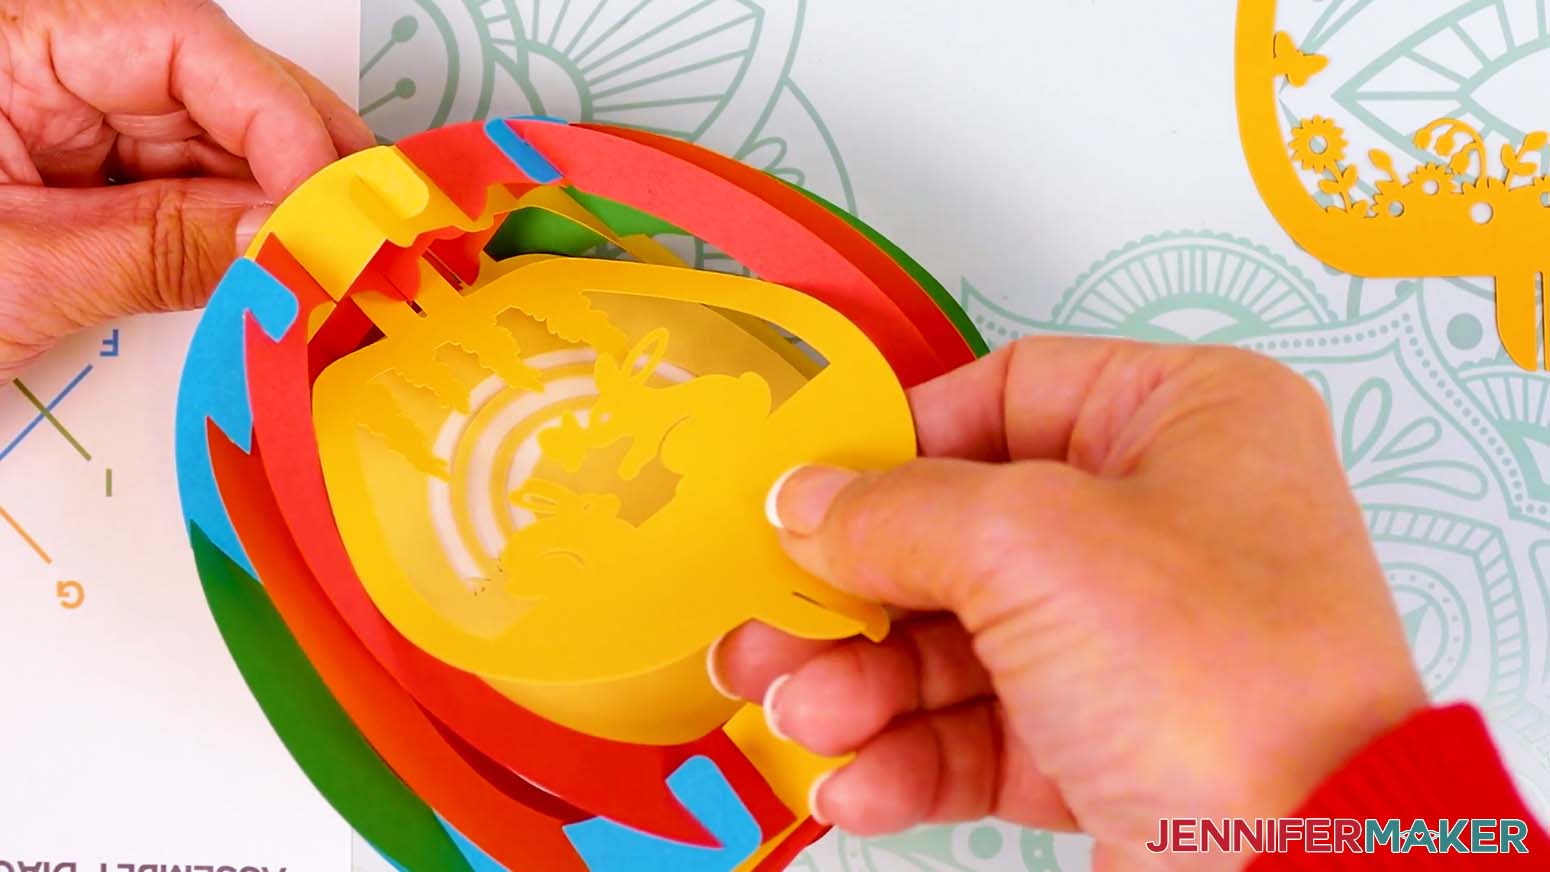
- Hold the front scene layer in one hand so the tabs are at the top and bottom and to the right of center.
- From the outside of the egg, pinch on either side of the last bump at the top with your other hand.
TIP: If you’re using color-coded layers like me, you’ll pinch D (yellow) and B (red). - Slide the layer’s top tab in so the slit crosses the "X" horizontally and seats fully.
- Carefully flip the project and gently curve the middle of the scene layer toward yourself so the loose tab can go inside the grid.
- Find the matching last bump on the egg and pinch it from the outside.
- Slide the front layer’s bottom tab in so the slit crosses the "X" horizontally and seats fully.
- Flatten and open the assembly to confirm the layer seated correctly.
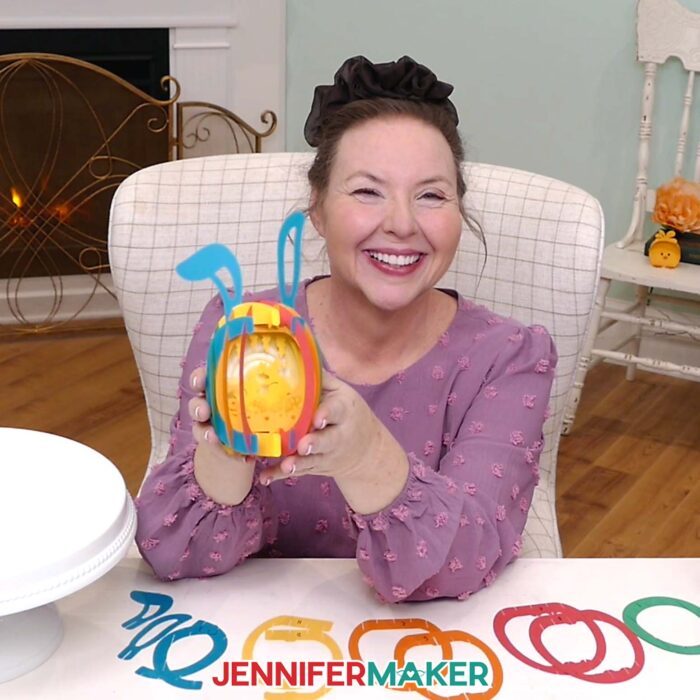
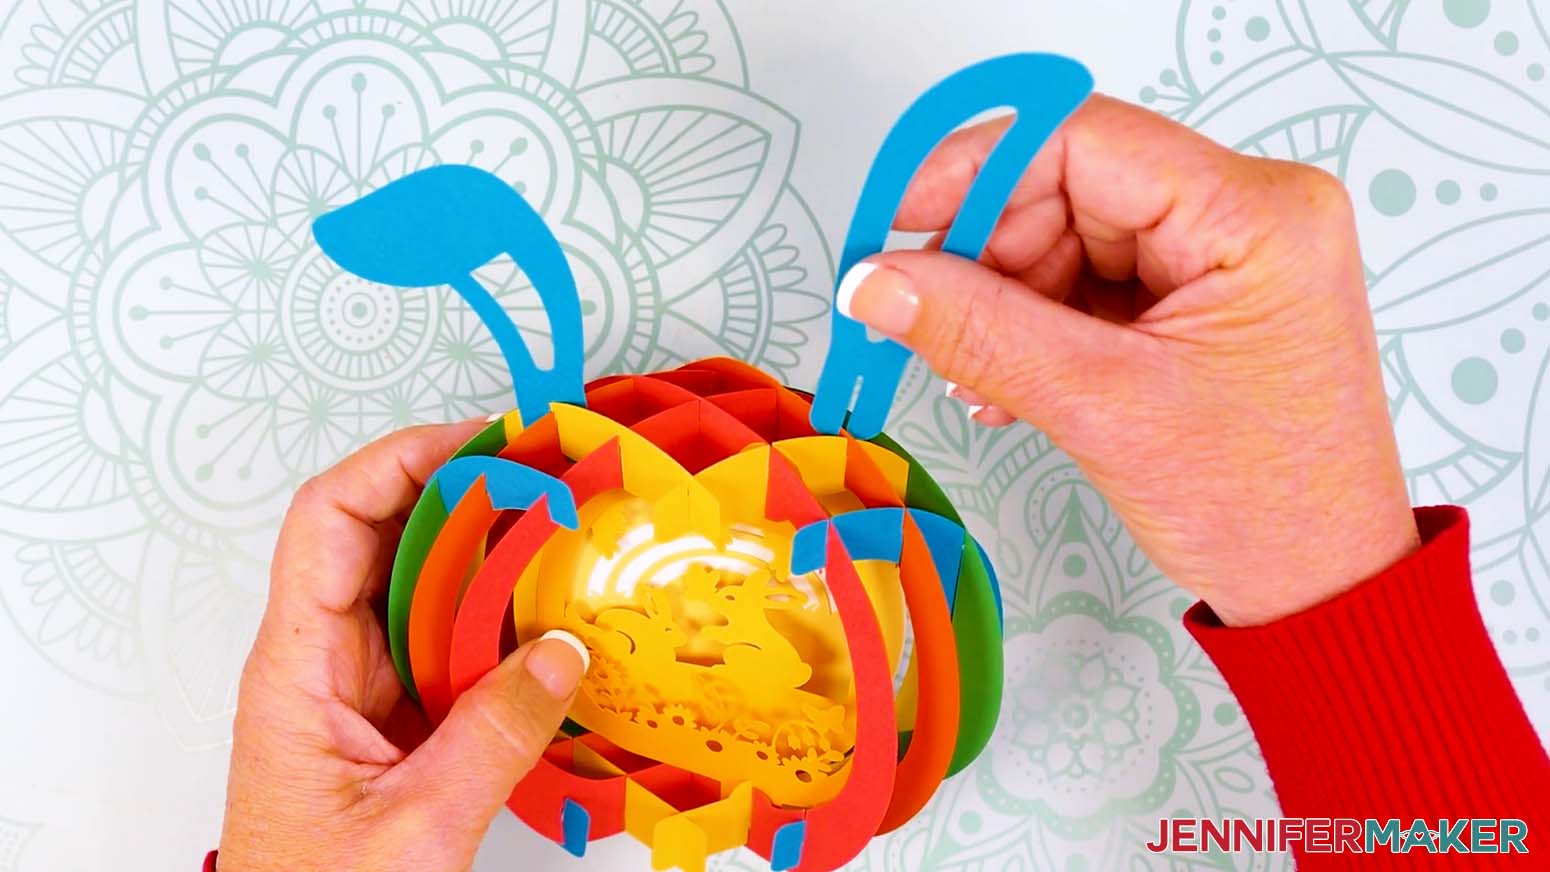
STEP 5: ADD THE EARS (OPTIONAL)
- Choose two “X” positions near the top of the egg that look balanced.
TIP: On either side of the center “X” usually looks best. - Slide each ear piece tab onto its chosen “X” intersection so it crosses straight through horizontally.
- If needed, adjust the ears until they sit evenly.
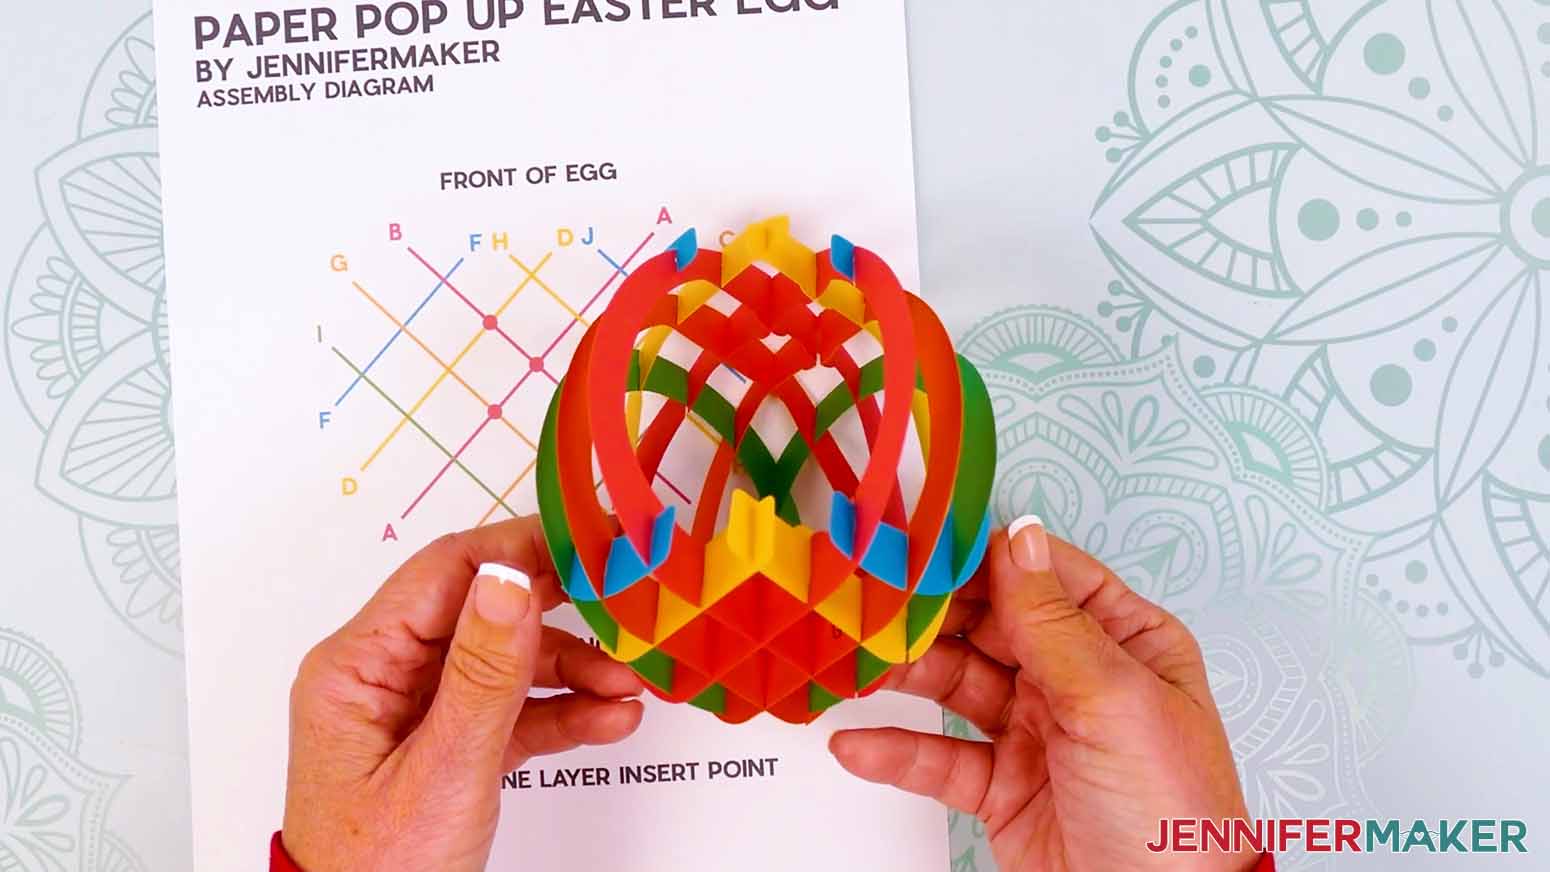
STEP 6: SHOW IT OFF
Your 3D Paper Pop-Up Easter Egg with a bunny scene inside is done and ready for display!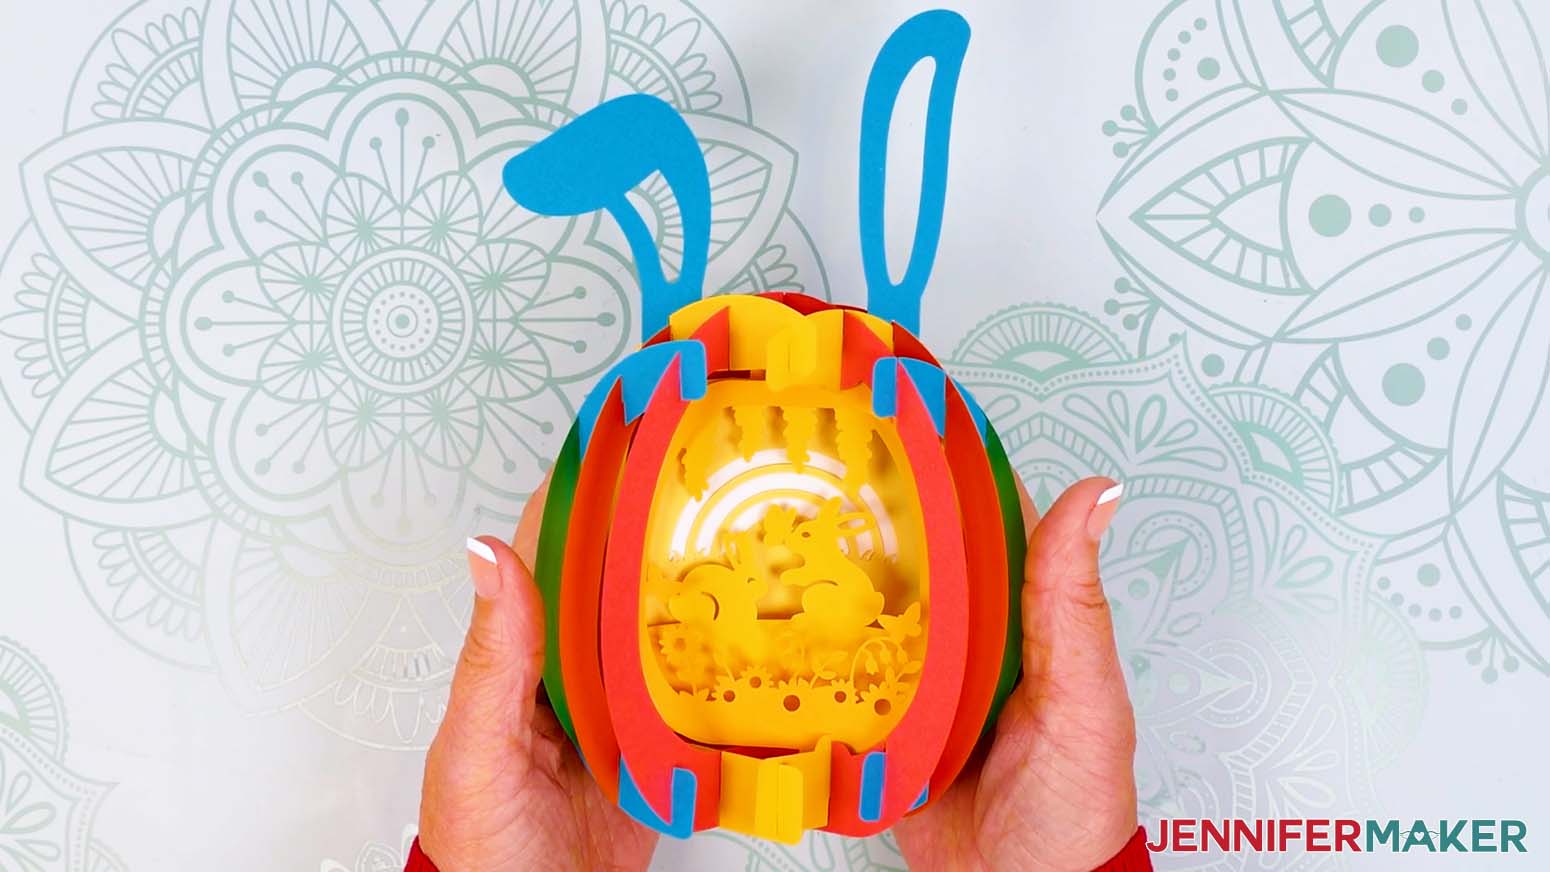
Notes
Finished Size: Approximately 4.5"W x 3.5"D x 5.25"H (8"H with ears)
Answers to Your Questions About Making 3D Pop Up Easter Eggs
Q: Is there a way to create a custom paper pop up Easter egg with custom text or a name?
A: You can learn how to design your own custom paper pop up Easter egg with a text personalization like the “Happy Easter” design below in my ADVANCE program. Learn more about ADVANCE here!
Q: Help! My Cricut Design Space screen looks different from yours!
A: If you’re using the latest version of Cricut Design Space, your screen may have slight variations from the screen you see on the video tutorial. Good news! All of the same functions are there, they may just be in different spots or have new icons.
Q: Can I make and sell paper pop up Easter egg crafts using your designs?
A: If you want to use my paper pop up Easter egg designs and project for commercial use, please familiarize yourself with my important licensing information before selling your crafts.
Q: Which Cricut machines work for making a paper pop up Easter egg?
A: You can make this project on Cricut Maker series machines, Explore series machines, the Venture, the Joy Xtra, the Joy, and the Joy 2.
Q: Can I make this without a Cricut?
A: Yes! While it’s a bit easier to get precise, detailed cuts on your egg shapes and cute Easter bunny outlines when using a cutting machine, I also include a printable PDF to help you hand-cut the pieces as part of my free download.
Q: Do I need glue to make a paper pop up Easter egg?
A: Nope! The entire project is designed to fit together using slits and tabs for sliceform construction.
Q: Is this an Easter egg card or decoration?
A: It’s primarily a dimensional display piece, but you can easily turn it into a pop-up card by adding a message or name, then collapsing it flat.
Q: What if my pieces don’t line up perfectly?
A: That’s normal! Paper is very forgiving, so gently adjust each connection and make sure every slit is fully seated.
Q: What is the best cardstock to use?
A: Medium weight cardstock (65-80 lb.) works best for both flexibility and structure on your paper pop up Easter egg.
Q: What material settings should I use?
A: When cutting the cardstock I’ve listed, choose “Medium Cardstock” in Cricut Design Space and set the pressure to “More” for clean cuts.
Q: What blade should I use?
A: A Premium Fine-Point blade (the one that came with your machine) works best for accurate cuts on all weights of cardstock.
Q: Why are the letters and colors important?
A: The letters and colors match my printable Assembly Diagram, which is the key to putting your paper pop up Easter egg together. It makes assembly so much easier by showing exactly how each piece connects in order.
Q: Why does my egg not fold flat?
A: Check each connection and make sure everything is slotted all the way together. One loose or misaligned piece can affect the collapsing movement.
Q: Can I use different colors or do I have to follow the diagram?
A: Absolutely! I do recommend practicing with the diagram’s colors first, but then you can switch to any color palette you want.
Q: Do I have to add the bunny ears?
A: The bunny ears are totally optional! The floppy ear is super cute, though, don’t you think?
Q: Where can I get help if I get stuck?
A: If you want quick troubleshooting or you want to show off your finished paper pop up Easter egg project, my Cricut Facebook group is a helpful place to get help, compare notes, and see what others are making!
Get my free SVG/DXF/PDF files to make your own Paper Pop Up Easter Egg and other projects!
(If you do not see the signup form above, click here.)
I absolutely love seeing your paper pop up Easter egg projects! Once you’ve learned how to make your own, inspire others and share photos of your projects in our Facebook group or tag me on social media with #jennifermaker.
Love,

Want to remember this? Save this tutorial on How To Make Paper Pop Up Easter Egg projects to your favorite Pinterest Board!