Learn how to make a paper picnic basket gift bag out of cardstock!
I love giving gifts just as much as receiving them — especially when the packaging looks almost too good to open! It’s so much fun to create a unique gift bag or box that is just as impressive as the gift inside. There are many ways to do this, but my new design opens up new possibilities. Wouldn’t it be lovely to capture the feeling of lovely summer picnics in the sun? You can do that with my adorable paper picnic basket project!
Watch the full step-by-step tutorial on how to make a paper picnic basket on my Youtube channel!

In this tutorial, I’ll show you how to make a paper picnic basket gift bag that looks like the REAL thing! These aren’t your typical paper bags — they’re more of a cross between a gift bag and box, and your gift recipient will be blown away when they see the detail that went into it. Aside from its quaint woven panels, the lid on the top of the basket flips up on both sides so you can fill the basket with gifts, candy, and other treats.

But that’s not even the cutest part! Have you seen the tiny version made especially for the Cricut Joy and Cricut Joy Xtra? They come together just like the full-size version, with a couple small differences I’ll show you in the video tutorial. I love how there are versions that work with any cutting machine, because it means more of you get to craft with me!

No cutting machine? That’s ok — you can still cut a cardstock picnic basket by hand. Just print out my PDF files and use them as a guide.
Speaking of cardstock, I used patterned and solid color 80 pound cardstock to create my full-size paper picnic baskets, 80 pound cardstock works great for the larger basket because it makes it more able to hold the weight of a bigger gift.

I don’t recommend using 80 pound cardstock for the Joy-sized version, though. Why? Because it’s so tiny, there are parts that would be tough to assemble with heavier, more rigid cardstock — especially when weaving each long strip into the slitted sides. Instead, I recommend using 65 pound cardstock for the Joy-sized version. It’s a more flexible cardstock, making it easier to fold, bend, and weave. Plus, since it’s so small, it will hold less weight inside anyway — meaning it doesn’t need such heavy-duty paper.

Or, if you want, you can leave the woven panels off for a simpler-looking basket that’s just as cute, but takes a little less time (and materials!) — just be sure to delete those components in Cricut Design Space before cutting your materials.

You can use any combination of colors and patterns you want for your basket. You can even use holiday-themed paper or your recipient’s favorite colors – just make sure to use solid-core cardstock so the edges look nice and finished. I’ll show you how to put everything together with some quality craft glue. Your brilliant DIY picnic basket can be as customized as you like!

Other than cardstock and the typical Cricut tools you can find in my materials list below, you’ll need some metal brads for the handle. I’ve said it before and I’ll say it again: I love impressive projects that only take a few materials!

Want to customize your paper picnic basket with an even MORE personalized touch? You can advance your skills and learn how to design your own custom gift tag with Cricut writing in my program ADVANCE with JenniferMaker! Learn more about ADVANCE here! I’ll show you how to prepare the project in Cricut Design Space, then walk you through using a special Cricut-compatible pen to create gift messages you don’t have to write by hand! The best part? This can be done on ALL Cricuts, even the Joy – just make sure you have a machine-compatible pen.

So, are you ready to make the cutest picnic basket gift bag you’ve ever seen? They make great wrap for presents to give your family, are wonderful for gifting goodies for neighbors, and make thoughtful teacher appreciation gifts. I love how the top opens so you can slip treats and fun crafts inside that you made just for them!

Let me show you how to make a paper picnic basket! This post contains some affiliate links for your convenience (which means if you make a purchase after clicking a link I will earn a small commission but it won’t cost you a penny more, there is no additional cost)! Read my full disclosure policy.
Materials to Make a Paper Picnic Basket
View my Amazon shopping list to see exactly what I used!
- Six (6) Sheets of 12″ x 12″ 65 lb. Solid Core Cardstock (any colors) (alternative) -OR-
- Six (6) Sheets of 12″ x 12″ 80 lb. Solid Core Cardstock (any colors)
- One (1) Sheet of 12” x 12” Patterned Cardstock (Alternative #1, Alternative #2, Alternative #3)
- Two (2) Brad Fasteners
- A way to cut your cardstock – I’m using the Cricut Maker 3, but you can also use the Cricut Maker, a Cricut Explore Series machine, Cricut Joy series machine, or the Cricut Venture
- Cricut Green StandardGrip Machine Mat 12″ x 12″
- Craft Glue (I used Bearly Art Precision Glue)
- Scoring Stylus (optional for files with score lines) -OR-
- Single Scoring Wheel (optional for files with score lines)
- Brayer
- Scraper
- Spatula
- Weeding Tool (optional for popping out small cutouts from intricate areas)
- Tweezers (optional)

How to Make a Paper Picnic Basket

Paper Picnic Basket
Learn how to make a paper picnic basket to use as a gift bag!
Materials
- Six (6) Sheets of 12" x 12" 65 lb. Solid Core Cardstock (any colors) -OR-
- Six (6) Sheets of 12" x 12" 80 lb. Solid Core Cardstock (any colors)
- One (1) Sheet of 12” x 12” Patterned Cardstock
- Two (2) Brad Fasteners
- Design #624 (My free SVG/PDF/DXF design files are available in my free resource library - get the password by filling out the form at the bottom of this page)
Tools
- A way to cut your cardstock - I’m using the Cricut Maker 3, but you can also use the Cricut Maker, a Cricut Explore Series machine, the Cricut Venture, the Cricut Joy Xtra, or even the Cricut Joy
- Cricut Green StandardGrip Machine Mat 12" x 12"
- Craft Glue (I used Bearly Art Precision Glue)
- Scoring Stylus (optional for files with score lines) -OR-
- Single Scoring Wheel (optional for files with score lines)
- Brayer
- Scraper
- Spatula
- Weeding Tool (optional for popping out small cutouts from intricate areas)
- Tweezers (optional)
Instructions
STEP 1: GET MY FREE PAPER PICNIC BASKET DESIGNS
First, download my Paper Picnic Basket designs from my free library – look for Design #624. Alternatively, you can use the Save This Project form near the top of this post and the design link will be emailed to you.
There are two design files in the main SVG folder. There is a score version of the picnic basket for use with a scoring tool, and a no-score version with dashed cut lines to create the foldable creases. There is also a folder for Cricut Joy users with a small version you can cut with a Joy.
In the main folder, there’s also a DXF folder with cut files, and a PDF folder with versions you can print and cut by hand.
In this tutorial, I will show you how to prepare and assemble the full-size score version of the picnic basket SVG with a Cricut Maker 3.
TIP: If you're not sure how to upload, go to jennifermaker.com/svgs to learn how to unzip and upload SVG files.
STEP 2: PREPARE AND CUT YOUR PAPER PICNIC BASKET
CRICUT DESIGN SPACE
- Open Cricut Design Space and click “New Project.”
- Click “Upload” and then “Upload Image.”
- Click “Browse.”
- Select the paper picnic basket SVG file of your choice. I’ll demonstrate with the full-size basket that has score lines, titled “paper-picnic-basket-score-jennifermaker-SVG.” The same steps apply for the no-score and Joy-sized baskets – just skip steps 11-16 below where we set and attach score lines.
- Click “Open.”
- On the Image Upload screen, there will be a design preview. Click “Continue.”
- The basket design is now on your Canvas.

- Click “Save” and give your project a name.
- Click “Save.”
- Zoom out if needed, then Ungroup the design.
NOTE: If you don't want to weave the side decorations, delete the top four pieces with vertical slits and the 12 strips right below them.
TIP: If you want to use single-sided cardstock for the handles, select the long vertical pieces with holes at one end and "Duplicate" them so you can glue the cut pieces back to back with the pretty side facing out. - Scroll through the Layers Panel and click the arrows to expand any layer groups.
- Find the top layer in the first layer group. It will look like black lines and its color will be red in the Color Box at the top.
- Set the Operation to “Score.”
- Click the topmost layer of that group to select both the Score and Cut layers.
- Click “Attach” to attach the score line to its corresponding cut layer.
NOTE: Some of the elements may have disappeared from the Canvas. They’re still there, but they may be behind other objects. Look through the Layers Panel to find them and bring them to the front of the Canvas if you’d like. - Repeat steps 12-15 with the remaining layer groups with score lines.
TIP: Save time and hold your Shift key while selecting the rest of the top layers in the expanded groups, then follow steps 12-15 to set and attach the score lines.
NOTE: If you don't want to cut the winged heart details, select a lid decoration layer, click "Contour," and select the cutouts in the pop up to hide them during cutting. Repeat for the second lid decoration piece. - If you’d like to change the color of any pieces to match your cardstock, select the layer and then select a new color from the Color Box next to the Operation menu.
- Select the correct machine from the top right drop-down menu.
- Click “Make.”
- On the Prepare screen, change the Material Size for each mat to match your paper if needed.
- Click back on the first mat, then click “Continue.”


CUTTING
- On the Make screen, set your Base Material settings for each mat. I used the “Medium Cardstock - 80 lb (216 gsm)” setting with More Pressure for all of my mats.
NOTE: For the full-size basket, I used 80 lb. cardstock for the base and 65 lb. patterned cardstock for the accents. For the Cricut Joy-sized basket, I used 65 lb. solid cardstock for the base and 65 lb. patterned cardstock for the accents.
TIP: Since all of the mats have the same cut setting, you can check the box next to “Remember Material Settings” to apply the settings to the rest of your mats and save time between cuts. - If you’re using the “no score” version, skip ahead to step 3. If you’re using the Scoring Stylus, insert it into the correct clamp now. If you’re using the Single Scoring Wheel, insert it into the correct clamp when prompted.
- Place your first mat’s cardstock face up on a green StandardGrip machine mat.
NOTE: If you’re using a Cricut Joy or Joy Xtra with the small basket file and smaller sheets of material, place your mat’s material in the top left corner of the mat, just like you would with a 12” x 12” mat. - Use a brayer to make sure it’s fully adhered.
- Check that your Premium Fine-Point Blade is clean and in the clamp.
- Press the flashing “Load/Unload” button to load the prepared mat into your Cricut.
- Press the flashing “Go” button to begin cutting.
- When the cut is complete, before unloading the mat, use your weeding tool to peel back a corner of the cardstock to make sure the cut went all the way through. If it didn’t, smooth the cardstock back down into place and press the “Go” button again for another pass.
- When it has finished cutting, unload the mat, flip it over onto your work surface, and roll it back to release the paper. Lay the cut pieces right side up on your work surface.
TIP: Use the spatula to help lift delicate parts. If you have any issues with your cuts, go to jennifermaker.com/cleaner-cuts. Use a scraper tool to remove the small bits left on your mat after you remove the cut pieces. - Follow steps 2-9 to continue cutting the rest of your cardstock mats.
TIP: Be sure to place the right color or pattern cardstock on each mat. - Here are what my cut pieces look like. There is one large main base piece, one large base side piece, one smaller base side piece, two small panels with slits, two larger panels with slits, twelve weaving strips, two handle pieces, one lid base piece, and eight decorative lid pieces.


STEP 3: ASSEMBLE YOUR PAPER PICNIC BASKET
ASSEMBLE THE PICNIC BASKET LID
- Gather the lid base piece and the eight decorative lid pieces. There are four short rectangular decorative pieces, two slightly longer rectangular decorative pieces, and two large decorative pieces with winged heart cutouts.
- Apply craft glue to the back of one of the short decorative rectangular lid pieces.
- Adhere the short rectangular piece to the center of one of the side flaps on the large lid base. Make sure it’s centered evenly within the rectangle formed by the outer edges of the flap and the crease line.
- Repeat steps 2-3 for the other three short decorative rectangular lid pieces, adhering them to the remaining three side flaps.
- Apply craft glue to the back of one of the slightly longer decorative rectangular pieces.
- Adhere the decorative piece to the center of one of the longer flaps with tabs on the large lid base. Again, make sure the rectangular decorative piece is centered evenly within the outer edge of the lid flap and the crease lines for the tabs.
- Repeat steps 5-6 for the other longer decorative rectangular lid piece.
- Apply craft glue to the back of one of the large decorative pieces with a winged heart cutout. Avoid gluing very close to the cutout.
- Adhere the large decorative piece to the center of one large rectangular-shaped area on the large lid base. Be sure the top of the heart cutout is pointing toward the center of the lid base.
- Repeat steps 8-9 for the other large decorative piece with a winged heart cutout.
- When the glue is dry, fold up on one of the two longest crease lines. Use your scraper tool to make a sharp crease on the line.
- Repeat step 11 with the other longest crease.
- Fold back (away from the side with decorative pieces) on one of the four crease lines for the medium-sized tabs.
- Use your scraper tool to make a sharp crease on the line.
- Repeat steps 13-14 with the other three medium-sized tabs.
- Fold back on one of the two crease lines for the long tabs.
- Use your scraper tool to make a sharp crease on the line.
- Repeat steps 16-17 with the other long tab.
- Fold back on one of the crease lines for the four tiny tabs at the end of each of the two longer tabs.
- Use your scraper tool to make a sharp crease on the line.
- Repeat steps 19-20 with the other three tiny tabs.
TIP: If any of the decorative pieces lift at the edges or corners while you’re folding, use your craft glue’s precision tip to apply glue under those areas, then press to adhere. - Apply glue to the outside of one of the tiny tabs.
- Position the glued tab under the adjacent medium-sized tab, aligning the crease of the tiny tab with the edge of the medium-sized tab.
- Press the pieces together on both sides to adhere them.
- Use your finger to wipe away any excess glue before it dries.
- Repeat steps 22-25 with the remaining three tiny tabs.
- Fold back on the crease line of one of the two small curved tabs with holes in the center of the lid base piece.
- Use your scraper tool to make a sharp crease on the line.
- Repeat steps 27-28 for the other small curved tab with a hole.


ASSEMBLE THE PICNIC BASKET BASE
- Grab the large main base piece, large base side piece, and smaller base side piece.
- If your cardstock isn't the same on both sides, place the large main base piece pretty-side DOWN on your work surface, and place the two side pieces pretty-side UP.
- Fold back on the crease line on the large base side piece.
- Use your scraper tool to make a sharp creases on the fold.
- Repeat steps 3-4 with all three crease lines on the smaller base side piece.
NOTE: Do not fold the creases on the large main base piece yet. - Grab the larger base side piece and apply craft glue to the outside of the folded tab. Be sure to apply glue to the corners and along the edges.
- Place the side piece pretty-side DOWN and press the folded edge of the glued tab against the large main base piece’s straight edge, so it mirrors the other side.
- With the side piece’s crease lined up with the main base piece’s edge, and the top and bottom edges aligning, fold the glued tab down onto the main base piece.
- Press to adhere.
- Grab the smaller base side piece and apply craft glue to the outside of the shortest folded tab. Be sure to apply glue to the corners and along the edges.
- Place the small side piece pretty-side DOWN and press the folded edge of the glued tab against the large main base piece’s short straight edge in the center, so it mirrors the opposite side.
- With the side piece’s crease lined up with the main base piece’s edge, and the top and bottom edges aligning, fold the glued tab down onto the main base piece.
- Press to adhere.
- Fold up on the longest crease line on the large main base piece.
- Use your scraper tool to make a sharp crease on the line.
- Repeat steps 14-15 with the remaining crease lines on the large main base piece.
TIP: Heavier cardstock can be more difficult to fold along the crease lines. Use your scraper tool to help start the folds. - When assembled, you’ll have a basket base with two large sides and two small sides. The two small sides each have two tabs.
- Apply glue to the outside of one of the tabs.
- Fold up the side with the glued tab, as well as the adjacent large side.
- Position the glued tab under the adjacent large side, aligning the crease of the tab with the edge of the adjacent side.
- Press the pieces together on both sides to adhere them.
TIP: Lay the basket base on its side and press against the glued area on the work surface from the inside to adhere the pieces. - Use your finger to wipe away any excess glue before it dries.
- Repeat steps 18-22 with the remaining tab on that side.
- Repeat steps 18-22 with the two tabs on the other side, creating a basket shape.


ASSEMBLE THE HANDLE AND WOVEN SIDE ACCENT PIECES
- Place the two handle pieces pretty-side-up on your work surface.
- Apply craft glue to the last ¼” of the straight end of the longer handle piece. Make sure to apply it close to the edges.
- Grab the shorter handle piece and place its straight end onto the glued portion of the longer handle piece.
- Align the edges and press the pieces together to adhere.
- Place the two larger panels with slits and the six largest weaving strips pretty-side-up on your work surface. Orient the panels so the longer sides with hole cutouts are pointing away from you.
- Set the two smaller panels and the six smallest weaving strips aside for now.
- Of the six largest weaving strips, there are two each of three different sizes. Grab one of the longest weaving strips.
- Position the strip at the top part of the panel with slits.
- Starting from the back, insert the weaving strip into the leftmost slit on the panel.
- Once you push it through the first slit, push it down into the next slit.
- Push the strip forward from the left with one hand, then weave it up through the next slit with the other hand.
- Push the strip forward again, then weave it down through the next slit.
- Continue pushing and weaving the strip up and down through the remaining slits until its entire length is woven and the short ends of the strip are underneath the edges of the panel on both ends.
- Flip the panel over and push the strip all the way to the top of the slits.
- Lift the very end of the strip on one side and use your craft glue’s precision tip to apply some glue underneath.
- Press to adhere.
- Repeat steps 15-16 with the other end of the strip.
- Grab one of the two shortest weaving strips.
- With the panel with slits pretty-side-up, insert one end of the strip into the second slit from the left, pushing it toward the left side of the panel.
- Push the strip forward from the left with one hand, then weave it down through the next slit with the other hand.
- Push the strip forward again, then weave it up through the next slit.
- Continue pushing and weaving the strip up and down through the remaining slits until its entire length is woven.
- Push the newly woven strip upward until it’s snug against the first strip.
- Flip the panel pretty-side-down and adjust the strip if needed so it’s centered in the panel.
- Lift the very end of the strip on one side and use your craft glue’s precision tip to apply some glue underneath.
- Press to adhere.
- Repeat steps 25-26 with the other end of the strip.
- Flip the panel back over so it’s pretty-side-up.
- Grab one of the two medium-length weaving strips.
- Position the strip at the bottom part of the panel.
- Starting from the back, insert the weaving strip into the leftmost slit on the panel.
- Follow steps 10-13 to weave the last strip into the bottom of the panel.
TIP: The last strip may be more difficult to push through the slits than the others. Be patient and try not to rip the paper. You can use tweezers to help. - Flip the panel over and push the strip up so it’s snug against the previous one.
- Lift the very end of the strip on one side and use your craft glue’s precision tip to apply some glue underneath.
- Press to adhere.
- Repeat steps 34-35 with the other end of the strip.
- Repeat steps 7-36 with the other larger panel with slits and the remaining larger weaving strips.
- Follow steps 7-36 to assemble the smaller panel pieces and their corresponding six smaller weaving strips.
- Grab the basket base and one of the large assembled panels.
- Apply glue to the back of the panel. Make sure to apply it close to the edges.
- Adhere the large panel to one of the large sides of the basket base, lining up the holes, and aligning the edges of the panel with the edges of the base.
- Repeat steps 40-41 with the other large panel.
- Grab a smaller assembled panel and apply glue to the back. Make sure to apply it close to the edges.
- Adhere the small panel to one of the small sides of the basket base, aligning the edges of the panel with the edges of the base.
- Repeat steps 43-44 with the other small panel.
TIP: Lay the basket base on its side and press against the work surface from the inside to adhere the pieces.


ATTACH THE LID AND HANDLE
- Apply craft glue to the outside of one of the curved tabs in the center of the lid, avoiding the hole.
- Use one hand to lift and hold the two sides of the lid out of the way.
- Slide the glued tab down into the basket base, aligning the hole in the tab with the hole in the basket base and making sure the straight edges are parallel.
- Press the tab against the basket base from the front and back until the glue dries.
- Rotate the basket so the opposite side is facing you.
- Follow steps 1-4 to adhere the other curved tab to the inside of the basket base. Make sure the holes are lined up and the straight edges are parallel.
- Grab two brads and the assembled handle piece, pretty-side-up.
- Align the hole in one end of the handle with a hole on the basket.
- Insert the pointy end of one brad through the holes.
TIP: Separate the two pointy ends of the brad a little before inserting them through the hole to make them easier to pull apart once they’re through. - Hold the brad in place and reach inside with your other hand to bend the ends of the brad apart, securing the handle to the basket.
- Repeat steps 8-10 to attach the other end of the handle to the opposite side of the basket.


TIPS FOR MAKING A PAPER PICNIC BASKET WITH A CRICUT JOY
CRICUT DESIGN SPACE
If you have a Cricut Joy, use the small basket design. It’s the same design as the large basket, with one small difference, adjusted to fit the small machine’s size and tools. 
You can reduce the red mats to one by moving the small accent piece on the second mat.
CUTTING
You may need to trim your materials to fit the Joy’s cutting area with a paper trimmer or scissors.
Remember, all machines can cut a little differently, but I used the following settings with my Joy: “Medium Cardstock - 80 lb (216 gsm)” material setting with “More” Pressure.
For the Joy size basket, I recommend using no heavier than 65 lb. cardstock to make weaving the paper on the side panels easier.
ASSEMBLY
When you’re putting everything together, follow the same steps as the full-size basket, with one small difference:
To assemble the basket base, there are four pieces instead of three. Repeat steps 10-13 in the “Assemble the Picnic Basket Base” section above to attach the extra small side piece. 
STEP 4: SHOW IT OFF
Here’s what my finished paper picnic basket gift bags look like!
Notes
Assembled Sizes:
Large Full-Size Basket: 8"W x 9.25"H x 5"D
Small Joy-Size Basket: 4.25"W x 5.25"H x 2.75"D
Answers to Your Questions About How to Make a Paper Picnic Basket
Q: How do I customize my own paper picnic basket gift tags?
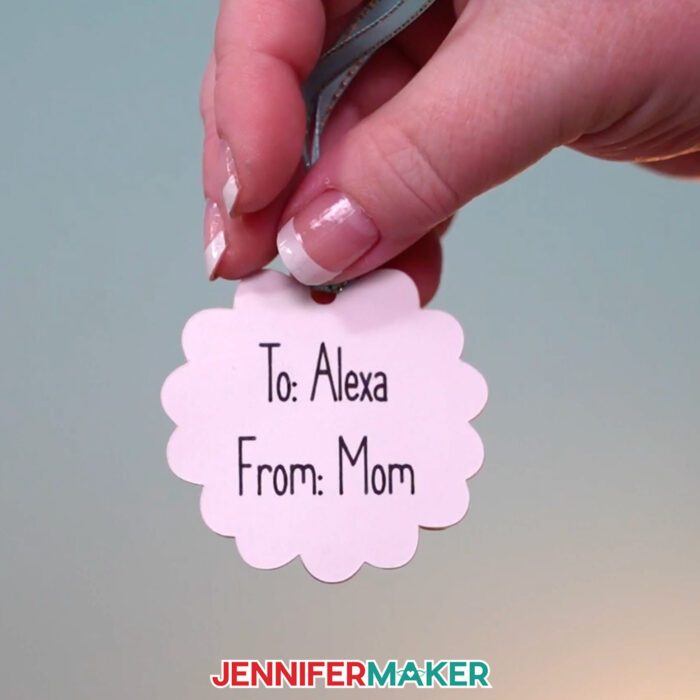
A: You can learn how to create customized gift tags in my ADVANCE program. Learn more about ADVANCE here!
Q: Which fonts did you use?
A: I used typefaces I designed called JM Cursive, JM Tall, and JM Penwriting. They’re free on my blog!
Q: Can you show me how to make a picnic basket with paper?
A: I sure can! The first step is to watch the video tutorial to get familiar with the project, then gather your materials and tools, and follow my easy steps to make your own basket.

Q: What paper is best for making gift bags?
A: When making a paper picnic basket, I recommend using 80 pound cardstock for full-size or larger baskets, and 65 pound cardstock for making my smaller Joy-sized version. The 80 pound cardstock is durable and strong, but easy to fold, curve, and weave in the larger basket sizes. Since the Joy-sized version is much smaller, lighter weight cardstock like 65 pound works best.
Q: Can I print on paper gift bags?
A: If your printer can accommodate cardstock, then sure! You can use your printer and Cricut Design Space’s Print Then Cut feature to print on the gift bag pieces as long as the objects fit the workable area. Then cut and assemble them according to their respective tutorial. Remember, not all Cricuts have Print then Cut capability.

Q: What are some other ways I can customize my paper picnic basket?
A: You can use patterned cardstock for the season, holiday, or occasion — or decorate the basket with paper flowers, vinyl decals, and more! The sky’s the limit!
Q: How can I use a paper picnic basket other than as a gift bag?
A: You can use paper picnic baskets as a decorative table centerpiece, as a base for a balloon bouquet, or as a toy for a child’s imaginary play. Use your imagination!
Q: Do you have any other unique gift bags and boxes I can make?
A: I sure do! Look around my blog, or check out some of these fun and different spins on a traditional gift bag or box:
- Baseball Cap Gift Box
- Personalized Wine Gift Bags
- Easy Heart Box
- Sublimated Gift Bags
- Heart Explosion Box
Get my free SVG files to make your paper picnic basket!
(If you do not see the signup form above, click here.)
I love seeing what you make with my designs and how you use them! Please share a photo of your paper picnic basket in our Facebook group or tag me on social media with #jennifermaker.
Love,

Want to remember this? Save this Tutorial on How to Make a Paper Picnic Basket to your favorite Pinterest Board!